

Hydrangea painting is the kind of acrylic project that rewards you fast: a few loaded dabs of blue and the petals are already there, round and full and a little wild. This list leans into that cool blue garden mood you love, starting with sixteen hydrangea scenes and then moving into other blue blooms that work the same soft, dabbed way on canvas.
Every idea below sits inside a little garden or home moment, so you are never just painting a flower on white, you are painting a porch, a lane, a china bowl on a sill. Scroll through, pick whichever one is already pulling at you, and paint it today.
Using these images: free for personal projects such as printing, coloring, cards, journals and gifts. Handmade items that include them may be sold up to 30 pieces per design. More than that is commercial use and is not permitted, and neither is selling or sharing the images themselves or passing them off as your own. Please ask before any other use.
Start where the eye naturally lands first: a blue hydrangea bush spilling along a white picket fence. Block in the fence with a few vertical strokes of titanium white over a cream canvas, then let the hydrangea mass sit behind and around it as a loose green shape before any flowers go in.
Build each hydrangea head from clusters of small dabbed petals, four or five strokes per cluster, using the corner of a flat brush loaded with cornflower blue and a touch of white. Measure the bush against the fence before you commit: it should sit roughly as tall as two fence pickets, so the flowers read as a real shrub and not a floating cloud.
The common mistake here is making every petal cluster the same size, which flattens the bush. Vary the dab sizes and let some clusters overlap the fence line. If you do not have a fence reference handy, a ruler held against the canvas keeps the pickets even.
Finish with a thin dark green shadow under the bush to ground it on the grass today.
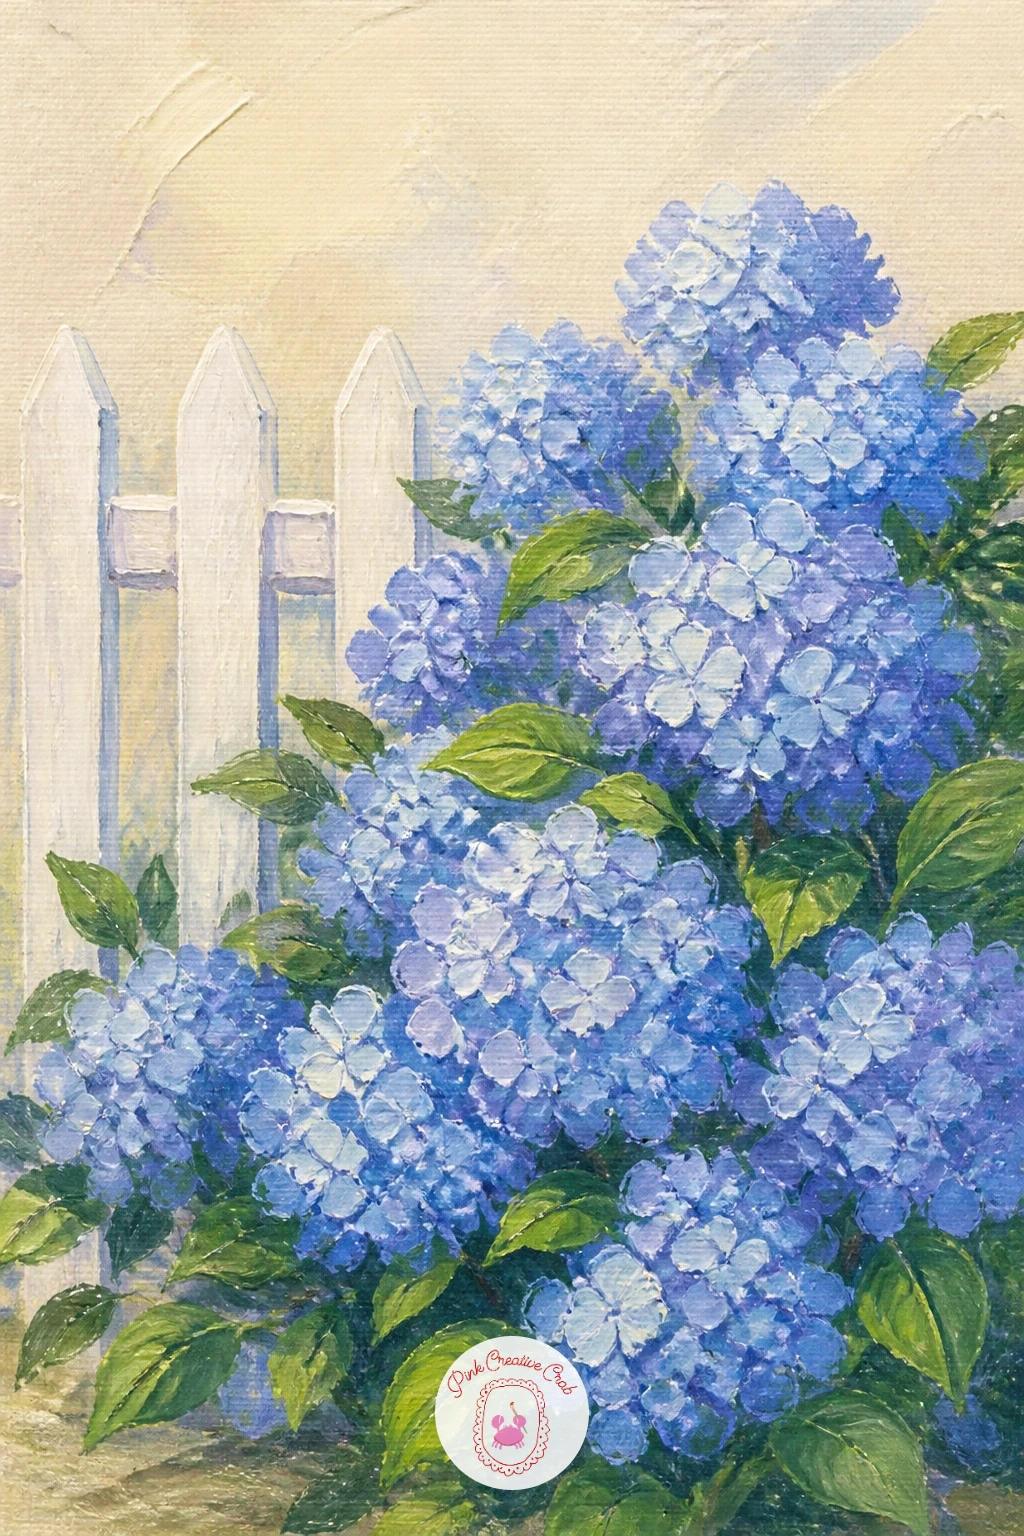
Palette: Cornflower Blue,Titanium White,Sap Green,Payne’s Grey
Move from the garden to the porch with hydrangeas gathered into a galvanized bucket. Paint the bucket first as a simple trapezoid with a cool grey base, then add a highlight stripe of white down one side and a darker grey rim to give it that tin shine before any flowers go near it.
Place the hydrangea heads above the bucket rim in overlapping rounds of periwinkle and cornflower blue, keeping the top blooms slightly smaller so the bouquet narrows toward the top. Dab in leaves low down around the bucket neck to hide the join between stems and metal, which is where this piece usually goes wrong if left bare.
If grey paint is not in your kit, mix white with a touch of black and a whisper of blue for that galvanized look. A porch floor board or two behind the bucket, painted in warm cream and soft brown, settles the whole scene.
Keep brushwork loose on the porch boards so the flowers stay the star today.
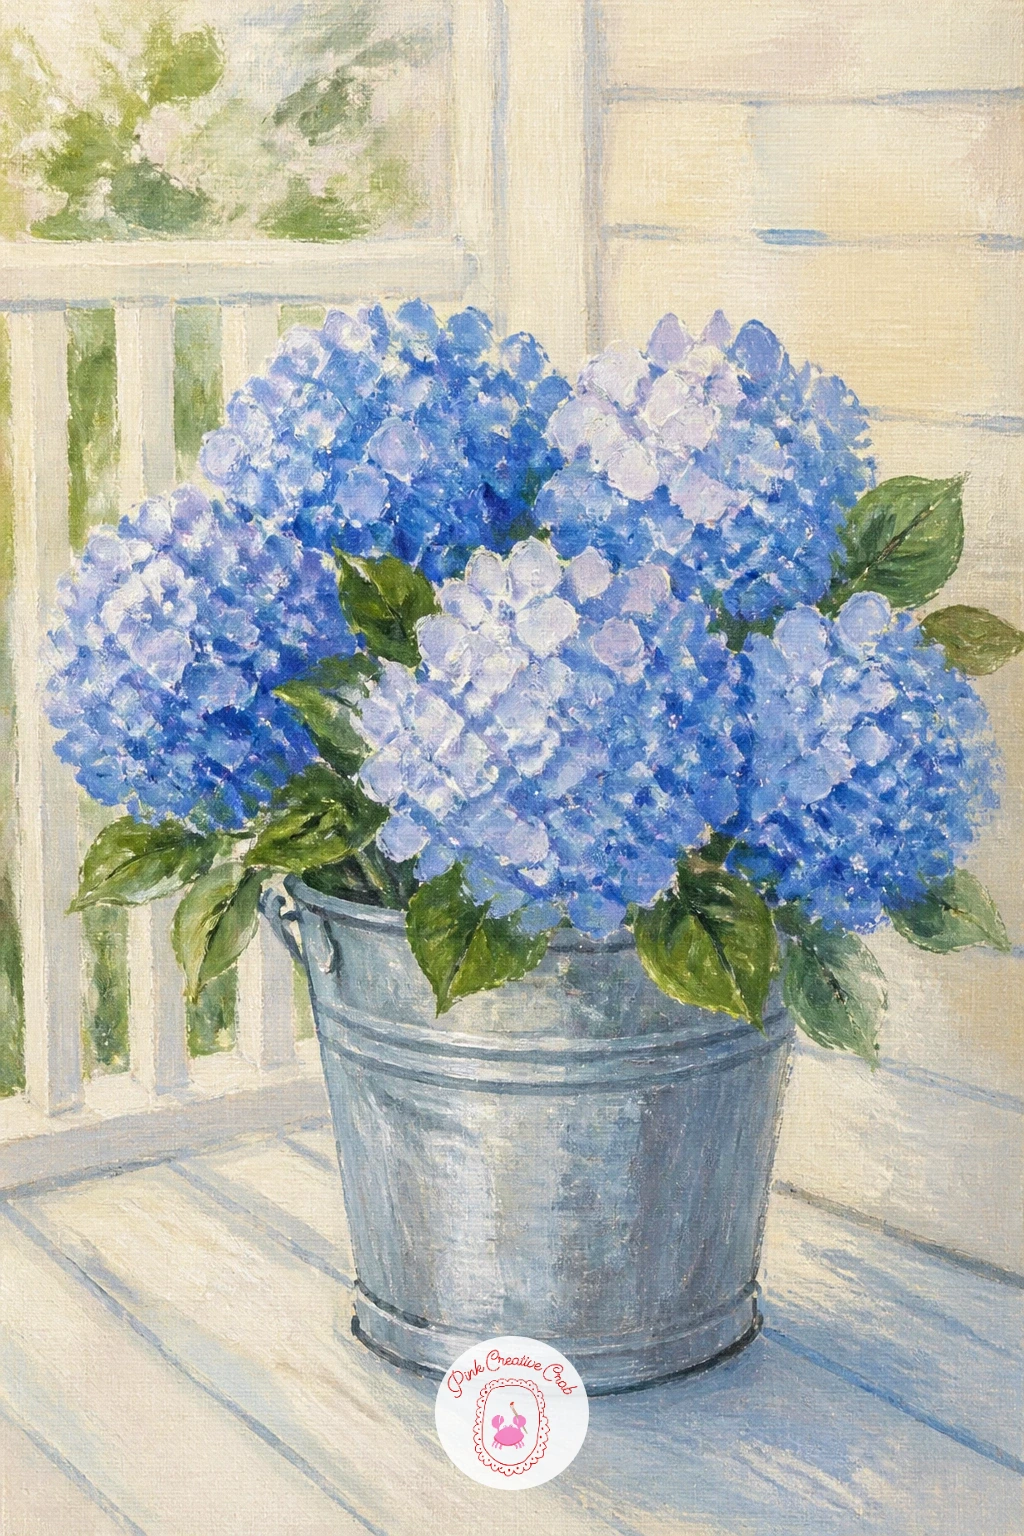
Palette: Periwinkle,Cornflower Blue,Neutral Grey,Fresh Green
Simplify everything down to one hydrangea head in a glass jar, a good choice if yesterday’s bucket felt busy. Sketch the jar first as a simple cylinder, then paint the water line a shade darker than the glass above it, since that tonal shift is what makes glass read as glass.
Build the single flower head as one large dabbed mass of cornflower blue and periwinkle, letting a few individual petal edges poke out at the silhouette so it does not read as a solid blob. Add one or two stems visible through the glass with a thin dark line, slightly bent at the water line, which sells the transparency.
If your glass looks muddy, lift a few streaks of near-white highlight down one side with a dry brush before the paint fully sets. No glass paint needed, titanium white thinned with water does the job.
Keep the background plain cream so the jar and bloom stay the whole story today.
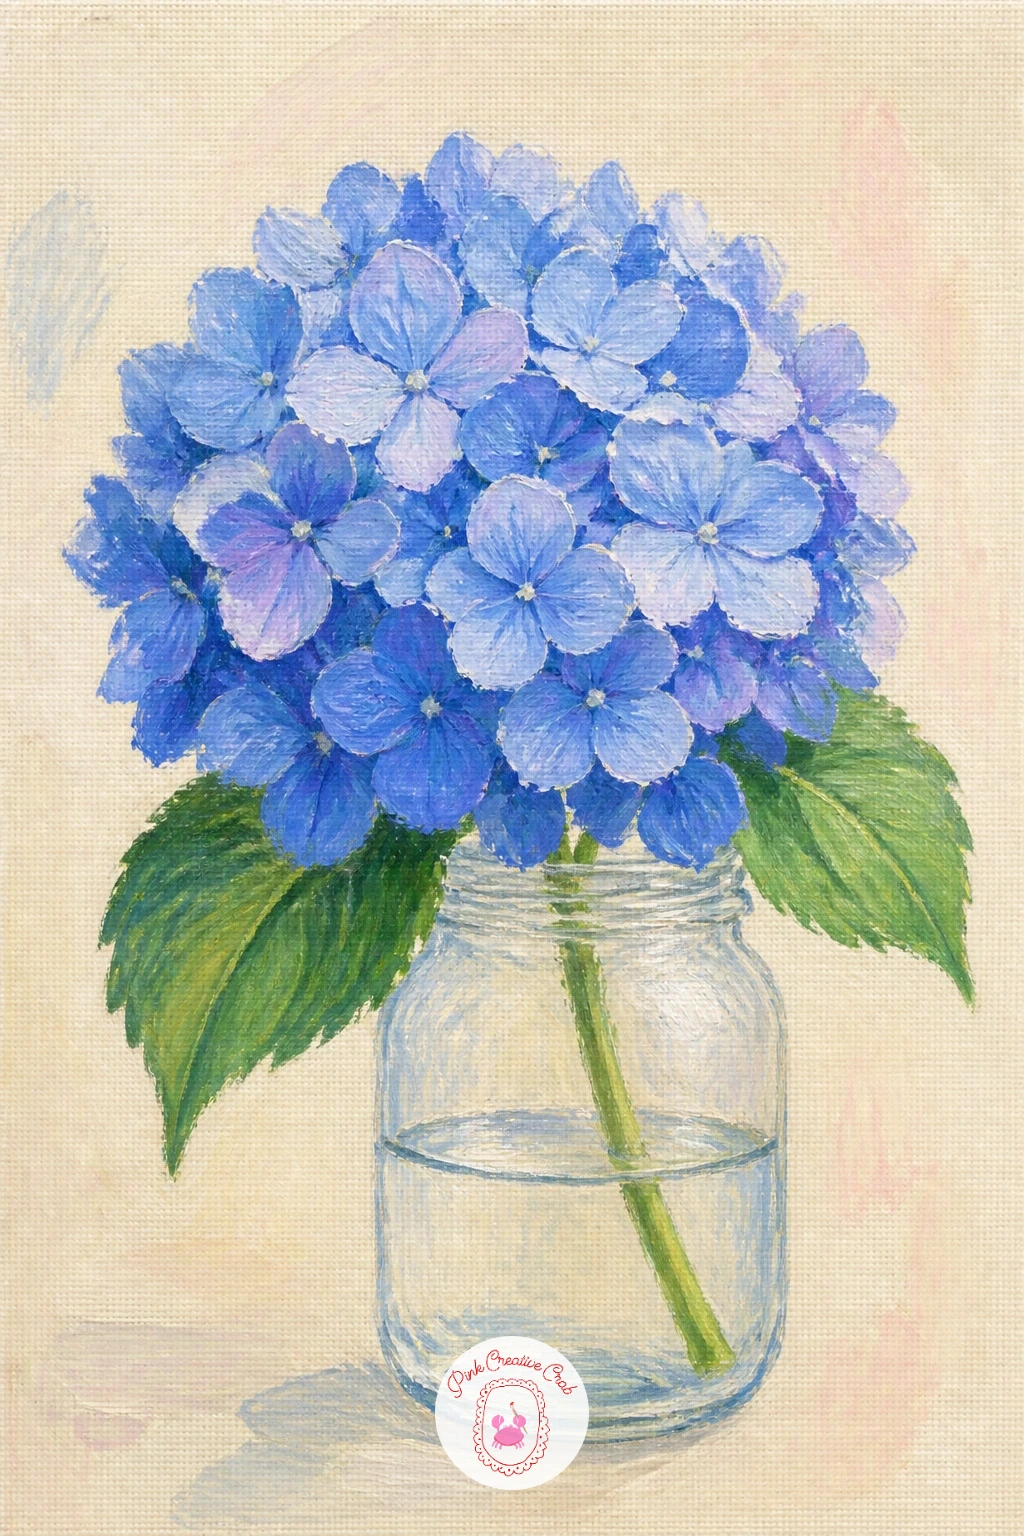
Palette: Cornflower Blue,Periwinkle,Titanium White,Payne’s Grey
Try tilting the jar slightly or placing it off-center for a more candid, just-picked feel instead of a perfectly centered still life.
Scale up now to a coastal cottage with hydrangeas climbing its walls. Block in the cottage shape first, a simple white or pale blue box with a peaked roof and one or two windows, keeping the architecture plain so the flowers can do the decorating.
Work the hydrangea masses up from the base of the walls in big loose green shapes, then dab in blue and periwinkle blooms over the green, letting them cluster thickest near the door and windows and thin out toward the roofline. This front-to-back order, cottage then foliage then flowers, keeps edges clean.
Eye level sits low here, looking up slightly at the cottage, which makes the hydrangeas feel like they are towering pleasantly over you rather than sitting flat beside a wall. A hint of blue sky peeking above the roof finishes the coastal feel.
If straight walls feel tricky, a ruler or the edge of a card keeps the cottage lines crisp today.
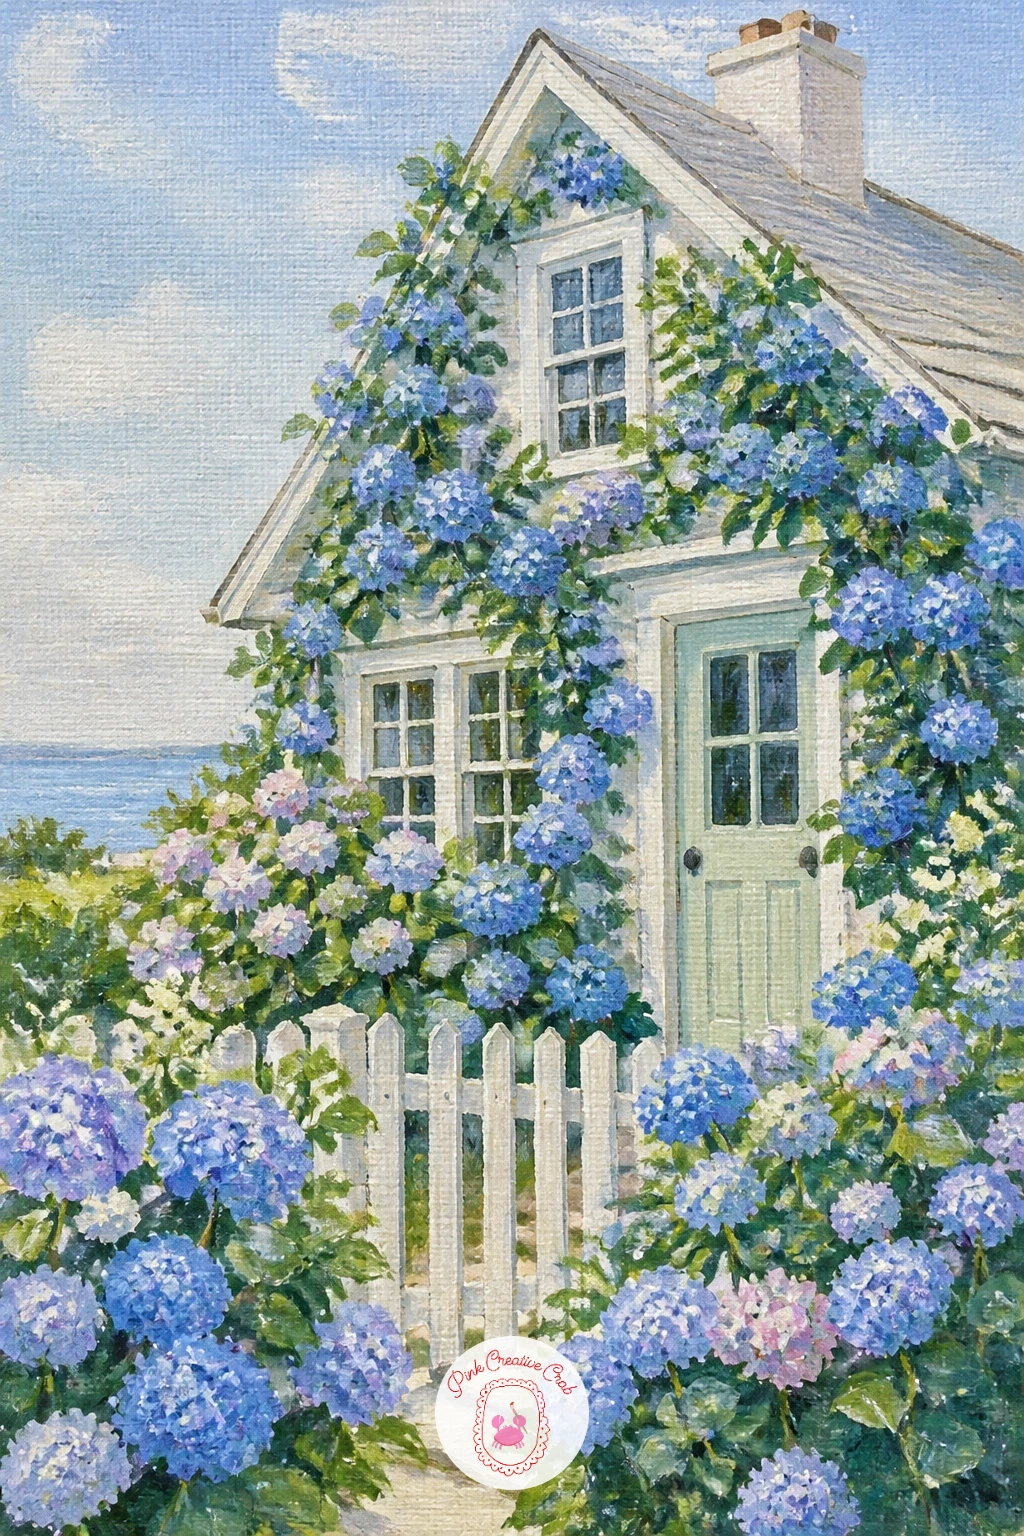
Palette: Titanium White,Cornflower Blue,Fresh Green,Sky Blue
Bring a figure into the garden with a girl cutting hydrangeas into a basket. Keep her simple: a soft silhouette in a pale dress, bent slightly at the waist, one arm reaching toward a hydrangea bush and the other holding a woven basket. Block her shape in flat color before any detail goes on.
Paint the hydrangea bush beside her first so you know how large to make the basket in proportion, roughly the width of her forearm to elbow. This comparison keeps the whole scene believable instead of a basket that looks too large or too small beside her.
Her dress can stay almost flat, just one shadow tone under the arm and along the folds, since the real detail sits in the flowers and basket weave. A few quick crisscross lines in brown suggest the basket without painting every strand.
If faces feel daunting, turn her away from the viewer or let a sun hat hide most of her features today.
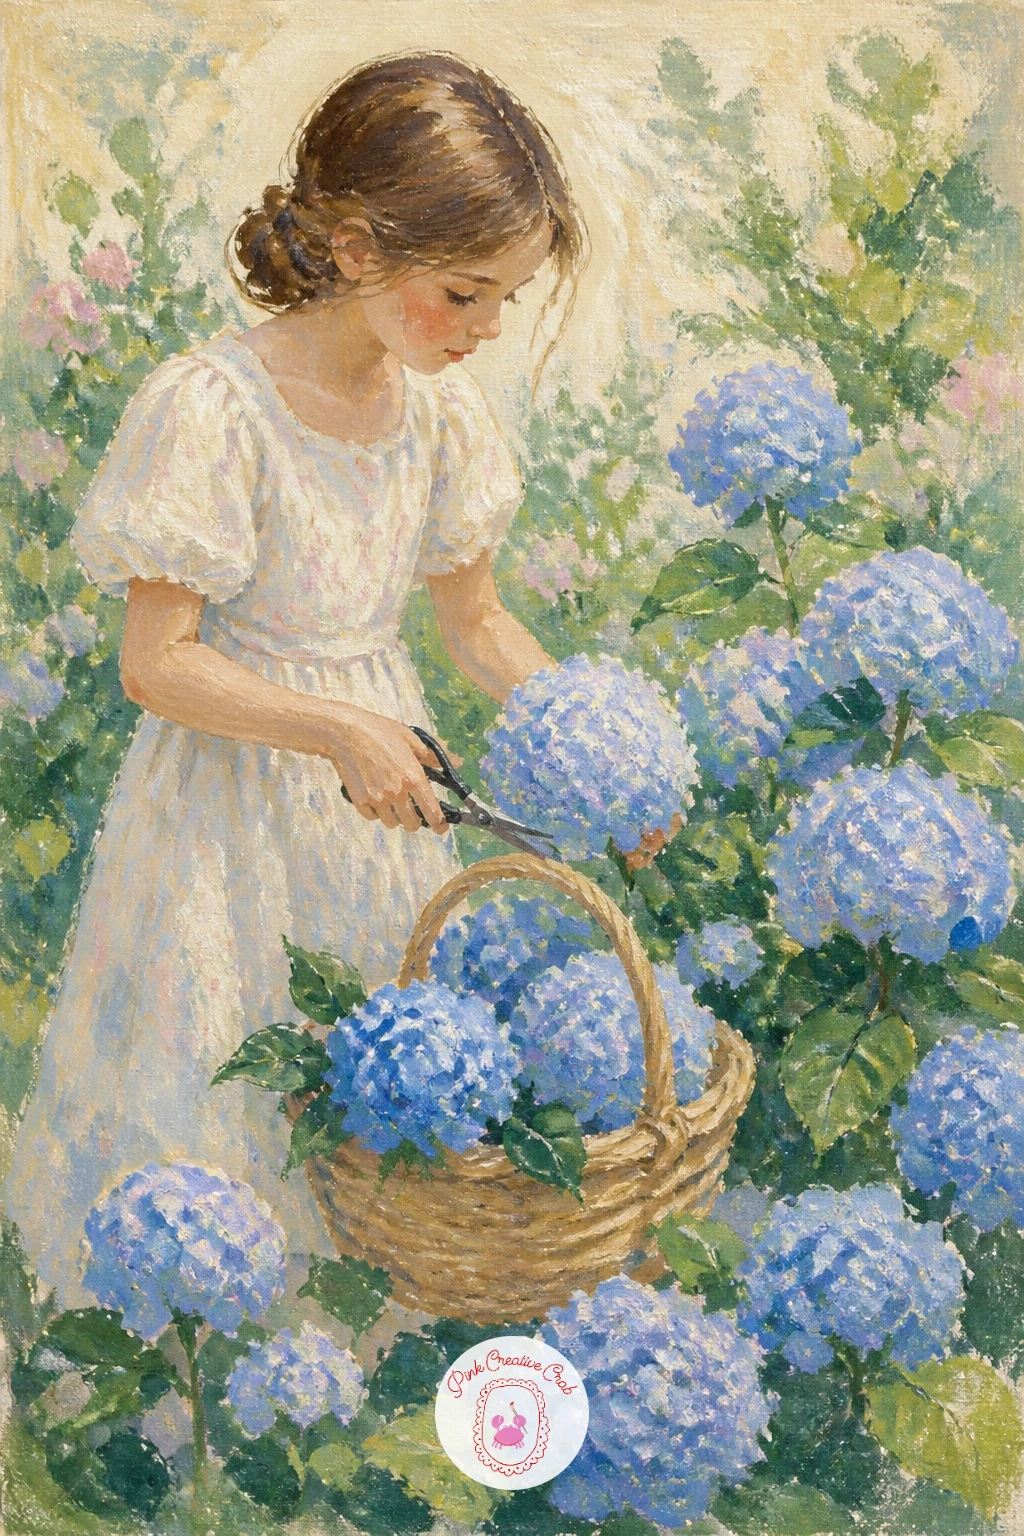
Palette: Cornflower Blue,Blush Pink,Warm Brown,Fresh Green
Pair up two hydrangea bushes, one pink and one blue, growing side by side, since the color trick here is the real lesson. Paint both bushes with the same dabbing method you have used already, but mix your blush pink from white, a touch of red and a whisper of blue so it leans cool and sits happily beside the hydrangea blue rather than clashing.
Work the blue bush first, then the pink one, leaving a narrow strip of green leaves between them so the two colors do not bleed together while wet. This order also lets you judge how much pink to add once the blue is already established.
If the pink edges look too sharp against the blue, soften the seam with a clean damp brush before it dries. No special pink paint needed, just mix from your existing reds and blues.
Step back and check the balance looks roughly even before calling it finished today.
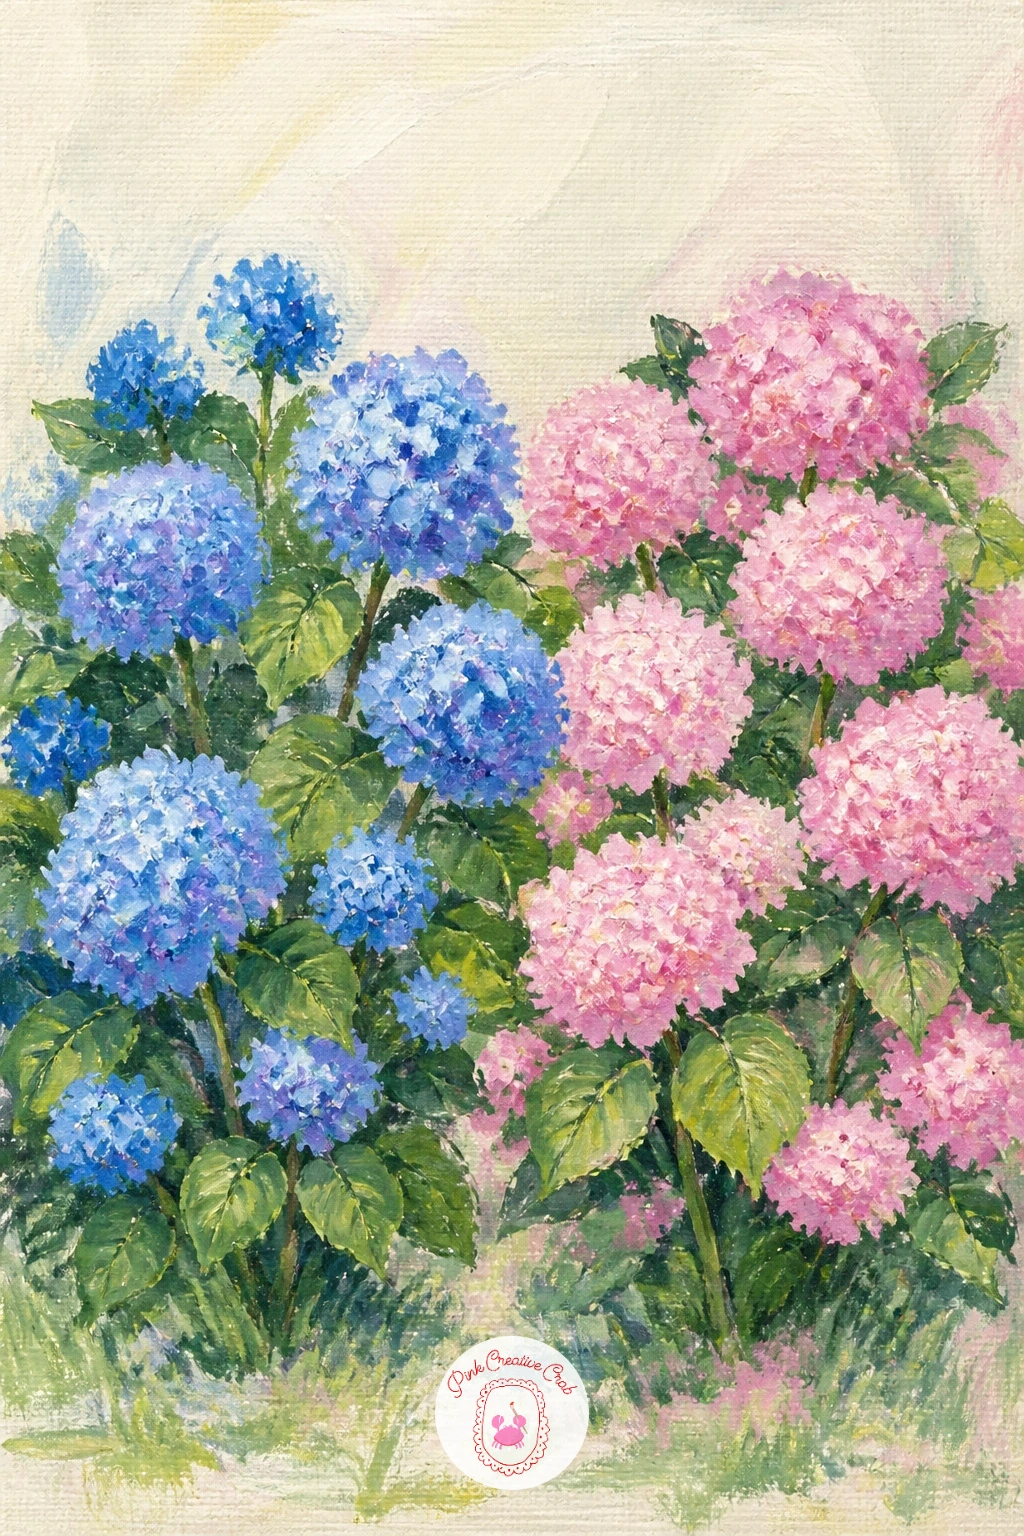
Palette: Cornflower Blue,Blush Pink,Fresh Green,Titanium White
Take the hydrangeas somewhere specific now, lining a set of stone steps up to a Japanese temple. Paint the steps first as simple grey trapezoids stacked up the canvas, receding smaller toward the top to suggest the climb, with the temple roofline just a dark red or brown triangle peeking at the very top edge.
Dab hydrangea bushes along both sides of the steps in cornflower blue and periwinkle, keeping them lower and tighter near the bottom of the composition and slightly smaller as the steps rise, which reinforces the sense of distance without any complicated perspective work.
Stone steps often go flat and grey all over, so warm them with a thin wash of soft ochre in the shadowed undersides of each step. If red paint for the temple roof is not in your set, mix a little burnt sienna with a touch of black.
Keep the temple small and soft-edged so the hydrangeas stay the focus today.
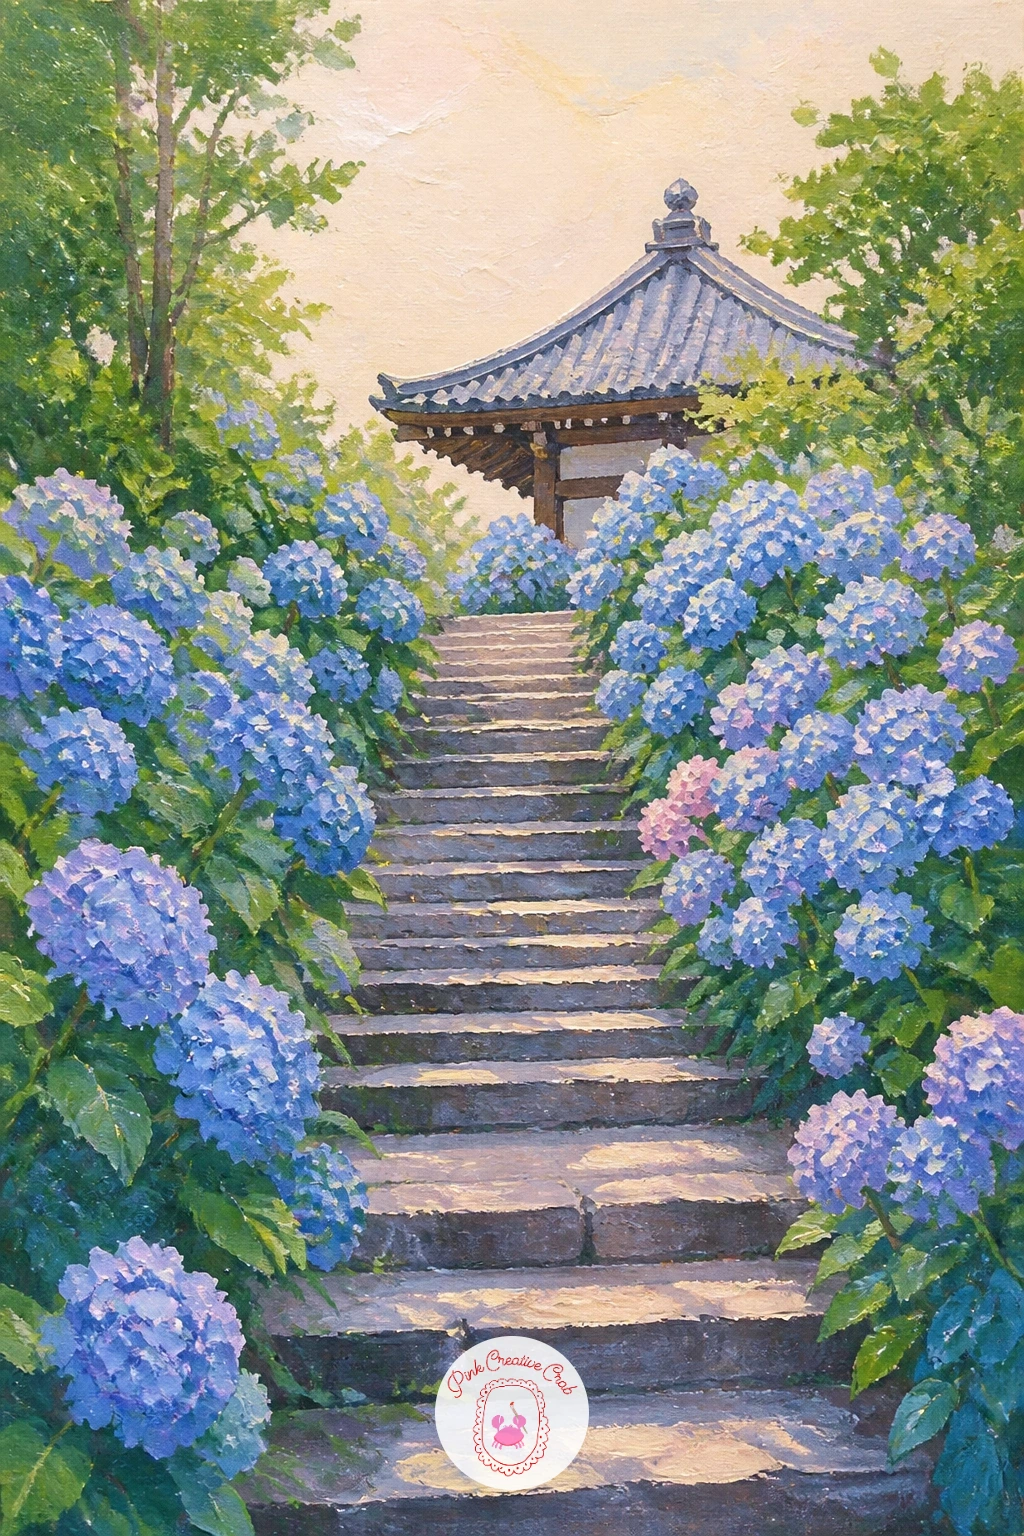
Palette: Cornflower Blue,Periwinkle,Stone Grey,Burnt Sienna
Bring the garden to the doorstep with a hydrangea wreath hung on a front door. Paint the door first as a flat panel in a soft coastal blue or white, with a simple brass knob dabbed in as one bright dot, then let the wreath sit as the clear focal shape against that plain background.
Build the wreath ring from a circle of green foliage dabs, then layer hydrangea clusters in cornflower blue and blush pink around it, leaving the door visible in the open center so the wreath reads as hung rather than solid. A paper plate or round lid traced lightly in pencil first keeps the ring even.
Wreaths often end up lopsided if you work around the circle in one direction only, so place four clusters at roughly twelve, three, six and nine o’clock first, then fill between them. This is the same balancing trick worth remembering for any round arrangement in the pieces that follow.
Finish with a simple ribbon bow at the base for a quick, satisfying detail today.
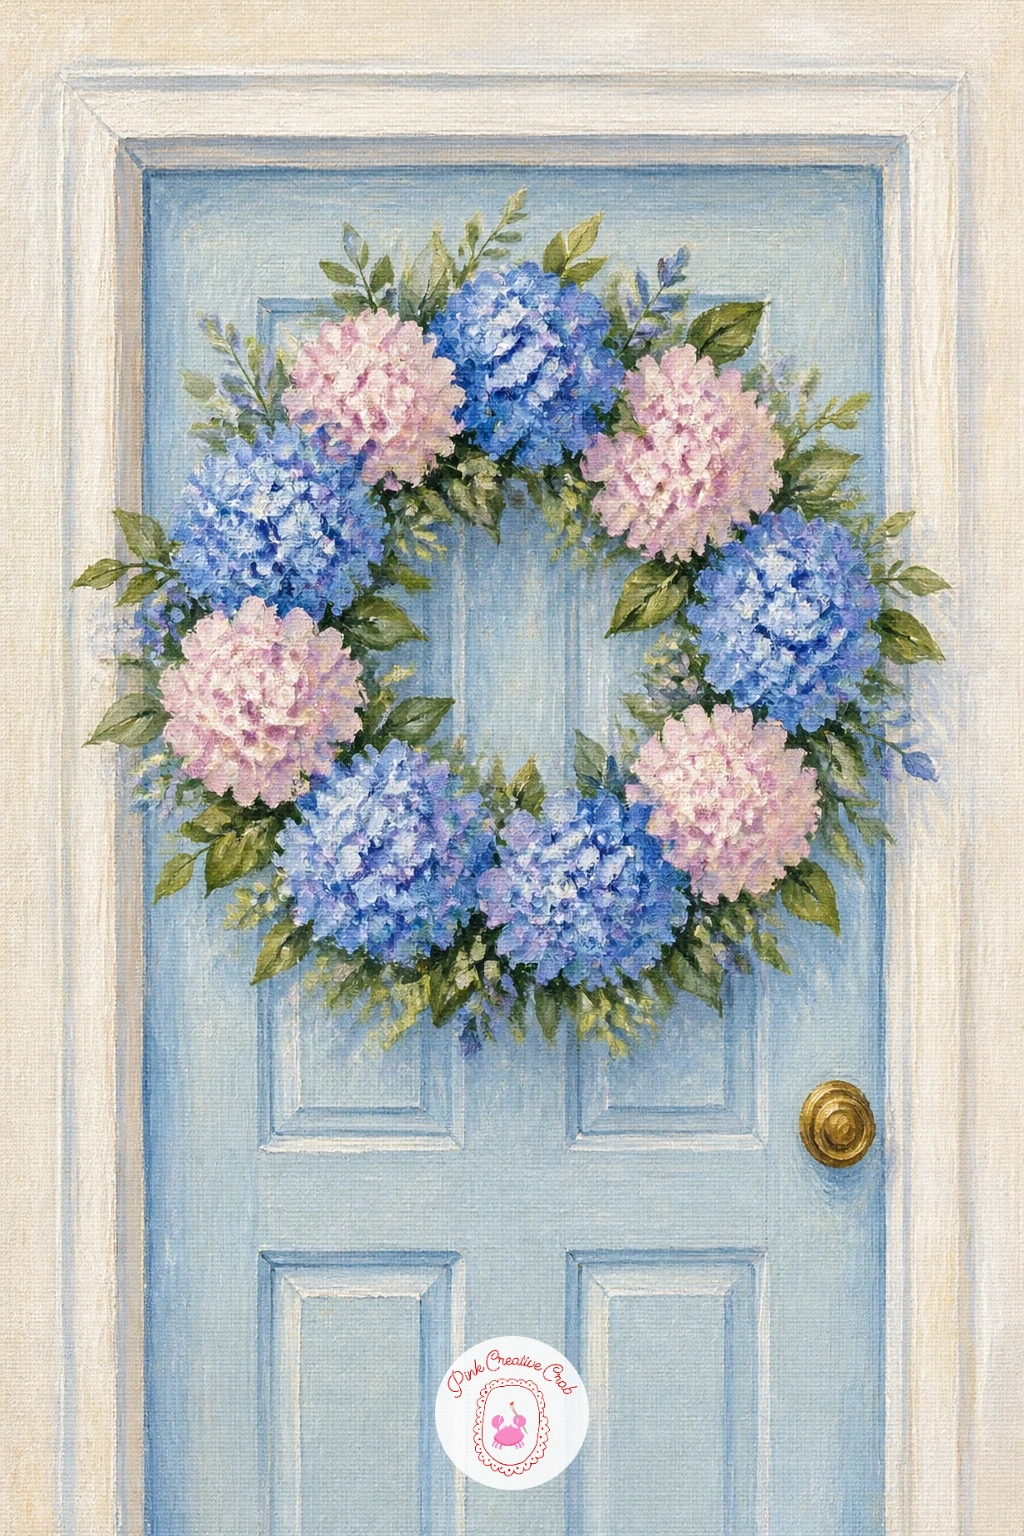
Palette: Cornflower Blue,Blush Pink,Fresh Green,Soft Coastal Blue
Shift the palette for a change of pace with dried hydrangeas in autumn tones, papery and faded rather than fresh. Keep the same dabbing method for the petal clusters but mix your blues down with burnt sienna and a touch of ochre until they turn dusty rose, soft rust and muted mauve, the colors real dried hydrangeas take on.
Paint the stems a dry warm brown rather than green, since dried foliage loses that fresh color entirely, and let a few petals look slightly curled at the edges with a thin darker line rather than a crisp outline.
The mistake to avoid is keeping the petals too saturated, which reads as fresh rather than dried. Mute every color with a touch of its opposite or a little burnt umber before applying it, and test on a scrap first if you are unsure.
A simple ceramic vase in warm cream suits this palette better than the galvanized bucket from earlier today.
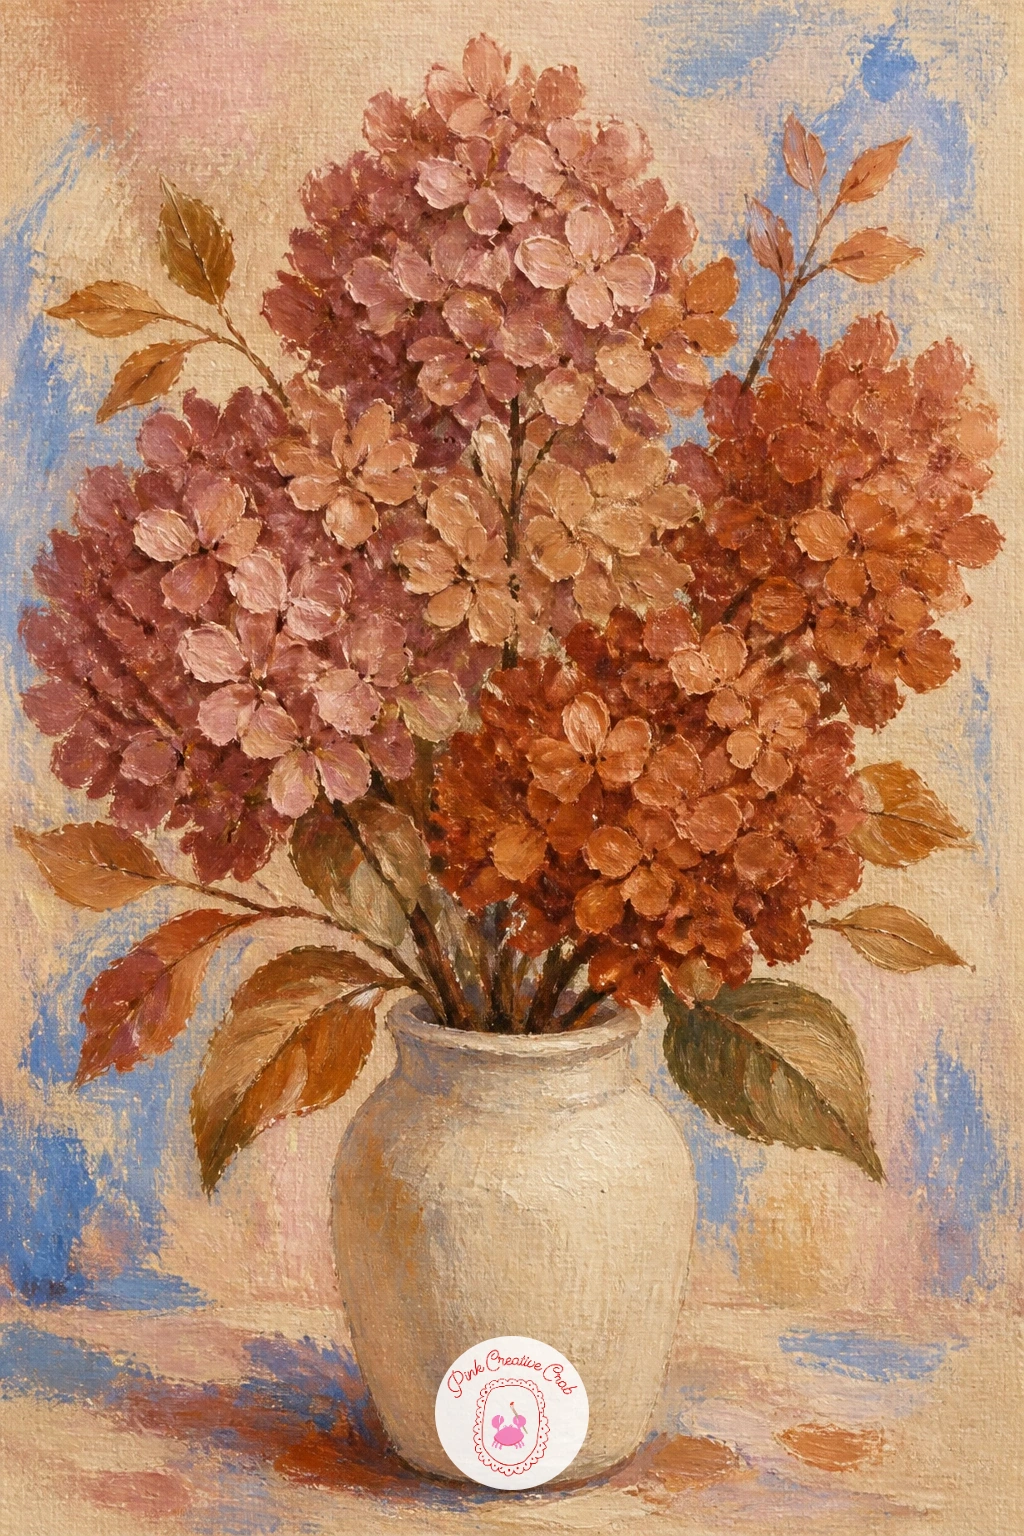
Palette: Dusty Rose,Muted Mauve,Burnt Sienna,Warm Brown
Add a quiet character with a cat asleep under a hydrangea bush, curled in the cool shade of the leaves. Paint the hydrangea foliage and a few blue blooms first as the backdrop, then block the cat in as one simple curled oval shape in front, since its body should read instantly even from a distance.
Keep the cat’s details minimal: two soft triangle ears, a curved tail wrapped around, and one or two darker stripes or patches if you want tabby markings. A kneaded eraser is not needed here since this is paint, but a small dry brush lifts a soft highlight along the top of the cat’s back where the light catches its fur.
The usual trouble spot is making the cat too large, so it overwhelms the flowers. Measure it against one hydrangea head first, the cat’s curled body should sit about the same size as two blooms together.
Finish with closed eyes and a relaxed tail for that properly asleep feel today.
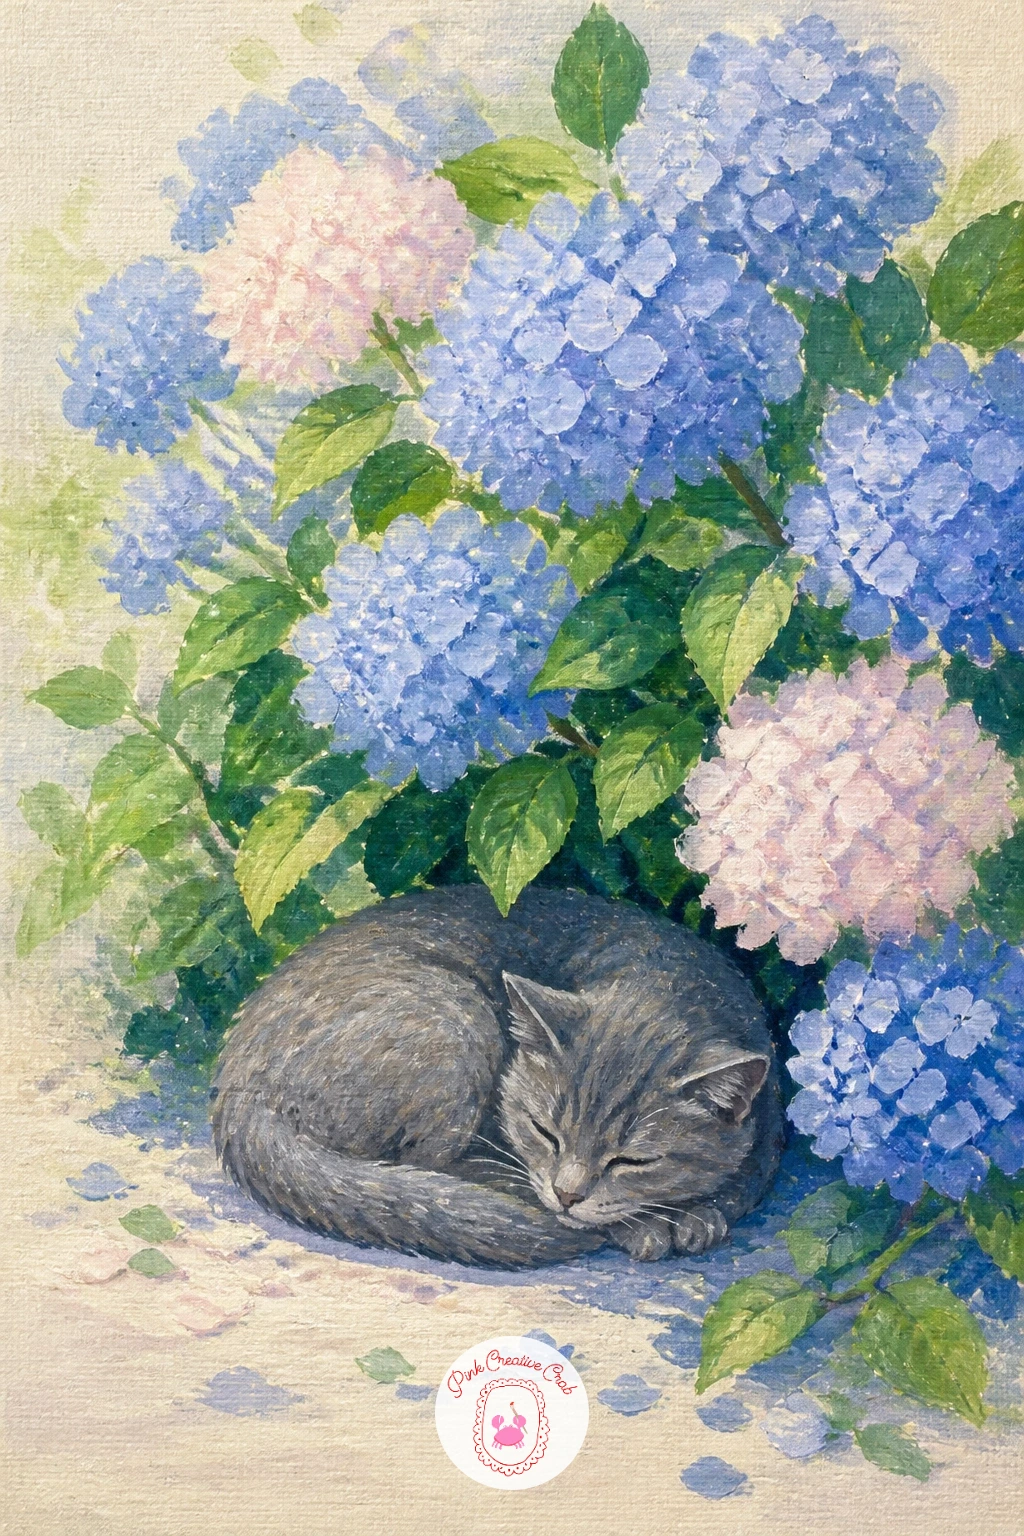
Palette: Cornflower Blue,Warm Grey,Fresh Green,Soft Orange
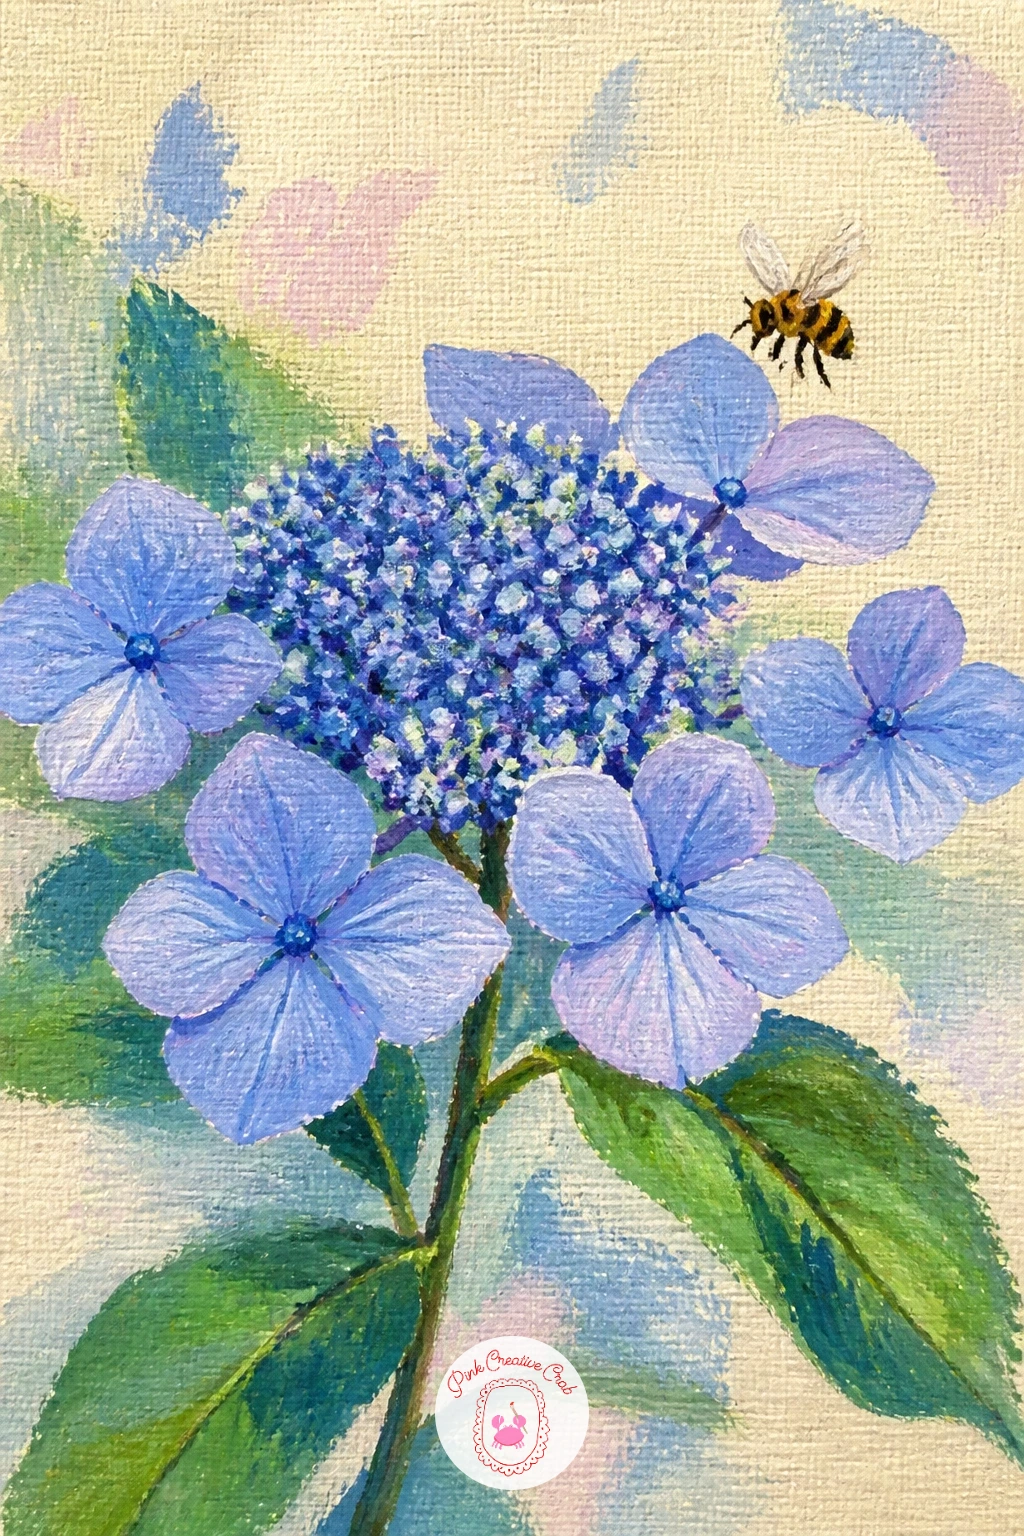
Switch to a lacecap hydrangea now, the flatter, open-faced variety with tiny center florets ringed by larger outer petals, and bring in a bee for company. Paint the flat disc shape of the flower head first in a pale periwinkle wash, then dab the tiny center florets in with the very tip of a round brush, keeping them small and close together.
Add the larger outer petals around the rim in cornflower blue, four or five per cluster, leaving the papery look of lacecap blooms by keeping these outer petals a touch more spaced out than the full round hydrangea heads from earlier ideas.
The bee comes last as a tiny oval of black and yellow stripes with two simple wing shapes in near-transparent white, placed hovering just above one outer petal. If painting something this small feels fiddly, a fine liner brush or even a toothpick dipped in paint gives better control than a regular brush.
Keep the bee small, it is a detail, not the subject, today.
You Will Need
- fine liner brush or toothpick for the bee
Palette: Periwinkle,Cornflower Blue,Golden Yellow,Payne’s Grey
Open the view out wide with a hydrangea-lined lane leading down to the sea in the distance. Paint the sky and a thin strip of sea first at the top of the canvas, then bring the lane down the center in soft perspective, narrowing as it goes, with the hydrangea bushes planted along both edges.
Because the eye level sits fairly high here looking down the lane, the bushes nearest the bottom of the canvas should be noticeably larger and more detailed than the ones further up, where a few loose blue dabs are enough to suggest distant bushes without painting every petal.
This fading of detail toward the horizon is the whole trick of the piece, so resist the urge to paint every distant bush as carefully as the front ones. A flat wash of pale blue-grey over the farthest bushes pushes them back further still.
Finish with a sliver of brighter blue sea catching the light at the very end of the lane today.
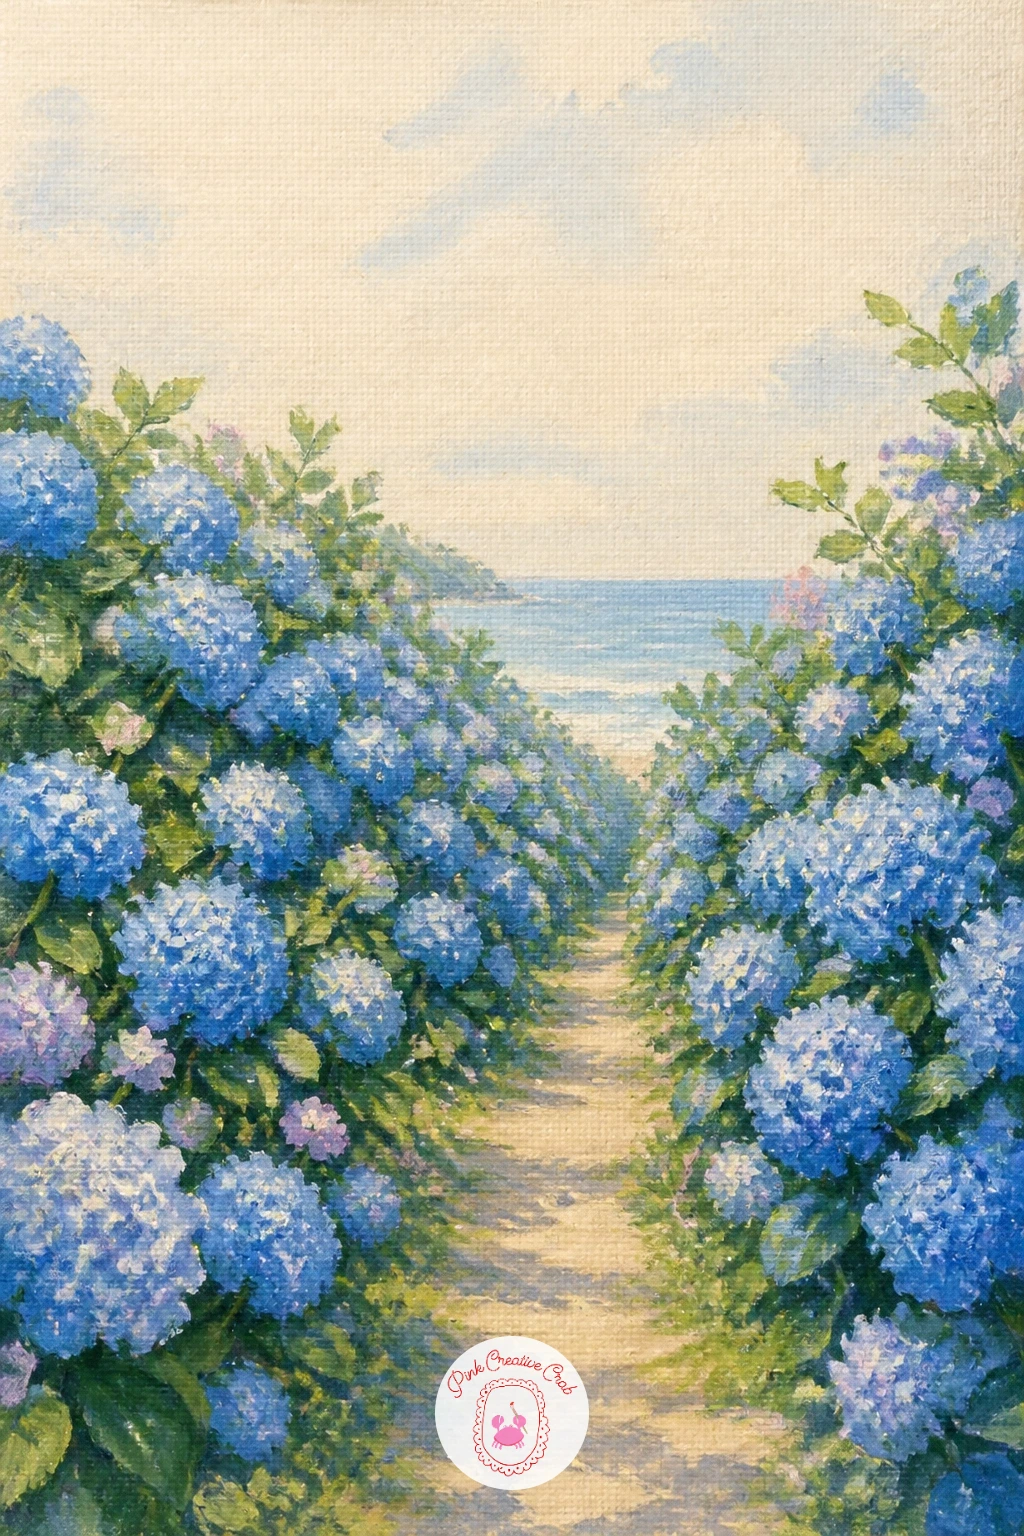
Palette: Cornflower Blue,Sea Blue,Sky Blue,Fresh Green
Bring the flowers indoors for hydrangeas arranged in a blue and white china bowl, a lovely pairing with that blue and white painting look if you enjoy porcelain patterns. Paint the bowl first, a simple rounded shape in white with a few confident brushstrokes of blue for a classic willow-style pattern around the rim, kept loose rather than precisely copied.
Once the bowl is dry, build the hydrangea heads rising from the rim in cornflower blue and periwinkle, letting the lowest blooms overlap the bowl edge slightly so the arrangement feels settled into the container rather than floating above it.
Patterned bowls can easily turn fussy, so limit the china pattern to three or four simple motifs rather than covering the whole surface. If a fine brush is not available for the pattern, the tip of a cotton swab dipped in paint makes neat small dots and dashes.
A plain cream tabletop under the bowl keeps the whole composition calm today.
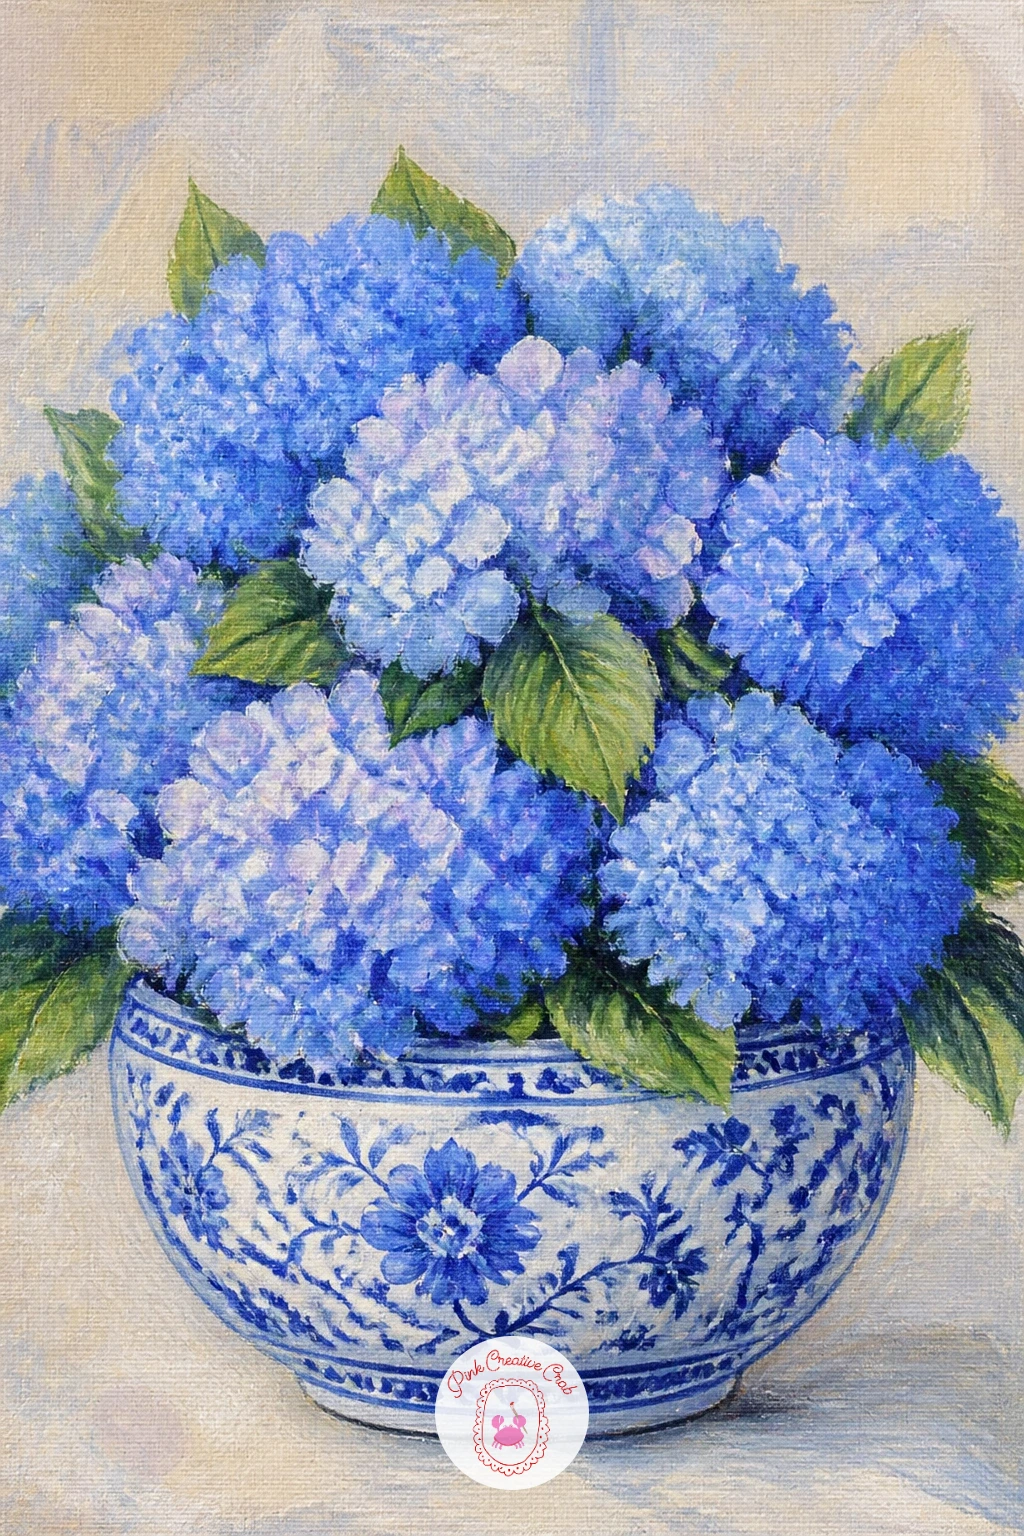
Palette: Cornflower Blue,Periwinkle,Titanium White,Fresh Green
Give the florals a romantic turn with a bride holding a hydrangea bouquet, her dress and the blooms sharing the frame as soft equals. Paint her silhouette first in flowing white with simple folds suggested by just two or three grey-blue shadow strokes, keeping the figure loose rather than detailed.
The bouquet comes next, a dense cluster of cornflower blue and blush pink hydrangea heads held at waist height, built from the same dabbing method used throughout this list but packed tighter together since a bouquet reads denser than a garden bush.
Faces are the part most likely to go wrong at this stage, so either turn her slightly away, keep features minimal with just a suggestion of a smile, or crop the painting at the shoulders and focus entirely on dress and bouquet instead.
A few loose ribbon trails from the bouquet add movement without extra difficulty today.
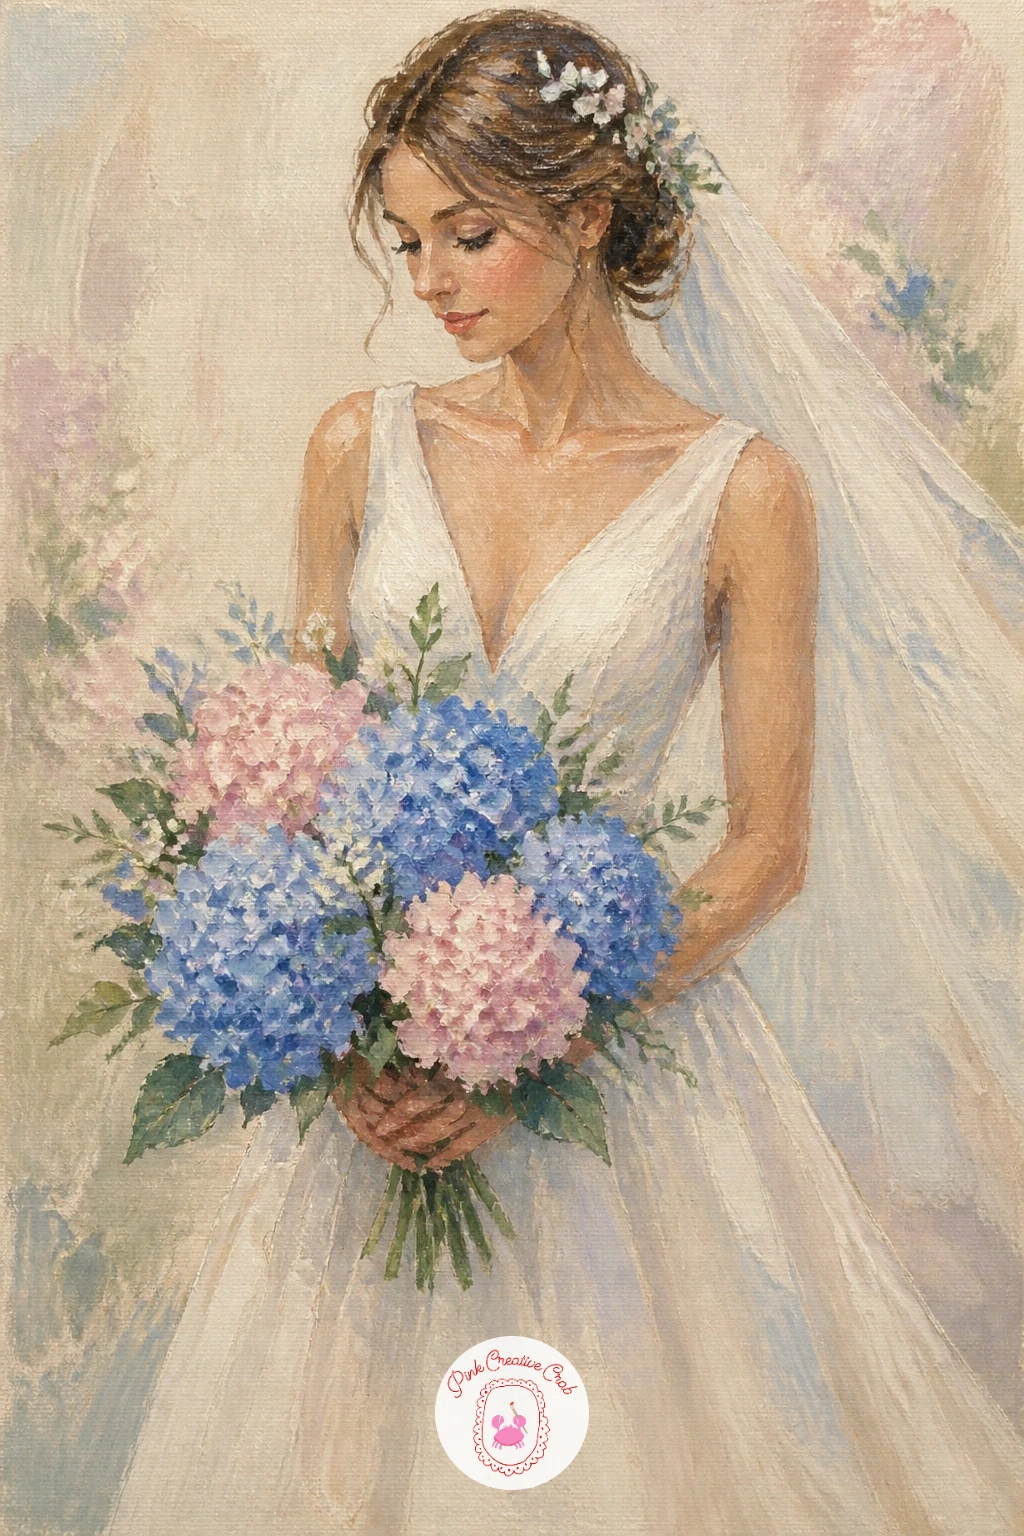
Palette: Titanium White,Cornflower Blue,Blush Pink,Soft Grey
Give an ordinary hydrangea head extra atmosphere with a scattering of raindrops caught on the petals. Paint the bloom as usual in cornflower blue and periwinkle, letting it dry fully before adding a single drop, since wet-on-wet paint will blur the texture you are after.
Once dry, dab small highlight dots of titanium white mixed with a touch of the surrounding petal color, then add one tiny bright white dot at the top of each drop for the light catching it, and a tinier shadow curve underneath. This dry-brush highlight technique, light, precise touches over a set base, is the real skill in this piece.
Too many raindrops scattered everywhere looks busy rather than realistic, so cluster eight or ten drops mainly along the upper petals and leave the rest of the bloom clean. A fine round brush or even a white gel pen works for the smallest highlight dots if your brush feels too thick.
Let the background stay a plain soft grey-cream for that overcast, just-rained feel today.
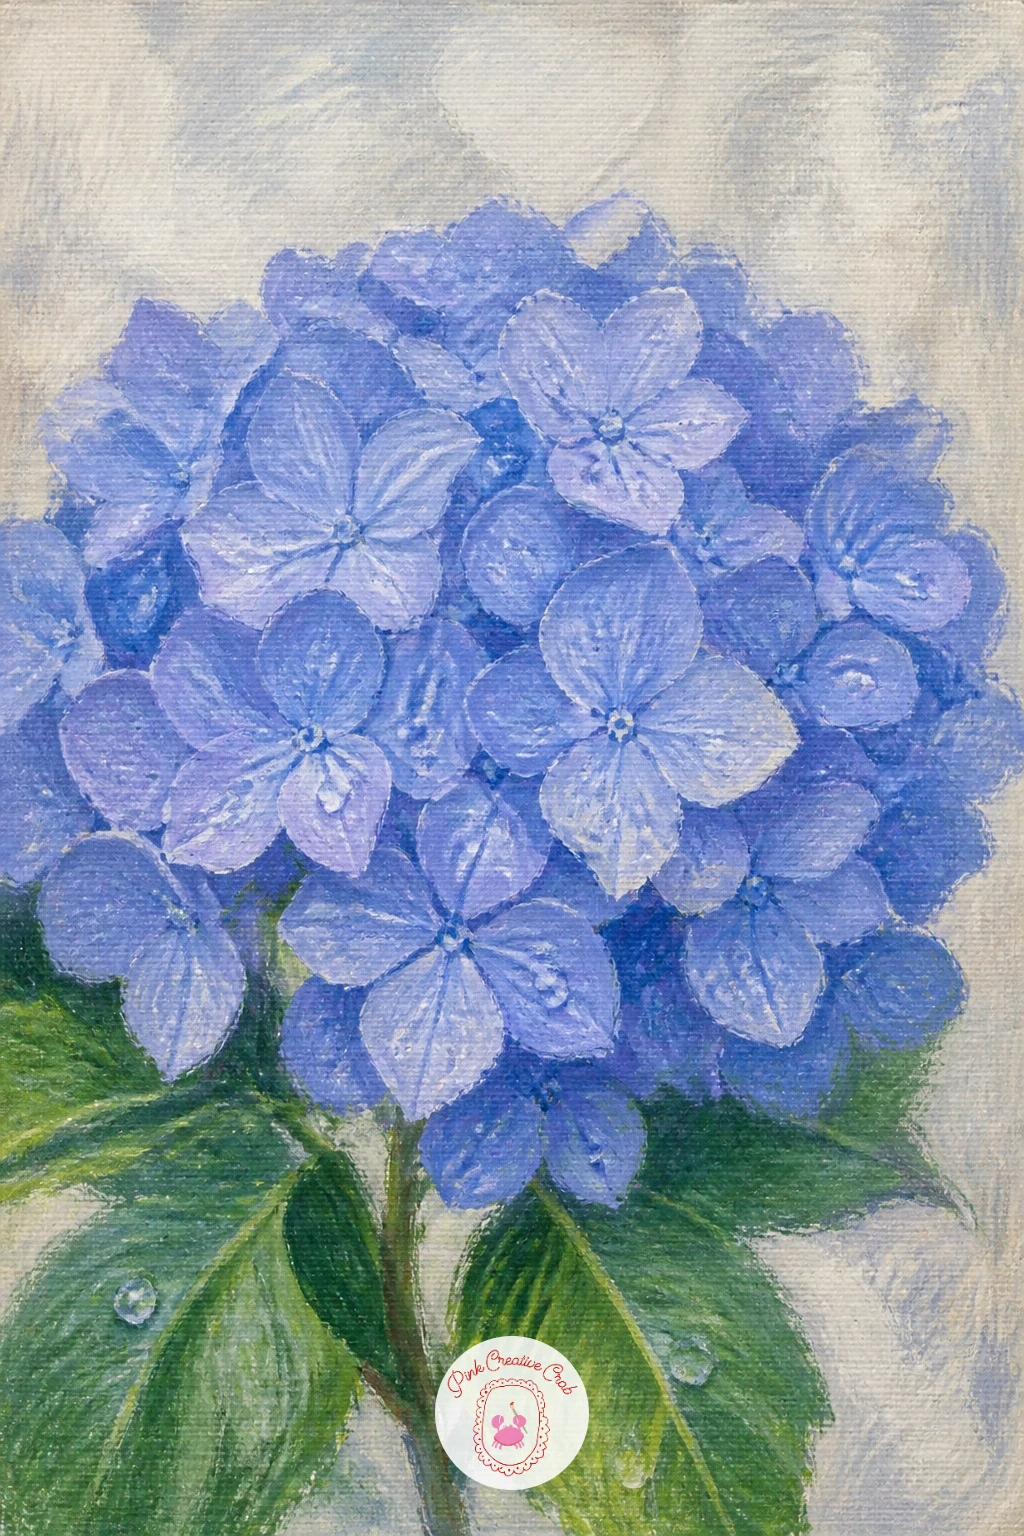
You Will Need
- white gel pen (optional, for raindrop highlights)
Palette: Cornflower Blue,Periwinkle,Titanium White,Soft Grey Cream
Pair the flowers with an object this time, a vintage watering can resting beside a hydrangea bush. Paint the can first in a weathered galvanized grey with a touch of rust along the seams and spout, since that worn detail is what makes it read as vintage rather than new.
Place the hydrangea bush growing up just behind and beside the can, taller than the can itself, so the eye reads the can as a small human touch set against the much larger plant. A useful comparison here: the can’s body should sit roughly at the same height as one full hydrangea bloom.
Rust spots are easy to overdo, so dab them sparingly along edges and the handle joint rather than across the whole surface. If you have no burnt sienna for the rust, a mix of red and a little yellow and brown gets close enough.
Tip the can’s spout slightly downward as if mid-pour for a livelier composition today.
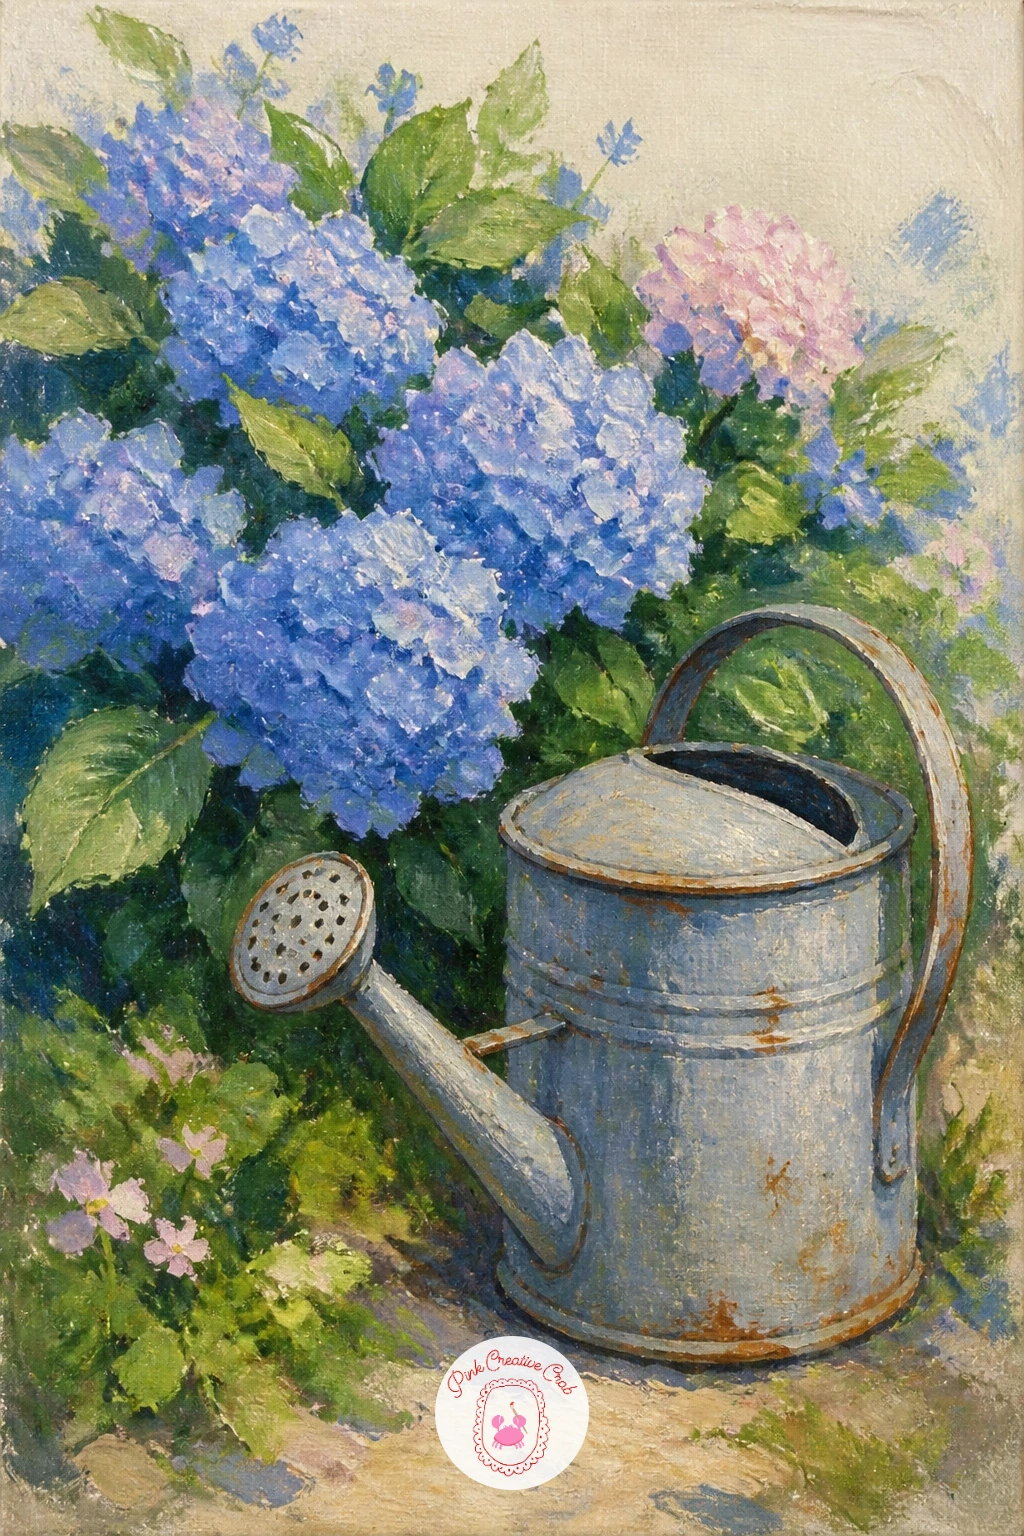
Palette: Weathered Grey,Burnt Sienna,Cornflower Blue,Fresh Green
Leave the hydrangeas behind now and head to a wheat field scattered with cornflowers, a lovely wild contrast to the garden scenes so far. Block in the wheat first as a broad warm gold field using loose vertical strokes, then scatter cornflowers across the lower third in bright true blue, smaller and simpler than any hydrangea head, just five slim petals around a dark center.
Painting wheat convincingly is about restraint: a fan brush dragged lightly through wet gold paint creates texture far faster than painting individual stalks, and this dry-brush dragging is worth trying here even if you have not used a fan brush before.
Keep the cornflowers smaller near the top of the field and slightly larger near the bottom edge of the canvas, which suggests they are closer to the viewer there. A plain pale sky above needs very little detail.
If a fan brush is not in your kit, the edge of an old credit card dragged through wet paint gives a similar texture today.
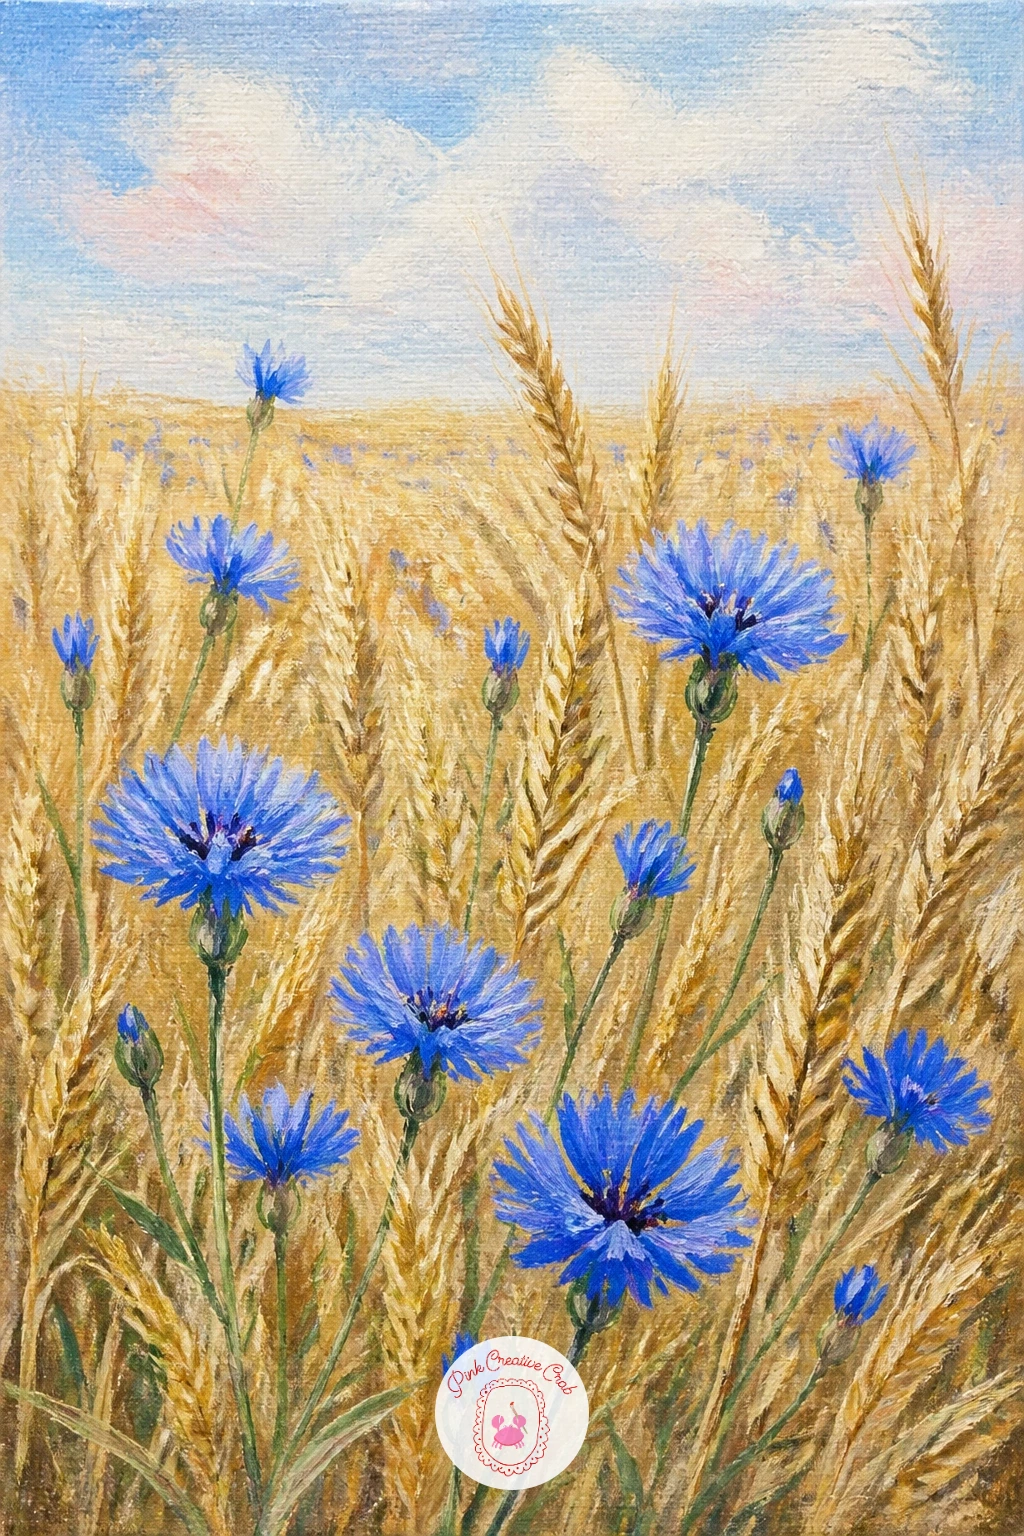
You Will Need
- fan brush for wheat texture
Palette: Golden Wheat,True Blue,Payne’s Grey,Sky Blue
Climb upward next with tall delphinium spires standing in a cottage garden border. Unlike the rounded hydrangea heads, delphiniums grow as tall vertical spikes, so start each flower with a single upward brushstroke for the stem, then dab small individual petals up both sides of that spike from the base to the tip.
Vary the heights of three or four spikes so they do not all line up like soldiers, and let the top few inches of each spike taper with smaller, fewer petals than the fuller base, since that is how delphiniums actually grow. This natural tapering is the detail that sells the whole flower.
A common trip-up is painting every spike the same cornflower blue, so mix a few spikes toward periwinkle and even a pale lilac for variety within the border. Surround the base with loose cottage garden greenery and perhaps a blurred pink bloom or two for depth.
Work from back spikes to front for easy layering today.
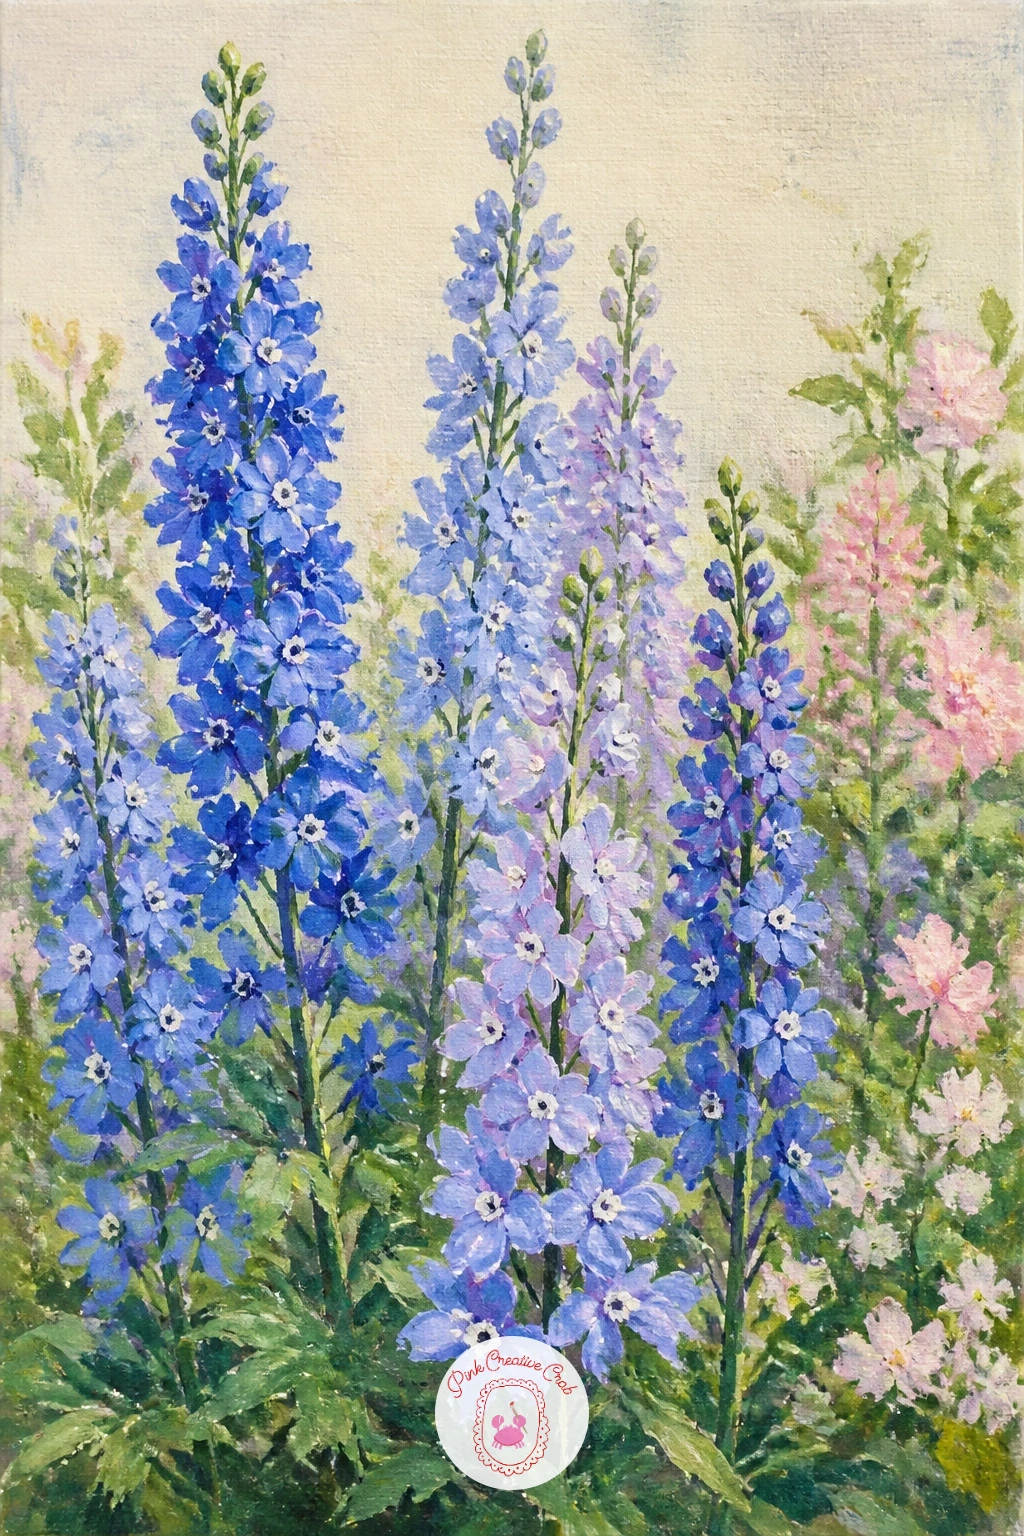
Palette: Cornflower Blue,Periwinkle,Soft Lilac,Fresh Green
Carry the blue theme into woodland with a carpet of bluebells spreading beneath beech trees. Paint the tree trunks first as a few tall simple grey-brown verticals, spaced unevenly across the canvas, then work the forest floor in soft dappled greens and browns before any flowers go in.
The bluebell carpet itself is less about individual flowers and more about suggestion: load a small brush with periwinkle and cornflower blue and stipple it across the lower half of the canvas in a loose haze, denser near the bottom and thinning as it recedes between the trees.
The light here comes down through the tree canopy above, so leave a few warmer, sunlit patches of yellow-green breaking through onto the bluebell carpet rather than keeping the whole floor one flat blue. This dappled light is what makes a woodland scene feel alive rather than flat.
If stippling feels slow, a stiff bristle brush dabbed quickly covers ground fast today.
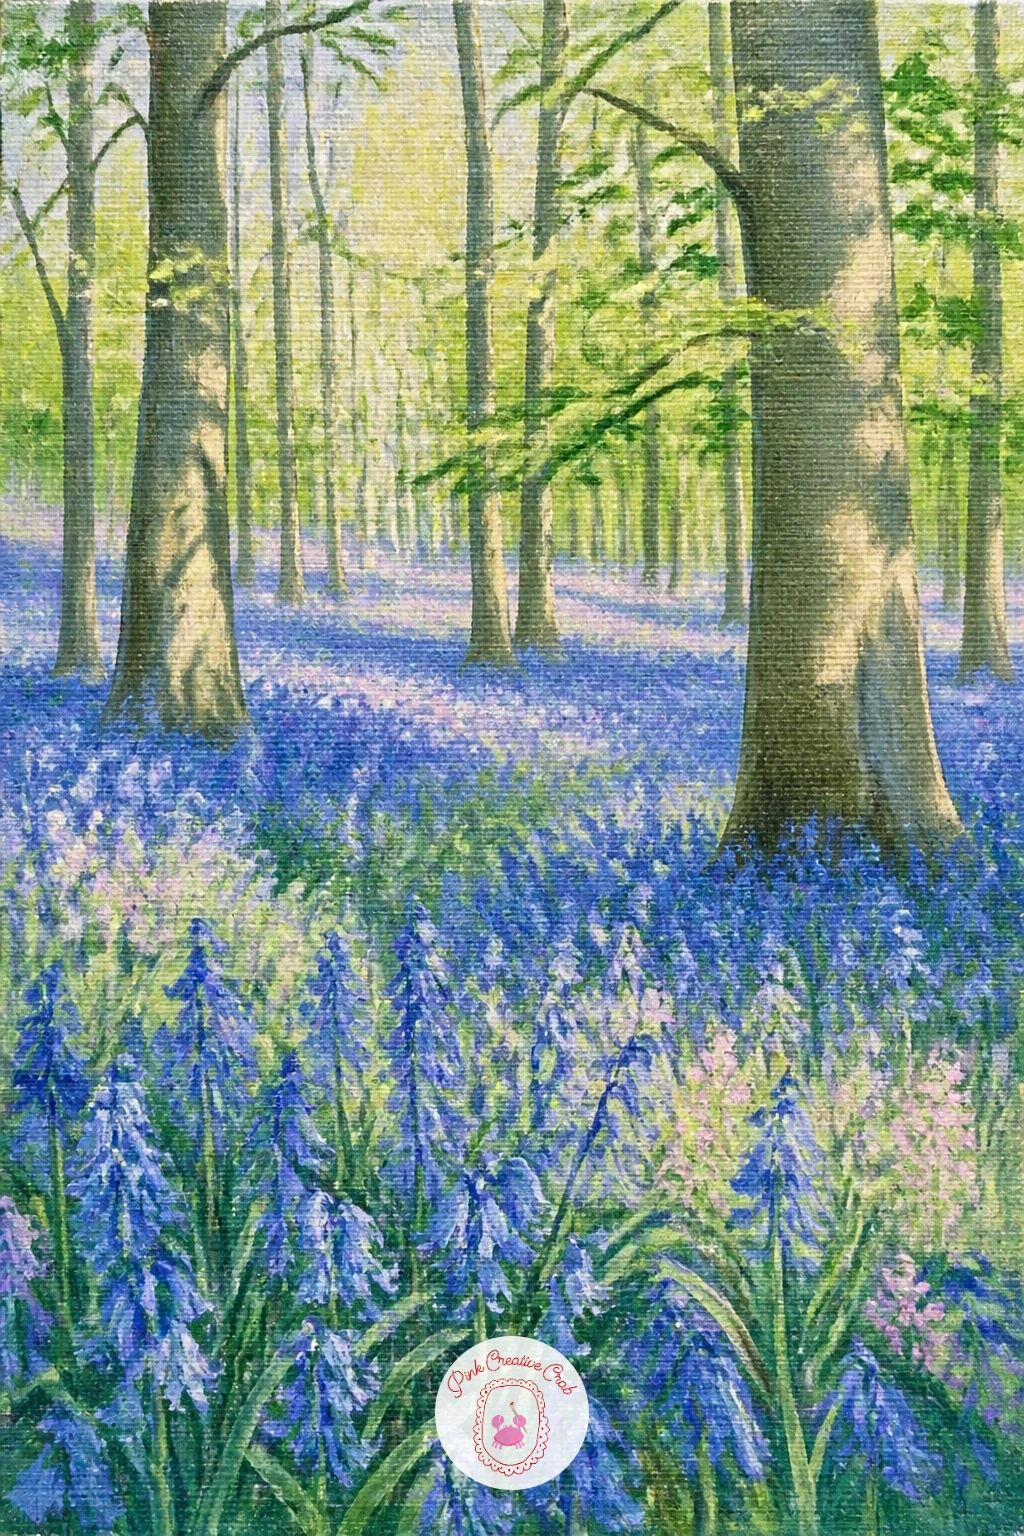
Palette: Periwinkle,Cornflower Blue,Forest Green,Warm Brown
Scale right down now for forget-me-nots clustered beside a gently moving stream. Paint the stream first as a simple curved band across the lower canvas, using horizontal strokes of blue-grey with a few lighter streaks for the water’s movement, then let the banks on either side carry the flowers.
Forget-me-nots are tiny, so this is the quick ten-minute version: scatter small single dots of pale blue with a tinier yellow center dot right at the heart of each, clustered loosely along the stream edge without painting individual petals. For a fuller forty-minute version, give each flower five small petal dabs around that yellow center instead of a single dot, which reads much richer up close.
Keep the water looking wet by leaving some canvas or a lighter blue showing through rather than covering it completely with opaque paint. A palette knife dragged lightly through wet water paint adds a nice ripple if you have one handy.
Either version finishes fast, so pick based on how much time you have today.
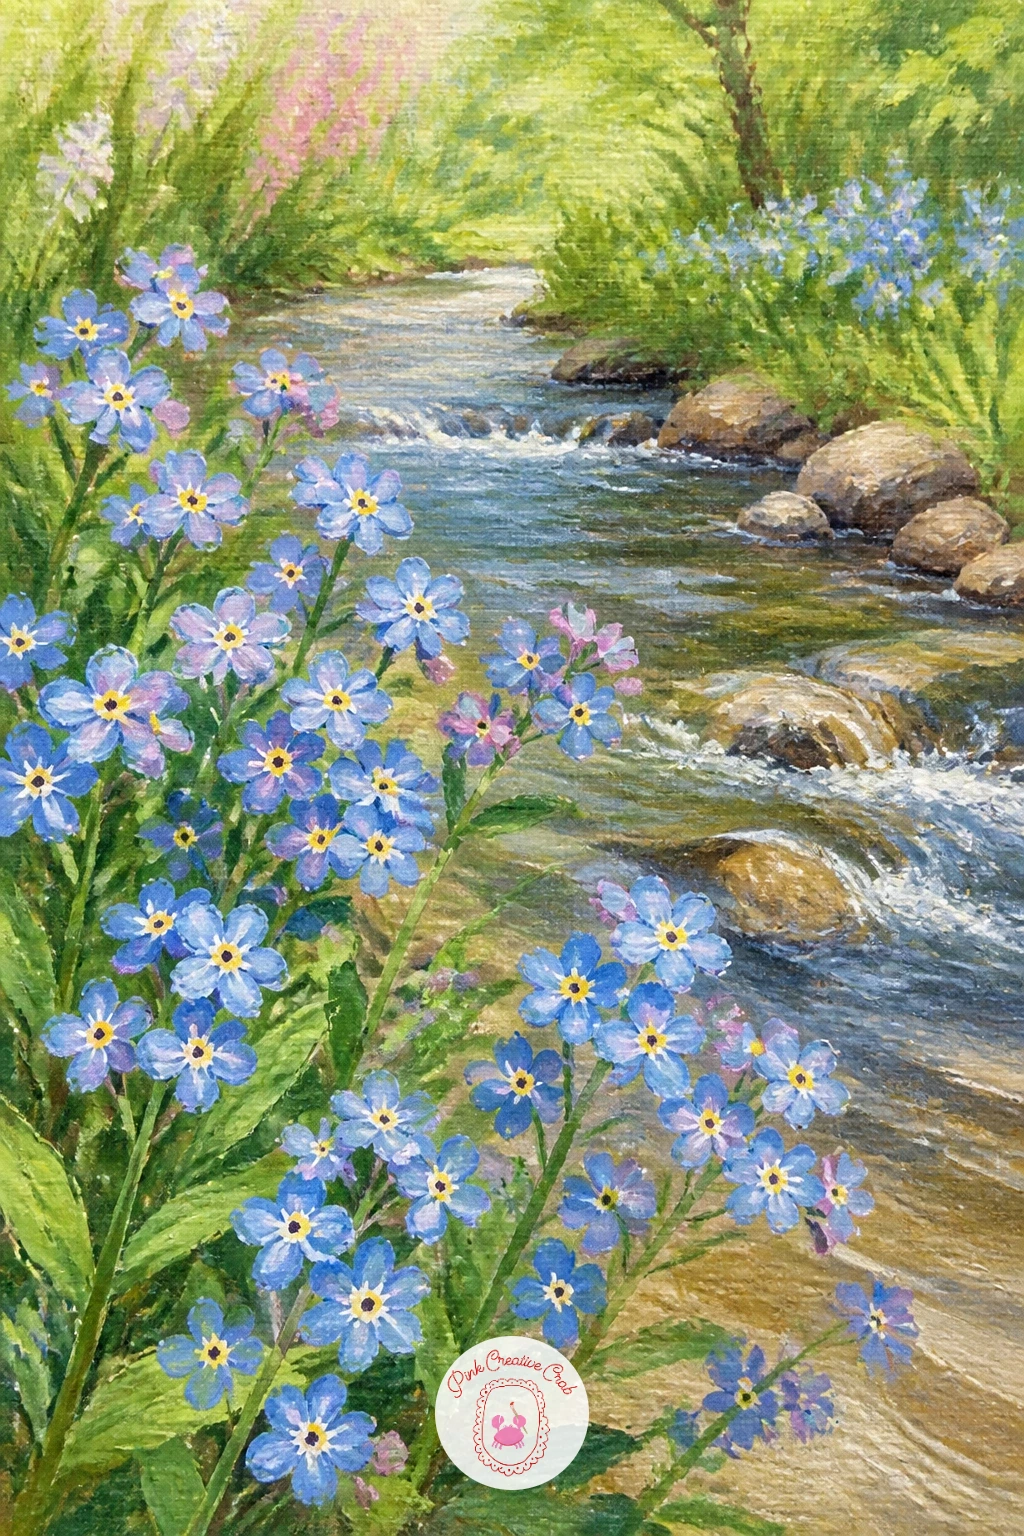
Palette: Pale Blue,Golden Yellow,Water Grey Blue,Fresh Green
Bring in a more architectural bloom with agapanthus standing beside a pool, their round flower heads perched on tall bare stems. Paint the pool first as a flat rectangle of clear blue with a few horizontal white reflection streaks, then place the agapanthus along one edge, each stem a single confident vertical line.
The flower head itself is a sphere made of many small star-shaped blooms radiating outward, so rather than dabbing it like a hydrangea, paint short straight petal lines fanning out from a central point, repeated in a rough ball shape at the top of each stem. This is a different hand motion from anything so far on this list and worth practicing once on scrap paper first.
Keep two or three agapanthus heads at slightly different heights so they do not look mechanically identical. A reflection of the blue flower heads in the pool water, just a soft blurred echo, ties the whole scene together.
Simplify to just the flower heads with no reflections if time is short today.
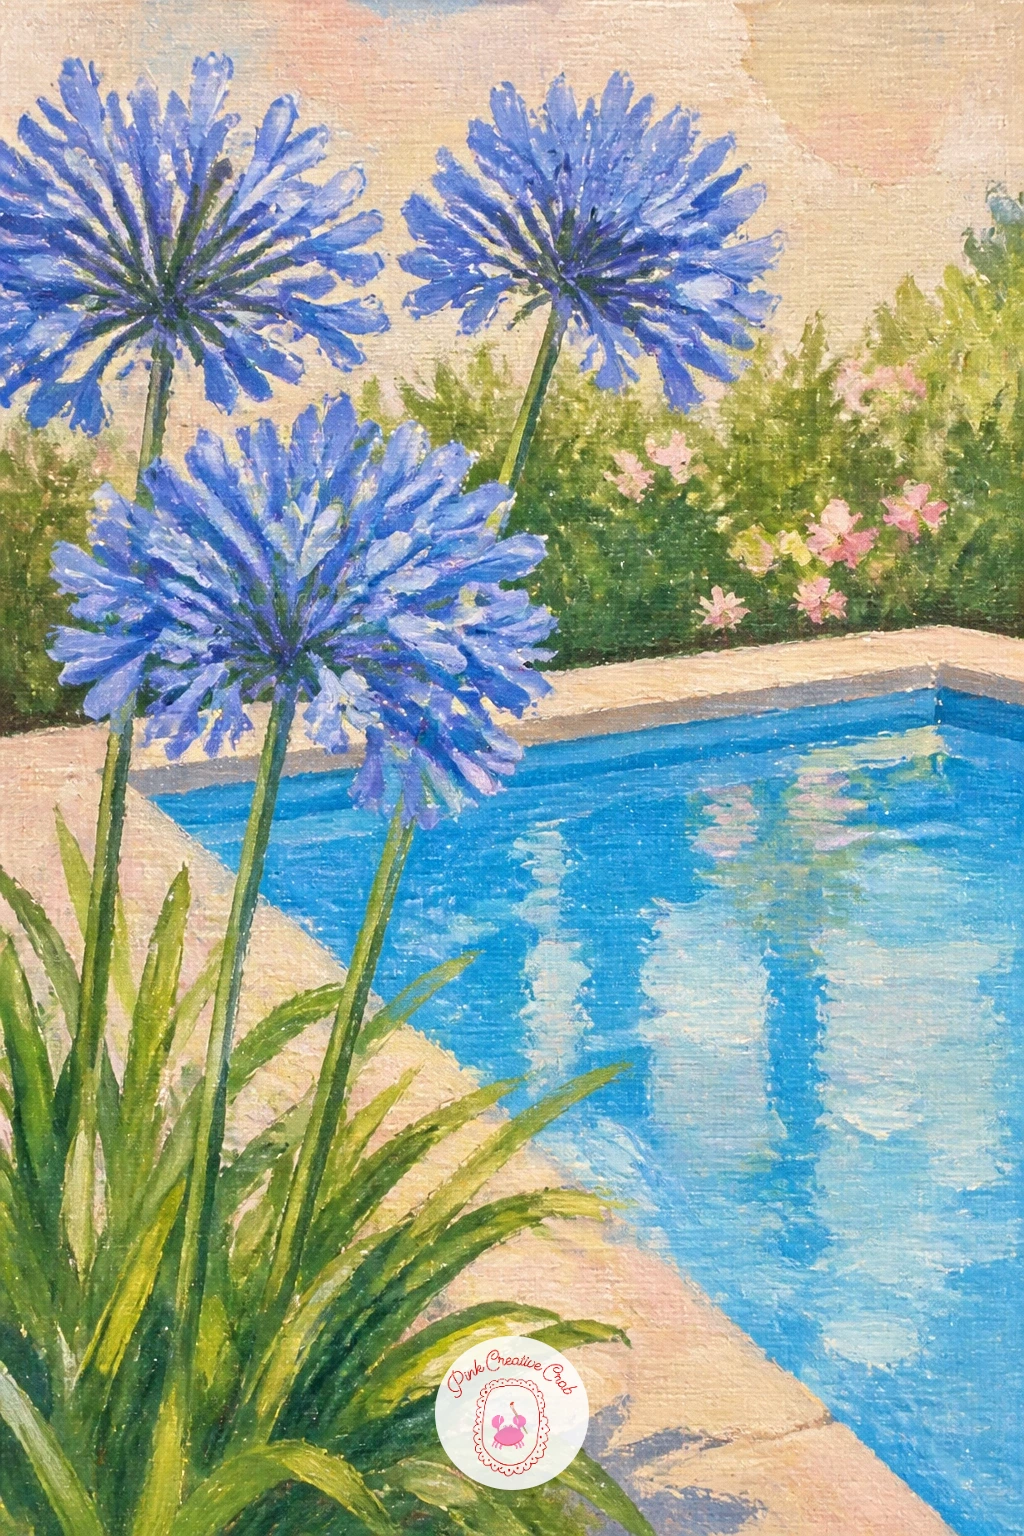
Palette: Cornflower Blue,Pool Blue,Titanium White,Fresh Green
Climb a trellis next with morning glories twining up a garden fence. Paint the fence or trellis structure first as a simple wooden grid in warm brown, then let the vine itself wind through it with a single curling green line, since the twisting stem is what makes morning glory read correctly rather than like any other climber.
Each flower is a simple trumpet shape, a cone opening outward, painted with one confident stroke from the dark center out to a lighter rim of cornflower blue or periwinkle. Unlike the hydrangea’s many small dabs, this flower wants fewer, bolder strokes, so resist overworking each bloom.
Morning glories open in the morning and close by afternoon, so keep a few buds painted as tight closed spirals among the open blooms for variety and a touch of realism. If the trumpet shape feels tricky, practice the cone shape on scrap paper first.
Let a couple of flowers face away from the viewer, showing just the back of the trumpet, for natural variety today.
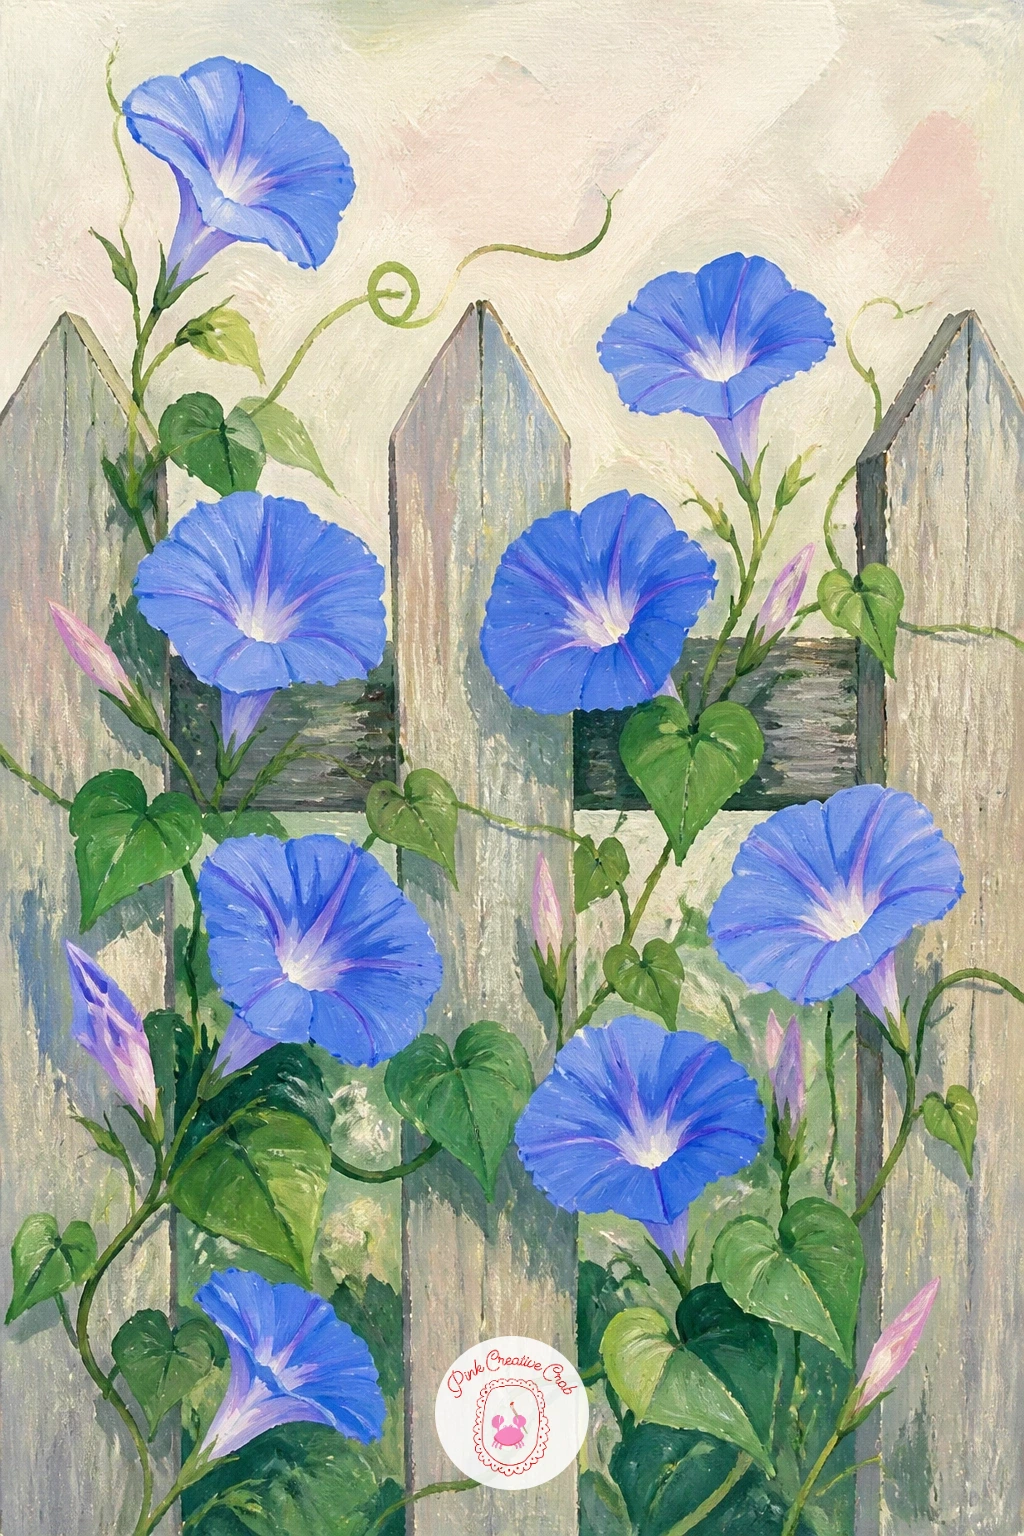
Palette: Cornflower Blue,Periwinkle,Warm Brown,Fresh Green
Bring the scale right back down with grape hyacinths growing in a small terracotta pot, perfect for a tabletop still life. Paint the pot first in warm terracotta orange with a simple rim highlight, then let the thin green leaves emerge from the soil line before any flowers appear.
Each grape hyacinth spike is built from tiny stacked dots of deep blue-purple, close together up a short stem, resembling a cluster of tiny grapes exactly as the name suggests. Work from the base of each spike upward, keeping the dots slightly smaller toward the tip.
Crowding too many identical spikes together is the main pitfall, so vary spike heights and let two or three lean at slightly different angles rather than standing perfectly upright. A cotton swab or the blunt end of a brush handle dipped in paint makes quick, even dots if a fine brush feels slow.
A plain cream windowsill behind the pot keeps this small piece calm and quick today.
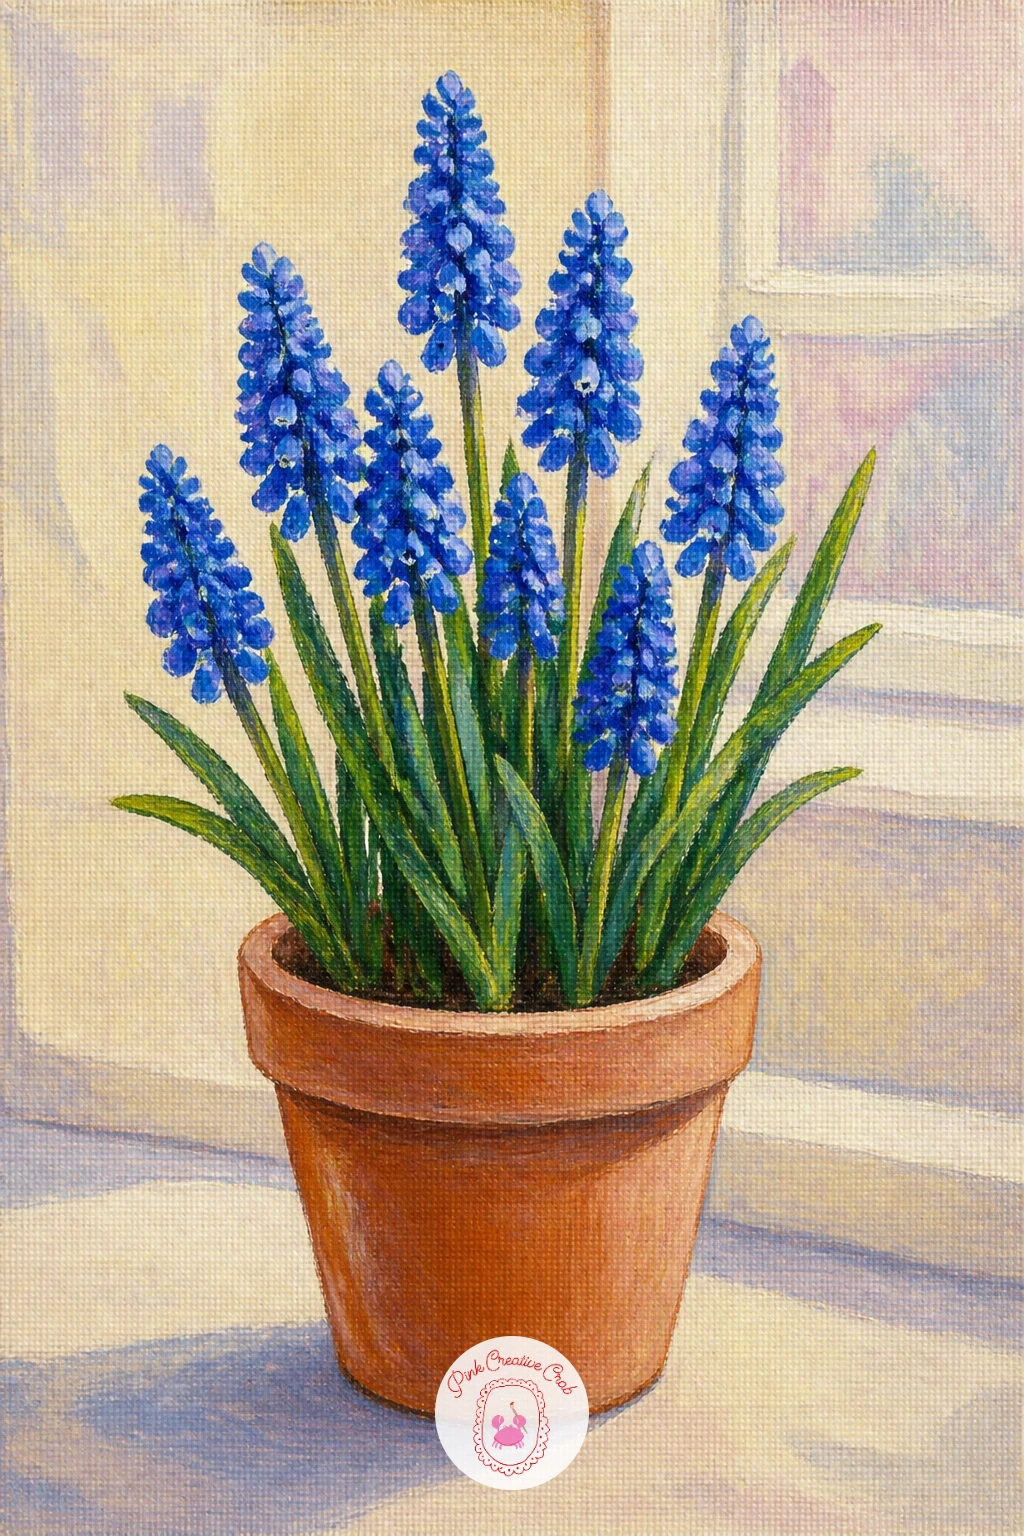
Palette: Deep Blue Purple,Terracotta,Fresh Green,Cream
Keep the small-scale mood going with scilla, those tiny star-shaped blue flowers that carpet the ground under trees in early spring. Paint the tree trunk first as a simple dark vertical shape at one side of the canvas, with bare or lightly budding branches reaching up and out of frame.
The scilla carpet spreads from the trunk’s base outward in a loose scatter of tiny six-pointed star flowers, each one just a quick cluster of thin blue lines radiating from a small center dot. Keep them denser right near the trunk and scattered more loosely further out, which mimics how these bulbs naturally spread over time.
Because the light here likely comes from one side through bare branches, let a soft patch of warmer light fall across part of the ground where the scilla sits brightest, with the rest in cooler shadow. This single light source is worth deciding before you place a single flower.
A quick wash of soft brown earth beneath the blue stars finishes the ground today.
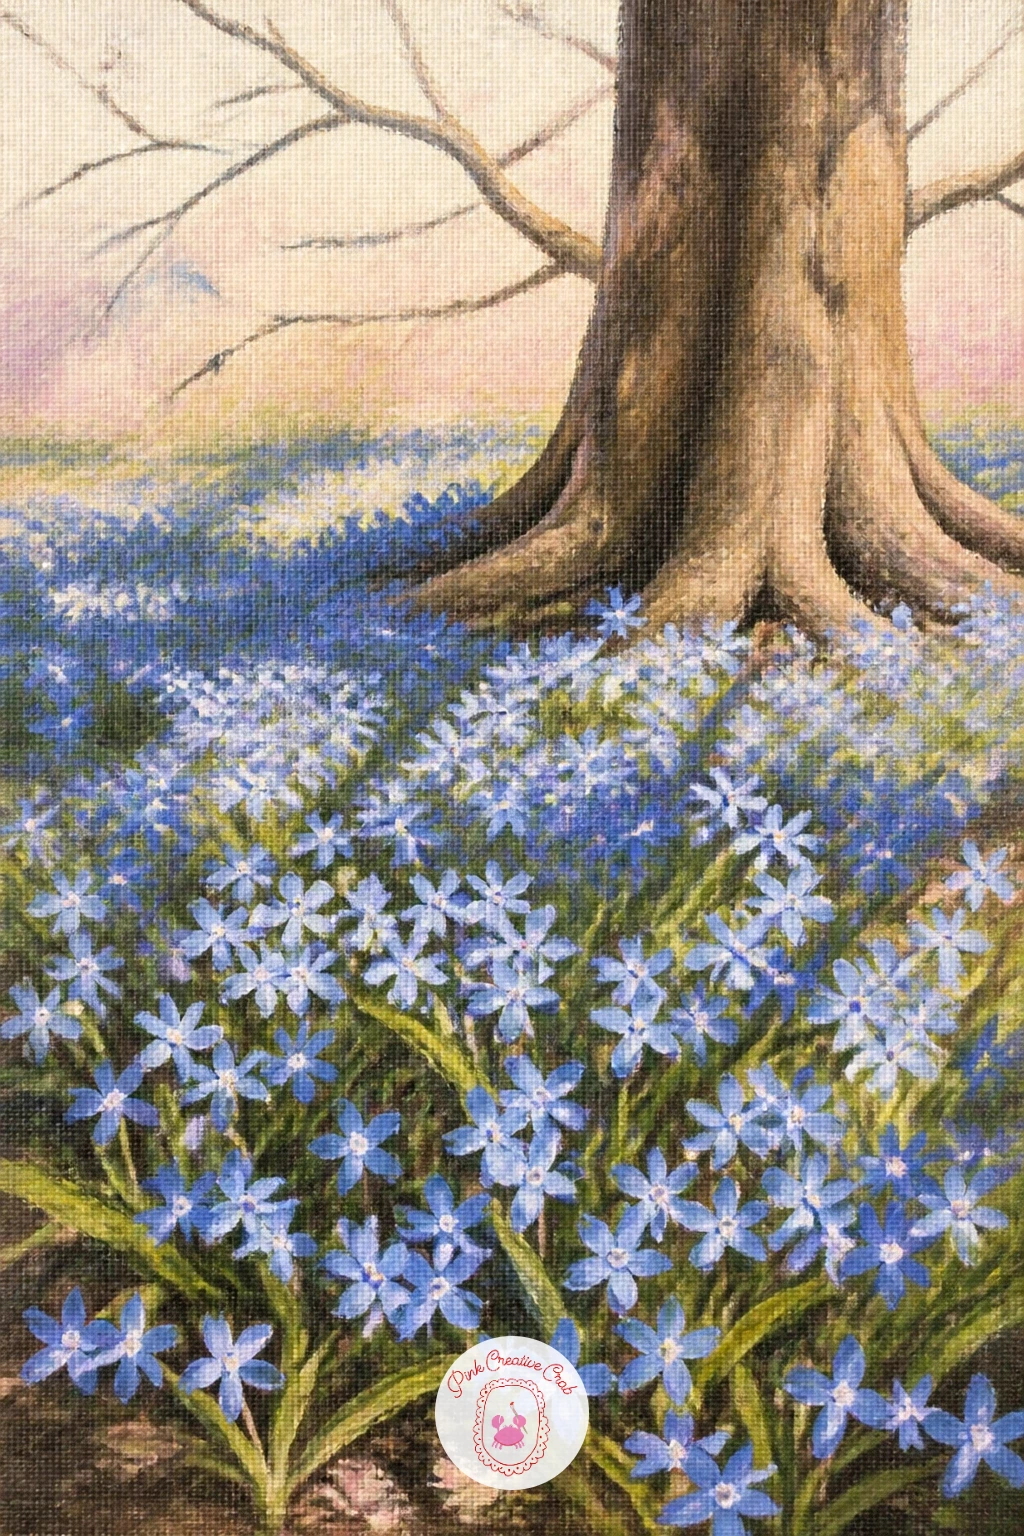
Palette: Cornflower Blue,Soft Brown,Pale Yellow Green,Payne’s Grey
Return to a larger shrub with ceanothus, sometimes called California lilac, tumbling in a cloud of tiny blue blooms over a garden wall. Paint the wall first as a simple stone or brick rectangle across the lower canvas, then let the ceanothus spill generously over the top edge in a loose, rounded mass of foliage.
Unlike hydrangea’s distinct round heads, ceanothus flowers in tight fuzzy clusters of countless tiny blooms, so stipple the whole mass with the tip of a stiff brush loaded with cornflower blue and periwinkle rather than dabbing individual petal shapes. This stippled texture technique covers ground fast and reads convincingly from a normal viewing distance.
If the result looks too uniform, vary the pressure as you stipple so some patches sit denser and darker while others stay lighter and more open, mimicking natural light falling across the shrub. A stiff old brush works better here than a soft new one.
Let a little wall texture show through gaps in the foliage today.
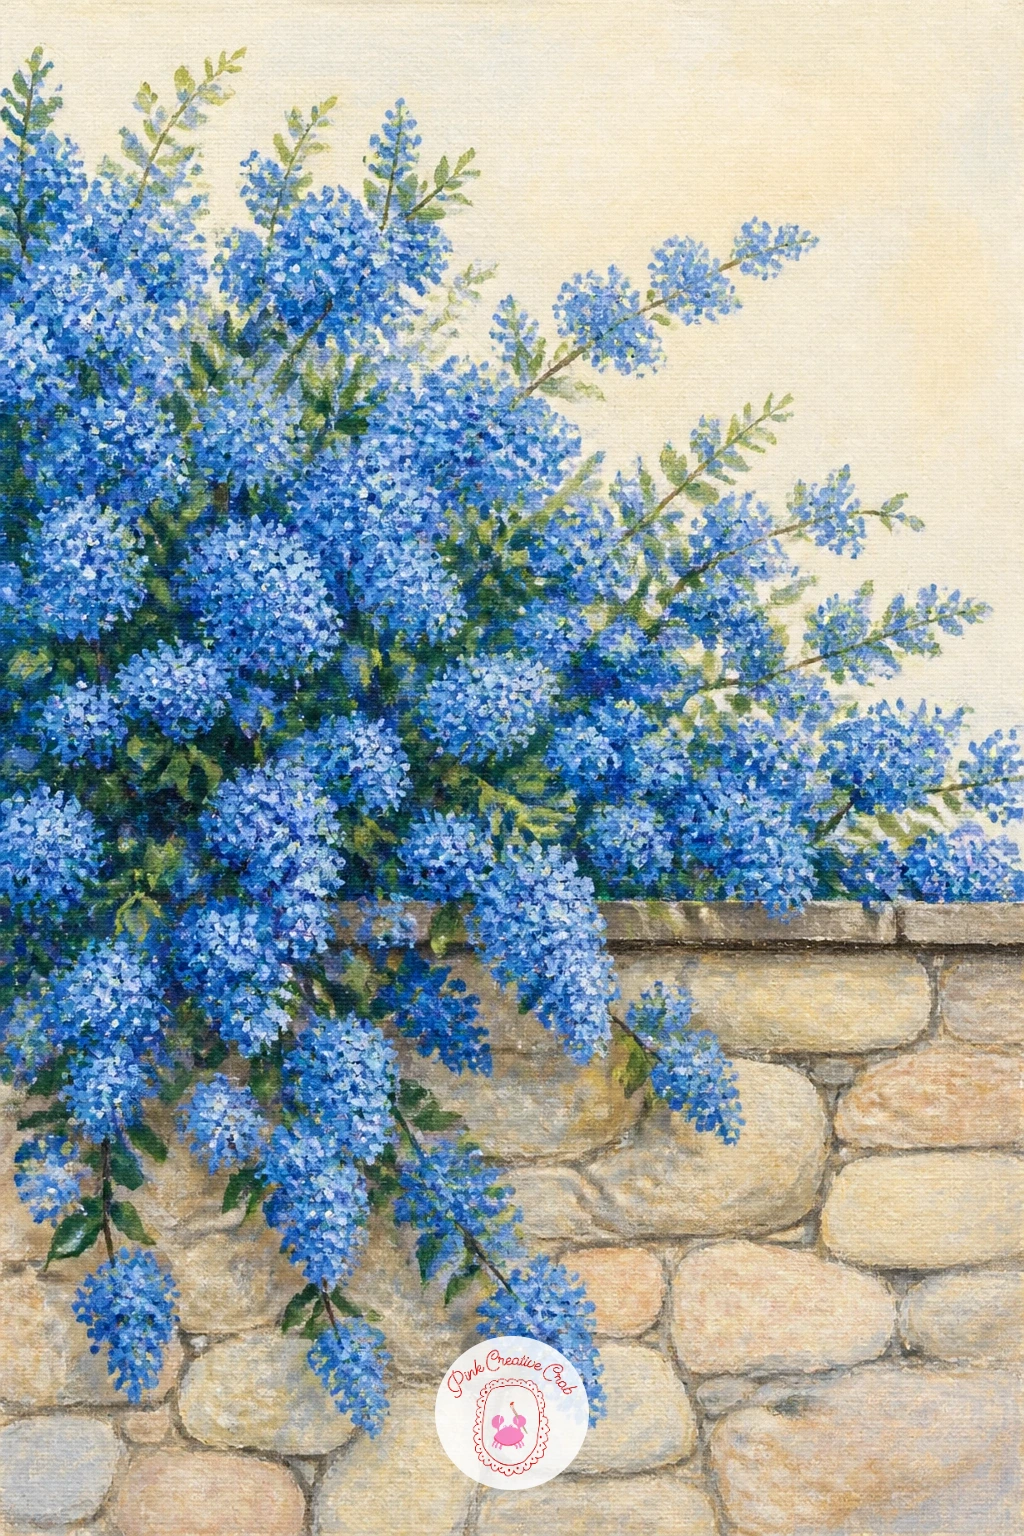
Palette: Cornflower Blue,Periwinkle,Stone Grey,Fresh Green
Travel briefly to a Mediterranean terrace where plumbago spills pale blue blooms along a sun-warmed wall. Paint the wall in warm ochre or terracotta first, since that warm backdrop is what makes plumbago’s cool powder blue flowers sing in contrast, then let the vine trail down from a pot or along the top of the wall.
Each plumbago flower is a simple five-petal shape, flatter and paler than cornflower blue, closer to a soft powder or sky blue, painted with light, quick strokes rather than heavy dabs since these petals are delicate and almost papery.
Strong Mediterranean sunlight means hard-edged shadows, so add one or two crisp dark shapes cast by the vine onto the wall below it, rather than the soft diffused shadows used in the woodland or stream scenes earlier in this list. That contrast of hard light is what places this piece somewhere sunny.
A terracotta pot glimpsed at the base finishes the terrace feeling today.
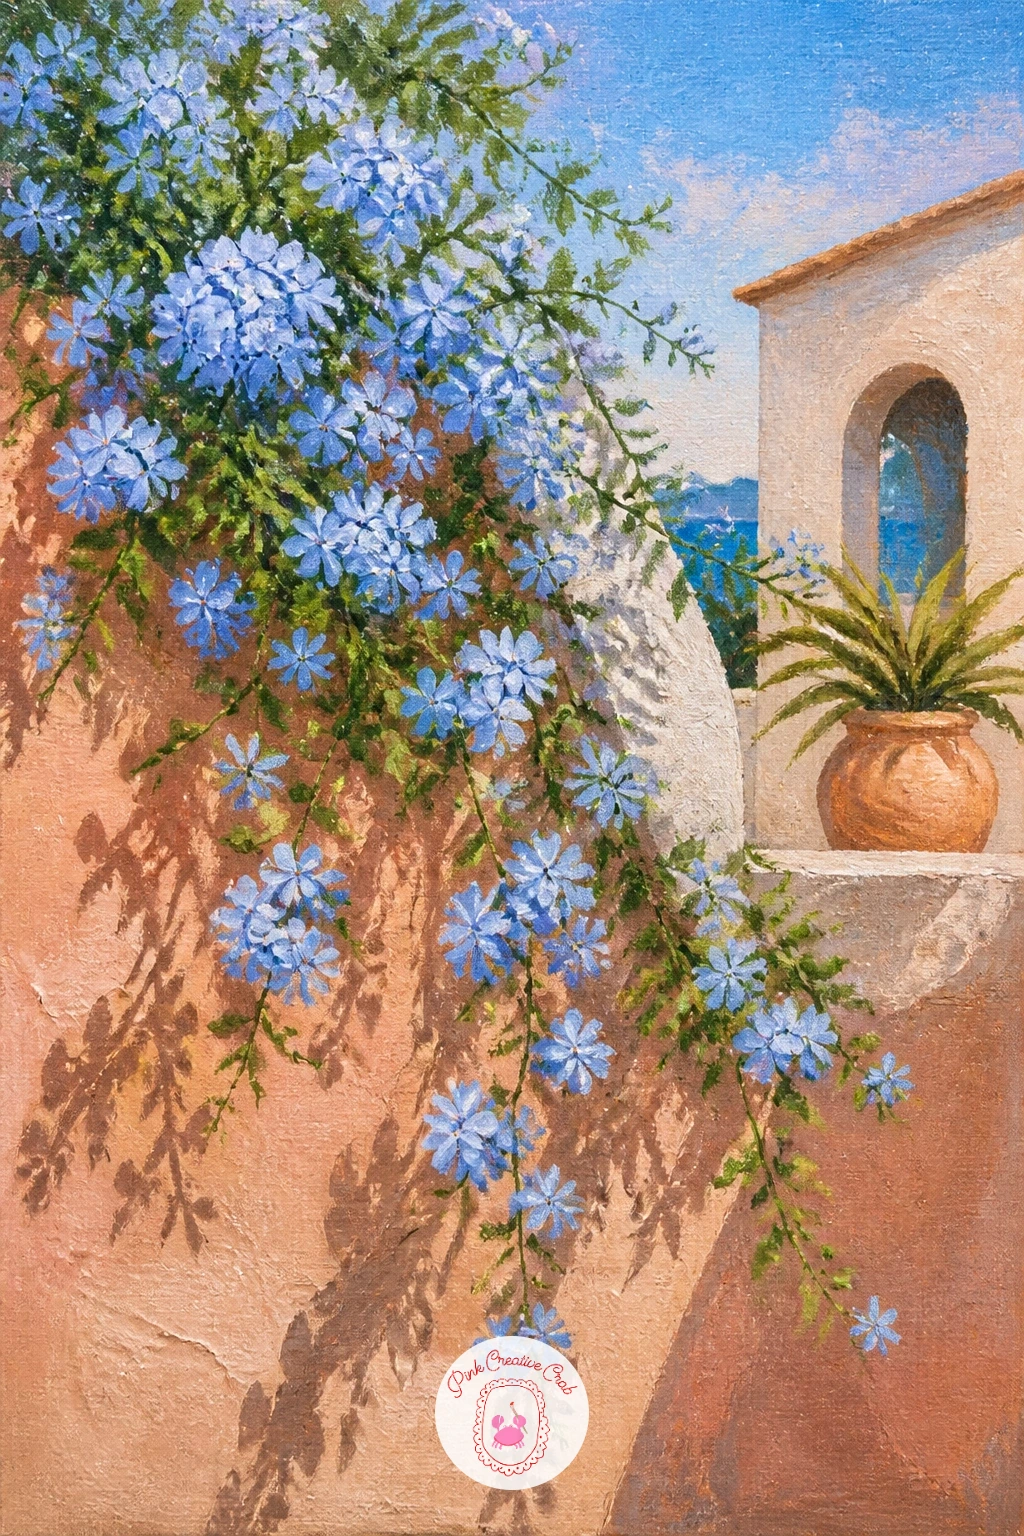
Palette: Powder Blue,Terracotta,Warm Ochre,Fresh Green
Pair flowers with a drink this time, borage blooms floating in a jug of lemonade, a cheerful summer still life. Paint the jug first as a simple glass cylinder with the lemonade inside rendered as a warm pale yellow, leaving a lighter streak down one side for the glass highlight.
Borage flowers are small, distinctive five-petal stars in a true, slightly purple-leaning blue, each with a tiny dark center cone, so paint a few floating on the lemonade’s surface and a few more scattered on the table beside the jug as if freshly picked. Keep the floating ones simplified, since the liquid surface softens their edges slightly.
Getting the liquid to look convincing is the tricky part, so keep your yellow slightly transparent by thinning the paint with water, and leave a thin pale rim of reflected light around the inside edge of the glass. If borage blue feels hard to mix, cornflower blue with a tiny touch of red gets close.
A slice of lemon against the jug adds a nice bright accent today.
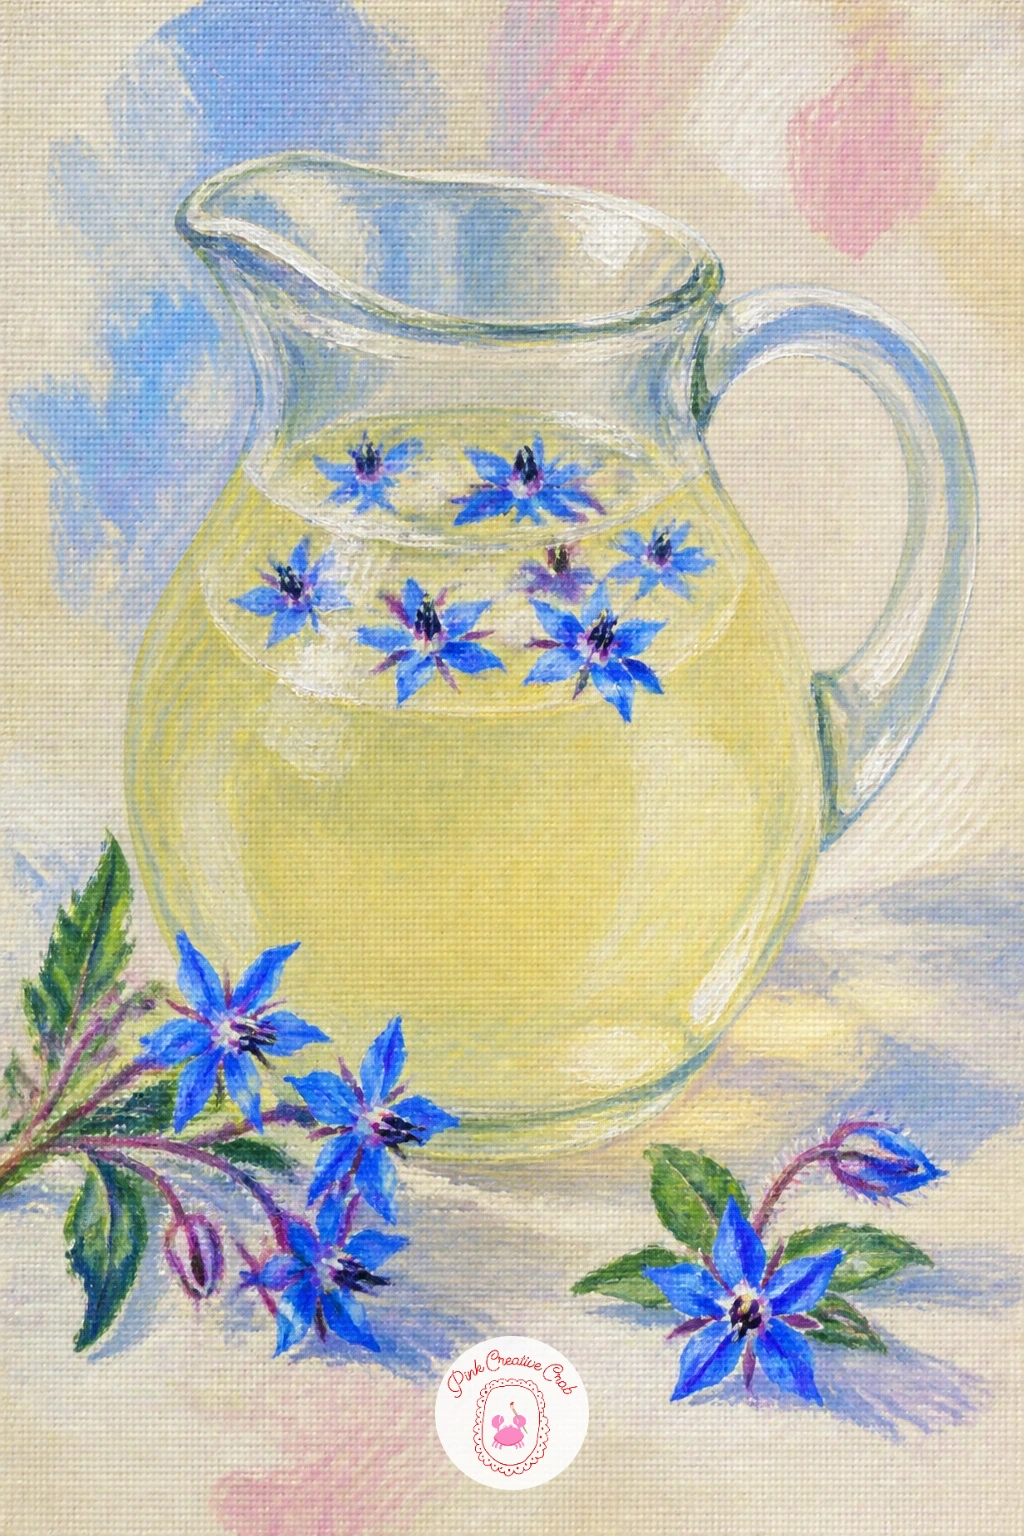
Palette: True Blue,Lemon Yellow,Titanium White,Fresh Green
Return to a simple jar arrangement, this time with love-in-a-mist, instantly recognizable for its wispy green thread-like foliage surrounding each pale blue bloom. Paint the jar and water line using the same method as the earlier hydrangea jar, then build the delicate feathery foliage first with thin, loose green lines before any flowers go on top.
Each flower sits nestled within its own halo of this wispy green, so paint the blue bloom, five soft rounded petals around a darker center, directly over the foliage rather than around it, letting a few green threads overlap the petal edges for that characteristic misty look.
If you want to try something different from this jar arrangement next time, paint love-in-a-mist’s dramatic seed pods instead, those round, striped balloon-like pods that follow the flowers, in soft green and maroon stripes for an entirely different but related subject.
Keep the foliage looser and thinner than any other greenery on this list today.
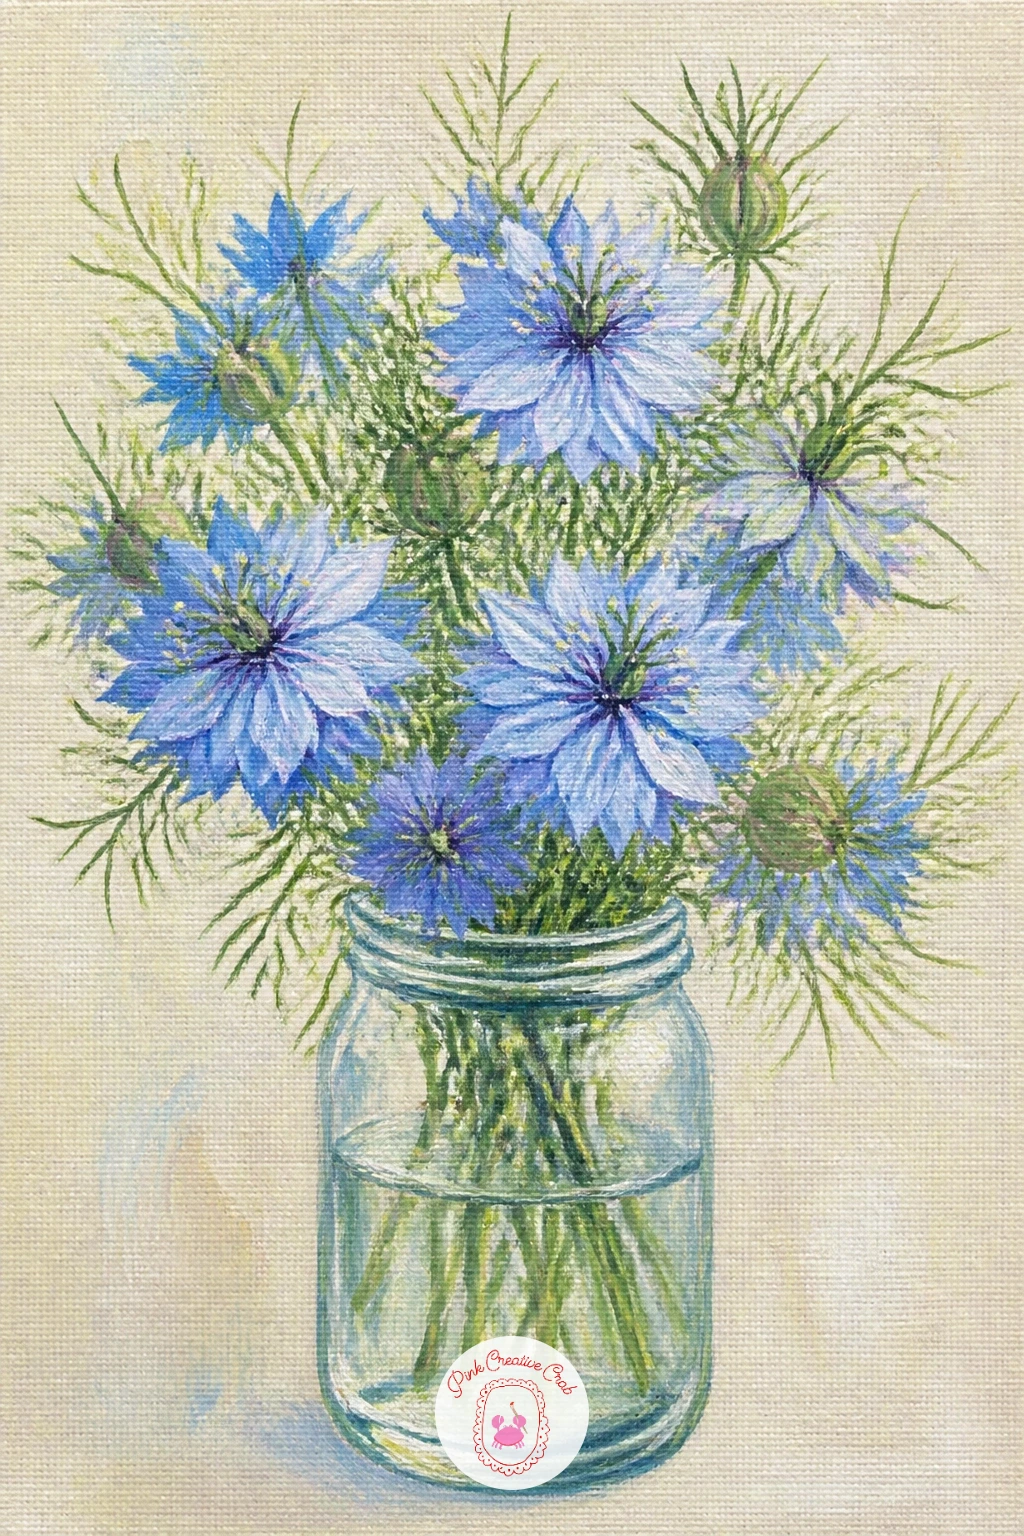
Palette: Pale Blue,Soft Lilac,Fresh Green,Titanium White
Open the view out again for a whole field of blue flax swaying under an open sky. Paint the sky first across the upper half of the canvas in soft pale blue, then bring the flax field in below using loose vertical strokes of green mixed with hints of blue where the flowers cluster thickest.
Flax flowers are tiny, pale blue, almost translucent five-petal blooms that only properly open in the morning, so rather than painting individual flowers across the whole field, suggest them with small dabbed clusters of pale blue scattered loosely across the green, denser in the foreground and fading to a soft blue-green haze near the horizon.
This fading from clear detail up close to soft color in the distance is the same perspective trick used in the hydrangea lane earlier, and it works just as well here. A dry brush dragged lightly over the foreground flax adds a nice windswept texture.
Keep the horizon low on the canvas so the sky and swaying field both get room to breathe today.
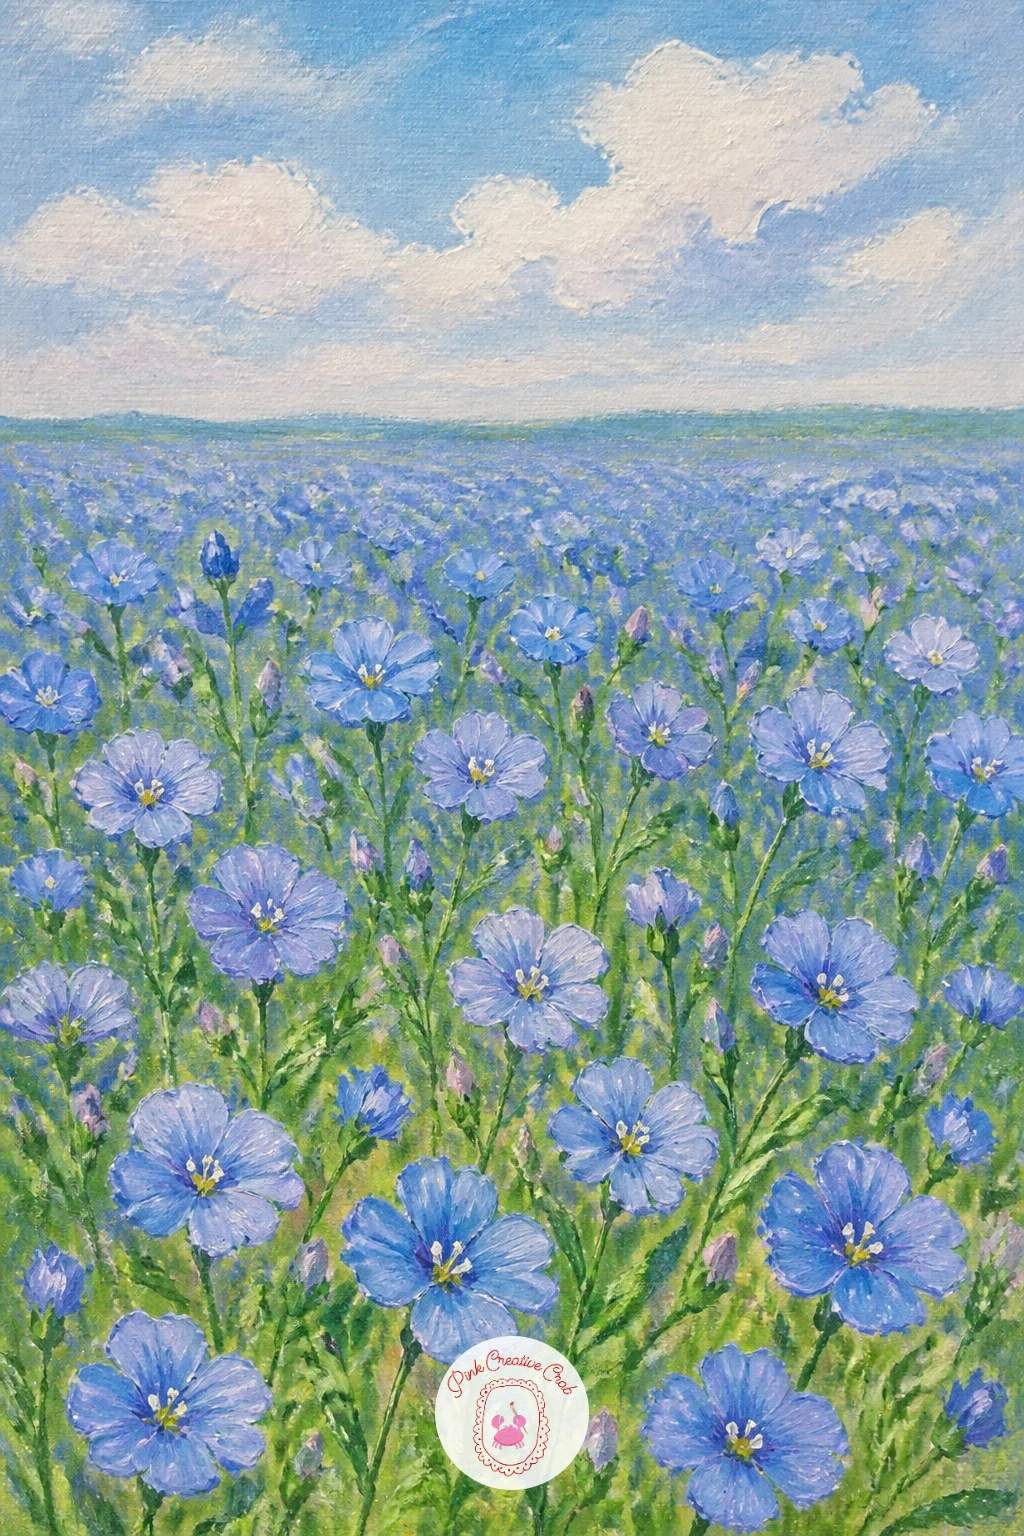
Palette: Pale Blue,Fresh Green,Sky Blue,Soft Blue Green
Travel again for nemophila fields, the famous rolling hillsides in Japan completely carpeted in tiny sky blue flowers, a dramatic and very paintable subject. Paint the sky first, then bring a gently rolling hill shape down from one side of the canvas, its slope covered edge to edge in the nemophila carpet rather than any visible soil or grass.
Build the carpet with a loaded stiff brush stippled repeatedly across the hill in varying shades of sky blue and pale cornflower, working from the furthest, palest part of the hill forward to the richest, most saturated blue in the foreground, since that gradation is what gives the hillside its rolling depth.
The temptation is to make the whole hill one flat blue, which loses all sense of distance, so keep checking as you go that the front of the hill reads noticeably bluer and more textured than the back. A distant tree or two on the horizon gives scale.
Let a few wisps of cloud break up the sky today.
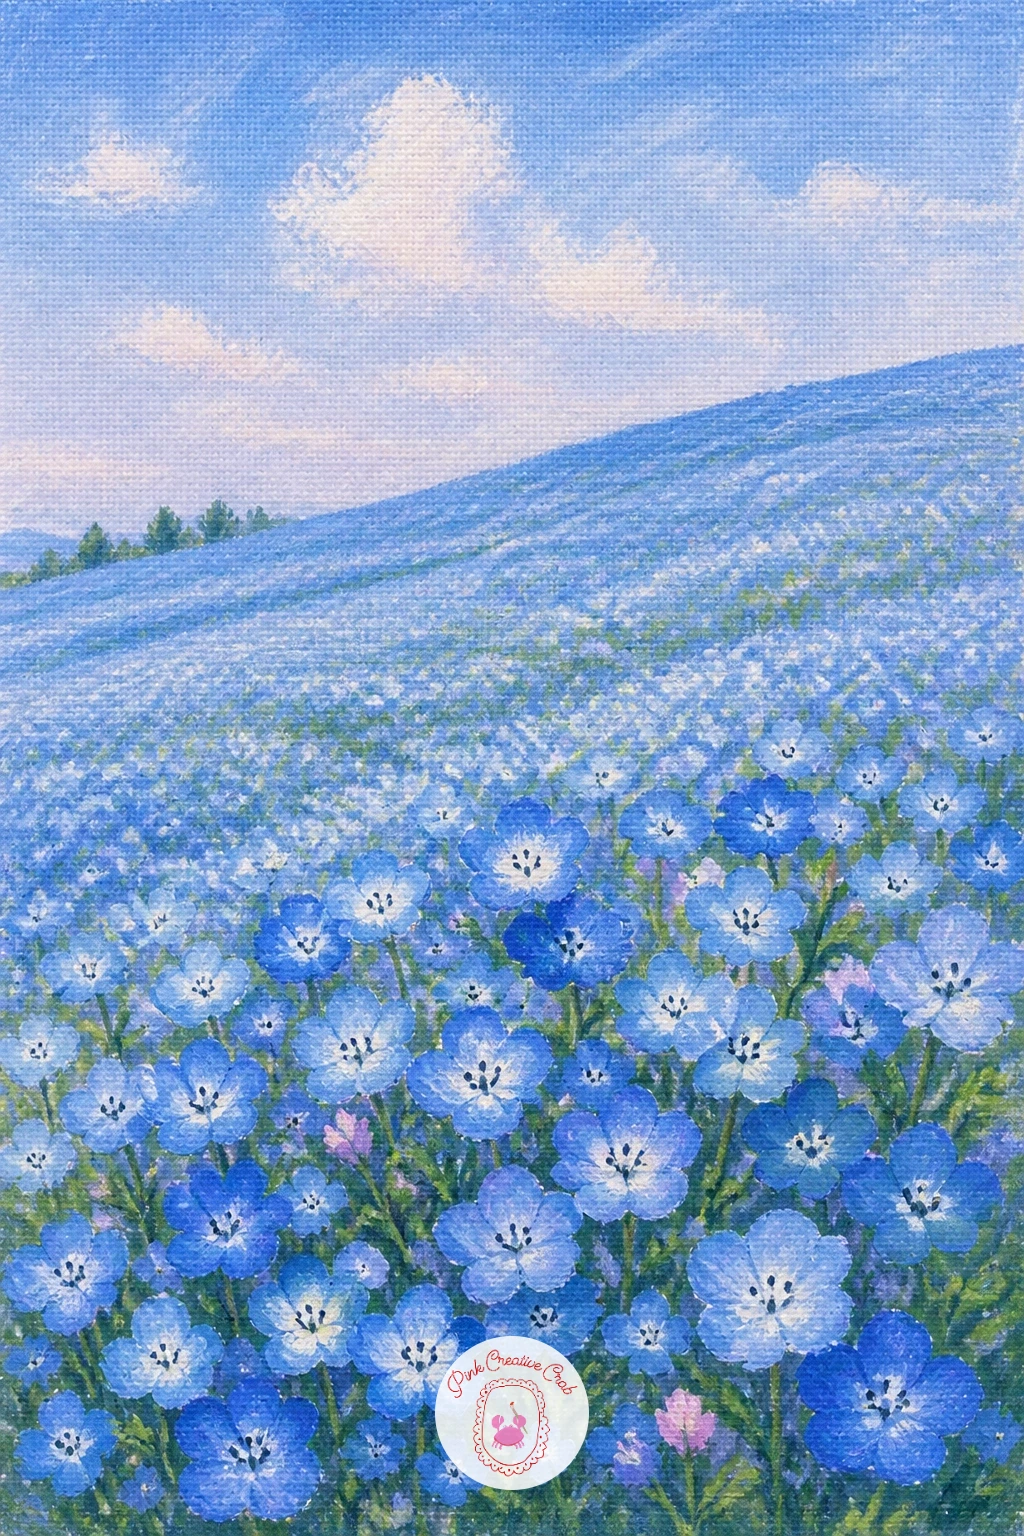
Palette: Sky Blue,Cornflower Blue,Pale Blue,Fresh Green
Bring the scale back down with periwinkle trailing low along the edge of a garden path. Paint the path first as a simple curving band of warm stone or gravel color across the canvas, then let the periwinkle vine creep in from one or both sides with thin trailing green stems close to the ground.
Each periwinkle flower is a flat, simple five-petal pinwheel shape, easy to paint quickly with five short strokes meeting at a small darker center, in that true periwinkle blue that sits between cornflower and lilac. Scatter them low along the path edge rather than upright, since periwinkle grows as a ground-hugging vine, not a bush.
If the quick ten-minute version is all today allows, a handful of these flat flower shapes along one path edge is complete on its own. With more time, add the glossy dark green leaves periwinkle is known for, painted with a slightly wet, shiny-looking stroke for contrast against the matte path.
Curve the path gently rather than straight for a more natural feel today.
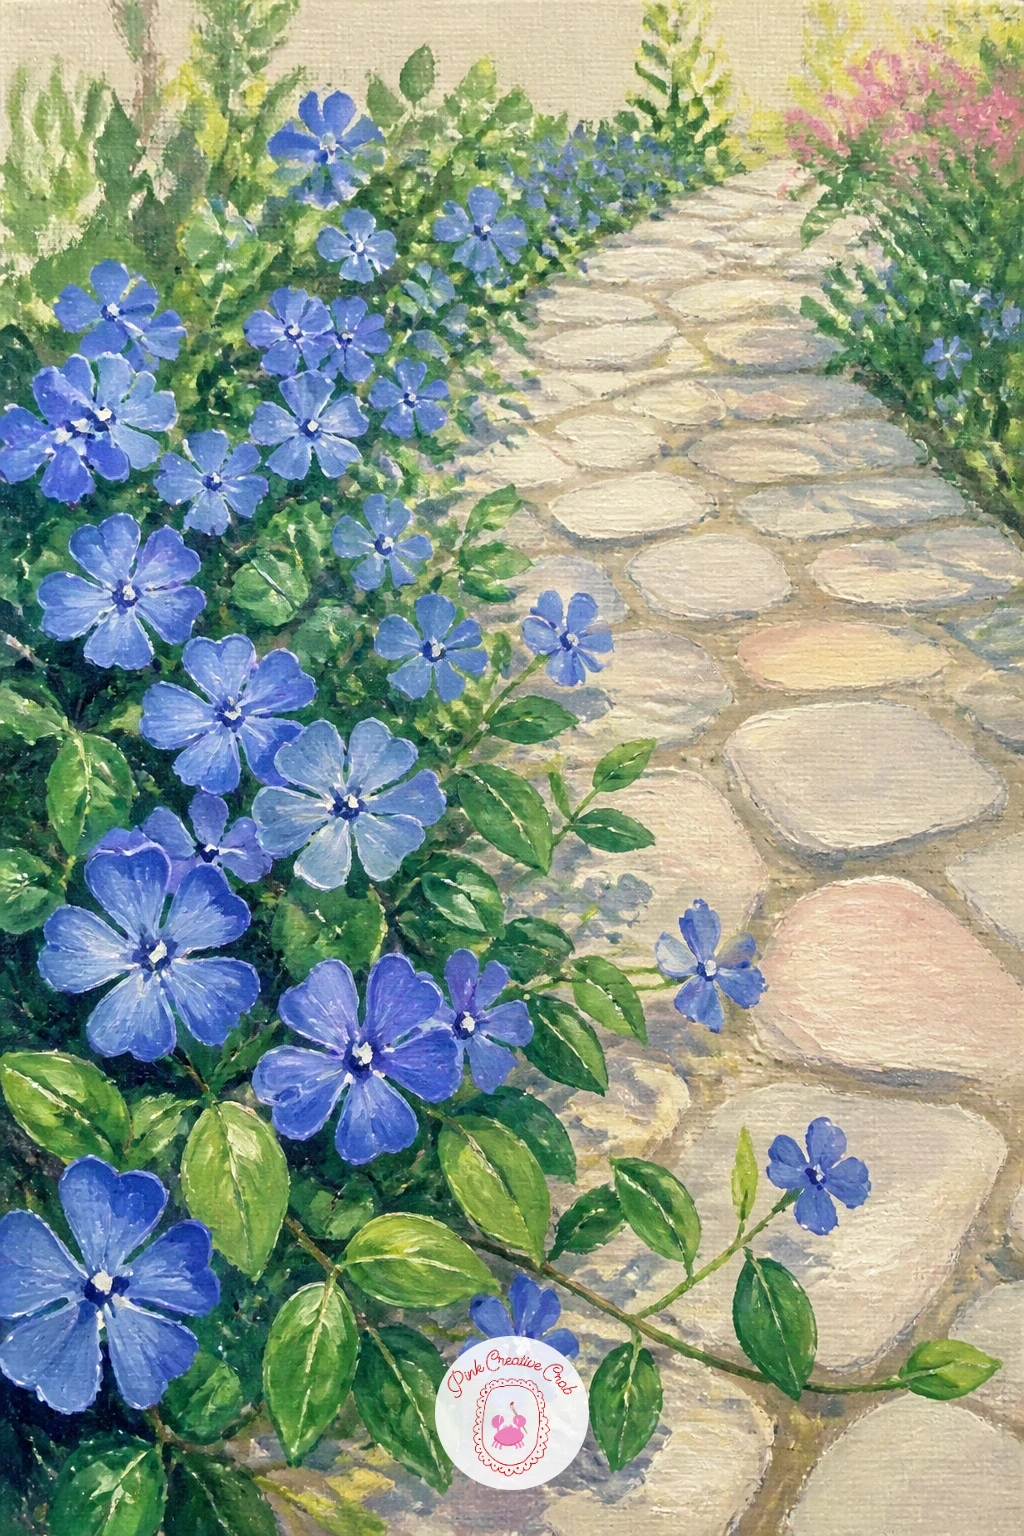
Palette: Periwinkle,Stone Grey,Dark Glossy Green,Warm Brown
Close the list with blue globe thistles, their perfectly round, spiky flower heads a satisfying final shape to practice after so many soft rounded petals. Paint each stem first as a tall straight green line, then build the globe head as a tight sphere of short, spiky blue-grey strokes radiating outward in every direction from the center, like a tiny firework.
This spiky, textured surface is the opposite hand motion from a hydrangea’s soft dabs, so load a dry, slightly splayed brush with thistle blue and work quickly around the whole sphere, keeping the strokes short and even so the ball shape holds together rather than looking shaggy.
Globe thistles often attract bees, so a small striped bee or two perched on one globe head, painted the same simple way as the lacecap hydrangea bee earlier in this list, adds life without much extra effort.
Group three thistles at varying heights with a few spiky silver-green leaves below to finish the whole hydrangea-and-blue-garden collection today.
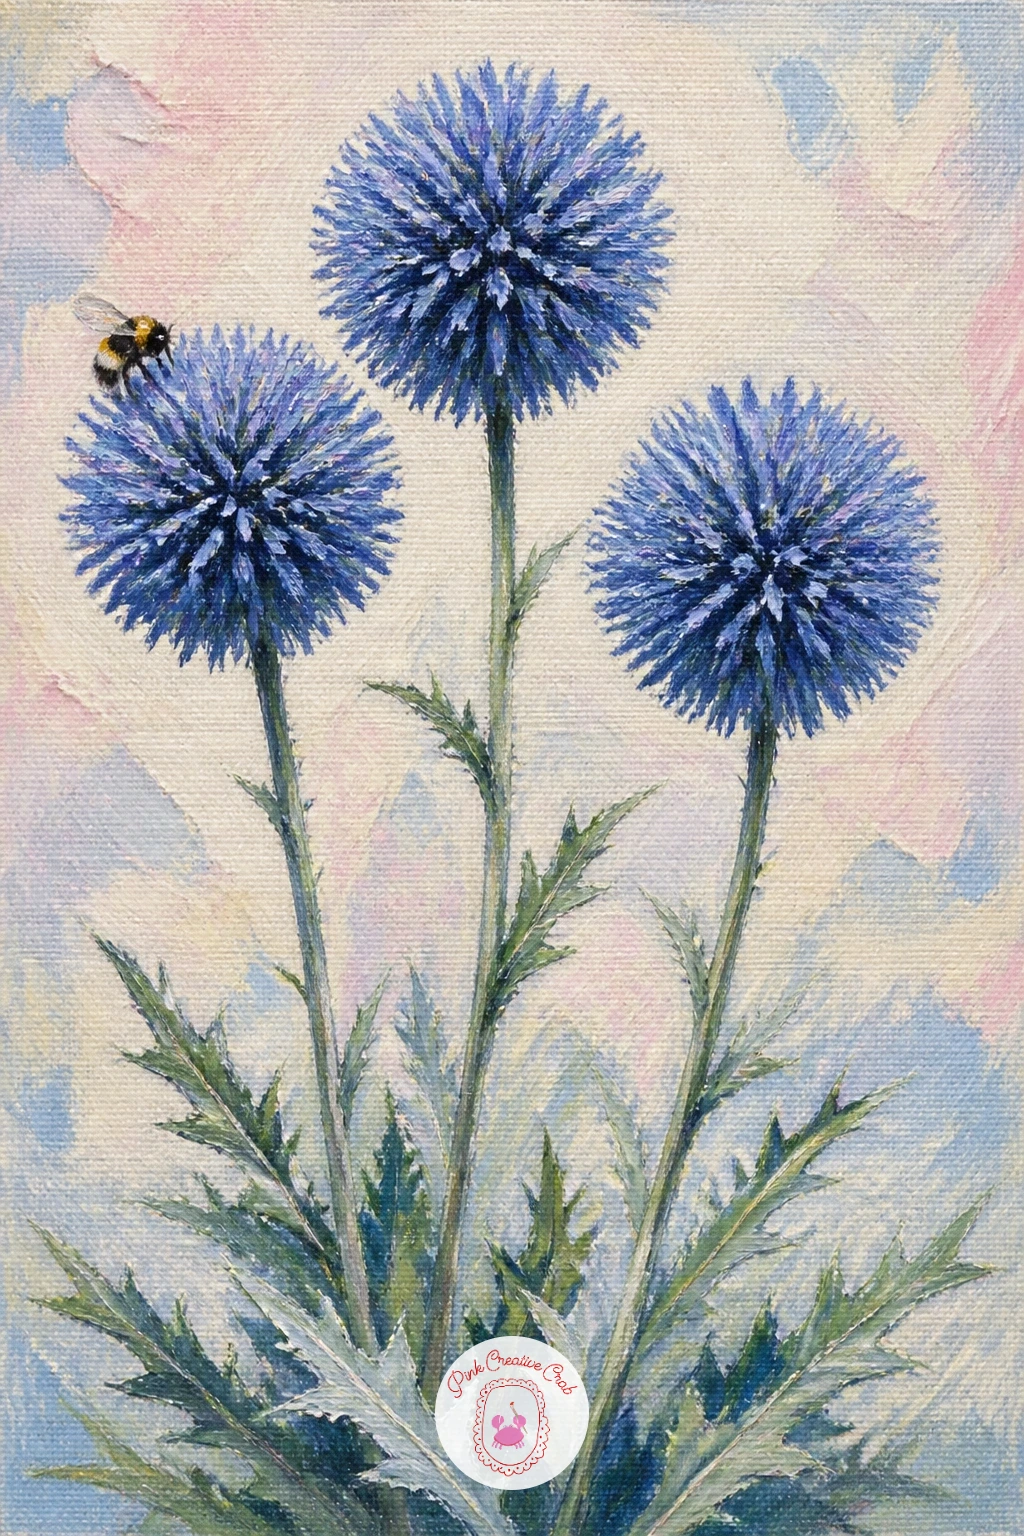
Palette: Thistle Blue Grey,Silver Green,Payne’s Grey,Golden Yellow
If acrylic globe thistles feel like a fun medium shift to revisit later, the same spiky sphere technique works beautifully in gouache too, as shown in these gouache painting ideas for beginners.
What to Do Next
Pick whichever bloom is pulling at you most, hydrangea, bluebell or globe thistle, and set up a canvas board with your cornflower blue, periwinkle and fresh green already mixed before you start. Work loose, let one idea lead naturally into the next sitting, and you will have a finished cool blue garden piece by the end of today.
Frequently Asked Questions
What paint works best for hydrangea painting if you are a beginner?
Acrylic works best for beginners because it dries fast and forgives mistakes with another layer on top. Build petals with small dabbed strokes rather than one flat wash, and keep a damp cloth nearby to lift fresh paint if a cluster spreads too far.
How do you mix a true hydrangea blue in acrylic?
Start with cornflower blue or ultramarine and lighten it gradually with titanium white until it reaches a soft, slightly dusty tone. Adding a tiny touch of violet shifts it toward periwinkle, which suits the lacecap and bouquet ideas particularly well.
Do you need real hydrangeas or a photo to paint from?
Neither is required, since a hydrangea head is simply a cluster of overlapping small dabs built up gradually. A photo helps with color variation across one bloom, but the dabbing technique itself comes from practice, not close observation.
How do you stop hydrangea petals from looking like a flat blob?
Vary the size and tone of each petal dab rather than repeating the same stroke across the whole flower head. Let a few individual petal edges break the outer silhouette, and add one slightly darker shadow dab where clusters overlap.
Can these blue flower ideas work in watercolor or gouache instead of acrylic?
Yes, the dabbing and layering approach adapts well to gouache, which also dries to an opaque finish similar to acrylic. Watercolor needs lighter, looser dabs since it stays transparent, so build color in thin layers rather than one thick stroke.
Have any thoughts?
Share your reaction or leave a quick response — we’d love to hear what you think!
-
 0
-
0
-
0
-
0
-
0
-
0


