

A christmas lights drawing works like nothing else on a dark page: a few warm dots of color against deep blue or black and suddenly a whole scene feels like midnight in December. These 32 ideas each drop a little moment into that glow, a cat caught in a string of bulbs, a girl curled up reading, a houseboat strung with light from bow to stern. Nothing here needs a big setup, just a dark ground, a handful of markers and a white gel pen for the sparkle.
Work through them in any order you like, from the quick porch scene to the busier carousel square, and keep the glow as the hero every time. Below you will find what to gather before you start, a tip box beside each idea, and answers to the questions that come up most when markers meet a black page.
Using these images: free for personal projects such as printing, coloring, cards, journals and gifts. Handmade items that include them may be sold up to 30 pieces per design. More than that is commercial use and is not permitted, and neither is selling or sharing the images themselves or passing them off as your own. Please ask before any other use.
Before You Start
- Lay down the dark background first and let it dry completely before adding any bulb colors, or the yellow will turn muddy and grey.
- Test every marker color on a scrap of the same dark paper before it touches the real page, since colors read very differently on black than on white.
- Save the white gel pen for last and use it only for the tiniest highlights, one dot per bulb is usually enough.
- Keep a reference photo of real fairy lights open nearby so the glow halos stay soft and round instead of becoming hard circles.
- Work from the furthest, darkest shapes forward to the brightest highlights, building the scene back to front like the night is settling in.
- Leave more dark paper showing than you think you need, since empty black space is what makes the lit areas look like they are actually glowing.
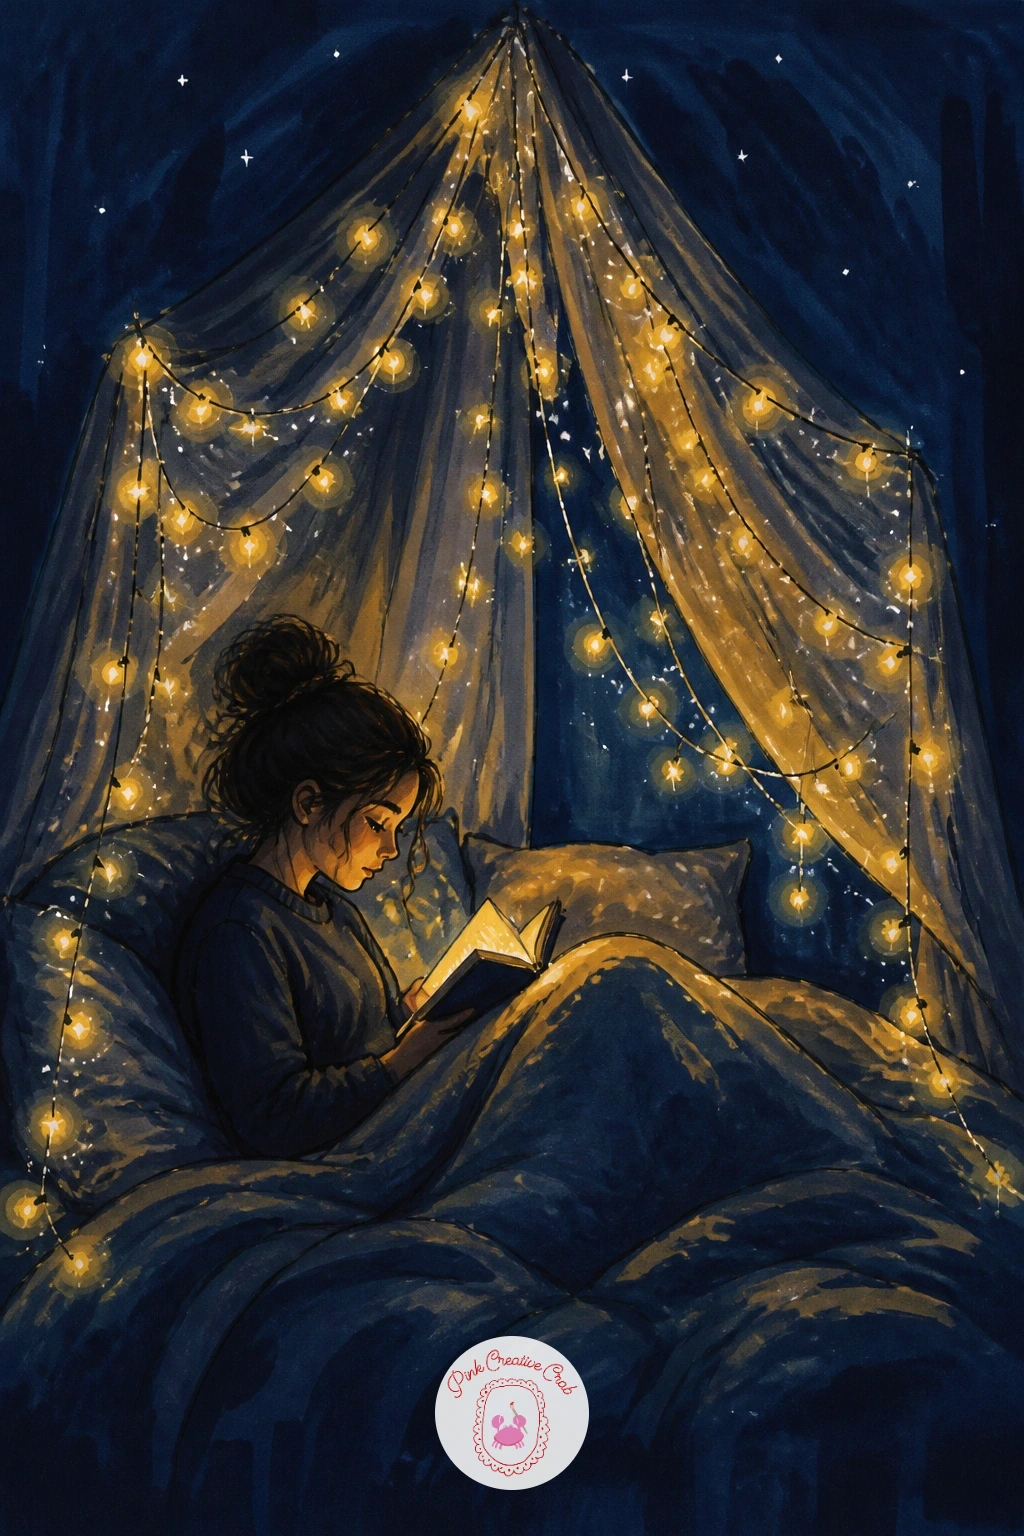
Start the whole set with something small and quiet: a girl reading in bed under a canopy of fairy lights strung along the headboard. Block in the dark blue background first, then sketch her shape in white charcoal pencil, knees up, book open, before any lights go in.
Add the string of bulbs as a loose scalloped line above her, then dot warm yellow marker at even intervals along it, leaving the paper dark between each one. The common slip here is spacing the bulbs too evenly, like a ruler drew them, so nudge a few closer together and a few further apart.
Measure her head against her forearm before you commit to ink, since getting that proportion close keeps the whole pose believable even in a loose sketch. If you do not have warm yellow, a pale orange marker does the same glowing job.
Finish with single gel pen dots at the center of each bulb for the hot highlight.
You Will Need
- black or deep blue toned paper
- warm yellow alcohol marker
- white charcoal pencil
- white gel pen
Palette: Payne’s Grey,Warm Yellow,Soft Peach,Chalk White
Study a real photo of fairy lights to see how the glow spreads unevenly around each bulb, never as a perfect circle, and copy that softness with a second lighter marker pass.
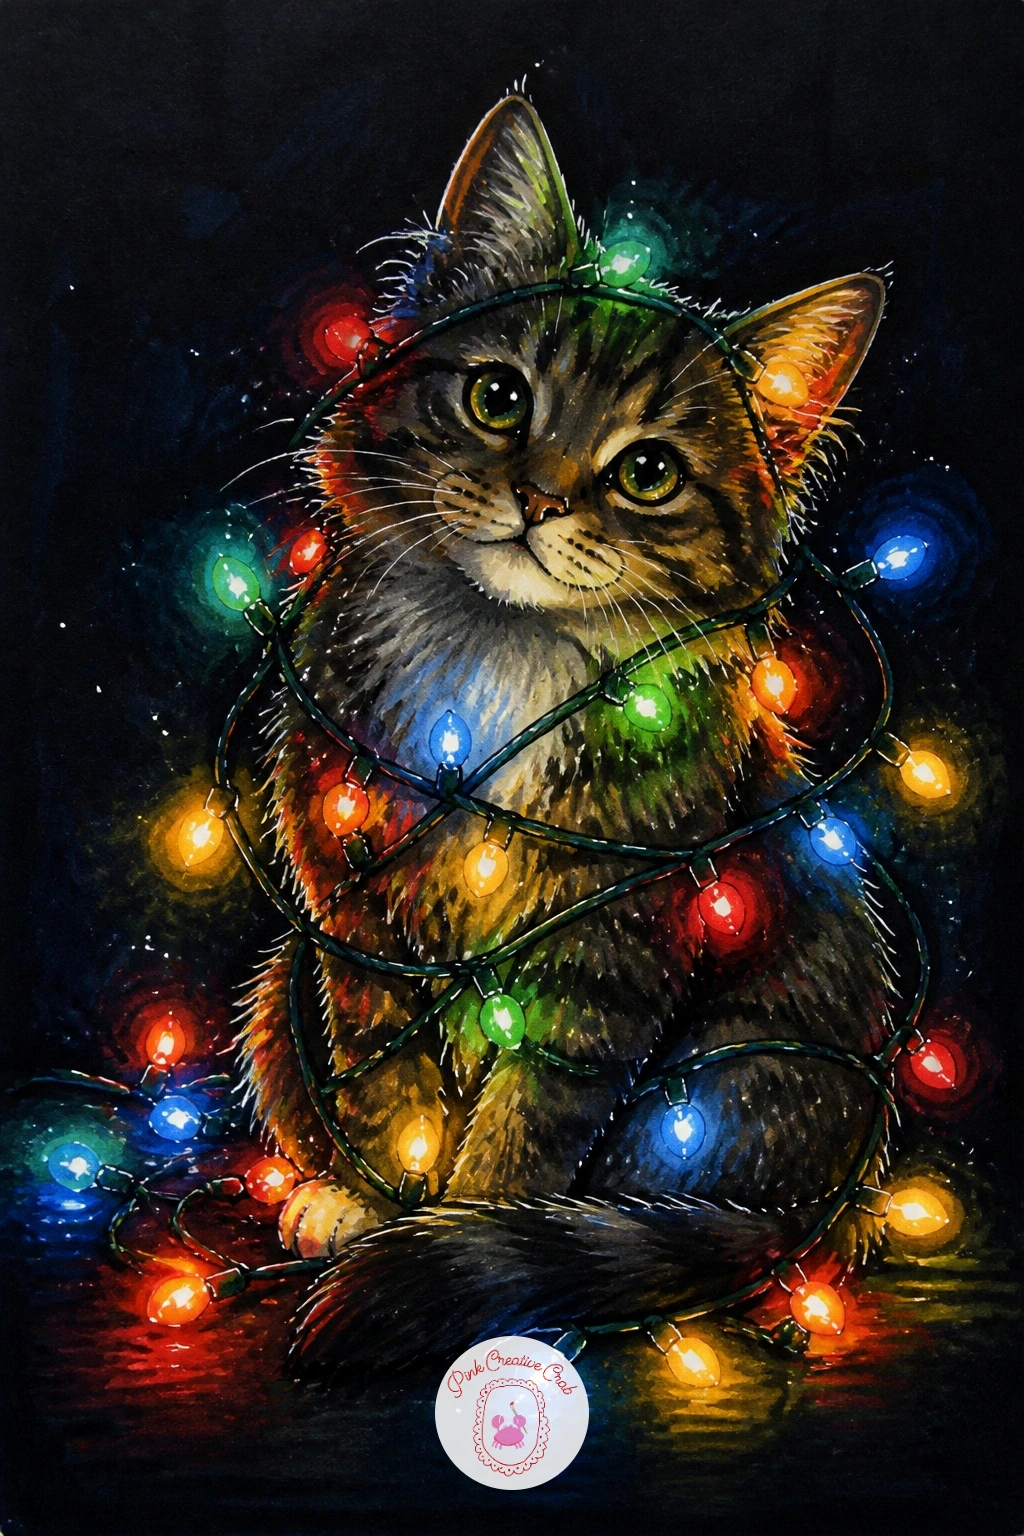
Bring in some mischief after that quiet bedroom scene: a cat tangled in a string of colorful bulbs is pure holiday chaos in the best way. Sketch the cat’s body first in a simple sitting or rolling pose, since the tangled lights only read well once the animal underneath makes sense.
Loop the string of lights loosely around a paw, the tail and one ear, coloring each bulb a different marker shade, red, green, blue, warm yellow, so the strand reads as colorful rather than repetitive. Many first attempts make the lights too neat, so let the string sag and twist instead of following a clean curve.
This is a nice spot for the quick ten-minute version: just the cat’s head and shoulders with two or three bulbs looped near its face. The fuller forty-minute version adds the whole tangled body and a shadow puddle beneath.
Finish each bulb with one gel pen dot, placed off-center for a livelier sparkle.
You Will Need
- black toned paper
- assorted colored alcohol markers
- white charcoal pencil
- white gel pen
Palette: Cherry Red,Spruce Green,Warm Yellow,Midnight Blue
Try an orange marker for the cat’s fur instead of grey or black, it reads warmer under glowing lights and feels more like a cozy holiday pet.
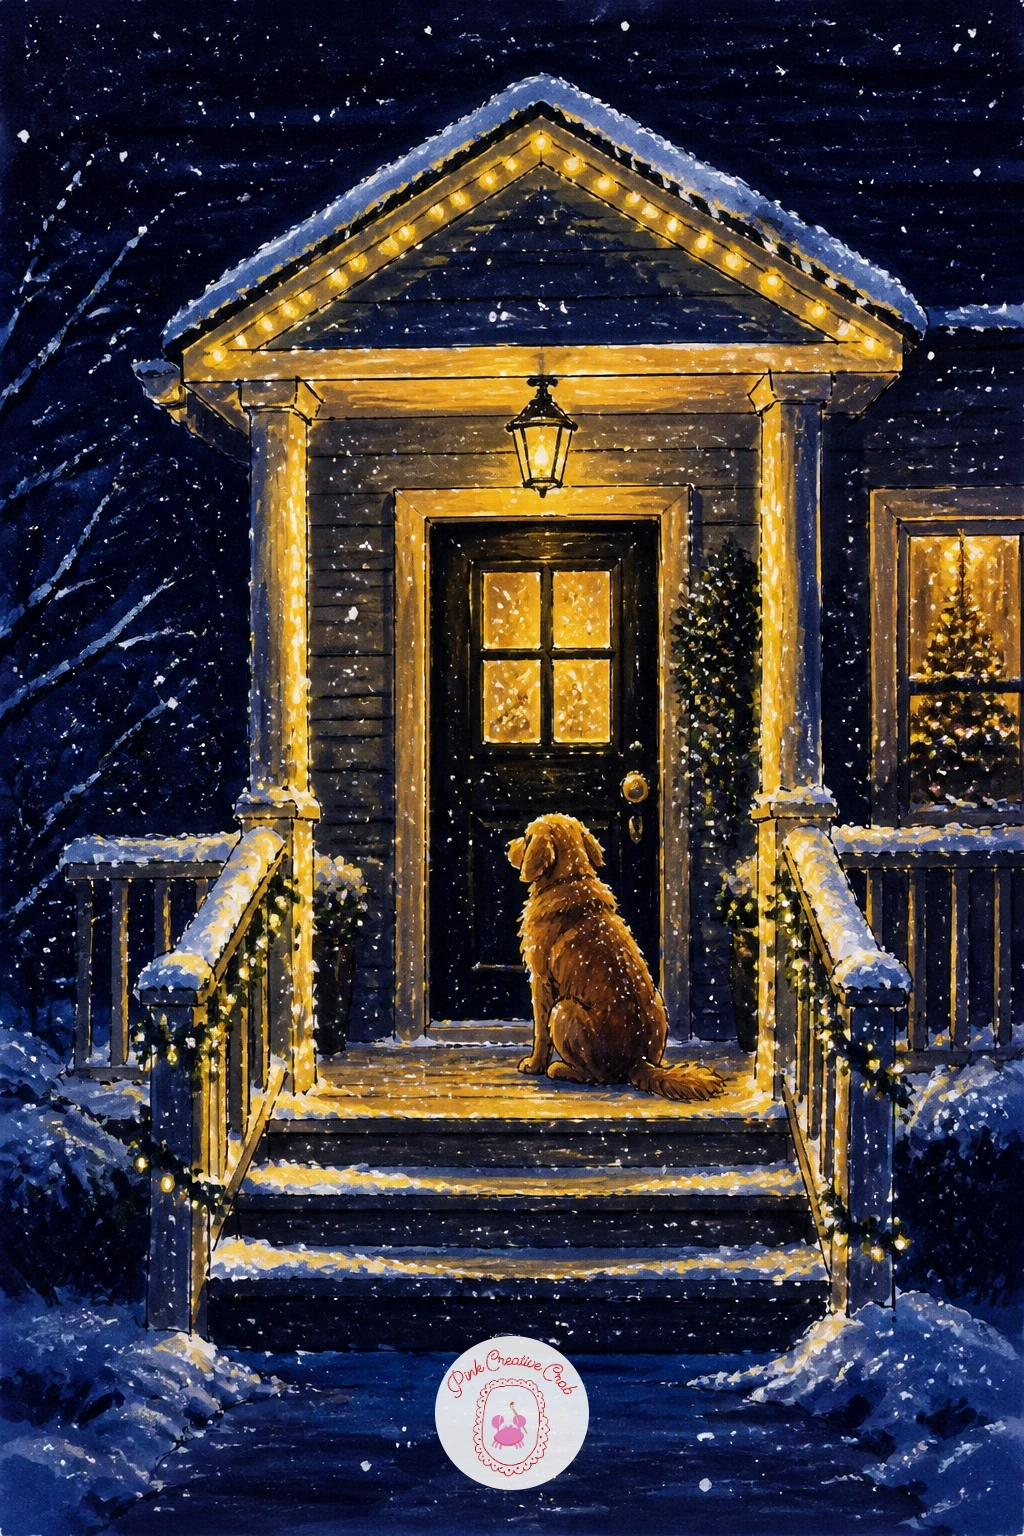
Move outdoors now for a snowy porch wrapped in warm lights with a dog waiting by the door. Block the porch railing and door frame first in simple straight lines, since this scene depends on the architecture reading clearly before any bulbs go on top.
Run a loose garland of warm yellow dots along the railing and doorframe, keeping them a little denser near the door where the light would pool. The eye level here sits low, roughly at the dog’s height looking up at the porch, which makes the glowing doorway feel bigger and more inviting.
White marker or gel pen scribbled loosely at the porch floor and railing edges suggests settled snow catching the light. A simple sitting silhouette works fine for the dog if full fur detail feels like too much for one sitting.
For more cozy porch scenes with snow, the Christmas scene drawing ideas collection has plenty more doorway inspiration.
You Will Need
- black toned paper
- warm yellow alcohol marker
- white gel pen
- white charcoal pencil
Palette: Warm Yellow,Deep Navy,Snow White,Charcoal Brown
Add a faint warm glow spilling onto the snow near the door using a soft orange marker blended lightly, it grounds the light source in the whole scene.
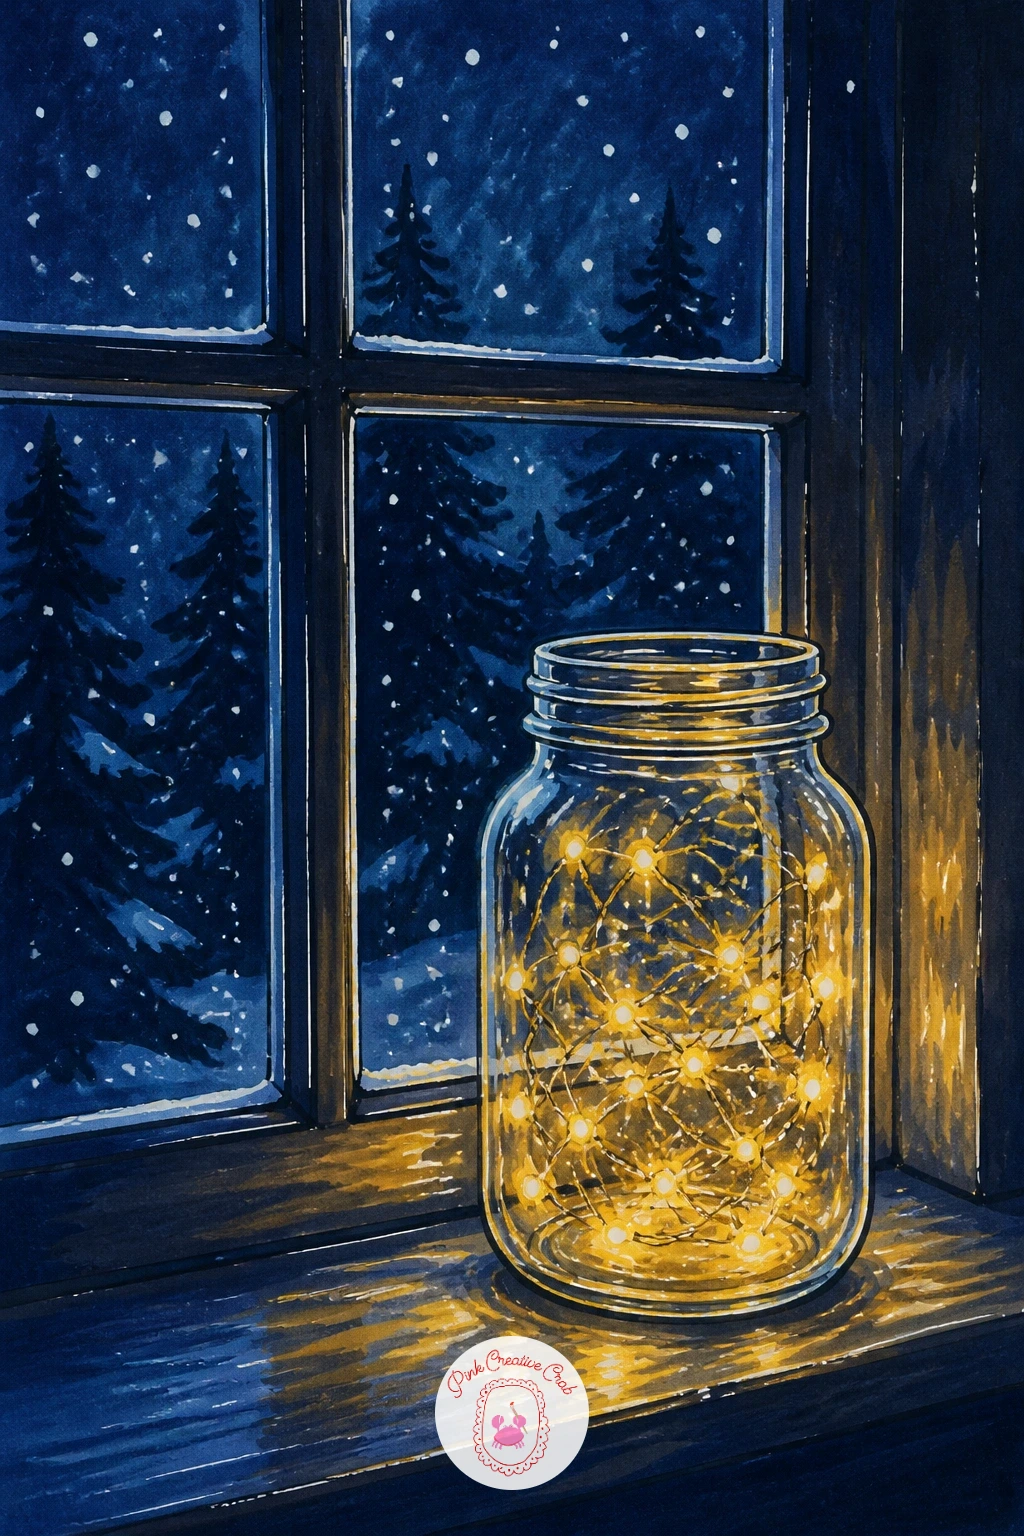
Slow the pace down with a jar of fairy lights on a windowsill, snow falling outside the glass. Draw the jar shape first with a few simple curved lines, then let the lights inside spill out and over the rim rather than sitting in a tidy pile.
Color the jar glass with a pale grey-blue marker so it still reads as see-through once the yellow bulbs glow behind it, then dot the bulbs in warm yellow both inside and trailing out. This is the spot to try the dry brush style trick with markers: run a nearly dry marker tip lightly over the glass edge to suggest reflected light without a hard line.
If the jar starts looking flat, lift a little color off the lit side with a clean blending marker or damp cotton swab to fake a highlight. No jar on hand to reference, a simple mason jar silhouette from memory works just as well.
Finish the windowpane with fine white lines for falling snow outside.
You Will Need
- black toned paper
- pale grey-blue alcohol marker
- warm yellow alcohol marker
- white gel pen
- blending marker or cotton swab
Palette: Warm Yellow,Pale Glass Blue,Deep Navy,Snow White
Try adding one or two bulbs in a soft pink or amber alongside the yellow, a single warm accent color makes the jar look hand-strung rather than uniform.
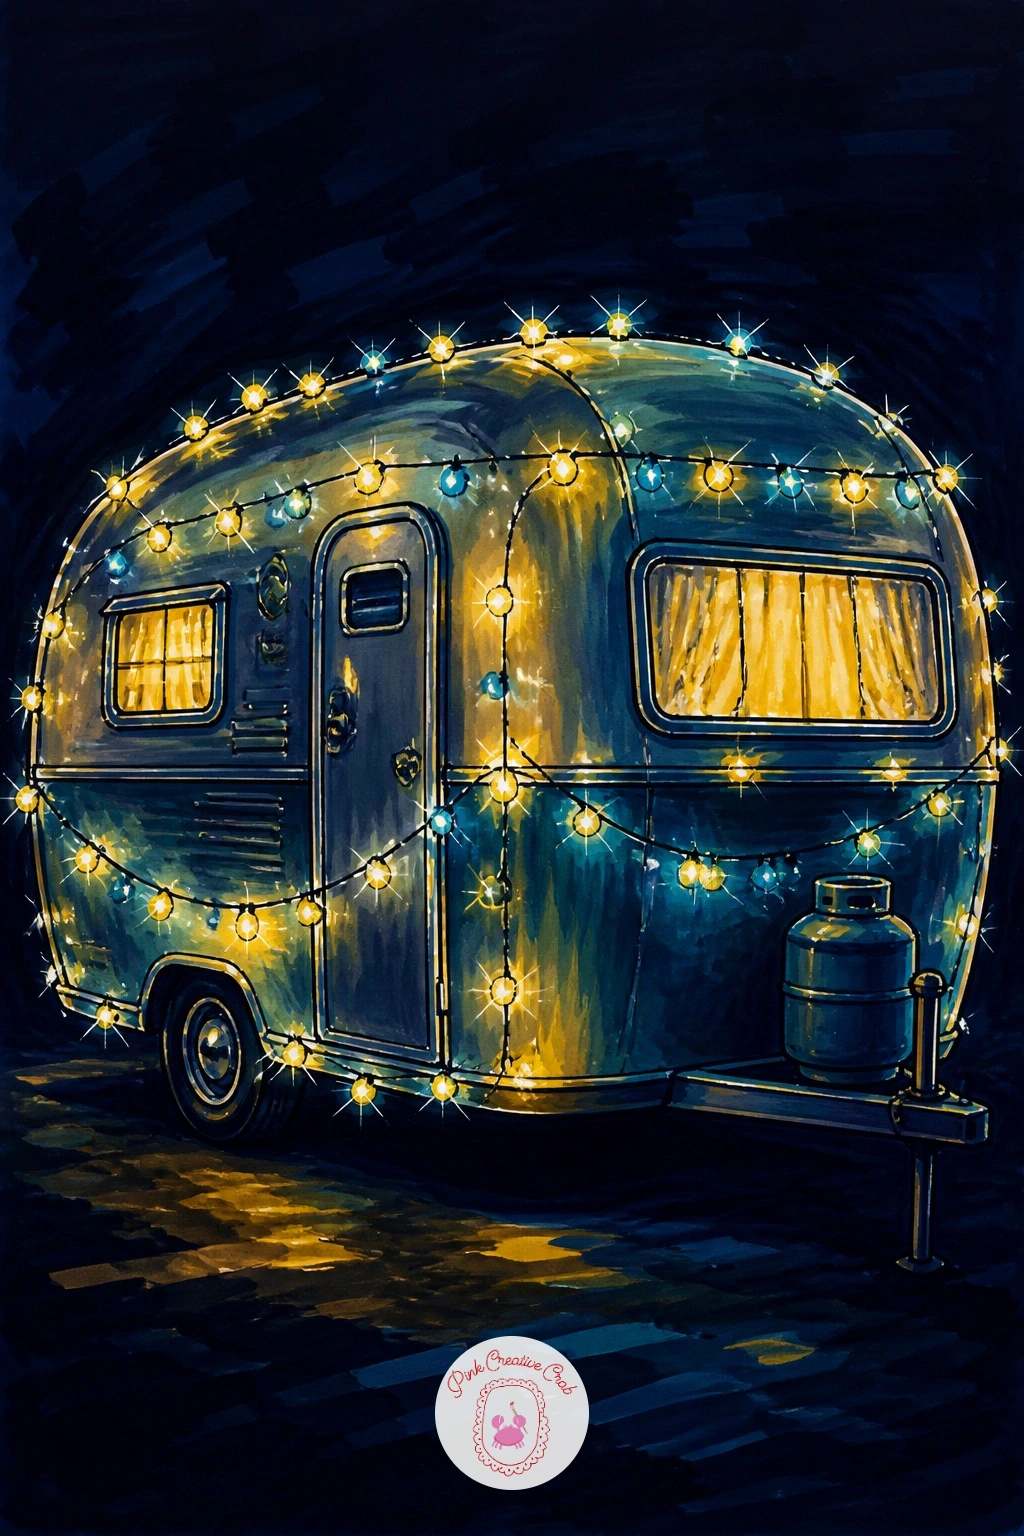
Give the lights a vehicle to decorate next: a vintage camper van wrapped in string lights parked for the night. Sketch the rounded camper body first with simple curved panels, since the classic shape depends on keeping the roofline soft and the wheels small.
Measure the van’s height against its length before adding detail, most vintage campers sit low and wide rather than tall, and getting that ratio right makes the whole drawing feel authentic. String the lights along the roof edge and around the front window in a loose swag, dotting each bulb in warm yellow with a few in soft blue or red for variety.
The common mistake is making the van too dark overall, so leave a two-tone panel, a lighter top half and darker lower half, even in silhouette form. If detailed campers feel daunting, a simple boxy trailer shape works just as well under the same string of lights.
Dot the windows with a warm interior glow to suggest someone is home.
You Will Need
- black toned paper
- warm yellow alcohol marker
- soft blue and red markers
- white gel pen
Palette: Warm Yellow,Soft Sky Blue,Cherry Red,Cream White
Add a tiny wreath or pine branch on the van door using a few green marker strokes, it gives the scene a sense of a specific holiday trip rather than a generic vehicle.
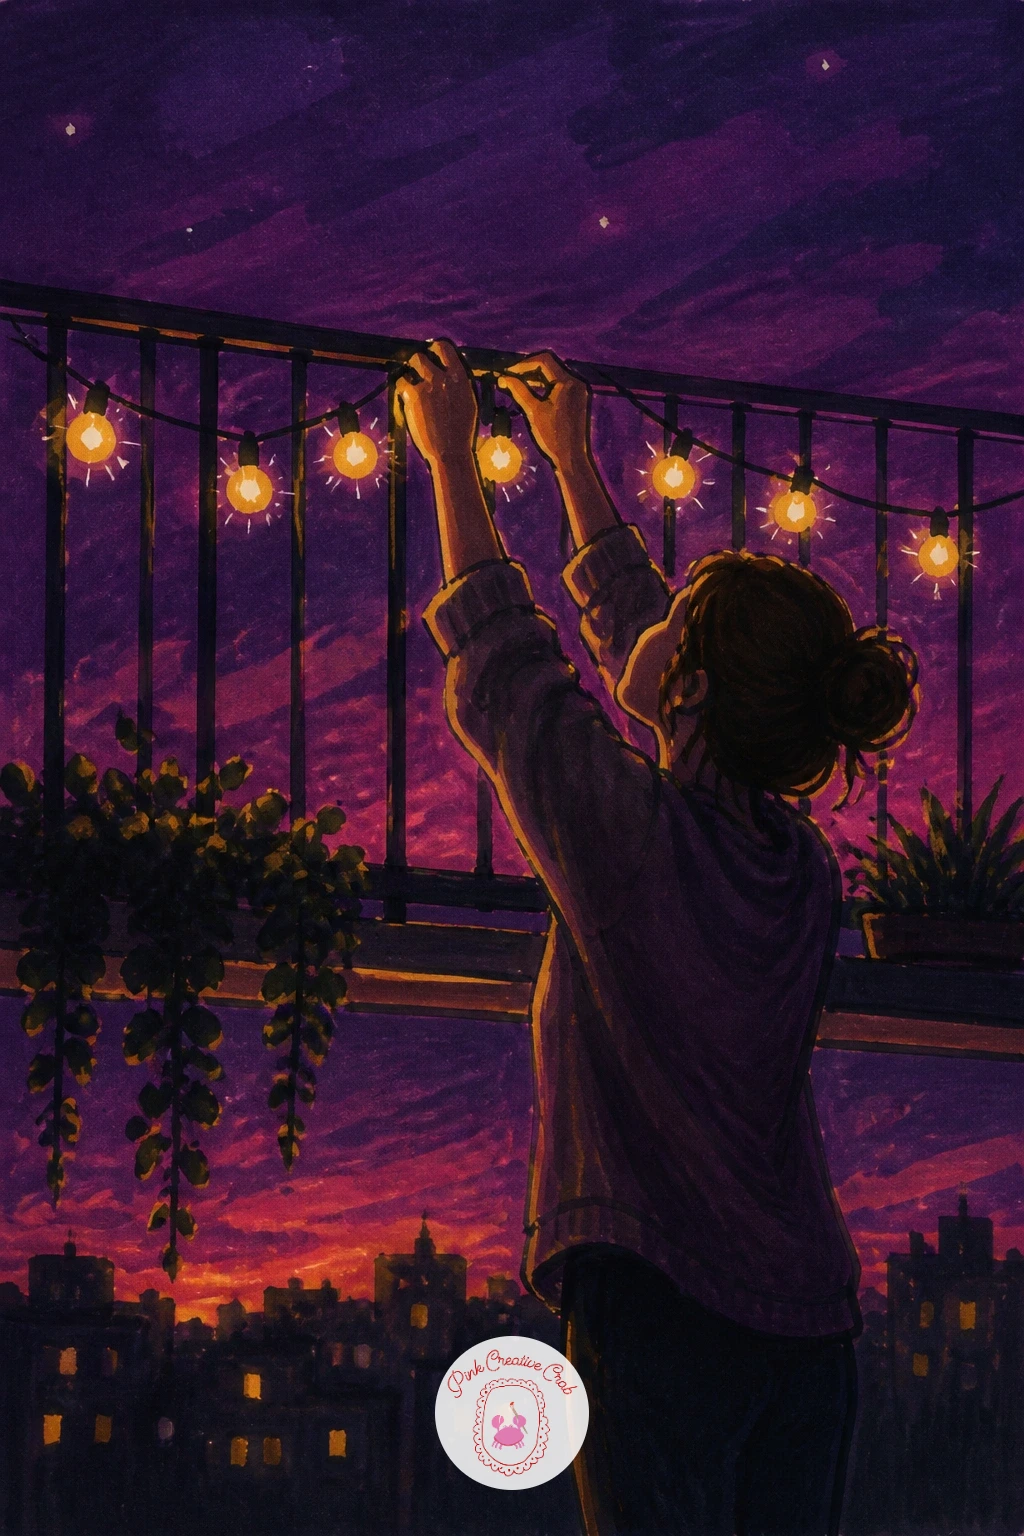
Put a person mid-task now: a woman hanging lights on her balcony at dusk, reaching up with one string still unlit in her hand. Sketch her pose first in simple gesture lines, arm raised, weight shifted to one hip, before adding the balcony railing or the lights themselves.
The light source here matters more than usual, since dusk means the sky still holds a little color behind her, a deep plum or dusty blue rather than full black. Color that sky first, then let the lit bulbs she has already hung glow warmer and brighter than the dim unlit string still in her hand, which should stay a flat dark color.
Keep her figure mostly in silhouette with just a rim of warm light along one arm and shoulder catching the glow from below. If a full figure feels like too much, crop the scene to just her hand and the string of lights against the railing.
A dusty rose marker blended into the sky above the rooftops finishes the mood nicely.
You Will Need
- black or deep plum toned paper
- dusty rose and plum markers
- warm yellow alcohol marker
- white gel pen
Palette: Dusty Plum,Warm Yellow,Dusty Rose,Charcoal Grey
Try this same pose from below looking up at the balcony railing instead of straight on, it makes the hung lights feel like they stretch overhead into the sky.
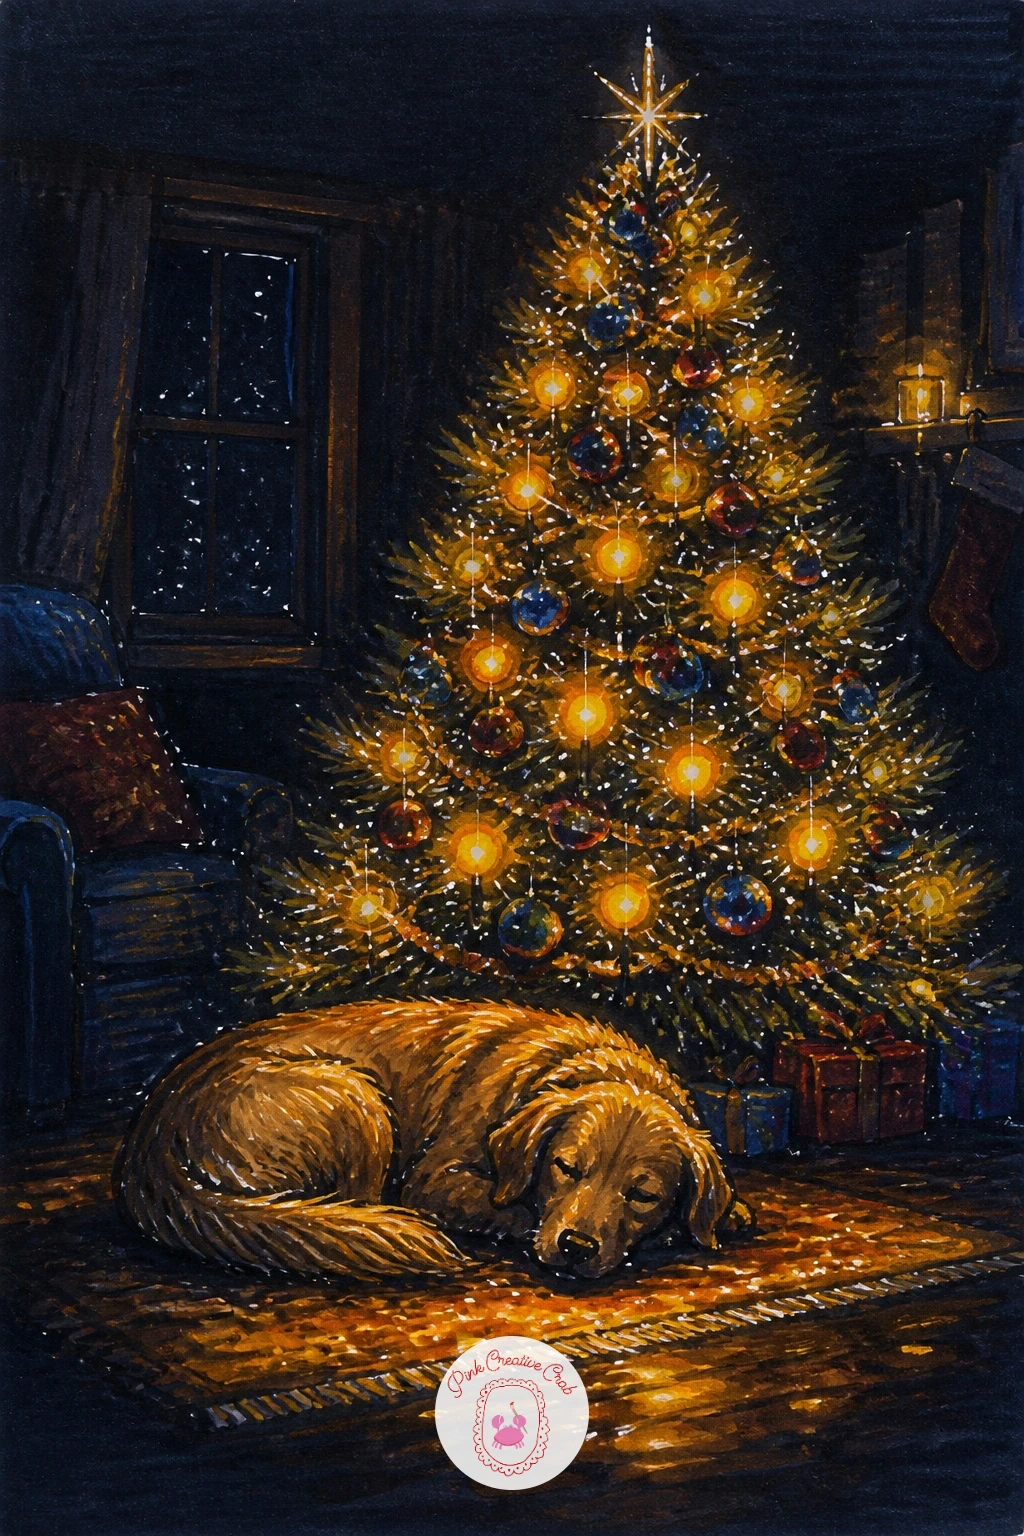
Bring the glow indoors for a Christmas tree glowing in a dark living room with a dog asleep beneath it. Block the tree shape first as a simple loose triangle, then scatter warm yellow dots through its branches before adding any ornaments, letting the lights sit unevenly rather than in rows.
Sketch the sleeping dog curled at the base in one smooth continuous line, since a tense or choppy outline will fight the cozy mood of the rest of the scene. The tree’s glow should wash warm light across the dog’s back and the floor around it, so blend a soft orange marker where the light would naturally fall.
The easy fix when the tree looks too stiff is scribbling a few extra branch tips poking out past the main triangle, real trees are never perfectly symmetrical. For the full room, the Christmas drawing ideas in pencil post has more ways to build a cozy living room scene.
Finish with gel pen highlights only on the front-facing bulbs, not every single one.
You Will Need
- black toned paper
- warm yellow and orange markers
- white charcoal pencil
- white gel pen
Palette: Spruce Green,Warm Yellow,Soft Orange,Deep Brown
Add one or two ornaments in a bold red or gold marker, just enough to break up the green without competing with the glowing lights for attention.
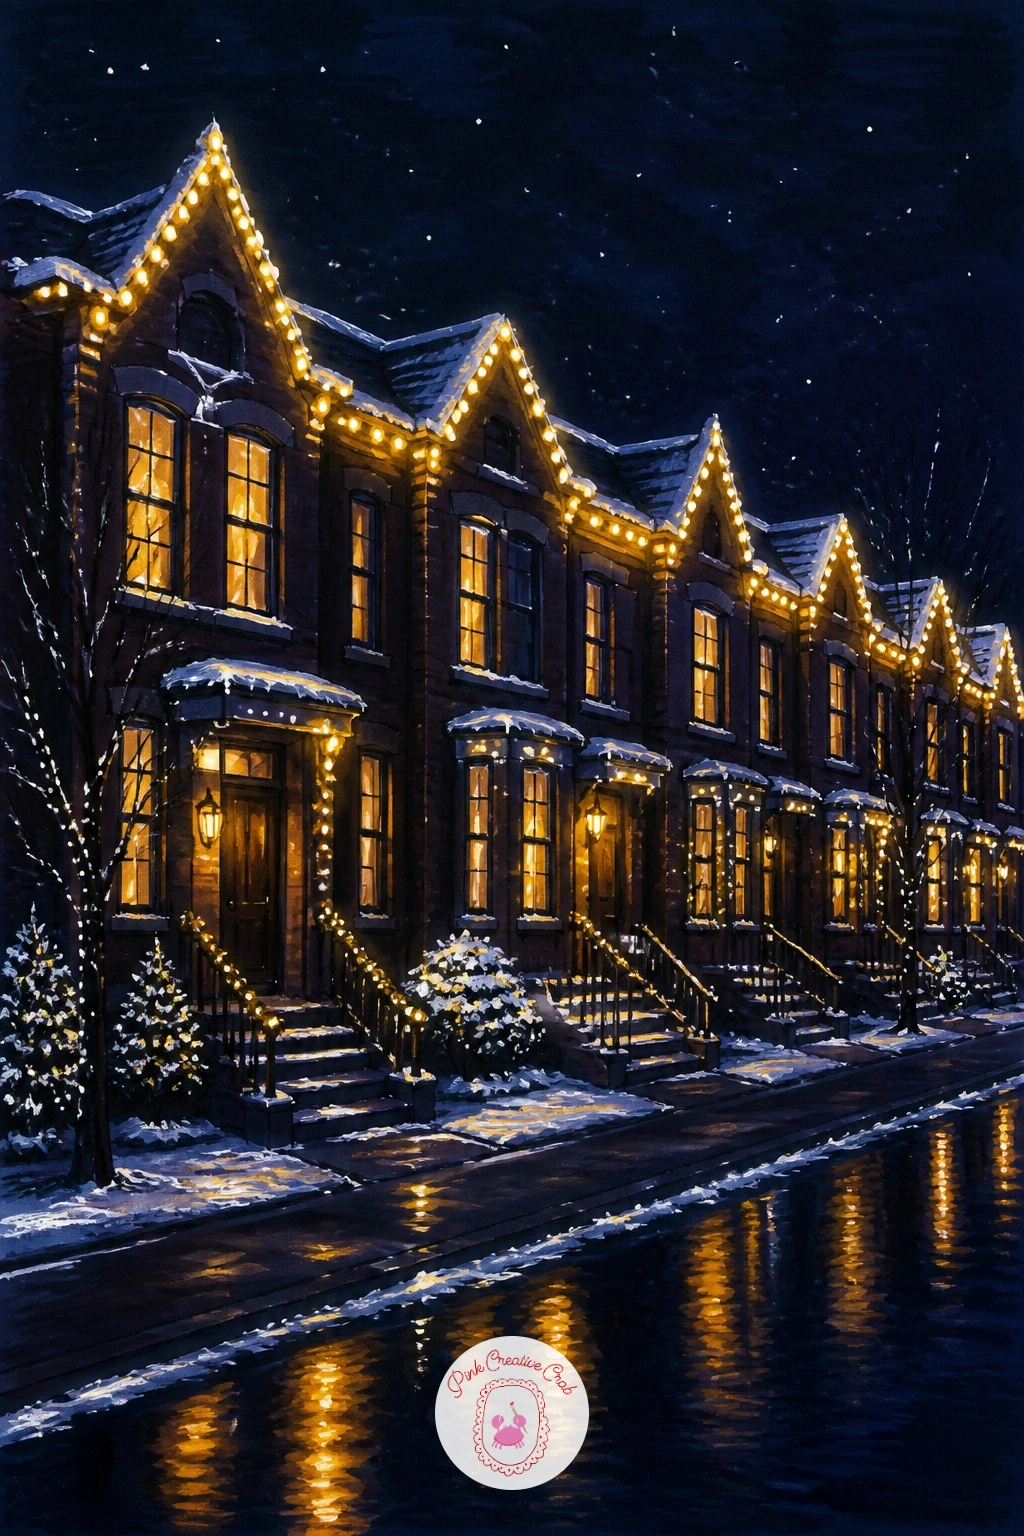
Widen the scene out to a street of townhouses outlined in lights, each roofline traced in glowing dots against the dark sky. Draw the row of buildings first as simple rectangles of varying heights, keeping the perspective flat and friendly rather than a full vanishing-point exercise.
Trace warm yellow dots along each roofline and doorframe, varying the spacing slightly house to house so the street does not look mechanically repeated. A few windows lit from inside in a soft amber add depth without extra work, just a filled rectangle with slightly rounded corners.
The quick ten-minute version stops at three simple house shapes with lit rooflines; the forty-minute version adds lit windows, a lamppost, and a dusting of white gel pen snow on the rooftops. If straight architectural lines feel tricky, a ruler kept just for the roof edges keeps the row looking tidy even in a loose drawing.
Finish with a single lit lamppost in the foreground to anchor the street.
You Will Need
- black toned paper
- ruler
- warm yellow and amber markers
- white gel pen
Palette: Warm Yellow,Amber Glow,Deep Navy,Snow White
Vary the roofline heights more than feels natural at first, uneven townhouses read as charming while perfectly matched ones can look stiff on the page.
Narrow back in on a small object after that wide street: a bicycle wrapped in lights, leaning against a lamppost. Sketch the bike frame first using two overlapping circles for the wheels and simple connecting lines for the frame, a detail-perfect bicycle is not the goal here.
Wind the string of lights loosely around the handlebars, frame and basket, letting a few bulbs dangle free rather than sitting flush against the metal. The lamppost glow should be the brightest point in the scene, so build it with two or three overlapping layers of warm yellow marker fading outward into the dark.
Bikes often come out lopsided, so check that both wheels sit on the same ground line before you add the lights on top. No lamppost reference handy, a simple vertical pole with a round glass top at the time works just fine.
One bold gel pen dot at the very center of the lamp light sells the glow instantly.
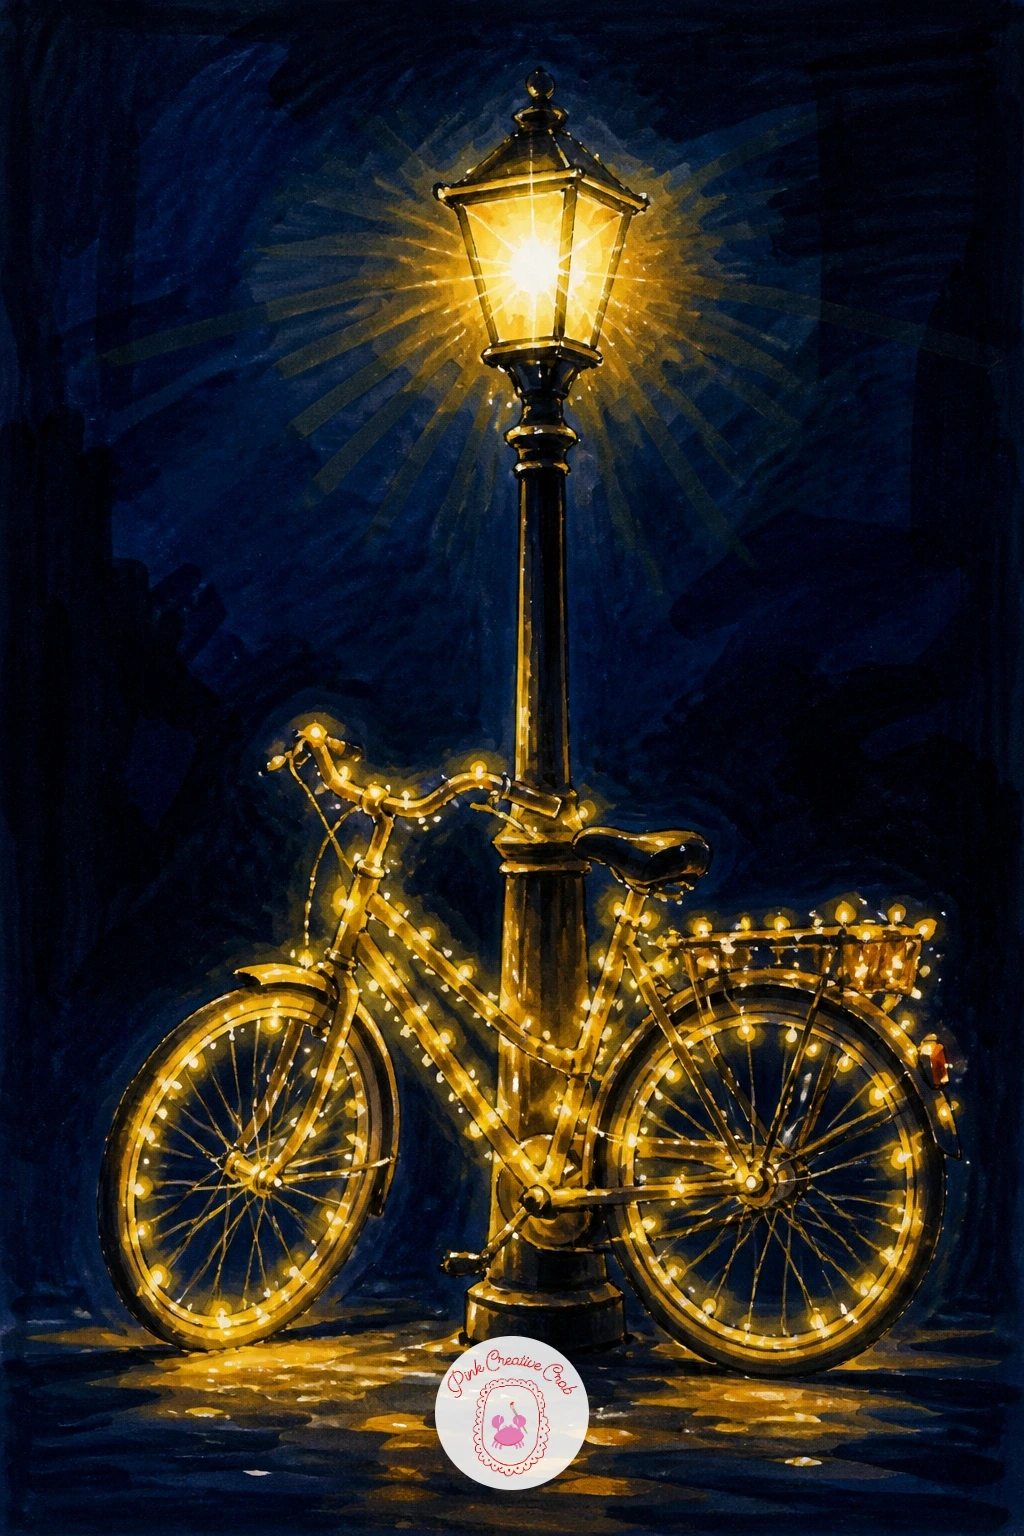
You Will Need
- black toned paper
- warm yellow alcohol marker
- white charcoal pencil
- white gel pen
Palette: Warm Yellow,Rust Red,Deep Navy,Snow White
Try the bike in a faded rust red instead of black, it reads as a weathered vintage bicycle and pairs nicely against the warm glow of the lamppost.
Add some life to the street with a café terrace, bulbs strung overhead and a couple of small tables below. Block the overhead string first as a loose swag between two points, then let it sag naturally in the middle rather than pulling it taut edge to edge.
Dot the bulbs along the swag in warm yellow, denser where the string dips lowest since that is where the eye naturally lands. Sketch the café tables and chairs as simple geometric shapes and the couples as soft rounded silhouettes, keeping faces out of it entirely to avoid getting stuck on detail.
The glow from the bulbs should fall gently onto the tables below, so a light wash of warm orange across the tabletops ties the whole scene together under one light source. If full figures feel like too much, two simple coat and scarf shapes seated across from each other read just as well.
Keep the background buildings soft and dark so the string of lights stays the clear star.
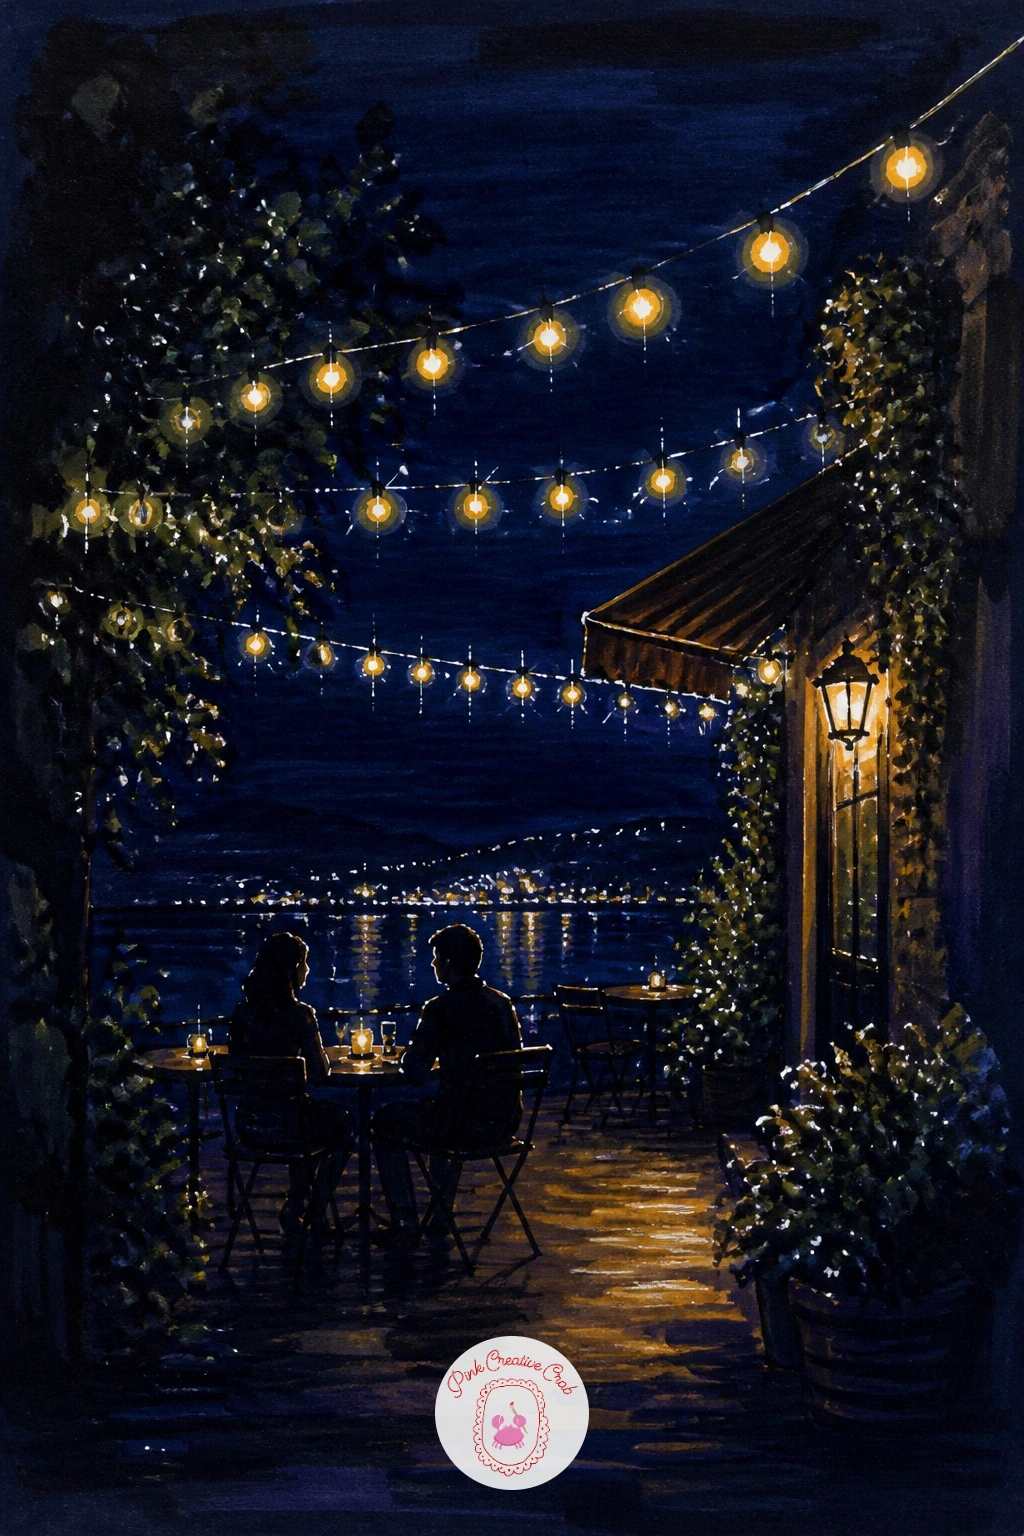
You Will Need
- black toned paper
- warm yellow and orange markers
- white charcoal pencil
- white gel pen
Palette: Warm Yellow,Soft Orange,Deep Navy,Charcoal Grey
Add steam rising from two small mugs on the tables using a few curved white gel pen lines, it is a tiny detail that makes the whole terrace feel warmer.
Open the scene up into a tree farm at night, rows of evergreens lit with hanging bulbs strung between posts. Sketch the rows of trees first as simple overlapping triangles, placing the closest ones largest and the furthest smallest to build depth quickly.
String the lights in loose horizontal lines between the rows rather than wrapped around each individual tree, which keeps the scene readable and quick to finish. Compare the height of the nearest tree against the furthest one before you commit to marker, keeping that size difference generous sells the distance far better than detail would.
Dot warm yellow bulbs along the strung lines and let a few trees stay mostly dark, lit only from the glow passing near them, so the whole farm does not look uniformly bright. A simple dusting of white gel pen across the ground reads as snow between the rows.
Finish with one small figure or sled near the front row for scale.
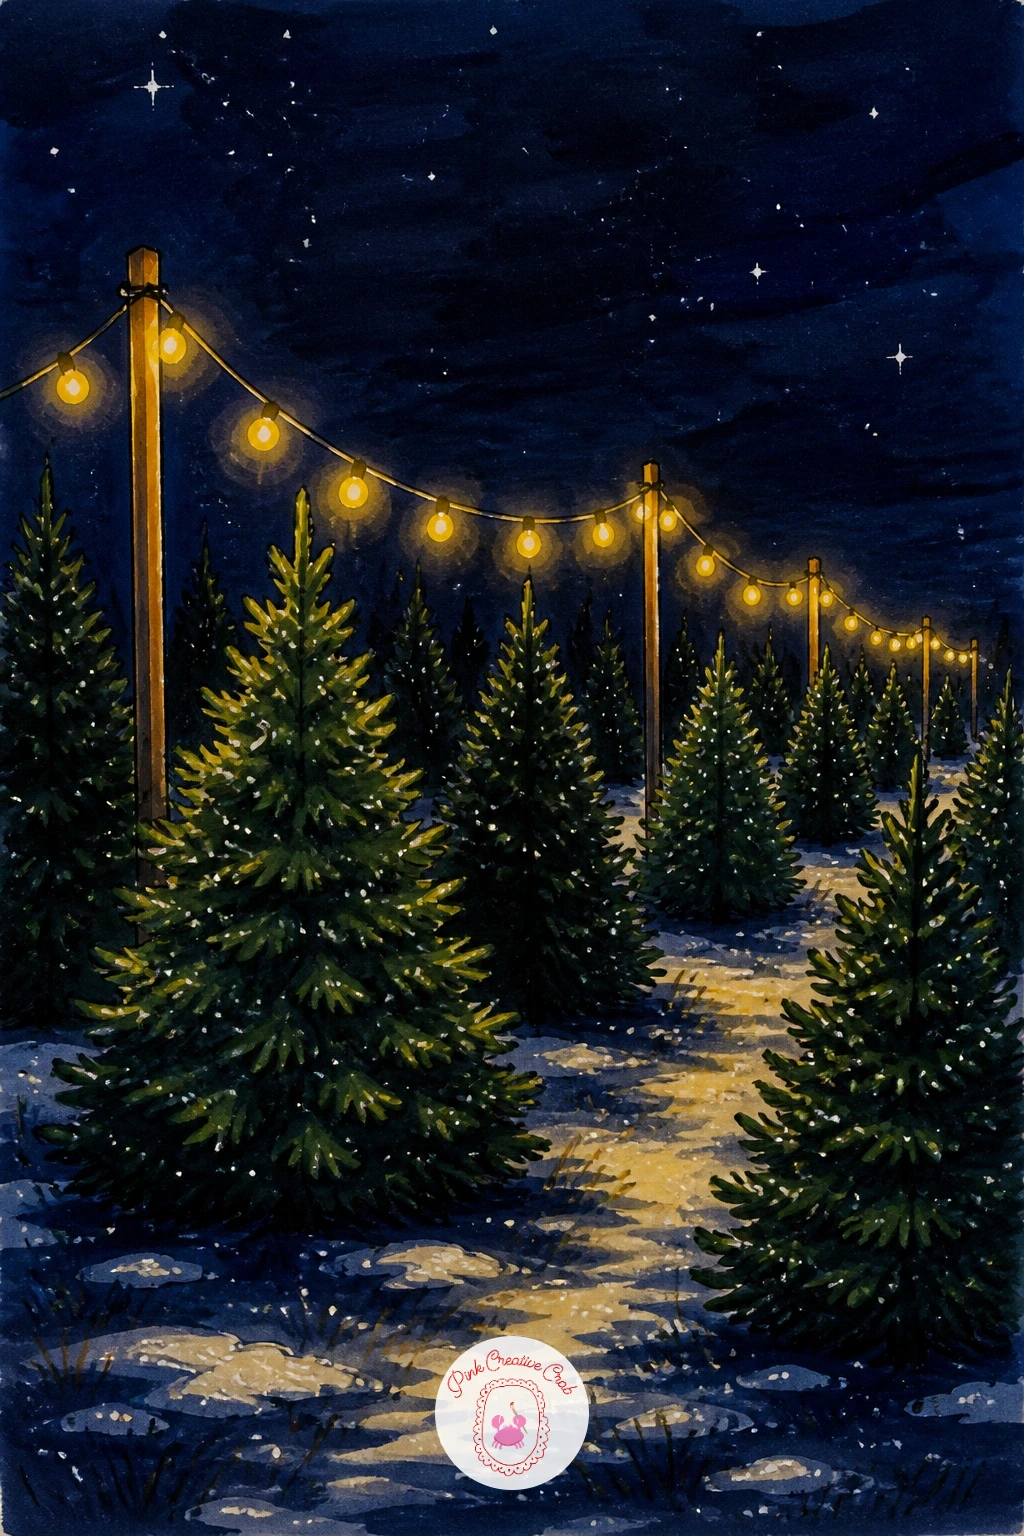
You Will Need
- black toned paper
- warm yellow alcohol marker
- white charcoal pencil
- white gel pen
Palette: Spruce Green,Warm Yellow,Deep Navy,Snow White
Try varying the tree shapes slightly, some fuller, some sparser, real tree farms never have identical trees and the variety keeps the drawing interesting.
Bring in some motion with an ice rink lit by globe lights strung in loops overhead. Draw the rink itself first as a simple flattened oval, since getting that perspective believable matters more here than any figure skating across it.
String the globe lights in soft scalloped loops above the rink, spacing the round bulbs more generously than a fairy light string since globe lights sit further apart in real life. The ice should catch and reflect the lights below, so drag a few streaks of pale blue and warm yellow marker across the rink surface where the glow would bounce.
One or two small skater silhouettes, just a simple curved body with a scarf line trailing behind, bring the scene to life without needing full figure detail. If the ice reflections look too busy, simplify to just two or three clean streaks rather than scattering color everywhere.
White gel pen dashes along the rink edge finish it as fresh-cut ice.
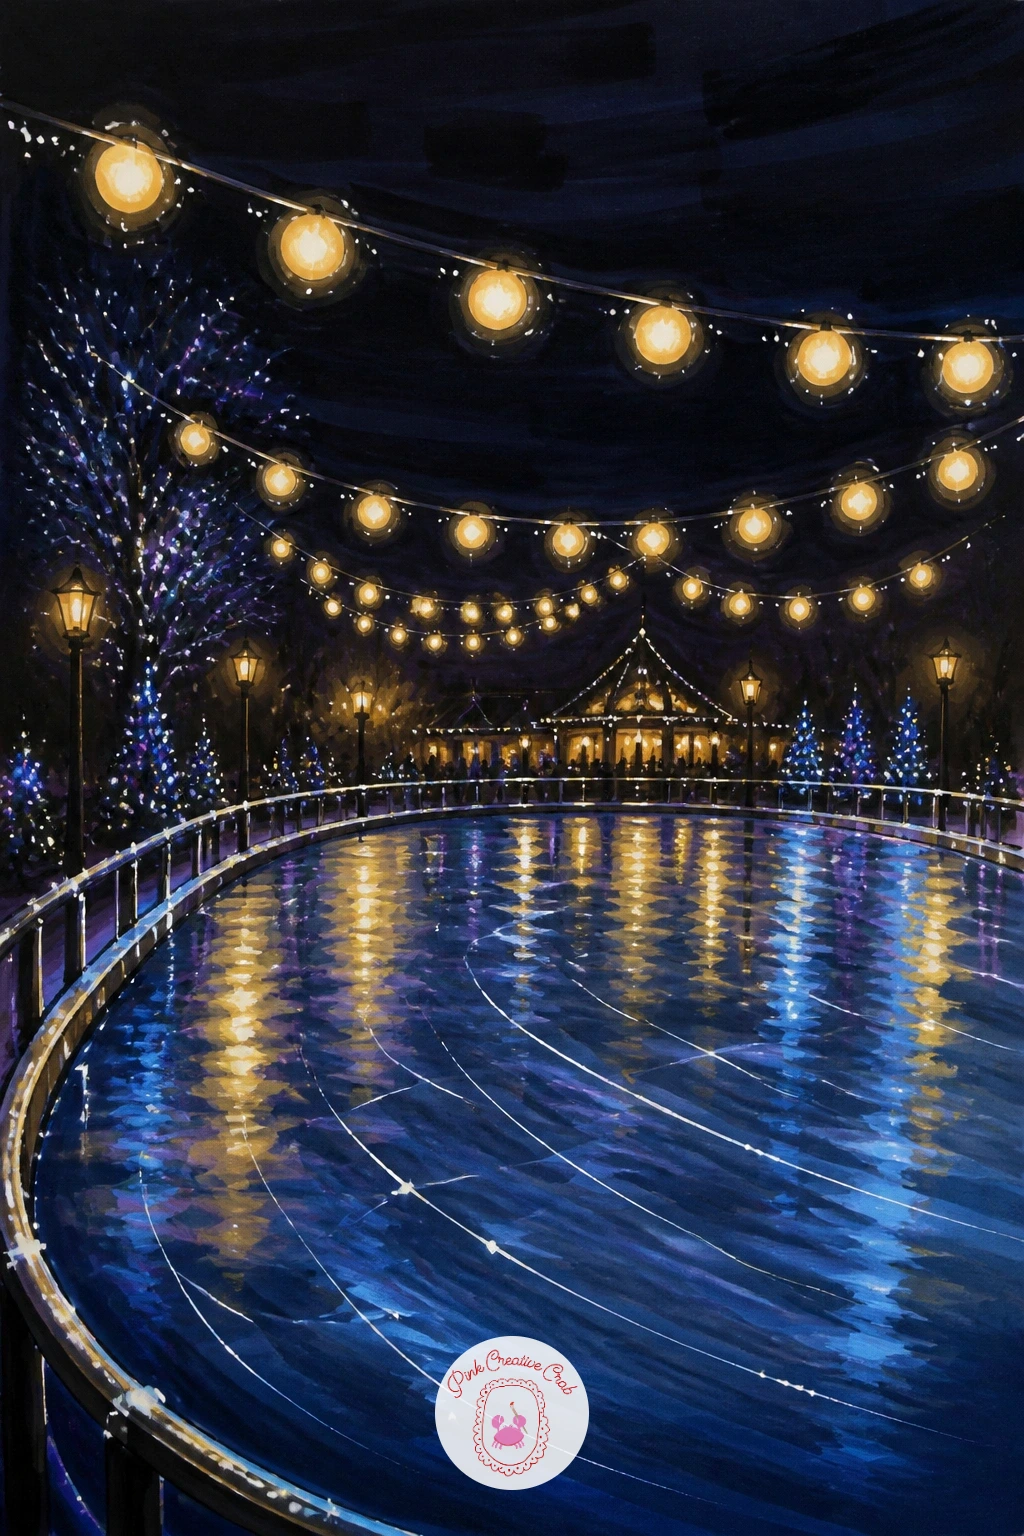
You Will Need
- black toned paper
- pale blue and warm yellow markers
- white charcoal pencil
- white gel pen
Palette: Pale Ice Blue,Warm Yellow,Deep Navy,Snow White
Try adding a warm amber globe light or two among the white ones, a single mismatched color makes the string feel vintage rather than store-bought new.
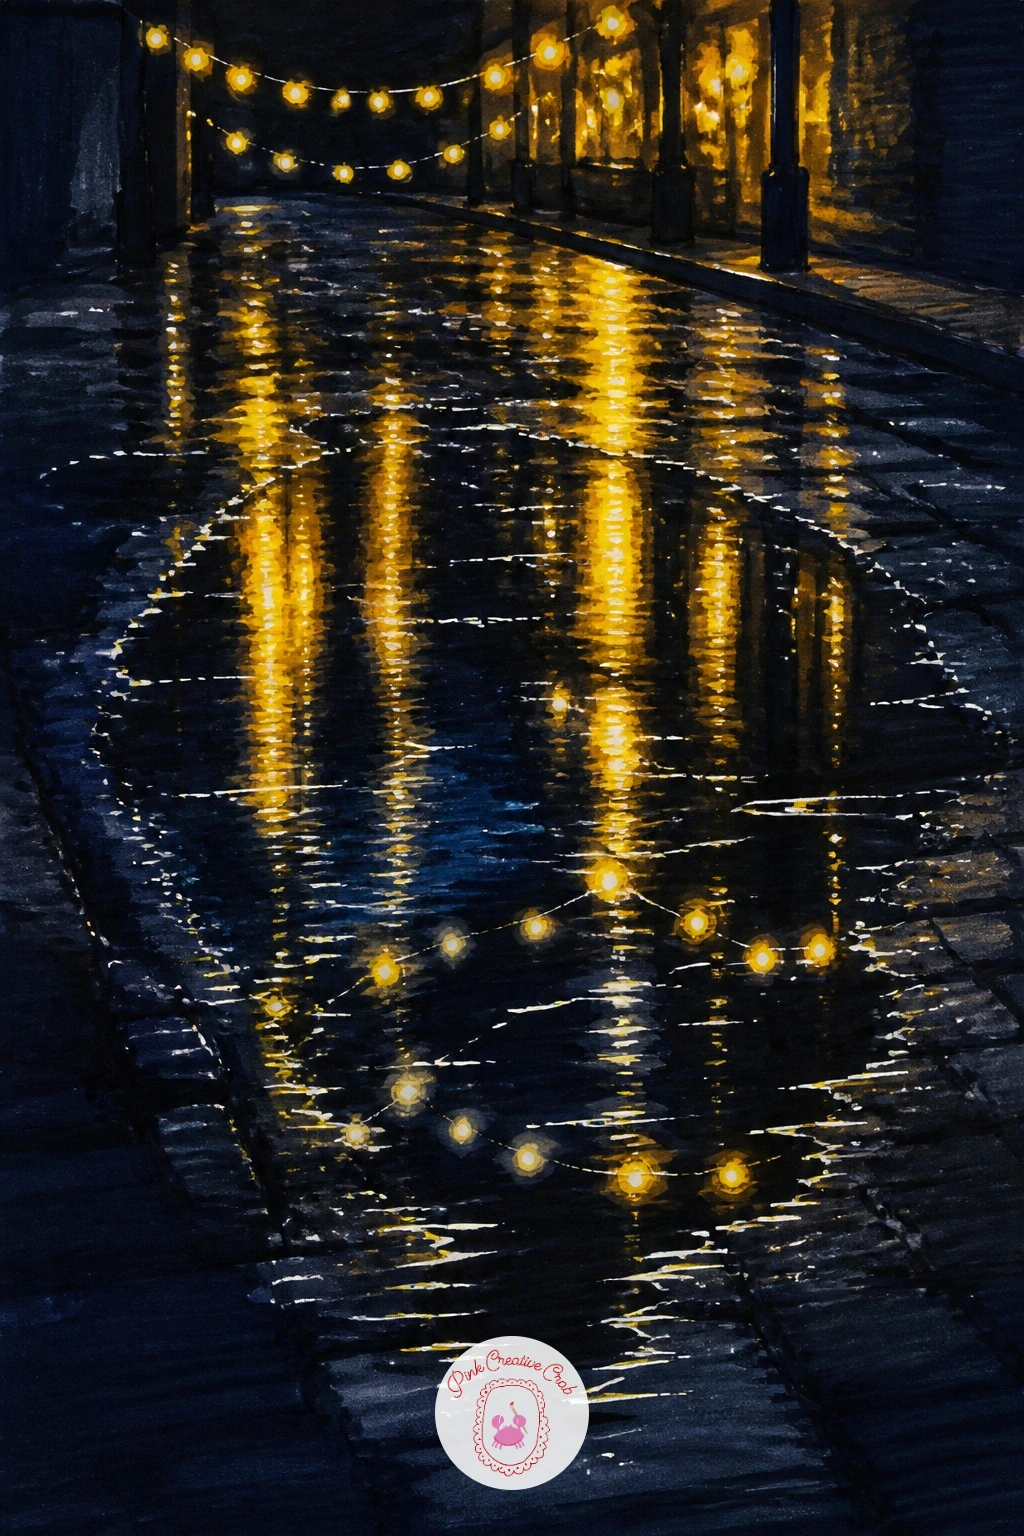
Slow back down for something quieter: fairy lights reflected in a puddle on a city street after rain. Sketch the puddle first as a simple irregular oval low on the page, then build the lit scene above it, a lamppost or shop window, before tackling the reflection.
Paint the reflection as a looser, slightly stretched echo of the lights above, using the same warm yellow but dragging the marker vertically to suggest the ripple of water rather than a mirror-sharp copy. This is the moment to try lifting color: dab a clean blending marker into the center of the puddle to pull some pigment back out, faking the shine of wet pavement.
The common mistake is making the reflection identical to the real lights above it, when in truth water always blurs and elongates what it reflects. No blending marker on hand, a damp cotton swab lifts alcohol marker ink almost as well.
A few white gel pen flecks across the puddle surface finish the wet shine.
You Will Need
- black toned paper
- warm yellow alcohol marker
- blending marker or damp cotton swab
- white gel pen
Palette: Warm Yellow,Wet Asphalt Grey,Deep Navy,Snow White
Add one colored light, a red or green, among the warm yellow ones above the puddle so the reflection below carries a second color too, it reads as far more realistic.
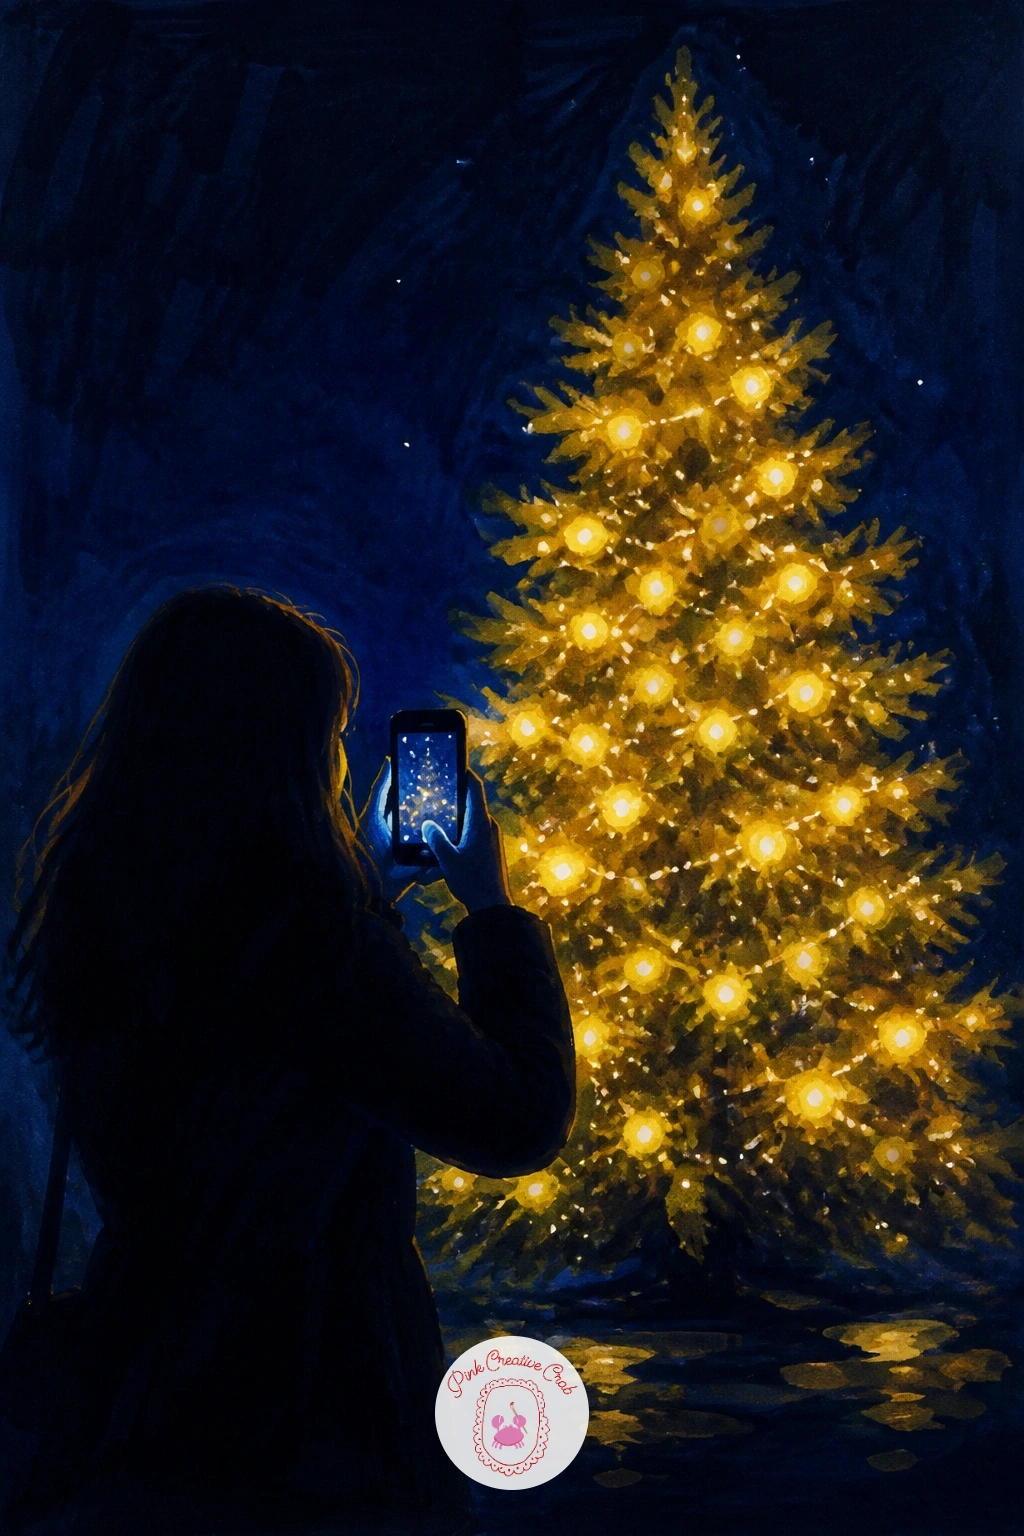
Add a small human action next: a girl taking a photo of a lit tree with her phone, the screen glowing faintly in her hand. Sketch her in a simple standing pose first, phone raised, before building the tree she is aiming at, since her gesture sets the whole composition.
Keep her mostly in silhouette with two light sources working on her at once, the cool blue-white glow of the phone screen on her face and hands, and the warm yellow glow from the tree washing over the rest of her. That contrast between a cool and a warm light source is what makes this scene more interesting than a single glowing subject.
The quick version limits the tree to a loose glowing triangle behind her; the forty-minute version adds full ornament detail and a street of other lit shapes receding behind. If a convincing phone shape feels fiddly, a simple rounded rectangle with one pale blue square for the screen does the job.
Finish her silhouette edge with a thin white gel pen rim light.
You Will Need
- black toned paper
- warm yellow and pale blue markers
- white charcoal pencil
- white gel pen
Palette: Warm Yellow,Pale Phone Blue,Deep Navy,Charcoal Grey
Try tilting her slightly off center in the frame with the tree filling more space on one side, an asymmetrical layout feels more like a candid snapshot.
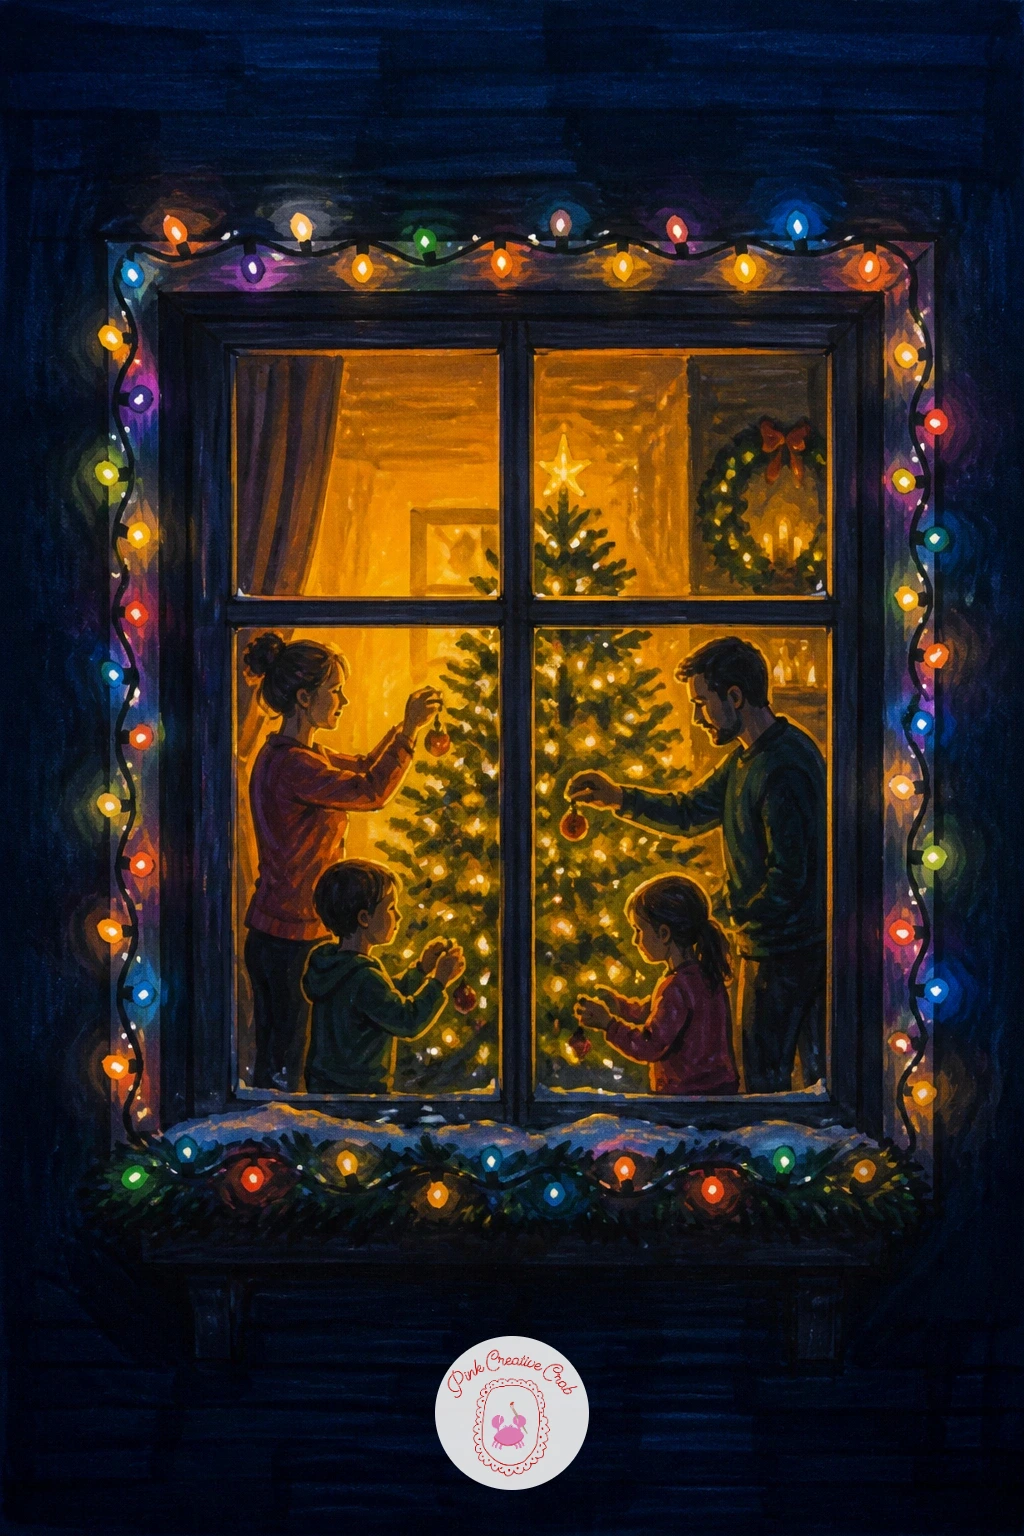
Step back to a lit window with a family decorating inside, seen from the dark street. Draw the window frame first as a simple rectangle divided into panes, then build the warm scene inside it before touching the dark exterior around it.
Keep the figures inside loose and simple, rounded shapes reaching toward a half-decorated tree, since detail at this distance would only compete with the glow of the window itself. The window should read as the single brightest shape in the whole piece, so surround it generously with untouched dark paper, the contrast does all the work.
A string of lights framing the window from outside adds a second smaller glow and ties the scene to the rest of this list. If figures inside feel too tricky, a lit tree alone in the window, visible through the glass, carries the same cozy story.
For more framed-window scenes, the Christmas aesthetic drawing lessons are worth a look.
You Will Need
- black toned paper
- warm yellow and amber markers
- white charcoal pencil
- white gel pen
Palette: Warm Yellow,Amber Glow,Deep Navy,Spruce Green
Leave the window panes slightly uneven and the frame a little crooked, a too-perfect grid of panes can flatten the warmth of the scene inside.
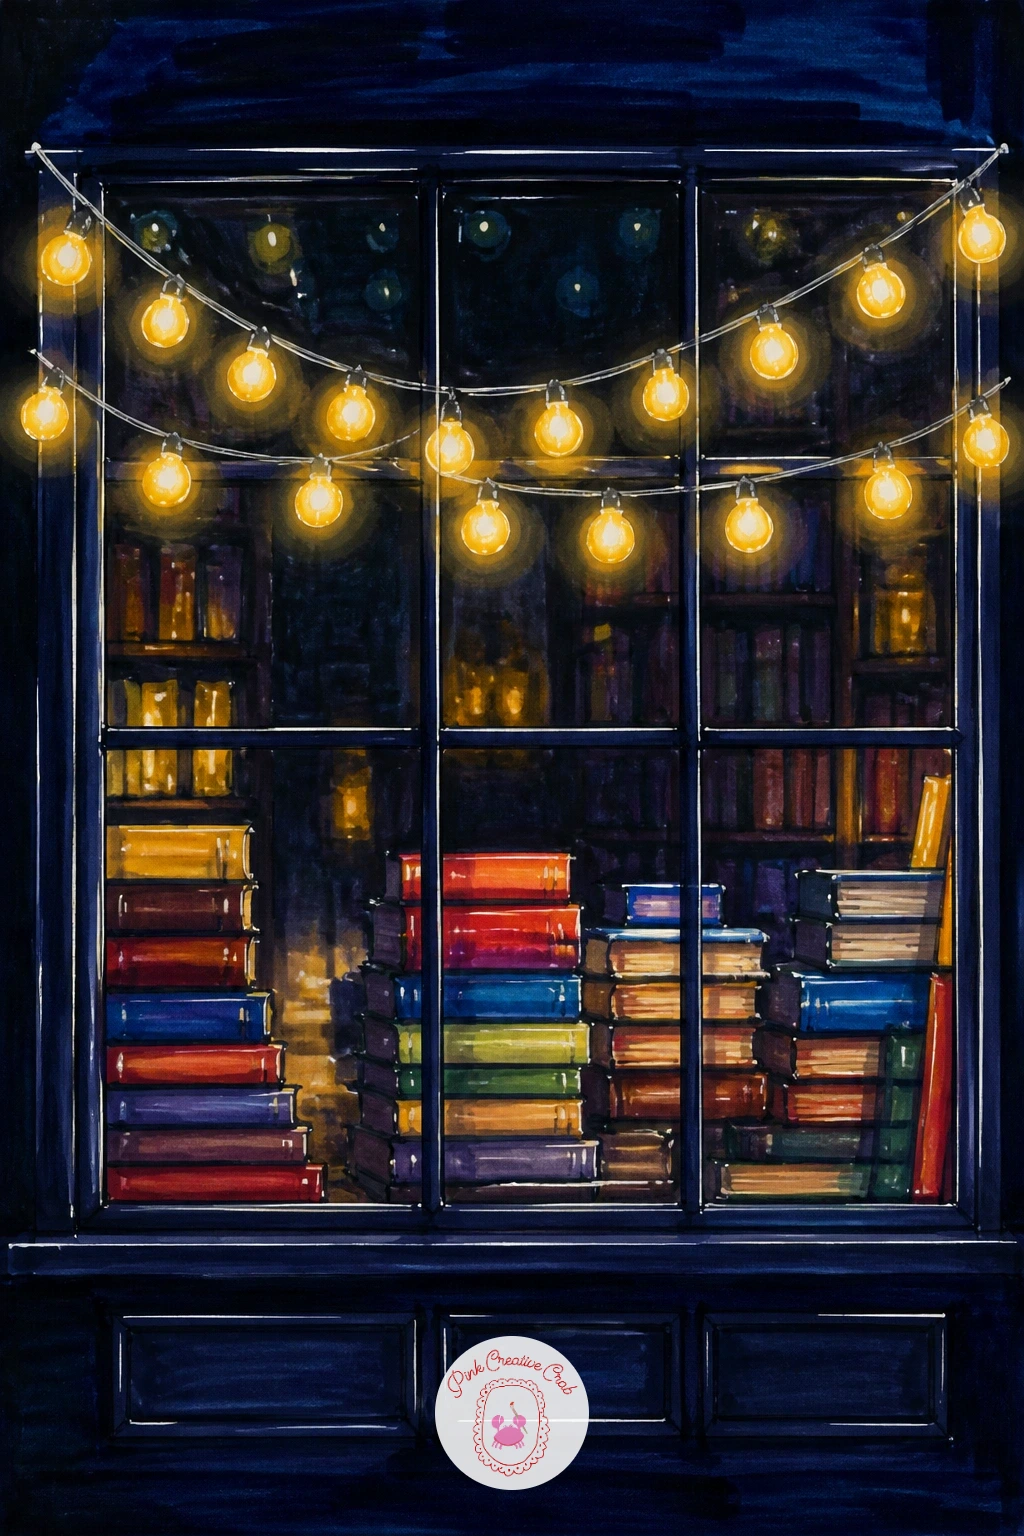
Give the glow a literary home with a bookshop window, lights strung across the glass and books stacked below. Sketch the window frame and the stacks of books first as simple rectangles of varying heights, since the leaning, uneven piles are what make the display feel real.
String a loose line of warm yellow bulbs along the top of the window frame, letting a few dangle lower into the display itself. Color the book spines in a mix of deep reds, greens and mustard rather than uniform brown, since a bookshop window always holds more color variety than you expect.
The easy trick for the glass itself is a faint diagonal streak of pale blue-white marker across one corner, suggesting a reflection without drawing the whole street. If a full title or spine lettering feels fussy, plain colored rectangles for the spines read just as well from a little distance.
Finish with gel pen dots on the bulbs and a thin highlight along the window’s glass edge.
You Will Need
- black toned paper
- assorted colored markers
- warm yellow alcohol marker
- white gel pen
Palette: Warm Yellow,Deep Maroon,Mustard Gold,Spruce Green
Add one small wrapped gift or a pair of reading glasses tucked among the books, a tiny prop like that gives the window a lived-in, specific feeling.
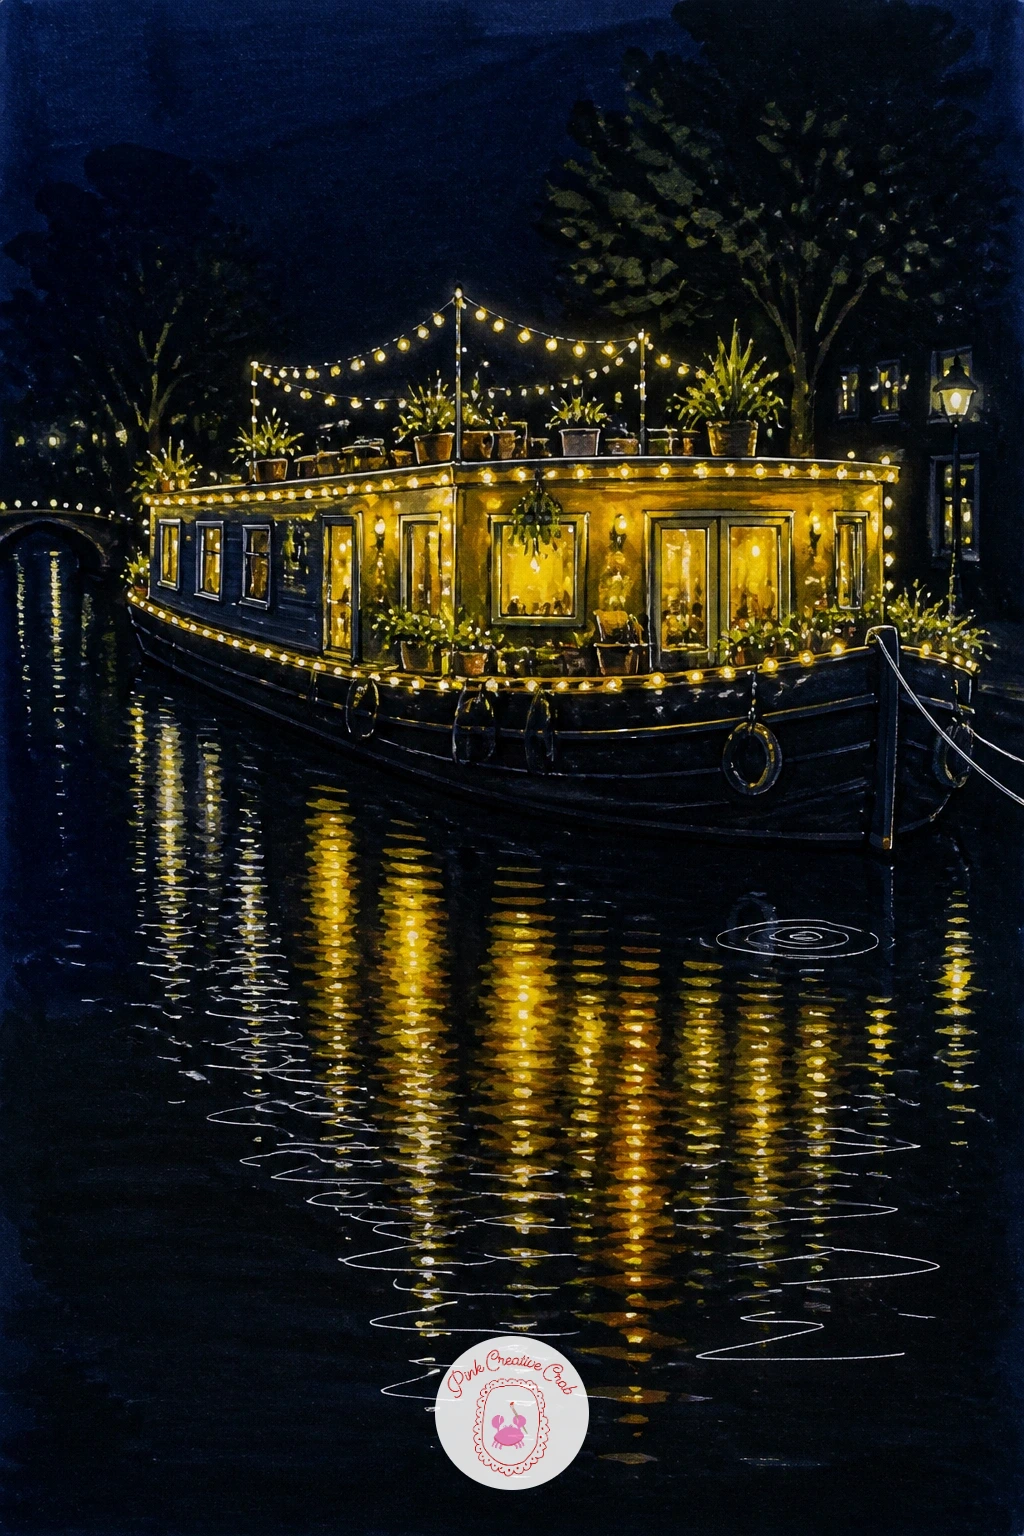
Carry the glow onto the water with a houseboat covered in lights, moored along a quiet canal. Sketch the boat’s low rectangular cabin and curved hull first, keeping the shape simple since the lights strung along the roofline and railing will do most of the visual work.
Wrap the string of lights along the cabin roof edge and down the sides toward the waterline, dotting warm yellow bulbs more densely where the boat meets the water. The water itself needs a loose reflection, dragged vertically in the same warm yellow beneath the boat, blurred rather than sharp.
Boats often end up looking like they are floating in midair, so anchor the hull with a dark horizontal line marking the waterline before adding any reflection below it. No canal reference on hand, a simple flat dark band across the lower third of the page reads as still water just fine.
A few white gel pen ripples finish the surface.
You Will Need
- black toned paper
- warm yellow alcohol marker
- white charcoal pencil
- white gel pen
Palette: Warm Yellow,Deep Navy,Charcoal Brown,Snow White
Try adding a thin plume of smoke from a small chimney on the cabin roof using soft grey marker, it hints at someone warm and cozy inside.
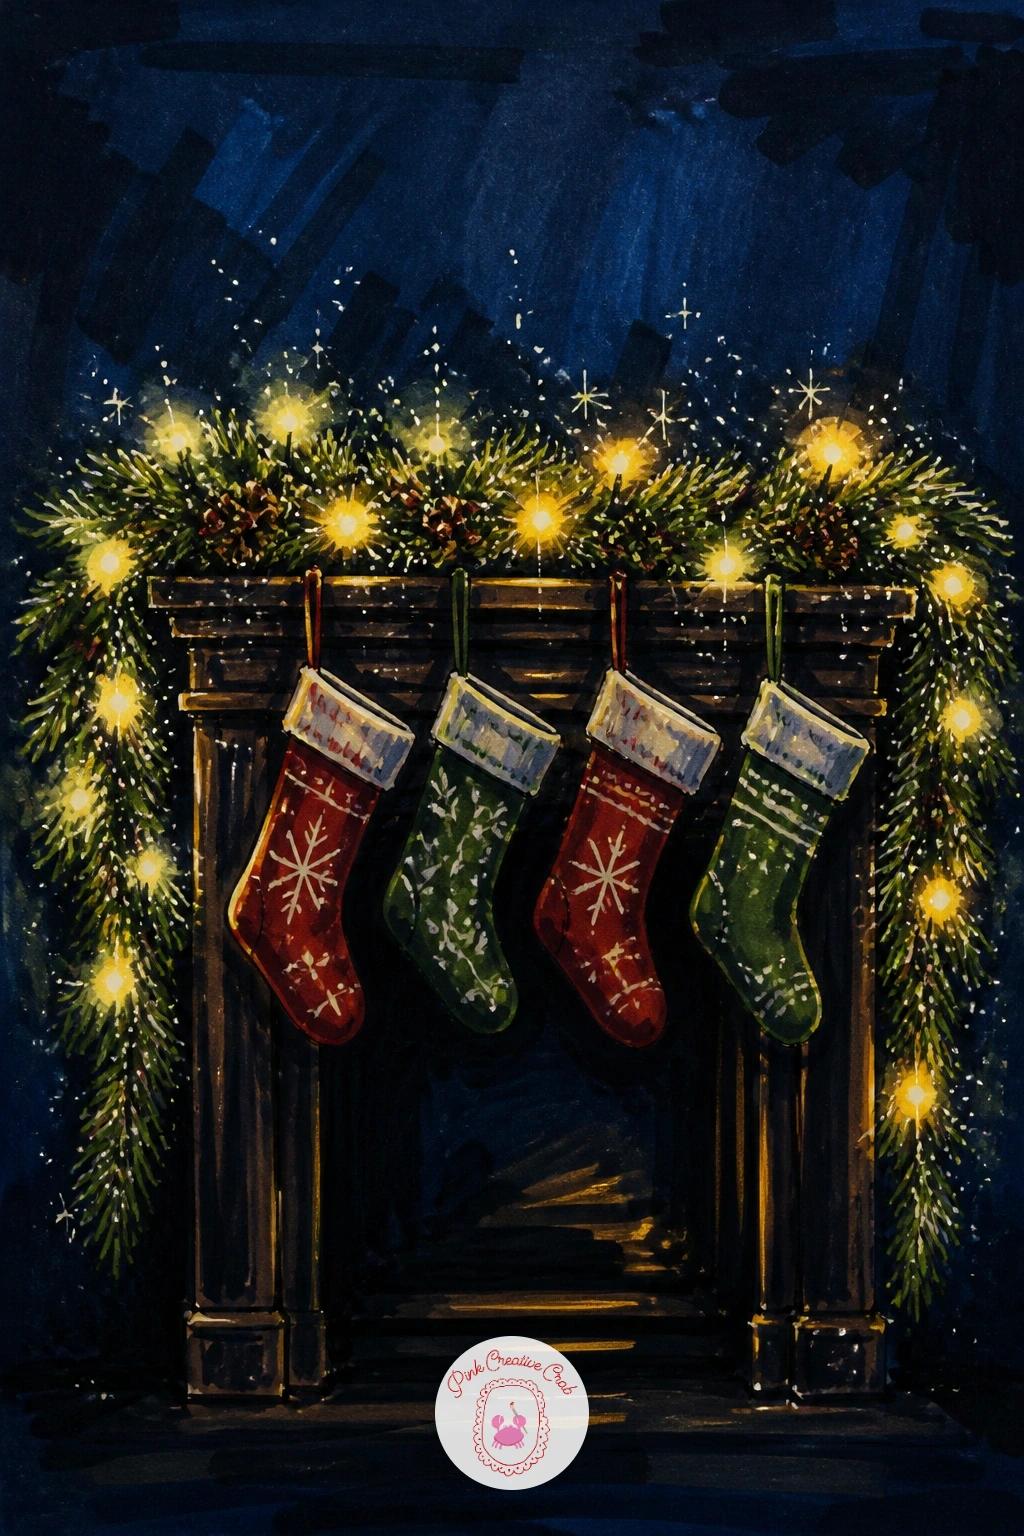
Bring the scene indoors to a close, cozy mantel with garland lights and a row of hanging stockings. Sketch the mantel shelf as a simple straight line first, then drape the garland along it in a loose scalloped curve before adding any lights or stockings on top.
Dot warm yellow bulbs through the garland at uneven intervals, letting a few nestle deeper into the greenery so they glow rather than sit on the surface. Hang two or three stockings along the mantel edge in different simple shapes and colors, since identical stockings in a row can look stiffer than the cozy mood calls for.
The easy fix when the garland looks too flat is layering a second, darker green marker underneath the first before the lights go on, giving it some depth before the glow sits on top. If a fireplace feels like too much to draw, just the mantel shelf and wall behind it carries the whole scene.
Finish with gel pen highlights scattered through the greenery.
You Will Need
- black toned paper
- two shades of green marker
- warm yellow alcohol marker
- white gel pen
Palette: Spruce Green,Deep Pine,Warm Yellow,Cranberry Red
Add a small clock or a few framed photos above the mantel in simple outline, it grounds the scene as someone’s actual living room rather than a generic display.
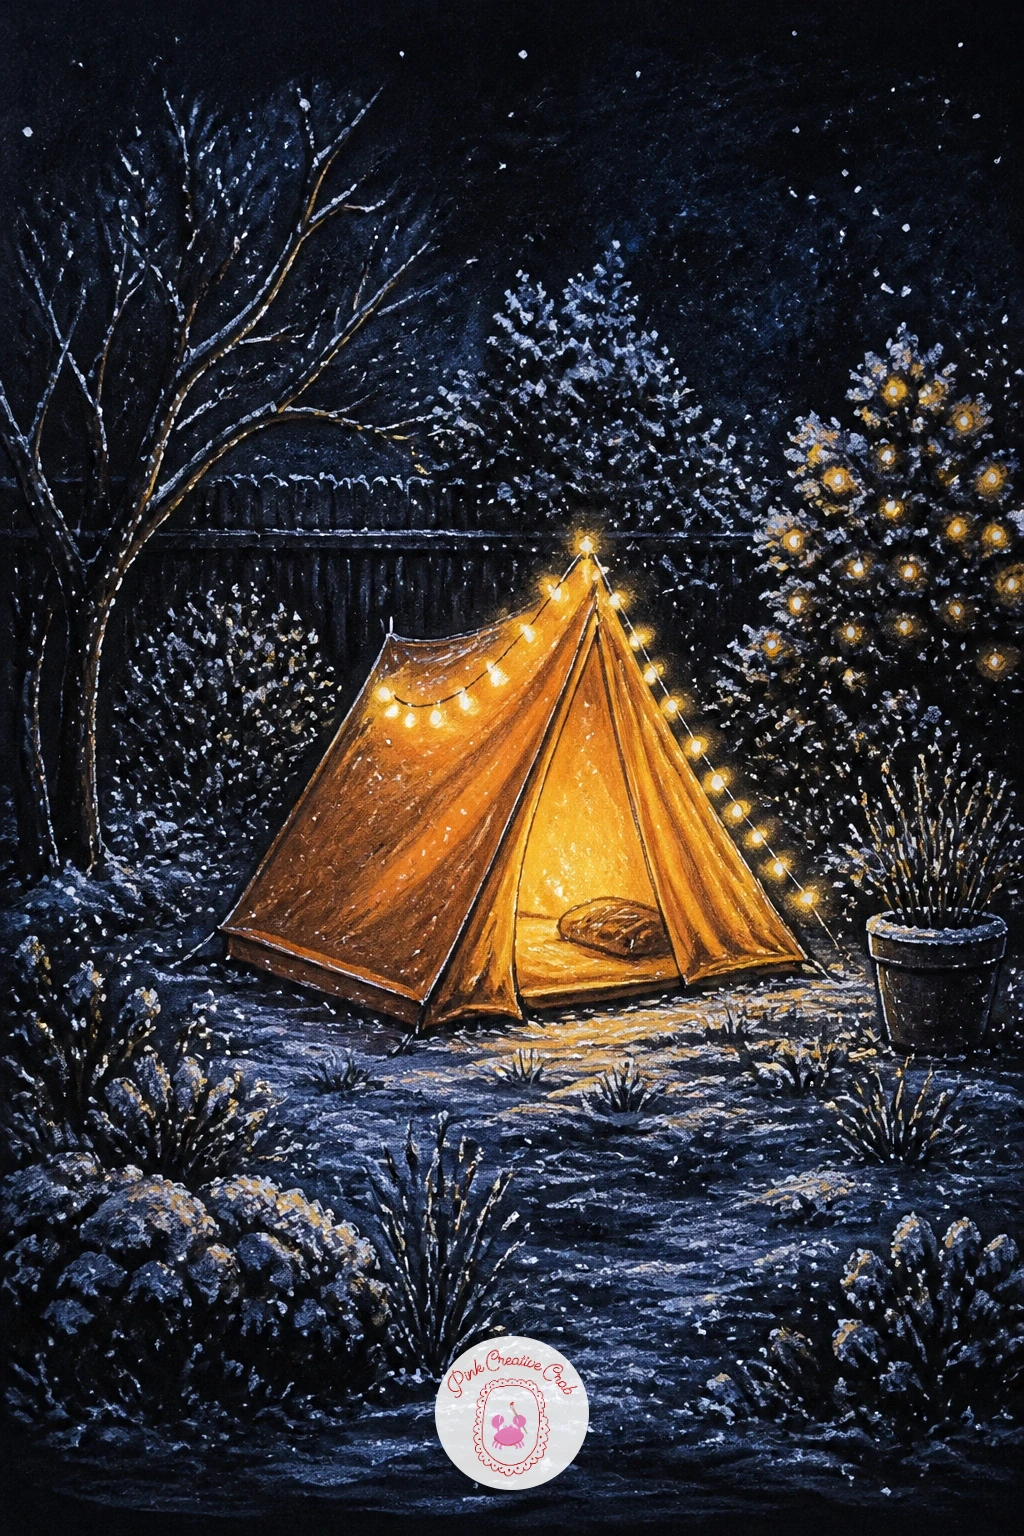
Take the glow outside again for a tent glowing with lights in a snowy garden, like a little winter hideaway. Sketch the tent as a simple triangular shape first, then decide where the light source sits inside it, since a tent lit from within glows most strongly through its fabric and door opening.
Color the tent’s canvas a soft warm orange where the inner light shows through, keeping the outer edges and ground around it much darker by comparison. String a few lights along the tent’s peak or door flap for an extra outer glow, distinct from the warm interior light coming through the fabric itself.
The common mistake is lighting the whole tent evenly, when in truth the side facing the viewer should glow brightest and the far side should stay nearly dark. If snow texture feels fiddly, a simple scattering of white gel pen dots across the ground reads as fresh snowfall without much effort.
Finish with a small lantern or figure near the tent door for scale.
You Will Need
- black toned paper
- warm orange marker
- white charcoal pencil
- white gel pen
Palette: Warm Orange,Deep Navy,Snow White,Charcoal Brown
Try adding a thin stream of warm light spilling out through the tent door onto the snow in front, it makes the whole scene feel like an invitation inside.
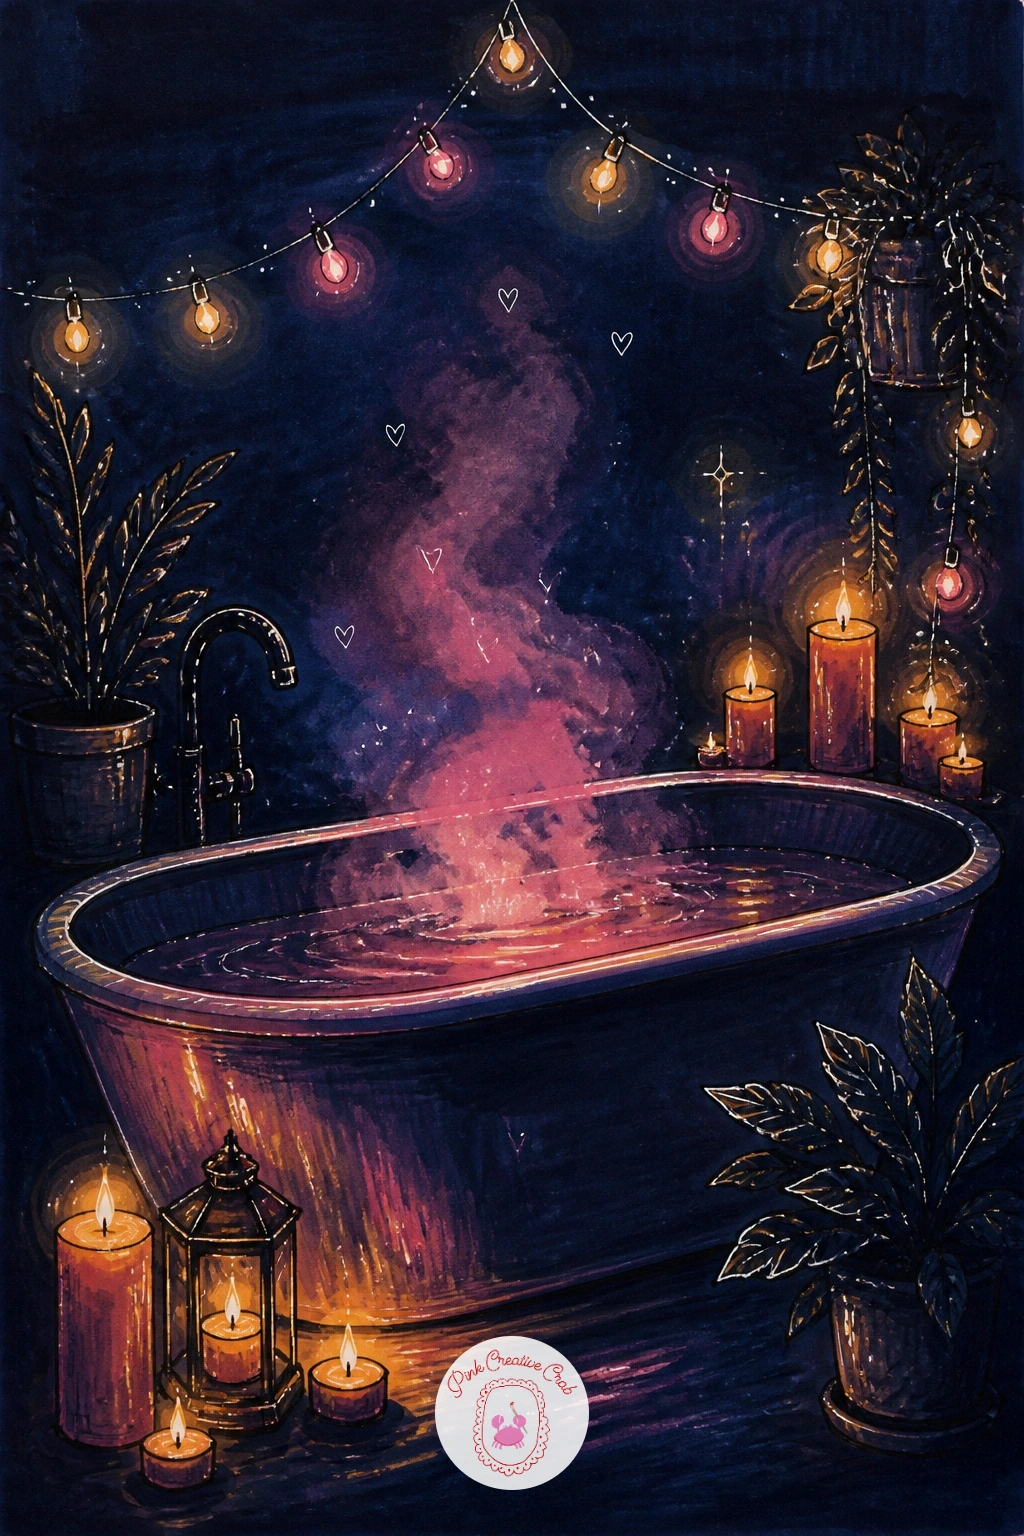
Slow right down for a cozy bathtub surrounded by fairy lights and candles, pure quiet indulgence. Sketch the tub’s simple curved outline first, then decide where the candles and light string sit around its rim before adding any water or steam.
Dot the fairy lights along the tub’s edge or draped from a nearby shelf in warm yellow, then add two or three candle flames nearby in a slightly hotter orange to tell them apart from the bulbs. Steam rising from the water is the detail that sells the whole cozy mood, so lift a few soft curved white gel pen lines upward from the tub’s surface.
The tricky part is making the water read as warm and inviting rather than flat grey, so blend a touch of pale warm pink or orange into the water where the candlelight would reflect. No candles to reference, imagine them simply as small teardrop flames on short pale sticks.
Finish with gel pen dots on every bulb for the full glow.
You Will Need
- black toned paper
- warm yellow and orange markers
- pale pink marker
- white gel pen
Palette: Warm Yellow,Candle Orange,Pale Blush Pink,Deep Navy
Add a small book or a mug resting on the tub’s edge, a tiny prop like that turns a plain bathtub into a specific, relatable moment of winding down.
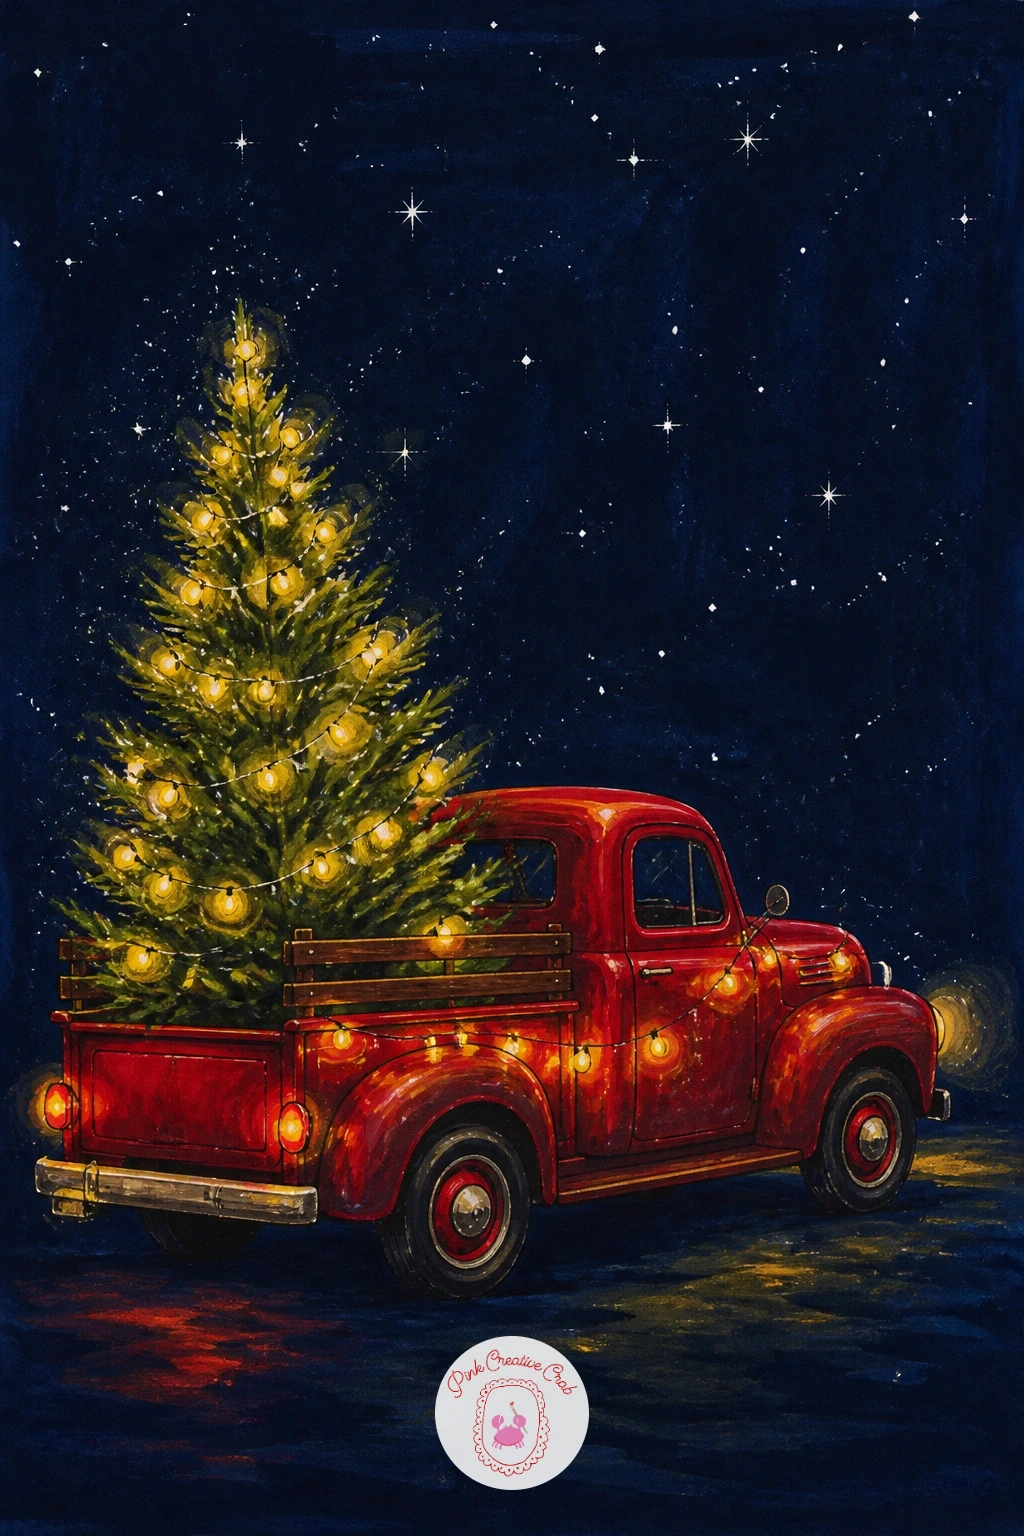
Bring back a classic after all that quiet indoors: a little red truck with a lit Christmas tree in the back. Sketch the truck’s boxy body first with simple rounded fenders, then place the tree leaning in the truck bed before adding any lights to either one.
Measure the tree’s height against the truck’s cab before you commit, a tree too large will overwhelm the vehicle while one too small will look like an afterthought, so aim for the tree standing roughly a head taller than the cab. String warm yellow lights through the tree’s branches and let one or two trail down into the truck bed as if still being wound on.
Color the truck body a deep cranberry red, keeping the headlights as two small warm yellow dots doing double duty as their own light source. If red feels too bold, a faded forest green truck works just as well with the same glowing cargo.
Finish with gel pen highlights on the chrome bumper and the tree’s bulbs.
You Will Need
- black toned paper
- cranberry red marker
- spruce green marker
- warm yellow marker
- white gel pen
Palette: Cranberry Red,Spruce Green,Warm Yellow,Deep Navy
Try drawing this scene parked on a snowy roadside at a slight angle rather than straight on, a three-quarter view makes the truck feel more like a snapshot and less like a logo.
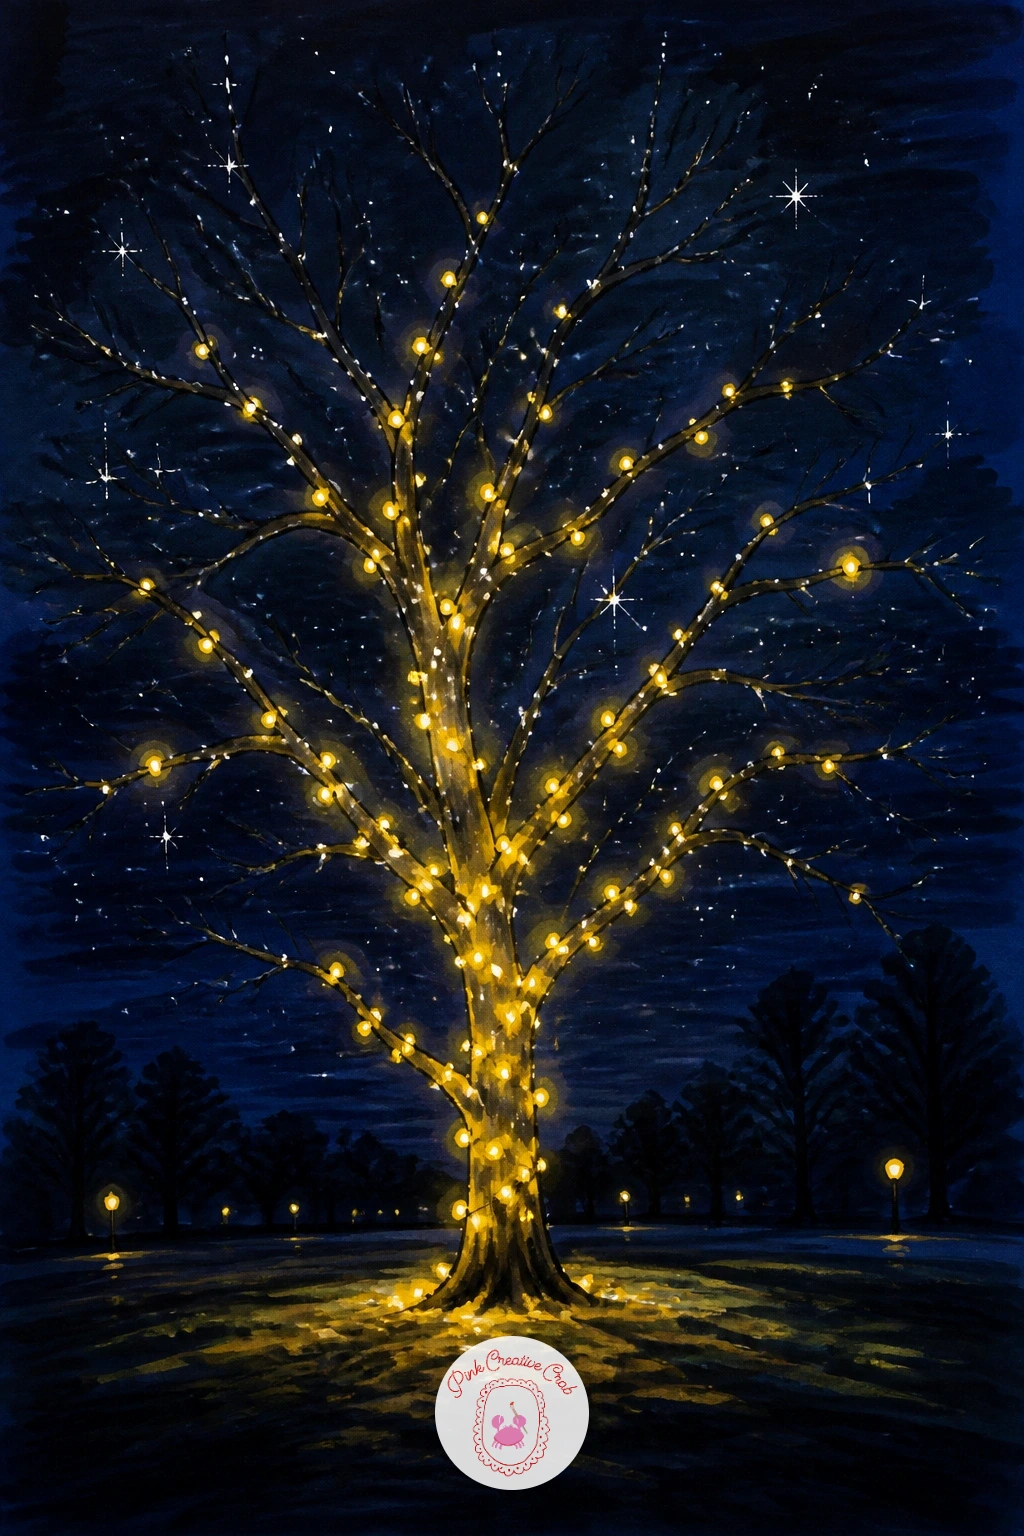
Strip the scene back to almost nothing: a bare tree in a park, its branches wrapped in strings of light with no leaves to soften them. Sketch the trunk and bare branches first in loose confident lines, letting them fork unevenly the way real winter trees do rather than symmetrically.
Wind the lights loosely around the main branches rather than every twig, since trying to light every small branch will eat the whole session and look busier than it needs to. Warm yellow dots spaced generously along two or three main limbs read as a fully lit tree from a normal viewing distance.
The common fix when bare branches look stiff is adding a few smaller twigs crossing at odd angles near the ends, real winter trees are never perfectly tidy. No park reference handy, picture any tree you have seen stripped bare by late autumn and simplify from there.
Finish with gel pen dots scattered unevenly through the light string for sparkle.
You Will Need
- black toned paper
- warm yellow alcohol marker
- white charcoal pencil
- white gel pen
Palette: Charcoal Brown,Warm Yellow,Deep Navy,Snow White
Try this same bare tree lit entirely in cool white bulbs instead of warm yellow for a frostier, more wintery version worth trying once the warm one feels comfortable.
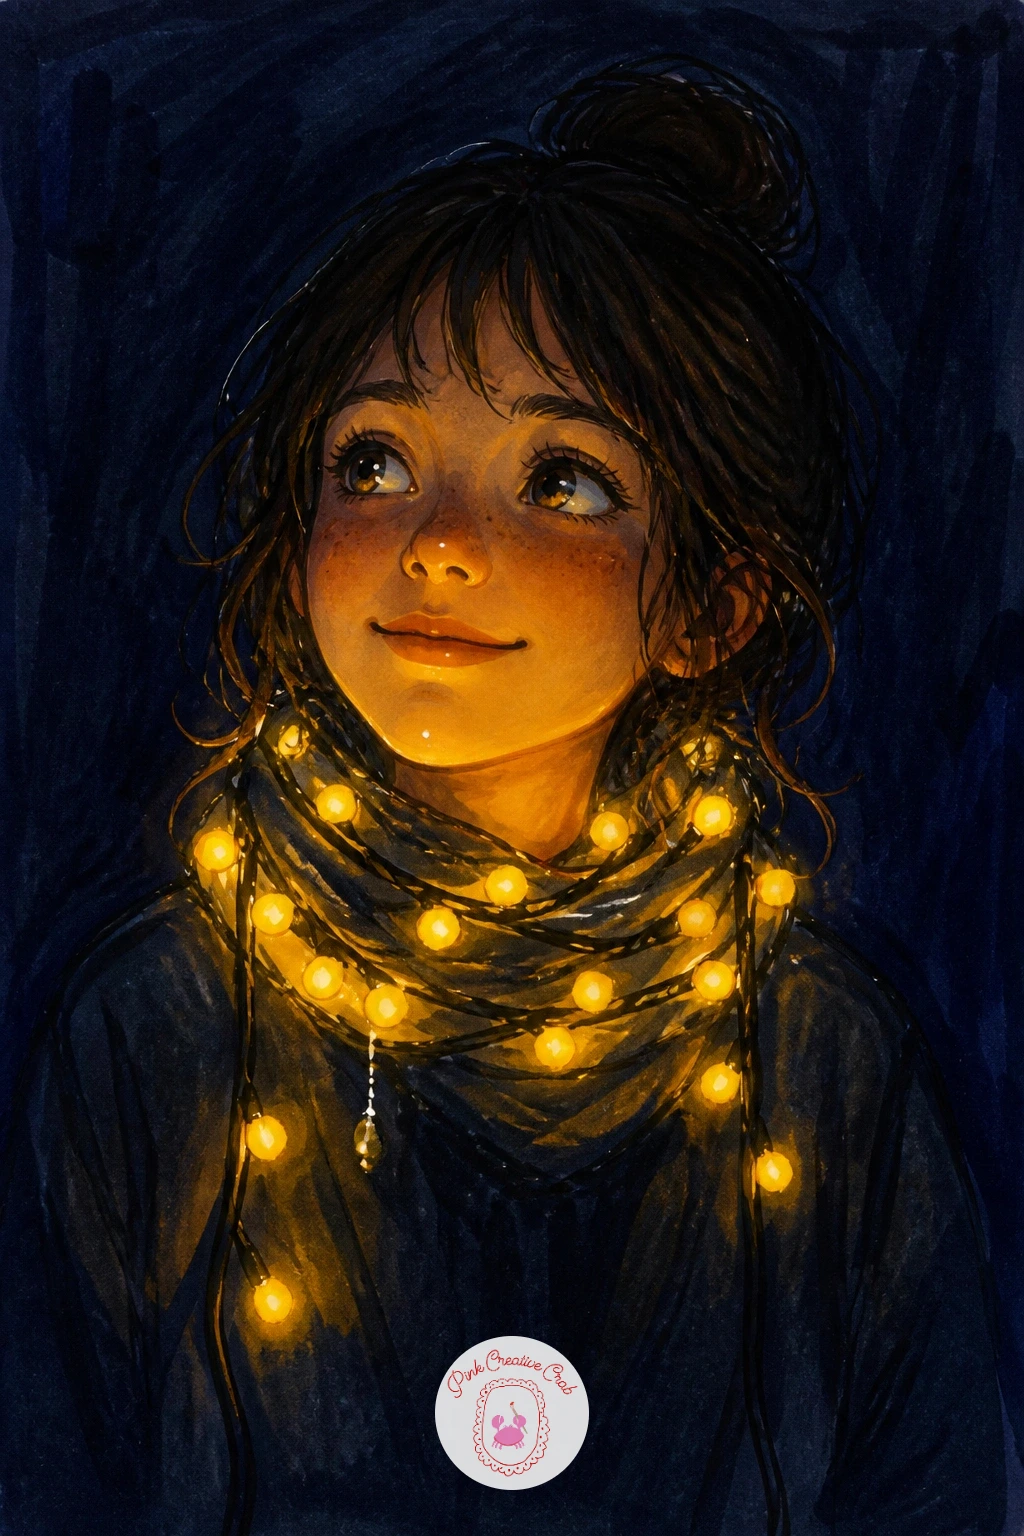
Turn the lights into clothing for a more playful idea: a girl with a string of lights wrapped around her neck like a scarf. Sketch her head, shoulders and a simple coat shape first, then loop the light string loosely around her neck and over one shoulder before coloring anything.
Light her face softly from below with warm yellow, since the string sitting close to her neck and chin would naturally cast an upward glow across her chin and cheeks, a different lighting setup from most of the other scenes here. That upward light is what makes this one feel intimate rather than just another portrait.
Keep her expression simple, a soft closed-eye or gentle smile, since an overworked face will compete with the glow for attention. If a full portrait feels ambitious, crop in tight to just her lower face, neck and the lit scarf for an easier, still striking result.
One bright gel pen dot right under her chin anchors the whole upward glow.
You Will Need
- black toned paper
- warm yellow alcohol marker
- white charcoal pencil
- white gel pen
Palette: Warm Yellow,Soft Skin Tone,Deep Navy,Charcoal Grey
Try varying the bulb colors around her neck, a few warm pink or amber ones mixed with the yellow will cast a slightly warmer, more flattering light across her face.
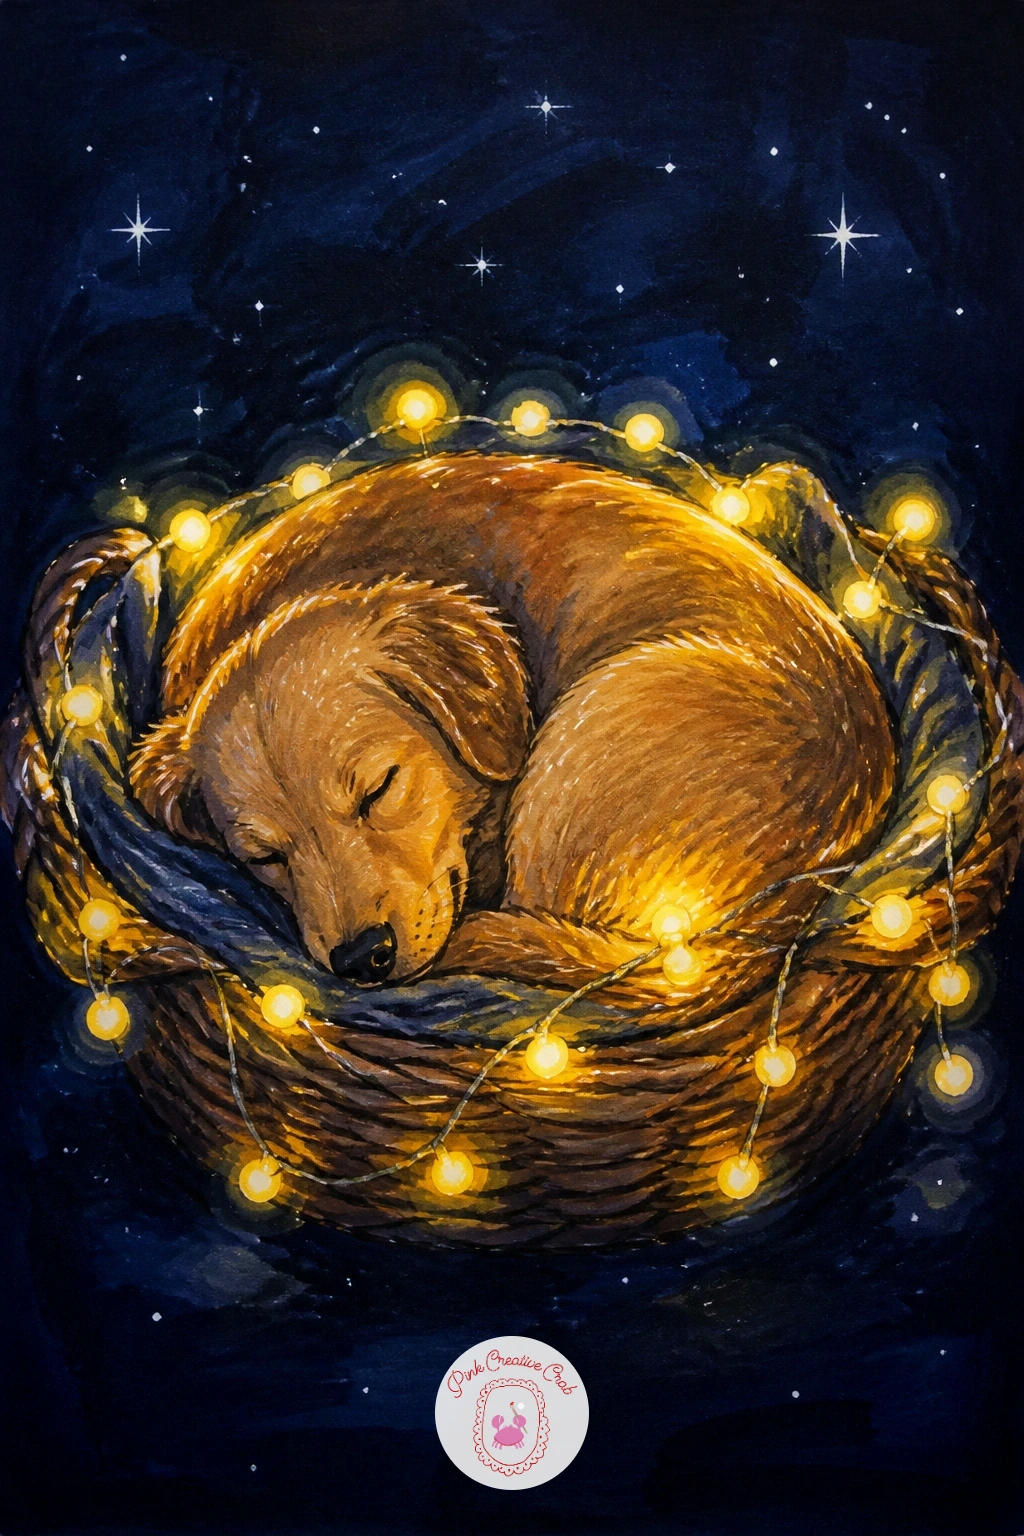
Return to the animals for a dog sleeping in a basket lit by a garland draped along its rim. Sketch the basket as a simple oval with a textured rim first, then curl the sleeping dog’s body inside it in one continuous line before adding any garland or lights.
Drape a short length of garland along the basket’s front edge, dotting warm yellow bulbs through it so the glow falls gently across the dog’s back and the blanket beneath. This is a good spot to try the texture trick of light pressure and a nearly dry marker dragged across the dog’s fur direction to suggest softness without drawing every strand.
Dogs curled tightly often lose their shape entirely, so keep one ear or paw visible poking out to anchor the pose as clearly canine. No basket to reference, a simple round dog bed shape works exactly the same way under the garland.
Finish with gel pen dots through the garland and one soft highlight along the dog’s back.
You Will Need
- black toned paper
- warm yellow marker
- brown or grey marker for fur
- white gel pen
Palette: Warm Yellow,Soft Brown,Spruce Green,Deep Navy
For more cozy sleeping-pet poses in pencil, the dog pencil drawing ideas collection has plenty of simple curled-up poses worth borrowing for this one too.
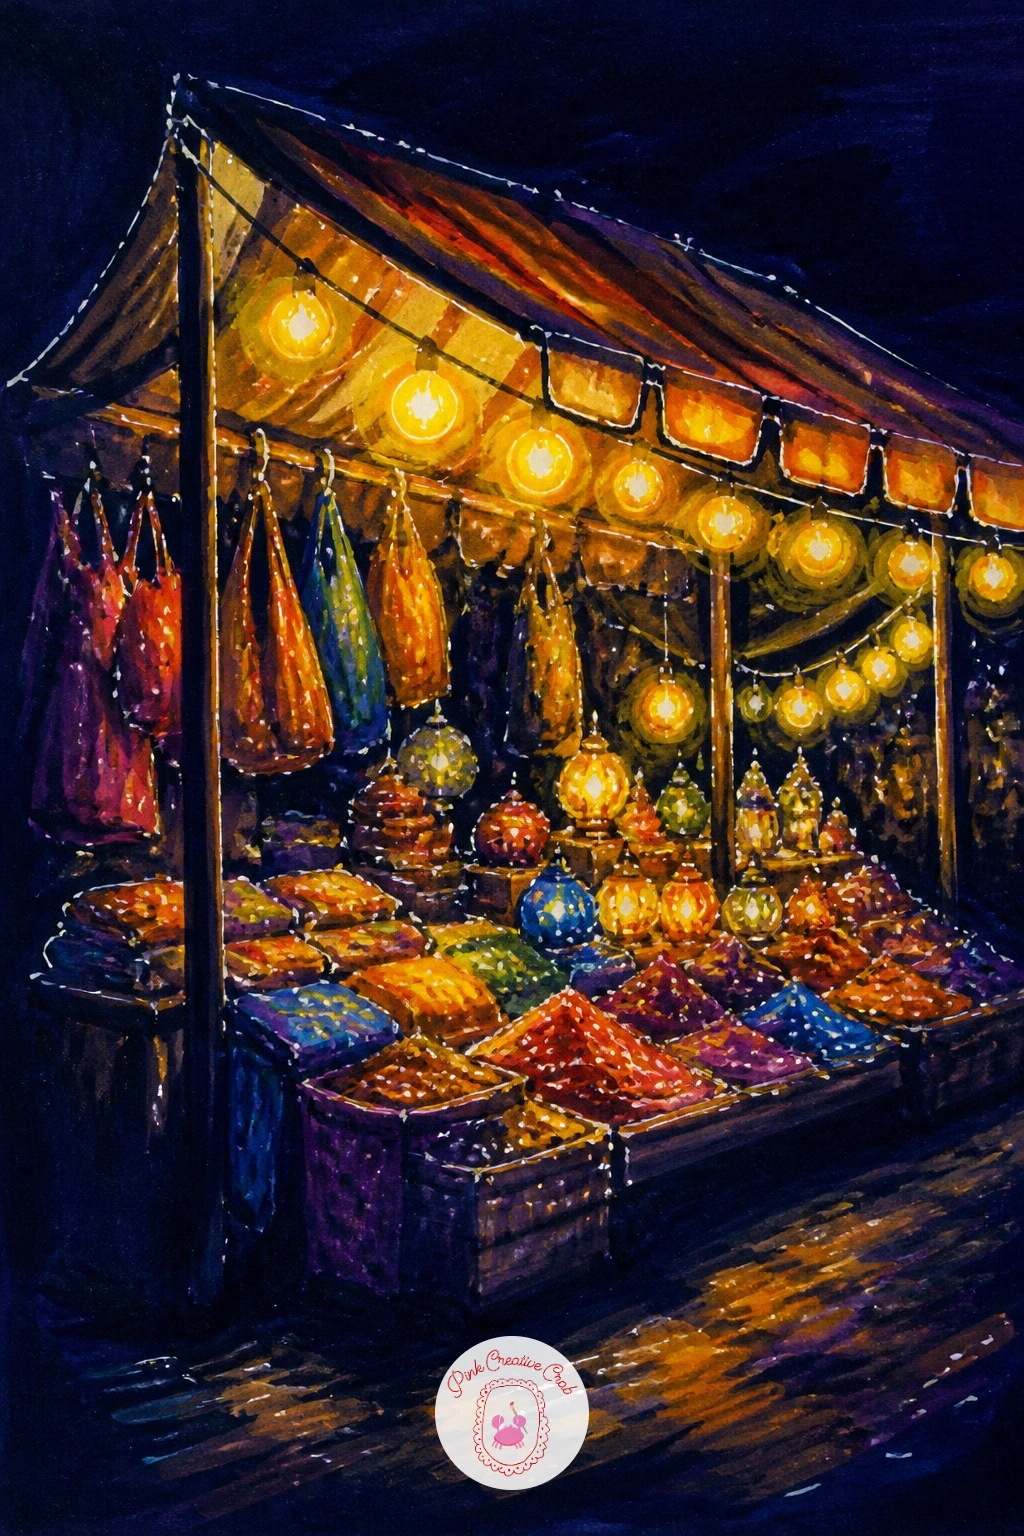
Fill the page with a market stall glowing with hanging bulbs, goods piled beneath a little awning. Sketch the stall’s simple frame and awning first, a few straight poles and a slanted canvas roof, before stringing any lights along its edges.
Hang warm yellow bulbs along the awning’s front edge in a loose scalloped line, then scatter the stall’s goods beneath, simple round shapes for ornaments or wrapped gifts, colored in two or three accent colors so the display reads as abundant without needing individual detail on each item.
The quick ten-minute version keeps the stall simple with just the awning and lights; the forty-minute version adds a seller silhouette behind the counter and a small crowd of shadowy figures nearby. If a full market scene feels like a lot, a single stall with no background crowd carries the glow just as well on its own.
Finish with gel pen highlights along the awning’s lit edge and on a few of the goods below.
You Will Need
- black toned paper
- warm yellow marker
- two or three accent color markers
- white gel pen
Palette: Warm Yellow,Cranberry Red,Mustard Gold,Deep Navy
Try adding a thin wisp of steam rising from a small mug or pot on the stall counter, it hints at mulled cider or cocoa and warms up the whole scene instantly.
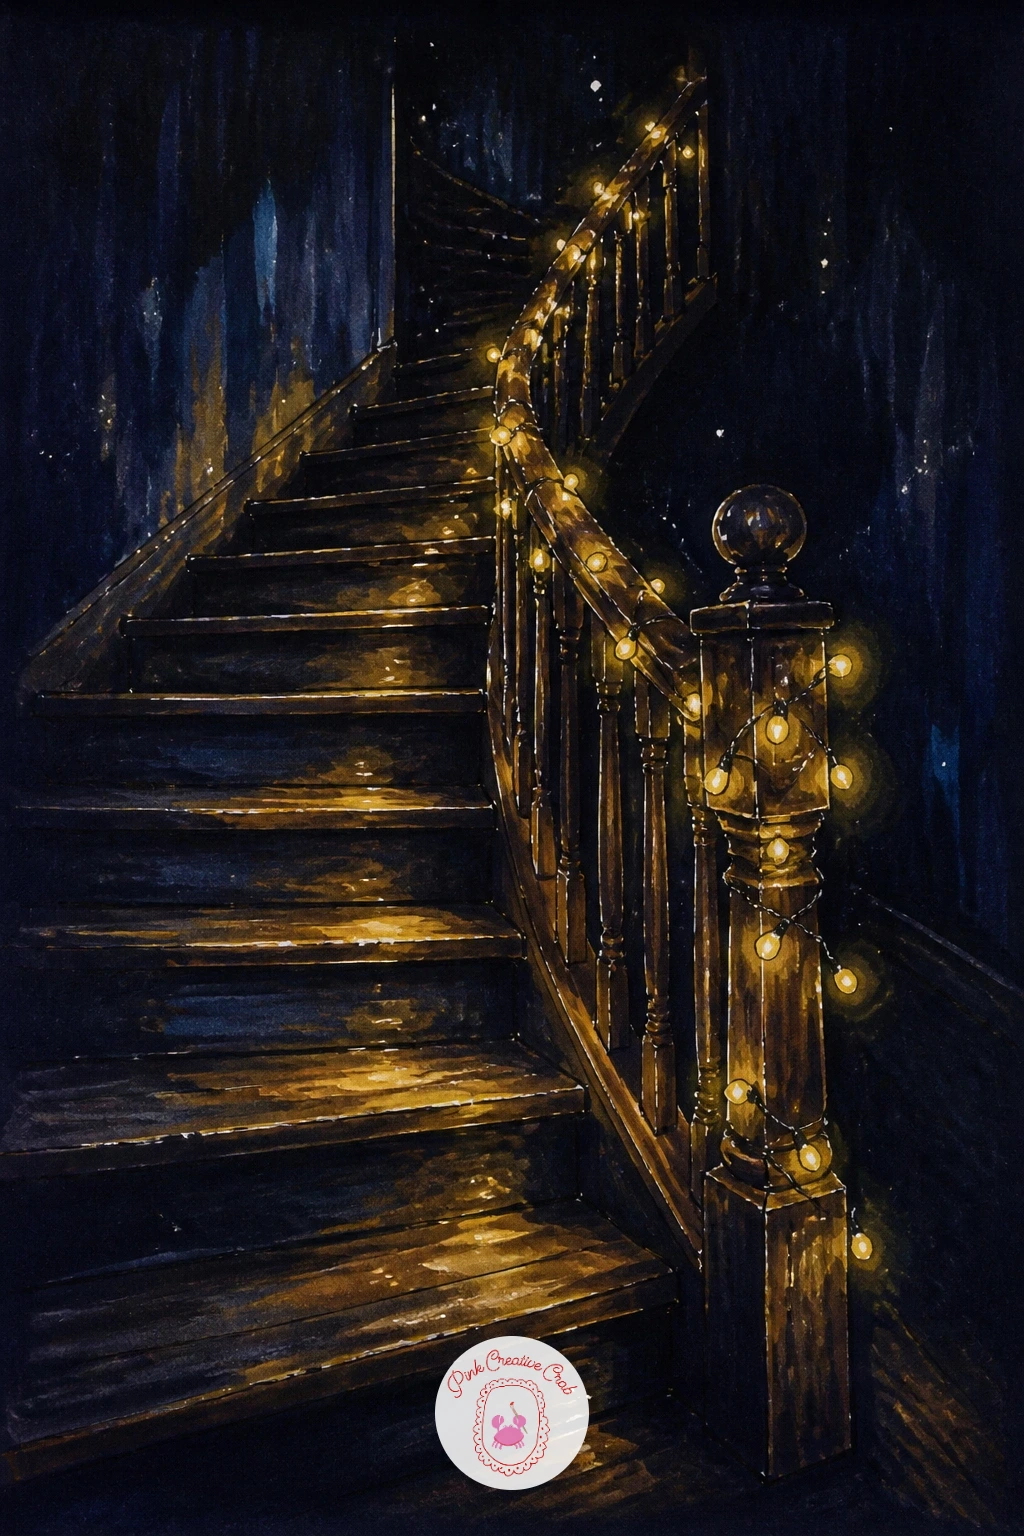
Move into an entryway for an old staircase with lights wound around the banister, climbing step by step into shadow. Sketch the staircase first in simple parallel diagonal lines for the steps and a curved banister rail running alongside, keeping the perspective loose rather than architecturally precise.
Wind the lights around the banister in a gentle spiral, spacing the warm yellow bulbs a little further apart as the staircase climbs away from the viewer and into darkness, which helps sell the distance. Eye level matters here: looking up the stairs from the bottom makes the lit banister feel like it is inviting you further into the house.
The common slip is lighting every single baluster evenly, which flattens the sense of depth, so let the lower steps glow brightest and the top steps fade into near black. If a full staircase feels like too much structure, a single curved section of banister with lights wound through it tells the same story.
Finish with gel pen dots that get smaller and sparser toward the top of the stairs.
You Will Need
- black toned paper
- warm yellow marker
- white charcoal pencil
- white gel pen
Palette: Warm Yellow,Deep Brown,Deep Navy,Snow White
Try adding a small pine garland draped alongside the lights on the banister, a touch of green breaks up the yellow and makes the staircase feel more decorated.
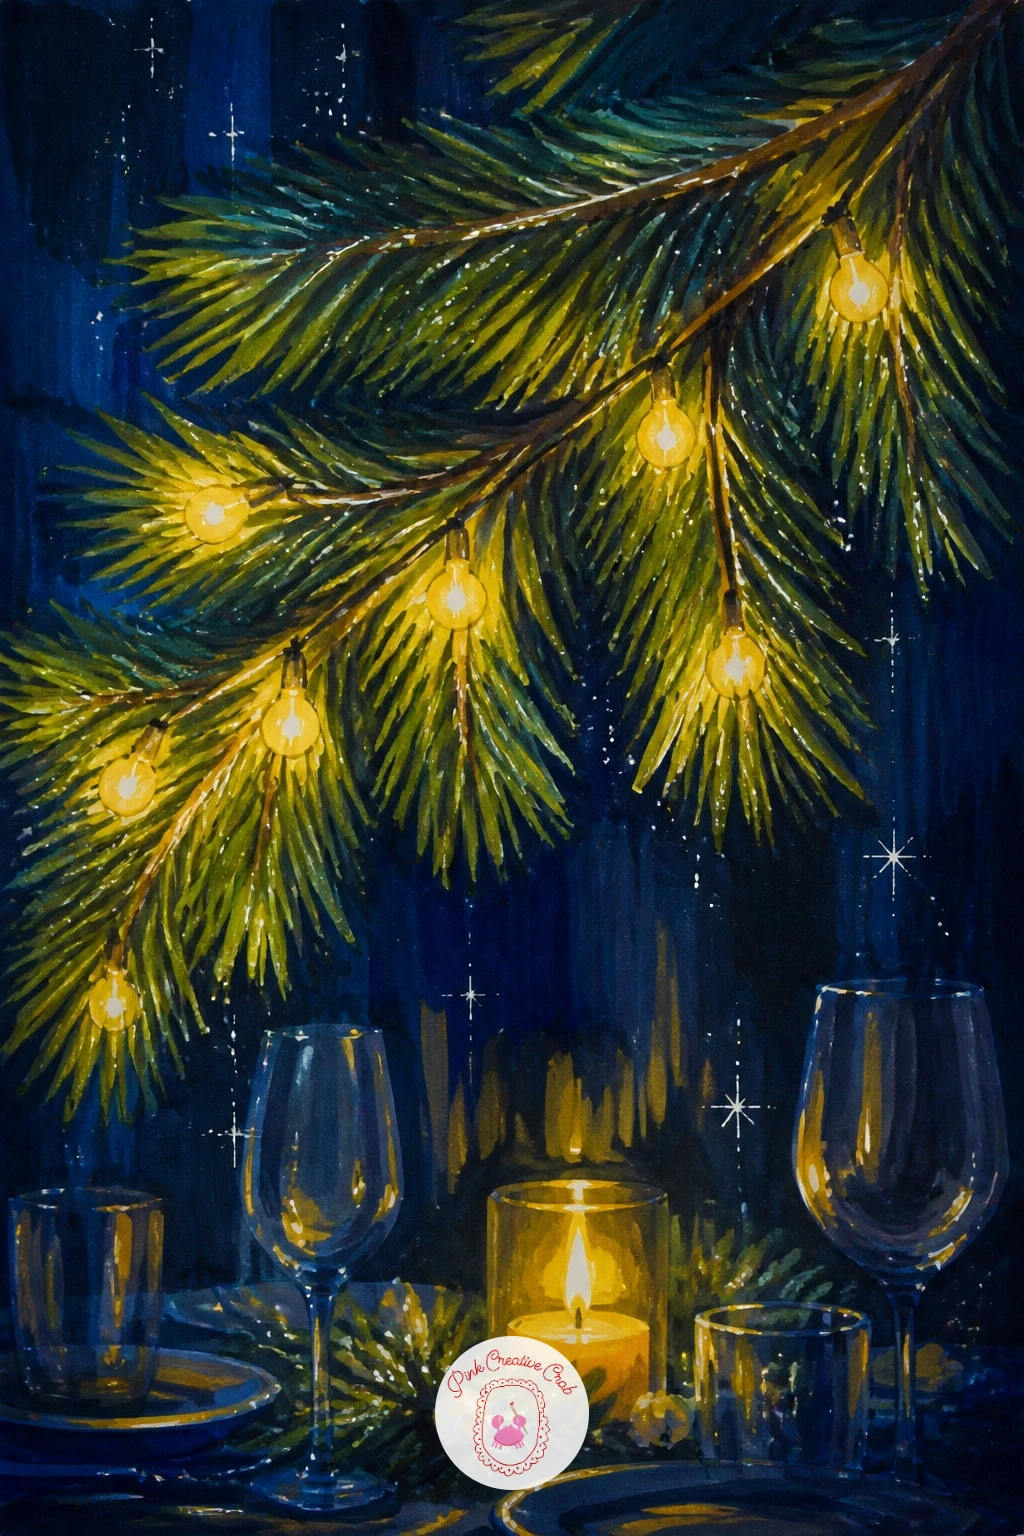
Bring the scene to table height for a pine branch draped with lights hanging low over a dinner table setting. Sketch the branch first as a loose diagonal line with smaller offshoots, then drape the light string along its length before any table details go in below.
Color the pine needles in two shades of green for depth, then dot warm yellow bulbs unevenly along the branch, letting a few hang slightly below the needles rather than sitting flush against them. The table beneath needs only a few suggested shapes, a candle, a plate edge, a wine glass, since the branch and its glow should stay the clear focus of the piece.
The easy trick for making the needles look soft rather than stiff is a light, almost dry marker dragged quickly outward from the branch in short strokes rather than one solid fill. No pine branch reference on hand, a simple fir twig shape from memory, a central stem with short diagonal needles, works fine.
Finish with gel pen highlights on each hanging bulb.
You Will Need
- black toned paper
- two shades of green marker
- warm yellow marker
- white gel pen
Palette: Spruce Green,Deep Pine,Warm Yellow,Deep Navy
Add a few loose red berries along the branch using small dots of cranberry marker, they add a second color accent without any extra drawing complexity.
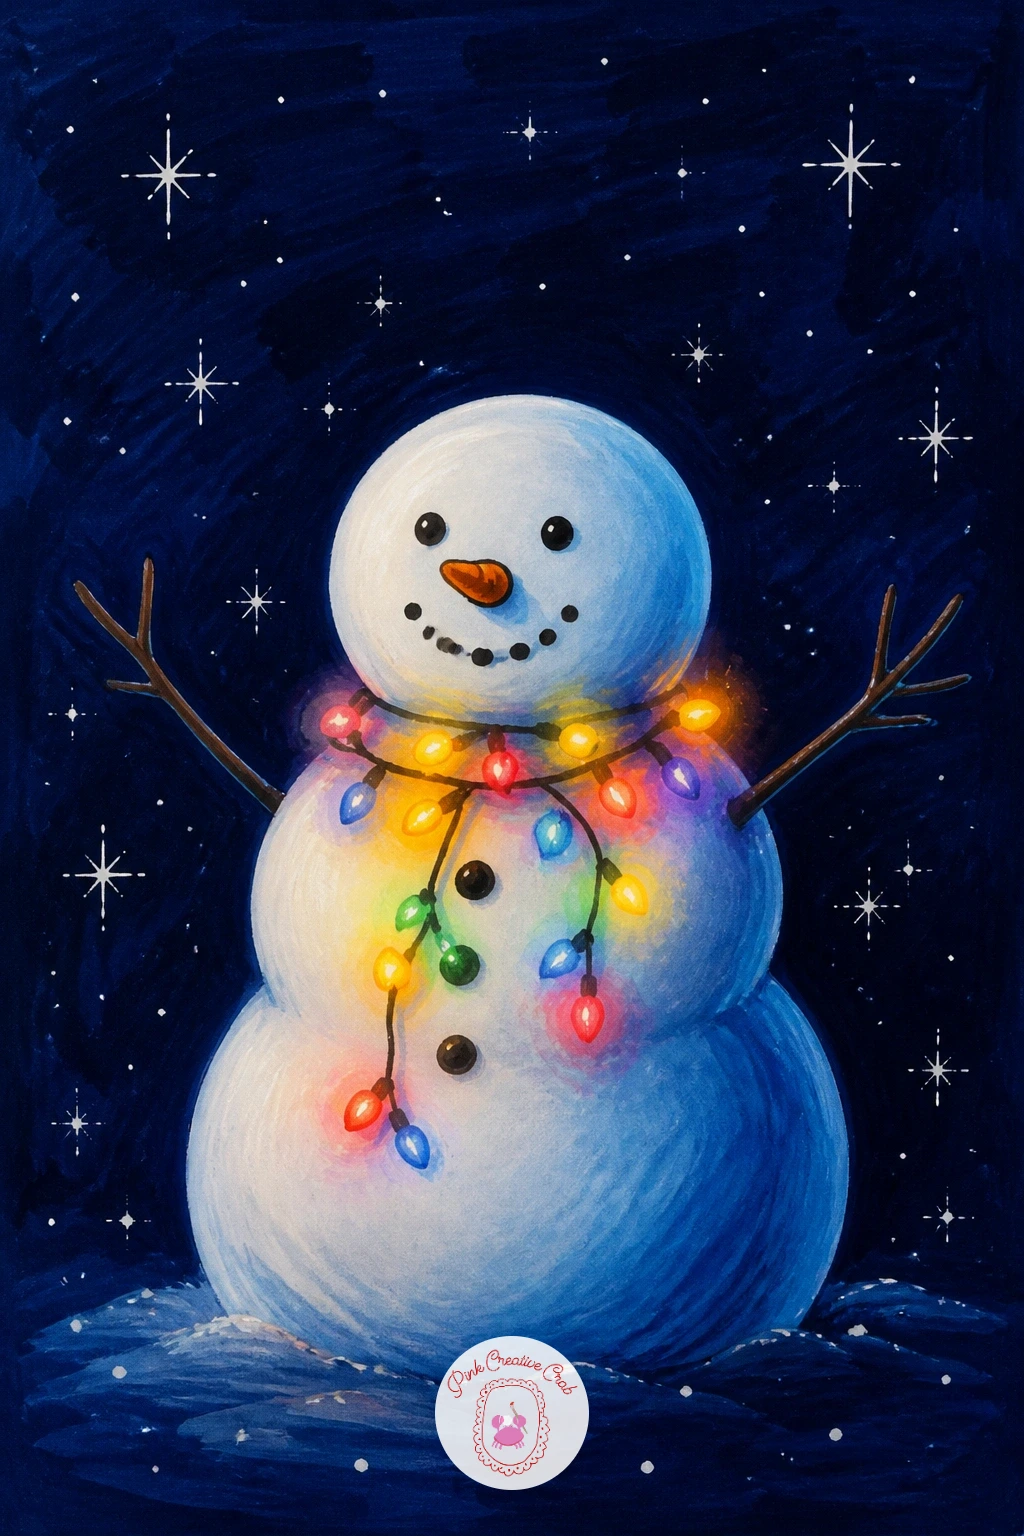
Bring back a classic figure with a twist: a snowman wearing a string of lights as a scarf instead of the usual knit one. Stack the three simple snowman circles first, largest at the bottom, before wrapping the light string around the neck area in a loose loop with one end dangling.
Color the lights in two or three alternating shades, red, green, warm yellow, so the scarf reads as festive and distinct from a plain light string elsewhere in the scene. The snowman himself stays mostly white with just soft blue-grey shading along one side to suggest roundness, since too much shadow on a snowman quickly looks dirty rather than dimensional.
If the shading looks heavy-handed, a kneaded eraser or a lighter blending marker lifts some of it back out to keep the snow looking clean and bright. No carrot or coal pieces to hand in reference, simple small orange and black shapes for the nose and buttons do the job.
Finish with gel pen dots on each light in the scarf and a few stars scattered in the sky above.
You Will Need
- black toned paper
- pale blue-grey marker
- red green and yellow markers
- white gel pen
Palette: Snow White,Pale Blue Grey,Cranberry Red,Spruce Green
For more playful snowman poses and variations to try next, the easy Christmas drawing ideas collection has plenty of simple winter character inspiration.
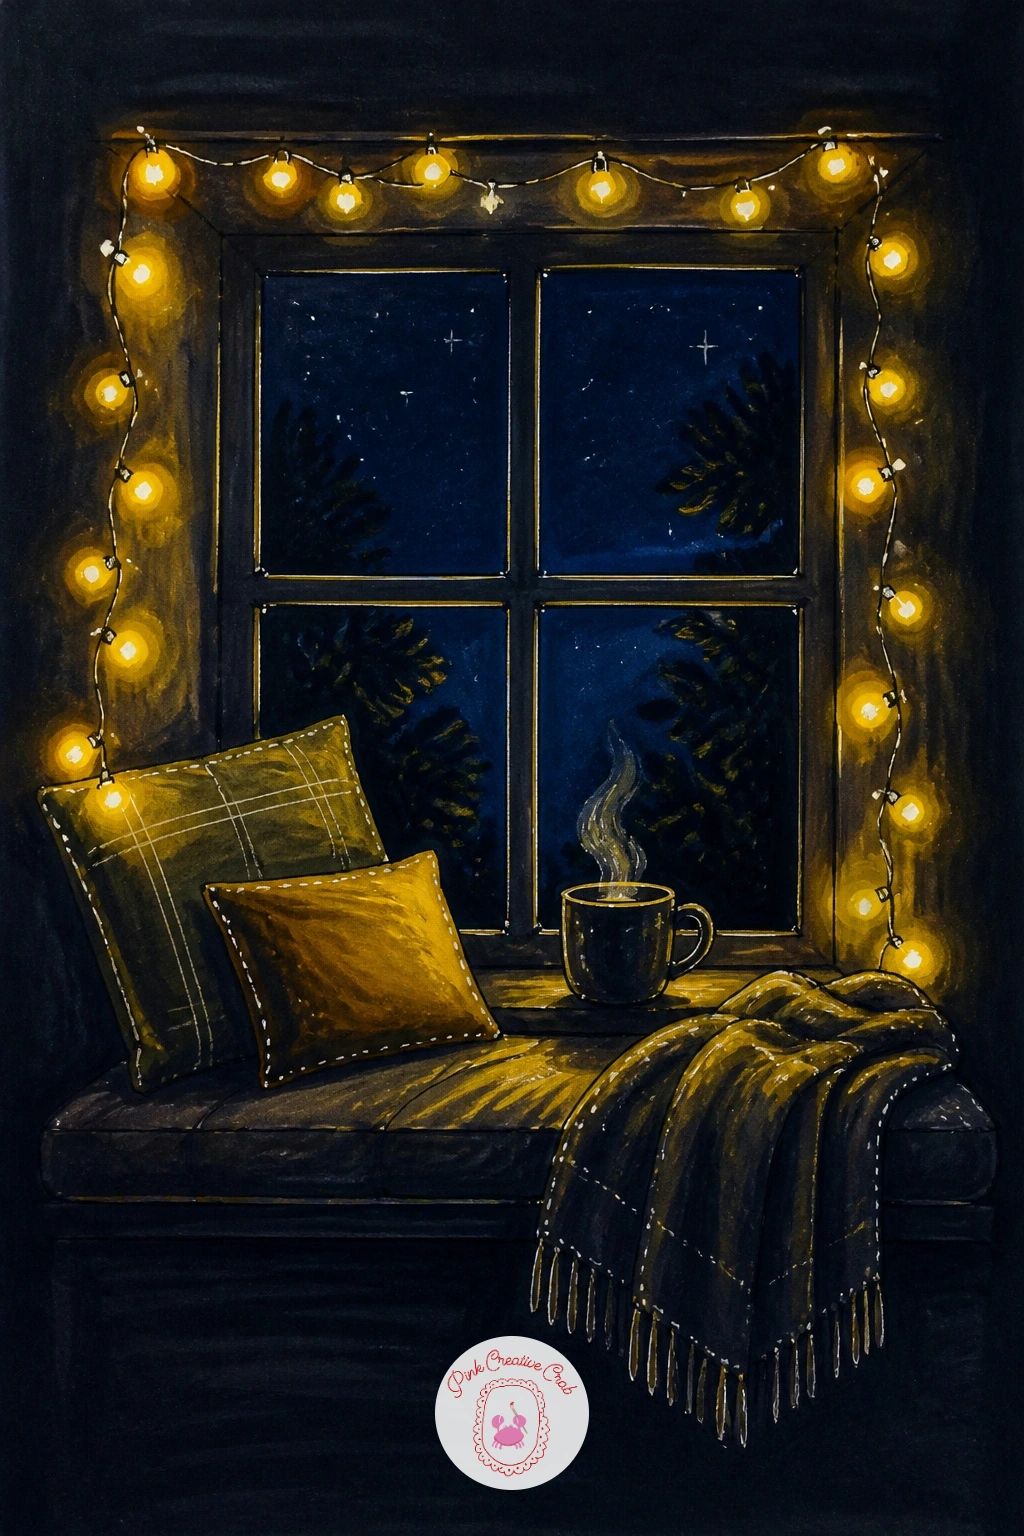
Settle back into something quiet for a window seat strung with fairy lights, a mug resting on the sill beside it. Sketch the window frame and the cushioned seat first in simple shapes, then drape the light string loosely along the top of the window frame before anything else goes in.
Dot warm yellow bulbs along the string and let a soft glow wash over the cushion and sill just beneath it, blending a touch of orange into the fabric where the light would naturally pool. Draw the mug as a simple rounded shape with a thin curl of steam rising from it in white gel pen, a tiny detail that instantly reads as warm and lived-in.
The common mistake is making the window itself too busy with outside detail, so keep the view through the glass soft and dark, maybe just a few distant lit dots to suggest other houses. No cushion pattern in mind, a plain solid color reads just as cozy as a patterned one.
Finish with gel pen highlights on the bulbs and a soft rim of light along the mug’s edge.
You Will Need
- black toned paper
- warm yellow and orange markers
- white charcoal pencil
- white gel pen
Palette: Warm Yellow,Soft Orange,Deep Navy,Cream White
Try adding a small stack of books or a folded blanket beside the mug, a couple of extra props make the window seat feel like a real, specific corner of a home.
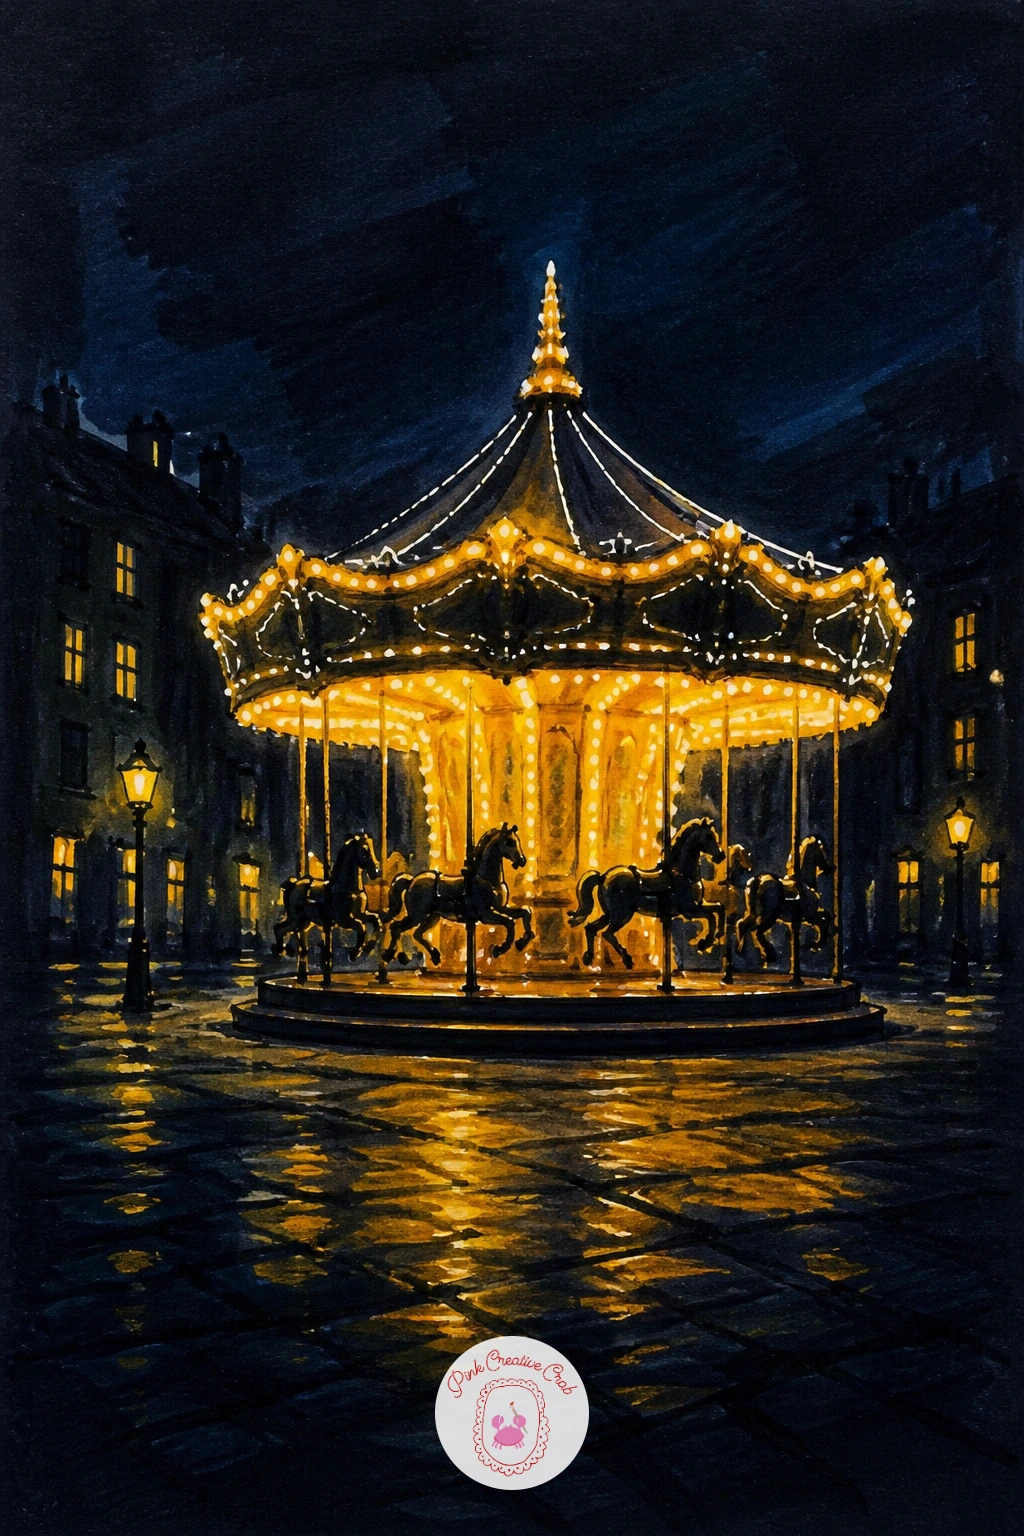
Give the set one busier centerpiece before the finale: a lit carousel standing in a dark town square, bulbs tracing its every curve. Sketch the carousel’s domed roof and central pole first, then add two or three simple horse or sled shapes around its edge before any lights go on.
Trace warm yellow bulbs along the roofline’s scalloped edge and down each supporting pole, since that repeating curve is what makes a carousel instantly recognizable even in a loose sketch. The square around it should stay almost entirely dark, with maybe one or two distant lit windows, so every bit of brightness pulls straight back to the carousel itself.
The common trap is trying to light every single bulb individually, which eats the whole session, so group them into short dotted clusters along the main curves instead of tracing every inch. If full carousel animals feel too detailed, simple rounded silhouettes on poles read just as charmingly from this distance.
Finish with gel pen highlights concentrated at the roofline and central pole.
You Will Need
- black toned paper
- warm yellow marker
- white charcoal pencil
- white gel pen
Palette: Warm Yellow,Deep Navy,Cranberry Red,Charcoal Brown
Try a soft colored glow, pale pink or lilac, bleeding outward from the carousel into the dark square around it, it gives the whole scene a dreamier, candy-like feeling.
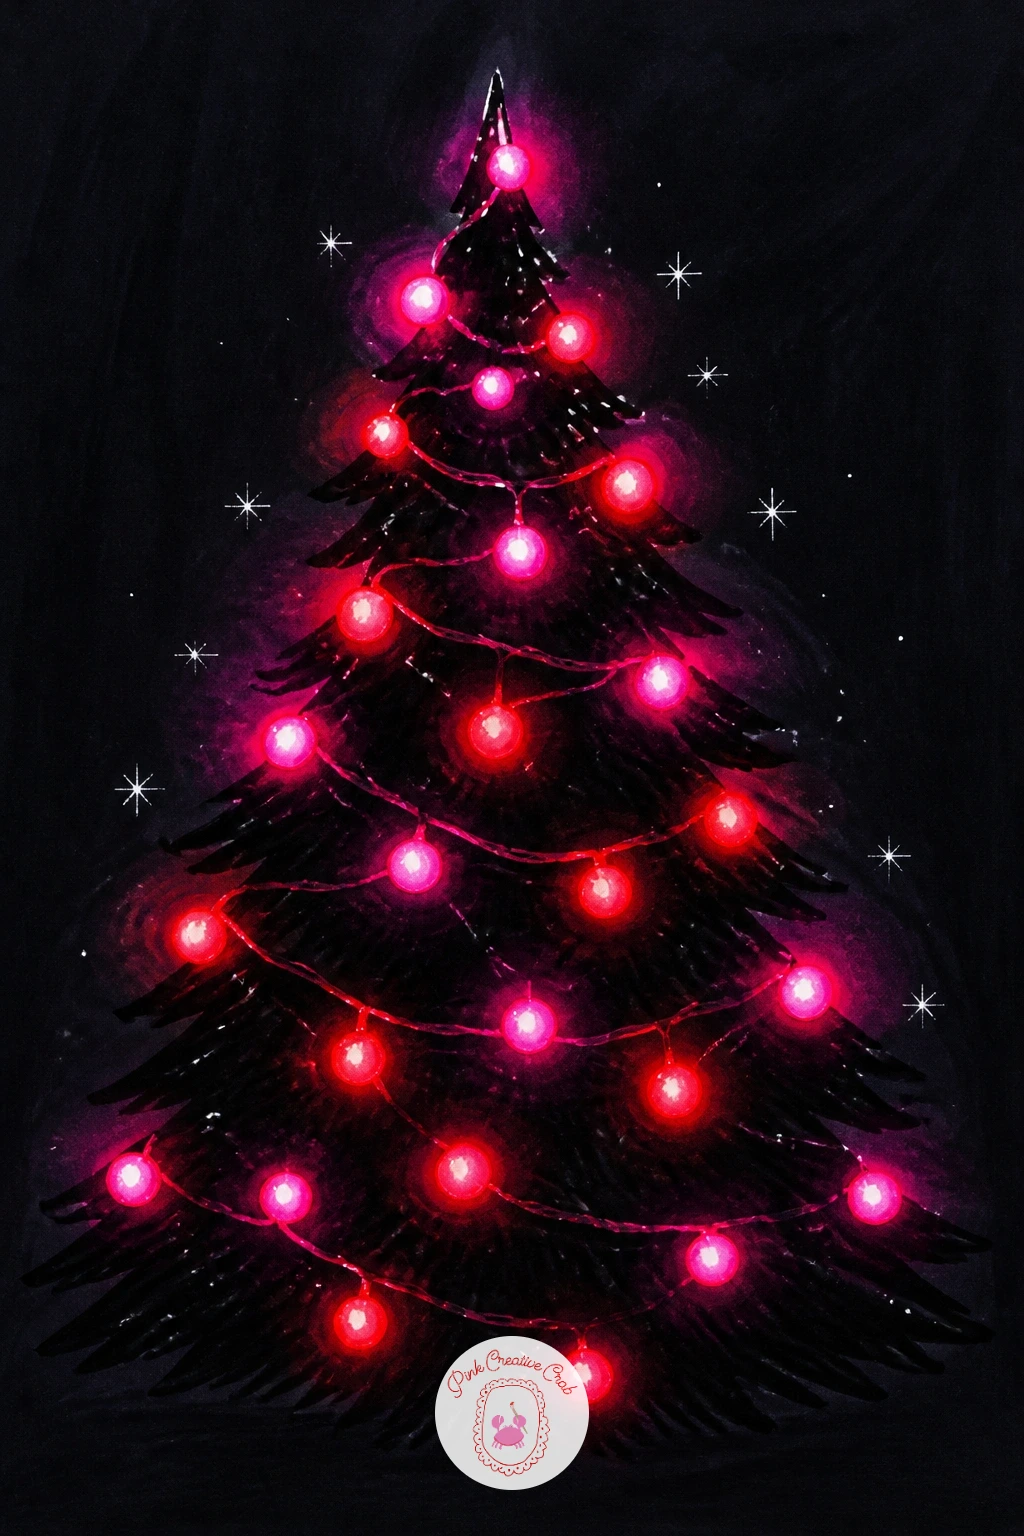
Shift the palette for something bolder: neon pink and red bulbs strung on an otherwise black silhouette tree. Sketch the tree shape first as a simple loose triangle in pure black marker or ink, keeping it flat and graphic rather than textured, since the lights alone will carry all the color and interest.
Dot the bulbs in hot pink and red across the branches in loose clusters rather than even rows, letting the two colors overlap in places for a slightly electric, modern feel distinct from the warm yellow trees elsewhere in this set. A soft outer glow around each bulb in a lighter pink, blended just slightly beyond the bulb itself, sells the neon buzz.
The easy trick for keeping this one quick is outlining the whole tree solid black first and never going back into it, all the visual interest sits in the lights layered on top. No neon pink marker on hand, a bright magenta or fuchsia reads just as electric.
Finish with a few white gel pen sparks scattered loosely through the branches.
You Will Need
- black toned paper
- solid black marker
- neon pink and red markers
- white gel pen
Palette: Jet Black,Neon Pink,Bright Red,Snow White
Try this same bold neon treatment on a bare wreath shape instead of a full tree next time, the same electric colors work just as well on a smaller, simpler form.
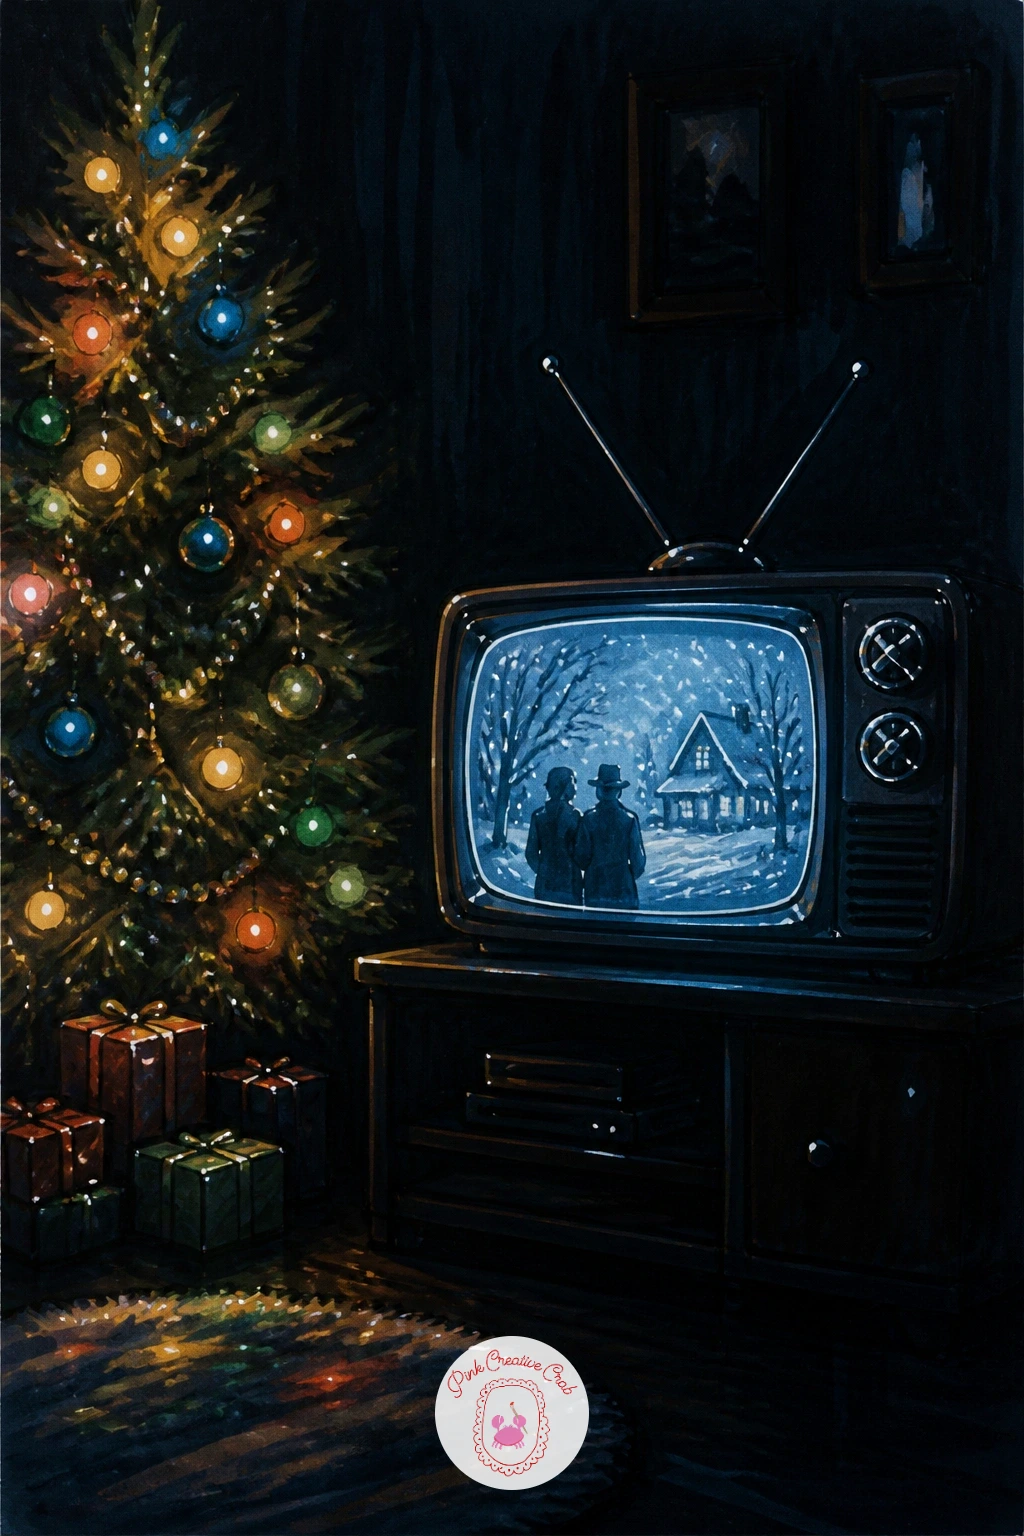
Close the set with a vintage TV playing a holiday film, its screen glowing beside a lit tree in the corner. Sketch the TV’s boxy rounded-corner body first, a classic console shape on short legs, then add the tree glowing softly beside it before building the screen’s light.
Color the television screen in a cool pale blue-white, distinct from every warm yellow light source in this set, since that contrast between the TV’s cool glow and the tree’s warm one is what makes the whole scene feel like a real room at night. A faint suggestion of a scene on the screen, just a few simple shapes in slightly darker blue, is plenty, full detail here would only distract.
The room around both light sources should stay mostly dark, with maybe a rug or armchair suggested in soft outline nearby. If drawing a vintage console TV feels tricky, a simpler boxy shape with a rounded screen and two dial knobs captures the same retro feeling.
Finish with gel pen highlights along the TV’s screen edge and scattered through the tree beside it, closing the whole set on two glowing light sources side by side.
You Will Need
- black toned paper
- pale blue-white marker
- warm yellow marker
- white gel pen
Palette: Pale Screen Blue,Warm Yellow,Spruce Green,Deep Navy
Try adding a small knit blanket draped over a nearby chair arm using a few soft marker strokes, it makes the whole glowing room feel settled in for the night.
What to Do Next
Pick whichever idea pulled at you most while scrolling, maybe the sleeping dog under the tree or that quiet window seat, and start there on a scrap of black toned paper before committing to a full page. Keep the dark background patient and dry, let the glow build in layers, and save every single gel pen dot for last.
Frequently Asked Questions
What paper works best for a christmas lights drawing with markers?
Toned black or deep blue marker paper works best, since it lets the warm bulb colors glow against the dark ground without needing to paint a background first. Choose a pad made for alcohol markers so the ink does not bleed through or buckle the page.
How do you make Christmas lights look like they are actually glowing?
Build each bulb in layers rather than one flat dot: a soft wider halo in a lighter shade first, then a smaller brighter center, finished with a single white gel pen highlight. Leaving plenty of dark paper untouched around each bulb is what makes the glow read as light rather than just a colored circle.
Can these christmas lights drawing ideas be done without alcohol markers?
Yes, soft pastels or colored pencils on black paper create a similar glow, and gouache mixed thickly also works well over a dark painted background. The main thing to keep is the dark ground and a white highlight tool for the final sparkle, whatever medium carries the color.
How long does one of these scenes usually take to finish?
Most of these ideas finish in twenty to forty minutes once the background is dry, since the scenes stay simple and the glow effect does not require heavy detail. Smaller subjects like the jar of lights or the bicycle can be done in under fifteen minutes.
What is the most common mistake when drawing glowing lights at night?
Overcrowding the page with too many evenly spaced bulbs is the most common mistake, which flattens the glow instead of making it feel atmospheric. Uneven spacing, a darker background left generously visible, and restraint with the white gel pen all keep the scene feeling like real nighttime light.
Have any thoughts?
Share your reaction or leave a quick response — we’d love to hear what you think!
-
 0
-
0
-
0
-
0
-
0
-
0


