

Christmas card doodles are the fastest way to turn a plain folded card into something someone actually wants to keep. A black fineliner gets the whole character down in a minute or two, then a red or green marker lands exactly where it matters: a hat, a berry, a scarf, a bow. No big painting setup, no drying time to wait around for, just a pen and a small square of paper.
Below you will find 31 of them, from a quick snowflake you could draw while the kettle boils to a fuller sleigh scene for when you have a bit more time. Work through them in order on scrap paper first, then pick your favorites for the actual cards and tags going out this year.
Using these images: free for personal projects such as printing, coloring, cards, journals and gifts. Handmade items that include them may be sold up to 30 pieces per design. More than that is commercial use and is not permitted, and neither is selling or sharing the images themselves or passing them off as your own. Please ask before any other use.
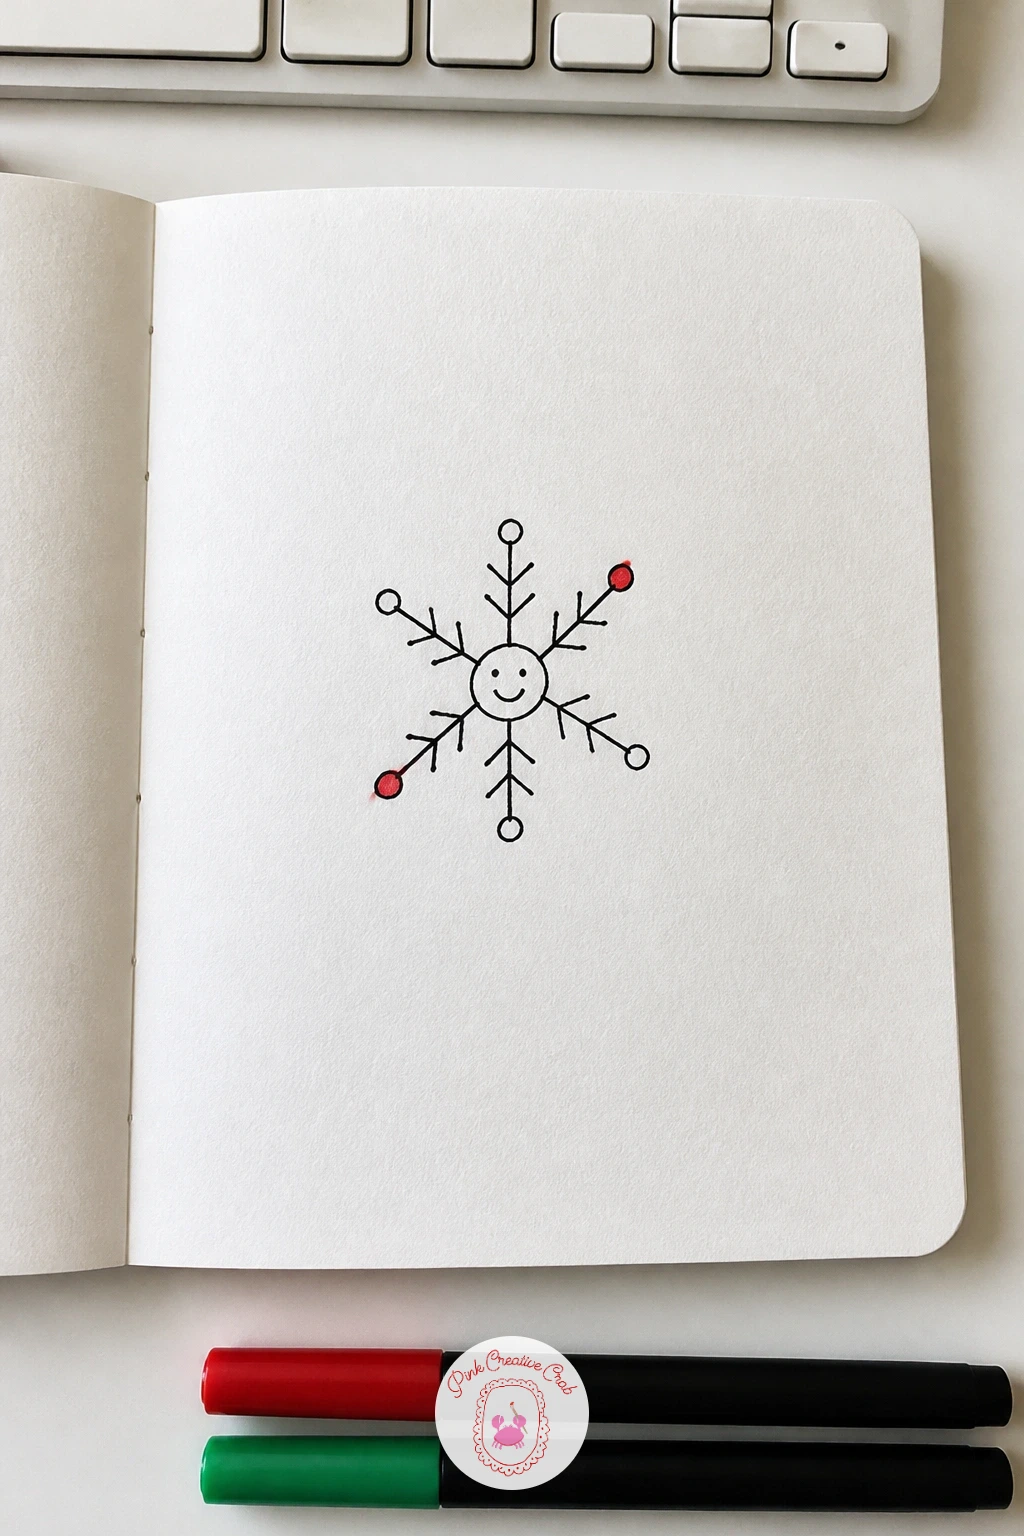
Start with the simplest doodle on the whole list: a snowflake with a smiley. Draw one short vertical line in fineliner, then cross it with a horizontal line through the middle, then add a third line on the diagonal, so you end up with six arms like a clock face.
Add two tiny dots and a small curved smile right in the center, where the lines cross, so the snowflake looks like it is enjoying itself. Keep every arm the same length by eyeballing the clock-face cross as your guide, since uneven arms are the one thing that throws this off.
Once the ink is dry, touch a little red marker to the very tips of two or three arms, like tiny baubles caught in the snow. If your fineliner slips, a kneaded eraser lifts pencil guidelines cleanly before you commit to ink.
Try today: draw three of these at different sizes scattered loosely across a gift tag, rather than one centered snowflake.
You Will Need
- black fineliner
- pencil for light guidelines
- red marker
- small gift tag or card
Palette: Carbon Black,Cherry Red
Try a white gel pen over the dried ink to add a few extra tiny sparkle lines around the snowflake for a bit more sparkle without more drawing.
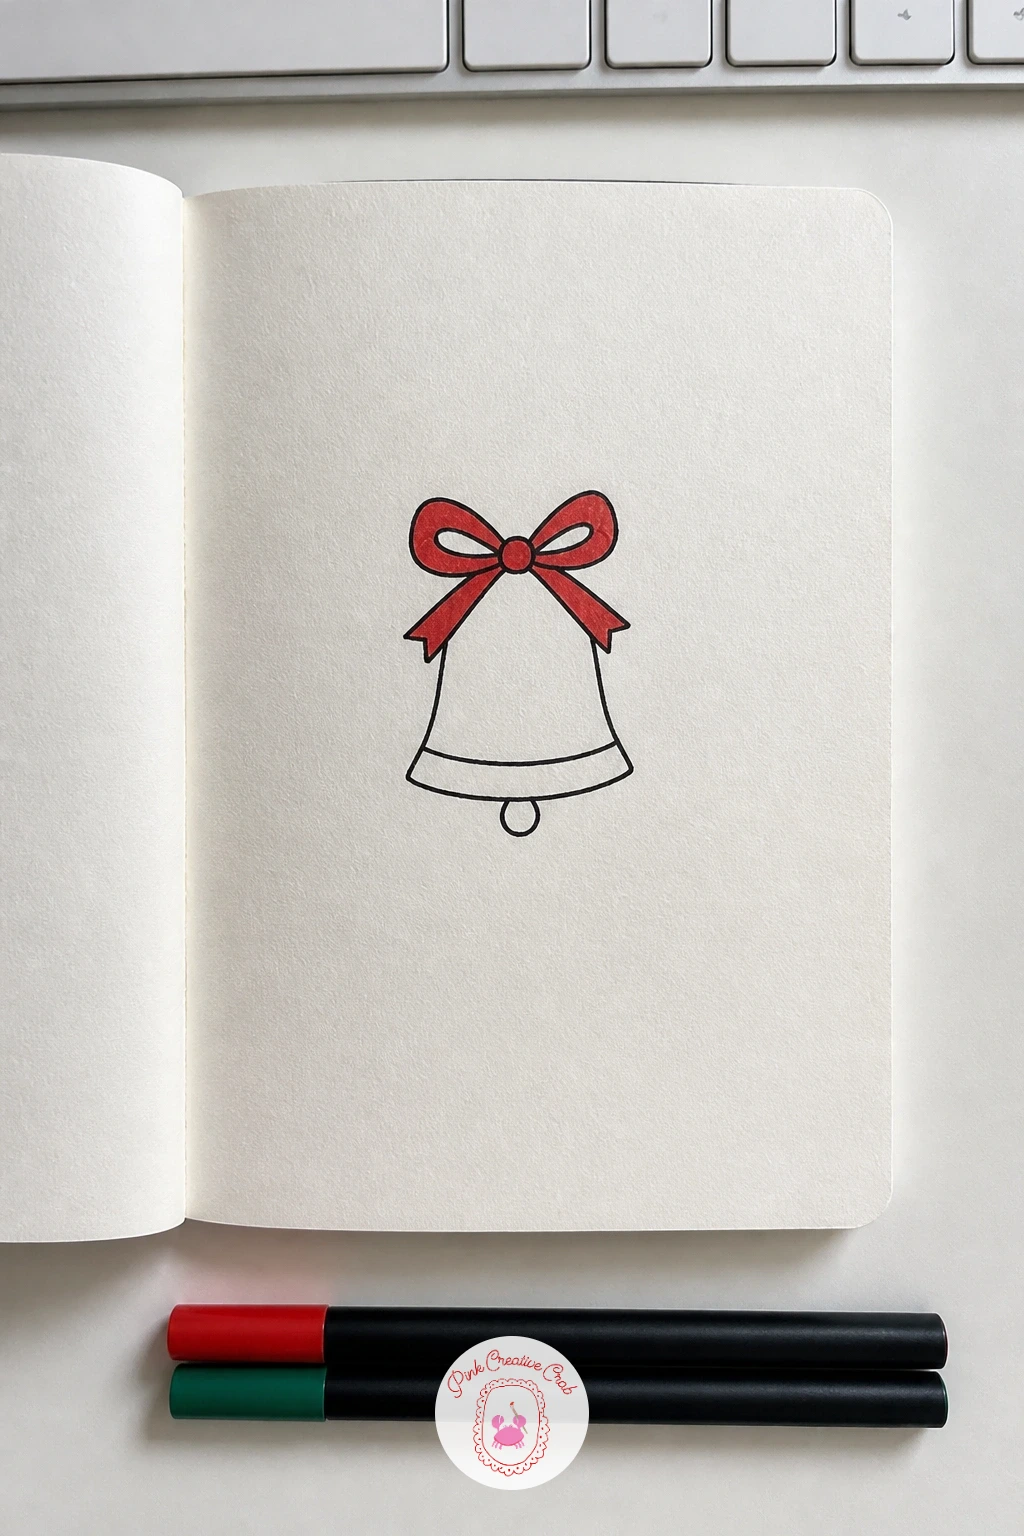
Move from the snowflake to a bell with a ribbon, another doodle that only needs a handful of lines. Draw a rounded dome shape in fineliner, wider at the bottom than the top, then add a small circle hanging just below it for the clapper.
The trick that keeps a bell looking like a bell rather than a blob is a short straight line down the center, dividing the dome in half, since that single line reads as metal instantly. Add a little loop at the top for the hanger before moving on to the ribbon.
Draw the ribbon as two loose triangle shapes meeting at a knot above the loop, then color the bell itself gold if you have a yellow or gold marker, or leave it black and white and just color the ribbon red. Green works just as well for the ribbon if you want to balance red elsewhere on the card.
Try today: draw two bells side by side, slightly overlapping, joined by one shared ribbon.
You Will Need
- black fineliner
- red or gold marker
- green marker (optional)
- pencil
Palette: Carbon Black,Golden Yellow,Cherry Red
Add three short curved lines beside the bell to suggest it mid-ring, a quick trick that gives a still drawing a sense of sound and movement.
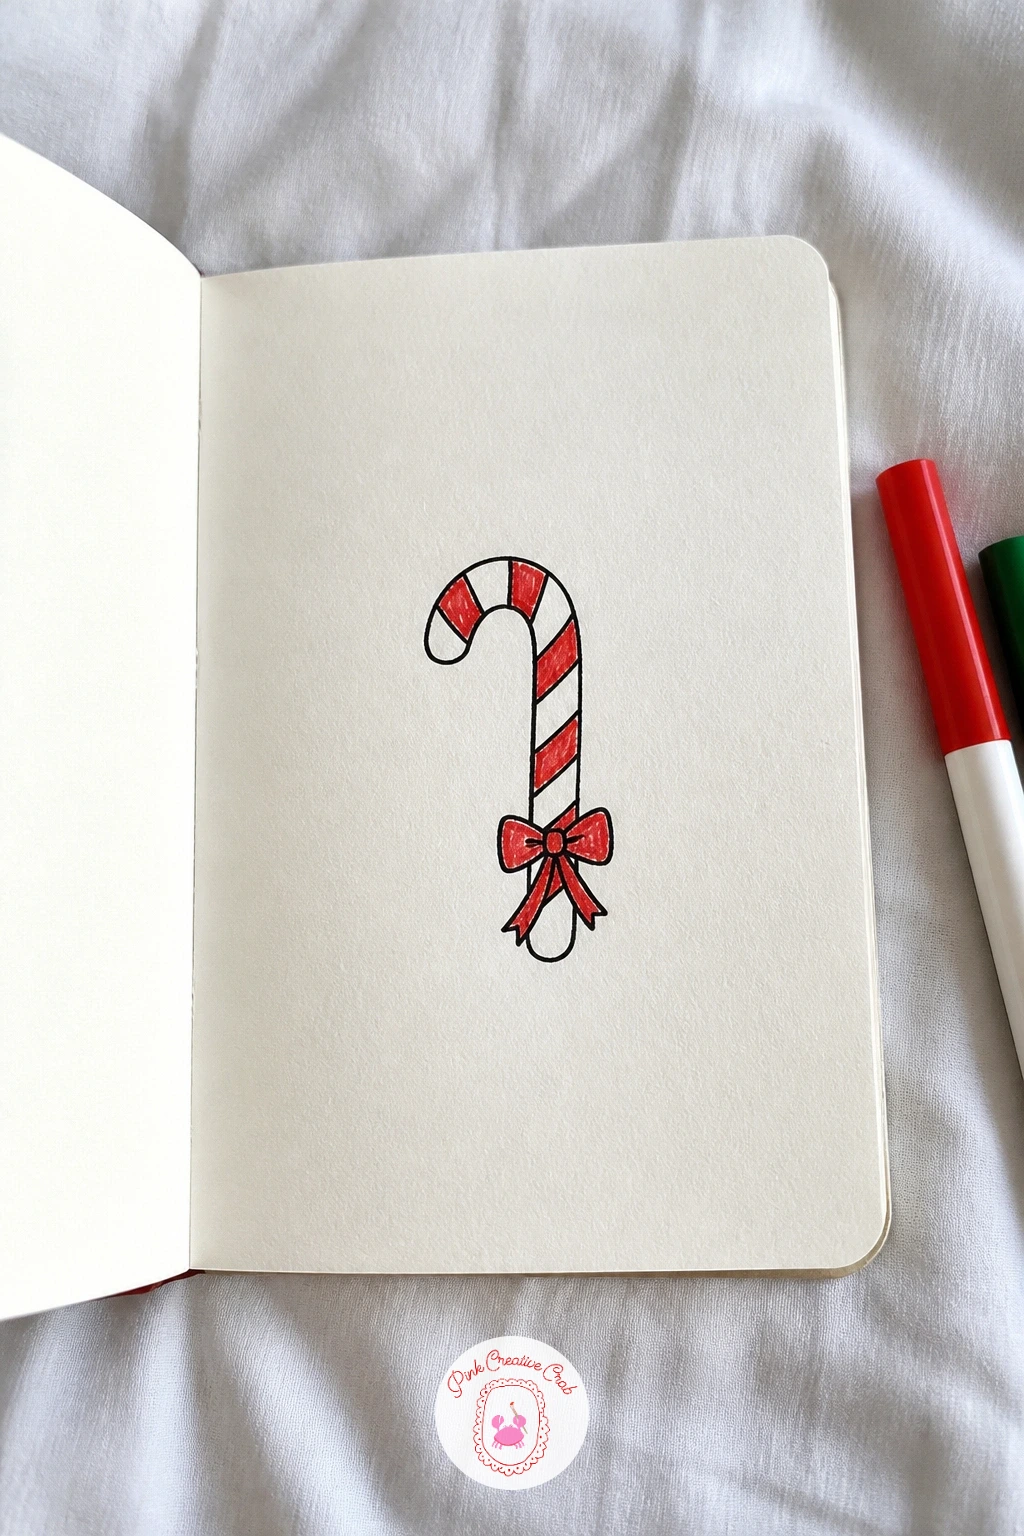
Build on that same ribbon shape with a candy cane with a bow, since the bow you just practiced slots right onto a new object. Draw the candy cane as two parallel curved lines forming a long hook shape, rounding the top like a shepherd’s crook and keeping the bottom straight.
Add diagonal stripe lines across the cane at a steady, even angle, leaving gaps between them rather than drawing them touching, which keeps it readable at a small size. This is the one place proportion really matters here: keep the hook no more than a third of the total length, or the candy cane reads as a walking stick instead.
Color every other stripe red with your marker, then add a small bow in red or green at the base of the hook where it meets the straight part. If your lines wobble on the curve, draw the hook lightly in pencil first and only ink once the curve feels right.
Try today: tilt the whole candy cane diagonally across the card rather than drawing it perfectly upright.
You Will Need
- black fineliner
- pencil
- red marker
- green marker
Palette: Cherry Red,Carbon Black,Pine Green
Curve the whole cane slightly, rather than drawing it ramrod straight, so it has a gentle lean that feels hand drawn instead of ruler-made.
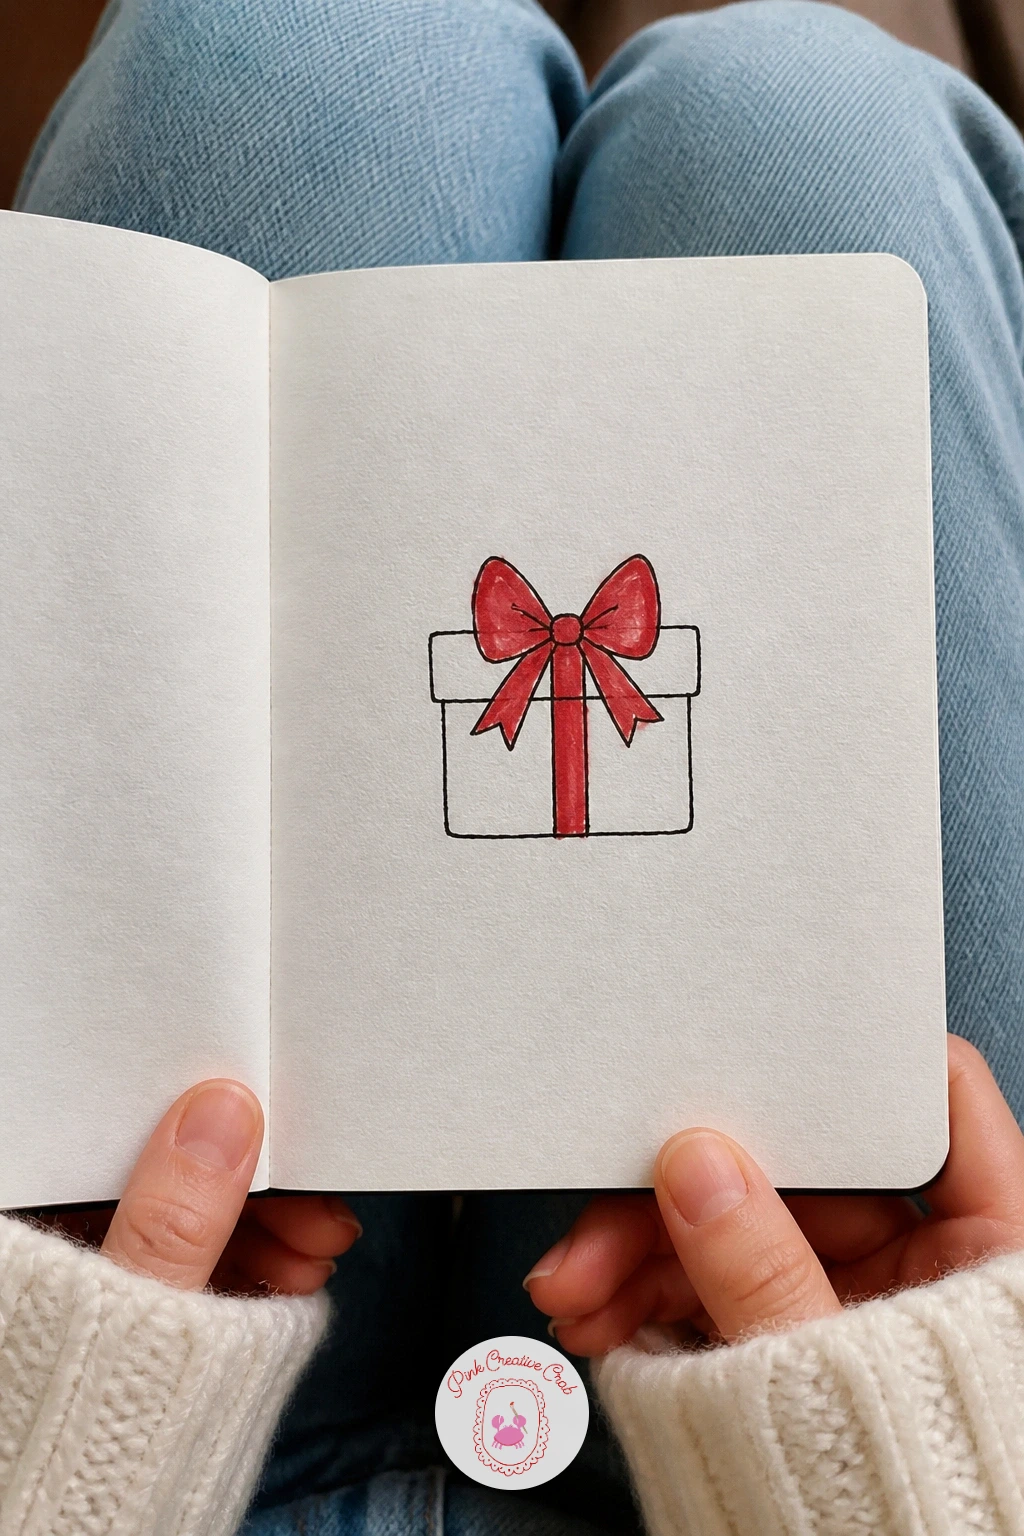
Keep the bow going with a gift with a big bow, a doodle built from nothing but boxes and loops. Draw a simple square or rectangle in fineliner for the box, then add a ribbon line straight across the middle both vertically and horizontally, wrapping it like a real present.
Where this one tends to go wrong is the bow itself looking flat, so draw two loops that overlap slightly at the center rather than sitting side by side, with two trailing ribbon tails hanging below. A small knot shape where the loops meet holds the whole bow together visually.
Color the ribbon red and leave the box itself plain, or swap it around with a green ribbon on a red-striped box if you want more color on the card. Either way keeps the eye focused on the bow as the star of the doodle.
Try today: draw three gifts stacked in a loose pyramid, each with a different color ribbon, for a fuller corner doodle.
You Will Need
- black fineliner
- ruler (optional)
- red marker
- green marker
Palette: Cherry Red,Pine Green,Carbon Black
Skip the ruler and draw the box freehand with slightly uneven lines, which reads as a wrapped parcel far more naturally than perfectly straight edges.
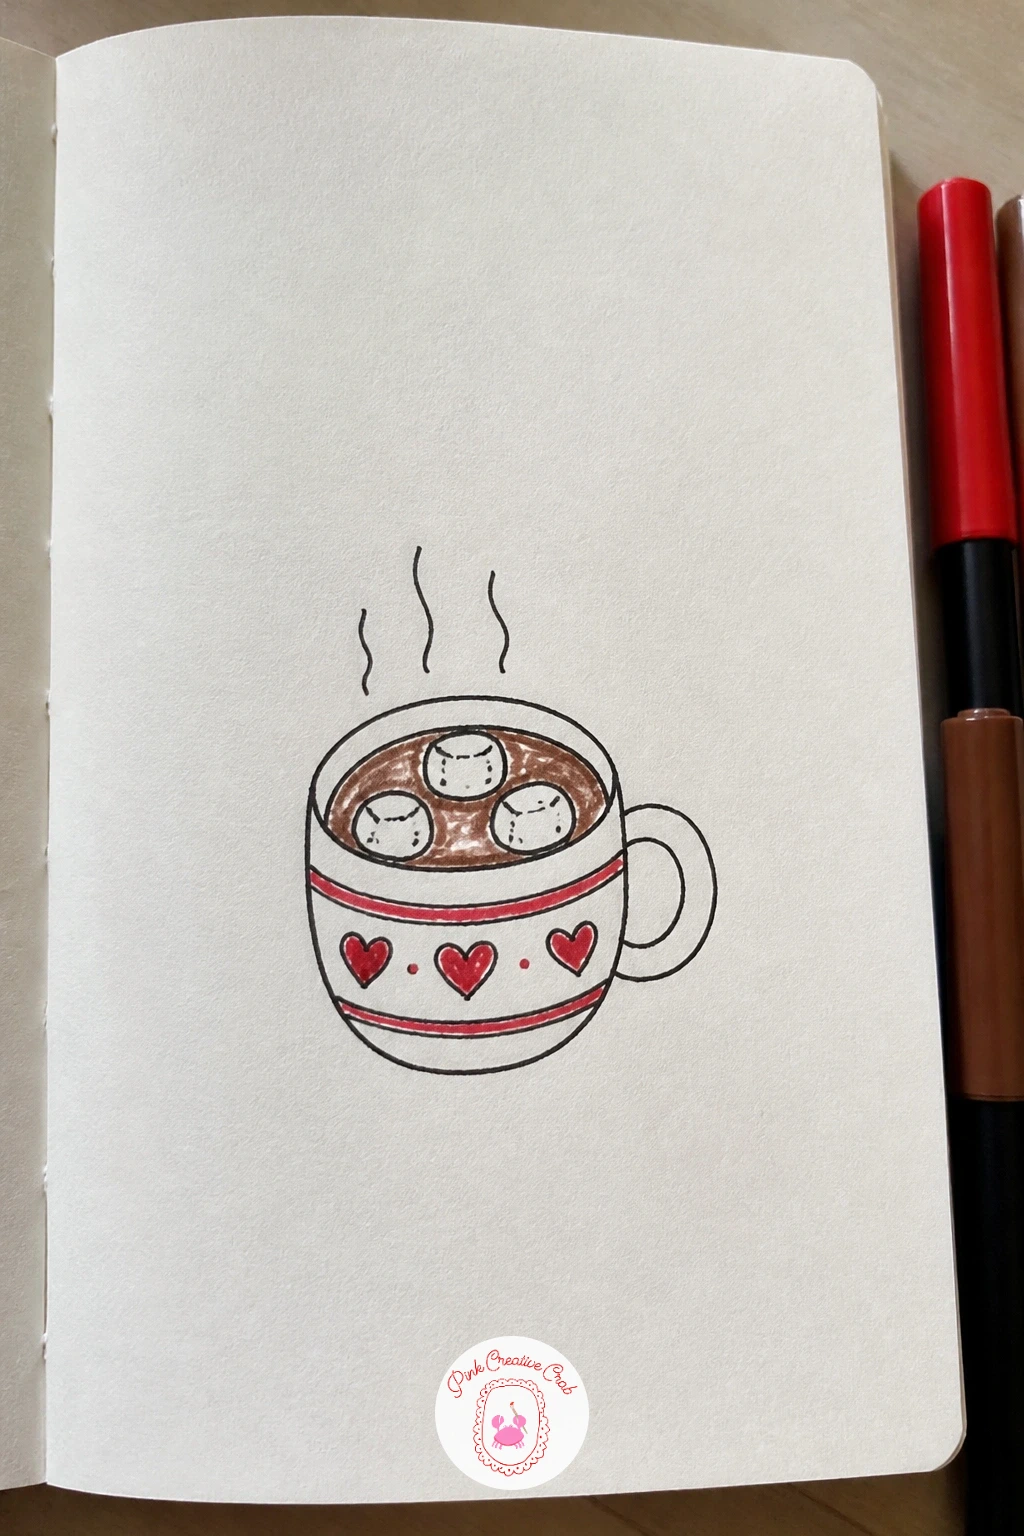
Warm things up with a mug of cocoa with marshmallows, a cozy little object doodle that works well on a card interior. Draw a simple rounded mug shape with a curved handle on one side, then add a wavy line across the top for the cocoa’s surface, sitting a little below the rim.
Float three or four small circles just above that wavy line for the marshmallows, leaving a sliver of white space between each one so they do not blur into a single blob. A few short curved lines rising from the mug suggest steam and make the drink feel hot rather than cold.
Color the cocoa itself a warm brown if you have that marker, or leave it as a plain wavy outline and just add color to a candy cane or holly sprig resting against the mug. If the handle looks stiff, round both its inner and outer edges rather than drawing straight lines.
Try today: tuck a tiny candy cane doodle into the mug, hooked over the rim, to connect two ideas on the same card.
You Will Need
- black fineliner
- brown marker (optional)
- red marker
- pencil
Palette: Warm Brown,Cherry Red,Carbon Black
Add a small holly sprig of two leaves and a red berry leaning against the mug’s base for a tidy finishing detail that ties the colors together.
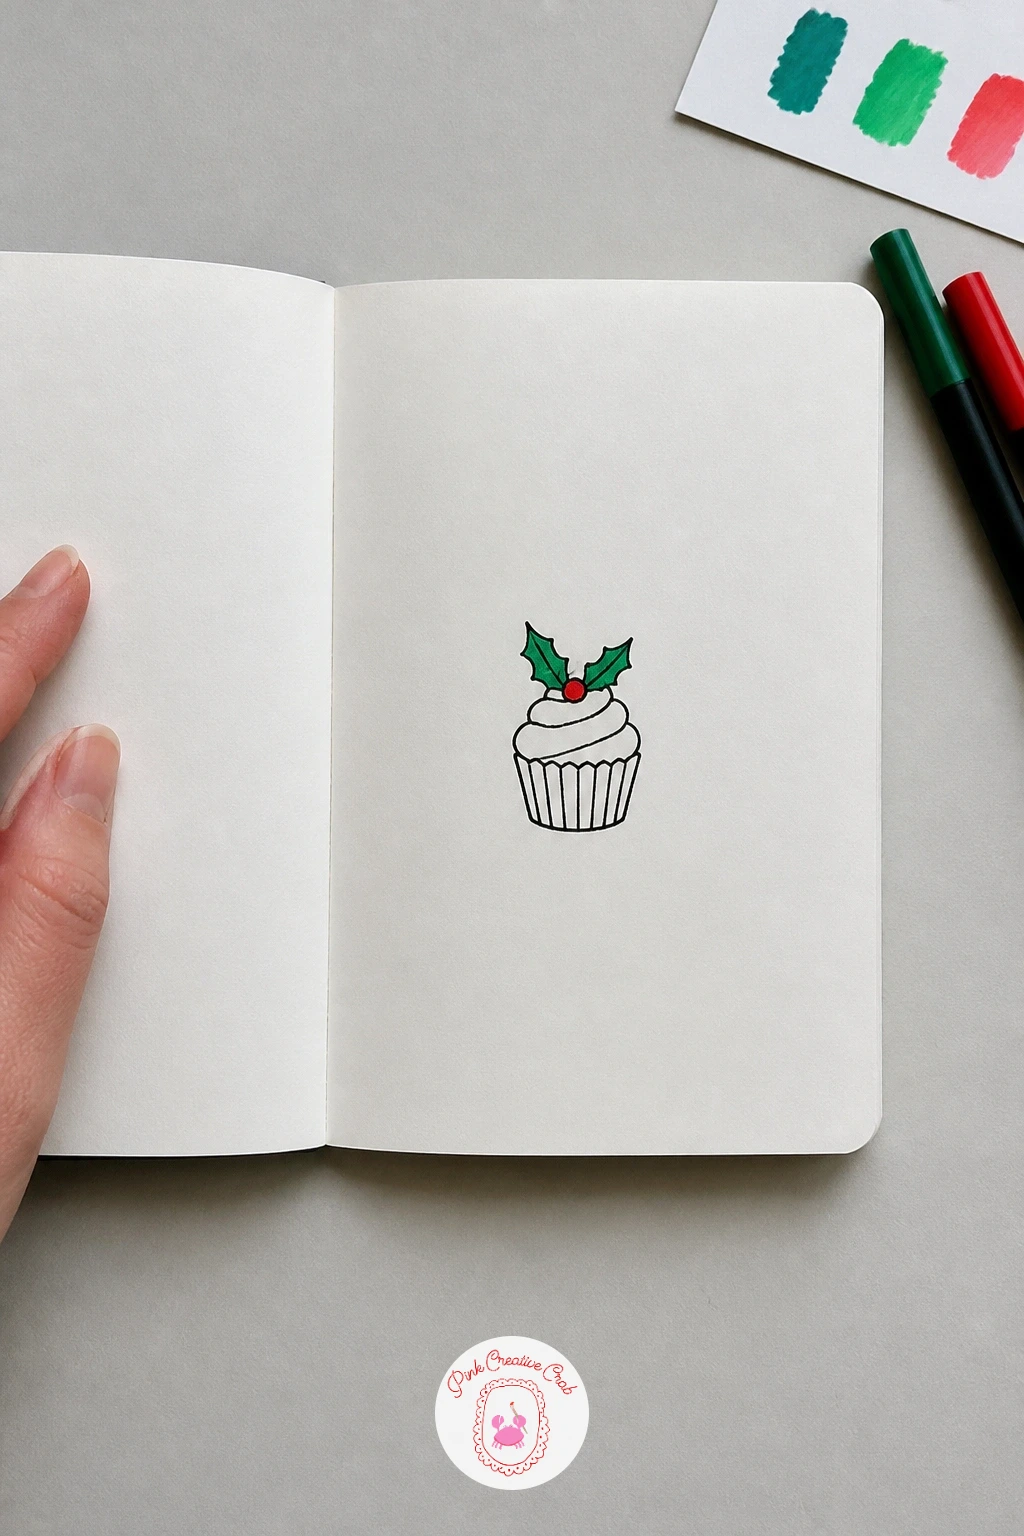
Carry that cozy food mood into a cupcake with holly, another simple object built from stacked shapes. Draw the wrapper first as a trapezoid with a few vertical pleats, then add a swirl of frosting on top using one continuous looping line rather than lifting your pen partway.
Keep the frosting swirl roughly as tall as the wrapper beneath it, which is the proportion that keeps a cupcake looking balanced rather than top-heavy or squashed. Top the swirl with two small pointed holly leaves and one round berry between them.
Color the berry red and the leaves green, then leave the frosting and wrapper as plain black outline, which lets the holly pop as the one bright detail. If the frosting swirl comes out lumpy, a single smooth stroke usually beats several short shaky ones, so practice the swirl a few times on scrap first.
Try today: add tiny dot sprinkles across the frosting for texture before you color the holly.
You Will Need
- black fineliner
- red marker
- green marker
- pencil for the swirl
Palette: Cherry Red,Pine Green,Carbon Black
Draw the frosting swirl lightly in pencil two or three times until the loop feels smooth, then trace only your favorite attempt in fineliner.
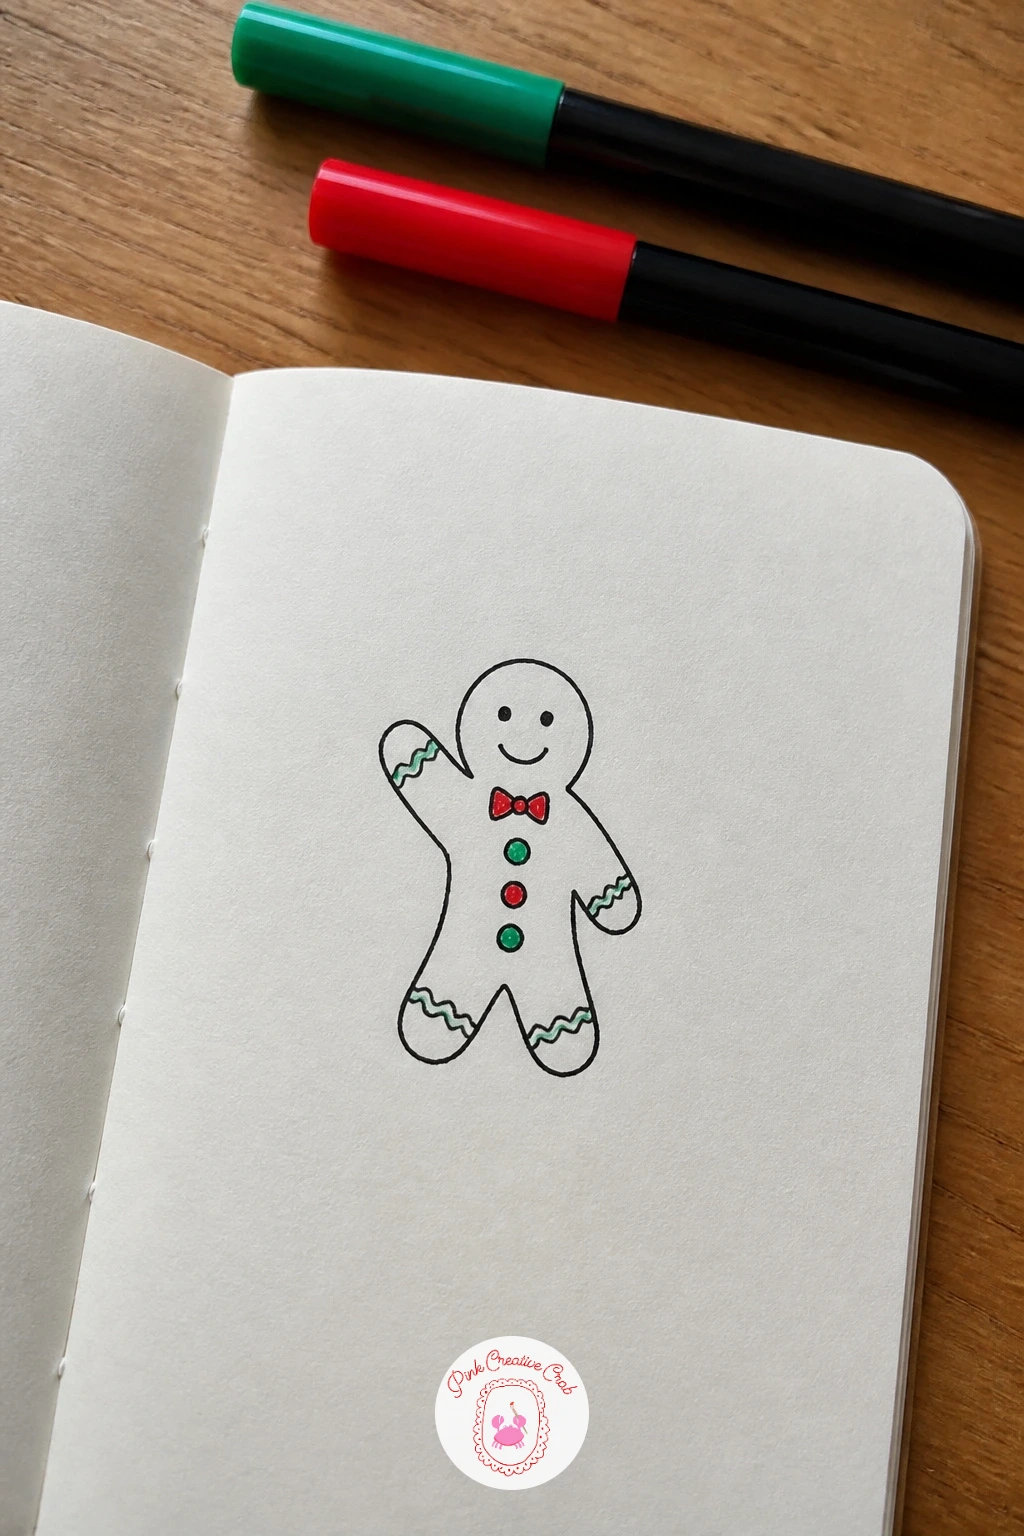
Move into characters with a gingerbread man waving, a shape most hands already know from childhood. Draw the body as one continuous rounded outline, the classic gingerbread silhouette, keeping the arms and legs short and stubby rather than long and thin.
Here is where eye level and gesture matter: tilt one arm up at the elbow in a wave rather than drawing both arms hanging straight down, which instantly gives the figure a sense of greeting the reader. A simple round-eyed, smiling face faces straight out toward the viewer to sell that friendly wave.
Add small dot buttons down the front and short icing lines at the wrists and ankles, then color just those icing details white (leave the paper blank) with a thin red line along the icing edge for contrast. If your first outline comes out lopsided, redraw just the wonky side rather than starting the whole shape over.
Try today: give the gingerbread man a tiny scarf in green marker for one extra spot of color.
You Will Need
- black fineliner
- red marker
- green marker
- pencil
Palette: Warm Brown,Cherry Red,Pine Green
Look at a real gingerbread cookie or a photo of one before you draw, noticing how the arms and legs flare slightly at the ends rather than staying the same width.
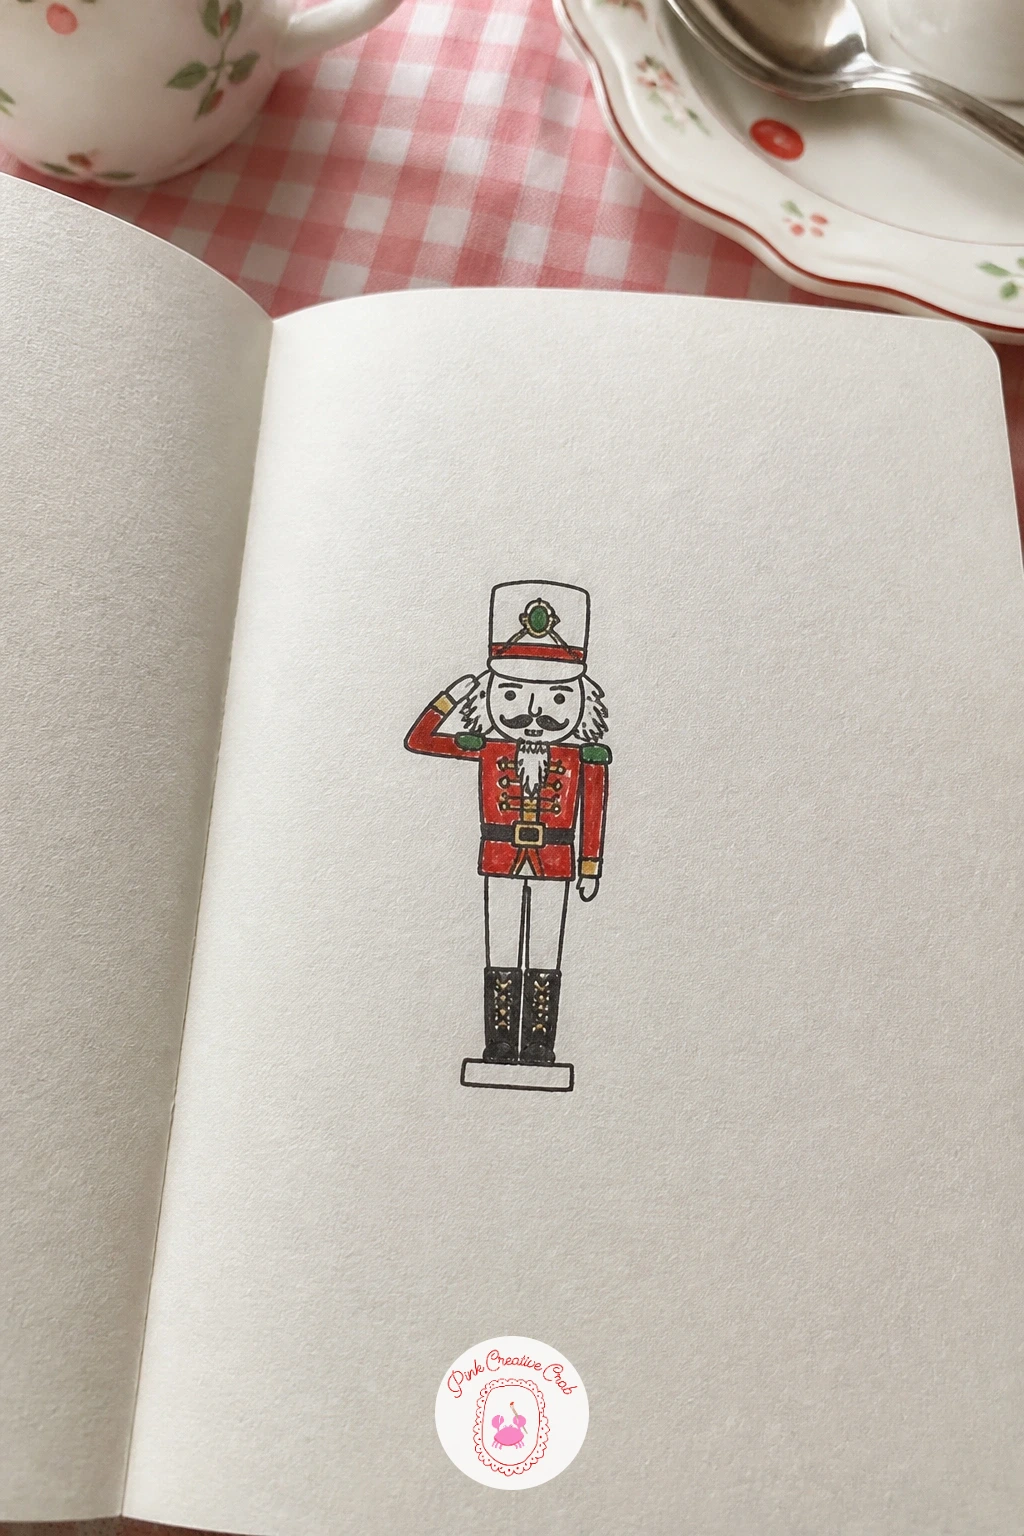
Keep the character energy going with a nutcracker saluting, a slightly more structured figure than the gingerbread man. Draw a tall rectangle for the body first, then add a round head on top wearing a tall hat shape, since getting these proportions right (head about a quarter of the total height) keeps the nutcracker from looking squashed.
Give him a stiff, straight-armed salute at the brow, which is simpler to draw than a relaxed arm and instantly reads as a nutcracker pose. A row of small buttons down the front and thick black eyebrows and mustache lines finish the classic look.
Color his hat and jacket trim red, with gold or yellow buttons if you have that marker, keeping the rest of the uniform as black and white outline. If the arm looks awkward, draw it as two simple rectangles meeting at a right angle at the elbow rather than trying to curve it.
Try today: add a short black baton under his other arm for extra character detail.
You Will Need
- black fineliner
- red marker
- gold or yellow marker
- pencil
Palette: Cherry Red,Carbon Black,Golden Yellow
Draw the hat extra tall and slightly narrow at the top, since an oversized hat is what makes a nutcracker instantly recognizable even at a small size.
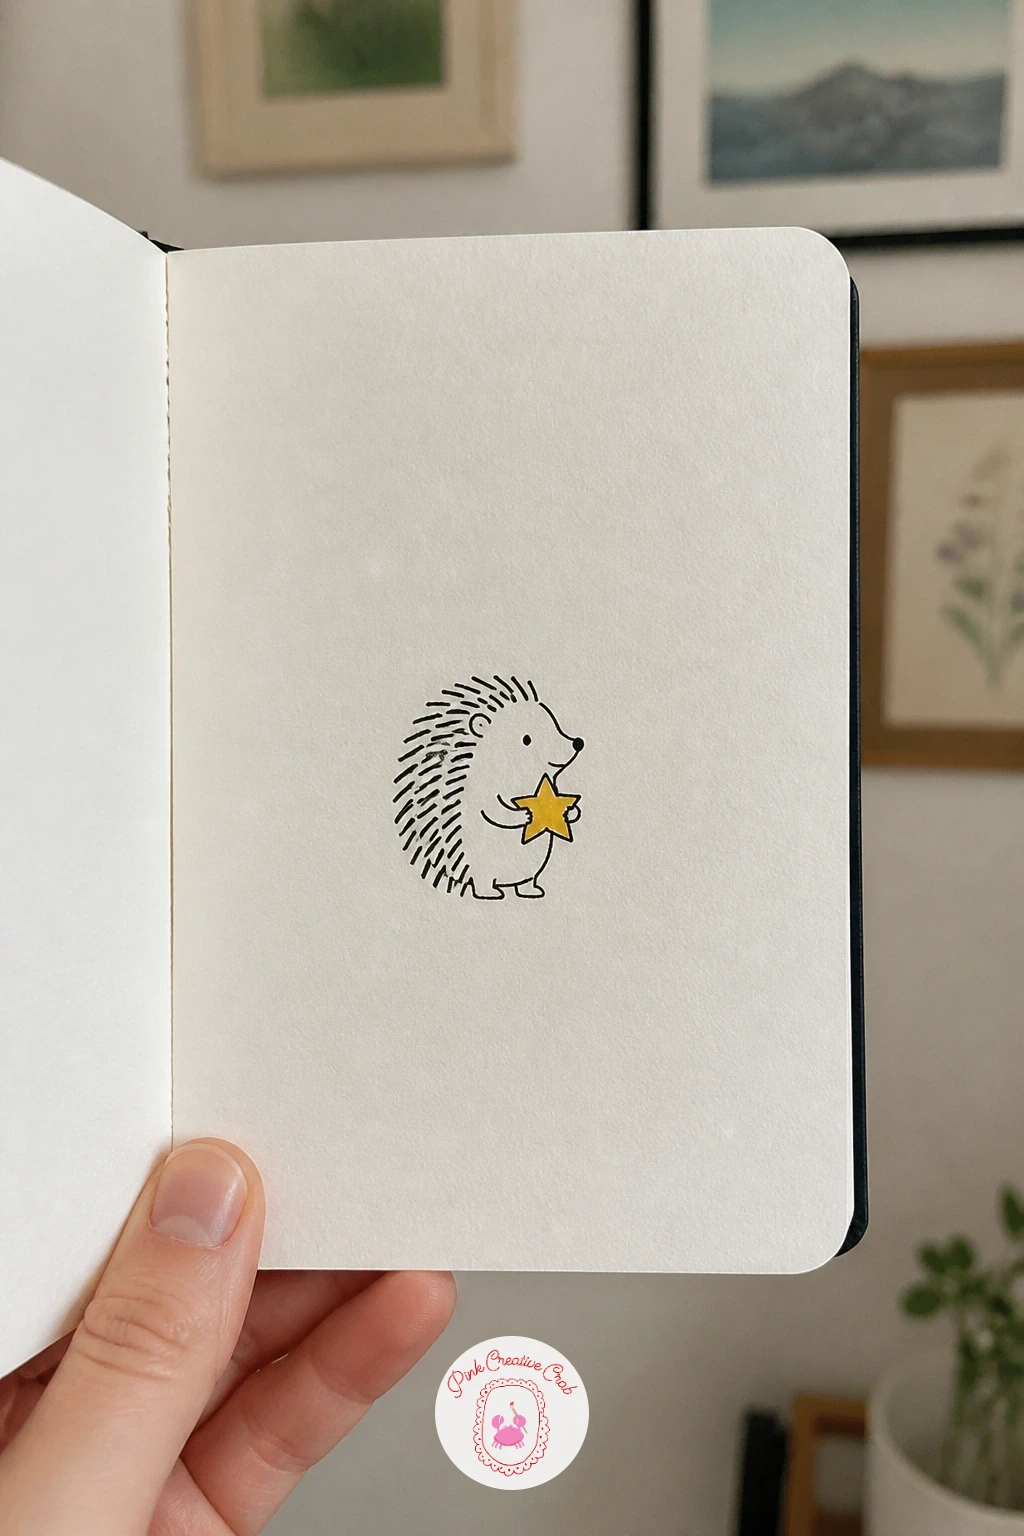
Shift into animals with a hedgehog holding a star, a shape built almost entirely from texture. Draw a simple rounded teardrop body first, then fill the back half with short, quick V-shaped lines pointing outward for spines, working from the head end back toward the tail.
This is the one doodle where edges matter most: keep the spine lines loose and a little uneven in length rather than perfectly even, since real hedgehog quills never line up neatly and uneven marks actually look more convincing. A small pointed snout and two tiny feet peek out from the smooth front half.
Give the hedgehog a small five-pointed star to hold between its front paws, coloring the star yellow or gold while the hedgehog itself stays black and white. If the spine texture gets too dense and muddy, stop adding lines sooner than feels natural, since a few confident marks read better than a scribble.
Try today: scatter two or three tiny stars loose around the hedgehog, as if it just caught one falling.
You Will Need
- black fineliner
- gold or yellow marker
- pencil
Palette: Carbon Black,Golden Yellow,Warm Brown
Try overlapping two layers of short lines at slightly different angles on the spiniest part of the back, which adds depth without needing any shading.
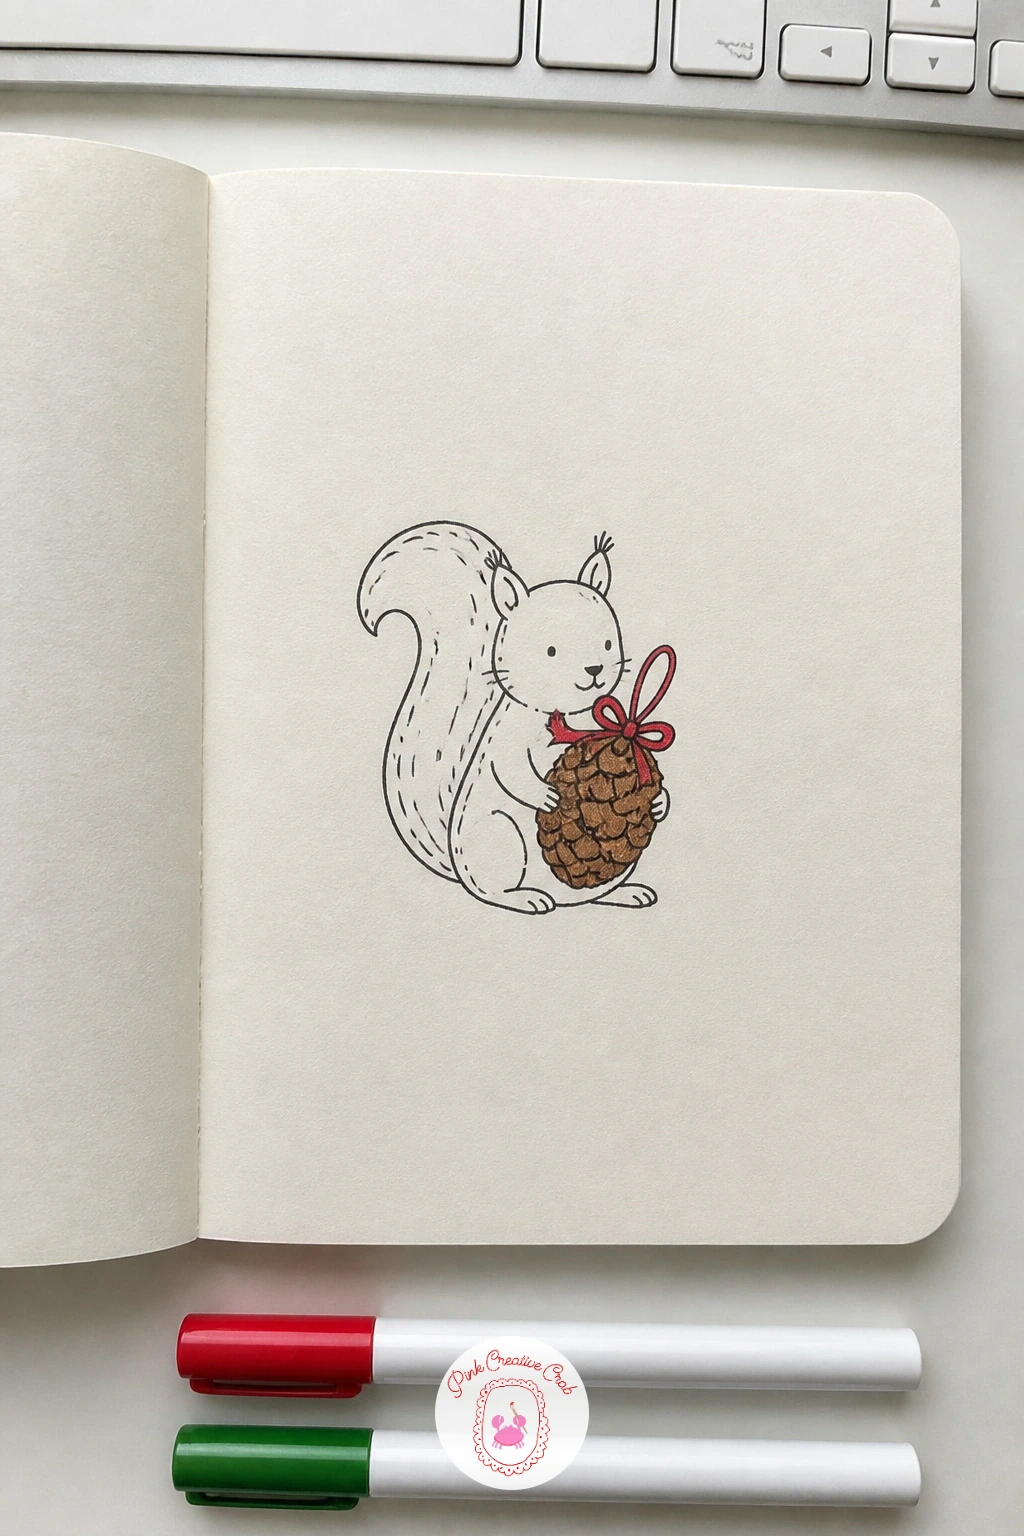
Stay with woodland animals for a squirrel with a pine cone ornament, a doodle that pairs a soft body with one spiky prop. Draw the squirrel’s body as a rounded curve sitting upright, then add the tail as one big sweeping C-shape behind it, since the tail is usually drawn about the same size as the whole body, which is what makes a squirrel read instantly.
Give it two small front paws held together at the chest, cradling a pine cone drawn as an oval covered in small overlapping scale marks, like tiny roof tiles stacked in rows. A thin loop of ribbon at the top of the pine cone turns it into a hanging ornament rather than a found object.
Color the ribbon red and leave the pine cone and squirrel both in warm brown or plain black and white. If the tail curve looks stiff, draw it in one quick unbroken stroke rather than several short joined lines, redoing it on scrap until it swings naturally.
Try today: add one small fallen leaf doodle beside the squirrel’s feet for extra seasonal detail.
You Will Need
- black fineliner
- brown marker
- red marker
- pencil
Palette: Warm Brown,Cherry Red,Carbon Black
Look at a real pine cone or photo for the scale pattern, noticing how the rows spiral rather than stack in straight lines, which is an easy detail to miss.
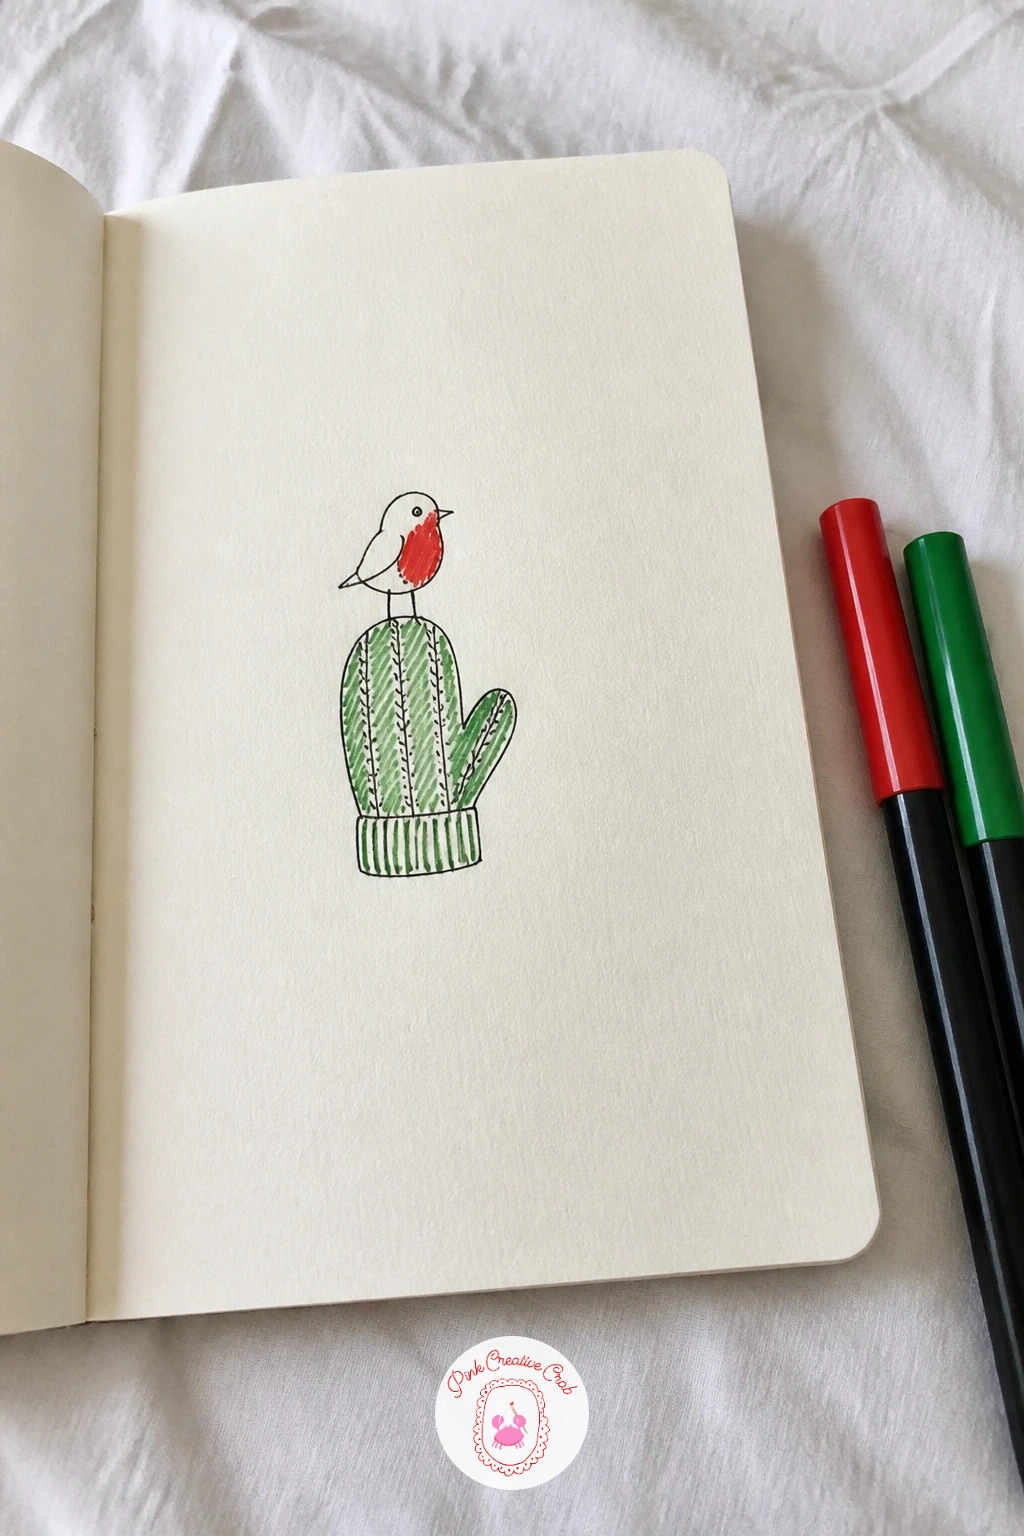
Pair a bird with an object for a robin on a mitten, one of the gentlest compositions on this list. Draw the mitten first as a simple rounded thumb shape attached to a wider palm shape, then add a ribbed cuff at the wrist with a few short vertical lines.
Perch the robin on top of the mitten by drawing an oval body with the head tucked slightly forward and down, a classic resting bird pose, with the legs hidden entirely behind the mitten’s curve so you never have to draw tiny bird feet at all. A small triangular beak and one dot eye finish the face.
Color the robin’s chest red and the mitten itself green, keeping the ribbed cuff as plain black and white outline for contrast. If the bird’s body looks too round and ball-like, flatten the top slightly where the wing folds over the back.
Find more small bird and wreath pairings in this roundup of cute Christmas doodles if this one is a favorite.
You Will Need
- black fineliner
- red marker
- green marker
- pencil
Palette: Cherry Red,Pine Green,Carbon Black
Add two or three short fluffy lines at the robin’s throat to suggest feathers catching the cold, a quick touch that makes the bird feel fluffed up and warm.
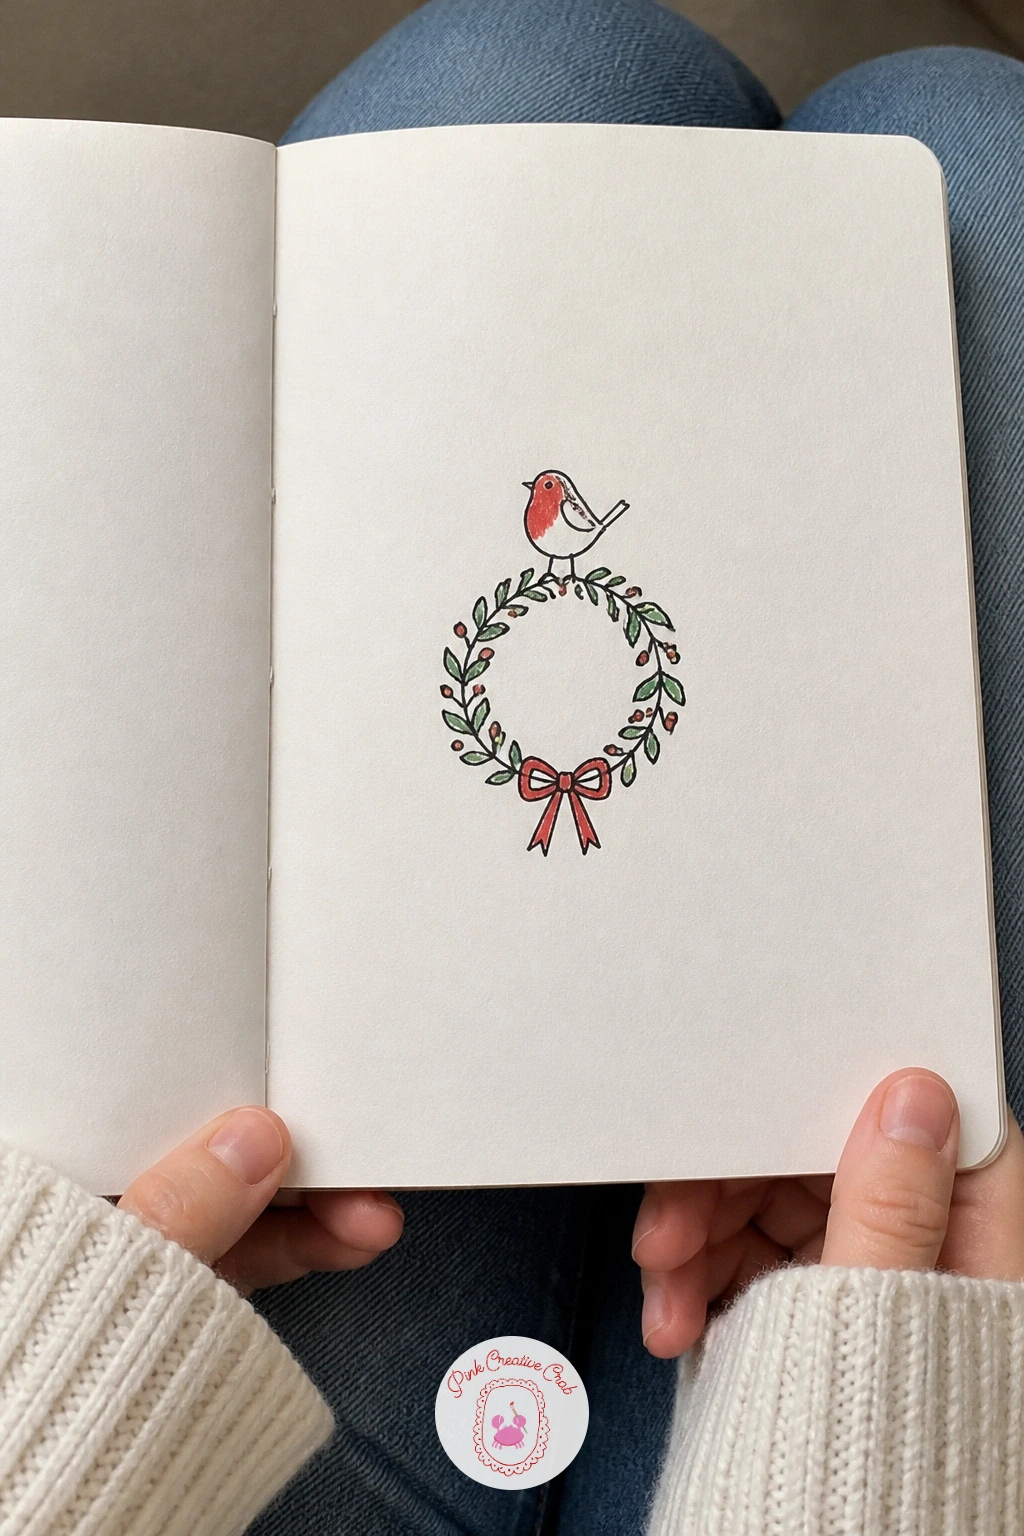
Build on that same perched bird pose for a bird sitting on a wreath, a doodle that gives you a full circular frame to work with. Draw the wreath as a ring of small overlapping leaf shapes, working your way all the way around a lightly penciled circle guide so the spacing stays even.
Where eye level matters here is the bird’s perch: sit it right at the top of the ring, feet gripping the leaves, rather than floating above it, which keeps the whole composition grounded and believable. Keep the bird itself simple, the same oval body and tucked head used elsewhere on this list.
Color three or four small berries scattered around the wreath in red, with a bow at the bottom also in red, while the leaves stay green and the bird’s chest gets its own small patch of red. If the circle guide shows through, erase it gently with a kneaded eraser once the leaves are fully inked.
Try today: leave one small gap in the wreath where the bow sits, rather than a perfectly unbroken ring, for a more natural look.
You Will Need
- black fineliner
- pencil and kneaded eraser
- red marker
- green marker
Palette: Pine Green,Cherry Red,Carbon Black
Vary the size of the leaf shapes slightly around the ring rather than making them all identical, which keeps the wreath looking hand drawn rather than stamped.
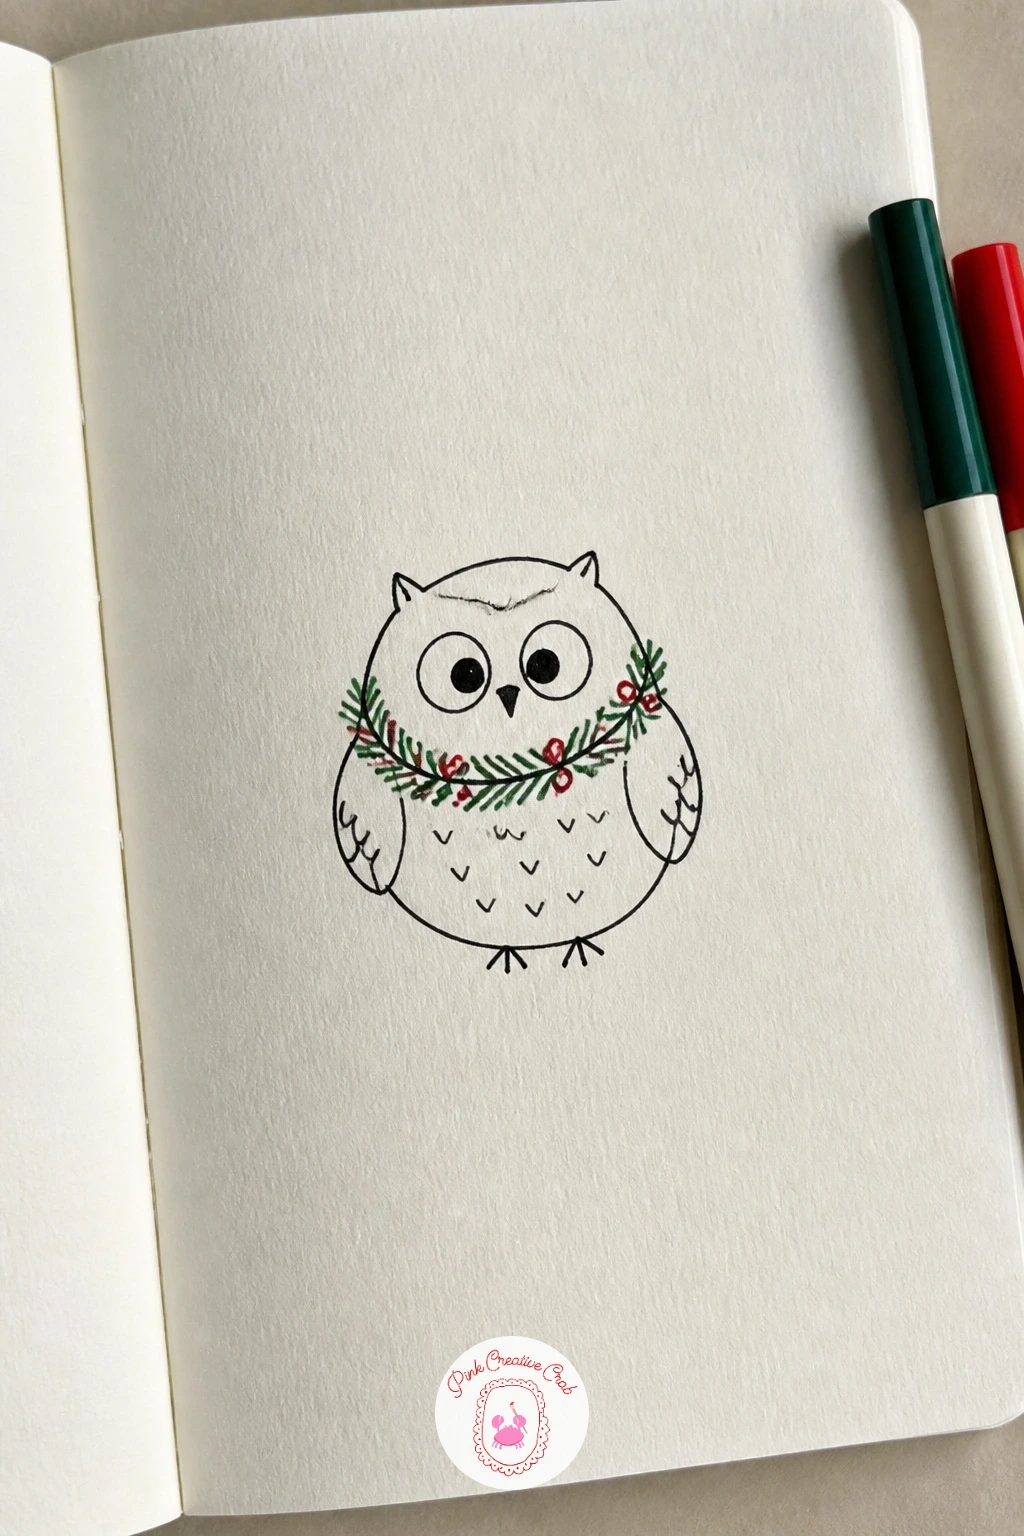
Give that wreath shape a second job in an owl with a wreath, this time worn rather than sat on. Draw the owl’s body as one tall rounded oval, then add two large circles for eyes near the top, each with a smaller black dot pupil inside, which is what makes an owl face read instantly even in a simple doodle.
Fit the wreath around the owl’s neck like a collar, using the same overlapping leaf-ring technique as the bird-on-wreath doodle, just drawn smaller and curved to sit against the body rather than floating free. Two small pointed ear tufts and folded wing shapes down each side finish the owl.
Color the wreath green with one or two red berries, and leave the owl itself in plain black and white, or add a warm brown wash to the body if you want more color overall. If the big round eyes come out uneven, draw both circles lightly in pencil at the same time using a coin or bottle cap to trace them.
Try today: add short vertical feather lines down the owl’s front for texture before coloring the wreath.
You Will Need
- black fineliner
- small round object to trace eyes
- green marker
- red marker
Palette: Carbon Black,Pine Green,Cherry Red
Trace a coin or bottle cap for both eyes so they end up perfectly matched in size, which matters more for an owl’s face than for almost any other animal.
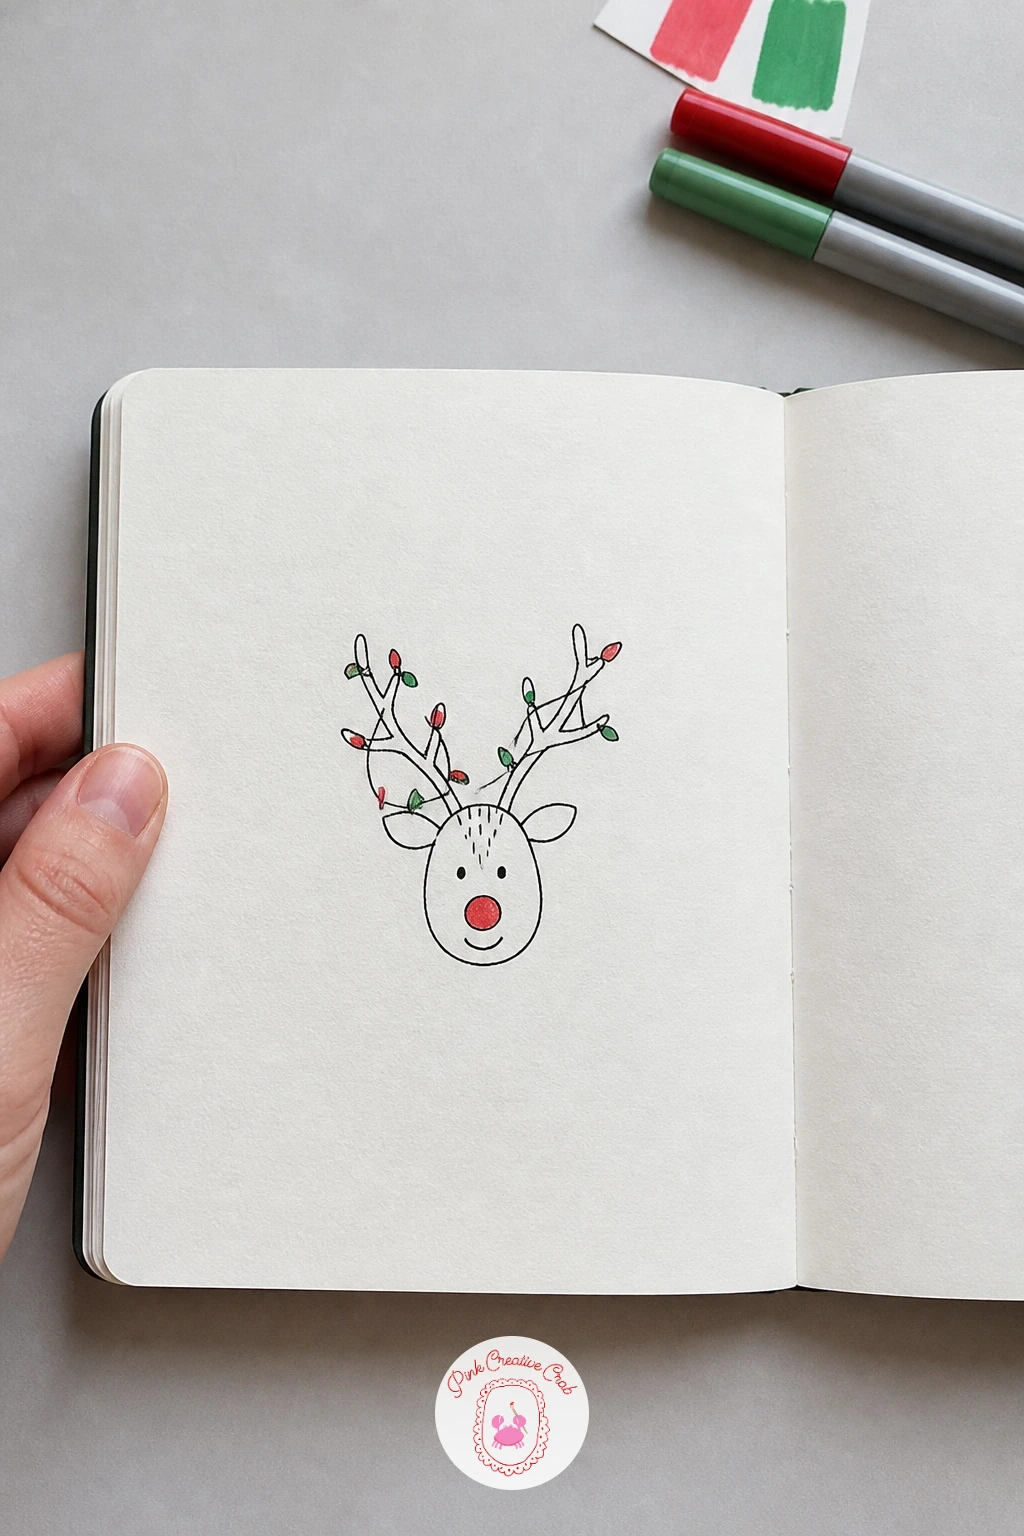
Move on to a reindeer with lights in its antlers, a doodle built around one tricky shape: the antlers. Draw the head first as a simple rounded muzzle with two ears, then branch the antlers out from the top of the head in a few forking Y-shapes, keeping each branch roughly the same length as the next for a balanced set.
String a loose looping line through the antlers from tip to tip, like a strand of fairy lights, then dot small circles along that line at uneven intervals rather than perfectly spaced, which looks more like a real tangled string of lights. This is the small hands-on trick worth practicing: draw the string loosely draped rather than taut and straight.
Color the light dots alternating red and green, and add one red nose at the tip of the muzzle for a classic finishing touch. If the antlers come out lopsided, draw one side, then flip your paper over and trace through it for the second side to match.
Try today: give the reindeer a small bow at the base of one ear to echo the lights.
You Will Need
- black fineliner
- red marker
- green marker
- light box or window to trace symmetry (optional)
Palette: Warm Brown,Cherry Red,Pine Green
Hold the paper up to a window to trace the second antler from the first if symmetry is tricky, rather than freehanding both sides separately.
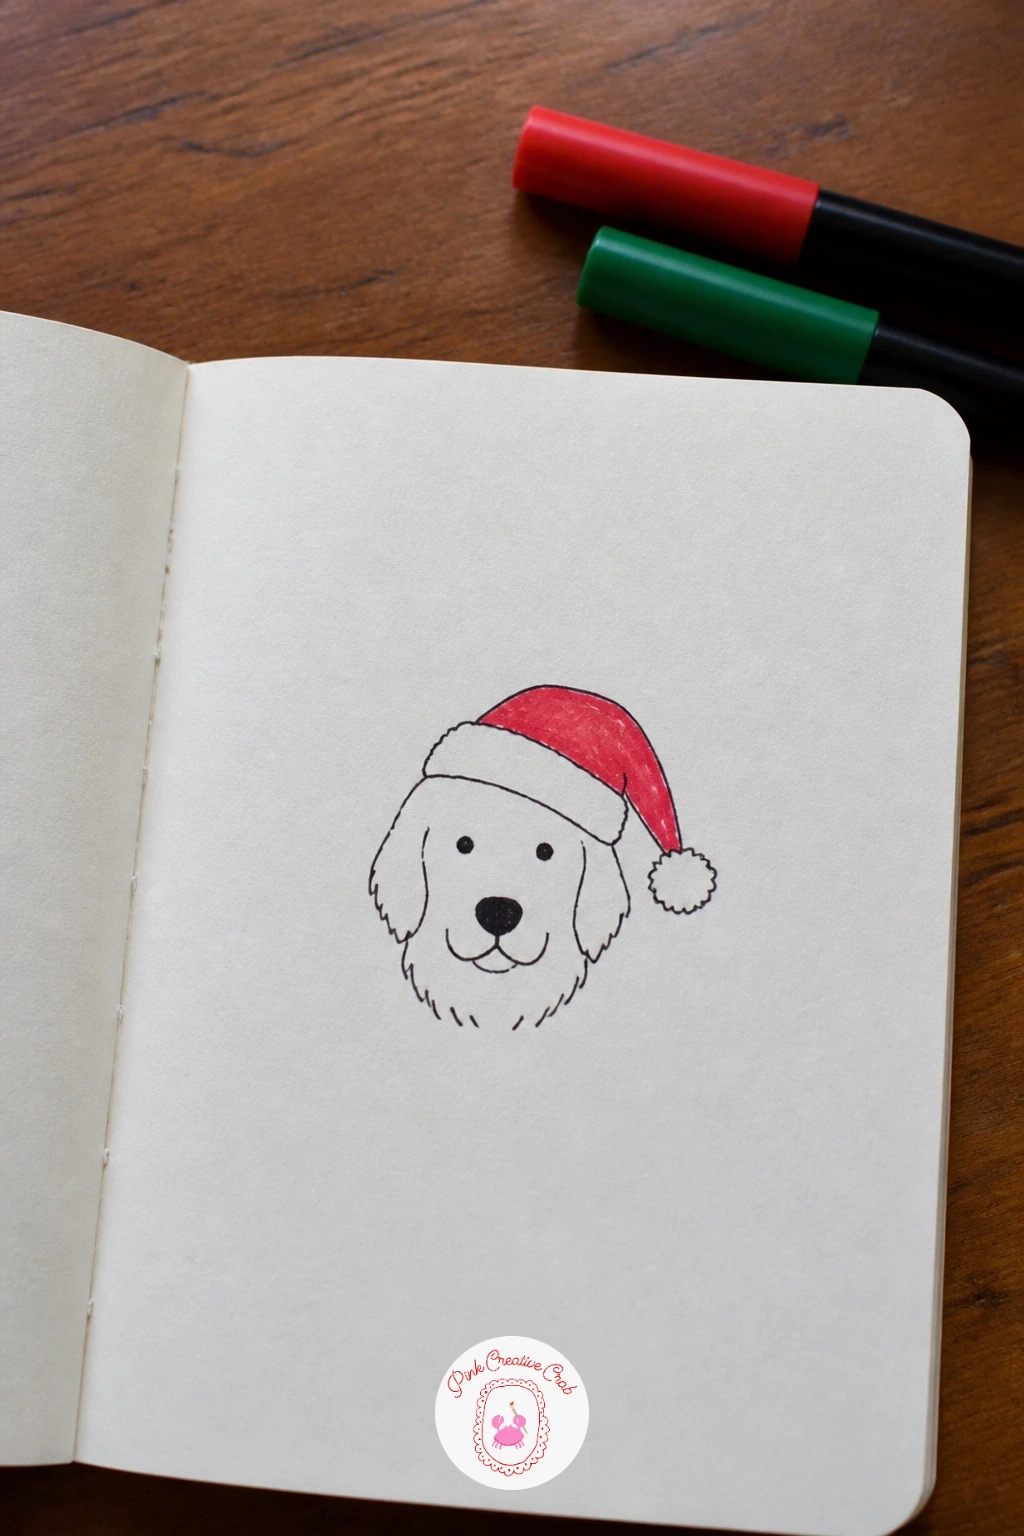
Give a pet a holiday touch with a dog in a Santa hat, an easy way to personalize a card for a dog-loving friend. Draw the dog’s head as a rounded shape with two floppy or pointed ears, whichever suits the breed you have in mind, then add a simple round snout and two dot eyes.
Sit the Santa hat at a slight tilt across the top of the head rather than straight on, which gives the drawing a playful, lived-in feel instead of looking stiffly posed. The hat is just a triangle with a curved dip at the front brim and a small pom-pom circle at the tip.
Color the hat red with a white brim and pom-pom (leave those areas as plain paper), then add a tiny red collar at the neck to tie the color together. If the ears look stiff, round off both corners of each ear shape rather than leaving sharp points, unless you are drawing a breed with naturally pointed ears.
For more pet portrait practice beyond the holidays, this dog doodles guide for beginners is worth a look.
You Will Need
- black fineliner
- red marker
- pencil
Palette: Cherry Red,Carbon Black,Warm Brown
Base the ear shape and snout length loosely on a real dog you know, since even a tiny doodle feels more personal when it nods to a specific pet.
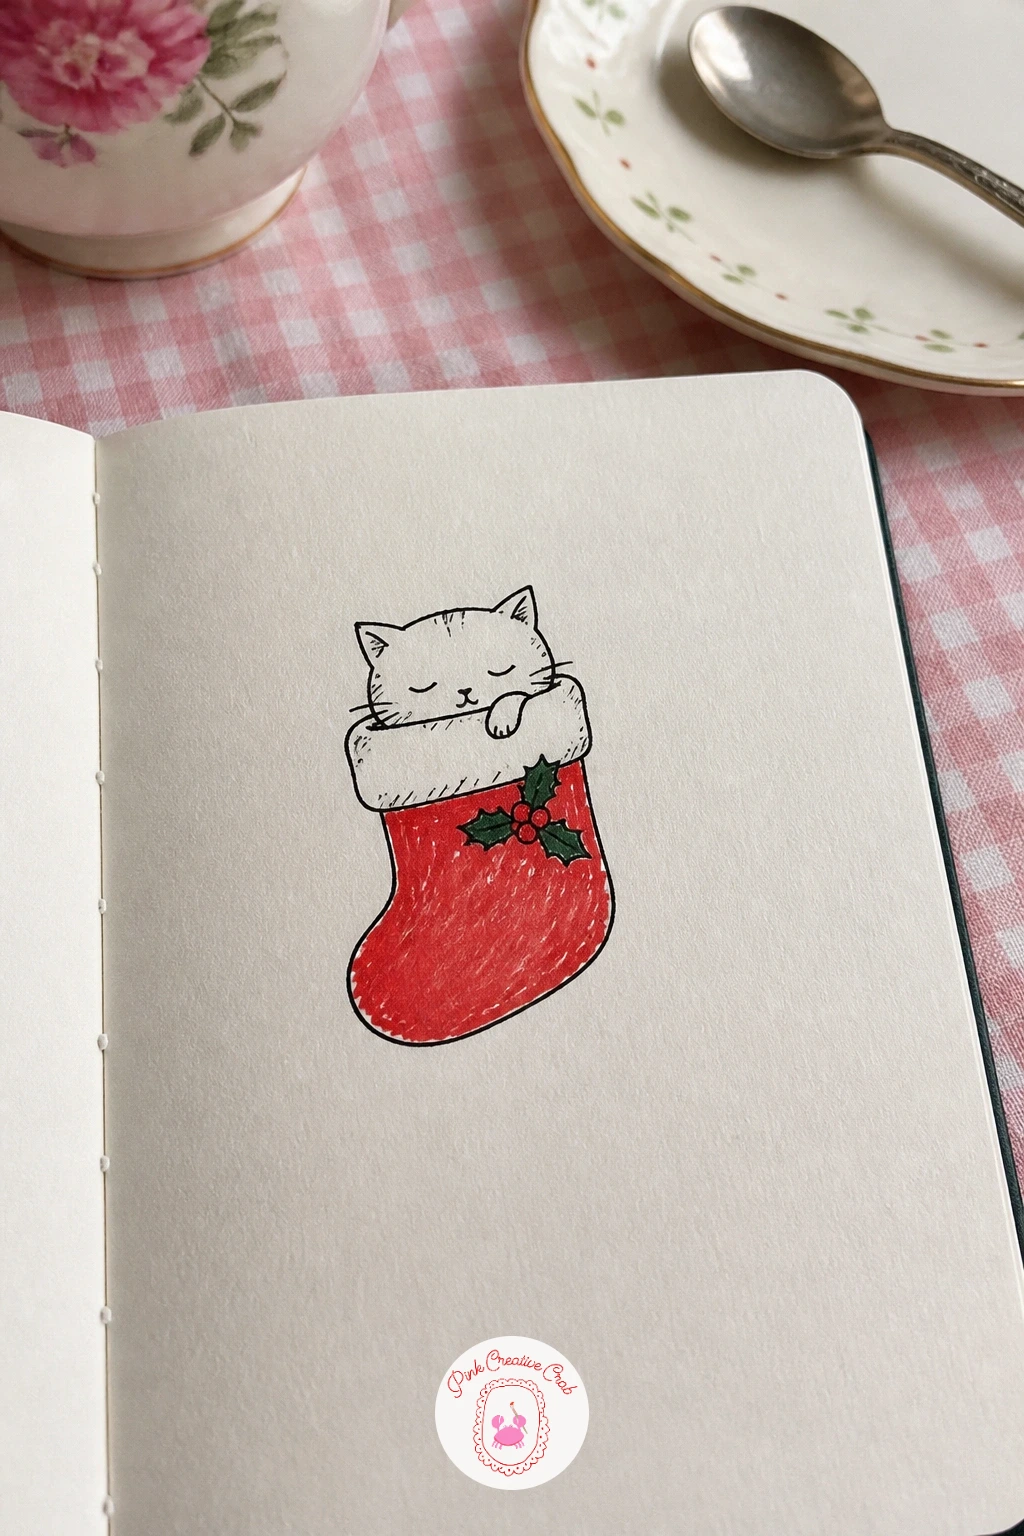
Settle into a quieter mood with a cat asleep in a stocking, a doodle that hides most of the hard anatomy inside the stocking itself. Draw the stocking first as a long curved sock shape with a folded cuff at the top, then nestle just a cat’s head and one curled paw peeking out over the rim.
Keep the cat’s face relaxed and closed-eyed, two simple curved lines for shut eyes and a tiny mouth, since a sleeping face needs far less detail than an alert one and is much easier to get right. A few short whisker lines and a soft furry edge along the head keep it clearly a cat.
Color the stocking’s cuff white (leave it blank) with the body of the stocking in red or green, and add one or two tiny Z shapes floating above the cat’s head for sleep. If the stocking shape looks lumpy, draw the outer curve first in one smooth stroke, then add the toe and heel bends only once that outer line feels right.
Try today: tuck one small bell or candy cane into the stocking cuff beside the cat’s paw.
You Will Need
- black fineliner
- red or green marker
- pencil
Palette: Cherry Red,Pine Green,Carbon Black
Try drawing the cat’s eyes as simple closed curves rather than attempting an open-eyed face, since a sleeping expression is both easier and more charming here.
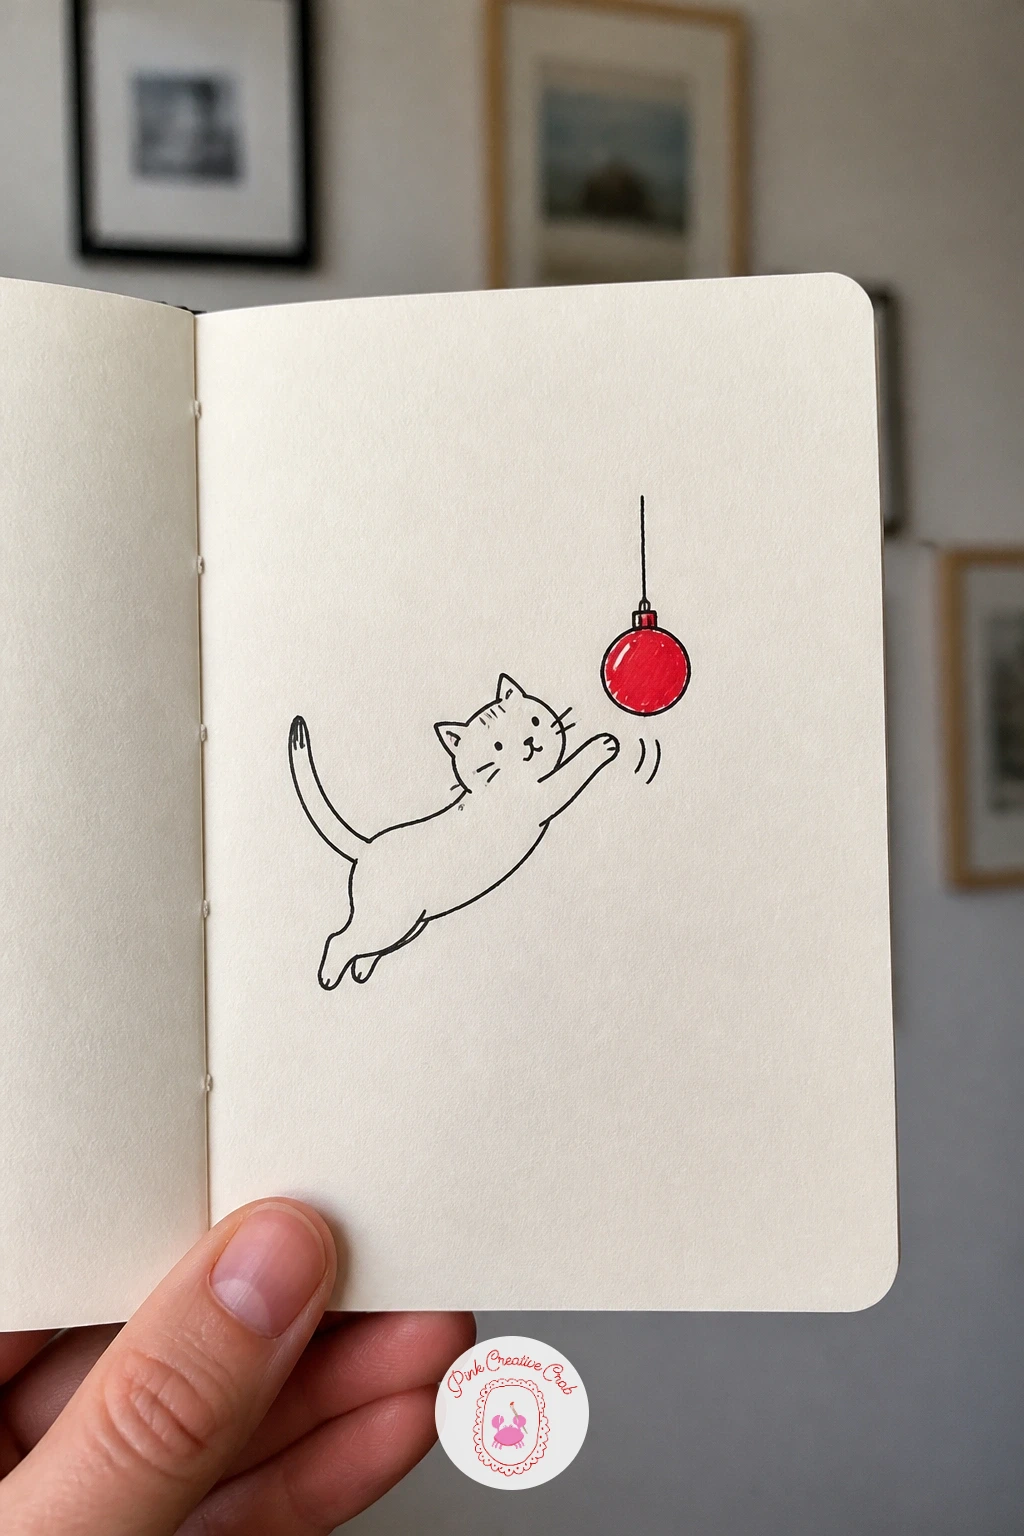
Give that same cat some energy in a cat batting a bauble, a doodle built around a single moment of motion. Draw the cat mid-pounce, one front paw raised and reaching, back legs tucked low and the tail flicked up behind it, which reads as playful far more than a cat simply sitting still.
Hang a round bauble ornament just above or beside the raised paw, drawn as a simple circle with a small loop and a thin hanging string trailing off the top of the frame, so it looks caught mid-swing rather than glued in place. A couple of short motion lines near the paw sell the action.
Color the bauble red or green with a thin gold line around its middle if you have that marker, and leave the cat as plain black and white outline, or add simple stripe or patch markings if you like. If the pouncing pose looks flat, raise the back haunches slightly higher than the front shoulders to suggest the coiled, ready-to-leap stance.
Try today: add a second, smaller bauble lying knocked over nearby to suggest the cat has already been busy.
You Will Need
- black fineliner
- red or green marker
- gold marker (optional)
- pencil
Palette: Cherry Red,Golden Yellow,Carbon Black
Add two or three short curved motion lines trailing from the raised paw, a simple trick borrowed straight from comic strips that instantly reads as movement.
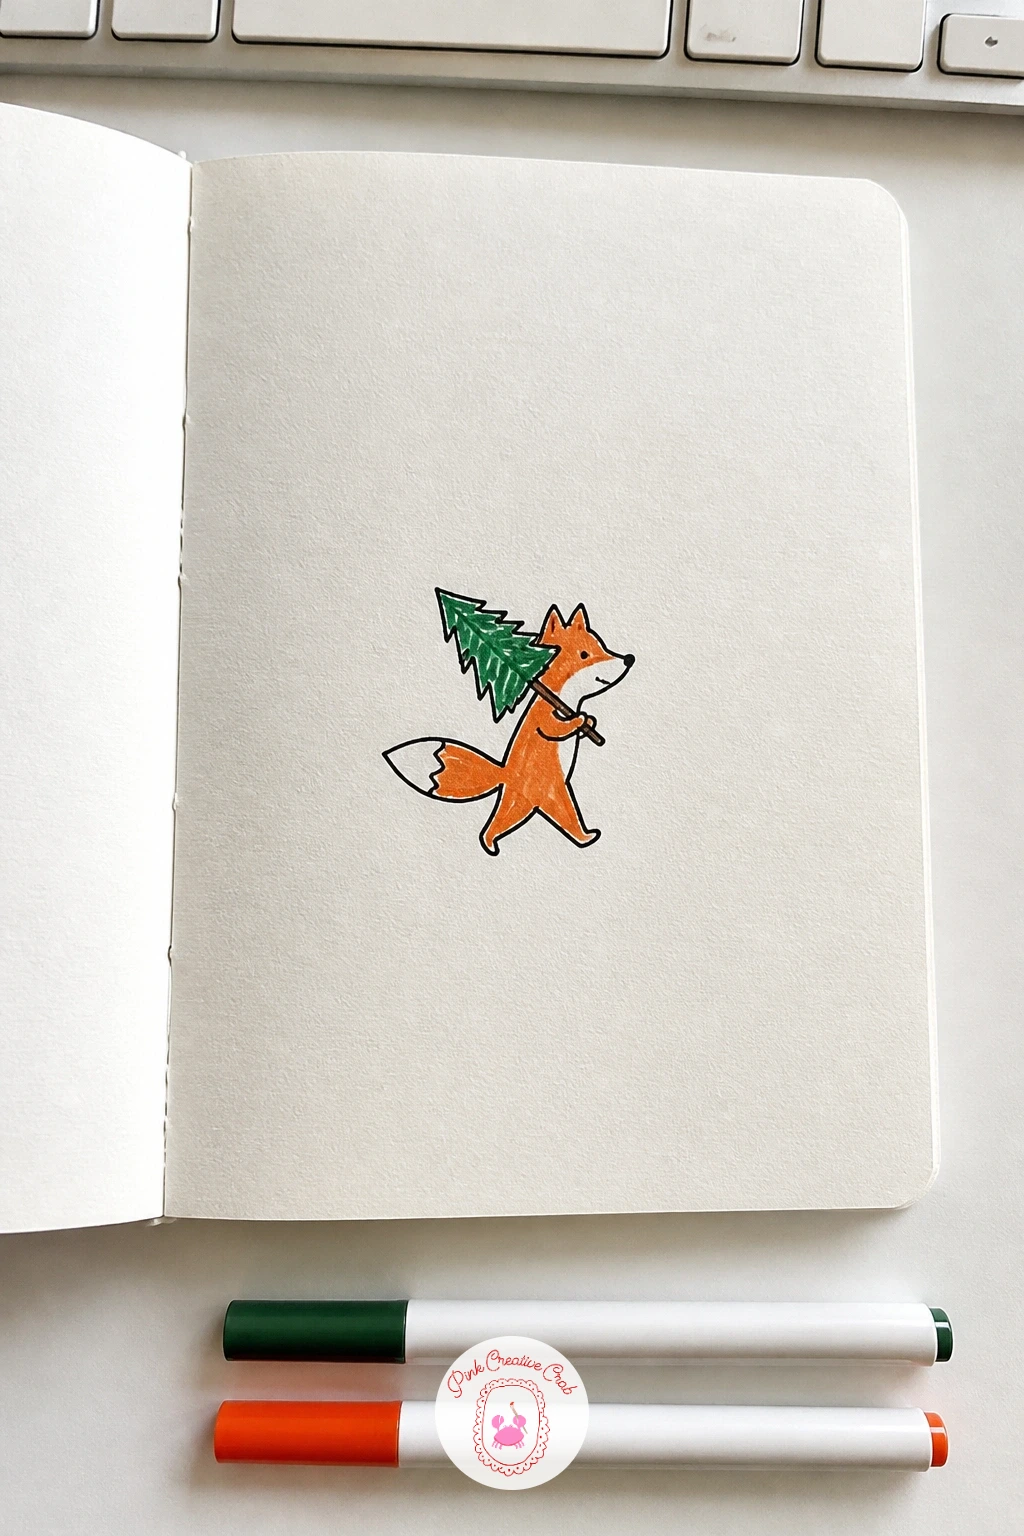
Step into a small scene with a fox carrying a tiny tree, one of the sweetest little stories on this list. Draw the fox in profile, walking pose, with pointed ears, a long snout and a big bushy tail trailing behind, since a side view makes the walking action far easier to read than a front-facing fox.
Rest a small pine tree shape across its back or held gently in its mouth, built from three or four stacked triangle layers getting smaller toward the top, with a short trunk line at the base. Keeping the tree noticeably smaller than the fox’s own body is the proportion trick that sells the “tiny tree” idea rather than making it look oversized and awkward.
Color the fox’s body a warm orange-red with a white underbelly and tail tip left blank, and color the tiny tree green with a few red dot ornaments if you like. If the walking pose looks stiff, bend the front and back legs at slightly different angles rather than drawing all four legs straight and parallel.
Try today: add two or three small paw prints trailing behind the fox in the snow for extra storytelling.
You Will Need
- black fineliner
- orange marker
- green marker
- red marker
Palette: Burnt Orange,Pine Green,Cherry Red
Try drawing the fox’s tail extra large and fluffy, noticeably bigger than feels natural, since an oversized tail reads as charming rather than wrong in a doodle.
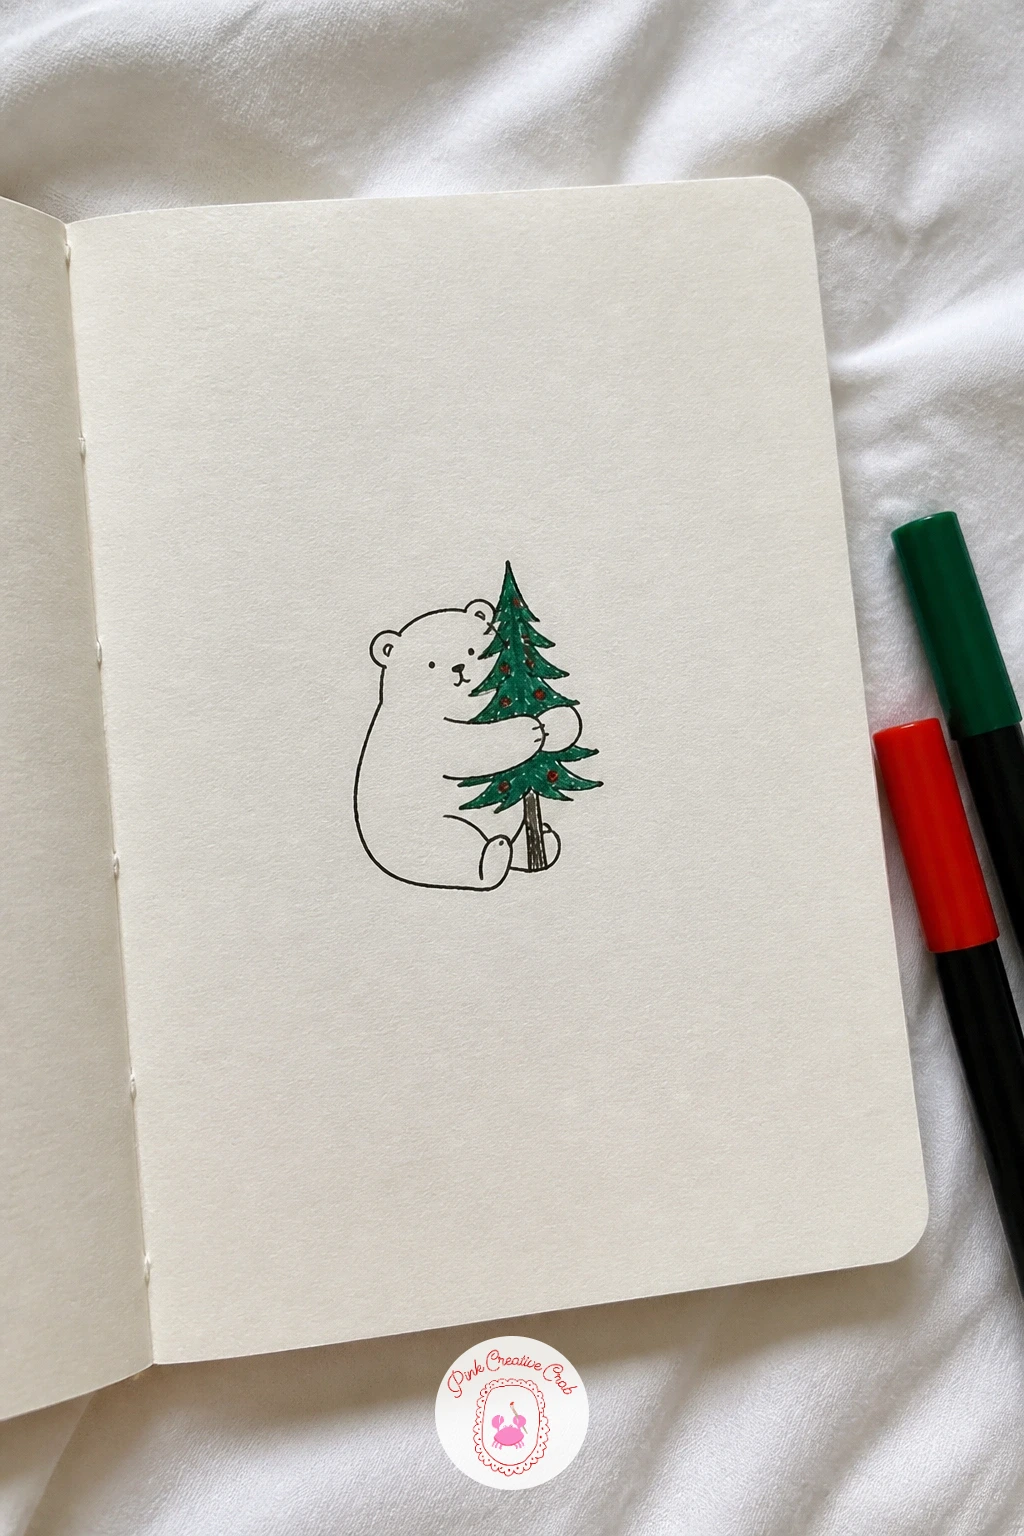
Keep the woodland story going with a bear hugging a tree, a doodle that leans on one simple interaction between two shapes. Draw the bear first as a round, soft-edged body sitting upright, with short stubby arms wrapped forward around a slim pine tree trunk drawn right beside it.
The light and placement trick here is to tuck the bear slightly behind the tree rather than fully in front of it, letting the trunk overlap the bear’s arms where they meet, which immediately reads as a hug rather than two separate shapes placed side by side. Small round ears and a simple snout keep the bear’s face friendly.
Color the tree’s foliage green with a few tiny dot ornaments in red, and leave the bear in warm brown or plain black and white outline so the tree’s color stands out as the main accent. If the overlap looks confusing, ink the tree trunk first, then draw the bear’s arms stopping right where they meet the trunk’s edge.
Try today: add a small knitted scarf around the bear’s neck in red for one more color note.
You Will Need
- black fineliner
- brown marker
- green marker
- red marker
Palette: Warm Brown,Pine Green,Cherry Red
Ink the tree trunk before the bear’s arms so the overlap stays clean, rather than trying to erase and fix crossed lines after the fact.
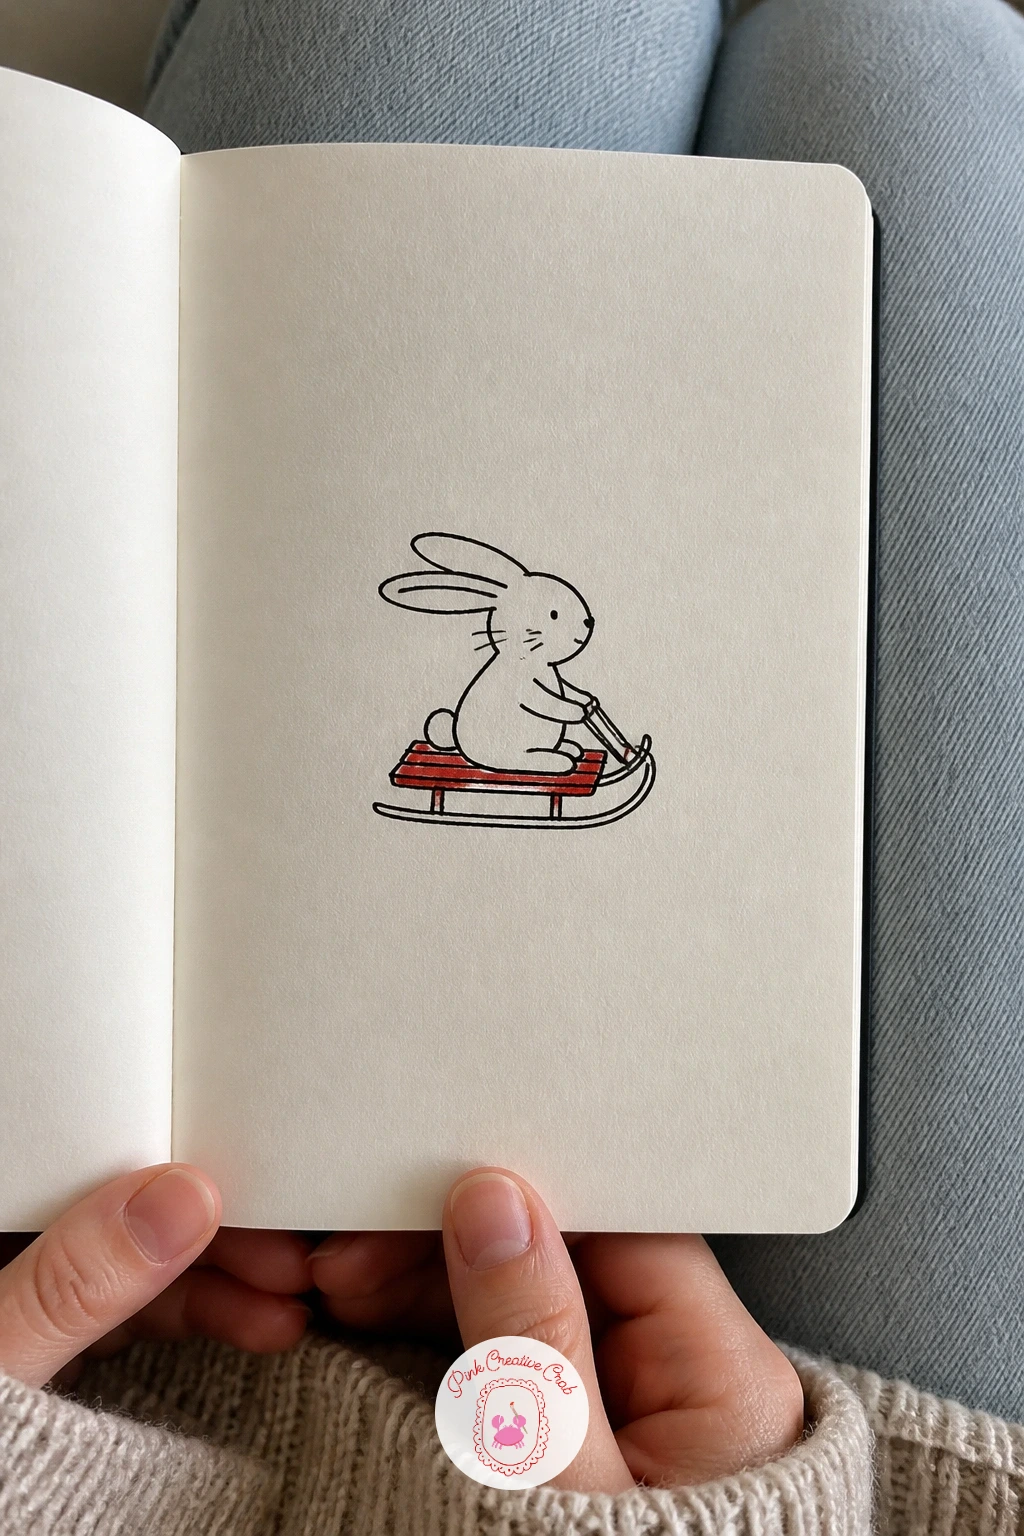
Add some motion with a bunny on a sled, a doodle that combines a soft animal with a simple geometric object. Draw the sled first as two curved runner lines beneath a flat rectangular seat, since getting the runners curved rather than straight is what makes the sled look like it is actually gliding.
Sit the bunny on top with its ears streaming back behind it rather than standing upright, which instantly suggests speed and wind, and tuck its front paws forward as if gripping the sled’s edge. Keep the body compact and round, with the long ears doing most of the storytelling work here.
Color the sled’s runners and seat edge in red, and leave the bunny itself white (plain paper) with just a pink nose dot and the inside of the ears lightly colored. If the ears look stiff streaming backward, curve them with a gentle S-shape rather than a straight diagonal line.
Try today: add two small spray lines of snow kicked up behind the sled’s runners for extra speed.
You Will Need
- black fineliner
- red marker
- pink marker (optional)
- pencil
Palette: Carbon Black,Cherry Red,Soft Pink
Try tilting the whole sled slightly downhill across the card rather than drawing it level, which adds a sense of motion without any extra lines.
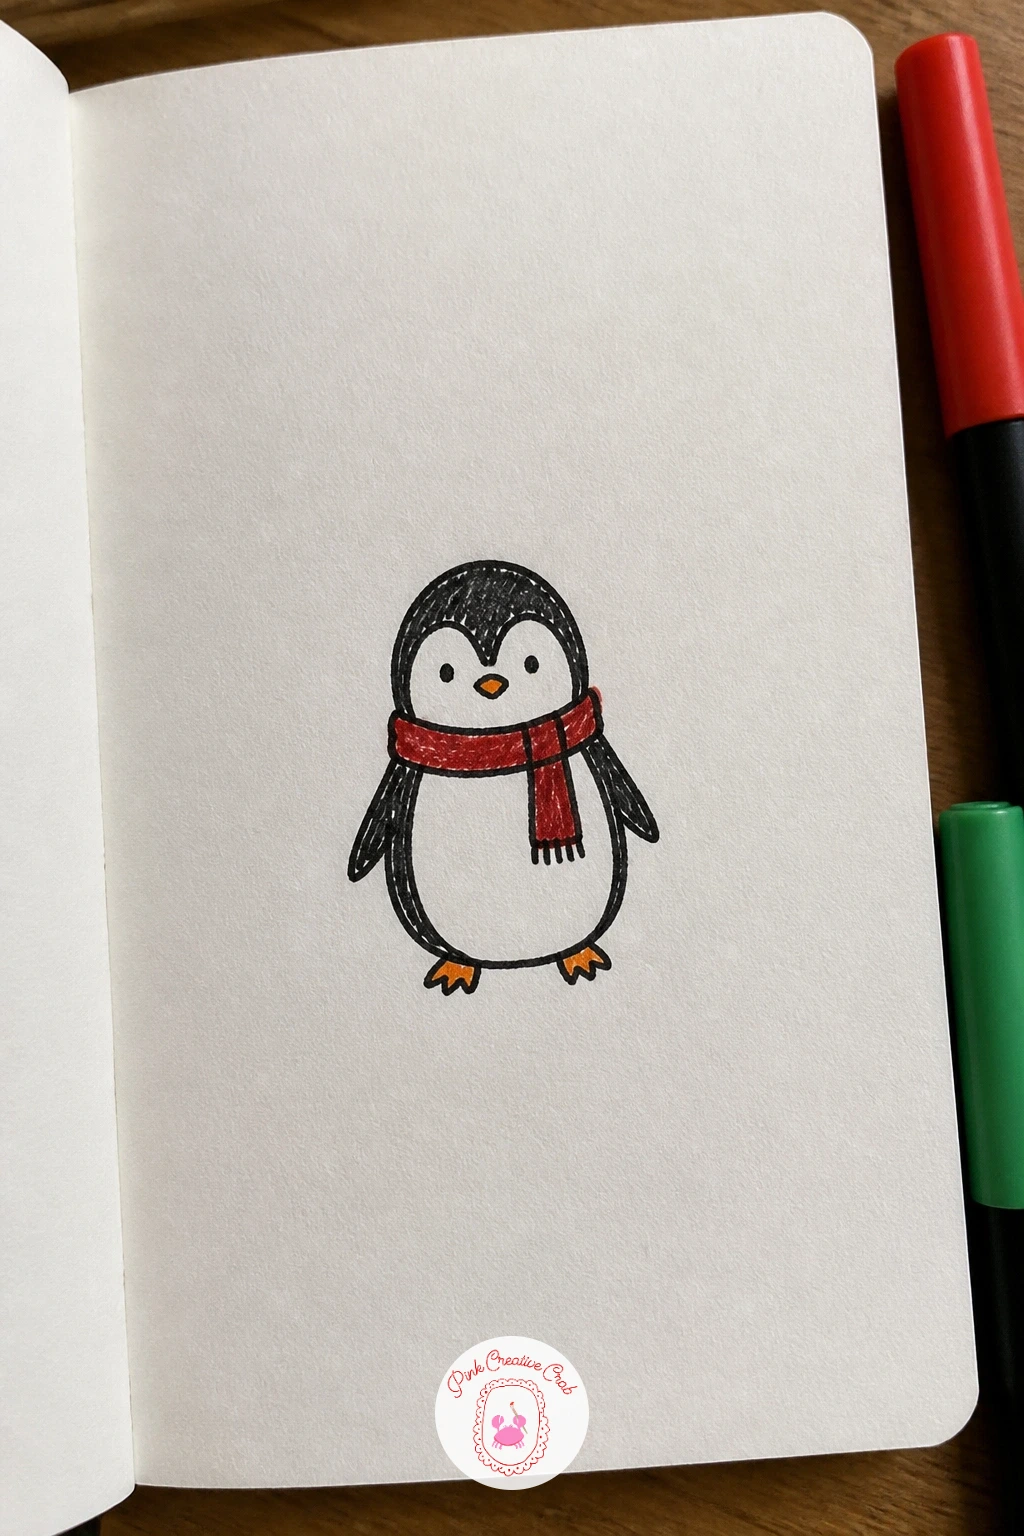
Move to the cold-weather crowd with a penguin with a scarf, a shape almost every hand finds easy. Draw the body as one tall rounded oval, then add a smaller white belly patch down the front (left as plain paper) and two small wing shapes flaring slightly out from the sides.
Wrap a scarf around the neck using two or three looping lines that cross at the front, leaving the ends hanging down unevenly, since even, matched ends look stiffer than a real tossed-on scarf. Small orange feet and a triangular beak finish the face.
Color the scarf red or green, and the beak and feet a warm orange, keeping the body itself black with the belly left white. If the body shape tips over looking unbalanced, widen the base slightly more than feels natural, since penguins are bottom-heavy birds and a narrow base makes them look like they might topple.
Try today: add fringe tassels at the ends of the scarf with a few short quick strokes.
You Will Need
- black fineliner
- red or green marker
- orange marker
- pencil
Palette: Carbon Black,Cherry Red,Burnt Orange
Widen the base of the penguin’s body more than feels natural, since a narrow bottom is the single most common thing that makes this shape look off balance.
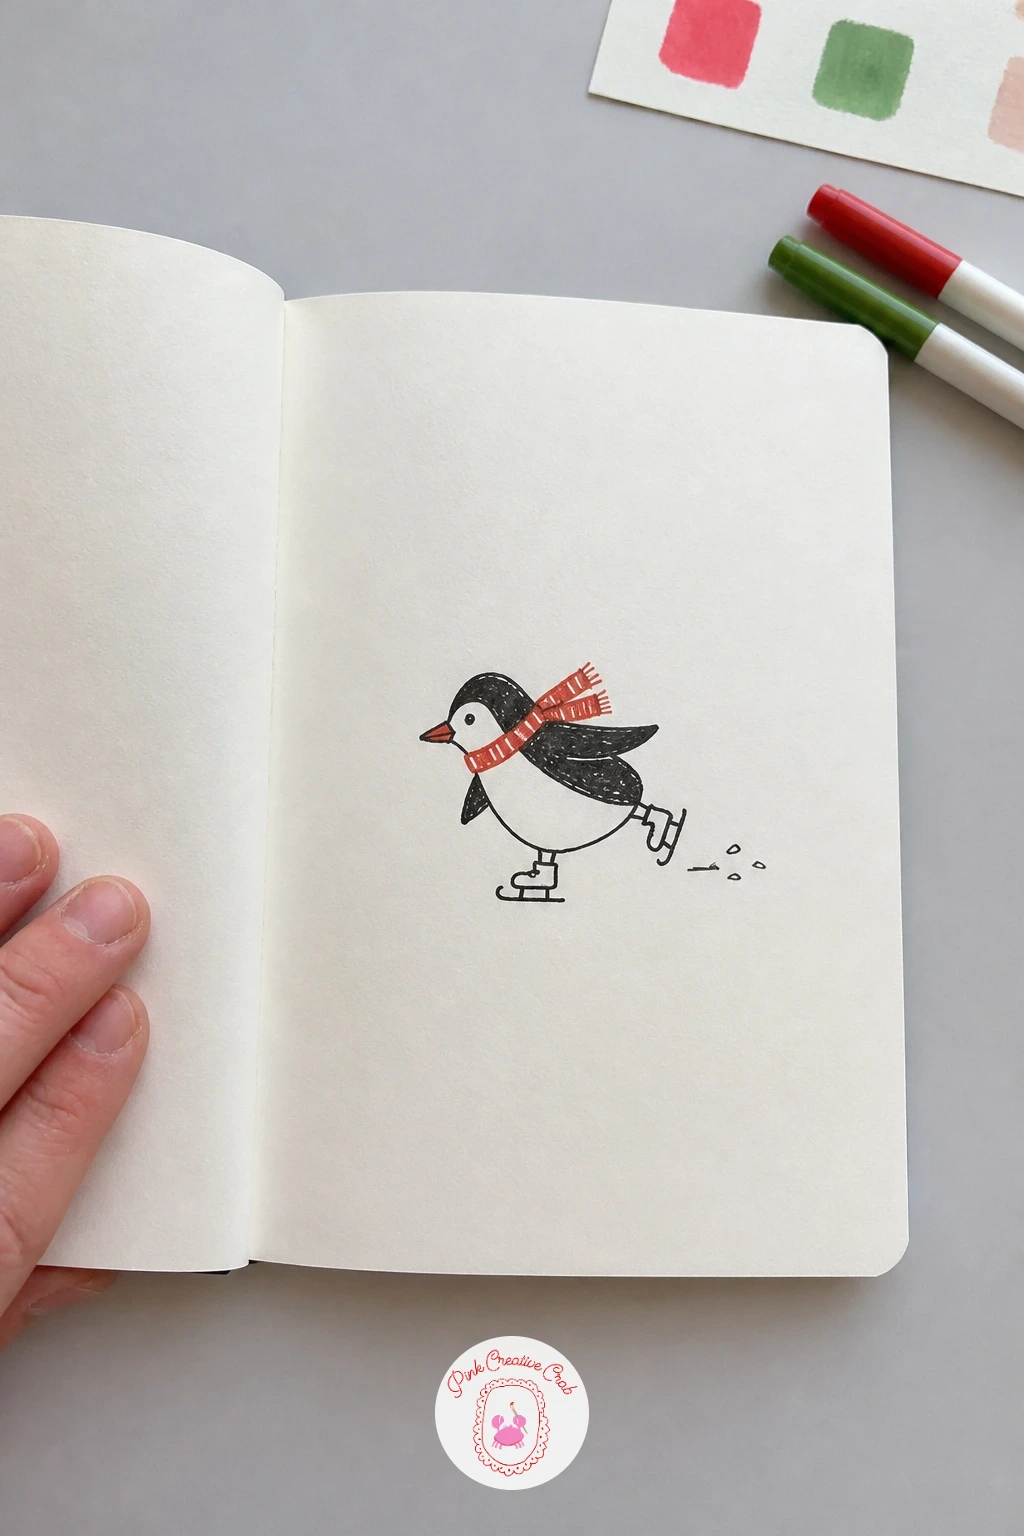
Give that same penguin a new pose for penguin skating, swapping a standing figure for one caught mid-glide. Draw the body leaning forward at an angle rather than upright, with one leg extended back behind it and tiny ice skate blades sketched beneath both feet, since the forward lean is what sells the skating motion more than the skates themselves.
Flare both wings out slightly to the sides for balance, the same way a real skater’s arms spread wide, and add two or three short curved lines behind the back foot to suggest ice shavings kicked up from a turn. Keep the face simple and cheerful, matching the standing penguin’s features.
Color the scarf or a small hat in red or green, and give the ice skate blades a thin silver or grey line if you have that marker, otherwise just leave them as black outline. If the leaning pose looks like it is falling rather than skating, double check the head stays upright and level even while the body leans.
Try today: draw a thin curved line trailing behind the skates to show the path carved into the ice.
You Will Need
- black fineliner
- red or green marker
- grey marker (optional)
- pencil
Palette: Carbon Black,Cherry Red,Cool Grey
Keep the head level and upright even as the body leans into the turn, since a tilted head on top of a leaning body reads as falling rather than skating.
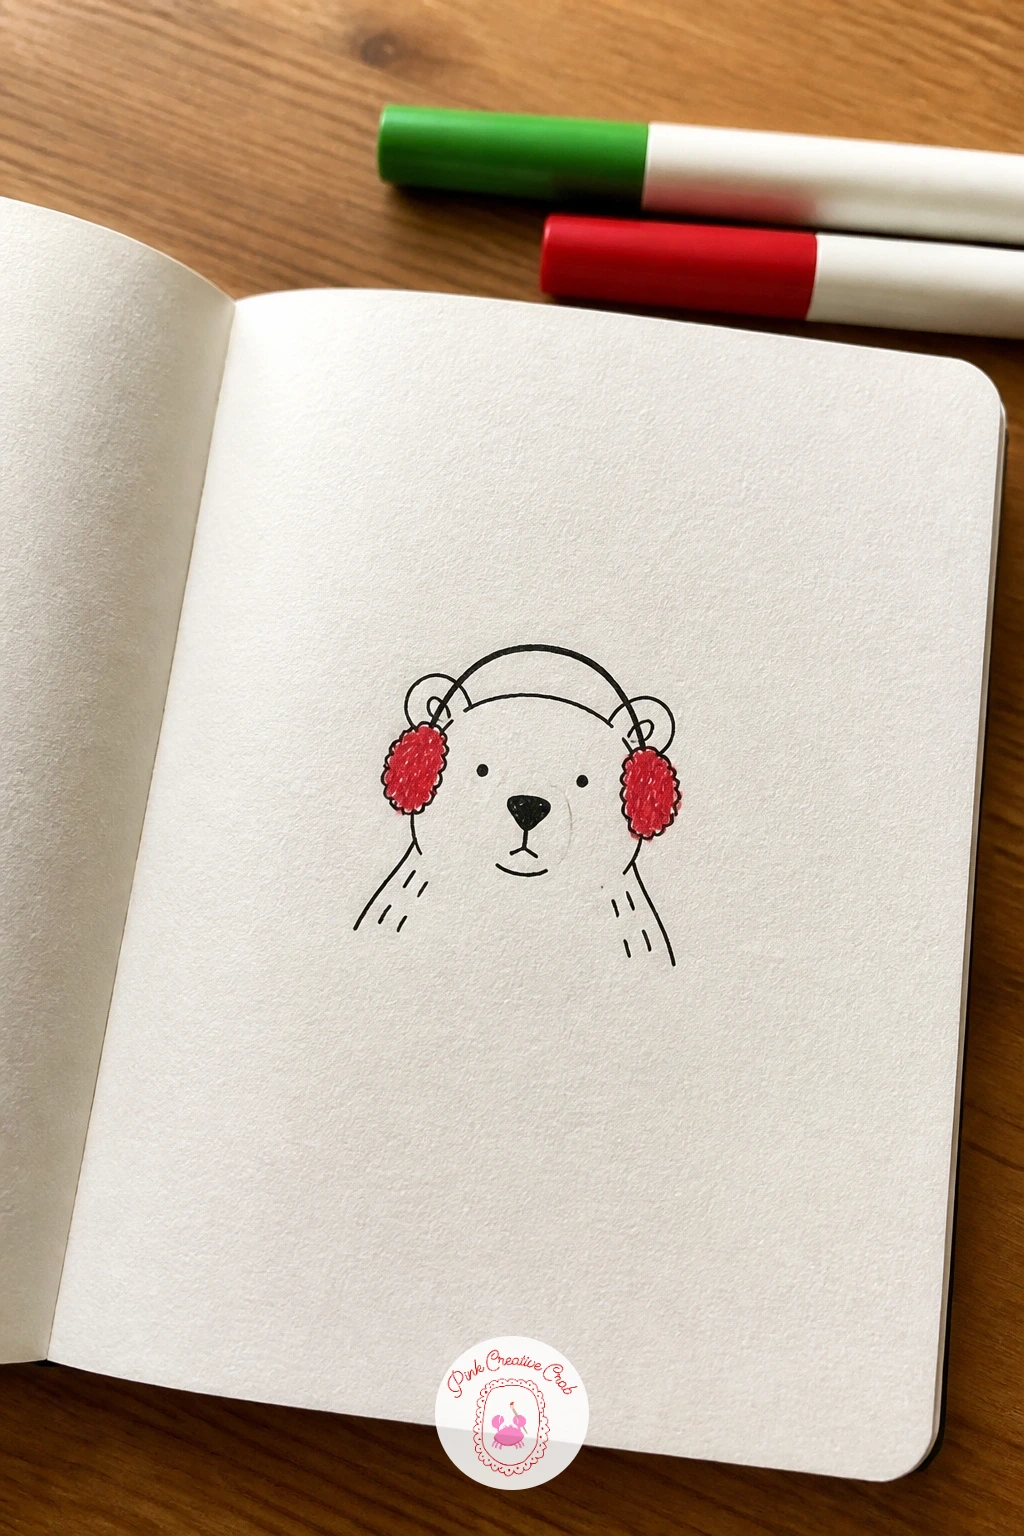
Stay in the snow for a polar bear with earmuffs, a doodle that only needs one small prop to feel finished. Draw the bear’s head and shoulders as one soft, rounded shape, keeping the whole silhouette gently curved rather than angular, which matches a polar bear’s naturally soft, bulky look.
Add small round ears close to the top of the head, then loop a simple headband shape over the top connecting two earmuff circles that sit just outside each ear, like a pair of headphones. A small black dot nose and two dot eyes against the otherwise plain white face keep the features minimal.
Color the earmuffs red or green, and leave the bear itself entirely white (plain paper), outlined only in black fineliner, since a polar bear’s color comes from what you leave blank rather than what you add. If the face looks too flat without shading, add a few short curved lines around the cheeks to suggest soft fur without filling in solid color.
Try today: add a thin red scarf at the neck to match the earmuffs for one coordinated color note.
You Will Need
- black fineliner
- red or green marker
- pencil
Palette: Carbon Black,Cherry Red,Pine Green
Add a few short curved fur lines around the cheeks and chin rather than leaving the face a totally flat outline, which gives the white bear some gentle texture.
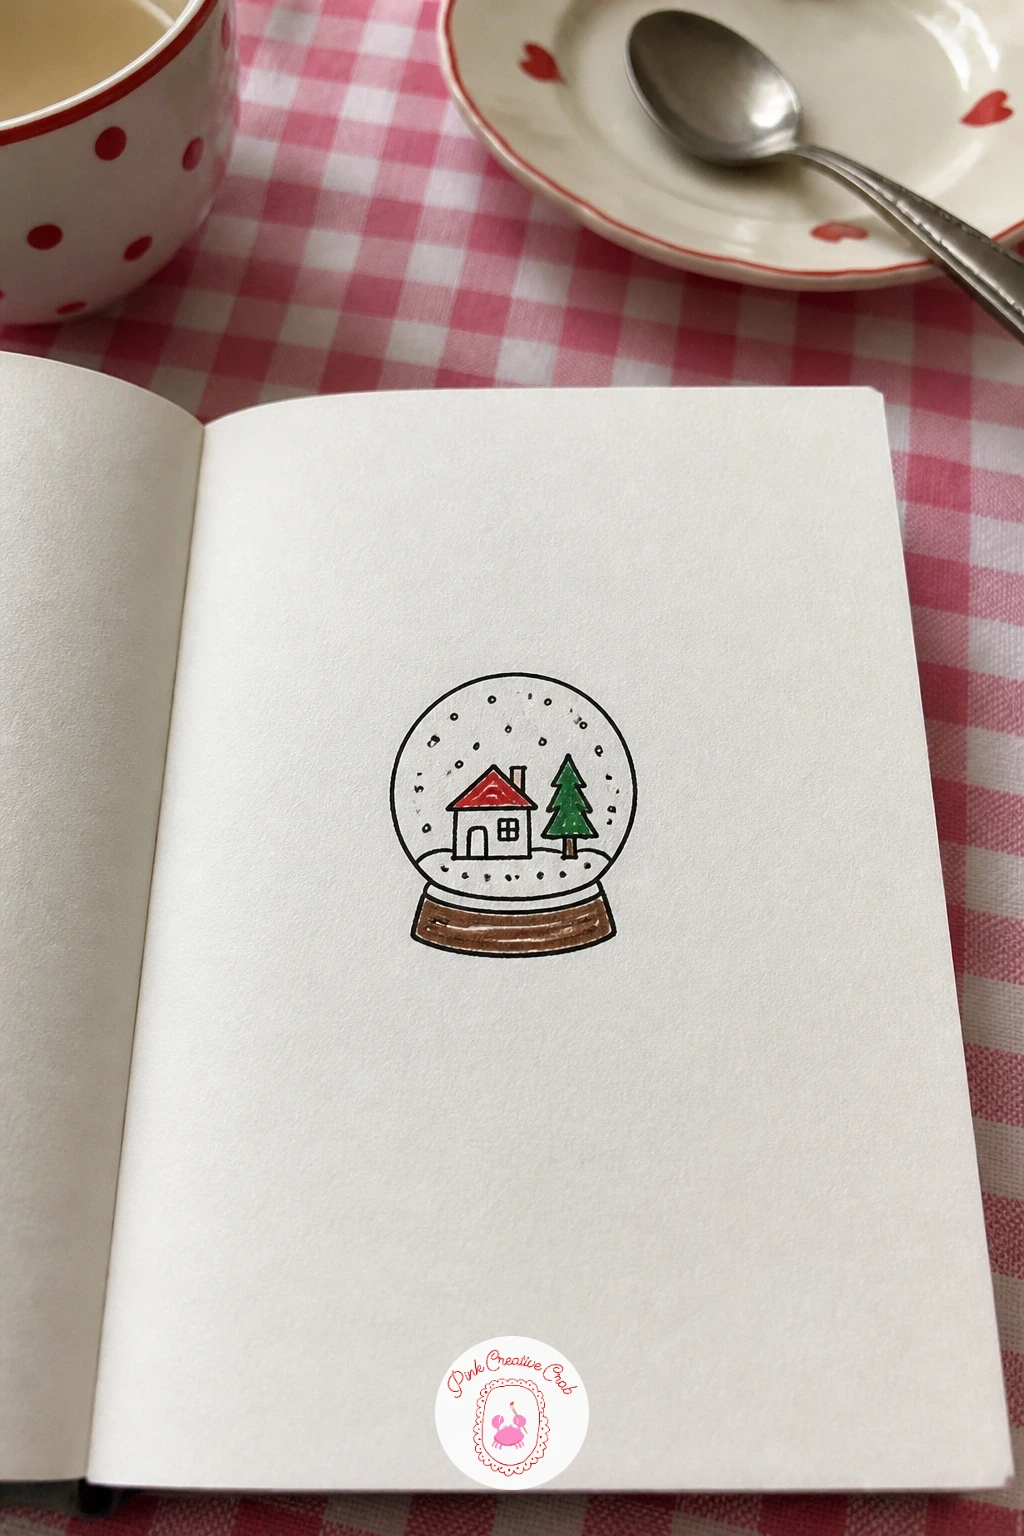
Build a small scene inside a frame with a snow globe with a house, one of the more structured doodles on this list. Draw a large circle first using a jar lid or glass to trace a clean curve, then add a short rectangular base beneath it to turn the circle into a tabletop ornament.
Inside the circle, keep the scene simple: a tiny house with a triangular roof, one small pine tree beside it, and nothing else, since a globe this size only has room for one clear focal point before it turns cluttered. Dot a scatter of small white snowflakes (leave them as plain paper, outlined only) floating around the house to suggest a shaken globe.
Color the roof and door red, the tree green, and the base of the globe a warm brown or plain black and white. If the circle outline comes out wobbly freehand, always trace a round object for this one rather than attempting it by hand.
See more snowy-scene pairings for cards in this winter doodles guide for beginners.
You Will Need
- black fineliner
- jar lid or glass to trace
- red marker
- green marker
Palette: Carbon Black,Cherry Red,Pine Green
Always trace a round object for the globe’s outline rather than freehanding the circle, since even a slightly uneven circle reads as a mistake here more than elsewhere.
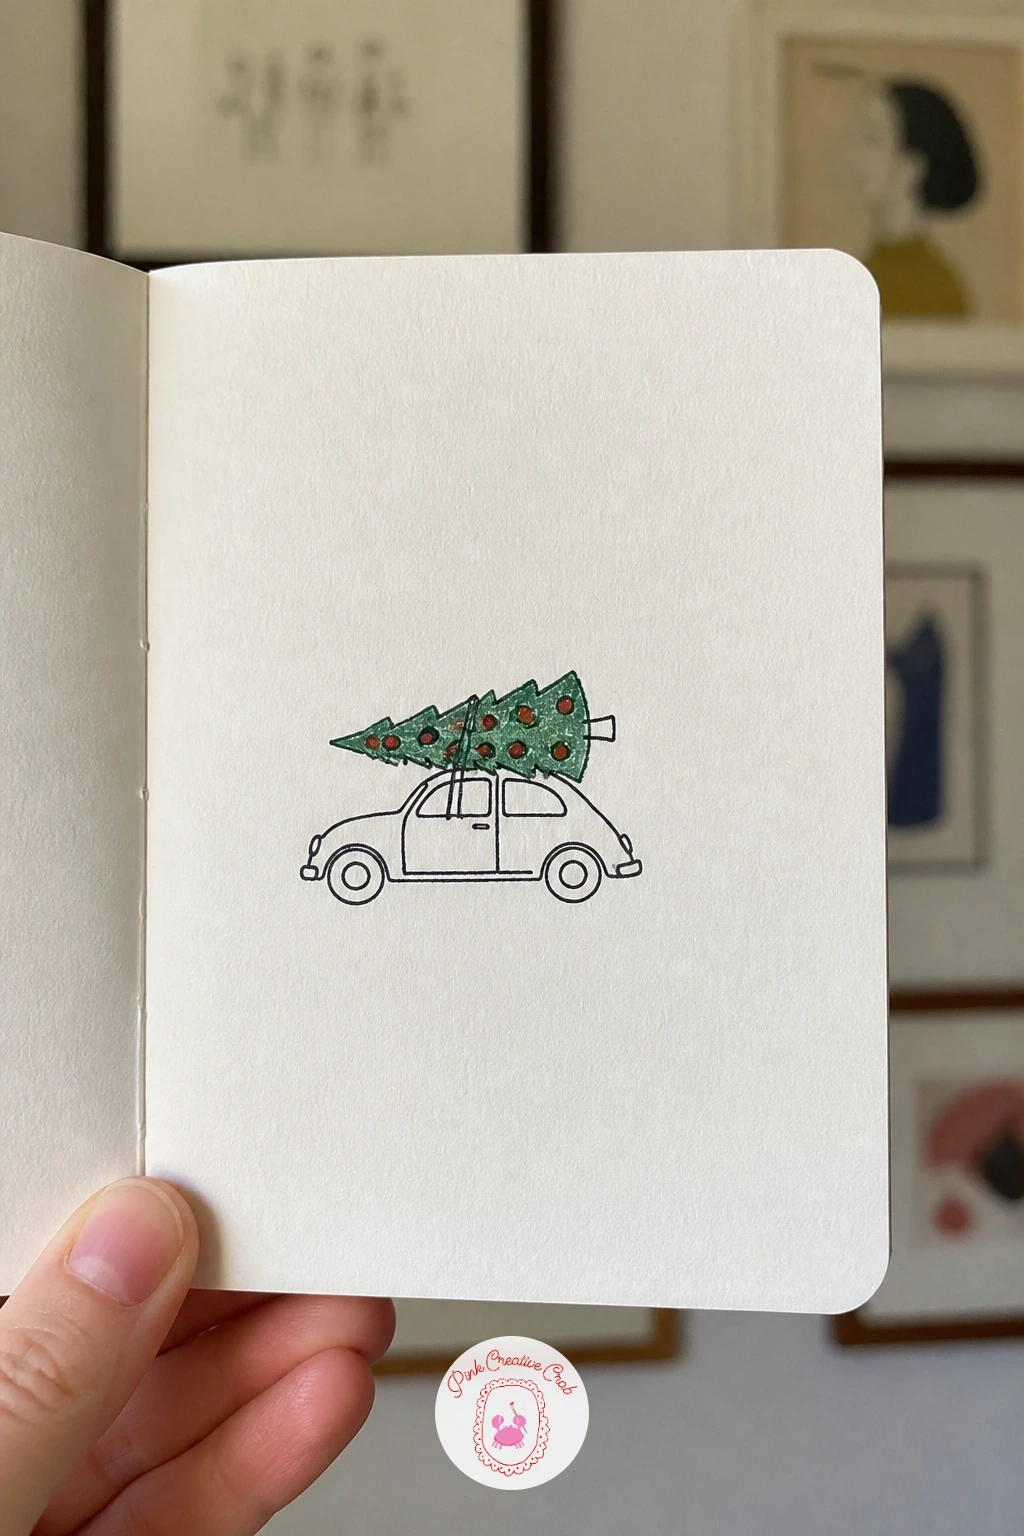
Give a classic holiday errand its own little scene with a Christmas tree on a car, a doodle built from two very different shapes sharing one roofline. Draw a simple rounded car body in profile first, boxy but with soft corners, then rope the tree directly on top using a few loose curved lines crossing over the roof like real tied rope.
Keep the car noticeably wider and longer than the tree is tall, which is the proportion that keeps this reading as a car with a tree strapped to it, rather than a tree that happens to have a car underneath. Two simple circle wheels and a small window square finish the car.
Color the tree green with a few tiny red ornament dots, and give the car itself a plain black and white outline, or a light wash of red or green if you want the whole doodle more colorful. If the rope lines look too neat, loosen them into slightly uneven crossing lines, since a slightly messy tie job feels more true to life.
Try today: add a small star poking out just above the car’s roofline from the top of the tree.
You Will Need
- black fineliner
- green marker
- red marker
- pencil
Palette: Pine Green,Cherry Red,Carbon Black
Keep the rope lines loose and slightly uneven rather than straight and symmetrical, since a slightly messy tie-down looks far more believable than a tidy one.
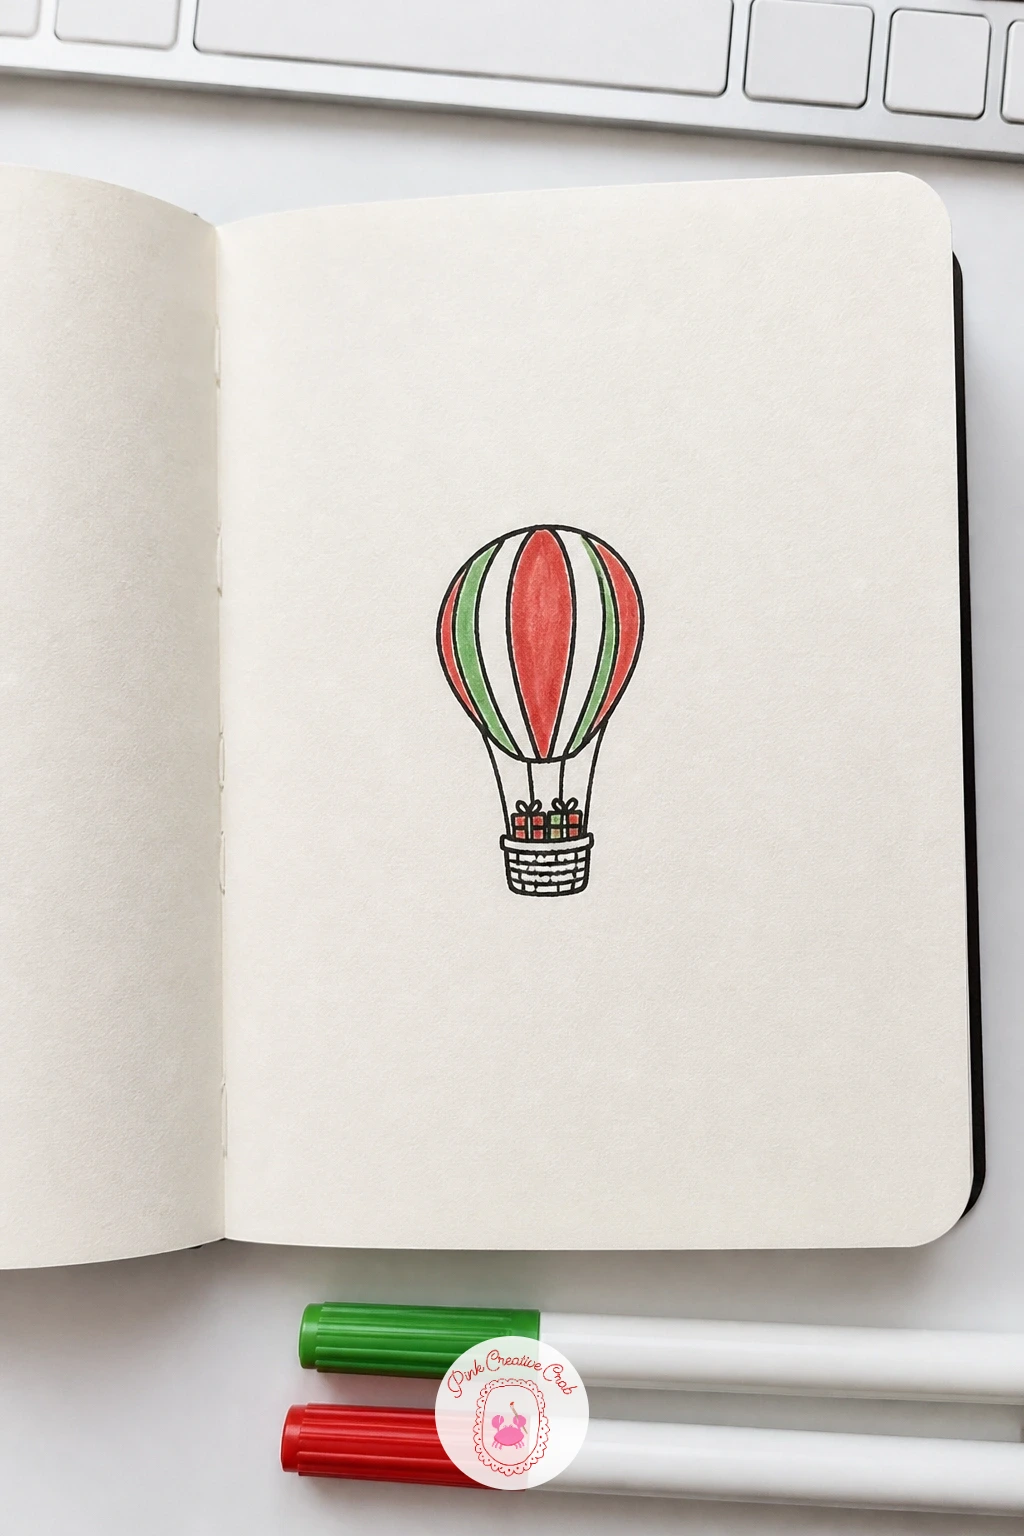
Take the scene upward with a hot air balloon with presents, a doodle that leans on one big shape and a basket of small ones. Draw the balloon envelope as a tall rounded teardrop, wider at the top and narrowing toward the bottom, then add vertical panel lines running down its surface to suggest the fabric seams of a real balloon.
Hang a simple woven basket below using crossed diagonal lines for the texture, connected to the balloon by four thin ropes, then fill the basket with two or three small gift box shapes peeking over its rim. Keeping the basket roughly a quarter the width of the balloon above it is the proportion that keeps the whole thing looking airborne rather than top-heavy.
Color alternating panels of the balloon in red and green, and give the gift boxes in the basket a few different accent colors to keep that corner of the doodle lively. If the panel lines bunch awkwardly near the top, taper them to meet at a single point rather than trying to keep them parallel all the way up.
Try today: add a tiny bow or star at the very top of the balloon where the panels meet.
You Will Need
- black fineliner
- red marker
- green marker
- pencil
Palette: Cherry Red,Pine Green,Warm Brown
Taper the balloon’s panel lines to a single point at the very top rather than keeping them parallel, since that is how real balloon seams actually converge.
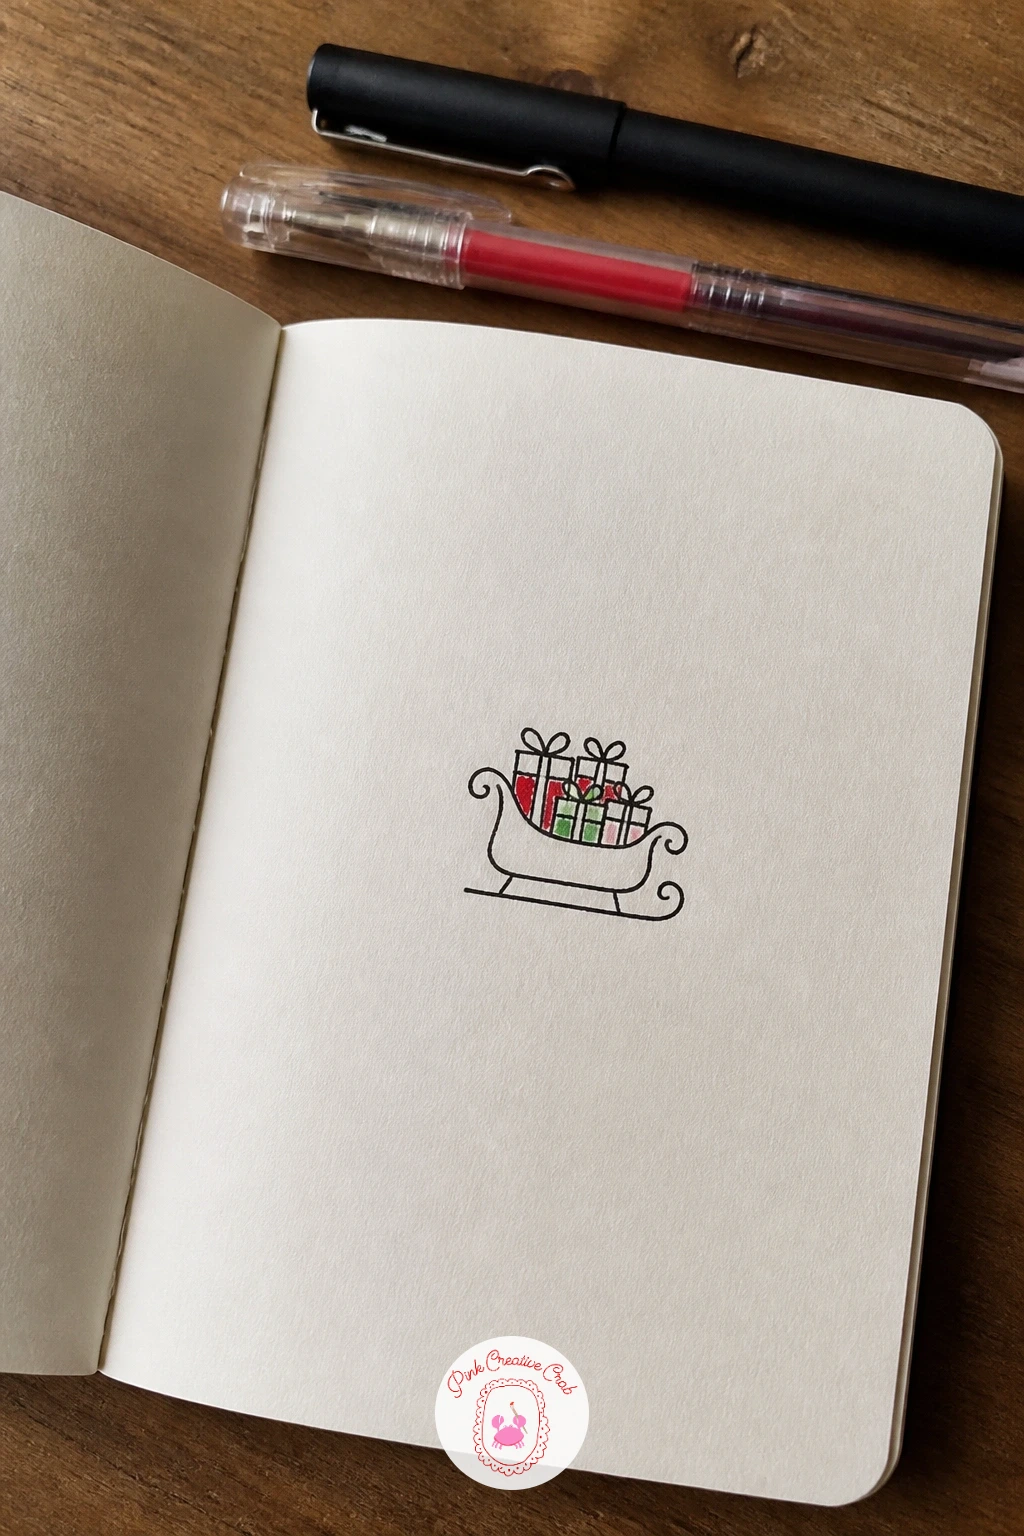
Bring the gift theme back down to earth with a sleigh full of gifts, a fuller scene for when you have a little more time. Draw the sleigh’s curved runner first in one long sweeping line, then build the body of the sleigh above it with a high curling back rail, the classic sled silhouette everyone already recognizes.
Fill the inside of the sleigh with four or five overlapping gift box shapes of varying sizes, letting some sit taller than the sleigh’s back rail and others tuck low, since uneven stacking reads as a fuller, more generous load than neatly matched boxes. This is a good one to try the ten-minute version first: just the sleigh’s outline and two or three simple gift boxes, then add the forty-minute version’s extra details (ribbon bows on each box, snow splashing from the runners, small patterns on the sleigh’s side) once the basic shape feels solid.
Color the gift ribbons in alternating red and green, and leave the sleigh itself black and white, or add a gold line of detail along its curling back rail. If the runner curve looks flat, exaggerate the upward sweep at the front more than feels natural, since sleighs read best with a dramatic curl.
Try today: tuck one small bell doodle onto the very top of the sleigh’s back rail.
You Will Need
- black fineliner
- red marker
- green marker
- gold marker (optional)
Palette: Carbon Black,Cherry Red,Pine Green
Start with the ten-minute version, just the sleigh outline and two gift boxes, then only add ribbon bows and extra detail if time allows afterward.
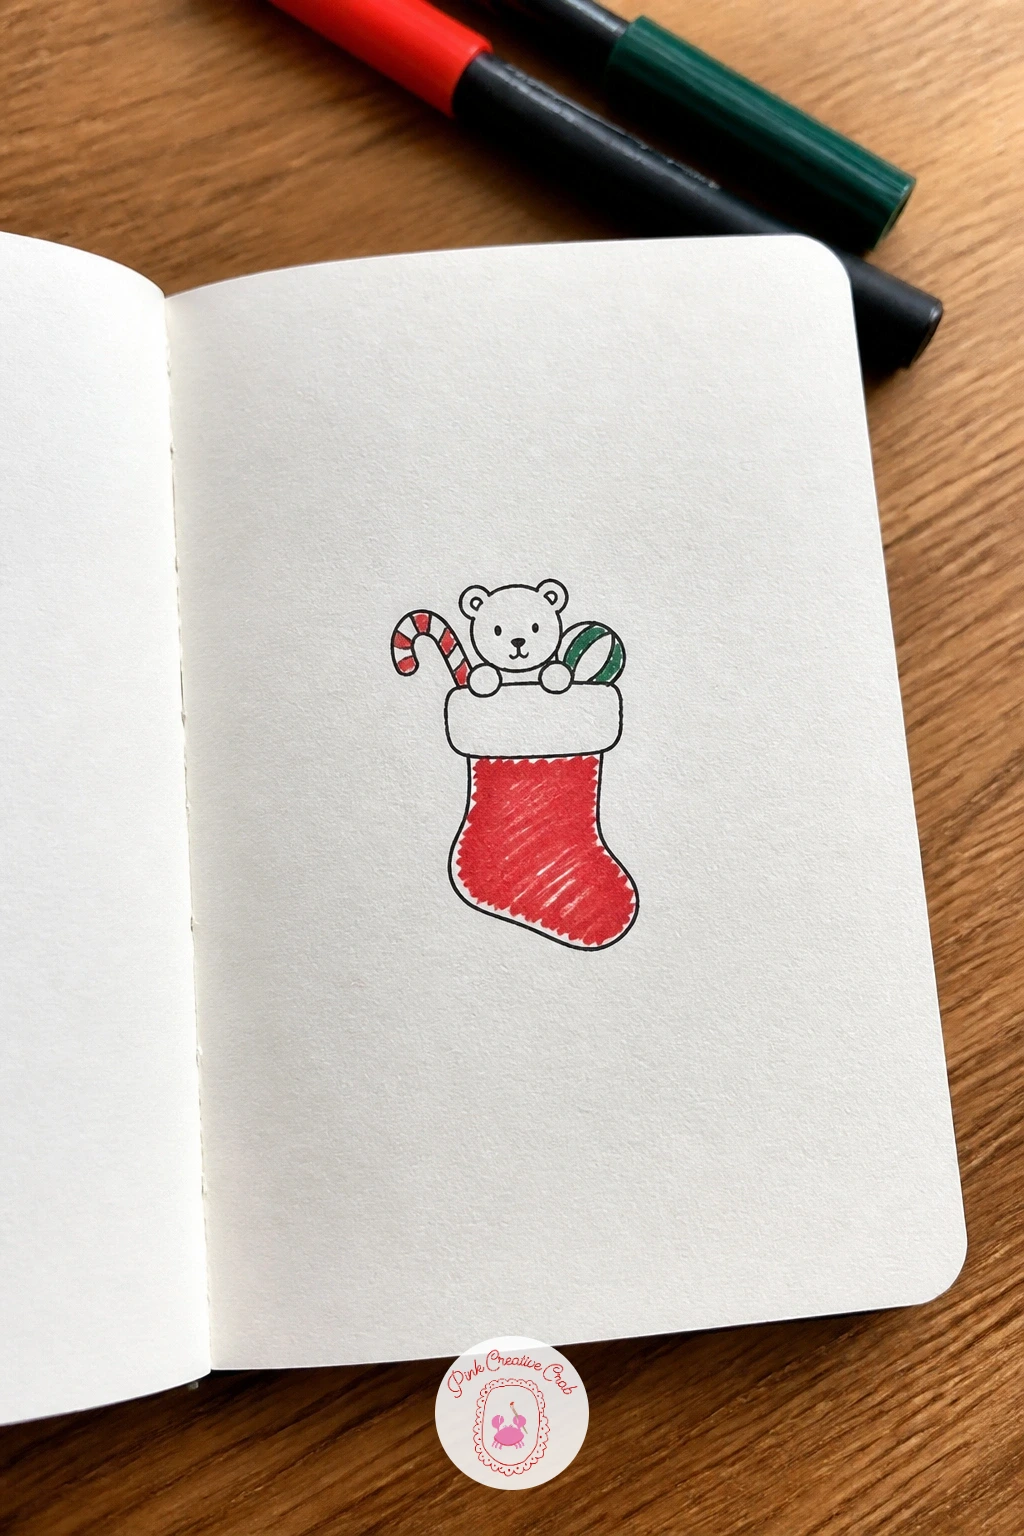
Return to the stocking shape with a stocking full of toys, this time filled to overflowing rather than holding a sleeping cat. Draw the same long curved sock shape with a folded cuff used earlier, but this time leave the top wide open and spilling, with small toy shapes poking up and over the rim.
Keep the toys themselves simple: a round ball, a candy cane tip, the top of a small teddy bear’s head, two or three distinct silhouettes rather than a crowded jumble, since a reader’s eye needs to be able to pick each one out at a glance. Overlap them slightly for a sense of fullness without letting the shapes blur together.
Color the stocking body red with a white cuff left blank, and give each small toy its own color accent, a green ribbon on the candy cane, a red bow on the teddy bear. If the stocking looks too stiff and flat, add a slight bulge partway down its length where the toys press against the fabric from inside.
Try today: let one single toy, like the candy cane, poke out higher than the rest for a clear focal point.
You Will Need
- black fineliner
- red marker
- green marker
- brown marker (optional)
Palette: Cherry Red,Pine Green,Warm Brown
Add a slight bulge in the stocking’s side where the toys press from inside, a small detail that makes it look genuinely full rather than just decorated on top.
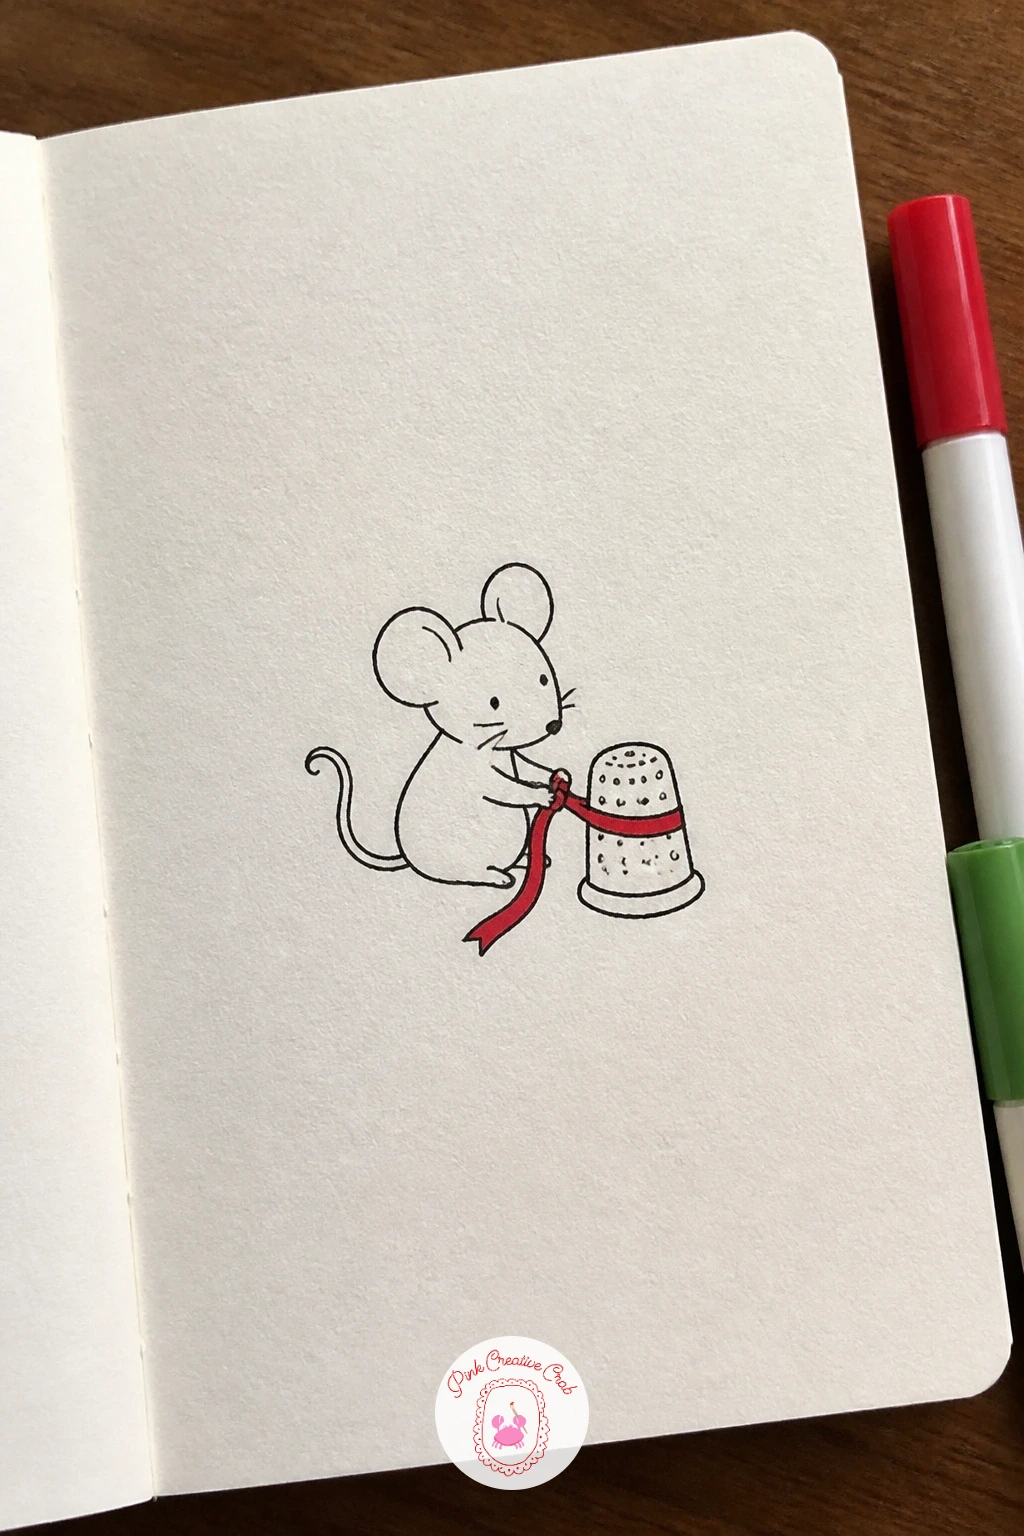
Scale right back down with a mouse wrapping a thimble present, a tiny, fiddly scene best saved for when you want more of a challenge. Draw the mouse first, a small rounded body with big round ears and a long thin tail curling behind it, sitting upright on its haunches with both front paws reaching forward.
Set a thimble in front of the mouse, drawn as a small dome shape with a grid of tiny dimple dots across its surface, then wrap a scrap of ribbon around it that the mouse appears to be tying, with the ribbon ends trailing loose rather than neatly tucked. Because everything here is so small, a fine or extra-fine fineliner tip makes a real difference over a standard one.
Color the ribbon red, the thimble itself silver or grey if you have that marker, and leave the mouse in warm grey or plain black and white outline. If the dimple dots on the thimble get too fiddly, space them out more loosely rather than trying to cram in a realistic grid.
Try today: add one tiny strand of ribbon trailing off the edge of the card as if mid-wrap.
You Will Need
- extra-fine fineliner
- grey marker
- red marker
- pencil
Palette: Cool Grey,Cherry Red,Carbon Black
Switch to an extra-fine fineliner tip for this one specifically, since the thimble’s dimple texture and the mouse’s whiskers both need a finer line than most doodles here.
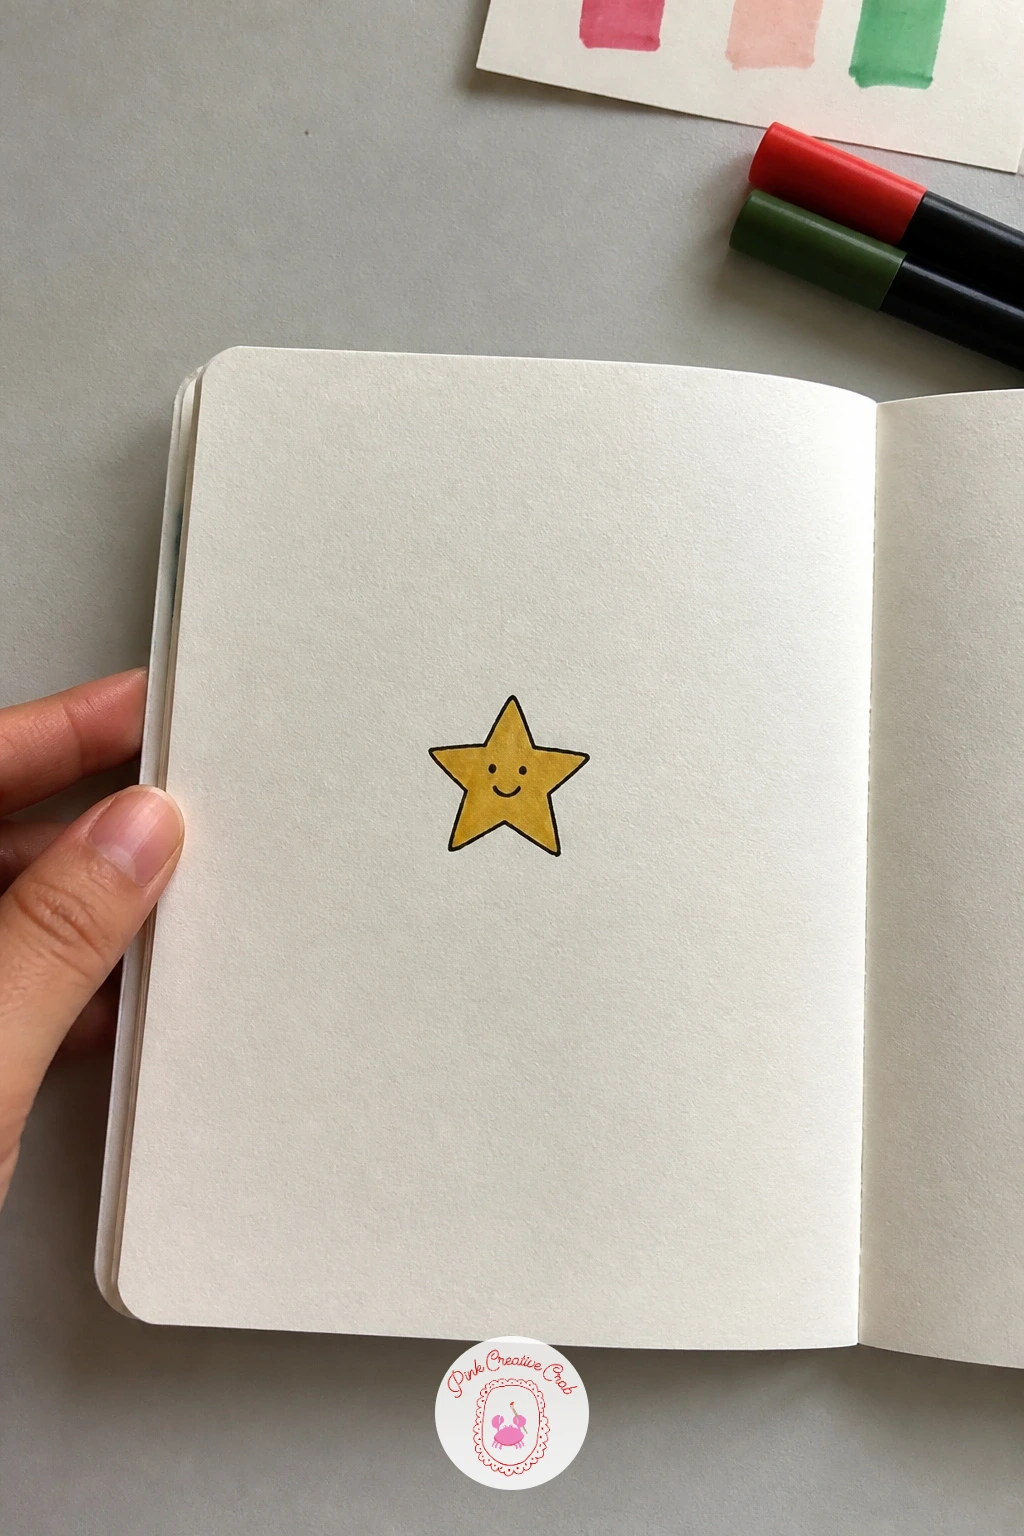
Wind down with a star with a tiny face, a cheerful last doodle that works as a border filler or a stand-alone accent. Draw a simple five-pointed star outline first, keeping all five points roughly even by lightly sketching a pencil circle as a guide and marking five evenly spaced points around it before connecting them.
Add a small face right in the center of the star: two dot eyes, a curved smile, maybe a tiny blush mark on each cheek, since a face this small only needs three or four marks total to feel alive rather than blank. Keep the features small and centered rather than spread toward the star’s points, where they would get lost in the shape’s angles.
Color the whole star yellow or gold, leaving the face itself as plain black line work against the color so the expression stays clear. If the star’s points come out uneven, a light pencil circle guide fixes that every time, so never skip it even on a doodle this small.
Browse more small character doodles with faces like this one in this beginner Christmas doodles roundup.
You Will Need
- black fineliner
- pencil and compass or round object
- gold or yellow marker
Palette: Golden Yellow,Carbon Black,Cherry Red
Try giving the star a wink instead of two open eyes on your next attempt, a tiny change that gives the same simple shape a completely different personality.
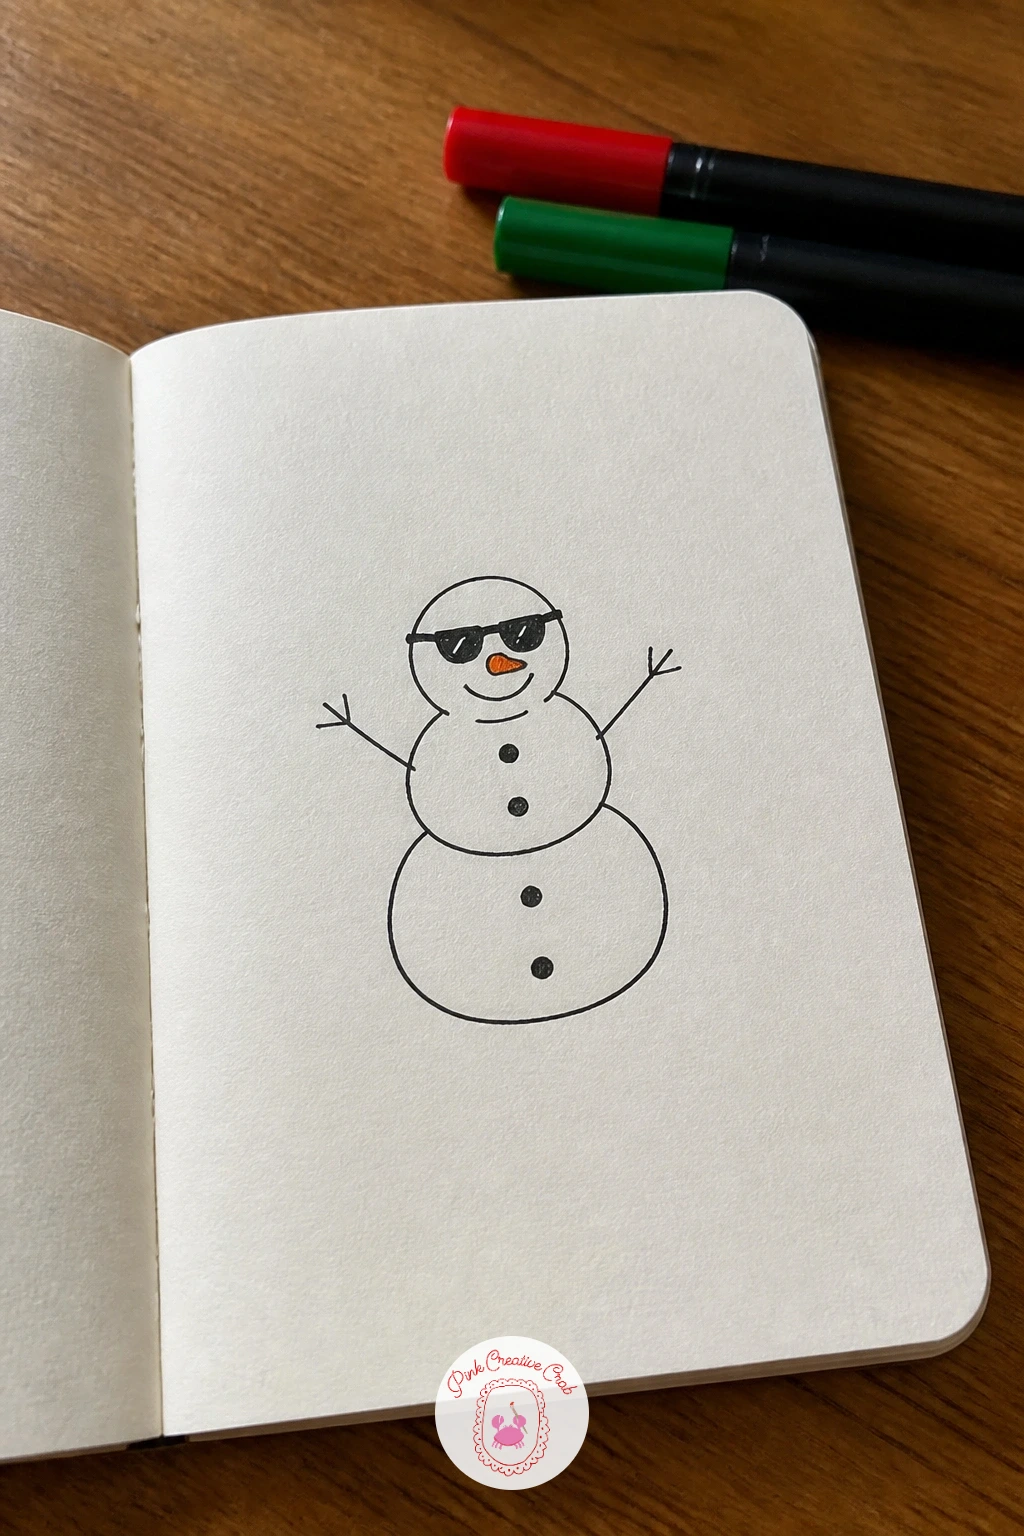
Close the list with a snowman in sunglasses, a familiar shape given one unexpected twist. Draw the three classic stacked circles, largest at the bottom and smallest at the top, keeping each circle slightly overlapping the one below it rather than floating separately, which holds the whole figure together as one stacked form.
Swap the usual coal eyes for a simple pair of sunglasses sitting across the top circle’s middle, two rounded lens shapes connected by a thin bridge line, which turns a familiar subject into something with a bit more personality and humor. Add the classic carrot nose and a row of small dot buttons down the front for the rest of the face and body.
Color the sunglasses lenses solid black and the carrot nose orange, leaving the snowman’s body entirely white (plain paper) outlined only in fineliner. If the three circles end up uneven in size, draw them in pencil first and adjust sizes before inking, since the stacked proportion is what makes or breaks a snowman.
Find more playful winter character ideas like this one in this cozy winter doodles guide for a bigger set of options.
You Will Need
- black fineliner
- orange marker
- pencil
Palette: Carbon Black,Burnt Orange,Cherry Red
Sketch all three circles in pencil and compare their sizes side by side before inking, since a snowman reads as off balance the moment one circle is too big.
What to Do Next
Pick one doodle that matches how much time is on hand today, a quick snowflake or candy cane if it is short, a sleigh or snow globe if there is more time to spare. Start on a scrap of the same cardstock the real cards use, pencil it lightly, ink it, then let the marker accents finish the job.
Frequently Asked Questions
What pens work best for christmas card doodles?
A black fineliner in a fine or medium tip works best, since it gives a clean, consistent line at the small scale cards and tags need. Keep a finer tip on hand too, for tiny details like whiskers or thimble texture.
Do I need to be good at drawing to try christmas card doodles?
No, these doodles are built from simple rounded shapes like circles, ovals and triangles that most hands can manage with a little practice. Sketching lightly in pencil first before inking removes most of the pressure.
How do I stop marker color from bleeding into the black ink?
Let the fineliner ink dry for at least a minute before adding any marker color, since wet ink and fresh marker will smudge together instantly. Testing on scrap cardstock first also shows how much a particular marker tends to bleed.
Can I use colored pencil instead of marker for the accents?
Yes, colored pencil works well as a swap and gives a softer, less saturated look than marker. It needs a bit more pressure and layering to reach the same depth of color, especially for solid reds and greens.
How small can these doodles go on a gift tag?
Most of these doodles work well down to about one and a half inches, as long as fine details like dimple dots or tiny faces are simplified further. A finer fineliner tip helps keep small doodles from looking cramped or muddy.
Have any thoughts?
Share your reaction or leave a quick response — we’d love to hear what you think!
-
 0
-
0
-
0
-
0
-
0
-
0


