

A mini doodle is the perfect size for a coffee break: small enough to finish before the cup goes cold, charming enough to fill a whole page with little scenes once you get going. Grab a fineliner, a notebook you don’t mind messing up, and a couple of markers, and every one of these 33 ideas below is ready to go from first line to last in one sitting.
You will find tiny food, pocket-sized animals, sleepy weather and small happy objects, each with its own quick trick for getting the shapes right and the line clean. Work through them in order, easiest first, or just flip down the list and draw whatever makes you smile today.
Using these images: free for personal projects such as printing, coloring, cards, journals and gifts. Handmade items that include them may be sold up to 30 pieces per design. More than that is commercial use and is not permitted, and neither is selling or sharing the images themselves or passing them off as your own. Please ask before any other use.
Start the page with a cactus wearing a party hat, since round cactus shapes are the gentlest way into mini doodles. Draw one plump oval or two stacked circles for the body, then a tiny triangle hat on top with a zigzag line for the party trim and a little pompom dot.
Work in fineliner from the outline inward: body first, then the hat, then short V-shaped marks scattered over the cactus for spines. If the spines start looking too busy, stop after a dozen marks, less is friendlier at this size.
Color the cactus body in mint marker and the hat in pink, leaving the pompom white. A small pot under the cactus with a short wavy soil line finishes it.
If your marker bleeds through thin paper, swap to coloring pencil for the same soft fill without the show-through.
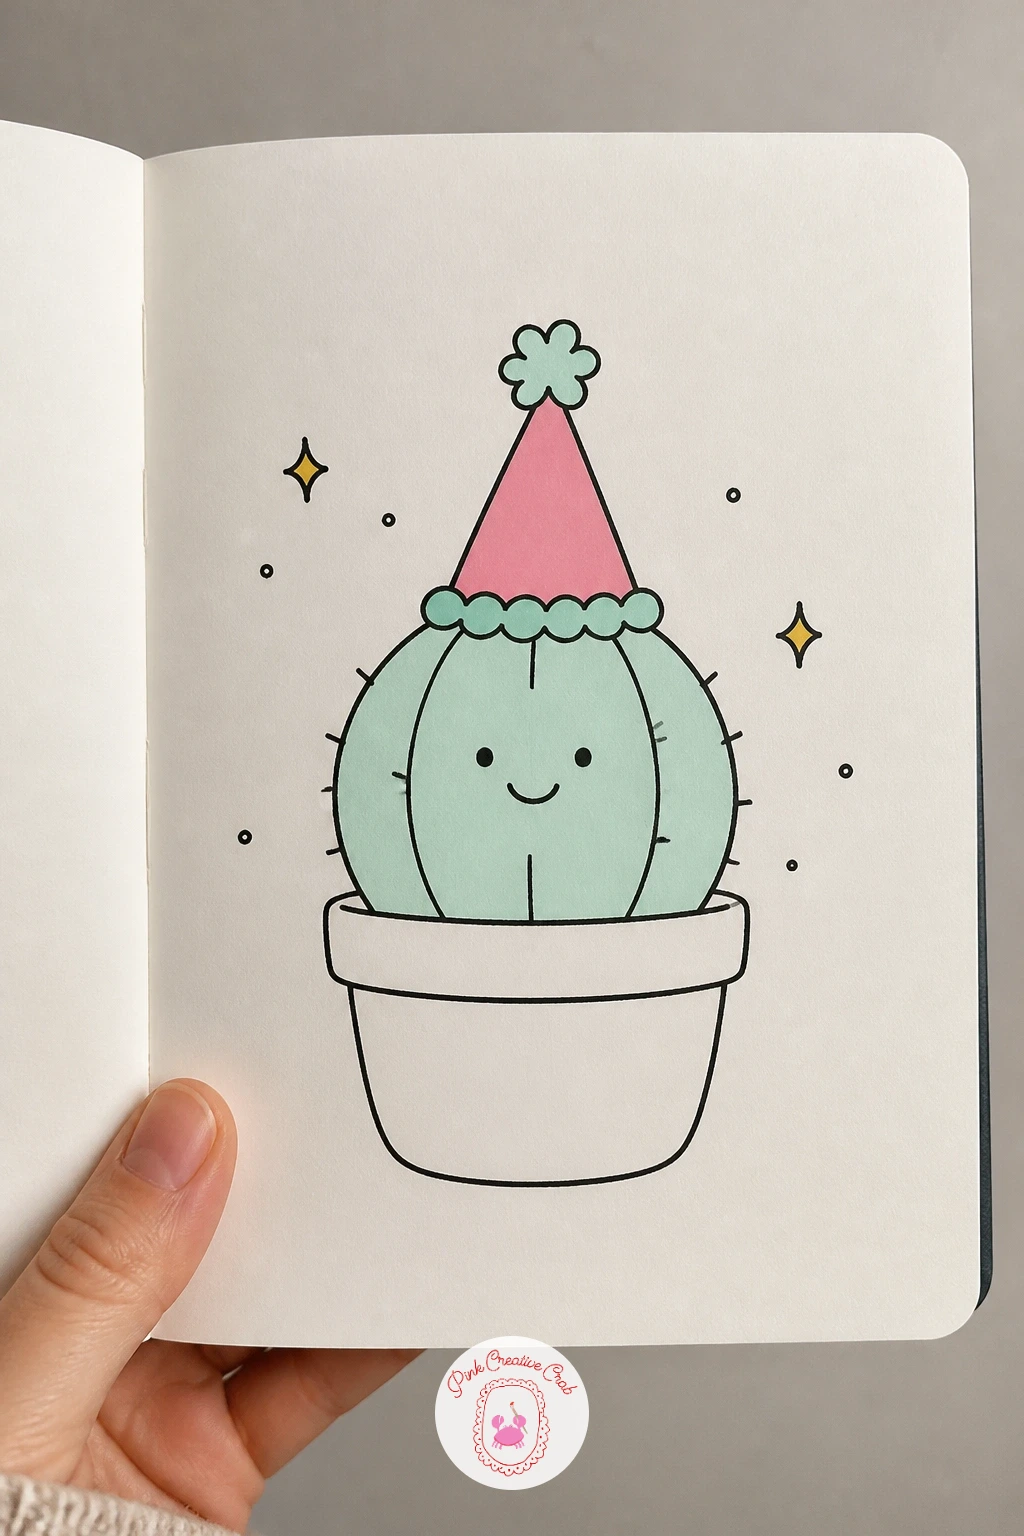
Palette: Mint Green,Soft Pink,Ink Black
Follow the cactus with something sweeter: a mini cupcake with a candle, built from just two shapes. Draw the fluted cup first with a few vertical wavy lines, then a swirl of frosting on top that curls like a soft-serve cone.
Add the candle last so it sits centered and slightly tilted, with a small teardrop flame. Keep the frosting swirl to two or three loops, more than that and it stops reading clearly at this size.
Color the cupcake liner in pink stripes and the frosting swirl in mint, leaving the candle white with a tiny yellow or orange flame if you have a marker for it. A scatter of three small dots nearby reads as sprinkles without extra drawing.
If your swirl comes out lopsided, go over it once more in a single confident stroke rather than retracing it line by line.
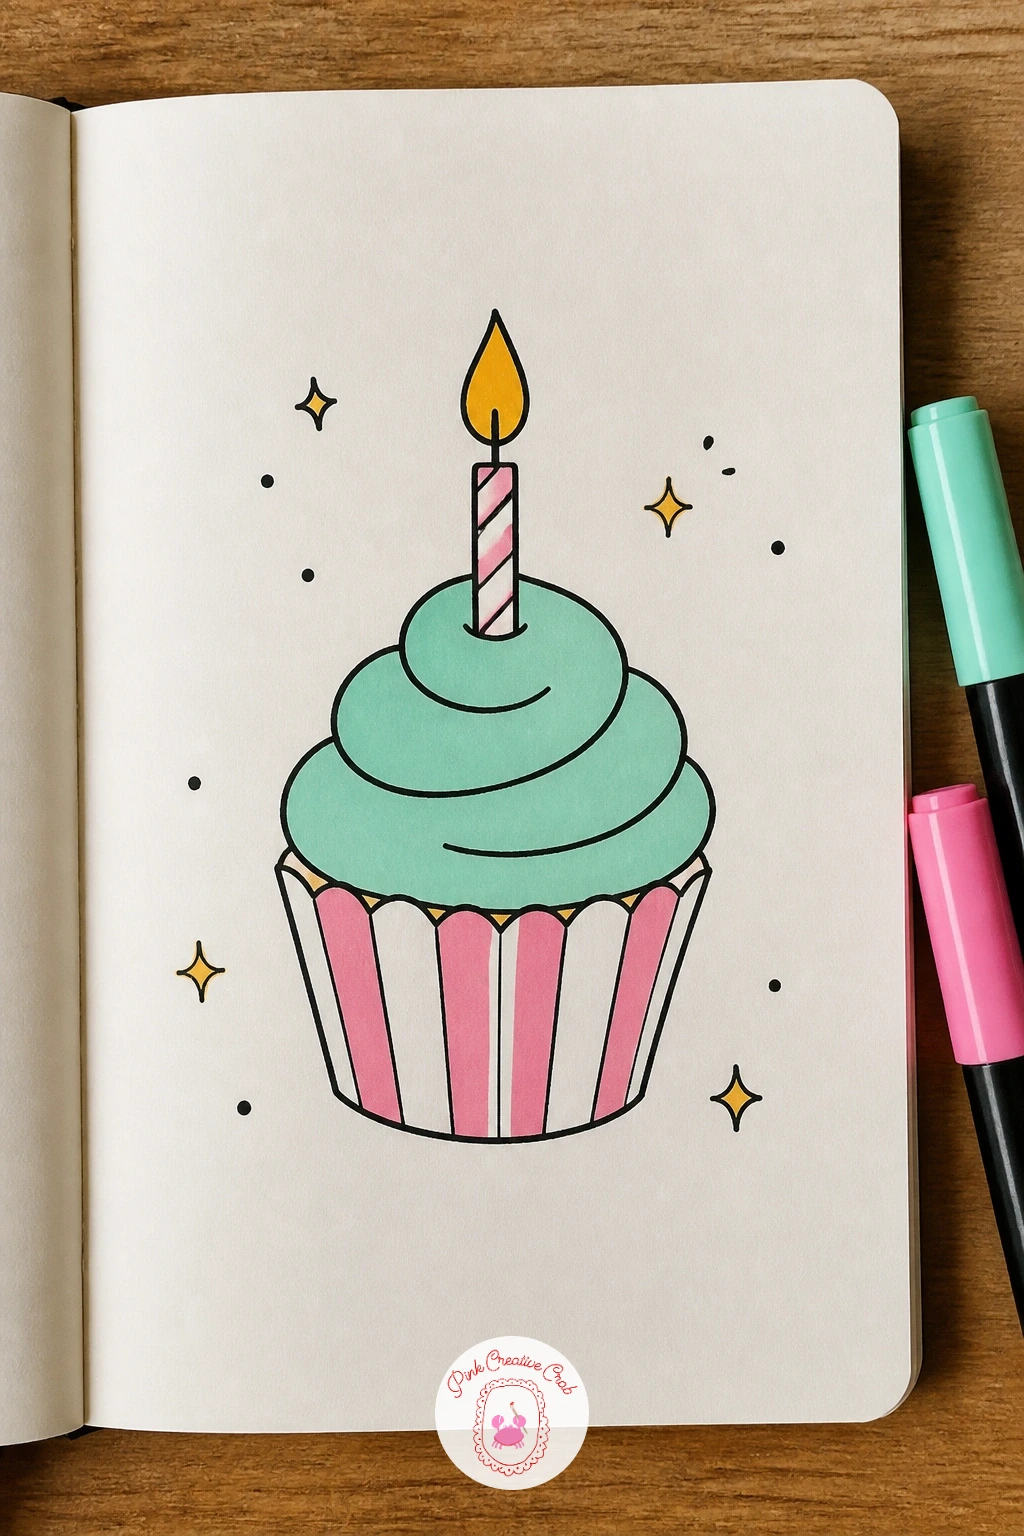
Palette: Soft Pink,Mint Green,Ink Black
Give the page a little companion with a pocket-sized cat peeking out of a coffee cup. Draw the cup first as a simple rounded rectangle with a handle, then add the cat’s head and two paws resting on the rim as if it climbed in for warmth.
Keep the cat’s face to two dot eyes, a small triangle nose and a few whisker lines, that is all a face needs at this scale. Work the steam lines above the cup last, two or three soft wavy strokes rising up.
Fill the cup in pink marker and leave the cat’s fur as white paper with fineliner outline only, which keeps the contrast crisp. A fun way to see how other artists handle small expressive faces is to look through cute sketchbook ideas of animals working little jobs for reference.
If the cat’s head ends up too big for the cup, just widen the cup rather than starting over.
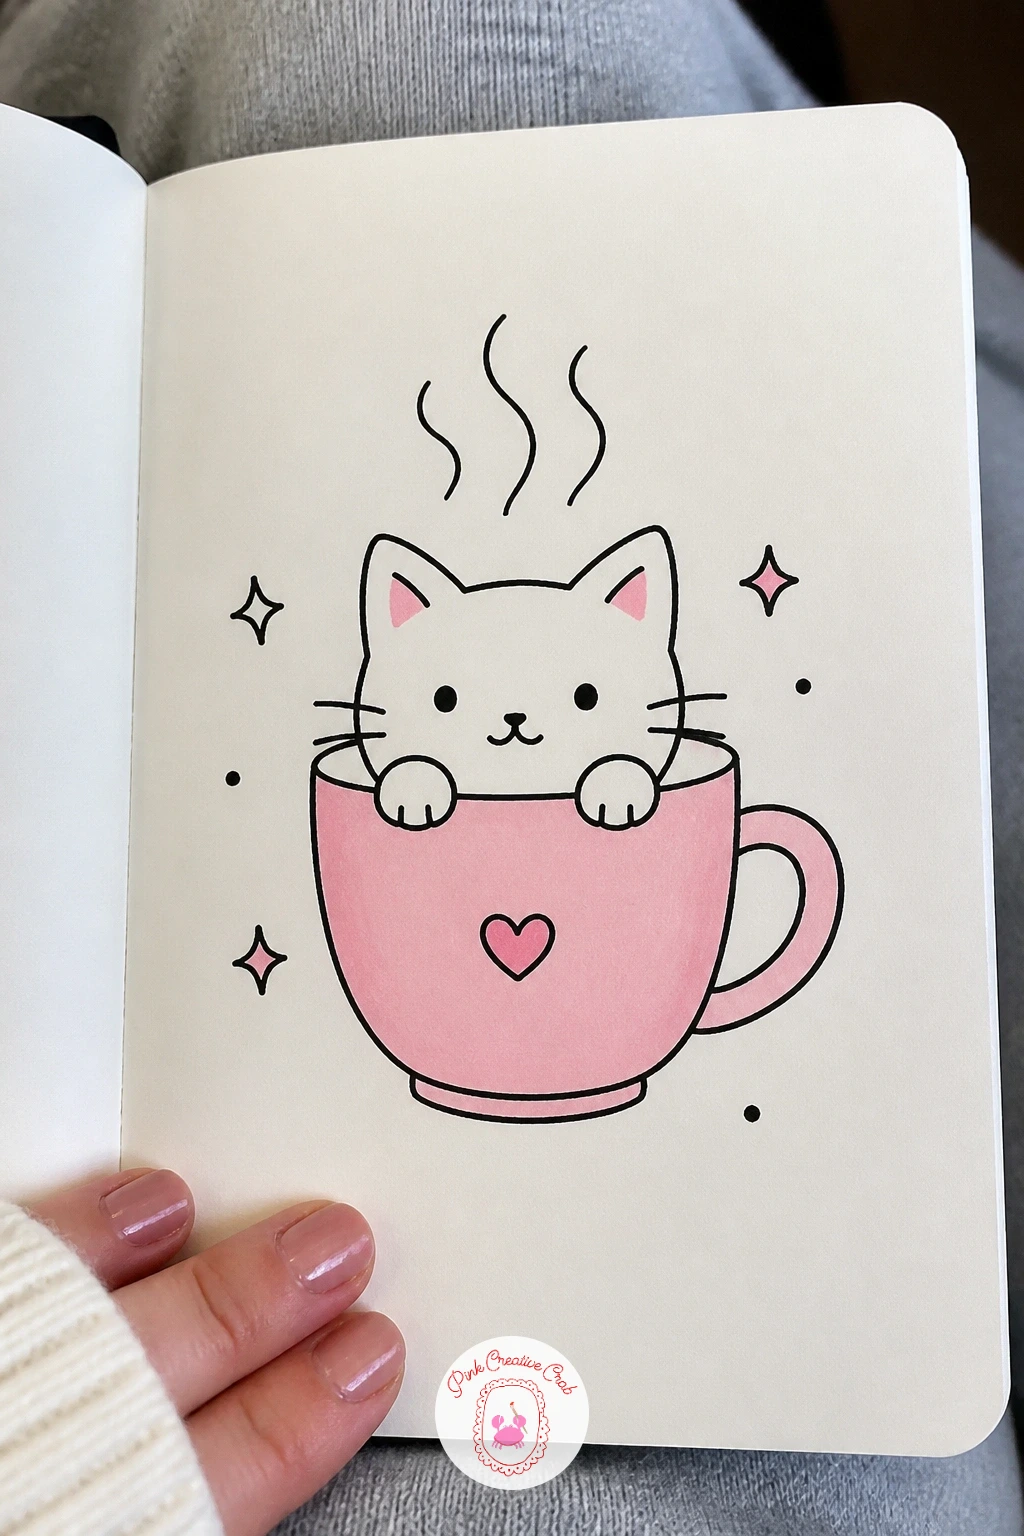
Palette: Soft Pink,Ink Black,Pale Grey
Move into a tiny weather scene with a little cloud raining on a sprout, a nice two-part composition for practicing where things sit on the page. Draw the cloud first as a row of overlapping bumps, positioned a little above and to one side of where the sprout will go, since the rain needs room to fall between them.
Add three or four short diagonal rain lines dropping straight down from the cloud’s underside, then draw the small sprout below with two curved leaves and a short stem. Keeping the rain lines parallel and at the same angle is what makes the scene feel like one moment rather than two separate doodles.
Color the cloud in a light mint wash and the sprout’s leaves in a slightly deeper green marker if you have one, or the same mint for simplicity. Leave the rain lines black so they stay crisp against the page.
One concrete tip for today: draw the cloud and sprout’s positions lightly in pencil first so the rain lines land exactly between them before you commit in ink.
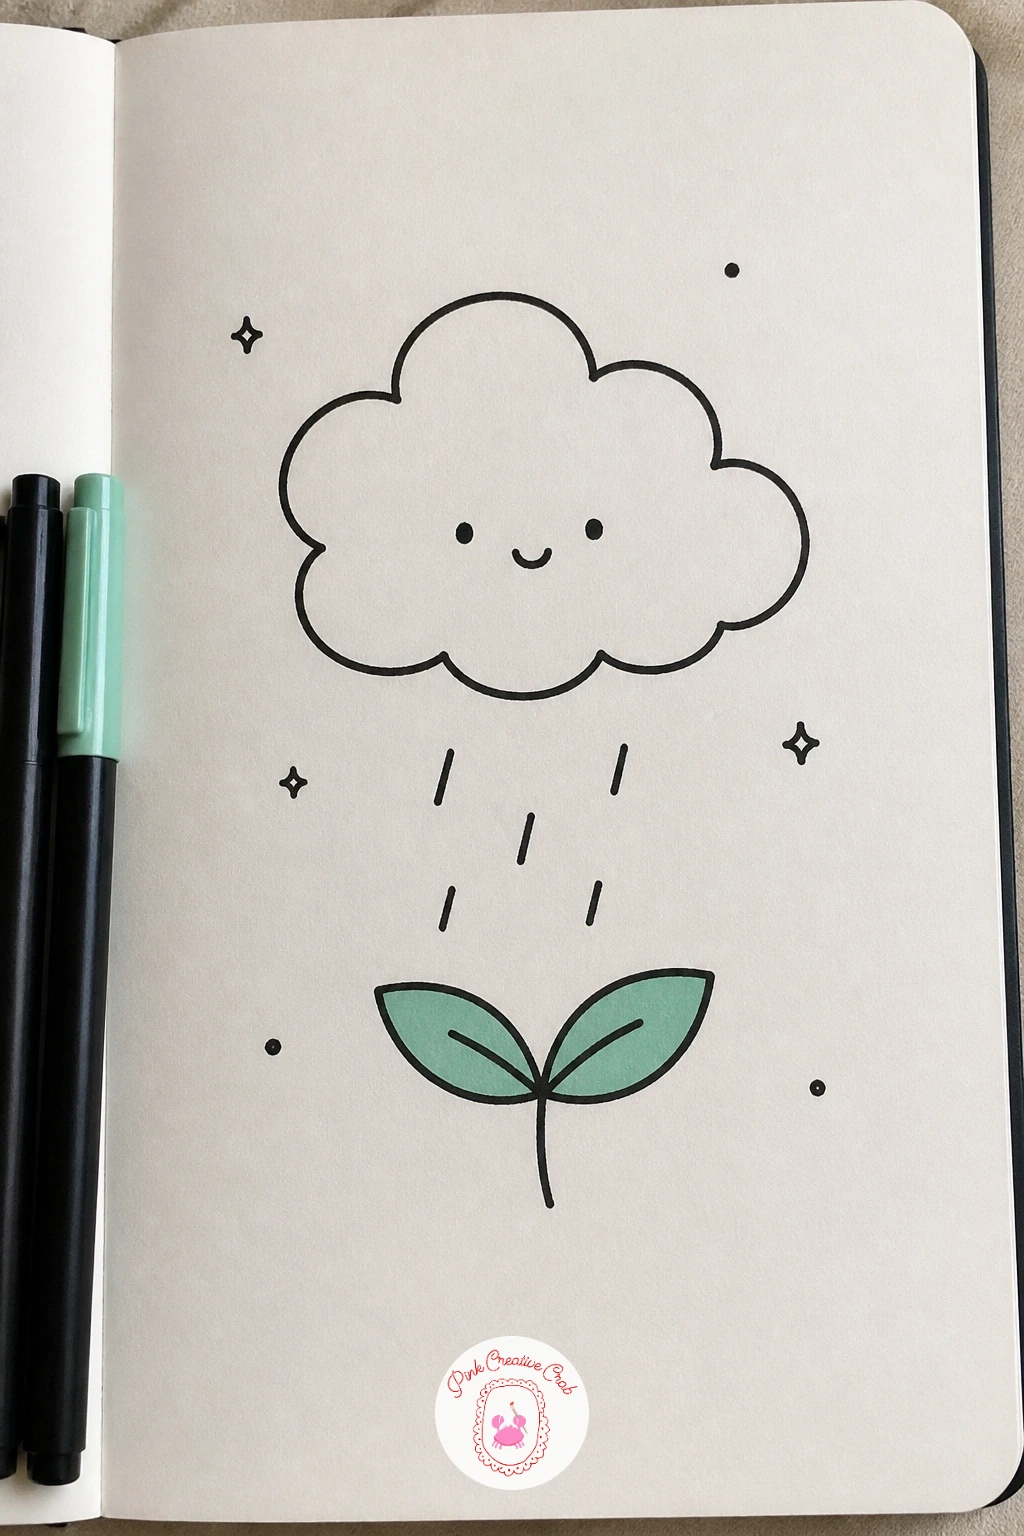
Palette: Mint Green,Ink Black,Soft Pink
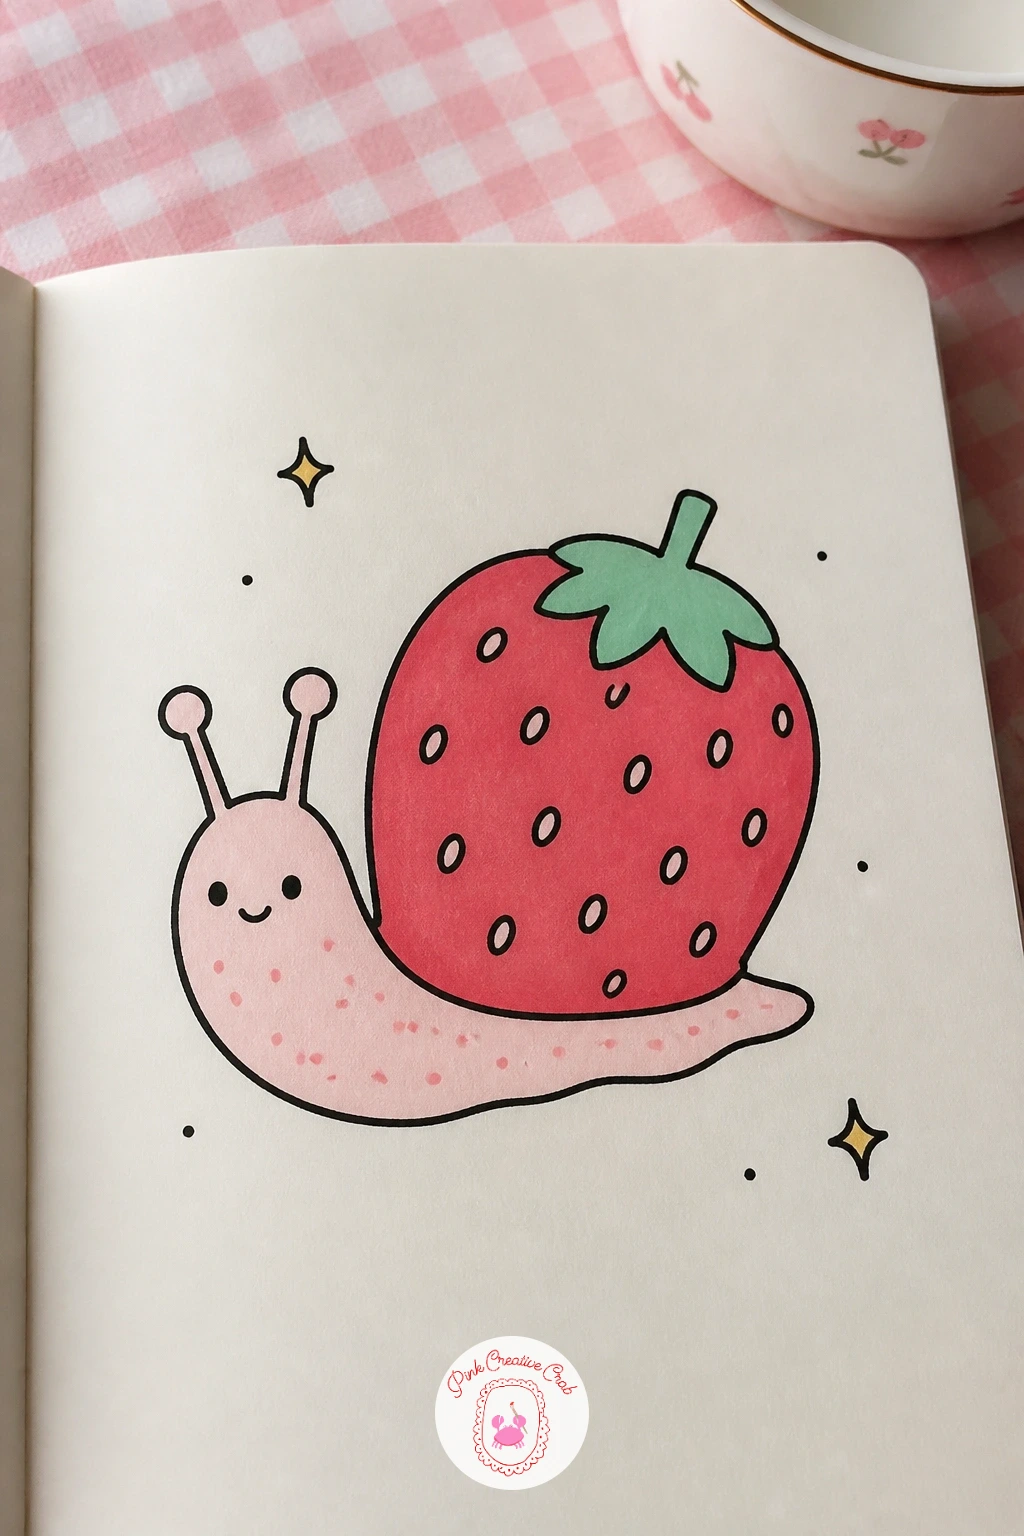
Swap the shell on an ordinary snail for a strawberry and you get one of the sweetest mini doodles on this list. Draw the strawberry shape first, rounded at the bottom and narrowing to a point, with a few small seed dots and a leafy green cap at the top where the shell opening would be.
Attach the snail’s body curling out from underneath, a simple S-curve tail and a small head with two thin antennae topped by dot eyes. The usual trouble spot is where the body meets the shell, so overlap the lines slightly rather than trying to join them edge to edge.
Color the strawberry in pink marker with the seeds left white or dotted in black, and the leafy cap and snail’s body in mint. If pink marker looks too solid for the strawberry’s texture, try leaving a few random white gaps in the fill for highlights.
Keep the antennae thin and slightly wobbly, perfectly straight lines look stiffer than a snail should.
Palette: Soft Pink,Mint Green,Ink Black
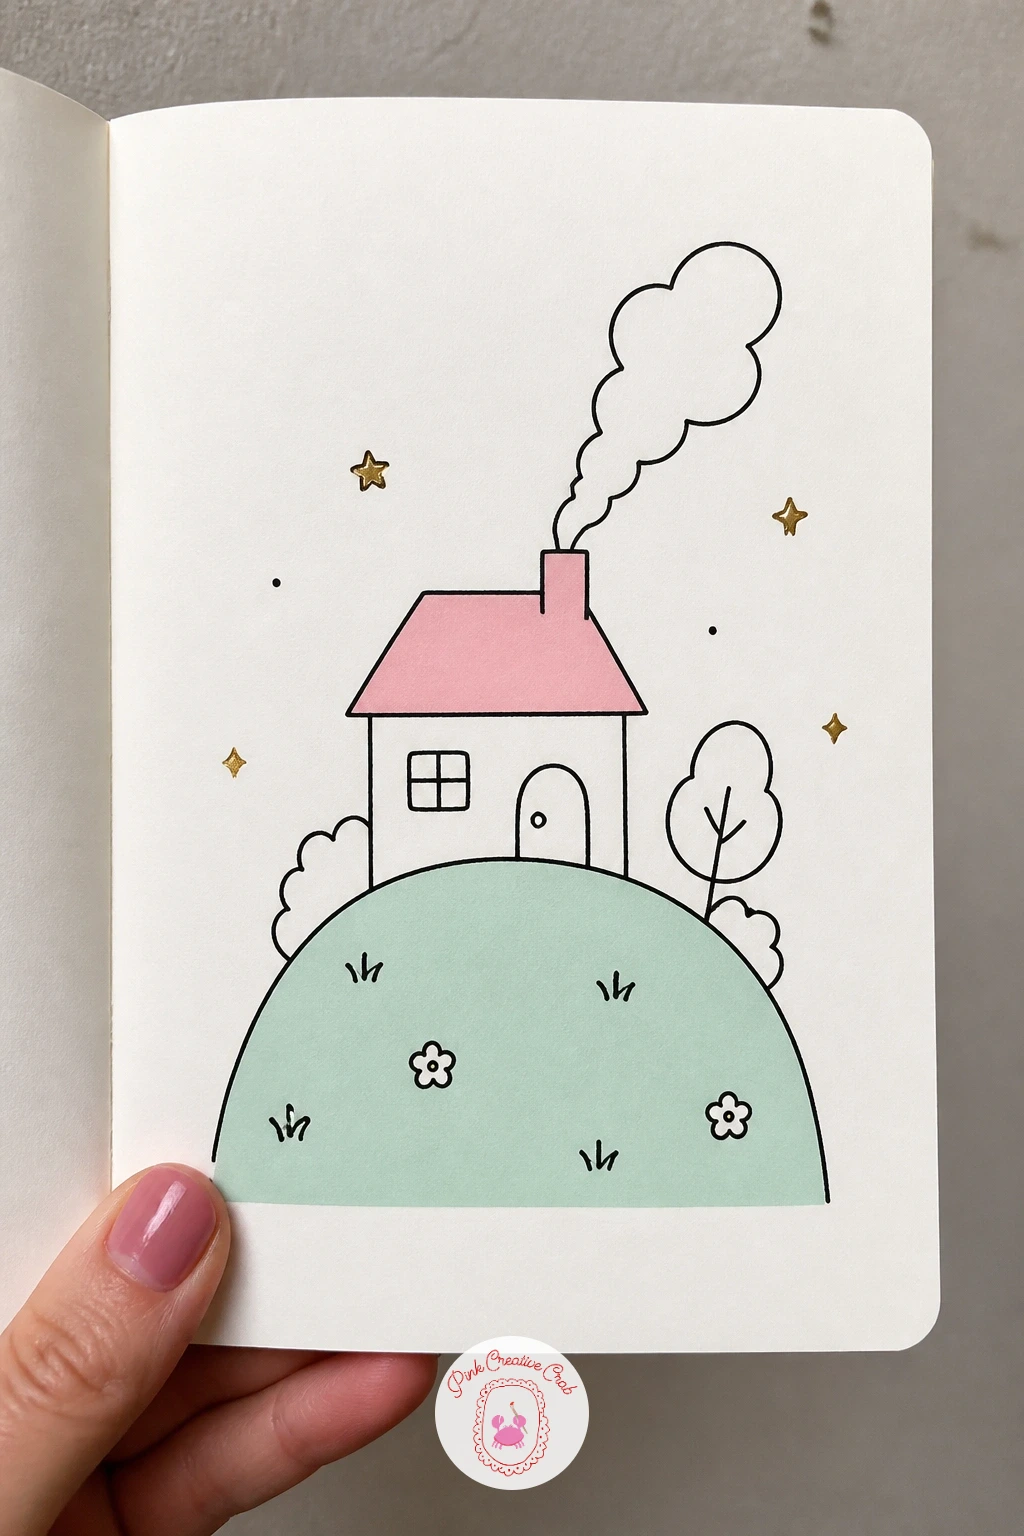
Give yourself a small landscape with a tiny house on a hill with chimney smoke, which works well once a few food and animal doodles are behind you. Draw the hill first as one gentle curved line across the lower third of the space, then set a small square house with a triangle roof sitting on top of it.
Add a tiny door, one window, and a thin chimney with two or three curling smoke lines drifting up and to one side. Eye level sits low here, right at the base of the hill, which is why the house reads as sitting on top of the curve rather than floating beside it.
Color the roof in pink and the hill in mint, leaving the house walls white with black outline for contrast. A small tree or bush beside the house, just a scribble circle on a short stem, fills any empty space nicely.
If the house looks too large for the hill, shrink the roof slightly rather than redrawing the whole hill underneath it.
Palette: Mint Green,Soft Pink,Ink Black
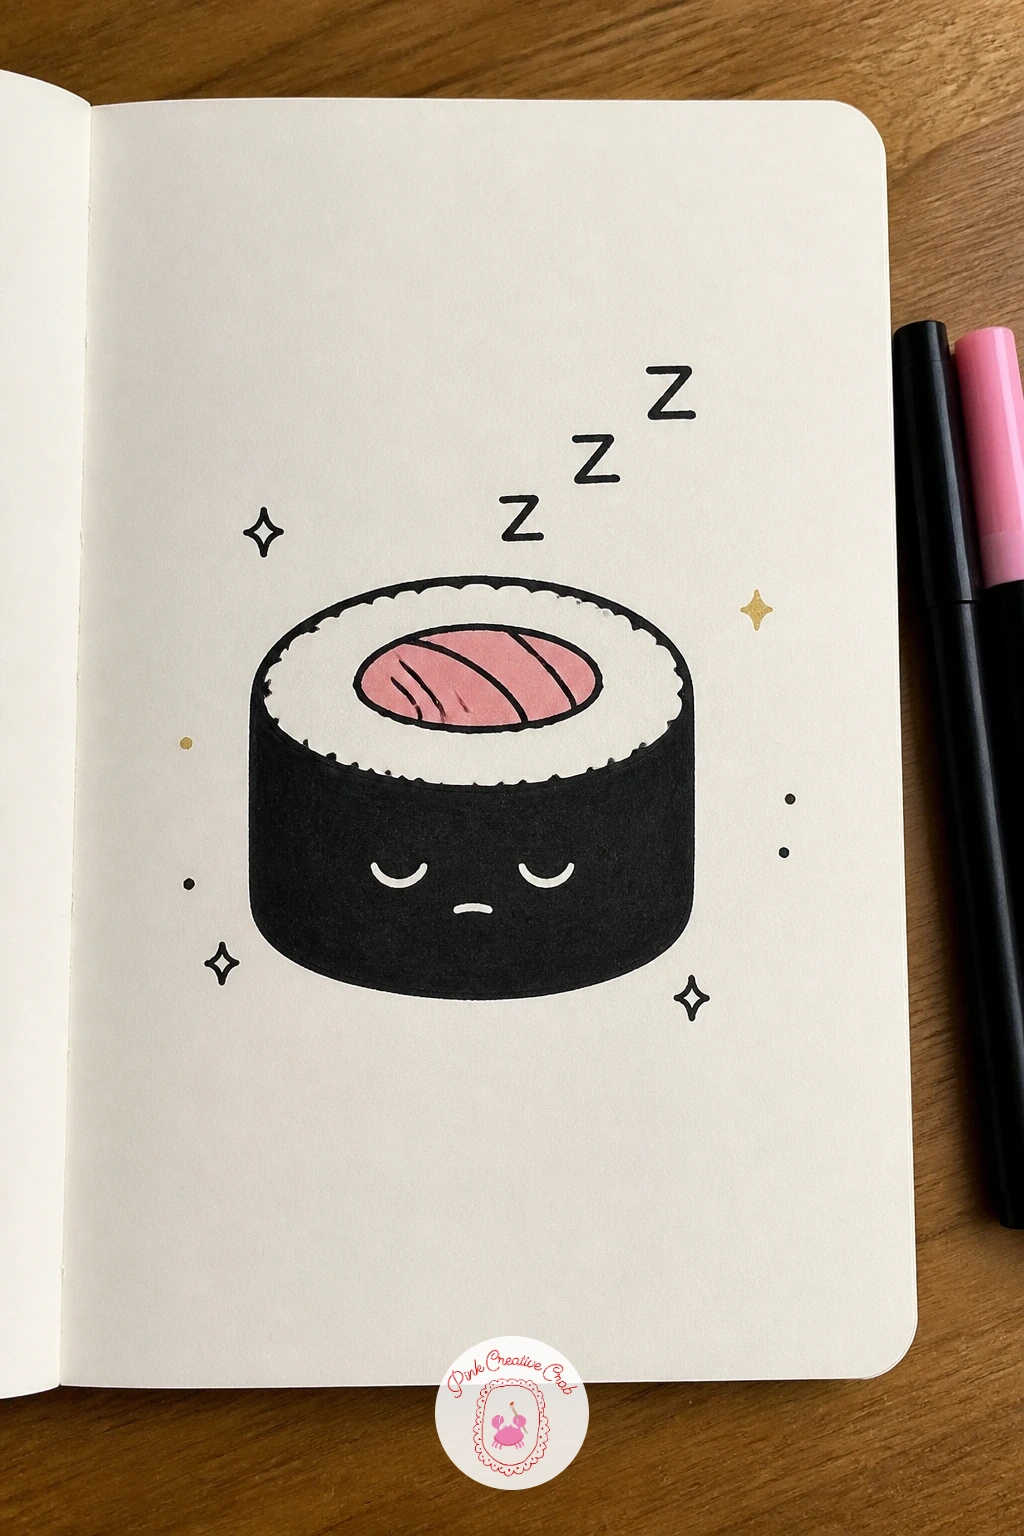
Bring a little humor in with a sleepy sushi roll, drawn as a simple circle divided by a few curved lines for the rice and filling. Draw the outer circle first, then a smaller inner circle for the nori wrap edge, and finish with one or two wavy lines inside for the filling.
Add a sleepy face right on the front of the roll, closed eyes as simple curved lines and a small “z” or two floating above its head. The trick with food faces is keeping the expression tiny and centered rather than letting it spread across the whole circle.
Color the nori band in near black marker or heavy fineliner fill, the rice area left white, and the filling in a dab of pink. A little blanket draped over the bottom half, just a soft scalloped edge, sells the sleepy idea without extra effort.
Swap the pink filling for mint if you want a cucumber roll instead, the drawing stays exactly the same.
Palette: Ink Black,Soft Pink,Pale Grey
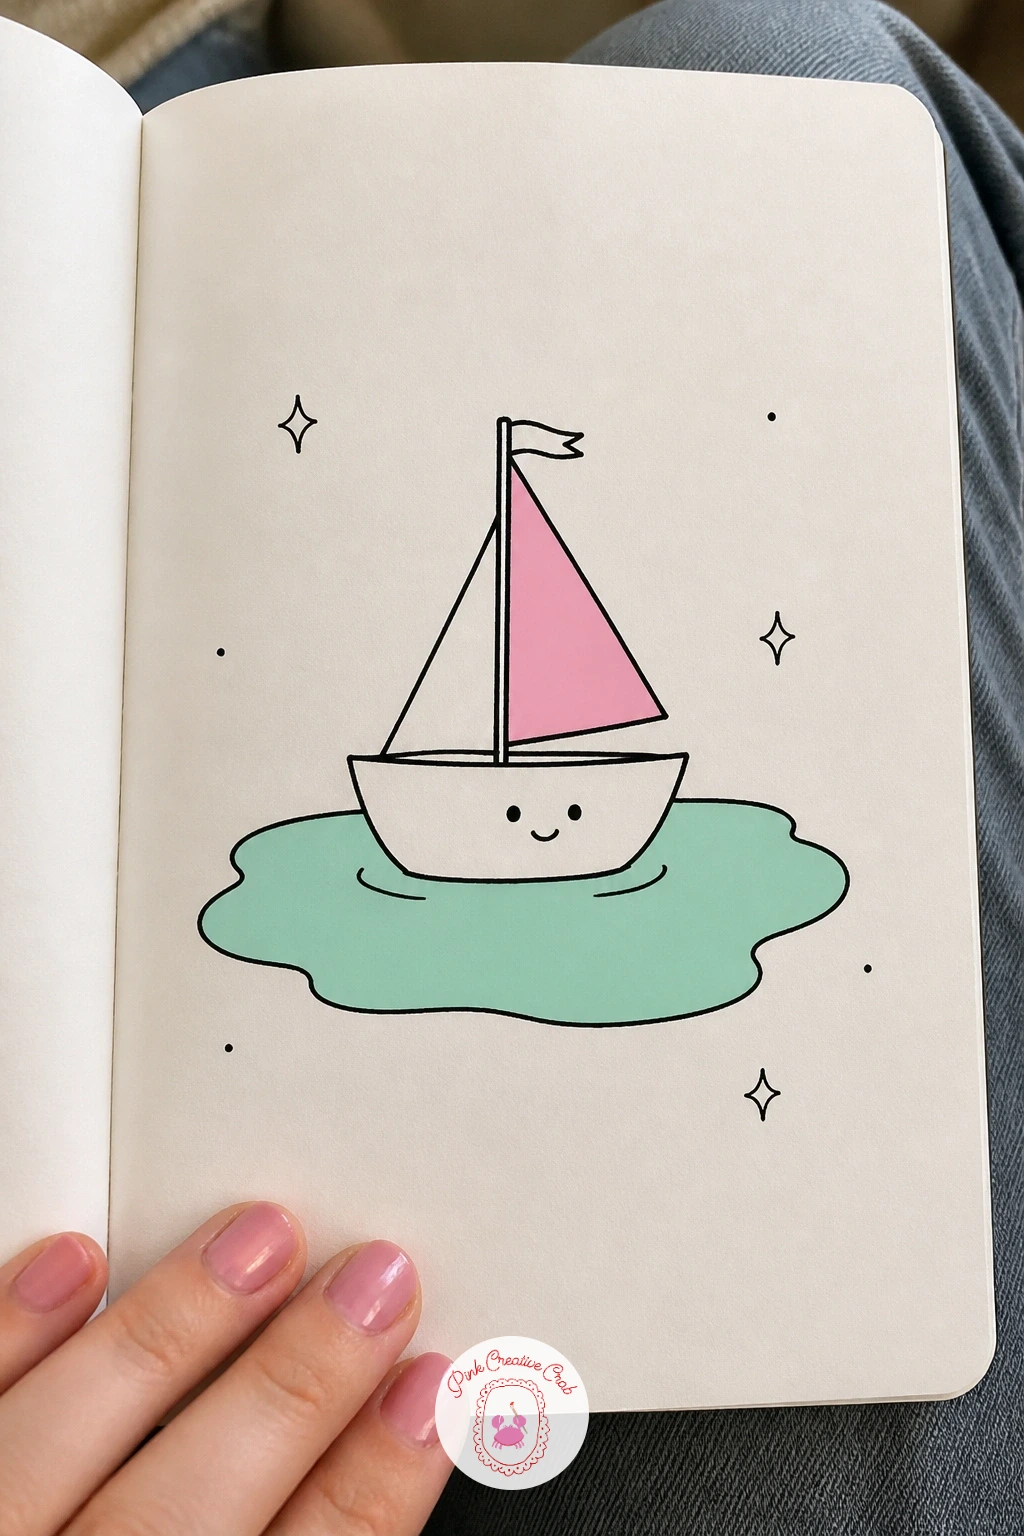
After the sushi roll, try something that plays with scale on purpose: a mini sailboat in a puddle. Draw the puddle first as one flat, irregular oval right at the bottom of the space, since everything else needs to sit inside it.
Add the boat’s hull as a simple curved triangle floating on the puddle’s surface, then a thin mast and a single triangular sail. The light source matters here, a few short curved lines on one side of the puddle suggest a ripple catching the light, which is what makes a flat oval read as water rather than a blob.
Color the puddle in a pale mint wash and the sail in pink, keeping the hull black or dark grey. If marker makes the puddle look too solid, try leaving the center lighter and only coloring near the edges for a watery feel.
A tiny cloud reflection drawn upside down inside the puddle is a nice optional touch once the basic scene feels solid.
Palette: Mint Green,Soft Pink,Ink Black
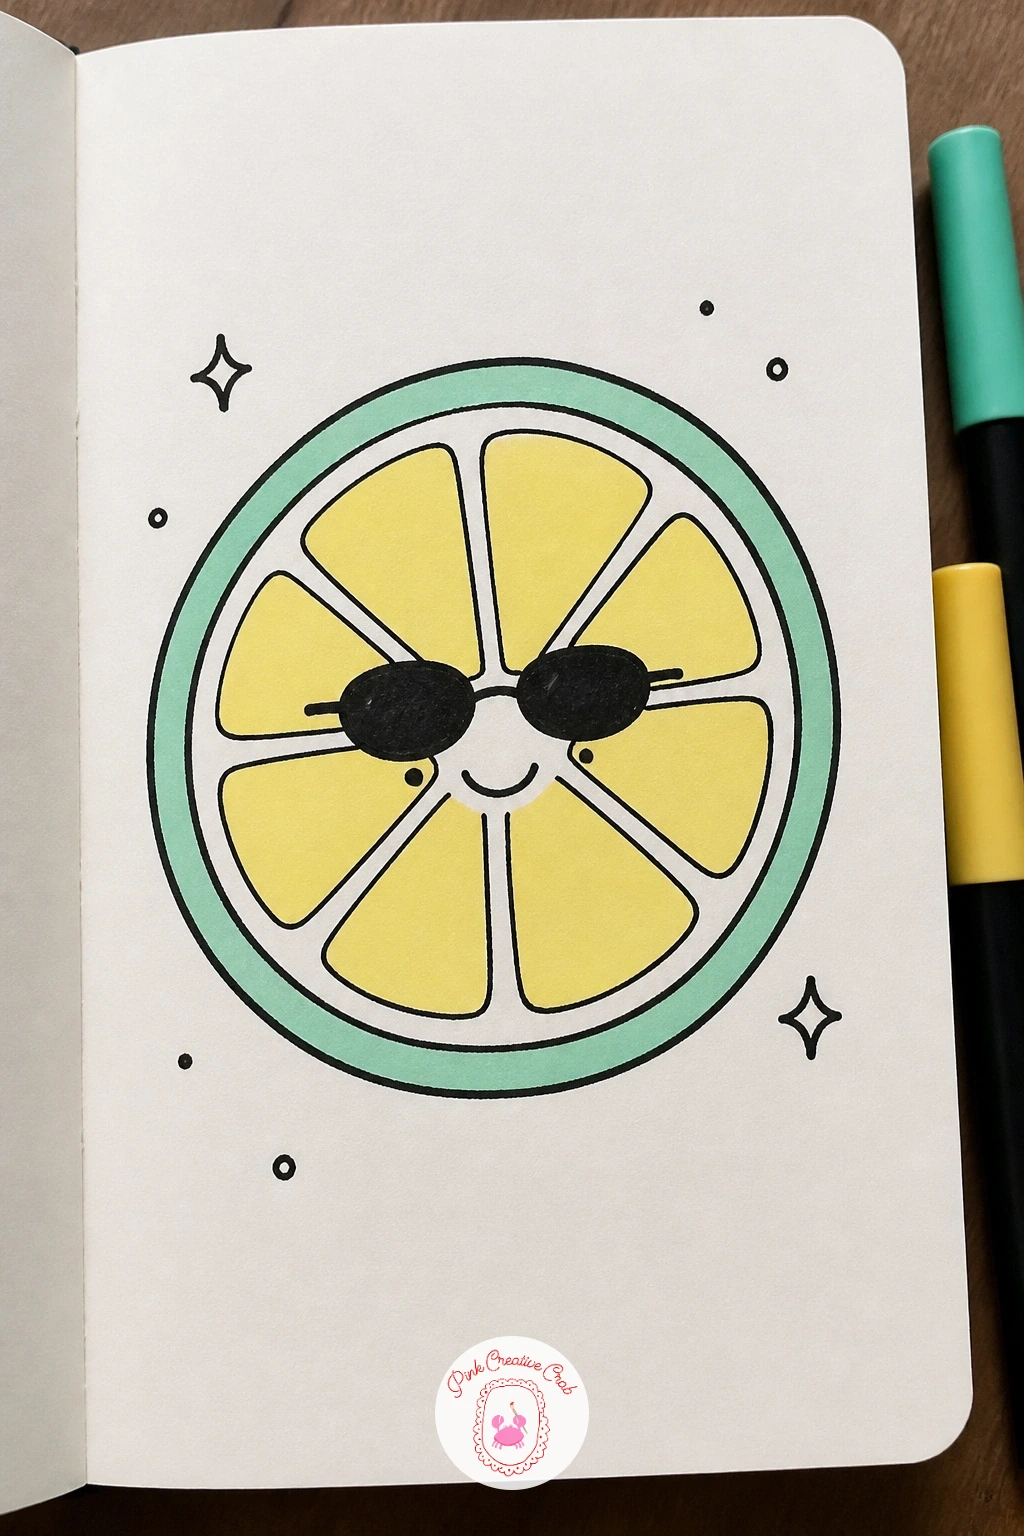
Keep the fun going with a lemon slice wearing sunglasses, a doodle built from one circle and some simple radiating lines. Draw the outer circle first, then a slightly smaller circle inside for the pith, and divide the inner circle into six or seven wedges with lines meeting near the center.
Add two small oval sunglasses sitting across the middle wedges like a face, with a simple smile curve just below. The wedge lines are the part most likely to wobble, so draw them from the outer edge inward rather than trying to hit the center dead on from outside.
Color the outer rind in mint and the wedges in a pale yellow if you have it, or leave them white with just the dividing lines in black. The sunglasses stay solid black for contrast against the bright slice.
If you want a bolder, flatter look for this one, posca art doodle ideas for bold little drawings show how opaque paint pens handle citrus brights nicely.
Palette: Mint Green,Ink Black,Soft Pink
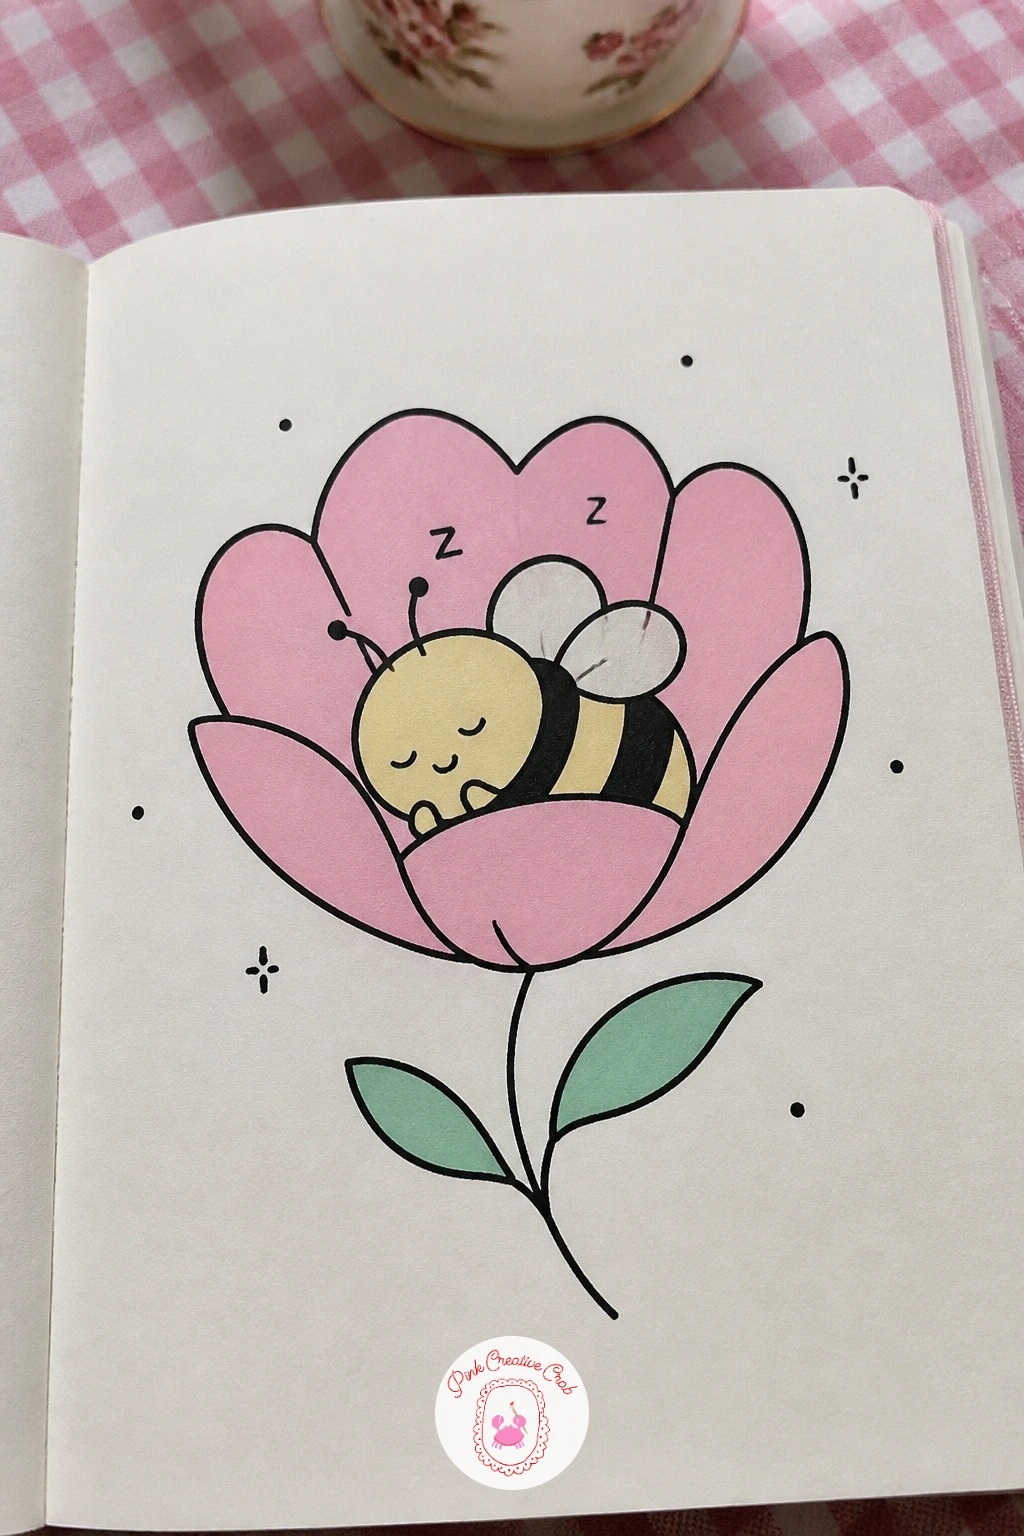
Slow the page down with a bee asleep inside a flower, a quiet little scene after the lemon’s energy. Draw the flower first as five or six rounded petals around a center circle, then nestle the bee’s small oval body right in the middle as if it curled up there for a nap.
Add two curved stripe lines across the bee’s body, tiny folded wings, and closed sleepy eyes with a small “z” floating above. Drawing the bee last and slightly overlapping the flower center is what makes it look tucked in rather than stuck on top.
Color the petals in soft pink and the bee’s stripes in black over a mint-tinted body, or leave the body white for more contrast. Keep the wings transparent by outlining only, no fill.
If the bee’s stripes look too thick, thin fineliner works better here than marker, since marker tends to spread on such a small shape.
Palette: Soft Pink,Ink Black,Mint Green
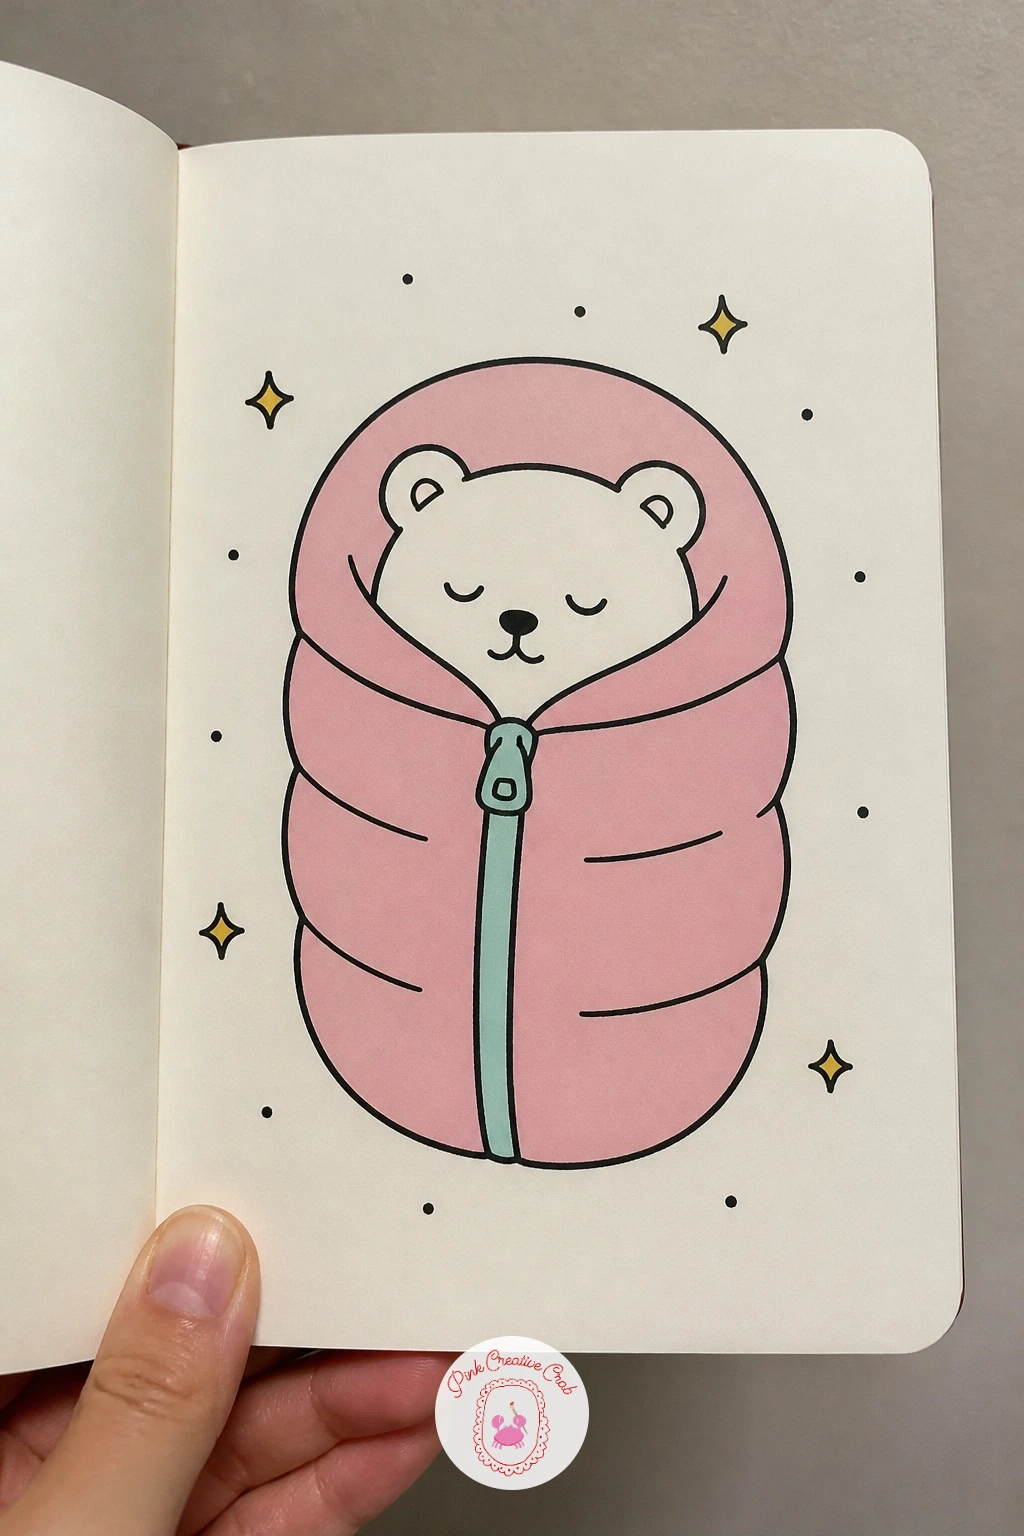
Carry the sleepy mood into a tiny bear in a sleeping bag, one of the cozier mini doodles to draw slowly. Start with the sleeping bag shape, a simple elongated oval with a scalloped or zipped top edge, then draw just the bear’s round head and two small ears peeking out above it.
Keep the bear’s face minimal, two dot eyes, a small nose, and no mouth needed since a sleeping face reads fine without one. The quick version in ten minutes stops right there; the forty-minute version adds a little pillow under the head, a few fabric fold lines on the bag, and a small star or moon doodle floating nearby for a bedtime feel.
Color the sleeping bag in pink with a mint zipper line down the middle, leaving the bear’s face and ears white with fineliner outline.
One tip worth keeping: draw the ears before the head outline so you know exactly where they interrupt the head’s curve, rather than squeezing them in afterward.
Palette: Soft Pink,Mint Green,Ink Black
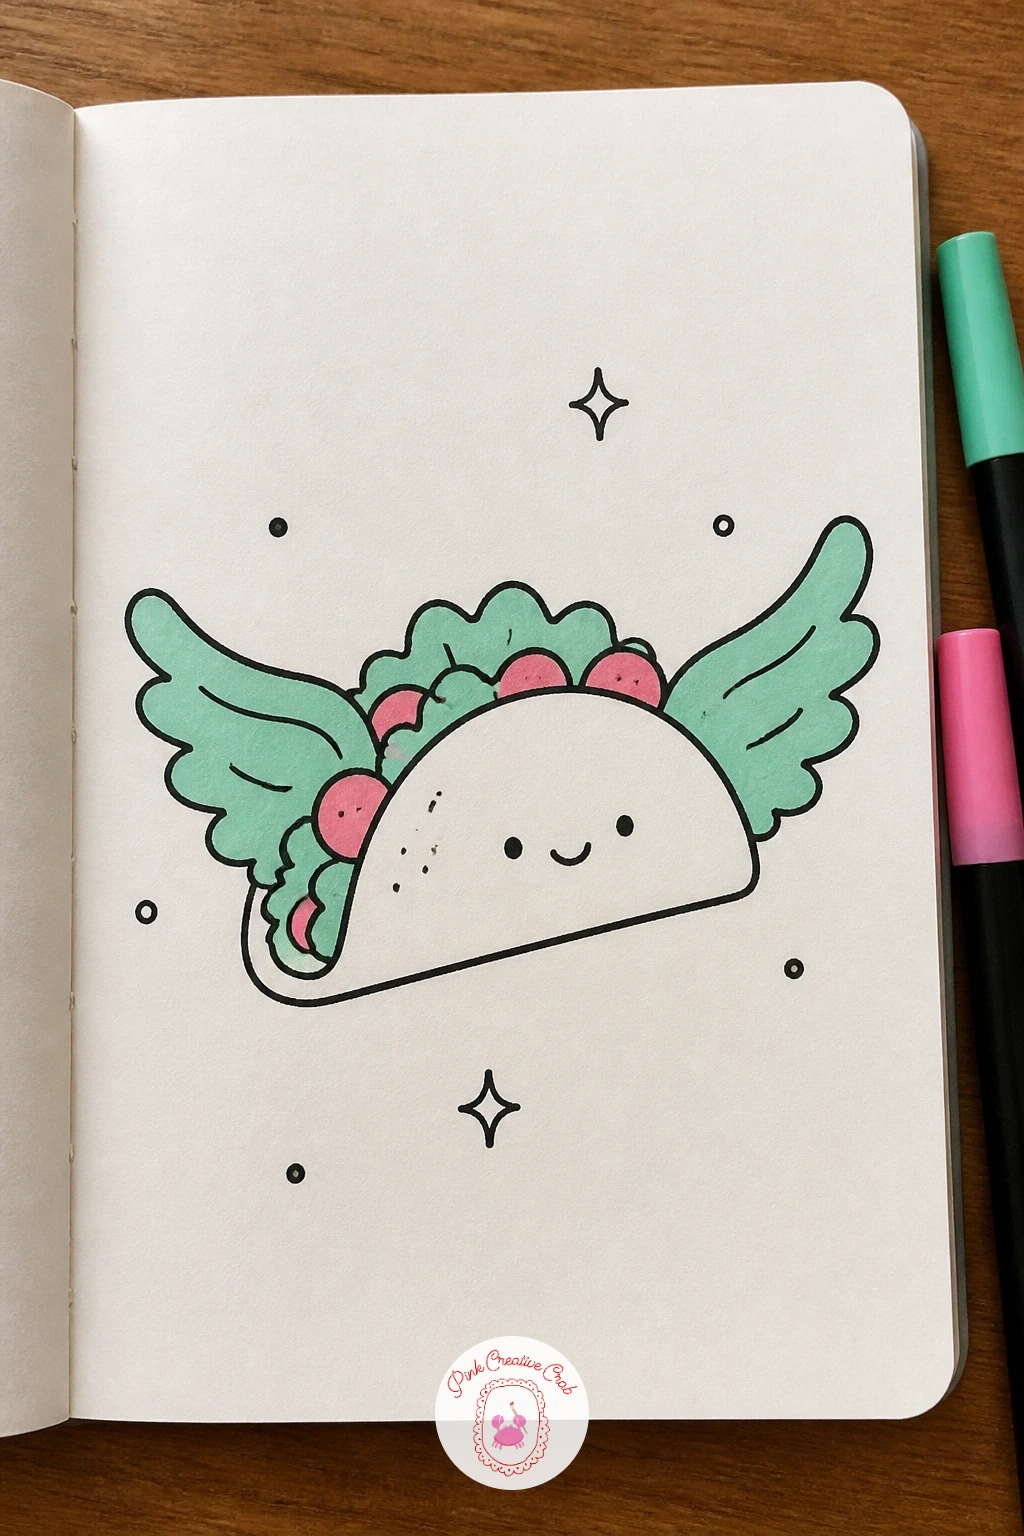
Give food a sense of humor with a mini taco with lettuce wings, where the usual taco shell gets a pair of wavy lettuce “wings” instead of a filling. Draw the taco shell first as a curved folded shape, like a smile lying on its side, then add the wavy lettuce edges spreading out from both sides like wings.
Fill the inside with a few small dots and short lines for toppings, kept loose and scattered rather than neatly arranged. The shell’s fold is the trickiest part, so draw it as one continuous curved line rather than two straight sides meeting at a point.
Color the shell in a warm tan or yellow if available, the lettuce wings in mint, and a few pink dots for tomato bits scattered on top. Add two tiny dot eyes near the top fold for a bit of character if you like.
Swap the lettuce for a different wavy shape in pink and you get a completely different little character from the same base shell.
Palette: Mint Green,Soft Pink,Ink Black
Head outdoors in miniature with a small mushroom topped by a ladybird. Draw the mushroom cap first as a simple dome, then the stem as a short rounded rectangle underneath, and finish with a few dot spots scattered across the cap for texture.
Measuring the ladybird against the cap before you draw it helps here: it should sit as a shape no bigger than a third of the cap’s width, otherwise it overpowers the mushroom. Draw the ladybird as one small oval with a thin center line and two or three dots on each side.
Color the mushroom cap in pink with white or black spots, and the ladybird in a deeper red or black with mint for the grass tuft underneath. A few short grass blades at the base finish the little scene.
If spacing the ladybird’s dots evenly feels fiddly, three dots per side is plenty, more than that just clutters a shape this small.
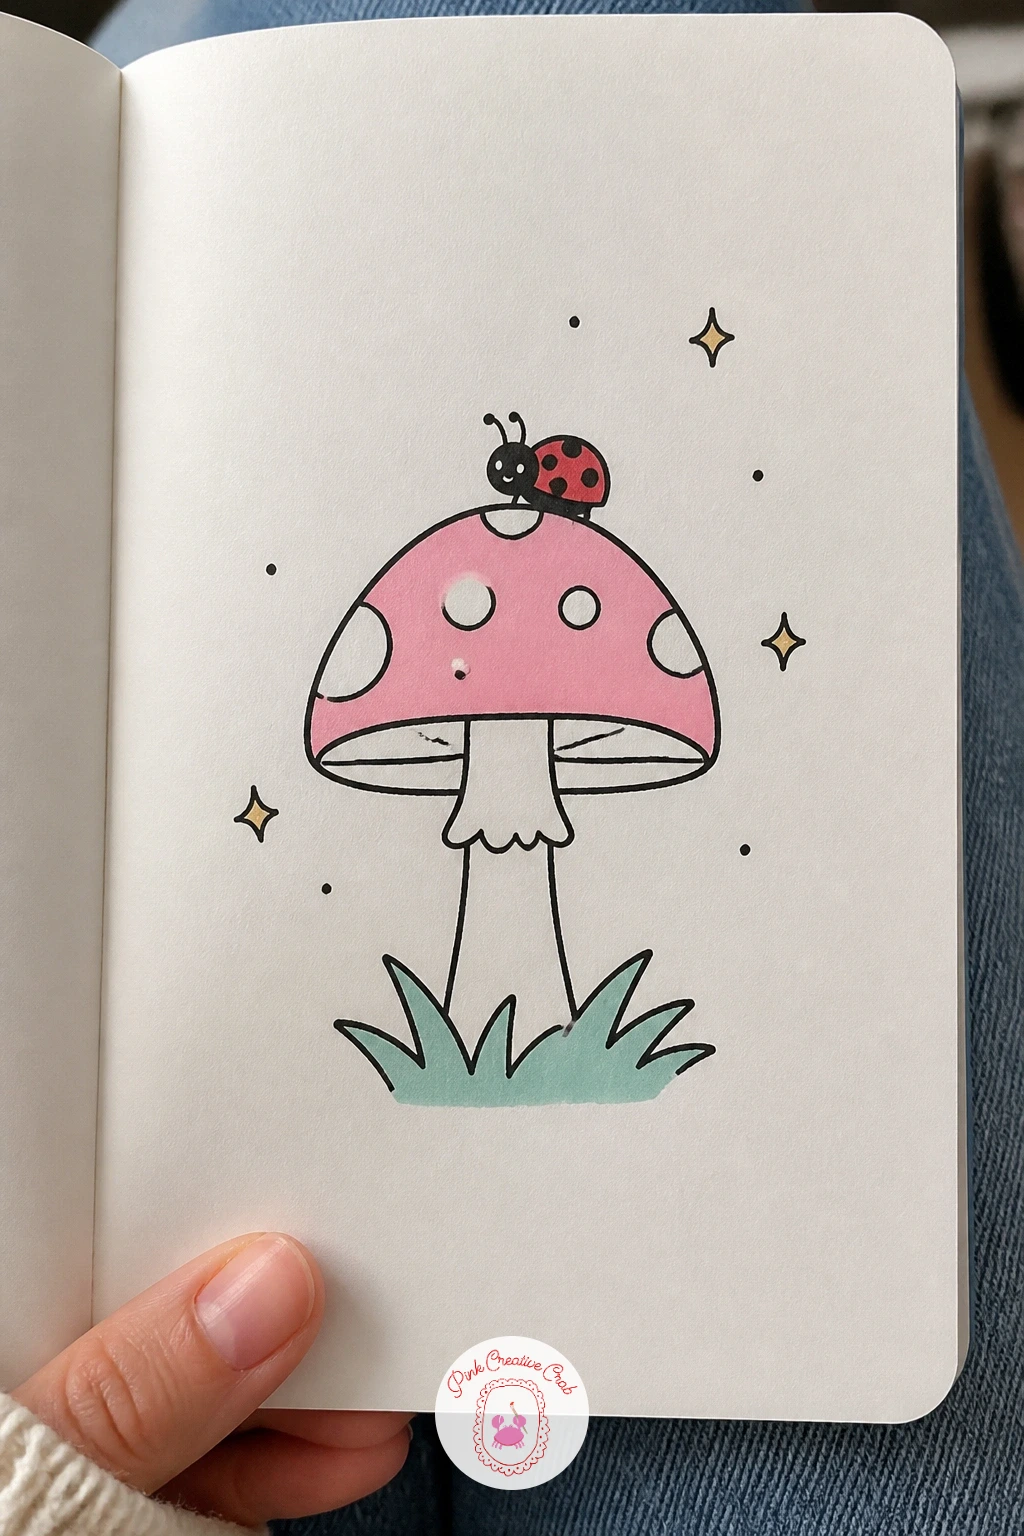
Palette: Soft Pink,Ink Black,Mint Green
Settle into something gentle with a teacup and a heart-shaped teabag tag, a doodle that rewards a steady hand on the small details. Draw the cup and saucer first, a simple rounded cup shape sitting on a flat oval base, then add the teabag string trailing up and over the rim.
Finish the string with a small heart shape at the top instead of the usual square tag, which is the one detail that makes this doodle feel intentional rather than generic. A few short steam lines rising from the cup’s surface complete the warm feeling.
Color the cup in mint with a pink heart tag, or reverse the two colors for a different mood entirely. Leave the saucer white with just an outline so the cup stays the visual center.
If the heart comes out lopsided, draw it as two small bumps meeting at a point rather than one continuous curve, it is far easier to balance that way.
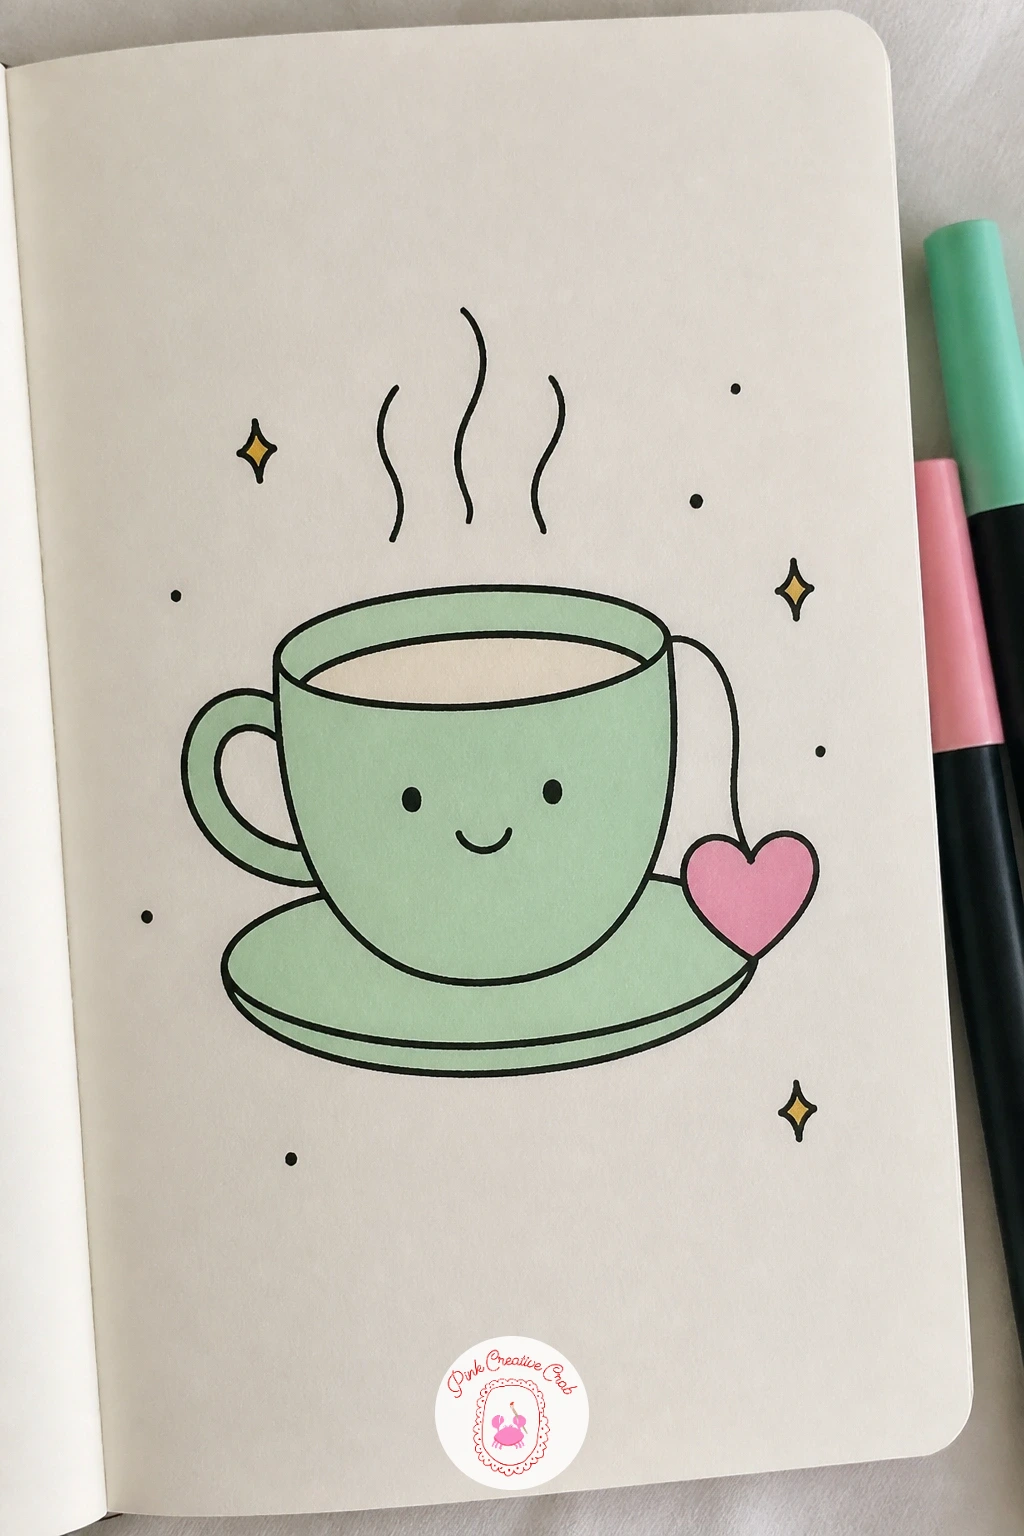
Palette: Mint Green,Soft Pink,Ink Black
Keep the bedtime theme going with a little star wearing a nightcap, a shape-based doodle that is mostly about getting the star’s points even. Draw a simple five-point star first, keeping the points short and rounded rather than sharp for a softer, friendlier look.
Add a small triangular nightcap draped over one of the top points, with a tiny pompom at its tip, then two closed sleepy eyes and rosy cheeks on the star’s face. Comparing the cap’s size against the star’s overall width keeps it from looking oversized, aim for the cap covering about a quarter of the star.
Color the star in a pale yellow or left white, the nightcap in pink, and two small mint dots for cheeks if you want extra color. A scatter of three tiny stars nearby adds depth without much extra drawing.
If the star shape fights you, sketch it faintly in pencil first and ink only once the points look even.
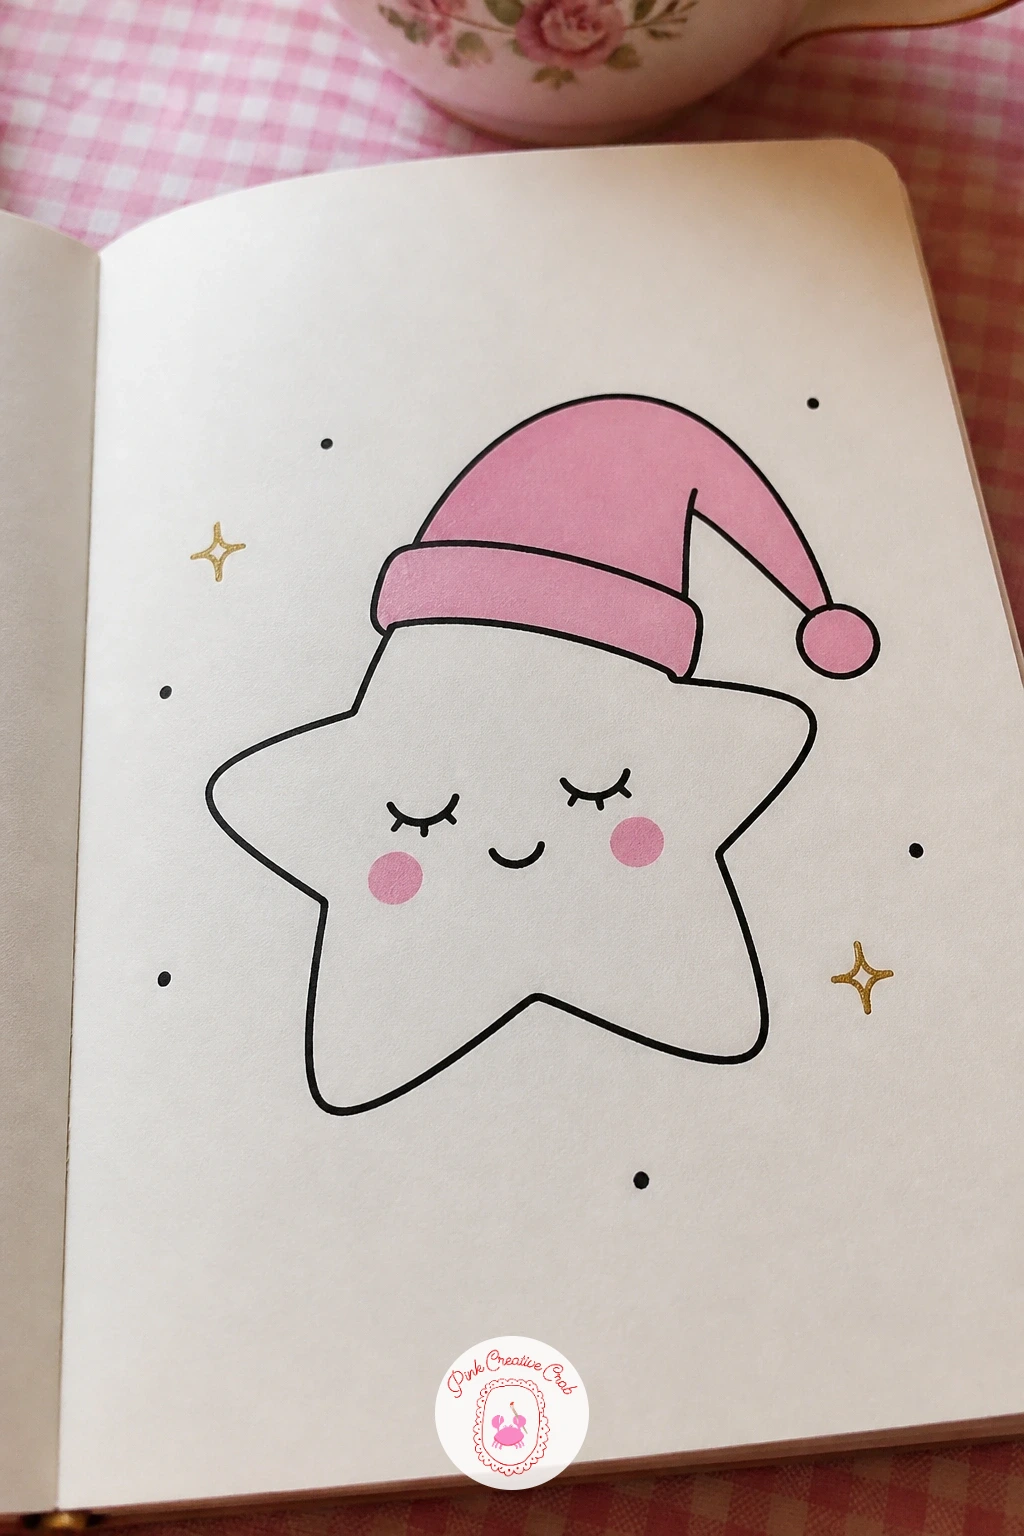
Palette: Soft Pink,Mint Green,Ink Black
Add a little visual story with a donut that has a bite taken out, crumbs scattered beside it. Draw the full donut ring first, then erase or simply leave a gap in the outline on one side and redraw that edge with a jagged bite mark cutting inward.
Drizzle a wavy icing line over the top and add a few small round sprinkle dots before coloring. Scatter three or four crumb specks near the bite mark on the page itself, which is the detail that sells the “just bitten” feeling.
Color the donut base in a warm tan if available, the icing drizzle in pink, and the sprinkles in mint and black dots. For a faster version, skip the sprinkles and crumbs and let the bite mark alone do the storytelling.
If the bite edge looks too smooth, redraw it with two or three small zigzag notches instead of one clean curve.
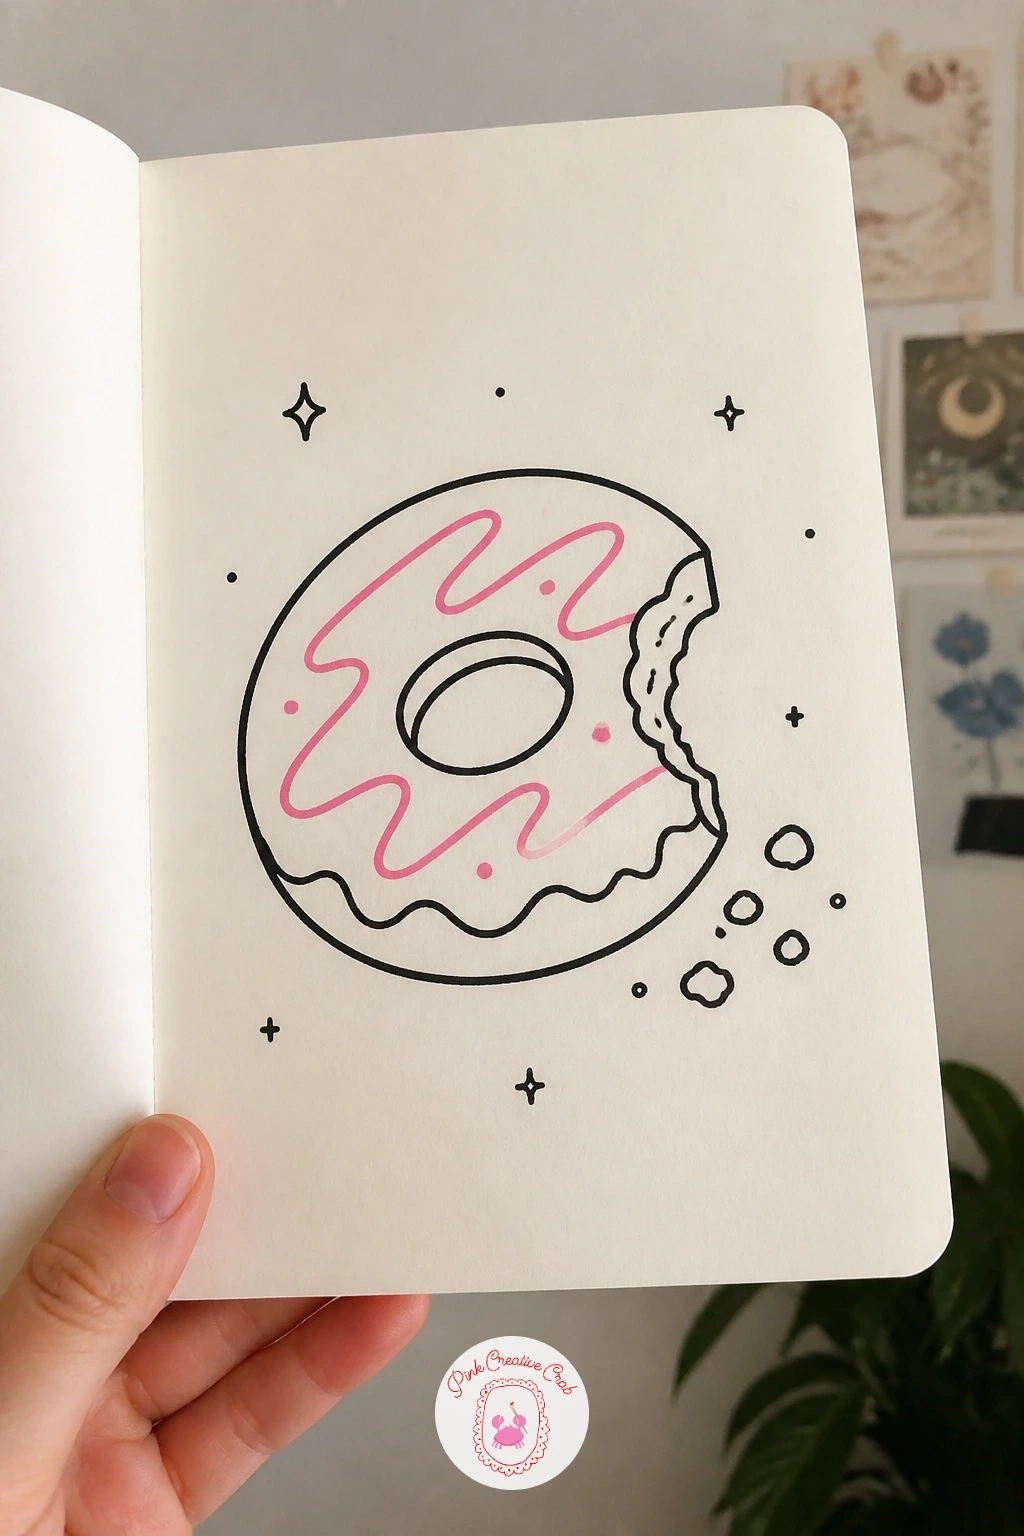
Palette: Soft Pink,Mint Green,Ink Black
Try a cozy little scene next with a sock that has a mouse peeking out of the top. Draw the sock shape first, a simple bent tube narrowing toward the toe with a folded cuff at the opening, then add just the mouse’s round head and two tall ears rising above the cuff line.
Keep the mouse mostly hidden, only the head, ears and maybe two paws gripping the edge need to show, which is what makes the “peeking out” idea read clearly. A thin curled tail trailing down the outside of the sock is an optional extra once the main shapes feel solid.
Color the sock in pink with a mint stripe at the cuff, and leave the mouse white or pale grey with black outline details. A tiny heart or star pattern on the sock’s body is a nice way to fill the space without extra effort.
If the mouse’s ears look too flat, round them slightly inward at the top rather than leaving them as straight triangles.
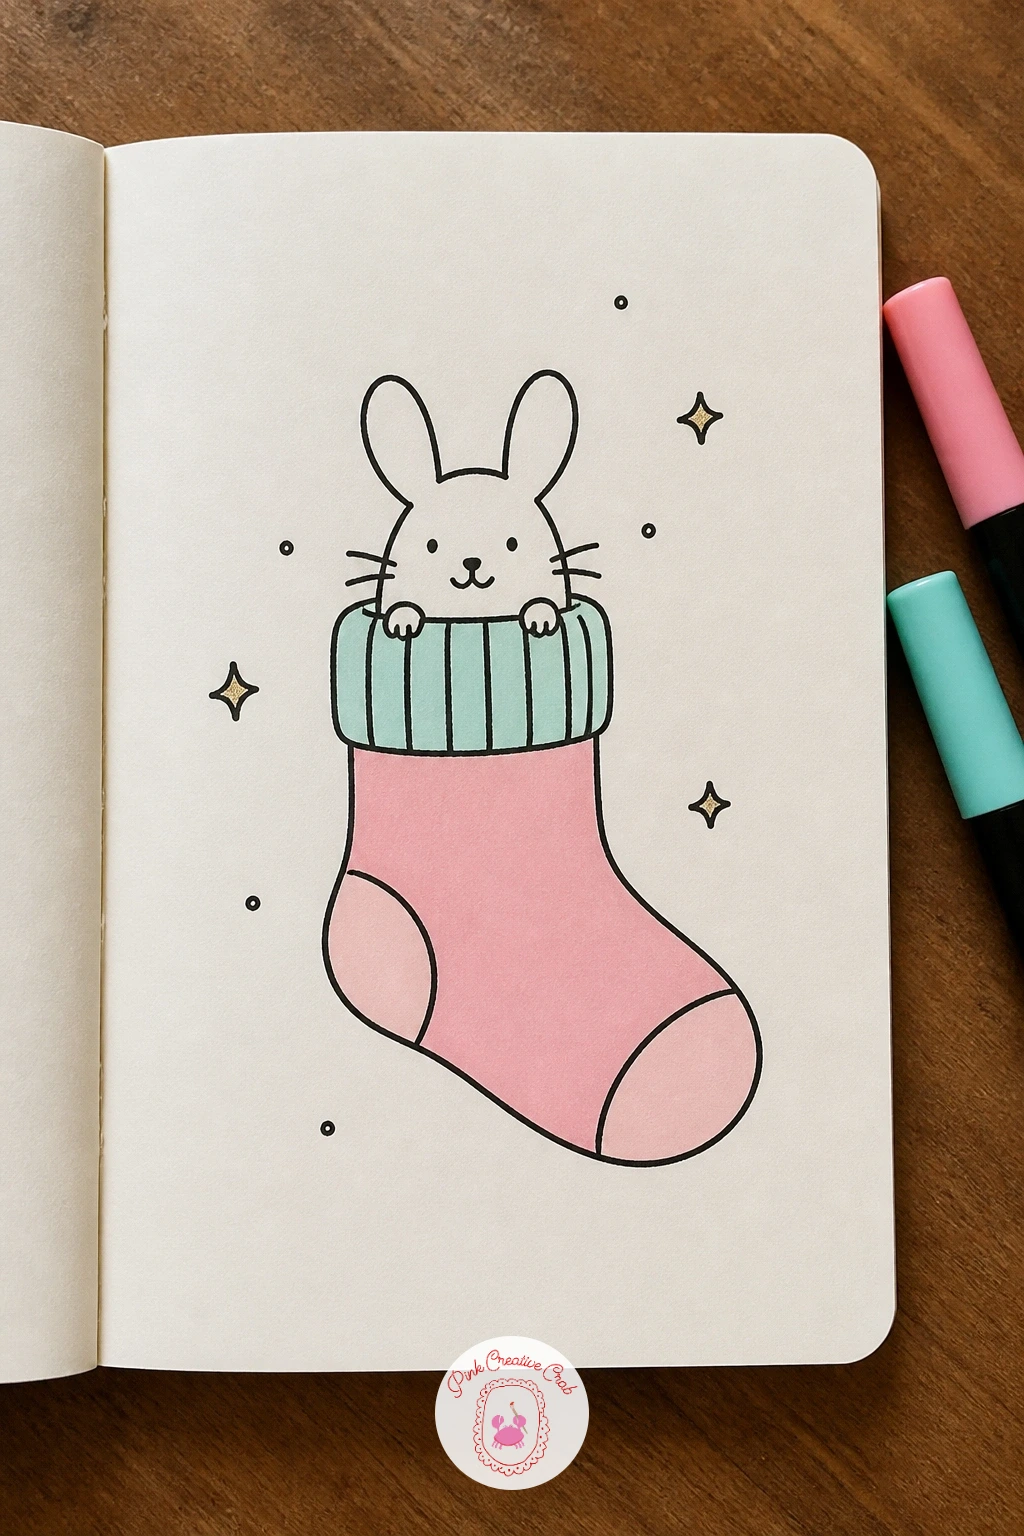
Palette: Soft Pink,Mint Green,Pale Grey
Pair a tiny watering can with a small heart-shaped plant for a doodle that leans sweet without much fuss. Draw the watering can first, a simple rounded body with a spout and handle, tilted slightly as if mid-pour, then a few curved drip lines falling from the spout toward the plant below.
Build the plant as a short stem with two or three heart-shaped leaves instead of ordinary pointed ones, planted in a small pot beneath the falling water. Lining the drip lines up so they land right where the plant sits is what connects the two halves of the doodle into one scene rather than two separate objects.
Color the can in mint and the heart leaves in pink, with the pot left white or a plain outline. A few extra small drip dots near the pot add a playful splash.
If the drip lines feel stiff, curve them very slightly rather than drawing them perfectly straight.
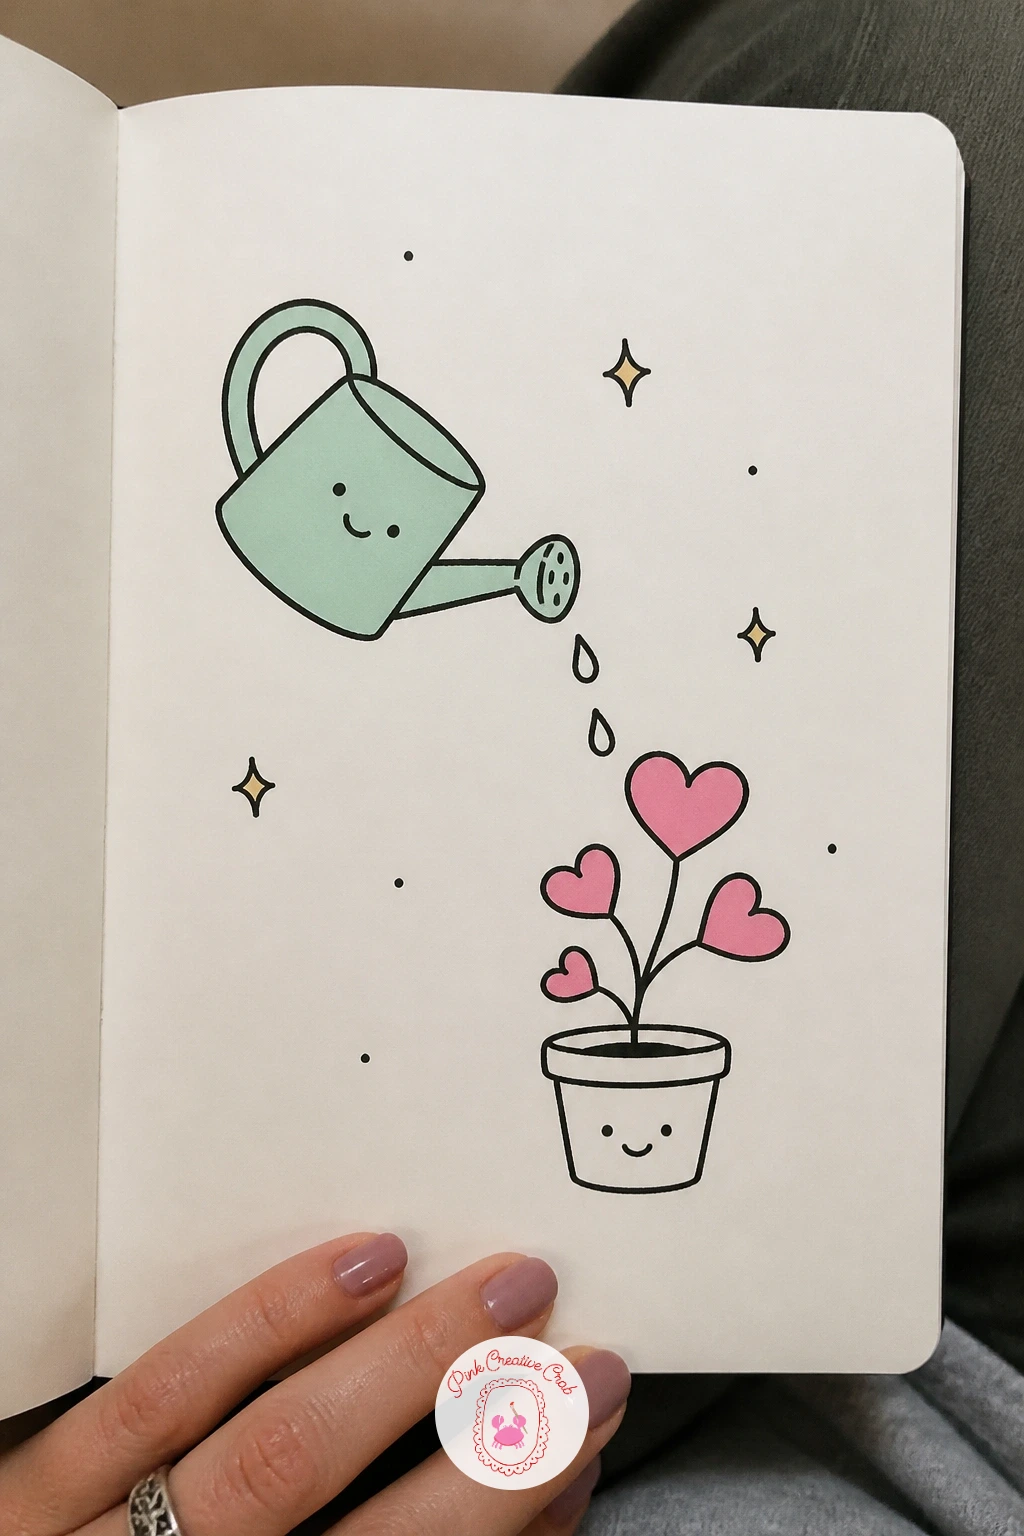
Palette: Mint Green,Soft Pink,Ink Black
Have some fun with a doodle inside a doodle: a pencil drawing a smiling sun. Draw the pencil first, angled diagonally across the space with a sharpened point touching the paper, then build the sun as a simple circle with short triangular rays coming out from it, as if the pencil just finished the last ray.
Add the sun’s face, two dot eyes and a wide curved smile, only after the rays are in place so the expression sits centered inside the finished shape. Leaving one or two rays only half drawn, with a faint pencil line instead of solid ink, is a nice touch that shows the sun still being made.
Color the sun in pink or mint, whichever feels brighter to you, and keep the pencil itself in plain black and white with a small pink or mint band near the eraser end.
If the pencil’s angle looks awkward, draw it entering the frame from a bottom corner rather than straight across the middle.
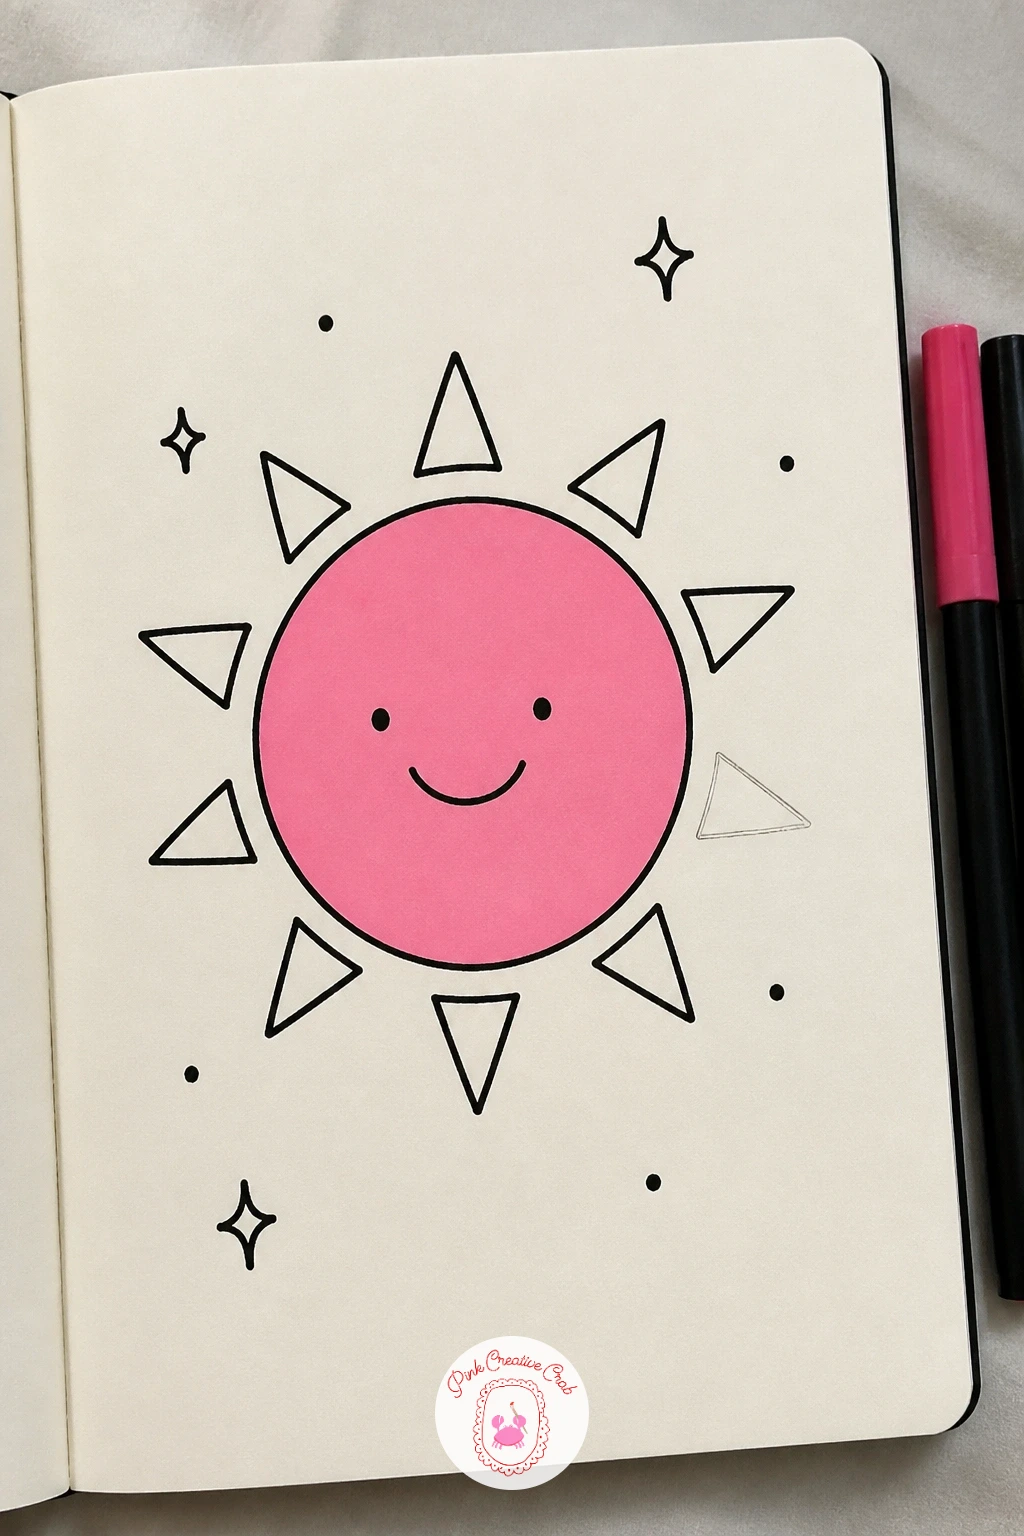
Palette: Soft Pink,Mint Green,Ink Black
Settle the page with a mini fishbowl holding just one goldfish, a calm doodle that relies on a clean, simple outline. Draw the bowl first as a rounded jar shape, wider in the middle and narrower at the top rim, then add a short wavy line partway up to mark the water’s surface.
Place the goldfish below that line, a simple oval body with a fan tail and two small fins, and keep it centered rather than near the glass edge so it reads as floating freely. A few small circles rising from its mouth suggest bubbles without needing any extra detail.
Color the fish in pink and the water a very pale mint wash, leaving the bowl’s glass outline uncolored so it still reads as clear glass. Two or three pebbles at the bottom, small dark ovals, finish the scene.
If the water line looks too straight, give it one gentle wave rather than a perfectly flat edge.
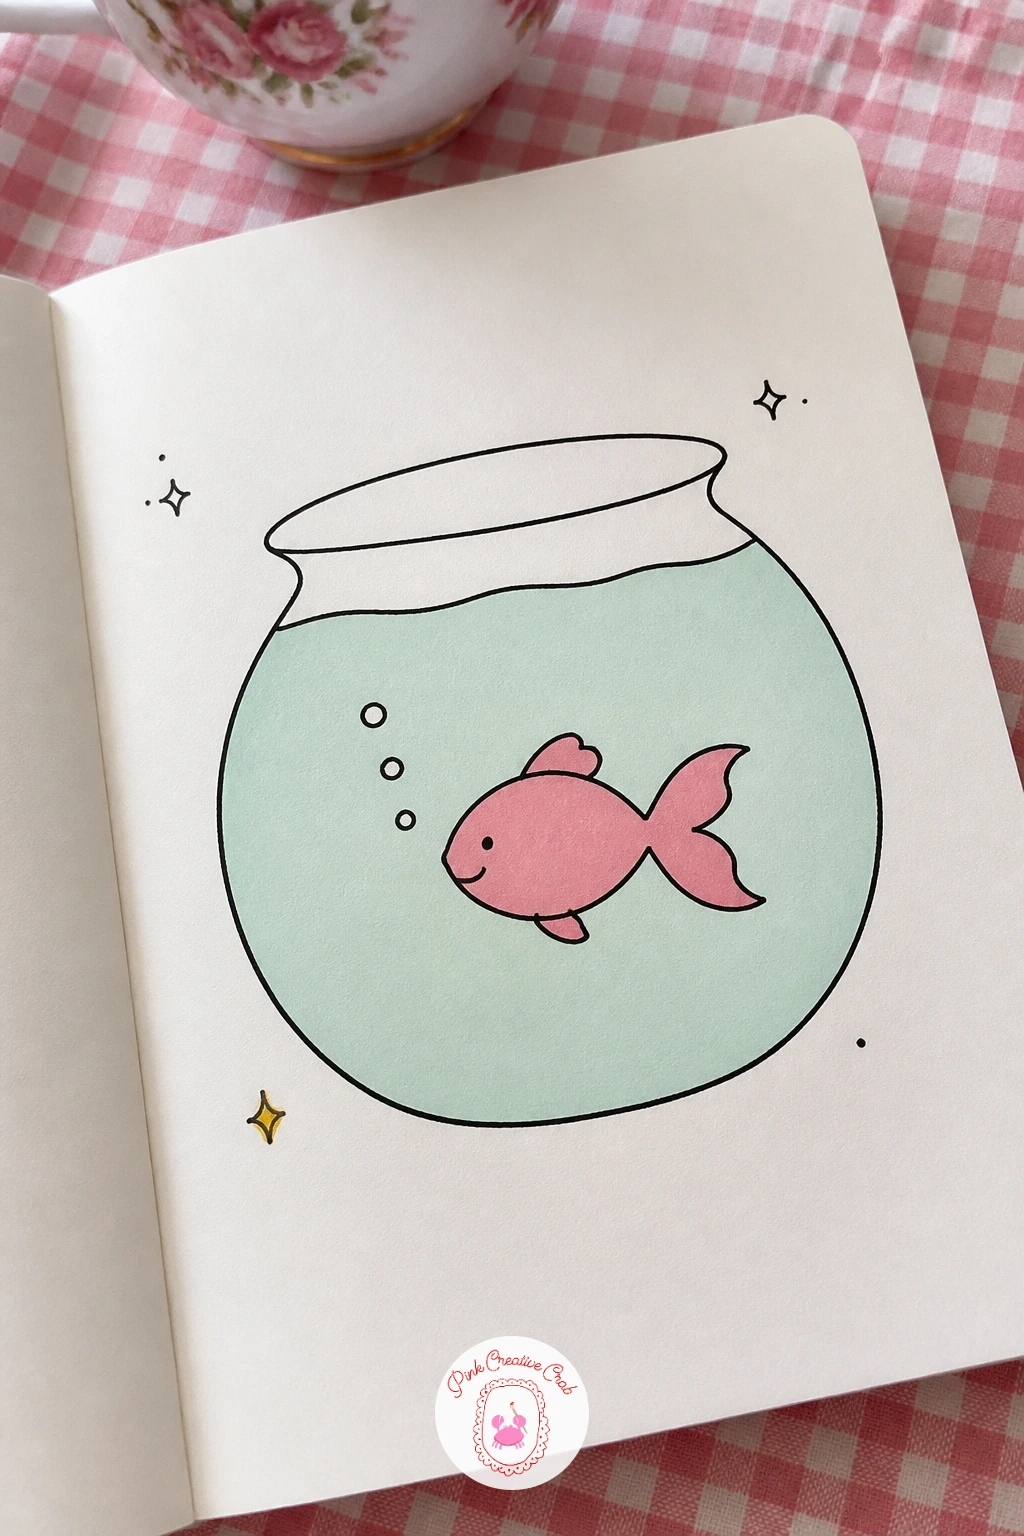
Palette: Soft Pink,Mint Green,Ink Black
Fold interest into the page with a paper boat carrying a tiny flag, a shape built entirely from straight angled lines rather than curves. Draw the boat’s hull first as a simple triangle-topped trapezoid, the classic folded-paper silhouette, then add a short vertical mast rising from its center with a small triangular or rectangular flag at the top.
Keep every line in this doodle straight and slightly angular, since that angularity is what makes it read as folded paper rather than a regular boat. A few short horizontal lines beneath the hull suggest gentle water without needing a full wave pattern.
Color the hull in mint and the flag in pink, leaving the mast as a thin black line. For a quicker version, skip the water lines entirely and let the boat float on plain white space.
If the hull’s fold lines look uneven, draw the center crease first, then build both sides out from it symmetrically.
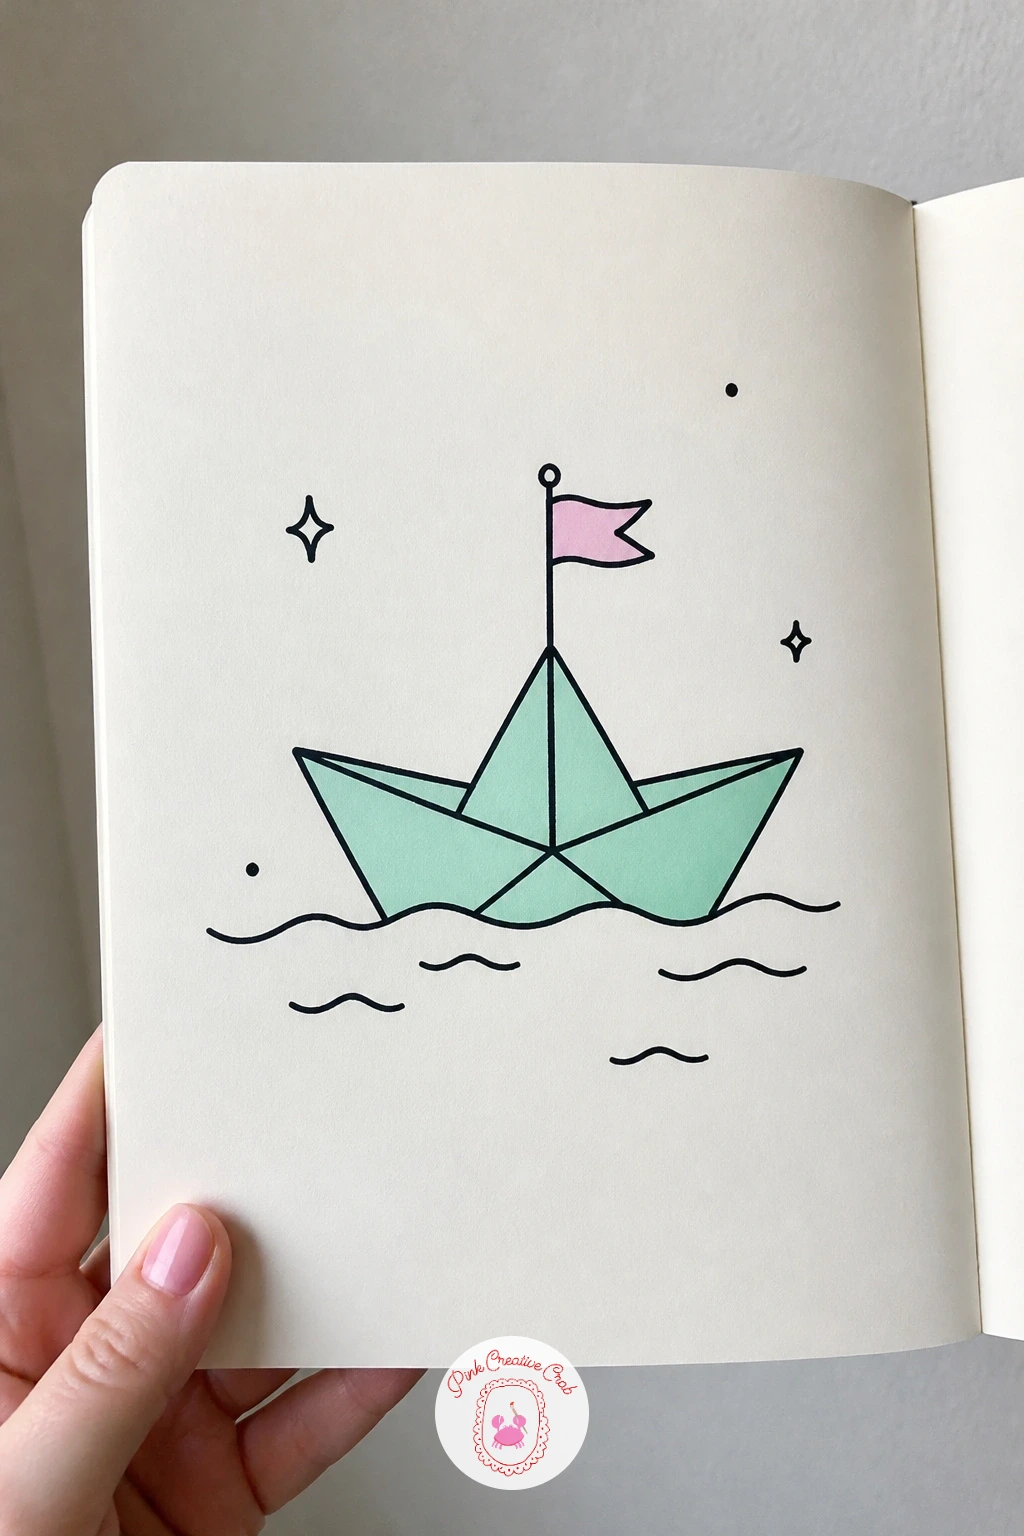
Palette: Mint Green,Soft Pink,Ink Black
Bring back a little character with an avocado half wrapped around its own pit as if hugging it. Draw the avocado’s outer shape first, a rounded oval with the skin edge slightly bumpy, then the lighter flesh ring inside, and finally the large round pit sitting in the center.
Give the pit two small arm-like curves reaching up from its sides, as though it is the one doing the hugging back, with a simple smiling face on the pit itself. The skin’s bumpy texture is easiest to fake with short jagged dashes along the outer edge rather than one smooth line.
Color the skin in mint, the flesh ring in a paler green or left white, and the pit in a warm brown if you have it, or just outline it in black. A pink blush on the pit’s cheeks adds a nice warmth.
If the arm shapes look odd, think of them as two simple commas curling toward each other rather than full limbs.
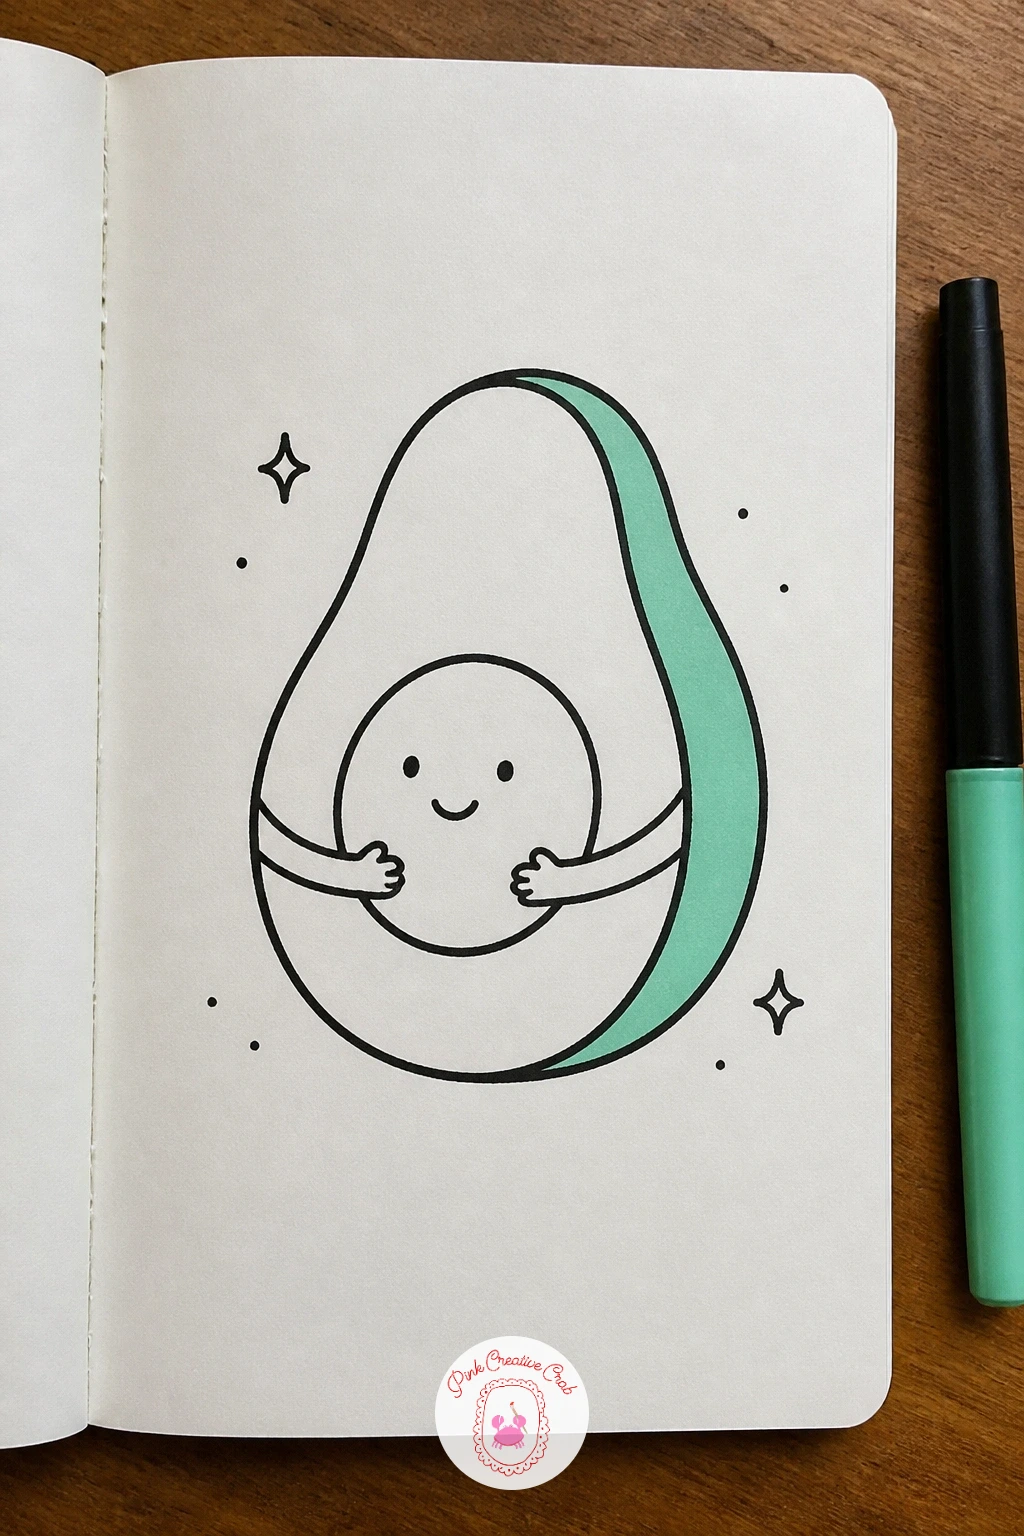
Palette: Mint Green,Soft Pink,Ink Black
Return to the night sky with a little moon resting on a cloud pillow, a quiet companion piece to the earlier sleepy star. Draw the crescent moon shape first, two curved lines meeting at points, then build a soft lumpy cloud shape directly underneath it as a pillow for the moon to rest on.
Add a closed sleepy face on the moon’s rounder side and a small fold or seam line across the cloud to suggest a pillow rather than just a plain cloud. Keeping the cloud’s bumps gentle and rounded, rather than sharp, is what makes it read as soft bedding.
Color the moon in pale yellow or leave it white, and the cloud pillow in mint with a pink seam line or edge trim. A few tiny stars scattered around finish the quiet scene.
If the crescent shape feels tricky, draw a full circle first in pencil, then ink only the curved sliver you want to keep.
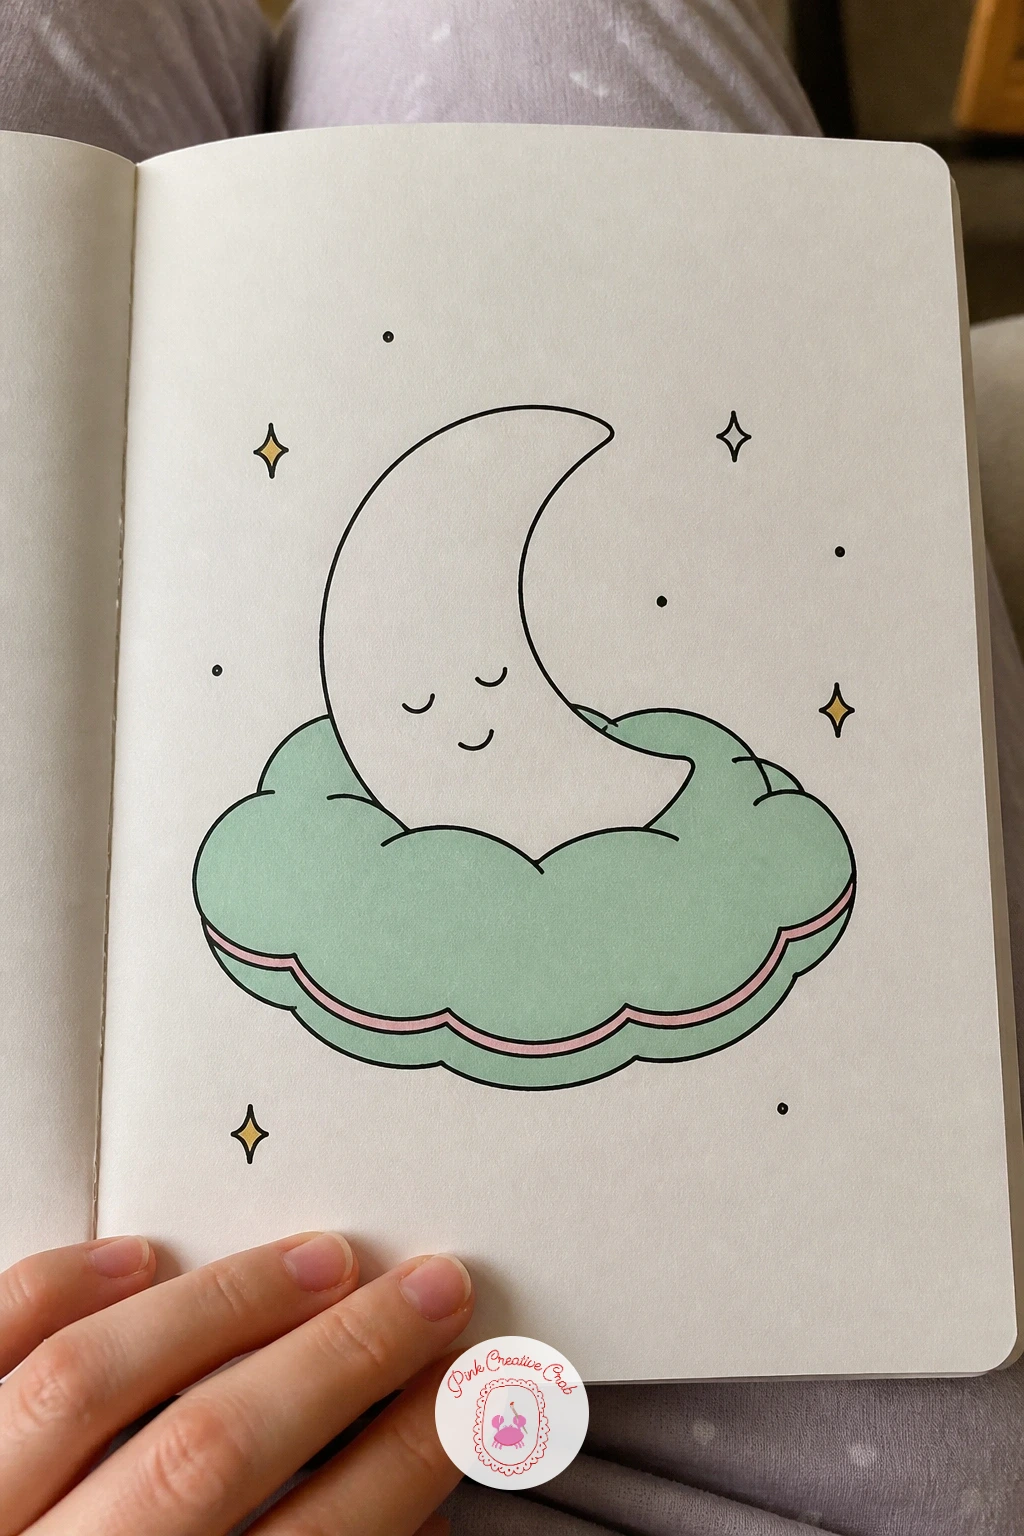
Palette: Mint Green,Soft Pink,Ink Black
Keep things sweet with two cherries holding hands, a doodle that is mostly about getting the stems to connect naturally. Draw both cherry circles first, sitting side by side and slightly overlapping, then the two stems curving up and meeting in a small loop above them, like linked arms.
Give each cherry a simple smiling face, and add tiny highlight ovals on the upper side of each circle for a glossy look. The stems meeting point is the part to watch, overlap them slightly rather than trying to join two lines at one exact spot, which almost never lines up cleanly freehand.
Color both cherries in a bright pink or red marker, and the stems and leaf, if you add one, in mint. For more cherry inspiration at a larger scale, the ideas in cherry painting ideas and other cherry red little things are worth a look.
If one cherry ends up bigger than the other, that small size difference actually reads as charming rather than wrong, so leave it be.
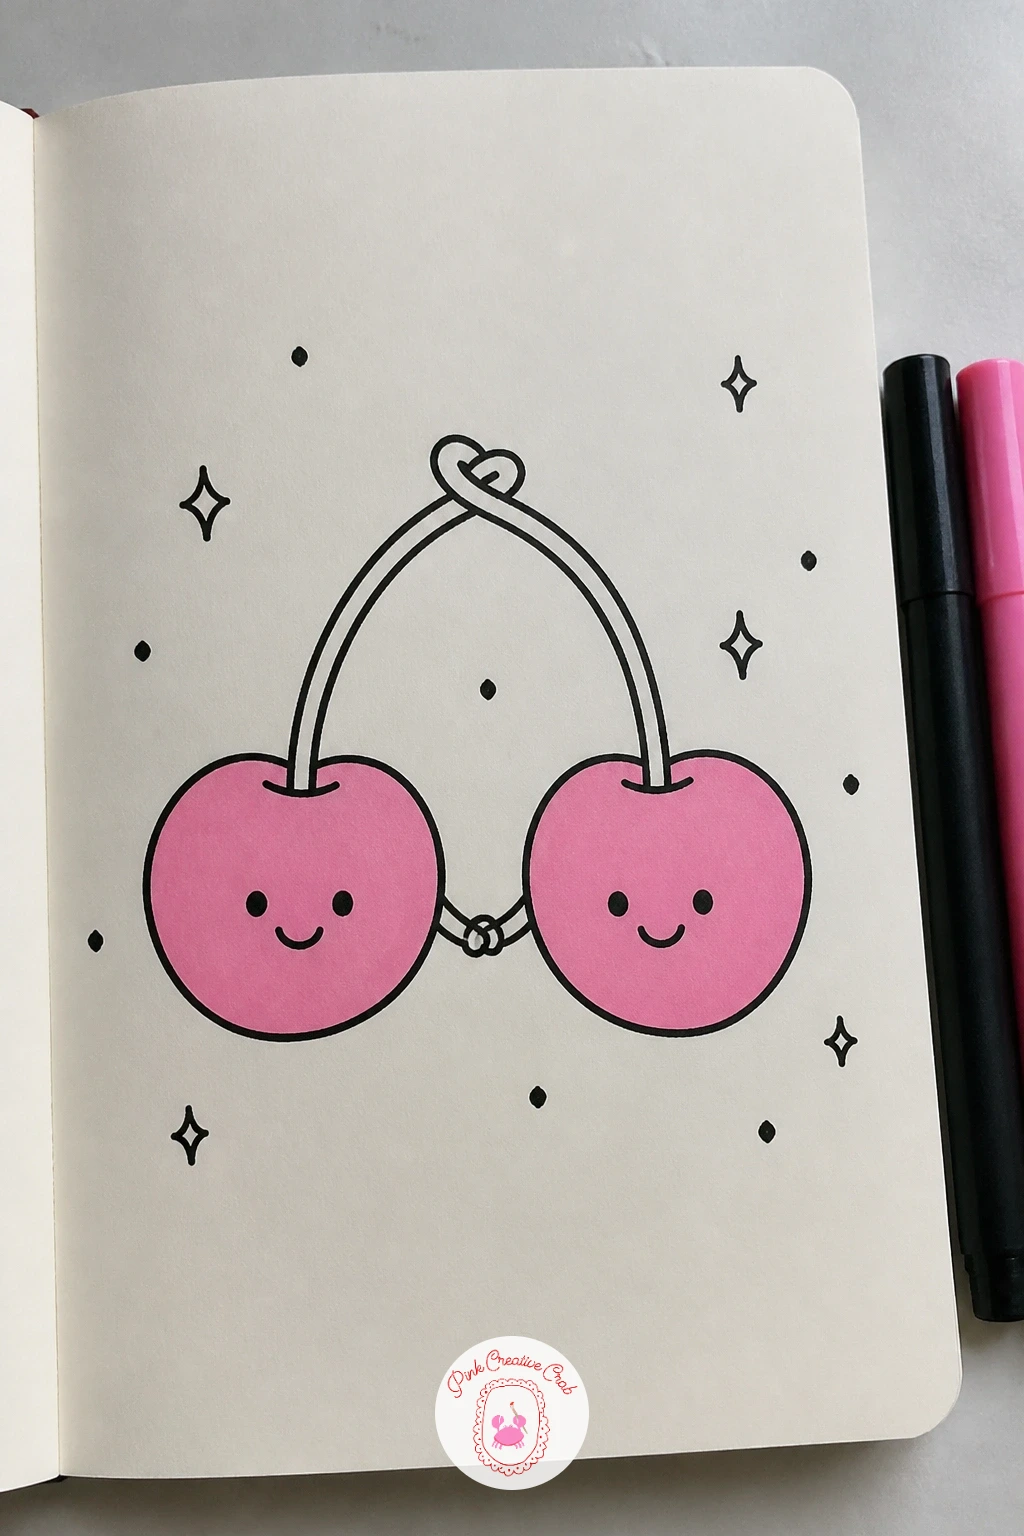
Palette: Soft Pink,Mint Green,Ink Black
Slow down with a tiny book that has a ribbon bookmark trailing out like a tail, a doodle built mostly from straight and gently curved lines. Draw the book’s closed cover first as a simple rectangle with a slightly curved spine edge, then a thin ribbon strip tucked into the pages and hanging down past the bottom edge with a small V-notch at its tip.
Add two or three short horizontal lines along the page edges to suggest paper thickness, which is what keeps a flat rectangle from looking like a plain block. Letting the ribbon curl slightly rather than hang perfectly straight gives it a bit of movement.
Color the book cover in mint and the ribbon in pink, leaving the page edges white with simple black lines. A tiny heart or star stamped on the cover is an easy way to personalize it further.
If the spine curve looks flat, exaggerate it slightly more than feels natural, books read rounder on paper than real books actually are.
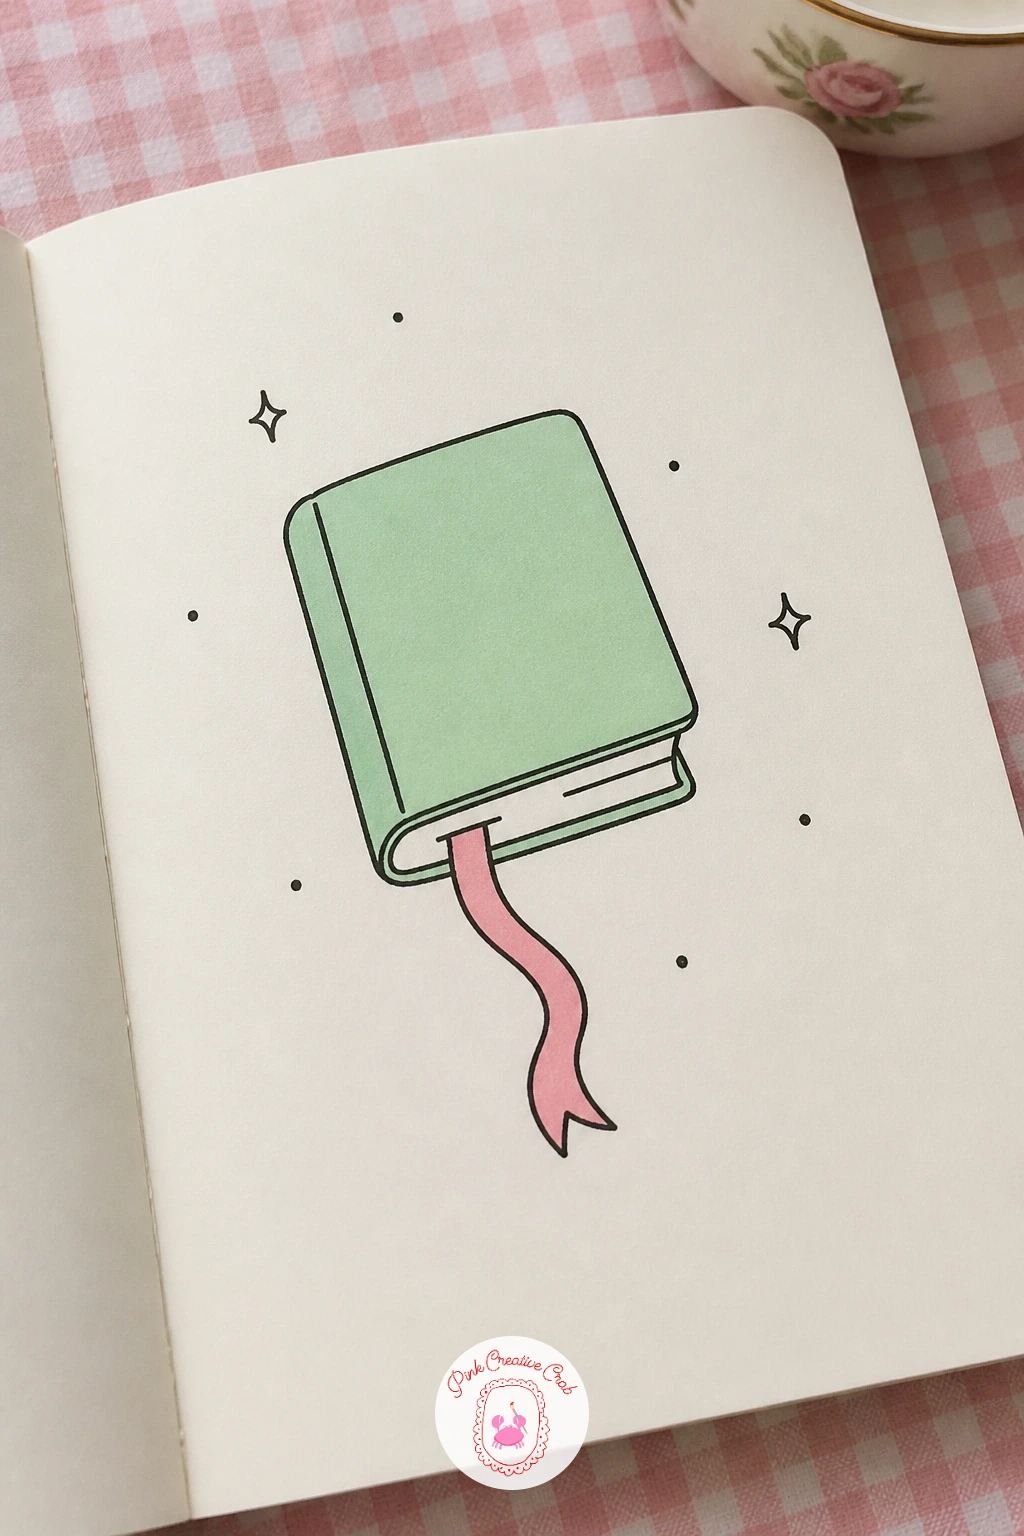
Palette: Mint Green,Soft Pink,Ink Black
Pot a tiny succulent inside an egg cup for a doodle that plays nicely with proportion. Draw the egg cup first, a simple hourglass-like shape with a small flat base, then build the succulent on top as a rosette of short rounded petal shapes layered in two or three rings, each ring a little smaller than the one below it.
Comparing the succulent’s overall width against the cup’s rim keeps the proportions readable, aim for the plant being roughly the same width as the cup it sits in, not wider. Working from the outer ring of leaves inward keeps the layering clean rather than starting in the center and running out of room.
Color the succulent in mint with a few pink-tipped leaf edges, a nice touch many real succulents actually have, and leave the egg cup white with a thin black outline. A short horizontal line partway down the cup suggests the egg cup’s base ring.
If the rosette feels stiff, vary each petal’s size very slightly rather than making them identical.
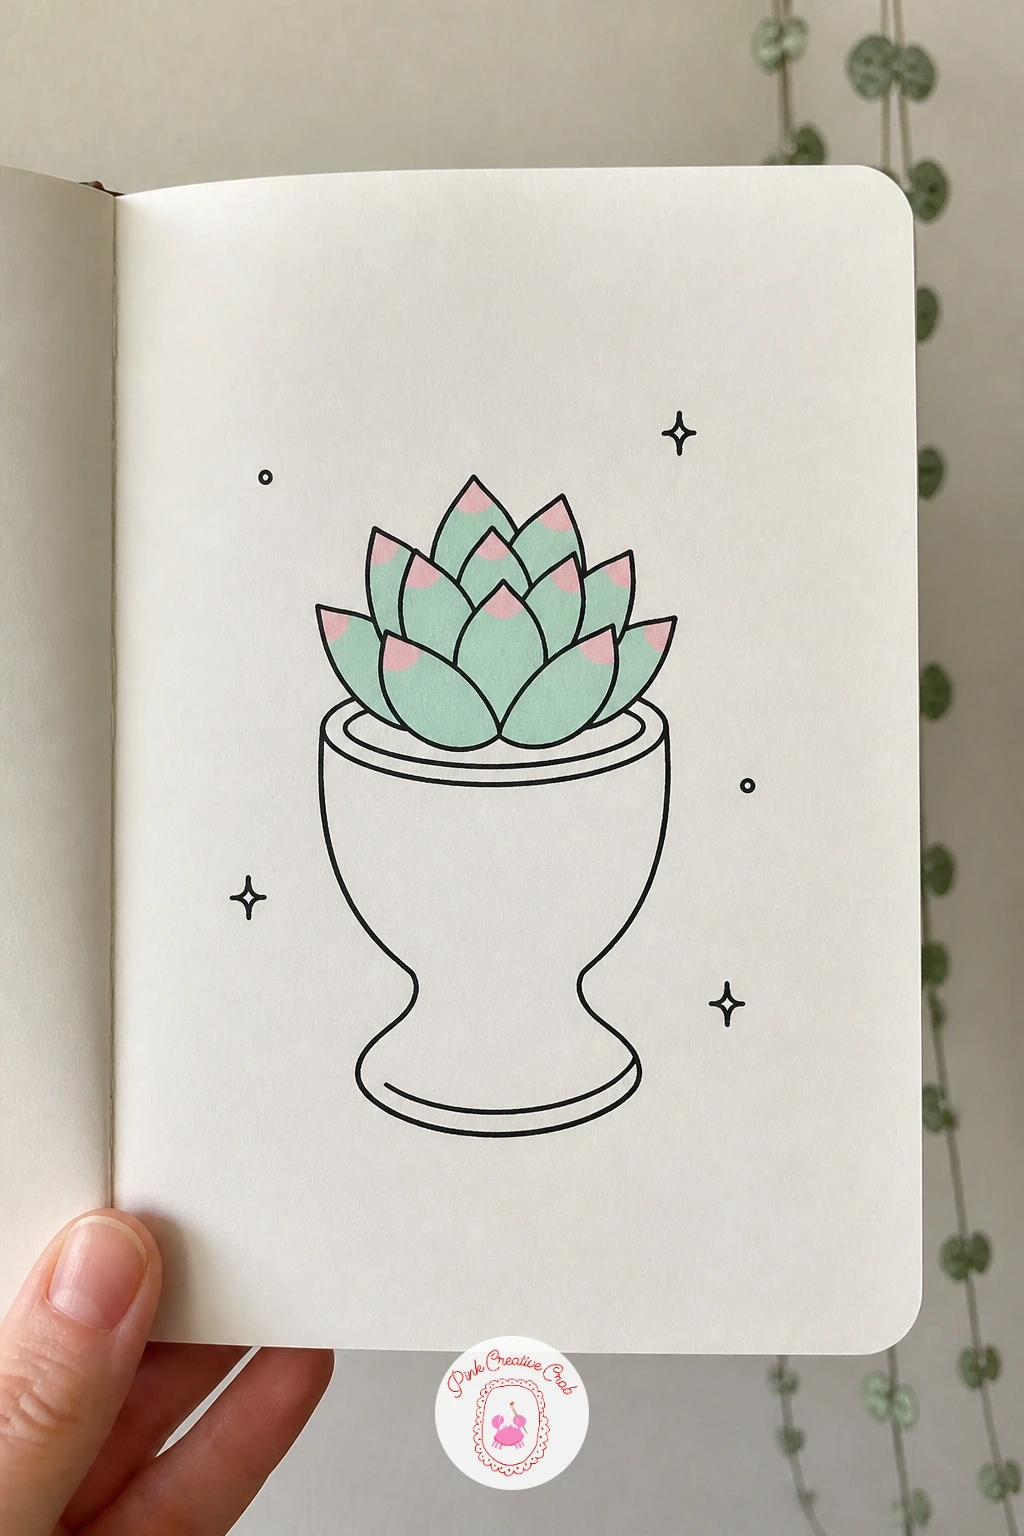
Palette: Mint Green,Soft Pink,Ink Black
A quick look through sketchbook pages built around one small repeating theme, like the ideas in sketchbook pages full of little drawings, shows how well tiny plants fill a page in rows.
Give a classic ice cream cone a little personality by letting it melt just slightly down one side. Draw the waffle cone first with a simple crosshatch pattern, then the scoop on top as a rounded dome, and finish with one or two drip lines trailing from the scoop’s edge down the side of the cone.
Keeping the melt to just one or two drips, rather than covering the whole cone, is what keeps this playful instead of messy. A small face on the scoop, with slightly worried or giggly eyes, adds to the “oh no, I’m melting” charm.
Color the scoop in pink and the cone in a warm tan if available, with the drip lines in a matching pink a shade lighter than the scoop. Leave the waffle crosshatch in plain black line only, color there would clutter the pattern.
If the crosshatch pattern feels fiddly at this size, four or five diagonal lines crossing four or five others is plenty, it does not need to be a true grid.
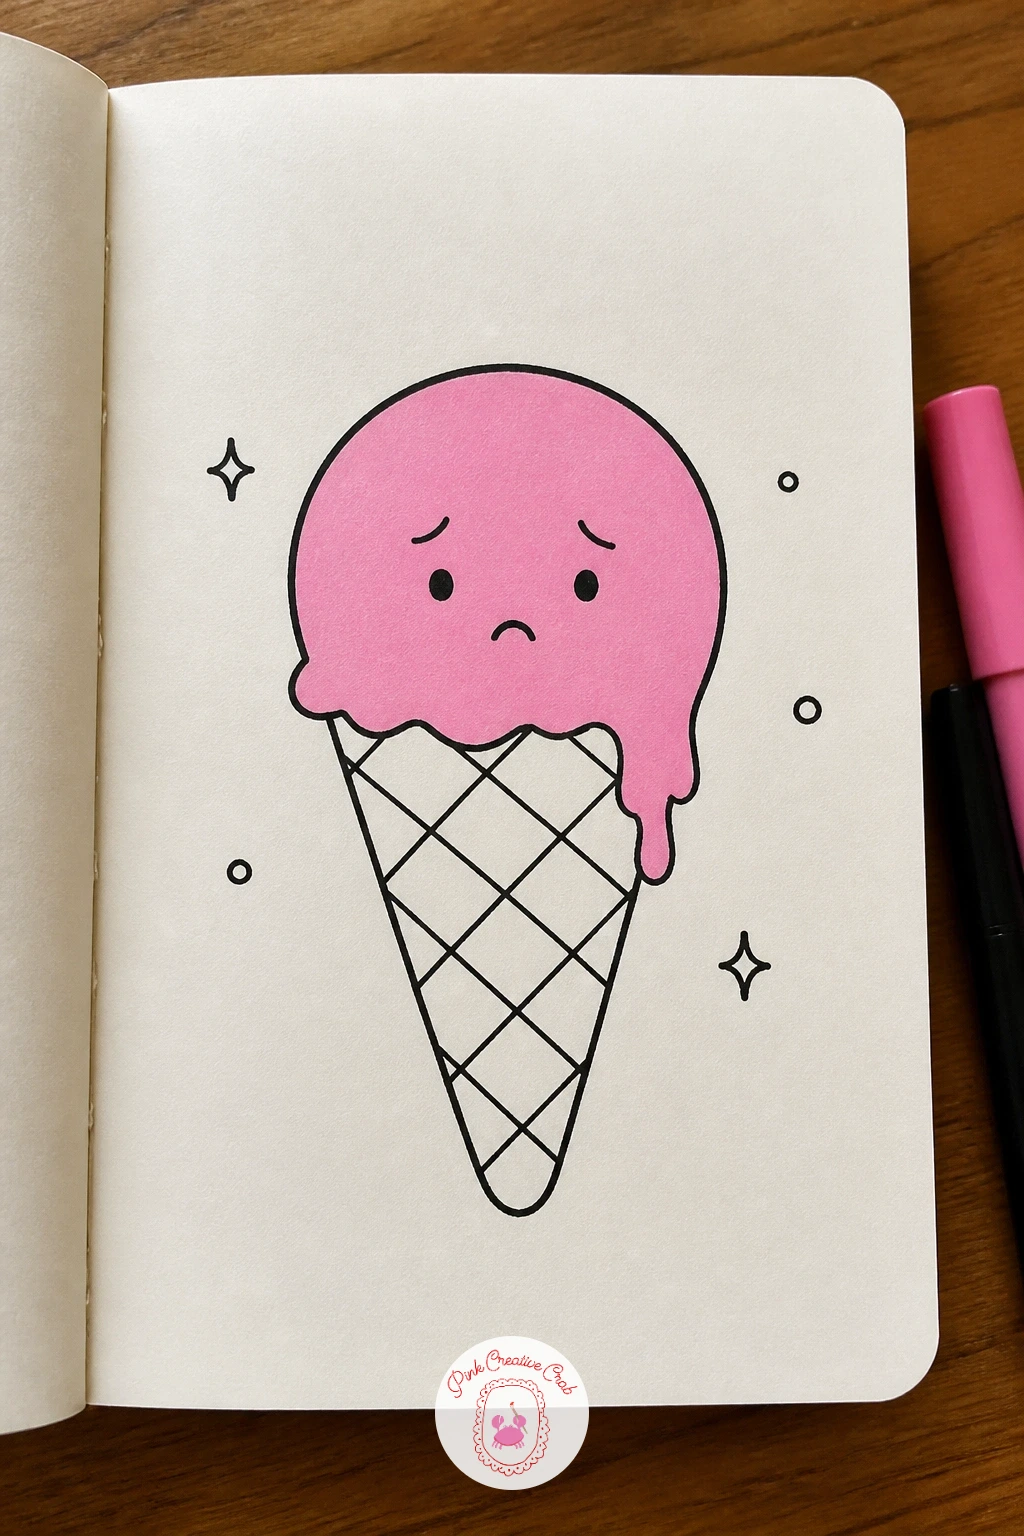
Palette: Soft Pink,Ink Black,Mint Green
Warm the page up with a little candle that has a happy flame, a doodle that works equally well for any season once the face is in place. Draw the candle body first as a simple cylinder, then the wick as a short line at the top, and the flame as a teardrop shape hovering just above the wick.
Give the flame two dot eyes and a small smile, which turns an ordinary flame into a character instantly. A few drip lines of melted wax running down one side of the candle body add texture without much extra work.
Color the candle body in mint or pink, whichever suits the rest of your page, and the flame in a warm yellow or orange if you have a marker for it, otherwise leave it white with black outline. A small plate or saucer underneath finishes the scene.
If the flame shape looks stiff, round the top slightly off-center rather than making it perfectly symmetrical, flames rarely sit still.
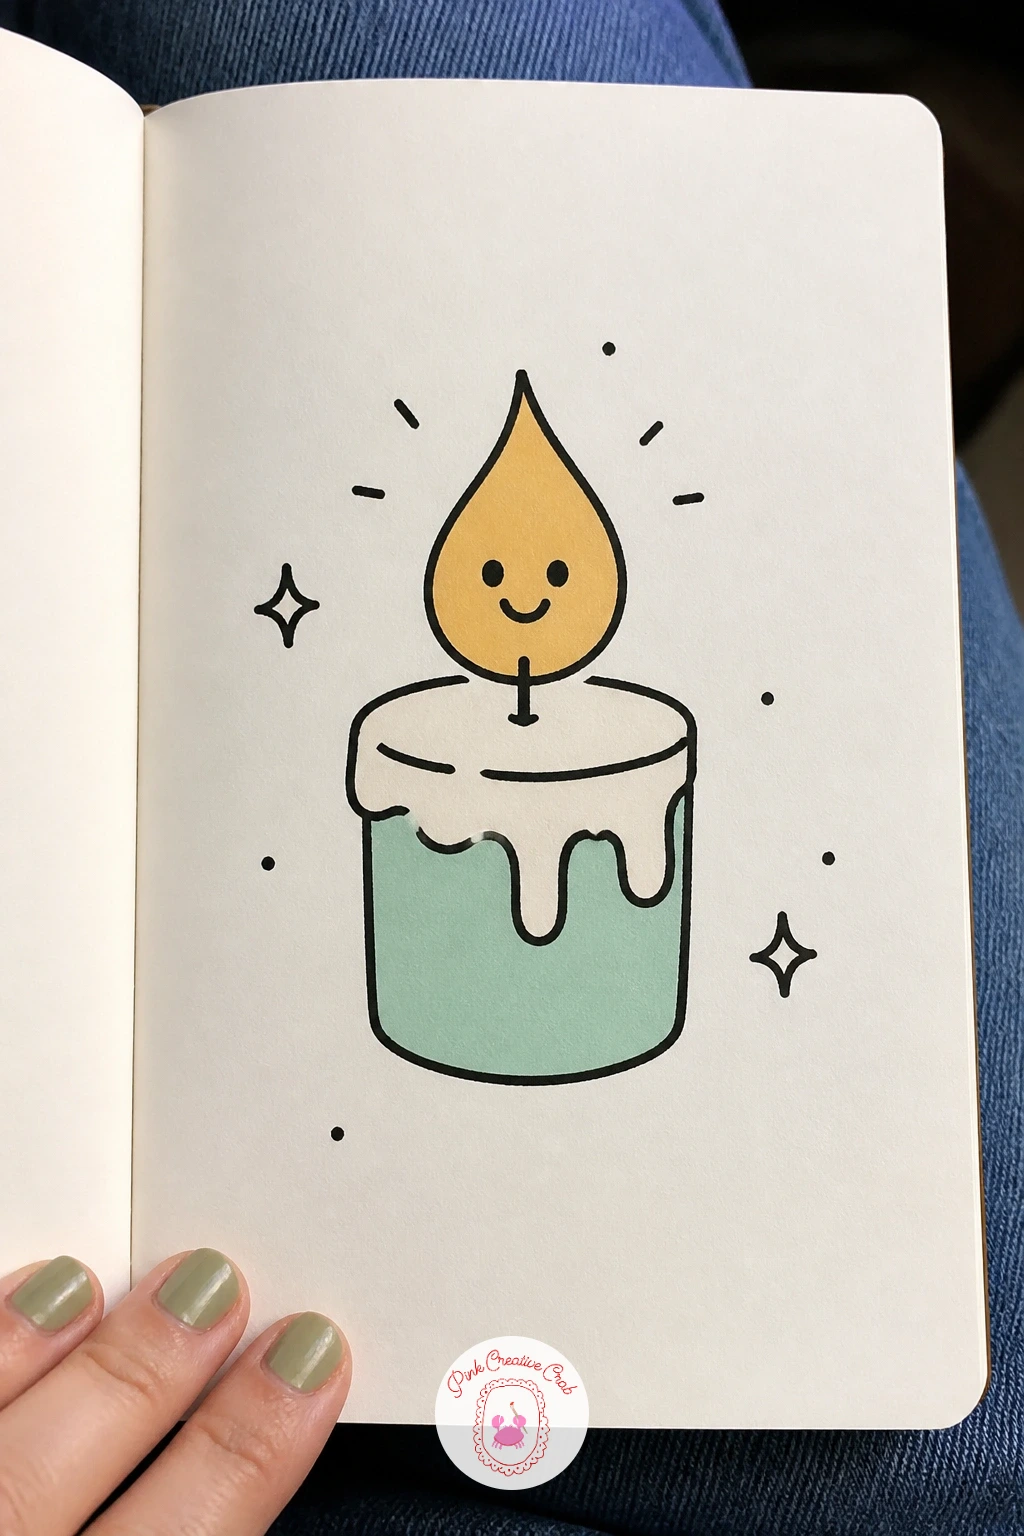
Palette: Mint Green,Soft Pink,Ink Black
Keep things calm with a simple pebble that has a heart painted on it, a doodle almost anyone can finish in a couple of minutes. Draw the pebble’s outline first as a rounded, slightly irregular oval, no two sides matching exactly since real pebbles never do, then add a small heart shape centered on its face.
A few short curved lines near the pebble’s edges suggest its rounded, dimensional surface without needing full shading. Keeping those lines light and sparse is what keeps a pebble looking smooth rather than scratched.
Color the heart in pink and leave the pebble itself in a pale mint wash or plain white with grey shading lines. A tiny scatter of two or three smaller plain pebbles beside it rounds out the little scene.
If you want a quicker version, skip the extra pebbles and the surface lines entirely, the heart on a plain outlined oval reads perfectly well on its own.
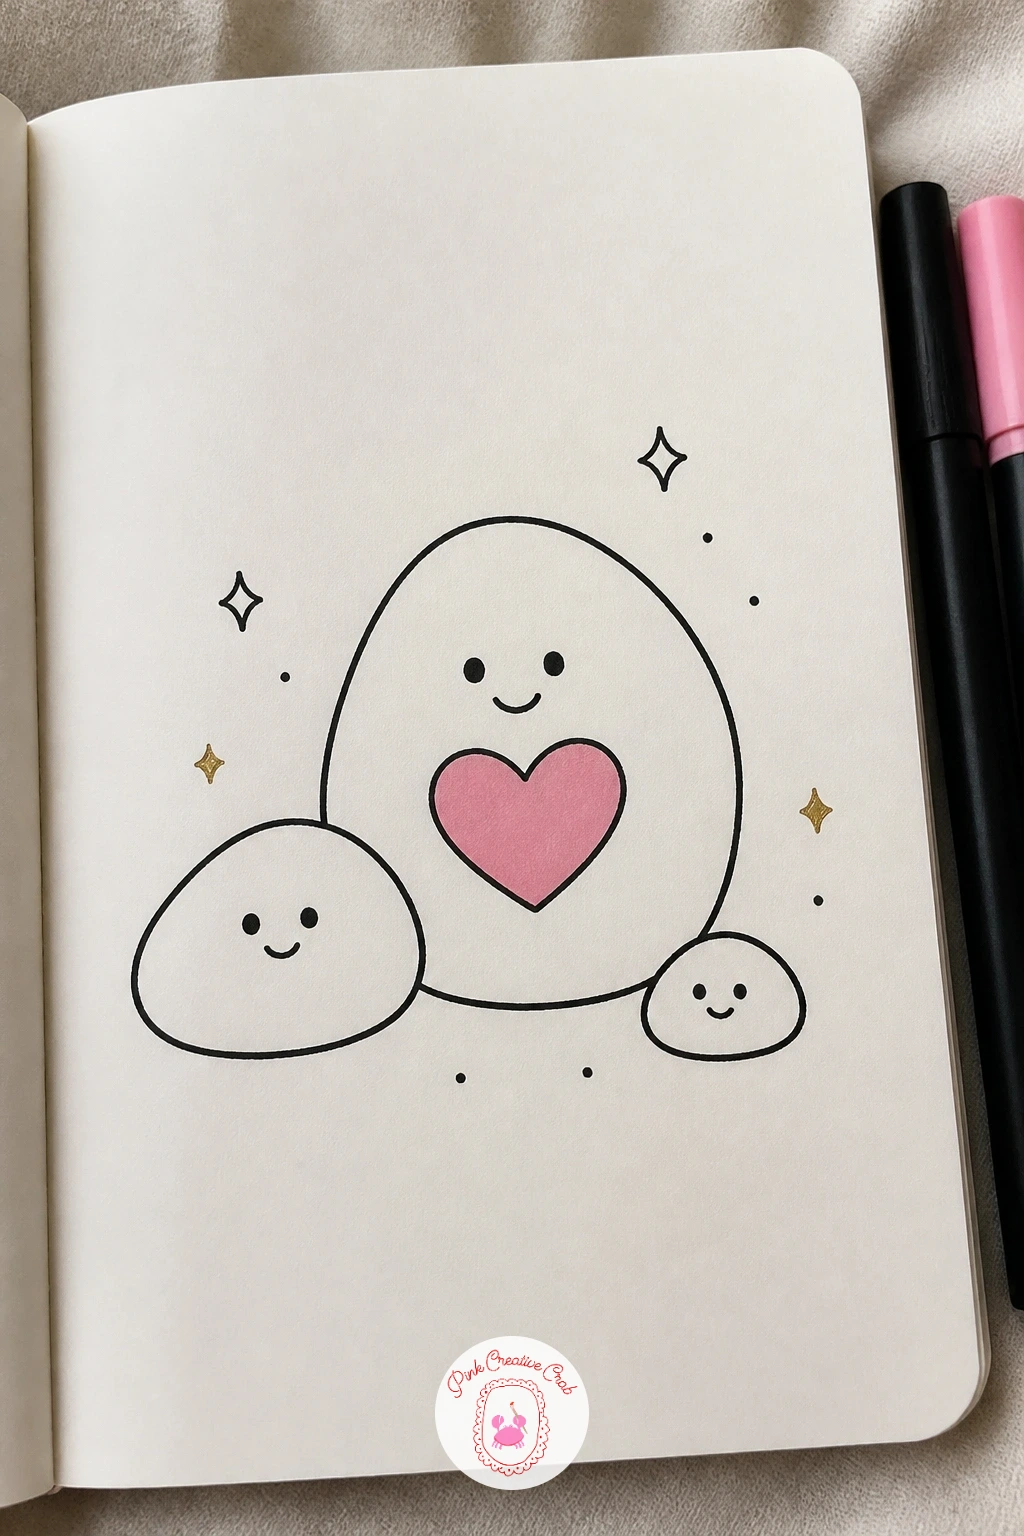
Palette: Soft Pink,Mint Green,Pale Grey
Give the page a little correspondence with an envelope that has a flower stamp in the corner. Draw the envelope first as a simple rectangle with diagonal fold lines meeting at the center, like an open flap seen from the front, then add a small square stamp in the top corner with a scalloped or perforated edge.
Draw a tiny flower inside the stamp square rather than leaving it blank, since the flower is what turns a plain envelope into something worth looking at twice. A short wavy line or two beside the stamp can suggest a postmark if you want the extra detail.
Color the envelope in white or pale mint with black fold lines, and the stamp’s flower in pink with a mint stem. Keep the stamp’s scalloped edge as small evenly spaced bumps rather than one wavy line.
If the perforated edge looks tedious at this size, a dashed line around the stamp gives nearly the same effect with far less fuss.
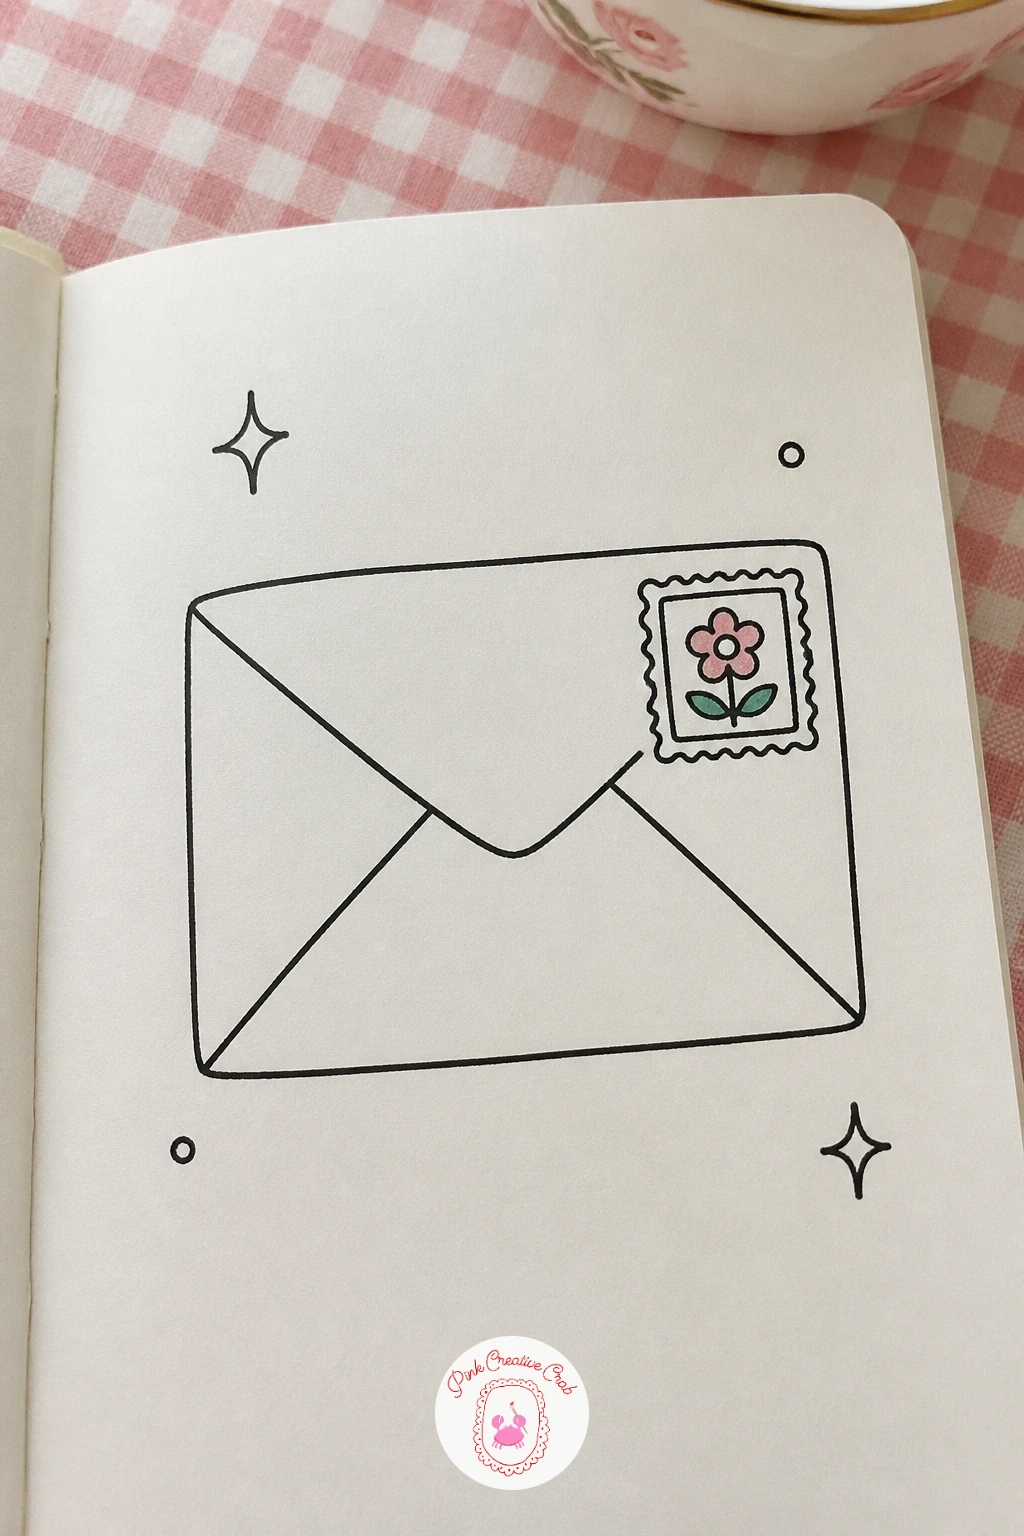
Palette: Mint Green,Soft Pink,Ink Black
Plant one more small flower on the page with a tiny potted tulip, simpler than the earlier succulent and a good one for a very quick break. Draw the pot first as a small trapezoid, then a single straight stem rising from it with two narrow leaves branching off at angles, and finish with the tulip bloom at the top as three overlapping rounded petal shapes.
Working from pot to stem to bloom in that order keeps the stem’s length in proportion, since you can measure it against the pot’s height before committing to how tall it grows. If the bloom ends up too small for the stem, simply widen the petals rather than redrawing the whole plant.
Color the tulip bloom in pink and the leaves and stem in mint, leaving the pot white or a very pale fill with a black outline. A short line partway up the pot suggests the soil line.
Try the same simple structure with a different bloom shape next time, a rounder flower head gives a completely different plant from identical stem and pot.
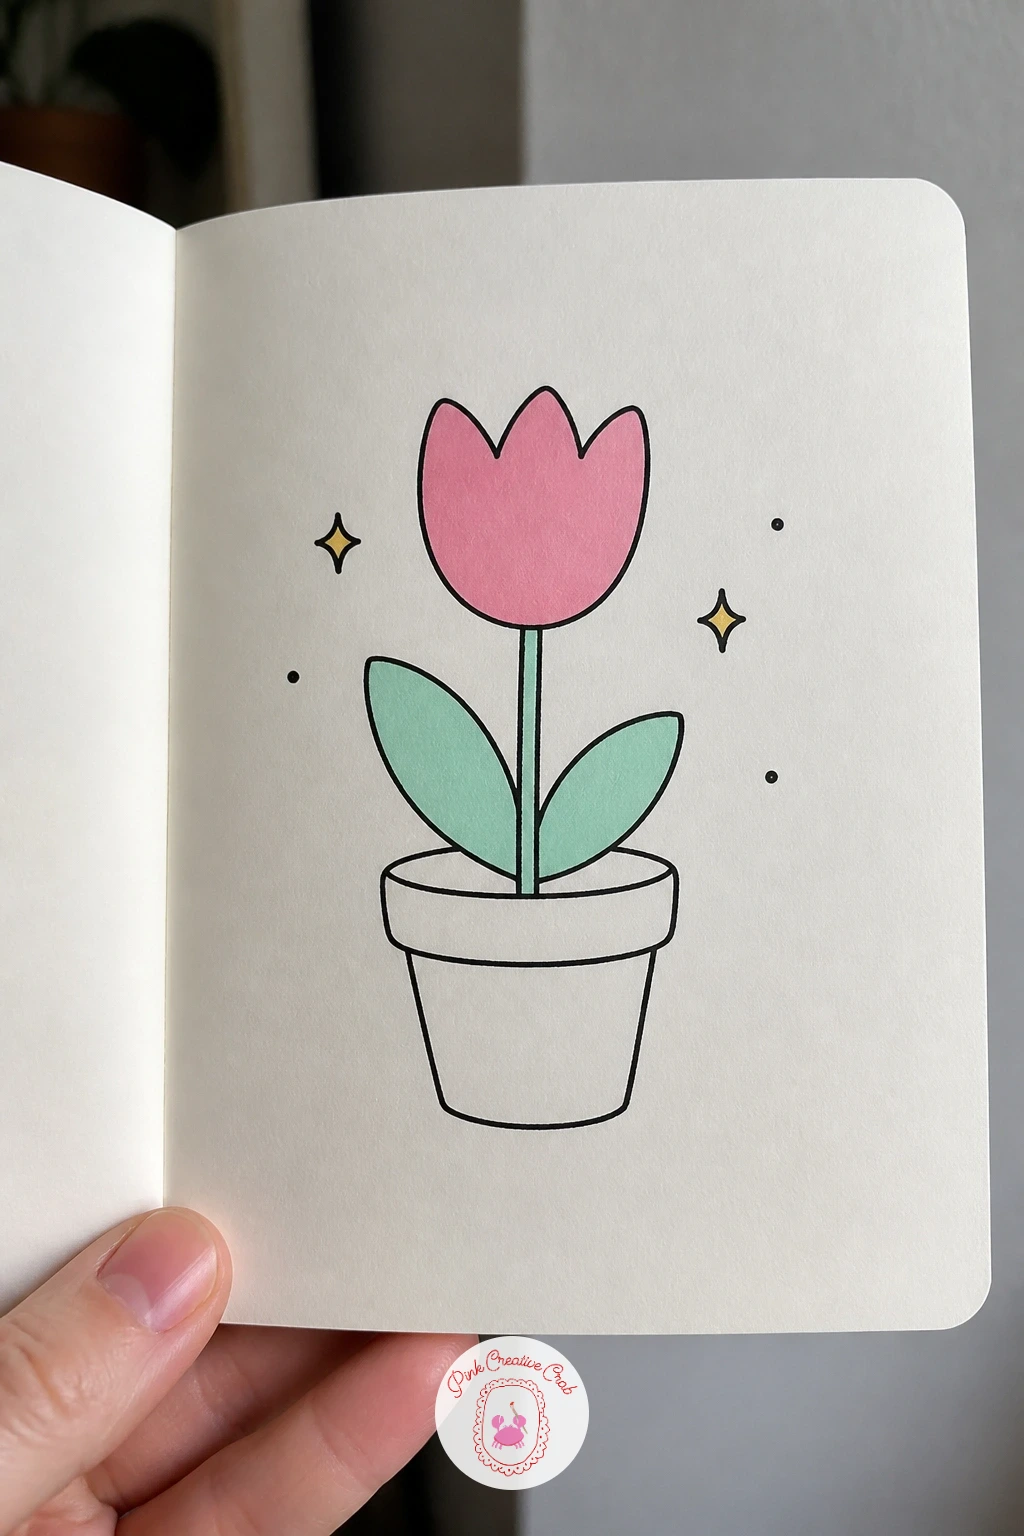
Palette: Soft Pink,Mint Green,Ink Black
Mix two morning favorites together with a sun rising right out of a coffee mug, as if the steam itself turned into sunshine. Draw the mug first as a simple rounded cup with a handle, then build the sun directly above the rim with short triangular rays, positioned so its bottom edge overlaps the mug slightly rather than floating clearly above it.
That overlap is the detail that sells the “rising out of” idea, so do not leave a gap between the sun and the rim. A simple smiling face on the sun finishes the character, and a short steam line or two curling beside it adds to the cozy morning feel.
Color the mug in mint and the sun in pink or a warm yellow if you have one, keeping the rays a consistent short length all the way around. For more small morning scenes in this same spirit, winter morning drawing ideas styled like a cozy lifestyle magazine offers a larger-scale companion to this idea.
If the rays look uneven, draw every other one first, then fill the gaps between them, it keeps the spacing far more consistent than going around in one pass.
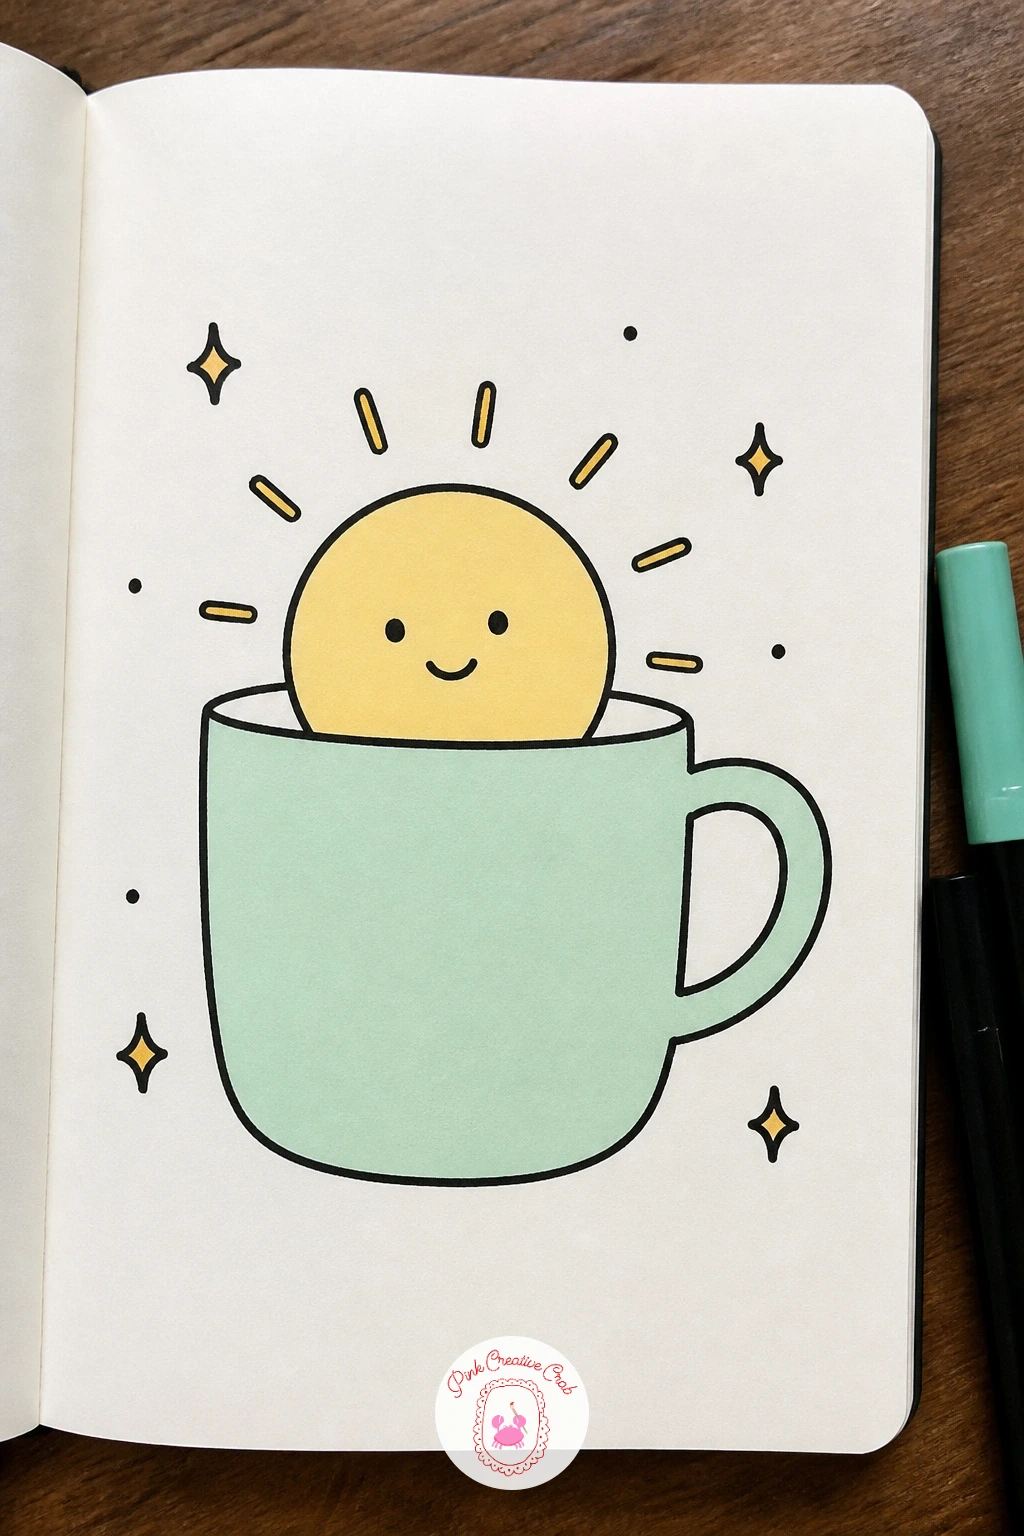
Palette: Mint Green,Soft Pink,Ink Black
Close the page out with a little whale spouting a heart instead of water, a sweet finishing note for the whole set. Draw the whale’s body first as one smooth curved teardrop shape, rounder at the head and tapering to a small tail fin, then add a simple dot eye and a gentle curved smile near the front.
Place a small blowhole on top of the head and draw a short curved spout line rising from it, ending in a heart shape instead of the usual water droplet. Keeping the body’s curve smooth in one or two strokes, rather than many short choppy lines, is what gives a whale its calm, rounded feel.
Color the whale’s body in mint and the heart spout in pink, with a few small wave lines beneath it in black to suggest water. For an easier finish, skip the waves entirely and let the whale float on plain white space.
Try the same pose later with a different sea creature from animal doodle painting ideas for beginners once this gentle curved shape feels comfortable to draw.
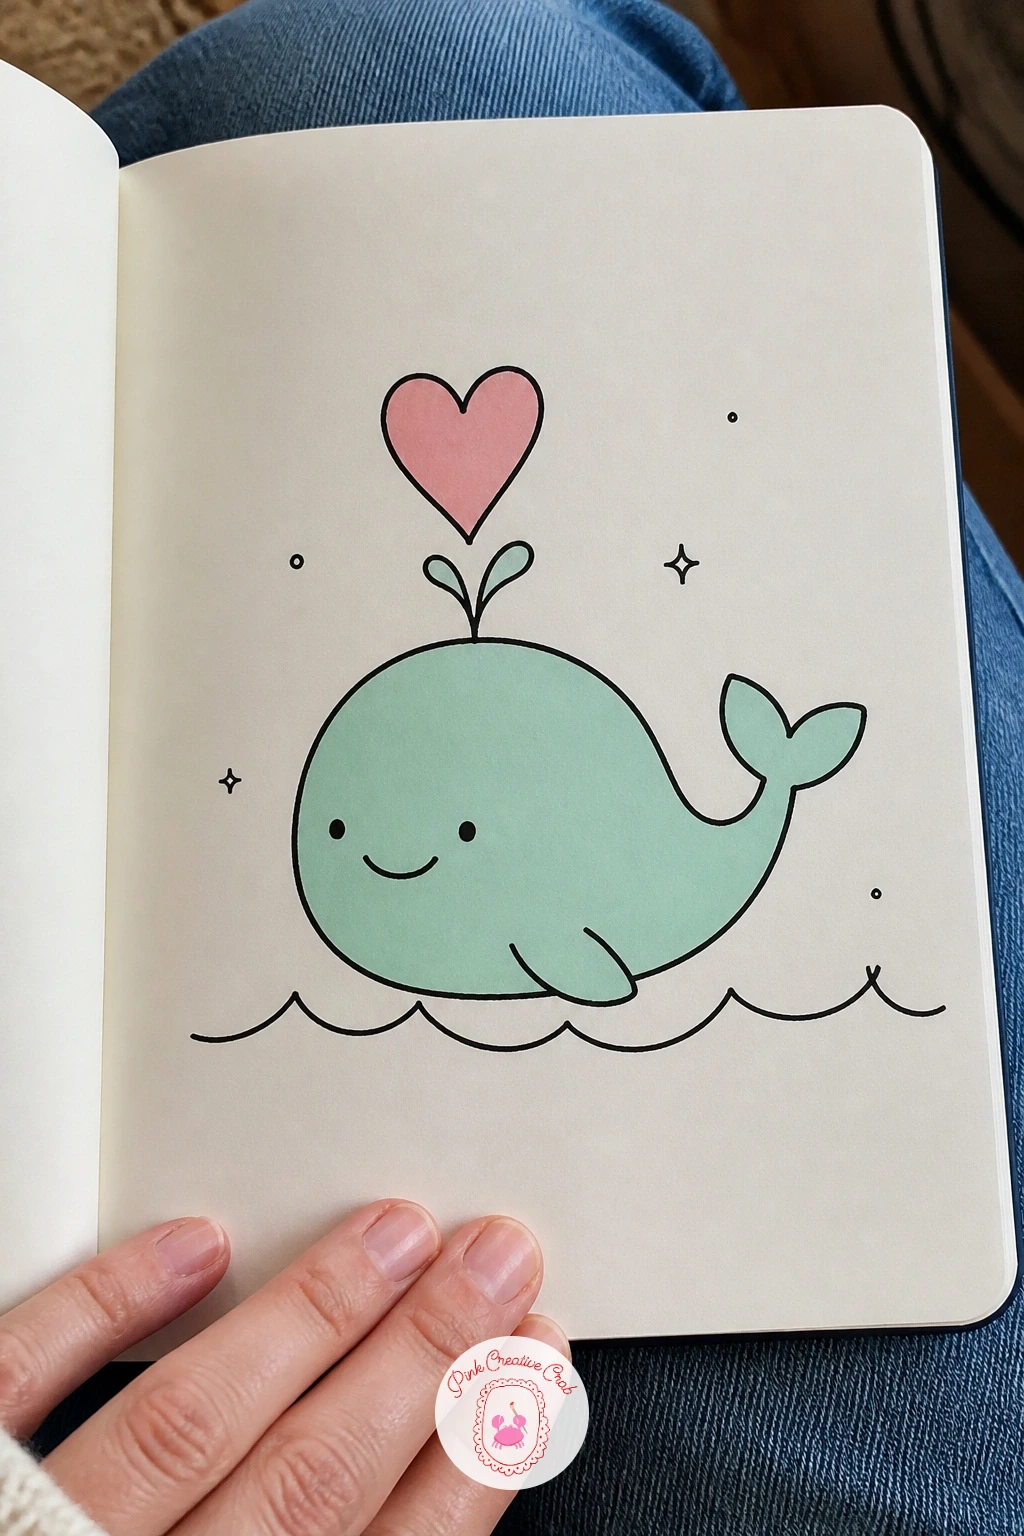
Palette: Mint Green,Soft Pink,Ink Black
What to Do Next
Pick whichever idea caught your eye first, open to a fresh page in your notebook, and start with the outline before any color goes down. One finished mini doodle today is often all it takes to want to fill the rest of the page tomorrow.
Frequently Asked Questions
What paper works best for a mini doodle?
Plain or lightly dotted notebook paper works best for a mini doodle, since it is smooth enough for fineliner and thick enough to stop marker bleeding through. A small sketchbook with slightly heavier paper handles marker fills even better if you plan to color most pages.
Do I need real art markers for mini doodles?
No, any dual tip marker or even colored pencil will work fine for mini doodles. The pink and mint accents in this list just add a quick pop of color, so soft colored pencils are a perfectly good swap if markers bleed through your paper.
How small should a mini doodle actually be?
A mini doodle usually fits in a space about the size of a large postage stamp up to a playing card. Staying this small is what keeps the shapes simple and the whole drawing finishable in a few minutes rather than becoming a bigger illustration.
How do I stop my mini doodles from looking stiff?
Draw the main outline in one confident stroke rather than retracing short, careful lines, since slow tentative lines are what make small doodles look stiff. Slight wobbles and uneven curves actually read as charming at this playful, small scale.
What is the fastest way to fill a whole sketchbook page with mini doodles?
Pick one theme, like tiny food or small sleepy characters, and repeat similar shapes with small variations across the page. Working through several ideas from this list in one sitting, smallest and simplest first, fills a page quickly without it feeling repetitive.
Have any thoughts?
Share your reaction or leave a quick response — we’d love to hear what you think!
-
 0
-
0
-
0
-
0
-
0
-
0


