

Every axolotl drawing starts with the same happy shape: a wide smiling mouth, two round black eyes set high on the head, and a crown of frilly gills that can go pink, lilac or gold depending on your mood. That one friendly face carries all 28 scenes below, from a teacup to a bubble bath, so once you have drawn it once you can draw it again and again without it ever feeling repeated.
Grab fineliners, alcohol markers and whatever paper is already on the table, because none of these need special supplies or a long afternoon. Work through the list in order and it grows gently from the simplest floating axolotl to small two and three character scenes, so pick a stopping point that suits the time you and your child actually have today.
Using these images: free for personal projects such as printing, coloring, cards, journals and gifts. Handmade items that include them may be sold up to 30 pieces per design. More than that is commercial use and is not permitted, and neither is selling or sharing the images themselves or passing them off as your own. Please ask before any other use.
Start here, because this is the one face every other idea in this list borrows from. Draw a soft rounded body shape first in pencil, wide at the head and tapering to a thin tail, then add two tiny oval eyes close together and a curved smile line underneath them.
Once the pencil shape feels right, go over it in fineliner, then add three or four feathery gill stalks fanning out from each side of the head like little branches. If this is your first time, keep the gills simple: a few short lines branching from one longer line is plenty, no need to draw every tiny frond.
Fill the body with pink alcohol marker, leaving a lighter patch near the belly for a soft rounded look, then add a cluster of leafy green water plants swaying at the base so the axolotl looks like it is floating among them. Kids can keep the plants as simple green loops, while an adult can add a second shade of green behind them for depth.
The easiest trick to keep the proportions friendly: make the head about a third of the whole body length, never smaller, since that is what keeps the face looking round and happy rather than snake-like.
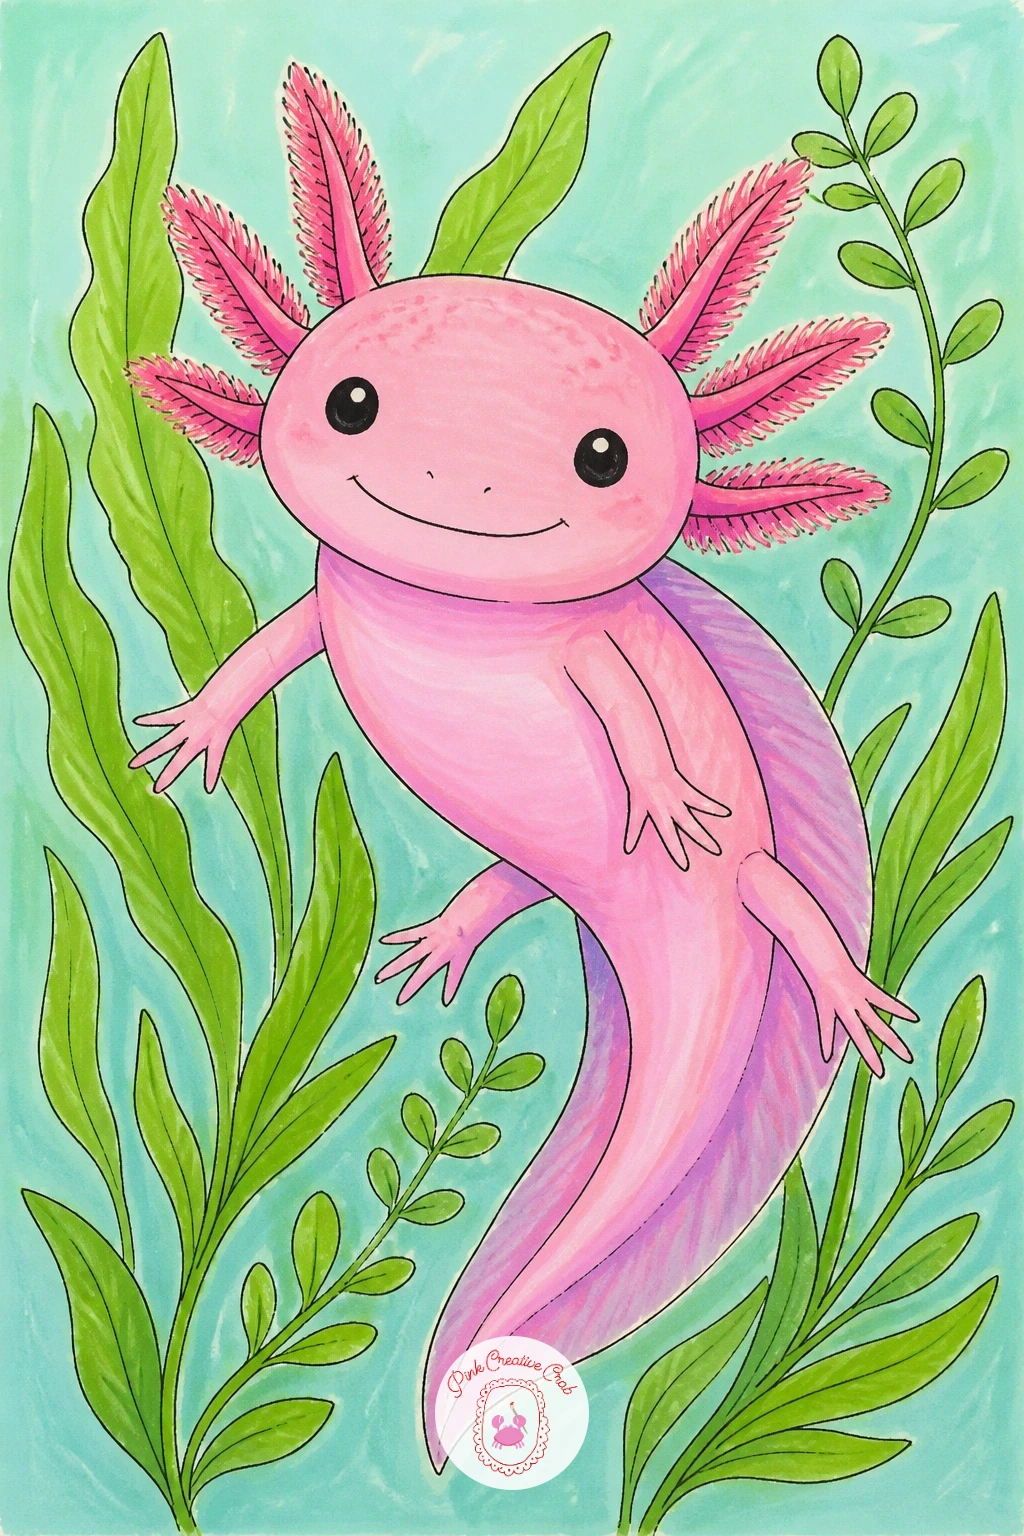
Palette: Axolotl Pink, Leaf Green, Soft Lilac, Charcoal Black
Build on that same smiling body and this time add a small ring of flowers sitting between the gill stalks like a crown. Sketch the head and body in pencil as before, then before inking, pencil in four or five small circles across the top of the head where the flowers will sit.
Ink the axolotl body and gills first, then draw each flower as five small petal loops around a dot center, keeping them small enough that the gills still show through behind them. The common mistake here is making the crown too big, which hides the face, so keep every flower smaller than one eye.
Color the axolotl in lilac this time for variety, then make the flowers pink and white with a yellow center dot. If a child finds tiny petals tricky, simple round flower blobs work just as well and still read as a crown.
An adult can add one thin green stem connecting the flowers into an actual ring, which makes the crown feel woven rather than scattered.
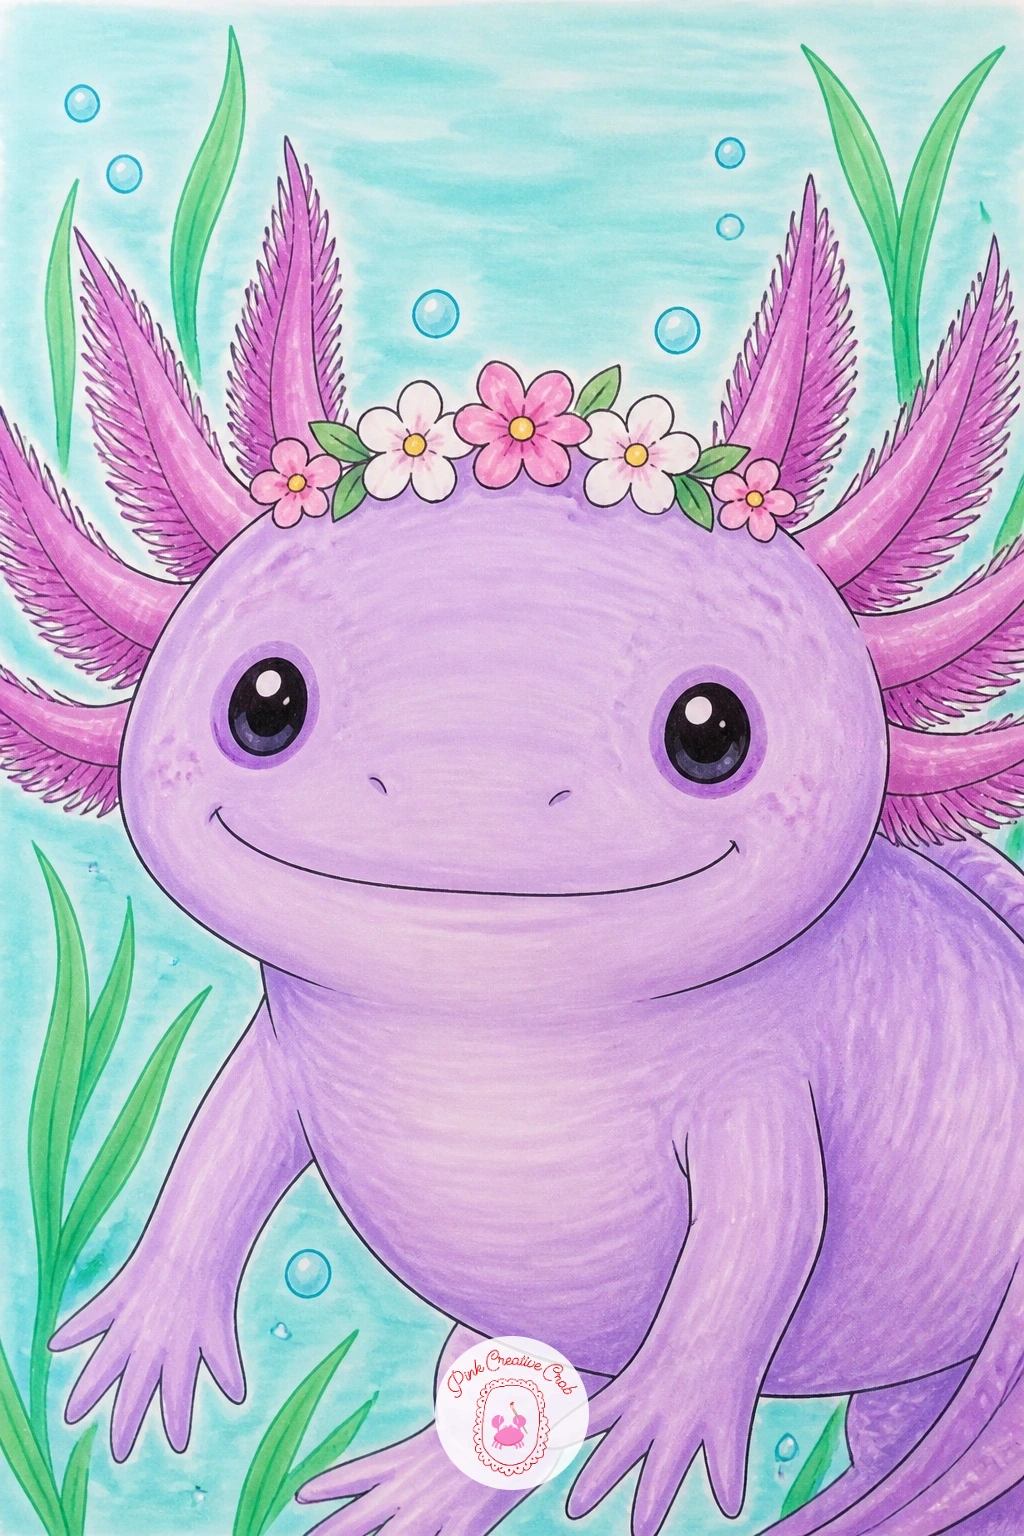
Palette: Soft Lilac, Blush Pink, White, Sunshine Yellow
Give the axolotl a little home for this one: a teacup sitting in for its tank. Draw a simple teacup shape first, wide at the top and curving in slightly at the base, with one small curved handle on the side, then draw the axolotl curled inside it with its head and gills peeking over the rim.
Ink the teacup outline before the axolotl so the cup reads as the container the axolotl sits inside, then add a saucer underneath as one flattened oval. The eye level matters here: draw the cup slightly from above, so the opening shows as a wide oval rather than a flat line, which makes it look like you are peeking down into it.
Color the teacup in soft white or pale aqua with one thin pink stripe near the rim, and keep the axolotl pink so it stands out against the cup. If the oval opening looks wonky, trace around a coin or small lid for a cleaner curve.
Swap the teacup for a jam jar if that is easier to draw, since the same peeking-over-the-rim pose still works.
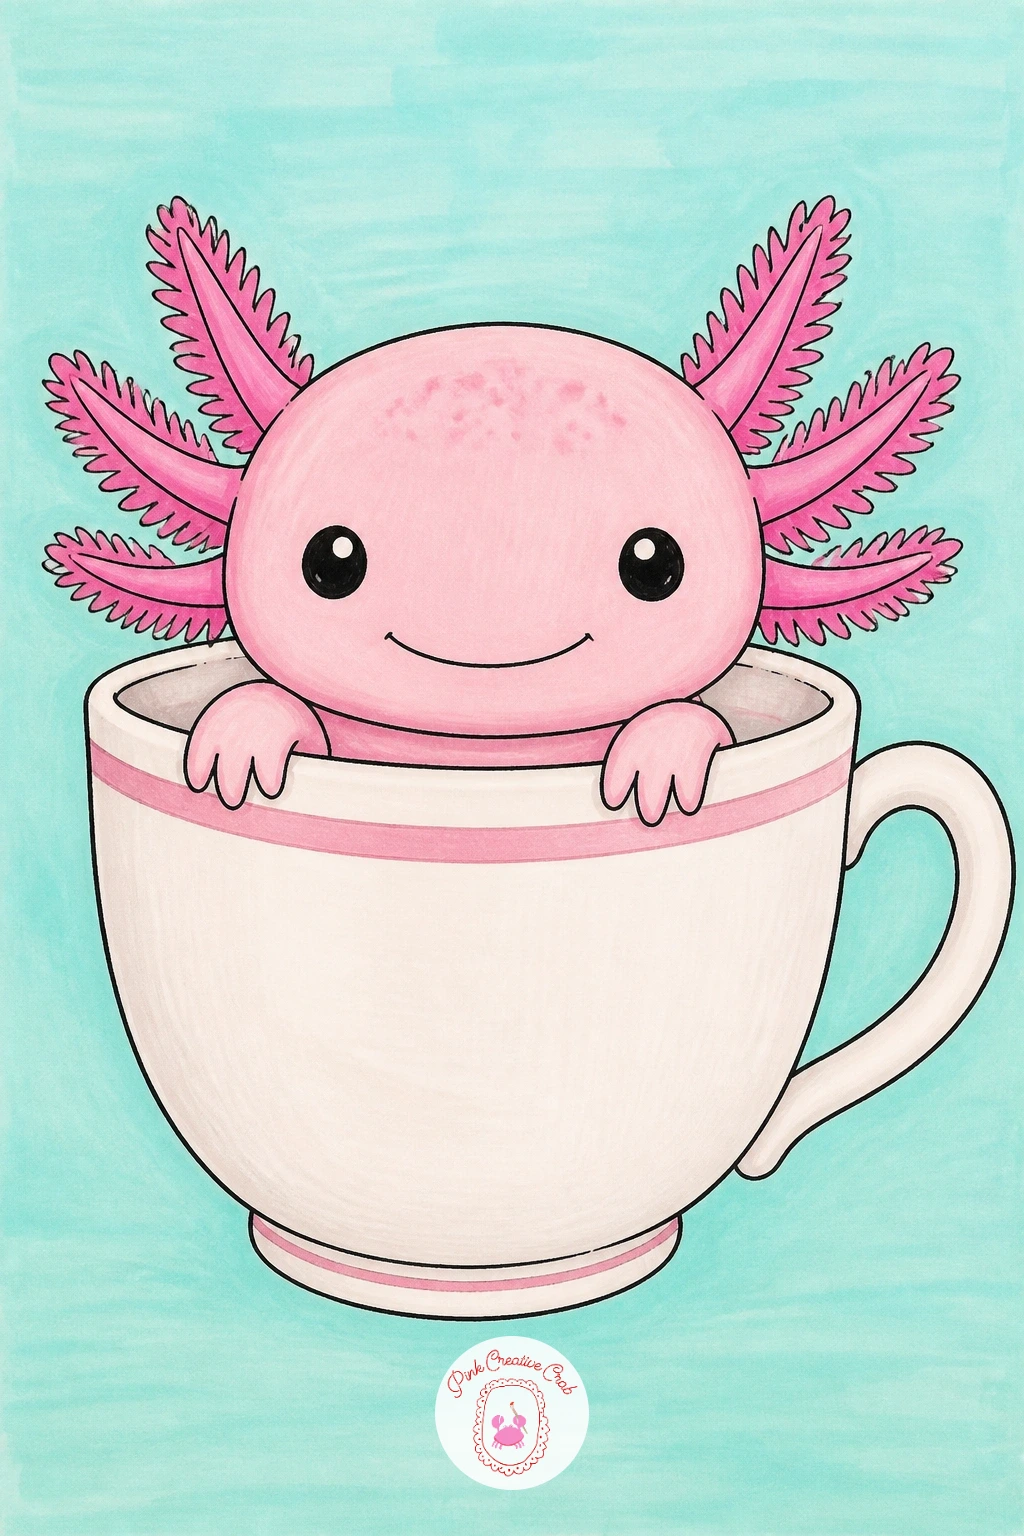
Palette: Axolotl Pink, Pale Aqua, White, Charcoal Black
Trace a small lid or coin for the teacup opening if ovals feel tricky by hand, it keeps the rim looking round instead of lopsided.
Move from one axolotl to two for this idea, facing each other with a strawberry between them. Draw both bodies first in pencil, mirrored so their heads lean toward the center and their tails curve outward, leaving a gap in the middle for the fruit.
Measure before you ink: the strawberry should sit no bigger than one axolotl head, otherwise it overwhelms the scene. Ink both axolotls first, then the strawberry last, drawing it as a rounded triangle with a few small seed dots and a leafy green top.
Color one axolotl pink and the other a paler blush so they read as two different little characters, then color the strawberry red with the seeds left as tiny uncolored dots. If red marker is not on hand, a soft coral works just as well and keeps the palette gentler.
For kids drawing this together, each child can draw and color one axolotl, then take turns adding the strawberry seeds.
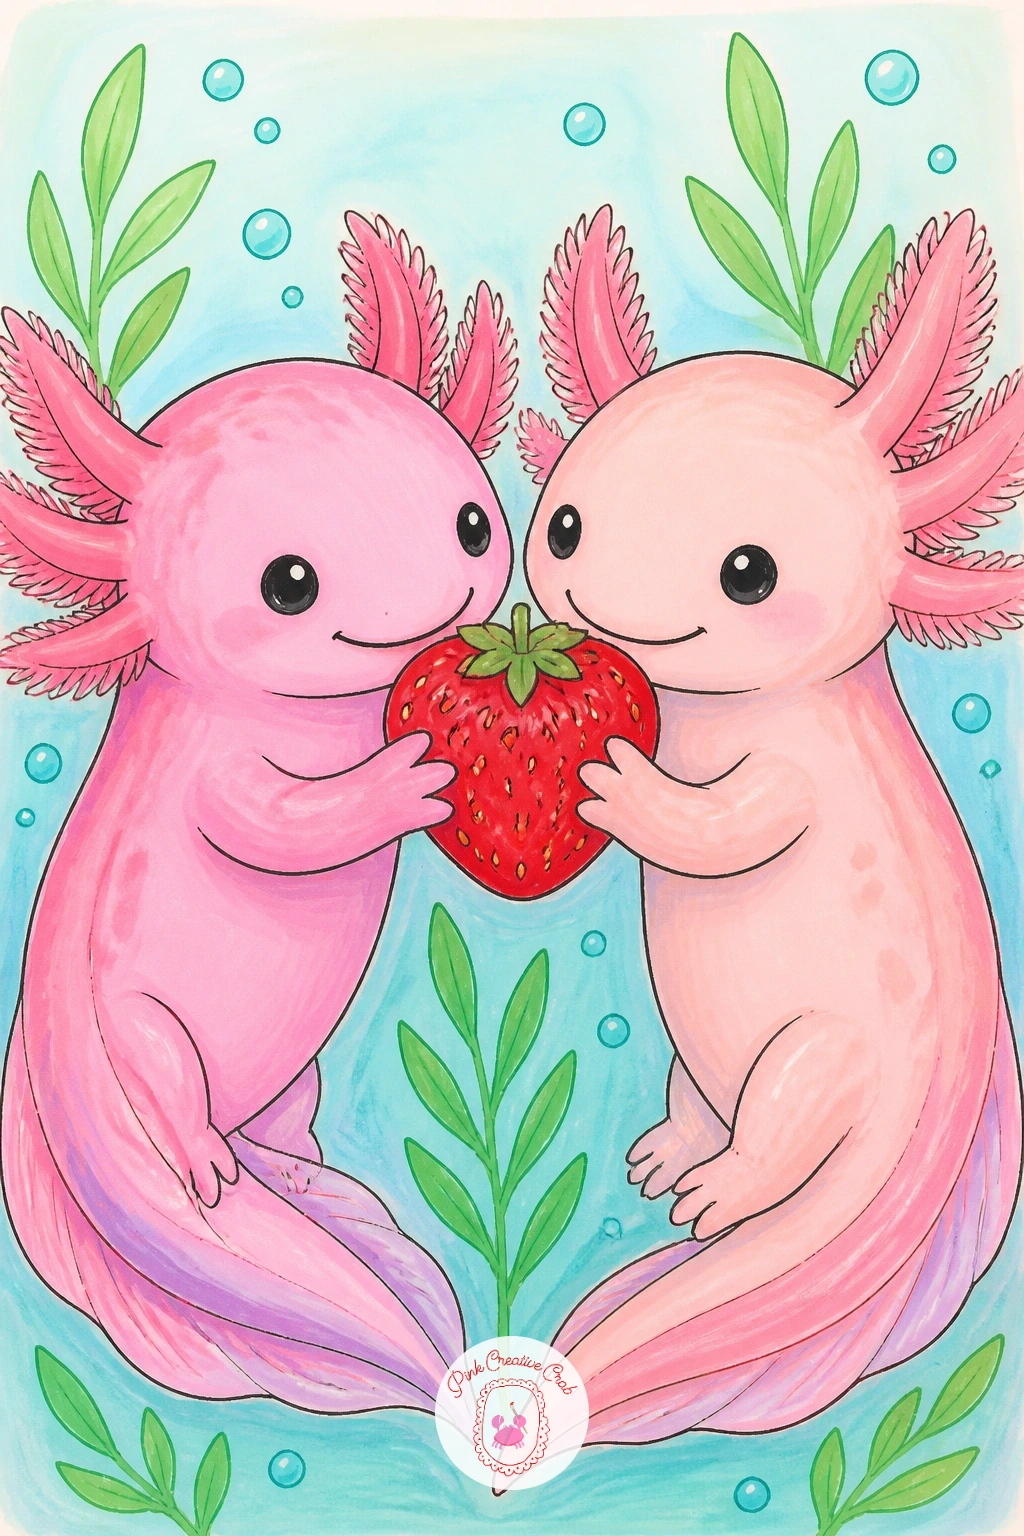
Palette: Axolotl Pink, Blush Pink, Strawberry Red, Leaf Green
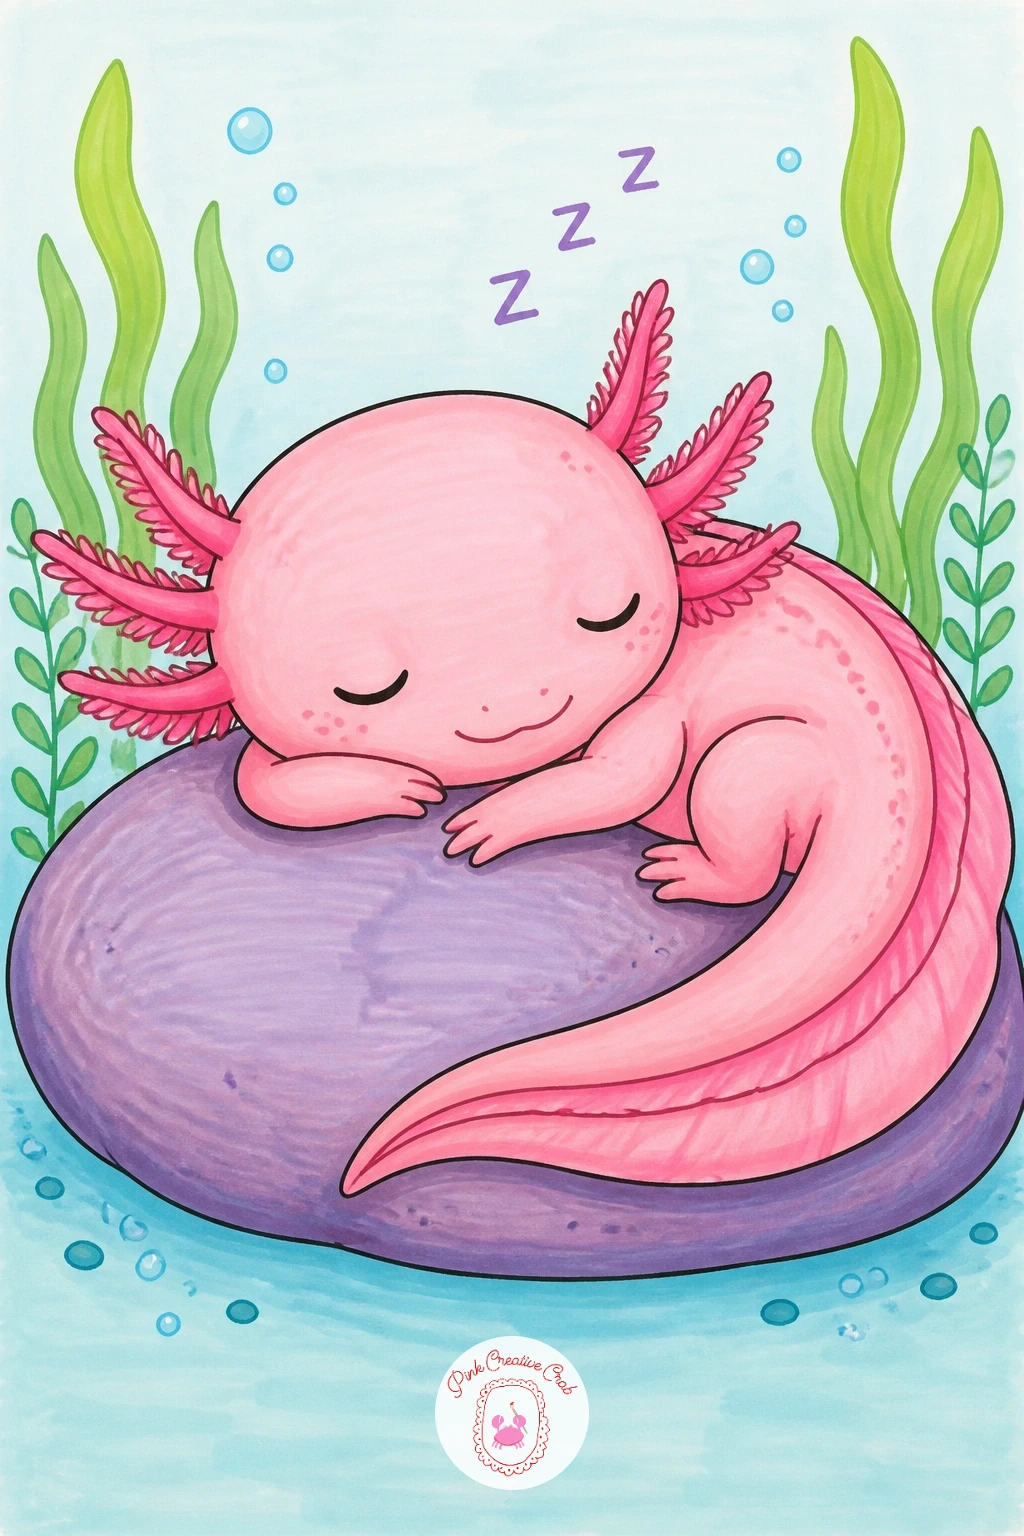
Slow the mood down with a sleeping axolotl curled on a smooth round pebble. Draw the pebble first as a simple flattened oval, then curl the axolotl body on top of it so the tail wraps gently around one side, with the eyes drawn as closed curved lines instead of open ovals.
Ink the pebble before the axolotl so you can see exactly where the body needs to rest without floating above it. The usual slip-up is drawing the axolotl too straight, which looks stiff, so curve the spine into a soft C shape before adding the gills.
Color the pebble in a muted grey-lilac and the axolotl in its usual pink, then add two or three small darker grey dots on the pebble for texture. A kneaded eraser can soften any pencil lines left under the ink for a cleaner, dreamier finish.
Draw a few tiny zzz marks floating above the head if you want the sleepy mood to read instantly, especially nice for younger artists.
You Will Need
- kneaded eraser
Palette: Axolotl Pink, Stone Grey-Lilac, Soft Lilac, Charcoal Black
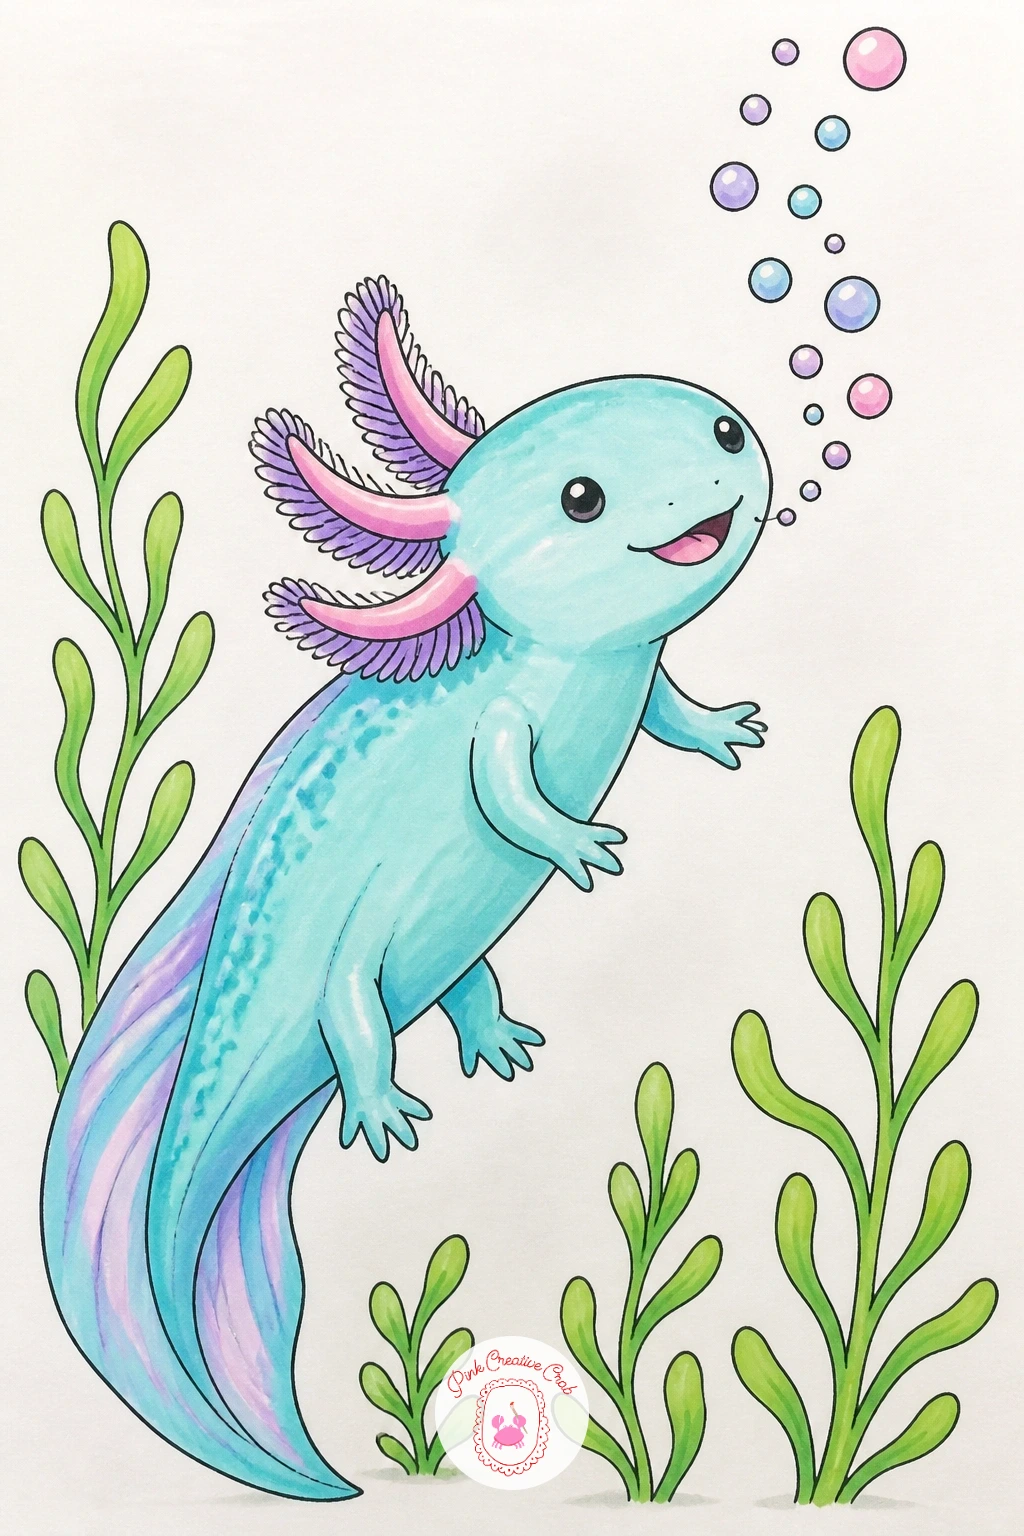
Bring in some movement with an axolotl mid-swim, blowing a trail of bubbles from its smiling mouth. Draw the body at a slight diagonal this time instead of flat, as if it is swimming upward, which instantly makes the pose feel livelier than a resting one.
Ink the body and gills first, then add a chain of circles trailing from the mouth, starting small near the face and growing larger as they float away. For the ten-minute version, three or four plain circle bubbles are enough; for a longer session, add a tiny white curved highlight inside each bubble with a white gel pen to make them look glassy.
Color the axolotl in pink or aqua and leave the bubbles uncolored except for a faint blue outline, so they read as water rather than solid shapes. If bubbles start looking too even in size, that is the fix: vary at least one of them noticeably bigger than the rest.
Next time, try this same pose with the axolotl swimming sideways across the page instead of upward, for a totally different feel.
You Will Need
- white gel pen
Palette: Aqua Blue, Axolotl Pink, Pale Blue, Charcoal Black
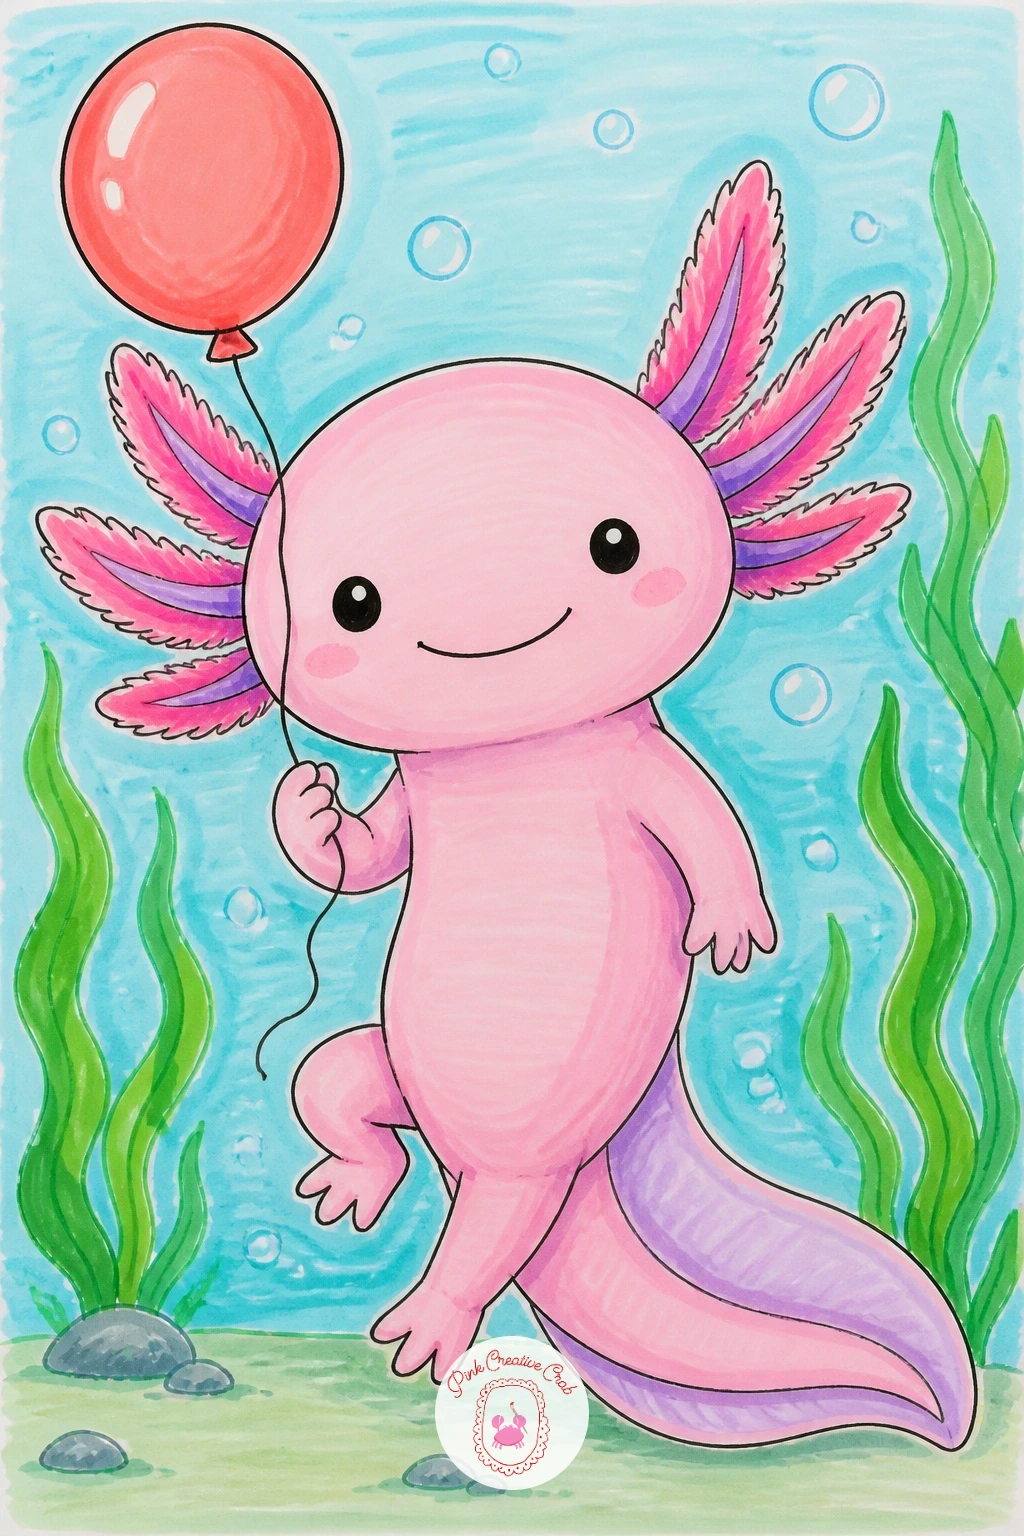
Give the axolotl a little prop this time: a round balloon held in one small front leg. Draw the body first with one front leg bent slightly outward instead of resting flat, since that bend is what makes it look like it is actually holding something.
Ink the axolotl, then draw the balloon as a simple circle attached to the leg by one thin curved string, with a small triangle knot at the bottom. The easiest way to keep the balloon looking round rather than egg-shaped is to trace a small coin or bottle cap for the outline before inking over it freehand.
Color the balloon in a cheerful yellow or coral so it stands out clearly against the pink axolotl, and leave a small white highlight dot unfilled on the balloon for shine. If markers are limited, colored pencil works fine for just the balloon while the axolotl stays in marker.
Here is the tip worth remembering today: always draw the string with a gentle curve, never a straight line, or the balloon looks tied down instead of floating.
Palette: Axolotl Pink, Coral Yellow, White, Charcoal Black
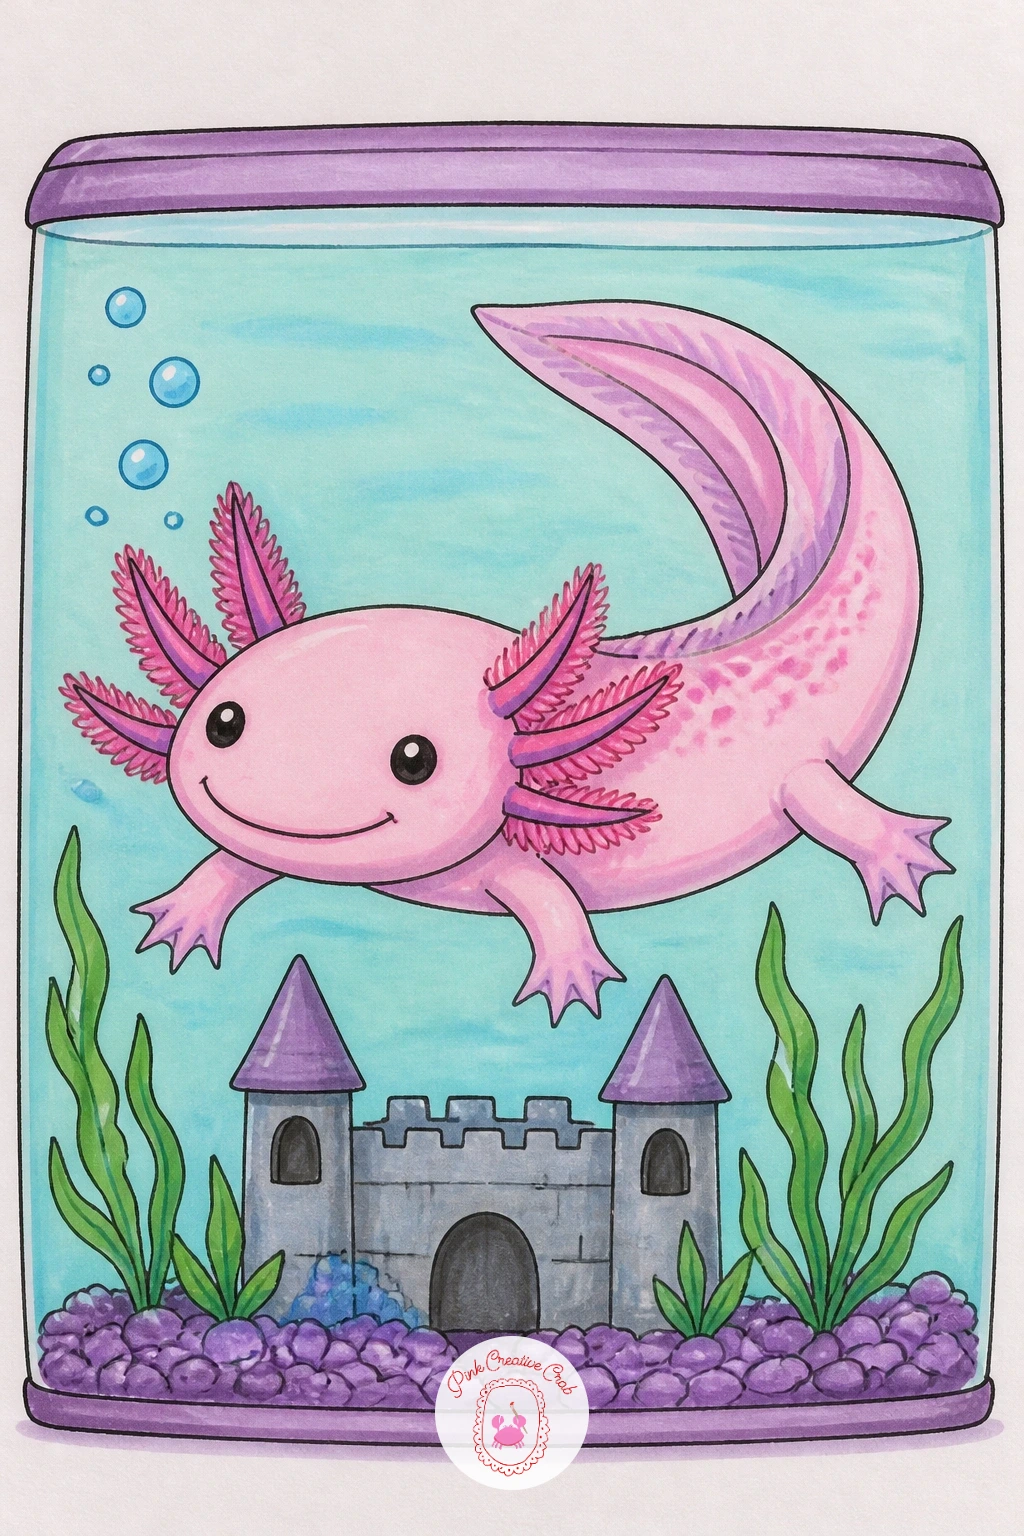
This one turns into a small scene rather than a single character, so plan the layout loosely in pencil before any ink touches the page. Draw a simple rectangle for the tank outline first, then sketch the axolotl swimming in the upper half and a small toy castle sitting at the bottom.
Build the castle out of basic shapes: one square base, two small towers made from rectangles topped with triangle roofs. Ink the tank outline last of all, as a thin double line along the edges, so it reads as glass rather than a solid box.
Color the axolotl pink, the castle in soft grey or lilac, and add a wash of pale aqua across the whole tank background to suggest water, leaving the axolotl and castle slightly lighter so they stand out. If the aqua wash makes everything too busy, keep it to just a few light scribble strokes instead of solid color.
For more scene ideas built the same way, the scenery drawing for kids list has more simple backgrounds worth trying.
Palette: Axolotl Pink, Pale Aqua, Stone Grey-Lilac, Charcoal Black
Make the gills the whole star of this one by drawing them bigger and bouncier than usual, as if the axolotl is waving hello with them. Start the head and body as usual, but this time draw six or seven gill stalks instead of three or four, each curving outward in a slightly different direction.
Ink the face first so the smile is locked in before the gills get busy, then add the gill stalks working from the base outward, keeping each one a single confident line rather than going back over it. The spot this goes wrong is overcrowding, so leave visible gaps of white paper between each stalk.
Color the gills in a deeper pink or coral than the body so they pop forward, using short dry-brush style marker strokes along each stalk to suggest soft feathery texture rather than flat color. A cotton swab can soften any marker edge that looks too hard.
If this is your first time drawing gills this detailed, practice just the gill cluster alone on scrap paper first before committing to the full axolotl.
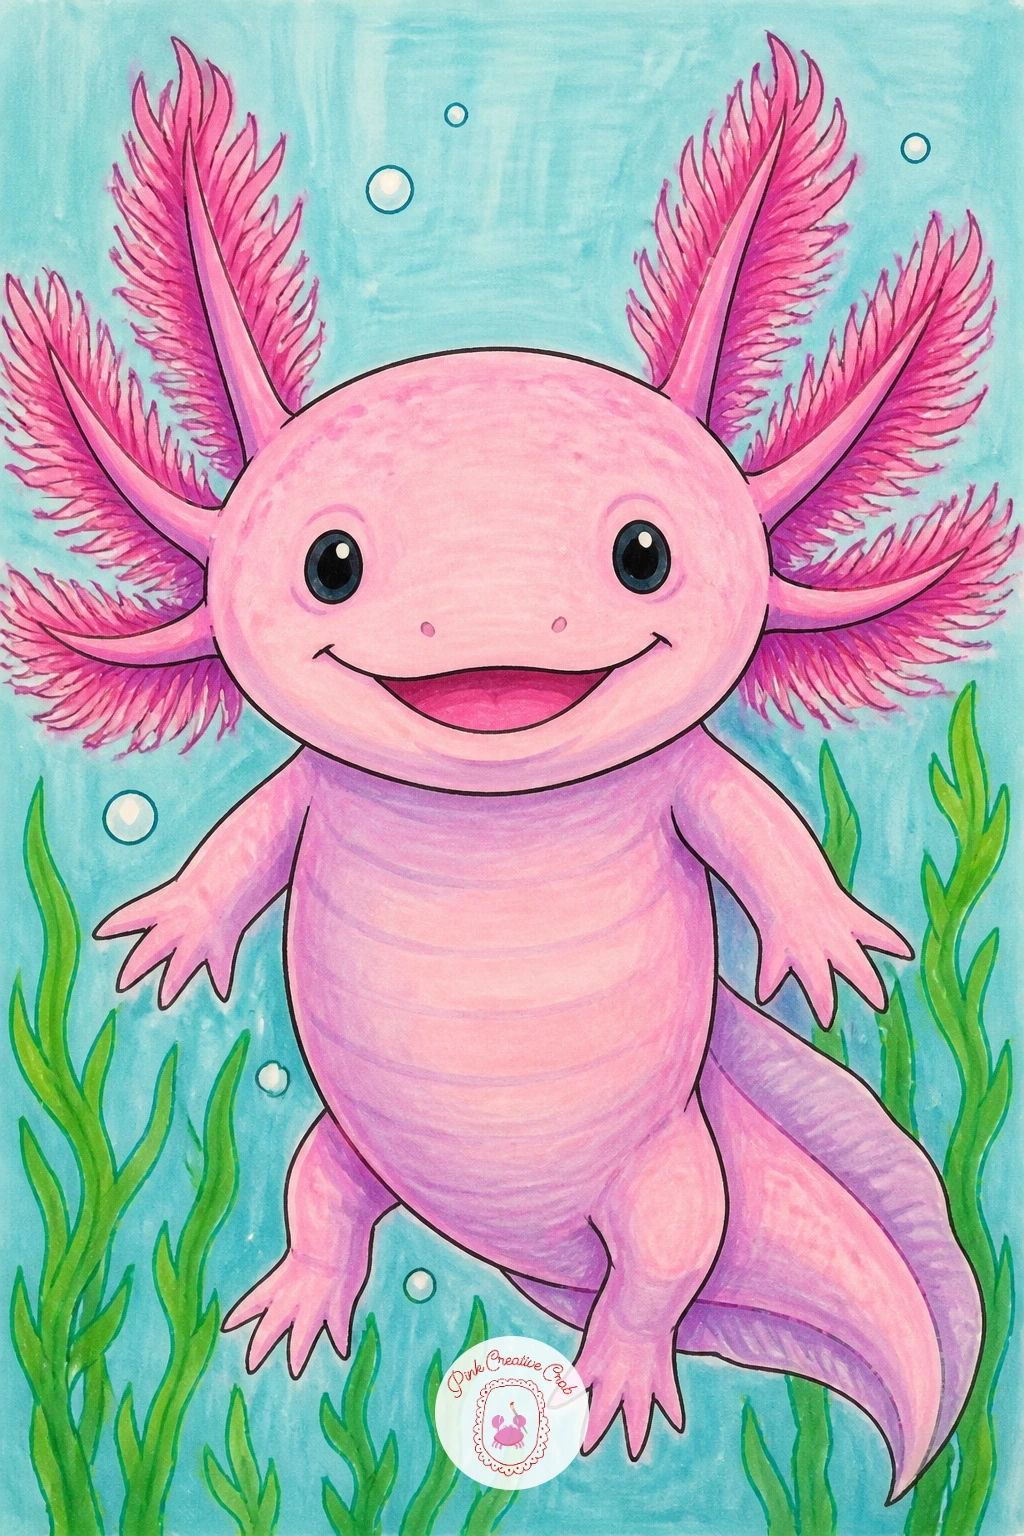
Palette: Axolotl Pink, Coral Pink, White, Charcoal Black
Pair up two color variations side by side for this one, since real axolotls do come in golden and pink forms and it makes a nice little lesson tucked into a fun drawing. Draw both bodies the same size and pose, facing the same direction like two friends standing together.
Ink both outlines identically first, then let the color be the only real difference between them. Fill one in warm gold or butter yellow and the other in the usual pink, keeping both smiles and gill shapes exactly matching so they clearly read as two versions of the same creature.
The easy comparing trick here: hold both halfway-colored drawings next to each other before finishing, to check the gold one is not drifting toward orange and losing its soft pastel feel. If gold marker is not available, pale yellow with a thin brown outline on the gills gives a similar warm effect.
Kids can each pick one axolotl to color while comparing whose markers match best, which makes this a nice one to draw together.
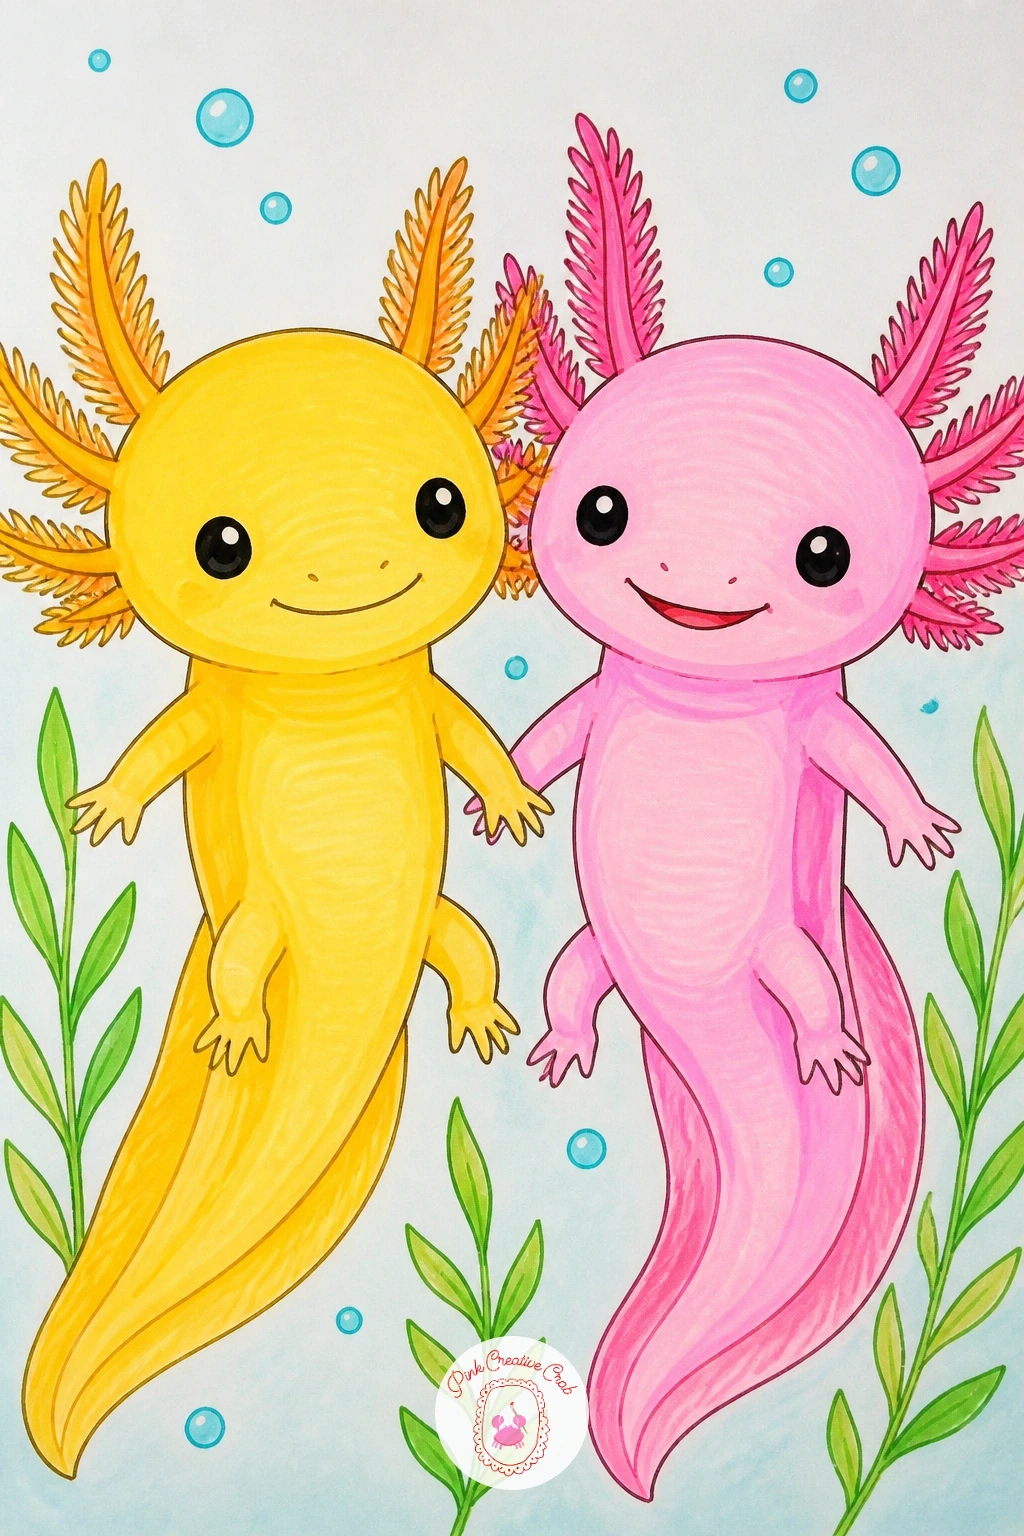
Palette: Golden Yellow, Axolotl Pink, Warm Brown, Charcoal Black
Tuck the axolotl into a spiral shell this time, with only its head and gills showing. Draw the shell first as a simple spiral, starting from a small center dot and curving outward two or three turns, then position the axolotl head emerging from the wide opening.
Ink the shell spiral slowly in one continuous curving line if possible, since a shaky spiral is the main way this idea goes wrong. If the spiral comes out uneven, a few short ridge lines added across it afterward will hide the wobble and make it look textured on purpose.
Color the shell in soft cream or pale lilac with slightly darker lines along the spiral ridges, and keep the axolotl pink so the face stands out clearly against the paler shell. Leave the inside of the shell opening a touch darker to suggest depth before the axolotl’s head sits in front of it.
Try drawing just the head and gills peeking out rather than any part of the body, which keeps this version quick and very beginner friendly.
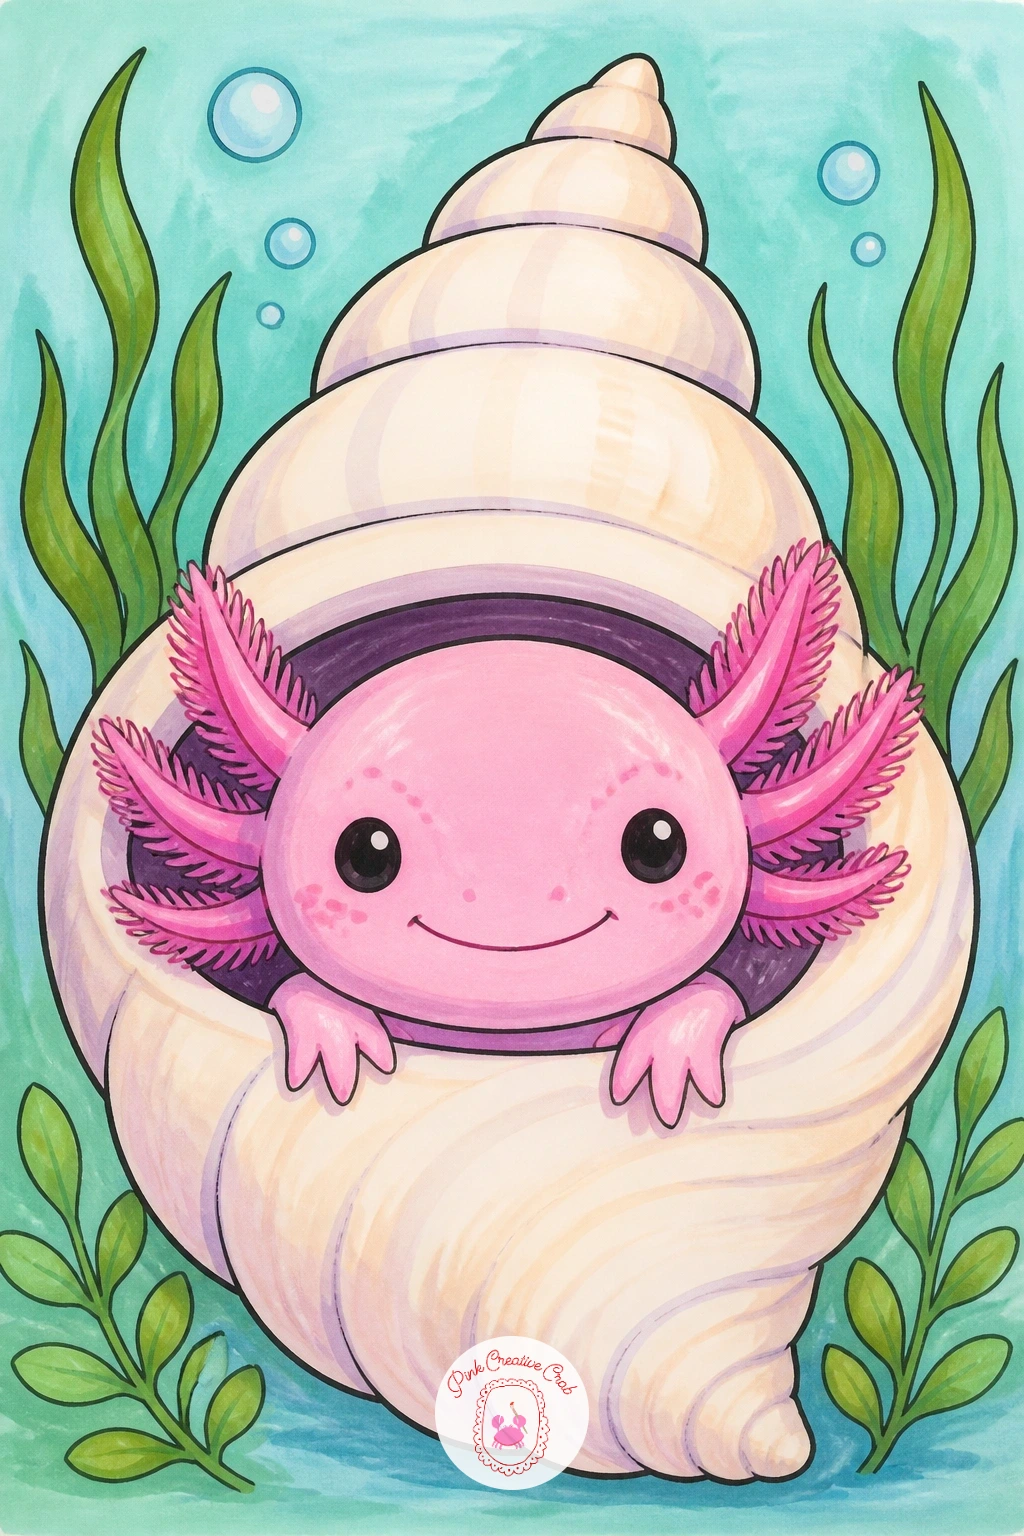
Palette: Axolotl Pink, Cream Shell, Soft Lilac, Charcoal Black
Add a little celebration to the page with a pointed party hat sitting between the gills. Draw the axolotl head and body as your base shape, then sketch a simple triangle cone above the head, tilted slightly to one side for a playful angle rather than straight up.
Ink the hat with a small pom-pom circle at the tip and a thin strap line curving under the chin area, then add a few polka dots or stripes across the cone once the outline is set. The common mistake is making the hat too tall, which looks top-heavy, so keep it no longer than the head itself.
Color the hat in a bright color that contrasts the pink body, coral or aqua work nicely, with white polka dots left as uncolored circles. A white gel pen can add dots on top of marker color instead, if coloring around small circles feels fiddly.
This is a nice one to draw for a birthday card, and the february doodles list has more small celebration scenes in the same spirit.
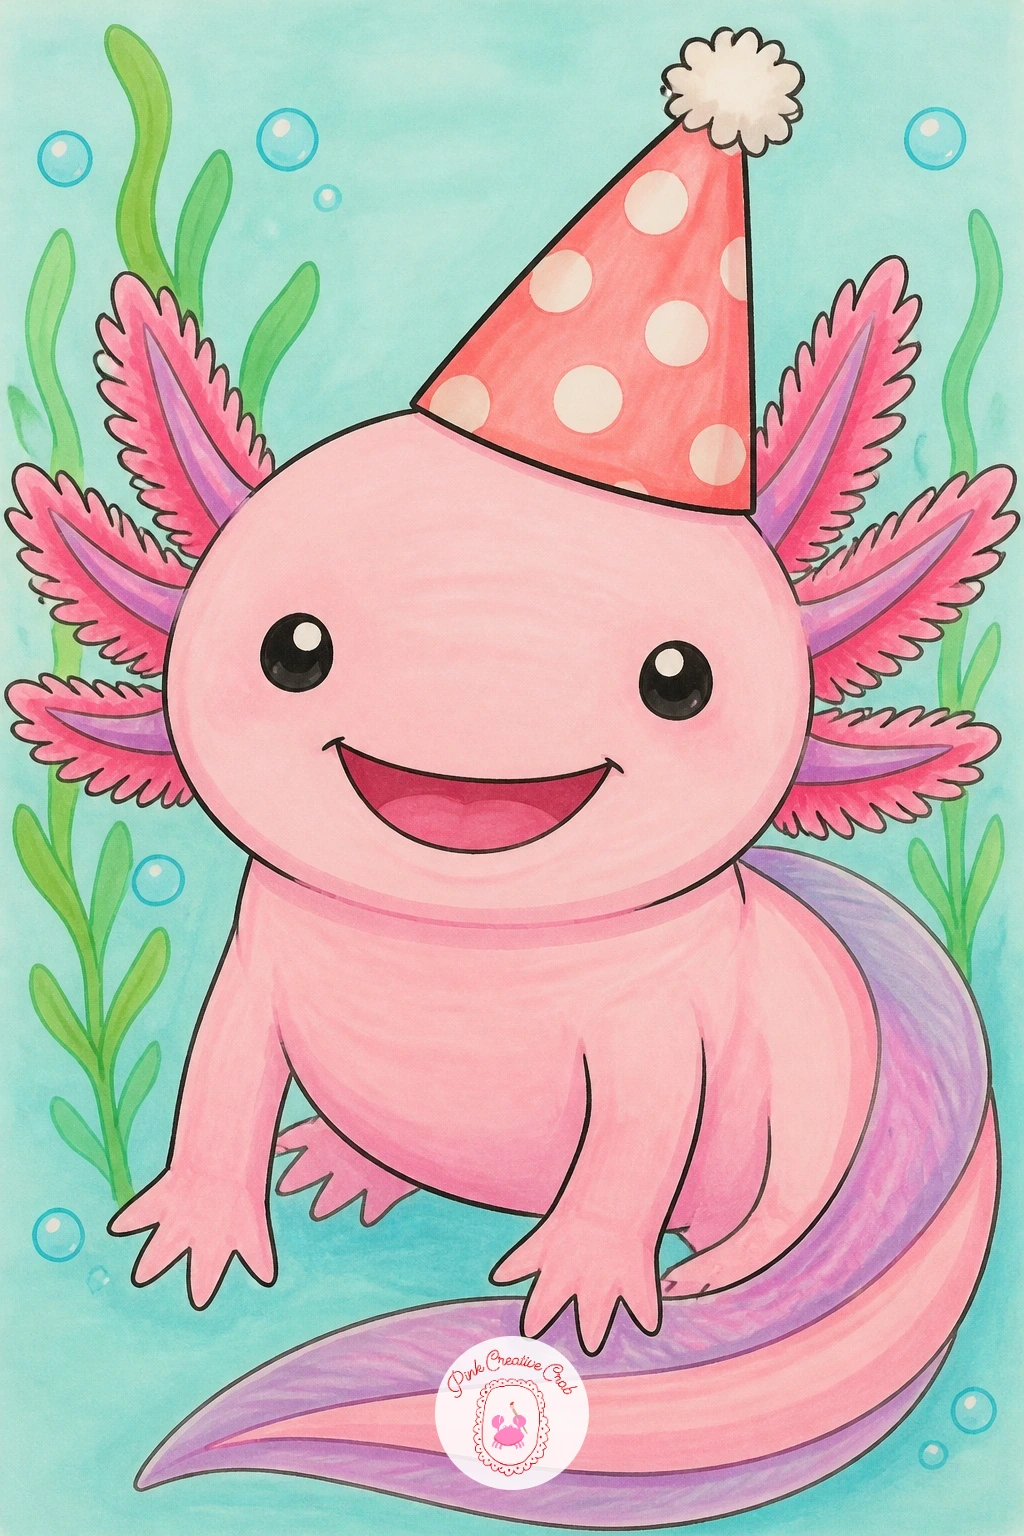
You Will Need
- white gel pen
Palette: Axolotl Pink, Coral, White, Charcoal Black
Rest the axolotl on top of a lily pad for this one, half in the water and half out. Draw a wide flattened circle with one small notch cut into the edge for the classic lily pad shape, then place the axolotl lying across it with its tail hanging slightly over the side.
Ink the lily pad first as one smooth confident outline, then the axolotl on top, overlapping the edge of the pad slightly so it looks settled onto it rather than floating above. Where this goes wrong is drawing the pad too small, which crowds the axolotl, so make the pad at least twice the width of the axolotl’s body.
Color the lily pad in a leafy green with a slightly darker ring near the notch, and add one small pink flower bud beside it for extra charm. If green marker runs dry mid-project, colored pencil blended lightly over the remaining area will match closely enough.
Try adding a few small ripple lines around the base of the pad next time, to suggest the water surface without drawing the whole pond.
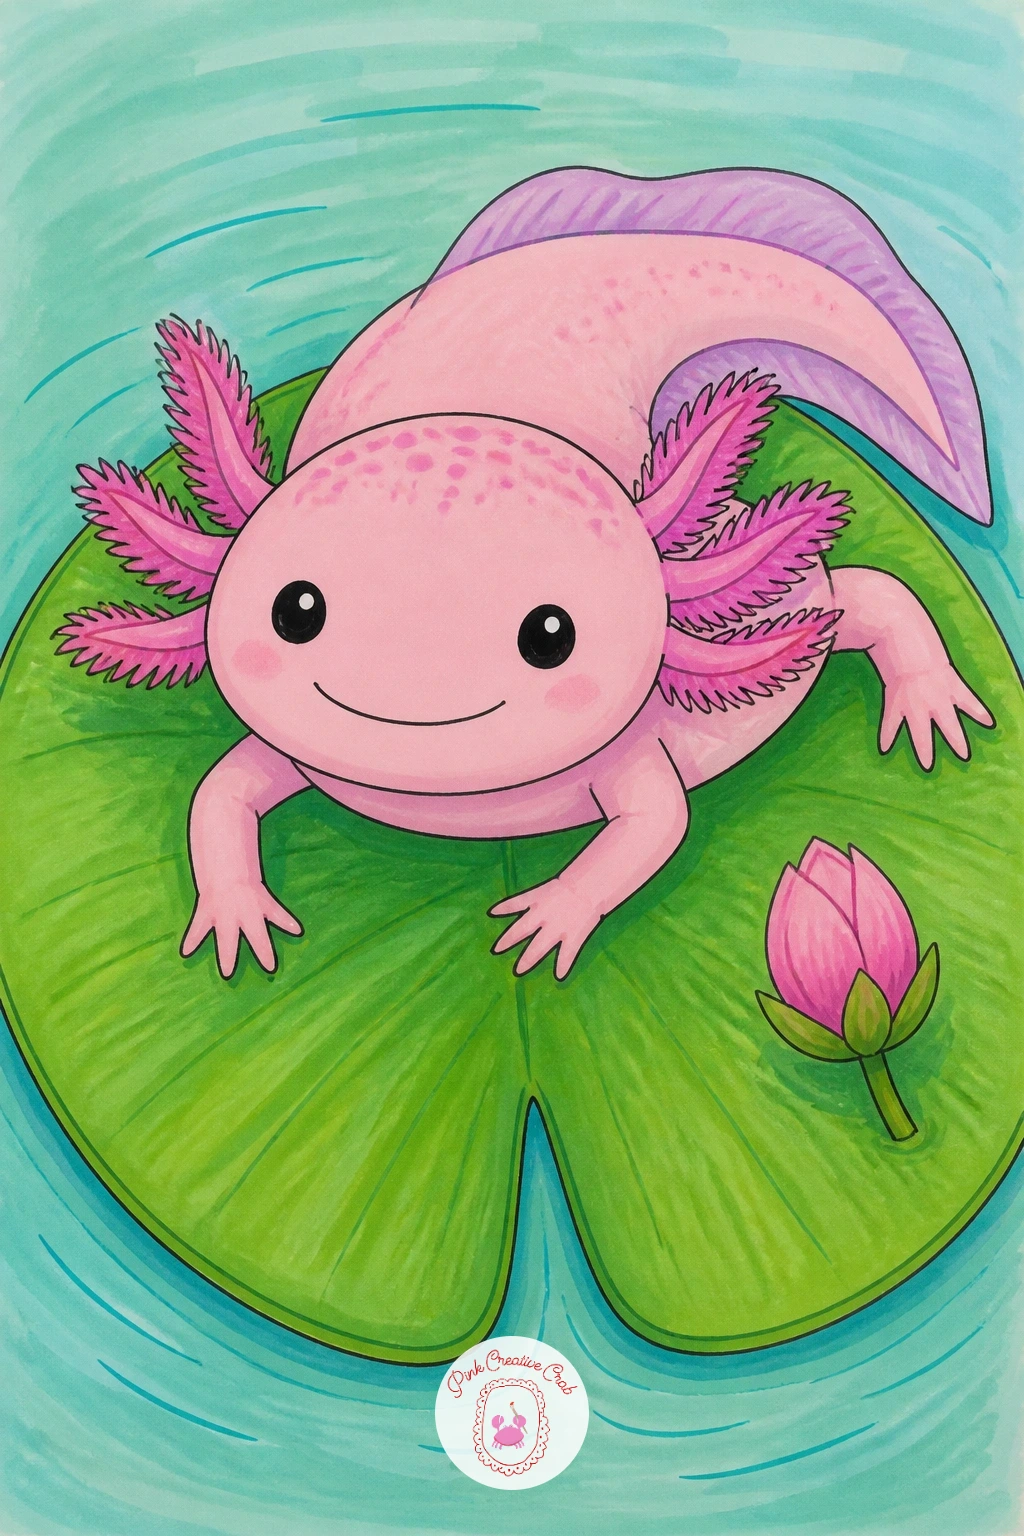
Palette: Leaf Green, Axolotl Pink, Blush Pink, Charcoal Black
Give the axolotl a cuddle buddy for this one, a small round plush toy held close to its chest. Draw the axolotl body first in a slightly curled sitting pose, then sketch a simple rounded stuffed animal shape, maybe a tiny bear or star, tucked into its front legs.
Ink the axolotl first, then the plushie, keeping the plushie’s shapes very soft and rounded so it clearly reads as something squishy rather than solid. The easiest fix if the hug looks stiff: angle both the axolotl’s head and the plushie slightly toward each other, which reads as affection instantly.
Color the plushie in a color that is not already used on the axolotl, a soft yellow or mint work well, with a simple stitched smile line on its face. If small stitching details are too fiddly for little hands, a plain round face with two dot eyes works just as sweetly.
This quick version takes about ten minutes; for a longer session, add a tiny patterned blanket draped half over the pair for extra coziness.
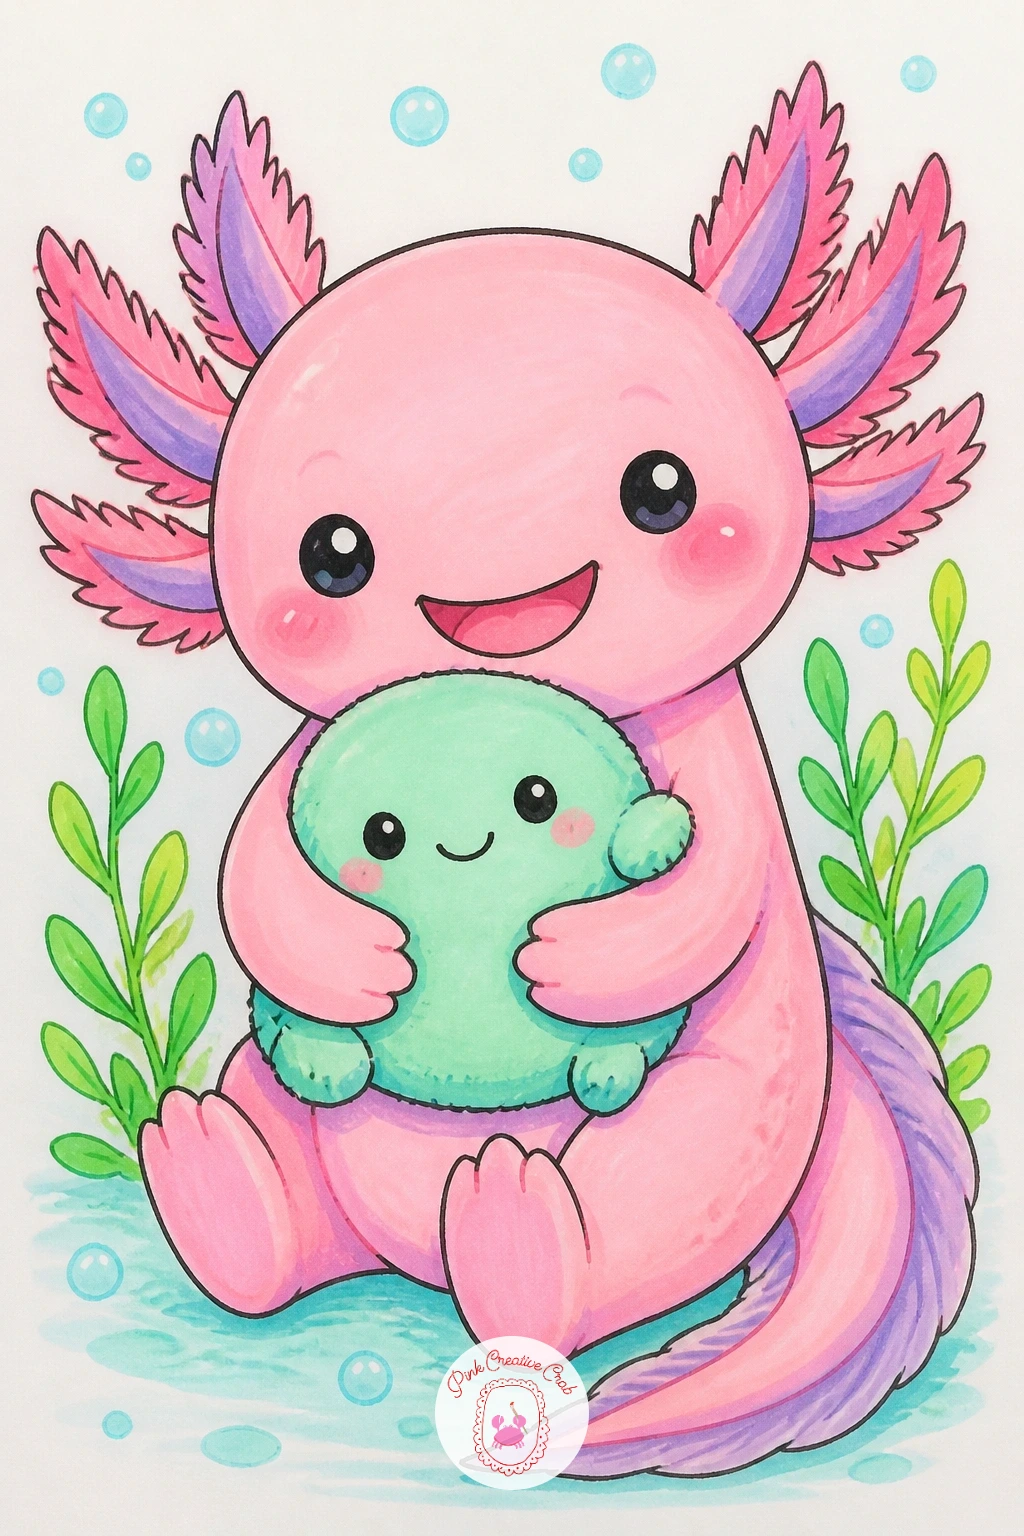
Palette: Axolotl Pink, Mint Green, Soft Yellow, Charcoal Black
Settle the axolotl down with a small open book propped in front of it. Draw the body sitting upright with both front legs resting on the edges of the book, which is just a simple open V shape with a thin spine line down the center.
Ink the axolotl first, then the book, keeping the pages slightly curved rather than straight flat lines, since a little curve makes the paper look soft instead of stiff. A few short horizontal scribble lines inside the book suggest text without needing to draw actual words.
Color the book cover in a contrasting color to the axolotl, soft teal or coral both work, and leave the inside pages white or cream. If the book looks too flat once colored, add one thin grey shadow line along the bottom edge where it meets the imaginary surface it rests on.
For more cozy little character moments like this one, the drawing ideas easy step by step list has a similar gentle pace worth browsing.
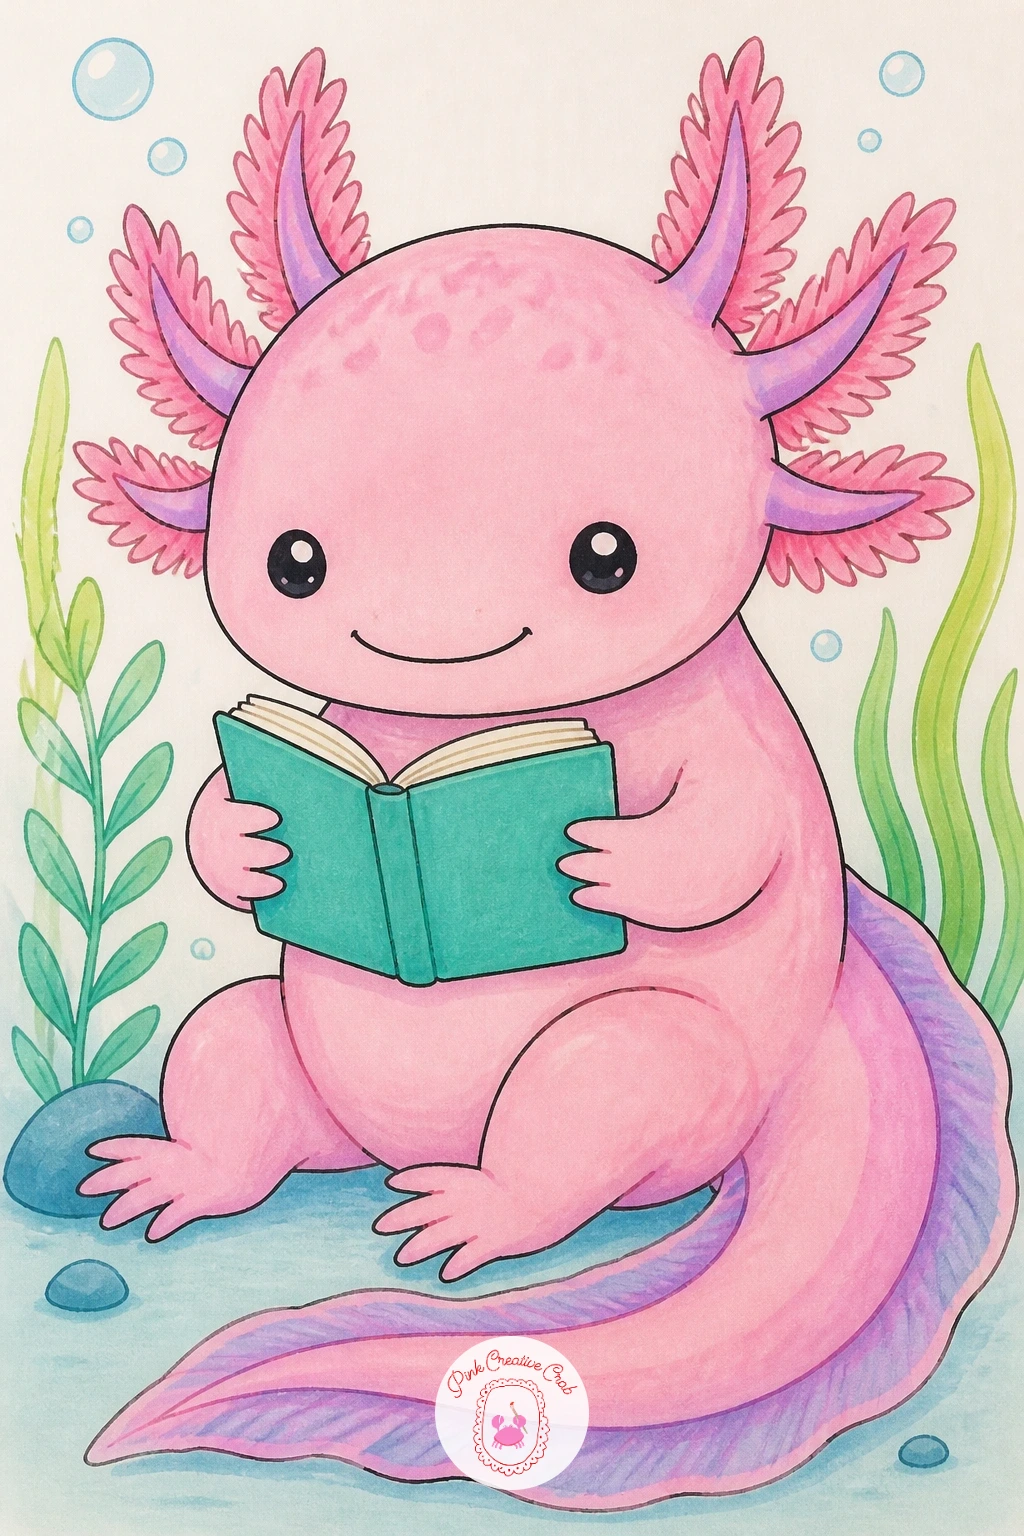
Palette: Axolotl Pink, Teal, Cream, Charcoal Black
Surround the axolotl in a pile of soft bubbles for this cozy scene. Draw the body sitting upright first, then build a cluster of overlapping circles around its lower half, varying the circle sizes so the bubble pile looks fluffy rather than like a row of balls.
Ink the axolotl before the bubbles, then draw each bubble circle individually, letting some overlap the body’s outline slightly for a sunken-in look. The quickest way to keep bubbles feeling light is to leave most of them uncolored white, adding just a faint blue outline here and there rather than filling every single one.
Add one or two bubbles floating above the head, each with a small white gel pen highlight dot for shine. If white gel pen is not available, simply leaving a small uncolored circle inside each bubble gives a similar glassy effect.
Try this scene again later with a rubber duck floating nearby, and the rubber duck drawing list has plenty of duck poses that would sit nicely beside this one.
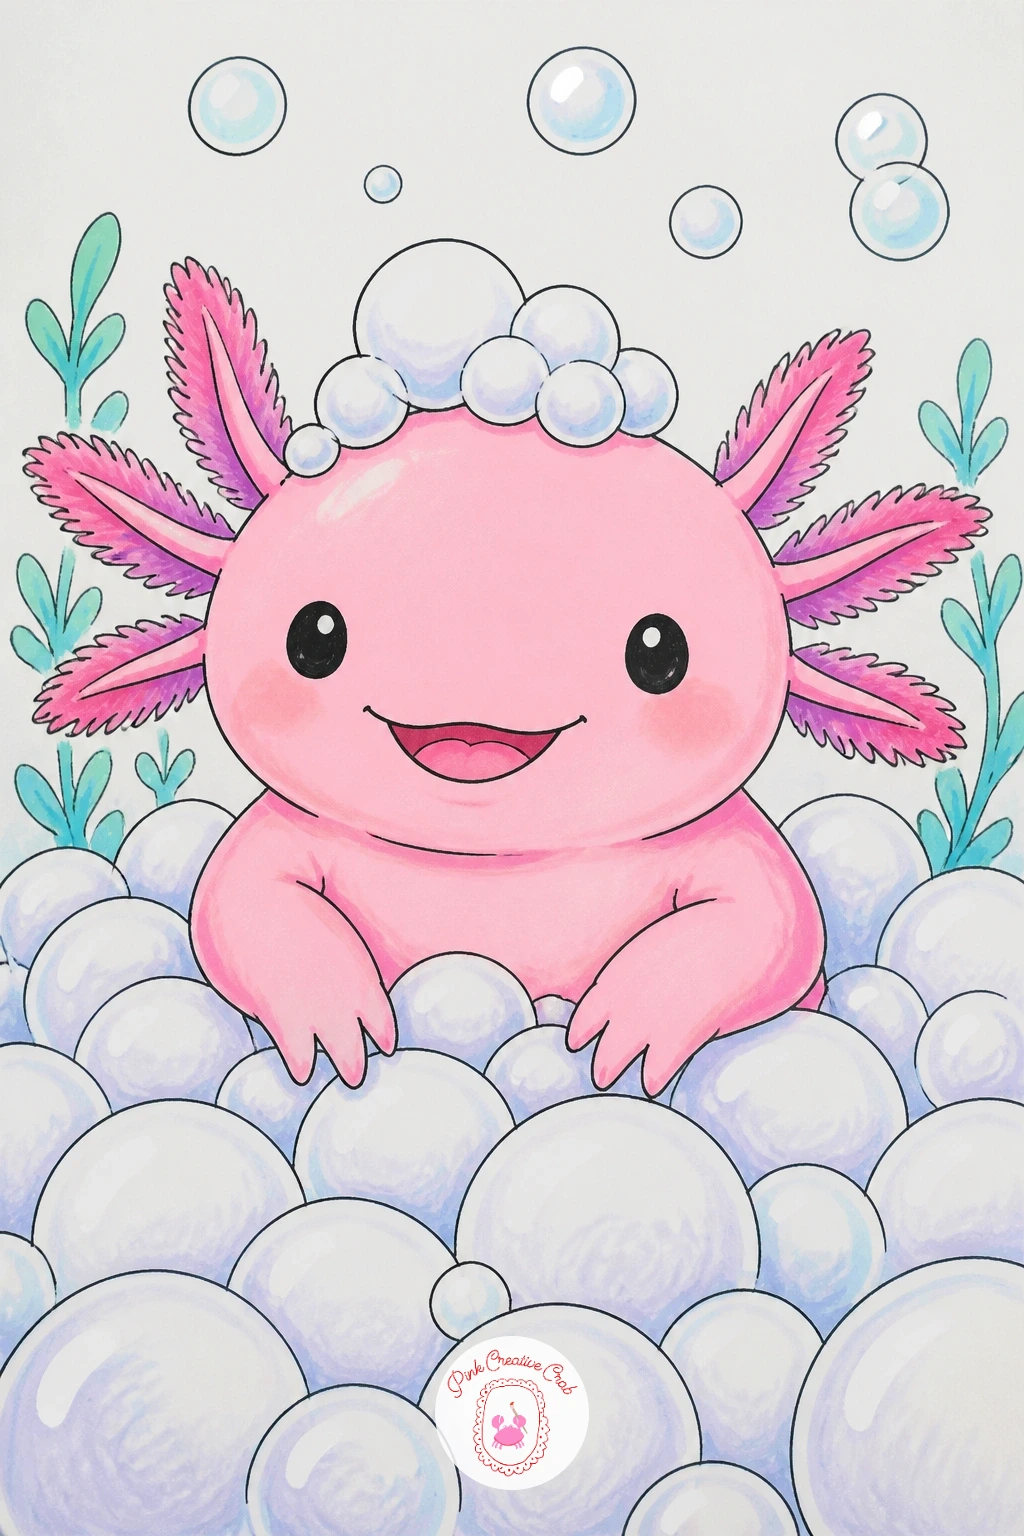
You Will Need
- white gel pen
Palette: Axolotl Pink, Pale Blue, White, Charcoal Black
Tie a little bow from a ribbon of seaweed onto the axolotl’s head for this one. Draw the body and gills as usual, then sketch two long wavy ribbon shapes crossing over each other at the top of the head, with the ends trailing down beside the gills.
Ink the axolotl first, then the seaweed bow, drawing each ribbon loop with a slightly wavy wobble rather than a straight edge, since seaweed never grows in perfectly straight lines. Where this idea can go wrong is making the bow symmetrical and stiff, so let one loop sit slightly higher than the other for a more natural, relaxed knot.
Color the bow in a darker leafy green than the background plants, so it reads clearly as a separate accessory rather than blending into a background plant. A thin darker green line down the center of each ribbon loop adds a nice vein-like texture.
If green marker feels too flat once dry, go back over just the edges with a slightly darker green pencil to add depth without redrawing anything.
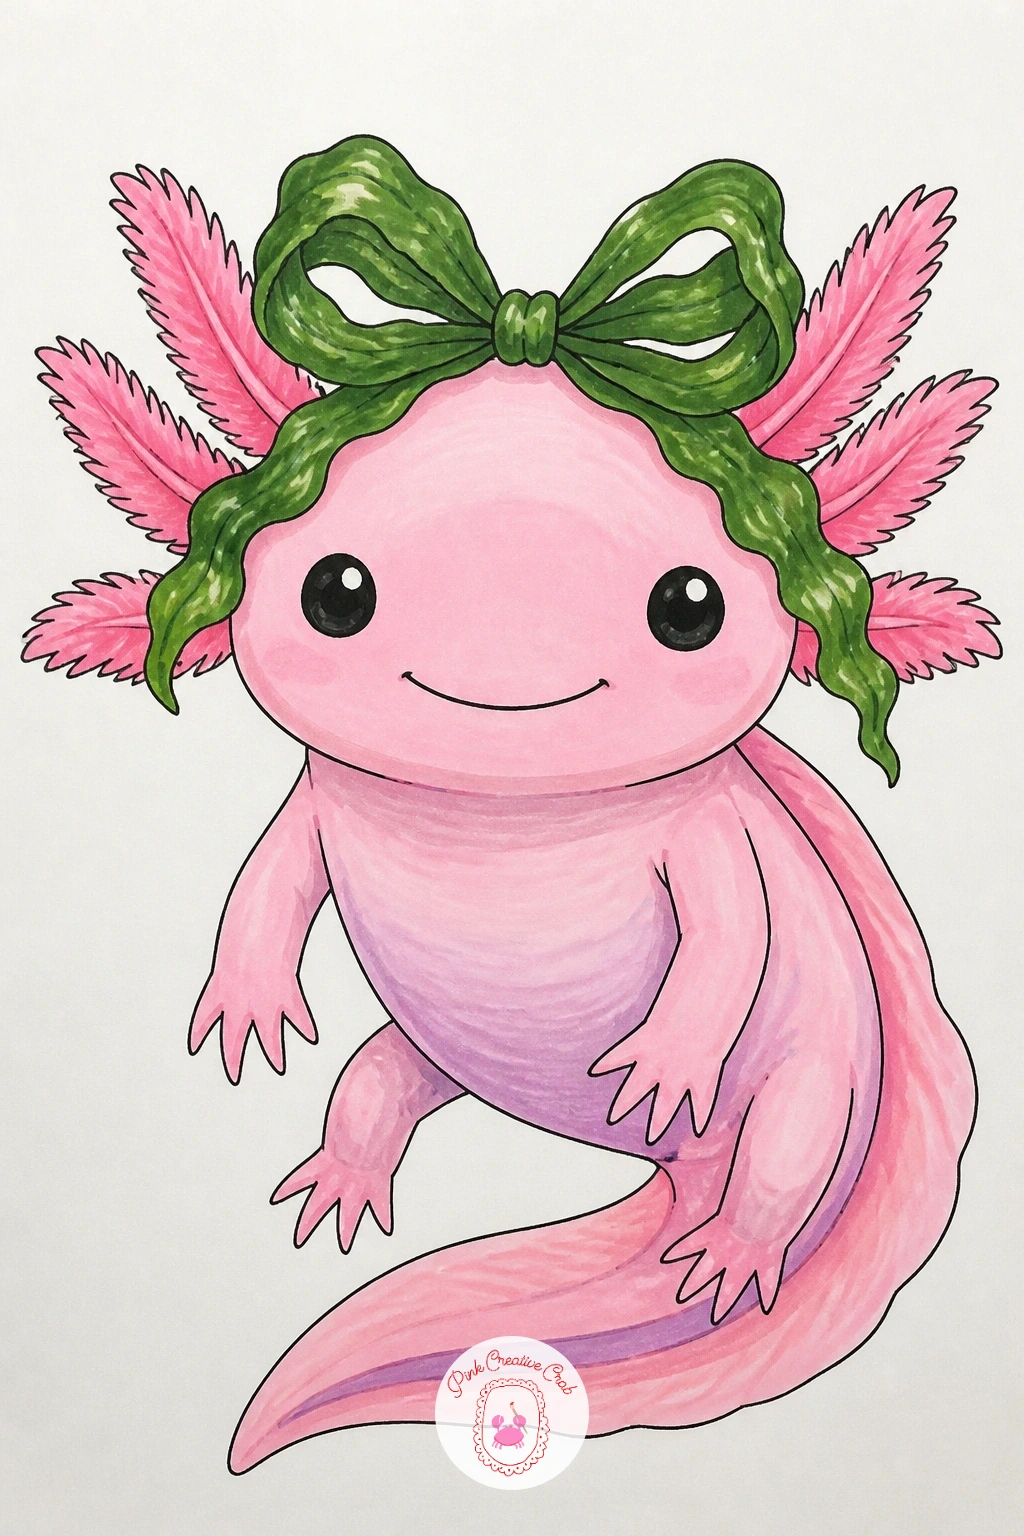
Palette: Axolotl Pink, Leaf Green, Deep Green, Charcoal Black
Capture an even tinier axolotl for this one, just its head poking out of a cracked round egg. Draw a simple oval egg shape first, then add a jagged crack line across the top third, with a small gap where the baby axolotl’s head emerges.
Ink the egg shell first, keeping the crack line angular and sharp compared to the egg’s otherwise smooth curve, since that contrast is what sells the hatching moment. Draw the baby axolotl’s head smaller and rounder than the usual adult proportions, since babies always read as younger with a bigger head relative to a tinier body.
Color the egg shell in pale cream or soft pink with a slightly darker shade along the crack edges, and keep the baby axolotl a lighter, softer pink than the usual shade to suggest newness. If the crack looks too neat, add one or two smaller secondary crack lines branching off it for a more convincing break.
This is a sweet one to pair with the sharing-a-strawberry idea above, since both work well together on the same page as a tiny family moment.
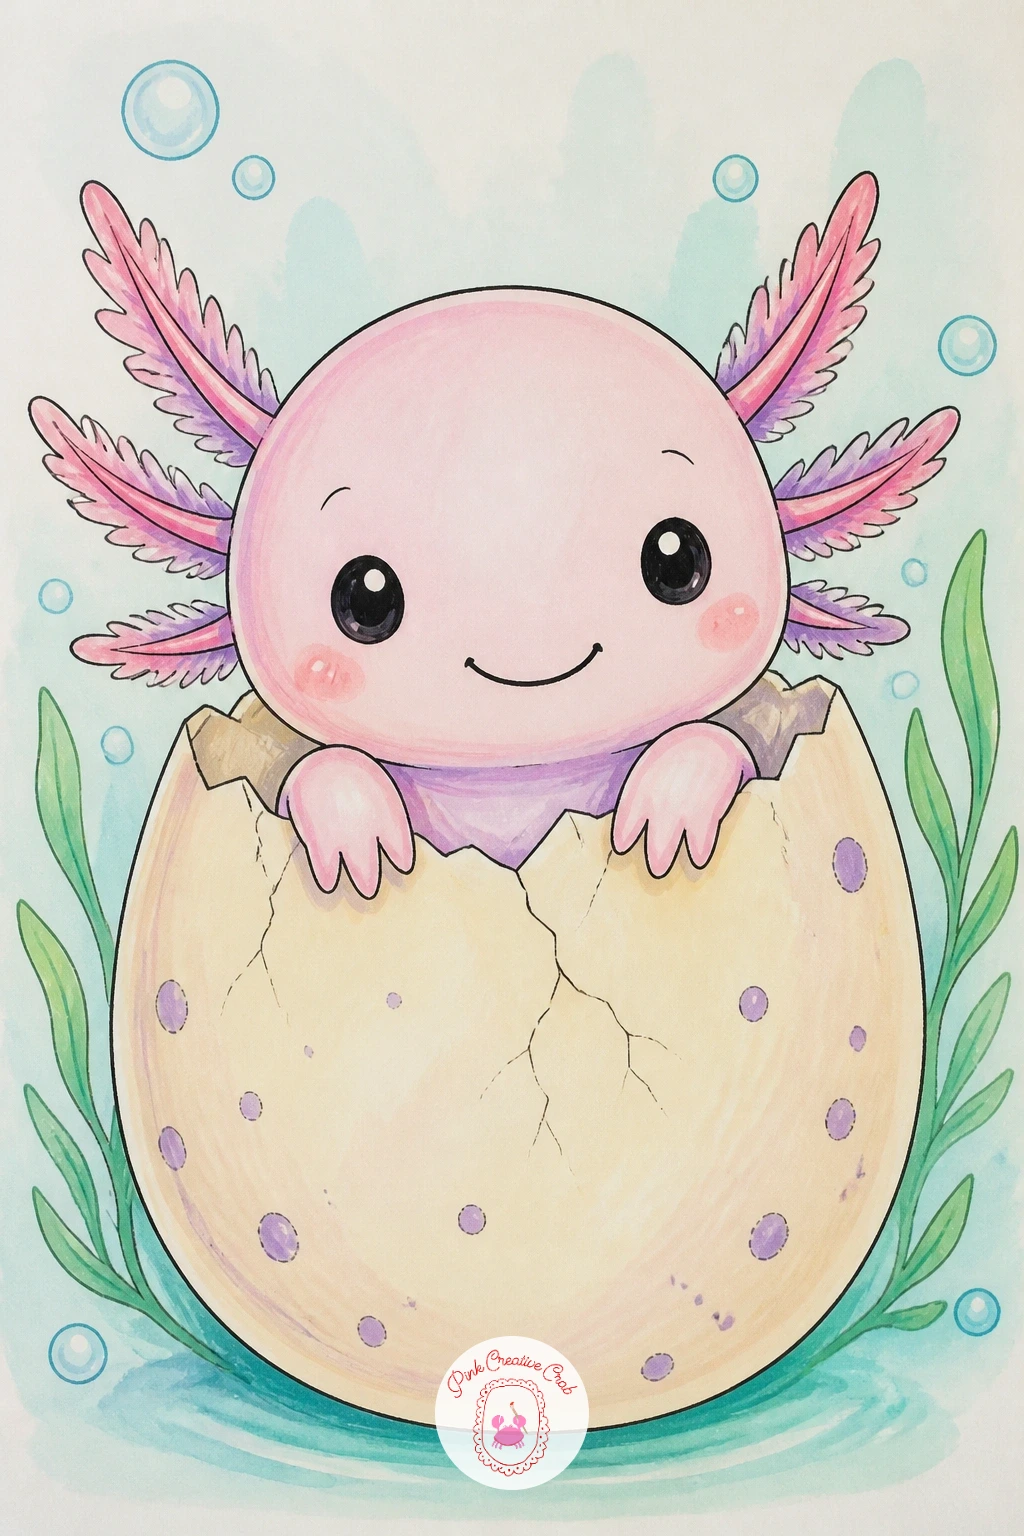
Palette: Pale Pink, Cream, Soft Lilac, Charcoal Black
Play a little hide-and-seek with this one, the axolotl mostly tucked behind a tall leafy water plant with just its face and one eye visible. Draw the plant first as two or three large curved leaf shapes rising from a small base, then position the axolotl body behind it before adding just the peeking portion of the head in front.
Ink the plant leaves first since they sit in front, then only ink the visible sliver of the axolotl face, letting the rest of the body stay hidden entirely behind the leaf shapes. The eye level trick here: draw the peeking eye slightly larger and rounder than usual, since a bigger eye instantly reads as curious and shy rather than fully confident.
Color the leaves in two shades of green for depth, a lighter shade on the leaf closest to the viewer and a darker shade behind it, then color just the visible axolotl sliver in its usual pink. If two greens feel like too much, one green with a darker outline along the leaf edges gives a similar layered look.
Try hiding a different amount of the axolotl next time, just the eyes and gill tips instead of half the face, for a more playful peekaboo feel.
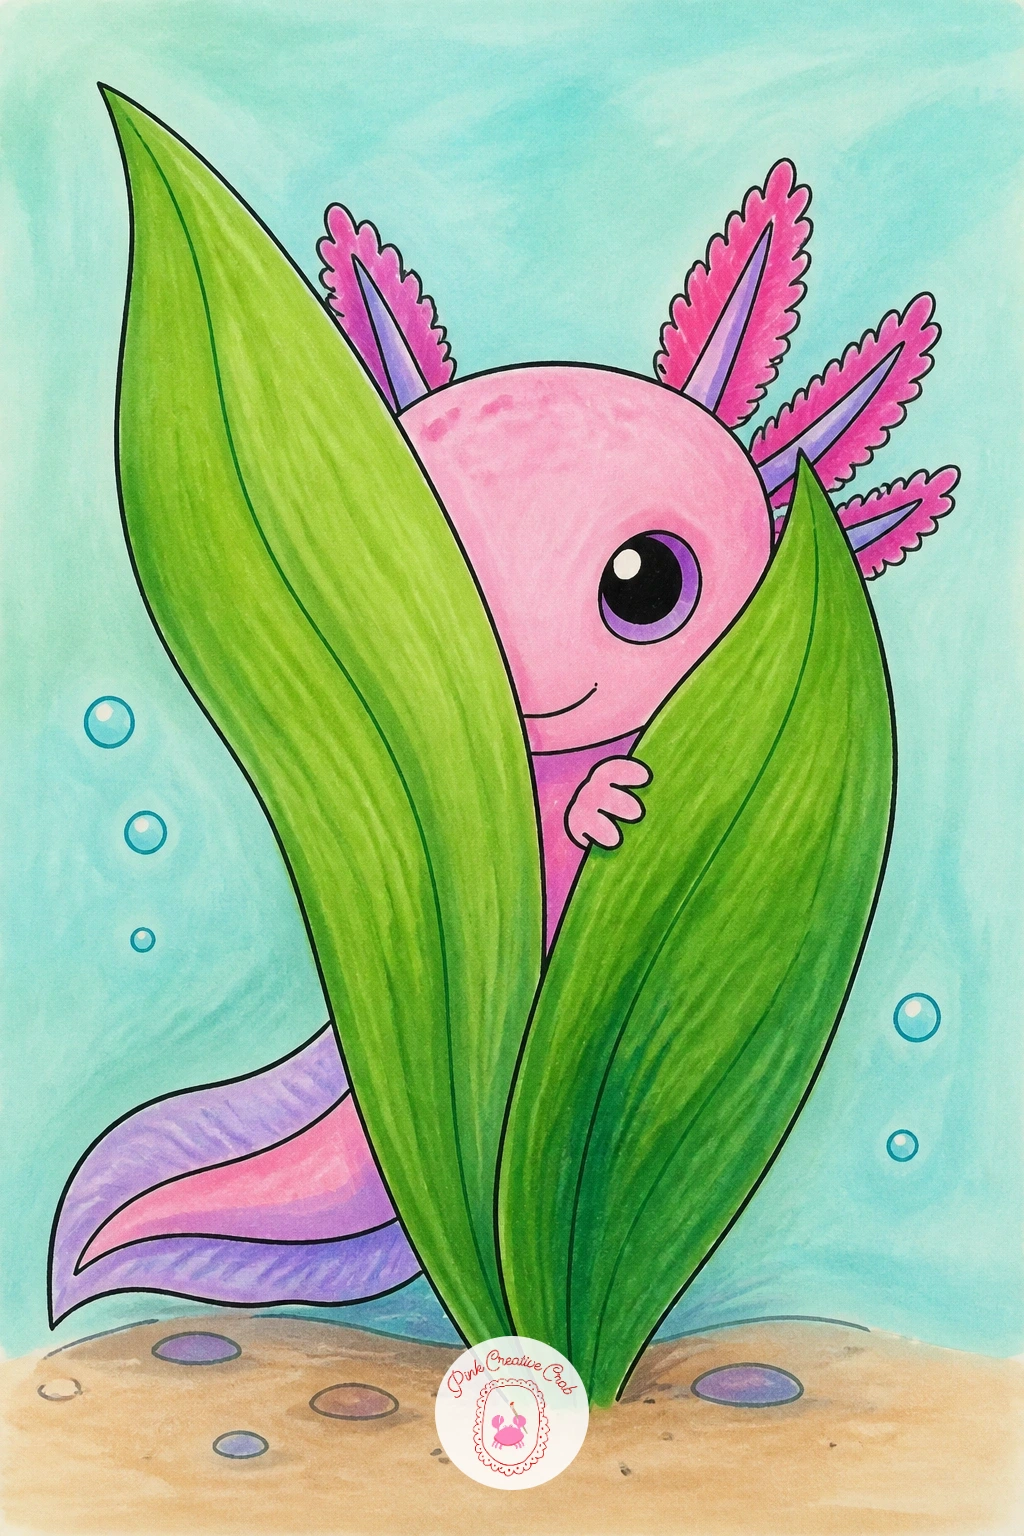
Palette: Light Leaf Green, Deep Green, Axolotl Pink, Charcoal Black
Turn the axolotl into a playful lunchbox character for this one, sitting inside a small rectangular bento box alongside a few tiny food shapes. Draw the box outline first as a simple rectangle divided into two or three sections with thin inner lines, then place the axolotl curled into the largest section.
Ink the box divisions before the axolotl, then add small simple food shapes in the remaining sections, a round rice ball, a tiny broccoli floret, a few berry dots, nothing more detailed than basic shapes. The common slip here is making the food too detailed and busy, which pulls attention from the axolotl, so keep every food item to one or two simple shapes each.
Color the box itself in a pale wood tone or soft grey, the axolotl in pink, and the little food items in small bright accent colors, red, green and cream work well together. If drawing food feels like a lot, two sections of food and one empty divider is still a complete, charming scene.
This pairs nicely with other tiny food scenes, and the pear drawing list has small fruit shapes worth borrowing for the food compartments.
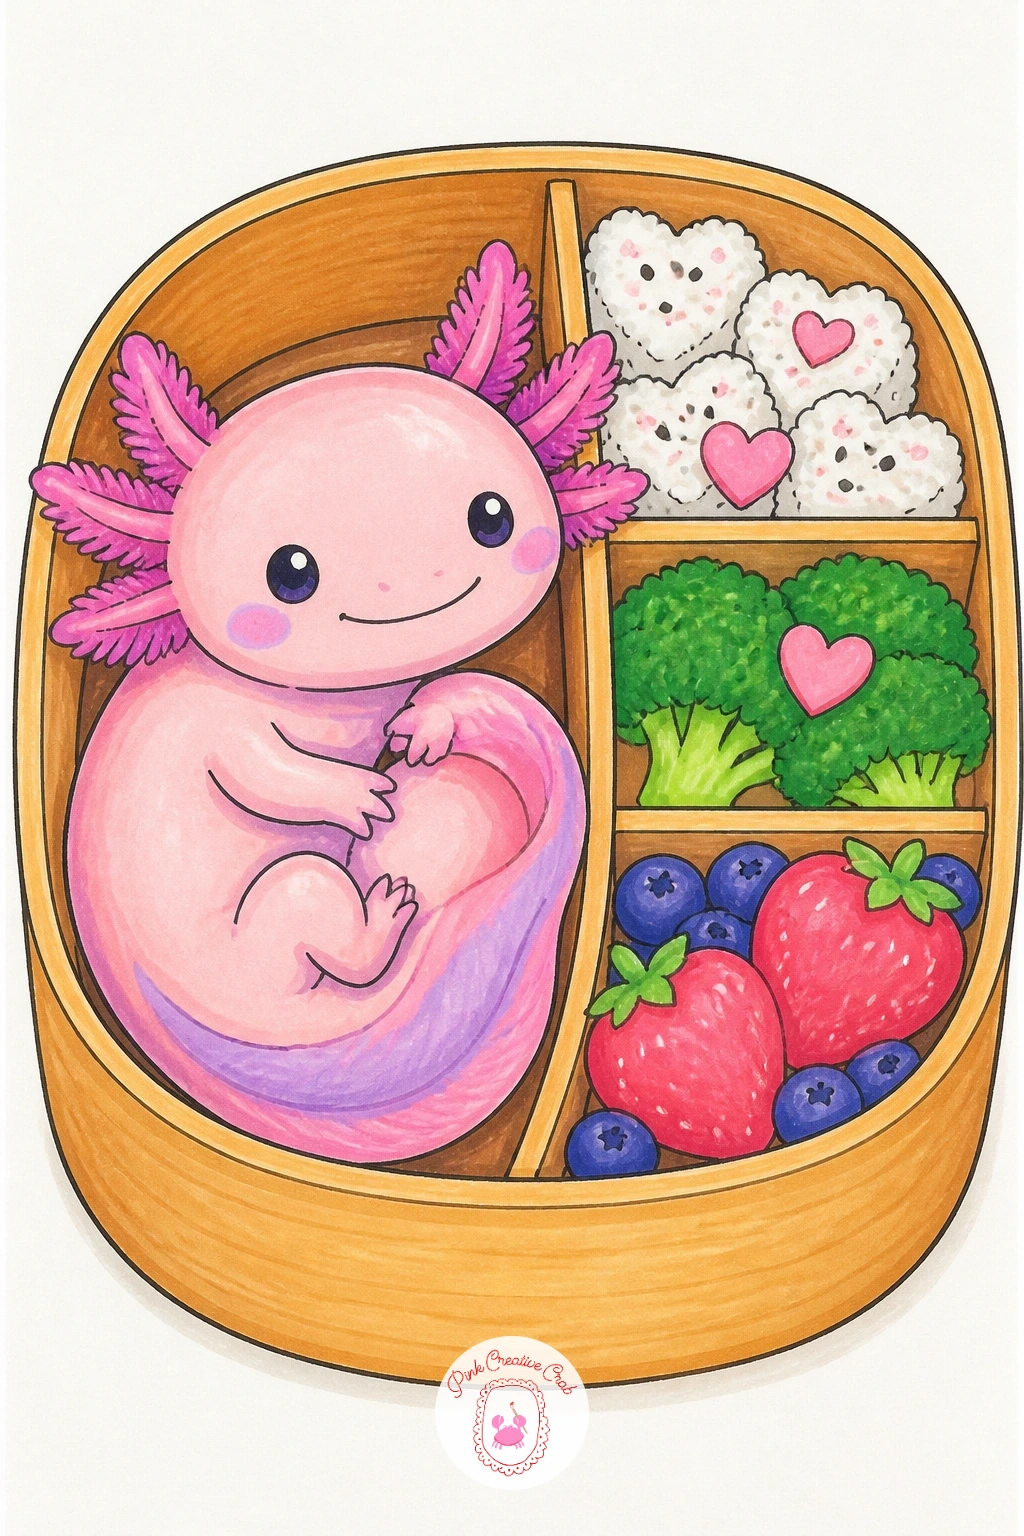
Palette: Axolotl Pink, Soft Wood Tan, Berry Red, Leaf Green
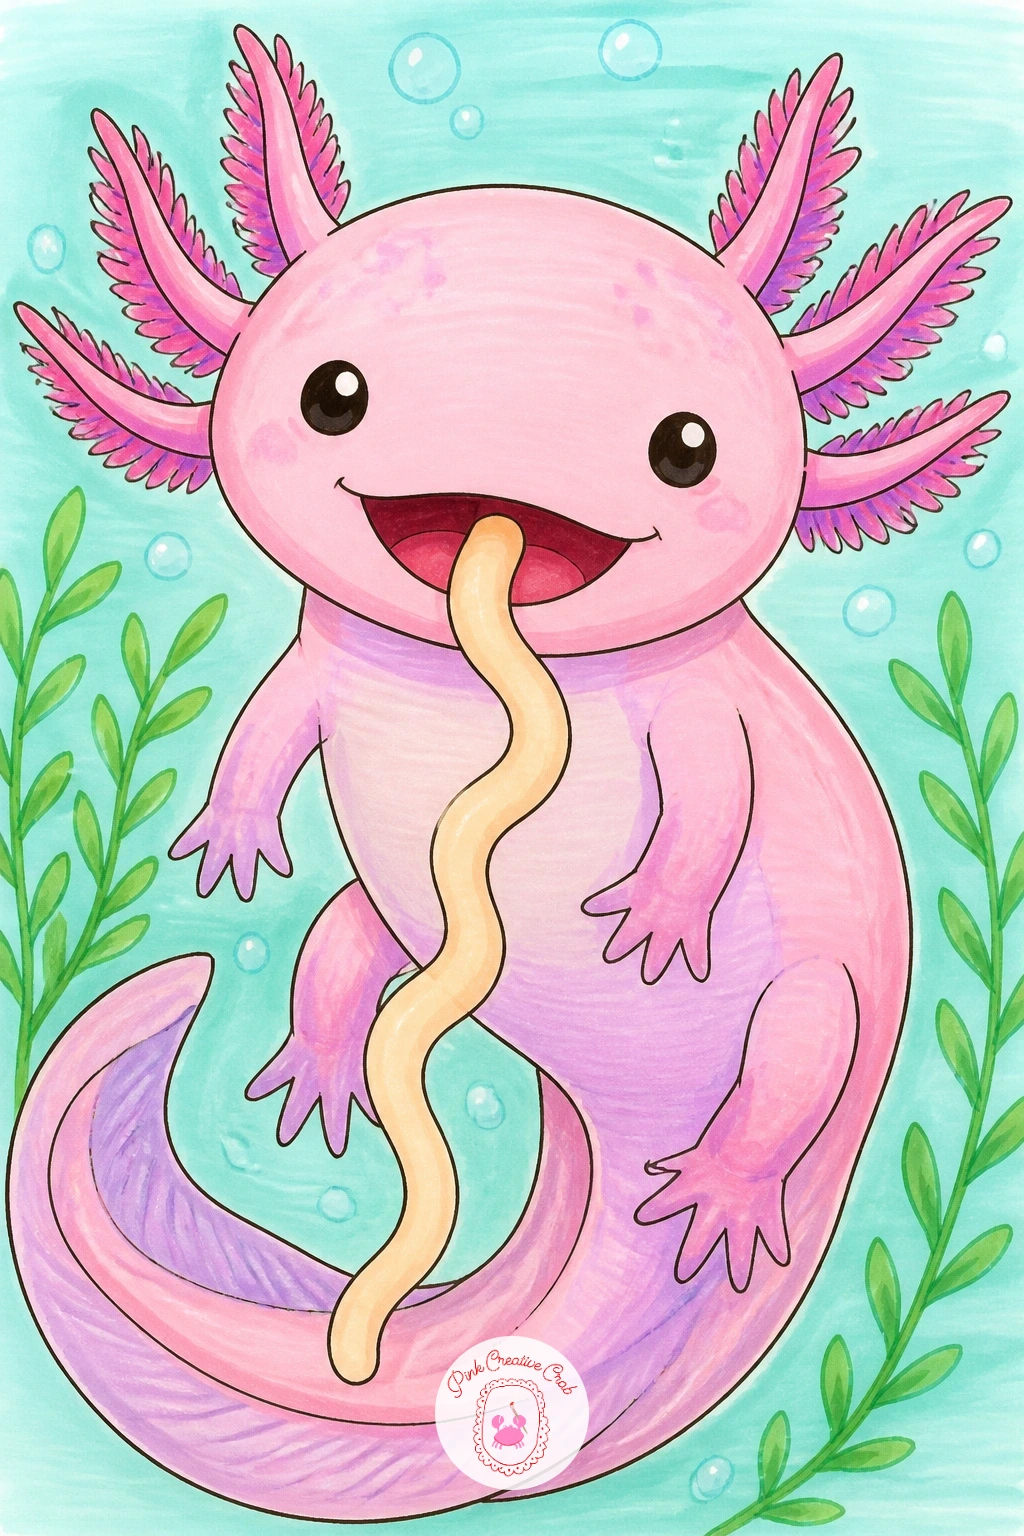
Give the axolotl a funny little meal for this one, a single wavy worm noodle dangling from its smiling mouth. Draw the head and open mouth first, slightly wider than the usual closed smile, then add one long wavy line trailing from the corner of the mouth down toward the body.
Ink the axolotl face first, then the noodle shape, keeping it as one continuous wavy curve rather than several short segments, since a single flowing line reads more like a noodle being slurped. The easy fix if the mouth looks too wide or odd: keep the opening no larger than the width of one eye, just enough to suggest eating without losing the cute proportions.
Color the noodle in a pale tan or cream so it reads clearly as food rather than another plant, and keep the axolotl in its usual pink for contrast. If tan marker is not available, a very pale yellow works just as well for the noodle color.
This quick version takes about ten minutes with just the face and noodle; for a longer session, add a small bowl shape underneath to complete the meal.
Palette: Axolotl Pink, Pale Tan, Cream, Charcoal Black
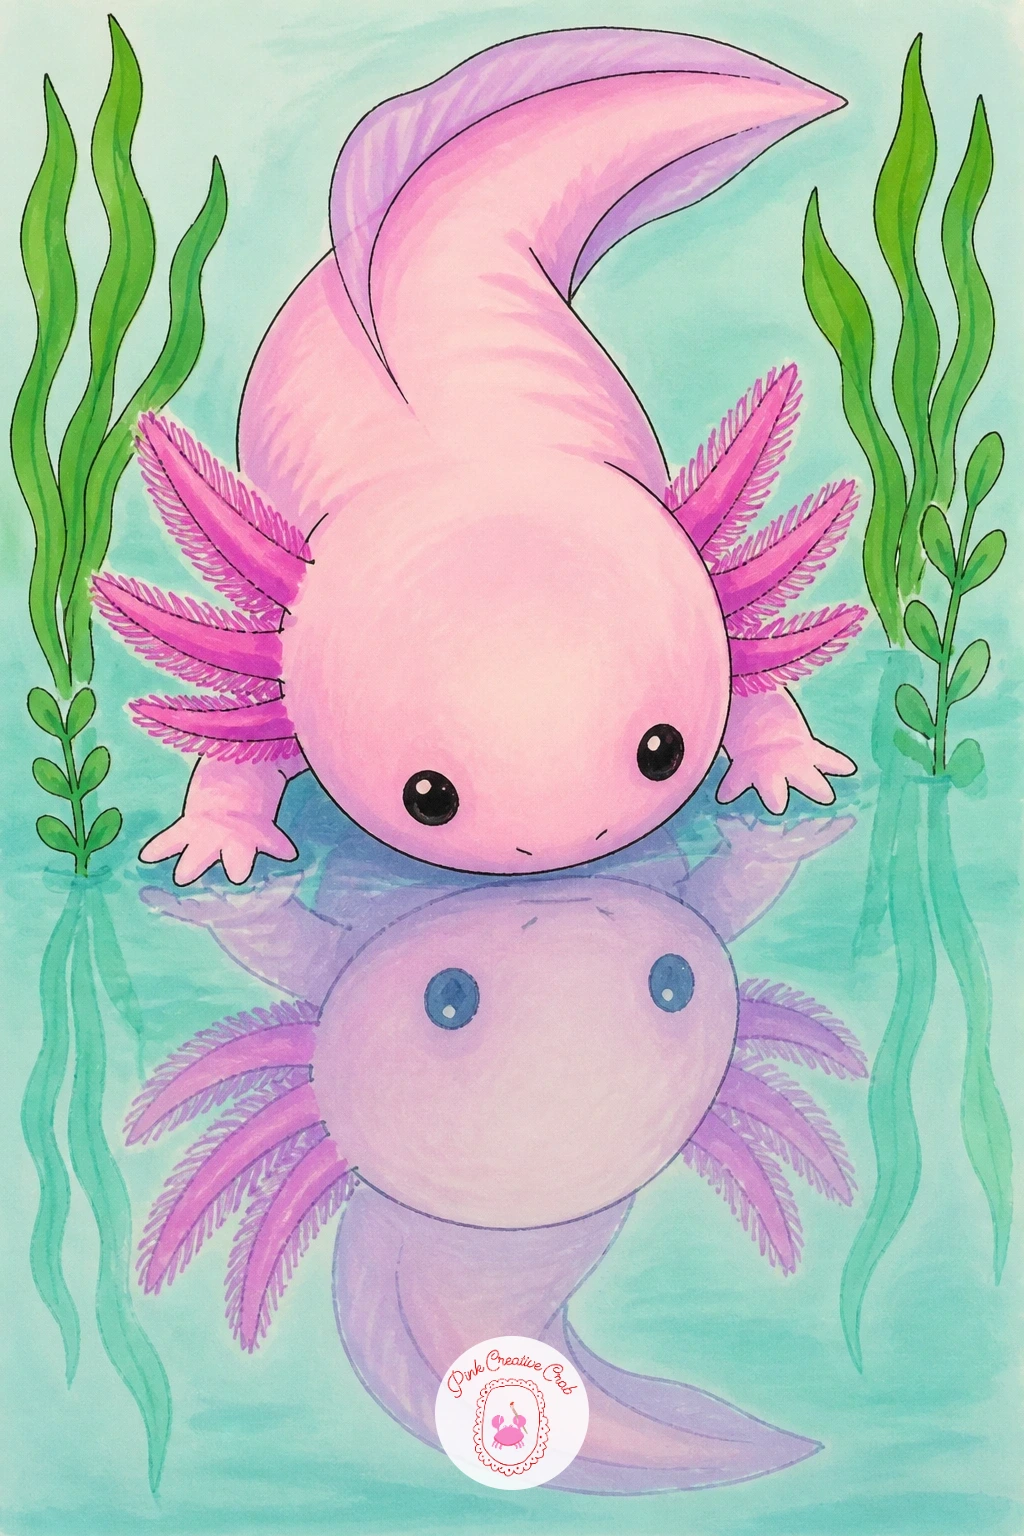
Add a quiet moment of wonder with this one, the axolotl gazing down at its own reflection in still water. Draw the axolotl body above a horizontal line that marks the water’s surface, then draw a second, slightly fainter axolotl shape upside down below that line as the reflection.
Ink the main axolotl fully and with confidence, then ink the reflected version more loosely, using a lighter touch or slightly broken lines so it clearly reads as a mirror image rather than a second full character. The trick that keeps this convincing: flip the reflection’s gill direction to match exactly, since a reflection always mirrors perfectly, not loosely.
Color the main axolotl in full pink, then color the reflection in the same pink but slightly diluted or lighter, which alcohol markers do naturally with a lighter second pass. If a lighter marker shade is not available, colored pencil over the same pink gives a softer, more muted reflected look.
Draw a few small ripple lines radiating from where the chin nearly touches the water, to suggest the surface is gently moving.
Palette: Axolotl Pink, Pale Reflection Pink, Pale Aqua, Charcoal Black
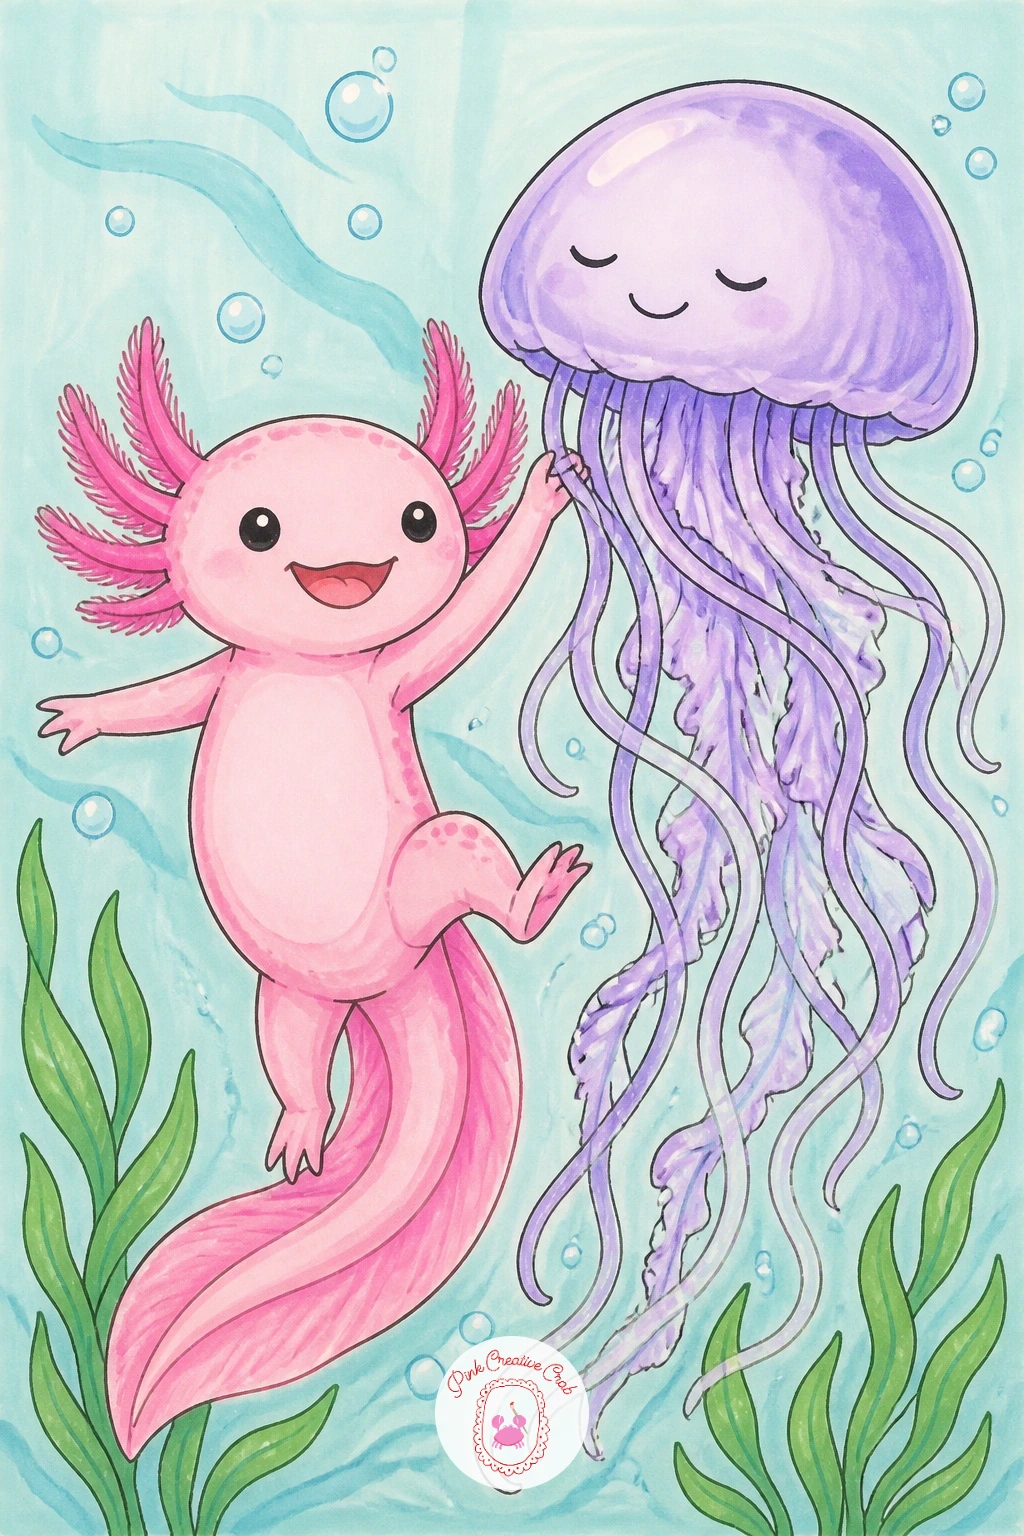
Pair the axolotl with a graceful jellyfish partner for this livelier scene. Draw the axolotl in a playful twisting pose, one side of the body curved and both front legs raised slightly, then add a jellyfish beside it with a simple rounded dome top and several long wavy tentacle lines trailing below.
Ink the axolotl first in its dancing pose, then the jellyfish, keeping its tentacles loose and flowing rather than straight, since movement is the whole point of this pairing. Where this goes wrong is drawing too many stiff, parallel tentacles, so vary their length and curve so they look like they are swaying rather than hanging straight down.
Color the axolotl pink and the jellyfish in a translucent-looking pale lilac or aqua, leaving some areas of the jellyfish dome uncolored or very lightly tinted so it keeps that see-through quality real jellyfish have. If full translucency feels tricky, a flat pale color with a thin darker outline still reads clearly as a jellyfish.
Try swapping the jellyfish for a seahorse next time, keeping the same twisting dance pose for the axolotl.
Palette: Axolotl Pink, Pale Lilac, Pale Aqua, Charcoal Black
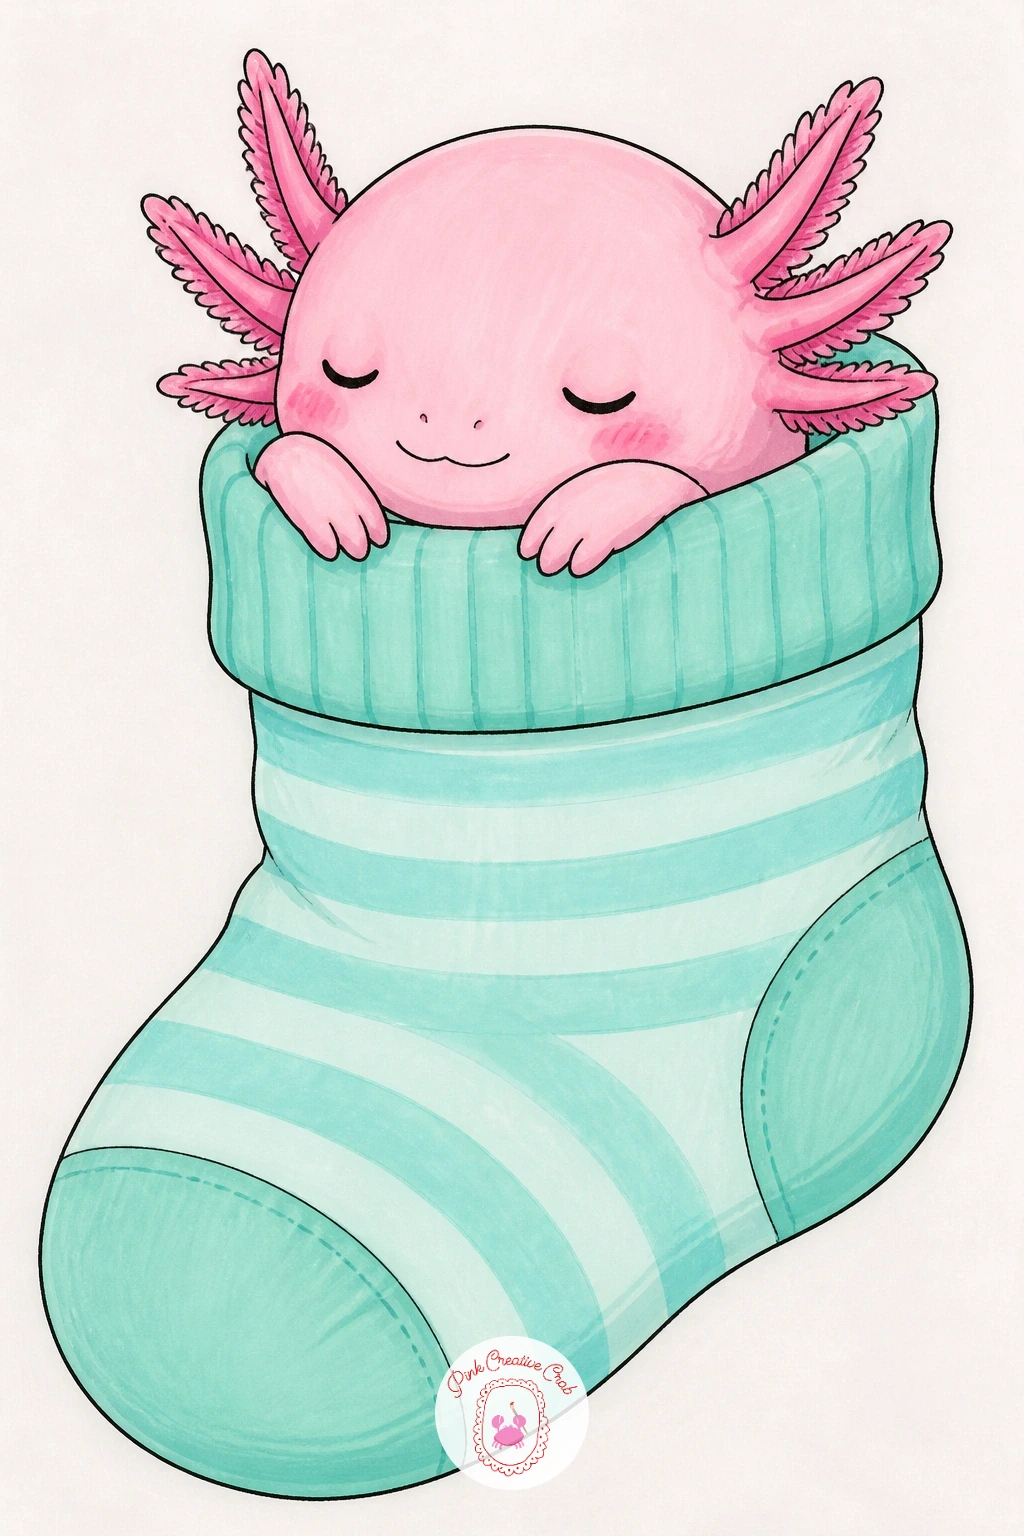
Tuck the axolotl into an unexpectedly cozy spot for this one, curled up snug inside a soft knitted sock. Draw the sock shape first, a simple curved tube with a slightly wider opening at the top and a rounded closed toe, then nestle the axolotl’s body inside it with just the head poking out of the opening.
Ink the sock outline first, adding a few short ribbed lines near the opening to suggest knitted texture, then ink the sleeping axolotl face with closed eyes resting just inside the rim. The common mistake is making the sock too stiff and straight, so give it a gentle slouch or fold near the opening instead of a perfectly straight tube.
Color the sock in a cozy pastel like soft yellow or mint with a simple stripe pattern near the top, and keep the axolotl in its usual pink peeking out. If stripes feel fiddly to keep even, two or three thick bands are easier to control than many thin ones.
This is a gentle bedtime-themed one worth pairing with the sleeping-on-a-pebble idea earlier in this list for a little goodnight pair.
Palette: Axolotl Pink, Soft Mint, Soft Yellow, Charcoal Black
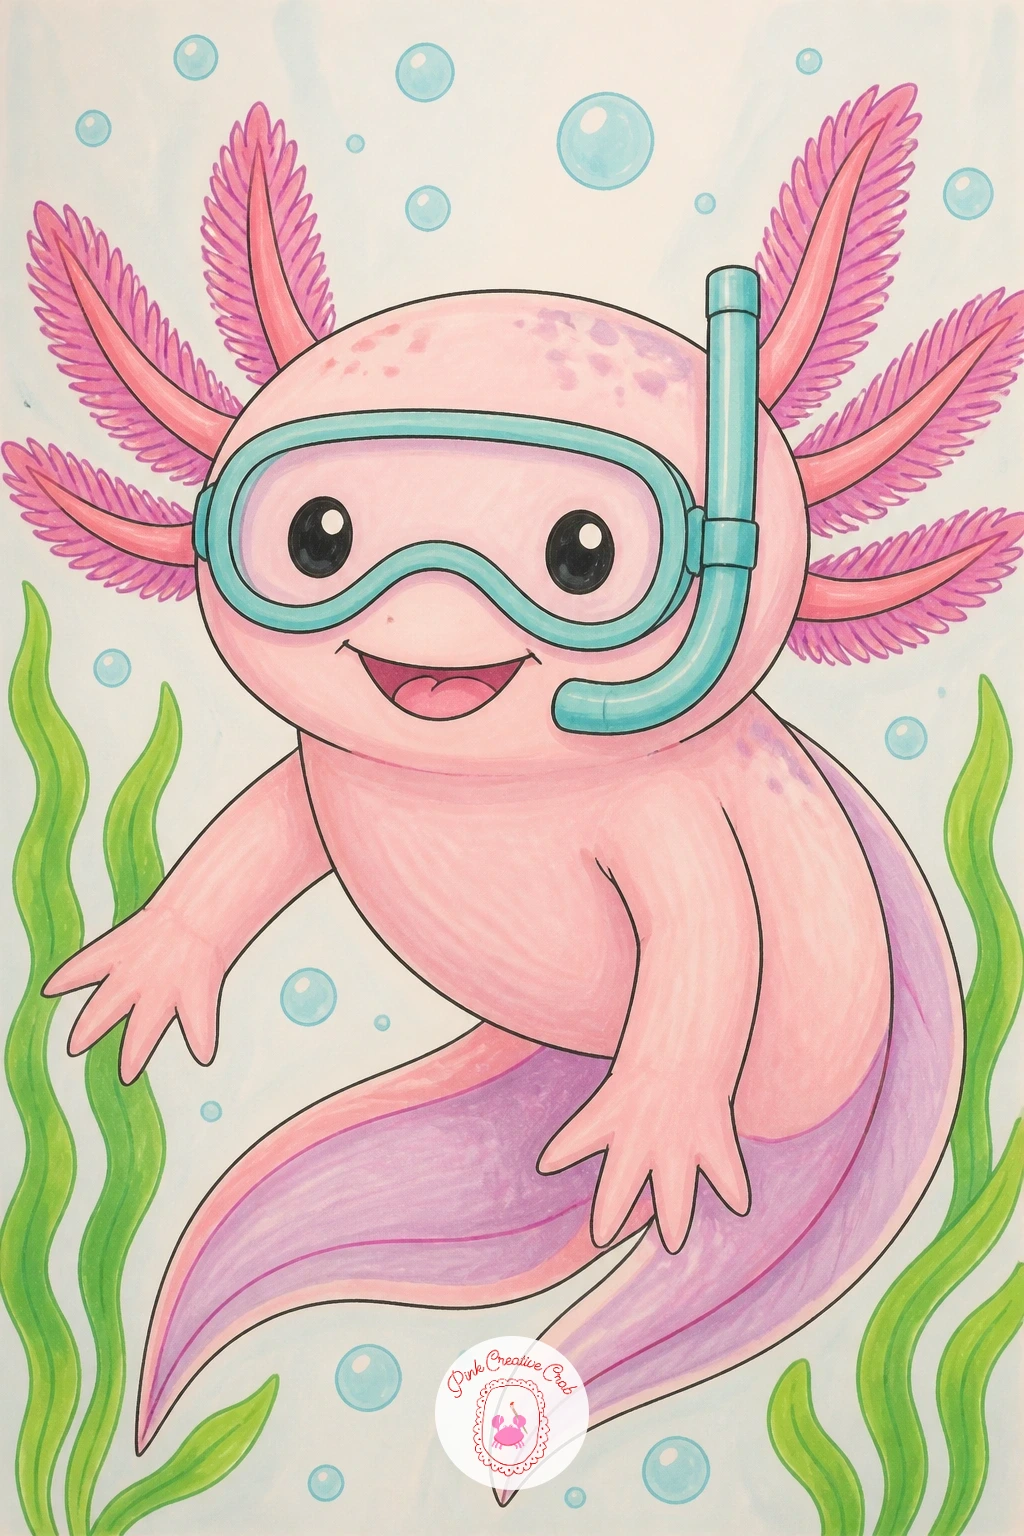
Give the axolotl an adventurous little accessory for this one, a tiny snorkel mask strapped over its eyes. Draw the head as usual, then sketch a simple rounded mask shape covering both eyes, with a thin strap curving around the back of the head and a short snorkel tube sticking up from one side.
Ink the axolotl face and gills first, then add the mask on top, keeping the mask lens as one continuous rounded shape rather than two separate eye holes, since a single mask lens is how real snorkel masks are shaped. The easiest proportion check: the mask should be about as wide as the space between the outer edges of both eyes, no wider, or it looks oversized.
Color the mask strap and frame in a bright color like aqua or coral, and leave the lens area mostly uncolored or very lightly tinted so the eyes still show through clearly underneath. If the lens reads as too flat once colored, a single curved white gel pen line across it suggests a glassy shine.
Add a few small bubble shapes near the snorkel tube top if you want to suggest it is actually underwater and working.
You Will Need
- white gel pen
Palette: Axolotl Pink, Aqua, Coral, Charcoal Black
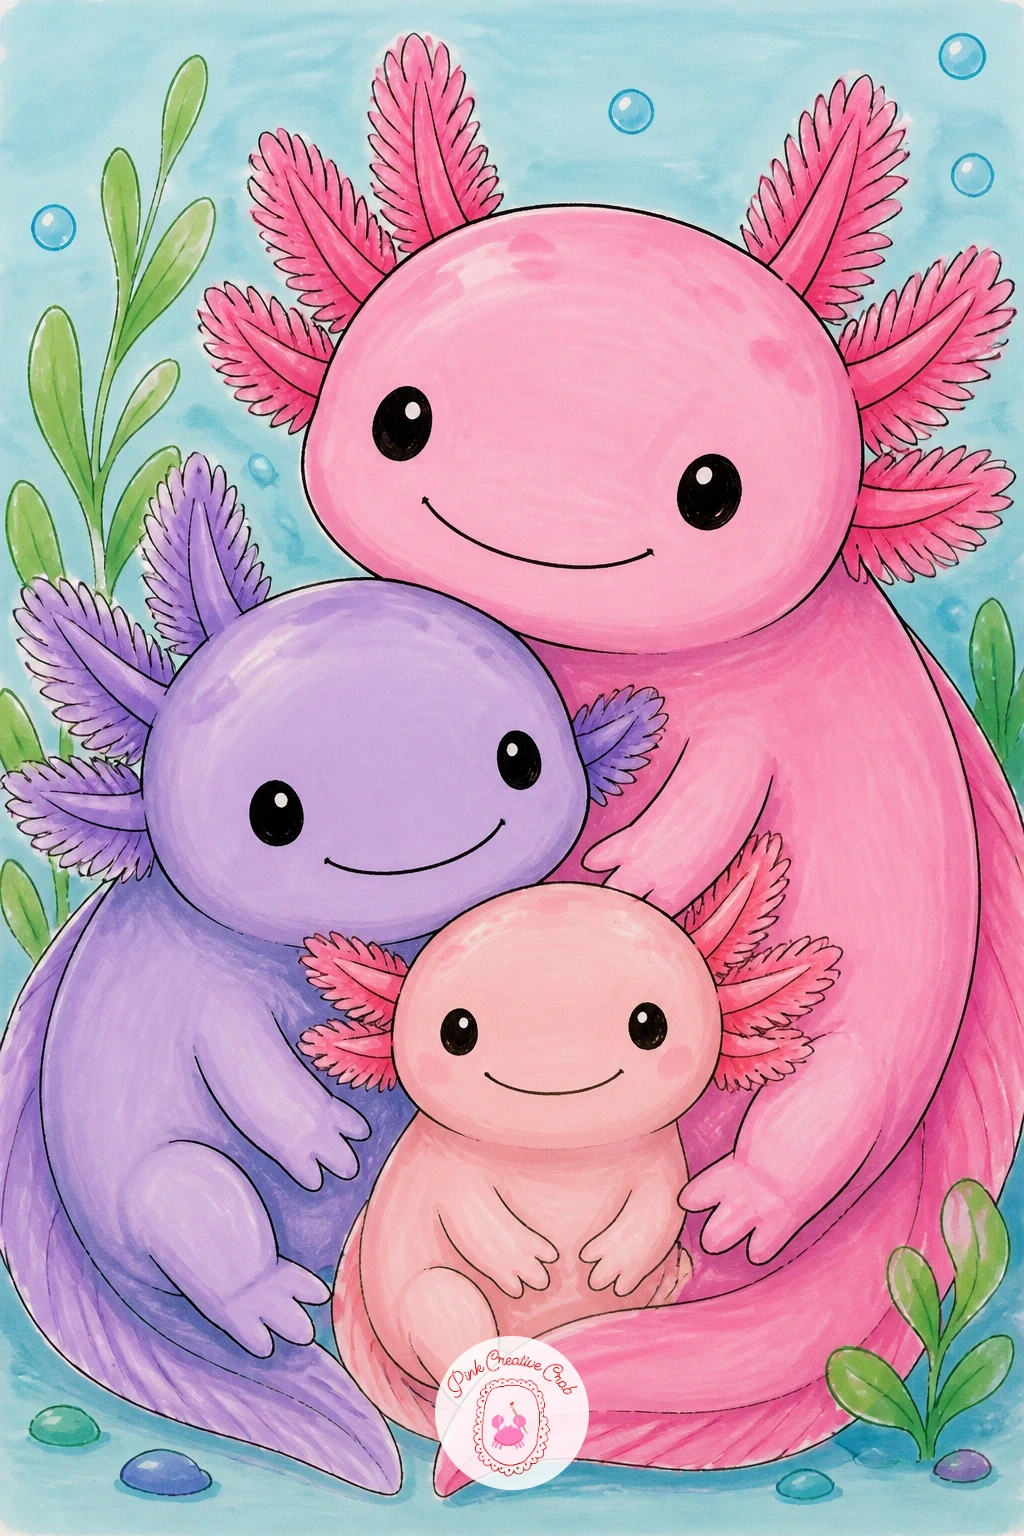
Bring together a full little family for this one, one larger axolotl alongside two smaller ones of different sizes. Plan the layout in pencil first, placing the biggest body on one side and the two smaller ones overlapping slightly in front or beside it, so they read as a group rather than three separate drawings.
Ink the largest axolotl first since it anchors the composition, then the medium one, then the smallest, each slightly overlapping the one before it for a sense of closeness. The proportion trick that keeps a family convincing: make the smallest axolotl roughly two thirds the size of the middle one, and the middle one about two thirds the size of the largest, rather than three nearly identical sizes.
Color all three in a shared palette of pink, lilac and pale blush so they feel like one family rather than mismatched characters, keeping every smile and gill shape consistent across all three. If three full figures feels like a lot for one sitting, drawing just their heads clustered together still reads clearly as a family group.
For more grouped character ideas built the same layered way, the friends drawing list has several multi-character layouts worth studying.
Palette: Axolotl Pink, Soft Lilac, Blush Pink, Charcoal Black
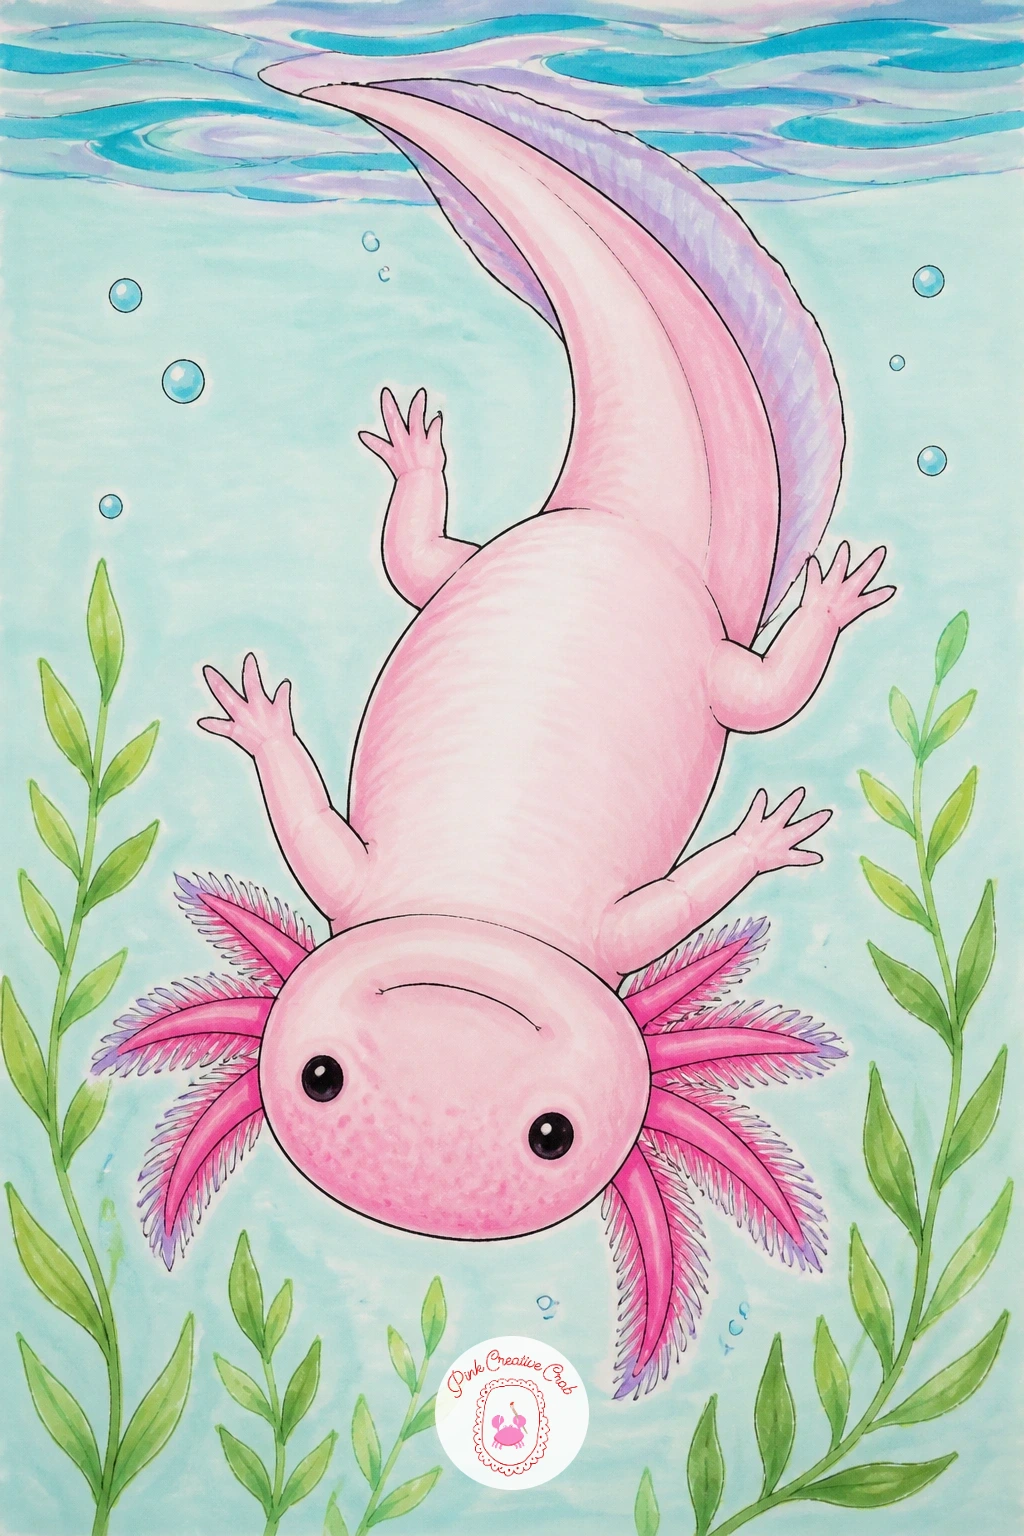
Flip the usual pose entirely for this one, the axolotl swimming belly-up near the top of the page. Draw the body upside down from the start, with the belly facing the viewer and the gills now fanning downward instead of upward, which changes the whole feel of the pose.
Ink the body in this flipped orientation carefully, since it is easy to accidentally draw the smile upside down too, so double check the mouth curve still reads as happy rather than a frown once flipped. The light source matters here: if you add any shading at all, keep it along what is now the top edge of the body, since in this pose that edge is actually the belly catching the light from above the water.
Color the belly a paler, softer pink than the usual shade, since the underside of an axolotl is naturally lighter than its back. A few small bubble shapes rising from the mouth upward toward the top of the page reinforce that this pose is genuinely upside down rather than just oddly drawn.
Try this same flipped pose later with one of the earlier scenes, like the lily pad or teacup idea, for a playful variation once the basic upside down shape feels comfortable.
Palette: Pale Belly Pink, Axolotl Pink, Pale Aqua, Charcoal Black
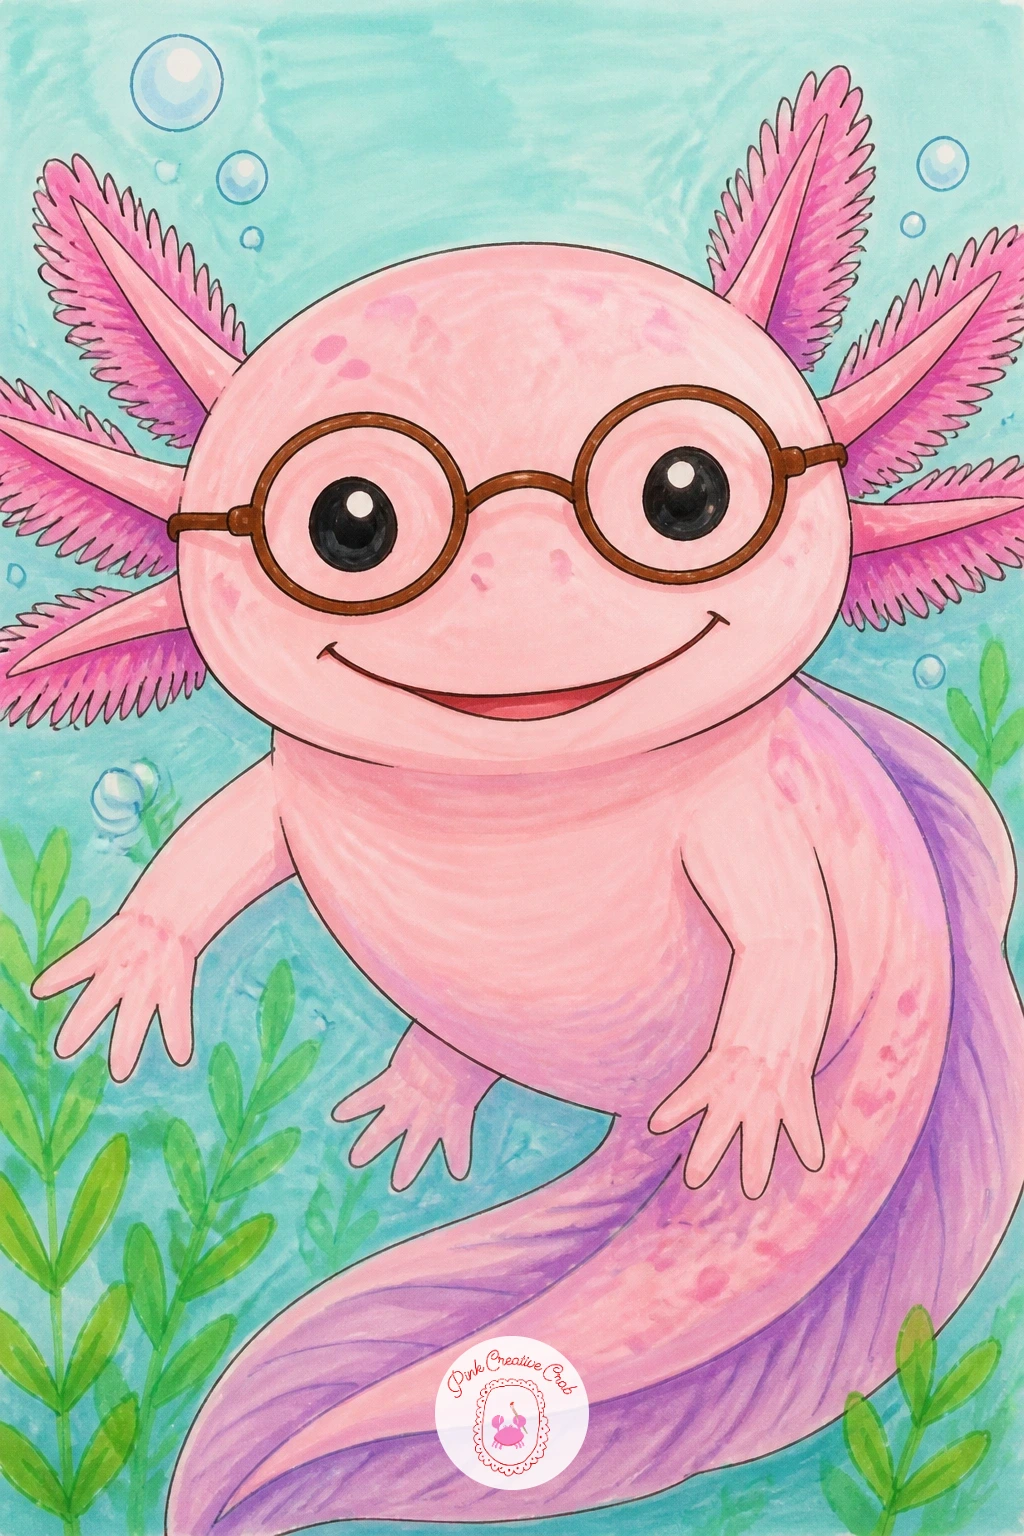
Close out the list with a small round pair of glasses perched on the axolotl’s face for a bookish, thoughtful look. Draw the head and eyes as usual first, then sketch two simple circles connected by a short bridge line sitting right over the eyes, with one short arm line extending back toward where an ear would be.
Ink the axolotl face fully before adding the glasses on top, so the eyes underneath still show clearly through the circular lenses. The easiest way to keep both lenses matching in size: draw one circle, then trace it lightly onto the other side before inking, rather than freehanding two separate circles that often end up uneven.
Color the glasses frame in a solid color like soft brown or black, and leave the lens circles uncolored so the pink eyes beneath stay visible, maybe with one small white gel pen glint on each lens for a glassy finish. If a steady circle is hard to manage, a small coin or bottle cap traced twice gives perfectly matching lenses every time.
Pair this one with the reading-a-book idea earlier in the list for a studious little axolotl duo on the same page.
You Will Need
- white gel pen
Palette: Axolotl Pink, Warm Brown, White, Charcoal Black
What to Do Next
Pick one axolotl, start with pencil, and let the smile come first since everything else in these little scenes builds from that one friendly face. A fresh sheet of smooth paper and your markers are really all today’s drawing needs.
Frequently Asked Questions
What is the easiest way to draw an axolotl face for a beginner?
Start with a wide rounded head, two small oval eyes set close together, and one curved smile line beneath them. Add a few simple feathery gill lines branching from each side, and the whole friendly face is done in under a minute.
What markers work best for a pink axolotl drawing?
Alcohol markers give the smoothest blended color for pink, lilac and aqua tones used across these ideas. Water-based markers or colored pencils work too, just blend gently in small circles to avoid streaky patches on the body.
How do you keep the axolotl’s gills from looking messy?
Draw each gill stalk as one confident single line instead of several short scribbled strokes. Leave a little white space between each stalk, and three or four gills per side always reads cleaner than a crowded cluster.
Can kids and adults really draw these together at the same table?
Yes, every idea keeps the core shapes simple enough for a child to manage alone. An adult can then add one small extra touch, like texture on gills or a shine on glasses, without redrawing anything the child made.
What paper works best for axolotl marker drawings?
Smooth marker paper or a bristol-style pad stops alcohol markers from bleeding through or feathering at the edges. Regular printer paper works in a pinch, just expect slightly softer, less blended color.
Have any thoughts?
Share your reaction or leave a quick response — we’d love to hear what you think!
-
 0
-
0
-
0
-
0
-
0
-
0


