

February doodles are the easiest way to warm up a cold notebook page, and this list gives you 29 of them to work through at your own pace. Nothing here needs a fresh sketchbook or a plan, just a fineliner, a gel pen or two in rose pink and red, and five spare minutes between the small stuff.
Scroll down and you will find love letters, snowdrops, sleepy cats, skating scarves and a whole mailbox of cards, each one small enough to finish today. Pick whichever one makes you want to pick up a pen first, that is always the right one to start with.
Using these images: free for personal projects such as printing, coloring, cards, journals and gifts. Handmade items that include them may be sold up to 30 pieces per design. More than that is commercial use and is not permitted, and neither is selling or sharing the images themselves or passing them off as your own. Please ask before any other use.
Start with the easiest shape on the whole list: a folded envelope, drawn as a simple rectangle with a triangle flap on top. Outline it in fineliner first, keep the lines a little loose so it reads as paper rather than a box, then add a short wavy line or two across the front for the address.
The seal is the fun part. Draw a small heart sitting right where the flap meets the envelope and fill it solid with red gel pen, letting it bleed slightly over the flap line for a melted wax look.
If the envelope looks stiff, round off the corners rather than squaring them, paper never has sharp corners in real life. Swap the gel pen seal for a rose pink one if red feels too bold for the page.
Finish with one small detail today: a tiny stamp doodled in the top corner, just a square with a few scribbled lines inside.
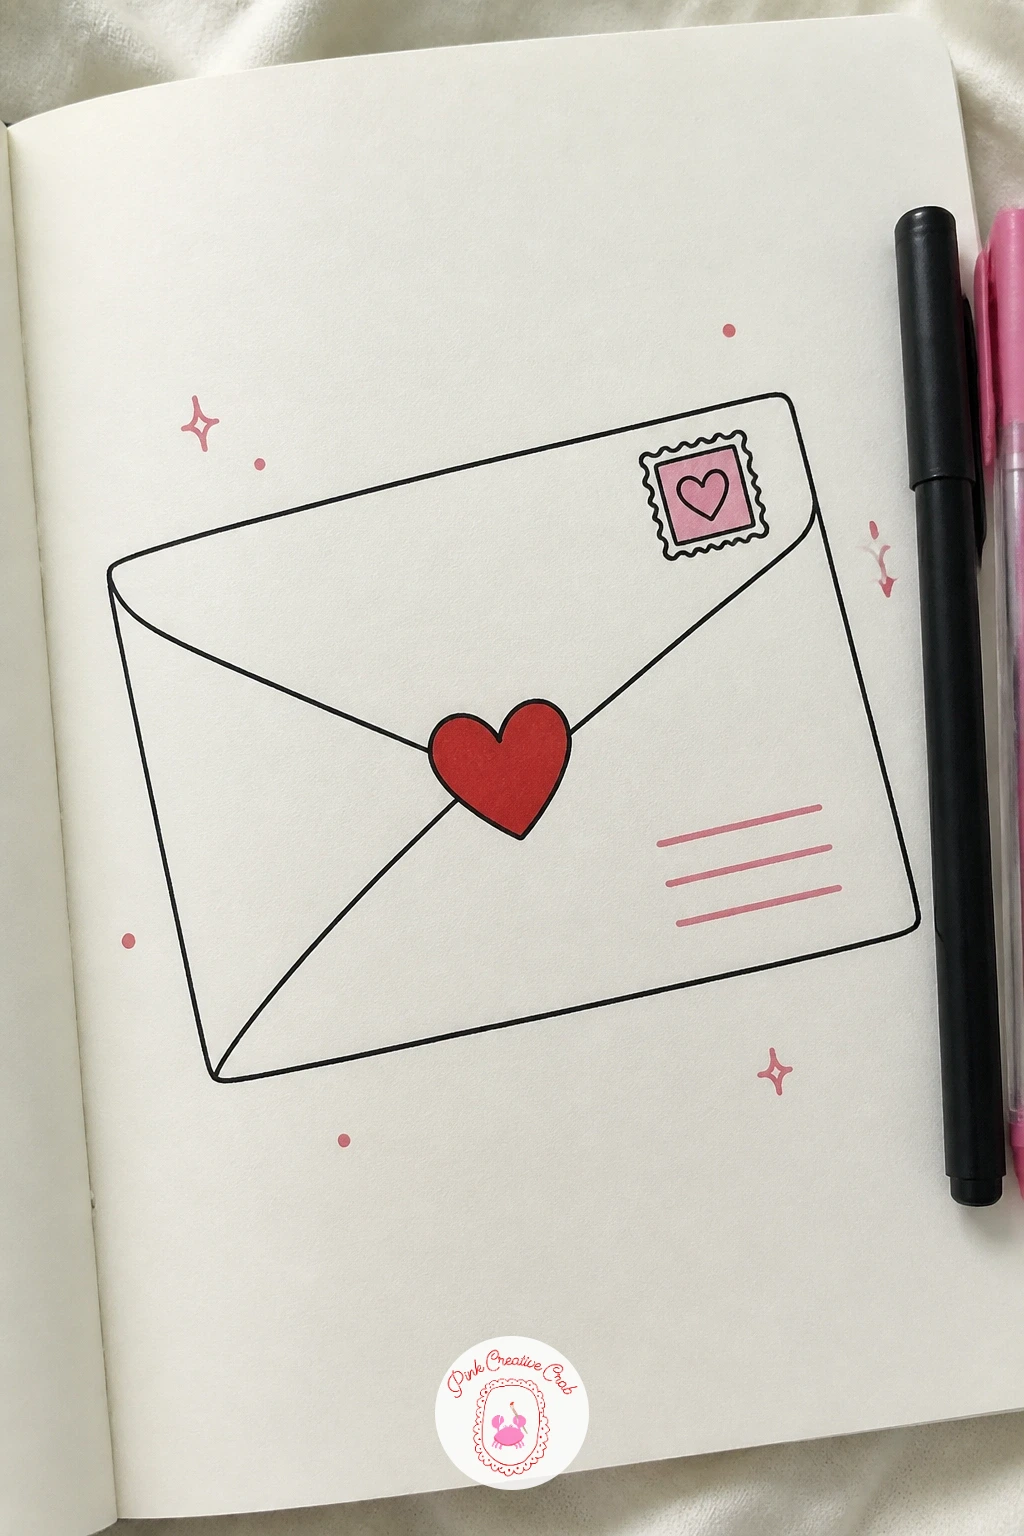
Palette: Red,Rose Pink,Cream Paper
Draw the teddy bear as three rounded shapes: a round head, an oval body and two short stubby arms wrapped around the front. Keep the fineliner outline soft and bouncy, bears are forgiving, there is no wrong proportion here as long as the head is the biggest part.
Compare the heart to the bear’s head before you commit to its size, it should sit roughly the same width so the hug looks snug rather than the bear swallowing something huge. Draw the heart first in pencil if you want to check that fit, then ink over it.
Fill the heart solid in red or rose pink gel pen, and add two small oval ears and a stitched X for the nose in fineliner. If the arms look too short to reach around, extend them slightly past the heart’s widest point rather than redrawing the body.
One tip for today: leave a small white gap where the paw lines overlap the heart, it reads instantly as one shape wrapped around another.
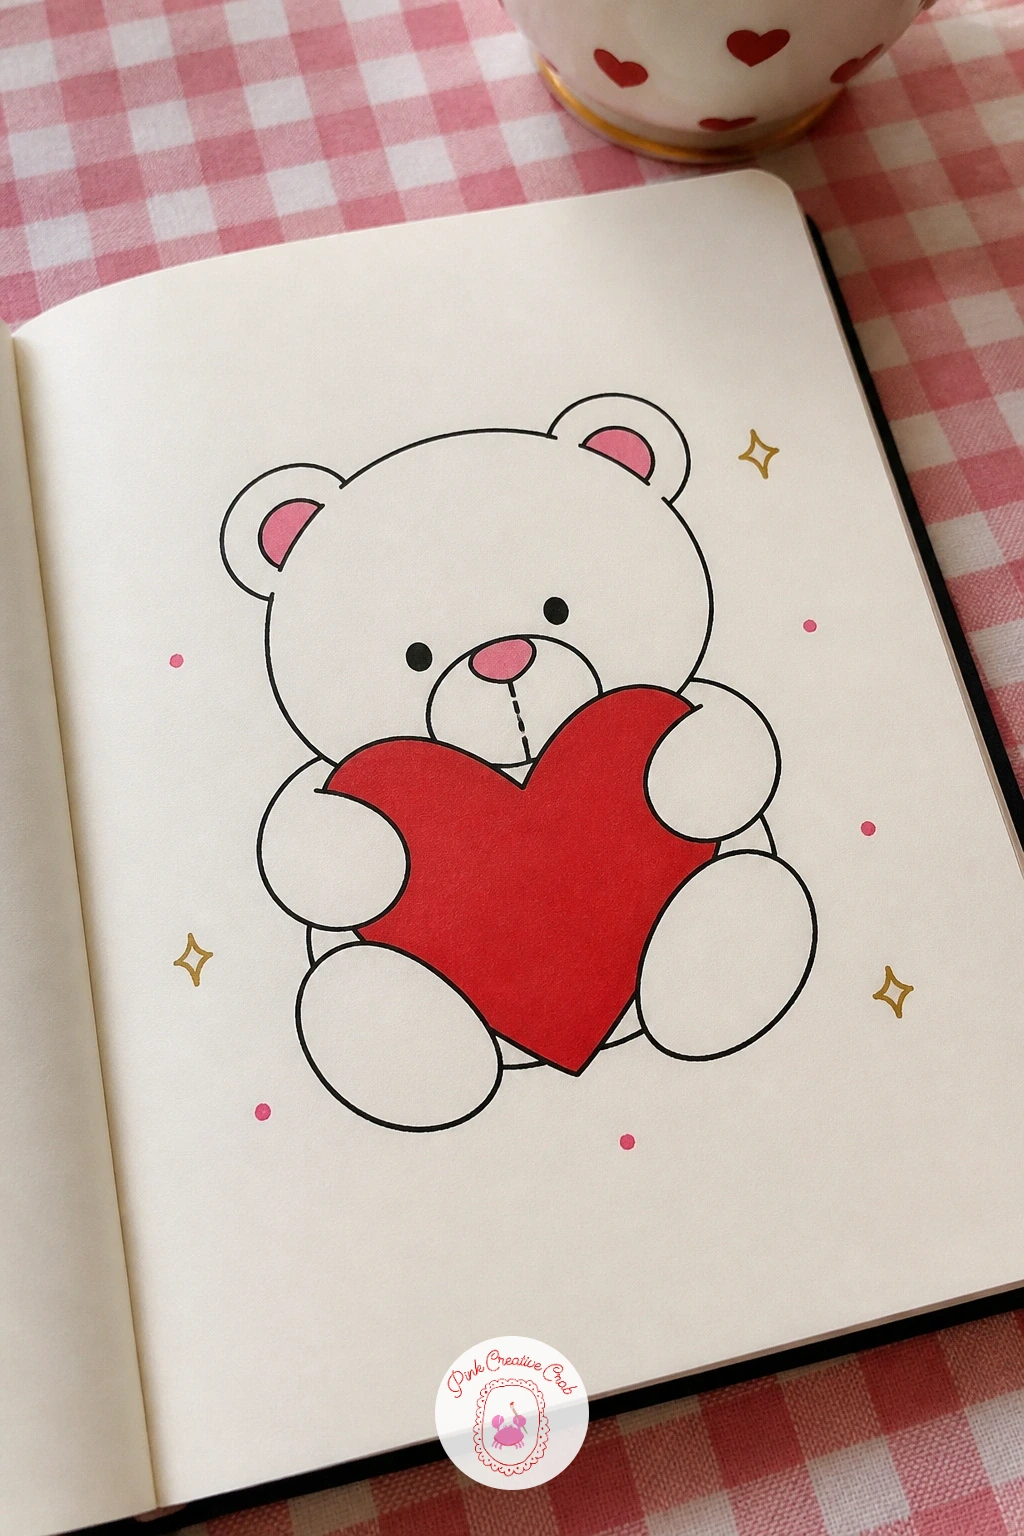
Palette: Warm Brown,Red,Cream Paper
Mugs follow straight on from a bear hug nicely, since both are about things pressed together. Draw two simple mug shapes side by side, each one a rounded rectangle with a curved handle, tilted slightly toward each other so the rims nearly touch where they clink.
Keep the eye level low, as if you are looking at the mugs from table height rather than straight down, this means the rims show as narrow ovals rather than full circles and the mugs read as sitting upright on a surface. Ink the outlines first, then add a short horizontal line near the rim of each to suggest the fill line of the drink.
Where they usually go wrong is the handles facing the same direction, which flattens the whole scene. Turn one handle left and one right so the mugs face each other.
For the steam, draw two or three soft wavy lines rising from each mug and let them curl into a small heart shape where they meet in the middle, coloured in rose pink gel pen.
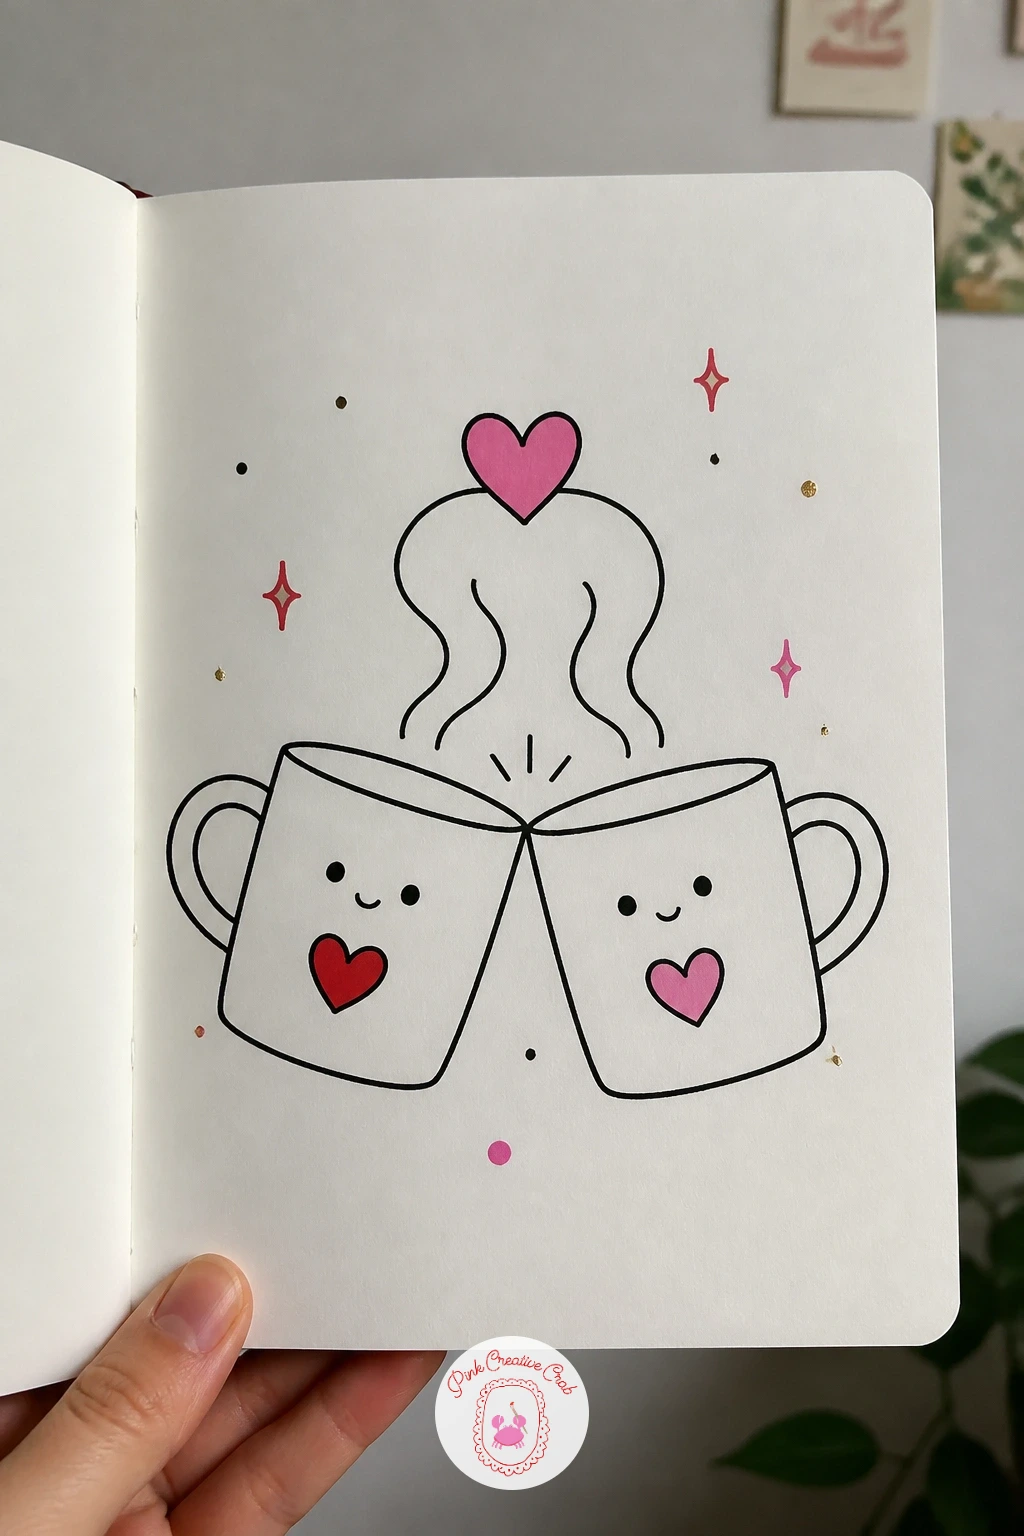
Palette: Rose Pink,Warm Brown,Cream Paper
Snowdrops are a nice change of pace after all the hearts, a quiet little sign that February is already turning toward spring. Draw a thin curved stem first in fineliner, then a small drooping bell shape at the top made of two or three petals, each one a narrow teardrop pointing down.
Light matters here more than anywhere else on this list. Decide where the light comes from, usually upper left works well, and leave that side of each petal as plain white paper while shading the opposite edge with light fineliner hatching or a touch of pale rose pink for contrast against the snow.
The snow itself is just a rough mound at the base of the stem, drawn with an uneven wobbly line rather than a neat curve, with a few short dashes scattered around for scattered snow crumbs. If the flower head looks too stiff, add a slight bend partway down the stem.
Keep it quick today: one flower, one mound of snow, nothing else competing on the page.
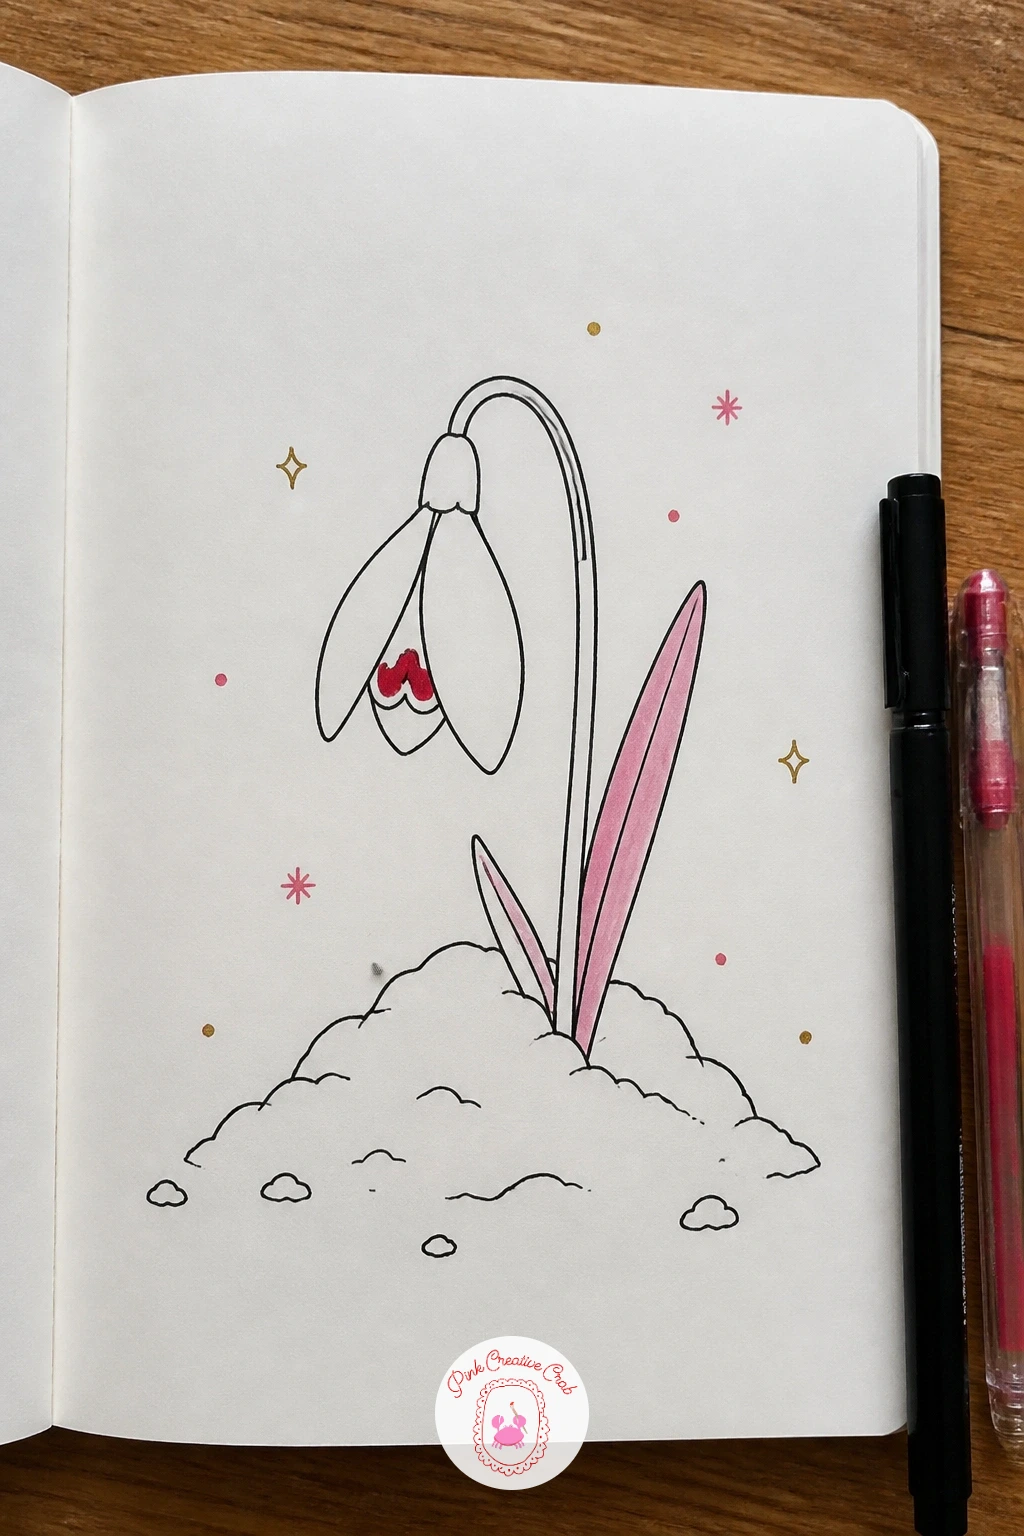
Palette: Soft Green,Pale Rose,White Gel
Try a white gel pen over the snow mound once the fineliner is dry, a few flicked dots give it a cold sparkle without any extra colour.
Chocolates make a satisfying subject because the shapes stack together so easily. Draw a shallow rectangle for the open box, then divide the inside into a simple grid of four or six little paper cup shapes, each one just a small scalloped oval.
Fill most of the cups with round or domed chocolate shapes in fineliner, a few plain, a few with a swirl or drizzle line on top, then colour one or two with a rose pink gel pen highlight to suggest a shiny wrapper. Leave one cup completely empty, just the scalloped paper shape with nothing inside, that is the missing piece that tells the whole story.
Where this goes wrong is making every chocolate identical, which flattens the box. Vary the dome heights slightly and the swirl patterns so each one reads as its own piece.
If you want the quick version, draw just four chocolates and the one empty cup, that is plenty for today.
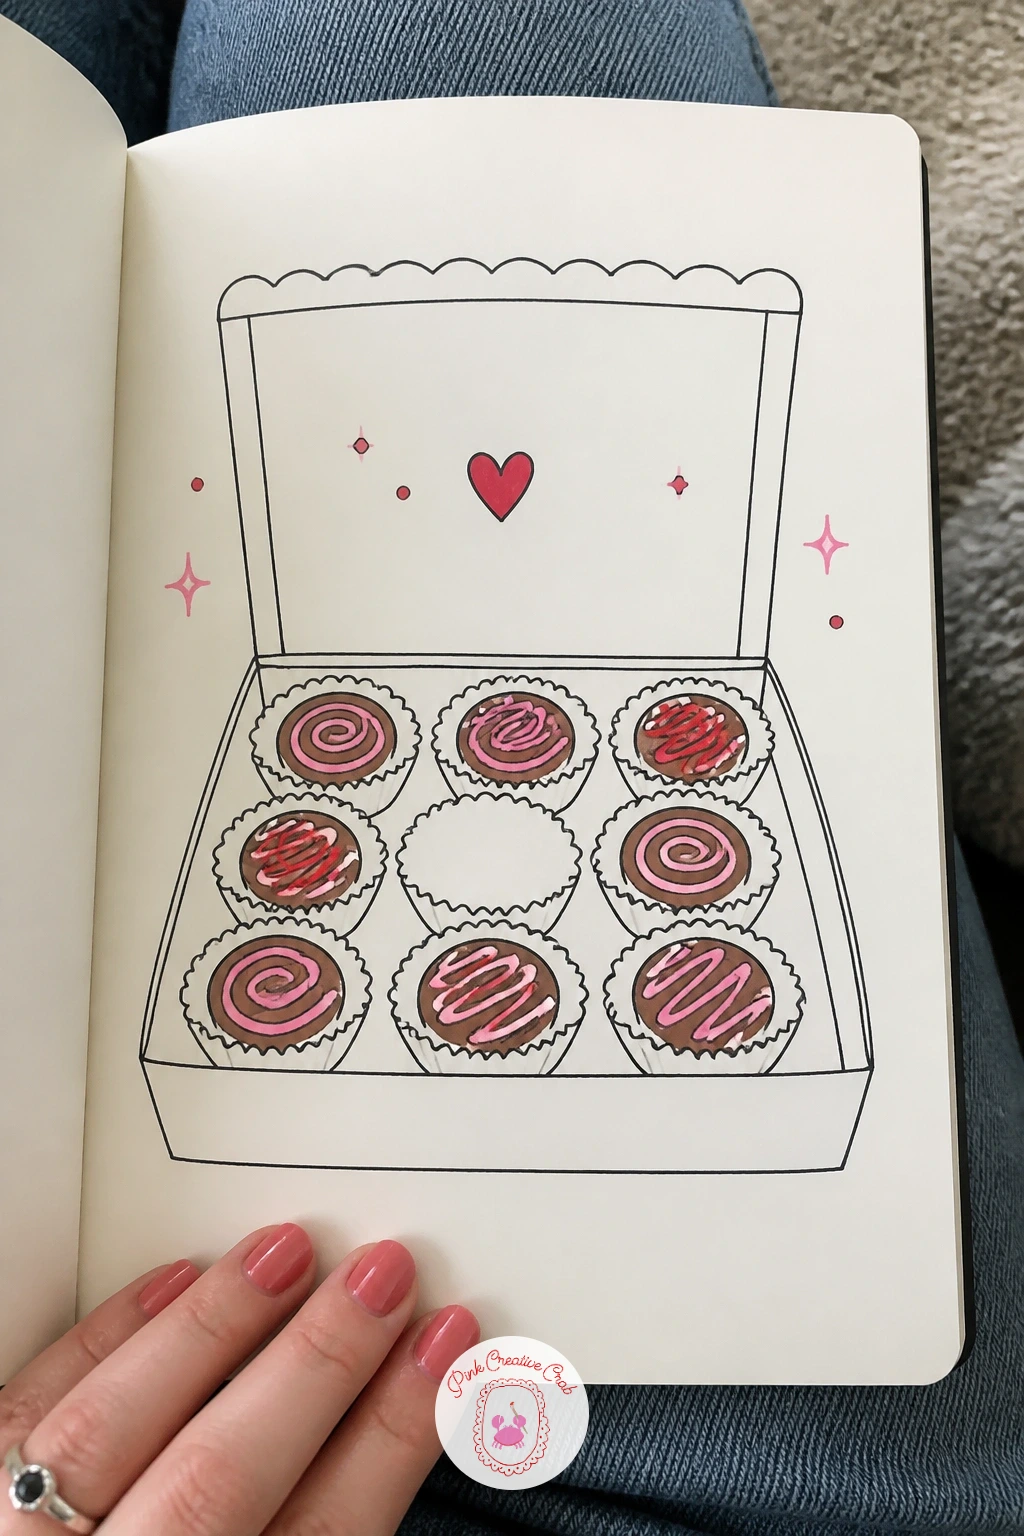
Palette: Warm Brown,Red,Rose Pink
After chocolates, slow the page down with a sleeping cat curled on a heart-shaped pillow. Draw the pillow first, a wide flattened heart shape with a soft dip at the top, then curl the cat’s body over it as one continuous rounded line, tail tucked in and head resting low.
Compare the cat’s curled body width to the pillow before adding ears or a tail, the cat should cover most of the pillow but let a little pink peek out at the edges so the shape underneath still reads. Add two small triangle ears and a few short whisker lines once the body shape feels right.
If the cat ends up looking stiff or too round, soften the outline with a few short overlapping strokes rather than one single clean line, cats are never perfectly smooth when curled up.
Fill the pillow solid in rose pink or red gel pen and leave the cat’s fur as plain fineliner with maybe a few hatched stripes for a tabby pattern.
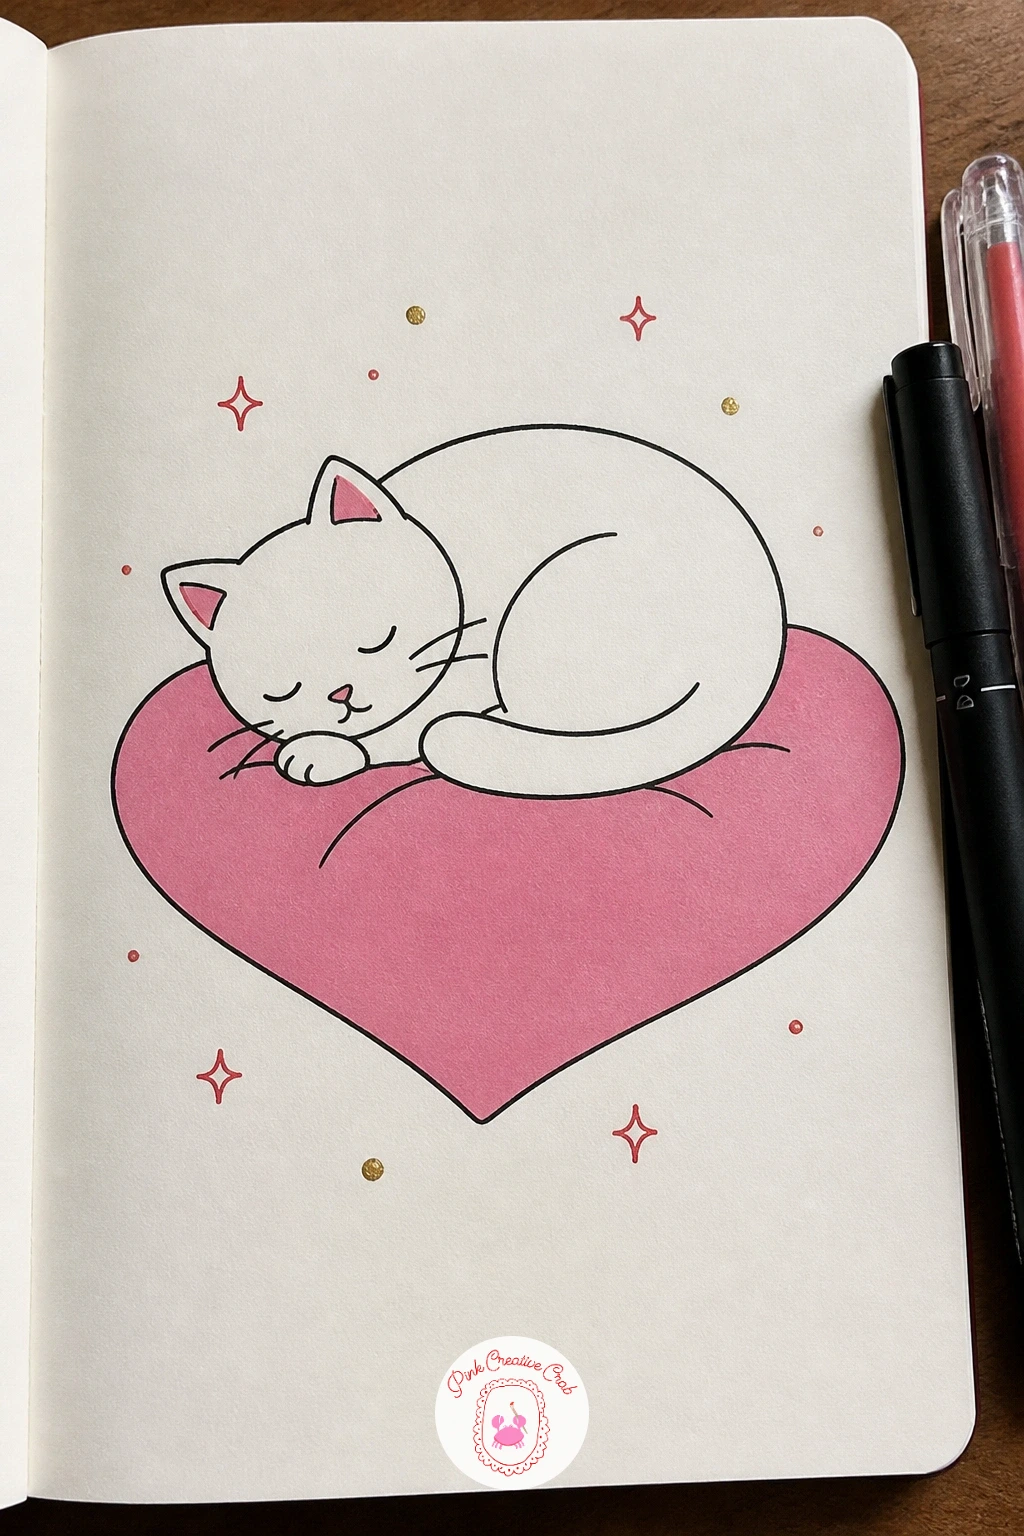
Palette: Rose Pink,Warm Grey,Cream Paper
Tulips are one of the simplest flowers to doodle because the petal shape barely changes from bloom to bloom. Draw three or four tall curved stems first, varying the heights slightly so the bouquet does not look like a row of soldiers, then cap each stem with a simple rounded petal shape, almost like a closed fist.
Wrap the stems together at the base with a triangular paper cone, drawn with a few loose diagonal lines to suggest creased kraft paper rather than a smooth cone. This is the piece that usually goes stiff, so keep the paper lines uneven and let one corner fold outward.
Colour two or three of the tulip heads in rose pink gel pen and leave one plain outline for contrast, filling every flower the same colour flattens the bouquet. A short ribbon tied around the paper, just two curved lines meeting in a bow, finishes it off.
No pink gel pen on hand, red works just as well for a bolder bunch.
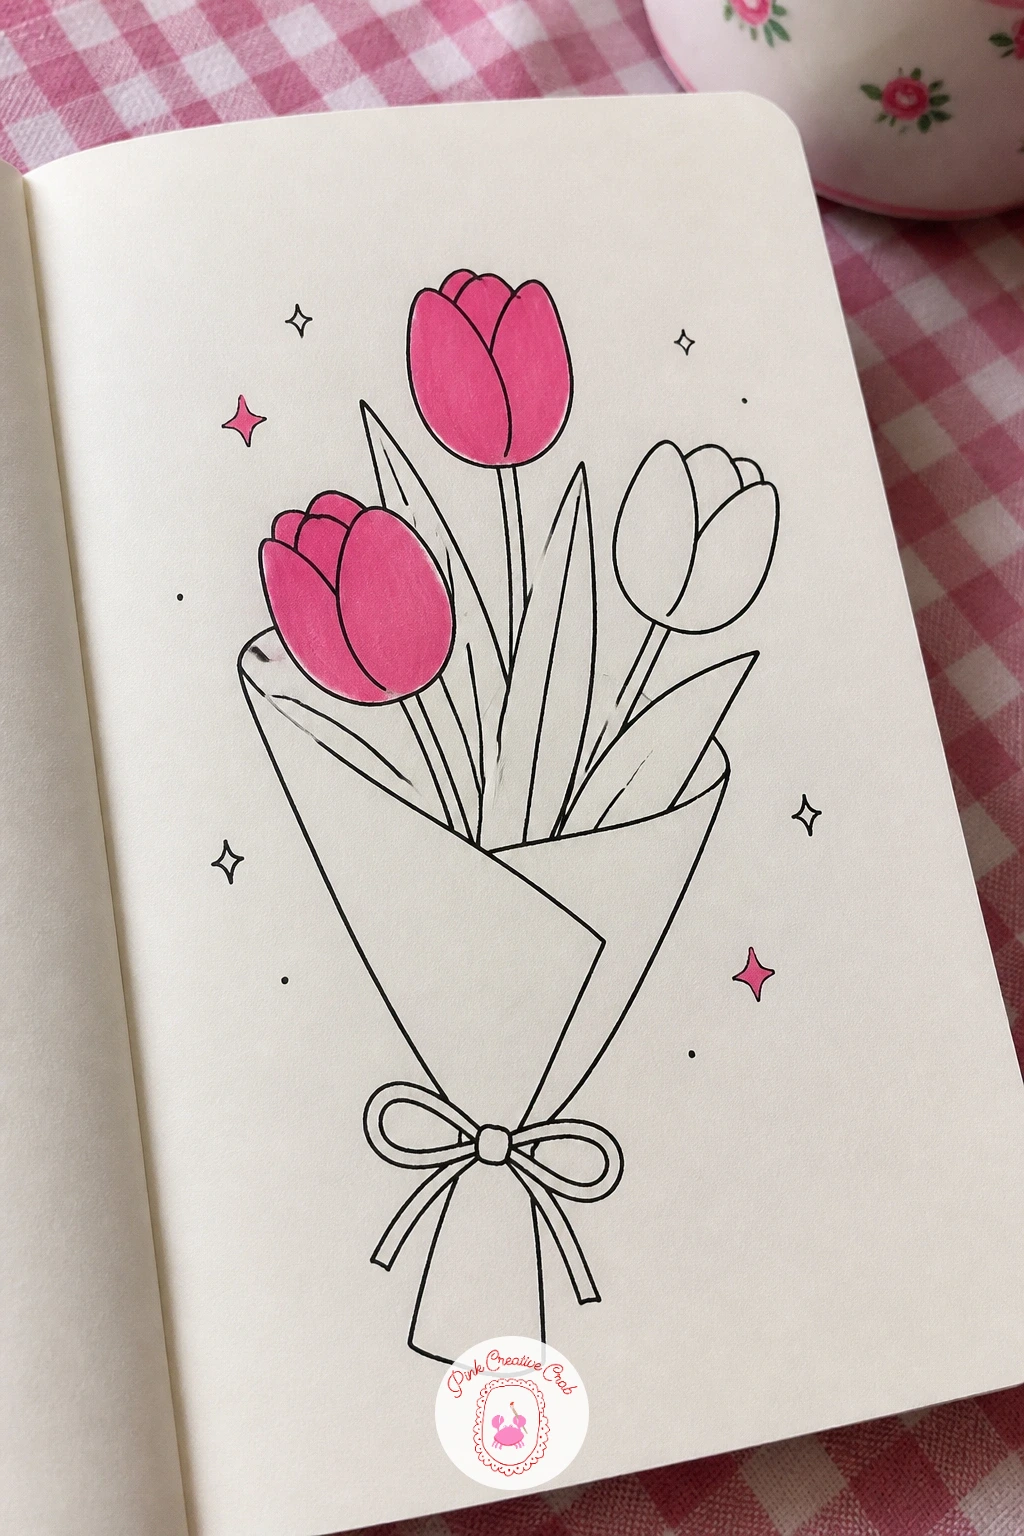
Palette: Rose Pink,Soft Green,Warm Brown
Give the cat from earlier a little costume change and turn it into cupid for the day. Start with the same rounded cat body sitting upright this time, draw two small folded wings on its back using simple scalloped feather shapes, and add a tiny bow and arrow held in one paw.
Keep the wings small relative to the cat’s body, oversized wings make the whole doodle look like it belongs to a different character entirely. A good check is lining the wingspan up with roughly the width of the cat’s body plus a little extra on each side.
The bow and arrow can be two thin fineliner lines crossed with a tiny heart tip on the arrow instead of a point, that small swap sells the whole joke. Add a thin ribbon or sash across the chest in rose pink gel pen for a finishing touch.
If the wings look too flat, add two or three short curved lines inside each one to suggest feather layers.
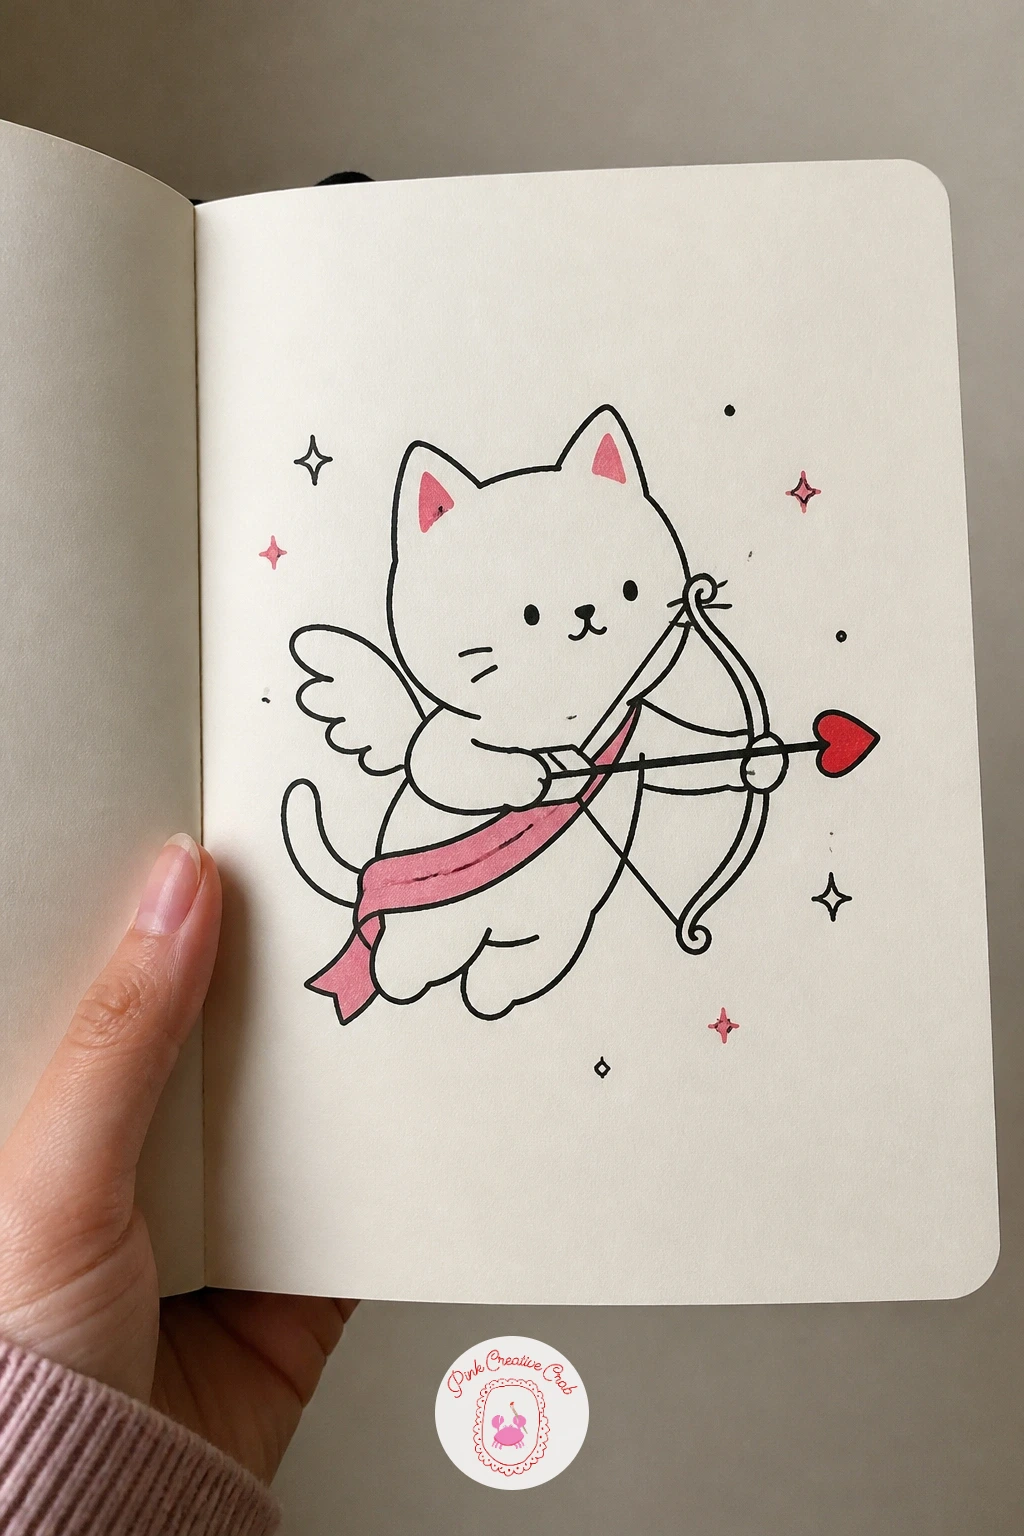
Palette: Warm Grey,Rose Pink,Red
Mittened or fingered, a pair of gloves reaching toward each other makes a sweet little scene with almost no complicated shapes. Draw one glove as a simple mitten outline, rounded at the top with a thumb bump on the side, then mirror it for the second glove, angling both so the fingertips nearly touch in the middle.
The trick with gloves is getting the thumb placement to match on both hands, since real gloves come in pairs. Draw the thumb on the outer edge of each mitten, facing away from the centre, so they read as a left and right pair rather than two identical shapes.
Outline both in fineliner, then add a line of running stitches around the cuff of each glove using small dashes. Where they meet in the middle, tuck a tiny heart between the fingertips, filled in red or rose pink.
If mittens feel too plain, swap one for a fingered glove with simple rectangle fingers, still easy to draw at this level.
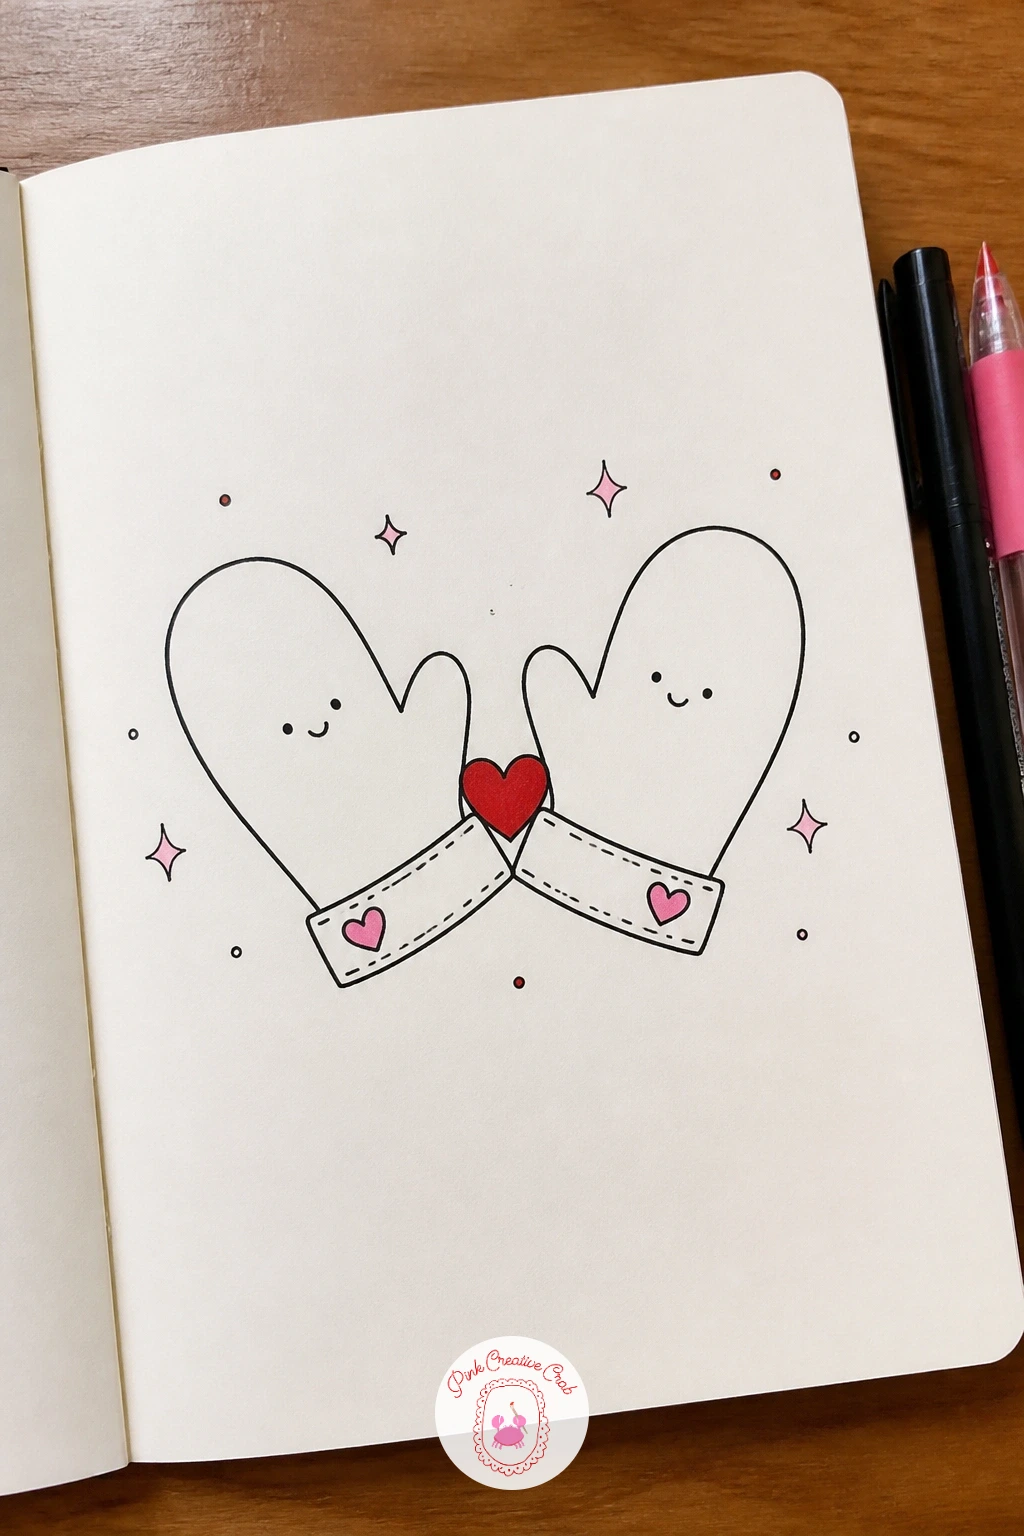
Palette: Rose Pink,Red,Warm Grey
Breakfast doodles are always a crowd pleaser, and a pancake stack is just a row of flattened ovals. Draw three or four pancakes stacked directly on top of each other, each one slightly wider than the one above it, with a wavy uneven edge rather than a perfect oval so they look soft and stacked rather than like coins.
Keep the eye level slightly below the stack so you are looking up at the layers a little, this makes each pancake edge visible as a thin curved band rather than hiding them flat. Ink the stack first, then add a slow drip of syrup running down one side using a single wandering line that pools at the base.
On top, draw a small pat of butter melting into a heart shape instead of the usual square, outlined in fineliner with a little shine line, then colour a drizzle of syrup or a few berries in red gel pen beside it.
If the stack looks too neat, nudge each pancake slightly left or right of centre rather than lining them up perfectly.
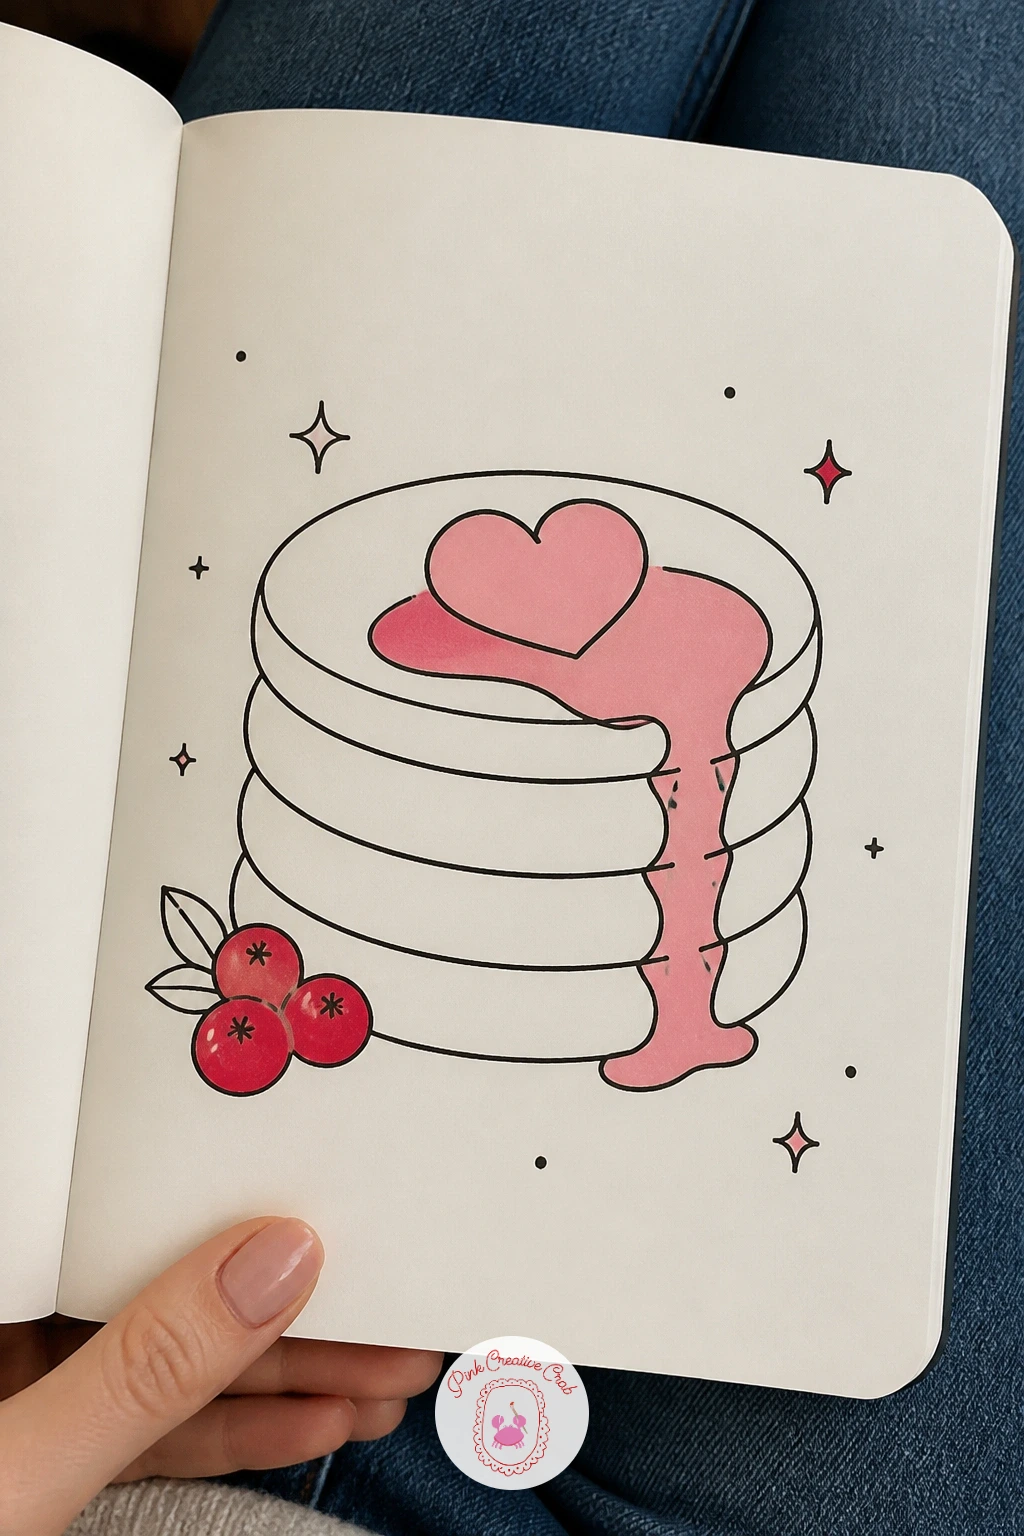
Palette: Warm Brown,Red,Cream Paper
Slow the page right down with a quiet still life of a candle and a book, the kind of small scene that fills a corner nicely. Draw a simple closed book first, lying flat, just a rectangle with a thin line down the middle for the spine edge and a few page lines along the side.
Beside it, draw a short candle in a simple jar or holder, a tall rectangle with rounded corners and a small flickering flame at the top. Keep the flame shape teardrop rather than perfectly symmetrical, flames never sit still.
This is a good spot to try dry fineliner hatching for texture: a few short parallel strokes along the side of the book suggest the thickness of the pages, and a soft scribble around the candle flame in rose pink gel pen gives it a gentle glow without shading the whole page.
No candle to reference, any small jar or mug on the table works as a stand-in shape.
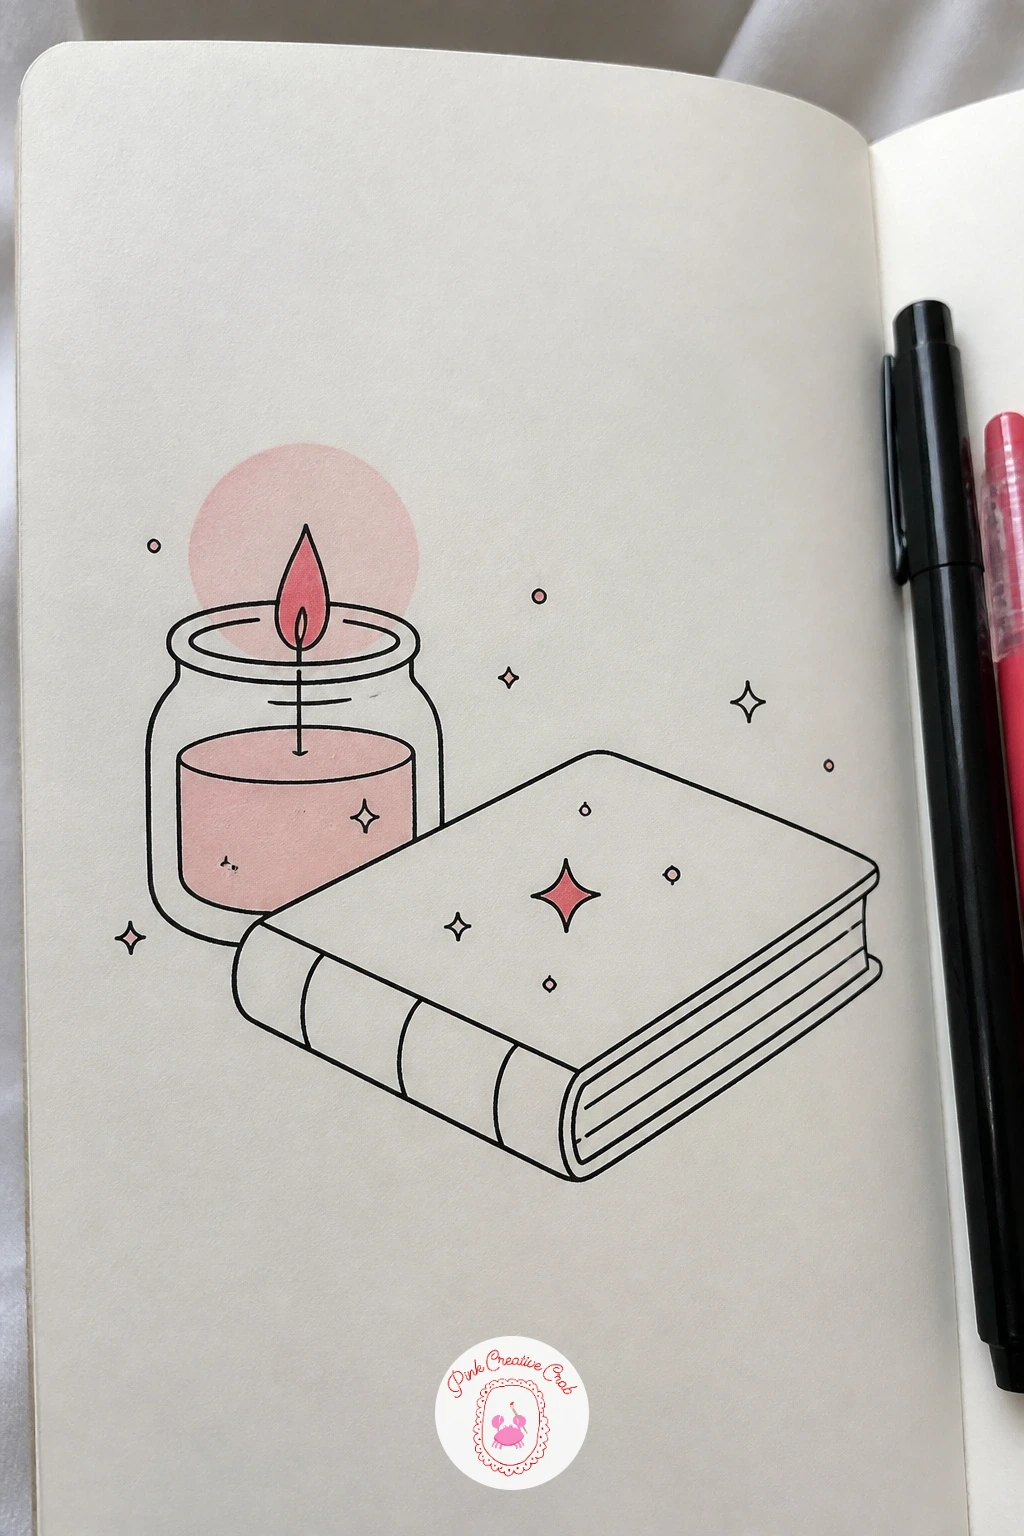
Palette: Warm Brown,Rose Pink,Cream Paper
A full mailbox is a nice way to multiply the envelope idea from earlier into a busier little scene. Draw a simple rounded mailbox shape first, like a loaf on its side with a small flag sticking up at one end, then open the front flap at an angle so the inside is visible.
Fill the opening with three or four envelope corners poking out, overlapping each other at slightly different angles rather than stacked perfectly straight. That overlap is what usually goes wrong, too neat a stack looks like a filing cabinet rather than an overstuffed mailbox.
Ink the mailbox and envelopes first, then colour just the edges or seals of the envelopes in rose pink and red gel pen so they pop out from the plain outline of the box. A couple of hearts or stamps doodled on the visible envelope corners add detail without much extra work.
If you want the quick version, draw just two envelopes poking out, the forty minute version fills the opening completely and adds a small bird perched on top of the flag.
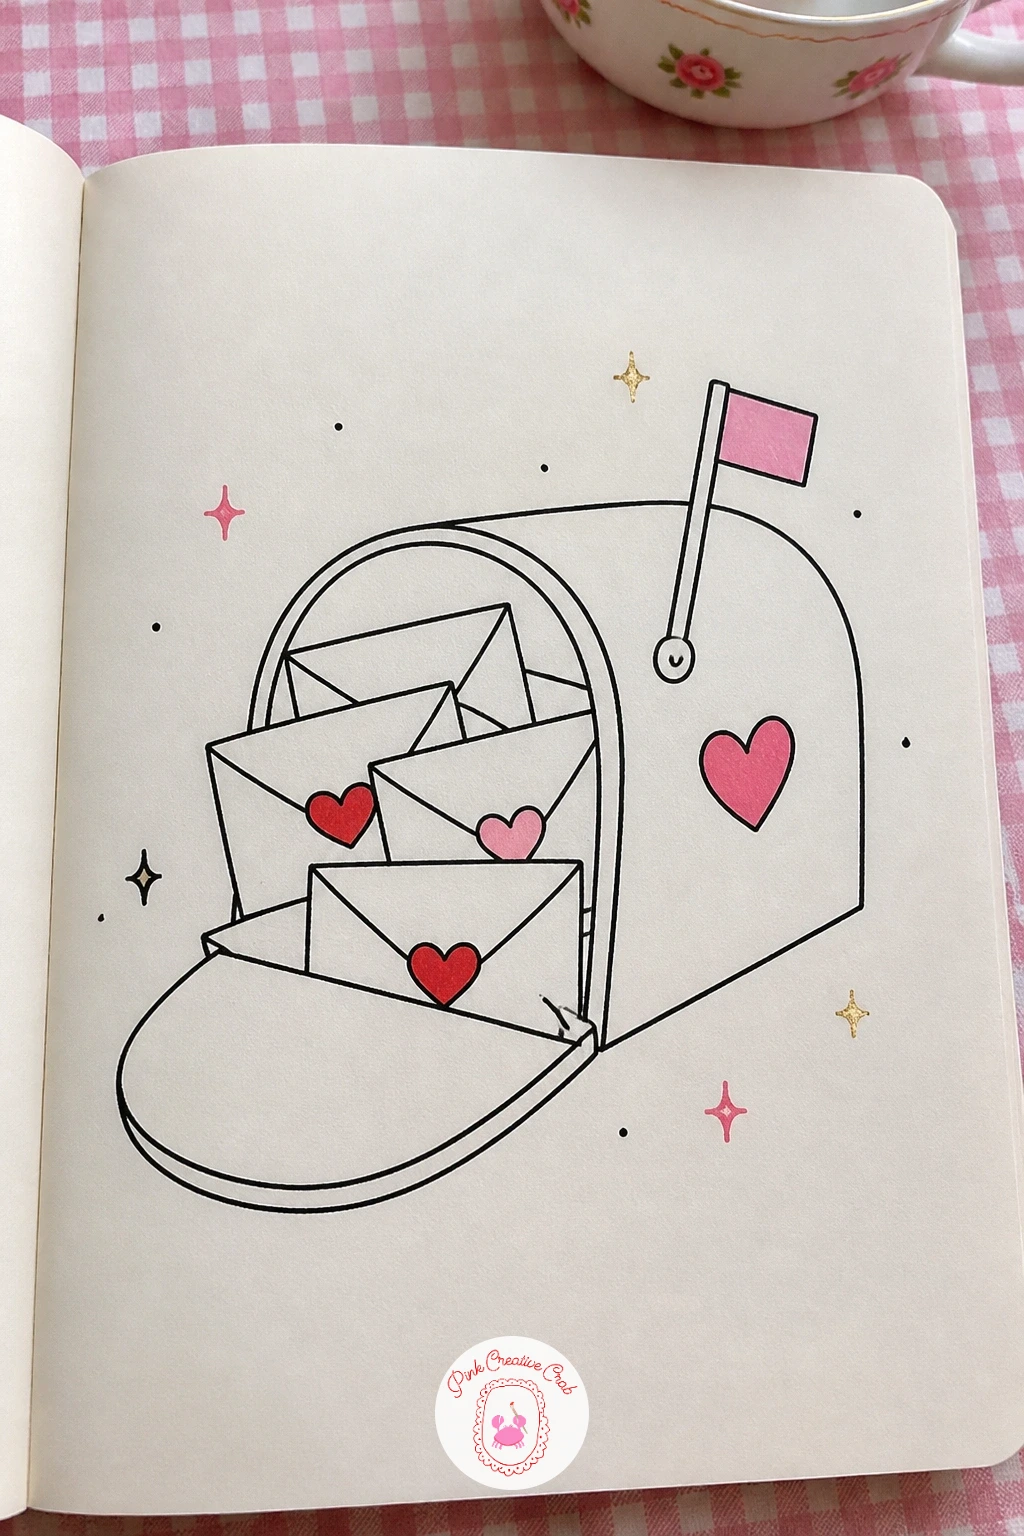
Palette: Red,Rose Pink,Warm Grey
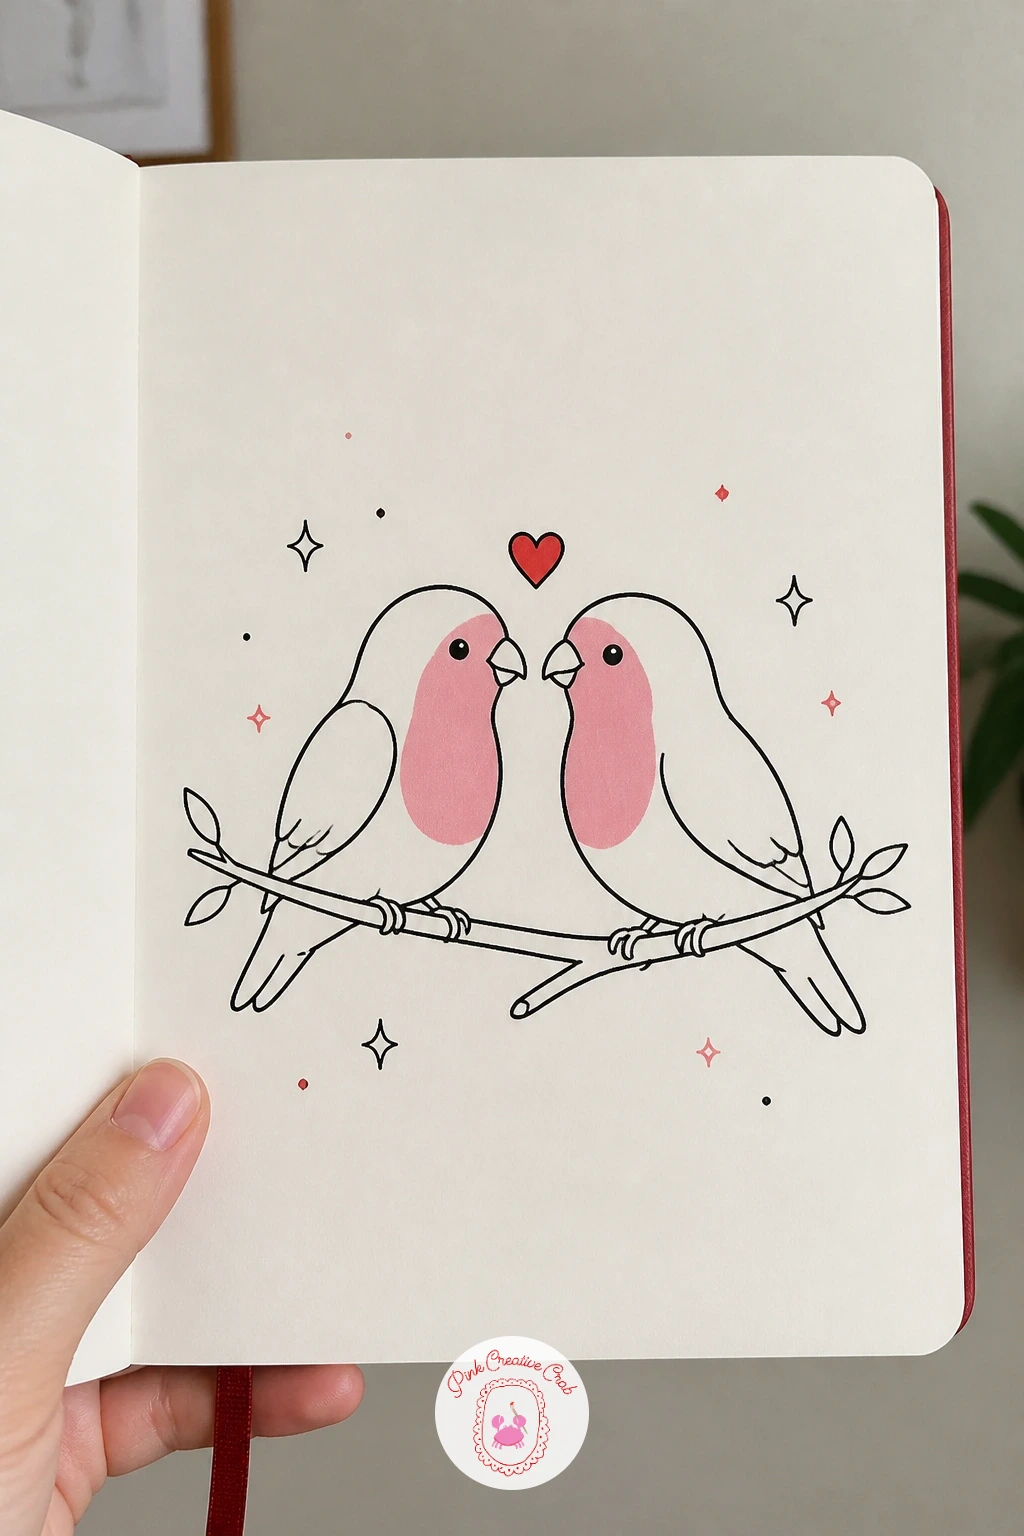
Lovebirds sit naturally after a mailbox scene, since both carry a little note of romance without a single heart in sight if you want it that way. Draw one bird first as a simple teardrop body with a small round head and a short pointed beak, then mirror a second bird facing it on the same thin branch.
Keep both birds at the same eye level along the branch so they read as a pair rather than one perched above the other, a quick way to check this is drawing a faint straight guideline across where both bodies should sit before inking. Add a simple wing shape as a curved line on each body, and a few short tail feathers fanning out behind.
Colour just the chest or a small wing patch on each bird in rose pink gel pen, leaving the rest as plain fineliner outline so the colour reads as a marking rather than a full paint job. A tiny heart floating between their beaks finishes the pair.
If the branch looks bare, add two or three small leaf shapes along its length.
Palette: Rose Pink,Warm Brown,Red
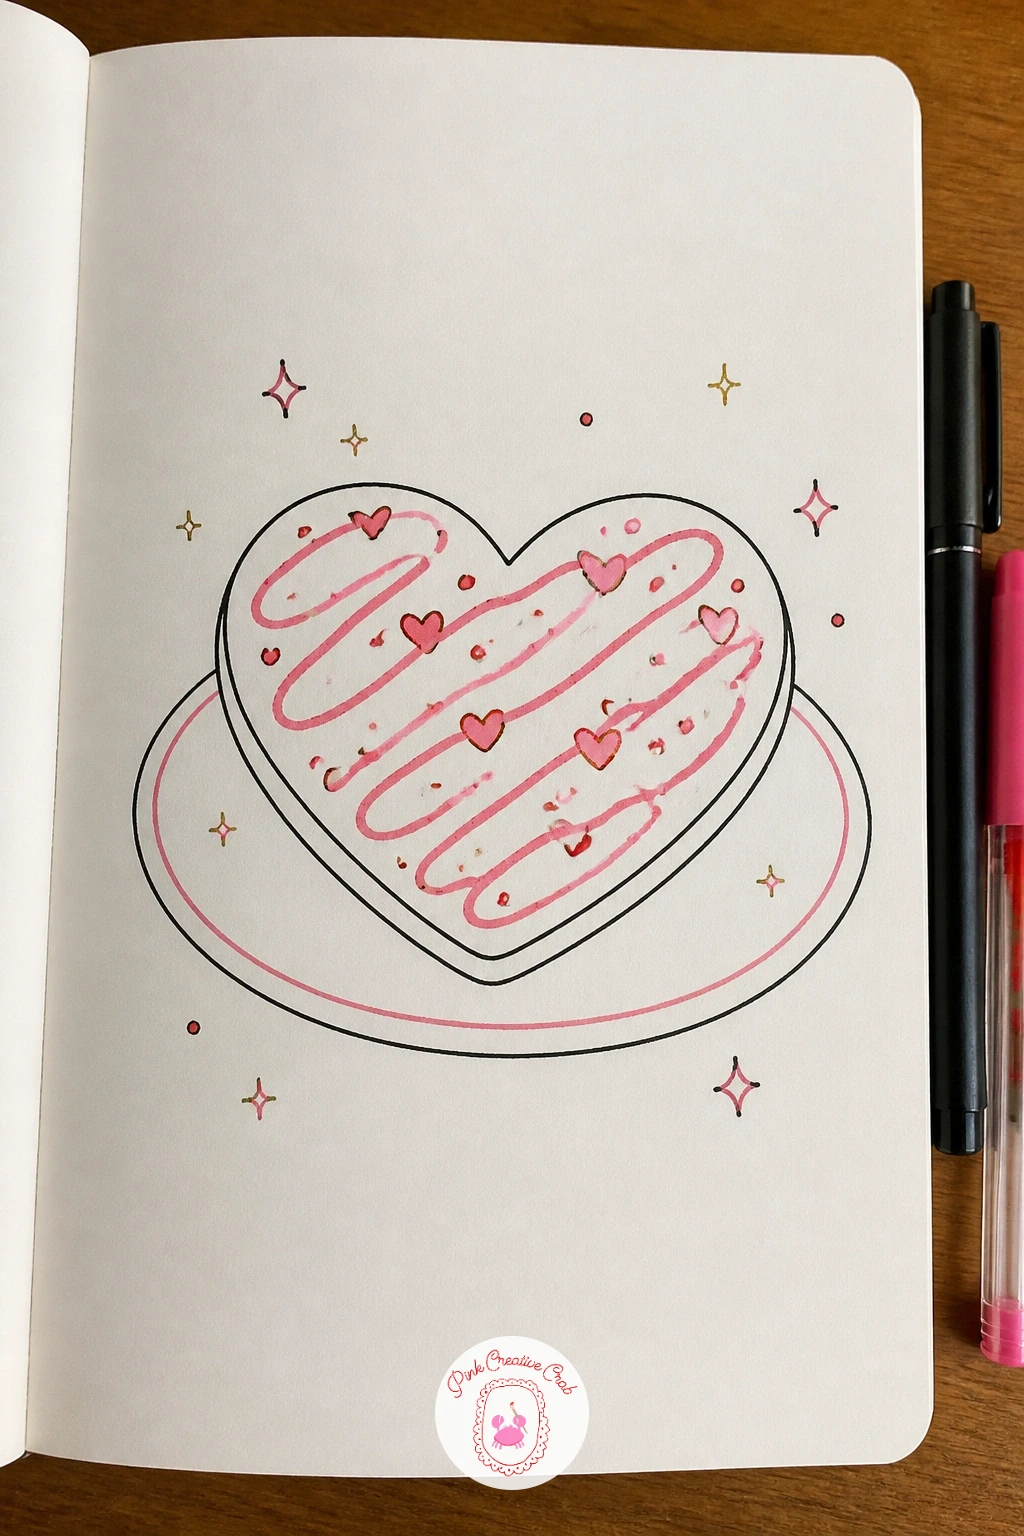
After the birds, come back to something you can draw in under a minute: a single heart-shaped cookie sitting on a small plate. Draw the plate first as a wide flattened oval with a thinner oval inside for the rim, then centre a heart shape on top, slightly uneven at the edges the way a real cut cookie never comes out perfectly symmetrical.
Outline the cookie in fineliner, then add a simple icing drizzle across the top using one wandering zigzag line, leaving gaps of plain cookie showing through rather than covering the whole surface. Colour the icing in rose pink or red gel pen, and dot a few tiny sprinkles along the drizzle line.
Where this goes wrong is a too-perfect heart outline that looks stamped rather than baked. Let one side bulge slightly more than the other.
For a quick version, skip the plate entirely and just draw the cookie floating with a short shadow line beneath it.
Palette: Warm Brown,Rose Pink,Cream Paper
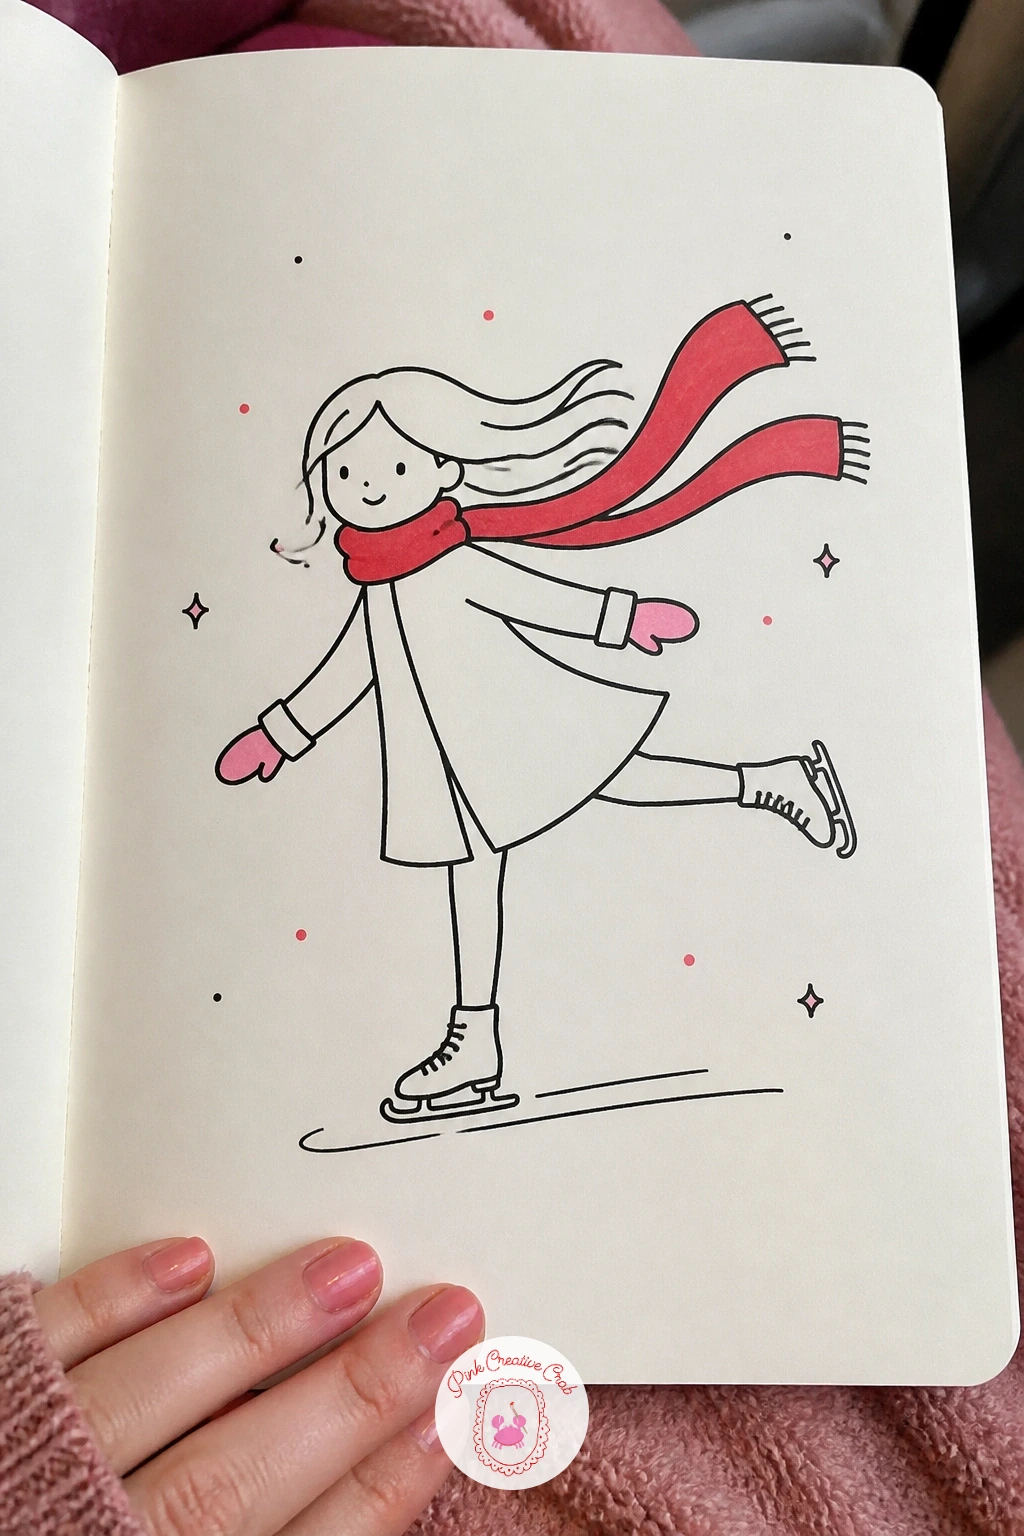
This is the most involved figure on the list, so take it slow and build it in simple shapes rather than one continuous outline. Start with a loose oval for the head, a curved line for the spine leaning forward slightly, and two bent legs ending in skate blades, one lifted slightly off the ground mid-glide.
Picture the light coming from one side and keep that side of her coat and hair mostly plain paper, saving the fineliner hatching for the shadowed side underneath her arms and along the back leg. This single choice does most of the work in making her look like she is actually moving rather than standing still on skates.
The red scarf is the detail that carries the whole doodle, so draw it loose and trailing behind her in the direction she is skating, with a few wavy lines rather than one stiff shape, coloured solid in red gel pen.
If full figures feel tricky, simplify the coat into one rounded triangle shape and spend your detail budget on the scarf and the ice lines beneath the blades instead.
Palette: Red,Warm Grey,Rose Pink
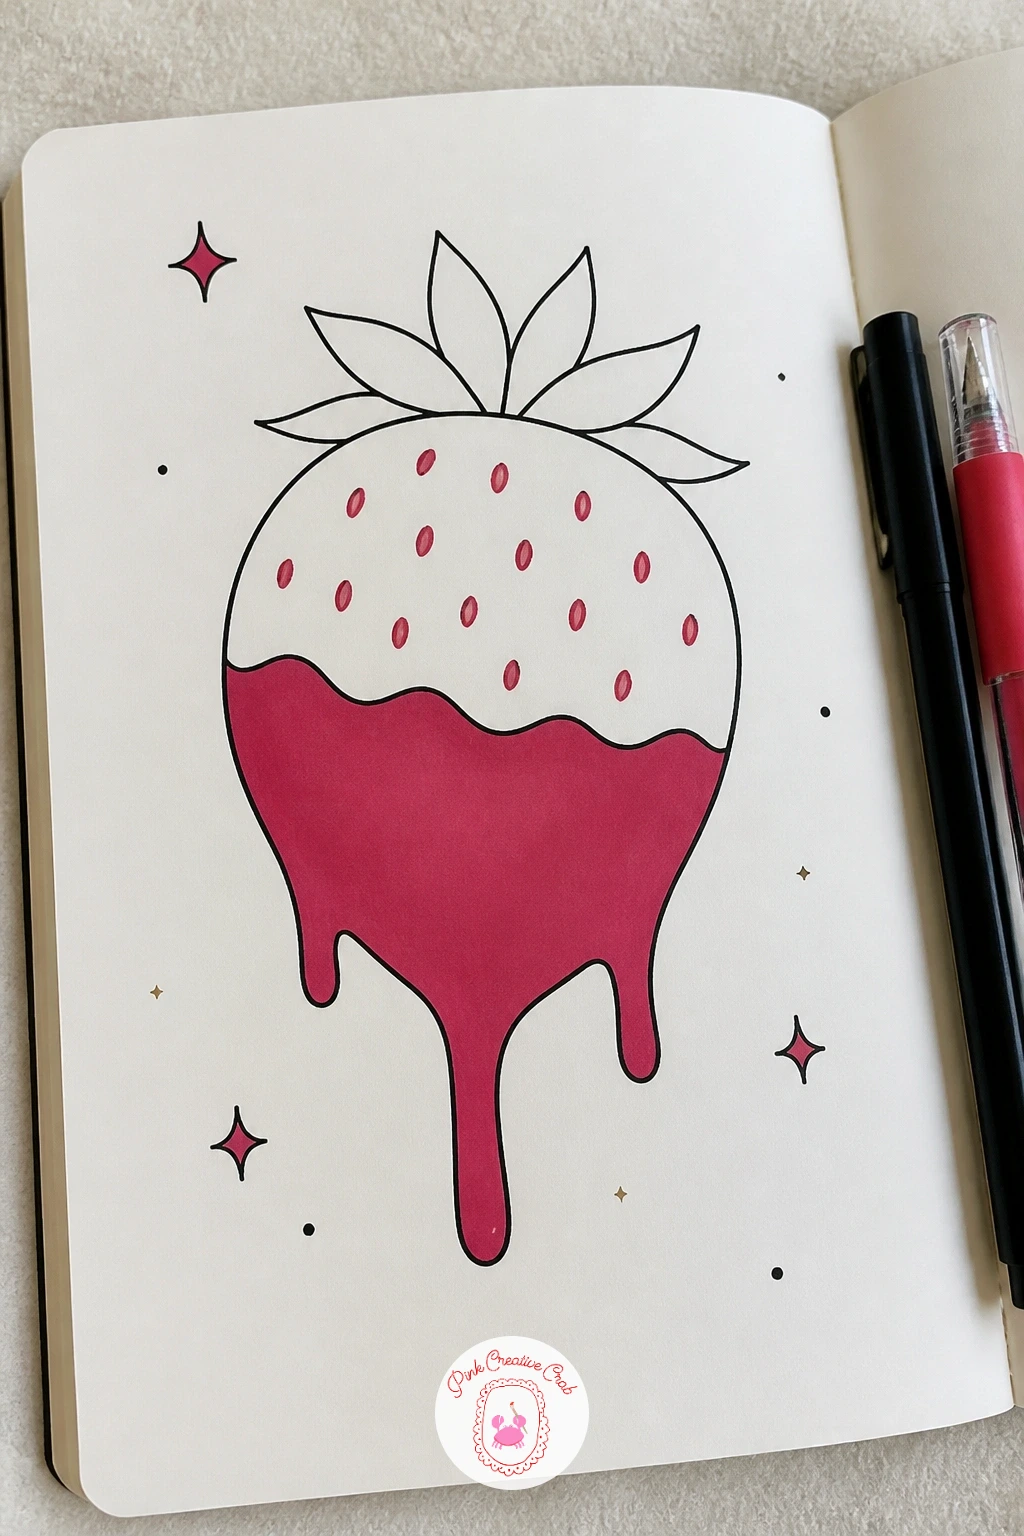
After a full figure, reward yourself with something small and fast. Draw a strawberry shape first, a rounded triangle with a slightly bumpy bottom edge, then add a wavy line partway up to mark where the chocolate coating ends and the bare berry begins.
Fill the top half above the wavy line solid in fineliner or leave it as plain outline with scattered dots for seeds, then colour the bottom chocolate half red or a deep rose pink, whichever gel pen you reach for first. A few small drips trailing down from the wavy line, drawn as short tapered lines, sell the dipped look instantly.
Where this goes wrong is a perfectly straight dip line, which looks painted on rather than dipped. Make it wander up and down slightly as it wraps around the berry.
Top it with a simple leafy crown, three or four small pointed leaves fanned out where the stem would be.
Palette: Red,Soft Green,Rose Pink
Two penguins make an easy pair because the body shape barely changes between them, just a rounded oval with a flat belly patch and two little flipper arms. Draw them standing side by side, slightly overlapping at the shoulder, with one long scarf wrapped around both necks and trailing down between them.
Keep the heads small compared to the bodies and tilt them slightly toward each other rather than facing straight ahead, that small tilt is what makes them read as a couple rather than two strangers standing in a line. Add simple triangle beaks and two small feet peeking out from under each round belly.
The scarf is the one connecting element holding the whole doodle together, so draw it as one continuous wavy band looping around both necks, coloured solid in red or rose pink gel pen with a few fringe lines at each trailing end.
If the bodies look too plain, add a short scribble texture along the back for feathers, leaving the belly patch completely blank white.
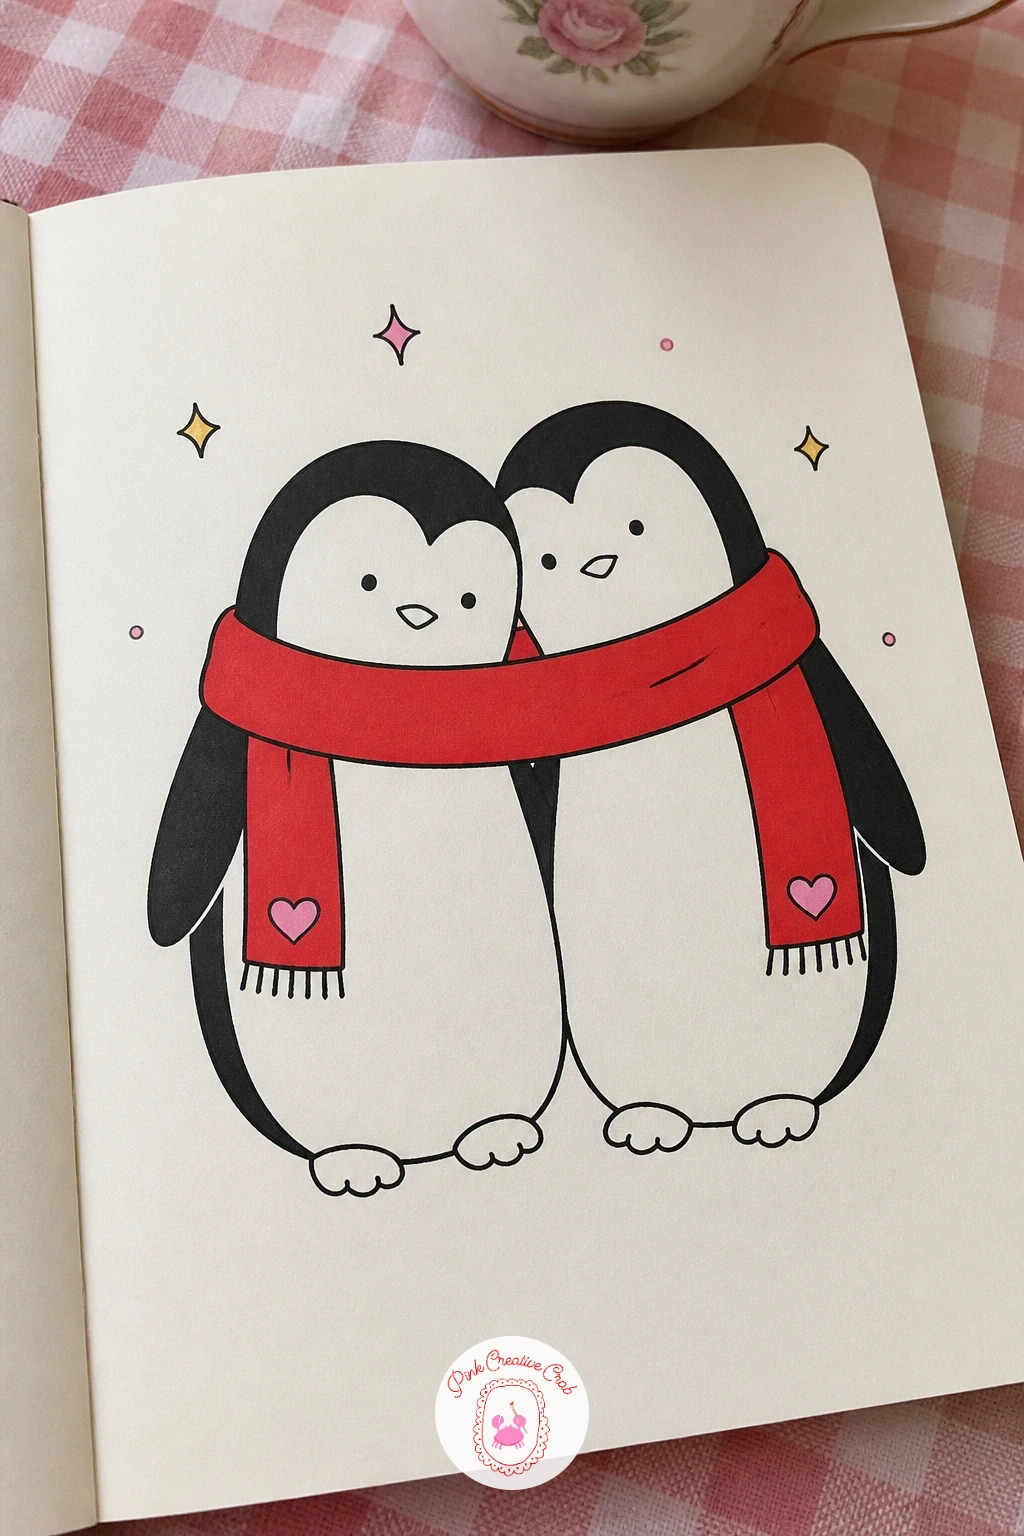
Palette: Warm Grey,Red,Rose Pink
Balloons are a quick way to fill a page with colour without much linework. Draw three or four heart shapes at slightly different heights, each one attached to a thin curving string, letting the strings drift and cross a little rather than hanging perfectly parallel.
Vary the size of each balloon noticeably, a mix of large and small is what makes a bunch look full rather than like a row of identical stickers. Ink all the outlines first, then come back and fill each heart in a different gel pen, alternating red and rose pink so neighbouring balloons never match.
Add a small highlight on each balloon by leaving a tiny crescent of plain white paper near the top left, unfilled by the gel pen, this is what gives balloons their shine. Gather all the strings together at the bottom with a small knot or bow.
If gel pens are not on hand, coloured pencil works just as well for filling the hearts, just press a little harder for depth.
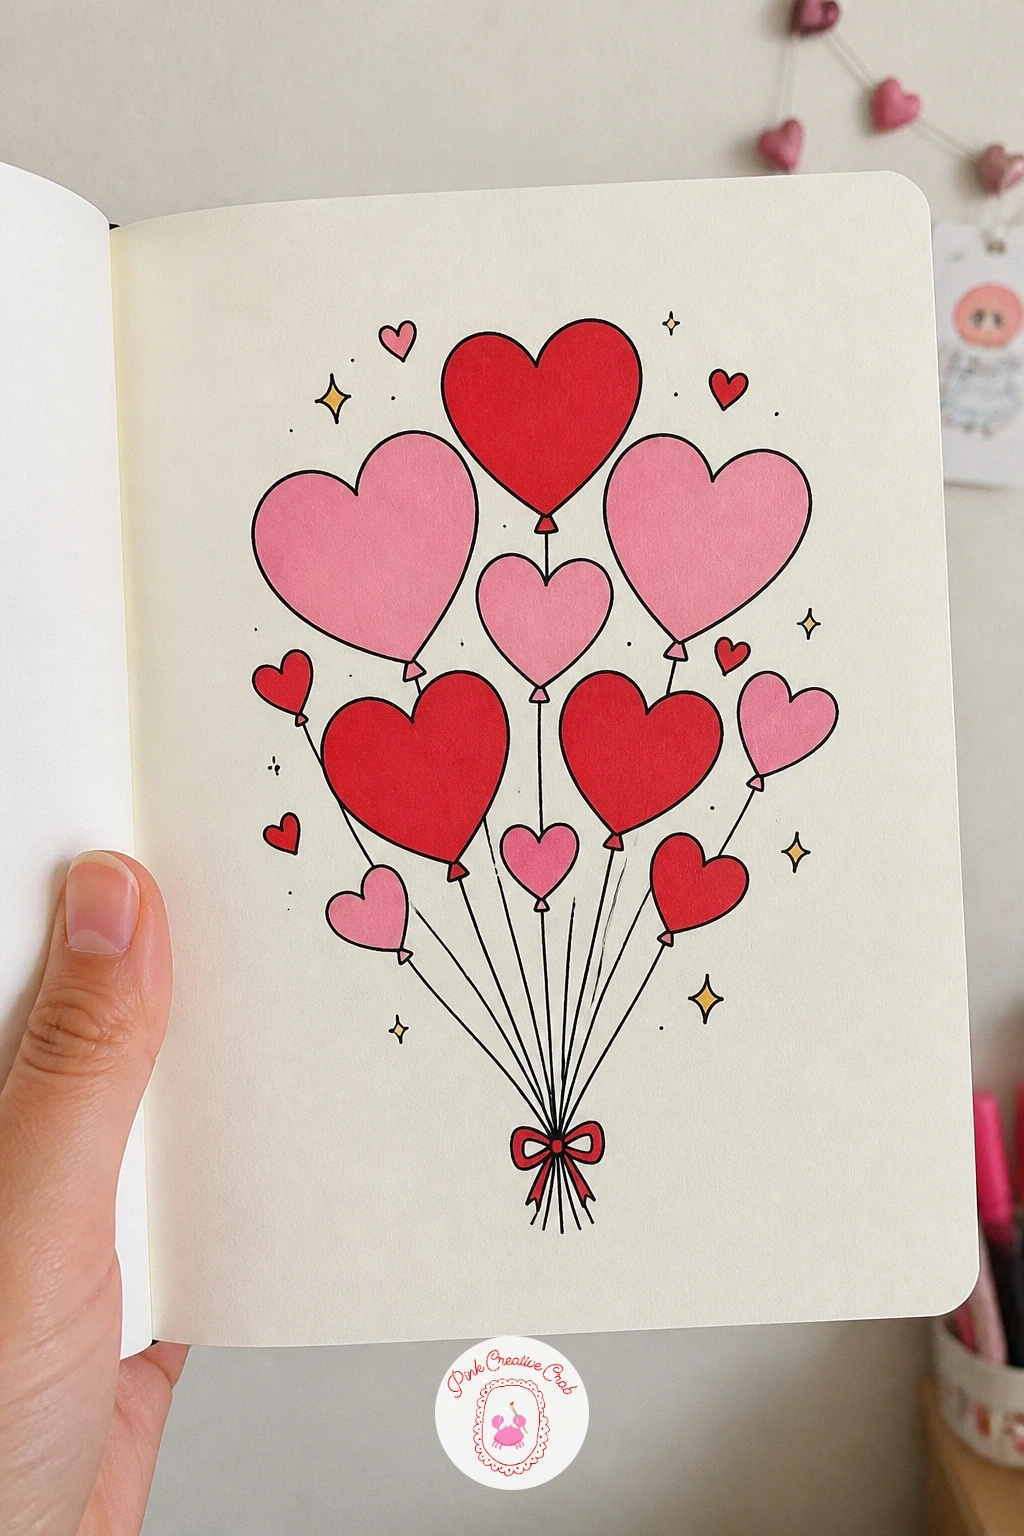
Palette: Red,Rose Pink,Cream Paper
For something a little moodier, draw a window pane as a simple grid, two or three straight lines crossing to make four or six panes, then fill the background just outside the glass with soft grey hatching to suggest an overcast sky. This is the one idea on the list where the background matters as much as the subject.
Inside the panes, draw a scatter of raindrops as short vertical streaks of varying length, heavier toward one side of the window as if wind is pushing them. Where this usually goes wrong is spacing the raindrops too evenly, scatter them unevenly instead with a few clustered together.
In the clearest pane, draw a heart shape with a fingertip, meaning an open outline rather than a filled one, as if someone traced it into the condensation. Leave it as plain fineliner or trace it once more in rose pink gel pen for a faint glow.
No grey pen on hand, light fineliner cross hatching gives the same overcast feeling.
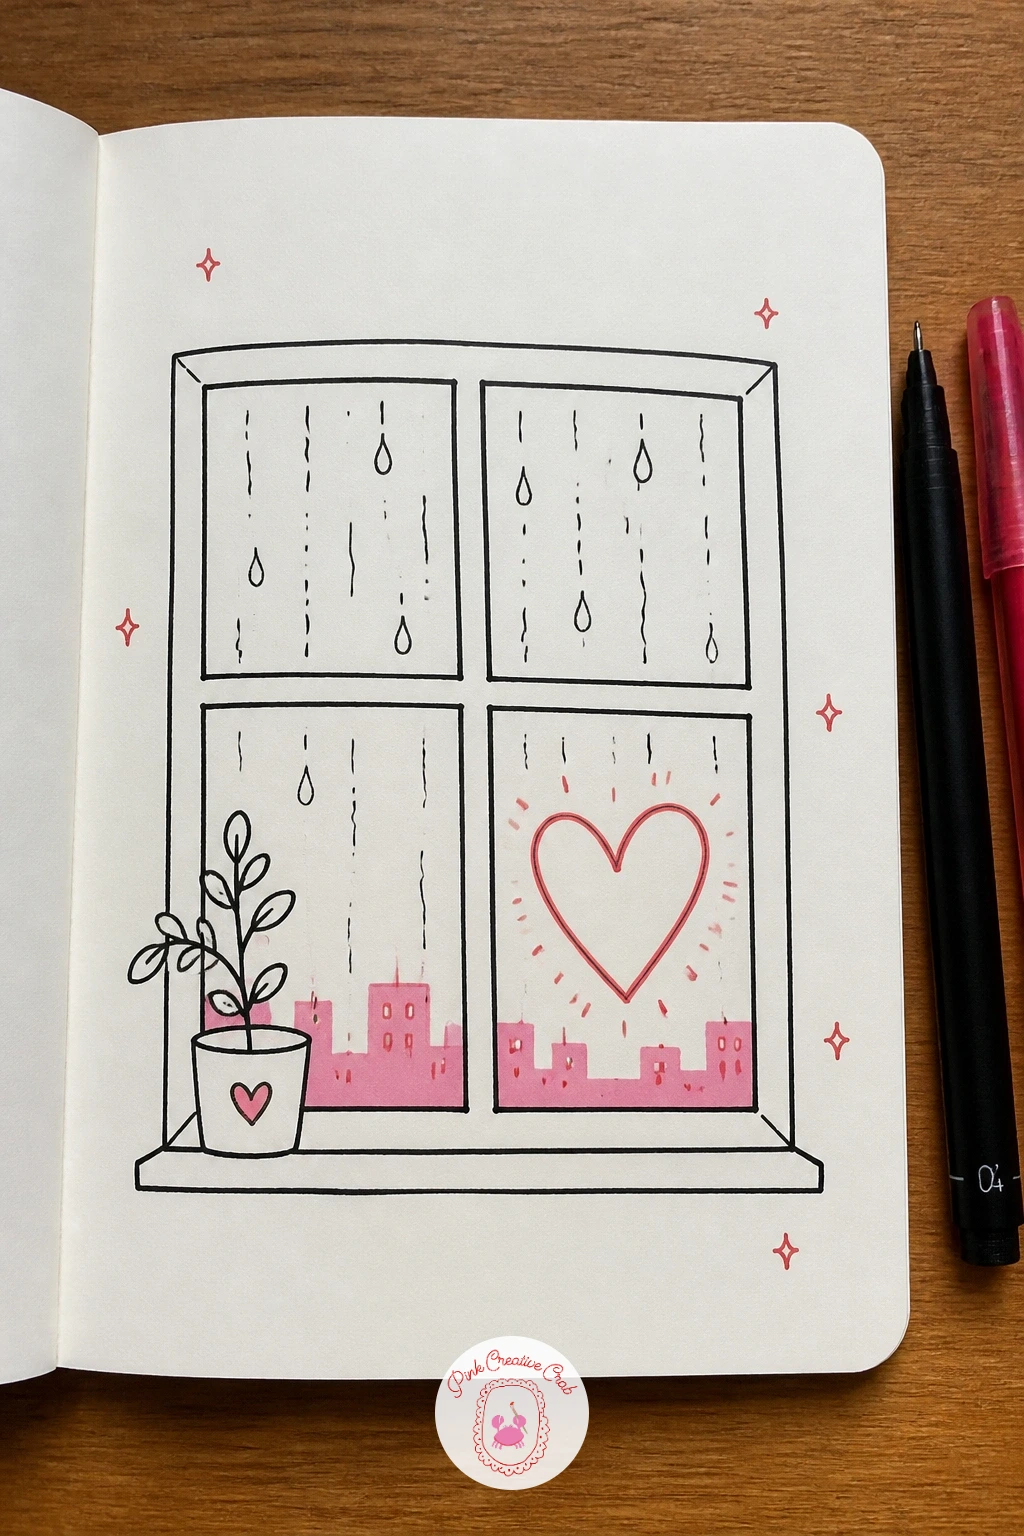
Palette: Warm Grey,Rose Pink,Cream Paper
A pair of socks is about as forgiving a shape as you will find, just two soft tube shapes with a rounded toe and a folded cuff at the top. Draw them standing upright side by side, slightly uneven in height the way socks always flop differently when they are not being worn.
Give the cuffs a ribbed texture with a few short vertical dashes rather than smooth lines, that small bit of detail does most of the work of making them look knitted. Scatter three or four small hearts across the body of each sock, varying their size so they feel randomly placed rather than printed in a grid.
Colour the hearts in alternating red and rose pink gel pen, and leave the sock fabric itself as plain fineliner outline so the hearts stay the brightest thing on the page. If the socks look too stiff standing up, add a slight lean or fold at the ankle.
For a faster version, draw just one sock lying flat with a few hearts scattered across it.
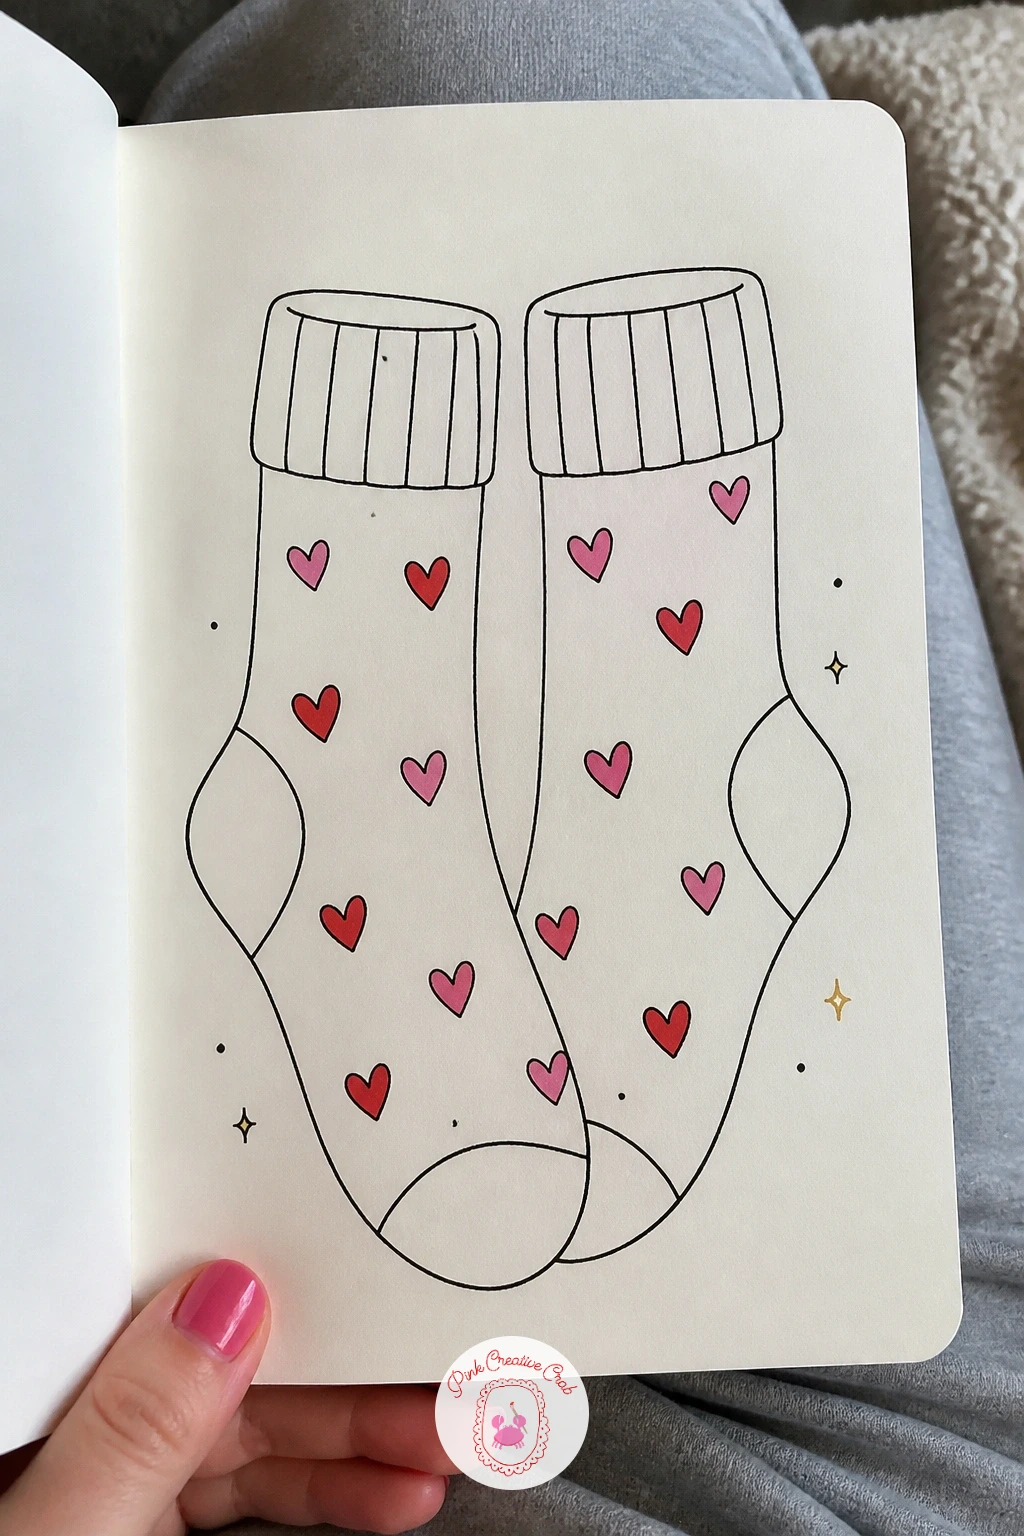
Palette: Red,Rose Pink,Cream Paper
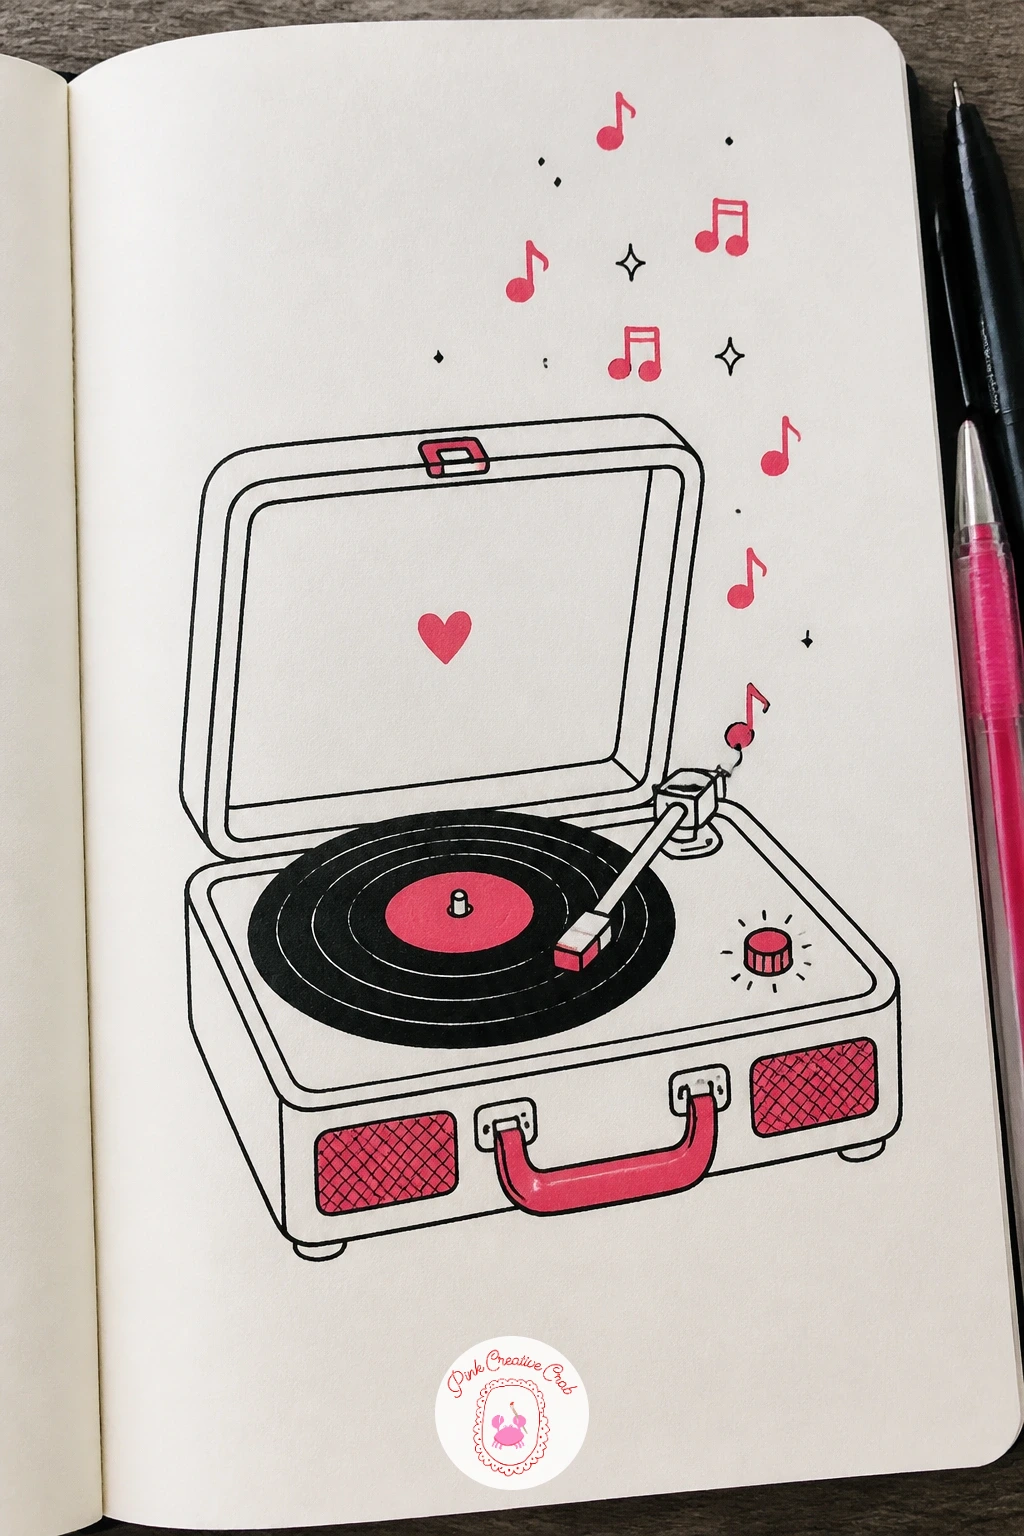
This one leans a little more decorative, a good pick once your hand feels warmed up. Draw a simple rectangle base for the record player, then a circle on top for the spinning disc, with a thin curved arm resting on its edge ending in a small needle point.
Keep the body low and wide rather than tall, real record players sit close to the surface, and add a couple of simple knob and dial shapes along the front edge, just small circles and short lines. Ink the whole base first before adding the disc grooves as a few thin concentric circles.
Above the player, scatter a handful of small musical notes drifting upward, drawn as simple filled ovals with short stems, some single and some paired with a flag. Colour a few of the notes in rose pink gel pen so they feel light rather than heavy on the page.
If circles are tricky freehand, trace a coin or a bottle cap for the disc shape.
You Will Need
- small coin or cap to trace the disc
Palette: Warm Brown,Rose Pink,Warm Grey
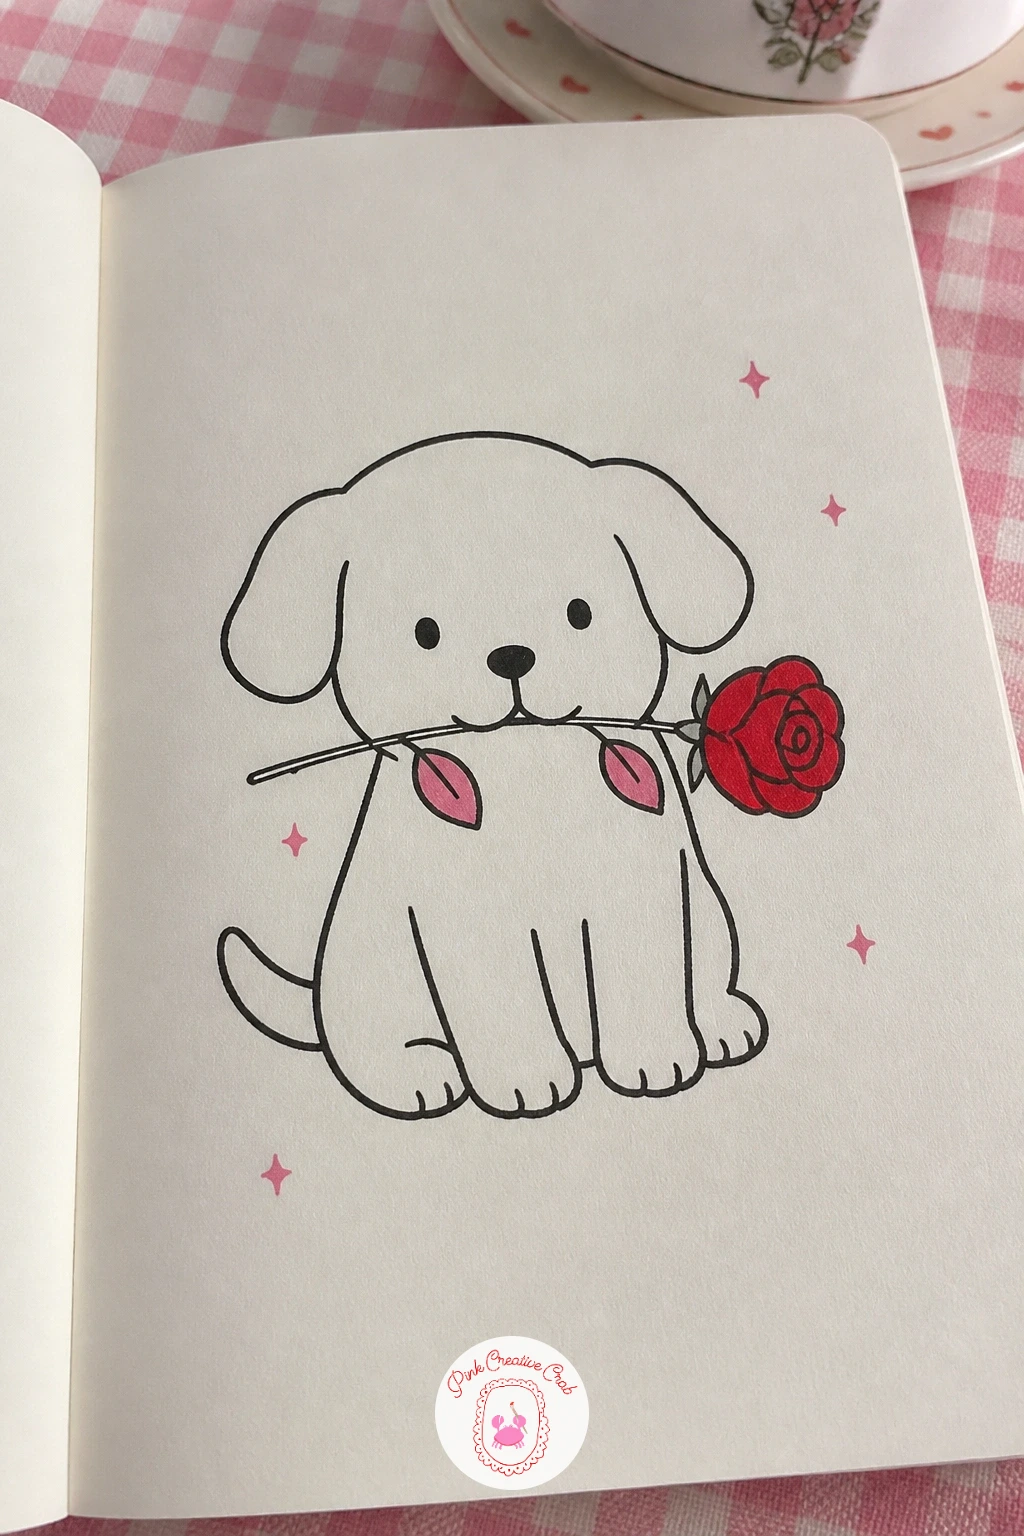
Puppies are always a welcome return to something soft and round after a mechanical subject like a record player. Draw a simple round head with two floppy ears hanging down on either side, then a small rounded body sitting low, front paws reaching forward to hold a single rose stem in its mouth.
Keep the rose smaller than you think it needs to be, a common mistake is drawing a flower so large it overwhelms the puppy’s whole face. Compare it to the width of the puppy’s muzzle before inking, it should sit comfortably within that width with the stem trailing a little past.
Ink the puppy first with soft rounded strokes, no sharp edges anywhere on a puppy, then add the rose as a small swirled bud shape with two simple leaves along the stem. Colour just the rose petals in red or rose pink gel pen, keeping the whole puppy in plain fineliner.
If the ears look stiff, add a slight fold or curl at the tip rather than drawing them perfectly straight.
Palette: Warm Brown,Red,Soft Green
Look at a photo of a spaniel or cocker puppy for the floppy ear shape if your own drawing feels stiff, their ears hang in a soft curve rather than a straight line.
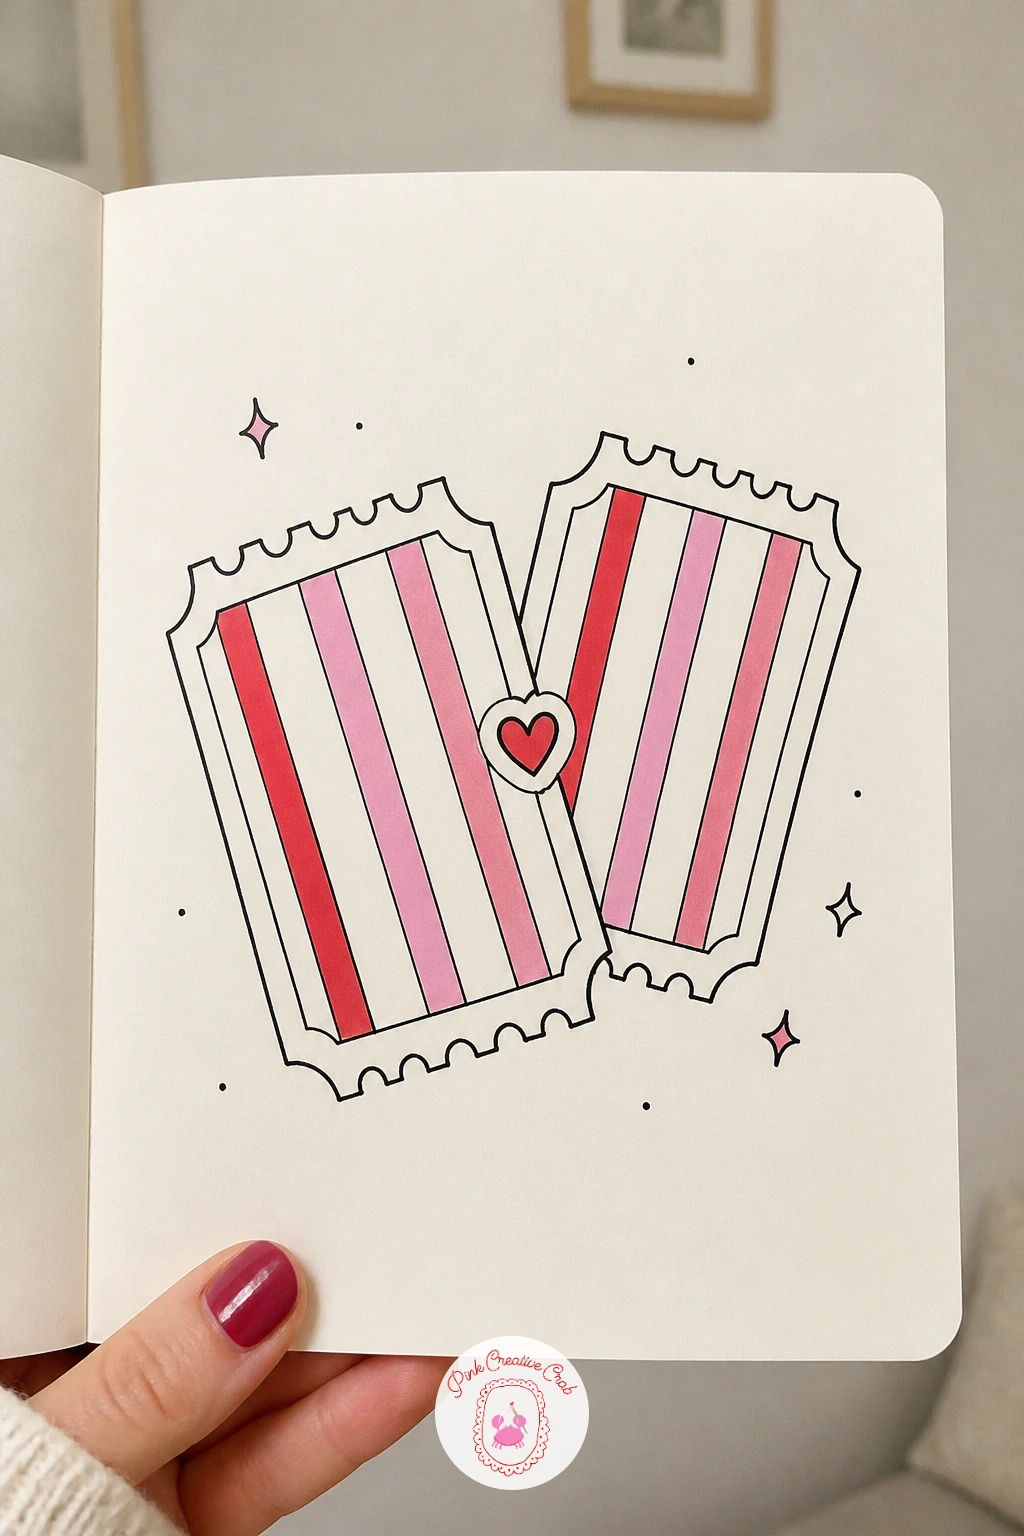
Two matching cinema tickets make a quick graphic little doodle, more about pattern than drawing skill. Draw a simple rectangle with a scalloped or perforated edge down one side, made from a row of small bumps rather than a straight line, then repeat it for a second ticket overlapping the first at a slight angle.
Fill in a few simple text lines across each ticket using short straight dashes rather than actual letters, along with a small square where a ticket stub number would sit. Ink both tickets fully before adding any colour so the perforated edges line up cleanly.
Colour a thin stripe along the top of each ticket in red or rose pink gel pen, and add a tiny heart stamped where the two tickets overlap. Where this goes wrong is making the scalloped edge too even, real perforations wobble slightly, so vary the bump sizes a touch.
If you want more detail, add a small popcorn bucket doodled beside the tickets.
Palette: Red,Rose Pink,Warm Grey
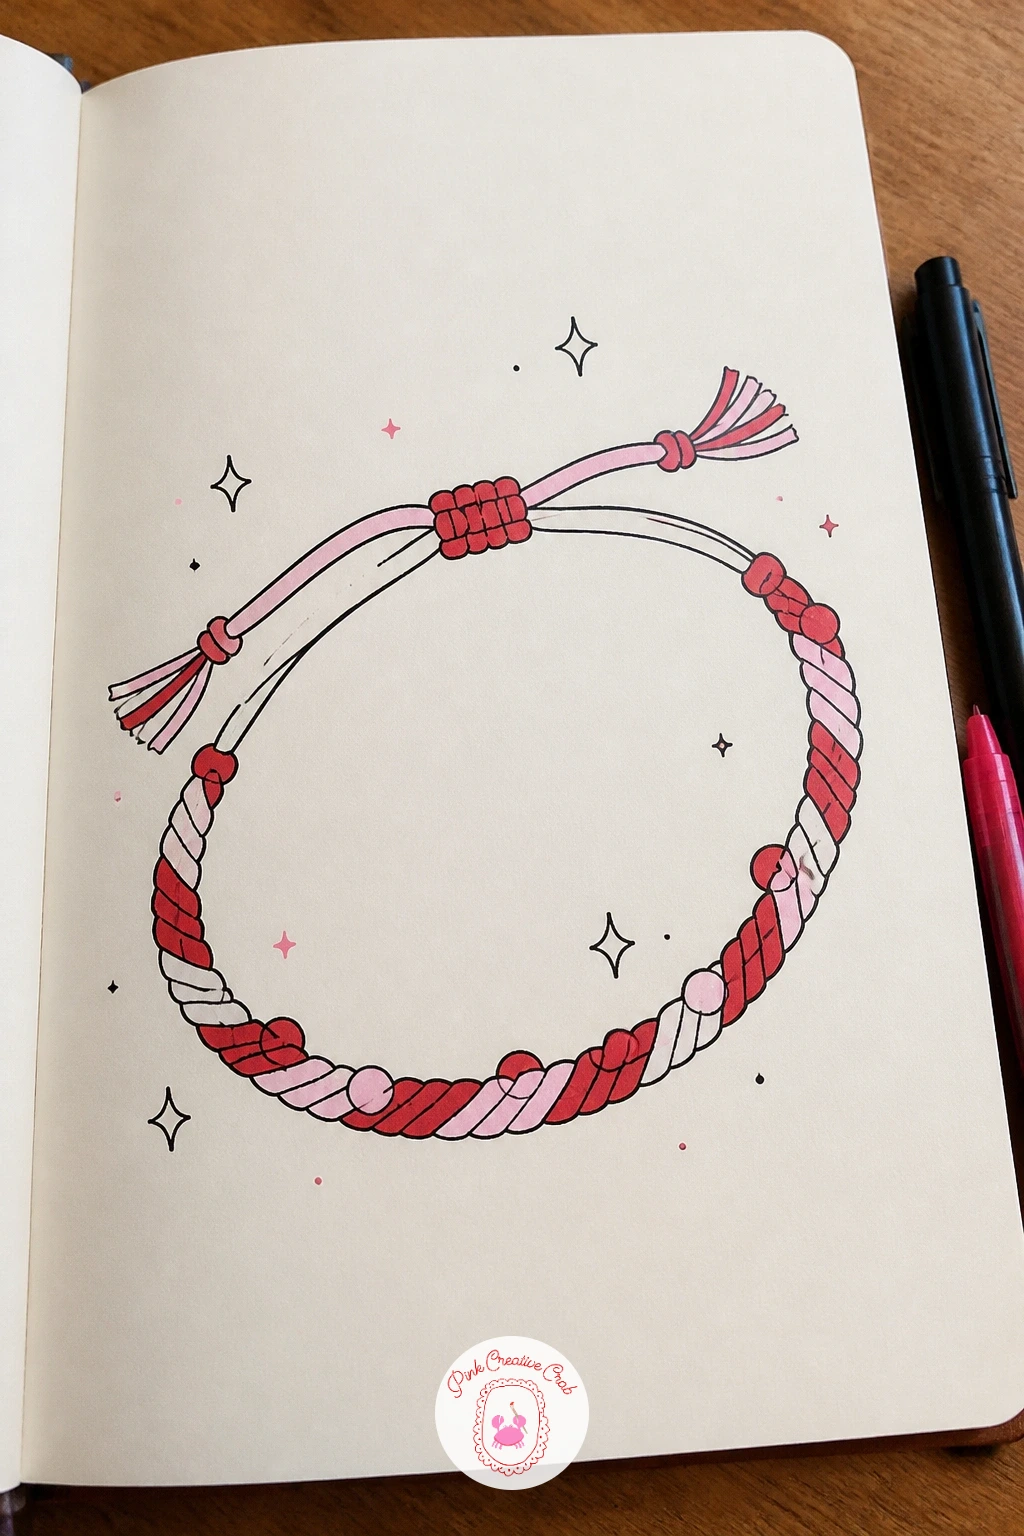
A friendship bracelet is a nice small pattern exercise after the straight lines of tickets. Draw a thin curved band first, shaped like a loose bracelet lying flat rather than a stiff circle, then divide it into small sections along its length using short perpendicular lines.
Fill alternating sections with a simple woven pattern, a few diagonal lines crossing in each box, which is enough to suggest braided thread without drawing every strand. Colour every other section in red or rose pink gel pen, leaving the rest plain fineliner so the pattern reads clearly rather than blurring together.
Add a tiny bead or two threaded along the band, drawn as small circles, and a small knot at each end where the bracelet would tie closed. If the woven pattern looks too busy, simplify it to plain colour blocks with no diagonal lines at all for a cleaner stripe look.
This one scales easily: a longer band with more sections for the forty minute version, or just four or five sections for something quick.
Palette: Red,Rose Pink,Cream Paper
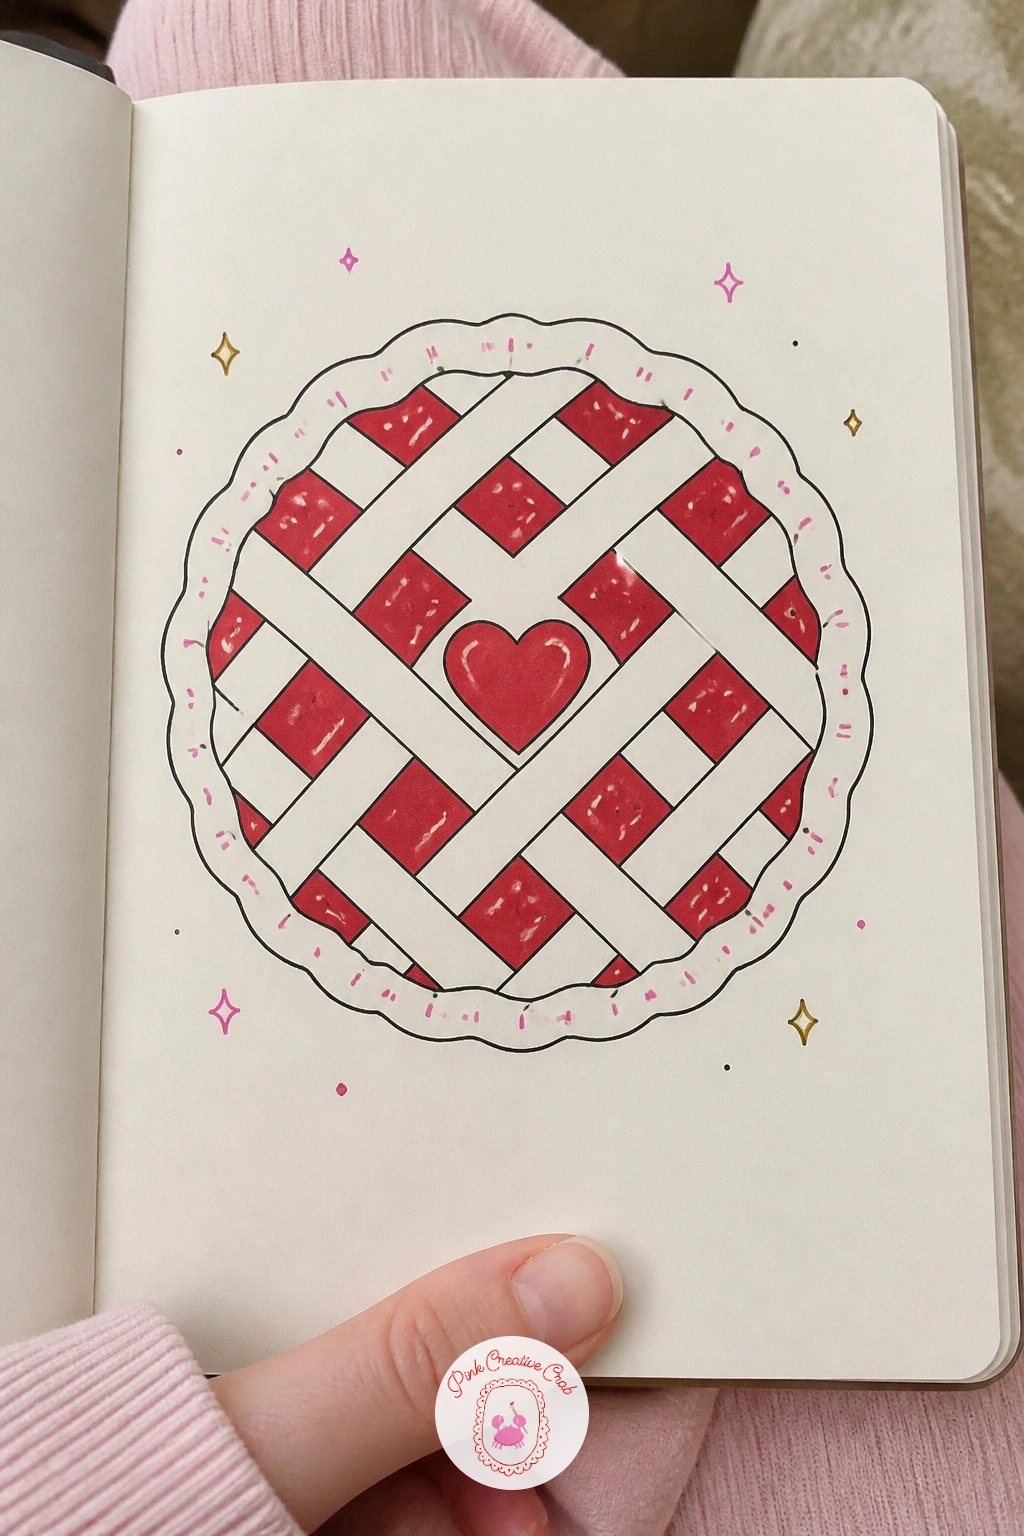
Pie is a satisfying one to finish because the lattice pattern looks far more complicated than it actually is. Draw a simple pie dish first, a shallow curved oval with a scalloped crust edge all the way around, then fill the top with a grid of straight lines crossing at right angles for the lattice.
Before adding the cherry filling, pick one diamond-shaped gap in the lattice near the centre and turn it into a small heart cut-out instead of a plain square, this is the detail that makes the whole pie feel intentional rather than generic. Colour the filling peeking through every gap in red gel pen, including through the heart cut-out.
Where lattice pies usually go wrong is making every line perfectly straight and even, which looks stamped rather than baked. Let a couple of strips sag or overlap slightly unevenly.
If a full lattice feels like too much today, draw just a plain top crust with one heart-shaped vent cut into the centre instead.
Palette: Red,Warm Brown,Cream Paper
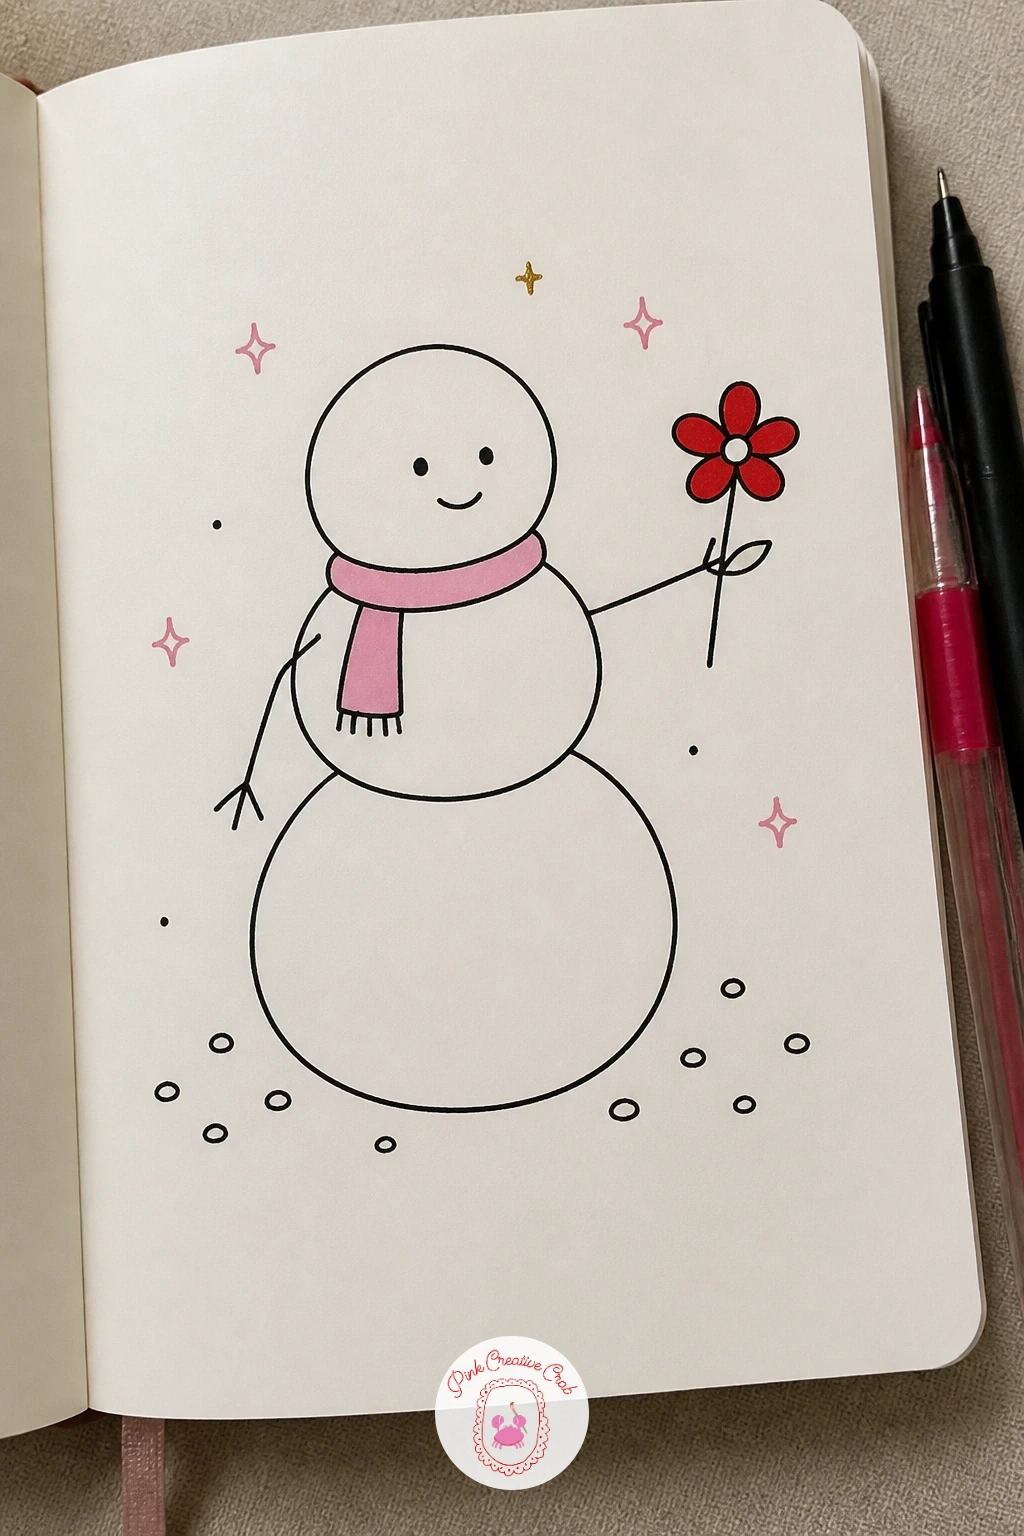
Bring back a classic winter character with a small twist: a snowman holding out a single flower instead of the usual broom or carrot nose joke. Stack three simple circles of decreasing size, add two small stick arms made of thin branching lines, and give him a plain triangle nose and a row of small dot buttons down the front.
In one stick hand, draw a single stemmed flower, a few simple rounded petals and a short stem, held out slightly away from the body as if offering it. Keep the flower small compared to the snowman’s head, this keeps the gesture reading clearly rather than the flower stealing the whole scene.
Colour just the flower petals in red or rose pink gel pen, leaving the entire snowman in plain fineliner against the white of the page, since the contrast is what makes the small gift stand out. A scattering of a few dots around his base suggests falling snow without much extra work.
If stick arms look too thin and fragile, thicken them slightly where they meet the body.
Palette: Red,Warm Grey,Rose Pink
For more winter character ideas like this one, the winter doodles for beginners list has plenty more small scenes to work through.
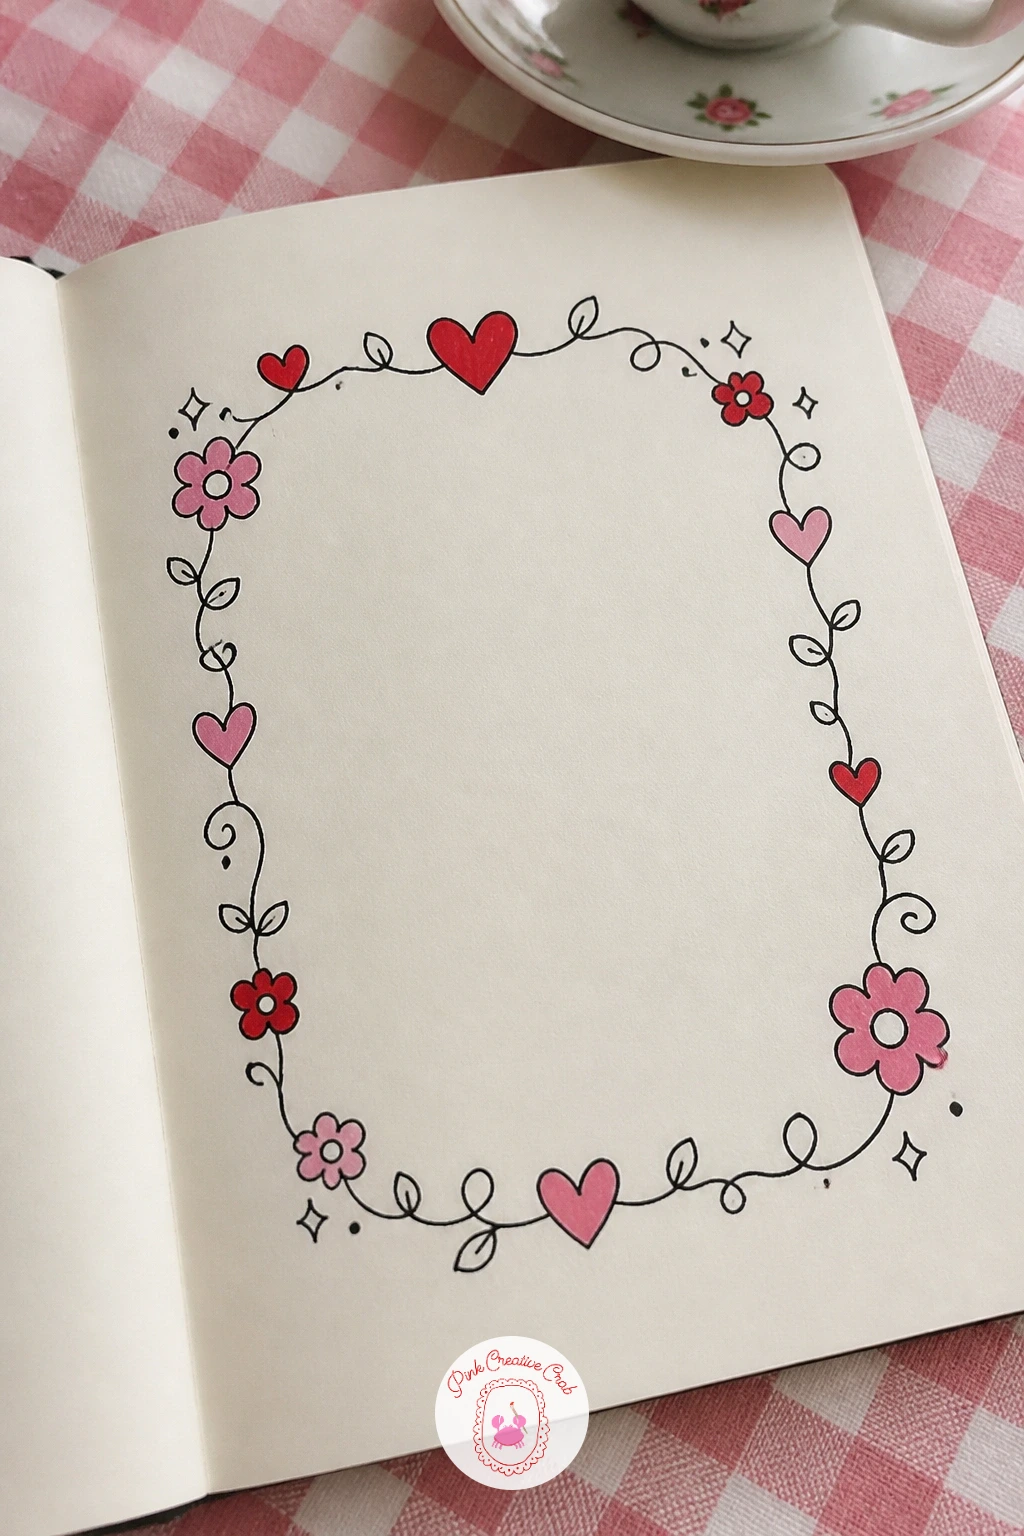
A thank you note gives you a reason to practise lettering and border work together on one small page. Start by lightly writing or tracing the words thank you in the centre in simple rounded letters, then build a decorative frame around them rather than filling the rest of the page with a separate drawing.
Keep the frame made of repeating small motifs rather than one continuous border, a row of tiny hearts along the top, a scattering of small flowers down one side, a wavy vine along the bottom. This modular approach is far easier to keep even than trying to draw one long unbroken pattern.
Ink the lettering first so it stays the clear focal point, then build the border around it, leaving generous white space between the words and the frame so nothing feels cramped. Colour just a few of the border motifs in rose pink or red gel pen rather than every single one.
If lettering feels shaky, pencil the words lightly first and trace over them once you are happy with the spacing.
Palette: Rose Pink,Red,Cream Paper
The valentines doodles for love notes and classroom cards list has more small border and card ideas if this one feels good to repeat.
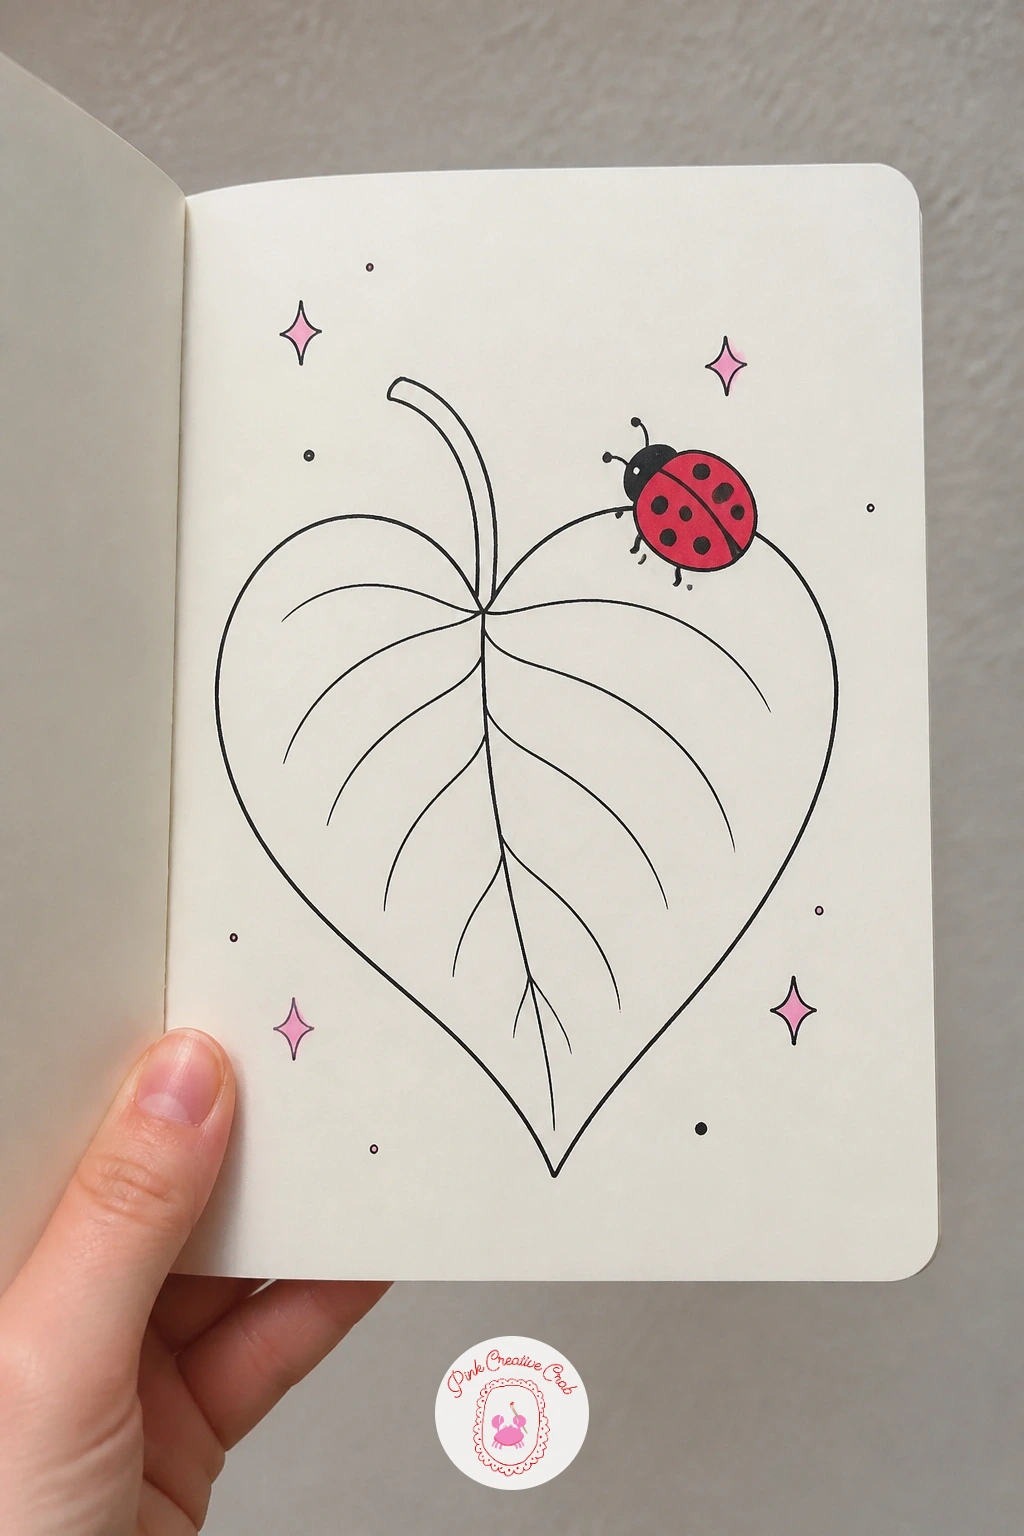
Close the garden side of the list with a ladybird resting on a leaf shaped like a heart rather than the usual oval. Draw the leaf first, a simple heart outline with a central vein line and a few short side veins branching off, then perch the ladybird near one edge rather than dead centre, which feels more natural.
The ladybird itself is just a rounded dome shape divided by a thin line down the back, with a small round head and two thread-like antennae. Fill the dome solid in red gel pen, then add small black dots scattered across both halves in fineliner, uneven in size and spacing rather than a neat grid.
Where this goes wrong is a ladybird that looks flat rather than domed, so leave a small crescent of plain red or a touch of white highlight near the top of its back before adding the dots. Colour the leaf itself in a soft green or leave it as plain fineliner outline for contrast against the red.
If you want a simpler version, skip the veins on the leaf and just outline the heart shape plainly.
Palette: Red,Soft Green,Warm Grey
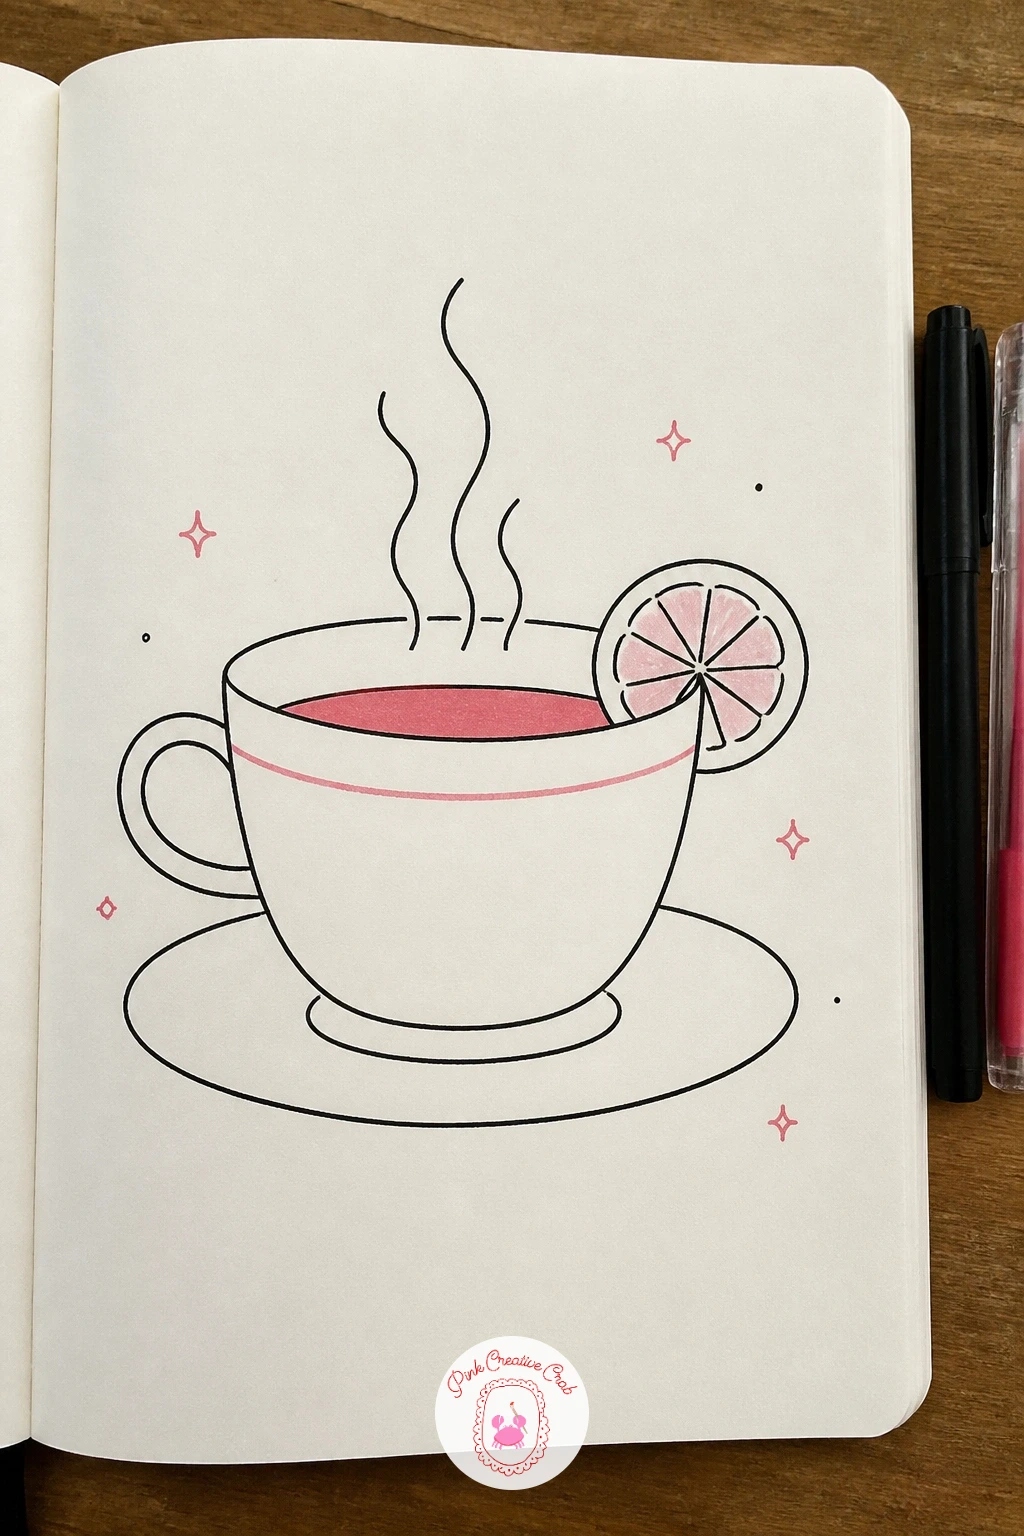
Finish the list with something small and calm, a single teacup and saucer with a lemon slice balanced on the rim. Draw the saucer first as a wide flattened oval, then the cup sitting on top as a rounded shape with a thin curved handle on one side, keeping the whole thing simple rather than ornate.
Add a short wavy line of steam rising from the cup, curling gently to one side rather than straight up, and a thin horizontal line just inside the rim to suggest the tea’s surface. On the rim itself, perch a simple lemon slice, drawn as a circle with a scalloped edge and a few radiating lines inside to suggest segments.
Colour the lemon slice pale yellow or leave it as plain fineliner with just the segment lines inked, and add a thin rose pink stripe or small floral pattern around the cup’s rim for a little extra charm. If the handle looks too thick, thin it down, teacup handles are usually delicate.
One tip for today: keep the whole page quiet, this is a good subject to sit on its own with plenty of white space around it.
Palette: Rose Pink,Soft Yellow,Warm Brown
What to Do Next
Pick whichever idea caught your eye first, grab a fineliner and whichever pink or red gel pen is nearest, and start on a plain or dot grid page. One finished doodle today is plenty, the rest of the list will still be here tomorrow.
Frequently Asked Questions
What pens work best for february doodles?
A black fineliner for the outlines paired with rose pink and red gel pens for accents works best. The fineliner keeps lines crisp while the gel pens add just enough colour without needing a full paint set.
Do I need to be good at drawing to try these?
No, every idea on this list uses simple rounded shapes built up in a few steps. Starting with pencil guidelines before inking makes any of these easy to attempt even on a first try.
How long does one february doodle take?
Most of these take five to twenty minutes once you know the shapes, since they are notebook doodles rather than finished illustrations. A few, like the ice skater or the record player, take a little longer if you add more detail.
What paper is best for doodling with gel pens over fineliner?
A smooth dot grid or plain notebook page works well since gel pens glide better on smoother paper. Very textured watercolour paper can drag the gel pen tip and skip, so save that for painting projects instead.
Can these doodles be turned into cards or gift tags?
Yes, many of these ideas, like the love letter, the thank you note or the heart cookie, work well scaled up onto a folded card or a small tag. Keep the same simple fineliner and gel pen approach at the larger size.
Have any thoughts?
Share your reaction or leave a quick response — we’d love to hear what you think!
-
 0
-
0
-
0
-
0
-
0
-
0


