

A good seal drawing has everything a marker lover wants: round soft shapes, big dark eyes, and that glossy highlight where the skin catches the light. Seals are forgiving to draw too, since a lumpy body or a slightly crooked flipper only makes them look more charming.
Below you will find 28 seal and seal pup moments, from a pup asleep on an ice floe to a tusked walrus hauled out on the shore. Pick whichever one makes you smile first, grab your fineliner and markers, and you can have it finished in one sitting.
Using these images: free for personal projects such as printing, coloring, cards, journals and gifts. Handmade items that include them may be sold up to 30 pieces per design. More than that is commercial use and is not permitted, and neither is selling or sharing the images themselves or passing them off as your own. Please ask before any other use.
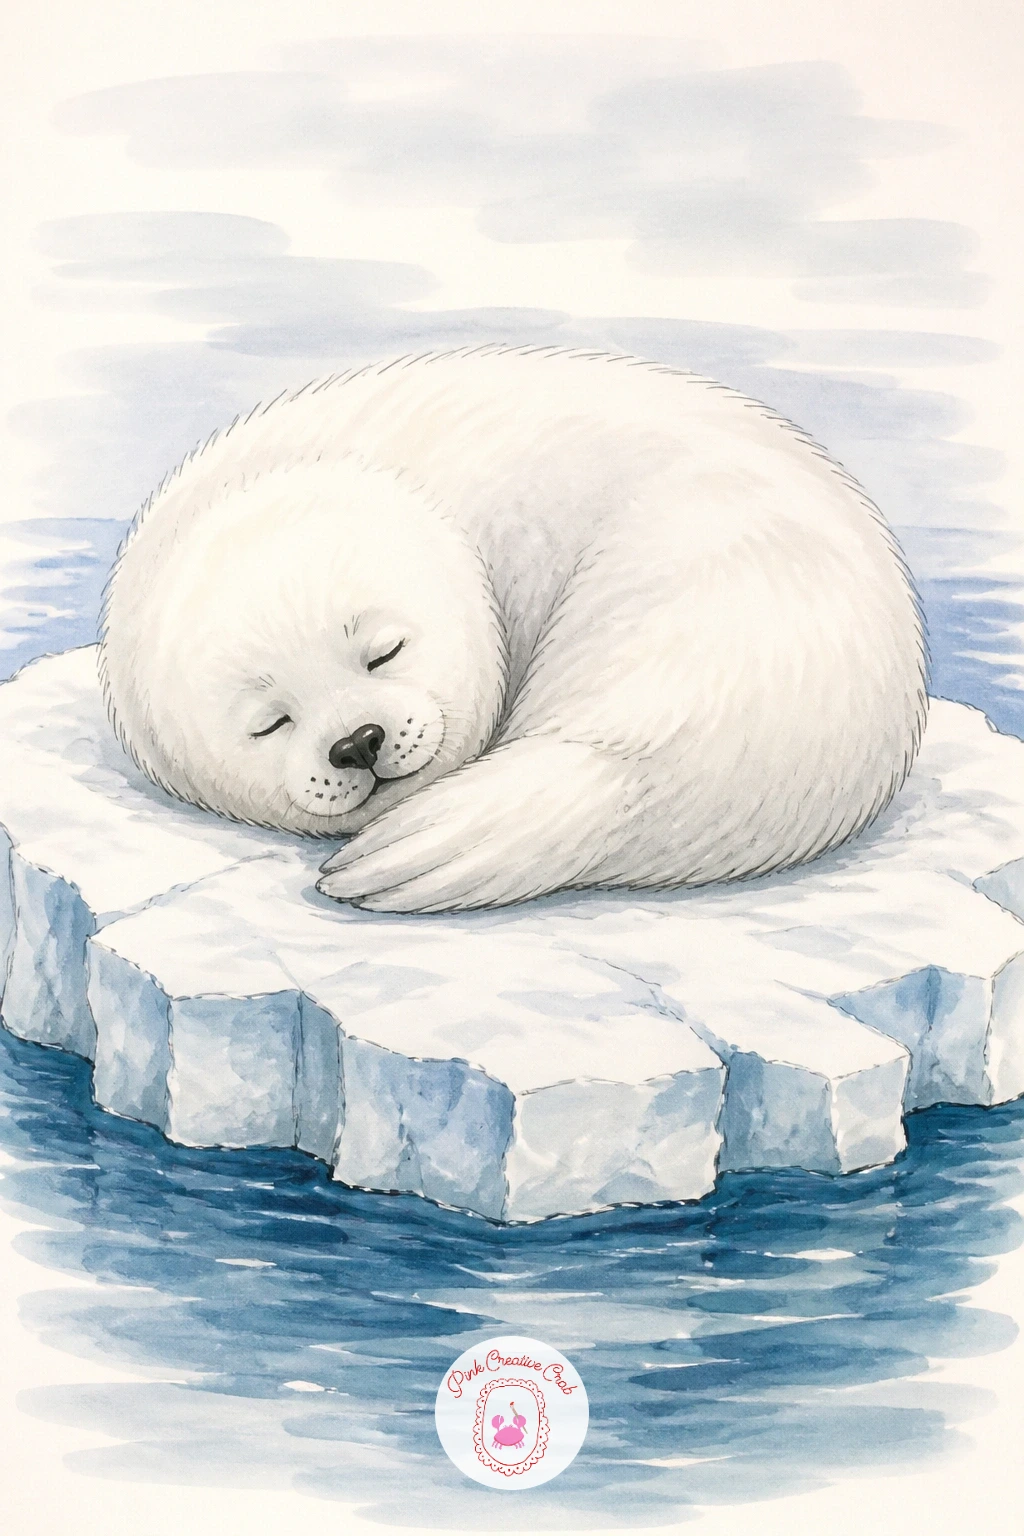
Start with the easiest subject on the list: a single white seal pup curled on a floating chunk of ice. Sketch the body as one soft teardrop shape in pencil, flippers tucked close, then ink the outline with a thin fineliner once you are happy with the proportions.
Fill the pup with a very pale grey or the lightest cool marker you own, since pure white paper left untouched will do most of the work for the fur. Shade only the shadowed side of the body and under the chin with a second light grey, blending while the first layer is still workable so the two tones melt together.
The ice floe is the part that usually goes wrong: keep its edges simple and slightly jagged rather than perfectly round, and shade its underside with icy blue so it reads as floating rather than sitting on a flat line. If you do not have a pale grey marker, a light blue-grey pencil works as a stand-in for the shadow tones.
Finish with a white gel pen for one bright highlight dot in each eye and a thin line along the pup’s back.
You Will Need
- white gel pen
Palette: Cool Grey 1,Cool Grey 3,Ice Blue,Payne’s Grey
Leave the pup’s belly completely white and unmarked. That one untouched patch of paper next to shaded grey is what sells the fluffy, downy look of newborn fur.
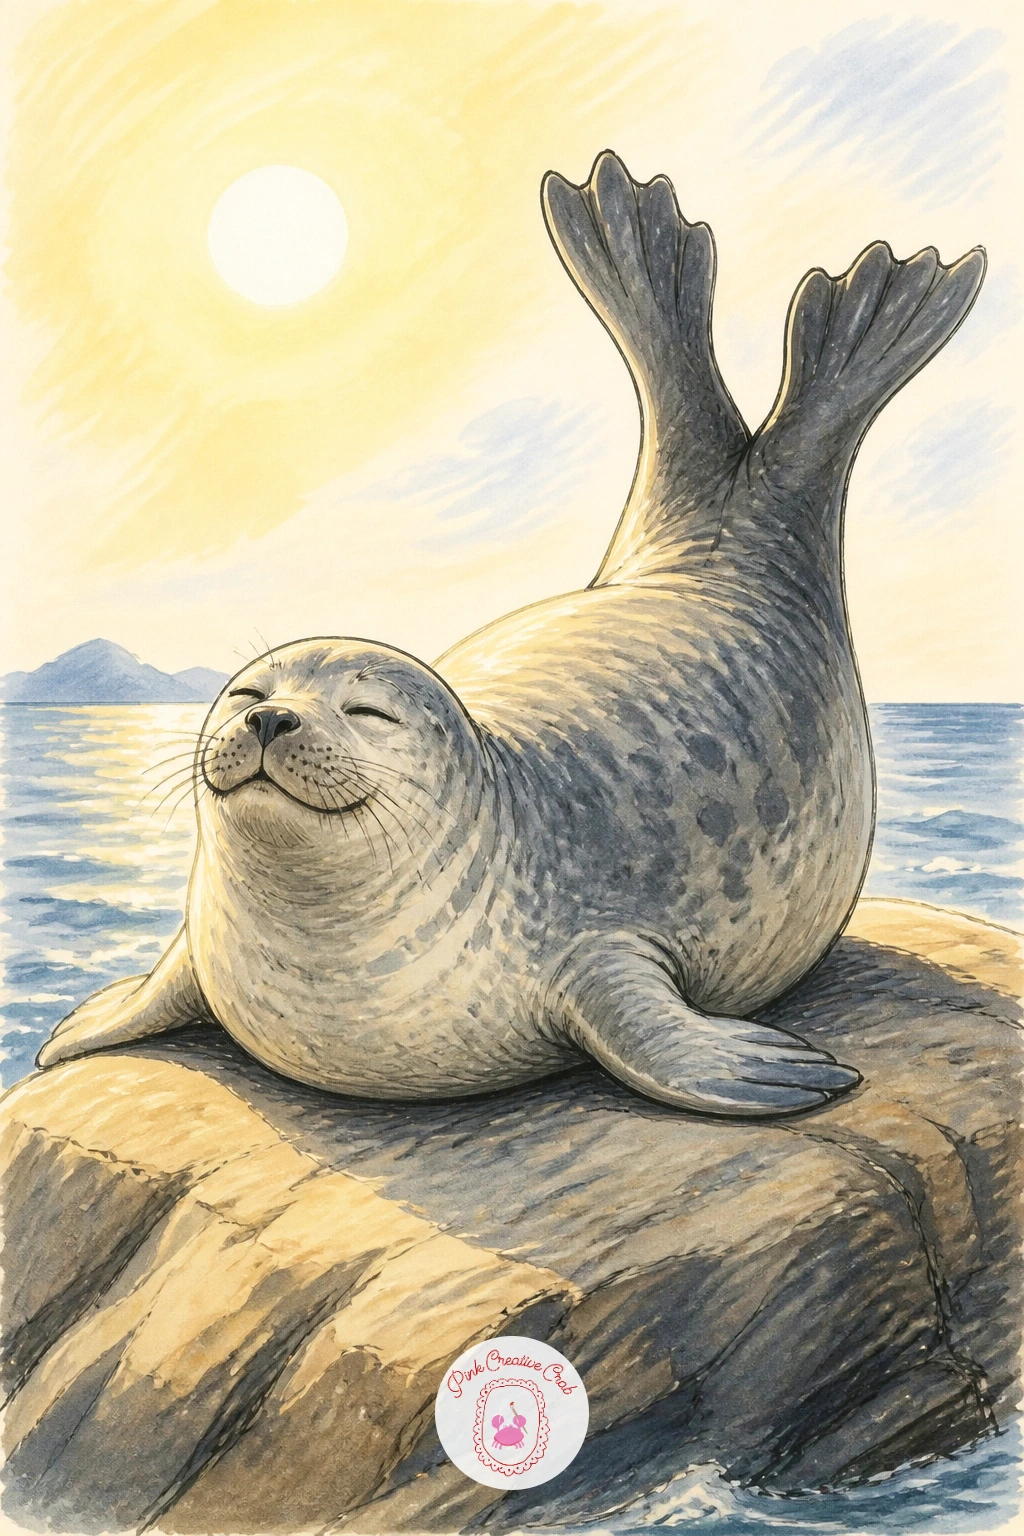
Move from ice to rock with a seal stretched out sunbathing, back arched and tail flippers lifted in that funny banana pose. Pencil in a curved body first, a shallow C shape, then raise both back flippers off the rock before you ink, since that lift is what makes the pose read as playful rather than simply resting.
Measure the head against the body before committing to fineliner: a seal’s head is roughly one fifth of its total length, so keep it small and round compared to the long tapering body. Ink the outline, then block in warm grey across the back and a paler tone on the belly and underside of the flippers.
Beginners often flatten the rock into a plain grey blob, so break its surface with two or three darker cracks and a warm tan undertone to separate it from the seal’s cooler grey. If your rock color looks muddy, a dry cotton swab can lift a little marker while it is still wet to open up a highlight.
Add a loose yellow glow behind the seal to suggest sun without painting a full sky.
Palette: Warm Grey 2,Sepia,Pale Yellow,Charcoal Grey
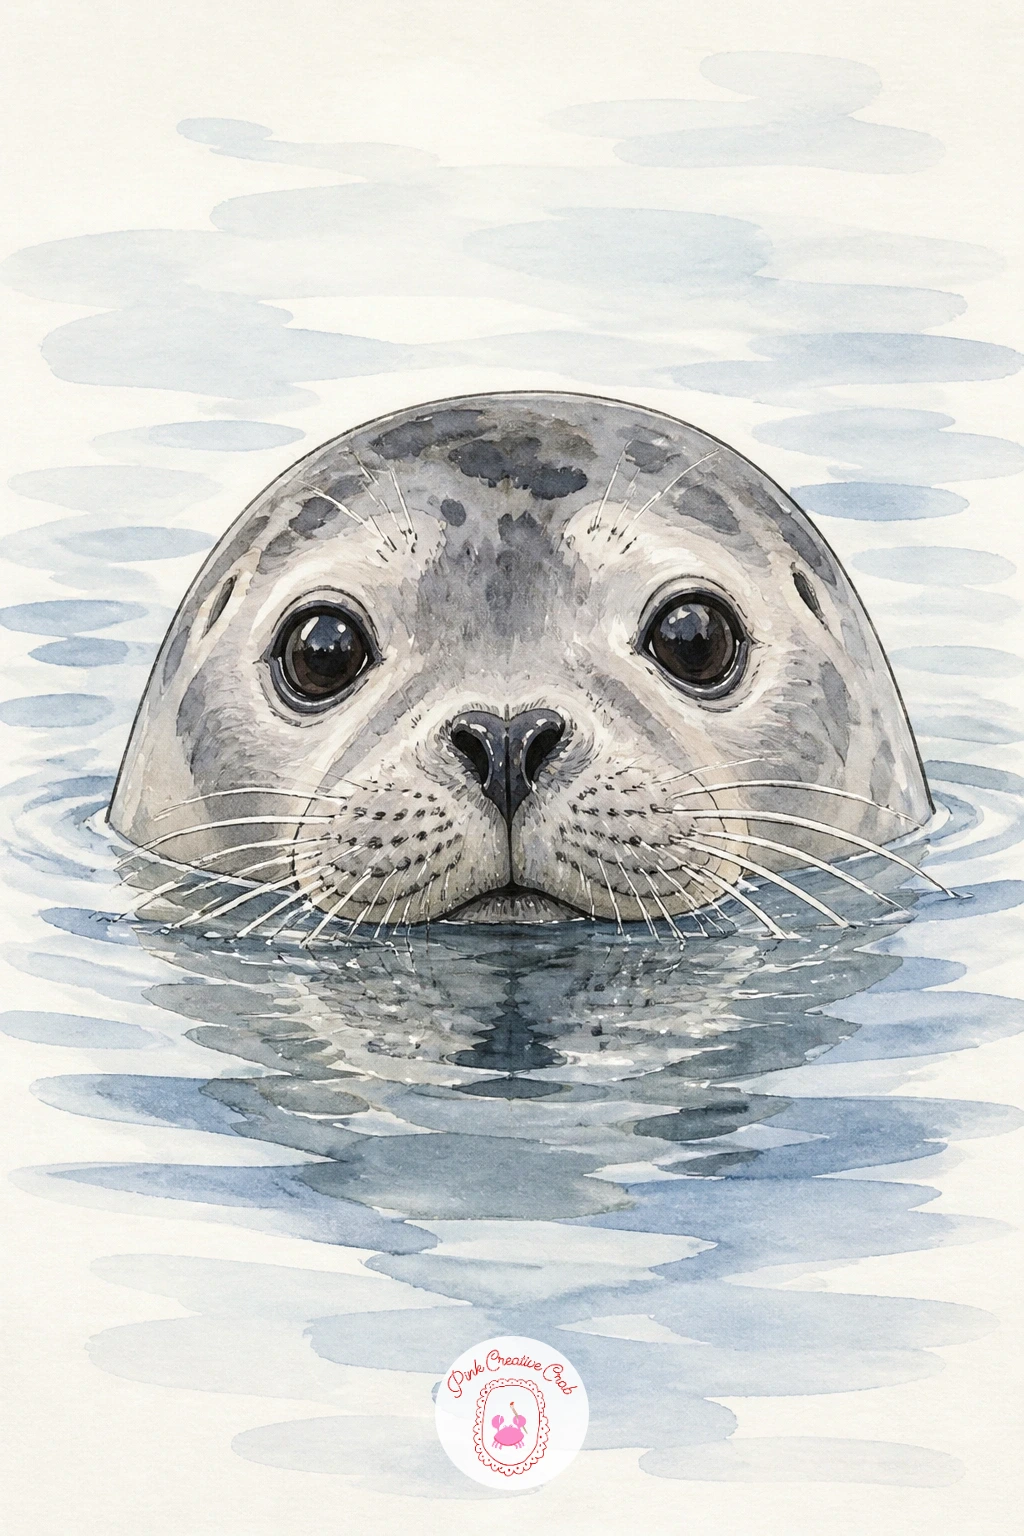
After two land poses, try a harbor seal with just its head above the waterline, since this teaches you to draw water as a shape rather than an afterthought. Pencil a rounded head with small ears and large eyes, then draw the water’s edge as a single confident horizontal curve crossing the neck, not a wobbly line.
Ink the head and whiskers first, then the waterline, and only after that fill the water itself so you are not painting around wet ink. Light source matters here: decide if the sun sits high or low, because a low light source means a long pale reflection trailing behind the head, while overhead light keeps the water mostly even in tone.
The water is where most people lose confidence, flooding it in one flat blue. Instead layer two blues, a lighter one first, then short horizontal strokes of a deeper icy blue while the first layer is still damp, which gives gentle ripples without needing fine detail work.
If blending feels tricky, a water-based brush marker over alcohol marker can soften hard edges in seconds.
Finish the whiskers last in white gel pen so they sit crisply on top of the color.
You Will Need
- white gel pen
Palette: Seal Grey,Sky Blue,Deep Teal,Warm White
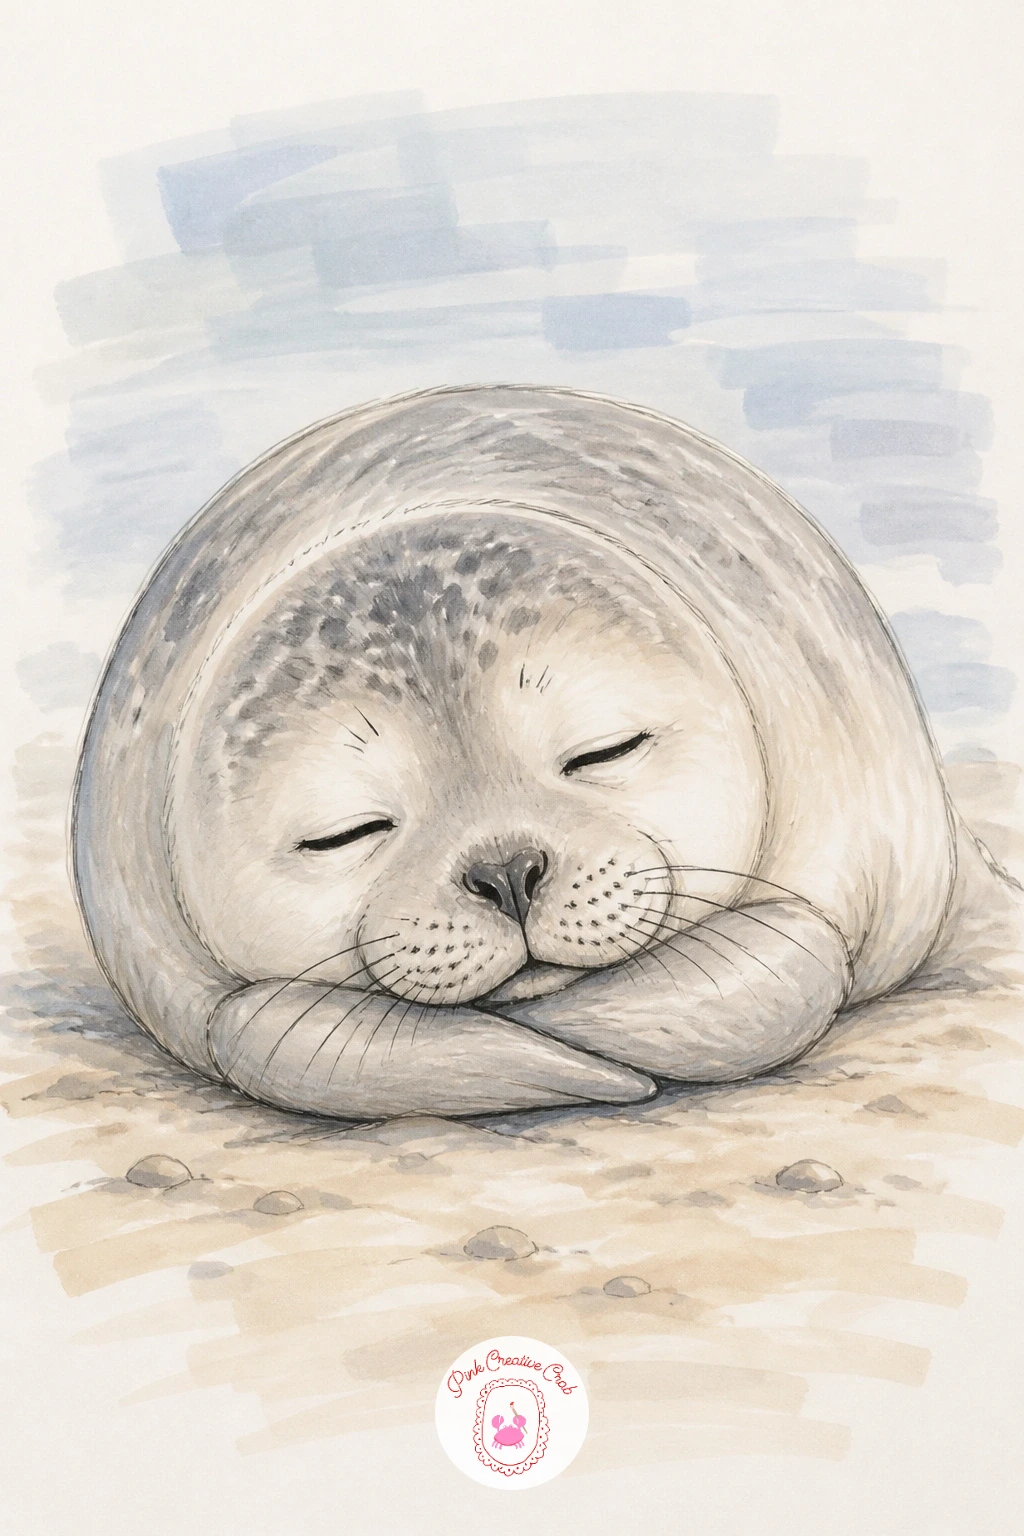
Bring the pup onto a sandy beach for a quieter, cozy pose: body curled sideways, both front flippers folded neatly under the chin. Sketch the body as a soft oval first, then add the folded flippers as two small curved shapes tucked against the chest, which keeps the pose readable even at a glance.
Ink the pup before the sand, working from the head down to the tail flippers, then switch to warm sandy tones for the ground. Beginners often make the sand too smooth and the seal too dark, so keep the pup pale grey or beige and let the sand carry slightly warmer, deeper tones by comparison.
If you want this finished in about ten minutes, stop after one flat sand tone and a simple shadow under the belly. For a fuller forty-minute version, scatter a few small shells or pebbles near the pup and add soft texture to the sand with short dry-brush marker strokes dragged in one direction.
Swap a tan colored pencil for marker if you want a softer, grainier sand texture.
Palette: Sand Beige,Warm Grey,Soft Tan,Shadow Brown
Give the page some motion with a seal caught mid-clap, both front flippers raised and nearly touching above a round belly. Pencil the body upright and slightly off-balance, since a seal clapping always tips a little backward, then bring both flippers up and in toward each other before inking.
Draw a few short curved motion lines near the flipper tips once the ink is dry, which instantly reads as movement without any extra color work. Keep the face simple and round with a wide open mouth or closed happy eyes, since an expressive face sells the joke of a clapping seal more than the flippers do.
The pose can look stiff if both flippers are drawn as mirror images, so make one slightly higher and more bent than the other for a livelier, less symmetrical clap. Block in grey across the body, saving the belly as the lightest value, then darken the flipper undersides slightly so they separate from the torso.
No gel pen on hand: a white colored pencil presses in similar sparkle highlights just as well.
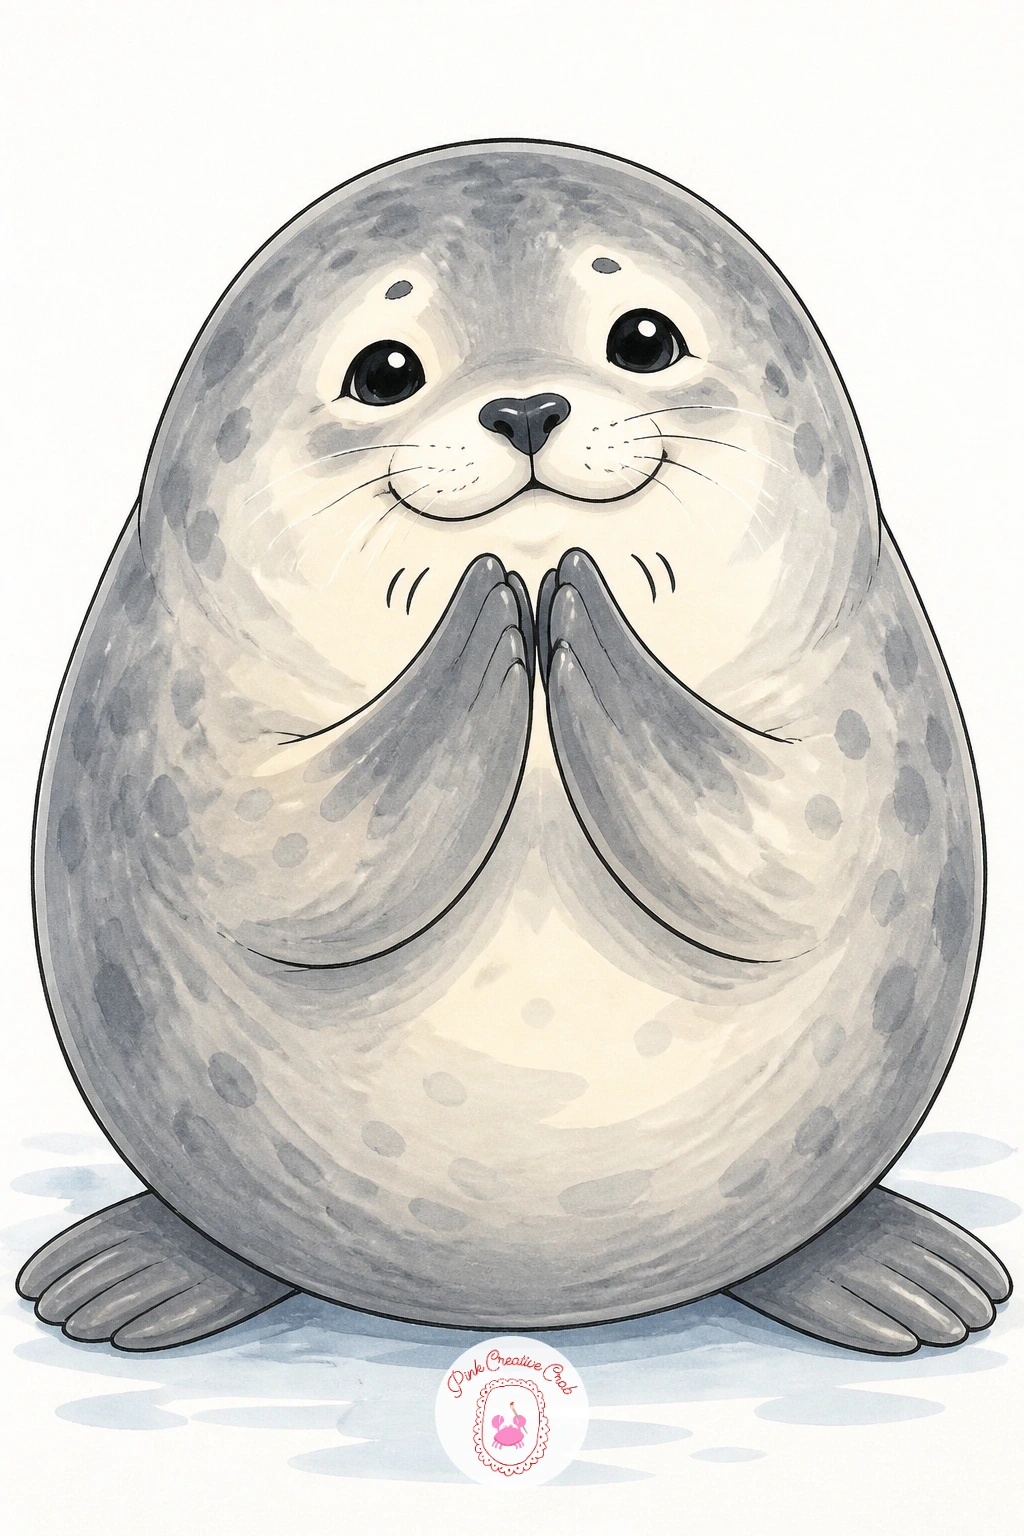
Palette: Dolphin Grey,Charcoal,Cream,Soft Pink
Pair a larger seal with a small pup for a tender nose-to-nose nuzzle, a nice next step once single seals feel comfortable. Sketch the mother noticeably bigger first, her head tilted down, then place the pup’s smaller head tilted up to meet hers, overlapping the two outlines slightly at the nose so they read as touching rather than just side by side.
Size contrast is the whole trick here: keep the pup’s head at roughly half the width of the mother’s, and her flipper can rest gently over the pup’s back to reinforce the connection. Ink the mother first since she sits behind, then the pup on top, which avoids messy overlapping lines.
Color the mother in a slightly deeper grey than the pup so the pair separates clearly even before any shading goes in. Keep the background minimal, maybe a pale rock shape beneath them, so the two faces stay the clear focus of the piece.
This pairs nicely with the quieter mood of a winter wonderland painting if you want a wider wintry scene around them later.
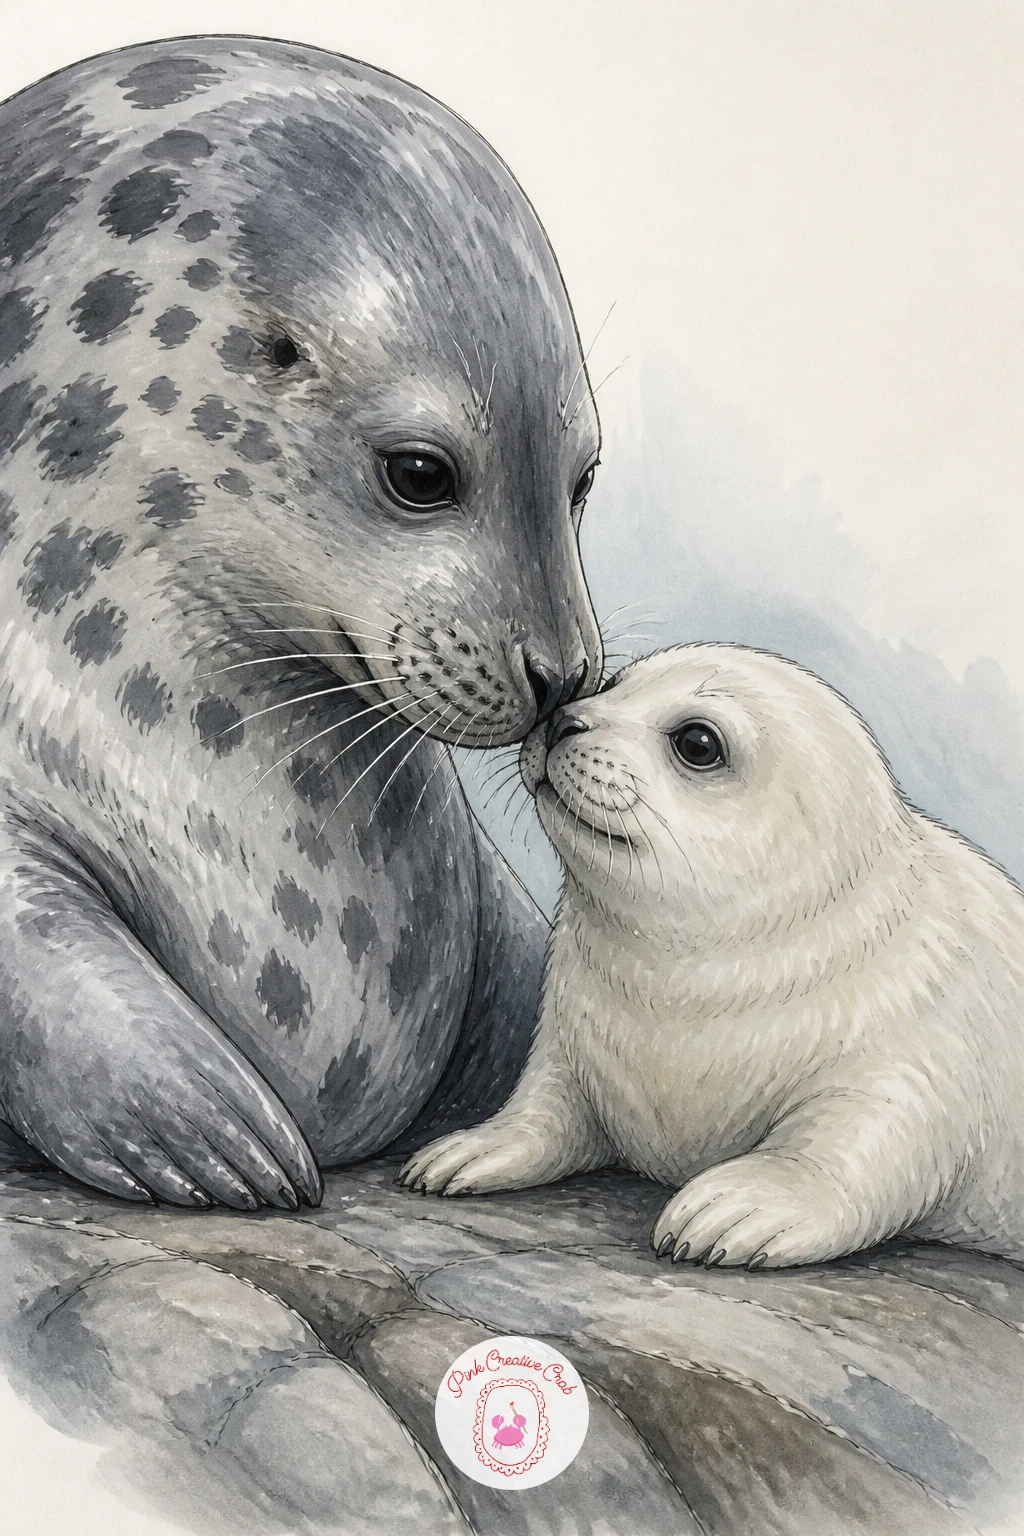
Palette: Slate Grey,Pale Grey,Rock Brown,Blush Pink
Take the seal fully underwater now, gliding sideways through tall ribbons of kelp. Draw the body in a long gentle S curve to suggest swimming motion, flippers trailing back rather than tucked in, then sketch three or four kelp ribbons behind and in front of the body at different heights.
Eye level and light change everything in an underwater scene: picture the light coming from above in soft shafts, which means the top of the seal’s back and the upper edges of the kelp stay lightest while everything below fades into deeper blue-green. Ink the seal first, then the kelp, overlapping one or two ribbons in front of the body so the seal looks tucked into the scene rather than floating on top of it.
Color the water in layered blues from pale near the top to a deep teal at the bottom, blending while damp. The kelp often ends up too stiff and straight, so curve each ribbon gently and vary the widths so they wave rather than stand like fence posts.
A damp blending marker or brush pen smooths any harsh line between the blue layers.
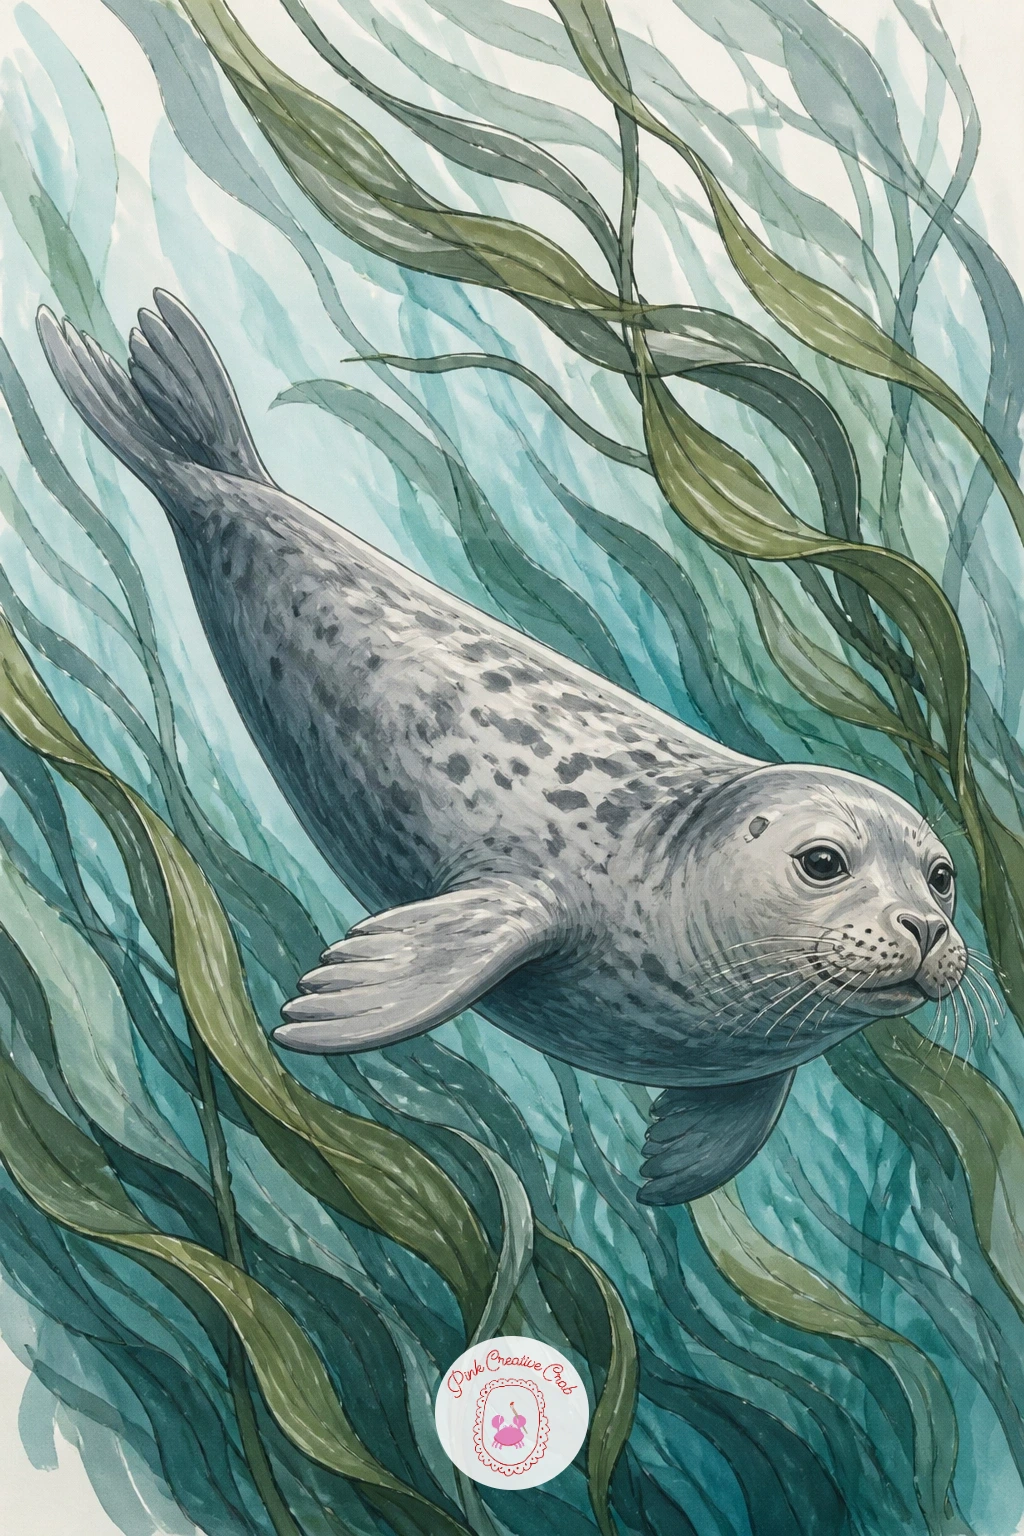
Palette: Kelp Green,Deep Teal,Pale Aqua,Seal Grey
Bring the seal up onto a wooden pier for a lazy, wide-mouthed yawn. Pencil the head tipped back and the mouth open in a rounded triangle shape, with the body resting flat along a few simple plank lines beneath it.
Draw the pier planks before you ink the seal, using a ruler or steady hand for three or four parallel lines so the perspective reads correctly, then layer the seal’s outline on top. A wide open mouth can look alarming instead of sleepy if the eyes stay sharp, so close them or draw them as soft downturned curves to keep the mood relaxed and funny.
Shade the inside of the mouth with a warm pink-grey rather than solid black, since pure black flattens the shape and loses the roundness of a real yawn. Color the planks in warm weathered brown tones, slightly different widths apart, and let one or two knife-like cracks run along the wood grain.
If pink marker feels too bold for the mouth, a warm brown pencil blended lightly gives a softer, more muted result.
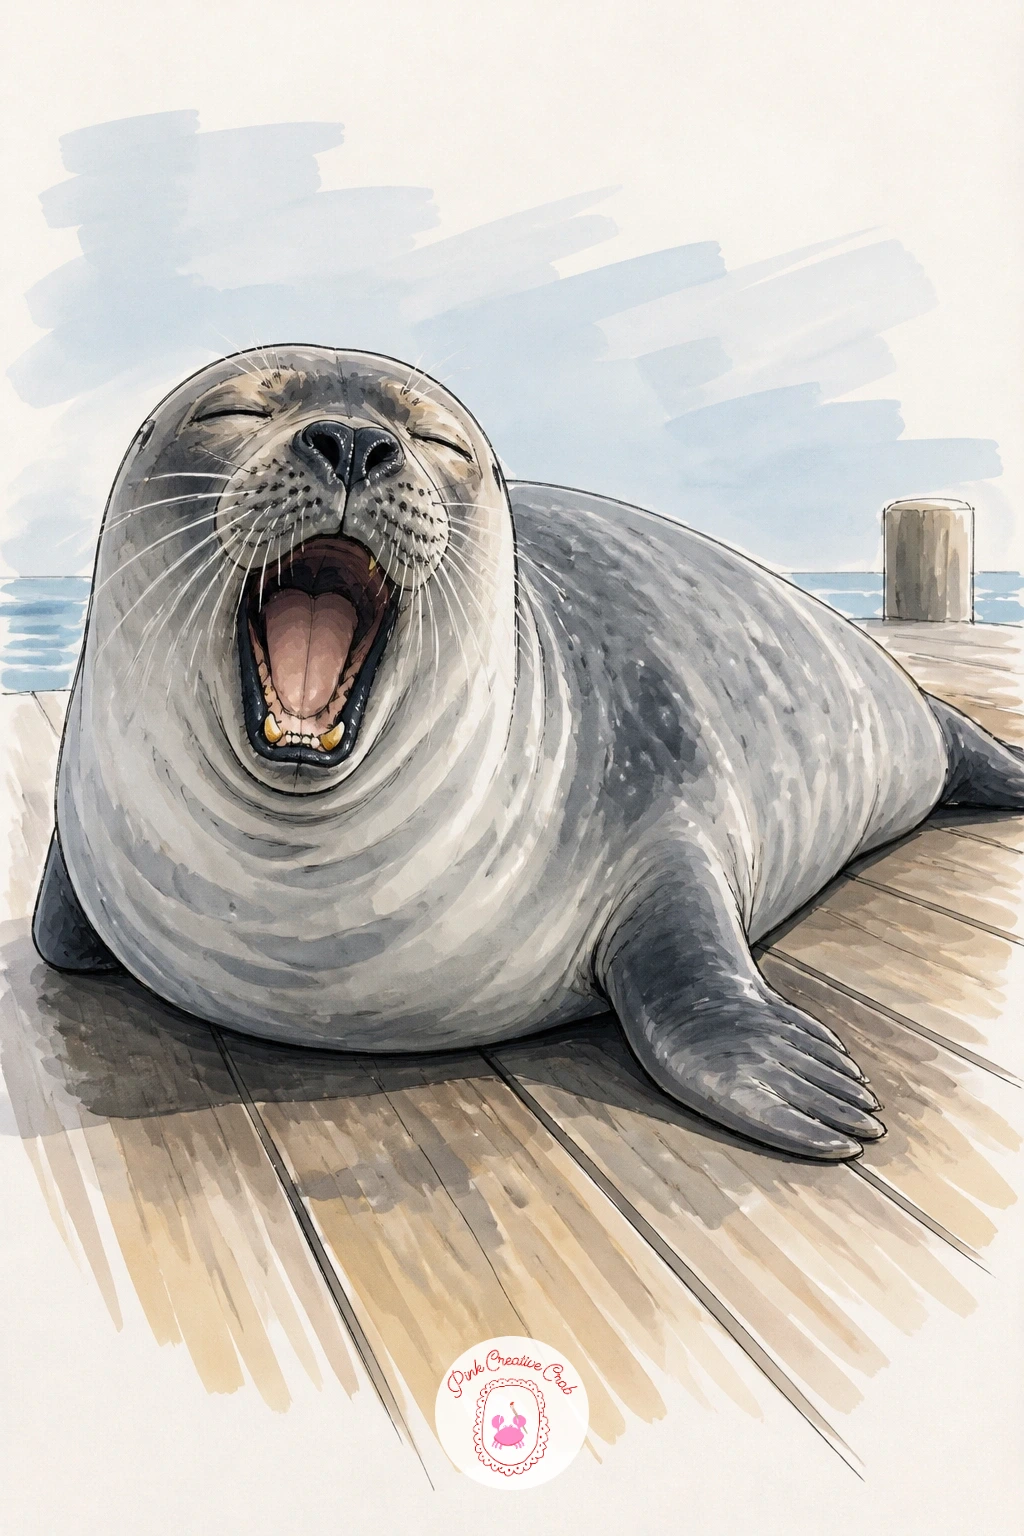
Palette: Weathered Brown,Warm Grey,Dusty Pink,Plank Tan
Widen the scene for this one with a grey seal resting on a pebble beach, a small lighthouse standing on a cliff behind it. Place the seal low and large in the foreground first, since it stays the main subject, then sketch the lighthouse much smaller and higher up to establish distance before any ink touches the page.
Keeping the lighthouse small and simple, just a tube shape with a red or white band and a tiny light at top, stops the background from competing with the seal. Ink the seal and the nearest pebbles first, then the cliff line and lighthouse last, since background elements drawn too heavily tend to pull the eye away from the main animal.
Pebbles are quick to overdo: scatter a loose handful of ovals in varying grey and tan tones rather than filling the whole foreground, leaving some bare paper between them. A pale sky wash behind the lighthouse, even just one flat color, is enough to separate land from air.
This coastal mood pairs well with a village scene drawing if you enjoy building out a shoreline setting further.
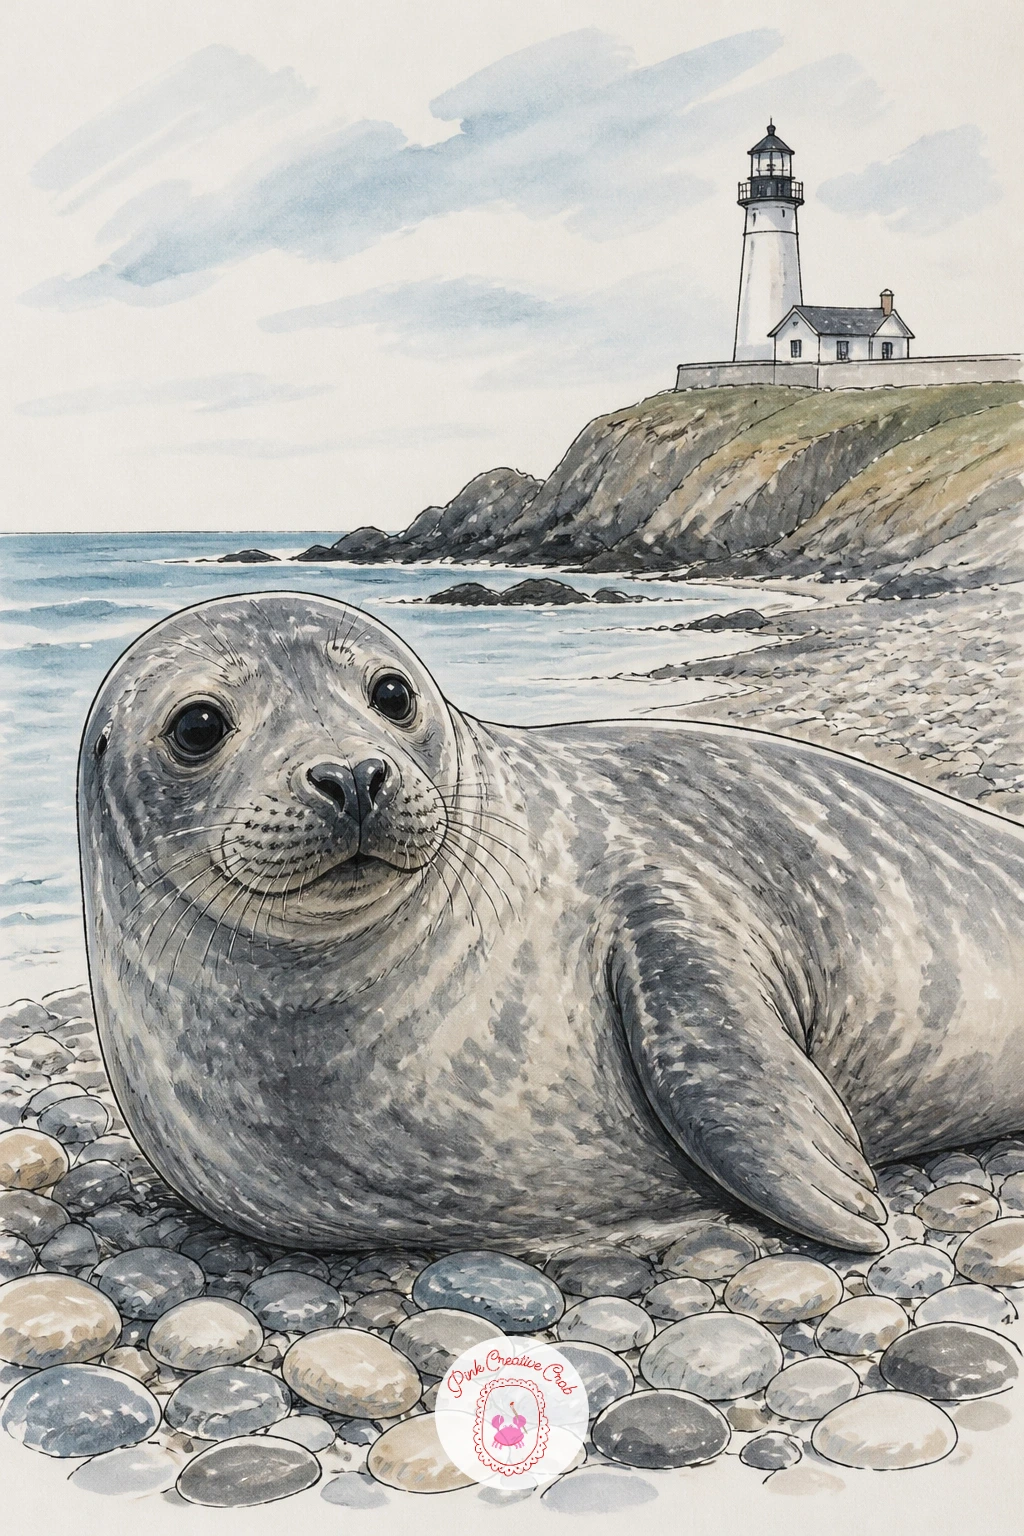
Palette: Pebble Grey,Seal Grey,Cliff Green,Soft Sky
Return to a single pup, this time sitting upright with snowflakes drifting around it. Sketch the pup in a simple seated teardrop shape, head slightly raised as if looking up at the falling snow, then ink the body cleanly before adding any flakes.
For the quick ten-minute version, dot a handful of small white gel pen flakes directly over the finished grey body and background. For the fuller version, build the scene first with a soft pale blue-grey background wash, let it dry, then layer snowflakes on top in two sizes so some feel closer and some farther away.
Resist outlining every snowflake in fineliner, since that makes them look like stars rather than snow. White gel pen dots and tiny plus-sign marks scattered unevenly read far more convincingly as falling snow than a neat grid ever will.
No gel pen available: a fine white paint pen or even flicks of white acrylic from an old brush gives the same scattered effect.
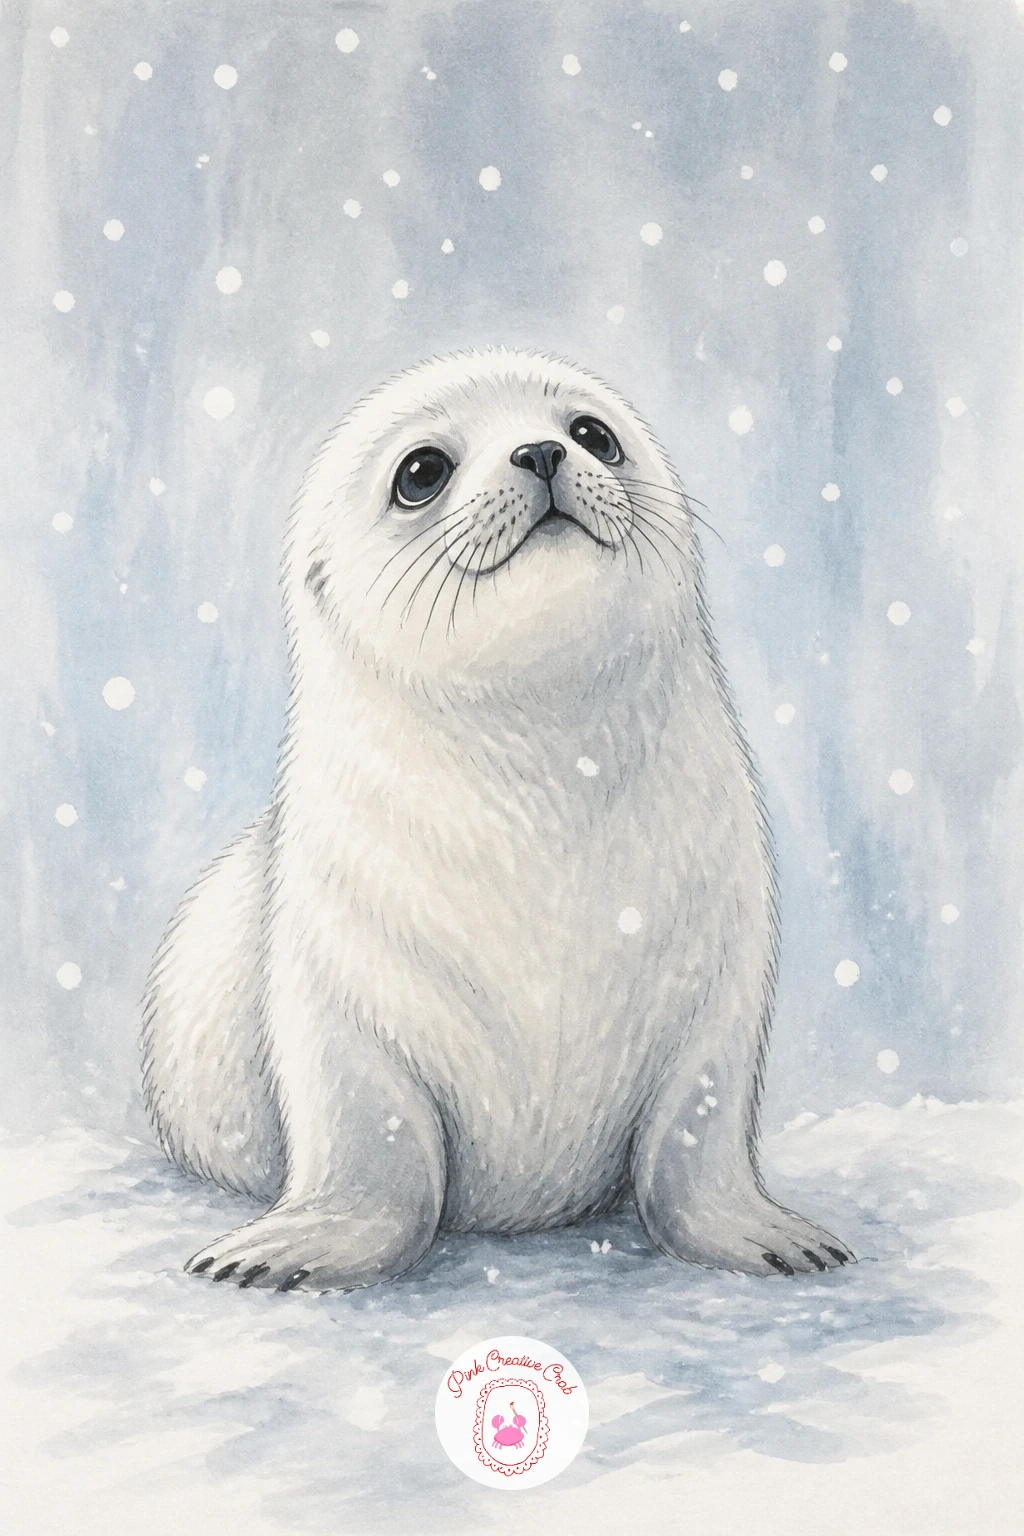
You Will Need
- white gel pen
Palette: Pale Grey,Blue Grey,Soft White,Dusty Blue
Capture a seal mid-slide, belly flat against the ice with flippers flung out behind. Draw the body stretched long and low, almost flattened compared to a resting pose, with the head lifted slightly and both front flippers pressed back along the sides rather than forward.
Speed lines behind the tail and a light spray of small white marks kicked up from the ice sell the motion instantly, so add those after the seal is fully inked and colored. Keep the ice surface simple, a pale blue-white plane with just a few thin crack lines, since too much detail on the ground competes with the sense of speed.
The pose reads flat and lifeless if the belly touches the ice in a dead straight line, so give the body a gentle downward curve in the middle, like a shallow smile, which keeps it looking soft rather than rigid. Shade the underside slightly darker where it meets the ice to ground the seal in the scene.
A kneaded eraser can lift small streaks out of blue marker on the ice to suggest slide marks if you work over marker-friendly paper.
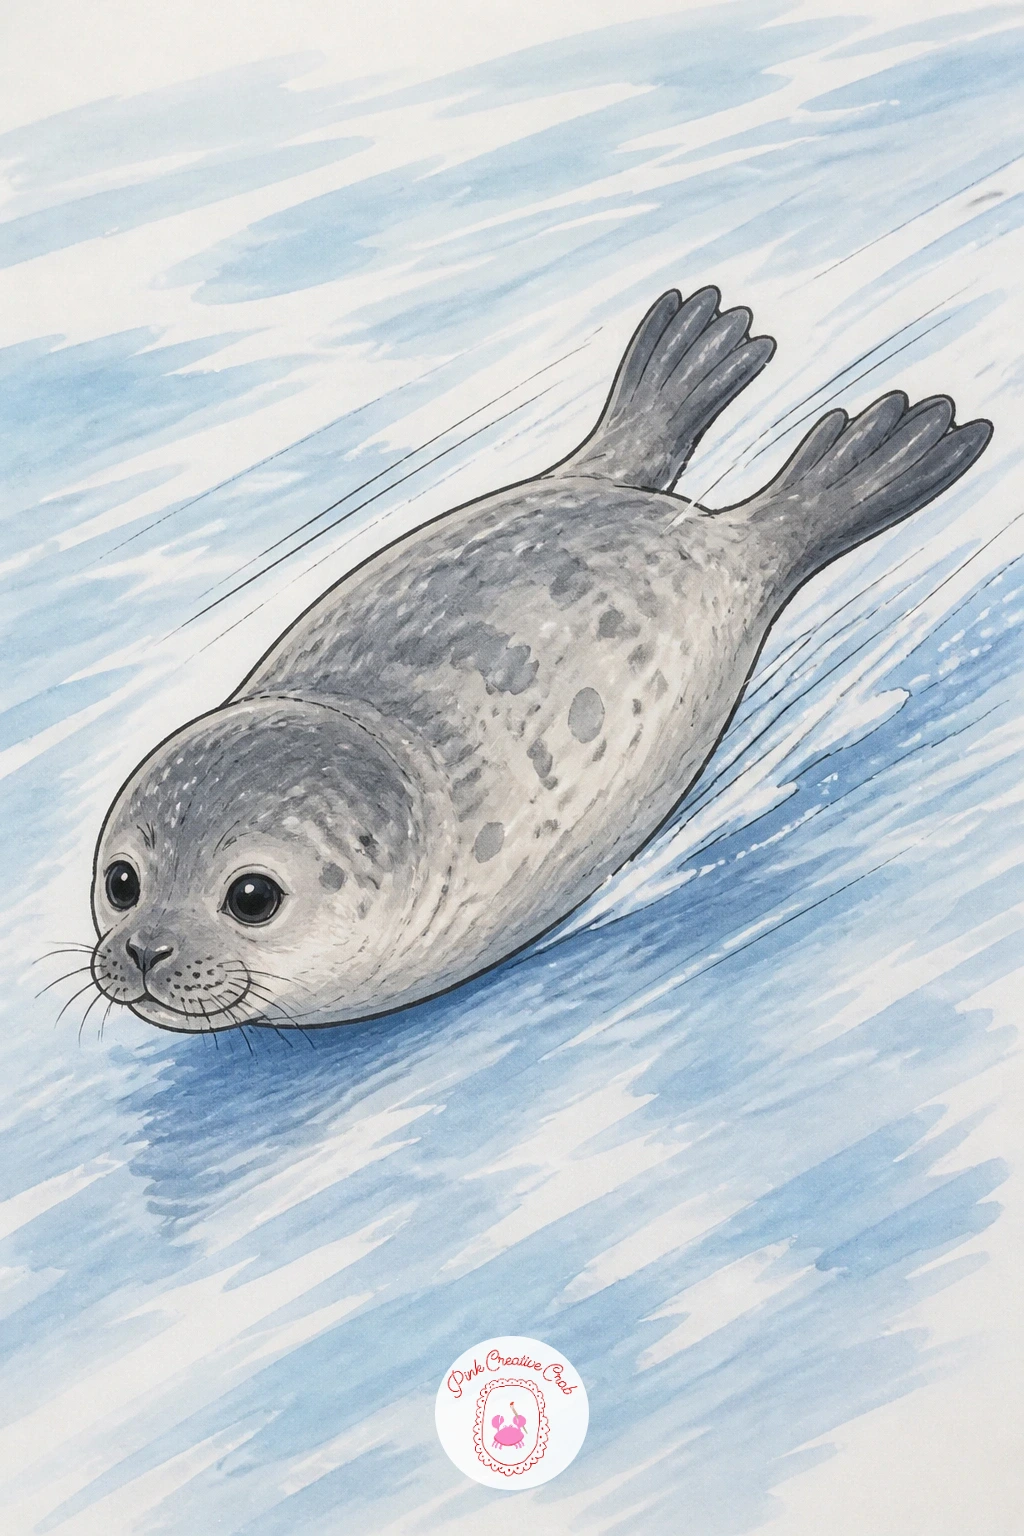
Palette: Ice White,Pale Blue,Seal Grey,Cool Shadow
Overlap two seals this time, curled together on a rock in a shared nap. Sketch one body first as the base shape, then nestle the second seal against its back or side, overlapping the outlines so the two forms interlock rather than simply sit side by side.
Vary the pose slightly between the two: one head tucked down, the other resting slightly higher, so the pair does not look like a copied and pasted duplicate. Ink the back seal first, then the front one on top, which keeps the overlap clean and avoids retracing lines through a finished shape.
Give each seal a very slightly different grey tone so they stay distinguishable even while pressed close together, and shade the contact point between their bodies a touch darker to show where one overlaps the other. A shared rock beneath them can stay loose and simple, just enough shape to anchor the pair.
If you enjoy pairing animals like this, a pony drawing session uses the same overlapping trick for two animals standing close together.
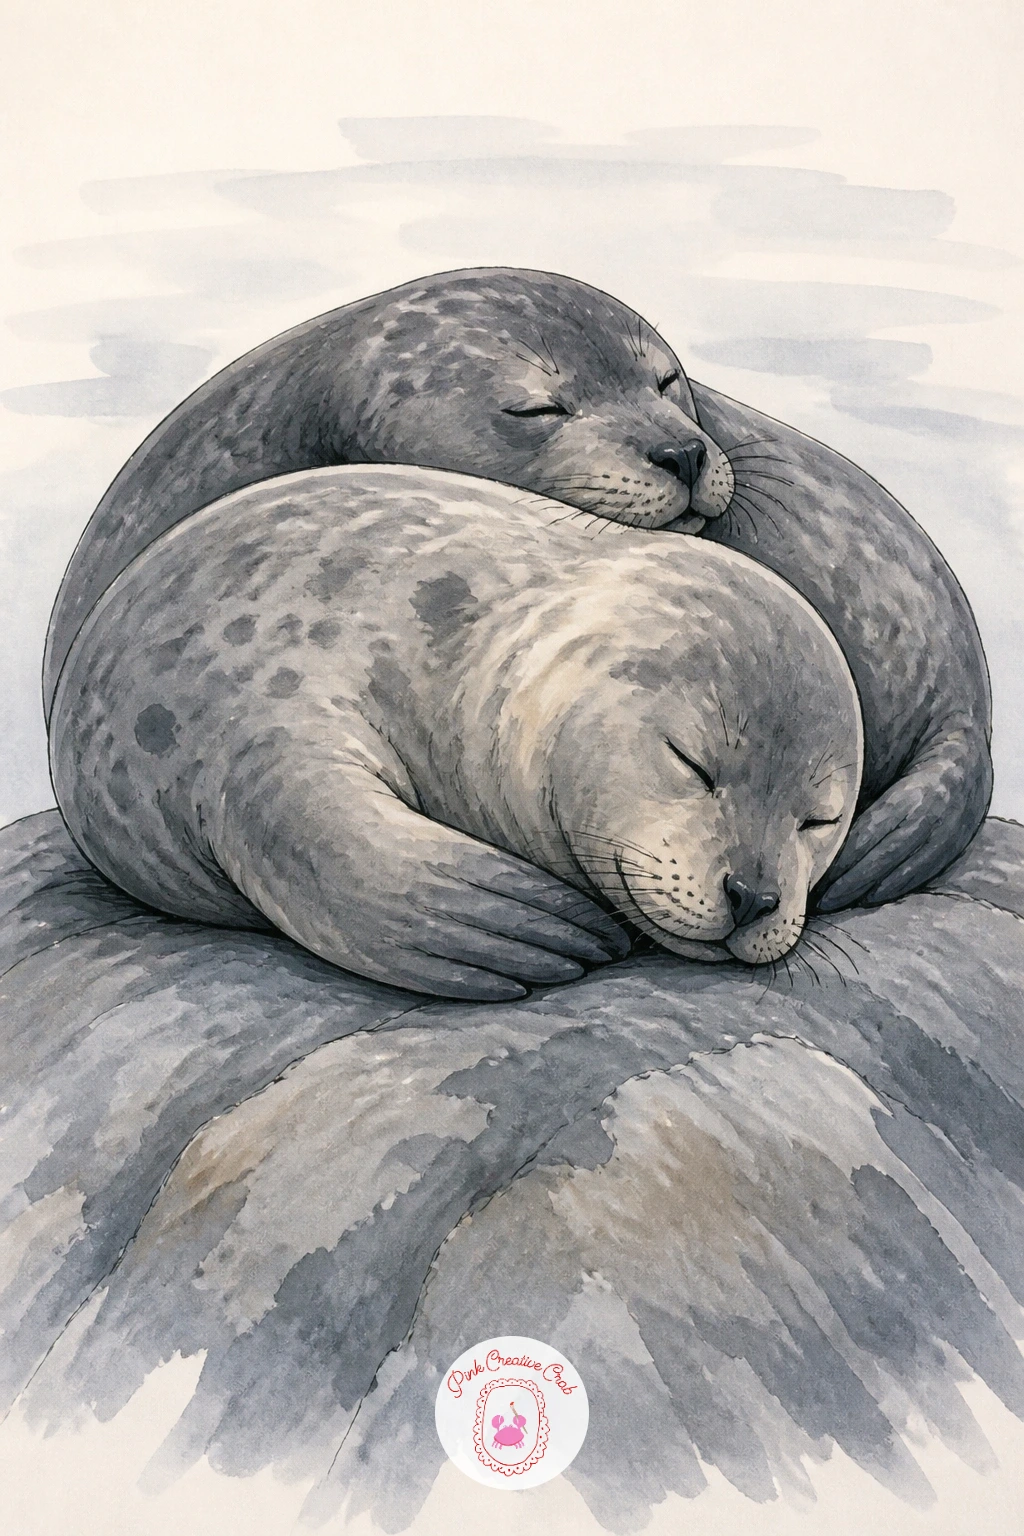
Palette: Warm Grey,Cool Grey,Rock Tan,Soft Shadow
Give the seal a small triumphant moment with a fish held crosswise in its mouth. Sketch the head tilted slightly up and proud, mouth closed around the middle of a small fish shape, with the fish tail and head poking out on either side.
Draw the fish before finishing the mouth line, since the mouth needs to curve naturally around the fish’s body rather than the fish being squeezed in as an afterthought. Keep the fish small, no longer than the width of the seal’s head, so the proportions stay believable and a little funny rather than looking like a struggle.
A common mistake is coloring the fish the same grey family as the seal, which makes it disappear. Pick a contrasting silver-blue or pale orange for the fish scales so it pops clearly against the seal’s grey face, and add two or three short line strokes for simple scale texture.
Swap a silver gel pen for the scale highlights if your marker set has no metallic option.
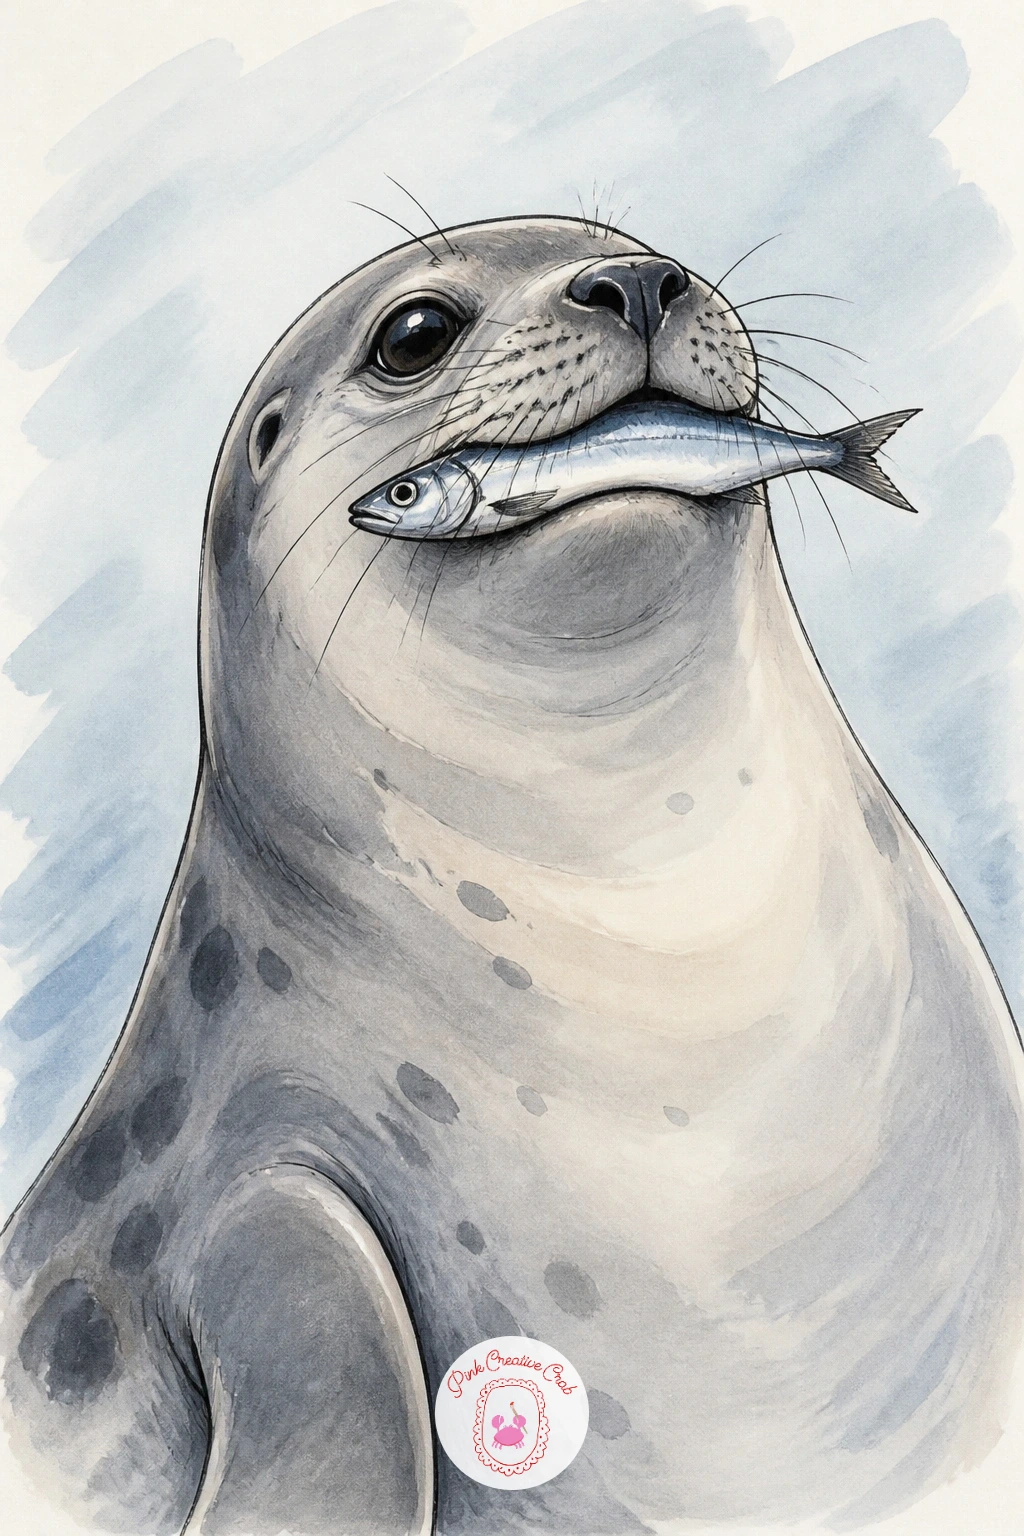
Palette: Seal Grey,Fish Silver,Fish Orange,Deep Grey
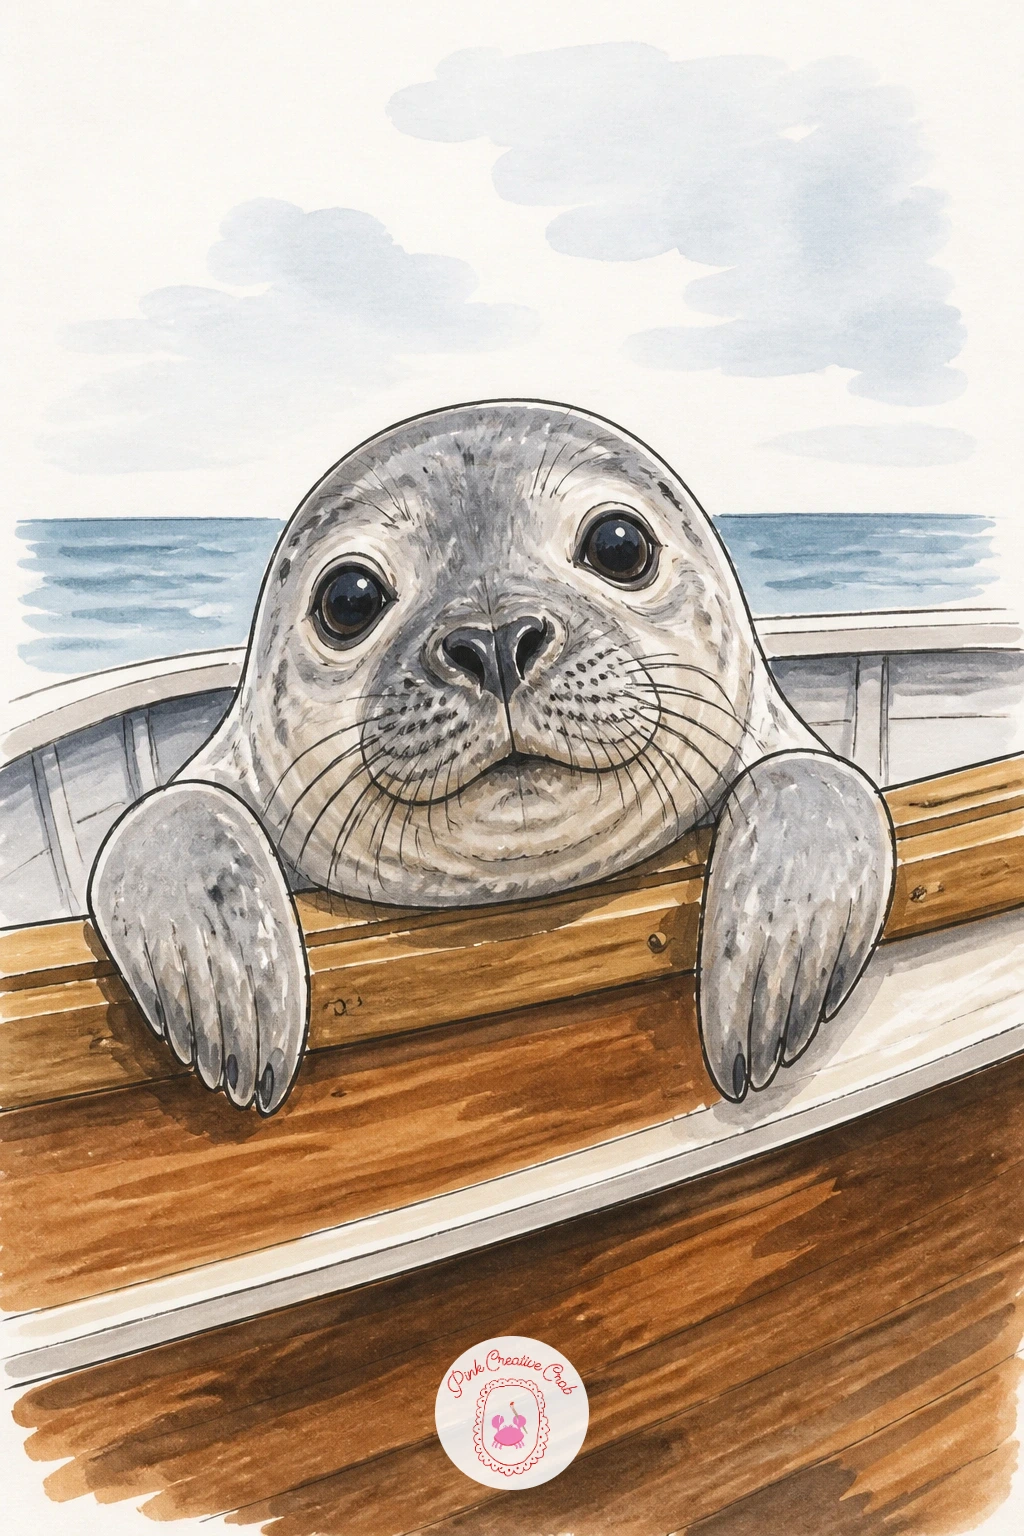
Place a seal’s head and front flippers hooked over the side of a small wooden boat, as if it has just hauled itself halfway up. Draw the boat’s edge as one confident diagonal or curved line first, since everything else in the drawing relates back to that single line.
Eye level matters a lot here: if you draw the boat edge low and the seal’s head high above it, the viewer feels like they are looking slightly up at the seal, which suits a cheeky, curious expression. Ink the boat edge and a small strip of hull, then the seal’s flippers draped over the top, and finally the head and face.
Keep the boat itself minimal, just enough curved hull and a plank line or two, so the seal remains the clear star of the piece rather than getting lost against a fully rendered boat. Warm wood tones on the hull contrast nicely against the cooler grey of the seal.
If drawing a convincing curved hull feels tricky, trace a dinner plate lightly in pencil first for the curve, then erase the extra line.
You Will Need
- a plate to trace a curve
Palette: Hull Brown,Seal Grey,Rope Tan,Sky Blue
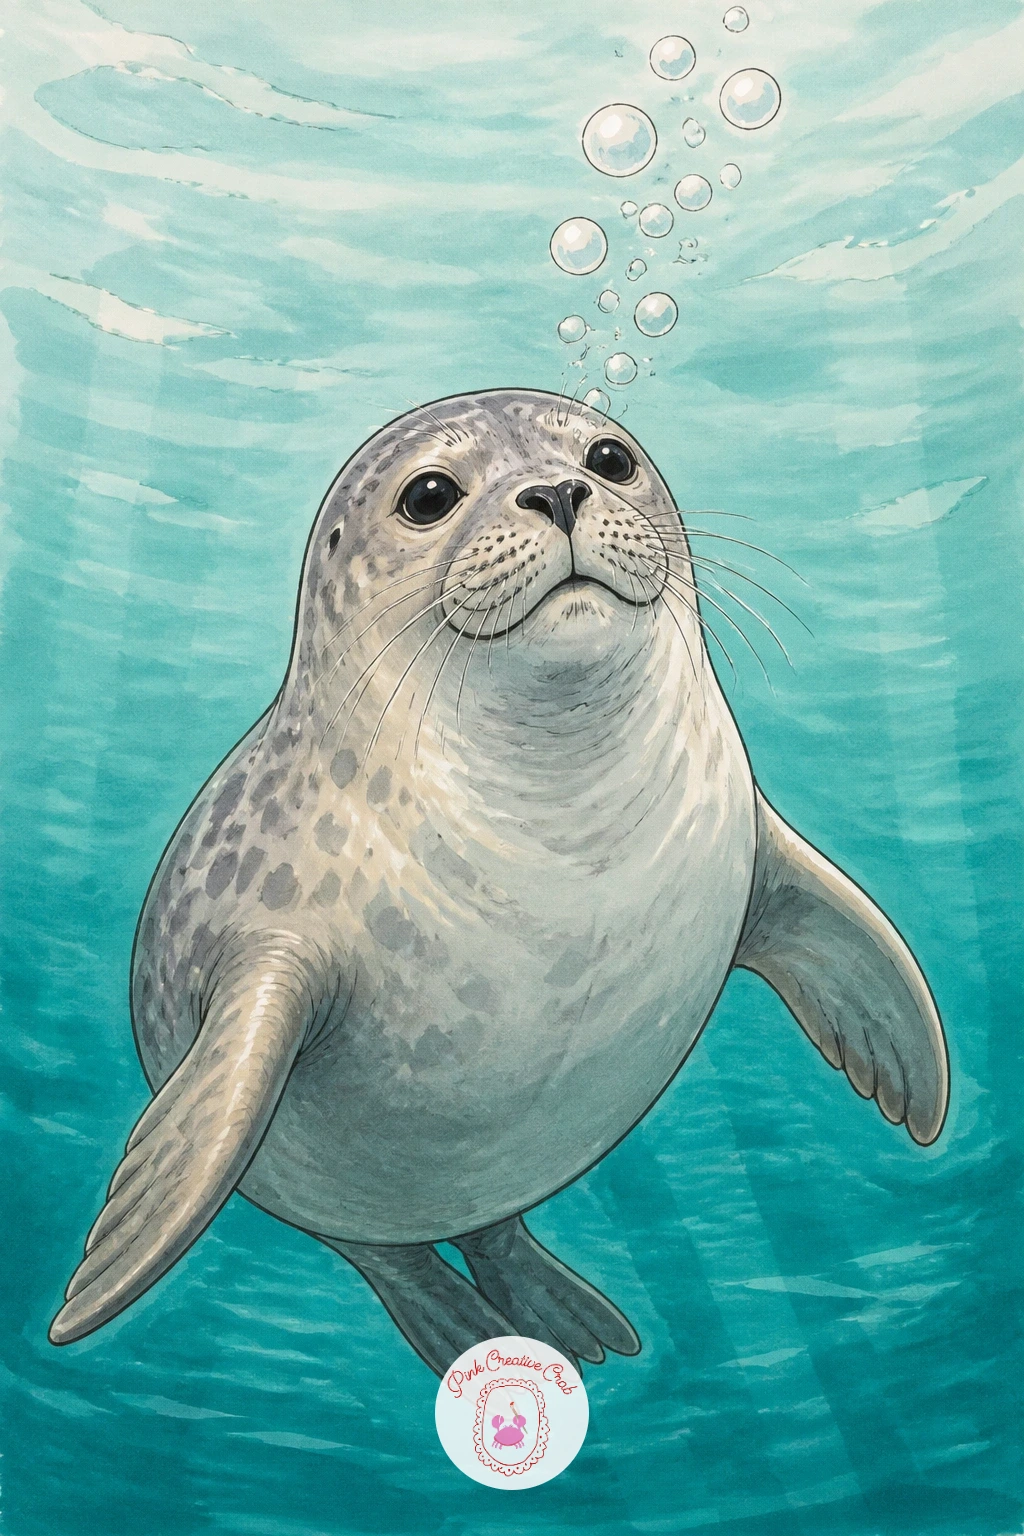
Send the seal fully underwater again, this time mid-exhale with a trail of round bubbles rising from its nose. Sketch the body in a relaxed curled pose, since a seal blowing bubbles is usually calm rather than swimming hard, then add a string of circles of decreasing size trailing up and to one side from the nose.
Vary the bubble sizes and spacing rather than lining them up evenly, which keeps the trail looking like it is drifting rather than printed on a ruler. Ink the seal first, then the bubbles, leaving each bubble’s outline open at one small spot to suggest a glassy highlight once color goes on.
Color the water in a gradient from pale blue-green near the seal to a deeper teal at the edges of the page, and leave every bubble pure white or the faintest blue so they read as glass rather than flat grey shapes. A stray fleck of white gel pen inside each bubble sharpens that glassy look further.
No gel pen handy: leaving a tiny gap of bare white paper inside each bubble does the same job.
You Will Need
- white gel pen
Palette: Teal Water,Pale Aqua,Seal Grey,Bubble White
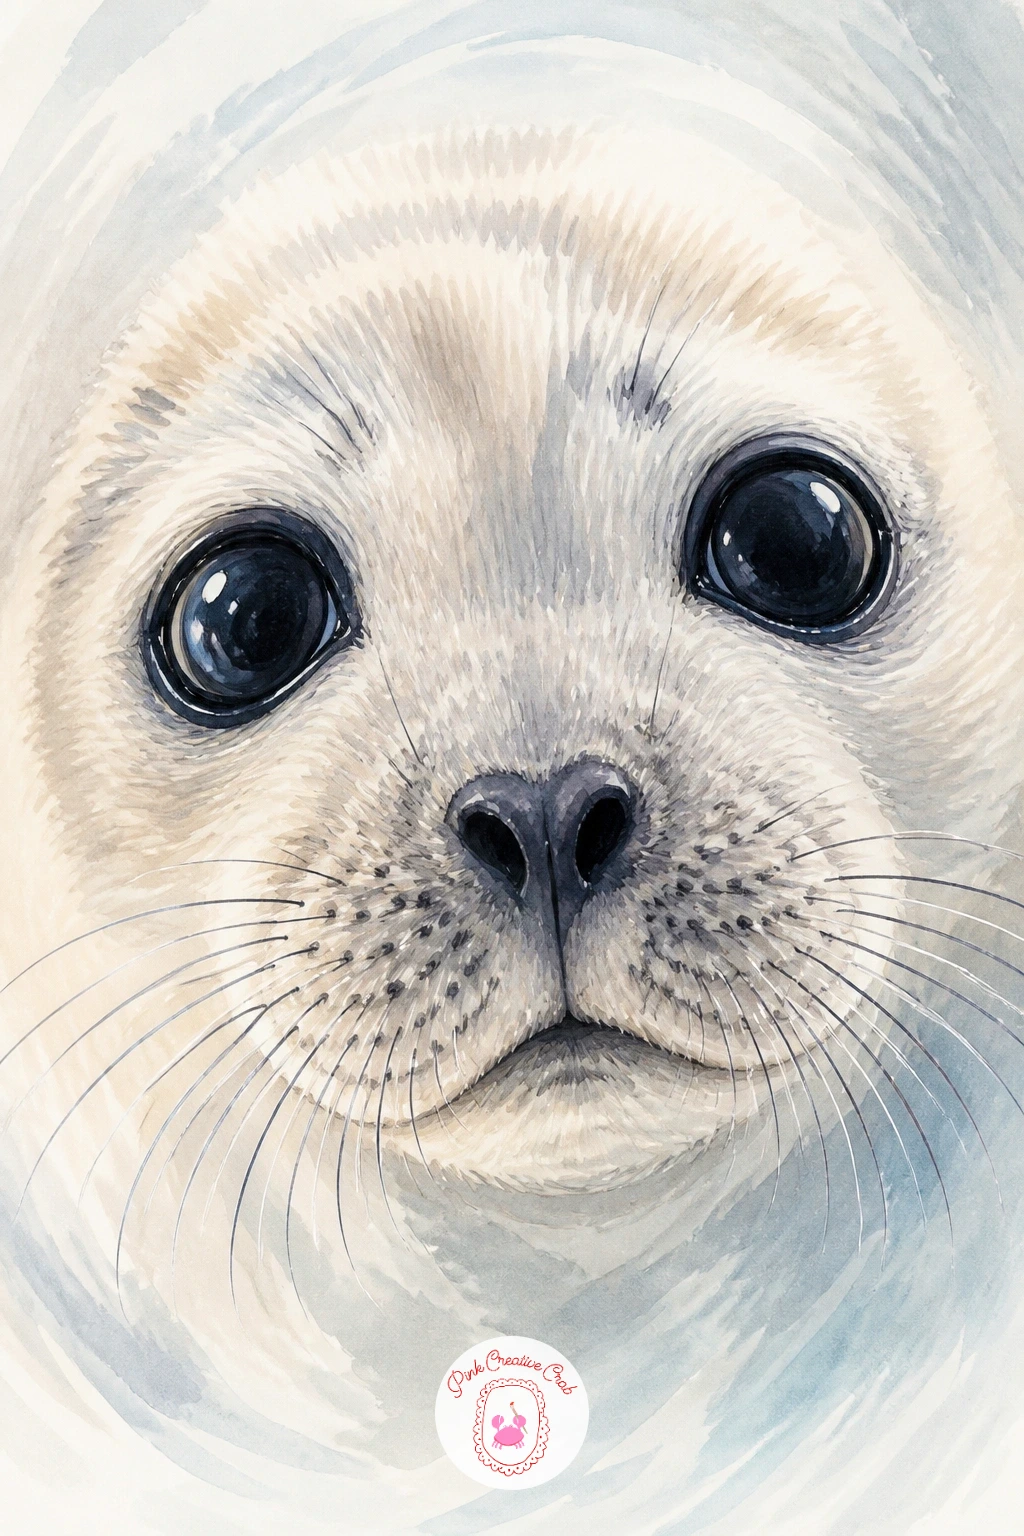
Zoom in tight for this one: just the pup’s face, filling almost the whole page, eyes huge and glossy. Sketch the head as a simple rounded shape first, then place the eyes large and close together low on the face, since that placement is exactly what makes a seal pup read as impossibly cute.
The eyes carry the whole drawing, so ink them first and take your time: a slightly almond outline, a solid dark fill, and one bright highlight left as a gap in the ink rather than added later. Everything else, the small nose, the short whiskers, the rounded cheeks, can stay loose and simple by comparison.
A flat black eye looks lifeless, so layer a very dark grey or deep brown first, then add true black only in the pupil’s core, which gives the eye more depth even up close. Keep the fur shading minimal around the face, just a touch under the chin and around the ears, so the eyes stay the obvious focus.
Finish with a single sharp white gel pen dot in each eye, placed in the same spot on both for a convincing, symmetrical sparkle.
You Will Need
- white gel pen
Palette: Deep Brown Black,Soft Grey,Warm White,Blush
Look at reference photos of real harbor seal pups before you start. Their eyes sit lower and closer together than most people guess, and getting that placement right does more for the cute factor than any shading.
Step slightly outside seals for a walrus, a chance to practice a heavier, wrinklier body and two long curved tusks. Sketch the body as a large rounded barrel shape, bigger and bulkier than any seal so far, then add the tusks last as two curved lines pointing down from the upper lip, roughly equal in length and curve.
Compare the tusk length against the head before inking: tusks that extend past the chin by about the height of the head itself look properly oversized and walrus-like, while shorter ones can read as uncertain sketch lines. Ink the body and face first, then the tusks on top so they sit clearly in front of the mouth.
Skin texture is where a walrus differs most from a seal, so add a few short curved wrinkle lines across the neck and shoulders rather than leaving the body perfectly smooth. Color the body in a warm pinkish brown rather than seal grey, since real walrus skin reads much warmer and ruddier.
Swap a cream or ivory marker for the tusks if a true tusk-yellow is not in your set, since the warm contrast against pink-brown skin matters more than the exact shade.
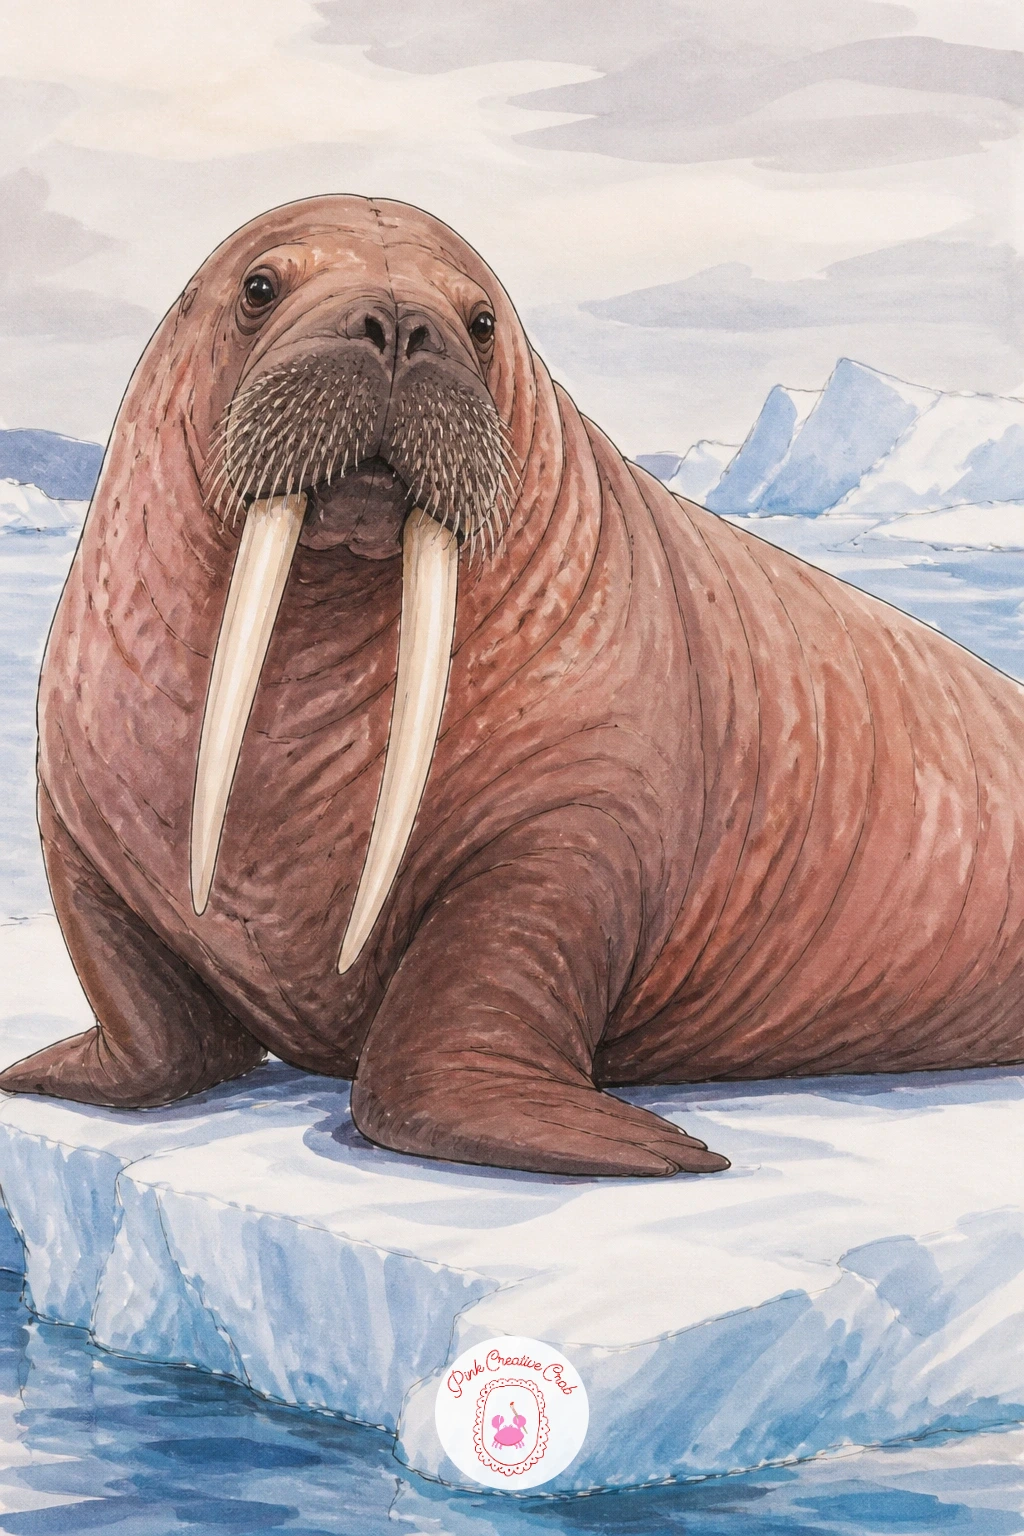
Palette: Walrus Pink Brown,Tusk Ivory,Deep Brown,Ice Blue
Bring in a sea lion for a sleeker, more upright cousin of the seal, propped on its front flippers on a harbor dock. Sketch the body with a noticeably longer neck and more arched posture than a seal, front flippers planted flat and pushing the chest up off the ground, since that upright stance is the clearest way to tell a sea lion apart on the page.
Small external ear flaps are another easy tell, so add two small curved shapes just behind the eyes before inking the head, something a true seal never has. Ink the raised front half of the body first, then the tucked hind flippers, then the dock planks beneath.
Color the body a slightly darker, warmer brown-grey than the seals elsewhere in this list, since that warmth separates the species at a glance even without a caption. Keep the dock simple with a few weathered plank lines and maybe one coiled rope shape for a lived-in harbor feel.
This pairs naturally with a dog pencil drawing session if you like practicing confident, upright animal poses next.
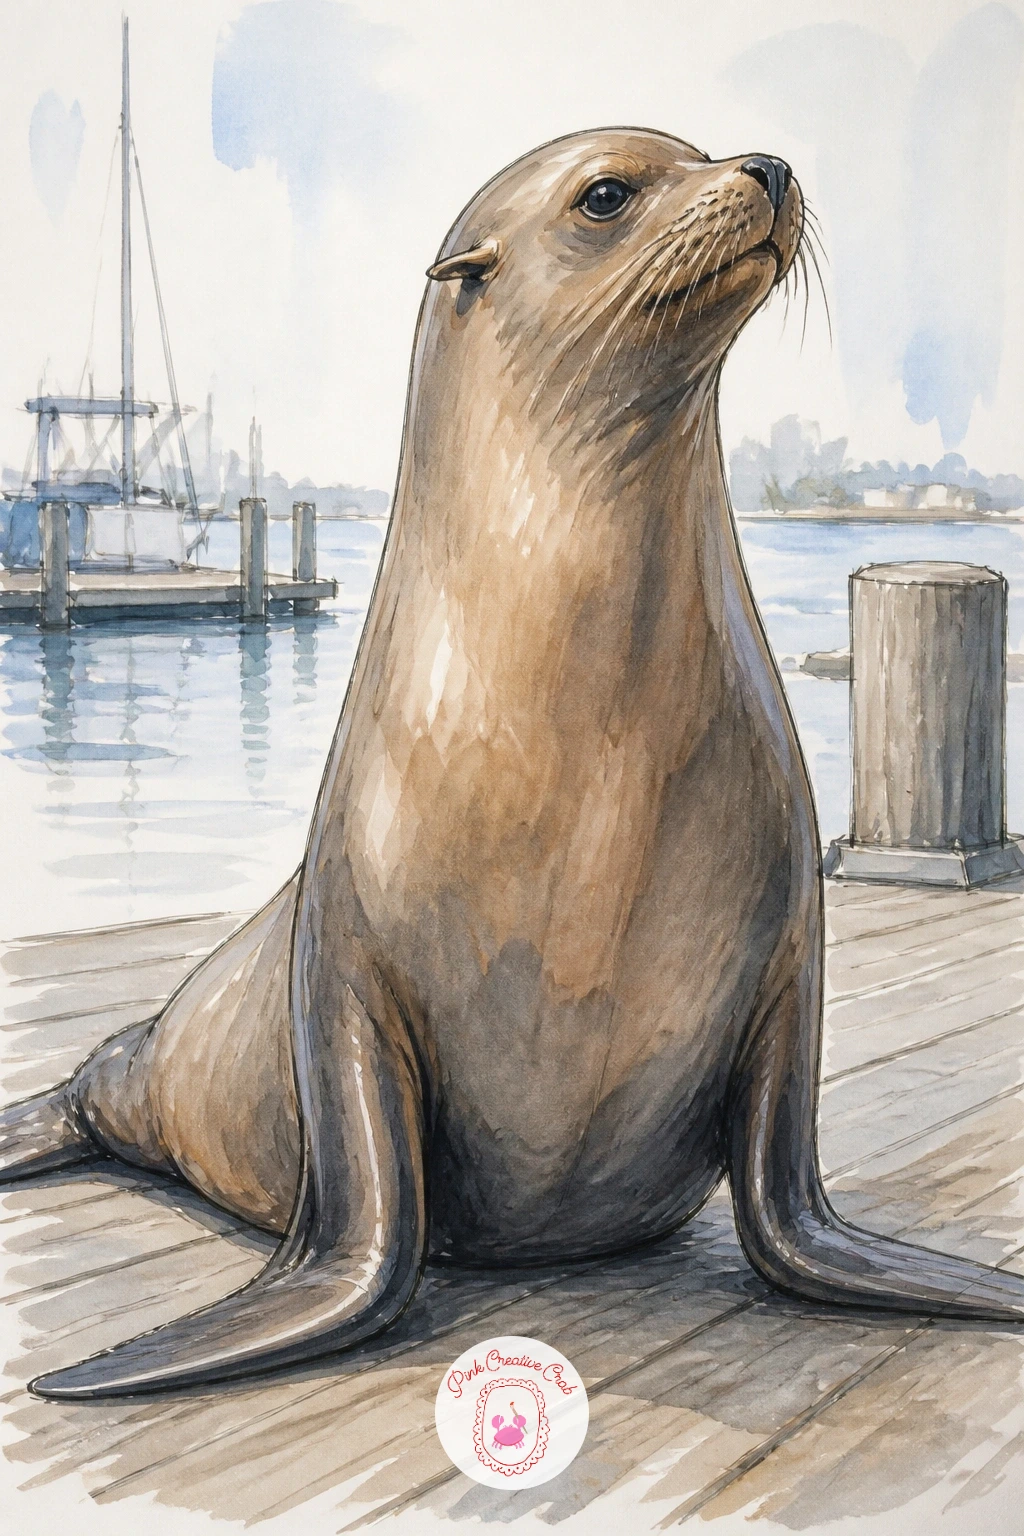
Palette: Warm Brown Grey,Dock Tan,Rope Brown,Pale Sky
Balance a seal awkwardly on top of a round harbor buoy bobbing in the water, a pose that is equal parts cute and precarious. Draw the buoy first as a simple sphere or rounded cylinder shape, since the seal’s whole pose depends on draping convincingly over that curved surface.
Measure the seal against the buoy before inking: if the buoy is roughly the same length as the seal’s body, the pose reads as a tight, funny squeeze, which is exactly the comic effect you want here. Let the flippers and tail hang off the sides of the buoy rather than keeping the whole body contained on top, since that overflow sells the joke of too-small a perch.
Ink the buoy first, then the seal draped over it, and finally the water ripples around the base. Color the buoy in a bright red or faded orange, a strong contrast against the cool grey seal and blue water, with a simple white stripe band for a classic buoy look.
If bright red marker feels too harsh, a muted rust or terracotta tone gives the same contrast more gently.
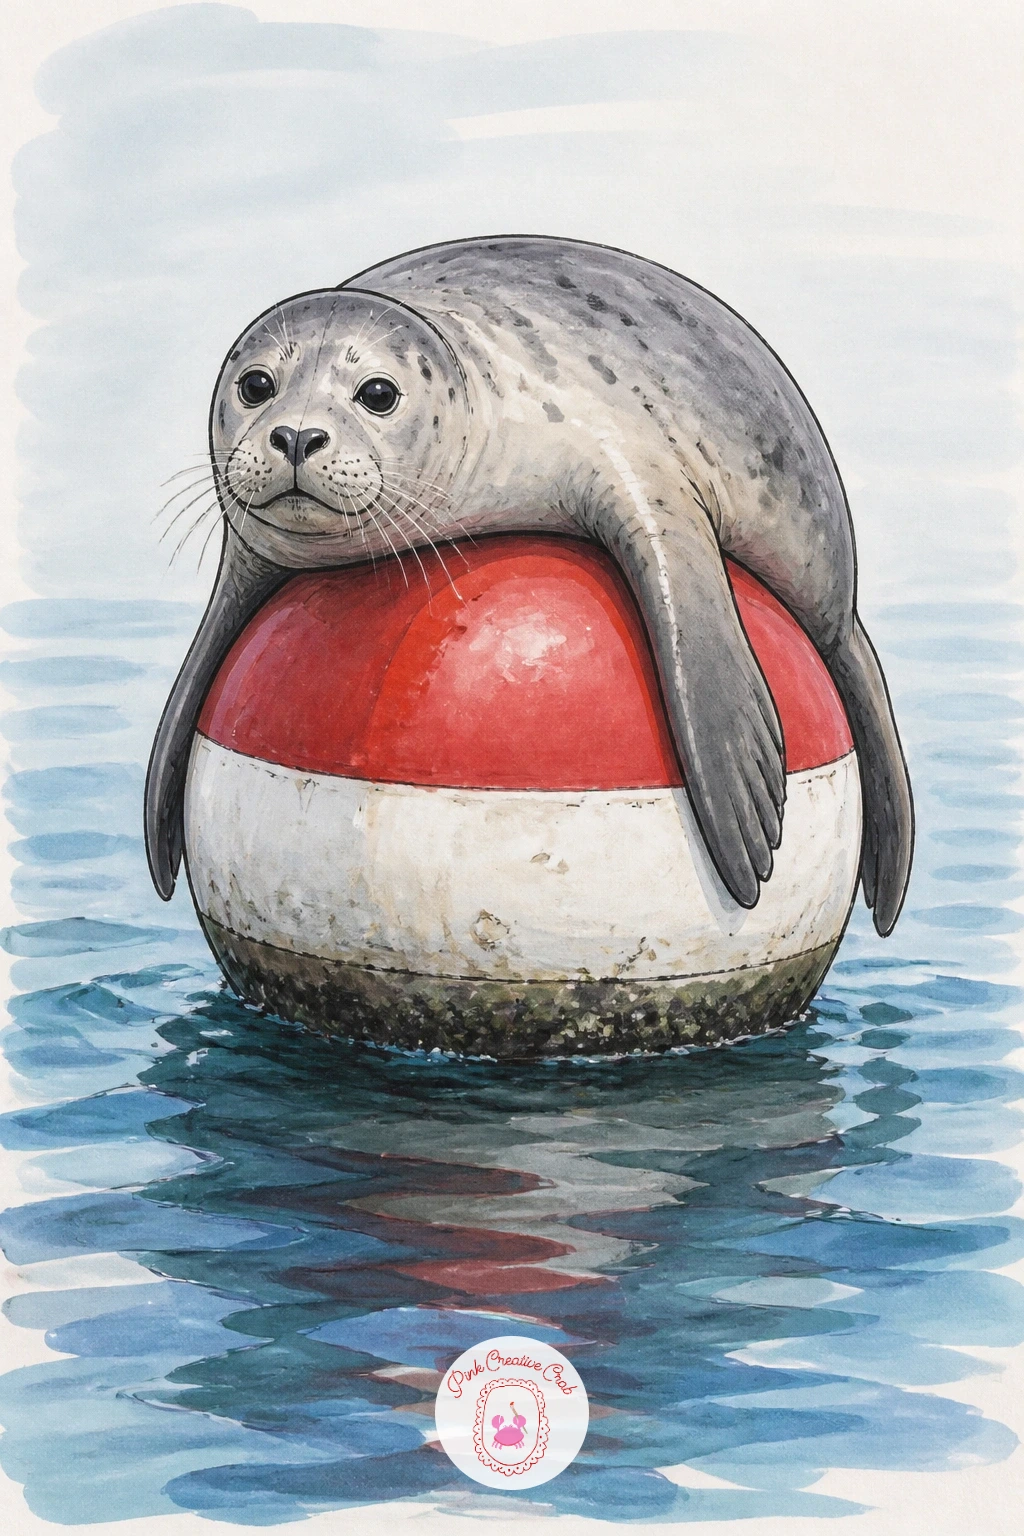
Palette: Buoy Red,Seal Grey,Buoy White,Water Blue
Add energy with a seal twisting mid-chase after a small darting fish just ahead of its nose. Sketch the seal’s body in a strong curved lunge, head stretched forward and flippers angled back, then place the fish small and slightly ahead, body bent as if turning sharply away.
For a fast ten-minute version, keep both shapes simple and add just a few motion lines behind the tail. For a fuller forty-minute version, add a scatter of small bubbles trailing from both the seal and the fish, plus a few streaks of lighter water color along the direction of motion to suggest speed through liquid.
Keep the fish notably smaller than in the earlier fish-in-mouth idea, more like a flickering minnow than a meal already caught, which keeps the chase feeling playful and ongoing rather than resolved. Ink the seal first since it is the larger, nearer shape, then the fish, then any bubbles or speed lines last.
A quick dry-brush marker streak behind the tail reads as a wake in the water without needing careful linework.
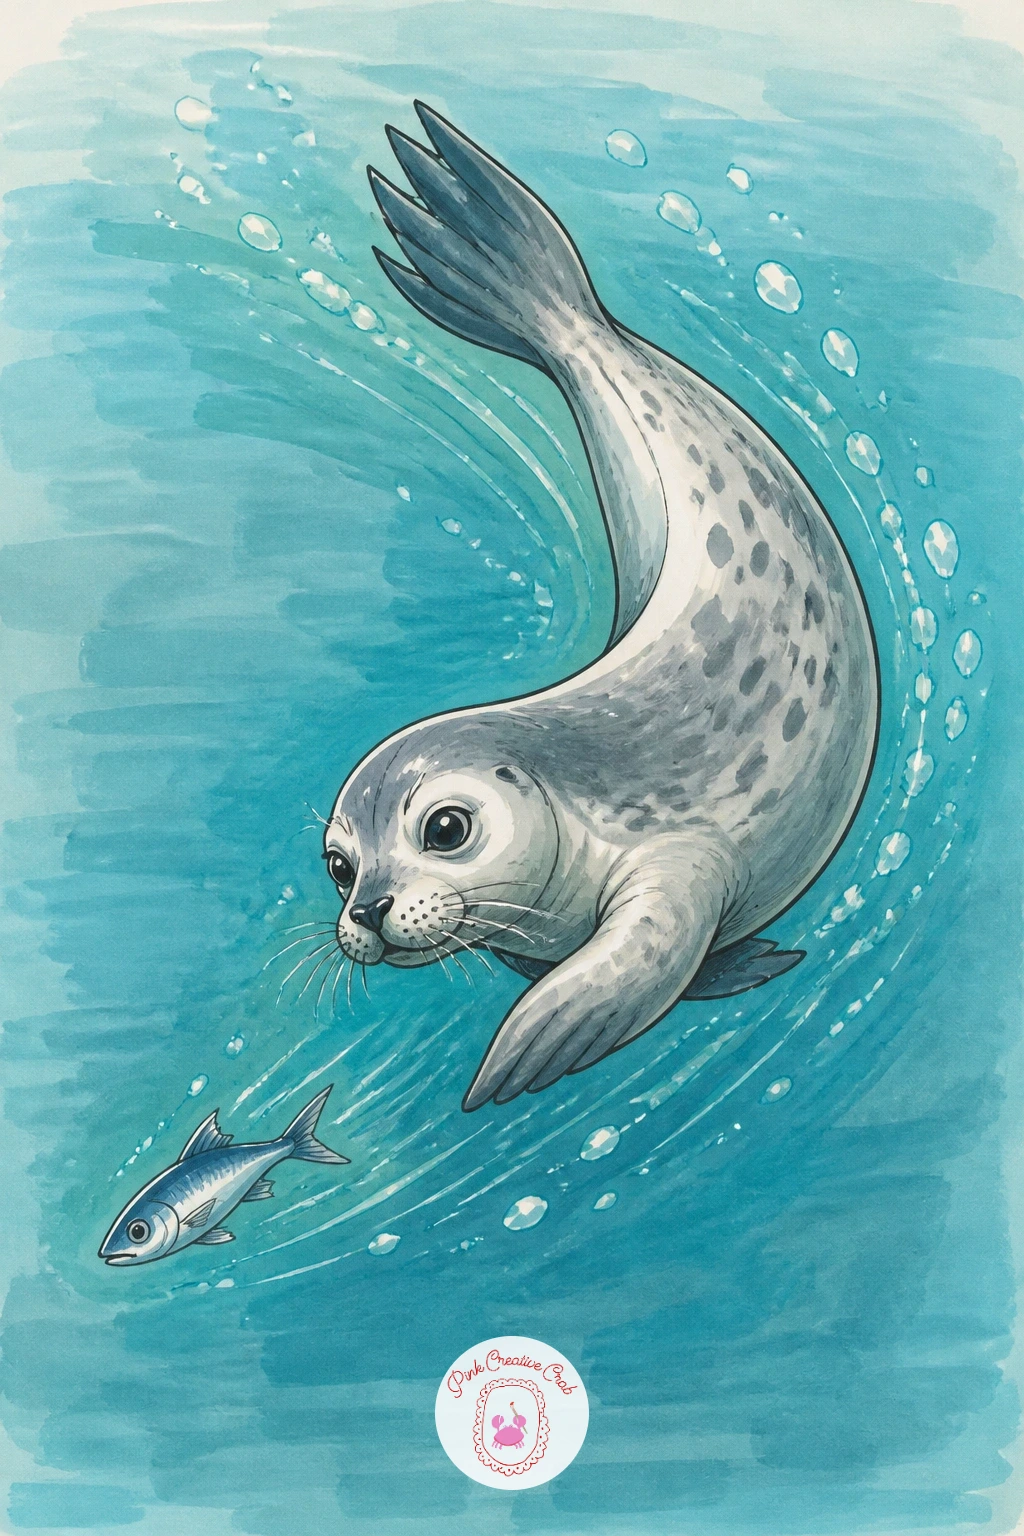
Palette: Seal Grey,Fish Silver Blue,Water Teal,Bubble White
Give the pup some company with a small seagull standing close by on the sand, heads tilted toward each other as if mid-conversation. Sketch the pup first as the larger shape, then place the gull noticeably smaller beside it, legs thin and simple, body a soft oval with pointed wingtips folded at its sides.
Keep the gull proportionate and modest in size compared to the pup, since a gull drawn too large competes for attention and confuses who the main subject is. Ink the pup first, then the gull, angling both heads slightly toward each other so the two feel like they are interacting rather than simply placed side by side.
Color the gull in simple white and pale grey with a small bright orange-yellow beak and legs, a nice warm contrast against the cooler grey pup. A plain sandy ground beneath both, with just a shadow shape under each, keeps the focus on the pair without extra background work.
If you enjoy pairing a creature with a small bird like this, a bird pencil drawing session is a nice follow-up for practicing the gull shape alone.
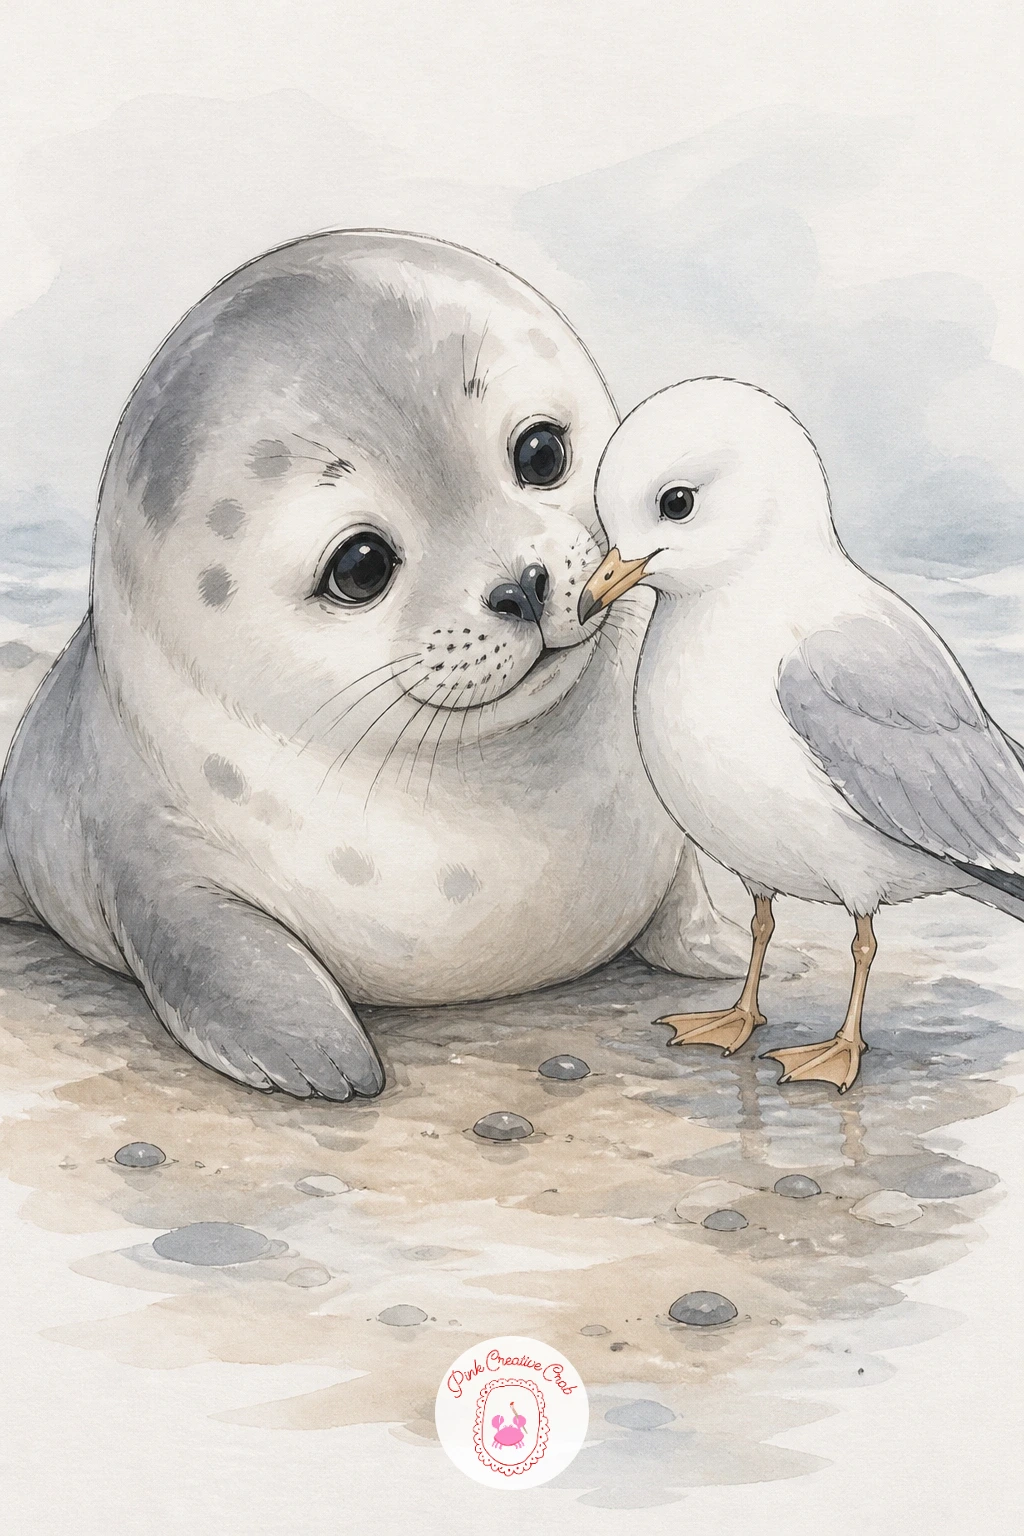
Palette: Seal Grey,Gull White,Gull Grey,Beak Orange
Tuck a seal partly behind a cluster of tall seaweed, just its face and one flipper visible, for a playful peekaboo moment. Draw the seaweed first as three or four broad ribbon shapes of varying height, then place the seal’s head peeking out from one side, body mostly hidden behind the fronds.
Overlapping is the whole trick of this one: ink the seaweed fronds that sit in front of the seal last, right on top of the body outline, so they genuinely cover part of the seal rather than just standing beside it. Keep one eye and most of the face visible so the expression still reads clearly through the gap.
Seaweed often ends up too thin and twig-like, so draw each frond as a broad wavy ribbon rather than a single line, and vary the widths along its length. Color the fronds in warm olive and deep green tones, which contrast nicely against the cooler grey of the seal peeking through.
A damp blending marker smooths the transition between two green tones on a single frond for a more natural, less stripy look.
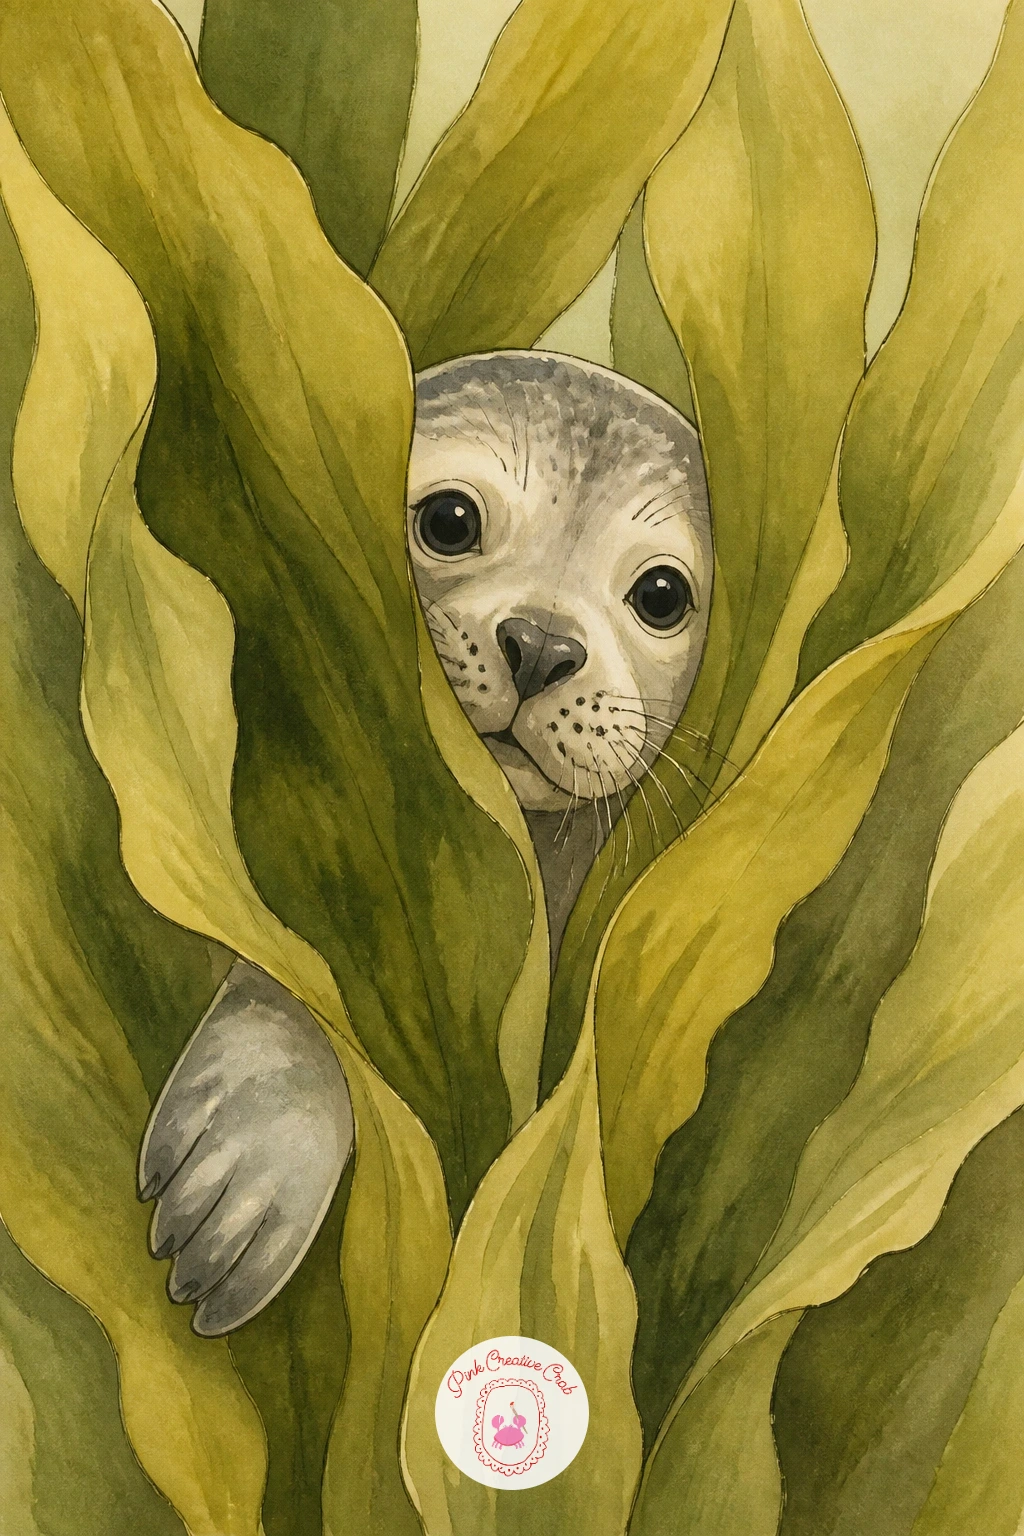
Palette: Olive Green,Deep Seaweed Green,Seal Grey,Pale Aqua
Set a single seal silhouette against a soft pastel sunrise, where the sky does most of the emotional work. Sketch the seal in a simple resting pose on a low rock or sandbar, keeping the outline clean, since it will read mostly as a darker shape against a bright sky rather than a fully detailed animal.
Build the sky before you touch the seal: layer pale pink near the horizon, soft orange above it, and a light lavender higher up, blending each boundary while still damp so the colors melt together rather than banding into stripes. Once the sky is dry, ink and color the seal in a flat, slightly darkened grey or warm brown-grey silhouette, since full detail would fight with the glowing sky behind it.
A light source this low means the seal’s edge nearest the horizon can carry a thin warm highlight line in orange or pink, while the rest of the body stays in cool shadow. Keep the water or sand beneath simple and dark so the sky stays the brightest part of the whole piece.
If pastel marker blends feel streaky, a damp brush dragged lightly across the boundary softens it further.
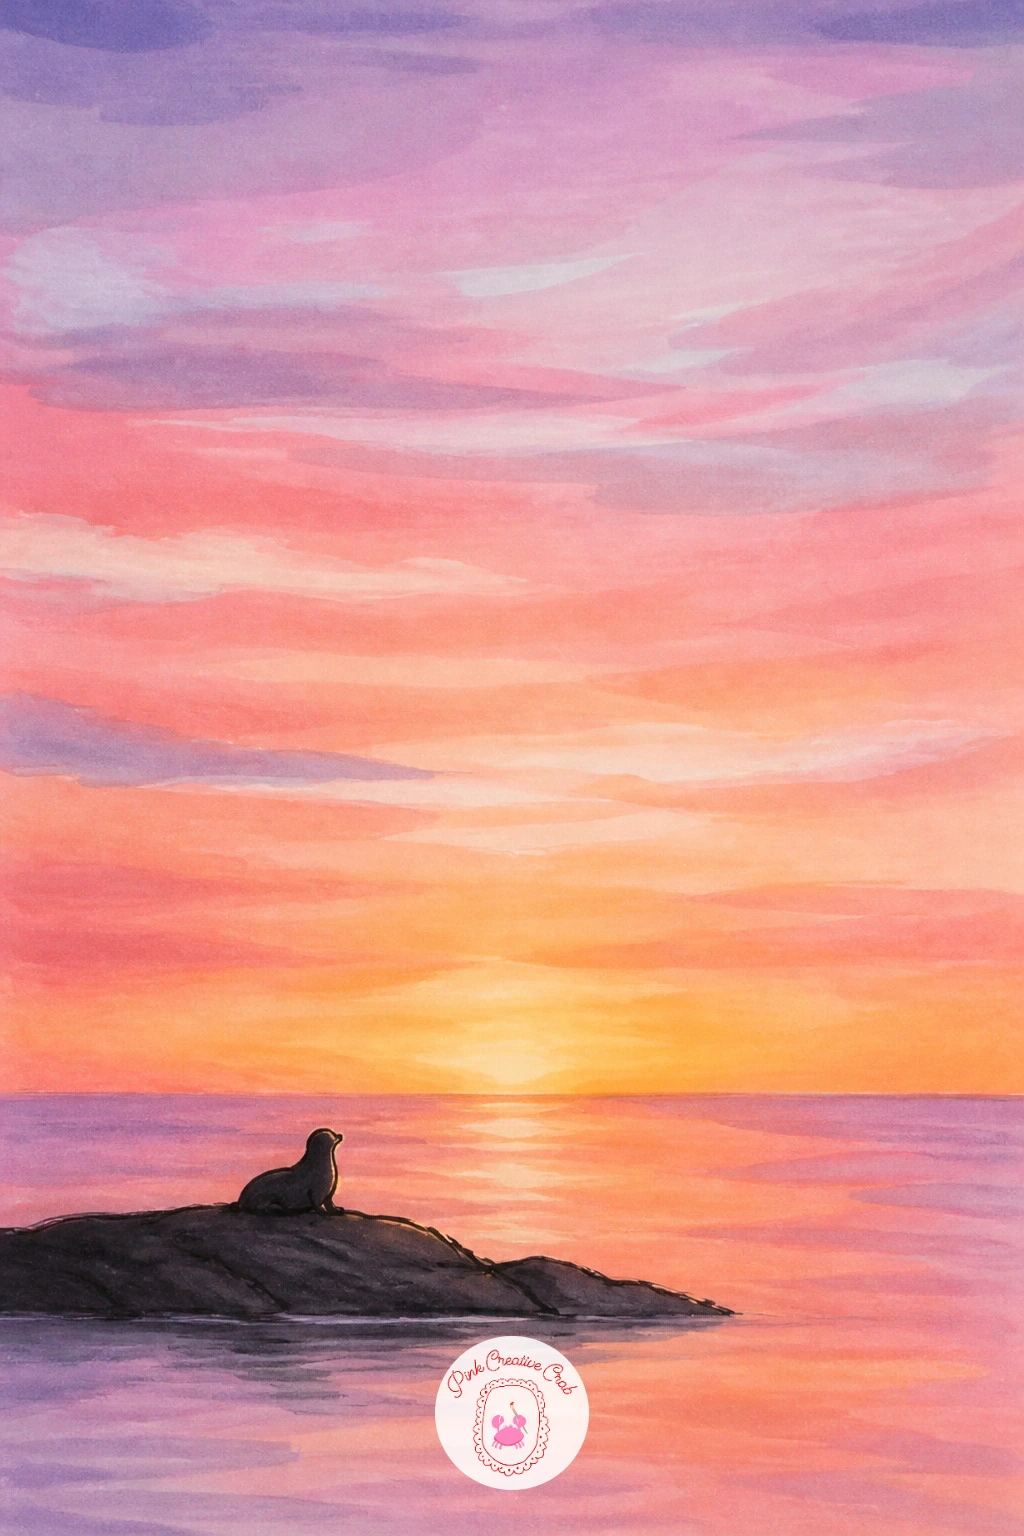
Palette: Soft Pink,Pastel Orange,Lavender,Silhouette Grey
Add a gentle, slightly story-driven scene with a seal pup wrapped snugly in a towel, only its head poking out. Sketch the towel first as a loose rounded bundle shape, then nestle the pup’s head into the opening at the top, eyes soft and half-closed for a calm, cared-for feeling.
Fabric folds are the extra challenge here, so keep them simple: three or four curved lines radiating gently from where the towel gathers near the neck is enough to suggest soft folded fabric without overworking it. Ink the towel bundle first, then the pup’s face on top, since the face needs to sit clearly forward of the fabric.
Color the towel in a warm, cozy tone like soft yellow, pale blue, or cream, something distinctly different from the cool grey of the pup so the two elements stay visually separate. Shade the folds with a slightly deeper version of the same towel color rather than grey, which keeps the fabric feeling warm rather than heavy.
A soft pastel version of this scene would also sit nicely alongside a christmas scene drawing if you want a cozier seasonal set.
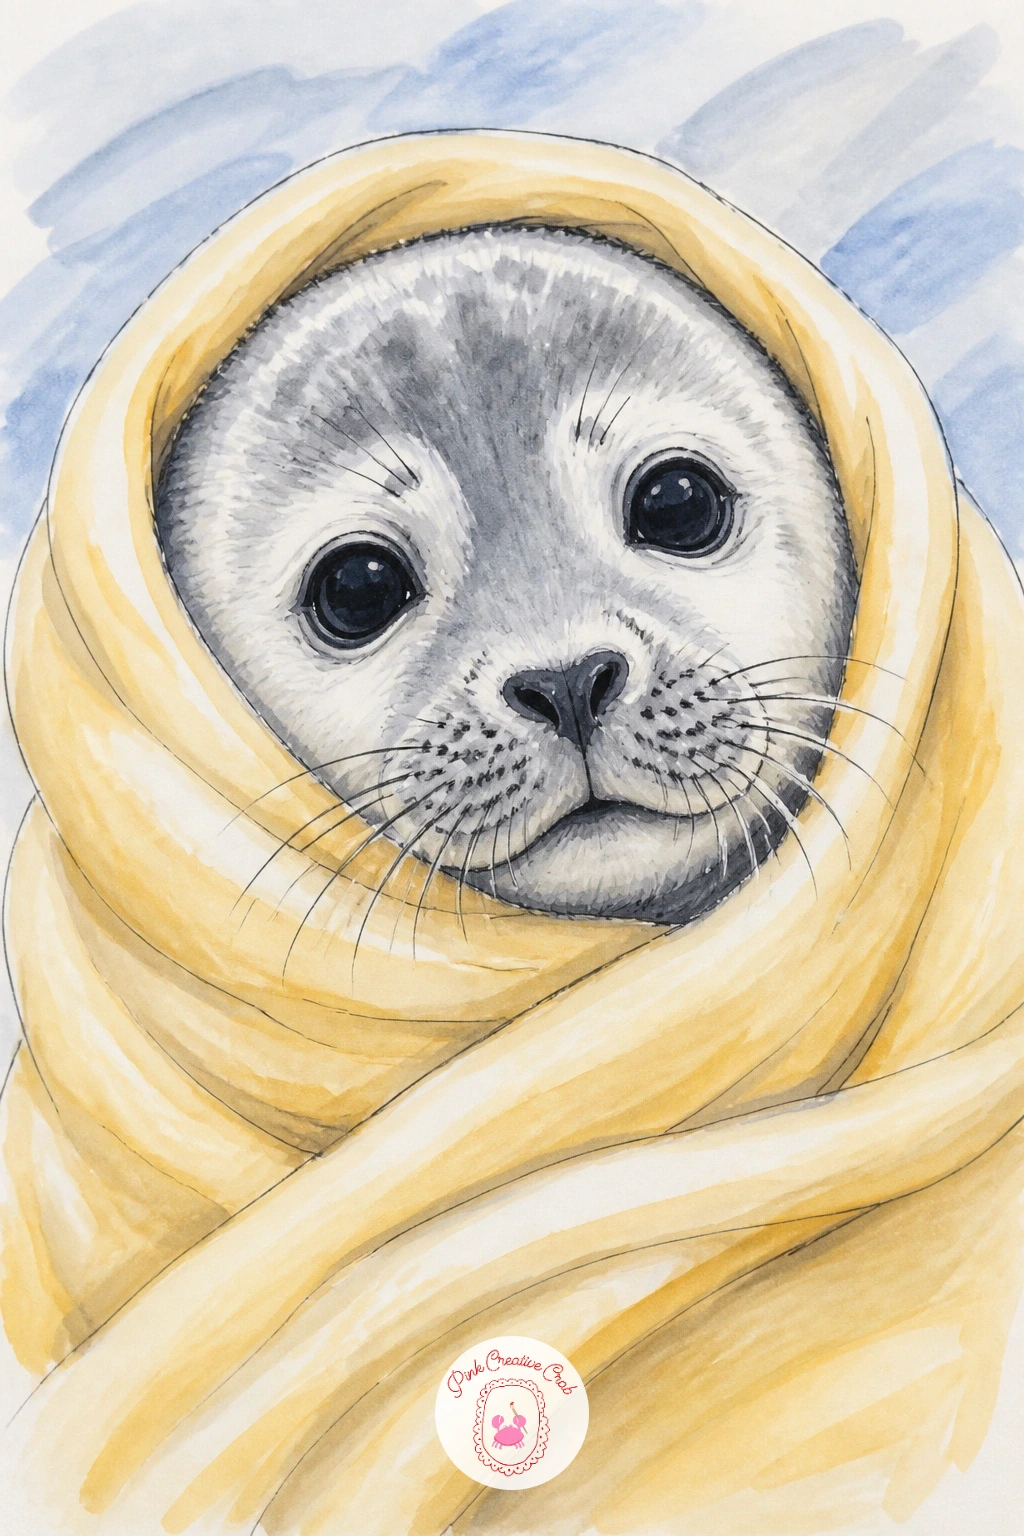
Palette: Soft Yellow Towel,Towel Shadow,Pup Grey,Warm White
Seals really do sleep bobbing upright in the water, nose just above the surface, which makes a quietly strange and charming subject. Sketch the body as a simple vertical oval, mostly submerged, with just the top of the head and nose breaking the waterline, eyes closed in a peaceful curved line.
Since most of the body stays hidden, the waterline itself needs confidence: draw it as one clean horizontal curve crossing the neck, then everything below that line gets colored as water rather than seal. Ink the visible head first, then the waterline, then fill the submerged body shape faintly through the water color to suggest it is still there beneath the surface.
A seal floating fully upright can look stiff if the head sits bolt straight, so tilt it very slightly to one side for a more relaxed, genuinely sleepy feel. Keep the water calm with just a few soft ripple lines radiating from the body, since a dozing seal barely disturbs the surface.
If layering a faint submerged shape through blue feels tricky in marker, a light colored pencil glazed over dry marker can suggest the shape without muddying the water color.
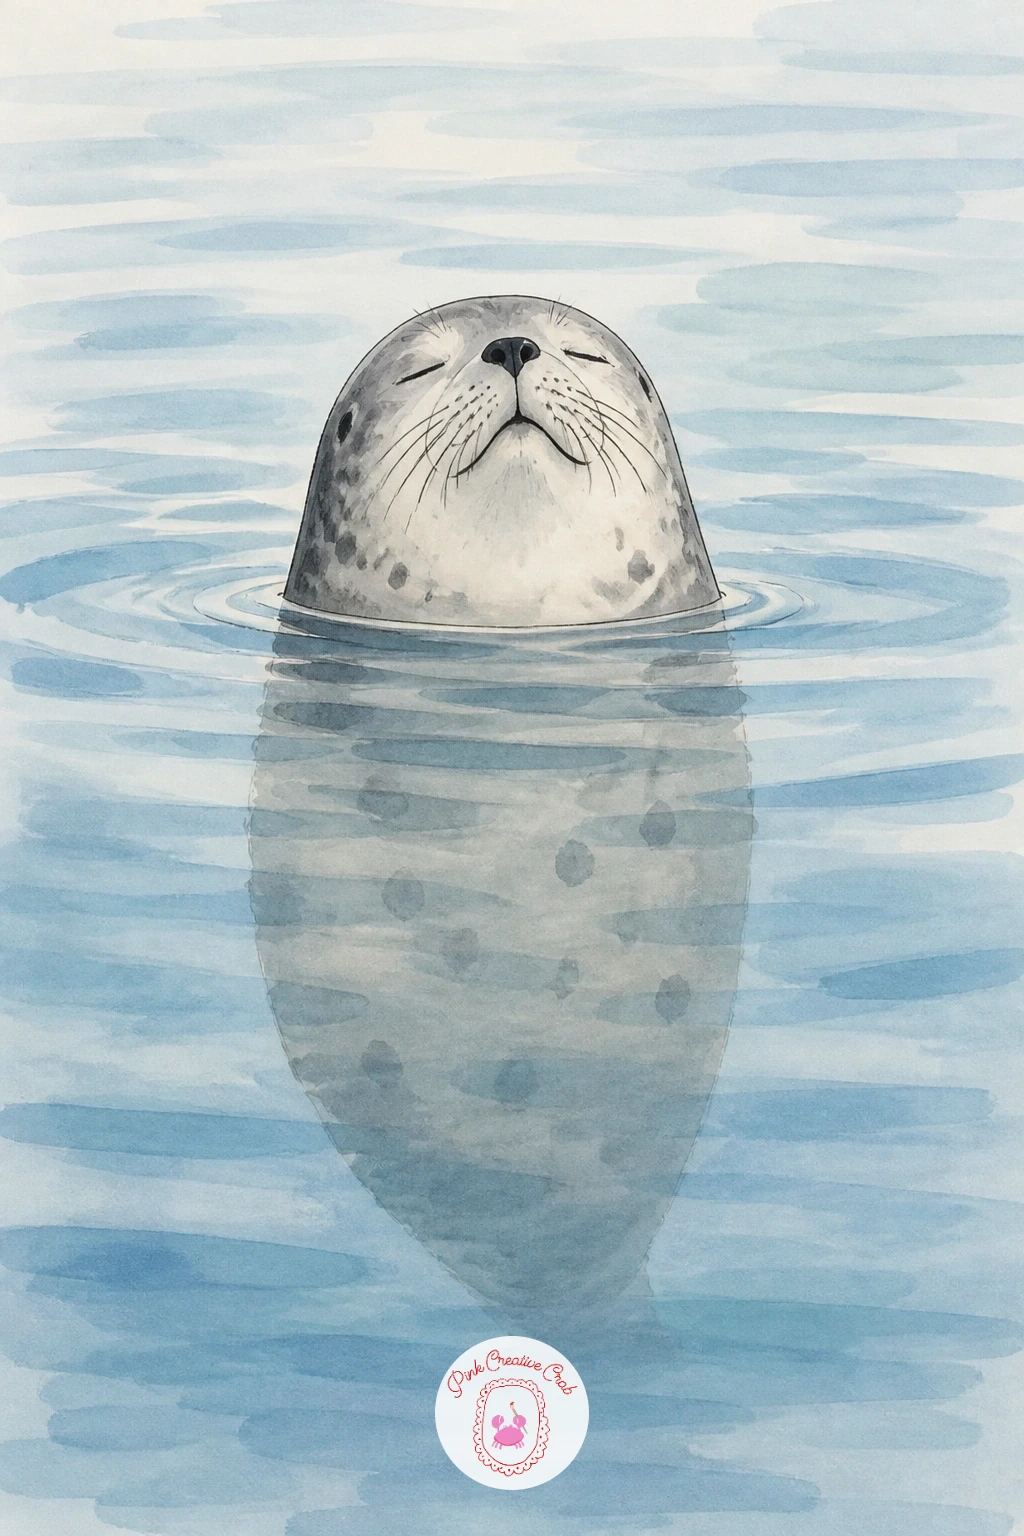
Palette: Calm Blue,Deep Water Blue,Seal Grey,Soft White
Zoom into a close, playful moment: a seal’s face with a few snowflakes caught right on its nose and whiskers. Sketch the head large and simple, filling most of the frame, with the nose tipped slightly up as if it just noticed the snow landing there.
Place three or four distinct, slightly larger snowflakes directly on the nose and brow before any smaller background snow goes in, since these close flakes carry the joke of the piece and deserve more careful drawing than the scattered background ones. A tiny cross or six-point shape, drawn small and kept loose rather than perfectly symmetrical, reads as a snowflake without needing geometric precision.
Ink the face first, leaving small blank circles where the close-up snowflakes will sit, then add the flake details on top once the face color is dry so they stay crisp and white. Keep the background simple with just a handful of smaller, softer flakes scattered loosely to avoid pulling focus from the face.
A fine white gel pen is the easiest way to add crisp flake shapes directly over dry marker without disturbing the color beneath.
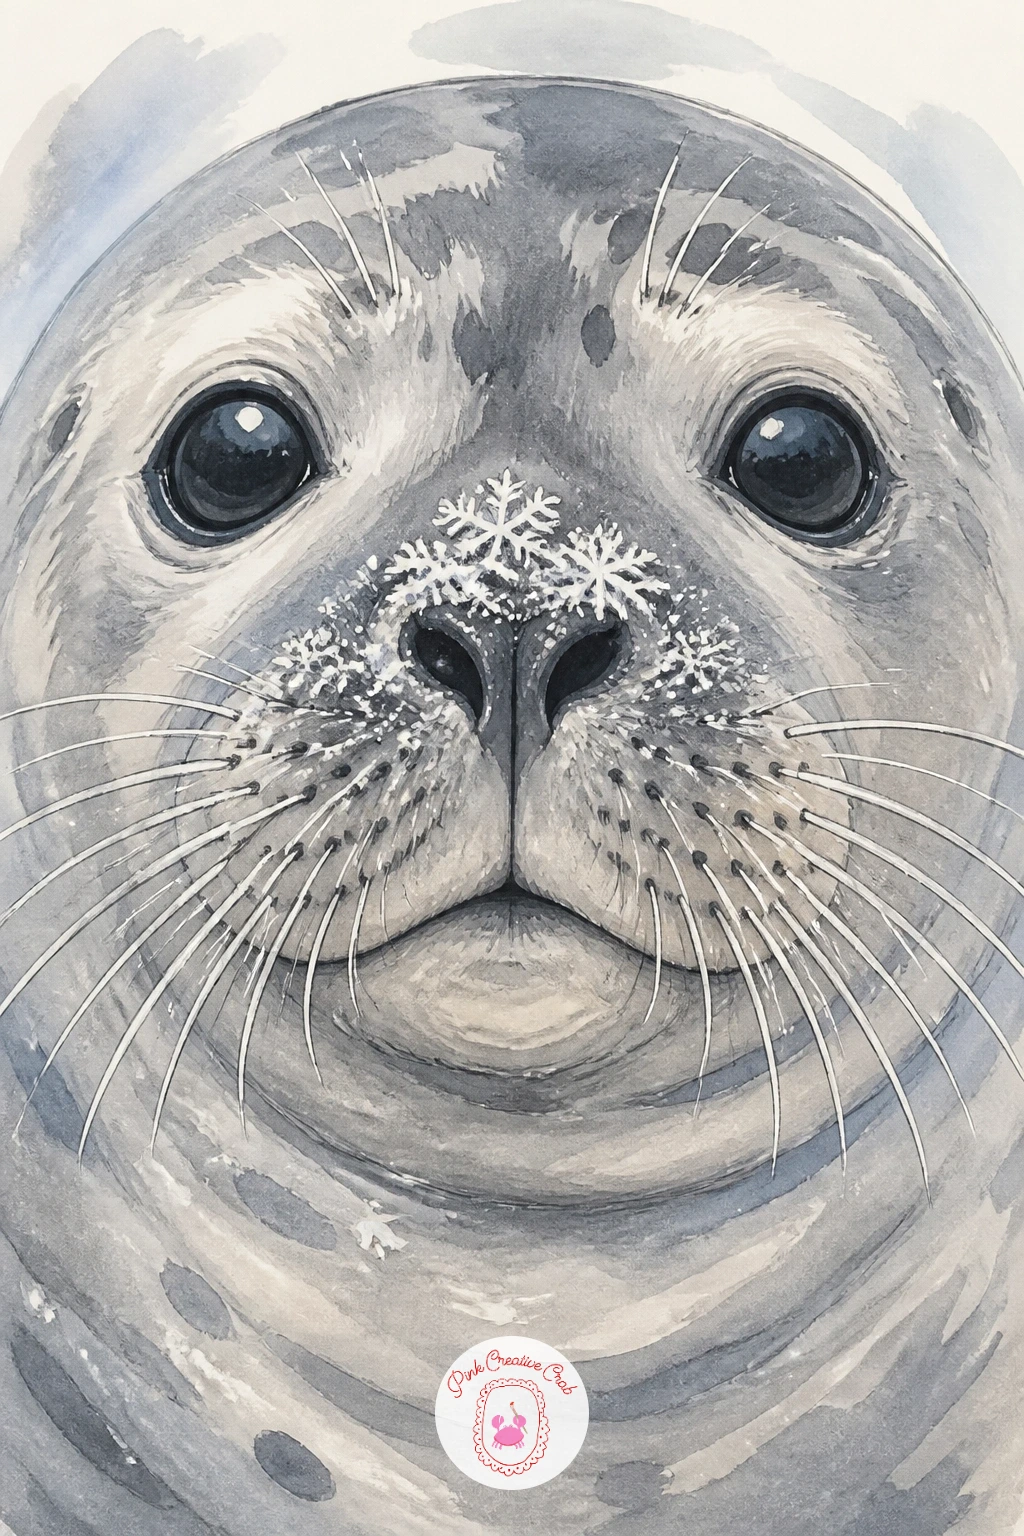
You Will Need
- white gel pen
Palette: Soft Grey,Pale Blue Grey,Snow White,Nose Black
End the rock-and-shore moments with a seal caught mid-tumble, sliding off a rock edge into an incoming wave. Sketch the rock as a simple angled shape first, then draw the seal’s body in a diagonal falling pose, flippers out and head tipped slightly back, crossing the rock’s edge so it clearly looks in motion rather than posed on top.
Where the seal meets the wave is the part to get right: let the front half of the body dip slightly into a curling wave shape, with a few splash marks and small white foam dots breaking the water’s edge around the point of contact. Ink the rock first, then the seal overlapping its edge, then the wave shape rising to meet it.
Color the wave in a deeper, more saturated blue than any resting-water scene on this list, since motion and splash read better with slightly punchier color. White gel pen or simply untouched paper along the wave’s crest and around the splash points keeps the energy of the moment visible.
A damp sponge dabbed lightly at the wave’s edge, with a touch of white paint or gel pen over it, adds a quick convincing foam texture.
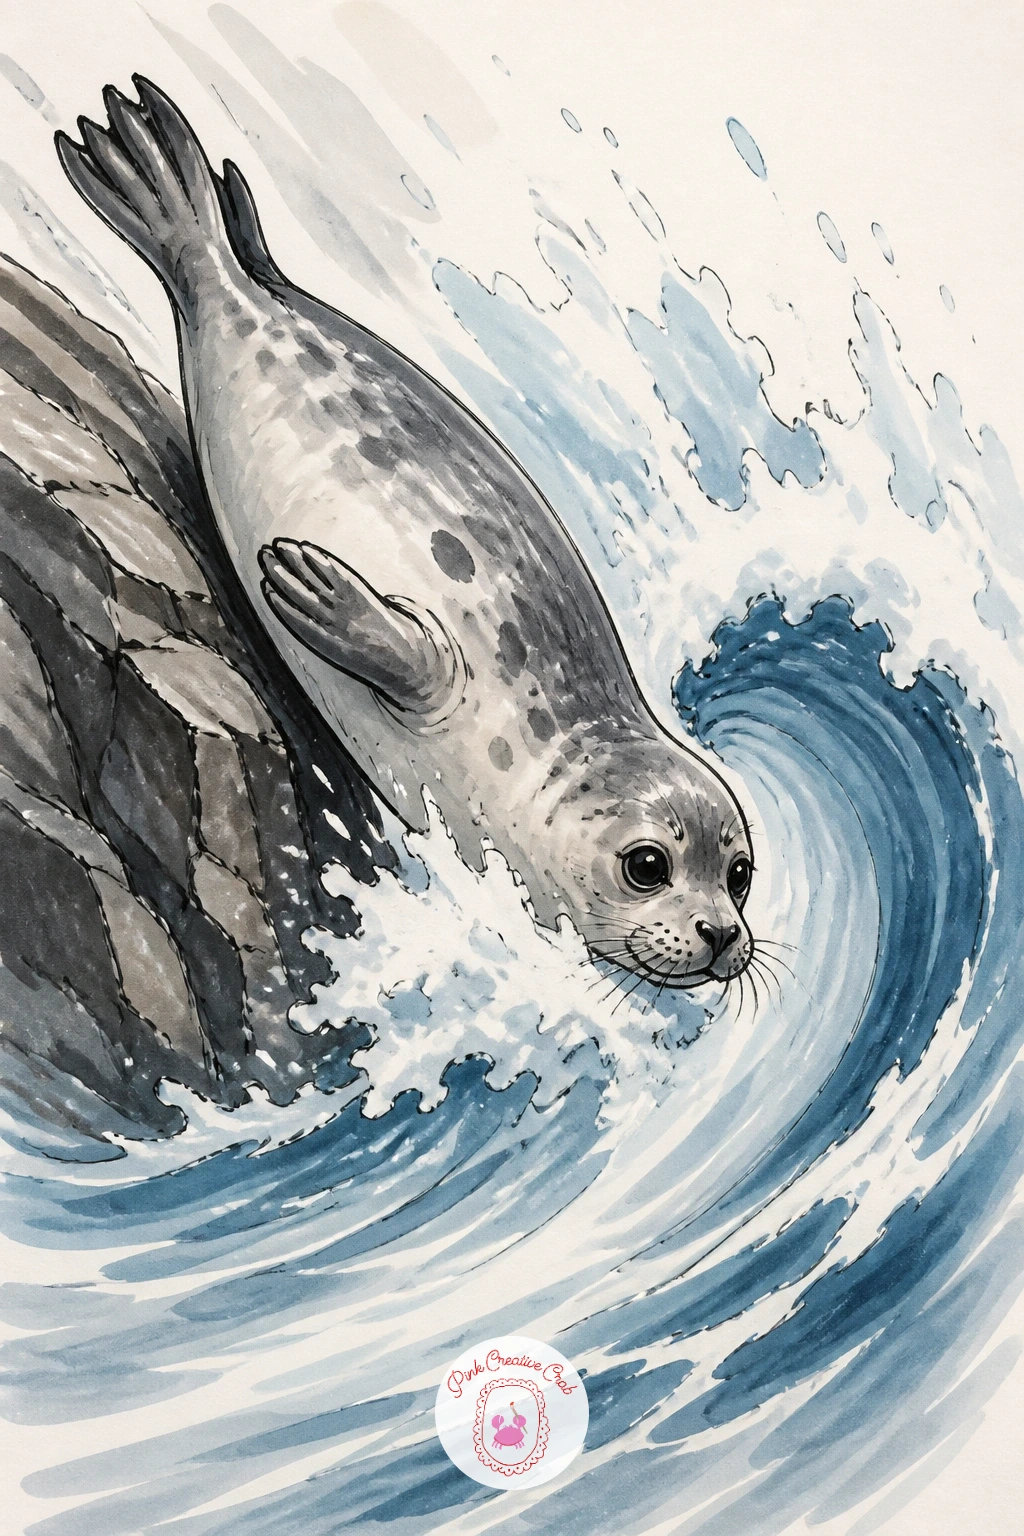
You Will Need
- white gel pen
Palette: Rock Grey,Wave Blue,Foam White,Seal Grey
Close the list on a cheerful note: a seal afloat in calm water, one flipper raised in a friendly wave. Sketch the head and upper body above the waterline first, then lift one flipper up and slightly curved at the tip, as if genuinely mid-wave rather than just resting out of the water.
Once this pose feels comfortable, it is an easy one to vary next time: try the other flipper raised, both flippers up for a bigger greeting, or the head turned to look directly at the viewer instead of off to one side. Ink the head and raised flipper first, then the waterline and the submerged half of the body beneath it.
Keep the face bright and open, eyes slightly wide and mouth in a small curved smile, since the expression needs to match the friendliness of the gesture. Water beneath stays simple, a few soft ripple lines spreading from where the body meets the surface.
A loose scribble of small white gel pen sparkle dots scattered across the water adds a cheerful finishing sparkle without any extra planning.
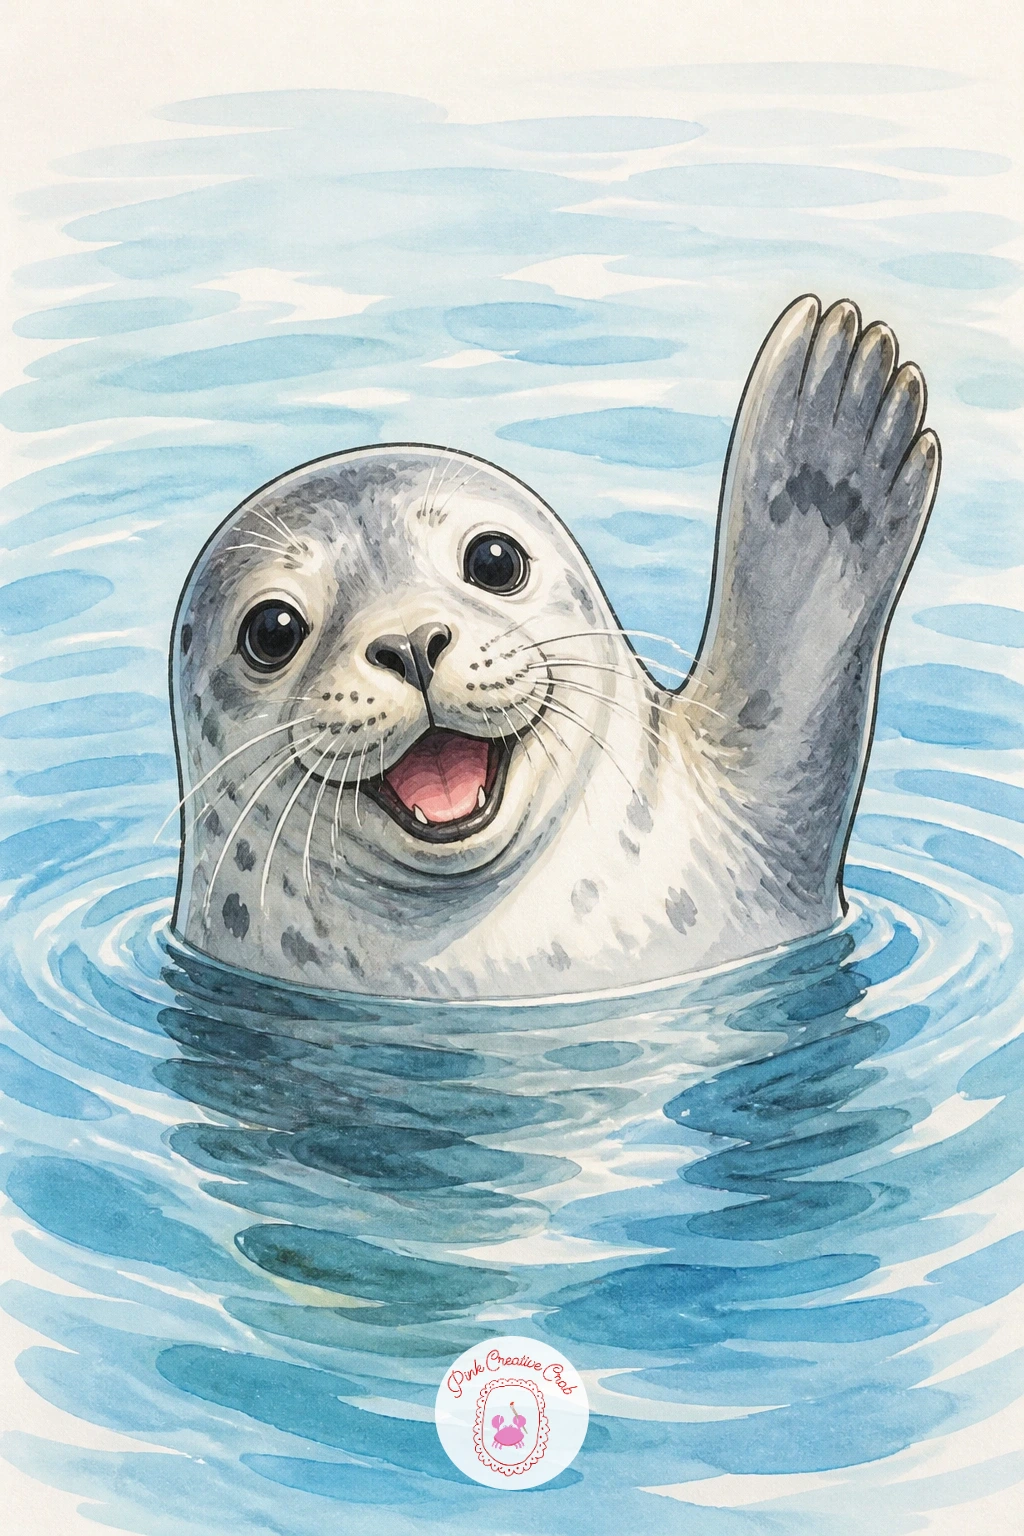
You Will Need
- white gel pen
Palette: Seal Grey,Calm Blue,Deep Blue,Warm White
What to Do Next
Pick whichever seal moment caught your eye first, since starting with real enthusiasm always shows in the finished piece. Grab a sheet of marker paper, rough out the body shape in pencil, and let today’s seal be the one you simply finish.
Frequently Asked Questions
What is the easiest way to start a seal drawing for a beginner?
Start with a simple teardrop or oval body shape in pencil before any detail. Seals have soft, rounded forms with no sharp angles, so one confident curved outline gets the pose right before you commit to fineliner.
Which markers work best for soft seal fur and water?
Alcohol markers blend best for seal fur and water since they stay workable long enough to merge two tones smoothly. Cool greys suit the fur while layered blues, light to dark while still damp, give the water its gradient.
How do you make a seal look cute instead of flat or stiff?
Large eyes placed low and close together are the biggest factor in a cute seal face. Keep the body soft and slightly asymmetrical too, since a perfectly symmetrical pose often reads as stiff rather than charming.
What is the difference between drawing a seal, a sea lion and a walrus?
A seal has no visible ear flaps and moves by wriggling its belly, a sea lion has small ear flaps and stands upright on its flippers, and a walrus is bulkier with long visible tusks. Each needs a different posture on the page.
How can you add snow or water texture without it looking messy?
Keep both loose and uneven rather than evenly spaced. Scatter snowflakes or ripple lines in varied sizes and gaps, and let a white gel pen or untouched paper carry the brightest highlights instead of outlining every detail.
Have any thoughts?
Share your reaction or leave a quick response — we’d love to hear what you think!
-
 0
-
0
-
0
-
0
-
0
-
0


