

A winter wonderland painting is the perfect excuse to mix icy blue with soft gold and let the whole canvas glow. Every scene below has its own small story: a girl crossing a frozen lake, a fox wearing a crown of icicles, a carriage rolling through a snowy street. You get to paint the magic version of winter, the one with lanterns in every window and snow that never feels cold.
Scroll through and pick whichever scene pulls at you first. Each idea below walks you through the order to paint in, the one spot that tends to go wrong, and a swap if you are missing a colour or brush, so you can sit down and actually finish something tonight.
Using these images: free for personal projects such as printing, coloring, cards, journals and gifts. Handmade items that include them may be sold up to 30 pieces per design. More than that is commercial use and is not permitted, and neither is selling or sharing the images themselves or passing them off as your own. Please ask before any other use.
Start the girl skating on a frozen palace lake with a quick pencil or thin paint sketch of the horizon line and the palace silhouette, keeping the building small and pale so it reads as far away. Block the ice first with horizontal strokes of pale blue and white, leaving the surface loose and streaky rather than flat, since real ice never looks like one solid colour.
Paint the skater last in a soft blush or icy blue coat, using a small brush for her pose and a thin dark line for the skate blade meeting the ice. This is where proportion matters most: hold your brush up to measure her height against the palace behind her, since a figure painted too large will flatten the whole sense of distance.
If the ice looks muddy, let it dry and glaze a thin wash of white over the top to push it back and brighten it. No palette knife on hand, a stiff flat brush can scrape in those same streaky highlights.
Keep her scarf or cloak trailing slightly behind her to suggest motion across the ice.
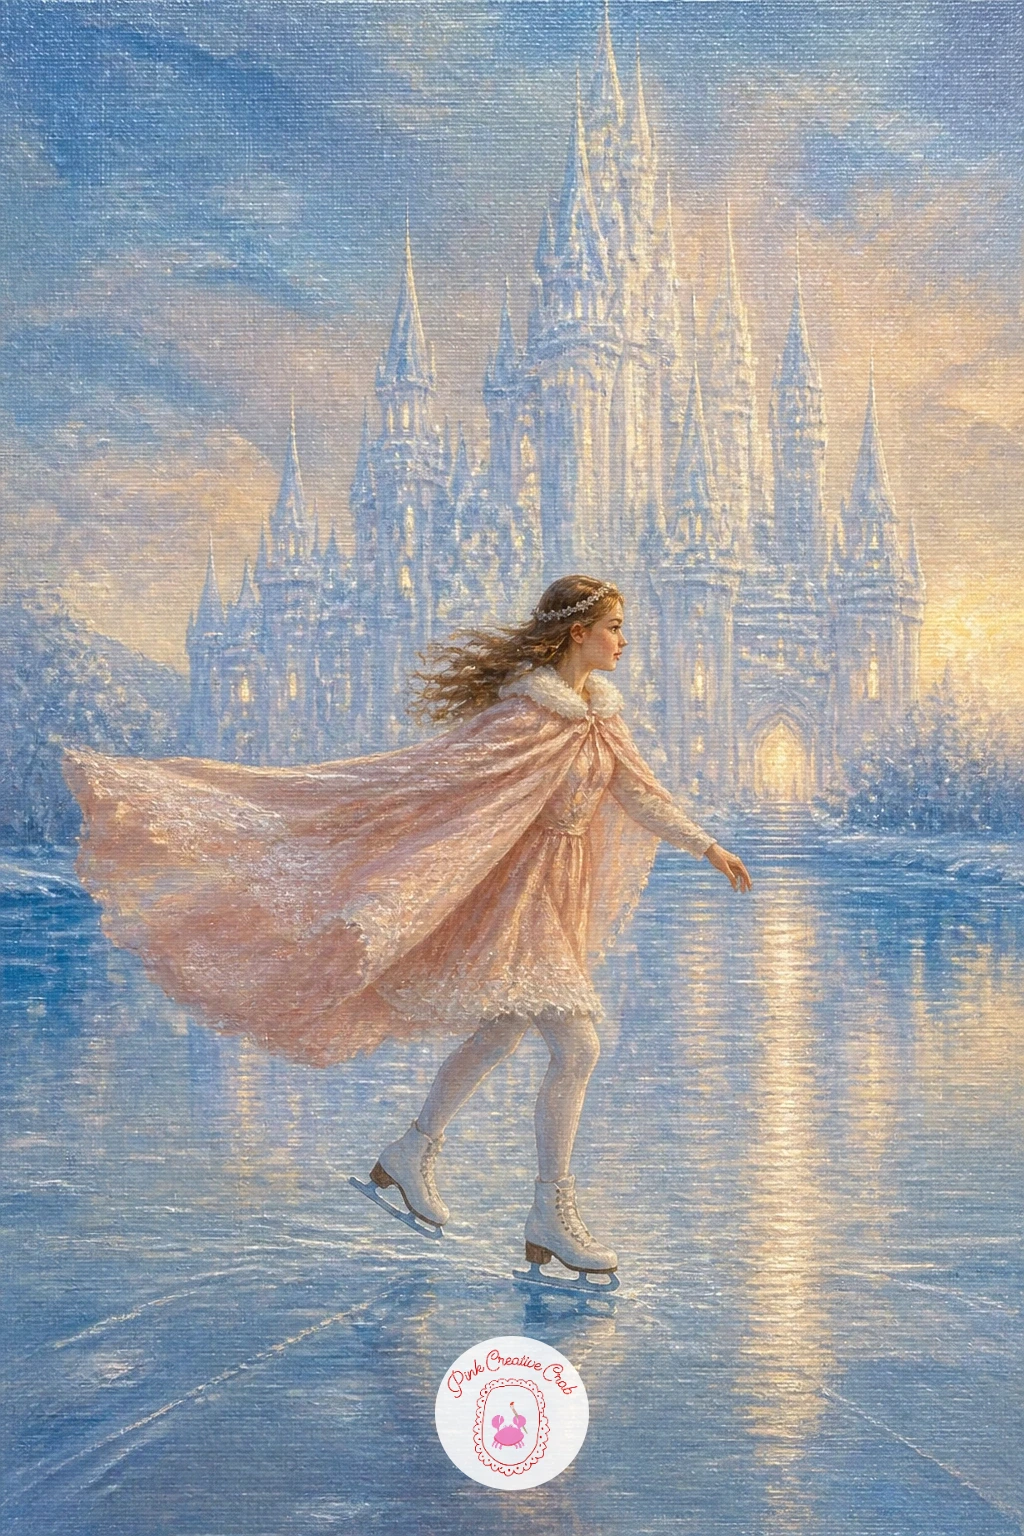
You Will Need
- canvas board
- small round brush
- flat brush for ice streaks
- pencil for the sketch
Palette: Titanium White,Cerulean Blue,Payne’s Grey,Rose Dust
Add a few thin diagonal cracks in darker grey across the ice with a liner brush, it reads as more convincing than a perfectly smooth surface.
A frosted glass greenhouse glowing with lanterns gives you a chance to paint warm light pushing through cold glass, which is one of the prettiest tricks in this whole list. Sketch the greenhouse frame loosely in thin dark paint, keeping the panes slightly uneven since a too-perfect grid looks stiff.
Paint the glass panes in cool greys and icy blue first, then drop warm gold and blush into the centre of each pane while it is still wet, blending gently so the warmth glows outward rather than sitting as a hard dot. This is the light moment of the list: decide where your main lantern sits and let every other pane dim slightly as it moves away from that source.
If the glow looks flat, go back in with a tiny bit of white mixed into the gold right at the lantern’s centre. No gold paint in your set, warm yellow ochre mixed with a touch of white does the same job.
Finish with soft snow drifts along the base of the greenhouse in thick white paint.
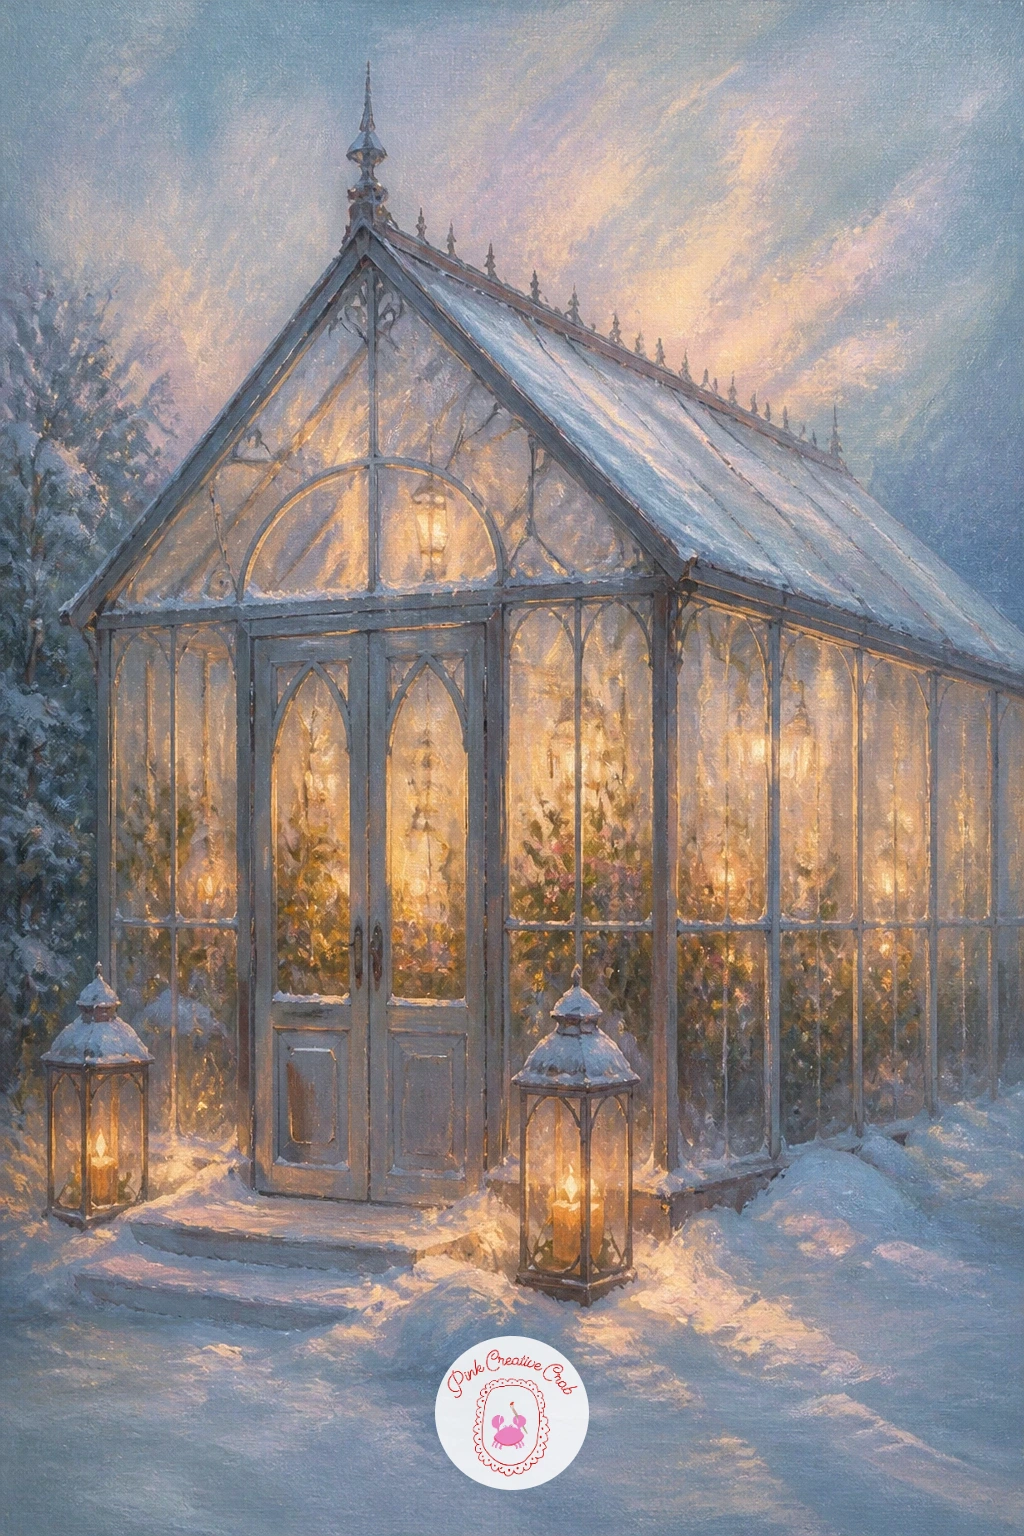
You Will Need
- canvas board
- flat brush for glass panes
- small round brush for lantern glow
- palette knife optional
Palette: Payne’s Grey,Icy Blue,Soft Gold,Titanium White
Dab a little blush pink into the lower corners of the glass panes, it warms the whole structure without competing with the lantern glow.
An ice castle at sunrise asks you to think about where the light comes from before you paint a single tower. Decide the sun sits low on one side, then block in the sky first with a gradient from blush pink near the horizon up into pale icy blue overhead, blending the two while wet so there is no hard line between them.
Paint the castle’s silhouette in cool blue-grey on the shadowed side and let the sunrise side catch streaks of gold and pink, using a dry brush dragged lightly over the surface so the light looks like it is skimming the ice rather than painted flat on top. Work from the back towers forward, keeping the furthest spires softer and paler.
If the castle looks too solid and opaque, thin your paint with a little more medium and let some canvas texture show through the icy sections. Short on time, a ten minute version can be just the silhouette and sky; a forty minute version adds reflected light in the snow below the walls.
Add one tiny warm window light somewhere in the castle to give it scale and story.
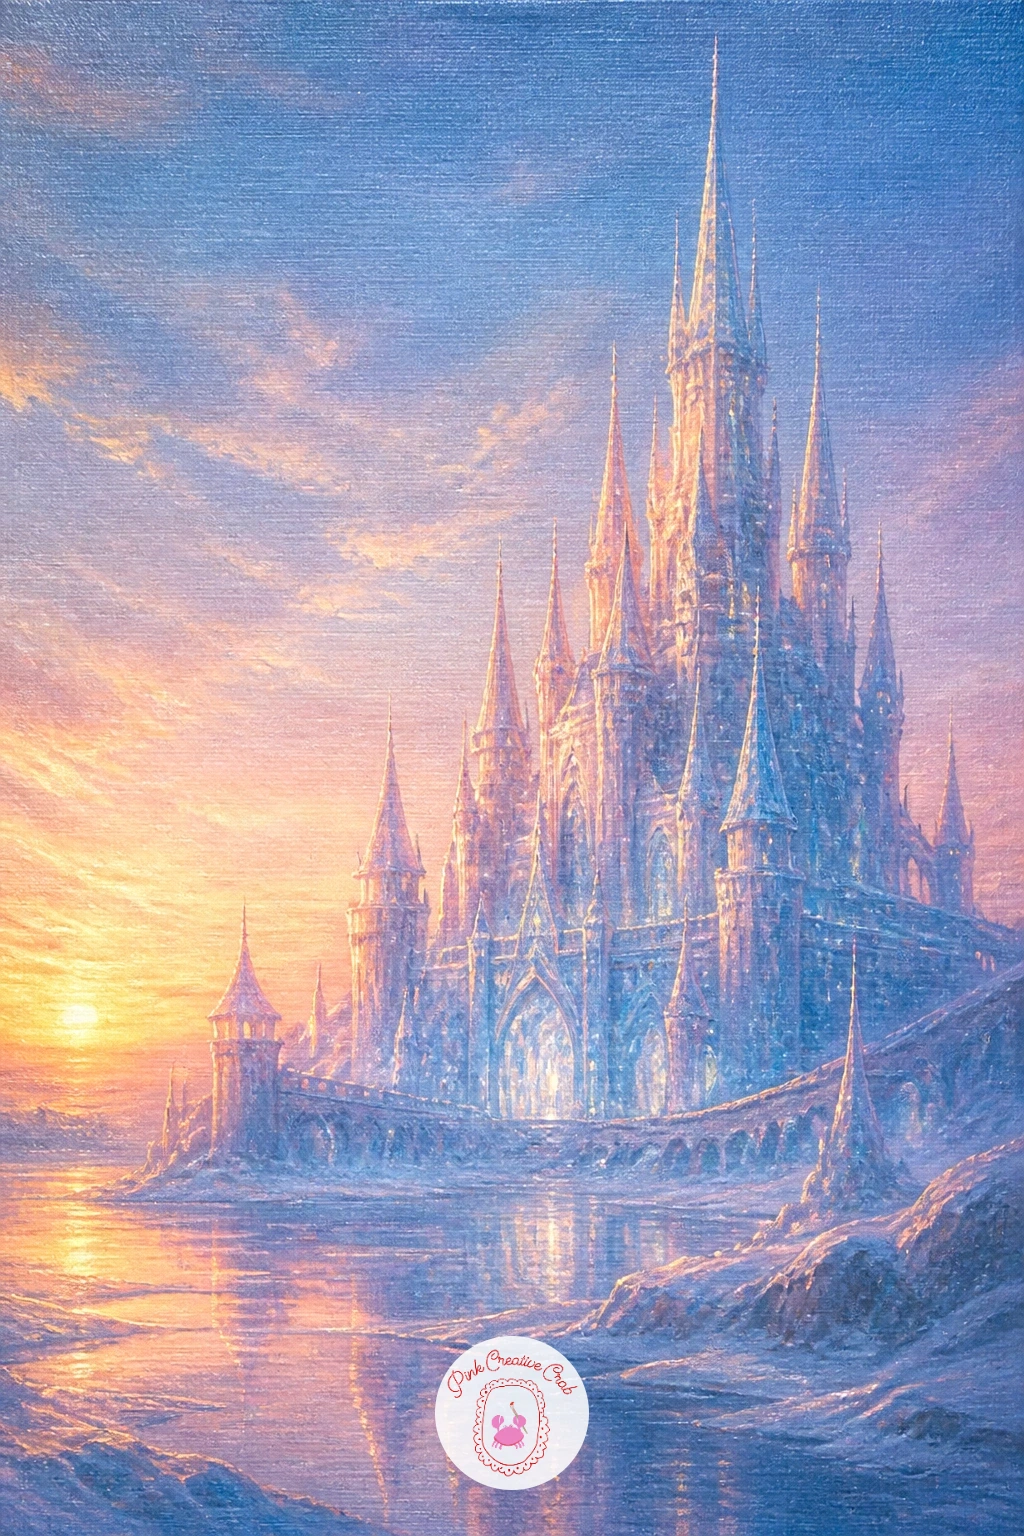
You Will Need
- canvas board
- wide flat brush for sky
- dry brush for light streaks
- medium or thinner
Palette: Blush Pink,Icy Blue,Payne’s Grey,Soft Gold
Try the same castle silhouette against a deep twilight sky another time, swapping the gold sunrise for a cool lavender glow to see how differently the mood lands.
Moving from towers to motion, a sleigh pulled by white horses through birches is really a painting about a path leading the eye through trees. Lay down the birch trunks first as simple vertical strokes of white and pale grey, spacing them unevenly so the forest feels natural rather than like a fence.
Block the snow path in warm white below and the sky in cool lavender-blue above, then paint the horses and sleigh small and slightly off-centre, since a tiny subject in a big snowy space reads as more magical than one that fills the frame. Keep the horses’ outlines soft, just a suggestion of movement and manes rather than hard anatomy.
If the trunks start looking like stripes instead of trees, break them up with a few thin dark horizontal marks for bark texture. No white horses available as reference in your head, picture them as soft grey-white shapes with just the manes catching a touch of gold light.
One concrete tip: angle the sleigh tracks in the snow slightly, curving away into the trees, to pull the eye deeper into the scene.
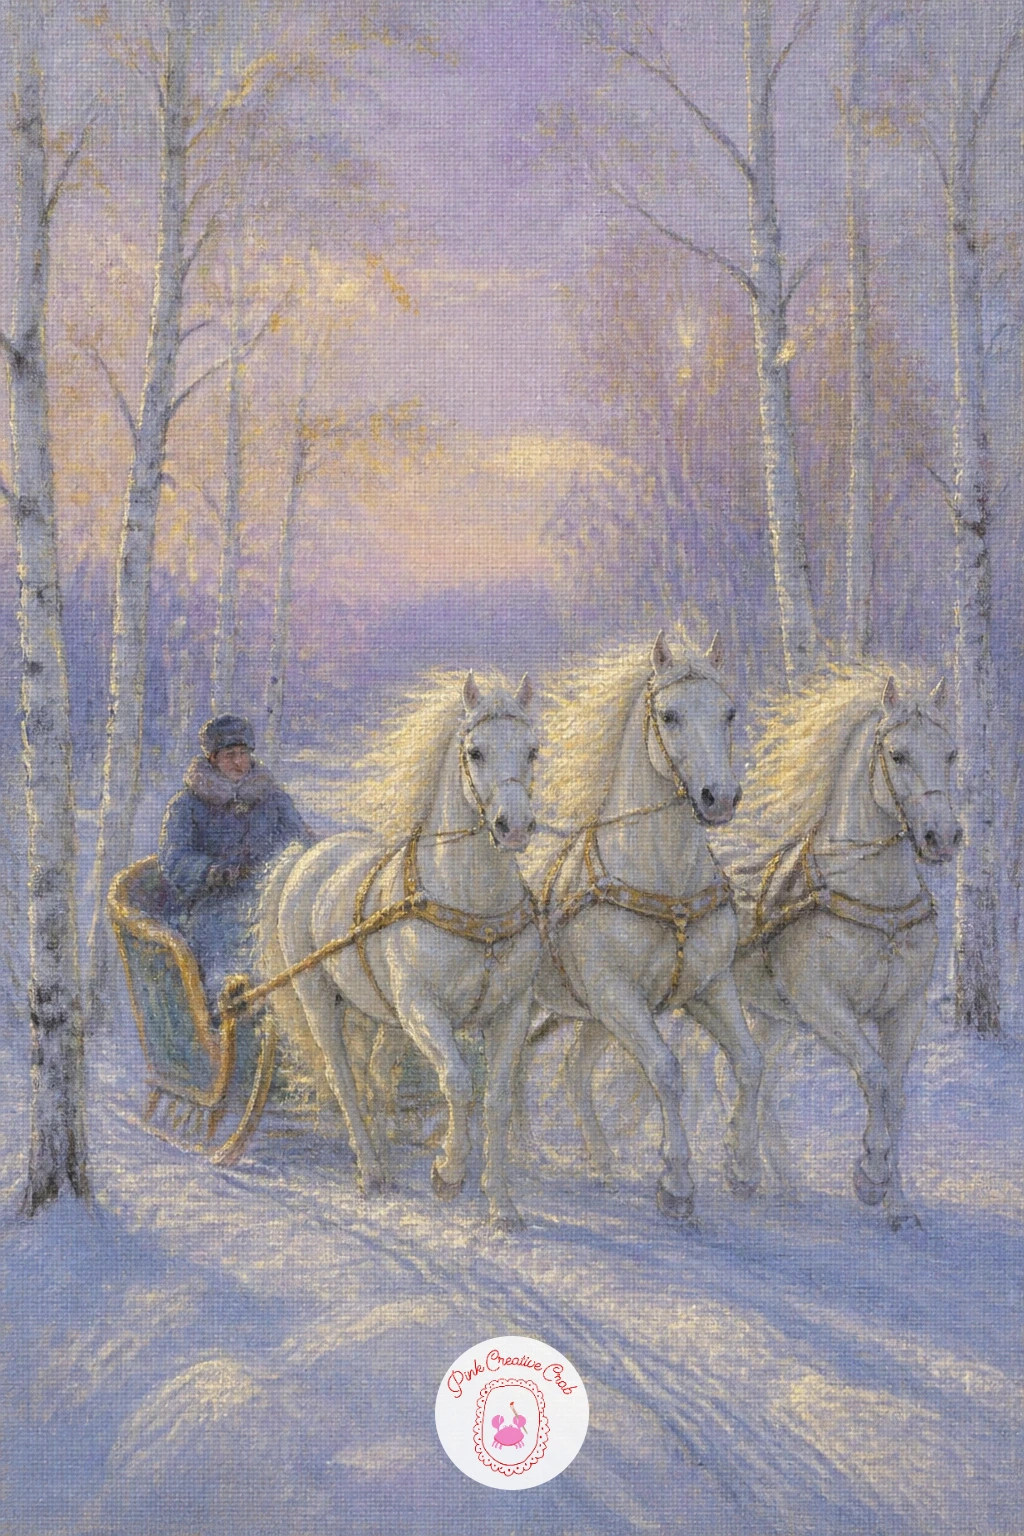
You Will Need
- canvas board
- fine round brush for trunks
- medium flat brush for snow
- liner brush for tracks
Palette: Titanium White,Lavender Grey,Payne’s Grey,Soft Gold
Scatter a few loose dots of white with a stiff brush flicked toward the canvas for falling snow, it adds movement without any extra blending.
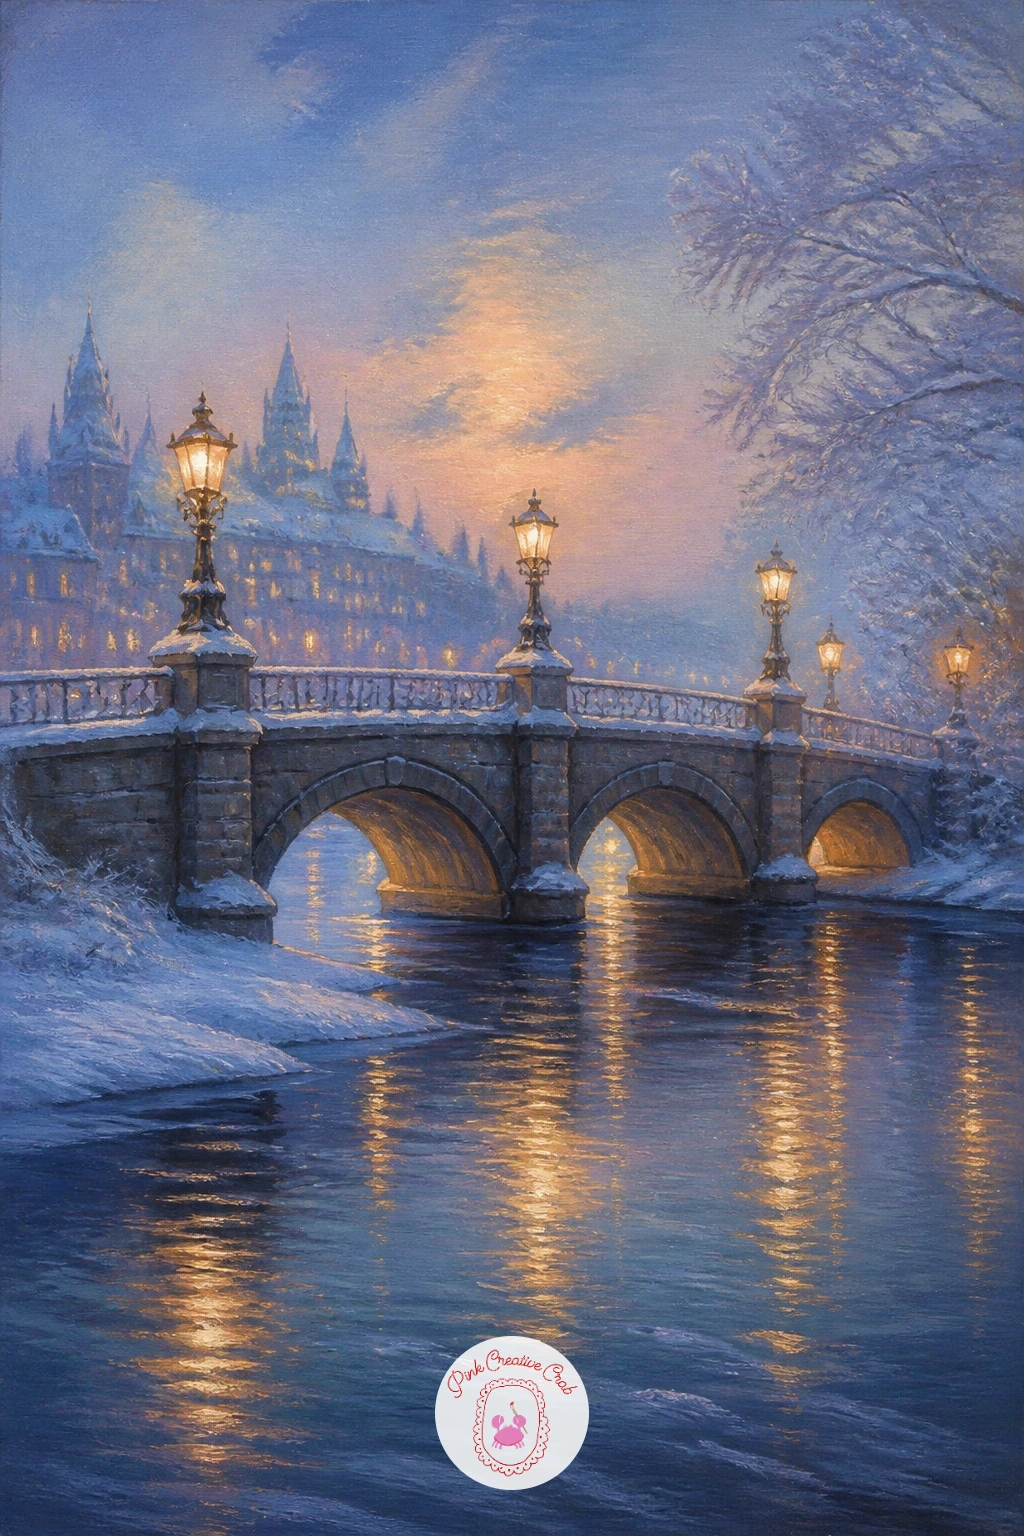
A snowy bridge with lamps over a river leans on reflection, which makes it a satisfying one to paint once you get the trick. Sketch the bridge arching gently across the canvas, then paint the river below in darker blue-grey with the bridge and lamps mirrored as soft, wavy reflections rather than sharp copies.
Work the bridge stonework in cool greys first, add snow caps along the railings in thick white, then finish with the lamp glow in warm gold dabbed on last so it sits on top of everything else. The usual mistake here is making the water reflection too crisp, which flattens the whole scene; keep your brush slightly dry and drag it horizontally to blur it.
If your river colour looks too dark and heavy, lighten it with a thin white glaze once dry. Missing a fan brush for those water streaks, the edge of an old credit card dragged through wet paint works almost as well.
Let one lamp glow slightly brighter than the rest to anchor the eye.
You Will Need
- canvas board
- flat brush for stonework
- fan brush or card edge for water
- small round brush for lamp glow
Palette: Payne’s Grey,Icy Blue,Titanium White,Soft Gold
Add a thin line of blush pink along the horizon beyond the bridge, it suggests early evening and makes the lamp glow feel warmer by contrast.
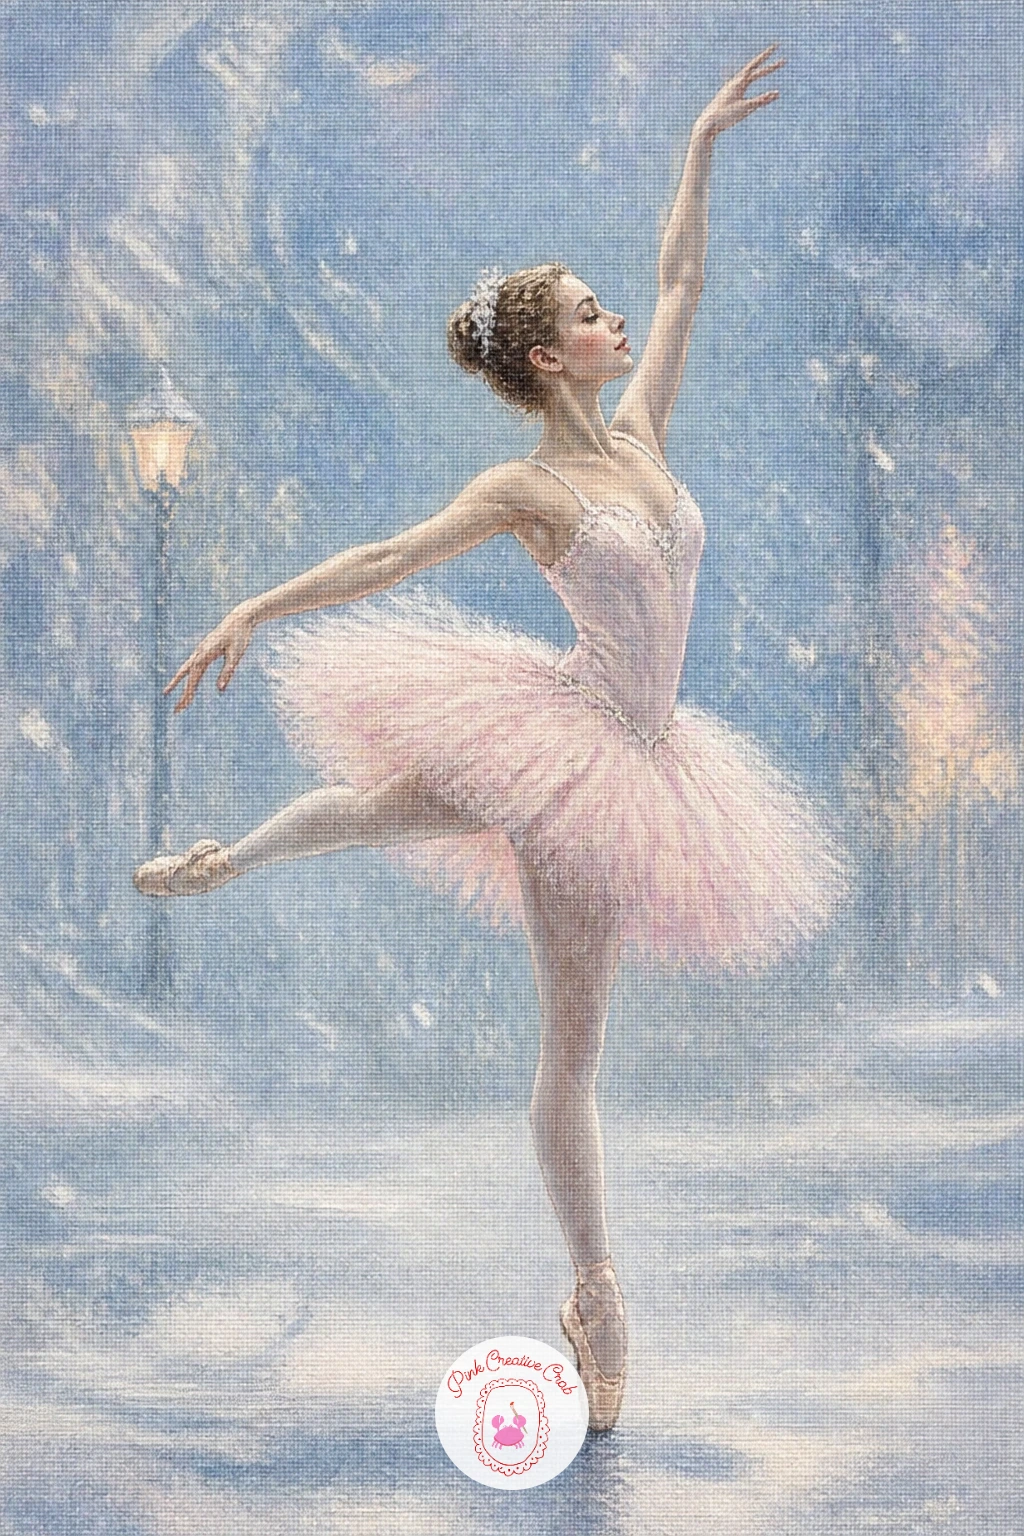
From architecture to a single figure, a ballerina dancing in falling snow is about pose more than detail. Sketch her shape loosely first, favouring one strong diagonal line through her body and skirt, since a stiff upright pose reads as static rather than dancing.
Paint the background soft and hazy in icy blue and blush, almost out of focus, before you touch the ballerina, so she stays the sharpest thing in the painting. Build her tutu with light, feathery strokes of white and pale pink, letting some strokes trail off the edge of the skirt to suggest tulle catching the air.
If her pose looks flat or frozen, check that her weight sits convincingly on one leg by comparing the angle of her shoulders against her hips, they should tilt in opposite directions. No reference of ballet poses handy, a simple arabesque with one leg lifted behind her is easy to invent and always reads as graceful.
Flick a few dry white dots across the whole canvas last for the falling snow.
You Will Need
- canvas board
- small round brush for the figure
- fine liner for tulle edges
- stiff brush for snow flicks
Palette: Titanium White,Blush Pink,Icy Blue,Soft Gold
Try her in a pale silver-blue costume instead of pink next time, it shifts the whole mood from warm and romantic to cool and fairy tale.
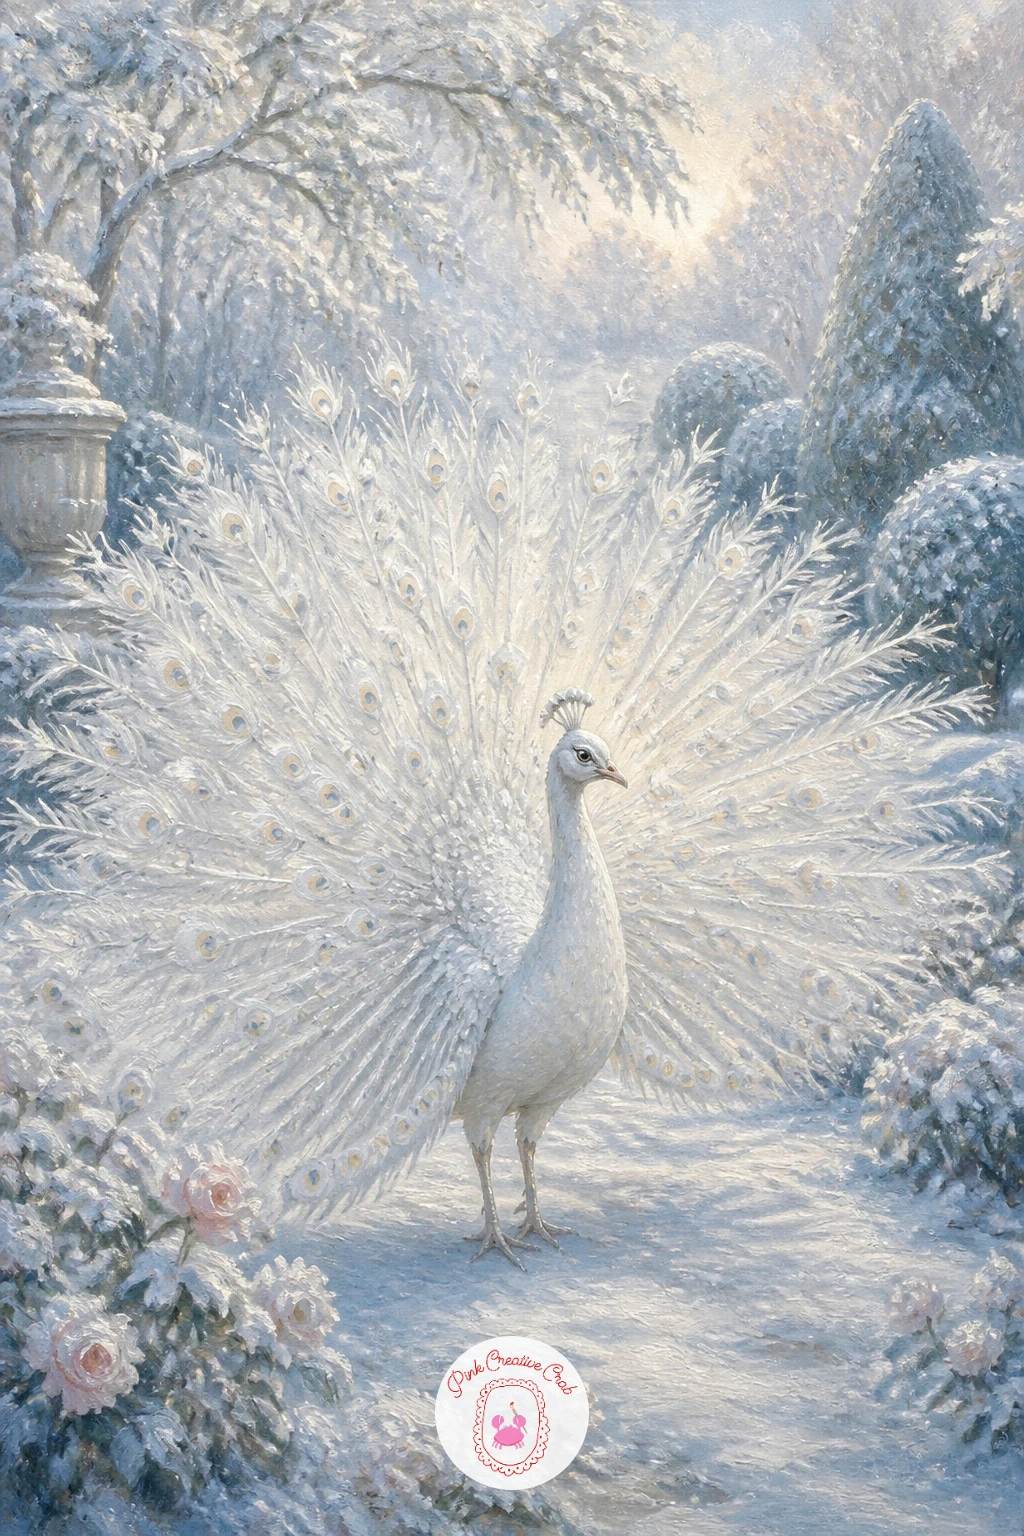
Trade the dancer for a bird and a white peacock in a snowy garden becomes a study in subtle value shifts, since everything here is close to white. Block in the whole canvas first with a pale grey-blue undertone so the white peacock and white snow both have something to sit against, otherwise the whole piece floats away into nothing.
Paint the peacock’s body in warm white with the faintest hint of blush in the shadows, then work the tail last, since that is where you can loosen up with long, curving brushstrokes radiating outward. Keep the eye spots on the tail feathers barely visible, just a ghost of pale blue-grey, so the bird still reads as a snow creature rather than a jewel-toned one.
If the peacock disappears into the background, darken the garden hedges or snow just behind its body to push it forward. Missing a fine detail brush for the tail feather lines, the tip of a dry flat brush dragged lightly does a similar feathery job.
Place one small warm light, like a lantern or pale sun, somewhere behind the peacock to give the white feathers something to catch.
You Will Need
- canvas board
- wide brush for undertone
- fine brush for tail feathers
- dry flat brush for texture
Palette: Titanium White,Payne’s Grey,Blush Pink,Icy Blue
Underpaint the whole canvas in a mid grey-blue before adding any white, it is the single easiest way to keep white-on-white subjects from looking flat.
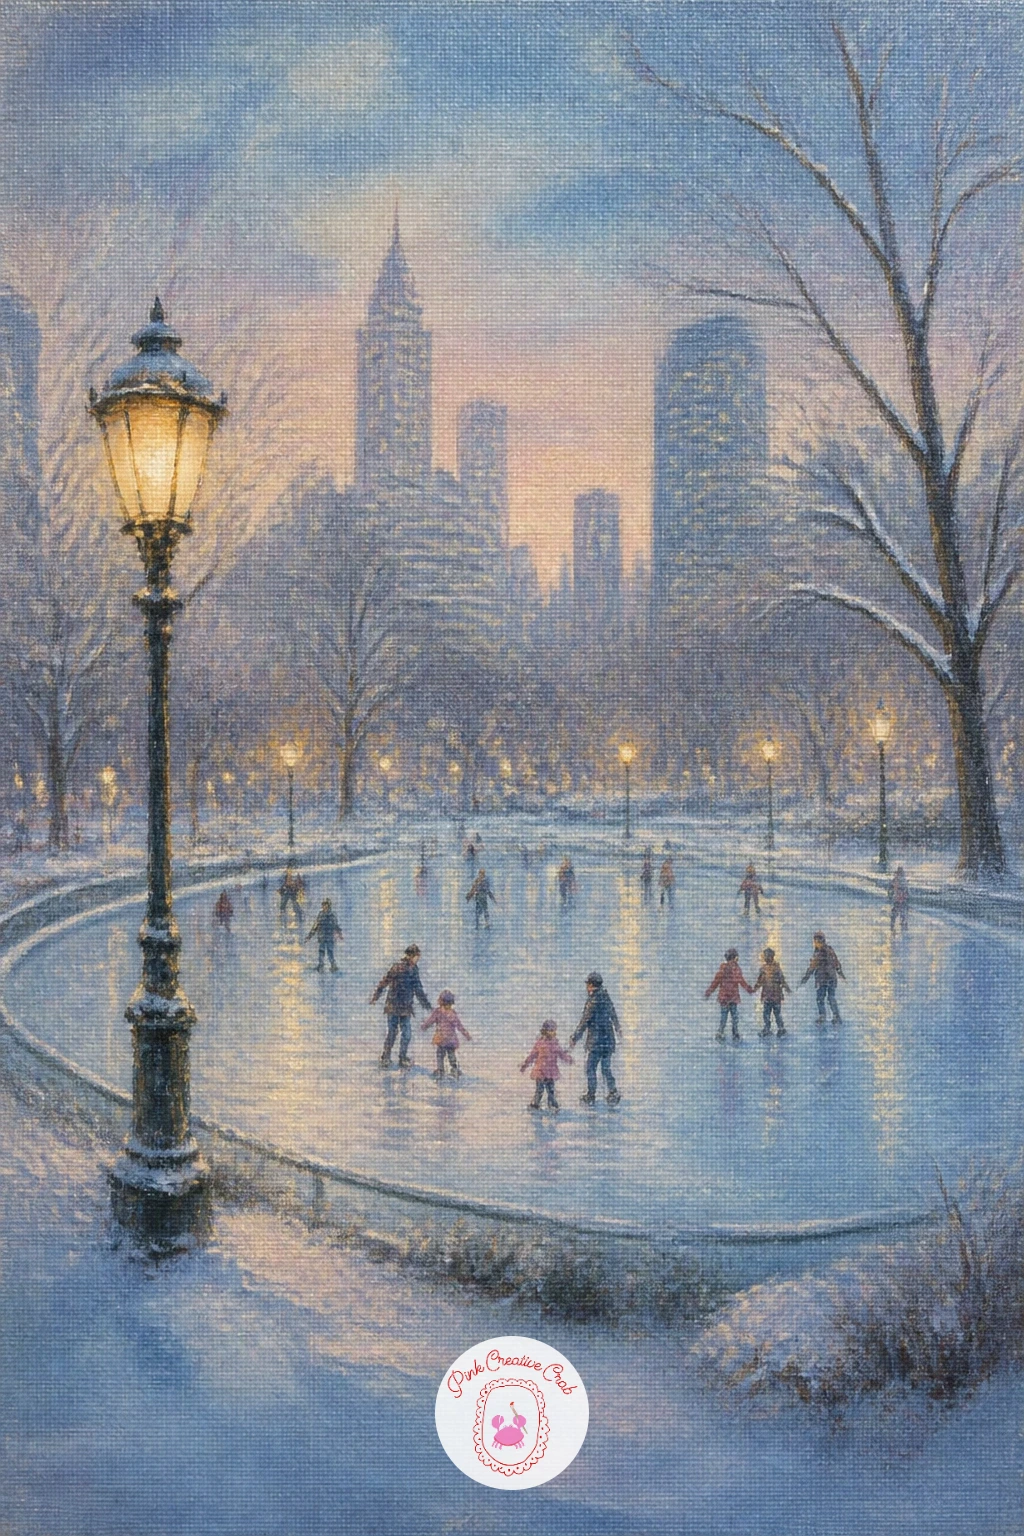
An outdoor skating rink in a city park swaps the lone skater for a small crowd, so this one is about keeping figures simple so they do not fight for attention. Block in the ice first as a pale oval or rectangle of streaky white and blue, then paint the surrounding trees and park lamps softly behind it in cooler, darker tones.
Add the skaters as small, loose silhouettes, two or three strokes each for a coat and a pair of legs, with no faces needed at this distance. The common mistake is making every figure the same size, which flattens the rink; vary their size slightly and place a couple further back and smaller to build depth.
If the ice looks too plain, drag a dry brush across it in a few curved lines to suggest skate marks crossing the surface. No park lamps to reference, a simple dark pole topped with a small gold dot reads instantly as a lamp at this scale.
Warm up two or three of the park lamps with a soft gold glow to light the whole scene from above.
You Will Need
- canvas board
- small flat brush for figures
- dry brush for skate marks
- fine brush for lamp posts
Palette: Titanium White,Icy Blue,Payne’s Grey,Soft Gold
Keep the furthest skaters as nothing more than pale smudges of colour, resisting detail at the back is what makes the near figures feel close.
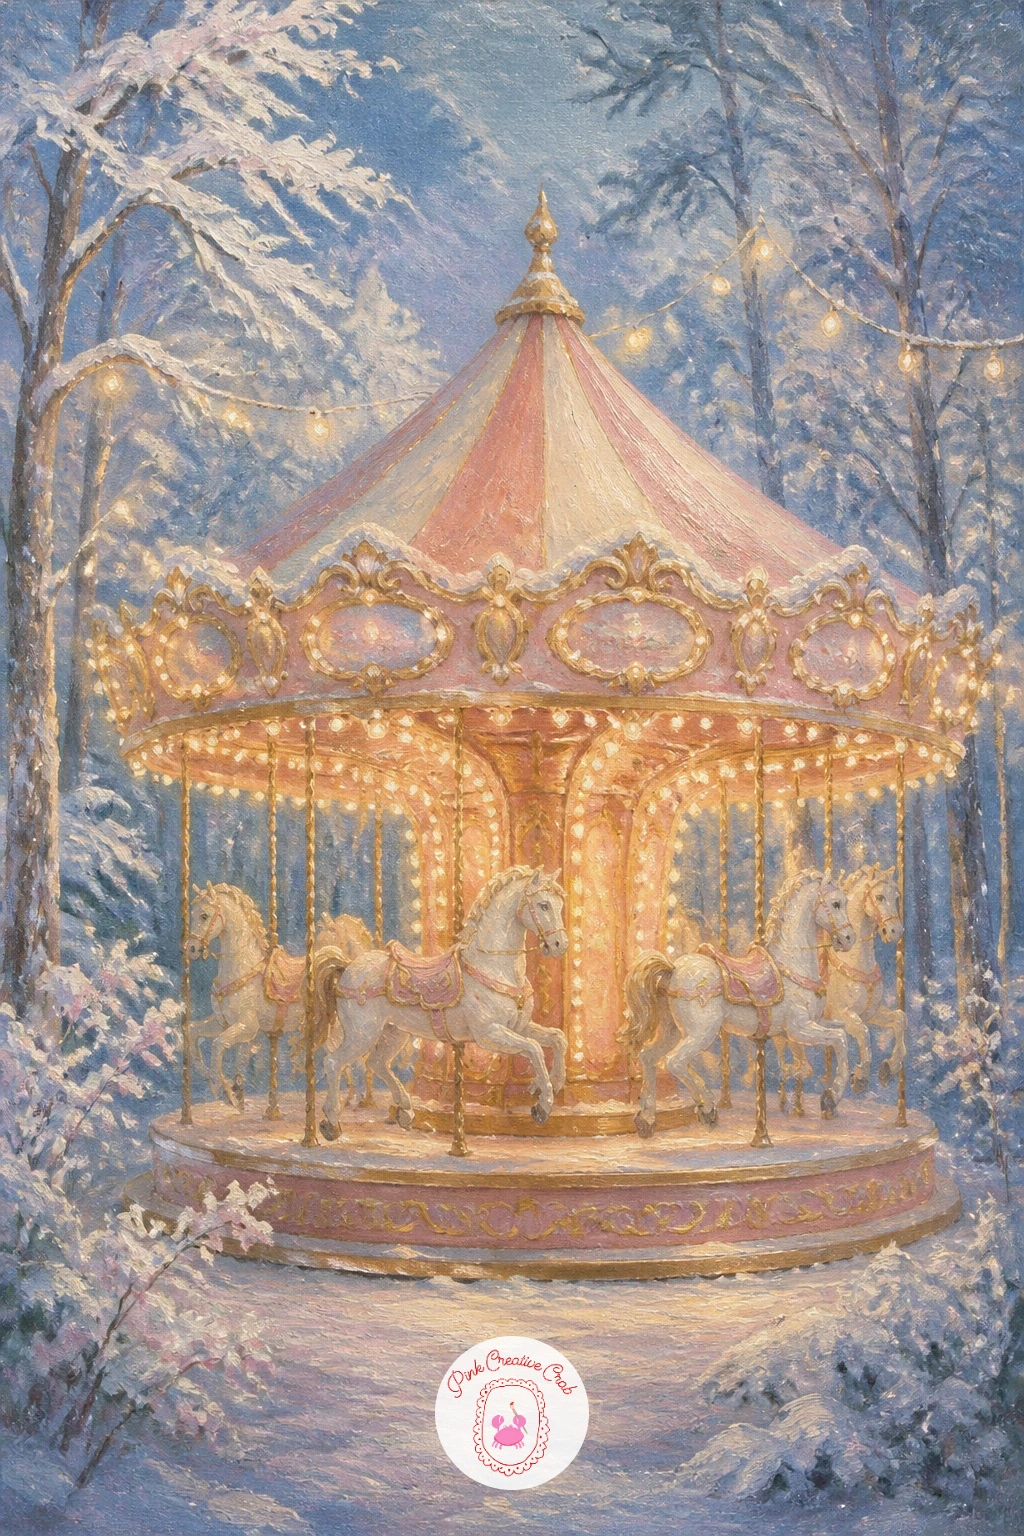
A carousel in a snowy forest gives you a bold, colourful focal point against all that white and blue, which makes it a nice change of pace in this list. Sketch the carousel’s round shape and central pole first, then paint the canopy top in alternating stripes of blush and gold, keeping the stripes slightly curved to follow the round roof.
Work the carousel horses loosely, more suggestion than detail, in soft white and cream, and let the string lights around the canopy edge be the very last thing you paint, as small dots of warm gold. The trees around it should stay cooler and darker so the carousel glows forward as the warmest, brightest thing in the painting.
If the whole carousel looks too busy, simplify by painting only two or three horses clearly and letting the rest blur into shadow behind them. No gold paint for the lights, a pale yellow dot with a tiny white centre does the same glowing trick.
Add fresh snow caught on the canopy’s edge to tie it back into the winter setting.
You Will Need
- canvas board
- round brush for canopy stripes
- fine brush for string lights
- small brush for horses
Palette: Blush Pink,Soft Gold,Titanium White,Payne’s Grey
Pick a cool twilight blue for the forest behind the carousel, a strong temperature contrast is what makes the warm lights feel like they are truly glowing.
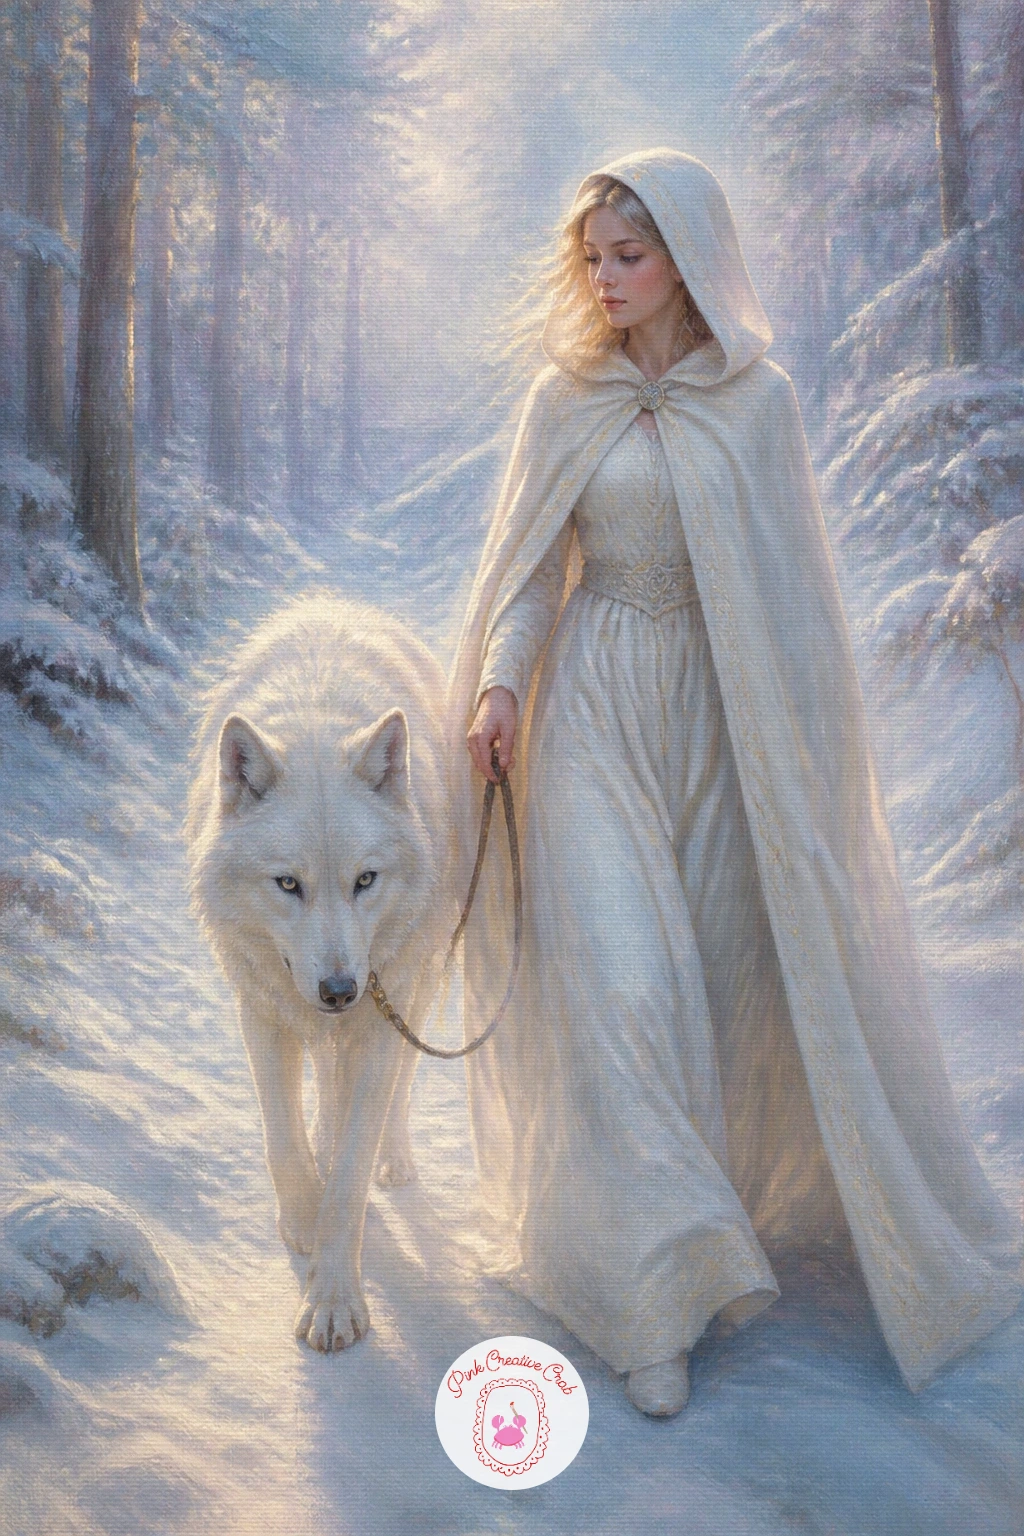
A girl in a white cloak walking a white wolf pairs two similar pale shapes, so the trick is separating them clearly even though they share a colour family. Sketch her first, standing or mid-step, with the wolf slightly ahead or beside her on a loose lead or simply walking close, then keep her cloak a touch warmer in tone (more blush) and the wolf a touch cooler (more icy blue) so your eye can tell them apart at a glance.
Paint the snowy path beneath them in mid-tone blue-grey so both pale shapes have something to stand on, then build the wolf’s fur with short, overlapping strokes rather than one flat shape, since fur needs that broken edge to read as soft.
If the two figures blend together, add a thin dark outline just where the cloak meets the wolf’s back to separate them. Missing a smaller detail brush for the fur strokes, an old toothbrush dabbed lightly can stipple a similar soft texture.
Let her cloak trail slightly in the wind for a sense of movement through the snow.
You Will Need
- canvas board
- small round brush for figures
- fine brush for fur texture
- mid grey-blue for ground
Palette: Blush Pink,Icy Blue,Titanium White,Payne’s Grey
Give the wolf pale blue eyes with a tiny dot of white highlight, it is a small detail that makes the whole creature feel alive rather than decorative.
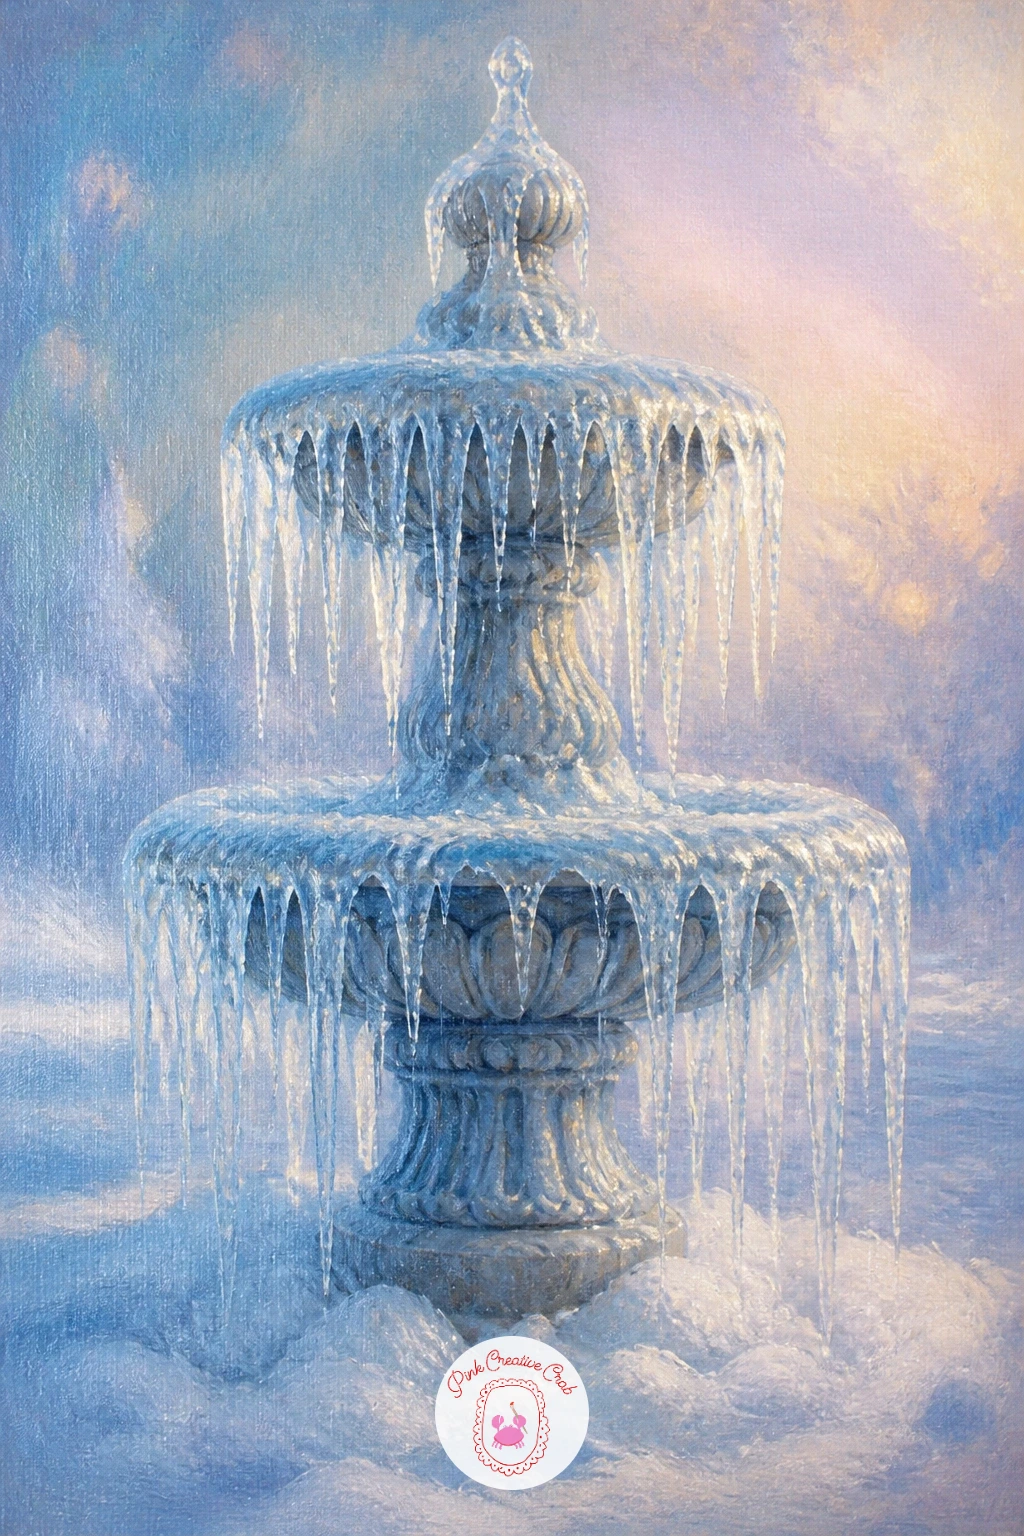
A frozen fountain with icicles is a good one for practicing hard edges after all that softness, since icicles need crisp, confident lines. Block in the fountain’s stone shape first in cool grey, then paint the frozen water pouring down its tiers as streaky white and pale blue, using vertical strokes that thin out toward the bottom.
Add the icicles last with a small liner brush, painting each one as a simple tapered triangle with a touch of white highlight down one side to catch the light. The common mistake is making every icicle the same length and width, which looks unnatural; vary them in size and let a few overlap.
If the icicles look too flat, add one thin streak of pale blue shadow along the opposite edge from your highlight. No liner brush in your kit, the corner of a flat brush pulled to a point does the job just as well.
Dust the base of the fountain with thick white snow to ground the whole piece.
You Will Need
- canvas board
- liner brush or pointed flat brush
- palette knife for stone texture optional
- fine brush for highlights
Palette: Payne’s Grey,Icy Blue,Titanium White,Soft Gold
Try painting the same fountain glowing faintly from within, as though a light sits inside the ice, for a more magical version once the basic one feels easy.
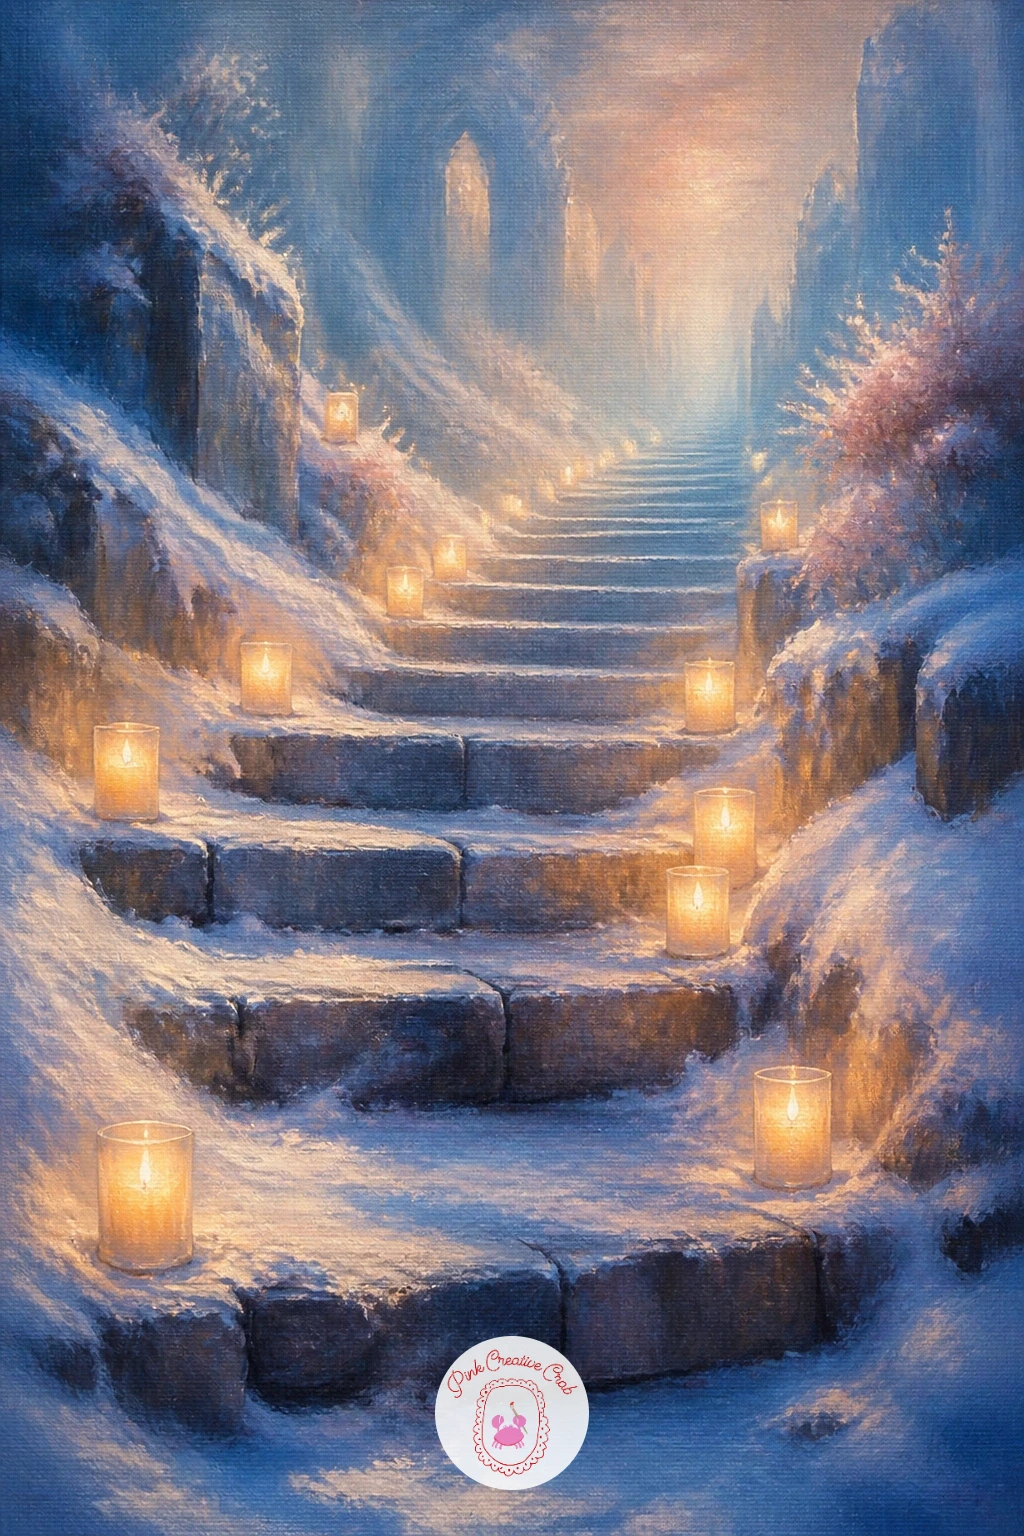
A snowy staircase with candles turns a simple architectural shape into something quietly romantic through light alone. Sketch the stairs first in a gentle diagonal climbing up through the canvas, keeping the perspective loose rather than mathematically perfect, since this is a dreamy scene rather than an architectural study.
Paint the stone steps in cool grey-blue, then place a small candle or lantern on alternating steps, painting each flame as a tiny warm gold dot with a soft halo blended around it while the paint is still wet. This is where the light does the real work: decide the candles are the only warm colour in the whole painting, and let everything else, snow, stone, sky, stay cool so the candlelight feels precious.
If the candle glow looks too harsh, soften its edges with a clean dry brush swept gently outward. No gold paint for the flames, a touch of warm orange mixed with yellow works just as well in small doses.
Let snow sit unevenly on each step rather than in a perfectly even layer.
You Will Need
- canvas board
- fine brush for candle flames
- flat brush for steps
- dry brush for softening glow
Palette: Payne’s Grey,Titanium White,Soft Gold,Icy Blue
Paint a faint figure in a cloak climbing the stairs in the distance for a version with a bit more story, keeping them small and soft-edged.
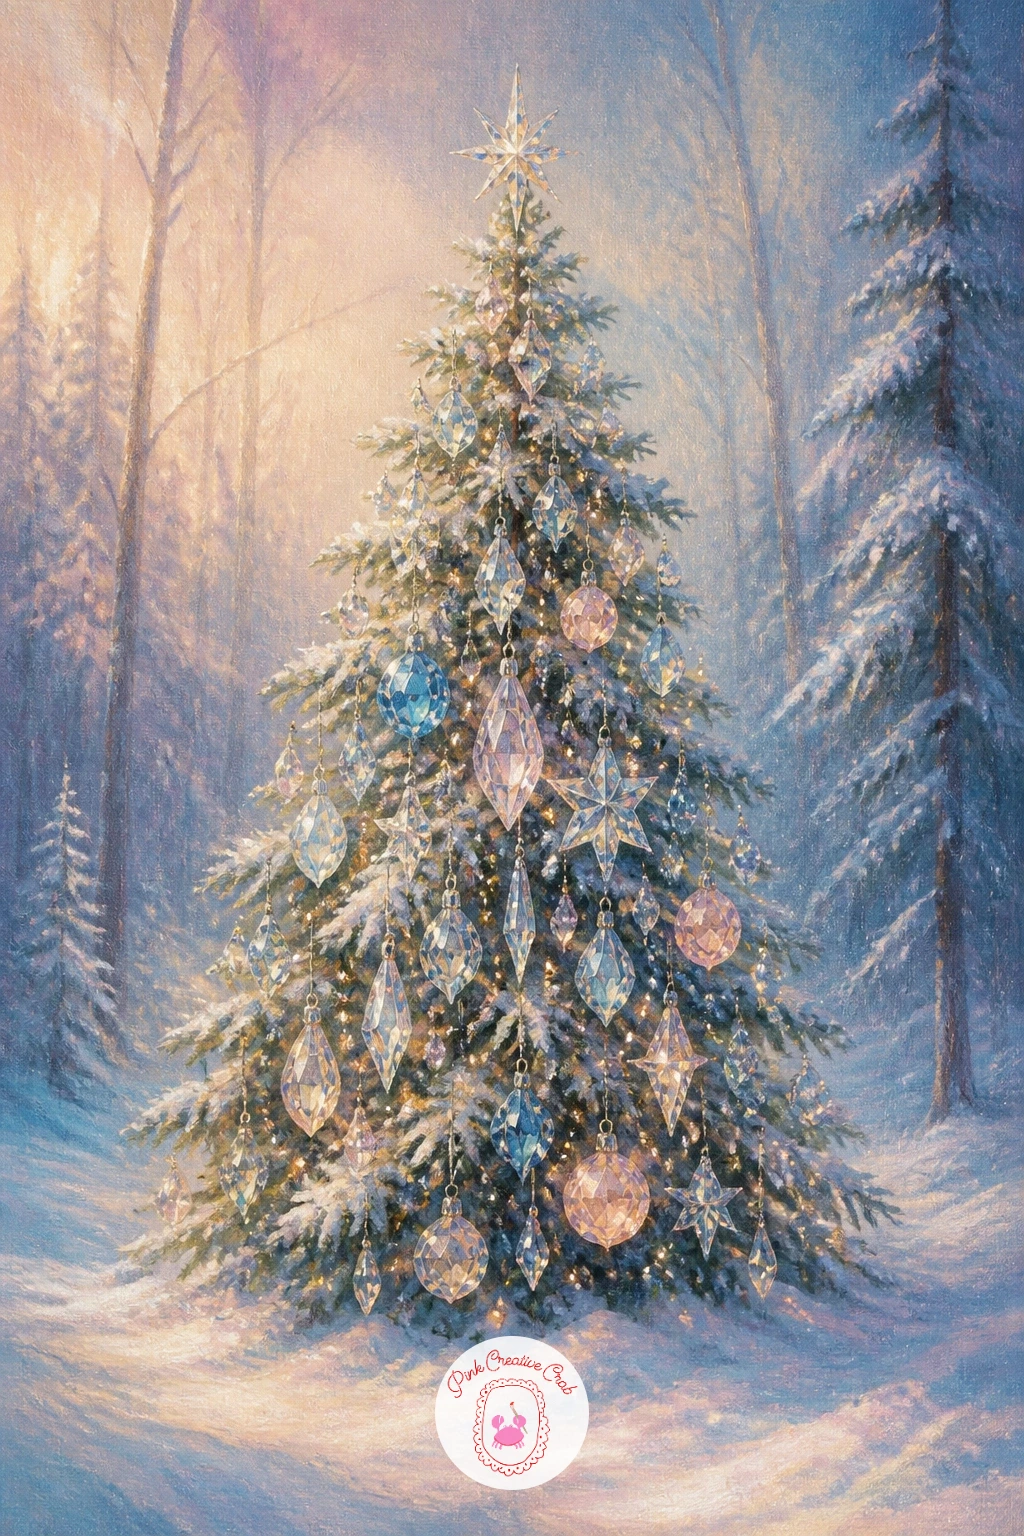
A tree of crystal ornaments in a forest lets you treat a plain pine tree as a canvas for tiny points of light. Paint the tree itself first in deep blue-green, keeping the branches loose and slightly irregular, then let it dry a little before adding ornaments so they sit crisply on top rather than muddying into the branch colour.
Add the ornaments as small round dabs of icy blue, silver and blush, each with one tiny white highlight dot, spacing them unevenly across the tree rather than in neat rows, which keeps it feeling organic. The usual mistake is making every ornament identical in size and placement, so vary them and cluster a few together in places.
If the tree looks too dark and heavy, lighten the tips of the branches with a dry brush of pale blue to suggest frost. No silver paint handy, a pale grey-blue with a dot of white does a convincing job on canvas.
Surround the base with a soft drift of snow and a few fallen ornaments half buried in it.
You Will Need
- canvas board
- fine round brush for ornaments
- dry brush for frost tips
- small brush for highlights
Palette: Deep Pine Green,Icy Blue,Blush Pink,Silver Grey
Scatter a few ornaments dangling from lower branches at slightly different heights, it reads as more natural than a perfectly symmetrical tree.
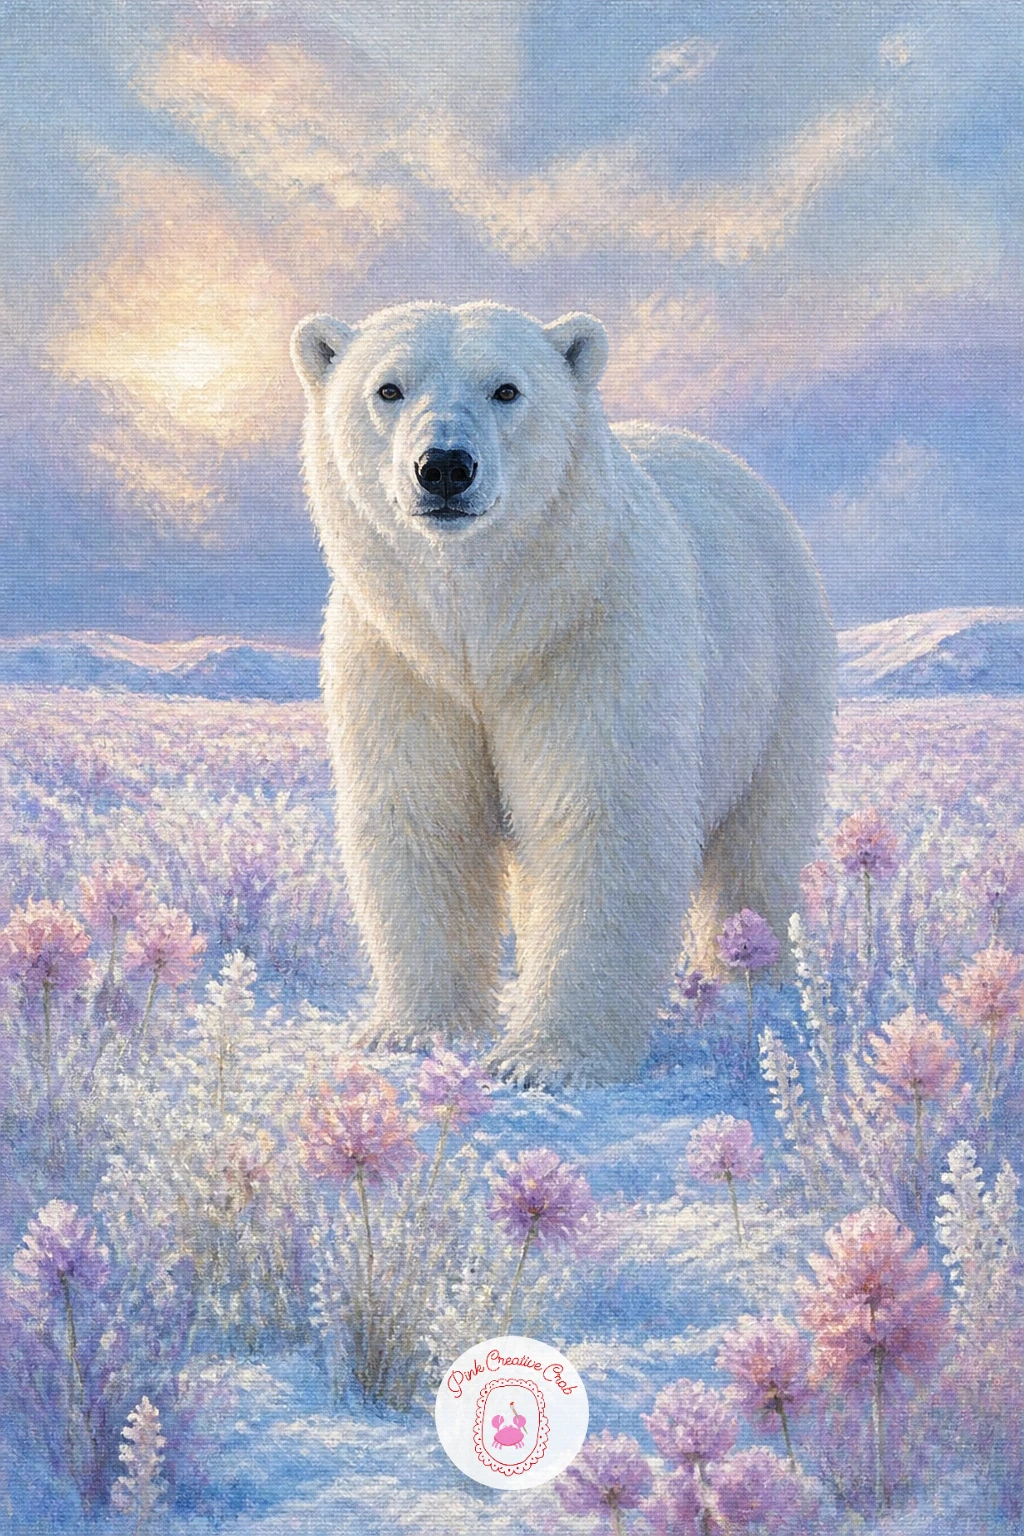
A polar bear in a field of snowy flowers mixes something unexpected into the palette, since this is the moment to let a few cool blush or lavender blooms poke up through the snow. Block the bear’s shape first in warm white with blue-grey shadows underneath, built up with soft, rounded strokes that follow the curve of its body rather than straight lines.
Once the bear is settled, scatter small flower shapes low in the foreground, simple five-petal dabs in pale pink and lavender with a tiny gold centre, keeping them smaller and softer the further they sit from the bear. Compare the bear’s size against where those flowers reach on its legs to keep the scale believable, since a bear painted too small beside tall flowers loses its presence entirely.
If the bear looks flat, deepen the shadow under its belly and along one side with a cooler grey-blue. No fine brush for the flower centres, the end of a brush handle dipped in paint makes a quick dot.
Let its breath show as a soft pale cloud in the cold air for one last touch of life.
You Will Need
- canvas board
- round brush for the bear’s fur
- small brush for flowers
- brush handle for dotting centres
Palette: Titanium White,Payne’s Grey,Blush Pink,Lavender Grey
Pick reference photos of real polar bear fur for the shadow shapes under the belly and legs, it is the detail that keeps the bear from looking like a plain white blob.
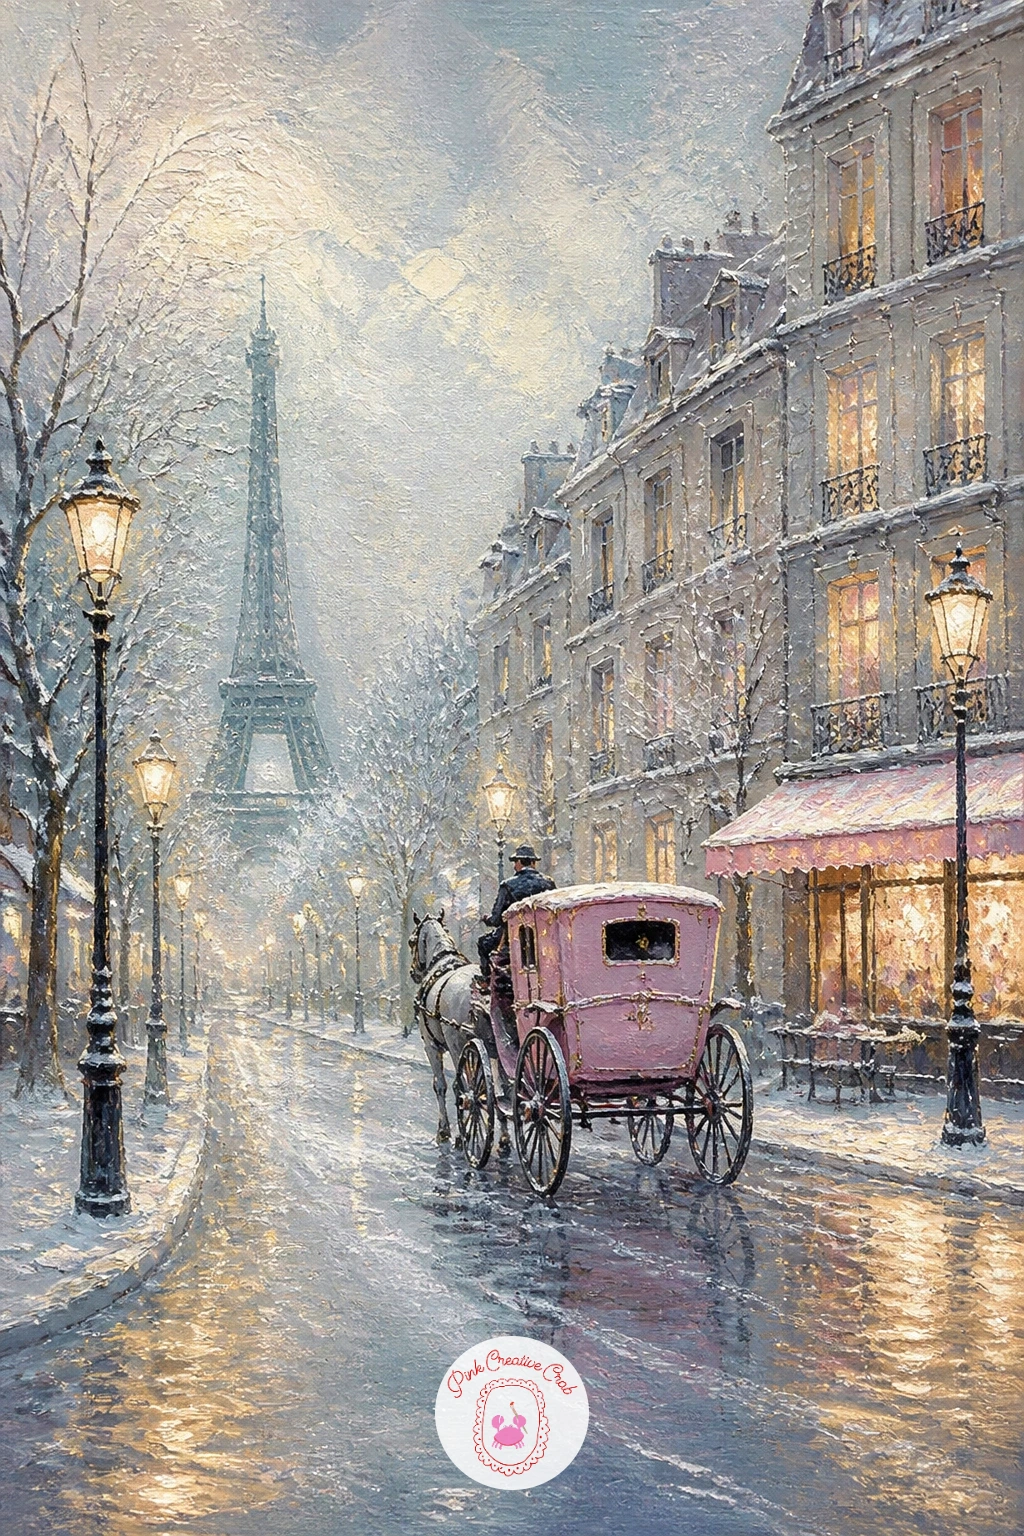
A snowy Paris street with a pink carriage is the one to reach for if you love painting buildings, since rows of narrow facades give you plenty of rhythm to play with. Block in the street buildings first as simple rectangles in soft grey and cream, varying their heights slightly and adding small dark windows, some lit in warm gold.
Paint the cobblestone street in cool blue-grey dusted with white, then place the pink carriage off to one side rather than dead centre, since a slightly asymmetrical composition feels more like a captured moment than a staged photograph. Keep the carriage’s horse small and simple, more silhouette than detail.
If the street looks cluttered, simplify the background buildings into soft, blurred shapes and save your sharpest detail for the carriage itself. No pink paint mixed yet, blush with a touch of white and a whisper of red gets you there quickly.
Add a single string of lights or a lamp post glowing warmly to tie the whole street together.
You Will Need
- canvas board
- flat brush for buildings
- small brush for the carriage
- fine brush for window lights
Palette: Blush Pink,Payne’s Grey,Soft Gold,Titanium White
Try the same street from a closer angle, filling the frame mostly with the carriage and just a hint of storefronts, for a more intimate version of the scene.
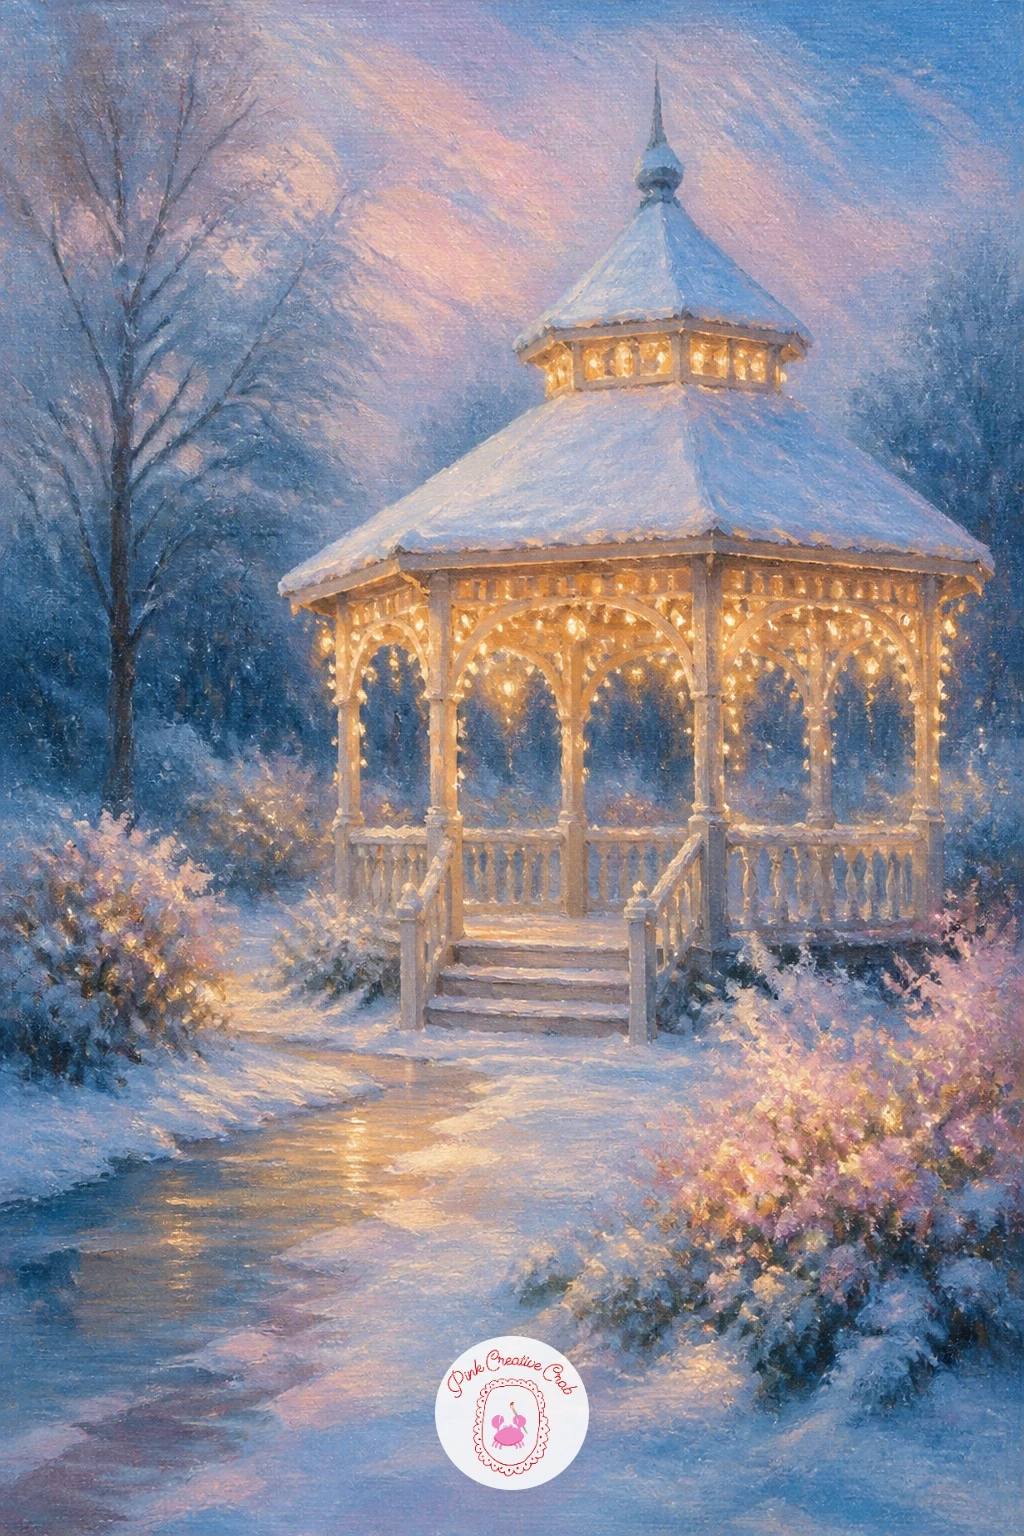
A gazebo with fairy lights in snow is a gentler architectural subject than the Paris street, built almost entirely from curved roof lines and small dots of light. Sketch the gazebo’s round or hexagonal roof first, then paint its structure in soft white and pale grey, keeping the roofline slightly uneven with a cap of snow along the top edge.
Add the fairy lights last, strung loosely along the railing, as a series of tiny warm gold dots connected by a thin, almost invisible line. The usual trap here is spacing the lights too evenly, which looks printed rather than strung by hand; let them bunch and gap unevenly along the curve.
If the gazebo looks stiff, soften its outline where it meets the snowy background with a light dry brush blend. No fine brush for the tiny lights, the tip of a toothpick dipped in gold paint makes a precise little dot.
Let the surrounding trees stay dark and soft so the lit gazebo reads as the warmest, brightest shape in the painting.
You Will Need
- canvas board
- fine brush or toothpick for lights
- flat brush for the gazebo structure
- dry brush for soft edges
Palette: Titanium White,Soft Gold,Payne’s Grey,Icy Blue
Add a faint reflection of the lights glowing on the snow just beneath the gazebo, it grounds the light source and adds a believable bit of realism.
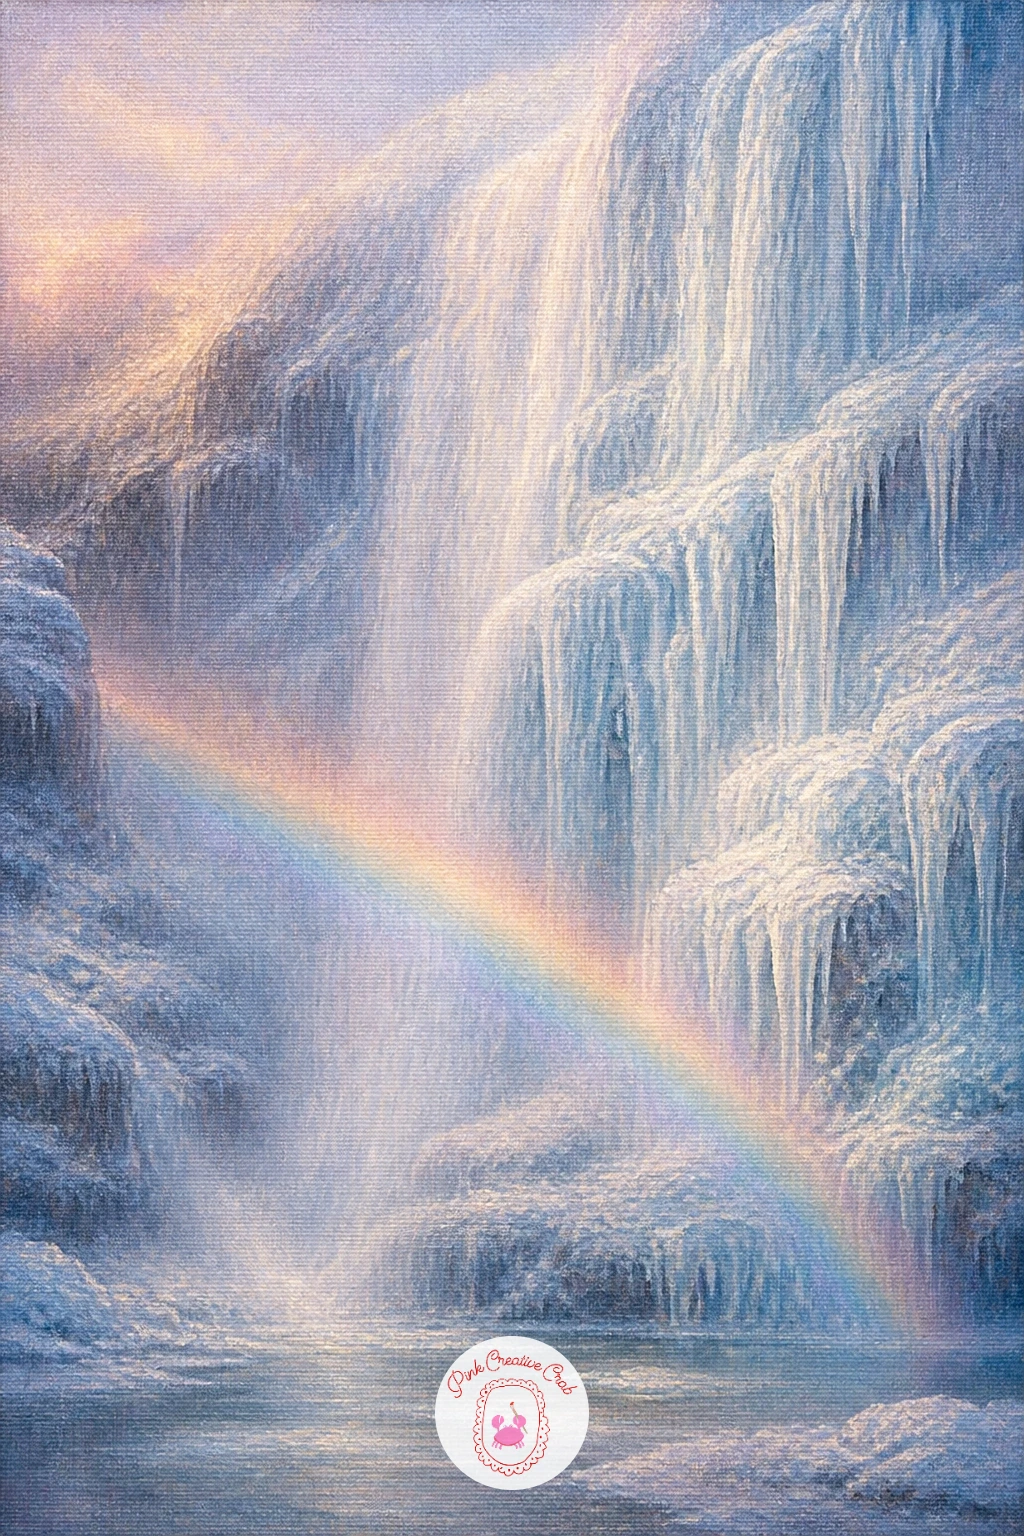
A frozen waterfall with a rainbow is the most dramatic light moment on this list, so it is worth slowing down on where that rainbow sits. Block in the frozen falls first with long vertical strokes of white and pale blue, leaving some darker grey-blue showing through in the gaps to suggest the ice has frozen in uneven layers.
Decide the sun sits low to one side, out of frame, then add the faintest arc of a rainbow across the spray at the base, using very thin, barely-there washes of pink, gold and blue so it looks like a trick of the light rather than a solid stripe. This is the spot that most often goes wrong: too much colour and the rainbow looks painted on top rather than part of the light.
If it looks too strong, wipe it back gently with a dry rag while the paint is still wet. No thin wash medium on hand, add extra white to your colours to make them translucent instead.
Finish with mist rising softly at the base in thinned white.
You Will Need
- canvas board
- wide flat brush for the falls
- soft rag for softening the rainbow
- thin medium or extra white
Palette: Icy Blue,Titanium White,Blush Pink,Soft Gold
Look at photos of real frozen waterfalls for how the ice layers in uneven ridges rather than smooth sheets, it is the detail that sells the whole scene.
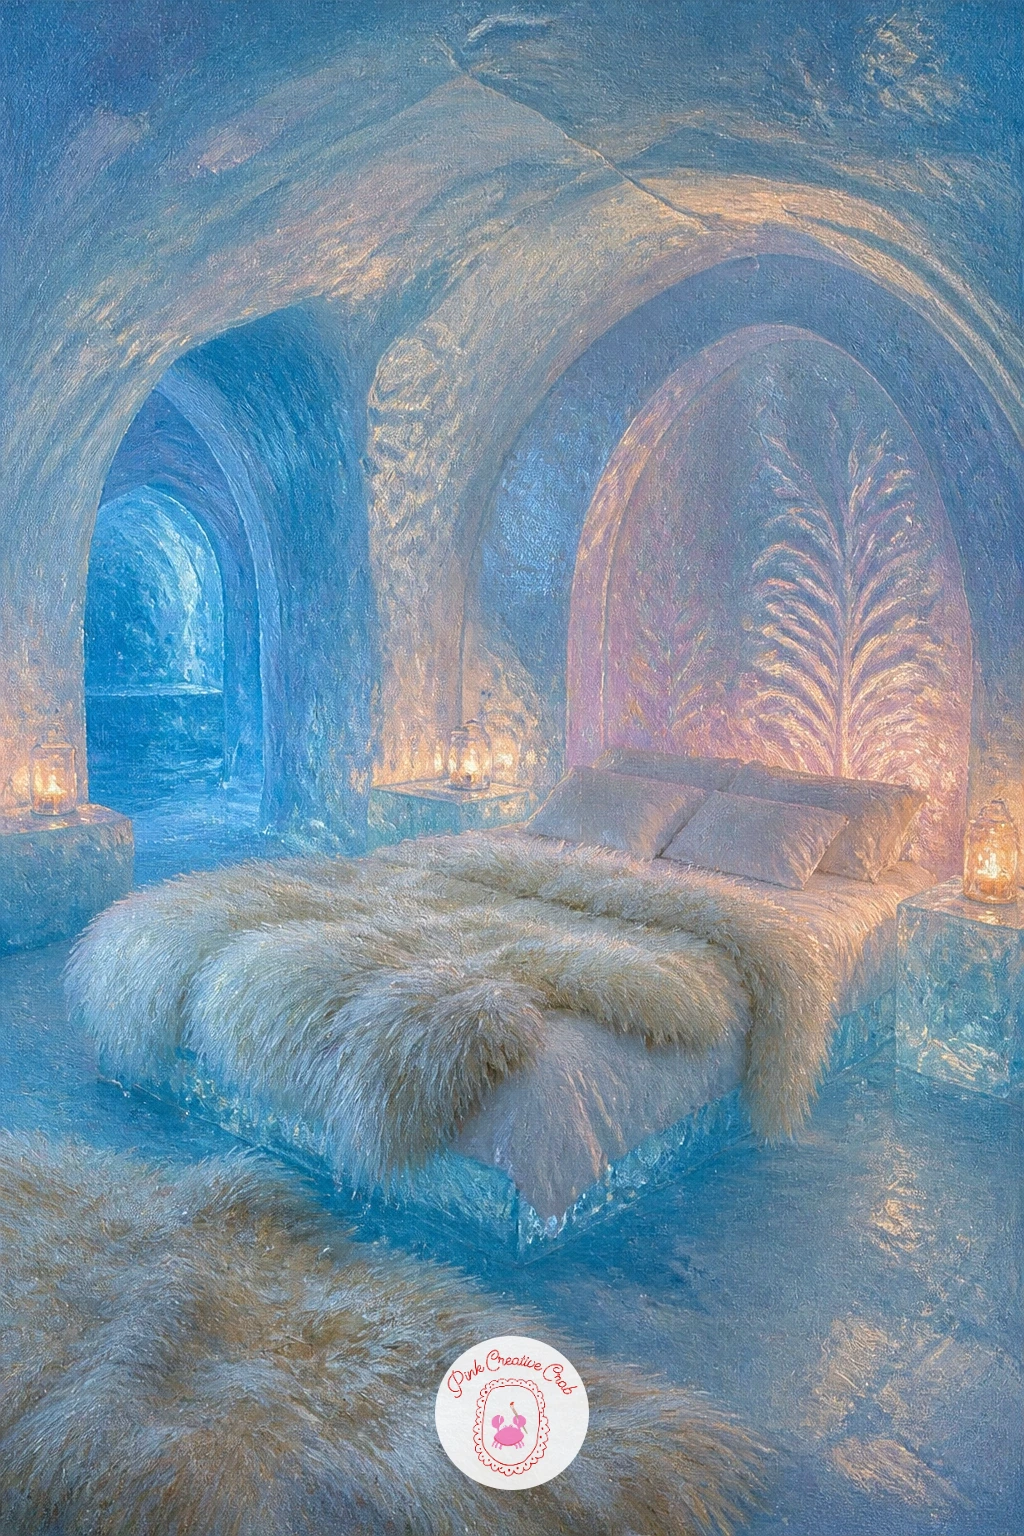
An ice hotel bedroom with fur blankets turns indoors, which is a nice change after so many outdoor scenes, and it is really a study in contrasting textures. Block the icy walls and bed frame first in cool blue-white, keeping the surfaces smooth and almost glassy with long, even brushstrokes blended while wet.
Paint the fur blankets next in warm cream and soft gold, using short, choppy strokes layered in different directions so the texture feels soft against all that hard ice. The contrast between smooth ice and fluffy fur is the whole point here, so resist blending the fur as smoothly as the walls.
If the fur looks too flat, go back in once it is slightly dry with a dry stiff brush and drag a few loose strokes on top for extra texture. No stiff brush handy, a dry old toothbrush dragged lightly creates a similar broken texture.
Add one small warm lamp or candle on a bedside ledge to keep the room from feeling cold.
You Will Need
- canvas board
- flat brush for ice walls
- stiff dry brush for fur texture
- small brush for the lamp
Palette: Icy Blue,Titanium White,Soft Gold,Cream
Try the same room with a window showing the northern lights outside for a quick way to add drama without repainting the whole interior.
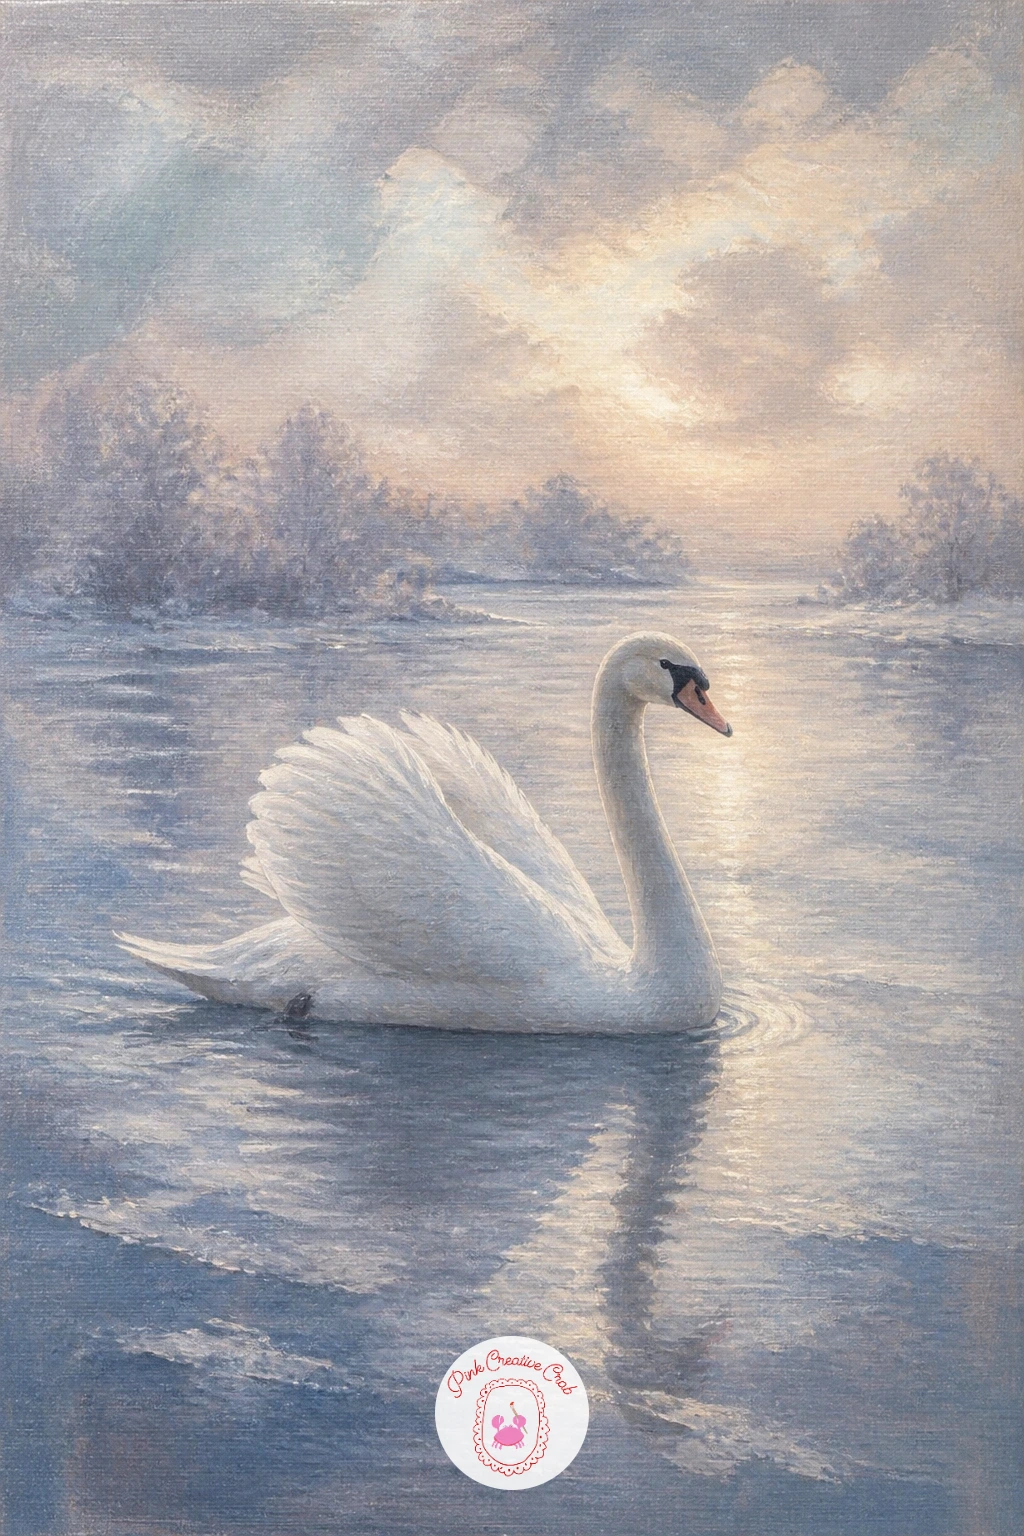
A swan on an icy lake is a quieter subject after the ice hotel, and a good one for practicing a single graceful curve. Sketch the swan’s neck first as one long, continuous S-curve, since getting that line right before you add any body bulk is what keeps the whole bird elegant rather than stiff.
Paint the icy water in cool grey-blue with a few pale streaks of reflected sky, then build the swan in layers of white, starting with a mid-tone grey-white base and adding pure white highlights only where light would actually catch, along the top of the back and the curve of the neck.
If the swan’s neck looks too thick or too thin, hold your brush up against the sketch and compare its width to the length of the head, a swan’s neck is roughly as wide as its head at the narrowest point. No reference image of a swan on hand, picture the neck shape as a soft question mark and you will get close enough.
Let a few ripples of open water surround the swan to break up the flat ice.
You Will Need
- canvas board
- small round brush for the swan
- flat brush for the water
- fine brush for highlights
Palette: Titanium White,Payne’s Grey,Icy Blue,Soft Gold
Add a faint golden reflection stretching from a low sun across the ice toward the swan, it is a small touch that makes the whole lake feel lit from one direction.
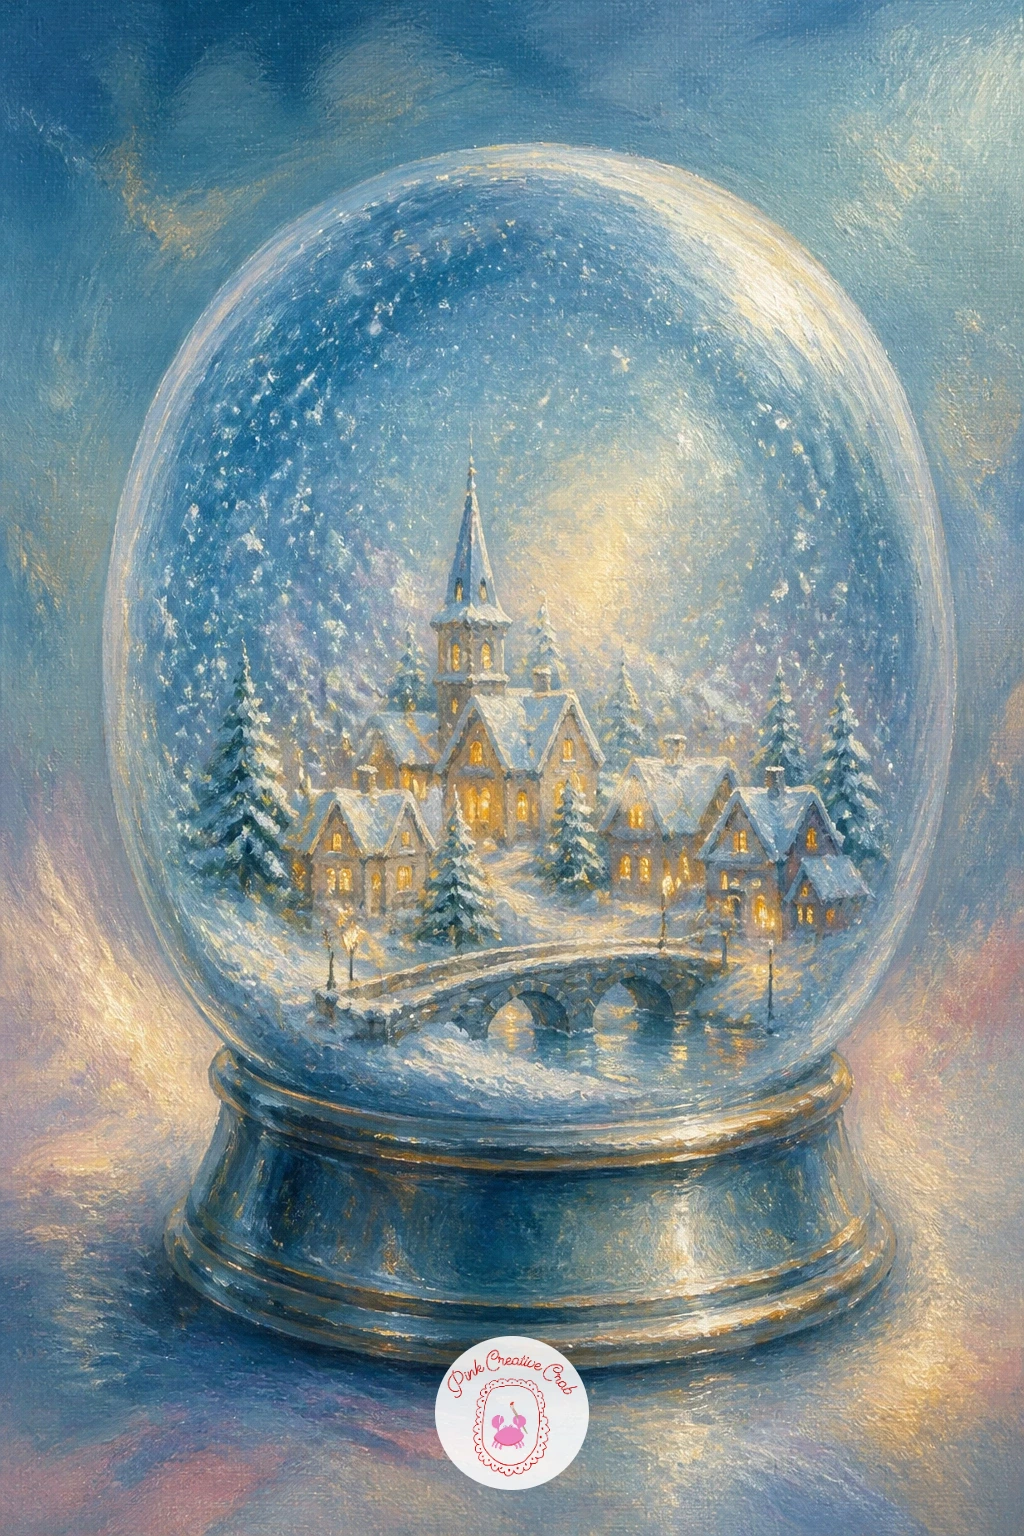
Following the swan’s stillness with something more playful, a snow globe world with a tiny town is really two paintings in one: the round glass sphere and the tiny scene inside it. Paint the sphere first as a simple circle with a soft white highlight curving along one edge to suggest glass, then build the tiny town inside with small, simplified shapes, a few rooftops, one lit window, a single pine tree.
Keep everything inside the globe slightly smaller and softer than you think it should be, since the glass itself naturally blurs fine detail, and painting it too sharp breaks the illusion. Add a thin rim of gold or silver around the base to suggest the globe’s stand.
If the glass does not read as round, strengthen the curved highlight along the top edge and add a subtle darker arc along the bottom inside edge. No compound for a perfect circle, trace a plate or jar lid lightly in pencil first.
Scatter a few loose white dots just inside the glass for the suspended snow.
You Will Need
- canvas board
- plate or lid to trace the circle
- fine brush for the tiny town
- small brush for the glass highlight
Palette: Titanium White,Icy Blue,Soft Gold,Payne’s Grey
Paint the background outside the globe in a soft blurred wash so the glass sphere reads as the one crisp, important shape in the whole painting.
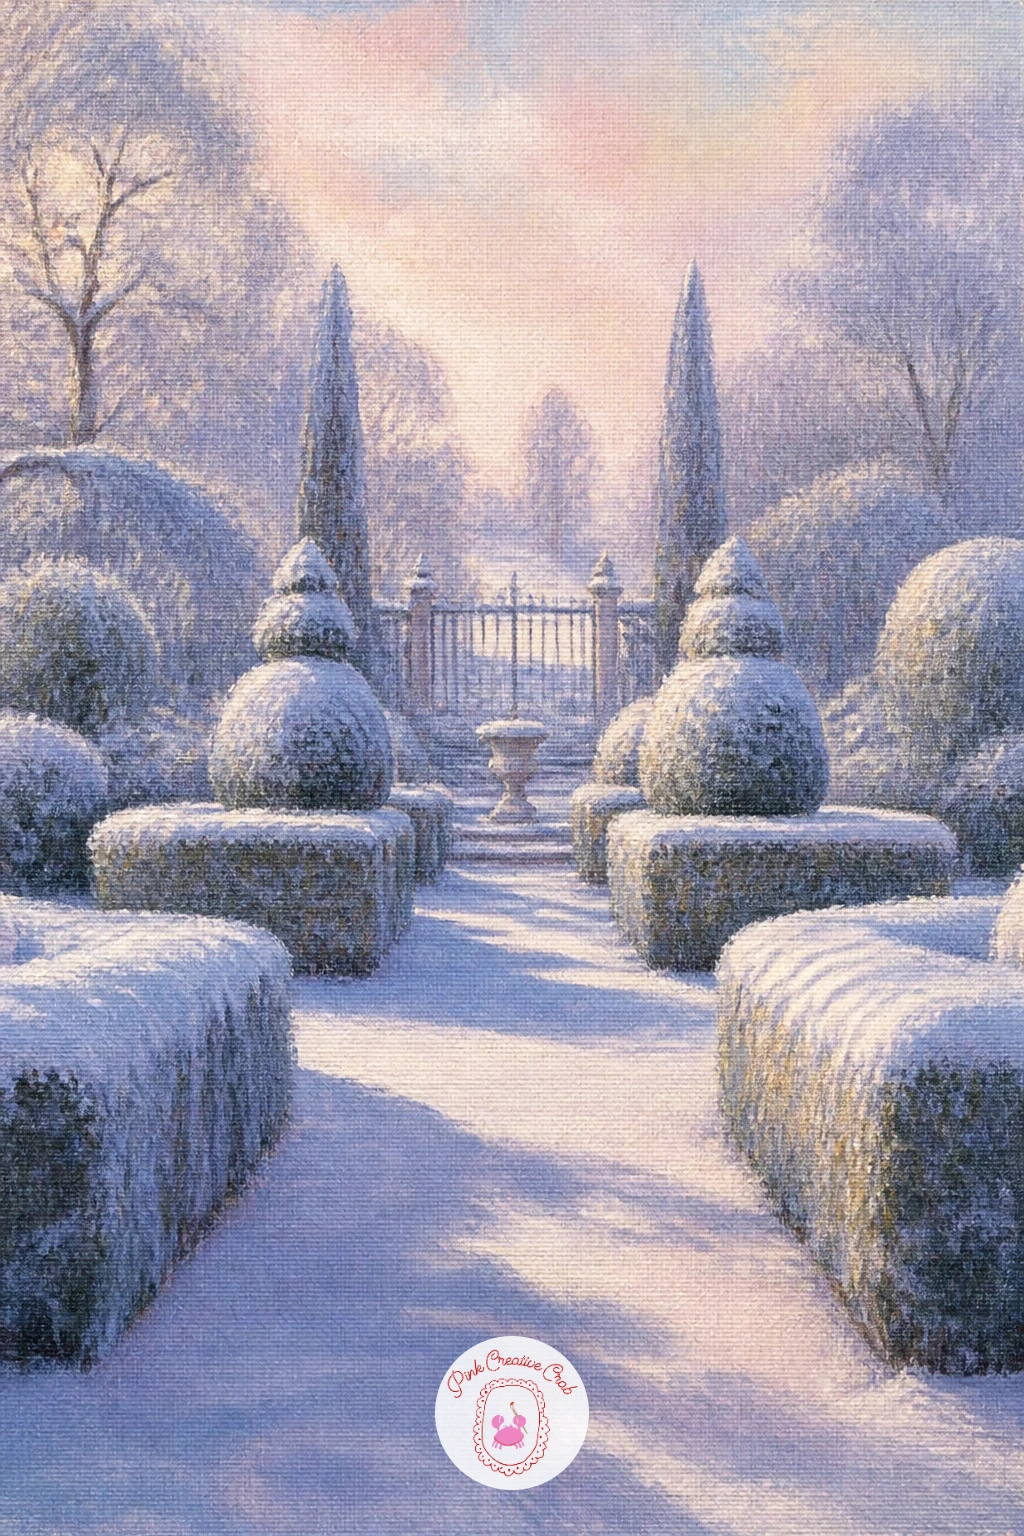
A winter garden with clipped hedges in snow is a calmer, more formal subject that rewards a steady hand with simple shapes. Block in the hedges first as soft rounded or cone shapes in deep green-grey, then cap each one with a thick layer of white snow using a palette knife or stiff brush for a crisp, slightly textured edge.
Arrange the hedges in a loose path receding into the distance, making each row slightly smaller and paler than the one before it to build depth, which matters more here than in busier scenes since there is little else to establish scale. Add a stone urn or small statue as a quiet focal point partway down the path.
If the hedges look too uniform, vary their height and shape slightly as you go, since a real garden is never perfectly symmetrical. No palette knife available, the flat edge of a dried out brush dabbed firmly does a similar crisp snow cap.
Finish with pale lavender shadows stretching from each hedge across the snow.
You Will Need
- canvas board
- palette knife or stiff brush for snow caps
- round brush for hedge shapes
- fine brush for shadows
Palette: Deep Pine Green,Titanium White,Lavender Grey,Payne’s Grey
Try the same garden under a pink sunrise sky instead of flat daylight next time, it changes the whole mood with almost no extra work.
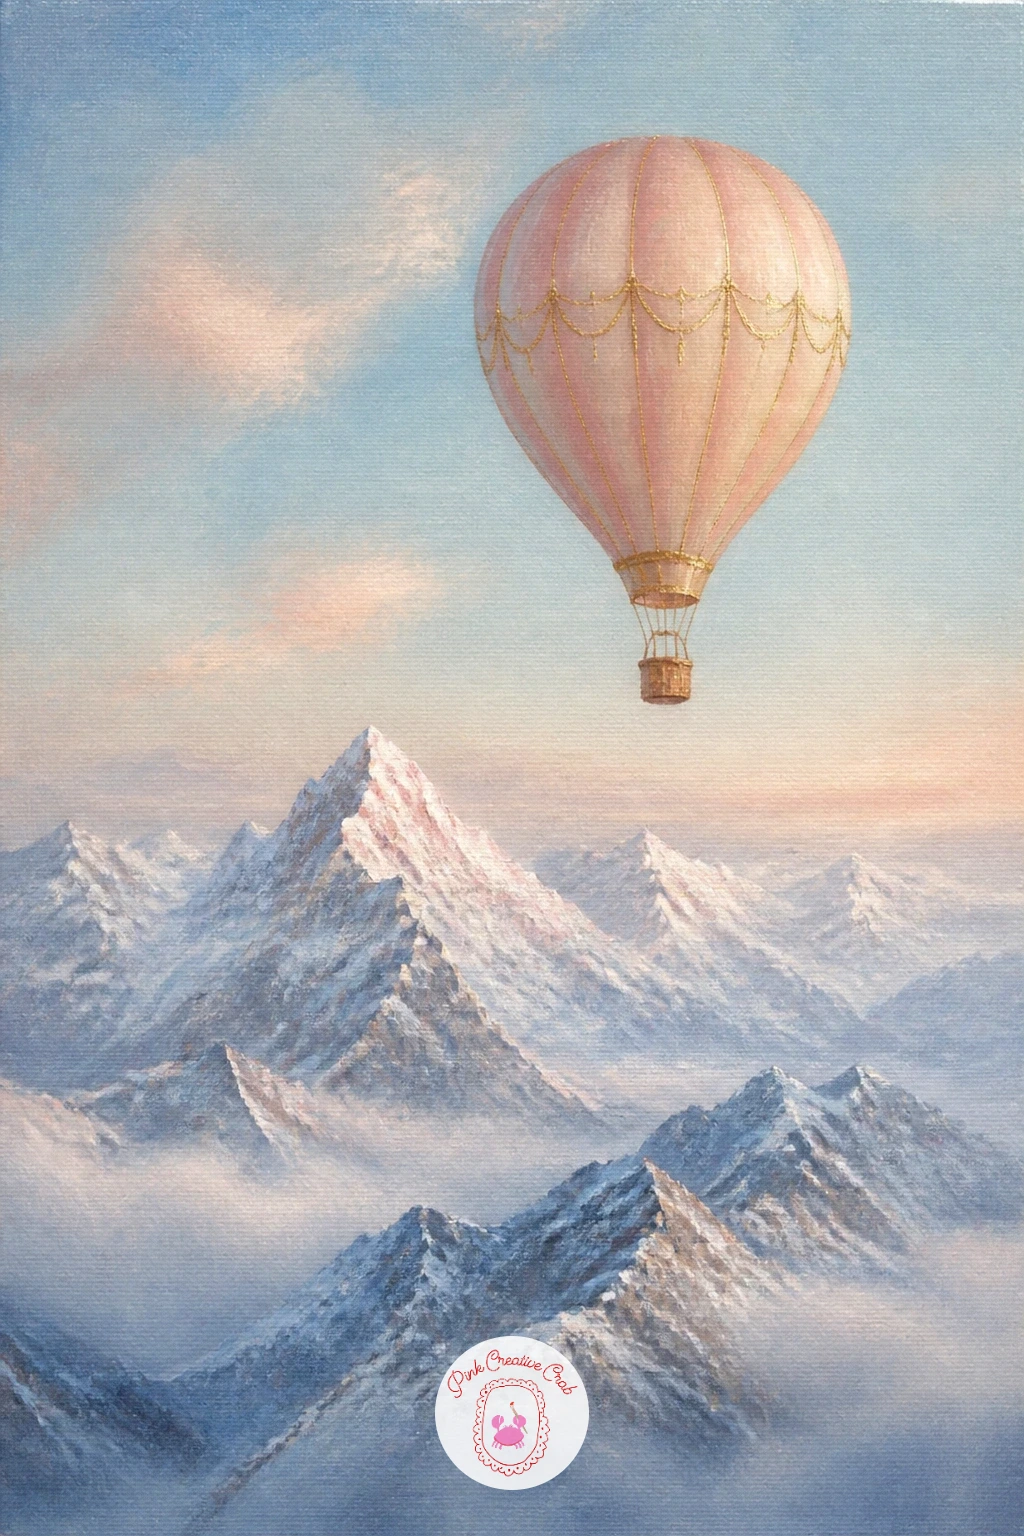
A hot air balloon over snowy mountains lifts the viewpoint up high, which changes how you build the whole composition compared to ground-level scenes. Paint the mountain range first in overlapping layers, palest furthest back and darkest nearest the front, since this layering is what makes distant peaks feel miles away rather than stacked flat.
Add the balloon small against the sky, using a bold pop of blush or gold for its canopy so it reads instantly as the focal point against all that pale blue and white. Keep the basket tiny and simple, just a few quick strokes, since at this distance detail would only clutter it.
If the mountains look flat, strengthen the contrast between the layers, cooler and paler in the back, slightly warmer and darker up front. No reference for mountain layering, overlapping triangular shapes in three or four value steps gets you there reliably.
Let a soft trail of mist sit in the valley between the mountains for extra depth.
You Will Need
- canvas board
- wide flat brush for mountain layers
- small brush for the balloon
- fine brush for mist
Palette: Icy Blue,Titanium White,Blush Pink,Soft Gold
Pick a striped pattern for the balloon canopy using two of your palette colours, it gives the eye something to linger on in an otherwise quiet sky.
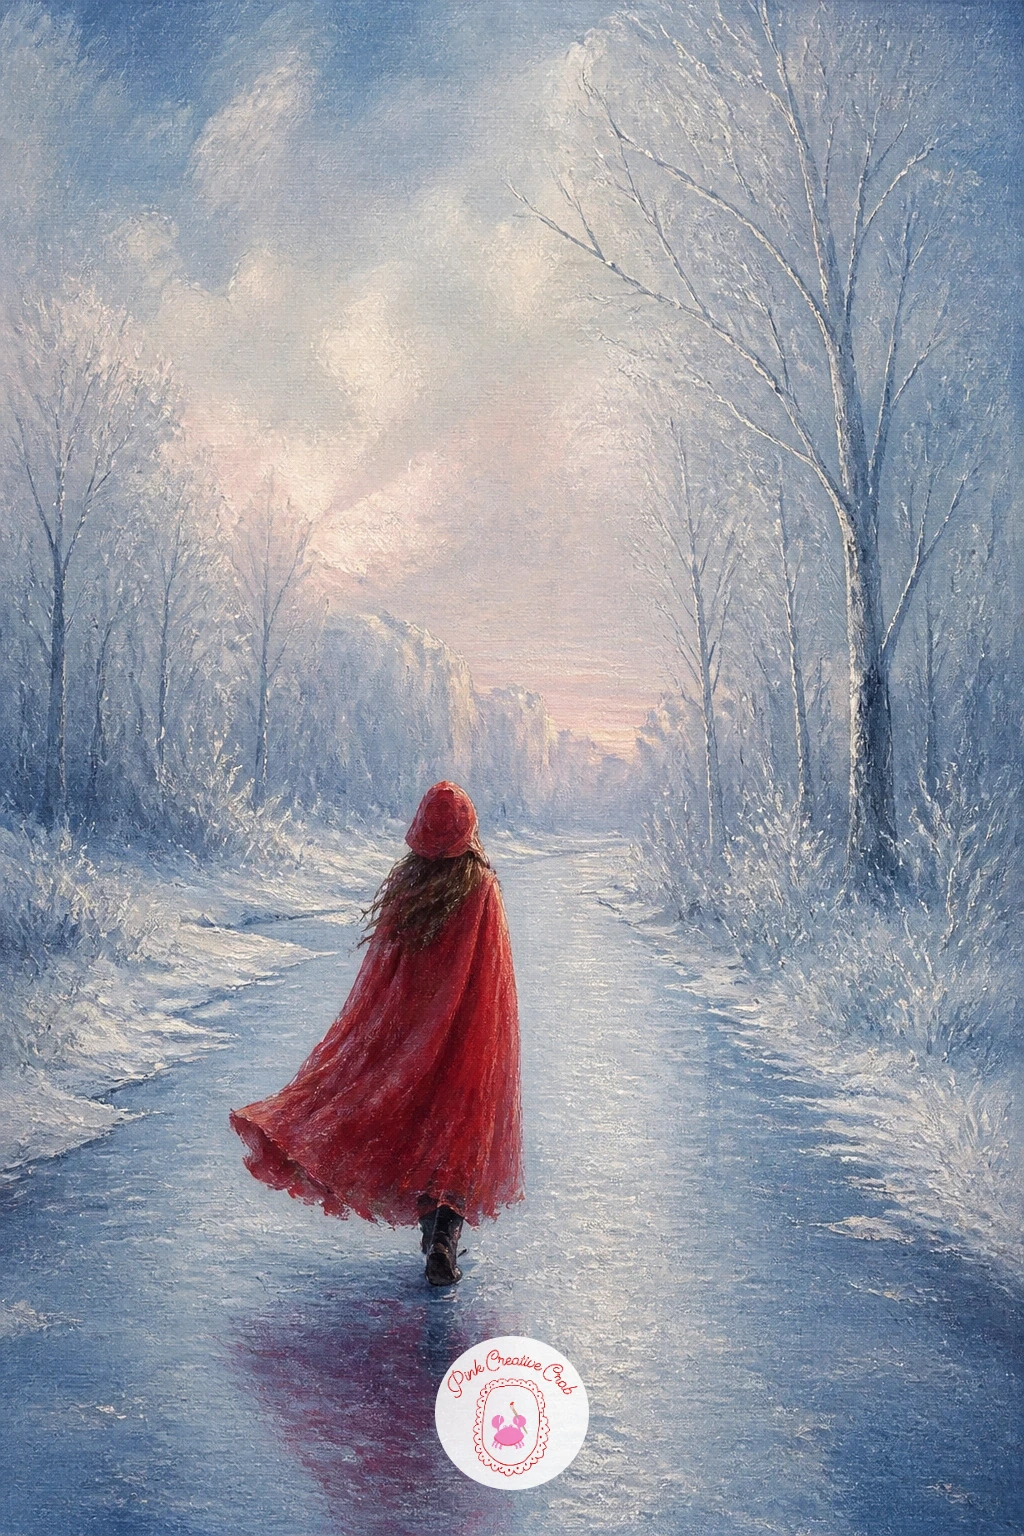
After the wide mountain view, a girl in a red cape on a frozen path brings the focus back down to a single warm note against a cool scene. Paint the path and surrounding snow first in your usual icy blues and whites, keeping the whole background soft and slightly underexposed, since the red cape needs somewhere quiet to stand out against.
Add the girl small and off to one side rather than centred, her cape the one true warm red in an otherwise cool painting, and keep her pose simple, walking or pausing to look back. The trick with a single bold colour like this is restraint: let nothing else in the painting compete with it, not even a gold lamp.
If the red looks too harsh against the blues, mix a touch of the background blue into the shadow side of the cape to tie the two together. No pure red in your set, mixing alizarin crimson with a little orange gets a warm, slightly muted red that suits this softer style better anyway.
Let her footprints trail behind her in the snow for a sense of a journey already underway.
You Will Need
- canvas board
- small round brush for the figure
- flat brush for the path
- fine brush for footprints
Palette: Alizarin Crimson,Icy Blue,Titanium White,Payne’s Grey
Keep every other red object out of the painting entirely, even a small one, since the cape only reads as striking if it stays the single warm accent in the scene.
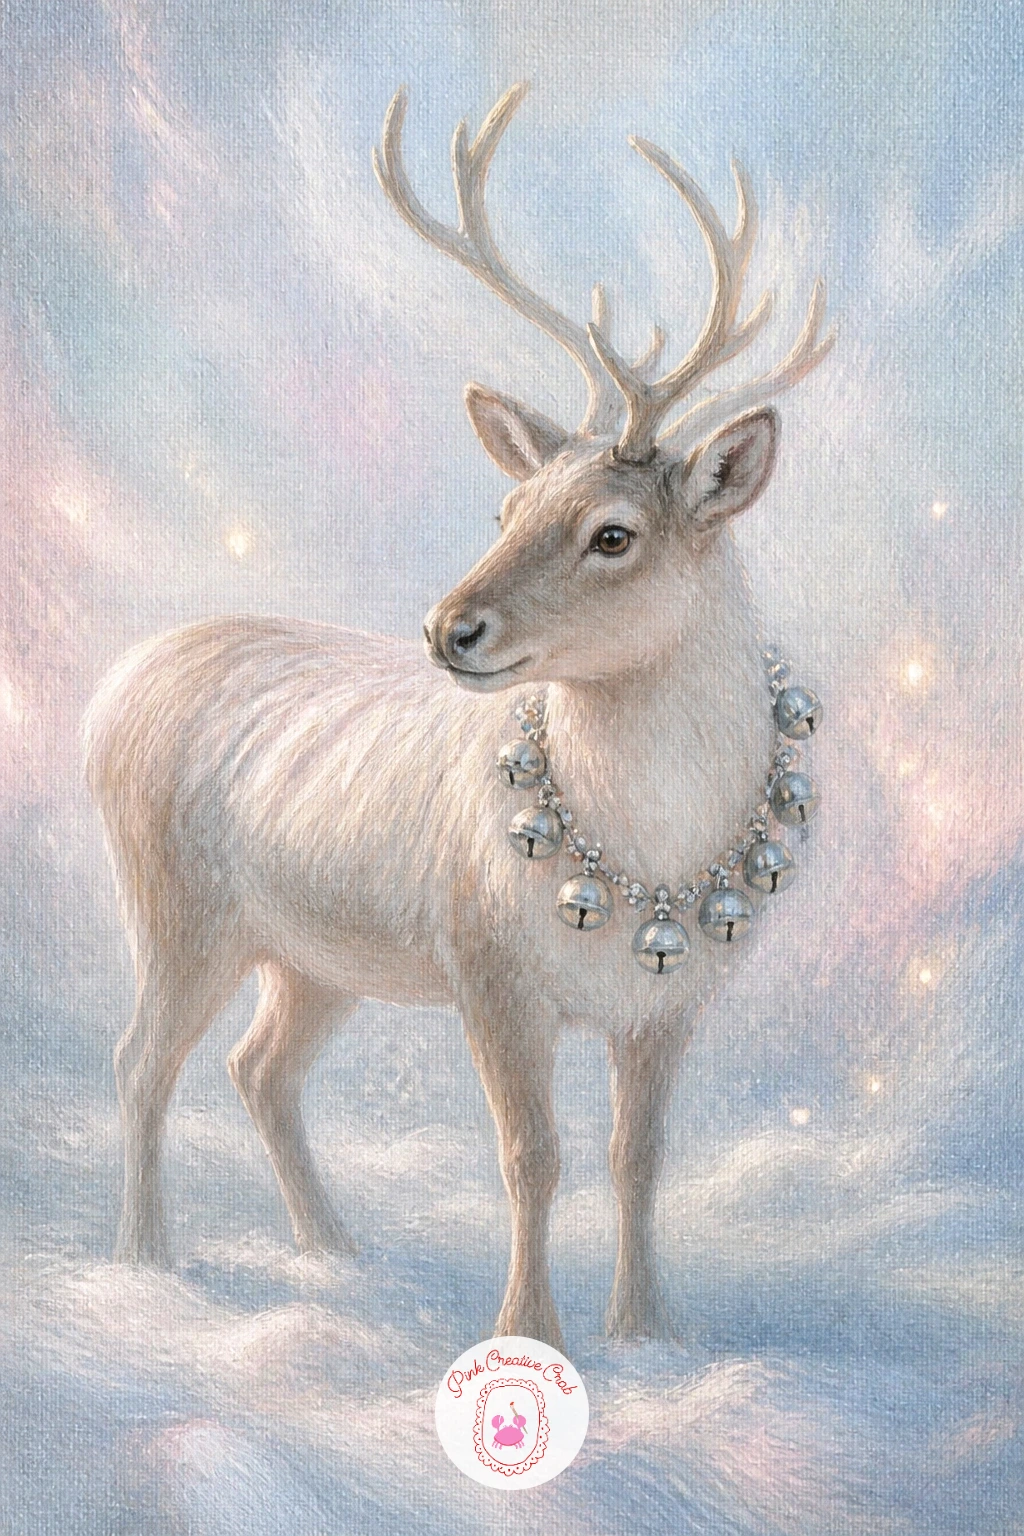
A reindeer with silver bells moves from a human figure to an animal portrait, and getting the antlers right from the start saves a lot of trouble later. Sketch the reindeer’s head and antlers first with a light pencil line, measuring the antler span against the width of the head so they do not end up too delicate or too oversized for the body.
Paint the body in warm grey-brown mixed with a touch of your blush and icy blue for a softer, more fantasy coat colour than a realistic reindeer, then add the silver bells around its neck as small round dabs with one bright highlight dot each. Build the antlers last with thin, confident branching strokes, since overworking them makes them look stiff rather than naturally forked.
If the antlers look too symmetrical and fake, nudge a few branches at slightly different angles on each side. No pencil for the sketch, a thin brush loaded with a pale neutral colour works fine to rough in the shape first.
Let snowflakes catch on its back and antlers for a final wintry touch.
You Will Need
- canvas board
- fine round brush for antlers
- small brush for bells
- pencil or thin brush for the sketch
Palette: Warm Grey Brown,Blush Pink,Icy Blue,Silver Grey
Look at real reindeer or deer photos for how antlers branch asymmetrically, it is the detail that keeps this fantasy version believable rather than cartoonish.
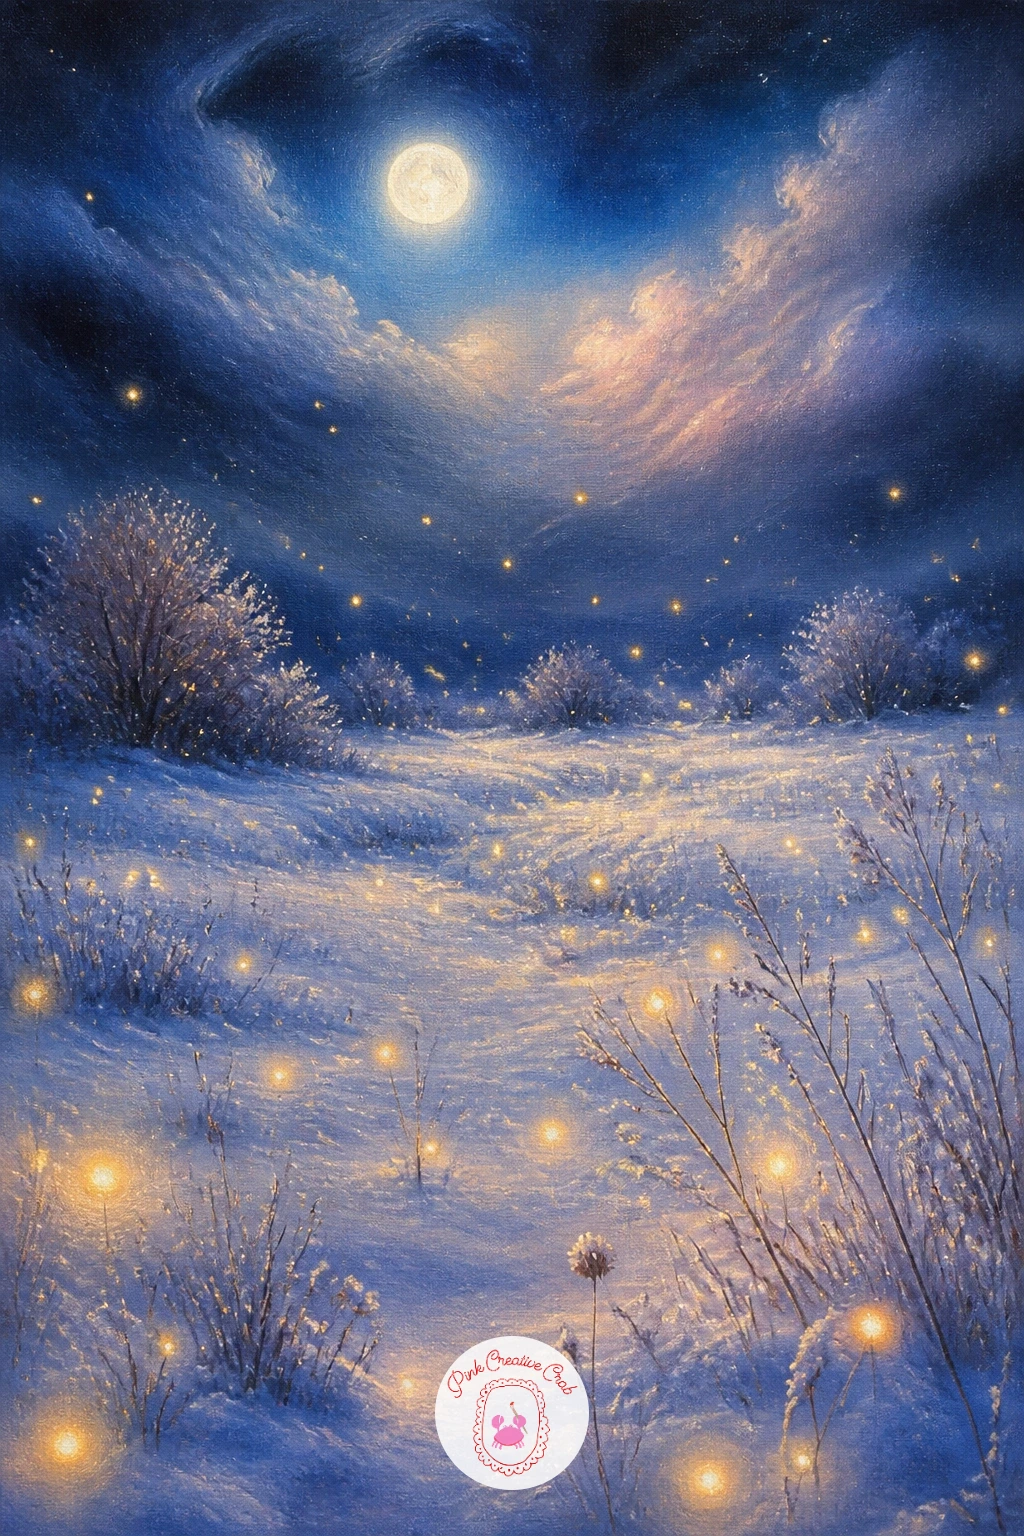
A moonlit snowy meadow with fireflies of light turns night into something glowing rather than dark, which asks you to rethink how black your shadows really need to be. Paint the sky first in deep blue, never pure black, with a soft pale moon glowing through a gentle halo blended into the surrounding sky while it is still wet.
Block the snowy meadow below in cool blue-grey, letting the moonlight catch along the tops of any drifts or grasses poking through, then scatter the fireflies of light last as small, soft dots of gold and pale blush with tiny halos around each one, varying their brightness so some feel closer and some further away.
If the scene looks too dark overall, lighten your darkest blues slightly with a touch of white rather than reaching for actual black, which keeps the whole painting feeling luminous rather than murky. No fan brush for the halos, a fingertip dabbed gently around each light dot blends a soft glow just as well.
Keep the horizon line low so the sky and its lights take up most of the canvas.
You Will Need
- canvas board
- wide brush for the sky
- fine brush for the lights
- soft rag or fingertip for halos
Palette: Deep Blue,Icy Blue,Soft Gold,Blush Pink
Vary the size of the glowing dots across the meadow, larger and softer ones feel closer, tiny sharp ones feel far away, which adds depth without any extra drawing.
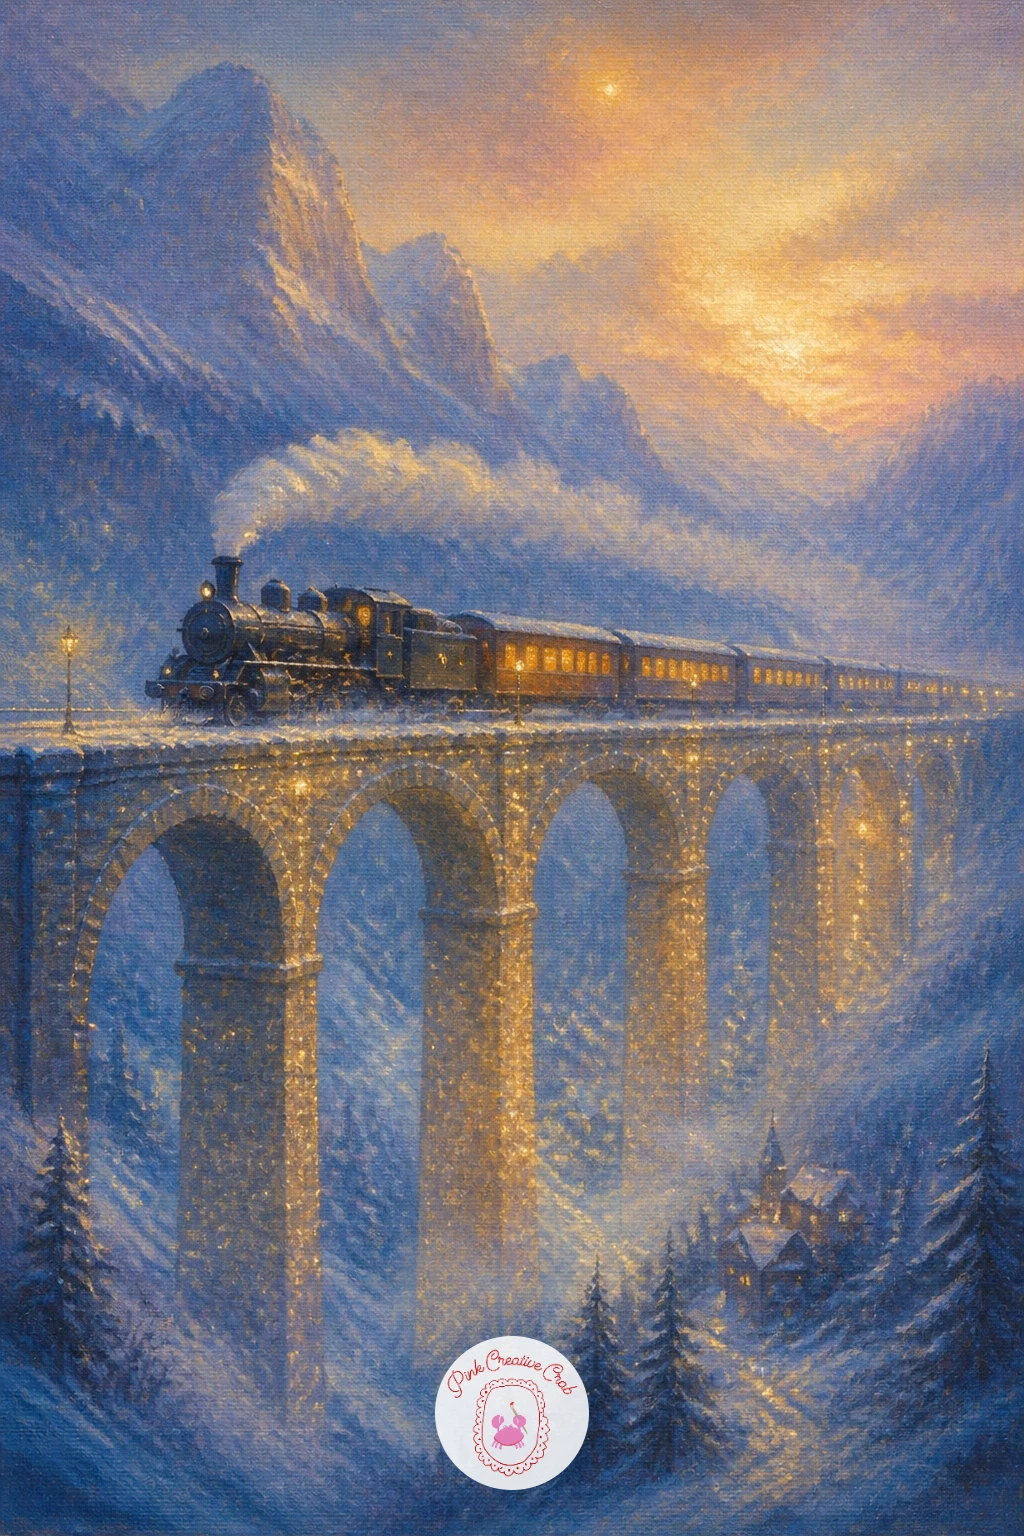
A train crossing a glittering viaduct brings a strong structural line into the composition after the soft meadow, so getting the viaduct’s perspective right matters more here than usual. Sketch the arches first, making each one slightly smaller as the viaduct recedes toward the horizon, and keep that horizon line consistent across every arch so the structure feels solid rather than wobbly.
Paint the stonework in cool grey, then add the train crossing on top as a simple elongated shape with a few glowing window lights along its length, using warm gold against the cool stone and sky. The valley below can stay loose and snowy, with just enough detail to suggest trees and drifts without competing with the viaduct itself.
If the arches look uneven, measure the top and bottom width of each one against its neighbour before committing to paint. No ruler for straight guide lines, the edge of a book or piece of card held against the canvas works just as well for the sketch stage.
Let a soft trail of steam or mist drift from the train’s engine for a touch of motion.
You Will Need
- canvas board
- straight edge or card for guide lines
- fine brush for window lights
- flat brush for stonework
Palette: Payne’s Grey,Soft Gold,Icy Blue,Titanium White
Add a faint pink blush along the horizon behind the viaduct to suggest evening, it warms the whole cool stone structure without extra detail.
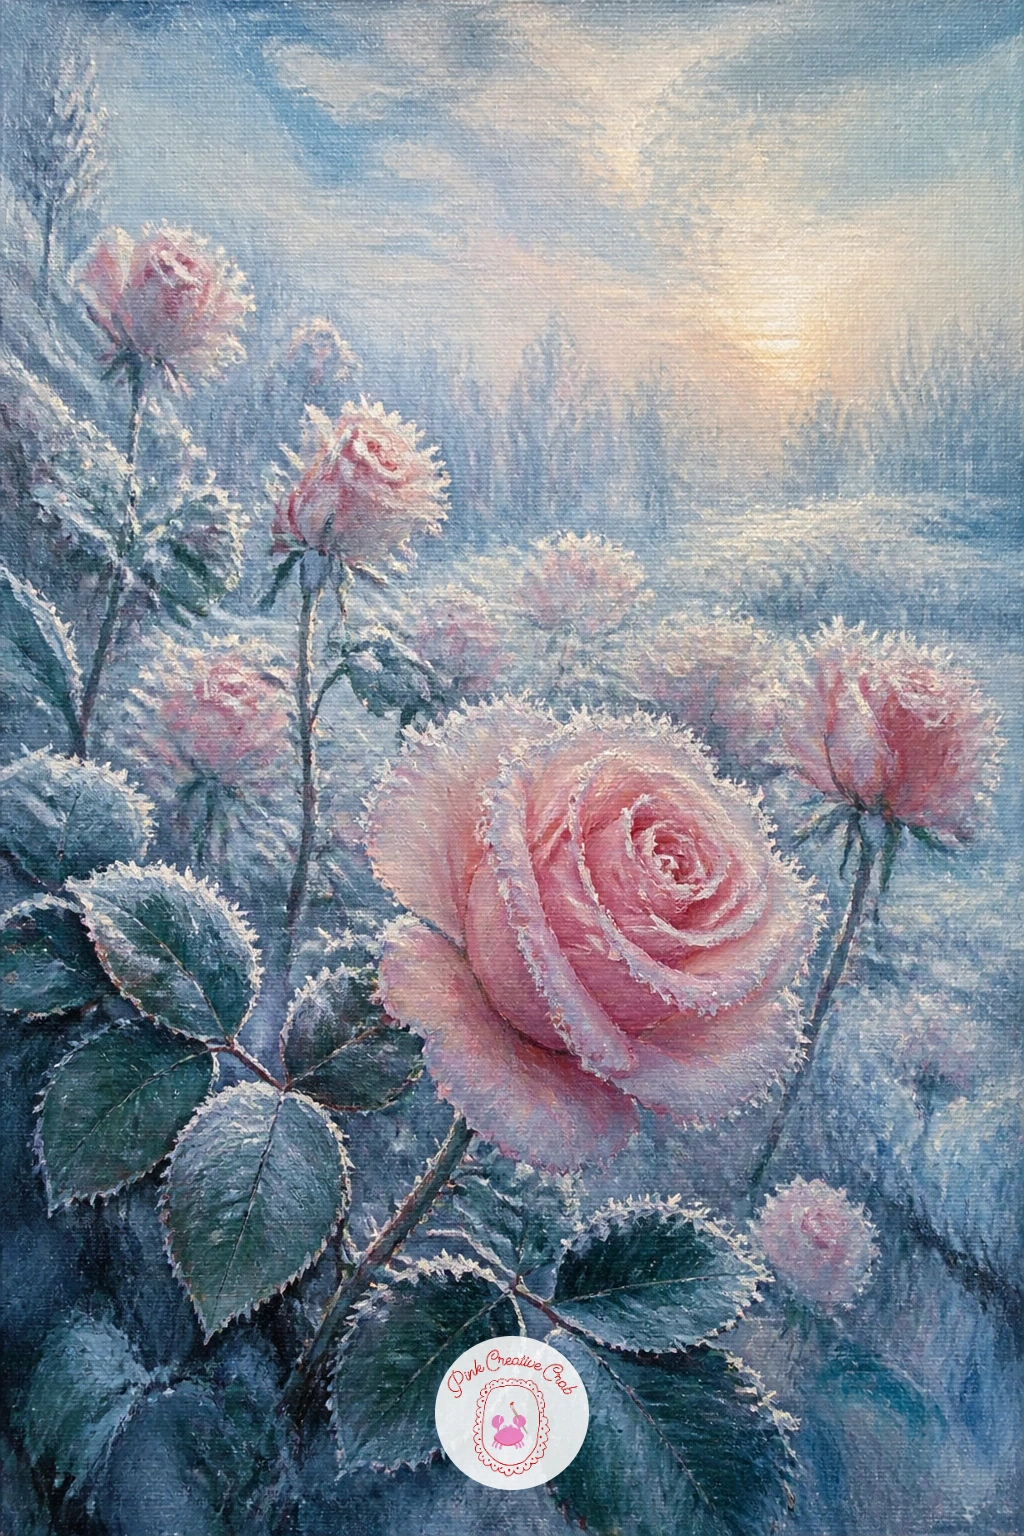
A frost-covered rose garden is a quieter botanical subject after the viaduct, and a nice one for layering delicate detail over simple shapes. Block in the rose bushes first as soft rounded masses of deep green-grey, then add the roses themselves in blush and pale icy pink, painted a little looser and softer than a summer rose since frost blurs sharp petal edges.
Once the roses are in place, add the frost last using a dry, almost bare brush loaded with white, flicked lightly across the petals and leaves so it sits on top as a fine, broken texture rather than a solid coat. This dry brush pass is the whole character of the piece, so resist going back over it with a wet brush once it is down.
If the frost looks too heavy and solid, scrape some of it back gently with a rag or your fingertip while still wet. No dry brush technique working for you, a light dusting from an almost empty brush loaded with white and wiped mostly off on a rag achieves the same broken texture.
Add a thin veil of mist in the background to soften the whole garden.
You Will Need
- canvas board
- round brush for roses
- dry brush for frost
- rag for softening
Palette: Blush Pink,Deep Pine Green,Titanium White,Icy Blue
Try a single close-up rose filling most of the canvas next time, it lets you really enjoy that dry brush frost technique on a larger scale.
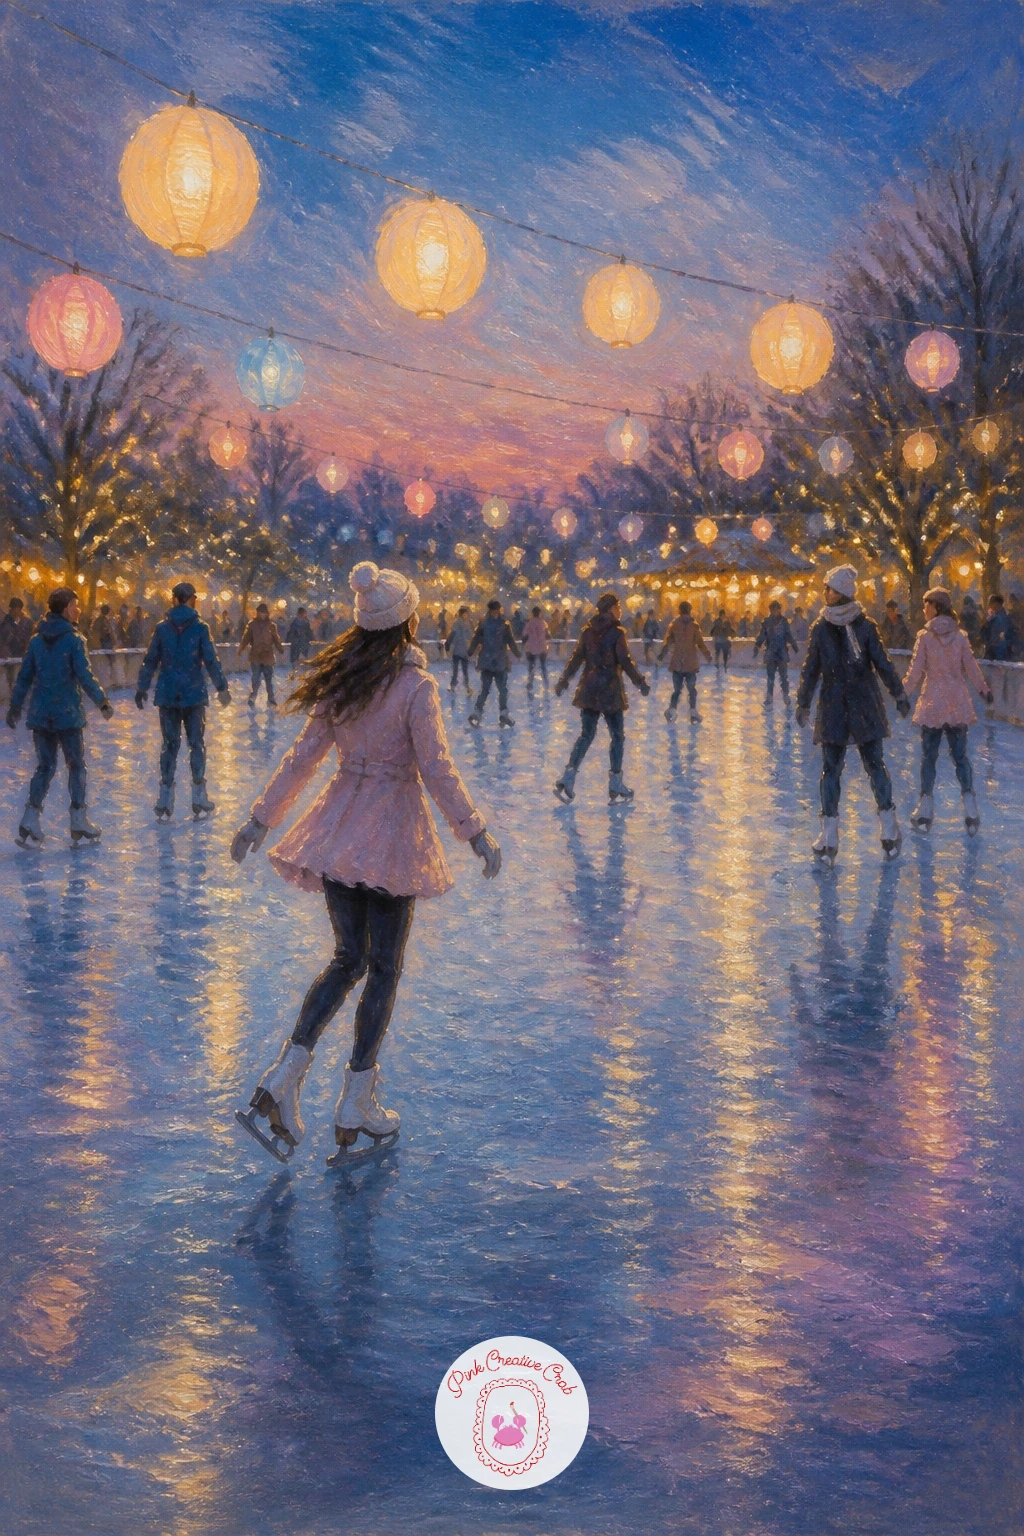
An ice skating party with lanterns brings several of the earlier tricks together: skaters, ice, and warm glowing light all in one lively scene. Block the ice first in pale streaky blue and white, then add several skaters as small, varied silhouettes spread across the surface, some paired off, some alone, each just a few confident strokes rather than detailed figures.
String lanterns along a simple rope or railing at the edge of the rink, painting each one as a warm gold glow with a soft halo, and let their light reflect faintly on the ice directly beneath them. With several figures to manage, keep most of them loose and let only one or two nearest the front get a touch more detail, like a scarf colour or a raised arm.
If the scene feels crowded, remove a skater or two and give the remaining ones more space to breathe. No rope or railing to paint, simple wooden posts with the lanterns hung directly between them work just as well.
Let the lantern glow be the warmest colour anywhere in the painting.
You Will Need
- canvas board
- small brush for skaters
- fine brush for lanterns
- flat brush for ice
Palette: Icy Blue,Titanium White,Soft Gold,Payne’s Grey
Pick one skater wearing a blush or gold coat instead of grey or blue, a single warm figure among the cooler ones draws the eye straight to it.
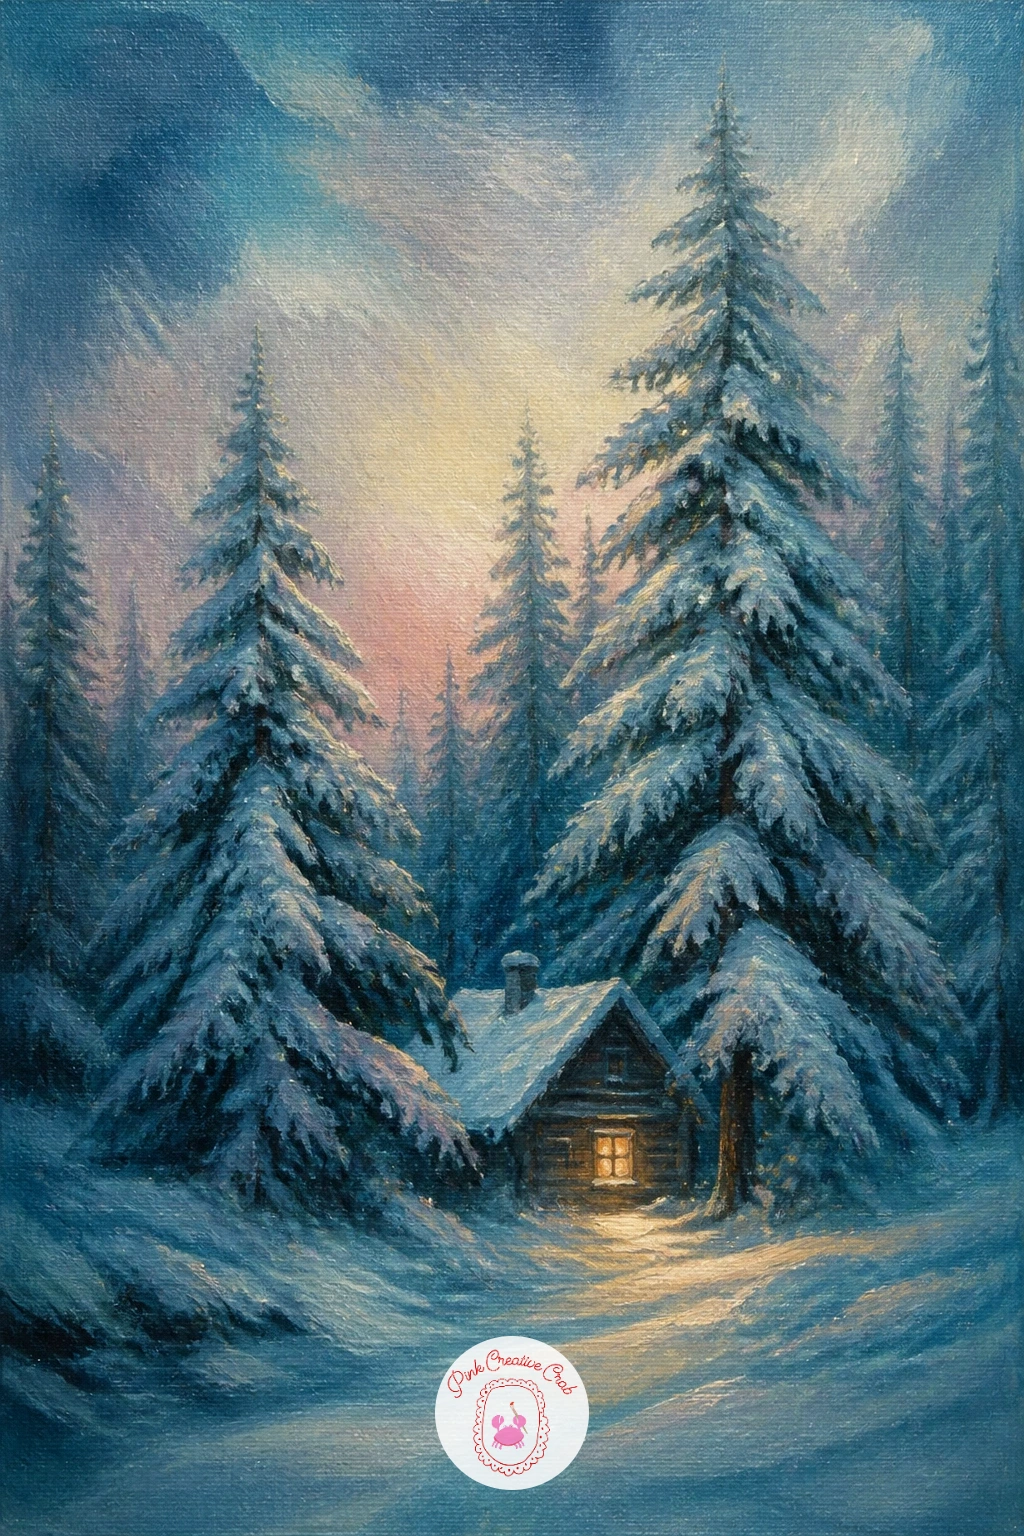
A cabin hidden in giant snowy pines scales everything up, since the trick here is making the trees feel enormous beside a tiny, cozy structure. Paint the pines first, tall and looming, using layered triangular shapes in deep green-blue that get paler and softer as they recede, then tuck the cabin small between them, its one lit window the brightest point in the whole painting.
Compare the cabin’s height against the trunk width of the nearest pine as you paint, since keeping the cabin notably smaller than the trees is what sells the sense of scale and shelter. Snow should sit thick on every pine branch in soft white clumps, heavier toward the top where branches bend under the weight.
If the pines look flat and solid, break up their outer edges with small gaps of sky showing through, since a tree silhouette with zero gaps reads as a cut-out rather than a living form. No deep green paint available, mixing blue and a touch of black or Payne’s grey into yellow gets you there.
Add a thin curl of smoke from the chimney for warmth and life.
You Will Need
- canvas board
- wide brush for pine shapes
- small brush for the cabin
- fine brush for smoke
Palette: Deep Pine Green,Titanium White,Soft Gold,Payne’s Grey
Look at the winter oil painting ideas for beginners for more ways to build snow-laden branches if this one is your first time painting pines in oil.
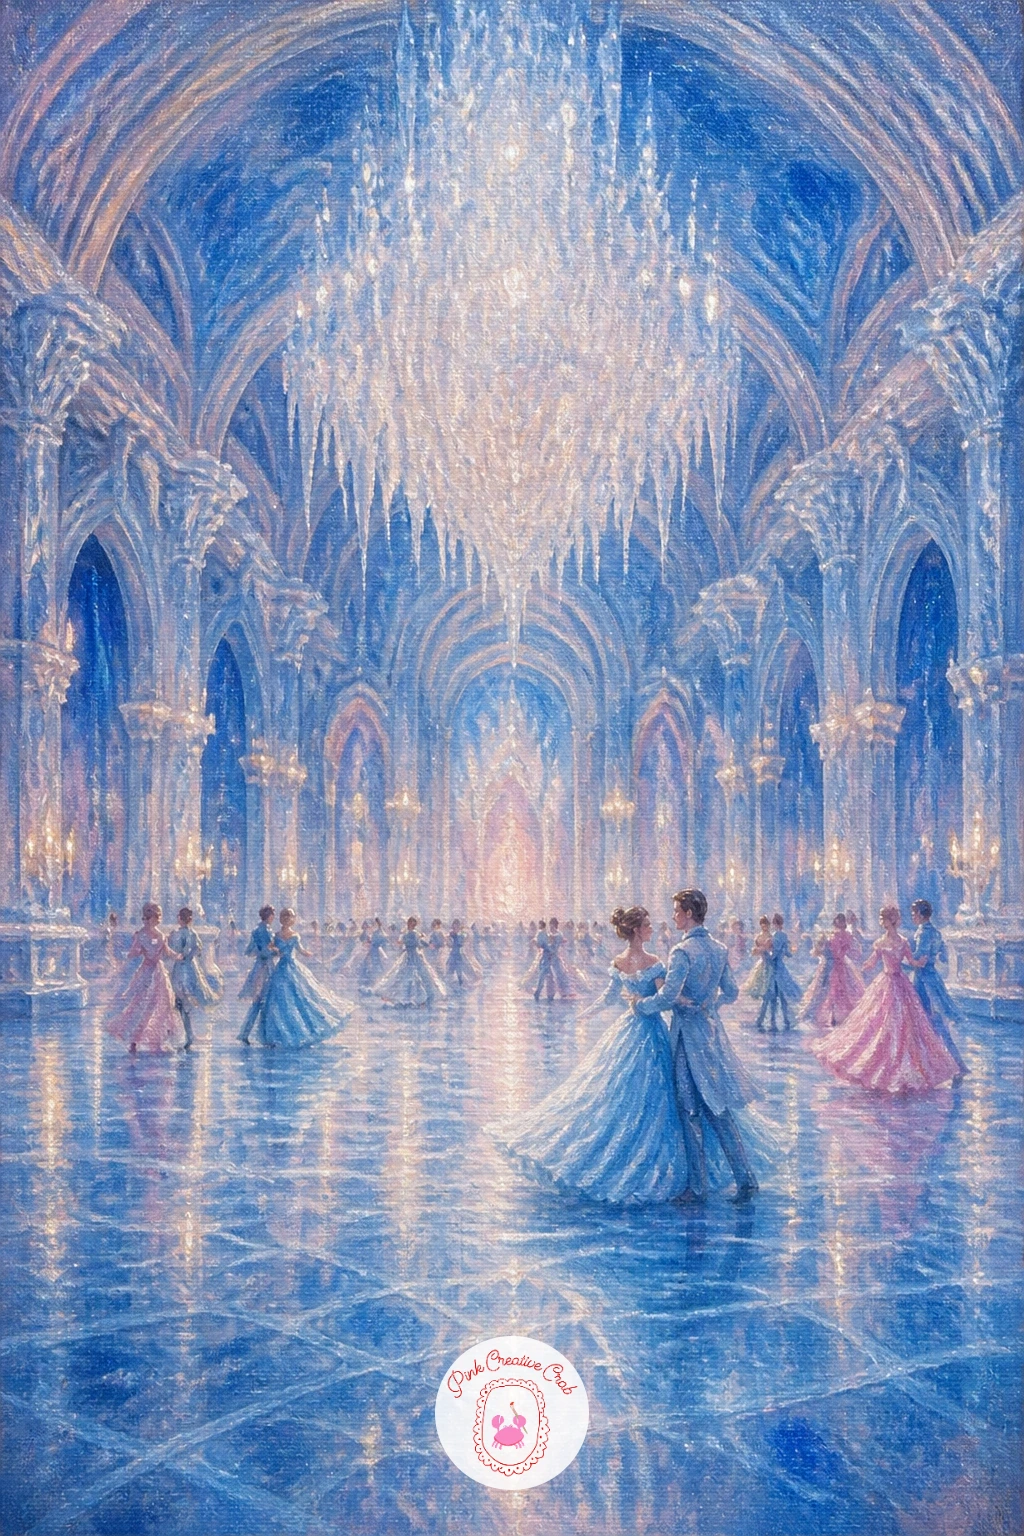
An ice palace ballroom is one of the more ambitious scenes on this list, so plan your light source before anything else. Sketch the room’s basic perspective first, a simple vanishing point somewhere near the centre of the canvas to keep the icy columns and floor lines converging believably, then block in the walls and floor in cool blue-white with long smooth strokes.
Hang a chandelier of icicles or crystal from the ceiling as your main light source, painting it with small sparkling highlights, then let that light pool warmly on the floor directly beneath it, the one warm note in an otherwise icy room. Keep any figures dancing below small and loose, since the architecture is really the star here.
If the perspective feels off, check that all the floor lines and column edges lead back toward that one central point. No clear plan for the chandelier shape, a cluster of simple teardrop icicle shapes hanging together reads convincingly enough.
Add a faint reflection of the chandelier light on the polished ice floor.
You Will Need
- canvas board
- straight edge for perspective lines
- fine brush for chandelier sparkle
- wide brush for walls and floor
Palette: Icy Blue,Titanium White,Soft Gold,Silver Grey
Try the same ballroom from a lower angle looking up toward the chandelier next time, it makes the whole space feel grander with no extra detail needed.
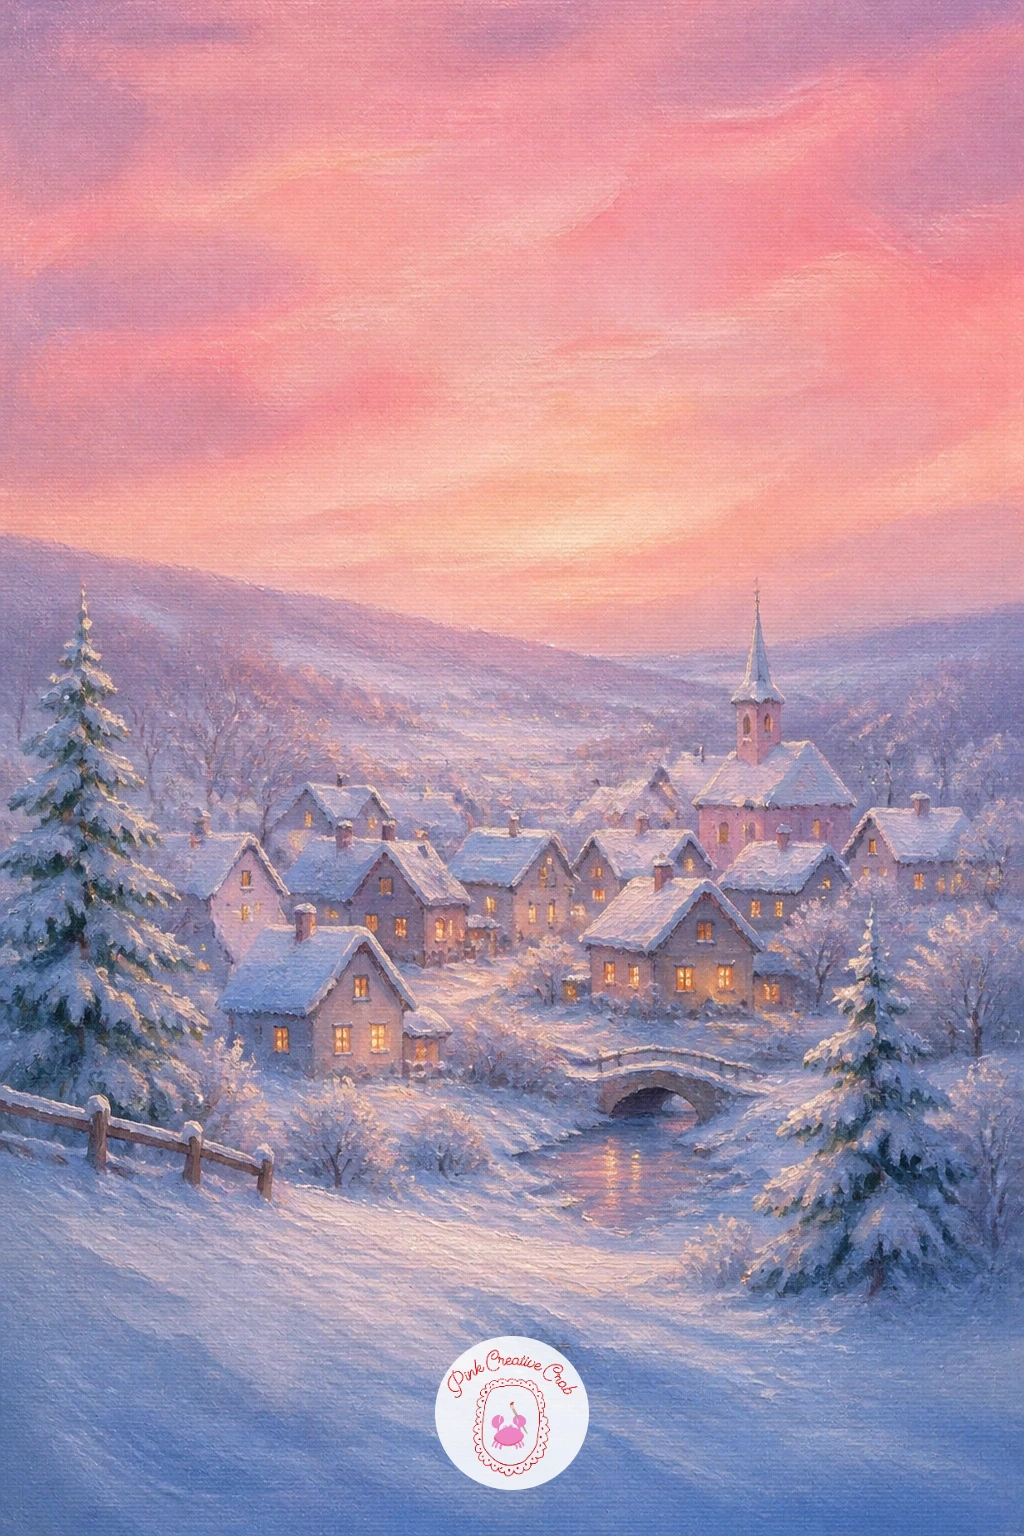
A snowy village under a pink sky steps back from the grand ballroom into something smaller and homelier, built mostly from simple rooftop shapes. Paint the sky first as a soft gradient from blush pink near the horizon into pale lavender-blue overhead, then let the village rooftops sit as a row of simple, varied triangles and rectangles silhouetted against it.
Add warm gold windows scattered unevenly across the buildings, more toward the centre where the eye naturally lands, and let the snow on each roof catch a touch of that pink sky colour reflected onto it. The quick version in ten minutes can be just the skyline and a few lit windows; a forty minute version adds smoke from chimneys, a path through the snow, and small trees between the buildings.
If the village looks too flat, vary the roof heights and angles more, since a perfectly even skyline looks like a paper cutout. No lavender mixed yet, a touch of blue into your blush pink gets you there quickly.
Let one window glow brighter than the rest as a quiet focal point.
You Will Need
- canvas board
- wide brush for the sky gradient
- small brush for rooftops
- fine brush for windows
Palette: Blush Pink,Lavender Grey,Soft Gold,Titanium White
For more cozy village compositions, the winter painting ideas for canvas collection has several variations worth comparing against this one.
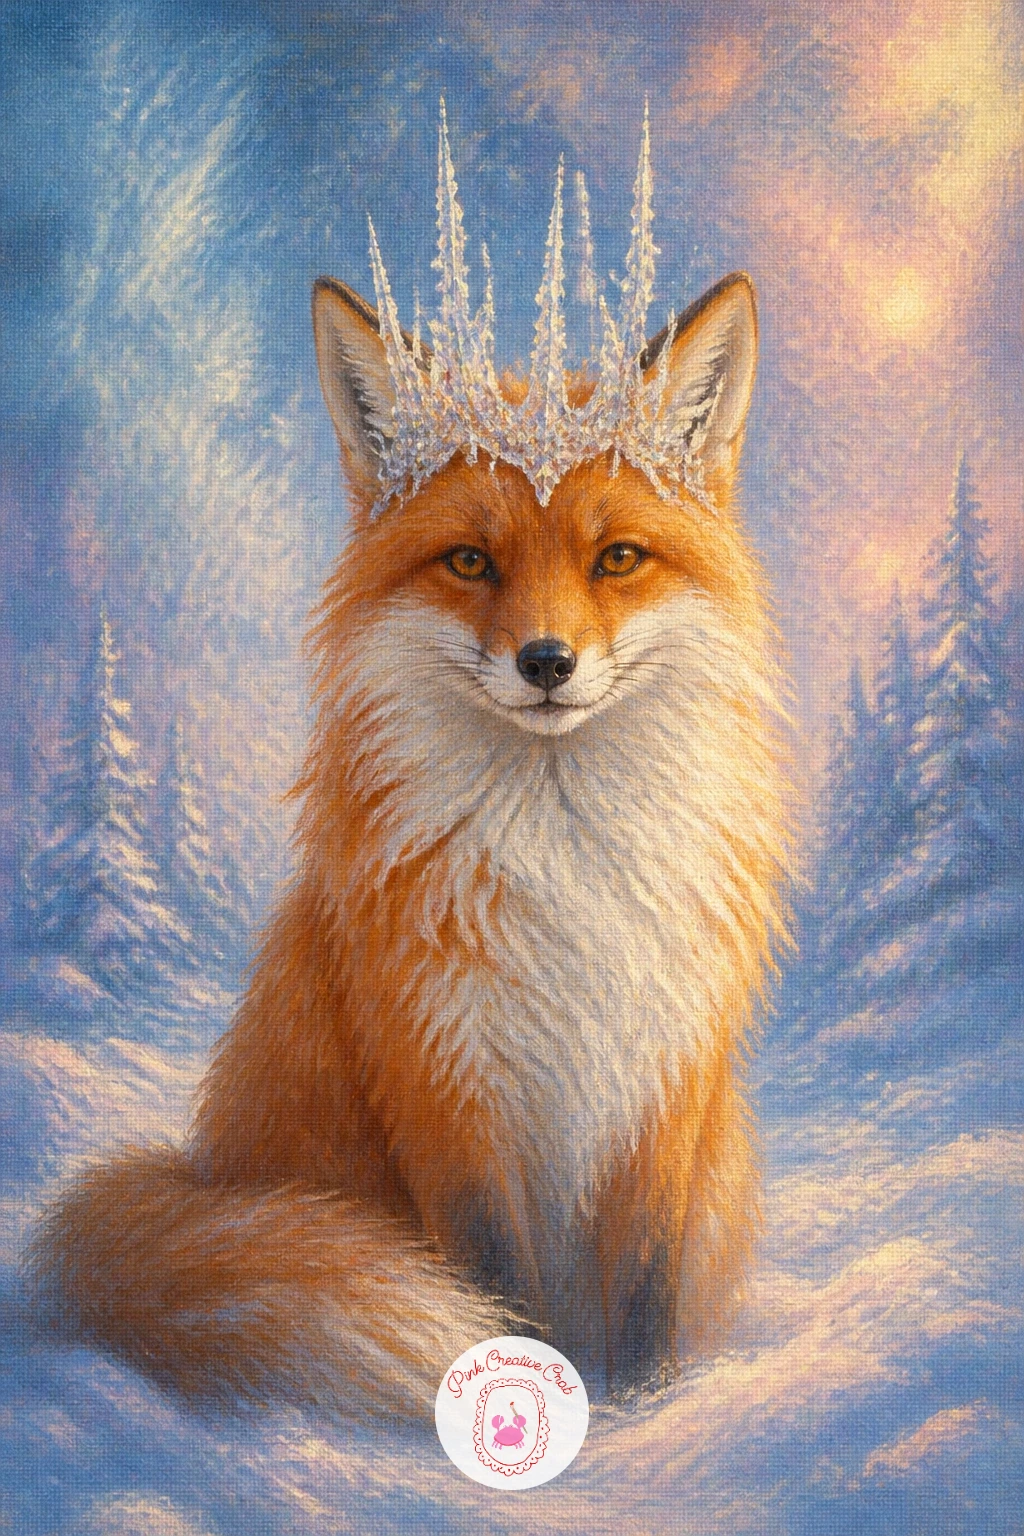
A fox in a crown of icicles brings a touch of whimsy back after the quiet village, and the challenge is making the icicle crown look like it belongs rather than sitting pasted on top. Paint the fox’s head and shoulders first in warm orange-red softened with a touch of blush, keeping the fur strokes short and layered around the face and ears.
Once the head is settled, add the icicle crown curving around the top of its head like real antlers or a wreath, using the same tapered triangle technique as any other icicle, varying their length so a few dip lower near the ears. The fox’s eyes should stay simple, just a dark almond shape with one white highlight dot, since overworking small animal eyes tends to make them look glassy rather than alive.
If the crown looks disconnected from the head, add a thin shadow where the icicles meet the fur to seat them properly. No orange paint for the fur, mixing red and yellow in roughly equal parts and warming with a touch of gold gets a close match.
Dust a few flecks of white snow across its shoulders for a final touch.
You Will Need
- canvas board
- small round brush for fur
- liner brush for icicles
- fine brush for the eyes
Palette: Burnt Orange,Blush Pink,Icy Blue,Titanium White
The animal sketchbook ideas of wild mothers and their babies page is a good place to study fox fur direction before painting this one.
A lake with skaters and a lit pavilion gathers several earlier techniques, ice, figures, and glowing architecture, into one wider scene, so composition matters more than any single detail. Block in the lake’s ice first across the lower half of the canvas, then place the pavilion on the far shore, small but glowing warmly from every window, as the painting’s main light source.
Scatter skaters loosely across the ice between the viewer and the pavilion, keeping them smaller and simpler the further they sit from the foreground, which builds a clear sense of distance across the whole lake. The common mistake with a scene this busy is giving every element equal detail; let the pavilion and one or two nearest skaters hold all the sharp edges while everything else stays soft.
If the composition feels cluttered, remove a few background skaters and widen the empty ice between clusters. No wide canvas for a panoramic feel, a standard square or rectangular canvas works fine if you keep the pavilion slightly off-centre.
Let the pavilion’s glow reflect faintly across the ice toward the viewer.
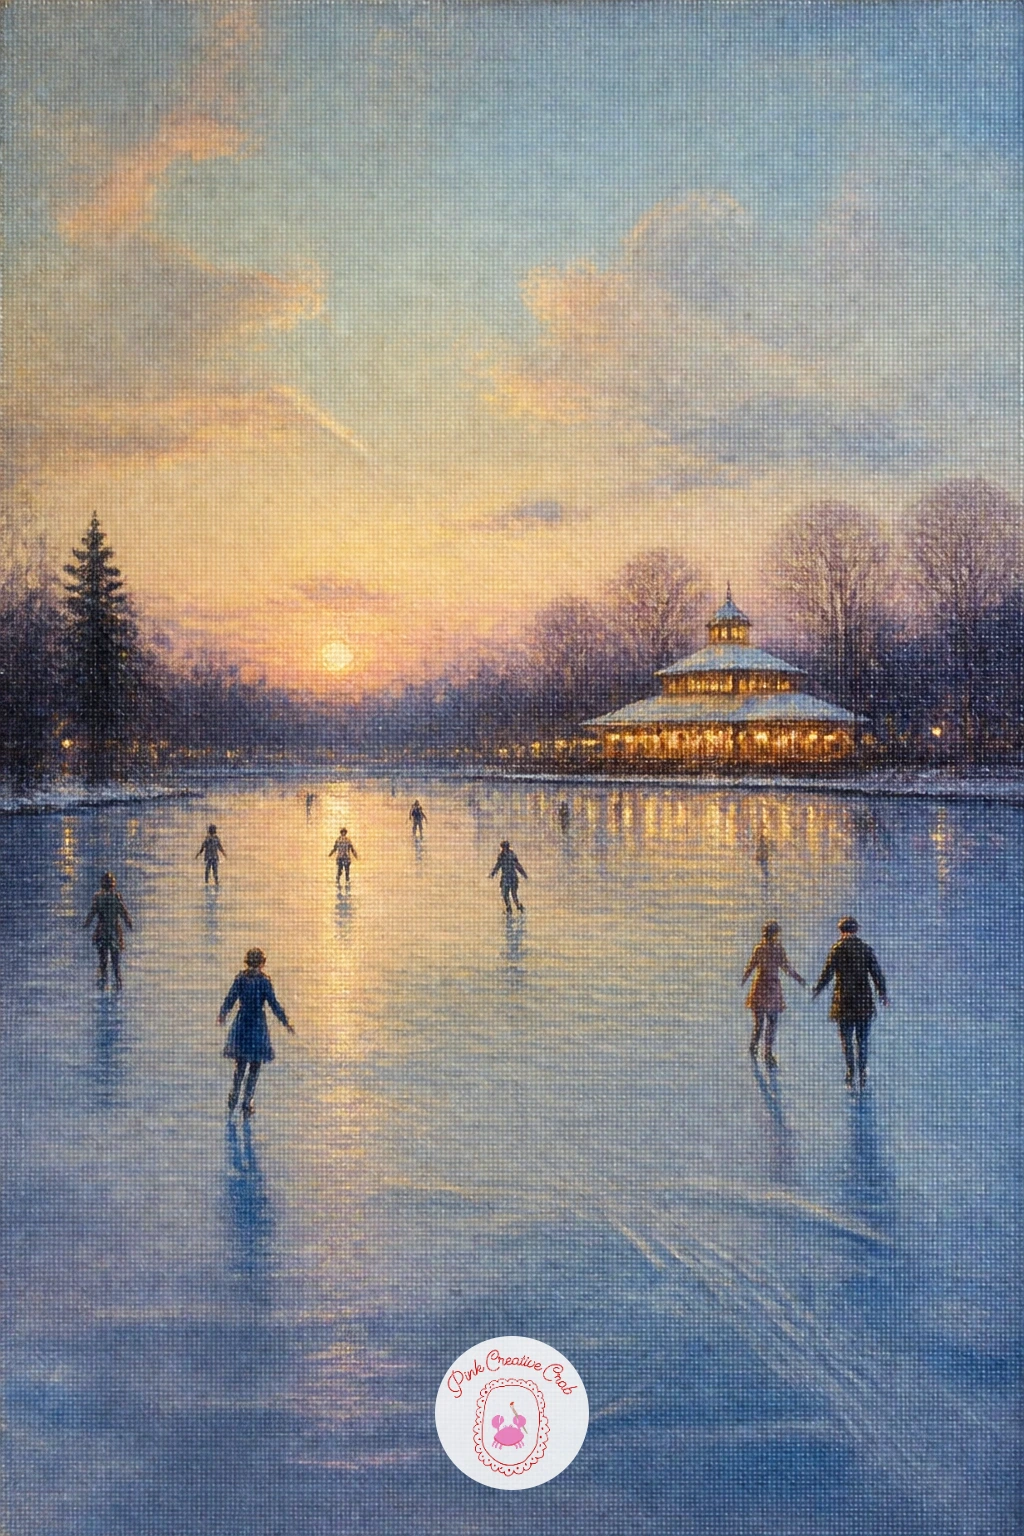
You Will Need
- canvas board
- wide flat brush for ice
- small brush for skaters
- fine brush for pavilion windows
Palette: Icy Blue,Soft Gold,Titanium White,Payne’s Grey
Step back from the canvas every few minutes while placing skaters, it is the easiest way to judge whether the spacing across the ice feels natural.
A frozen orchard with silver apples is a quietly surreal subject, perfect for a little dry brush practice on the frosted branches. Paint the bare orchard trees first as simple dark branching shapes against a pale sky, then let a dry brush loaded lightly with white skim across the branches for a frost coating, the same broken technique used earlier in the rose garden.
Add the silver apples last, small round dabs of cool grey-blue with a tiny bright highlight on each, scattered unevenly through the branches and a few fallen into the snow below. Vary the apple sizes slightly since uniform fruit looks artificial even in a fantasy painting.
If the apples look too flat, deepen the shadow on the underside of each one with a touch of Payne’s grey before adding the highlight. No proper silver paint, a cool grey mixed with a touch of blue and a dot of white highlight reads just as metallic on canvas.
Let the orchard rows recede gently into a soft, misty background.
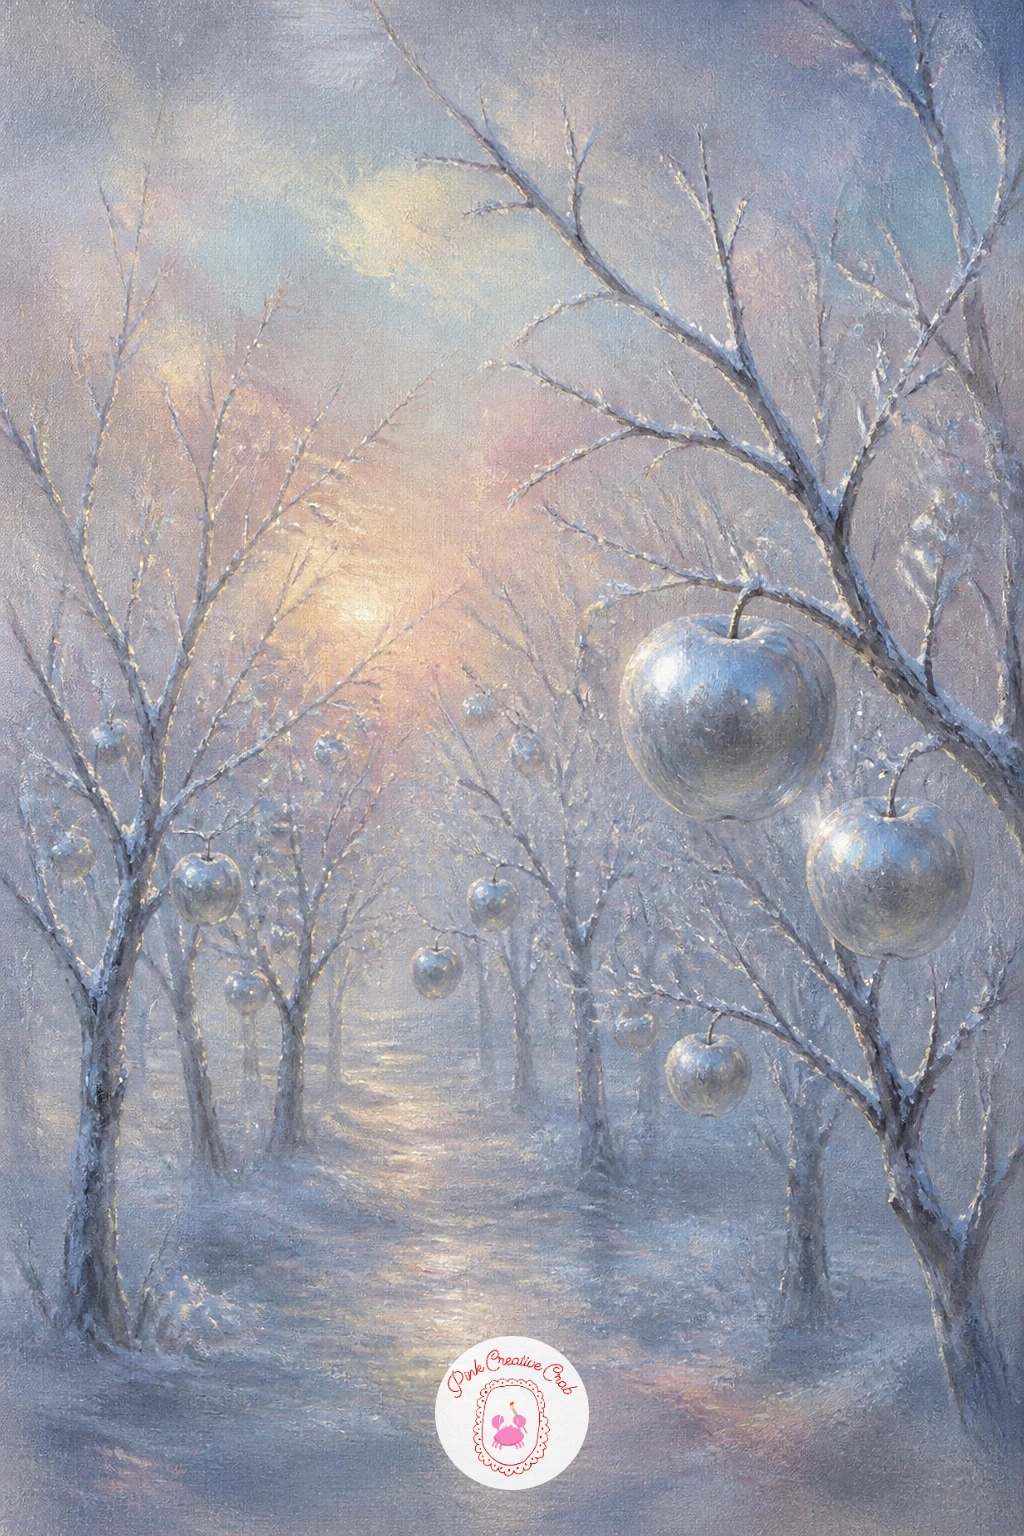
You Will Need
- canvas board
- dry brush for frost
- small round brush for apples
- fine brush for highlights
Palette: Silver Grey,Payne’s Grey,Titanium White,Icy Blue
For more frosted branch and orchard techniques, the oil painting for beginners step by step lessons for snowy winter villages walks through similar dry brush work.
A winter fairy garden is a good one to save a little creative freedom for, since it invites small magical details wherever you like. Block in a miniature garden setting first, perhaps a cluster of mushrooms, frosted leaves and tiny lanterns, all in soft icy blues and blush, keeping every element small in scale to suggest a hidden, fairy-sized world.
Add one small fairy figure as the focal point, simple and softly rendered with a pale glowing dress and a faint pair of wings suggested with just a few translucent strokes rather than hard outlines. This is the idea to revisit and vary next: try the same garden with a different season of flowers peeking through the snow, or swap the fairy for a different small creature entirely.
If the fairy’s wings look too solid, thin your white paint with extra medium so they stay delicate and see-through against the background. No fine detail brush for the face, keep it simple with just a soft pink blush and no features at all, which often reads as more magical anyway.
Scatter a few tiny glowing dots throughout the scene like floating fairy dust.
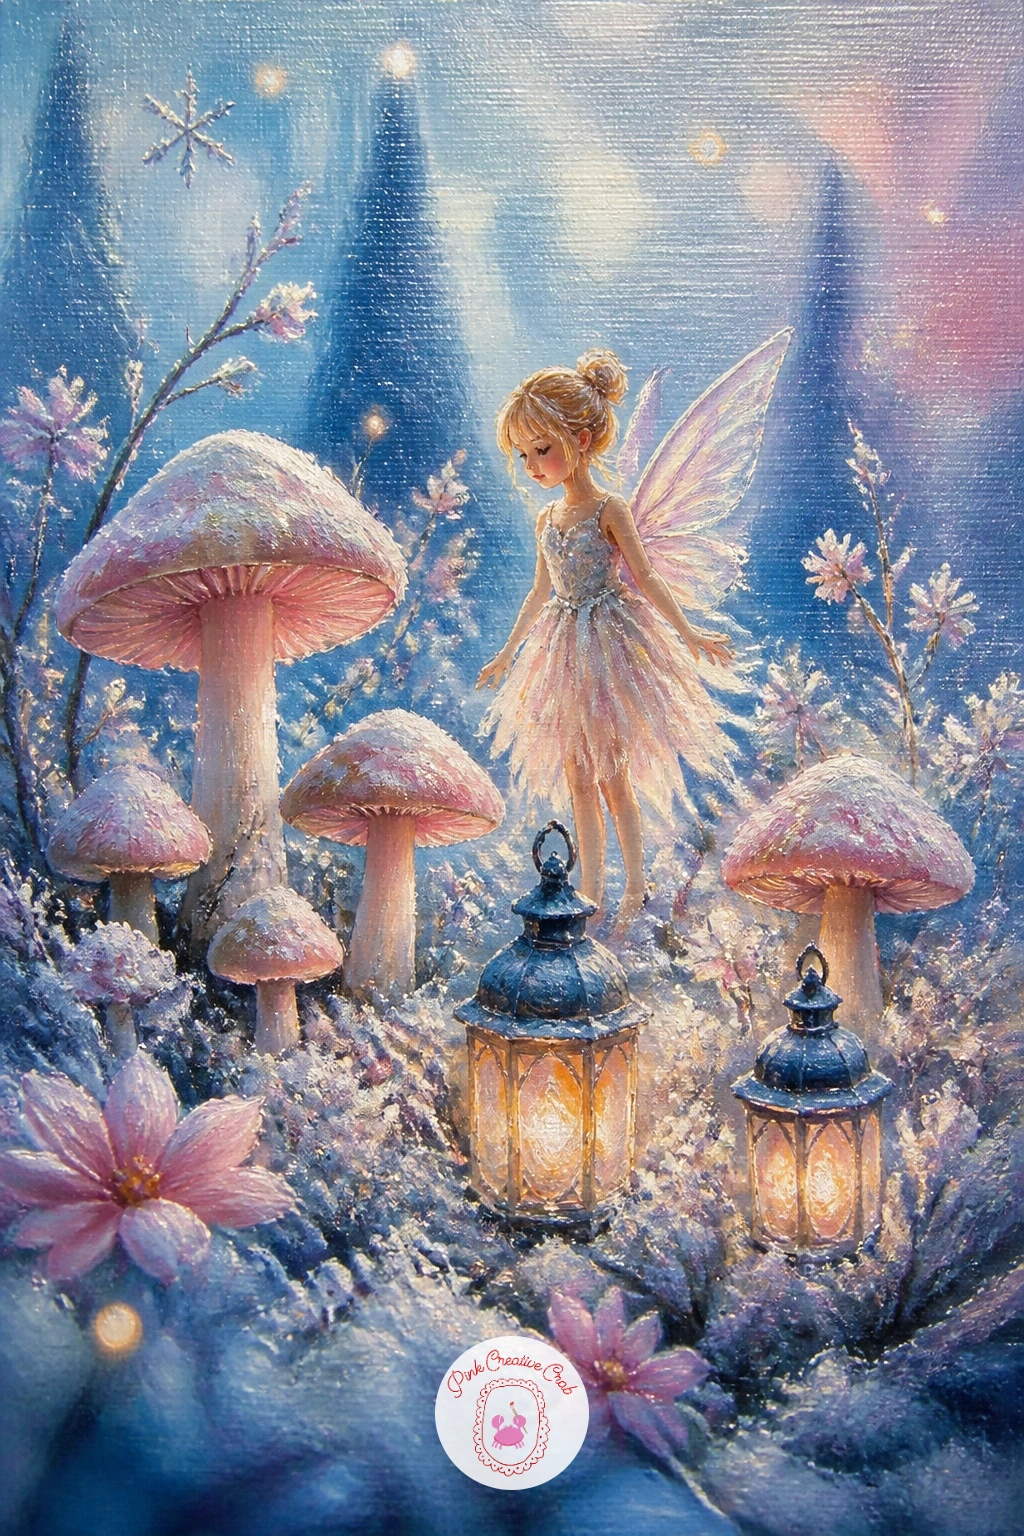
You Will Need
- canvas board
- fine brush for the fairy
- small brush for mushrooms and leaves
- medium for thin translucent wings
Palette: Icy Blue,Blush Pink,Soft Gold,Titanium White
Look at the winter junk journal pages with frosted windows and snowy villages for more tiny magical details worth borrowing into this scene.
Closing out the list, a snowy rooftop terrace with lanterns brings the whole palette back together in one cozy final scene looking out over a city or village skyline. Block the terrace floor and railing first in cool grey-blue, then paint a soft skyline of distant rooftops and lit windows beyond it, kept hazy and simple since the terrace itself is the real subject.
Add lanterns strung along the railing or set on small tables, each a warm gold glow with a soft halo, and let their light spill gently onto the snow-covered terrace floor in pale golden patches. With the whole series building up your eye for warm light against cool snow, this is a good one to let that glow do most of the emotional work rather than reaching for extra detail.
If the terrace feels empty, add one small chair or a blanket draped over the railing to suggest someone was just there. No string lights to paint convincingly, a loose scatter of small gold dots along the railing reads just as well without a connecting line.
Finish with a few soft snowflakes drifting down past the lanterns.
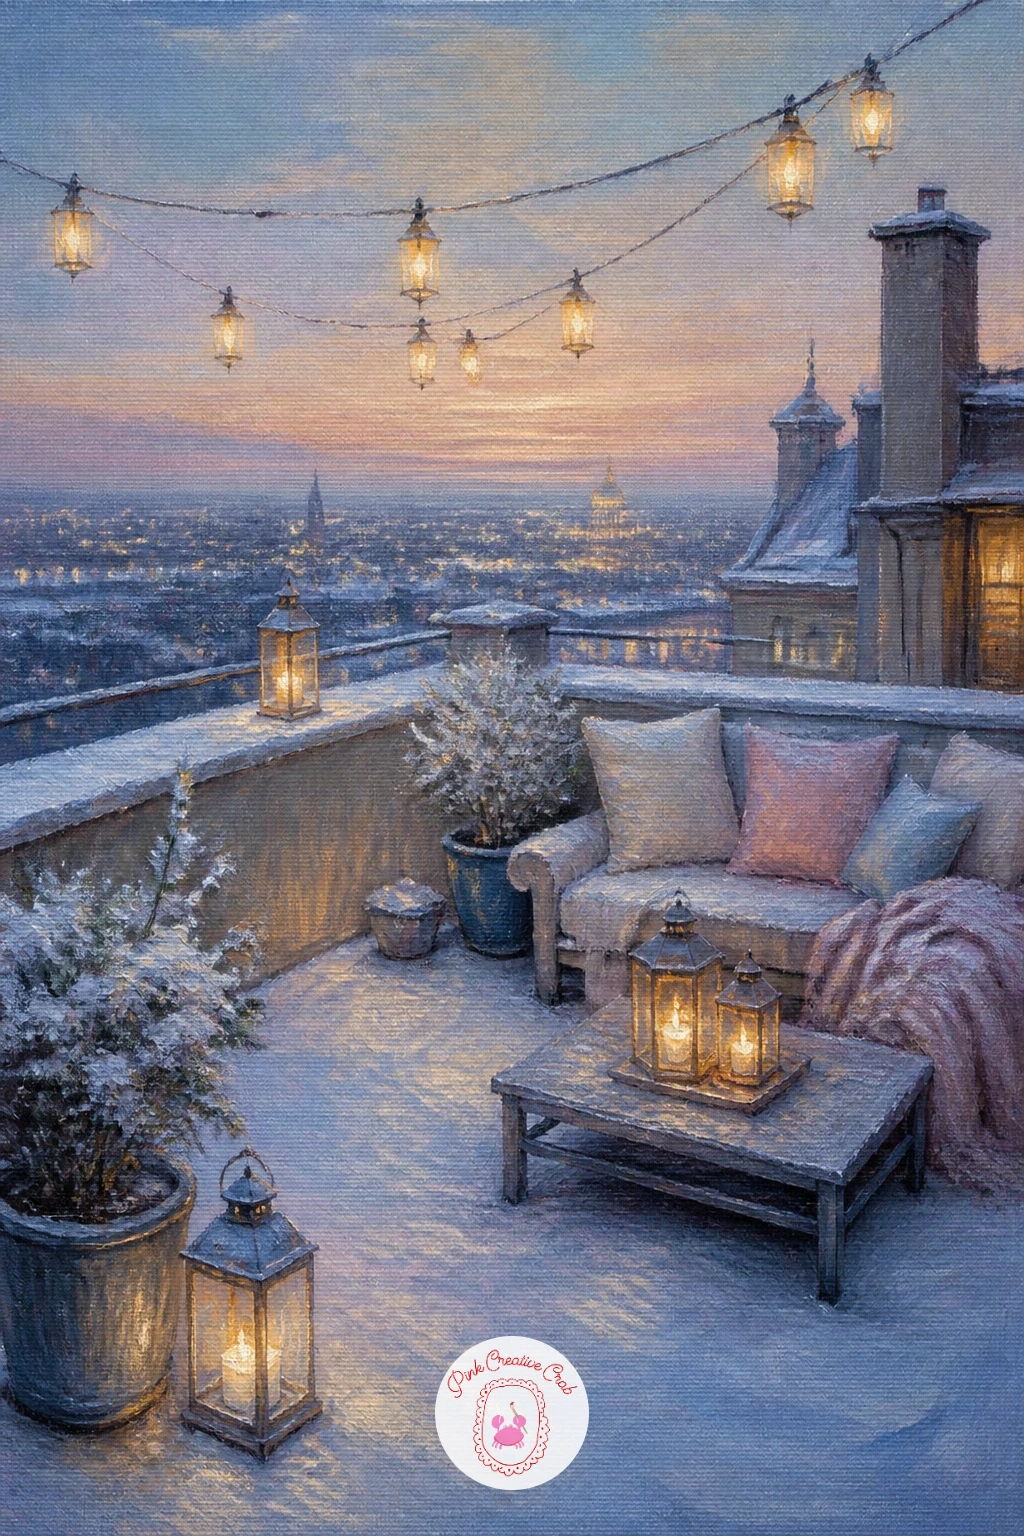
You Will Need
- canvas board
- flat brush for the terrace
- fine brush for lanterns
- small brush for the skyline
Palette: Icy Blue,Soft Gold,Payne’s Grey,Titanium White
Try this same terrace at the very start of snowfall, with just a dusting rather than deep drifts, for a lighter and quicker version to paint on a busy evening.
What to Do Next
Pick whichever scene caught your eye first, set up a small canvas board, and block in just the sky and the biggest shapes before you worry about any detail. One finished winter wonderland painting tonight beats a dozen half-started ones, so start small and let the glow build up slowly from there.
Frequently Asked Questions
What paint works best for a winter wonderland painting like these?
Oil paint is ideal because it stays workable long enough to blend soft, glowing transitions between cool blues and warm gold light. Acrylic can work too if you slow your blending and keep a spray bottle nearby to stop it drying too fast.
How do you mix that soft dreamy glow without it looking muddy?
Keep warm and cool colours separate on your palette and blend only where they meet on the canvas, not in a pile beforehand. Adding a touch of white into both colours near the blend point keeps the glow soft instead of grey.
What is the easiest winter wonderland scene to start with?
A frozen fountain with icicles or a swan on an icy lake are the simplest, since each has one clear subject and a plain background. Scenes with several figures, like the skating party, are better once you are comfortable with the basics.
How do you keep snow from looking flat and plain white?
Mix a little blue, lavender or blush into your white rather than using it straight from the tube, since pure white rarely appears in real light. Vary the direction of your brushstrokes too, since flat, even strokes read as less convincing than textured ones.
Can these ideas be painted smaller than a full canvas?
Yes, every idea here works just as well on a small canvas board or panel, which also dries and finishes faster. Simplify background detail slightly on a smaller surface so the main subject still has room to breathe.
Have any thoughts?
Share your reaction or leave a quick response — we’d love to hear what you think!
-
 0
-
0
-
0
-
0
-
0
-
0


