

Pizza drawing gives markers something they genuinely love: hot color, glossy cheese, and edges that beg to be outlined in black first. This list skips the lonely slice on white paper and sends you to the places pizza actually lives, the rooftop picnic, the scooter weaving through an Italian street, the couch on movie night with the box balanced on your knees.
Work through these in any order you like, from the simple paper-plate slice to the busier street scenes with figures. Each one is built to finish in one sitting with a fineliner and a handful of markers, so pick whichever moment makes you hungry first.
Using these images: free for personal projects such as printing, coloring, cards, journals and gifts. Handmade items that include them may be sold up to 30 pieces per design. More than that is commercial use and is not permitted, and neither is selling or sharing the images themselves or passing them off as your own. Please ask before any other use.
Start the whole list with the classic: a whole margherita pizza resting on a wooden peel, the kind of image that teaches you the bones of every pizza you draw after this. Pencil a wide circle first, then trace it in fineliner with a slightly wobbly line so the crust reads as hand-stretched rather than stamped from a template.
Lay the peel as a long paddle shape behind the circle, angled so one end points toward a bottom corner of the page. Color the crust in warm ochre before the sauce, leaving the outer rim paler, then drop in tomato red and let it pool slightly short of the edge. Add torn basil leaves and a few loose mozzarella blobs last, in a cooler white-yellow so they lift off the red.
Most new pizza drawings go wrong at the crust, which ends up looking too thin and ruler-straight. Measure the crust width against the whole pizza’s diameter before you commit: a real crust is roughly one tenth of that distance, slightly thicker where it bubbles. If you only have one brown marker, warm it with a touch of yellow blended wet so the peel doesn’t read as flat grey-brown.
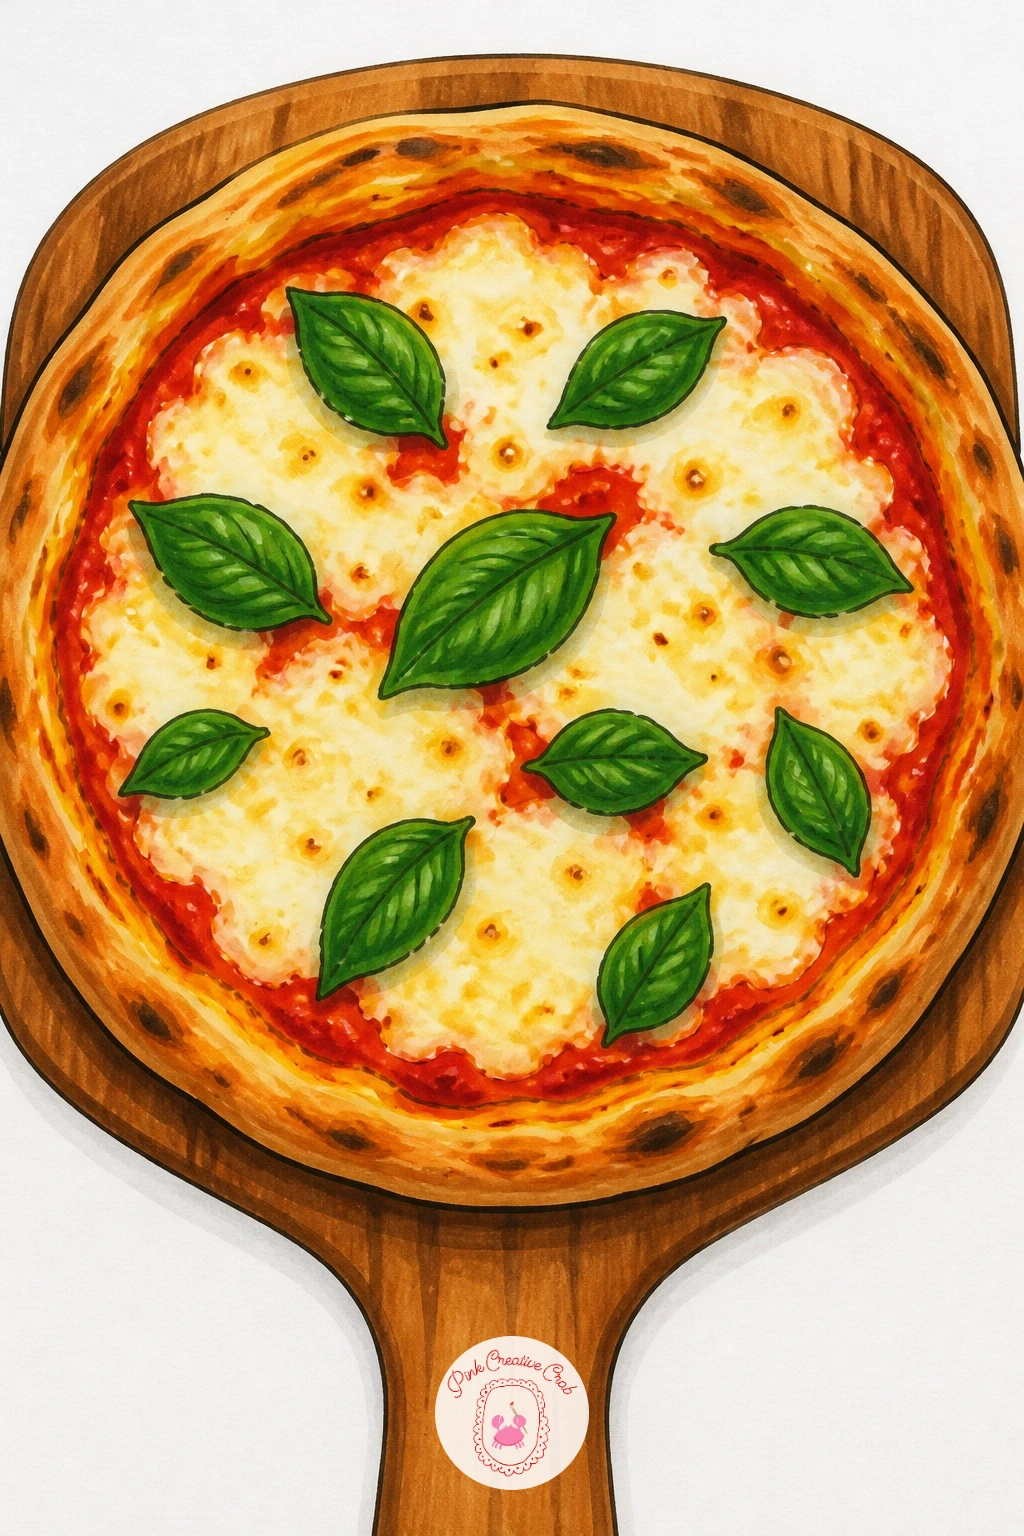
Palette: Tomato Red,Cheese Yellow,Basil Green,Crust Ochre
Once the whole pie feels comfortable, zoom into one slice lifted mid-bite, with a long stretchy cheese pull connecting it back to the pan. This is the drawing that rewards patience with the fineliner more than any other on the list, since the pull is really a handful of thin ribbons rather than one thick rope.
Draw the slice first as a simple wedge, crust at the wide end, then sketch the pan or box edge below it before adding the cheese strings. Vary their width and let two or three cross over each other for depth. Color the slice itself before the pull, then go back in with pale cheese yellow on the strings and a thin white gel pen highlight down one side of each strand to catch the light.
The pull collapses visually if every strand is the same thickness and perfectly straight, so bend at least one and taper the ends to a point. If your marker set has no pale yellow, use your main cheese color at low pressure, or go over it twice with a colorless blender to lighten it. Finish by adding a faint shadow where the slice meets the pan, which grounds the whole stretch.
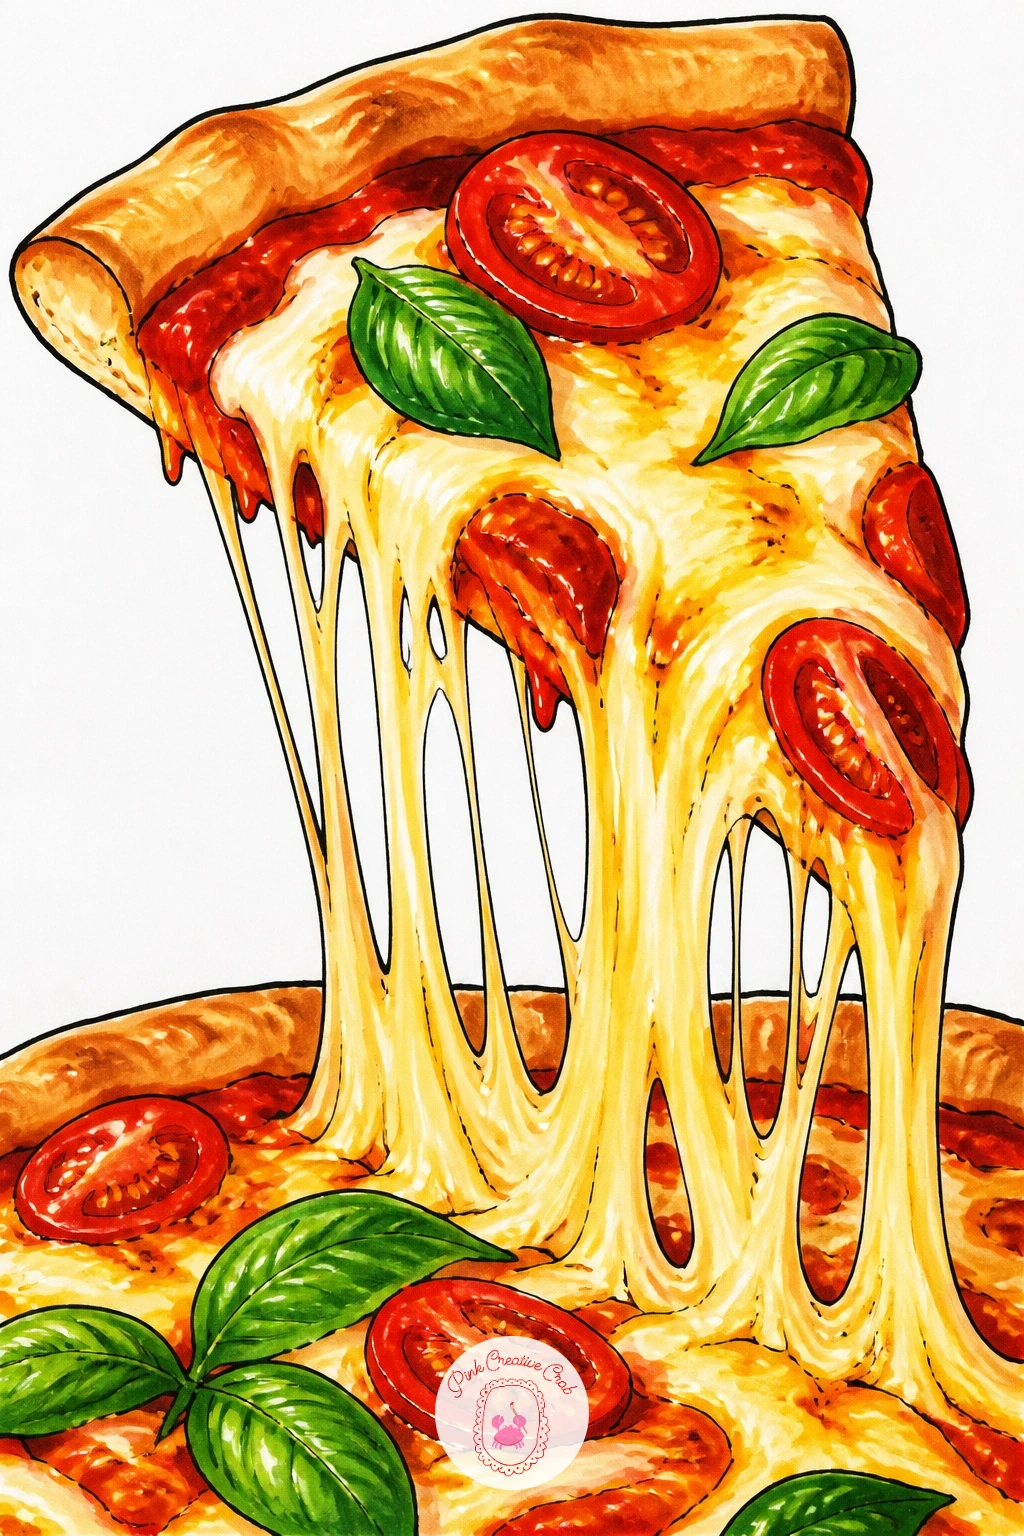
Palette: Tomato Red,Cheese Yellow,Pale Mozzarella,Warm Shadow Brown
Try drawing the cheese pull in one continuous pencil line before inking, looping back on itself twice, so the fineliner version keeps that unbroken, elastic feel.
Move from the close-up slice to a whole scene: an open pizza box sitting between two friends on a bed, late-night energy, socks and a soft blanket nearby. This is where your pizza drawing becomes a little story rather than a food study, so think about what the box tells you before you draw the people.
Block the box as a flattened square shape first, lid open and propped against a pillow, then rough in two simplified figures sitting cross-legged on either side using soft pencil shapes. Ink the box and pizza in full detail, keep the figures looser with fewer internal lines, and let the blanket and pillows carry pattern instead of faces. Color the box in warm cardboard brown, the pizza inside in your usual red and yellow, and let the bedding sit in cooler, muted tones so the food stays the brightest thing on the page.
Scenes like this often go wrong when the figures compete with the pizza for attention, so keep their clothing flat and simple. If you’re short on a cool grey marker for the blanket, a light blue or lilac works just as well for that cozy, dim-bedroom feel. If figure drawing still feels shaky, the girl pencil drawing ideas page has useful warm-up poses for seated figures like these.
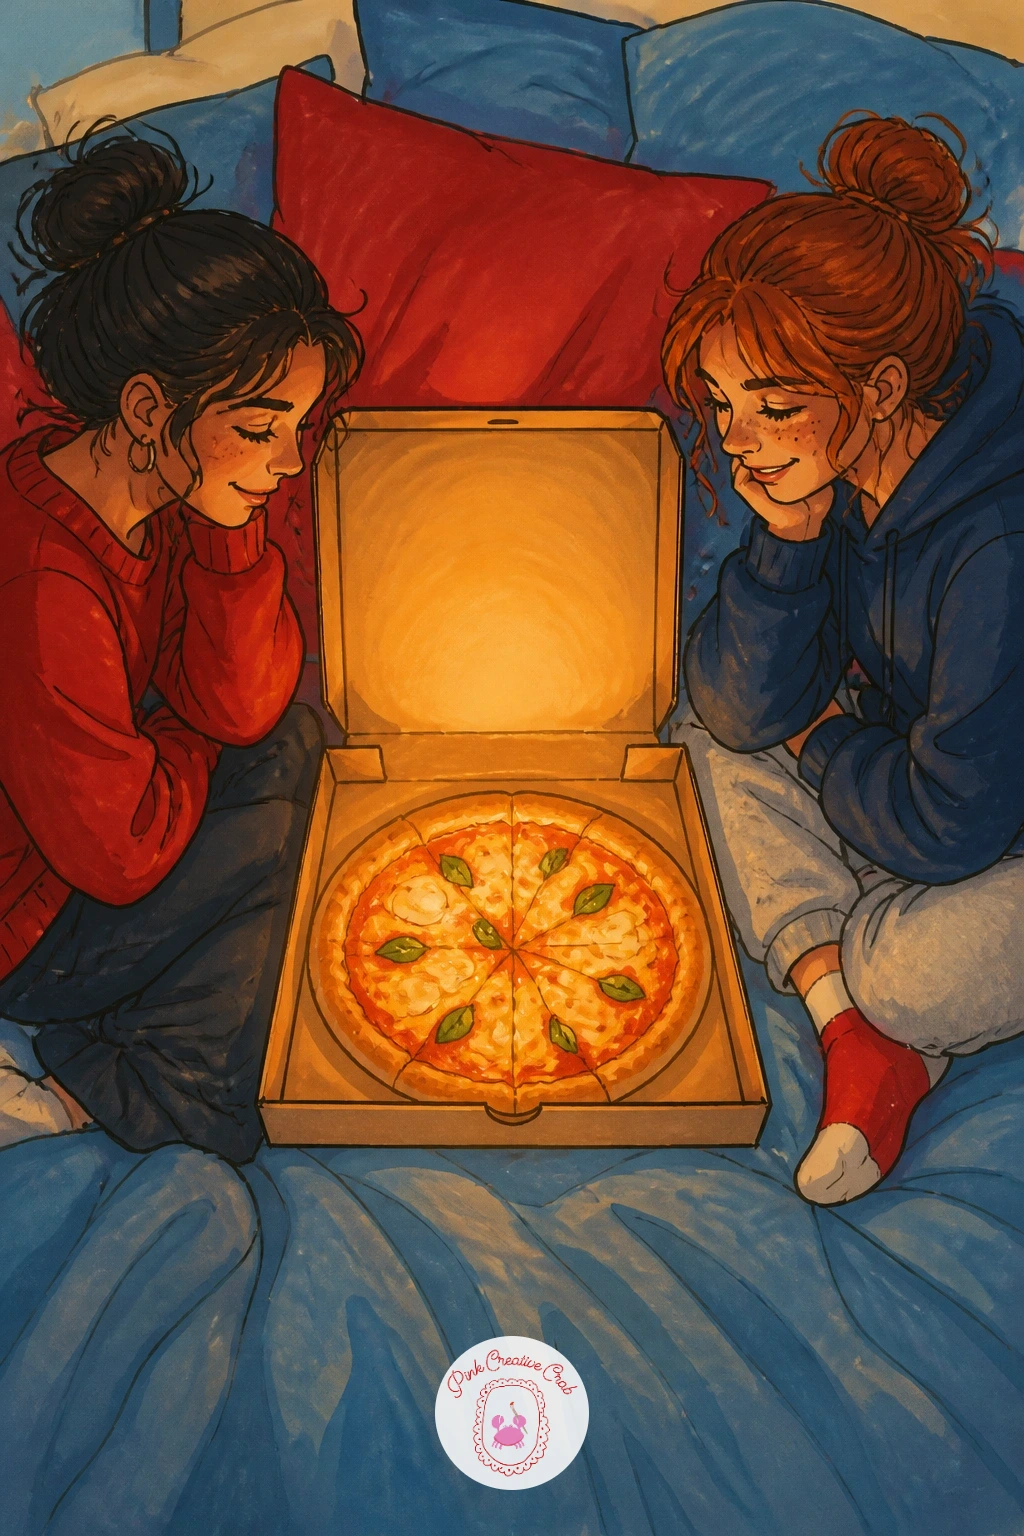
Palette: Cardboard Brown,Tomato Red,Muted Blanket Blue,Cheese Yellow
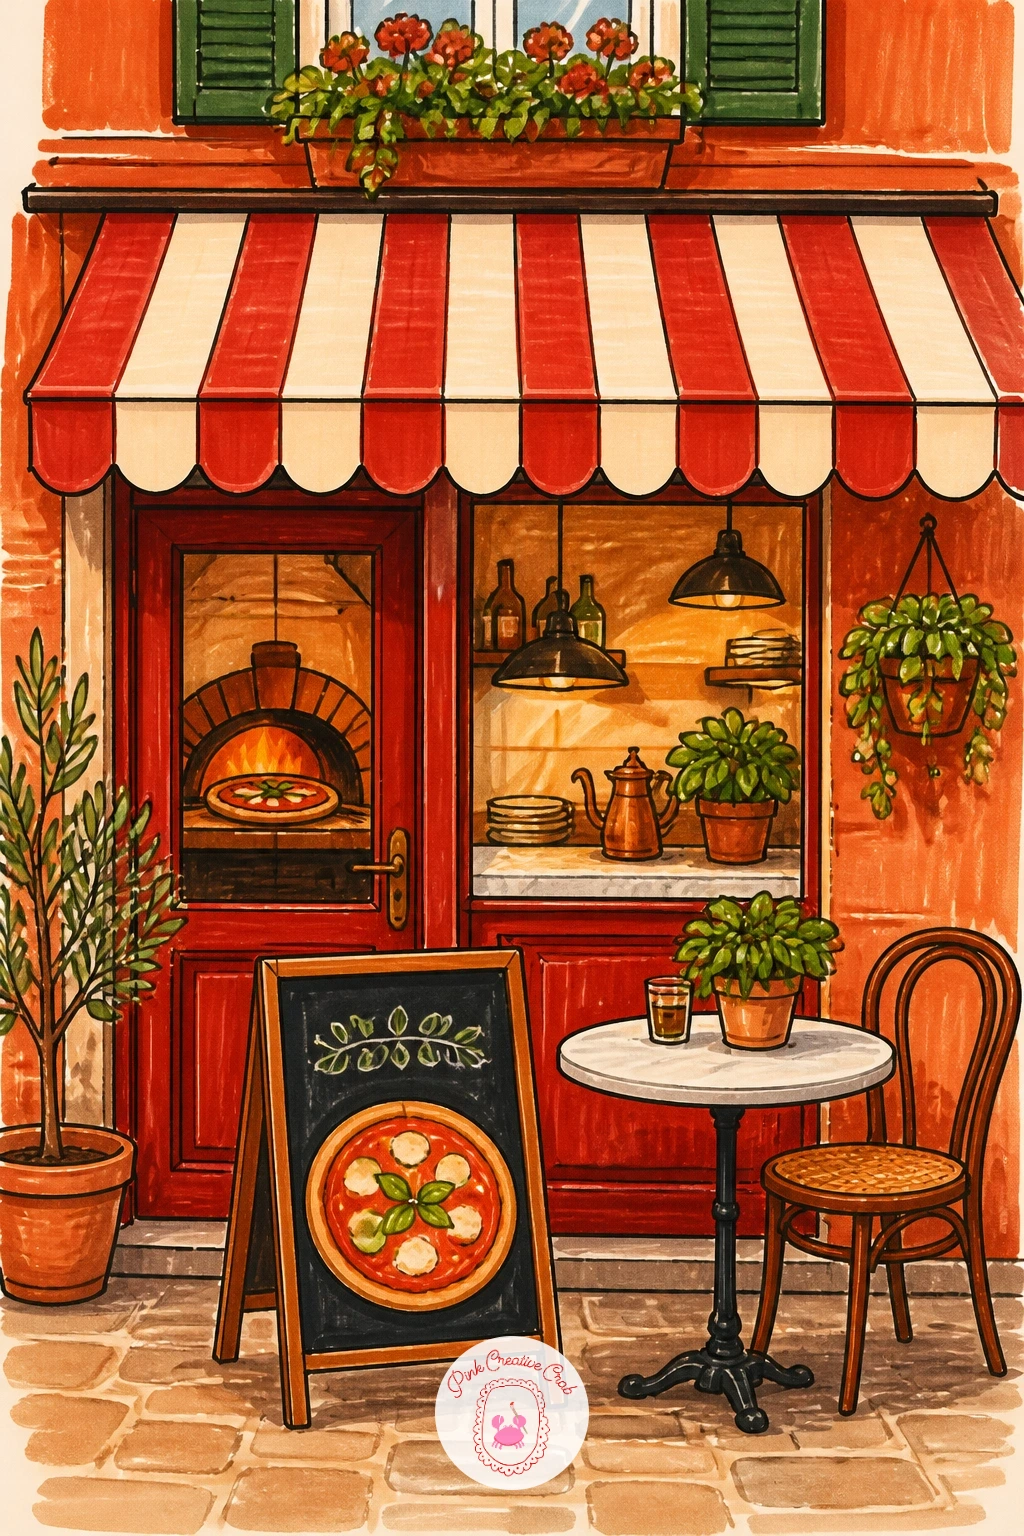
Step outside for a pizzeria storefront, striped awning out front, a chalkboard sign and maybe a cafe table on the sidewalk. Architecture scares some marker artists more than food does, but a storefront is really just a handful of rectangles stacked and divided, so start there.
Draw the building as one large rectangle, then add the door and window as smaller rectangles inset from the edges before you touch the awning. The awning itself is a simple fan of triangles or a curved strip, whichever reads easier to your eye, striped in alternating tomato red and cream. Ink the architecture with a ruler if your hand wobbles on long lines, then free-hand the signage lettering and any hanging plants for a human touch.
The eye level matters more here than in any food-only drawing: decide whether you’re looking at the storefront straight on or slightly from below, and keep every horizontal line (window ledges, awning stripes, door frame) parallel to that same angle. A storefront with mismatched angles looks unstable even if the colors are lovely. If you don’t have a ruler, the edge of a bookmark or a straightened magazine corner works just as well.
You Will Need
- ruler or straight edge
Palette: Tomato Red,Cream,Terracotta,Soft Brick
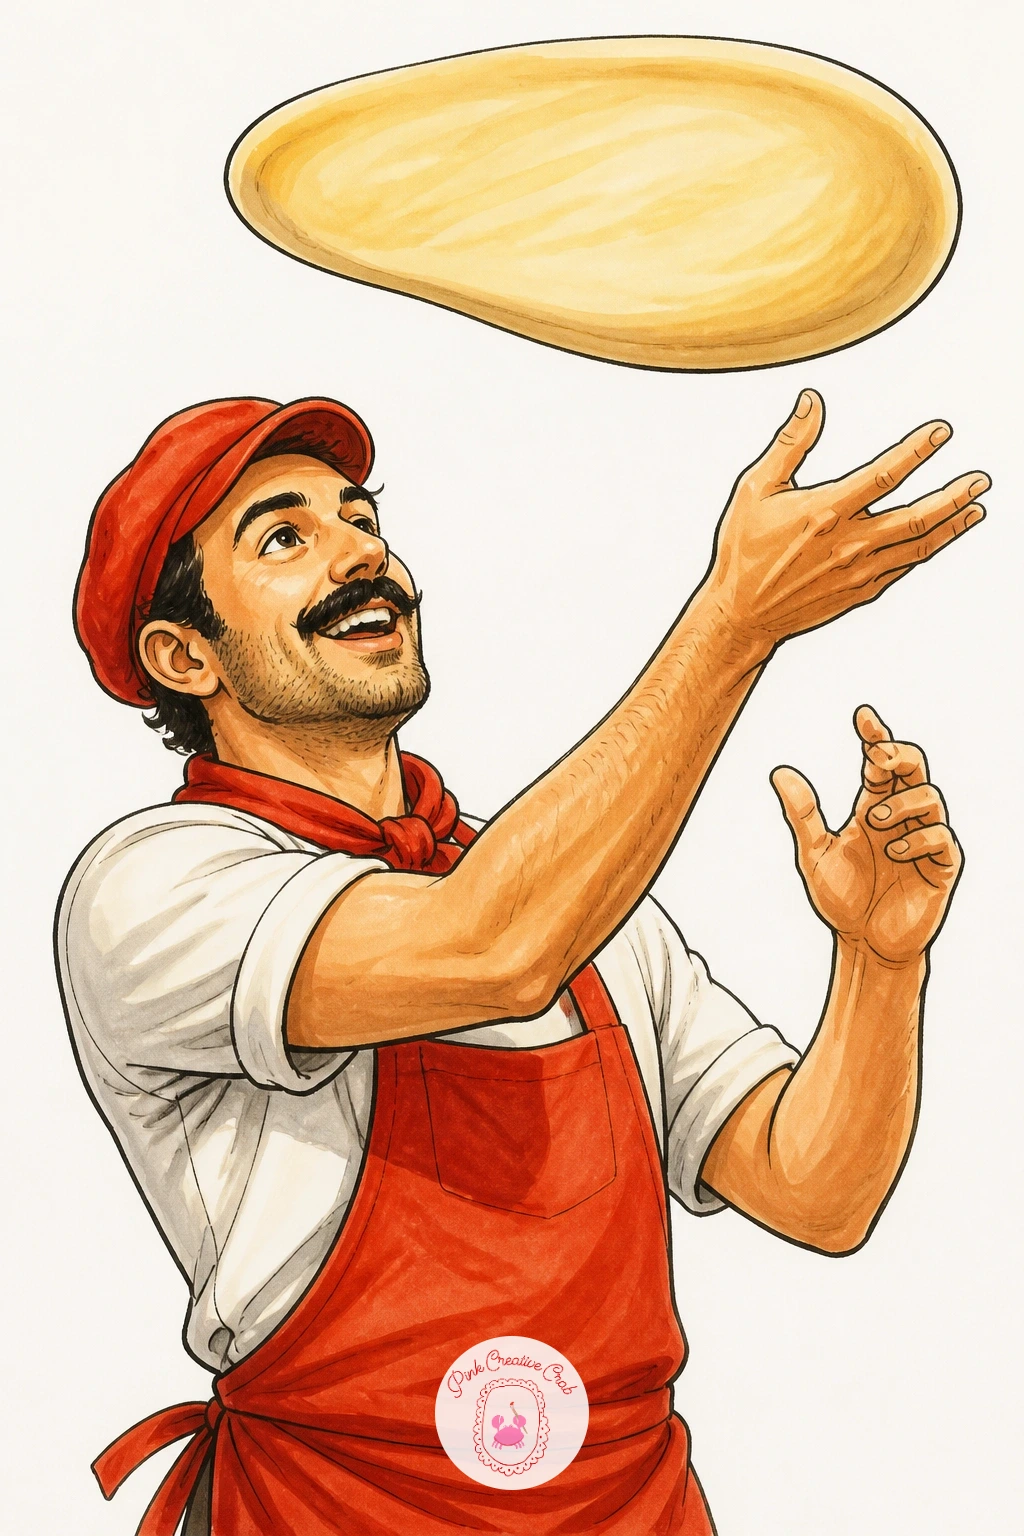
Bring motion into the series with a pizza chef caught mid-toss, dough flattened into a disc hanging in the air above his hands. Action poses rely on a clear gesture line more than on anatomy, so sketch one sweeping curve for the spine and arms before you add any body shape to it.
Keep the chef simplified, a rounded apron shape, a cap, and arms raised with hands slightly cupped under where the dough will land. Draw the dough disc separately as a soft circle with a slightly torn, uneven edge, floating above the highest hand. Ink the figure first, dough second, and leave a faint motion line or two trailing from the dough to suggest the spin.
This pose goes wrong most often when the dough sits directly above the head instead of slightly off to one side, which flattens the sense of a throw. Picture the dough continuing an arc from the chef’s hands and place it along that curve, not straight up. If drawing a full figure feels like too much today, crop the scene at the chest and just show the raised arms and flying dough, still a complete picture on its own.
Palette: Dough Cream,Apron White,Warm Skin Tone,Flour Dust
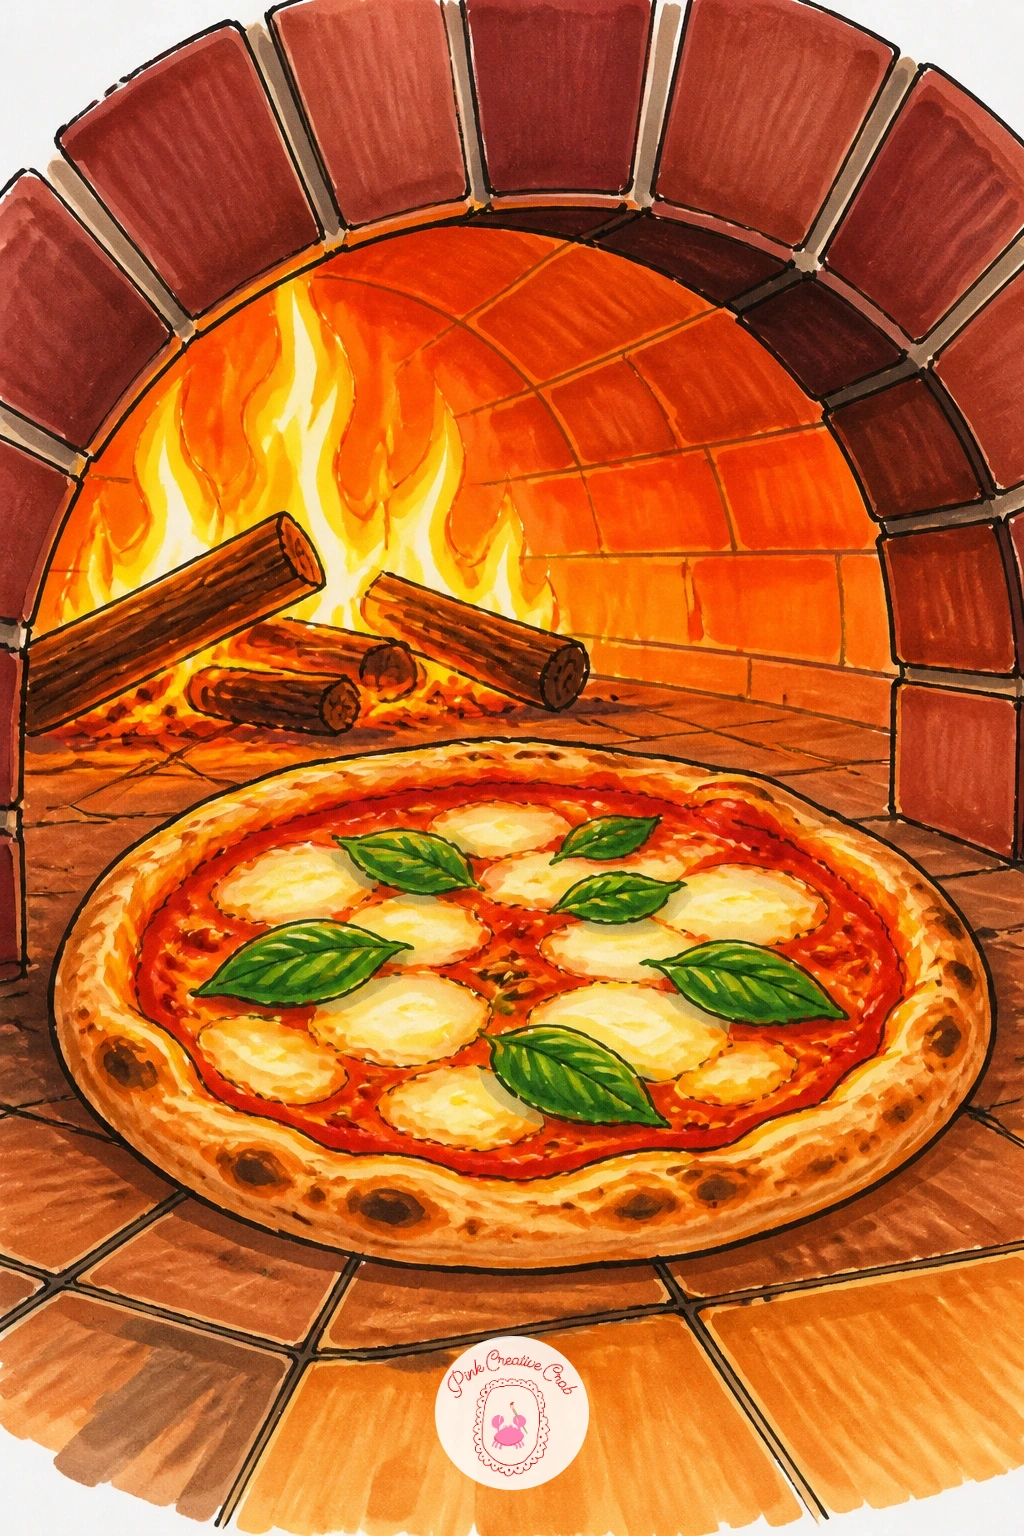
Head back indoors, so to speak, for a pizza baking inside a wood-fired oven, flames licking at the brick and a wooden peel sliding it in. Light is the whole point of this one, so decide where the fire sits before drawing anything else, because it will push warm color onto everything nearby.
Draw the oven’s dark round opening first, a simple arched shape, then place the pizza sitting just inside it, slightly smaller in scale and a little obscured by the arch’s edge. Add the flame shapes at the back in bright orange and yellow, letting them overlap the pizza’s crust where the light would naturally catch it. Color the bricks around the opening in deep red-orange near the fire, cooling to grey-brown further from the heat, which does most of the work in making the oven feel lit from inside.
Beginners often color the whole oven interior one flat orange, which flattens the glow instead of building it. Work from the brightest spot near the flame outward in two or three value steps instead. No orange marker on hand? Layer red and yellow directly on the paper and let them blend while still wet for a near-identical effect.
Palette: Flame Orange,Fire Yellow,Brick Red,Charcoal Grey
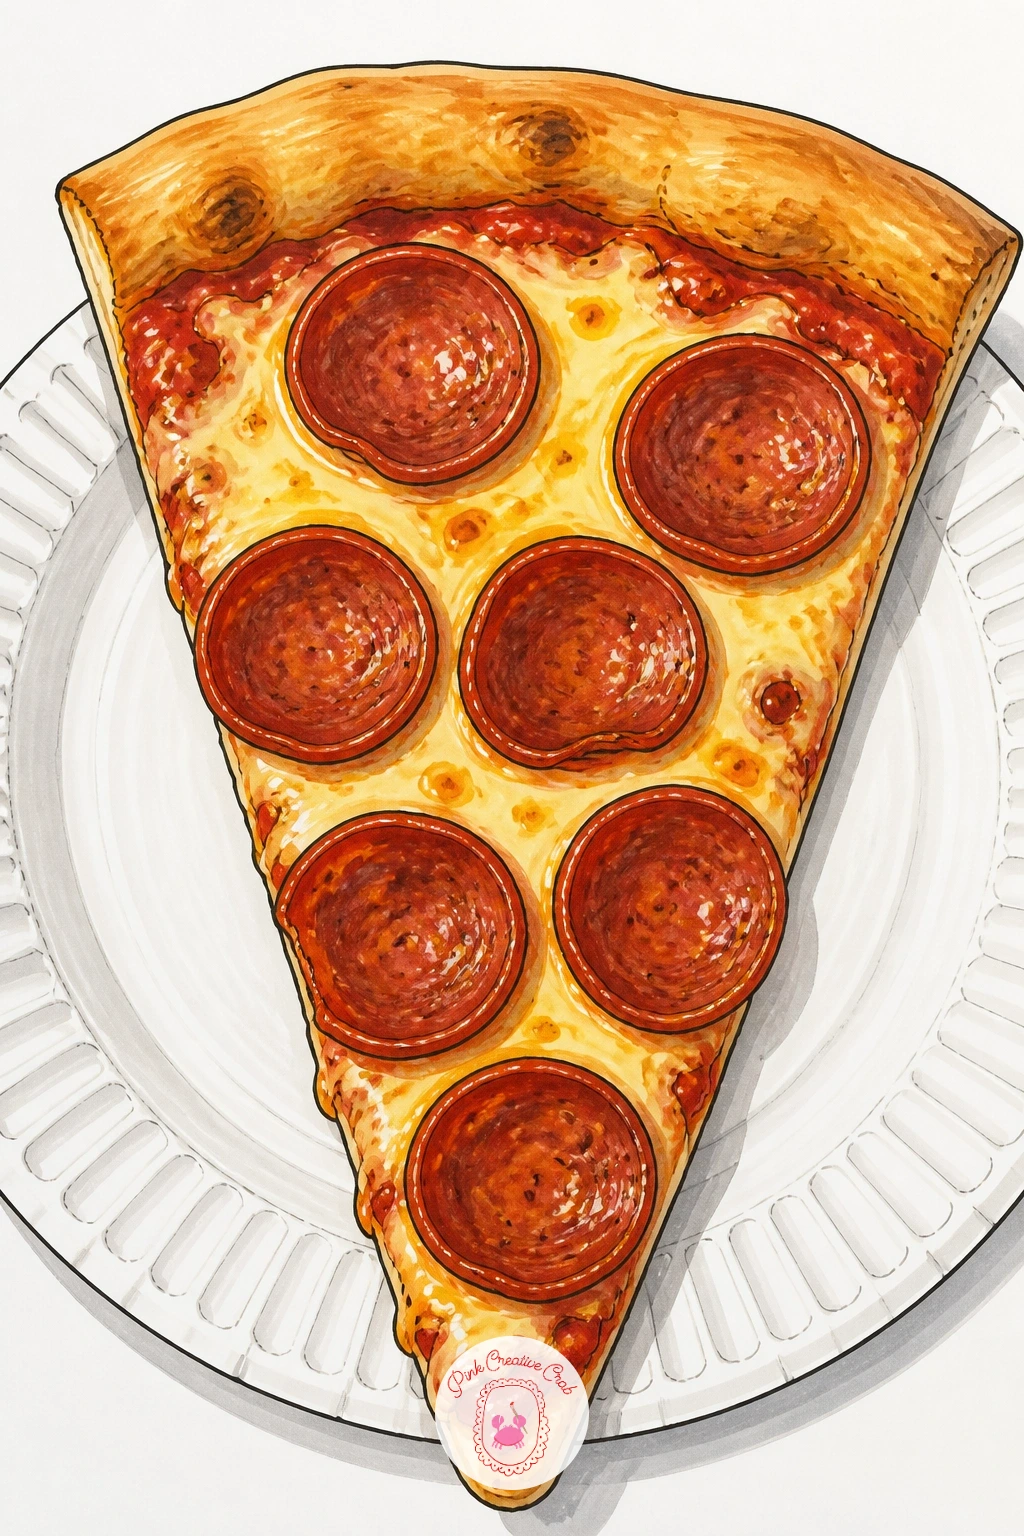
Settle into something quieter next, a single pepperoni slice resting on a thin paper plate, the kind of drawing you can finish before your coffee goes cold. The plate’s slight ridge is what sells it as paper rather than ceramic, so pay attention to that small detail even though the slice is the star.
Draw the slice as a simple wedge with a gently curved crust edge, then the plate as a wide oval beneath it, slightly wider on the side where the crust points. Ink the pepperoni as overlapping ovals with slightly cupped, curled edges rather than flat circles, which is what makes them look cooked instead of pasted on. Color the plate in the palest warm white you have, leaving the rim a shade cooler than the center where the slice’s shadow falls.
Flat-looking pepperoni is the most common letdown here, fixed by adding a small darker red-brown ring around each piece’s curled edge and a tiny highlight dot of orange in the center where grease pools. If you don’t own an orange marker, a yellow dot blended slightly into the red does nearly the same job.
Palette: Tomato Red,Pepperoni Red-Brown,Cheese Yellow,Paper White
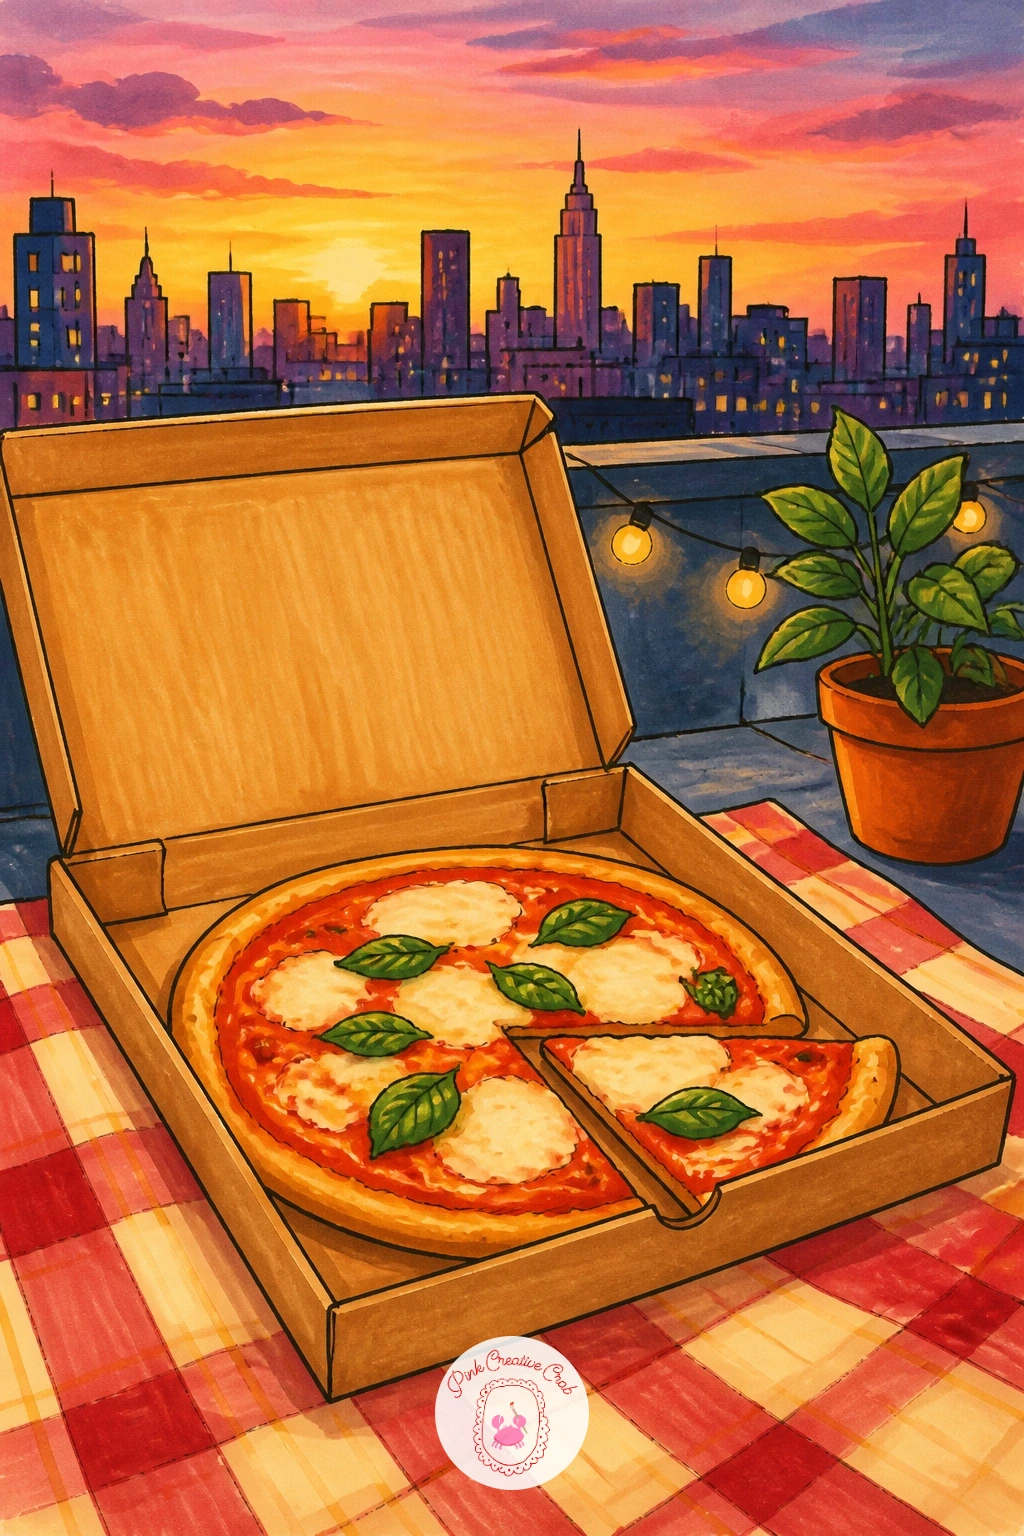
Give pizza a view with a rooftop picnic, a box open on a blanket and a skyline silhouette behind it. Rooftop scenes work best when you treat the skyline as background shapes only, simple rectangles and triangles in a single flat color, so it never competes with the pizza in front.
Build the blanket and open box low in the frame first, then add the skyline well above it, smaller buildings toward the edges and one or two taller ones breaking the horizon near center. Keep the sky itself a soft gradient, warm near the buildings fading to a cooler tone higher up, suggesting early evening. Save your brightest reds and yellows entirely for the pizza, which keeps it the clear focal point against a city that’s mostly silhouette.
This idea leans on perspective more than most on the list: sit the eye level low, around the blanket itself, so the buildings tower upward rather than sitting flat like paper cutouts. Angle a couple of their edges very slightly inward toward a point above the page to suggest that height. A picnic on grass works just as well if rooftops feel like too much architecture for today, and the picnic drawing ideas page has more ground-level setups to borrow from.
Palette: Dusk Orange,Skyline Blue-Grey,Tomato Red,Blanket Cream
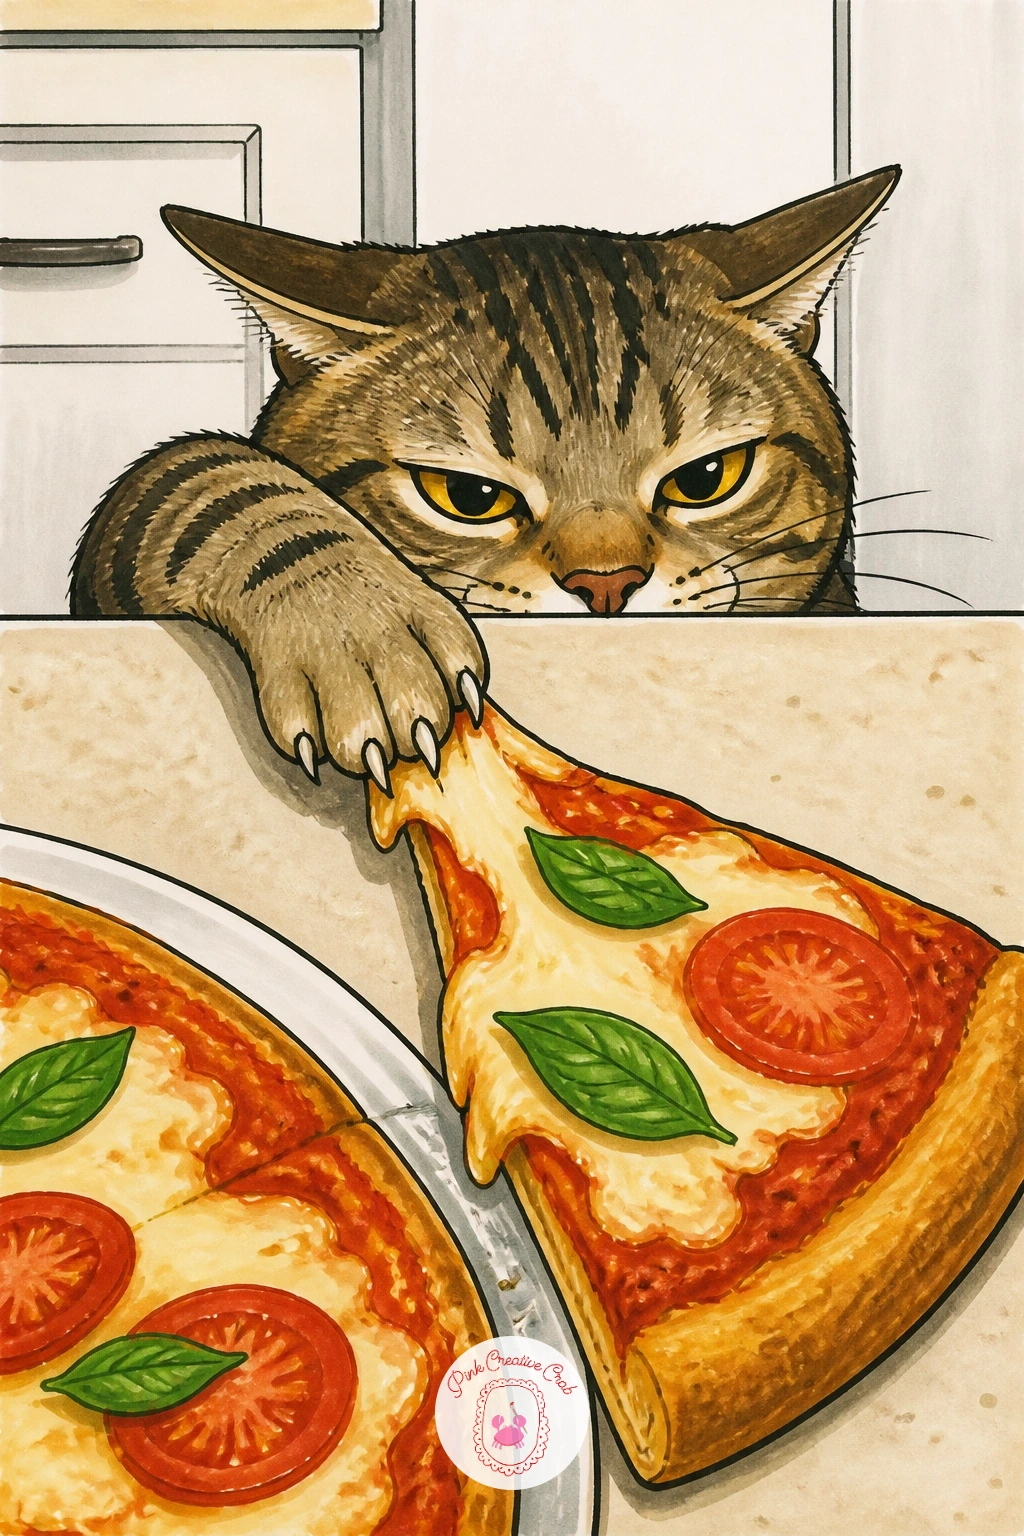
Let a little mischief into the kitchen with a cat stealing a slice off the counter, paw mid-reach and ears pinned back in concentration. Cats are mostly simple geometric shapes stretched into a pose, so build this one from an oval body and a rounder head rather than trying to draw fur detail first.
Sketch the cat stretched up on its hind legs against the counter edge, one front paw hooked over a slice that’s sliding toward the edge of a plate. Ink the cat with clean, confident outlines and keep internal lines minimal, just enough for the face and a stripe pattern if you want one. Color the slice last and brightest, since it needs to read instantly as the object of all that feline attention.
The pose often collapses if the cat looks too relaxed for a theft in progress, so check the ears (flattened back) and the tail (low or slightly puffed) before inking. If you’re nervous about cat anatomy, a quick warm-up from the cat pencil drawing ideas page will help the proportions click before you commit to marker.
Palette: Tabby Grey-Brown,Tomato Red,Cheese Yellow,Counter Cream
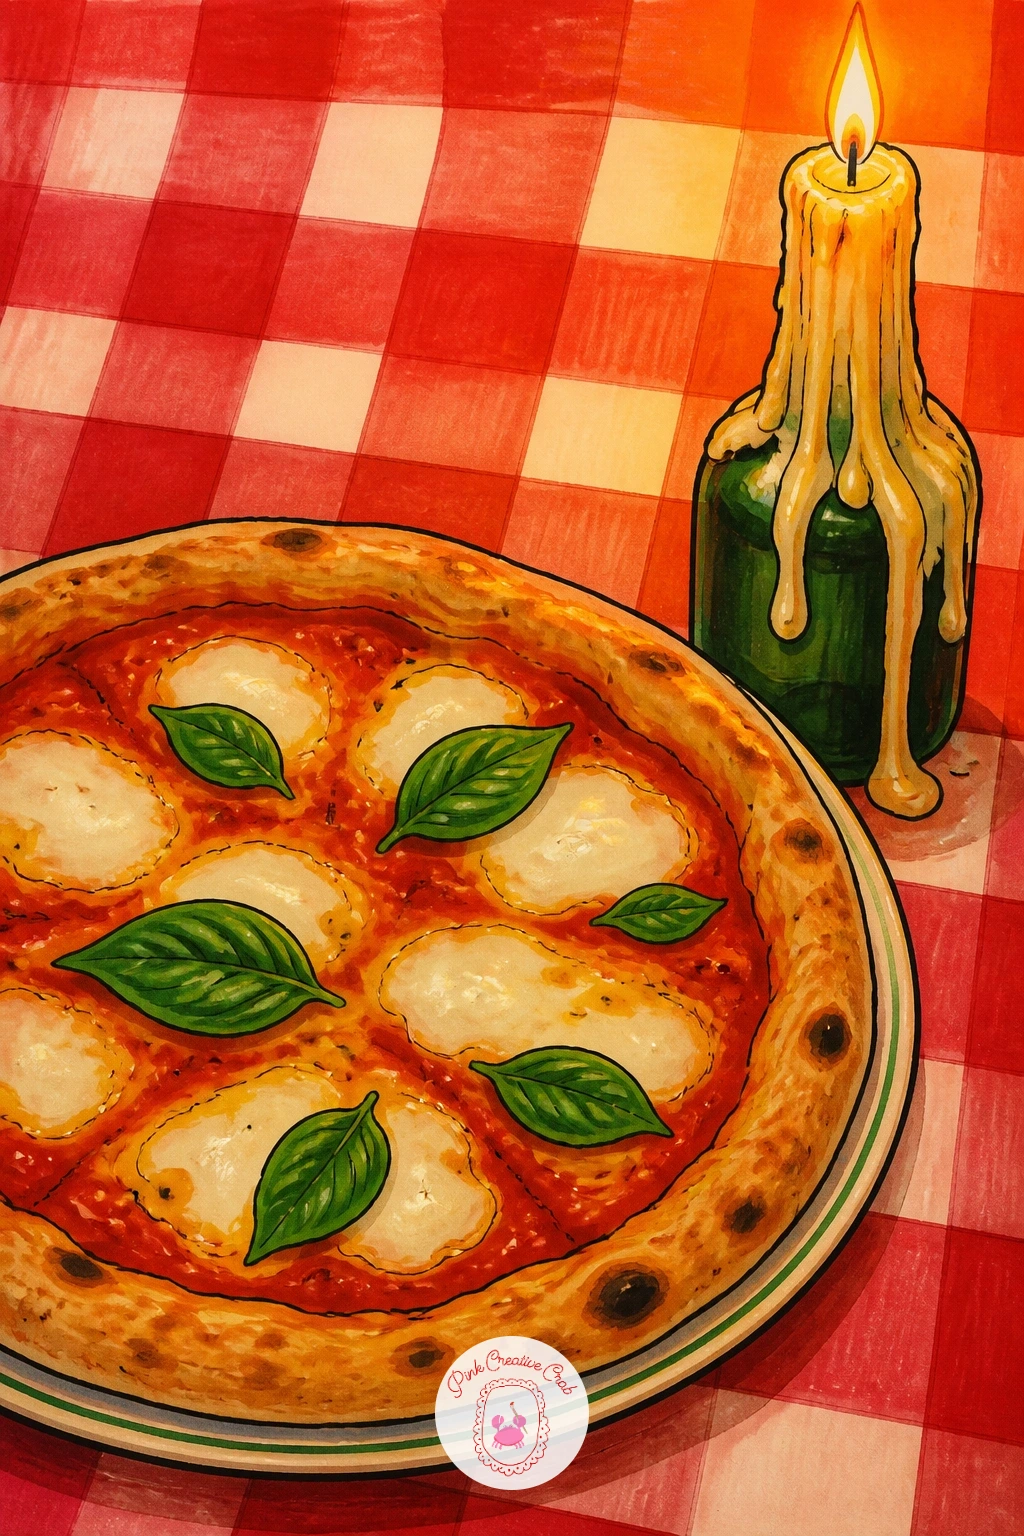
Set a romantic little scene next: a pizza on a red-and-white checkered tablecloth with a single candle melting down a wine bottle beside it. The checkered pattern is the real test of patience here, so plan its scale before you start inking a single square.
Draw the pizza and bottle first, then lightly pencil a grid across the visible tablecloth, keeping squares a consistent size that shrinks slightly as the cloth recedes toward the back of the table. Ink alternating squares in tomato red, leaving every other one white, and let the pattern break naturally where the pizza or bottle overlaps it. Add the candle flame last in a small warm glow, with a touch of orange bleeding onto the bottle’s glass just below it.
Checkered patterns look stiff when every square is perfectly identical in a way real fabric never is, so vary the line weight slightly square to square. If gridding by eye feels risky, a lightly drawn ruler grid in pencil underneath solves it completely and erases away before you color.
You Will Need
- ruler or straight edge
Palette: Tomato Red,Candle Orange,Bottle Green,Cheese Yellow
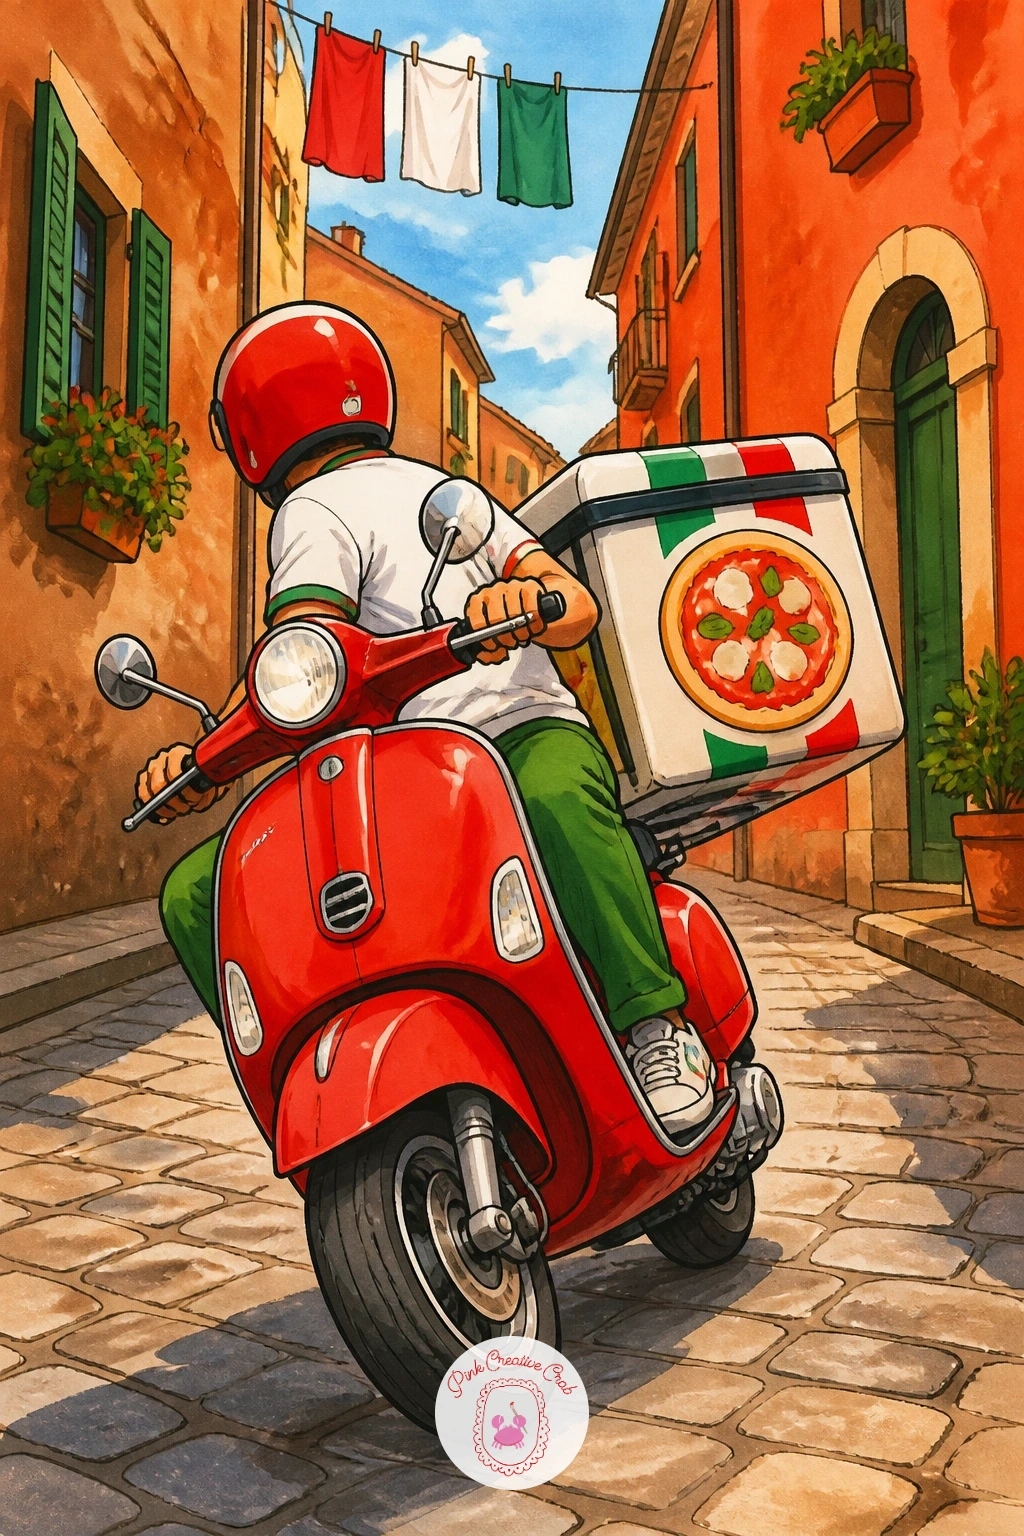
Take the pizza out for delivery on a scooter weaving down a narrow Italian street, insulated box strapped to the back and laundry lines strung overhead. Vehicles intimidate a lot of marker artists, but a scooter breaks down into two wheels, a seat, and a simple curved body you can draw almost like a comma shape.
Block the scooter at a slight three-quarter angle rather than straight side-on, which reads as more dynamic and hides tricky wheel ellipses. Strap the pizza box to the back rack as a simple rectangle, then add the rider leaning slightly forward into the turn. Behind them, keep buildings loose and warm-toned, narrower and taller than real life to suggest that tight European street feel, with a line or two of hanging laundry strung between windows for charm.
The scooter tips over visually if both wheels sit at the exact same angle, so tilt the whole vehicle a few degrees as if caught mid-lean around a corner. If three-quarter angles feel too ambitious today, a straight side view is a completely fine simpler version, and still captures the scene. For more street and building inspiration in this same warm palette, the Italy painting ideas page is worth a scroll even though it’s a different medium.
Palette: Scooter Red,Terracotta Building,Laundry White,Shadow Blue
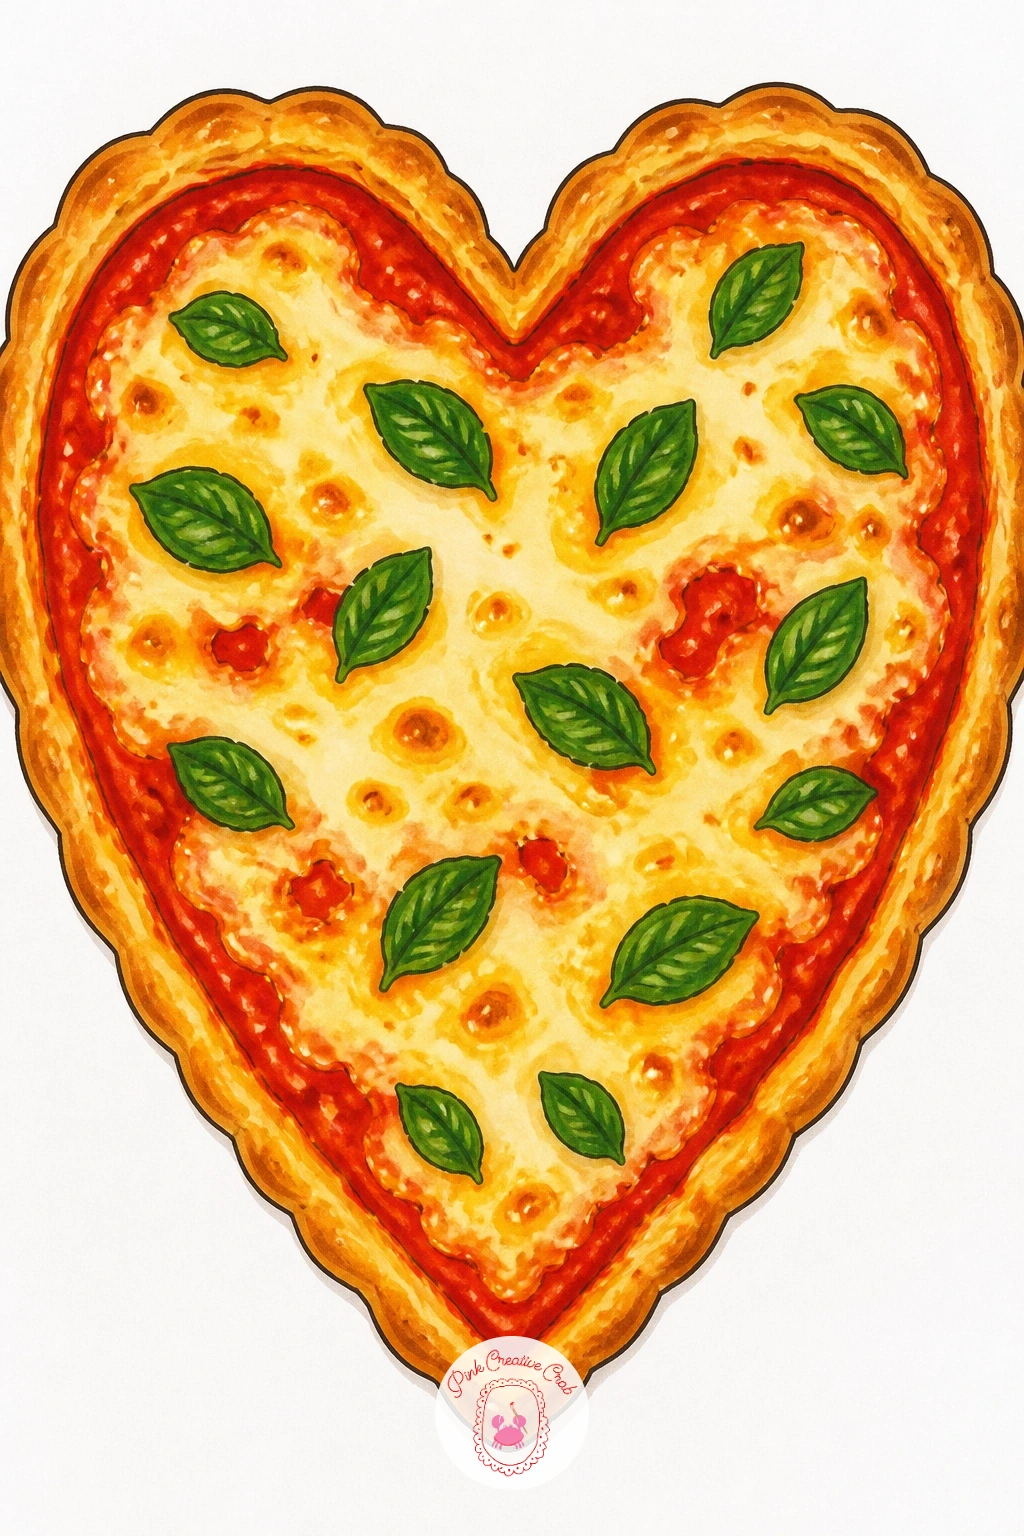
Simplify things with a heart-shaped pizza, whole and proud in the center of the page, the kind of drawing that works for an anniversary card as easily as practice paper. The trick to a convincing heart shape is building it from two overlapping circles before you ever touch a point at the bottom.
Draw two equal circles side by side, overlapping by about a third, then connect their outer edges down to a single point beneath them to form the heart outline. Treat the inside exactly like any other pizza from here: crust ring, sauce, cheese, toppings arranged to follow the heart’s curve rather than scattered randomly. Ink the scalloped crust edge with small even bumps so the heart silhouette stays clean and readable from across the room.
Hearts go lopsided easily, so lightly pencil a vertical center line first and check both lobes match before inking anything. If you’d rather skip the geometry entirely, trace a heart-shaped cookie cutter or a simple heart stencil as your base line, then build the pizza details inside it freehand.
You Will Need
- heart shaped stencil or cookie cutter (optional)
Palette: Tomato Red,Cheese Yellow,Crust Ochre,Basil Green
Keep the mood playful with a kids’ pizza topped to make a smiley face, pepperoni eyes, a pepper smile, maybe a sprig of basil for hair. This one is less about technical skill and more about placement, so sketch the whole face loosely in pencil before you ink a single topping.
Lay the pizza base down first exactly as usual, then place two round pepperoni eyes a little above center and slightly apart, leaving generous space for a curved pepper-strip smile below them. Ink each topping with the same rounded, friendly edges you’d use on a cartoon face rather than realistic cooked pepperoni. Color the face elements slightly brighter than you would on a realistic slice, since cheerfulness benefits from a bit of extra saturation here.
Faces go wrong when the features crowd too close to the center, so leave visible cheese between each feature the way you would on an actual child’s plate. This is a quick, forgiving ten-minute piece; if you want to stretch it to forty, add a second mini pizza beside it with a different expression, winking or surprised, for a little pair.
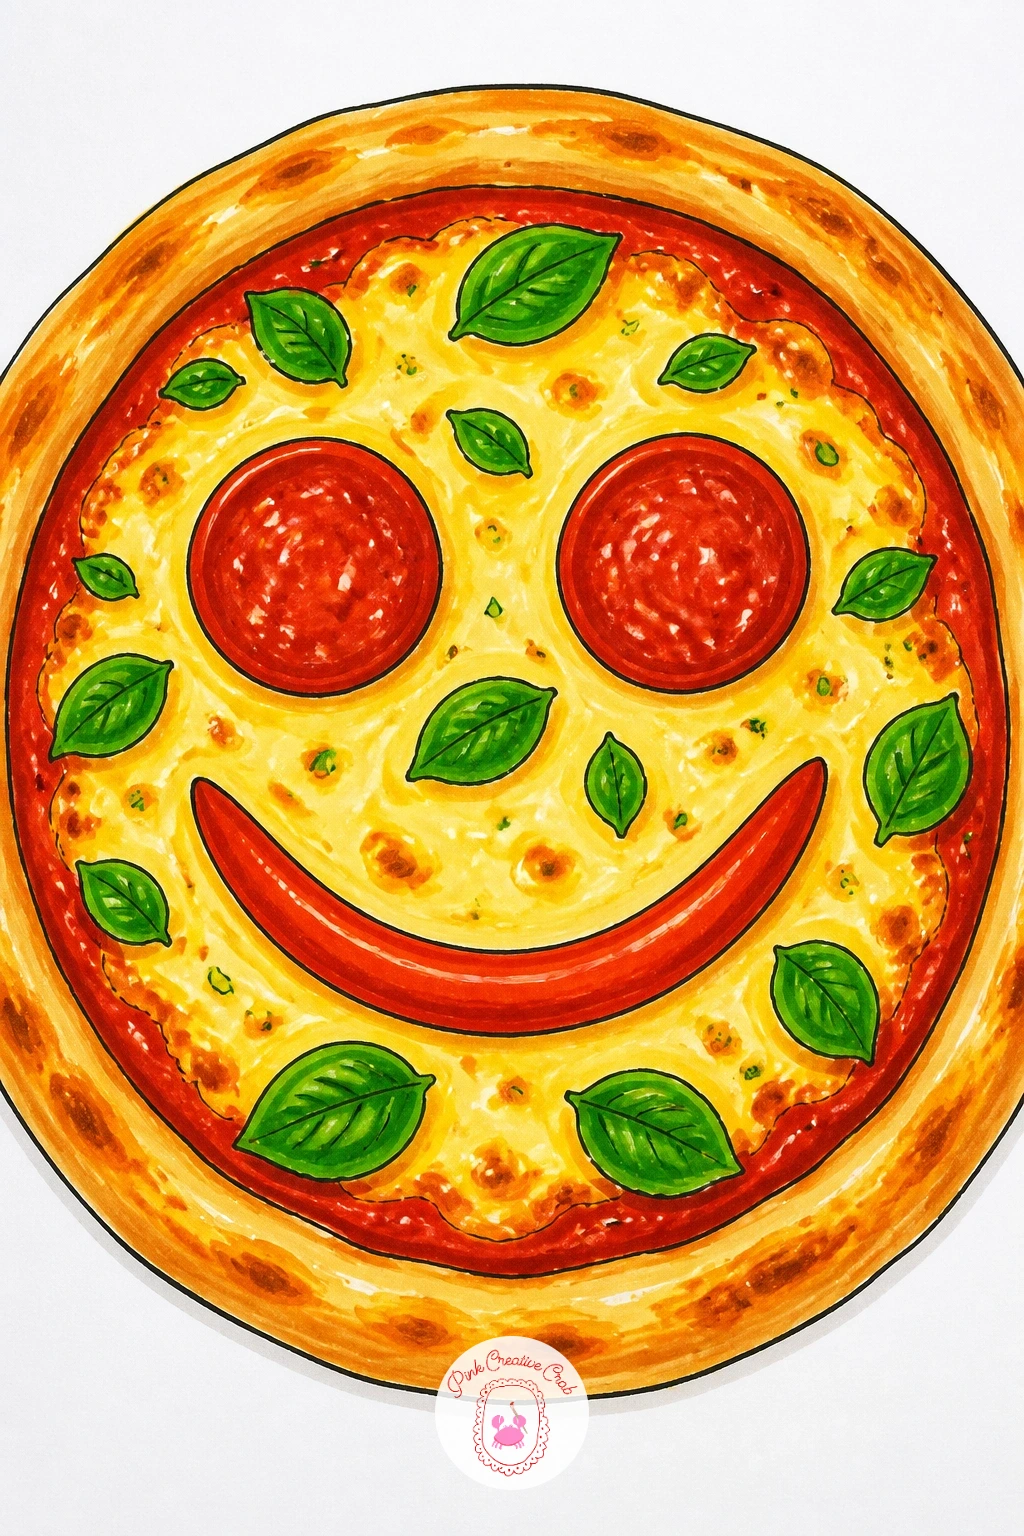
Palette: Tomato Red,Cheese Yellow,Pepper Green,Pepperoni Red-Brown
Widen the frame for a full pizza party table, a couple of open boxes, soda cans, and paper plates scattered in that happy mid-party mess. Group scenes like this work best when you establish one clear focal pizza first and let everything else support it rather than compete.
Place one open box slightly forward and larger than the rest, angled toward the viewer, then tuck a second box and a scatter of cans and cups behind and around it at smaller scale. Ink the focal pizza with full detail, toppings and all, while the background items get simpler outlines and flatter color, almost like props rather than subjects. Bring in color accents from the soda cans, a cool blue or green, to balance all that warm red and yellow across the table.
Busy tables often lose their focal point when every item gets equal attention, so deliberately leave background plates and cans with less contrast and simpler shading. If cans feel fiddly to draw well, swap them for simple glass bottles, which need only a straight-sided cylinder and a cap.
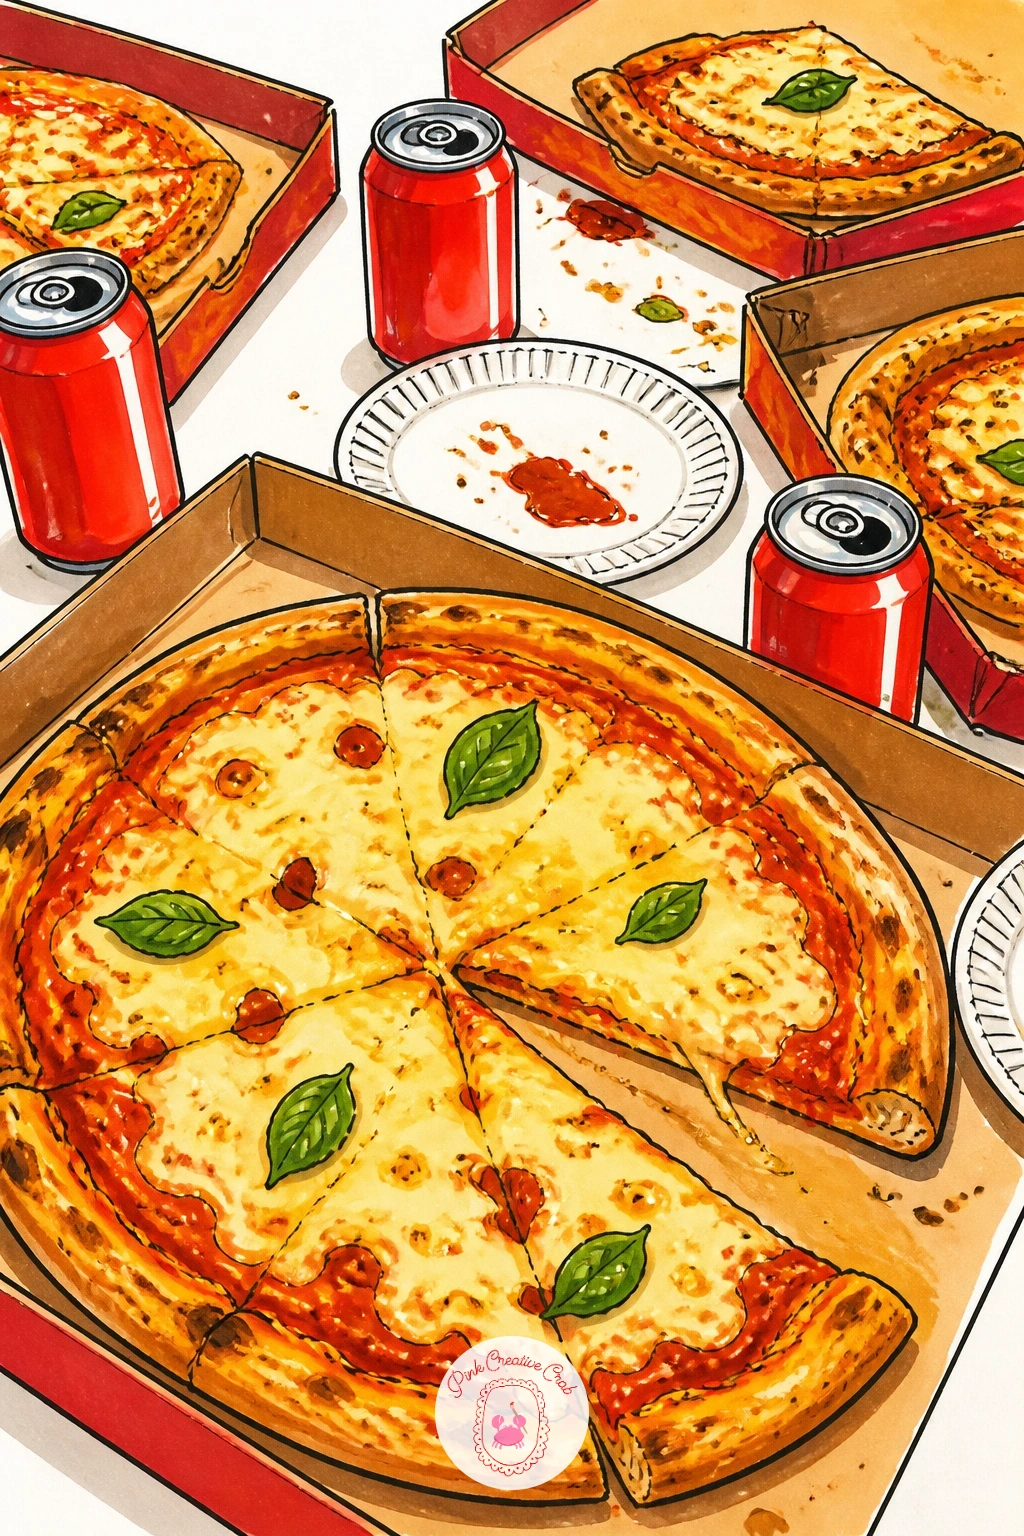
Palette: Tomato Red,Soda Can Blue,Cheese Yellow,Paper Plate White
Go back to a single iconic slice, this time a New York-style one folded in half the way locals eat it on the go. The fold is the whole character of this drawing, so get the crease believable before worrying about any topping detail.
Draw the slice as a long, slightly droopy wedge rather than a stiff triangle, then add a visible crease line running from the crust down toward the tip where it’s been folded. Let the two folded halves overlap slightly at the center, with the top layer casting a thin shadow onto the one beneath it. Color the cheese pale and glossy with a visible sheen line along the fold, since New York pizza is famous for that oily shine under the lights.
A fold reads as fake if the slice stays perfectly flat and symmetrical, so let the tip droop downward slightly under its own weight, the way a real thin slice does when held upright. If you’d rather skip the fold, an unfolded version eaten “properly” is a fine, simpler version of the same subject.
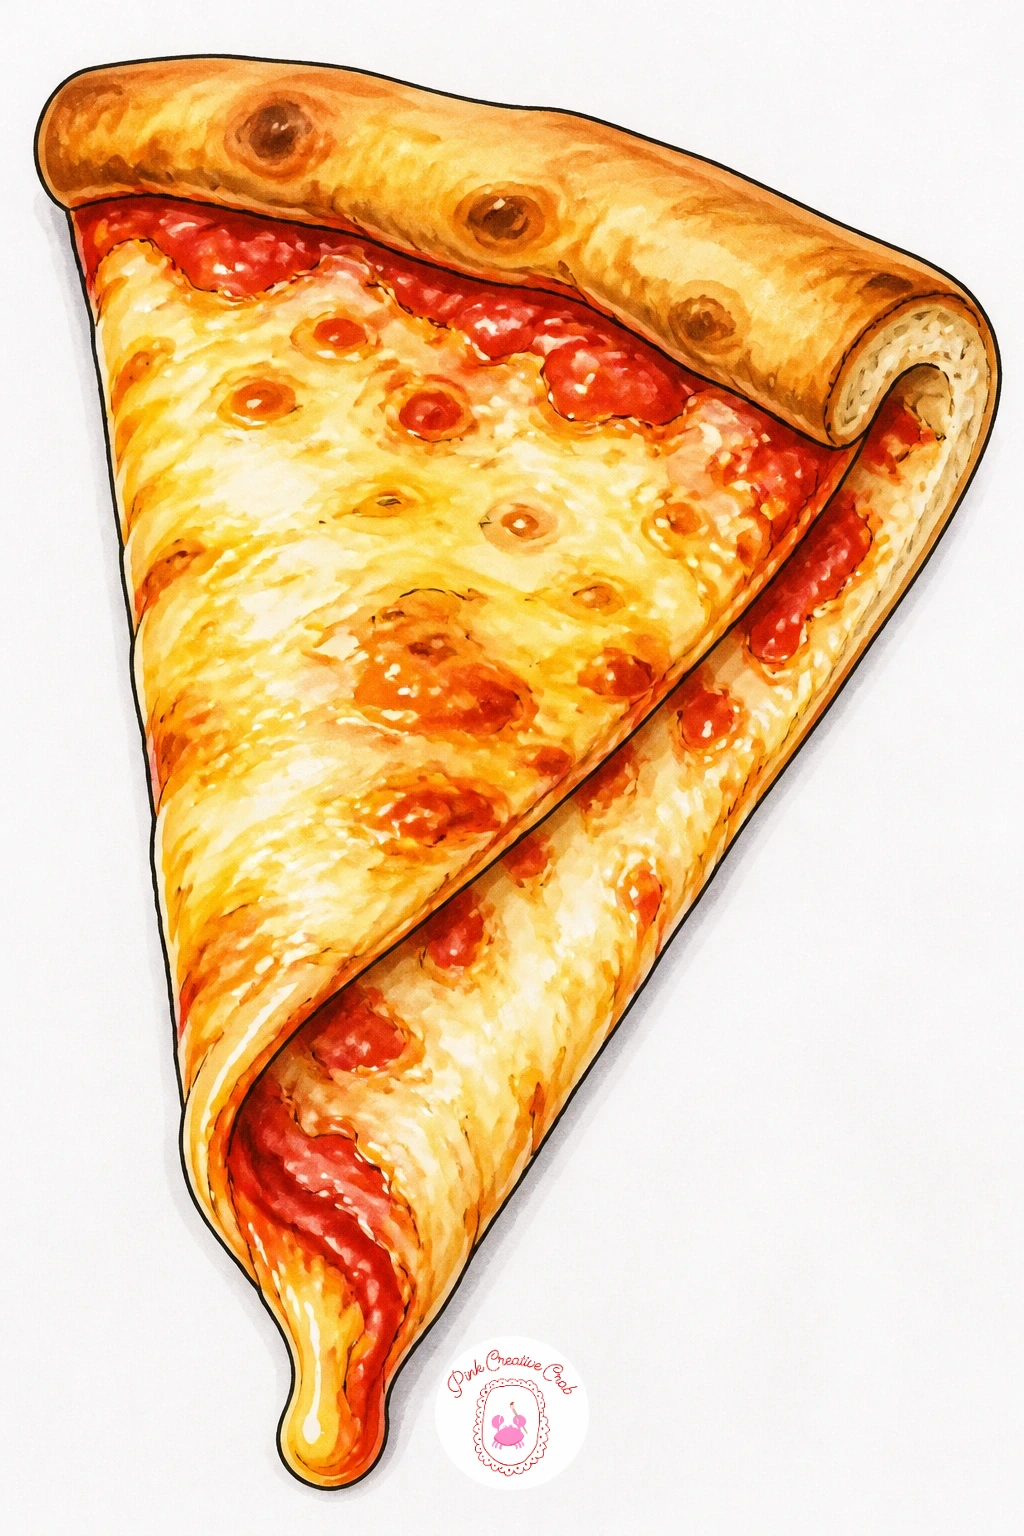
Palette: Tomato Red,Cheese Yellow,Crust Ochre,Shadow Brown
Settle any kitchen debate on paper with a pineapple and ham pizza, drawn without judgment and with just as much care as the margherita you started with. The chunky, faceted pineapple pieces are the fun technical challenge here, since their texture reads completely differently from smooth pepperoni.
Lay the usual base down first, crust, sauce, cheese, then scatter pineapple chunks as small irregular blocks with slightly flattened tops and a few visible fiber lines across their surface. Tuck pink-edged ham pieces between them, drawn as soft folded ovals rather than flat circles, since real ham slices crinkle when they cook. Color the pineapple in two yellows, a lighter one for the flesh and a thin golden edge where it’s caramelized slightly under the cheese.
Pineapple often ends up looking like lumps of plain yellow if you skip that caramelized edge, so don’t leave it out even on a quick version. No gold or deep yellow marker on hand? A light orange run thinly along just the edge of each chunk gives nearly the same toasted effect.
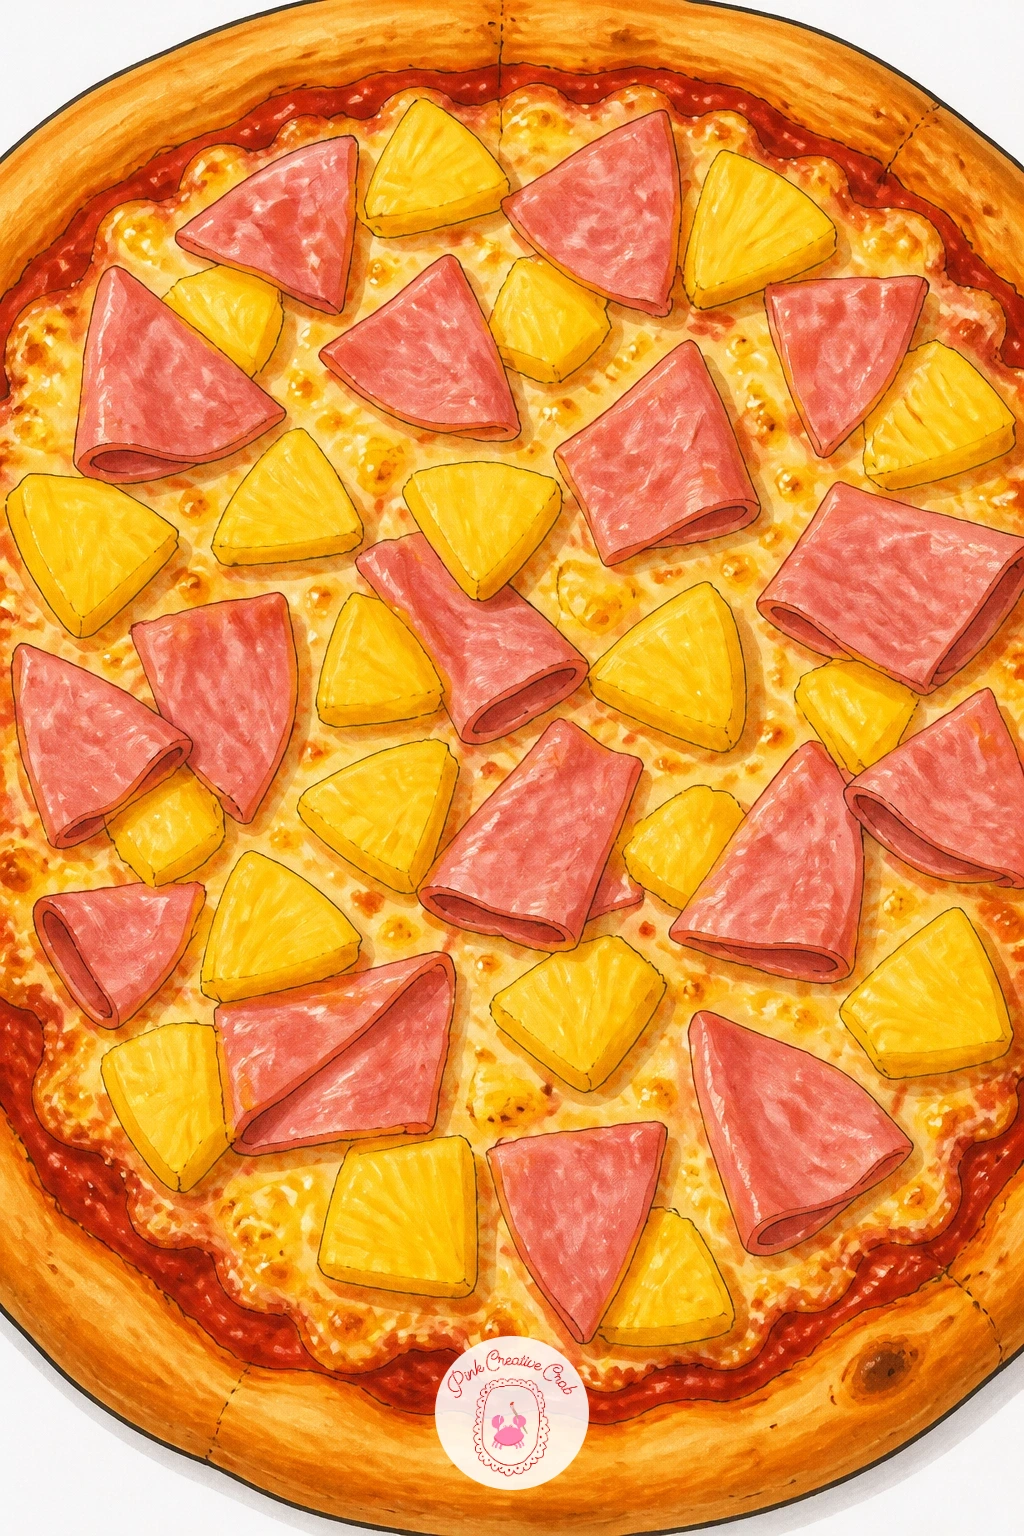
Palette: Tomato Red,Pineapple Yellow,Caramel Gold,Ham Pink
Shift scale with a tray of mini pizzas, each one small enough that the whole batch fits in one drawing, fresh out of the oven on a baking sheet. Repetition is the skill being practiced here, keeping several small pizzas consistent in style while still letting each feel individually baked.
Draw the baking sheet first as a simple rounded rectangle, then place four to six small pizza circles across it in a loose, slightly uneven grid, since a perfectly even grid looks mass-produced rather than homemade. Vary the toppings slightly between them, one plain margherita, one with pepperoni, one with just cheese, so the tray reads as a real batch rather than a copy-pasted pattern. Ink the tray’s rim with a thin consistent line and let a little steam, drawn as two or three soft curved lines, rise from one or two of the pizzas to suggest they just came out of the oven.
Trays like this lose charm if every mini pizza is identically sized, so let a couple run slightly larger or smaller the way dough actually spreads. If a full tray feels like too much today, three mini pizzas instead of six is still a complete, satisfying version.
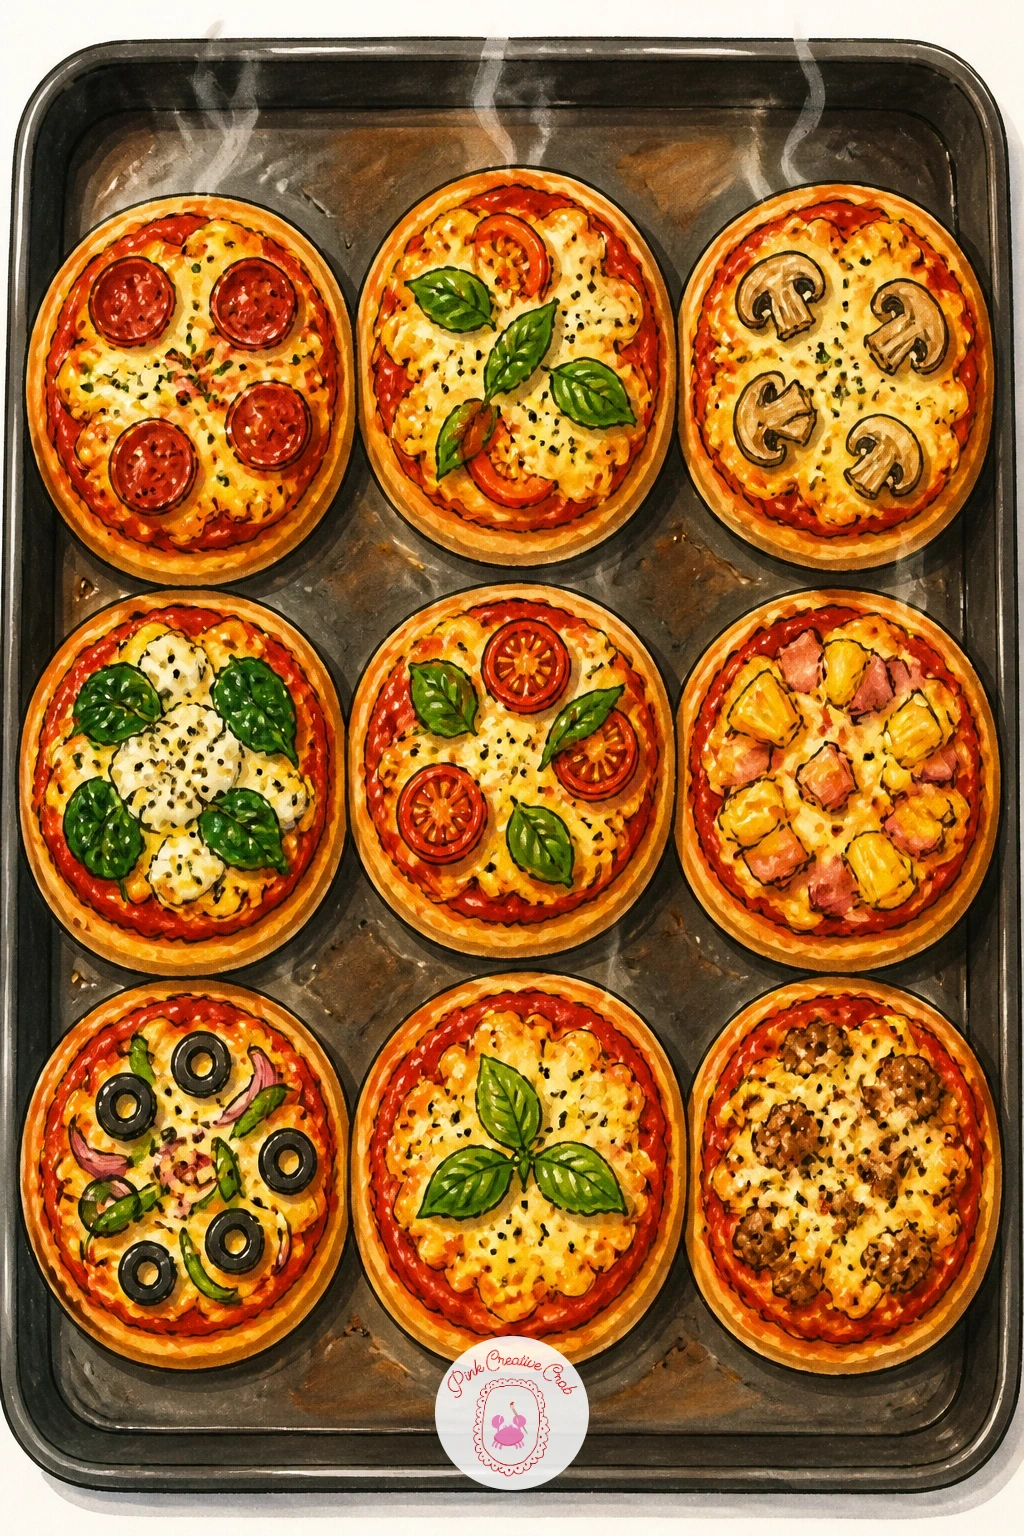
Palette: Tomato Red,Cheese Yellow,Tray Grey,Basil Green
Bring the energy down for pizza night on the couch, box balanced on a lap, a glowing TV screen lighting the room, maybe a cozy blanket pulled over crossed legs. Light sources from a screen behave very differently from daylight, which makes this a nice change of pace after some of the sunnier scenes on this list.
Draw the couch and seated figure first in simple blocky shapes, then place the pizza box on the lap at a slight forward tilt so it reads as resting rather than floating. Add the TV’s glow last as a soft rectangle of cool blue-white light, and let that same cool tint fall faintly across the nearest edge of the figure’s face and the top of the pizza box. Keep the rest of the room dim and warm by comparison, which makes the screen glow feel real without needing any detail inside it.
The scene flattens if the cool screen light and the warm room light compete equally, so pick one as dominant, usually the screen, and let the room colors sit a few shades darker and warmer in response. If a full room feels like a lot, crop tightly to just the lap, pizza box, and a sliver of blanket, still a complete cozy scene on its own.
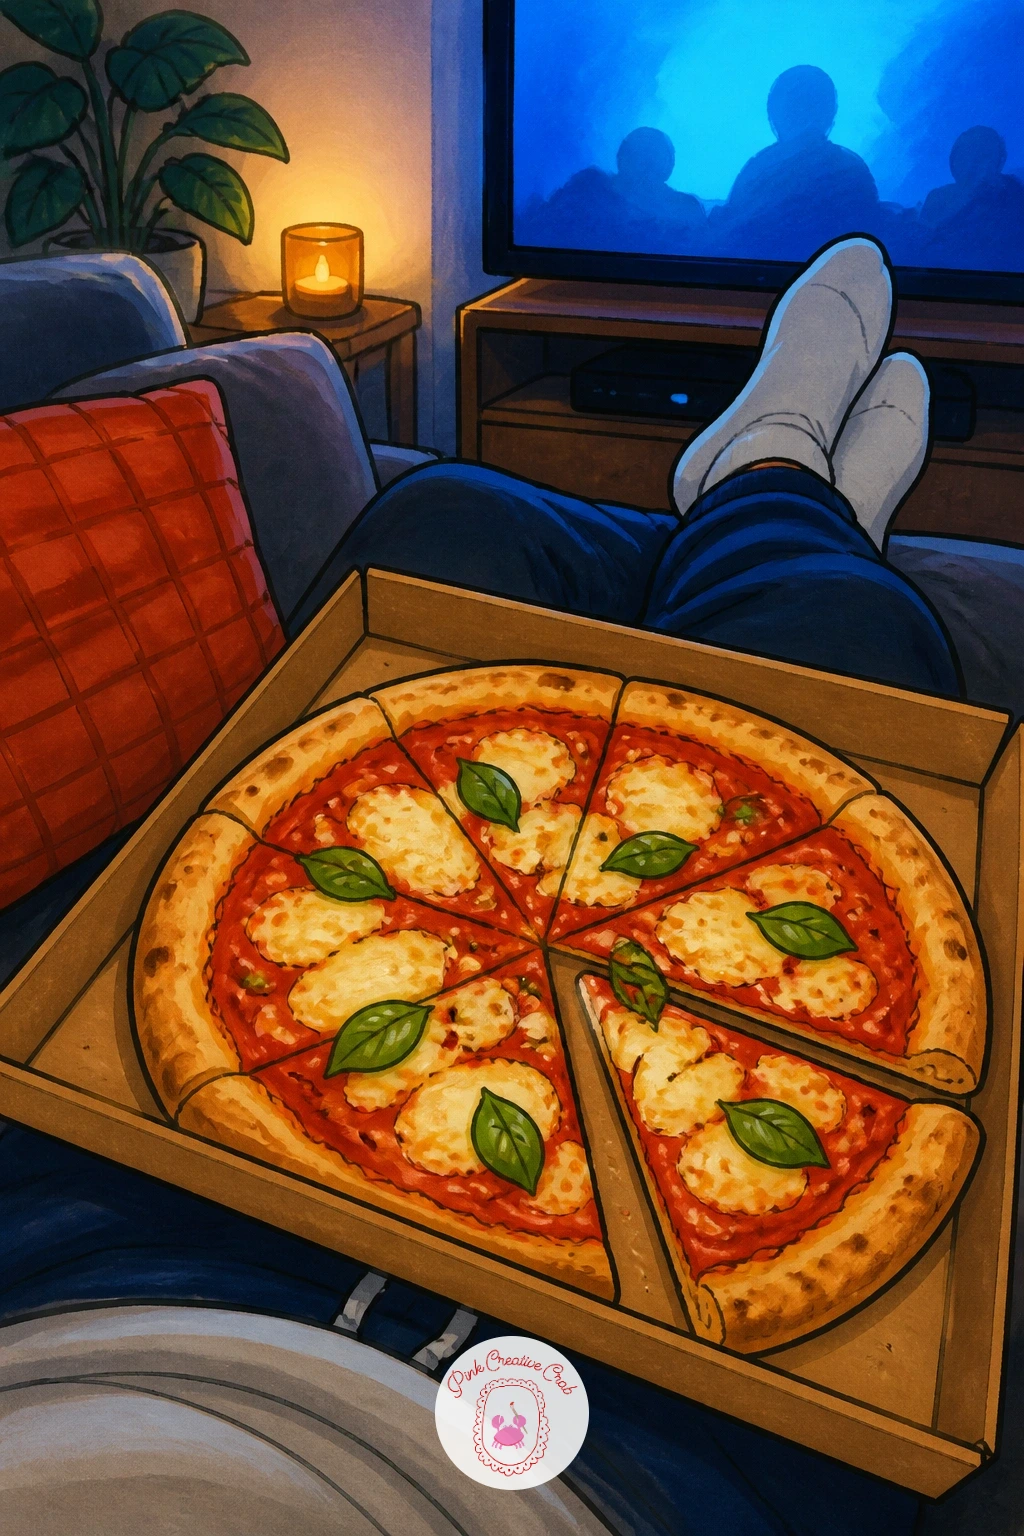
Palette: Tomato Red,TV Glow Blue,Blanket Warm Grey,Cheese Yellow
Pause the pizza itself for a moment and draw its ingredients laid out on a wooden board, fresh basil, halved tomatoes, and a torn ball of mozzarella. Still life setups like this let you practice color blending without the pressure of getting a whole pizza’s proportions right.
Arrange the three elements with some overlap, tomato halves leaning against the mozzarella, a few basil leaves tucked between them, rather than lined up like a shopping list. Ink the tomato halves with visible seed clusters inside pale flesh, the mozzarella as a soft, slightly lumpy torn shape rather than a perfect sphere, and the basil as simple pointed ovals with a visible center vein. Color the board itself in warm honey brown beneath everything, letting a little shadow pool where each ingredient touches the wood.
Mozzarella reads as a boring white blob without some texture, so add a few faint grey-blue shadow lines in the torn creases to suggest its soft, uneven surface. Short on fresh red for the tomatoes? A touch of orange blended into the edges keeps them from looking flat and plasticky.
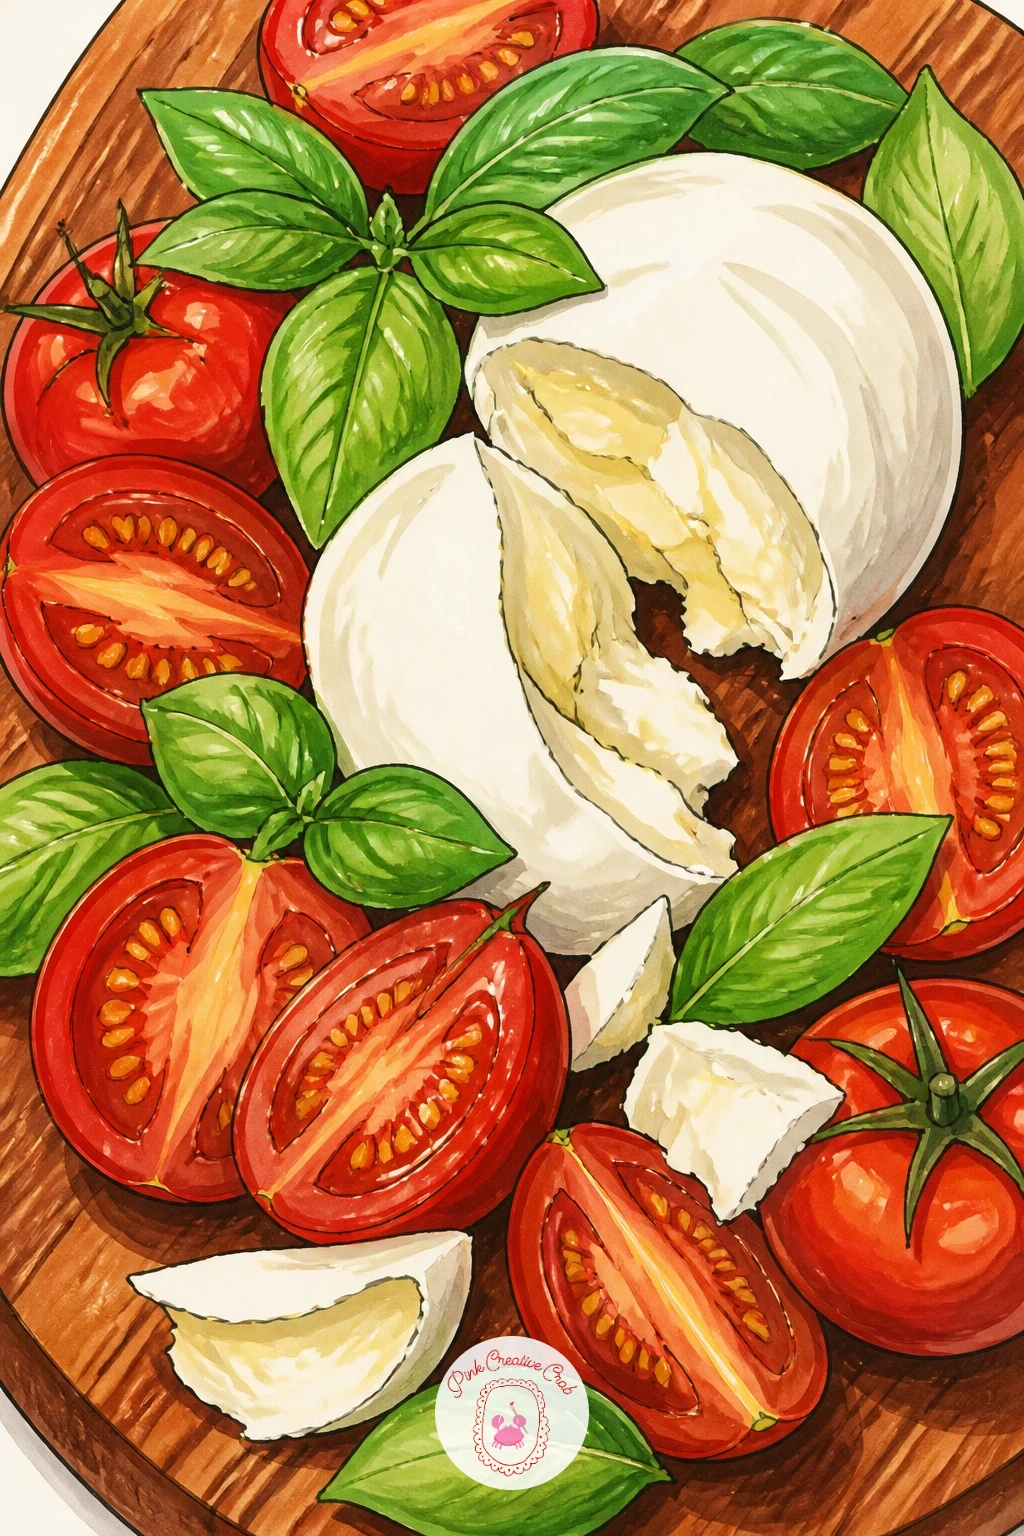
Palette: Tomato Red,Mozzarella White,Basil Green,Board Honey Brown
Return to a human moment with a girl rolling pizza dough at a kitchen counter, sleeves pushed up, flour dusted across the surface in front of her. Hands doing an action like this are easier than they look if you build them as simple mitten shapes first and refine the fingers only at the very end.
Sketch the figure leaning slightly forward over the counter, rolling pin held in both hands pressed into a pale, roughly circular dough shape. Ink the figure with soft, rounded lines, keep the face simple with minimal features, and let loose flour dust marks scatter around the dough’s edge as small irregular white specks left unmarked on the paper. Color clothing in a muted, comfortable tone so attention stays on the warm cream of the dough and the pale wood counter beneath it.
Hands cramped around a rolling pin often end up too small compared to the forearm, so check the hand’s width against the wrist before inking, they should be close to equal. If a full figure feels ambitious right now, crop to just the hands, rolling pin, and dough, which is a complete and satisfying smaller version of the same idea.
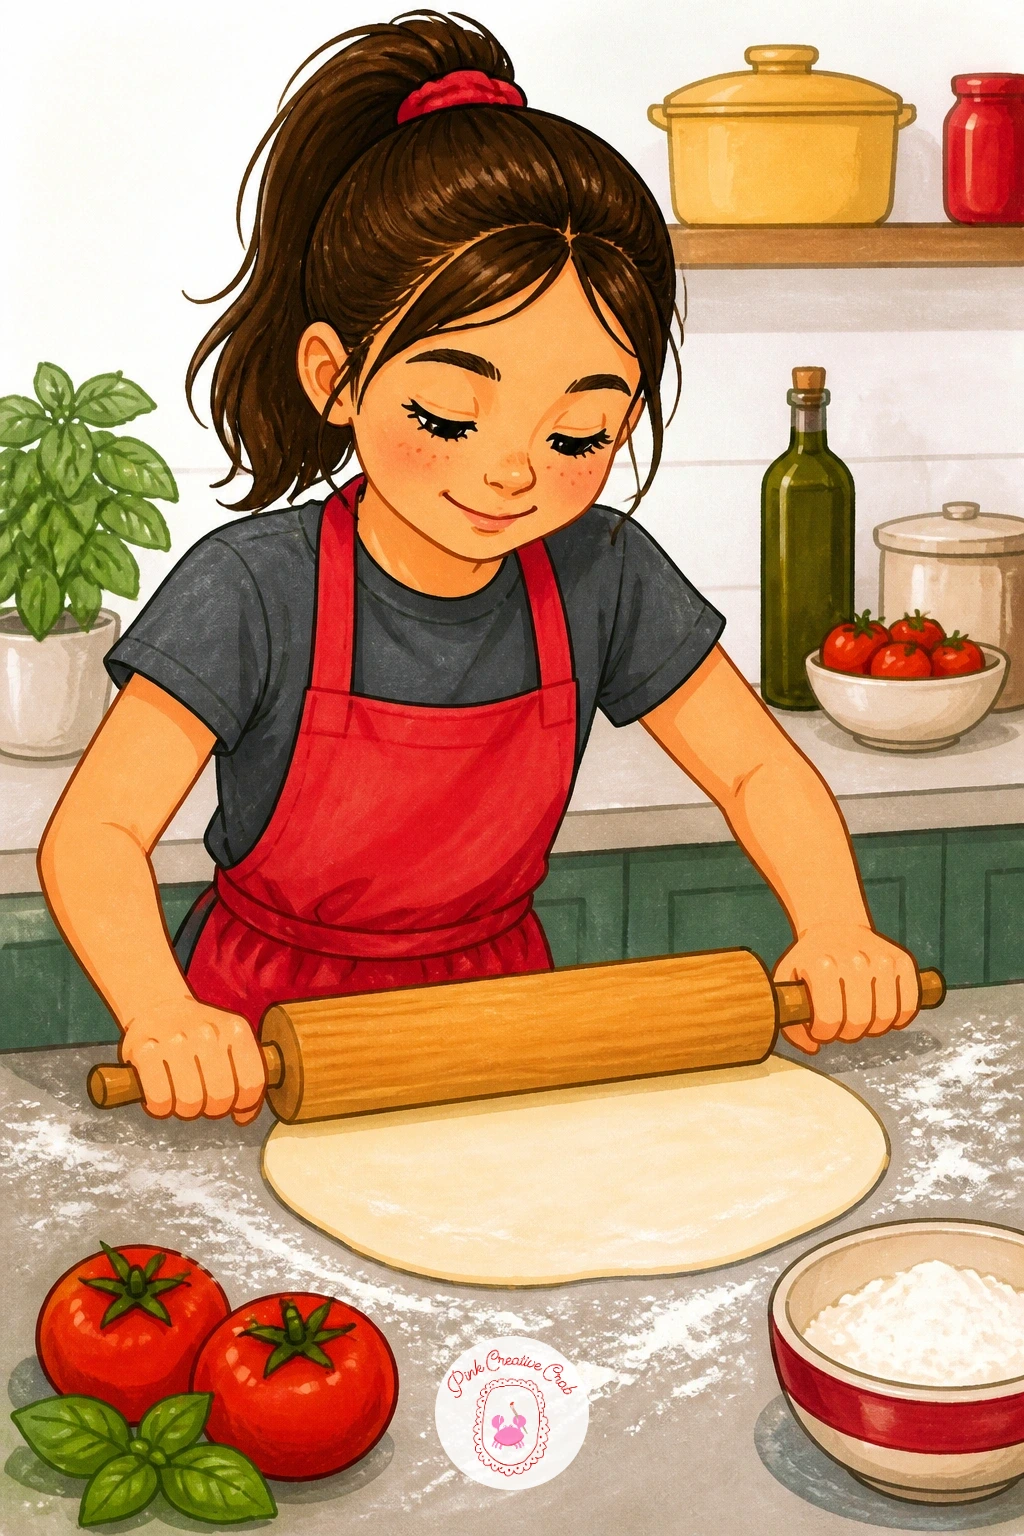
Palette: Dough Cream,Counter Wood,Soft Clothing Blue,Flour White
Turn toppings into a pattern with a pizza arranged like a sunflower, yellow pepper strips fanning out from a dark center of olives or mushrooms. This one rewards a bit of planning with a compass or a plate, since the radial symmetry is what makes it read as a flower rather than a random scatter.
Lightly trace a circle for the pizza, then mark a smaller circle at the center for the “flower’s” middle before placing anything else. Arrange pepper strips pointing outward from that center circle like petals, evenly spaced, slightly overlapping their neighbors near the base. Fill the center circle with dark olives or mushroom slices packed close together, which gives the strongest contrast against the yellow petals around it.
Uneven spacing between petals is the easiest way to break the illusion, so count your pepper strips (eight to ten works well) and mark their starting points around the circle lightly in pencil before inking any of them. No small plate to trace for the center circle? A coin or a bottle cap does the job just as well for a shape that size.
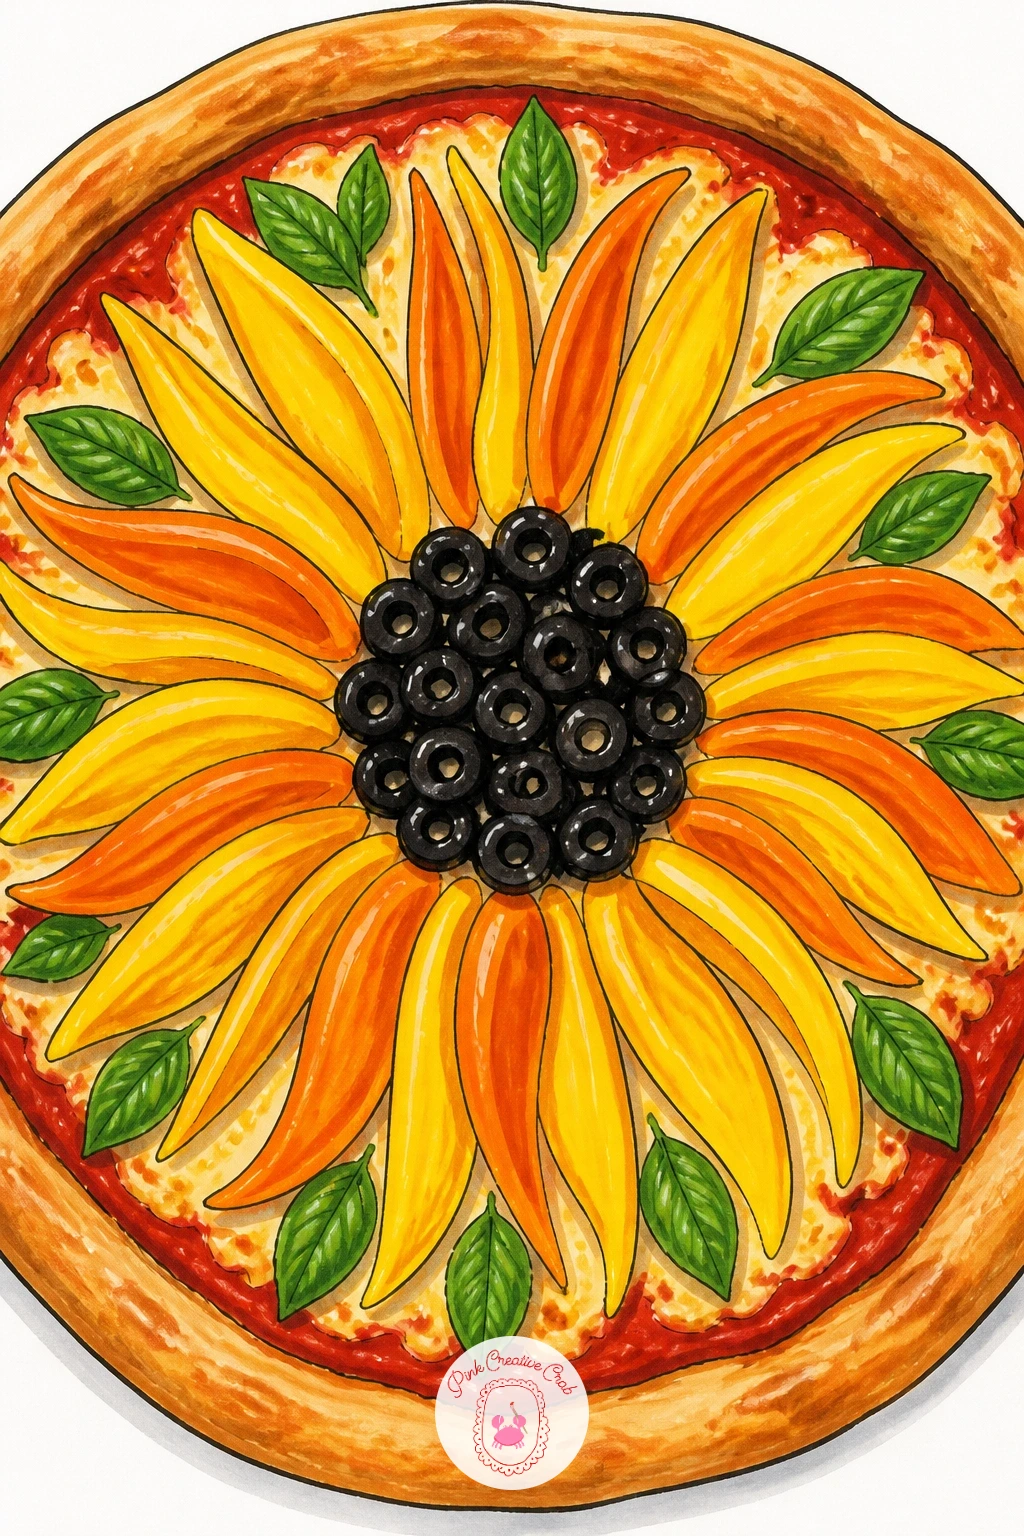
You Will Need
- small plate or coin to trace a circle
Palette: Pepper Yellow,Pepper Orange,Olive Black,Crust Ochre
Switch shapes entirely for a square Detroit-style slice, thick crust with that signature caramelized cheese edge where it meets the pan. The crisp right angles here are the opposite challenge from every round pizza so far, so a ruler or straightedge genuinely earns its keep in this one.
Draw the slice as a clean square or rectangle, crust visibly thicker along the sides than a thin-crust slice would be, with sauce striped across the top in a couple of thin ribbons rather than spread edge to edge. Ink the crust’s outer edge with a slightly darker, crisped line, since Detroit style is known for that deep caramelized cheese crust that catches on the pan. Color the cheese itself pale in the center, deepening to a rich reddish brown right at that outer edge where it fries against the hot pan.
Skipping the caramelized edge is the single thing that makes this read as a generic square pizza instead of Detroit style specifically, so don’t leave it pale all the way to the crust line. If a ruler isn’t handy, a straightened index card edge works fine for keeping the sides crisp.
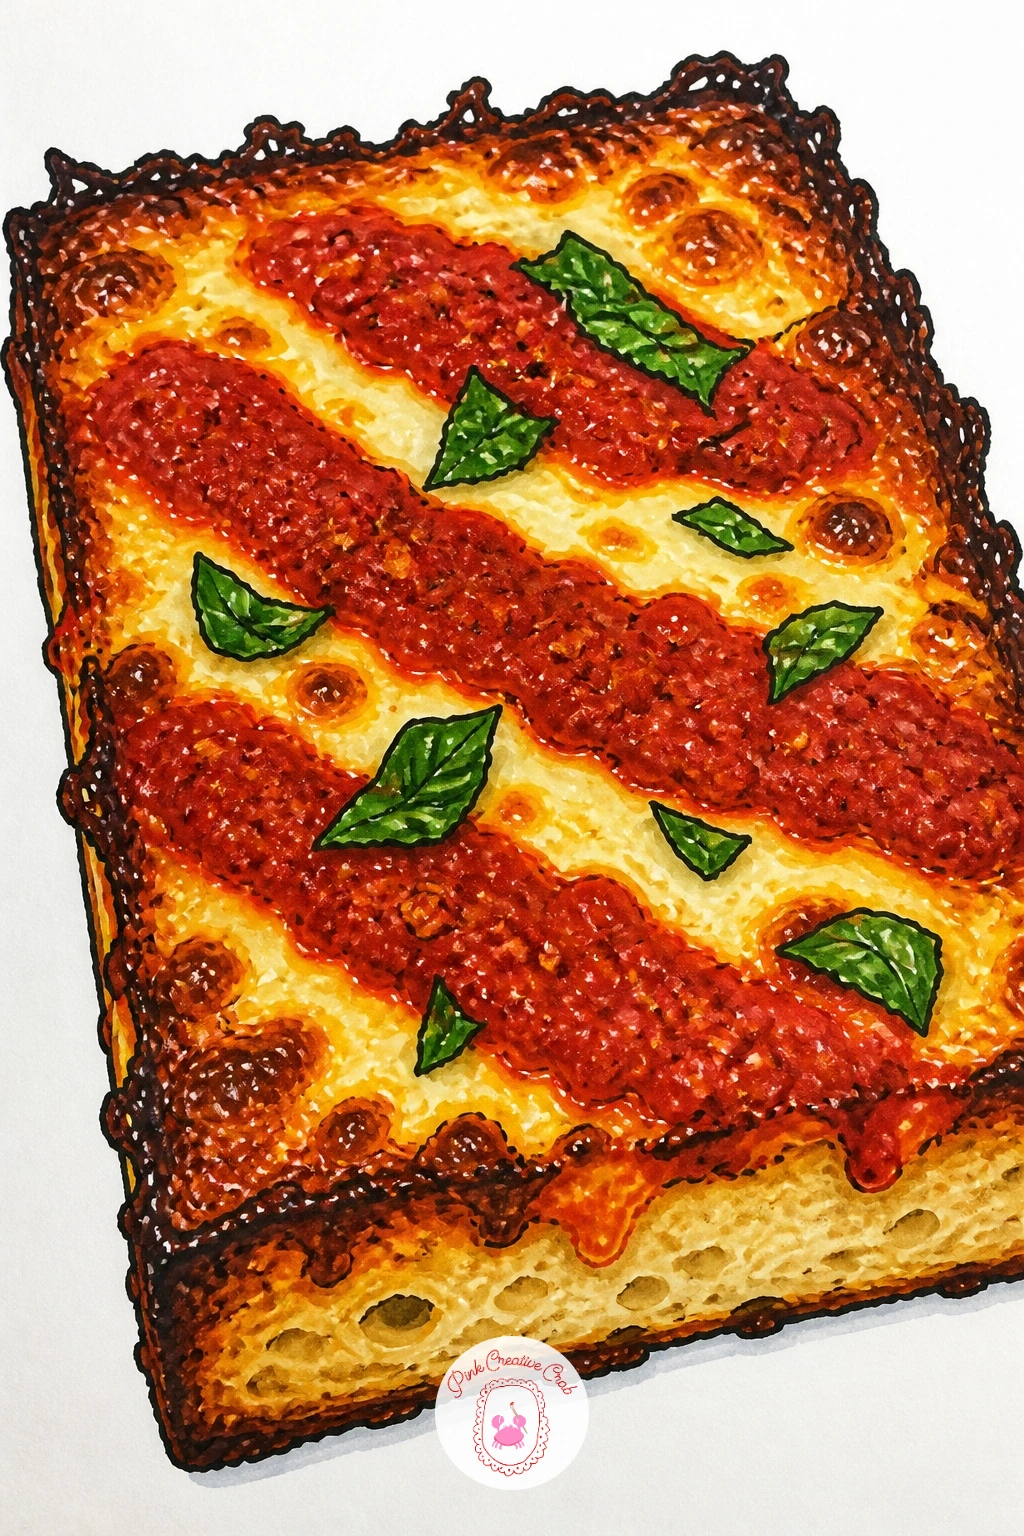
You Will Need
- ruler or straight edge
Palette: Tomato Red,Cheese Yellow,Caramelized Brown,Crust Ochre
Add a little comedy with a guilty-looking dog sitting beside a pizza that’s missing exactly one slice, ears down, eyes wide, the evidence plain to see. Guilt is one of the most fun expressions to draw because it lives almost entirely in the eyebrows and the set of the ears.
Build the dog from simple rounded shapes, oval body, round head, and sketch the missing slice as a clean wedge-shaped gap in the pizza before anything else, since that gap is really the whole joke of the drawing. Ink the dog with ears pinned back and eyebrows pulled slightly inward and up, which reads as guilt far more effectively than a sad mouth alone. Color the dog in warm, friendly tones, and let a small smear of sauce near its mouth seal the story.
The joke falls flat if the dog’s face stays neutral, so exaggerate the eyebrows and ear position more than feels natural at first, cartoon expressions usually need to be pushed further than real life. For dog proportions and friendly expressions to warm up with first, the dog pencil drawing ideas page has plenty of starting poses.
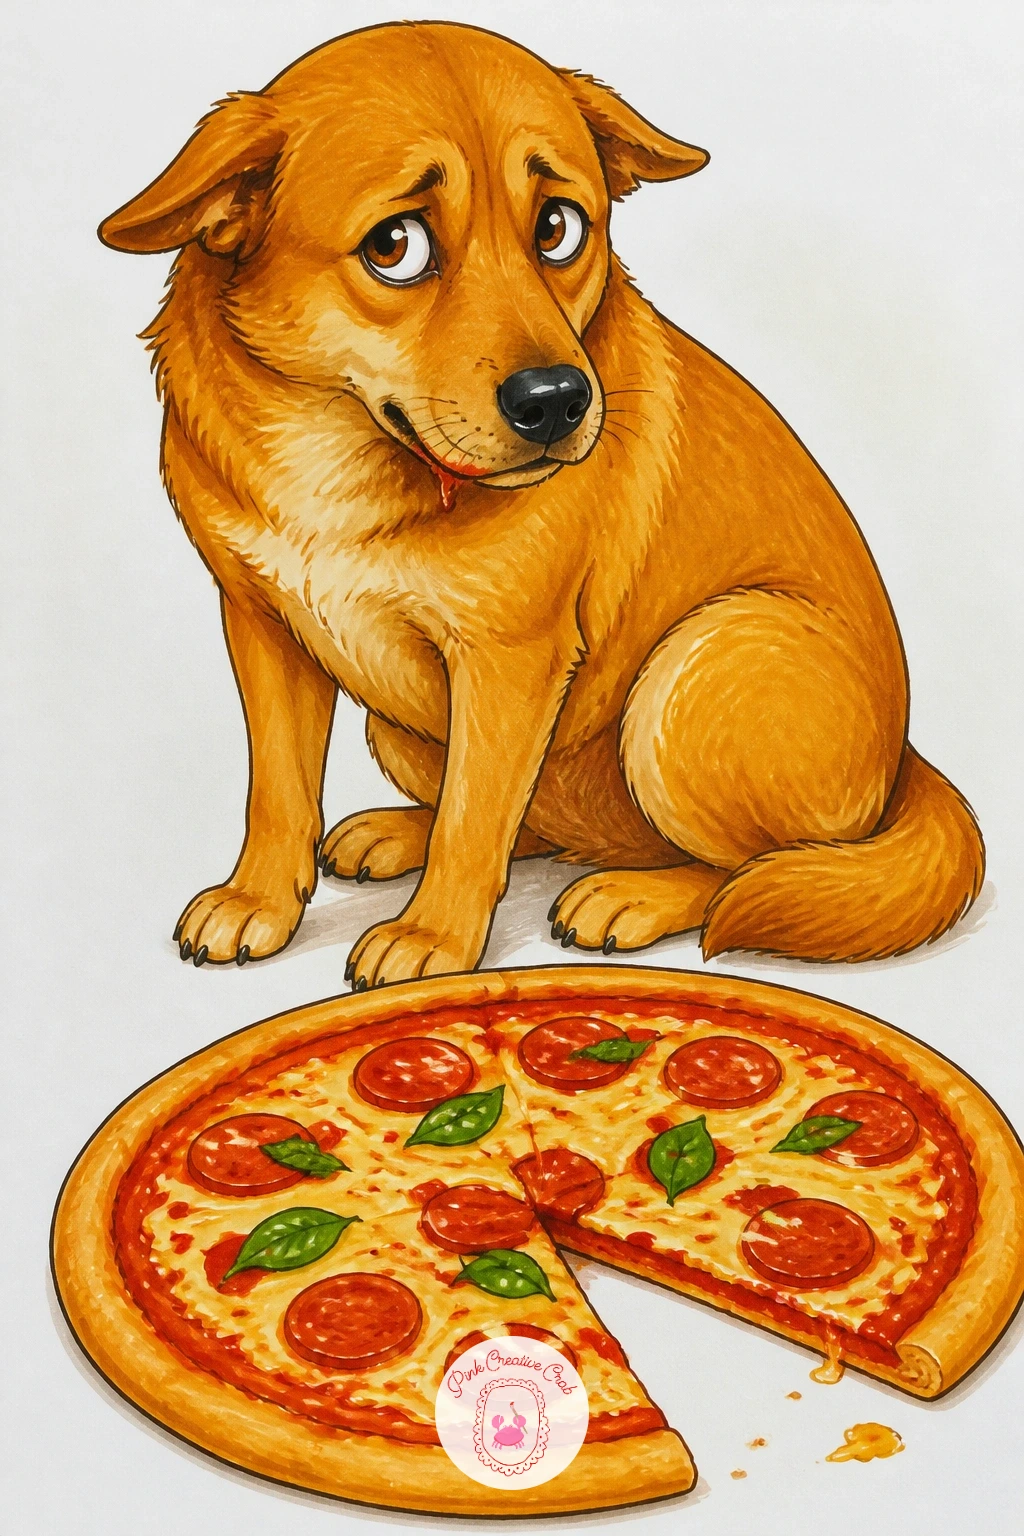
Palette: Dog Fur Brown,Tomato Red,Cheese Yellow,Sauce Smudge Red
Step into a garden for a backyard pizza oven, dome-shaped and tucked among plants or vines, with a pizza sliding in on a peel. This combines two earlier skills from this list, the arched oven opening and a leafy outdoor setting, so it works well once those feel comfortable on their own.
Draw the oven’s dome shape first as a rounded form with a small arched opening near the base, then build a simple garden setting around it, a potted plant or two, maybe a low stone wall, kept looser and less detailed than the oven itself. Ink the oven’s texture with short curved lines suggesting stacked stone or rendered plaster, and let warm light spill from the opening onto the ground just in front of it. Color the greenery in a few varied greens so the garden doesn’t flatten into one solid color block behind the oven.
Gardens can easily overwhelm the main subject if every leaf gets equal detail, so keep foliage simple and let the oven and its glow stay the most detailed, highest-contrast part of the page. If a full garden setting feels like too much today, a single potted herb beside the oven is enough context on its own.
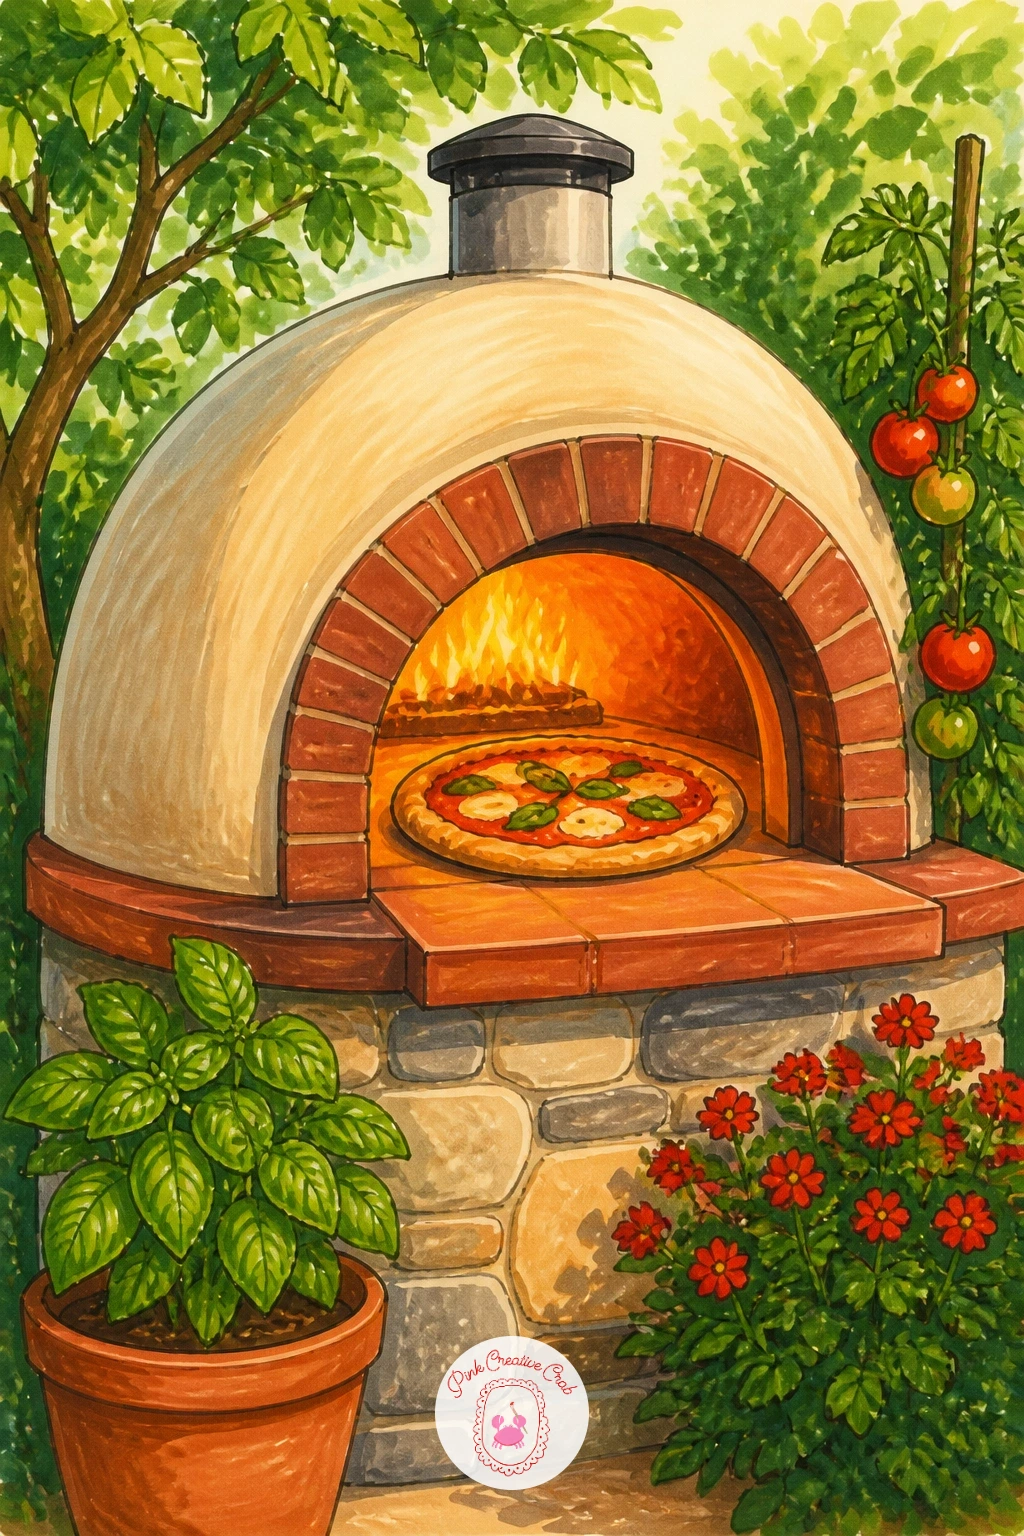
Palette: Stone Grey,Flame Orange,Garden Green,Terracotta Pot
Take pizza to the beach with a slice resting on a striped towel, sand just visible at the edges and maybe a pair of sunglasses nearby. Bright outdoor sunlight changes color temperature noticeably, so this is a nice companion to the dimmer couch and oven scenes earlier on the list.
Draw the towel as a simple rectangle with rounded, slightly rumpled edges rather than stiff straight ones, then stripe it in alternating warm colors before placing the slice on top. Ink the pizza slice exactly as usual, then add a scatter of fine sand texture, small dots and short flicks at the towel’s edges, and a pair of simple sunglasses tucked to one side for scale and story. Keep colors overall brighter and slightly lighter in value than your indoor pizza drawings, since full sun washes color out a little compared to indoor light.
Towels look stiff if the stripes run perfectly straight across a perfectly flat rectangle, so let a gentle wave or fold interrupt one or two stripes where the fabric bunches. If sand texture feels fiddly with marker, a few short pencil flicks left uninked at the towel’s edge reads just as well as texture.
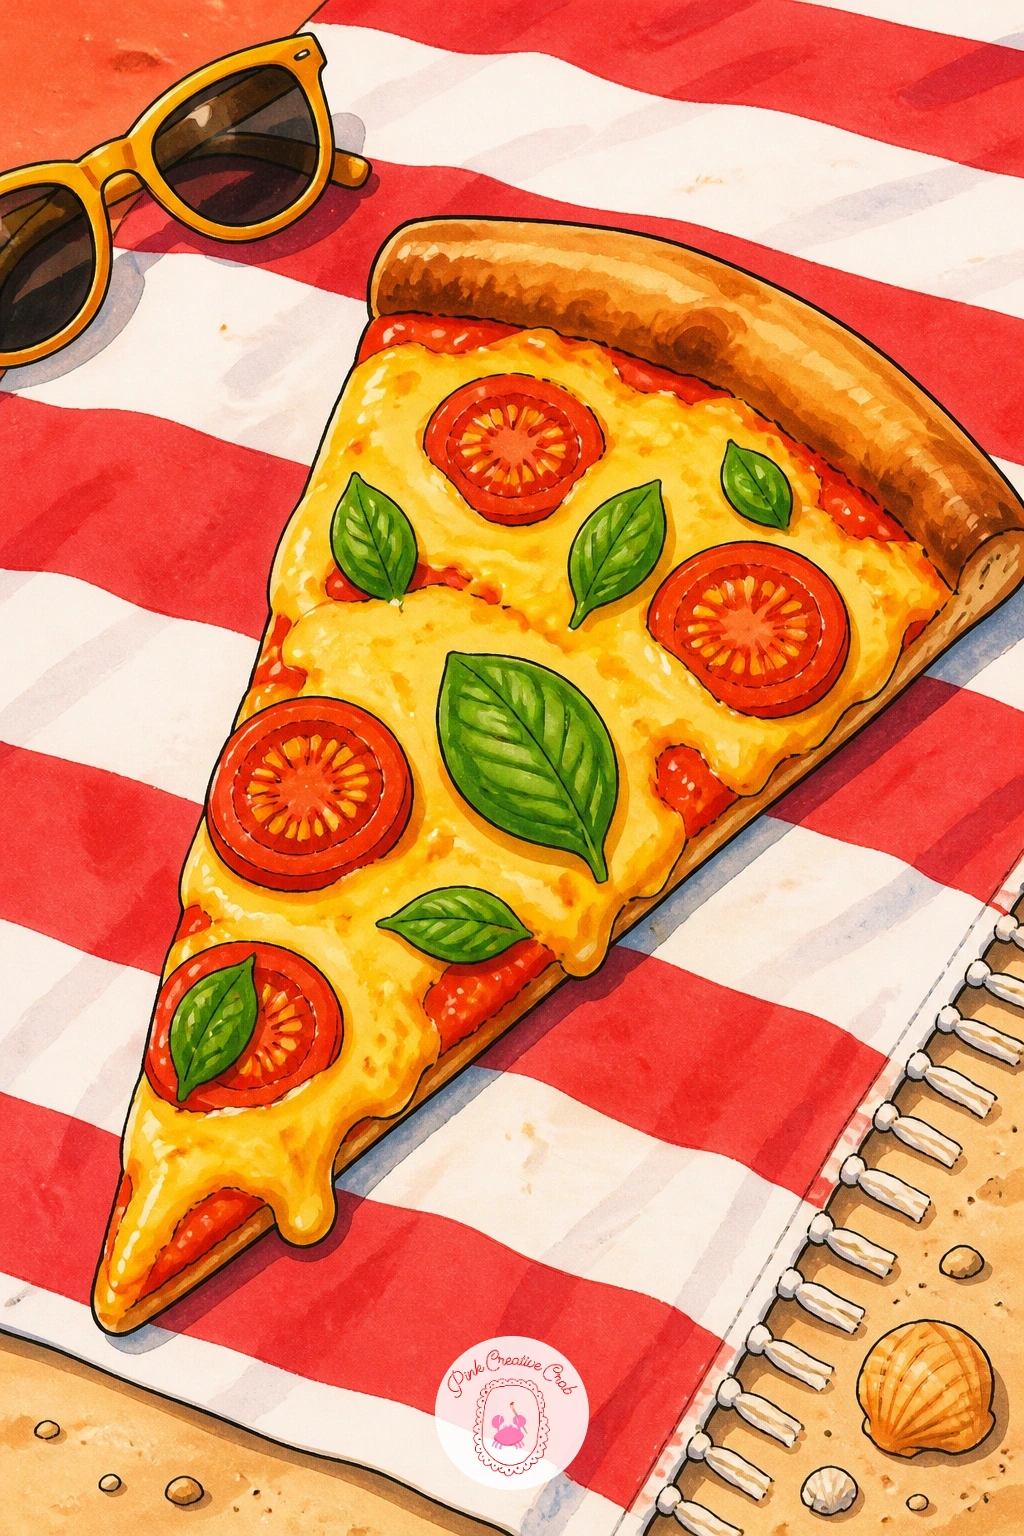
Palette: Tomato Red,Towel Teal,Sand Beige,Cheese Yellow
Build a small urban still life with a stack of pizza boxes strapped to a bike rack, ready for a multi-stop delivery run. Stacked boxes are a nice lesson in keeping flat rectangular shapes from looking boring, since the interest here comes entirely from slight tilts and overlapping edges.
Draw three or four boxes stacked with a slight offset between each one, never perfectly aligned, and angle the whole stack a touch to one side as if balanced rather than glued in place. Ink the bike rack beneath them as simple curved metal tubing, with a strap or bungee cord crossing over the top box to hold everything together. Color each box a slightly different shade of warm brown or red so the stack reads as individual boxes rather than one solid block.
A perfectly square, perfectly aligned stack looks like a drawn diagram rather than a real pile, so push the tilt and offset further than feels natural at first. If drawing a bike rack feels fussy, resting the stack on a simple wooden crate is an easier swap that keeps the same idea.
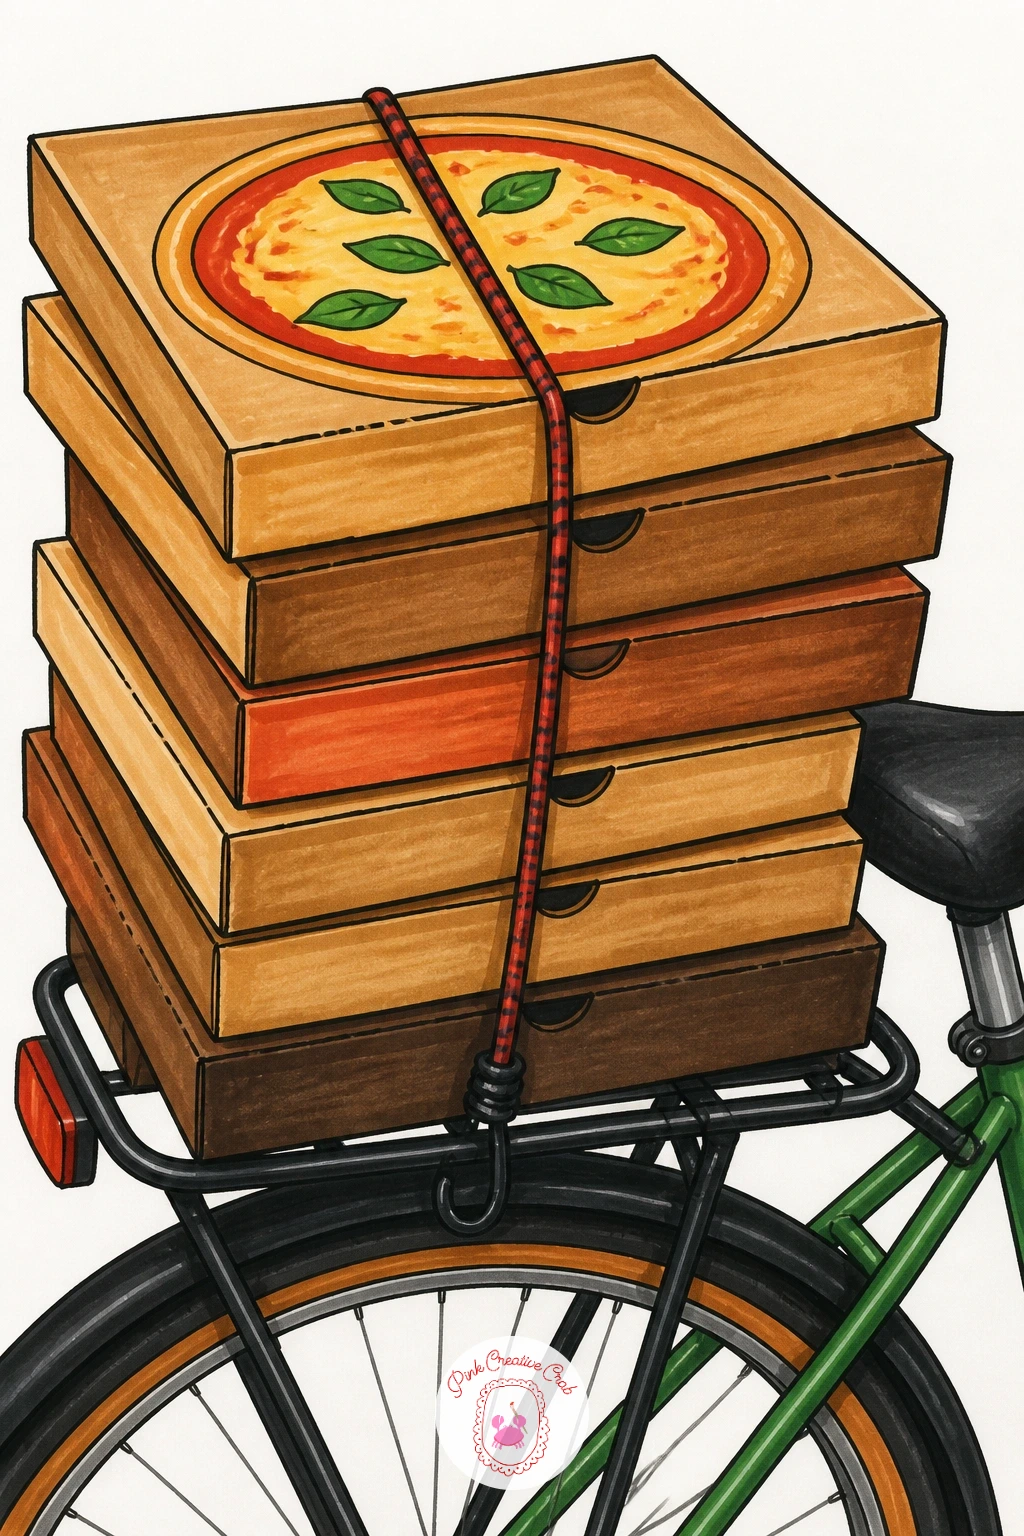
Palette: Cardboard Brown,Box Red,Metal Grey,Strap Black
Bring the whole list full circle with friends sharing pizza around a table, several hands reaching in, plates and glasses scattered between them. Group scenes work best built outward from the center, so place the pizza itself first and let the people arrange around it rather than the other way around.
Draw the pizza at the center of the composition, then sketch three or four simplified figures around it at different angles, a shoulder and arm reaching from one side, a full upper body facing the viewer from the other. Ink the pizza with full detail as the clear focal point, keeping the figures looser with simpler clothing and minimal facial features so they support the scene rather than steal it. Color skin tones and clothing in a varied but muted range, saving your strongest, most saturated color for the pizza itself at the center.
Group scenes often feel stiff when every figure faces the viewer directly, so turn at least one person in profile or three-quarter view reaching toward the food. If a full group feels like a lot today, two friends instead of four tells the same story with half the figure drawing, and the BFF drawing ideas page has easy two-figure poses worth borrowing.
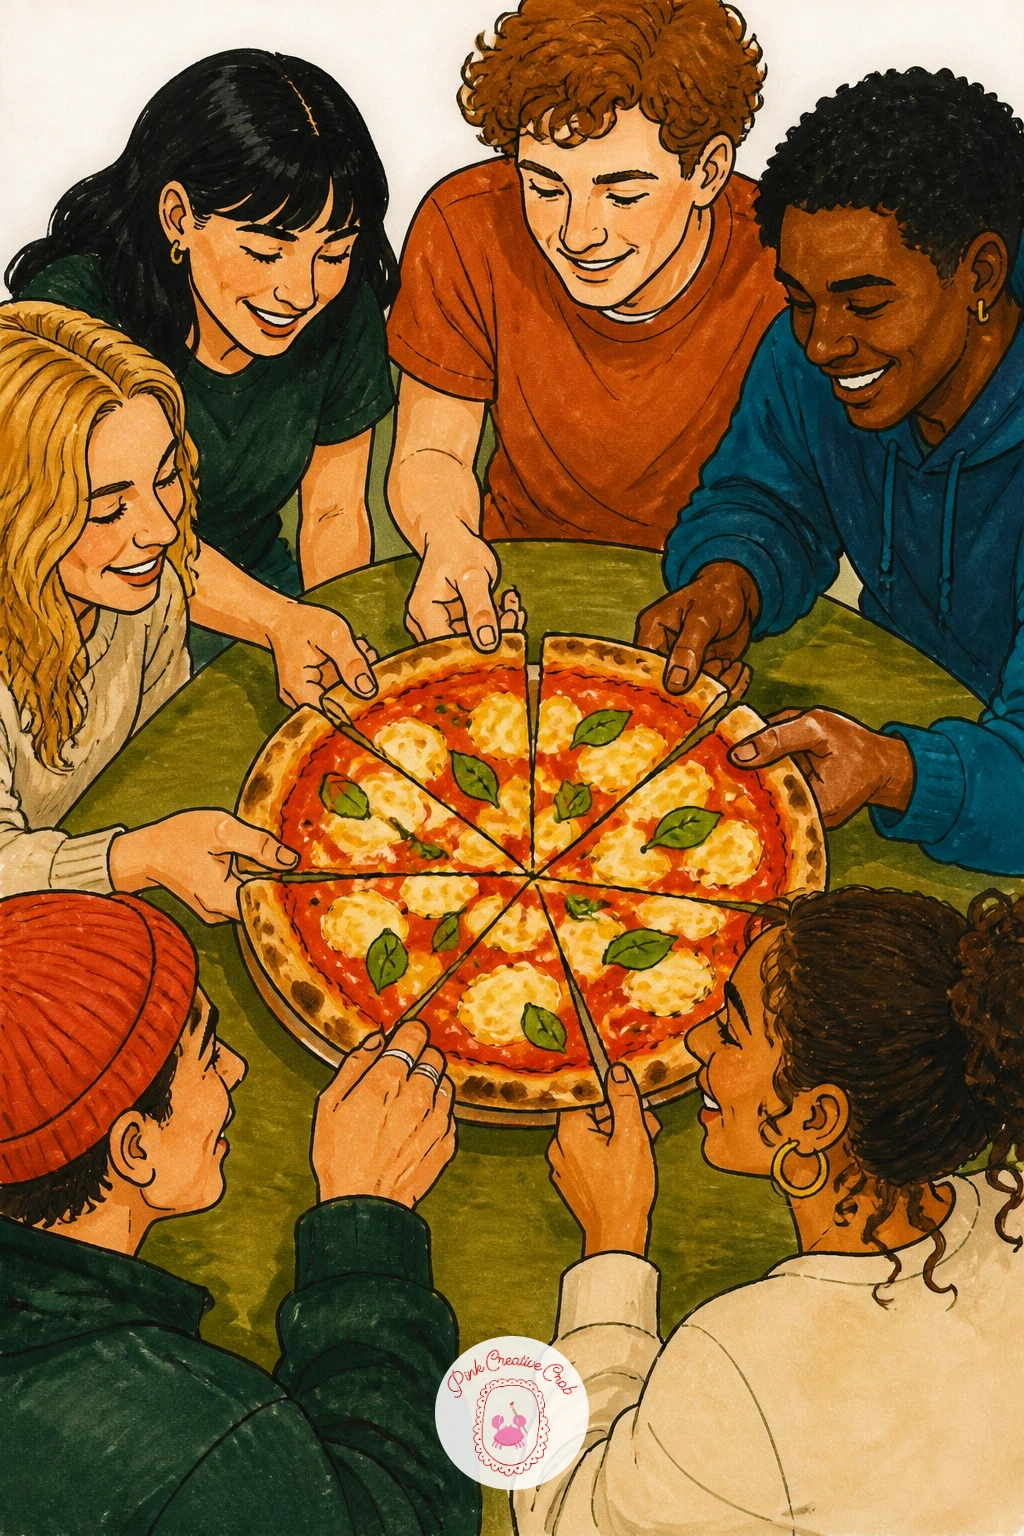
Palette: Tomato Red,Cheese Yellow,Muted Clothing Blue,Warm Skin Tone
Close the list the way a real Neapolitan pizzeria would finish its best pie: a tight close-up on the crust, charred bubbles and all, cheese just barely in frame at the edge. This is the most technical texture study on the list, worth saving for last once the earlier ideas have warmed up your marker control.
Crop in tightly on just a curved section of crust, drawing three or four large bubbles along it as soft rounded bumps of varying size rather than a uniform row. Ink dark charred spots unevenly across the bubbles’ highest points, since real char lands where the dough puffs closest to the flame, not in a neat pattern. Color the crust in warm ochre as a base, then stamp or dab dark brown-black directly onto the char spots with the marker’s broad nib for a textured, slightly rough edge rather than a smooth outline.
Char looks pasted-on if it’s too uniform in size and perfectly round, so vary each spot’s shape and let a couple bleed slightly into their neighbors. If your darkest marker still looks too clean, go over a few char spots a second time once the first layer is dry, which naturally roughens the edge.
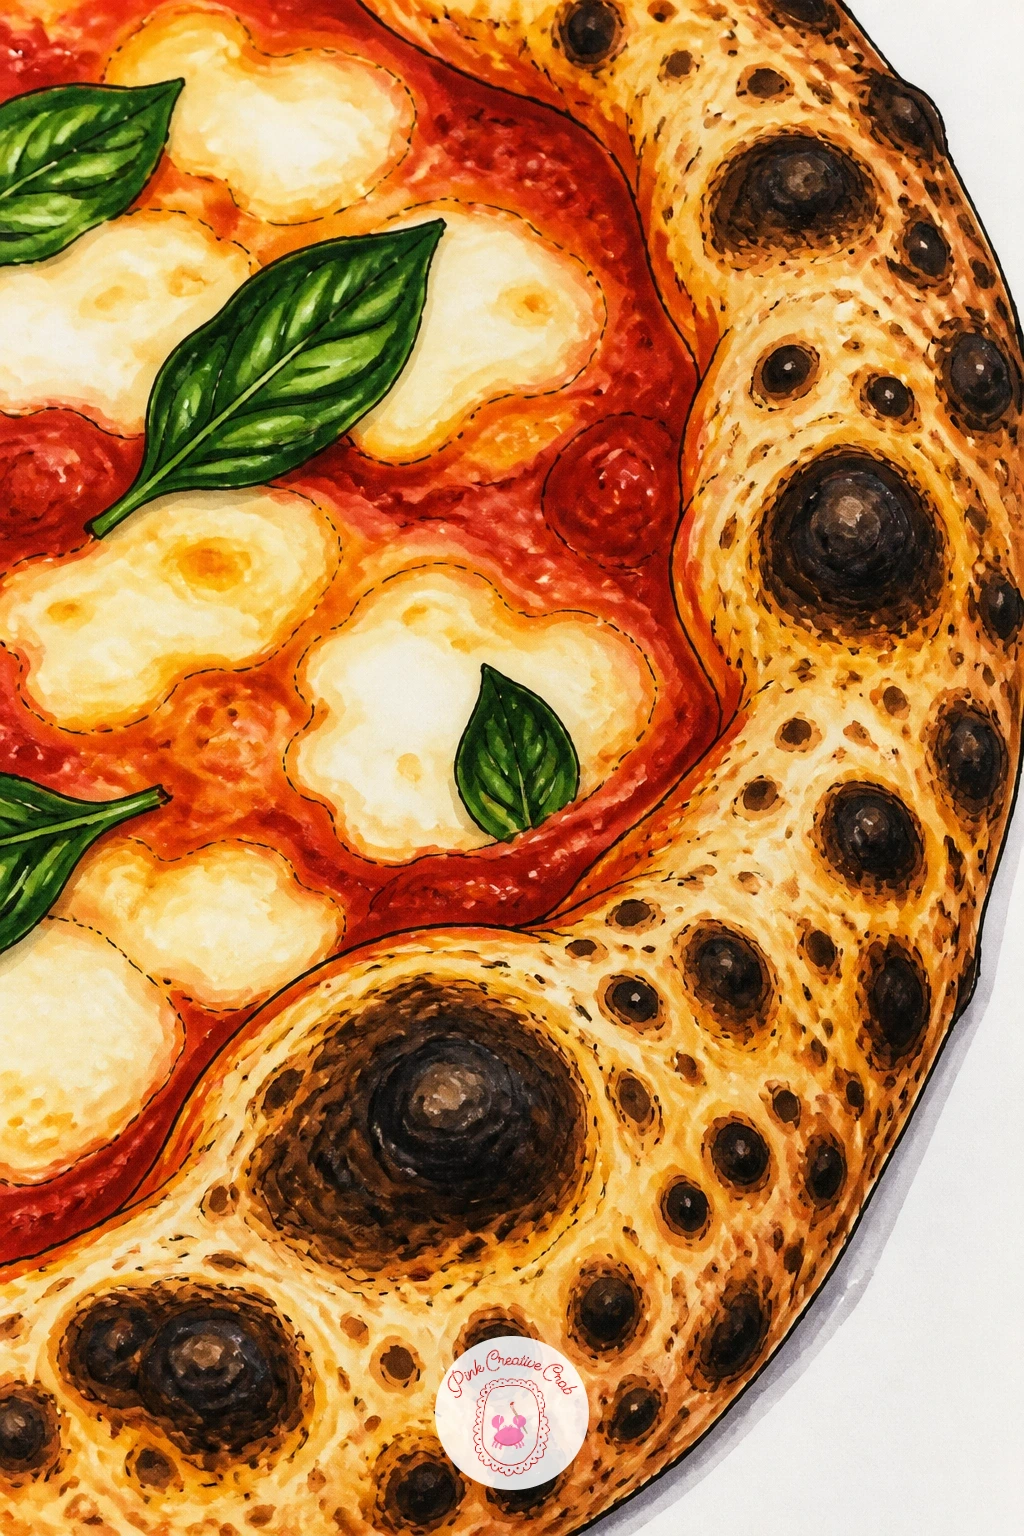
Palette: Crust Ochre,Char Black-Brown,Cheese Yellow,Deep Char Brown
Try a stippling technique with the marker’s fine nib for the rougher, pitted texture right at a bubble’s charred peak, rather than solid flat color.
What to Do Next
Pick whichever idea made you want to grab a marker first, a quiet pepperoni slice on a paper plate is a fine place to start, and keep the fineliner and a handful of warm reds and yellows within reach before you begin.
Frequently Asked Questions
What markers work best for pizza drawing?
Alcohol-based markers work best because they blend smoothly and layer without streaking, which matters for melted cheese and glossy sauce. Dual-tip markers with a broad and fine nib cover both large fills and crust detail in one pen.
Should I ink before or after coloring a pizza drawing?
Ink the outline first with a fineliner, then color once the ink is fully dry. This keeps the black lines crisp and stops alcohol markers from dragging wet ink into the color underneath.
How do I make cheese look melted instead of flat?
Build cheese in two tones, a pale base color and a slightly deeper yellow pooled in the lower areas and corners. A thin white gel pen highlight along one edge of each cheese shape adds the glossy, melted look.
What paper is best for alcohol marker pizza drawings?
Smooth, marker-specific paper or a blending card works best, since regular printer paper lets color bleed and feather at the edges. A dedicated marker pad also stops colors from ghosting through to the next page.
How do I keep toppings like pepperoni from looking flat?
Give each piece a slightly curled or cupped edge rather than a flat circle, then add a darker ring around that curled edge. A small highlight dot in a lighter color finishes the cooked, slightly greasy look.
Have any thoughts?
Share your reaction or leave a quick response — we’d love to hear what you think!
-
 0
-
0
-
0
-
0
-
0
-
0


