

A christmas wreath drawing is the fastest way to get a whole season onto one page: a ring, a ribbon, a handful of details, and you are done before the kettle boils. This list skips the plain pine hoop you have seen a hundred times and goes straight for the wreaths that actually show up in modern holiday decor this year: pastel baubles, dried orange slices, brass rings, even one hanging off a bicycle basket.
Every idea below fills the center of the page and finishes in one sitting, with colored pencil for the build and alcohol marker for the color that needs to glow. Pick whichever one matches the mood you are in tonight, from a five minute sketch to a slower, richer piece worth framing.
Using these images: free for personal projects such as printing, coloring, cards, journals and gifts. Handmade items that include them may be sold up to 30 pieces per design. More than that is commercial use and is not permitted, and neither is selling or sharing the images themselves or passing them off as your own. Please ask before any other use.
Before You Start
- Sketch the ring in pencil first, barely pressing, so you can erase and resize it before any color goes down.
- Block the wreath shape as a flattened circle, not a perfect one: real wreaths are lumpy and that is what reads as handmade.
- Lay alcohol marker color first in loose patches, then add colored pencil on top for texture and detail once the marker is dry.
- Test every marker color on a scrap of the same paper, since alcohol ink bleeds differently on smooth versus toothy stock.
- Leave small gaps of white paper between marker strokes on foliage, since solid flat color flattens the whole wreath.
- Save the ribbon or bow for last, after the greenery is in, so it sits convincingly on top instead of floating behind it.
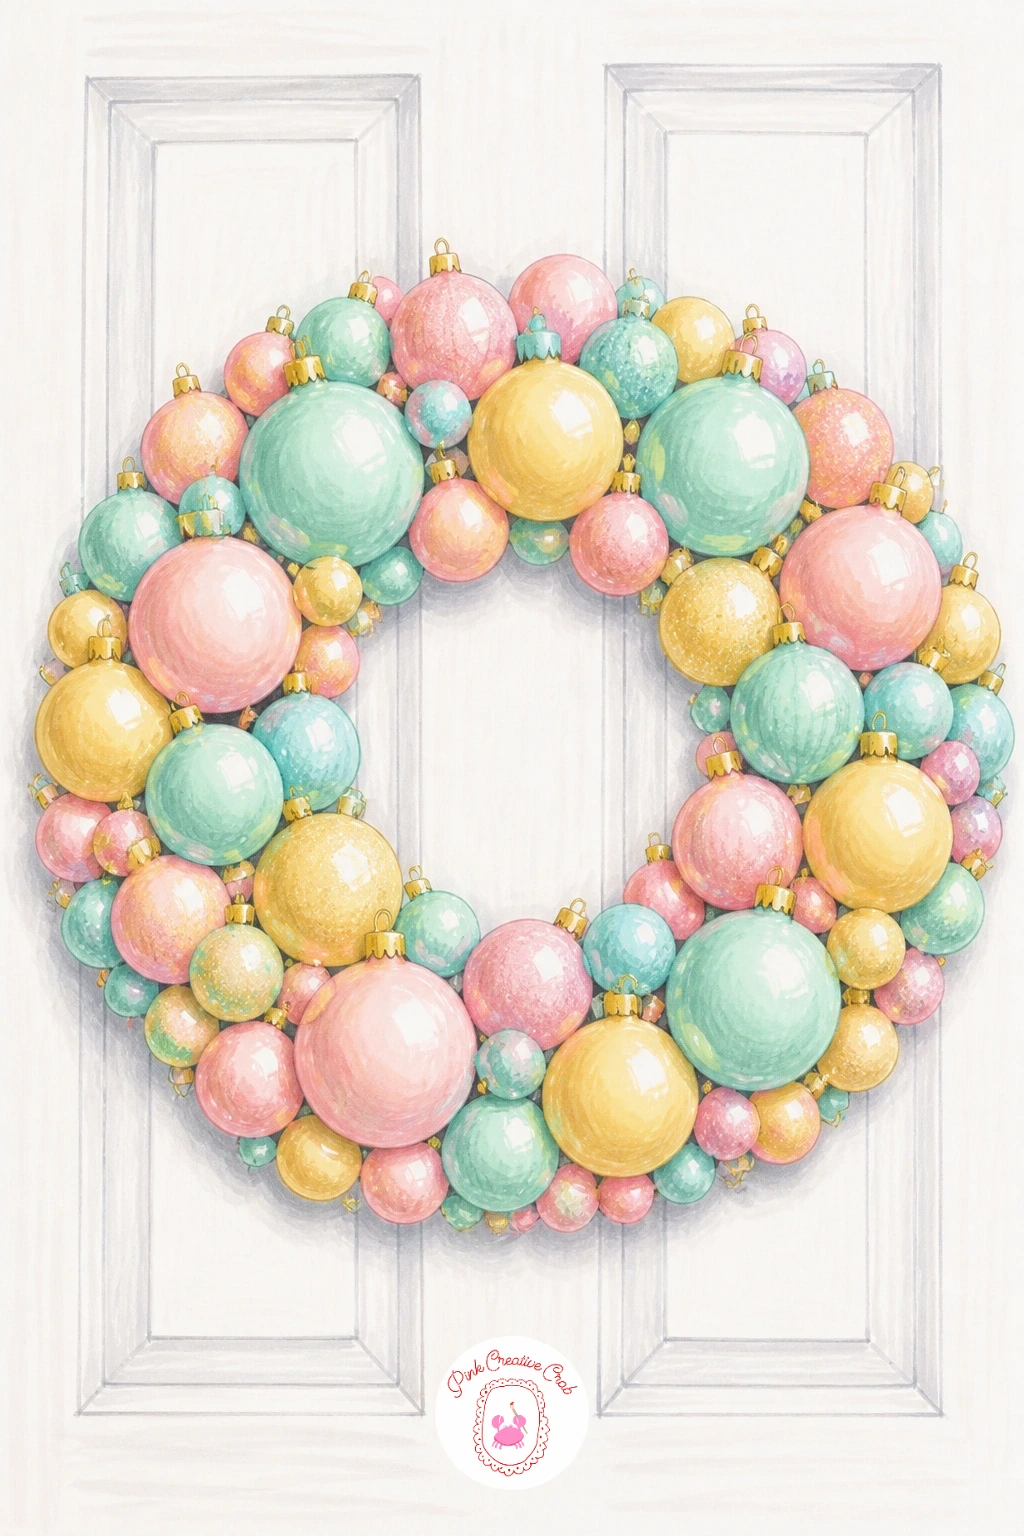
Start with a pastel bauble wreath, the easiest entry on this list and a good warm up for your marker hand. Draw a loose circle guide in pencil, then fill it with overlapping bauble shapes in varied sizes rather than a neat ring of identical circles.
Color each bauble with one quick alcohol marker pass in mint, blush, butter yellow or pale blue, leaving a small white highlight dot untouched on each one. Add the hint of a white door behind as just two straight pencil lines and a doorknob, nothing more, so the wreath stays the star.
The common mistake is making every bauble the exact same size, which reads as a pattern instead of a wreath. Mix three sizes and tuck a few sprigs of pencil greenery between them to break up the roundness.
Keep your highlight dots consistent in position (upper left on every bauble) and the whole wreath will look lit from one light source, which is the detail that sells it as a drawing rather than a sticker sheet.
You Will Need
- smooth marker paper
- pastel alcohol markers
- graphite pencil
- white gel pen
Palette: Mint, Blush, Butter Yellow, Pale Blue
Try a cool grey marker for the door instead of leaving it white paper: it pushes the pastel baubles forward and reads as a real entryway.
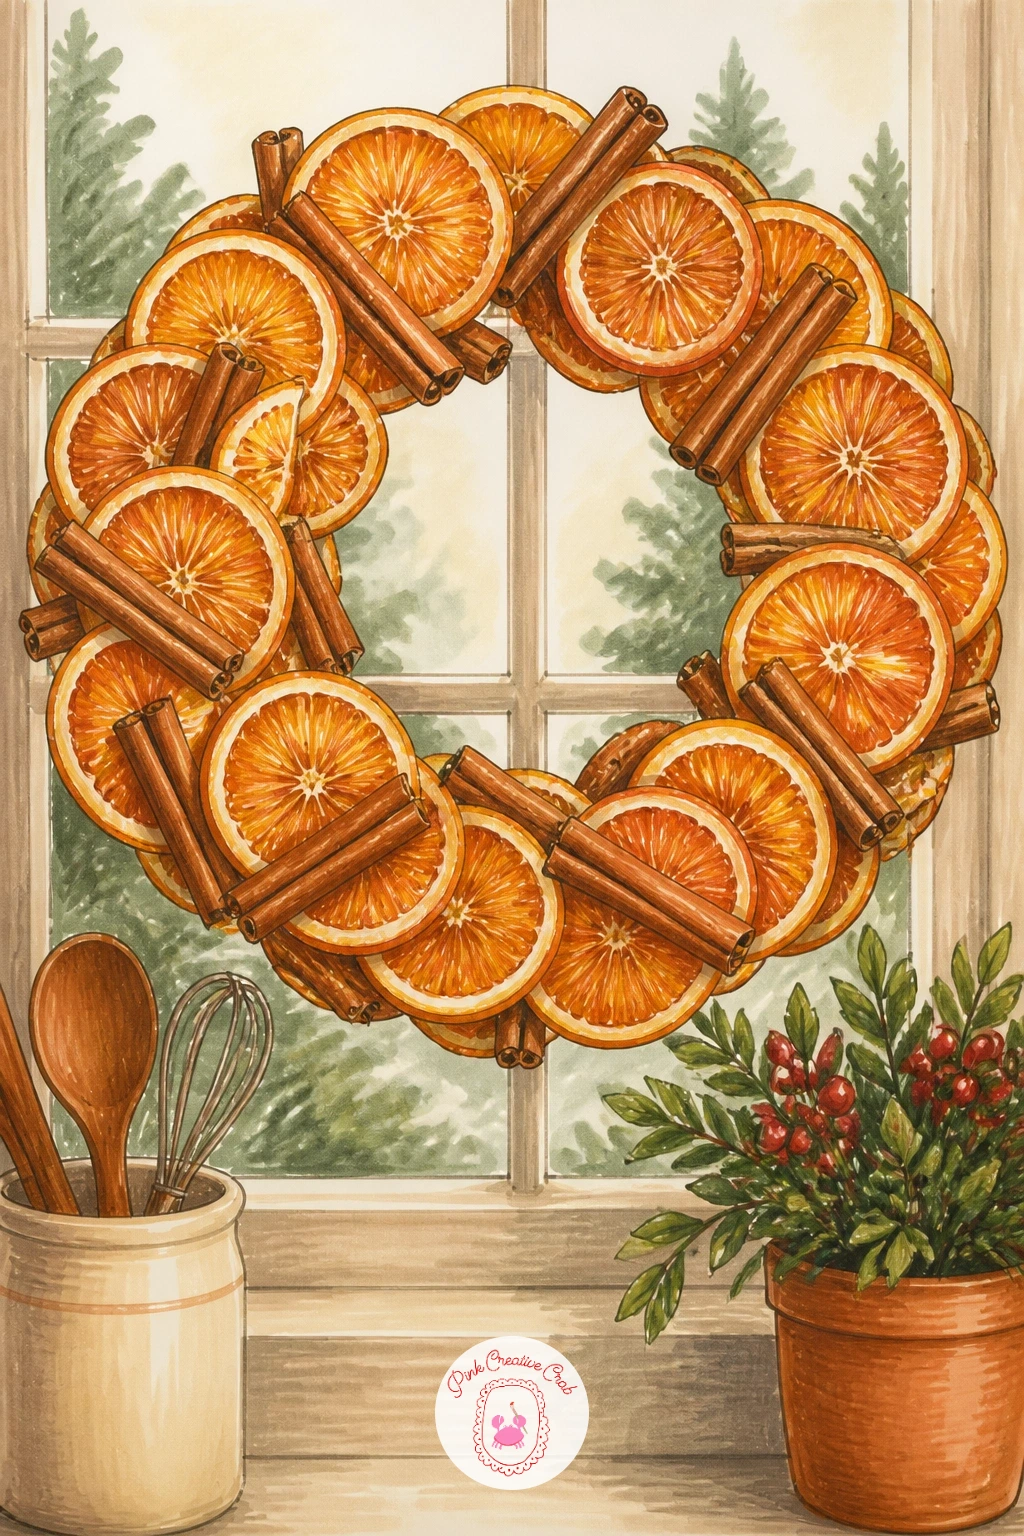
Move from baubles to a dried orange and cinnamon wreath, which leans on marker blending more than line work. Pencil a ring of overlapping orange slice circles first, each with the pith line and a few seed shapes marked lightly.
Lay a warm orange marker over each slice then drop a slightly darker burnt orange along the rind edge while the first layer is still workable, letting the two blend into that dried, leathery look. Add cinnamon sticks as simple tan rectangles tucked between the slices, with three thin pencil lines down each one for bark texture.
The edges of a dried orange slice are never crisp, so if yours look too clean, go back in with a kneaded eraser and lift tiny ragged bites out of the rind. A faint kitchen window grid behind the wreath, just two crossed pencil lines, grounds the whole scene without competing with it.
If you do not have burnt orange on hand, layer regular orange with a touch of brown marker instead; the blend reads nearly the same.
You Will Need
- orange and brown alcohol markers
- graphite pencil
- kneaded eraser
- tan colored pencil
Palette: Burnt Orange, Cinnamon Tan, Warm Orange, Soft Brown
Look at a real dried orange slice photo before you start: the pith pattern is irregular and that irregularity is what makes the drawing convincing.
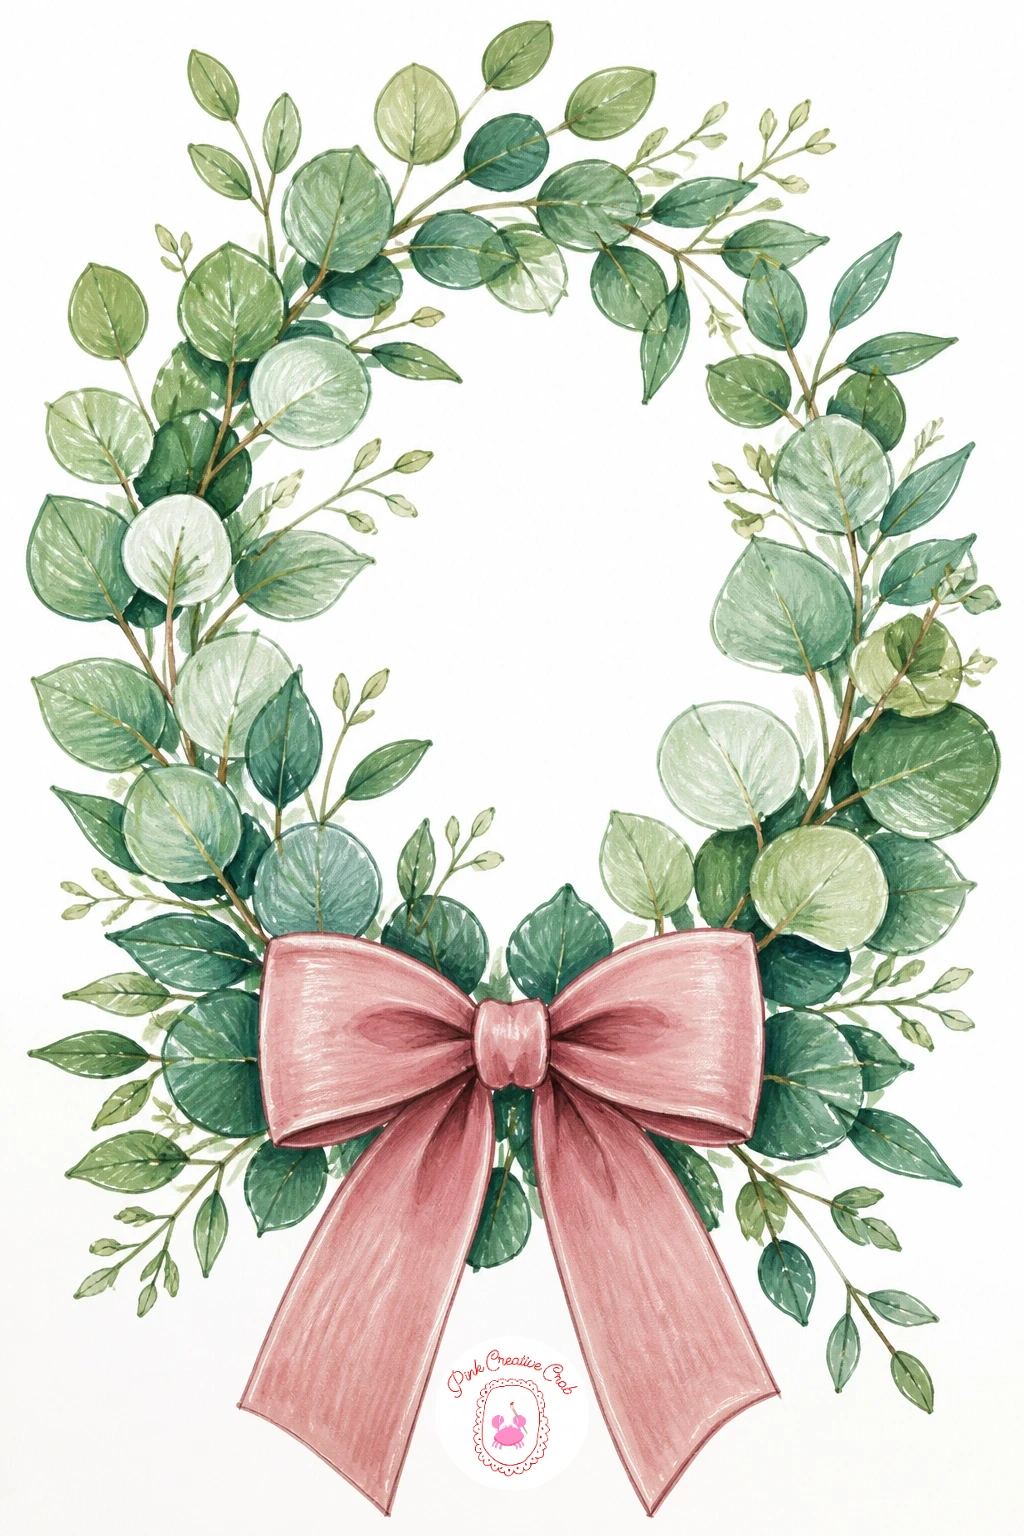
Give your pencil hand a break from circles with a eucalyptus wreath, built from leaf shapes instead. Draw the ring as a loose oval skeleton, then branch small stems off it at varied angles, each stem carrying three to six rounded eucalyptus leaves.
Here is where eye level matters: draw the wreath as if you are standing in front of it at arm’s length, so the top leaves tilt slightly down toward you and the bottom ones tilt slightly up, which gives the ring real dimension instead of a flat circle of leaves. Color the leaves in two greens, a soft sage and a dusty blue-green, switching between them stem by stem.
Finish with a blush velvet bow at the base, drawn as soft overlapping loops rather than sharp folds, since velvet never has a crisp edge. Shade the bow’s shadowed folds with a deeper rose pencil to suggest that soft, light-absorbing velvet texture.
If blush velvet markers feel too similar to your paper, add a thin grey pencil shadow under the bow to lift it off the page.
You Will Need
- sage and dusty green markers
- blush and rose colored pencil
- graphite pencil
- blending marker
Palette: Sage Green, Dusty Blue Green, Blush Pink, Deep Rose
Press slightly harder with your pencil on the leaves closest to the bow to suggest they sit in its shadow, which adds depth with almost no extra time.
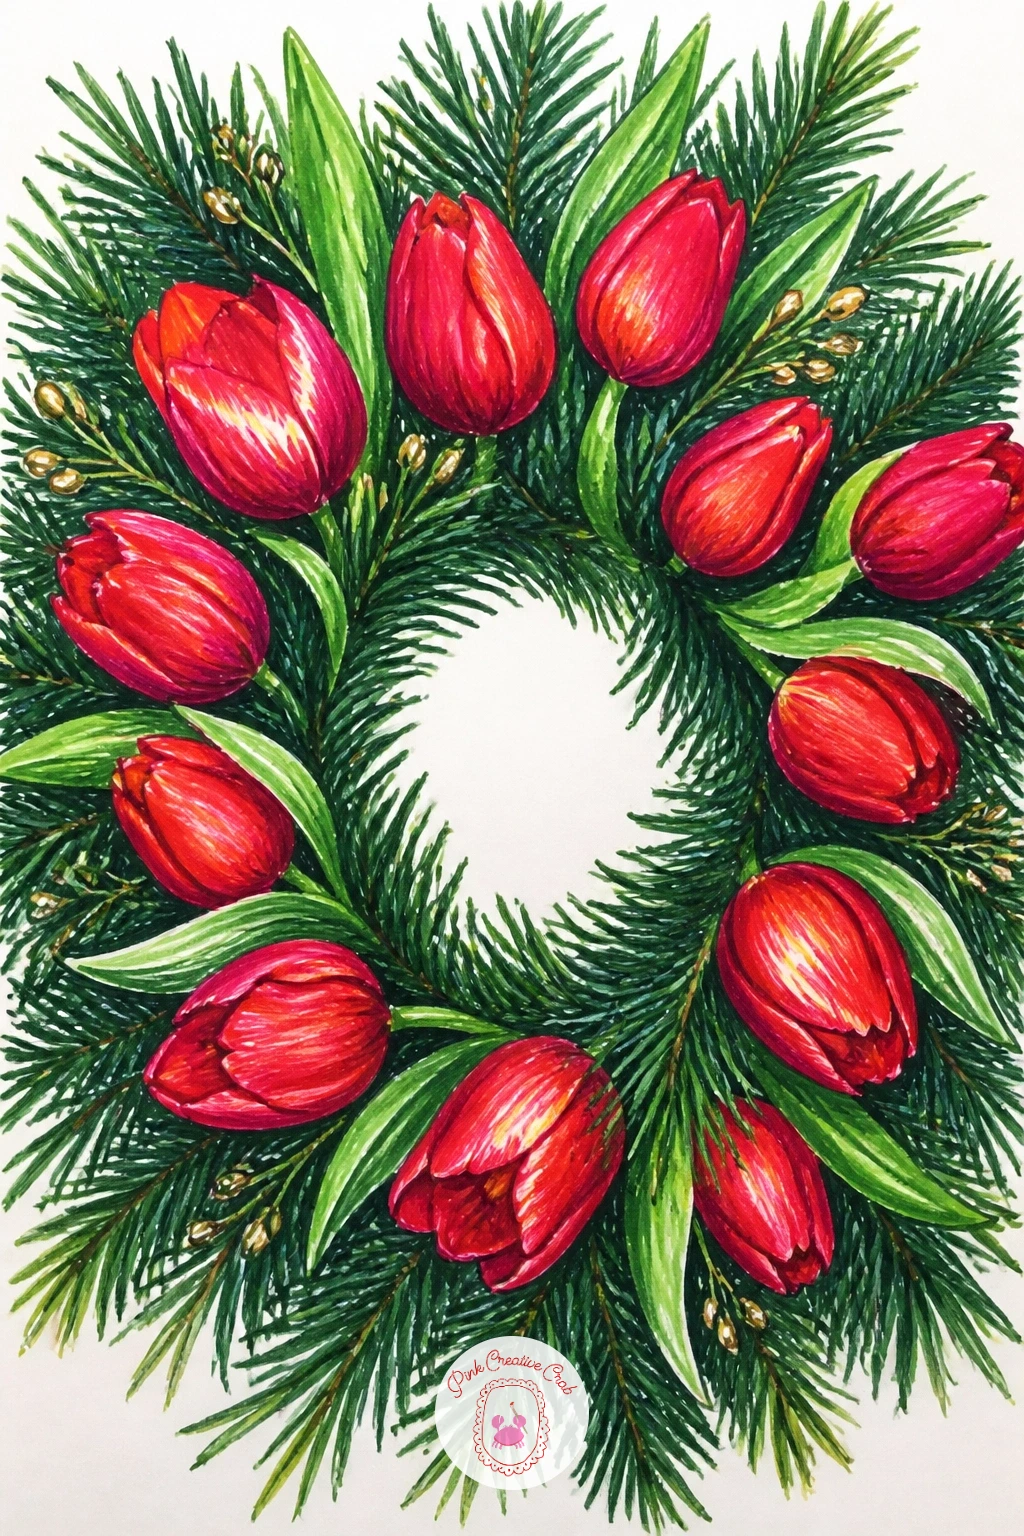
Trade the expected holly for a red tulip and pine wreath, a nice surprise for anyone scrolling past the usual designs. Sketch the pine base first as short overlapping V-shaped needle clusters around your ring guide, then add five or six tulip shapes resting on top, each one a simple closed cup with two or three petal lines.
Color the pine in two greens worked wet into each other with marker for a soft blended backdrop, then go in with sharp colored pencil tips for the individual needle clusters once the marker has dried. The tulips get a bold red marker base with a touch of deep maroon at the base of each petal where it meets the stem.
Tulips drawn too round lose their shape fast, so keep the petal tips slightly pointed rather than fully rounded, which is what reads as tulip rather than rose. Swap in red ranunculus if tulips feel tricky; the same pointed-cup approach works for both.
Finish with a few single pine needles crossing over the tulip stems to tie the two elements together.
You Will Need
- red and maroon markers
- two green markers
- fine colored pencils
- graphite pencil
Palette: Pine Green, Deep Maroon, True Red, Forest Shadow
Reference a real tulip photo for the petal curve: the outer edge bows out before curving back in, which is easy to flatten by accident.
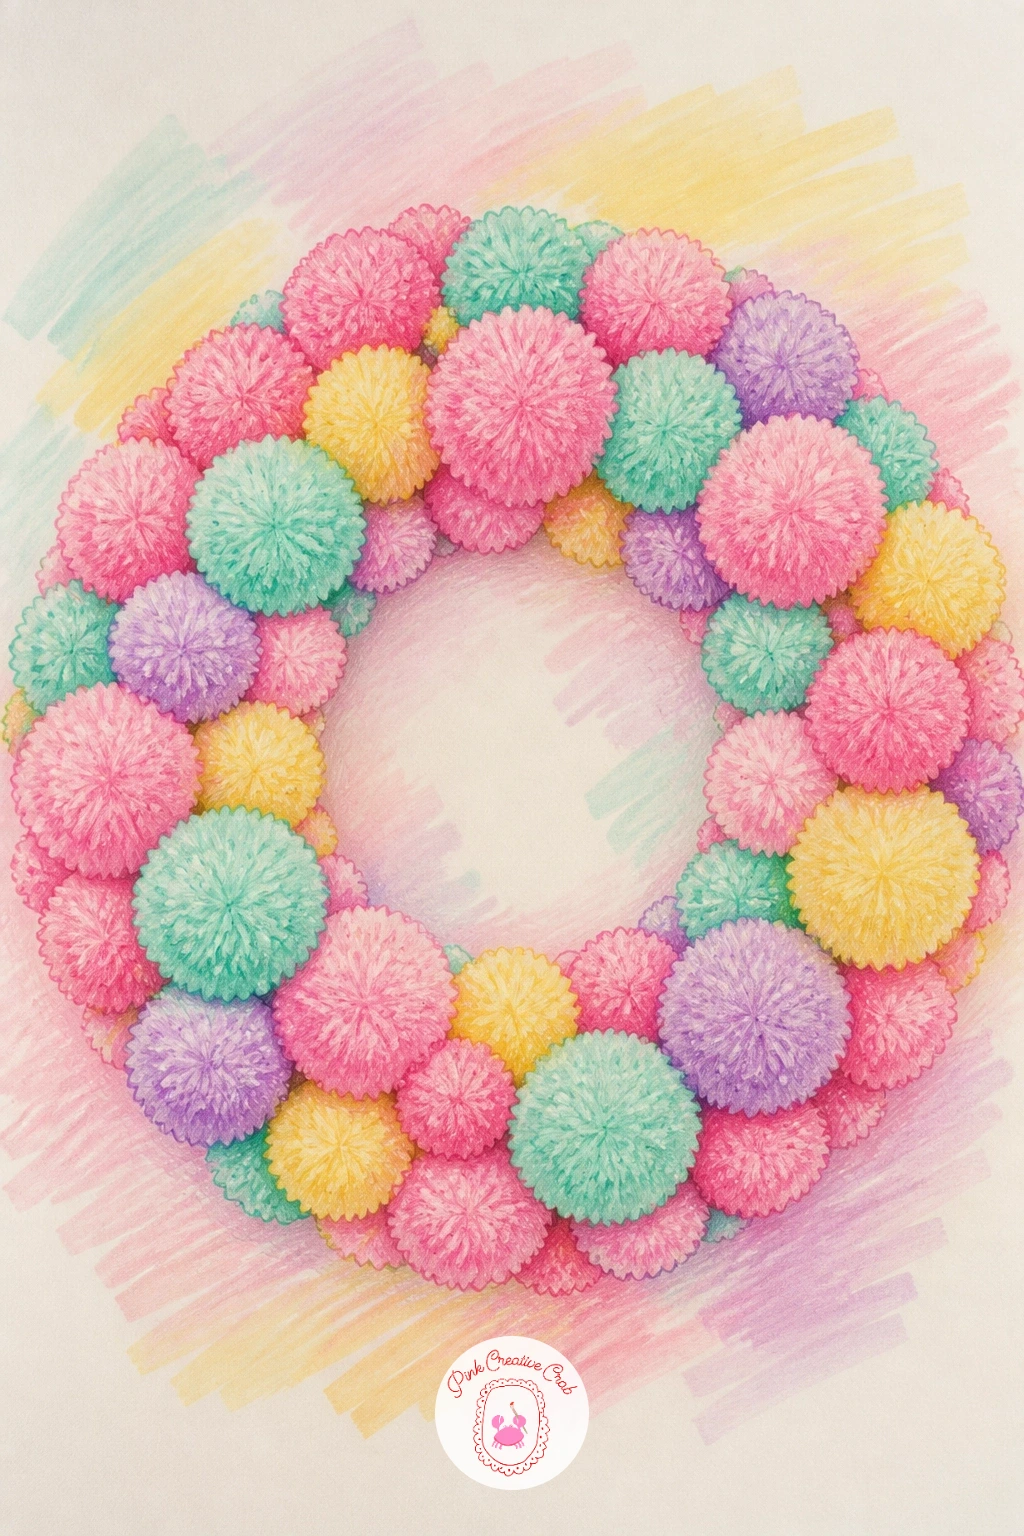
Loosen up with a pom pom wreath in candy colors, which is mostly about texture rather than accurate shape. Pencil a ring of overlapping circles in varied sizes, then instead of a clean outline on each one, scribble the edge in small jagged pencil marks that suggest fuzzy yarn.
Color each pom pom with marker first in candy pink, mint, lavender or pale yellow, then once dry, go back over the whole surface with short flicking colored pencil strokes radiating outward from the center of each circle. That flicking motion is the one hands-on trick that turns a flat colored circle into something that looks soft and touchable.
If the flicks start looking too uniform, vary their length and direction slightly on each pom pom, since real yarn never sits perfectly even. White pom poms left as bare paper with just a grey pencil shadow underneath work well as a break between the bright colors.
Candy cane striped ribbon threaded between the pom poms is an easy finishing touch if you have red and white markers handy.
You Will Need
- candy color alcohol markers
- colored pencils in matching shades
- graphite pencil
Palette: Candy Pink, Mint Candy, Lavender, Pale Yellow
Try this one on slightly textured paper instead of smooth marker stock; the tooth of the paper helps the pencil flicks look fuzzier.
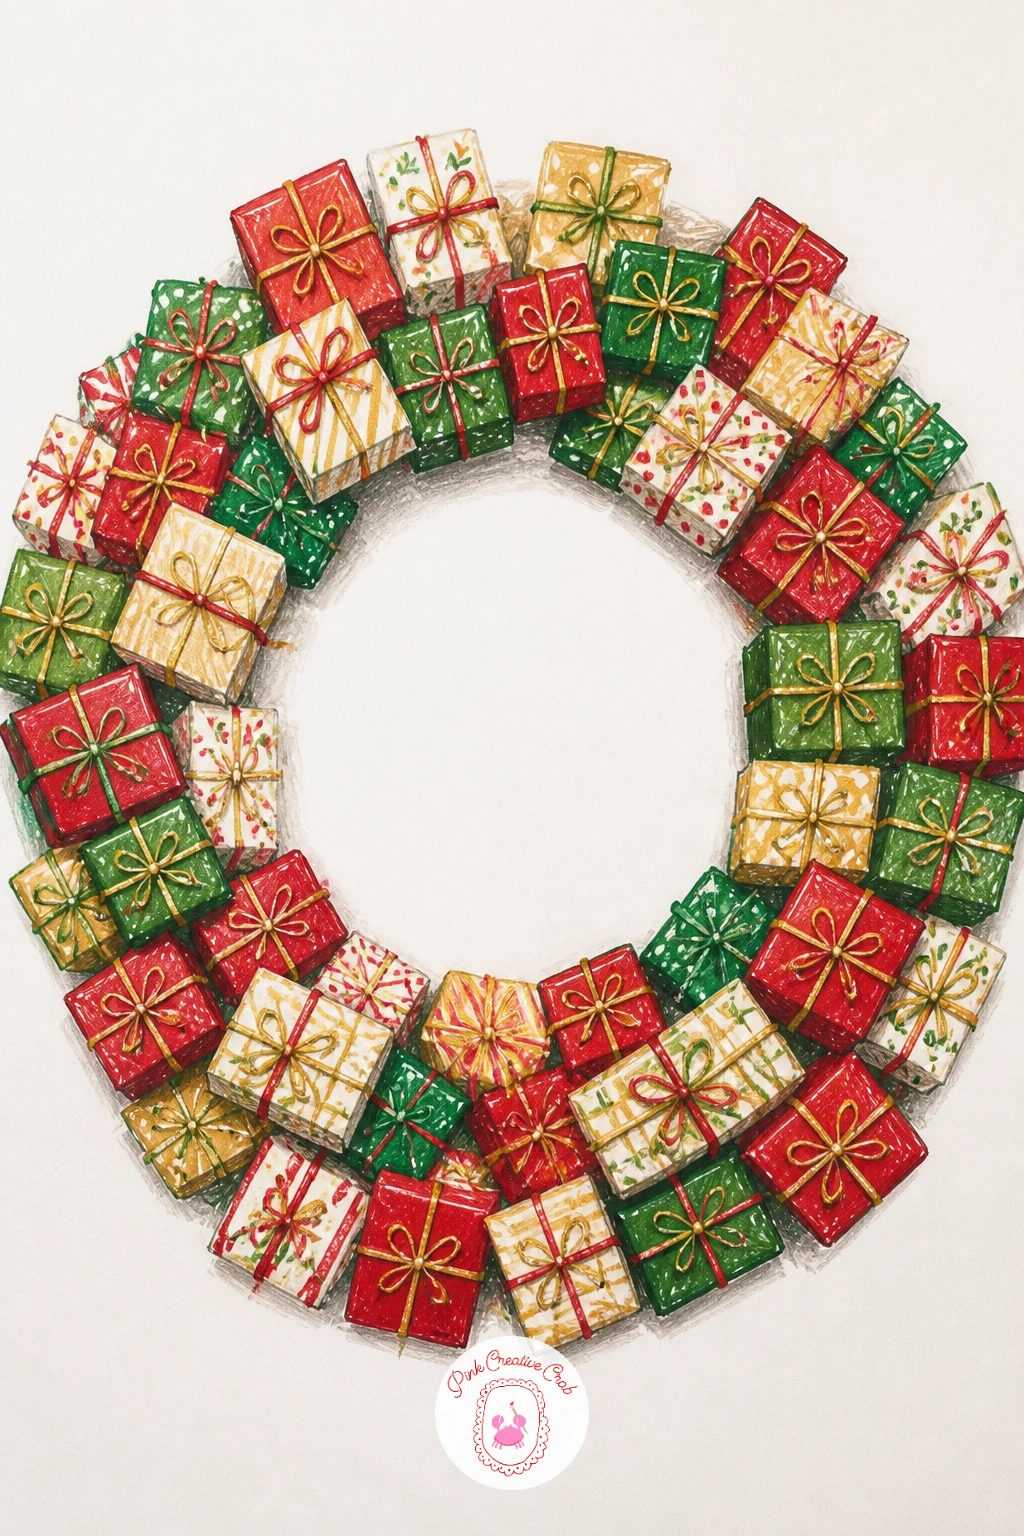
Build a wreath made of tiny wrapped presents next, which is really an exercise in drawing small boxes at different angles. Sketch six or seven simple rectangles and squares around your ring guide, turning each one slightly so they do not all face forward the same way.
Keep the forty-minute version in mind here: a quick ten-minute wreath gets flat marker color and a single ribbon line per box, while the longer version adds a cast shadow under each package and a tiny bow drawn with real loops and tails instead of a cross. Both versions work, so pick based on how much time you actually have tonight.
Wrap each box in a different paper pattern using thin colored pencil lines, stripes on one, dots on another, a plaid grid on a third, so the wreath reads as a collection rather than one pattern repeated. A gold or white ribbon crossing each box ties the whole thing together visually even when the papers clash.
If patterns feel fiddly, solid-color boxes with just a contrasting ribbon look just as polished and take half the time.
You Will Need
- assorted colored markers
- gold colored pencil
- fine liner pen
- graphite pencil
Palette: Berry Red, Forest Green, Gold, Cream
Angle a couple of boxes so only a corner shows behind another; it adds depth and solves the problem of fitting seven boxes into one ring.
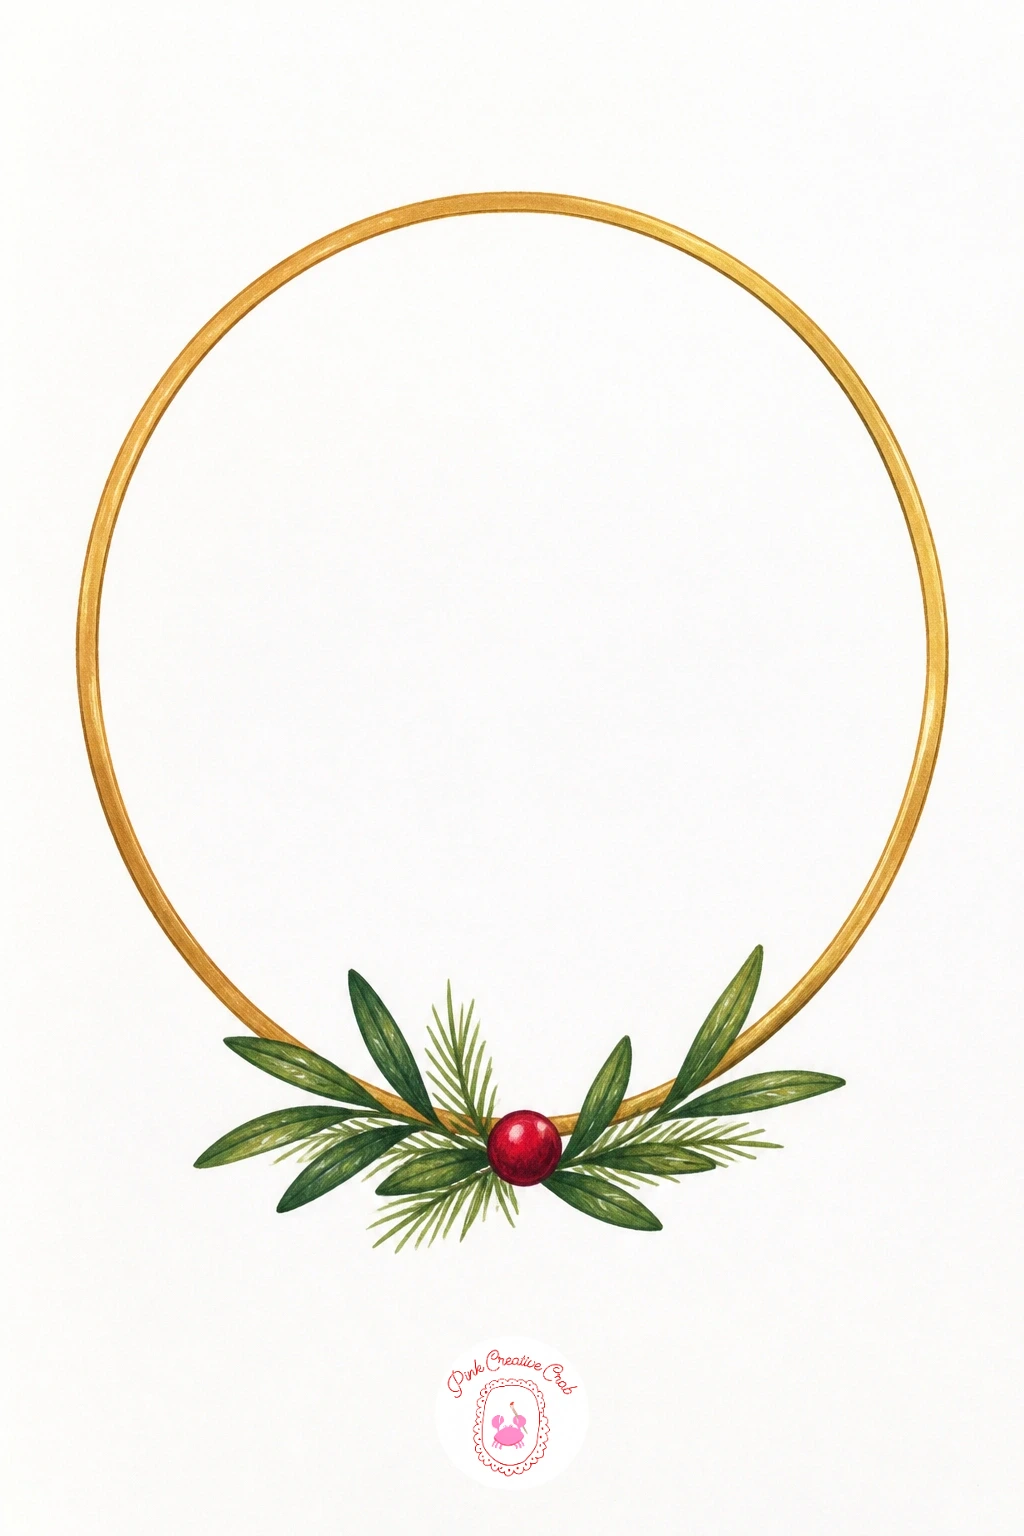
Slow right down for a minimalist brass ring wreath, which depends entirely on getting the ring itself right since there is so little else on the page. Use a plate or round lid to trace a perfect circle in pencil, then draw a second circle just inside it to give the ring some thickness, like a drawn metal hoop rather than a flat line.
This is the idea where measuring actually matters: keep the gap between your inner and outer circle exactly the same width all the way around, checking it at the top, sides and bottom before you commit to color, since an uneven ring is the first thing anyone notices. Shade the metal with warm gold and a touch of brown along one edge to suggest a light source hitting the brass, leaving a thin streak of bare paper as the shine.
Add one single sprig of greenery resting across the bottom third of the ring, just three or four leaves and a berry, nothing more. The restraint is the whole point of this one, so resist the urge to fill empty space.
You Will Need
- gold and brown colored pencils
- graphite pencil
- plate or lid to trace
- green pencil for the sprig
Palette: Antique Gold, Warm Brass, Deep Brown, Sprig Green
Hold the drawing at arm’s length before adding color: a ring that looks even up close can still look lopsided from a normal viewing distance.
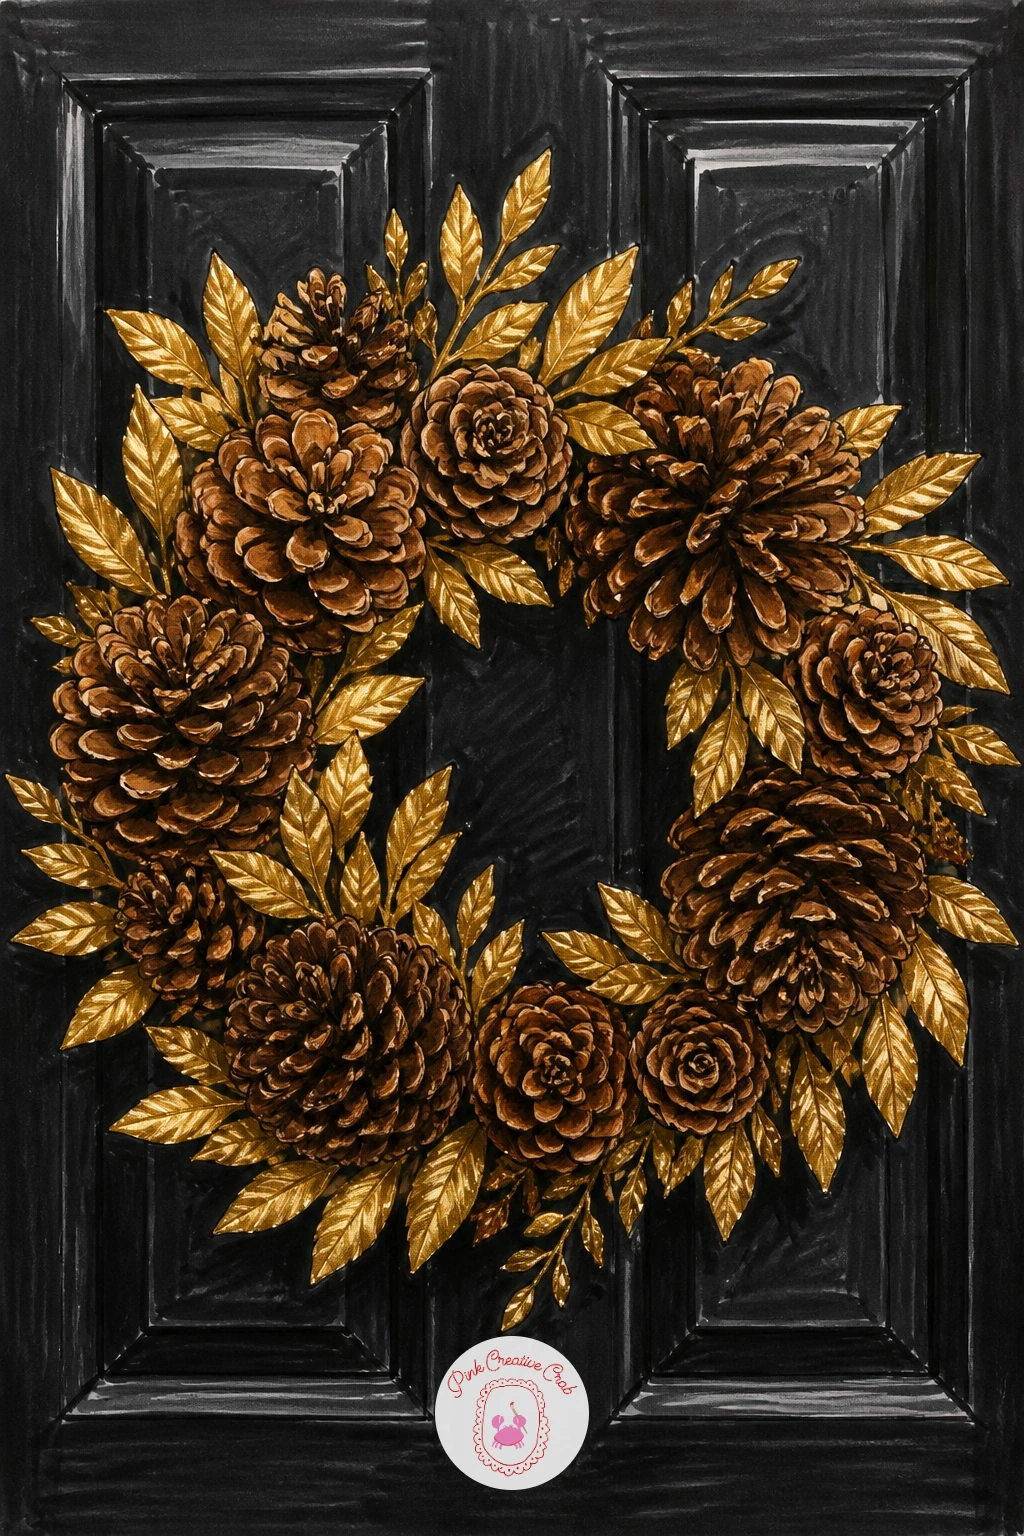
Switch to drama with a pine cone and gold leaf wreath set against a black door, which teaches a useful lesson in light direction. Since the background reads as dark, every highlight on the wreath needs to be deliberate: decide early that the light comes from the upper left, and keep every bright marker streak on that same side of each pine cone.
Draw the pine cones as layered teardrop scales, darkest in the shadowed lower right of each scale and lightest where your chosen light hits. Scatter gold leaf shapes, simple almond outlines with a single vein line, between the cones, and color them with gold marker so they catch light the pine cones do not.
Block the black door behind the wreath with a dark grey or black marker, leaving the wreath’s outer edge with a thin sliver of untouched paper so it does not vanish into the background. If true black marker feels too heavy, a very dark warm grey reads almost the same and is easier to layer evenly.
You Will Need
- brown and gold markers
- black or dark grey marker
- graphite pencil
- white gel pen for final highlights
Palette: Warm Brown, Gold Leaf, Charcoal Black, Deep Umber
Add a single white gel pen fleck on the gold leaves last, after everything else is dry, for a metallic sparkle the markers alone cannot give.
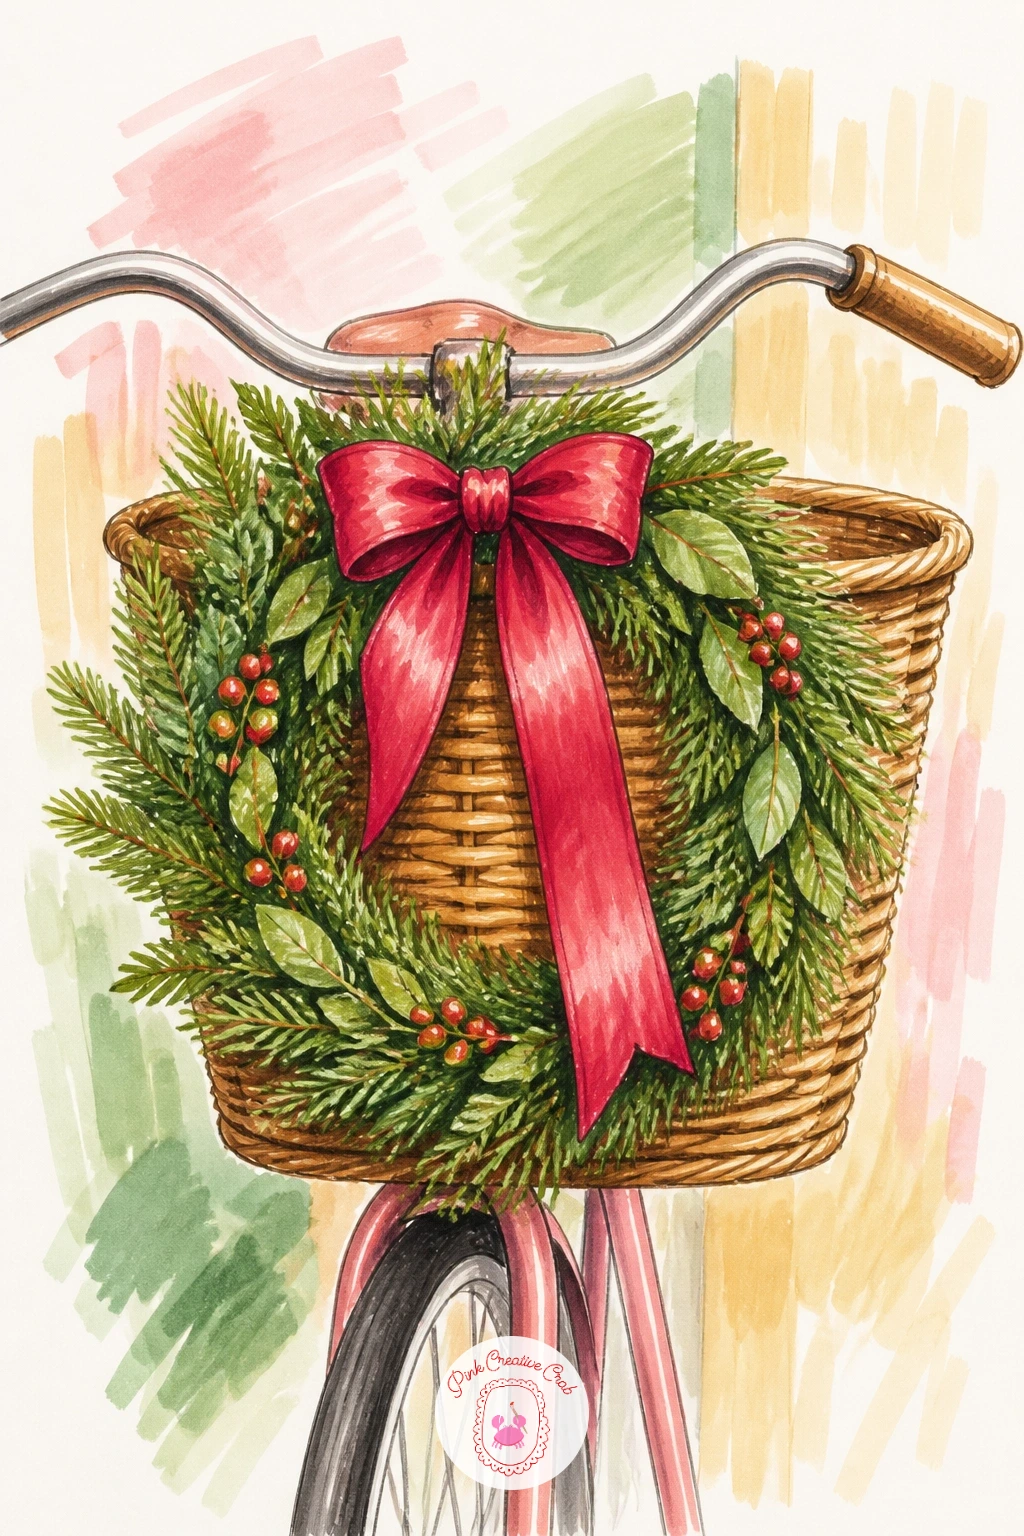
Give the wreath a little story by hanging it on a bicycle basket instead of a door. Draw the basket first as a simple woven oval, crosshatched lightly in pencil to suggest wicker, then sit the wreath ring just in front of or draped over its rim.
Keep the bicycle itself minimal: one curved handlebar and the top of a wheel is enough to tell the viewer what this is without you having to draw an entire bike in proportion. The wreath can be a simple mixed-greenery ring with a red ribbon, since the setting is doing the storytelling here, not the wreath’s complexity.
The basket’s weave pattern is the part most likely to go wrong, turning into a solid brown blob if you rush it. Slow down and draw the crosshatch as individual short strokes in two tan shades, light and dark alternating, rather than one scribbled mass.
No bicycle reference handy? A simple curved front wheel arc and one handlebar loop reads as “bicycle” even with nothing else drawn.
You Will Need
- tan and brown colored pencils
- green and red markers
- graphite pencil
Palette: Wicker Tan, Dark Wicker, Holiday Green, Ribbon Red
Tilt the whole basket slightly rather than drawing it dead straight on; a small angle makes the scene feel like a candid moment rather than a diagram.
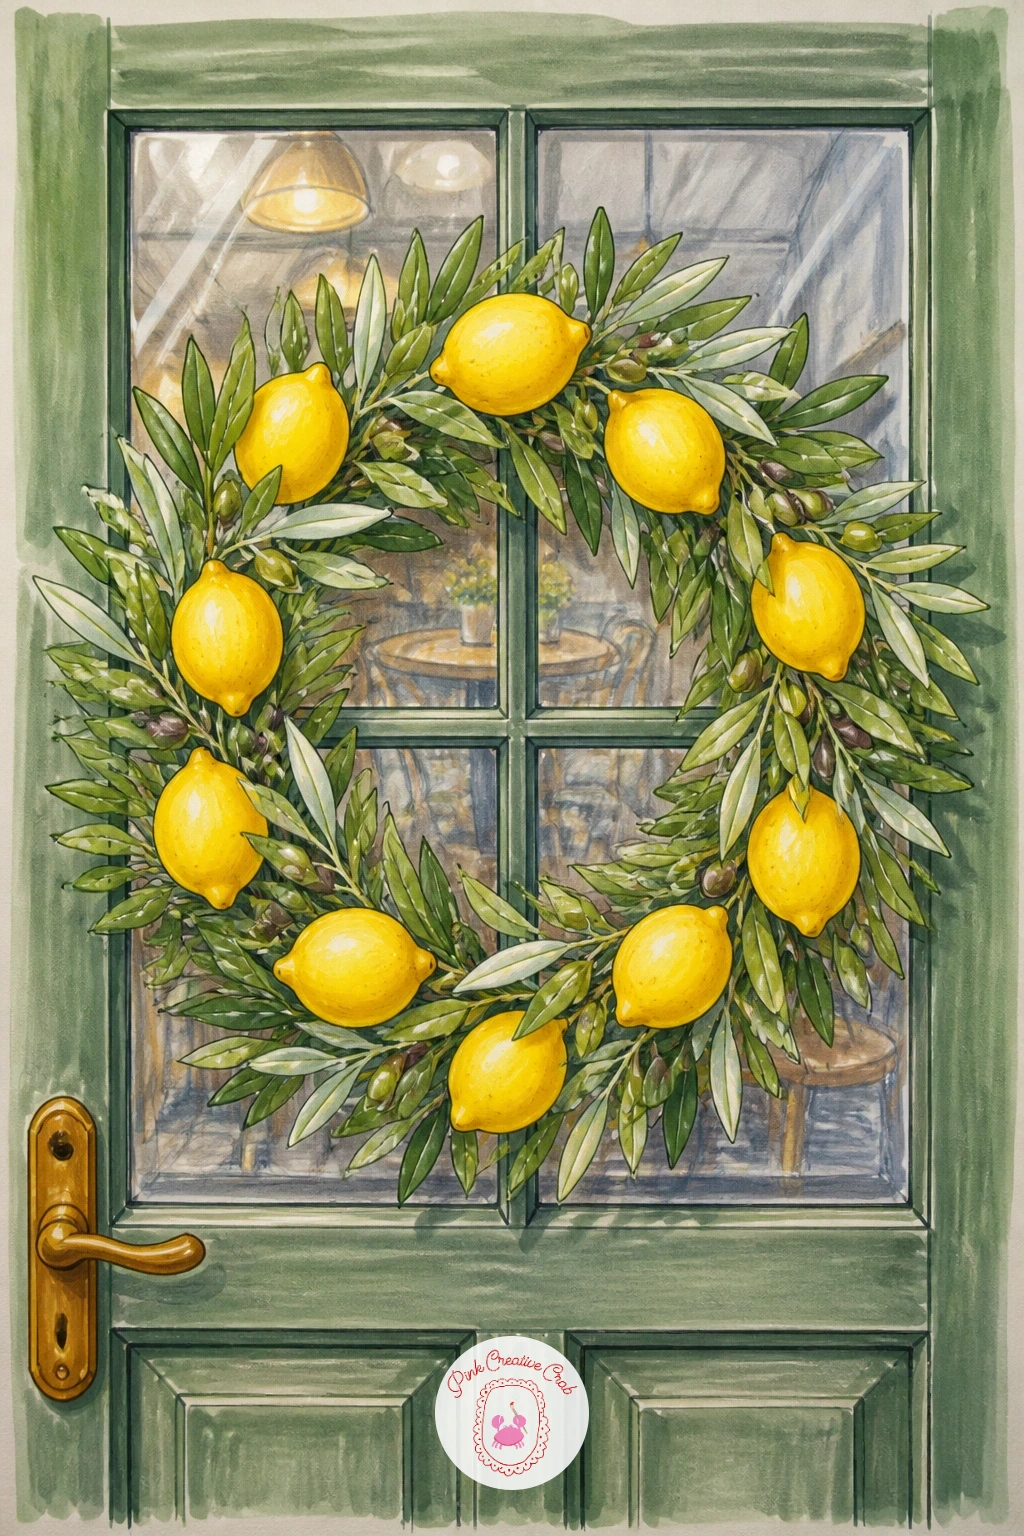
Bring in some Mediterranean brightness with a lemon and olive leaf wreath, a nice contrast to all the deep greens and reds so far. Draw five or six lemon shapes as simple ovals with a small nub at one end, then surround them with long thin olive leaf pairs branching off slim stems.
Color the lemons in a bright yellow marker, leaving a small highlight patch untouched, then add a second pass of deeper yellow-orange just at the nub end for realism. The olive leaves get a muted grey-green that sits quietly behind the bright yellow rather than competing with it.
A café door behind the wreath can be suggested with just a pane of glass, drawn as a single rectangle with a faint reflection streak, plus a hint of a painted sign edge in the corner. Keep that background loose and light in value so the lemons stay the brightest thing on the page.
You Will Need
- yellow and grey-green markers
- fine colored pencils
- graphite pencil
Palette: Bright Lemon, Yellow Orange, Olive Grey Green, Soft Glass Grey
Cluster lemons in groups of two or three rather than spacing them evenly, which looks more like a real gathered wreath and less like a pattern.
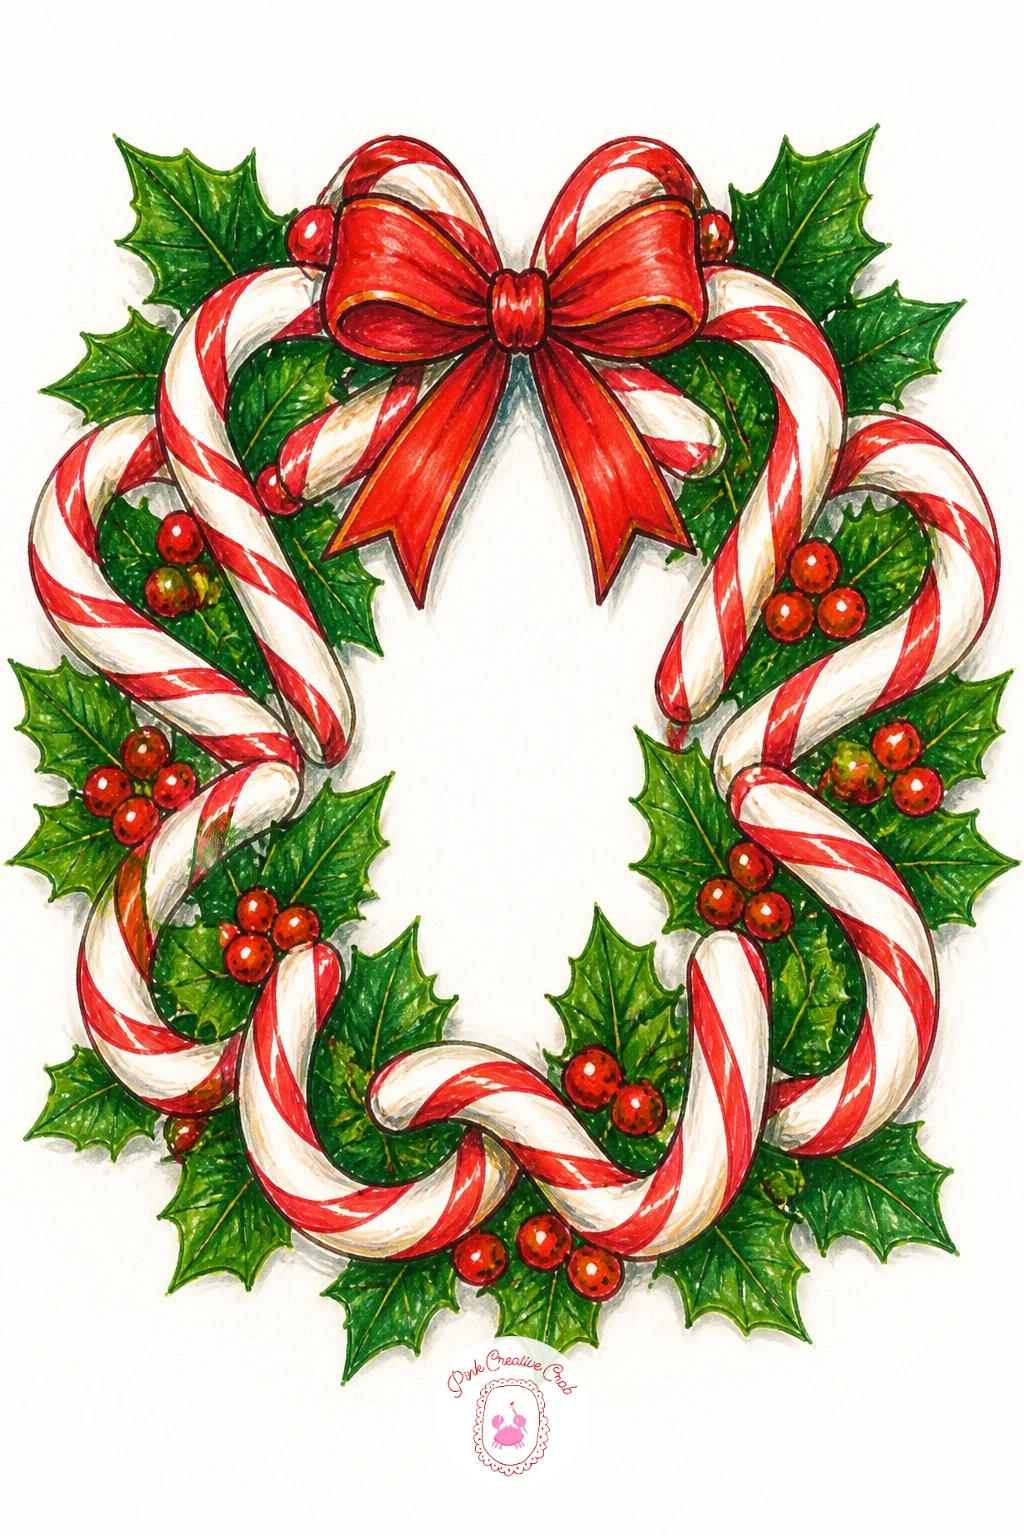
Take on one of the classic shapes, a candy cane wreath, and use it to practice clean curves. Draw six or seven candy cane hooks of slightly different sizes arranged in a ring, each one a simple curved line doubled to give it width, with the hook ends all curling the same direction for visual rhythm.
The red and white stripes are where this goes wrong fastest: pencil in the diagonal stripe guidelines lightly before adding any marker, spacing them evenly along the curve rather than guessing stripe by stripe. Color the white gaps as bare paper and fill only the red stripes with marker, which keeps the candy cane look crisp instead of muddy.
Tuck a few sprigs of holly or plain green pencil leaves between the canes to fill the gaps and soften all those matching curves. A thin red bow at the top center, where several canes overlap, gives the eye a place to land first.
You Will Need
- red marker
- green pencil
- graphite pencil
- ruler for stripe spacing (optional)
Palette: Candy Red, Paper White, Holly Green, Berry Accent
Curve the stripe lines slightly to follow the bend of each hook rather than drawing them straight, which is what makes a candy cane look wrapped rather than painted on.
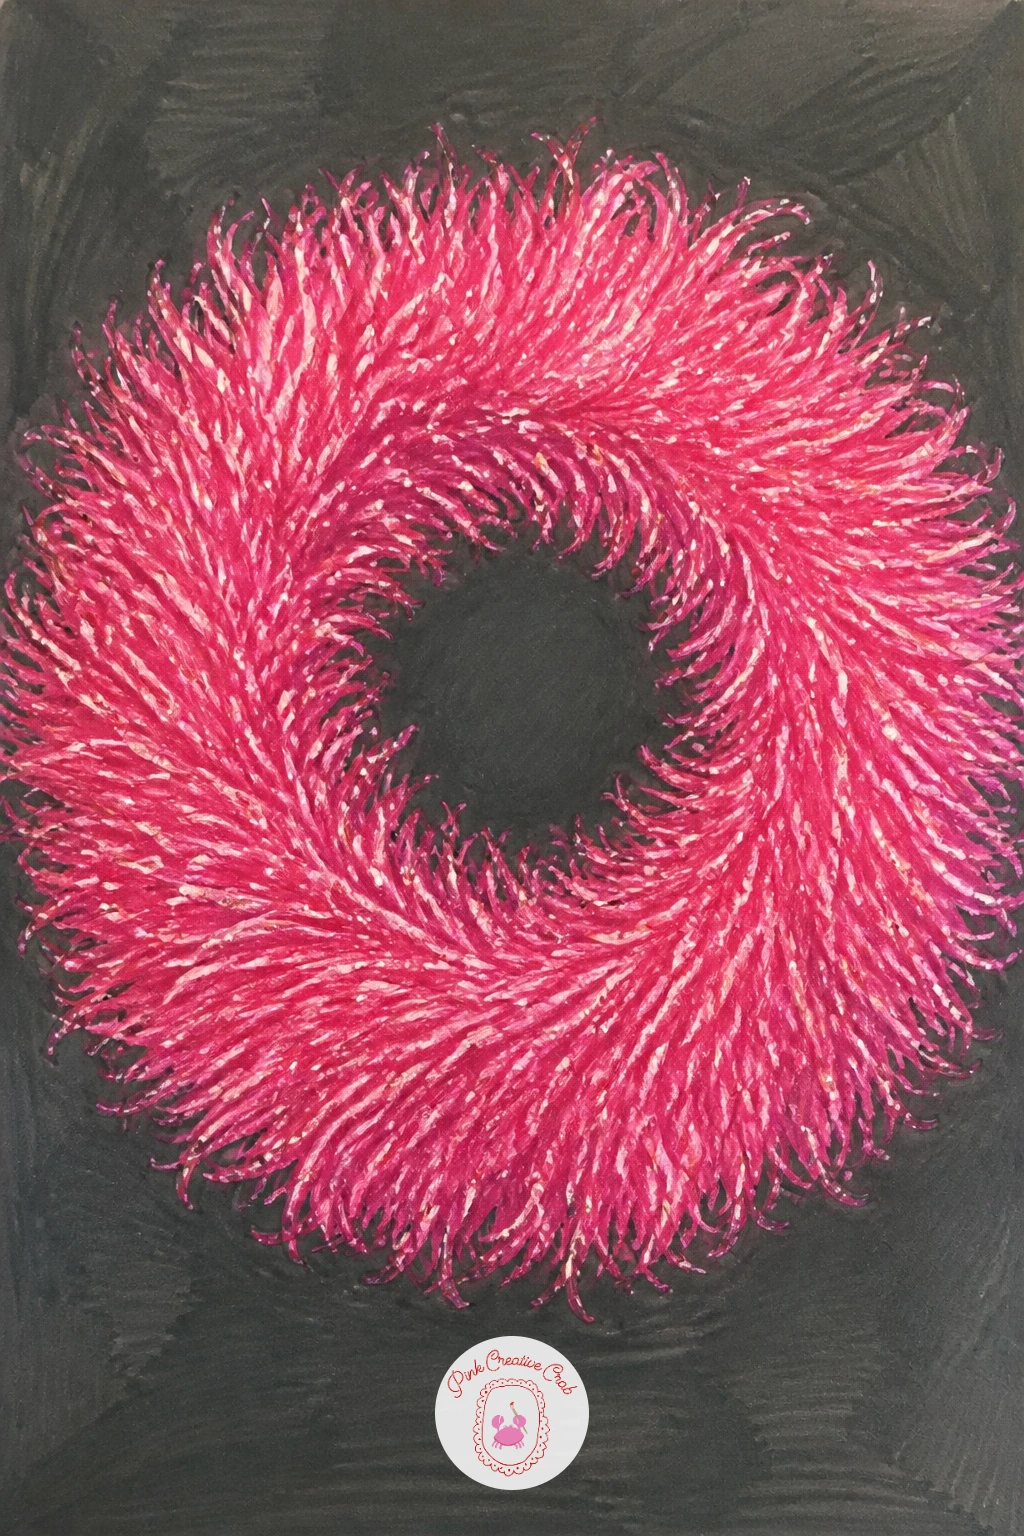
Have some fun with a pink tinsel wreath, which trades careful detail for loose, sparkly energy. Pencil a simple ring guide, then instead of individual strands, build the whole shape from short, quick squiggled pencil lines all pointing roughly outward from the center of the ring, like a soft exploded halo.
Color over the squiggles with a bright pink marker in patches, letting some of the pencil squiggle show through at the edges rather than covering everything solidly. This is the one idea on the list that rewards a messy hand, so do not tighten up your line work here.
Add scattered white gel pen flecks across the pink once the marker is dry, for the glitter-catch that real tinsel has under light. If pink feels like too much commitment, the same squiggled technique works just as well in silver or gold pencil for a more traditional tinsel wreath.
A plain dark background strip behind the wreath, just a few marker strokes, makes the pink pop far more than white paper does.
You Will Need
- bright pink marker
- white gel pen
- graphite pencil
- dark grey marker for background
Palette: Hot Pink, Soft Pink, White Sparkle, Background Grey
Work fast and loose on the squiggles rather than planning each one; tinsel never has a logical structure and overthinking it makes the texture look stiff.
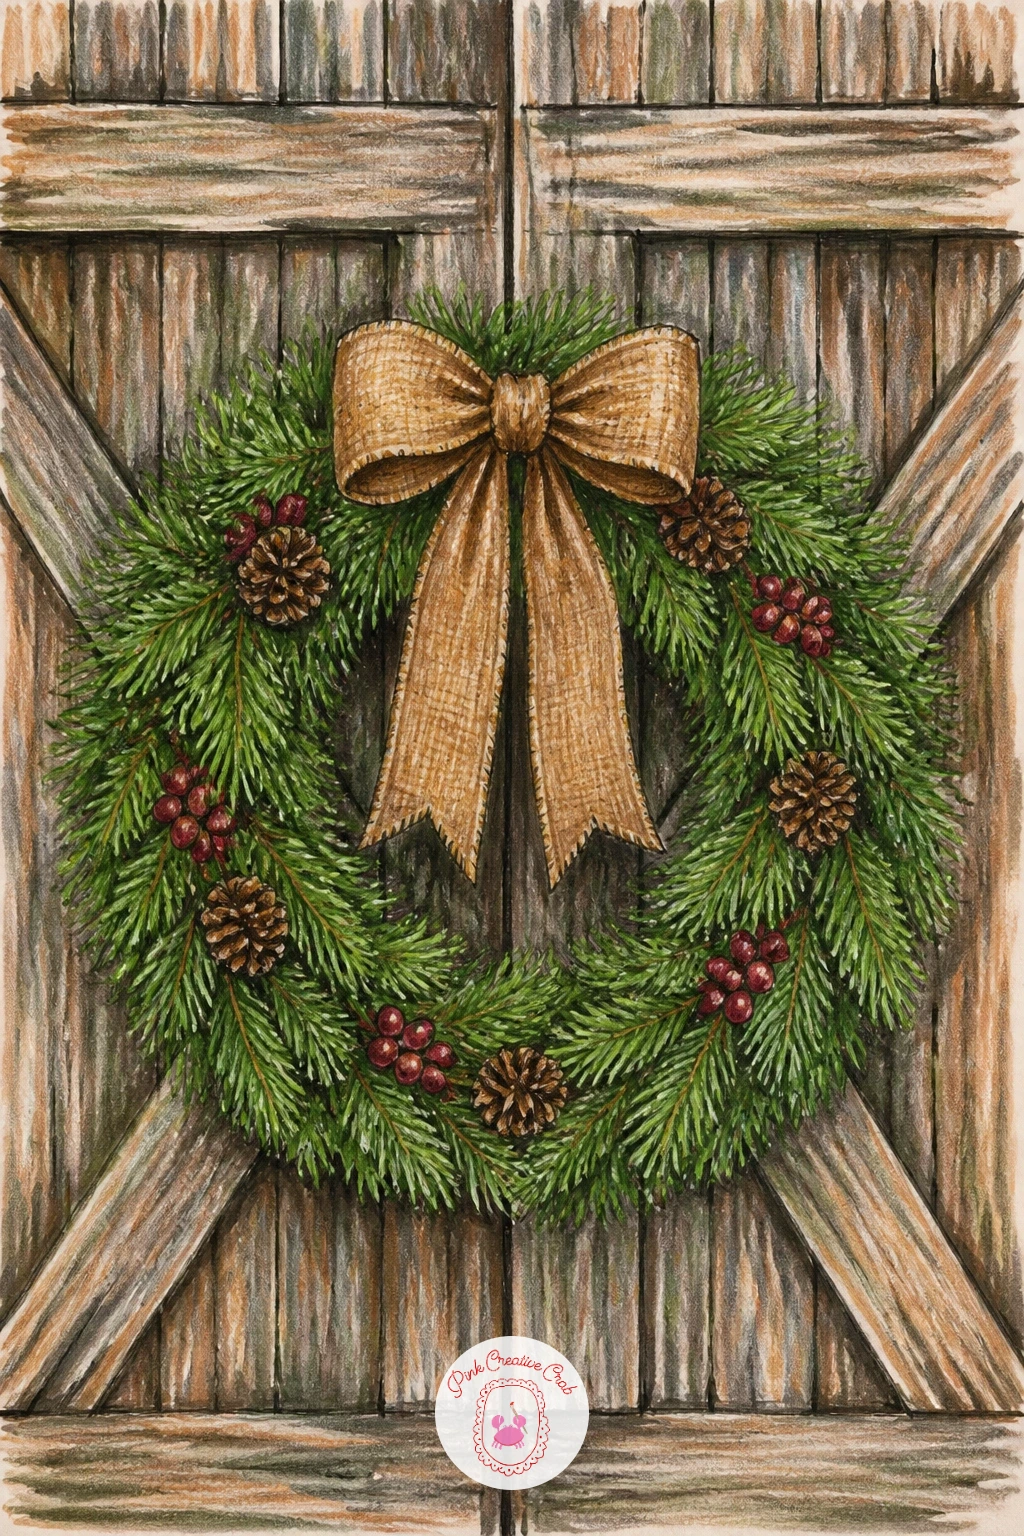
Carry that rustic feeling further with a wreath hung on a horse barn door, built from weathered wood and a simple mixed-greenery ring. Draw the barn door first as a few vertical wood plank lines with a horizontal cross beam, keeping the perspective flat and straight on rather than at an angle, which is the easiest version to get right.
Shade the wood in streaky brown pencil strokes that follow the plank direction, varying the pressure so some boards read lighter and some darker, the way real weathered wood never matches itself perfectly. The wreath hanging on it can combine pine, a few dried seed pods and a plain burlap-colored ribbon, kept visually simple since the wood texture is already doing a lot of work.
If the plank lines start looking too ruler-straight, add a tiny warp to one or two boards; barn wood is never perfectly flat. A rusted metal hook, just a small dark curved line above the wreath, finishes the story.
You Will Need
- brown colored pencils in two shades
- green marker
- graphite pencil
Palette: Weathered Brown, Dark Plank Brown, Barn Green, Burlap Tan
Draw the wood grain as broken, irregular lines rather than continuous ones; unbroken lines read as fabric stripes instead of timber.
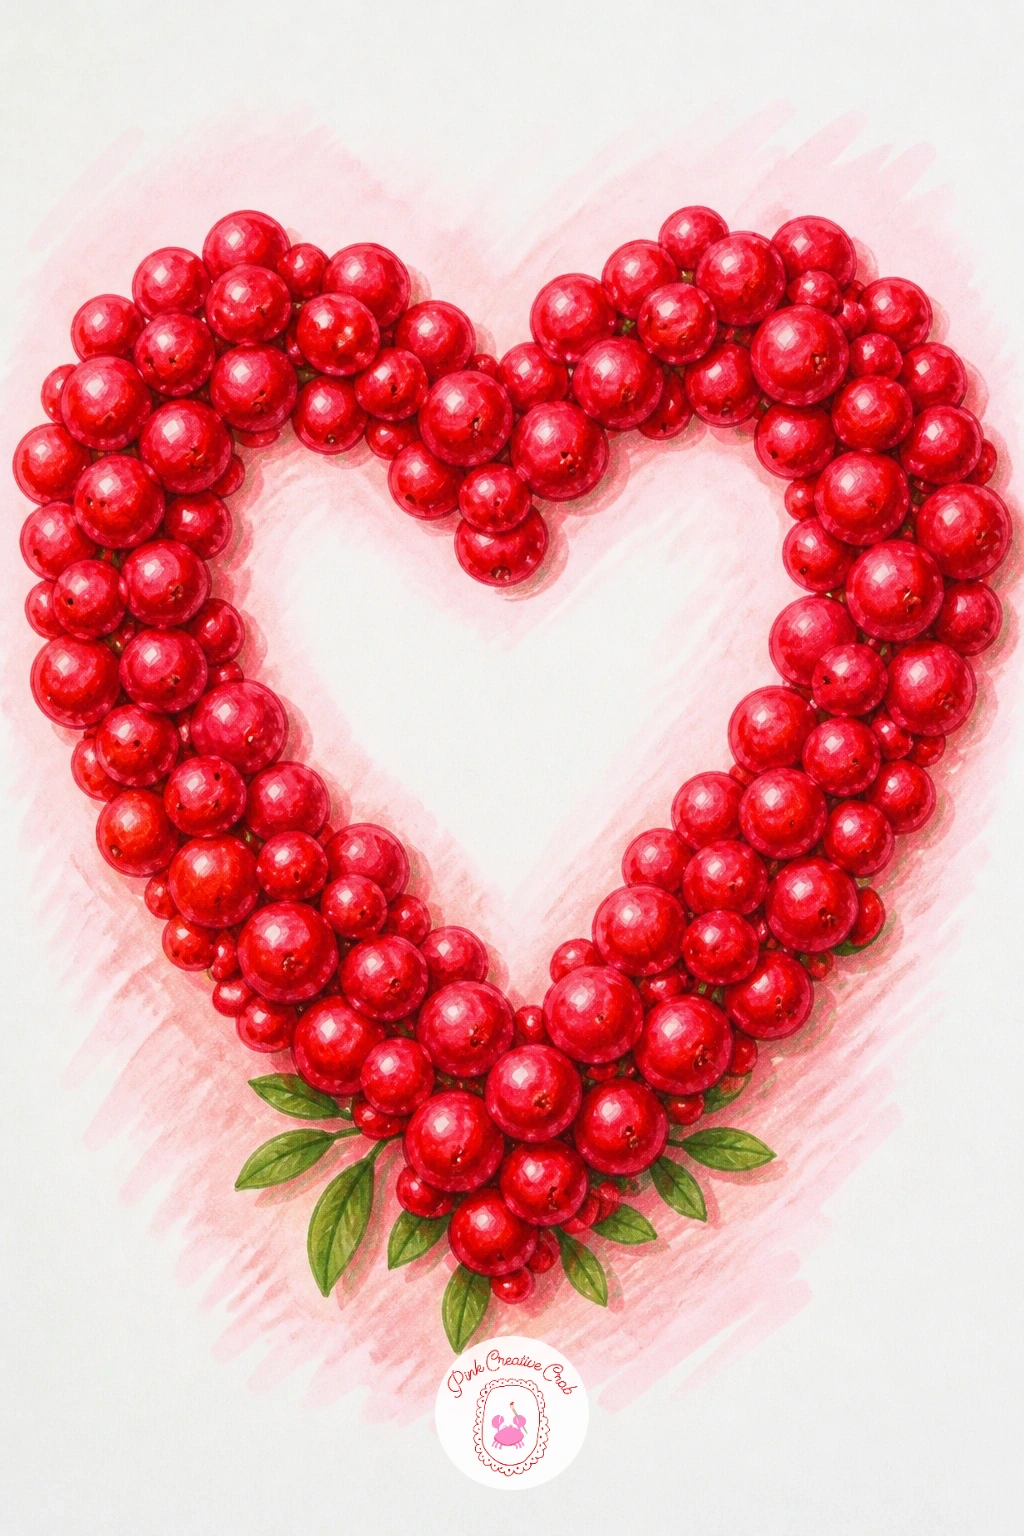
Bend the usual circle into a heart shaped wreath of red berries, a sweeter shape for anyone who wants their wreath to double as a Valentine-adjacent keepsake. Sketch the heart outline lightly first using two overlapping circles for the top lobes and straight guide lines tapering to the bottom point, which is far easier than trying to freehand a heart in one go.
Once the heart shape reads correctly, erase the guide lines and build the berries as small overlapping circles following that heart path, clustering three or four together rather than spacing each one alone. Color the berries in two reds, a bright cherry and a deeper maroon in the shadowed clusters, with a tiny white highlight dot on the brightest berries.
Hearts drawn freehand tend to go lopsided on one side, so check both lobes against each other before you commit to berries. A few sprigs of small green leaves tucked at the base balance all that red and keep it from feeling flat.
You Will Need
- two red markers
- white gel pen
- graphite pencil
- green pencil
Palette: Cherry Red, Deep Maroon, Leaf Green, Highlight White
Trace a heart cookie cutter or a found heart shape for your first guideline if freehand symmetry feels tricky; you can erase it completely once the berries are in.
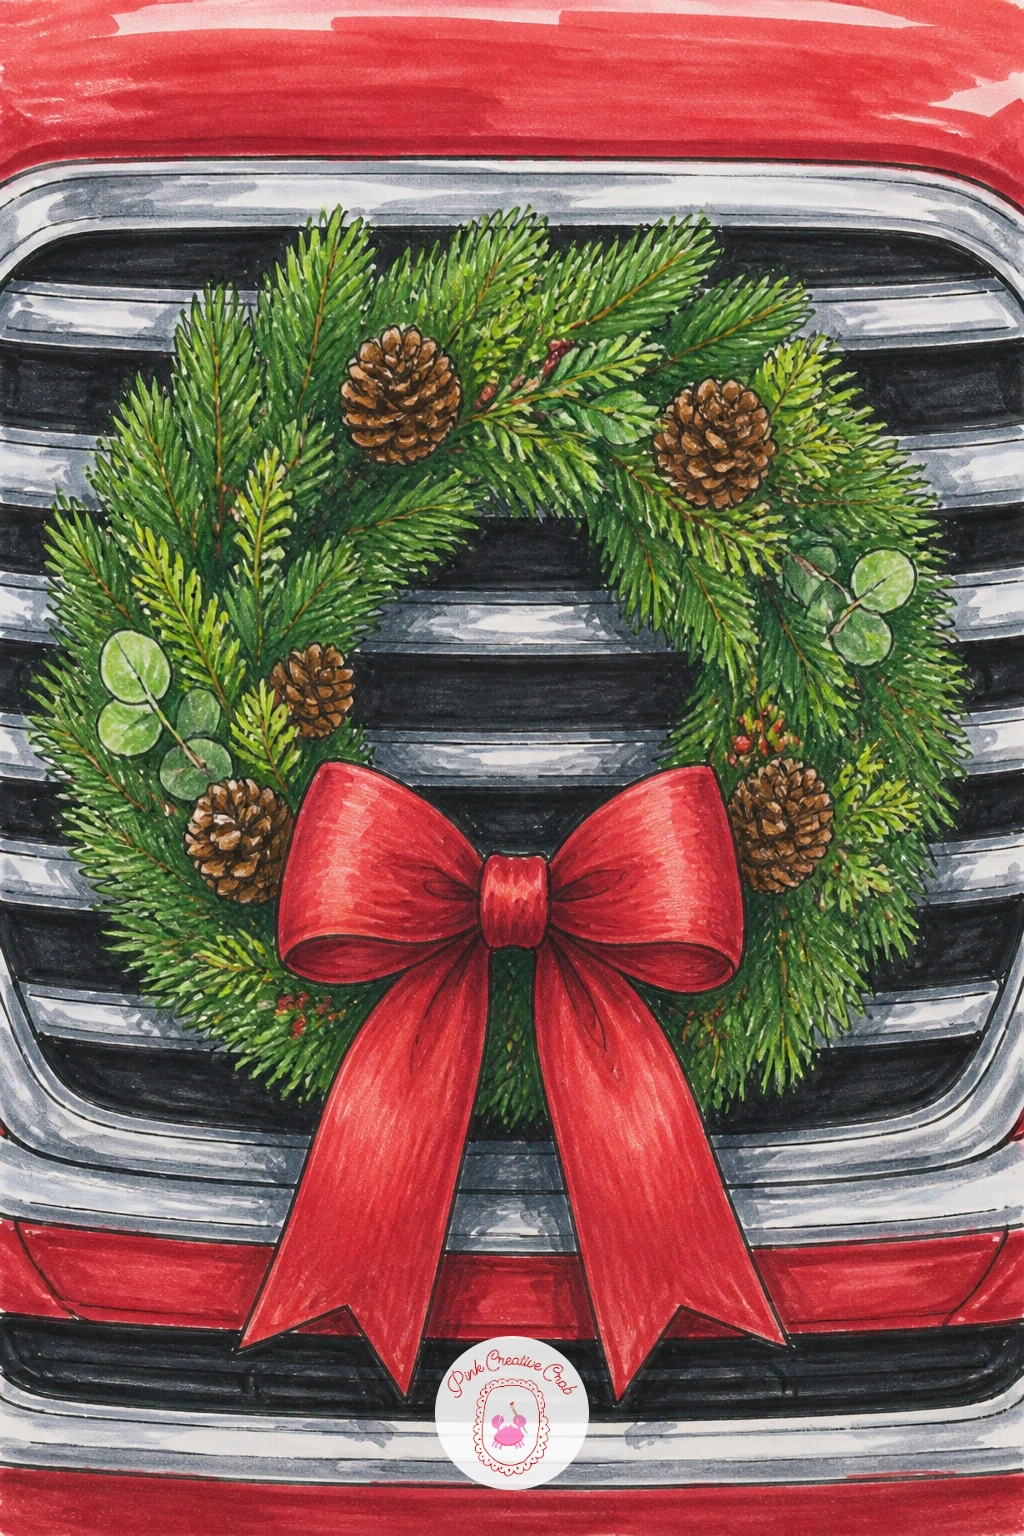
Have some fun with scale and draw a wreath on a car grille, a cheerful holiday card tradition rendered in colored pencil. Keep the car itself extremely simple: a few horizontal grille bars and the rounded top edge of a bumper is enough, drawn from a straight front-on angle so you avoid any tricky car perspective.
Center the wreath over the grille, slightly larger than you might expect, since that oversized scale is part of what makes this subject charming rather than accurate. Build it from mixed greenery with a single bold red bow, colored boldly enough to hold its own against the metallic grille bars.
Shade the grille bars in cool greys and a touch of blue, with one or two bars left almost white where the car’s paint would catch light, which sells the idea of polished metal without needing real reflections. If drawing a grille from scratch feels daunting, a single curved chrome line behind the wreath implies the car just as well.
You Will Need
- cool grey and blue pencils
- green and red markers
- graphite pencil
Palette: Chrome Grey, Cool Blue Grey, Wreath Green, Bow Red
Keep the grille bars perfectly horizontal and evenly spaced; any wobble reads instantly as a mistake since straight metal lines are what the eye expects.
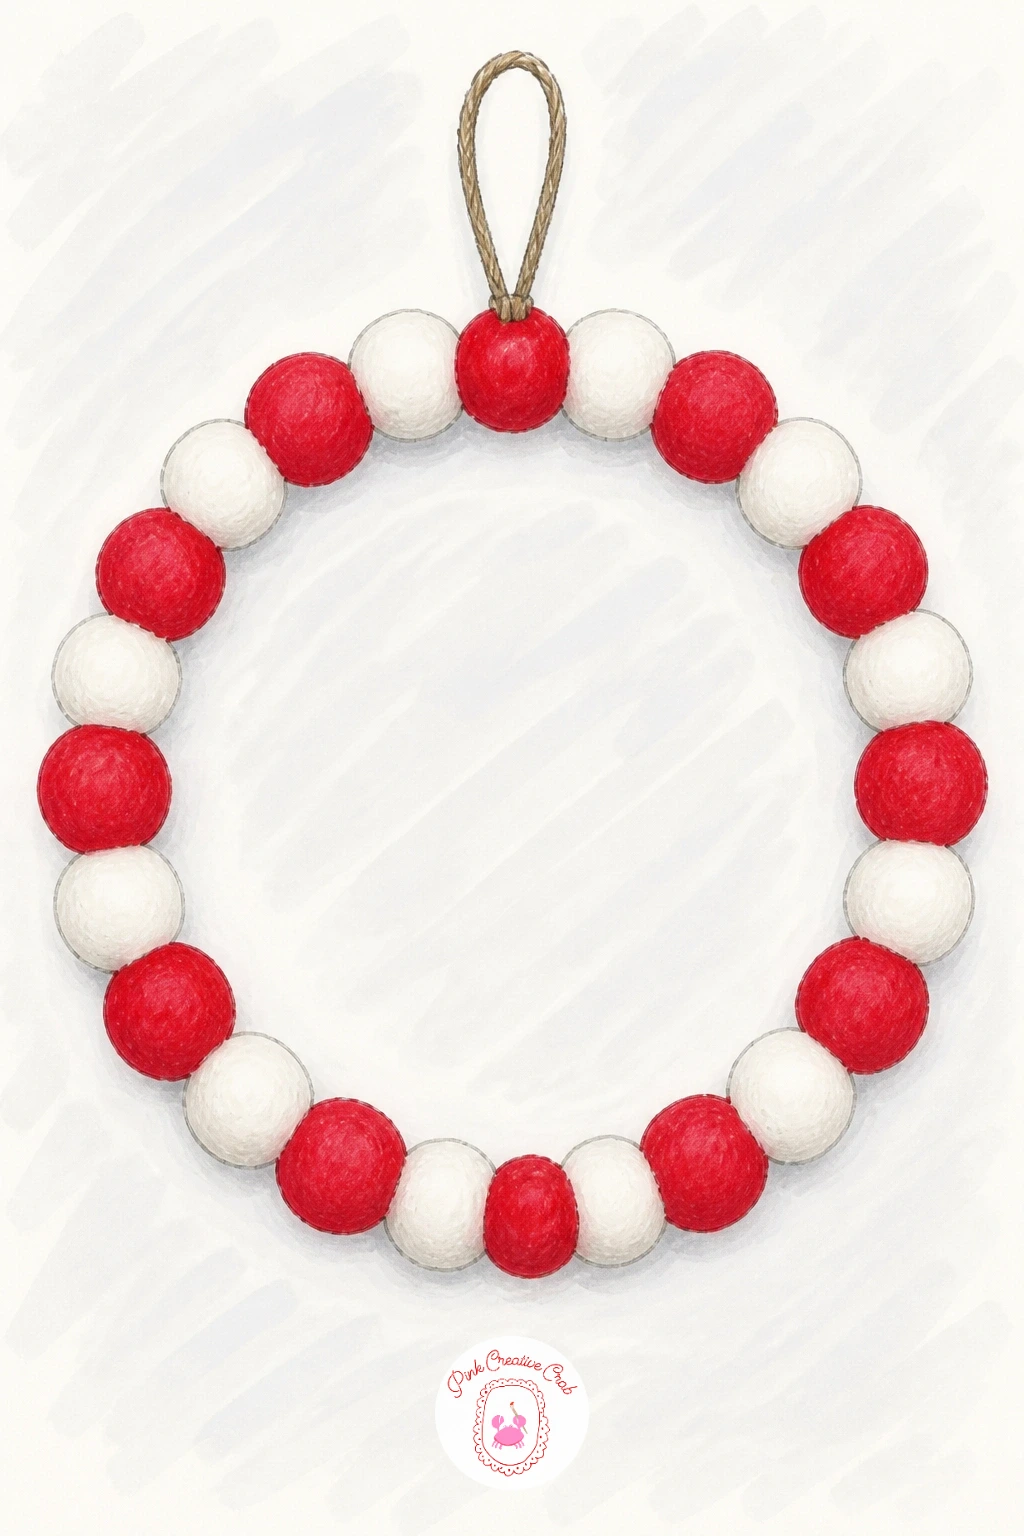
Return to a cozier texture with a red and white felt ball wreath, which is quicker than the pom pom version since felt balls are smooth rather than fuzzy. Draw a ring of overlapping perfect circles, alternating sizes slightly, then color them in a simple pattern: two red, one white, repeating around the ring.
Since felt has a soft matte surface rather than a shine, keep your marker coverage flat and even with no hard highlight dot, just a touch of a slightly darker shade along the lower edge of each ball to suggest where it meets its neighbor in shadow. That soft, shadowless flatness is the exact quality that separates felt from the glossy bauble wreath earlier in this list.
If the ring starts looking too mechanical with its repeating pattern, break the rhythm by swapping one ball out of sequence here and there. A plain jute string loop at the top, just two curved lines, is all the hanging detail this one needs.
You Will Need
- red and white markers (or leave white as paper)
- grey pencil for shading
- graphite pencil
Palette: Felt Red, Felt White, Shadow Grey, Jute Tan
Try this one in a slightly larger size than you’d first guess; bigger circles make the alternating red and white pattern easier to read at a glance.
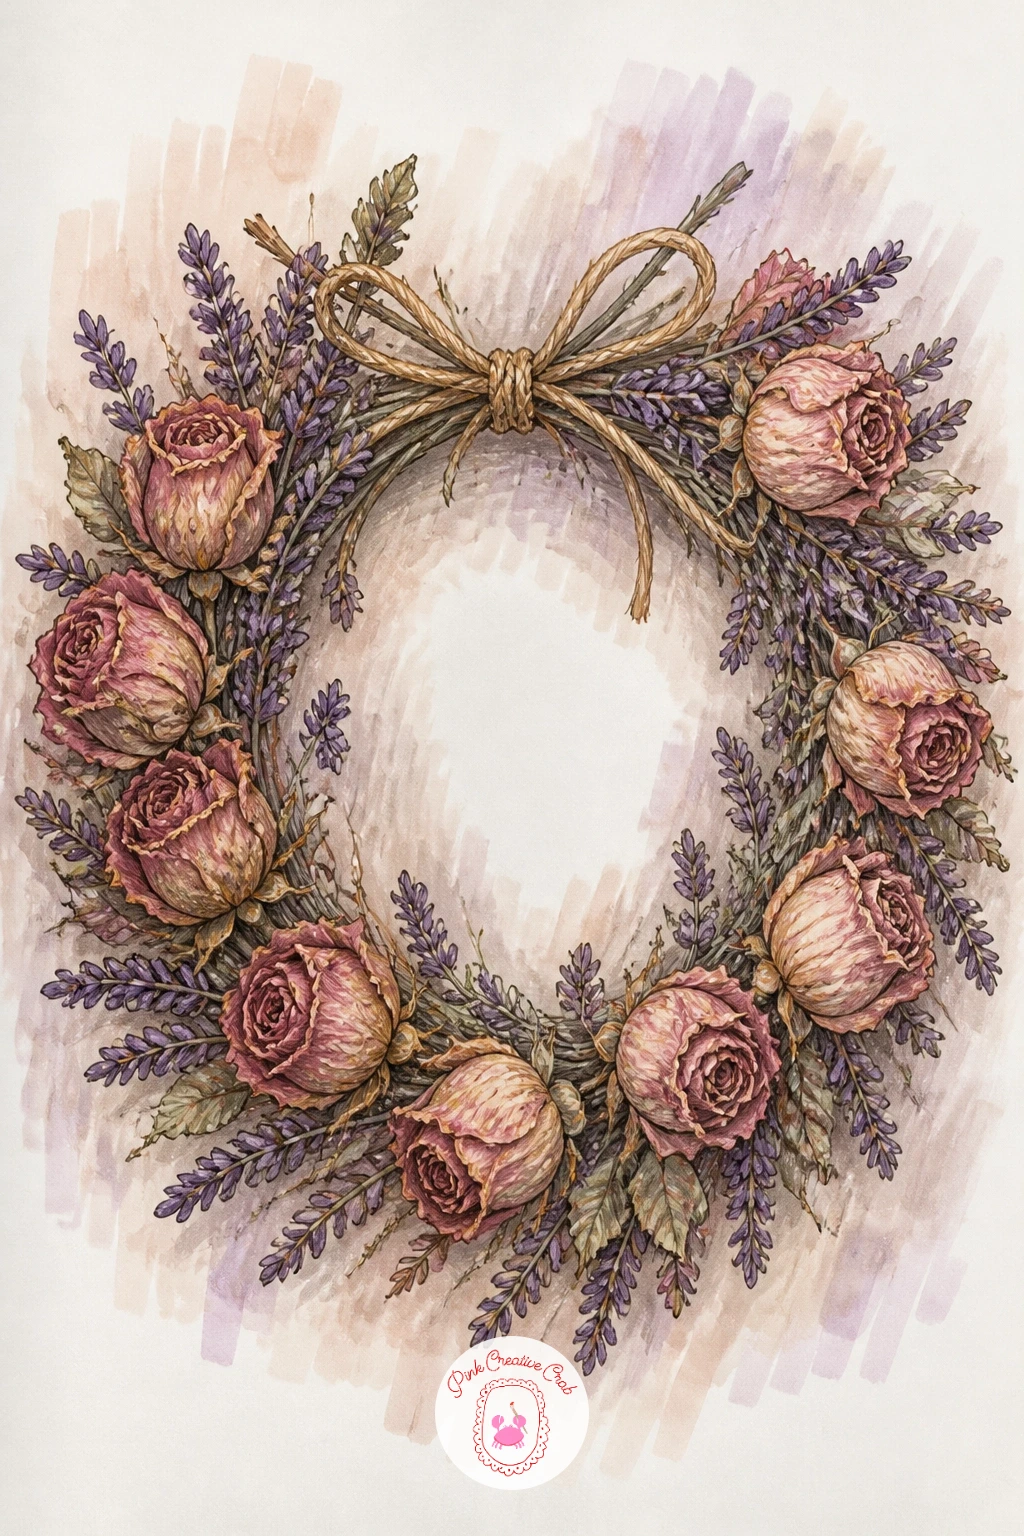
Slow down again for a dried rose and lavender wreath, which rewards patient layering more than any other idea here. Draw four or five rose shapes as tight spirals of overlapping curved petal lines, then fill the gaps between them with small lavender sprigs, each one a thin stem with a cluster of tiny oval buds along the top.
Color the roses in a faded dusty pink rather than a bright red, since dried roses lose their saturation, and add a few brown-edged petals at the outer layer where a real dried rose would be most faded. The lavender buds get a muted purple with a grey undertone, kept small and repetitive along each stem.
The spiral rose centers are the trickiest part; if yours looks like a scribble, slow down and draw each petal layer as a distinct curved line before adding the next one in rather than looping continuously. Tie the whole wreath together with loose tan twine, just two wavering lines crossing the base.
You Will Need
- dusty pink and brown pencils
- muted purple pencil
- graphite pencil
- fine marker for lavender stems
Palette: Dusty Pink, Faded Brown, Muted Purple, Twine Tan
Reference a real photo of a dried flower wreath before starting; the faded, slightly brittle color story is hard to invent from memory alone.
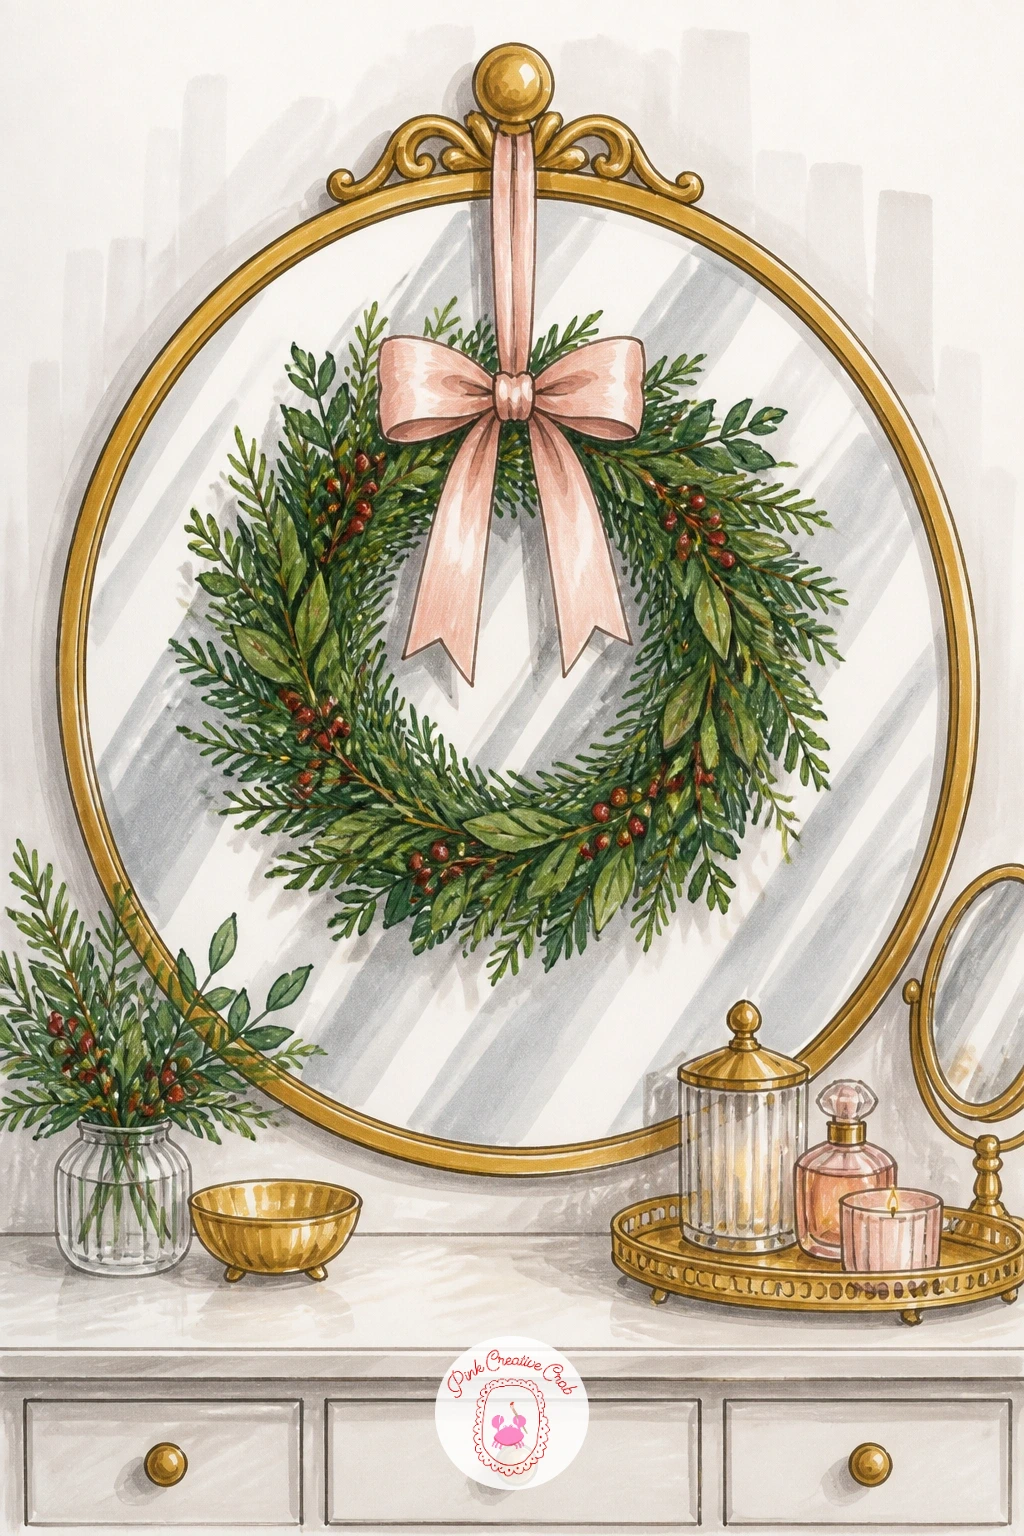
Carry the wreath into an interior scene with one hung on a mirror over a vanity, a nice chance to practice drawing a reflective surface without much fuss. Draw the mirror as a simple oval or round frame, then the wreath hanging from its top edge, overlapping the frame itself slightly so it reads as resting against it rather than floating in front.
Suggest the mirror’s reflective surface with one or two soft diagonal streaks of pale grey marker across the glass area, rather than trying to draw an actual reflected room, which keeps the scene simple and modern. The wreath itself can be a mixed greenery ring with a blush bow, echoing the eucalyptus wreath earlier but smaller in scale since it shares the page with the mirror frame.
A common slip here is making the mirror frame too thick, which crowds out the wreath. Keep the frame line thin and let the wreath be the larger, busier shape on the page.
A perfume bottle or candle silhouette at the base of the vanity, just a simple outline, adds a lived-in detail without extra color work.
You Will Need
- pale grey marker
- green and blush pencils
- graphite pencil
Palette: Mirror Grey, Vanity Green, Blush Bow, Frame Gold
Keep the reflective streaks on the mirror diagonal and few; more than two or three starts to look like cracked glass instead of a shine.
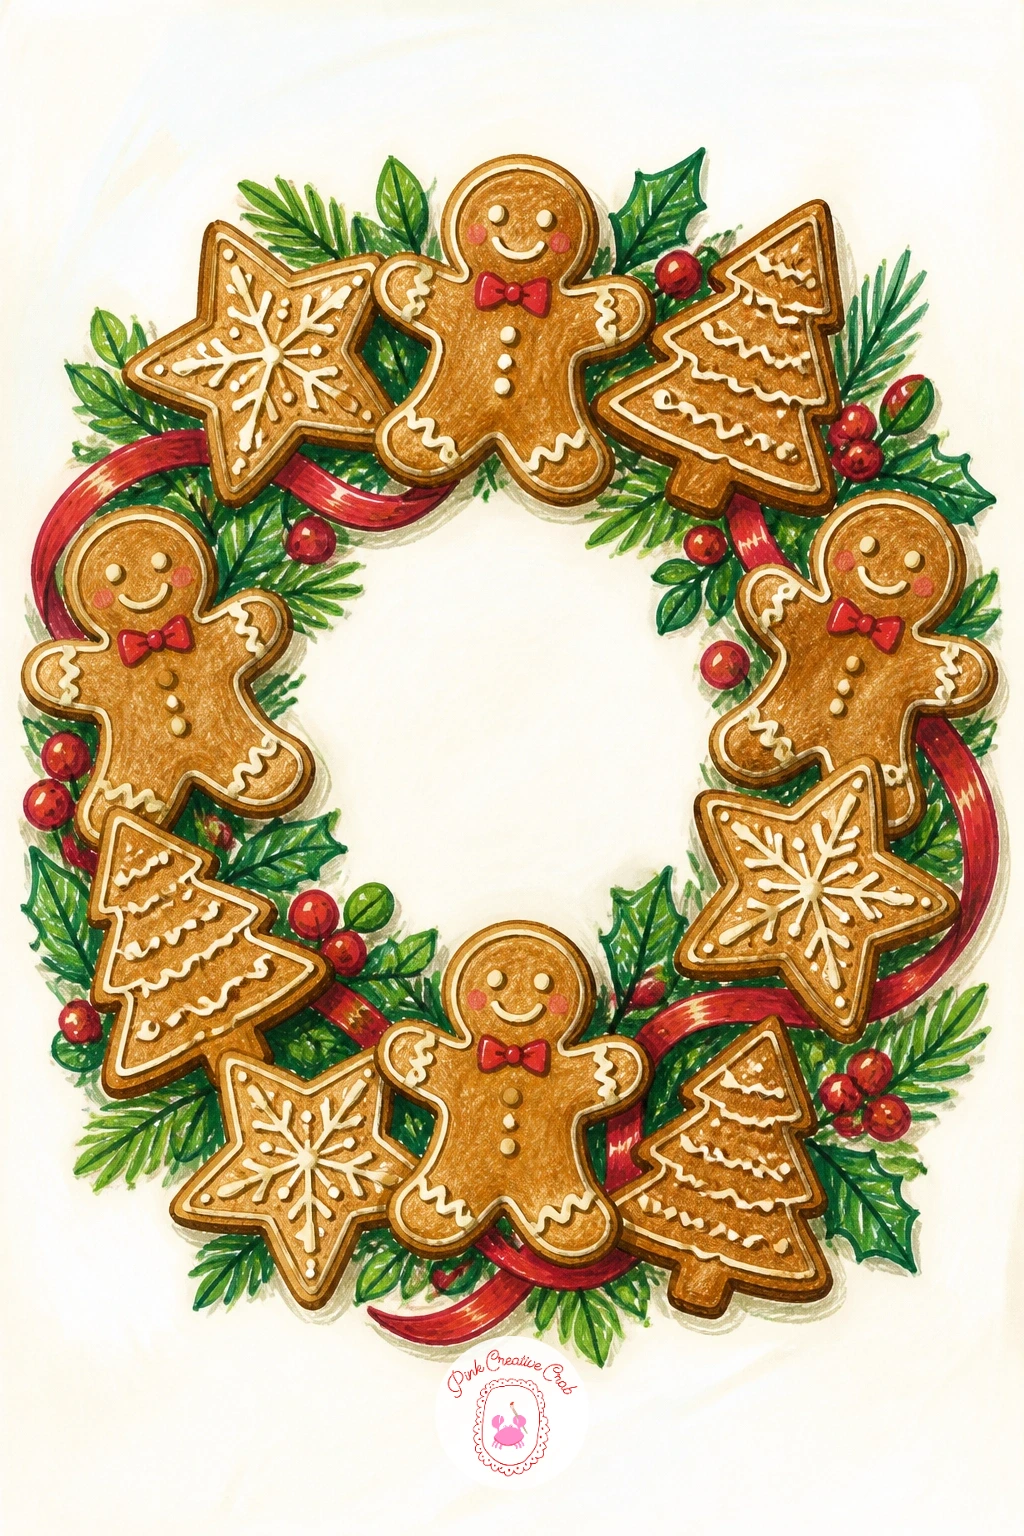
Turn to something playful with a gingerbread cookie wreath, built from simple cookie cutter shapes rather than realistic baking. Draw four or five classic gingerbread person outlines arranged in a ring, arms and legs overlapping their neighbors slightly, then fill the gaps with a couple of star and tree cookie shapes.
Color every cookie in the same warm gingerbread brown so the wreath reads as one cohesive bake, then add the decorating details in white gel pen once the marker is fully dry: dotted buttons, a zigzag smile, simple icing swirls along the edges of each shape. This is the one detail that takes a flat brown shape and turns it into a cookie.
If the white icing lines smear into wet marker, you have moved too fast; wait the extra few minutes for alcohol marker to cure fully before going over it with gel pen. A thin red ribbon woven between the cookies ties the ring together visually.
You Will Need
- brown alcohol marker
- white gel pen
- red marker for ribbon
- graphite pencil
Palette: Gingerbread Brown, Icing White, Ribbon Red, Dark Brown Shadow
Vary the cookie poses, some arms up, some down, rather than drawing identical gingerbread figures; small variety keeps the repeating shape from feeling stamped.
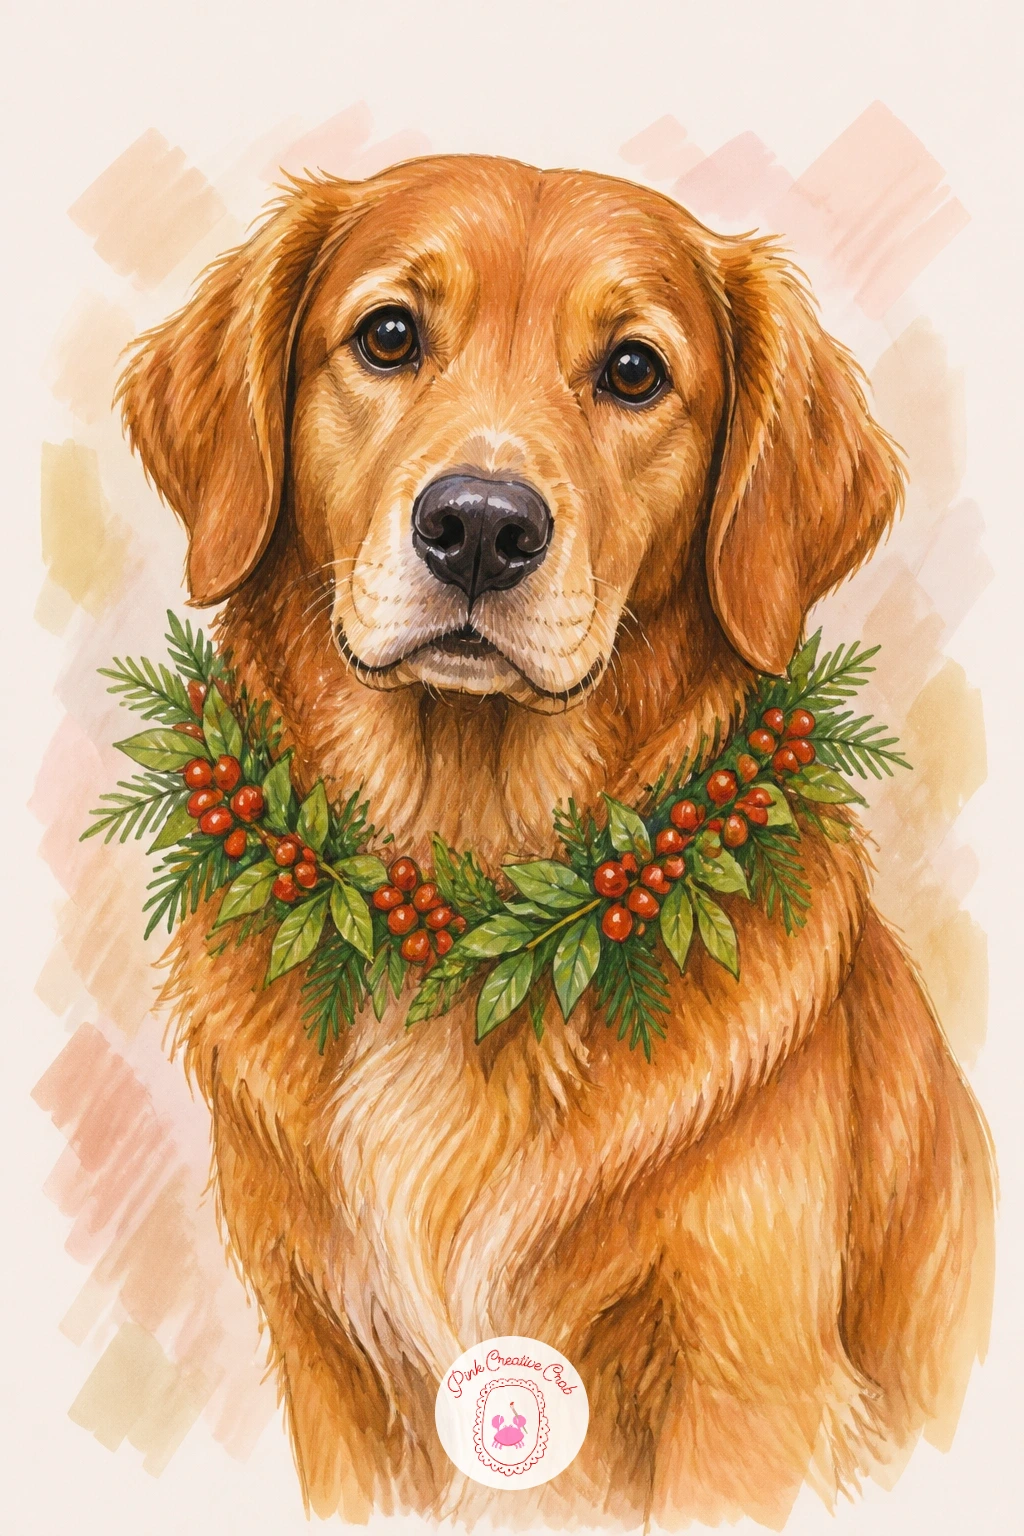
Give a dog a starring role with a wreath drawn as its collar, a sweet pairing that works well if you enjoyed the dog pencil drawing ideas for beginners. Start with the dog’s head and the top of its chest in simple rounded shapes, keeping the breed generic unless you are working from a reference photo, then wrap a small wreath ring around the neck where a collar would sit.
Build the fur first in short layered pencil strokes following the direction it would actually grow, lightest at the top of the head and darker under the chin and ears where shadow naturally falls. The wreath collar stays simple, mixed greenery with a few red berries, since the dog’s face is doing the emotional work in this piece.
Fur drawn in one flat tone looks like felt rather than fur, so vary your pencil pressure as you layer strokes, pressing harder in shadow areas and lighter where the fur catches light. Swap a plain bandana-style wreath band for the full ring if a complete circle around a photographed dog’s neck looks awkward in your reference.
You Will Need
- brown or black pencils for fur
- green and red markers
- graphite pencil
- blending stump
Palette: Warm Fur Brown, Fur Shadow, Collar Green, Berry Red
Work from one clear reference photo rather than imagining the dog’s fur direction; guessed fur strokes almost always end up looking too uniform.
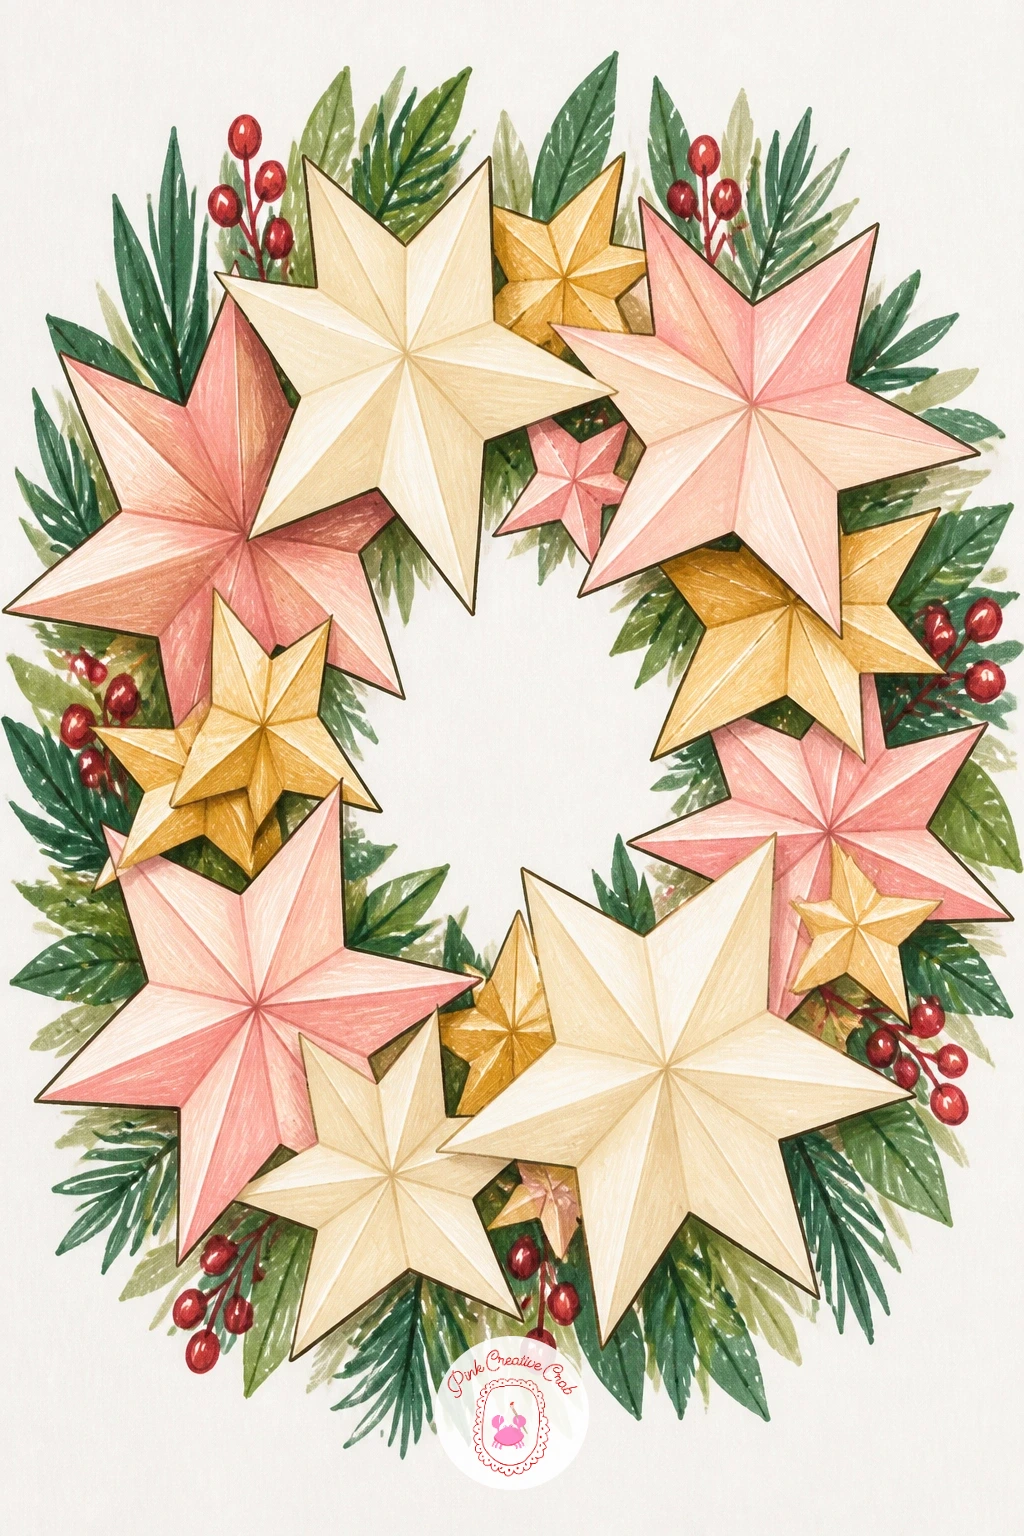
Build a wreath of paper stars next, a graphic, modern shape that is mostly about confident straight lines. Draw six or seven five-pointed stars in a ring, overlapping their points slightly, varying each star’s size and rotation so none sit at the exact same angle.
Color the stars in a soft palette of cream, pale gold and blush rather than bright primary colors, which keeps the modern decor feel rather than tipping into a kids’ craft look. Add a single pencil fold line down the center of each star to suggest the crease of folded paper, since a perfectly flat star shape reads as sticker rather than paper.
Uneven star points are the usual stumble; lightly pencil a five-point guide circle first, marking even angles around it before you connect the points, rather than freehanding the whole star. If straight stars feel stressful, rounded five-point stars with slightly curved edges are an easy, forgiving substitute.
You Will Need
- cream and gold markers
- blush pencil
- graphite pencil
- ruler or protractor (optional)
Palette: Paper Cream, Pale Gold, Soft Blush, Fold Shadow Grey
Try layering two overlapping stars in different sizes at a few points around the ring; the layering reads as more dimensional than single flat stars alone.
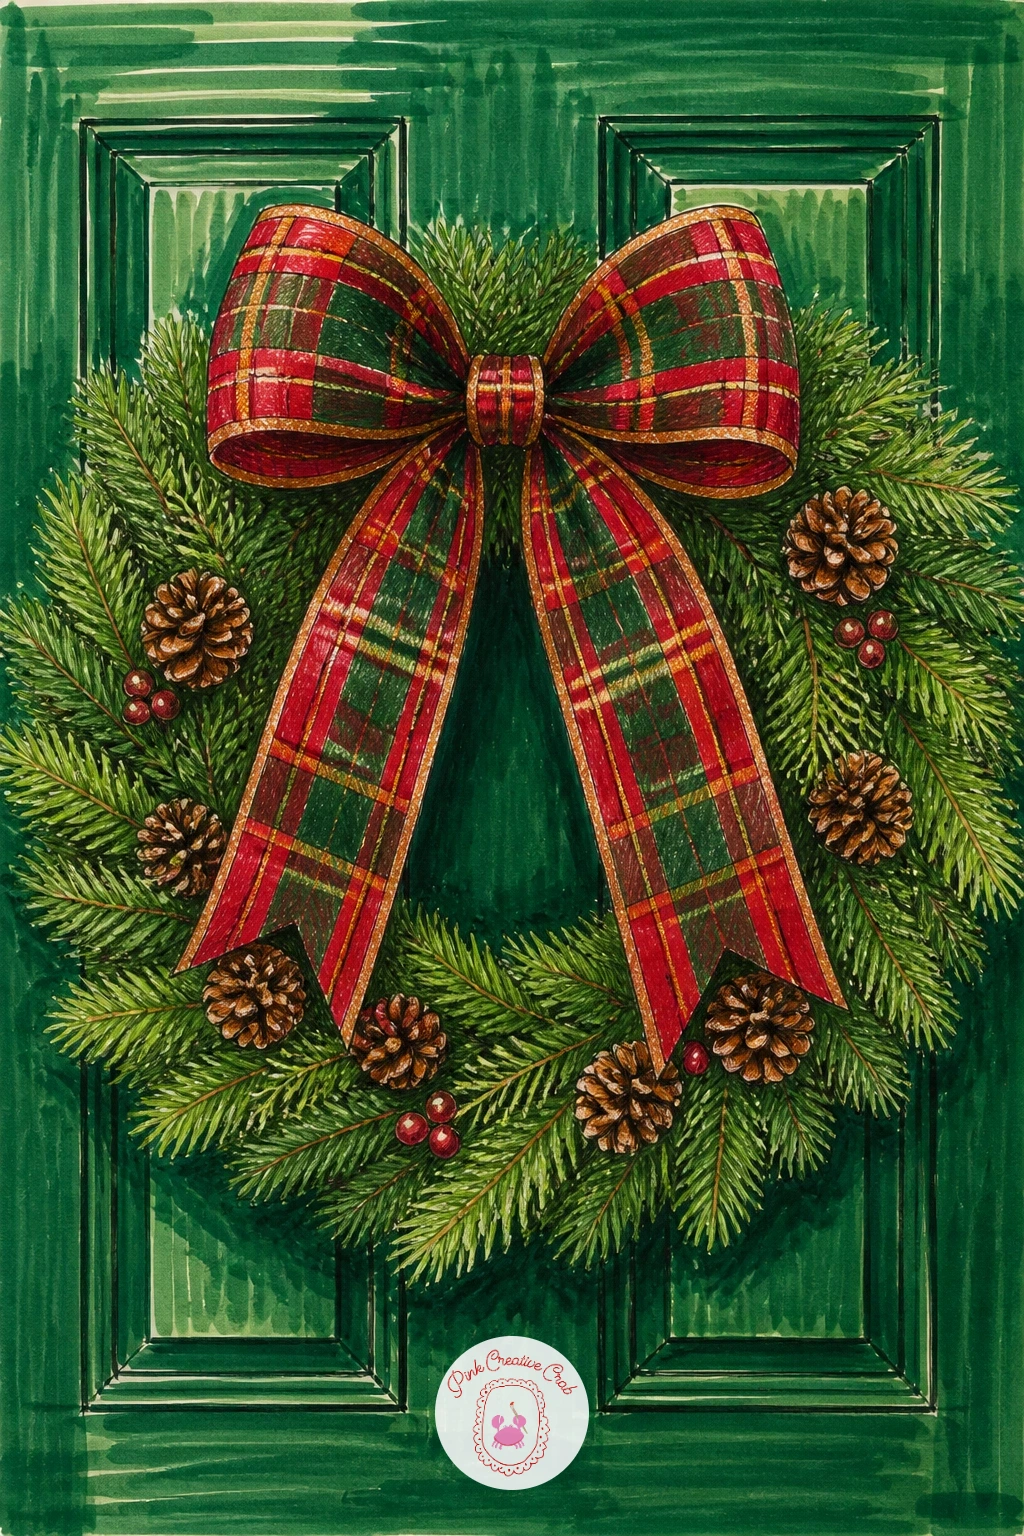
Bring in pattern with a tartan ribbon wreath on a green door, where the ribbon plaid is the real technical challenge. Build the wreath ring first in simple mixed pine greenery, then draw the ribbon as a wide looping bow with long trailing tails crossing over the greenery at the bottom.
Plaid falls apart fast if you rush it, so pencil the ribbon’s grid lightly first: evenly spaced vertical lines, then evenly spaced horizontal lines crossing them, before adding any color. Color the background squares in red, then layer thin green and gold stripe lines on top of the dry red, letting the stripes cross the folds of the ribbon so they bend where the fabric bends rather than staying perfectly straight.
A green door behind the wreath, just a flat marker fill with the faint suggestion of a panel line, gives the whole piece somewhere to sit without stealing attention from the ribbon. If a full tartan grid feels like too much, a simpler buffalo check of just two colors reads as “plaid” almost as well.
You Will Need
- red and green markers
- gold and black fine pencils
- graphite pencil
- ruler for grid lines
Palette: Tartan Red, Tartan Green, Gold Stripe, Door Green
Draw the grid lines so they curve and bend across the bow’s folds instead of staying straight; that bend is what makes ribbon look like fabric and not wallpaper.
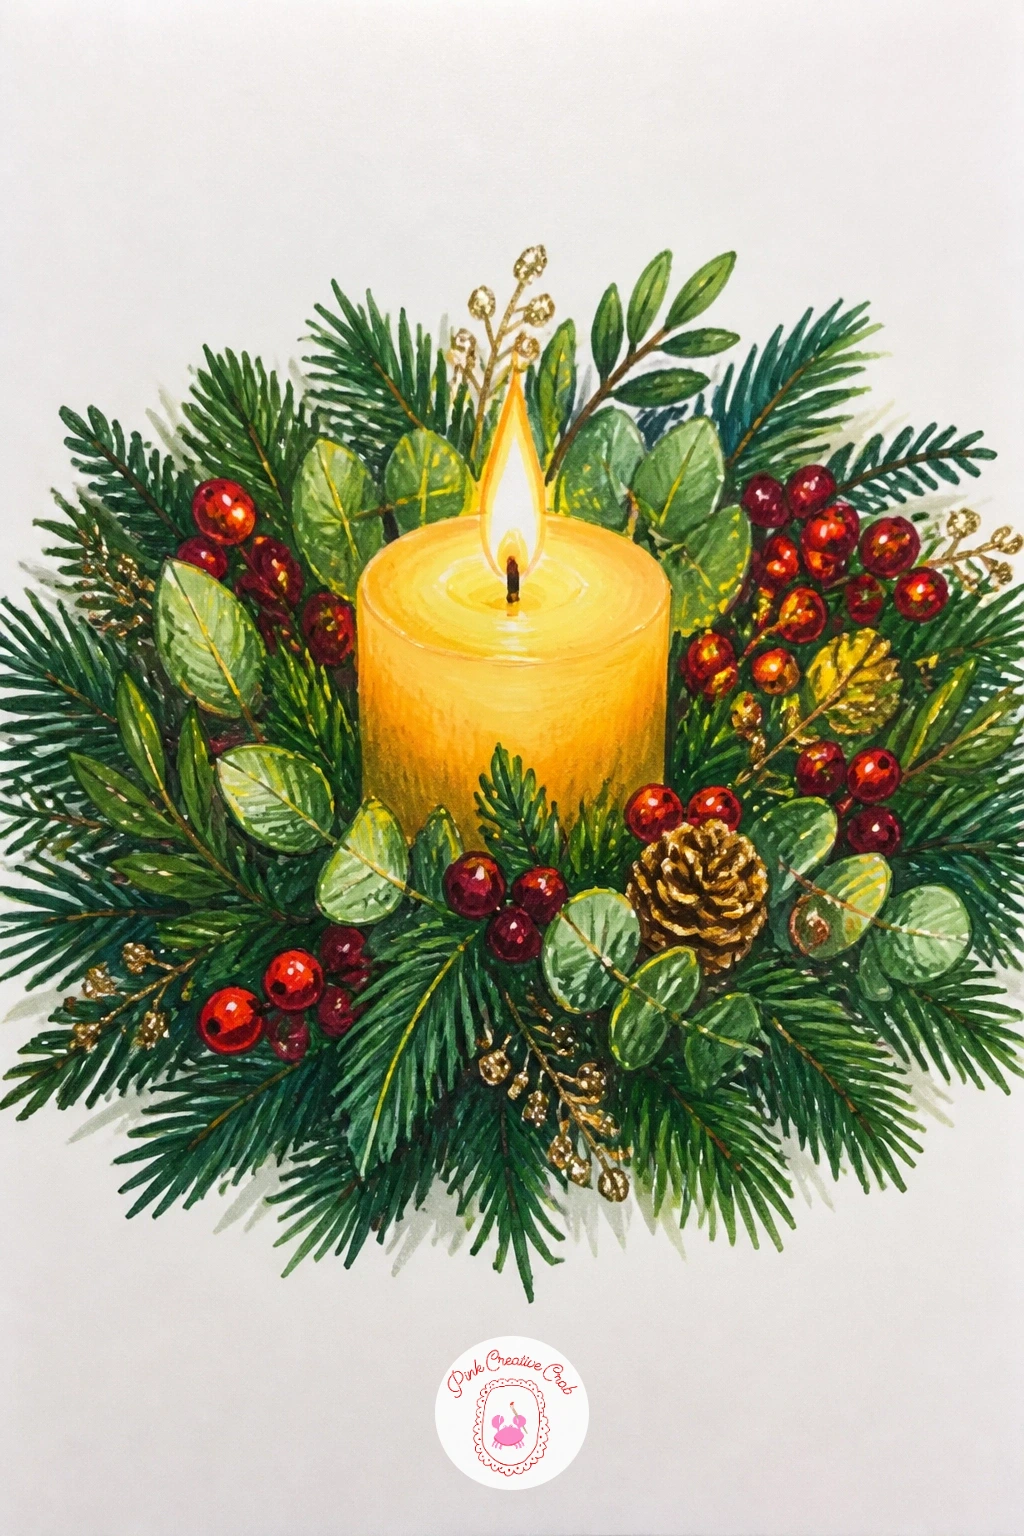
Shrink the wreath down to tabletop scale with one wrapped around a candle for a dinner table centerpiece. Draw the candle first as a simple tall cylinder with a small flame shape at the top, then build a low, flat wreath ring resting around its base rather than hanging vertically like the others on this list.
Light changes everything here: since the flame is the brightest point in the scene, keep your darkest pencil shading on the side of the wreath farthest from it, and add a soft warm glow of yellow-orange marker radiating just slightly onto the nearest greenery. That single light source is what separates a convincing candlelit scene from a wreath with a candle simply placed next to it.
Overworking the flame is the easy mistake; keep it as two or three simple teardrop shapes in yellow and orange rather than adding too much detail, since a candle flame is mostly about soft light, not hard edges. A few small gold ornaments tucked into the greenery pick up that candlelight nicely.
You Will Need
- yellow and orange markers
- green and gold pencils
- graphite pencil
Palette: Flame Yellow, Flame Orange, Table Green, Candle Cream
Add a soft yellow glow halo around the flame with a blending marker before the greenery is fully colored in, so the warm light looks like it is actually touching the leaves.
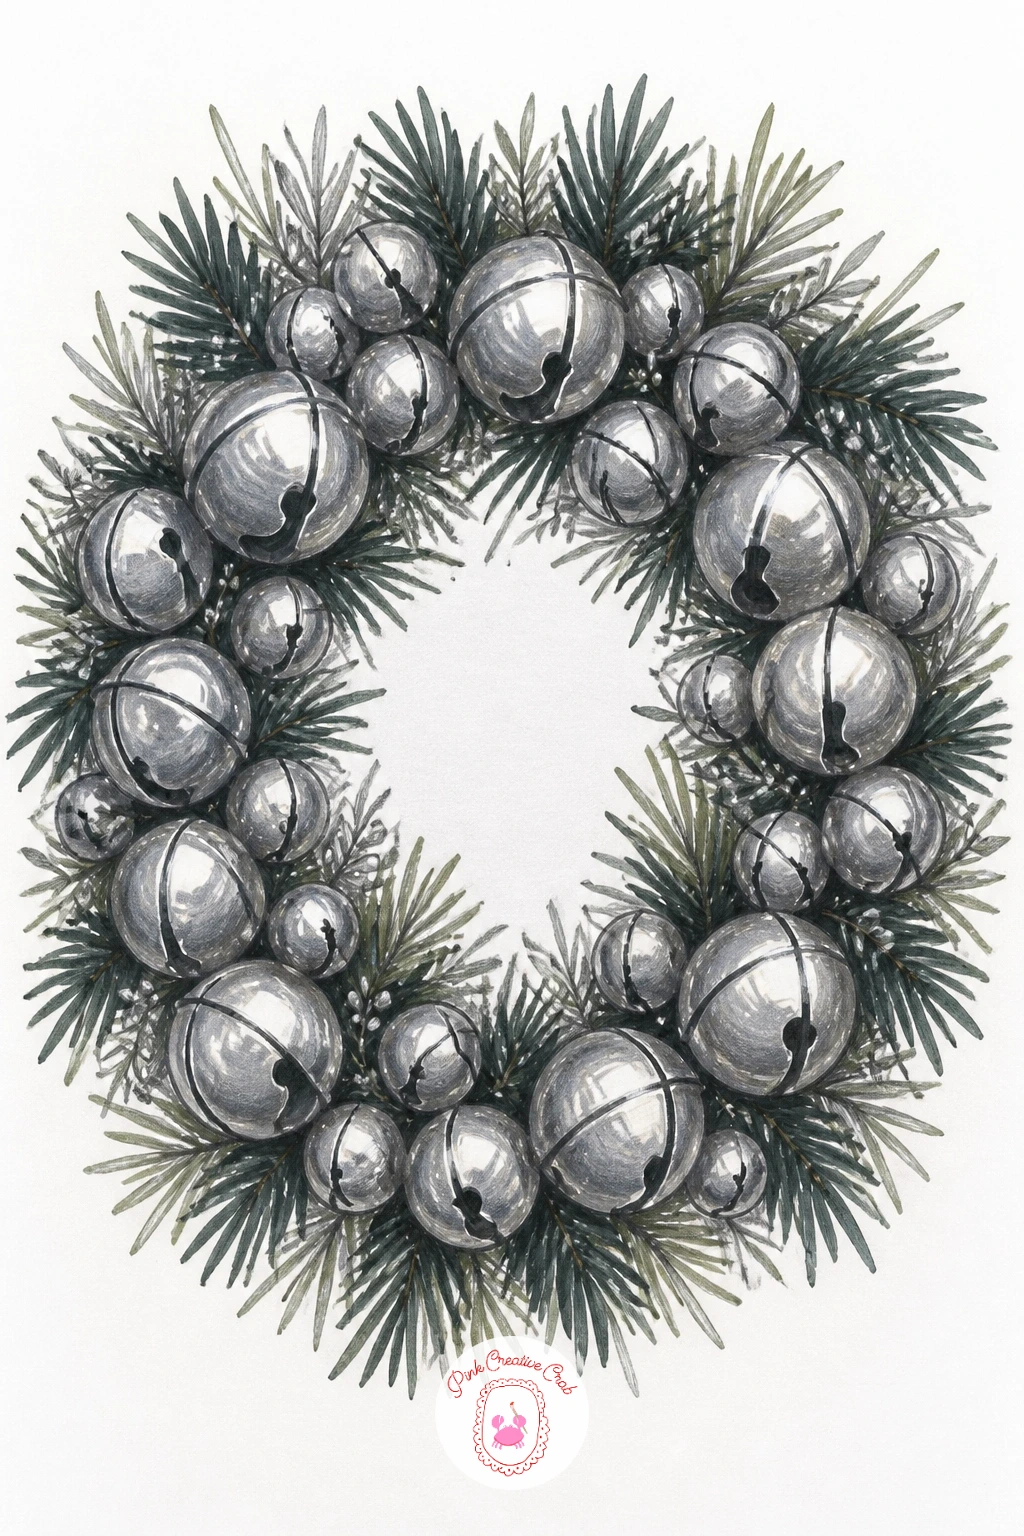
Go for shine with a silver bell wreath, a good subject for practicing how metal catches light differently from fabric or foliage. Draw five or six bell shapes in a ring, each one a simple rounded dome with a small loop at the top and a short clapper line hanging inside.
Shade each bell in cool silver-grey, keeping a clean streak of untouched white paper down one side of every bell to act as the shine, and a darker grey-blue along the opposite edge for the shadow side. Keeping that highlight streak in exactly the same relative spot on every bell, rather than scattering it randomly, is what makes the whole wreath look lit consistently.
Flat grey bells with no highlight at all look like stones rather than metal, so do not skip that white streak even if it feels like a small detail. A sprig or two of pine tucked behind the bells, kept dark and muted, makes the silver pop by contrast.
You Will Need
- silver-grey and blue-grey pencils
- dark green pencil
- graphite pencil
- white gel pen
Palette: Silver Grey, Blue Grey Shadow, Bell Shine White, Muted Pine
Add one tiny white gel pen dot right in the middle of each highlight streak for a sharper metallic sparkle once the pencil shading is finished.
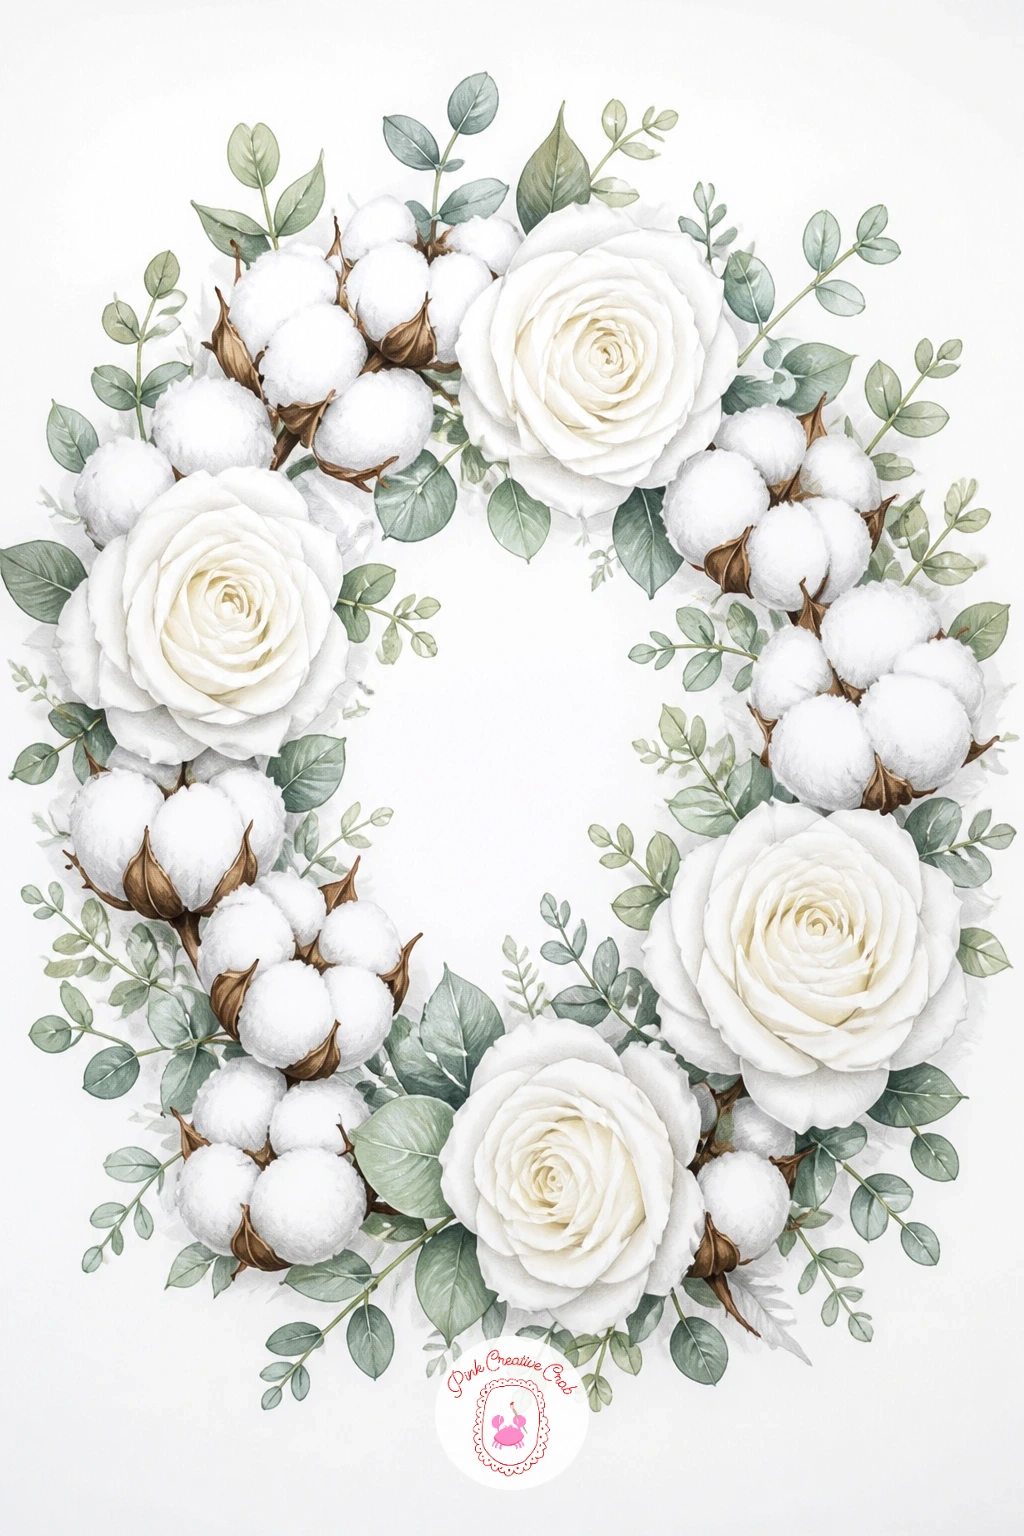
Return to something textural and soft with a cotton boll and white rose wreath, which stays almost entirely in a single pale color family. Draw the cotton bolls as fluffy irregular puffs, a rough cloud outline rather than a clean circle, and the roses as tight spiral layers similar to the earlier dried rose idea but kept fuller and less faded.
Since nearly everything here is white or cream, the whole piece depends on shadow rather than color to read as three-dimensional. Use a light grey pencil to shade the undersides of every puff and petal, keeping your pressure soft so the grey stays a whisper rather than a hard line.
The risk with an all-white subject is flatness, so check your shadows are consistent in direction across both the cotton and the roses before calling it finished. A few stems of pale green eucalyptus tucked in give the eye one small color note to rest on.
You Will Need
- light grey pencil
- soft green pencil
- graphite pencil
- white gel pen for final puff edges
Palette: Cotton White, Soft Shadow Grey, Rose Cream, Pale Eucalyptus
Photograph your sketch in black and white on your phone before adding final highlights; it is the fastest way to check your shadow placement on an all-white subject.
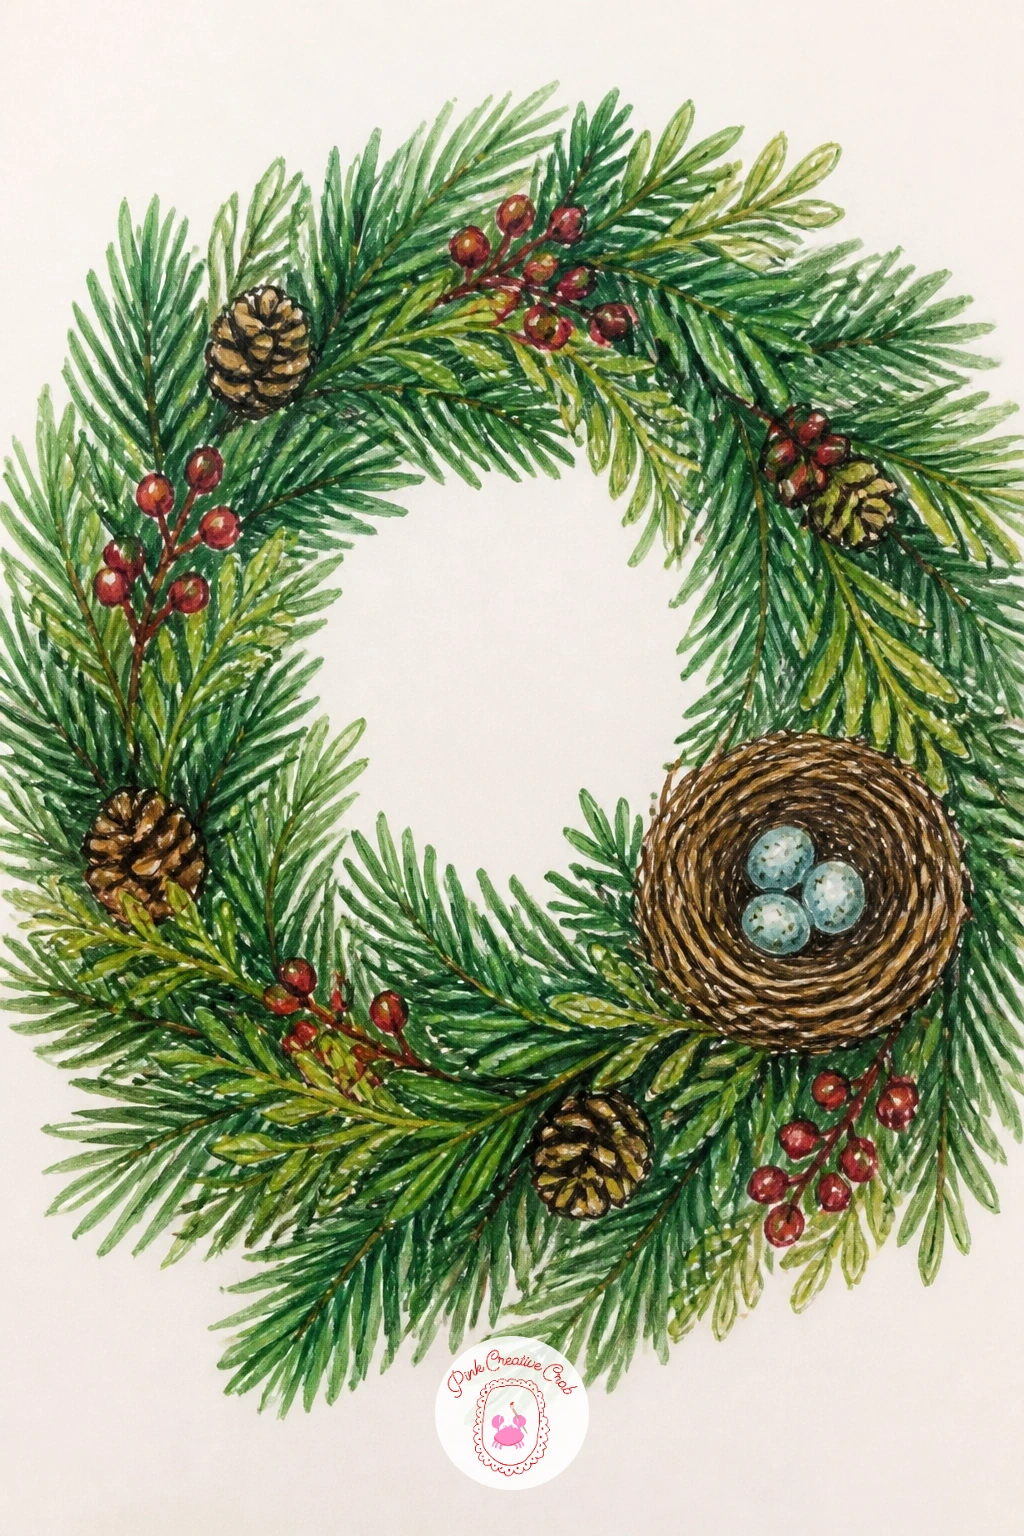
Add a small story to a plain greenery wreath by tucking a tiny bird nest into one side of it. Build the main ring first in simple mixed pine and berry, kept a little looser and sparser than your other wreaths on one side, which leaves room for the nest to sit convincingly into a gap rather than on top of the greenery.
Draw the nest itself as a loosely woven oval of short overlapping curved lines in two or three browns, with two or three small pale blue egg shapes nestled inside, each with a single white highlight dot. Keeping the egg shapes simple and few is what keeps this detail charming rather than busy.
The nest can look like a tangled scribble if the curved lines are too uniform in length, so vary them, some short, some long, crossing at different angles. If blue eggs feel too specific, plain speckled cream eggs work just as well and are a touch easier to color convincingly.
You Will Need
- brown pencils in two shades
- pale blue or cream pencil
- green marker
- graphite pencil
Palette: Nest Brown, Dark Twig Brown, Egg Blue, Wreath Green
Draw the nest slightly tucked behind a few greenery sprigs rather than fully exposed; a partly hidden nest reads as more natural and found.
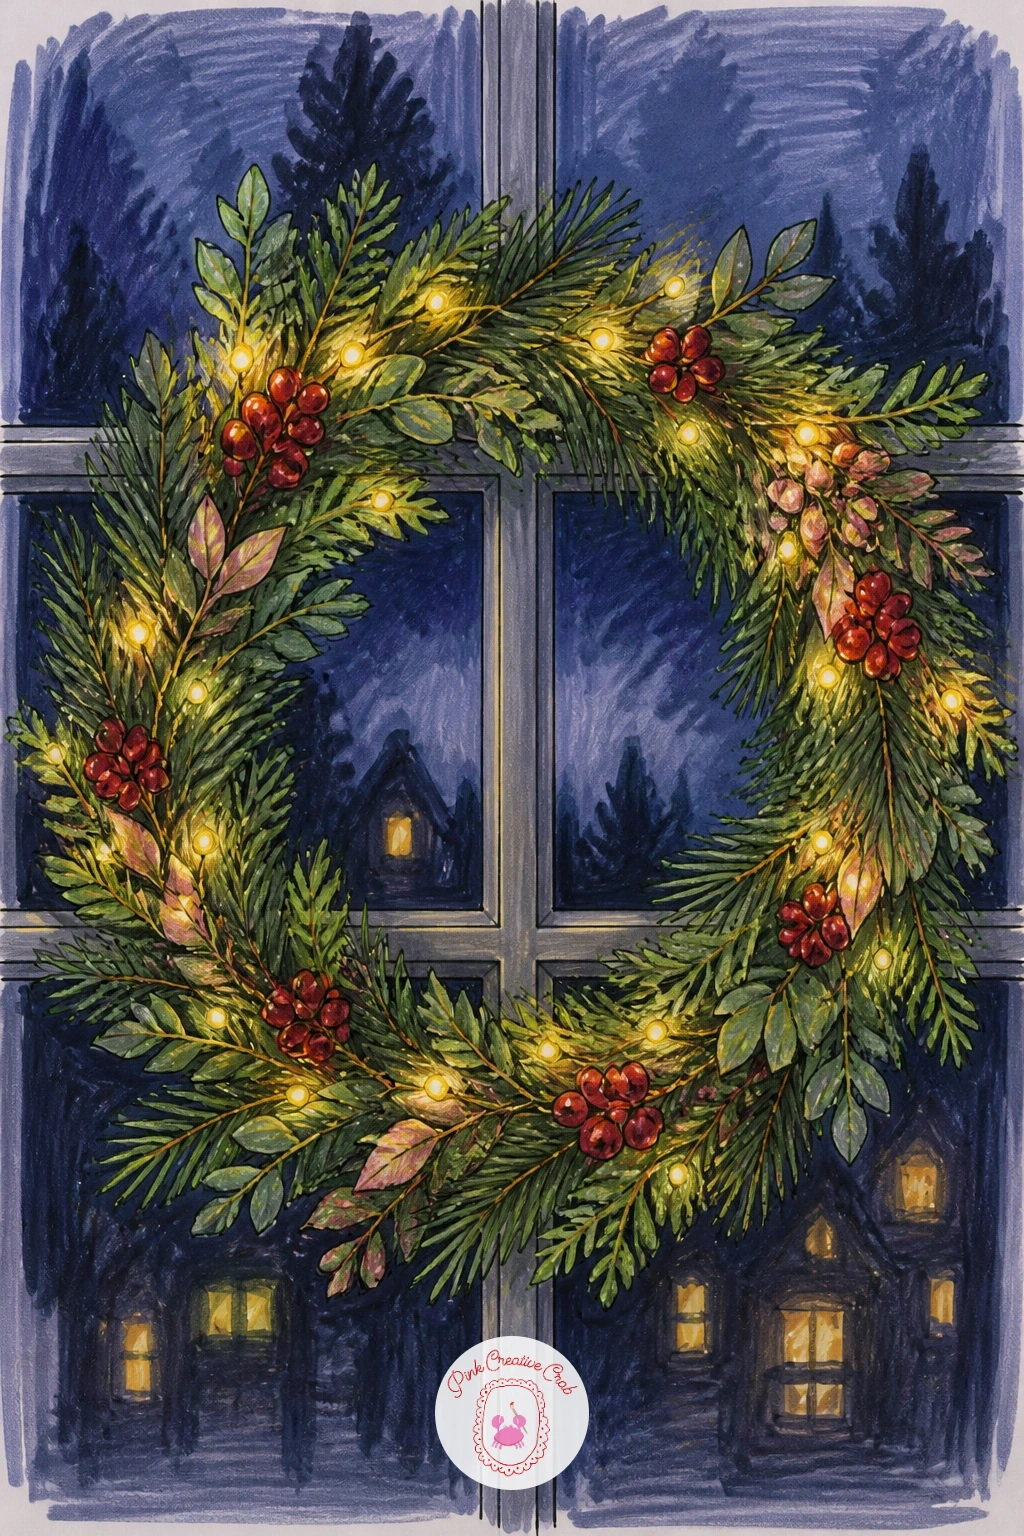
Light things up with a fairy light wreath seen glowing in a window at dusk. Draw the wreath ring as simple mixed greenery first, then thread a single continuous wire line through it in pencil, marking small bulb shapes at even intervals along its length.
The glow is the whole point here, so color each bulb with a soft yellow marker, then add a slightly larger, very light circle of yellow around each one to suggest the light spilling outward, blending its edge so it fades rather than stops sharply. A dark blue-grey background behind the window, standing in for evening sky, makes every one of those small glows look far brighter by contrast.
If the glow circles end up with hard edges, go back over them with a blending marker or a slightly damp fingertip on the colored pencil version to soften the transition. Keep the bulb count modest, ten to twelve is plenty, since too many competing glows start to cancel each other out visually.
You Will Need
- yellow marker
- blending marker or colorless blender
- dark blue-grey marker for background
- graphite pencil
Palette: Light Glow Yellow, Warm Bulb Gold, Evening Blue Grey, Wreath Green
Work the background dark blue-grey in first and let it dry completely before adding the glow circles, so the yellow sits cleanly on top instead of muddying into it.
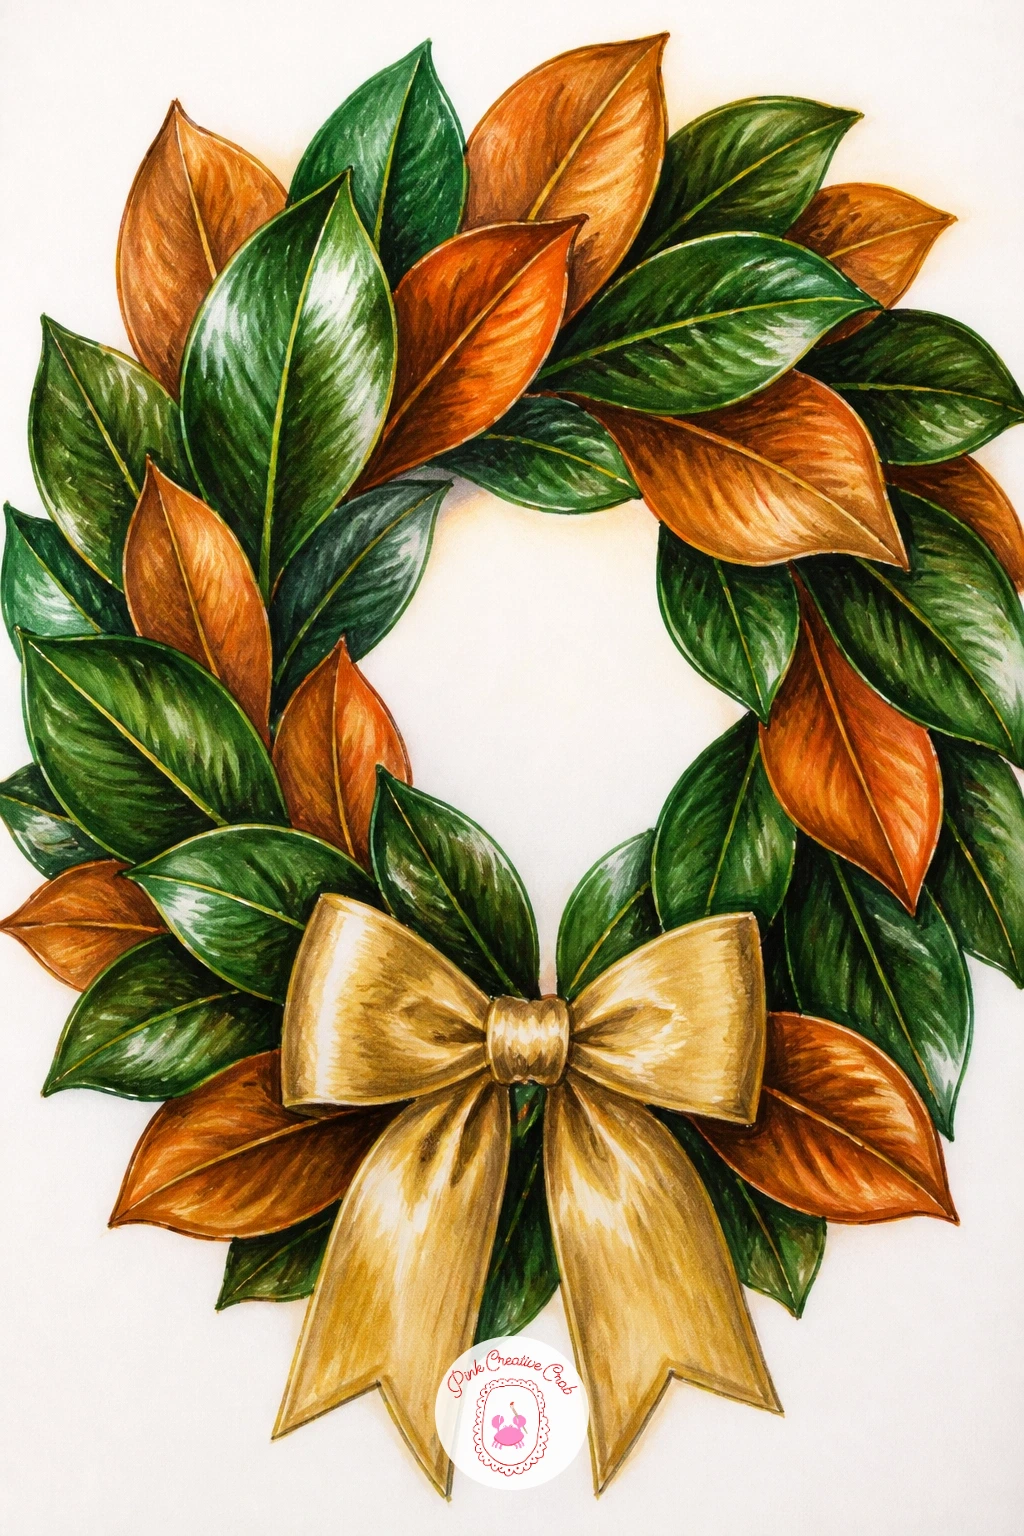
Close out the foliage ideas with a magnolia leaf wreath, known for its glossy two-tone leaves that make a satisfying marker exercise. Draw the leaves as elongated ovals with a pointed tip, layered around the ring so each one overlaps its neighbor by about a third, which is the trick that keeps a magnolia wreath looking full rather than sparse.
Color the top surface of each leaf in a deep glossy green with a visible marker streak left lighter down the center vein, and flip alternating leaves to show their undersides in a warm copper-brown, which is the real signature of magnolia foliage. That two-tone flip is what separates this from a generic green leaf wreath.
A gold bow at the base, drawn with the same confident loop shapes as the earlier velvet bow idea, finishes it. If copper-brown marker is not in your set, a warm burnt sienna colored pencil layered over light brown gets close enough.
You Will Need
- deep green and copper-brown markers
- gold colored pencil
- graphite pencil
Palette: Glossy Magnolia Green, Copper Underside, Gold Bow, Vein Highlight
Flip roughly one in four leaves to show the copper underside rather than every other one; an exact alternating pattern looks too regular for real foliage.
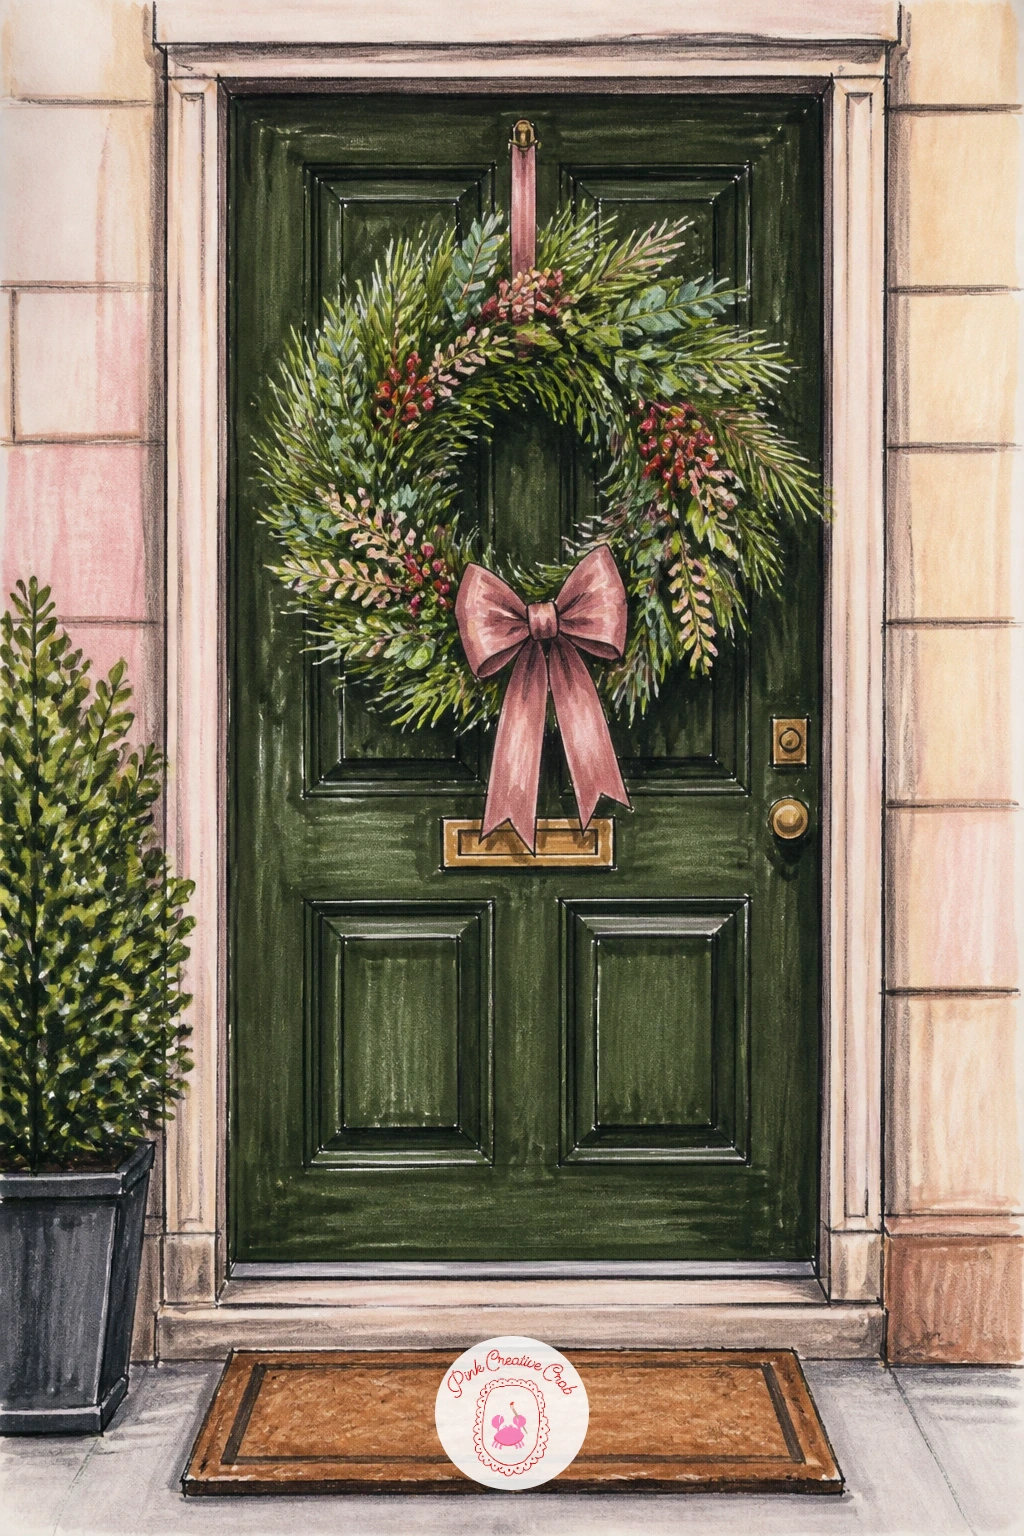
Finish the list the way it started, on a door, but bring in a little urban context with a wreath on a city apartment door complete with a welcome mat. Draw a simple door panel with one small window pane cut into the upper half, then a flat welcome mat at the base, drawn in perspective as a slightly narrower rectangle at the top than the bottom since it sits flat on the ground below your eye level.
That mat is the one perspective lesson in this piece: because you are looking slightly down at it while looking straight on at the door, its far edge needs to sit higher and narrower on the page than its near edge, or it will look like it is standing upright against the door instead of lying flat. The wreath itself can pull together elements from earlier in this list, pine, a ribbon, a few berries, since by now you have practiced most of the pieces it needs.
A soft shadow under the mat and a number or two on a small door plaque adds just enough apartment detail without overloading the composition. For more ways to build a full seasonal scene around a single door or window, the christmas scene drawing ideas are worth a look next, alongside the christmas aesthetic drawing lessons for more cozy holiday framing, and the christmas sketching ideas for beginners if you want to keep the pencil work going past this list.
You Will Need
- brown and grey pencils for the door and mat
- green and red markers
- graphite pencil
Palette: Door Grey, Mat Tan, Wreath Green, Berry Red
Add a small number plaque or a pair of potted plants beside the door to round out the apartment feel without adding much extra drawing time.
What to Do Next
Pick one wreath that matches your evening: the pastel bauble wreath or the minimalist brass ring for a quick sitting, the dried rose and lavender or the magnolia leaf wreath if you have more time to layer color. Start with a sheet of smooth marker paper, keep your first pencil lines light, and let the ring guide the whole page from there.
Frequently Asked Questions
What paper works best for a christmas wreath drawing in marker and pencil?
Smooth marker or bristol paper works best, since it lets alcohol marker glide and blend without feathering, while still taking colored pencil cleanly on top. Avoid heavily textured watercolor paper, which drags the marker tip and wastes ink.
Do I need to draw the wreath as a perfect circle first?
No, a slightly uneven ring actually looks more handmade and realistic than a perfect one. Use a plate only for subjects like the brass ring wreath where precision is the whole point; everywhere else, a loose freehand oval is fine.
How do I stop alcohol marker colors from bleeding past my pencil lines?
Keep your pencil outline light and work the marker in small sections, letting each patch dry for a moment before adding an adjacent color. Bleeding usually happens when two wet colors touch, so work from lightest to darkest across the page.
What is the easiest wreath idea on this list for a first attempt?
The pastel bauble wreath is the easiest, since it is built from simple overlapping circles with one quick marker pass each. The minimalist brass ring wreath is a close second if careful, even linework feels more comfortable than color blending.
Can I draw these wreaths with just colored pencils and no markers?
Yes, every idea on this list can be built in colored pencil alone, just by layering more passes to build up the saturation markers give in one layer. Expect it to take a little longer, especially on anything meant to glow or shine.
Have any thoughts?
Share your reaction or leave a quick response — we’d love to hear what you think!
-
 0
-
0
-
0
-
0
-
0
-
0


