

Every christmas fireplace drawing on this list starts the same way a good interior photo does: warm light on one side, deep shadow on the other, and one small human detail that makes the whole room feel lived in. That is what makes a mantel so satisfying to draw. You get marble, brass, velvet and greenery all in one frame, plus a dog, a mug of cocoa or a girl wrapping gifts to give the scene a pulse.
Below you will find 28 styled scenes, from a simple white mantel with a garland to a full gingerbread village glowing on a shelf. Work through them in order if you like, easiest first, or jump straight to the one that matches the room you wish you lived in tonight.
Using these images: free for personal projects such as printing, coloring, cards, journals and gifts. Handmade items that include them may be sold up to 30 pieces per design. More than that is commercial use and is not permitted, and neither is selling or sharing the images themselves or passing them off as your own. Please ask before any other use.
Measure before you color: draw the mantel shelf as a simple rectangle first, then mark its exact midpoint so the garland hangs even on both sides. A ruler helps here more than a confident hand, since a crooked mantel throws off everything else in the scene.
Block the marble in pale grey-cream, then drag a sharpened grey pencil in thin broken lines across it for veining, turning the pencil as you go so no two lines run perfectly parallel. Build the garland from loose pine sprigs in two greens, then add pampas plumes in cream with short flicking strokes for the fluffy texture.
The fireplace opening behind stays a deep warm shadow, almost black-brown, so the white marble reads as bright by contrast. If the marble looks flat, add one or two faint grey shadows under the garland where it rests on the shelf.
Swap pampas for a few dried hydrangea heads if you do not want to draw the fluffy plumes today.
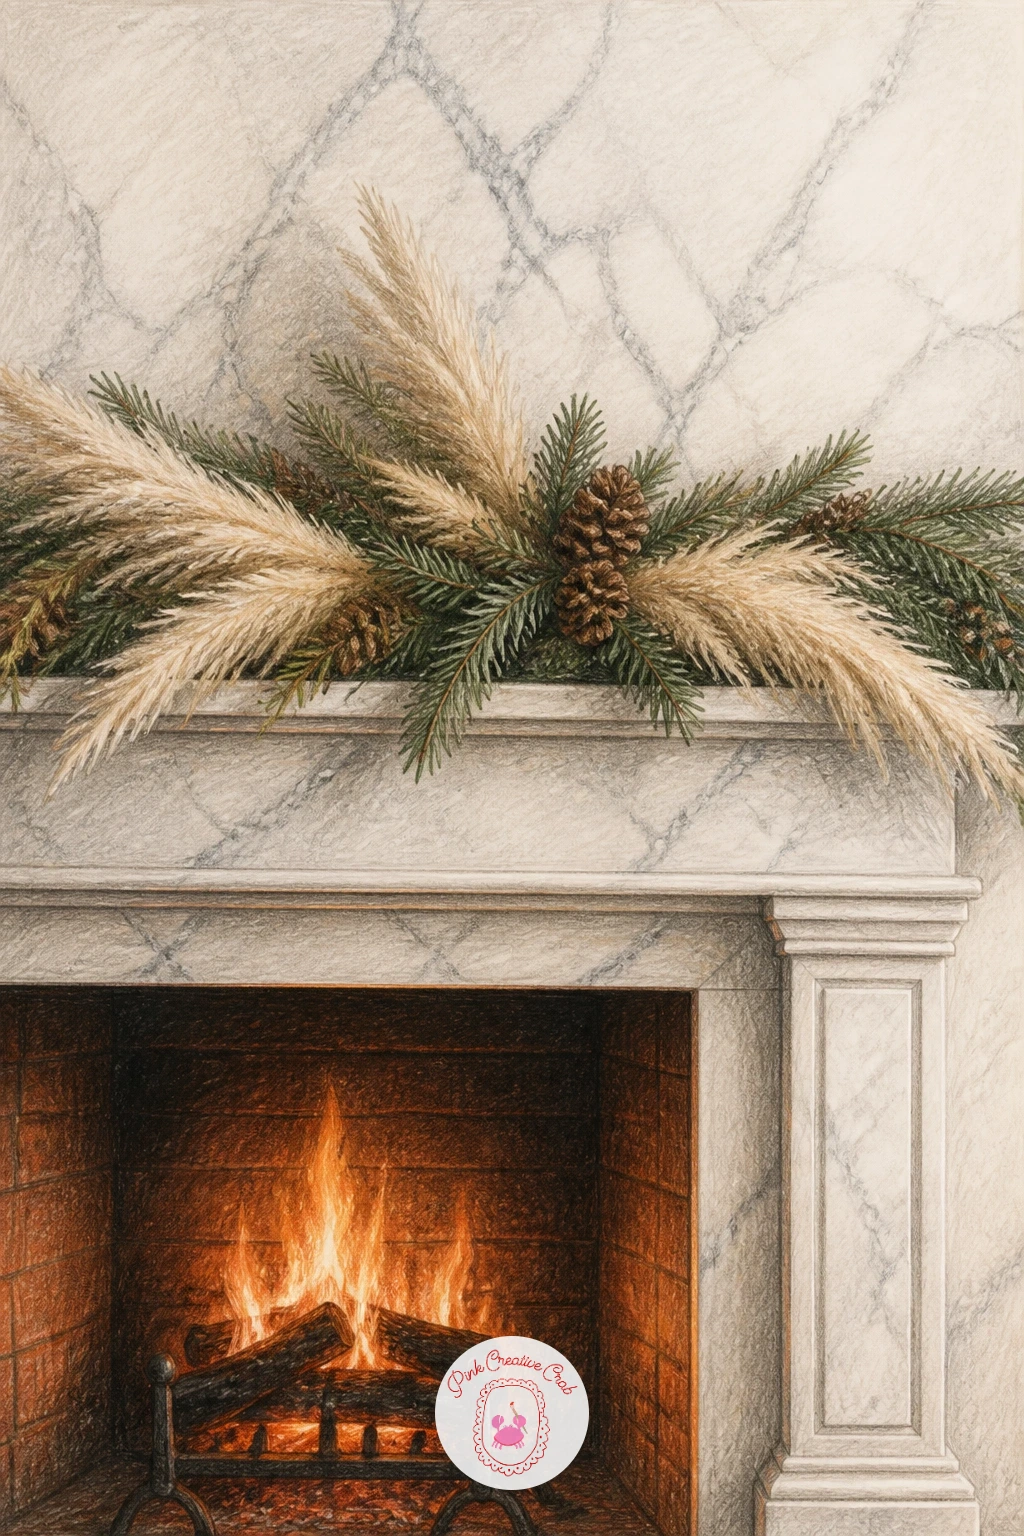
You Will Need
- smooth white paper
- grey and cream colored pencils
- two shades of green pencil
- ruler
- sharpener
Palette: Warm White,Pewter Grey,Pine Green,Sage Green,Cream
Look at a real marble slab or photo before you start, even a kitchen countertop, since marble veining is never symmetrical and copying a real one keeps it convincing.
Following on from a bare mantel, hanging stockings is the fastest way to make it feel dressed. Sketch four or five stocking shapes in a row first, varying the tilt of each one slightly so they do not look stamped from a template.
Color in two families: burgundy for some, soft blush pink for others, alternating them along the row. Velvet reads through soft, blended pressure rather than hard lines, so lay color down in circular strokes and avoid any sharp pencil edges inside the stocking body.
The mistake to watch for is flat stockings with no sense of hanging weight. Add a curved shadow line near the top cuff where the fabric folds over the mantel edge, and a darker patch at the toe where the stocking bulges slightly.
No blush pencil on hand: a very light dusty rose mixed from pink and a touch of grey works just as well.
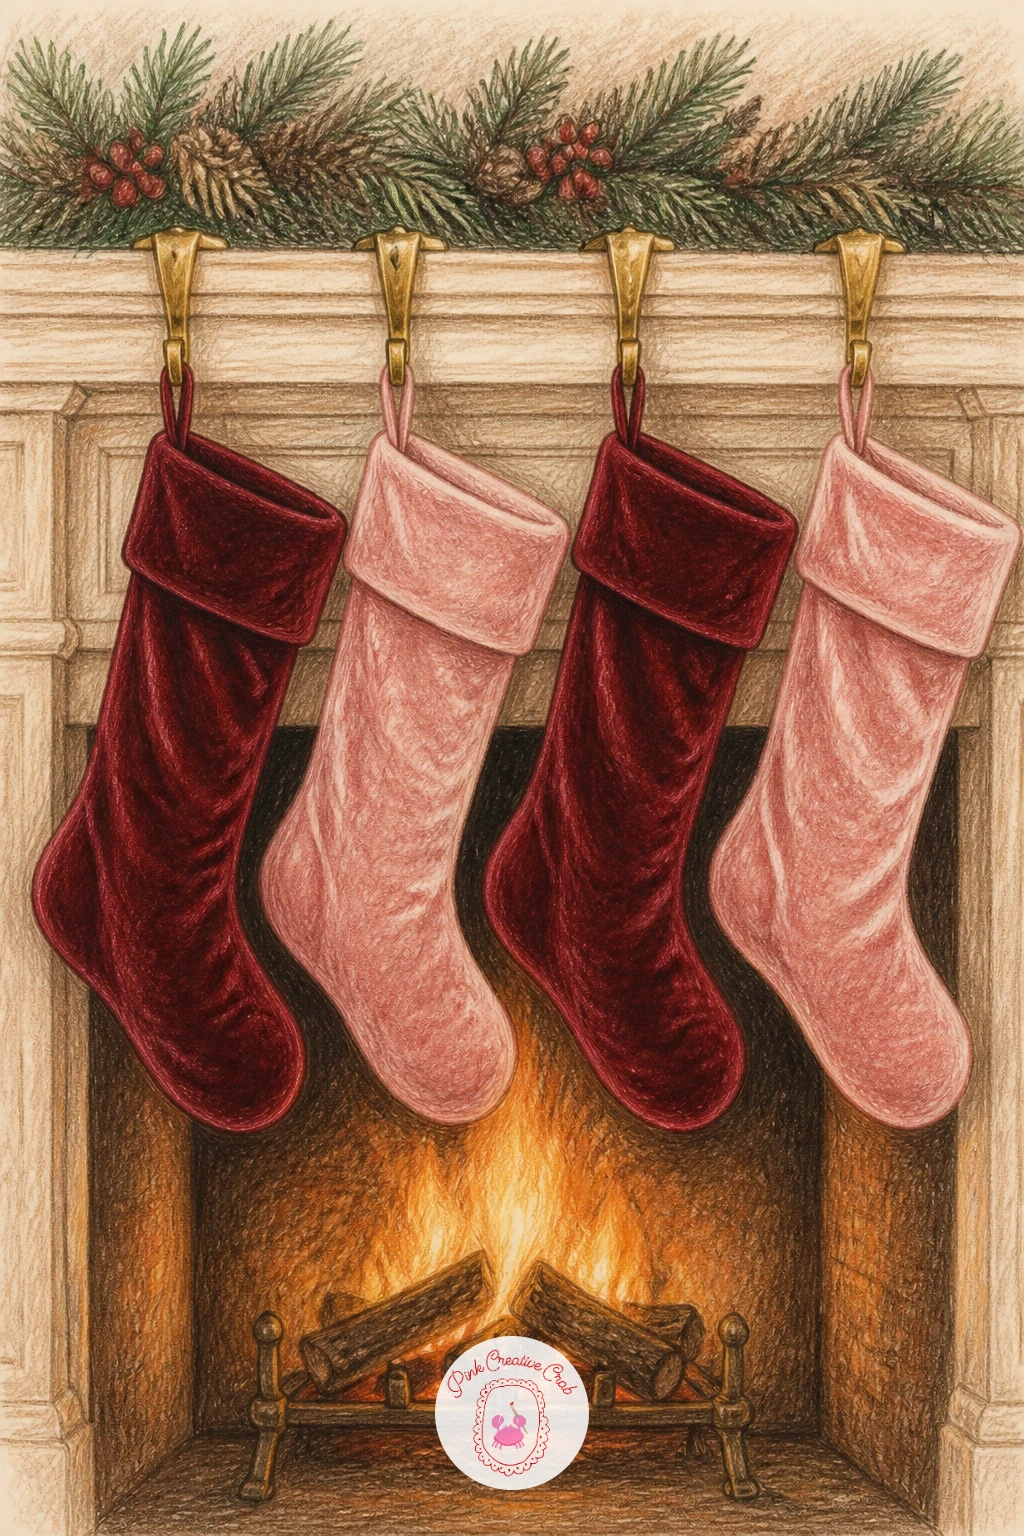
You Will Need
- burgundy and blush pink pencils
- white pencil for cuff highlights
- fine liner or sharp pencil for hooks
- smooth paper
Palette: Burgundy,Blush Pink,Cream,Soft Grey,Brass
Add one tiny detail per stocking, a cuff pattern, a bow or a monogram letter, so the row feels like a real styled set rather than five identical shapes.
With the mantel dressed, bring in the first living thing in the room. Start the dog as simple ovals, one for the body curled into a crescent and one for the head tucked near the paws, before refining the outline into fur.
Build the coat in short layered strokes that follow the direction fur actually grows, darker along the spine and lighter where the firelight catches the curve of the back. The sheepskin underneath goes down first in loose cream squiggles, overlapping so the texture looks woolly rather than striped.
Dogs go wrong most often at the legs, which disappear entirely when curled asleep. Keep the whole body one soft continuous shape and only suggest a paw tip or two, never a full outstretched leg.
If you want a quick reference for believable fur direction and proportion, a dog pencil drawing guide is worth a look before you start.
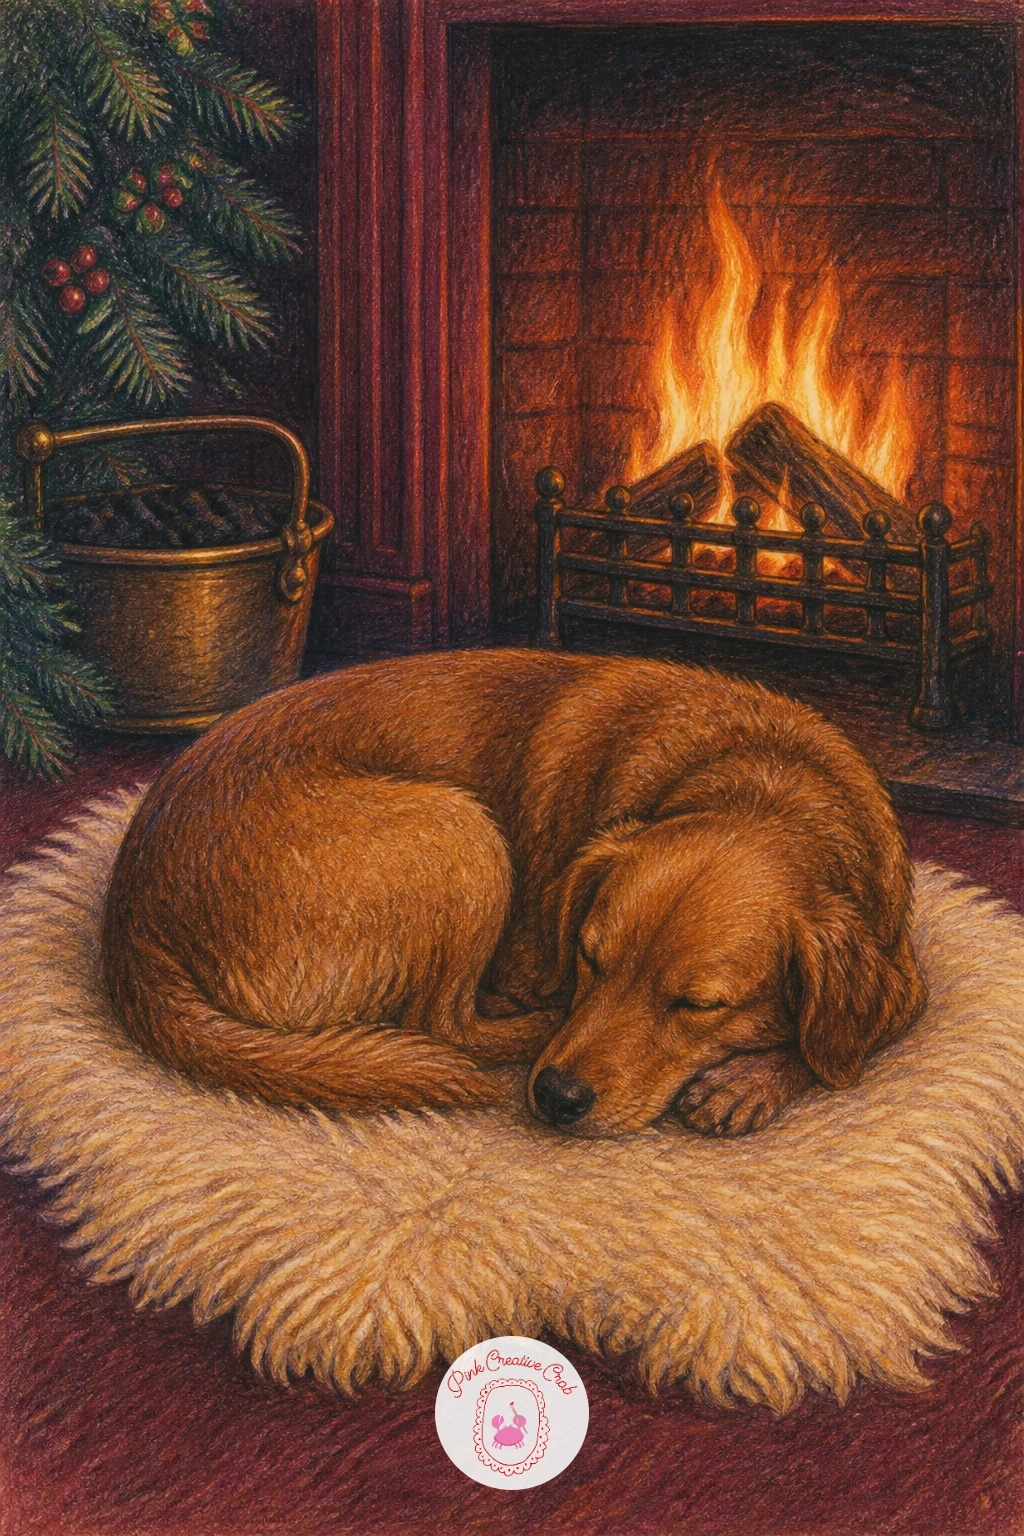
You Will Need
- warm brown and tan pencils
- cream pencil for sheepskin
- white pencil for highlights
- blending stump
Palette: Warm Brown,Tan,Cream,Burnt Orange,Soft Grey
Study one close-up photo of curled fur rather than a full-body dog photo, since the way fur bunches at a curled spine is the detail that sells the pose.
After the soft fur of the sleeping dog, switch to something crisp and metallic. Draw the candelabra as a simple center stem with symmetrical branching arms, using a ruler lightly for the straight sections before freehanding the curves.
Brass needs both a dark and a bright side on every curve to look like metal rather than flat yellow paint, so work gold-brass color in first, then push a warm dark brown into the shadowed underside of each arm. Taper candles sit on top in soft cream, each with a tiny bright flame of yellow-white and a thread of orange around its edge.
The eye level matters here: draw it slightly below the candelabra, looking up a little, the way a mantel actually sits above head height when you stand close to a fireplace. That small tilt is what makes the piece feel like part of a real room rather than a flat diagram.
No gold pencil: ochre layered under a thin wash of warm brown gets close enough.
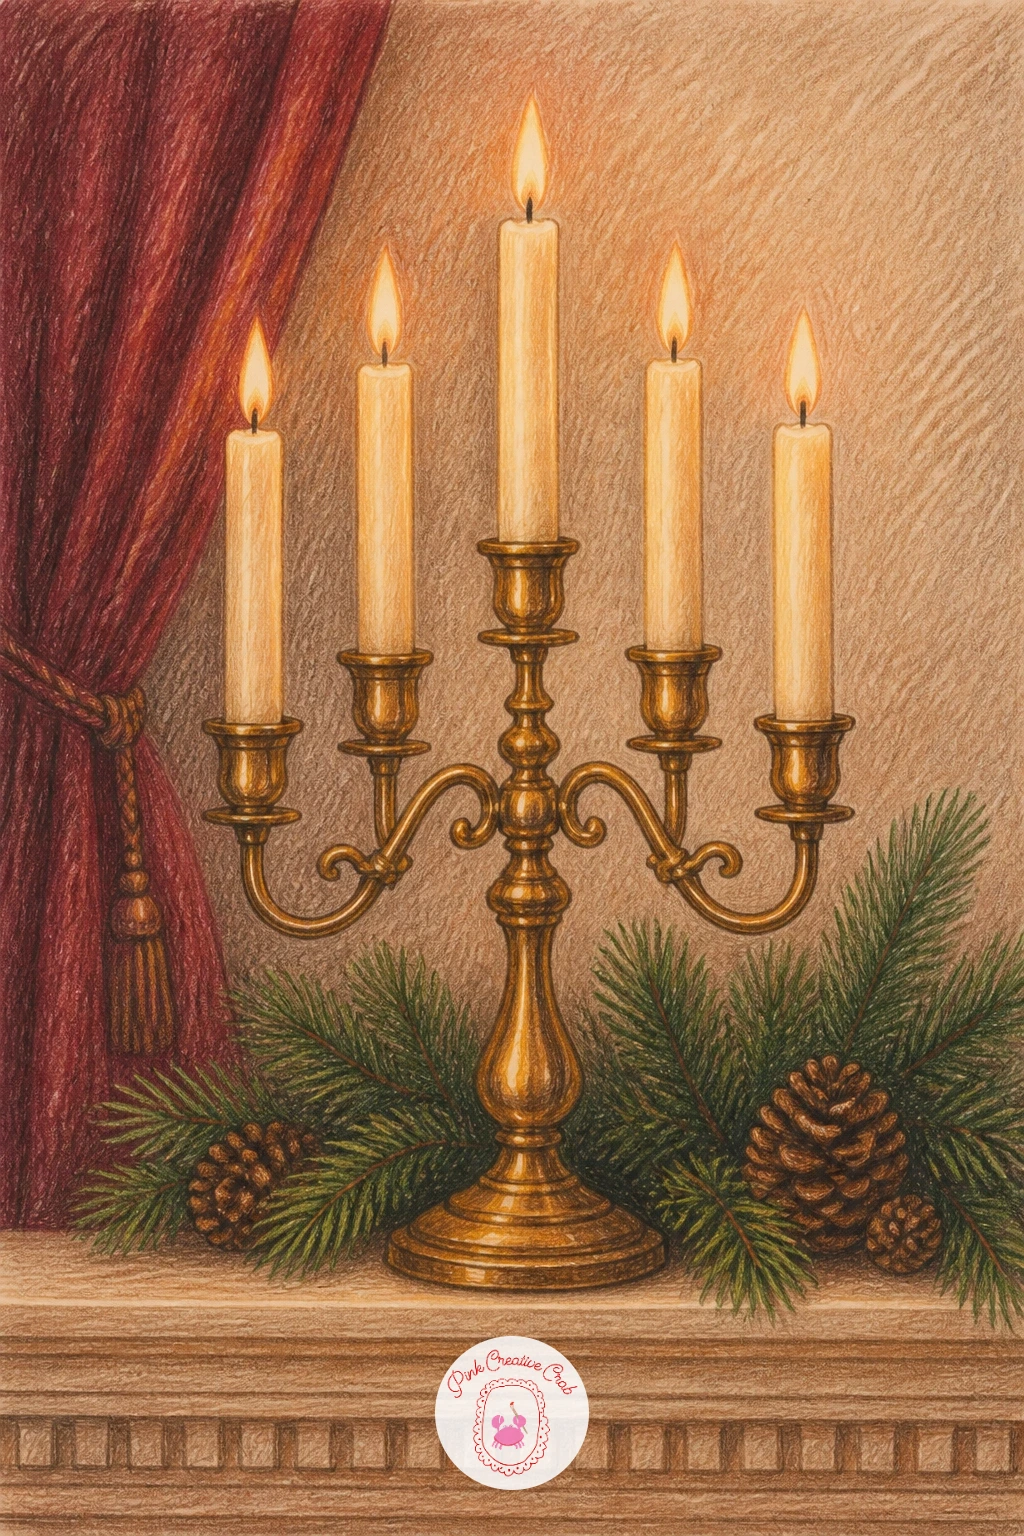
You Will Need
- gold or ochre pencil
- warm dark brown pencil
- cream and yellow pencils for candles
- ruler
Palette: Brass Gold,Warm Brown,Candle Cream,Flame Yellow,Deep Shadow
Leave two or three tiny unshaded white flecks along each brass arm. That bare paper, not more color, is what reads as a bright metal highlight.
Give the room a person now that the mantel and its fire are established. Place the armchair at an angle rather than square to the fireplace, since a three-quarter view reads as a real room and not a stage set.
Draw the woman’s pose first as a loose gesture line, knees drawn up or crossed, book held at a relaxed angle, before adding the chair around her. Work the firelight hitting one side of her face and sweater in warm orange, keeping the far side in cool shadow so the two light sources (fire versus the darker room) stay distinct.
Faces at this scale go wrong when overworked, so keep hers simple: a suggestion of a nose and closed or downcast eyes is enough, since the pose and the warm light are doing most of the storytelling.
For more help keeping a seated figure in proportion, a girl pencil drawing guide covers simple pose basics.
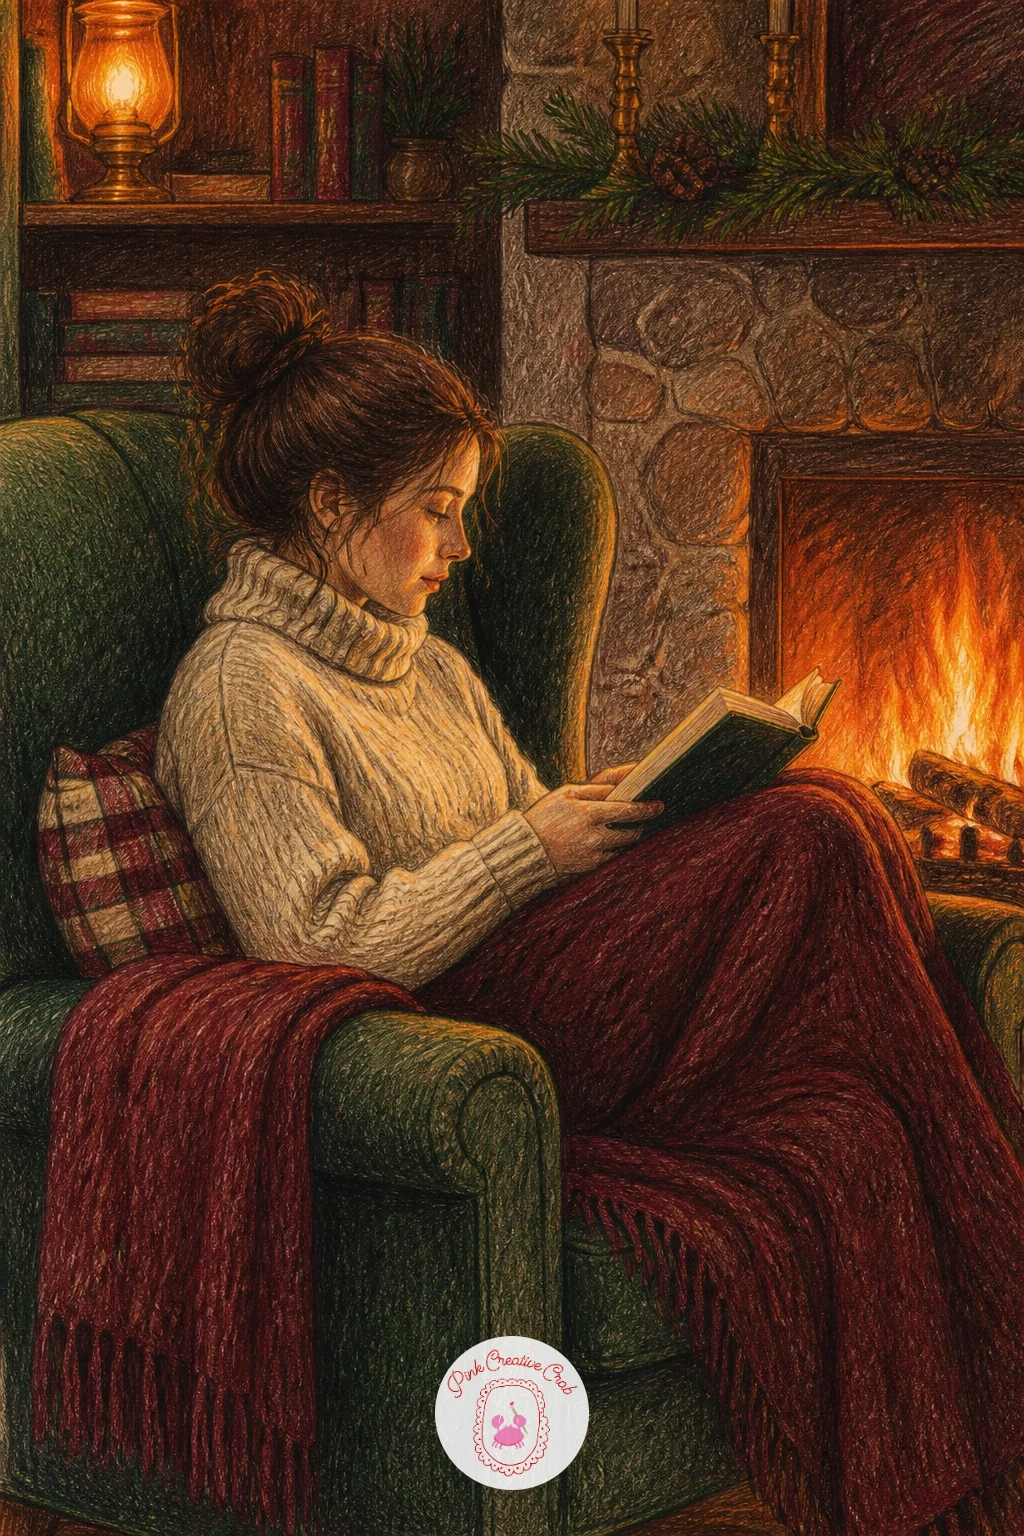
You Will Need
- skin tone pencil
- burgundy or cream pencil for sweater
- warm brown for chair
- soft grey for shadow side
Palette: Burgundy,Warm Skin Tone,Chair Brown,Firelight Orange,Cool Shadow
Sketch the pose from a seated selfie or photo reference rather than from imagination, since the angle of bent knees in an armchair is easy to get wrong freehand.
Move back to the mantel itself for a quieter, more graphic scene. Line up four or five tiny ceramic houses along the shelf, each a simple square body with a triangle roof, varying the height and roof angle slightly so the row has rhythm.
Work each house in flat cream or white with a single warm window glowing yellow-orange, since that one lit window per house is what sells the christmas fireplace drawing mood without extra detail. Add a light dusting of pine sprigs tucked between the houses rather than a full garland, letting the houses stay the main subject.
Ceramic surfaces look chalky if you blend too hard, so keep strokes light and let a little white paper show through on each roof for that matte ceramic finish.
Swap the houses for simple ceramic trees if that is what you have styled before, the same flat-color approach works either way.
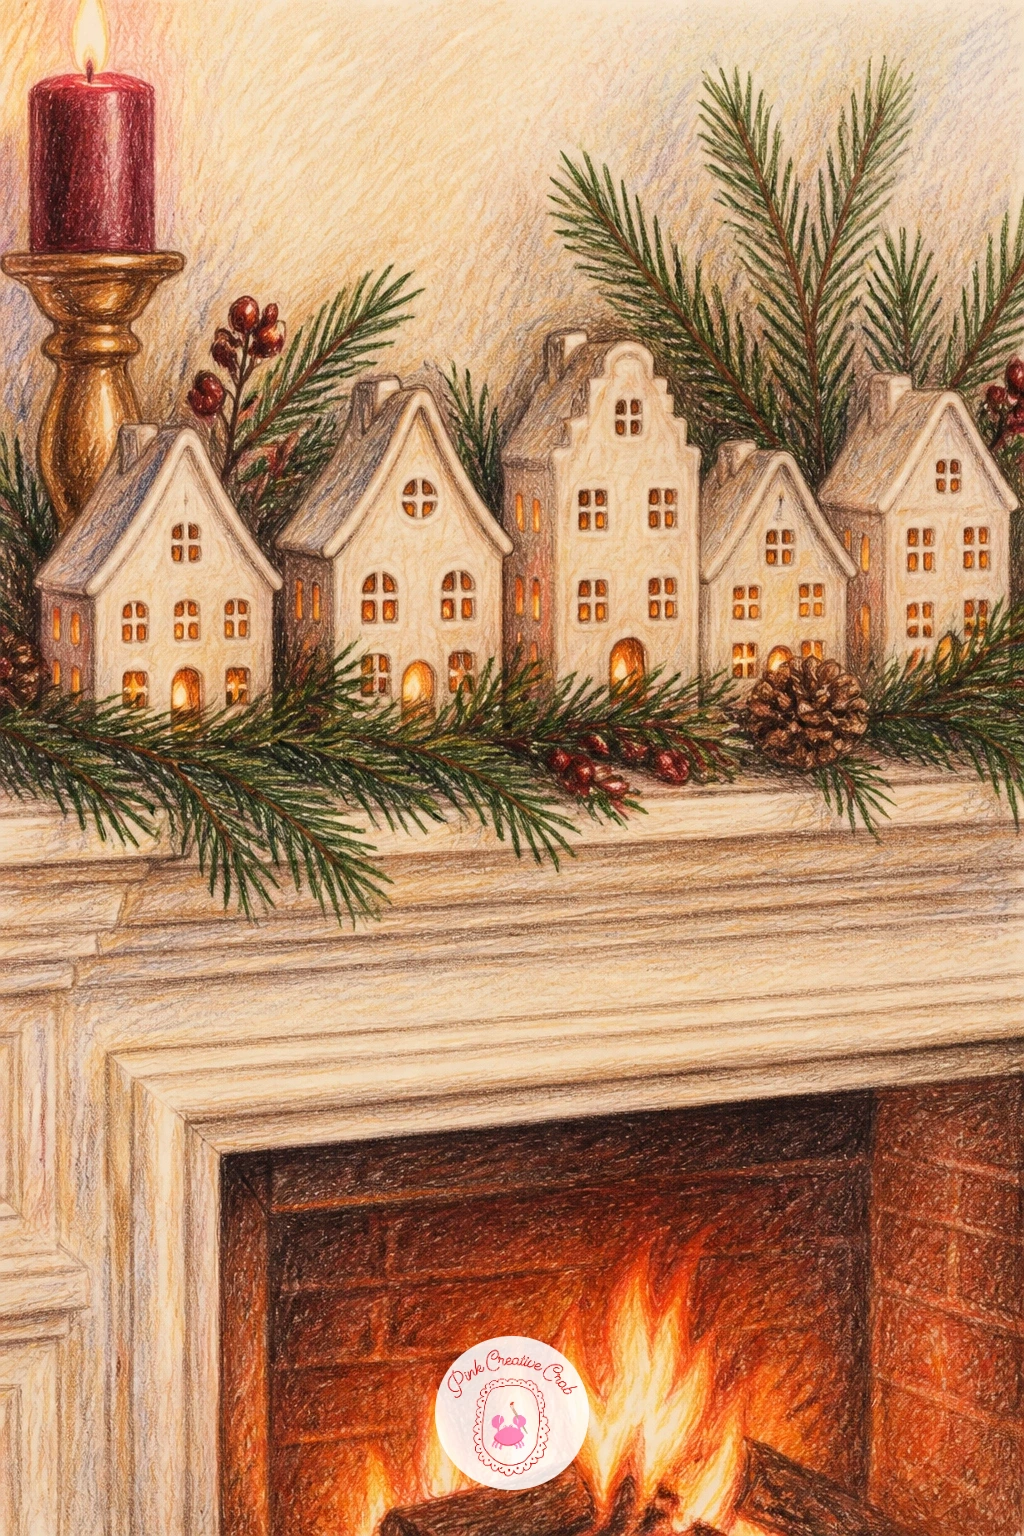
You Will Need
- cream and white pencils
- yellow-orange pencil for windows
- green pencil for sprigs
- fine liner for window frames
Palette: Ceramic White,Warm Cream,Window Gold,Pine Green,Soft Grey
Try a photo of real ceramic house ornaments for reference. The simplified roof shapes and tiny door details are easier to copy than to invent.
Bring in a second pet moment, this time tucked lower in the scene near the hearth itself. Draw the log stack first as simple overlapping cylinders, each one a slightly different length, before placing the cat curled against the end of the pile.
Compare sizes as you go: a cat curled tight is roughly the same width as two or three stacked logs, which keeps the scale believable. Build the cat’s fur in short strokes that curve with the body, darker along the spine and tail, and leave the logs in warm browns with a few darker rings at each cut end.
Texture is the whole point of this one. Try short, slightly dry pencil strokes for bark, and much softer blended strokes for the cat’s fur, so the two textures contrast rather than blur together.
If pencil grain feels too smooth for bark, a bit of oil pastel texture technique applied lightly on top can rough it up.
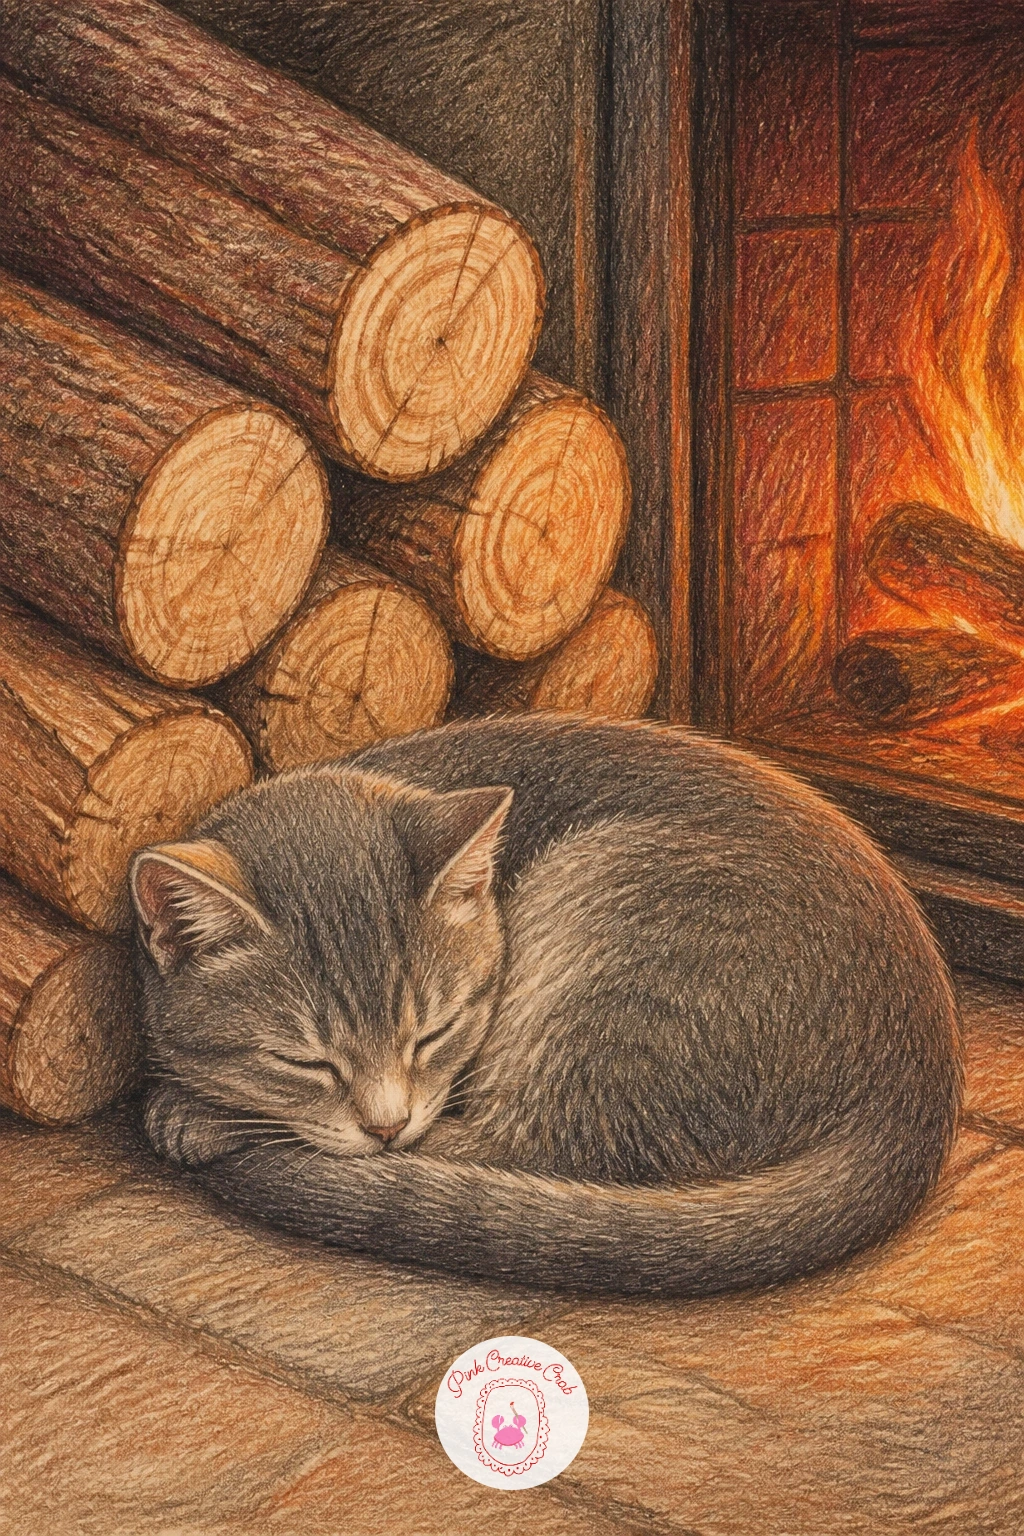
You Will Need
- warm brown pencils for logs
- grey or tabby pencils for cat
- dark brown for log rings
- blending stump
Palette: Log Brown,Bark Dark,Tabby Grey,Warm Cream,Firelight Orange
Compare the cat’s curled width to the logs beside it before adding fur detail, since getting that scale right matters more than any single stroke.
Scale up the drama after two quiet, textural pieces. Draw the fireplace opening first, then center a single oversized bow above it, roughly as wide as the mantel itself, since the whole point of this scene is one bold graphic shape.
Build the bow from two large looping ribbon shapes crossing at the center knot, keeping the ribbon folds simple rather than fussy. Velvet ribbon takes color unevenly on purpose: lay burgundy down, then deepen the inner folds with a near-black red so the loops feel like they fall forward, away from the wall.
Eye level matters here too: draw the bow slightly foreshortened, as if you are standing below it looking up, which makes it feel oversized the way a styled holiday bow photo does.
No deep red pencil: layer regular red hard first, then burgundy over the top for a richer, darker tone.
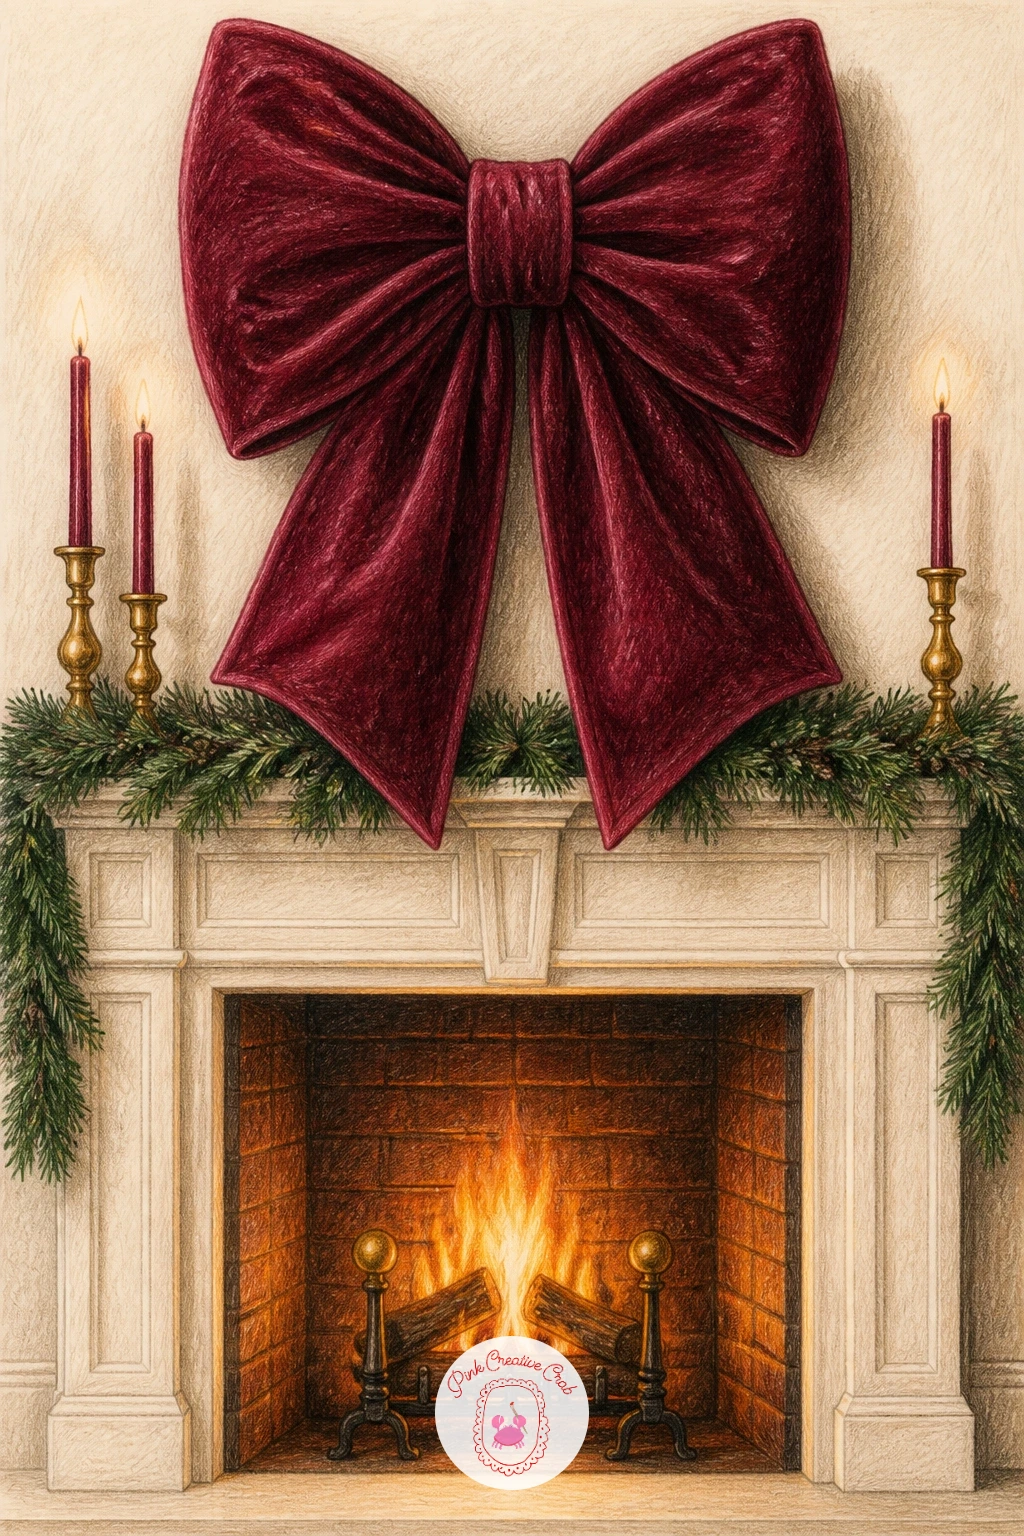
You Will Need
- burgundy and deep red pencils
- black or very dark red pencil for shadow folds
- white chalk pencil for highlights
Palette: Burgundy,Deep Red,Near Black Red,Cream,Brass
Pin up a photo of a real oversized holiday bow before you draw it, since the way big velvet loops fold and twist is genuinely tricky to invent from memory.
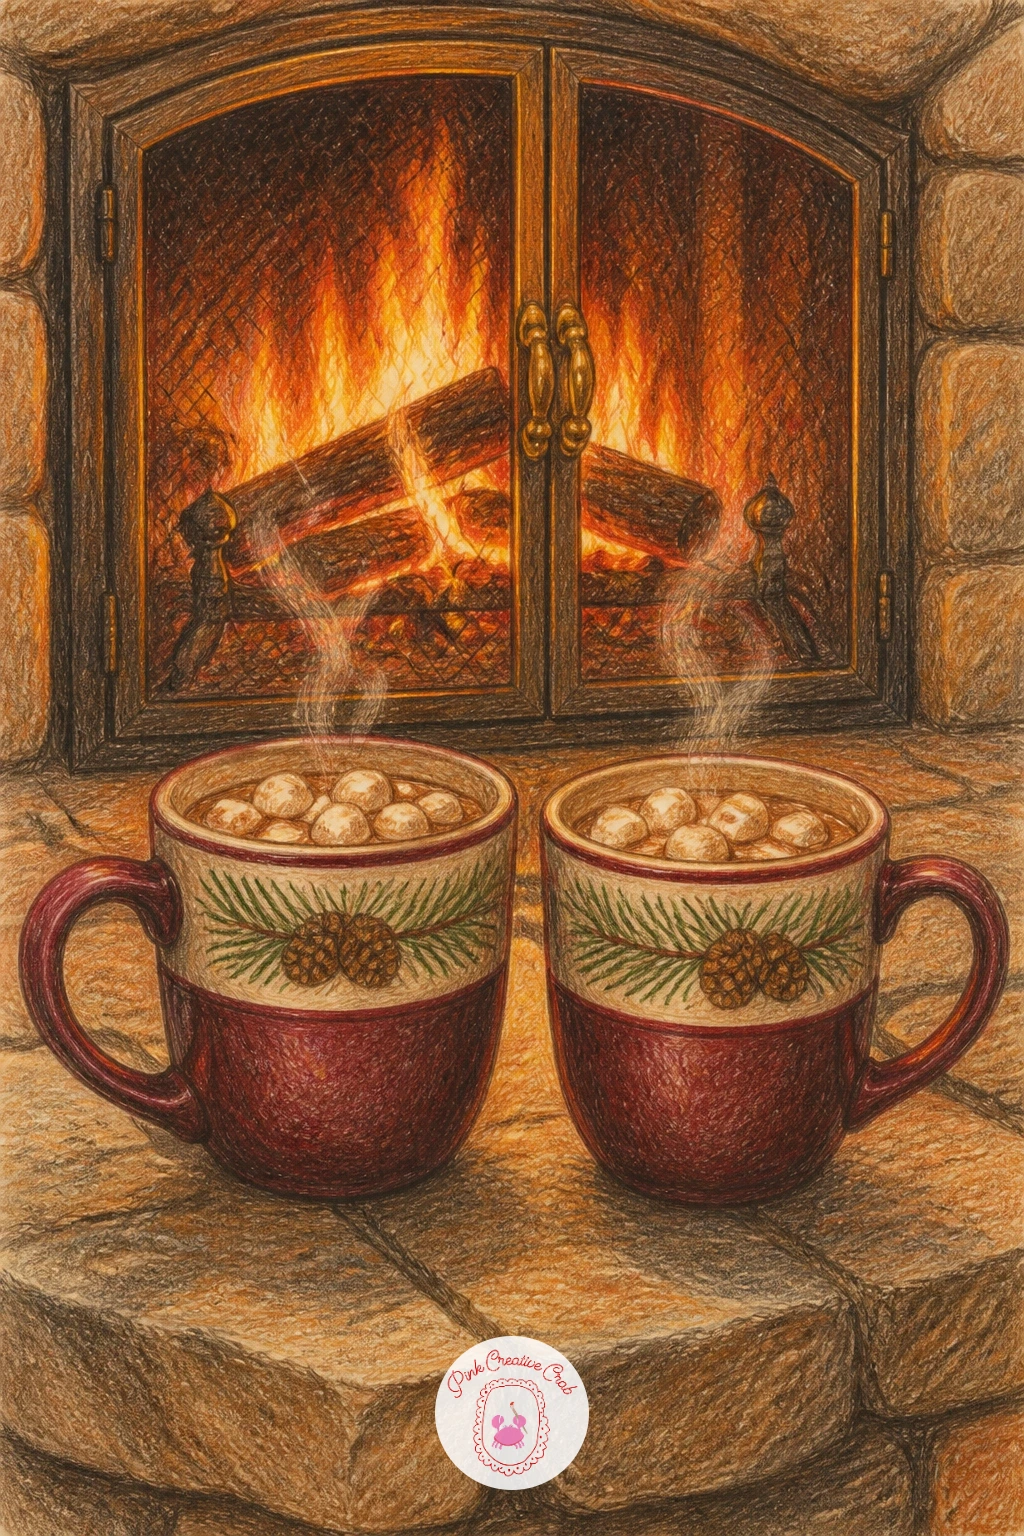
Bring the scale back down to something small and quiet after the giant bow. Draw two simple mugs sitting directly on the hearth stone, slightly offset from each other, one a little closer to the viewer than the other for depth.
Steam is the trick here: use a very light grey pencil in loose, broken curved lines rising from each mug rather than one solid line, since real steam breaks apart as it rises. Marshmallow tops or a cinnamon stick resting across one mug add a nice small detail if you want one.
Ten minutes gets you two plain mugs with steam and firelight reflections. Forty minutes lets you add a knitted blanket draped nearby, a few cookie crumbs on a small plate, or a second steam wisp catching the light differently.
If you only have brown and grey pencils on hand, that is genuinely all this one needs.
You Will Need
- cream and warm brown pencils for mugs
- light grey pencil for steam
- white pencil for highlights
- hearth stone texture pencil (grey)
Palette: Cocoa Brown,Mug Cream,Steam Grey,Hearth Stone Grey,Firelight Orange
Keep steam lines thin and break them into short dashes rather than one continuous curl, since a solid line reads as smoke, not rising warmth.
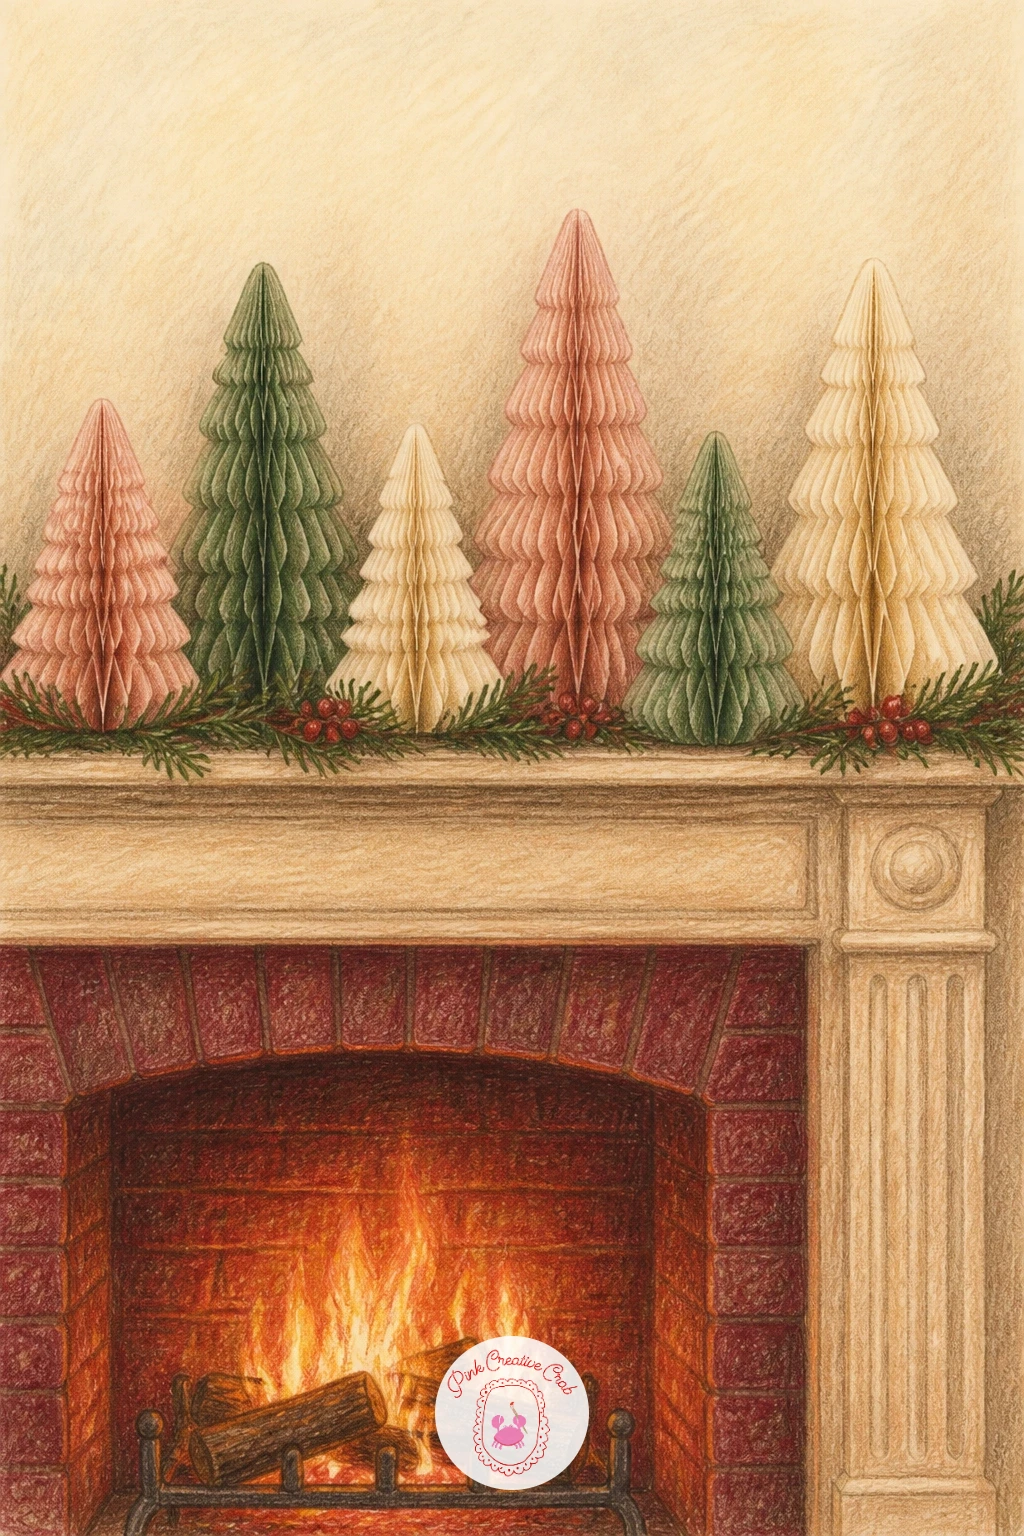
Pick up the graphic, modern thread again with a row of paper honeycomb trees standing along the mantel. Draw each tree as a simple triangle silhouette first, then add the honeycomb fold lines as a grid of short diagonal marks across the surface, which is what gives paper honeycomb its distinct textured look.
Vary the heights across three or four trees so the row reads as a styled display rather than a uniform set. Color them in soft blush, cream and sage, alternating so no two neighboring trees match, and keep the mantel itself plain so the trees stay the focus.
The honeycomb texture is easy to overdo. Keep the fold lines light and evenly spaced rather than scribbled, and stop once the grid pattern reads clearly from a small distance.
Swap the trio of colors for all-white trees with gold edging if that is closer to the room you are picturing.
You Will Need
- blush, sage and cream pencils
- fine liner for honeycomb fold lines
- ruler for even spacing
Palette: Blush Pink,Sage Green,Cream,Soft Grey,Brass
Draw the honeycomb fold lines last, after the tree’s base color is fully in, so the grid sits crisply on top rather than disappearing into blended pencil.
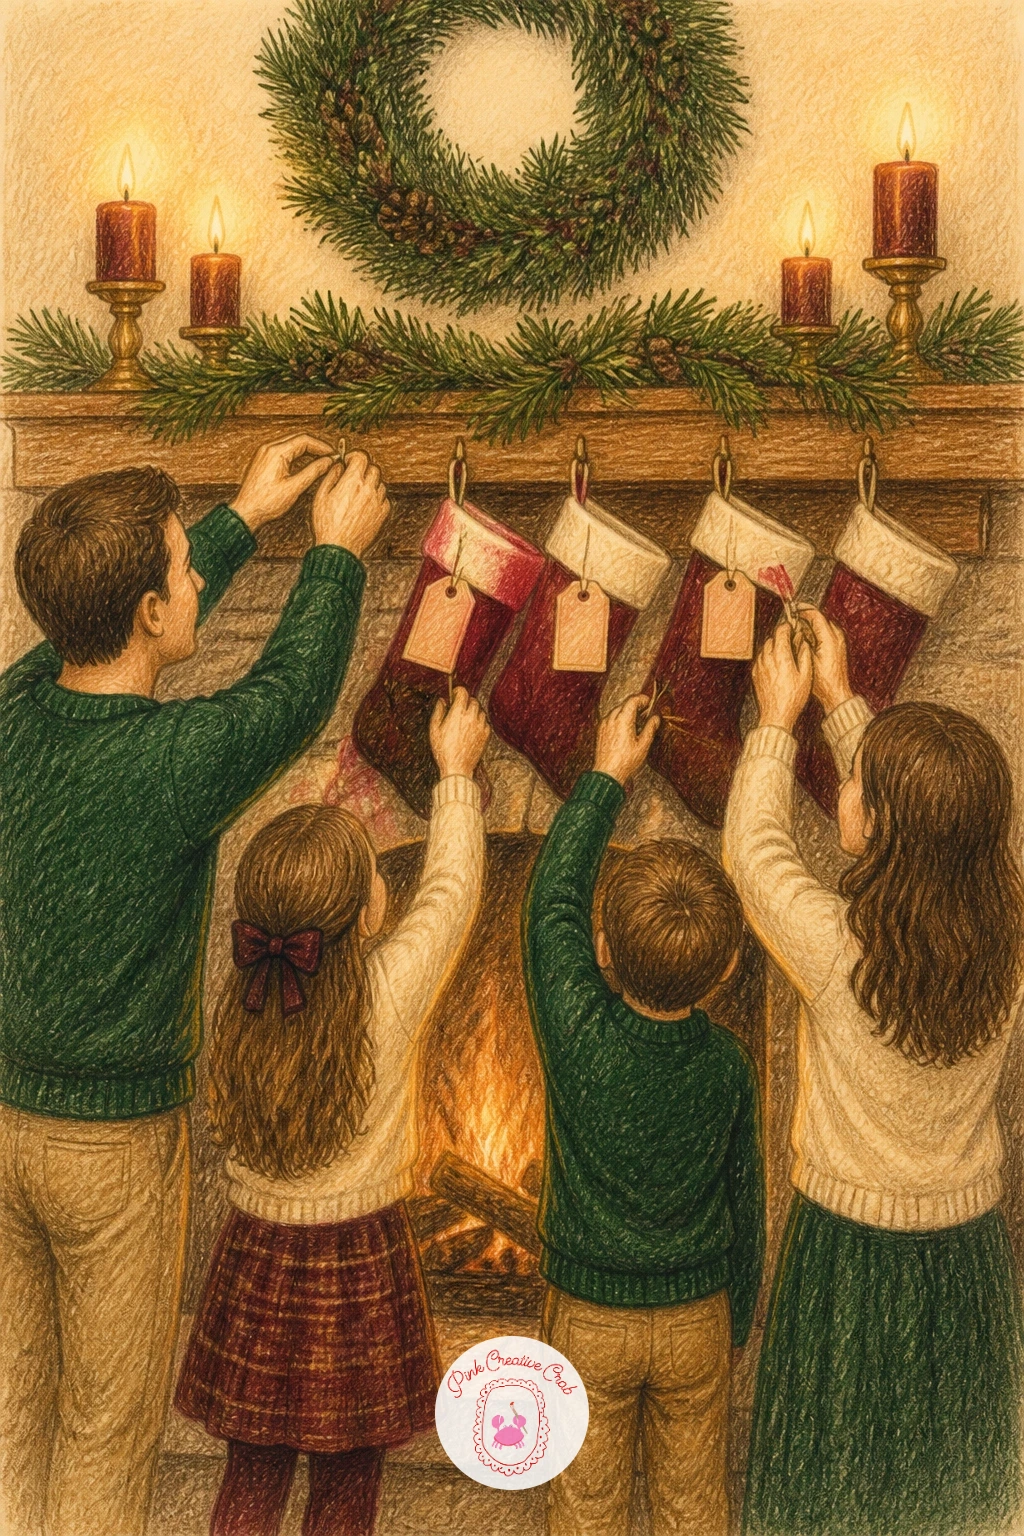
Bring people back into the scene with a small group moment. Sketch two or three figures reaching up toward the mantel, keeping poses simple: one on tiptoe, one holding a stocking out at arm’s length, so the gestures read clearly even at a small scale.
Compare each figure’s height against the mantel shelf as you draw, since getting a child noticeably shorter than an adult is what sells the family moment more than any facial detail. Keep faces loose and let the small tags tied to each stocking (just tiny cream rectangles with a scribbled name line) carry the personal touch instead.
Crowded scenes like this go wrong when every figure gets equal detail. Pick one figure to render most carefully and let the others stay simpler silhouettes in the background.
For more help with a cozy, uncomplicated holiday scene like this, the ideas in Christmas scene drawing are worth a browse.
You Will Need
- skin tone and hair color pencils
- burgundy and cream for stockings
- fine liner for name tags
Palette: Burgundy,Warm Skin Tone,Cream,Soft Brown,Pine Green
Draw the tallest figure first to set the scale for the room, then size everyone and everything else, mantel included, against that one figure.
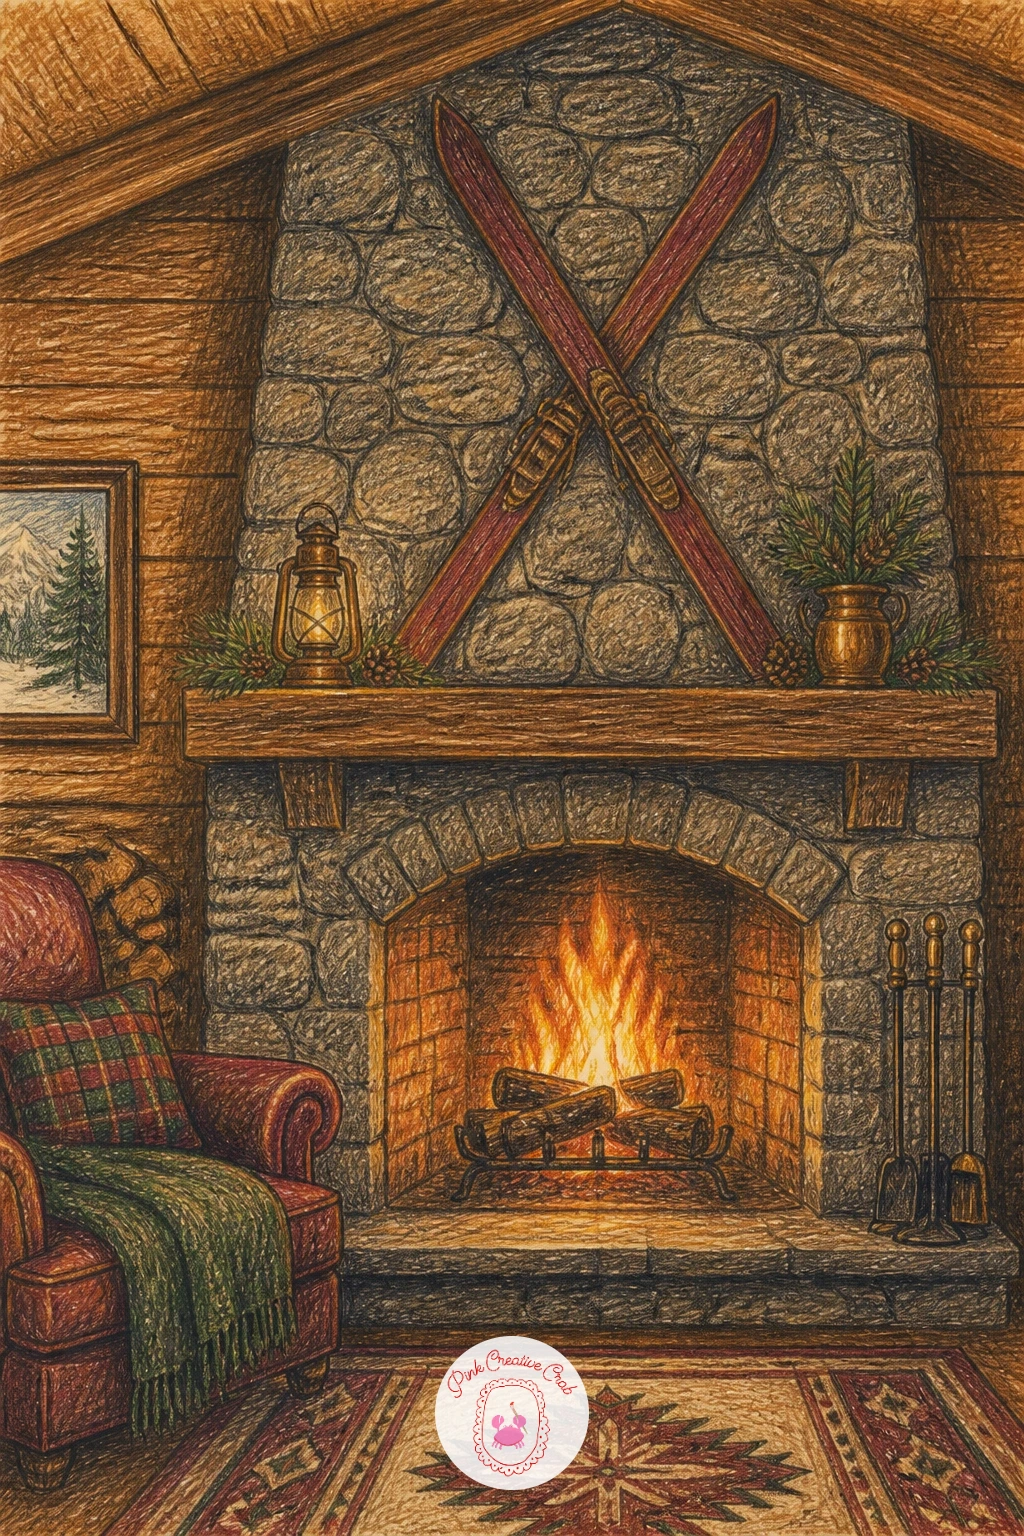
Change the whole backdrop now for a rustic cabin version. Draw the fireplace in rough stacked stone rather than marble, using short uneven lines and varied grey tones so each stone reads as a separate shape rather than one grey block.
Crossed skis mounted above the mantel give the scene its cabin identity, so draw them as two long simple strips crossing at an angle, with a small strap detail where they meet. Keep the wood paneling behind in warm honey brown with a few knot marks for grain.
Stone and wood both go flat without a clear light source, so decide early that the firelight comes from low on the right and let every stone and plank get a touch darker on its left edge.
No grey pencil for stone: a light wash of brown and blue mixed together gets a similar cool-stone effect.
You Will Need
- grey pencils in two or three shades
- honey brown for wood paneling
- dark brown for ski detail
Palette: Stone Grey,Cool Grey,Honey Wood,Dark Brown,Firelight Orange
Try a reference photo of a stone fireplace rather than inventing the stone pattern, since real stacked stone has an irregular rhythm that is hard to fake convincingly.
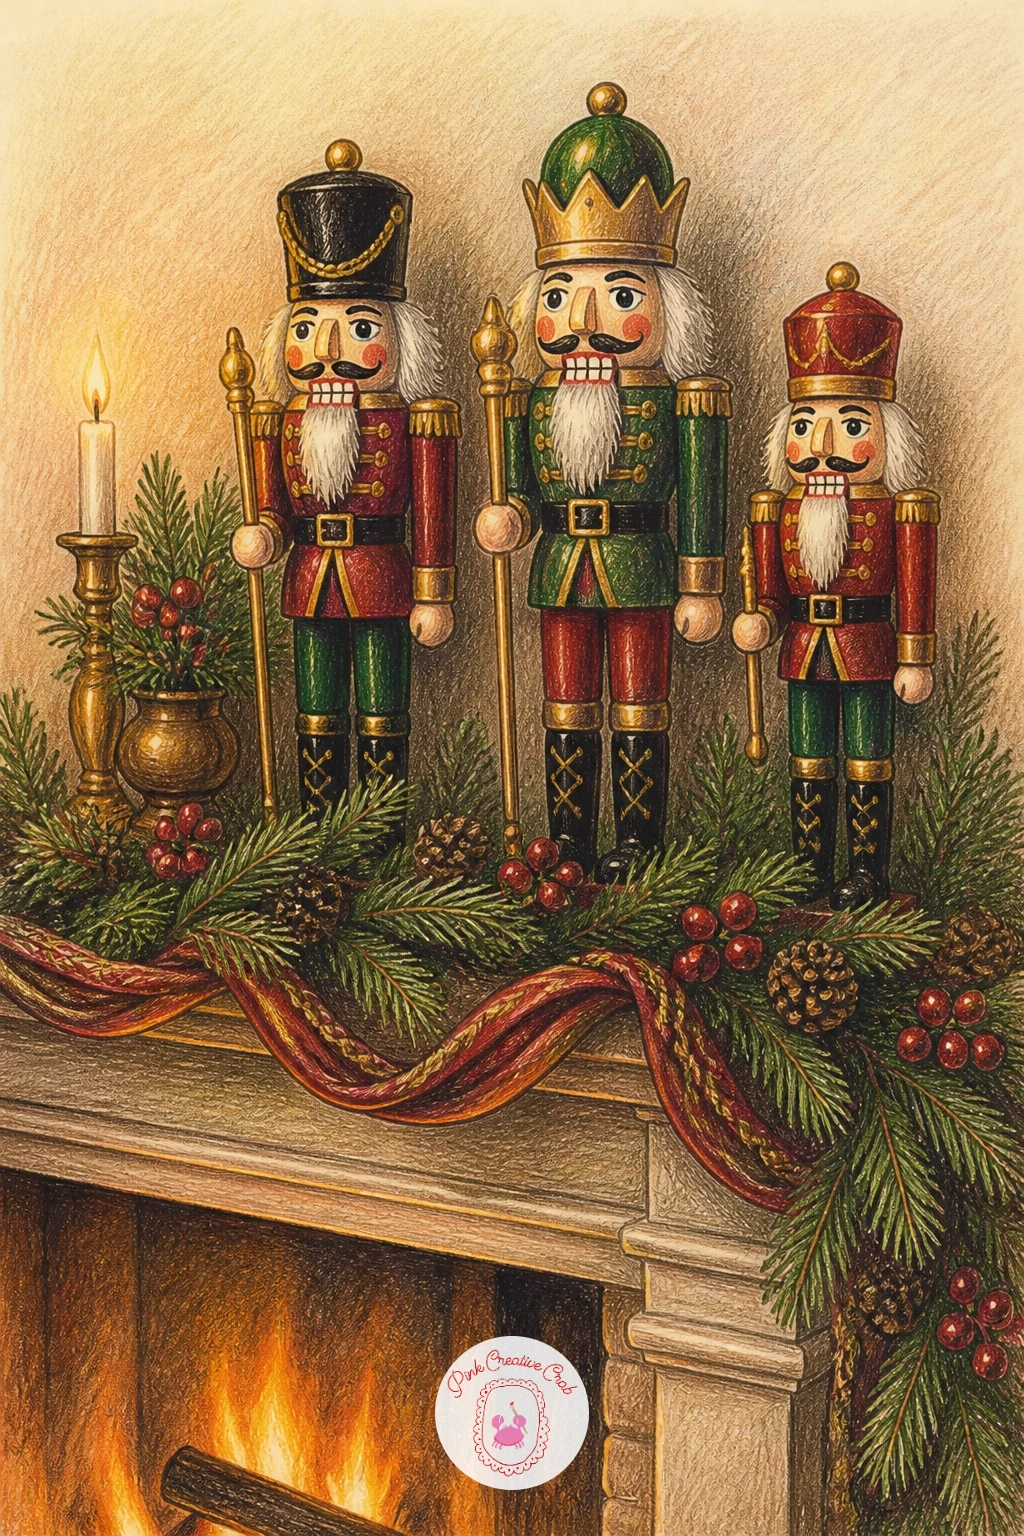
Return to a more classic mantel after the rustic cabin scene. Line up two or three nutcracker figures at slightly different heights, drawing each one as a simple cylinder body with a tall hat and a painted face, since nutcrackers are naturally graphic and symmetrical.
Paint the uniforms in alternating red and pine green so the row has visual rhythm, then tuck fresh greenery sprigs around their feet to soften the hard edges. Gold braid details on the uniforms (just thin straight lines of brass-gold pencil) add the festive polish without much extra time.
Nutcrackers often end up with mismatched proportions between figures. Draw a single faint horizontal guideline across the page first to keep every figure’s hat tip and base aligned, even if their heights vary slightly.
Swap the gold braid pencil for a metallic gel pen on top once the color layers are dry if you want extra sparkle.
You Will Need
- red and pine green pencils
- gold or brass pencil for braid
- black pencil for faces and details
- ruler for guideline
Palette: Nutcracker Red,Pine Green,Brass Gold,Cream,Deep Brown
Keep every nutcracker face minimal, a few dots and lines, since too much facial detail at this scale makes the figures look odd rather than charming.
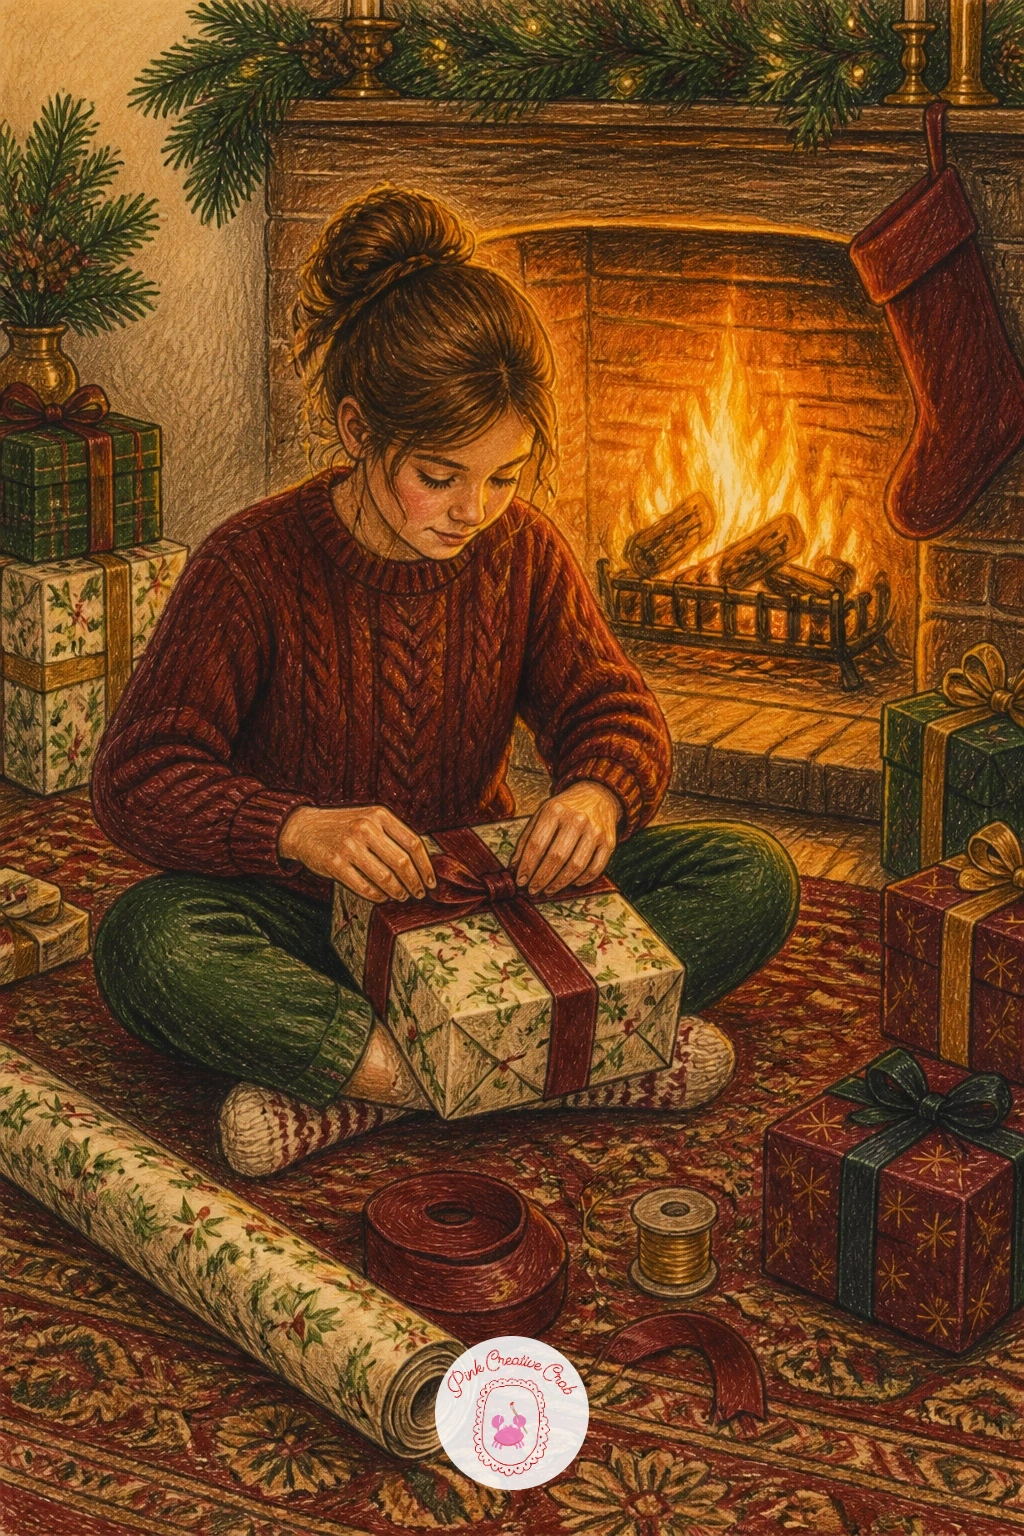
Bring the scene down onto the rug for a close, intimate moment. Draw the girl seated cross-legged with a half-wrapped box in front of her, paper and ribbon spread loosely around, keeping her pose relaxed rather than stiff.
The eye level here sits low, almost at rug height, as if you are sitting on the floor across from her, which makes the fireplace fill the whole background rather than sit as a distant detail. Work the wrapping paper in two or three patterns using simple repeated shapes (dots, stripes, tiny trees) rather than anything detailed.
Hands holding ribbon are the hardest part. Simplify them into soft rounded shapes gripping a loop of ribbon rather than drawing individual fingers, which reads perfectly well at this scale.
For more help with a cozy seated figure pose like this one, BFF drawing ideas has useful tips on simplifying hands and poses.
You Will Need
- skin tone pencil
- two or three wrapping paper color pencils
- warm brown for hair
- white pencil for ribbon highlights
Palette: Warm Skin Tone,Burgundy,Cream,Pine Green,Firelight Orange
Scatter the wrapping paper scraps unevenly around her rather than symmetrically, since a slightly messy pile reads as a real moment rather than a staged photo.
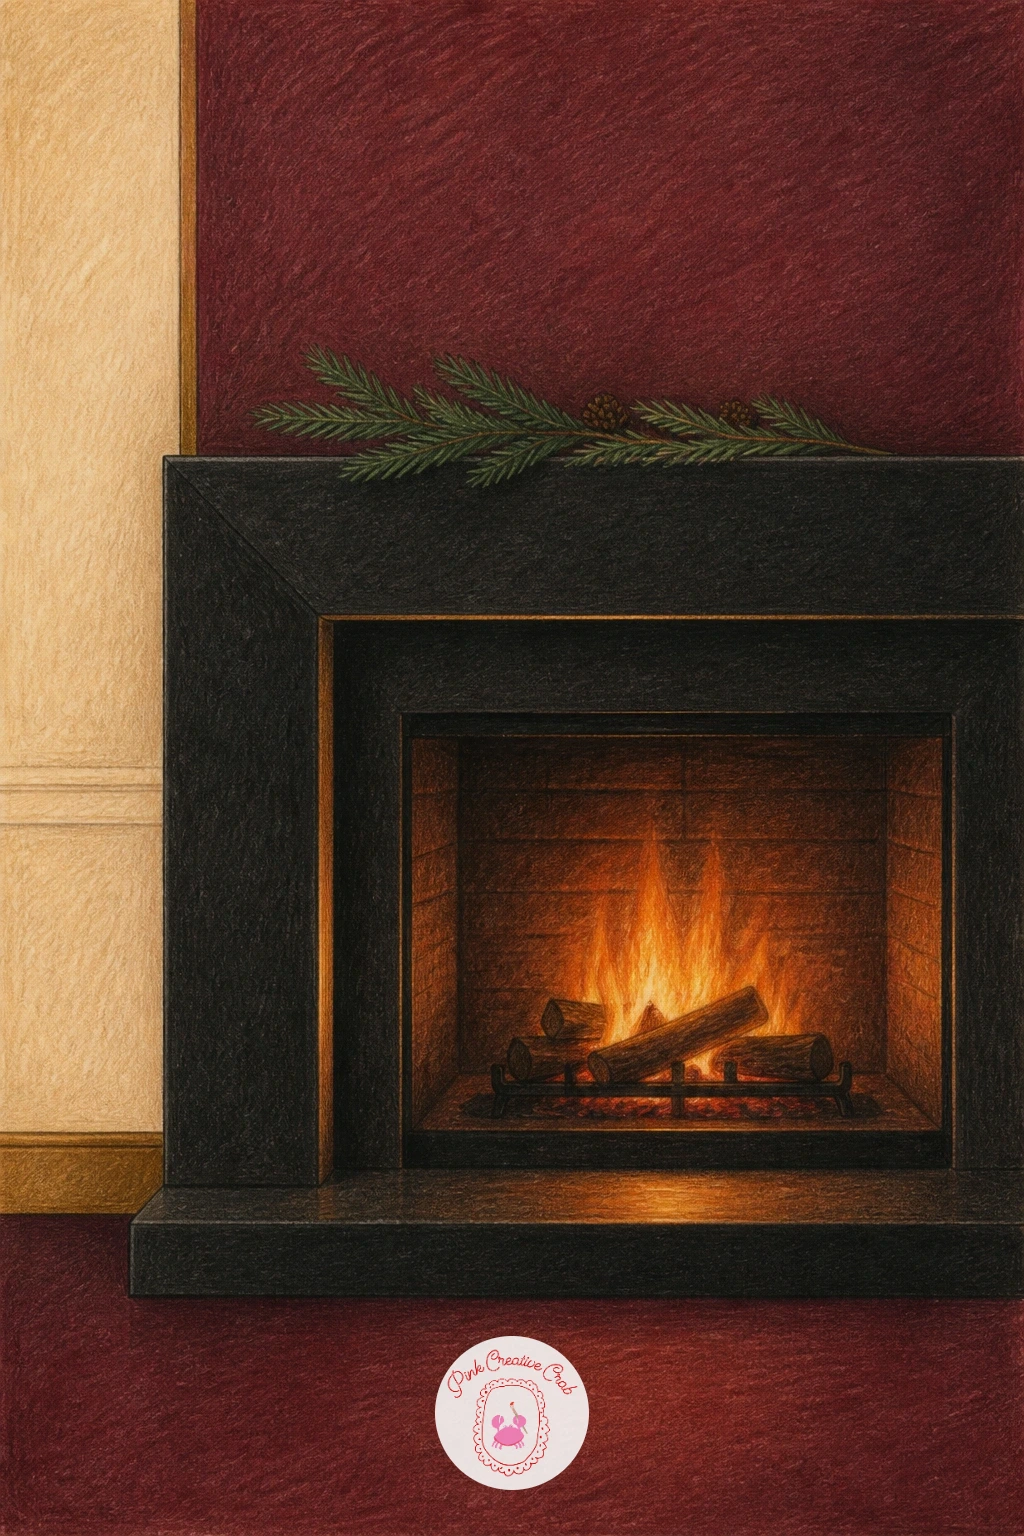
Strip the scene right back for a contrast after the busy wrapping moment. Draw the fireplace surround as a clean black rectangle, keeping every line ruler-straight, since the whole appeal of this one is architectural precision rather than texture.
Black surfaces need a true dark value, almost no light reflected, except for a thin warm highlight along one edge where the firelight catches it directly. Lay in one single sprig of pine or eucalyptus across the mantel rather than a full garland, since restraint is the whole point of a minimal styled scene.
Flat black can look like a hole in the page if there is zero variation. Push a very slightly warmer dark brown-black into the areas nearest the fire opening, and a cooler blue-black into the corners furthest from it.
No true black pencil: layer dark brown and dark blue heavily together for a near-black that still has some life in it.
You Will Need
- black and dark blue pencils
- dark brown pencil for warm black
- single green pencil for sprig
- ruler
Palette: True Black,Warm Black-Brown,Cool Blue-Black,Sage Green,Firelight Orange
Step back from the page often while shading the black surround, since value differences this subtle are easy to lose track of up close.
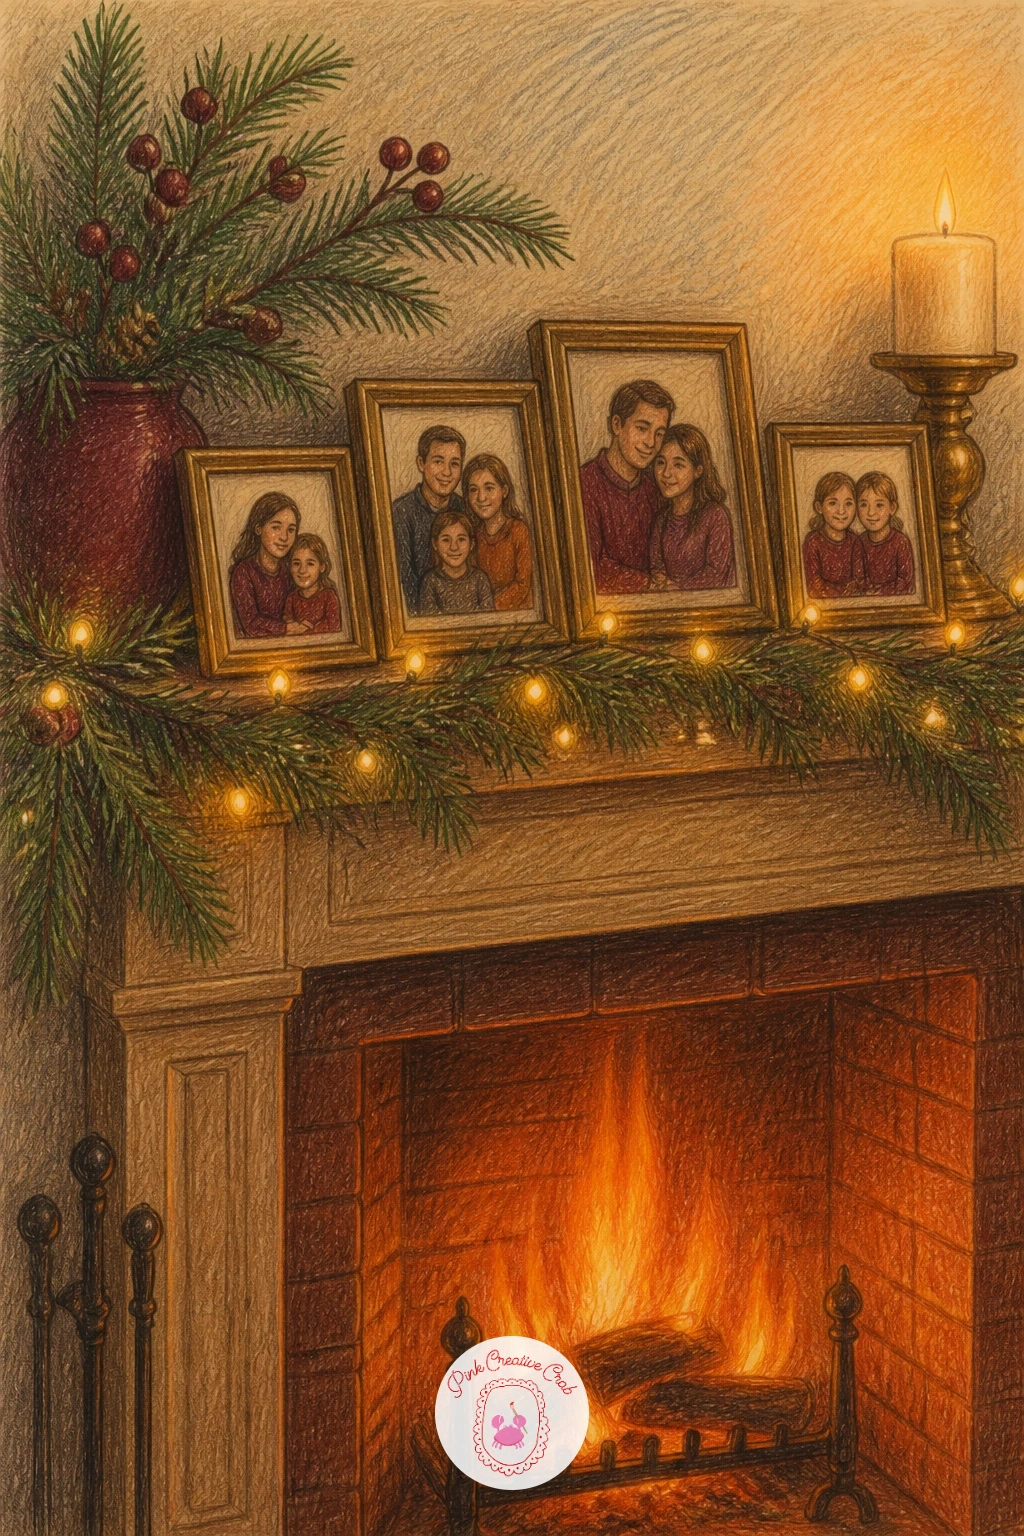
Soften things again with a personal, lived-in mantel. Draw three or four small picture frames leaning at slightly different angles along the shelf, each one just a plain rectangle outline with a loose scribble suggesting a photo inside rather than a detailed portrait.
String a line of fairy lights along the mantel edge, drawn as a thin wire with small evenly spaced dots, then give each dot a soft glow by surrounding it with a light yellow halo rather than a hard circle. The fire below and the fairy lights above should feel like two separate warm light sources, so keep the lights a cooler, whiter yellow against the fire’s deeper orange.
This scene reads as cluttered if every frame and light gets equal weight. Make one frame larger and sharper than the rest so the eye has somewhere to land first.
Swap fairy lights for a single row of small flameless candles if wiring feels fiddly to draw.
You Will Need
- warm brown pencils for frames
- pale yellow pencil for fairy light glow
- fine liner for wire and photo scribbles
Palette: Frame Brown,Fairy Light Yellow,Cream,Firelight Orange,Soft Grey
Try a photo of a real styled mantel with fairy lights for the spacing and droop of the wire, since evenly spaced dots alone can look stiff.
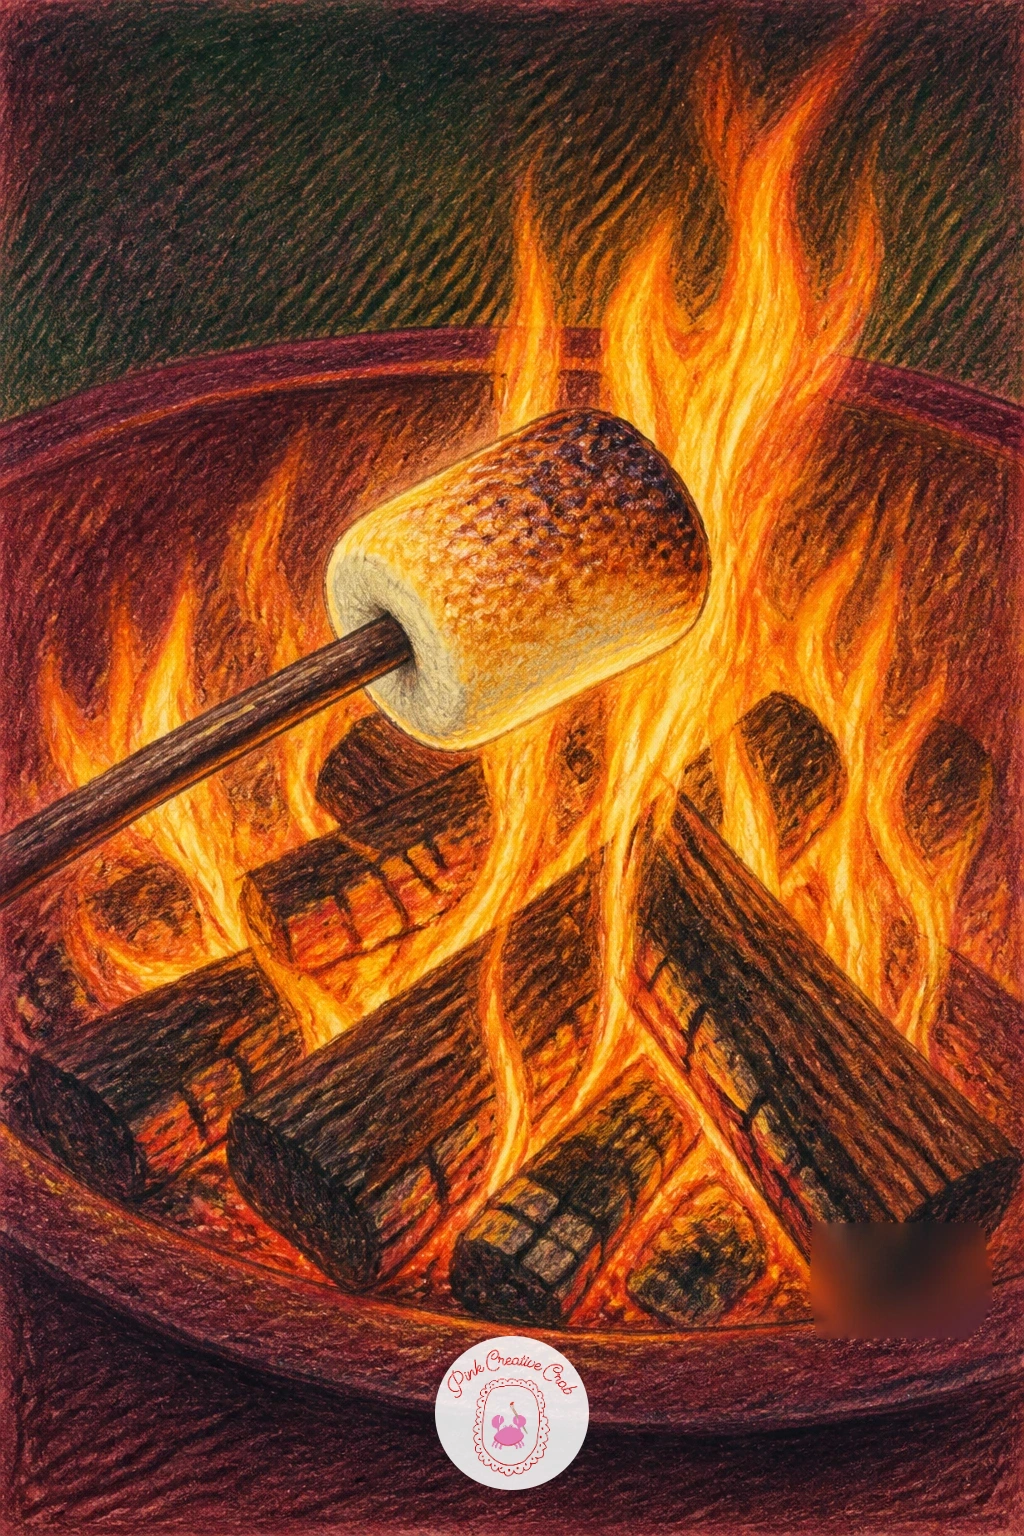
Zoom right into the fire itself for this one. Draw a long roasting stick angled into the frame from one corner, with two or three marshmallows skewered at the end, keeping the stick perfectly straight with a ruler before anything else goes down.
Build the fire first in layered yellow, orange and red, letting the colors blend loosely at the edges rather than staying in hard bands, since real flame color shifts gradually. Marshmallows toast unevenly, so color each one mostly cream with one or two patches of golden brown and a touch of near-black char at the very tip, never uniform all over.
The flame shapes themselves go wrong when drawn too symmetrical. Vary the height and curve of each tongue of fire, and let a few trail off into thin wisps rather than ending in a blunt point.
No red pencil for the fire’s core: a strong orange alone, pressed hard, reads convincingly as the hottest part of the flame.
You Will Need
- yellow, orange and red pencils
- cream pencil for marshmallows
- dark brown pencil for toasted spots
- ruler for the stick
Palette: Flame Yellow,Flame Orange,Flame Red,Marshmallow Cream,Toasted Brown
Draw the flames last, on top of a dark background, rather than trying to leave gaps for them, since it is far easier to add bright color over dark than the reverse.
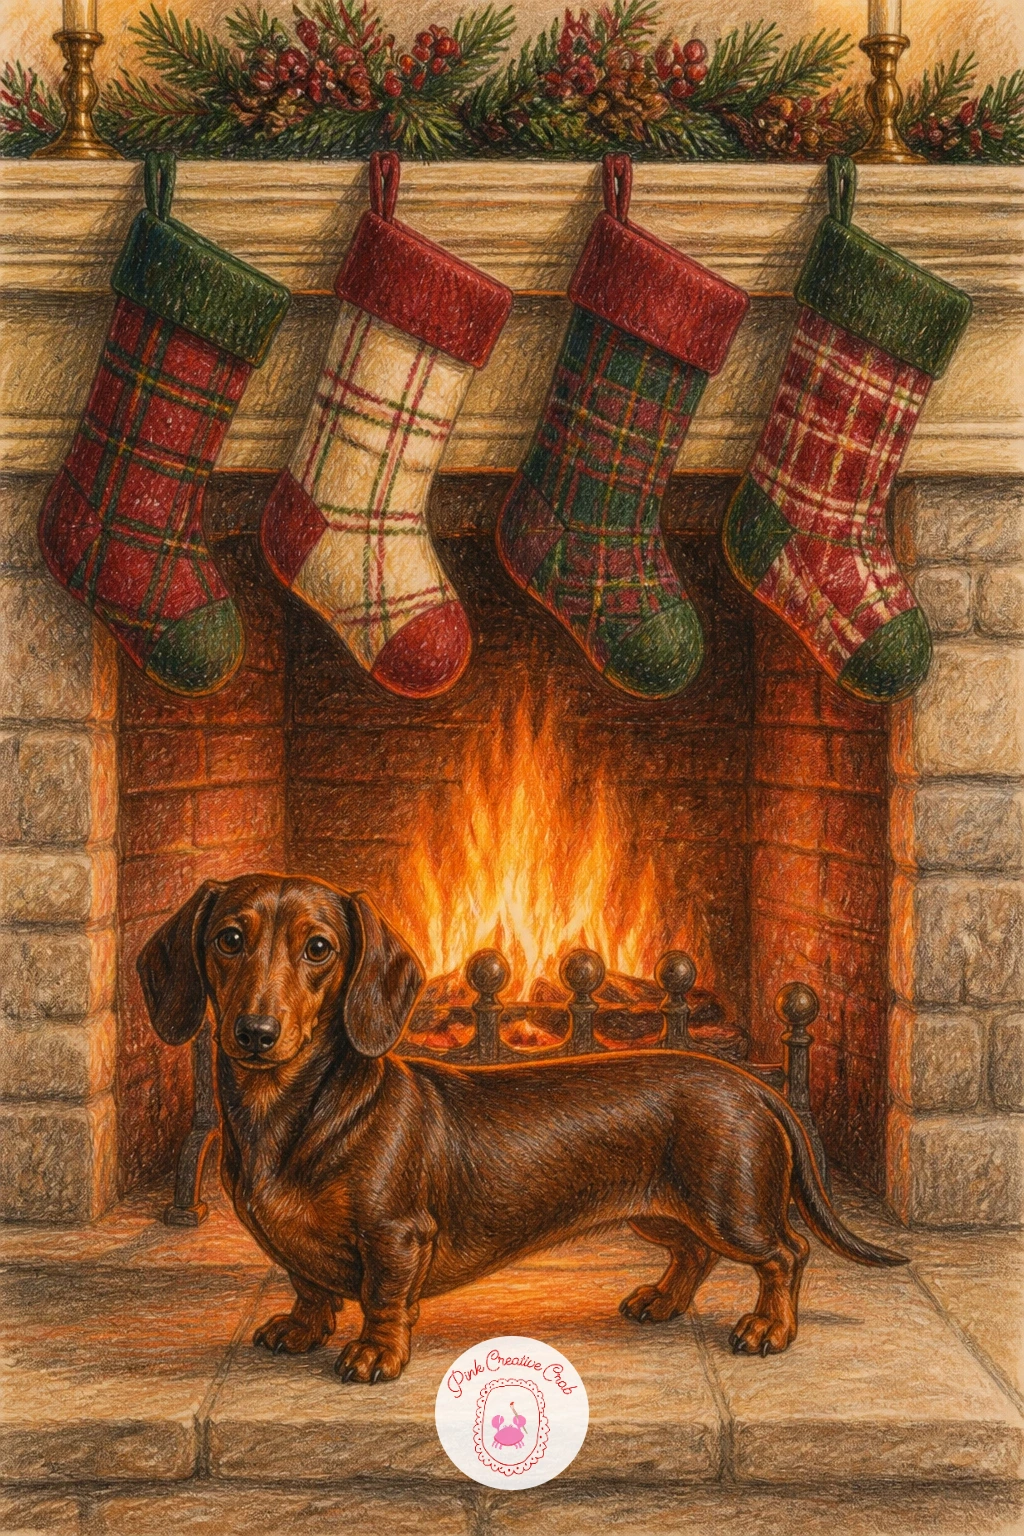
Pair a specific pattern with a specific dog for this one. Draw two or three stockings first in a simple tartan: a base color crossed with evenly spaced vertical and horizontal lines in two accent colors, which reads as plaid even when kept quite loose.
The dachshund sits or stands below the stockings, and its long low body is the whole challenge here: compare its length to roughly two and a half times its height at the shoulder, which is the proportion that makes a dachshund instantly recognizable rather than just a short dog.
Keep the coat smooth and glossy with soft blended color rather than the rougher strokes used for a shaggier dog, since dachshund fur is short and reflects more light. A thin white highlight along the back and ears sells that glossy coat.
Swap tartan for simple stripes if the crossed-line pattern feels fiddly at a small scale.
You Will Need
- red and green pencils for tartan
- warm brown pencils for dachshund coat
- black fine liner for tartan lines
- white pencil for coat highlight
Palette: Tartan Red,Pine Green,Cream,Dachshund Brown,Deep Shadow
Draw the dachshund’s body length against the stocking width beside it as a quick ratio check before adding fur, since the proportion is easy to shorten by habit.
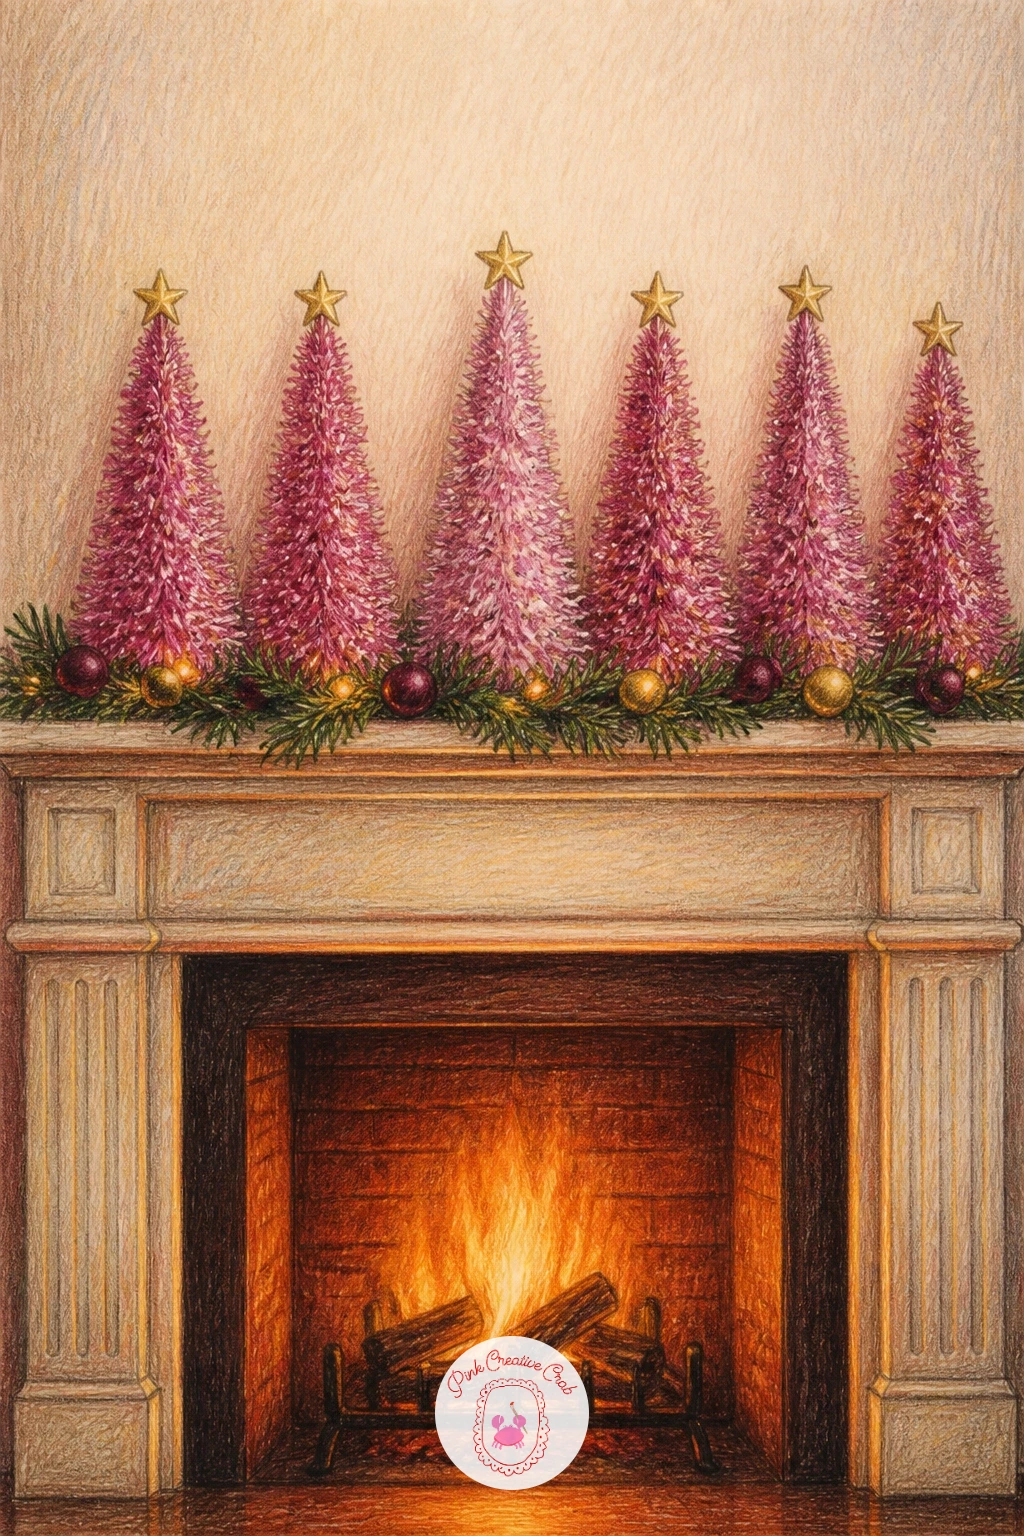
Go bold and modern again with a playful color choice. Draw three or four small tinsel tree silhouettes as simple triangles first, then build the tinsel texture with short, feathery strokes radiating outward from the center line of each tree rather than smooth shading.
Layer two shades of pink, a brighter one at the tips of each strand and a deeper rose toward the base, so the tinsel catches light the way real metallic tinsel does. A single gold star or small ornament tucked at the top of the tallest tree gives the row a focal point.
Tinsel texture turns muddy fast if overworked. Stop adding strokes once the silhouette reads clearly as fluffy rather than solid, and resist the urge to keep blending.
No two pinks on hand: a single bright pink layered unevenly, lighter in some patches and pressed harder in others, creates enough variation on its own.
You Will Need
- two shades of pink pencil
- gold pencil for star topper
- fine liner for feathery strand texture
Palette: Bright Pink,Deep Rose,Gold,Cream,Soft Grey
Work each tree’s strand strokes in one consistent direction, outward from the trunk, since mixed directions are what make tinsel texture look scribbled rather than fluffy.
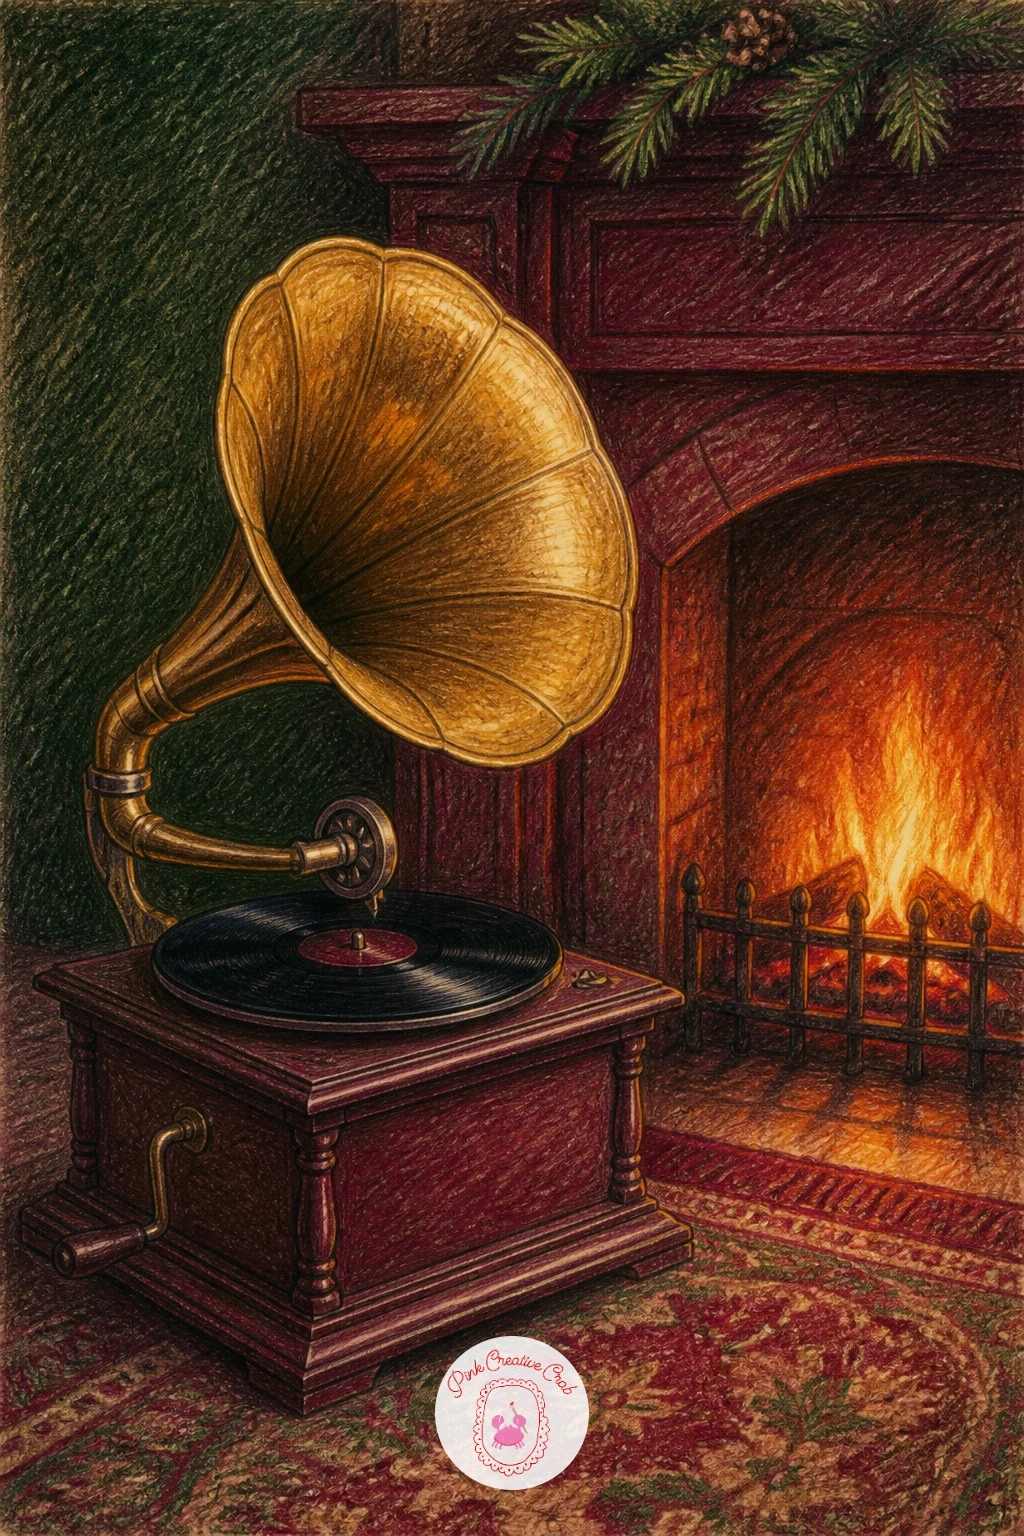
Bring in a single vintage object for a quieter, more sculptural scene. Draw the gramophone’s horn first as a smooth flared cone shape, since getting that curve right early makes the rest of the build straightforward.
Brass takes the same dark-and-bright approach used earlier on the candelabra: a warm gold base color, a dark brown shadow along the inner curve of the horn, and a few bare white highlight flecks along the outer rim. The wooden base below stays a rich warm brown with simple straight grain lines.
A record spinning on top is a nice touch if you want one, drawn as a flattened ellipse rather than a true circle, since a perfect circle on an angled surface looks pasted on rather than resting there.
Swap the full horn view for a simple three-quarter angle if the flared curve feels tricky to draw straight on.
You Will Need
- gold or ochre pencil
- dark brown pencil for shadow
- warm wood brown pencil for base
- white pencil for highlights
Palette: Brass Gold,Warm Brown,Wood Base Brown,Deep Shadow,Firelight Orange
Try a reference photo of a real gramophone horn for the flare of the curve, since that proportion between the narrow neck and wide bell is easy to get wrong freehand.
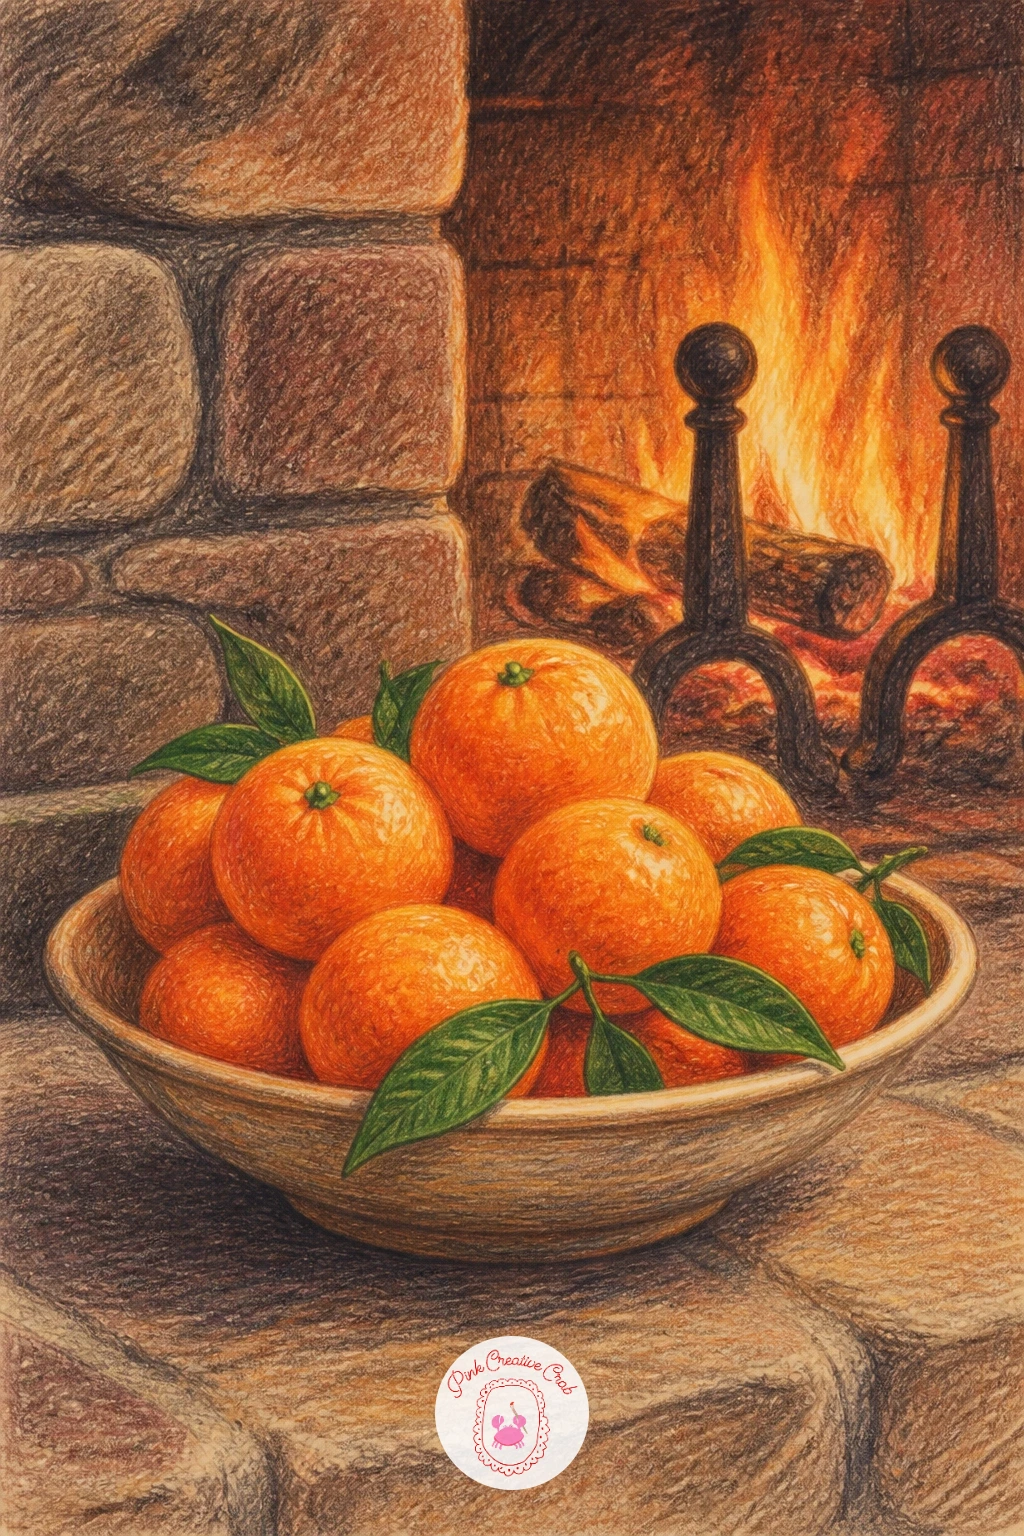
Keep the scene simple and still with this one. Draw a wide shallow bowl first as a simple curved ellipse, then fill it with six or seven overlapping clementine circles, varying their size slightly so the bowl does not look like stamped copies.
Build each clementine in warm orange with a touch of yellow near the firelight side, then darken the opposite side with a little burnt orange or brown for roundness. A few loose green leaves tucked between the fruit add a fresh note against all that orange.
Round fruit relies entirely on shading to look three-dimensional, so decide where the firelight hits from and keep every clementine’s highlight on that same side consistently.
No burnt orange pencil: layer regular orange with a little brown on top for the same shadowed effect.
You Will Need
- orange and yellow pencils
- brown pencil for shading
- green pencil for leaves
- bowl color pencil (cream or grey)
Palette: Clementine Orange,Warm Yellow,Shadow Brown,Leaf Green,Bowl Cream
Keep the highlight on every clementine on the exact same side, since that single consistency is what makes a whole bowl of fruit feel lit by one light source.
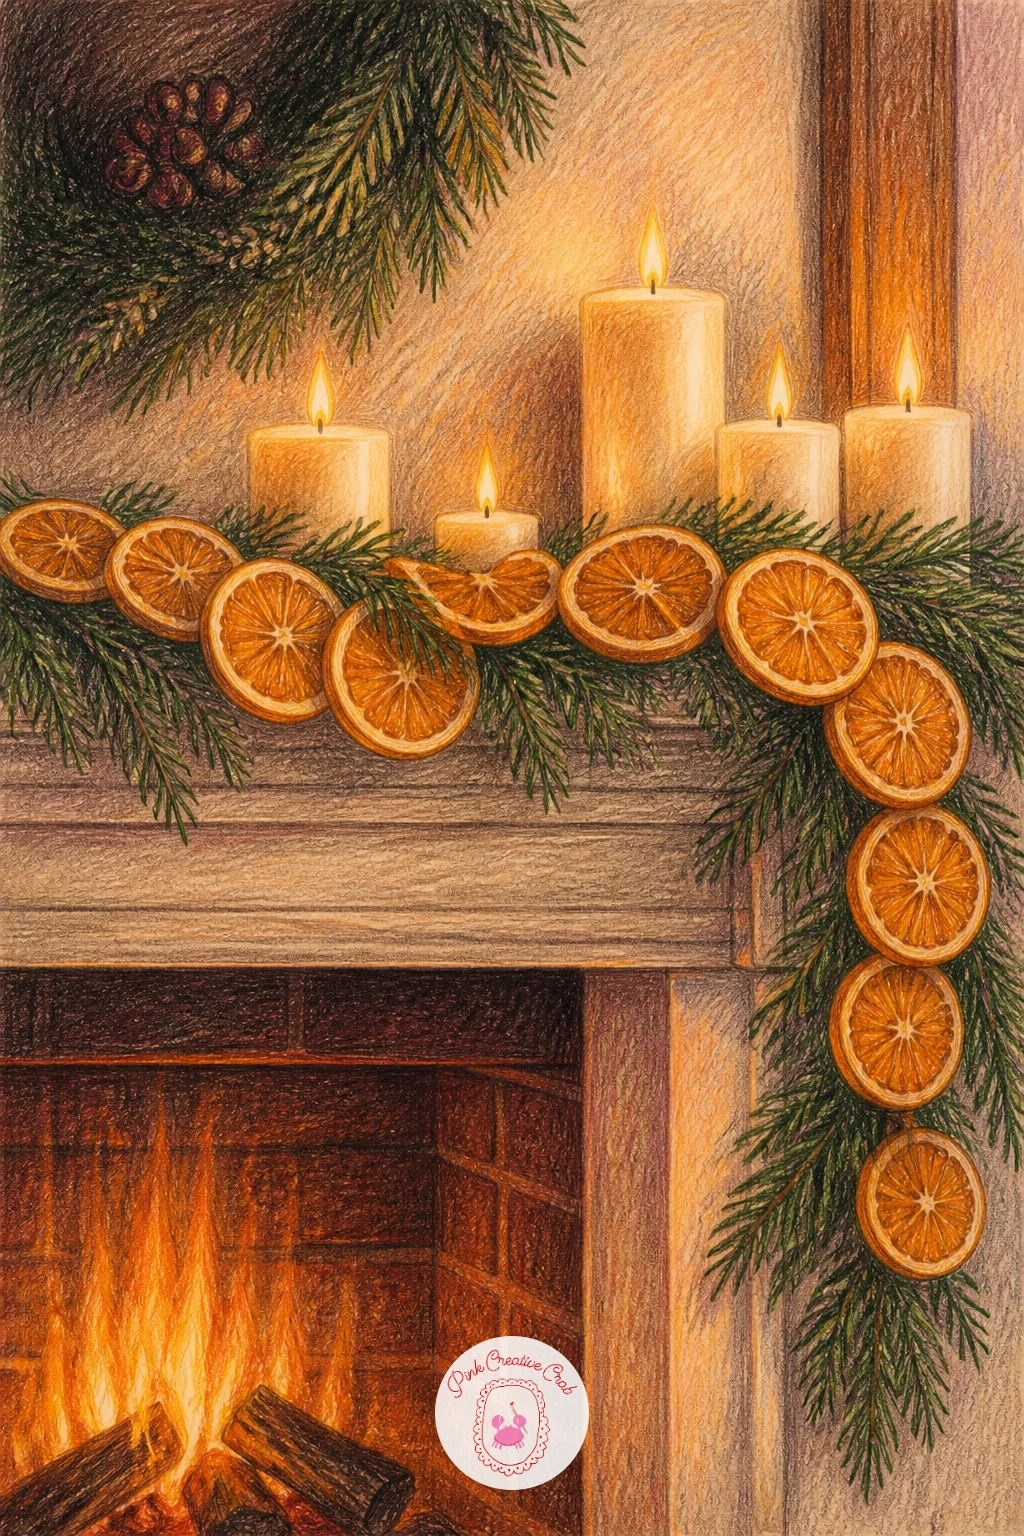
Carry the citrus theme up onto the mantel itself. Draw a simple garland string first, then thread dried orange slices along it as flattened circles with a visible pith pattern: a thin outer ring, a scalloped inner ring, and a few simple line segments dividing it into sections.
Color the slices in warm burnt orange rather than the bright clementine orange from the hearth bowl, since dried fruit is duller and more translucent-looking. Tuck a few pillar candles among the garland, their flames small and steady compared to the main fireplace glow behind everything.
Dried orange slices look flat without that pith detail, so do not skip the inner scalloped ring even though it is a small mark, since it is what separates a dried orange from a plain circle.
Swap candles for a few cinnamon sticks laid across the garland if you want an even simpler version.
You Will Need
- burnt orange pencil
- cream pencil for pith detail
- fine liner for slice segments
- candle cream and yellow pencils
Palette: Dried Orange,Pith Cream,Candle Cream,Flame Yellow,Pine Green
Draw the pith ring detail with a sharp pencil point before coloring the rest of each slice, so the thin lines stay crisp instead of disappearing under later layers.
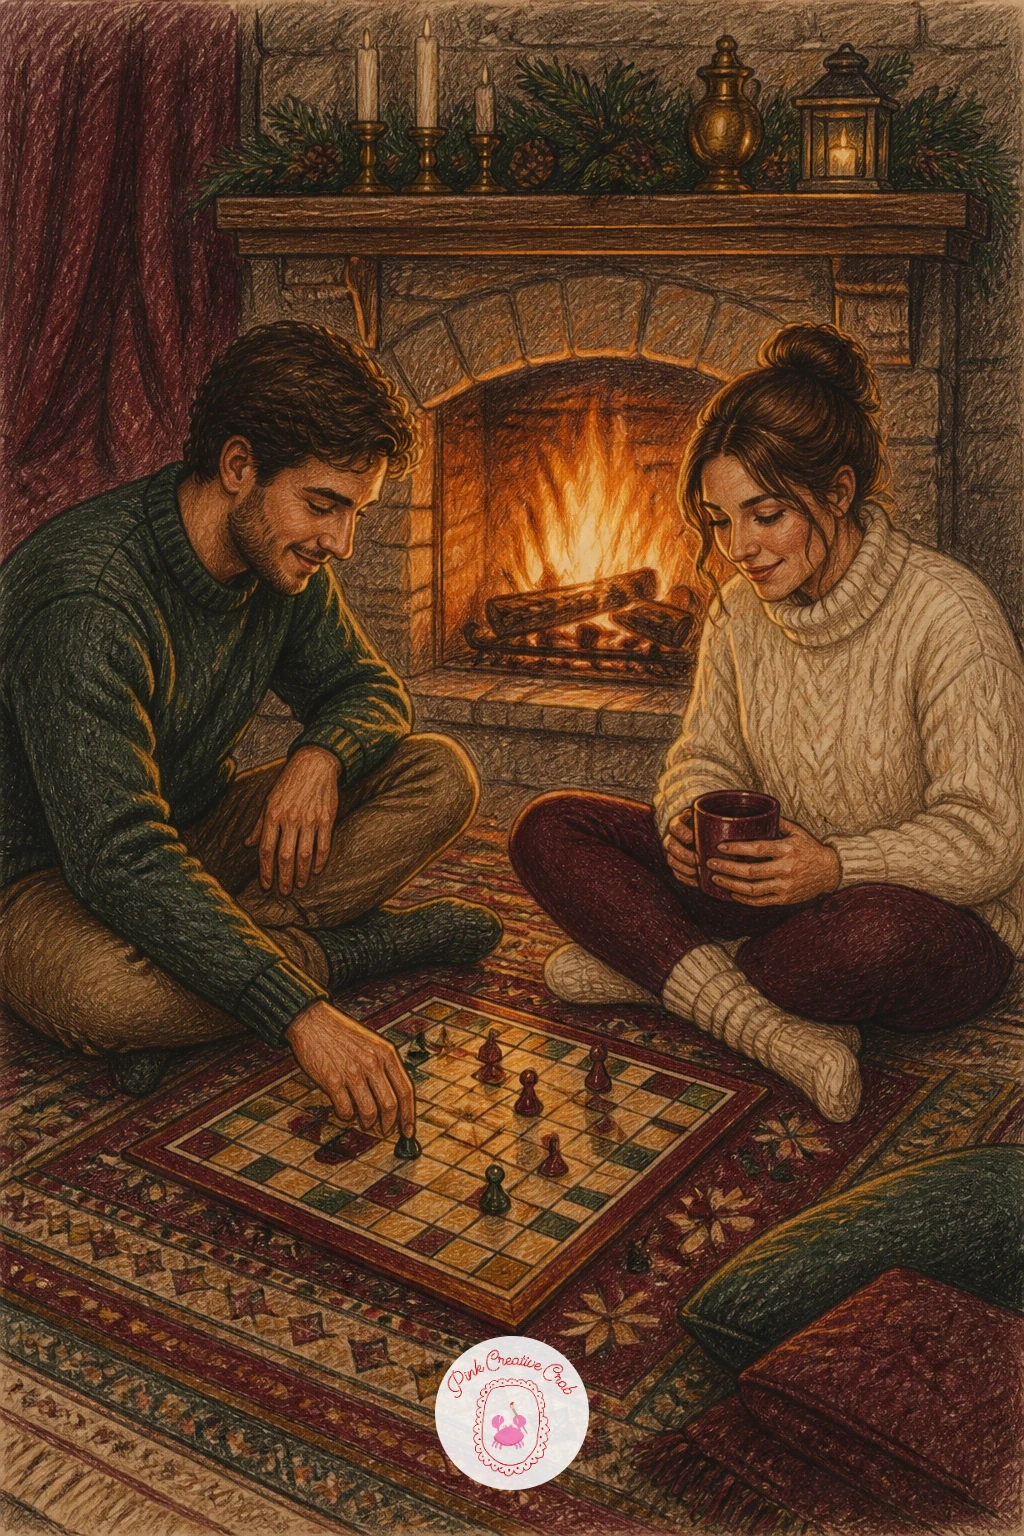
Bring two figures together for a relaxed, close moment. Seat them on the floor or a low bench facing each other across a small board, sketching both poses as loose gesture lines first so the lean and tilt of each body feels natural before any detail goes in.
Compare the two figures’ heights and shoulder widths against each other as you refine them, since even a small mismatch in scale between two people sitting close together reads instantly as wrong. Keep the game board itself simple: a grid of plain squares or a handful of scattered pieces is enough, since neither figure’s face needs to be doing much more than a soft half-smile.
Hands reaching toward game pieces are the trickiest part. Simplify them into soft mitten-like shapes rather than individual fingers, especially at this scale.
For more help easing into simple seated figures together, the Christmas aesthetic drawing lessons cover relaxed cozy poses step by step.
You Will Need
- skin tone pencils
- warm sweater color pencils
- brown pencil for board and pieces
- soft grey for shadow
Palette: Warm Skin Tone,Burgundy,Pine Green,Cream,Firelight Orange
Sketch both figures’ shoulder line on one continuous faint guideline across the page, which keeps their heights honestly matched even in a relaxed seated pose.
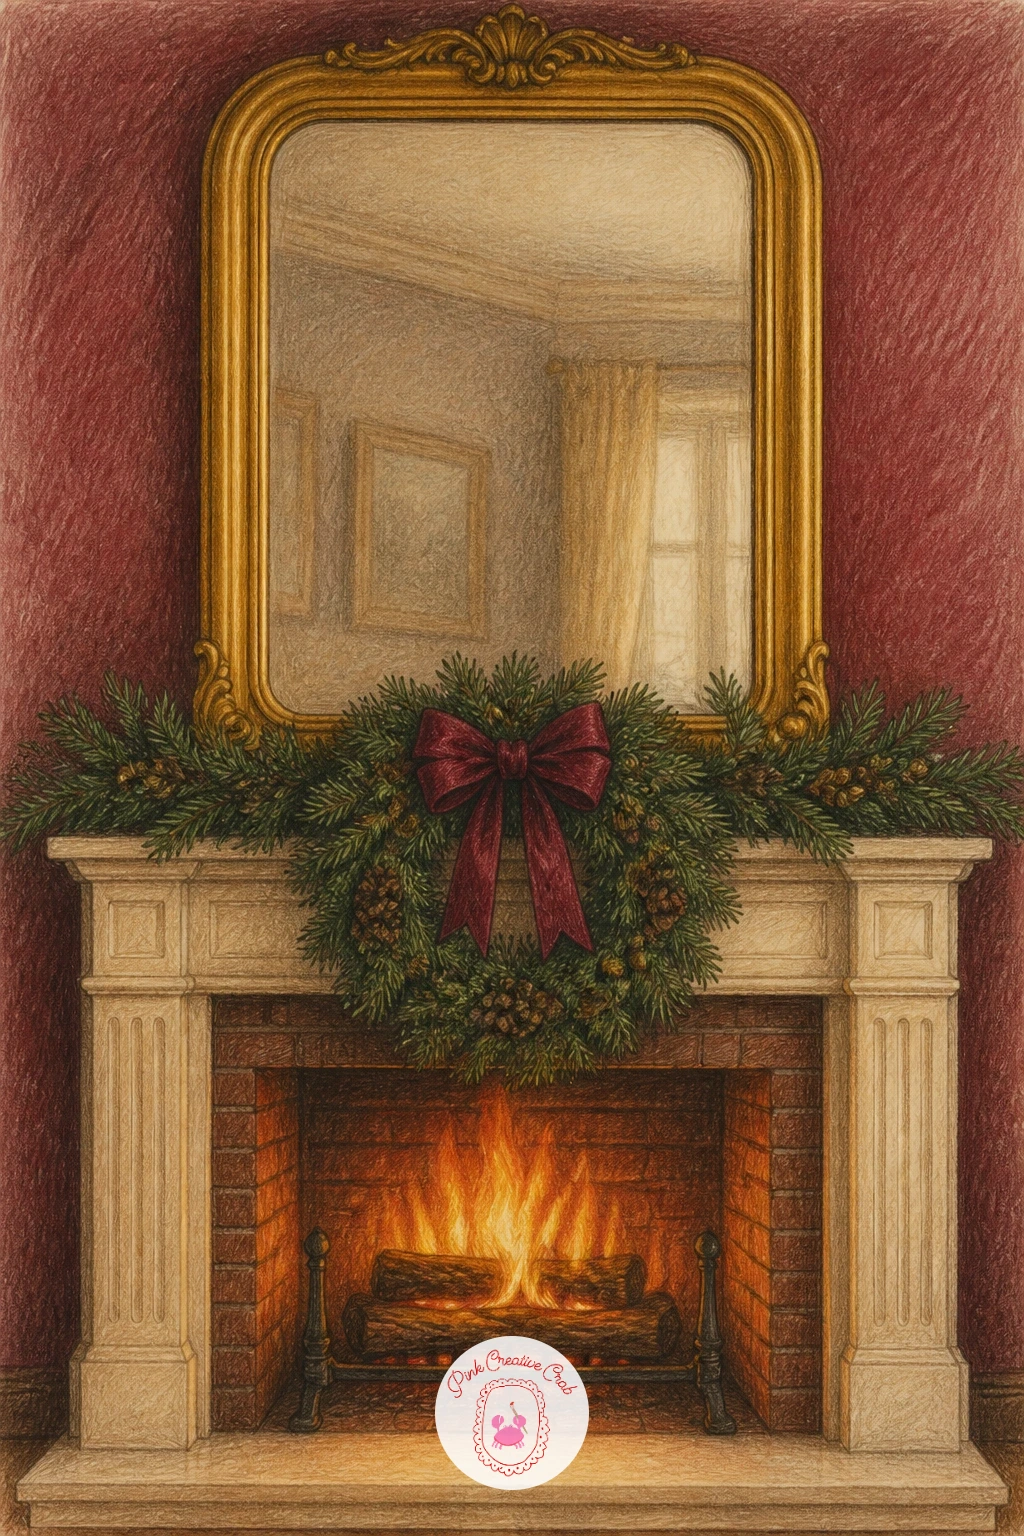
Add reflection into the scene for a bit of extra depth. Draw a large mirror frame above the mantel first, then decide what it reflects: usually a hint of the room behind the viewer, kept loose and pale rather than detailed, since a busy reflection competes with the fireplace itself.
Hang a wreath over the mirror’s lower edge or centered within its frame, building it from overlapping pine sprigs and a few berries in the same way as the garland pieces earlier, just rounded into a ring shape this time. The mirror’s glass surface needs one or two long diagonal streaks of near-white to read as reflective, placed where the firelight would naturally catch it.
Mirrors go wrong when the reflection is rendered as crisply as the real room. Keep everything inside the mirror frame slightly softer and paler than everything outside it.
No gold pencil for the mirror frame: a layered brown and yellow gets close enough for a warm metallic frame.
You Will Need
- gold or brass pencil for frame
- pale grey pencil for reflection
- pine green and red pencils for wreath
- white pencil for glass streaks
Palette: Frame Gold,Pine Green,Berry Red,Reflection Grey,Firelight Orange
Keep the mirror’s reflected content vague and pale on purpose, since a softer reflection reads as glass far more convincingly than a sharp, detailed one.
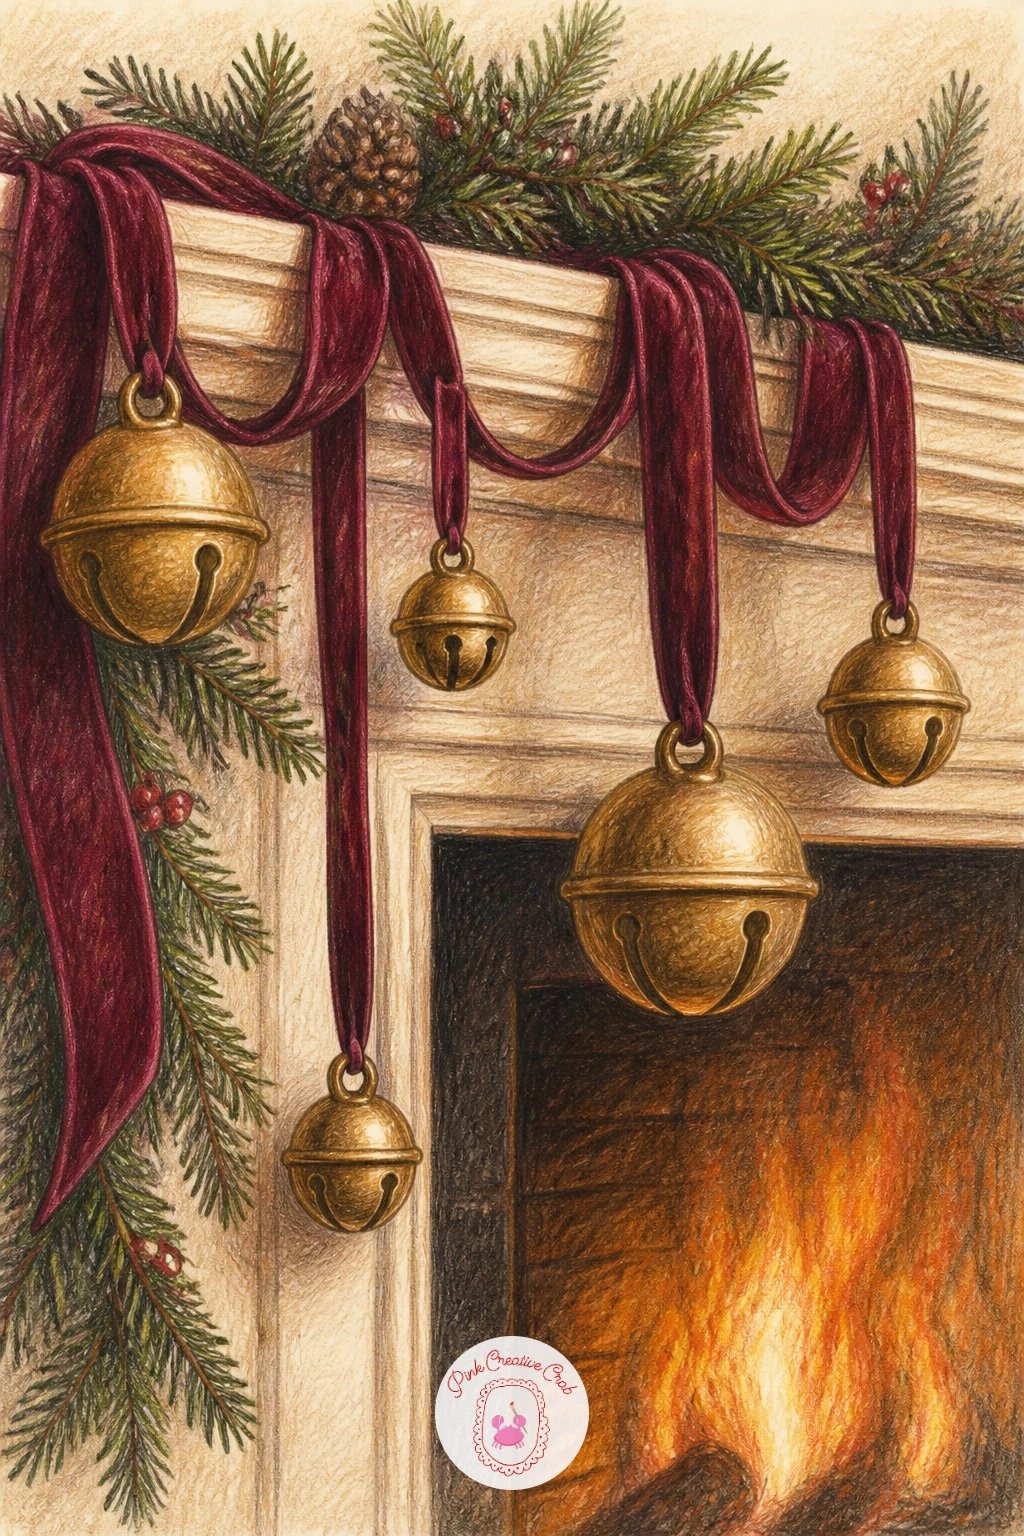
Return to brass and velvet for a smaller, more delicate still life. Draw three or four bell shapes of different sizes, each a simple rounded cone with a small loop at the top, before threading a length of velvet ribbon through and around them in loose loops.
Shade each bell with the same dark-and-bright brass approach used earlier: warm gold base, dark brown along the inner curve, a thin white highlight streak down the outer edge. The ribbon, by contrast, wants soft blended burgundy with almost no hard edges, so its matte velvet texture sits in clear contrast against the shiny brass.
Bells often end up looking like plain triangles without that small top loop and a tiny clapper line hinting at the inside. Do not skip either, even though both are small marks.
Swap burgundy ribbon for deep forest green if your mantel scenes so far lean heavily red already.
You Will Need
- brass or gold pencil
- dark brown pencil for shadow
- burgundy pencil for ribbon
- white pencil for highlights
Palette: Brass Gold,Warm Brown,Burgundy,Cream,Deep Shadow
Place the bells at slightly different heights along the ribbon rather than in a straight line, since an uneven arrangement looks more deliberately styled.
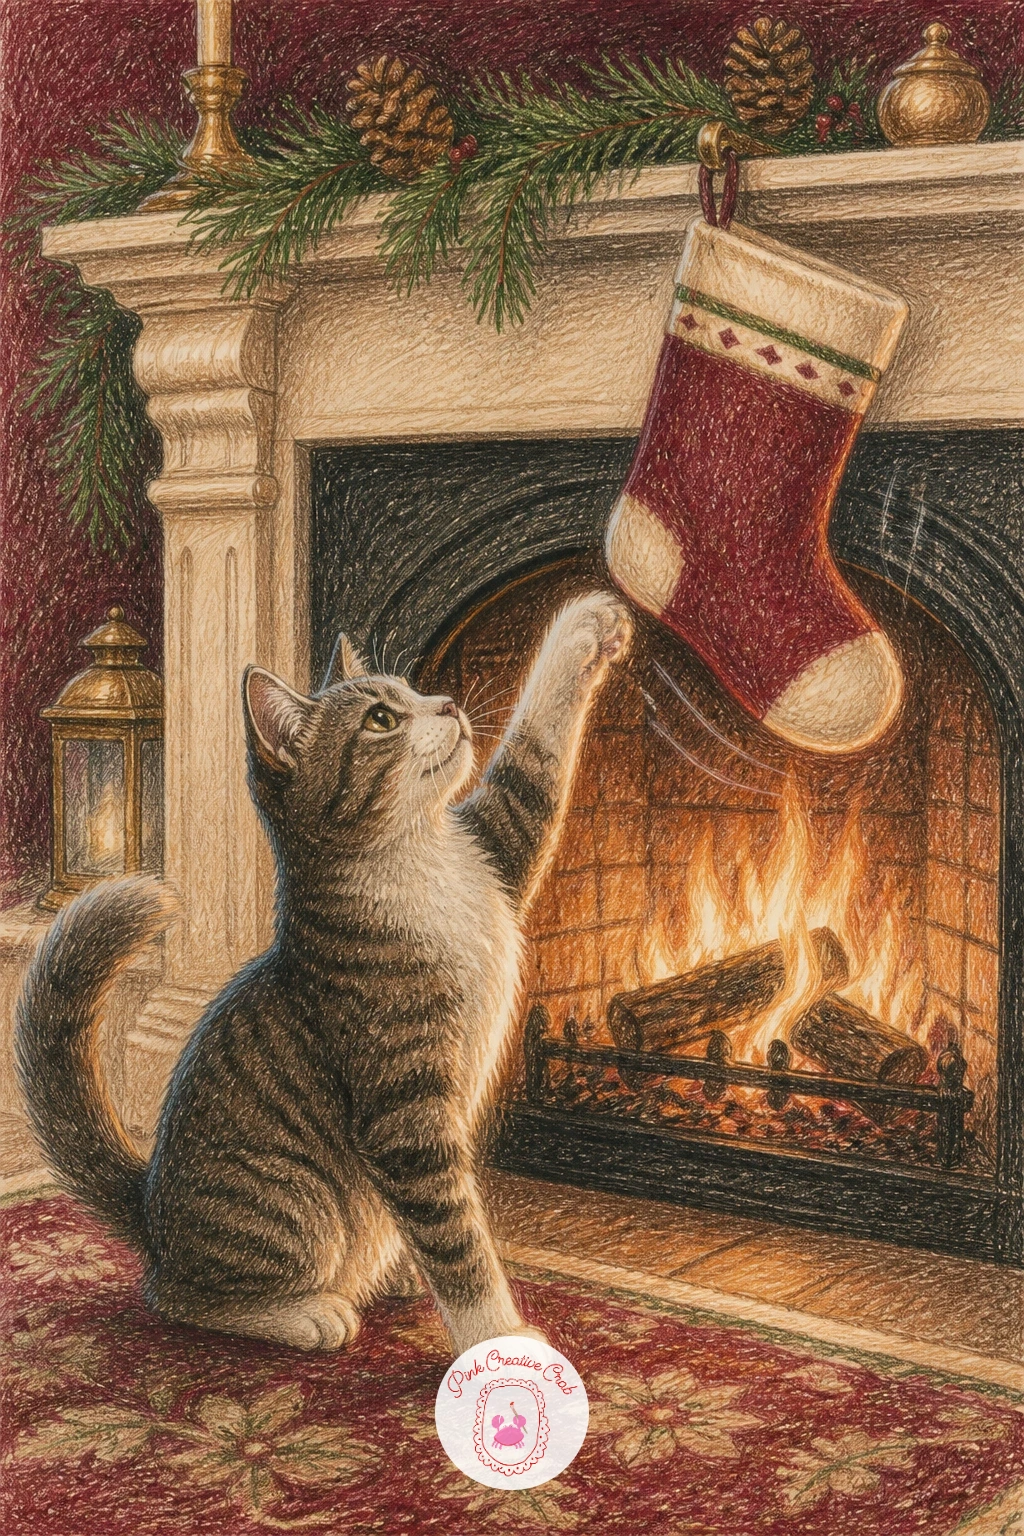
Bring in a moment of motion after several still, styled scenes. Draw the cat mid-reach, one paw raised toward the bottom of a hanging stocking, with its body weight shifted onto the back legs, since that weight shift is what makes a pose read as action rather than a static stand.
Keep the stocking swinging slightly, drawn at a small angle rather than hanging perfectly straight, to suggest it has just been touched. The cat’s raised paw and tail both want a slight blur-soft edge rather than a crisp outline, achieved by going over the pencil line lightly with a blending stump, which hints at motion without needing actual speed lines.
A quick ten-minute version is just the cat and the stocking against plain shadow. Add fuller mantel dressing (a second stocking, garland, a candle) for the forty-minute version if you have the time.
No blending stump: a cotton swab rubbed gently over the pencil line softens it almost as well.
You Will Need
- grey or tabby pencils for cat
- burgundy pencil for stocking
- blending stump or cotton swab
Palette: Tabby Grey,Charcoal Grey,Burgundy,Cream,Firelight Orange
Look at a photo of a cat mid-swipe at a toy for the exact angle of the raised paw, since that small detail is what separates playful motion from a stiff standing pose.
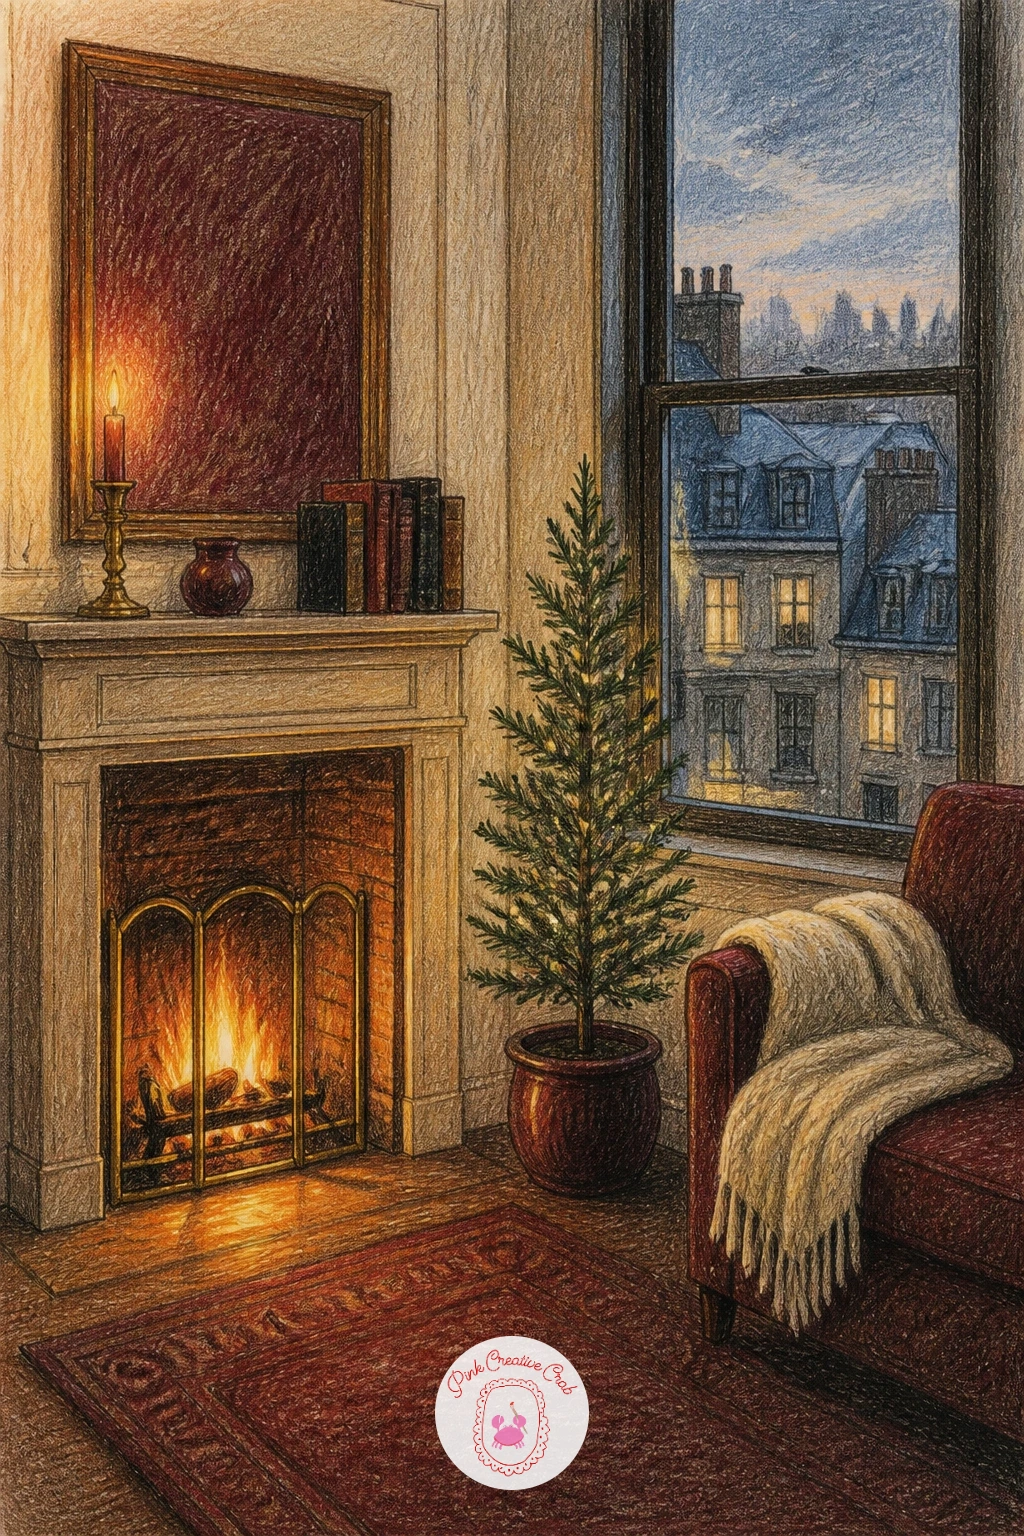
Shrink the whole scene down to apartment scale for a change of setting. Draw a narrow fireplace surround, simpler and smaller than the grand marble or stone versions earlier, with a single small tree in a pot on one side rather than a full-sized one, since that scale shift is what reads as a city apartment rather than a house.
A hint of a window behind, with a soft suggestion of city lights or rooftops in cool blue-grey, grounds the whole scene without needing real architectural detail. Keep everything inside the apartment warm (the fire, the tree’s few ornaments, the wall color) so it contrasts clearly against that cool window view.
Small apartment scenes go wrong when crammed too full. Leave genuine empty wall space around the fireplace and tree rather than filling every inch, since that restraint is what makes a small space look deliberately styled rather than just small.
Swap the window city view for a plain curtain if buildings feel fiddly to draw small.
You Will Need
- warm wall color pencil
- cool blue-grey pencil for window view
- pine green pencil for tiny tree
- gold pencil for a few ornaments
Palette: Warm Wall Cream,Cool Window Blue,Pine Green,Firelight Orange,Brass Gold
Keep the city view outside the window soft and low-contrast, since a sharp detailed skyline pulls focus away from the warm fireplace scene it is meant to support.
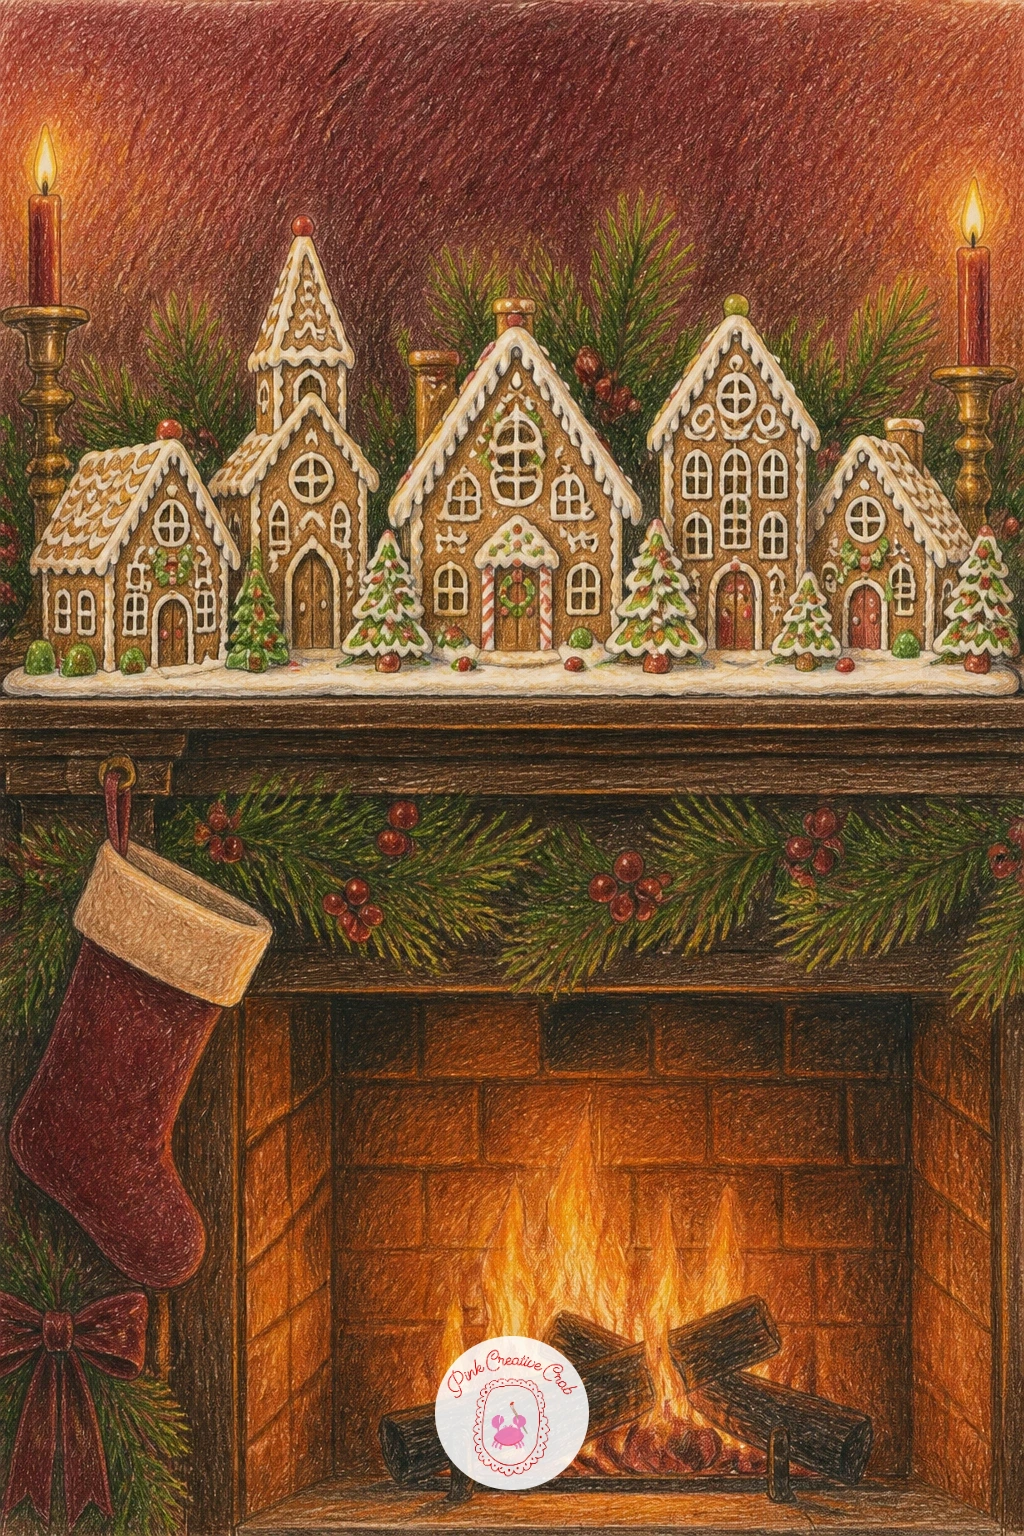
Close the list with the most detailed scene, a full miniature village lined along the mantel. Draw three or four gingerbread house shapes first, each a simple square body with a triangle roof, before adding the icing details that make them read as gingerbread rather than plain houses.
Icing goes on in thick white dots and wavy lines along every roofline and window edge, pressed firmly so the pencil sits bright and opaque against the warm brown house color beneath. A few tiny candy shapes (circles, stripes) scattered along the rooflines finish the effect without needing real detail in each one.
This is the one idea on the list worth letting run long if you enjoy it: the quick version is two houses with simple icing, the fuller version adds a path, tiny trees, and a dusting of white “snow” pencil across the whole display.
If gingerbread and cozy Christmas scenes are your favorite subject, the ideas in Christmas drawing ideas pencil make a good next stop after this one.
You Will Need
- warm brown pencils for gingerbread
- white pencil for icing detail
- red and green pencils for candy accents
- fine white gel pen for extra icing crispness
Palette: Gingerbread Brown,Icing White,Candy Red,Candy Green,Firelight Orange
Press the white pencil firmly and apply it last, on top of the finished brown houses, since icing detail needs to sit opaque rather than blend into the base color.
What to Do Next
Pick one scene that matches a mood you actually want tonight, whether that is the quiet glow of two mugs of cocoa or the full detail of a gingerbread village, and start it on a single sheet of smooth paper with a light pencil underdrawing. The mantel and the fire carry most of these ideas, so once you are comfortable with one, the rest of the list gets easier fast.
Frequently Asked Questions
What paper works best for a christmas fireplace drawing in colored pencil?
Smooth to medium-tooth paper made for colored pencil or bristol board works best. It takes layered color cleanly and lets you blend marble, brass and fur textures without the paper surface breaking down under repeated layers.
How do you make firelight look warm instead of flat orange?
Layer yellow first, then orange over it, then a touch of red only in the hottest, smallest areas. Keep the surrounding shadows cool (grey-blue or soft violet) so the warm fire colors stand out by contrast.
What is the easiest idea on this list to start with?
The white marble mantel with a pampas and pine garland is the simplest entry point, since it relies on one straight shelf line and loose texture rather than a figure, animal or tricky perspective.
How do you keep a mantel scene from looking too busy?
Pick one main focal point, a bow, a figure, a sleeping dog, and let everything else (garland, stockings, candles) stay simpler in color and detail so the eye knows where to land first.
Can these ideas work in graphite only, without color?
Yes, though the warm firelight against deep shadow is easier to read in color. In graphite alone, push the value contrast harder between the fire area and the shadowed room so the glow still reads clearly.
Have any thoughts?
Share your reaction or leave a quick response — we’d love to hear what you think!
-
 0
-
0
-
0
-
0
-
0
-
0


