

Witchy watercolor is the sort of painting that lets you light a candle, put on something quiet, and spend an hour somewhere between a cottage kitchen and a moonlit garden. There is no need for anything scary here: these pages lean into plum shadows, deep green herbs, mustard candlelight and soft black cats curled up on old books, the kind of cozy spell-work that looks lovely pinned to a board or framed on a shelf.
Below you will find thirty-one small scenes, each one a complete little world you can finish in a single sitting, starting simple and building up to busier compositions once your wrist has warmed up. Pick whichever one is calling to you tonight and let the paint pool where it wants to.
Using these images: free for personal projects such as printing, coloring, cards, journals and gifts. Handmade items that include them may be sold up to 30 pieces per design. More than that is commercial use and is not permitted, and neither is selling or sharing the images themselves or passing them off as your own. Please ask before any other use.
Start with the witch reading a spell book with a black cat curled beside her, since it sets the whole mood for everything else on this list. Pencil in a simple seated shape first: rounded shoulders, a pointed hat, and the book open on her lap, keeping the proportions loose rather than anatomically exact.
Block in the cat as a soft black oval with triangle ears before you touch the witch’s robe, so the darkest shape anchors the page early. Paint the robe in wet plum with a deep green shadow side, then drop mustard candlelight along one edge of the book while the paper is still damp so it glows rather than sits flat.
If you are new to this, keep the face mostly a suggestion: a small nose and closed eyes read as peaceful and save you from fussing over features. Swap the plum for a deep indigo if that is what is already open on your palette.
Finish with a fine black pen for the spell book’s tiny symbols once everything is bone dry, and stop there rather than adding more detail than the scene needs.
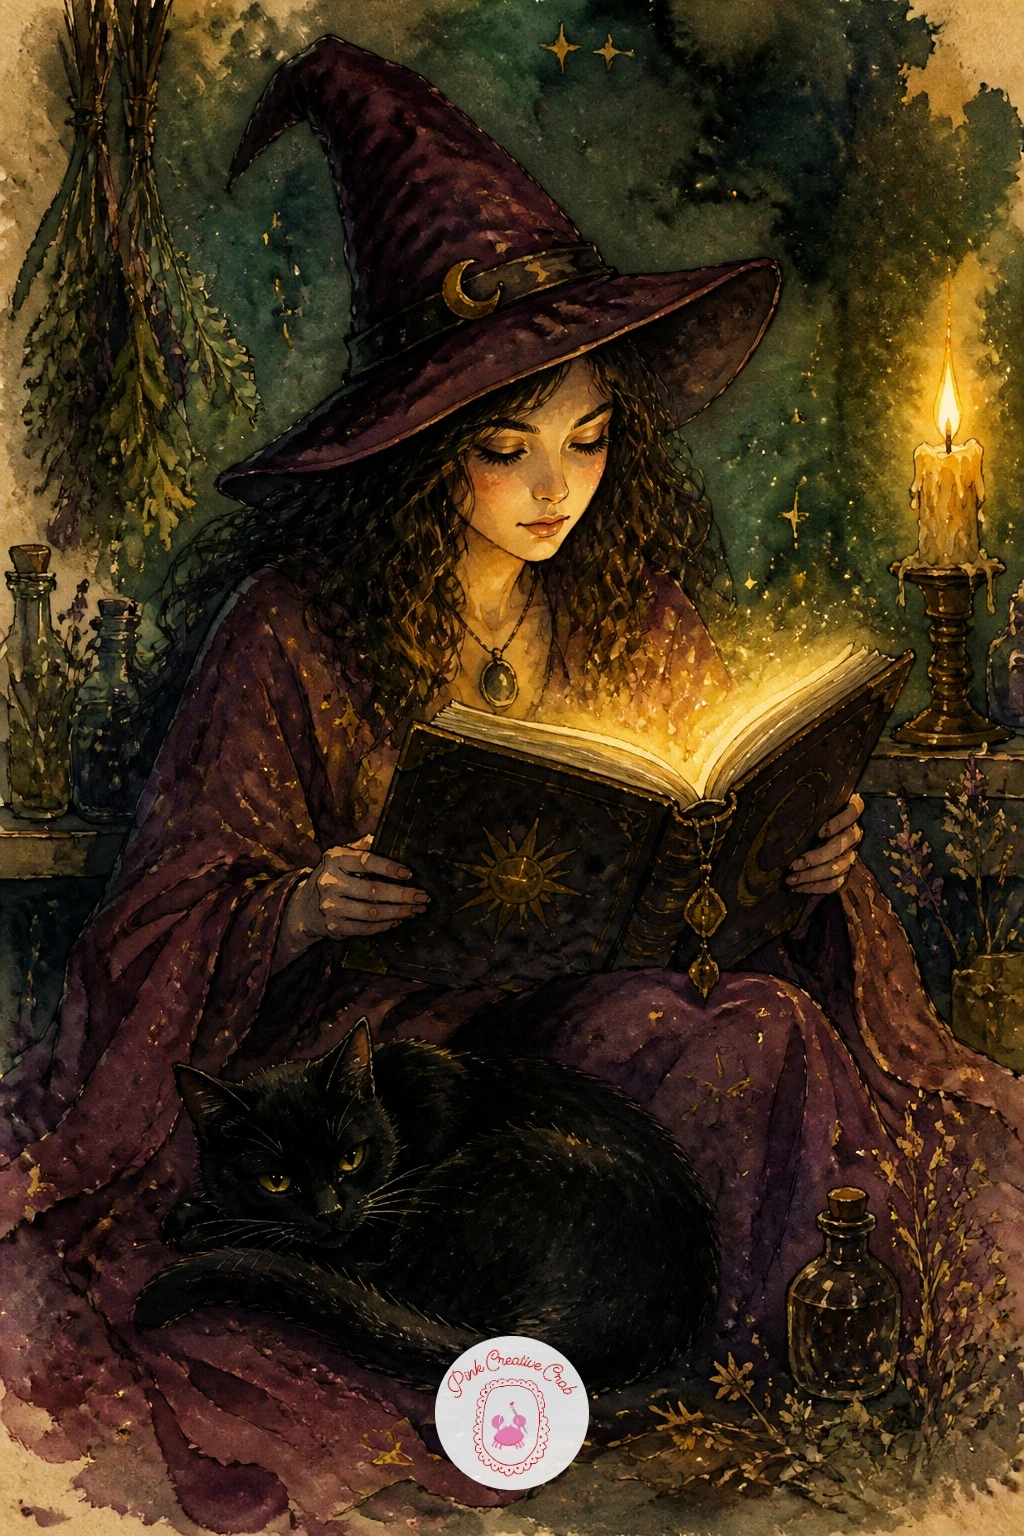
Palette: Quinacridone Violet,Hooker’s Green,Mustard Yellow,Ivory Black
Reference a seated cat photo for the curl of the tail, since that small curve is what makes the cat read as relaxed rather than stiff.
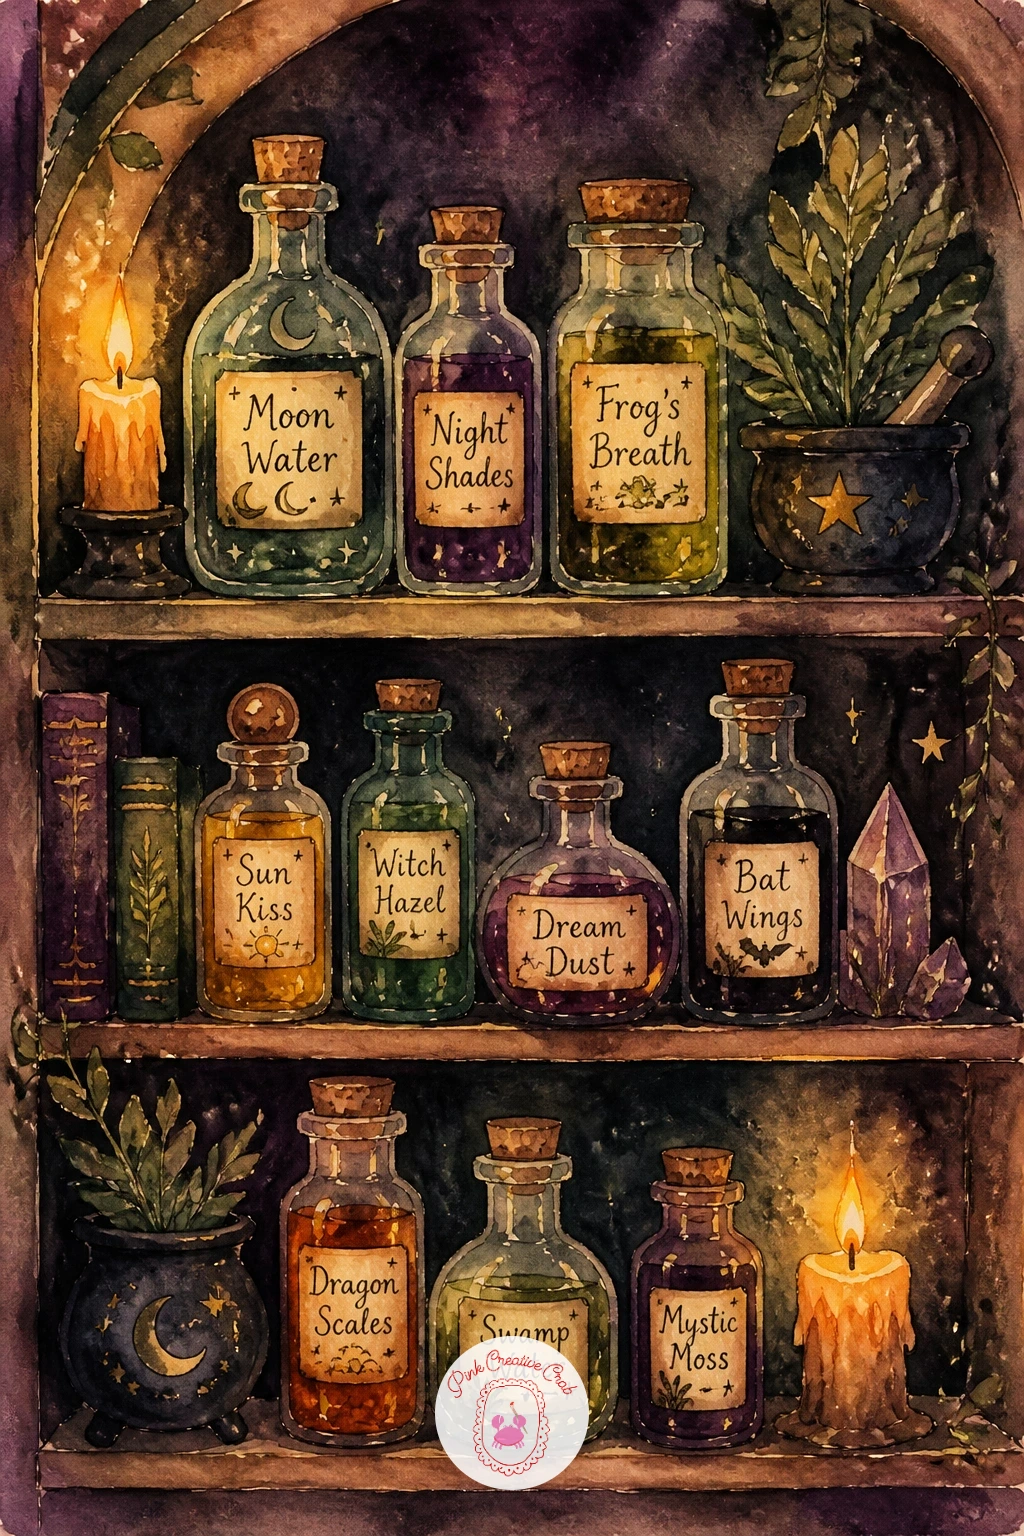
Move from the witch herself to her supplies with a potion shelf lined with labeled bottles, a subject that rewards a loose hand more than a careful one. Draw a simple wooden shelf line first, then sketch five or six bottle shapes of different heights along it, no two quite the same silhouette.
Paint each bottle in one quick wash of color while the others dry, cycling through plum, green and mustard so the row reads as a set rather than a muddle. Measure the gaps between bottles with your brush handle before you paint, since even spacing is what keeps a shelf of small objects from feeling cramped or lopsided.
Drop a little clean water into the wet glass to lift soft highlights once the first wash has set, which gives the bottles that glassy shimmer without any white paint. If your watercolor set has no deep green, a mix of blue and a touch of brown gets you there just as well.
Finish with tiny pen labels on two or three bottles only, leaving the rest blank so the eye has somewhere to rest.
You Will Need
- white gel pen
Palette: Payne’s Grey,Hooker’s Green,Mustard Yellow,Deep Plum
After a shelf of bottles, slow down with a single witch hat hung with dried flowers on a hook, a quieter subject that still carries plenty of charm. Sketch the hat as two simple triangles, a tall cone and a wide brim, before you add the hook or any flowers.
Paint the hat in one flat wash of black or deep plum and let it dry completely, since dried flowers only read clearly against a settled, even background. Add small sprigs of dried lavender and mustard-colored seed heads tucked into the hatband with a fine brush, working from the hook outward so the stems all point the same loose direction.
This is a good one for comparing sizes before you commit: hold your brush up to the hat to check the flowers stay small and secondary rather than overwhelming the shape. If you lack black paint, a dark mix of plum and green reads just as witchy and keeps a little color warmth in the shadow.
One concrete tip: paint the hook last in a thin dark line so it sits convincingly behind the brim.
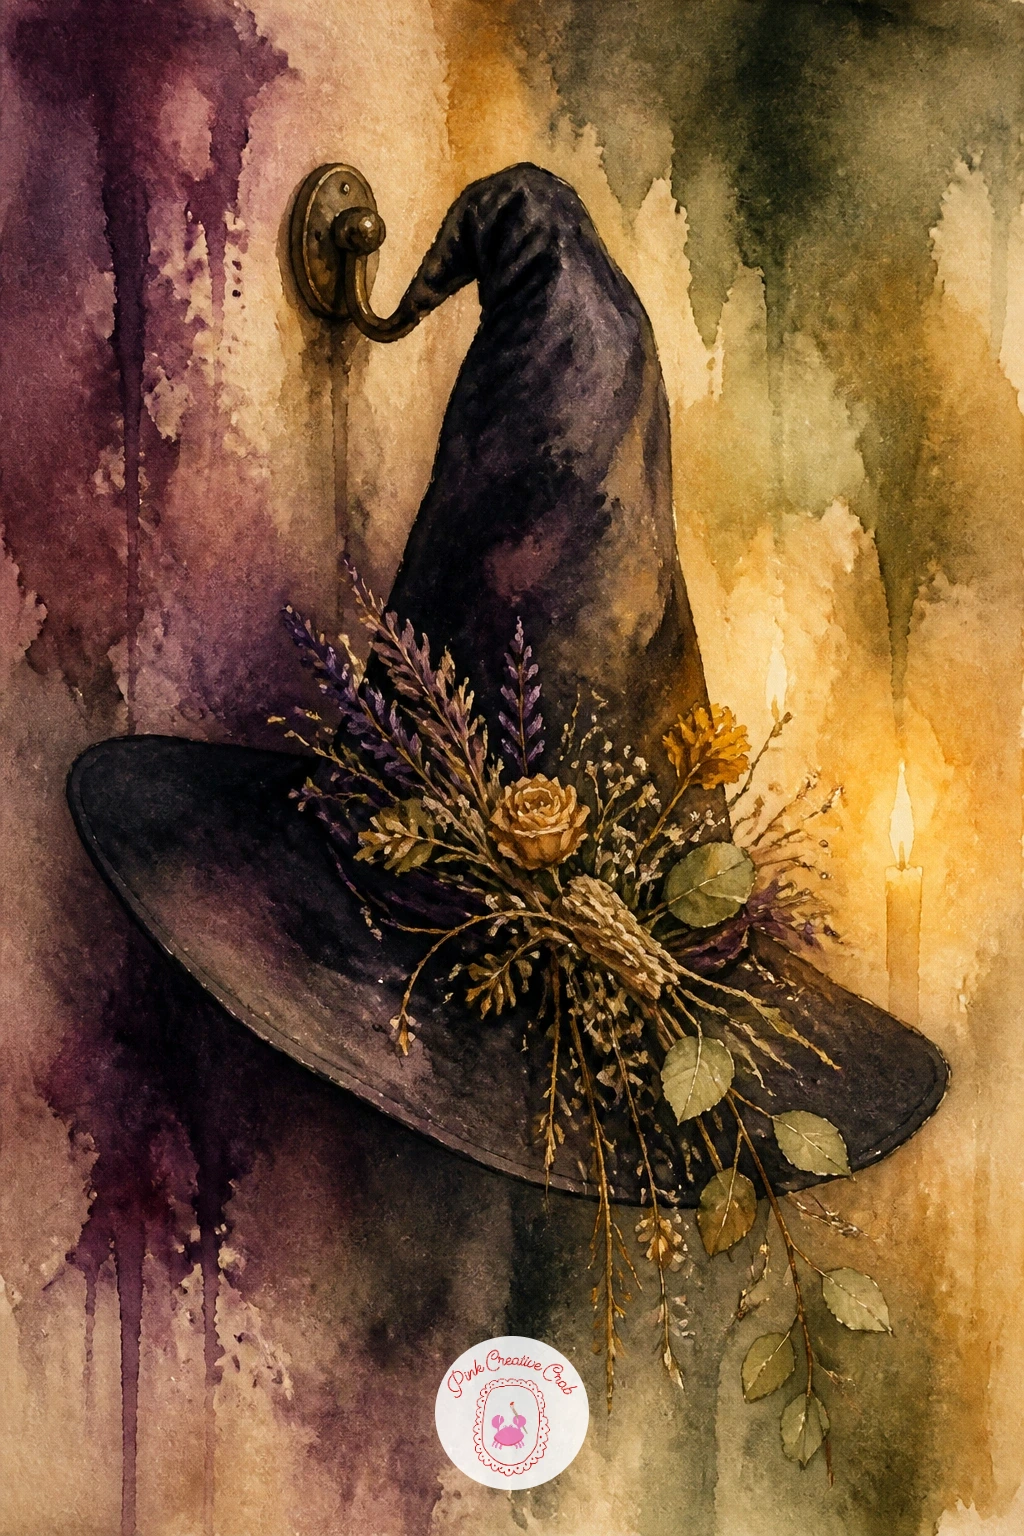
Palette: Ivory Black,Deep Plum,Mustard Yellow,Sap Green
Bring some warmth back into the page with a witch brewing tea in a cauldron, since steam and candlelight make this one feel instantly cozy. Draw the cauldron low and round on the page first, then place the witch standing just behind it, stirring with one arm extended.
Paint the cauldron in a dark wash with a mustard rim catching the firelight below it, then work upward into the witch’s robe while the cauldron is still a little damp so the two shapes blend softly where they meet. Add the steam last in very pale grey, dragging a nearly dry brush upward in loose wisps rather than solid lines.
The usual trouble spot here is steam that looks stiff: keep your brush almost out of water for this part and let the paper texture break up the stroke naturally. If you only have a round brush and no flat one, a dry round dragged sideways gives the same broken, wispy texture.
Finish by dabbing a little orange glow at the base of the cauldron to suggest the fire underneath.
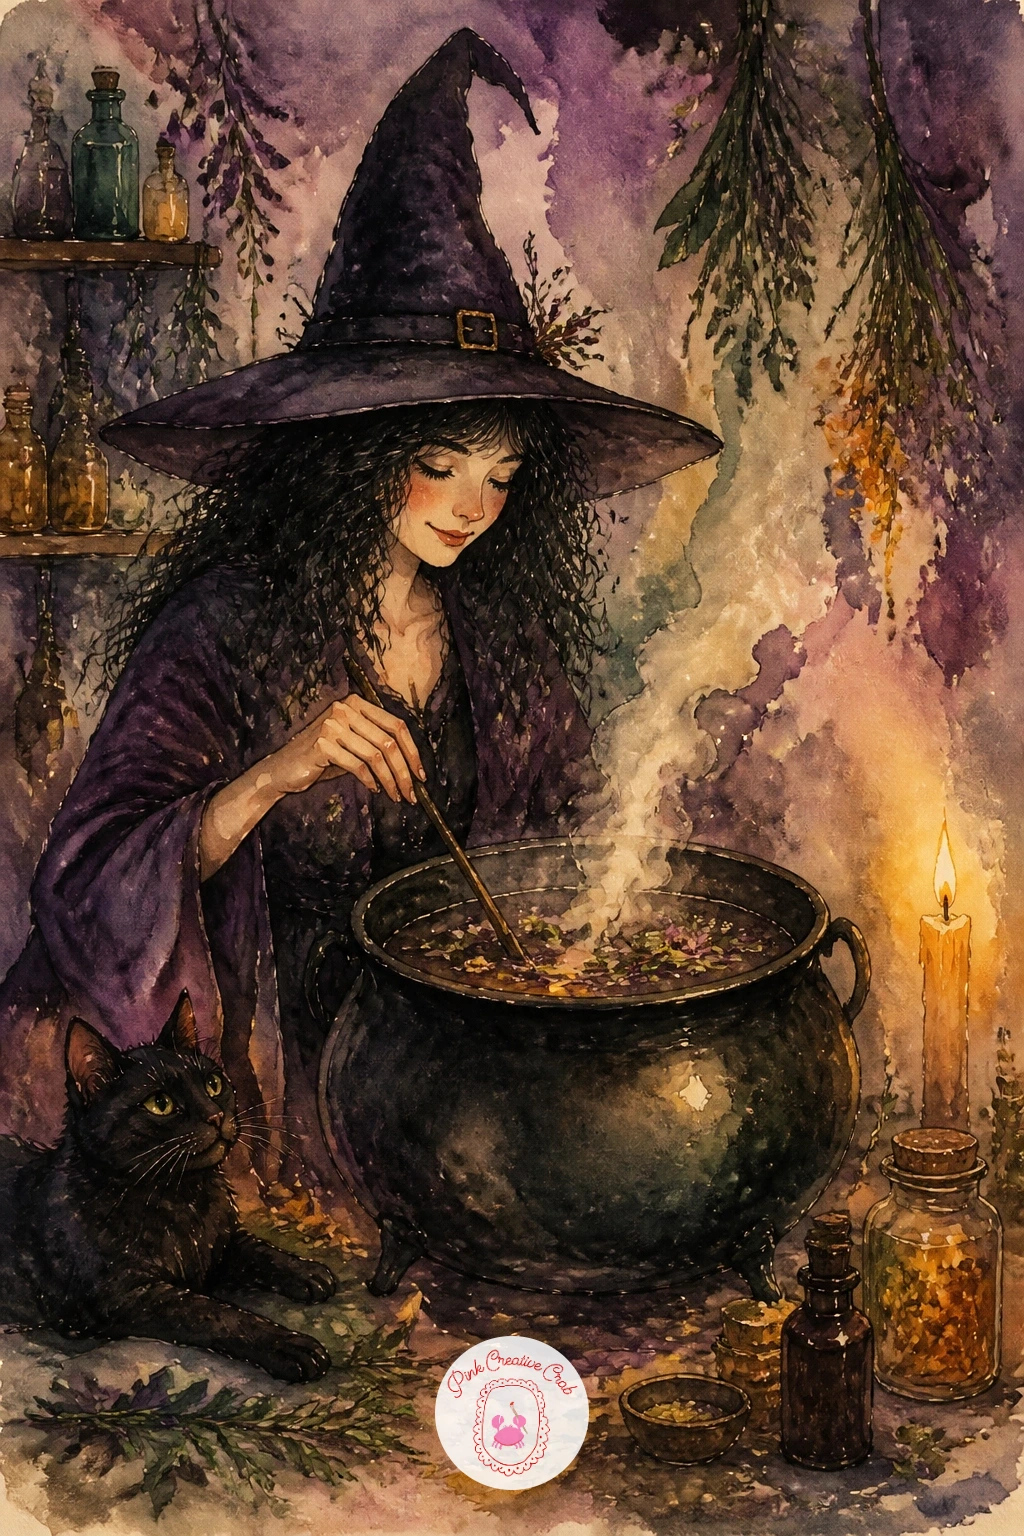
Palette: Ivory Black,Mustard Yellow,Burnt Orange,Payne’s Grey
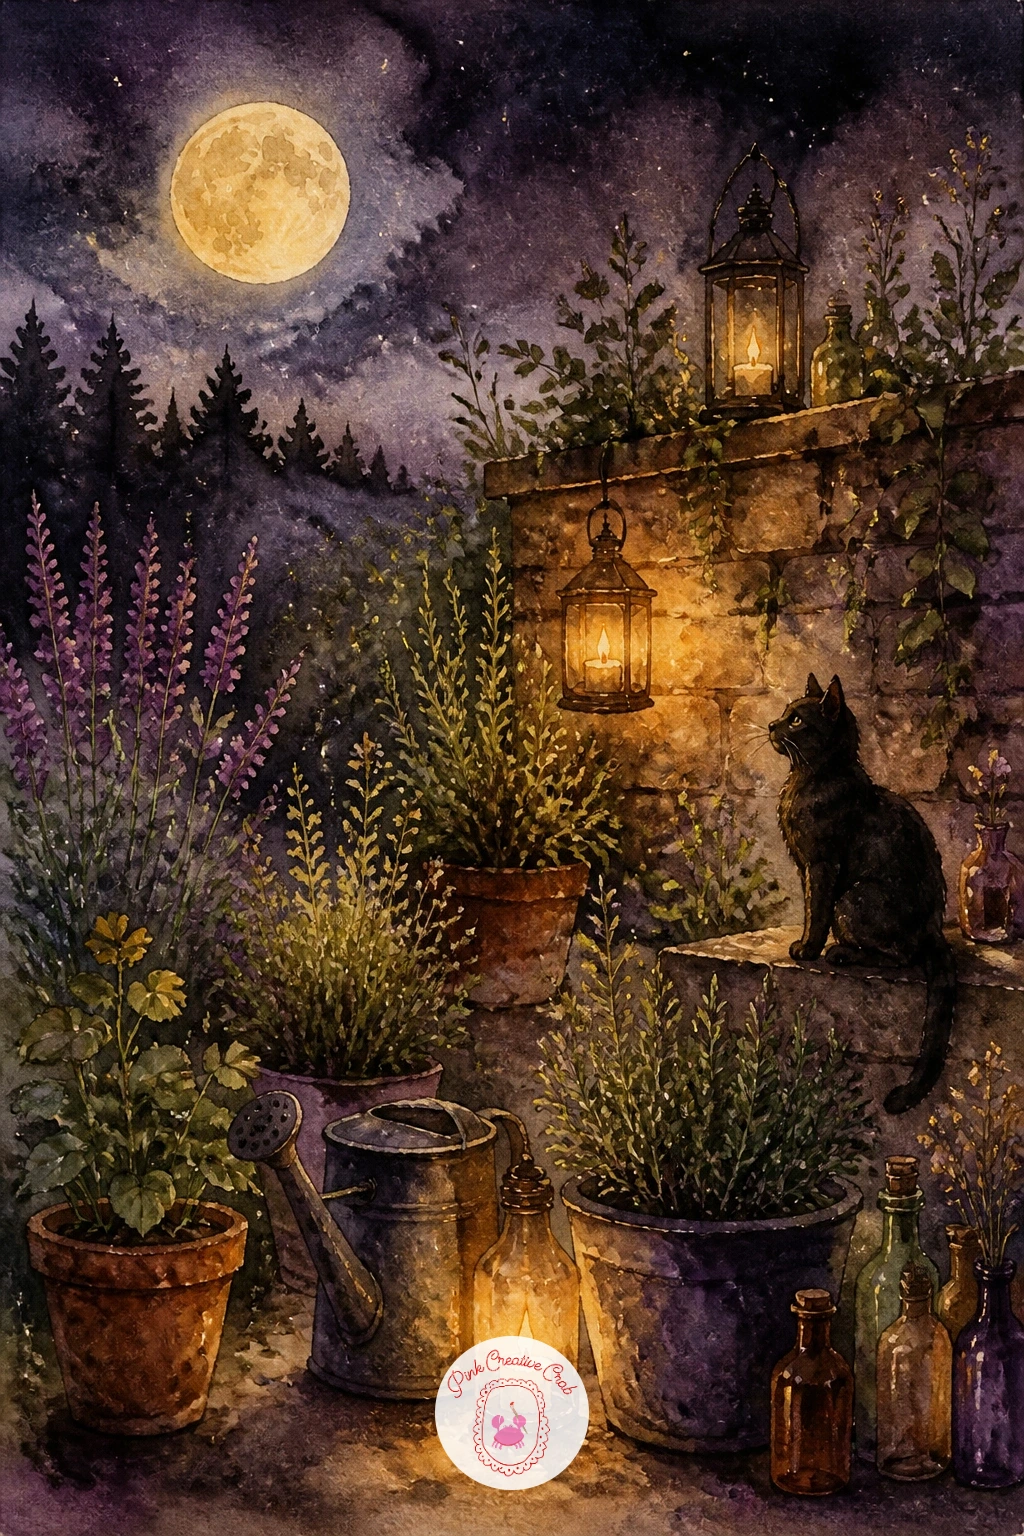
Step outside the cottage for a moonlit herb garden, a scene built from soft rows of green under a pale sky rather than any single character. Lightly pencil a low horizon line about a third of the way up the page, keeping the eye level low so the garden rows stretch out ahead of you rather than being seen from above.
Paint the sky first in a deep indigo wash with a soft pale moon lifted out with a clean damp brush while the sky is still wet. Once that layer dries, work the herb rows in varied greens, keeping the plants closer to you larger and darker and the ones further back smaller and paler, which is what gives the garden its sense of distance.
A common mistake is making every plant the same size, so vary your rows deliberately as you go. No indigo on hand just means mixing blue with a touch of plum instead.
Finish with a scatter of tiny white gel pen dots for stars once the sky is completely dry.
You Will Need
- white gel pen
Palette: Indigo,Sap Green,Hooker’s Green,Mustard Yellow
Look at real herb garden photos for the way rosemary, sage and lavender have different leaf shapes, since mixing those silhouettes keeps the rows from looking repetitive.
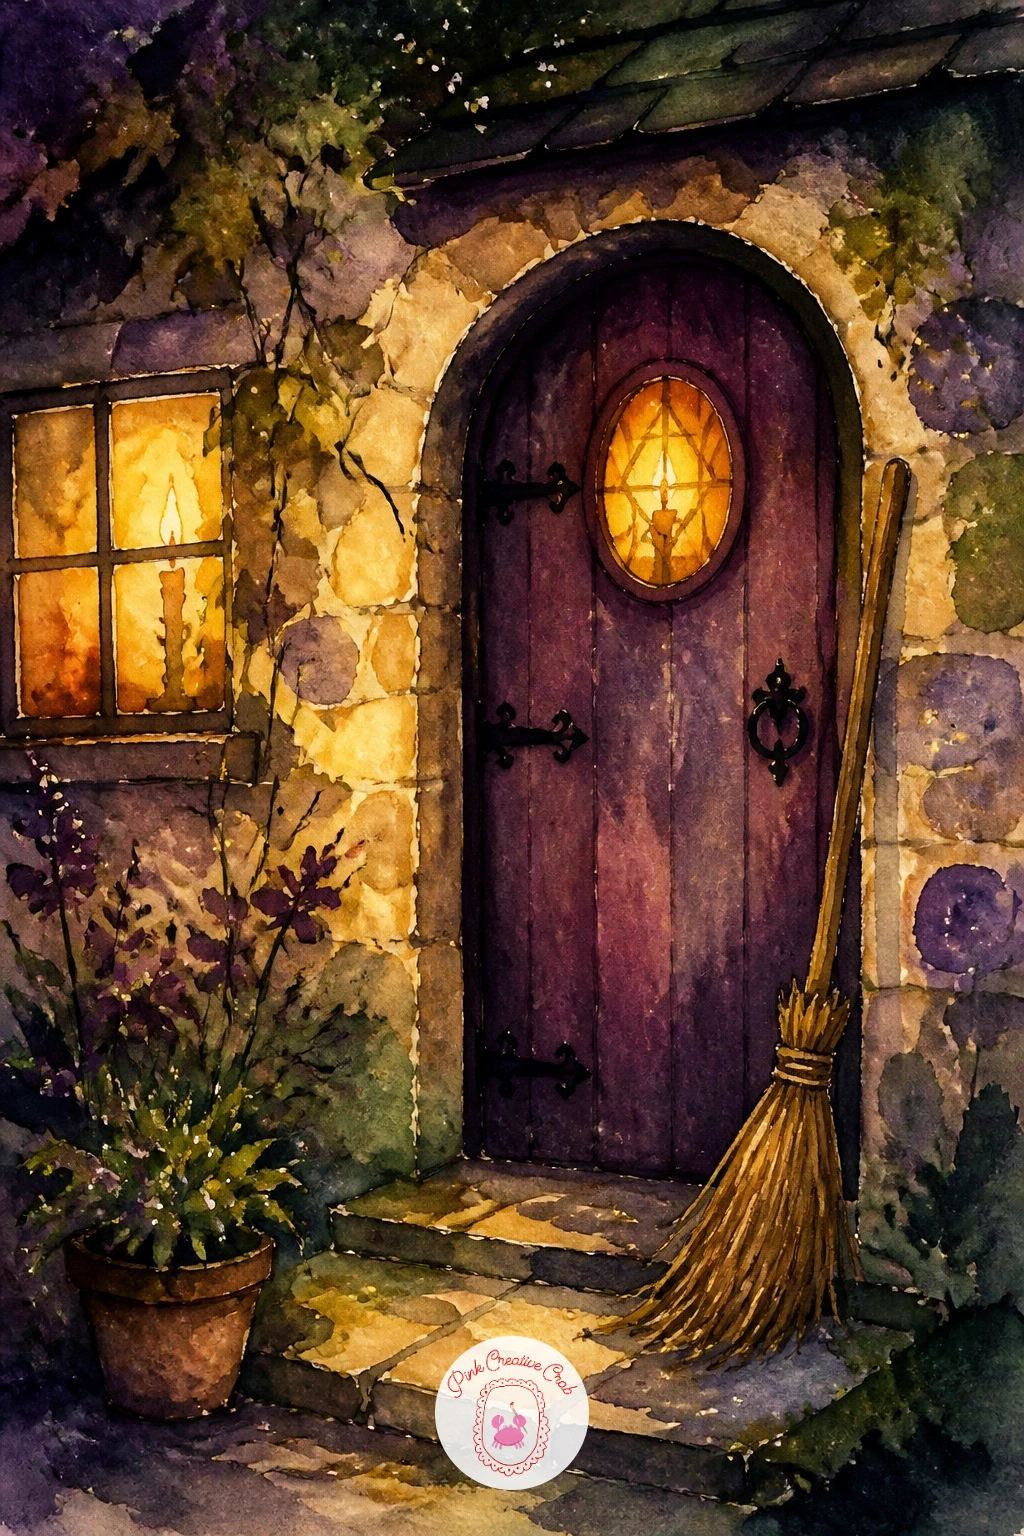
Carry that same soft evening light indoors by painting a broom leaning by a cottage door, a simple and satisfying subject for anyone who wants a quick win today. Sketch a round wooden door first, then lean the broom’s handle against the frame at a gentle diagonal, bristles fanning out at the bottom.
Paint the door in a flat wash of deep plum or green and let it dry fully before you add the broom, since the broom’s pale handle needs a settled background to stand out against. Work the bristles with a dry, splayed brush dragged downward so individual straw-like strokes show through rather than one solid triangle.
If the bristles come out too neat, lift a few streaks out with a damp brush while still slightly wet to rough up the edge. In ten minutes you have a charming little sketch; given forty, add ivy climbing the door frame and a small lantern glow beside it.
Keep the broom handle a warm mustard brown so it reads clearly against the darker door.
Palette: Deep Plum,Mustard Yellow,Burnt Umber,Sap Green
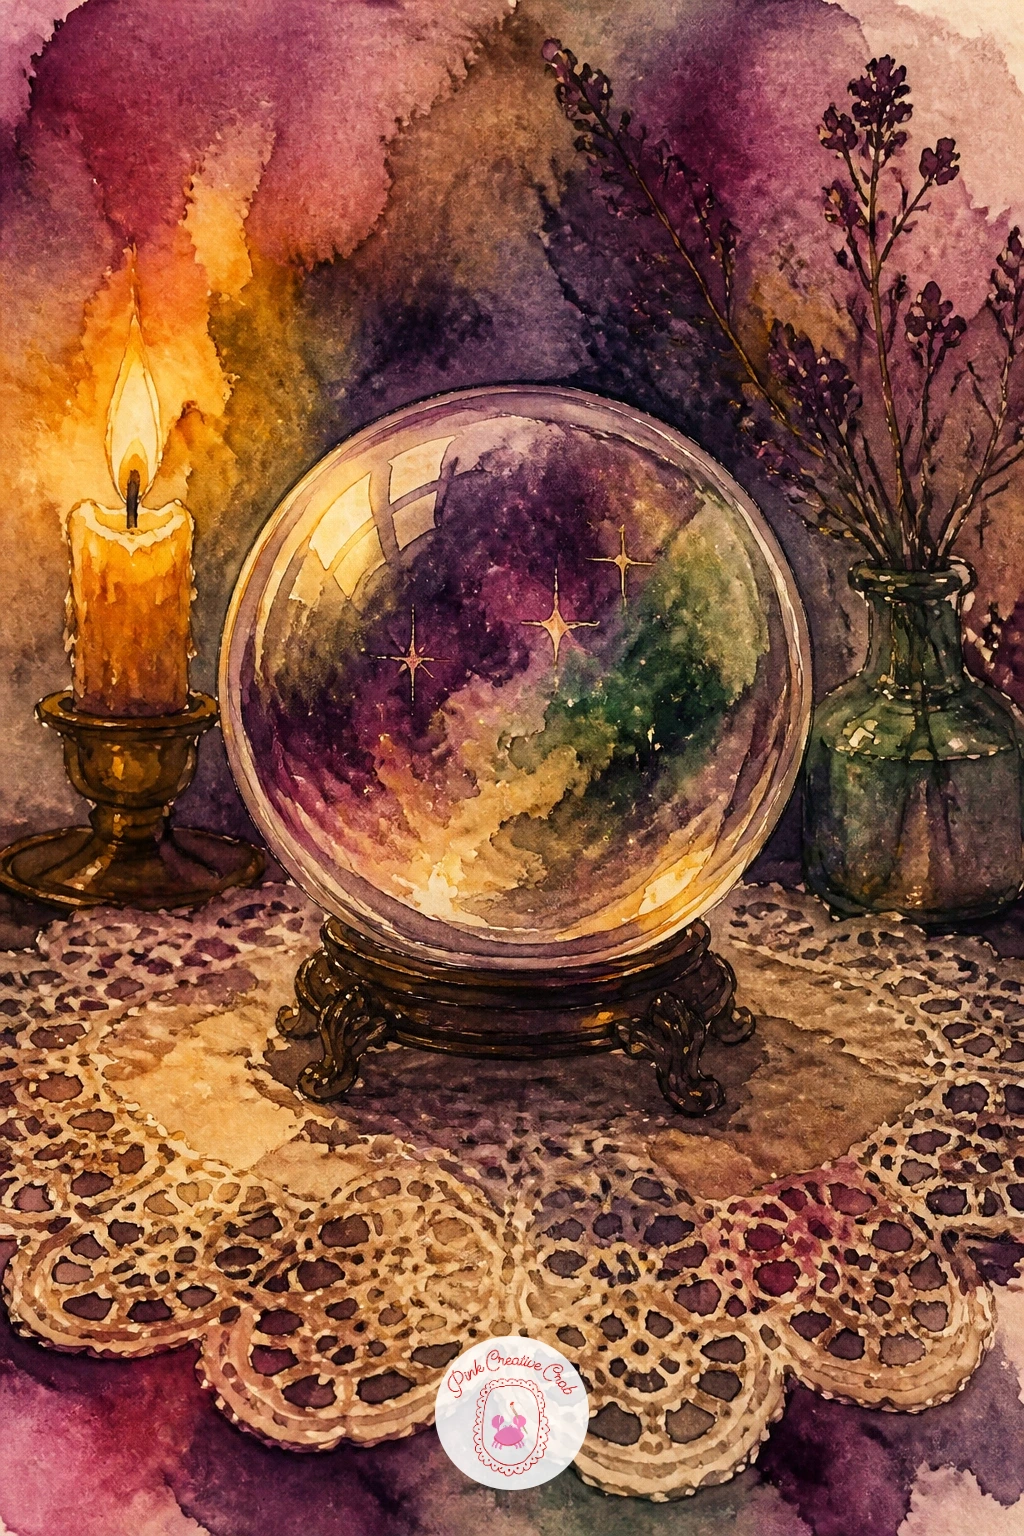
Add something a little more technical next with a crystal ball on a lace tablecloth, since the sphere itself is good practice in controlled shading. Trace a perfect circle with a small plate or coin so the ball’s outline stays clean, then pencil a simple tablecloth edge beneath it.
Paint the ball in one wet wash of pale blue-grey, then while it is still damp, drop in a deeper plum shadow on the lower edge and lift a soft highlight near the top with a clean damp brush. This wet-in-wet approach is what gives glass its soft inner glow, so resist the urge to go back in and fix it once it has started to dry.
The lace beneath is best suggested rather than drawn stitch by stitch: a fine white gel pen scattered in a loose grid over a pale cream wash reads as lace from a normal viewing distance. No plate handy just means tracing around a cup or a roll of tape instead.
Let the ball dry completely before adding the pen details so the ink does not bleed into the wash.
You Will Need
- white gel pen
- small plate or round object to trace
Palette: Payne’s Grey,Deep Plum,Cream,Mustard Yellow
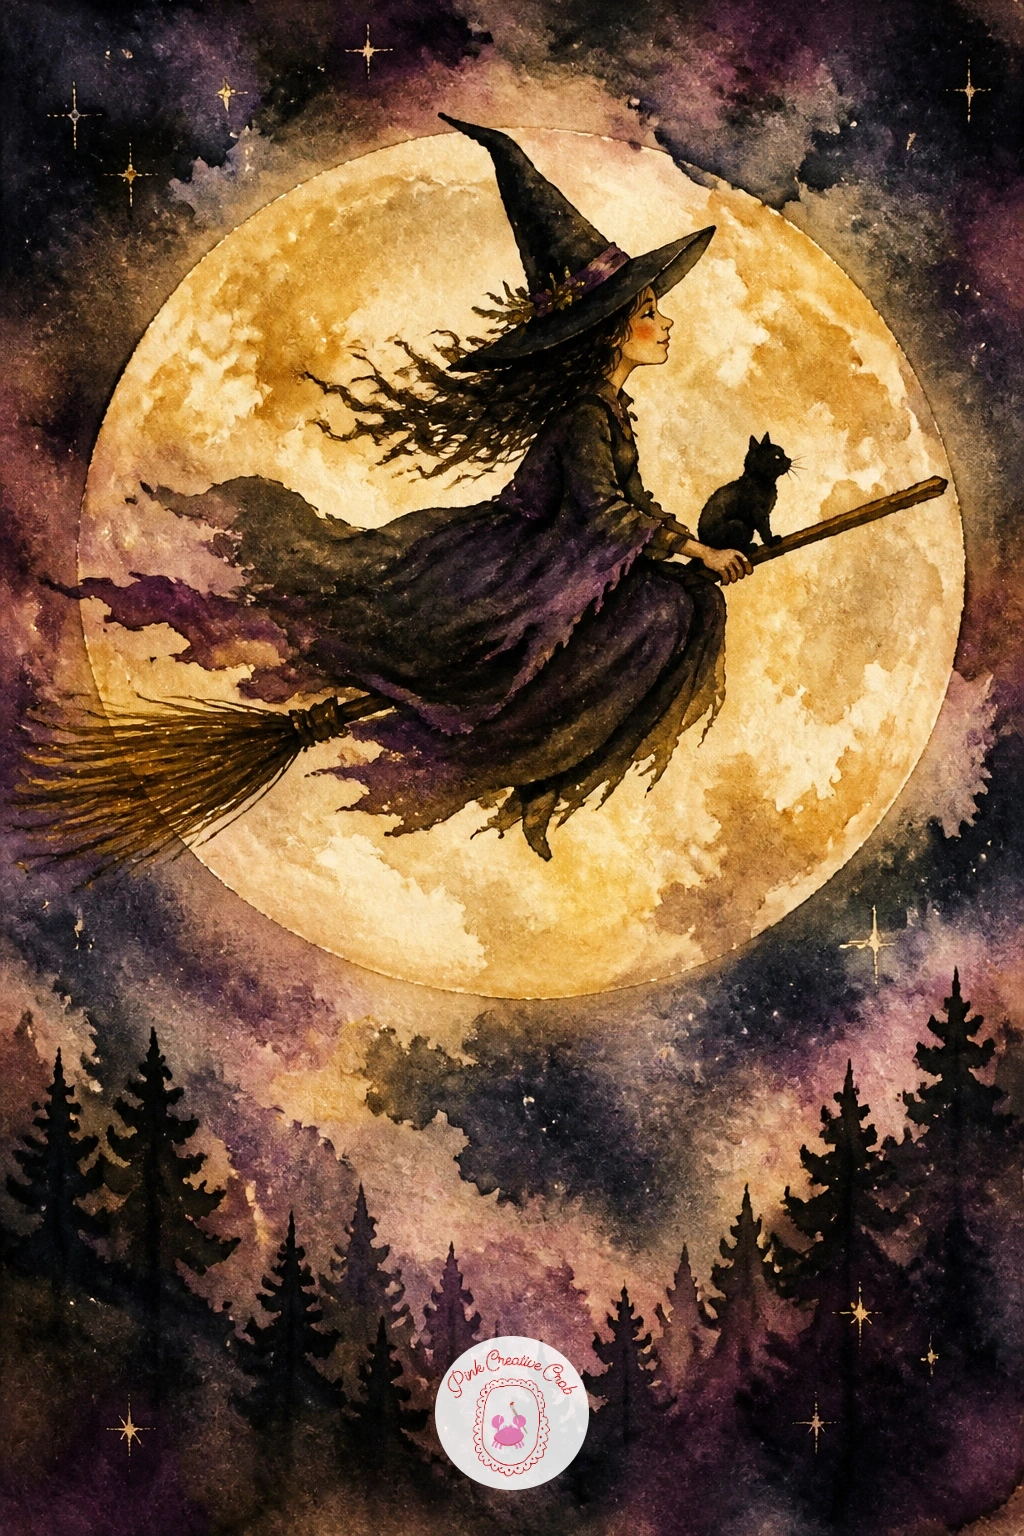
Take that same crystal ball glow and send it into the sky for a witch riding a broom over the moon, the kind of silhouette scene that looks dramatic for very little effort. Paint a large full moon first in pale mustard, keeping its edges soft so it glows into the surrounding sky rather than sitting as a hard circle.
Once the moon wash is dry, paint the witch and her broom as one simple black silhouette crossing in front of it, cape streaming out behind her in a loose diagonal line. Working in silhouette means you never have to worry about facial features, which makes this a forgiving pick if you are newer to figures.
Check the proportion of broom to witch by holding your brush up to the reference: the broom handle should run roughly as long as her torso and legs together, or it starts to look like a toy. Swap the mustard moon for a soft rose pink if you want a gentler color story.
Add a few tiny black bats or stars scattered around her for scale once the main silhouette is dry.
Palette: Mustard Yellow,Ivory Black,Indigo,Deep Plum
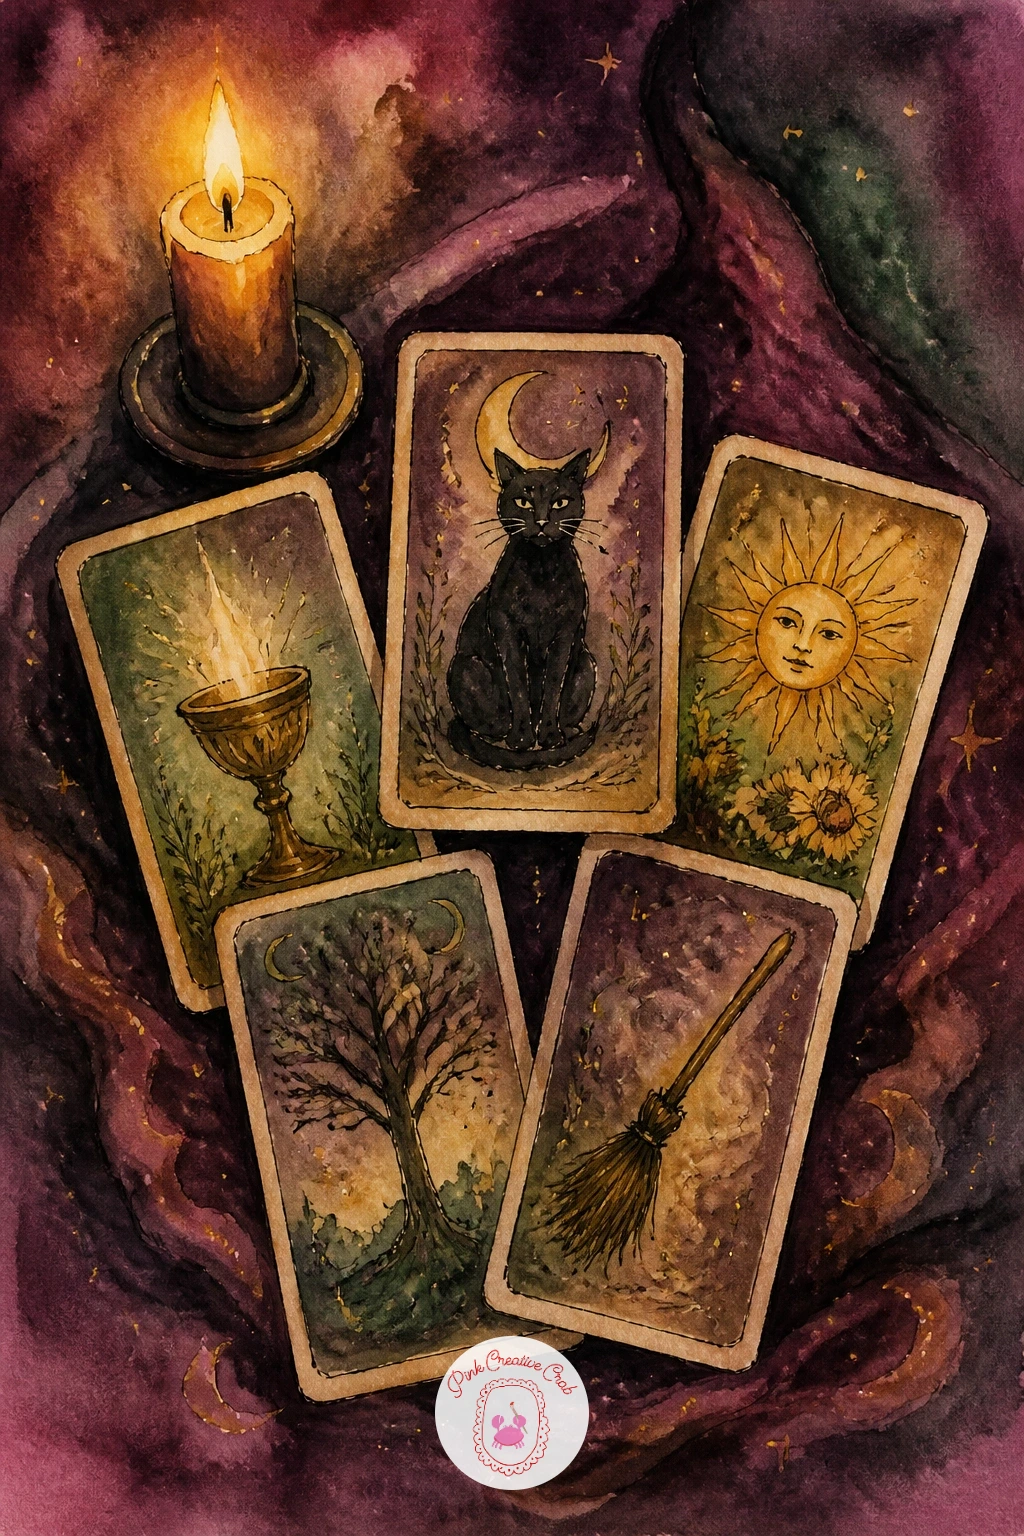
Bring the page back down to a tabletop with tarot cards spread on a velvet cloth, a nice change of pace after a sky full of silhouettes. Pencil three or four simple rectangles in a loose fan shape, overlapping their corners slightly so the spread feels relaxed rather than a stiff grid.
Paint the velvet cloth beneath them first in a deep, rich plum, leaving the card shapes as dry white paper so they stay crisp against the dark background. Once the cloth is dry, paint each card in a pale cream wash and add one tiny symbol to each with a fine brush, a moon, a star, a cup, keeping the marks small and simple rather than fully illustrated tarot art.
Velvet is really a texture trick: once the plum wash is dry, drag a nearly dry brush of deeper plum across it in one direction to suggest the nap of the fabric catching light. If plum paint is in short supply, a deep burgundy or maroon does the same cozy job.
Finish with a thin gold pen line around each card’s edge for a little extra glow.
You Will Need
- gold or metallic gel pen
Palette: Deep Plum,Cream,Ivory Black,Mustard Yellow
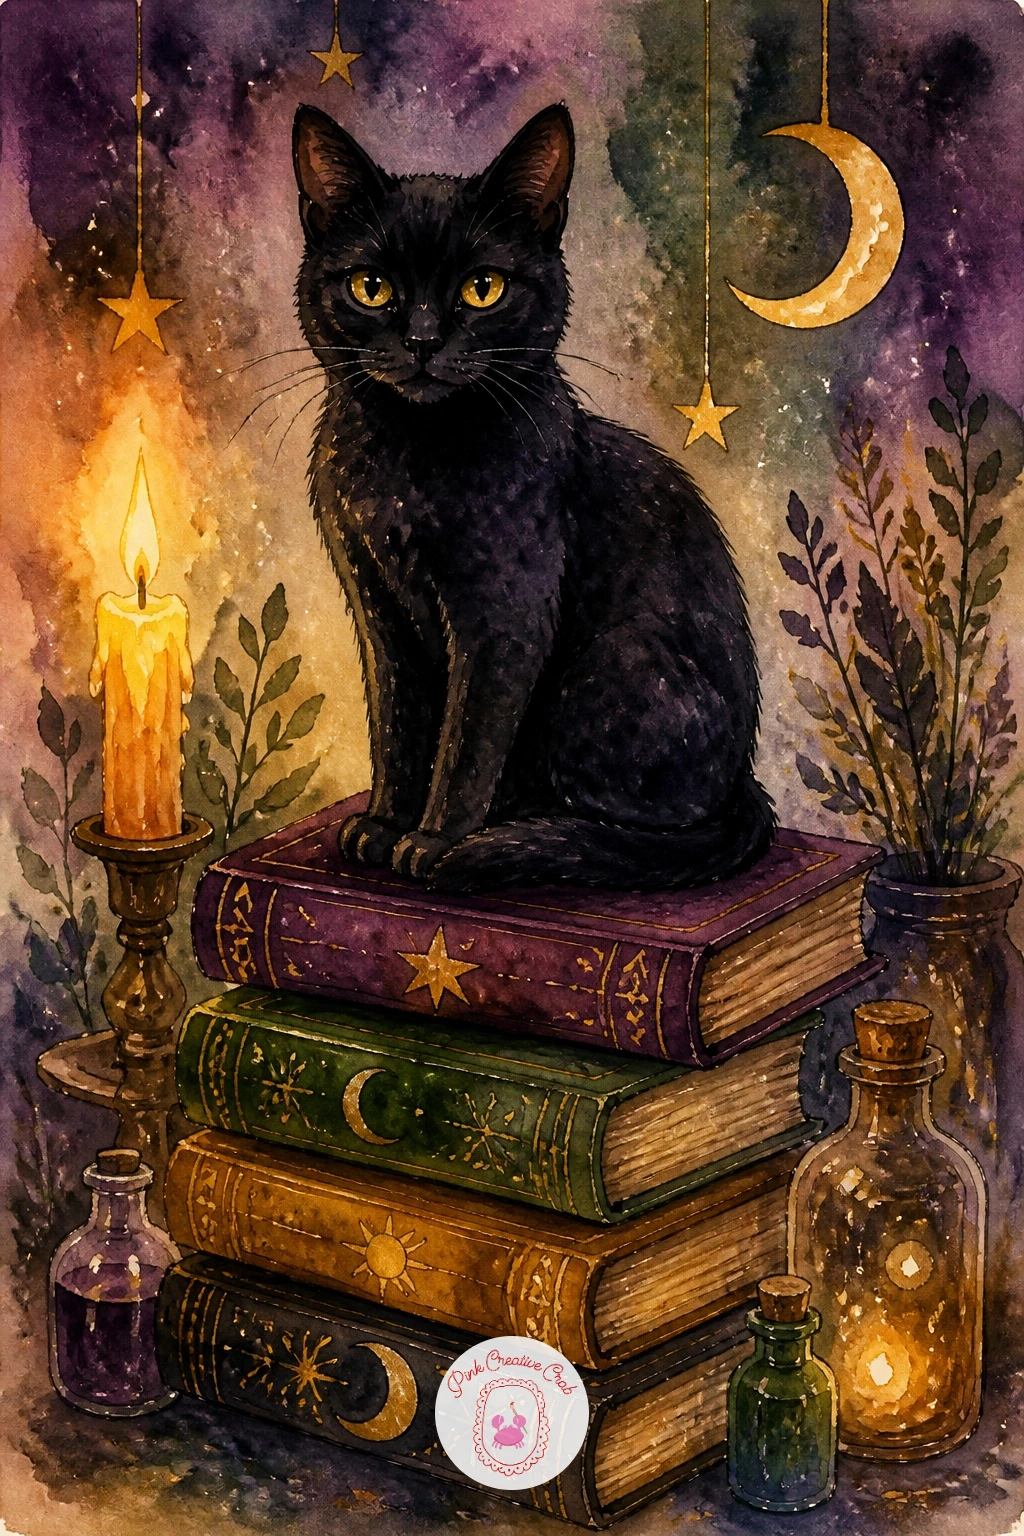
Return to the cat from your first painting, but give her a scene of her own this time: a black cat on a stack of grimoires. Stack three or four simple book shapes first, varying their widths slightly so the pile looks settled rather than perfectly even, then perch the cat on top with her tail curled around her paws.
Paint the books in warm plum, green and mustard washes so each one reads as a separate volume, then let them dry fully before adding the cat as one solid black shape on top. A cat’s silhouette lives or dies on the ear and tail shapes, so pencil those carefully before you commit any paint.
If the black looks flat once dry, mix a touch of deep plum into a second black wash and drop it along the cat’s back while the first layer is still slightly damp, which gives the fur a little depth without any detailed brushwork. No black paint in your set just means mixing a deep plum with a deep green instead for a warmer almost-black.
Finish with two tiny dots of pale yellow for watchful eyes.
Palette: Ivory Black,Deep Plum,Mustard Yellow,Hooker’s Green
If you enjoyed painting her, the cat watercolor ideas collection has more feline poses to try in this same loose style.
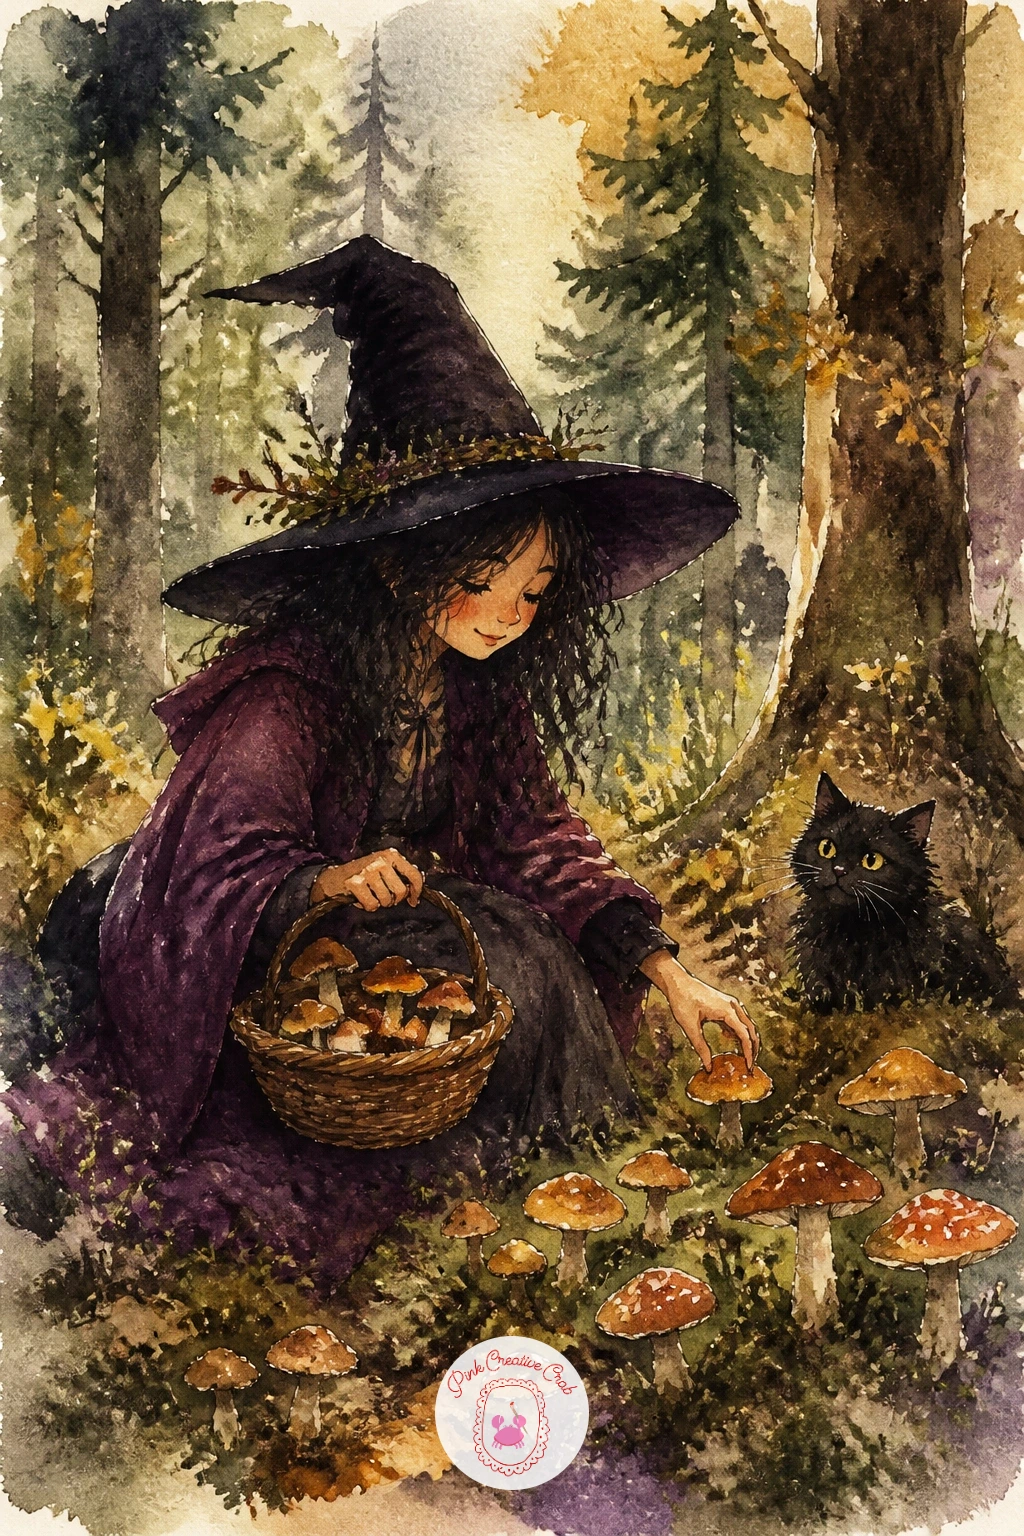
Head into the woods for a witch picking mushrooms in the forest, which brings some natural texture into the list after several tabletop scenes. Sketch the witch kneeling low among tree trunks, basket in one hand, then scatter a handful of small mushroom caps at her feet in mustard and deep red.
Paint the forest floor in a deep green and brown wash first, working wet-in-wet so the colors bleed softly into one another the way a forest floor naturally looks dappled. Add the mushroom caps once that layer is dry, keeping each one a simple small dome with a thin pale stem, grouped in twos and threes rather than scattered evenly.
The light source here matters: imagine soft daylight filtering down through the trees above, so keep highlights on top of the mushroom caps and on the witch’s shoulders, with shadow pooling low around the roots. A fan brush dipped lightly and tapped near the base of the trees adds a quick suggestion of undergrowth if you have one.
Finish with a few tiny dots of white gel pen for drifting spores or light.
You Will Need
- white gel pen
Palette: Hooker’s Green,Burnt Umber,Mustard Yellow,Deep Plum
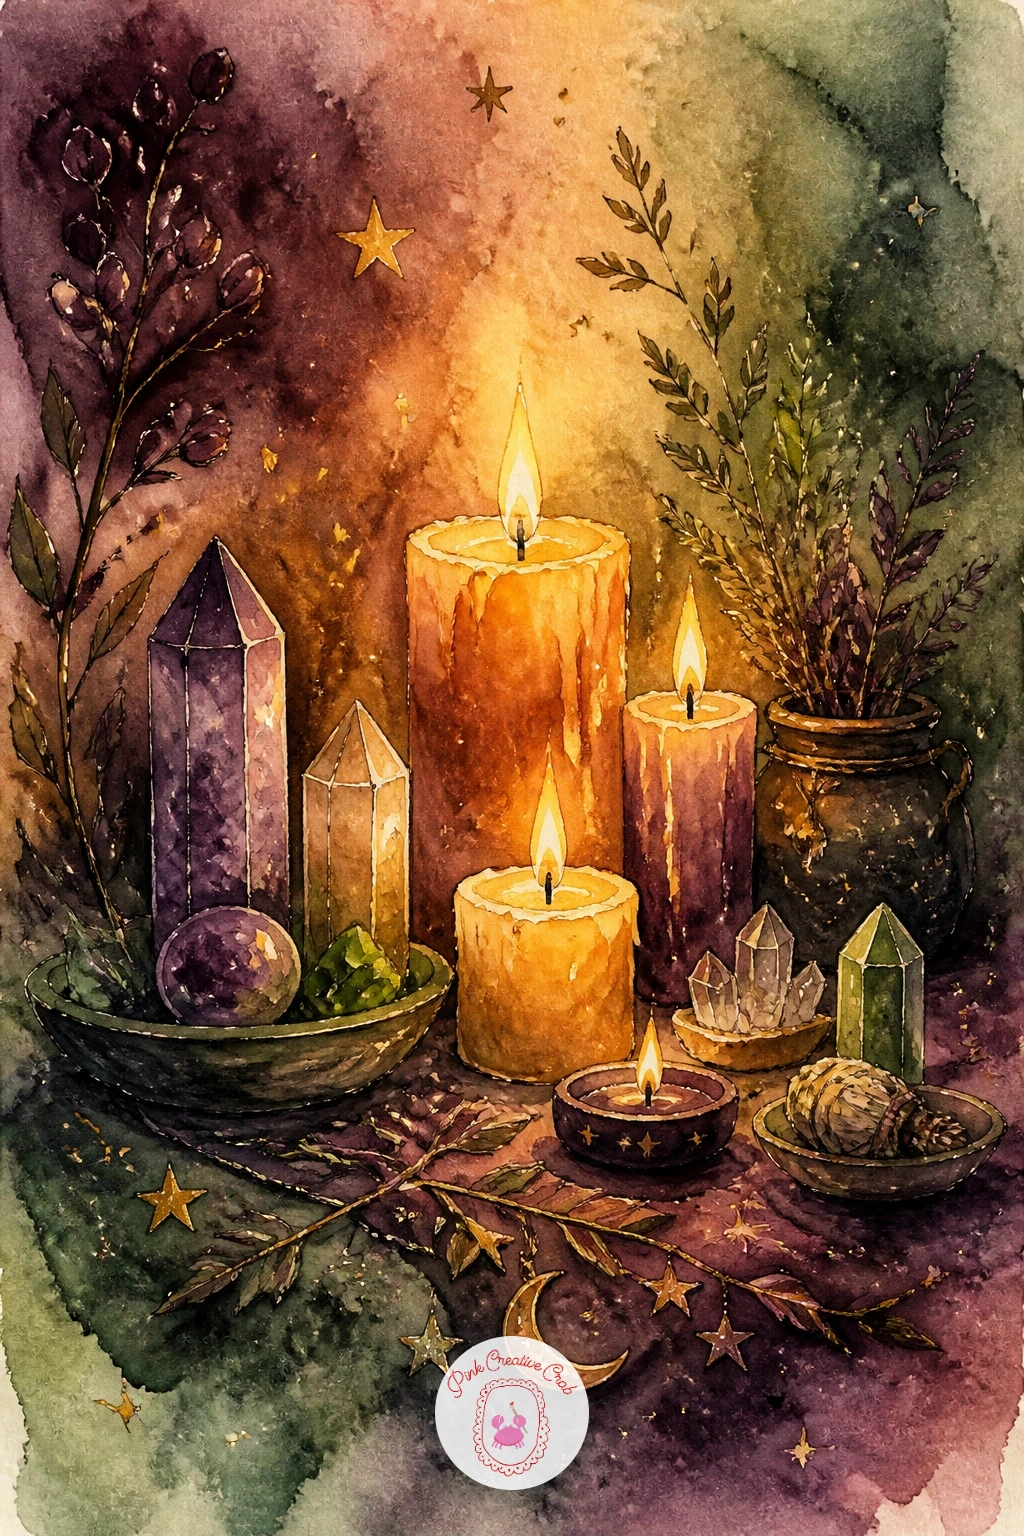
Settle back indoors with candles and crystals on an altar, a still-life arrangement that lets you practice warm glow against cool stone. Pencil two or three candles of different heights first, then tuck a handful of simple crystal shapes, small angular clusters, around their bases.
Paint the candle flames first in a tiny dab of orange with mustard around the edges, then work outward into the candle bodies in cream while the flame color is still a little wet so the glow bleeds softly upward. Once dry, paint the crystals in cool plum and grey, leaving small white triangles of untouched paper on each facet for sparkle.
This is a good scene for the ten-minute versus forty-minute choice: a quick version stops at two candles and one crystal, while the longer version adds a small dish of dried herbs and a thin trail of smoke. If mustard is not in your palette, a warm yellow ochre glows just as nicely.
One tip worth keeping: always paint the flame before the wax, since it is much easier to glow outward than to carve a bright shape out of dried paint.
Palette: Burnt Orange,Cream,Deep Plum,Payne’s Grey
Widen the altar scene into a full witch’s kitchen with drying herbs, a busier composition that rewards patience once you have a few of these under your belt. Sketch a simple kitchen corner first: a worktop, a window, and several bundles of herbs hanging upside down from a beam above.
Paint the window and wall in a soft warm wash first since that sets the overall light of the room, then add the hanging herb bundles in deep green and mustard, letting each bundle be only a loose cluster of small brushstrokes rather than individual leaves. Work the worktop and any jars last so they sit clearly in front of the warmer background.
Busy scenes like this often go wrong by filling every inch with equal detail, so pick one focal bundle to paint with slightly more care and let the rest stay soft and suggested. A kitchen scene pairs nicely with the easy watercolor food ideas if you want more practice with cozy indoor still life afterward.
Finish with a single steaming teacup on the worktop to pull the eye into the room.
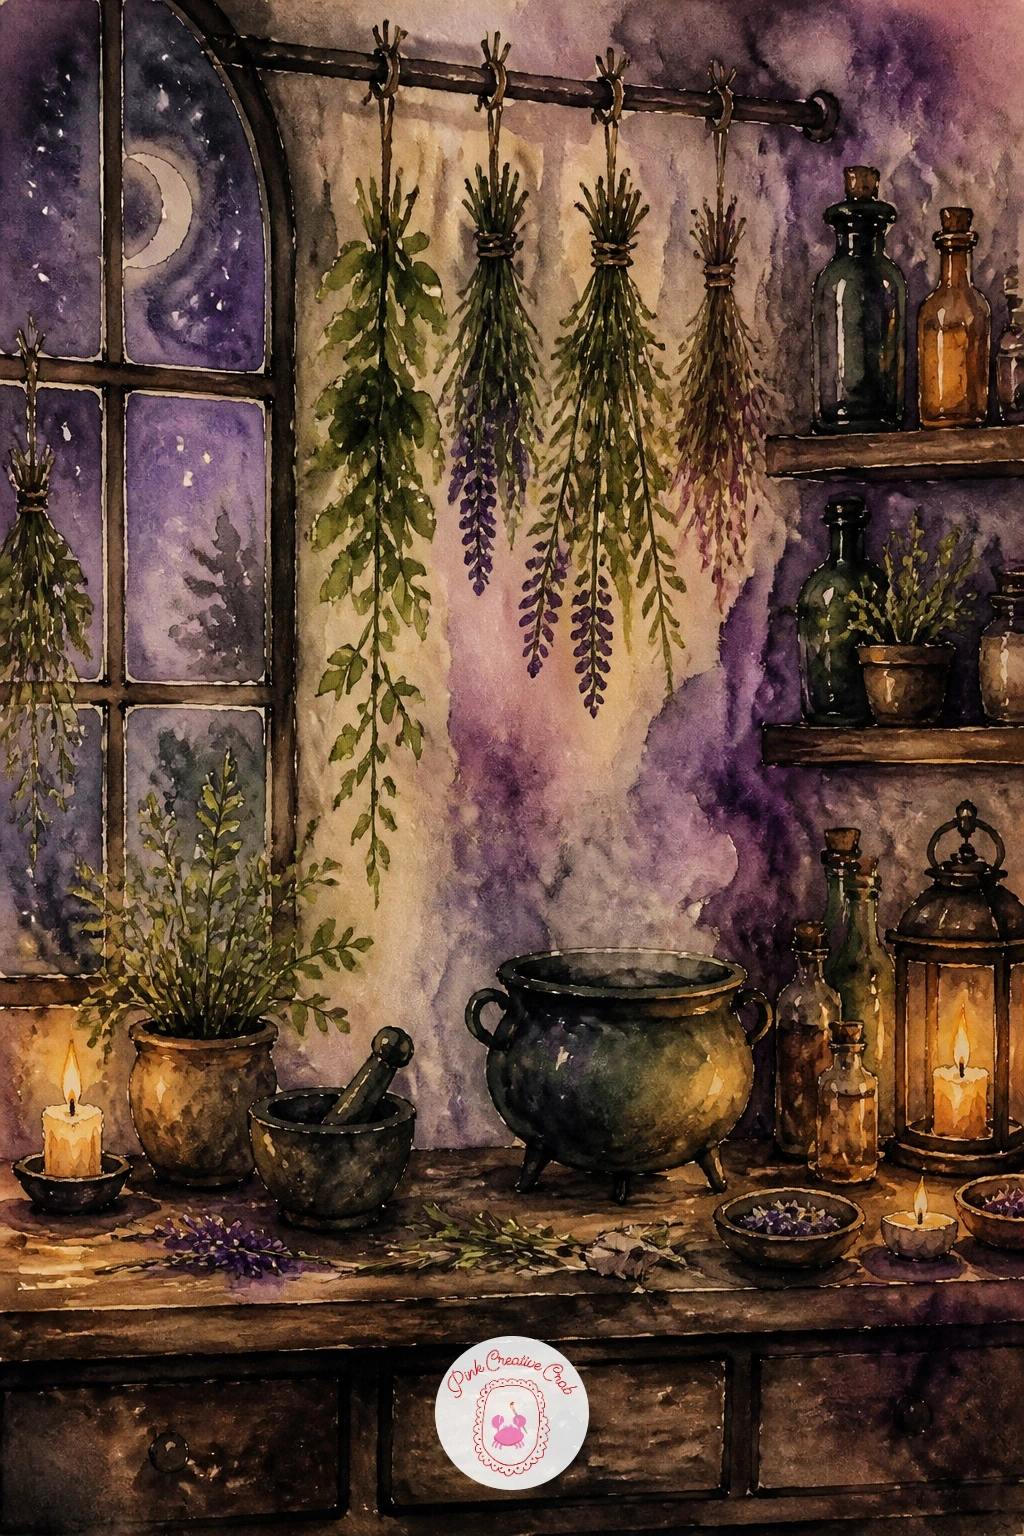
Palette: Hooker’s Green,Mustard Yellow,Burnt Umber,Cream
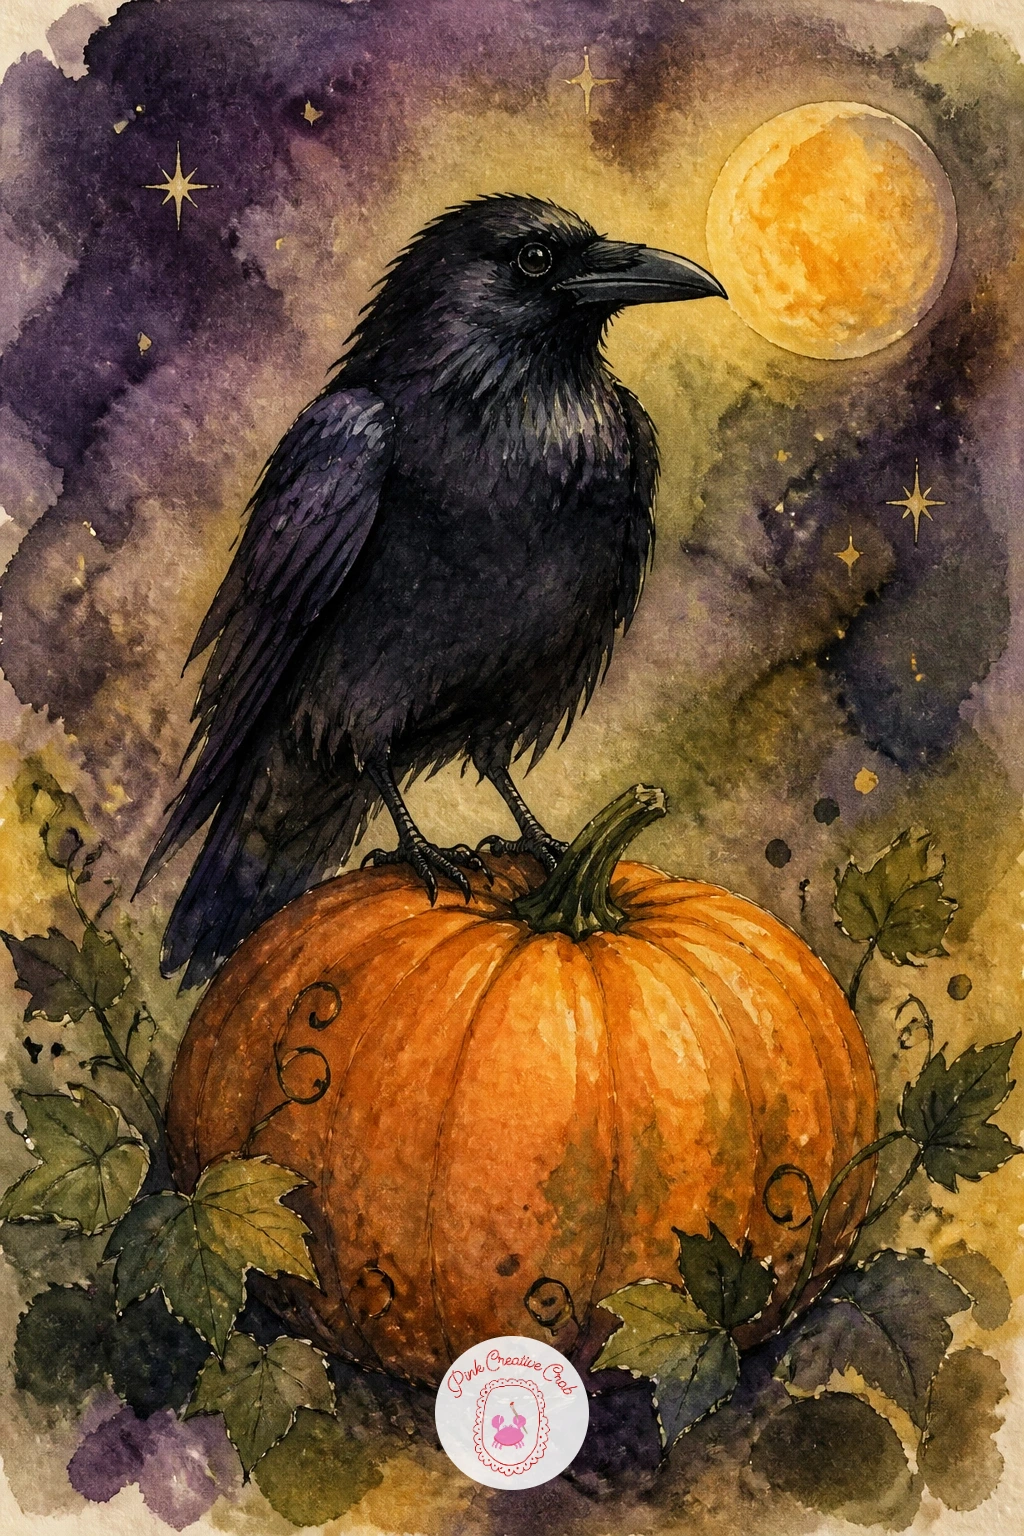
Bring in a little autumn with a raven on a pumpkin, a simpler subject after the busy kitchen and a good one for building confidence with birds. Draw the pumpkin first as a wide flattened circle with a few gentle vertical lines for its ridges, then perch the raven on top with its head turned slightly to one side.
Paint the pumpkin in a warm orange wash, dropping a little deep plum into the shadow side while still wet so the ridges feel rounded rather than flat. Paint the raven as a near-black silhouette once the pumpkin has dried, using a slightly lighter grey-black for the wing feathers so the shape does not read as a flat hole in the page.
Ravens go wrong most often at the beak, which can end up too long or too thick, so keep it short and slightly curved and check it against reference before committing ink. No orange on hand just means mixing mustard with a touch of red instead.
Finish with one small white gel pen dot for the eye, placed slightly forward so the bird looks alert.
You Will Need
- white gel pen
Palette: Burnt Orange,Deep Plum,Ivory Black,Payne’s Grey
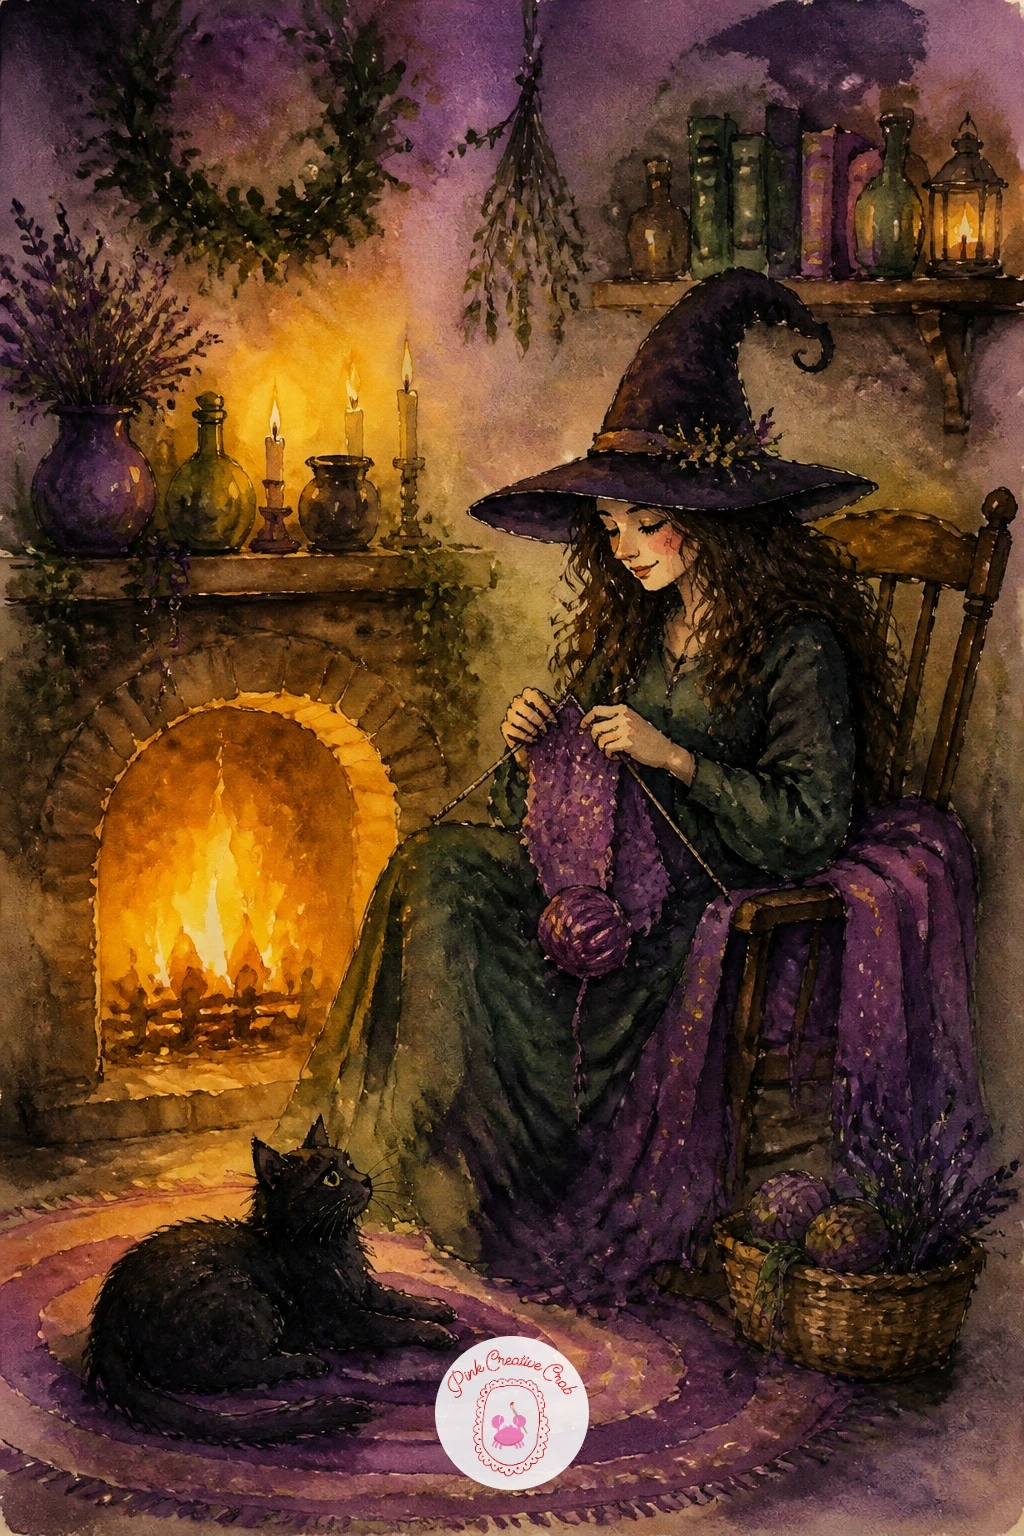
Slow right down with a witch knitting by a fire, one of the cozier scenes on this list and a nice one for a quiet evening. Sketch her seated in a simple chair with knitting needles crossed in her lap, then add a glowing fireplace just beside or behind her.
Paint the fire first in layered washes of orange, mustard and a touch of red, keeping the flame shapes loose and upward-pointing rather than neatly outlined. Once that glow is dry, paint the witch’s robe in deep green or plum, letting the side nearest the fire stay warmer and lighter while the far side cools into shadow, which is what makes her look genuinely lit by the flames rather than just placed next to them.
If the fire looks too solid, dab a damp brush into the edges to soften them into the surrounding wash while still wet. A ball of yarn in mustard at her feet is an easy extra touch if you have time left.
Finish with a thin trail of pale smoke rising from the chimney if you have included one.
Palette: Burnt Orange,Mustard Yellow,Sap Green,Deep Plum
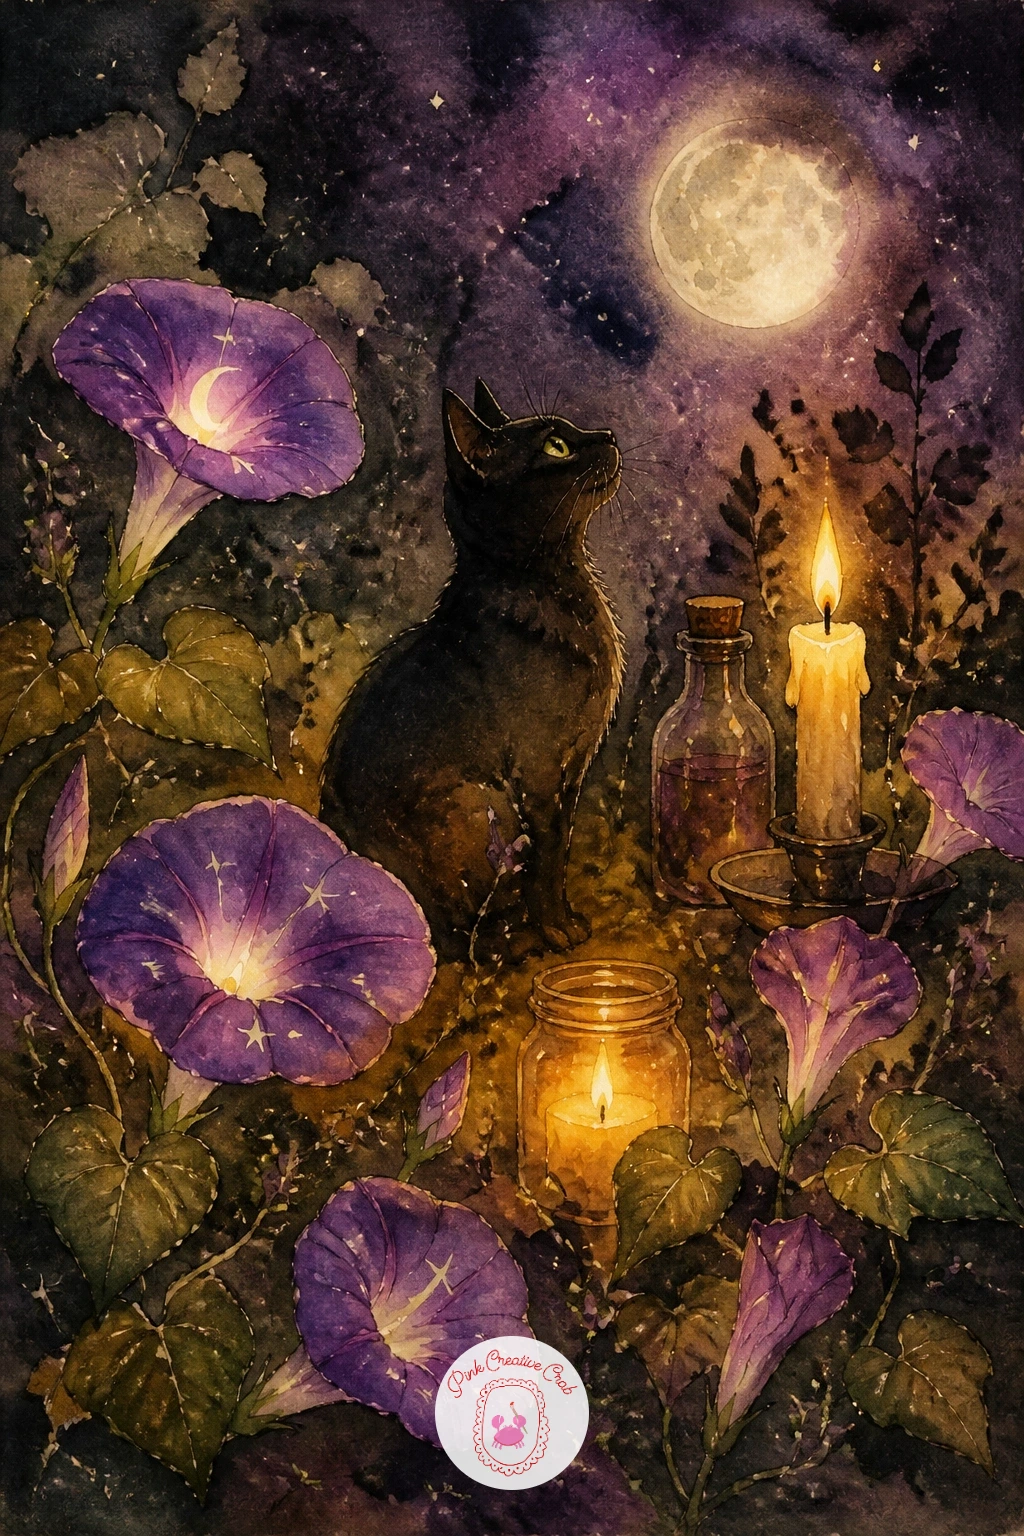
Step back outside for a garden of moonflowers, pale blooms that look lovely against a deep night sky and are a nice break from character painting. Pencil several trumpet-shaped flowers at different heights and angles across the lower half of the page, keeping some fully open and a few still closed buds.
Paint the sky behind them first in deep indigo, then once completely dry, paint the flowers themselves in the palest cream or white gouache so they lift forward against the dark background. Measure the spacing between blooms with your brush before you start so they cluster naturally rather than lining up in a row, which is the detail that keeps a garden scene from looking planted in rows.
Moonflowers are a good match for the technique used in the easy watercolor flower for beginners guide if you want more practice with simple petal shapes afterward. No white gouache on hand just means leaving the paper untouched for the palest petals instead.
Finish with a scatter of tiny stars in white gel pen once the sky is fully dry.
You Will Need
- white gouache or white gel pen
Palette: Indigo,Cream,Sap Green,Payne’s Grey
Keep the night sky going with a jar of moon water on a windowsill, a small and satisfying subject that focuses on painting glass and light together. Draw a simple round jar first, then place a window frame and a pale moon behind it, keeping the composition tight and close rather than showing a whole room.
Paint the moon and night sky first, then once dry, paint the jar in a very pale wash, leaving small untouched strips of white paper down its side to suggest the glass catching moonlight. Drop a little deeper blue-grey into the jar’s base while the wash is still wet so the water pools convincingly at the bottom rather than looking flat all the way through.
Glass is mostly about restraint: the fewer marks you add inside the jar, the more convincingly it reads as something you can see through. A quick ten-minute version is just the jar and moon; given more time, add a sprig of dried herb resting against the glass.
Finish with one soft reflected glow of mustard where the moonlight hits the sill.
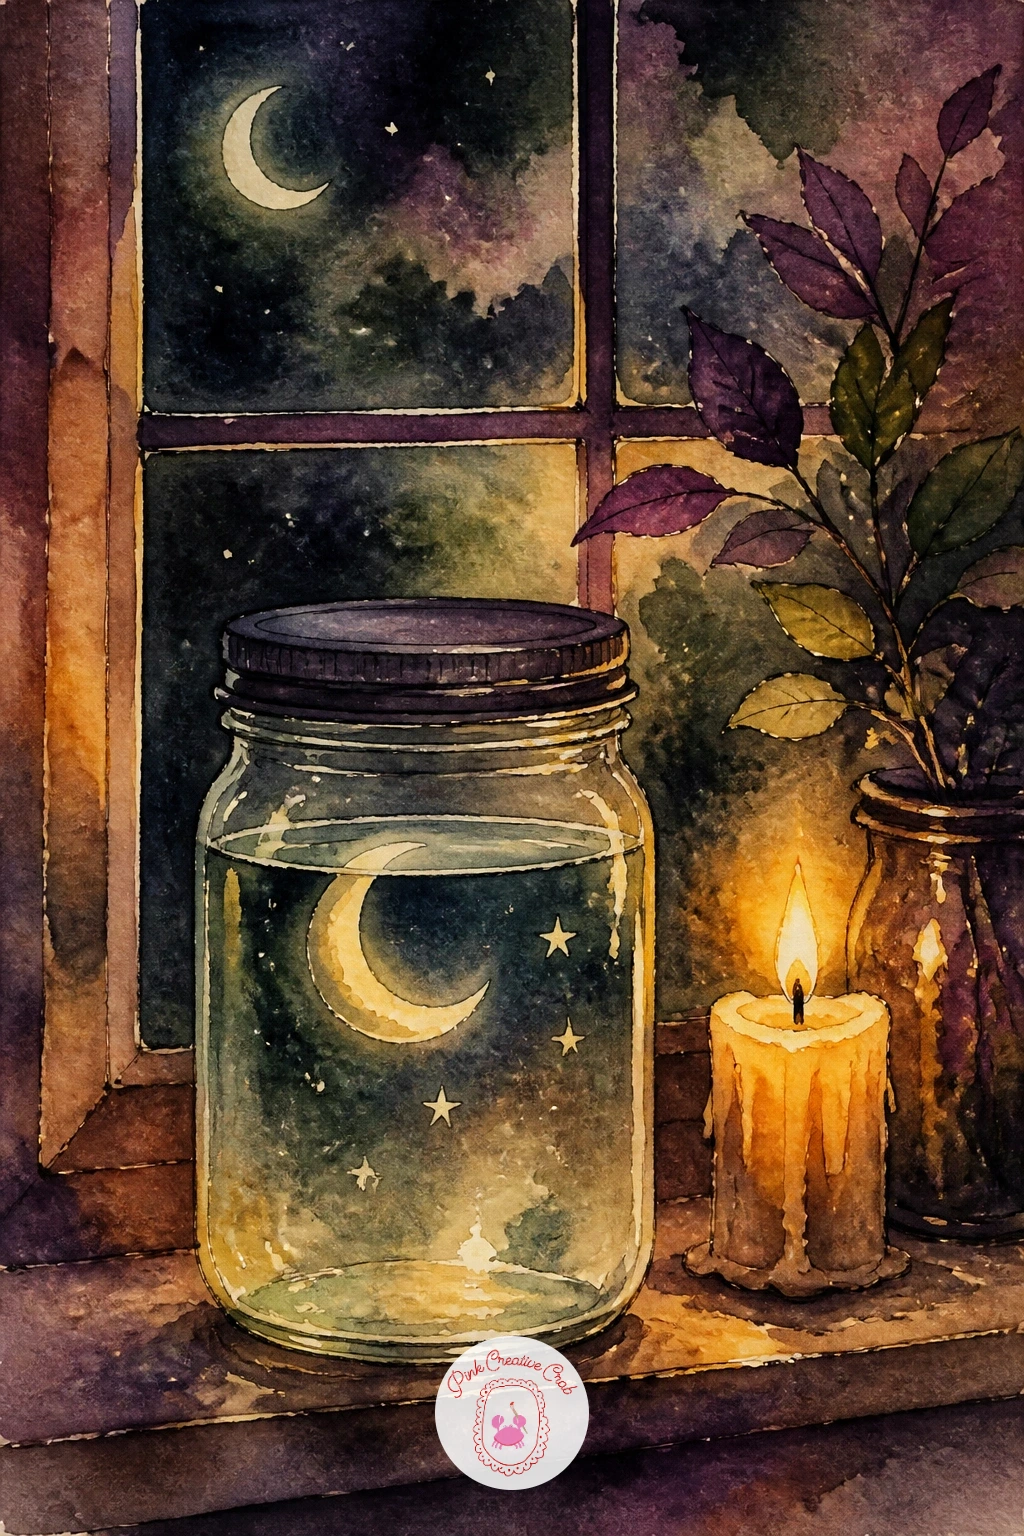
Palette: Indigo,Payne’s Grey,Mustard Yellow,Cream
Zoom out for a witch hat shop, a small storefront scene with rows of hats in the window, which makes a nice complex piece once you have warmed up on the simpler subjects above. Sketch a shop window frame first, then line up four or five witch hats inside it at slightly different heights, like a display rather than a single hat on its own.
Paint the window glass in a very pale wash first so the hats will sit clearly against it, then work each hat in a different shade, plum, green, mustard and black, so the row reads as a varied little shop rather than repeated copies. Add a small painted sign above the window last, keeping any lettering tiny and loose rather than trying to paint readable words.
The shopfront itself can be suggested with just a few dark vertical lines for window framing rather than fully rendered brickwork, which keeps the hats as the real subject. If you enjoy storefront scenes, the easy watercolor abstract ideas page has looser compositional tricks worth borrowing.
Finish with one small lantern glow beside the door for warmth.
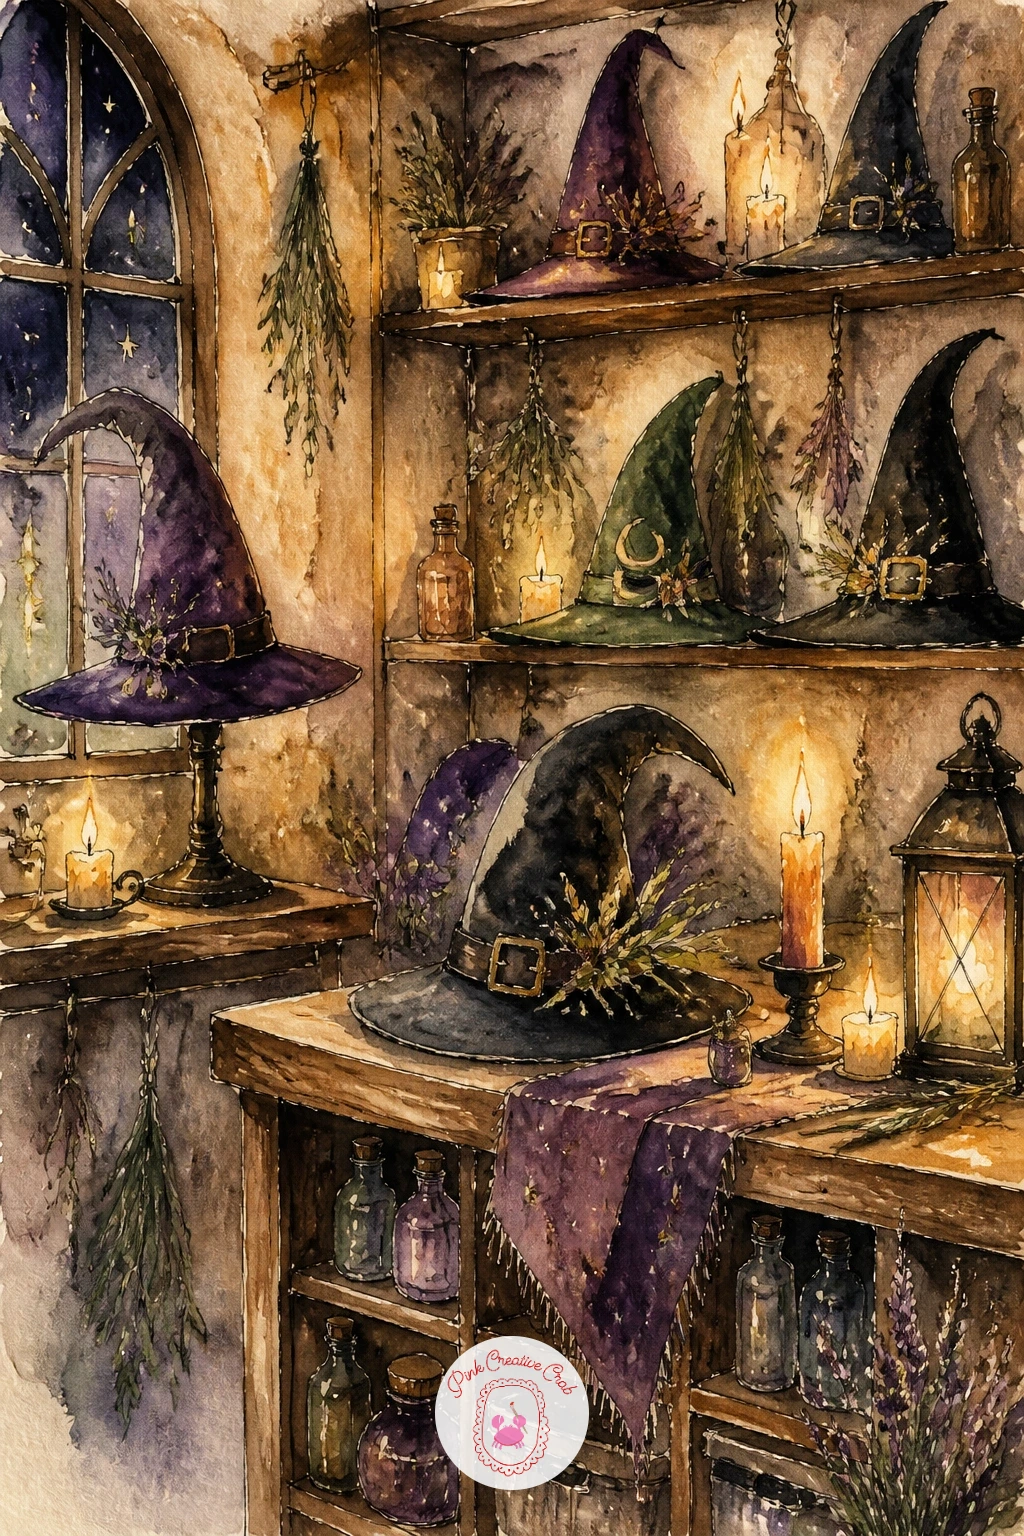
Palette: Deep Plum,Hooker’s Green,Mustard Yellow,Ivory Black
Cool things down with a frog familiar on a lily pad, a simple, charming subject that works well after a busier shop scene. Draw the lily pad as one wide flattened oval floating on the water, then place the frog sitting squarely in its center, legs tucked beneath him.
Paint the water first in soft greens and blues, leaving the lily pad as dry white paper until the water has dried, then paint the pad itself in a brighter green with a thin darker outline where it meets the water. The frog comes last in a deep green with a paler cream belly, keeping the eyes as two small round bumps on top of his head rather than on the sides, since that is what gives frogs their watchful, witchy charm.
If the water looks too still, drag a dry brush lightly across it once dry to suggest a few ripples. A tiny witch hat perched on the frog’s head is a fun optional addition if you want to tie him more clearly into the cozy witch theme.
Finish with one small lily flower floating beside the pad for balance.
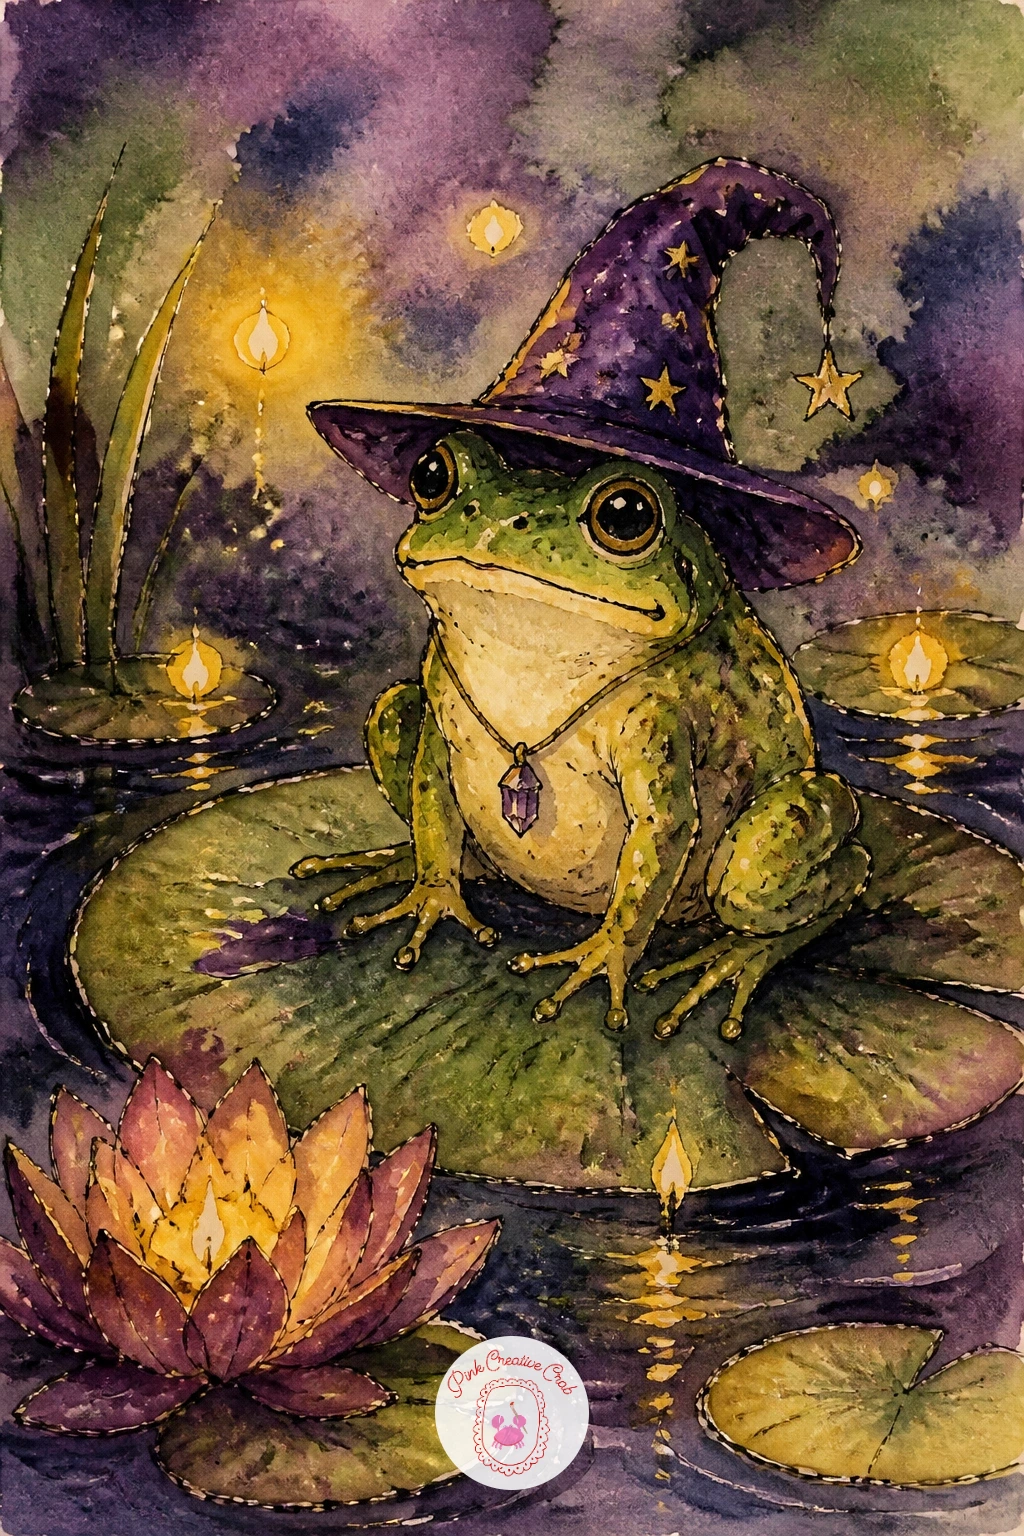
Palette: Sap Green,Hooker’s Green,Cream,Payne’s Grey
Return indoors for an apothecary cabinet, a wall of tiny drawers and labeled jars that makes a satisfying, detailed piece once you are ready for it. Sketch a simple grid of small rectangular drawers first, then add a shelf above with a row of jars in varied shapes and sizes.
Paint the cabinet wood in a warm brown wash first and let it dry fully, since the drawer handles and jar details need a settled background to sit against cleanly. Work each jar in a different color, plum, green, mustard, so the cabinet reads as a collection built up over years rather than a single matching set.
A grid like this can easily go stiff and ruler-straight, so pencil the lines loosely freehand rather than with an actual ruler, keeping a slight human wobble in every drawer edge. If you want a simpler version, four drawers and two jars tells the same story in far less time.
Finish with tiny pen labels on two jars only, leaving the rest blank so the eye has somewhere to land.
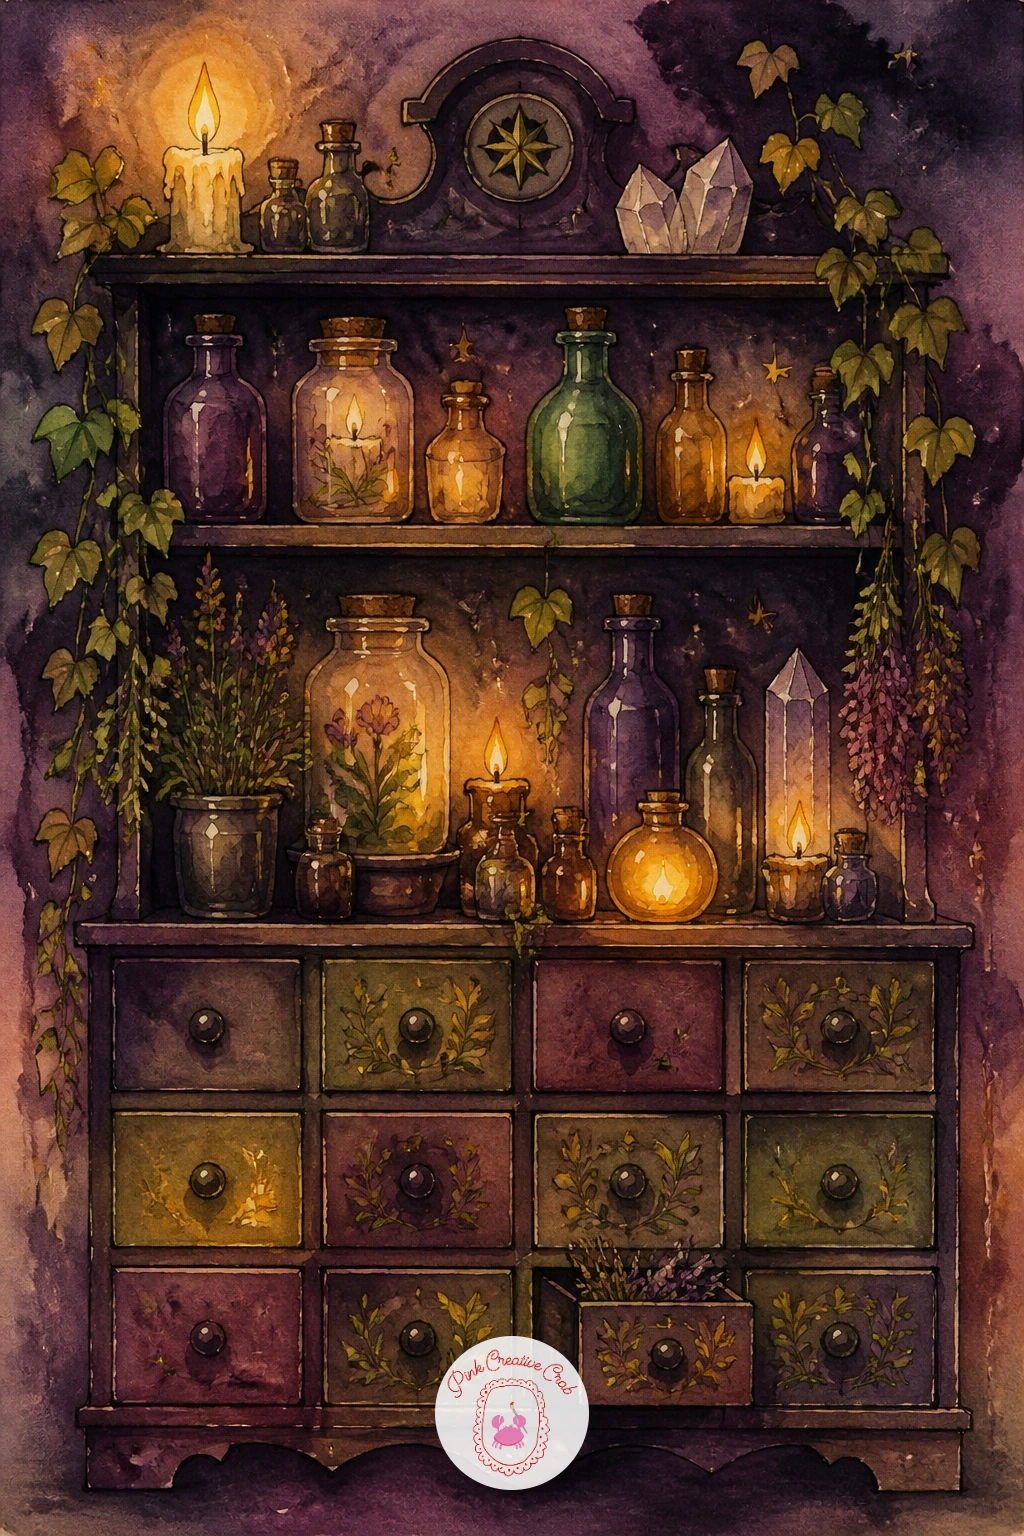
You Will Need
- white gel pen
Palette: Burnt Umber,Deep Plum,Hooker’s Green,Mustard Yellow
Shift into something moodier with a witch with a lantern in fog, a scene built almost entirely from soft, blended edges rather than crisp shapes. Sketch the witch walking, lantern held out in front of her, keeping the rest of the page nearly empty since fog will fill it in paint rather than pencil.
Paint the whole background first in a very pale grey-blue wash, then while it is still wet, drop in the witch’s silhouette so her edges blur softly into the fog around her rather than staying hard-edged. The lantern light goes in last, a small dab of warm mustard with the surrounding fog lifted slightly lighter around it using a clean damp brush.
The eye level here sits low and close, as though you are walking just behind her, which is what makes the fog feel like it is closing in rather than being viewed from a safe distance. If the silhouette dries too sharp, soften the edges afterward with a clean wet brush worked gently along the outline.
Finish with one faint suggestion of a tree shape barely visible in the fog ahead of her.
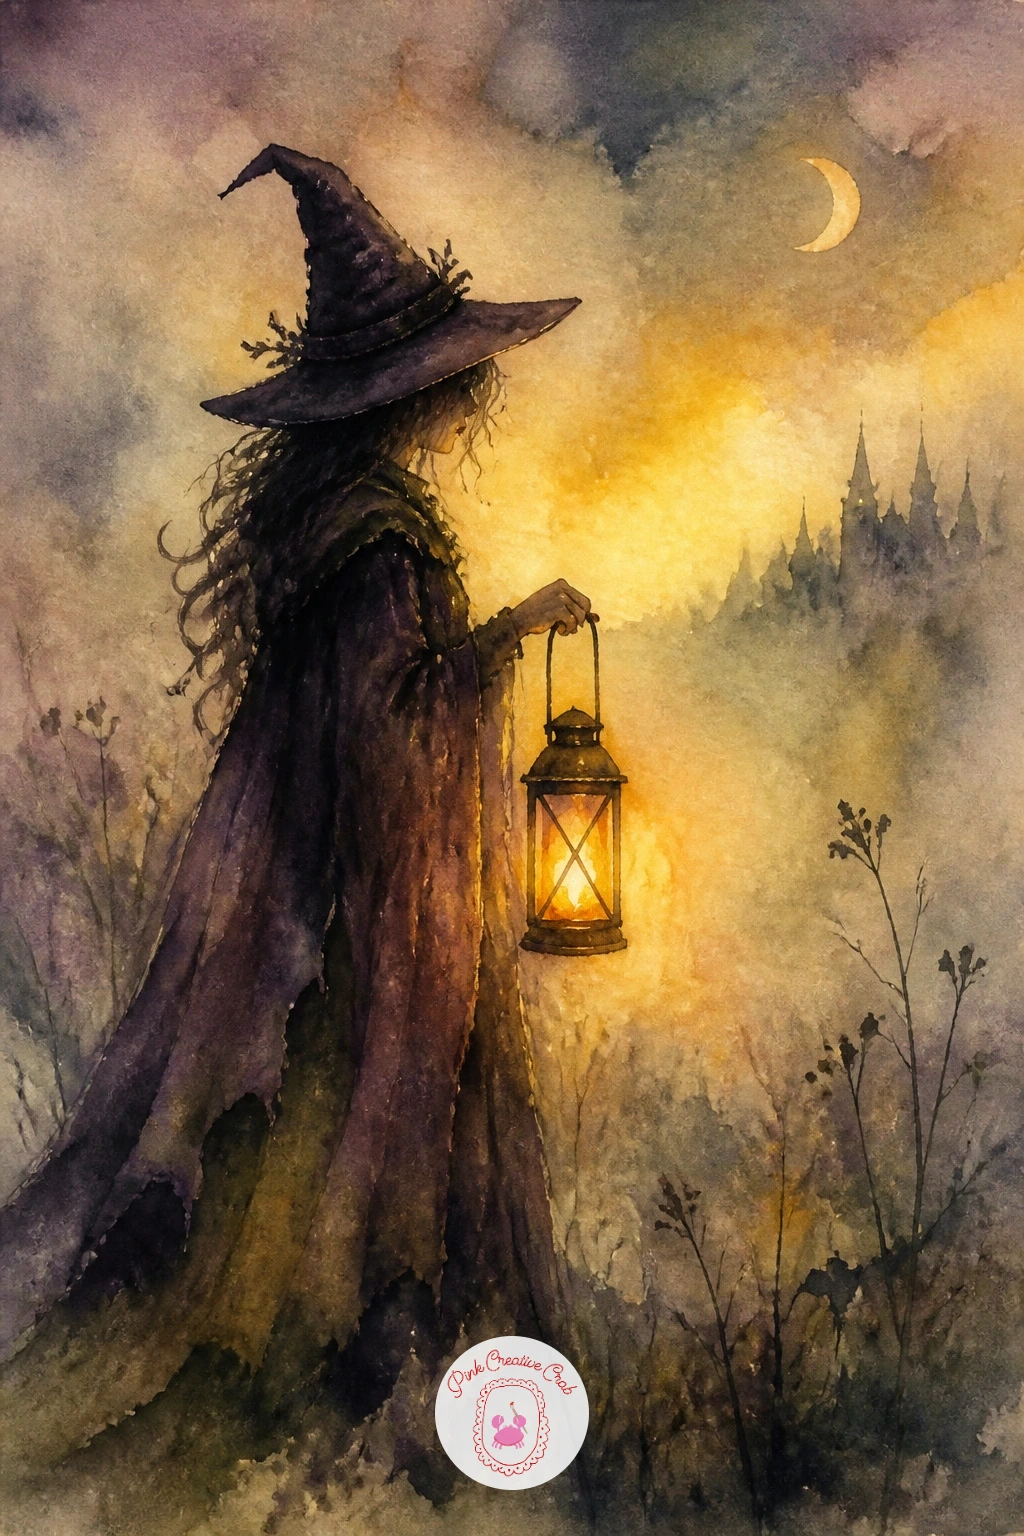
Palette: Payne’s Grey,Ivory Black,Mustard Yellow,Deep Plum
Narrow the focus right down with a moth on a candle jar, a small and quiet subject that is mostly about soft candle glow and delicate wing patterns. Draw a simple round jar with a candle inside it first, then perch the moth on the rim, wings spread flat and still.
Paint the candle flame and glow first in warm orange and mustard, letting the color bleed gently up into the jar’s glass while still wet. Once dry, paint the moth in soft grey-brown with a fine brush, adding small darker spots and lines along the wings last, since those tiny marks are what makes a moth recognizable rather than a generic insect shape.
The wings are the part most likely to go wrong if you overwork them, so lay in the pattern with confident single strokes rather than scrubbing back and forth. No fine brush on hand just means using the very tip of a round brush loaded lightly with paint instead.
Finish with a soft halo of mustard light glazed around the whole jar once everything else is dry.
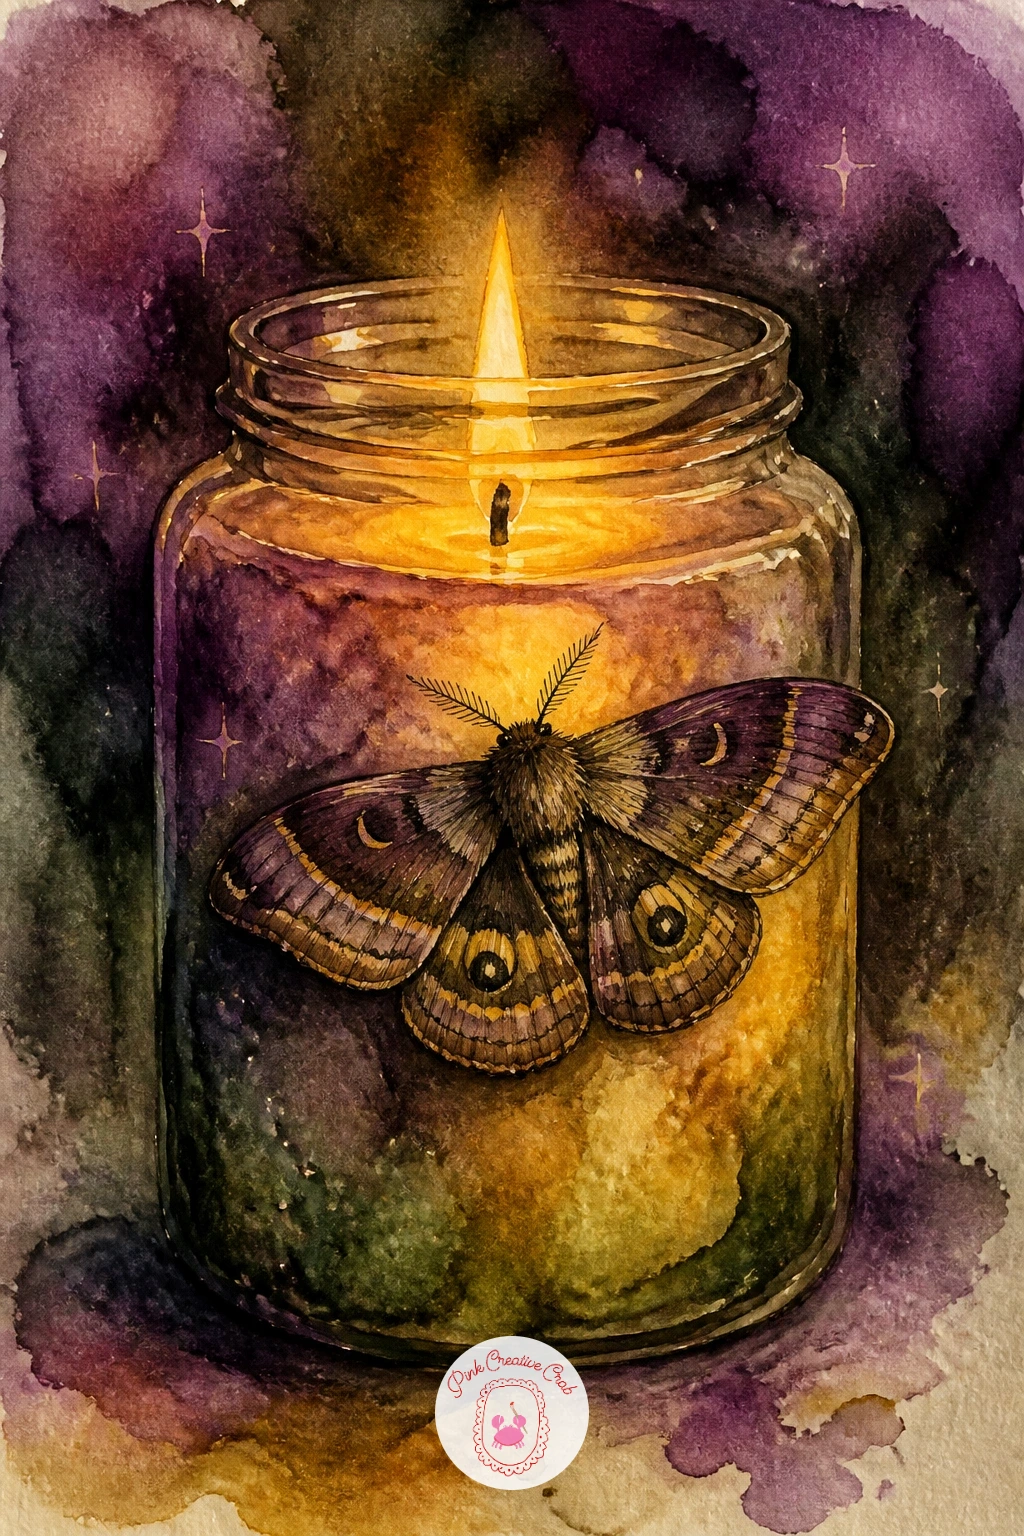
Palette: Burnt Orange,Mustard Yellow,Payne’s Grey,Burnt Umber
Widen out again for a witch’s cottage in autumn, a small landscape that ties together many of the colors used elsewhere on this list. Sketch a simple cottage shape with a pointed roof and one glowing window, then surround it with a few bare or autumn-colored trees.
Paint the sky first in a soft dusky wash, then work the cottage walls and roof once that has dried, keeping the window as the single brightest, warmest point on the whole page. Add the autumn trees last in layered mustard, orange and deep plum, dabbing the color on with the side of your brush rather than painting individual leaves.
Landscapes like this often lose their glow if every part of the painting is equally bright, so let the window light be the one true highlight and keep everything else a shade or two darker in comparison. For more practice with this kind of small scene, the easy watercolor landscapes collection is a good next stop.
Finish with a thin curl of smoke rising from the chimney.
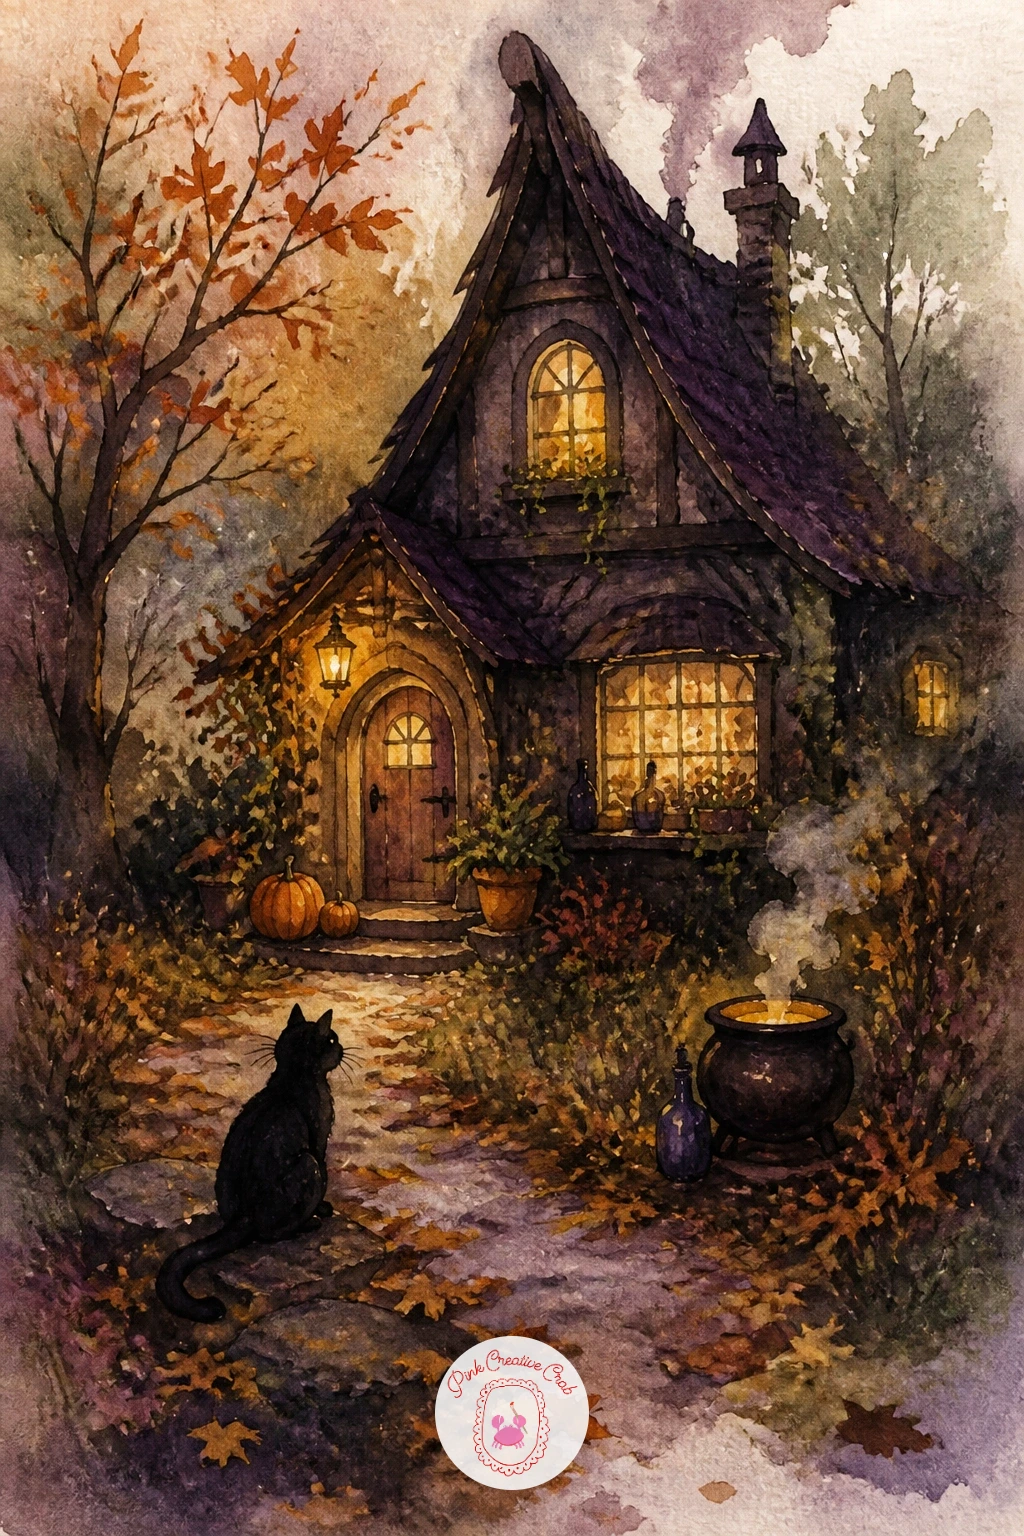
Palette: Mustard Yellow,Burnt Orange,Deep Plum,Payne’s Grey
Bring the mood back indoors with a witch reading tea leaves, a close, intimate scene centered on a single teacup. Draw the witch’s hands cupped around a teacup first, with her face tilted downward studying the leaves inside, keeping the rest of her body loosely suggested around the edges of the page.
Paint the teacup and saucer in a pale cream wash, then once dry, drop a scatter of small dark brown shapes inside the cup for the tea leaves themselves, clustering some together and leaving others scattered apart. The witch’s hands and sleeves come in around the cup in deep plum, painted last so the pale cup stays the clear center of attention.
Hands can be tricky at speed, so simplify them into soft rounded shapes rather than attempting individual fingers in full detail, especially if this is a subject you have not painted before. If brown tea leaves feel too plain, a touch of deep green mixed in gives them a slightly more mysterious, mossy color.
Finish with a thin curl of steam rising from the cup.
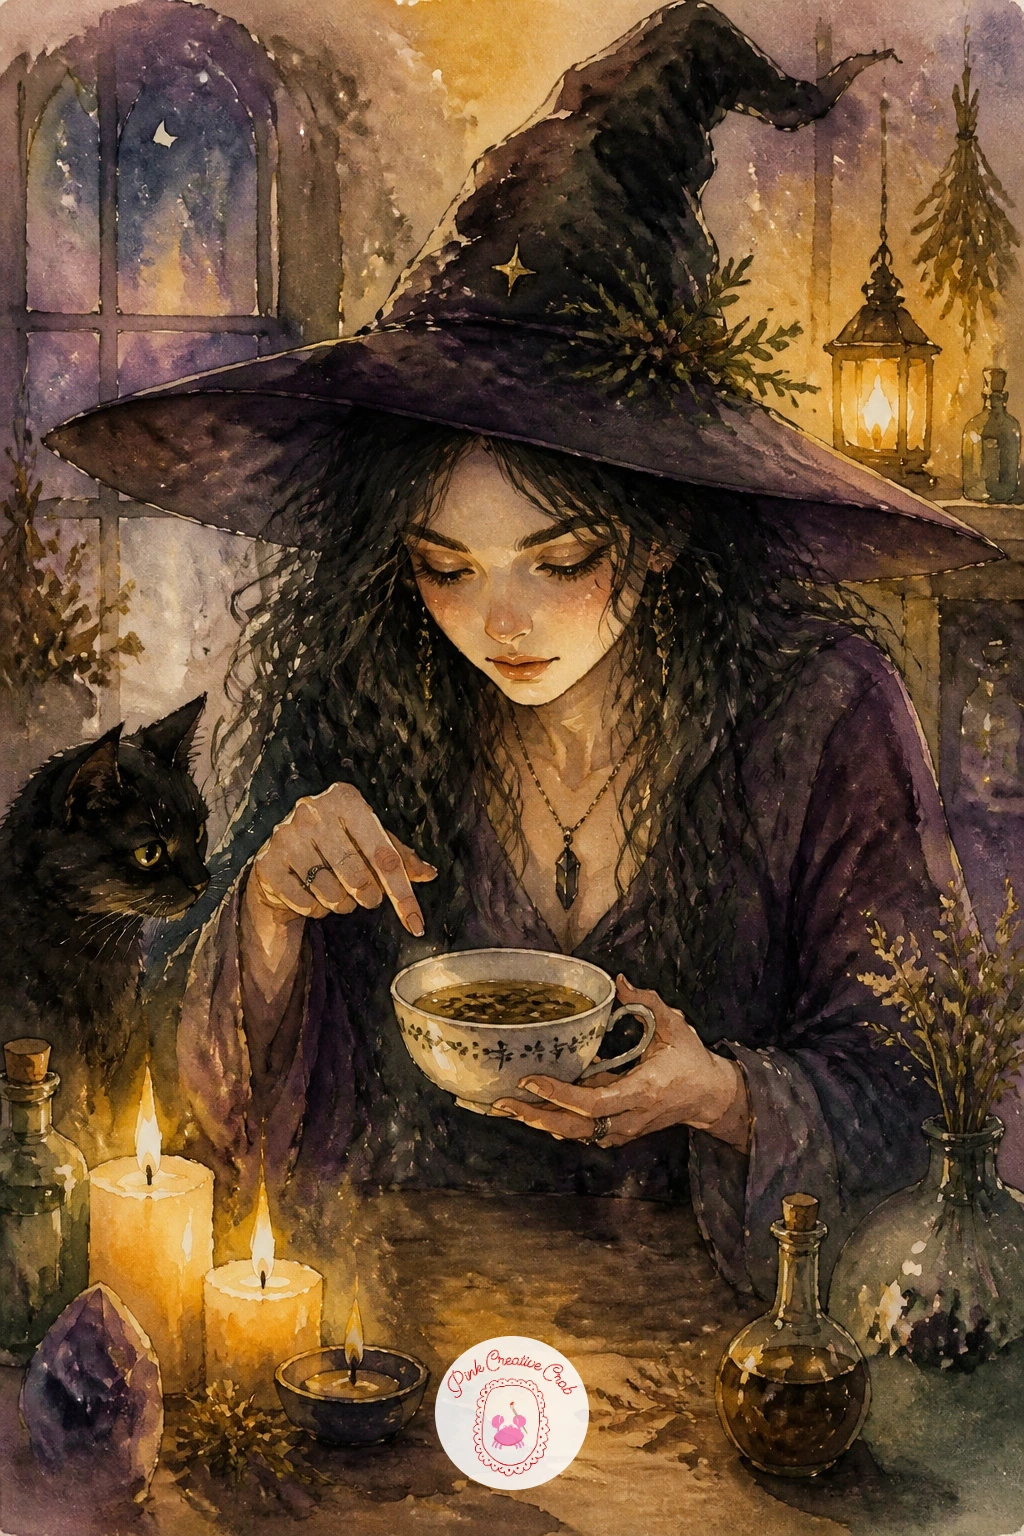
Palette: Cream,Burnt Umber,Deep Plum,Hooker’s Green
Move outside again for a witch and an owl on a branch, pairing a human figure with a bird for a composition that balances the two shapes side by side. Sketch a simple branch running across the page first, the owl perched on one end and the witch standing just beside or beneath it, one hand raised toward the bird.
Paint the owl first in soft grey-brown with a paler front, using small dabbed strokes for the chest feathers and smoother strokes for the wings, since that contrast in texture is what sells the bird’s shape. Once dry, paint the witch in deep green or plum, keeping her smaller in the frame than the owl so the branch and bird remain the visual anchor.
Check the owl’s proportions by comparing its head width to its body width before you paint: owls generally read as correct when the head looks a touch larger than you expect. A reader wanting more bird practice first can look at the bird pencil drawing beginner ideas for simple shapes to borrow.
Finish with two small round eyes in pale yellow for the owl, placed close together for that watchful look.
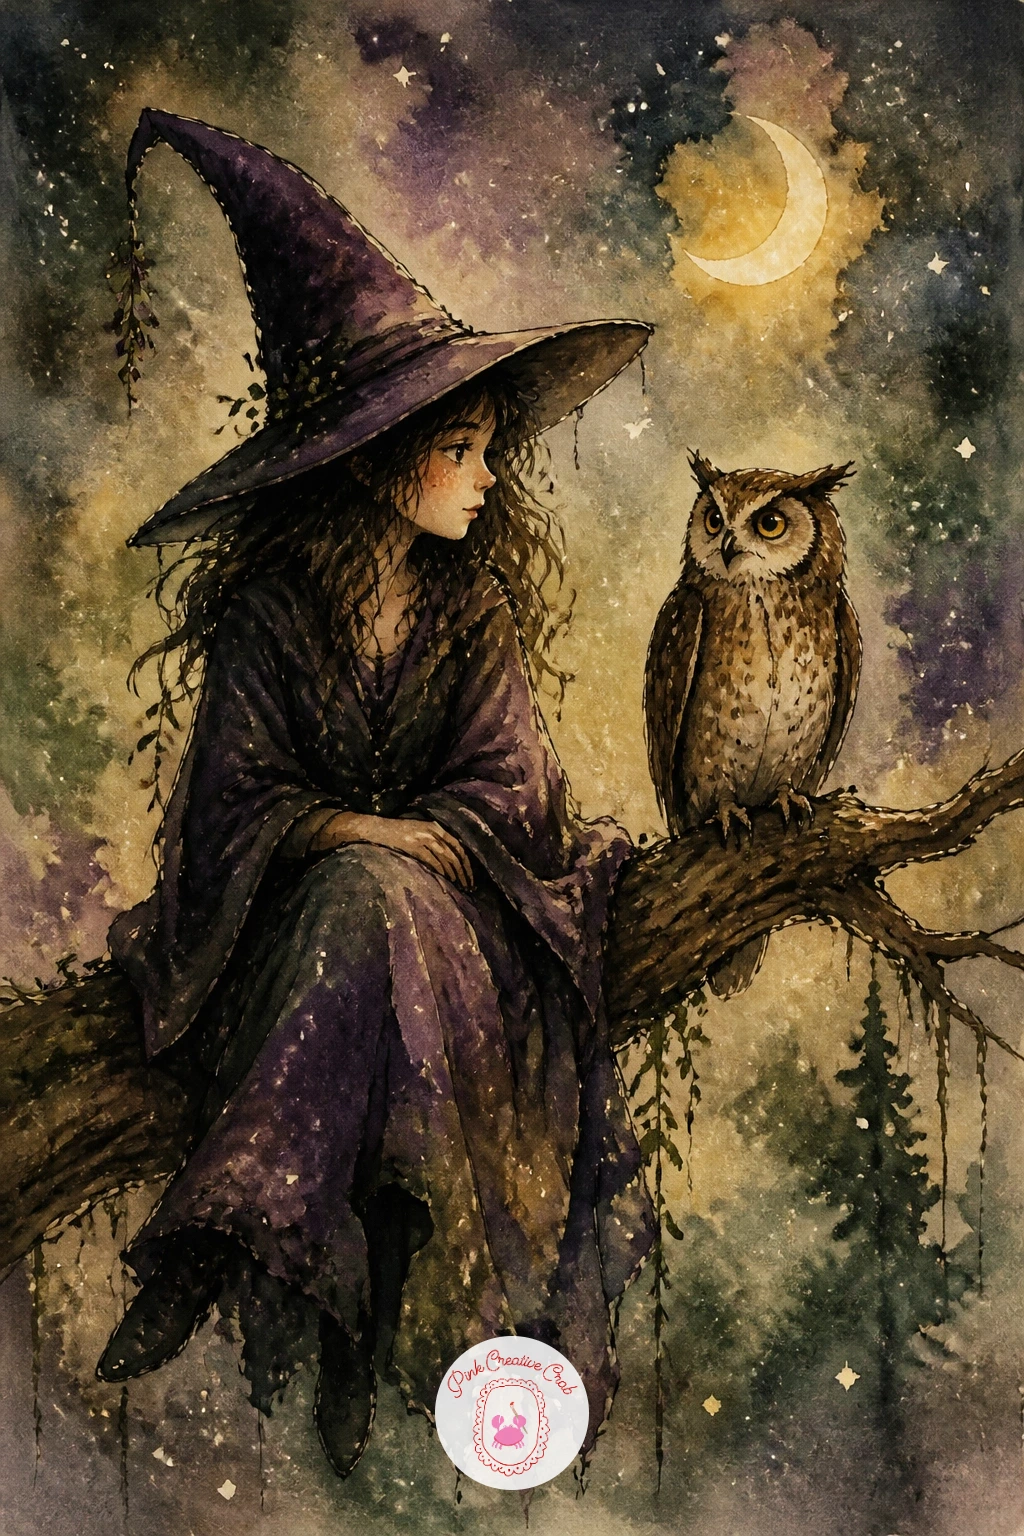
Palette: Payne’s Grey,Burnt Umber,Deep Plum,Mustard Yellow
Take a breather with dried lavender and sage bundles, a simple still life that is mostly about texture rather than any figure or setting. Sketch two or three loose bundles tied with string, hanging or lying across the page, keeping the stems slightly bent rather than perfectly straight for a more natural, dried look.
Paint the sage leaves first in soft sage green, using the dry brush technique of a lightly loaded brush dragged across rough paper to get that papery, dried texture rather than smooth fresh leaves. Once dry, add the lavender in small repeated dabs of dusty plum along thin stems, working from the base of each stem upward.
Dried herbs go wrong when painted too smoothly, so resist blending the color evenly and let some patchiness show through, since that is exactly what dried plant matter looks like. No rough paper on hand just means dragging the dry brush a little faster for a similar broken texture.
Finish with a thin loop of string or twine tying each bundle together.
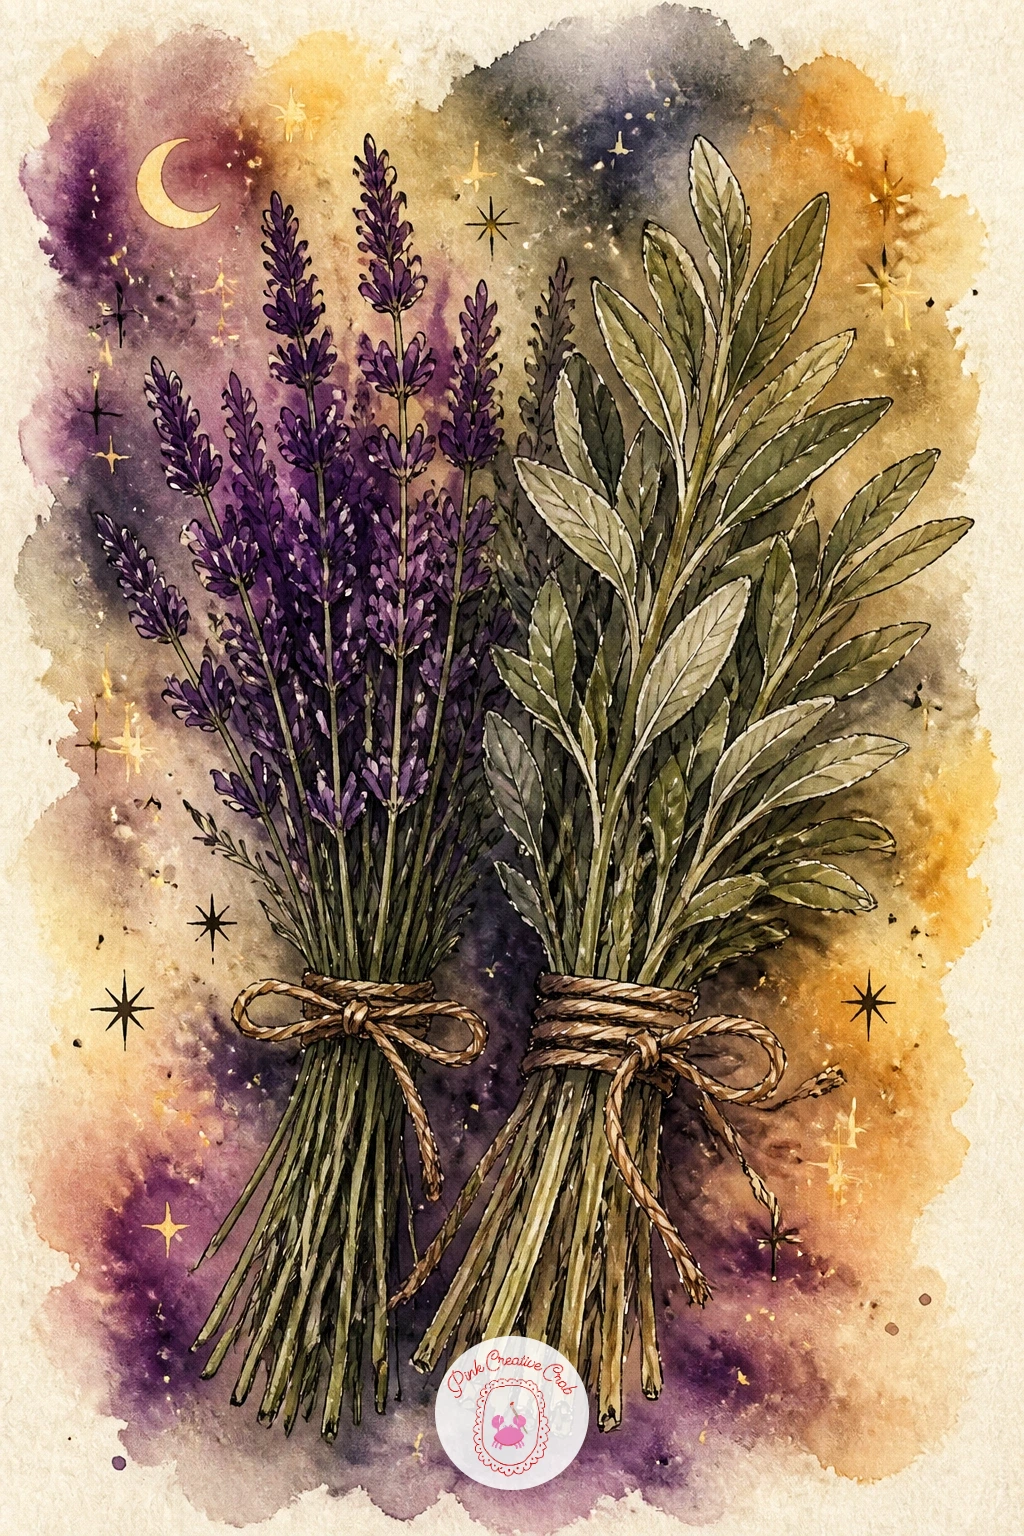
Palette: Sap Green,Deep Plum,Burnt Umber,Mustard Yellow
Go bigger again with a witch flying past a castle, a dramatic little landscape that works well once several simpler scenes are behind you. Sketch a castle silhouette low on the page first, with the witch and her broom crossing the sky above it at a steep diagonal.
Paint the sky in a deep twilight gradient, plum near the top fading into mustard near the horizon, working quickly while the paper is wet so the colors blend smoothly into one another. Once that sky has dried, paint the castle as a flat dark silhouette, then add the witch as a smaller silhouette crossing in front of the sky but behind or beside the castle’s tallest tower, depending on how you want the depth to read.
Distance is the trick here: keep the castle’s silhouette simple and a little soft-edged compared to the sharper, closer witch shape, which is what convinces the eye that one is far away and the other is near. If you prefer a gentler palette, swap the plum for a warm dusky rose instead.
Finish with a few lit windows in the castle, tiny dabs of mustard against the dark stone.
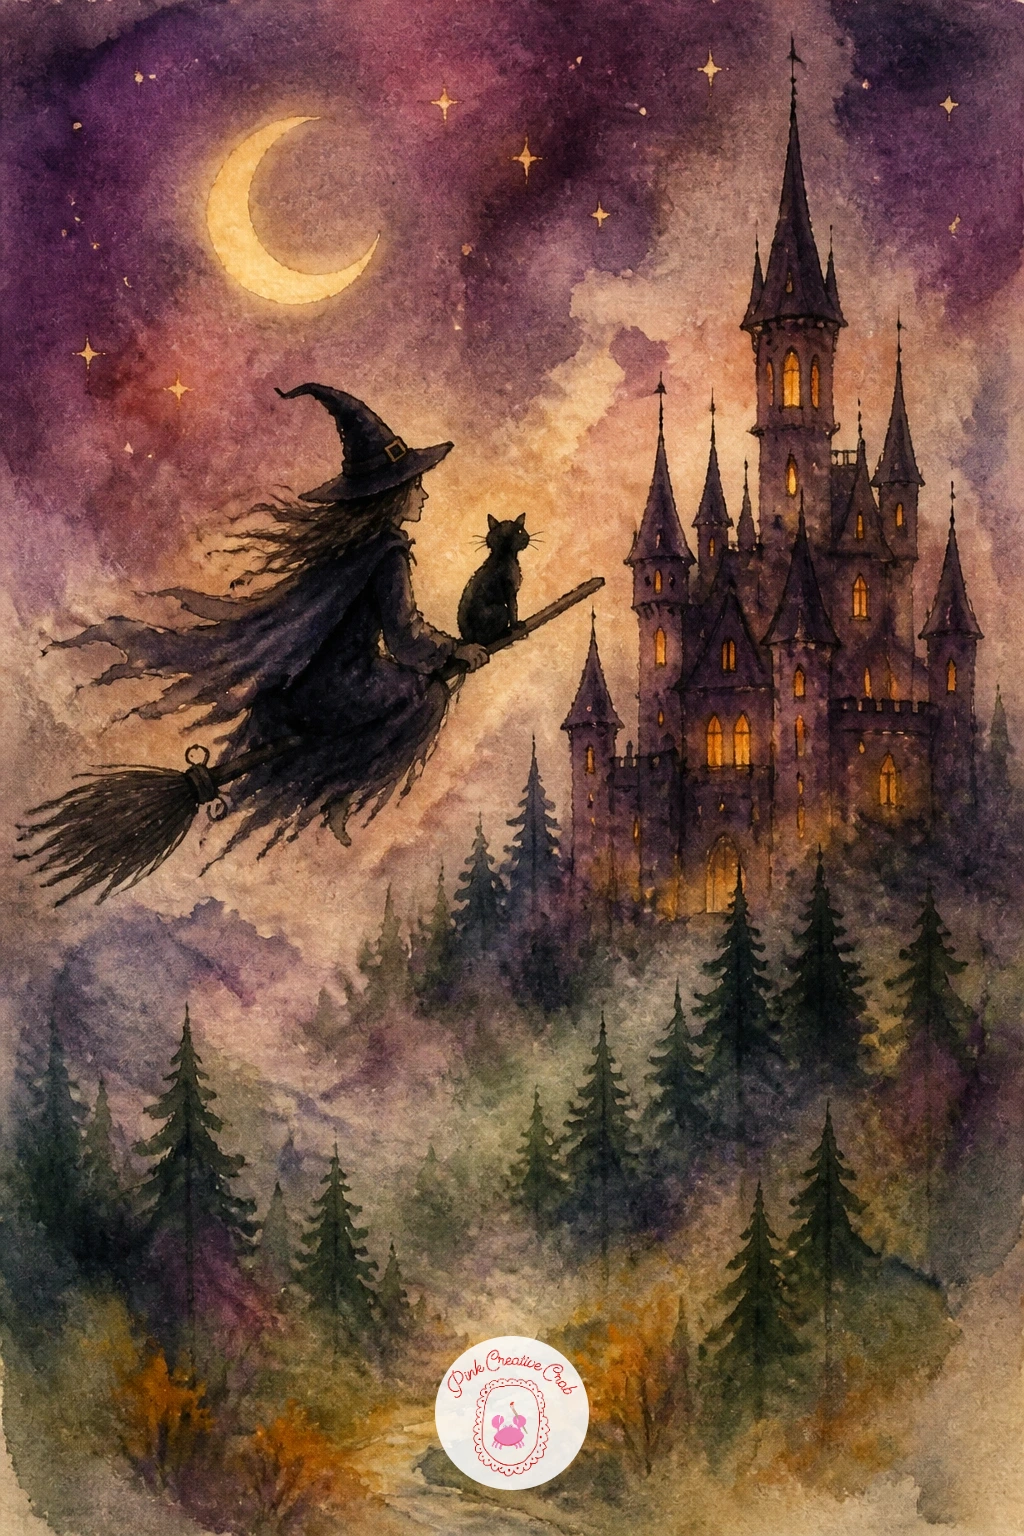
Palette: Deep Plum,Mustard Yellow,Ivory Black,Payne’s Grey
Return to something simpler and warmer with a cauldron of soup with steam, a close-up companion to the earlier tea-brewing scene but focused purely on the pot itself. Draw the cauldron large and centered, filling most of the page, with a ladle resting across its rim.
Paint the soup inside in a warm, varied wash, orange, mustard and a touch of green dropped in together so it looks like a thick vegetable broth rather than flat color. Paint the cauldron’s iron body in deep black-grey once the soup has dried, leaving a thin rim of untouched paper where the firelight catches its edge.
This is an easy one to rush through in ten minutes with just the pot and soup, or to extend by adding floating vegetable pieces and a small fire glowing beneath it for the forty-minute version. If you enjoy painting food textures like this, the summer watercolor food and drinks page has more ideas for soft, steamy subjects.
Finish the steam in the same dry, wispy brushwork used for the tea-brewing scene earlier on this list.
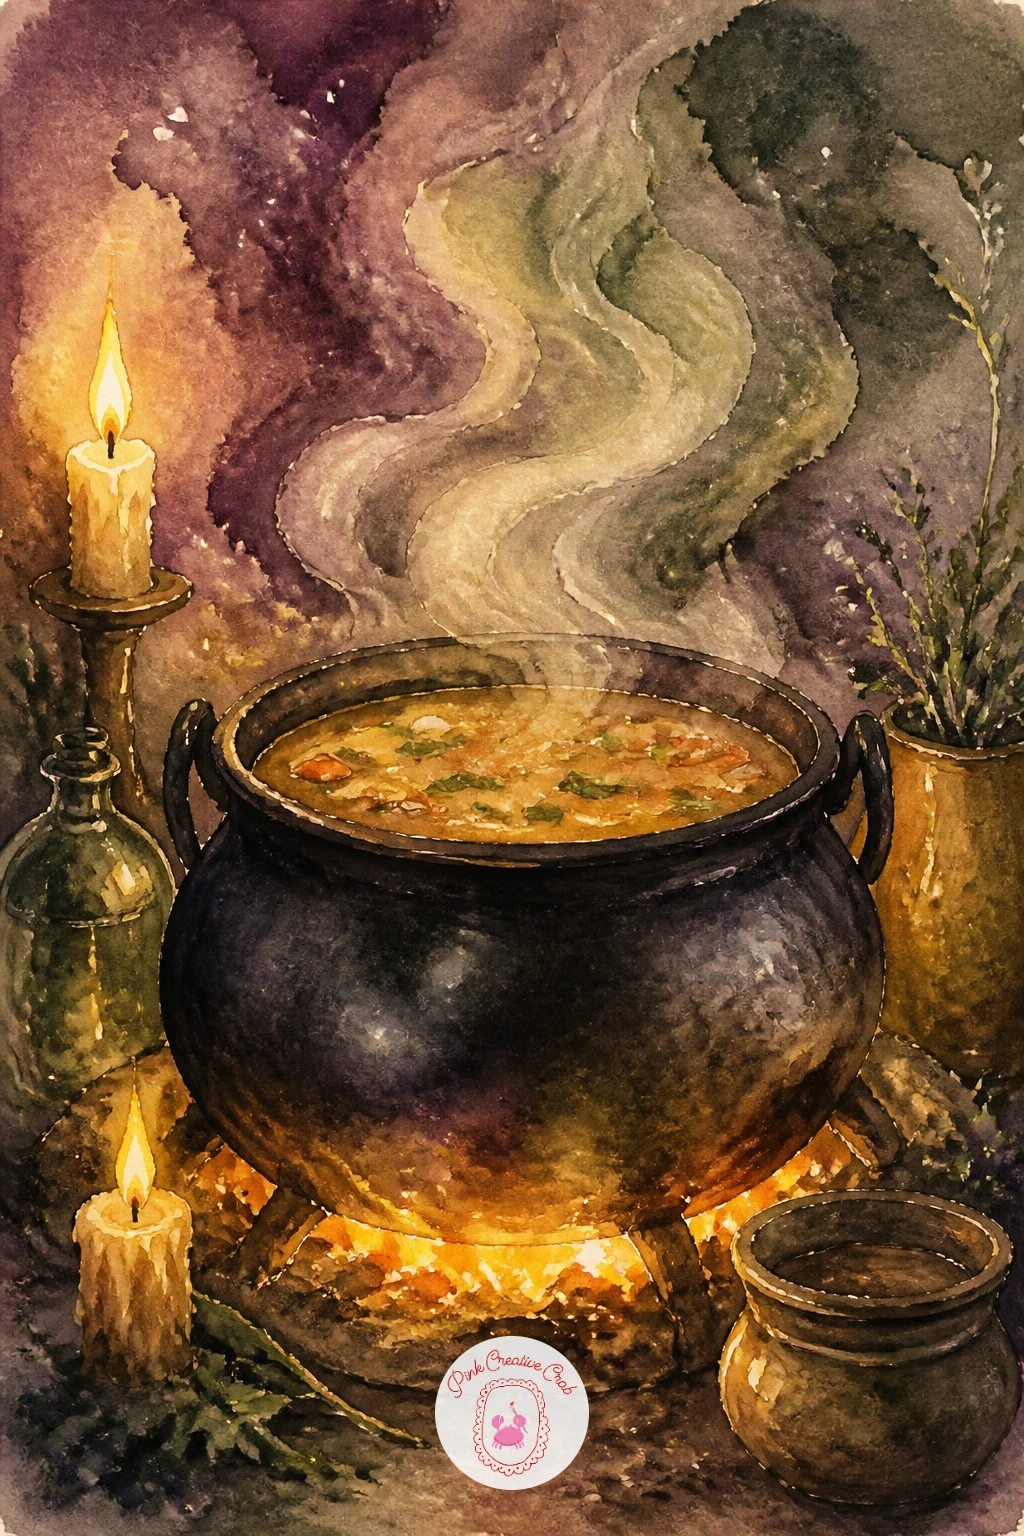
Palette: Burnt Orange,Mustard Yellow,Hooker’s Green,Payne’s Grey
Settle into a witch’s desk with a quill and map, a quiet still life full of small objects that rewards a careful, slower hand. Sketch a desktop surface first, then arrange a rolled or flattened map, an ink bottle and a feather quill across it, overlapping the objects slightly so they feel gathered rather than lined up.
Paint the map in a soft aged cream wash with a few loose brown lines suggesting coastlines or borders, nothing too literal or detailed. Once dry, paint the ink bottle in deep black-plum and the quill in warm cream with fine dark lines for its feather barbs, saved for last since those small marks need a steady, dry surface beneath them.
A desk scene like this is good practice for comparing object sizes against one another: hold your pencil up to check the quill is roughly the same length as the ink bottle is tall, which keeps the whole arrangement believable. If you enjoy small object compositions, the easy watercolor fruit paintings guide uses a similar approach with a different subject.
Finish with a small puddle of spilled ink for a little extra character.
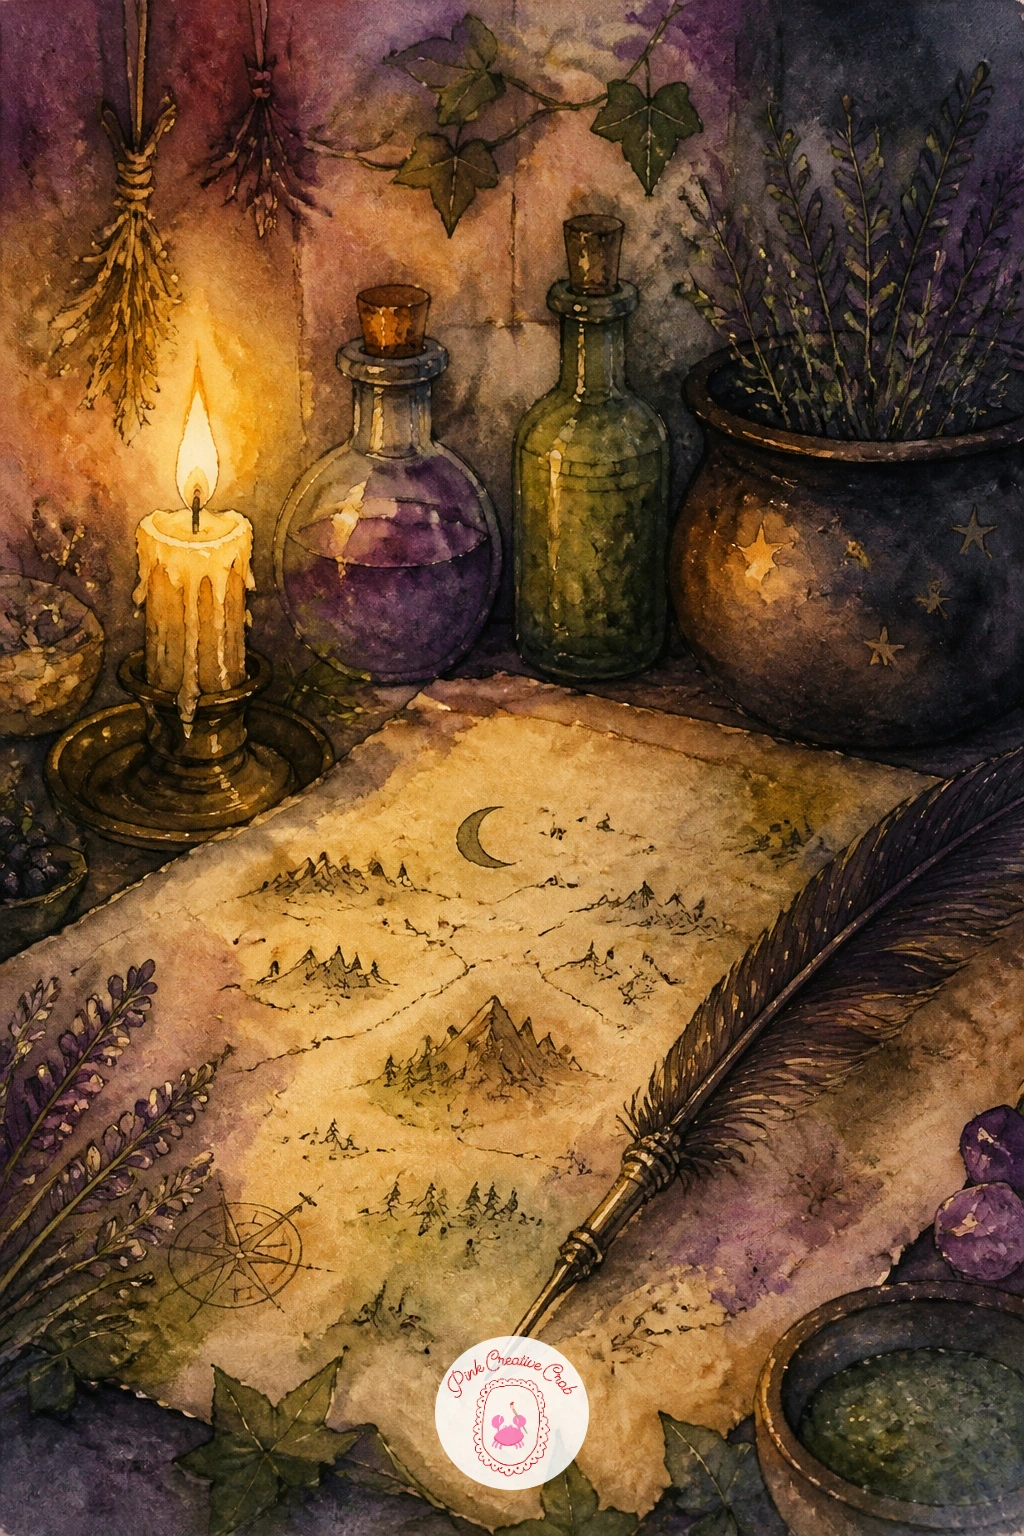
Palette: Cream,Burnt Umber,Deep Plum,Ivory Black
Lighten the mood with a black cat with a tiny witch hat, a simple and playful subject that makes a lovely small painting on its own. Draw the cat sitting upright first, tail curled neatly around its front paws, then add a small pointed hat perched between its ears.
Paint the cat’s body in one flat black wash, then while still slightly damp, drop a touch of deep plum into the shadow side so the fur has a little warmth rather than reading as a flat silhouette. The hat comes next in mustard or deep green, painted small enough that it stays clearly a tiny accessory rather than competing with the cat’s own shape.
If the hat looks too stiff once dry, soften its edge with a damp brush so it sits more naturally on the fur rather than looking stuck on top. A white gel pen whisker or two, added last once everything is bone dry, finishes the face nicely.
Keep the eyes two small simple ovals in pale yellow for that classic watchful cat look.
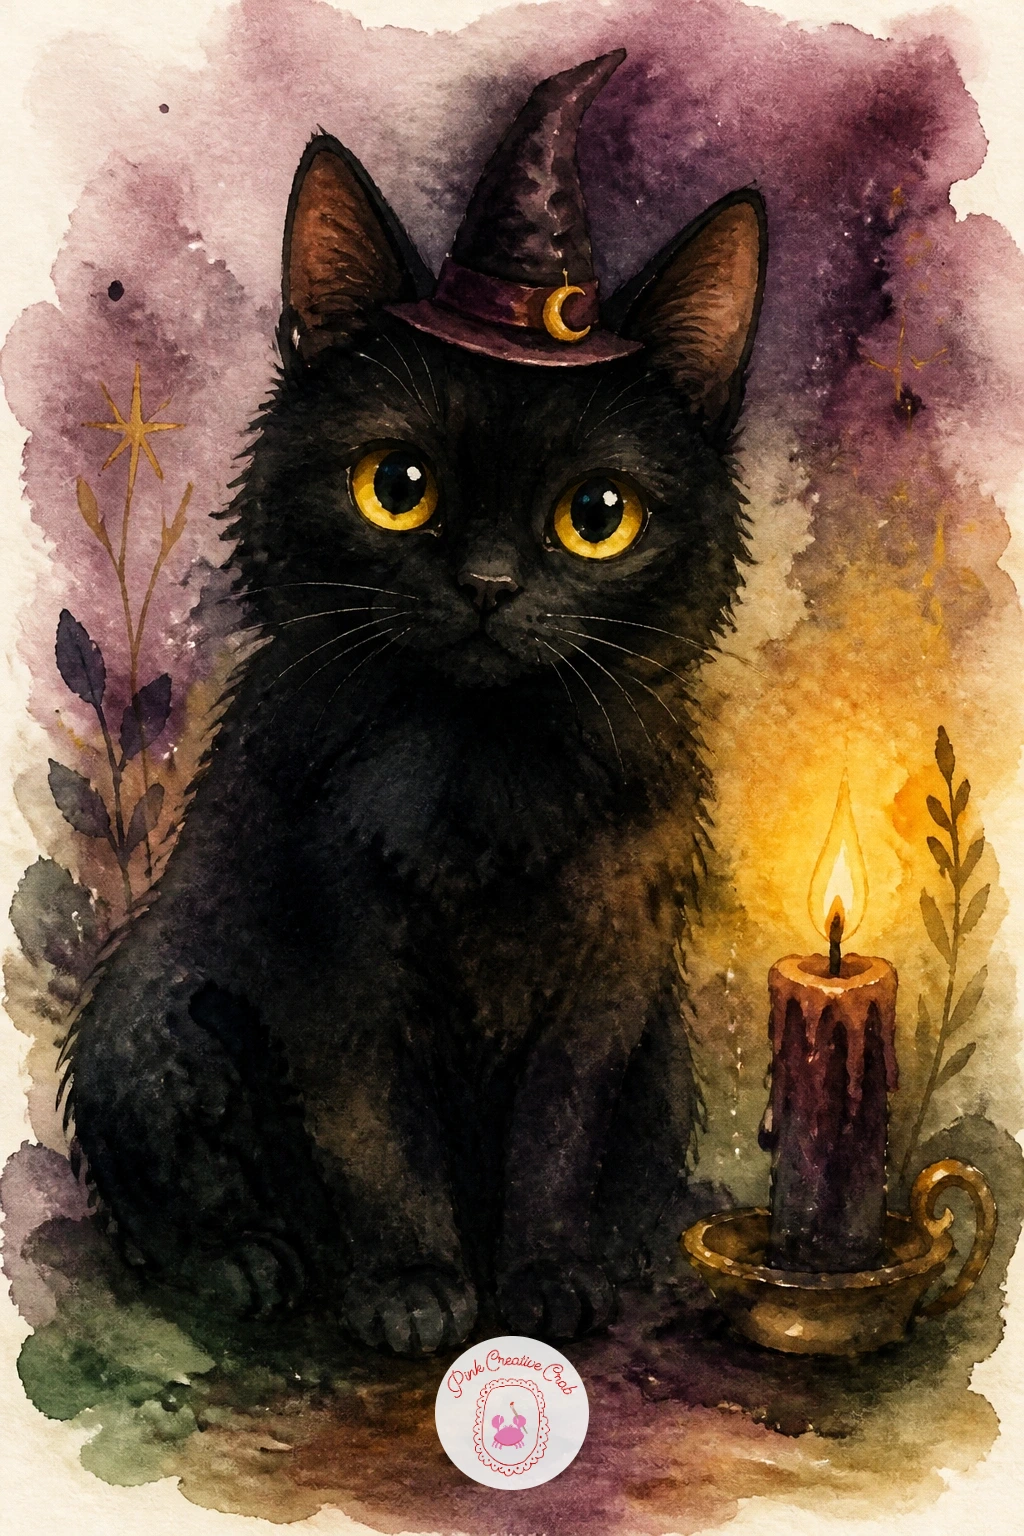
You Will Need
- white gel pen
Palette: Ivory Black,Deep Plum,Mustard Yellow,Hooker’s Green
Close the list with a witch planting seeds under a full moon, a gentle, hopeful scene that makes a nice last painting after everything else here. Sketch the witch kneeling low in a small garden patch, one hand pressed into the soil, with a large full moon rising behind her.
Paint the moon and night sky first in deep indigo, lifting the moon’s pale glow with a clean damp brush while the sky wash is still wet so it blends softly rather than sitting as a hard white circle. Once dry, paint the witch kneeling in deep green or plum, then add the soil and a few tiny seedling sprouts in front of her in bright fresh green, since that small spot of new growth is really the heart of the whole scene.
If you want to vary this one later, try painting it at dawn instead of night, swapping the indigo sky for soft rose and mustard while keeping the same kneeling pose and sprouting seedlings.
Finish with a scatter of tiny stars and one soft beam of moonlight falling across her hands.
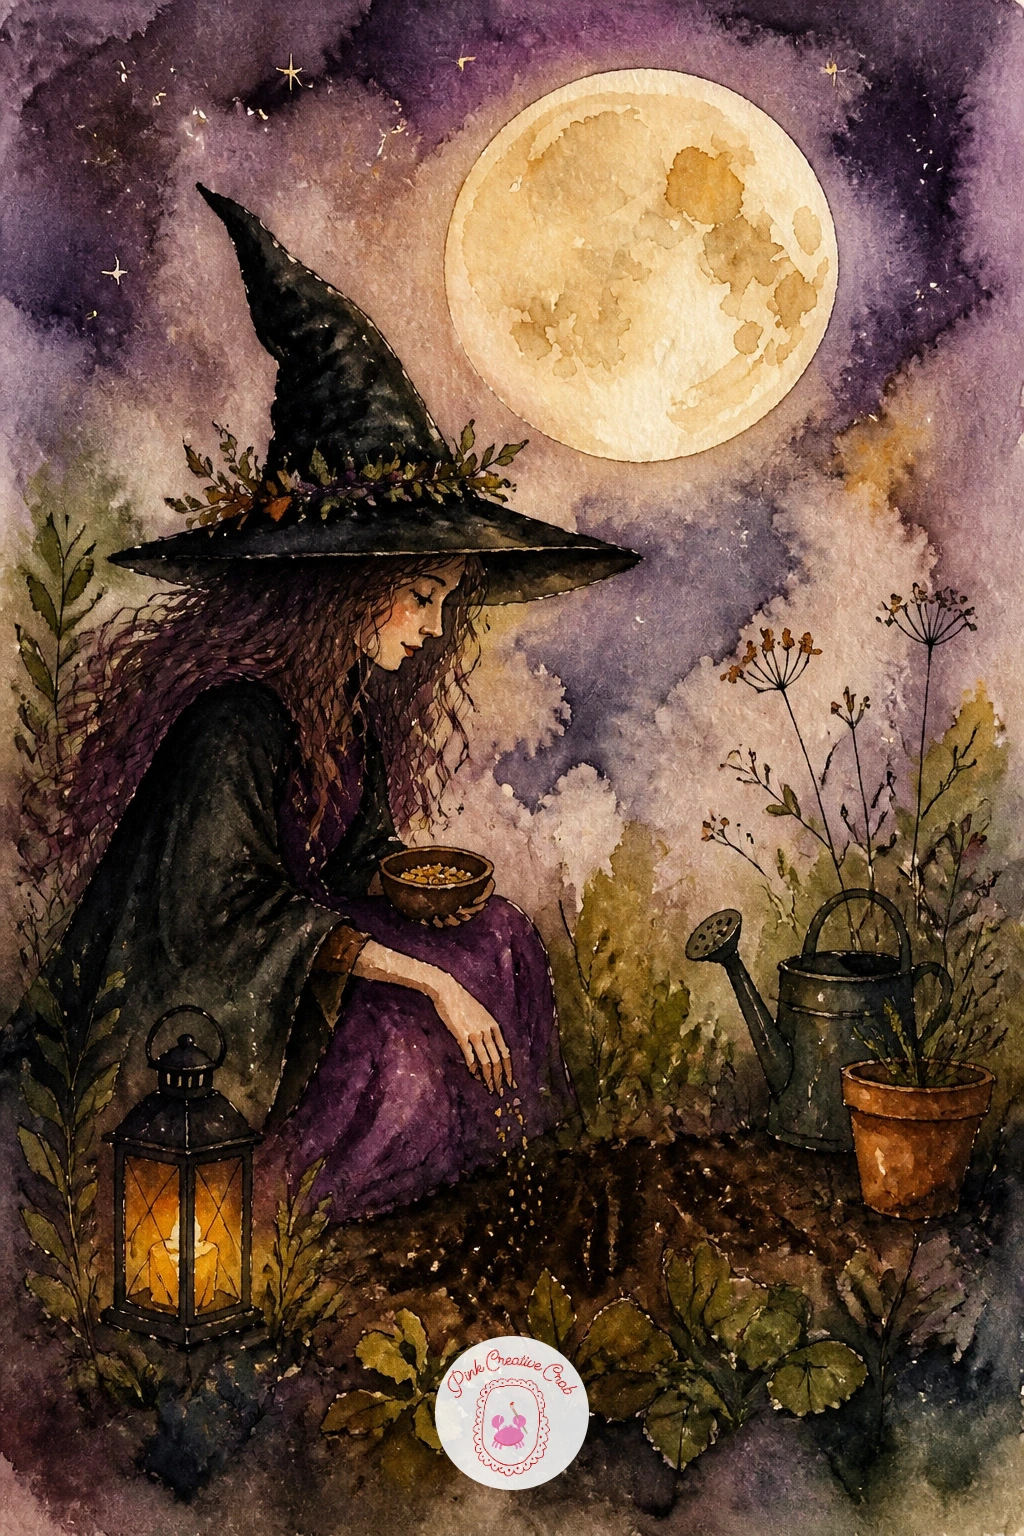
You Will Need
- white gel pen
Palette: Indigo,Sap Green,Deep Plum,Mustard Yellow
What to Do Next
Pick whichever scene matches the time you actually have tonight: a quick silhouette like the broom by the door for a short sitting, or the cottage in autumn if you want to settle in longer. Tape a sheet of cold press paper to your table, mix your plum and green first, and let the candlelight do the rest.
Frequently Asked Questions
What colors work best for witchy watercolor paintings?
Plum, deep green, mustard and black work best, since they give a warm, candlelit feel without turning scary. Mix them wet-in-wet for soft glow and reserve pure black for small silhouettes rather than whole backgrounds.
How do you paint a soft glowing light in watercolor?
Paint the light source first in warm mustard or orange while the surrounding area is still wet, letting the color bleed outward naturally. Keep the brightest point untouched paper or the palest wash, and deepen the shadows around it afterward.
What paper is best for cozy witch watercolor scenes?
Cold press watercolor paper around 140lb works best, since its slight texture helps dry-brush effects like fur, steam and dried herbs. Smoother hot press paper is fine too if you prefer crisper edges over texture.
How do you keep a black cat from looking flat in watercolor?
Drop a little deep plum or green into the wet black wash so the fur reads with some warmth and depth rather than a solid silhouette. Adding this while the first layer is still damp blends it in softly without hard lines.
Can beginners paint witchy watercolor scenes without drawing experience?
Yes, beginners can manage these scenes by starting with the simpler silhouette-based ideas, like the broom by the door or the cat with a witch hat. Simple shapes, a reference photo and a willingness to keep details loose are all that is needed.
Have any thoughts?
Share your reaction or leave a quick response — we’d love to hear what you think!
-
 0
-
0
-
0
-
0
-
0
-
0


