

A stingray drawing is one of those subjects that looks far harder than it actually is: a flat diamond body, a long tail, a pair of curious eyes, and suddenly you have something alive on the page. That gentle glide is what makes rays so satisfying to draw with alcohol markers, because the body is really just a soft triangle with rounded corners, and the color does the rest of the work.
Below you will find 27 ideas, starting with stingrays in every mood and setting, then drifting out to the other gliding creatures that share their calm, floaty energy: jellyfish, manta rays, seahorses, a leaping dolphin. Every one uses the same light sea palette of blue, sand, coral and lilac, so pick whichever one catches your eye first and you can have it finished before your coffee goes cold.
Using these images: free for personal projects such as printing, coloring, cards, journals and gifts. Handmade items that include them may be sold up to 30 pieces per design. More than that is commercial use and is not permitted, and neither is selling or sharing the images themselves or passing them off as your own. Please ask before any other use.
Start the easiest way possible: a stingray gliding over sand, seen from above with its diamond body spread flat across the page. Sketch a rounded triangle shape in pencil first, soft at every corner, then add the long whip tail trailing off to one side in a gentle curve, never straight.
Block in the body with a mid sea blue marker, leaving the underside edge lighter where it catches the light, then layer a second darker blue along the back ridge while the first layer is still workable so the two blend into a soft gradient. Dot the eyes and gill slits with your fineliner once the marker is fully dry, or you risk the ink feathering into the color.
The sand underneath is where most beginners rush: lay it down in warm beige first, well below the ray, and let it stay simple rather than textured. If your sea blue runs streaky, a pale lilac marker swept over the top evens it out beautifully.
Finish with a scatter of tiny white gel pen dots for sand sparkle, and keep that one tip in mind for every ray in this list: round every corner, never sharp.
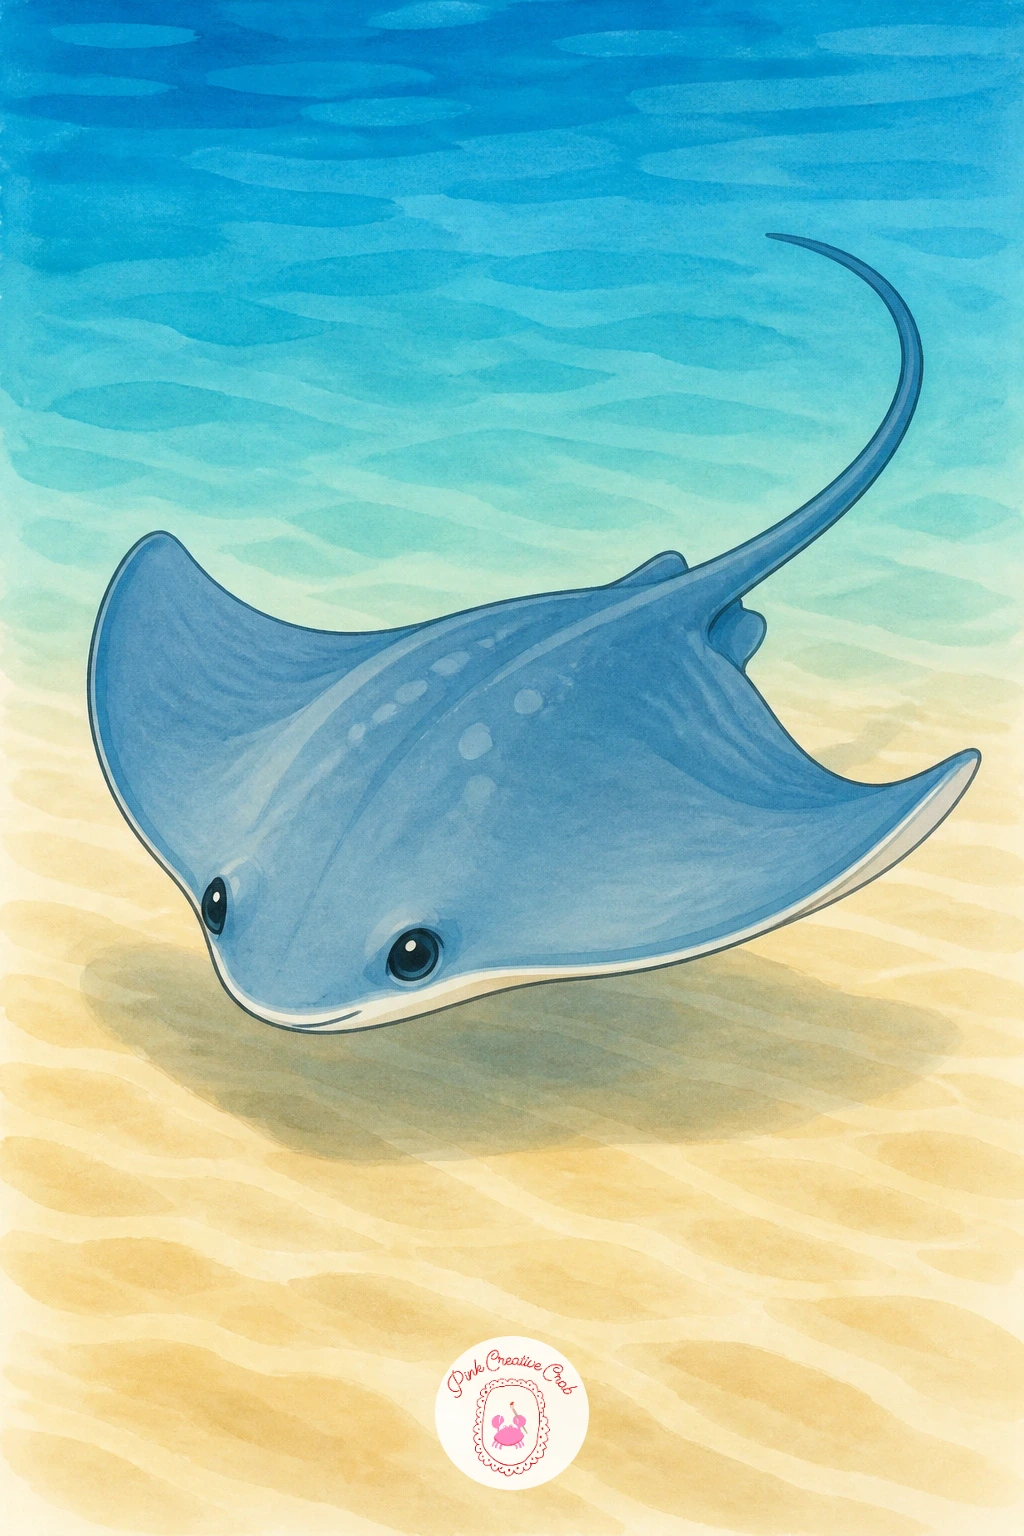
Palette: Sea Blue,Sand Beige,Soft Lilac,Ink Black
Once the basic ray shape feels comfortable, try a smiling stingray from below, which is the pose everyone loves because of that built in grin. The underside of a ray reads almost like a cartoon face: two small eye spots near the top and a curved mouth line beneath them, with the gill slits forming a row of little marks across the middle.
Draw the outline as a rounded diamond first, wider than it is tall, then place the face features a little above center so the “smile” sits in the lower half and reads clearly from a distance. Keep the mouth a single confident curve in fineliner rather than several short strokes, since that is what sells the friendly expression.
Color the body in pale sand or soft coral rather than blue, since the underside of a ray is naturally lighter, and blend a touch of lilac shadow around the outer edges where the body curls slightly toward the viewer. If the smile ends up too wide or uneven, a small dab of white gel pen can soften and reshape the corner.
This is a lovely one to repeat smaller in a sketchbook margin once you have the proportions down.
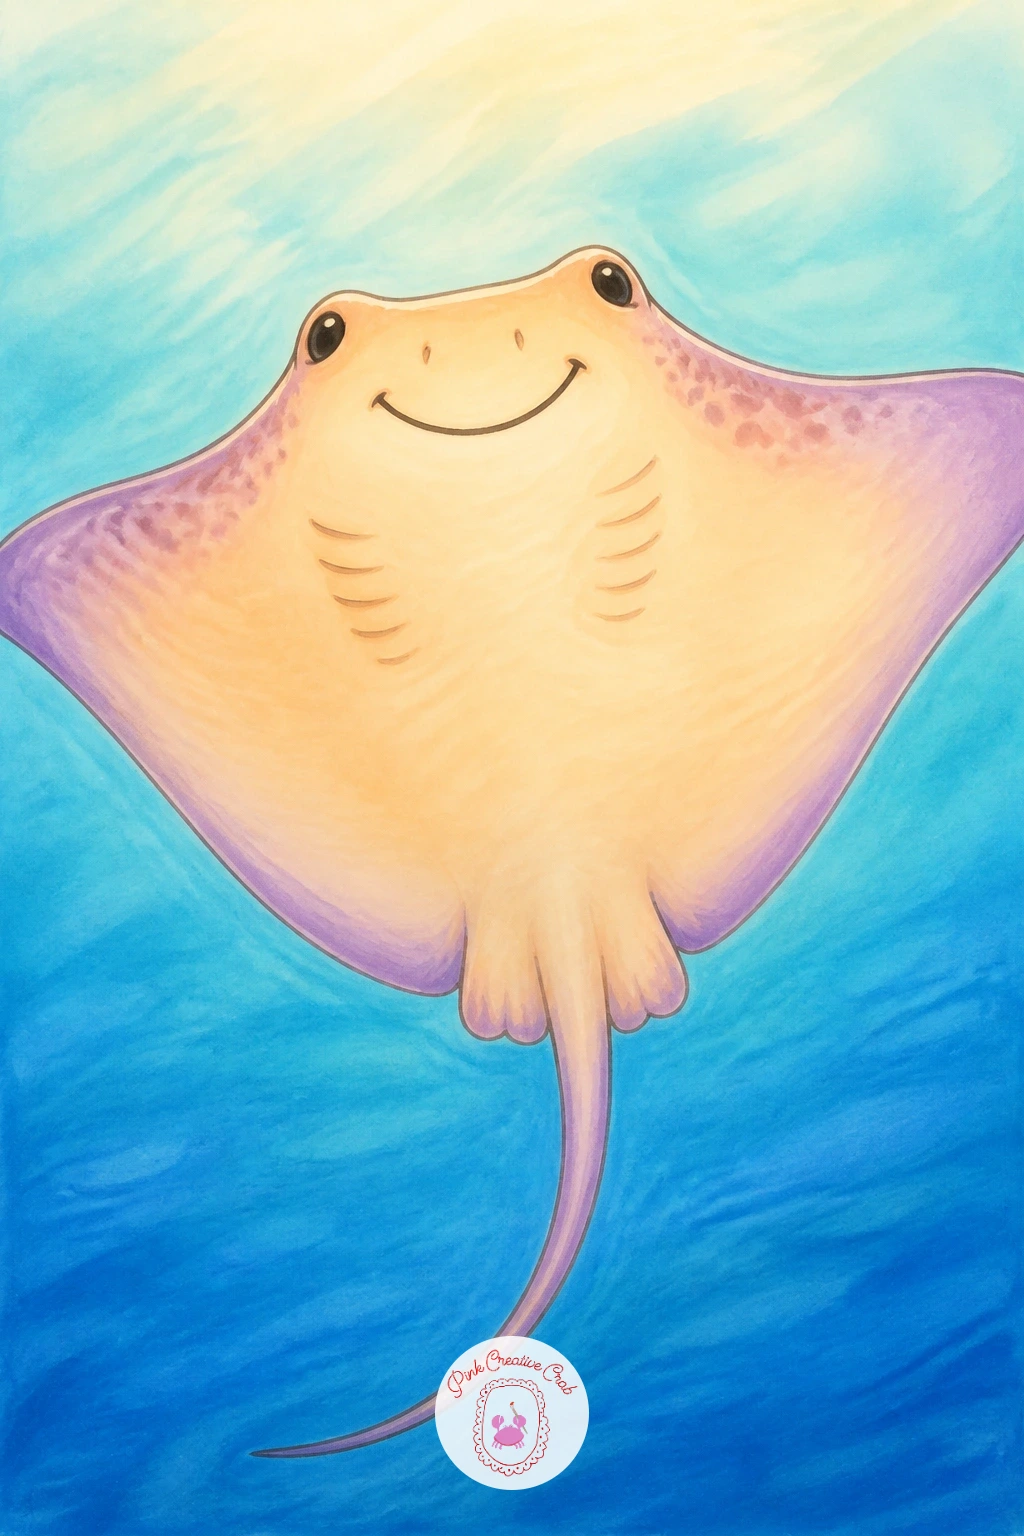
Palette: Coral Pink,Sand Beige,Soft Lilac,Ink Black
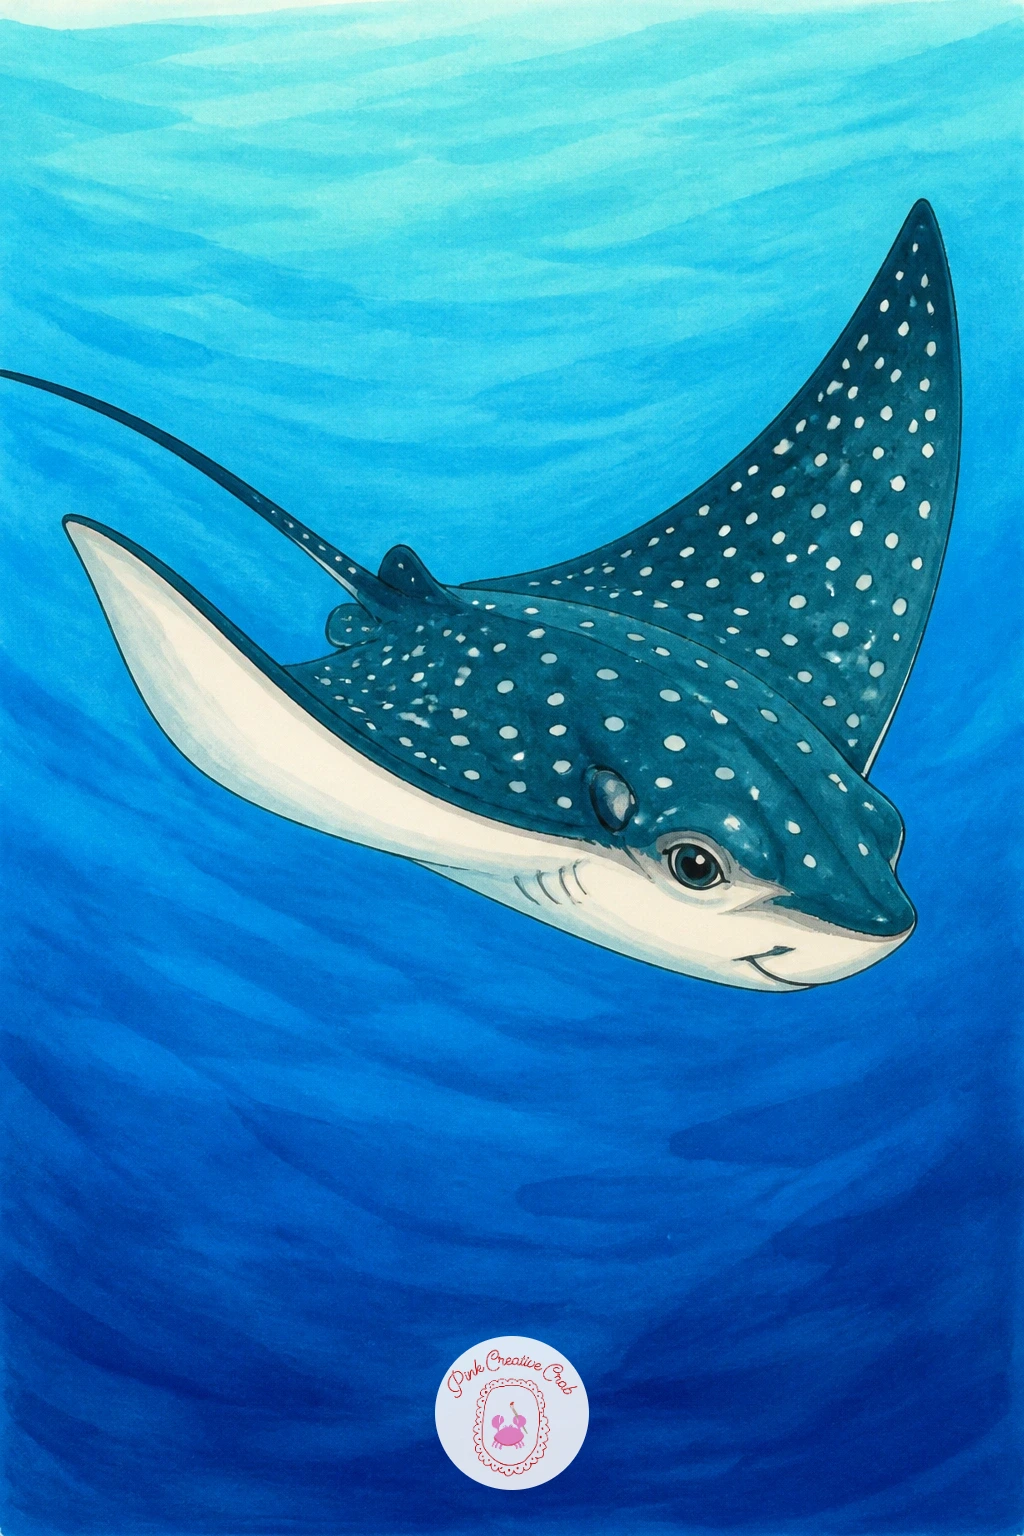
Move from the plain ray shape to a spotted eagle ray, known for the pretty constellation of white spots across its dark back. Shape the body the same rounded diamond way, but pull the “wingtips” a little more pointed than a standard stingray, since eagle rays have a slightly more angular silhouette in flight.
Lay a deep sea blue or teal base across the whole top of the body and let it dry completely before adding the spots, since wet spots on wet marker will bleed into a muddy blur. Use a white gel pen for the dots once dry, varying their size slightly so they look natural rather than a printed pattern.
Eye level matters here: draw this ray from slightly above and ahead so you see the top of the body and a hint of the pale underside at the tail, which gives a real sense of it swimming forward through the water rather than lying flat. That small shift in angle is what makes a ray feel like it is gliding rather than pinned to the page.
Keep the spots loose and irregular, that is the one tip that saves this piece every time.
You Will Need
- white gel pen
Palette: Deep Teal,Sea Blue,Sand Beige,White
Scale things up with a manta ray with fish around it, the biggest and most dramatic ray on this list. Manta rays have a much wider, flatter wingspan than stingrays and two distinct head fins called cephalic lobes, which curl forward like small horns and are worth getting right since they define the silhouette.
Block the huge wings in dark blue or near black on top, keeping the underside pale, almost white with a hint of lilac shadow, since that strong light to dark contrast is the manta’s signature look. Add the small fish, three or four is plenty, in a bright coral marker scattered around one wingtip, drawn as simple curved teardrop shapes rather than detailed bodies.
If the manta ends up looking flat and static, angle one wingtip slightly up and the other down, which instantly suggests the slow banking turn these rays are known for. No teal marker on hand? A mix of your darkest blue layered twice gets you the same moody depth.
This is a satisfying forty minute piece if you take time blending the wing gradient; ten minutes gets you a flatter but still charming version.
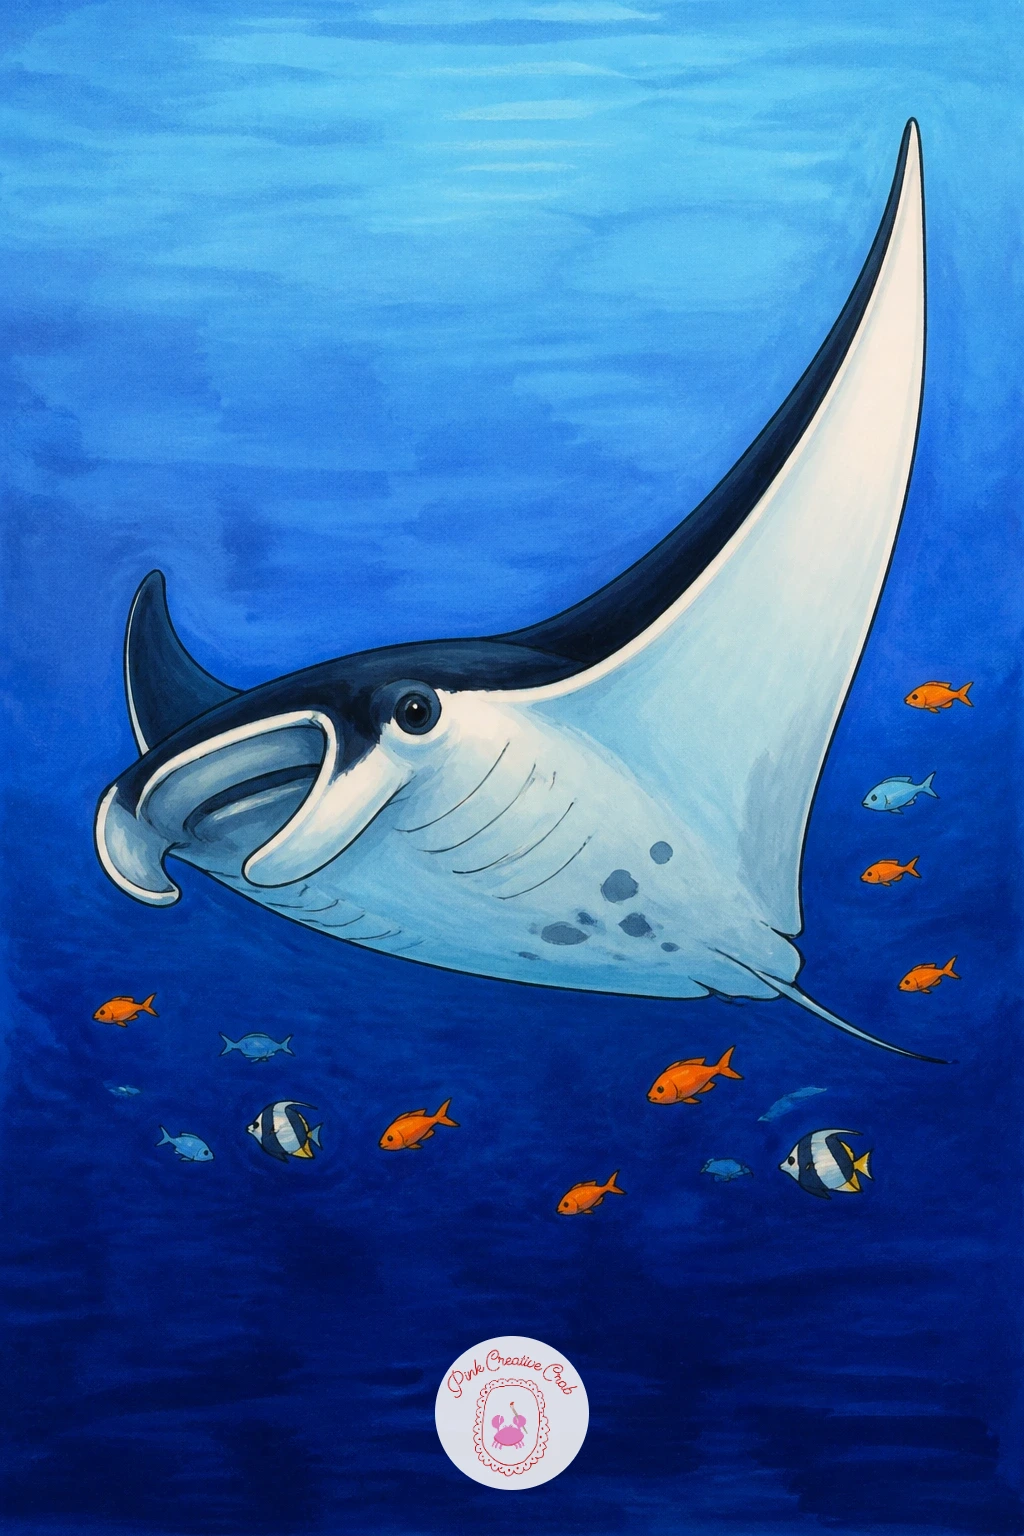
Palette: Deep Navy,Sea Blue,Coral Pink,Soft Lilac
Look up real manta ray photos for the cephalic lobe shape before you start, since getting those two little head fins right is what separates a manta from a stingray at a glance.
Bring in light with a stingray in a sunbeam, where shafts of sunlight cut down through the water and land across the ray’s back. Draw the ray gliding diagonally across the page first, then lightly pencil in two or three wide triangular beams coming from one top corner down toward it, wider at the top, narrower where they reach the ray.
Here the light direction decides everything: color the side of the ray facing the beams in a warmer, paler blue almost touched with yellow, and the shaded side in your deepest sea blue, so the body reads as rounded rather than flat. Lay the sunbeams themselves in a very pale yellow or warm sand marker with loose, soft edges, almost dry brushed in with light pressure so they look hazy rather than solid.
If the beams come out too sharp and graphic, go over their edges with a barely loaded blender marker to soften them into the water around them. This is the one idea on the list where light direction really drives the whole composition, so decide it before you color anything else.
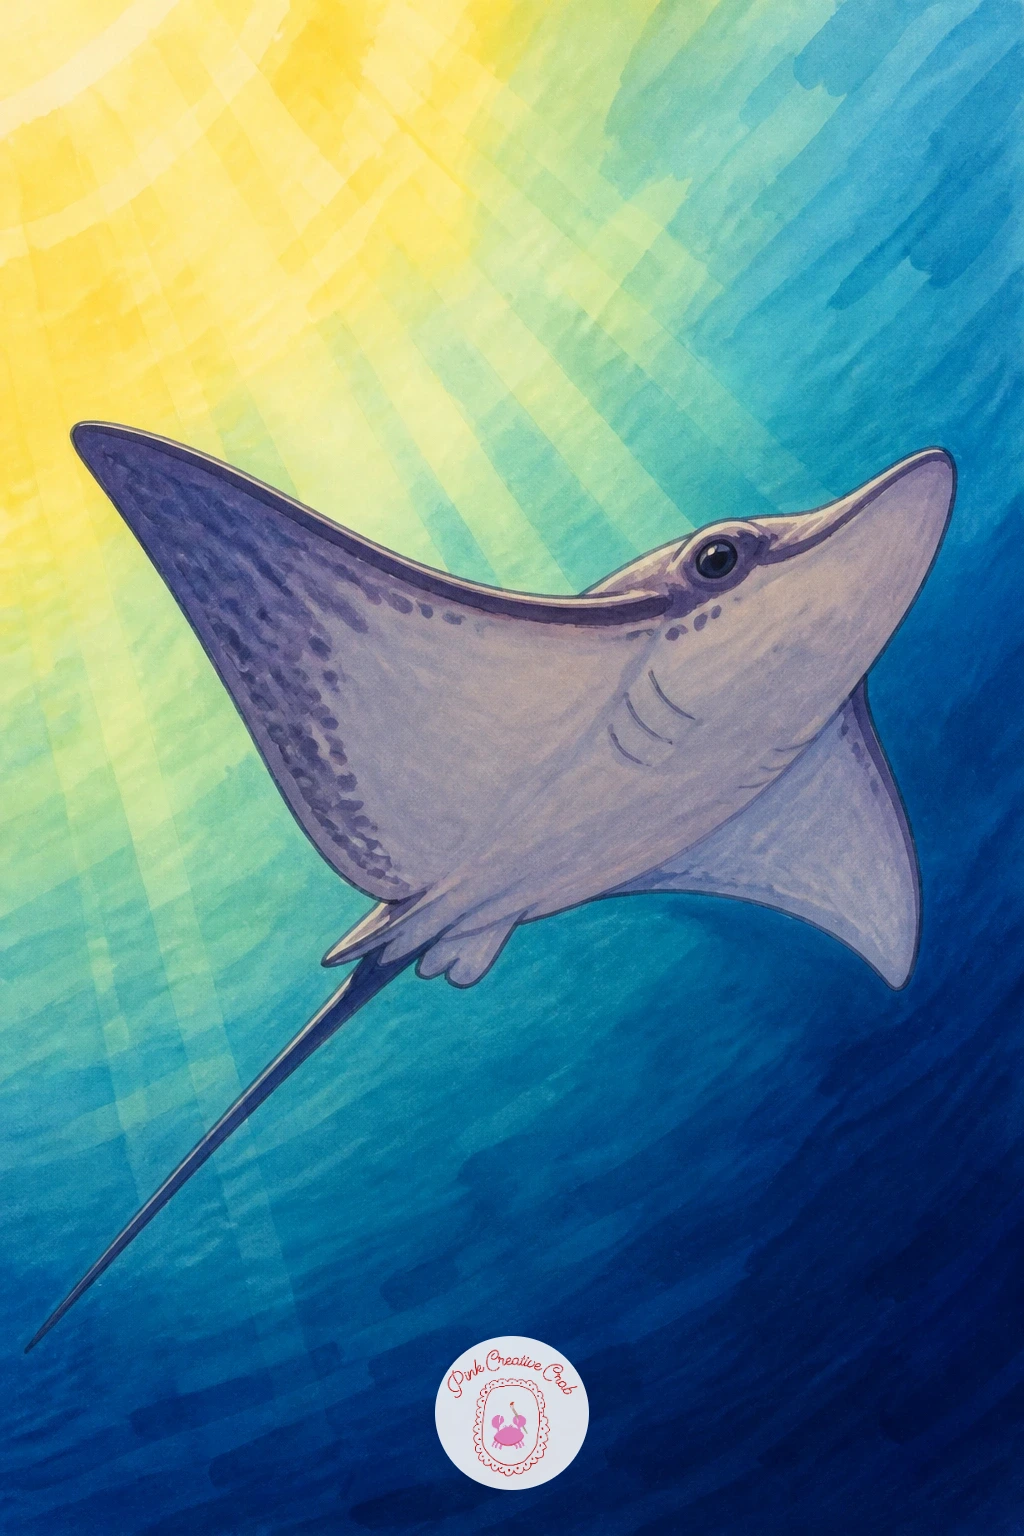
Palette: Warm Yellow,Sea Blue,Deep Navy,Sand Beige
Try a stingray half buried in sand next, a pose rays actually rest in and a fun excuse to texture the seabed a little. Draw only the top half of the body breaking the sand line, eyes and the raised curve of the back visible, with the tail trailing out from beneath the sand on one side.
The trick for texture here is dry brushing: load your sand beige marker lightly, then drag it across the paper with the nib almost out of ink so it leaves a scratchy, grainy mark rather than a smooth fill, which reads instantly as sand rather than solid ground. Build the visible part of the ray in your usual blue, keeping the edge where body meets sand soft and a little uneven, never a clean straight line.
If the sand line ends up too hard, go back over the border with the sand marker itself, pulling a few grains of color up over the ray’s edge. A light dusting of white gel pen flicks on top finishes the sand nicely if you want extra sparkle.
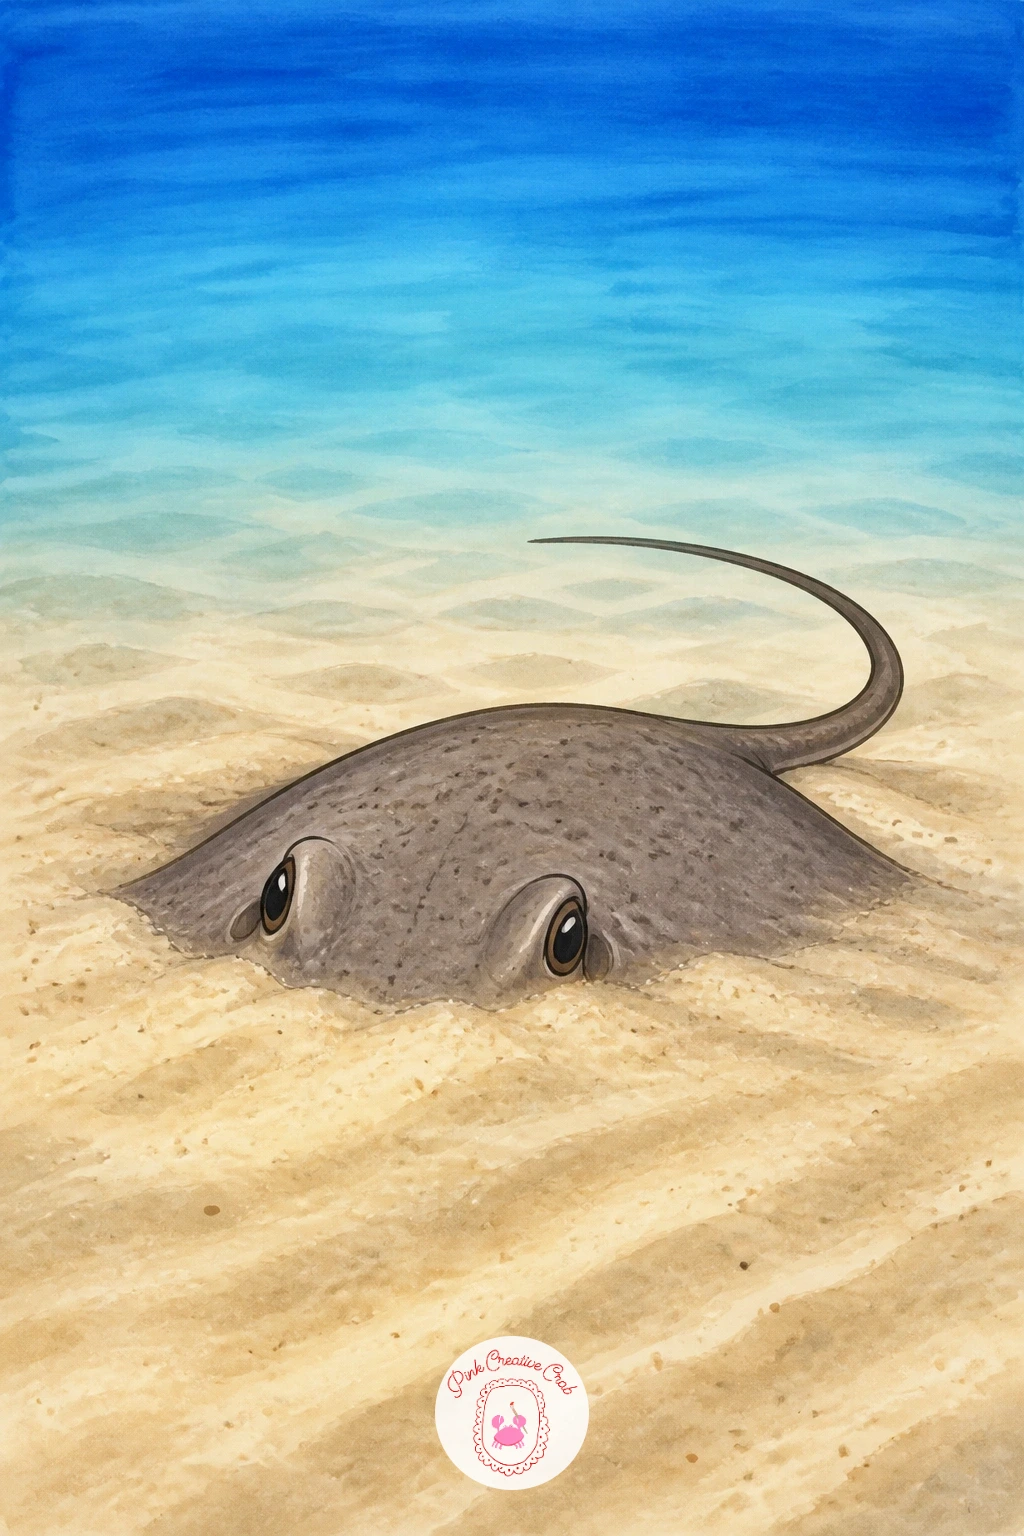
Palette: Sand Beige,Sea Blue,Deep Navy,White
Give yourself a bigger canvas for a stingray family, one larger ray with two or three smaller ones gliding alongside it. Draw the biggest ray first, roughly in the center of the page, then scale the smaller rays down to about half and a third of its size, overlapping them slightly behind and to the sides so the group reads as one gentle cluster rather than scattered shapes.
Comparing every small ray’s width against the big one’s as you sketch keeps the proportions honest. Color the large ray in your deepest blue and let the smaller ones go progressively paler, almost sand toned for the smallest, which also helps them sit further back in the water visually.
Beginners often space family members too evenly. Let two of the smaller rays overlap each other slightly instead, it reads as far more natural and lively. If the composition feels crowded, drop to just two rays, a parent and one baby is plenty of story for this piece.
Keep tails flowing in the same general direction across the group, that single detail unifies the whole drawing.
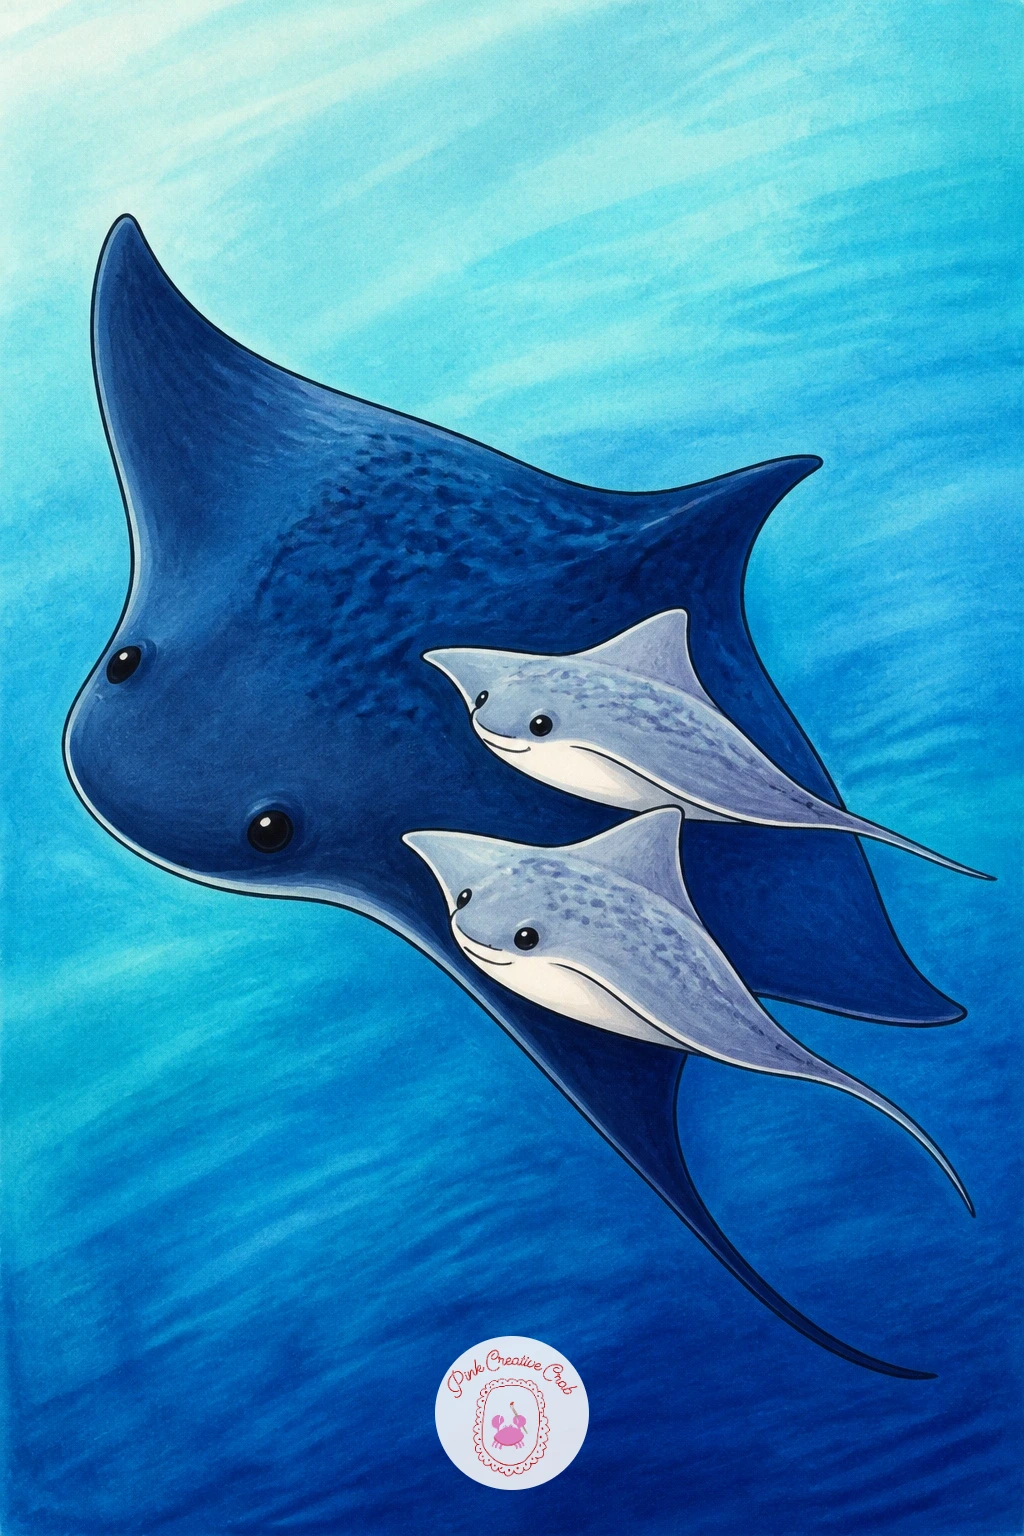
Palette: Deep Navy,Sea Blue,Sand Beige,Soft Lilac
Settle a blue spotted ray on coral for a piece with real color contrast built in. This small ray is famous for its bright electric blue spots over a yellowish brown body, so draw the usual rounded diamond shape and this time save the color plan for after the outline is fully dry.
Fill the body in warm sand or soft ochre first, then once dry, add the signature blue spots with a saturated sea blue marker, round and slightly irregular, denser toward the center of the back and sparser near the edges. A simple coral branch beneath the ray, built from a few curved coral pink fingers reaching upward, grounds the whole piece and gives the eye somewhere to land besides the ray itself.
If the blue spots bleed into each other, you likely worked before the base layer dried, so next time give it a full minute longer before starting the dots. No proper blue on hand? Lilac spots read just as striking against the warm body color.
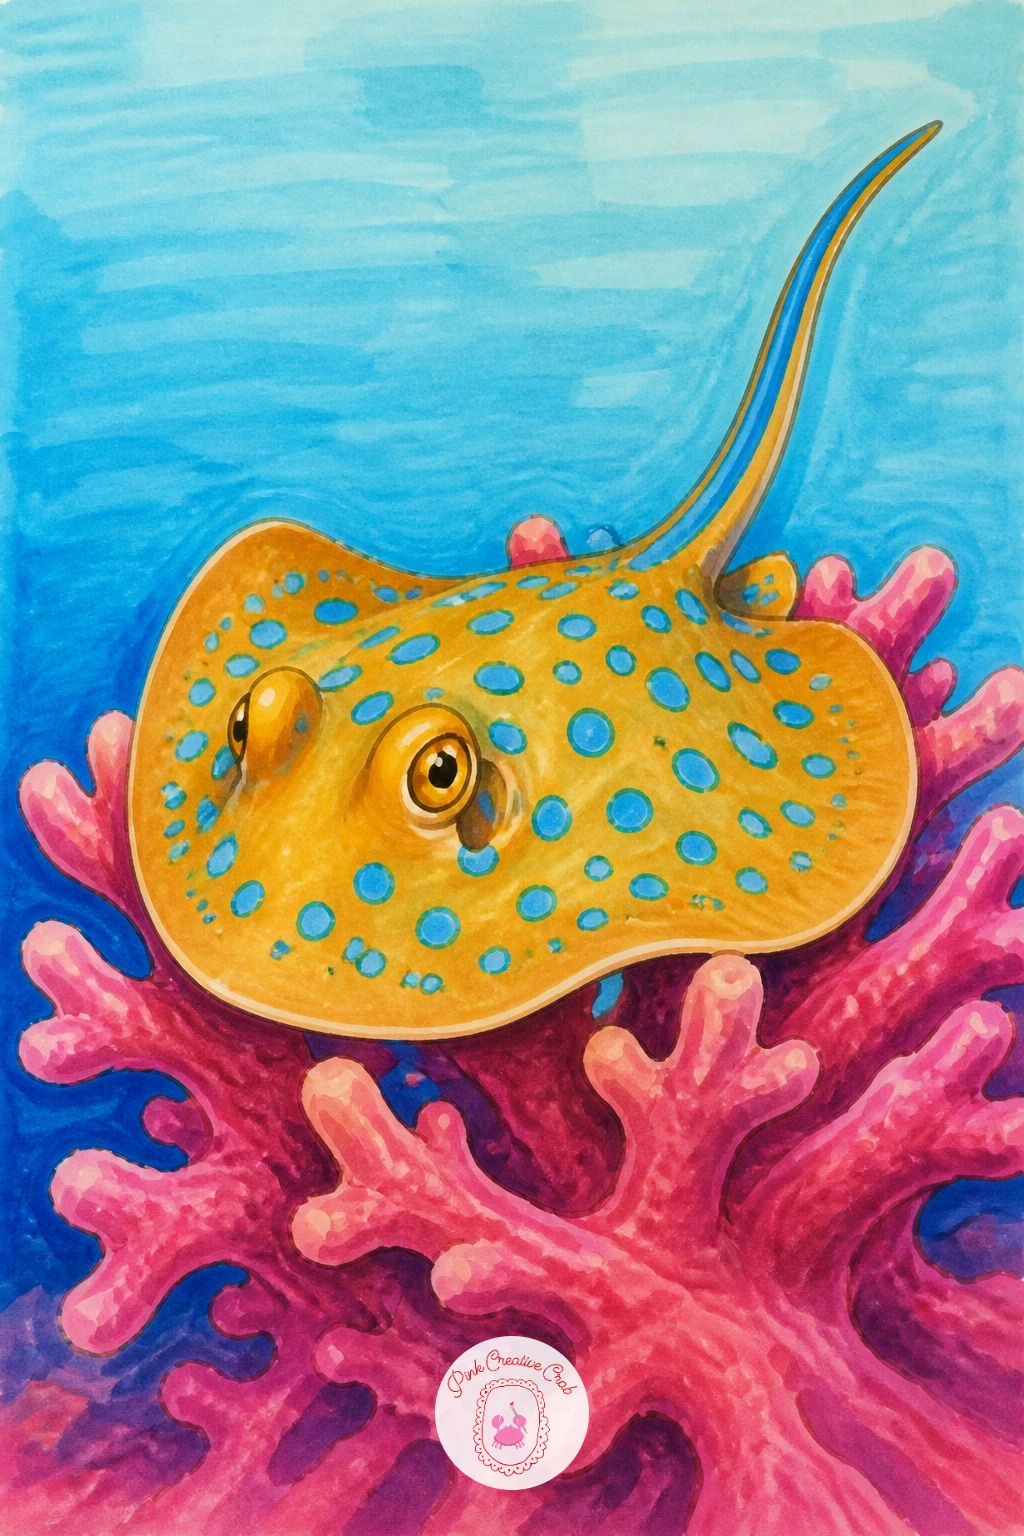
Palette: Ochre Sand,Sea Blue,Coral Pink,Soft Lilac
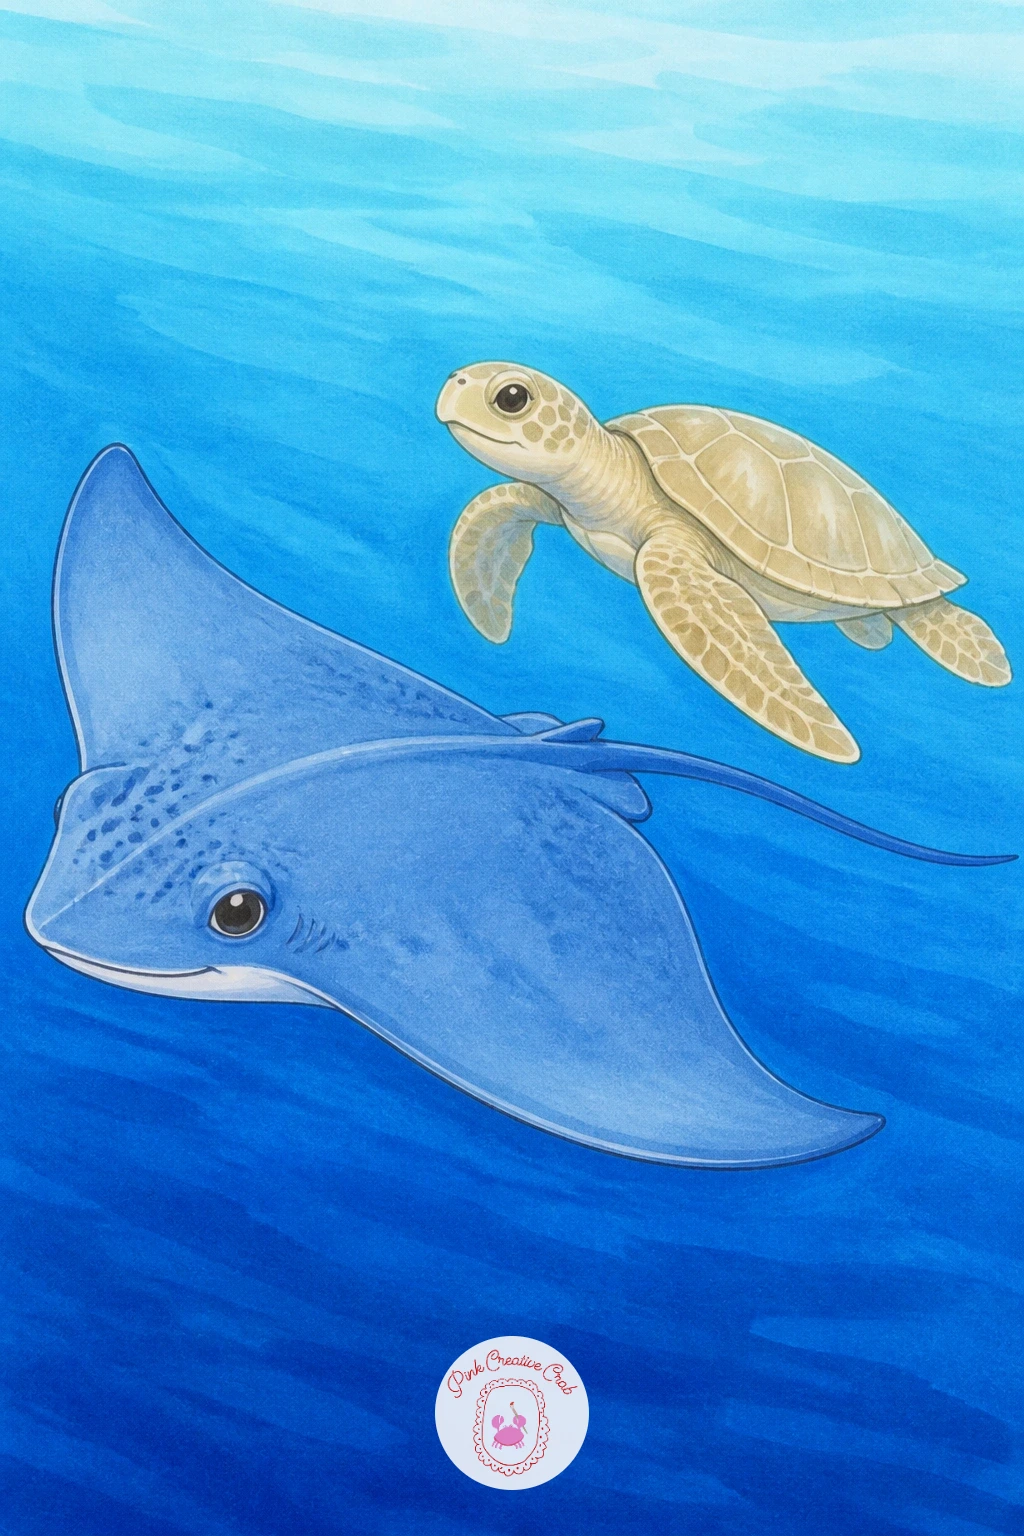
Pair two gentle swimmers with a stingray with a turtle, gliding together across the page at slightly different depths. Sketch the ray lower and larger, since it is the lead subject, then place the turtle smaller and a little higher so it reads as farther back in the water, which is as simple as drawing it with a touch less detail and a paler color.
Shell texture is the one hands on trick worth learning here: once the turtle’s shell is base colored in sand or soft coral, use the edge of a darker marker nib to press in a light grid of curved hexagon lines rather than drawing each one with a fineliner, which keeps the pattern soft rather than harsh. Keep the ray simple beside it so the two don’t compete for attention.
If the pair end up looking like they are stacked rather than swimming together, angle both slightly toward the same corner of the page, as if heading the same direction. That single alignment trick instantly makes two separate creatures look like companions.
Palette: Sea Blue,Sand Beige,Coral Pink,Deep Navy
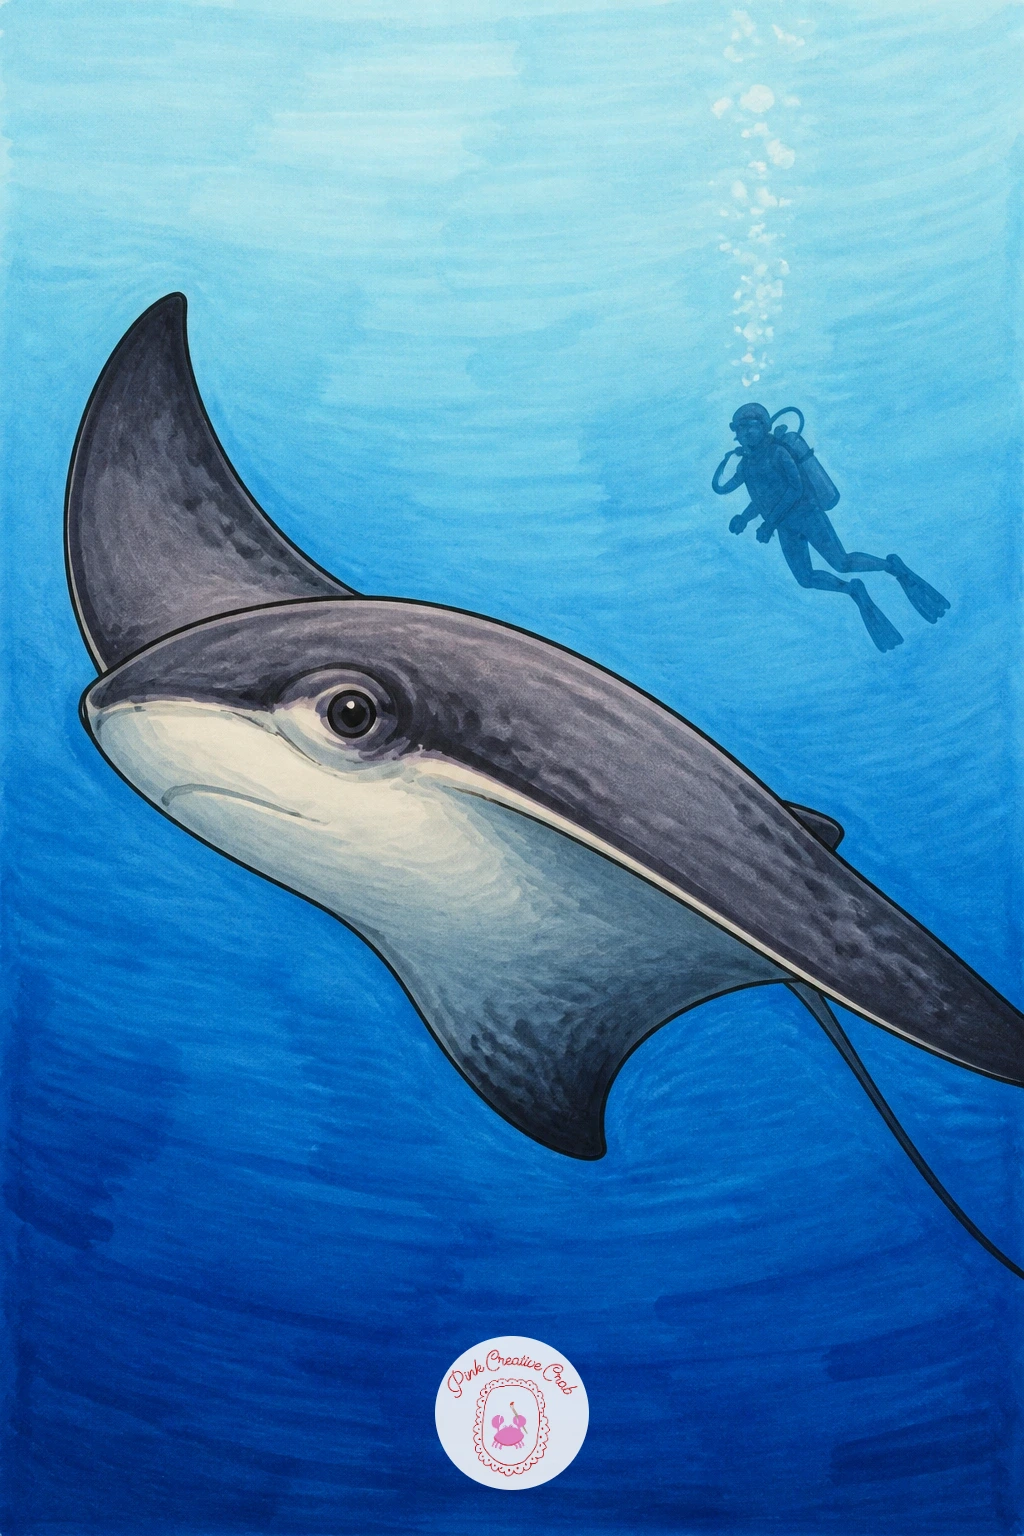
Add a human element with a stingray swimming past a diver, a lovely piece for showing scale. Draw the ray first, large and close, taking up most of the lower half of the page, then place a small diver silhouette in the upper background, simplified to a rounded wetsuit shape, mask, and a trail of bubbles rather than any real anatomical detail.
Keeping the diver small and flat, almost a silhouette in deep navy or near black, against a paler background is what sells the sense of depth and distance, so resist the urge to color them in full detail; they are a supporting shape, not the subject. The ray stays the star, fully colored and textured in your usual blue gradient.
If the diver ends up competing with the ray for attention, simplify them further or shrink them down, since less detail on a background figure always reads as farther away. A simple row of small white bubble circles trailing up from the diver finishes the depth illusion nicely.
Palette: Sea Blue,Deep Navy,Sand Beige,White
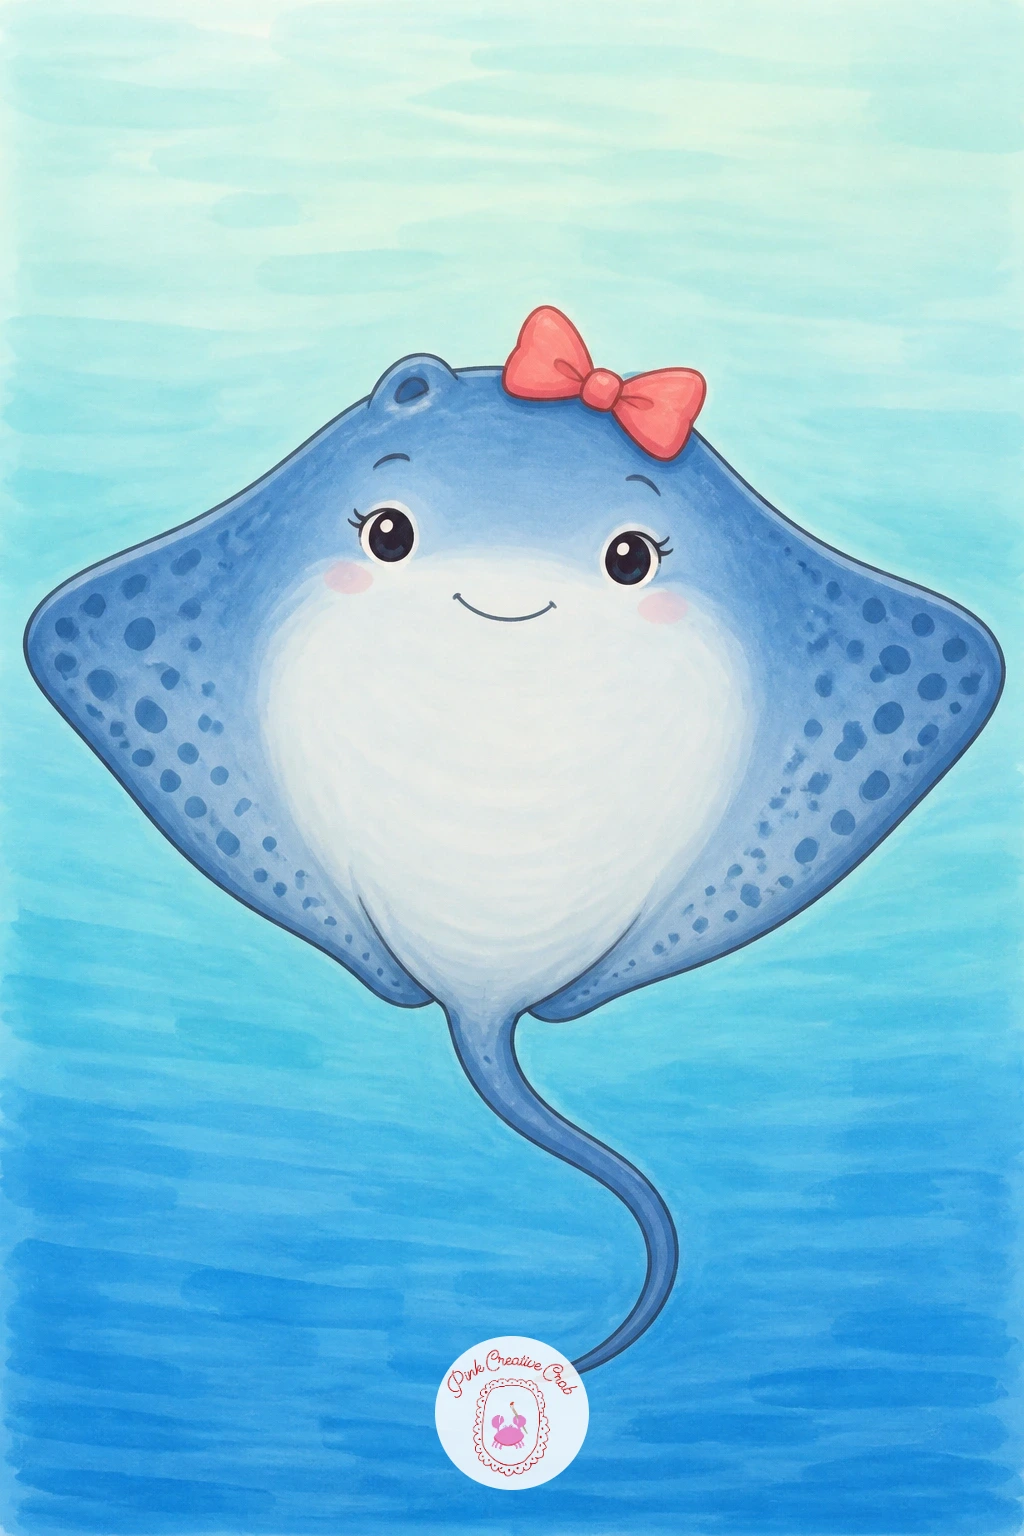
Lighten things up with a stingray wearing a bow, a playful piece that works beautifully for a greeting card or a little print. Draw the ray in its simplest, cutest form, rounded body, big friendly eyes, then add a small bow sitting right at the top of the head where the body narrows, drawn as two overlapping triangles with a tiny knot circle between them.
Color the bow in coral or soft lilac so it pops clearly against the ray’s blue body, and keep its shape slightly asymmetrical rather than perfectly even, which actually makes it look more charming and hand drawn. This is a lovely quick version: ten minutes gets you the ray and bow fully colored, while a forty minute version might add a soft background wash and a few bubbles for more polish.
If the bow looks stiff, round its corners further and let one loop sit slightly lower than the other. This whole piece works just as well scaled down small for a sticker sized sketch.
Palette: Sea Blue,Coral Pink,Soft Lilac,Ink Black
Try this one in a soft pink marker body instead of blue for a girlier variation, it works just as well and makes a sweet little greeting card subject.
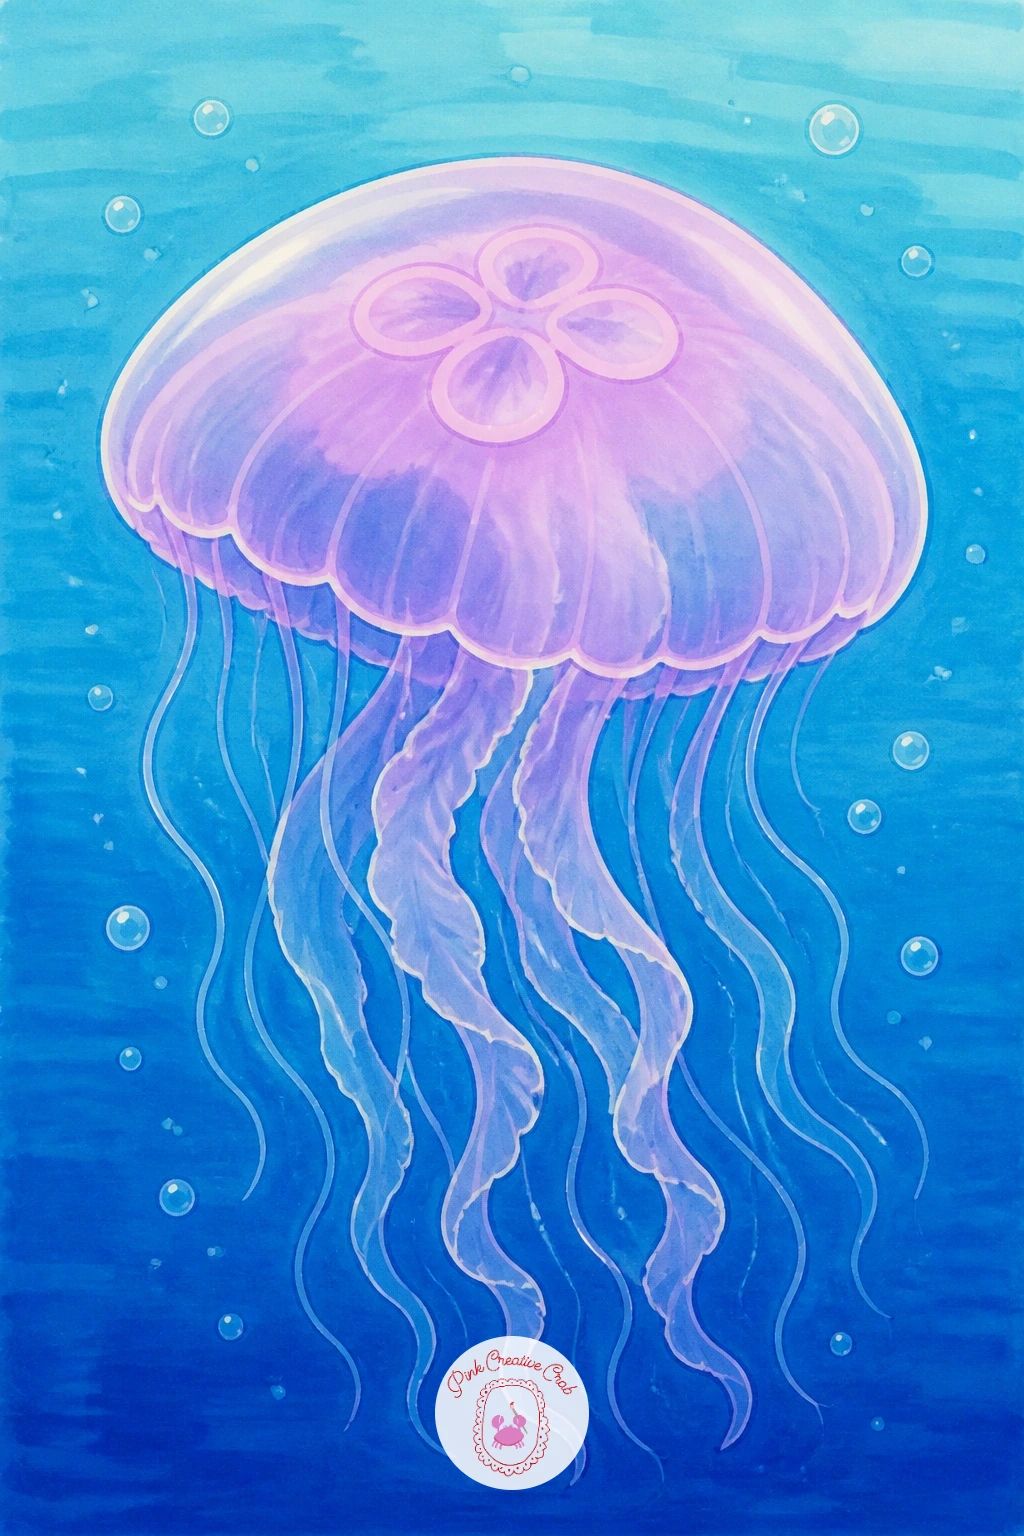
Shift gently out of rays with a moon jelly drifting by, one of the simplest and most forgiving shapes in the whole ocean world. Draw a soft dome for the bell at the top, then let four small horseshoe shapes show faintly through the dome, the jelly’s signature reproductive organs, followed by a cluster of thin trailing tentacles hanging loosely beneath.
Color the dome in the palest lilac or near white with just a whisper of sea blue at the edges, since moon jellies are almost translucent, and too much color flattens that delicate quality immediately. The tentacles are best drawn with a very fine fineliner in loose, slightly wavy lines rather than straight ones, since real jellies drift rather than hang stiffly.
If the bell looks too solid, go back with a clean marker blender and lift a little color from the center, leaving the edges a touch darker, which creates that glassy, see through look. A simple scatter of tiny bubbles around the jelly finishes the sense of drifting beautifully.
Palette: Pale Lilac,Sea Blue,White,Ink Black
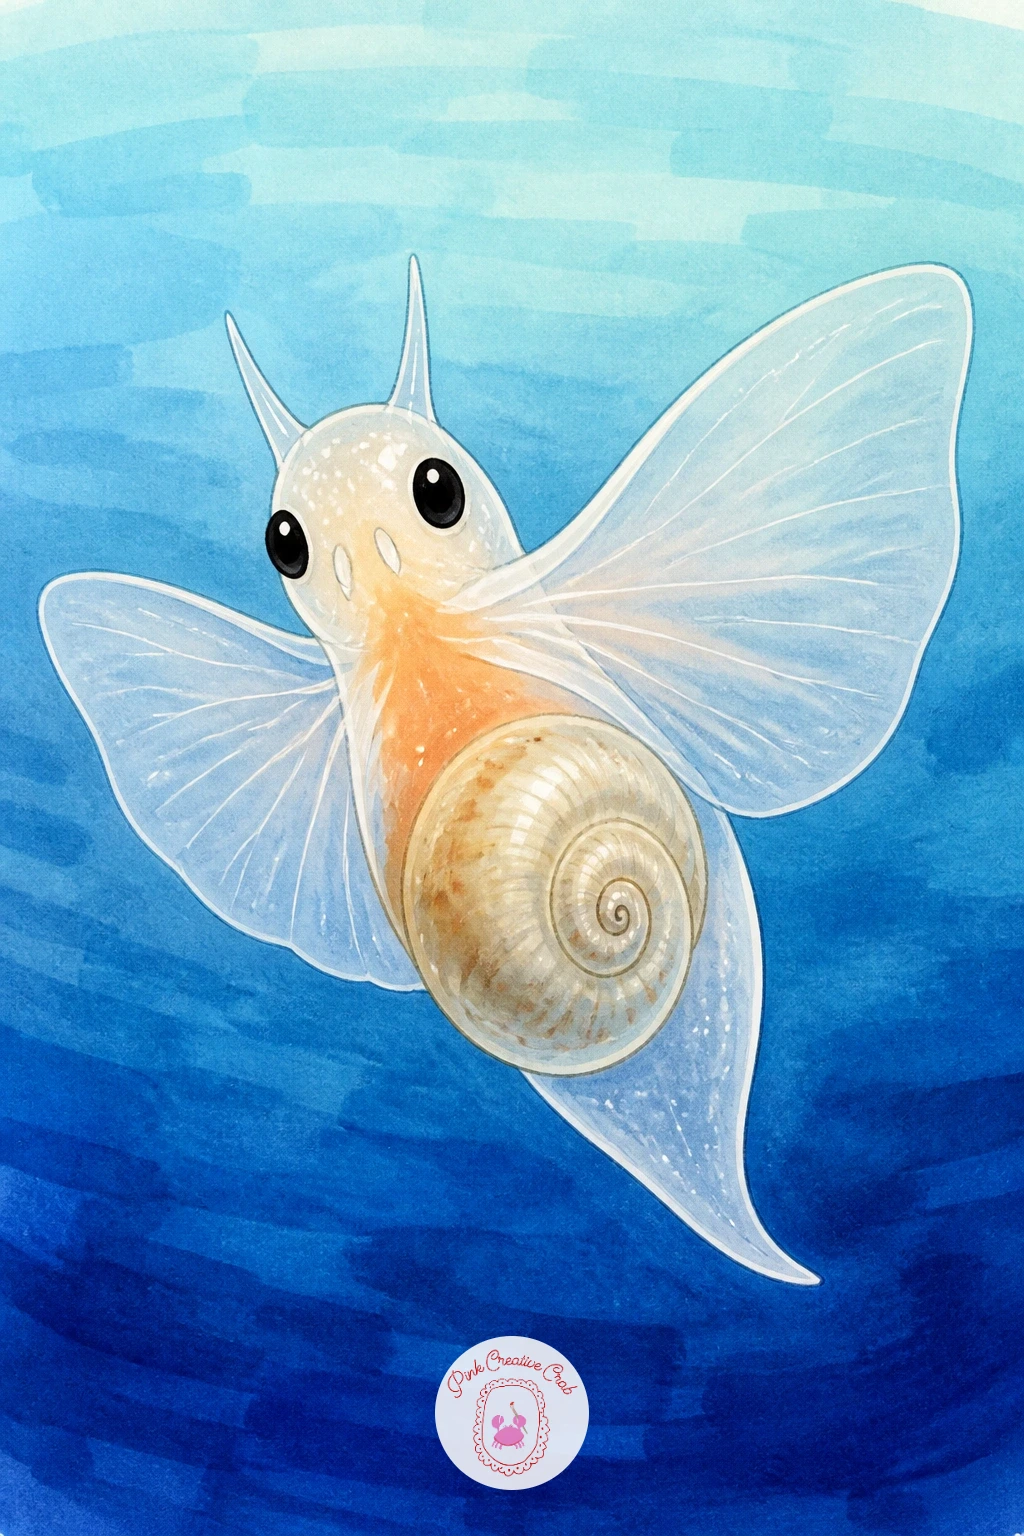
Try something unusual with a sea butterfly, a tiny swimming sea snail with wing like fins that genuinely looks like it belongs in the sky, not the ocean. Draw a small coiled shell shape at the top, rounded and spiral, then two soft wing shapes flaring out beneath it, curved and slightly uneven like real butterfly wings caught mid flap.
Because this creature is so small and unfamiliar, scale is your friend: draw it much larger than life size, filling most of the page, so the delicate wing shapes and shell spiral have room to read clearly. Color the shell in warm sand or soft coral and the wings in the palest sea blue, almost translucent, blended with a touch of lilac at the tips.
If the wings come out looking stiff or symmetrical, erase one gently with a kneaded eraser pressed and lifted rather than rubbed, which softens the marker edge without smearing it, then redraw that wing slightly more relaxed. This is a quick ten minute sketch, with forty minutes letting you add a faint trail of bubbles behind it for movement.
Palette: Sand Beige,Sea Blue,Soft Lilac,Coral Pink
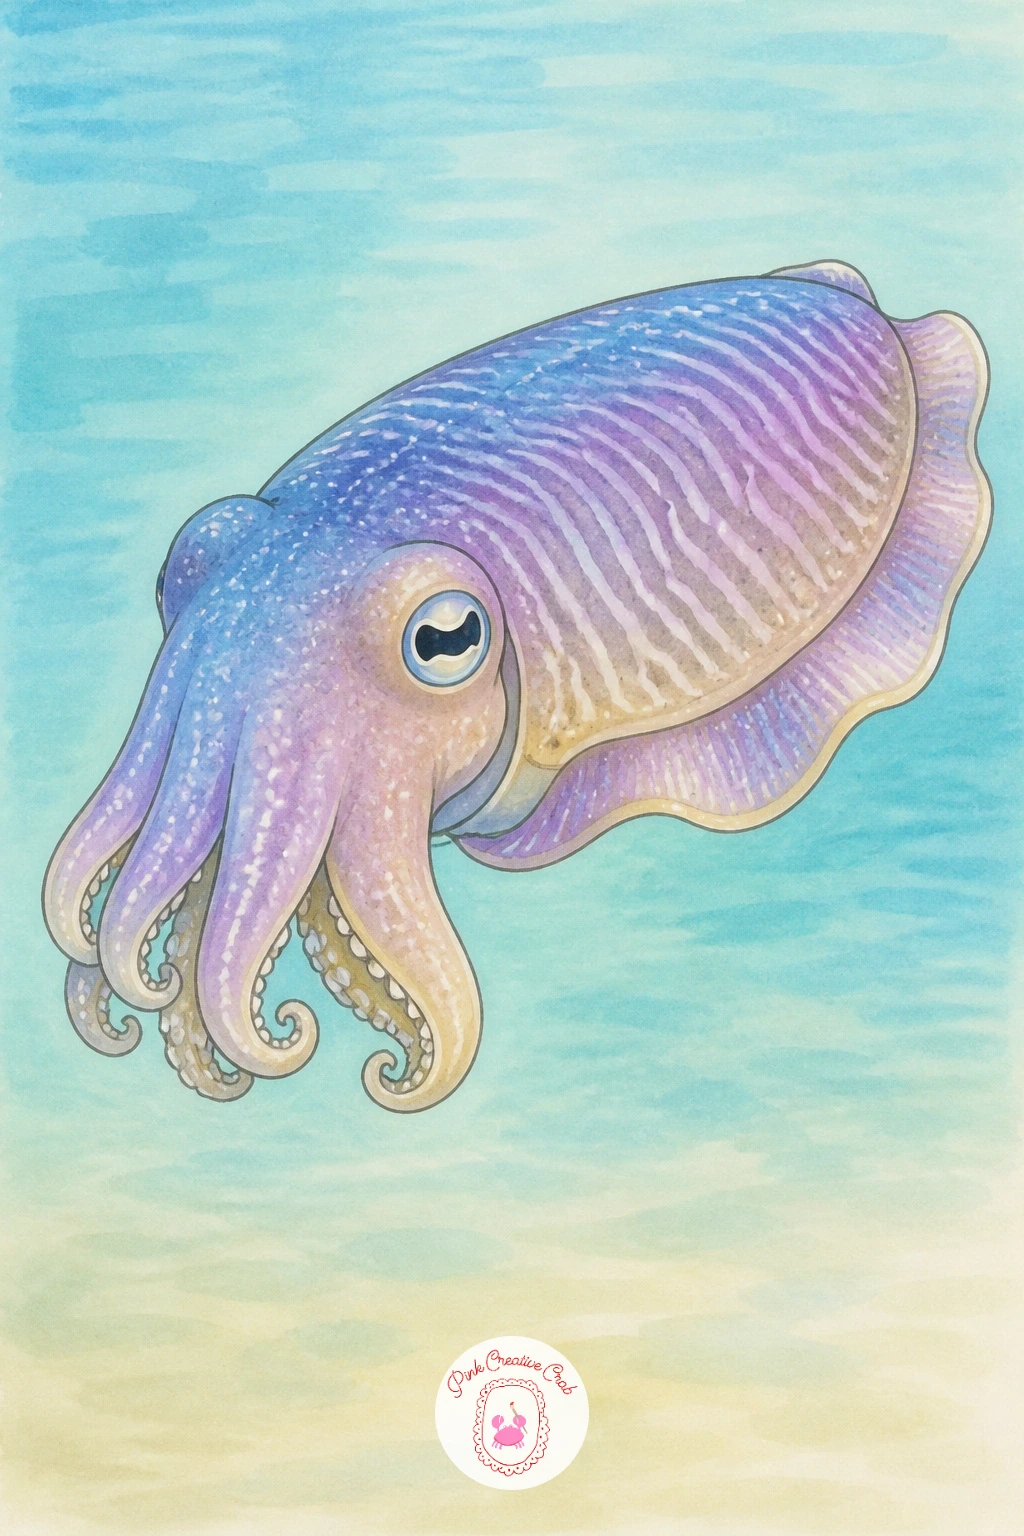
Build a cuttlefish next, a wonderful subject for playing with color since real cuttlefish shift their skin tone constantly. Draw the soft oval body first with a small fringe of fin rippling along each side, then add the eight short arms and two longer feeding tentacles bunched beneath the head, kept loose and slightly curled rather than straight.
Instead of one flat color, blend two or three tones across the body wet into wet, sea blue fading into lilac fading into a touch of sand, which mimics that shifting cuttlefish skin beautifully and is far more forgiving than trying to get one perfect color. The fin fringe along the body’s edge works well as a dry brushed ruffled line rather than a smooth stroke.
If the arms turn into a tangled mess, draw fewer of them, four or five read as a cuttlefish just as clearly as eight and keep the drawing from getting busy. This piece pairs nicely with other deep water subjects if you enjoyed exploring watercolor octopus ideas before.
Palette: Sea Blue,Soft Lilac,Sand Beige,Coral Pink
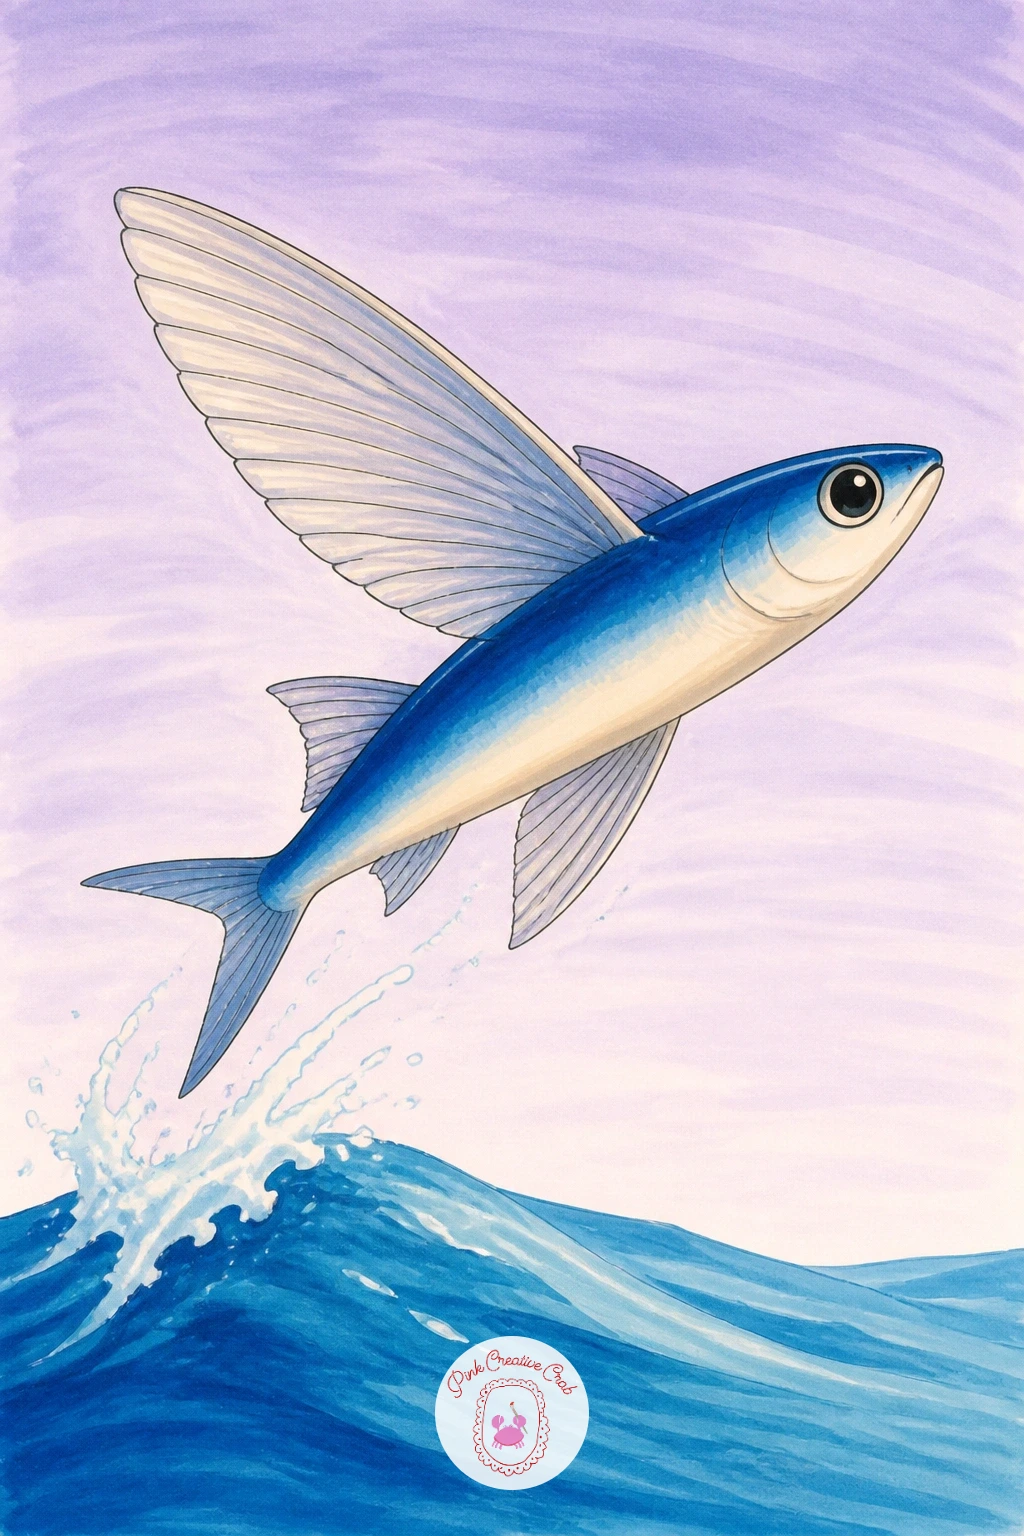
Catch some motion with a flying fish, mid leap above the waterline with its wide fins spread like wings. Draw the slender torpedo body first, angled upward, then the two large pectoral fins stretched wide on either side, drawn with a slightly ribbed texture of thin fineliner lines radiating out from the base, since that ribbing is what makes them read as fins rather than wings.
Eye level matters a lot here: place the horizon line low on the page and draw the fish above it against pale sky toned lilac, with just a hint of sea blue wave beneath where it launched from, which makes the leap feel high and dramatic rather than a fish simply floating in water.
Color the body in cool sea blue on top fading to pale sand on the belly, a natural pattern real flying fish actually have, and it conveniently also helps the body look three dimensional. If the fins look flat, add one or two darker blue lines along their length to suggest the fin rays catching light.
Palette: Sea Blue,Sand Beige,Pale Lilac,Ink Black
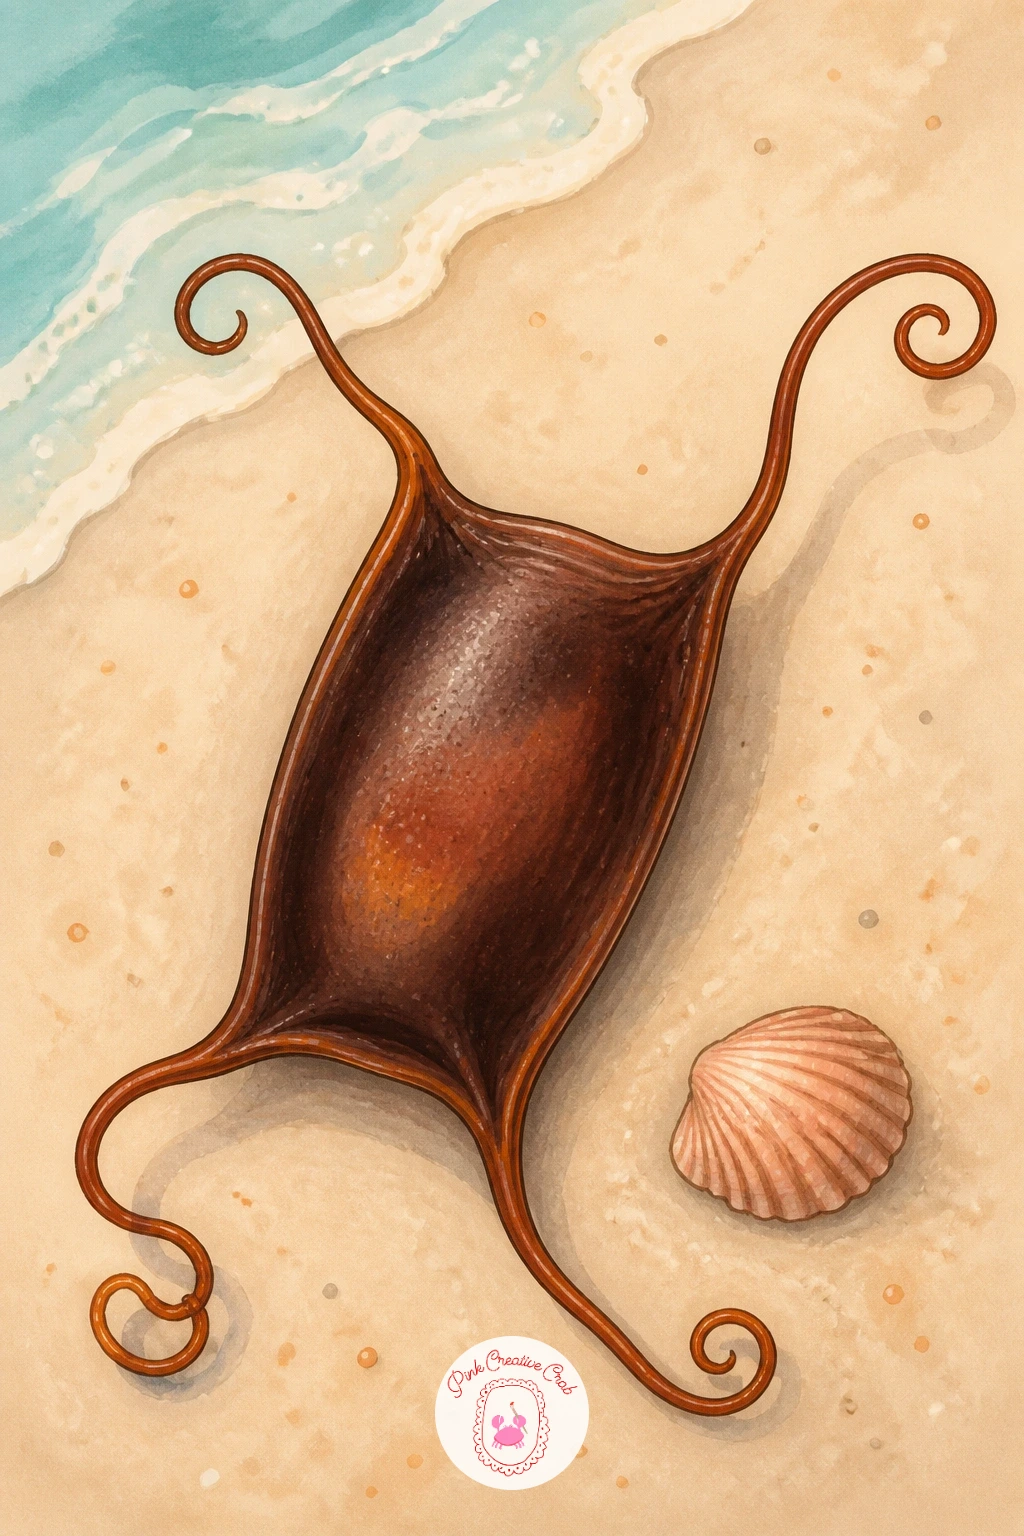
Slow the pace with a skate egg case on the beach, sometimes called a mermaid’s purse, a quiet still life subject rather than a swimming creature. Draw the rectangular leathery pouch shape first, with a curled horn like tendril reaching out from each of its four corners, slightly uneven in length and curve since these washed up cases are never perfectly symmetrical.
Color the case itself in a deep warm brown or muted coral rather than blue, since it sits dry on the sand, and build its leathery texture by dry brushing a slightly darker tone unevenly across the surface rather than coloring it flat. The sand beneath should stay pale and simple, with perhaps one small shell nearby for scale.
If the four curling tendrils all end up looking identical, that is the first thing to fix, vary their length and the tightness of their curl so the case looks genuinely washed in by the tide rather than drawn with a template. This is a nice contrast piece after several swimming subjects, calm and grounded on solid sand.
Palette: Warm Brown,Coral Pink,Sand Beige,Ink Black
Return briefly to the ray family with a guitarfish, a curious creature that looks like a cross between a shark and a ray and is named for its guitar shaped body. Draw a flattened triangular head and body that narrows smoothly into a long shark like tail with a proper fin at the end, unlike the whip tail of a true stingray.
Comparing the length of the tail section against the body section as you sketch keeps the proportions convincing, since the tail on a guitarfish is roughly as long as the head and body combined. Color it in muted sand or soft ochre along the top, paler beneath, with the fin on the tail picked out in a slightly deeper tone so it does not disappear against the body.
If the shape starts looking like a plain shark, flatten the head and body more and widen it slightly at the front, that is the detail that reads as “ray” rather than “shark” to the eye. A light lilac shadow beneath the body anchors it gently to the sea floor.
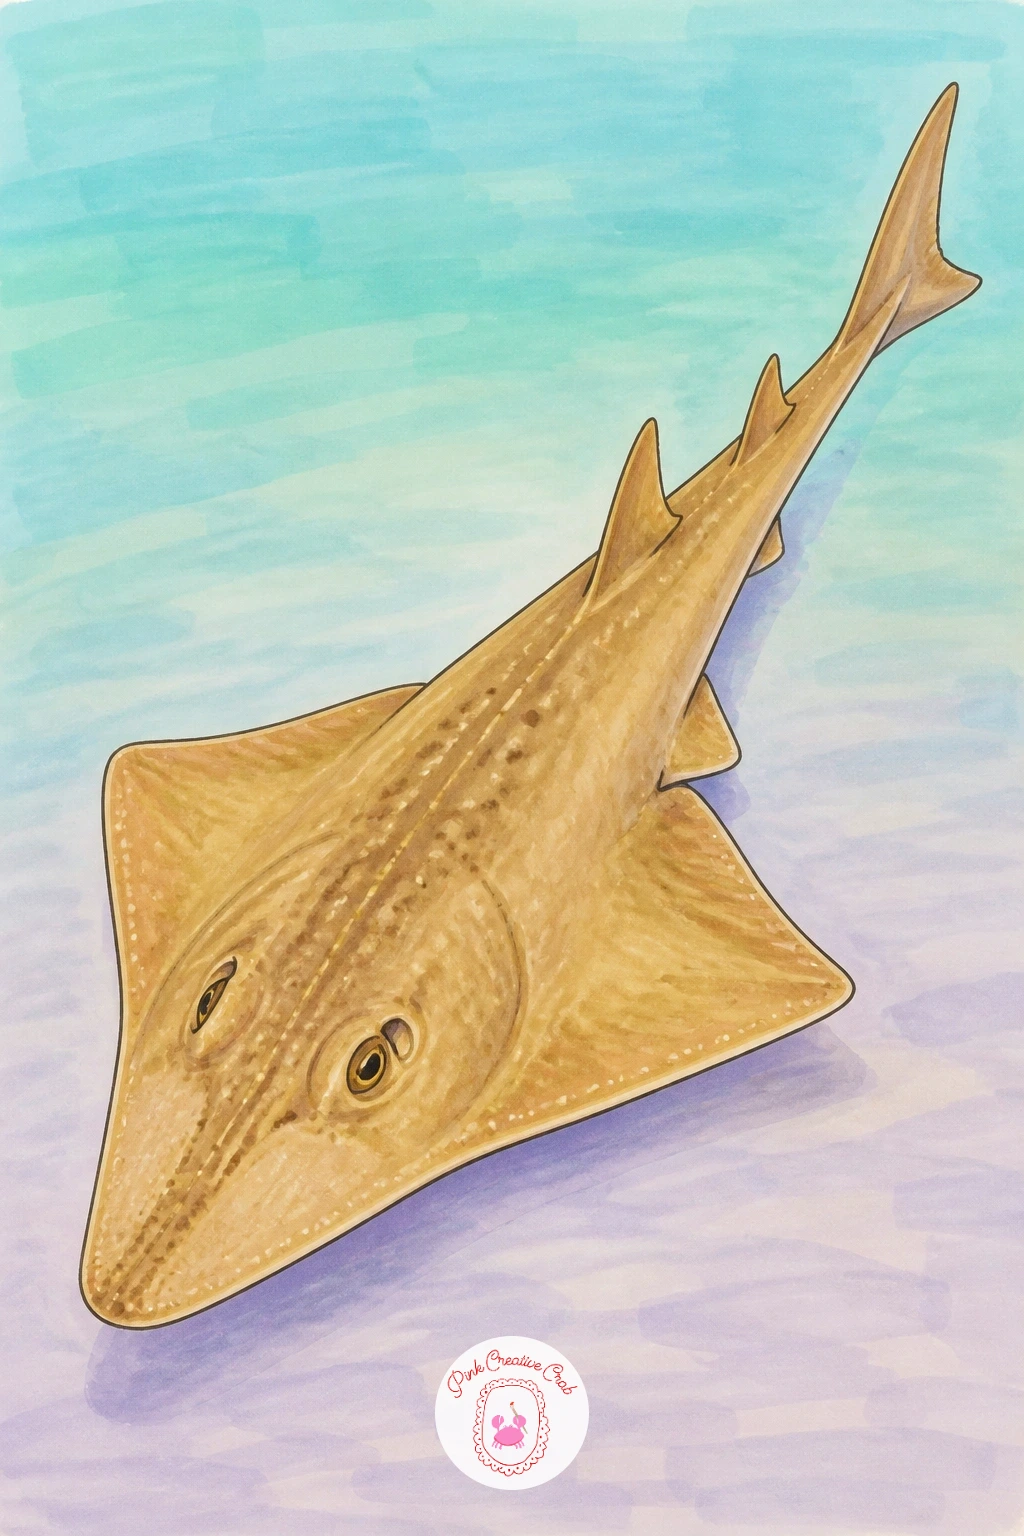
Palette: Ochre Sand,Sand Beige,Soft Lilac,Ink Black
Soften the pace with a seahorse pair, two small curling bodies facing each other, perhaps with tails loosely linked the way real seahorses actually do. Draw each body as a gentle S curve, slightly different in height so one reads as larger, then add the curled prehensile tail at the base, the delicate dorsal fin along the back, and a small snout extending from the head.
Varying the two seahorses slightly in color, one in sea blue, one in soft coral, keeps the pair visually distinct and makes a lovely two tone piece rather than two identical shapes. Texture the body ridges lightly with your fineliner once the marker is dry, small curved lines following the natural segments down the spine, which is the one small detail that makes a seahorse look like a seahorse rather than a generic curl.
If the tails linking together looks awkward, simply let them curl near each other without quite touching, which reads just as sweetly as a couple without the fiddly overlap. Keep the background simple so the pair stays the clear focus.
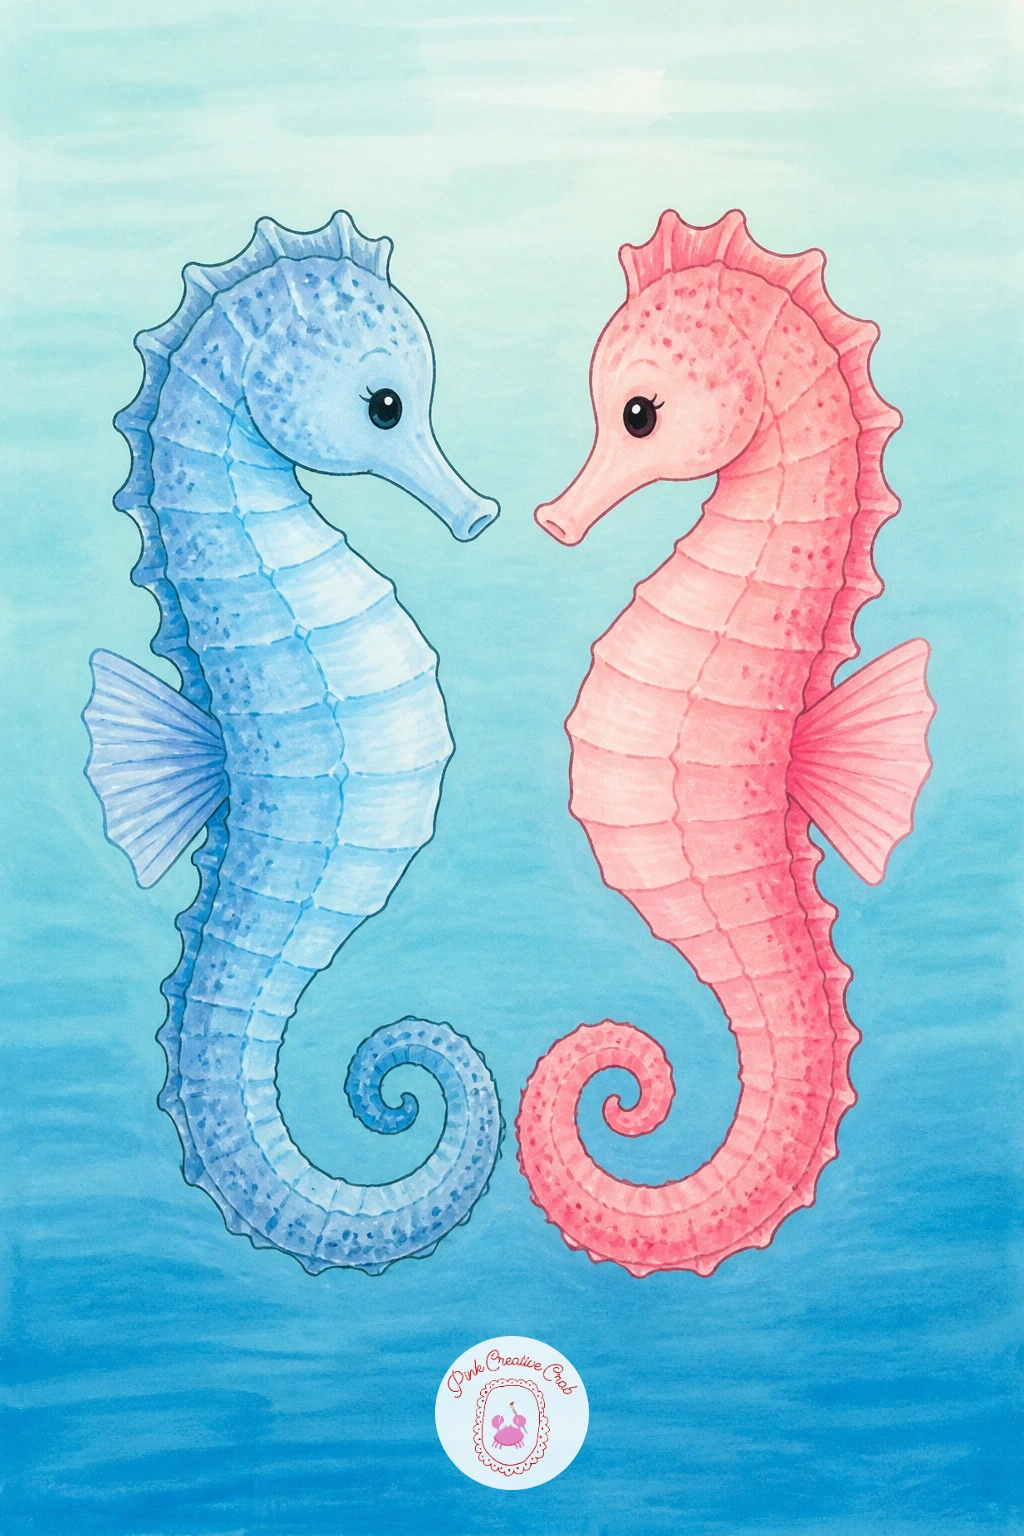
Palette: Sea Blue,Coral Pink,Soft Lilac,Ink Black
Take on a leafy sea dragon if you are ready for something more detailed, since this seahorse relative is covered in leaf shaped fins that double as camouflage. Build the slender curved body first, the same basic S shape as a seahorse but longer, then add numerous leaf shapes branching off along the back, sides and head, each one a simple elongated teardrop at a slightly different angle.
This is the piece to practice edges on: alternate dry brushed, slightly ragged edges on some leaf shapes with clean blended ones on others, since that mix of crisp and soft is exactly what makes real sea dragon fins look organic rather than stamped from a pattern. Color the body in muted sea blue or soft ochre and let the leaf fins shift between sand, coral and lilac for variety.
If the leaves start to look too uniform, group a few closely together near the head and spread others out along the tail, uneven spacing reads far more natural. This one rewards patience, so give yourself the full forty minutes rather than rushing it.
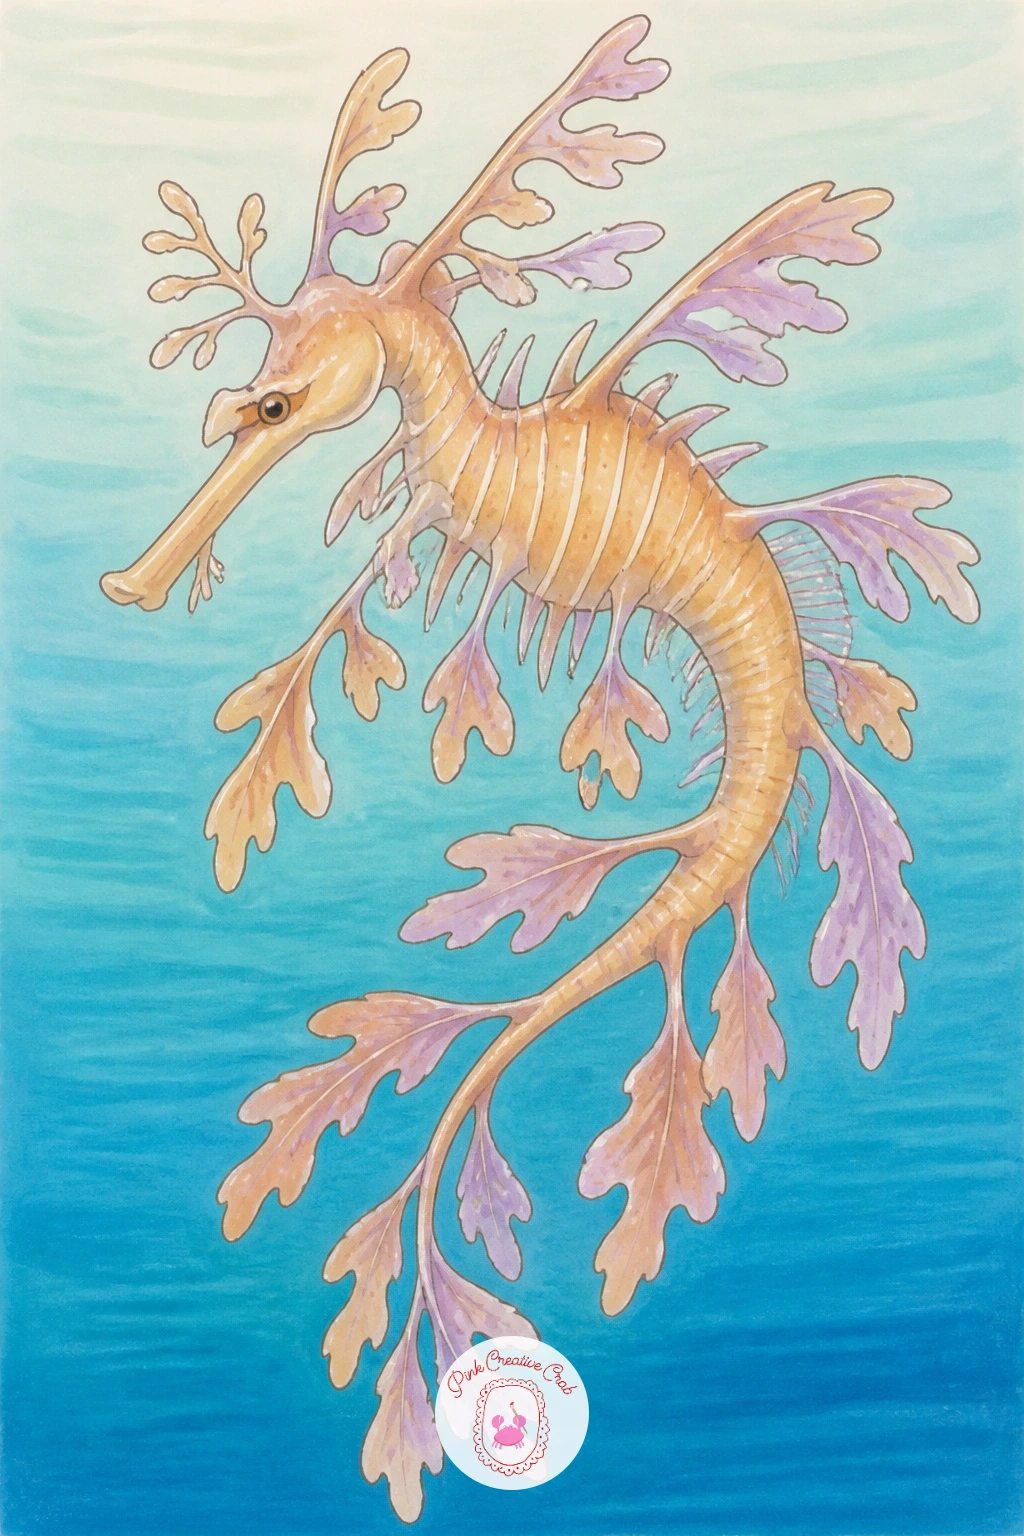
Palette: Ochre Sand,Coral Pink,Soft Lilac,Sea Blue
Go big and round with a sunfish, one of the strangest and most charming fish shapes to draw because it looks almost like a fish that forgot its tail. Draw a wide oval body, flattened slightly at the back where the tail would normally extend, then add one tall dorsal fin on top and a matching long fin beneath, both drawn as simple curved blades rather than feathered fins.
Keep the eye small and placed well forward on the body, since that single placement choice is what gives the sunfish its distinctive, slightly surprised expression real ones are known for. Color the body in pale sea blue fading into sand along the belly, with a soft mottled texture achieved by dabbing a slightly darker blue marker unevenly across the surface while the base layer is still a touch damp.
If the body ends up looking like a plain circle, flatten the top and bottom very slightly and taper the back edge inward, that subtle adjustment reads instantly as a sunfish rather than a ball. This gentle giant looks lovely drawn very large, filling almost the whole page.
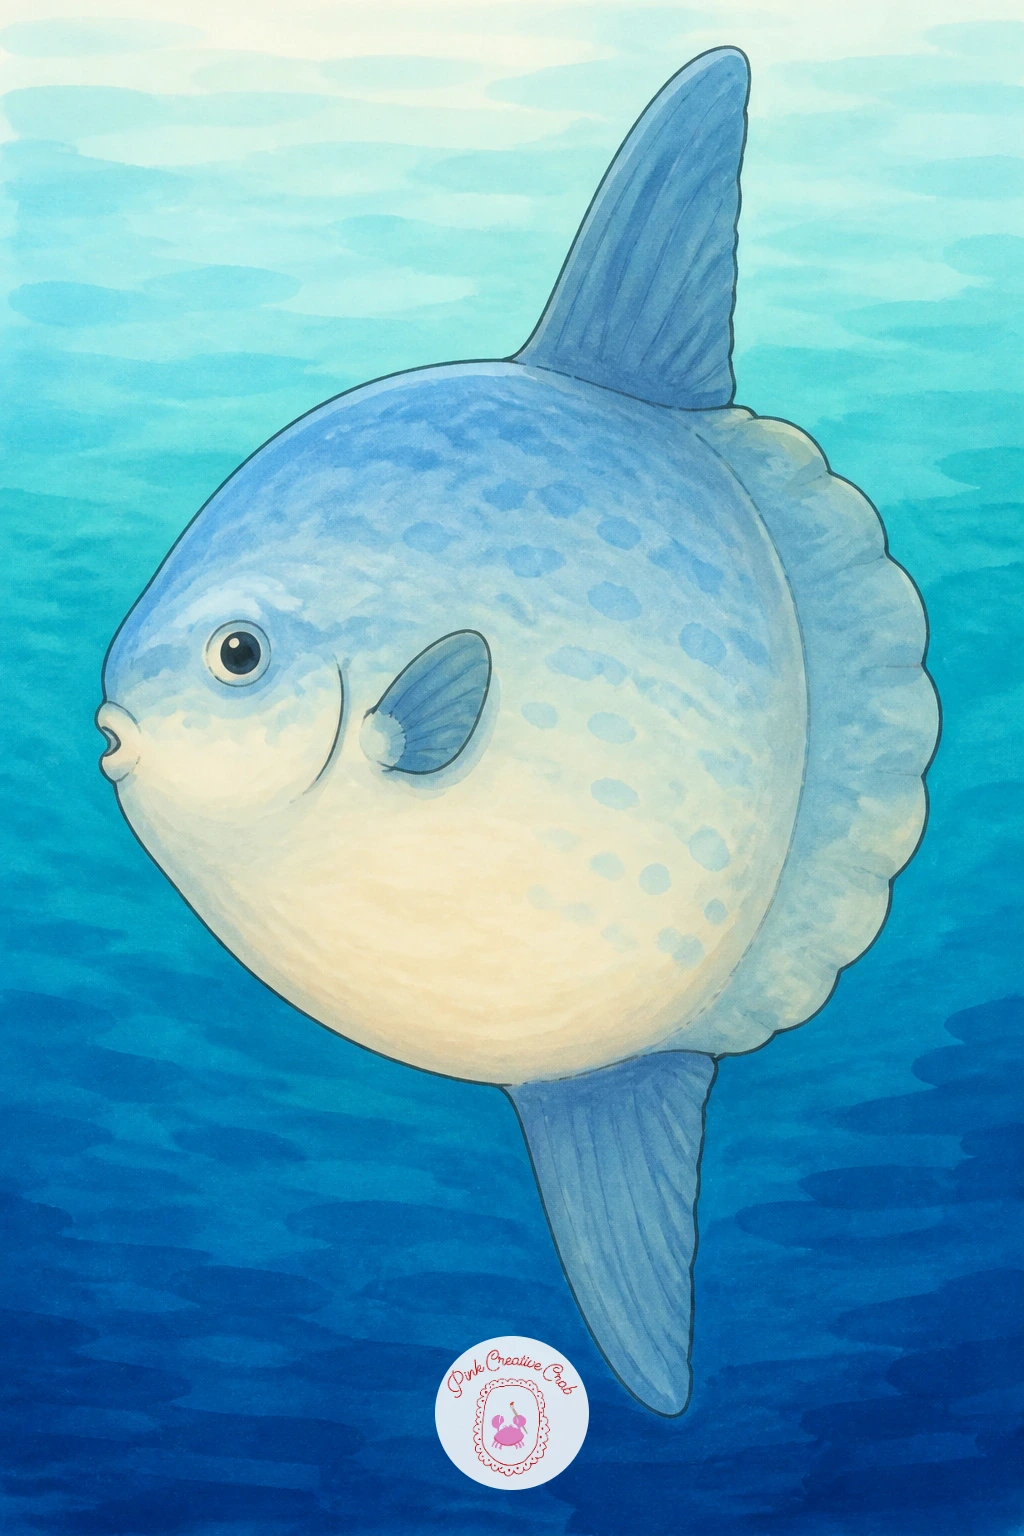
Palette: Sea Blue,Sand Beige,Pale Lilac,Ink Black
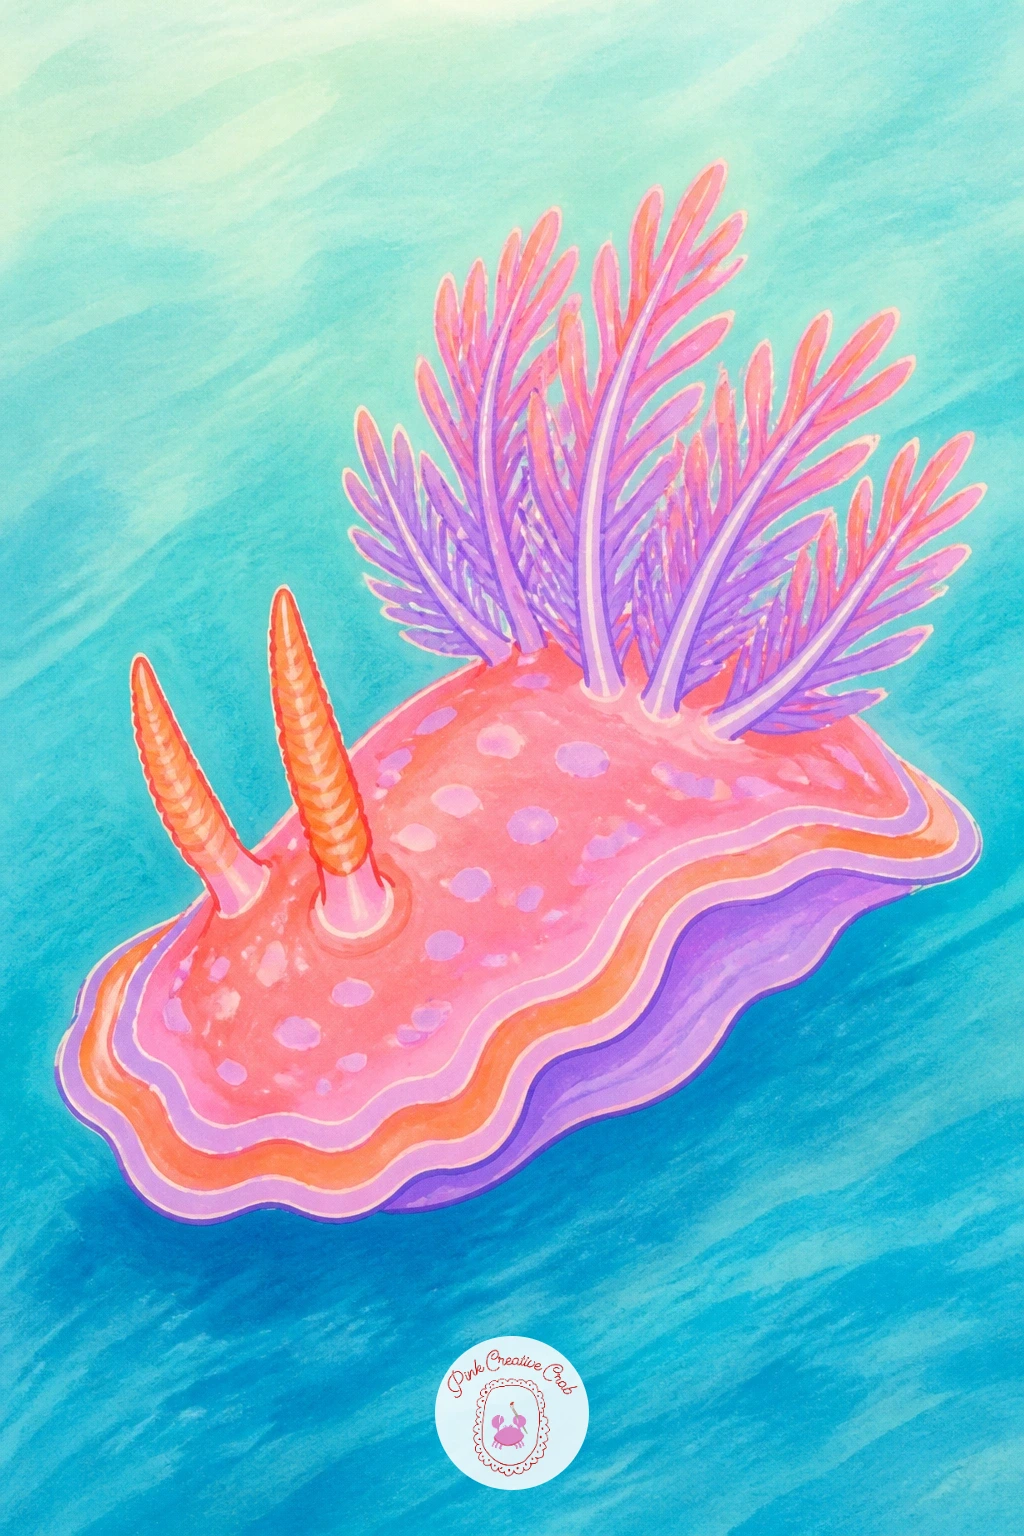
Turn up the color with a sea slug in neon, since real nudibranchs come in some of the brightest, most unlikely color combinations in the ocean and give you full permission to go bold. Draw a soft elongated oval body first, then a crown of feathery gills at the back and a pair of small rhinophore horns at the front, both built from clusters of thin tapered lines rather than solid shapes.
This is the piece to really experiment with color layering: lay a bright coral base across the body, then add streaks of lilac and even a touch of sea blue along the edges and gill tips while everything is still workable, letting the colors bleed into each other slightly for that glossy, almost liquid nudibranch look. A light wash of white gel pen along the very top ridge catches the light nicely once everything else is dry.
If the colors turn muddy, you likely used too many at once, so next time limit yourself to two bold colors plus one neutral. Ten minutes gets a simple colorful blob, forty minutes lets the gills and horns get genuinely delicate.
You Will Need
- white gel pen
Palette: Coral Pink,Soft Lilac,Sea Blue,White
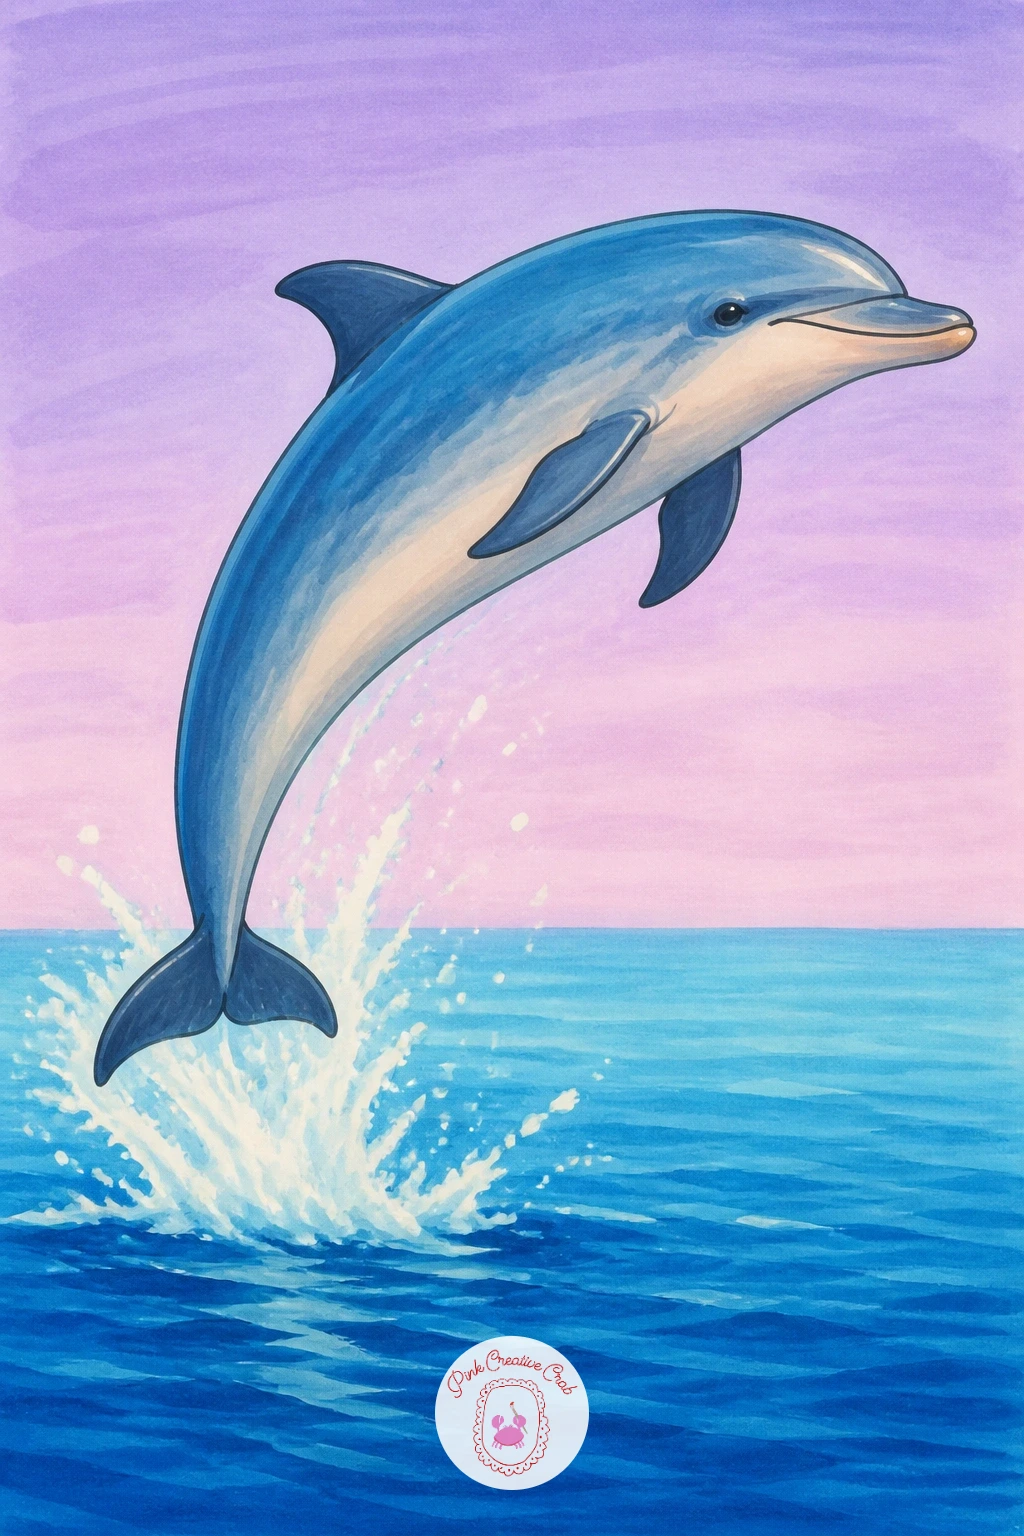
Bring in energy with a dolphin leaping clear of the waterline, a nice change of pace from all the gentle gliding so far. Draw the sleek curved body mid arc, nose pointed upward or slightly forward, dorsal fin raised along the back, and the tail flukes curving down behind, all in one smooth continuous line before you add any detail.
A low horizon line is the trick here too: place the water line well below center so most of the dolphin’s body reads clearly against open sky toned lilac or pale blue, with just a splash shape beneath where it broke the surface. Color the body in cool sea blue on top fading to pale sand beneath, the same light to dark logic as the flying fish, since it is a genuinely reliable way to make any leaping sea creature feel three dimensional.
If the leap looks stiff, check that the curve of the spine, the angle of the nose and the direction of the tail flukes all follow one continuous sweeping line rather than fighting each other. A few simple white splash marks beneath finish the motion nicely.
Palette: Sea Blue,Sand Beige,Pale Lilac,White
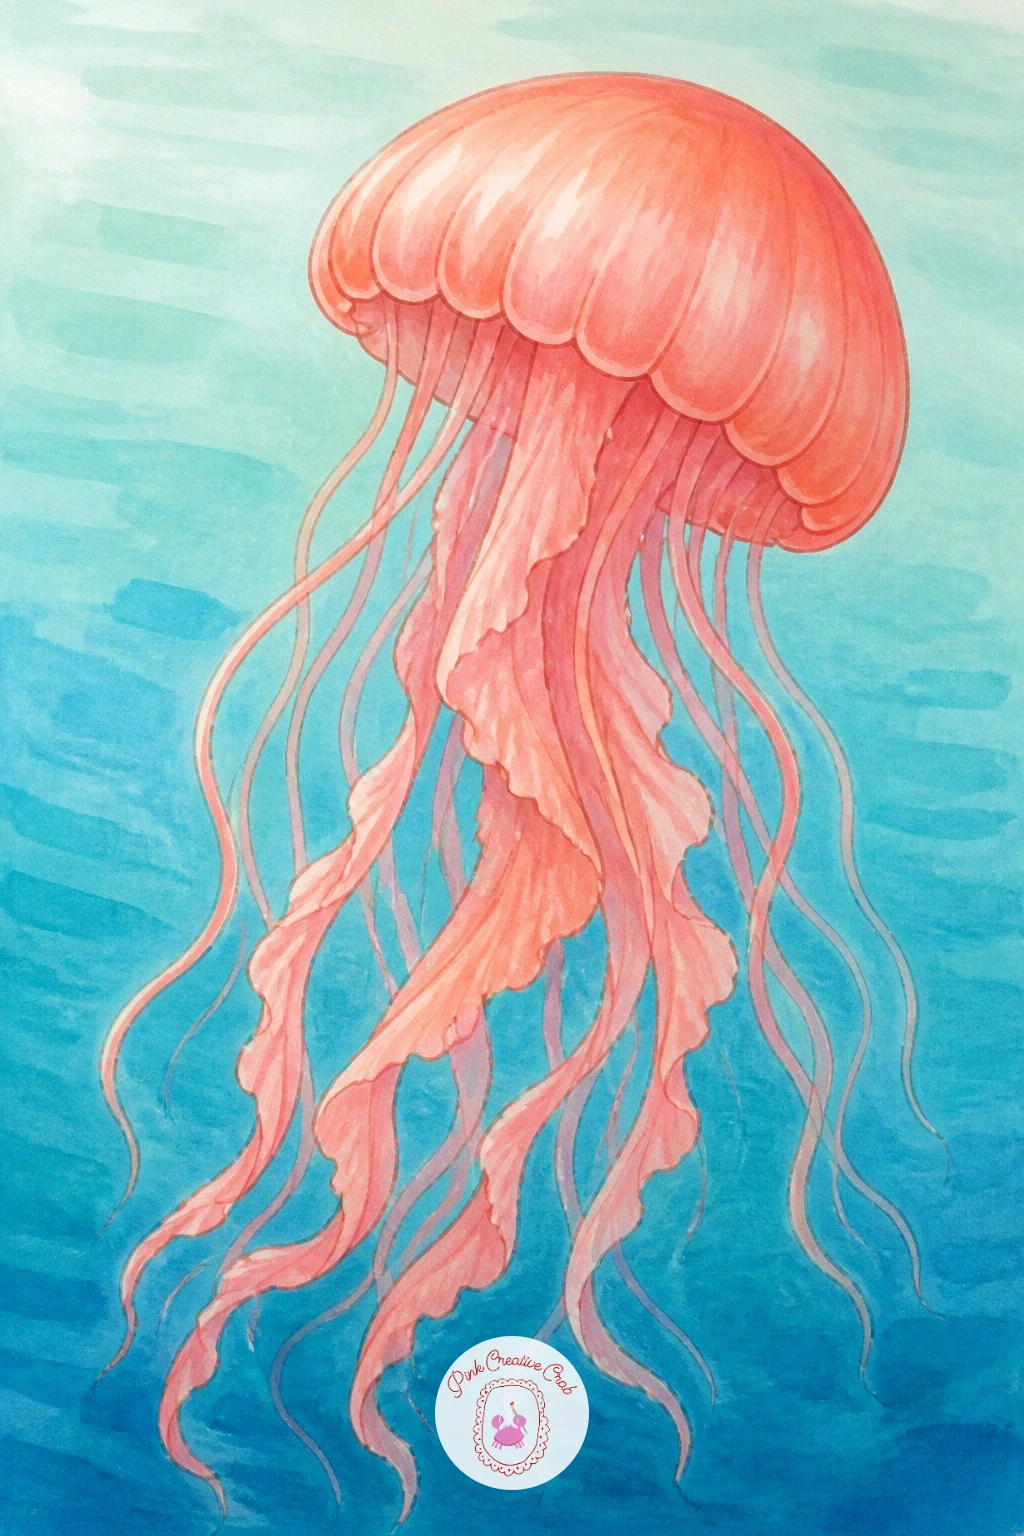
Return to something calmer with a jellyfish drifting, this time a more colorful cousin of the earlier moon jelly, with a rounder bell and longer, more decorative tentacles. Draw the bell as a full dome rather than the moon jelly’s flatter shape, then let four or five long ribbon like tentacles trail downward in loose wavy curves of varying length.
This is a good subject for practicing edges once more: dry brush the very outer rim of the bell so it fades softly into the water rather than stopping at a hard line, which gives it that gentle underwater glow real jellyfish seem to have. Color the bell in warm coral or soft lilac this time, a nice contrast to the earlier pale moon jelly, with the tentacles in a slightly deeper matching tone.
If the tentacles end up too stiff and parallel, vary their length more dramatically, let two trail much longer than the rest, since real jellyfish tentacles never match in length. Readers who enjoyed drawing jellyfish might also like exploring the sea creatures in easy ocean watercolor animal ideas.
Palette: Coral Pink,Soft Lilac,Sea Blue,White
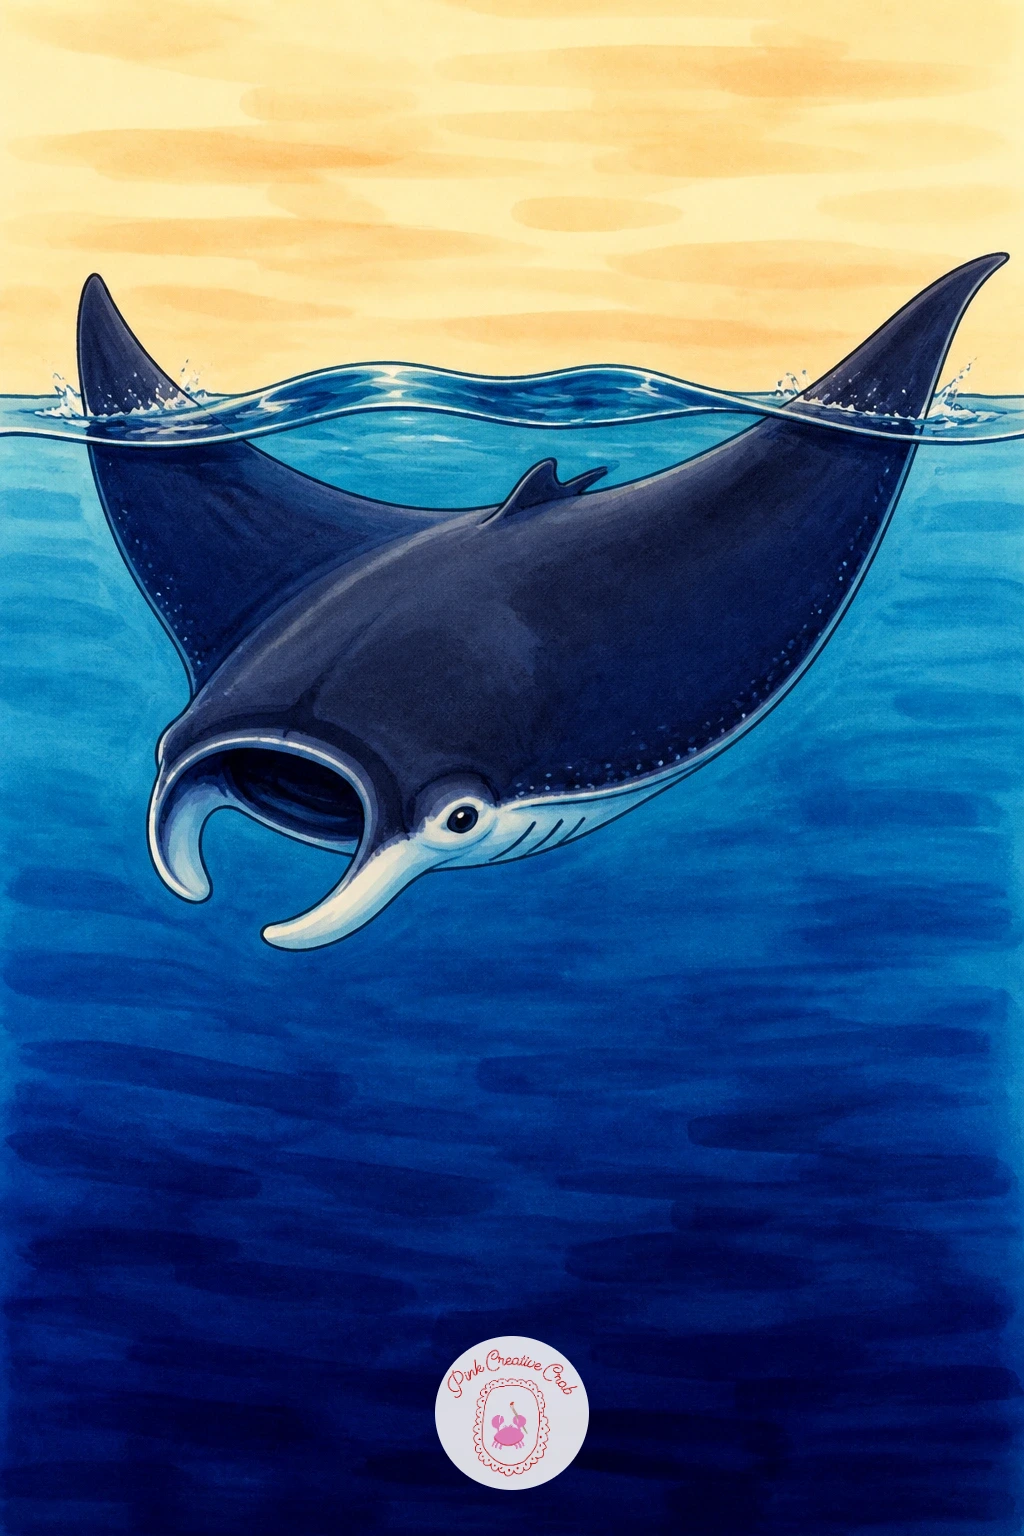
Circle back to rays with a manta at the surface, this time seen from above breaking the waterline rather than gliding fully underwater. Draw the wide manta silhouette as before, but let the tips of both wings curl just above a simple wavy water line, with gentle ripples spreading outward from where the body meets the surface.
Here the light source sits above the water rather than filtered through it, so the parts of the manta breaking the surface can take a touch of warm highlight, almost sand toned, where sunlight hits directly, while the submerged portion stays in your usual cool deep blue. That single contrast between warm surface and cool depth is what separates this piece from the earlier underwater manta.
Keep the ripple lines loose and few, three or four curved lines are enough to suggest water breaking around the body without turning into a busy pattern. If the ripples look too rigid, soften them with the same dry brush approach used for sand earlier in this list.
Palette: Deep Navy,Sea Blue,Sand Beige,Pale Lilac
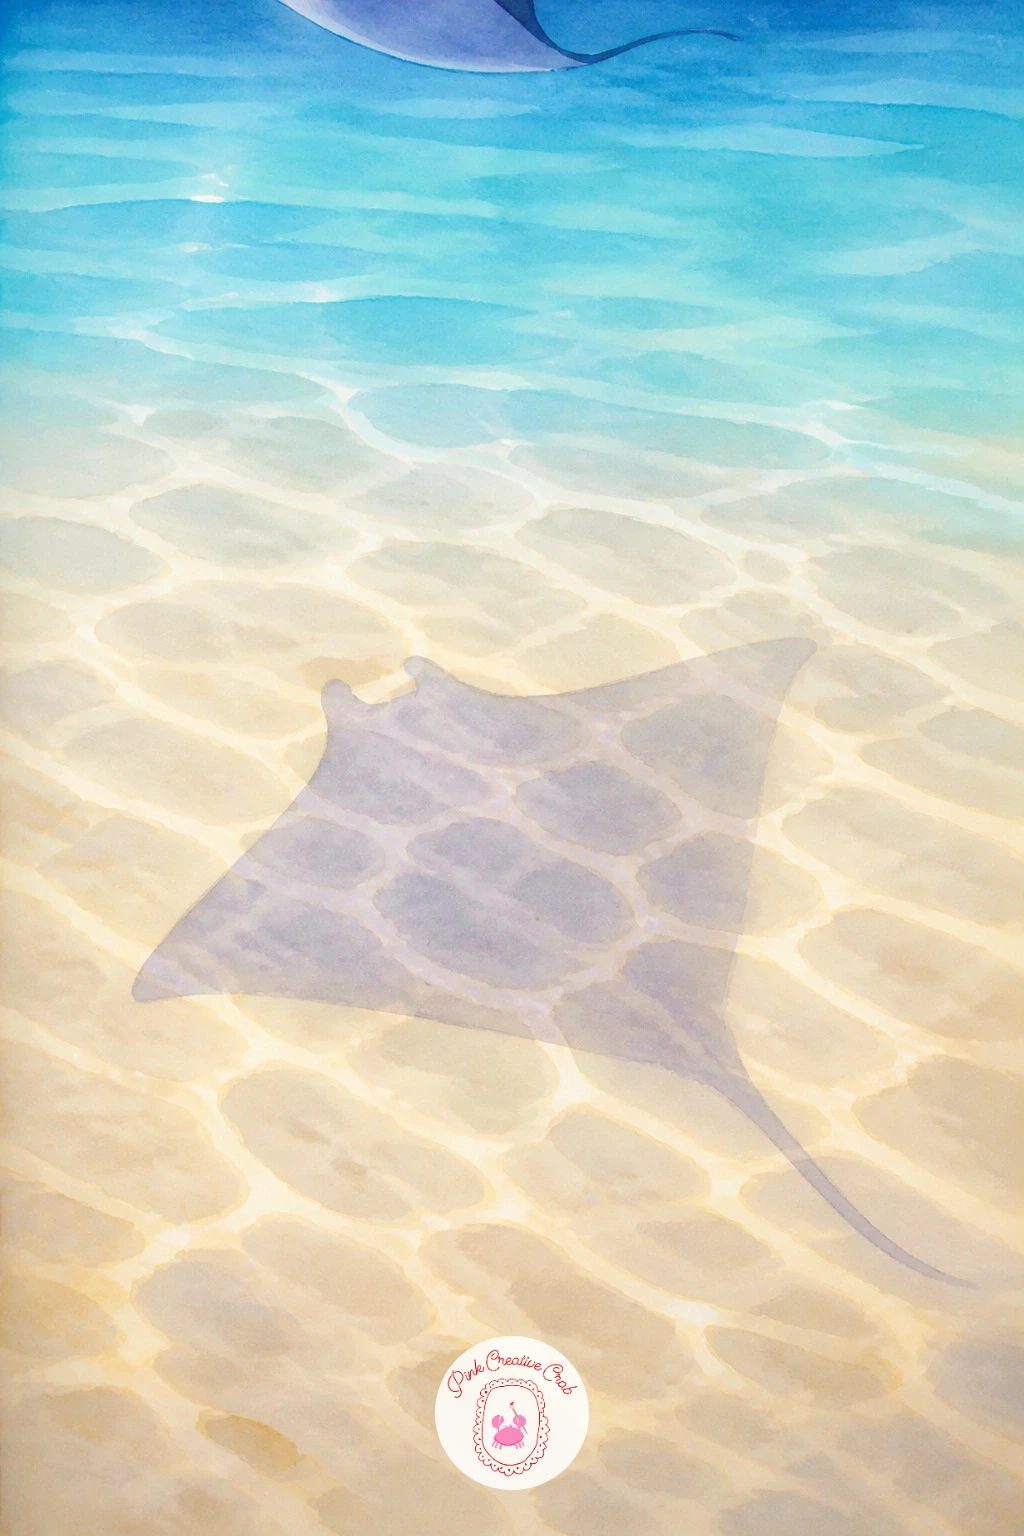
Try a more conceptual piece with a ray shadow on the sea floor, where the real subject is the dappled light and dark shape rather than the ray itself, barely visible at the top of the frame. Draw a simple sandy seabed filling most of the page, then add just the faint suggestion of a ray’s silhouette near the top edge, a soft diamond shape swimming above, out of the main frame almost entirely.
The real work happens on the sand: build a loose, irregular dark shadow shape beneath where the ray would be, using a cool lilac grey rather than plain grey, since shadows underwater pick up the surrounding blue tones. Dry brush the edges of the shadow so it fades softly into the lighter sand around it rather than sitting as a hard cutout.
If the shadow reads as a flat blob, add two or three short rippled lines radiating from it, mimicking how light refracts through moving water onto a seabed. This quiet, almost abstract piece makes a nice palette cleanser after several full color creatures.
Palette: Sand Beige,Soft Lilac,Sea Blue,Deep Navy
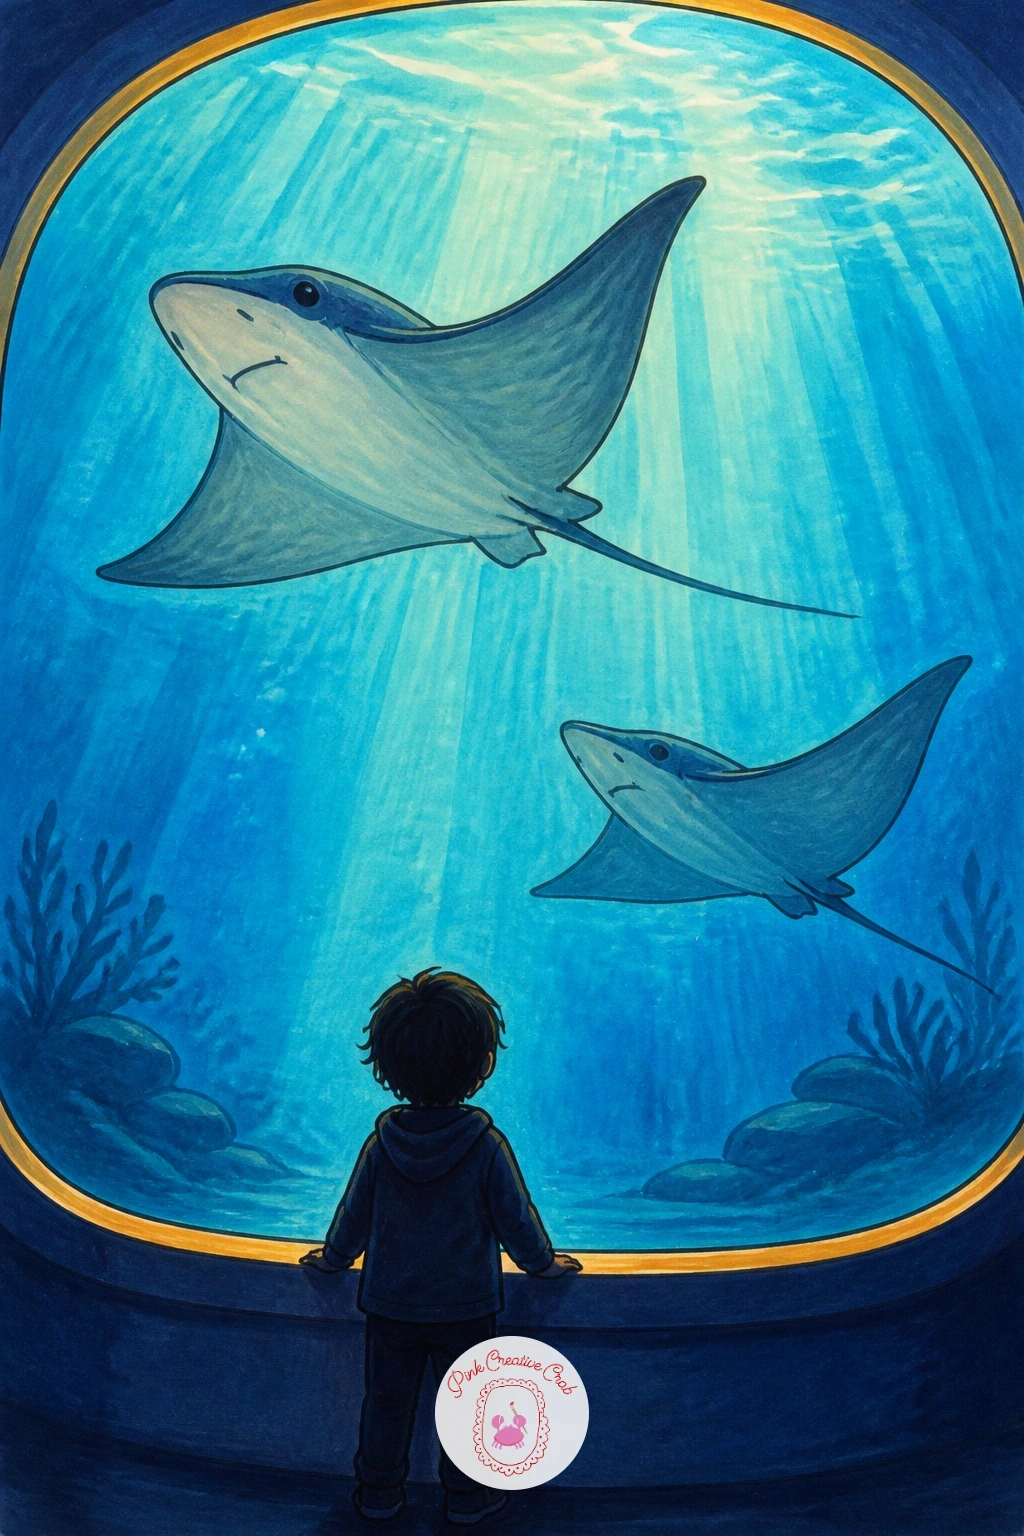
Add a warm human moment with a child watching rays at an aquarium, framed through a large curved viewing window. Draw the window first, a simple rounded rectangle taking up most of the page, then place a small child silhouette at the bottom edge, just a simple rounded head, shoulders and raised arm, facing into the glass.
Keep the child entirely in silhouette, a flat warm brown or deep navy shape with no facial detail, since this keeps the focus on the glowing water beyond rather than pulling attention into a face that is hard to get right at this scale. Inside the glass, one or two simple rays glide past in your usual blue palette, drawn a little larger than life to suggest the glass magnifying them slightly, a real effect aquarium windows have.
If the scene feels flat, add a soft rim of warm light along the top of the window frame, suggesting overhead gallery lighting spilling in. This is a lovely one to adapt from ideas in girl pencil drawing ideas if you want to bring the child further into focus next time.
Palette: Sea Blue,Deep Navy,Sand Beige,Warm Brown
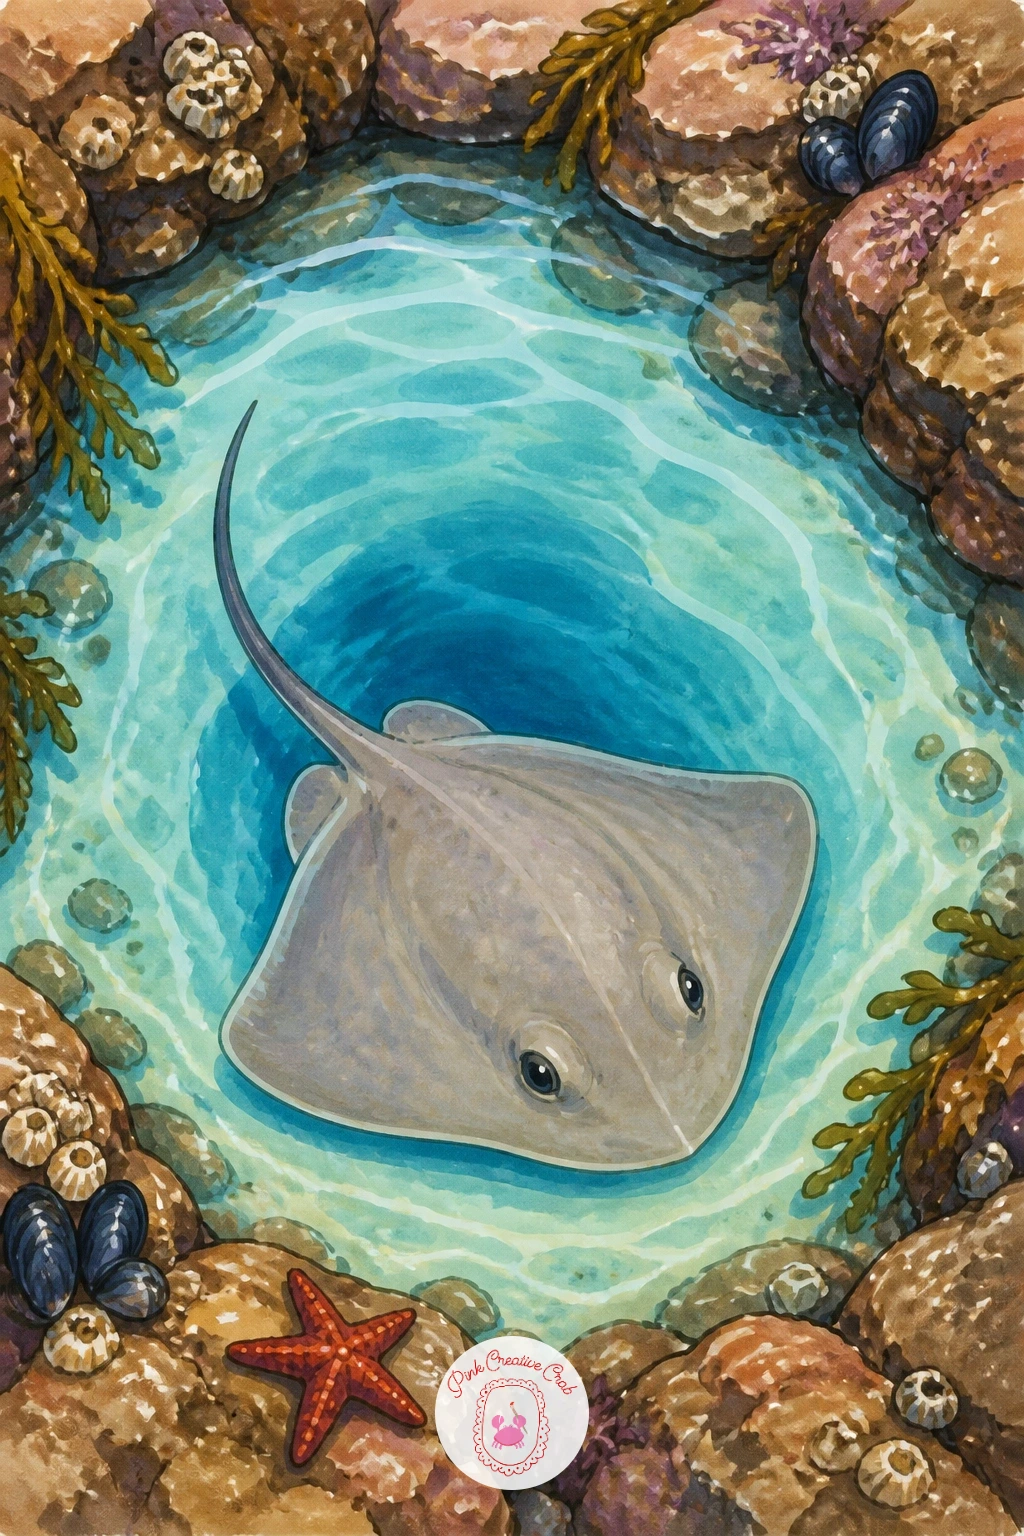
Close the list with a stingray in a tide pool, a small, intimate scene rather than open ocean. Draw an irregular rounded pool shape first, rocky and uneven at the edges rather than a perfect oval, then fit a small ray inside it, scaled down so there is clearly water, rock and sky all sharing the frame.
Comparing the ray’s width against the pool’s width as you sketch keeps it believably small rather than oversized for its home, since a tide pool ray should look snug, not cramped. Color the water in pale sea blue fading to a slightly deeper tone at the pool’s center for depth, with rough grey brown rocks dry brushed around the rim for texture.
If the rocks look too smooth and round, press harder in a few spots and lighter in others as you dry brush, which breaks up the evenness nicely. A few small white gel pen highlights on the wet rock edges finish the sense of a sunny day at the shore, a calm, grounded note to end the whole list on.
You Will Need
- white gel pen
Palette: Sea Blue,Sand Beige,Warm Brown,Soft Lilac
What to Do Next
Pick whichever creature pulled at you first, whether that is the gliding stingray at the top of the list or the sea slug further down, and start with light pencil guidelines on smooth marker paper before any color touches the page. One finished piece today beats a sketchbook full of half started oceans.
Frequently Asked Questions
What is the easiest way to start a stingray drawing?
Start with a rounded diamond shape for the body and a single curved line for the tail. Keep every corner soft rather than pointed, since sharp angles are what make early attempts look stiff instead of gliding.
What markers work best for a light sea background?
Alcohol based markers in two or three blues plus a lilac blender work well, since they blend wet into wet for soft gradients. Lay the lightest color first and work toward the darkest before the layers fully dry.
How do you stop the stingray’s color from looking streaky?
Work quickly in one direction while the marker is still wet, and go over streaky patches with a clean blender marker rather than more color. Letting each layer dry before adding spots or details also prevents muddy blending.
How is a manta ray different from a stingray to draw?
A manta ray is much wider and flatter with two forward curling head fins called cephalic lobes, while a stingray has a simpler diamond body and a long whip tail. Getting the head fins right is what separates the two at a glance.
What paper suits alcohol markers for this kind of drawing?
Smooth, slightly absorbent marker paper or bristol paper gives the cleanest blends and stops colors from bleeding through. Regular printer paper works in a pinch but soaks up ink unevenly and tends to buckle.
Have any thoughts?
Share your reaction or leave a quick response — we’d love to hear what you think!
-
 0
-
0
-
0
-
0
-
0
-
0


