

A bee watercolor painting is one of those small, happy subjects that rewards you fast: a few loose petals, some fuzzy stripes, maybe a wing or two, and you have something worth pinning to the fridge. This list leans into that, starting with bees in every garden moment you can imagine, then widening out to the butterflies, moths, hummingbirds and other visitors that share the same flower beds.
Work through them in any order, but the early ones are built for a quick sitting and the later ones ask a little more patience with wings and fine detail. Keep your palette simple: honey golds, warm yellows, soft greens, and whatever jewel tone the butterfly of the day calls for.
Using these images: free for personal projects such as printing, coloring, cards, journals and gifts. Handmade items that include them may be sold up to 30 pieces per design. More than that is commercial use and is not permitted, and neither is selling or sharing the images themselves or passing them off as your own. Please ask before any other use.
Start simple: a bee landing on a lavender stem gives you one small body and one tall, friendly shape to build everything else around. Sketch a soft diagonal stem in pencil, then stipple short dashes up each side for the lavender buds, using a small round brush loaded with violet and a touch of blue.
Paint the bee last, once the lavender has dried, so the two shapes don’t bleed together. Two ovals, gold and black stripes, clear wings touched in with the thinnest wash of grey: that’s the whole insect.
Where this usually goes wrong is the stem reading flat. Compare the width of the stem to the width of one lavender bud before you commit to pencil, it should be noticeably thinner, and that single comparison keeps the whole stalk in proportion.
If you don’t have violet, mix a dusty purple from ultramarine and a little alizarin crimson instead.
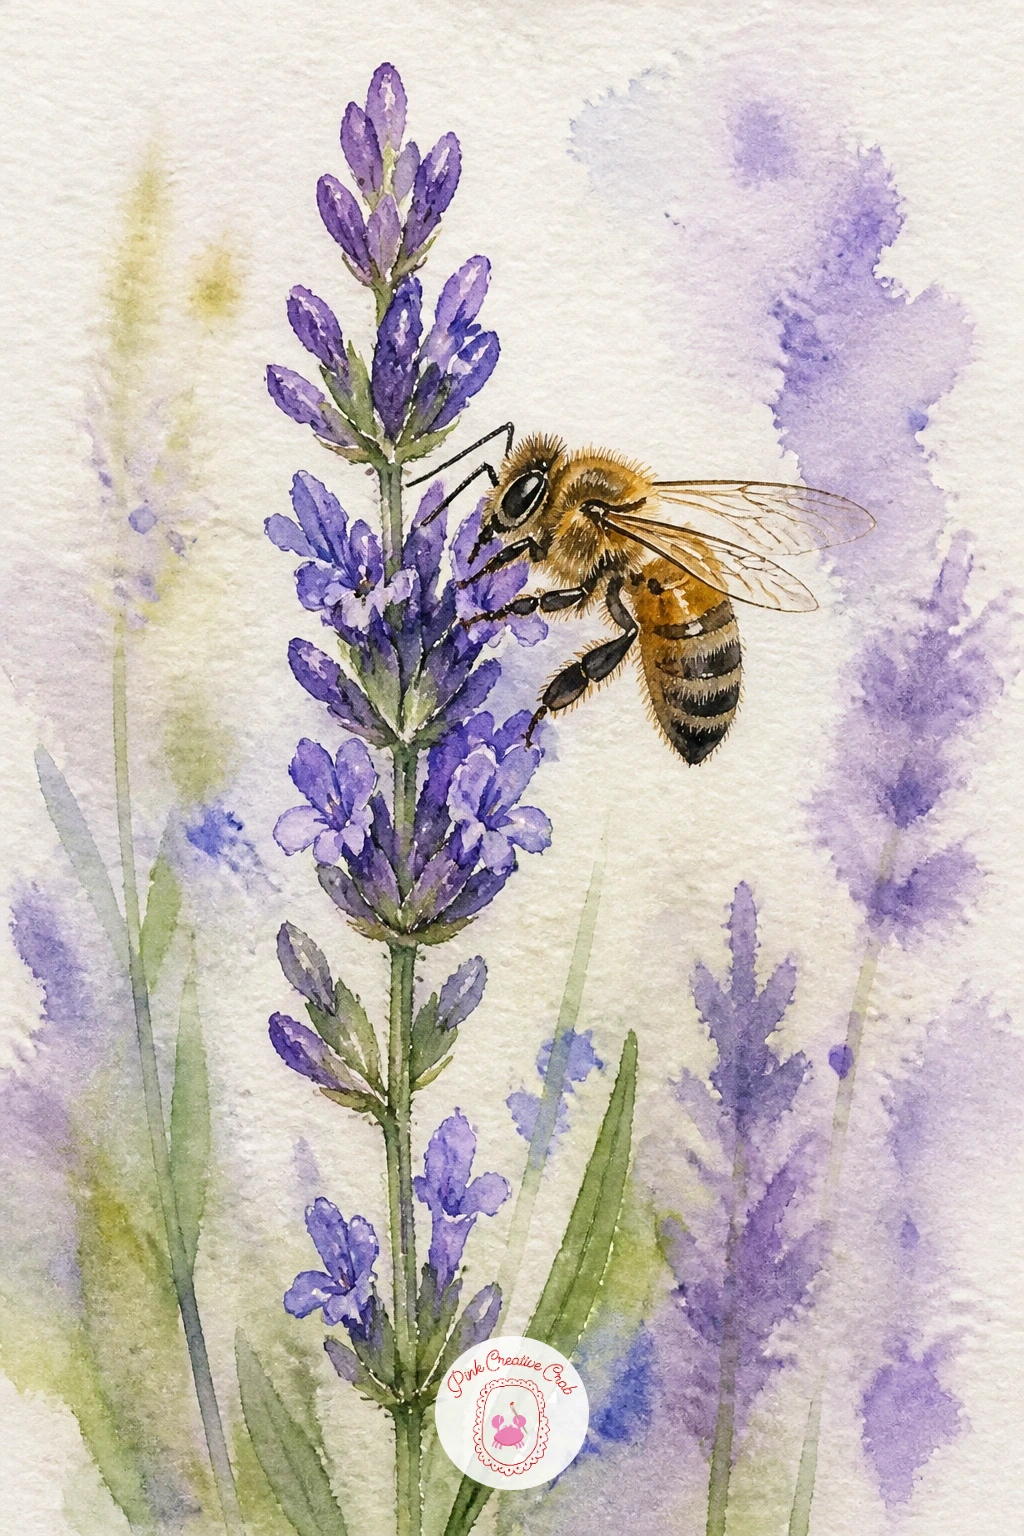
Palette: Dioxazine Violet,Sap Green,Yellow Ochre,Payne’s Grey
Move from flower to kitchen table with a honey jar with a dipper and a bee perched on the rim. Draw a simple jar shape in pencil, slightly wider at the shoulder, then mask the thin wooden dipper and the bee’s wings with masking fluid before you paint so they stay bright white against the honey.
Wash the jar in warm golden yellow, leaving a pale streak down one side for the glass highlight, then drop in a deeper amber while it’s still damp so the color pools naturally. Once it’s bone dry, peel the masking fluid and add the honey color to the dipper with a dry brush for texture.
The glass often ends up looking too flat. Fix that by glazing one more thin layer of ochre only over the shadowed half of the jar once the first wash is dry.
No masking fluid on hand? Simply paint around the dipper and bee shapes with a steady hand instead.
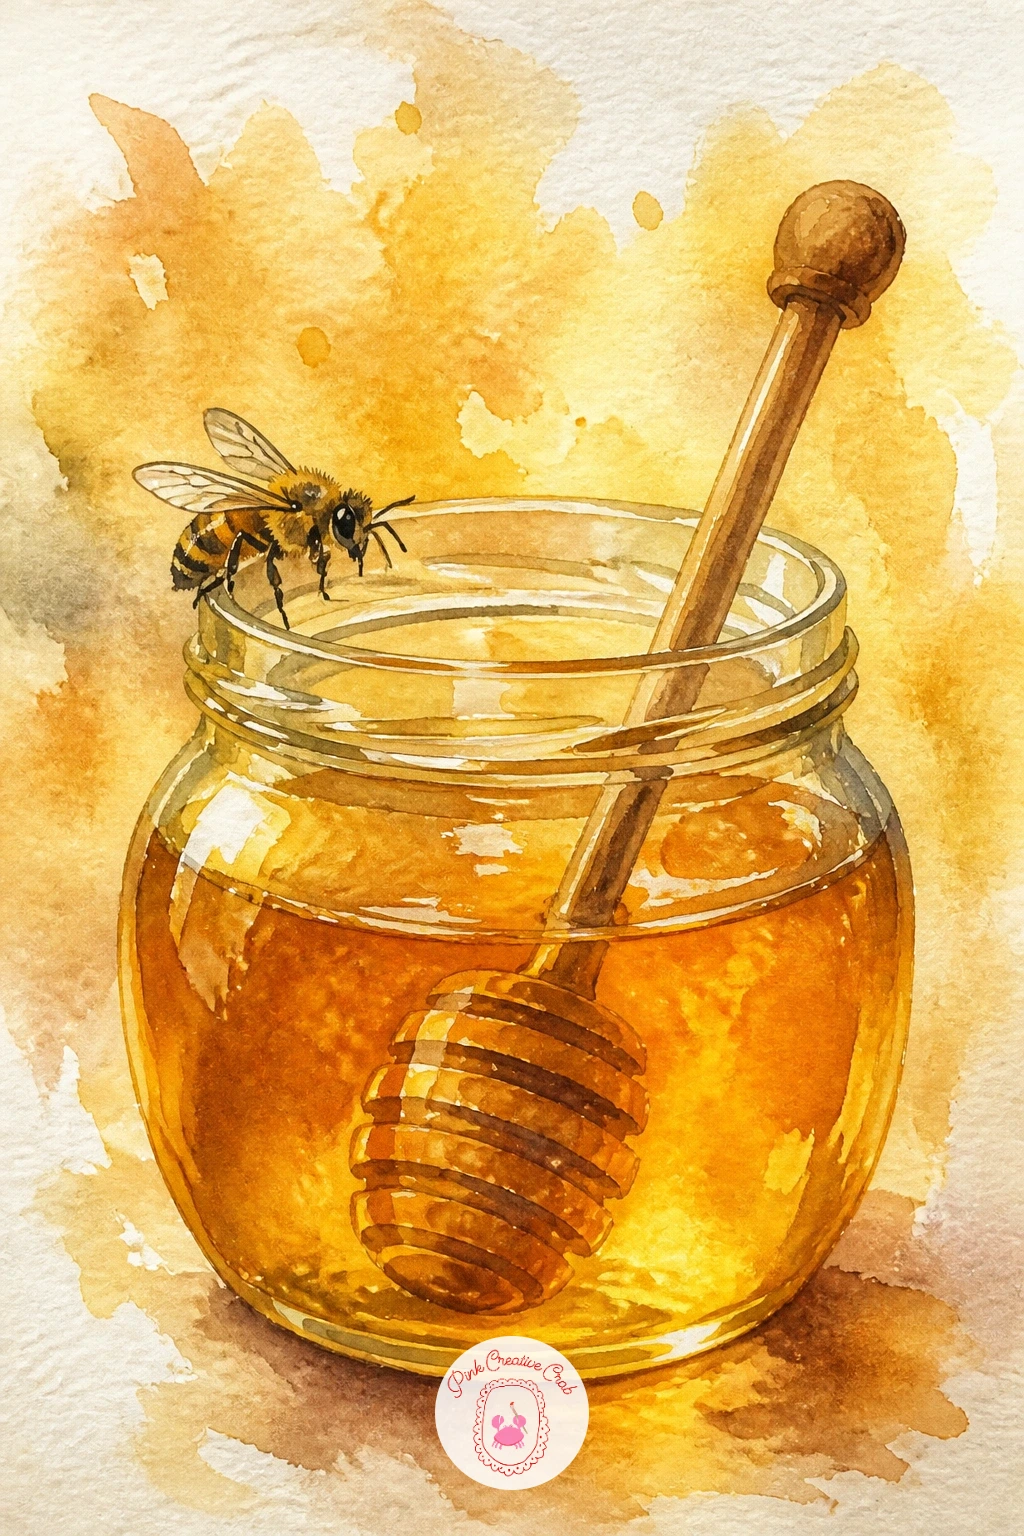
You Will Need
- masking fluid
Palette: Yellow Ochre,Burnt Sienna,Raw Umber,Lamp Black
Widen the scene with a beehive in a wildflower meadow, a nice chance to practice painting a small structure sitting inside a loose, busy background. Block in the meadow first with a wide flat brush, dropping greens, soft yellows and pink dots wet-into-wet so the flowers blur softly behind the hive.
Once that layer is dry, paint the hive itself as simple stacked boxes in weathered white or pale grey, keeping the lines straighter than anything around it so it reads as solid and man-made.
Think about eye level here: if you place the horizon low on the page, you’re looking slightly up at the hive, which makes it feel more present and close, while a higher horizon flattens it into the distance. Either works, just decide before you start washing in the field.
If your paper buckles with the wet meadow wash, tape it down on all four sides before you begin.
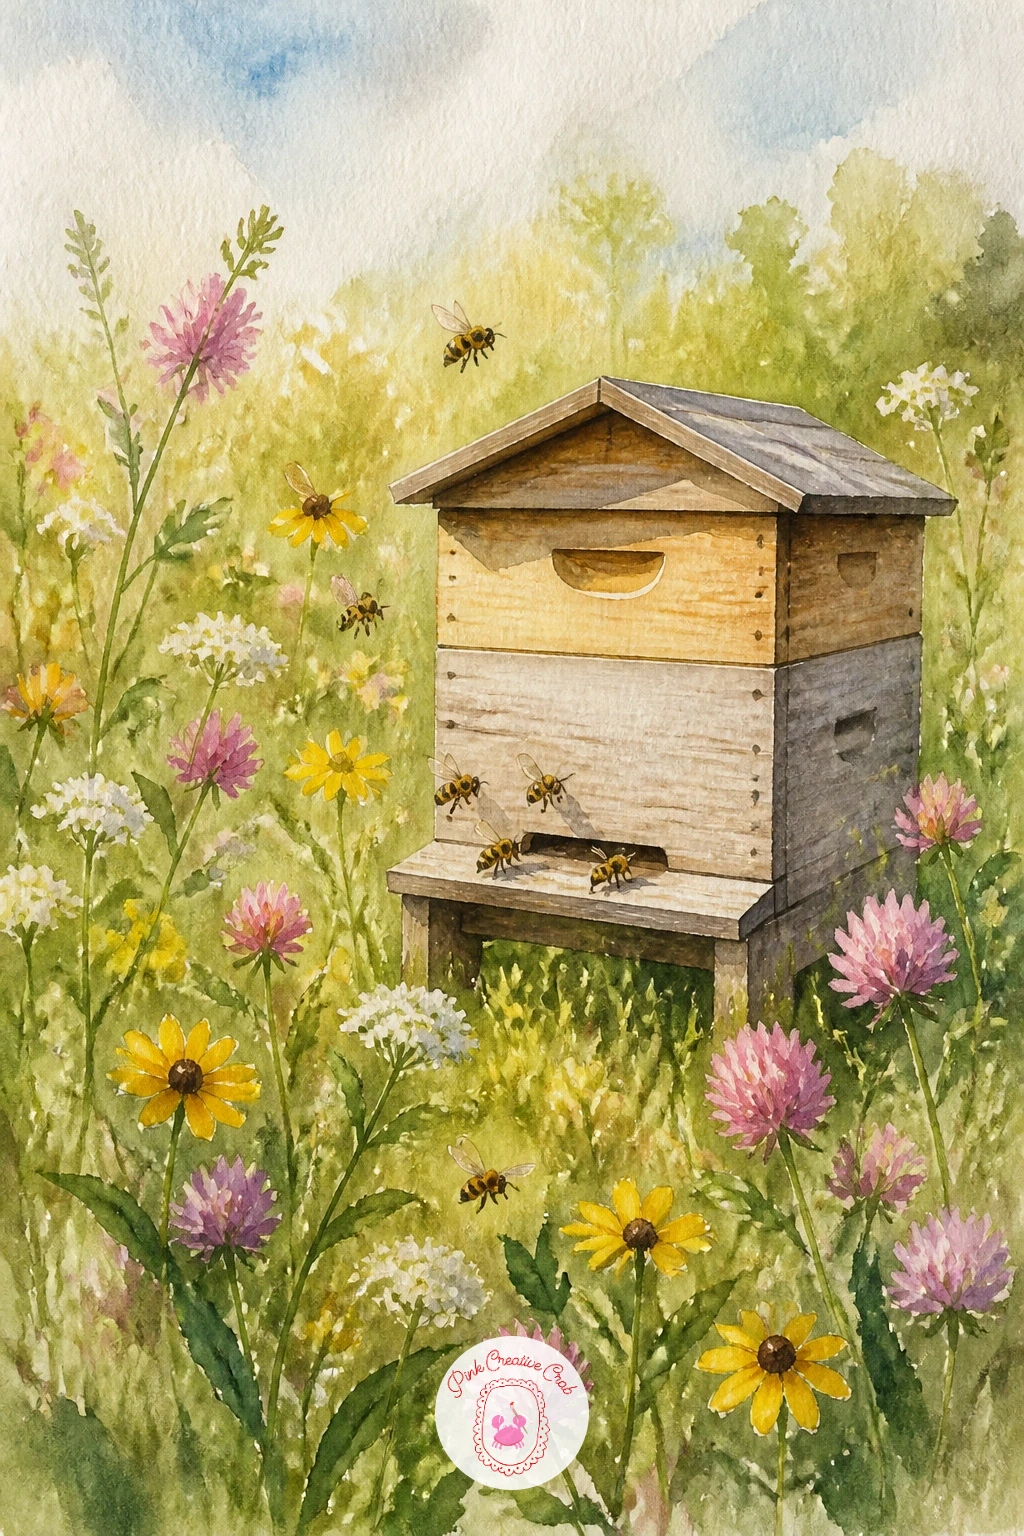
Palette: Sap Green,Cadmium Yellow,Quinacridone Pink,Titanium White
Try a palette knife or an old credit card to scrape a few grass blades into the wet meadow wash, it gives texture faster than a brush ever will.
Bring a person into the garden with a beekeeper in a straw hat, tending the hive from the last idea. Pencil in a simple standing figure first, keeping the proportions loose: the hat brim should be roughly as wide as the shoulders beneath it, a quick comparison that stops the head looking oversized once you add paint.
Paint the hat in warm straw yellow with a few dry-brush lines for texture, then block in the veil netting as a thin grey wash over the face so it reads as sheer rather than solid. Work the jacket and gloves last in pale cream so the whole figure stays light and sunlit.
Faces are the usual trap: keep this one almost featureless, just a soft shadow under the veil, and the painting stays charming rather than awkward.
Swap the straw yellow for a warm ochre if that’s what’s already open on your palette.
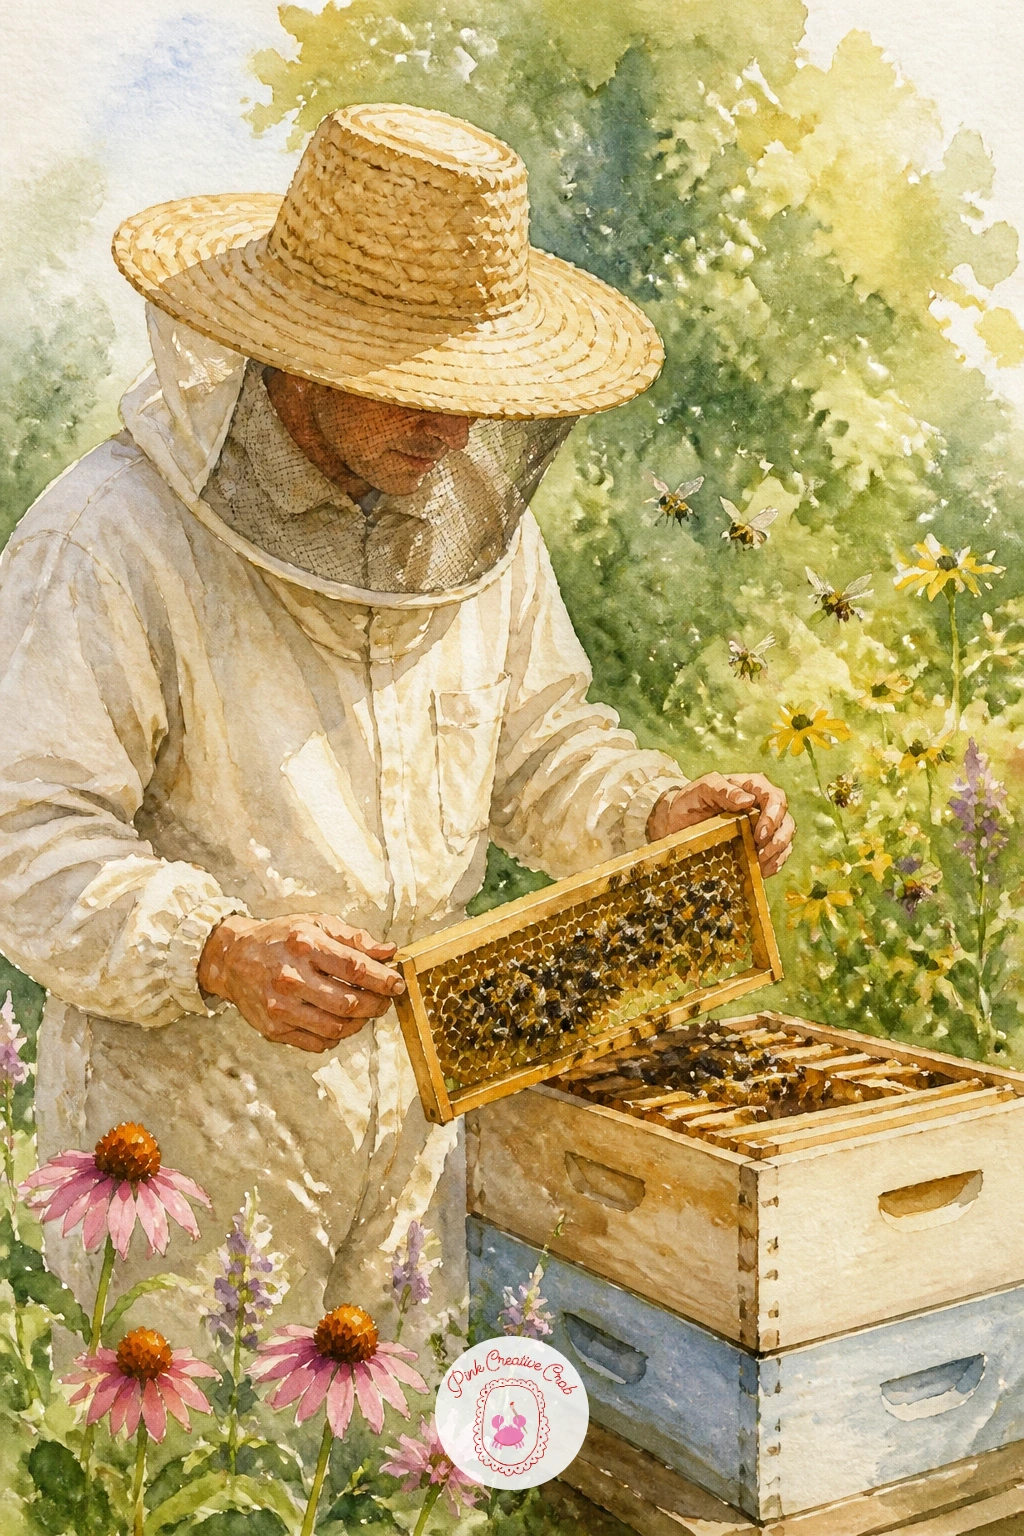
Palette: Yellow Ochre,Payne’s Grey,Ivory Black,Naples Yellow
Zoom right in for a honeycomb with bees at work, a satisfying subject once you get the hexagon trick. Lightly pencil a loose grid of hexagons rather than trying to draw each one freehand, it keeps the honeycomb pattern even without feeling stiff or ruler-drawn.
Paint the cells in warm amber, varying the value so some look full of honey and others look empty and pale, then drop a few bees on top once that layer is completely dry.
This is a good one to practice the forty-minute version on: a quick ten-minute take covers maybe a dozen cells and two bees, while the longer version fills the whole page, adds a thin wax drip down one edge, and varies the honey color cell by cell so it never looks uniform.
If the hexagons wobble, don’t erase, just let the uneven shapes read as handmade wax.
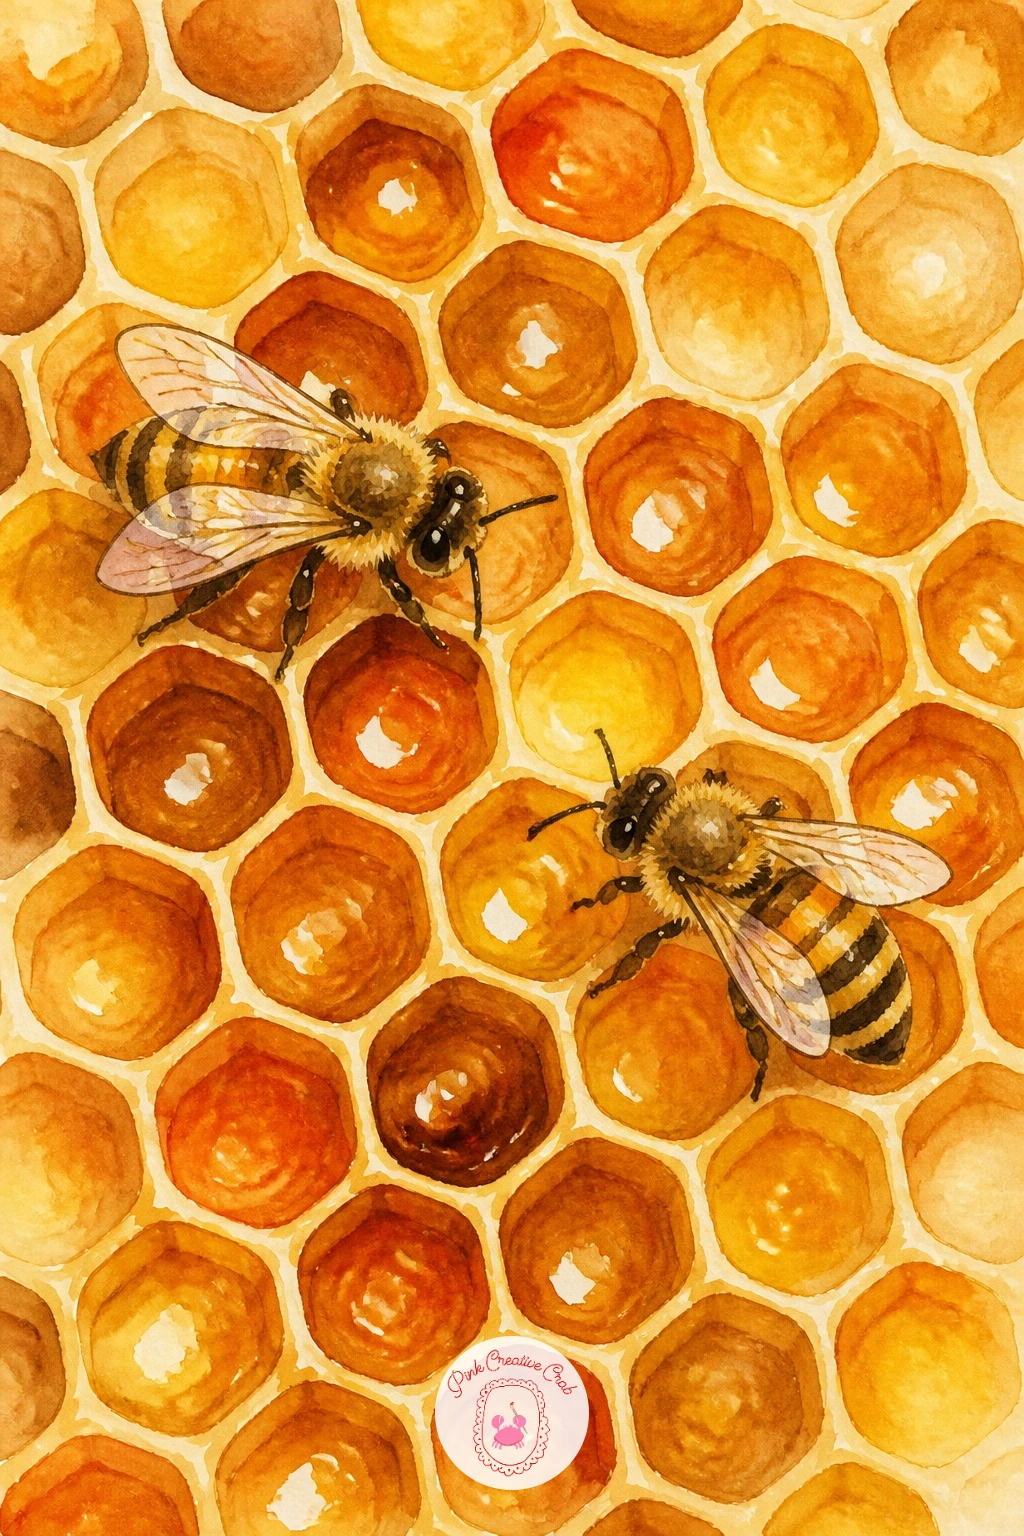
Palette: Burnt Sienna,Yellow Ochre,Raw Umber,Lamp Black
Settle a bee inside a pink rose next, tucking it among the petals rather than out in the open air. Paint the rose first with a wet-into-wet base of pale pink, then drop deeper rose and a touch of violet into the center while it’s still damp so the petals fold inward naturally toward the bee’s hiding spot.
Once the rose is dry, paint the bee small and partly hidden, just the striped back and one antenna peeking from between two petals, which does more for the story than a bee shown whole.
Soft edges are everything here. Lift a little color with a damp clean brush where petals catch the light, rather than leaving a hard painted line, and the rose stays soft instead of papery.
No rose pink in your set? Mix alizarin crimson with plenty of water and a whisper of yellow.
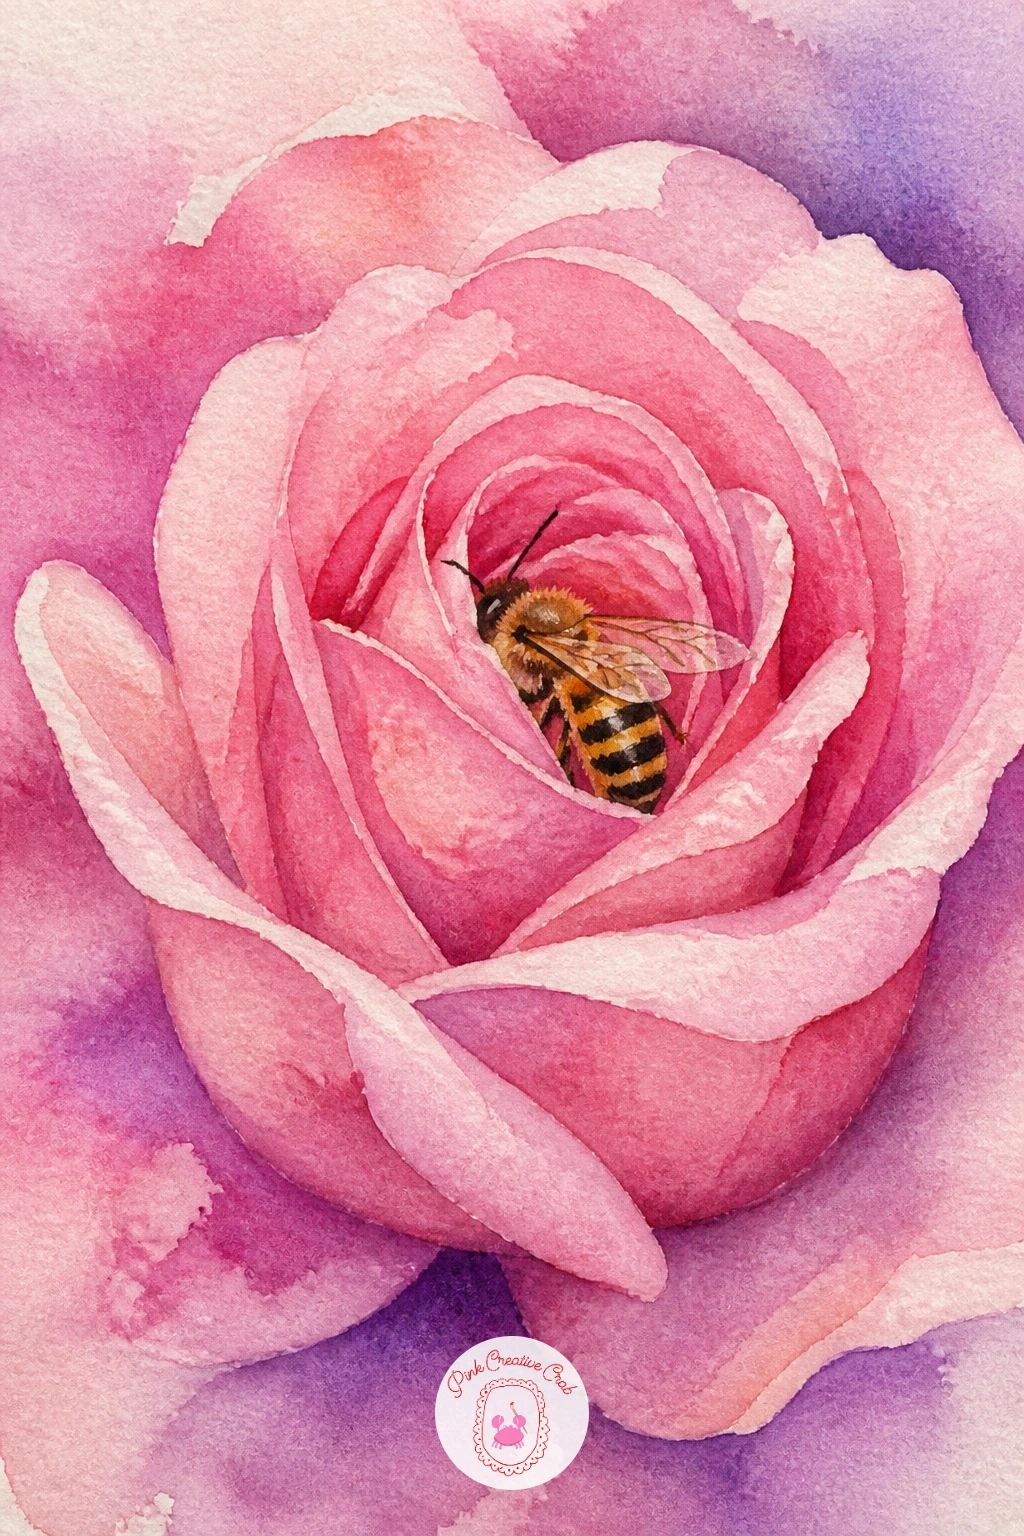
Palette: Quinacridone Rose,Alizarin Crimson,Sap Green,Yellow Ochre
Scale up with bees around a sunflower, a bold, friendly subject that fills a page fast. Paint the sunflower center first as a rich brown-black circle stippled with the tip of a round brush, then add the petals radiating outward in warm yellow and orange, leaving the tips a little ragged rather than perfectly even.
Once the flower is dry, scatter two or three bees around the petals and one more landing on the dark center, varying their sizes slightly so the nearest one feels closest to you.
Where beginners lose the shape is in the petals all facing the same direction. Instead, tilt a few petals toward and a few away from you as you paint, which gives the flower head some gentle roundness instead of a flat pinwheel.
For more texture in the center, try the easy watercolor flower techniques for layering petals before the bees go in.
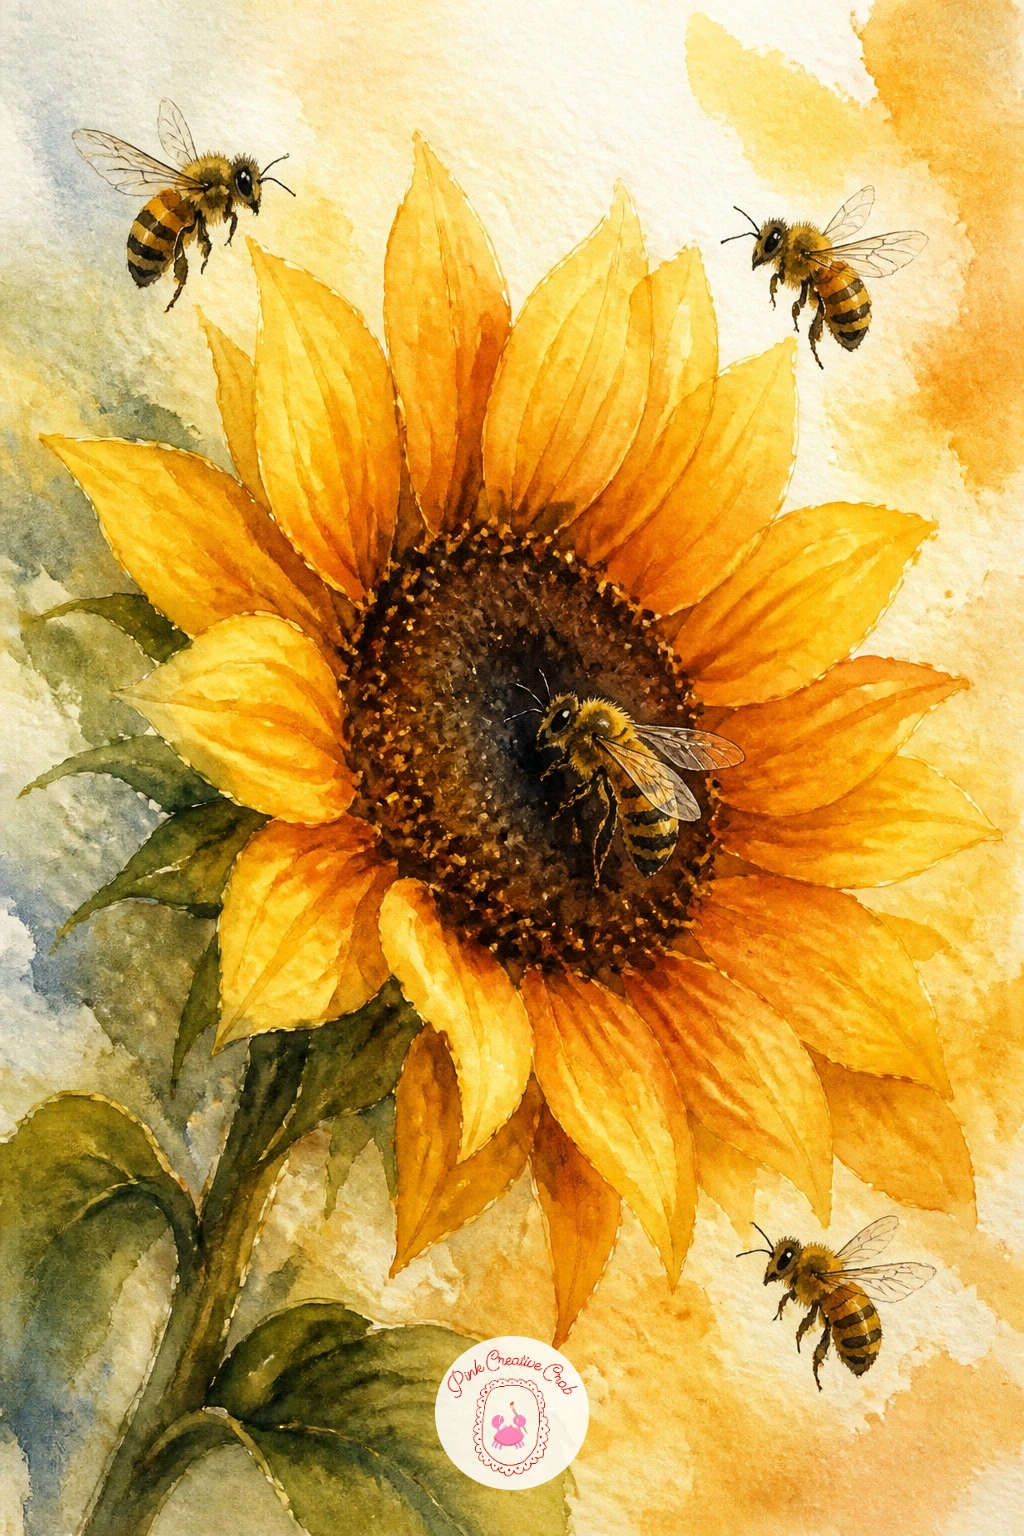
Palette: Cadmium Yellow,Burnt Orange,Burnt Umber,Lamp Black
Bring the garden indoors with a bee on a teacup rim, a sweet little still life for anyone who loves cottagecore details. Draw the teacup first using a simple ellipse for the rim and a slightly wider ellipse for the base, checking that the two line up on the same center line before you paint, which keeps the cup from looking tilted.
Wash the china in soft white with a thin blue or pink pattern painted in afterward, then let the cup dry completely before adding the bee balanced right on the rim’s edge.
The classic mistake is painting the ellipse too round, which flattens the whole cup. Keep it noticeably wider than it is tall and the perspective reads correctly straight away.
If floral china patterns feel fiddly, three small dots of color per side read as a pattern just as well as painted flowers.
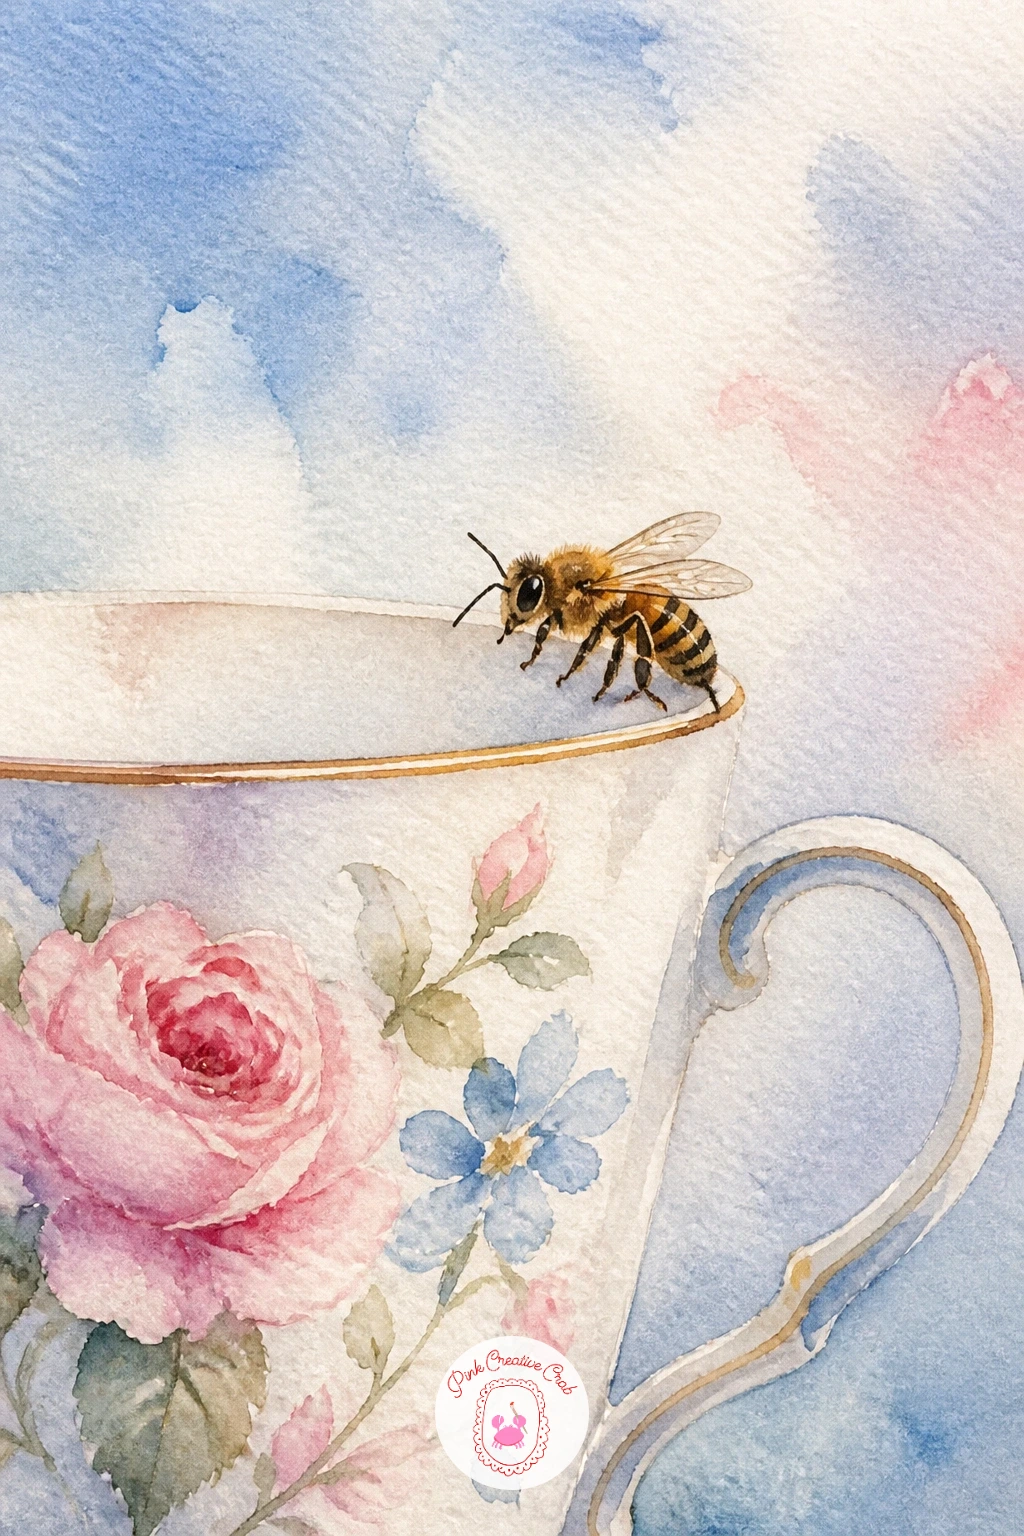
Palette: Cerulean Blue,Quinacridone Rose,Titanium White,Yellow Ochre
Return outdoors for a skep hive in a cottage garden, the classic woven dome shape tucked among tall flowers. Build the skep from the top down, painting a series of curved horizontal bands in warm straw tones that get slightly wider toward the base, which mimics the coiled straw construction without you needing to draw every strand.
Surround it with loose, tall cottage garden flowers in pinks, blues and purples, painted wet-into-wet so they blur gently behind the hive and don’t compete with it for attention.
If the skep looks too smooth and modern, dry-brush a few darker lines over the bands once dry to suggest the texture of woven straw.
Swap the straw tones for a cooler grey-brown if your yellow ochre is running low, it still reads as aged straw.
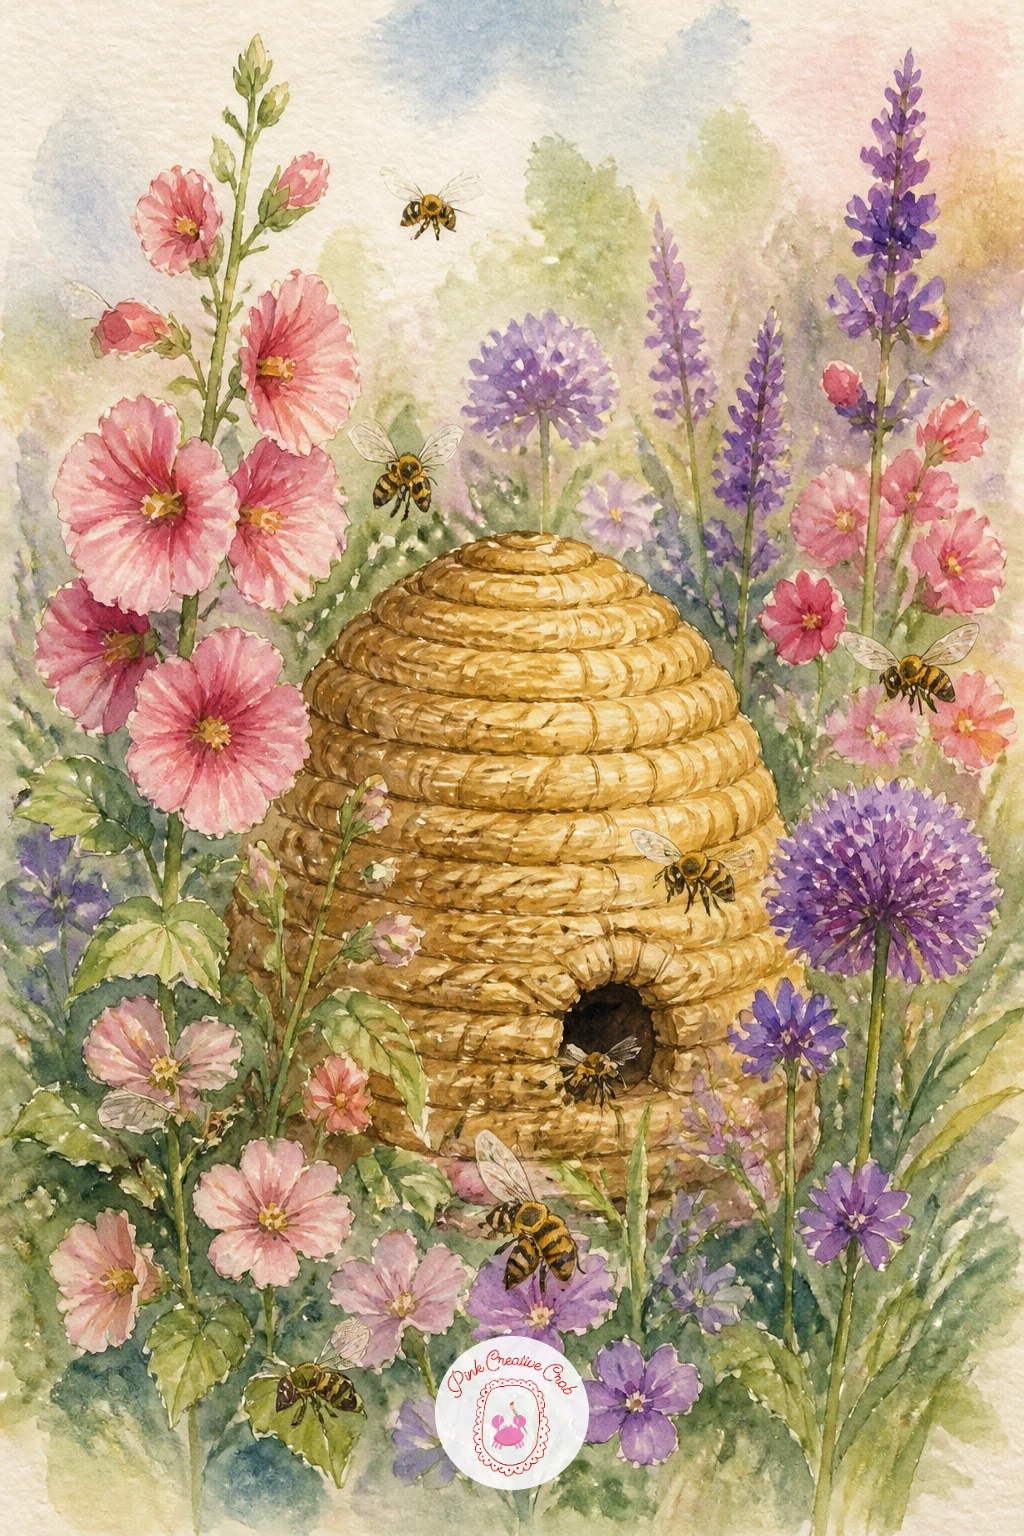
Palette: Yellow Ochre,Burnt Sienna,Dioxazine Violet,Sap Green
Tuck a bumblebee in a foxglove bell next, half-hidden the way bumblebees really disappear into these tall spotted flowers. Paint the foxglove spike first, working from the top bud down to the open bells at the base, each bell a simple tube shape in soft pink or purple with a scatter of tiny dots inside for the spots.
Let that dry, then paint the bumblebee’s rounder, fuzzier body climbing into the lowest bell, using a slightly drier brush than you used for the bee earlier in this list so the fur reads softer and thicker.
Spacing the bells evenly up the stem is the trickiest part. Mark light pencil dashes first at regular intervals before you paint a single bell, and the whole spike stays balanced.
If pink and purple together feel too busy, paint every bell the same soft lavender instead.
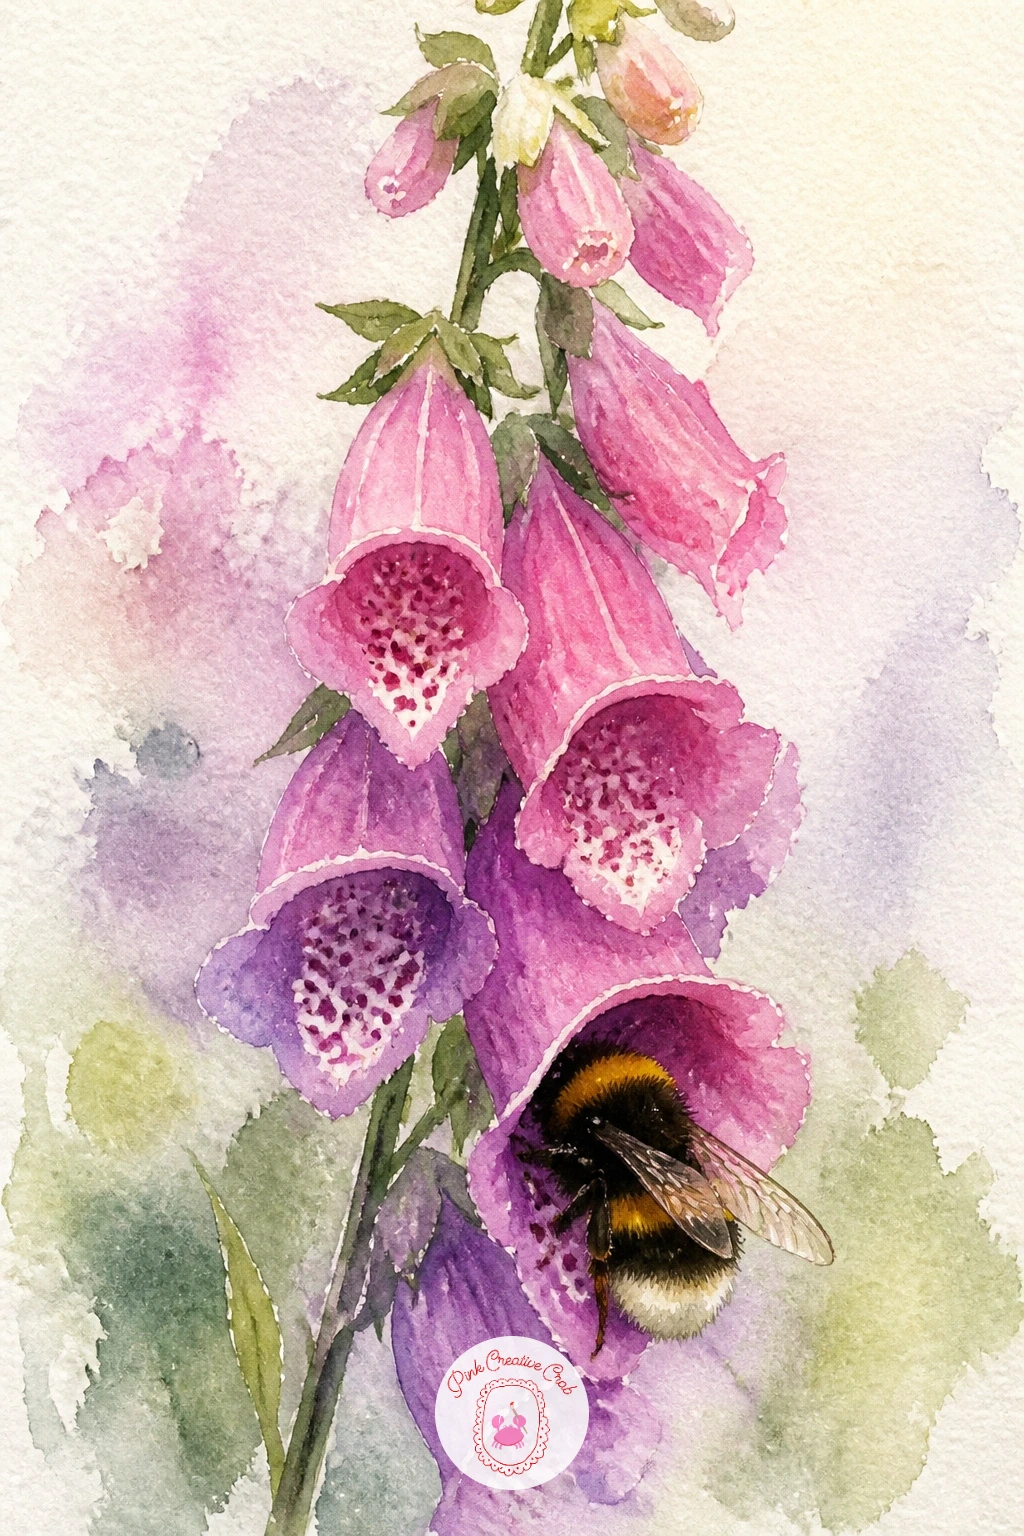
Palette: Quinacridone Rose,Dioxazine Violet,Sap Green,Yellow Ochre
Head back to the breakfast table for a bee on a slice of honey toast, a cozy, slightly funny little painting. Paint the toast first as a simple golden-brown square with rounded corners, dry-brushing the crust edges so they feel rough rather than smooth.
Drizzle honey on top with a thin, wandering line of deep amber, thickest where it pools and thinnest where it trails off the edge of the slice, then let that dry before placing a small bee right at the edge of the honey pool.
The honey drizzle is the one detail worth taking slowly. Paint it in one continuous, unhurried stroke rather than several short ones, and it keeps the glossy, liquid look instead of turning into dashes.
No deep amber on hand? Layer burnt sienna over yellow ochre instead for the same warm honey color.
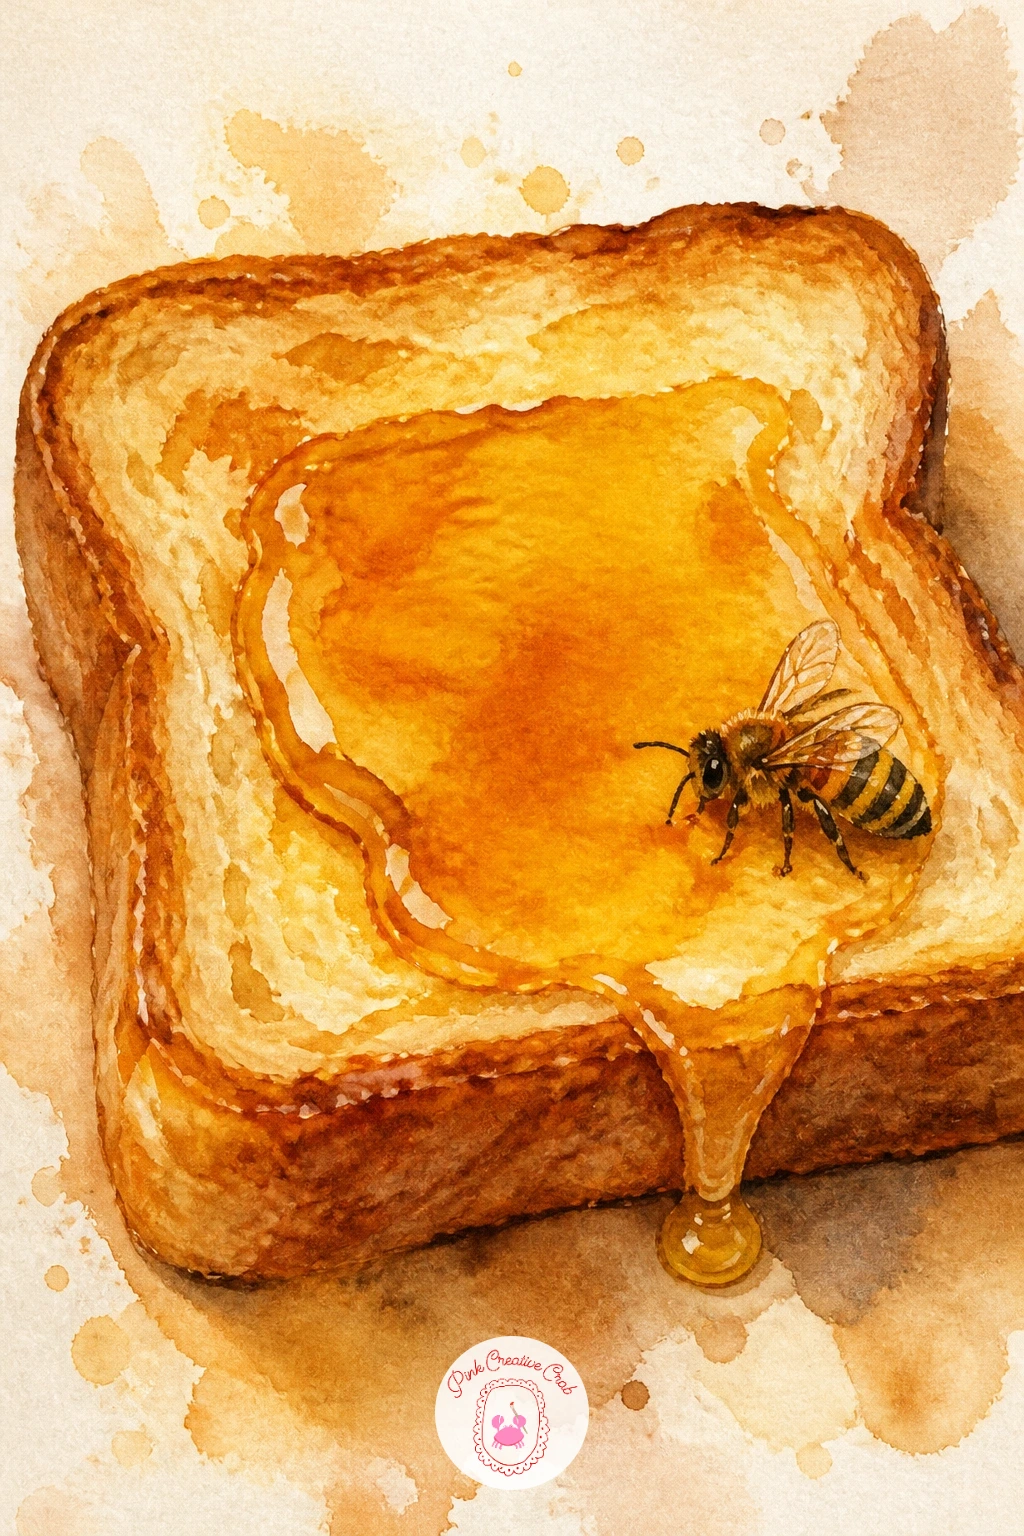
Palette: Burnt Sienna,Yellow Ochre,Raw Umber,Lamp Black
Slow the whole mood down with a bee asleep inside a flower, curled up for the night among the petals. Choose a wide, open bloom like a poppy or a dahlia and paint it loose and generous, leaving a soft shadowed pocket near the center where the bee will rest.
Paint the sleeping bee smaller and rounder than your earlier bees, tucked on its side rather than upright, with its legs drawn in close instead of spread out working a flower.
Lighting matters most here. Decide where a late sun sits, low off to one side, then keep that same side of both the petals and the bee a touch warmer and lighter, while the opposite side stays in cooler shadow, and the whole scene feels like one quiet moment rather than two separate paintings pushed together.
Finish today with a single warm glaze over the whole piece once it’s dry, it unifies the light beautifully.
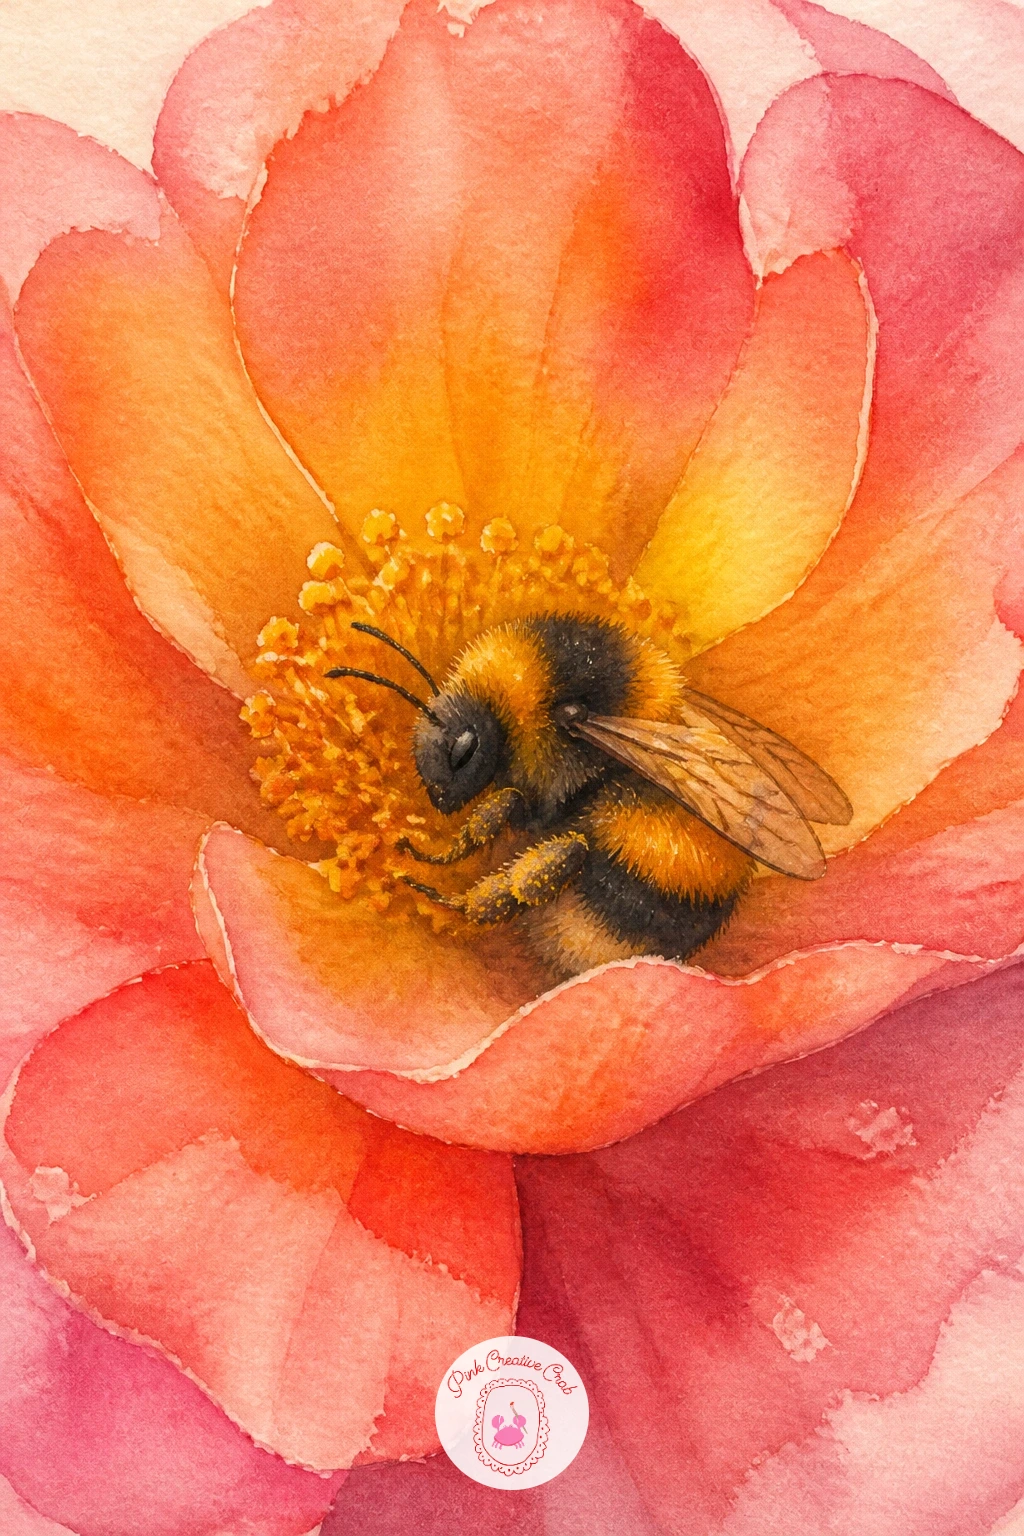
Palette: Quinacridone Rose,Cadmium Orange,Yellow Ochre,Payne’s Grey
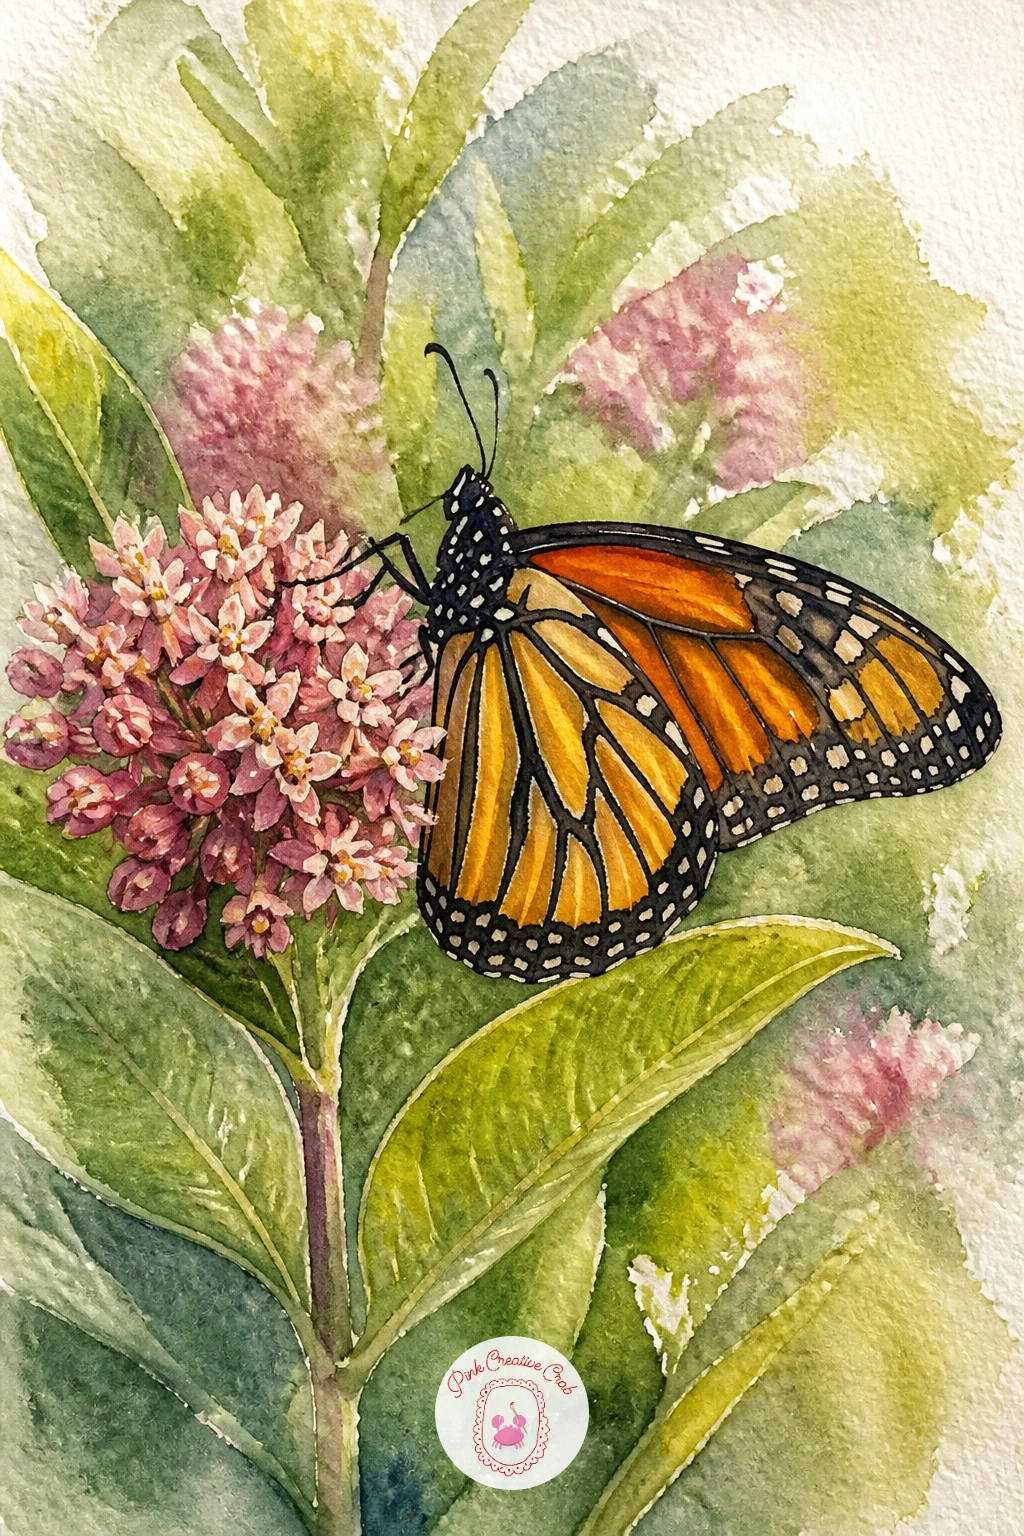
Shift the spotlight to the butterflies, starting with a monarch butterfly on milkweed, the pairing gardeners know best. Paint the milkweed’s narrow leaves and small clustered pink flowers first in cool green and dusty pink, then let the whole thing dry before the monarch lands on top.
Build the wings as two simple fans, orange with black veining and a border of white dots, painted symmetrically by folding your reference line down the center of the body first so both sides match.
Wing symmetry is where most people struggle. Paint one wing fully, then flip your paper upside down and trace the general shape lightly in pencil before painting the second wing, and the two sides line up far better than painting both from memory.
Short on black ink for the veining, use a very dark mix of Payne’s grey and burnt umber instead.
You Will Need
- waterproof fine liner pen
Palette: Cadmium Orange,Ivory Black,Titanium White,Sap Green
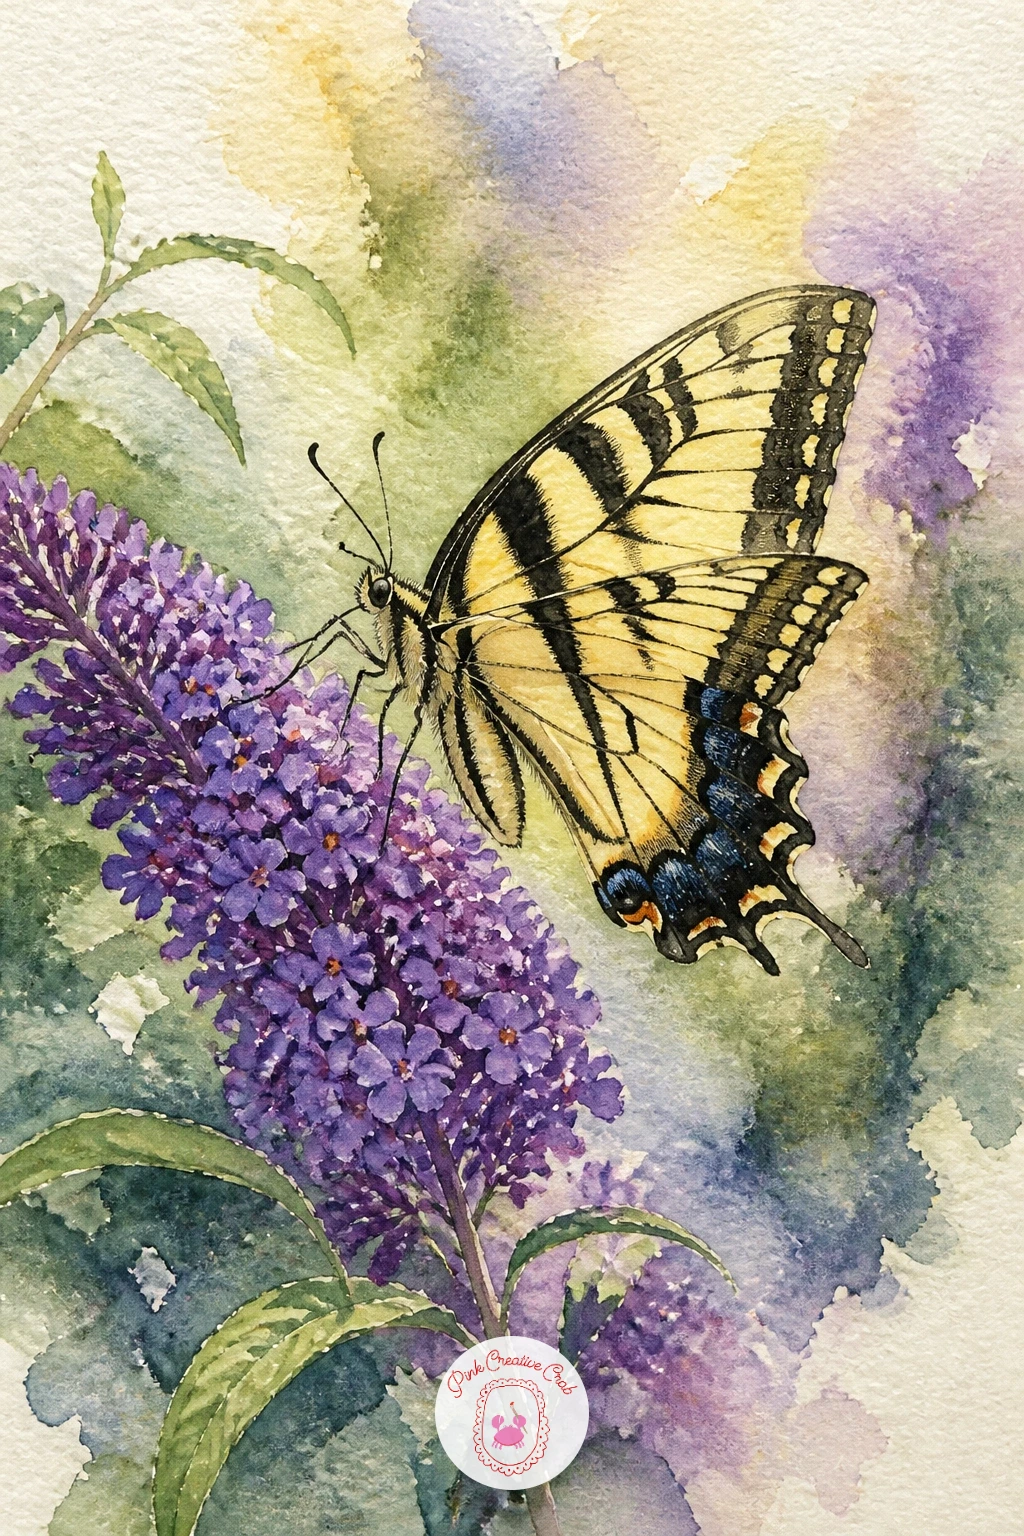
Follow with a swallowtail on a buddleia, pairing the long tapered wings with the butterfly bush’s drooping purple flower spikes. Paint the buddleia spike first as a loose cone shape built from dozens of tiny dabbed dots in violet and pink, denser at the top and looser toward the base.
Once dry, paint the swallowtail with its distinctive wing tails, a pale yellow base washed first, then black stripes and a touch of blue and red near the tail added once that yellow is bone dry so the colors stay crisp rather than muddy.
A ten-minute version covers the flower spike loosely and a simple butterfly silhouette; the forty-minute version adds the black stripe detail, the tiny blue scales near the tail, and a second swallowtail further back for depth.
If your violet looks flat, mix in the faintest touch of blue toward the top of the spike.
Palette: Dioxazine Violet,Cadmium Yellow,Ivory Black,Cerulean Blue
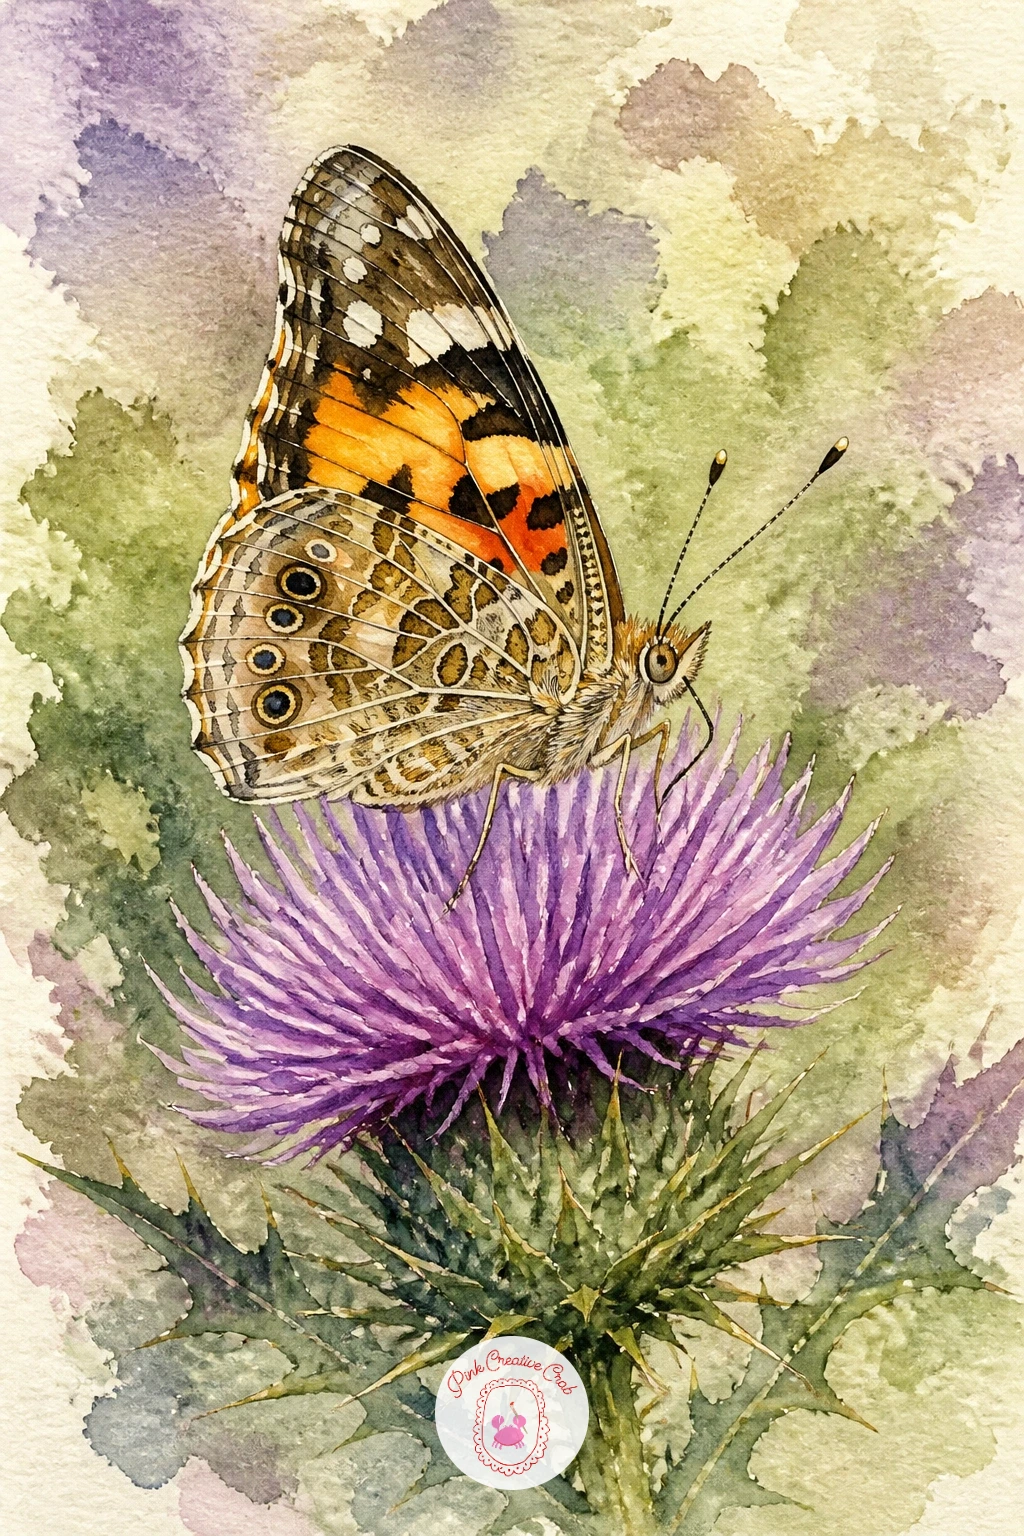
Give the prickly plants a turn with a painted lady on thistle, a nice contrast between a spiky flower and a soft, patterned wing. Paint the thistle head first as a round, bristly puff in violet-pink, flicking outward strokes with a nearly dry brush so the texture reads as spiky rather than fuzzy.
Let it dry, then paint the painted lady’s wings in warm orange and brown with small black and white eyespots near the edges, keeping the pattern looser and more mottled than the crisp stripes of a monarch.
Compare the butterfly’s wingspan to the width of the thistle head before you paint, it should sit a little smaller than the flower, and that single check stops the butterfly looking oversized against its perch.
Dry-brushing feels scratchy at first, practice the thistle texture on scrap paper before committing to the final piece.
Palette: Dioxazine Violet,Burnt Orange,Ivory Black,Titanium White
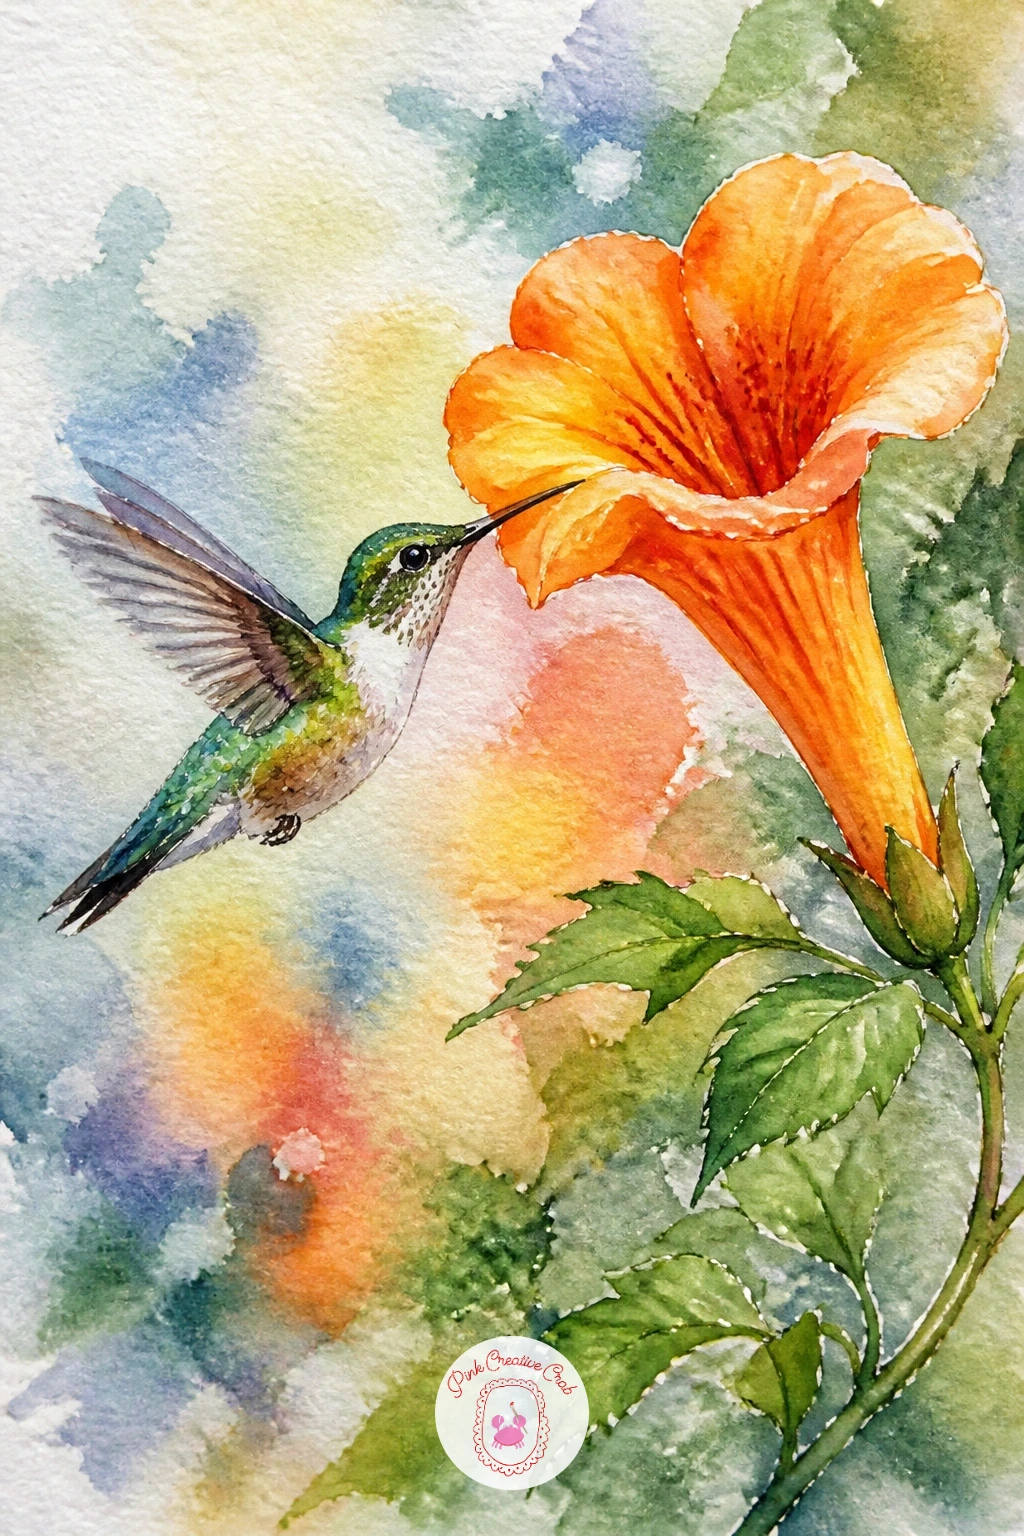
Bring in the birds with a hummingbird at a trumpet flower, the long curved beak reaching into the long orange bloom. Paint the trumpet-shaped flower first, a simple cone opening toward the viewer, warm orange fading to yellow deep in the throat where the nectar sits.
Once dry, paint the hummingbird hovering just in front, body first in iridescent green built from a thin blue-green wash with a touch of violet dropped in wet, then the wings as a soft blur rather than two solid shapes, since real hummingbird wings move too fast to see clearly.
The beak is the detail that makes or breaks this one. Keep it thin, slightly curved, and exactly long enough to reach into the flower’s throat, measuring that length against the bird’s head before you commit to ink.
For more bird-painting groundwork, the watercolor birds tutorial covers feather texture that transfers nicely here.
Palette: Viridian,Dioxazine Violet,Cadmium Orange,Cadmium Yellow
Move into dusk with a hawk moth at an evening primrose, pairing a pale, moon-colored flower with a fast, streamlined moth. Paint the evening primrose first in soft pale yellow, its petals slightly crumpled and delicate, since this flower opens only as the light fades.
Once dry, paint the hawk moth’s long narrow wings in muted grey-brown with a thin band of pink or orange near the body, and give it a long thin proboscis reaching toward the flower’s center rather than a visible mouth.
Think about the light source: with the sun nearly gone, keep your whole palette cooler and dimmer than a daytime scene, adding just one warm touch, maybe a pink glow near the flower’s center, so the eye still has somewhere warm to land.
If grey-brown feels dull on its own, warm it slightly with a touch of burnt sienna mixed in.
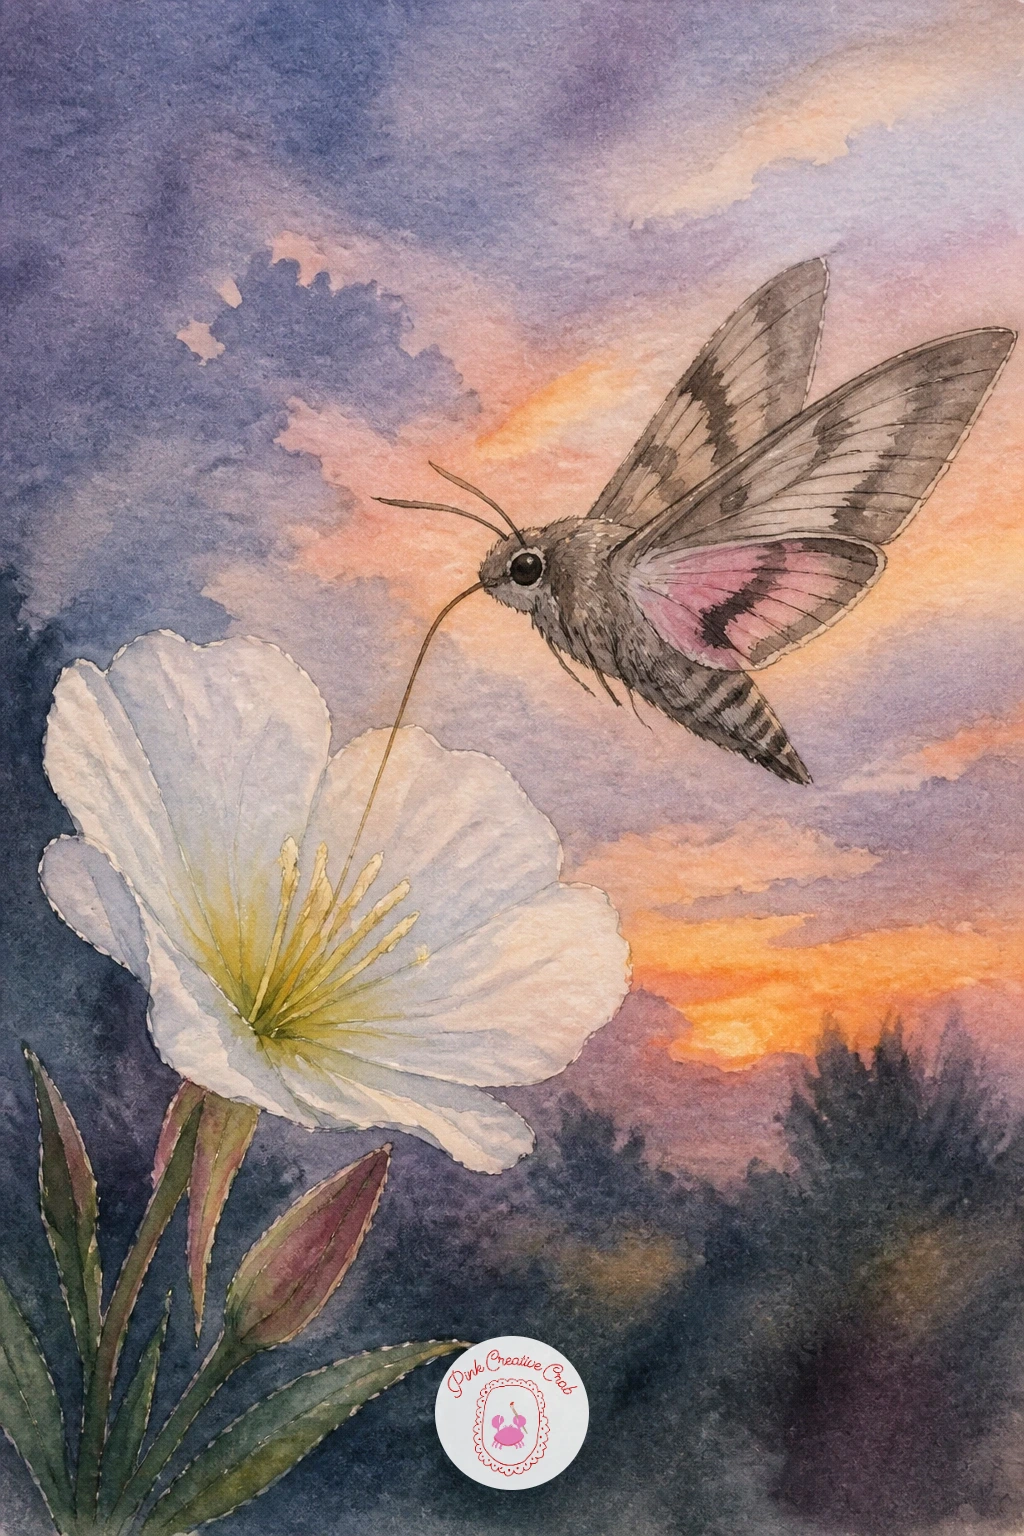
Palette: Payne’s Grey,Burnt Sienna,Naples Yellow,Quinacridone Rose
Keep the night mood going with a luna moth by a lantern, its pale green wings glowing softly against the warm light. Paint the lantern first as a simple glass shape with a warm orange glow inside, letting that color bleed softly outward into the dark background while the paper is still damp.
Once the glow is dry, paint the luna moth’s wide pale green wings resting just beside the light, including the long curved tails that trail from the hindwings, a detail that instantly identifies this moth over any other.
The glow is the trickiest effect here. Work the warm orange from the inside outward and stop while the edge is still soft and damp, rather than painting a hard circle of color, so the light looks like it’s actually spilling into the dark.
For a deeper background, try the easy watercolor skies ideas for blending dark, glowing night tones.
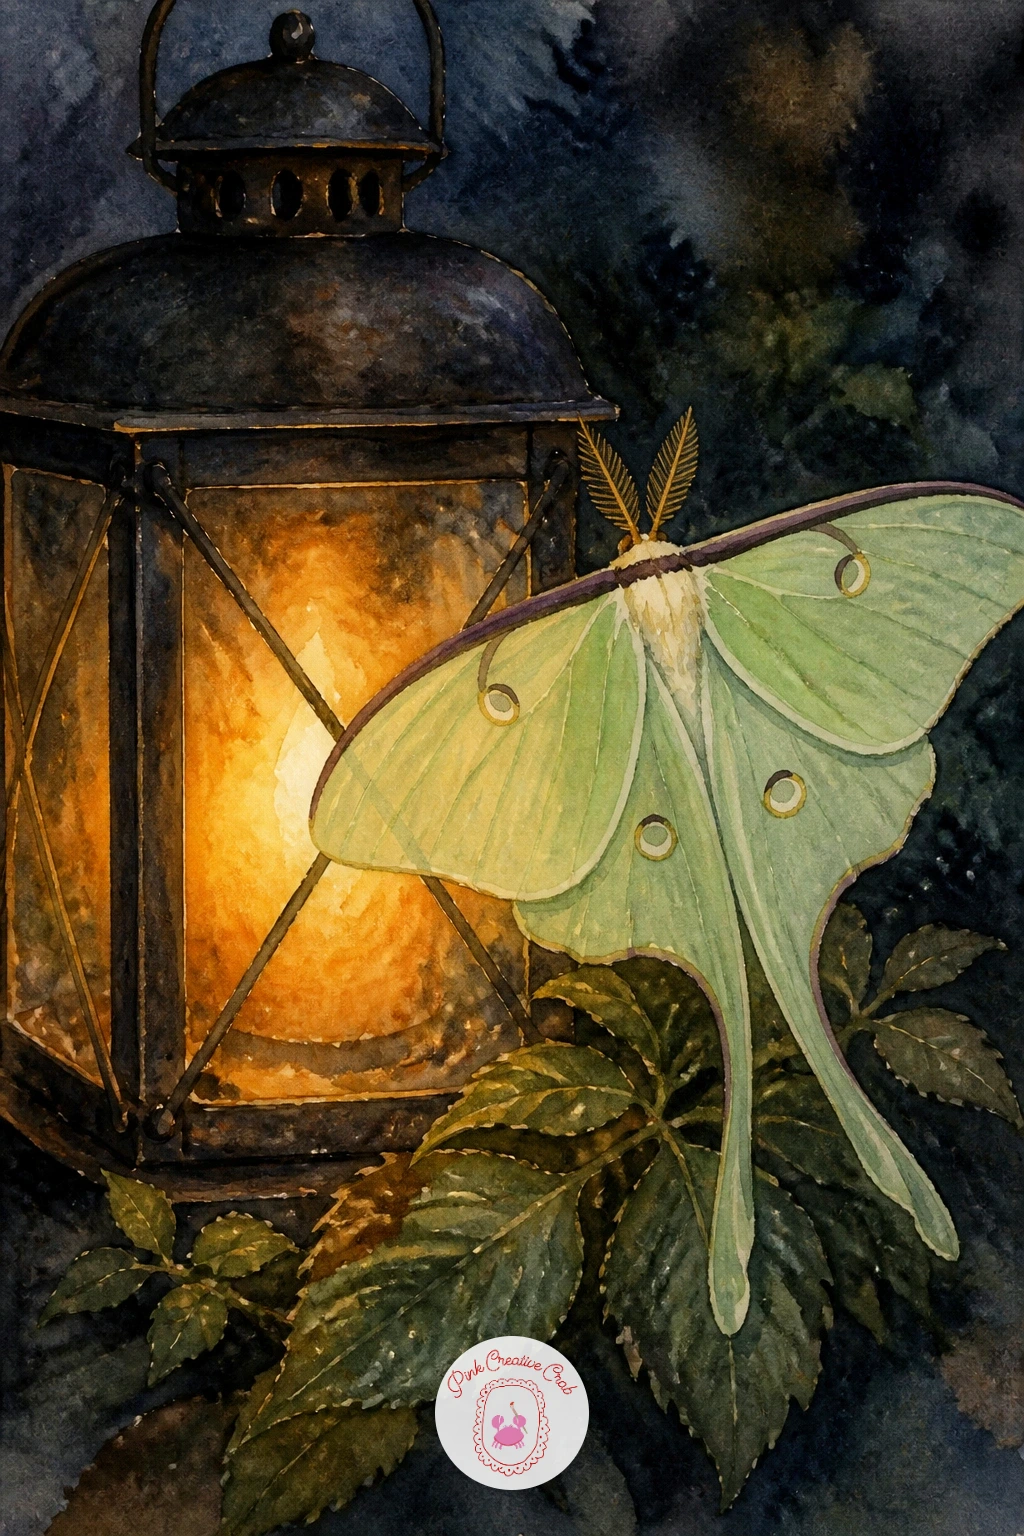
Palette: Viridian,Naples Yellow,Payne’s Grey,Cadmium Orange
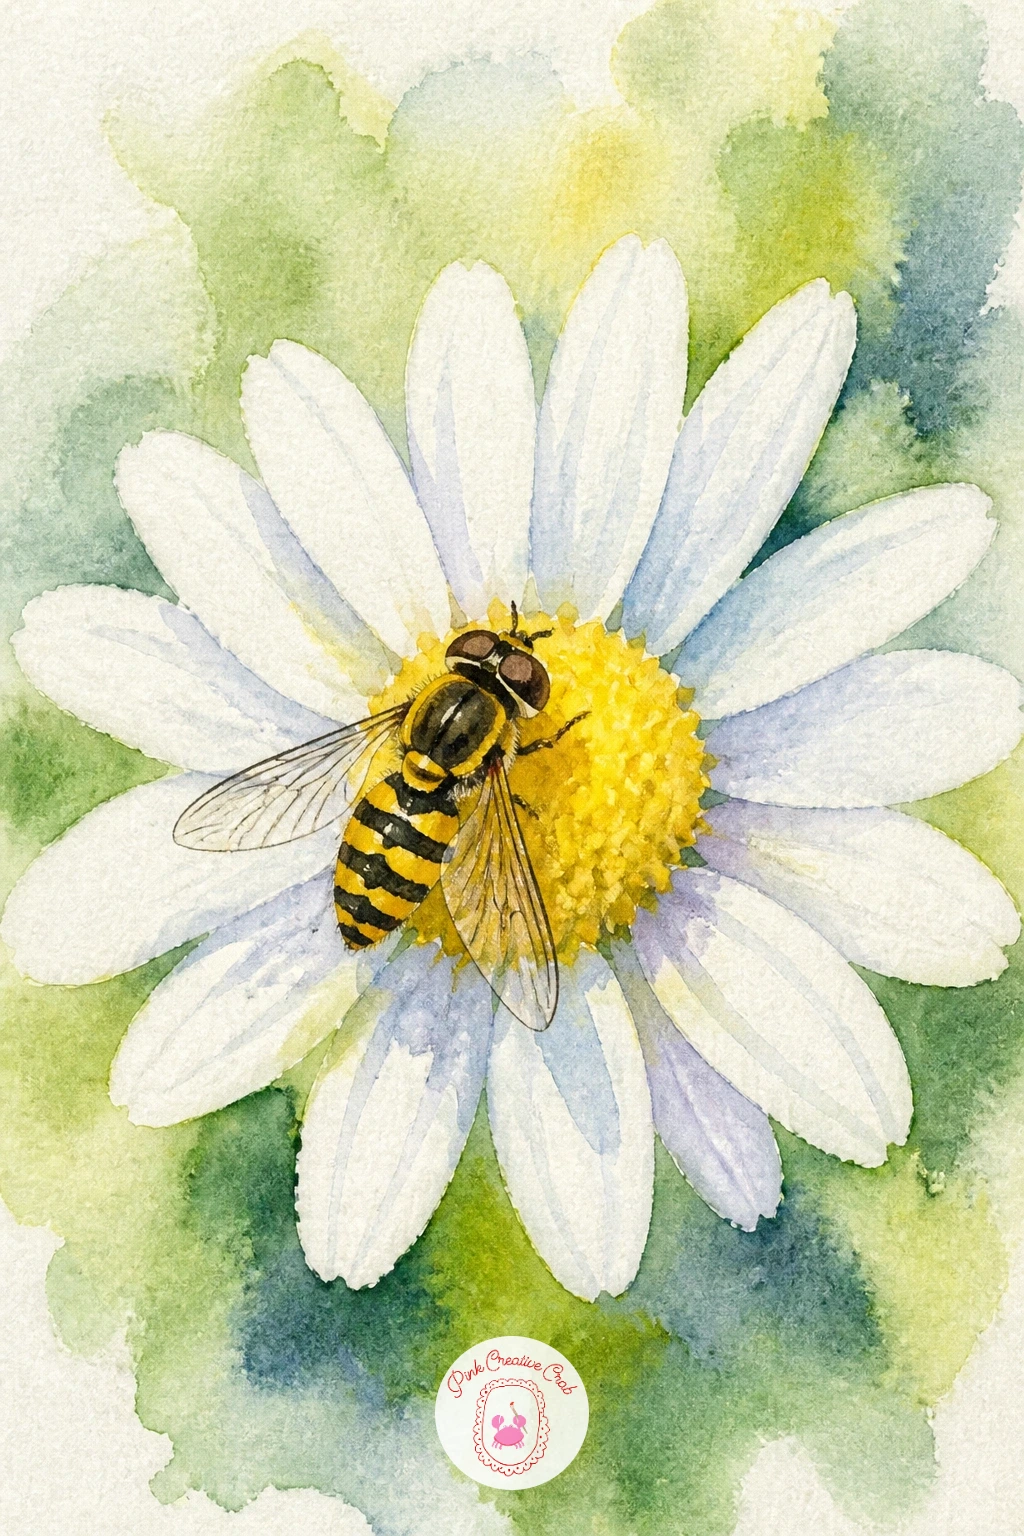
Return to a bright, easy subject with a hoverfly on a daisy, a small and forgiving pairing for anyone wanting a quick palette cleanser after the night scenes. Paint the daisy first with simple white petals radiating from a bright yellow center, leaving the petal tips untouched white paper rather than painting them flat.
Let it dry, then paint the hoverfly small and neat, a narrower body than a bee with thinner yellow and black bands and clear, veined wings held flat rather than folded.
If this is your first time painting insect wings, keep them almost transparent, just the faintest grey wash with two or three fine pen lines for veins, since overworking them is what makes wings look heavy instead of light.
Short on space for a full daisy, paint just two or three petals in the corner with the hoverfly close to the center.
You Will Need
- waterproof fine liner pen
Palette: Cadmium Yellow,Titanium White,Ivory Black,Sap Green
Take the night theme further with a fruit bat at a night flower, an unexpected pollinator for anyone who wants something a little different. Paint a large pale night-blooming flower first, something like a moonflower, with soft white petals that catch what little light there is.
Once dry, paint the fruit bat’s dark wings as two broad curved shapes stretched wide, using a nearly black mix of Payne’s grey and burnt umber, then add the small furry body and face in warm brown so it doesn’t read as too sinister.
Getting the wing shape wrong is the easiest slip. Look at the bat’s wing as one continuous curved membrane rather than feathered like a bird, stretching from a long finger bone to the body, and a single smooth sweep of the brush captures that better than several short strokes.
If full black feels harsh, soften it with a touch of ultramarine mixed in.
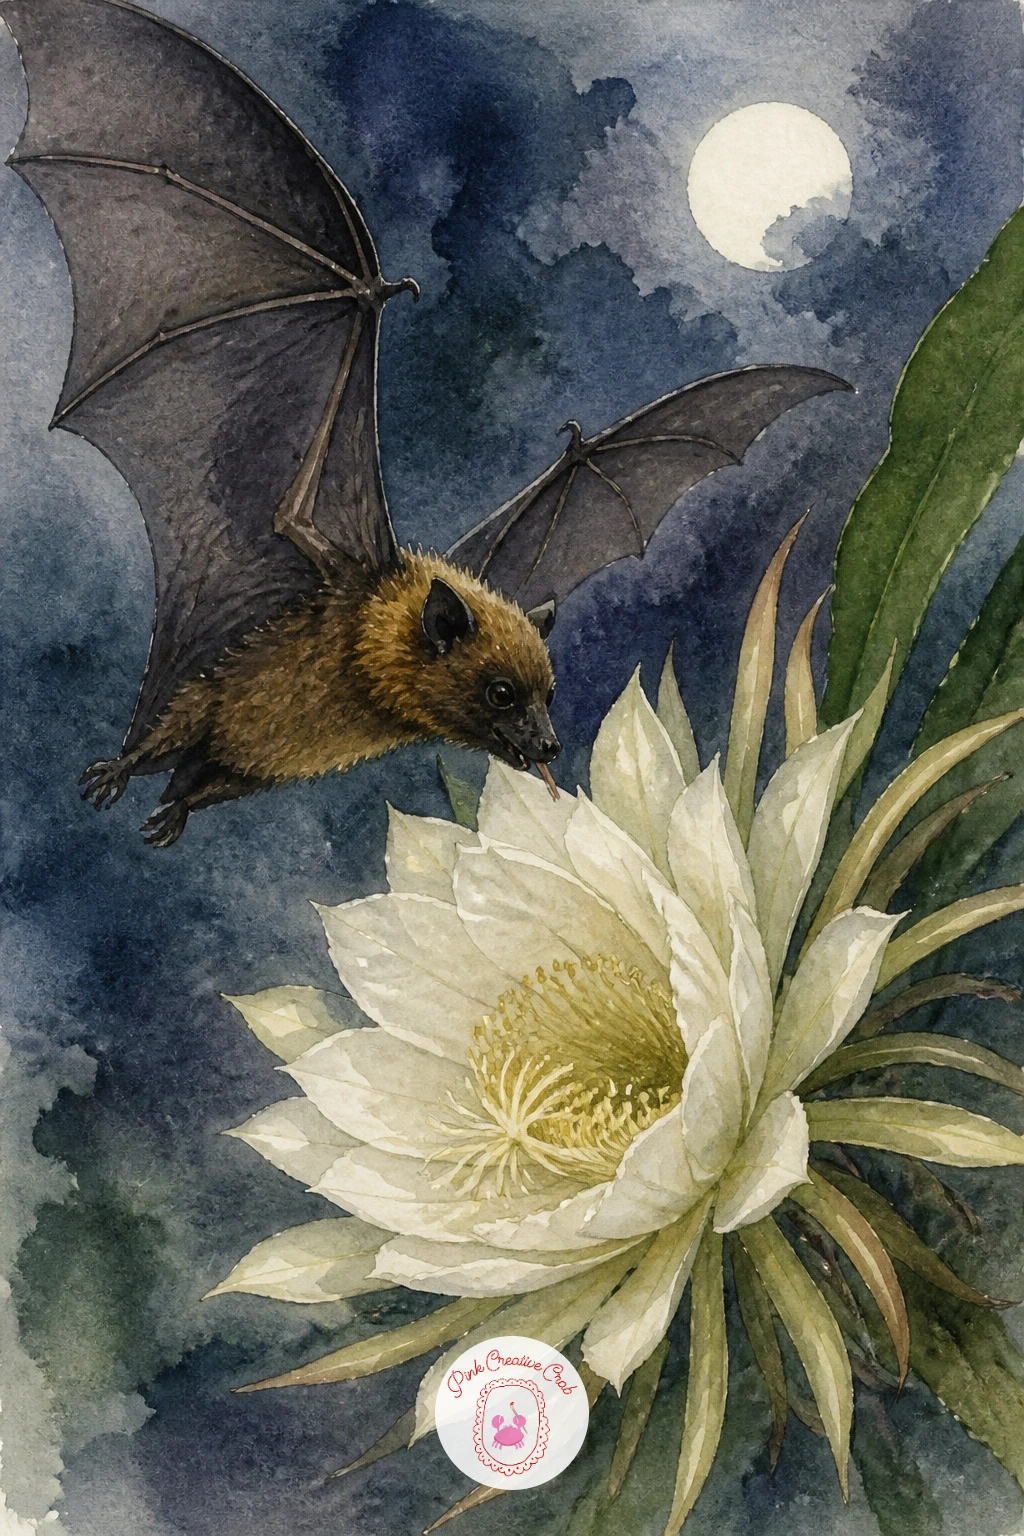
Palette: Payne’s Grey,Burnt Umber,Titanium White,Ultramarine Blue
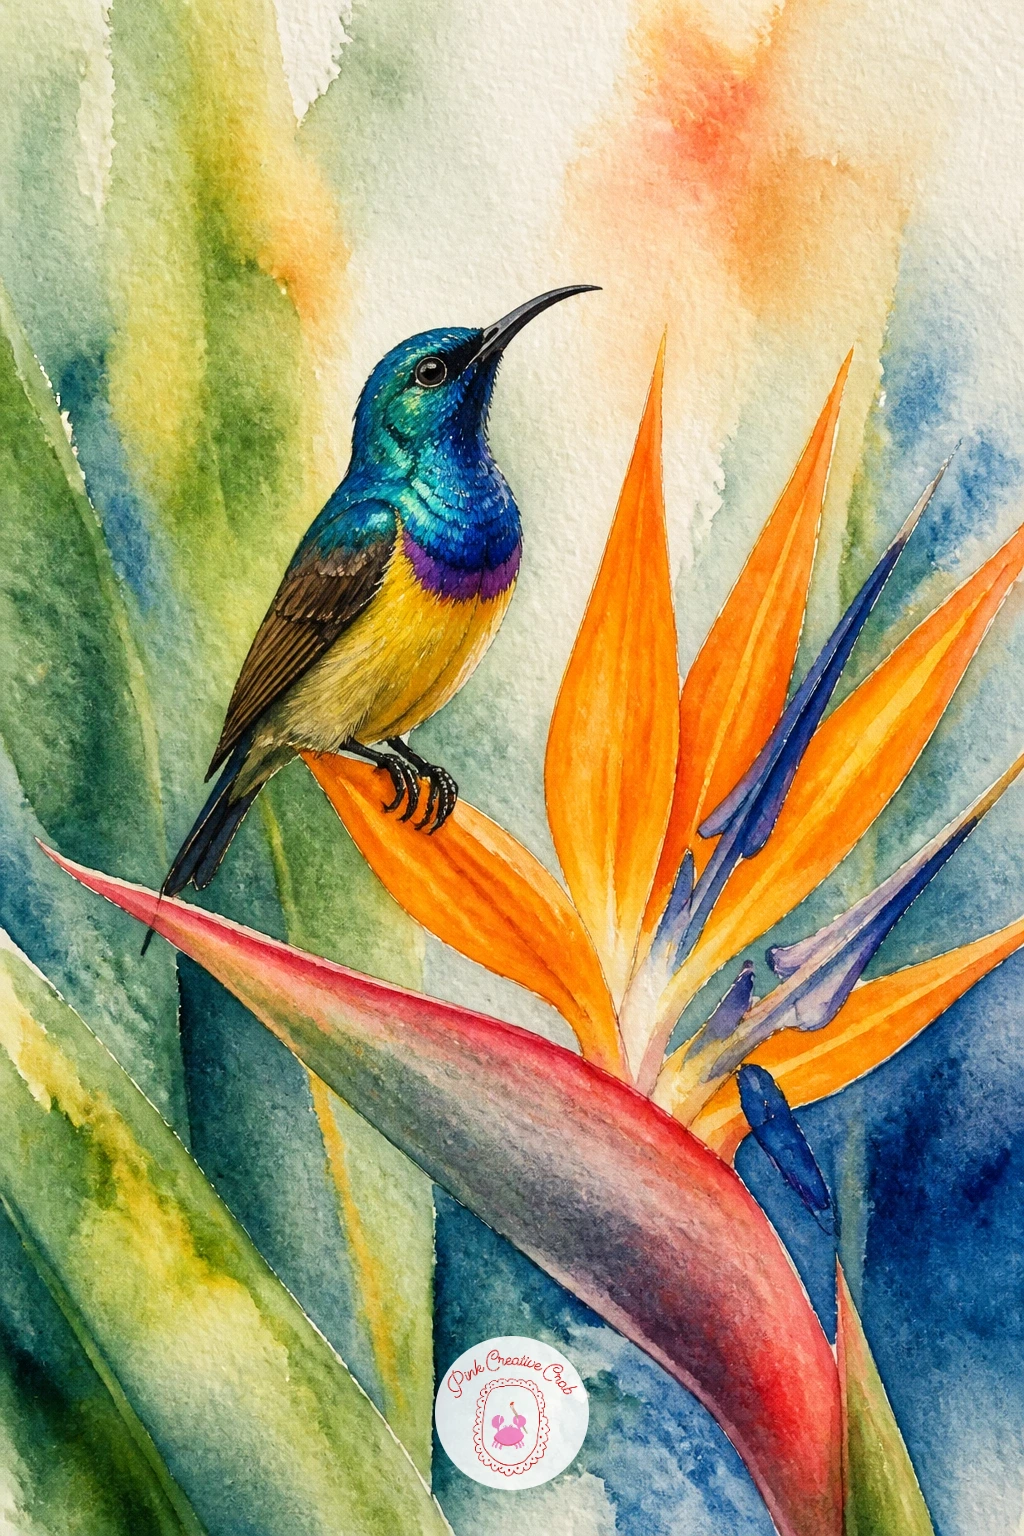
Bring in a jewel-toned bird with a sunbird on a bird of paradise flower, a bold, exotic pairing full of color. Paint the bird of paradise flower first, its sharp orange and blue petals fanning out like a crown, using crisp edges here rather than soft ones since this flower has a naturally architectural, pointed shape.
Once dry, paint the sunbird’s iridescent throat in shifting blue-green and violet, dropping the colors in wet-into-wet so they blend into each other the way real iridescent feathers shift in the light, then add the long thin curved beak last.
Compare the curve of the beak to the curve of the flower’s petals before you paint, since echoing that same curve ties the bird and flower together as one composition rather than two separate shapes placed side by side.
If blue-green and violet fight each other, paint one first and drop the second in while the first is still damp rather than side by side.
Palette: Cadmium Orange,Cerulean Blue,Dioxazine Violet,Viridian
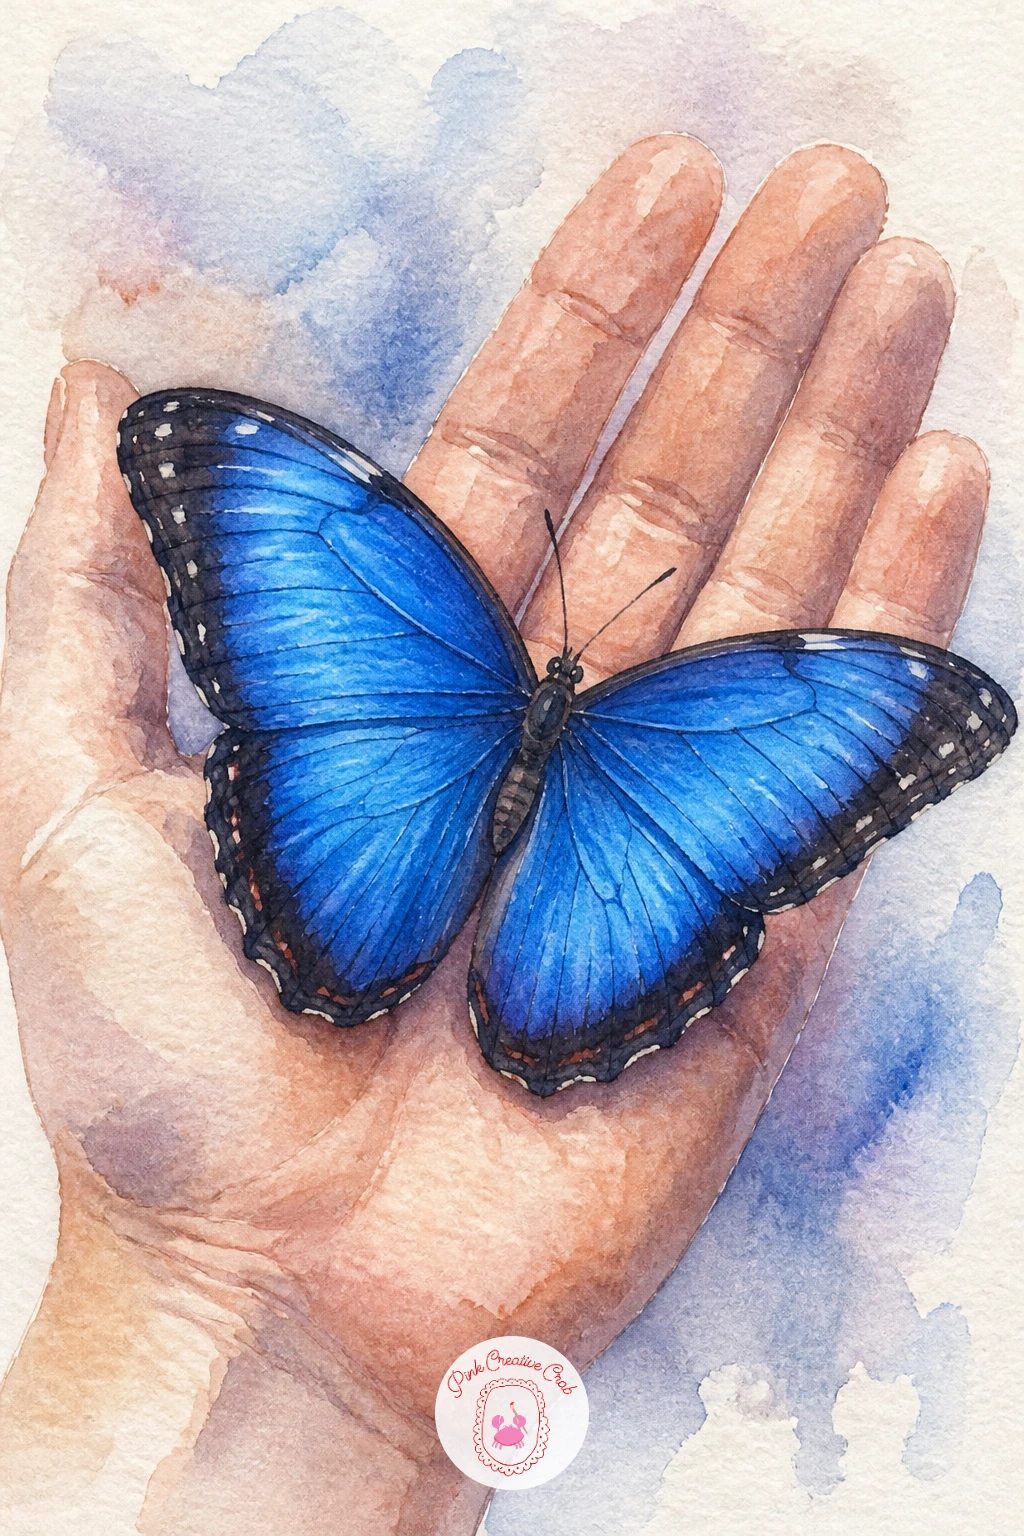
Shift the scale with a blue morpho on a hand, a lovely subject for anyone who wants to practice both an insect and a simple figure part in one sitting. Pencil in an open palm first, kept loose and simple with soft shadows between the fingers rather than hard outlines, then paint the skin tone in one thin, even wash.
Once the hand is dry, paint the morpho’s wings in brilliant electric blue, built from a strong wash of phthalo blue with a touch of white gel pen or a lifted highlight added once dry to suggest the wing’s natural shimmer.
Hands are notoriously tricky, so if this is your first attempt, simplify it to a flat palm and slightly curled fingers rather than a detailed grip, and let the vivid blue wings carry most of the visual interest instead.
No phthalo blue on hand, mix ultramarine with a touch of viridian for a similarly electric tone.
You Will Need
- white gel pen
Palette: Phthalo Blue,Ivory Black,Burnt Sienna,Titanium White
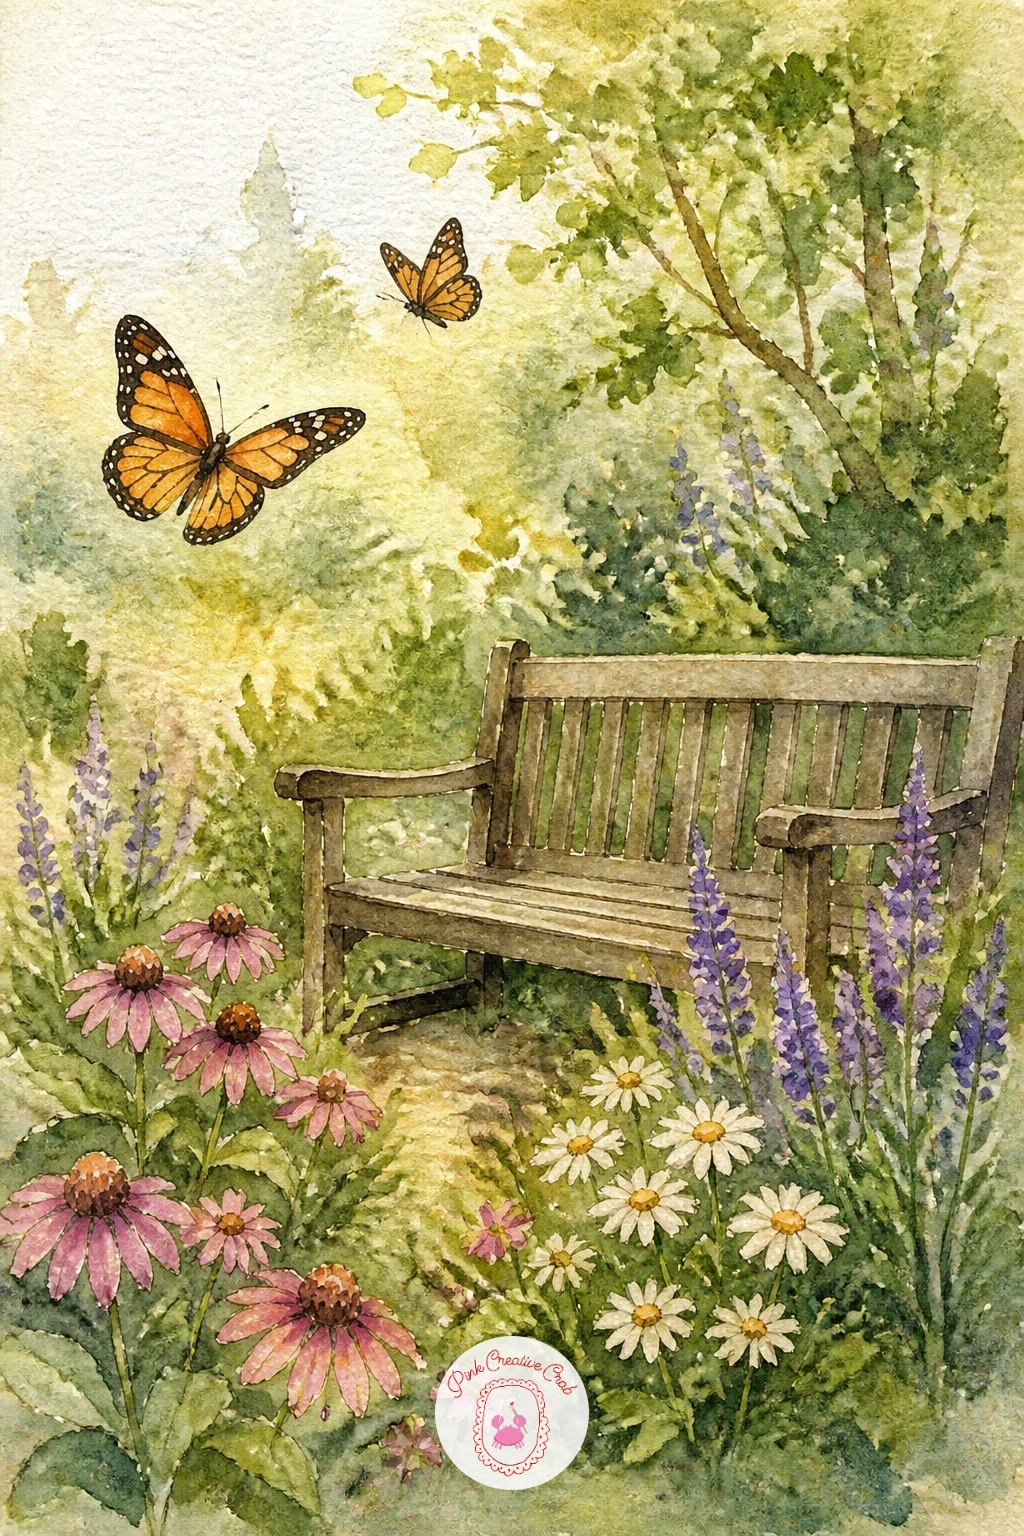
Widen the view with a butterfly garden with a bench, a small scene that lets several of your earlier flowers and butterflies share one page. Block in the garden loosely first, a wash of green for the lawn and looser dabs of color for distant flower beds, keeping everything soft and undetailed since it’s background.
Paint the bench next in simple weathered wood tones, using straight confident lines for its structure since it’s the one hard-edged object in an otherwise soft scene, then scatter two or three butterflies around it once everything else is dry.
A ten-minute version keeps the bench small and empty with just one butterfly nearby; the forty-minute version adds climbing flowers along the bench legs and three or four different butterflies at varied distances for more depth.
If straight lines intimidate you, use a ruler for just the pencil stage, then paint freehand over your guide.
Palette: Sap Green,Burnt Umber,Cadmium Orange,Dioxazine Violet
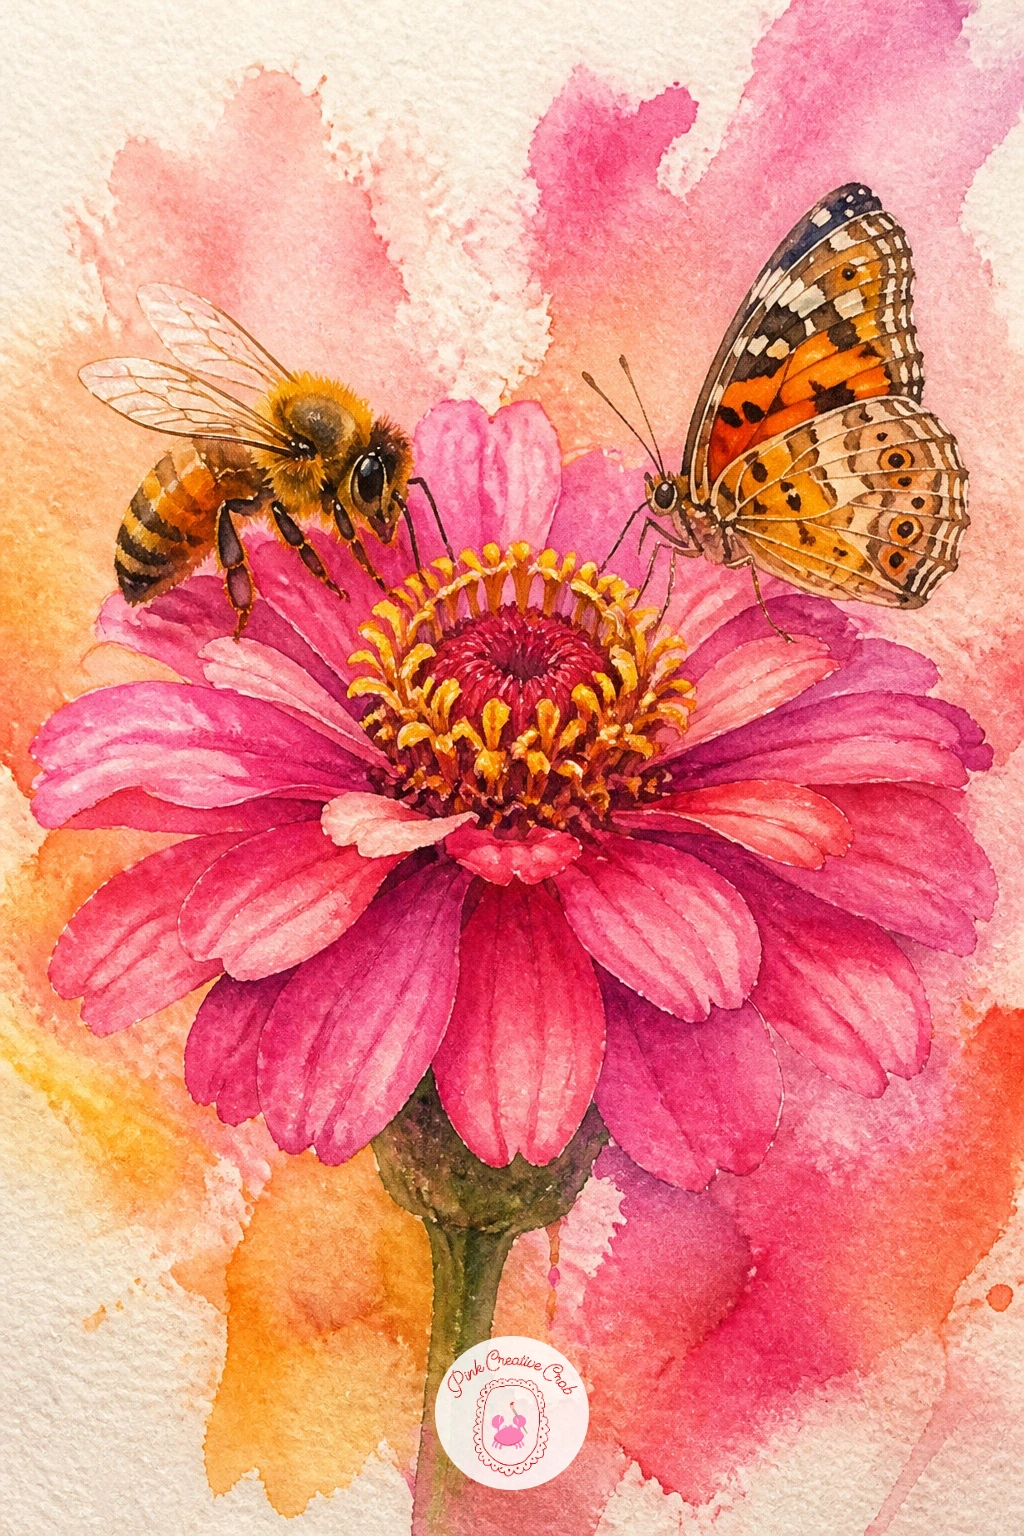
Bring your pollinators together with bees and butterflies sharing one zinnia, a single bold flower busy with visitors. Paint the zinnia first with its many layered, slightly pointed petals in hot pink or orange, working from the outer petals in toward the flat, textured center.
Once dry, add one bee and one small butterfly perched on opposite sides of the flower, keeping them at different heights on the petals so they don’t visually collide into one shape.
Vary this one next time by swapping the zinnia for a dahlia or cosmos and changing which pollinators visit, the same approach of one bold flower with two small visitors works for almost any bloom in this list.
If the petals start looking too uniform, vary a few in length and tilt as you go, real zinnia petals are rarely perfectly even.
Palette: Quinacridone Rose,Cadmium Orange,Ivory Black,Sap Green
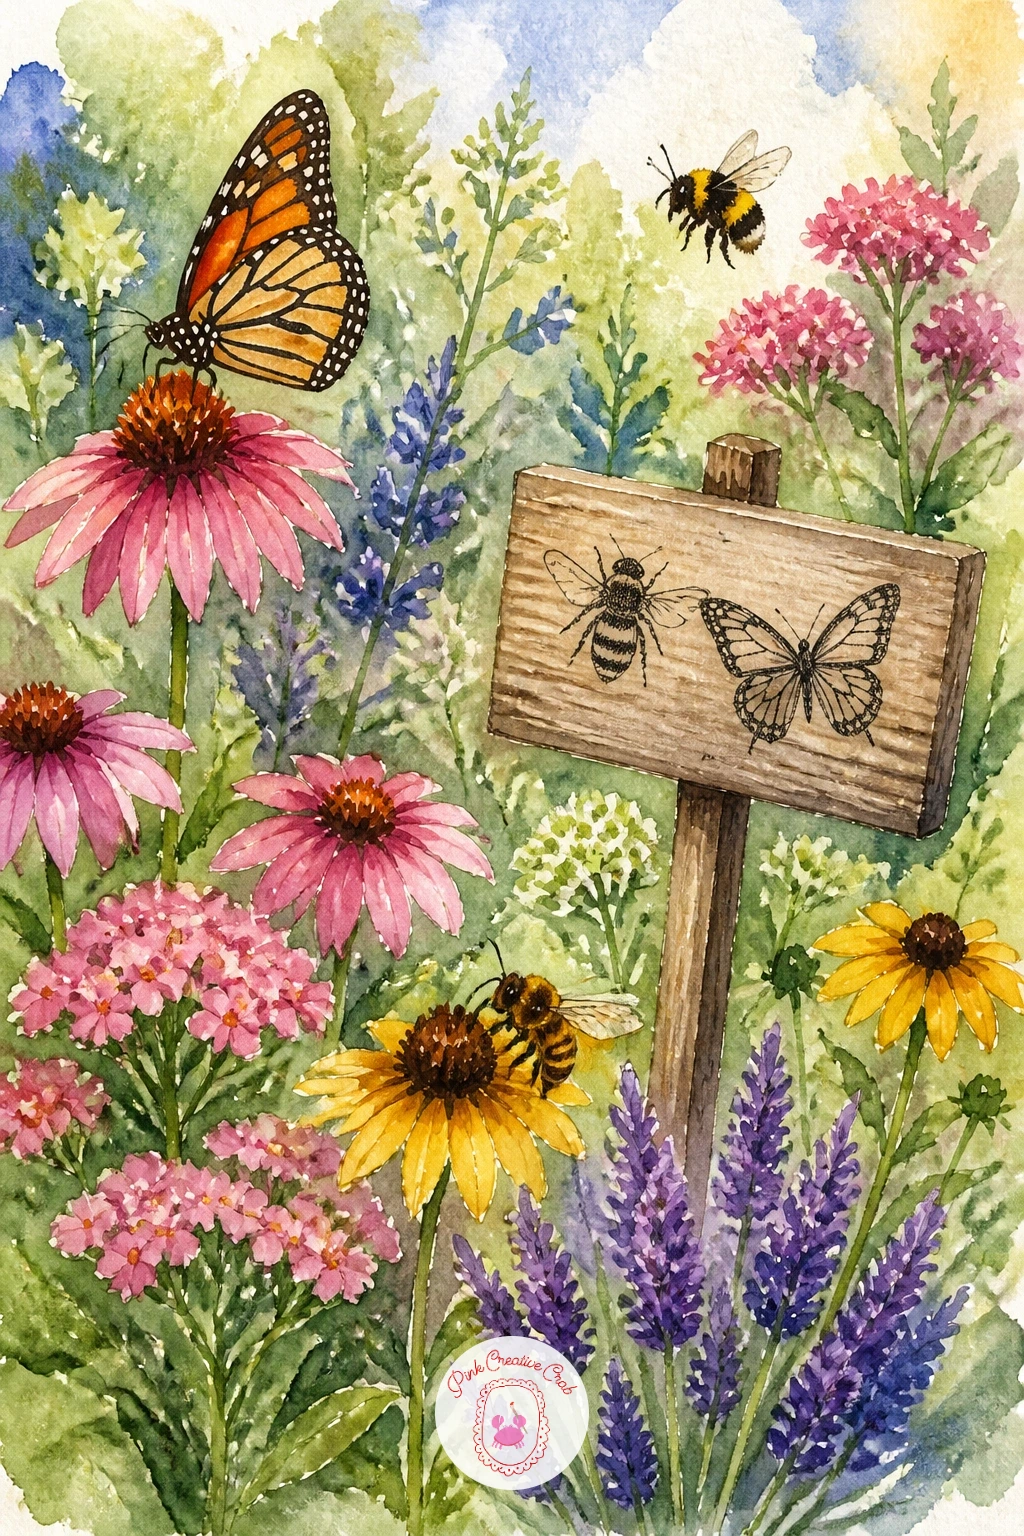
Add a message to the scene with a pollinator garden with a sign, the kind of small hand-painted marker real gardeners put up to protect these plants. Paint the garden bed first as a loose, layered mix of flowers and greenery, keeping the colors varied but the shapes simple so nothing competes with the sign.
Paint the wooden sign next on a thin post, a simple rectangle with rounded corners, then leave the lettering area as clean white space rather than attempting readable text, since small hand-lettering rarely survives a loose watercolor style.
The sign reads best with real weight behind it, so paint its shadow falling onto the grass beside it, matching the direction of light you’ve used for the rest of the garden so it feels anchored rather than floating.
If you’d like lettering practice separately, keep this piece simple and letter a caption afterward in pen once the paint is dry.
Palette: Sap Green,Burnt Umber,Quinacridone Rose,Cadmium Yellow
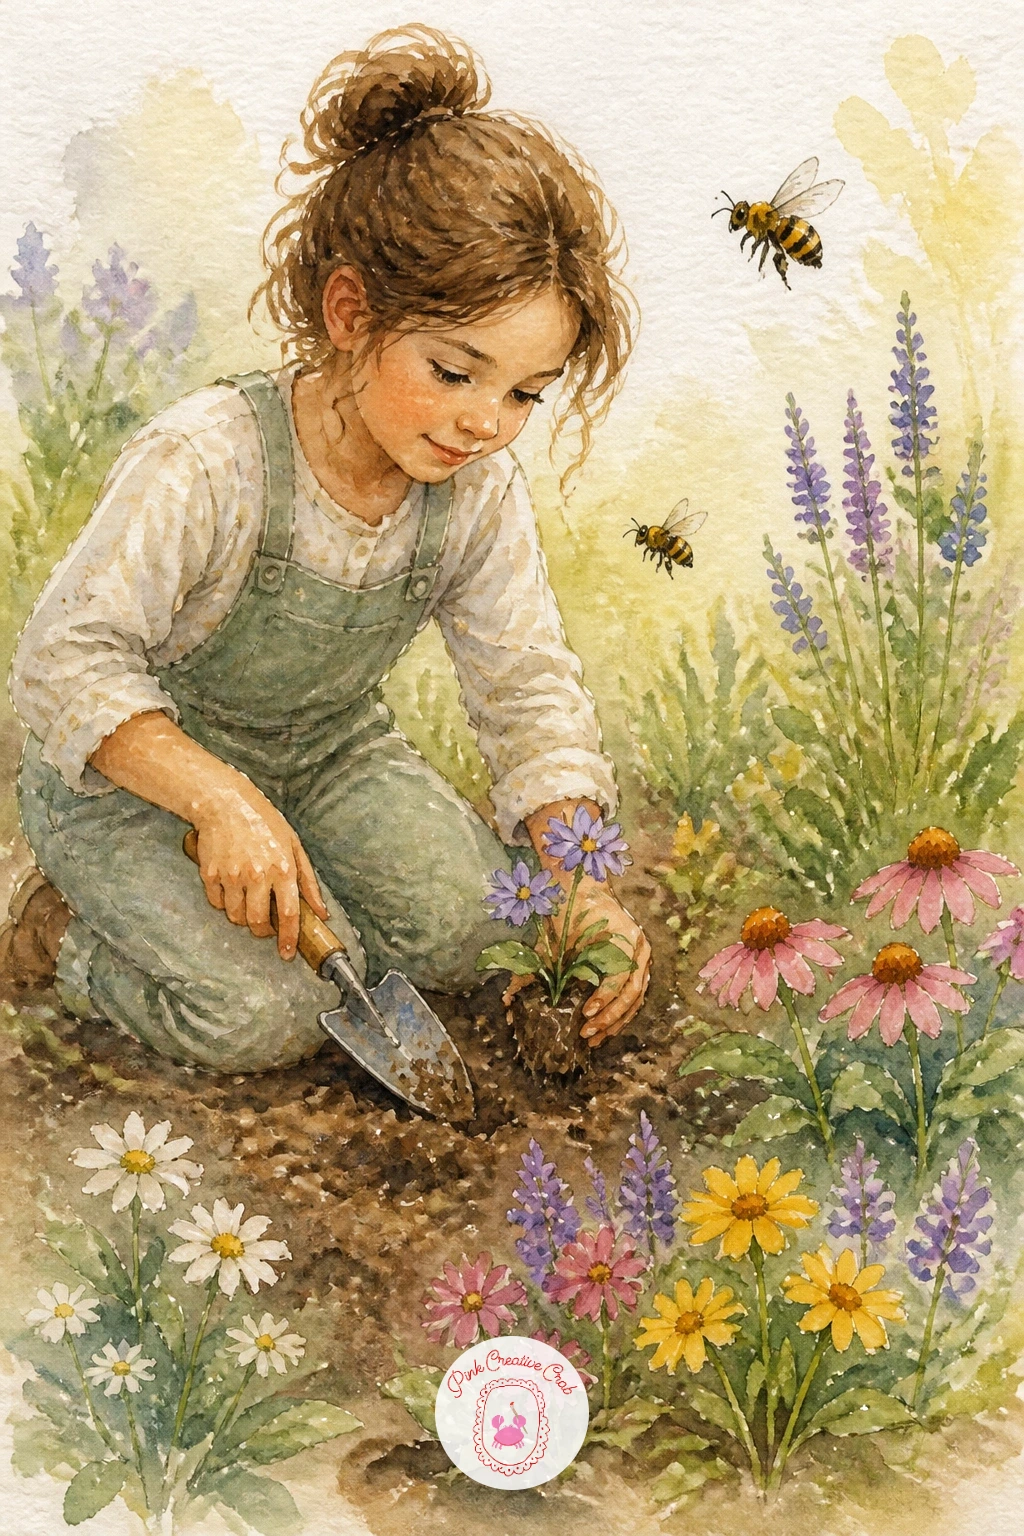
Bring in a gentle human moment with a girl planting flowers for bees, kneeling in the dirt with a small trowel. Sketch the figure first in a simple kneeling pose, checking that her bent knee and her shoulder line up roughly at the same height, a quick comparison that keeps a kneeling figure from looking off-balance.
Paint her clothing in soft, muted tones so she doesn’t outshine the flowers, then add the small flat of seedlings beside her and a scatter of loose soil dabbed in with a dry brush.
Faces and hands are the two places this painting can go wrong fast. Keep her face turned slightly away or down toward her work, and simplify her hands to soft rounded shapes around the trowel handle rather than individual fingers.
If full figures feel daunting, crop the scene to just her hands, the trowel, and the seedlings for an easier version with the same warmth.
Palette: Sap Green,Burnt Umber,Quinacridone Rose,Naples Yellow
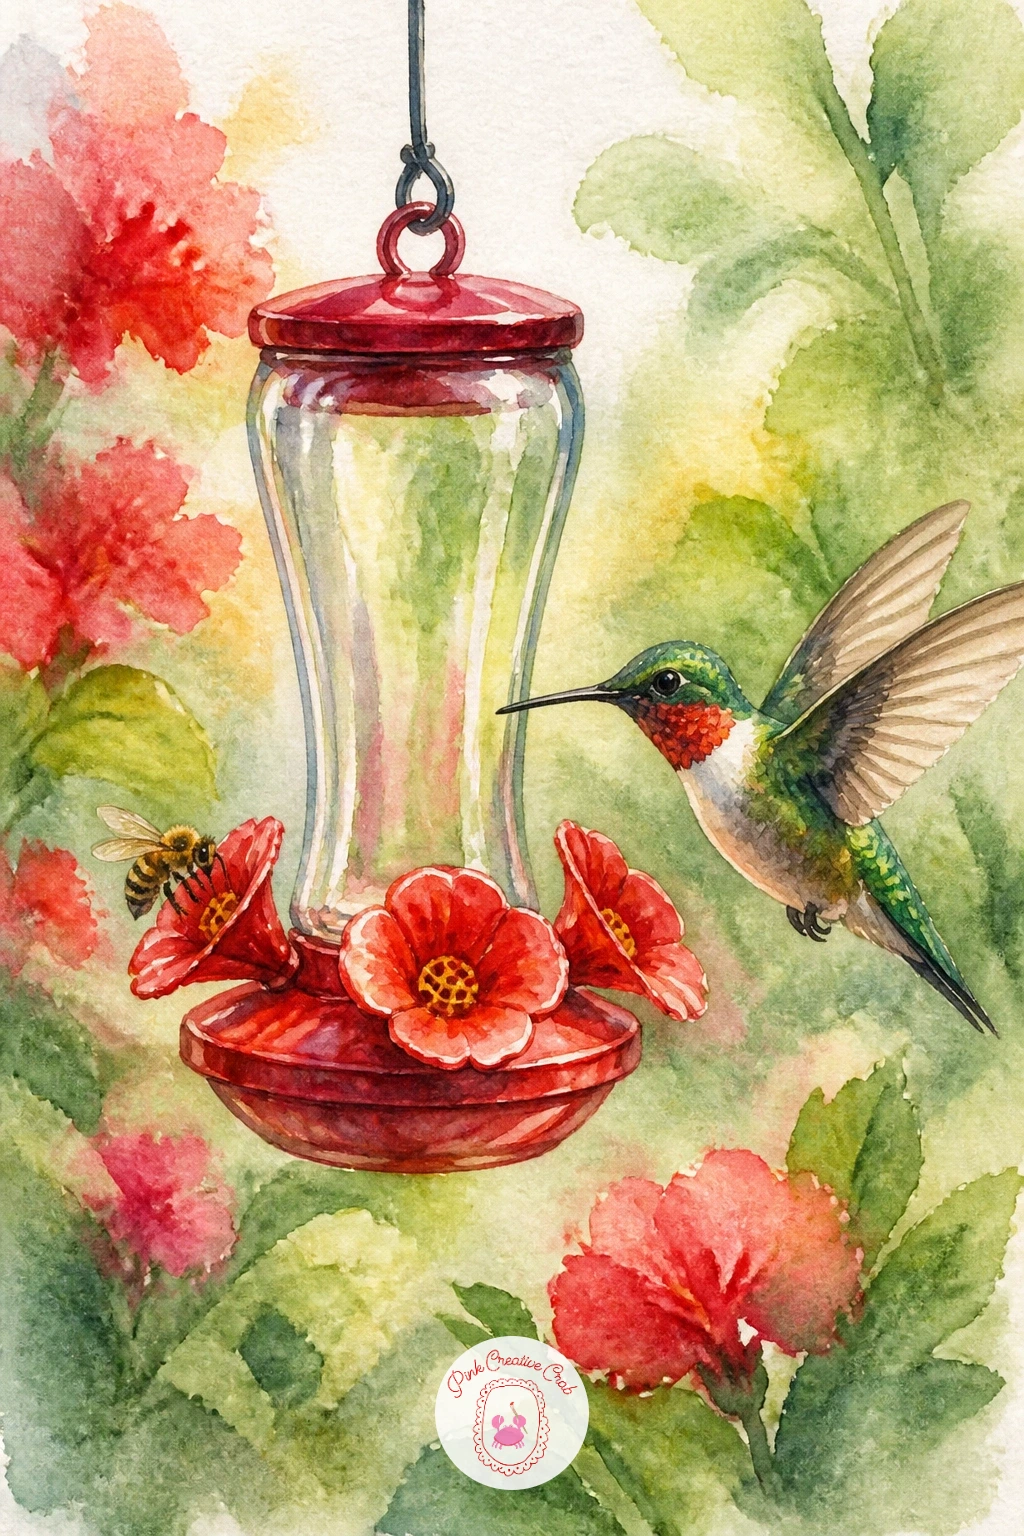
Pair two very different visitors with a bee and a hummingbird at the same feeder, sharing one bright red perch. Paint the feeder first as a simple glass shape with red plastic flower ports, keeping the glass mostly transparent with just a hint of color at the edges and the sugar water visible inside.
Once dry, paint the hummingbird hovering at one port and the bee perched at another, making the hummingbird noticeably larger than the bee, a size comparison that instantly sells the scale of both creatures without needing anything else in the frame.
If the glass feeder looks muddy, keep your washes very thin and let plenty of white paper show through rather than filling the whole shape with color.
Short on red, a warm orange-red mix of cadmium red and a touch of yellow works just as well for the feeder ports.
Palette: Cadmium Red,Viridian,Yellow Ochre,Payne’s Grey
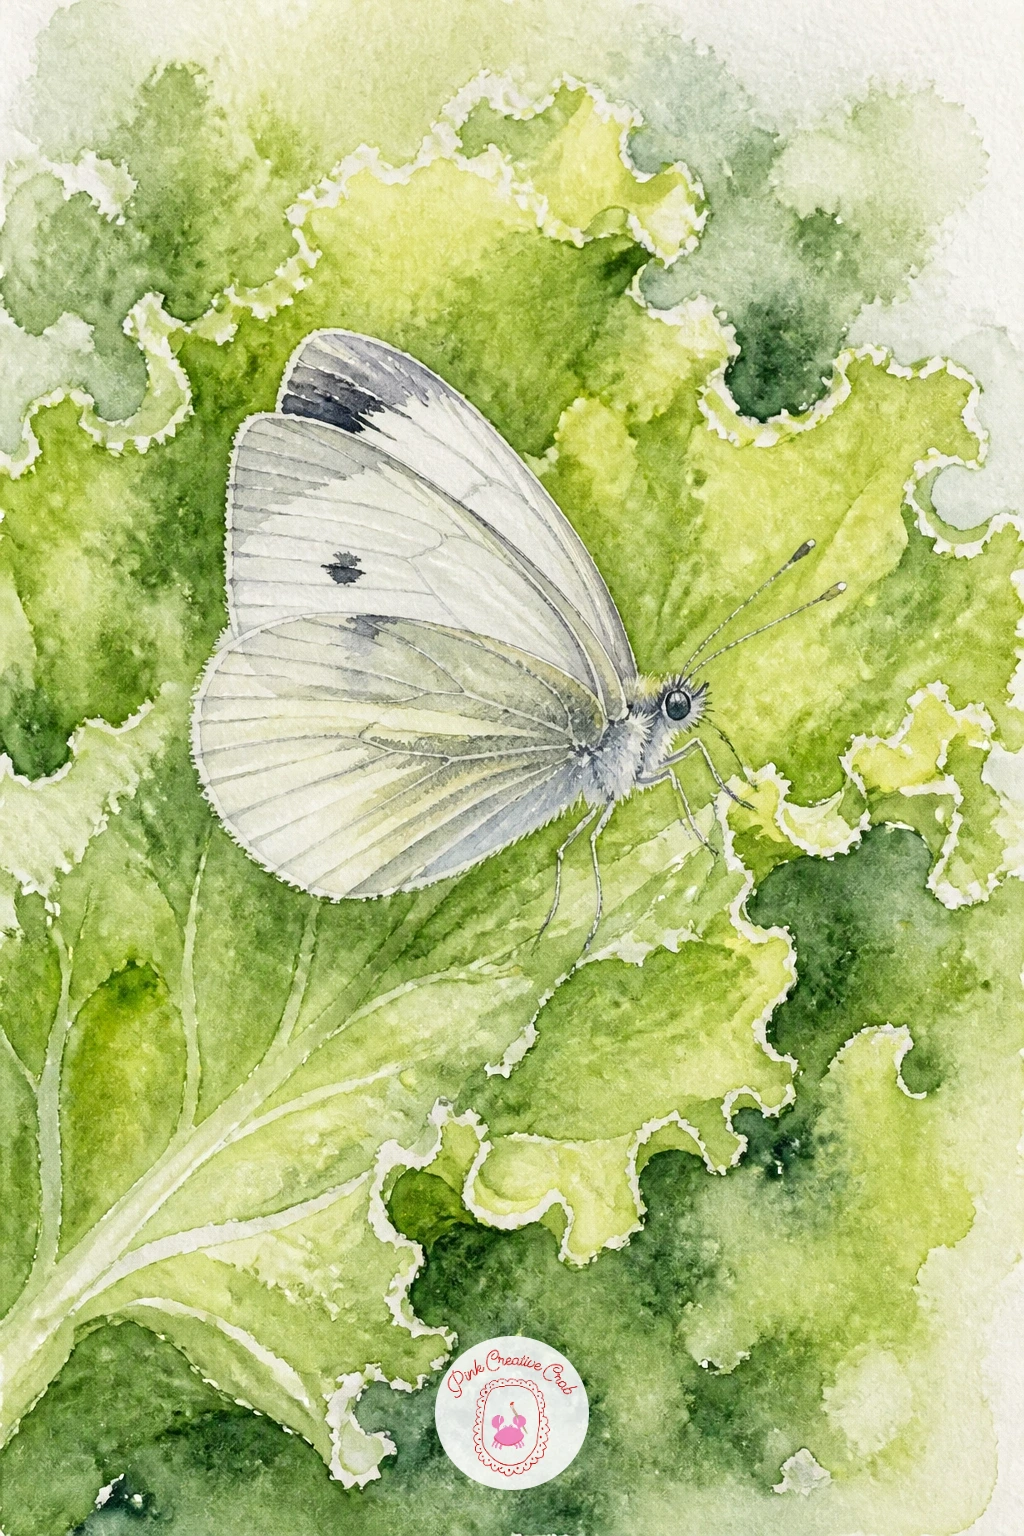
Head into the vegetable patch with a cabbage white butterfly on lettuce, a quieter, cooler-toned pairing than the earlier flower scenes. Paint the lettuce head first as layered, ruffled leaves in fresh green, working from the outer leaves inward and leaving the veins as thin unpainted lines of white paper.
Once dry, paint the small white butterfly resting on one outer leaf, its wings almost entirely white paper with just the faintest grey shadow and two small black dots, since this butterfly is defined by how little color it actually carries.
The leaves are the forgiving part here and the butterfly is the precise part. Mix your grey wash very thin before touching the wings, since cabbage whites lose their charm fast if the wings end up too heavy or too grey.
For more texture ideas on leafy vegetables, the easy watercolor food ideas cover similar ruffled greens.
Palette: Sap Green,Titanium White,Payne’s Grey,Ivory Black
Pair the day and night shifts with a bumblebee and a moth at dusk, both working the same patch of flowers as the light fades. Paint the background first in cooling violet-blue tones, darker than any daytime scene in this list, with one or two flower shapes kept simple and soft.
Once dry, paint the round, fuzzy bumblebee on one bloom and a plainer, moth with folded triangular wings on another nearby, their two different wing shapes doing most of the work to tell them apart at a glance.
Deciding where the last light sits matters most here: pick one edge of the painting to stay warmer and brighter, the rest cooling into violet and grey, and both insects will feel like they’re caught in the same fading moment rather than painted in two different lighting setups.
If violet-blue feels too heavy straight from the tube, thin it generously with water for the background wash.
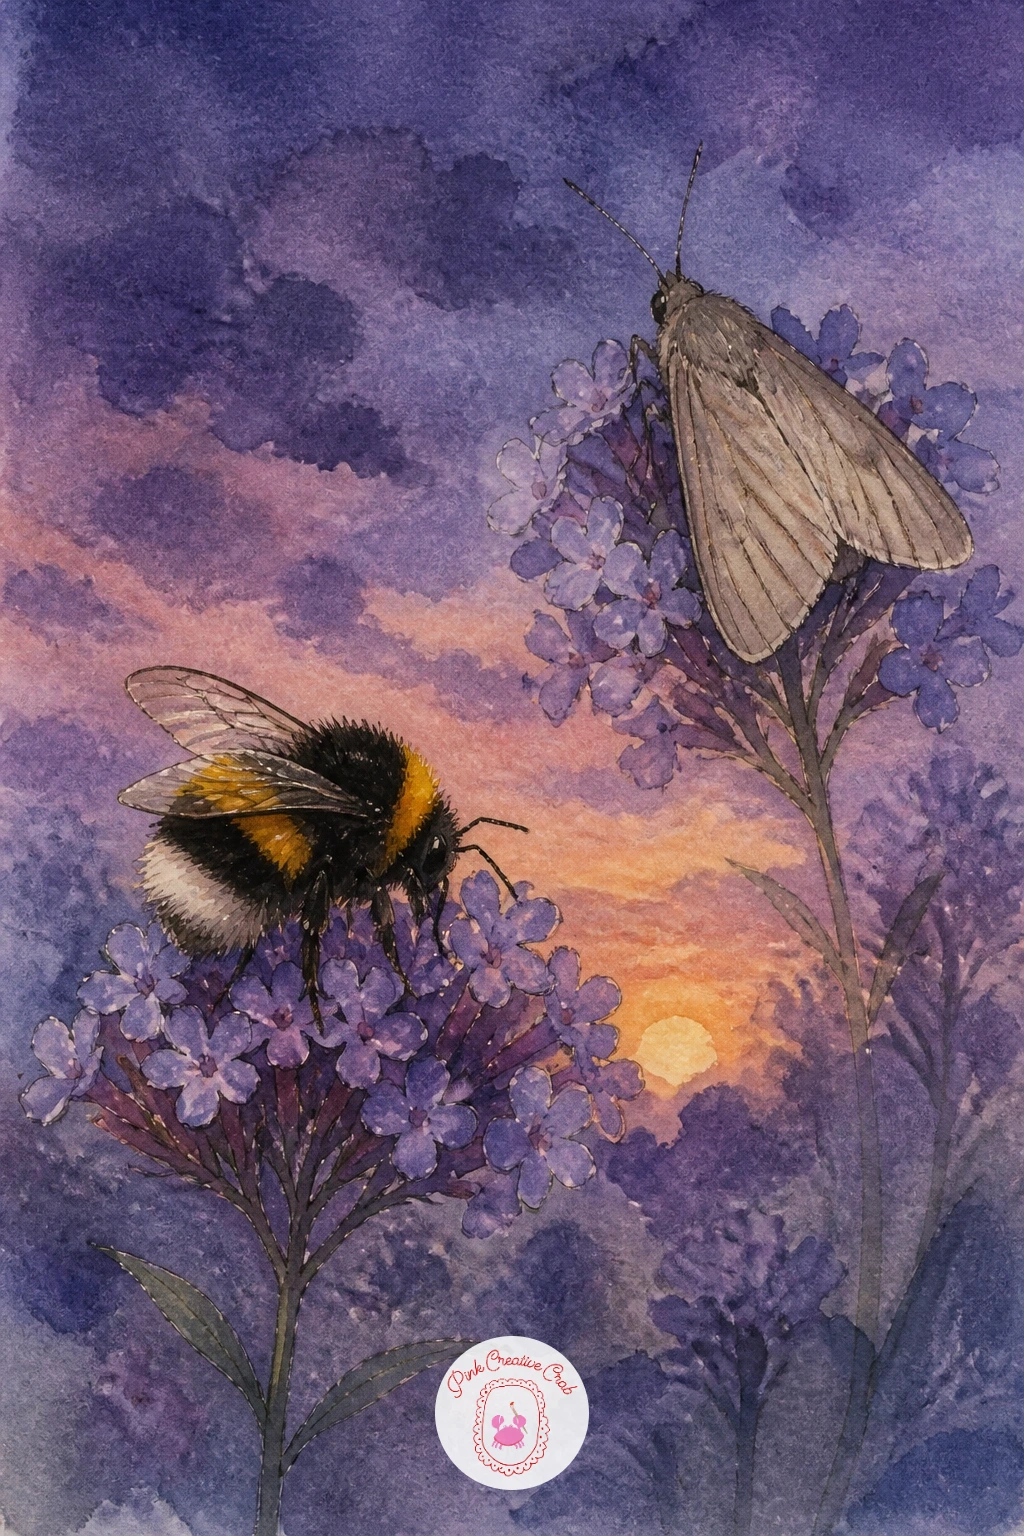
Palette: Dioxazine Violet,Payne’s Grey,Burnt Sienna,Cadmium Yellow
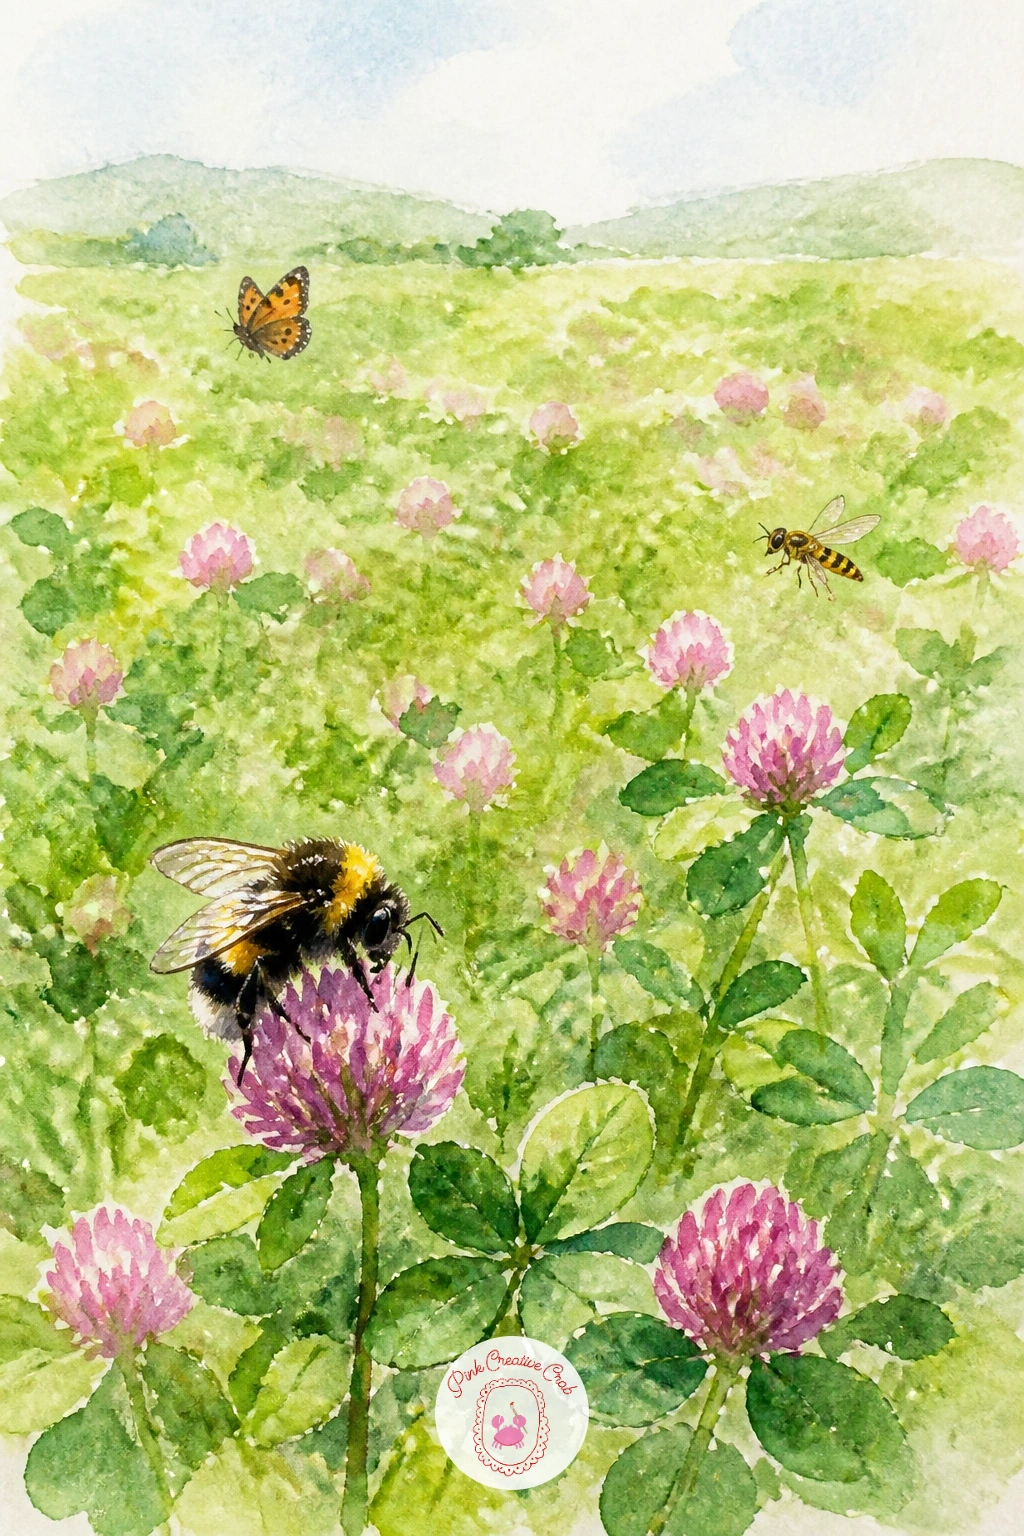
Palette: Sap Green,Quinacridone Pink,Titanium White,Cadmium Yellow
For a landscape warm-up before tackling the full field, the easy watercolor landscapes ideas cover similar loose wash backgrounds.
Close the list with a beeswax candle with a bee, a warm, quiet still life that ties the whole honey theme together. Paint the candle first as a simple tapered cylinder in warm honey gold, leaving a thin vertical highlight of white paper down one side to suggest the curve of the wax.
Once dry, paint a small flame at the top in bright yellow fading to soft orange at its base, then add one bee resting near the candle’s foot, as if drawn in by the warm beeswax scent.
The flame is the one spot of real contrast in an otherwise soft, golden painting, so keep its center nearly white and let the orange and yellow spread outward from there rather than painting the whole flame one flat color.
If you want a second piece from this same idea, follow it with the watercolor garden paintings for summer for more honey and garden color pairings.
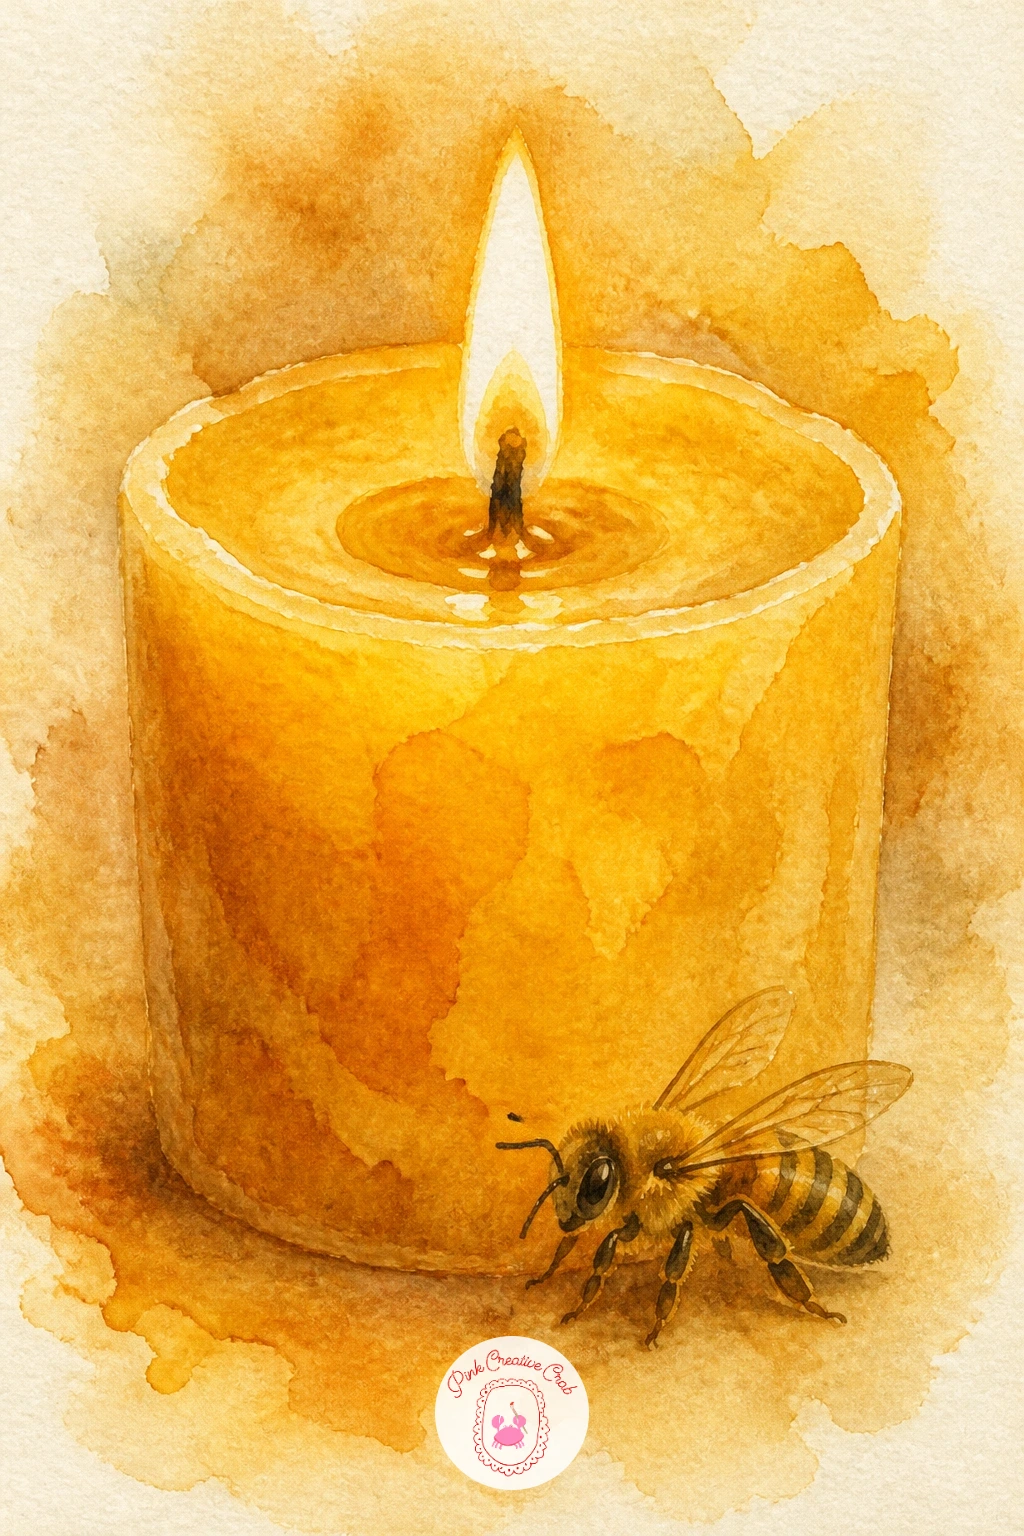
Palette: Yellow Ochre,Cadmium Orange,Cadmium Yellow,Burnt Umber
What to Do Next
Pick one bee or pollinator from this list, pour a cup of tea, and work through it start to finish on a half sheet of cold press paper. Once a few feel easy, string three or four together on one page for a fuller garden scene.
Frequently Asked Questions
What colors work best for a bee watercolor painting?
Warm honey gold, yellow ochre and a near-black mix of Payne’s grey and burnt umber cover most bees. Keep the black soft rather than pure, and let the gold stripes stay the brightest part of the insect.
How do you paint realistic bee wings in watercolor?
Keep bee wings almost transparent with one very thin grey wash and a few fine pen lines for veins. Overworking the wings with too much color is what makes them look heavy instead of light and papery.
What paper is best for detailed insects like bees and butterflies?
Cold press watercolor paper gives enough texture for soft washes while still holding fine pen detail for wings and antennae. Hot press paper works too if you prefer very crisp, smooth detail lines.
Should bees and butterflies be painted before or after the flowers?
Paint the flower first and let it dry completely before adding the insect. This stops the two colors bleeding together and keeps the insect’s edges crisp against the softer petals.
How do you keep a garden watercolor scene from looking too busy?
Limit any one scene to two or three pollinators and leave plenty of open space around them. Vary their size and detail level so the eye has one clear focal point instead of competing details.
Have any thoughts?
Share your reaction or leave a quick response — we’d love to hear what you think!
-
 0
-
0
-
0
-
0
-
0
-
0


