

A highland cow painting is one of those projects that feels like a warm hug the moment you mix the first rust and cream on your palette. There is something about that shaggy ginger fringe and those gentle eyes that makes every canvas feel like farmhouse comfort, and the good news is you do not need fine detail to get there. Loose, loaded brushstrokes do most of the work for you.
Below you will find thirty one ideas, starting with highland cows in every mood and setting, then moving out across the Scottish countryside to the ponies, deer, birds and wild creatures that share its hills. Pick whichever one calls to you first and paint it today, start to finish, no sketch required.
Using these images: free for personal projects such as printing, coloring, cards, journals and gifts. Handmade items that include them may be sold up to 30 pieces per design. More than that is commercial use and is not permitted, and neither is selling or sharing the images themselves or passing them off as your own. Please ask before any other use.
Start the whole list with a highland cow wearing a flower crown, because it is the friendliest way to practice the breed’s shape before you add anything tricky. Block in the head and shoulders first with a big filbert brush in burnt sienna and raw umber, keeping the outline rounded and soft rather than sharp.
Build the shaggy fringe with short upward flicks of a dry, half loaded brush, letting ridges of paint catch the light. Save the horns for last, a pale cream with a grey shadow underneath so they curve forward believably.
Paint the flower crown with small dabs of a round brush in dusty pink, white and a touch of yellow, resting it between the horns and ears rather than on top of the head. If your dabs start looking too neat, drag a dry brush lightly over the edges to soften them into the fur.
If this is your first highland cow, use a photo of the breed nearby just for proportion, not to copy exactly: the head should take up roughly a third of the canvas height.
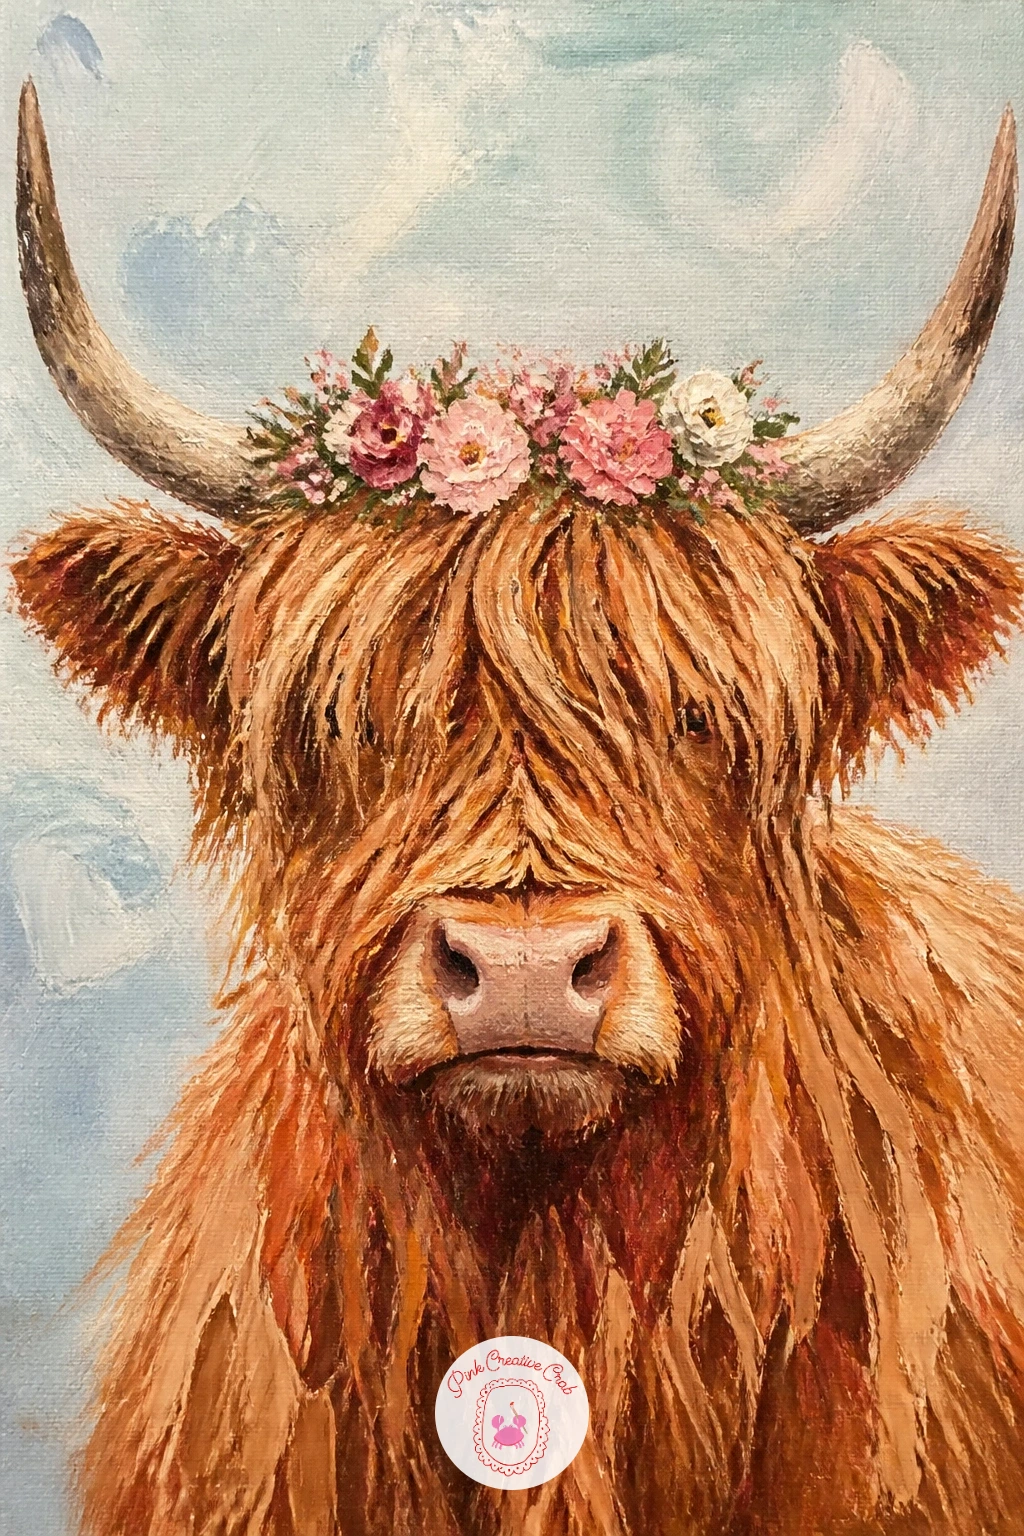
Palette: Burnt Sienna,Raw Umber,Titanium White,Quinacridone Pink
Measure the gap between the eyes against the width of one eye before you commit to the fringe: highland cows read as gentle mainly because that gap is wide and calm.
Keep the energy soft and gentle for a highland calf standing in purple heather, since calves have a rounder face and shorter horns than their mothers. Mix a lighter, warmer ginger than you would for an adult cow, closer to apricot, and block in the calf’s body first with a large brush.
Where beginners go wrong here is making the calf look too much like a mini adult: keep the legs a touch stockier and the face rounder, with the eyes set a little lower on the head.
Once the calf is dry to the touch, switch to a small round brush loaded with heather purple and a touch of white, and stipple in loose clusters of heather around its feet, letting some dots overlap the lower edge of the fur for a sense of standing in it rather than on it.
A ten minute version stops at the calf and a simple heather patch. Give it forty minutes and add a soft moss green hillside behind, fading paler toward a light sky to push the heather forward.
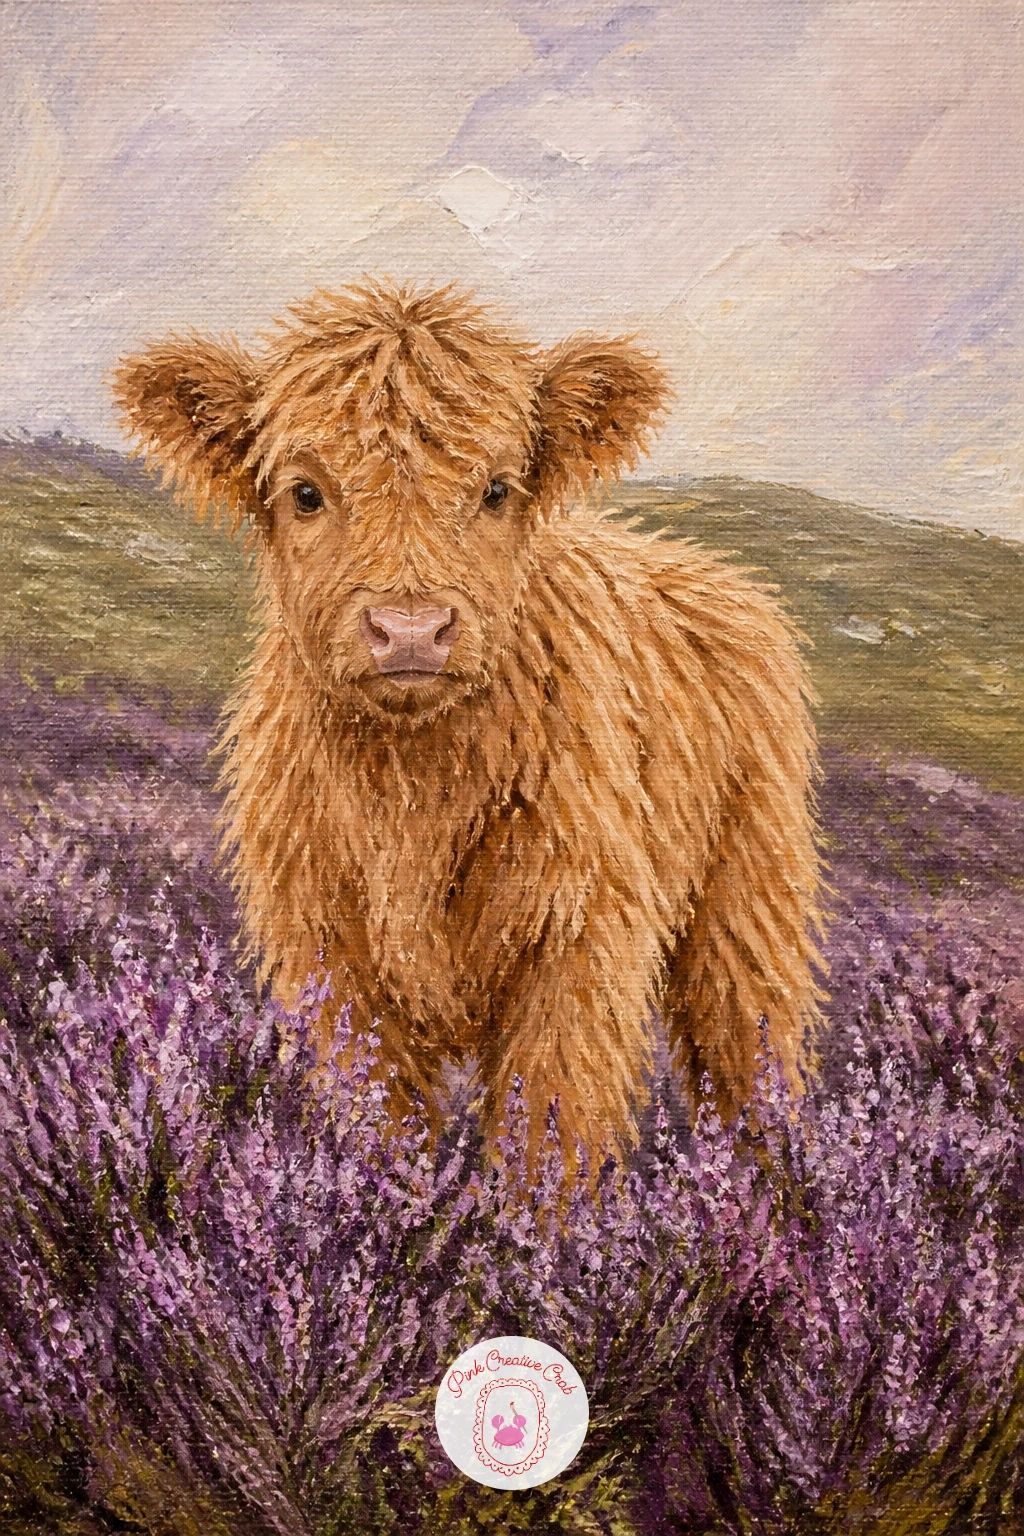
Palette: Heather Purple,Naples Yellow,Sap Green,Titanium White
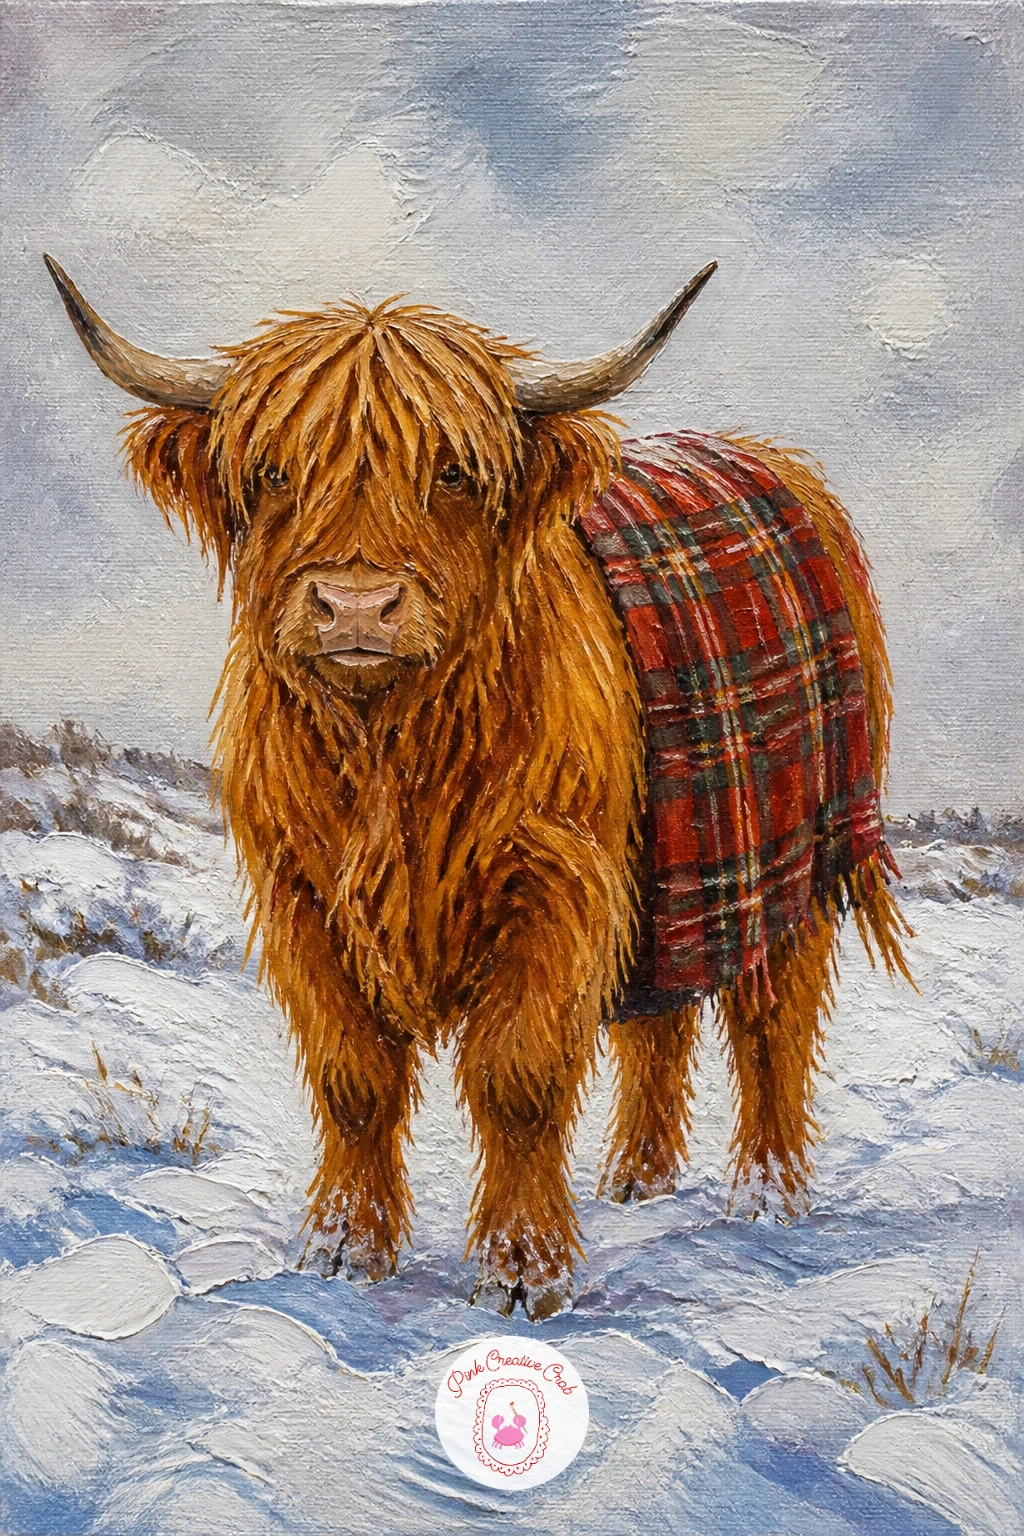
Snow scenes ask you to think about light direction before you pick up a brush, so decide now where your light comes from, because every shadow in the snow depends on it. Paint the sky first, a soft grey blue, then lay the snow ground in titanium white with a cool grey shadow on the side away from your light source.
Build the cow over the dry ground in the usual way, burnt sienna and umber for the body, but keep the belly and legs a touch darker where snow would be reflecting less light onto them.
For the tartan blanket draped over its back, paint a solid rust red rectangle first, then drag thin lines of black and a lighter cream across it with a small flat brush, letting the lines bend slightly over the curve of the back rather than staying perfectly straight.
If you do not have a rigger brush for those tartan lines, the edge of an old credit card dragged through wet paint gives a surprisingly convincing thin stripe.
You Will Need
- rigger brush or a flat edge for fine lines
Palette: Titanium White,Payne’s Grey,Indian Red,Burnt Sienna
Mist is mostly about what you leave soft, so paint a highland cow beside a misty loch by working background to foreground and letting edges disappear as they recede. Lay the sky and distant hills first in pale grey violet, blending them together while still wet so there is no hard line between them.
Bring the loch in below as a flat, paler reflection of the sky, then paint the cow standing at the water’s edge with the usual ginger and umber mix, keeping its lower legs slightly blurred into the mist with a dry, barely loaded brush dragged sideways.
The common mistake is making the whole scene equally sharp, which kills the mood instantly. Keep the cow’s head and horns the crispest part of the painting and let everything else, hills, water, far shore, go softer the further back it sits.
No large soft brush for blending the hills into the sky? A clean, dry sponge dabbed gently over wet paint creates the same hazy transition.
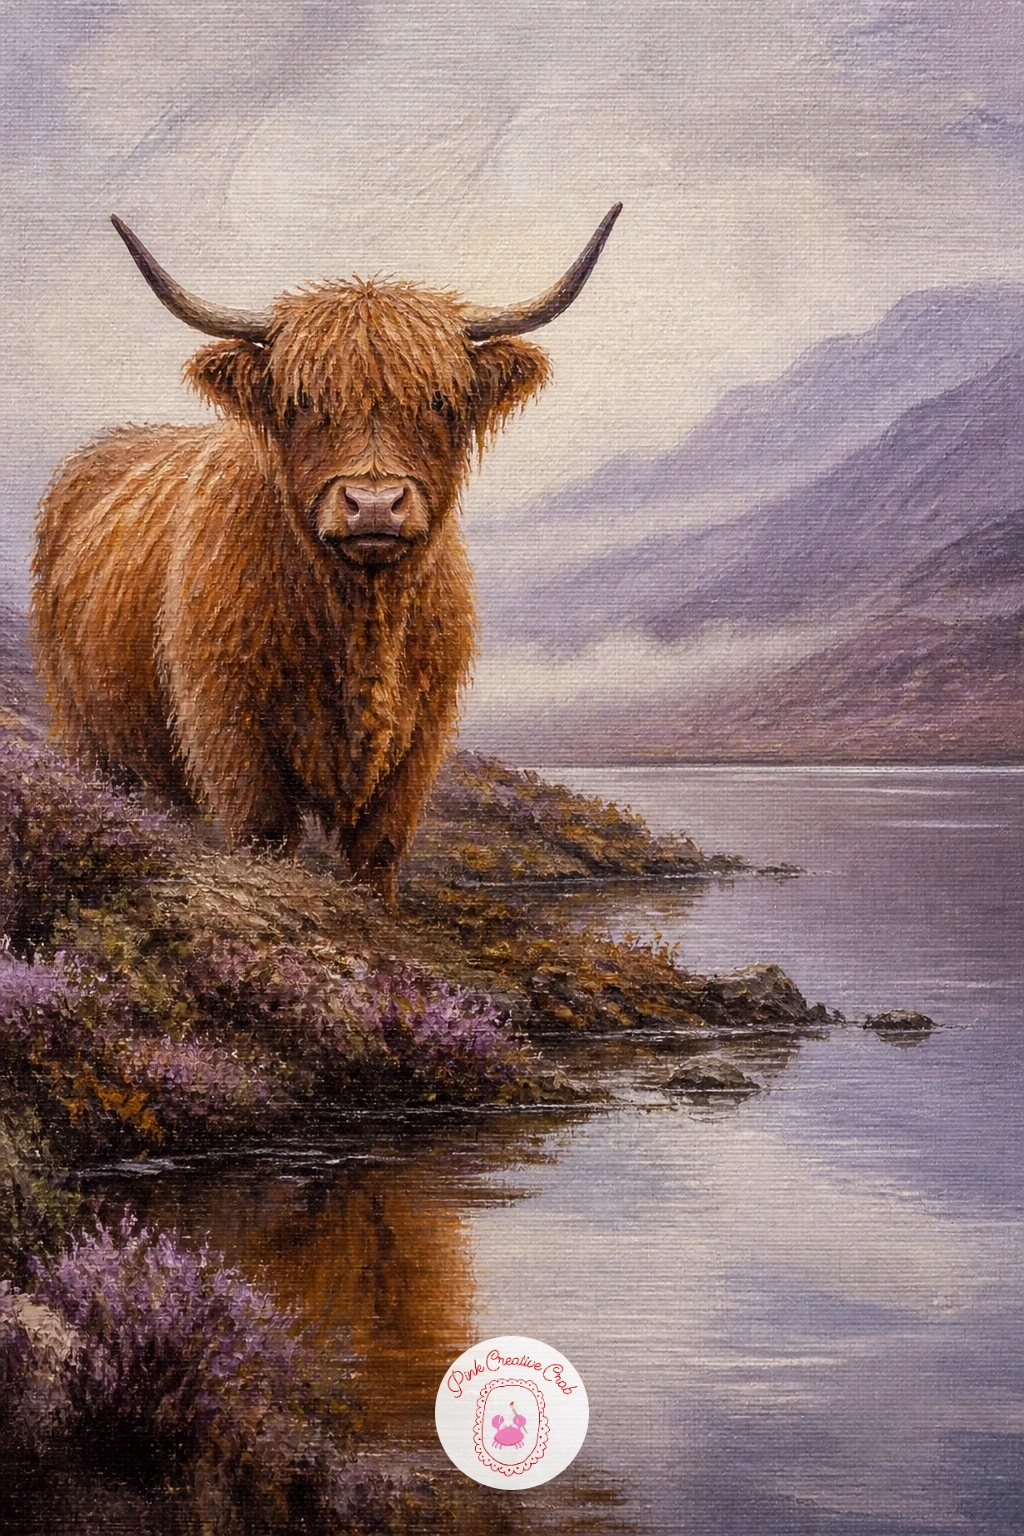
Palette: Payne’s Grey,Dioxazine Purple,Burnt Sienna,Titanium White
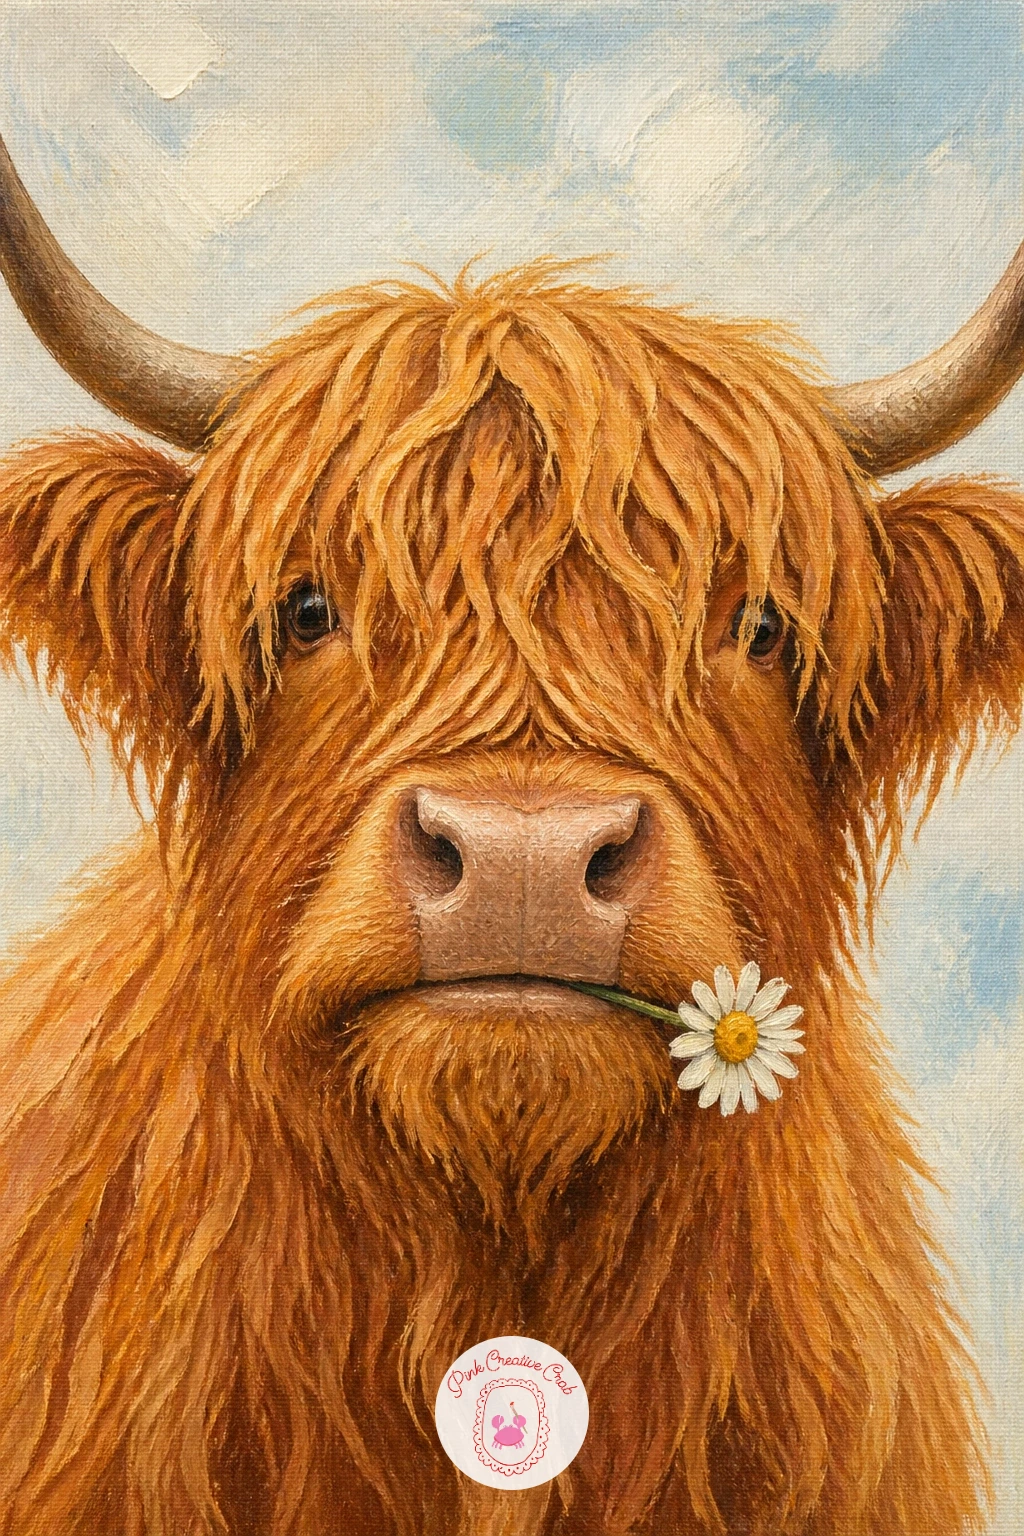
Give your highland cow a little personality by having it chew on a single daisy, a small detail that does a lot of charm for very little extra work. Paint the head and face as usual, but leave the mouth area slightly open and relaxed rather than closed.
Once the face is dry, paint one simple daisy, a few white oval petals around a small yellow center, held gently at the corner of the mouth with the stem trailing down past the chin.
This is a lovely subject to practice eyes on, since the whole painting reads as sweet mainly through the expression. Keep the eye a soft dark brown oval with one tiny white highlight dot, placed slightly toward the nose rather than centered, which reads as gentle and curious.
If your daisy looks stiff, soften the petal edges with a tiny dry brush once the paint is just tacky, blurring them slightly into the fur color around the mouth.
Palette: Burnt Sienna,Raw Umber,Titanium White,Cadmium Yellow
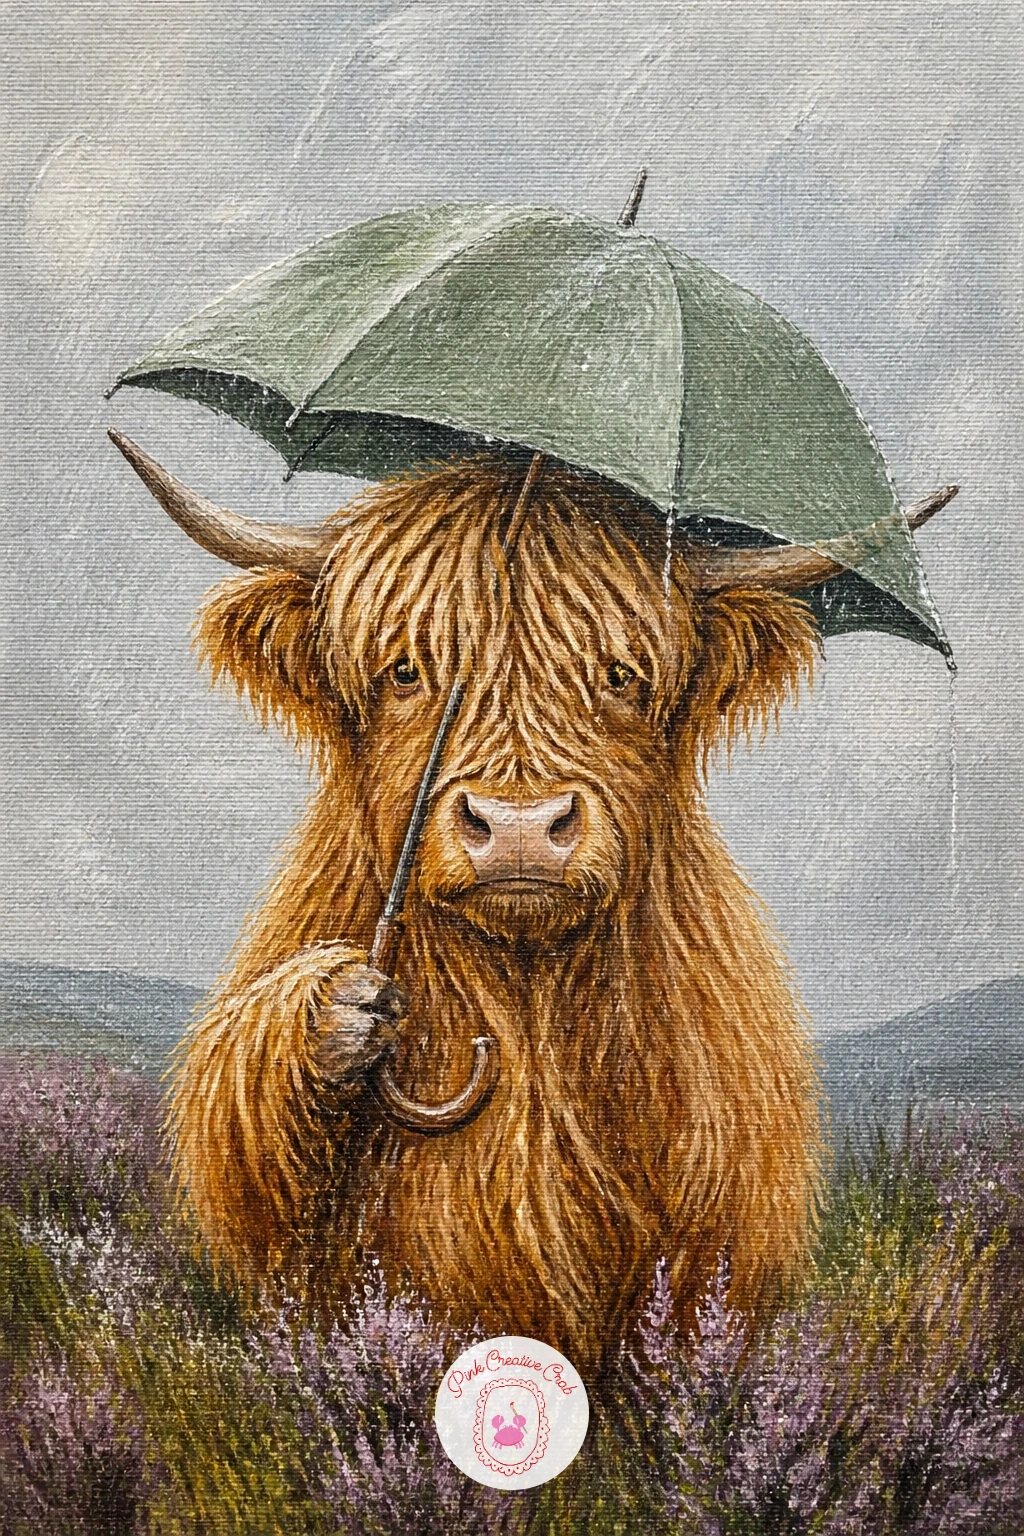
This is a fun, slightly whimsical one for anyone who loves a bit of storytelling in their farmhouse art: a highland cow standing under a small umbrella in gentle rain. Paint the cow first, fully, as your usual ginger and cream build, then let it dry completely before adding the umbrella on top.
Paint the umbrella as a simple dome shape in a solid color like sage green or dusty red, held above the cow’s head by a thin handle, with a few ribs suggested by darker lines radiating from the center point.
For rain, dip an old toothbrush lightly in thinned white or pale grey paint and flick it gently across the dry background from a few inches away, keeping the heaviest spatter away from the cow’s face so it still reads as sheltered and dry.
If the rain spatter looks too heavy in a spot, dab it immediately with a damp cloth before it dries, which lifts it back to a soft mist.
You Will Need
- old toothbrush for rain spatter
Palette: Burnt Sienna,Sap Green,Payne’s Grey,Titanium White
Hold the toothbrush bristle side down and run your thumb across it for a finer, more even spatter than flicking it from the handle.
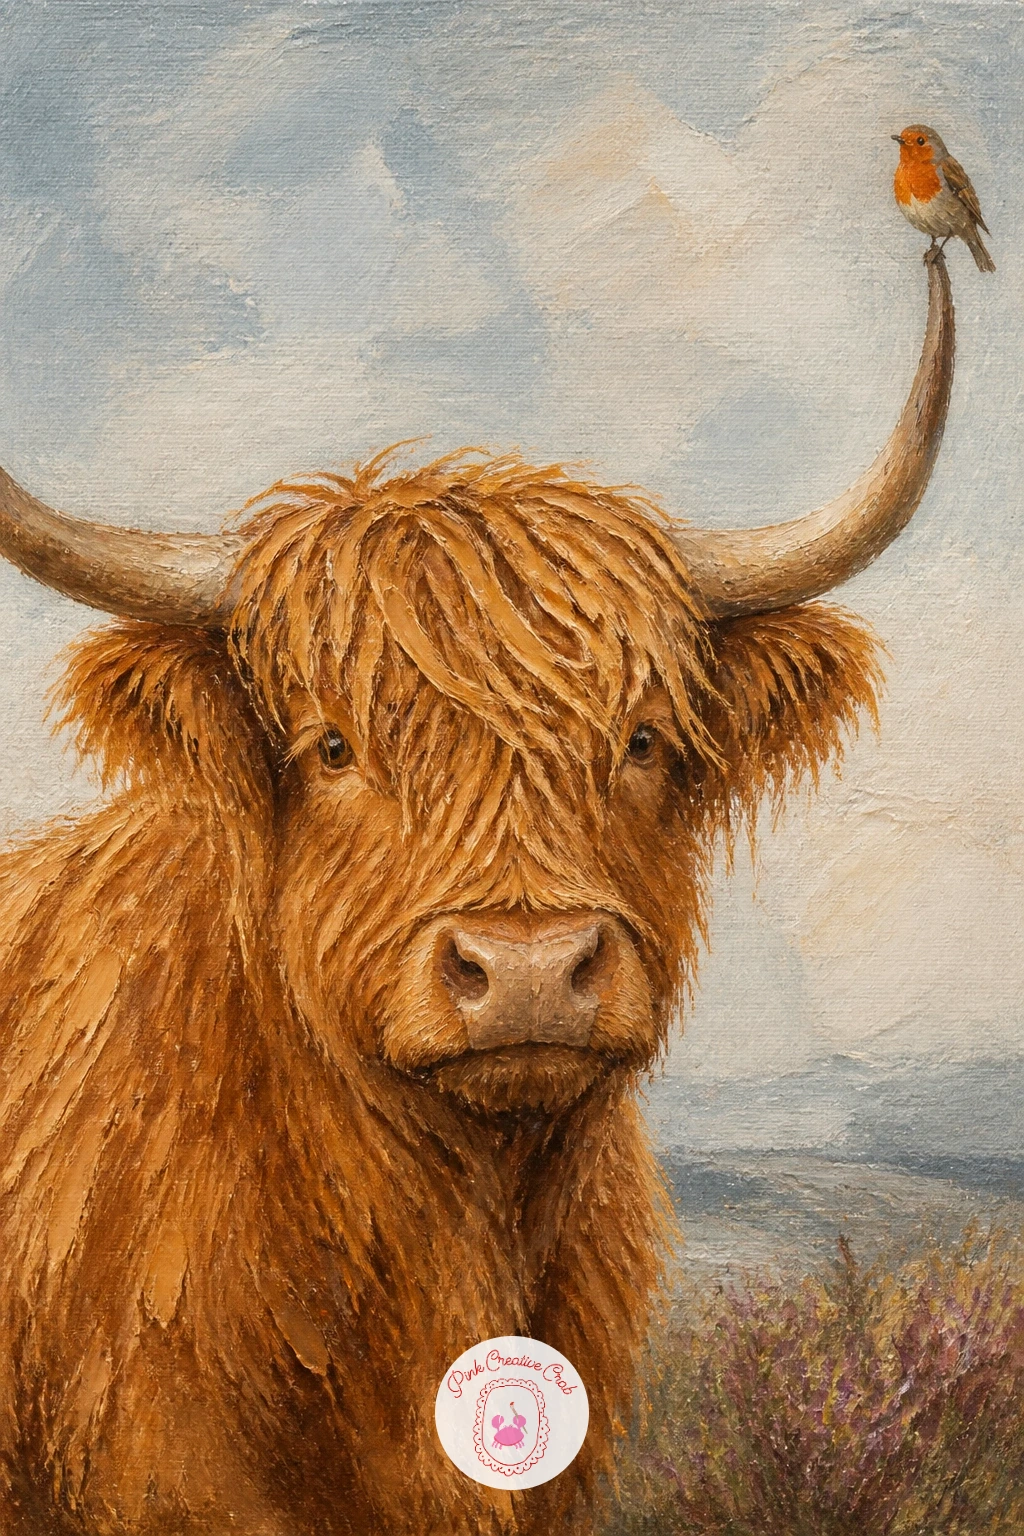
Perch comes before paint here: decide exactly where the robin will sit on the horn before you load your brush, since the horn’s curve has to support it believably. Finish the cow’s head and horns completely first, letting the horn tips lighten toward cream where they catch the light.
Paint the robin small and simple, a round rust orange breast, a soft grey brown back, tiny black legs gripping the horn, using a small round brush rather than the big one you used for the cow.
Where this goes wrong is scale: a robin painted even slightly too large turns the whole piece cartoonish. Keep it no taller than the width of the horn it sits on, and it will read as a believable visiting bird.
Once the cow works at this scale, try the same pairing with a different horn position next time, robin on the tip versus lower down the curve, to see which feels more balanced to you.
Palette: Burnt Sienna,Titanium White,Cadmium Orange,Raw Umber
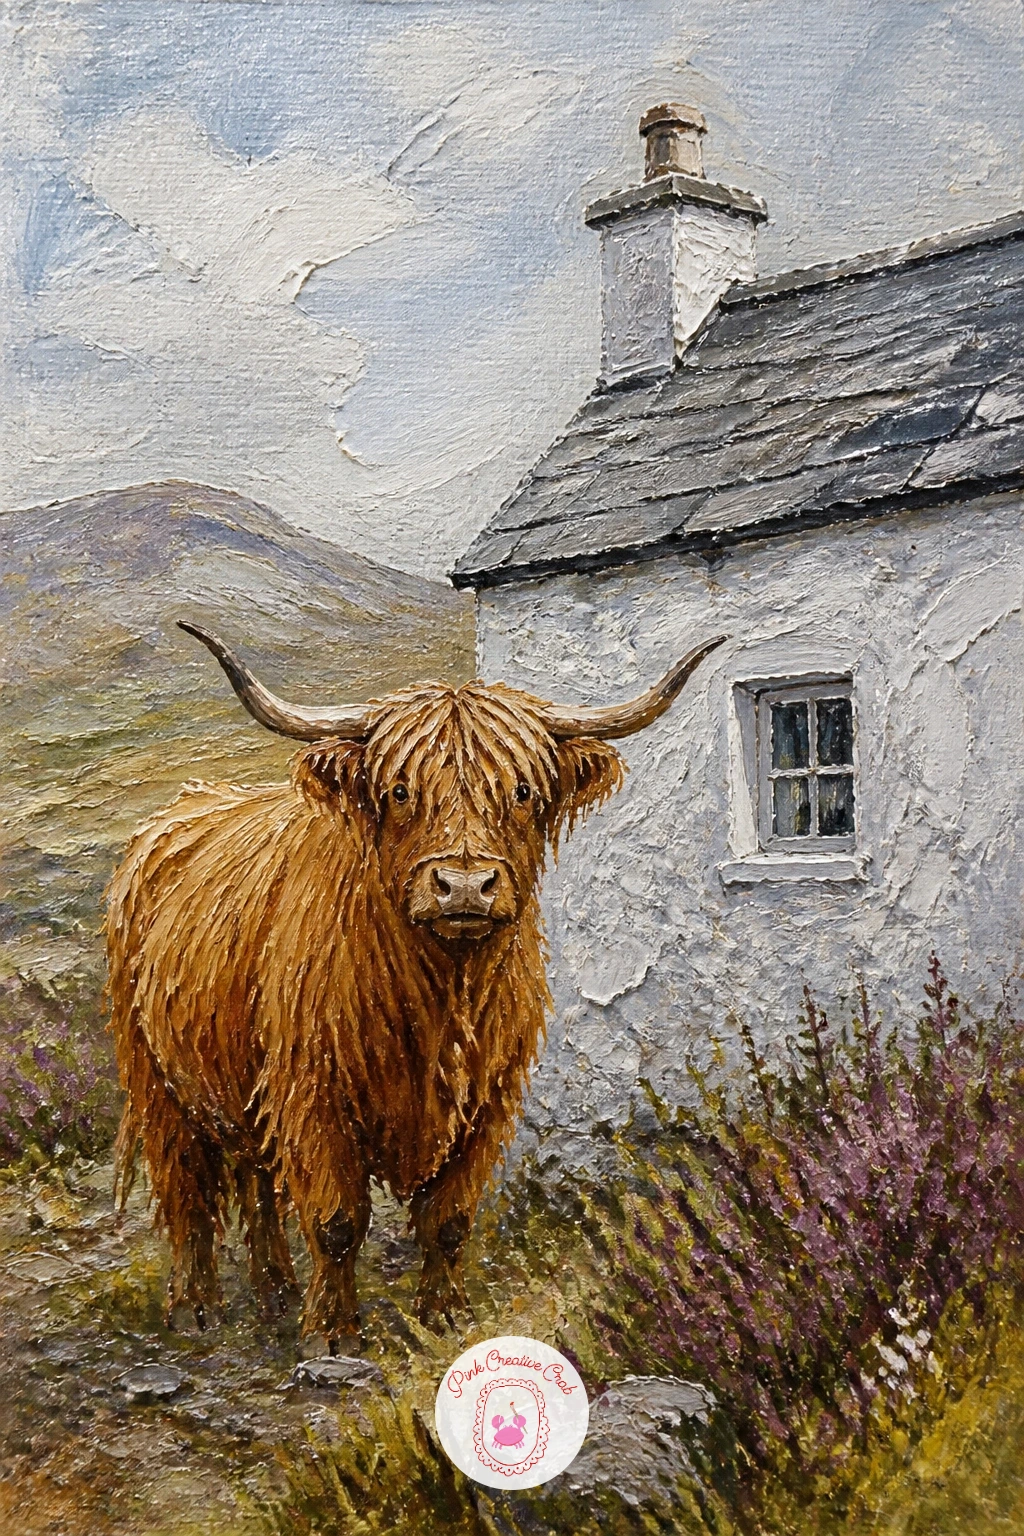
Bring in a bit of Scottish architecture with a highland cow standing beside a whitewashed cottage, a lovely one for anyone wanting more of a farmhouse scene than a single animal portrait. Block the cottage in first, a simple white rectangle with a grey slate roof and one small dark window, keeping the shapes blocky and uncomplicated.
Paint the cow standing in front of or slightly beside the cottage, overlapping its edge so the two elements feel like one scene rather than two separate paintings pushed together.
Keep the cottage walls a warm off white rather than pure white, since pure white next to cream colored fur tends to look chalky and flat. A touch of raw umber mixed into the white warms it just enough.
No slate grey on your palette? Mix payne’s grey with a touch of burnt sienna for a warmer, more weathered roof color that still reads as stone.
Palette: Titanium White,Payne’s Grey,Burnt Sienna,Raw Umber
Two heads touching is harder than two heads side by side, so for a mother and calf nuzzling, sketch the basic placement lightly in thinned paint before committing to thick strokes. The mother’s head tilts down, the calf’s tilts up, and the two foreheads or noses meet somewhere in the middle third of the canvas.
Paint the mother first since she is larger and sits slightly behind, then bring the calf forward and slightly in front of her, overlapping her chest so the connection feels physical rather than just nearby.
The trickiest part is the point of contact itself: keep the fur strokes at that meeting point flowing in the same rough direction on both animals, as if one continues into the other, which sells the gentleness of the gesture.
If you have a soft spot for painting farm animals in general, this pairing is a lovely one to return to with different color moods later, autumn gold instead of summer ginger.
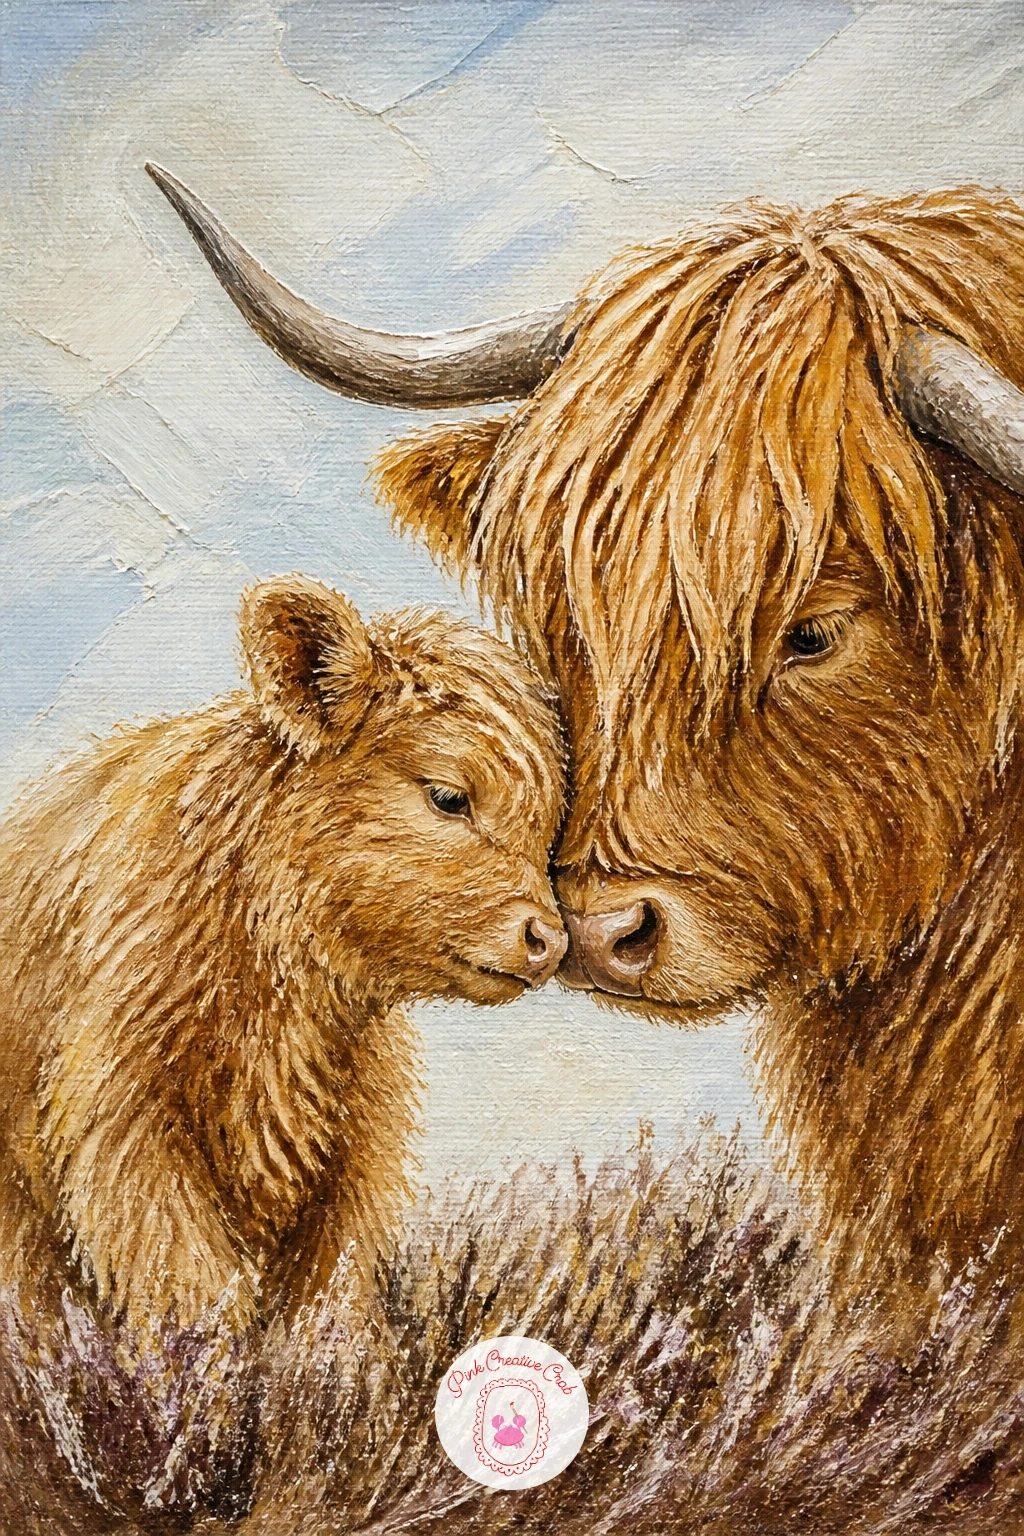
Palette: Burnt Sienna,Raw Umber,Naples Yellow,Titanium White
Direction of every stroke matters more than usual for a highland cow with its fringe blowing in the wind, since the whole feeling of movement comes from which way the fur points. Decide on one wind direction before you start, left to right works well, and keep every fringe stroke angled that same way without exception.
Paint the head and body as usual first, then load a dry fan brush with cream and a little burnt sienna and drag the fringe strokes outward and sideways in long sweeps rather than the short upward flicks you would use for a calm cow.
Beginners often mix in a few stray strokes going the wrong way out of habit, which flattens the windblown effect instantly. Step back every few strokes and check the overall flow reads as one direction.
A few loose grass blades at the base of the painting, bent the same direction as the fringe, reinforces the wind without any extra difficulty.
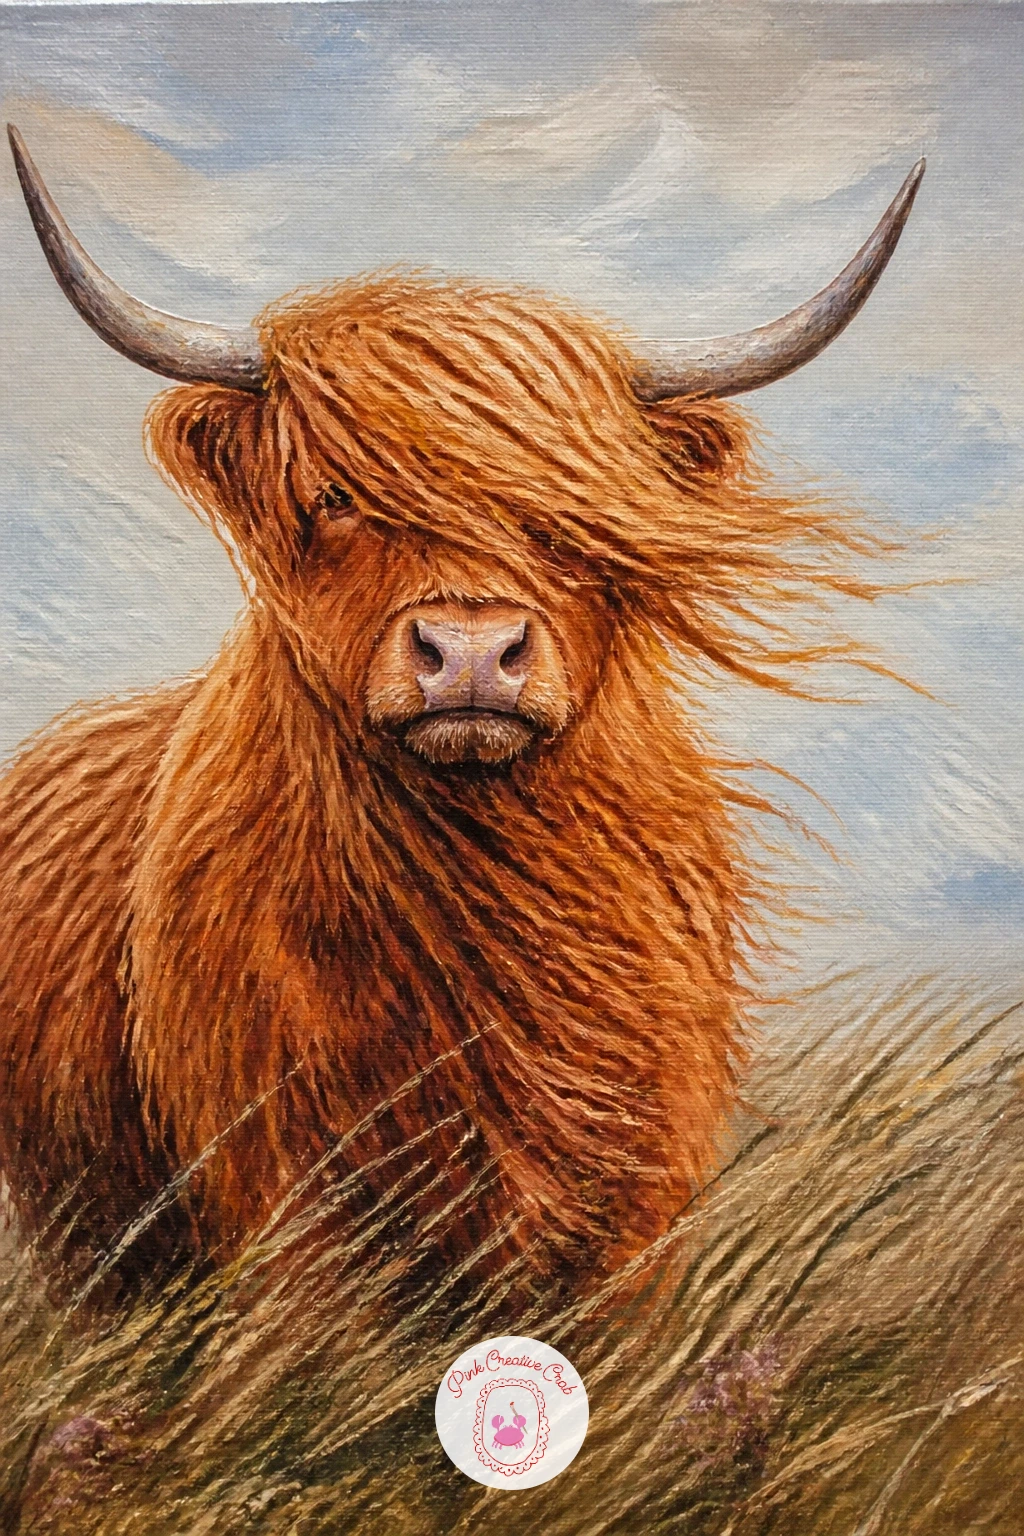
Palette: Burnt Sienna,Naples Yellow,Titanium White,Sap Green
For a bit of personality and a nod to Scottish tradition, dress your highland cow in a tam o’shanter hat, the soft round woolen bonnet with a pompom on top. Paint the cow’s head and horns completely first, then add the hat afterward so it sits convincingly over the ears.
Build the hat as a soft dome in a solid color, navy or heather purple, with a slightly darker shadow where it meets the fur beneath, and finish with a small round pompom in a contrasting color at the crown.
Where this idea can go wrong is making the hat look stiff and separate from the head. Let a few strokes of fur color overlap the hat’s lower edge so it looks worn rather than glued on.
If you enjoy dressing up animals like this, the same trick works nicely across other animal painting projects where a small costume detail adds charm without much extra effort.
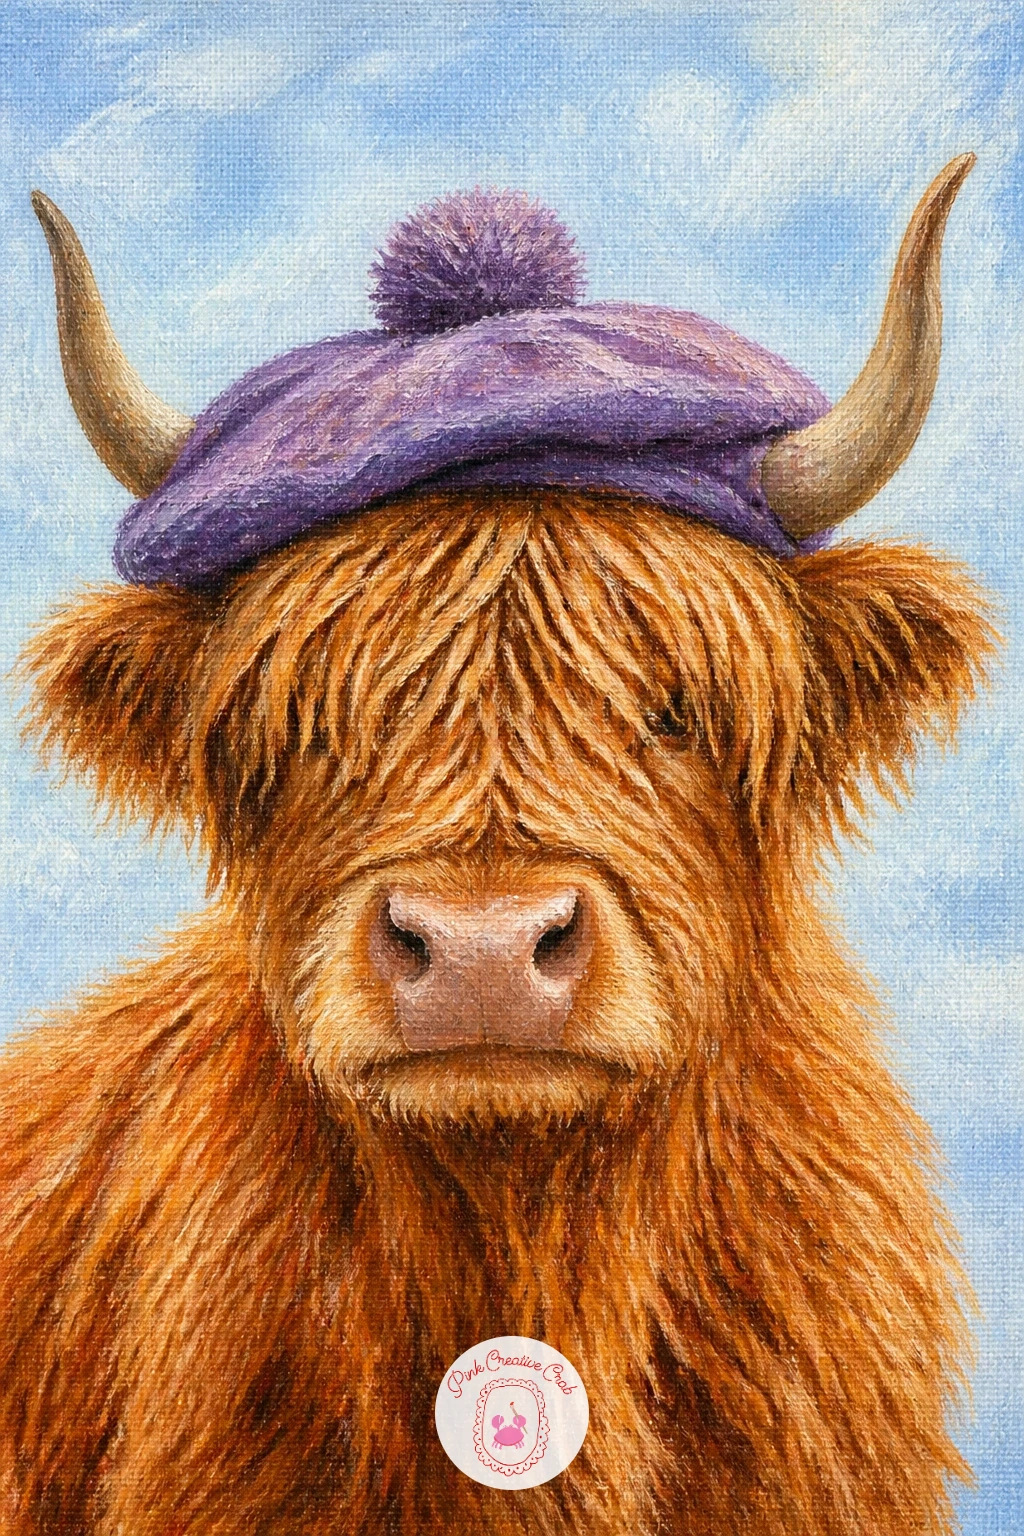
Palette: Burnt Sienna,Dioxazine Purple,Titanium White,Raw Umber
Color contrast carries this one: a highland cow in a field of bluebells works because warm ginger and cool blue violet sit opposite each other and make both colors look richer. Paint the cow first, fully, before touching the bluebells, so you are not working around wet paint.
Once dry, build the bluebell field with a small round brush, loose clusters of tiny blue violet dashes angled slightly downward, denser near the base of the painting and thinning out as they go further back.
Keep a patch of green showing between clusters rather than filling every inch with blue, since a solid carpet of flowers reads as flat rather than natural. Let the cow’s legs disappear slightly into the taller clusters nearest it.
If blue violet looks too cool and flat on its own, warm it slightly with a touch of the same burnt sienna you used for the cow, which ties the whole palette together.
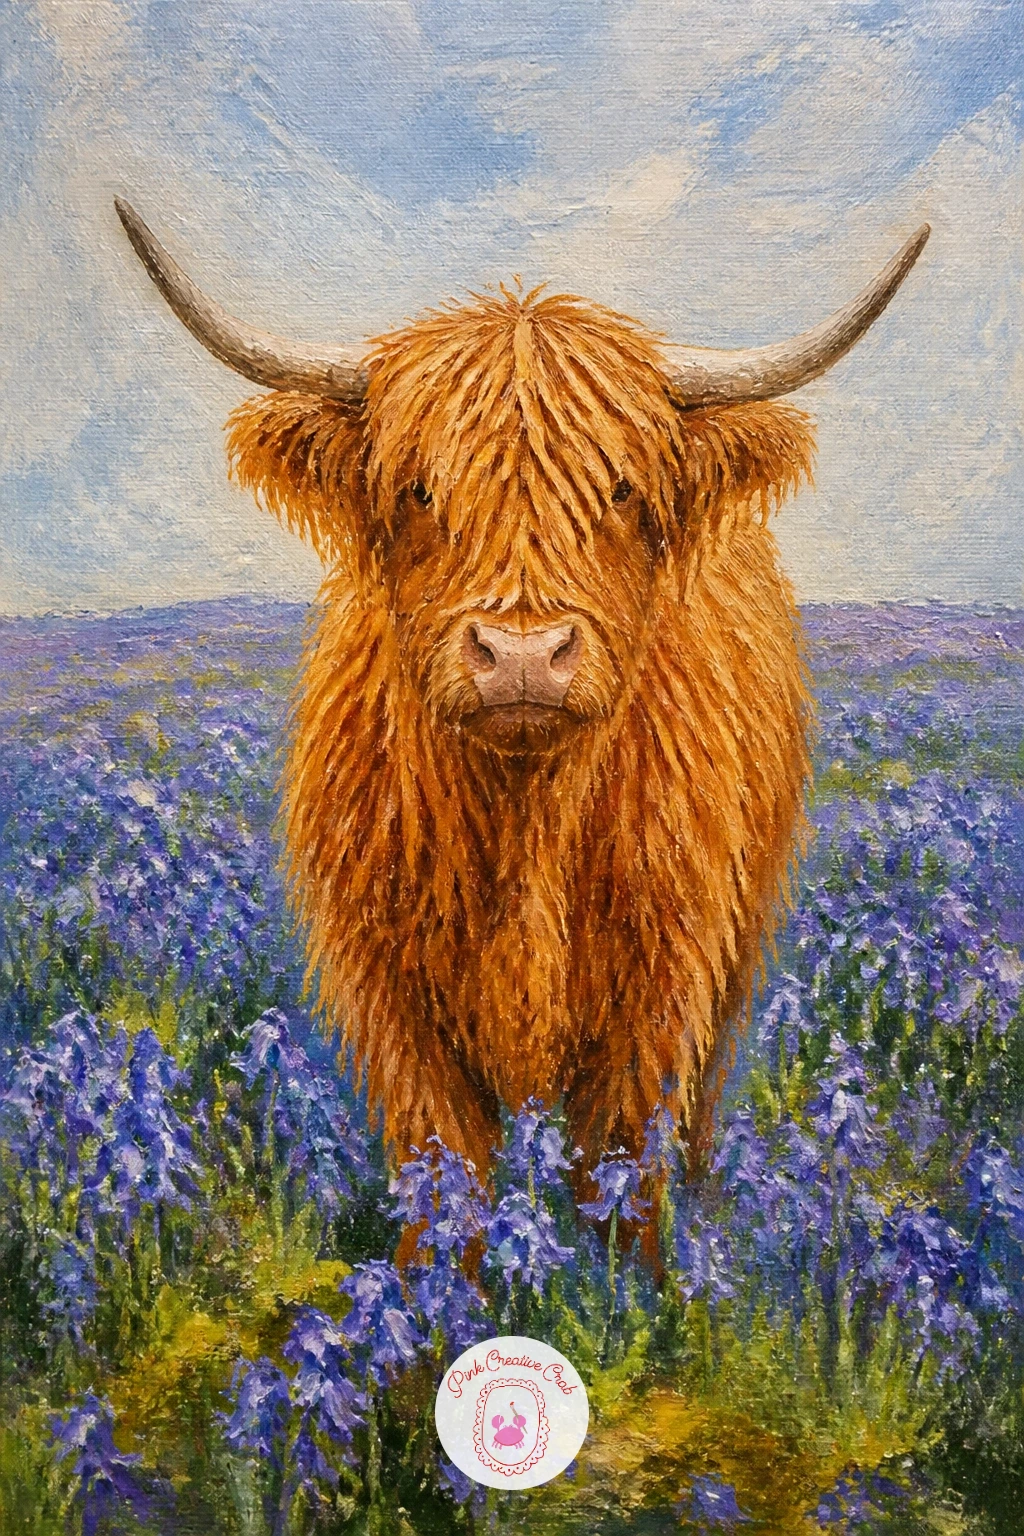
Palette: Burnt Sienna,Dioxazine Purple,Sap Green,Titanium White
Soft, rounded and low to the ground, a highland calf asleep in straw is one of the gentlest compositions on this list and a good one if your hand is tired from bigger subjects. Paint the straw bed first as loose horizontal strokes in straw yellow and raw umber, letting the strokes overlap messily rather than lining up neatly.
Bring the sleeping calf in over the dry straw, curled with its legs tucked under and its head resting down, using the softest, roundest shapes you have used for this animal anywhere on this list.
The easy mistake is painting the eyes open out of habit. Keep them as a single closed curved line with short lash marks, which instantly reads as peaceful sleep rather than an alert animal lying down.
A ten minute version stops here. Given forty minutes, add a soft shadow pooling under the calf’s body and a few loose straw strands scattered over its back for a just settled in look.
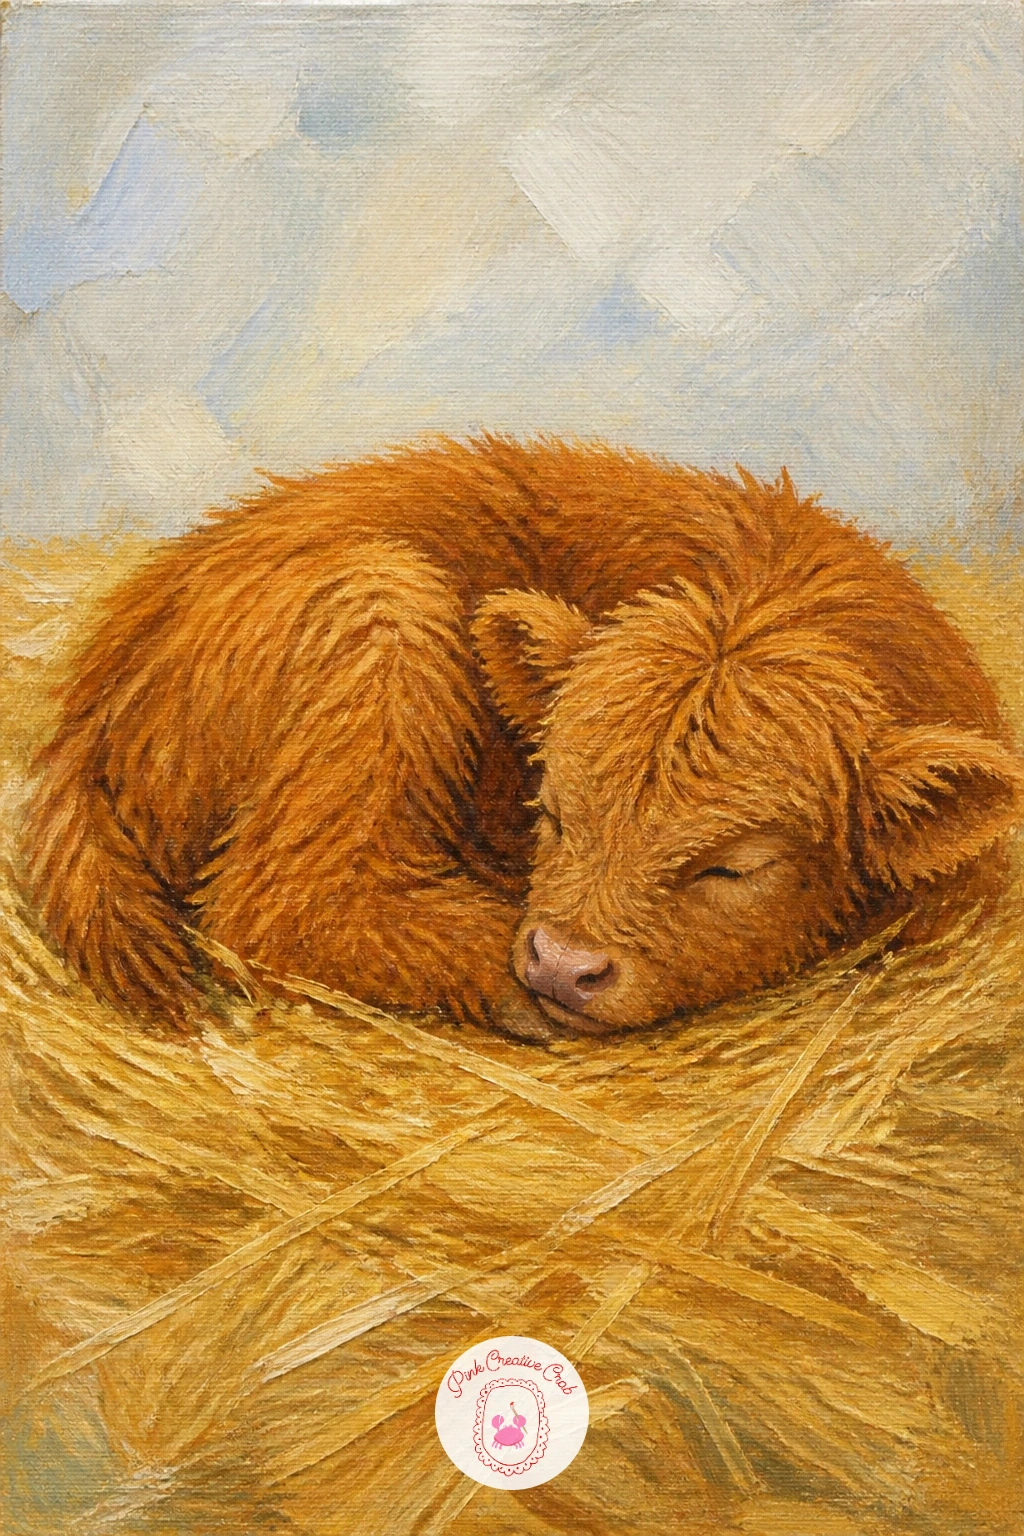
Palette: Naples Yellow,Raw Umber,Burnt Sienna,Titanium White
Scale and placement decide whether a highland cow and a farmer girl reads as a sweet farmhouse scene or an awkward one, so work out proportions before you paint either figure. The cow stays large, taking up most of the canvas height, while the girl stands smaller beside its shoulder, about as tall as the cow’s back.
Paint the cow first as your main subject, then add the girl in simple shapes, a dress or overalls in a solid color, hair pulled back, one hand resting on the cow’s side.
Keep her face very simple, a few soft marks rather than detailed features, since this composition works on warmth and shape rather than portraiture. Overworking her face pulls attention away from the cow, which should stay the star.
If figures feel daunting, a simplified back view works beautifully too: just her shoulders and the back of her head leaning gently against the cow’s side.
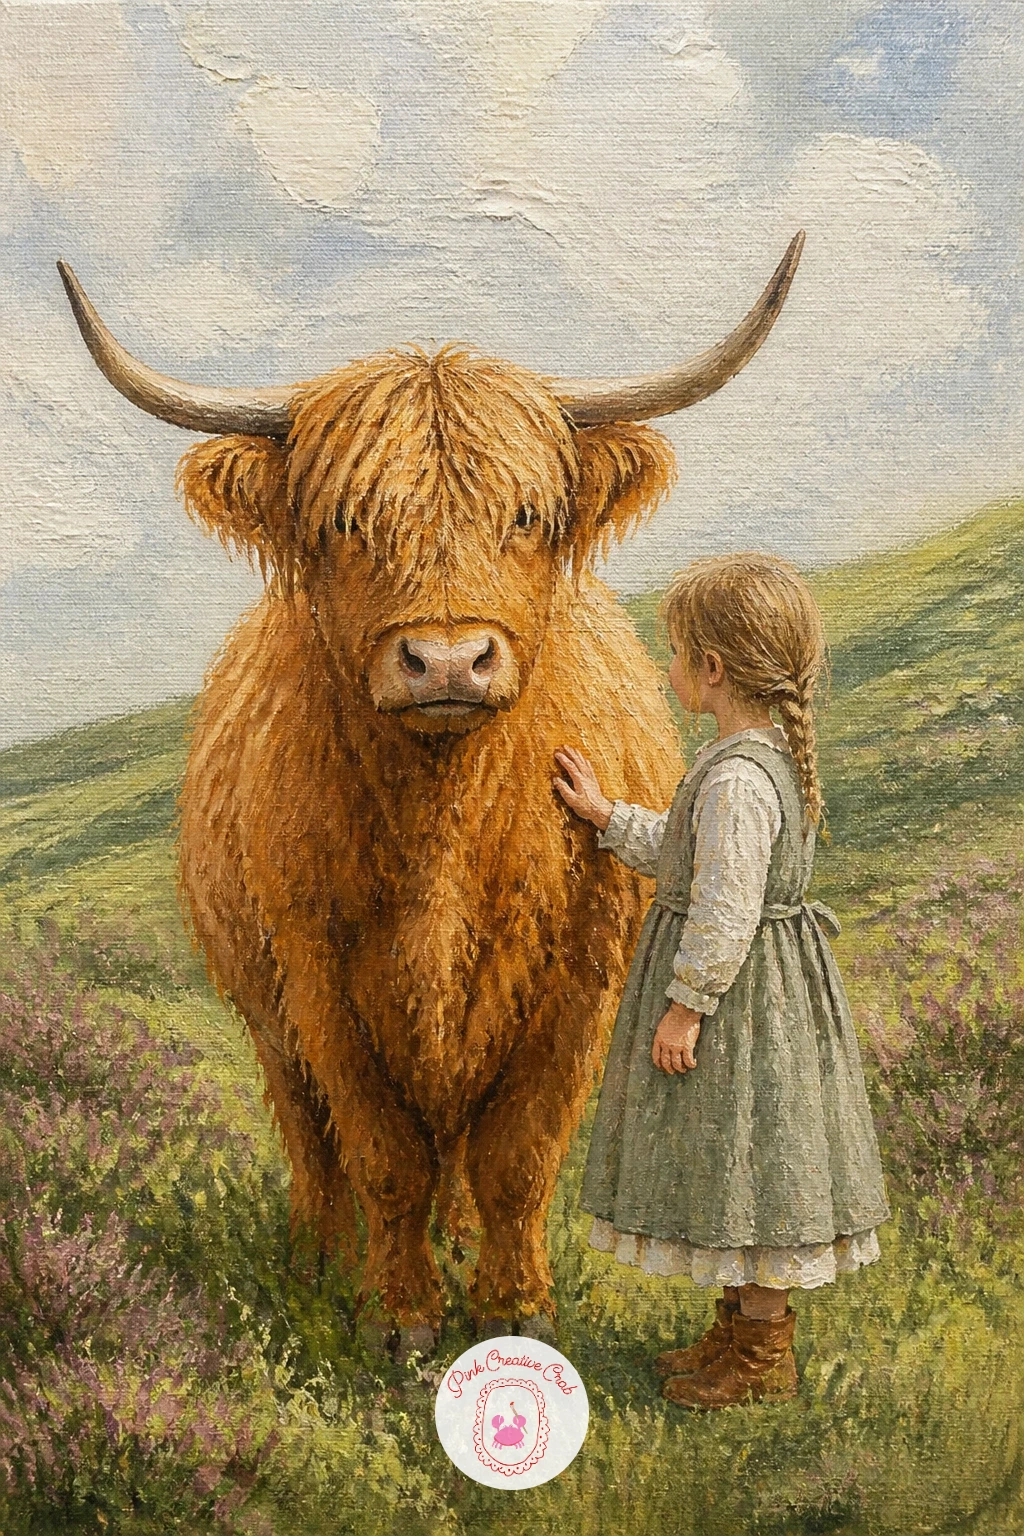
Palette: Burnt Sienna,Sap Green,Naples Yellow,Titanium White
This busier scene, a herd crossing a single track road while a car waits, is the most involved highland cow idea on the list, so plan the layout loosely before committing paint. Place two or three cows crossing at different points along a diagonal road, with the nearest one largest and the furthest smallest and simplest.
Paint the road and hillside background first, then build the cows from back to front so each new one can overlap the one behind it slightly, which reads naturally as a line moving across the road.
The waiting car sits small in one corner, just a simple colored block with two headlight dots and a dark windscreen, painted last so it does not compete with the cows for attention.
If three cows feels like too much at once, two is plenty: keep the composition’s charm in the idea of patient waiting rather than in a crowded scene.
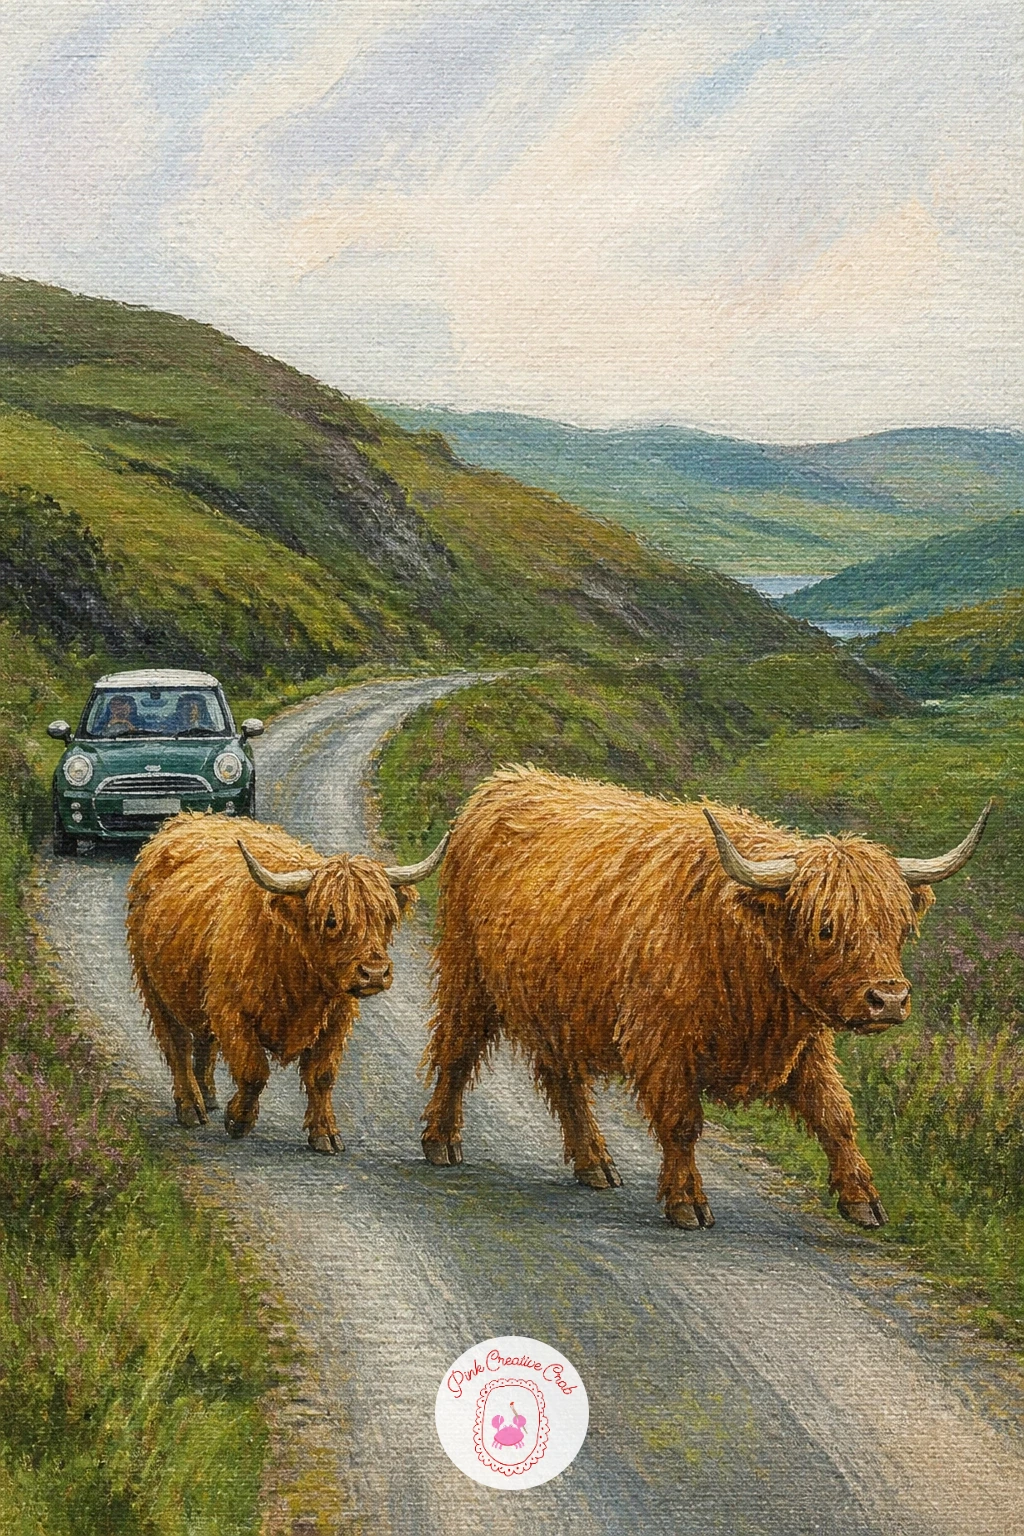
Palette: Burnt Sienna,Payne’s Grey,Sap Green,Titanium White
Round out the highland cow section with a cozy barn moment: a highland cow eating hay from a wooden rack. Build the rack first as a simple geometric shape, a few crossed wooden slats in warm brown, with loose golden hay strands poking out between the gaps.
Bring the cow in facing the rack, head lowered and slightly tucked, with a few stray hay strands painted hanging from its mouth once the head is fully dry.
Wood grain is the part that often gets overworked. A few confident dry brush drags in a slightly darker brown, following the direction of each plank, say more than a dozen fussy little lines ever will.
If you enjoy this kind of cozy barn still life alongside your animals, it pairs nicely with the warm, rustic mood found in autumn painting ideas built around harvest colors.
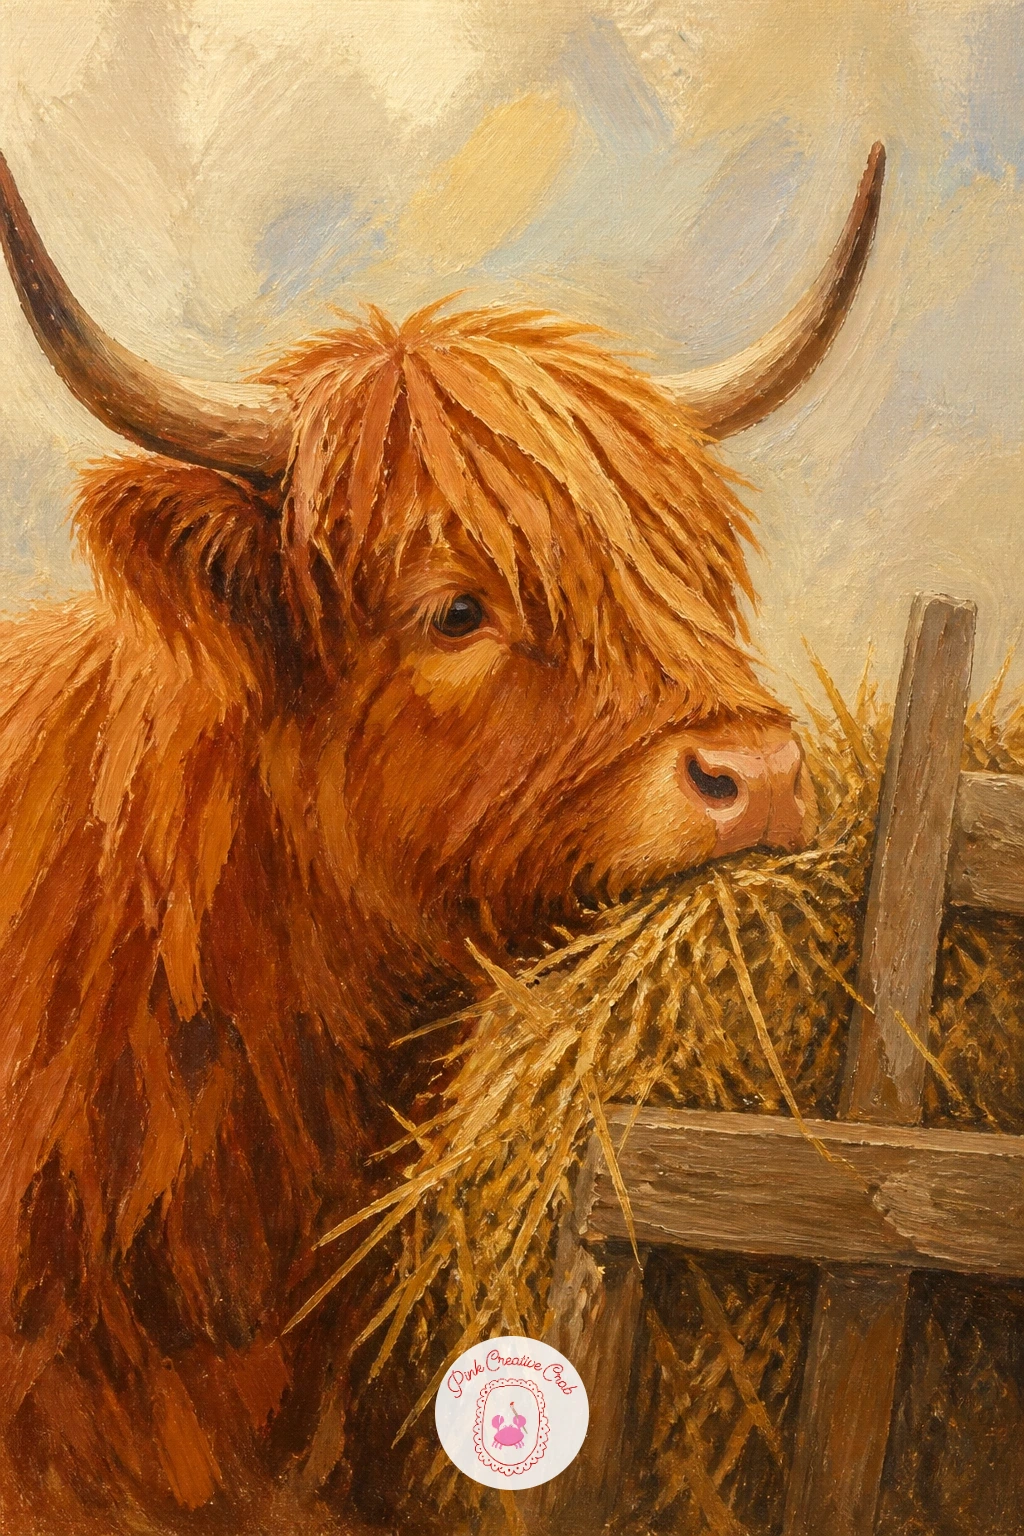
Palette: Burnt Sienna,Naples Yellow,Raw Umber,Titanium White
Moving on from cattle, a Shetland pony in a woolly coat is a natural next animal for this countryside, since its thick winter coat uses the same shaggy brushwork you have been practicing. Block in the compact, round little body first, keeping the proportions stocky and short legged rather than elegant.
Build the coat texture with the same dry, loaded brush technique as the highland cow’s fringe, but in shorter, denser strokes all over the body rather than concentrated at the forehead, since Shetlands are woolly head to tail.
Keep the mane and tail thick and slightly tangled looking, using long wavy strokes in a slightly darker tone than the body. A common mistake is painting the mane too neat and flowing, which looks more like a show pony than a hardy island one.
No chestnut brown on hand? Mix burnt sienna with a touch of black for a convincing dark bay coat instead.
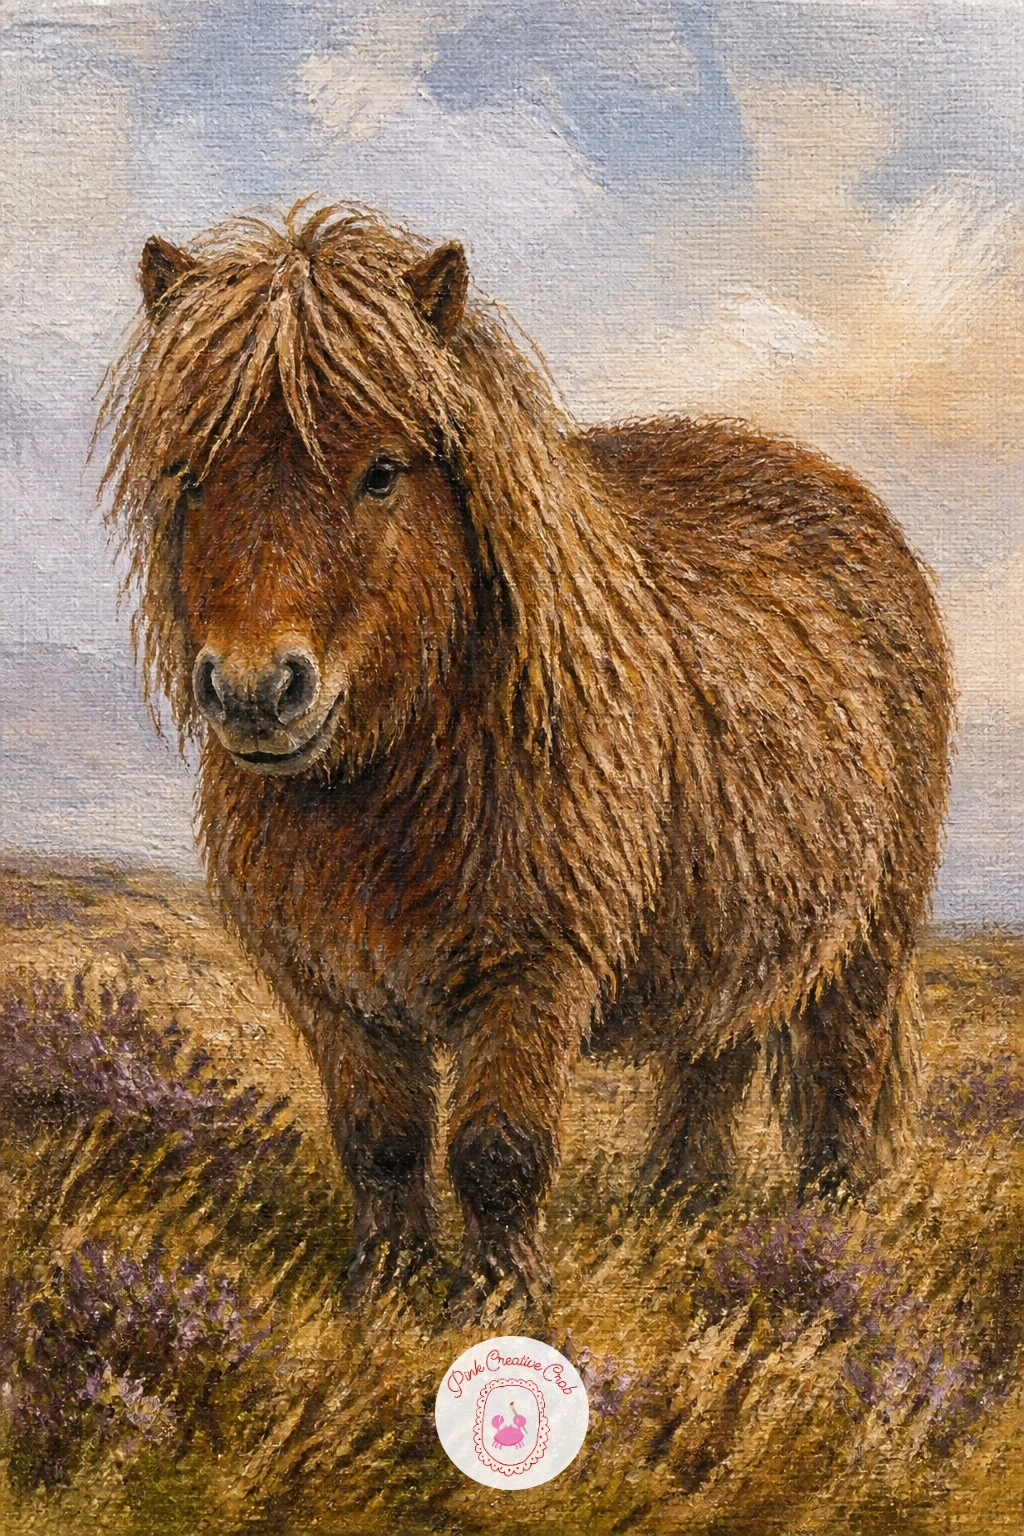
Palette: Burnt Sienna,Raw Umber,Titanium White,Payne’s Grey
Small and graphic, a Scottie dog in a tartan coat is a lovely quick companion piece if you want something faster than the larger animals on this list. Paint the dog’s black body first as a simple, low, compact silhouette, pointed ears up and a short straight tail.
Once dry, add the tartan coat over its back as a solid rust or green rectangle, then drag thin crossing lines across it in black and a lighter color with a small flat or rigger brush, letting the lines curve slightly with the dog’s back.
Black fur can go flat fast, so mix the tiniest touch of blue into your black for the shadowed areas and keep a few strokes closer to pure black only where the light would not reach, giving the coat some depth without lightening it overall.
If a rigger brush feels fiddly for the tartan lines, a fine liner pen over fully dry acrylic gives the same crisp crossing pattern with far less wobble.
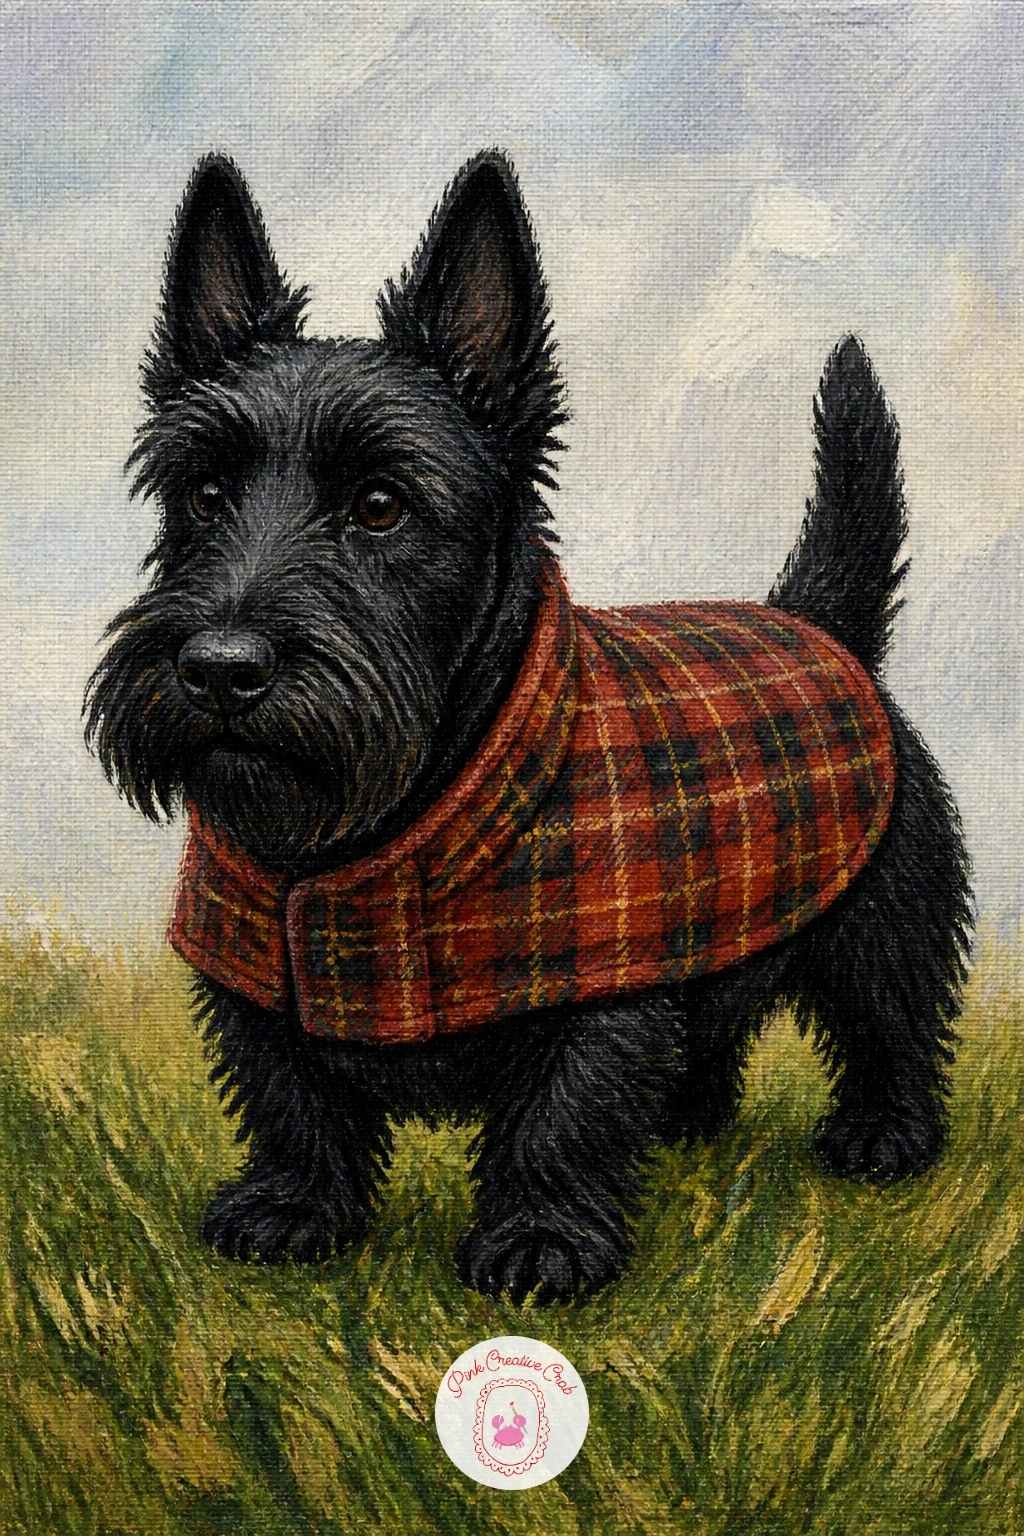
You Will Need
- rigger brush or fine liner pen for tartan lines
Palette: Payne’s Grey,Indian Red,Titanium White,Sap Green
Now head for the coast with a puffin on a sea cliff, a great subject for practicing clean color blocking after all the soft fur textures. Paint the rounded black and white body first, keeping the shapes simple, a dark back, white belly, and sit it on a rocky cliff edge painted in cool greys and greens.
The beak is the star here: block it in as a simple wedge shape, then once dry, paint the orange, yellow and blue grey bands across it with a small brush, keeping the lines slightly curved to follow the beak’s natural shape.
Where this subject usually goes wrong is a flat, even orange beak with no bands, which loses all the charm. Take the extra few minutes to layer those three beak colors even if it feels fussy.
If you enjoy quick, characterful coastal birds like this, a similar approach to shape and color blocking appears in woodland animal painting projects built the same simple to detailed way.
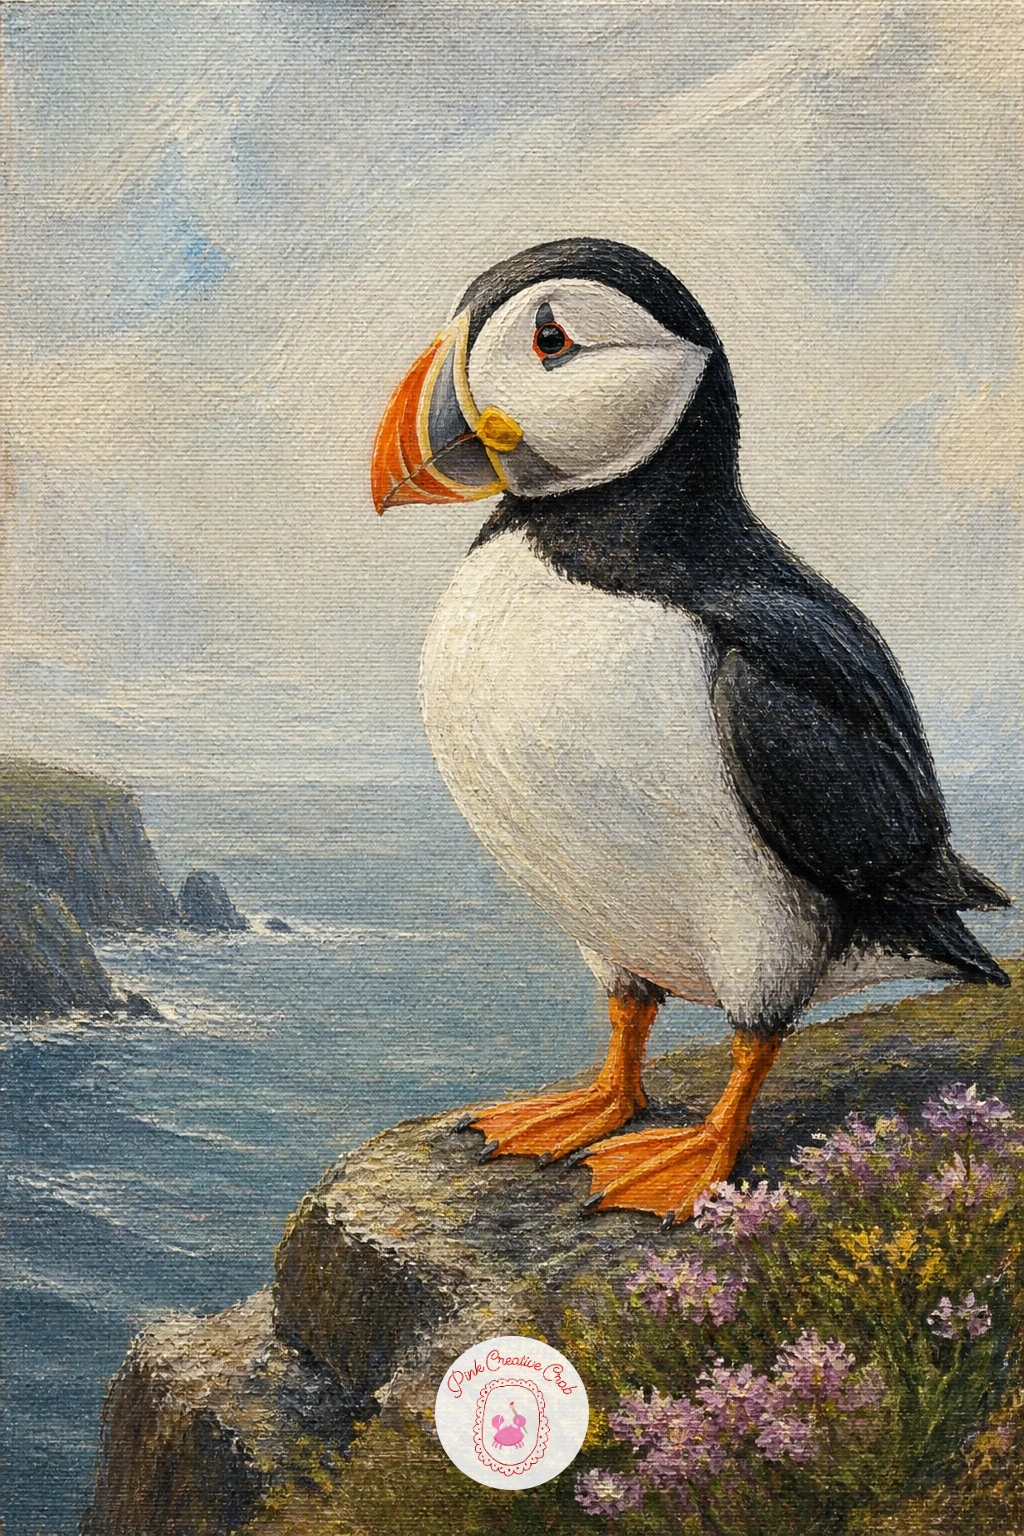
Palette: Payne’s Grey,Titanium White,Cadmium Orange,Cadmium Yellow
Eye level changes everything for a red deer hind in bracken, so decide early whether you are painting her from a low, close angle or from further back at standing height, since that choice sets how much of the bracken hides her legs. A lower eye level with tall bracken in front feels intimate and watchful, closer to how you would actually spot one.
Block in her body first in warm reddish brown, keeping the head alert and turned slightly, ears forward, before building the bracken around her in loose, upright strokes of rust and ochre.
Let the bracken overlap her lower legs and belly rather than stopping neatly at her outline, which sells the idea that she is standing among it rather than in front of a painted backdrop.
If your bracken strokes feel stiff, vary the pressure on your brush as you drag each one upward, heavier at the base, lighter at the tip, for a more natural taper.
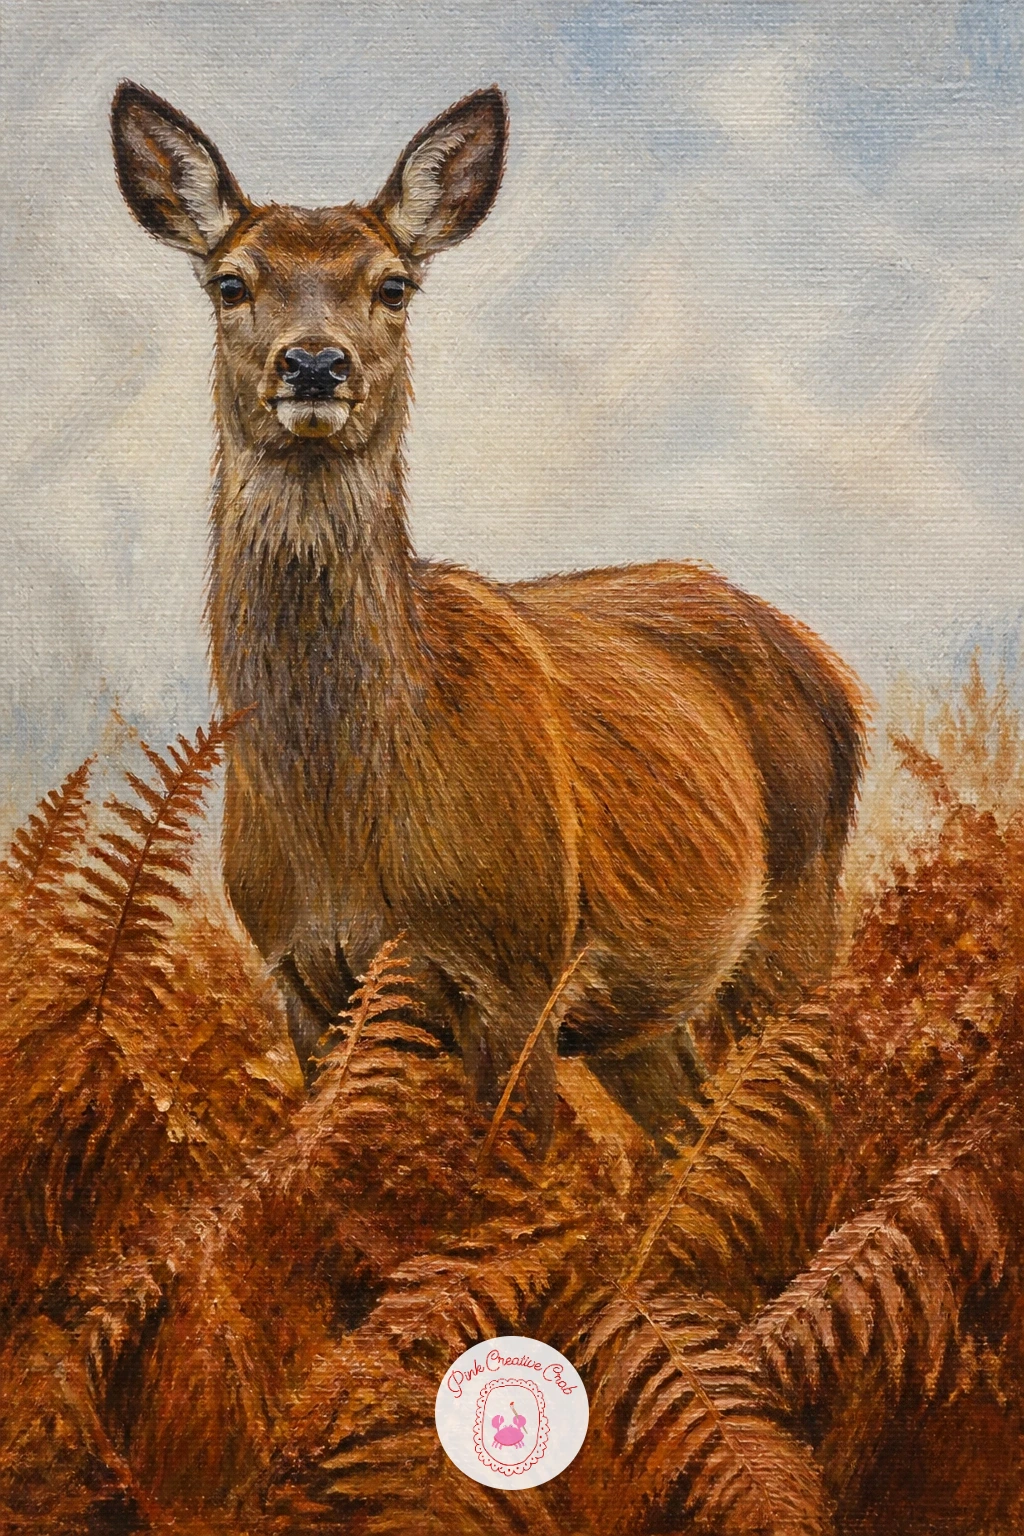
Palette: Burnt Sienna,Raw Umber,Cadmium Orange,Naples Yellow
Following the deer, a hare in the heather asks for careful attention to those long ears and powerful back legs, the two features that make a hare read as a hare rather than a rabbit. Paint the body in a crouched, alert pose first, keeping the back legs noticeably larger and more muscular than the front.
Build the ears long and slightly backswept, with a soft grey inner shadow and a darker tip, before adding the heather around its feet in the same loose purple dabs you used for the highland calf earlier in this list.
The eye is everything on a hare: keep it large, round and set slightly to the side of the head, with one bright highlight dot, which gives it that alert, about to bolt expression.
A quick ten minute version stops at the hare and a little heather underfoot. With forty minutes, add a soft golden evening light across its back by dry brushing a thin layer of warm yellow over the highlighted side.
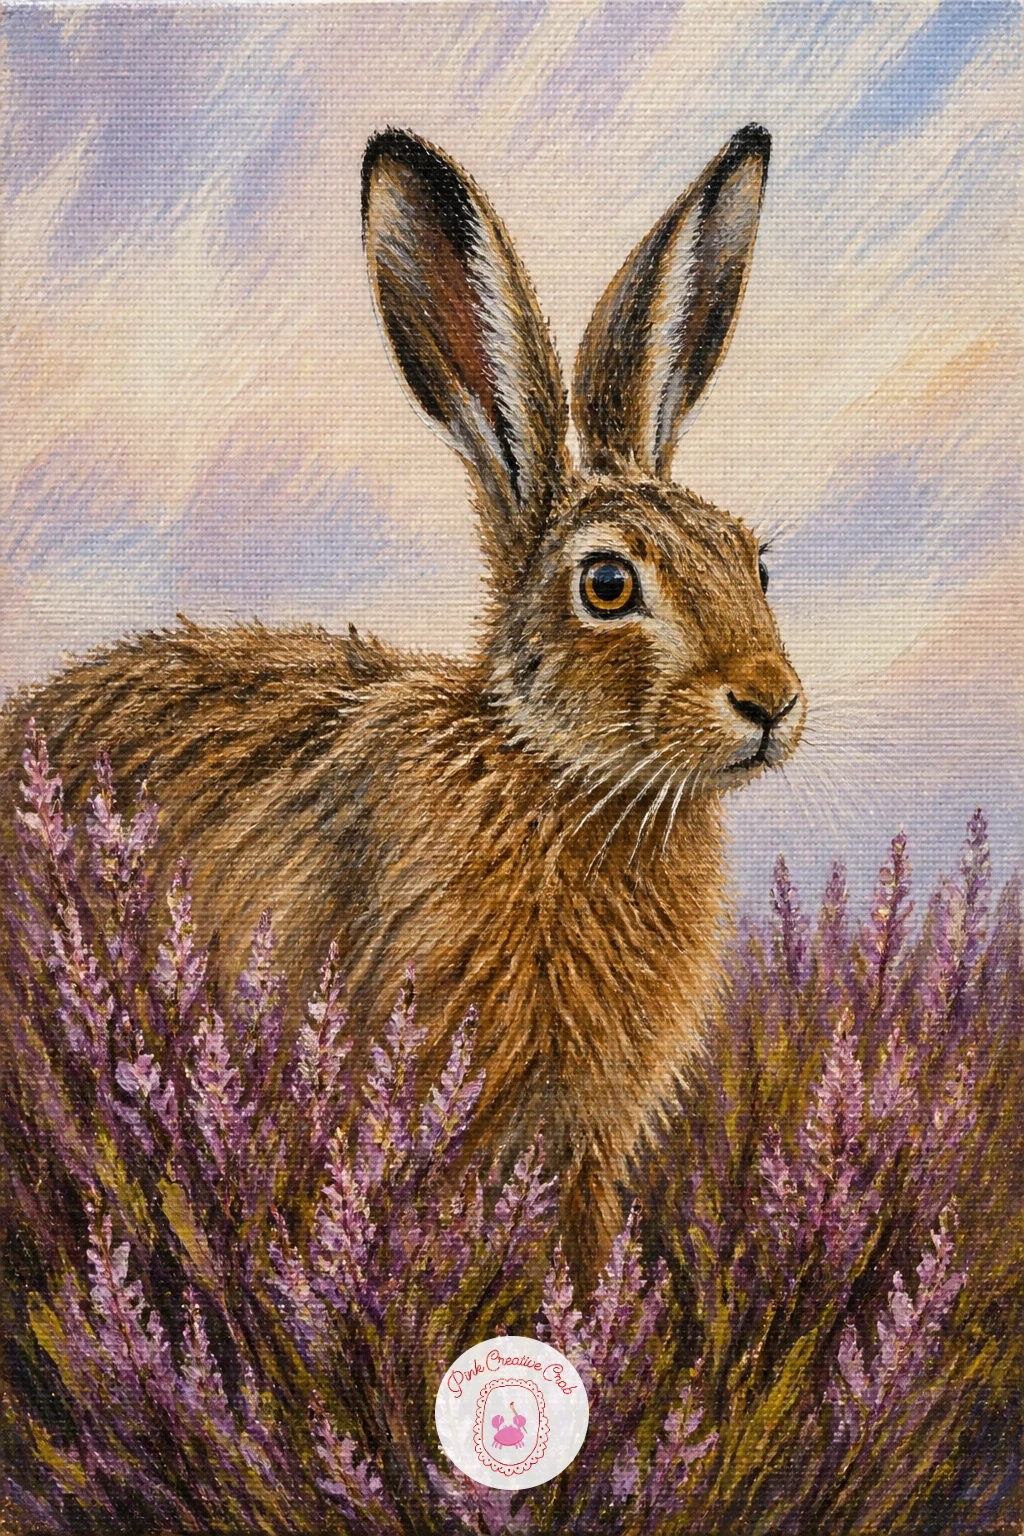
Palette: Burnt Sienna,Payne’s Grey,Dioxazine Purple,Naples Yellow
Bring the farm back into view with a border collie on a farm gate, resting its front paws on the top rail as collies so often do while watching the fields. Paint the gate first as simple horizontal and vertical wooden bars in weathered grey brown, leaving gaps for the dog to appear behind and over.
Build the dog’s black and white coat next, keeping the classic collie markings, a white blaze down the face, white chest and paws, against mostly black elsewhere, and let its front paws overlap the top rail of the gate.
Edges matter most here: keep the collie’s black fur edge slightly soft and broken against the sky rather than a hard cutout line, using a dry brush to feather a few strokes outward.
If straight gate rails feel tricky freehand, a strip of painter’s tape laid down first and removed once the paint is dry gives you perfectly crisp lines with no wobble.
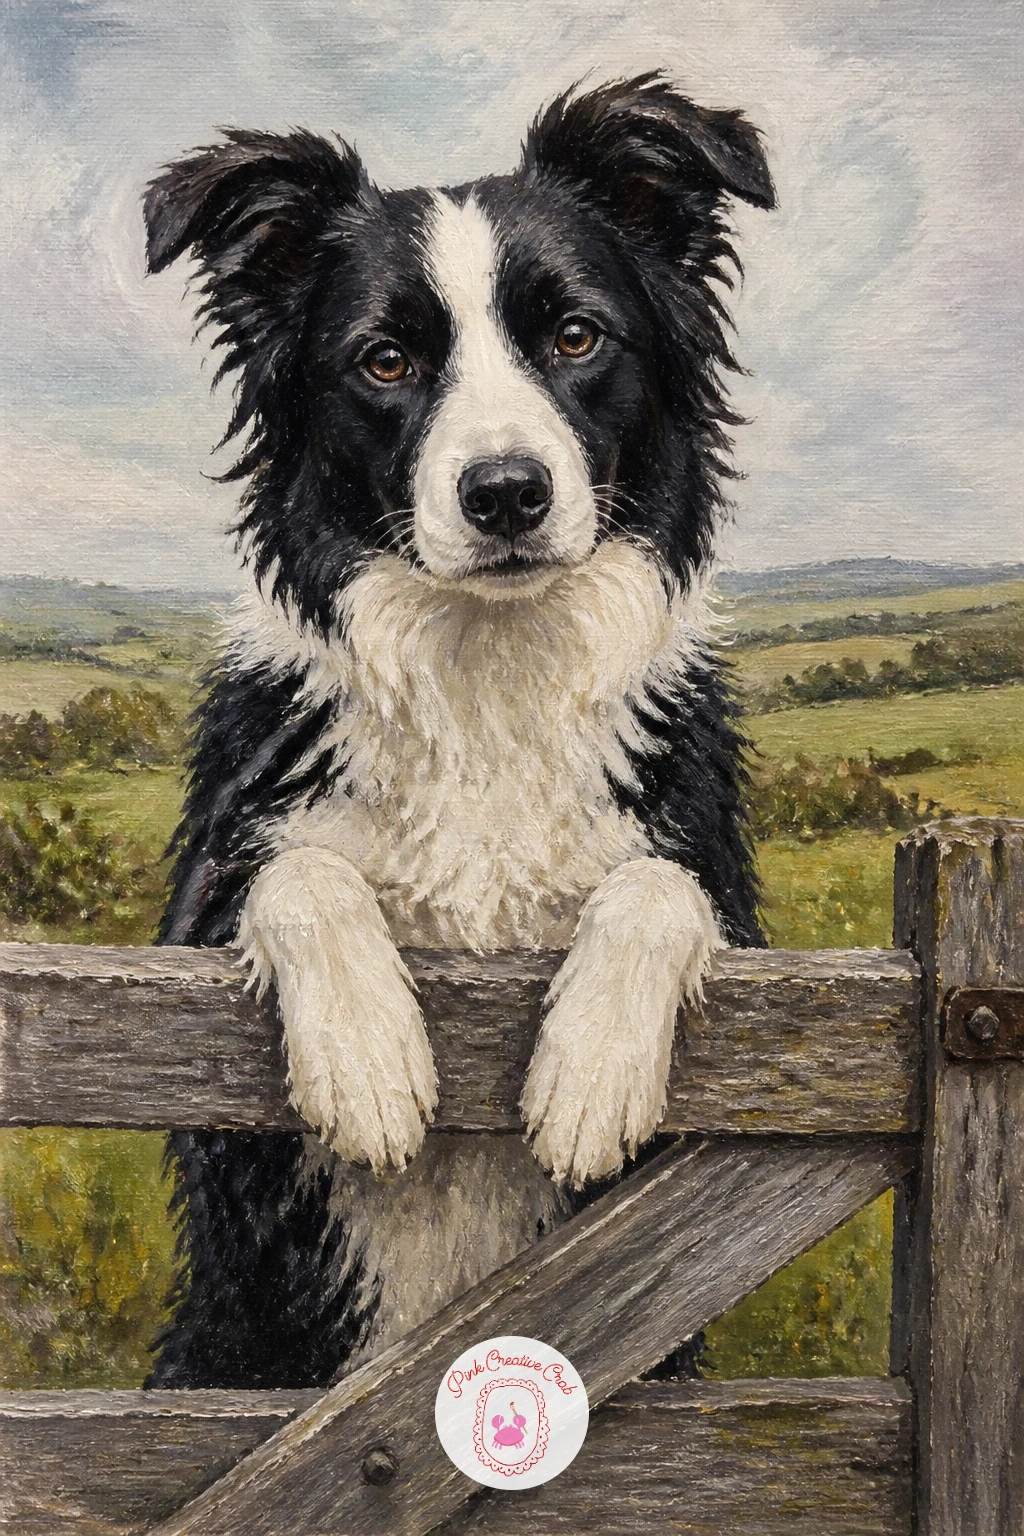
You Will Need
- painter’s tape for straight gate lines
Palette: Payne’s Grey,Titanium White,Raw Umber,Sap Green
Size and proportion are the whole challenge with a Clydesdale horse in a field, since this breed’s huge frame and feathered lower legs set it apart from any other horse you might paint. Compare the length of the leg to the depth of the chest before you commit, a Clydesdale’s chest is notably deep and its legs thick all the way down.
Block in the large, solid body first in a warm bay brown, then build the distinctive white feathering around the lower legs with soft, feathery upward strokes once the leg color beneath is dry.
Keep the mane and tail black or dark brown and fairly tidy compared to the shaggy Shetland pony earlier on this list, since Clydesdales have a groomed, working horse look rather than a wild one.
If the leg feathering looks too solid and blocky, stipple a little white dry brush texture through it afterward to break up the edge into soft wisps.
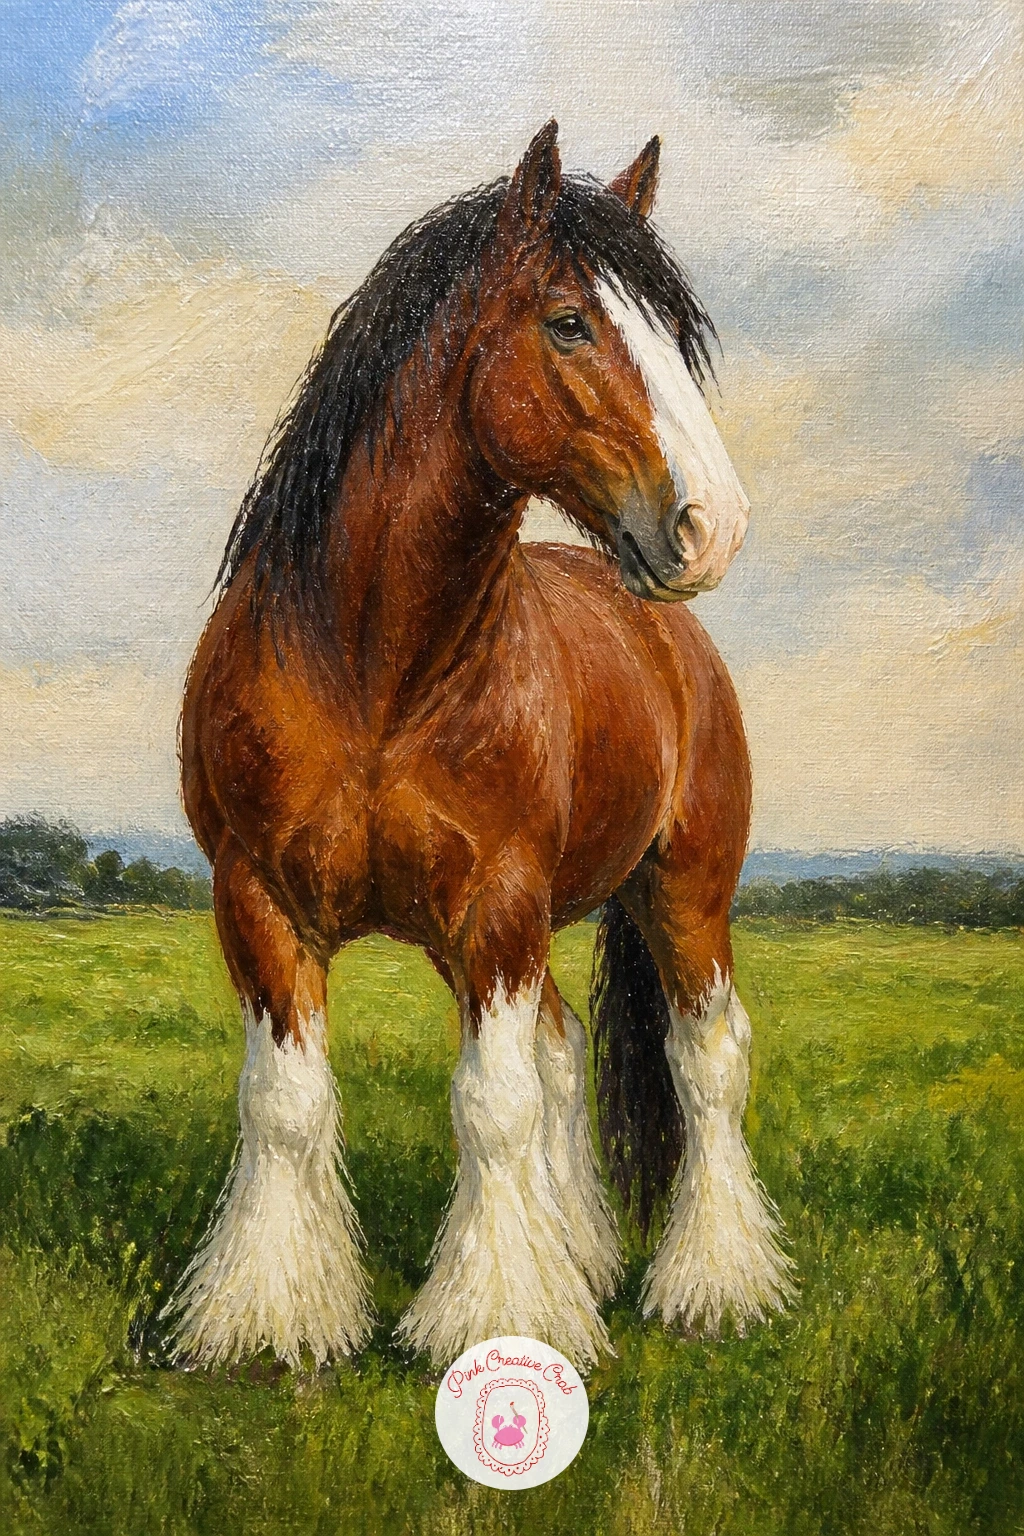
Palette: Burnt Sienna,Raw Umber,Titanium White,Sap Green
Climb up into the branches next for a pine marten in a tree, a quick and lively little subject once you have the body shape right. Think of its body as a long, low curve draped along a branch, closer to a cat stretched flat than a standing animal, with a thick bushy tail trailing behind.
Paint the branch first in warm brown, then lay the marten’s body over it in rich chestnut brown with a pale cream throat patch, which is the breed’s most recognizable feature and worth taking care over.
Where beginners lose the shape is the tail, often painted too thin. Keep it as thick as the body itself, built with the same dry brush fur technique you used for the highland cow’s fringe.
A simple swap if you are short on chestnut brown: mix burnt sienna with a touch of raw umber for a near identical warm tone.
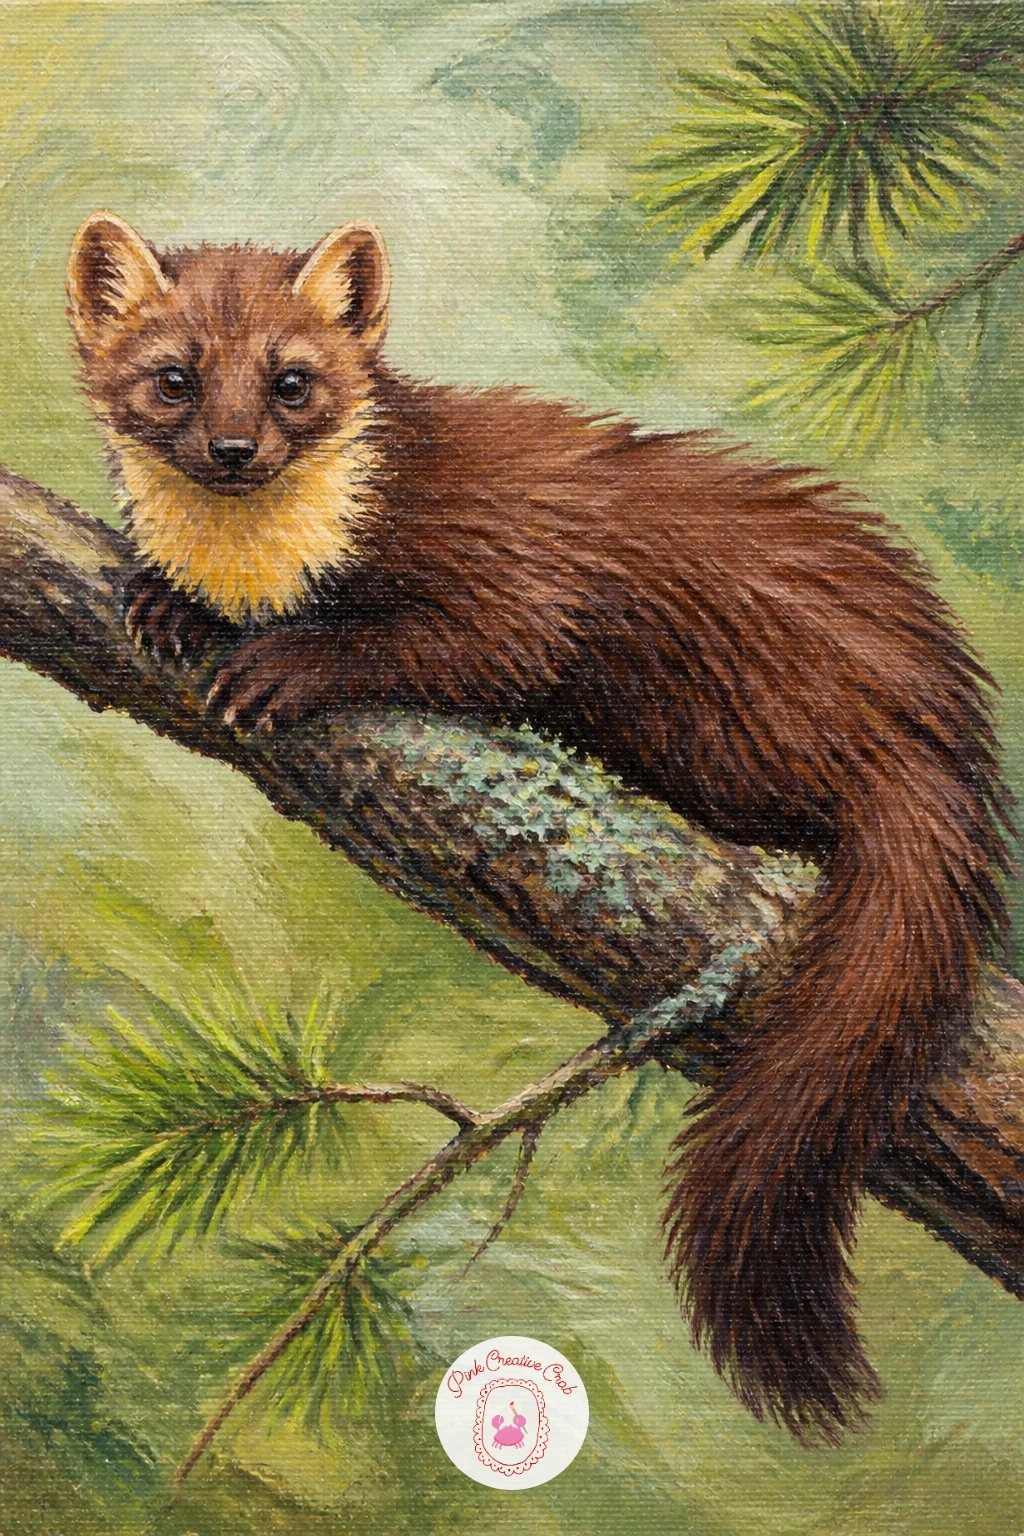
Palette: Burnt Sienna,Raw Umber,Naples Yellow,Sap Green
Low to the ground and round bodied, a grouse in the heather is a forgiving shape to paint, closer to an oval with a small head than anything complicated. Block in the rounded body first in deep reddish brown, keeping the head small and the beak short and dark.
The red marking above the eye is the detail that makes this bird instantly recognizable, so paint it as a small, bright red crescent once the head color is dry, placed just above and slightly behind the eye.
Build the surrounding heather in the same loose purple dabs used elsewhere in this list, letting a few sprigs overlap the bird’s lower body so it sits in its habitat rather than beside it.
If plain reddish brown looks flat for the feathers, drag a dry brush loaded with a slightly darker brown in short overlapping strokes across the back, which reads as individual feathers without painting each one.
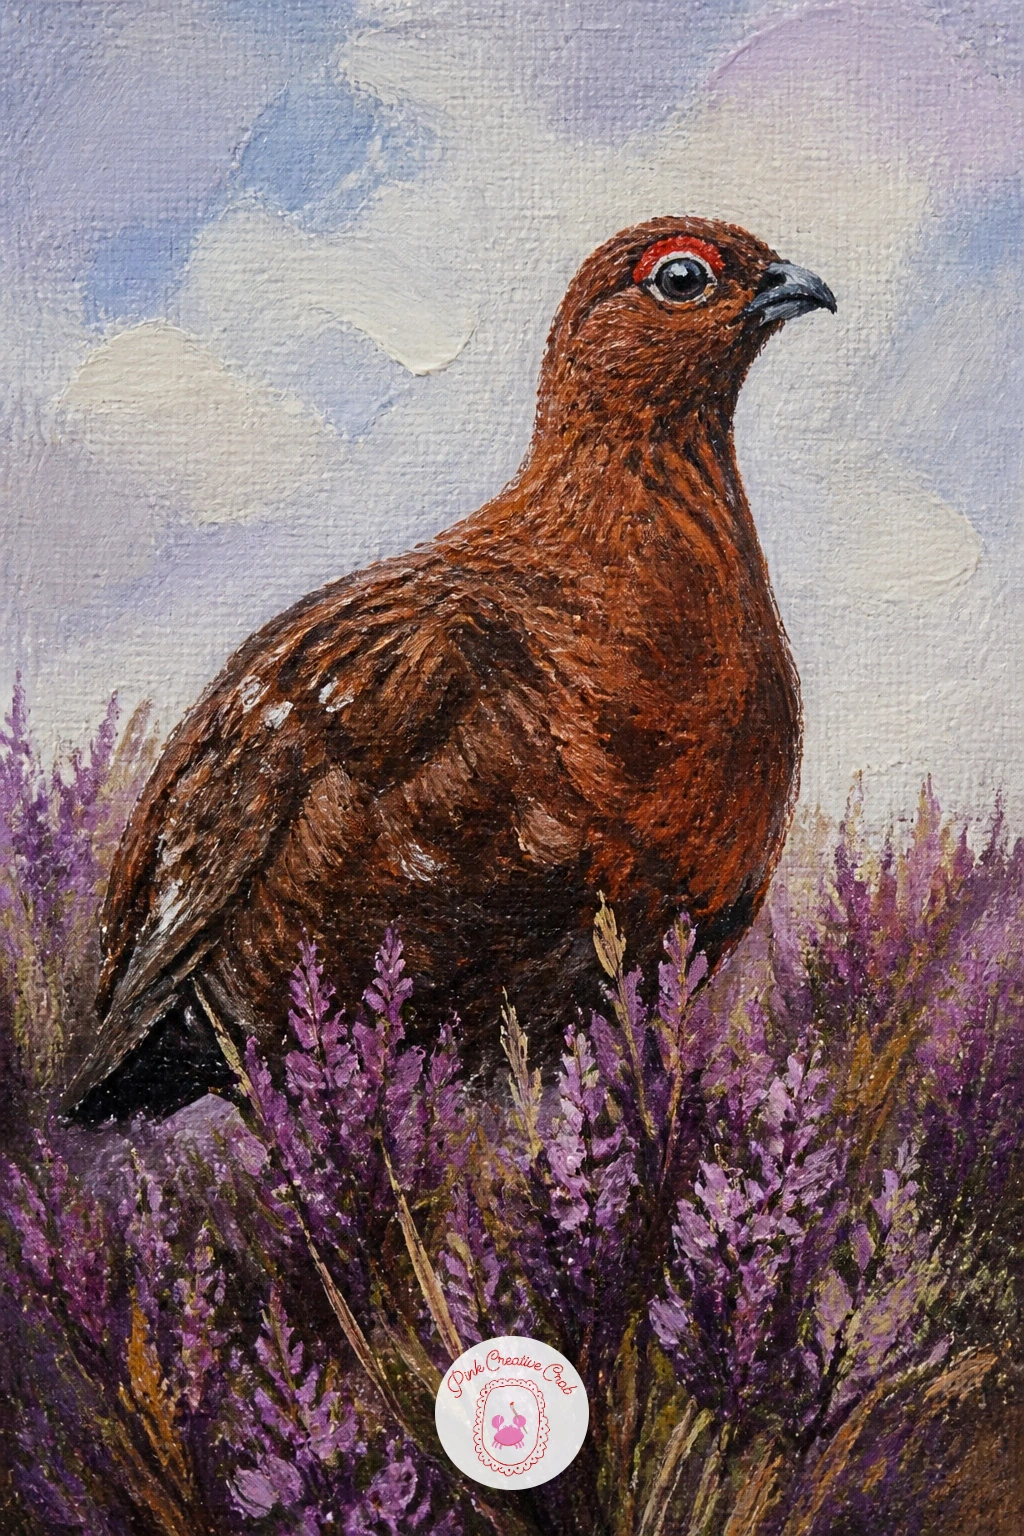
Palette: Burnt Sienna,Raw Umber,Indian Red,Dioxazine Purple
Light direction shapes the whole mood of a roe deer in birch woods, so pick whether dappled sunlight falls from the left or right before painting a single birch trunk, since every highlight depends on it. Paint the pale birch trunks first, simple vertical shapes with dark horizontal bark marks, leaving gaps of sky color between them.
Bring the roe deer in standing among the trunks, a slim reddish brown body in summer coat or a greyer tone for winter, with the side facing your chosen light source painted noticeably warmer and brighter than the shadowed side.
Scatter a few soft, loose dabs of warm yellow light across the ground and lower trunks on the lit side to suggest sunlight breaking through the canopy, keeping these dabs irregular rather than evenly spaced.
If the deer’s shadowed side looks muddy, cool it with a touch of grey rather than just adding more brown, which keeps it looking like shadow rather than dirt.
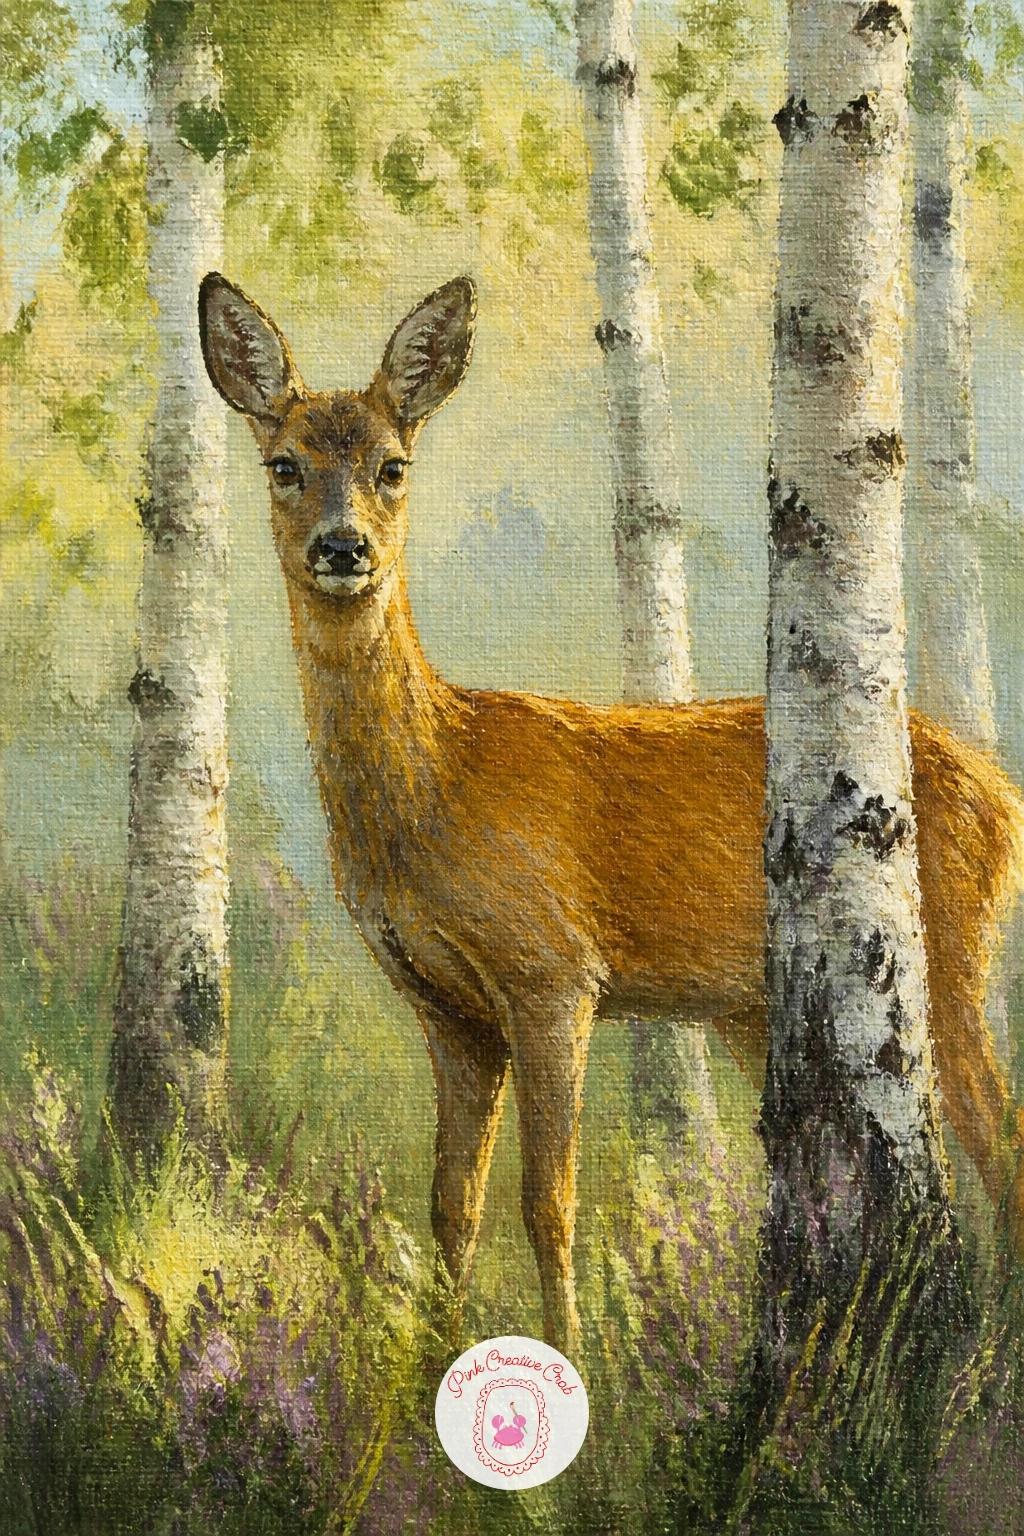
Palette: Burnt Sienna,Titanium White,Payne’s Grey,Naples Yellow
Markings carry almost the entire likeness of a Scottish wildcat, so get the body and face blocked in simply first before worrying about a single stripe. Paint a sturdy, thick bodied cat shape in grey brown, bigger and heavier looking than a house cat, with a short, thick, blunt tipped tail rather than a tapering one.
Once the base coat is dry, add the bold black stripes down the back and legs with a small flat brush, keeping them broken and irregular rather than perfectly even, which is how they actually appear.
The blunt, ringed tail is the detail people recognize most, so take care to paint it thick all the way to a rounded black tip rather than letting it taper like a domestic cat’s.
If bold black stripes feel intimidating freehand, draw their placement first in a thinned grey wash, let it dry, then go over confidently in solid black once you are happy with the spacing.
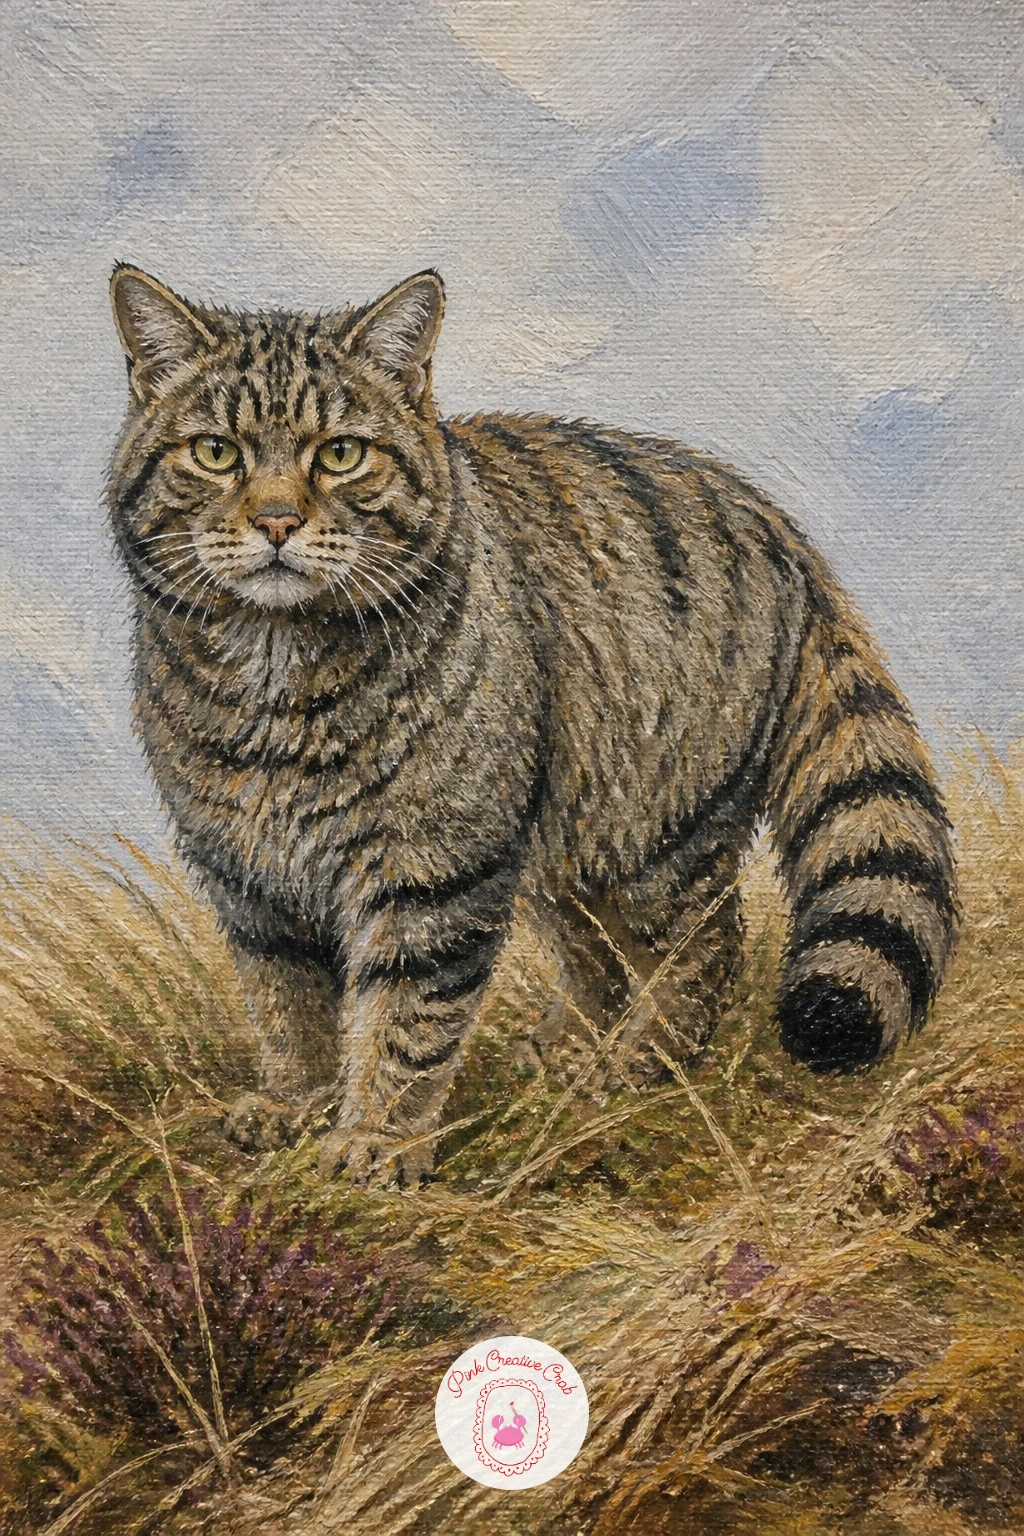
Palette: Payne’s Grey,Raw Umber,Titanium White,Sap Green
Nearly all white against white, a ptarmigan in snow lives or dies on subtle shadow, so lay a very pale grey blue base across the whole snow area before adding the bird, rather than leaving it stark white. Paint the ptarmigan itself in a slightly warmer, creamier white than the snow, with small flecks of mottled grey brown remaining on the wings and back.
Keep its black eye and the small red marking above it as the only strong dark accents in the whole painting, since everything else sits in a narrow range of soft whites and pale greys.
The mistake to avoid is flattening the bird into the background entirely. A thin blue grey shadow line along the underside of its body, where it meets the snow, is enough to lift it forward without losing the wintry, camouflaged feel.
If you do not have a pale blue grey mixed, a touch of payne’s grey into titanium white, added gradually, gives exactly that quiet, cold undertone.
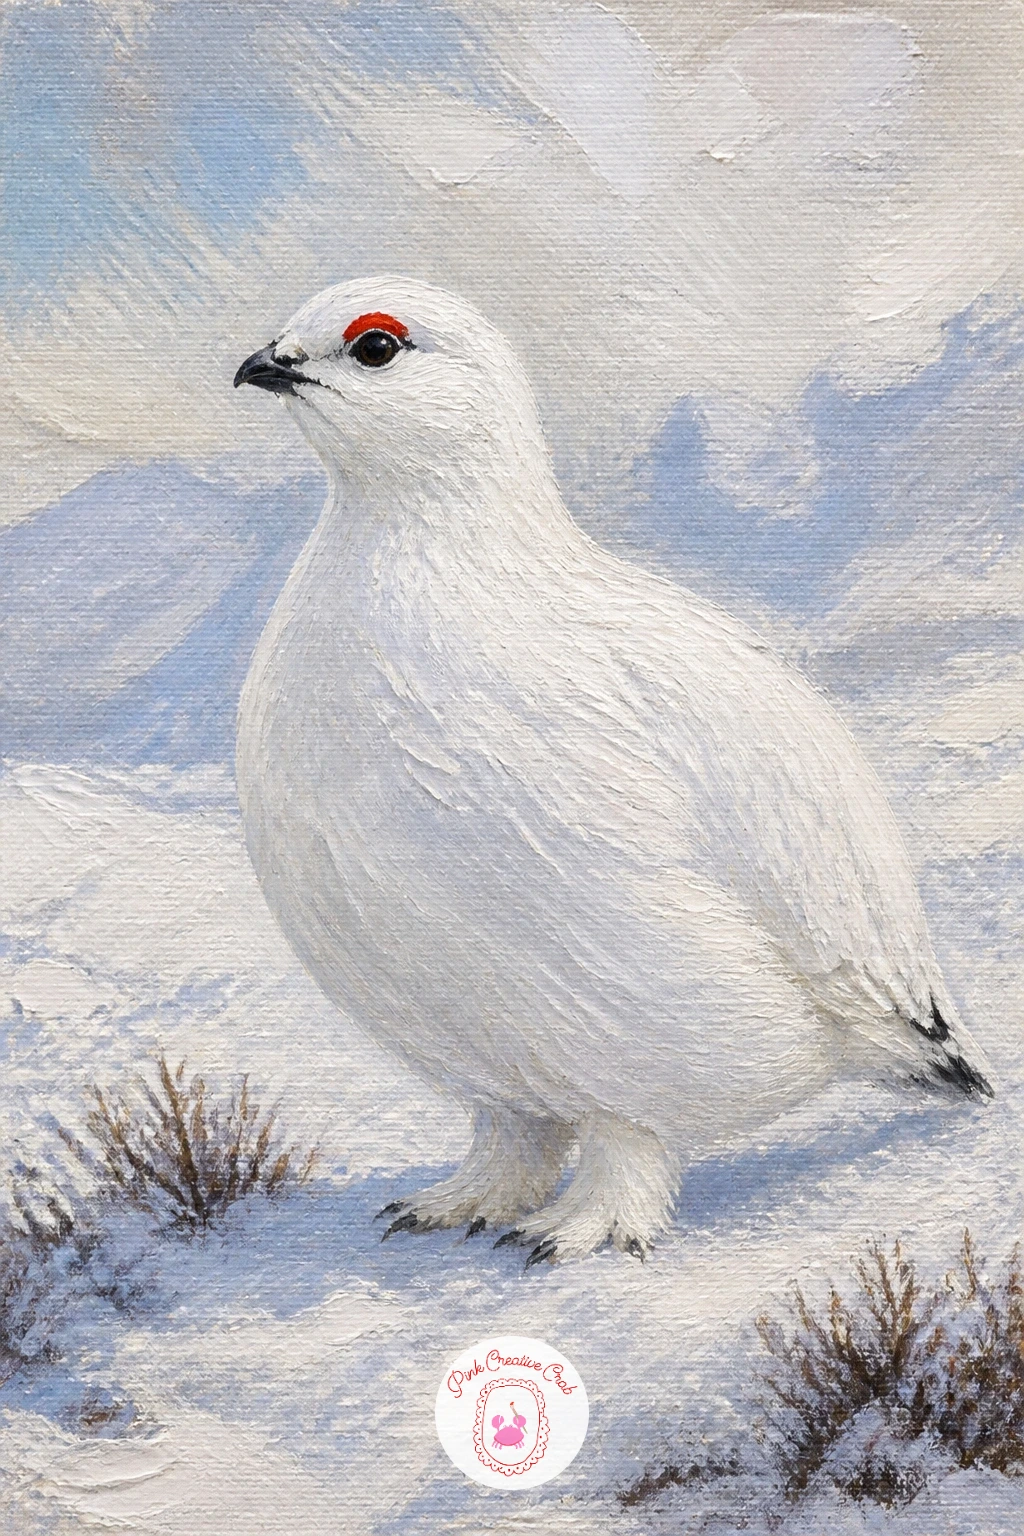
Palette: Titanium White,Payne’s Grey,Raw Umber,Indian Red
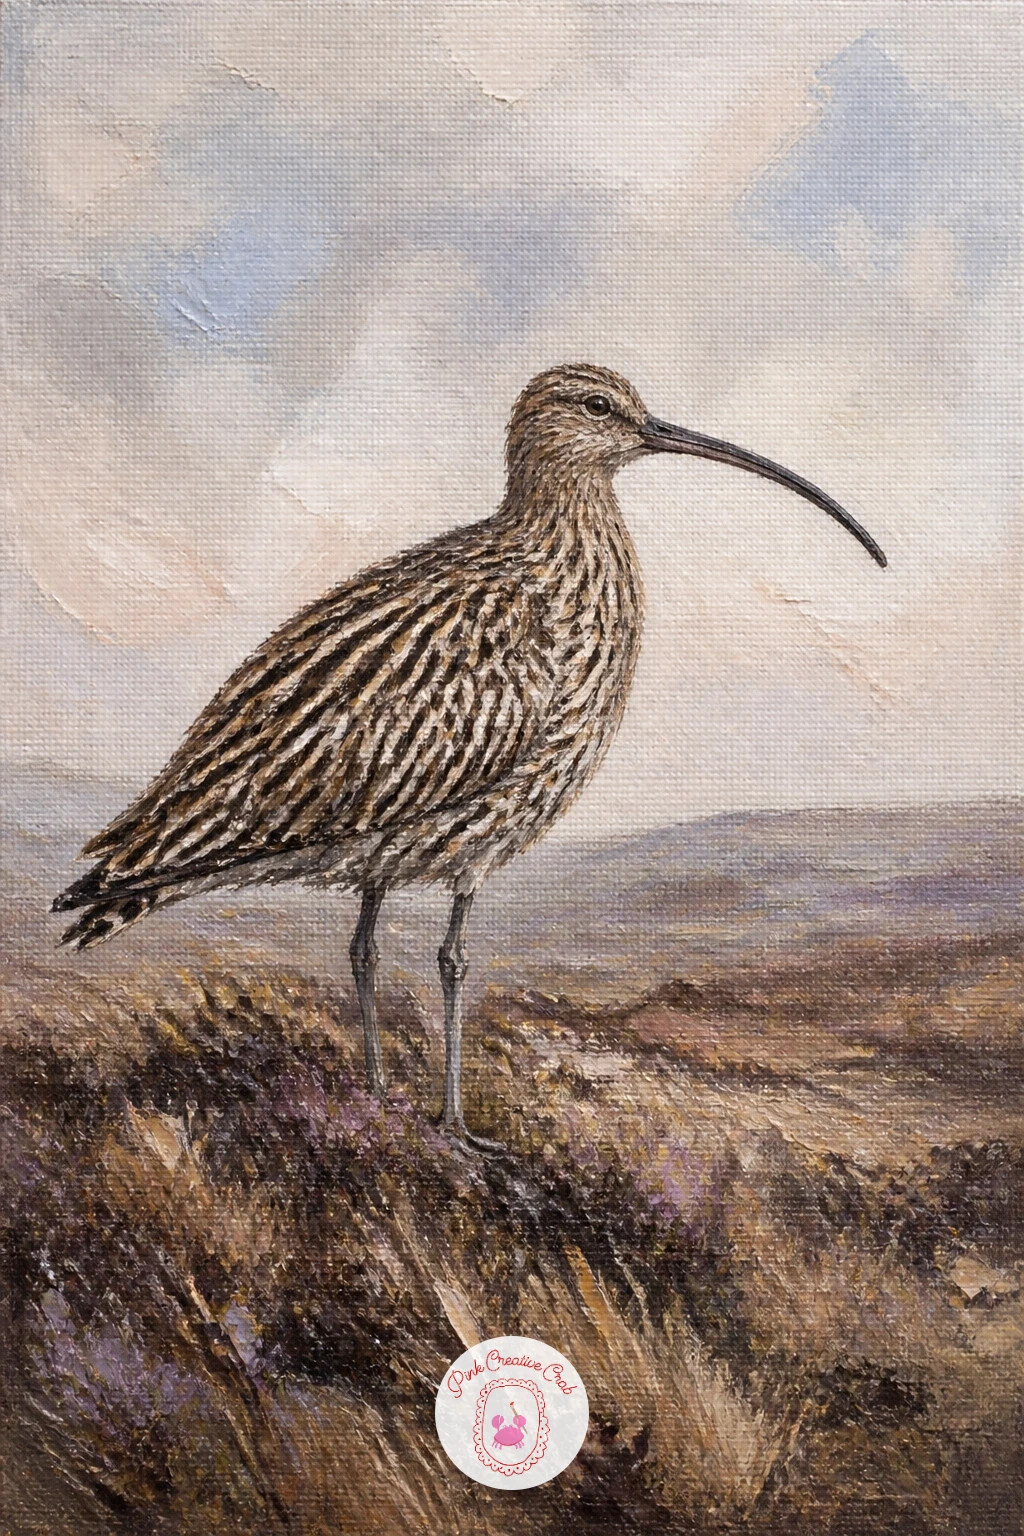
That long, distinctive curved beak is the whole identity of a curlew on a moor, so start there with a light, confident line before building the rest of the body around it. Paint the mottled brown body in soft, overlapping dabs of brown and cream, keeping the overall shape slim and long legged.
Bring the beak in once the head is dry, a long, smoothly curving dark line tapering to a fine point, longer than most beginners expect, roughly as long as the bird’s head and neck combined.
Stand it on a simple moorland ground of muted browns and dull greens, keeping the background loose and understated so the curved beak silhouette stays the clear focal point of the piece.
If the beak curve looks uneven, paint it in one smooth, unhurried stroke rather than several short ones, loading your brush generously so you do not have to lift it halfway through.
Palette: Raw Umber,Naples Yellow,Payne’s Grey,Sap Green
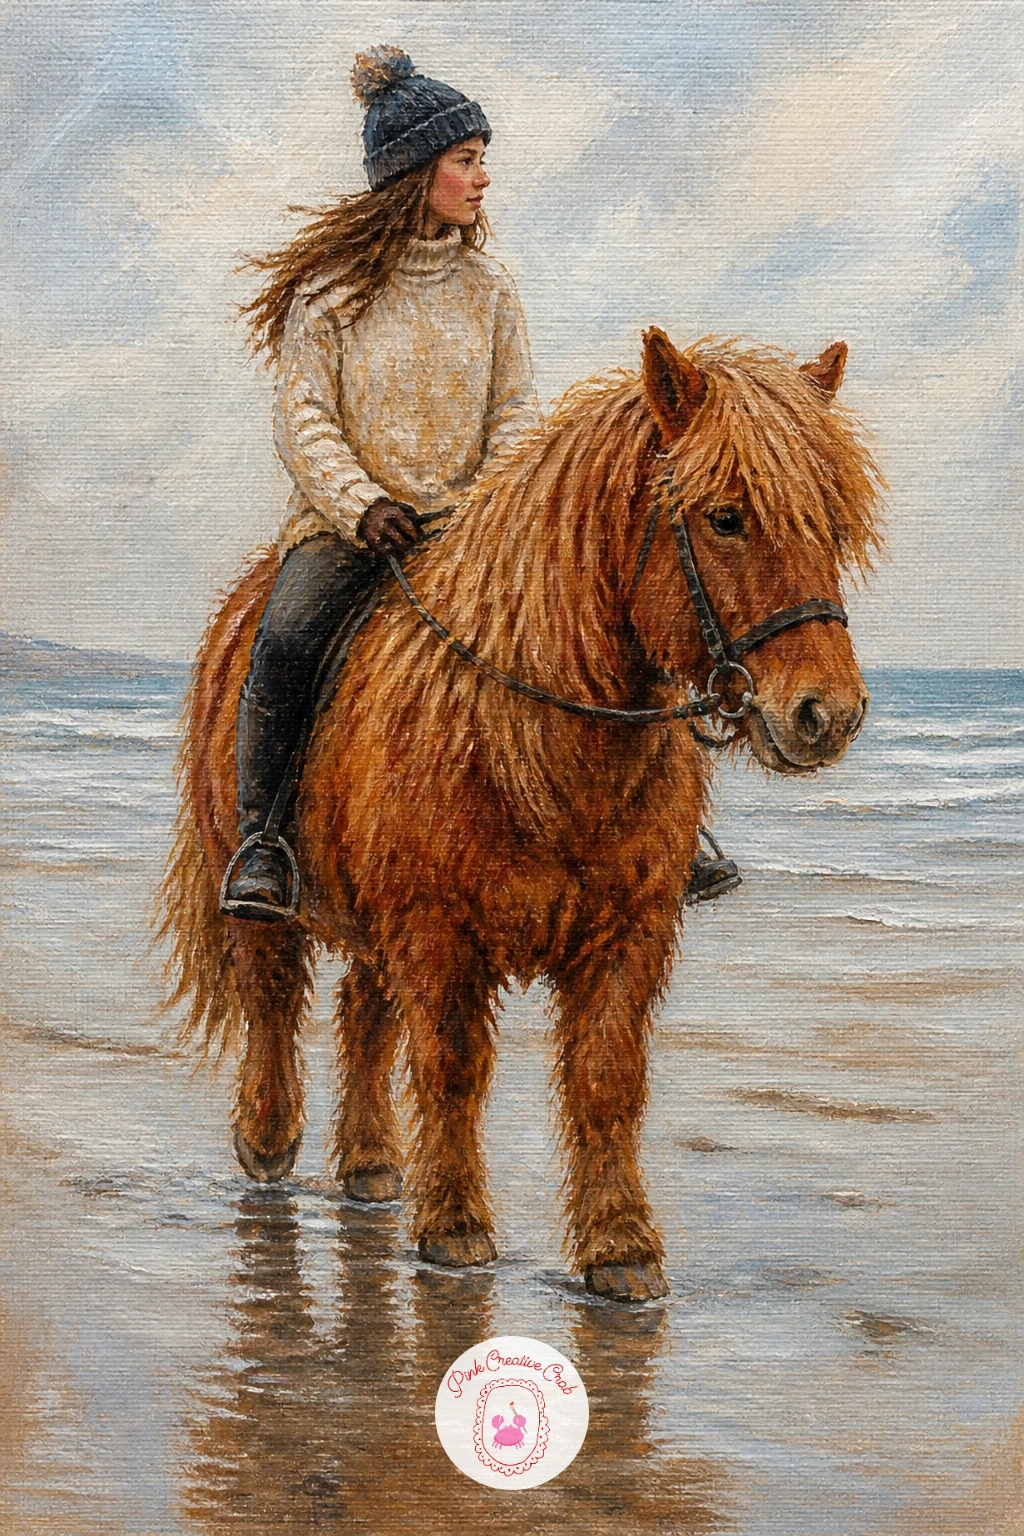
Bring the whole list toward the coast with a highland pony and rider on a beach, a livelier composition to finish on since it combines a moving figure with a landscape. Paint the wet sand and pale sky first, blending them loosely at the horizon, then build the pony standing or walking across it in warm dun or chestnut tones.
Add the rider in simple shapes on top, a jacket in a solid color, simplified limbs, keeping the figure smaller and less detailed than the pony so it stays the clear focal point.
A thin, pale reflection painted directly beneath the pony’s legs, just a soft smudge rather than a crisp mirror image, instantly sells the idea of wet sand underfoot.
If the beach background feels empty, a few simple gull shapes as small dark checkmarks in the sky fill the space without any extra detail work.
Palette: Burnt Sienna,Titanium White,Payne’s Grey,Naples Yellow
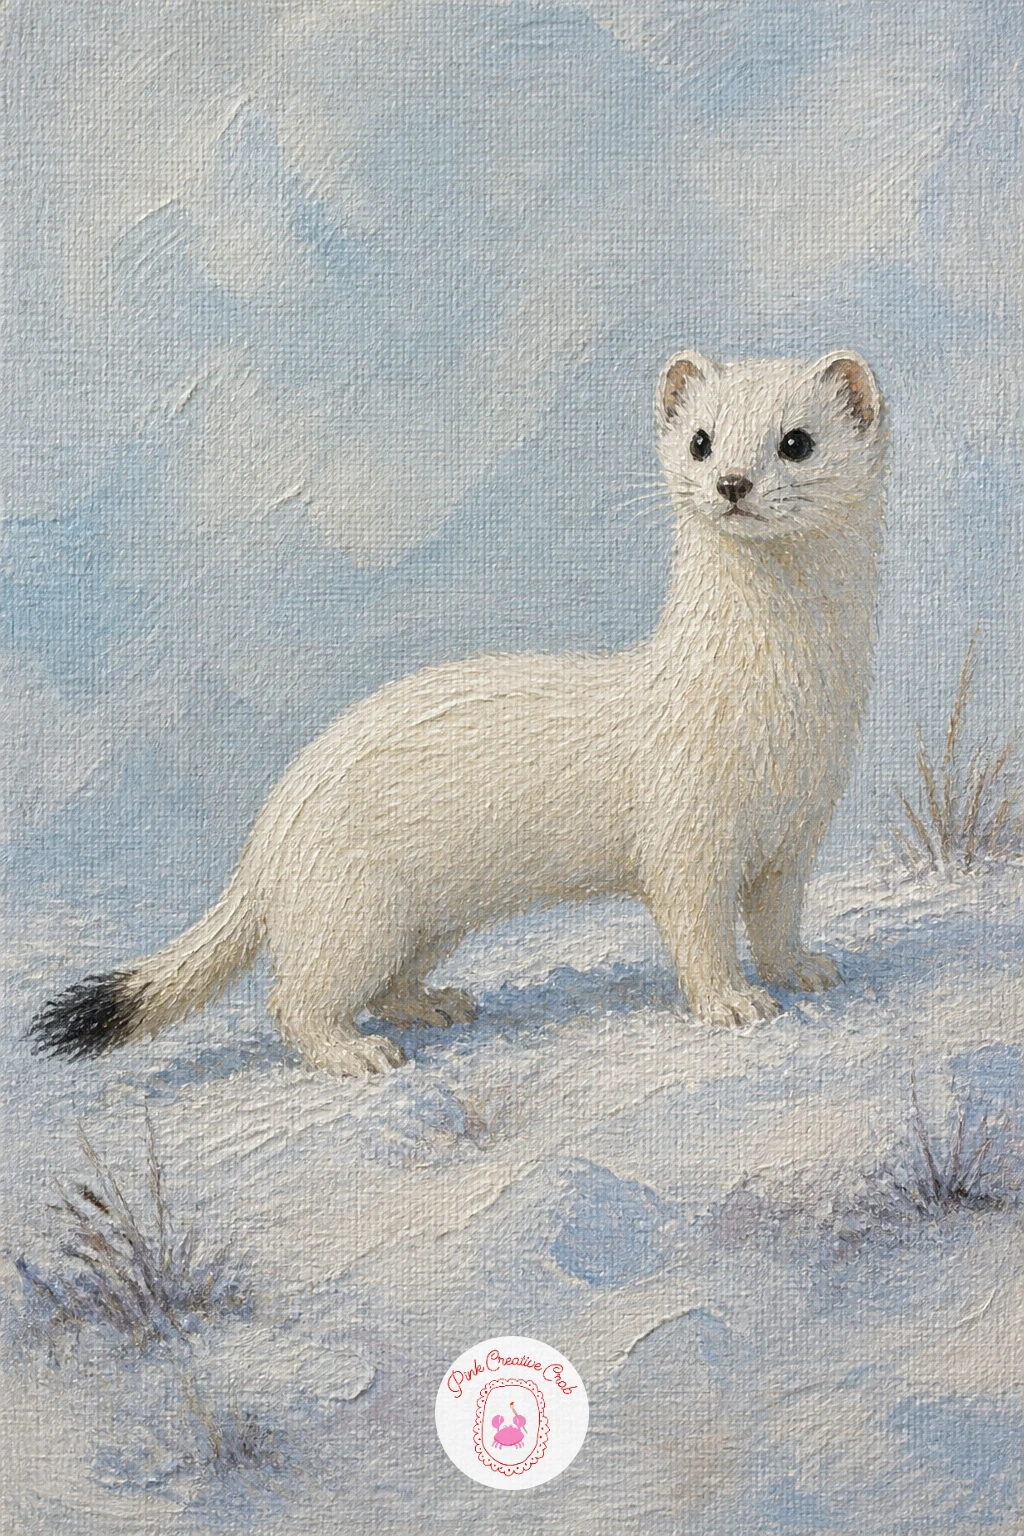
Close the whole list with the smallest animal on it: a stoat in its winter white coat, all compact body and quick energy. Paint the long, slender body first in soft creamy white, keeping the shape low and sinuous rather than round, with a noticeably long neck and small pointed head.
The one unmissable detail is the solid black tip at the very end of the tail, the single strongest dark mark anywhere in the painting, so save it for last and paint it with confidence once everything else is dry.
Keep the snow beneath it in the same pale blue grey tones used for the ptarmigan earlier in this list, so the stoat’s cream colored coat, slightly warmer than pure white, stands apart from the ground it sits on.
One concrete tip to finish on: whatever subject from this whole list you choose to paint today, mix your white with the tiniest touch of another color first, since pure white straight from the tube rarely sits well next to anything else on the canvas.
Palette: Titanium White,Payne’s Grey,Raw Umber,Naples Yellow
What to Do Next
Pick whichever highland cow or countryside creature pulled at you most while scrolling, gather your canvas, acrylics and a stiff brush, and start blocking in those big simple shapes today. One finished painting is always more useful than a long list of good intentions, so let the first brushstroke be the one you make right now.
Frequently Asked Questions
What paint is best for a highland cow painting?
Acrylic paint works best for this shaggy, textured style because it dries fast and holds thick brush ridges well. Student grade heavy body acrylics are ideal for beginners and build up fur texture without constant layering waits.
How do you paint realistic shaggy fur on a highland cow?
Use a dry, stiff brush loaded with only a little paint and drag it in short, consistent strokes following the direction fur actually grows. Layering two or three fur tones this way, lightest last, builds believable depth quickly.
What colors do I need for a highland cow painting?
A warm palette of burnt sienna, raw umber, titanium white and a soft grey covers almost every highland cow. Adding heather purple, sap green and a cream or yellow lets you paint the Scottish backgrounds around it too.
Do I need to sketch before painting a highland cow?
A light pencil or thinned paint outline helps with proportion but is not essential once you have practiced the shape. Beginners usually find it easier to block in simple rounded shapes first rather than fine outlines.
How long does a highland cow painting take to finish?
Most of these ideas finish comfortably in one sitting, somewhere between thirty minutes and an hour depending on detail. Simpler subjects like a resting calf take less time than busier scenes like a herd crossing a road.
Have any thoughts?
Share your reaction or leave a quick response — we’d love to hear what you think!
-
 0
-
0
-
0
-
0
-
0
-
0


