

A christmas snowman painting gets so much more fun once your snowman starts acting like an actual character instead of a cone of white paint. These 33 ideas give you a snowman sunbathing in sunglasses, one toasting with champagne, one badly ice skating, each one a tiny scene you can finish in a single sitting with gouache.
Scroll at your own pace and pick whichever one makes you smile first. Every idea below walks you through the paint order, the one place it tends to go wobbly, and a swap if you are missing a color, so you can go straight from phone screen to paper.
Using these images: free for personal projects such as printing, coloring, cards, journals and gifts. Handmade items that include them may be sold up to 30 pieces per design. More than that is commercial use and is not permitted, and neither is selling or sharing the images themselves or passing them off as your own. Please ask before any other use.
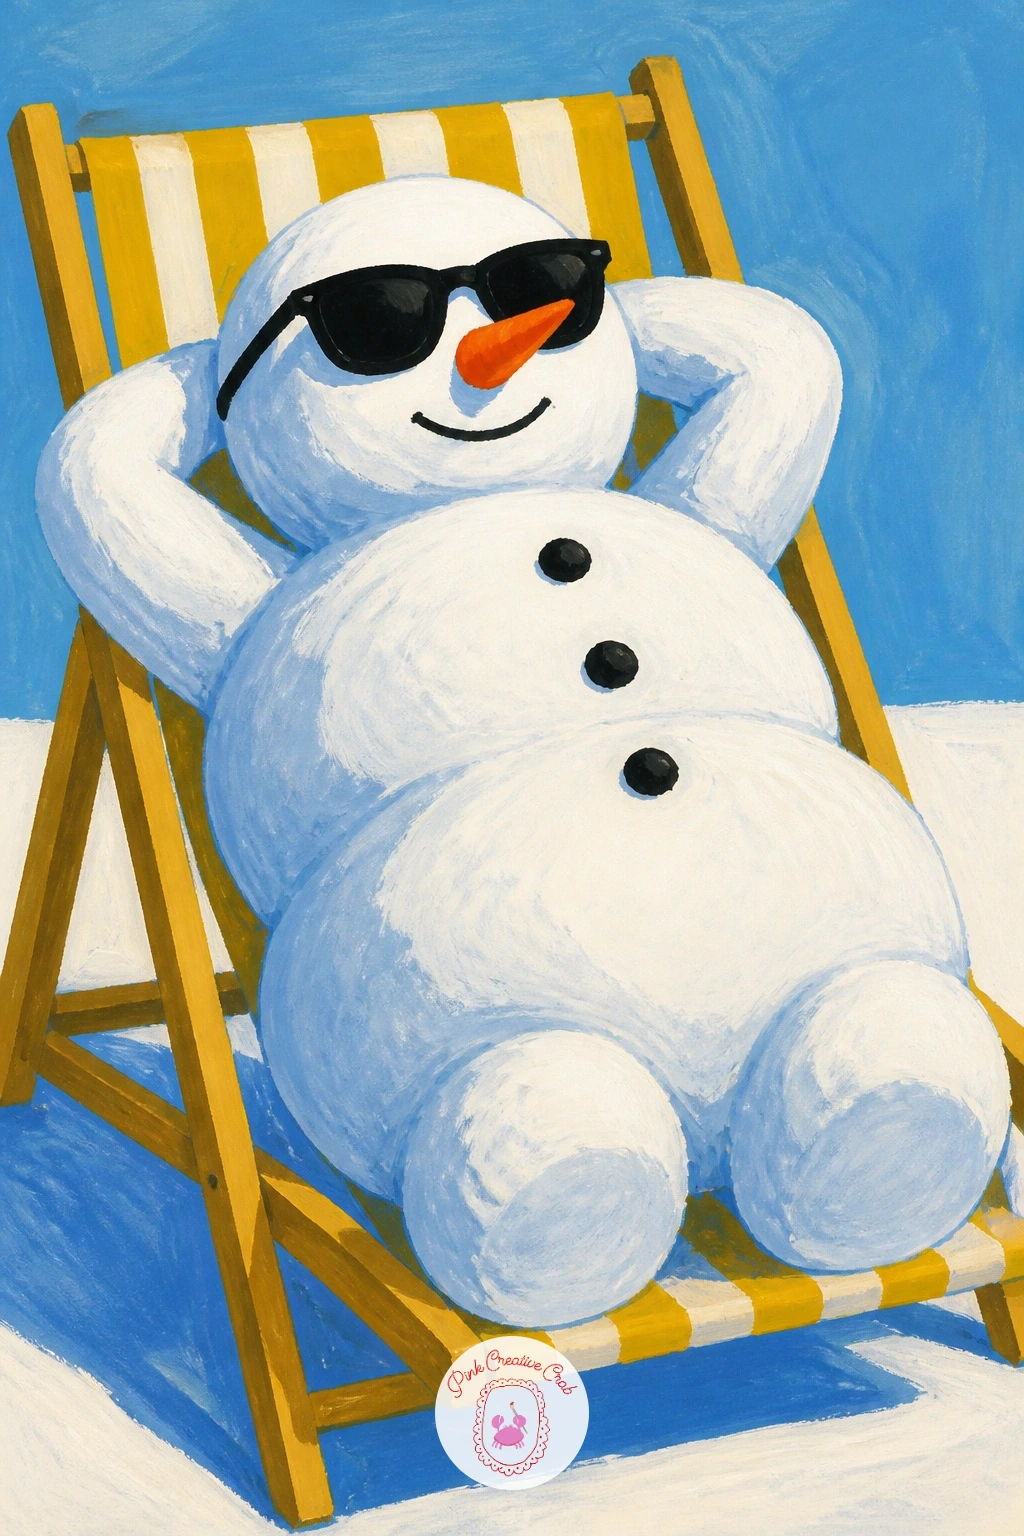
Start simple with a snowman sunbathing, stretched out in a tiny deck chair with round black sunglasses perched on his coal nose. Block in the white body first as two stacked ovals, letting the lower one dry before you paint the chair stripes in mustard and white across the top.
Keep the snowman’s limbs loose, just a few curved stick-arms in dark gray, so the pose reads as relaxed rather than stiff. Add the deck chair fabric in flat mustard stripes once the body is dry, then drop in tiny blue cast shadows underneath each stripe to ground it on the snow.
The mistake here is painting the sunglasses too early and smudging them while you finish the body, so save them for last with a fine round brush. If you do not have mustard gouache, mix yellow ochre with a touch of white instead.
Try this one in ten minutes with no shadows at all, just flat shapes, and save the blue cast shadow for the forty-minute version.
You Will Need
- heavyweight paper
- round brush size 6
- fine liner brush
- mustard and blue gouache
Palette: Titanium White,Payne’s Grey,Mustard Yellow,Cerulean Blue
Look at a real folding deck chair for the stripe spacing, it reads more convincing than evenly guessed stripes.
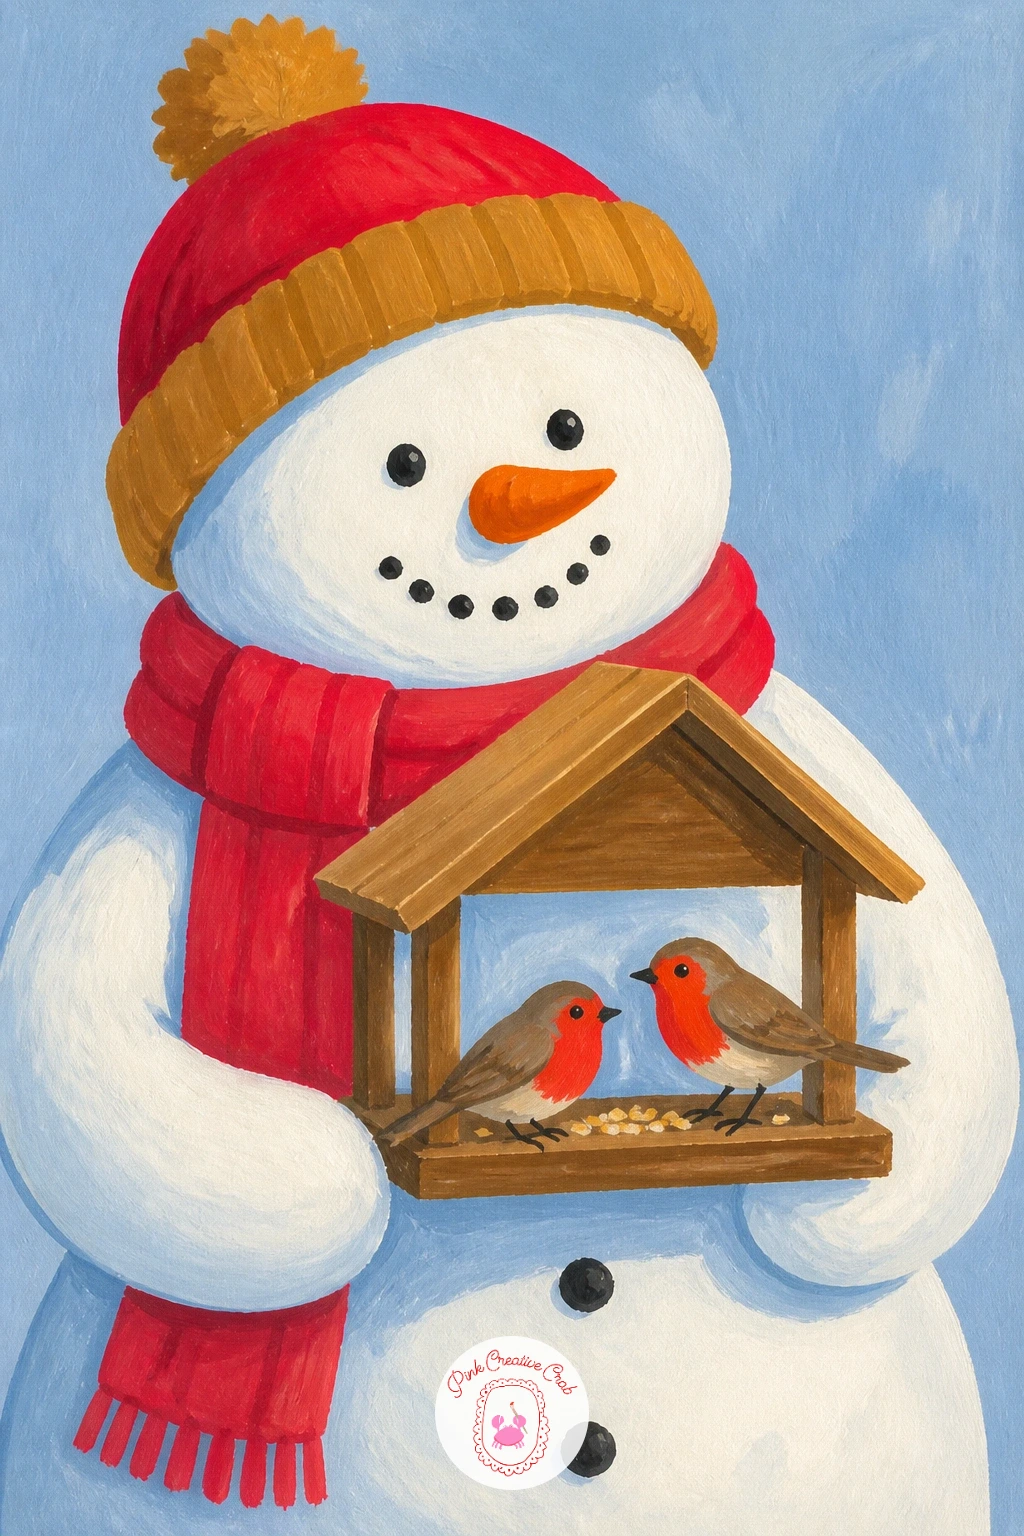
Move from lounging to kindness with a snowman holding a little bird feeder out for two robins. Paint the snowman’s round body first in two layered white circles, using a slightly grayer white underneath for the shadowed side so the form feels rounded rather than flat.
Once dry, add a simple wooden feeder shape in warm brown held in one stick arm, then paint the robins perched on its edge with round red-orange bellies and tiny black heads. This is where eye level matters: paint the robins slightly below the snowman’s arm so they look like they are genuinely landing there, not floating beside it.
If the robins come out too big, scale them down with a smaller brush rather than repainting, since gouache layers well once dry. No red gouache on hand, mix a little orange into crimson instead.
Finish with one tip: add tiny black dot eyes last, after everything else dries, so they stay crisp instead of bleeding into wet feathers.
You Will Need
- round brush size 6
- fine liner brush
- brown and red-orange gouache
- scrap paper for testing
Palette: Titanium White,Burnt Umber,Vermilion,Payne’s Grey
Reference a real robin photo for the belly shape, an oval rather than a circle makes the bird instantly more convincing.
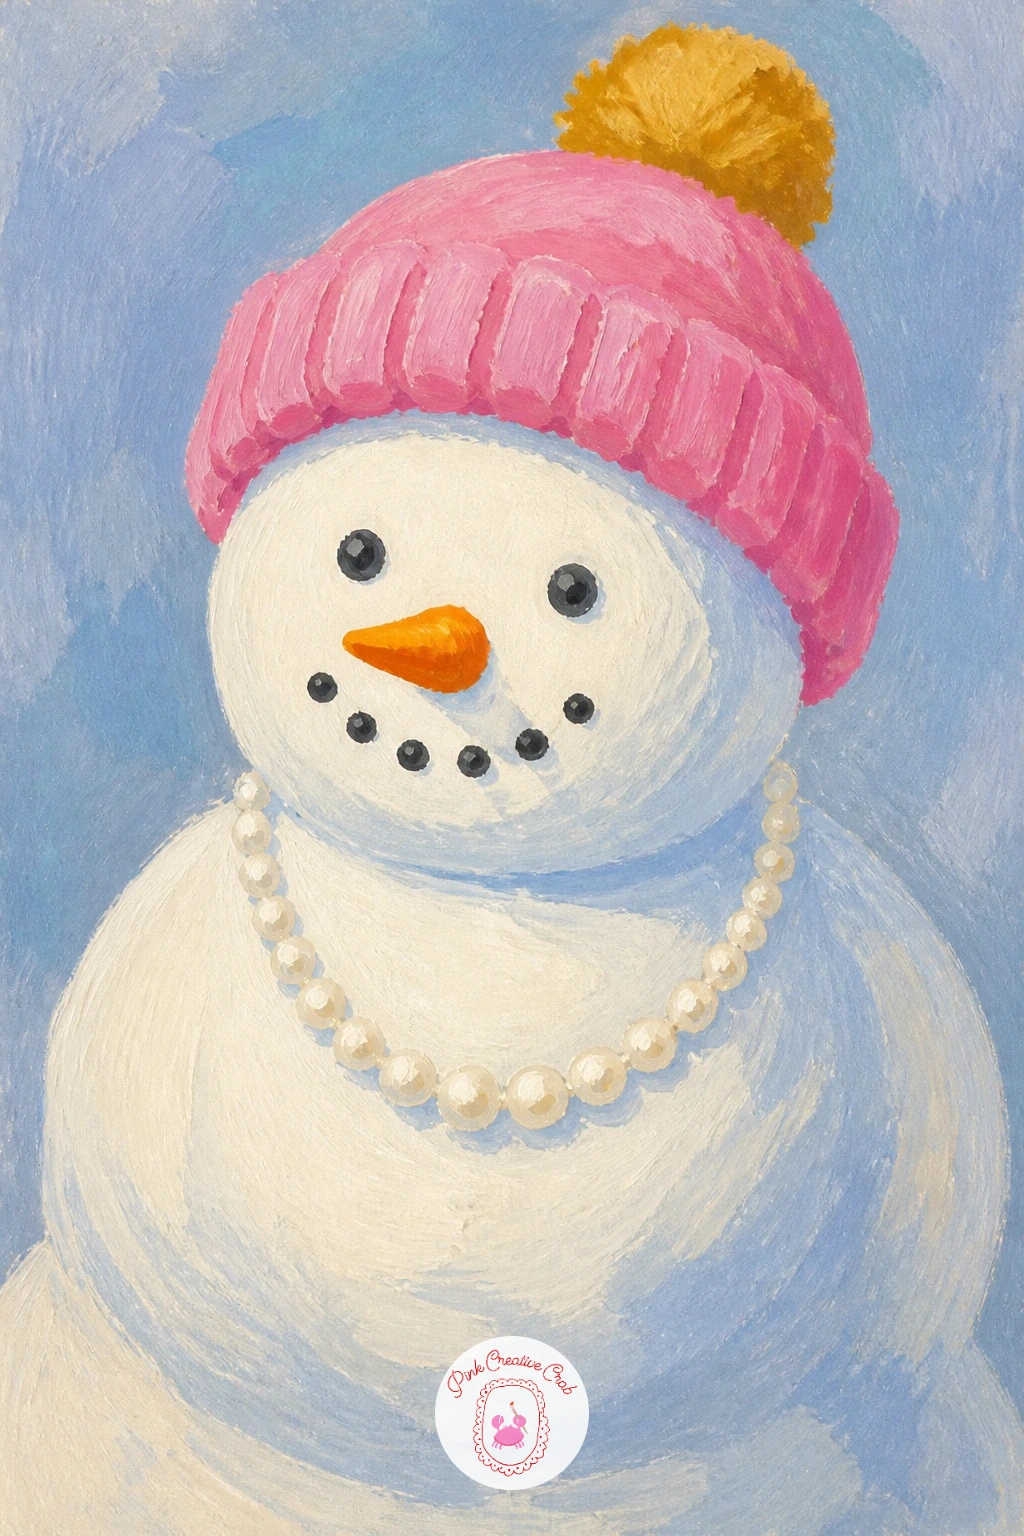
Give your snowman a glamorous moment in a pink beanie and a string of pearls. Lay down the white body in two circles as before, then while it is still slightly damp, soften the edge between the circles with a dry brush so the neck join disappears.
Paint the beanie in flat bubblegum pink once the body is dry, adding a small mustard pompom on top for contrast. The pearls go on last as a single curved row of small white dots outlined in the faintest gray, which is the part that goes wrong if you crowd them too close together or make them perfectly even.
Space the pearls slightly irregular, the way a real necklace drapes, and it reads far more natural. No pink gouache in your set, mix white into magenta or crimson until it lightens.
Try adding a second strand of pearls next time, or swap the beanie color to red for a different mood entirely.
You Will Need
- round brush size 6
- fine liner brush
- pink and mustard gouache
- white gouache for pearls
Palette: Titanium White,Bubblegum Pink,Mustard Yellow,Payne’s Grey
Try a gold gel pen over the dry pearls for a little shimmer instead of plain white dots, it catches the eye nicely on a finished piece.
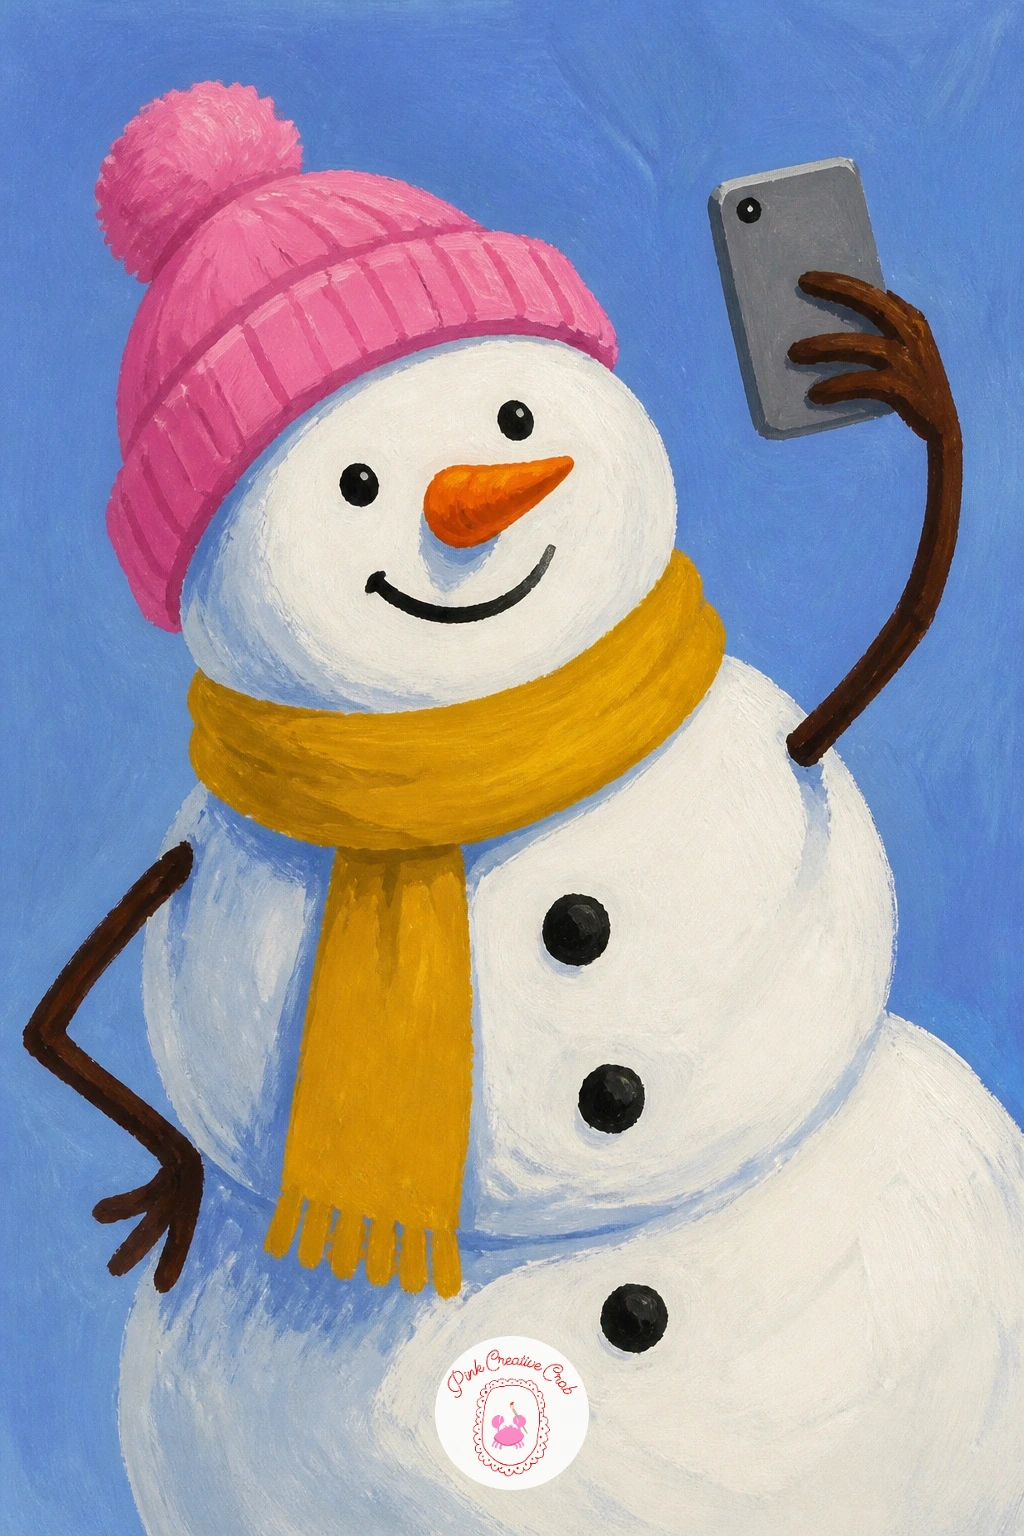
Here is where things get genuinely funny: paint a snowman holding up a phone to take his own selfie, arm bent awkwardly the way everyone’s does. Start with the body as usual, then plan the bent stick-arm before you paint it, sketching it lightly in pencil so the elbow angle looks deliberate rather than broken.
The phone itself is a small flat gray-blue rectangle with a lighter blue screen rectangle inside it, painted once the arm is fully dry. Give the snowman a goofy smile made of three dots in a curve, which instantly sells the joke more than a serious coal-button face ever could.
The common slip is making the phone too large, so hold your brush at arm’s length and check the scale against the snowman’s head before committing. If you lack a cool gray-blue, mix Payne’s grey with a touch of white.
Today’s tip: paint the smile last with the tip of a fine brush, one confident stroke rather than several timid ones.
You Will Need
- fine liner brush
- round brush size 4
- gray-blue and white gouache
- pencil for the arm angle
Palette: Titanium White,Payne’s Grey,Slate Blue,Soft Black
Try giving the snowman rosy cheeks with a pink dry brush blush, it adds warmth and makes the selfie pose feel even more alive.
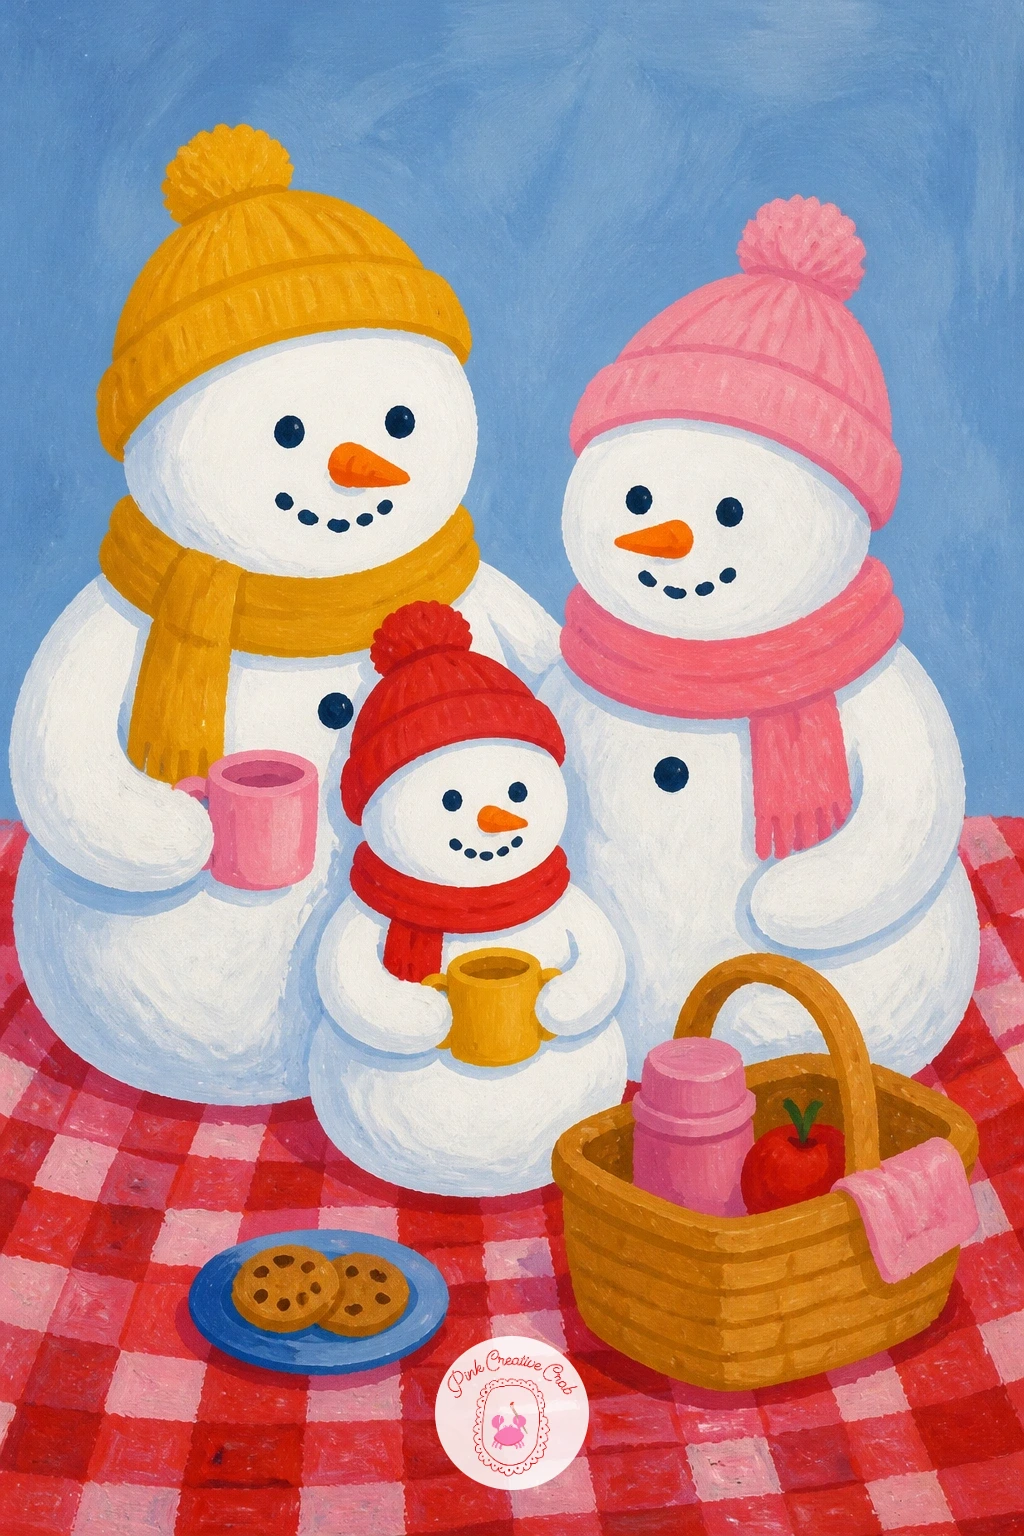
Build on that single snowman by painting a whole snowman family having a picnic together on the snow. Start with the tallest snowman first, placing him slightly left of center, then add a smaller one and a tiny baby snowman scaled down by roughly half each time, which keeps the family size relationships believable.
Paint a red checkered blanket beneath them before any of the figures, so the white snowmen sit cleanly on top once the blanket dries. Add a basket and a couple of mustard-colored sandwiches between them as the final detail layer, keeping these props small so the snowmen remain the stars of the page.
The easy mistake is spacing the three snowmen in a perfectly even row, which looks stiff, so overlap the smallest one slightly behind the blanket’s edge instead. If red gouache runs low, a warm coral works just as well for the blanket.
For a quicker version, paint just two snowmen and skip the props entirely, adding the full picnic spread only when you have forty unhurried minutes.
You Will Need
- round brush size 6 and size 2
- red and mustard gouache
- pencil for sizing
- heavyweight paper
Palette: Titanium White,Poppy Red,Mustard Yellow,Payne’s Grey
Space the three snowmen using the smallest one as your measuring unit, roughly one and a half baby-widths between each figure keeps it balanced.
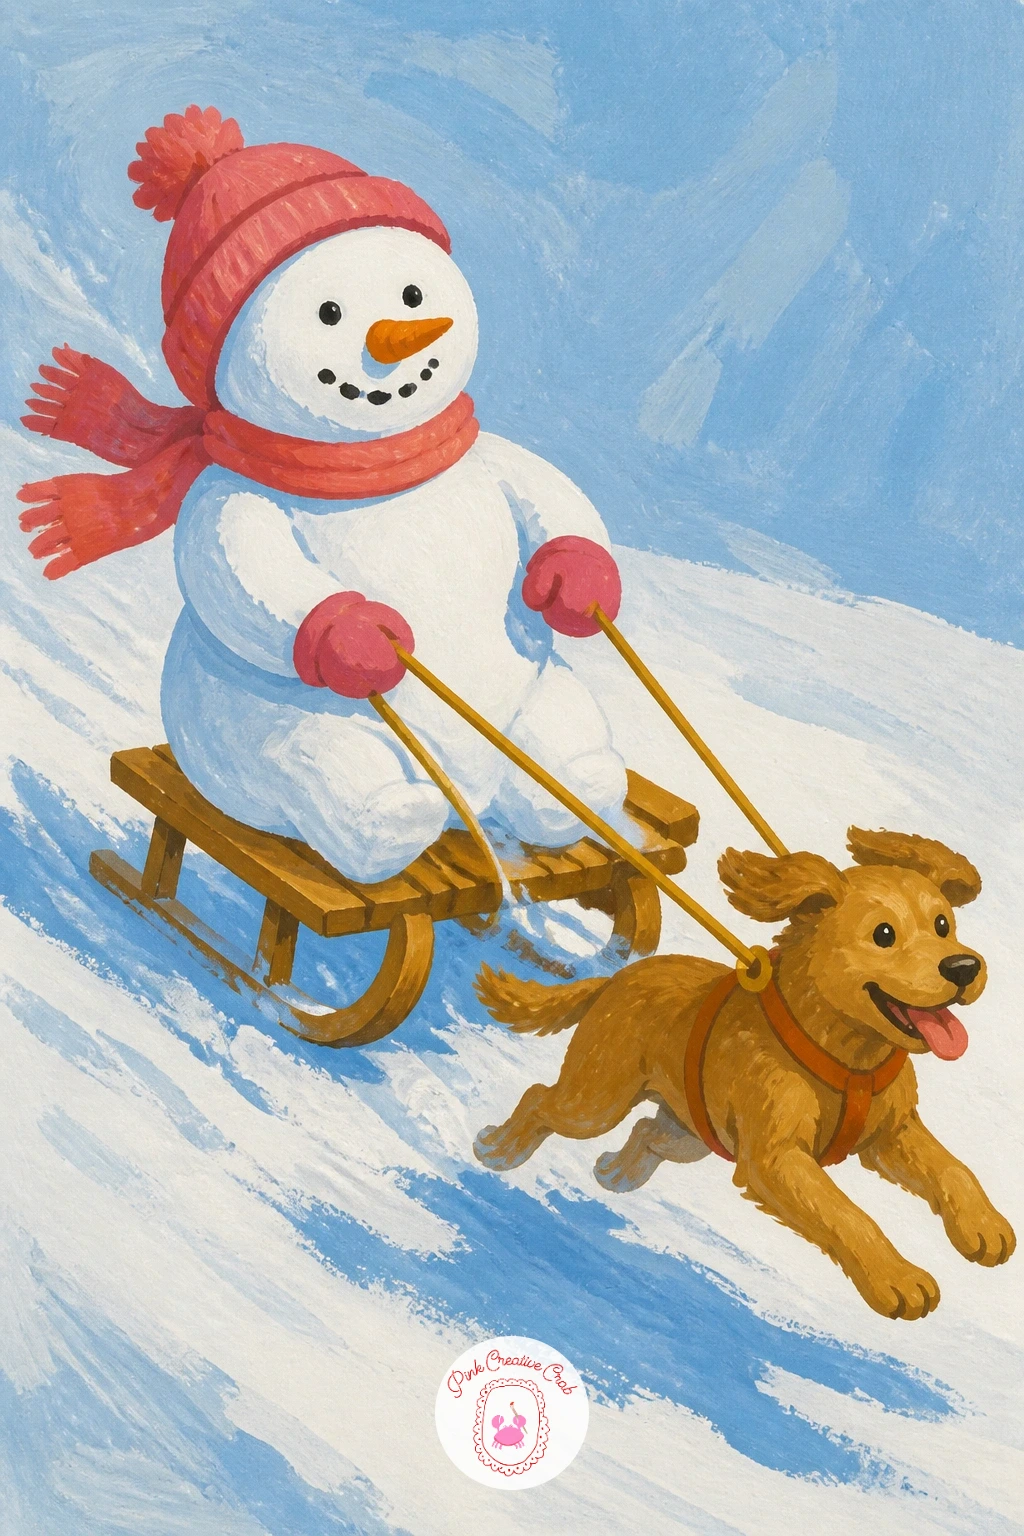
Speed things up with a snowman riding a wooden sled pulled by an eager little dog. Paint the sled first as a simple brown rectangle with curved runners, then add the snowman sitting on top leaning slightly forward, which gives the whole scene a sense of motion before you have painted a single line of speed.
The dog goes in next, a small rounded shape in warm brown or gray with two perked triangle ears and a stretched-out running pose. Light should come from one side consistently across both figures, so decide early whether the sun sits left or right and keep every blue shadow falling the same direction.
Where this goes wrong is painting the dog standing still instead of mid-stride, so angle its back legs behind it and front legs stretched forward to suggest a gallop. No brown gouache handy, mix burnt sienna with a touch of Payne’s grey instead.
One tip for today: add a few flicked white snow spray marks behind the sled’s runners with a dry brush, it instantly sells the speed.
You Will Need
- round brush size 6
- fine liner brush
- brown gouache
- dry brush for snow spray
Palette: Titanium White,Burnt Sienna,Payne’s Grey,Cerulean Blue
Reference a photo of a dog mid-run for the leg angles, it is the detail that makes the sled scene feel like it is actually moving.
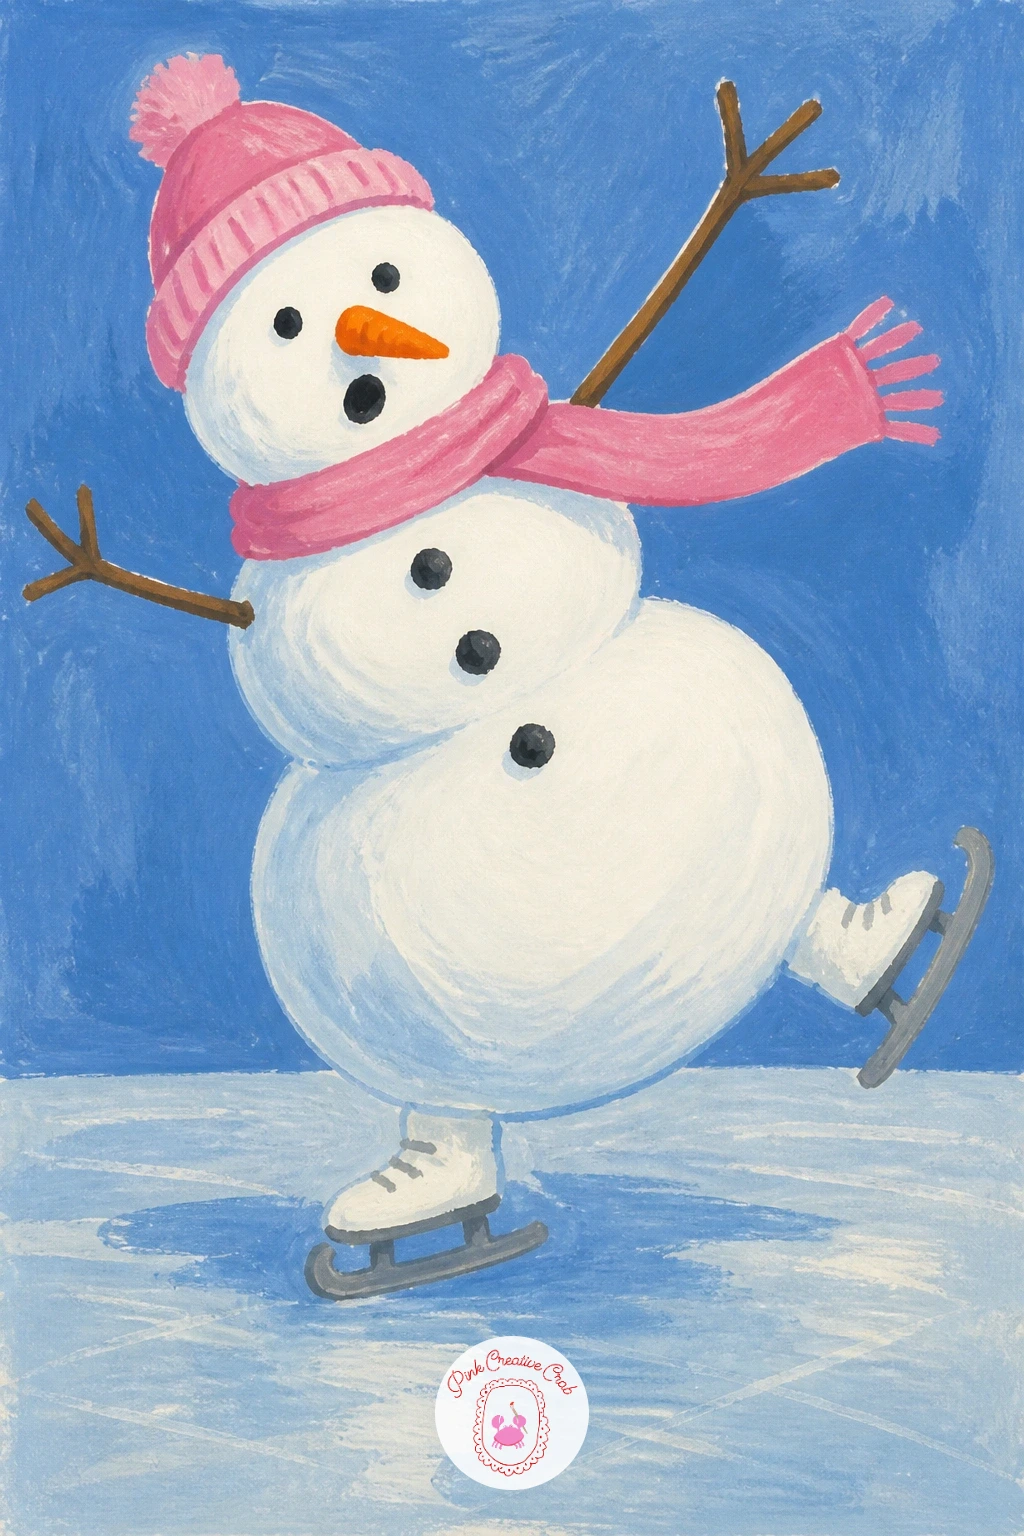
Keep the humor going with a snowman mid-wobble on ice skates, arms flailing for balance. Paint the body leaning off-center from the very first pencil sketch, since a straight-up snowman will never look like he is about to fall over no matter how wild you make the arms.
Add two simple skate blades at the base in gray, angled slightly apart rather than parallel, which does more than anything else to suggest the wobble. His arms should shoot out wide and uneven, one higher than the other, painted as thin dark gray lines once the body white is fully dry.
The spot people fumble is making the pose too symmetrical and tidy, so exaggerate the lean further than feels natural and it will read correctly on paper. If you are missing gray gouache for the blades, a thinned-down black works fine.
Try this as a quick ten-minute sketch with flat shapes only, then come back and add a cracked-ice detail under the skates for the longer version.
You Will Need
- fine liner brush
- round brush size 4
- gray gouache
- pencil for the lean
Palette: Titanium White,Steel Gray,Payne’s Grey,Cerulean Blue
Exaggerate the arm angles more than feels right while sketching, a cautious wobble reads as standing still once painted.
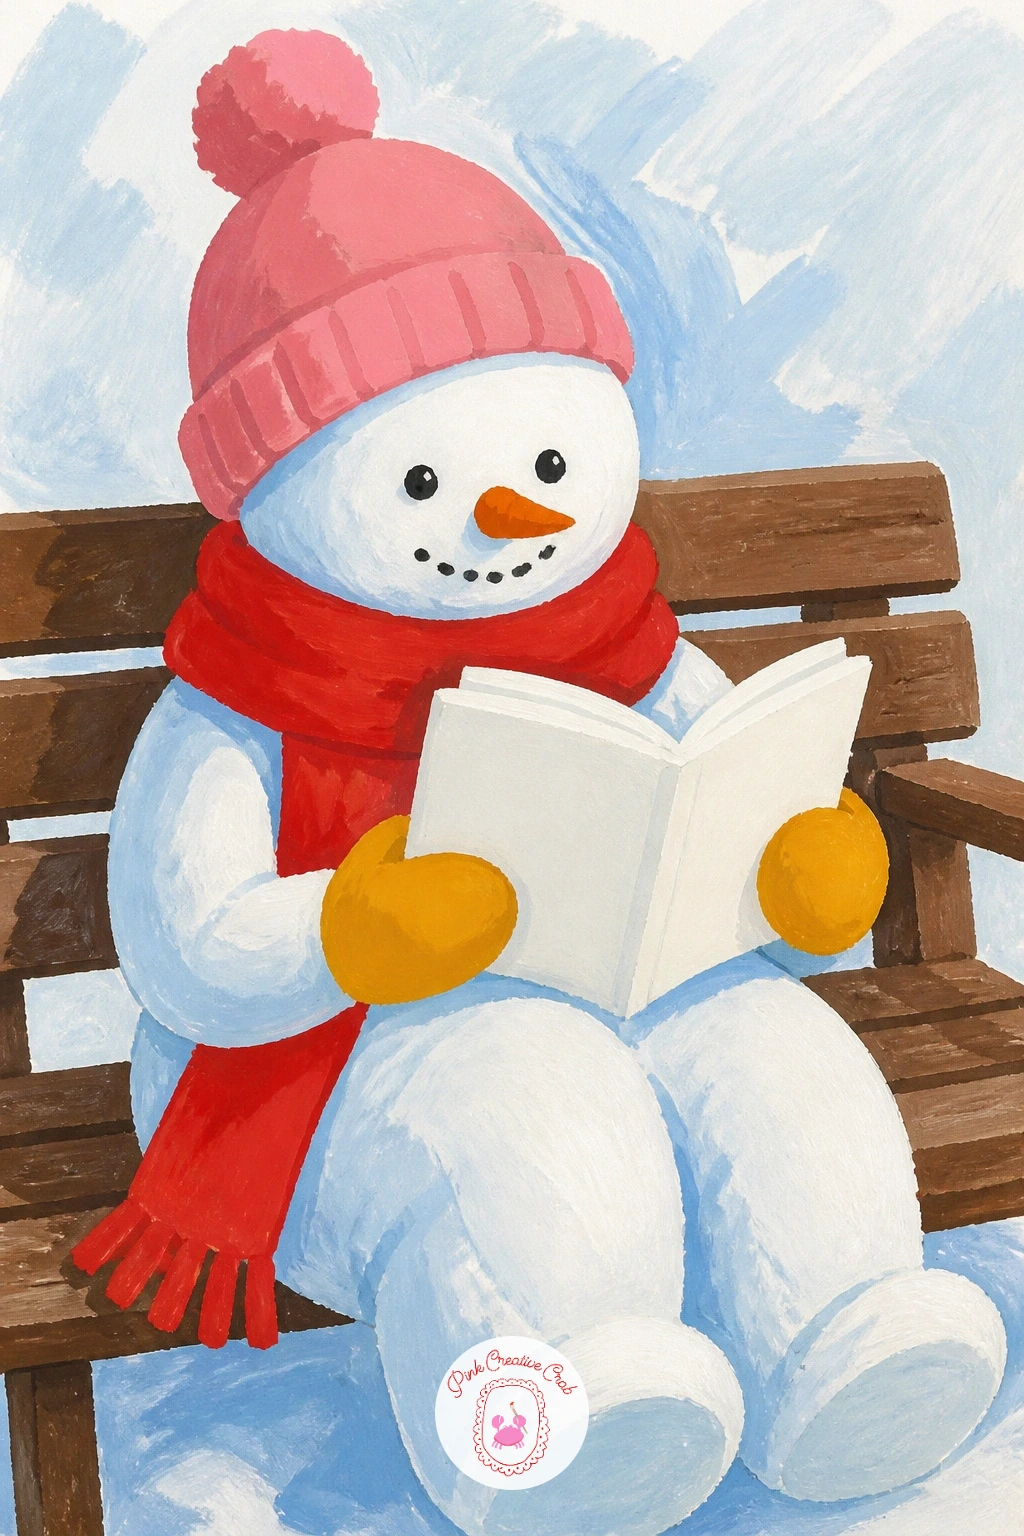
Slow the pace with a cozy snowman reading a book on a snowy bench. Paint the wooden bench first in warm brown slats, letting it dry completely before the snowman sits on top, so the white body does not pick up brown underneath it.
The open book is a small white rectangle with a thin gray spine line down the middle, held in two stick arms angled toward the snowman’s face. Keep the whole scene quiet and still, since this one is about contrast with the livelier ideas around it rather than motion or expression.
The common error is making the book too large for the hands holding it, so hold your brush up to check the book’s width against the arm’s thickness before painting. If brown gouache is low, raw sienna makes a fine substitute for the bench.
For a cozier feel next time, add a knitted blanket draped over the bench slats in a warm color of your choice.
You Will Need
- round brush size 6
- fine liner brush
- brown gouache
- white gouache for the book
Palette: Titanium White,Raw Sienna,Payne’s Grey,Cerulean Blue
This pairs beautifully with the quiet mood in cozy bookshop illustrations if you want a matching set for a reading nook wall.
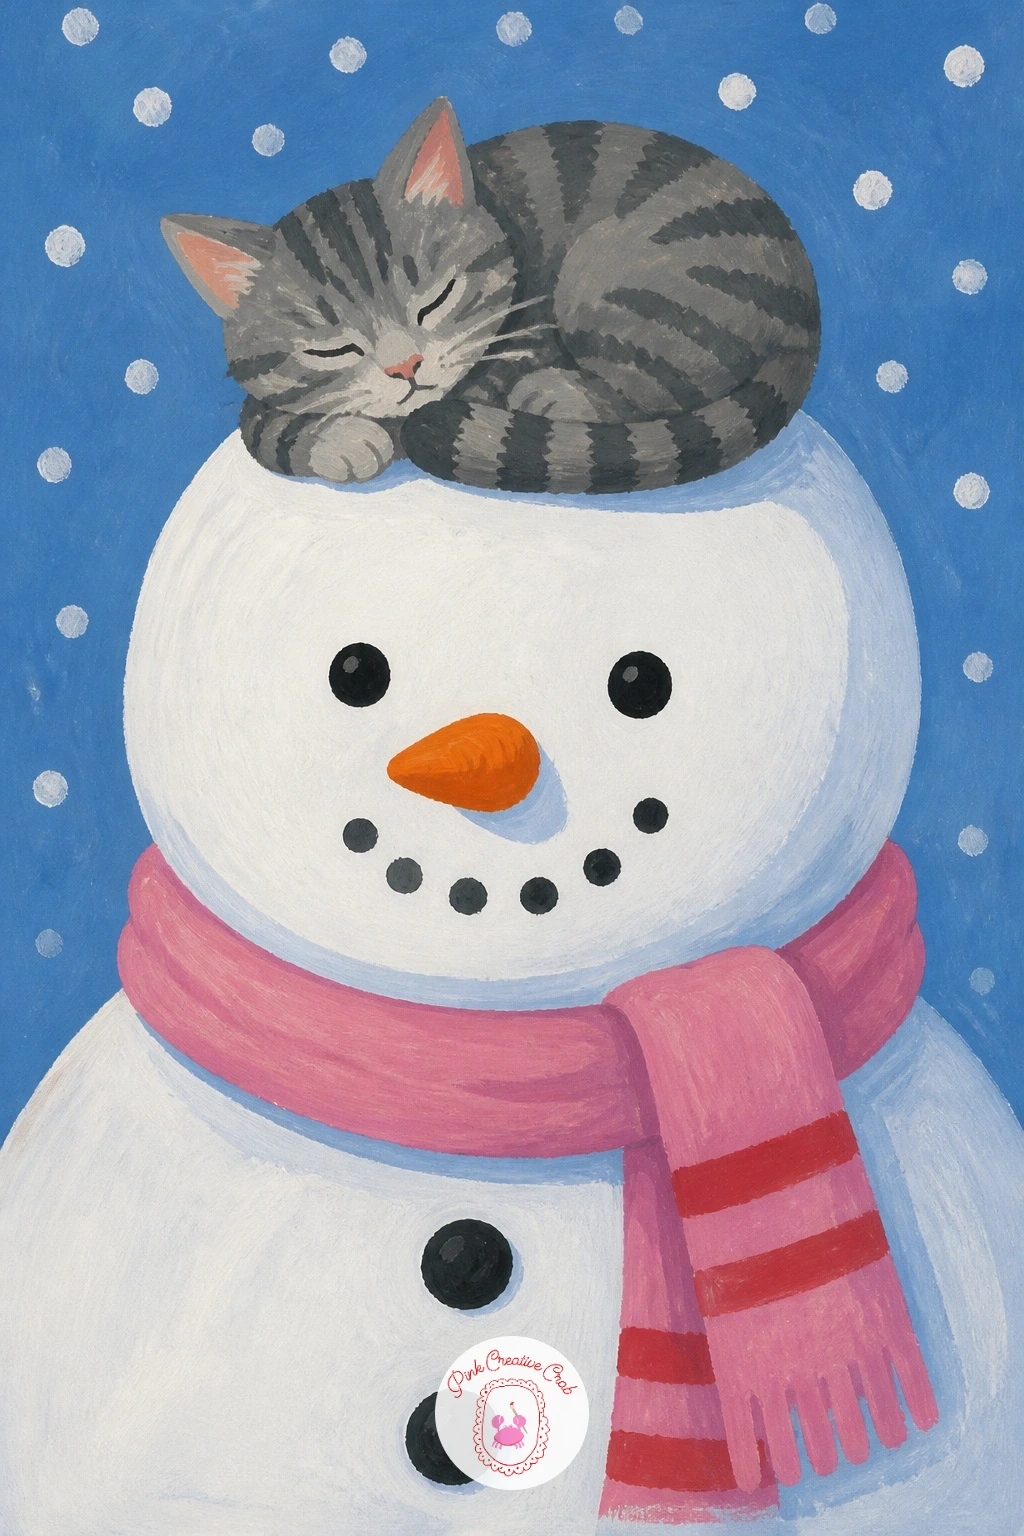
Paint a snowman wearing the most unexpected hat of all, a small cat curled up asleep right on top of his head. Build the snowman body as usual, then before adding the cat, flatten the top circle slightly with your pencil so there is a clear resting spot for it.
The cat itself is a simple curled oval shape in gray or orange tabby stripes, with two small pointed ears and a tucked tail, painted once the snowman’s head is fully dry. This is a good place to practice dry brush texture, dragging a nearly dry brush loaded with a touch of darker gray across the cat’s back for soft fur strokes instead of a flat block of color.
The mistake is painting the cat too large, which makes the snowman’s head look tiny by comparison, so sketch the cat at roughly a third the width of the head before committing paint. No orange on hand, a plain gray tabby works just as well.
One tip for today: leave a thin sliver of white paper showing along the cat’s top edge before the fur strokes, it reads as a soft highlight.
You Will Need
- round brush size 4
- dry brush for fur texture
- gray or orange gouache
- pencil for proportion
Palette: Titanium White,Warm Gray,Burnt Orange,Payne’s Grey
If you enjoy painting cats like this, the mischief in cats doing very cat things is worth a look for more poses.
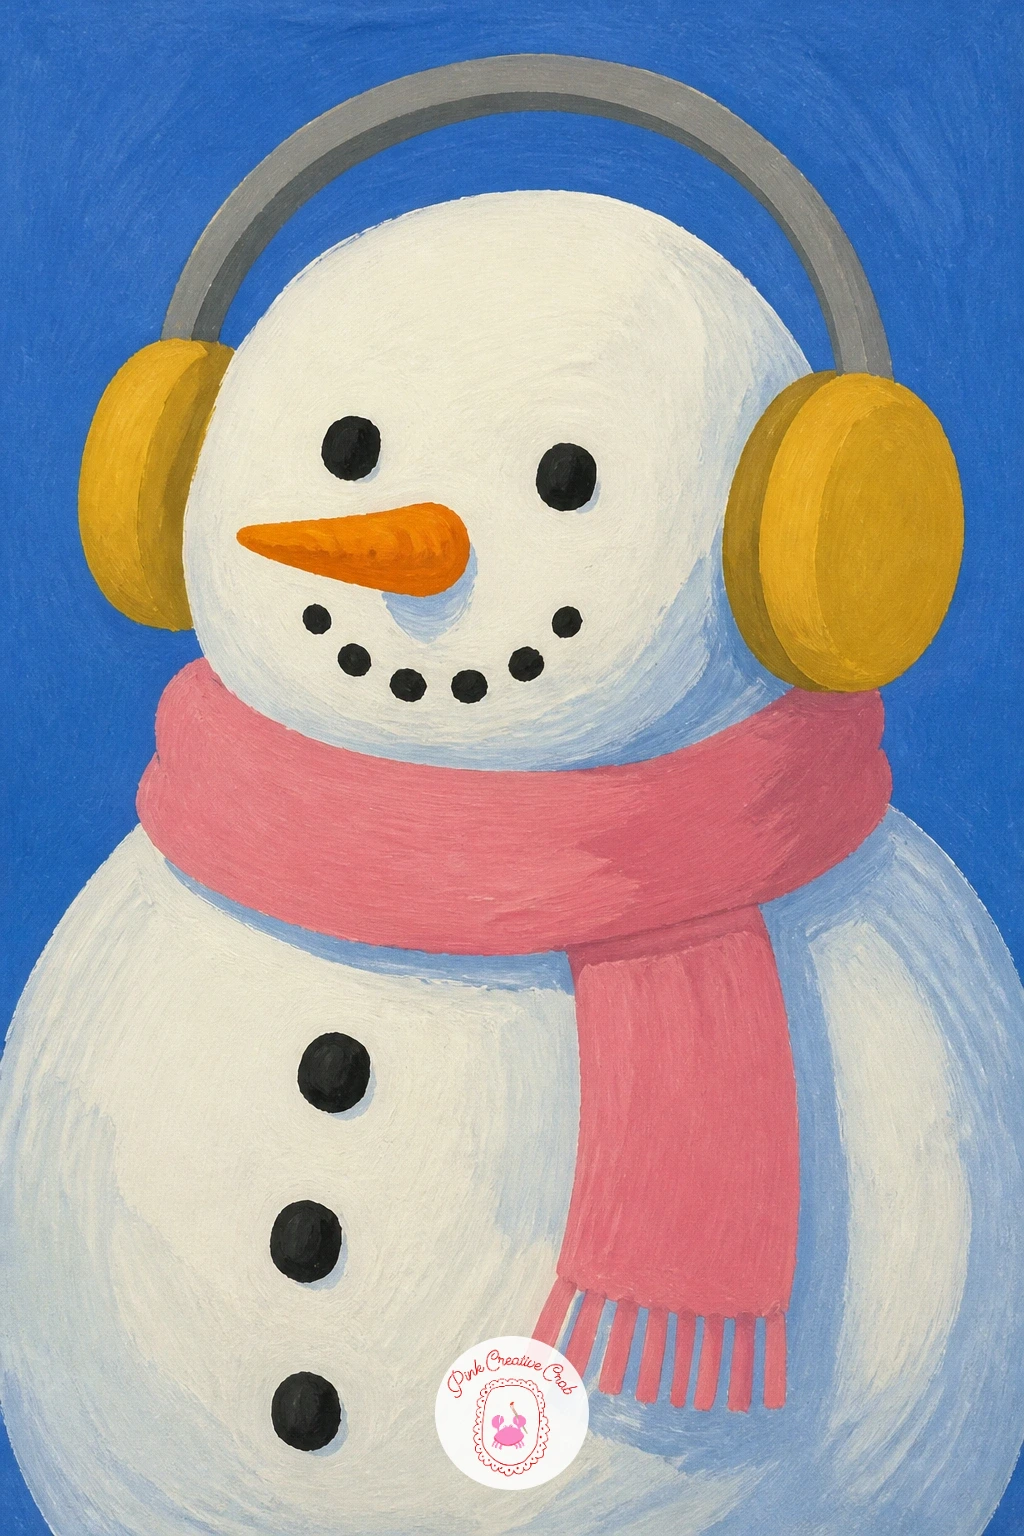
Give your snowman a bit of modern attitude with a pair of oversized headphones. Paint the round body first, then plan the headphone band lightly in pencil before painting, since it needs to curve smoothly over the very top of the head rather than sit as a flat line.
Use mustard or red for the headphone cups, two flat circles pressed against where ears would be, connected by a slim gray band arching overhead. Light direction matters here: if your light source sits to the left, keep the right-side headphone cup slightly darker with a touch more blue mixed in, so the round shape reads as three-dimensional rather than a sticker.
The usual slip is painting the band too thick, which swallows the snowman’s head, so keep it thinner than feels right at the sketch stage. If mustard runs out, a warm red cup works just as well.
Try this as a fast ten-minute flat version, then add the shaded cup and a few musical notes floating nearby for the longer sitting.
You Will Need
- fine liner brush
- round brush size 4
- mustard or red gouache
- pencil for the band curve
Palette: Titanium White,Mustard Yellow,Payne’s Grey,Poppy Red
Add a couple of small musical notes floating near the headphones in a contrasting color, it fills empty space without crowding the composition.
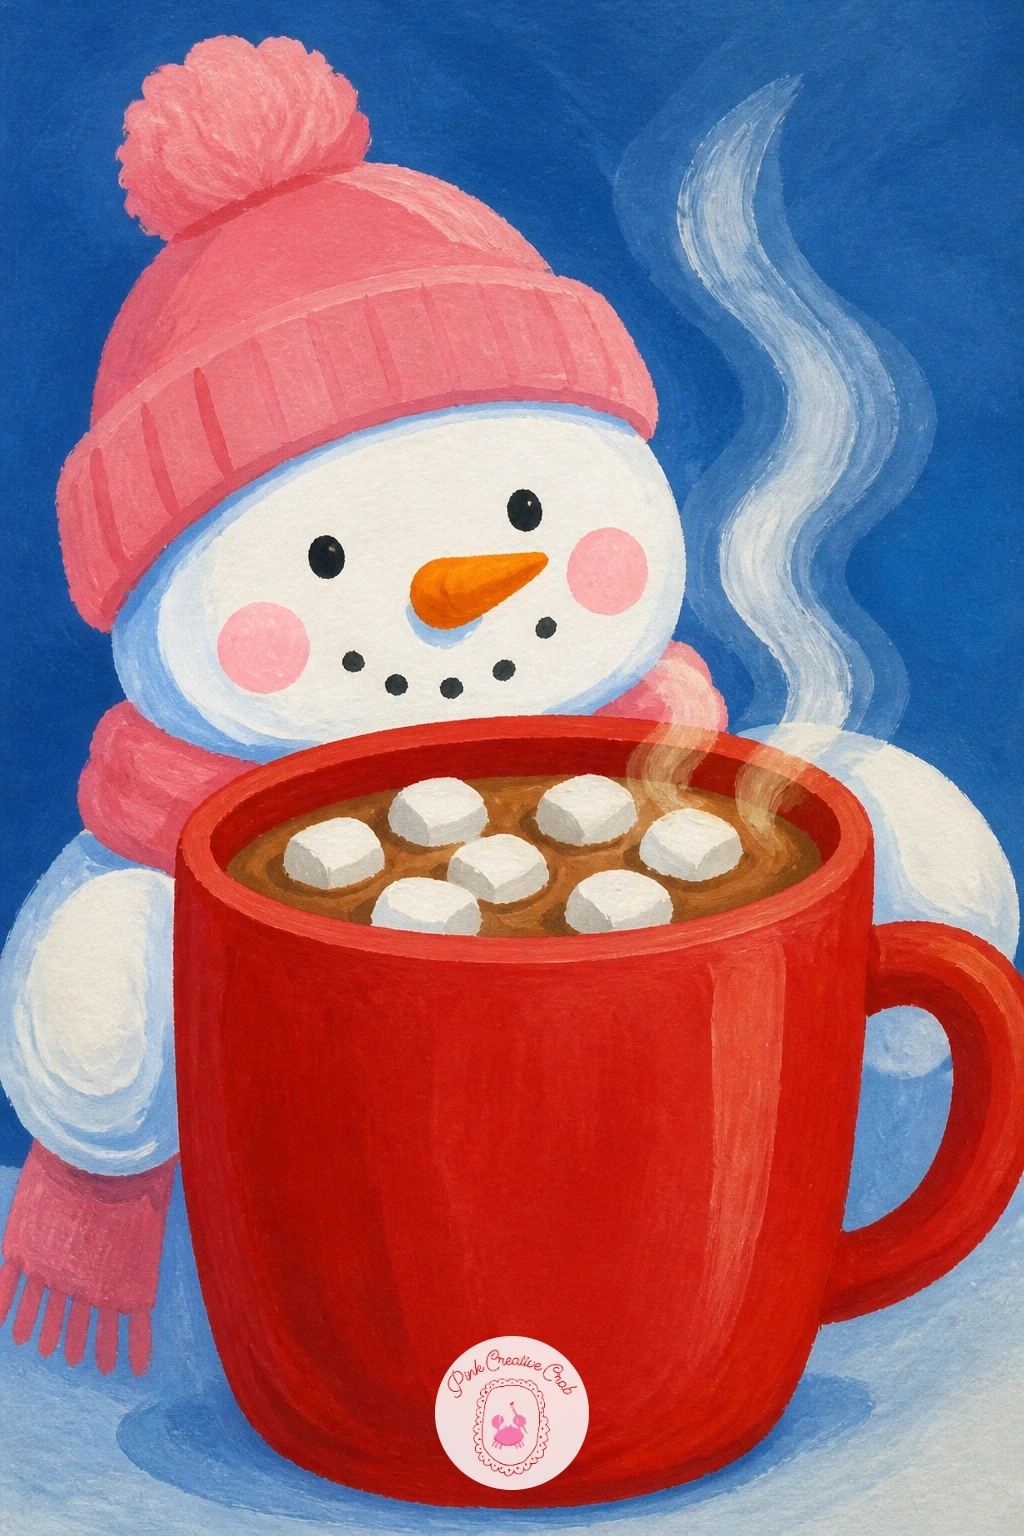
Warm things up with a snowman holding an oversized mug of cocoa nearly as big as he is. Start with the mug before the snowman, a simple rounded cylinder in red with a thick white handle, so you can judge exactly how much of the page it needs before adding the figure around it.
Paint the snowman’s body wrapping slightly behind the mug rather than beside it, which sells the scale joke far better than placing them side by side. Add a puff of steam rising from the top in pale gray-blue once everything else is dry, using a dry brush dragged upward for a soft wispy edge instead of a hard-edged cloud.
The common mistake is making the mug too small once the snowman goes in around it, so always paint the mug first at a size that looks almost absurd. No red on hand, a deep pink works just as charmingly for the mug.
One tip for today: leave tiny white marshmallow circles floating on the cocoa’s surface as the very last detail.
You Will Need
- round brush size 6
- dry brush for steam
- red and gray-blue gouache
- fine liner brush
Palette: Titanium White,Poppy Red,Slate Blue,Payne’s Grey
Try marbling two browns together for the cocoa surface before it dries, it gives a richer swirl than one flat brown fill.
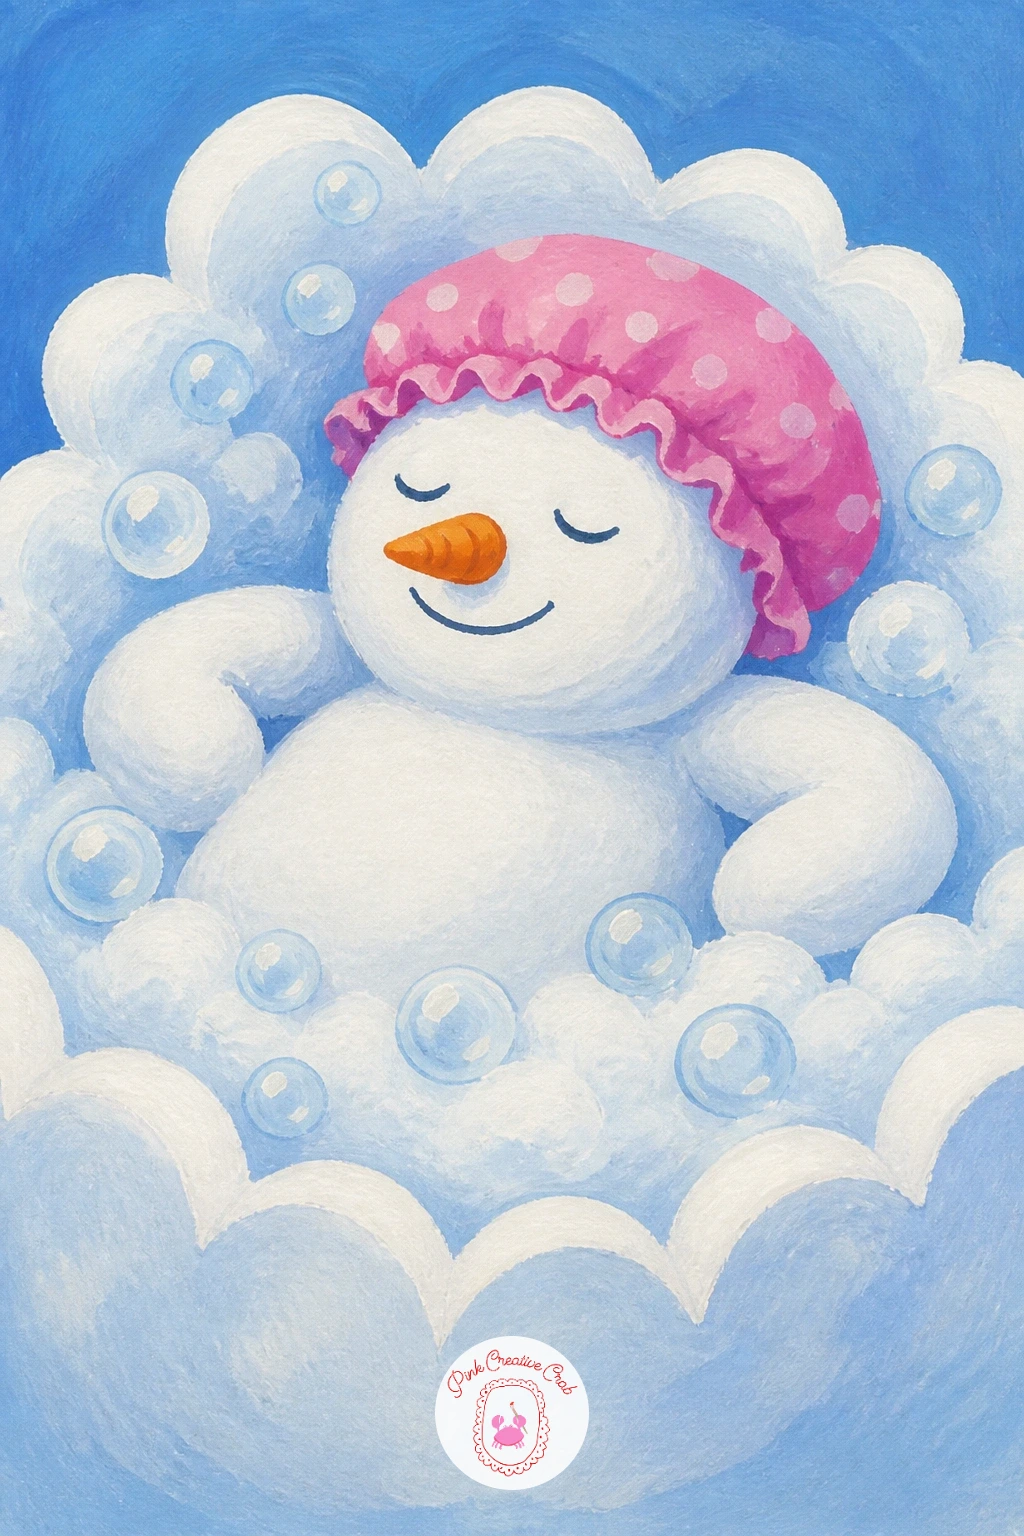
Have some fun with a snowman relaxing in a tub-shaped mound of snow dotted with little bubbles, as if he is taking a bath. Paint the snow mound first as a soft rounded shape with a scalloped top edge, then let it dry before adding the snowman’s head and shoulders peeking out from inside it.
Bubbles go on last as small irregular white circles outlined faintly in pale blue, scattered unevenly rather than in a tidy grid, which is exactly where this idea tends to go wrong if you space them too perfectly. A rubber-tipped tool or the end of a brush handle dipped in white paint makes quick, consistent bubble circles if a fine brush feels fiddly.
Keep the snowman’s expression relaxed, eyes as soft closed lines rather than round dots, to sell the mood of the scene. If pale blue gouache runs low, thin your Payne’s grey heavily with white instead.
For next time, try adding a tiny rubber duck floating beside him for an extra laugh.
You Will Need
- round brush size 6
- brush handle or dotting tool
- pale blue gouache
- white gouache for bubbles
Palette: Titanium White,Pale Blue,Payne’s Grey,Soft Black
Dip the round end of a brush handle into white paint to stamp perfectly consistent bubble circles instead of painting each one by hand.
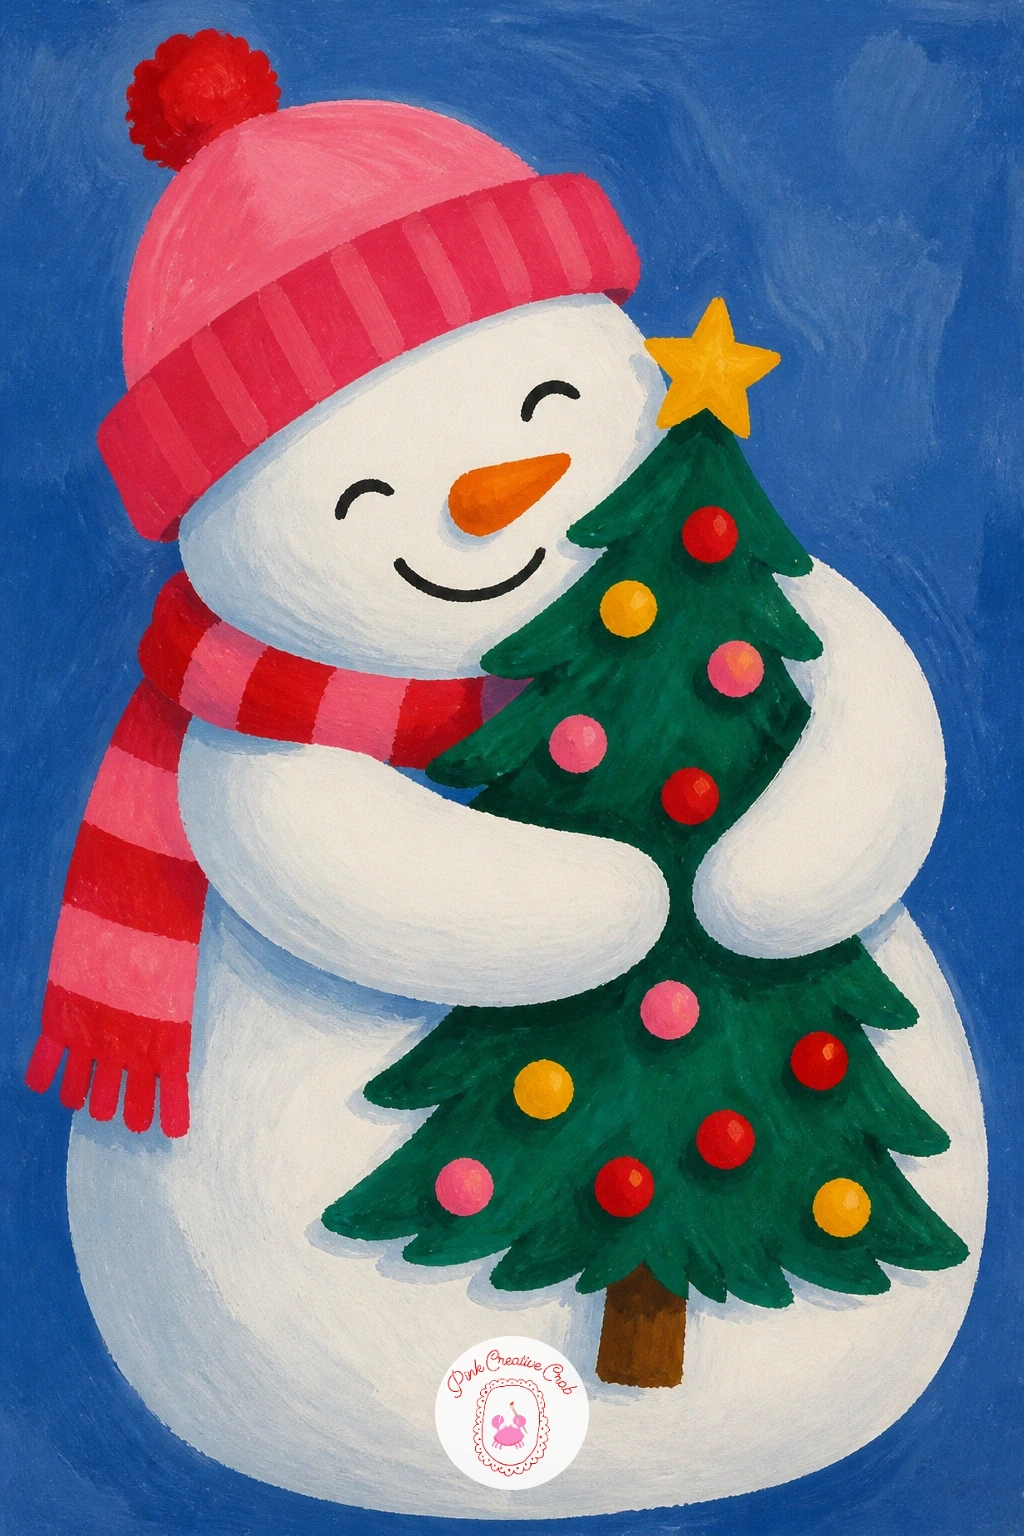
Bring in some warmth with a snowman wrapping both arms around a small Christmas tree in a full hug. Paint the tree first in layered triangles of deep green, leaving the center slightly lighter where the snowman’s arms will eventually cross over it.
Once the tree is dry, paint the snowman’s body overlapping its base, with the two stick arms curving around the trunk rather than straight, which is what makes the hug pose convincing instead of stiff. Add a few mustard or red ornament dots scattered across the tree as the final layer, keeping them small and irregular rather than evenly spaced.
The spot this goes wrong is painting straight pencil-stiff arms, so curve them generously around the tree shape before you commit any paint. No deep green on hand, mix a little Payne’s grey into a leaf green to deepen it.
Try this one small on a single sheet for a quick gift card version, or go bigger and add a star on top for the full forty-minute piece.
You Will Need
- round brush size 6
- fine liner brush
- deep green gouache
- mustard or red for ornaments
Palette: Titanium White,Forest Green,Mustard Yellow,Poppy Red
For more small-canvas holiday scenes like this, Christmas painting ideas for small canvases has plenty worth bookmarking.
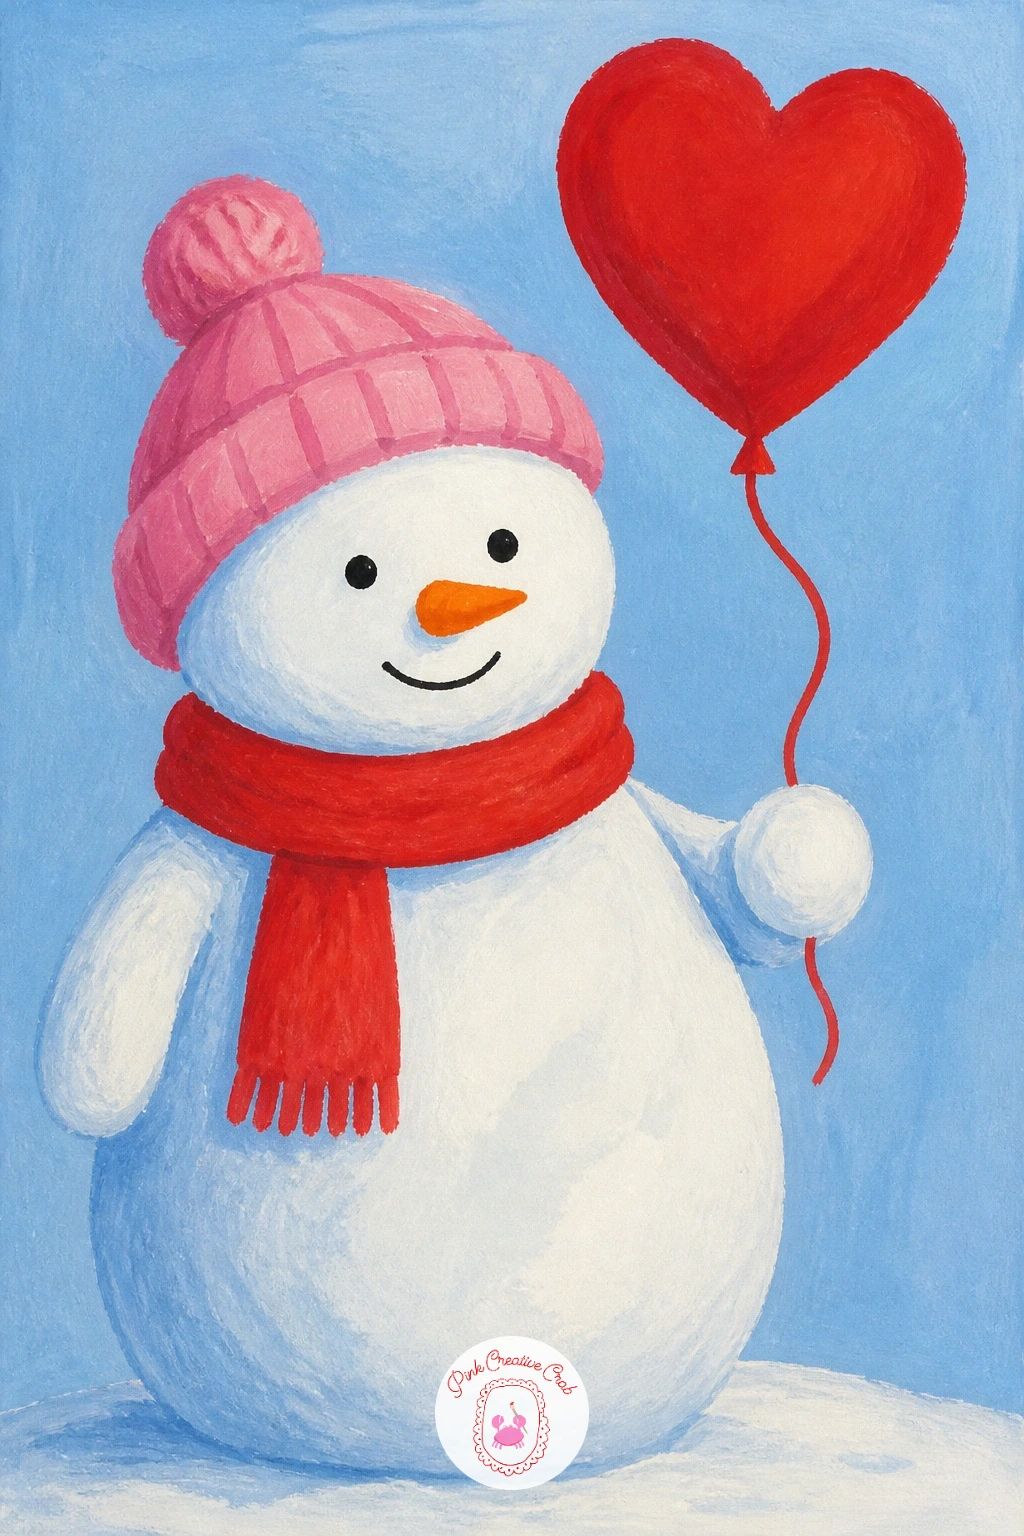
Keep the sweetness going with a snowman holding a single red heart-shaped balloon on a string. Paint the balloon first, a simple heart shape in solid red with a small white highlight left unpainted near the top for shine, then let it dry before adding the string.
The string is one thin curved line connecting the balloon down to the snowman’s stick hand, and keeping that curve gentle rather than ruler-straight is what makes the balloon look like it is actually floating and tugging upward. Paint the snowman’s body as usual, positioned slightly below and to one side of the balloon so there is visible space between them for the string to travel through.
The easy mistake is painting the string perfectly straight, which flattens the whole composition, so give it a soft gentle sag instead. If red gouache is low, a deep pink heart works just as sweetly.
One tip for today: leave that small unpainted highlight on the balloon before anything else dries, it is much harder to add convincingly afterward.
You Will Need
- round brush size 4
- fine liner brush
- red gouache
- pencil for the string curve
Palette: Titanium White,Poppy Red,Payne’s Grey,Cerulean Blue
This one makes a sweet Valentine-adjacent keepsake too, worth painting again in pink for a different season entirely.
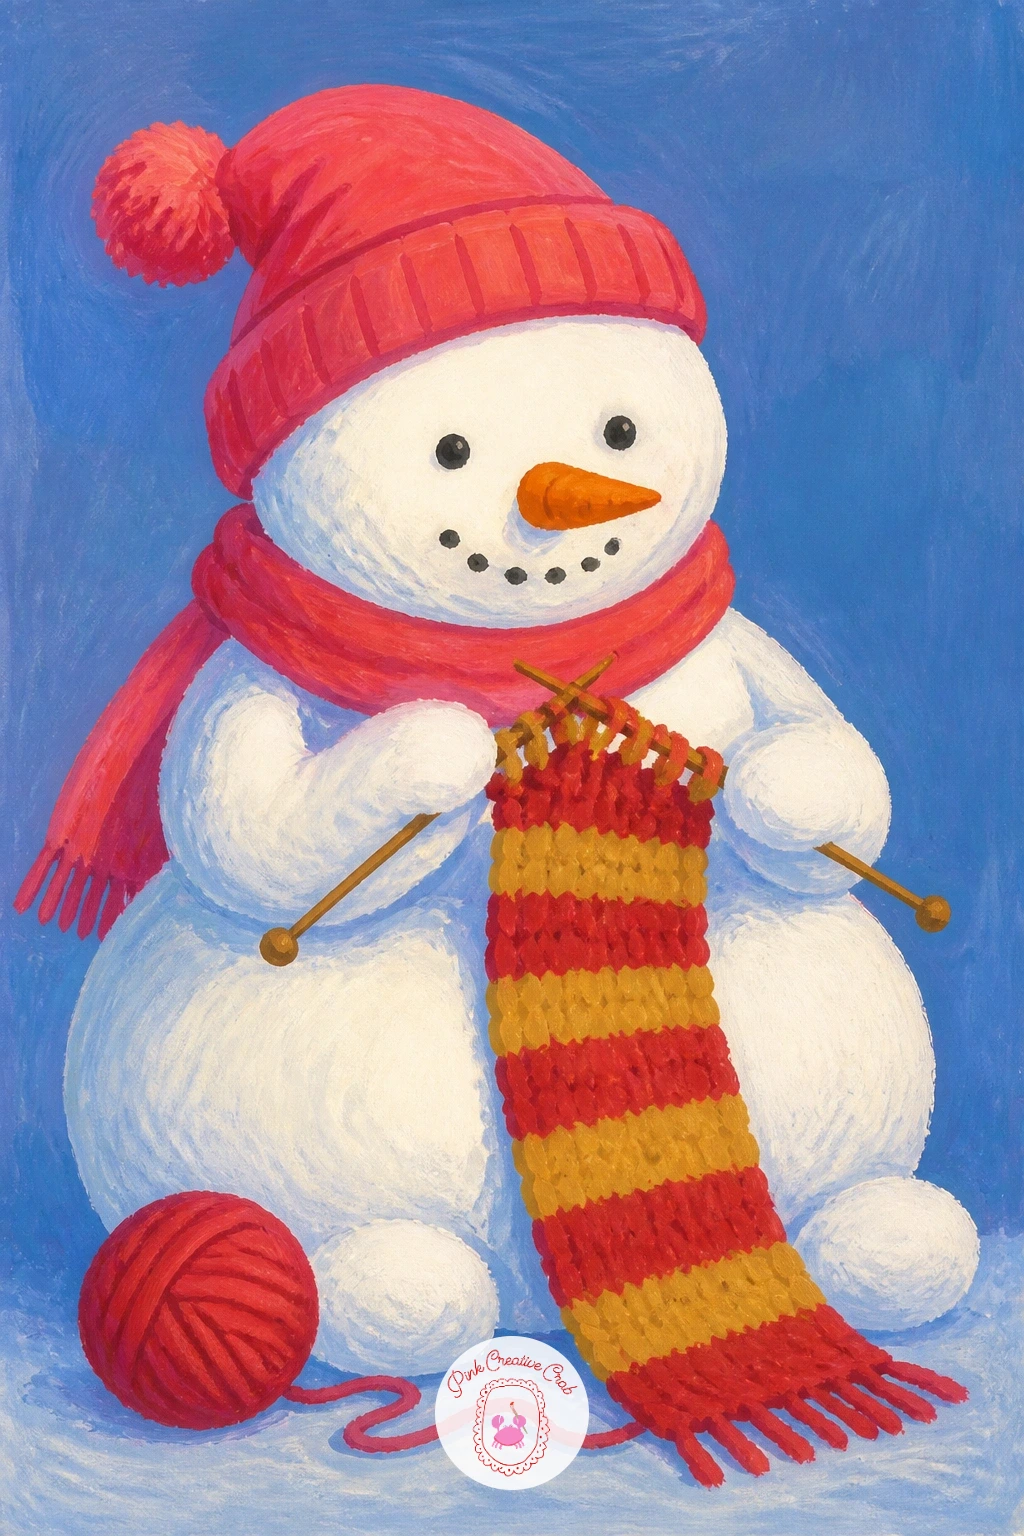
Settle into something quieter with a snowman knitting his own scarf, needles in hand and a loose coil of yarn at his feet. Paint the body first, then add two thin knitting needle lines crossing in front of him, held steady in both stick arms rather than dangling loosely.
The scarf itself trails from the needles down past the snowman’s base, painted in alternating stripes of red and mustard for a knitted look, with a small ball of yarn as a loose circle beside his feet. This is a nice place to practice edges: keep the scarf’s stripe edges slightly soft and uneven rather than ruler-sharp, since real knitting never has perfectly crisp lines.
Where people stumble is making the needles too thick, so use the very tip of a fine brush and keep them thin and precise even while the scarf stays looser in style. No mustard on hand, alternate red with a cream or pale yellow instead.
Try varying this next time with a striped sweater draped over a branch instead of a scarf, using the same knitting technique.
You Will Need
- fine liner brush
- round brush size 4
- red and mustard gouache
- pencil for needle placement
Palette: Titanium White,Poppy Red,Mustard Yellow,Payne’s Grey
Keep the scarf stripe edges a little soft and uneven rather than razor straight, real knitting never lines up perfectly and it reads more handmade.
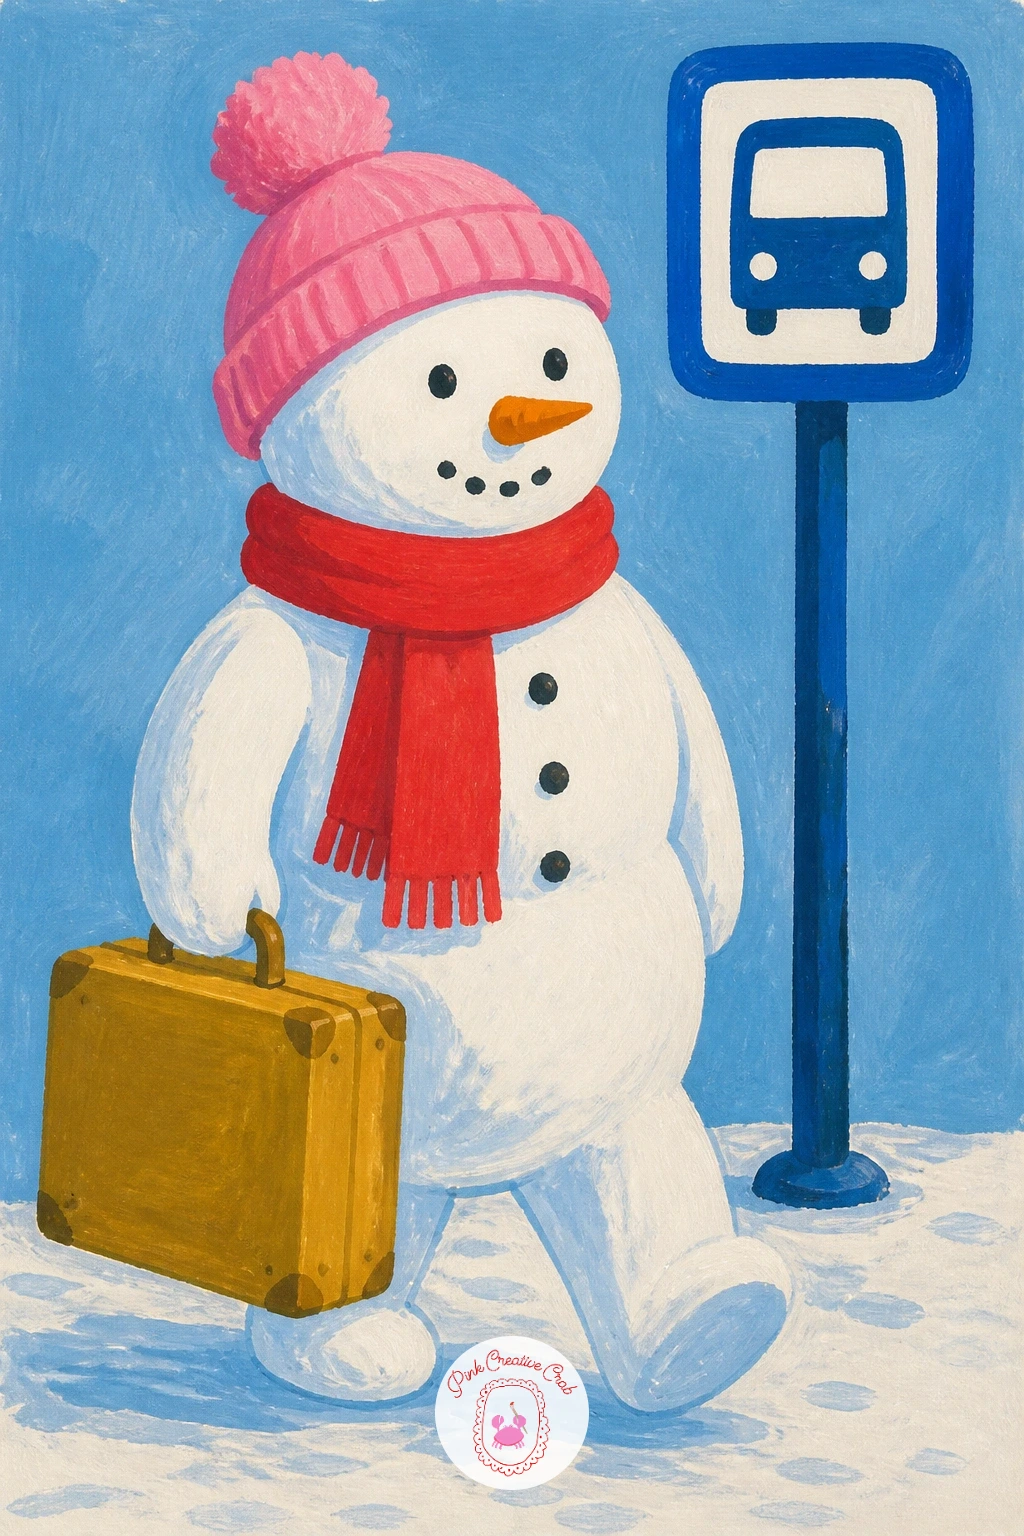
Try a travel scene next with a snowman standing at a small bus stop sign, suitcase in hand as if heading off somewhere festive. Paint a simple sign post first, a thin vertical line topped with a small rectangle, positioned to one side so the snowman has somewhere to stand beside it.
The suitcase is a flat rectangle in mustard or red with a thin darker handle line on top, held in one stick arm once the snowman’s body is dry. Keep the snowman’s pose slightly turned, one foot forward, as if mid-step toward the sign, which adds more life than a snowman simply standing still.
The common slip is centering the snowman directly under the sign with no sense of movement, so shift him a touch to one side and angle his stance. If mustard gouache is unavailable, a warm tan works just as well for the suitcase.
One tip for today: add a tiny luggage tag dangling from the handle in a contrasting color, it is a small detail that reads as very funny up close.
You Will Need
- round brush size 4
- fine liner brush
- mustard or red gouache
- pencil for the pose
Palette: Titanium White,Mustard Yellow,Payne’s Grey,Poppy Red
Add a tiny dangling luggage tag in a contrasting color as the final touch, it is a small joke that makes people look twice.
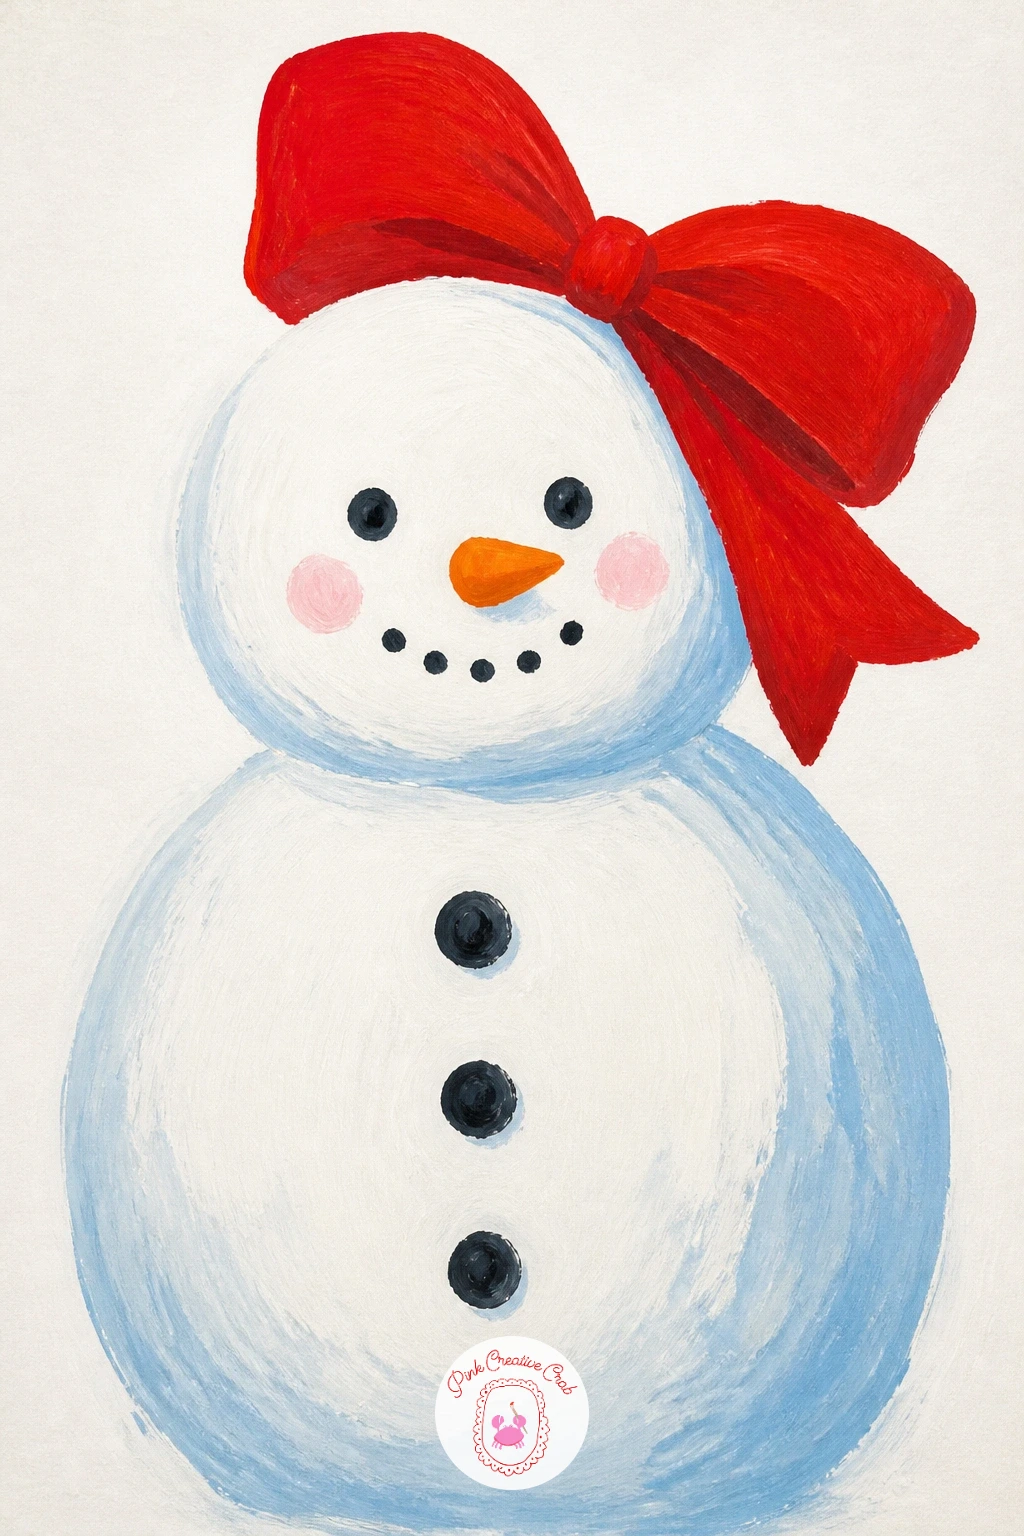
Keep things simple and sweet with a snowman wearing nothing more than a single oversized bow on top of his head. Paint the round body as usual, then plan the bow’s two loops lightly in pencil before painting, making sure they sit slightly asymmetrical rather than perfectly mirrored.
Use red or pink for the bow, painting the two loops first and the center knot last on top, once the loops have dried enough not to smear together. This is one of the simplest ideas on this list, so it is a good one to practice getting the white body smooth and even without any distracting accessories to hide behind.
The mistake here is making both bow loops identical, which looks stamped rather than tied, so vary their size and angle slightly. No pink or red handy, a deep plum works beautifully as an alternative.
Try this one as a quick ten-minute practice piece, focusing purely on smooth even white layers before moving to busier ideas on this list.
You Will Need
- round brush size 6
- fine liner brush
- red or pink gouache
- pencil for the bow shape
Palette: Titanium White,Poppy Red,Bubblegum Pink,Payne’s Grey
Use this simple piece to practice smooth even white gouache layers, it is the base skill every busier snowman idea on this list relies on.
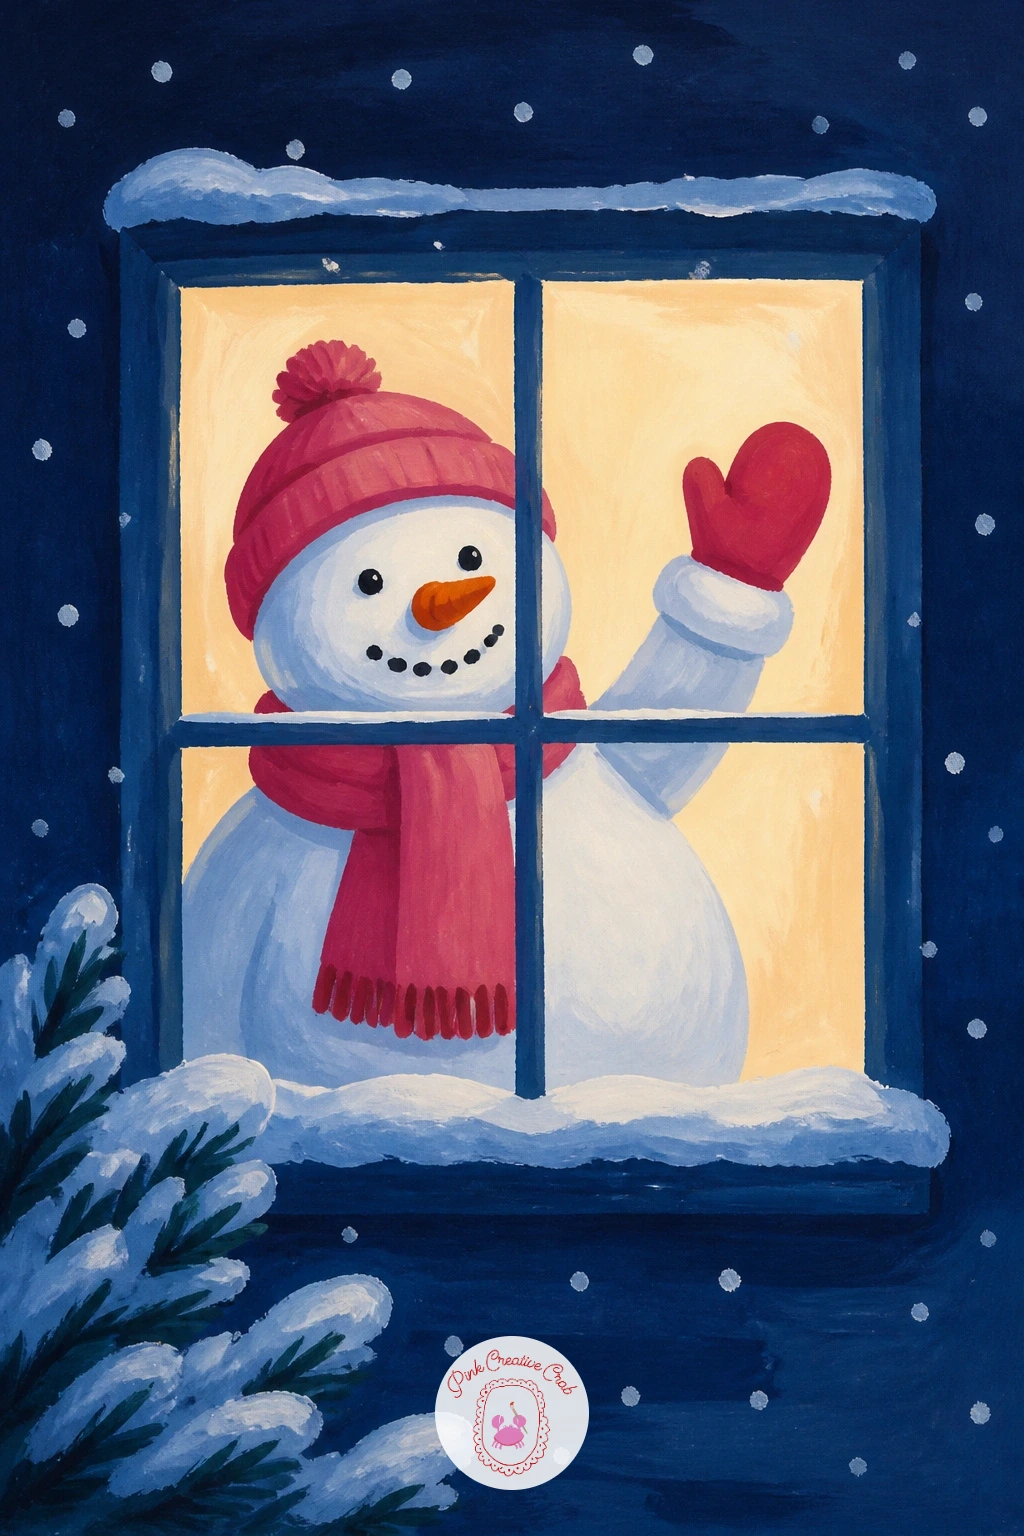
Frame a snowman peeking through a small window, one arm raised in a cheerful wave. Paint the window frame first as a simple square or arched shape in brown or gray, with a pale yellow glow filling the inside before the snowman goes in.
Once the frame is dry, paint only the snowman’s head and shoulders visible within the window opening, as if he is standing just behind it, with one stick arm raised above the frame’s edge in a wave. Light sits inside the window here, so let that warm glow spill slightly onto the surrounding snow outside the frame for a cozy evening feel.
The usual error is painting the full snowman body when only the top half should show, so plan the window’s bottom edge in pencil first and paint the snowman only above that line. If pale yellow gouache is low, a cream tint works just as warmly.
One tip for today: add a tiny wreath on the window frame as a last detail, it finishes the scene nicely.
You Will Need
- round brush size 6
- fine liner brush
- brown and pale yellow gouache
- pencil for the window line
Palette: Titanium White,Warm Cream,Burnt Umber,Payne’s Grey
Let the warm window glow spill slightly onto the snow just outside the frame, it ties the cold and cozy halves of the scene together.
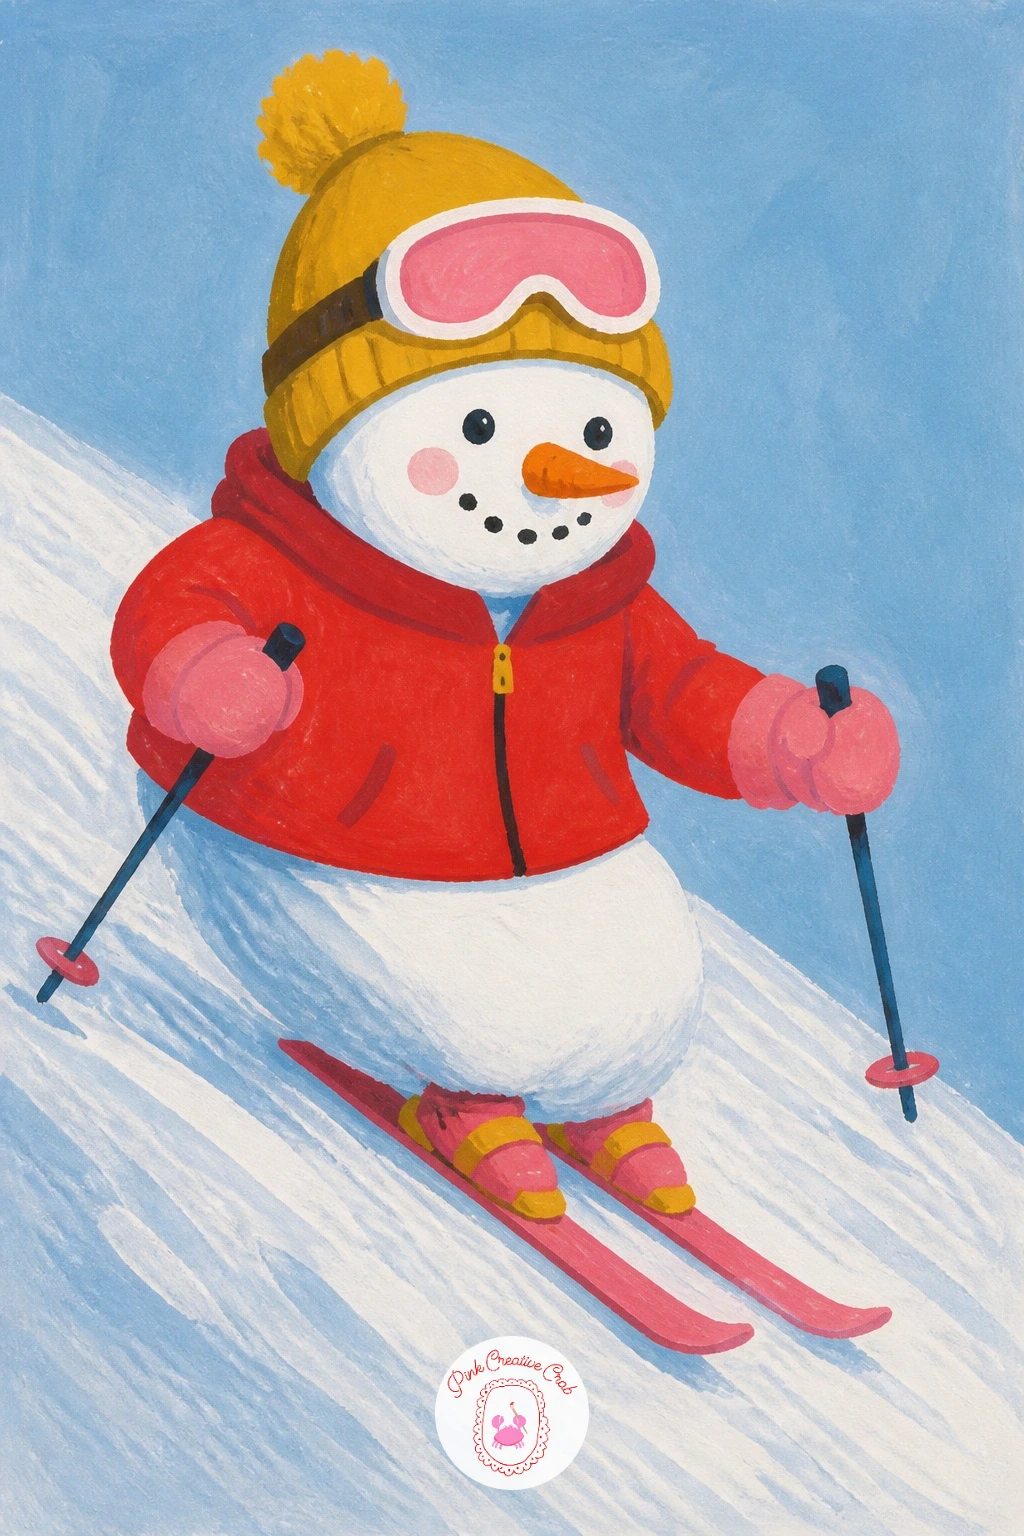
Send your snowman downhill with a full ski outfit and a pair of tiny skis beneath his feet. Paint a simple sloped line of snow first running diagonally across the page, then place the snowman standing on it at an angle matching the slope, rather than perfectly upright, which instantly sells the hillside.
Add a small red or mustard jacket shape over the top circle of his body, along with two thin ski poles angled back behind him as if he is pushing off. Keep his skis as two simple parallel lines beneath his base, slightly longer than his body width, painted last once the slope and body are both dry.
The mistake to avoid is keeping the snowman perfectly vertical against a diagonal slope, which looks like he is floating rather than standing on it, so always match his lean to the hill’s angle. No mustard on hand, a bright red jacket works just as boldly.
Try varying this next time with him mid-tumble instead, skis crossed and arms flailing, for an even funnier version.
You Will Need
- round brush size 6
- fine liner brush
- red or mustard gouache
- pencil for the slope angle
Palette: Titanium White,Poppy Red,Mustard Yellow,Cerulean Blue
Match the snowman’s lean exactly to the slope’s angle before painting a single stroke, this one detail decides whether the whole scene works.
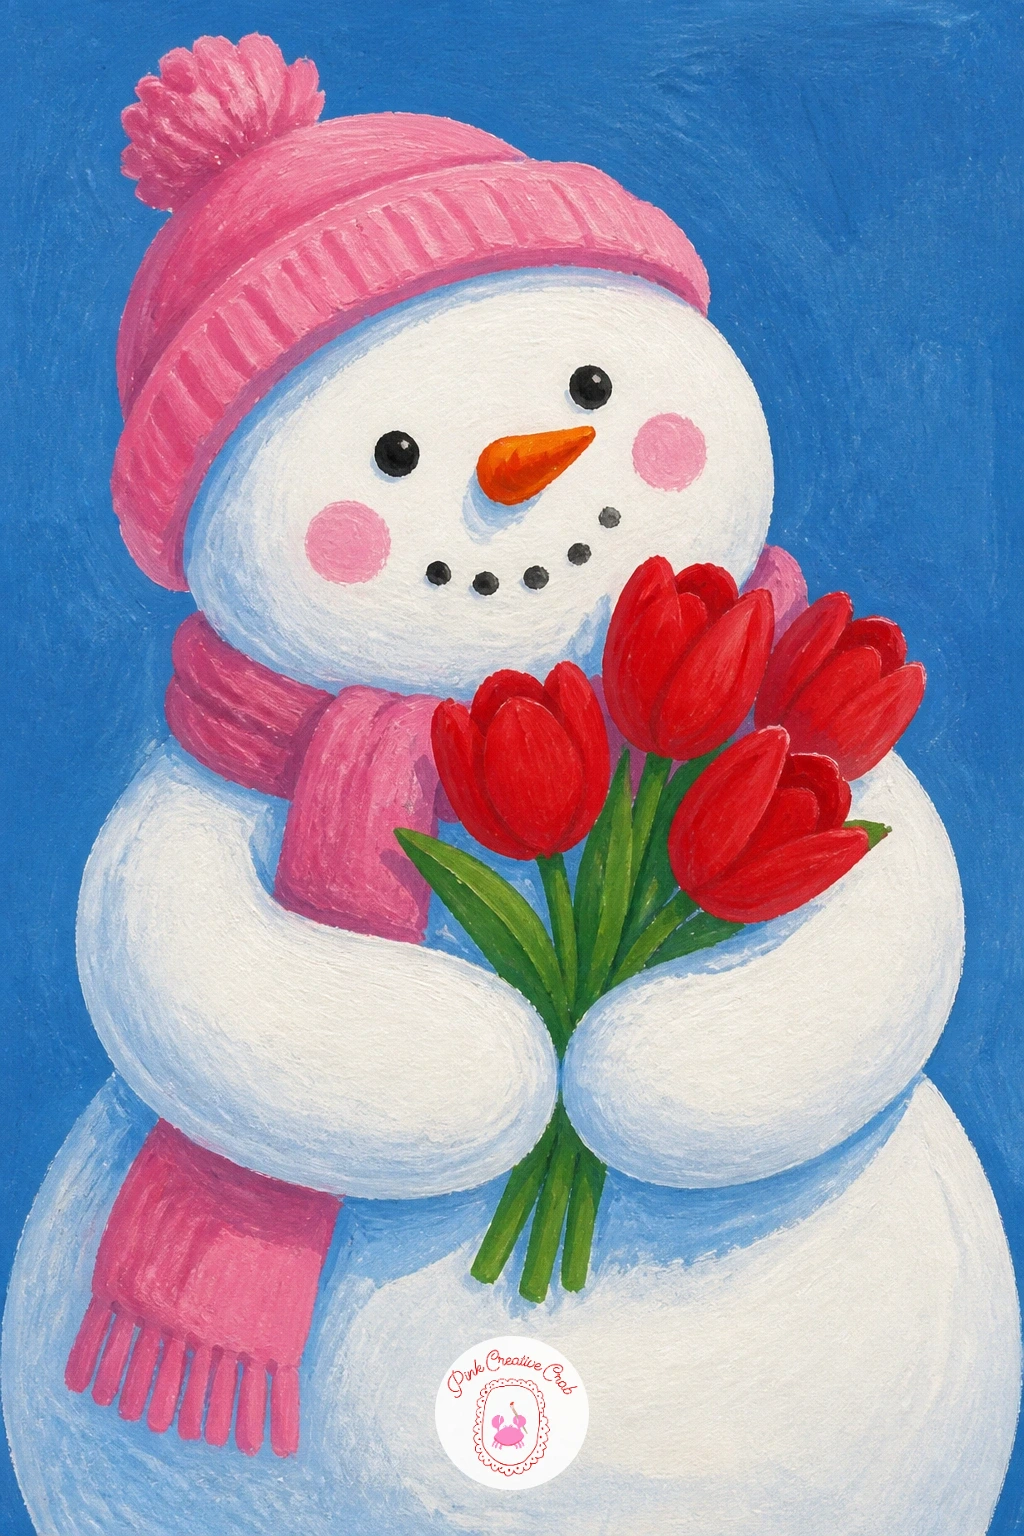
Bring an unexpected spring note into a winter scene with a snowman holding a bouquet of bright red tulips. Paint the tulip shapes first, a small cluster of simple cup forms in red with thin green stems, since it is easier to judge the bouquet’s size before building a snowman’s arm around it.
Once the tulips are dry, paint the snowman’s body with one stick arm curving to hold the bouquet against his chest, overlapping slightly rather than sitting perfectly beside it. The contrast of warm red flowers against the cool white and blue snowman is the whole charm of this idea, so keep the tulip red as saturated and bold as your paint allows.
The common slip is painting the stems too long, which makes the bouquet look gangly, so keep them short and tucked close to the blooms. If red gouache runs thin, a deep coral still reads clearly as tulips.
One tip for today: paint the green stems slightly curved rather than ruler-straight, it makes the bouquet feel freshly picked.
You Will Need
- round brush size 4
- fine liner brush
- red and green gouache
- pencil for bouquet placement
Palette: Titanium White,Poppy Red,Sap Green,Payne’s Grey
Keep the tulip red as saturated as your paint allows, the whole charm of this idea is the warm bold color against the cool white snowman.
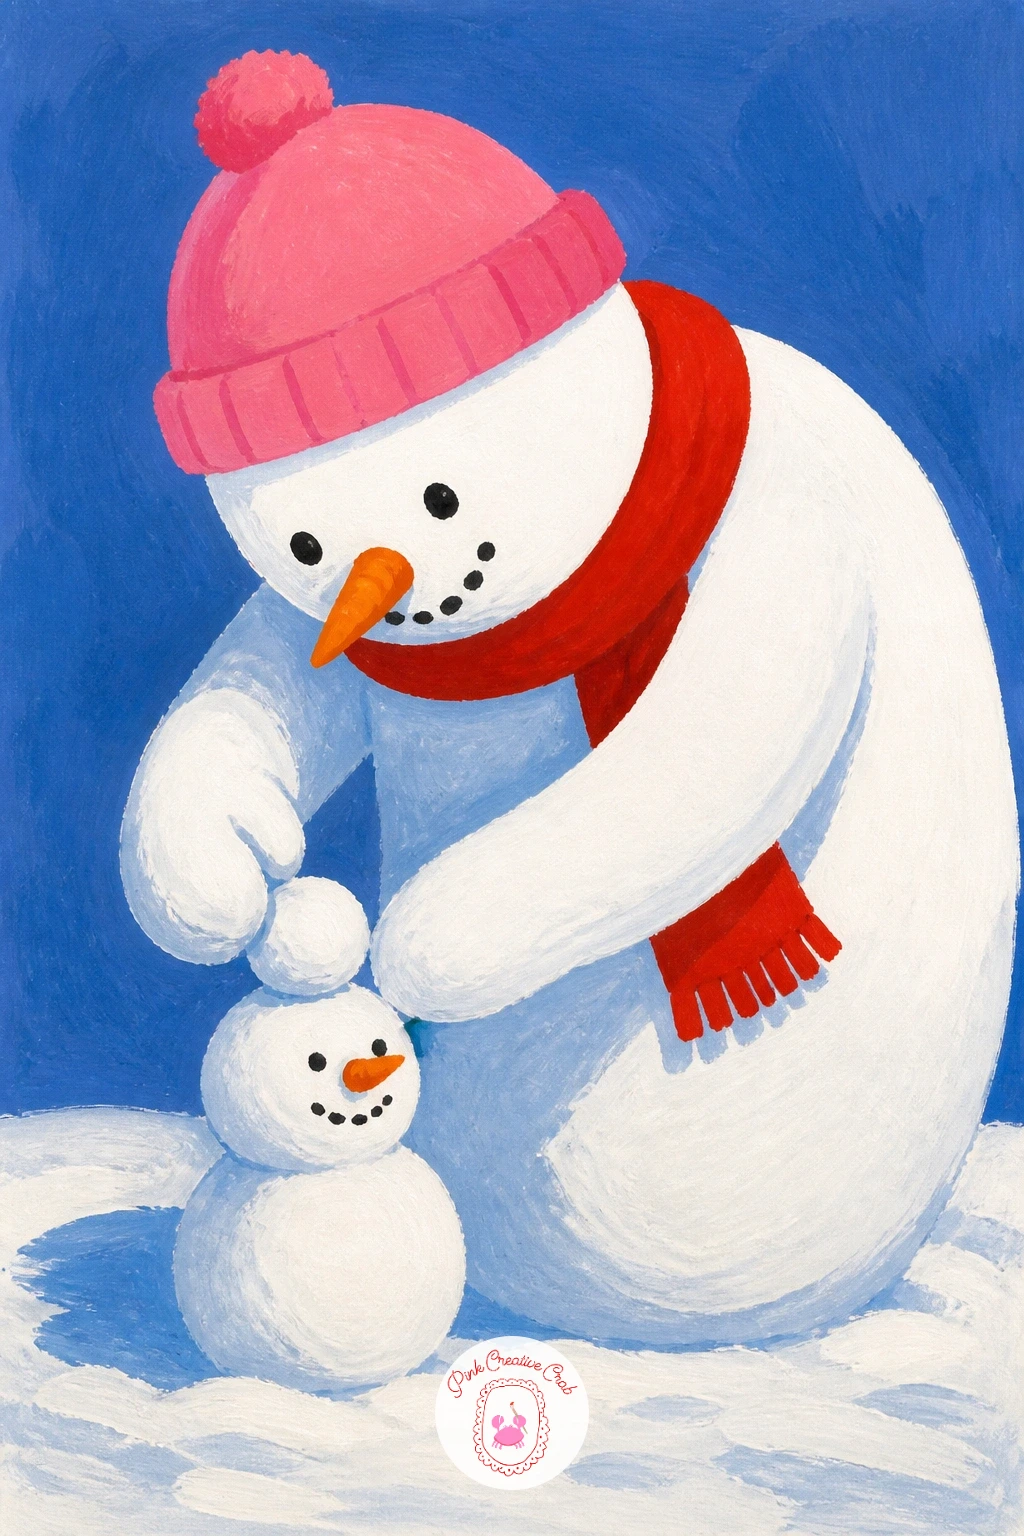
Loop back to something playful and a little meta with a big snowman building his own tiny snowman. Paint the larger snowman’s body first as usual, then add a small second snowman beside his feet, scaled down to roughly a quarter of the main figure’s height.
Give the big snowman’s arms a reaching, patting motion toward the little one, as if he is shaping the top snowball into place, which is the detail that turns two stacked circles into a believable action rather than a static pairing. Keep the mini snowman simpler than the main figure, with fewer or no accessories at all, so the size contrast and the joke both stay clear.
The mistake is making the smaller snowman too similar in size to the main one, which loses the scale gag entirely, so measure it against the big snowman’s head for reference before painting. No particular swap needed here beyond your usual white and blue.
Try this one as a quick ten-minute sketch for a card front, since the simple shapes suit a smaller piece well.
You Will Need
- round brush size 6 and size 2
- pencil for scale
- white and blue gouache
- fine liner brush
Palette: Titanium White,Payne’s Grey,Cerulean Blue,Soft Black
Measure the mini snowman against the big one’s head size before you paint it, keeping it roughly a quarter height sells the scale joke clearly.
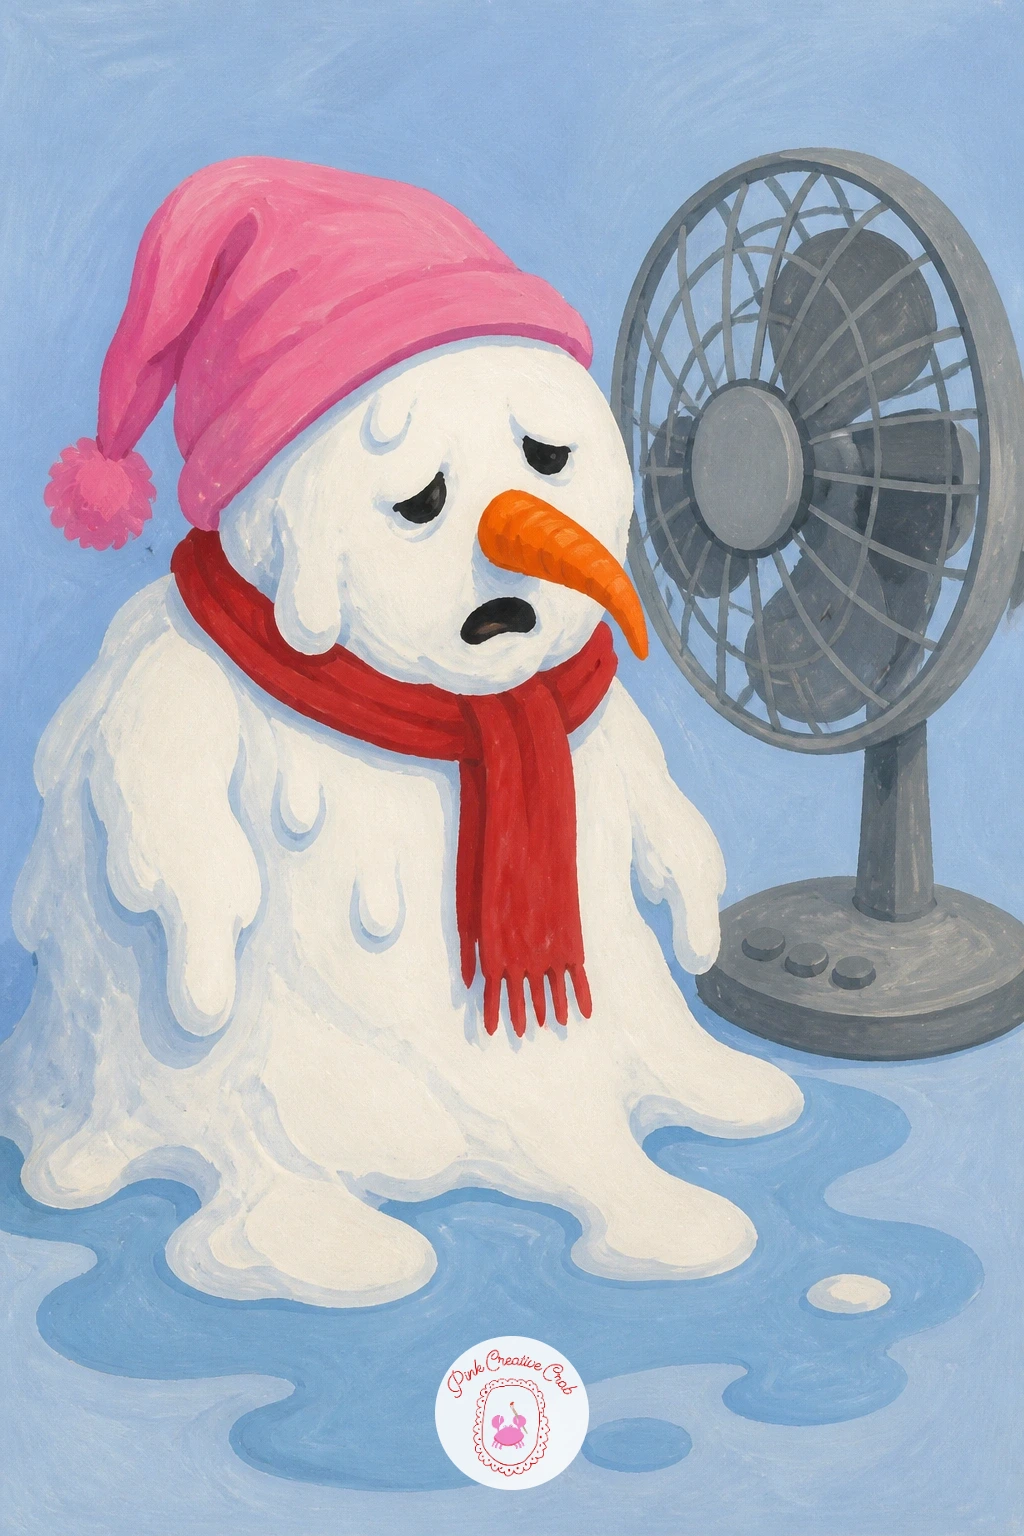
Turn the joke on its head with a snowman melting dramatically in front of an electric fan. Paint the body first with slightly rounded, drooping edges rather than crisp circles, letting the top of his head tilt sideways as if already softening.
The fan sits to one side as a simple round cage shape on a stand, painted in gray once the snowman is dry, with a few thin curved lines suggesting moving air drifting toward him. A small puddle of pale blue beneath his feet finishes the joke, painted last with a very wet, loose brush so the edges bleed softly rather than staying sharp.
The place this goes wrong is keeping the snowman too solid and upright, which undercuts the whole gag, so let his outline sag and droop more than usual. If gray gouache is low, thin black with plenty of white works for the fan’s cage.
One tip for today: let that puddle edge stay genuinely loose and wet rather than controlled, a sharp puddle edge looks wrong here.
You Will Need
- round brush size 6
- wet brush for the puddle
- gray gouache
- pale blue gouache
Palette: Titanium White,Steel Gray,Pale Blue,Payne’s Grey
Let the puddle edge stay genuinely loose and wet while painting, a crisp controlled puddle outline undercuts the melting joke entirely.
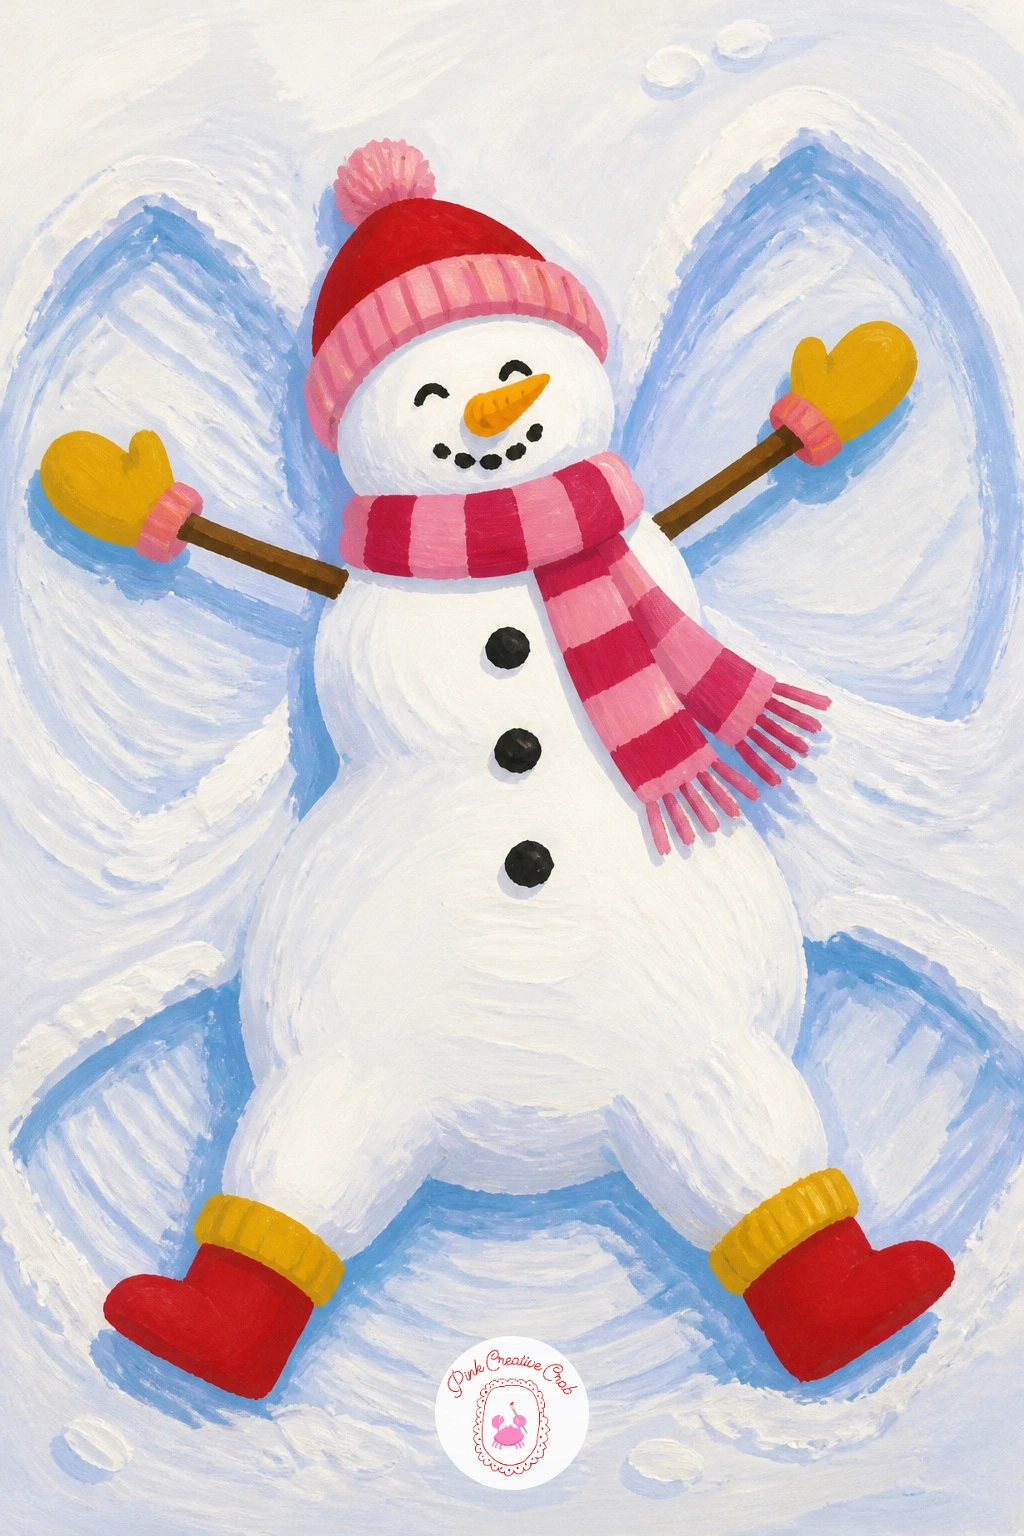
Get playful with perspective on a snowman lying flat on his back making snow angels, arms and legs swept wide. Paint him from above rather than straight on, so his body reads as a flattened oval shape viewed from overhead instead of the usual standing circles.
Add two curved arm-sweep marks and two leg-sweep marks radiating out from his sides in pale blue, overlapping his white body slightly to suggest the motion trail in the snow. This bird’s-eye angle is the trickiest part of the whole list, so keep every shape rounder and flatter than your instinct tells you, since a standing-view snowman dropped flat on the page will look wrong immediately.
The common mistake is drawing him with a front-facing circle face while lying down, so simplify his features to two small dots and a short line instead, viewed from above. No particular swap needed, just keep your blue thinned for the sweep marks.
Try this one small and loose for a ten-minute study of unusual angles before attempting a busier scene.
You Will Need
- round brush size 6
- fine liner brush
- pale blue gouache
- pencil for the overhead angle
Palette: Titanium White,Pale Blue,Payne’s Grey,Soft Black
Keep every shape flatter and rounder than instinct suggests for this overhead view, a standing-style snowman dropped flat on the page reads wrong immediately.
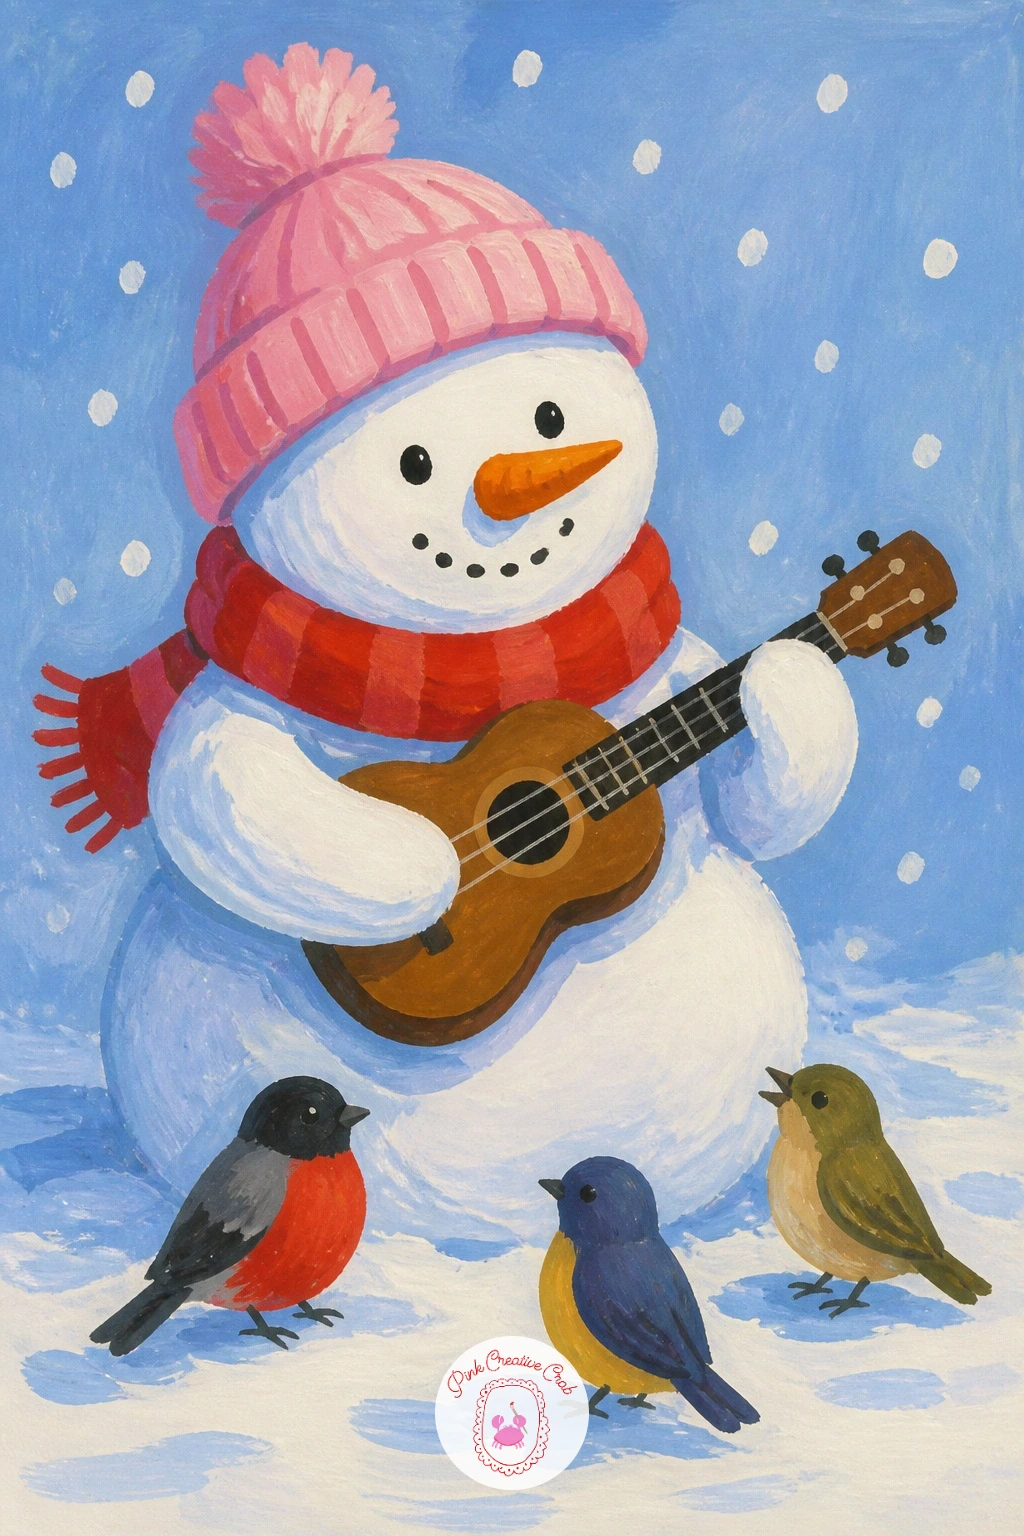
Add a little whimsy with a snowman strumming a small guitar while a few birds gather to listen. Paint the guitar body first as a simple figure-eight shape in warm brown, with a thin neck and a few fine string lines added once it is dry.
The snowman holds it across his front with both stick arms, one bent higher near the guitar’s neck than the other, which reads far more natural than two evenly placed arms. Scatter two or three small birds nearby in simple rounded shapes with short pointed beaks, painted smaller than the robins from earlier ideas to keep the focus on the snowman and his guitar.
The usual slip is centering the guitar too low, making it look like it is floating rather than held, so position it snug against the snowman’s chest before adding the arms around it. If brown gouache runs low, a warm burnt orange works for the guitar body.
One tip for today: paint the birds in slightly different poses, one with wings half-open, rather than three identical copies.
You Will Need
- round brush size 4
- fine liner brush
- brown gouache
- small round brush for birds
Palette: Titanium White,Burnt Sienna,Payne’s Grey,Soft Black
If you love painting small birds like these, the ideas in animal doodle painting ideas offer plenty more charming poses to borrow from.
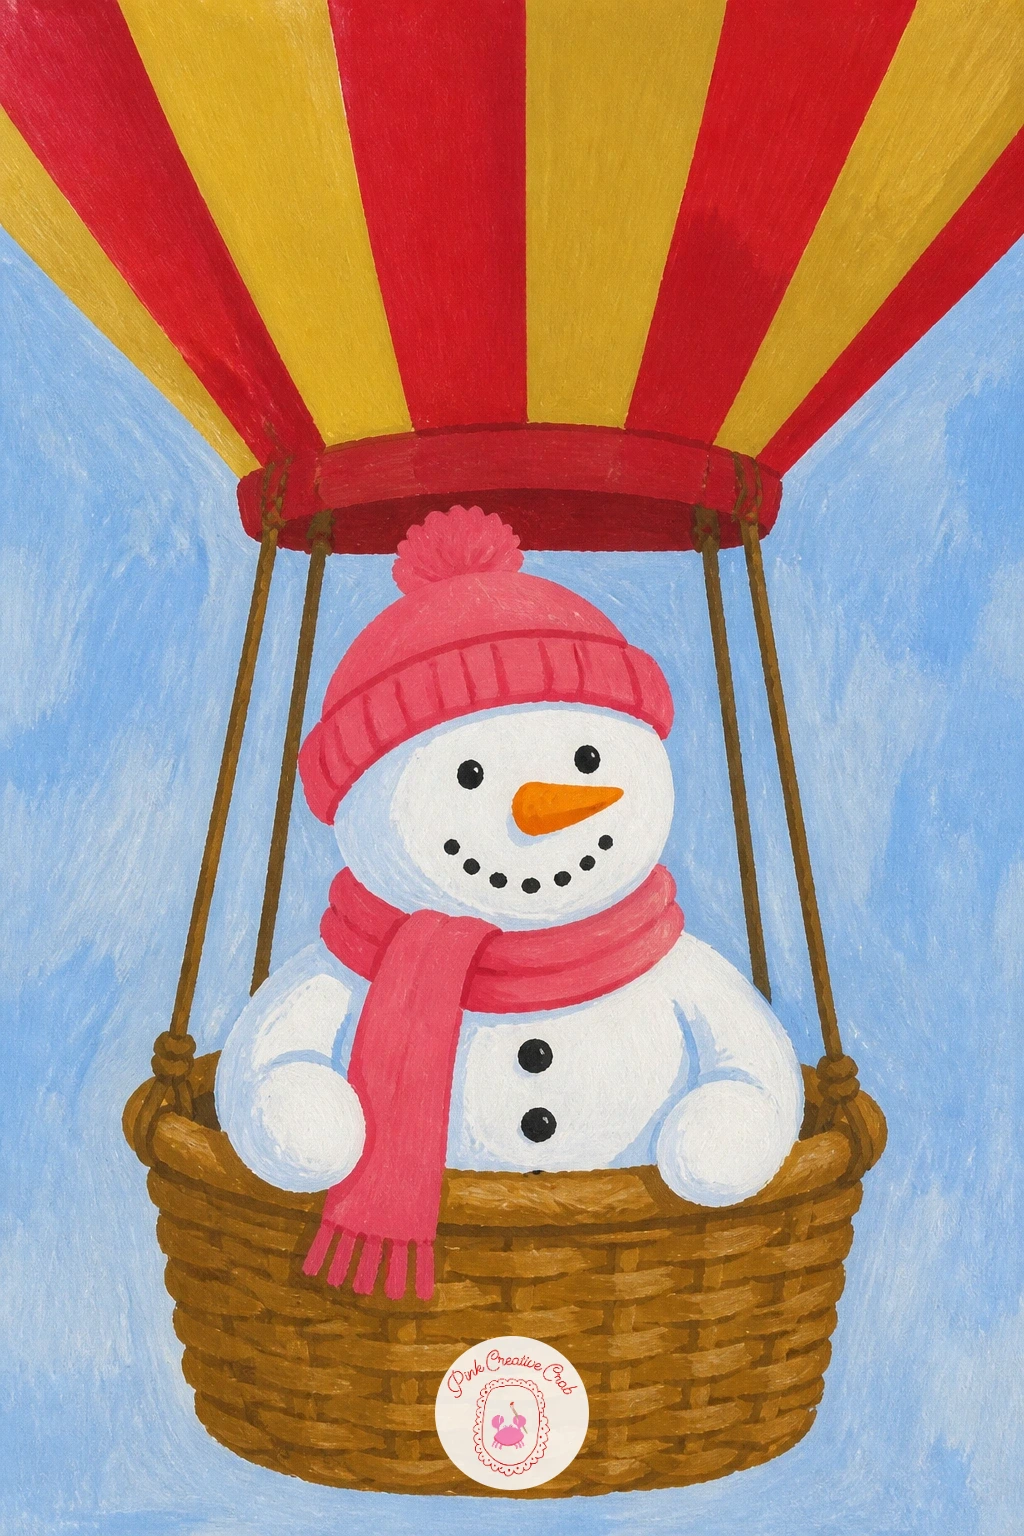
Lift the scene off the ground entirely with a snowman riding in a small hot air balloon basket. Paint the balloon envelope first as a large rounded teardrop shape in alternating panels of red and mustard, letting each color dry before painting its neighbor so they stay crisp rather than bleeding together.
The woven basket sits below in warm brown, small enough that the snowman’s head and shoulders peek over its rim once he is painted inside it. Because this scene floats in open sky rather than on snowy ground, you can skip the usual blue cast shadow beneath him and instead add a soft blue wash across the whole background for atmosphere.
The mistake here is making the basket too large relative to the balloon above it, so sketch the balloon first and size the basket at roughly a third of its width. No mustard on hand, alternate red with cream panels instead.
Try adding a tiny bird flying alongside the balloon for extra charm on the longer version of this piece.
You Will Need
- round brush size 6
- fine liner brush
- red and mustard gouache
- brown gouache for the basket
Palette: Titanium White,Poppy Red,Mustard Yellow,Burnt Umber
Wash a soft pale blue across the whole background sky before adding the balloon, it gives the scene atmosphere without needing a ground shadow.
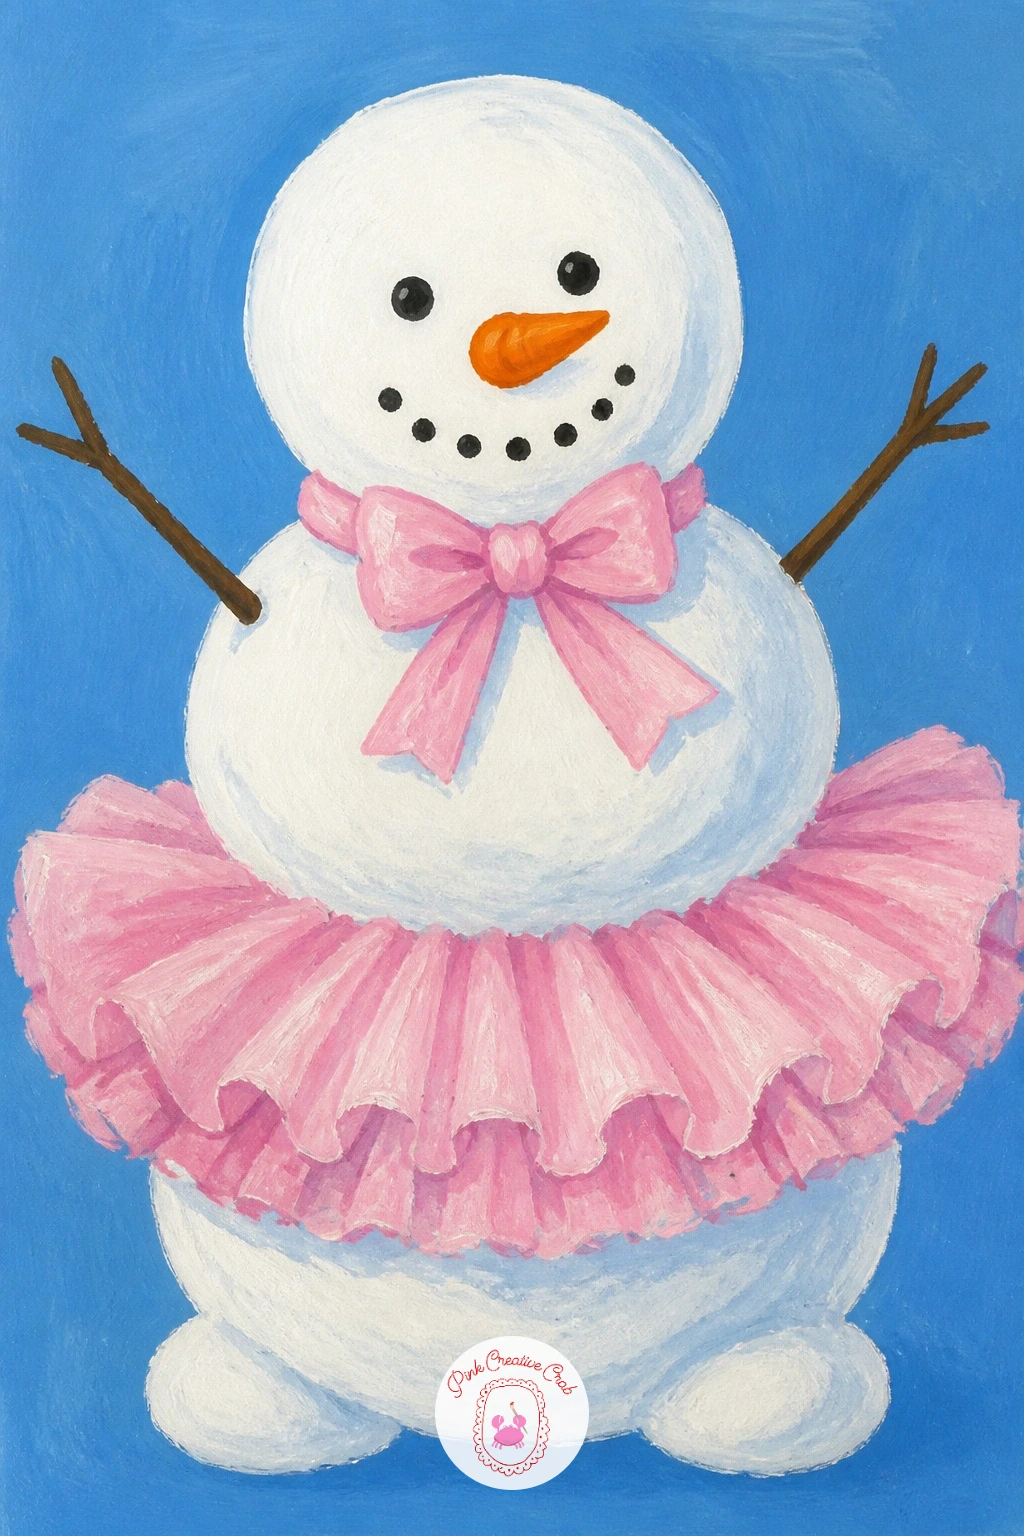
Dress your snowman up for the stage with a little pink tutu around his middle circle. Paint the body first as two stacked circles, then add the tutu as a layered ruffle shape wrapped around the base of the top circle, built from several short overlapping brushstrokes rather than one flat fill.
Working the ruffles from the back layer forward keeps each stroke visible and textured, which is exactly the look a tutu needs instead of a smooth painted skirt. Add a small matching bow at the snowman’s neck once the tutu is dry, using the same pink to tie the whole look together.
The usual mistake is flattening the tutu into one solid pink blob, losing the ruffled texture entirely, so keep your brushstrokes short and layered rather than one continuous sweep. If pink gouache runs low, a soft lavender tutu works just as playfully.
One tip for today: let a few ruffle edges overlap unevenly rather than lining them up, it keeps the tutu feeling light and bouncy.
You Will Need
- round brush size 4
- fine liner brush
- pink gouache
- dry brush for ruffle texture
Palette: Titanium White,Bubblegum Pink,Payne’s Grey,Soft Black
Build the tutu from several short overlapping brushstrokes rather than one flat fill, that layered texture is what sells the ruffled look.
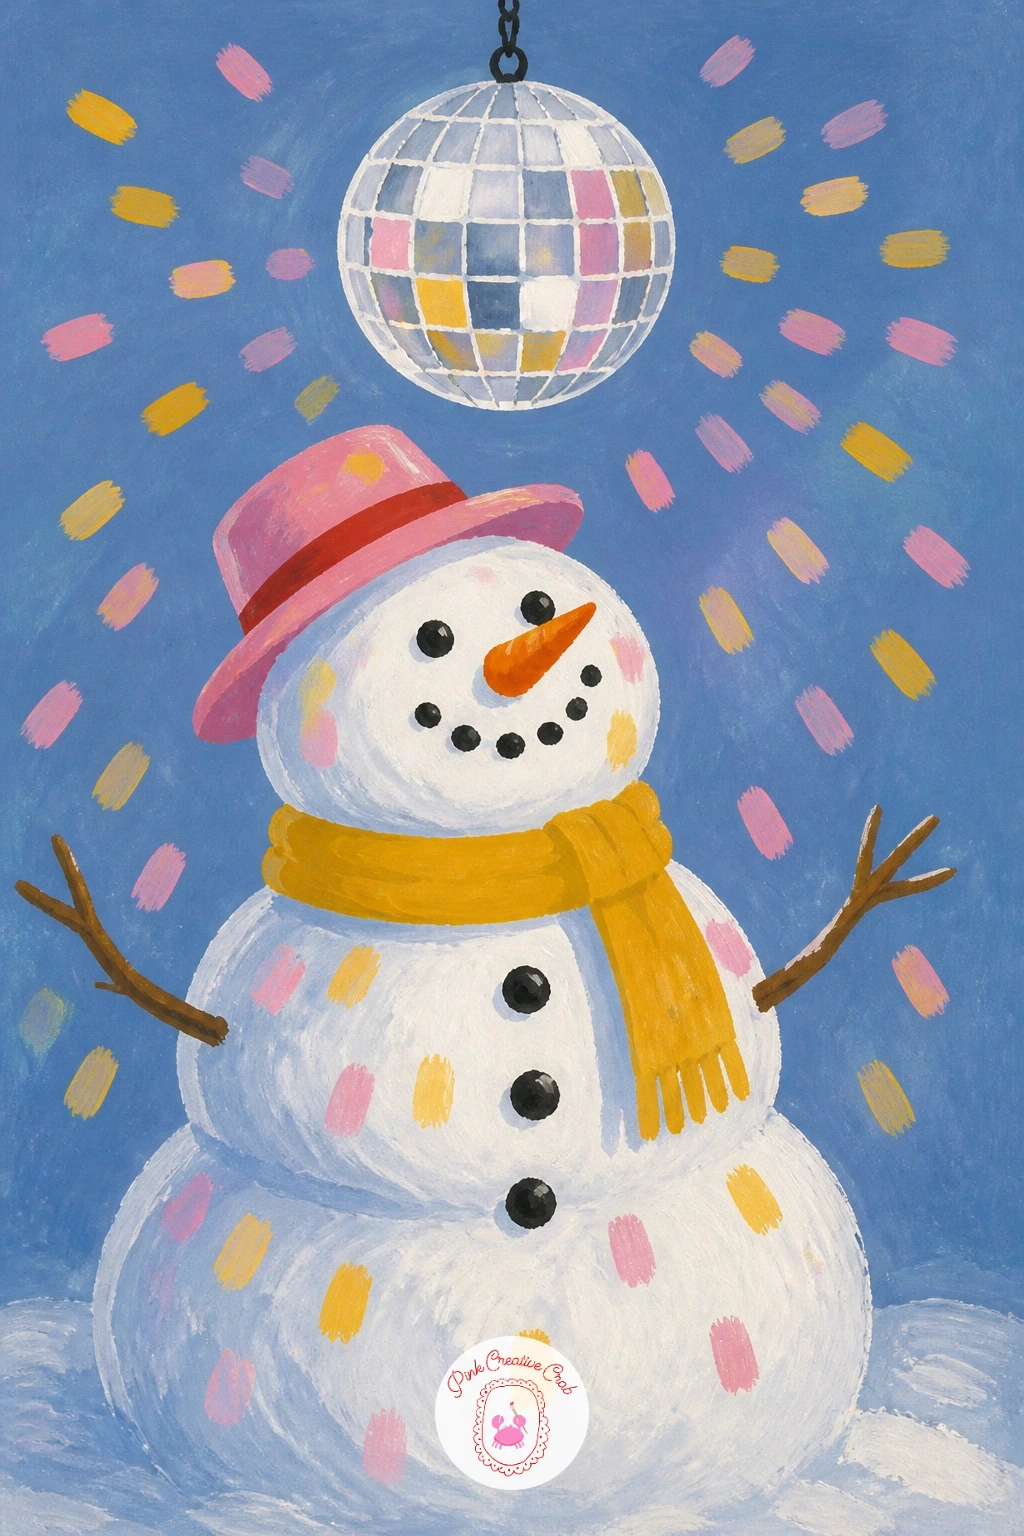
Bring in some sparkle with a snowman standing beneath a hanging disco ball. Paint the ball first as a simple circle divided into a loose grid of small diamond facets, using a slightly darker gray-blue in alternating facets to suggest the mirrored surface without painting each tiny panel in detail.
Hang it above the snowman on a single thin line, positioned so a few small triangles of reflected light scatter across his white body below, painted last in soft mustard and pink once the snowman is fully dry. This scattered light is what makes the scene feel like a party rather than just a snowman standing under a ball, so keep those light triangles irregular rather than evenly spaced.
The mistake is painting every facet of the disco ball in painstaking detail, which takes far too long and often looks busy rather than sparkly, so a loose suggested grid reads better at this scale. No mustard on hand, a pale yellow dot works fine for the light reflections.
Try scaling this one down to a tiny gift tag size, since the disco ball reads clearly even very small.
You Will Need
- round brush size 4
- fine liner brush
- gray-blue gouache
- mustard and pink for light reflections
Palette: Titanium White,Slate Blue,Mustard Yellow,Bubblegum Pink
Keep the disco ball’s facet grid loose and suggested rather than carefully detailed, it reads as sparkly from a normal viewing distance either way.
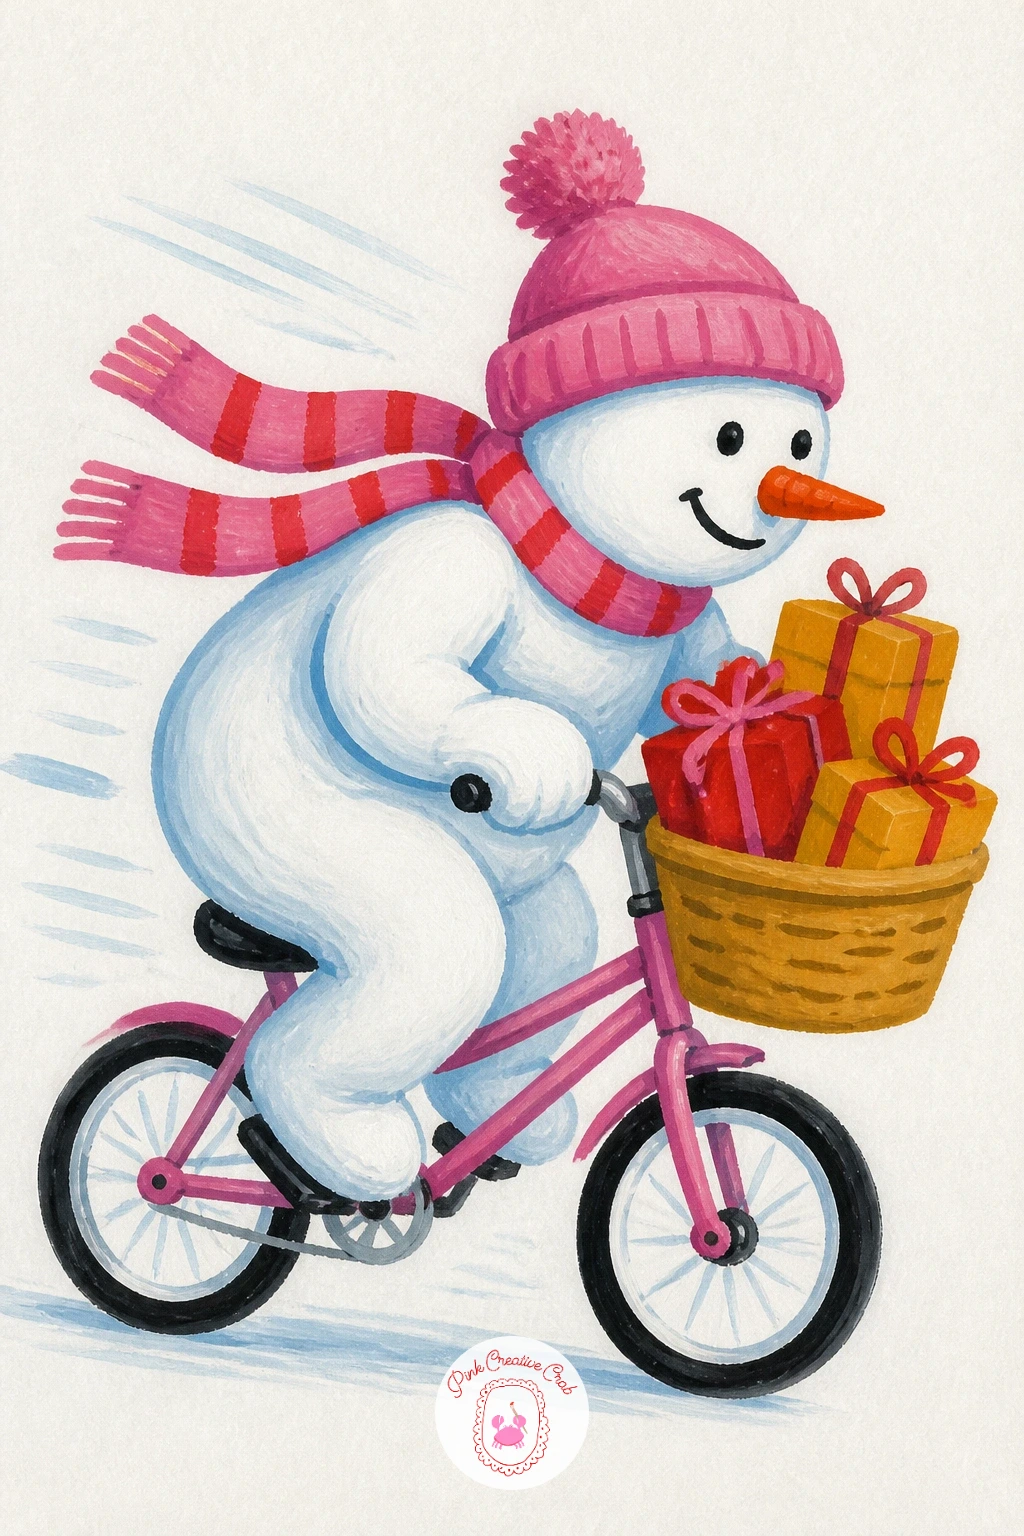
Add some motion with a snowman riding a small bicycle, a stack of wrapped presents balanced in the front basket. Paint the bicycle frame first as two simple circles for wheels connected by thin crossing lines, keeping the whole thing small enough that the snowman clearly towers over it.
Once the frame is dry, paint the snowman sitting on top leaning slightly forward over the handlebars, the same forward lean used for the sled idea earlier, which always reads as motion no matter the vehicle. The basket at the front holds two or three small wrapped boxes in red and mustard, stacked slightly off-balance rather than neatly squared, since a neat stack looks posed rather than genuinely delivered.
The mistake here is painting the bicycle wheels as perfect circles with no sense of speed, so add a few short curved motion lines trailing behind them once everything else is dry. If mustard gouache runs low, cream-colored boxes work just as well.
One tip for today: tilt the whole bicycle slightly, as if caught mid-pedal, rather than keeping it perfectly level.
You Will Need
- round brush size 4
- fine liner brush
- red and mustard gouache
- pencil for the bike frame
Palette: Titanium White,Poppy Red,Mustard Yellow,Payne’s Grey
Tilt the whole bicycle slightly off level as if caught mid-pedal, a perfectly upright bike looks parked rather than in motion.
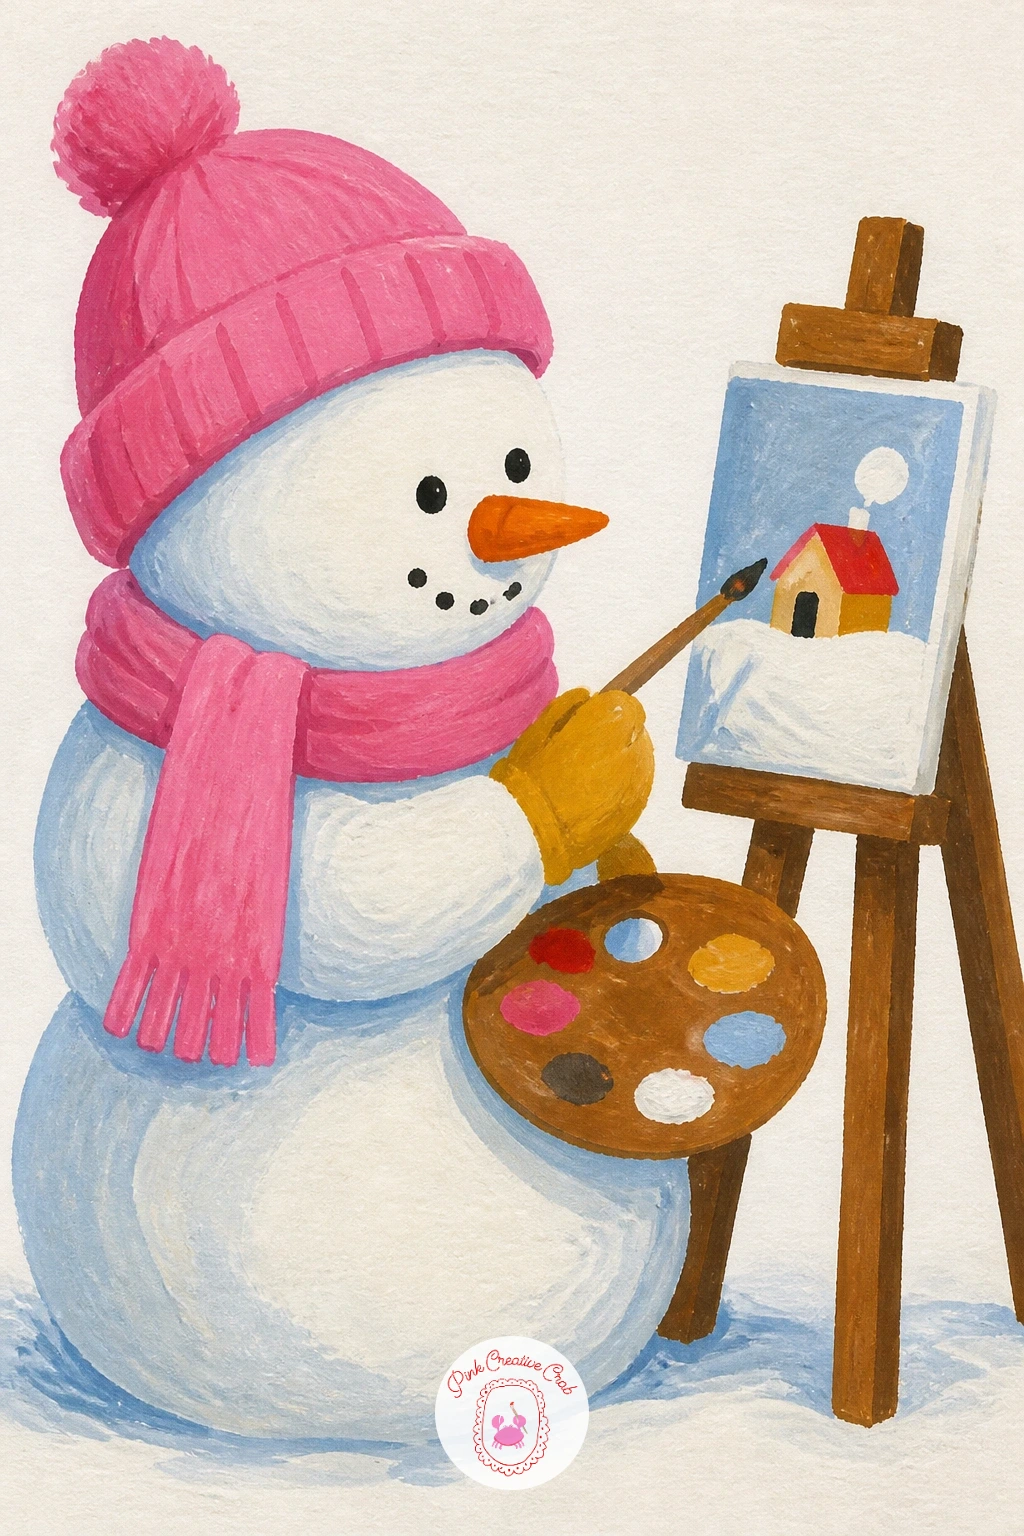
Turn the joke inward with a snowman standing at a tiny easel, painting his own picture. Paint the easel first as three thin crossed lines in brown, with a small white canvas rectangle propped at the top, before adding the snowman standing beside it holding a tiny brush.
Give the canvas on the easel a simple miniature scene of its own, perhaps a tiny sun or a single small tree, painted with the very tip of a fine brush so it reads as a picture-within-a-picture rather than a messy smear. Keep the snowman’s painting arm raised and bent toward the canvas, the brush tip just touching the surface, which completes the small joke of the whole scene.
The common slip is making the canvas painting too detailed, which competes with the main snowman instead of supporting the joke, so keep it as simple as two or three shapes. If brown gouache runs low, a dark gray easel works just as well.
Try this one if you enjoy a meta subject, since it pairs nicely with other scenes in this list for a small gallery wall grouping once a few are finished.
You Will Need
- fine liner brush
- round brush size 4
- brown gouache
- white gouache for the canvas
Palette: Titanium White,Burnt Umber,Payne’s Grey,Poppy Red
Keep the tiny painting on the easel down to two or three simple shapes, an overly detailed picture-within-a-picture fights the main snowman for attention.
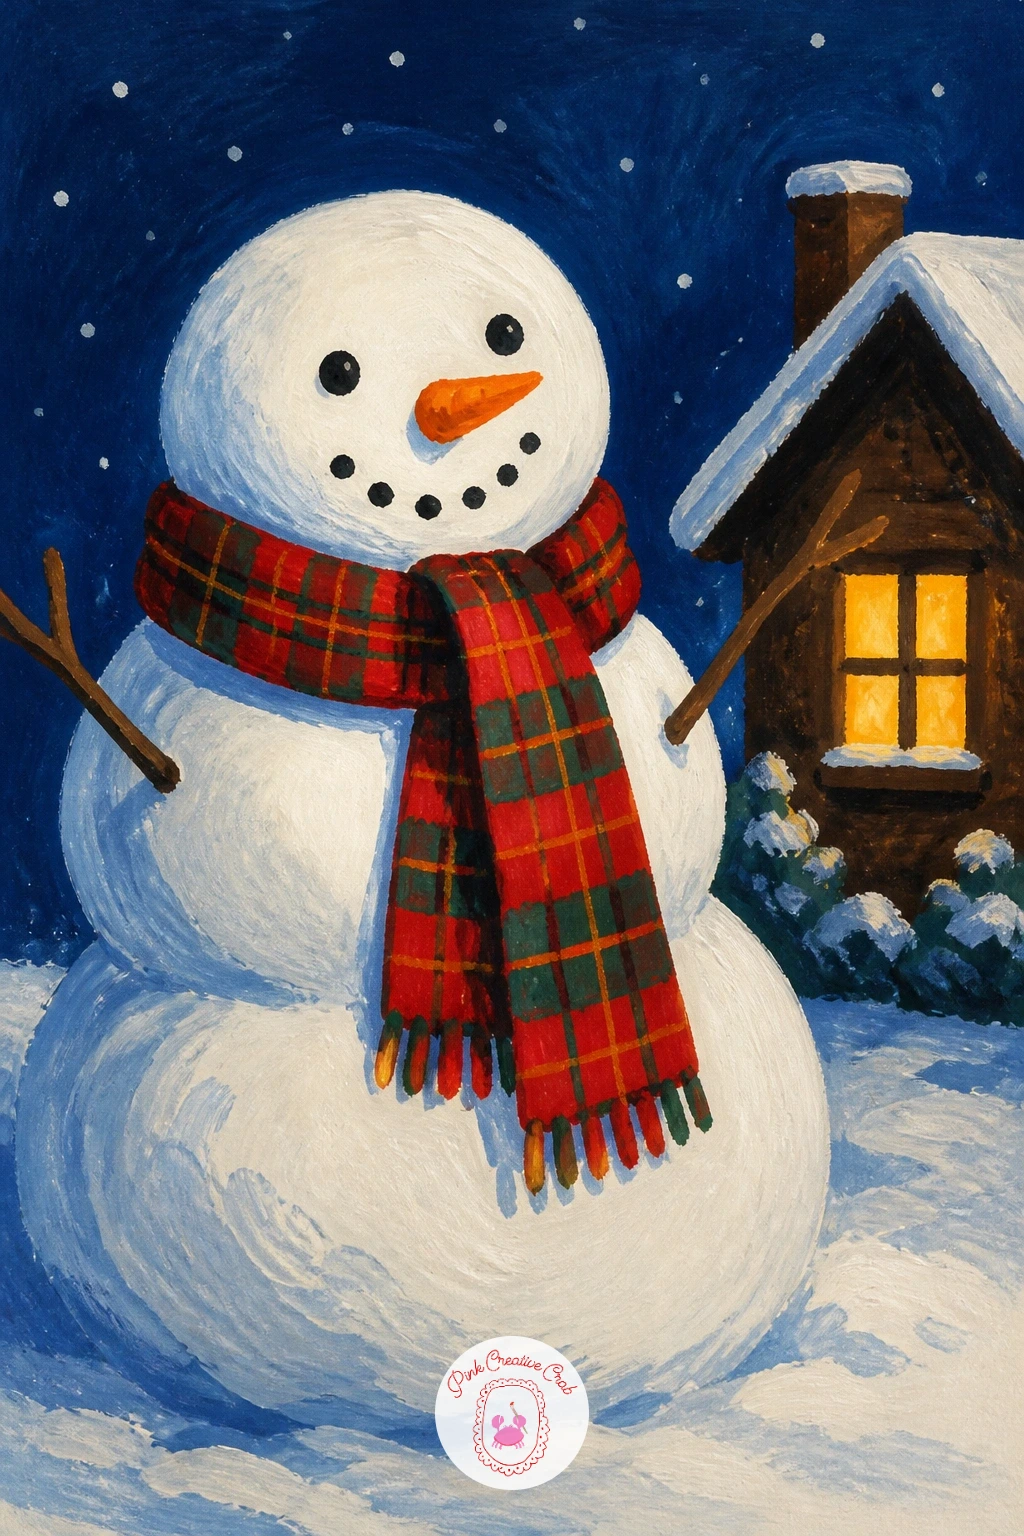
Settle into a cozier mood with a snowman wrapped in a tartan scarf standing beside a small glowing cabin. Paint the cabin first as a simple triangle roof over a rectangle base, with one warm yellow window glowing against the rest of the structure left in cooler brown and gray tones.
Once the cabin is dry, paint the snowman standing beside it, his tartan scarf built from a few crossing lines of red and dark green over a white or cream base strip, wrapped loosely around his neck rather than lying perfectly flat. Let the cabin’s window glow cast a small warm patch of light onto the snow near its base, which ties the two elements of the scene together.
The mistake here is making the tartan pattern too busy with too many colors, so limit yourself to red lines crossing over a green base for a clean, readable plaid. No tartan experience needed, just keep the crossing lines evenly spaced and confident.
For a quieter version, skip the scarf pattern entirely and use a single flat color, saving the full tartan for when you have more time.
You Will Need
- round brush size 6
- fine liner brush
- red and green gouache
- warm yellow gouache for the window
Palette: Titanium White,Forest Green,Poppy Red,Warm Cream
If cozy cabin scenes like this appeal to you, winter oil painting ideas for beginners has more in the same warm wintery mood.
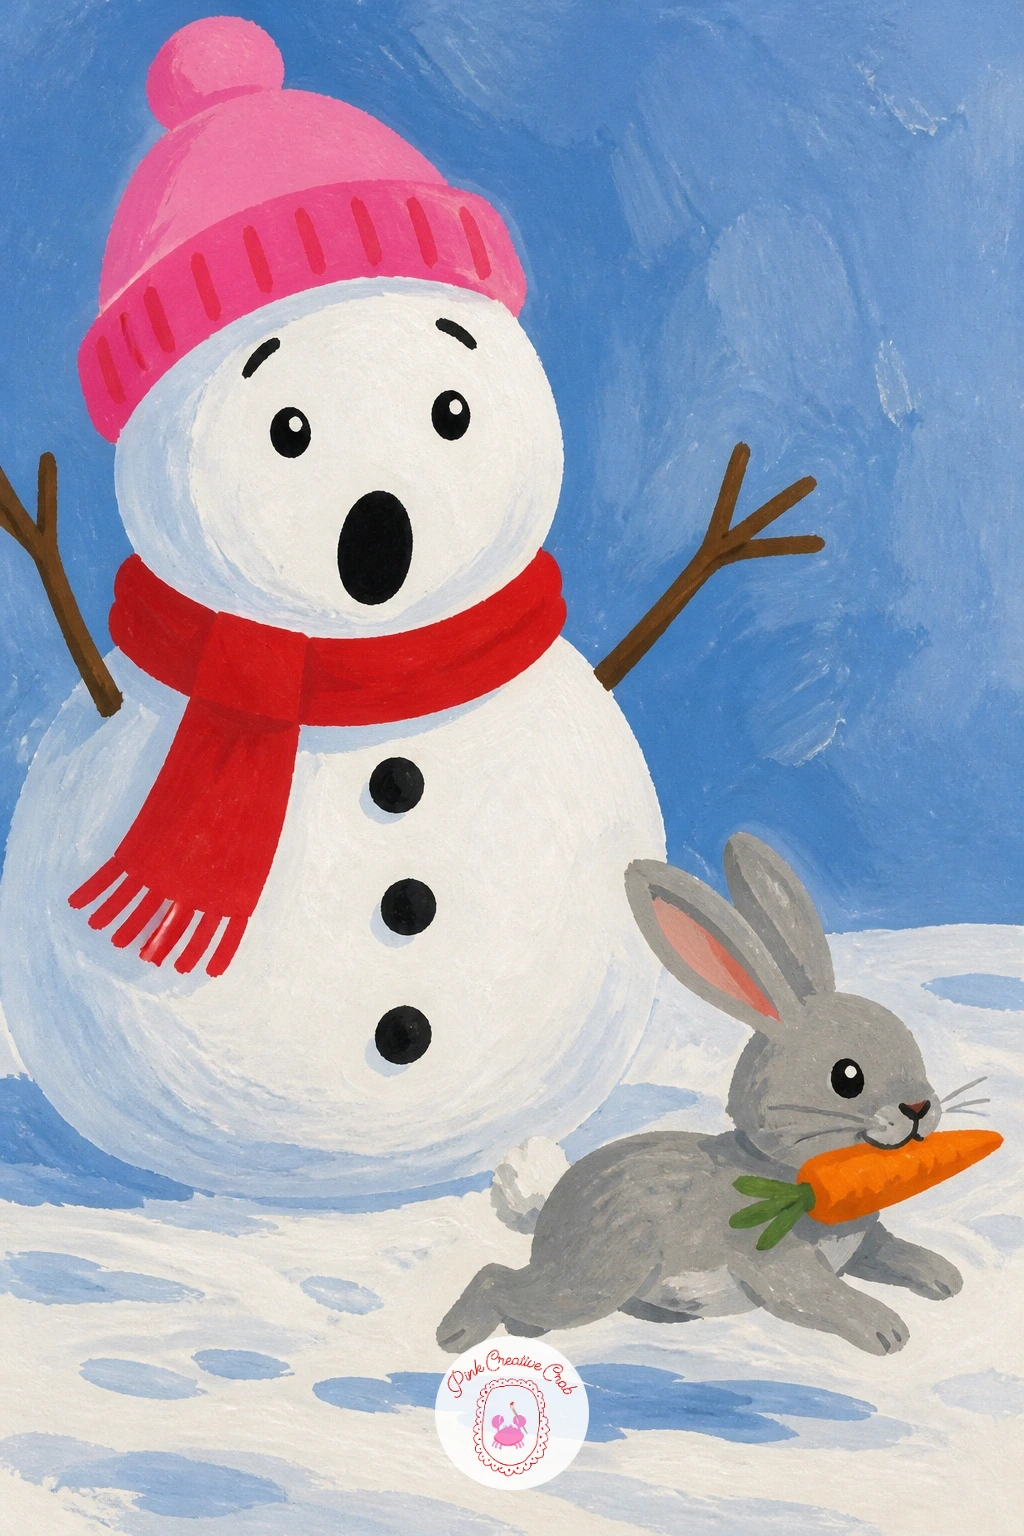
End the mischief section with a snowman caught mid-surprise as a small rabbit makes off with his carrot nose. Paint the snowman’s face first with an empty space where the nose should be, which feels strange to leave blank but sells the joke once the rabbit appears.
The rabbit sits low near the snowman’s base, a simple rounded body in soft gray with long upright ears, the stolen carrot held in its front paws or mouth, painted in bright orange once the rabbit’s body has dried. Give the snowman’s remaining coal-dot eyes a slightly wider, more surprised spacing than usual, which does a lot of work to sell his shock without needing an elaborate expression.
The usual mistake is painting the carrot still attached to the snowman’s face, which confuses the joke entirely, so commit fully to the empty nose space from the very first layer. If orange gouache is low, a deep coral carrot still reads clearly.
One tip for today: angle the rabbit’s whole body as if mid-dash away from the snowman, it adds energy to the small scene.
You Will Need
- round brush size 4
- fine liner brush
- gray and orange gouache
- pencil for the empty nose spot
Palette: Titanium White,Warm Gray,Burnt Orange,Soft Black
Widen the spacing of the snowman’s two coal eyes slightly more than usual, it does most of the work in selling his surprise without extra detail.
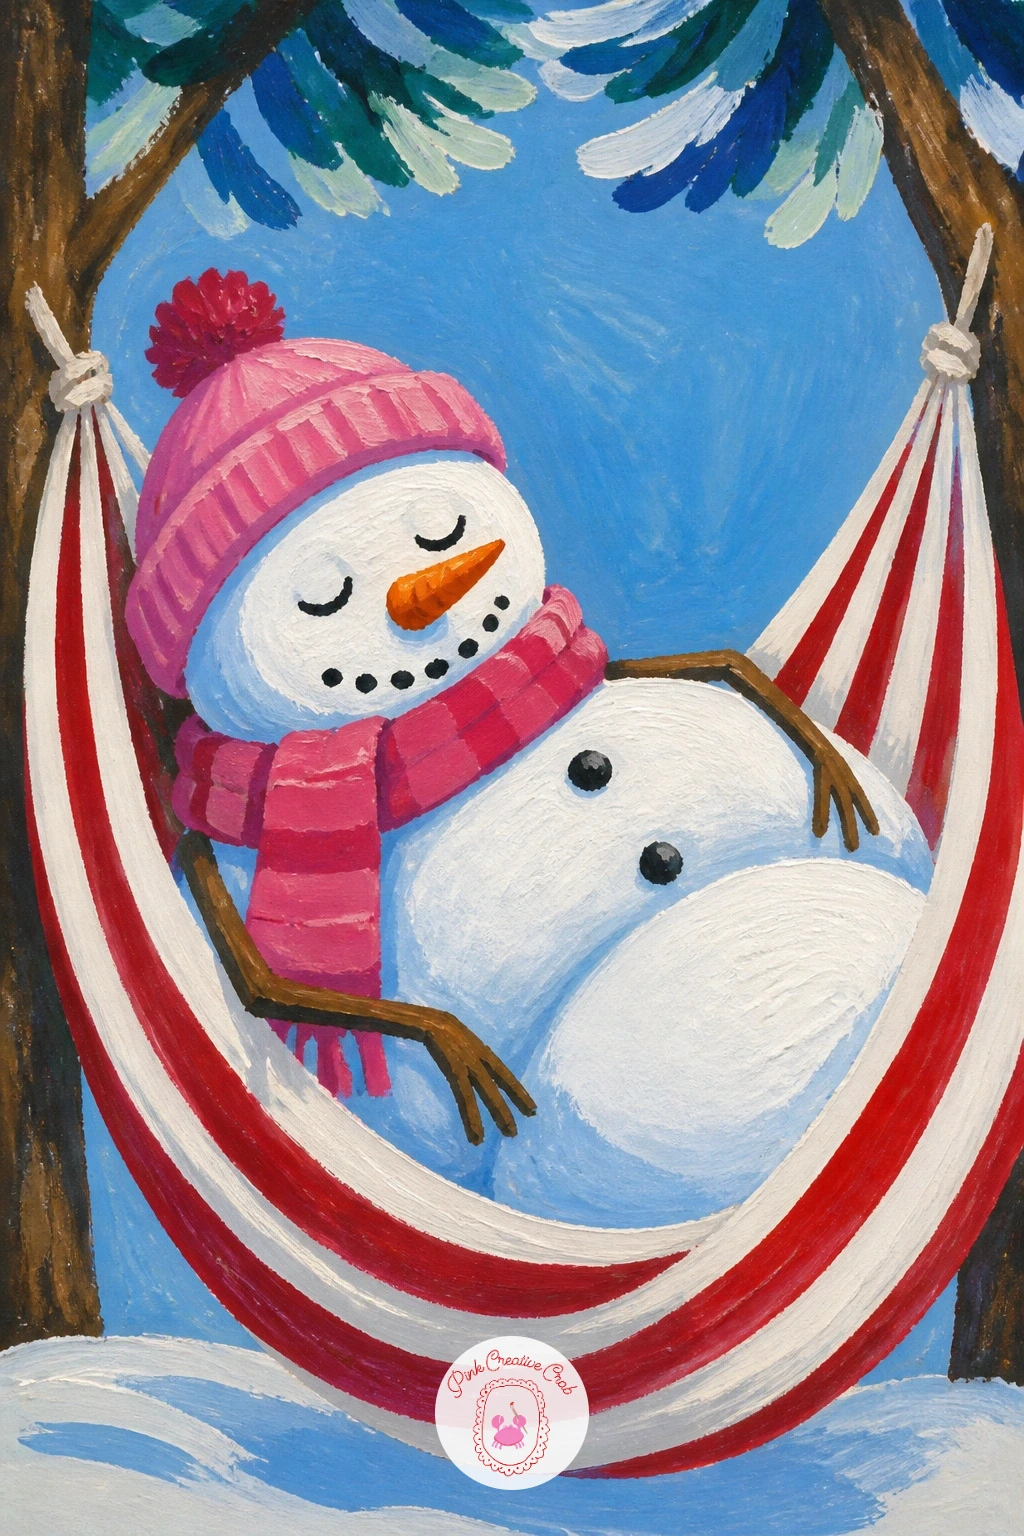
Slow everything down with a snowman dozing in a little hammock strung between two unseen points. Paint the hammock first as a simple curved sagging shape in red and white stripes, dipping low in the middle, since the sag of the fabric is what makes the whole scene read as restful.
Once the hammock is dry, paint the snowman’s body nestled inside the curve, slightly compressed and rounder than his usual standing shape to suggest he is sinking into soft fabric. A closed-eye, simple curved line for his face finishes the sleepy mood, added last with a fine brush so it stays delicate rather than heavy.
The common slip is painting the hammock too flat and straight, which looks like a shelf rather than fabric, so exaggerate the sag more than your instinct suggests. If red stripes are not available, mustard stripes work just as cozily.
Try varying this one next time with a tiny knit blanket draped over him, or a steaming mug resting just within reach of one arm.
You Will Need
- round brush size 6
- fine liner brush
- red and white gouache
- pencil for the hammock sag
Palette: Titanium White,Poppy Red,Payne’s Grey,Cerulean Blue
Exaggerate the hammock’s sag more than feels natural while sketching, a too-flat hammock reads as a shelf rather than soft fabric.
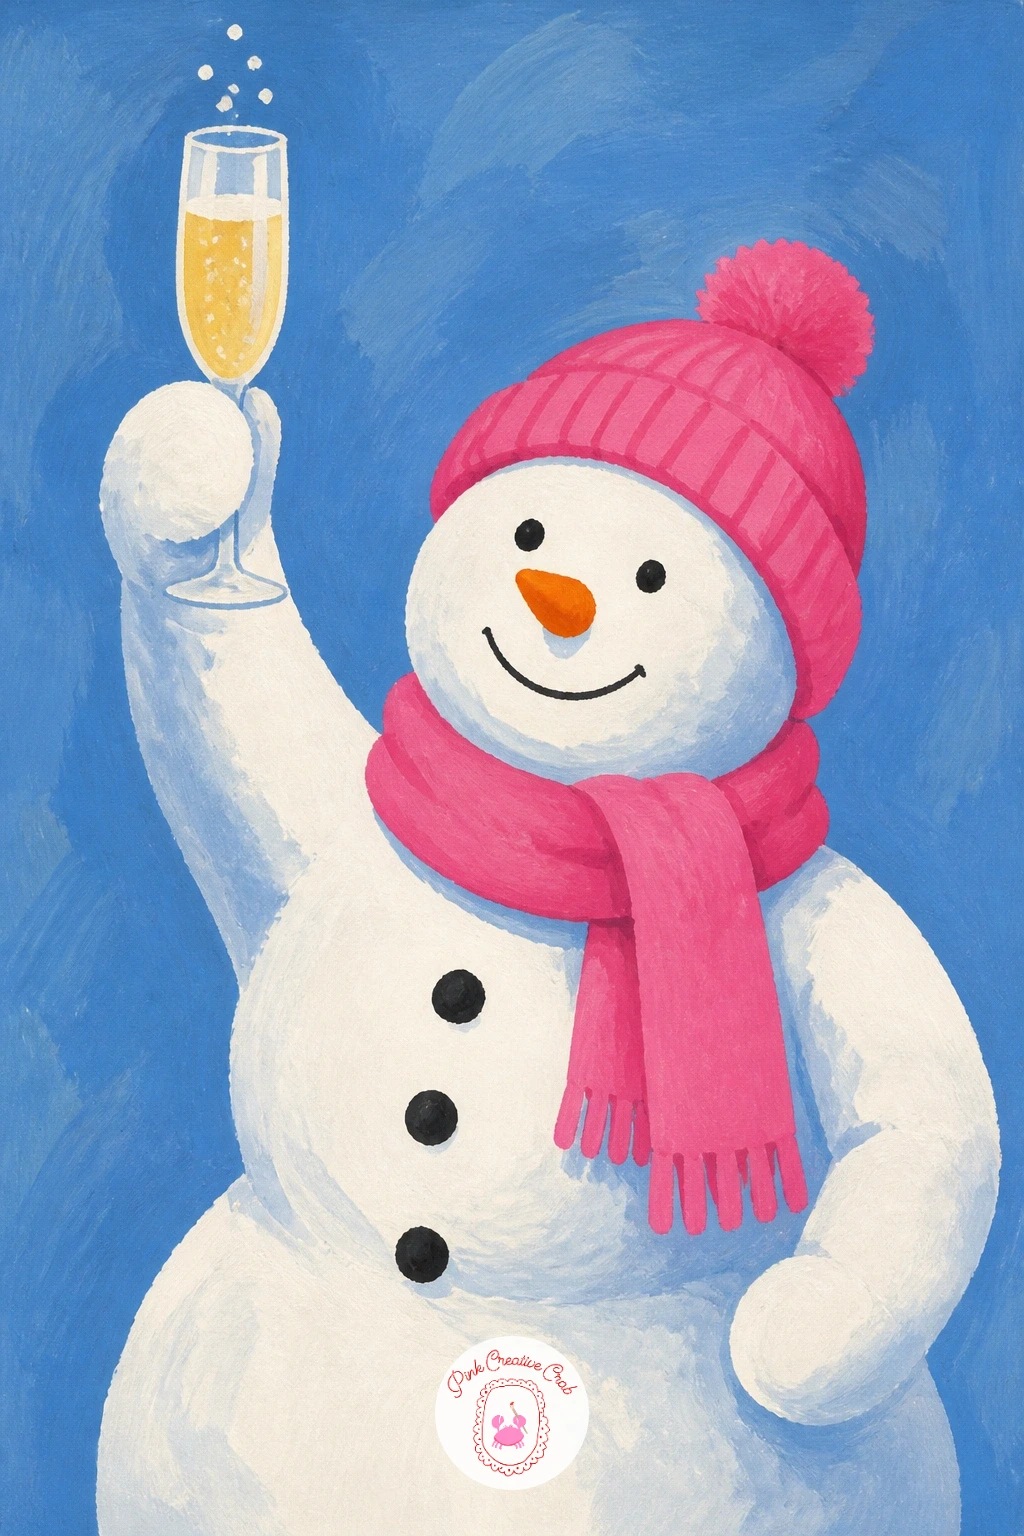
Close the list on a celebratory note with a snowman raising a tiny glass of champagne in a toast. Paint the body first, then add a thin-stemmed glass shape in pale gold, held high in one stick arm raised above his head rather than at chest height, which gives the pose a genuine toasting energy.
A few small bubble dots rise from the glass once it dries, painted with the very tip of a fine brush in white, scattered loosely rather than in a straight line. This is a lovely one to finish the whole series on, since the raised arm and bright gold glass give it a sense of occasion that suits a final piece in the set.
The mistake is making the glass too large for the delicate stem, so keep the bowl of the glass small and let the stem do most of the visual work. No pale gold on hand, mix a touch of mustard into white instead.
One tip for today: raise the snowman’s arm as high as the pose allows, it reads as celebration far more clearly than a half-raised glass.
You Will Need
- fine liner brush
- round brush size 4
- pale gold gouache
- white gouache for bubbles
Palette: Titanium White,Pale Gold,Payne’s Grey,Cerulean Blue
Raise the snowman’s toasting arm as high as the pose comfortably allows, a half-raised glass reads as hesitant rather than celebratory.
What to Do Next
Pick whichever snowman made you laugh first, whether that is the one toasting with champagne or the one caught mid-wobble on ice skates, and start there on a sheet of heavyweight paper. One finished painting today beats a long list of good intentions, so set a timer, keep your white layers clean, and let the character carry the rest.
Frequently Asked Questions
What kind of paper works best for a christmas snowman painting in gouache?
Heavyweight paper around 300 gsm works best, since gouache goes on thick and wet layers can buckle thinner paper. A cold press watercolor or gouache pad handles multiple layers without warping.
How do I keep the white snowman body from looking flat?
Mix two shades of white, a warm titanium white and a slightly grayer version, and use the darker one for the shadowed side of each circle. This small shift in value gives the round body depth without extra detail.
Can I paint these snowman ideas with acrylic instead of gouache?
Yes, acrylic works as a close substitute since both are opaque water-based paints that layer similarly. Keep your acrylic slightly thinned with water so it spreads as smoothly as gouache does on paper.
How do I stop the blue shadows from looking muddy against the white?
Let the white body dry completely before adding any blue shadow on top, since wet-into-wet blending is what causes muddiness. A clean, dry base keeps the blue crisp and the white bright beside it.
What is the easiest snowman idea on this list to start with?
The bow-topped snowman is the simplest, since it only needs smooth white layers and one small accessory. It is a good first attempt before moving into busier scenes with props and background elements.
Have any thoughts?
Share your reaction or leave a quick response — we’d love to hear what you think!
-
 0
-
0
-
0
-
0
-
0
-
0


