

Cool sketch ideas are the ones that bend the rules a little: a whale drifting over rooftops, a door standing alone in a desert and opening onto the sea, a staircase that just keeps climbing into cloud. Nothing here needs color or a big setup, just a pencil, a bit of white paper and a willingness to draw something that could not actually happen.
Below are 33 scenes built around scale and gravity gone slightly wrong, ordered from the quickest sketches to the ones with a bit more going on. Pick whichever one grabs you first and work through it start to finish this sitting.
Using these images: free for personal projects such as printing, coloring, cards, journals and gifts. Handmade items that include them may be sold up to 30 pieces per design. More than that is commercial use and is not permitted, and neither is selling or sharing the images themselves or passing them off as your own. Please ask before any other use.
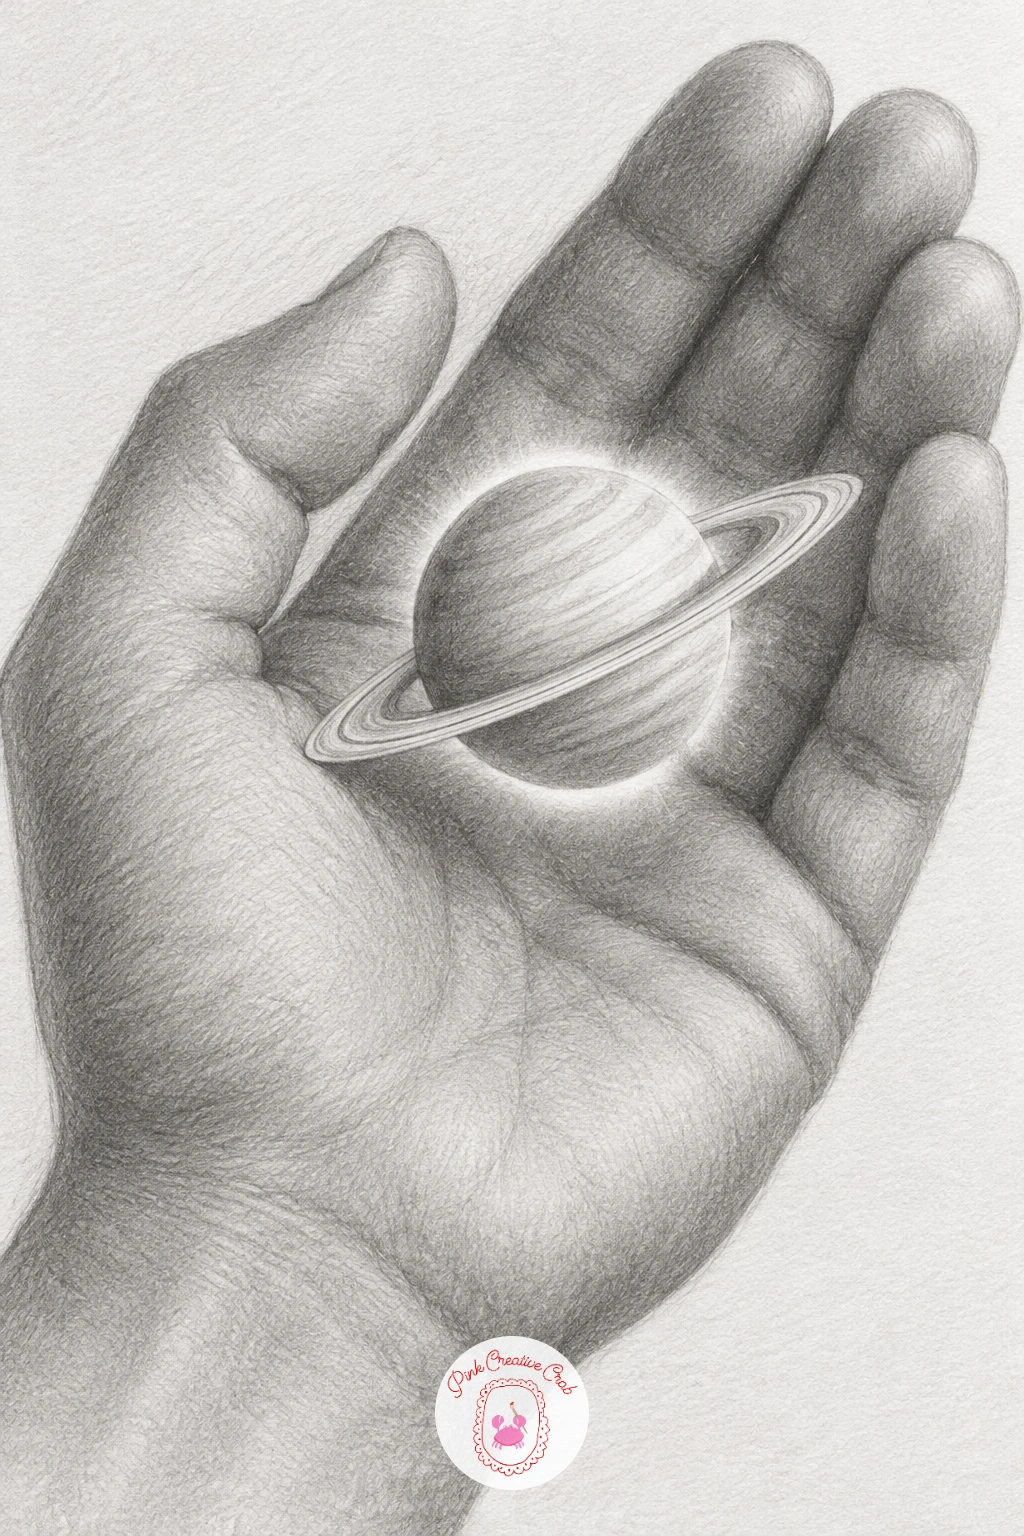
Start with the hand holding a tiny planet, since it is the simplest idea on this list and a good warm up for the stranger ones ahead. Sketch the hand first, palm turned up, fingers loosely curled as if cradling something fragile. Keep the fingers a little short and blocky at first, you can refine the joints once the gesture feels right.
Block the planet as a circle resting just above the palm, then add a thin ellipse ring slicing through it at an angle. Shade the hand with mid grey tones that follow the curve of the knuckles, leaving the brightest highlight where light hits the palm.
The ring is where most people lose the illusion: keep the front edge crisp and let the back edge fade behind the sphere to show it wrapping around. Darken the planet unevenly, like a tiny moon with craters, rather than one flat grey ball.
If hands feel intimidating, trace your own hand lightly in this pose first, then erase the guide lines once the proportions sit right.
Palette: Graphite Grey,Charcoal Black,Soft Silver
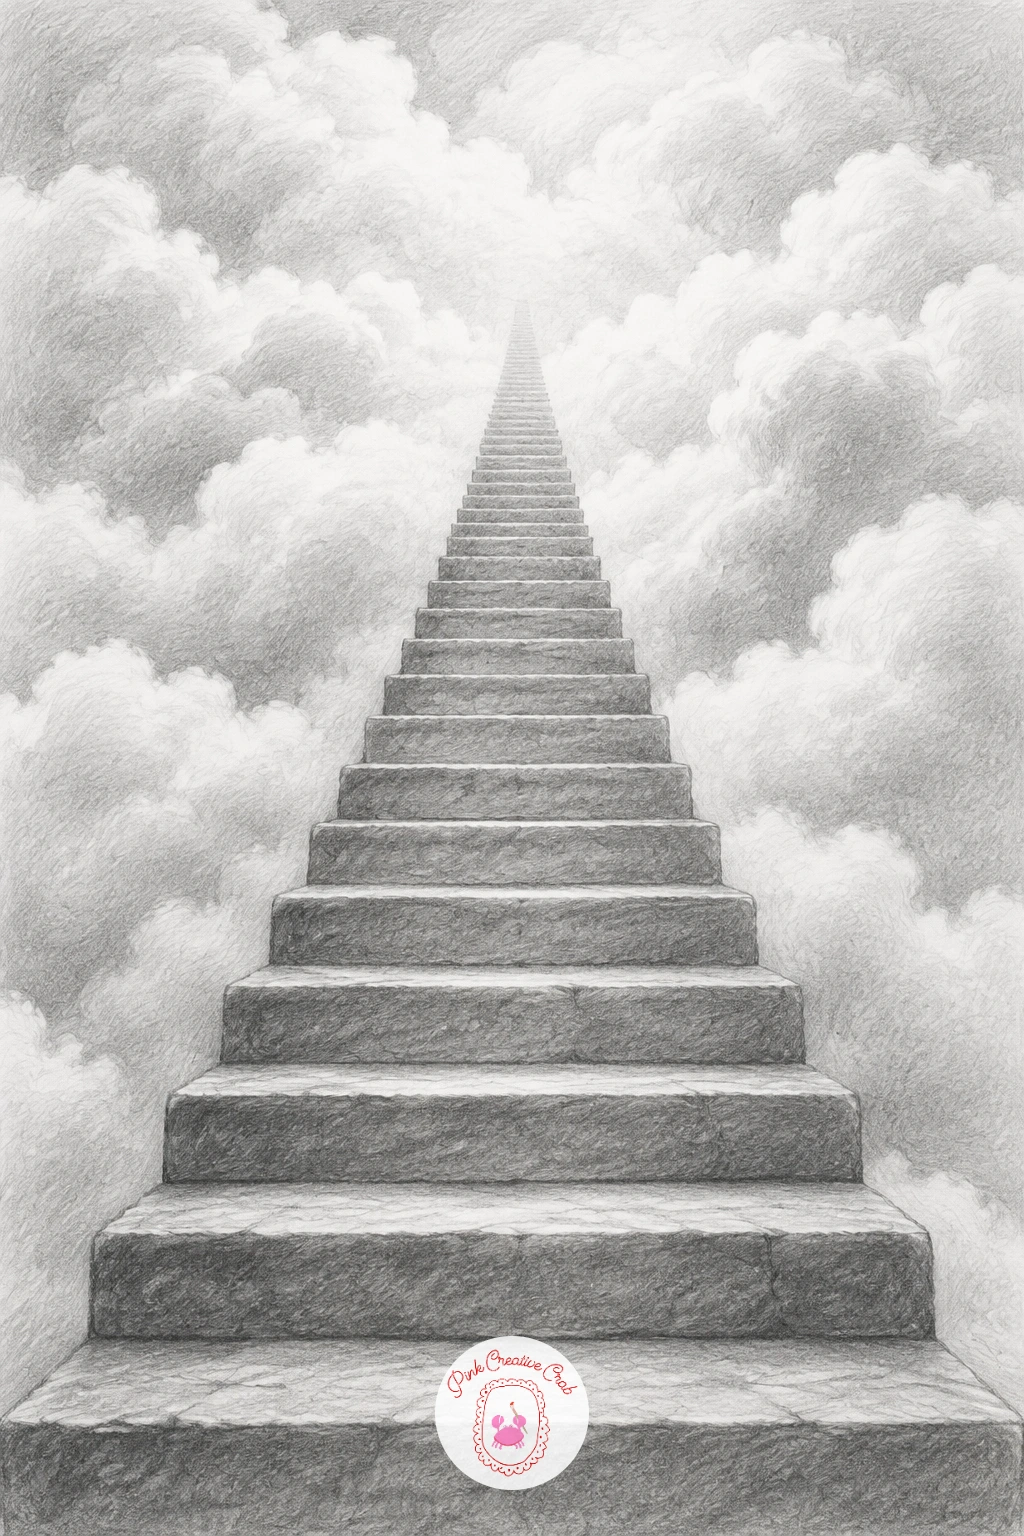
Move from the hand to something with more depth: a staircase climbing straight into the clouds. Lightly sketch a single vanishing point near the top third of the page, then draw the stair treads getting smaller and closer together as they rise toward it, the same trick used in any one point perspective drawing.
Keep the first few steps wide and clearly defined, with visible side edges, then let the top steps dissolve into loose pencil marks as they vanish into the cloud bank. This gradual loss of detail is what makes the top feel endless rather than just cut off.
Shade the clouds with a blending stump in soft circular motions, darker at the base where they meet the stairs and lighter where they thin out at the top of the page. If the perspective feels tricky, rule the vanishing lines faintly in pencil first and erase them once the steps are drawn.
A quick version keeps six or seven steps and a simple cloud bank. Given more time, add a thin shadow falling across each tread to really sell the climb.
Palette: Pale Grey,Steel Grey,Deep Charcoal
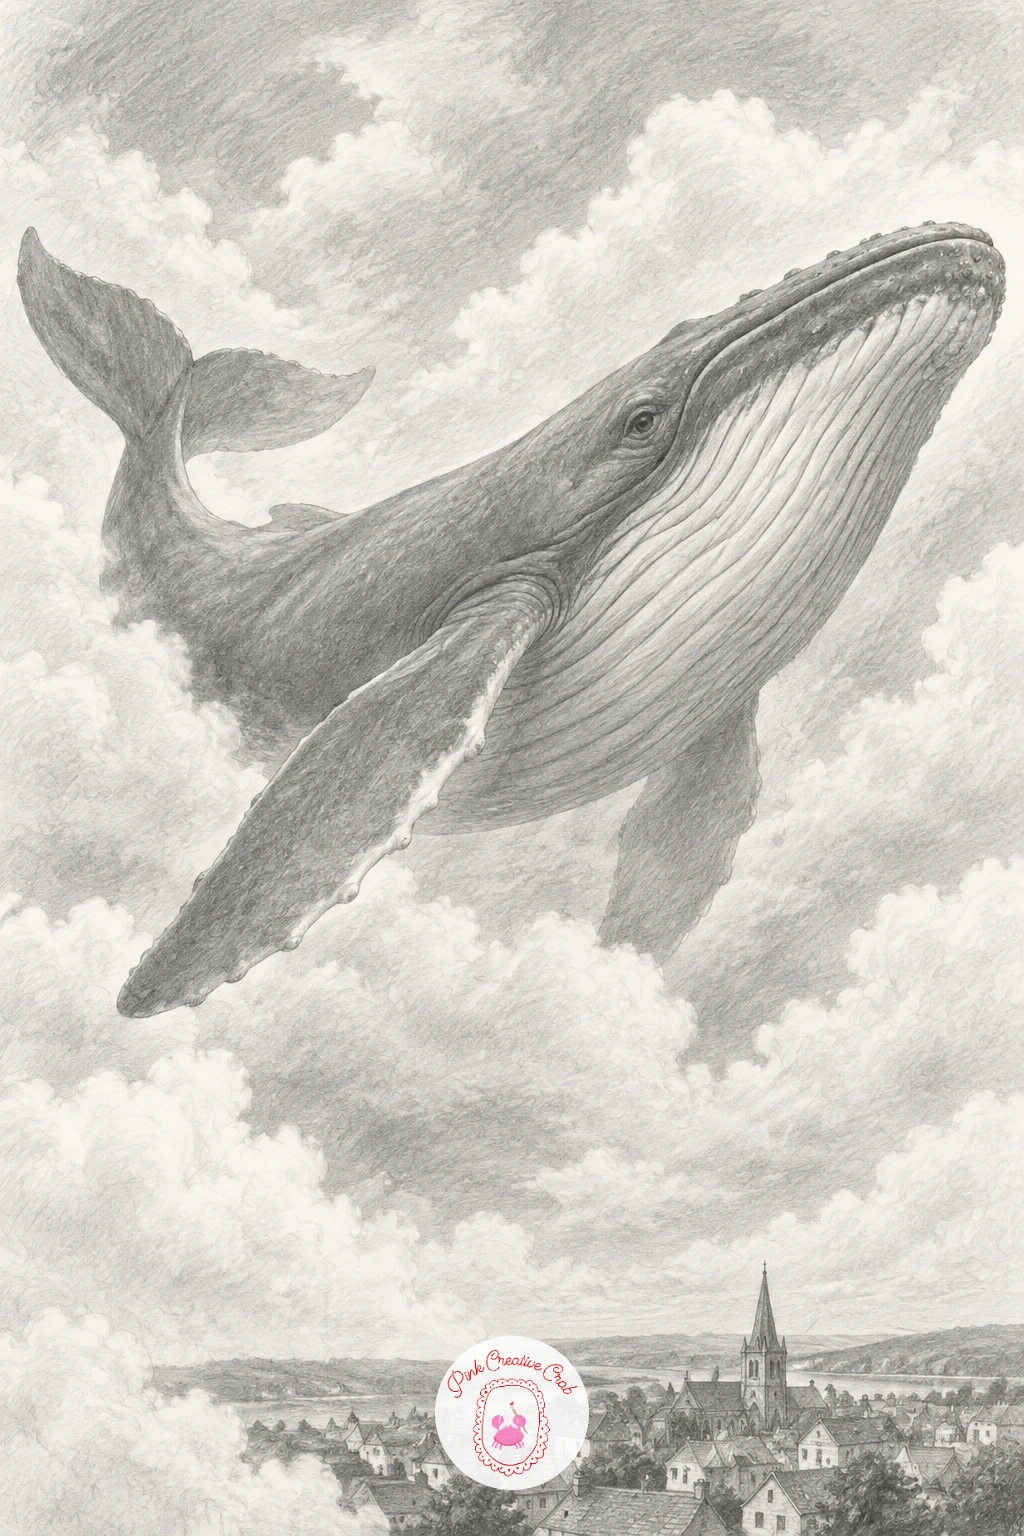
From stairs in the clouds to a whale swimming above a town: this one lives or dies on the whale’s pose, so draw the body first as a long curved teardrop, nose down, tail lifted as if mid glide. Keep the proportions close to a real whale, generous belly, small flippers, a tail fluke that tapers to points.
Once the body sits right, sketch a tiny row of rooftops along the bottom of the page, small enough that the whale dwarfs the whole street. Shade the whale’s underside darker where it curves away from the light, and leave a pale highlight along its back to suggest it is lit from above like something swimming near the surface.
The common mistake is making the whale too flat, so study a few photos of real whales for the gentle roll of the body before you commit to final lines. If the anatomy feels like a lot, simplify the flippers and fluke into clean shapes rather than anatomically exact ones.
Finish with a few soft cloud wisps trailing behind the tail, like a wake, to make the sky feel like water.
Palette: Charcoal Grey,Mid Grey,Paper White
Look at a few whale photographs before you start. Real whales have surprisingly soft, round bellies, and getting that curve right does more for believability than any amount of shading.
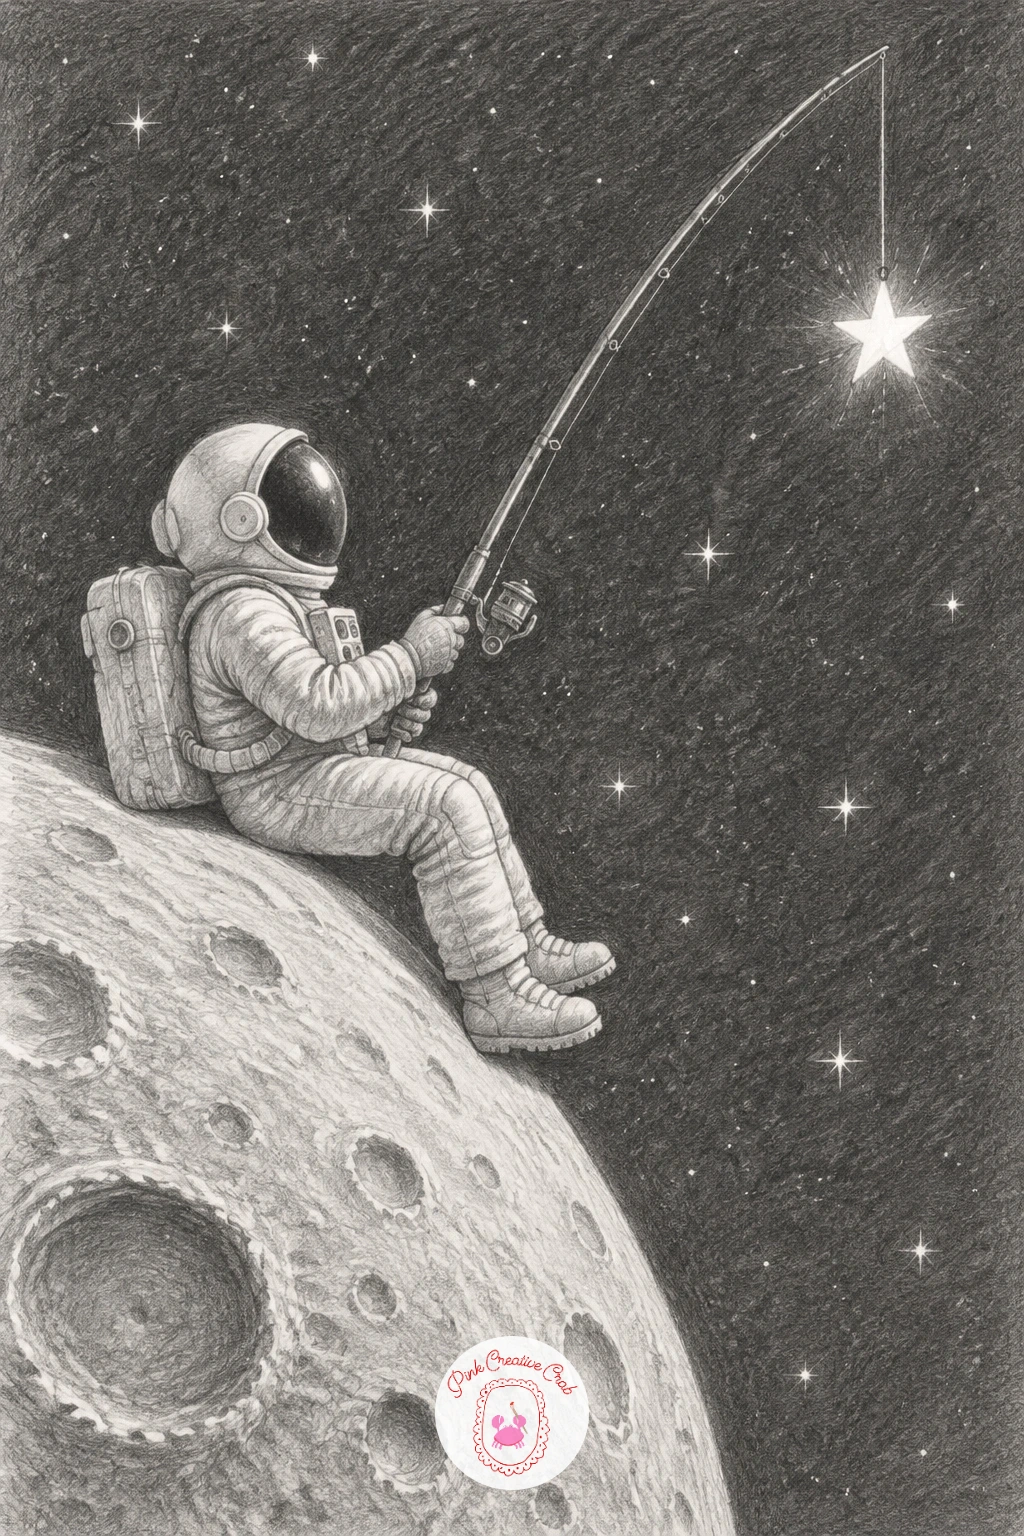
Give yourself a character to draw next: an astronaut sitting on the edge of the moon, fishing line cast up into the stars. Block the figure first as simple shapes, a rounded helmet, a boxy torso in a bulky suit, legs dangling over the moon’s curved edge.
Draw the moon’s surface as a gentle arc across the lower part of the page, scattered with a few craters so it reads as rock rather than a flat shape. The fishing line is a single clean pencil line running up into the sky, ending at a star drawn slightly larger and brighter than the rest.
Shade the suit in soft grey with a brighter highlight along the helmet where it catches starlight, and keep the visor dark enough to suggest reflection without drawing a detailed face inside it. If the suit proportions feel off, reference any photo of a padded spacesuit and simplify the joints into rounded shapes.
One tip that helps every time: keep the star field sparse, a dozen dots is plenty, so the one star on the line still stands out.
Palette: Lunar Grey,Space Black,Starlight White
Here is where light starts doing real work: a lone door standing upright in a desert, its open frame showing the sea instead of more sand. Begin with the door itself, a simple rectangular frame with a few panel lines, standing with no wall around it, just its own shadow on the ground.
Draw the desert as a few soft dune curves receding toward the horizon, shaded lightly so the sand feels warm even without color. Inside the doorframe, switch the marks completely: looser, more fluid lines for waves, a horizon line that sits lower than the desert’s, and a scattering of light to suggest water catching the sun.
The scene works because of the contrast in light direction, so decide where your sun sits (say, upper right) and keep the desert shadows consistent while letting the sea inside the door glow from a different, cooler source. If that split lighting feels fussy, simplify by making the sea side slightly darker overall rather than fully relit.
Finish with a hard cast shadow stretching from the door’s base across the sand, which does more than anything else to plant it firmly in the scene.
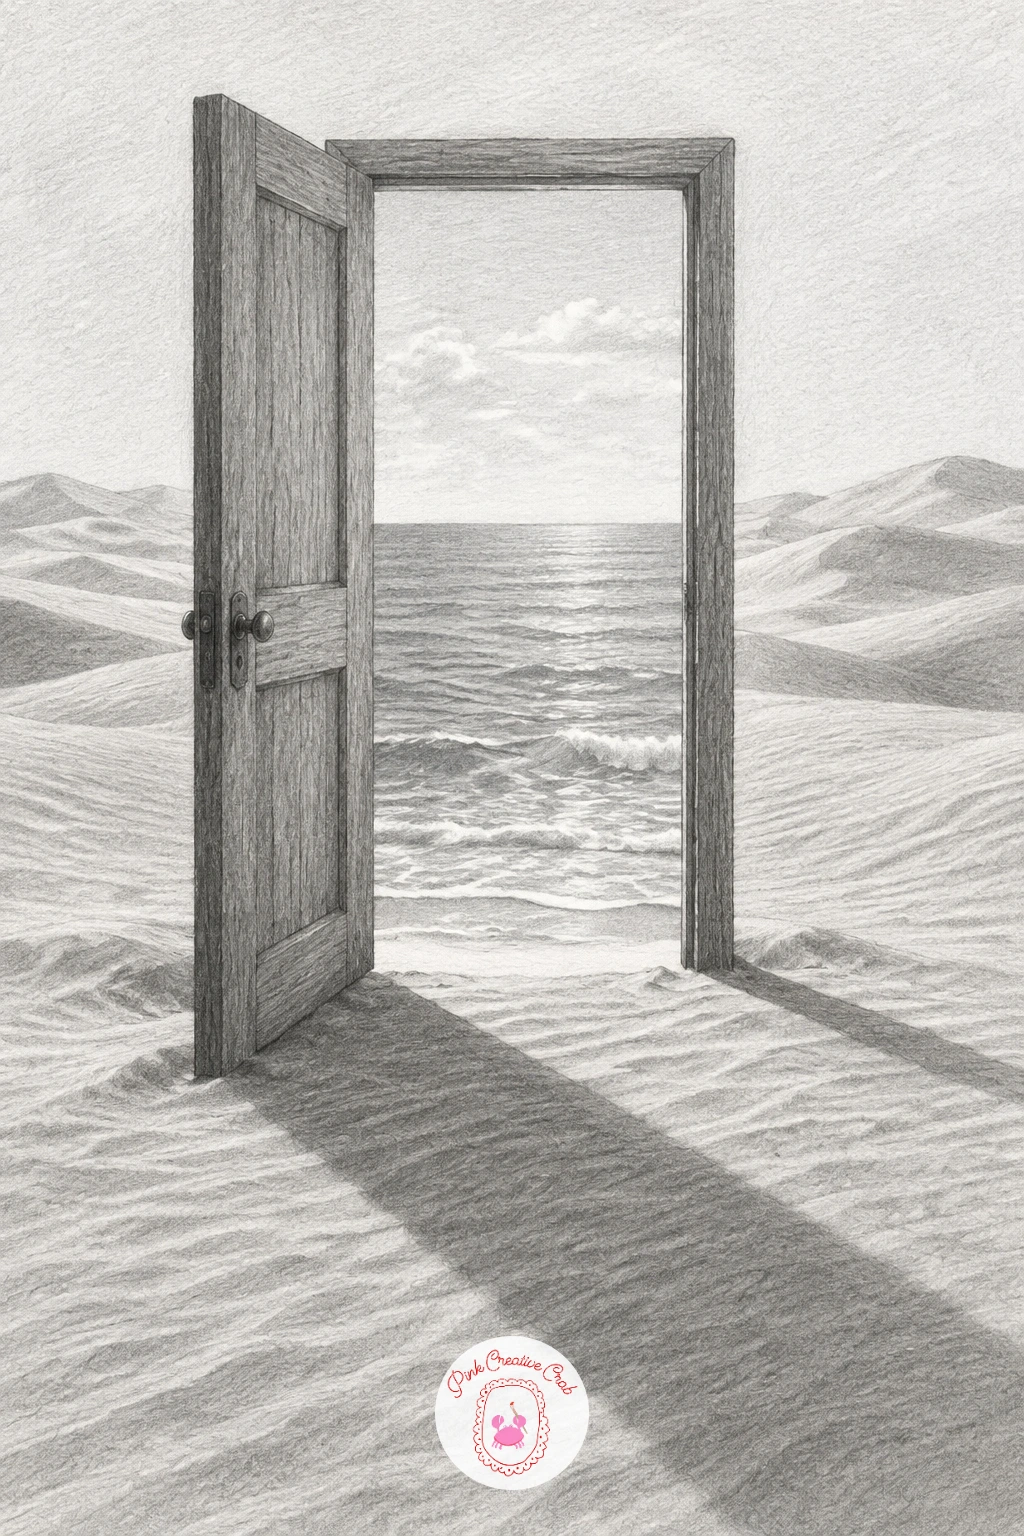
Palette: Sand Grey,Deep Shadow,Horizon Grey
Scale back down for this one: a teacup holding a tiny stormy sea instead of tea. Draw the cup and saucer first with ordinary careful linework, a slight ellipse for the rim, a curved handle, since the surreal part only reads well if the ordinary part looks convincingly real.
Inside the rim, sketch small choppy wave peaks rather than a flat liquid surface, with a few tighter squiggles near the center to suggest turbulence. A loose scribble of storm cloud can hover just above the cup’s rim, darker at the center and trailing off at the edges.
Shade the porcelain with smooth, even strokes so it reads as glossy and calm against the chaos inside it, that contrast in mark making is what sells the whole idea. If tiny waves feel fiddly in graphite, simplify them into a handful of sharp zigzag lines rather than full wave shapes.
Keep the cup sitting on a plain tabletop with one soft shadow, nothing else needs to be in the scene.
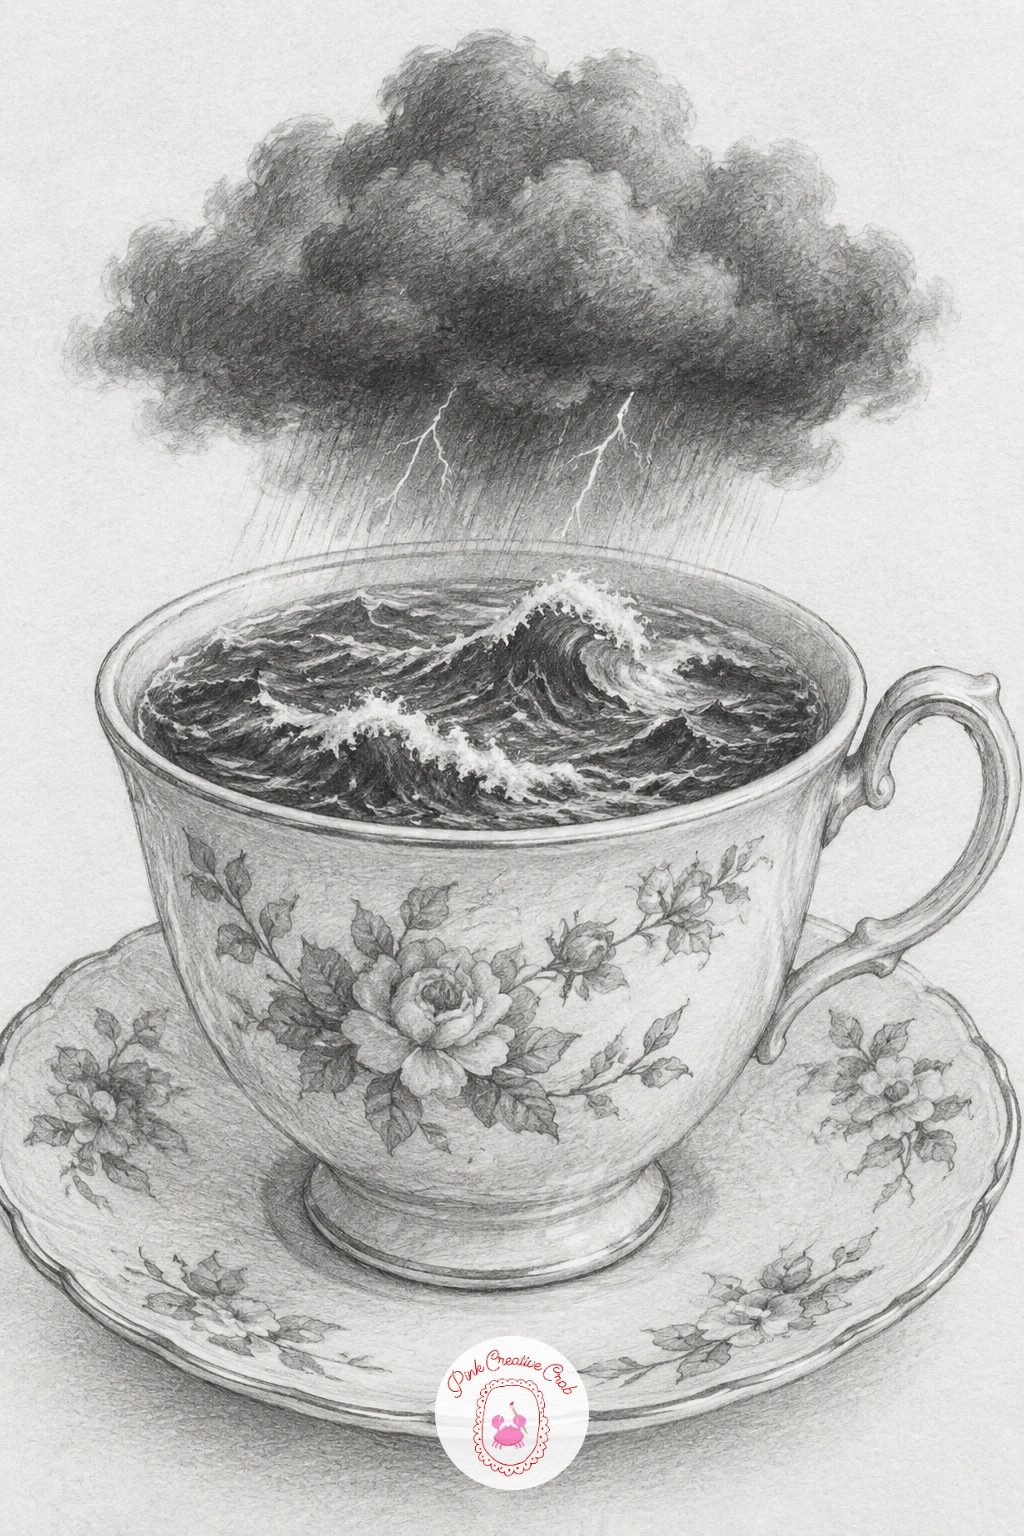
Palette: Porcelain White,Storm Grey,Deep Wave Grey
Faces come next, starting gently: a girl whose hair turns into ocean waves as it flows down. Draw her face and shoulders first using normal proportions, keeping the expression calm, eyes closed or half lidded works well since it reads as peaceful rather than startled.
Where the hairline usually ends, let the pencil marks shift: instead of hair strands, draw rolling wave shapes that curve and crest, getting larger and more wave like the further they get from her head. A few foam highlights, left as untouched white paper, sit at the crest of each wave.
The hardest part is the transition zone where hair becomes water, so work it gradually over an inch or two rather than switching abruptly, blending strand like lines into wave curves. If that transition fights you, try starting the waves slightly lower down, past the shoulders, so the hair has room to read as hair first.
Shade the waves with a blending stump for smooth graded tone, reserving your eraser for the sharp foam highlights.
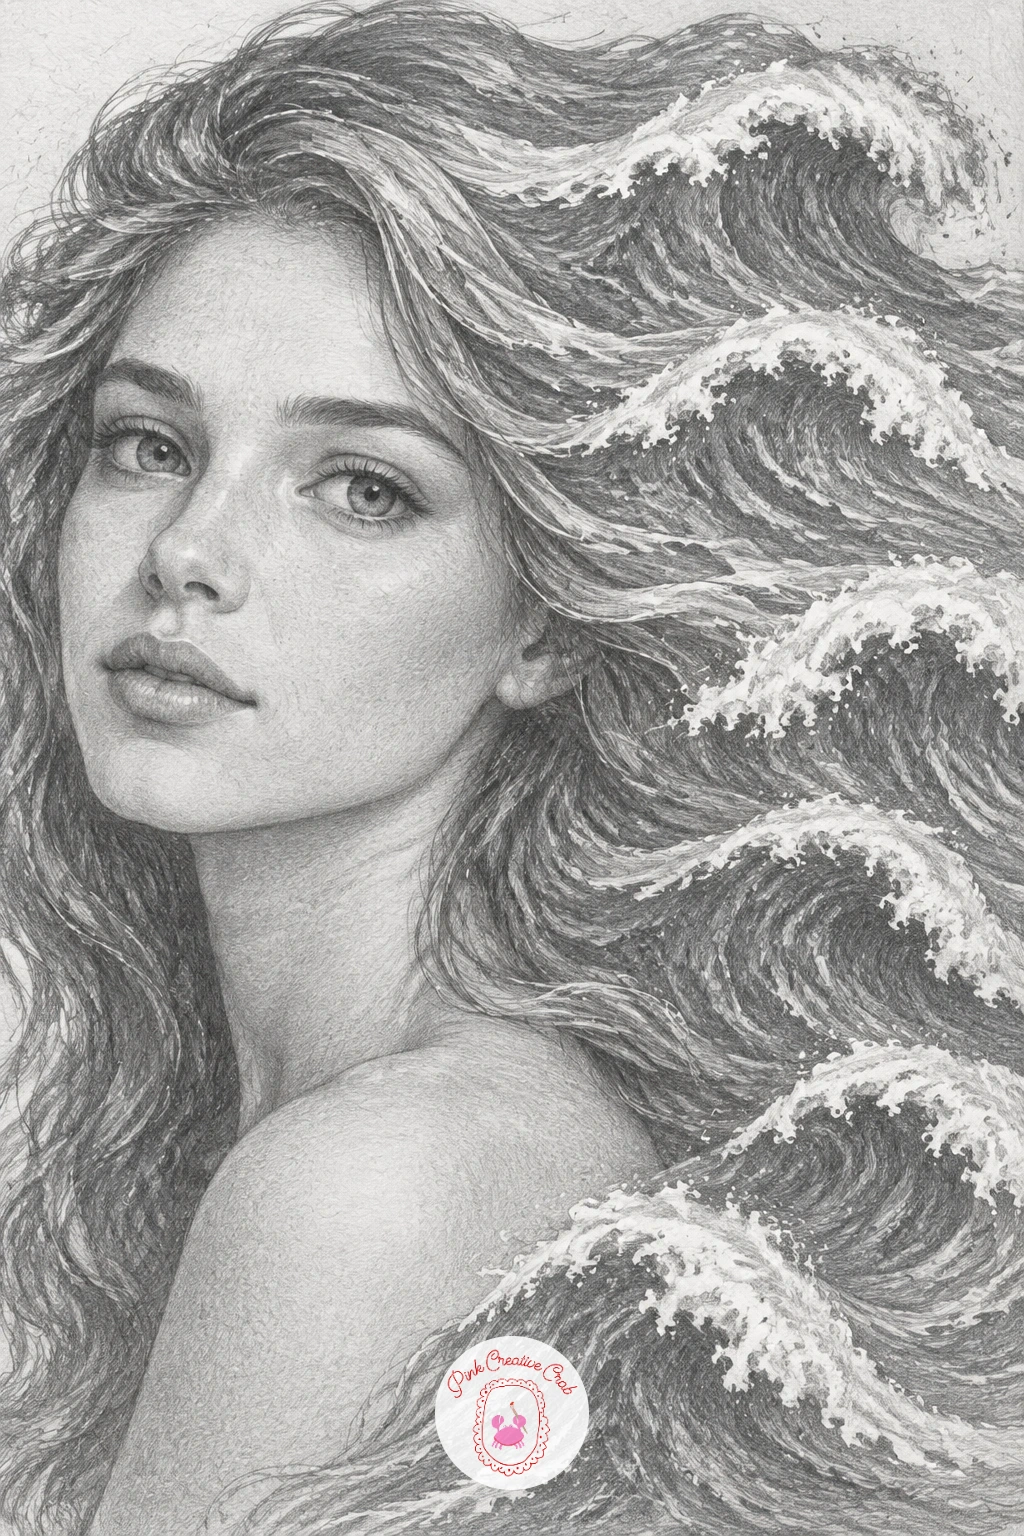
Palette: Skin Grey,Deep Sea Grey,Foam White
Keep the containment theme going with a glass jar holding a full thunderstorm inside it. Draw the jar first as a simple cylinder with a lid, using two faint curved lines to suggest the glass surface without overworking it, glass reads better from restraint than detail.
Inside, build a miniature storm: dark cloud masses filling the upper half, a jagged lightning bolt left as crisp white paper against the dark cloud, and a few straight diagonal lines for rain falling toward the jar’s base. The jar’s glass can bend the storm very slightly, a subtle curve to the cloud edges near the rim, to remind the eye it is seen through glass.
Shade the clouds heavily with layered pencil strokes, building from light to dark in passes rather than pressing hard once, and lift the lightning bolt’s shape with a kneaded eraser rather than trying to draw white on white. If the glass highlights feel tricky, keep them to just two or three clean vertical strokes down one side of the jar.
Sit the jar on a plain tabletop with one soft cast shadow and nothing else competing for attention.
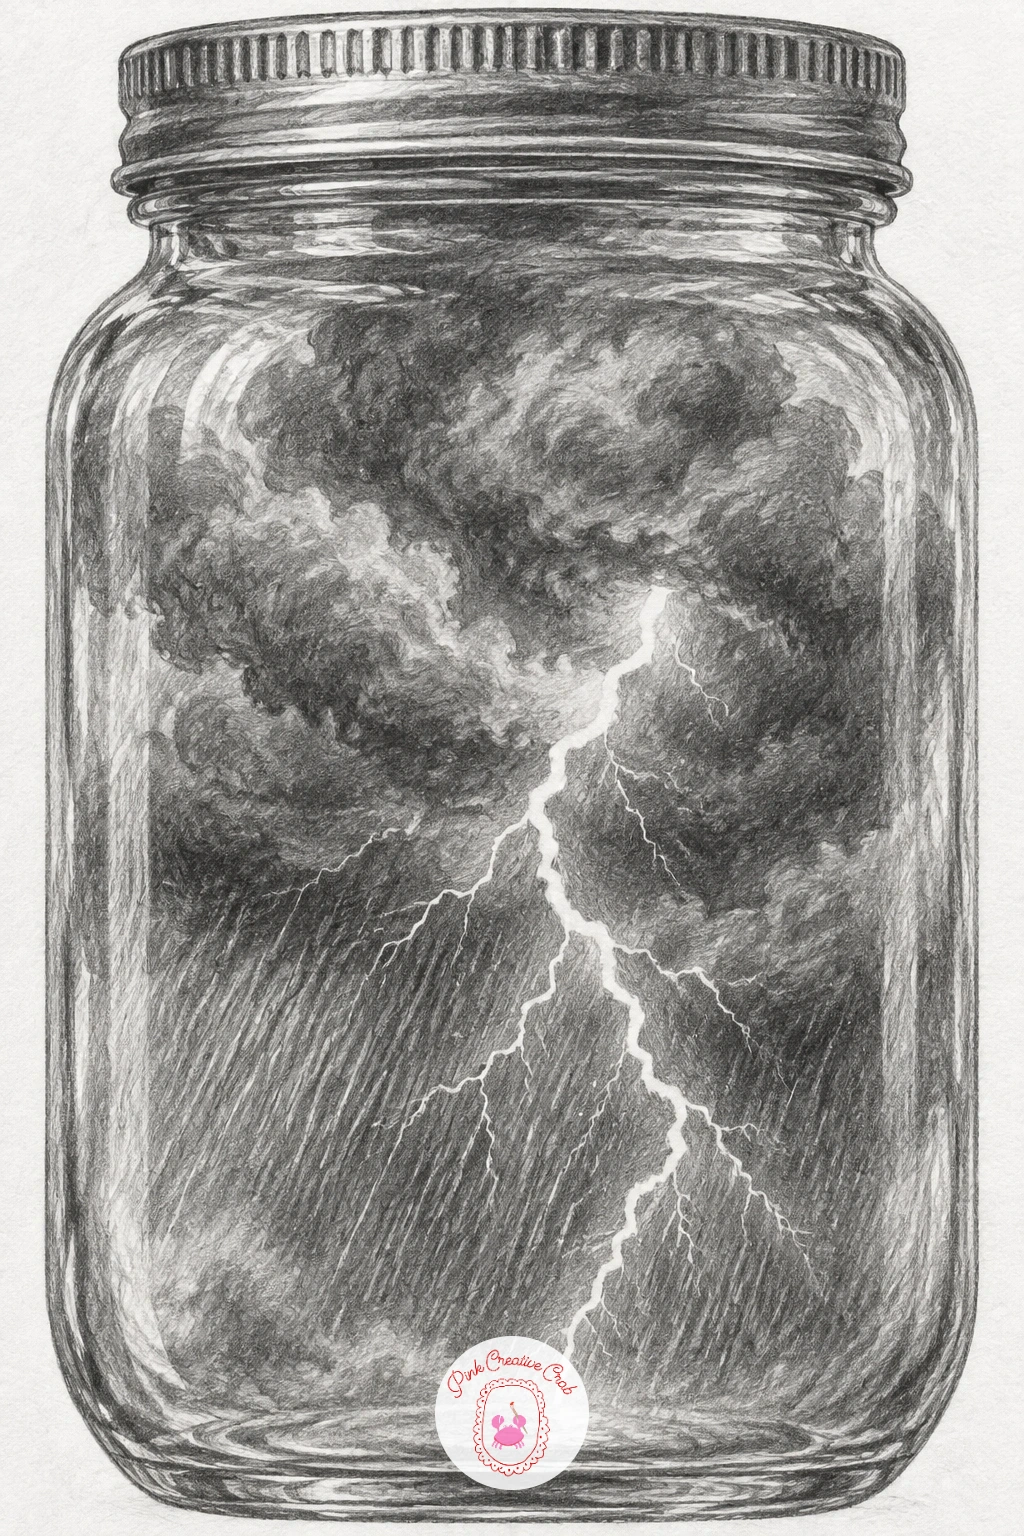
You Will Need
- kneaded eraser for lifting the lightning bolt
Palette: Glass Grey,Storm Cloud,Lightning White
Try a reflection trick next: a city reflected upside down in a puddle, but under a different sky than the one above it. Draw the puddle shape first as a flat, slightly irregular oval lying on plain ground, since its outline needs to read clearly before anything appears inside it.
Above the puddle, sketch a simple row of rooftops in daylight, ordinary and unremarkable. Inside the puddle, draw that same skyline upside down but change the sky behind it completely, perhaps a night sky full of stars where the real sky above was plain and empty.
Keep the reflected buildings slightly wavier and less crisp than the real ones, a few broken, rippled edges along the puddle’s surface sells the water instantly. If keeping two matching skylines upside down and right side up feels confusing, draw the real skyline first, trace it lightly through the paper or a lightbox flipped, then adjust the sky inside the reflection freely.
Darken the puddle’s edge where it meets the pavement, that single ring of shadow does a lot of work for very little effort.
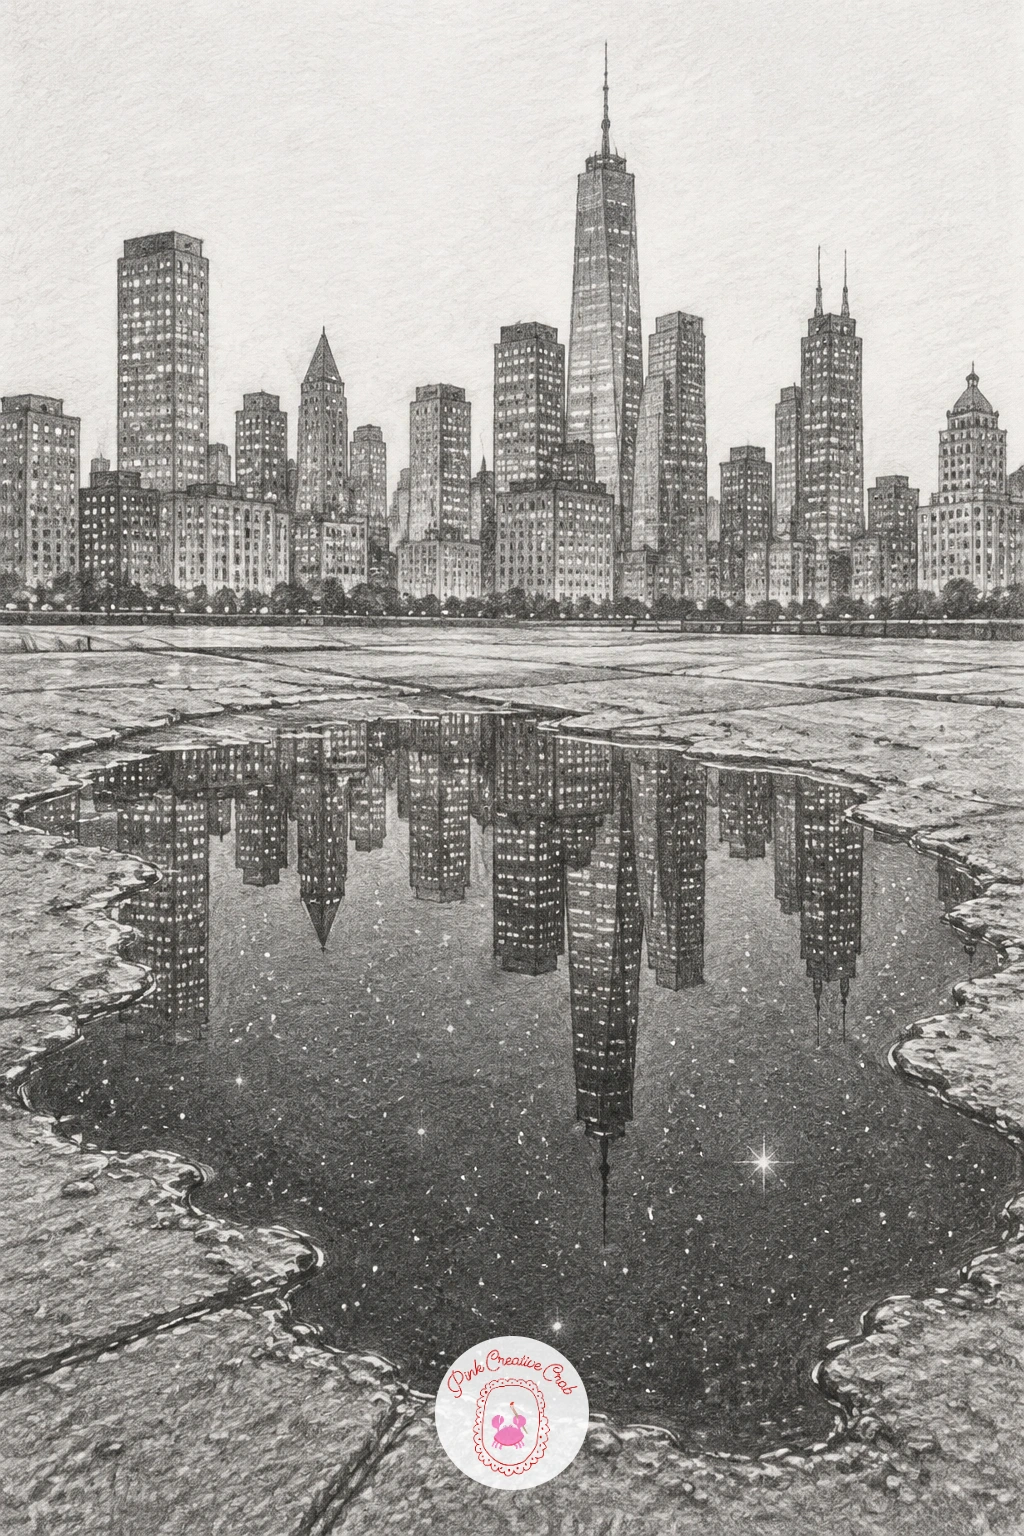
Palette: Pavement Grey,Daylight Grey,Night Reflection
Return to something small and contained: a keyhole cut into a tree trunk, showing a starry night through the gap instead of more wood. Draw the tree trunk first, rough bark texture built from short overlapping pencil strokes running vertically, with the keyhole shape cut cleanly into the center.
Inside the keyhole’s dark silhouette, switch to a night sky: a scattering of small white dots left as untouched paper for stars, maybe a thin crescent moon, with the deepest black reserved right at the keyhole’s edge to make the opening feel like it goes somewhere impossibly far.
Bark texture is the part people rush, so vary your stroke pressure and length rather than repeating the same mark across the whole trunk, real bark is never that even. If the keyhole shape feels stiff, draw it freehand rather than with a ruler, old keyholes are rarely perfectly symmetrical.
A fast version keeps the bark simple and the stars sparse. Given more time, add a few twisting roots at the base and deepen the bark’s shadows for more weight.
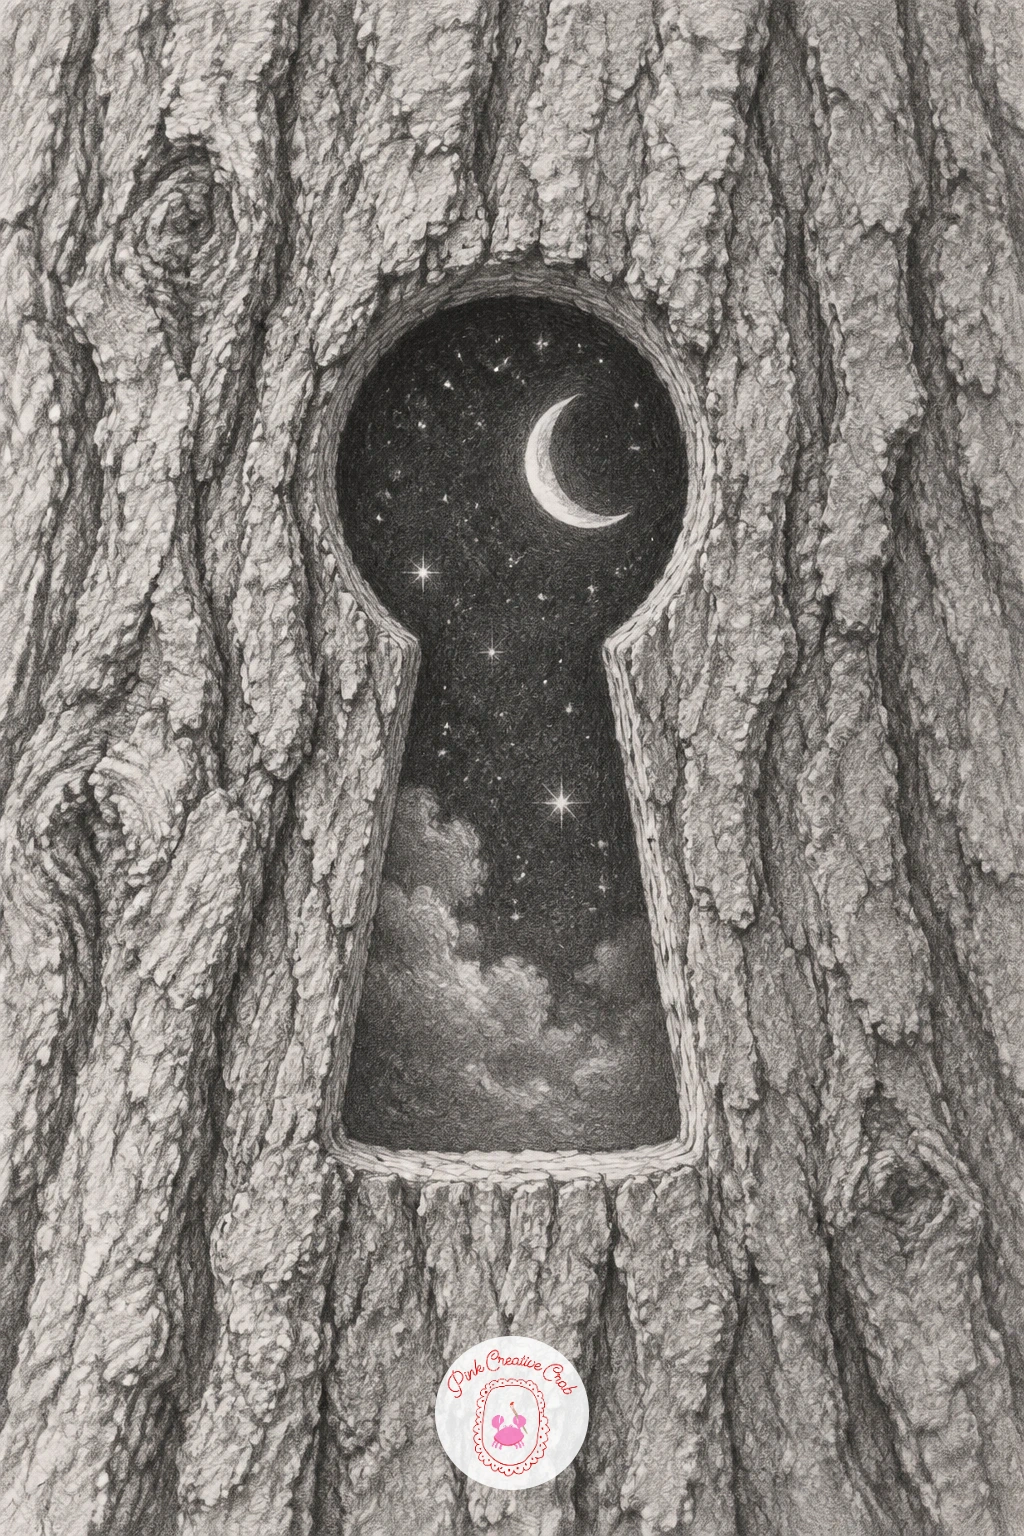
Palette: Bark Brown Grey,Deep Night,Star White
Build on that idea of a small window onto somewhere else with an hourglass filled with a tiny beach and ocean instead of sand. Draw the hourglass frame first, two glass bulbs pinched at the center, resting in a simple wood or metal stand, keeping the glass outline light and the stand slightly heavier in tone.
In the lower bulb, sketch a small curve of beach with a few tufts of dune grass, meeting a narrow strip of ocean with small wave lines. In the upper bulb, let loose sand fall through the pinch point as usual, grains suggested with a scatter of tiny dots rather than drawn one by one.
The glass itself should stay mostly untouched white paper, with just a few curved highlight lines and a soft shadow along one side to suggest its roundness, overworking the glass flattens the whole effect. If the beach feels cramped in such a small space, simplify it to just sand, water and one wave line rather than trying to fit palm trees in too.
Shade the stand last, darkest at its base, to ground the whole object on the page.
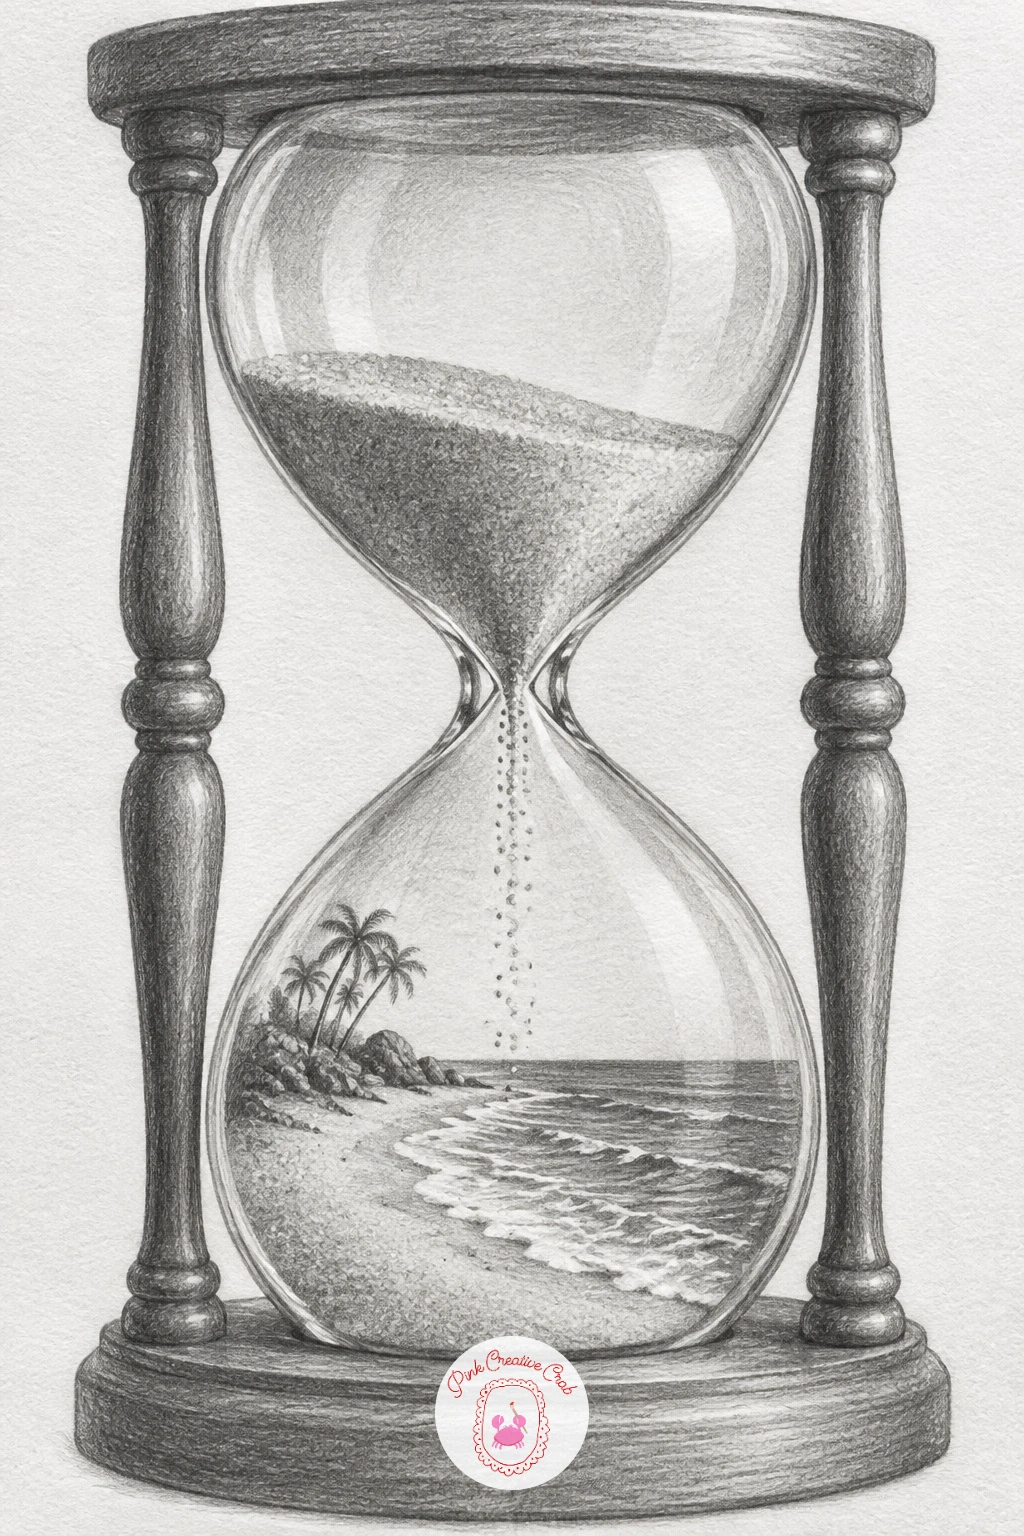
Palette: Sand Beige Grey,Ocean Grey,Glass Highlight
Scale and balance take center stage here: an elephant standing with all four feet on top of a single ball of yarn. Block the elephant’s body first using simple rounded shapes, big belly, thick legs, large ears, since getting the weight and bulk convincing matters more than fine detail.
Draw the yarn ball beneath its feet as a tangle of overlapping curved lines rather than a flat circle, with one loose strand trailing off to the side as if it could unravel at any moment. The elephant’s feet should sit slightly sunken into the yarn’s surface, a small dip in the strands under each foot, to suggest real weight pressing down.
Shade the elephant with soft rounded strokes that follow its body’s curves, keeping the legs darkest where they meet the yarn for contrast. If the balance looks unconvincing, check that the elephant’s center of mass lines up directly over the middle of the yarn ball, a few degrees off and the whole pose reads as falling rather than balancing.
Finish with one stray loop of yarn dangling off the ball’s edge for a bit of visual tension.
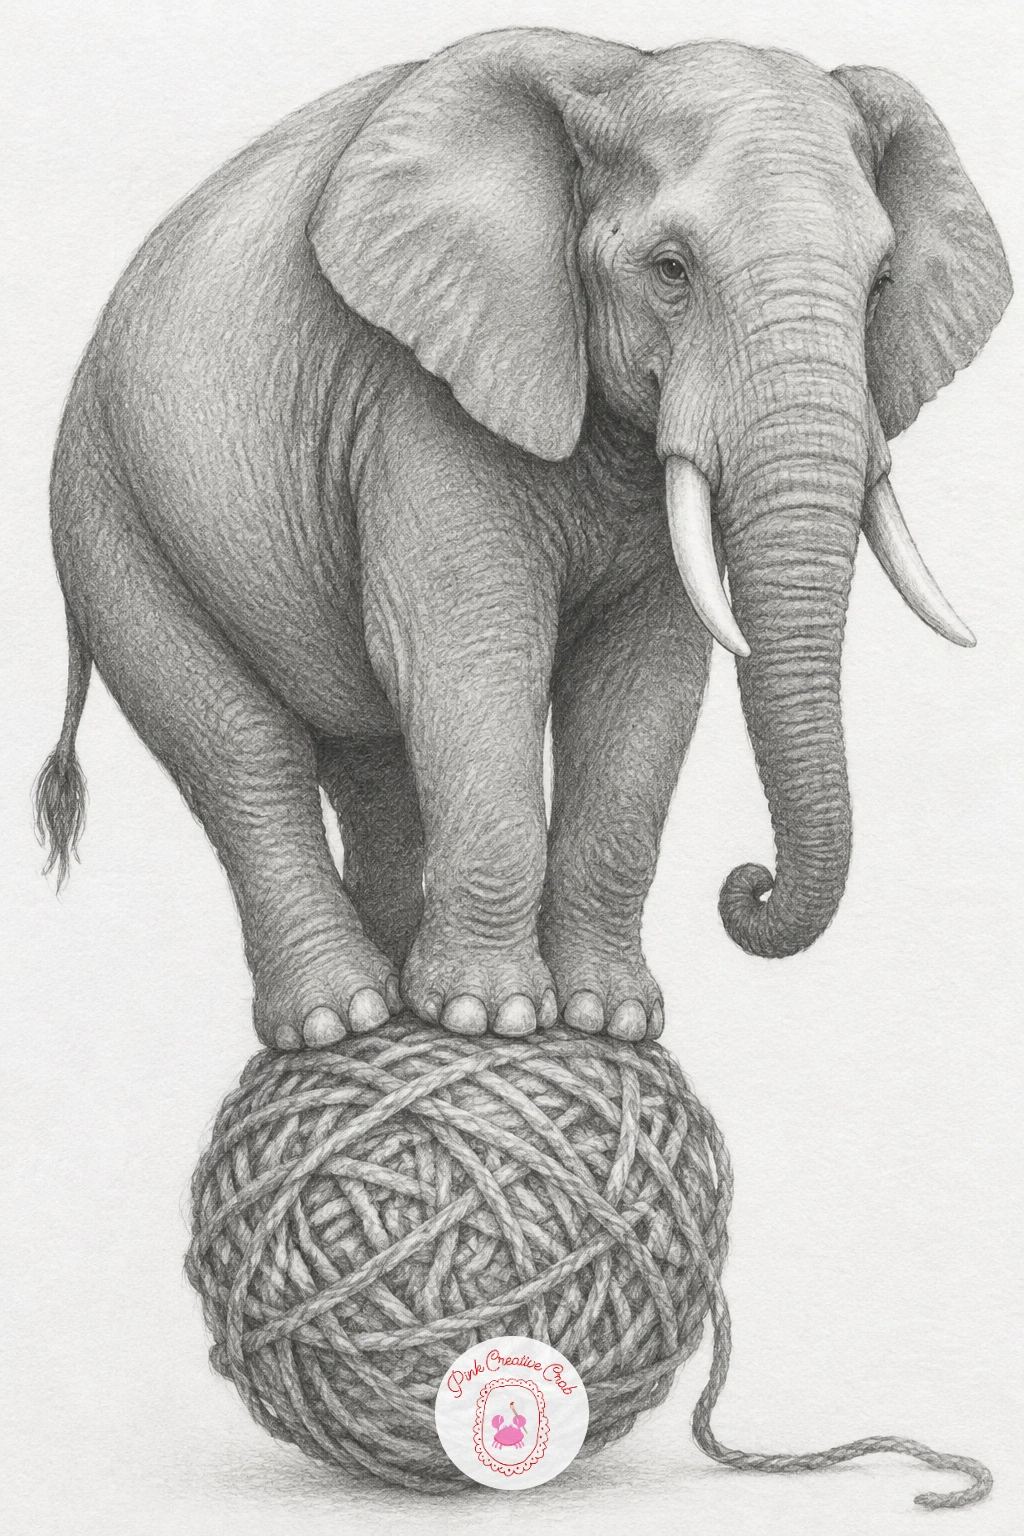
Palette: Elephant Grey,Yarn Grey,Deep Shadow Grey
After all that weight, try something that floats: a paper boat sailing on a sea of clouds instead of water. Fold reference or memory helps here, draw the paper boat with crisp, straight creased edges, since its folded geometry should contrast sharply with the soft clouds around it.
Build the cloud sea as overlapping rounded shapes receding toward a distant horizon, denser and darker near the boat’s hull where it sits lowest, lighter and more scattered further back. A few wisps can trail off the boat’s sides like a wake, echoing how water would curl around a real hull.
Keep the boat’s paper folds sharp with clean straight lines and flat shading, while the clouds stay soft and blended with a stump, that difference in mark making is what makes the paper read as solid against something as insubstantial as cloud. If the clouds start looking too uniform, vary their size noticeably, a few large billowing shapes near the boat and much smaller ones toward the horizon.
A ten minute version keeps the cloud sea simple and flat. With more time, add a faint sun breaking through the cloud bank in the distance.
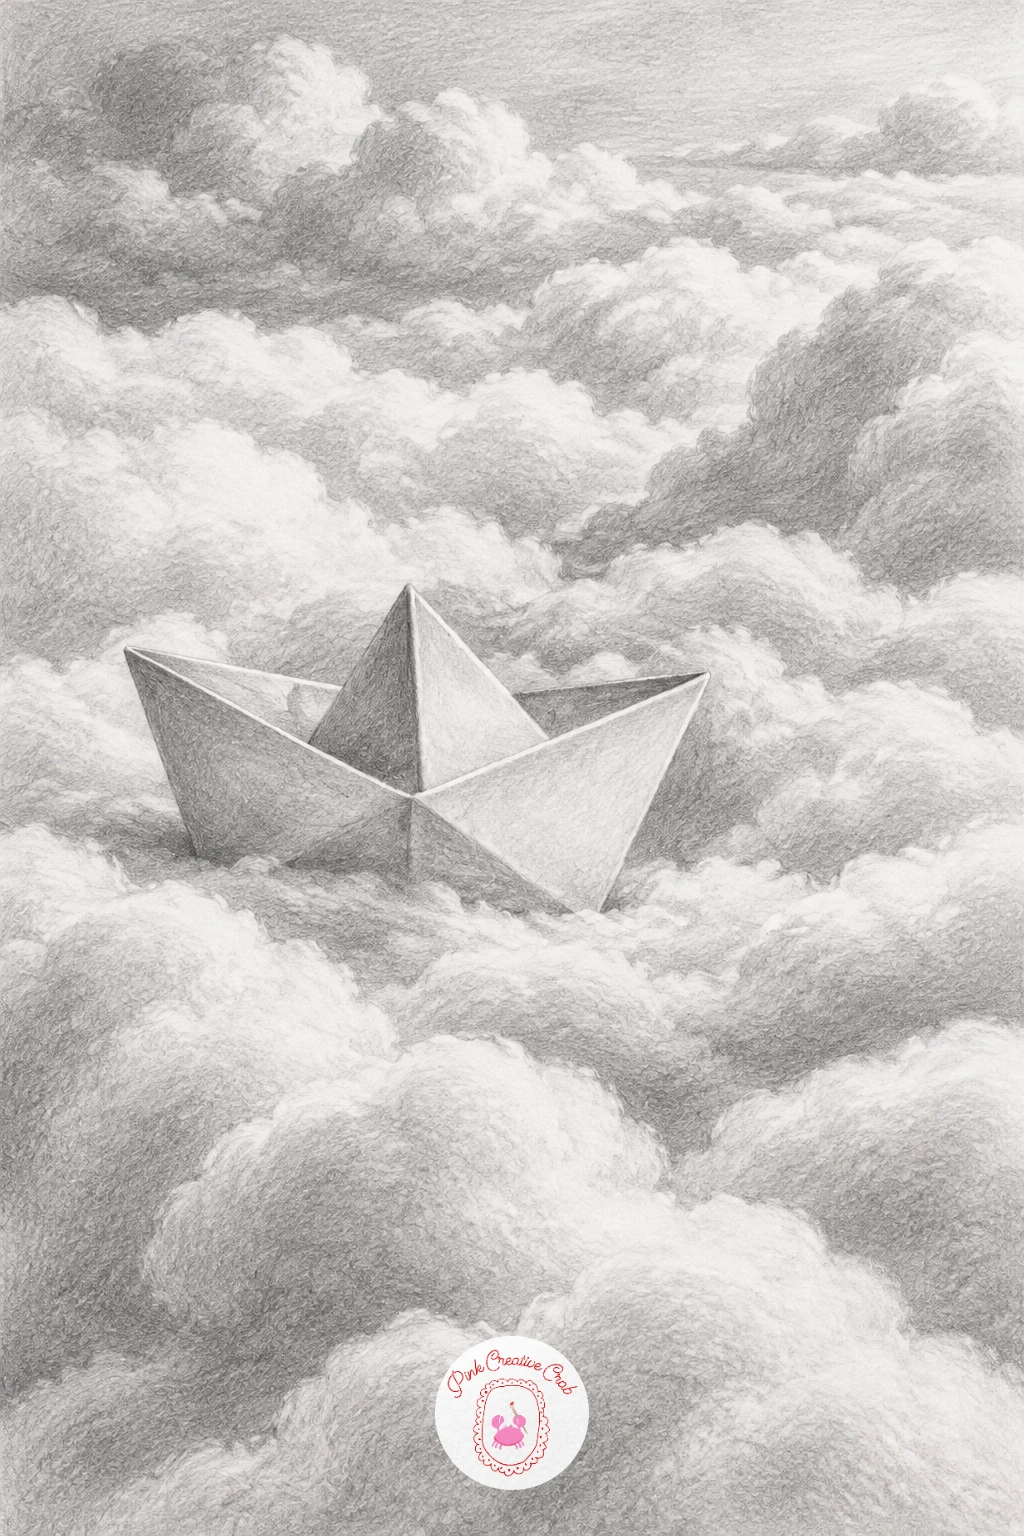
Palette: Paper White,Cloud Grey,Fold Shadow
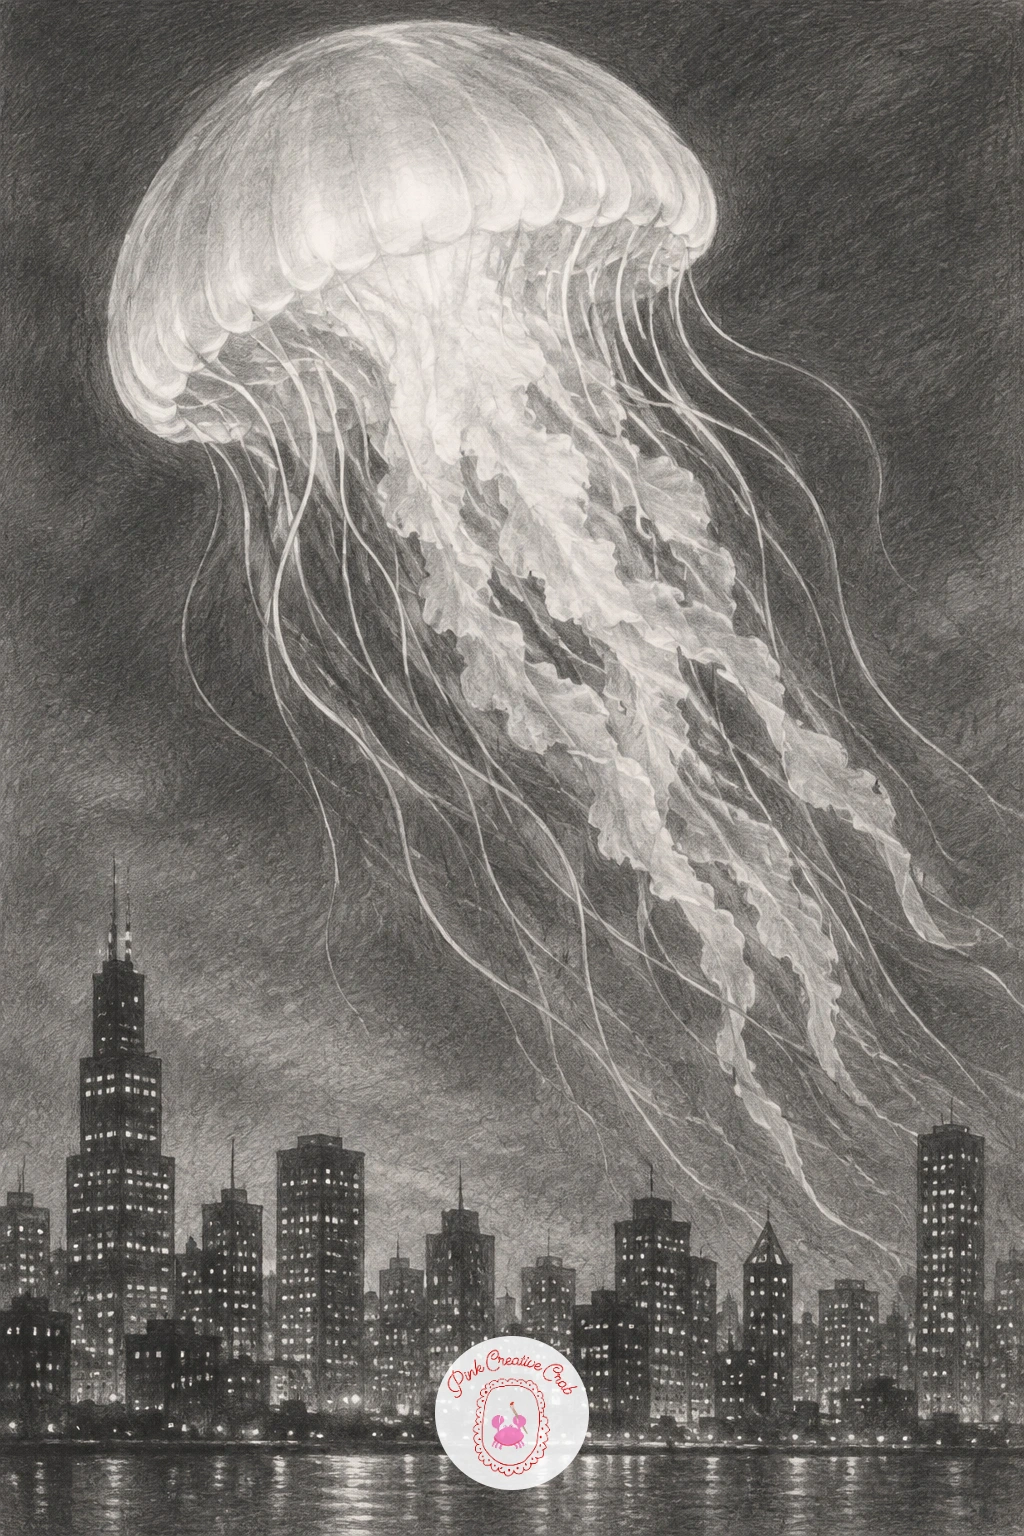
Bring back a sky creature, this time a giant jellyfish floating over a city at night. Draw the jellyfish’s dome first as a smooth, slightly domed curve, then let a cluster of long trailing tentacles drift downward, some curling gently, others hanging nearly straight, to avoid them looking too uniform.
Beneath it, sketch a simple night skyline in silhouette, dark rooftop shapes against a paler sky, with a scattering of small lit windows left as tiny white dots. The jellyfish’s dome can carry a soft glow, achieved by keeping its center lighter than its edges, like it is lit from within.
Tentacles are where this one usually goes wrong if they all curl the same way, so vary their length and curve individually, and let two or three drift behind the nearest rooftops to tuck the jellyfish into the scene rather than floating flatly on top of it. If that layering feels like too much, a simpler version keeps all tentacles in front of the skyline.
Finish with a faint halo of light around the dome using a kneaded eraser to lift a little graphite back to white.
You Will Need
- kneaded eraser for the glow around the dome
Palette: Night Sky Grey,Jellyfish Glow,City Silhouette
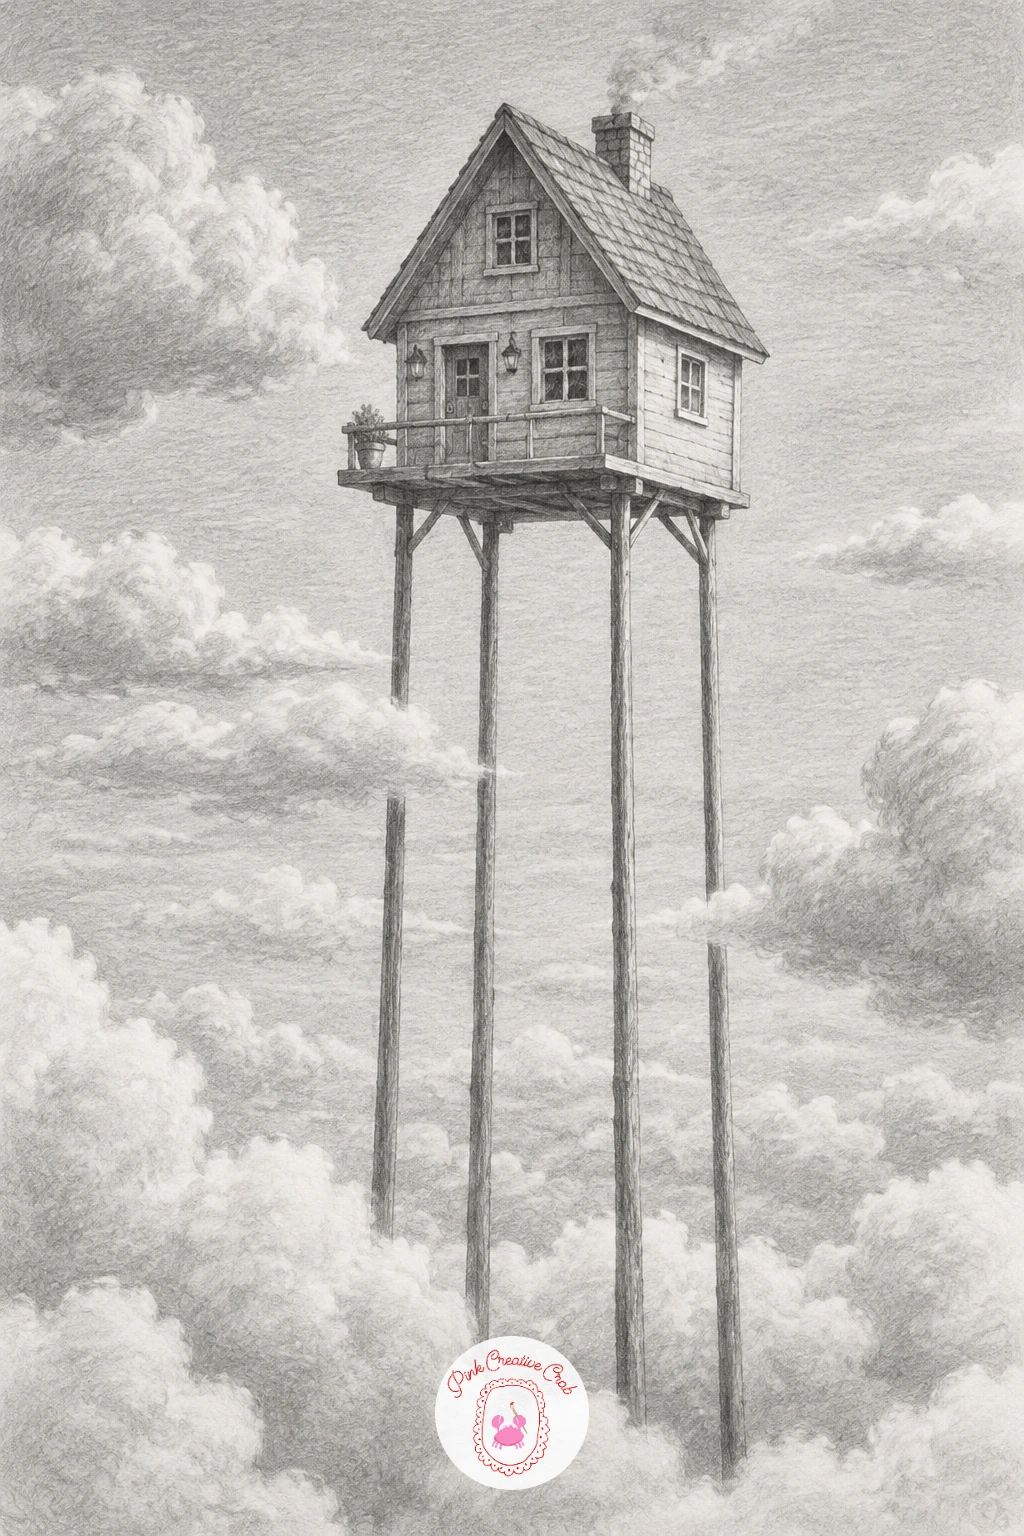
Think about structure next: a small house standing on tall, impossibly thin stilts planted in open sky, no ground anywhere in sight. Draw the house itself first, a simple cottage shape with a peaked roof and one window, kept modest and ordinary since the strangeness comes entirely from where it stands.
Extend the stilts downward from each corner of the house, long and thin, converging slightly as they vanish below the bottom edge of the page rather than reaching any visible ground. A scattering of clouds at different depths around the stilts helps establish how high up the house sits.
Keep the stilts perfectly straight using a ruler for the initial guideline, then roughen the edges slightly freehand so they do not look mechanically perfect. If the composition feels empty, add one small bird gliding past at a lower level than the house to give a sense of scale and height.
Shade the house warmly with even tones and let the stilts fade slightly paler as they descend into the distance below.
Palette: Cottage Grey,Sky Grey,Stilt Grey
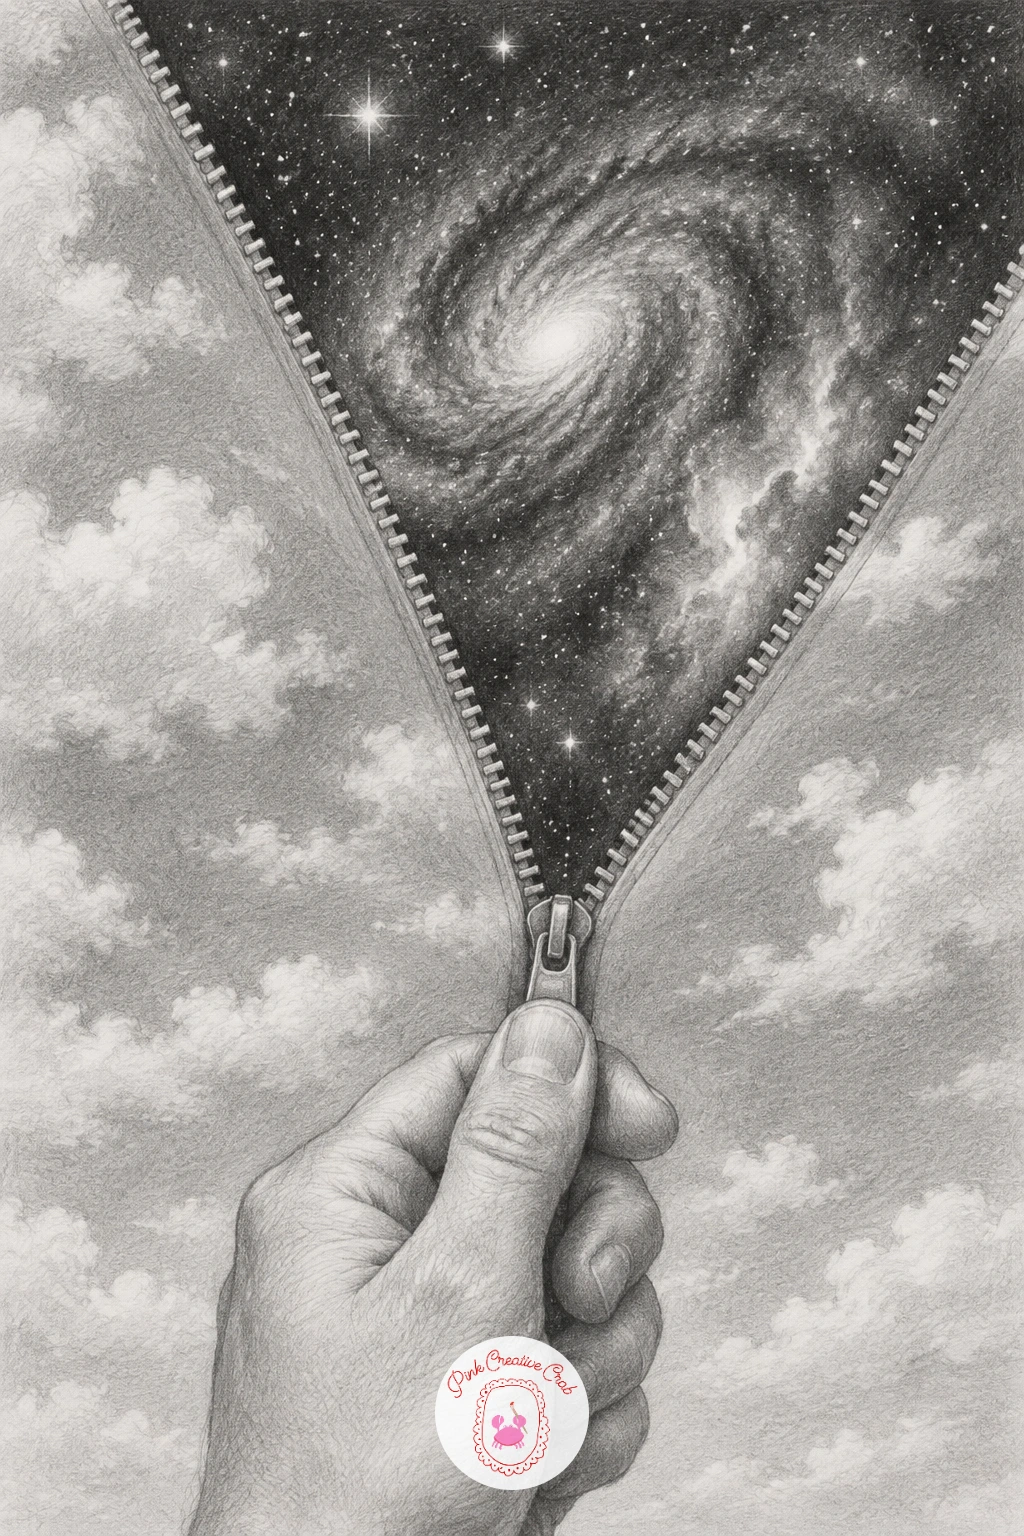
Here is one of the more graphic ideas on the list: a hand reaching up to unzip the sky, revealing a galaxy underneath. Draw the hand first, fingers pinched around a zipper pull, positioned confidently rather than tentatively, since a hesitant looking hand undercuts the drama of the gesture.
The zipper itself runs diagonally across the page, drawn with small evenly spaced teeth along a central seam. Above the open zipper, keep the sky plain, pale and uneventful, while below it, inside the opening, pack in a dense galaxy: swirling star clusters, a bright nebula smudge, scattered pinpricks of light.
Edge control matters enormously here, the torn open edge of the sky fabric should look slightly jagged and frayed rather than a clean straight cut, which makes it read as fabric being pulled apart rather than paper. If the galaxy detail feels overwhelming, simplify it to one bright swirl and a scatter of dots rather than trying to render every star individually.
Shade the galaxy side heavily dark with a blending stump, saving your sharpest eraser highlights for just two or three bright points of light.
You Will Need
- kneaded eraser for star highlights
Palette: Plain Sky Grey,Galaxy Deep,Nebula Glow
Switch to something smaller and sweeter: a snail carrying a tiny detailed castle in place of its usual shell. Draw the snail’s body first, the soft curving foot and stalked eyes, using the same simple proportions a real garden snail has, since the castle on its back works better against a convincingly ordinary snail.
Build the castle shell by starting with the same spiral a shell would have, then layer turrets, small windows and a tiny flag along that spiral form rather than drawing a castle shape and sticking it on top. Keeping the castle following the shell’s natural curve is what makes it feel attached rather than pasted on.
Shade the snail’s body smooth and glossy with light even strokes and a couple of sharp highlights, while the castle gets much busier, textured shading with little windows picked out in dark pencil. If the architecture feels like too much to invent, reference one simple castle photo for turret shapes and simplify from there.
A quick version uses just two turrets and a flag. With more time, add tiny climbing ivy along one castle wall.
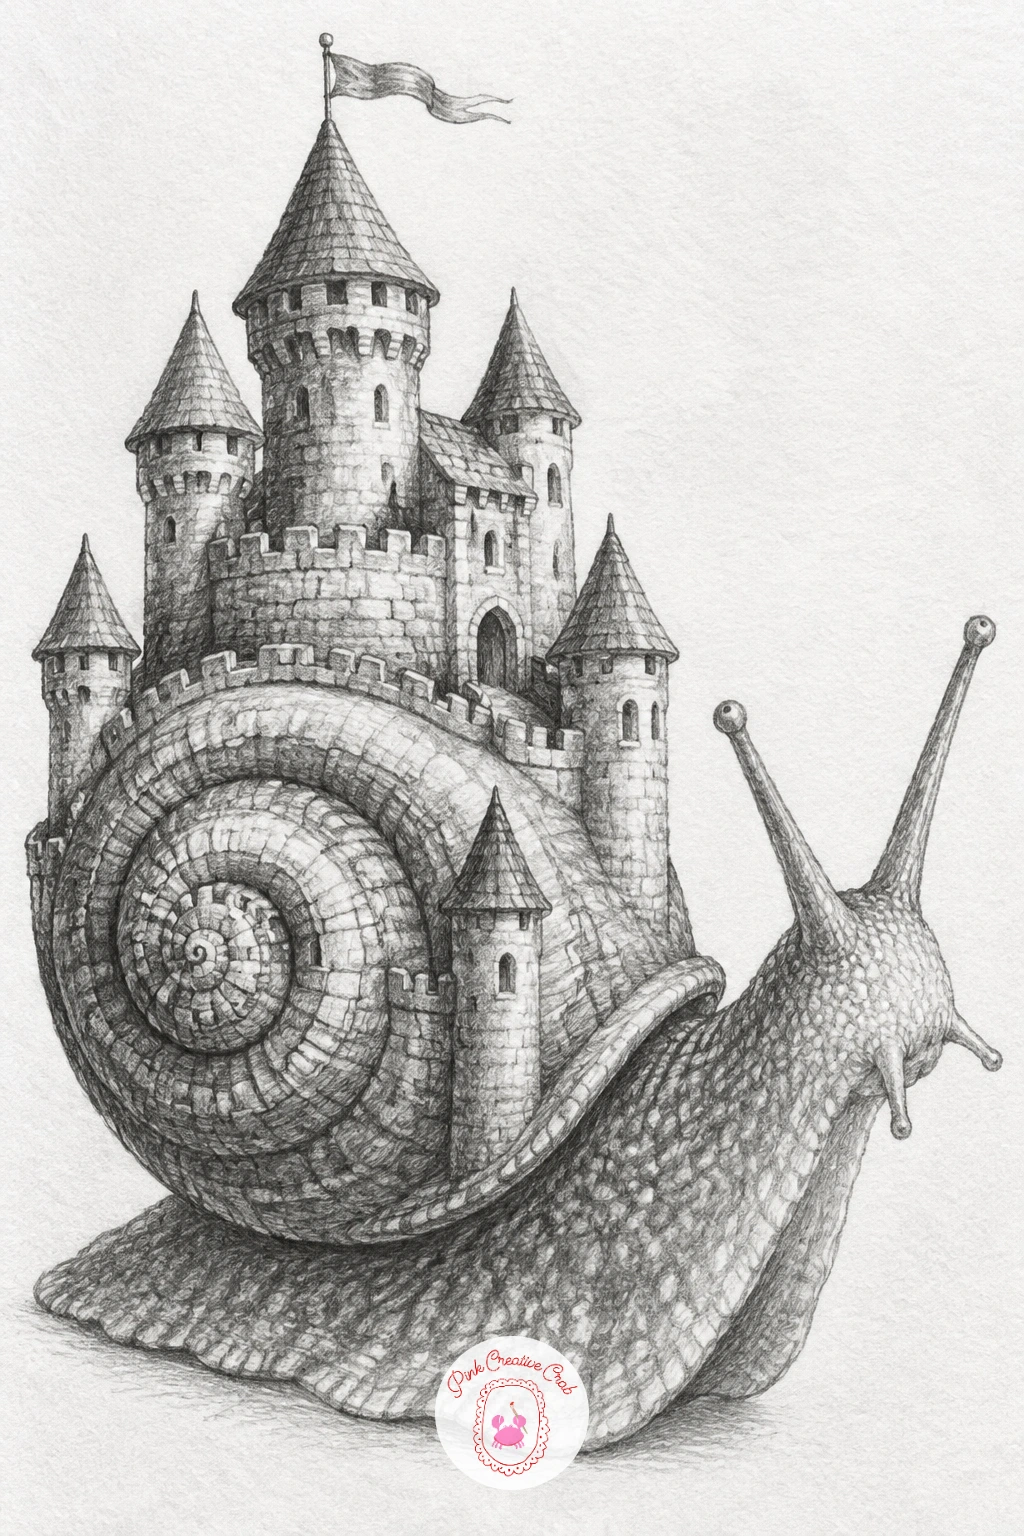
Palette: Snail Grey,Castle Stone,Deep Window Grey
Return to the sky for a simpler composition: a crescent moon caught in a fishing net, as if someone had hauled it down from above. Draw the moon first as a clean crescent shape, smooth and bright, with a few soft craters along its curved edge to keep it from looking flat.
The net is built from a grid of slightly curved diagonal lines crossing over each other, loosely draped around the moon’s shape rather than perfectly even, since a real net sags and bunches where it catches on something. Let a few net lines cross directly over the moon’s surface and a few hang slack below it, trailing off the bottom of the page.
Shade the moon bright with careful even tone and a strong highlight, while the net stays line based rather than shaded, its crossing points slightly darker where threads overlap. If the net’s perspective feels confusing, draw it as a flat grid first and only curve it gently once the basic crossing pattern is in place.
One tip worth remembering here: fewer, more confident net lines always look better than many shaky ones.
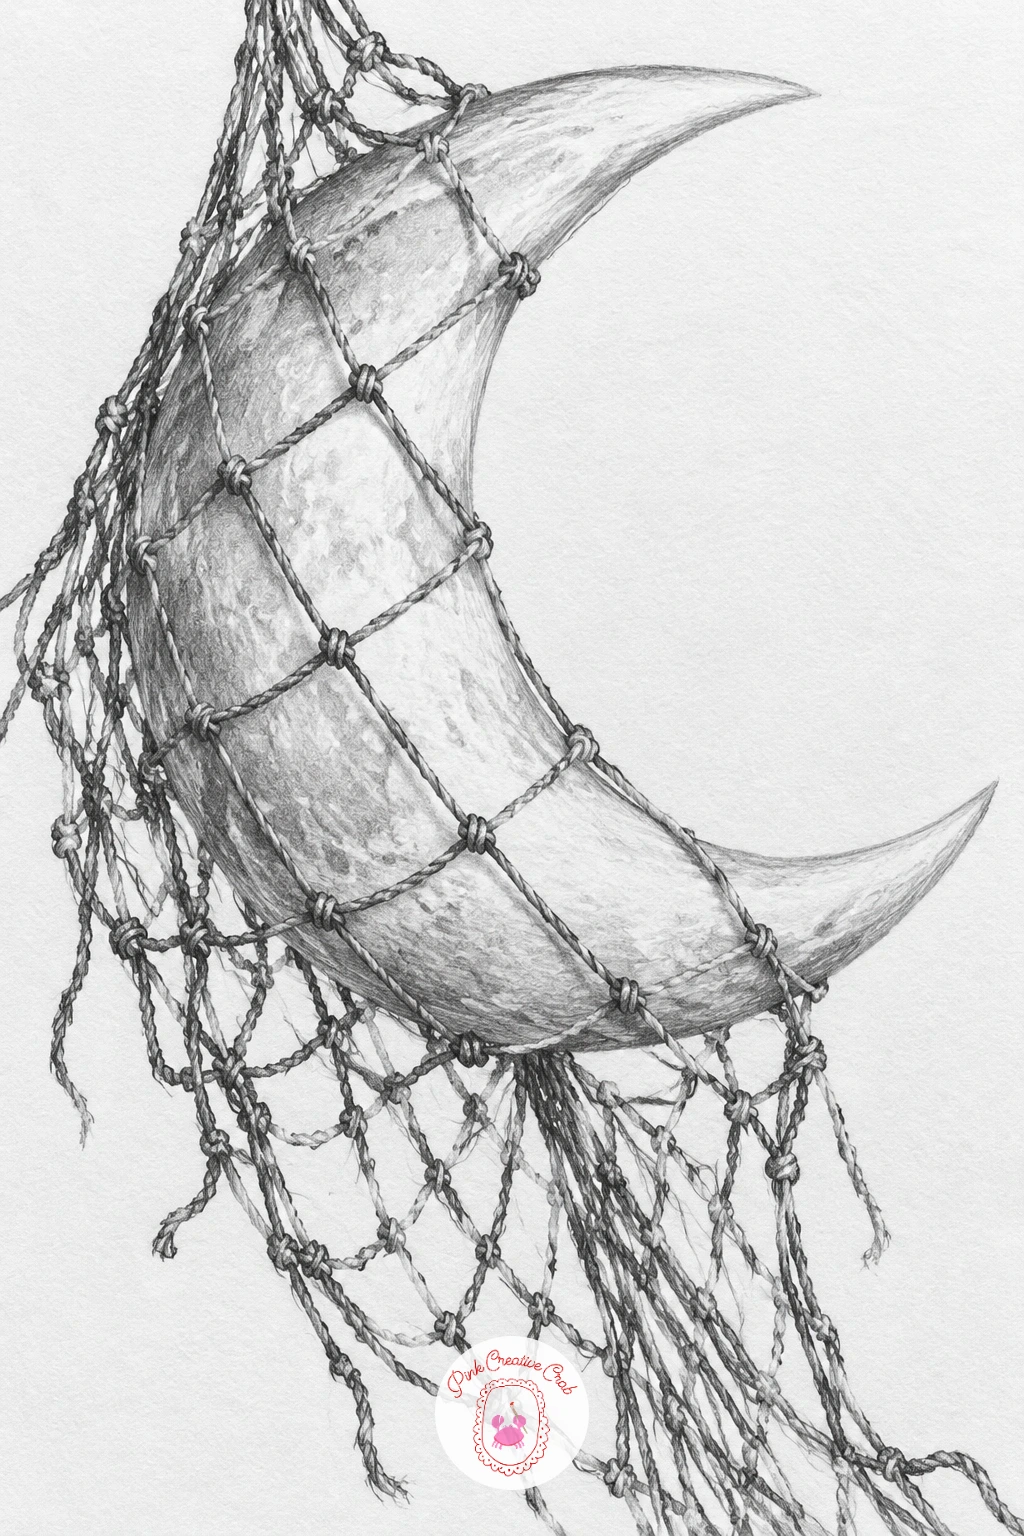
Palette: Moon White,Crater Grey,Net Grey
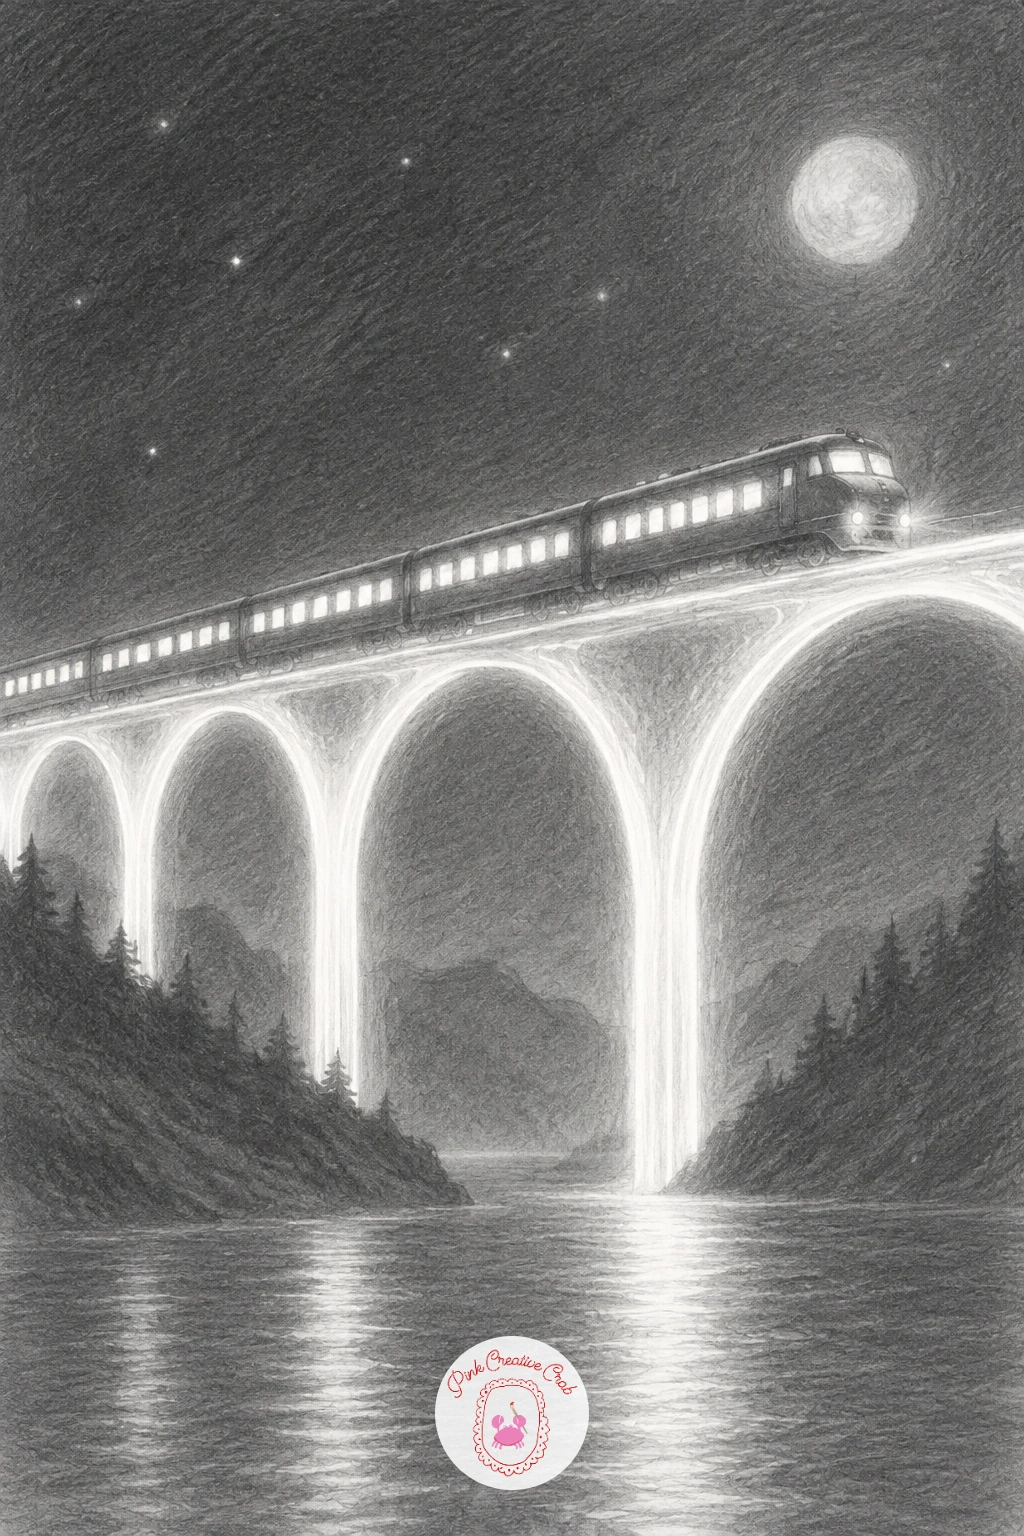
Pick up speed with a train crossing a bridge built entirely from light instead of steel or stone. Draw the train itself with ordinary solid detail, a rounded front car, a line of carriages trailing behind, windows lit faintly from within, since a believable train against an impossible bridge is exactly the contrast that sells this one.
The bridge is a series of glowing arches or beams, drawn as bright shapes left mostly as untouched white paper with just a soft graded edge where the light fades into the darker sky around it. Keep the beams structurally logical, following the curve a real bridge arch would take, even though they are made of light.
Shade the sky around the bridge quite dark so the light structure reads as genuinely glowing by contrast, this is one place where a darker background does more work than any detail on the bridge itself. If pure white glowing shapes feel tricky to control, lift them with a kneaded eraser from an evenly shaded dark sky rather than trying to draw around them.
Finish with a faint reflection of the light bridge on the train’s windows for one extra connecting detail.
You Will Need
- kneaded eraser for lifting the light beams
Palette: Night Sky Deep,Light Bridge White,Train Grey
Shift to portraiture again, this time a face built entirely out of ivy leaves instead of skin. Lightly sketch the underlying face shape first, basic proportions for eyes, nose and mouth, as a guide you will cover almost completely, since the leaves still need to sit on a believable underlying structure.
Build the face up from overlapping ivy leaf shapes, each one simple and five pointed, layered so they follow the contours of a cheek, the ridge of a nose, the curve of a brow. Vary leaf size noticeably, smaller leaves clustered around the eyes and lips, larger ones across the forehead and jaw.
Shade each leaf individually with its own small highlight and shadow rather than treating the whole face as one flat texture, that leaf by leaf shading is what convinces the eye this is made of many small overlapping things. If the layering feels overwhelming, start with the outer silhouette of the face in leaves first, then fill inward.
Leave the eyes as the one area without leaves, just calm, simply shaded eyes looking out from the green.
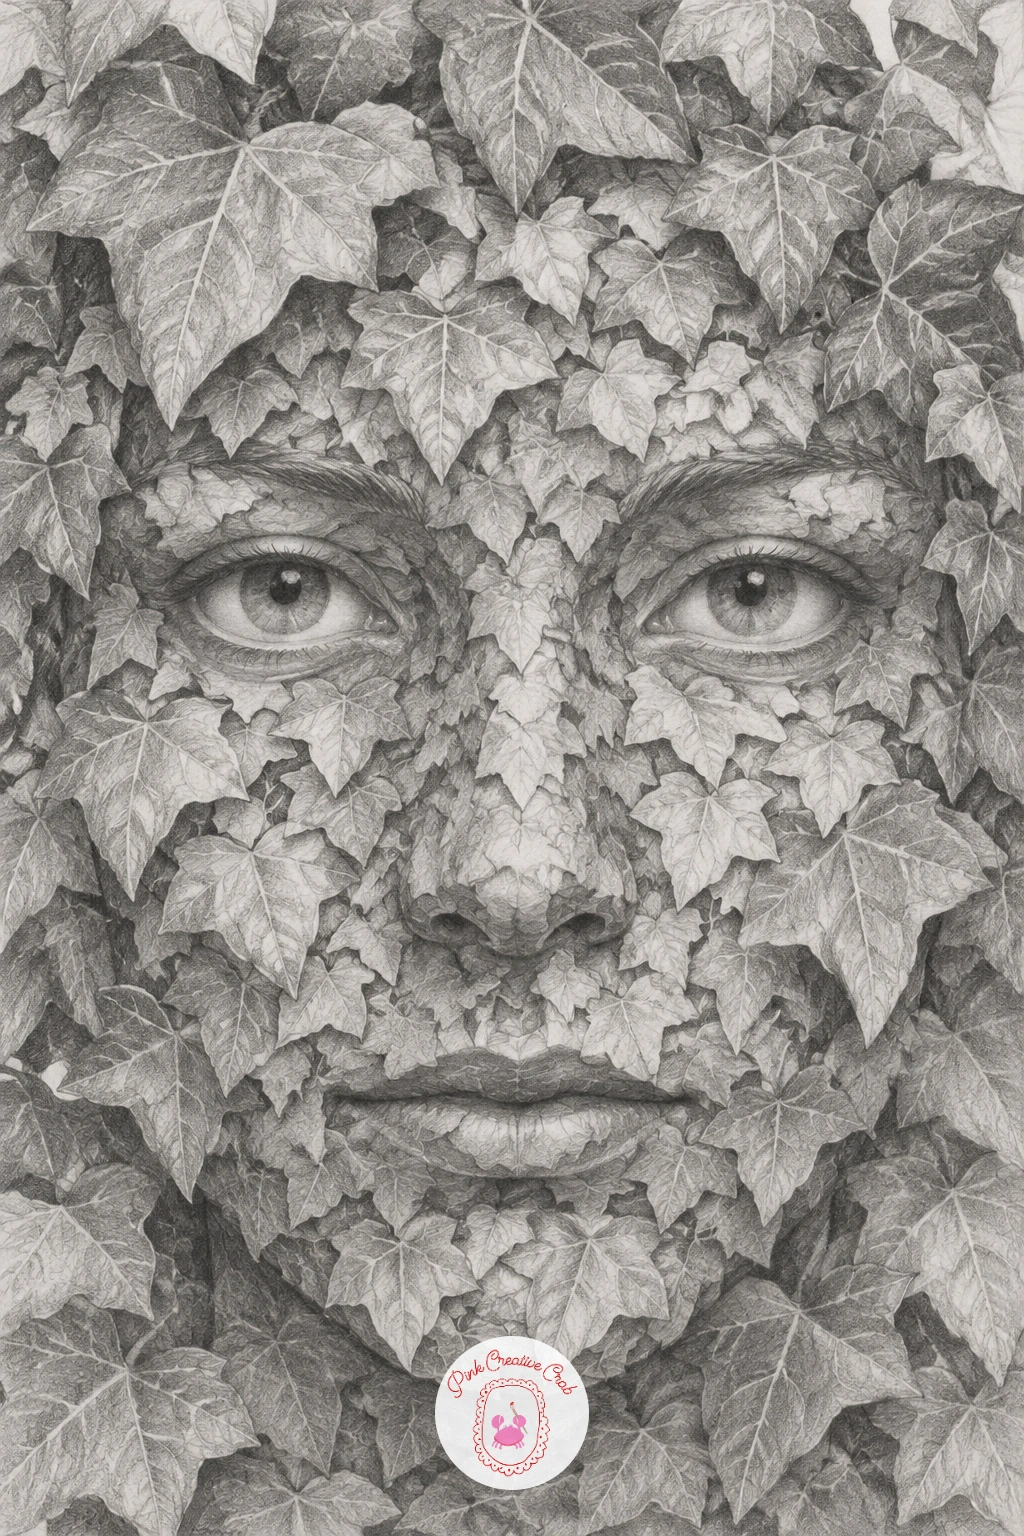
Palette: Leaf Grey Green,Deep Ivy Shadow,Eye Grey
Scale back up for something cozy and enormous: a giant cat curled protectively around a tiny sleeping town. Draw the cat’s curled body first as one long sweeping C shape, tail wrapped around to meet its nose, since getting that curl graceful rather than stiff matters more than any fur detail.
Nestle a small cluster of rooftops and a few lit windows in the hollow of the cat’s curl, scaled tiny enough that a single paw could cover several houses. Keep the town simple, four or five buildings and maybe one little lamppost, so it reads clearly against the cat’s bulk without competing for attention.
Shade the cat’s fur in long soft strokes following the direction it would actually grow, darker along the spine and tail, lighter across the belly where it curves around the town. If the fur texture feels like a lot to cover, focus detailed strokes only along the outer silhouette and keep the interior body softer and more blended.
A quick version keeps the cat solid grey. With more time, add a few darker tabby stripes along the back and tail.
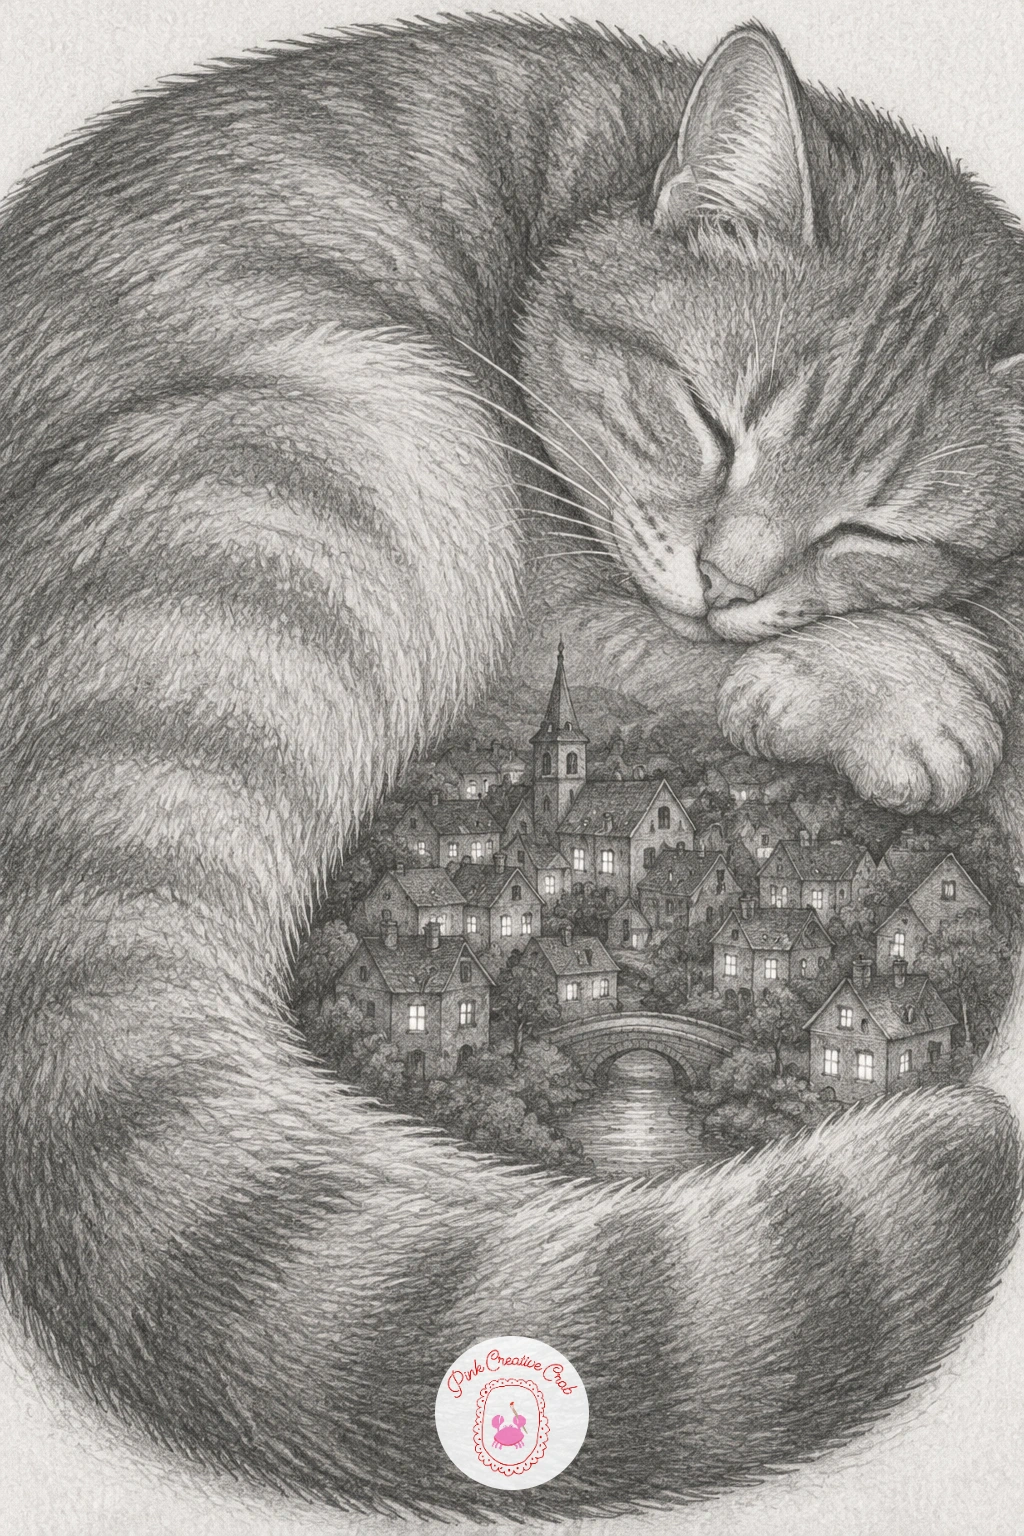
Palette: Tabby Grey,Deep Fur Shadow,Window Glow
For more giant creatures curled around tiny settlements like this, the cool sketchbook ideas list has several more to try next.
Keep exploring household objects behaving strangely with a waterfall pouring out of an open desk drawer. Draw the drawer and its chest first with ordinary solid lines, simple wood grain texture, a drawer pulled halfway open, since the furniture needs to look sturdy and real before water starts spilling from it.
From the open drawer, let water pour out in a continuous falling sheet, drawn with long vertical streak lines that catch light unevenly, pooling at the base into a small puddle or stream that spreads slightly across the floor. A faint mist of spray near where the water meets the floor adds a nice sense of motion.
Keep the wood grain shading tight and controlled while the water gets looser, more gestural strokes, that contrast between a rigid object and flowing water is the whole point of the drawing. If the falling water looks too stiff, loosen your wrist and draw the streak lines faster and lighter rather than carefully.
Finish with a few water droplets suspended mid air near the drawer’s edge using small circular highlights.
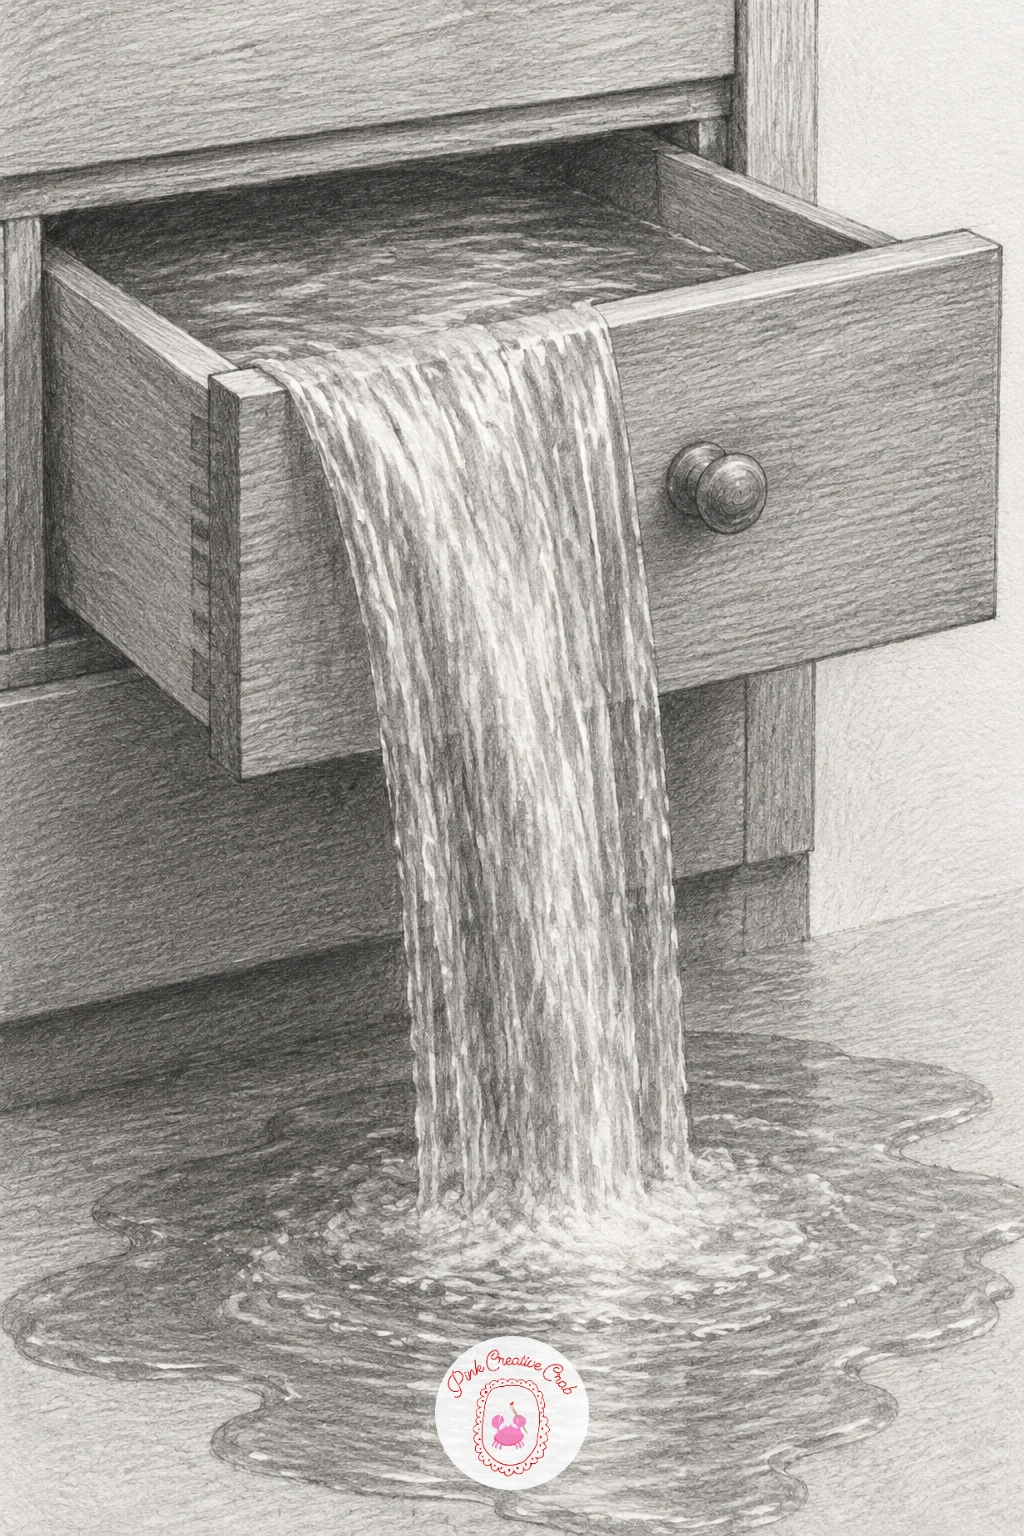
Palette: Wood Grey Brown,Water Grey,Puddle Dark
Lighten the mood with a girl swinging gently on a crescent moon as if it were a playground swing. Draw the crescent moon first as a smooth curved shape, then attach two thin rope lines from its upper points down to a simple seat, keeping the ropes taut and believable with a slight inward curve from the moon’s weight pulling on them.
Pose the girl seated on the swing with her legs relaxed, one arm loosely holding a rope, hair or clothing trailing slightly as if caught mid motion. Scatter a handful of small stars around her at varying distances, a few close and bright, several further off and smaller, to build real depth in the sky.
Getting the swing’s rope tension right is the trickiest part, so check that both ropes meet the moon at a natural pulling angle rather than hanging perfectly straight down, which would look stiff and unconvincing. If figure proportions feel difficult, simplify her into a relaxed silhouette with minimal facial detail.
Shade the moon bright and the girl mostly in silhouette for a calm, quiet feeling overall.
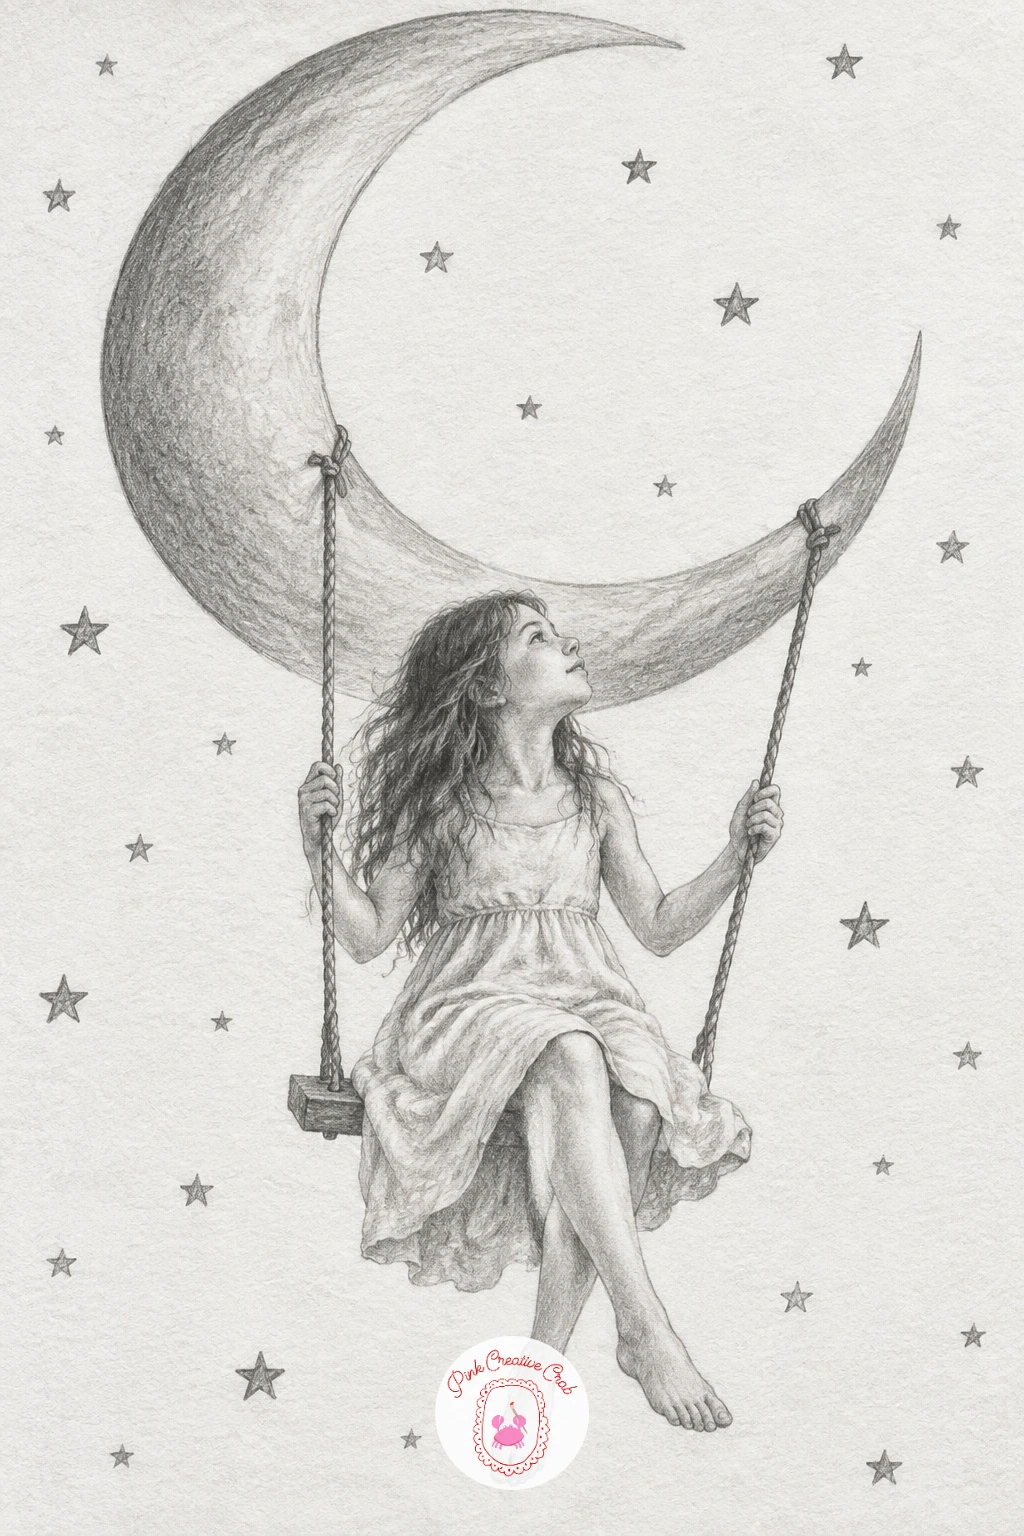
Palette: Moon White,Figure Silhouette,Star Scatter
Add a little story to the next sketch: a small robot carefully watering a single flower in the middle of a ruined, overgrown city. Draw the robot first with simple geometric parts, a boxy head, cylindrical limbs, a small watering can held carefully in one hand, keeping its posture gentle rather than mechanical and stiff.
The flower it tends sits in a crack in broken pavement, drawn with far more delicate linework than anything else in the scene, soft curved petals and a thin stem, since the contrast between its fragility and the robot’s bulk is the whole emotional point. Rubble and collapsed walls fill the background loosely, kept rough and undetailed so they do not compete with the flower.
Shade the robot in flat, even metallic tones with a few scratches and dents for wear, while the flower gets careful gradual shading on its petals. If the ruined cityscape feels like too much to invent, simplify it to one broken wall and a pile of rubble rather than a full skyline.
A ten minute version keeps the background as rough scribbled rubble. Given more time, add one small bird perched nearby watching the robot work.
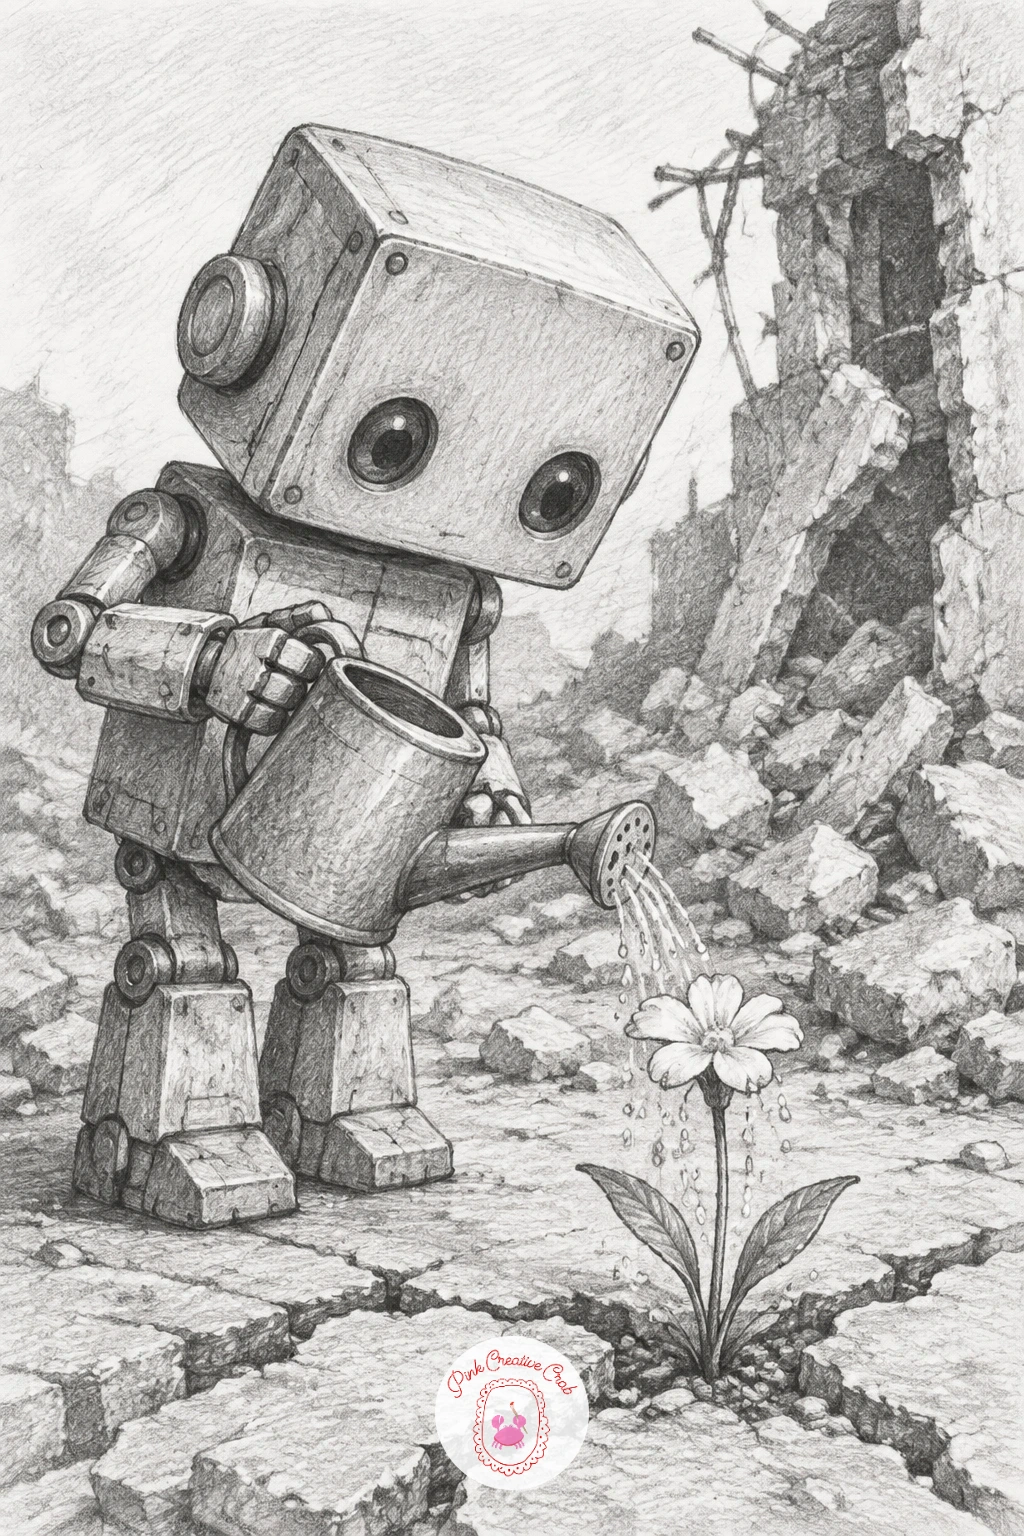
Palette: Robot Metal Grey,Rubble Grey,Flower Petal Grey
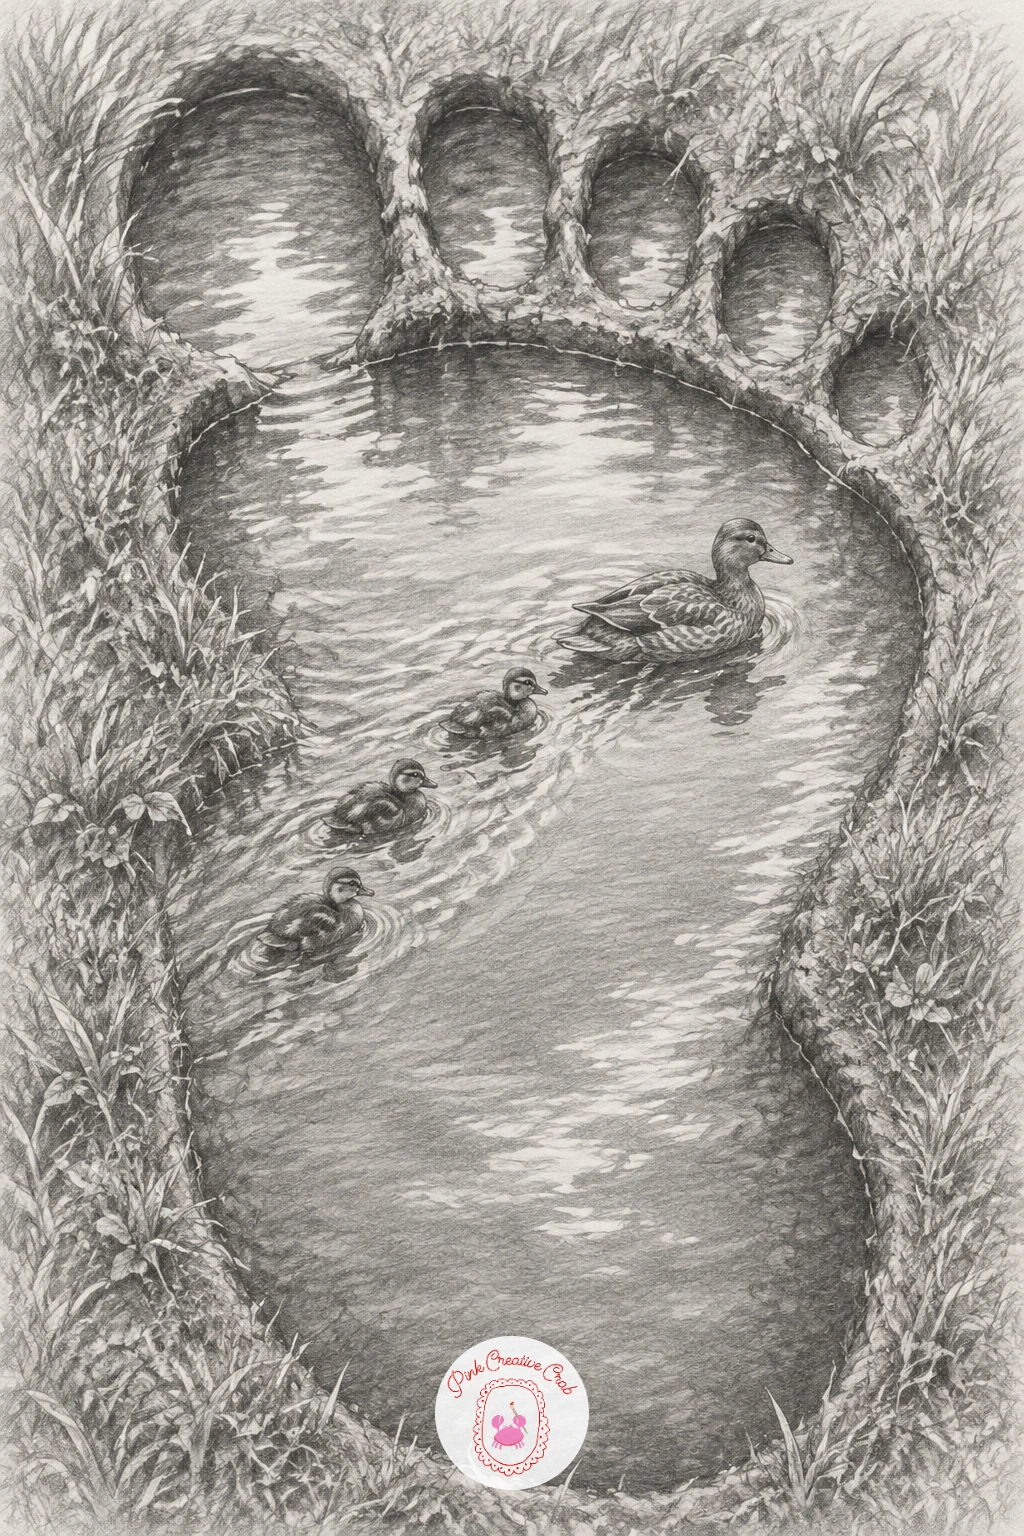
Keep playing with scale: a giant’s footprint pressed deep into the ground, now filled with rainwater and a small family of ducks swimming in it. Draw the footprint’s outline first, a rough, irregular shape with clear toe indentations, much larger and deeper than any ordinary puddle would be.
Fill the footprint with a flat water surface, a few ripple lines radiating from where the ducks paddle, and shade the deepest parts of the toe indentations darker to suggest real depth. Scatter three or four small ducks across the water’s surface, simple oval bodies with short necks, varying their poses slightly so they do not look identical.
Surrounding grass or dirt should be scaled normally, ordinary blades of grass and small stones, which is what makes the footprint read as genuinely giant by comparison rather than just a big hole. If the perspective of a footprint’s shape feels odd, look at a photo of a real bare footprint in mud or sand and simplify its outline from there.
Finish with one duck mid splash near the footprint’s heel for a bit of life and motion.
Palette: Mud Grey Brown,Water Grey,Duck Grey
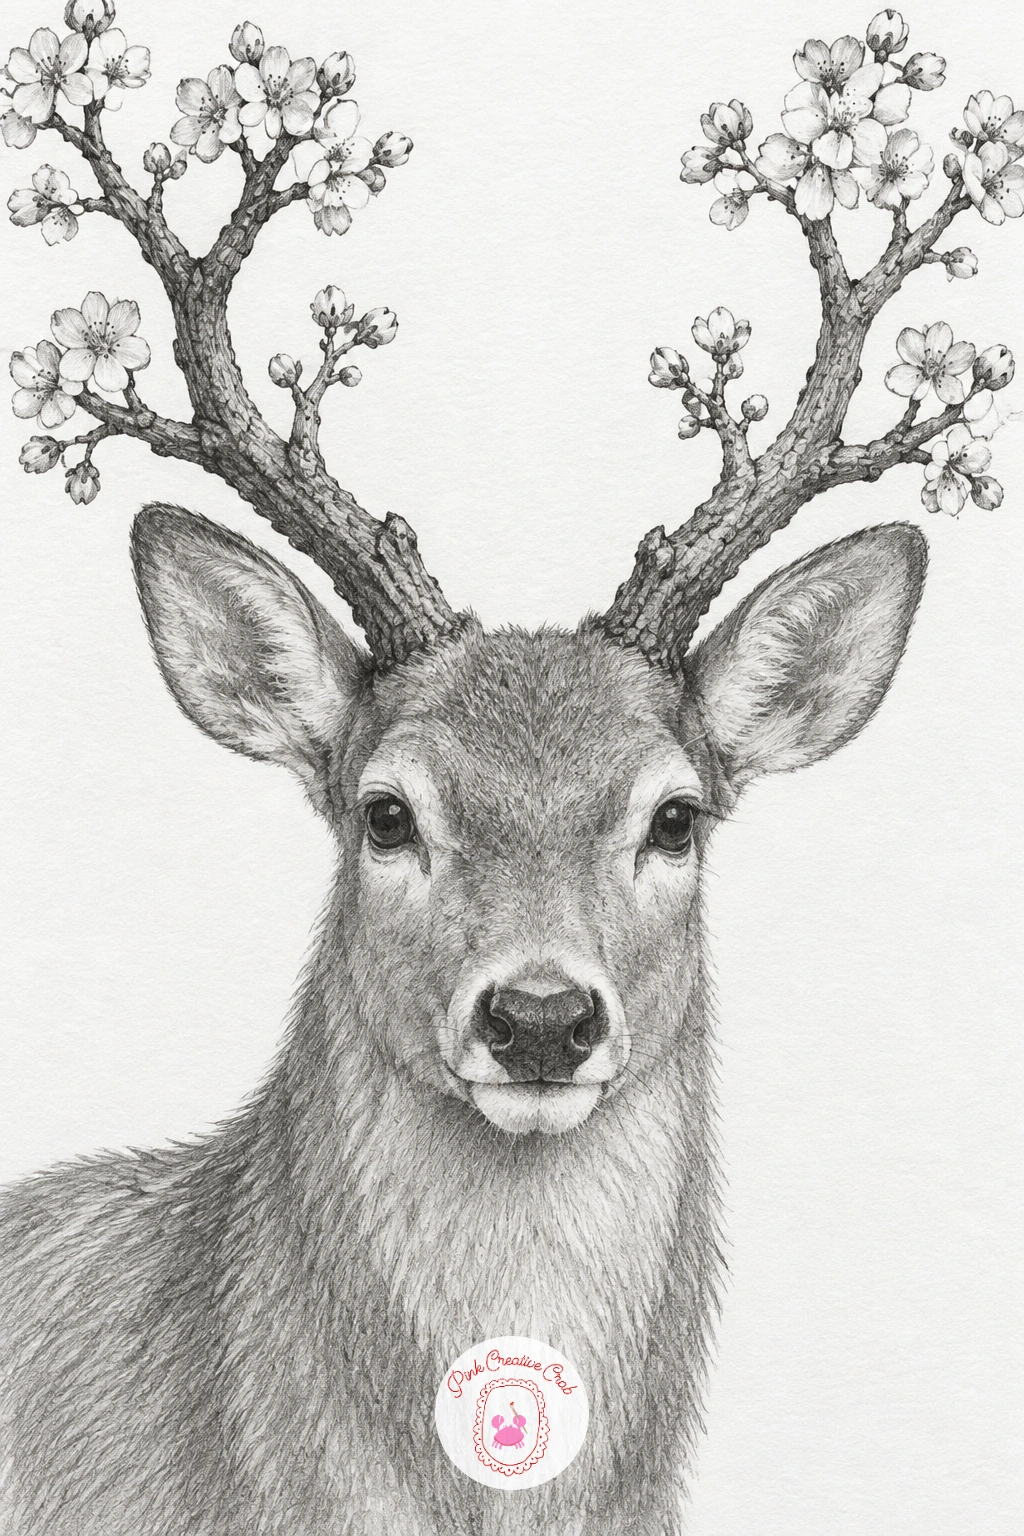
Bring in some quiet nature imagery with a deer whose antlers are made of real branches, bursting into blossom at the tips. Draw the deer’s head and body first with calm, gentle proportions, a soft eye, a relaxed stance, since the antlers will carry most of the visual interest and the deer itself should feel peaceful.
Build the antlers as genuine tree branches, rough bark texture and irregular forking, rather than smooth deer antlers, then let small blossom clusters sprout from the branch tips, simple five petaled flowers left mostly as untouched white paper with just a soft shadow at each petal’s base.
Shade the deer’s coat in short soft strokes following its body’s natural direction, keeping the antler branches darker and rougher by contrast so the smooth coat and rough bark read as clearly different textures. If the blossoms feel fussy at a small scale, reduce them to just a few clusters at the very tips rather than covering every branch.
A quick version keeps three or four branch points with one blossom cluster each. With more time, add a couple of petals drifting loose in the air nearby.
Palette: Deer Fawn Grey,Branch Bark Grey,Blossom White
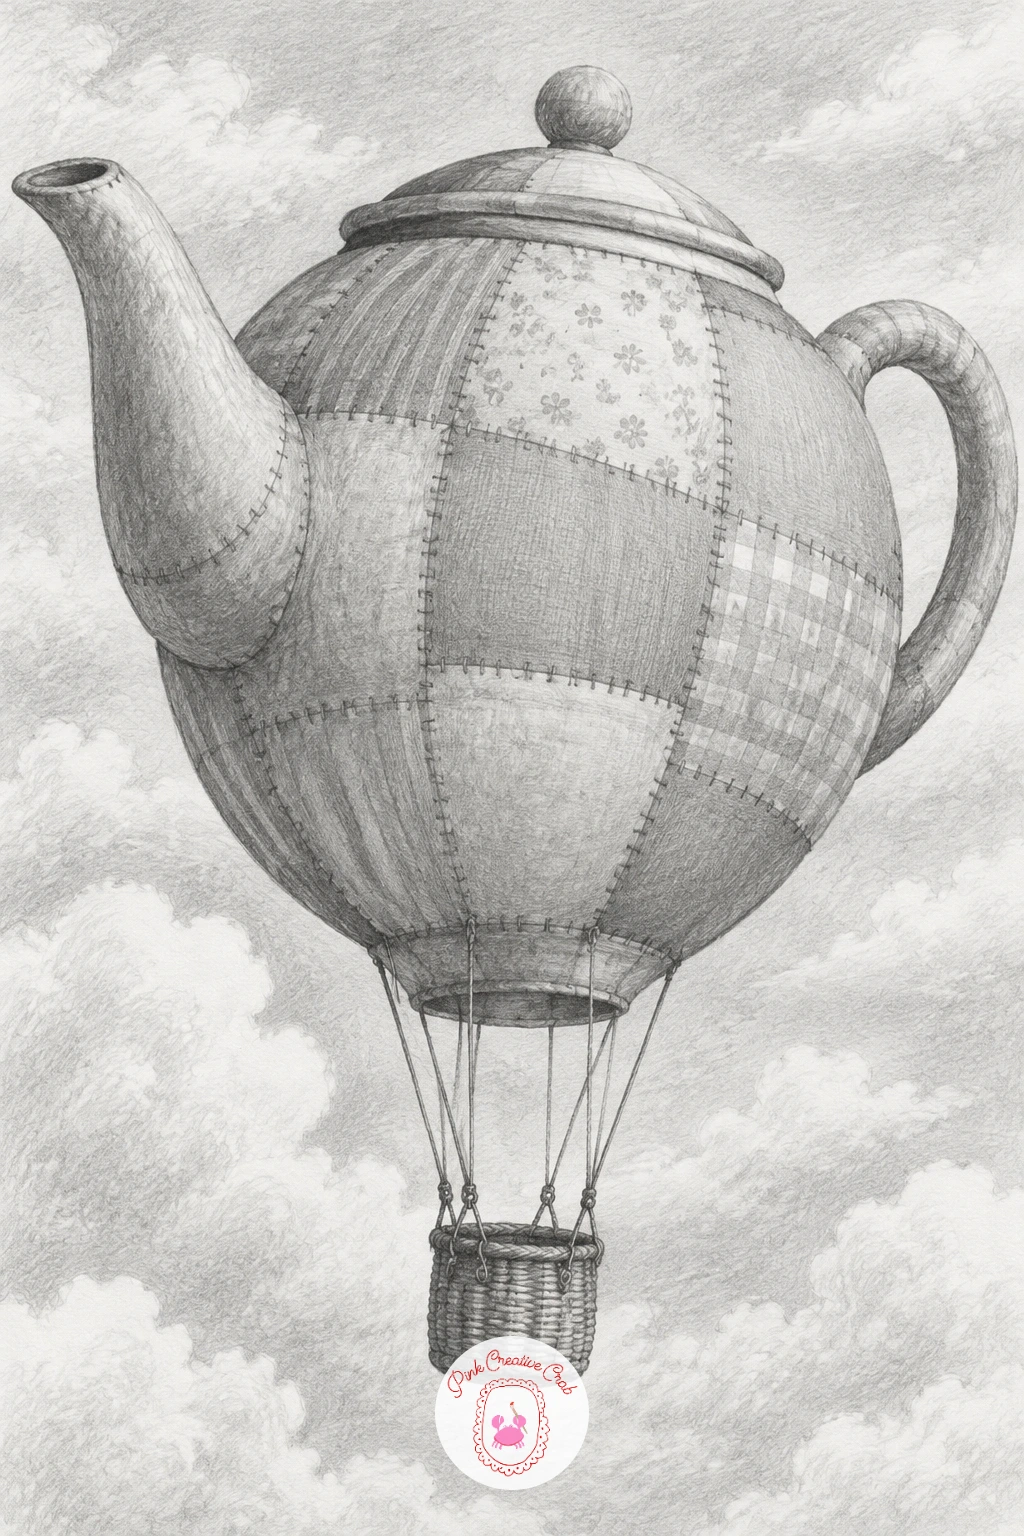
Return to household objects turned fantastical: a hot air balloon whose envelope is a large patched teapot, basket hanging below as usual. Draw the teapot first in familiar detail, its curved spout, handle and lid, but scaled up enormous and fitted with a few visible patches and seams as though it has been stitched like fabric.
Beneath the teapot’s spout, attach simple rope lines down to a small woven basket, keeping the ropes evenly spaced and slightly taut from the basket’s weight. A thin trail of steam or smoke can drift from the spout upward past the teapot’s body, like hot air escaping the way it would from a real balloon’s burner.
Shading the teapot like glossy porcelain while treating its patches as rougher fabric texture is what makes the swap convincing, so keep those two surfaces visibly different in how you render them. If the patch stitching feels fiddly at this size, simplify to two or three large patches with simple cross stitch marks rather than many small ones.
Finish with a scattering of small clouds drifting past at different heights to anchor it in open sky.
Palette: Porcelain Grey,Patch Fabric Grey,Sky Grey
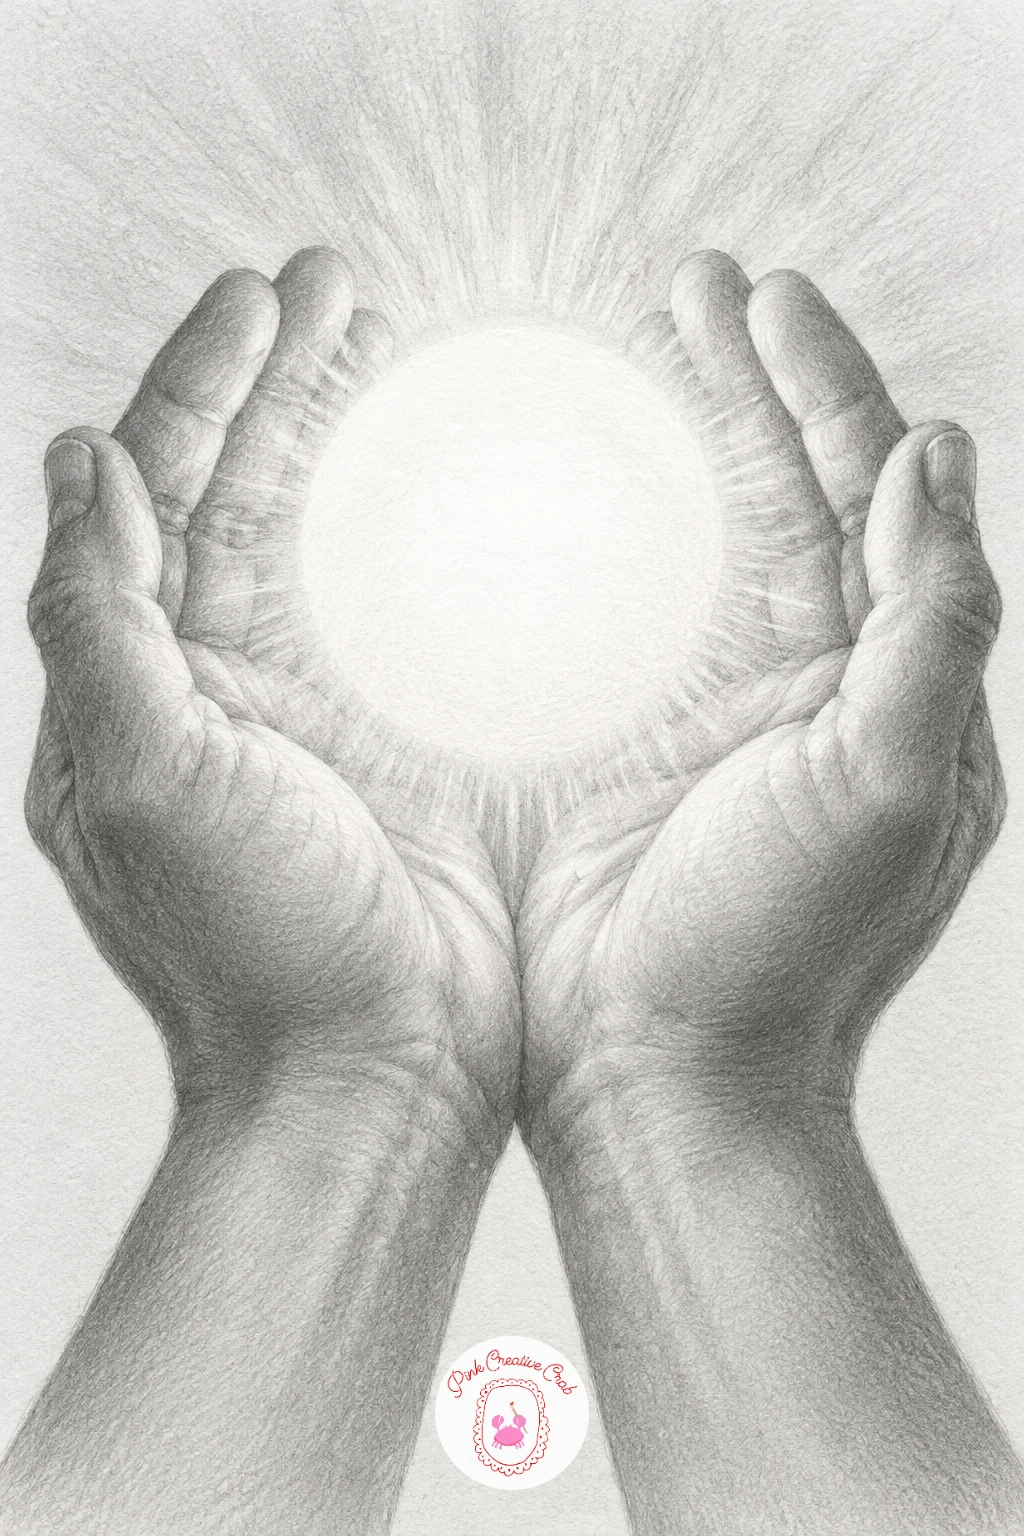
Simplify again with a strong, graphic composition: a pair of cupped hands holding a rising sun as if lifting it into the sky. Draw both hands first, forming a bowl shape together, fingers slightly spread, wrists turned to show the undersides of the hands clearly, since the gesture needs to read instantly as offering something upward.
Between the palms, draw the sun as a bright circle with a soft, graduated glow extending beyond its edge, achieved by blending graphite outward from the circle and lifting a little tone back out with a kneaded eraser the further it spreads. A few simple rays can extend outward past the hands if you want more drama.
Shade the hands with warm, even mid tones, brightest along the fingers closest to the sun’s glow, since light should visibly affect the skin nearest the source. If the glow blending feels difficult to control, build it in thin layers rather than one heavy pass, you can always add more tone but lifting too much back out is harder.
Keep the background completely plain so nothing distracts from the hands and the light between them.
You Will Need
- kneaded eraser for the sun’s glow
Palette: Skin Grey,Sun Glow White,Deep Shadow
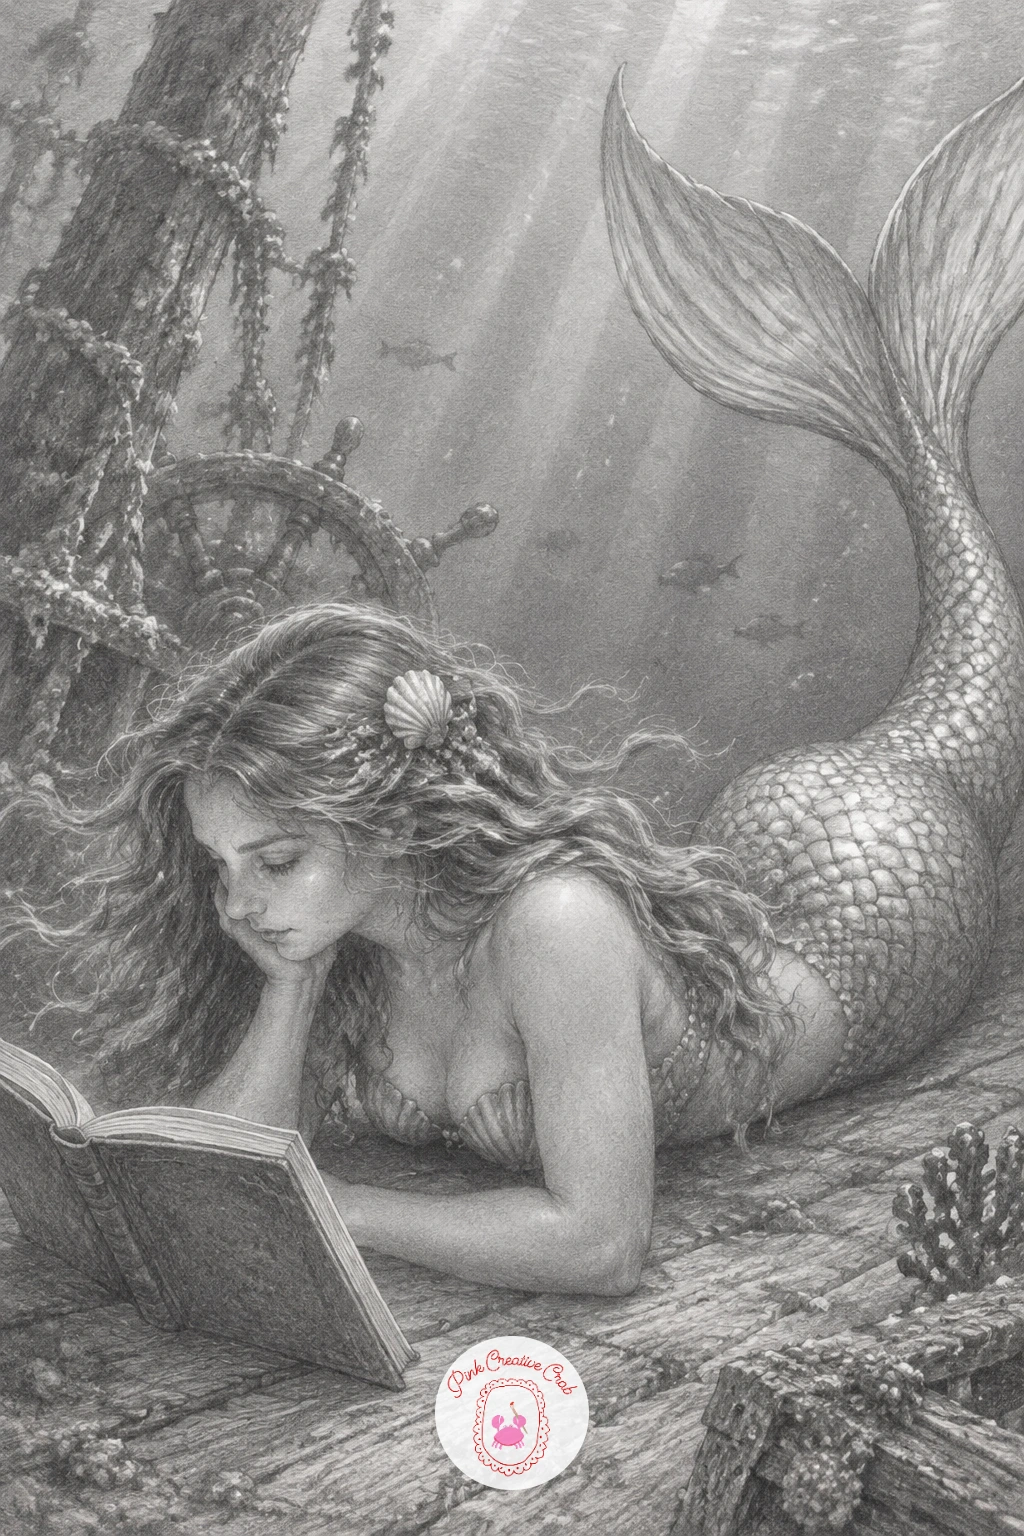
Add a quiet underwater scene: a mermaid lying on the deck of a sunken ship, calmly reading a book. Draw the ship’s deck first, weathered wooden planks, a broken mast lying across the background, some trailing seaweed caught on the railings, to establish it is long sunk and settled on the seabed.
Pose the mermaid relaxed on her stomach or propped on one elbow, tail curling gently behind her, book held open in both hands. Keep her scales simple, a repeating curved pattern rather than individually rendered scales, and let a few small fish drift past in the background at different depths to suggest the surrounding water.
Water itself can stay mostly implied through soft overall shading and a few light rays filtering down from above rather than drawn literally, heavy linework for water often looks busier than it needs to. If the figure feels difficult, simplify her pose to lying flat with the tail curved in one simple sweep rather than a complex twist.
Shade the ship’s wood darker and rougher than her smooth skin and scales for a clear material contrast.
Palette: Ship Wood Grey,Mermaid Skin Grey,Deep Water Grey
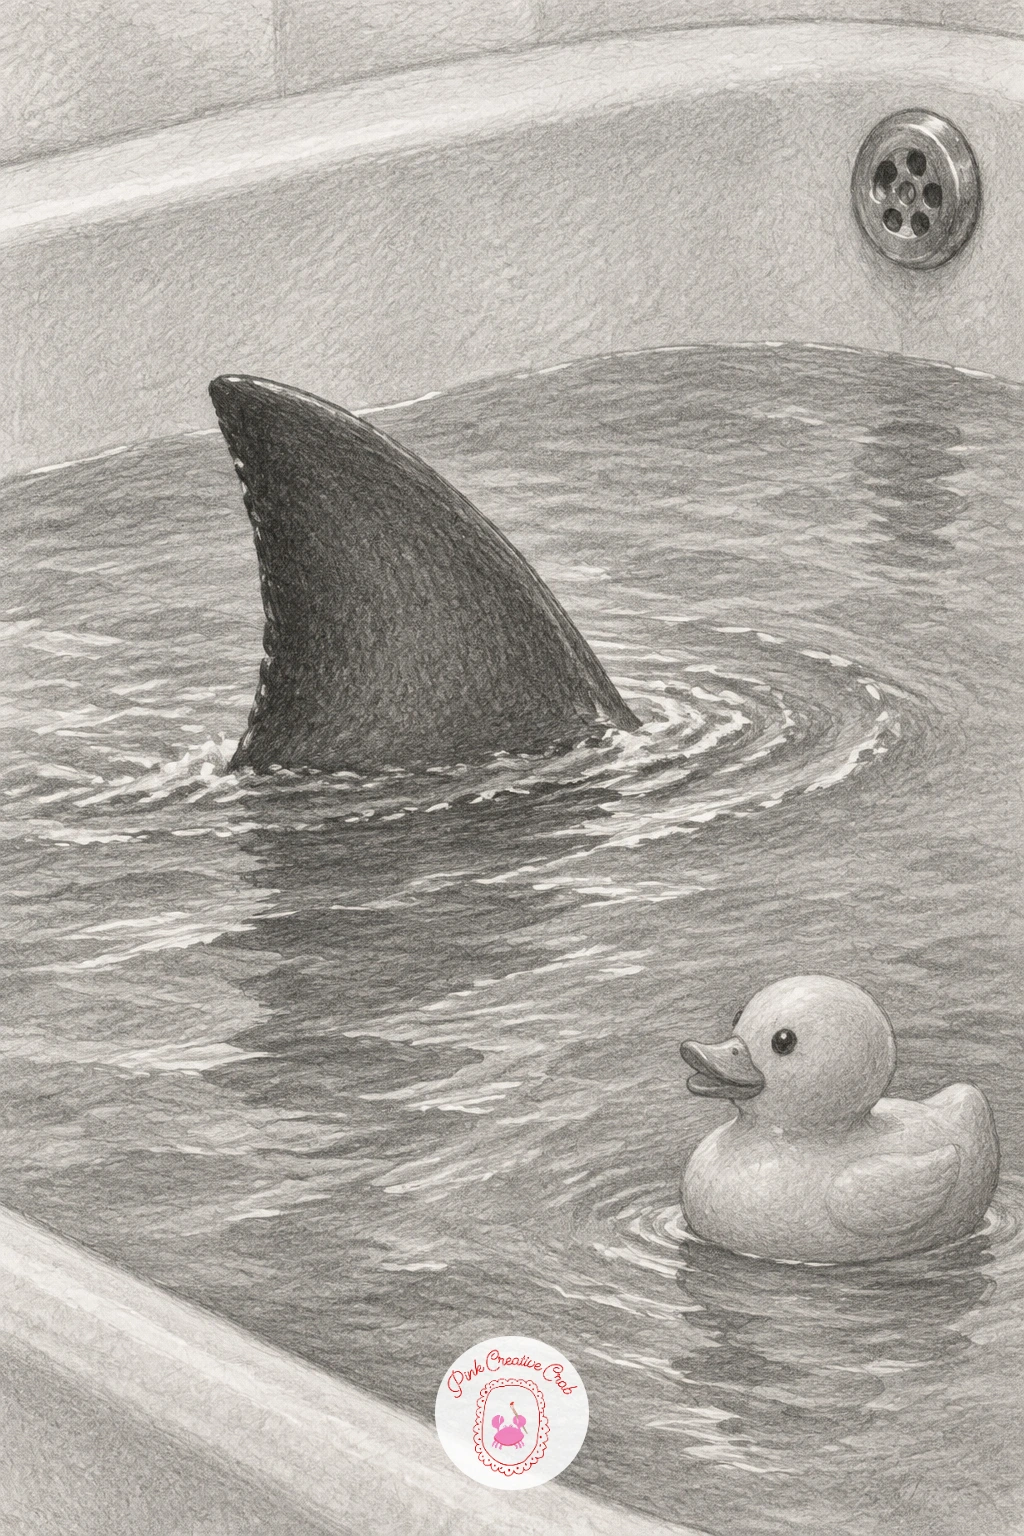
Bring the scale trick indoors with a single shark fin circling the water in an ordinary bathtub. Draw the bathtub first with plain, domestic detail, the curved rim, taps, maybe a rubber duck bobbing nearby, since the everyday setting is what makes the fin feel so unexpected.
The fin itself breaks the water’s surface at a slight angle, drawn with a crisp, confident triangular shape and a thin ripple trailing behind it to suggest motion through the water. Keep the bathwater surface mostly calm and flat except right around the fin, where a few curved ripple lines radiate outward.
Scale is everything in this one, so keep the fin notably large relative to the tub, large enough to suggest something far bigger lurking just beneath the surface than the tub could reasonably hold. If that scale feels hard to judge, sketch the tub and duck at normal size first, then draw the fin last so you can exaggerate it against an already fixed sense of scale.
A quick version keeps the water flat and plain. With more time, add a faint dark shadow shape just beneath the surface near the fin.
Palette: Bathtub White,Water Grey,Fin Dark Grey
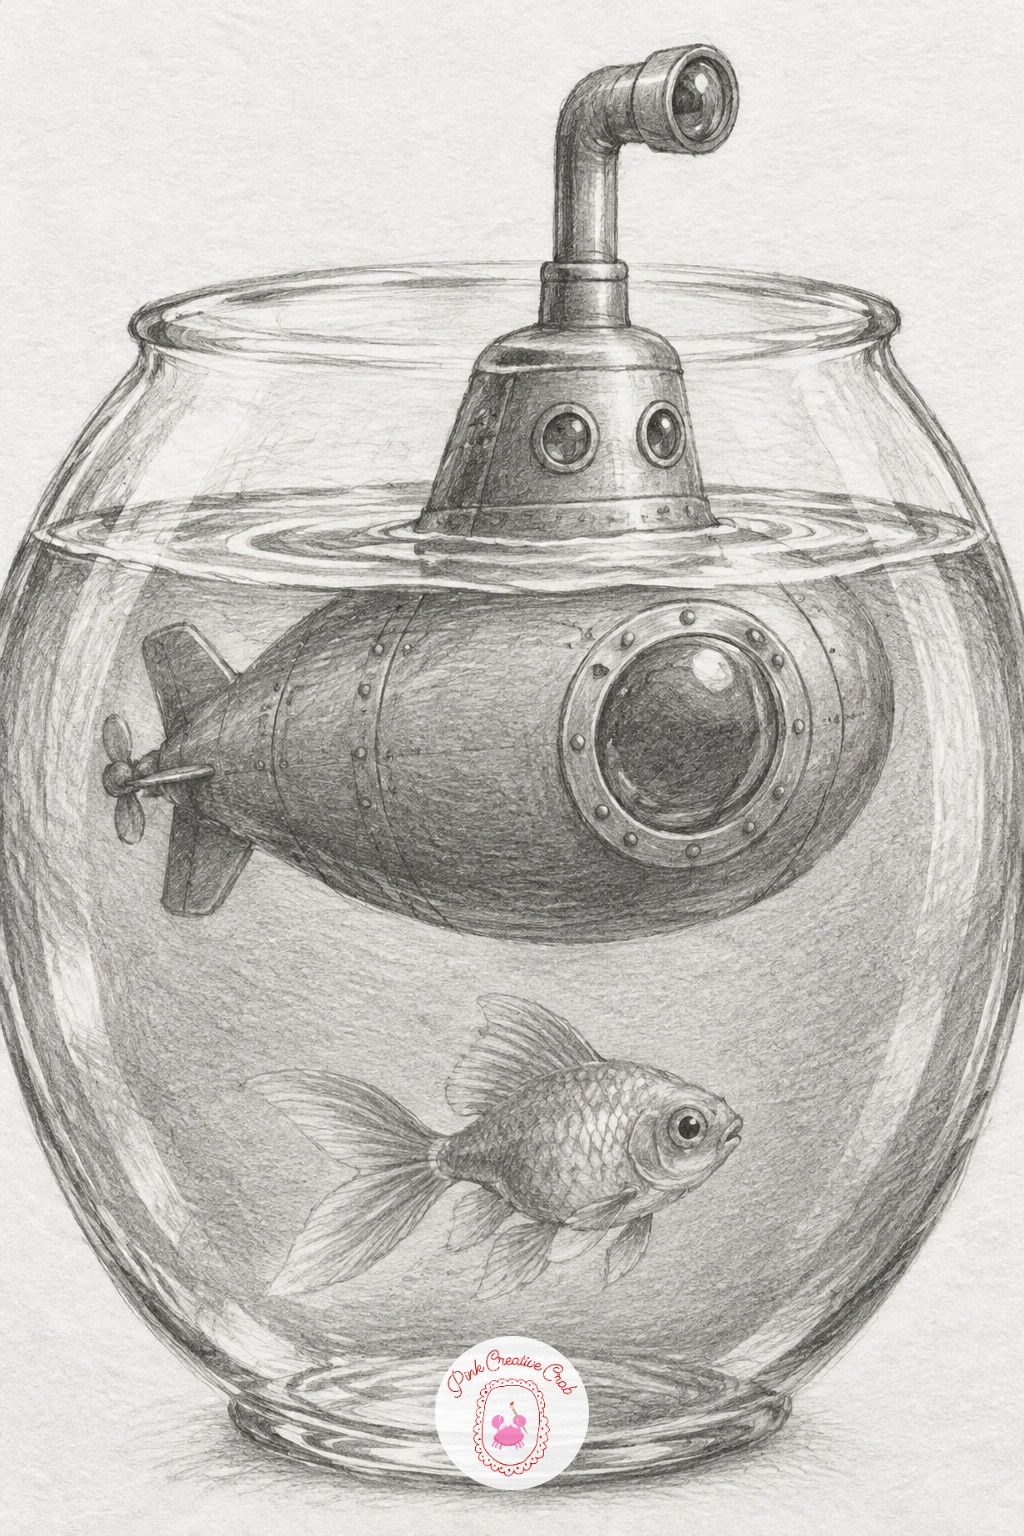
Keep the scale confusion going with a small submarine peeking its periscope and nose out of the top of a round fishbowl. Draw the fishbowl first as a simple curved glass sphere on a stand, with maybe one ordinary goldfish still swimming near the bottom for contrast against the stowaway submarine above.
The submarine itself rises from the water near the bowl’s surface, periscope extended above the waterline, hull still mostly submerged, drawn with recognizable riveted detail and a rounded nose to read clearly as a vessel rather than an abstract shape.
Keep the glass curve of the fishbowl subtly distorting the submarine’s hull where it is seen through the water, a slight bend or shift along the glass edge, which is a small detail that convinces the eye this is genuinely inside a bowl rather than just sitting in front of one. If the glass distortion feels too technical, a simpler version skips it and keeps the bowl’s outline clean with just a couple of curved highlight lines.
Finish with a small trail of bubbles rising from the submarine’s hull to suggest recent movement.
Palette: Glass Grey,Submarine Grey,Water Grey
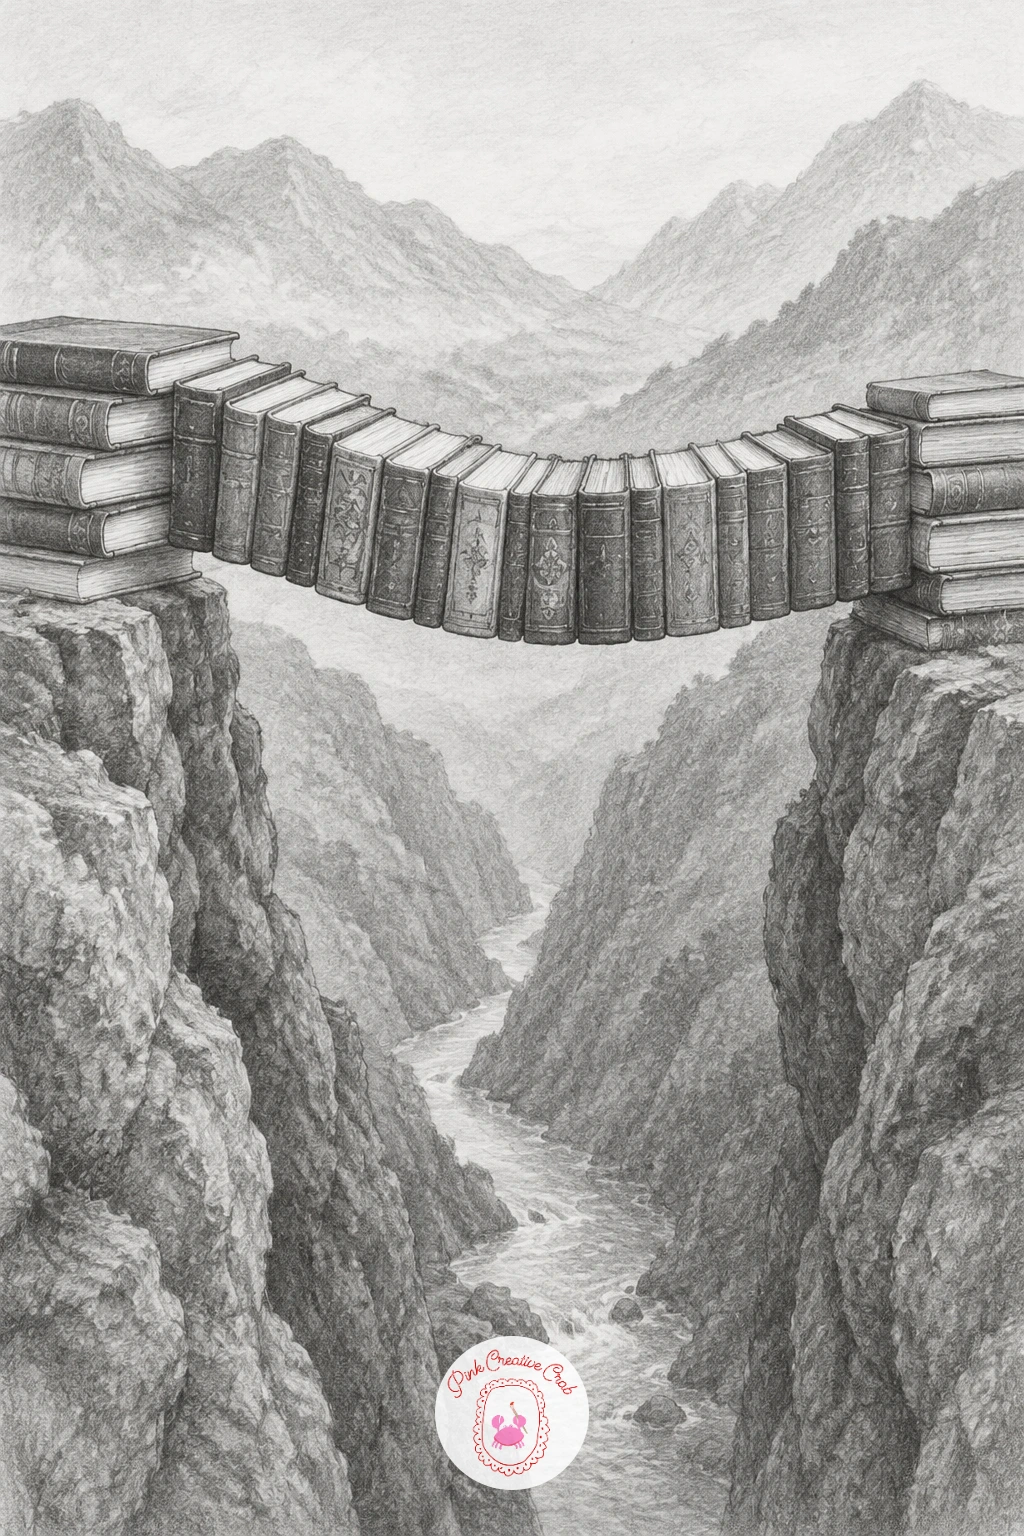
Move to a more architectural idea: a bridge built entirely from stacked books spanning a deep canyon. Draw the canyon first, two steep rocky cliff faces with a gap between them, shaded with rough jagged strokes to establish real depth and danger before the bridge goes in.
Build the bridge from books stacked and overlapping at slightly varied angles, spines facing outward with a few visible titles or simple cover patterns, arcing gently across the gap like a real stone bridge would. Keep the books near the bridge’s center slightly larger or more prominent to draw the eye there first.
Shade the canyon walls heavily dark and rough while keeping the books themselves cleaner and more structured, flat planes of tone with crisp edges, since that contrast in texture is what makes the bridge read as a deliberate, sturdy structure rather than a random pile. If drawing legible book spines feels like too much, simplify most of them to plain rectangles and only detail two or three up close.
A tip worth keeping in mind: a slight downward sag at the bridge’s center, like a real rope bridge, sells the structure far better than a perfectly straight stack.
Palette: Canyon Grey,Book Cover Grey,Deep Shadow
For another way to turn everyday objects into surreal structures like this, the cool sketchbook pages ideas take the theme even further.
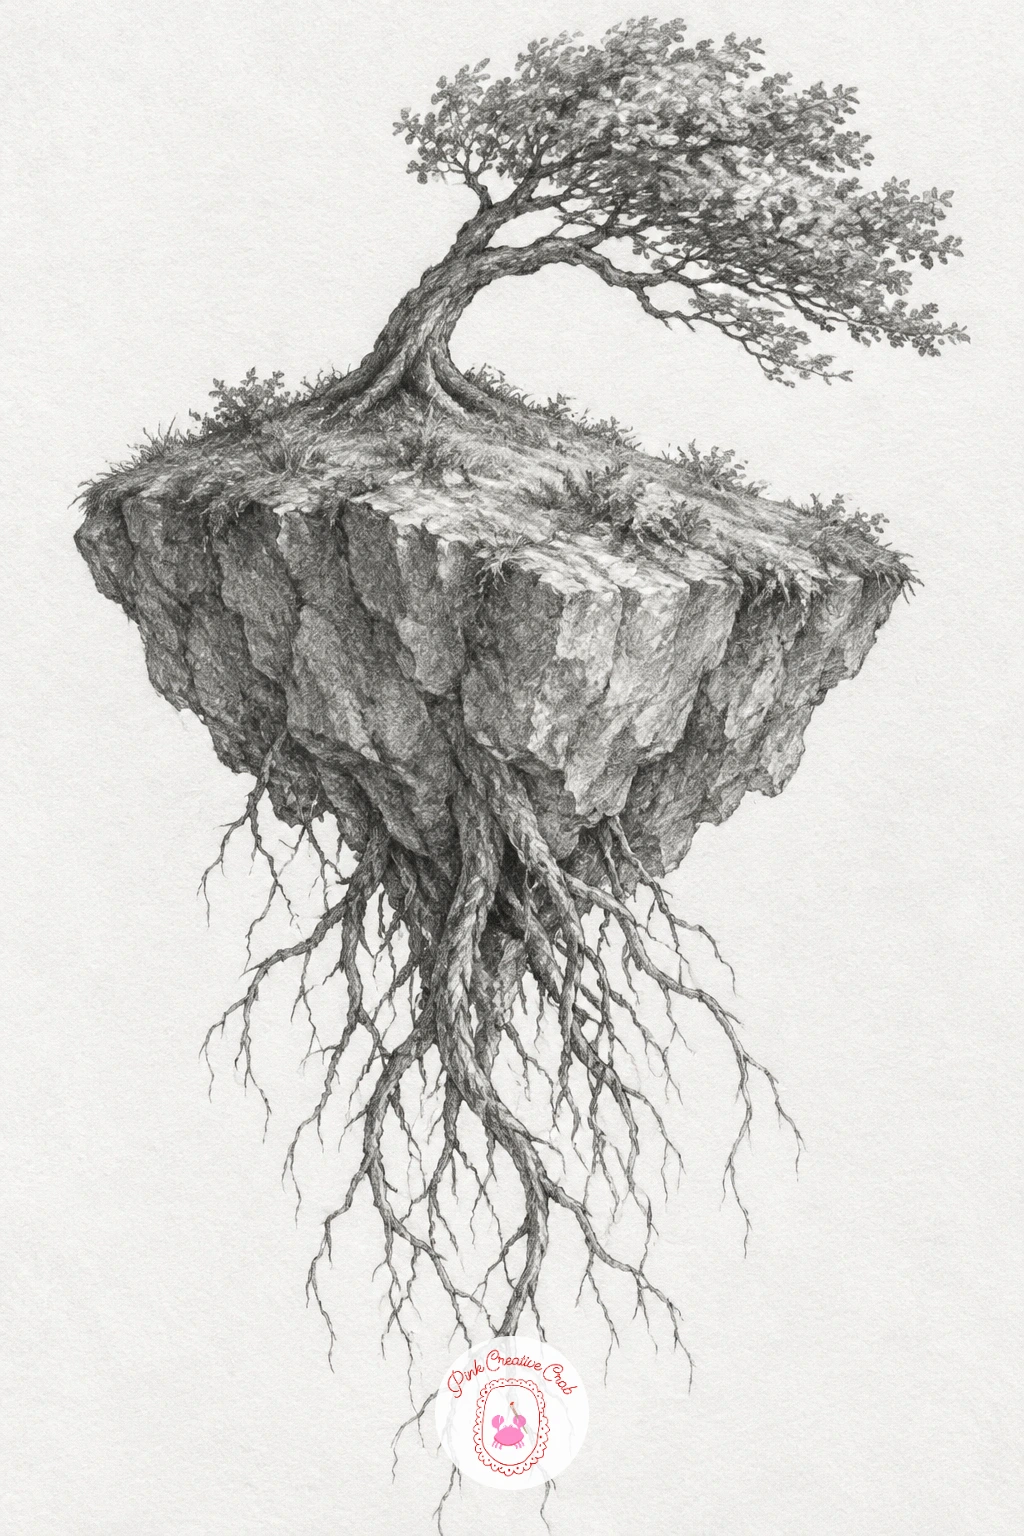
Close with the most involved scene on this list: a lone tree growing on a small floating island, its roots dangling freely in open air beneath the drifting rock. Start with the island’s underside first, a jagged, irregular chunk of rock torn away at the bottom, layered strata lines running through it to suggest real geological weight.
From the rock’s base, let a tangle of roots hang downward into empty space, thinning and splitting as they descend, some curling back on themselves, none reaching anything below since there is nothing left for them to reach. On top of the island, draw the tree itself with a modest, wind bent trunk and a simple canopy of leaves, kept smaller in scale than the dramatic root tangle beneath it so the roots stay the visual focus.
Shade the rock heavily textured and the roots with fine tapering linework, darkest where they bunch together near the rock and finest at their loose trailing tips. If the whole composition feels like a lot to plan at once, block the island’s silhouette and the general root mass first in light pencil before committing to any detail.
Scatter a few small clouds drifting past at a lower level than the island to really sell the height and isolation.
Palette: Rock Grey,Root Grey,Leaf Grey
What to Do Next
Pick whichever idea you keep circling back to, start with a light pencil block in of the main shapes, and build your shading in layers from light to dark. Any plain white sketchbook page is enough to begin, and once one of these feels finished, the next one on the list is already waiting.
Frequently Asked Questions
What pencils work best for cool sketch ideas like these?
A small range from 2H to 6B covers it, with the softer grades for deep shadows and the harder ones for light sky and water tones. A blending stump helps smooth clouds, water and glow without smudging the whole page.
How do I make a surreal scale drawing look believable?
Keep every ordinary part of the scene drawn with real care, the hand, the teapot, the cottage, so the one impossible element stands out against something your eye already trusts. Consistent light direction across the whole page matters just as much as the strange part itself.
Do I need to plan the whole composition before starting?
A light, loose block in of the main shapes first saves most redraws later. Keep the first pass soft enough to erase, settle the proportions and placement, then commit to firmer lines once the balance of the page looks right.
How long does one of these sketches usually take?
Simpler ideas like the teacup or the moon swing can finish in fifteen to twenty minutes, while detailed scenes like the floating island or giant cat can take closer to an hour with full shading. Either length works, since detail is optional throughout this list.
What if I am not confident drawing figures or animals?
Start with the ideas that use mostly objects and simple shapes, the jar, the teacup, the hourglass or the door, and build confidence before tackling the whale, the elephant or the mermaid. Reference photos for any figure or animal pose make a real difference.
Have any thoughts?
Share your reaction or leave a quick response — we’d love to hear what you think!
-
 0
-
0
-
0
-
0
-
0
-
0


