

Good sketch ideas do not need a special occasion, just a pencil, a blank page and something worth looking at twice. This list leans on everyday things: a sleeping cat, a pair of old sneakers, a hand wrapped around a mug. Nothing here needs a studio or a long afternoon, and every subject can sit on one page and feel finished by the time you put the pencil down.
You will find pets, hands, old objects, small buildings and a few quiet human moments mixed together, running from the simplest shapes up to the ones with a bit more going on. Work through them in order if you want a gentle warm up, or jump straight to whichever one catches your eye on the page below.
Using these images: free for personal projects such as printing, coloring, cards, journals and gifts. Handmade items that include them may be sold up to 30 pieces per design. More than that is commercial use and is not permitted, and neither is selling or sharing the images themselves or passing them off as your own. Please ask before any other use.
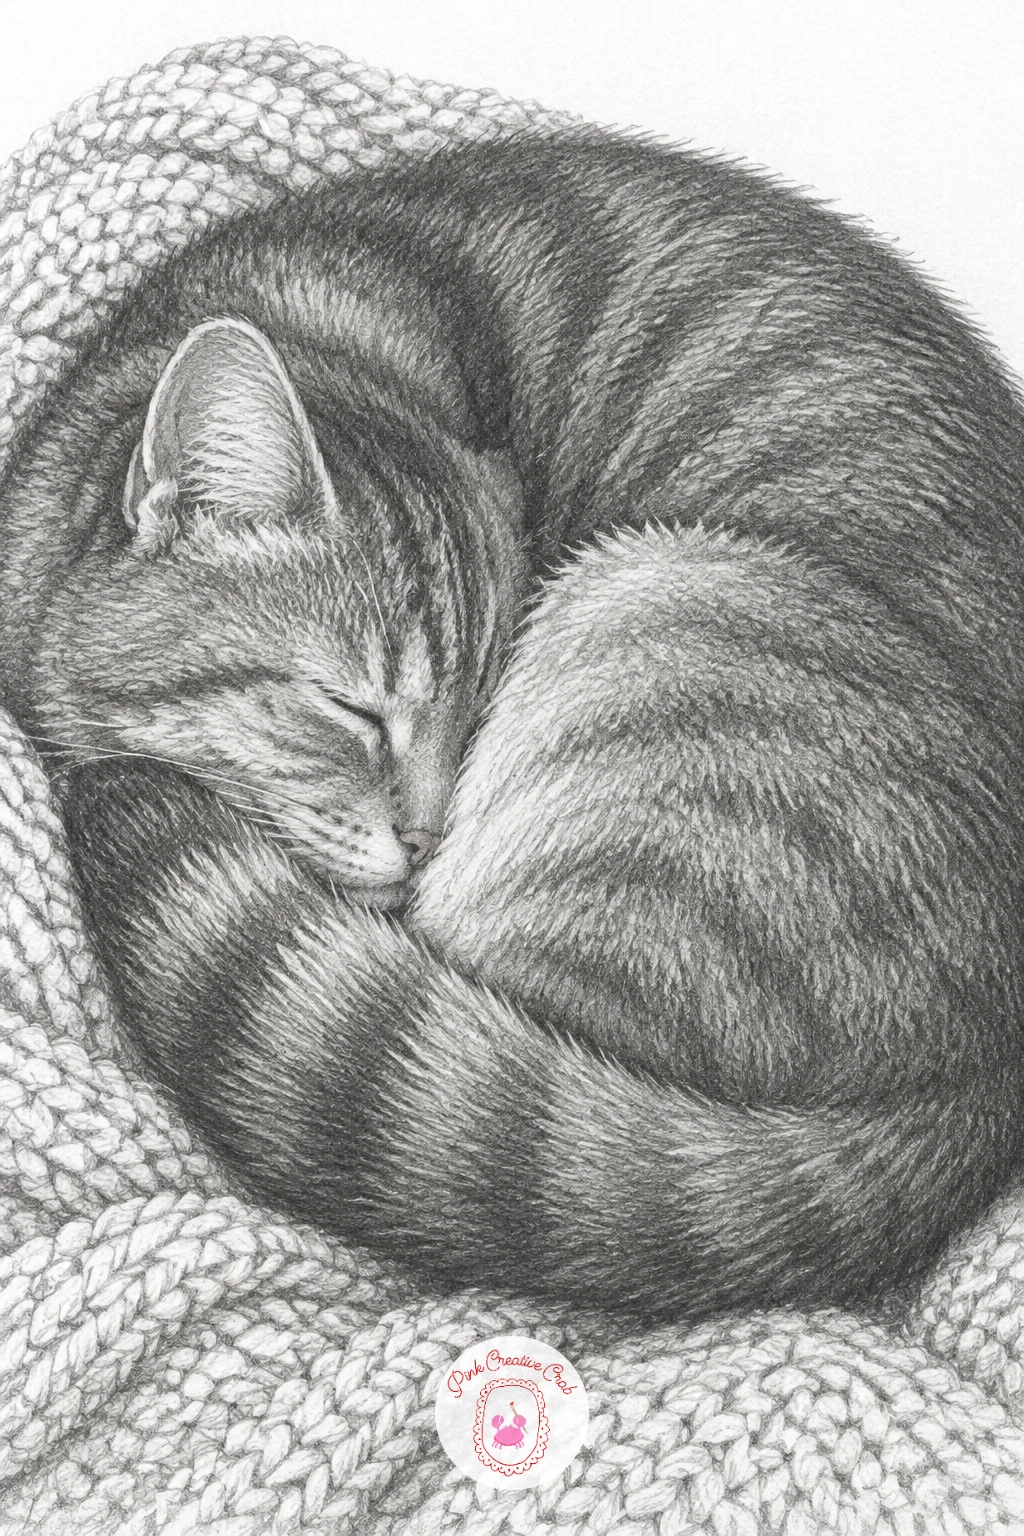
Start the whole list with something forgiving: a cat asleep in a curled ball on a knitted blanket. Block in one soft oval for the curled body before any ear or paw goes near the page, because cats collapse into a single rounded shape when they sleep and that shape is what you are really drawing.
Work from a 2B pencil for the big soft shadow under the body, then move to a 4B for the darker folds where the blanket bunches up against the fur. Keep the knit pattern loose, just a few short diagonal strokes rather than every stitch, or the blanket will fight the cat for attention.
If the proportions feel off, check that the head is roughly a third of the whole curled shape, not half: new sketchers almost always draw the head too big on a curled up animal. No wool blanket handy for reference? A folded towel photographed under lamp light gives you the same soft creases.
Finish by lifting a few bright threads out of the darkest blanket folds with a kneaded eraser so the texture reads instantly.
Palette: Graphite Grey,Charcoal Black,Paper White
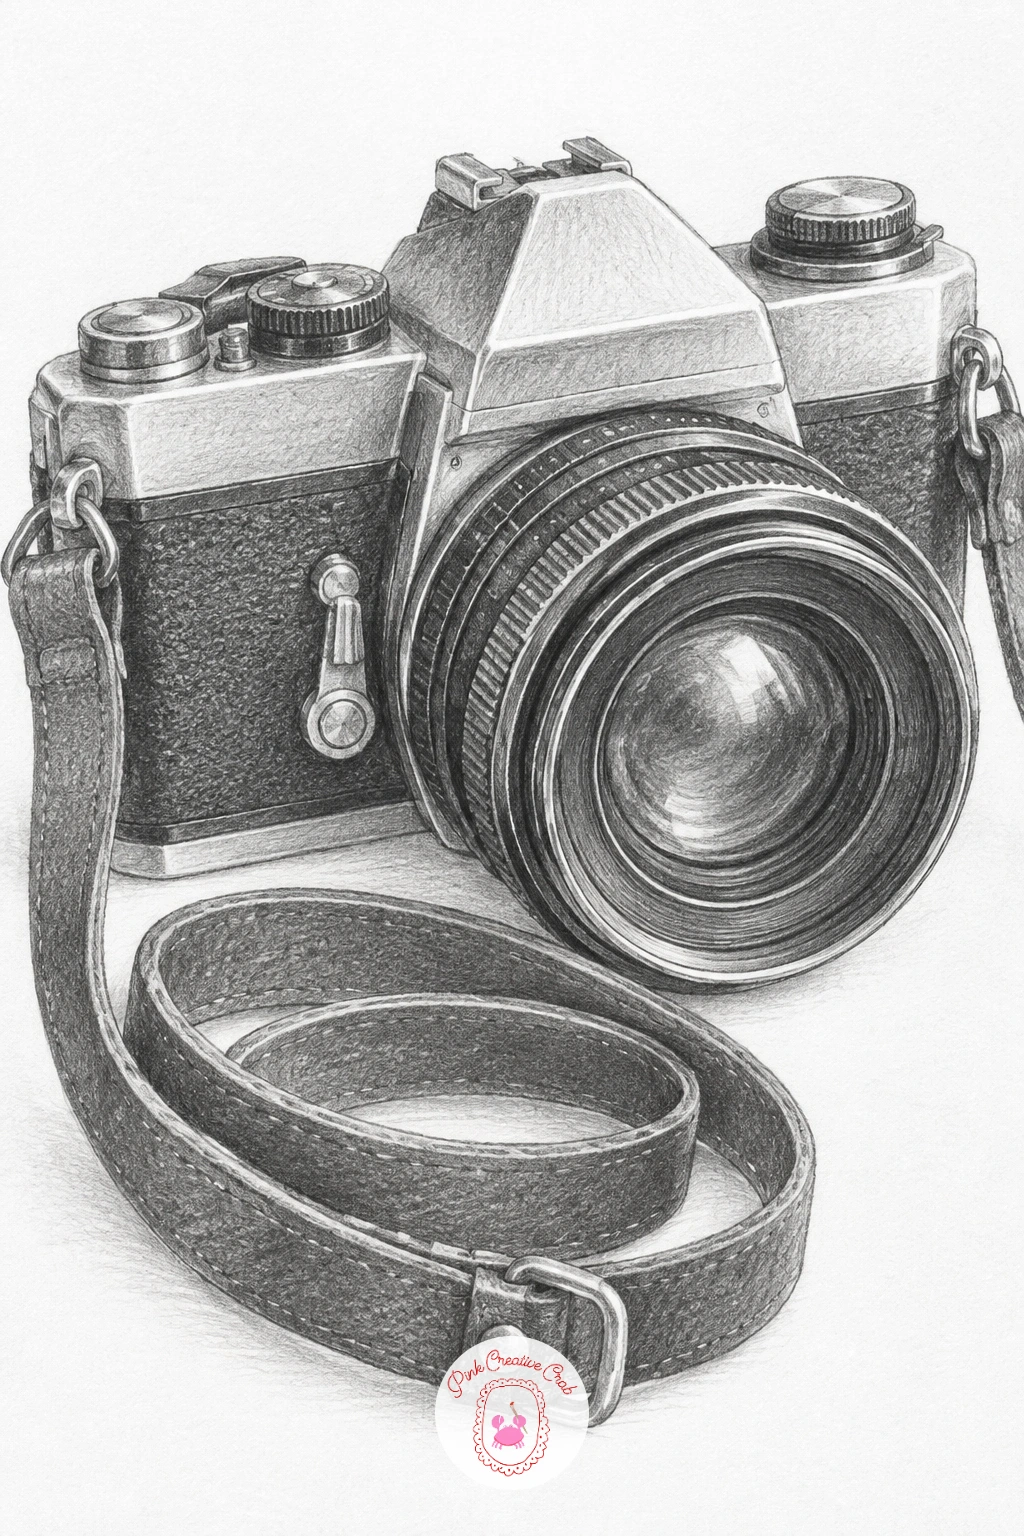
Move from fur to metal with a vintage film camera, its leather strap coiled loosely beside the body. Light pencil guide lines first: a rectangle for the body, a smaller cylinder for the lens barrel sitting slightly proud of the front. Getting that lens cylinder round rather than oval is the one thing worth checking twice before you shade anything.
Use an HB for the flat metal panels and switch to a 2B for the lens barrel’s rings, where a tiny strip of pure white paper left untouched reads as a hard chrome highlight. Work the leather strap last in loose curved strokes with a softer pencil, since it should look relaxed compared to the crisp camera body.
The common mistake is making every edge of the camera equally dark, which flattens it. Push the shadow side noticeably darker than the lit side and the whole thing suddenly sits on the page instead of floating.
No real camera on hand? Any boxy old radio or a tin of mints with a round lid works just as well for practicing hard edges against soft leather.
Palette: Graphite Grey,Charcoal Black,Warm Grey
Try drawing the camera from a low angle, almost eye level with the lens. It makes the barrel look more cylindrical and gives the sketch a bit more presence on the page.
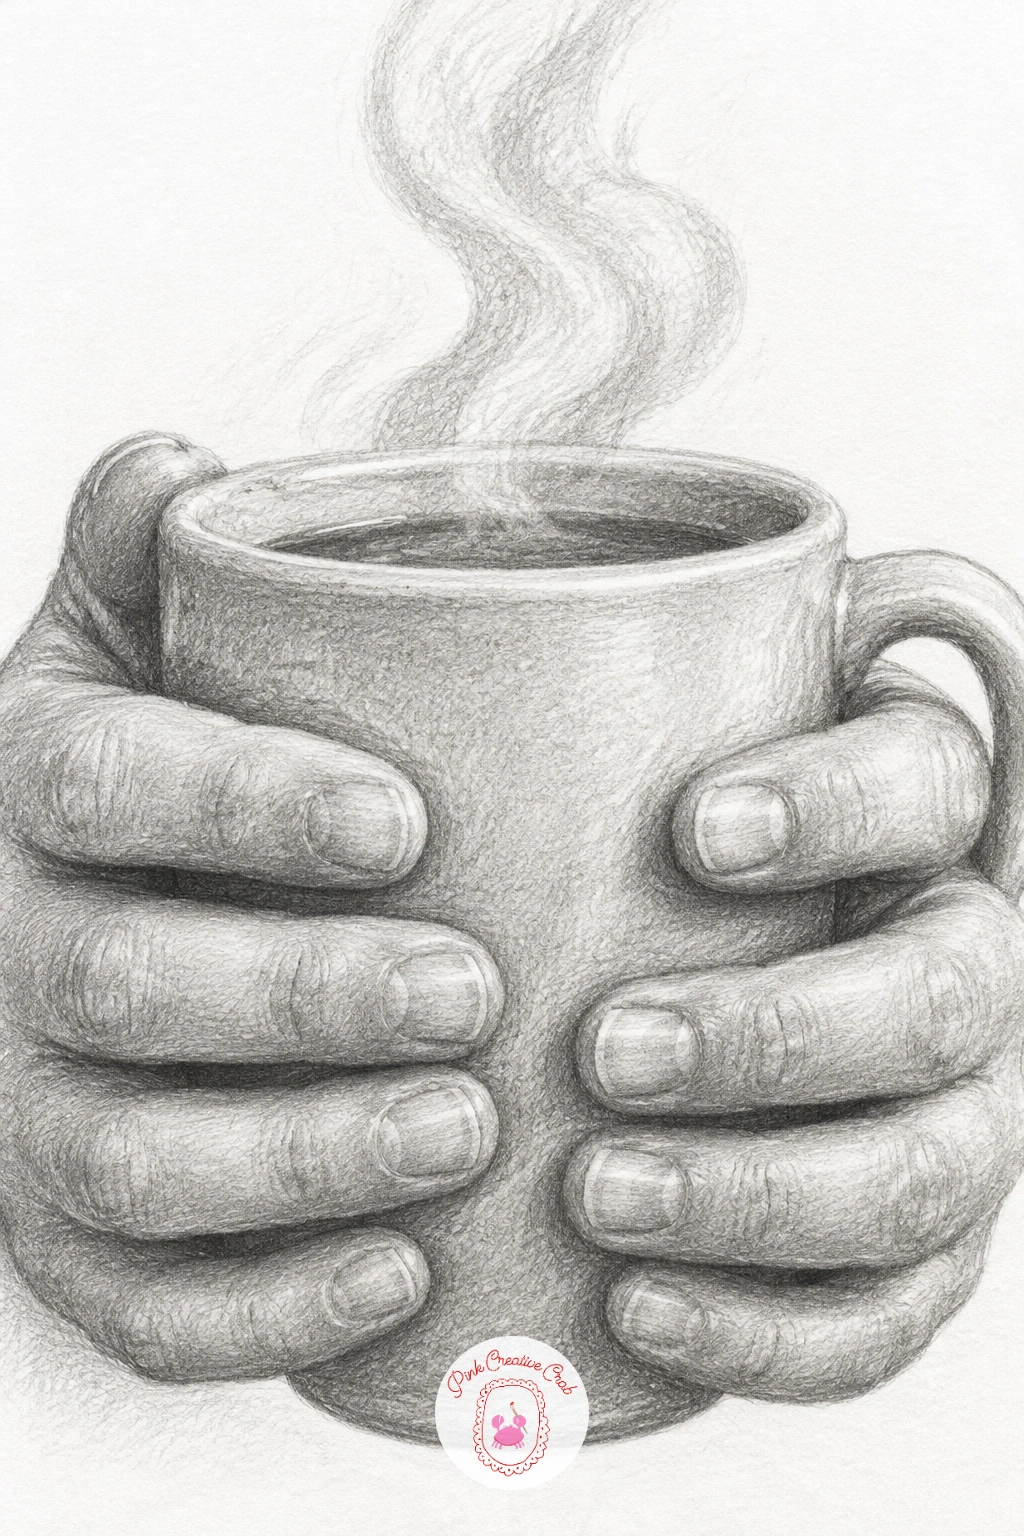
Hands trip up a lot of sketchers, so ease in with two hands wrapped around a steaming ceramic mug rather than a whole figure. Lightly sketch the mug as a simple cylinder first, then build each hand from a soft rounded palm shape with short sausage shapes for fingers, since fingers drawn as flat rectangles always look stiff.
Shade the mug’s curve with an HB in one smooth sweep, leaving a vertical strip of white where the light catches the rim. For the hands, a 2B picks out the knuckle creases and the shadow where fingers overlap each other, which is what actually sells the grip.
The steam is the easiest part and the one people overdo: two or three faint wavy lines in a very soft pencil, barely there, say more than a thick cloud ever will.
If hands feel too hard to invent, photograph your own holding a mug on the kitchen table and sketch straight from the photo.
Palette: Graphite Grey,Soft Black,Paper White
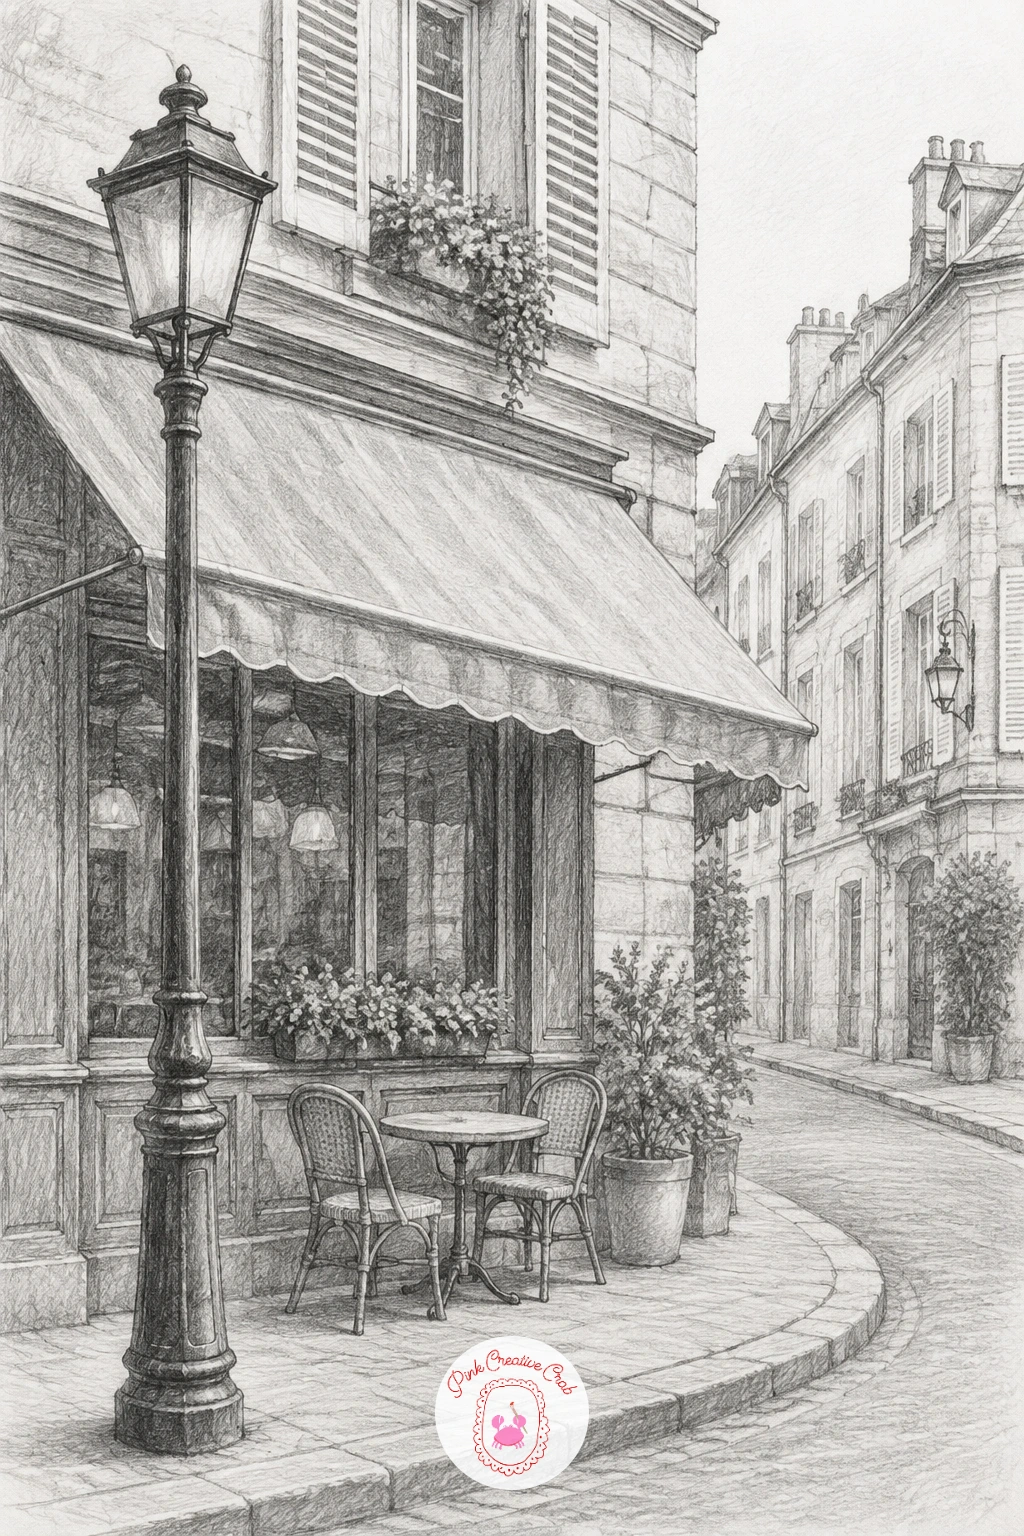
Step outside the house for a quiet street corner with a lamppost and a café awning, a nice change of pace after small objects. Rough in the horizon line first and decide where your eye level sits, because everything else, the lamppost’s height and the angle of the awning’s stripes, follows from that single line.
Draw the lamppost as a simple tapering pole with an HB, then rough the awning as a wedge shape before adding its folds, since awnings read as a handful of straight creases rather than a soft curve. Save your darkest 4B marks for the doorway shadow underneath the awning, which anchors the whole corner.
Streets fall apart when every building front gets equal detail. Pick one wall to render with brick texture and let the rest stay as flat, lightly shaded blocks.
If you enjoy this kind of corner, there is a whole run of similar scenes in this cafe drawing list worth working through next.
Palette: Graphite Grey,Charcoal Black,Warm Grey
Bring a person into the mix with a girl reading cross-legged in a deep armchair. Block the armchair first as a big soft rectangle with rounded arms, then fit the figure into it rather than drawing the body first and squeezing furniture around her afterward.
Build the folded legs from simple overlapping ovals before any fabric fold goes on top, since crossed legs read correctly only when the underlying shapes overlap in the right order. Shade the chair’s deep cushions with a 2B in broad strokes, keeping the book itself almost white so it pops against the darker chair.
Faces are optional here: a simple profile or even a bowed head looking down at the book avoids the trickiest part of figure drawing while keeping the scene warm. For more sketchbook moments built around two people rather than one, the couple sketchbook list is worth a look.
Finish with a soft eraser pass along the chair’s arm to lift a highlight where light would naturally catch the worn fabric.
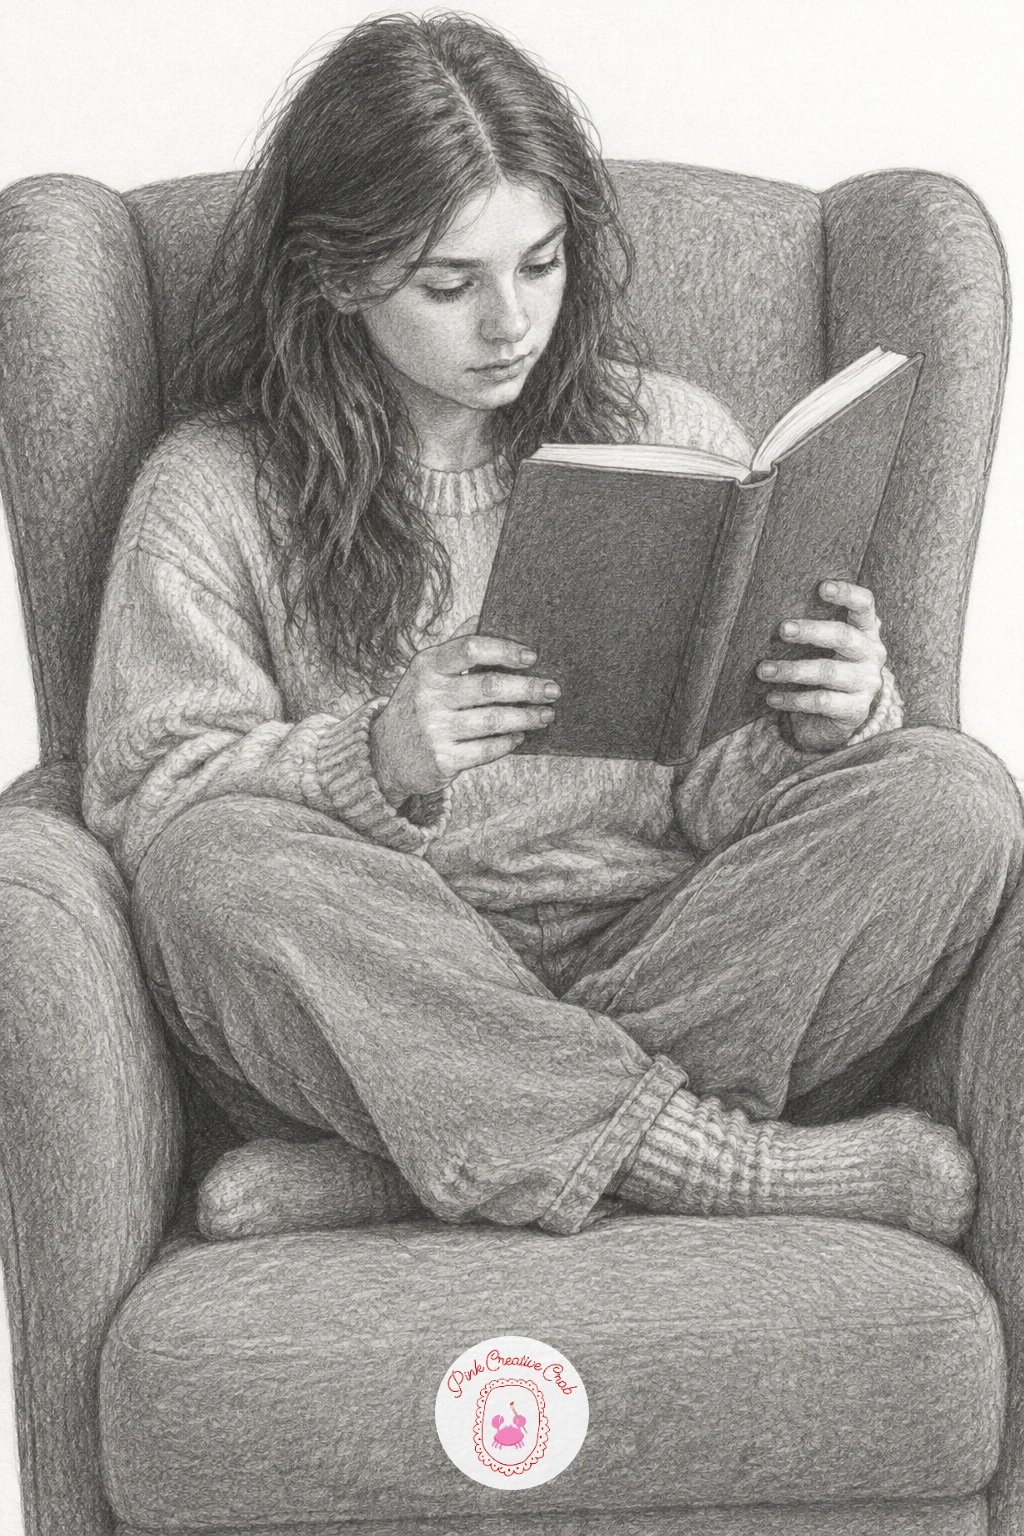
Palette: Graphite Grey,Soft Black,Paper White
Head to the water’s edge for an old wooden rowboat pulled up on a pebbly shore. Draw the boat’s hull as one long curved shape first, checking that the bow rises higher than the stern before you add a single plank line, since a flat hull is the fastest way to make a boat look broken.
Plank lines run parallel to the hull’s curve, not straight across it, so sketch them lightly with an HB and let them bend with the boat’s shape. Shade the inside of the hull darkest, since it falls into shadow, while the pebbles below stay a scatter of small varied ovals in a lighter 2B.
Boats often go wrong where the waterline meets the pebbles. Keep that edge soft and slightly uneven rather than one hard straight line, and it will settle into the beach convincingly.
No boat nearby? A wheelbarrow tipped on its side gives similar curved wood and the same shadow problem to solve.
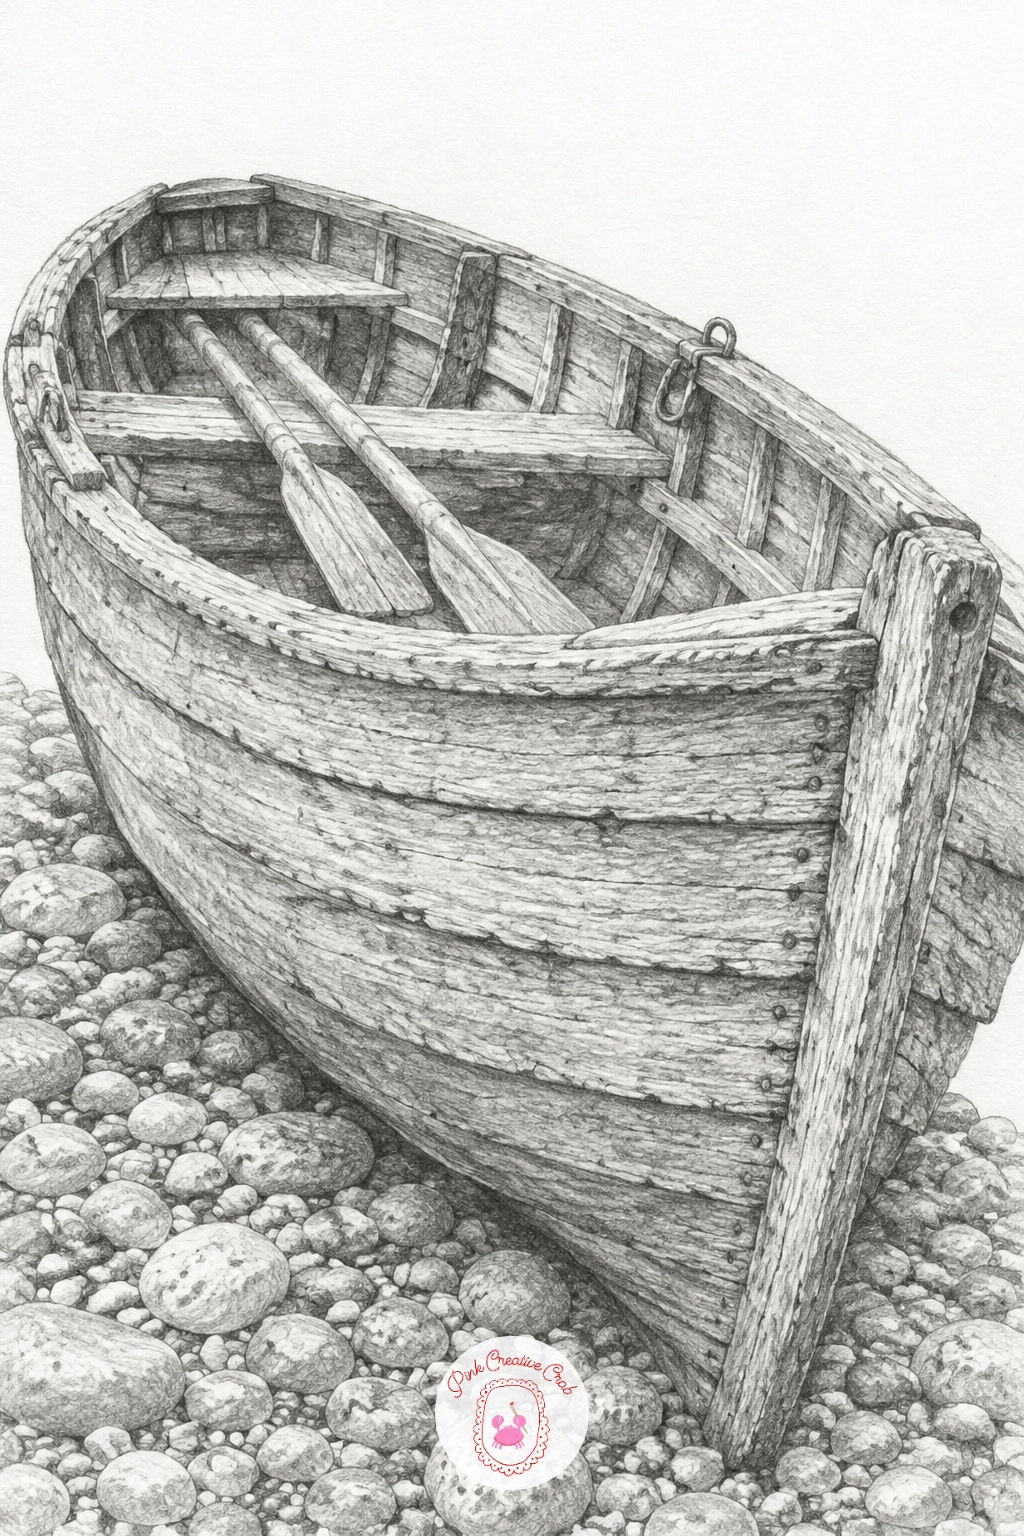
Palette: Graphite Grey,Charcoal Black,Warm Grey
Switch to a pair of worn canvas sneakers with untied laces, a favorite subject for practicing texture. Rough in each shoe as a simple wedge shape before the sole or laces go on, and compare the two shoes to each other as you draw so they end up a believable pair rather than two different sizes.
Shade the canvas upper with an HB in light even strokes, saving a 4B for the thick rubber sole and the deep crease where the toe bends. The loose laces are where this drawing comes alive: let them flop and cross messily rather than drawing them straight, with small dark dots for the eyelets they thread through.
The canvas fabric often ends up looking too smooth. A scribbly, slightly broken pencil stroke across the toe area reads as worn cotton far better than a flat tone does.
Working from real shoes on the floor, slightly apart and at a slight angle, beats any reference photo for getting the laces to fall naturally.
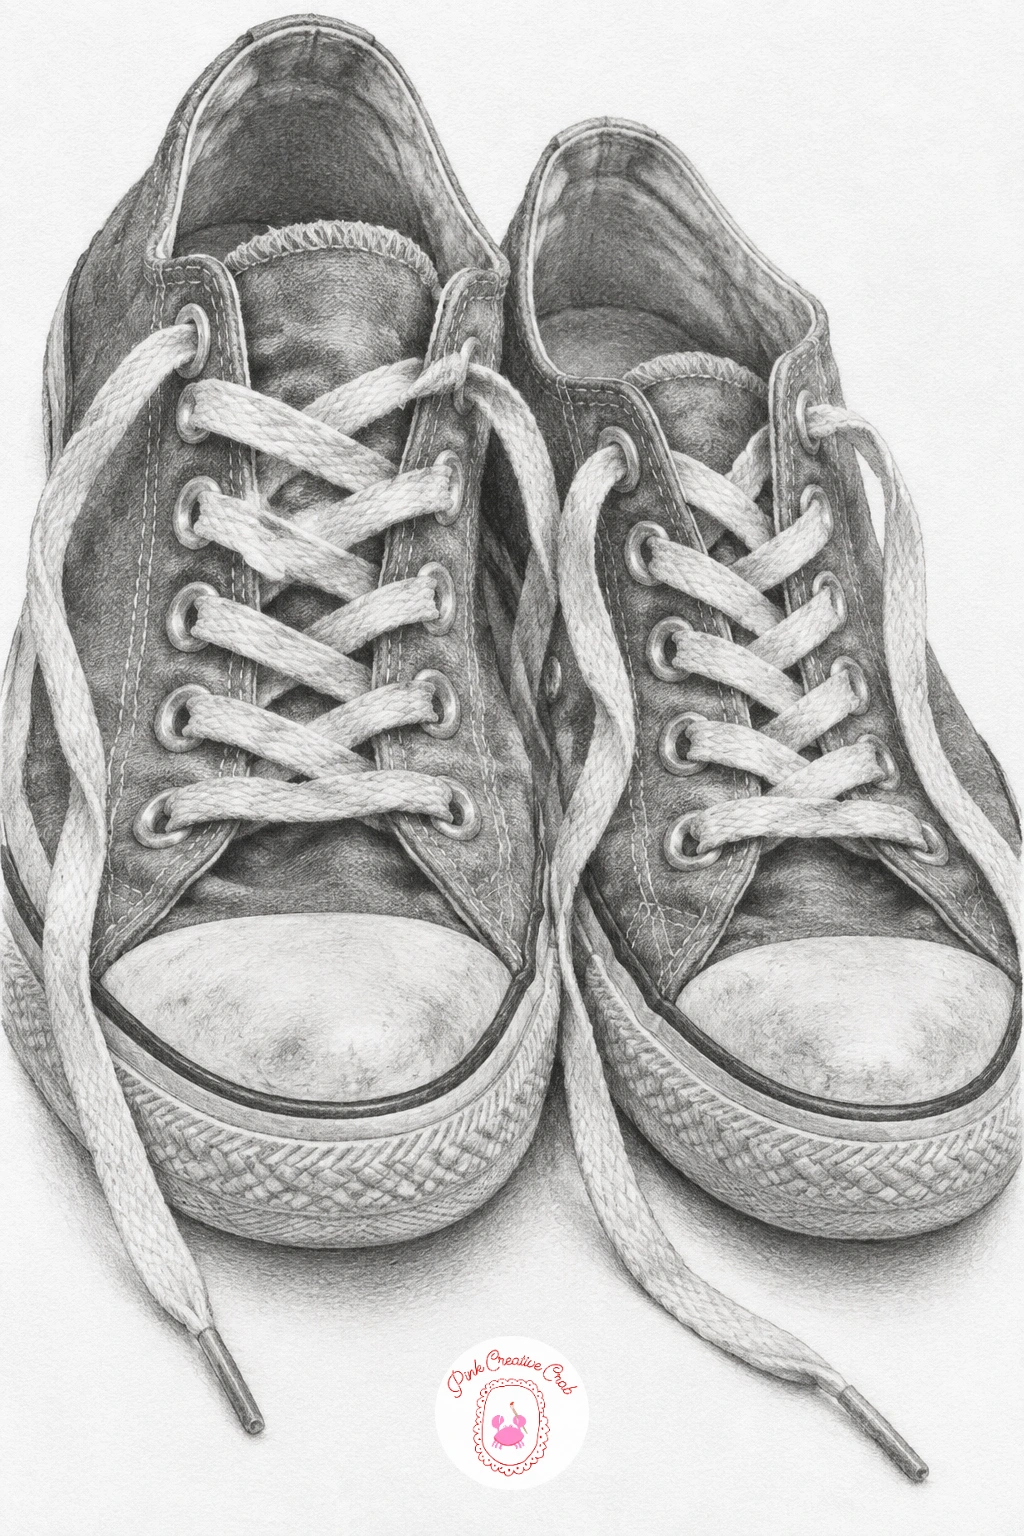
Palette: Graphite Grey,Soft Black,Paper White
Bring in some greenery with a potted monstera plant on a little wooden stool. Sketch the stool’s legs first using a ruler for straight lines, then build the pot as a simple trapezoid on top before a single leaf appears, since the plant only looks grounded if the furniture underneath it is solid.
Draw one big leaf shape at a time with an HB, cutting the splits into each leaf only after the outline is right, and vary the leaf sizes so the plant does not look like repeated stamps of the same shape. Shade each leaf with its vein running paler than the surrounding tone, using a 2B either side of a thin erased highlight line.
Monstera leaves can turn into a flat green blob in pencil. Push some leaves darker and further back, others lighter and closer, to give the whole plant some depth even in grey.
Any houseplant with big simple leaves, a rubber plant or a peace lily, works just as well if monstera is not nearby.
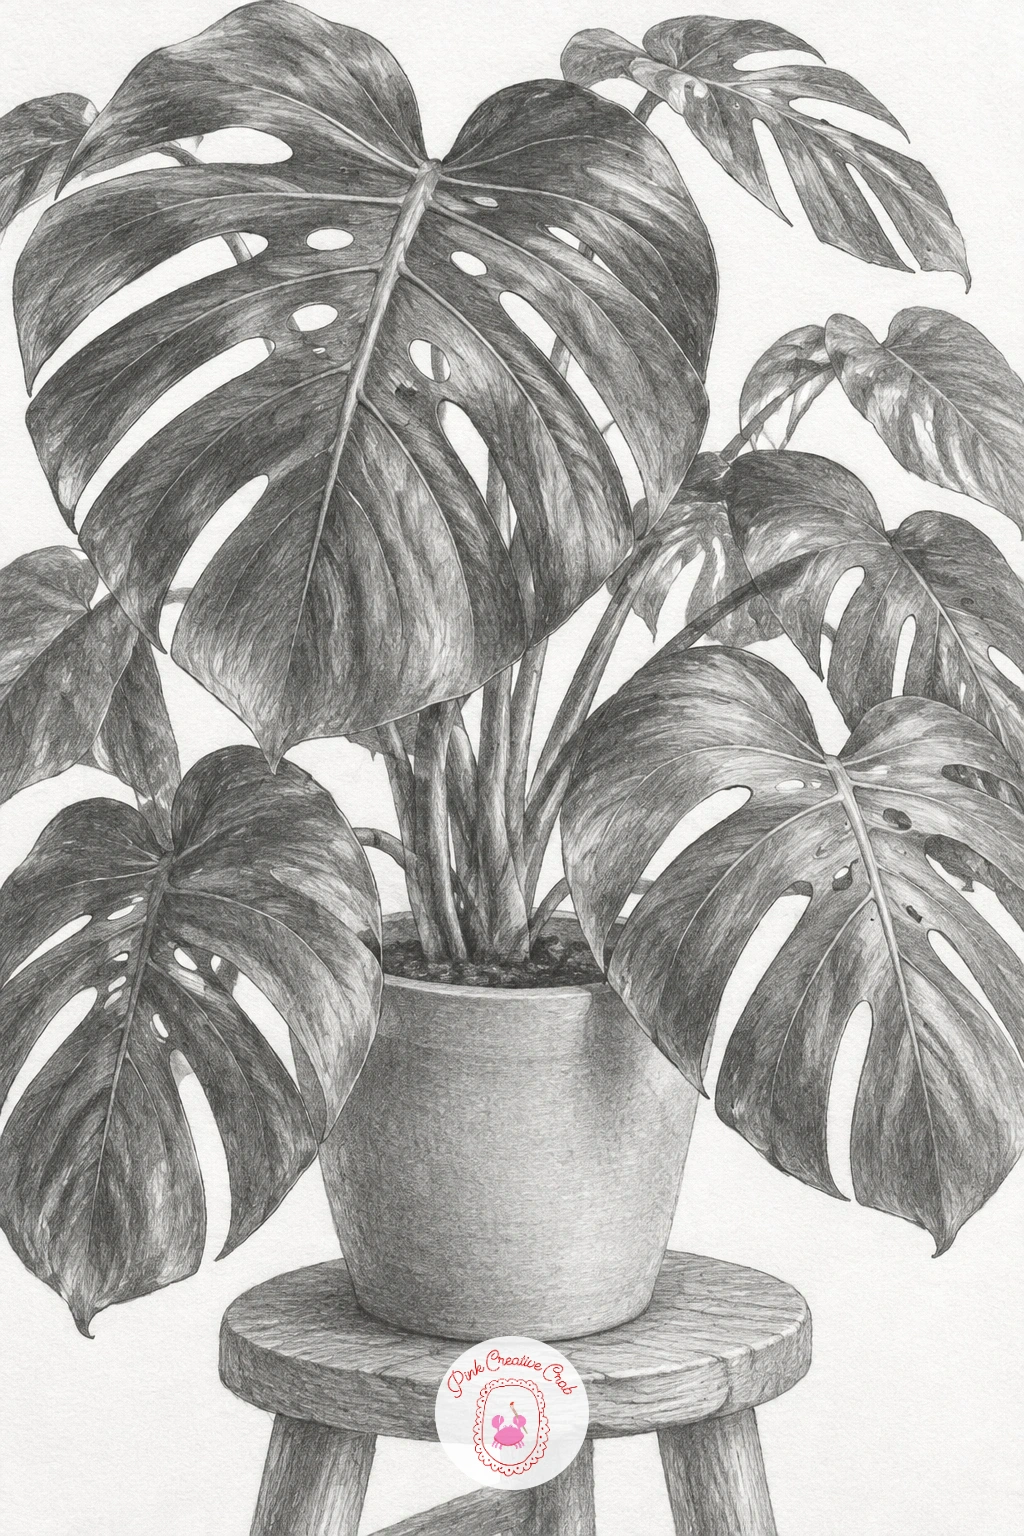
Palette: Graphite Grey,Charcoal Black,Warm Grey
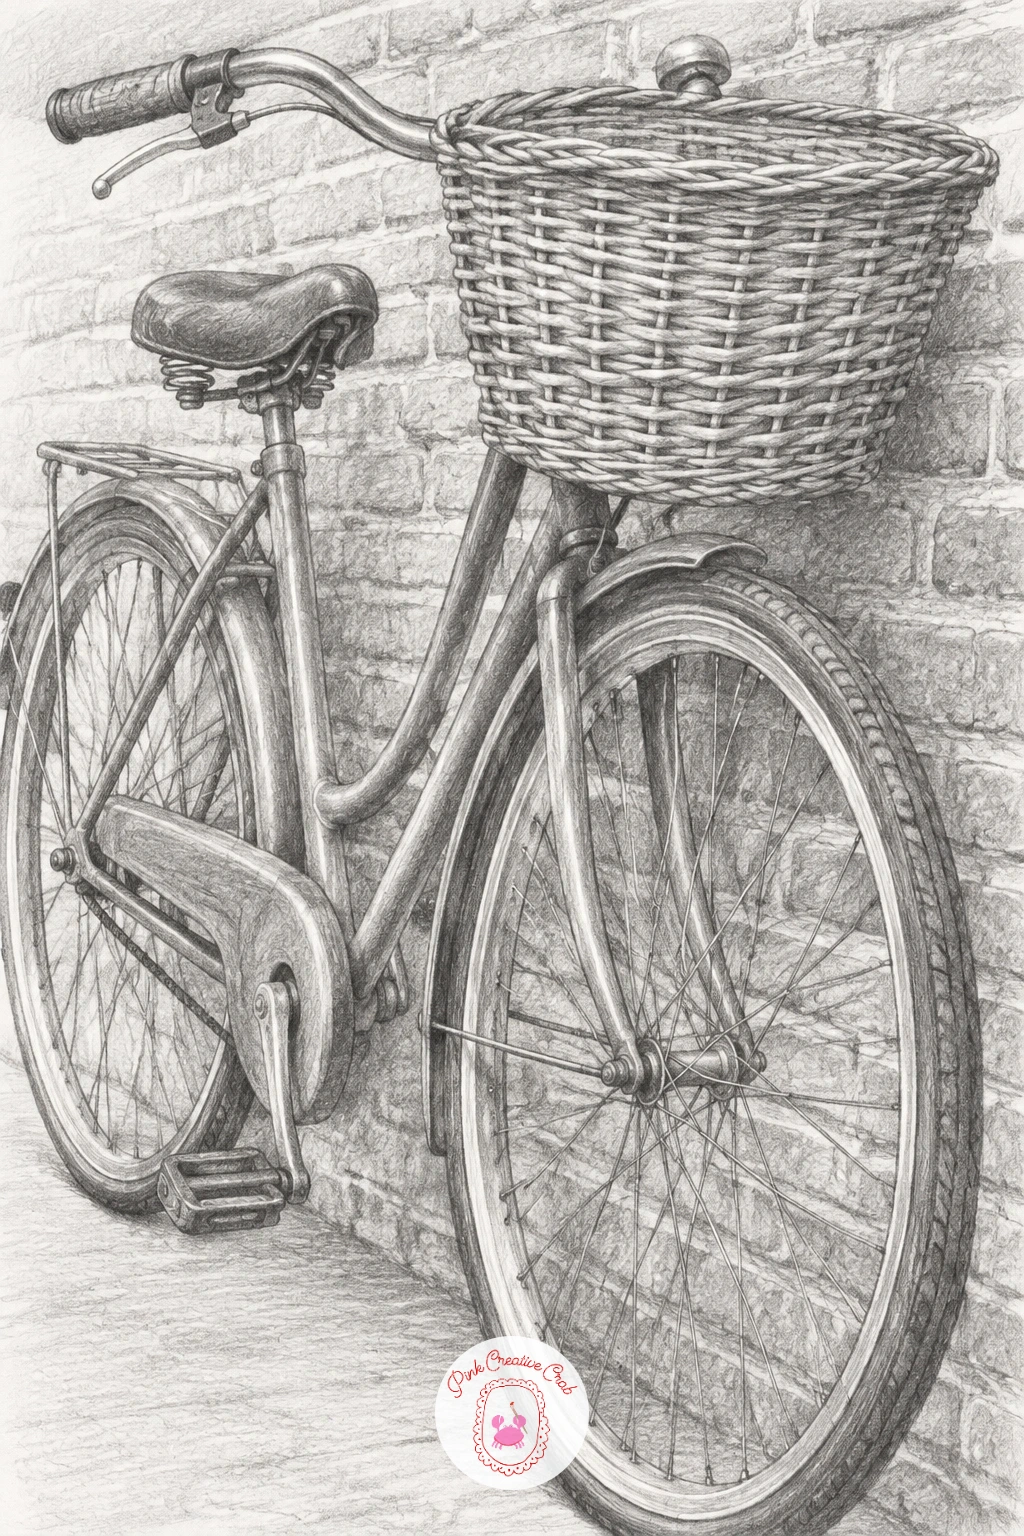
Roll on to a bicycle with a wicker basket leaning against a brick wall. Start with the two wheels as circles drawn with a compass or a round lid traced lightly, keeping them exactly the same size, since mismatched wheels are the single fastest way to make a bicycle sketch look wrong.
Connect the frame with straight ruled lines between the wheel centers, then add the basket on the handlebars as a simple woven texture built from short overlapping curved strokes rather than a perfect grid. Shade the brick wall behind with loose rectangular blocks in an HB, keeping it lighter than the bike so the bicycle stays the star of the page.
Spokes are the usual trap: drawing every single one makes the wheel look busy and flat. Four or five with a touch of smudged graphite between them reads as a full wheel from a normal viewing distance.
Lean the bike slightly against the wall rather than standing it perfectly upright, it instantly looks more at rest and less like a technical diagram.
Palette: Graphite Grey,Charcoal Black,Warm Grey
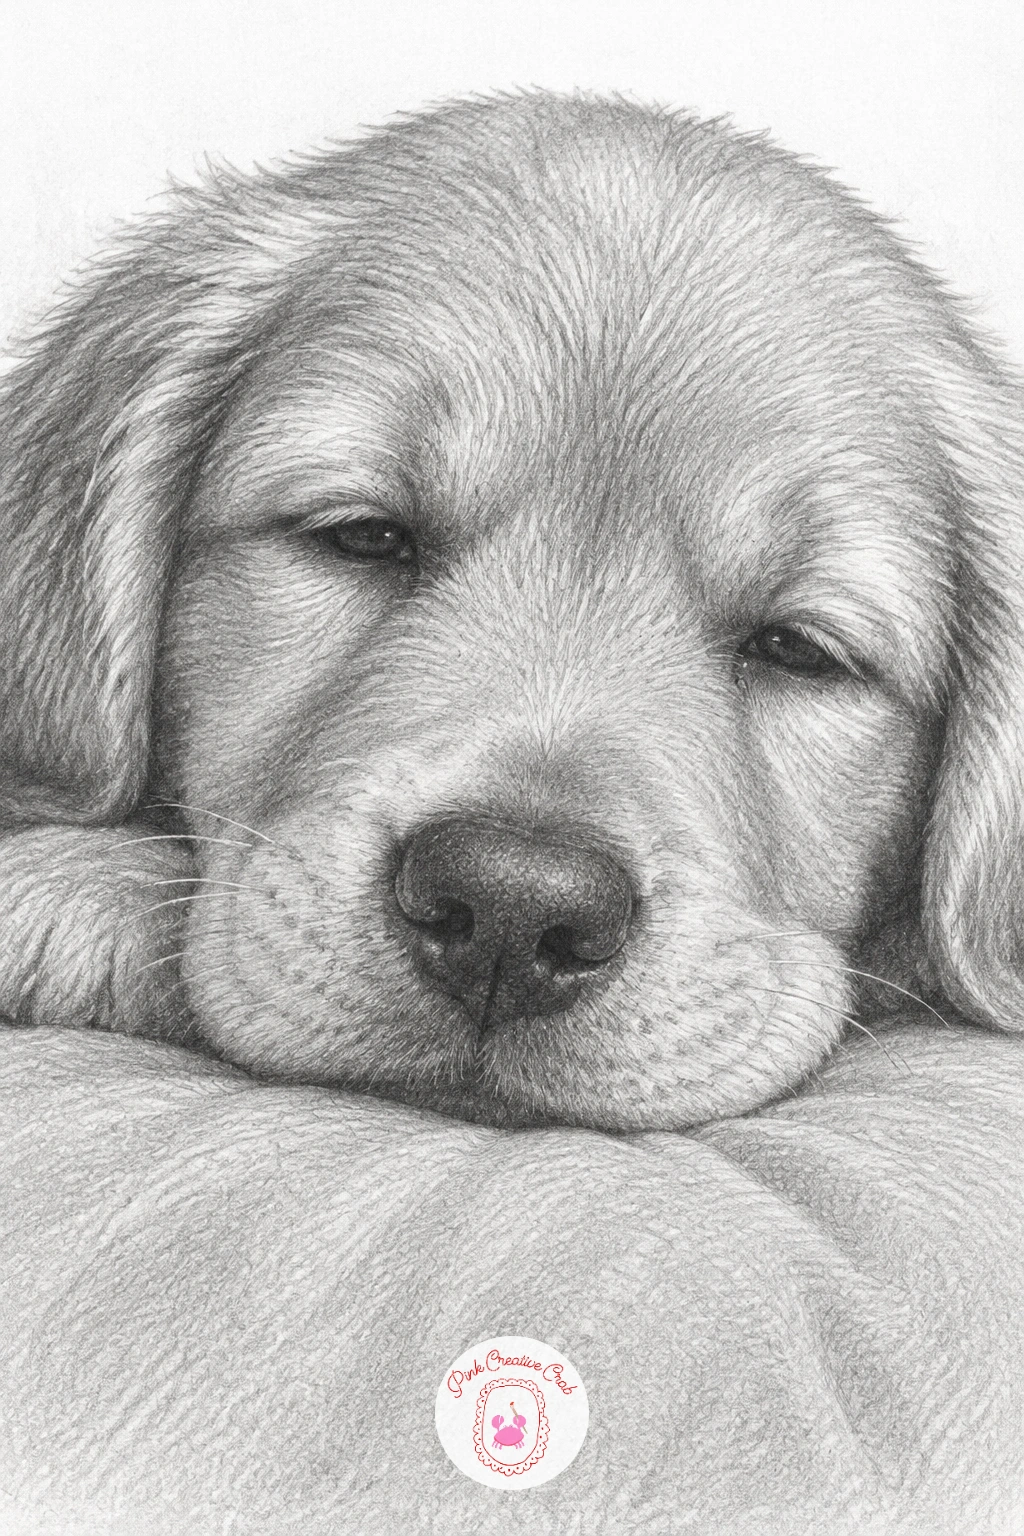
Back to animals for a sleepy puppy resting its chin on a cushion, a good one for practicing soft fur after the sharper edges of the bicycle. Block the head as a rounded wedge first, with the chin pressing a visible dent into the cushion beneath it, since that pressed dent is what makes the whole pose read as resting rather than floating.
Build fur with short flicking strokes that follow the direction it actually grows, darker 2B strokes around the ears and under the chin where shadow pools, lighter HB strokes along the top of the head where light catches. The eyes carry most of the puppy’s expression, so keep a tiny bright white dot of reflected light in each one and everything else can stay fairly loose.
Puppy fur often ends up looking scribbled rather than soft. Slow the stroke down and keep each pencil mark short and curved rather than one long scratchy line.
For more pet subjects at this gentle level, the cute animal sketching ideas for beginners list has plenty more to try.
Palette: Graphite Grey,Soft Black,Paper White
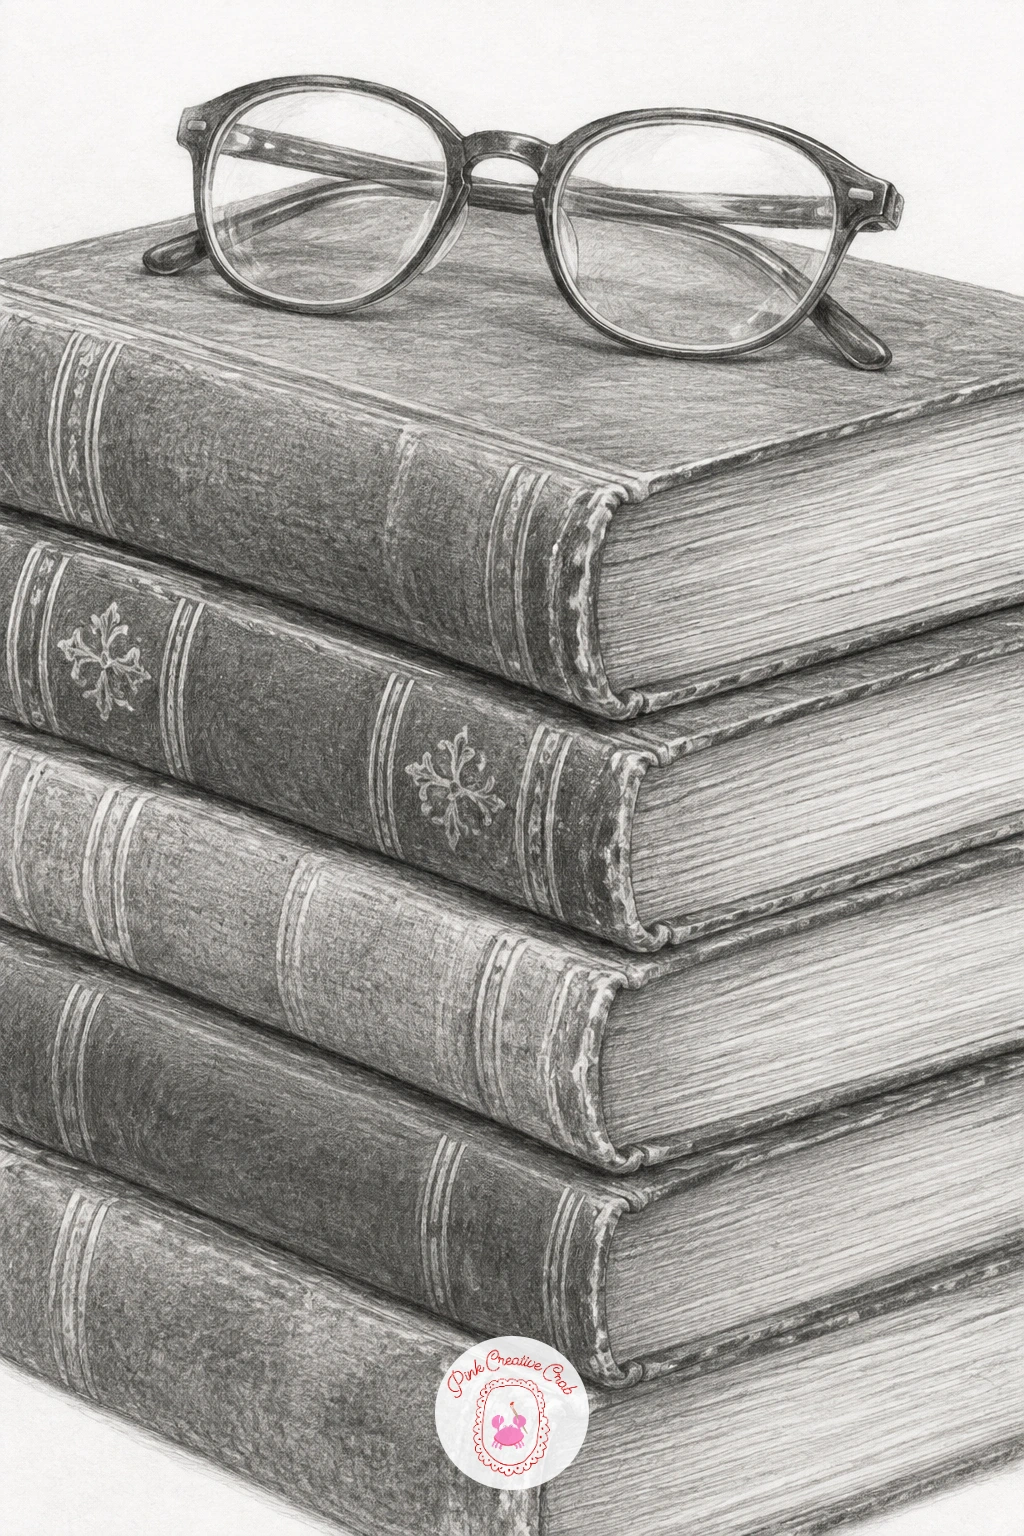
Settle into a stack of old hardback books with reading glasses resting on top, a satisfying subject for practicing straight edges and layered shadow. Draw each book as a simple rectangular block, slightly offset from the one below, and check that every spine lines up with the same vanishing point so the stack does not look like it is leaning off the page.
Shade the side of each book cover darker than its top with an HB, since that contrast between top and side is what gives each book its own weight sitting on the pile. The reading glasses on top need the thinnest lines in the whole drawing, just the lens rims and a couple of reflected highlights left as untouched white paper.
Book covers often come out flat and plasticky. A slightly rougher, uneven pencil texture along the worn corners and spine edges instead of a smooth fill makes them read as old and well used.
Stack the books slightly unevenly rather than in a perfectly neat tower, it gives the whole pile more personality on the page.
Palette: Graphite Grey,Charcoal Black,Warm Grey
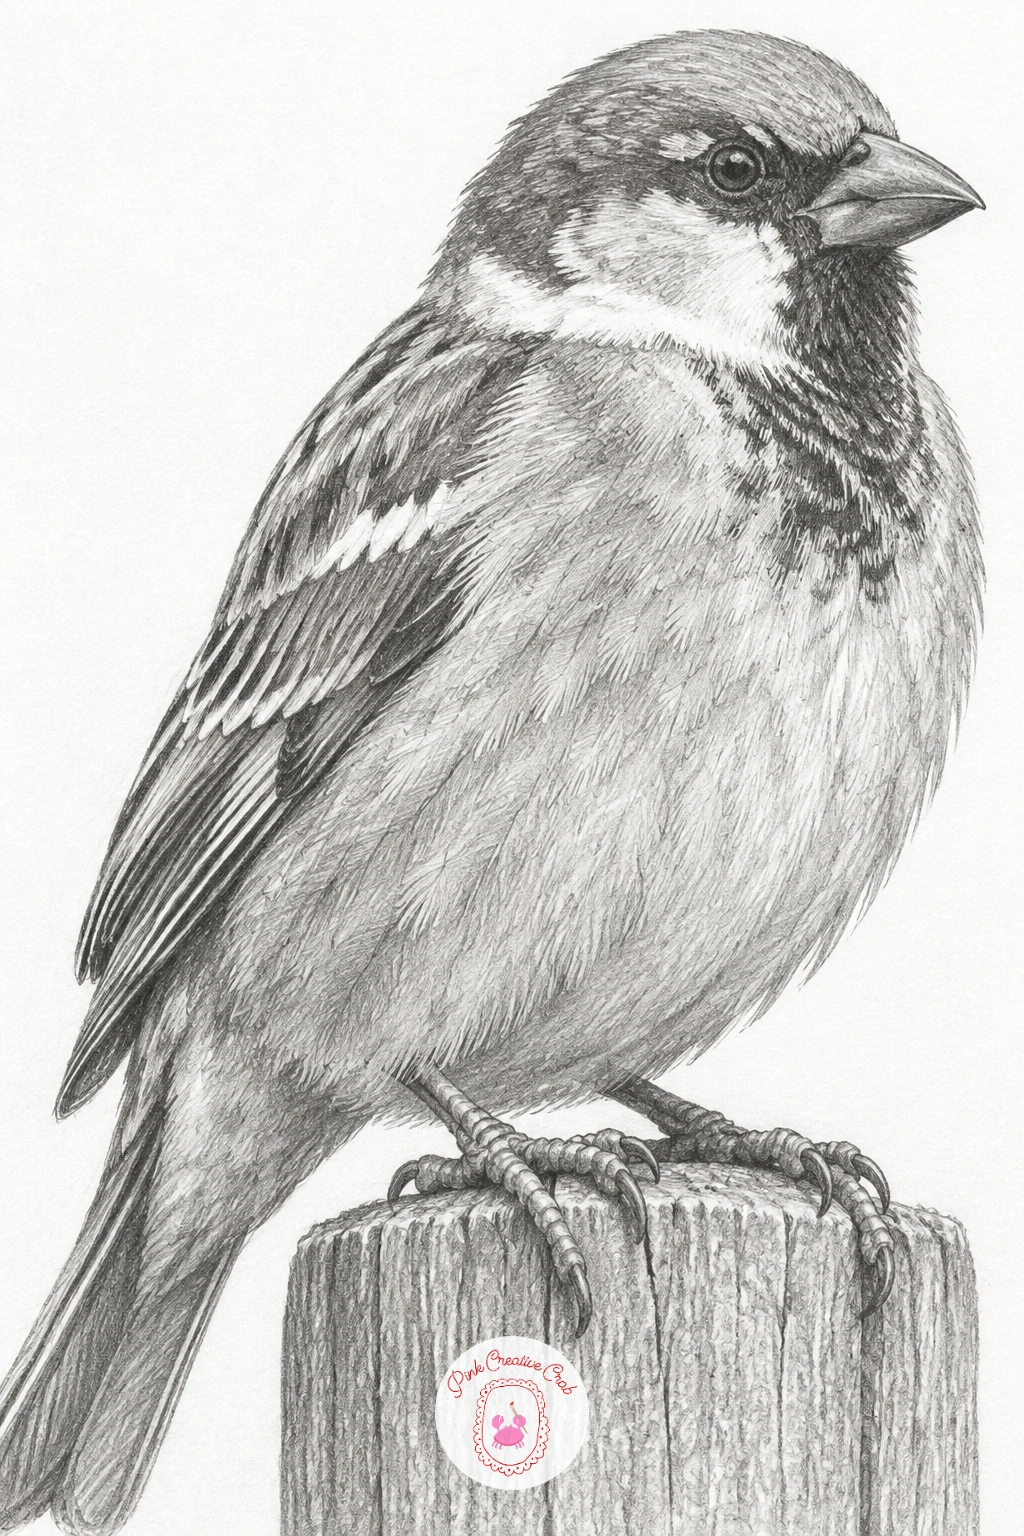
Move outdoors again for a sparrow perched on a garden fence post, small and quick but easy to get wrong in the proportions. Sketch the body as one rounded triangle first, then compare the head’s width to the body, a sparrow’s head is noticeably smaller than its puffed up chest, before any feather detail goes near the page.
Shade the wing feathers in overlapping short strokes with an HB, each one slightly darker at its tip, layered like roof tiles rather than drawn as separate floating lines. The fence post underneath needs straight ruled edges and a 2B for its weathered grain, giving the soft bird something solid and textured to perch against.
Bird feet are the usual sticking point. Keep the toes simple, just three thin curved lines gripping the post, rather than trying to render every joint.
Working from a photograph of a perched bird rather than a flying one makes the proportions far easier to check and copy accurately.
Palette: Graphite Grey,Soft Black,Warm Grey
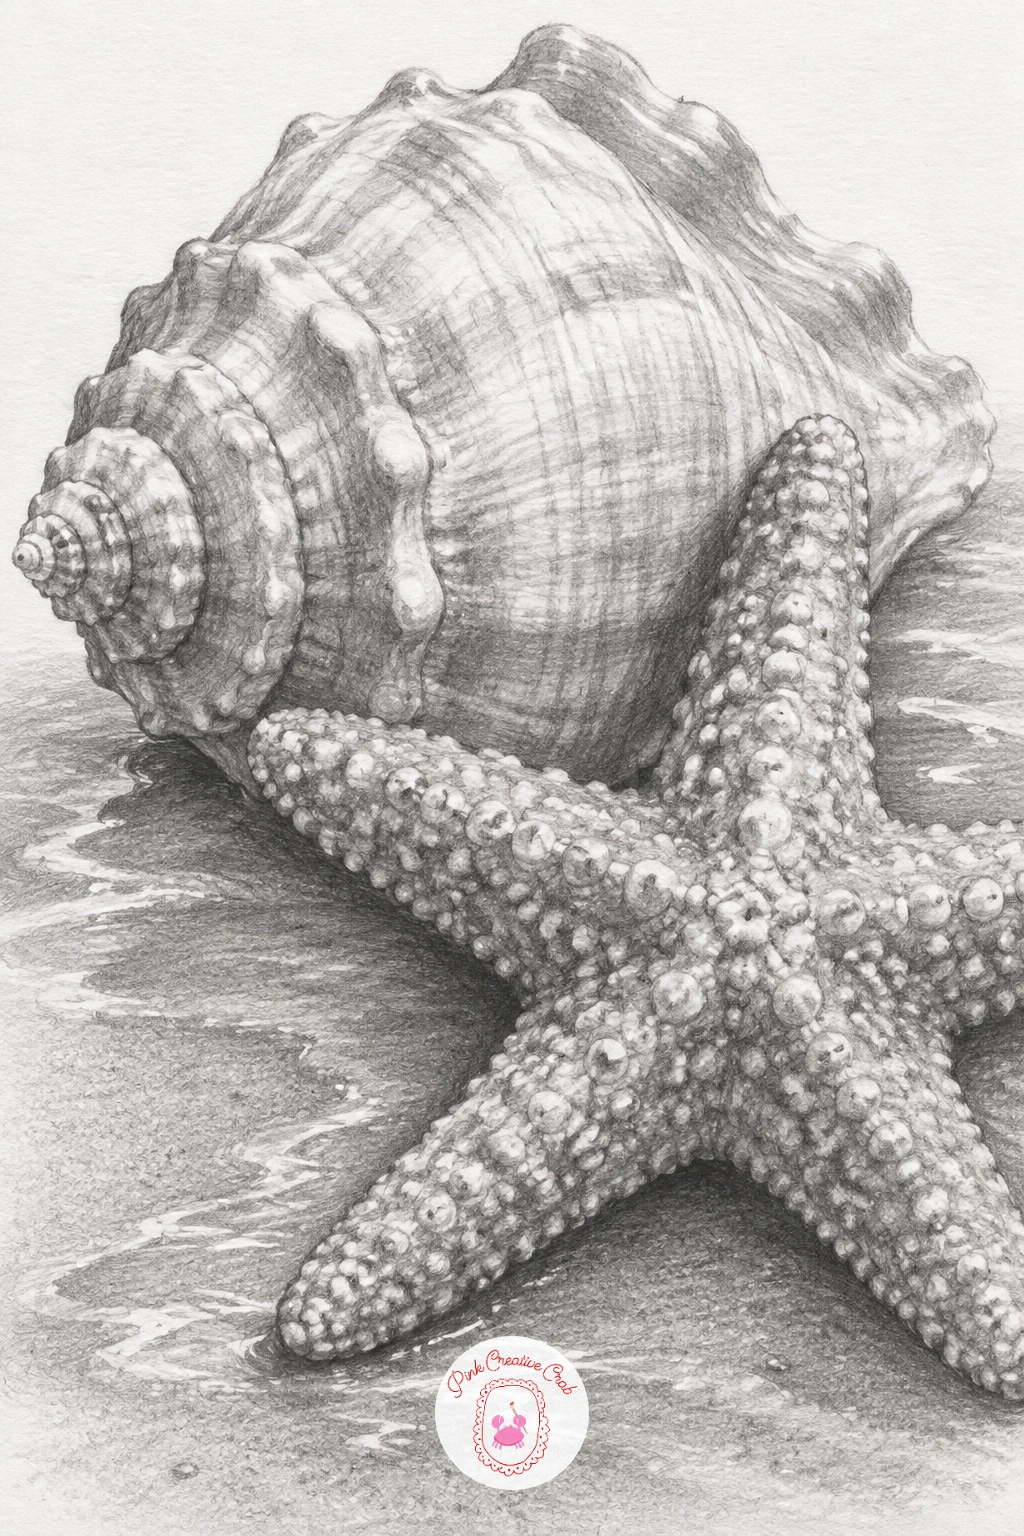
Head to the shoreline for a seashell and a starfish lying together on wet sand. Draw the shell’s spiral first with a light continuous HB line before adding its ridges, since the spiral’s curve has to feel continuous or the whole shell looks pinched. The starfish next to it is really just five tapering arms built from one rounded center, so keep them slightly uneven in length rather than perfectly symmetrical.
Shade the wet sand around both with a very light, even 2B tone, leaving small scattered white flecks untouched for the wet shine, and darken the sand directly under each object to seat them firmly on the ground.
The shell’s ridges are where sketches often overwork themselves. Draw only the main ridge lines with real conviction and let the smaller ones fade out toward the shell’s edge.
No beach finds on your desk? Any curled pasta shell and a small rubber starfish toy give the same shapes to study up close.
Palette: Graphite Grey,Charcoal Black,Paper White
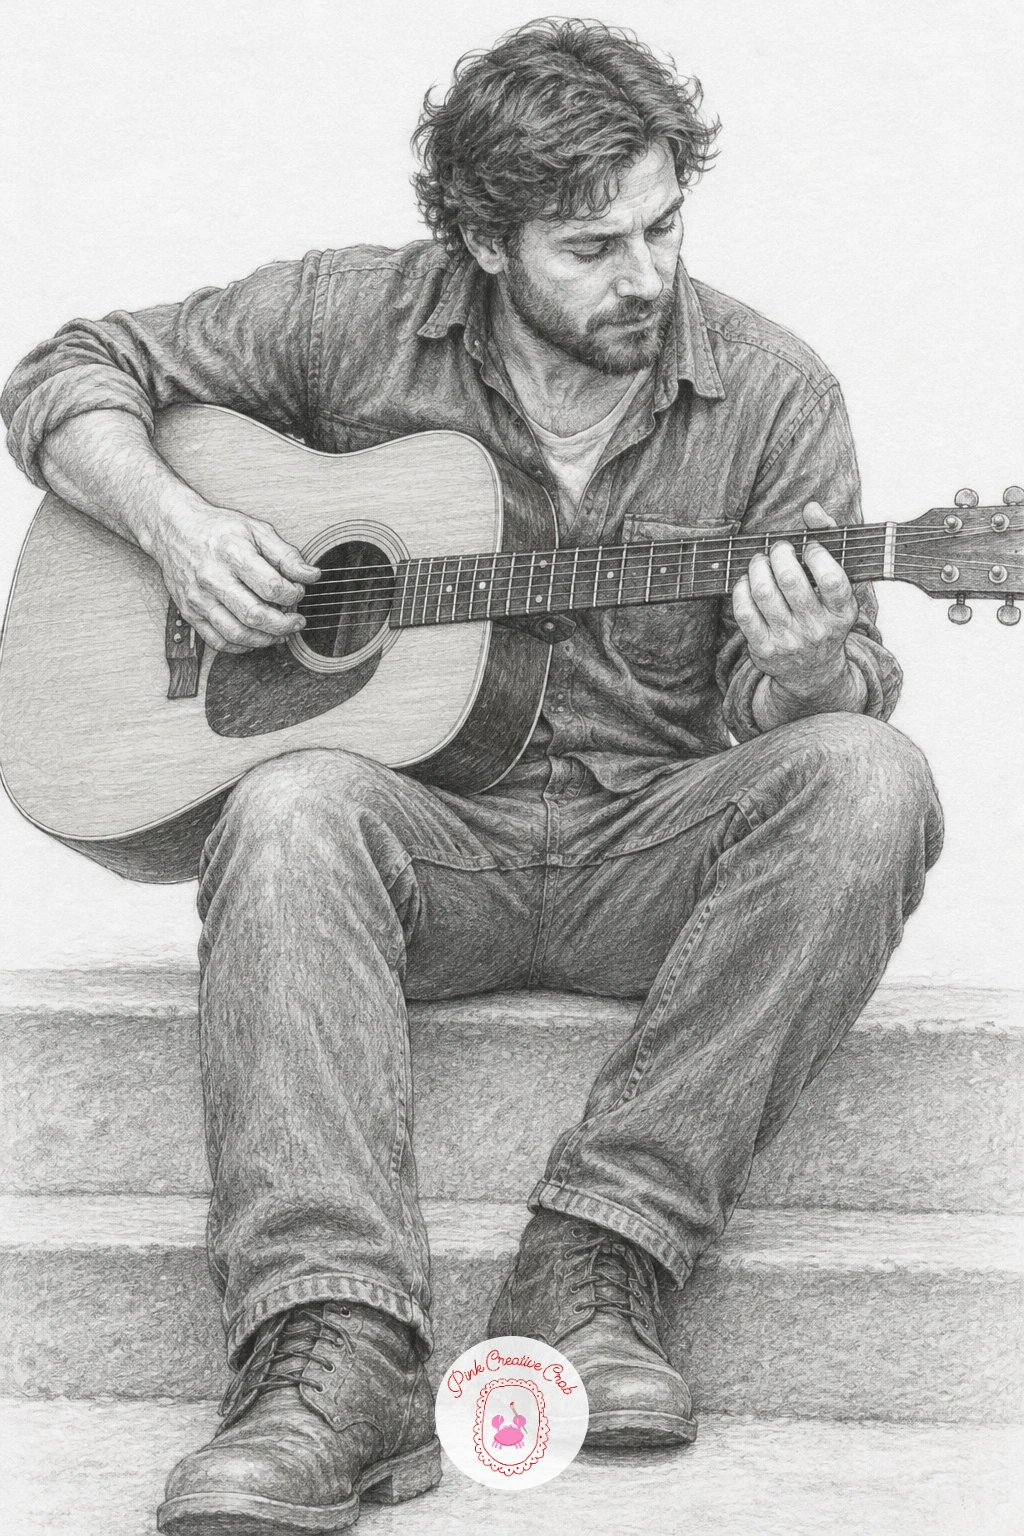
Bring a figure back in with a man playing an acoustic guitar seated on a front step. Block the guitar’s body as a simple figure eight shape first, angled across the lap, and fit the man’s arms and hands around that shape rather than drawing the body first and forcing the guitar to match afterward.
Shade the guitar’s rounded body with an HB in one smooth gradient from light to dark across its curve, which is what makes it read as rounded wood rather than a flat cutout. The fretting hand on the neck is the hardest part: keep the fingers slightly curled and overlapping rather than spread flat, and do not worry about drawing every string, three or four light vertical lines are enough.
Seated figures often end up with legs that look too short. Measure the thigh against the guitar’s body width before committing to the leg’s length.
If figures playing instruments interest you, there is a lot more of this kind of quiet human moment in the sketchbook prompts list.
Palette: Graphite Grey,Soft Black,Warm Grey
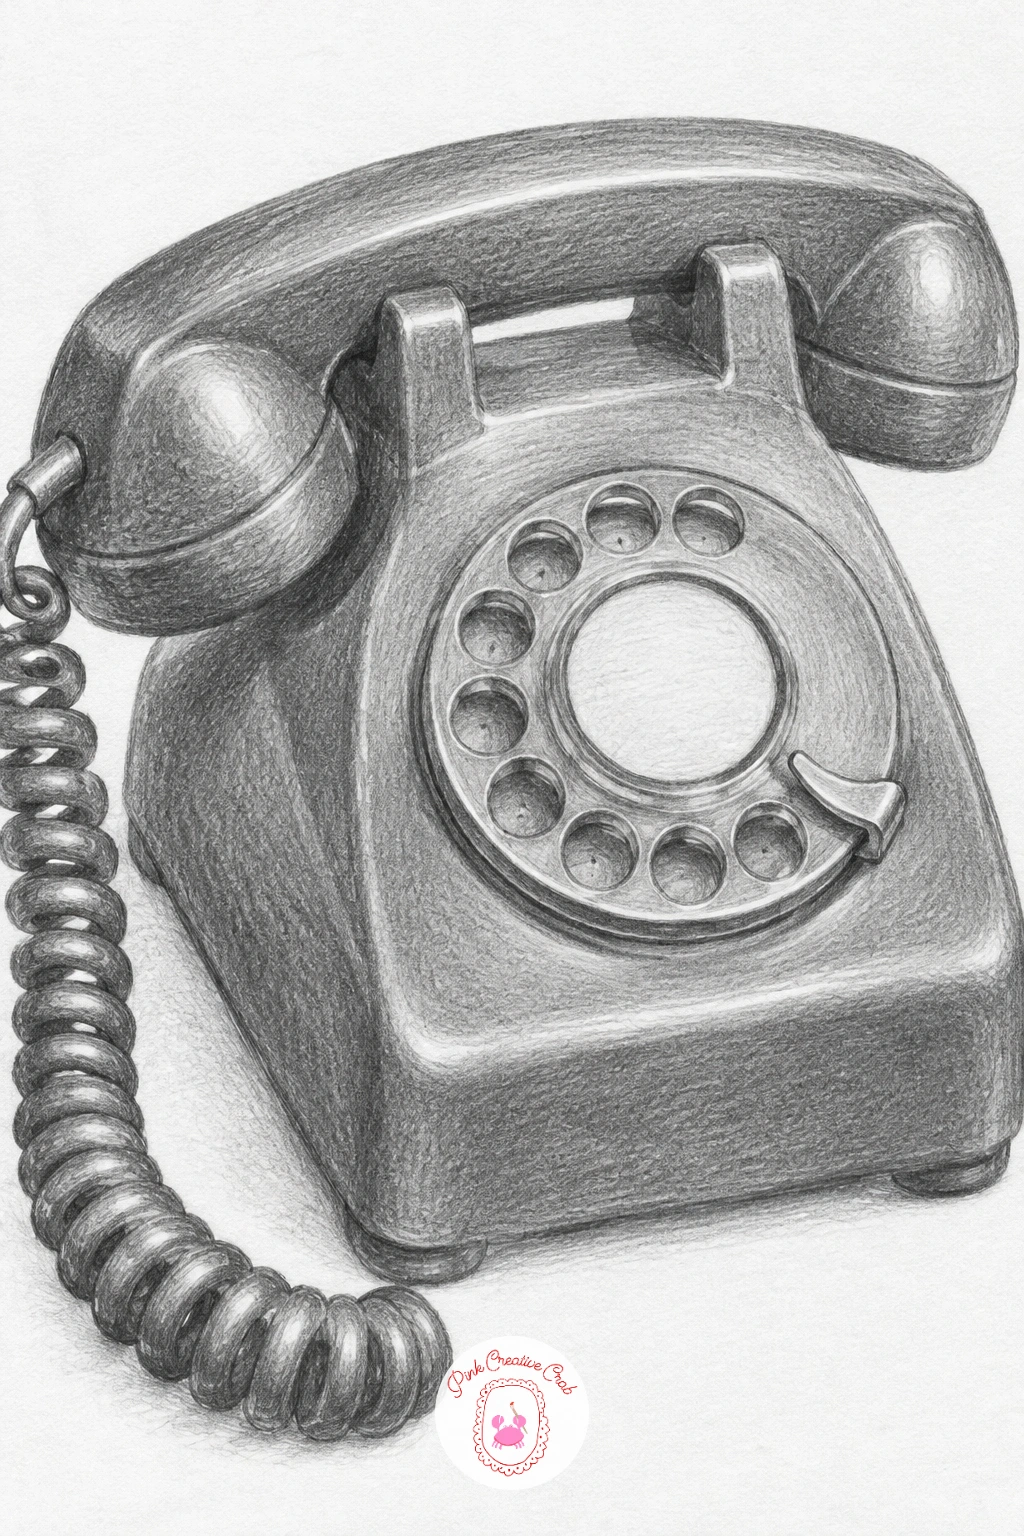
Settle back into an object with a vintage rotary telephone resting on a side table. Build the main body as a simple rounded block first, then add the handset on top as two curved ends joined by a thinner middle bar, checking that both ends of the handset match in size before any shading begins.
Shade the body with an HB in one even gradient, then push a 2B into the dial’s recessed numbers area, where the deepest shadow in the whole object usually sits. The coiled cord trailing from the handset is the most satisfying part: draw it as a loose spring of overlapping loops rather than a straight line, getting looser and more relaxed as it nears the table.
Round dials often come out looking oval if drawn freehand. Trace a small coin or bottle cap for the outer dial ring to keep it properly circular.
No rotary phone around? An old kettle with a curved spout and handle gives similar rounded metal shapes to practice on.
You Will Need
- a small round object like a coin or bottle cap to trace the dial
Palette: Graphite Grey,Charcoal Black,Warm Grey
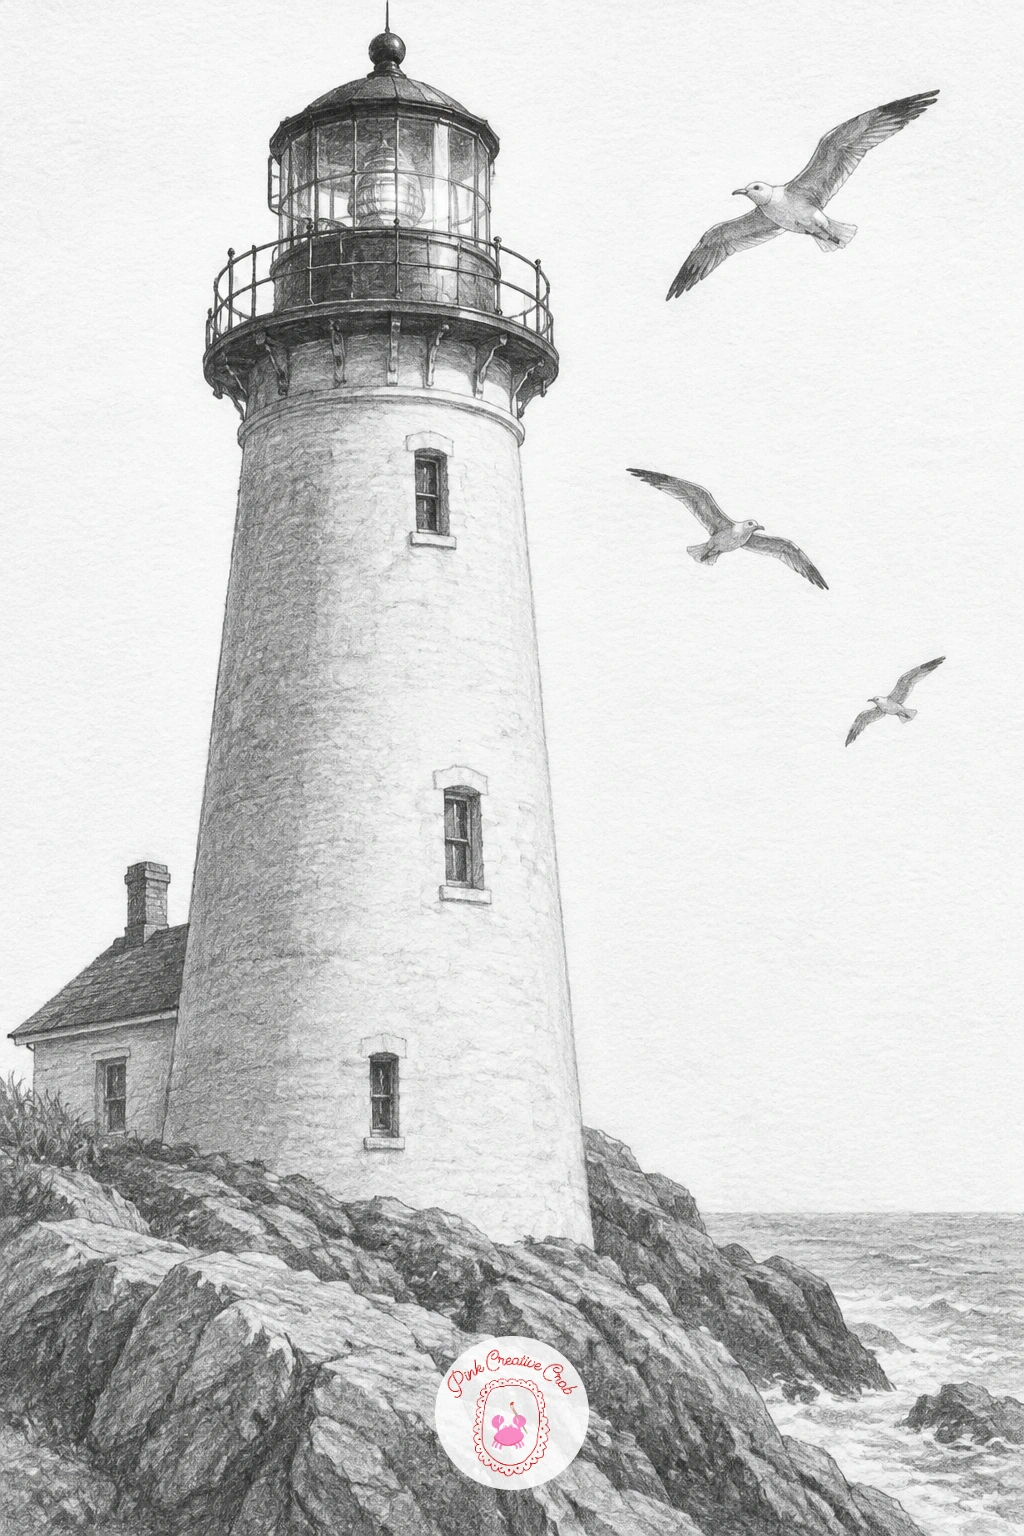
Widen out to a small building with a lighthouse standing on a rocky point, gulls circling overhead. Draw the tower first as a tall tapering cylinder, narrower at the top than the base, and mark the horizon line before adding a single rock, since the lighthouse’s height only reads correctly against a clear sea line behind it.
Shade the tower in horizontal bands with an HB, alternating a slightly lighter and darker tone to suggest the painted stripes many lighthouses carry, then switch to a 2B for the jagged rocks below, keeping their edges angular and sharp rather than smooth like pebbles. The gulls overhead are just a handful of simple w shapes, kept small and loose in the sky.
Lighthouses often end up looking too thin and wobbly. Rule a faint center guideline straight up through the tower before you shade, and check both sides stay even against it.
Keep the sky almost entirely untouched white paper, it makes the dark tower and rocks stand out far more than any shading there would.
Palette: Graphite Grey,Charcoal Black,Paper White
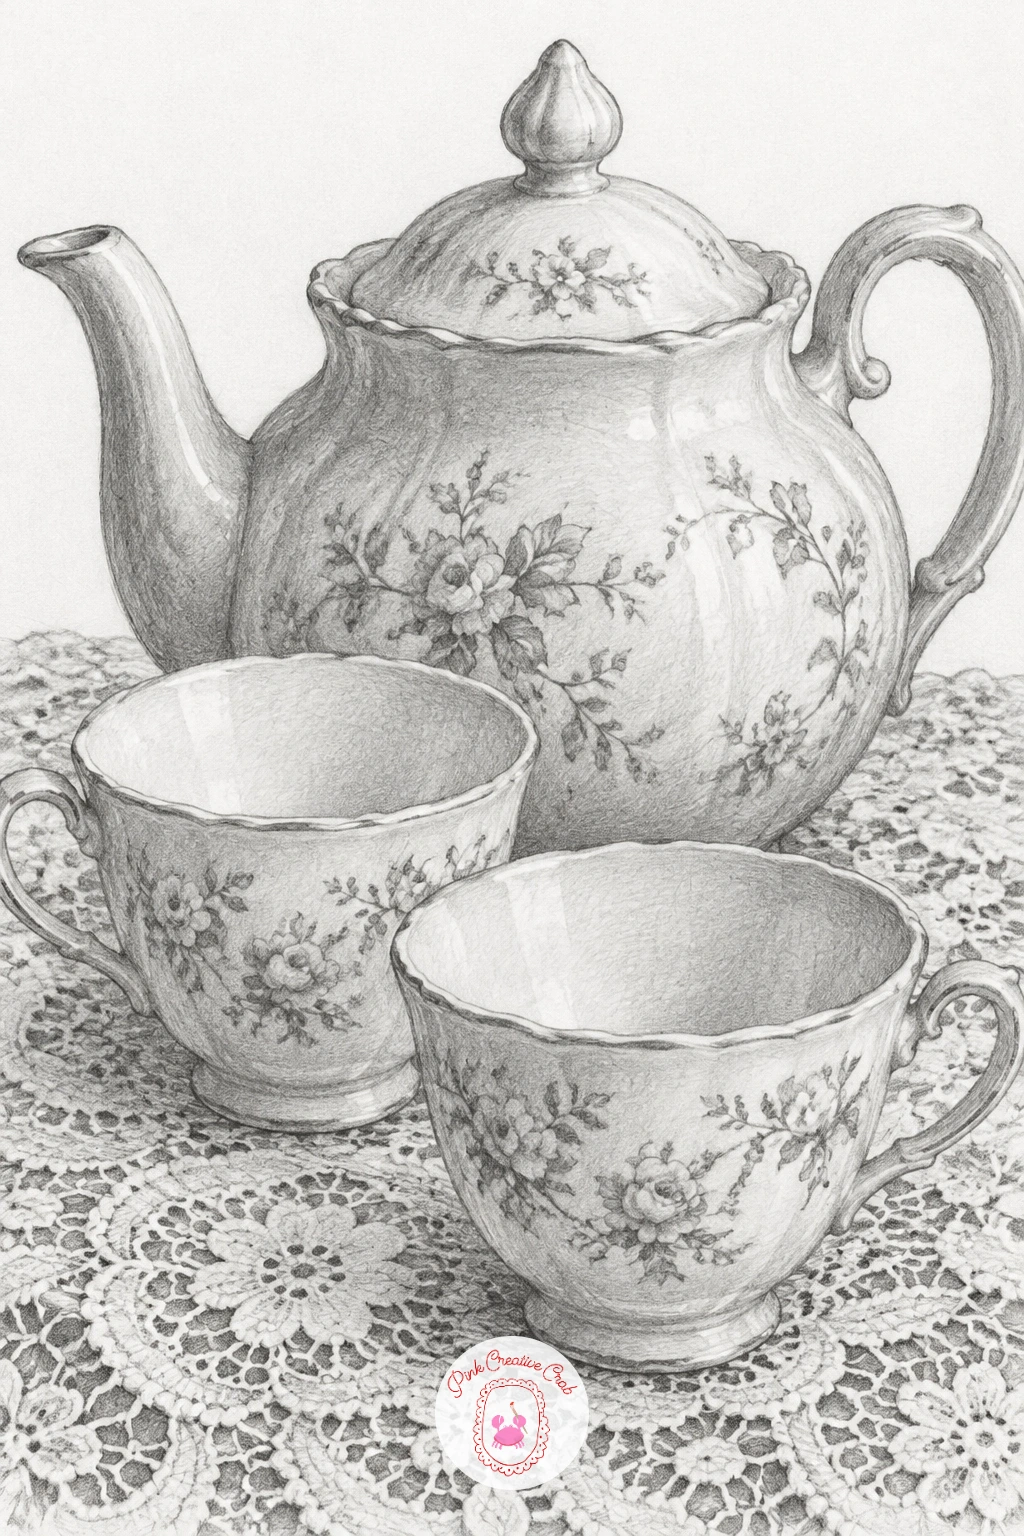
Return indoors for a teapot and two teacups set on a lace tablecloth, a lovely subject for practicing curves and fine pattern. Draw the teapot’s rounded body first as a single confident oval, adding the spout and handle only once that main shape feels balanced, since a lopsided pot body cannot be fixed by a nicely drawn spout.
Shade the pot’s curve with an HB in one smooth sweep, leaving a vertical highlight strip where light catches the china, then do the same smaller version for each teacup. The lace tablecloth underneath is the trickiest part: rather than drawing every hole in the pattern, suggest it with small clusters of dots and tiny curved marks concentrated near the edge closest to the viewer, fading out further back.
China often looks too heavy in pencil if every edge gets the same weight. Keep the rims of the cups drawn with a lighter touch than the shadowed base, and the whole set will feel more delicate.
For more cozy tabletop scenes like this, the watercolor and ink list is worth a browse even if you are sticking with pencil.
Palette: Graphite Grey,Soft Black,Paper White
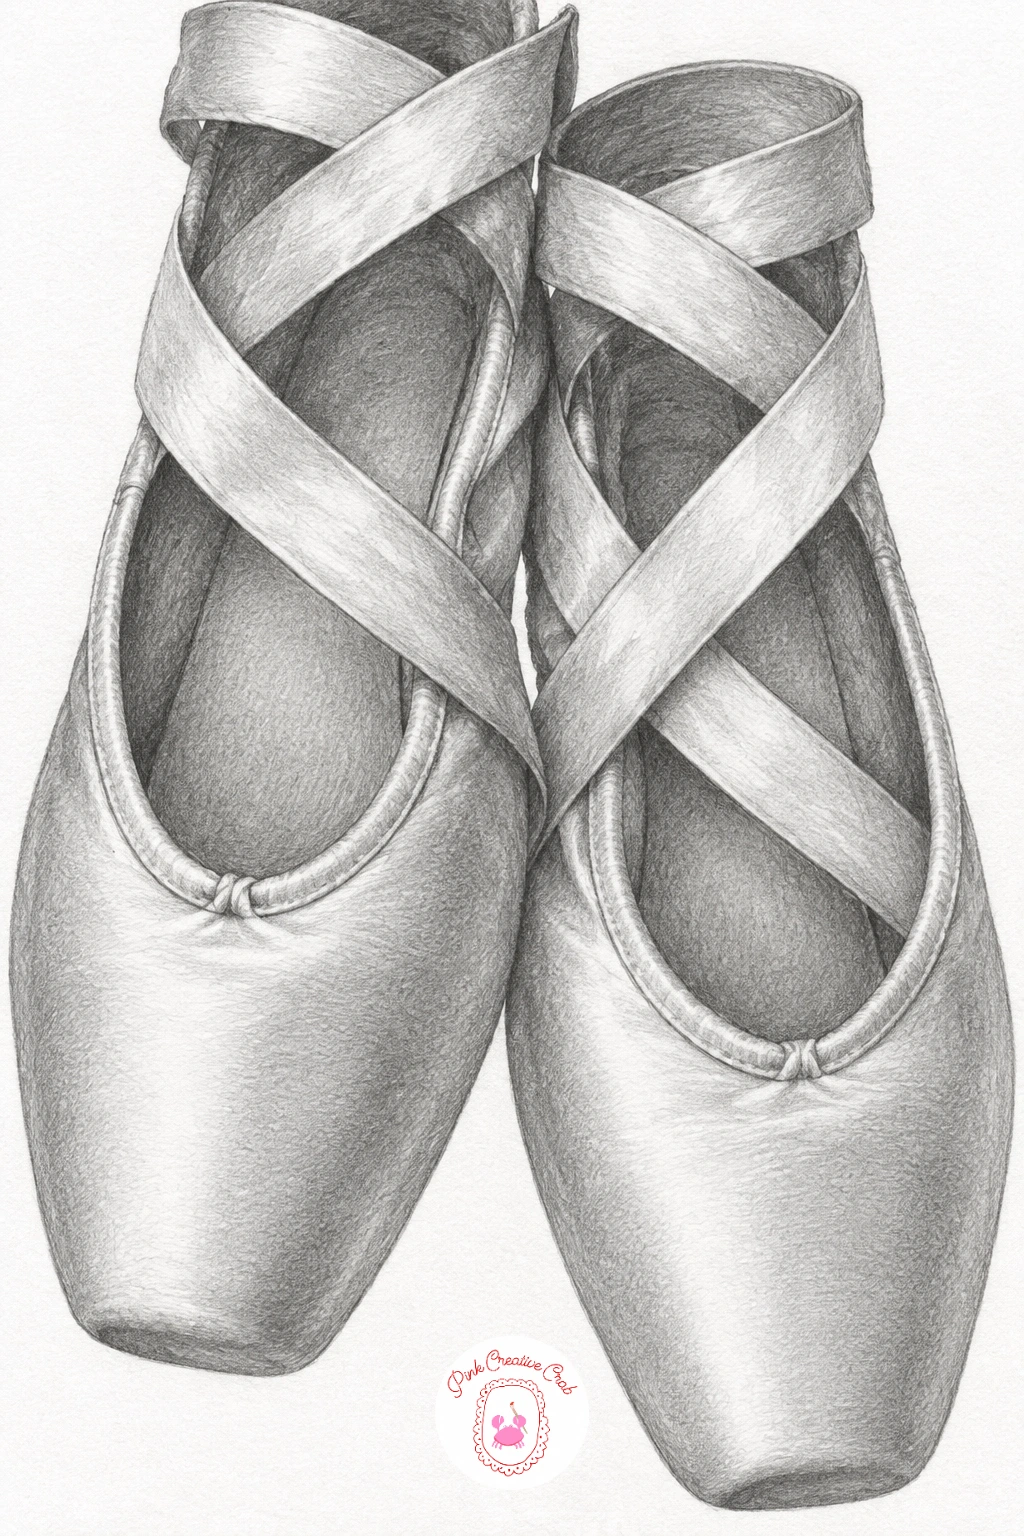
Turn to a pair of ballet shoes with their ribbons crossed, a lovely study in soft satin and fine lines. Block each shoe as a simple rounded wedge shape first, matching the two shoes in size and angle before any ribbon is added, since mismatched shoes are obvious even to a casual glance.
Shade the satin upper with an HB using very light even strokes, since satin reads as smooth through subtle gradient rather than texture, then pick out one or two sharp highlight strips left as bare paper where the fabric catches light directly. The ribbons crossing over each other need careful overlap: draw the ribbon that passes in front completely before adding the one behind, rather than trying to weave both at once.
Satin shoes can end up looking stiff and papery. Keep the shading gradient very gradual with no hard lines inside the shoe’s body, only at its outer edge.
If you do not have ballet shoes handy, a pair of soft fabric slippers gives the same smooth curved surface to practice shading.
Palette: Graphite Grey,Soft Black,Paper White
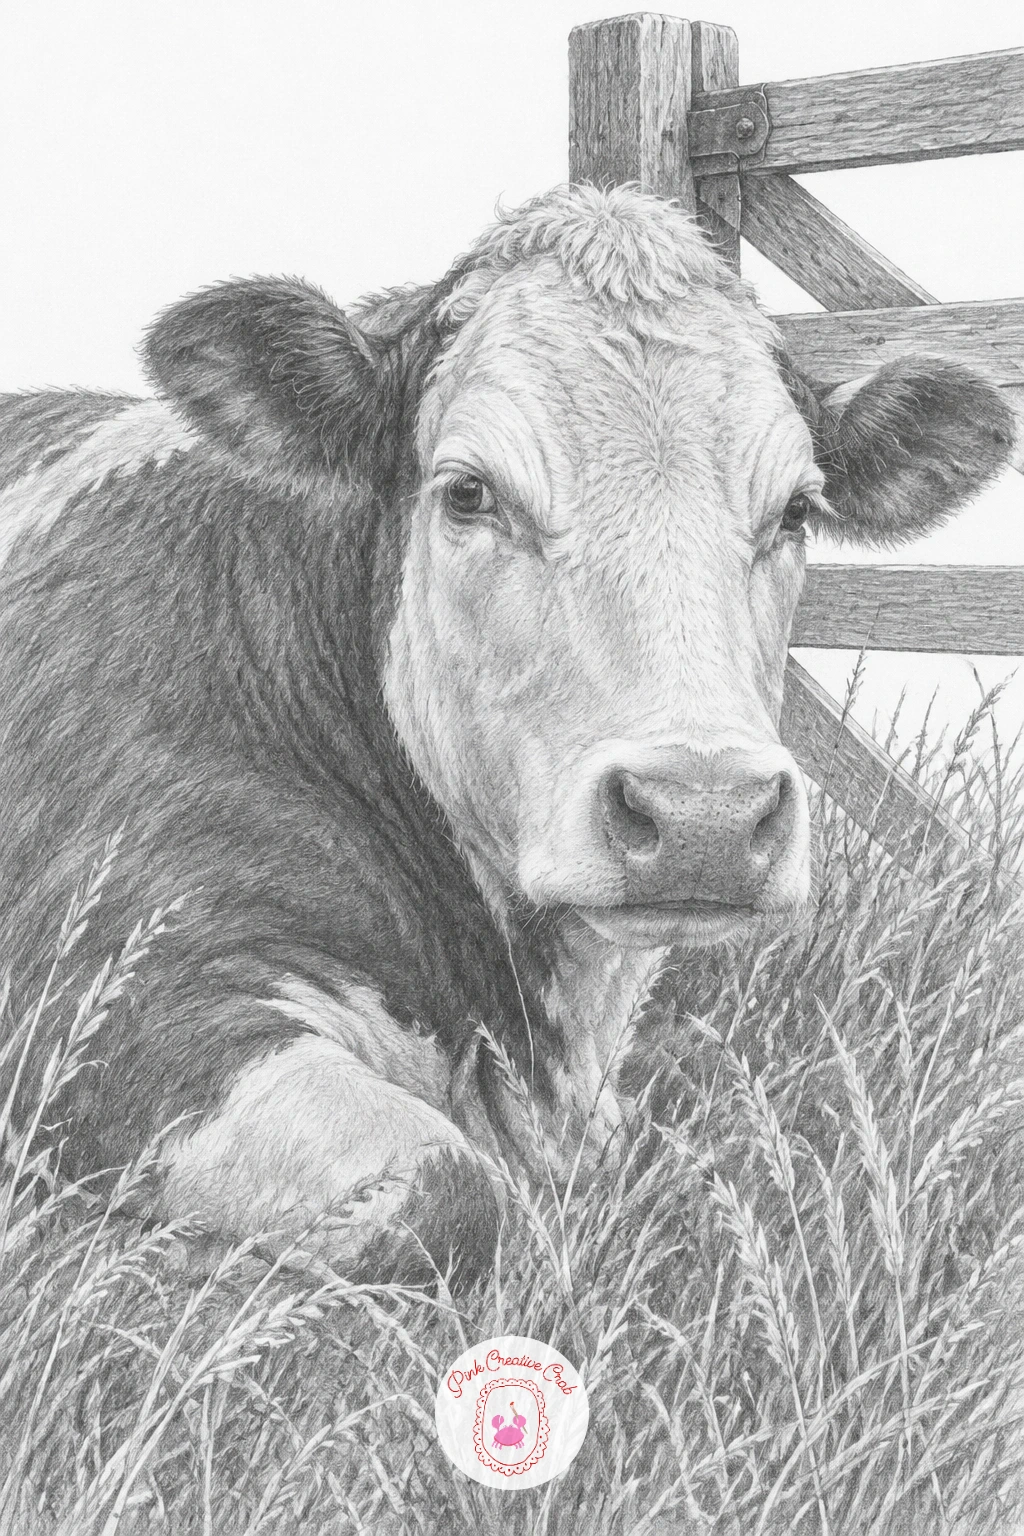
Head out to a field for a cow lying in tall grass beside a wooden gate. Block the body as one large rounded mass first, with the legs tucked beneath it rather than extended, since a lying cow is mostly one big soft shape with the head and ears as the only sharply defined parts.
Shade the body with an HB in broad even strokes, keeping the patches of color (if the breed has them) as distinct lighter and darker zones rather than blended together, then switch to a softer 2B for the deep shadow where the body meets the ground. The tall grass around the cow is drawn last, in loose upward flicking strokes that partly overlap the lower edge of the body so the animal looks settled into it rather than placed on top.
Cow faces often go wrong at the nose, which is wider and flatter than most sketchers expect. Measure its width against the distance between the eyes before committing to the final line.
Keep the wooden gate behind simple and lightly shaded so the cow stays the clear focus of the page.
Palette: Graphite Grey,Charcoal Black,Warm Grey
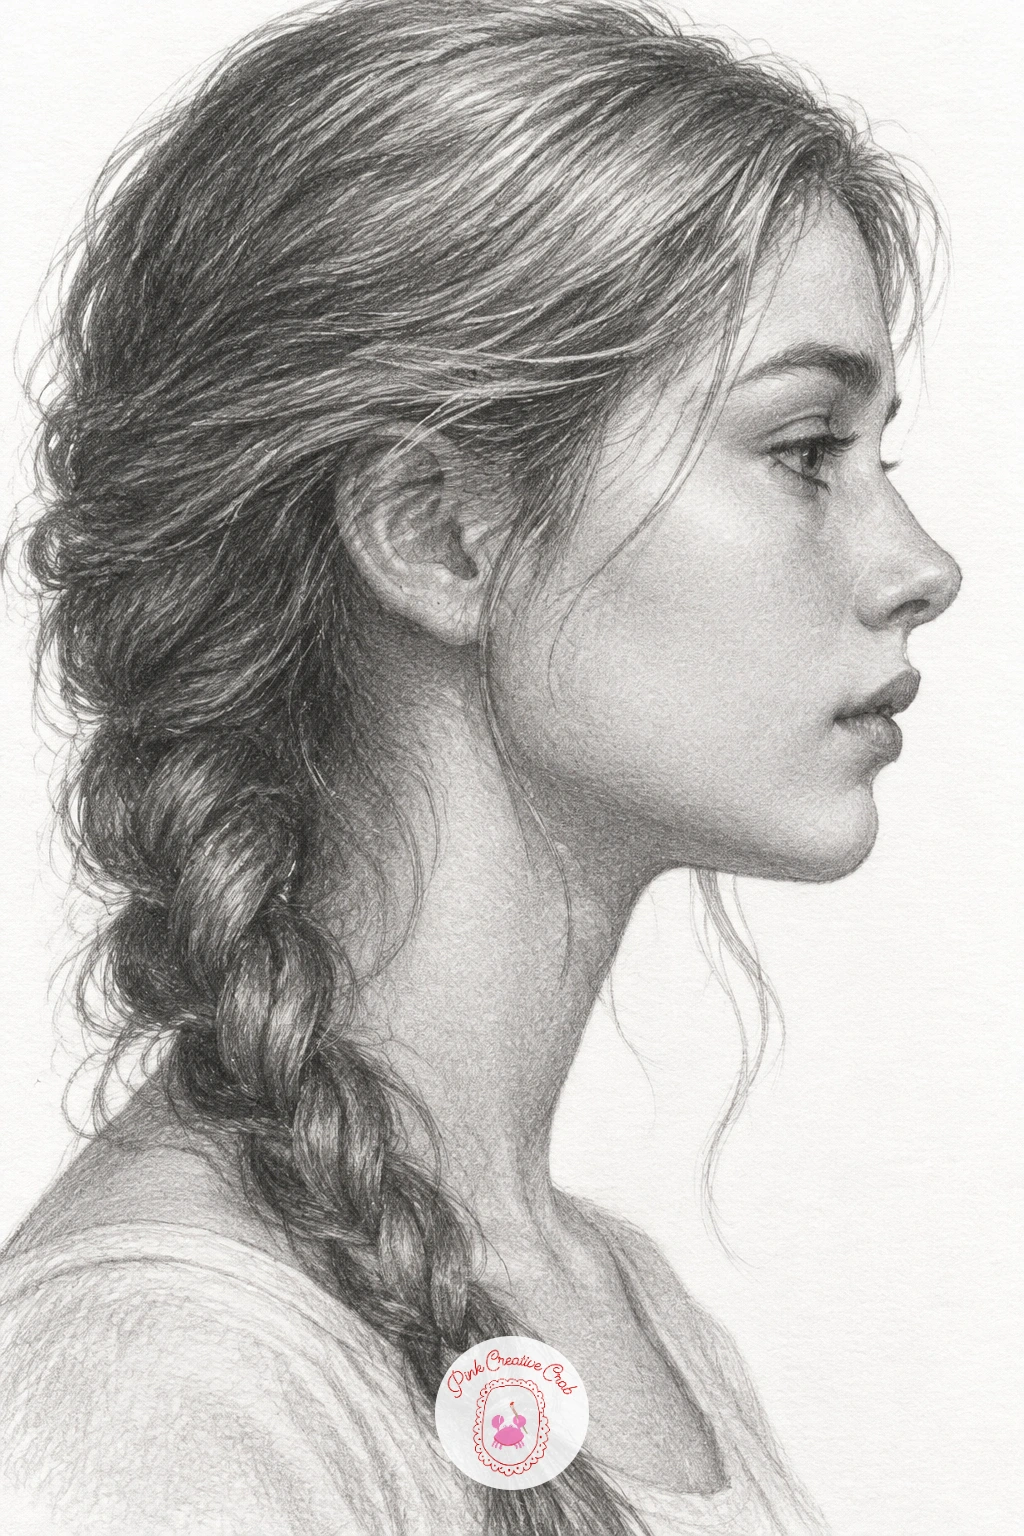
Try a portrait study next with a girl in profile, her hair gathered into a loose braid. Lightly sketch the head as an egg shape first, then drop a faint vertical guideline down the front of the face to place the eye, nose and mouth in correct proportion, since profiles go wrong fastest when features are placed by eye alone.
Shade the face with an HB in very gentle gradients, keeping most of the tonal range subtle since skin rarely shows harsh value jumps, then switch to a 2B for the braid, where each twist of hair gets its own small shadow underneath it. The nose and chin profile line is the one edge worth drawing slowly and checking twice, since a few millimeters there change the whole likeness.
Hair often ends up as one solid dark shape. Break the braid into its three visible twists and shade each one slightly differently so it reads as woven rather than solid.
If drawing a real likeness feels daunting, work from a simple reference photo rather than imagination until the proportions feel automatic.
Palette: Graphite Grey,Soft Black,Paper White
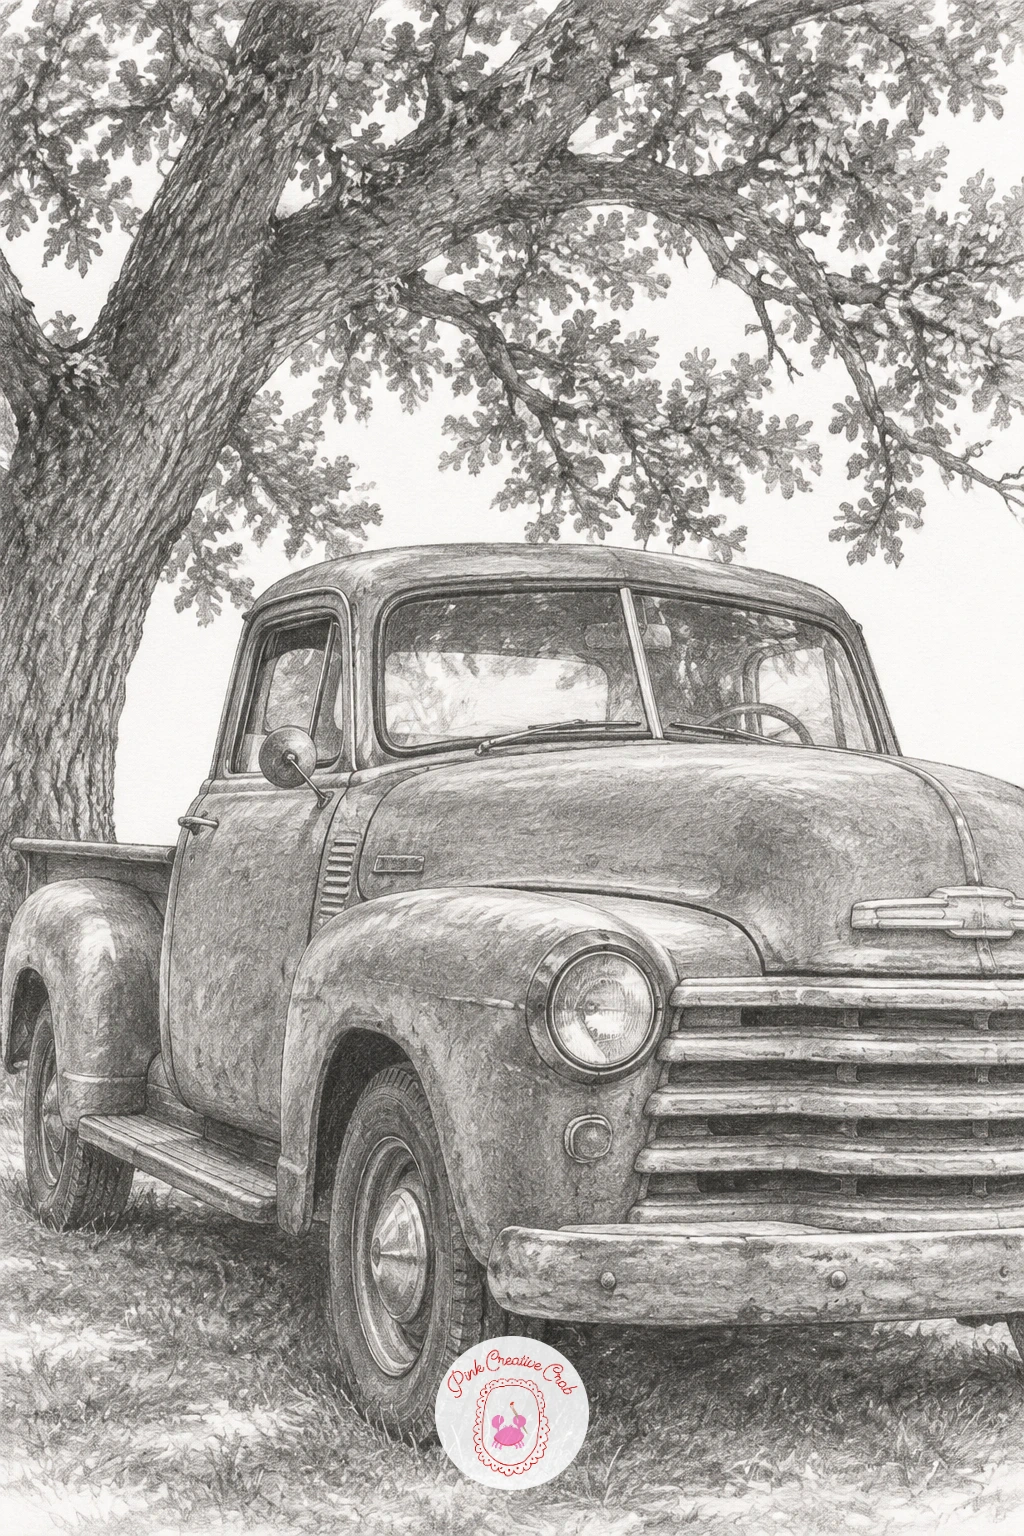
Step up to a bigger subject with an old pickup truck parked under a big oak tree. Block the truck’s body as a simple boxy shape with the wheel arches cut in afterward, and check the two wheels line up on the same ground line before adding any body detail, since a truck sitting unevenly on its wheels is the fastest way to lose the whole drawing.
Shade the truck’s bodywork with an HB in flat panels, pushing a 2B into the dented or rusted areas if you want some age in it, since a slightly uneven surface tells the story of an old vehicle better than a perfectly smooth one. The oak tree above gets built from the trunk out, with the canopy suggested through clustered scribbly marks rather than individual leaves, kept lighter in tone than the dark truck below so the eye stays on the vehicle.
Trucks often look toy like if the wheels are drawn too small. Compare wheel height against the truck’s body height, real pickup wheels are larger in proportion than most people guess.
Park the truck at a slight three quarter angle rather than straight on, it reads as far more natural and gives you a front and a side to shade differently.
Palette: Graphite Grey,Charcoal Black,Warm Grey
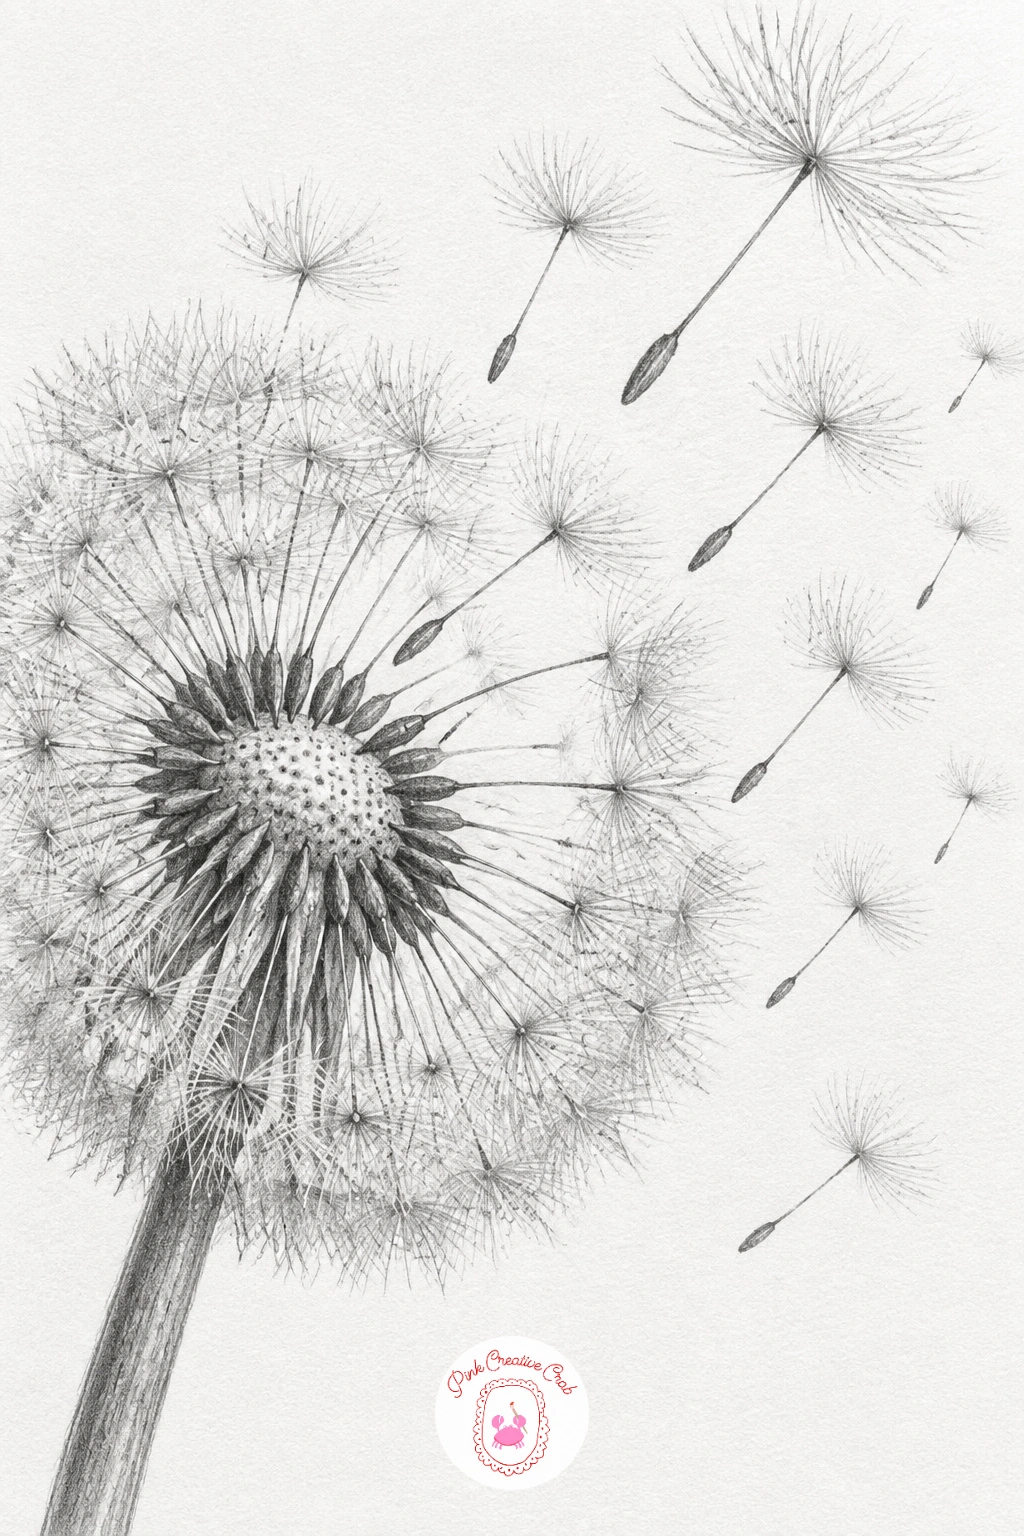
Slow down with a dandelion clock, its seeds drifting away on the breeze. Draw the central seed head as a simple sphere first, very lightly, since this whole drawing depends on restraint rather than heavy outlines. Each seed is a tiny stem with a fine burst of lines at its tip, and no two should point in exactly the same direction or the sphere looks mechanical.
Use a sharp HB for the seeds still attached to the head, pressing lightly so the lines stay delicate, then switch to an even lighter touch for the seeds drifting away across the page, fading them slightly as they move further from the main head to suggest distance.
The temptation here is to add too many seeds and lose the airy feeling entirely. Leave generous white space between clusters and resist filling every gap, since the empty paper is doing real work in this one.
A kneaded eraser dabbed gently over a few seed heads after shading lifts tiny bright specks that catch the light beautifully.
No dandelion in season? Any seed head, thistle down or even a photograph of one gives the same fine radiating structure to study.
Palette: Graphite Grey,Soft Black,Paper White
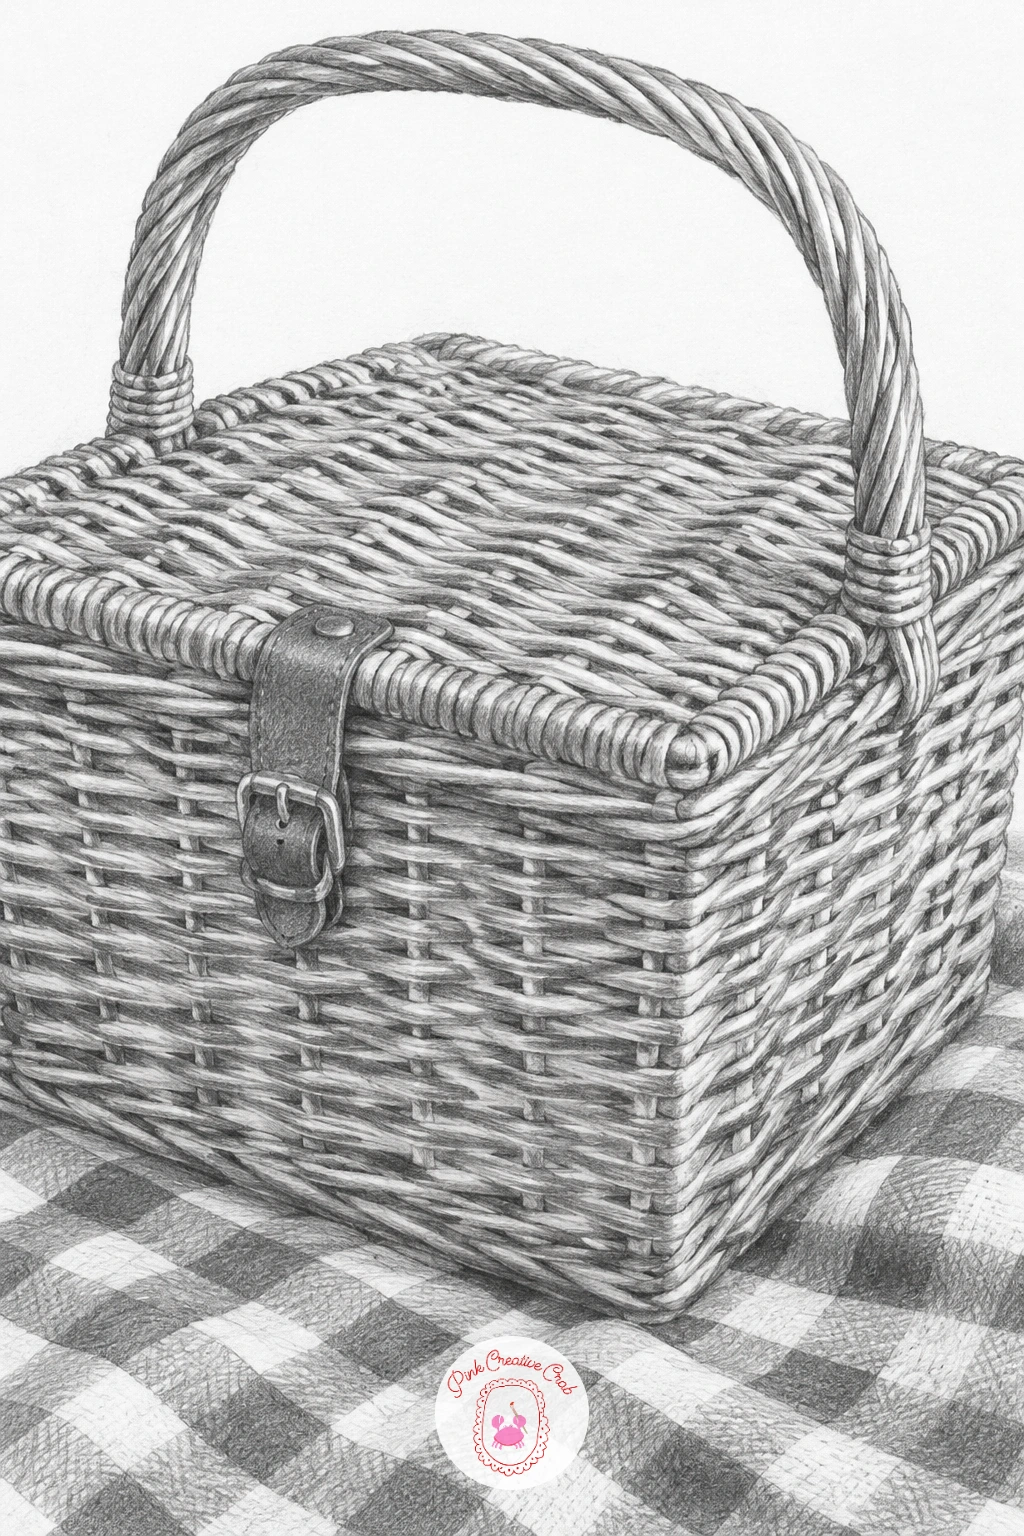
Settle onto the grass for a wicker picnic basket resting on a checked blanket. Draw the basket’s main shape as a simple rounded rectangle first, then build the weave in short overlapping curved strokes going both horizontally and vertically, keeping the weave pattern looser near the lid and tighter around the base where real wicker is usually denser.
Shade the basket with an HB, letting the gaps between woven strands carry the darkest small shadows, then move to the checked blanket beneath it. Draw the blanket’s check pattern with a ruler for the straight lines first, then shade alternating squares slightly differently so the pattern reads without needing actual color.
Wicker baskets often turn into a messy scribble if the weave direction is not planned. Keep a loose grid of pencil guidelines under the weave so each strand has a clear path to follow.
Let the blanket’s checked lines bend slightly where they pass over the folds of fabric rather than staying perfectly straight, it makes the blanket feel soft rather than like a printed sheet of paper.
Palette: Graphite Grey,Charcoal Black,Warm Grey
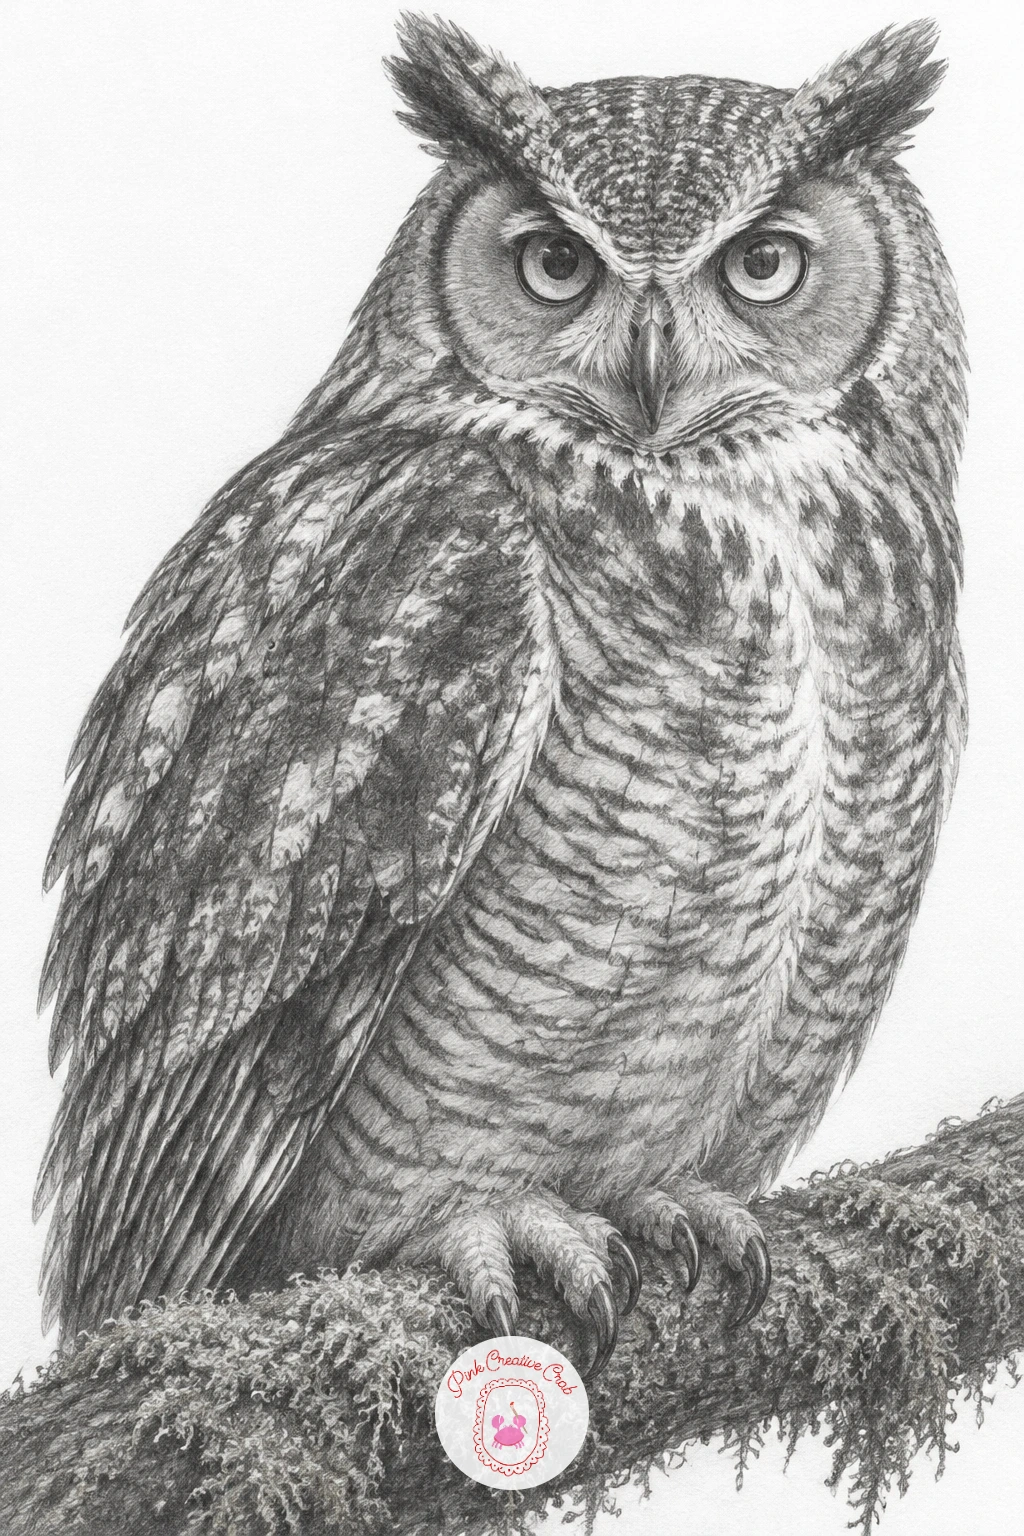
Move into quieter light for an owl sitting on a mossy branch at dusk. Block the body as one rounded teardrop shape first, with the head sitting almost directly on the shoulders rather than on a visible neck, since owls famously have almost no visible neck and getting that right instantly makes the silhouette convincing.
Shade the facial disc with an HB in a very soft radiating pattern out from the eyes, then build the body feathers in layered short strokes with a 2B, each row overlapping the one above like scales. The eyes carry enormous weight in an owl drawing, so keep one tiny sharp highlight dot in each and make sure both pupils point in exactly the same direction.
Feather texture often turns muddy if every stroke is the same darkness. Vary the pressure strand by strand, lighter near the chest, darker toward the wings, to keep the body from flattening into one grey mass.
The mossy branch beneath benefits from small clustered dots and short flicking lines for the moss texture, kept darker in tone than the owl so the bird stays the clear subject.
Palette: Graphite Grey,Charcoal Black,Soft Black
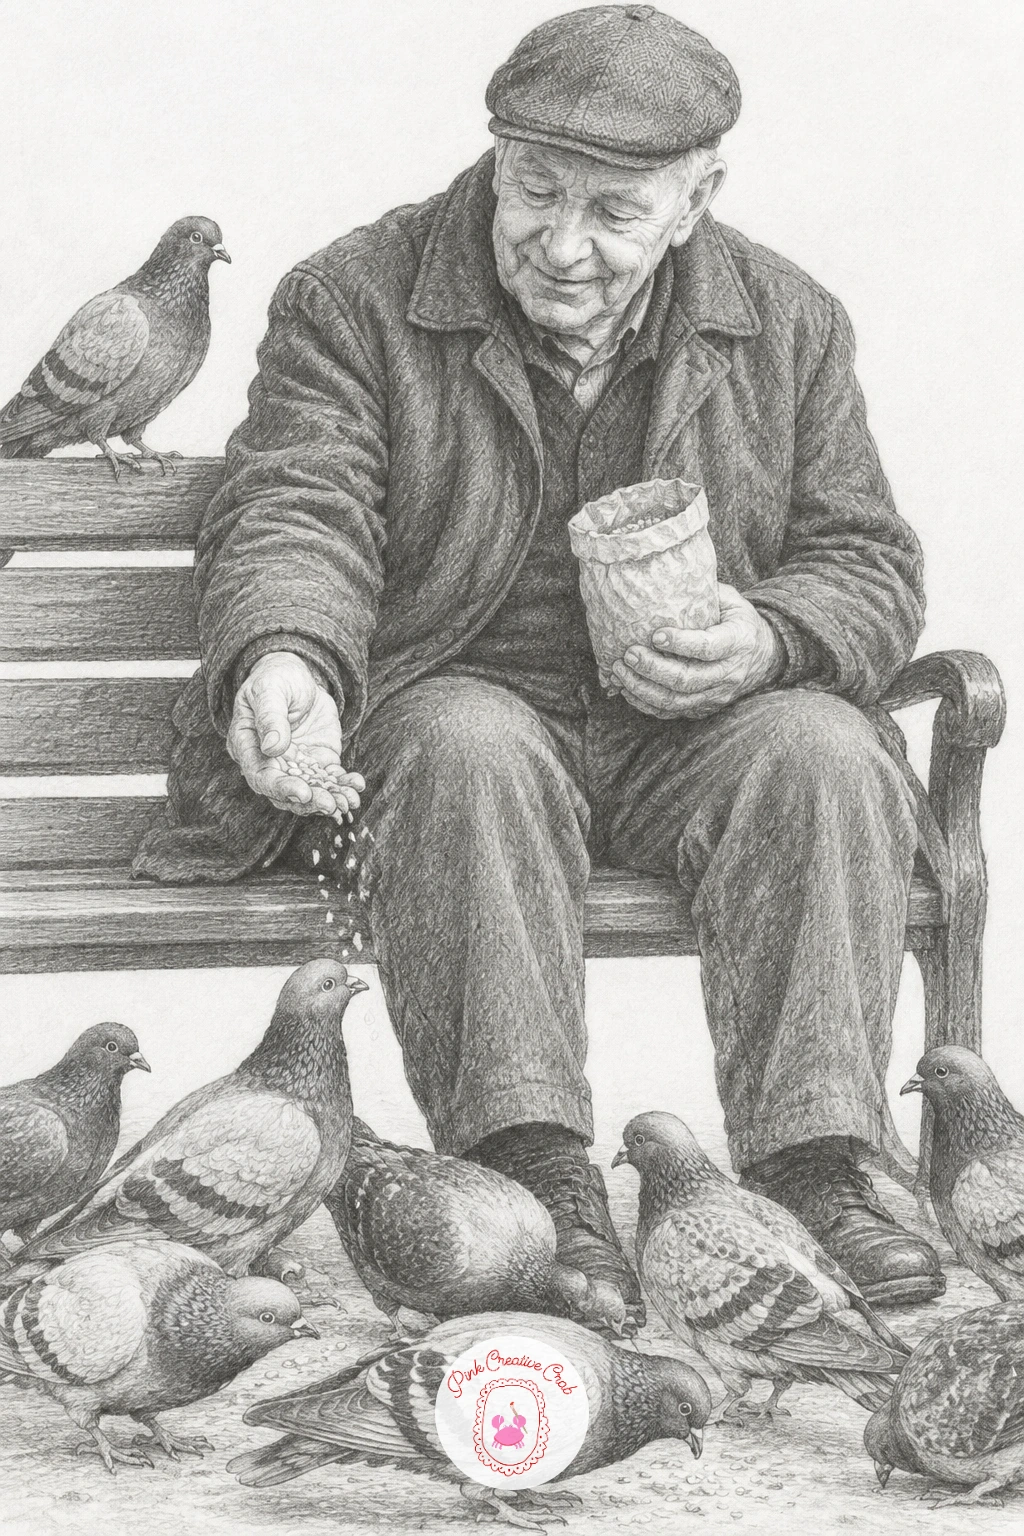
Bring in a quiet human moment with a grandfather in a flat cap feeding pigeons from a park bench. Sketch the seated figure first as simple overlapping shapes, torso, legs and the flat cap as its own distinct rounded form, and check the proportion of cap to head before adding facial detail, since an oversized cap is a common and easy mistake.
Shade the coat and trousers with an HB in broad simple folds rather than many small wrinkles, then turn to the pigeons scattered near his feet, each one built from a plump rounded body and a small head tucked low, pecking at the ground. Keep two or three pigeons at different distances rather than a neat row, since that variation is what makes the scene feel like a real moment rather than a diagram.
Figures seated on benches often end up floating above the seat. Draw the bench itself first with ruled lines and make sure the figure’s weight visibly presses down into it before refining anything else.
A handful of scattered crumbs, just a few tiny dots near his hand and on the ground, finishes the story without needing any extra detail.
Palette: Graphite Grey,Soft Black,Warm Grey
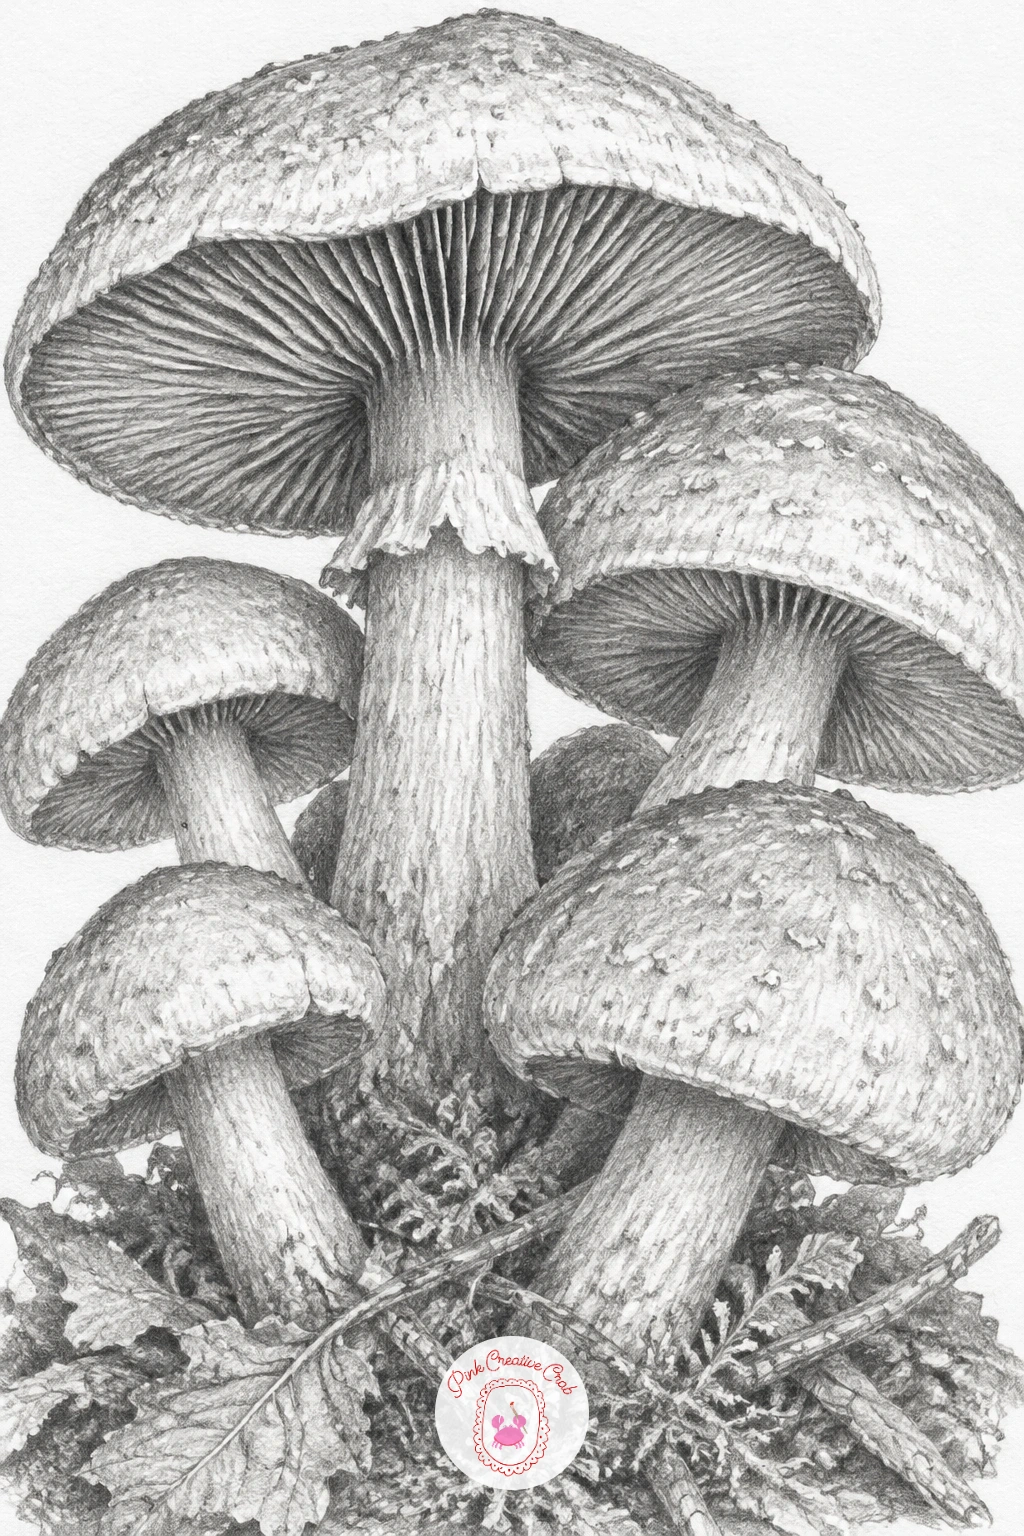
Back to nature for a cluster of wild mushrooms growing on the forest floor. Draw each cap as a simple dome shape first, varying the sizes noticeably since real clusters almost never grow in matching pairs, then add the thin stem beneath each cap only once the dome feels solid.
Shade the underside of each cap with a 2B where the gills sit in deep shadow, using short radiating lines fanning out from the stem, while the top of each dome stays lighter with an HB and a small highlight left as bare paper where it catches any light. The forest floor beneath gets a loose scatter of fallen leaves and small dark flecks for soil, kept lighter than the mushrooms so the cluster stays the clear focus.
Gills are the part most often rushed into a solid dark smudge. Slow down and draw them as individual fine lines radiating outward, even if only on the one or two caps angled toward the viewer.
No mushrooms outside right now? A few sliced supermarket mushrooms on a plate show the gill structure clearly up close.
Palette: Graphite Grey,Charcoal Black,Warm Grey
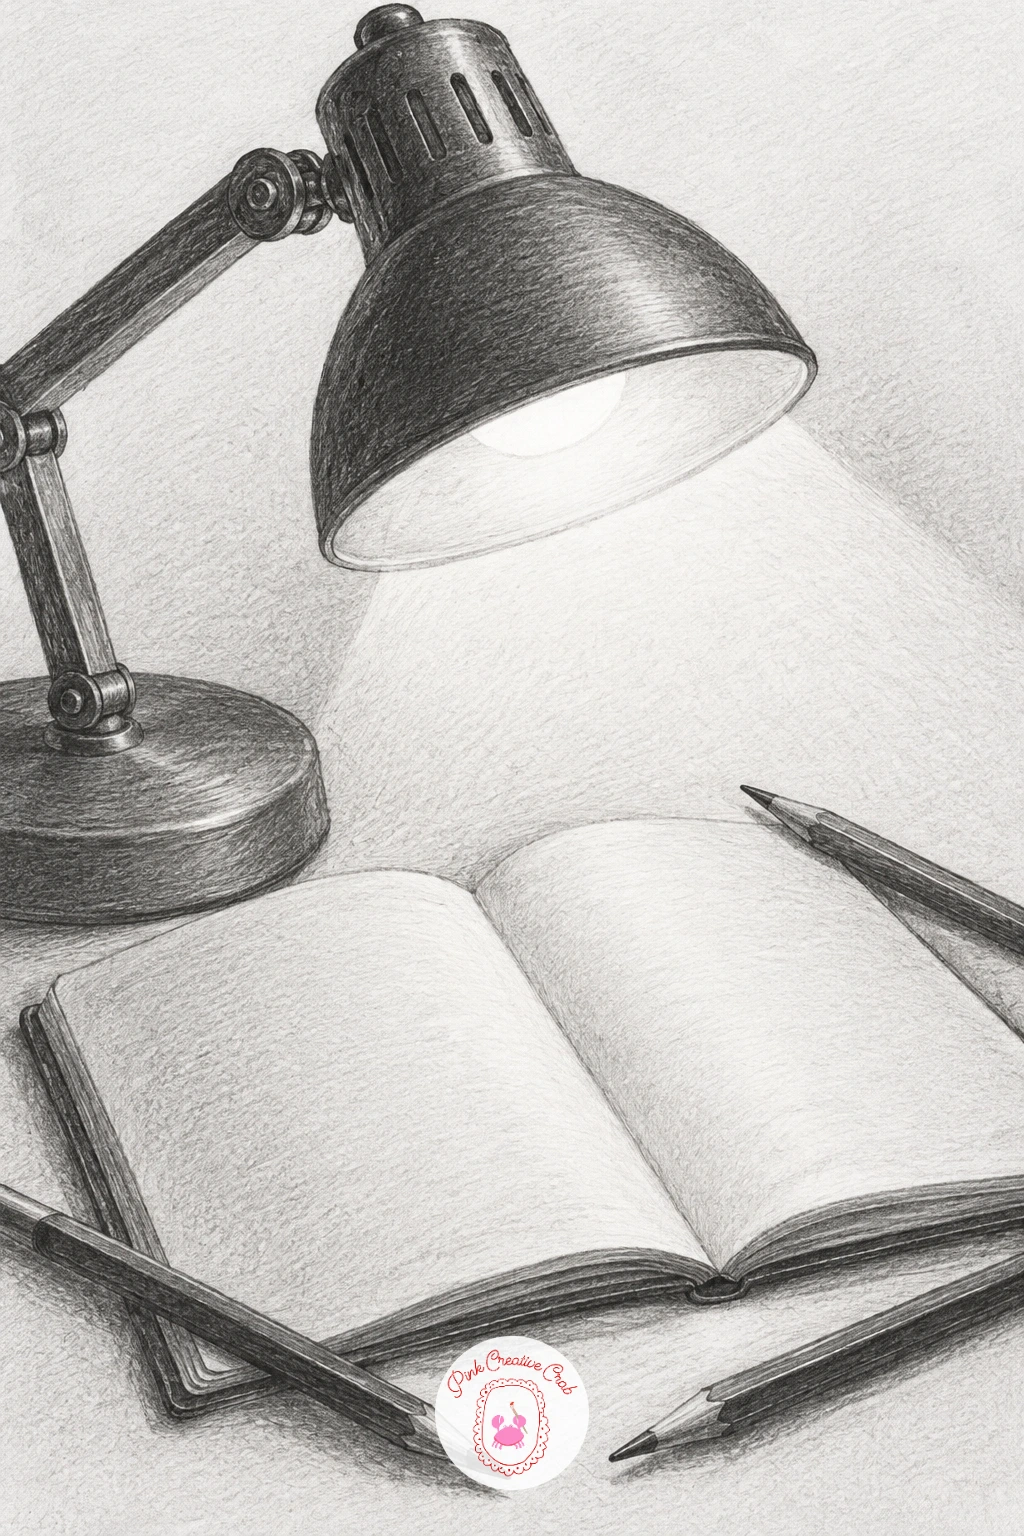
Settle back indoors for a desk lamp shining over an open notebook and a scatter of pencils. Draw the lamp’s shade and arm first using simple geometric shapes, a cone for the shade and straight ruled segments for the adjustable arm, then decide where the strongest light falls before shading anything else, since this whole drawing depends on one clear light source.
Shade the pool of light on the notebook’s open pages by leaving that whole area nearly untouched white paper, then build the darkness around it gradually with an HB fading into a 4B at the edges of the page, well away from the lamp. The scattered pencils nearby get quick confident single strokes for each one, slightly overlapping, rather than carefully outlined and filled shapes.
The biggest trap here is shading too evenly, which kills the whole mood. Push the contrast harder than feels natural between the lit page and the shadowed desk around it.
If you want practice with dramatic light before a full scene, try this same lamp and notebook setup with the lamp turned to a different angle next time to see how the shadow shape changes.
Palette: Graphite Grey,Charcoal Black,Paper White
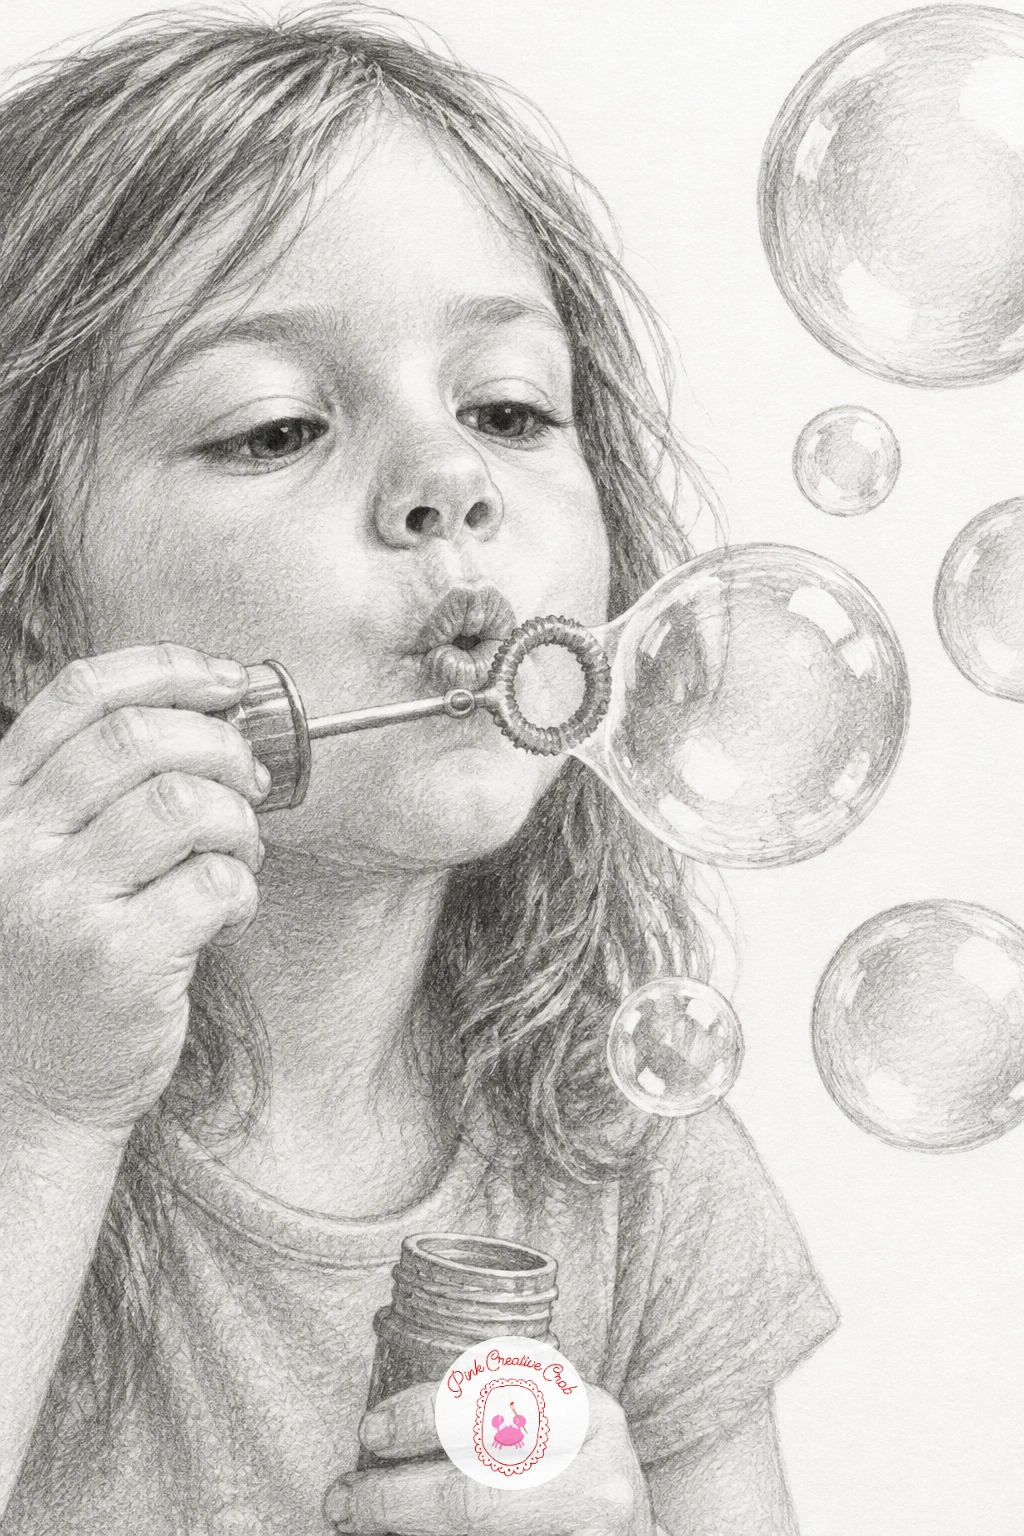
Lighten the mood with a child blowing soap bubbles in a backyard. Sketch the figure first in a simple relaxed pose, leaning slightly forward with cheeks puffed, then place the bubble wand at the mouth before any bubbles appear, since the wand’s position decides where every bubble in the drawing should float from.
Shade the bubbles themselves very lightly with an HB, using just a thin curved edge and one small bright highlight circle left as bare paper on each, since real soap bubbles are almost entirely reflected light rather than solid tone. Vary the bubble sizes and let a few drift further from the wand than others, since bubbles never travel in a neat line.
Bubbles often end up looking like solid balls instead of transparent film. Keep the shading inside each one extremely minimal, really just a thin crescent of shadow along one edge, and trust the empty white space to do the rest.
If figures feel tricky, focus the whole sketch tighter on just the face, the wand and a few bubbles rather than the full body and backyard.
Palette: Graphite Grey,Soft Black,Paper White
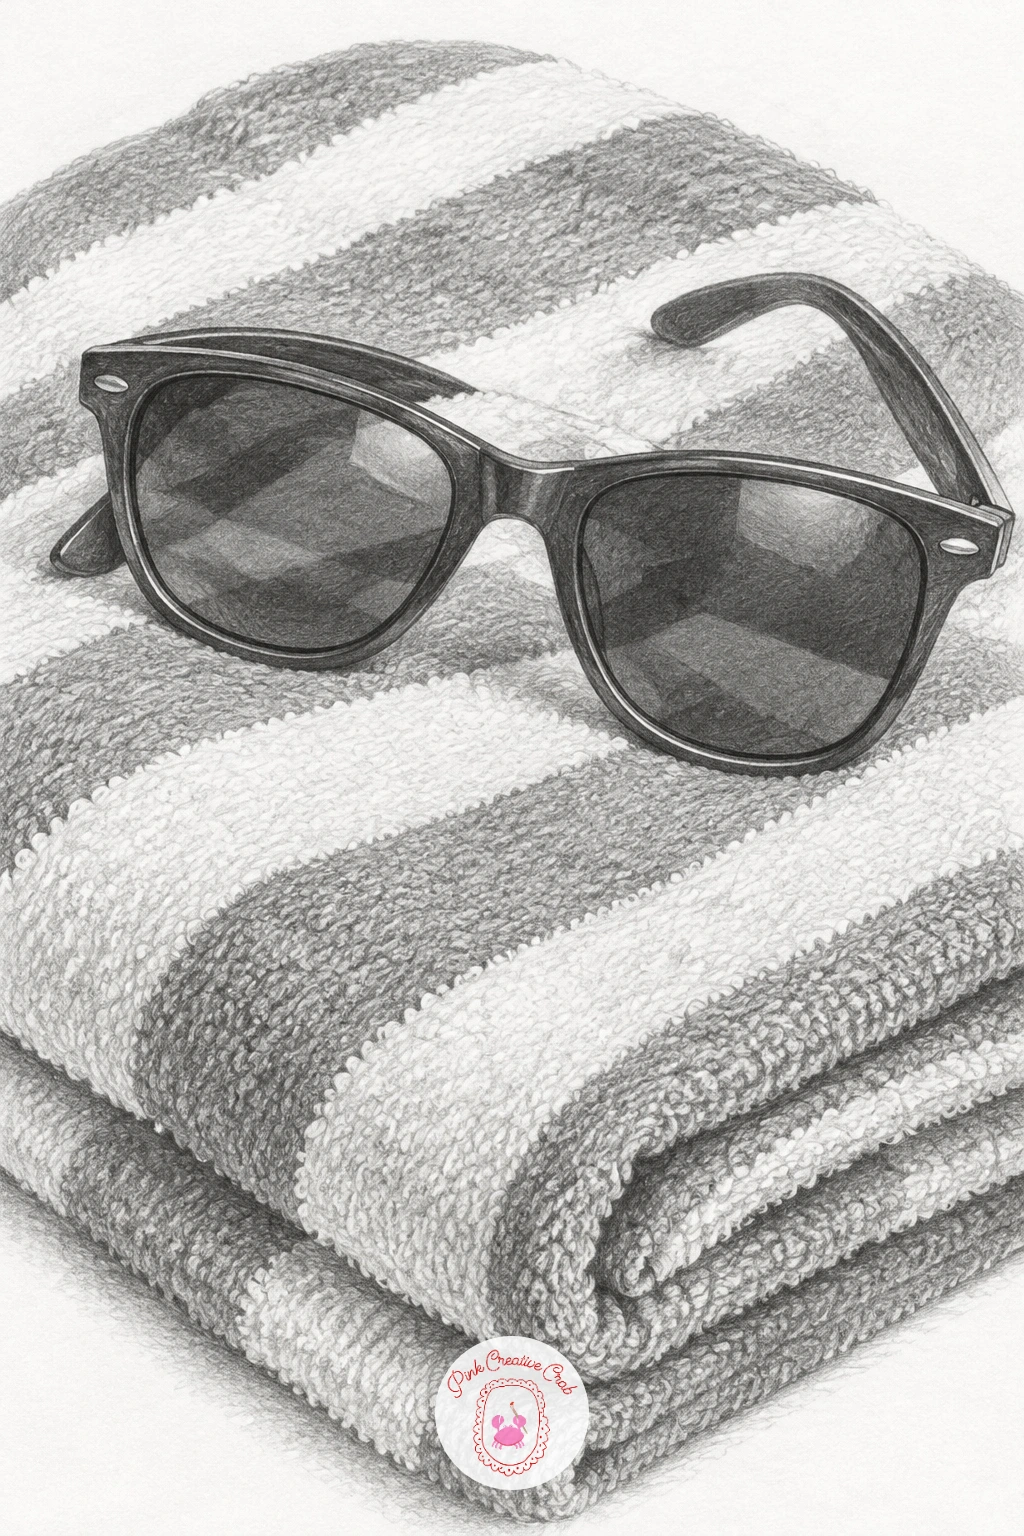
Head back to the beach for a pair of sunglasses resting on a folded beach towel. Draw the sunglasses first, checking that both lenses match in size and angle before adding the frame details, since mismatched lenses are obvious even at a glance and hard to fix after the fact.
Shade the lenses with a smooth 2B gradient, leaving one small bright reflection shape untouched on each lens, which instantly reads as glass or plastic rather than a flat dark shape. The folded towel beneath gets simple straight stripe shading with an HB, following the folds so the stripes bend slightly where the fabric creases, never staying perfectly straight across the whole towel.
Towel stripes often end up looking printed flat rather than folded. Darken the stripe shading noticeably inside each fold’s shadow and lighten it on the raised parts of the fabric to bring out the real three dimensional folds.
If stripes feel fiddly, a plain towel with just a few simple fold lines works just as well and keeps the focus on the sunglasses.
Palette: Graphite Grey,Charcoal Black,Paper White
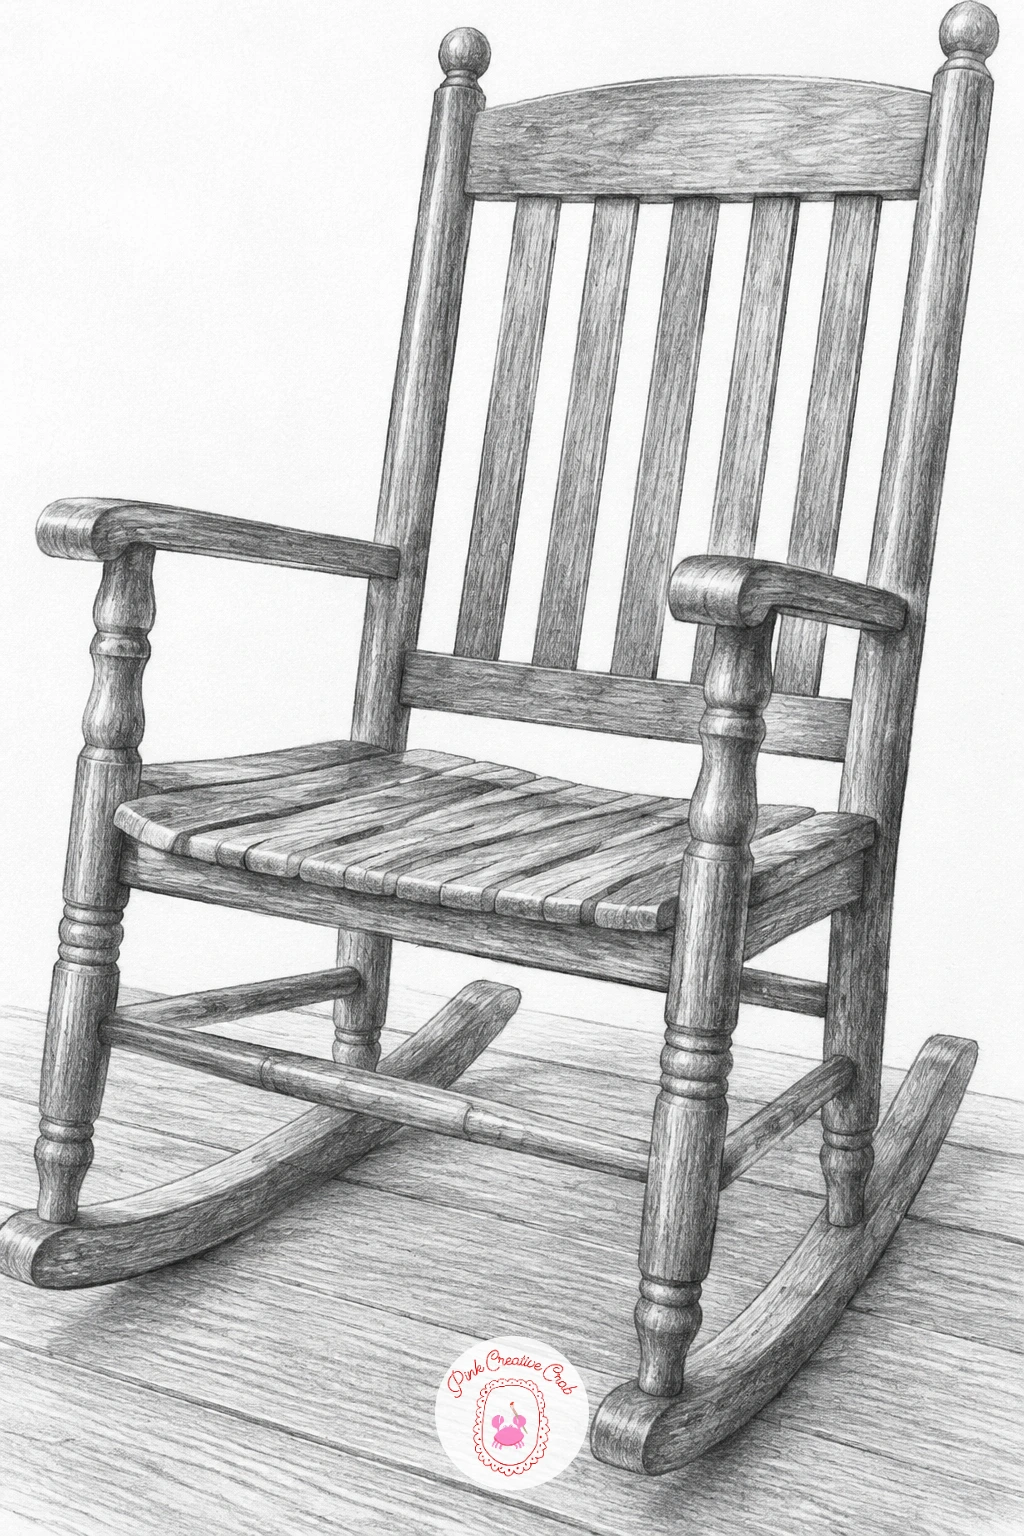
Slow the pace right down with an empty rocking chair sitting on a wooden porch. Draw the chair’s curved rockers first, matching their curve exactly on both sides with a light construction line, since mismatched rockers are the fastest way to make the whole chair look unstable.
Build the chair’s frame with straight ruled lines for the back slats and arms, then shade with an HB in flat even tones, keeping the wood grain suggestion to just a few long loose lines rather than dense texture. The porch floorboards beneath run in straight parallel lines toward a single vanishing point, with a 2B used to deepen the shadow directly beneath the chair where it meets the floor.
Empty chairs can look stiff if every line is perfectly straight and tidy. Let one or two of the slats sit slightly unevenly, as old wooden furniture usually does, and the chair gains real character.
Leaving the chair empty rather than adding a person keeps the whole mood quiet, which is really the point of this one.
Palette: Graphite Grey,Charcoal Black,Warm Grey
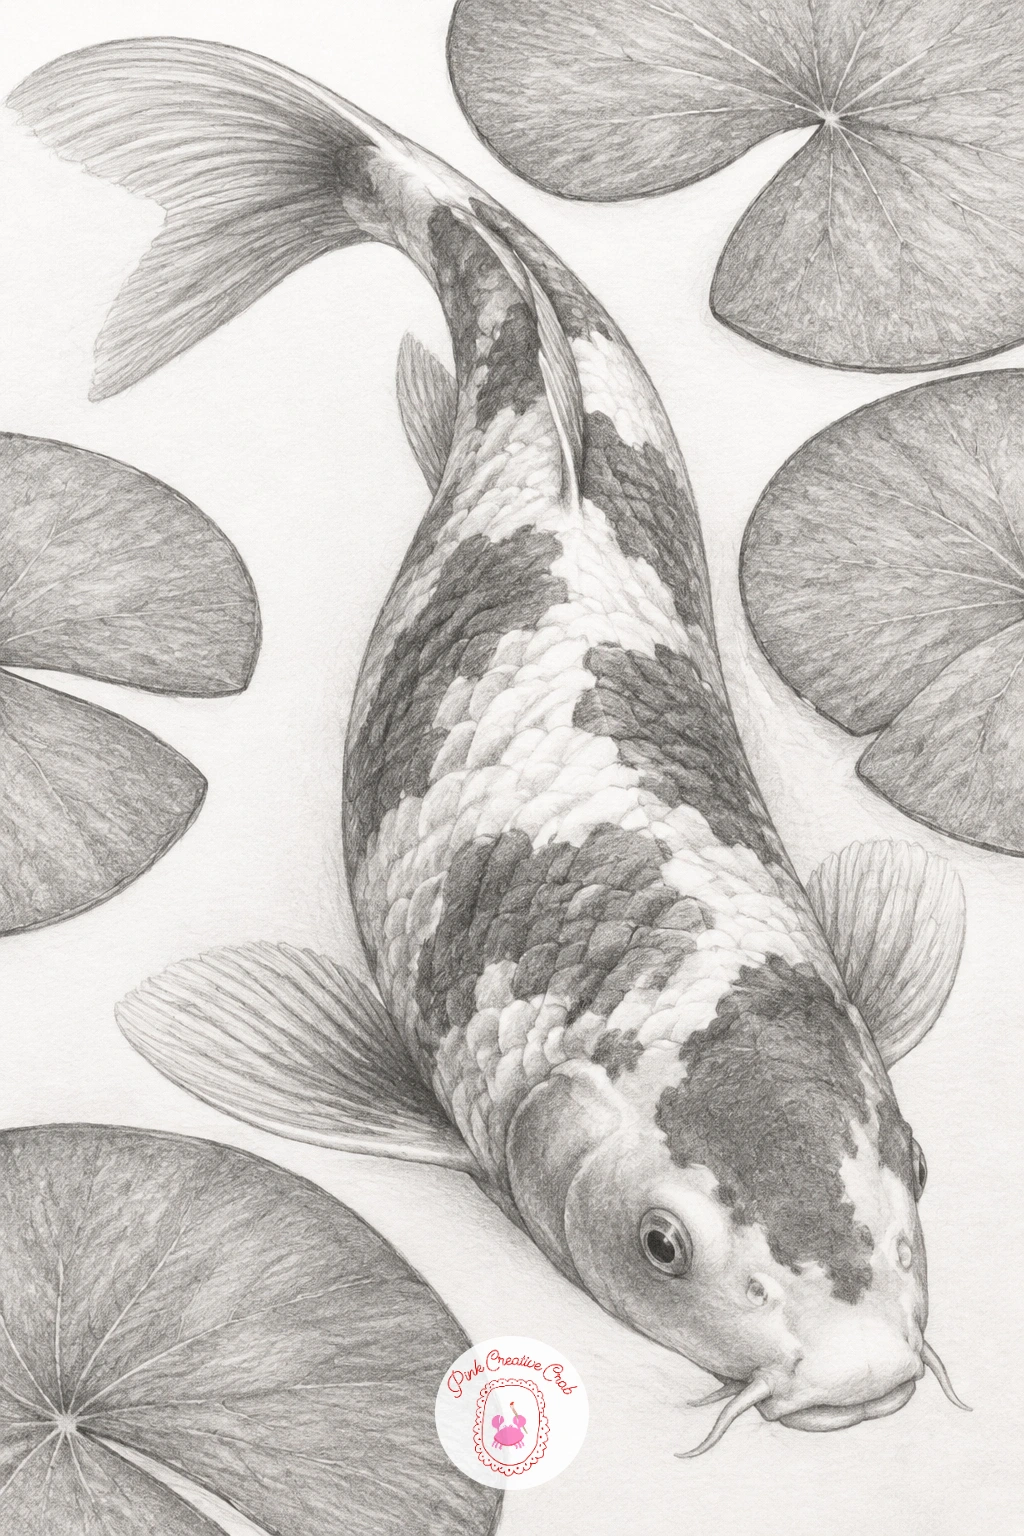
Move to water for a koi fish swimming between lily pads. Draw the fish’s body as one smooth elongated oval first, with the tail fin flaring out at the end in soft flowing curves, since a stiff tail is the quickest way to make a swimming fish look frozen rather than moving.
Shade the koi’s body pattern with an HB, keeping the patches distinct and slightly irregular in shape rather than perfectly round, then use a 2B for the darker shadow along the fish’s lower body where it curves away from the light. The lily pads floating around it are simple flattened circles with one notch cut into each, shaded only at their edges so their centers stay pale and reflective looking on the water’s surface.
Water itself is the trickiest part to suggest without color. A few short horizontal wavy lines and a touch of smudged graphite near the fish’s body, left mostly as untouched white paper elsewhere, reads as calm water far better than heavy shading would.
If a koi feels too detailed to start, any simple goldfish shape practices the same curved body and flowing tail.
Palette: Graphite Grey,Charcoal Black,Paper White
For more pond scenes with reflections and lily pads to practice after this one, the watercolor pond list has plenty of layout ideas worth borrowing for pencil too.
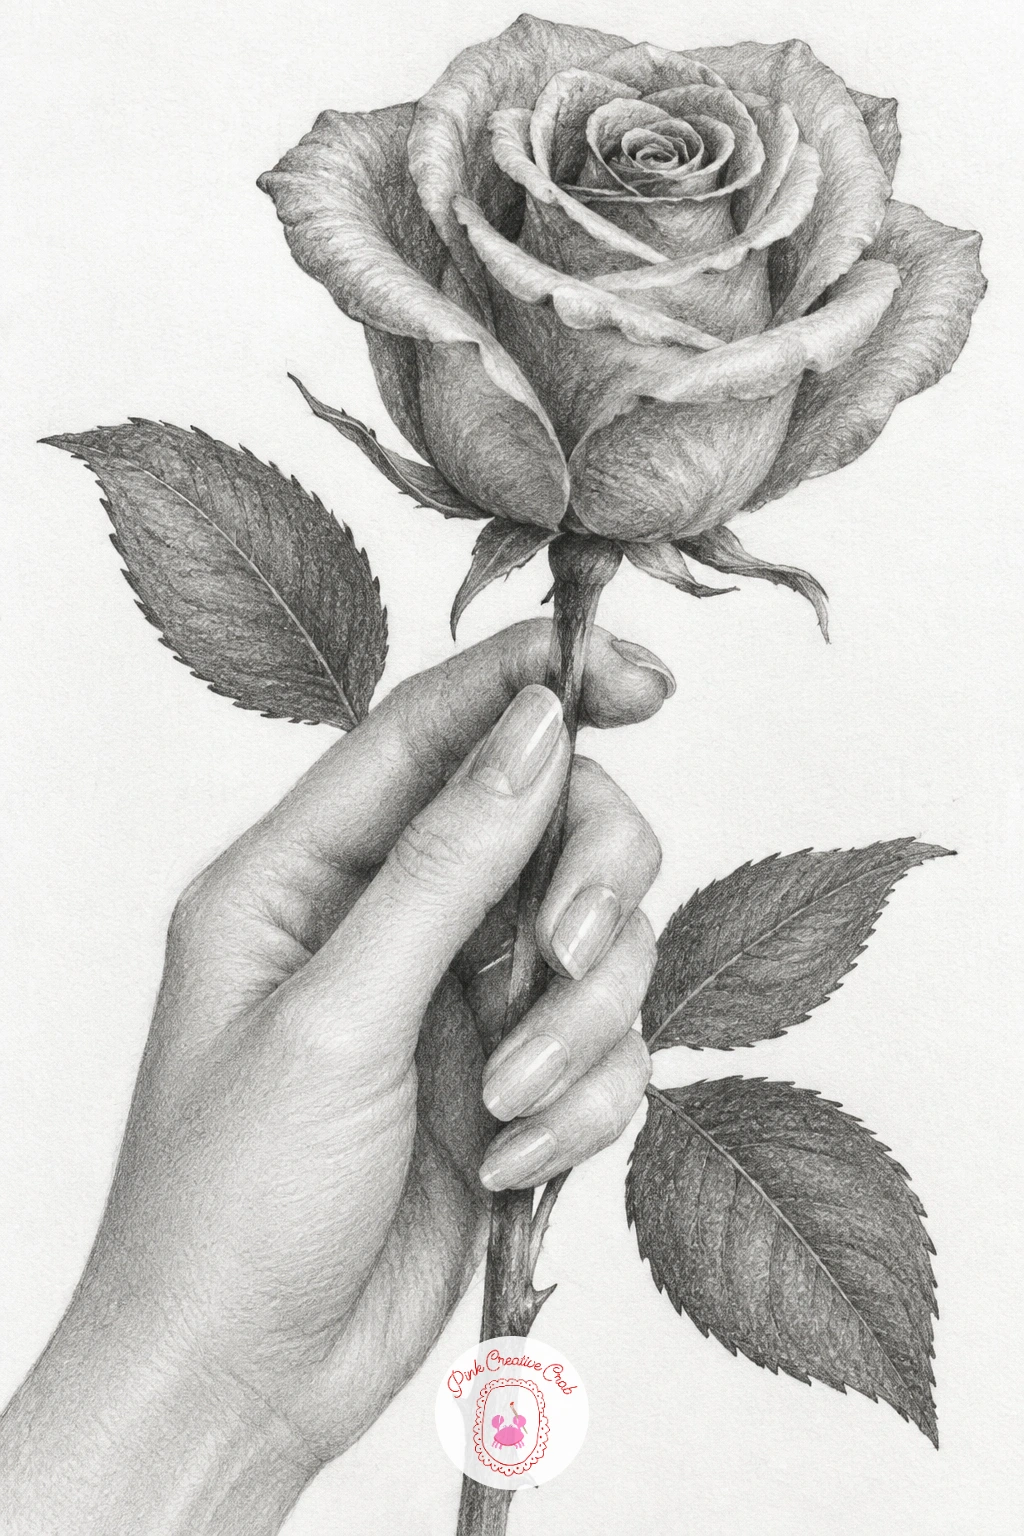
Return to hands for a woman’s hand holding a single long stemmed rose. Build the hand first from simple rounded shapes for the palm and sausage shapes for each finger, checking that the fingers wrap naturally around the stem’s thickness before any rose detail is added, since the grip has to look physically plausible before the flower matters at all.
Shade the hand with an HB, softening the gradient across the knuckles since skin rarely shows a hard edge, then move to the rose itself, built from a tight spiral of overlapping petal shapes starting at the center and working outward. Use a 2B for the deep shadow where petals overlap and curl inward, leaving the outer petal tips lighter to suggest them catching light.
Rose petals often collapse into a shapeless scribble if too many are attempted at once. Draw and shade three or four confident inner petals fully before adding the looser outer ones, and the flower will hold together.
Thorns on the stem are optional but a single small one near the hand adds a nice bit of story to the whole sketch.
Palette: Graphite Grey,Soft Black,Paper White
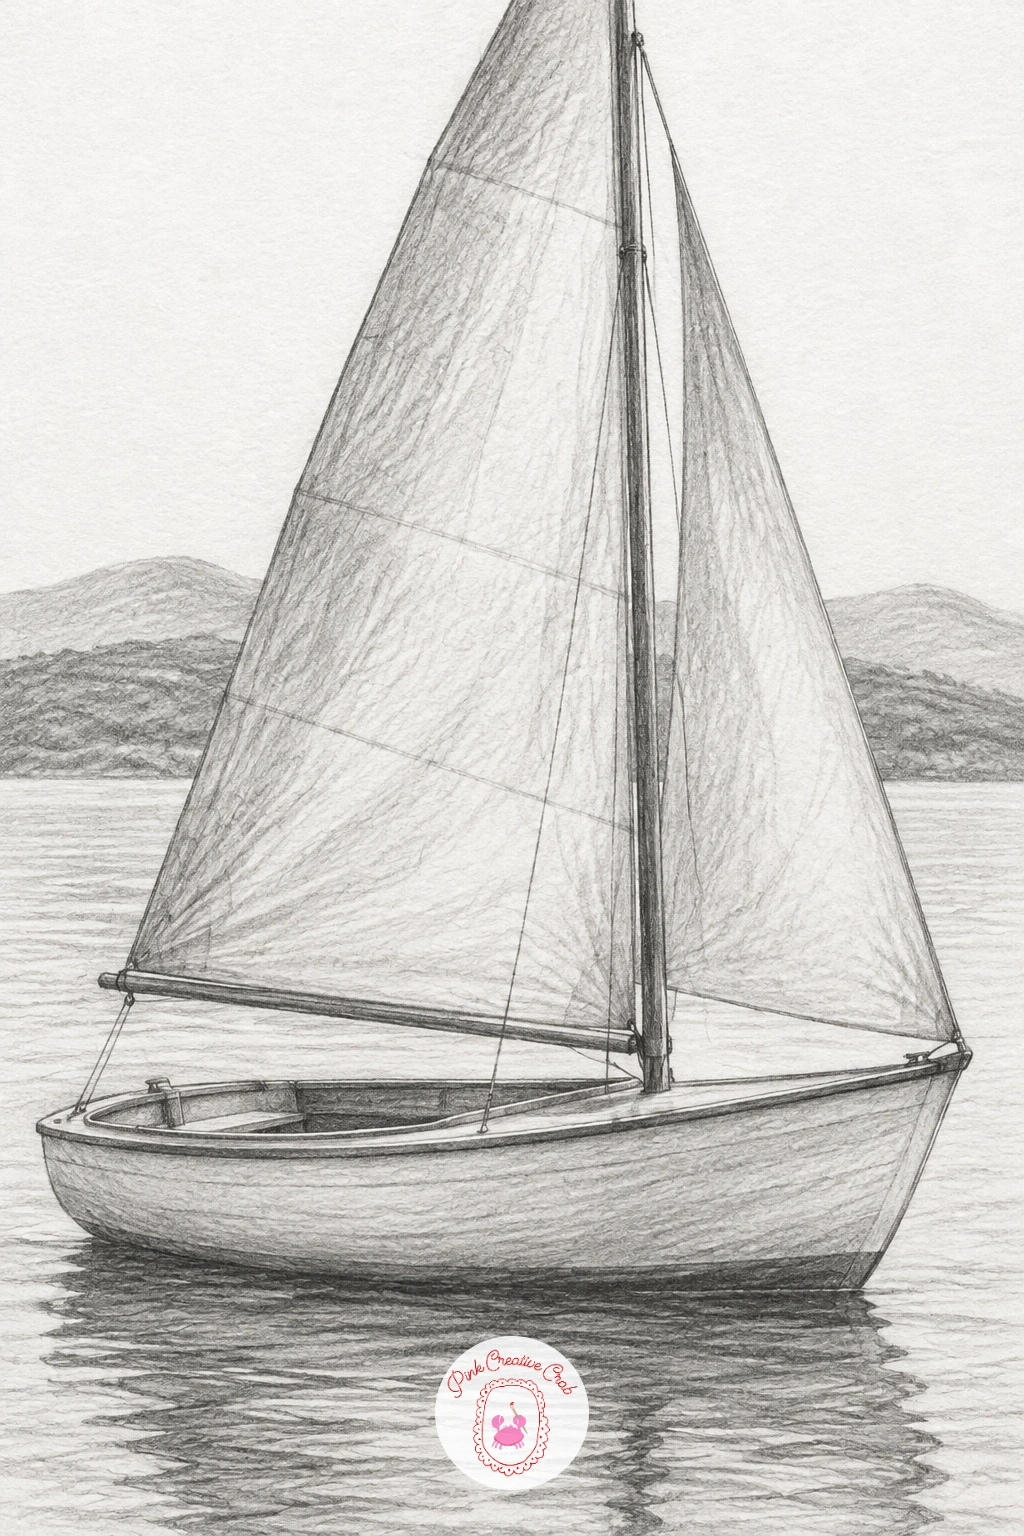
Widen the view for a small sailboat resting on calm water with distant hills behind it. Place the horizon line first, low on the page, then build the boat’s hull as a simple curved wedge sitting right on that line, since the horizon’s position decides how much sky and water you have left to work with before a single sail goes on.
Draw the sail as one clean triangular shape with an HB, shading it slightly darker on the side away from the light, then add the mast and a thin boom line with a ruler for crisp straight edges against the soft sail. The distant hills behind get only the faintest 2B tone, much lighter than the boat, since distant shapes should always read softer and paler than anything close to the viewer.
Calm water is easy to overwork. A few very light horizontal lines beneath the boat’s reflection, breaking up slightly where the hull meets the surface, say far more than heavy shading across the whole lower half of the page.
Keep the sky almost entirely bare white paper so the pale hills and dark boat both stand out clearly against it.
Palette: Graphite Grey,Charcoal Black,Warm Grey
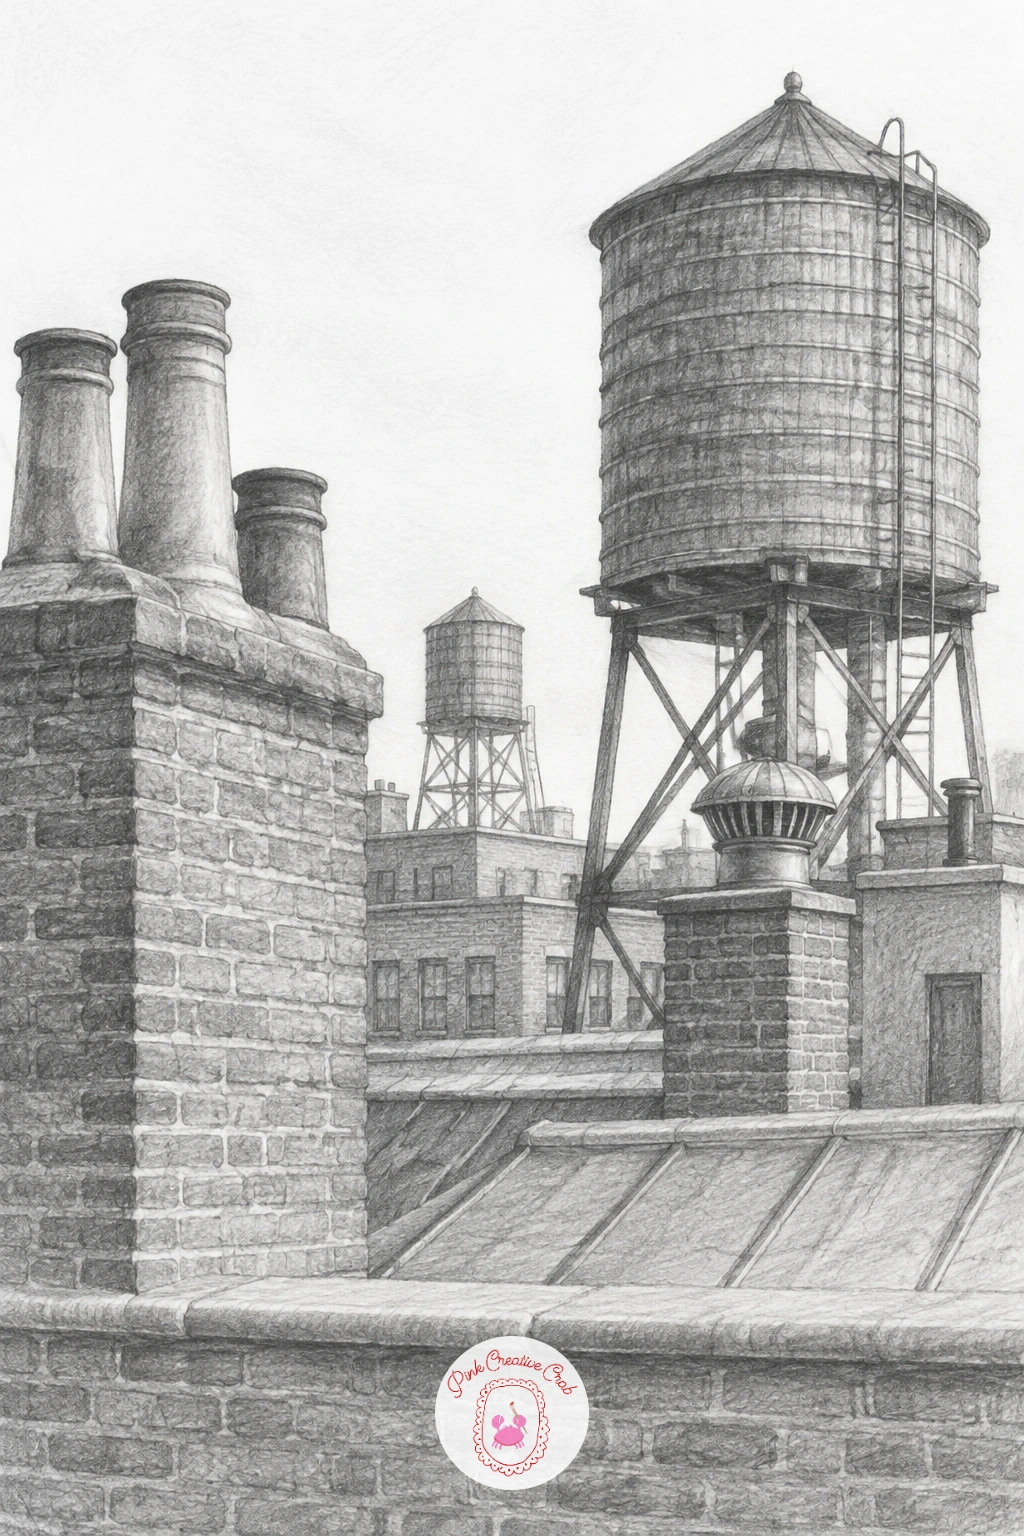
Climb up for a rooftop view of chimneys and water towers against the sky. Rough in the main rooflines first using a ruler, deciding on one consistent perspective angle for all the buildings before adding a single chimney, since mismatched angles between rooftops are the quickest way to make this kind of scene feel unstable.
Draw each chimney as a simple rectangular block with a slightly wider cap, and the water tower as a cylinder on thin angled legs, shading both with an HB in flat simple tones that get progressively lighter for shapes further back in the scene. Save a 4B for just the closest rooftop’s deep shadow, which anchors the whole view and gives the eye somewhere to land first.
Rooftop scenes often end up flat because every building gets equal detail regardless of distance. Push the nearest shapes darker and more detailed, and let everything further away fade toward a soft, barely there grey.
If the full skyline feels like too much at once, crop the view tighter to just two or three rooftops rather than a wide sprawling scene.
Palette: Graphite Grey,Charcoal Black,Warm Grey
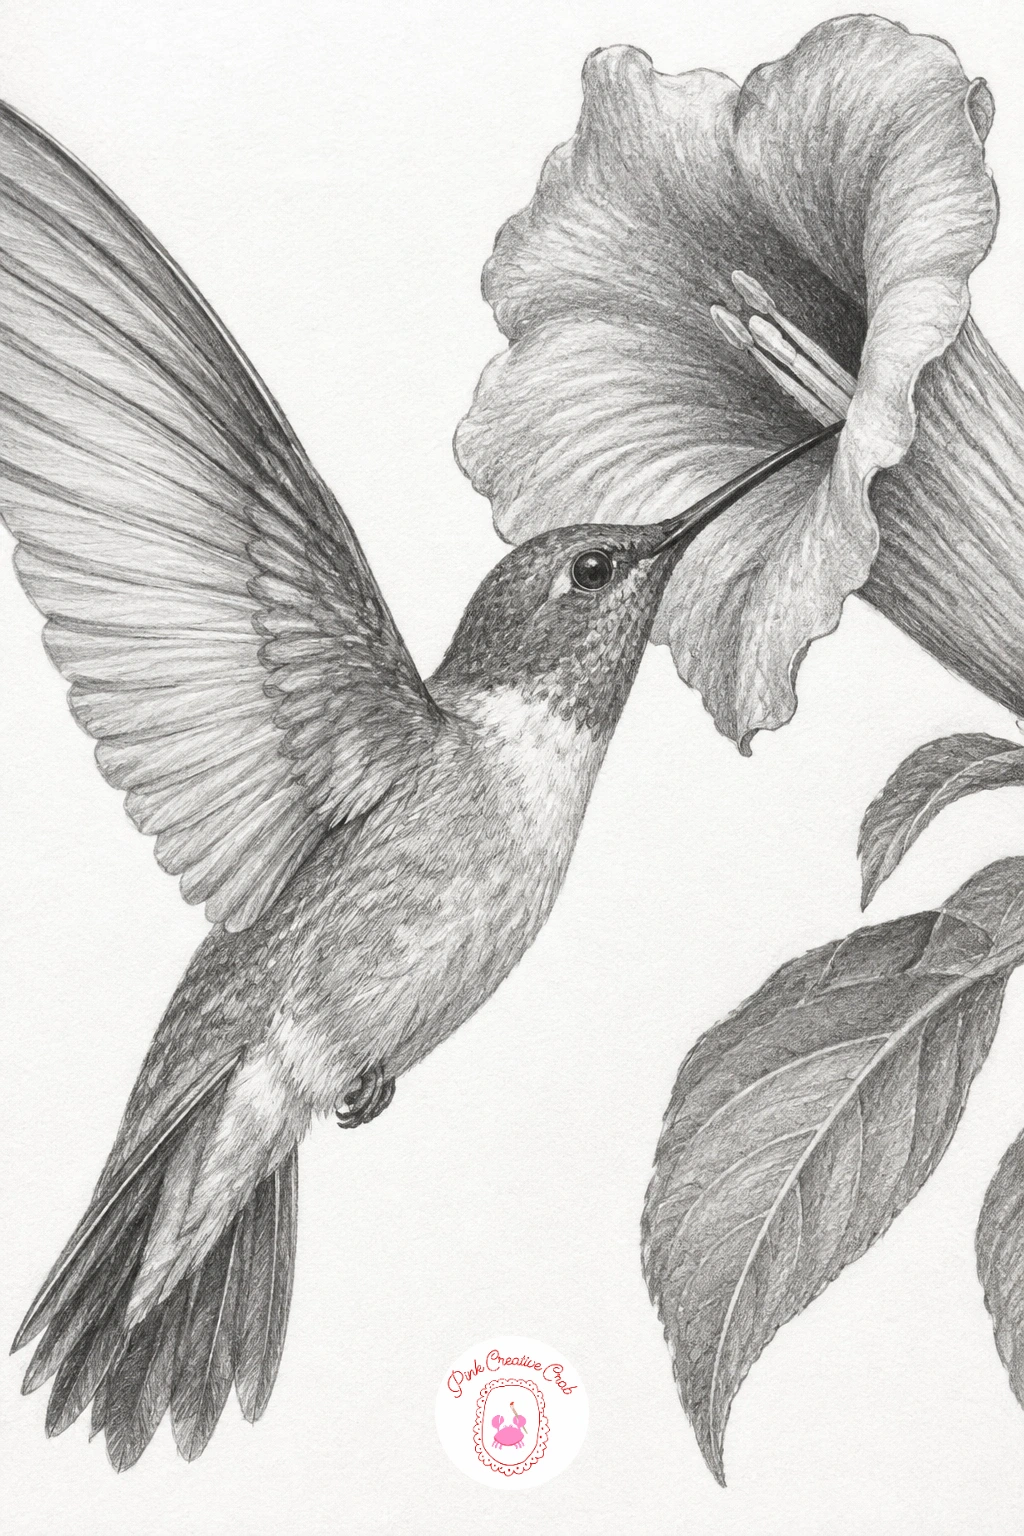
Return to small creatures for a hummingbird hovering at a trumpet flower. Draw the flower’s long trumpet shape first with a confident curved HB line, then place the hummingbird’s body facing into the opening, since the bird’s position only makes sense once the flower’s shape and angle are settled.
Shade the hovering wings as a soft blur rather than crisp individual feathers, using quick light strokes with the side of the pencil to suggest rapid motion, while the body itself stays more defined with a 2B for its rounded chest and the long thin beak drawn with one clean confident line. The trumpet flower gets its deepest shadow inside the throat where the petals curl inward, with the outer petal edges left lighter to suggest the bloom opening toward the light.
Hovering wings often get drawn too solidly, which kills the sense of motion entirely. Blur the wing edges deliberately with a blending stump rather than leaving them crisp like the rest of the bird.
No real trumpet flower on hand? Any long tubular flower, even a photograph of a lily, gives a similar shape for the bird to approach.
Palette: Graphite Grey,Soft Black,Paper White
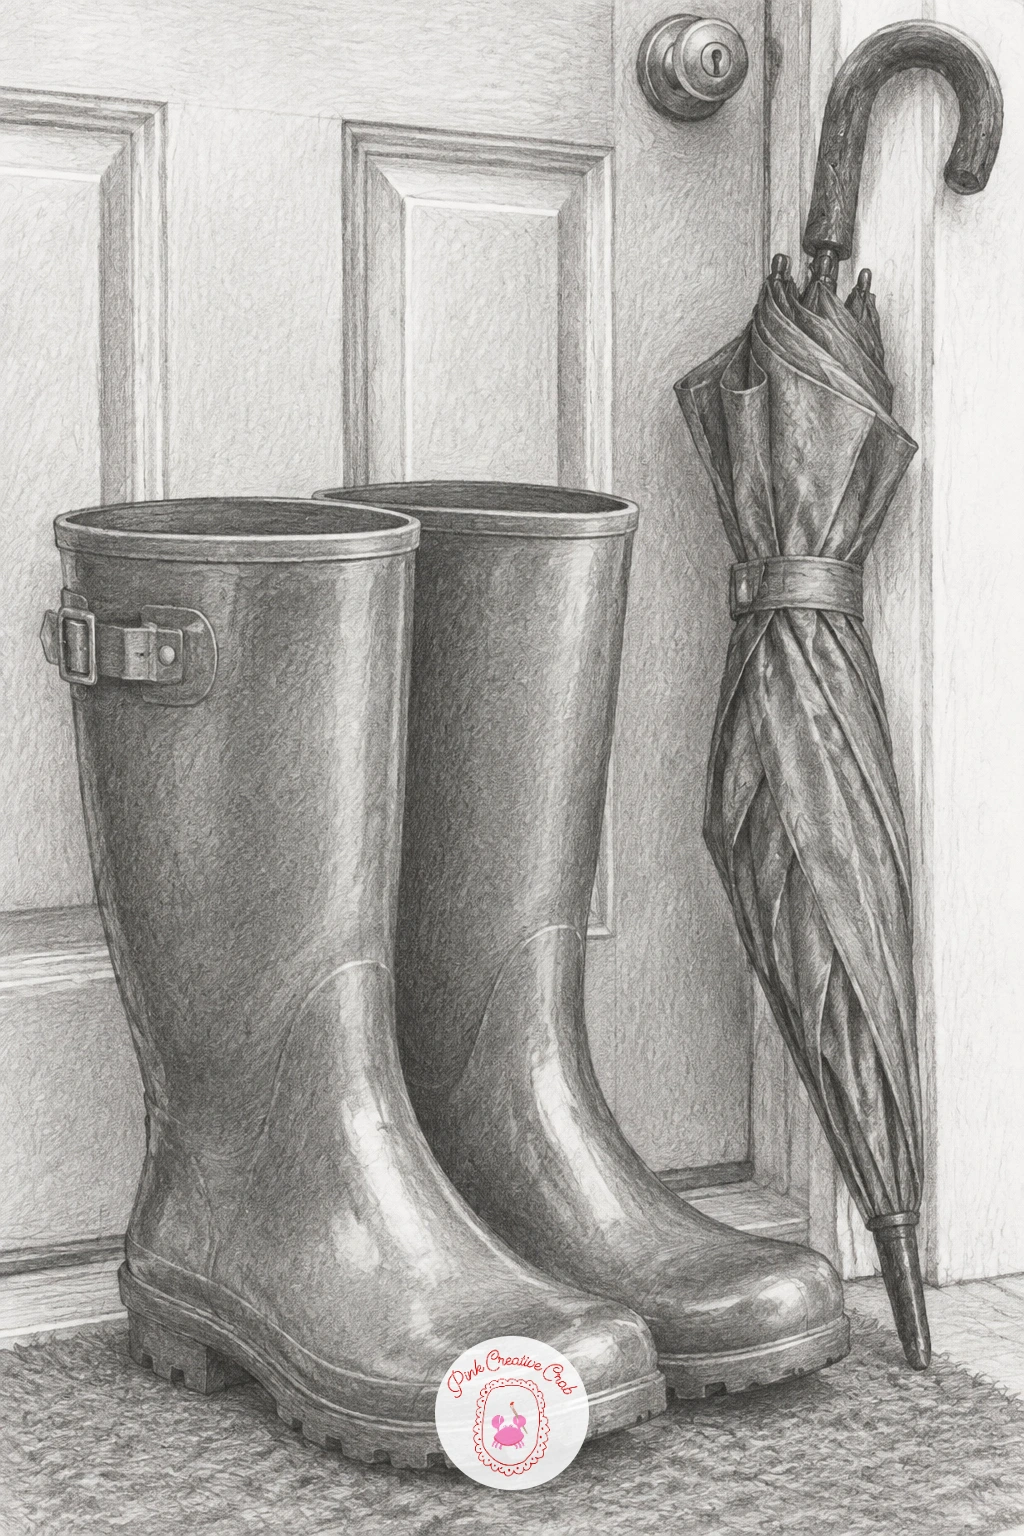
Near the end of the list, settle on a pair of rain boots standing by a front door with an open umbrella leaning nearby. Draw each boot as a simple tall cylinder shape first, matching their height and angle to each other, then add the umbrella’s curved handle and ribbed canopy once both boots feel solid and settled on the ground.
Shade the rubber boots with an HB in one smooth even gradient, leaving a vertical highlight strip down the front of each where light catches the shiny rubber surface, then move to the umbrella’s canopy, shading each panel between the ribs slightly differently so the dome reads as faceted rather than perfectly smooth. A 2B deepens the shadow where the boots meet the floor and where the umbrella leans against the door frame.
Rubber boots often look dull if shaded too evenly all over. Keep that one bright highlight strip completely untouched white paper, since the shine is really what tells the viewer this is rubber rather than fabric or leather.
Tilt the umbrella at a slight angle against the doorway rather than standing it perfectly straight, it looks far more like it was actually left there a moment ago.
Palette: Graphite Grey,Charcoal Black,Paper White
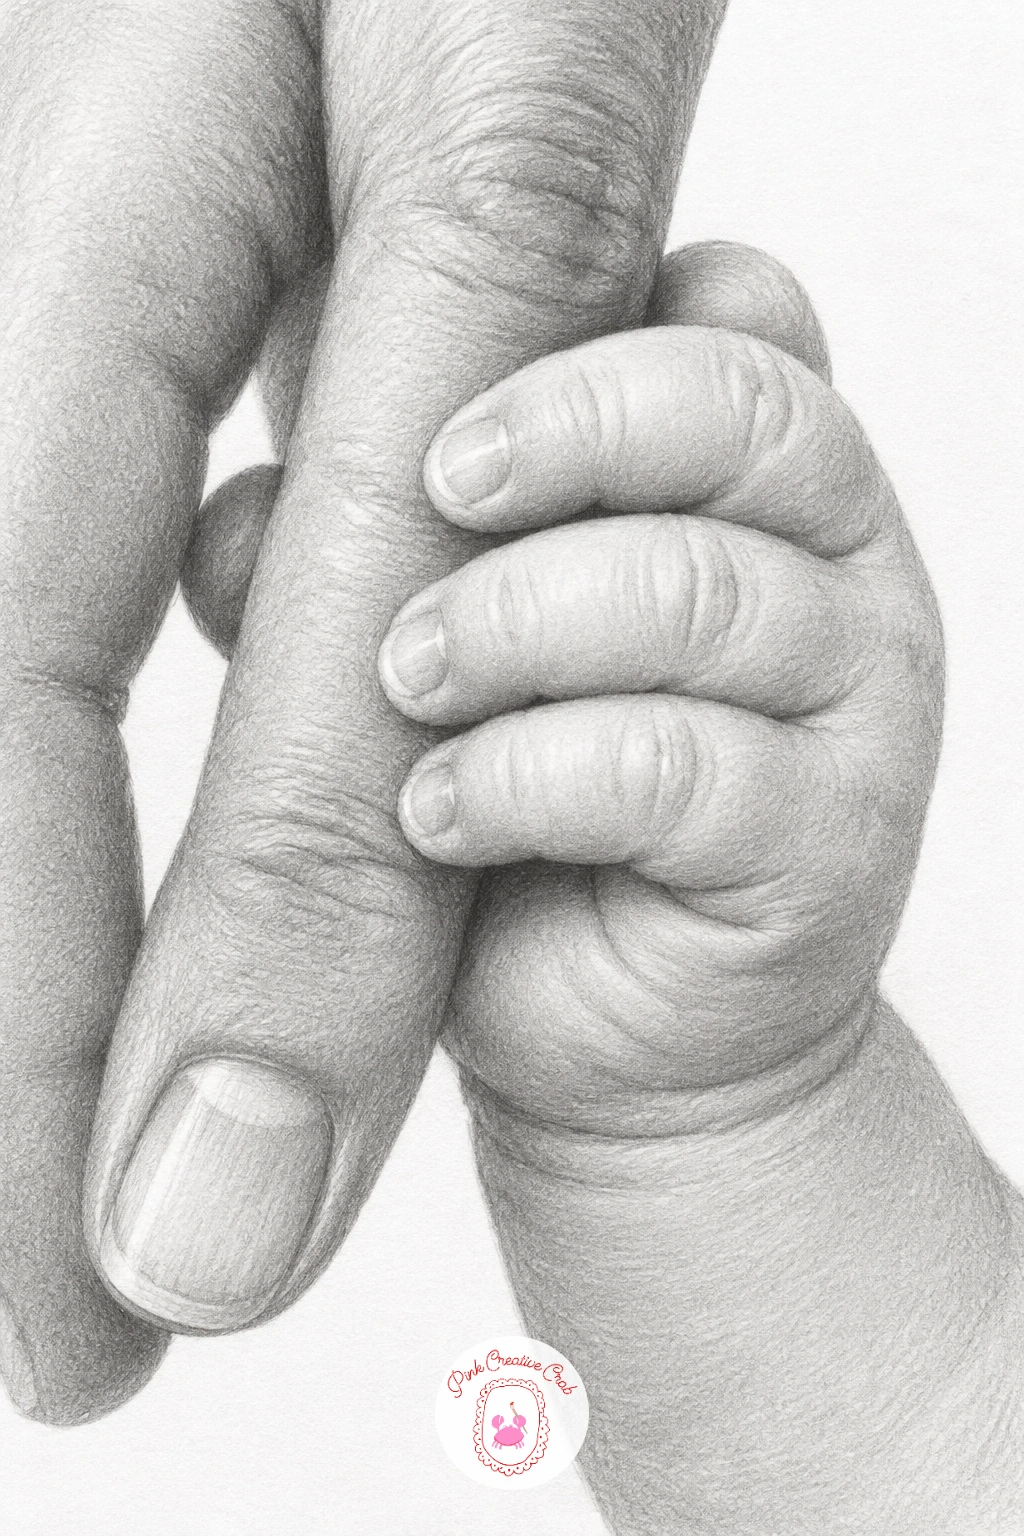
Close the whole list on something tender: a baby’s tiny hand curled around a grown up finger. Draw the adult finger first as one simple smooth cylinder shape, then build the baby’s hand wrapped around it from small soft rounded shapes, keeping every proportion noticeably tiny against the adult finger, since that size contrast is really the whole emotional point of this sketch.
Shade the skin with an HB in extremely gentle, almost imperceptible gradients, since a baby’s hand shows very little hard shadow and far more soft rounded form. Keep the fingernails as the only sharply defined small shapes in the whole drawing, each one just a tiny curved line and a touch of white left untouched.
Baby hands often come out looking too adult if the fingers are drawn too long and straight. Keep each tiny finger short, soft and slightly curled rather than extended, which is how a baby’s hand naturally rests.
Working from a close cropped reference photo rather than imagination makes a huge difference here, since the proportions are genuinely different from an adult hand and easy to get wrong by guessing.
Palette: Graphite Grey,Soft Black,Paper White
What to Do Next
Pick whichever subject feels most finishable right now, grab an HB and a 2B, and start with the lightest construction lines before any shading goes near the page. A plain sketchbook page is all this needs, so open to a clean sheet and get the first shape down.
Frequently Asked Questions
What pencils do I actually need for sketch ideas like these?
A range from HB to 4B covers almost everything here. HB handles light construction lines and flat mid tones, while 2B and 4B carry the deeper shadows, so you rarely need more than three pencils for any single sketch on this list.
How long should one sketch from this list take?
Most of these subjects suit a single sitting of thirty to sixty minutes once you know the shapes. Simpler objects like sunglasses or a seashell finish faster, while figures and animals with fur or feathers naturally take a bit longer to shade properly.
What paper works best for graphite pencil sketches?
A smooth to lightly textured bright white sketchbook paper gives the cleanest gradual shading. Very rough or heavily toothed paper fights fine blending, so look for paper described as smooth, hot press or drawing weight rather than rough watercolor stock.
How do I stop my pencil shading from looking patchy?
Build tone gradually in several light layers rather than pressing hard once. Work in small circular or back and forth strokes, blend lightly with a stump or tissue between layers, and let the darkest tones develop only at the very end.
Do I need reference photos for these sketch ideas?
Reference helps enormously, especially for hands, animals and seated figures where proportions are easy to misjudge. A quick phone photo of the actual object, or even a close substitute mentioned in each idea, keeps shapes and shadows accurate.
Have any thoughts?
Share your reaction or leave a quick response — we’d love to hear what you think!
-
 0
-
0
-
0
-
0
-
0
-
0


