

Bird painting acrylic projects are some of the most satisfying small canvases you can start and finish today. Each bird gets its own little world, a branch, a splash of water or a strip of sky, so you never have to tackle a whole busy scene to get a picture that looks finished.
Below you will find thirty two birds, from the chickadee at your feeder to the macaw in the jungle, every one built from flat shapes of color you block in and refine. Scroll through, pick whichever one makes you want to pick up a brush right now, and get painting.
Using these images: free for personal projects such as printing, coloring, cards, journals and gifts. Handmade items that include them may be sold up to 30 pieces per design. More than that is commercial use and is not permitted, and neither is selling or sharing the images themselves or passing them off as your own. Please ask before any other use.
Bluebird on a branch of white blossoms is the friendliest place to start, because the shapes are all soft ovals. Pencil a simple branch across the lower third of the canvas, then sketch the bird as one round body shape sitting on top of it.
Block the sky first in a pale cornflower wash so you are not painting around the bird later, then let it dry fully before adding the branch in a warm brown. Paint the bluebird in two values, a mid cornflower blue over the whole body and a deeper blue on the wing and tail, keeping the belly a soft rust orange.
The blossoms go in last with a small round brush, five quick petal dabs per flower and a yellow dot center, so they stay loose rather than fussy. If the bird’s head looks too big or too small once it is painted, a thin outline in deep blue can quietly resize it by pulling the eye to a new edge.
If you do not have cornflower blue on hand, mix ultramarine with a touch of white and a whisper of green.
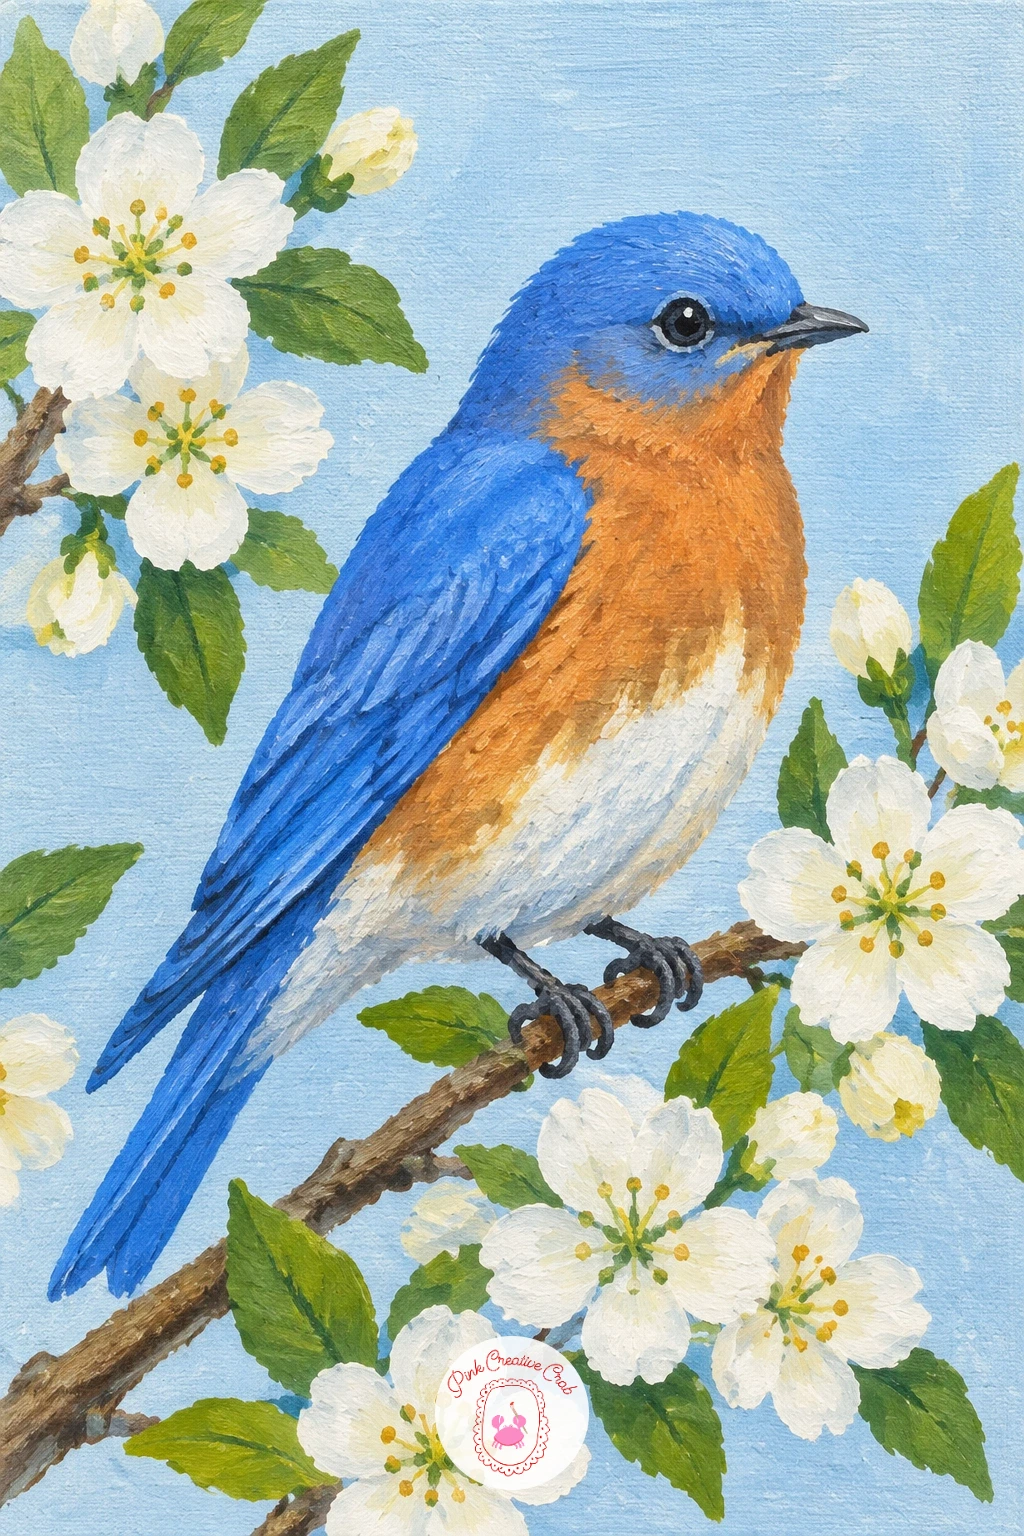
Palette: Cornflower Blue,Payne’s Grey,Rust Orange,Titanium White
Once the bluebird feels comfortable, try a hummingbird hovering beside a pink trumpet flower, because the wing blur gives you a new trick to learn. Start with the flower, a long cone shape painted in a bright pink with a soft yellow throat, and let it dry before the bird goes in front of it.
Paint the hummingbird’s body as a teardrop in deep green, then its throat patch in a hot rust orange, built up in two thin layers rather than one thick one so the color stays clean. The wings are the part that usually goes wrong: painting them as solid shapes makes the bird look stiff and glued in place.
Instead, mix a thin grey glaze and drag it quickly in two soft arcs where the wings would be, letting some sky show through so they read as a blur of motion. If pink trumpet flowers are not your thing, a red tubular flower works just as well and keeps the same hovering pose believable.
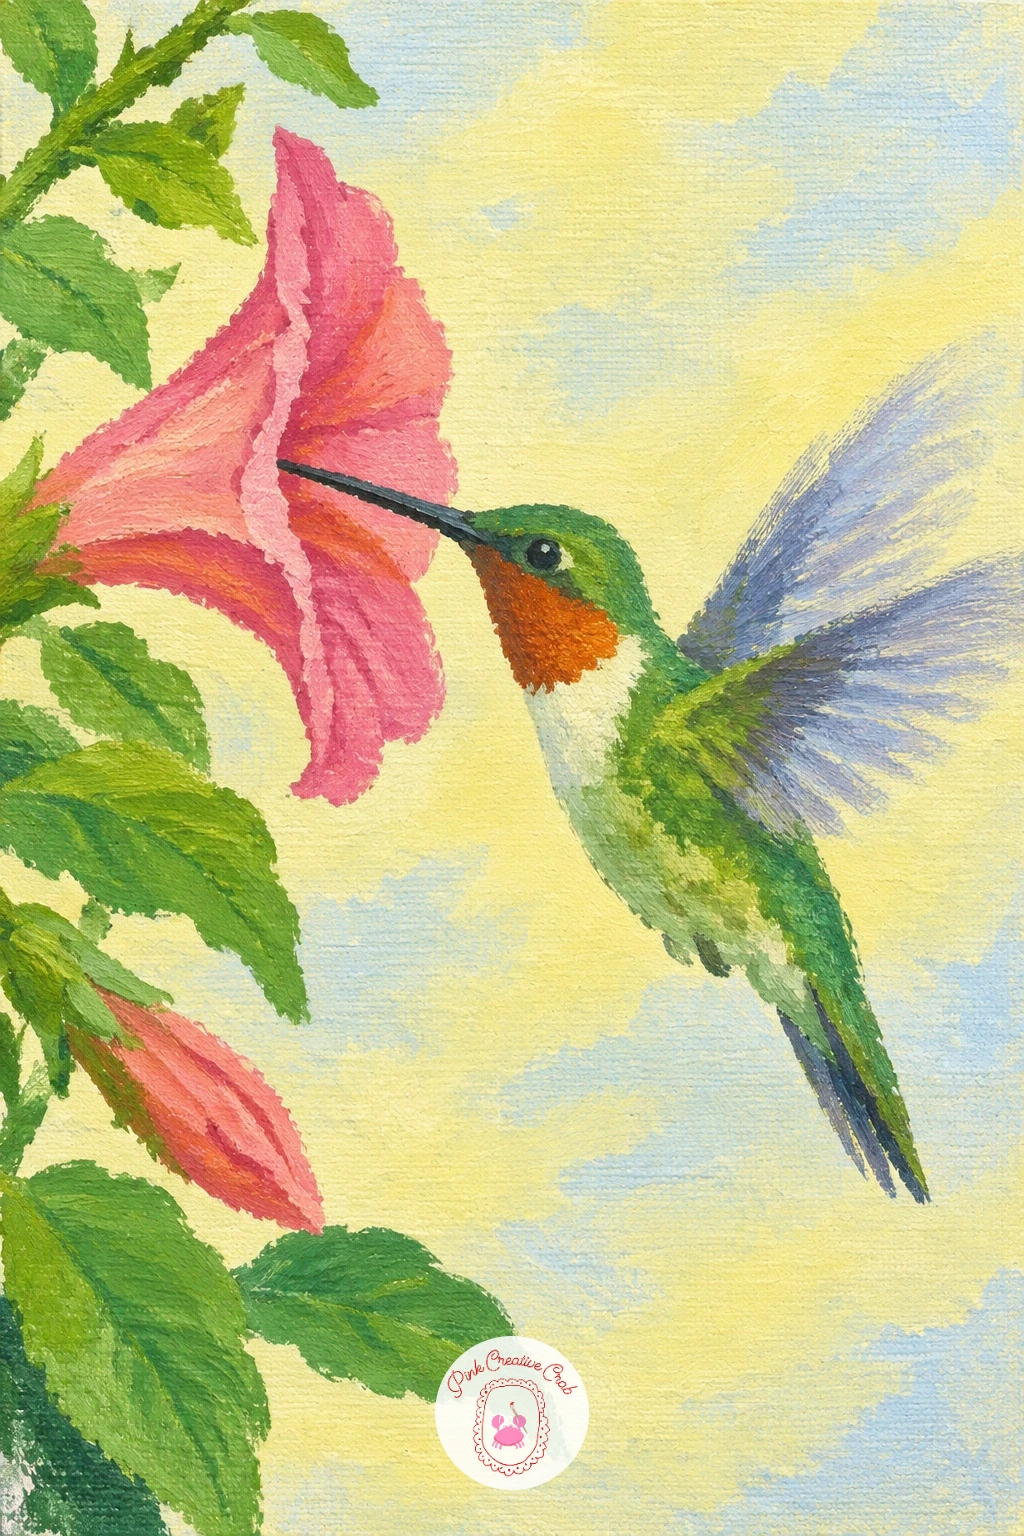
Palette: Phthalo Green,Quinacridone Rose,Soft Yellow,Payne’s Grey
A kingfisher diving toward a clear stream gives you a chance to think about where the eye naturally travels across a canvas. Sketch the bird at a diagonal, head down and wings tucked back, positioned a little above the water line so the whole canvas reads as motion rather than a bird just sitting there.
Paint the stream first in bands of cornflower blue and white, leaving the diagonal space above empty for the bird. Block the kingfisher’s back in a strong teal blue and its chest in rust orange, then add the long dark beak last with a fine liner brush, since one shaky line there can throw off the whole dive.
Eye level matters here: paint the water from slightly above, with the far bank as a thin green strip near the top of the stream, and the dive instantly feels more real. A short fan brush dragged lightly through the wet blue makes a believable ripple where the beak is about to break the surface.
No teal on your palette is fine, just mix phthalo blue with a touch of green.
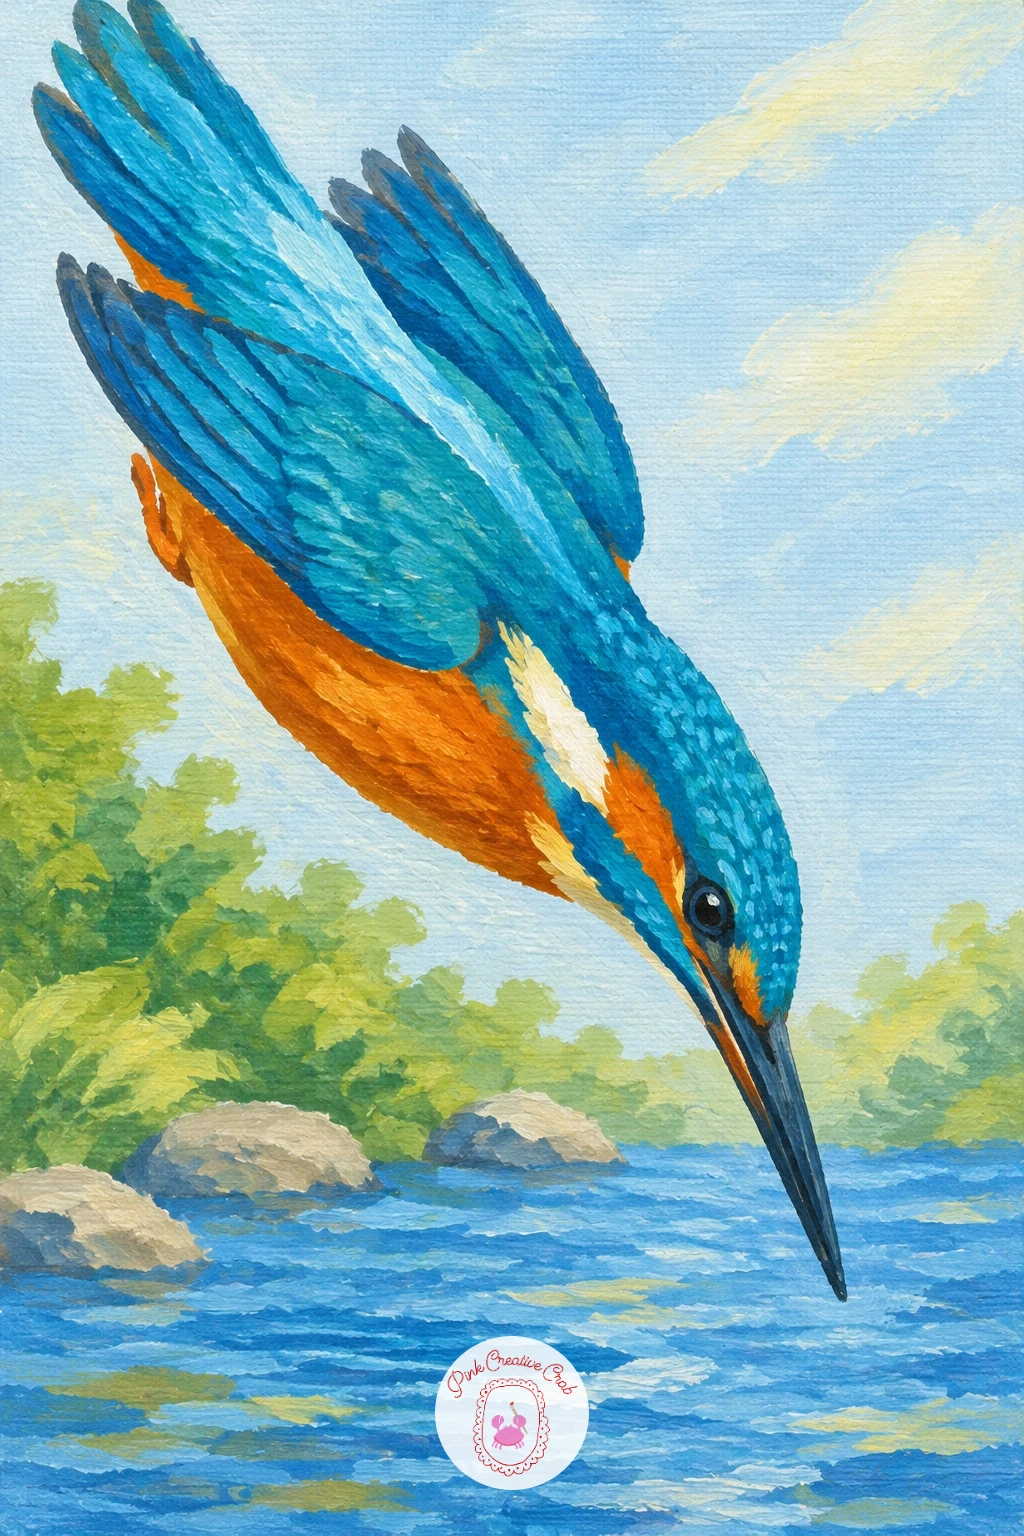
Palette: Teal Blue,Rust Orange,Leaf Green,Titanium White
After a diving bird, slow things down with a pair of lovebirds snuggled on a perch, since this one is really about getting two matching shapes to sit well together. Draw both bodies as overlapping ovals, one slightly behind and lower than the other, so they read as leaning into each other rather than two separate birds side by side.
Paint the perch first in a warm brown, then block in the front bird’s body in leaf green with a soft yellow face, letting it dry before you paint the second bird close behind in a slightly deeper green so it recedes a little. Keep the beaks small and rust orange, just a short triangle each.
If the two birds end up looking flat and same sized, darken the back bird’s shadow edge where it meets the front one, and the pair will suddenly separate into near and far. This is a good one to paint quickly, in under ten minutes for the blocked color, then spend the rest of the sitting softening the edge where the two bodies touch.
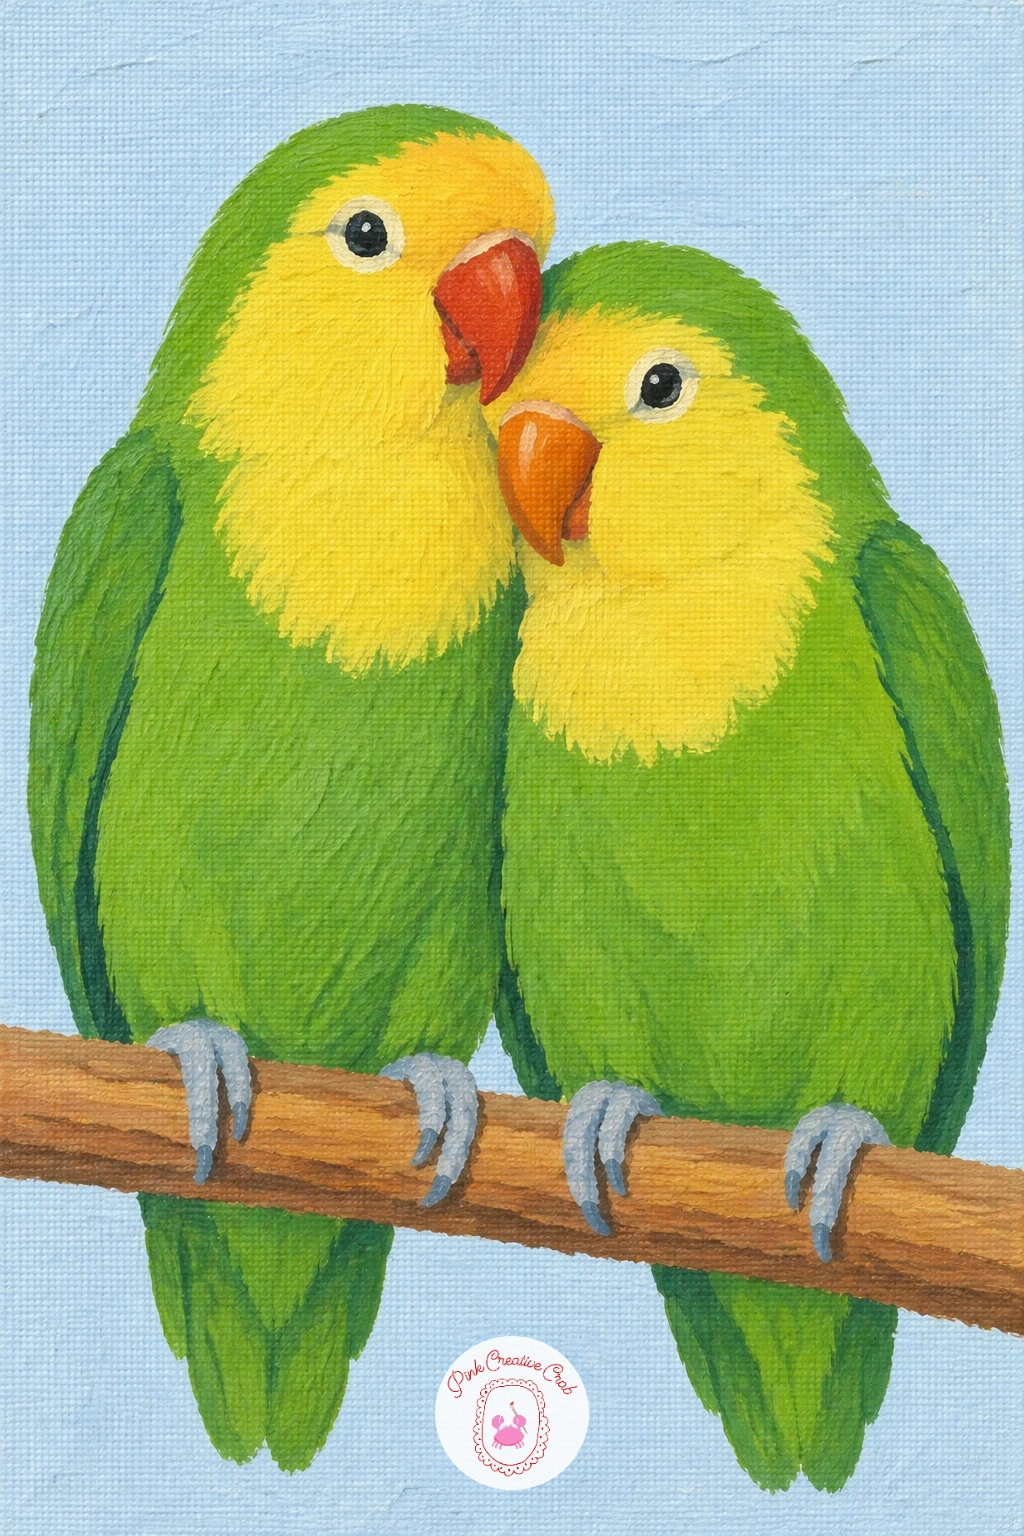
Palette: Leaf Green,Soft Yellow,Rust Orange,Burnt Umber
A blue jay on a mossy fence post moves you toward texture work, since the moss and the jay’s crest both reward a bit of dry brush. Block the fence post as a simple vertical rectangle in weathered grey, then paint the jay on top in cornflower blue with a black necklace marking and a white belly.
Once the post is dry, load a stiff flat brush with leaf green, wipe most of the paint off on a paper towel, and drag it lightly across the top of the post so the texture of the canvas breaks up the color into moss-like patches. The crest on the jay’s head is where beginners often flatten the whole bird by painting it as one smooth triangle.
Instead paint it as three or four short pointed strokes with a small round brush, each one a touch lighter at the tip, and the head immediately looks alert rather than sleepy. No stiff brush at home, an old toothbrush dabbed dry works for the same broken moss texture.
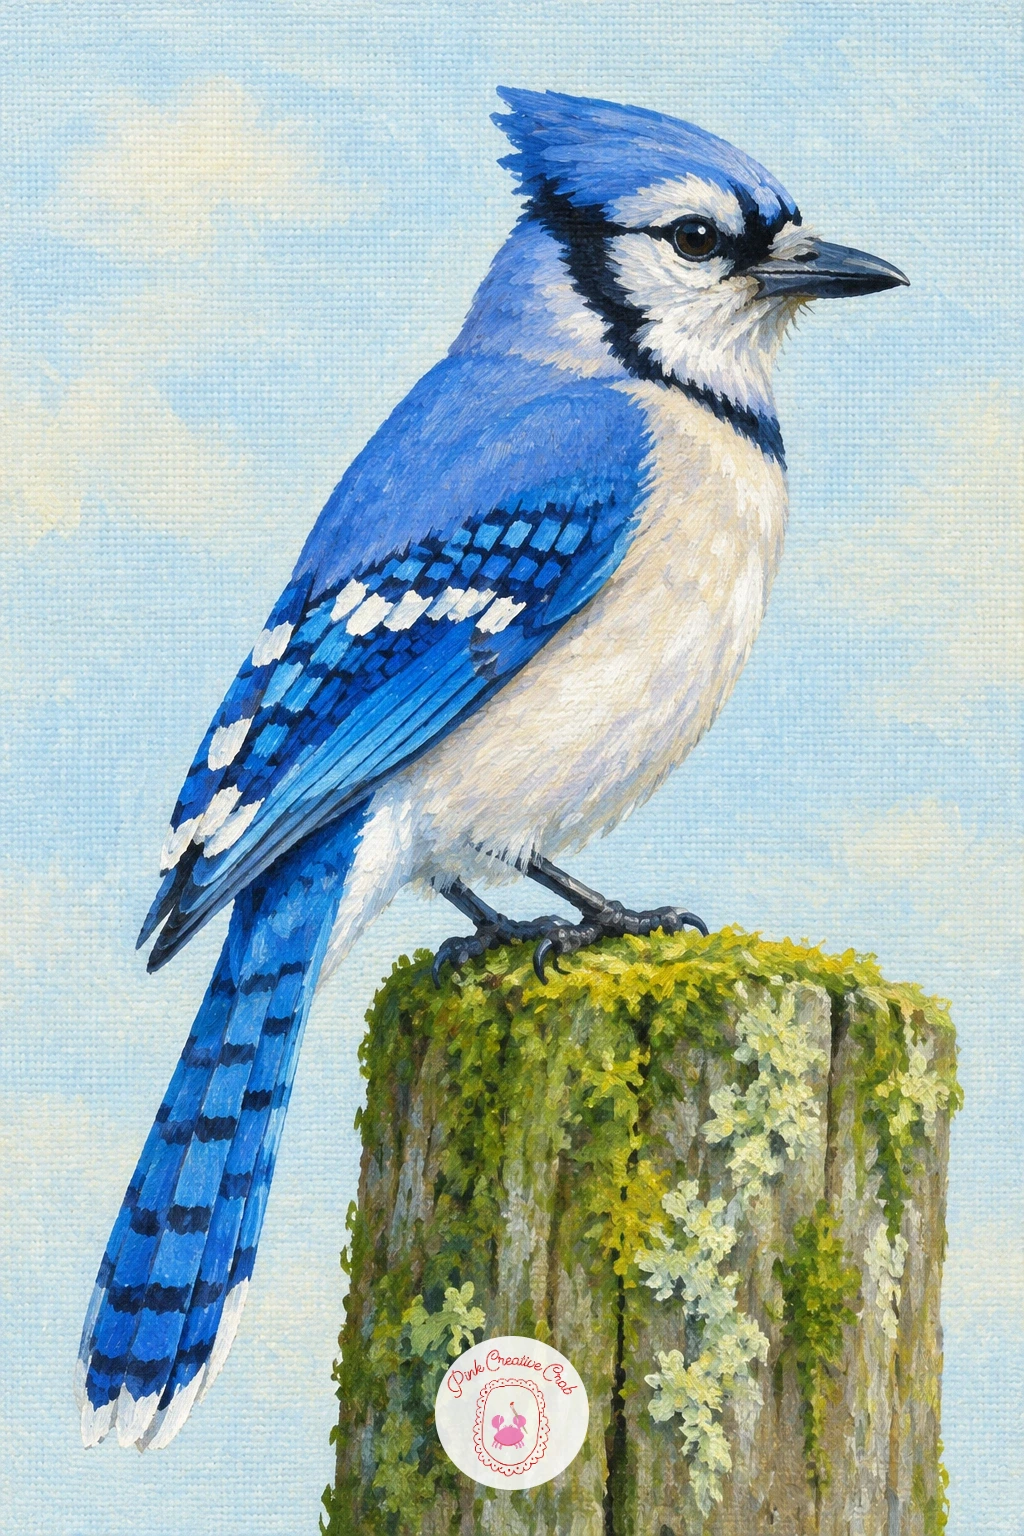
You Will Need
- stiff dry brush for texture
Palette: Cornflower Blue,Payne’s Grey,Leaf Green,Titanium White
Goldfinch on a purple thistle head is a lovely color study, since the bright yellow bird sits right against its complementary purple, and that contrast alone does most of the work for you. Paint the thistle head first as a round spiky shape in a muted purple, using short outward strokes with a small brush so the spikes feel sharp rather than fuzzy.
Once dry, block the goldfinch in soft yellow with a black cap and black wing tips, keeping the body shape rounded and compact like a small pear. The feet gripping the thistle are the part most likely to go wrong, since too many thin lines make them look spidery.
Paint each foot as two simple curved strokes wrapping around the stem rather than separate toes, and it reads clearly from across the room. If purple thistles are not available in your reference, a dried purple allium head gives the same round spiky silhouette.
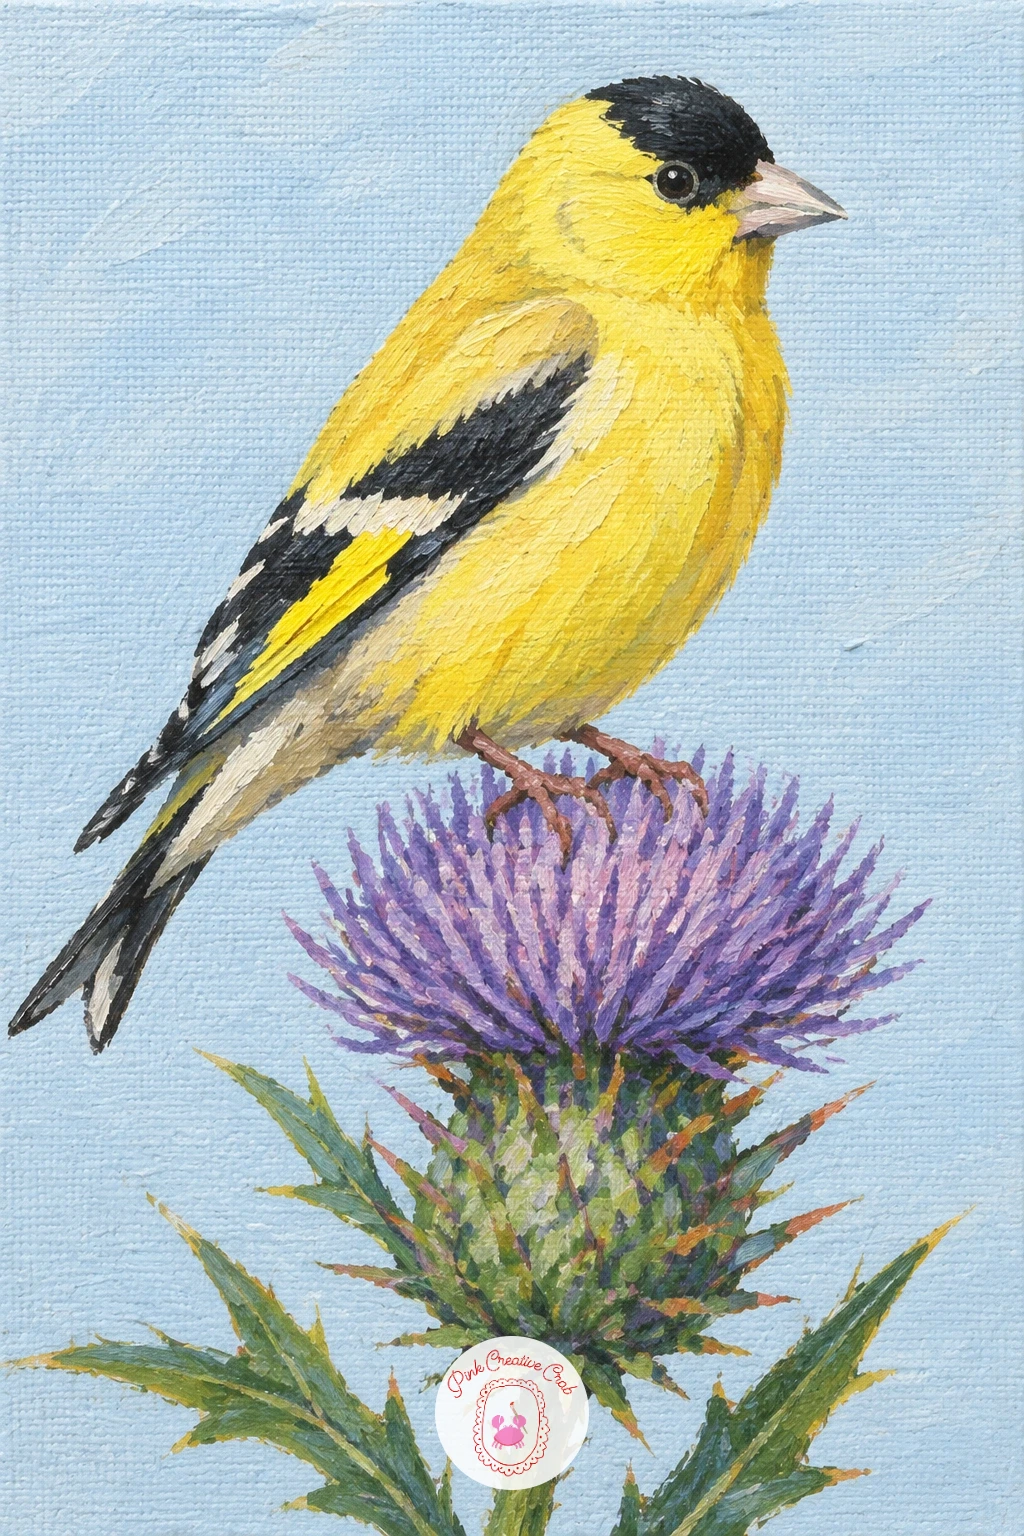
Palette: Soft Yellow,Muted Purple,Payne’s Grey,Leaf Green
Move toward the coast with a puffin standing on a grassy cliff, where getting the proportions right starts with the beak, not the body. Lightly measure the puffin’s beak against its head before you paint anything, since the real bird’s beak is nearly as tall as its head is long, and most first attempts paint it far too small.
Block the body as a rounded white and black shape, then paint the beak in two bands, rust orange at the tip and a paler yellow orange closer to the face, with a thin black line dividing them. The cliff behind is just a flat green slope with a few darker green strokes for grass clumps, kept simple so it never competes with the beak.
If the beak still looks small once it is dry, you can always paint a touch more orange over the existing shape to widen it, acrylic forgives that kind of correction easily. Keep the feet a simple rust orange too, tucked under the body rather than fully drawn out.
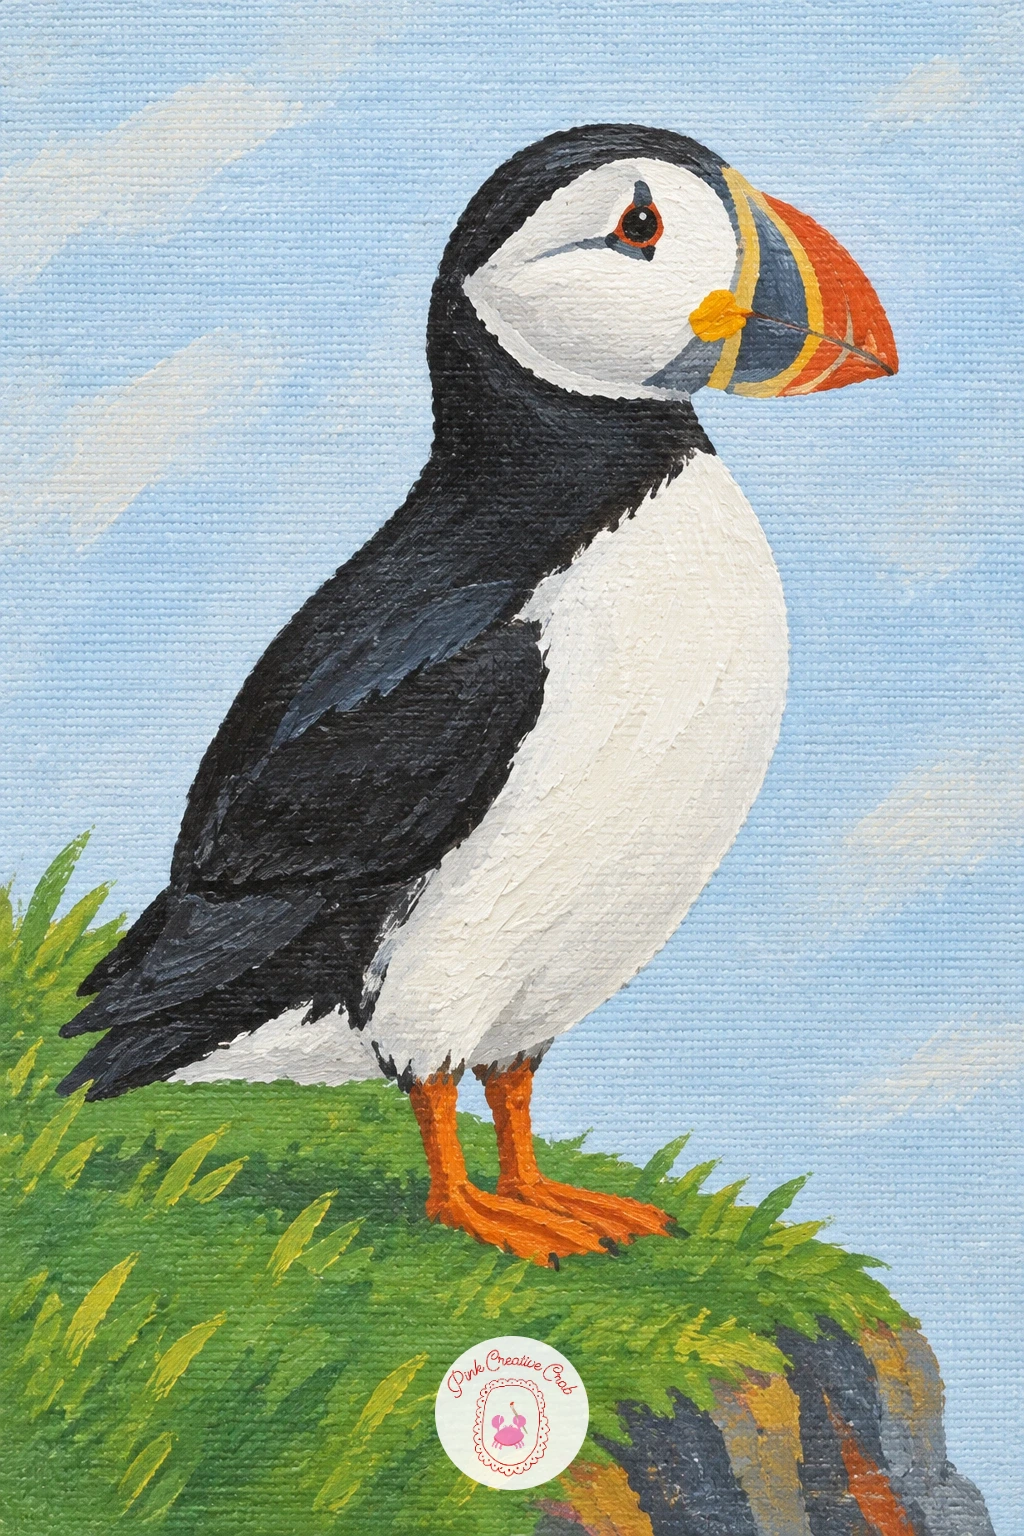
Palette: Payne’s Grey,Titanium White,Rust Orange,Leaf Green
Look at a few reference photos of puffin beaks before you start, since the size of that beak is what makes this bird instantly recognizable on canvas.
A magpie with a shiny ring in its beak brings in a small prop, and this is where light direction starts to matter more than it has so far. Decide early where your light source sits, say upper left, and paint the magpie’s black feathers with a slight blue sheen only on the side facing that light, keeping the shadow side a flatter black.
Block the body first, black with a clean white belly patch and white wing edges, then paint the tail as one long tapering shape rather than a bundle of feather lines. The ring is tiny but it carries the whole idea, so paint it last as a small circle in soft yellow with a single bright white highlight dot where the light would catch metal.
If the magpie’s black ends up looking flat and lifeless, that highlight dot on the ring is often enough contrast to make the whole bird feel lit. A simple coin or button shape works just as well as a ring if you prefer, the idea of something shiny in the beak is what matters.
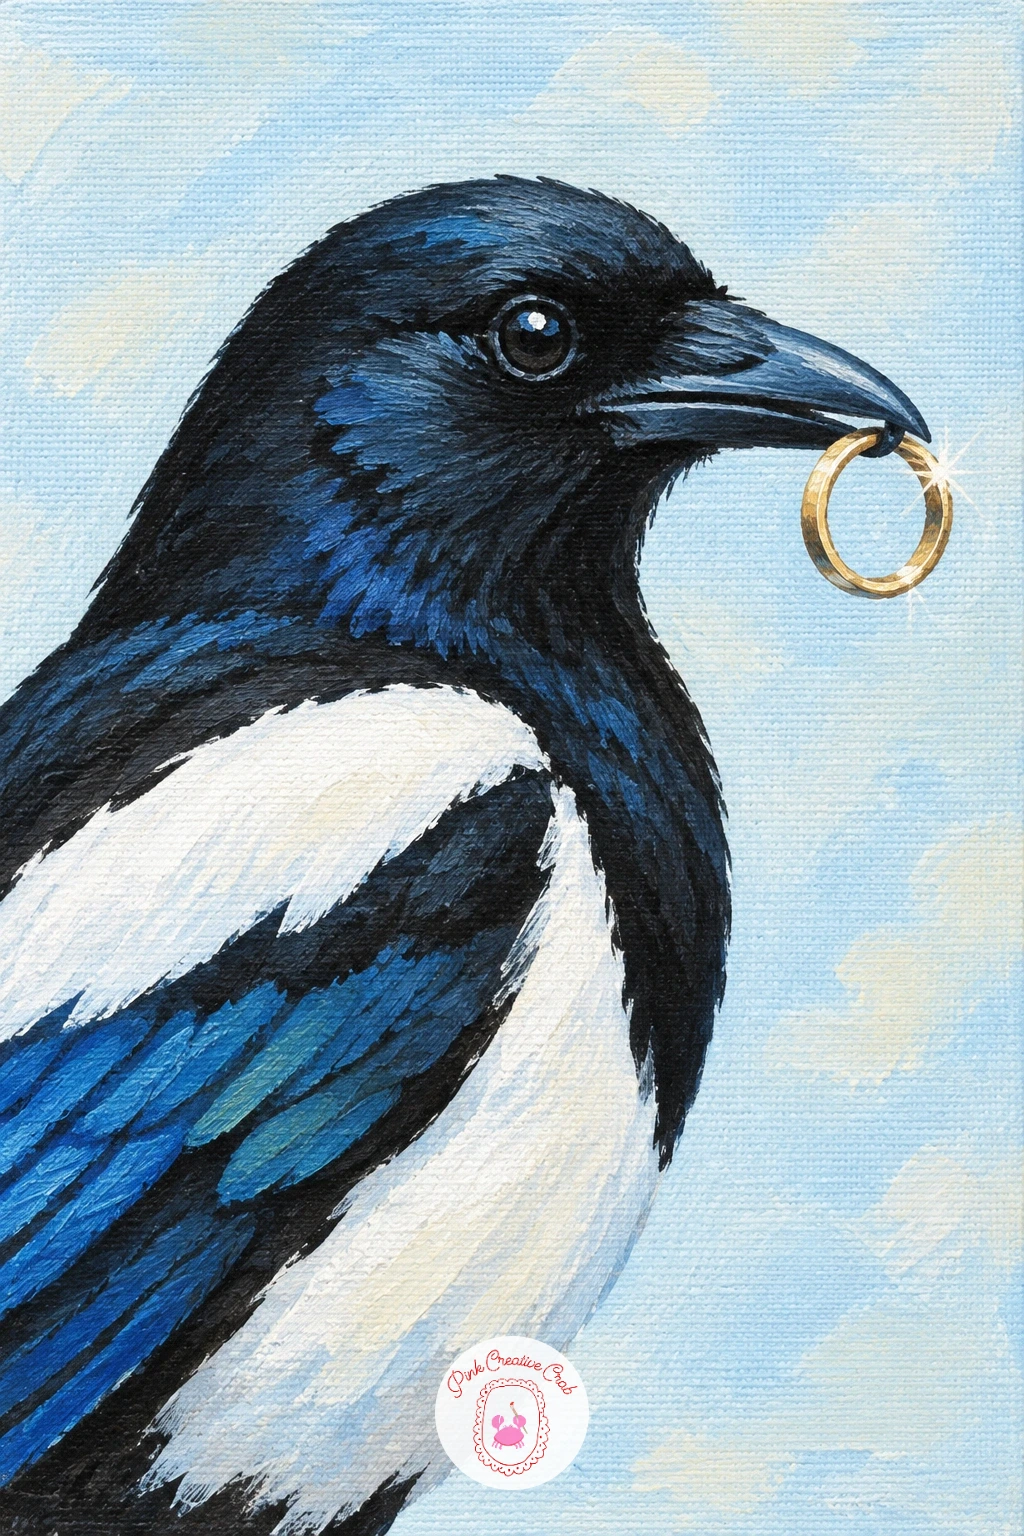
Palette: Mars Black,Titanium White,Soft Yellow,Cornflower Blue
Wren peeking out of a teapot birdhouse takes you into one of the more playful little scenes on this list. Paint the teapot first as a rounded shape in a soft pastel color with a simple curved handle and spout, keeping it flat and graphic rather than trying to render shine on ceramic.
Once dry, paint a dark round opening where the wren peeks through, almost black so the bird reads as emerging from shadow, then add just the wren’s head and shoulders in warm brown with a short upturned tail poking out beside it. Keep the detail on the wren light, a few short dark strokes for the wing pattern is plenty.
This is a quick one for a first sitting, the teapot shape and the dark opening alone take maybe ten minutes, and a longer sitting lets you add a small branch resting against the teapot or a few leaves tucked near its base. If you like painting small whimsical animal scenes like this one, the animal doodle painting ideas page has more in the same playful spirit.
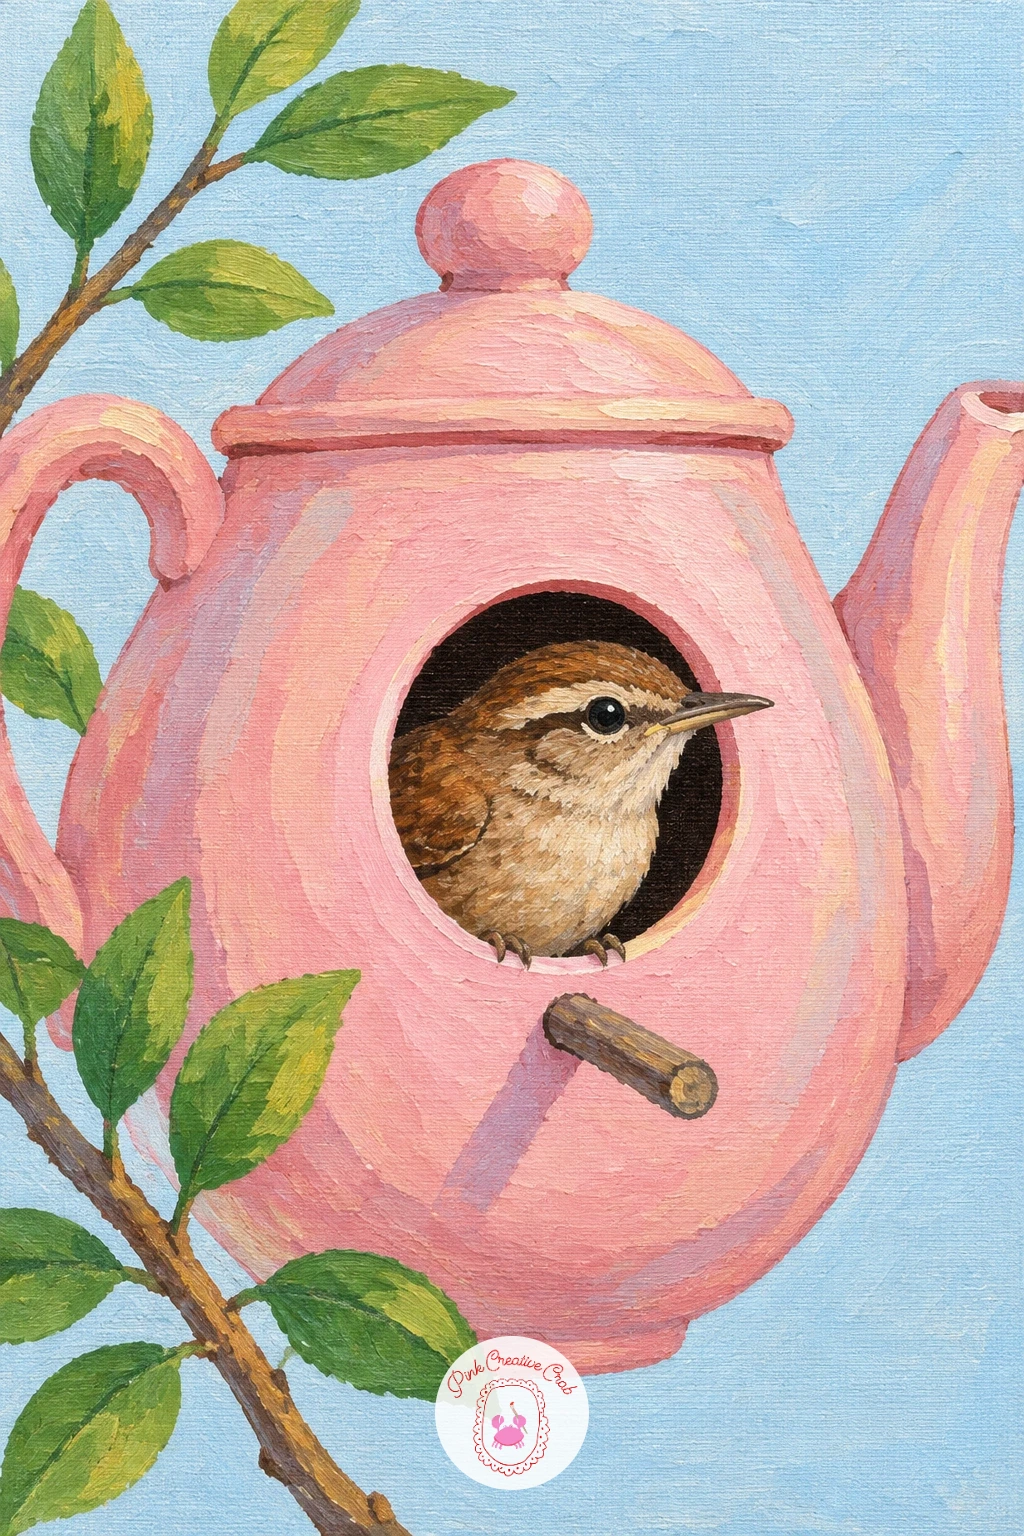
Palette: Pastel Pink,Burnt Umber,Mars Black,Leaf Green
A family of chickadees lined up on a twig is a good proportion exercise, since all three birds share the same basic round shape but need to read as individuals. Measure the twig first, a single thin horizontal line across the canvas, then space the three bird bodies evenly along it, overlapping their feet just slightly with the branch rather than floating above it.
Paint all three chickadees in the same sequence, black cap, white cheek, grey body, so the painting stays consistent, but vary each head’s tilt slightly, one looking left, one straight ahead, one looking right. That small variation in head angle is what keeps three near-identical birds from looking like a stamped pattern.
The twig itself can go in last with a thin liner brush loaded with burnt umber, one confident stroke rather than several shaky ones. If three birds feels like too much for one sitting, start with two and add the third once you are happy with the first pair.
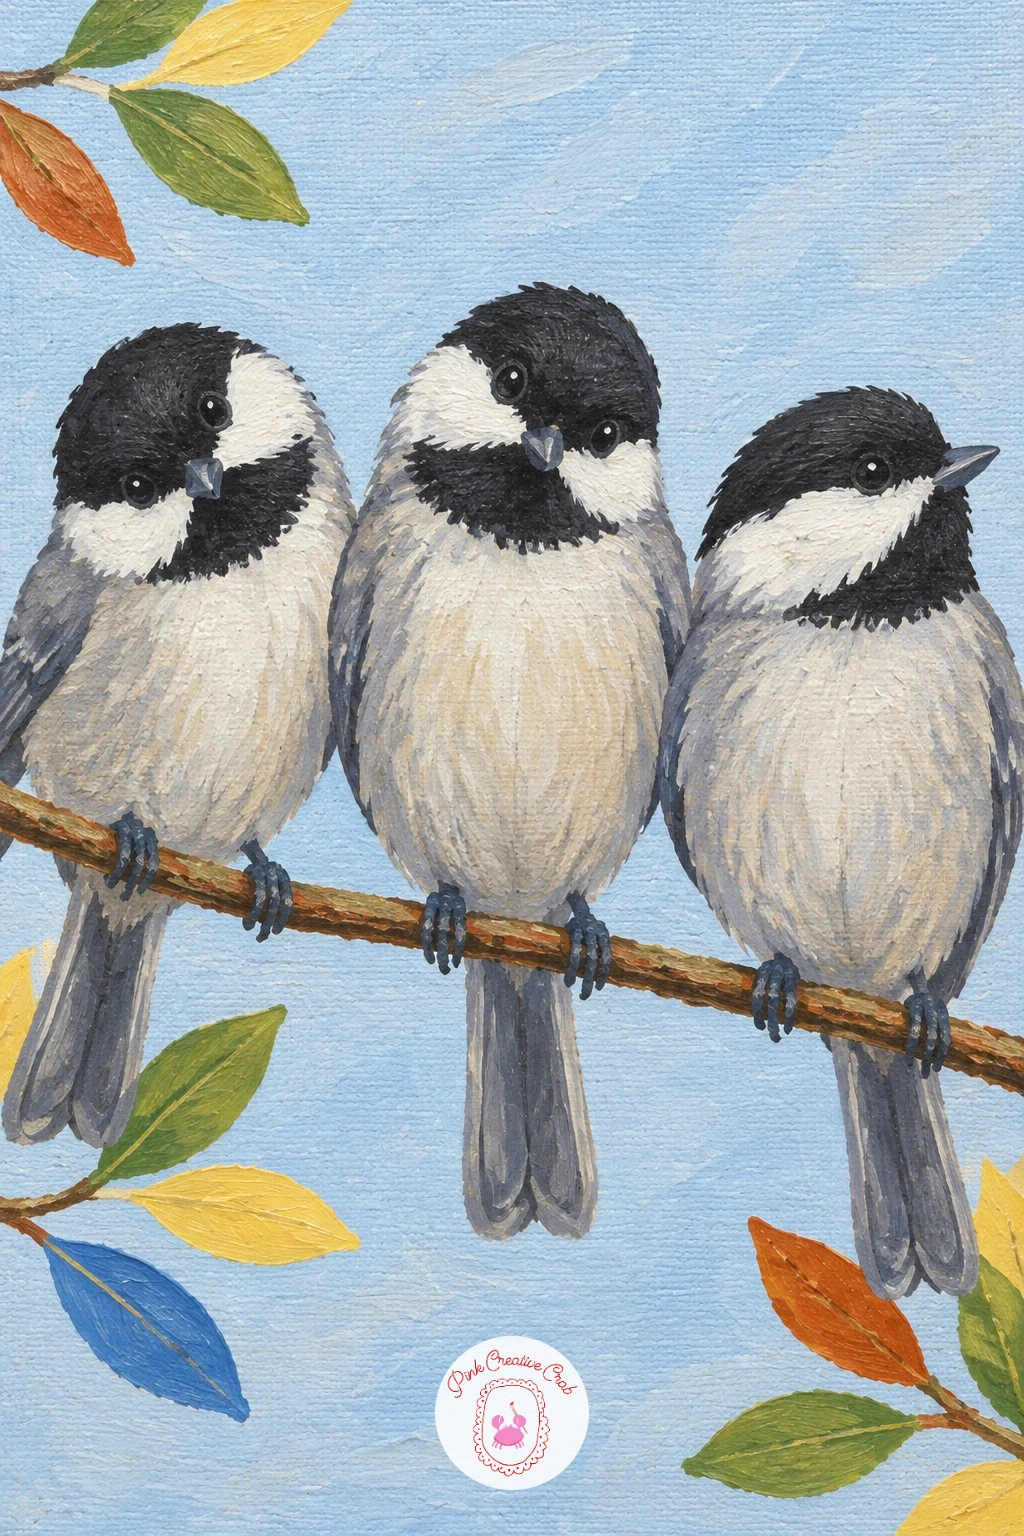
Palette: Mars Black,Titanium White,Payne’s Grey,Burnt Umber
Pelican gliding low over the waves asks you to think about eye level again, this time from the bird’s own point of view rather than the viewer’s. Paint the water as flat bands of cornflower blue and white near the bottom of the canvas, then place the pelican’s long body stretched out horizontally just above it, wings swept back rather than spread wide.
Block the body in a soft grey white, the throat pouch in a warm pale rust, and the long flat beak in grey with a thin dark line along its length. Because the bird is gliding so low, keep its shadow visible on the water directly beneath it, a simple elongated grey smudge, and that single shadow does more to sell the height of the glide than any amount of extra detail on the bird itself.
If the wingspan looks awkward, check that the wingtip reaches roughly as far back as the tail, a common proportion mistake is making the wings too short for how big pelicans actually are. White gouache or white gel pen can add a crisp highlight along the top of the wave if your acrylic white feels too flat.
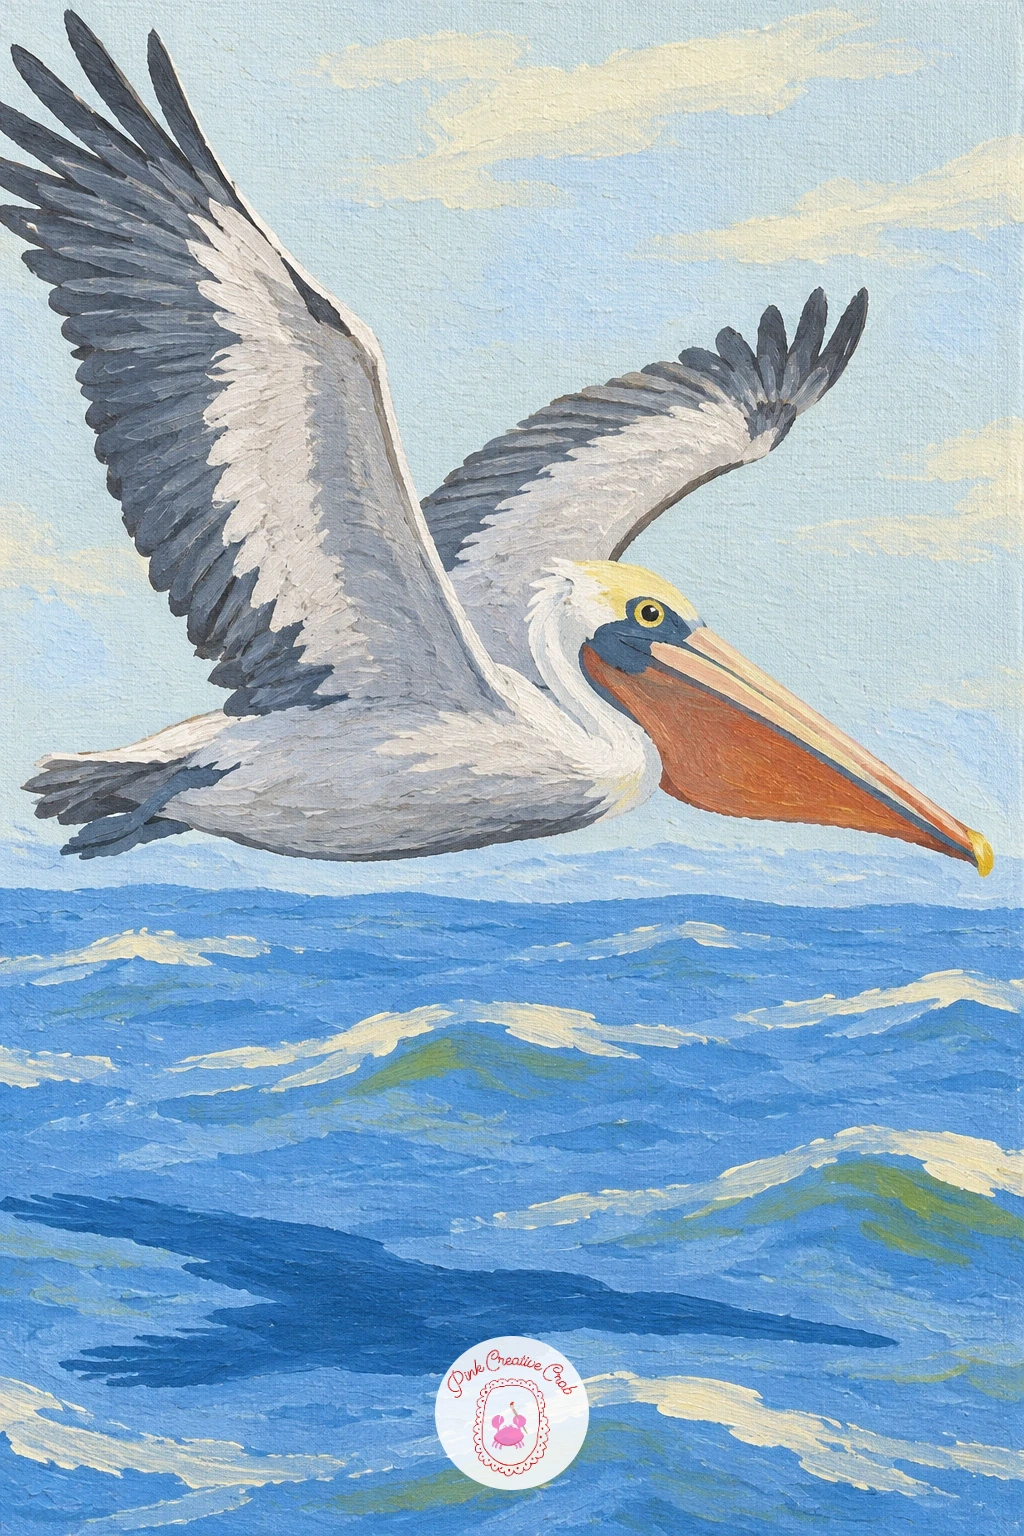
You Will Need
- white gel pen for wave highlights (optional)
Palette: Cornflower Blue,Titanium White,Payne’s Grey,Rust Orange
A pink roseate spoonbill wading in shallow water is one of the most rewarding color blocks on this whole list, because that saturated pink against pale water does most of the visual work for you. Paint the water first as a flat pale blue with a few horizontal white streaks for ripples, then let it dry completely before the bird goes on top.
Block the spoonbill’s body in a bright pink, slightly deeper pink on the wing where shadow falls, and keep the long legs thin and dark so they do not compete with that big pink shape. The spoon shaped beak is the detail that makes this bird instantly readable, so paint it last in grey, flattened and slightly curved downward at the tip.
If the pink looks too flat once it is dry, a thin glaze of white mixed with a touch of pink dragged across the lit side of the body adds just enough variation without overworking it. For a reference swap, any wading pose with the neck curved down toward the water will read correctly even if you are painting from imagination.
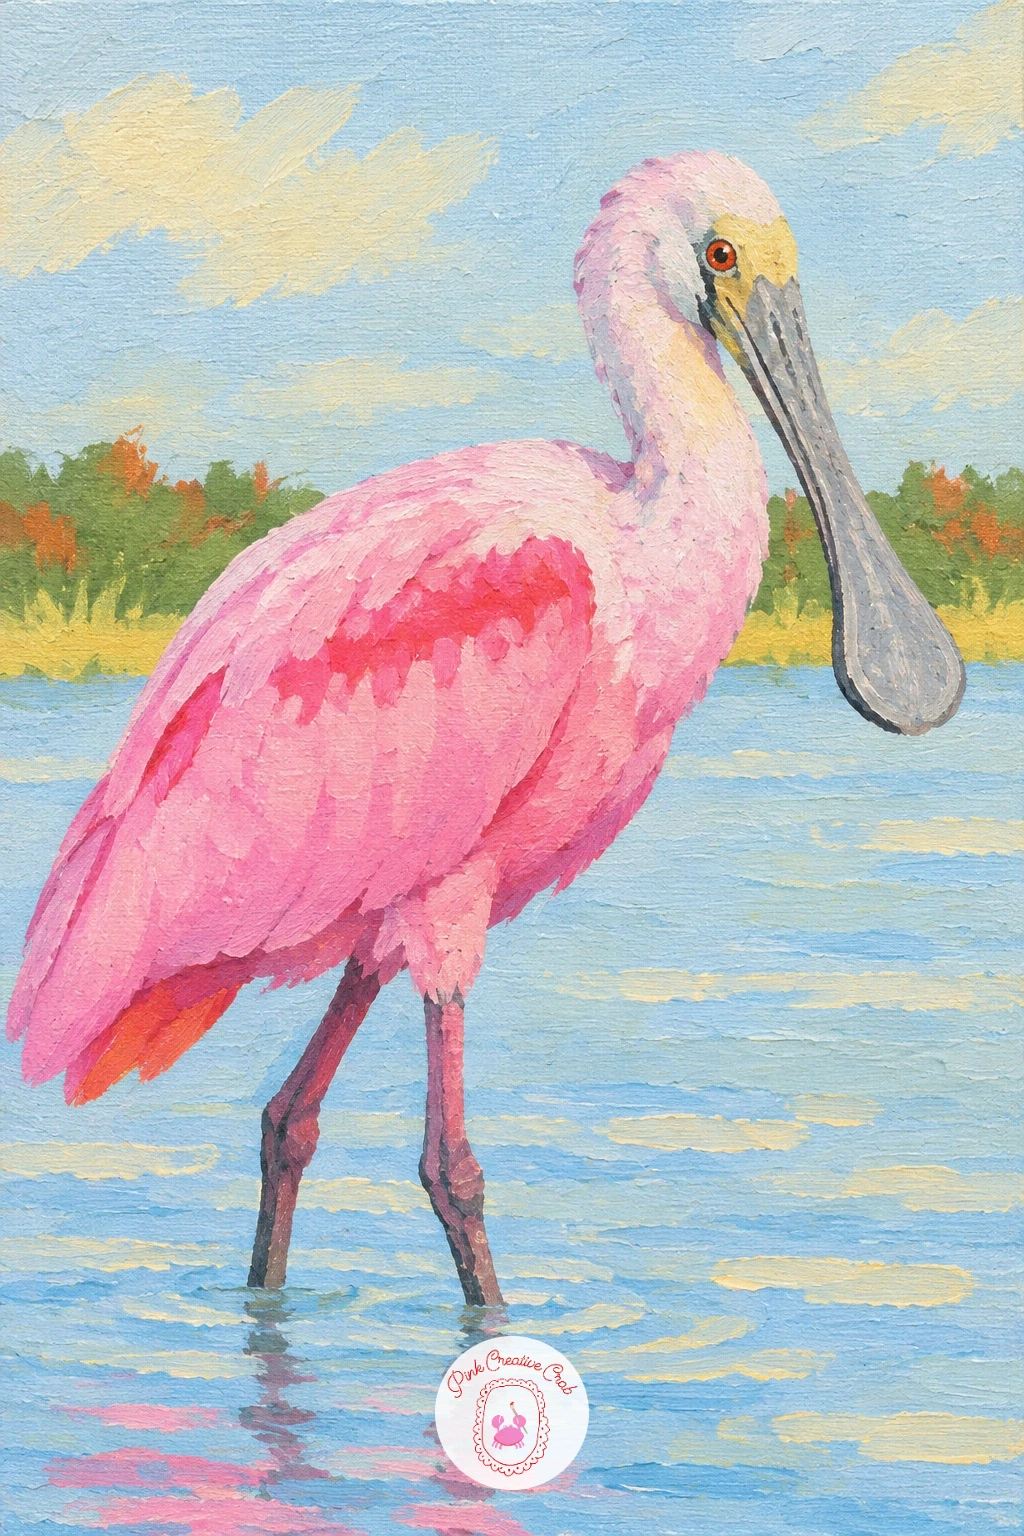
Palette: Quinacridone Rose,Deep Pink,Payne’s Grey,Cornflower Blue
A cockatoo with its crest raised is a chance to practice a texture trick you can reuse on any crested bird. Block the body first in soft white with pale yellow undertones near the cheek and crest, keeping the overall shape simple and rounded, almost like a single large teardrop with a hooked beak.
Once that base layer is dry, load a fine round brush with a slightly deeper yellow and pull short upward strokes from the base of the crest to its tip, following the direction the feathers actually fan out in. This directional stroke is what separates a believable raised crest from a flat yellow triangle stuck on top of the head.
The beak and the dark eye ring go in last with a liner brush, since one clean curved line for the beak reads better than several short hesitant ones. If you want a quicker version, skip the individual crest strokes and block it as one solid yellow shape, it still works, it just looks less feathery up close.
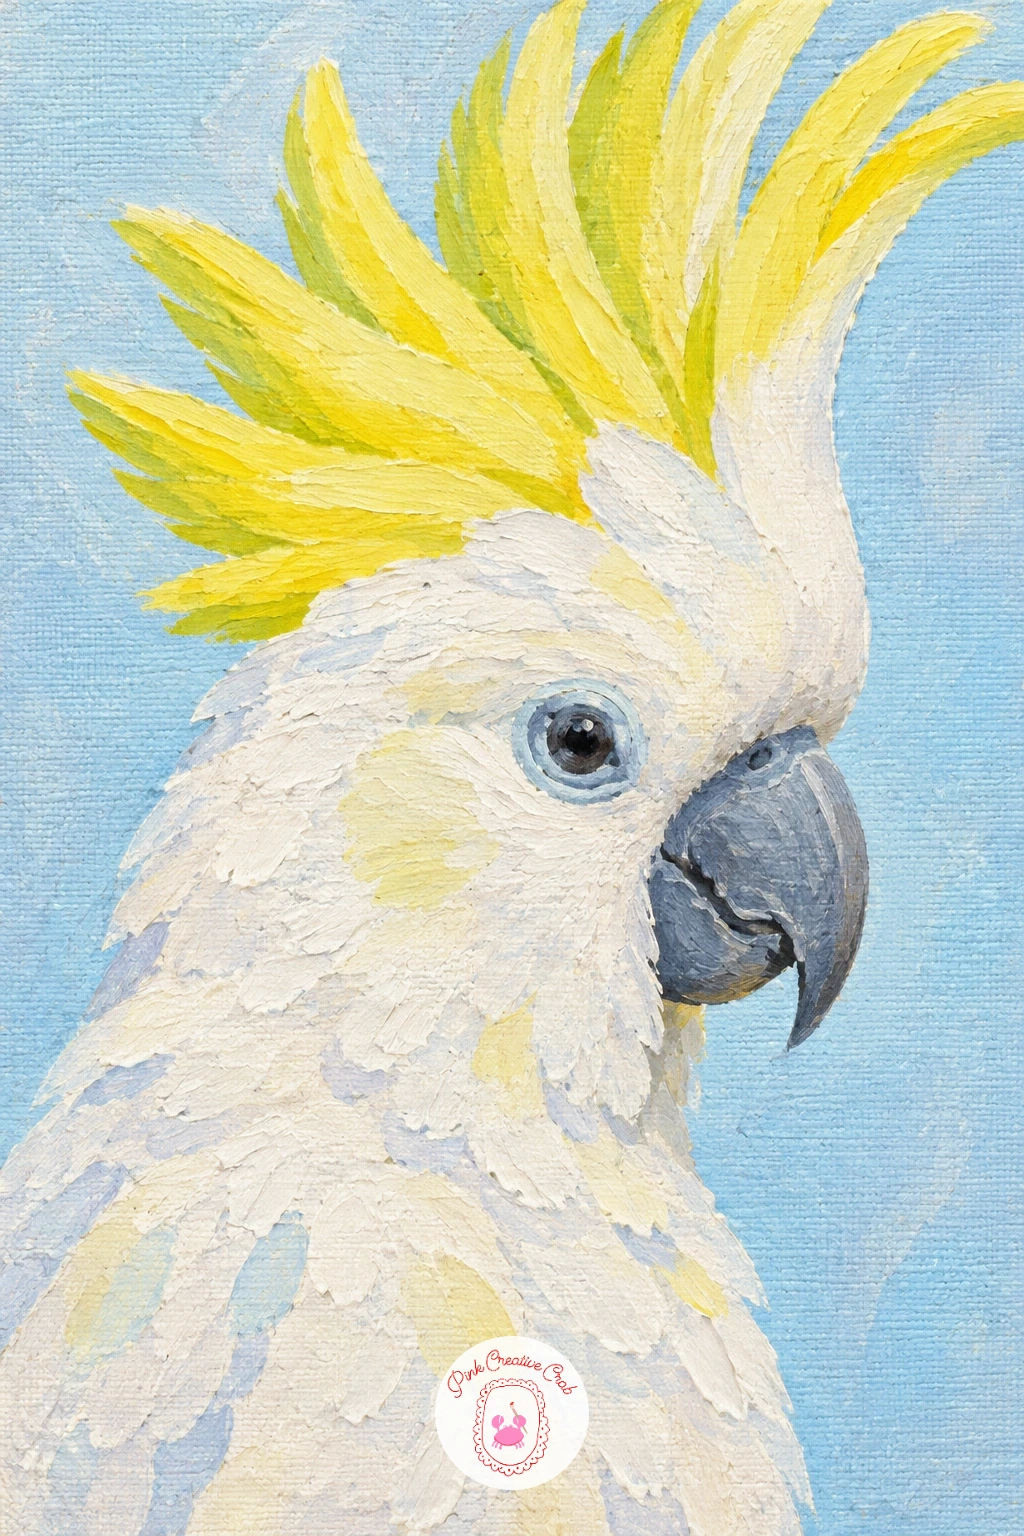
Palette: Titanium White,Soft Yellow,Payne’s Grey,Mars Black
A hoopoe with a striped crown on a stone wall carries on that same crest idea but adds a strong pattern across the whole body, so this one rewards patience more than speed. Paint the stone wall first as a few flat grey rectangles with slightly different values, then block the hoopoe’s body in a warm pinkish tan.
The black and white striping across the wings and the fanned crown is the heart of this painting, and it goes in last with a small flat brush, short confident stripes rather than long wavering ones. If the stripes start looking too busy, step back and simplify, three or four clean bands read better than a dozen thin ones.
A long curved beak in grey, slightly open, finishes the head and gives the bird a sense of being mid call. If painting a full stone wall texture feels like too much for one sitting, a single flat grey block with a few cracks sketched in gets the idea across just as well.
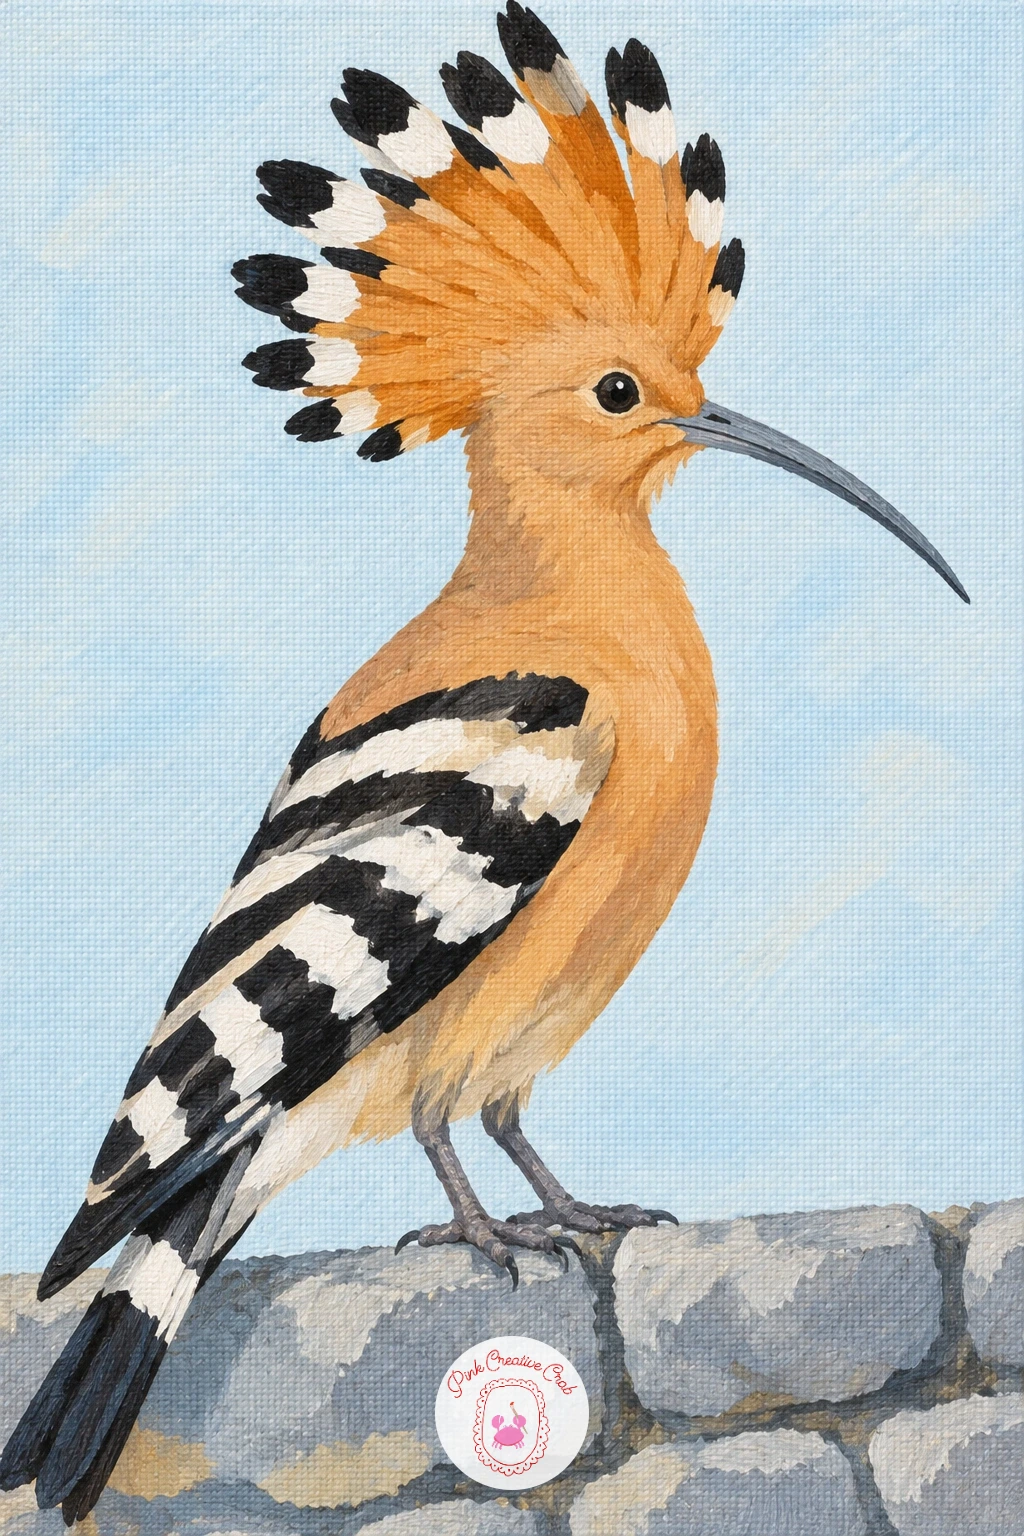
Palette: Warm Tan,Mars Black,Titanium White,Payne’s Grey
Mandarin duck on a lily pond is probably the most colorful bird on this whole list, so block it in stages rather than trying to mix every color at once. Start with the pond, a flat cornflower blue with a few pale green lily pad shapes scattered across the surface, keeping the pads simple ovals.
Build the duck in layers, orange sail feathers first as two curved upright shapes on the back, then the deep green head, then the white face stripe and rust orange chest, letting each color dry before the next touches it so they stay crisp rather than muddy. Those upright sail feathers are the part most likely to collapse into a shapeless blob if you rush them.
Paint them as two clean curved triangles rather than a scribble, and the whole duck suddenly looks recognizable. For a second version down the line, try the same duck swimming instead of resting, with a few ripple lines trailing behind it to suggest movement across the pond.
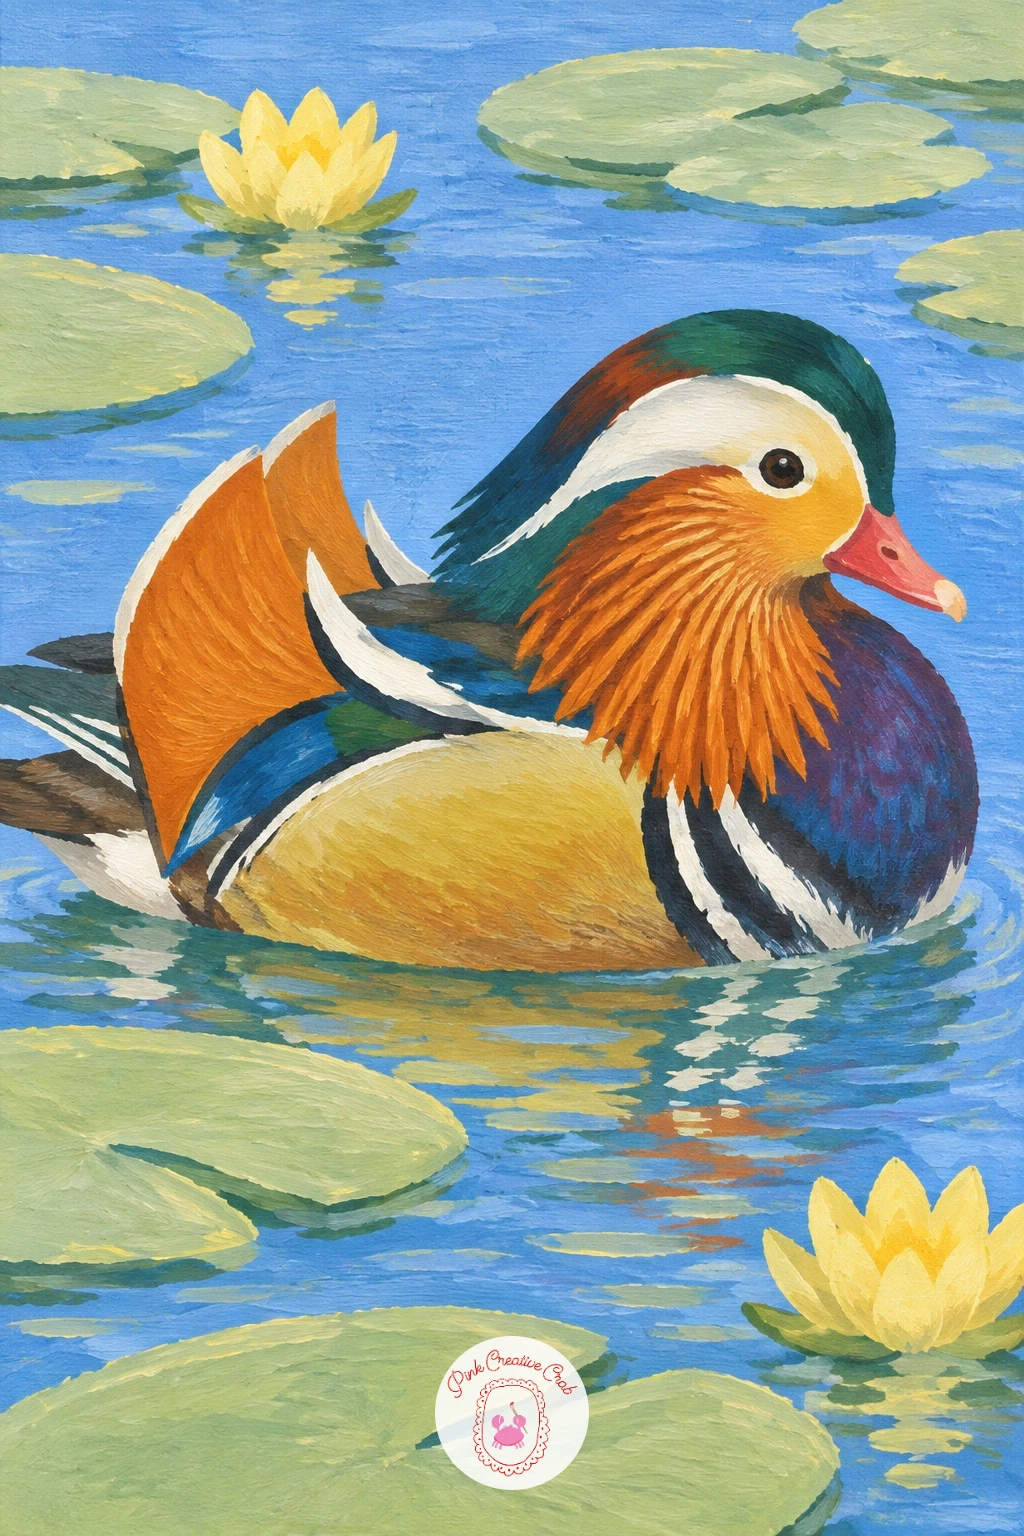
Palette: Rust Orange,Phthalo Green,Titanium White,Cornflower Blue
A stork standing on a chimney nest is a nice change of setting, since the nest shape and chimney give you straight lines to balance against the bird’s long curves. Paint the chimney first as a simple rust colored rectangle, then the nest on top as a loose tangle of brown twig strokes, varying the direction of each stroke so it does not look like a solid mat.
Block the stork in white with black wing tips and a long rust orange beak and legs, standing tall and slightly off center on the nest so the composition feels balanced rather than symmetrical. Long thin legs are easy to paint too stiffly straight, so bend the back leg very slightly at the joint to give the pose some life.
If the twiggy nest texture feels fiddly, a dry brush dragged once or twice across a plain brown base gets a similar broken texture with far less effort. This pairs nicely with other rooftop or village scenes, and if you enjoy small architectural settings like this one, the acrylic bridge painting ideas page has more structures to try next.
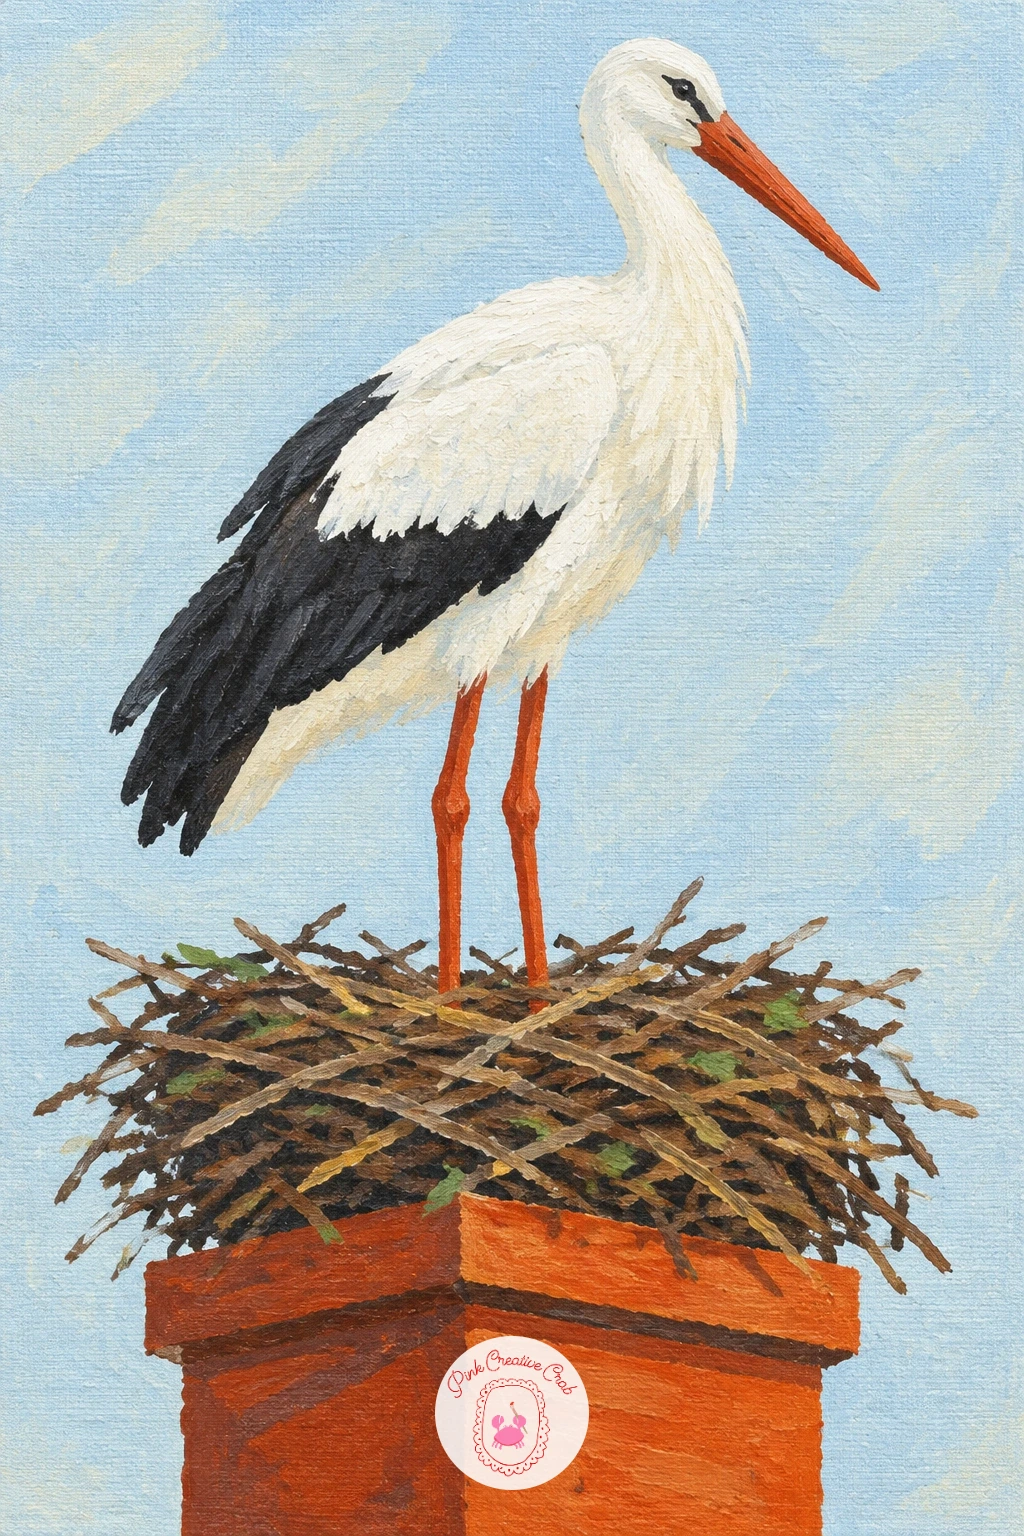
Palette: Titanium White,Mars Black,Rust Orange,Burnt Umber
A barn swallow swooping over a meadow is all about capturing speed with very little detail, so resist the urge to paint every feather. Block the meadow first as a flat leaf green base with a few lighter green streaks for grass, then paint the swallow as a single dark navy blue teardrop shape with long forked tail streamers trailing behind it.
Those tail streamers carry the whole sense of motion, so paint them as two thin tapering lines with a liner brush, slightly curved as if caught mid flap rather than stiff and straight. A small patch of rust orange under the chin and a pale belly are the only other colors this bird needs.
If the swallow ends up looking static, tilt the whole body diagonally across the canvas rather than painting it level and centered, since a tilted silhouette reads as movement almost automatically. Quick version, block the body and streamers only, in under ten minutes, then use a longer sitting to add the lighter grass streaks and a second smaller swallow further back for depth.
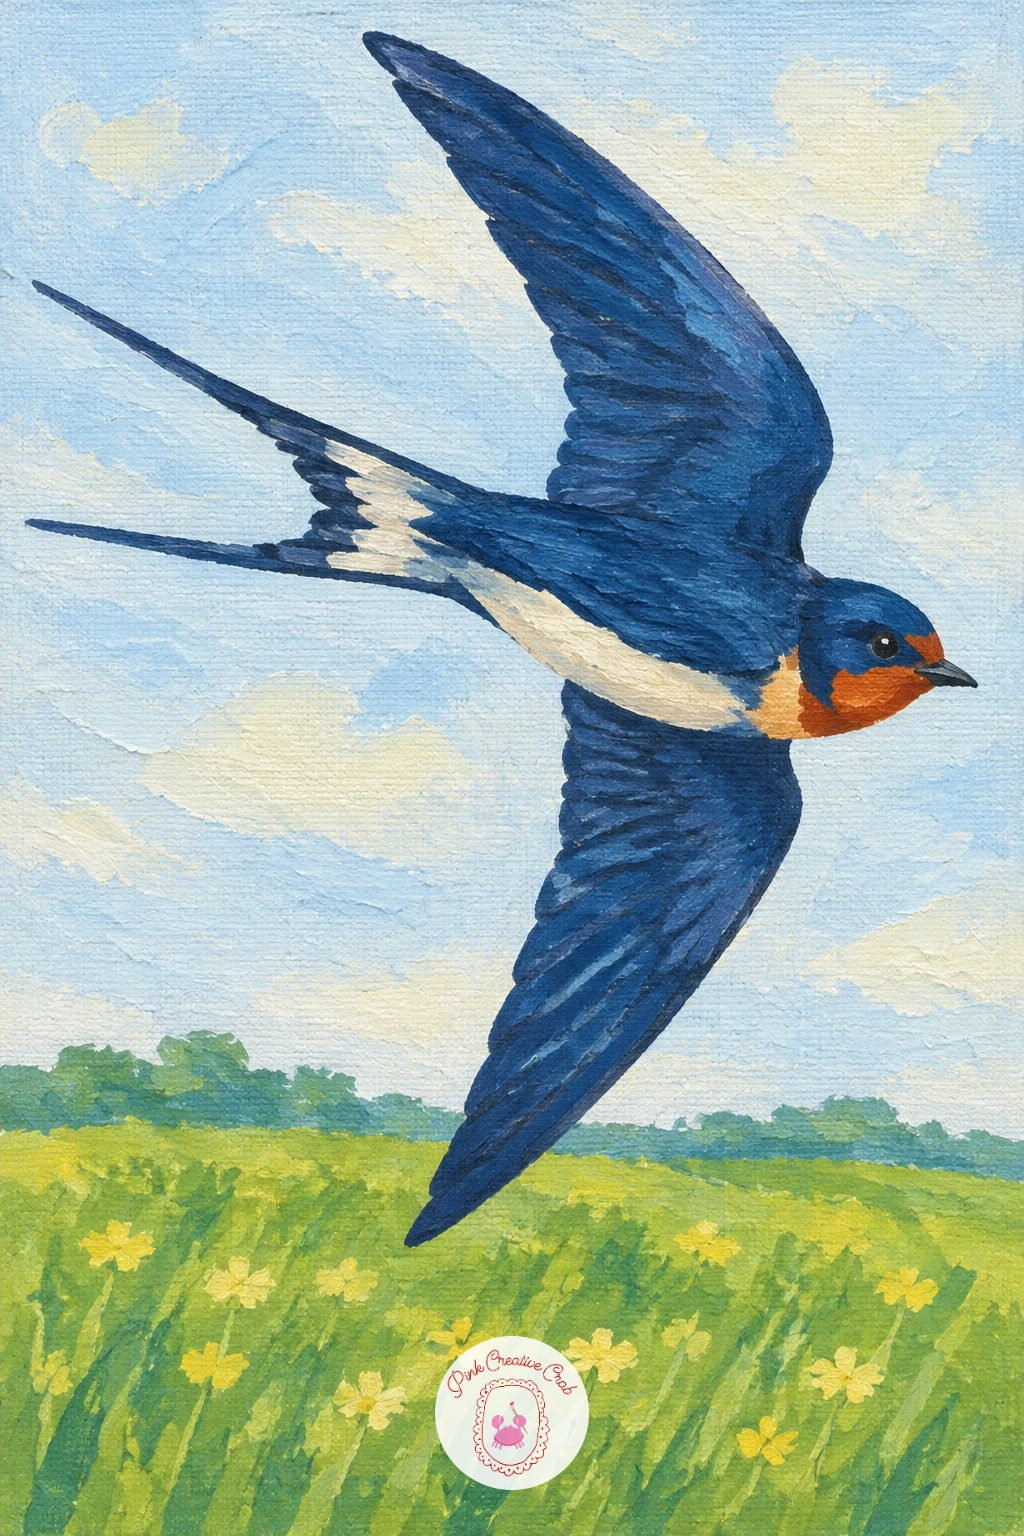
Palette: Navy Blue,Leaf Green,Rust Orange,Titanium White
Cedar waxwing with red berries on a branch is a quieter painting after that last one, and a good place to practice tiny bright accents against a muted body. Block the waxwing’s soft brown body first, then the black mask across the eye and the pale yellow band at the tip of the tail, keeping all of it smooth and understated.
The branch and berries go in next, a simple diagonal brown branch with a cluster of small round red dots for berries, each one given a tiny white highlight dot once dry. Those red berries are the whole point of the painting, so keep the rest of the palette muted enough that the red actually pops rather than competing with anything else bright nearby.
If your red looks too orange once it dries, a touch of a cooler crimson mixed in will push it back toward true red. First time painting berries like this, start with fewer, three or four well placed red dots read better than a crowded cluster of ten.
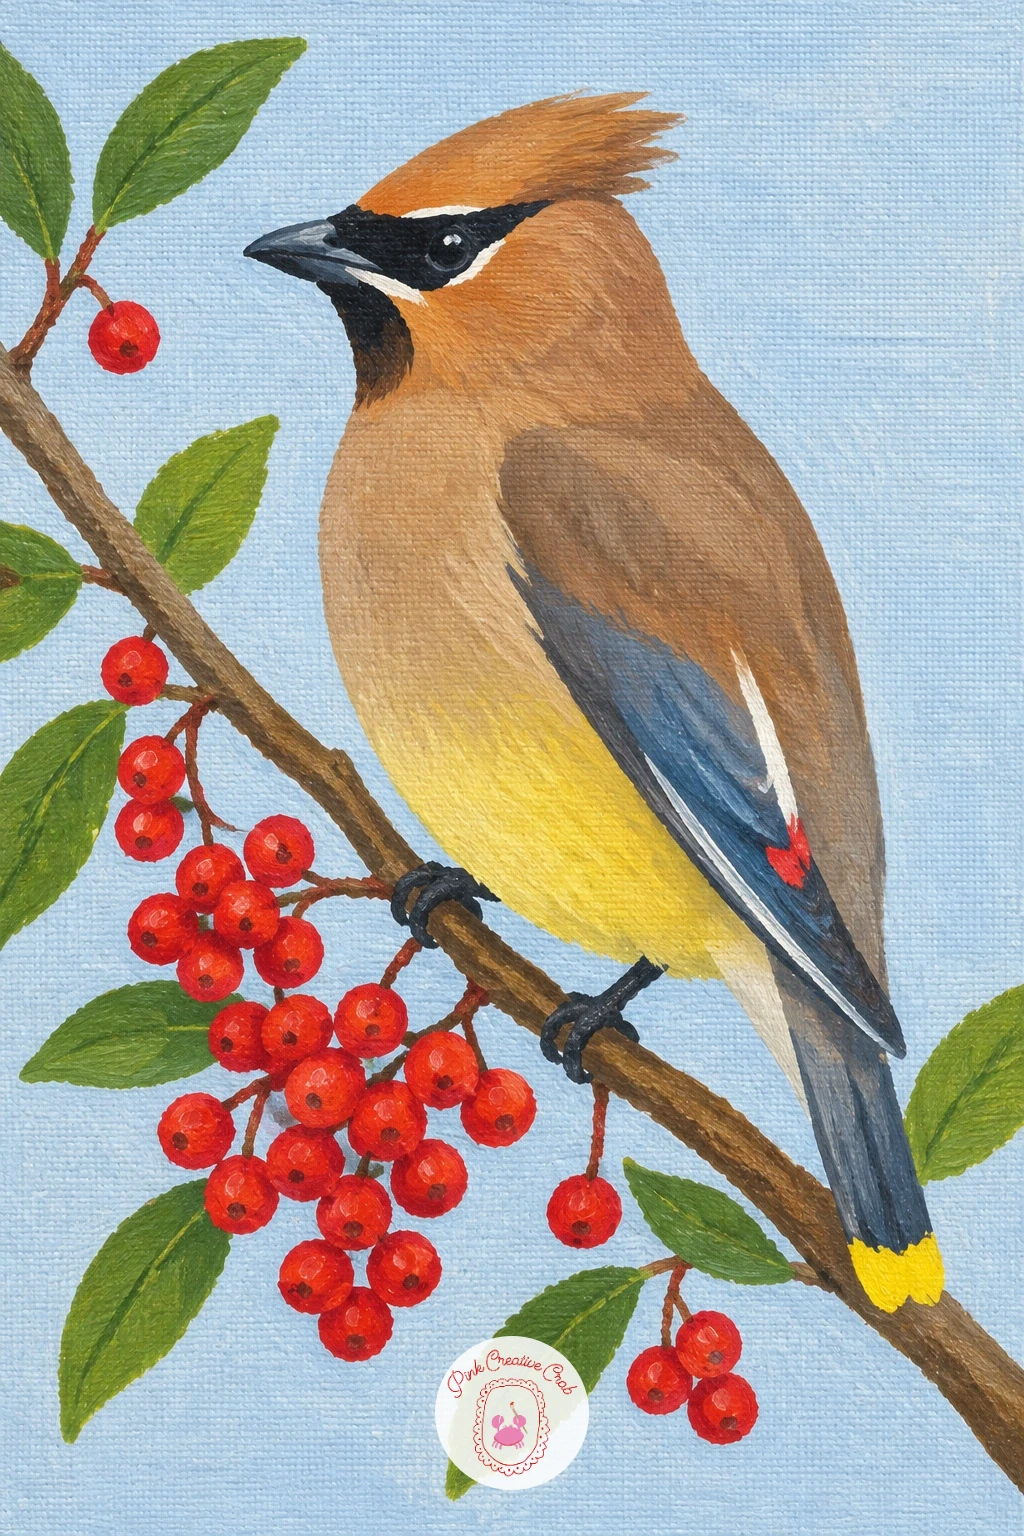
Palette: Burnt Umber,Mars Black,Soft Yellow,Cadmium Red
A bald eagle soaring over mountains needs a strong sense of scale, so set up the mountains and sky before you even think about the bird. Paint the mountain range as overlapping triangular shapes in cooler, paler blues the further back they sit, a simple trick that pushes distance into a flat background without any blending.
Block the eagle’s dark brown body and wings spread wide across the upper half of the canvas, then paint the white head and tail last so that bright white immediately draws the eye to the most important part of the bird. Keep the wing shape broad and slightly curved rather than straight, since a flat straight wing edge is what usually makes an eagle look stiff instead of soaring.
A hooked yellow beak and sharp yellow eye finish the head, painted small and precise with a liner brush. If mountains feel like too much for today, a plain pale sky with a single distant cloud works just as well behind this eagle.
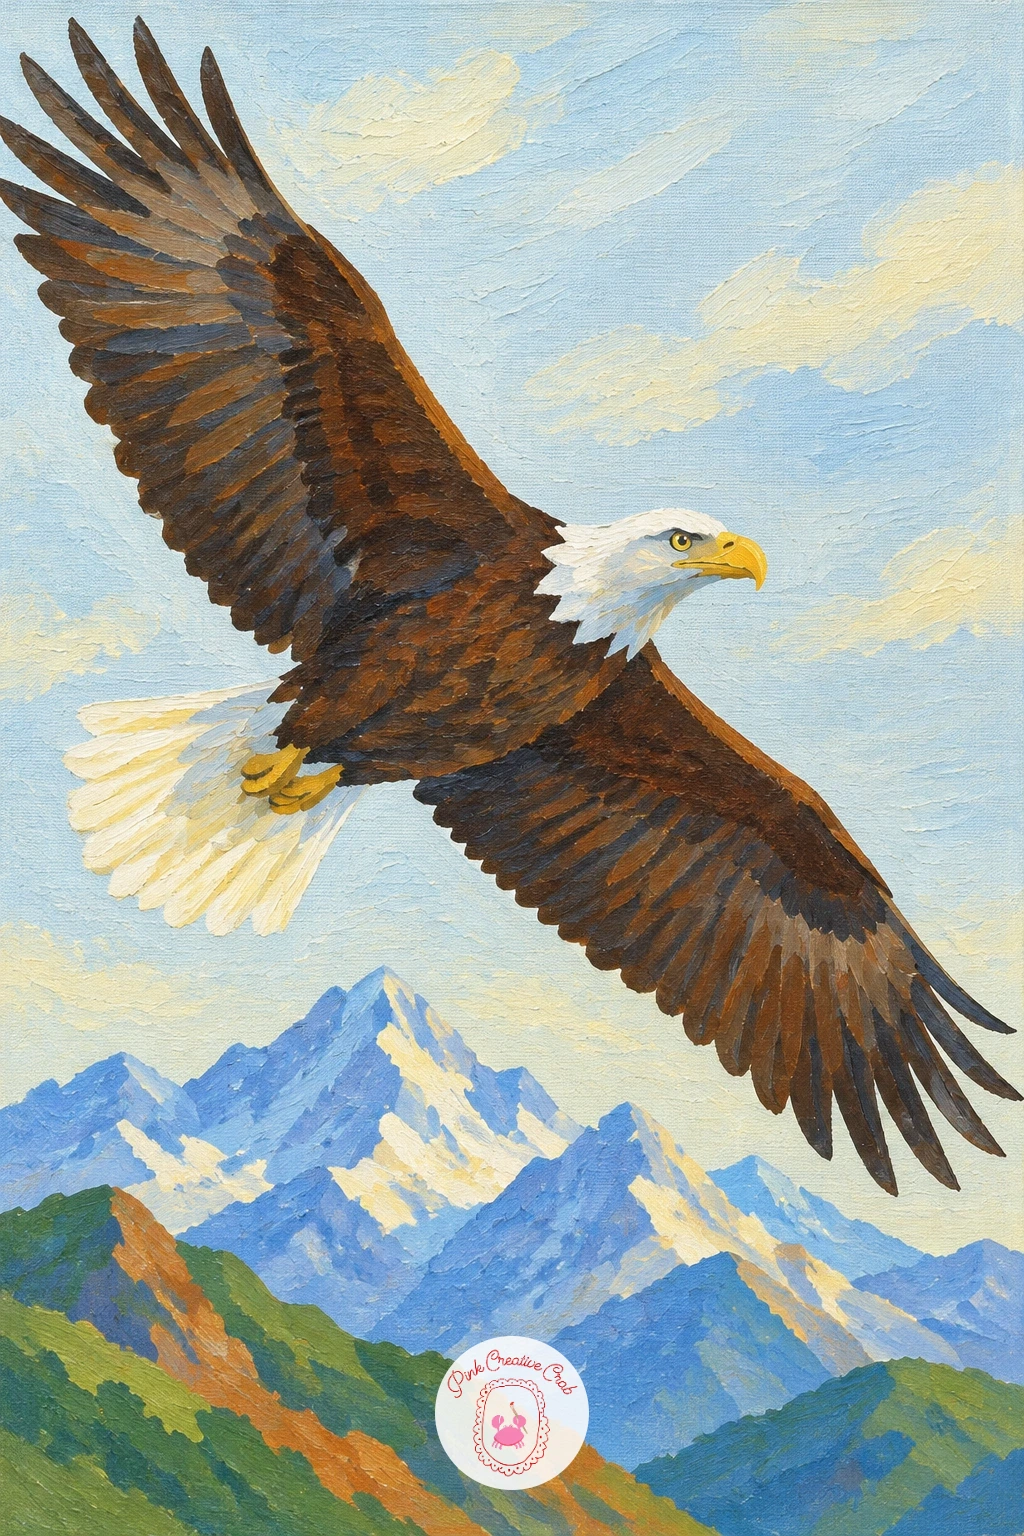
Palette: Burnt Umber,Titanium White,Soft Yellow,Cornflower Blue
If painting realistic wildlife like this interests you, the acrylic painting animals guide covers more techniques for fur and feather texture worth trying next.
Little budgie on a perch in a sunny room brings things back indoors with warmer light to think about. Decide the light source is a window just out of frame, then paint the background as a soft warm yellow gradient, lighter near where the window would be and slightly cooler in the opposite corner.
Block the budgie’s body in a bright leaf green with a yellow face and a scatter of small black dots across the back of the head, since that dotted pattern is what makes a budgie read correctly rather than looking like a generic green bird. The perch, a simple wooden dowel shape, goes in with one or two strokes of warm brown beneath the feet.
Because the light is warm and close, let a touch of that yellow bleed into the shadow side of the green body rather than using a cool grey shadow, and the whole bird feels lit from within. For a different mood, the same pose works in blue and white feathers if you prefer that more common pet color.
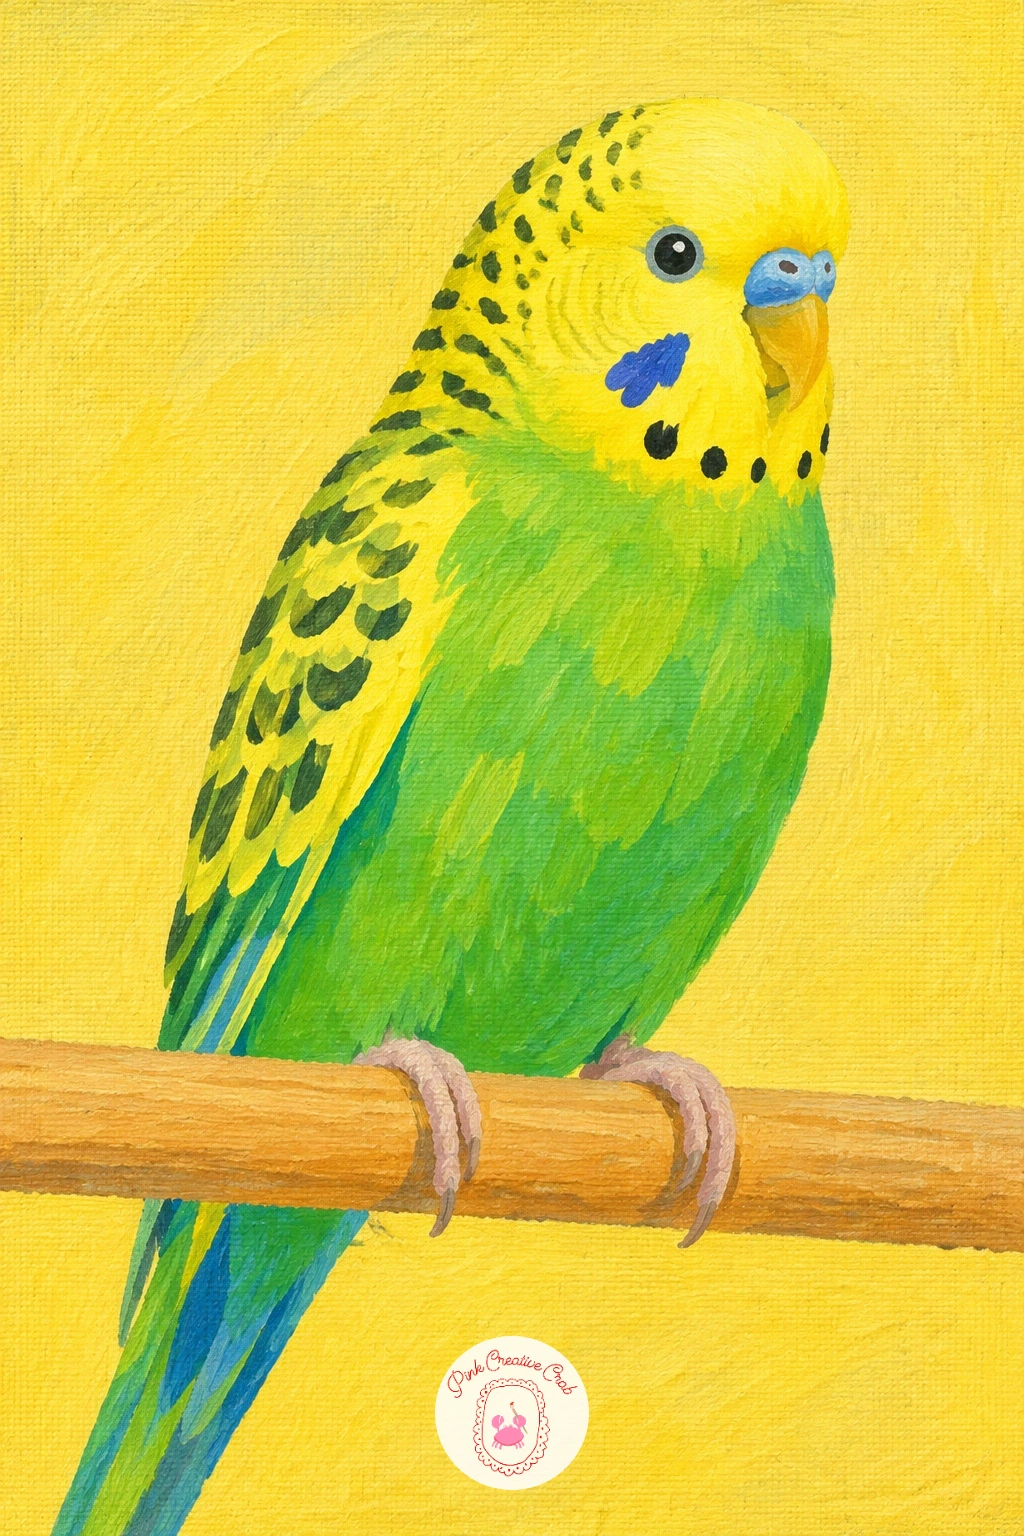
Palette: Leaf Green,Soft Yellow,Mars Black,Burnt Umber
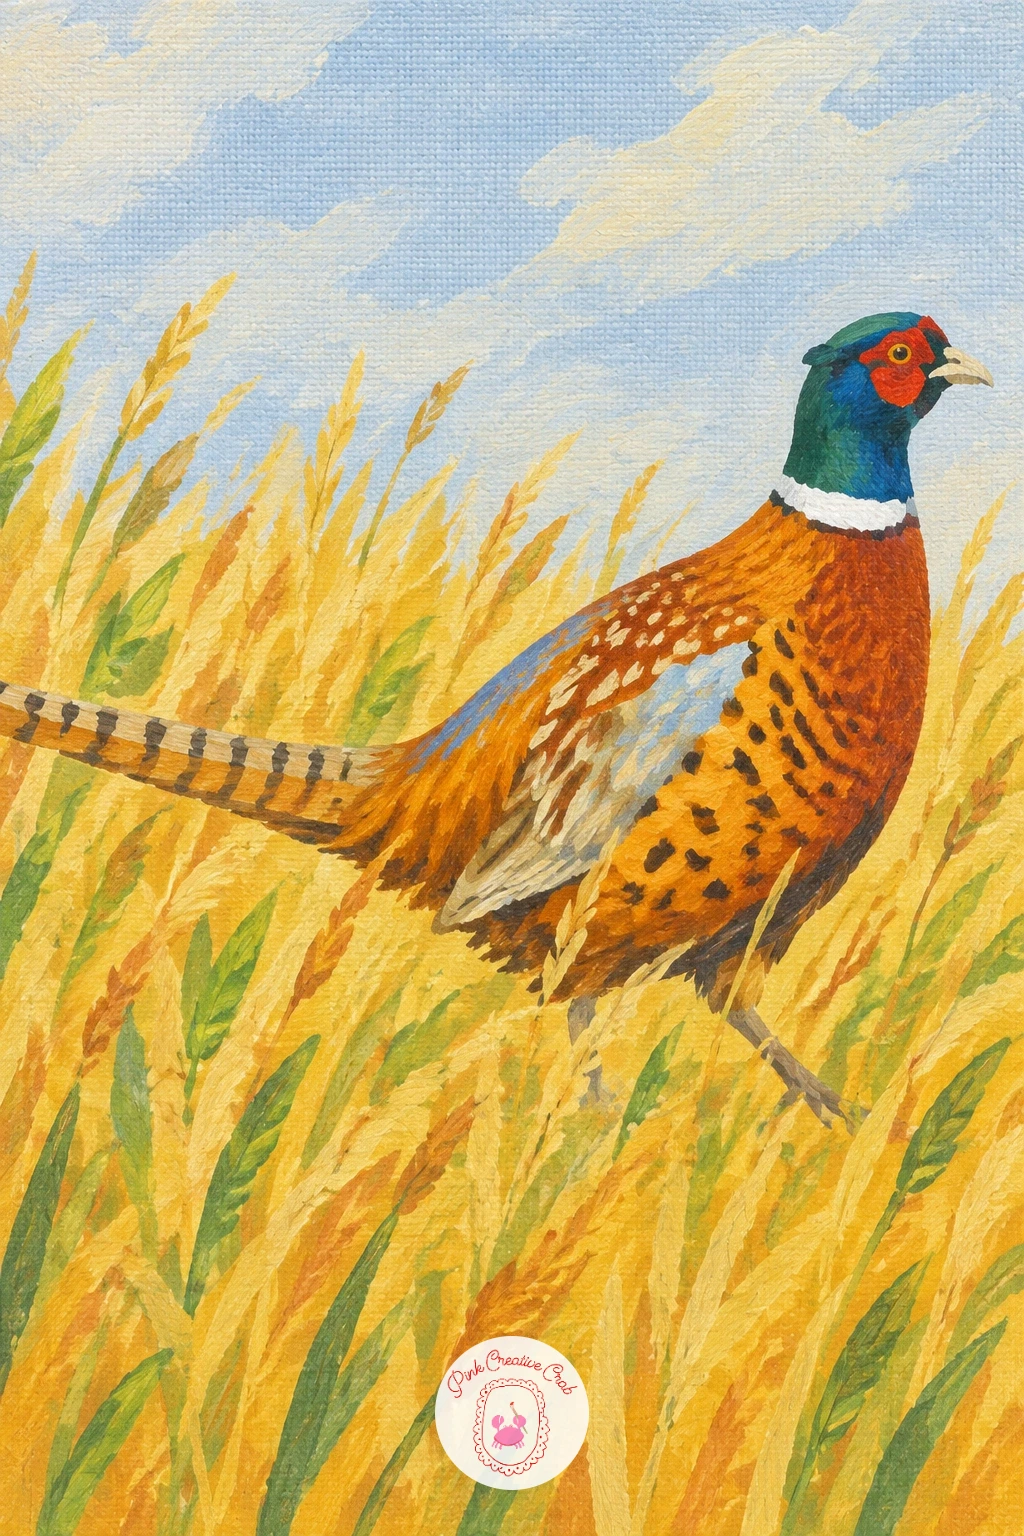
A pheasant walking through tall golden grass is a good one for practicing how a bird’s body sits believably among its surroundings rather than floating on top of them. Paint the grass first as vertical strokes of soft yellow and a touch of leaf green, varied in height, and let a few of the tallest blades overlap slightly in front of where the bird’s legs will go.
Block the pheasant’s body in warm rust orange with a deep green head and a ring of white around the neck, keeping the long tail trailing behind in alternating bands of rust and brown. That tail is the trickiest part, so paint it as one long tapering shape first and add the banding afterward with a thin brush, rather than trying to build the whole tail out of separate stripes from the start.
If the bird looks like it is standing in front of the grass instead of walking through it, go back with a few grass blade strokes painted directly over the lower legs, and the depth problem solves itself. No golden grass reference handy, tall dry wheat photographed anywhere works the same way.
Palette: Soft Yellow,Phthalo Green,Rust Orange,Titanium White
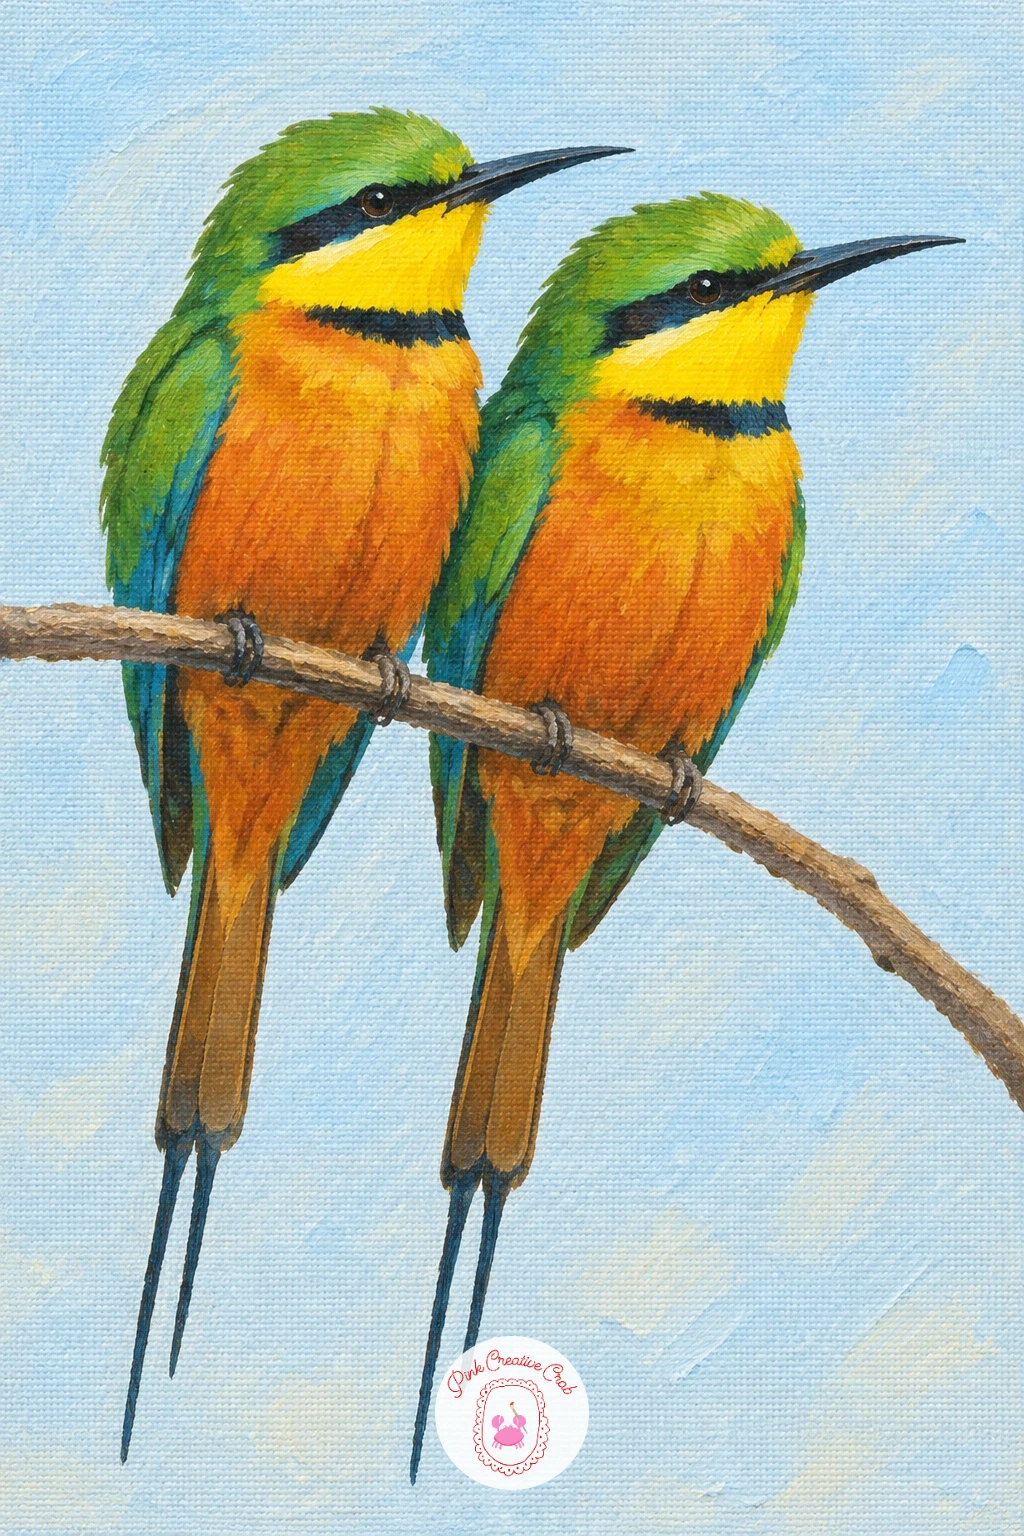
A pair of bee-eaters on a thin branch is a satisfying color exercise, since these birds carry three or four bright colors in neat bands rather than one dominant hue. Sketch the thin branch as a single curved line, light enough that it bends slightly under the weight of the two birds, then place them close together near its middle.
Paint each bee-eater in horizontal color bands from head to tail, soft yellow throat, leaf green back, rust orange belly, with a thin black line through the eye on each one. Painting both birds in the same color order keeps the pair looking like a matched species rather than two different birds that happen to be similar size.
The long central tail feathers that bee-eaters are known for go in last with a liner brush, two thin dark lines extending past the rest of the tail on each bird. If a true thin curved branch feels tricky to balance visually, a straighter branch works fine too, just angle it slightly rather than painting it perfectly horizontal.
Palette: Soft Yellow,Leaf Green,Rust Orange,Mars Black
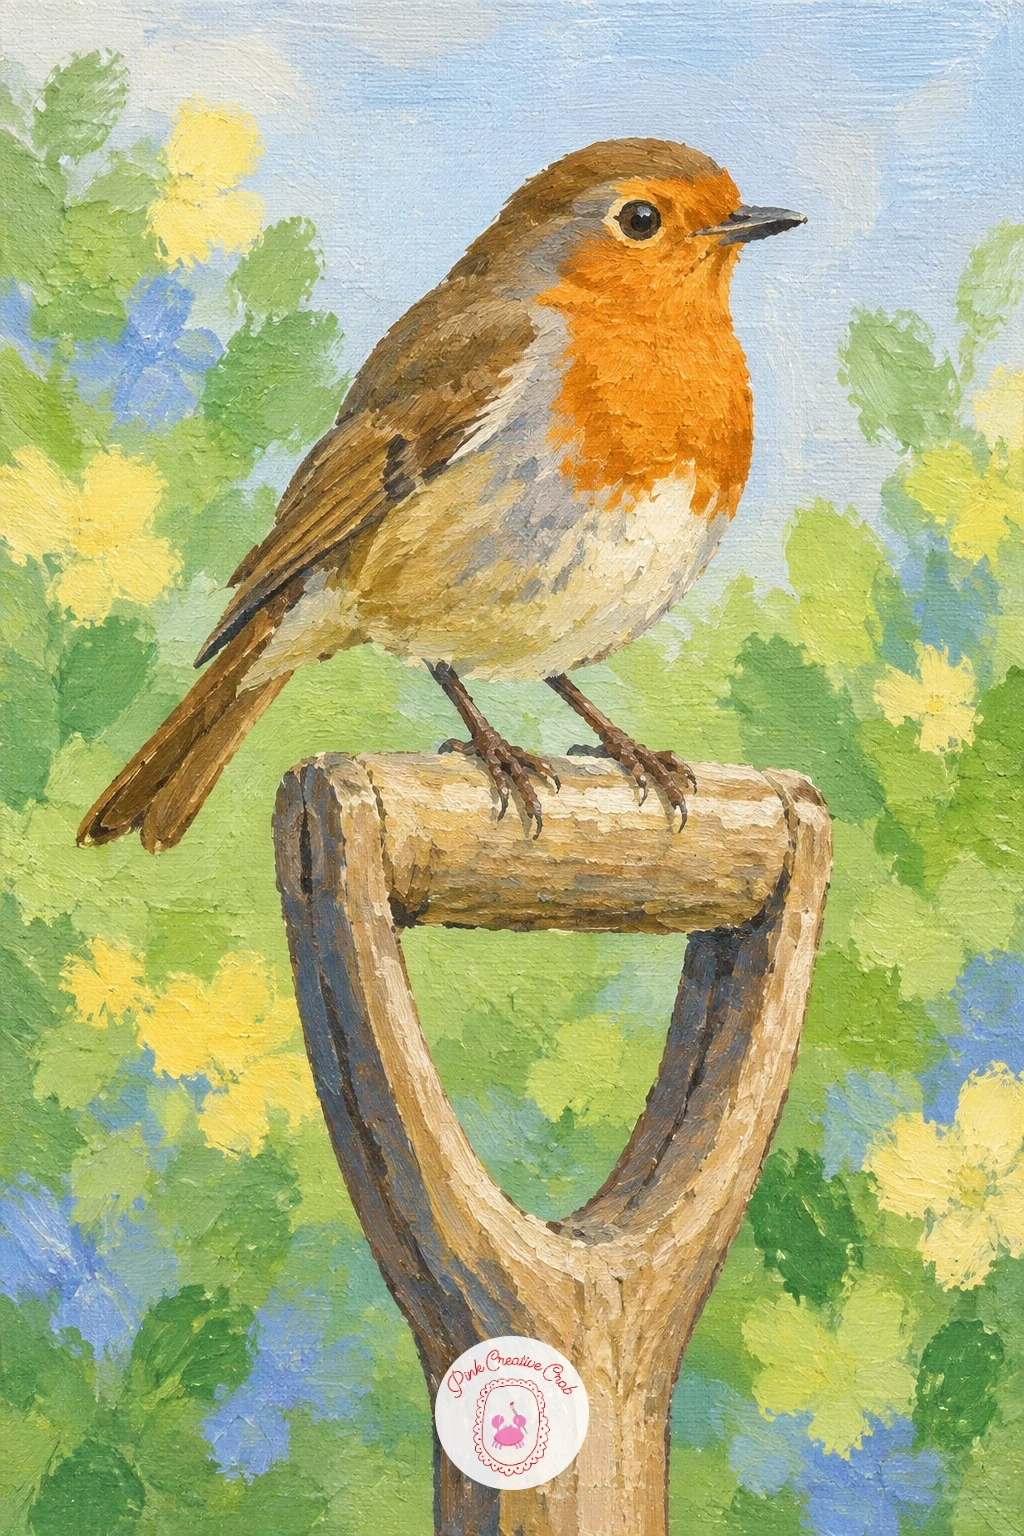
A robin on the handle of a garden spade brings in a human made object without any need for a person in the scene. Paint the spade handle first as a simple wooden diagonal shape with a rounded top, kept plain so it does not pull focus from the bird balanced on it.
Block the robin in warm brown with the recognizable rust orange chest patch, rounded and plump so the whole body reads as one soft shape rather than several separate parts. Birds’ feet gripping a rounded handle are easy to overcomplicate, so paint them as two simple curved claw shapes wrapping around the wood rather than several thin separate toes.
A blurred green and brown background suggesting a garden bed, just a few loose strokes, keeps the spade and robin as the clear focus. If you enjoy small garden tool still lifes like this one, the easy acrylic painting ideas for beginners page has more simple object based projects worth trying.
Palette: Burnt Umber,Rust Orange,Leaf Green,Titanium White
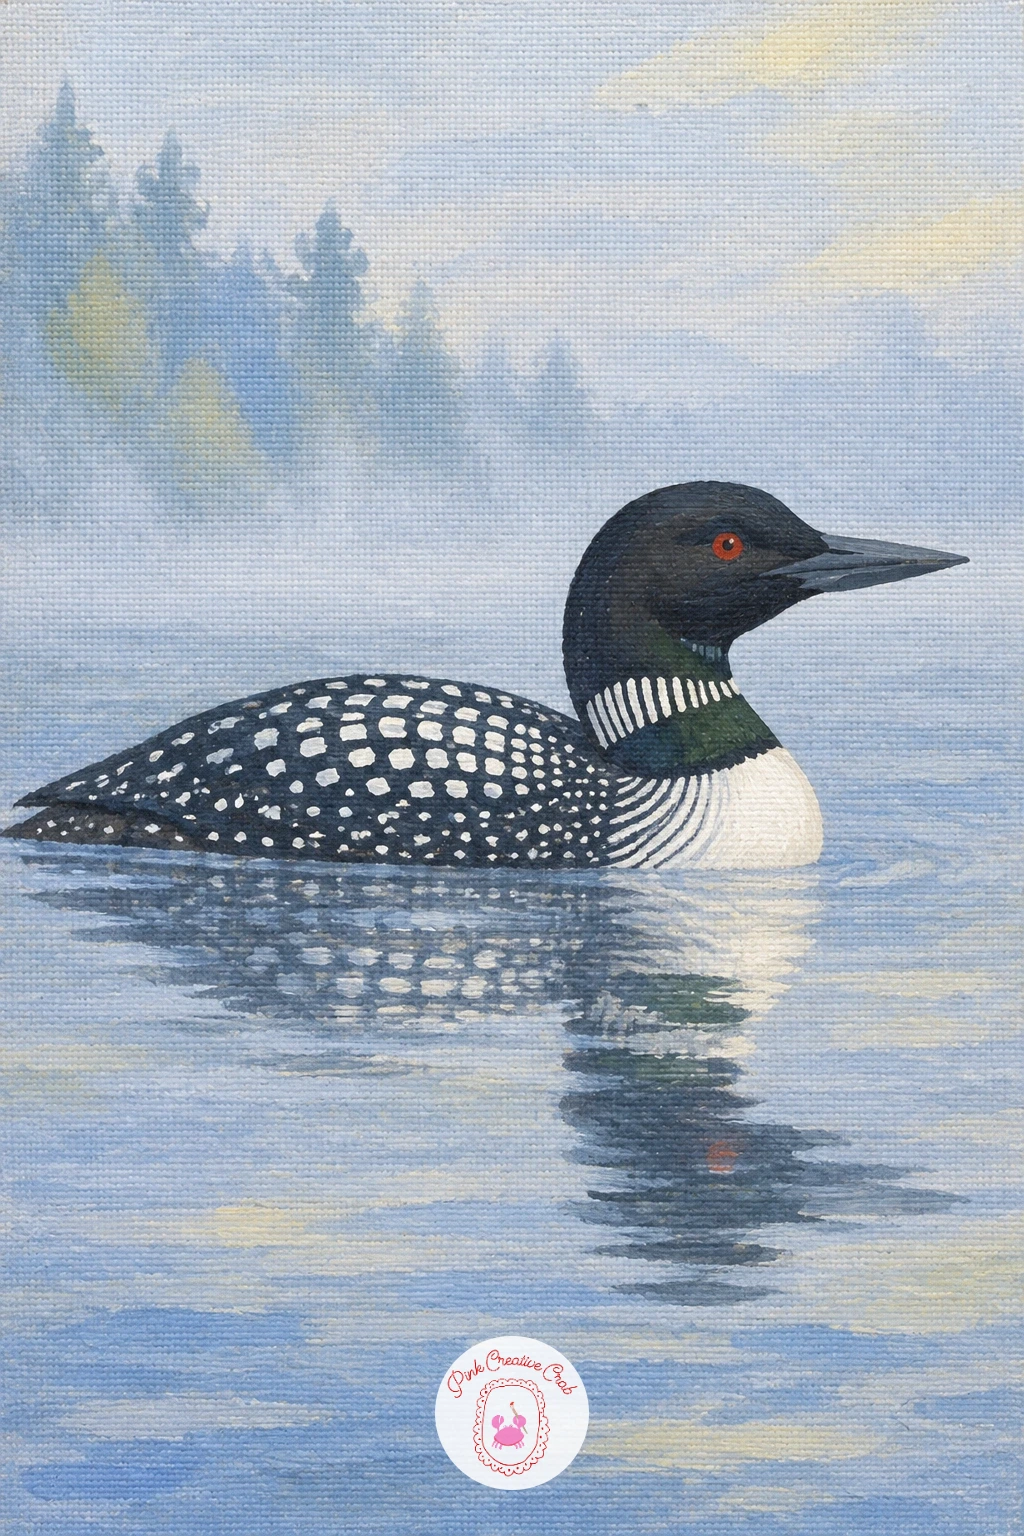
A loon on a misty lake is a quiet, moody one, and it leans entirely on soft edges rather than sharp detail. Paint the lake and sky together first as one continuous pale grey blue wash, no hard line between water and air, since that blur is what reads as mist.
Once that base is dry, block the loon’s body in strong black and white, the classic checkerboard pattern on its back painted as a loose scatter of small white rectangles rather than a perfectly even grid. Keep the whole bird’s edges slightly softer than you would on a sunny scene, a small dry brush lightly dragged over the outline blurs it just enough to feel like it belongs in the mist rather than cut out and placed on top.
A faint reflection directly beneath the loon, just a soft smudge of the same black and white, sells the stillness of the water. If checkerboard patterning feels fussy, simplify it to a few pale dapples along the back and the bird still reads clearly as a loon.
Palette: Mars Black,Titanium White,Payne’s Grey,Cornflower Blue
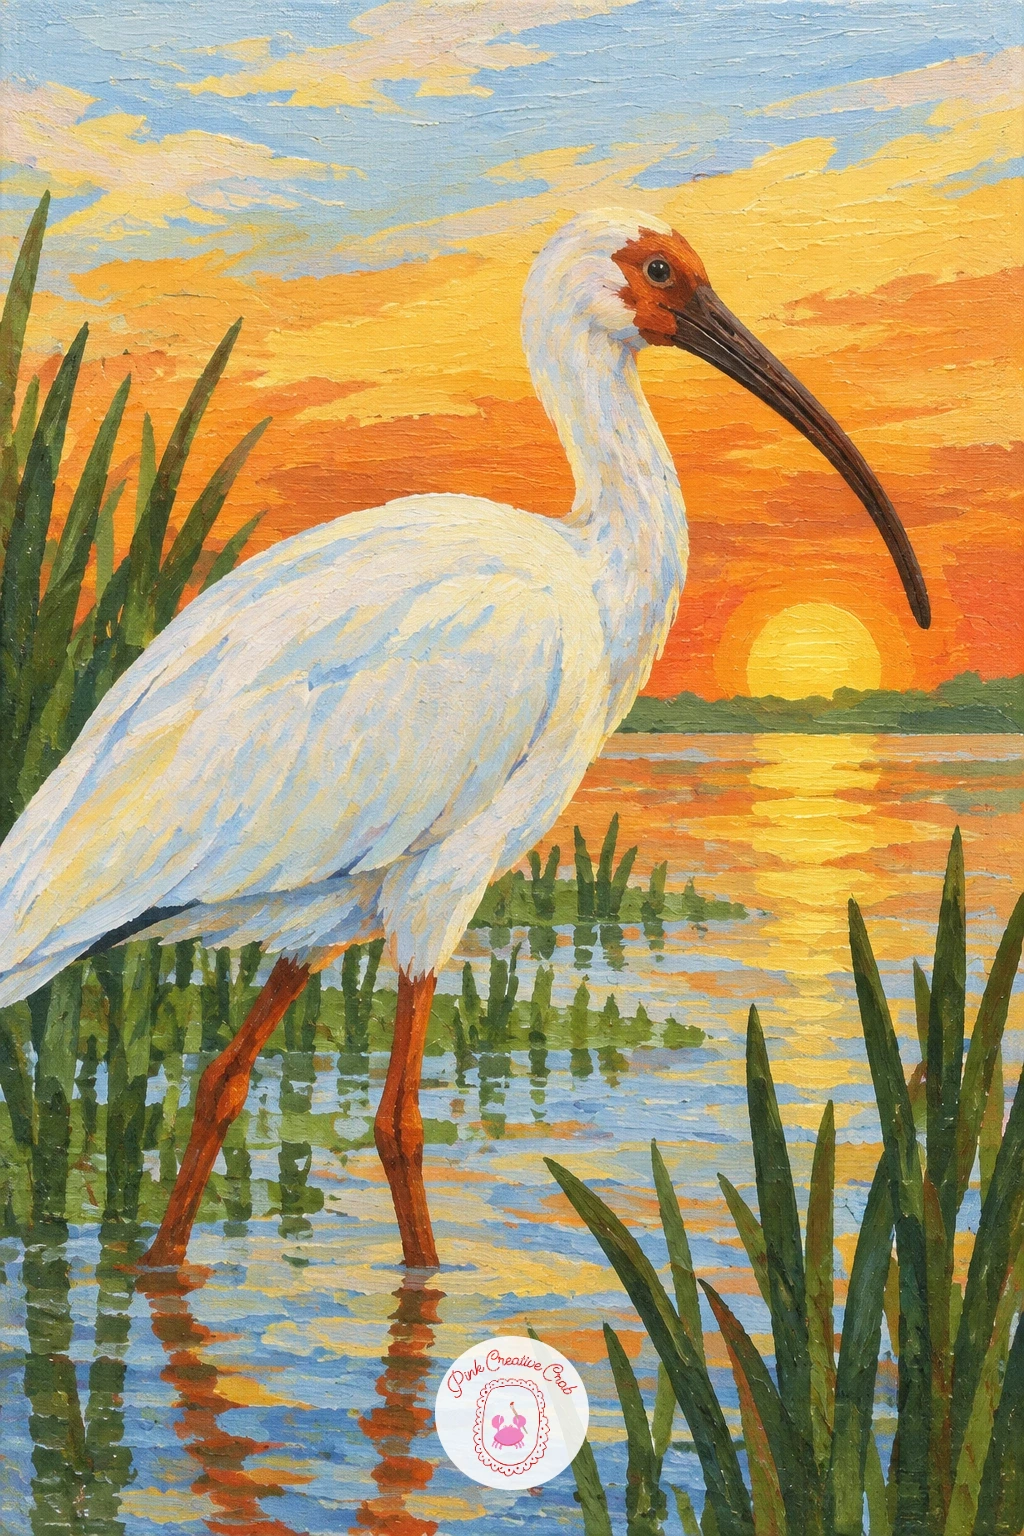
An ibis in a marsh at sunrise lets you play with warm light against a cooler bird, and the order you paint in matters more here than usual. Start with the sky as a gradient from soft yellow near the horizon up into a pale rust orange higher up, then paint the marsh water beneath it reflecting those same warm tones rather than staying plain blue.
Block the ibis in white with a long curved dark beak, then glaze a thin wash of that same warm yellow across the lit side of the body so the bird feels bathed in the sunrise rather than painted separately and dropped into the scene. A few tall dark marsh reeds in silhouette along the bottom edge anchor the whole composition.
If the white body looks too stark against all that warm color, push a little more of the yellow glaze into the shadow areas underneath the wings, since pure white rarely survives next to a sunrise untouched. Reeds too fiddly for today, a few simple vertical dark strokes do the same job.
Palette: Soft Yellow,Rust Orange,Titanium White,Mars Black
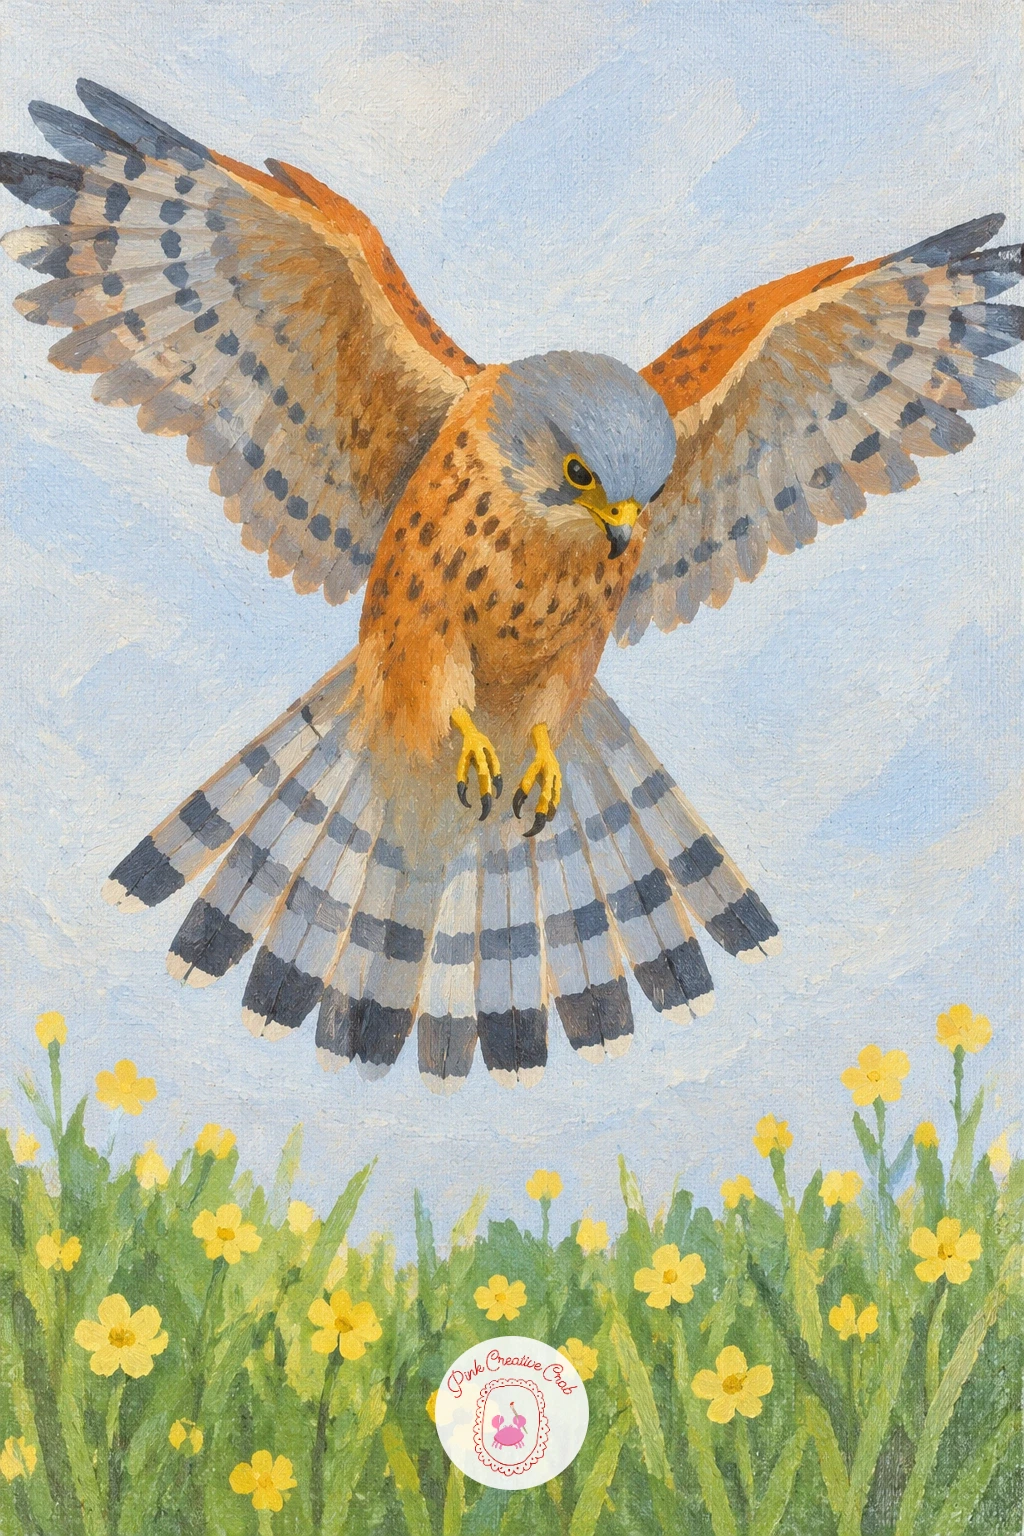
A kestrel hovering over a meadow pairs nicely with the earlier hummingbird idea, since it is another bird suspended in mid air, just on a bigger scale. Block the meadow below first in flat leaf green with a few soft yellow wildflower dots scattered through it, then leave the upper two thirds of the canvas as open pale sky for the kestrel.
Paint the kestrel’s body in warm rust orange with a soft grey head and tail, wings spread and angled slightly forward, since a true hover holds the wings in a particular beating position rather than the gliding pose you would use for an eagle. The tail fanned open and the head held very still and level are the two details that make this read as hovering rather than just flying.
If the whole bird looks like it is falling rather than hovering, check that the body sits level and horizontal rather than angled downward, that single adjustment fixes the pose more than any amount of extra wing detail. A quick ten minute version blocks just the silhouette against the sky, while a longer sitting adds the subtle wing feather separation.
Palette: Rust Orange,Payne’s Grey,Leaf Green,Soft Yellow
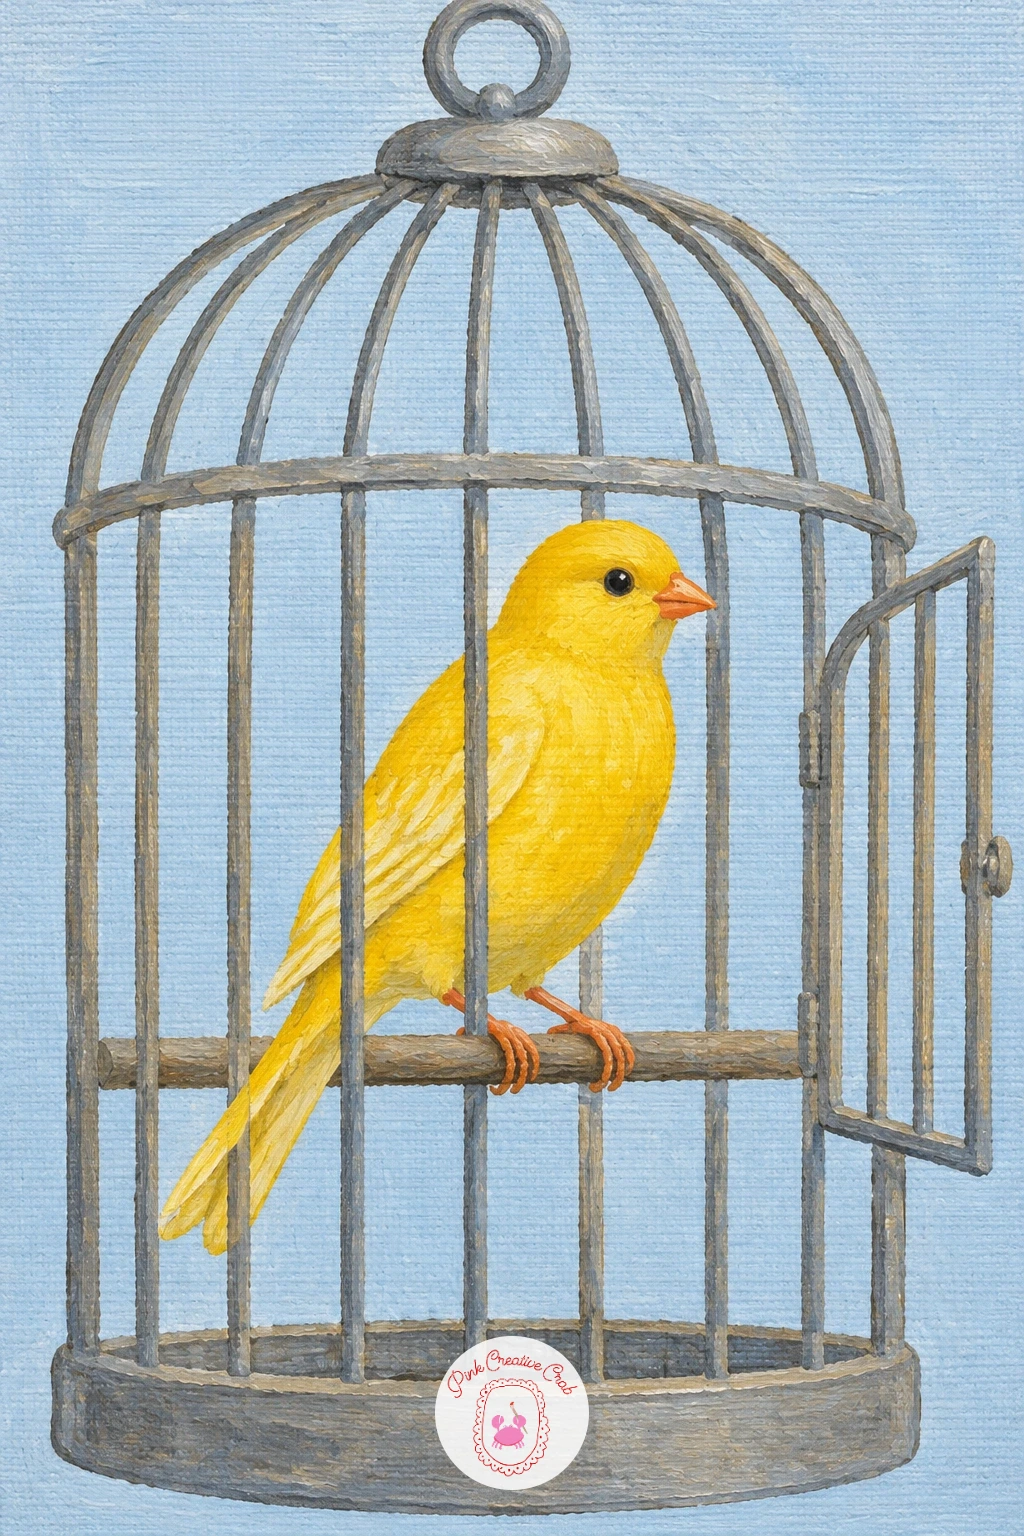
A canary in an open vintage birdcage is a nice object study, since the cage itself is really just a pattern of thin lines over the bird rather than a separate hard thing to paint. Block the background and the canary first, a bright soft yellow body with a warm orange beak, fully finished before any cage lines go on top.
Once that layer is dry, paint the cage structure with a thin liner brush in a muted metallic grey, starting with the curved outer frame and open door, then adding the vertical bars only where they would cross in front of the bird, leaving the rest of the bars out entirely behind it. This selective layering, bars only where they overlap the canary, is what keeps the cage from turning into a messy grid that fights the bird for attention.
Keep the door swung open and empty space beside it, which reads instantly as a cage that is not shut. If fine linework feels shaky freehand, a ruler held lightly against the canvas for the straight bars keeps them clean while the curved frame stays freehand.
Palette: Soft Yellow,Rust Orange,Payne’s Grey,Titanium White
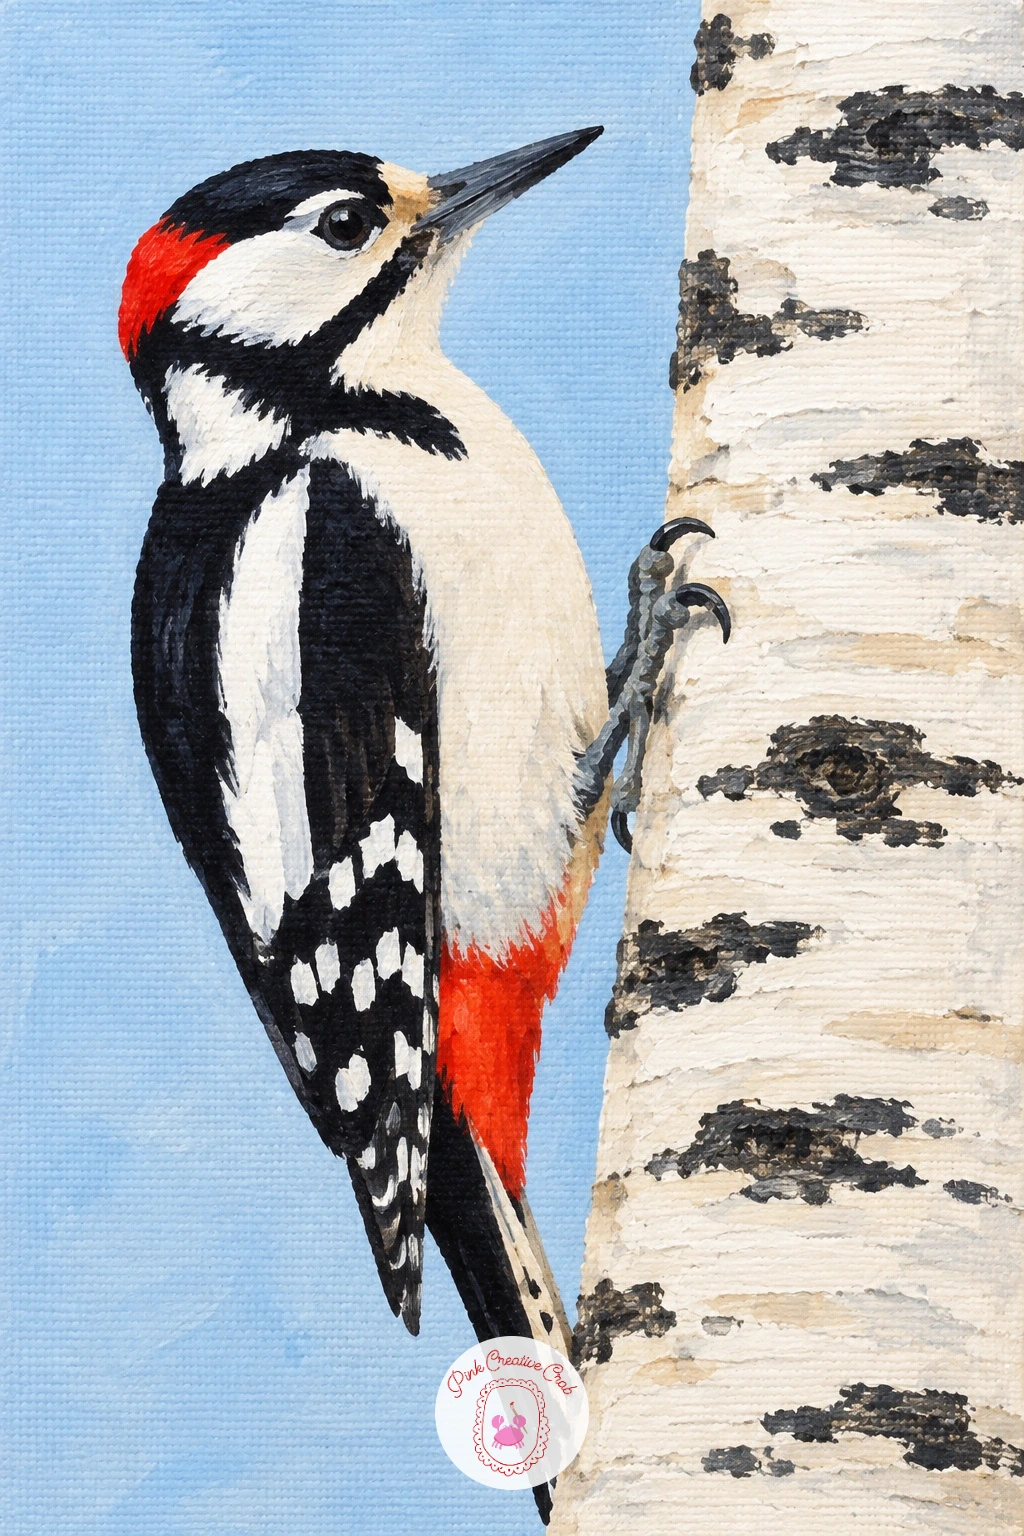
A woodpecker on a birch trunk is built almost entirely around one texture trick worth learning well, since birch bark has a distinctive pattern you can fake quickly. Block the trunk first as a vertical white to pale grey shape, then once dry, use a small flat brush to paint short horizontal dark grey dashes at varying lengths up the trunk, the classic birch bark markings.
Paint the woodpecker gripping the side of the trunk in black and white with a bright rust orange or red patch on the head, its tail braced against the bark as a stiff wedge shape rather than a soft curved one, since that stiff tail is how woodpeckers actually balance. The claws gripping bark are easy to lose in the trunk’s pattern, so paint them in last over the bark dashes, not before, so they stay visible on top.
If birch bark dashes start looking too regular and striped, vary their length and spacing more than feels natural, real bark markings are quite irregular. A plain brown trunk without the birch texture is a fine swap if white bark paint is not available.
Palette: Titanium White,Payne’s Grey,Mars Black,Cadmium Red
A scarlet macaw in flight over the jungle is one of the busiest color combinations on this list, so plan the layering before you start rather than mixing as you go. Block the jungle canopy first in two or three values of leaf green, darker shapes further back and lighter leaf clusters in front, keeping it loose and impressionistic rather than painting individual leaves.
Paint the macaw’s body in bold horizontal bands, bright red head and chest, then a band of soft yellow across the wing, finishing with deep phthalo blue along the flight feathers and tail. Wings spread wide in flight is the pose that sells this bird, so angle both wings slightly upward and keep the tail long and straight, trailing well past the body.
If all that saturated color starts to feel chaotic together, let the red dominate as the largest area and treat the yellow and blue as accent bands rather than equal thirds. For a quieter variation next time, try the same macaw perched on a branch instead of flying, which needs far less background work.
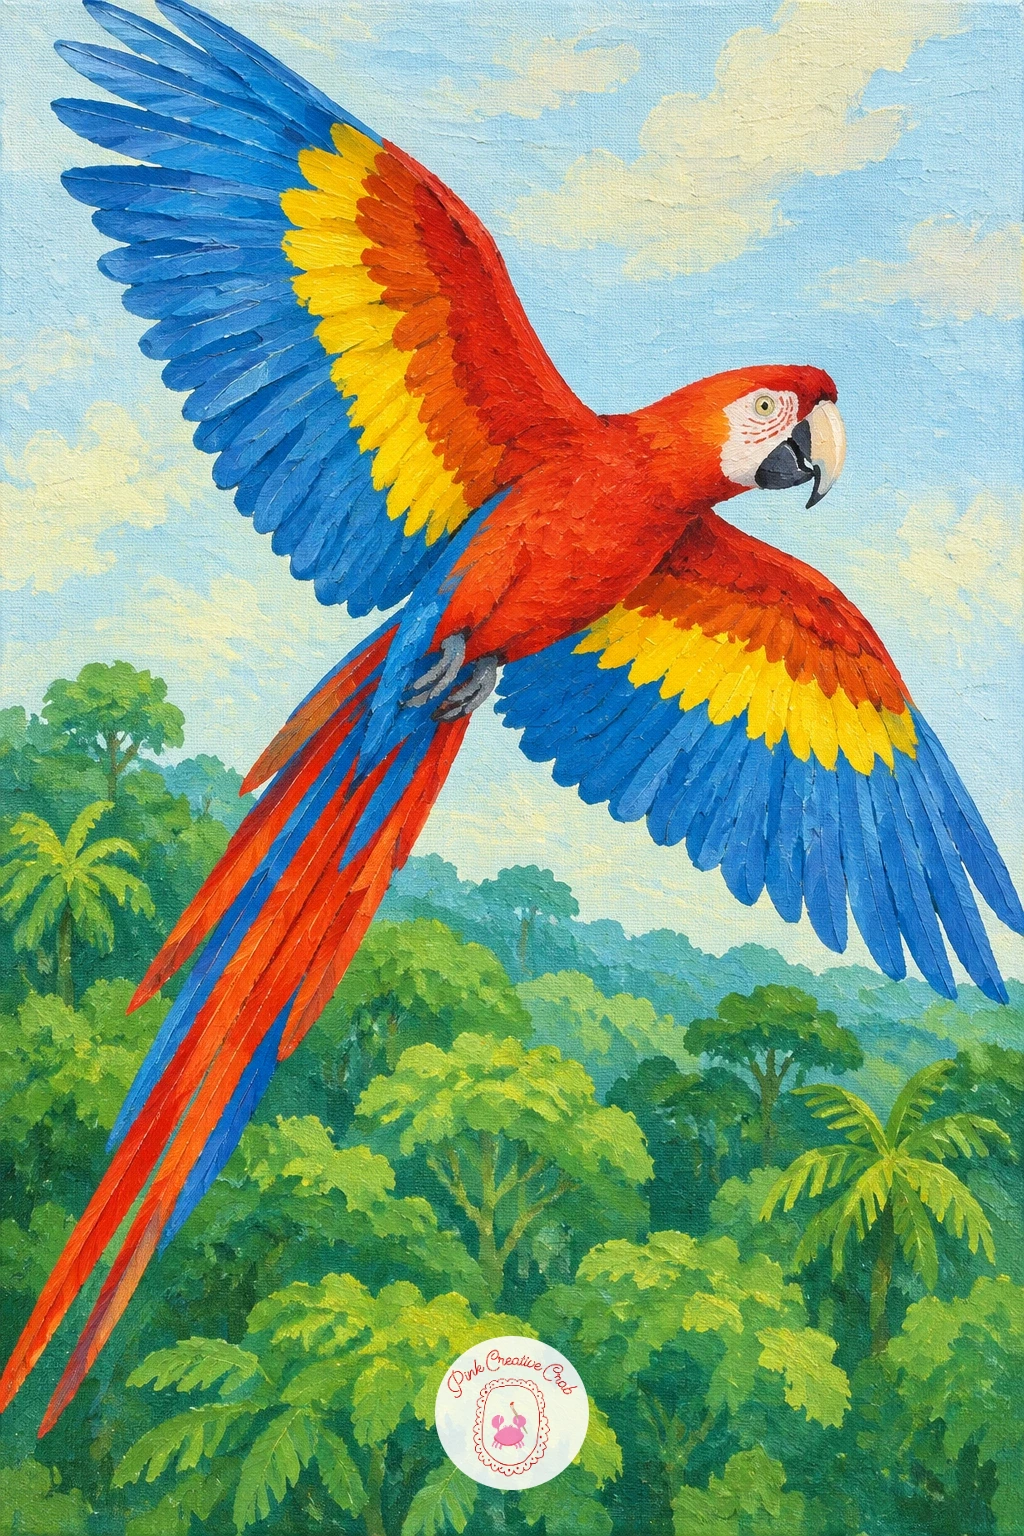
Palette: Cadmium Red,Soft Yellow,Phthalo Blue,Leaf Green
An oystercatcher on a rocky shore is a strong black and white silhouette against grey rocks, so getting the beak color exactly right matters more than almost any other detail here. Paint the rocks first as a cluster of flat grey angular shapes with a few darker cracks between them, then let that dry fully before the bird sits on top.
Block the oystercatcher’s body in solid black with a clean white belly patch, keeping the shape bold and simple, then paint the long straight beak in a strong rust orange red, a color so bright it should feel almost too saturated next to all that black and grey. That contrast is the whole point of this bird, so resist softening the beak color down to match anything else in the painting.
Pink legs, a simple pair of thin bent lines, finish the pose standing on a rock edge. If grey rocks feel dull to paint, add a thin wash of pale blue over parts of them to suggest wet rock catching the sky’s reflection.
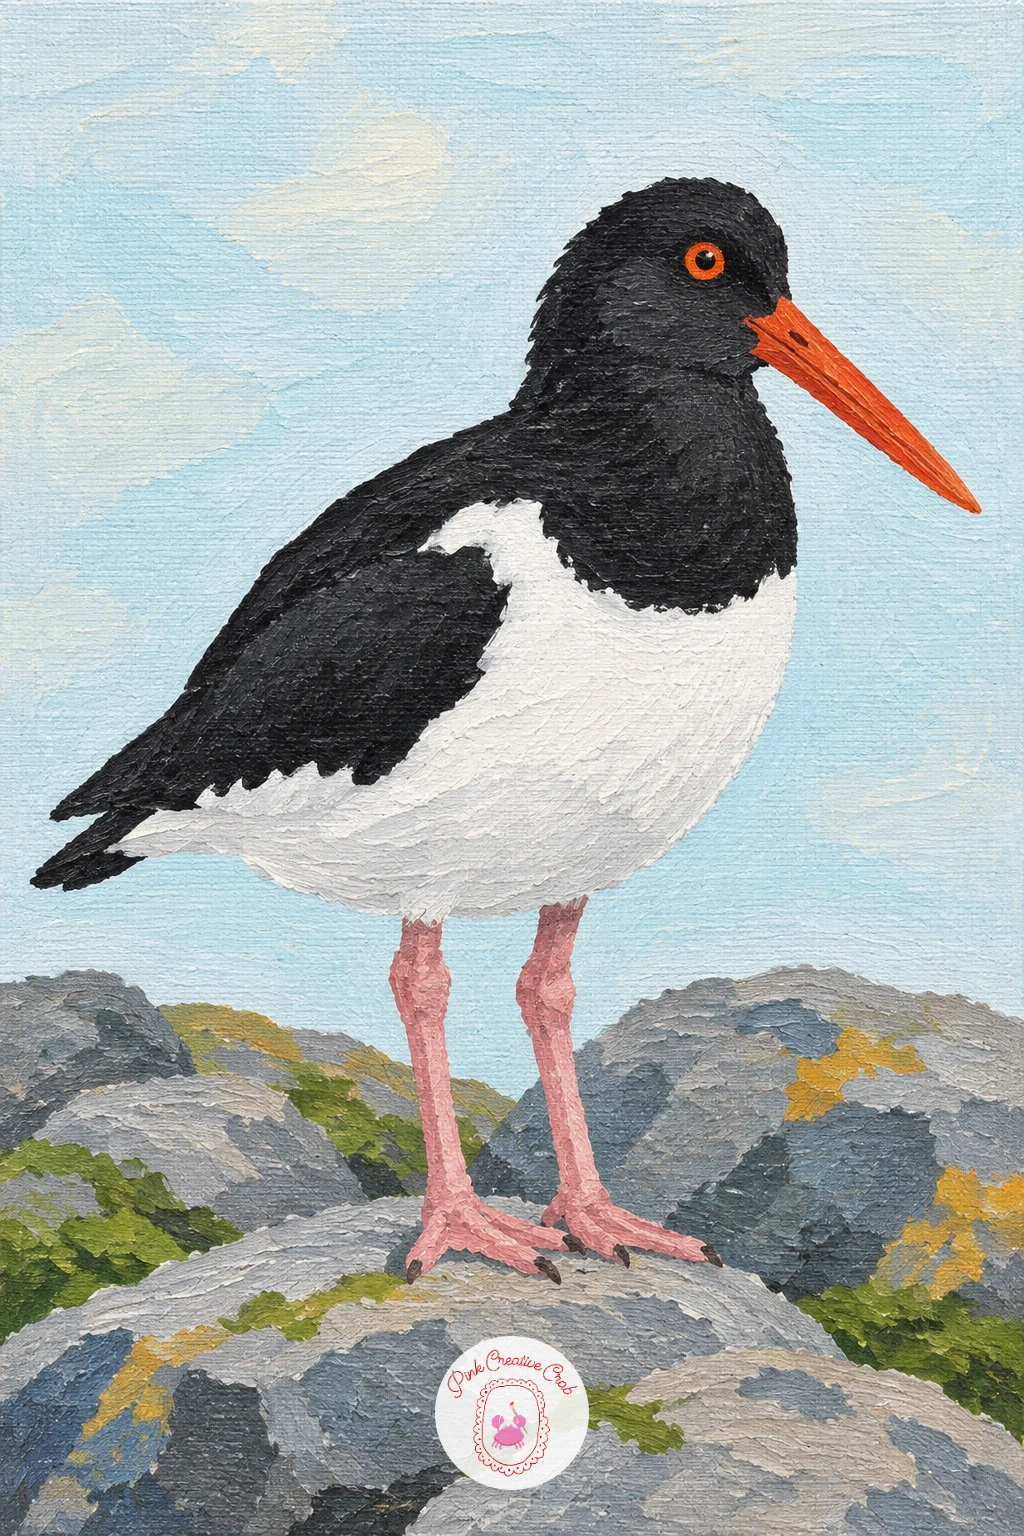
Palette: Mars Black,Titanium White,Rust Orange,Payne’s Grey
A hornbill on a jungle branch is really a study in one dramatic shape, the casque on top of the beak, so give that the most attention of anything in the painting. Block the body first in deep black with a white tail tip, then paint the long curved beak in warm yellow with a rust colored base near the face.
The casque sits on top of the beak like a second smaller beak stacked above the first, and painting it as a separate curved block rather than blending it into the main beak is what makes a hornbill look like a hornbill rather than just a big beaked bird. A dark outline where the casque meets the beak helps that separation read clearly even at a glance.
The branch beneath its feet can stay a simple flat brown diagonal, with a few jungle leaf shapes in leaf green tucked behind to suggest setting without demanding much extra time. If yellow and rust feel too warm against deep black, cooling the black very slightly with a touch of blue keeps the whole bird from looking too heavy.
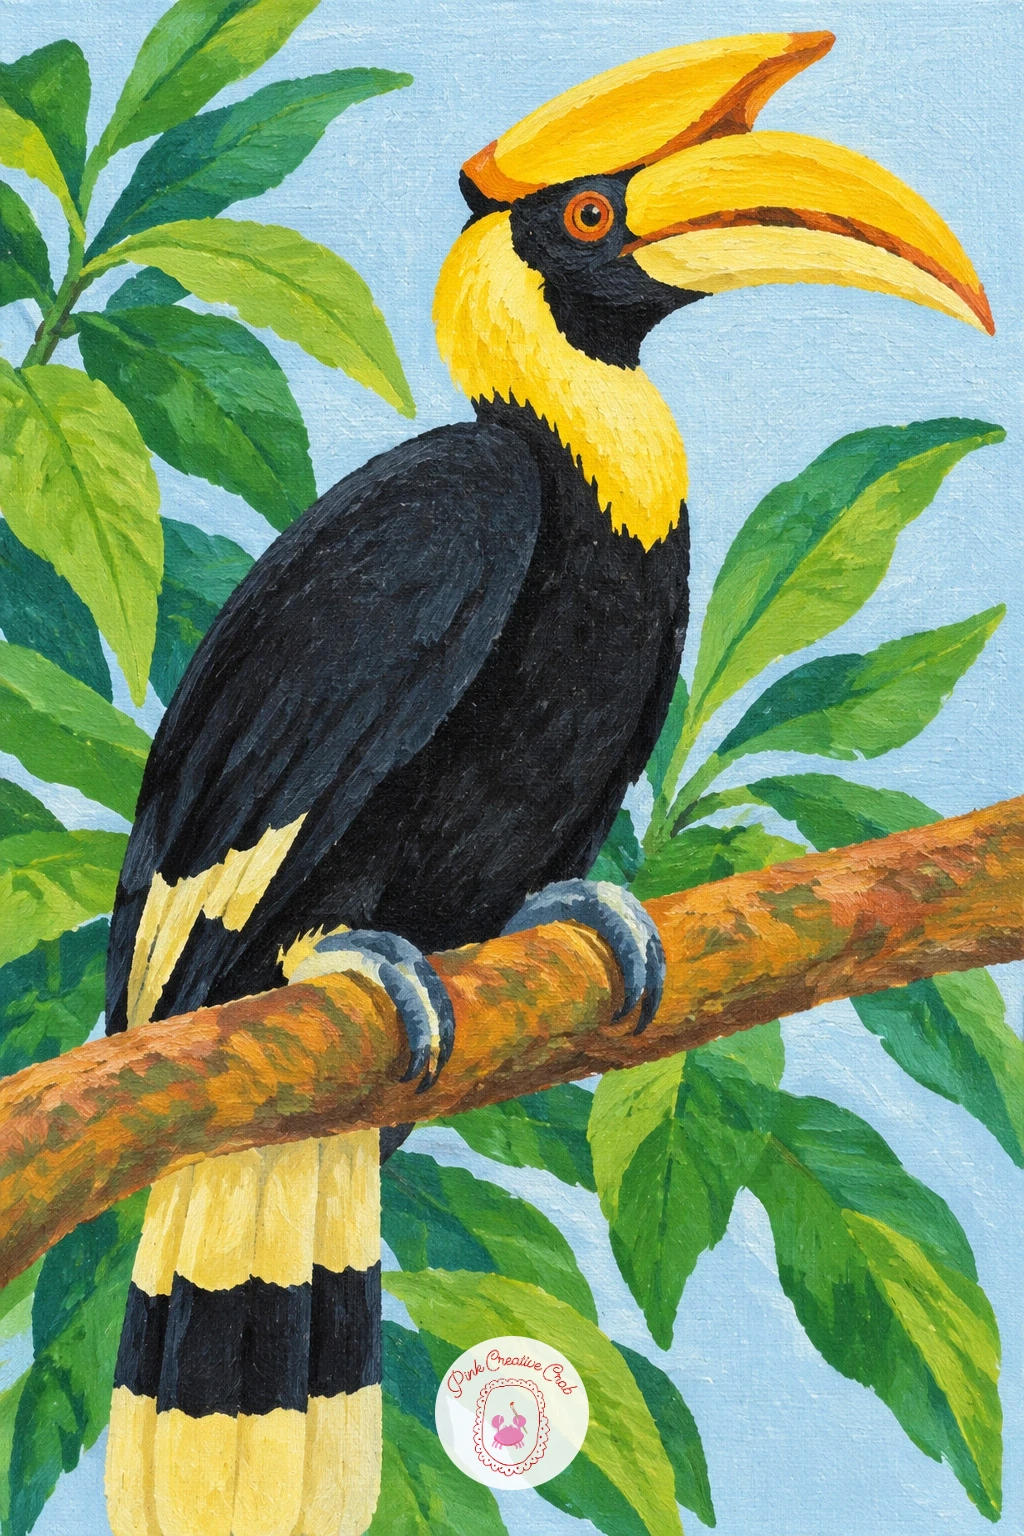
Palette: Mars Black,Soft Yellow,Rust Orange,Leaf Green
A starling with shimmering feathers on a wire closes out the list with a small lesson in iridescence, which is really just several colors layered thin rather than one tricky special paint. Paint the wire first as a single confident horizontal line across the canvas, then block the starling’s body in a dark base, close to black but not quite, perched with its feet gripping the wire.
Once that base dries, mix thin glazes of cornflower blue, phthalo green and a touch of rust orange, and dab each one lightly over different patches of the body with a small brush, letting the dark base show through between them rather than covering it solidly. That patchy layering of thin color over dark is exactly what reads as shimmer, and it is far more convincing than trying to paint one smooth gradient.
Small pale speckles flicked across the body with the tip of a round brush, loaded thin, finish the pattern. If mixing several glazes feels like a lot for one sitting, two colors dabbed over the dark base, blue and green, already gives a convincing shimmer without the full palette, and for more work on getting color and value right on creatures like this, the acrylic painting animals techniques page is worth a look.
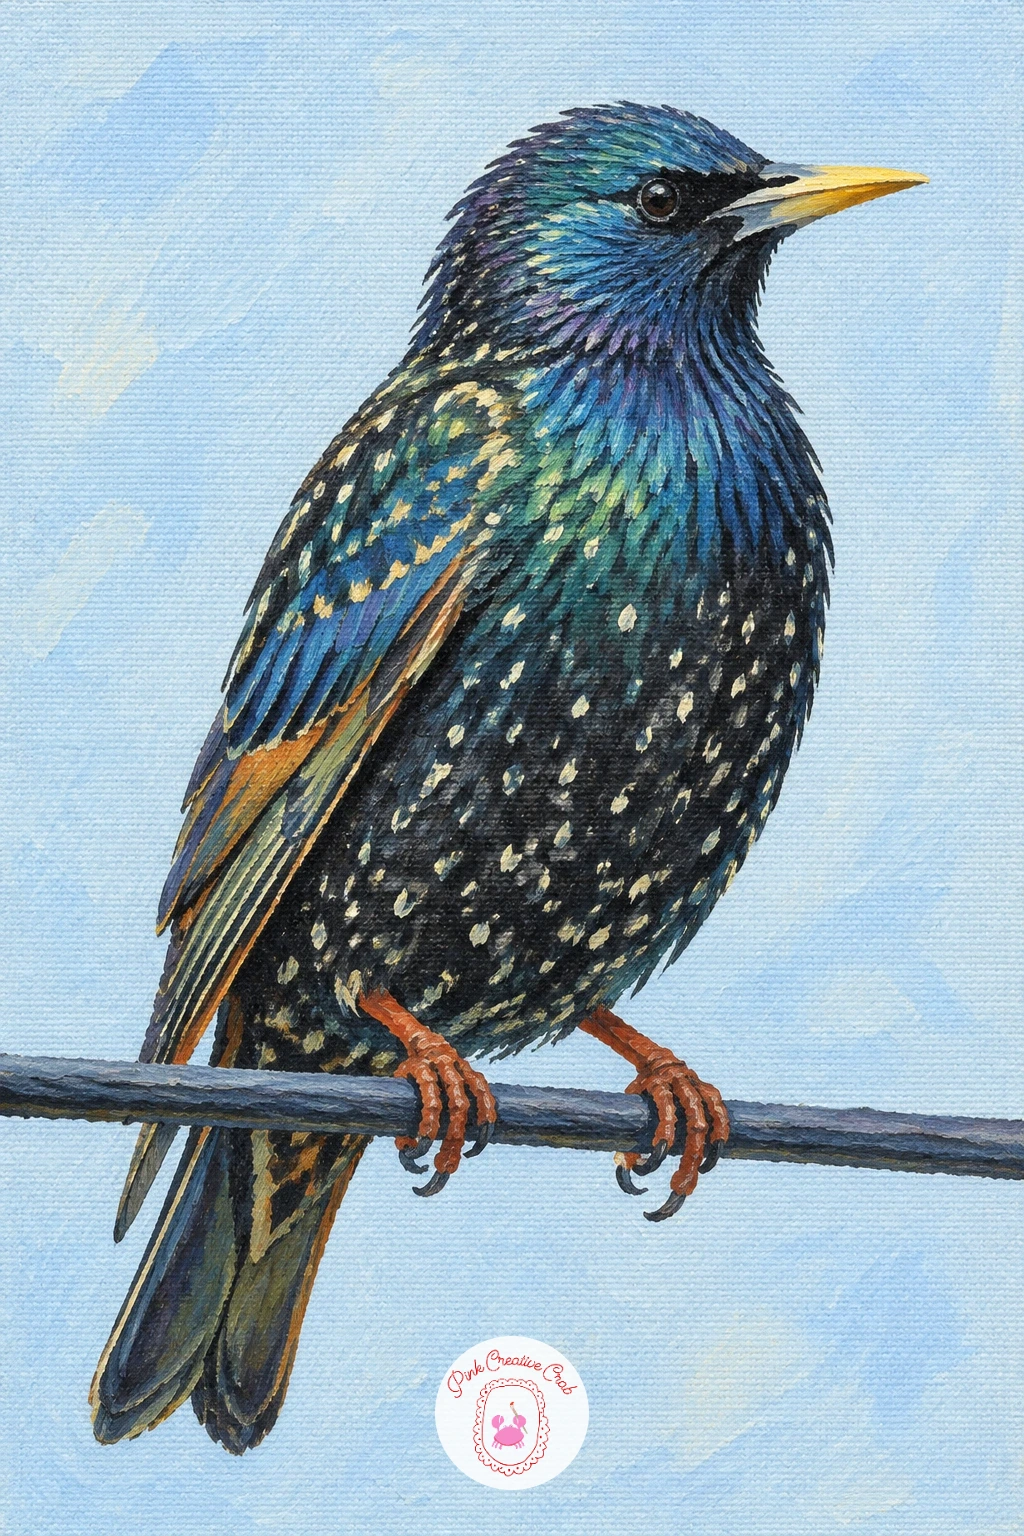
Palette: Mars Black,Cornflower Blue,Phthalo Green,Rust Orange
What to Do Next
Pick whichever bird made you want to start painting the moment you read it, grab a small canvas, and block in the background first while it is still fresh in your mind. One finished bird today is a good reason to come back for the next one on the list tomorrow.
Frequently Asked Questions
What acrylic colors do I need for bird painting?
A basic set covering blue, red or orange, yellow, green, black and white mixes almost every bird color here. Add a true cornflower or ultramarine blue and a warm rust orange first, since those two appear most often across garden and coastal birds.
Do I need to prime the canvas before painting a bird?
Most small stretched canvases come pre primed and ready to paint straight from the pack. If you are using raw canvas or board, add a thin coat of gesso first and let it dry fully so the acrylic color sits smoothly rather than soaking in unevenly.
How do I stop my bird painting from looking flat?
Flatness usually comes from using only one value of each color across the whole bird. Add a slightly darker shade on the shadow side of the body and a touch of white or warm highlight where the light would catch feathers, and the shape reads as rounded rather than cut out.
Is it better to paint the background or the bird first?
Paint the background first in almost every case, since it is much easier to paint a crisp bird shape over a dry background than to paint sky or water carefully around an already finished bird. Let each layer dry fully before the next one goes on.
How do I make feather texture without painting every feather?
Suggest feather groups with a few directional brush strokes rather than individual lines, following the way feathers actually lie on the body. A dry brush dragged lightly over a dry base layer adds broken texture fast without demanding fine detail work.
Have any thoughts?
Share your reaction or leave a quick response — we’d love to hear what you think!
-
 0
-
0
-
0
-
0
-
0
-
0


