

Acrylic painting animals is one of the most rewarding creative challenges you can take on as an advanced painter, and honestly, it never gets old. Every creature brings its own personality, texture, and energy to the canvas — and that is exactly what makes this subject so endlessly exciting. Whether you are drawn to the majestic weight of a lion or the delicate shimmer of a hummingbird’s wing, there is always something new to discover and master.
However, painting animals well takes more than just enthusiasm — it takes smart technique, patient observation, and a willingness to experiment. Therefore, this list of 24 ideas is designed to stretch your skills, spark fresh inspiration, and guide you through a wide range of subjects and approaches. Additionally, each idea is a gentle push toward trying something you might not have attempted before. So grab your favourite brushes, squeeze out some gorgeous colour, and let’s celebrate every single brushstroke together.
Key Takeaways
Layering thin glazes of acrylic over a dry underpainting is the secret to achieving believable animal fur and feather textures without overworking the paint.
Starting with a detailed value study in burnt umber or grey before adding color helps advanced painters lock in realistic animal form and anatomy early.
Negative painting around light fur or feathers — rather than painting each strand — creates a more natural, luminous effect that looks far more lifelike on the finished canvas.
Table of Contents
- Golden Hour Lion Portrait on Dark Canvas
- Painting Realistic Wolf Fur with Fan Brushes
- Wet-on-Wet Elephant Skin Textures
- A Single Owl Eye in Breathtaking Detail
- Capturing the Speed of a Running Horse
- Layered Glazes for Iridescent Hummingbird Feathers
- Moody Deep-Sea Turtle in Teal Depths
- Acrylic Painting Animals on Reclaimed Wood Panels
- Bold Graphic Bear in a Limited Palette
- Soft Edges and Hard Lines: Painting a Sleeping Fox
- Atmospheric Snow Leopard in Falling Snowflakes
- Palette Knife Textures for a Shaggy Highland Cow
- Negative Space Techniques for White Arctic Hare
- Painting Animal Eyes That Truly Come Alive
- Vibrant Tropical Parrot with Complementary Colours
- Underpainting a Grizzly Bear in Raw Umber
- Impressionistic Herd of Zebras at Dusk
- Feather by Feather: A Peacock Tail Study
- Wildlife in Motion — Acrylic Painting Animals Mid-Leap
- Dreamy Bokeh Background Behind a Red Fox
- Translucent Wings of a Dragonfly in Acrylics
- Expressive Loose Strokes for a Galloping Stallion
- Colour Theory in Action: Painting a Chameleon
- From Photo Reference to Canvas — Acrylic Painting Animals with Accuracy
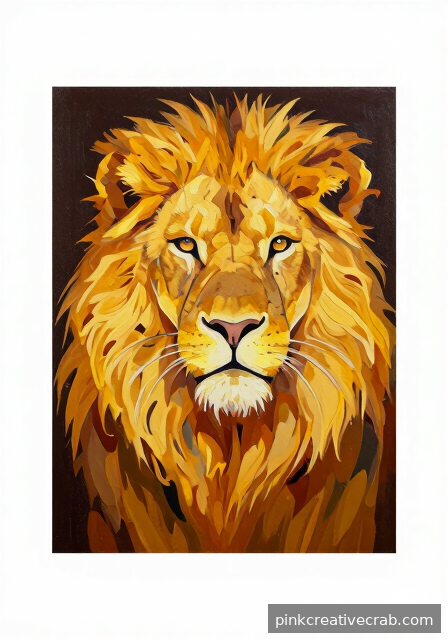
Golden Hour Lion Portrait on Dark Canvas
Painting a lion at golden hour is one of the most rewarding advanced acrylic projects you can tackle. Because dark canvases naturally amplify warm tones, your oranges and yellows will glow with incredible intensity. Start by toning your canvas with deep burnt umber, then build up your lion’s mane using short, confident brushstrokes in layers of amber, ochre, and raw sienna. The contrast does most of the heavy lifting for you!
Additionally, pay close attention to where light catches the fur along the mane’s edges. Those bright highlights — painted last with titanium white mixed with yellow — are what make the portrait feel truly alive. Therefore, resist the urge to add them too early. Patience here pays off beautifully.
For this project, a good set of bristle brushes in multiple sizes makes a huge difference. Check out these acrylic lion portrait brushes to get started confidently.
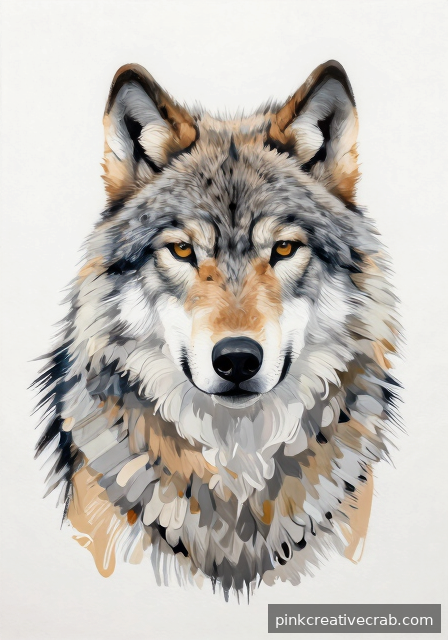
Painting Realistic Wolf Fur with Fan Brushes
Wolf fur is surprisingly approachable once you understand one simple secret — direction matters more than detail. Because each section of fur flows in a specific direction, always stroke your fan brush following that natural growth pattern. Start with a mid-tone grey base, then layer darker values underneath and brighter highlights on top. The result looks impressively realistic even from the very first session!
However, don’t rush the layering process. Allow each layer to dry slightly before adding the next, as this prevents muddy colour mixing. Meanwhile, vary your pressure on the fan brush — lighter pressure creates wispy individual hairs, while heavier pressure builds thicker texture. Both techniques are useful at different points in the painting.
For the finest fur details, thinning your paint slightly with a glazing medium gives beautiful, transparent strokes. Additionally, exploring resources like the Color Mixing Guide: Everything You Need to Know helps you mix convincing grey fur tones. Grab some quality fan brushes for acrylic fur painting to bring your wolf to life.
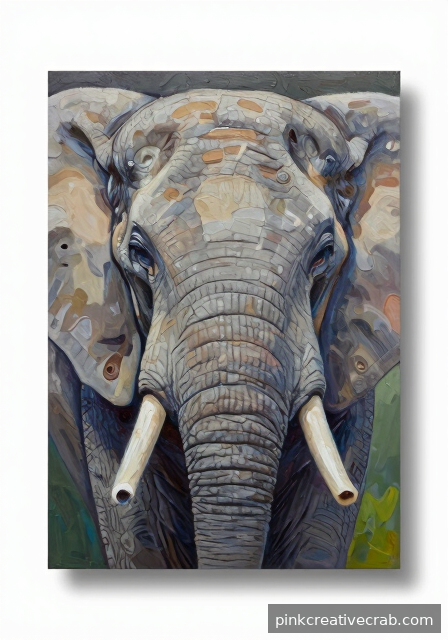
Wet-on-Wet Elephant Skin Textures
Elephant skin is a masterclass in controlled chaos — and acrylics handle it brilliantly using the wet-on-wet technique. Because elephant skin features deep wrinkles, subtle colour shifts, and incredible texture, working into wet paint lets you blend those transitions naturally. Start with a mid-tone warm grey across the entire surface, then immediately push in your darks along wrinkle lines using a small filbert brush. Watch how the colours soften at the edges automatically!
As a result, you get organic-looking texture without overworking the surface. Highlights along wrinkle ridges come next — a soft blue-grey mixed with white creates that characteristic dusty, weathered look elephants have. Therefore, keep your paint consistency fluid but not watery during this stage.
Working wet-on-wet requires a medium that keeps acrylics open longer. For foundational painting principles that support this approach, the Art Fundamentals: Complete Guide to Drawing & Painting Basics is a wonderful companion resource. Also, grab an acrylic retarder medium to extend your working time beautifully.
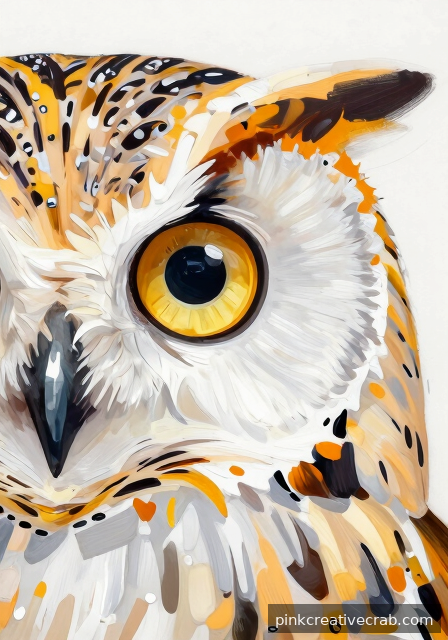
A Single Owl Eye in Breathtaking Detail
Focusing on just one owl eye transforms a complex subject into a completely achievable masterpiece. Because you’re working at a large scale, every beautiful detail becomes paintable — the concentric rings of amber and gold in the iris, the glassy reflection of light on the pupil, and the soft feathers framing the eye. Start by mapping the iris with a warm yellow base, then layer increasingly specific rings of burnt orange, brown, and dark gold moving inward toward the pupil.
However, the real magic lives in that tiny white reflection dot on the pupil. Although it seems insignificant, this single highlight instantly transforms the eye from flat to alive. Therefore, save this step for last and apply it decisively with a fine detail brush. Don’t second-guess yourself — one confident dot is perfect!
Additionally, using a good magnifying glass while painting keeps your detail work precise. For brush control techniques, the Drawing Techniques Encyclopedia: 50+ Essential Methods offers transferable skills for fine painting work. Treat yourself to quality detail brushes for acrylic painting — your eye will thank you!
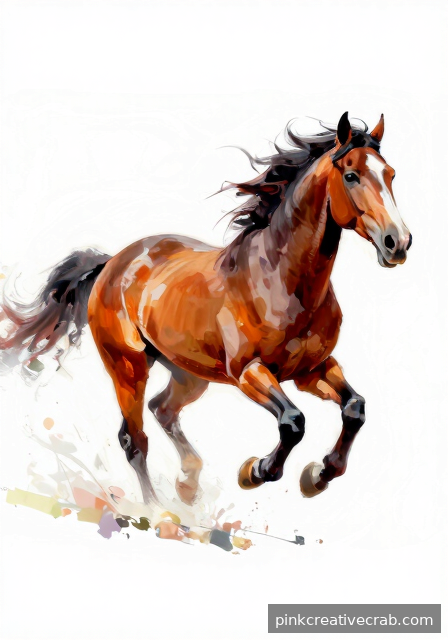
Capturing the Speed of a Running Horse
A running horse painted in acrylics is pure energy captured on canvas — and it’s more achievable than you might think. Because speed is about suggestion rather than perfection, deliberately softened edges and directional brushwork do the storytelling for you. Start with a loose gesture sketch, then block in your darks and lights quickly. Working with slightly watery paint during the initial stage allows beautifully energetic, flowing strokes.
Meanwhile, keep your background abstract and blurred — a few horizontal streaks of muted colour create an immediate sense of motion. As a result, the eye focuses entirely on the horse rather than the surroundings. Additionally, blurring the mane and tail edges with a dry fan brush while paint is still slightly tacky adds incredible momentum to the composition.
For colour decisions that make your horse’s coat sing, the Color Mixing Guide: Everything You Need to Know is genuinely helpful for mixing rich, warm animal tones. Furthermore, a set of acrylic palette knives and brushes gives you exciting textural options for the mane and coat.
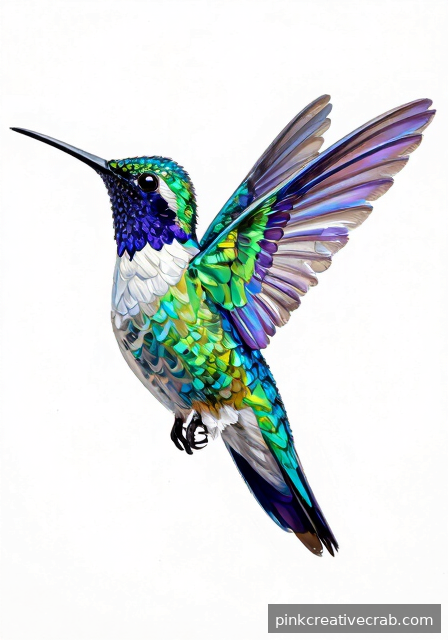
Layered Glazes for Iridescent Hummingbird Feathers
Hummingbird feathers are nature’s most dazzling colour show — and glazing techniques in acrylics let you recreate that iridescence beautifully. Because iridescence shifts between colours depending on light, layering thin transparent glazes of jewel tones over each other creates that same optical magic on canvas. Start with a deep teal base, allow it to dry completely, then glaze over it with transparent violet, then emerald green, then touches of electric blue. Each layer adds depth without covering what’s underneath.
However, patience is genuinely the secret ingredient here. Therefore, resist glazing over paint that hasn’t fully dried — muddy colours are the only risk in this otherwise forgiving technique. Additionally, mixing your pigments with a glazing medium rather than water maintains the beautiful transparency without weakening adhesion.
For anyone curious about how acrylics compare to other mediums for this kind of layering work, Acrylic vs Watercolor vs Oil vs Gouache: Which Medium Should You Choose? answers that question wonderfully. Stock up on quality acrylic glazing medium before you begin this gorgeous project.
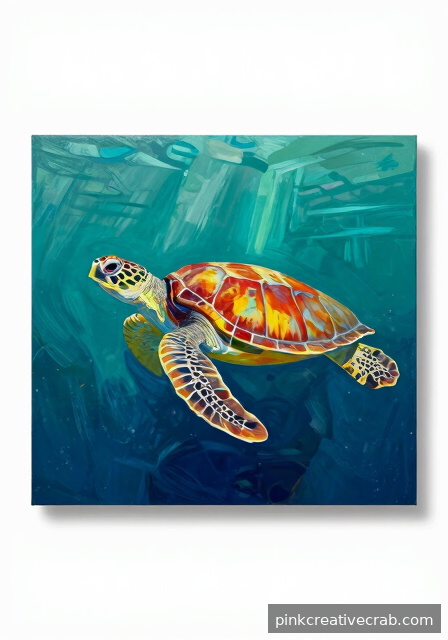
Moody Deep-Sea Turtle in Teal Depths
Painting a sea turtle emerging from deep teal water creates one of the most atmospheric and emotionally powerful acrylic paintings possible. Because deep water absorbs warm light quickly, your colour palette naturally shifts toward mysterious blue-greens and dark teals as you move away from the turtle. Start by painting a rich, layered background using Prussian blue, phthalo teal, and deep violet — blending them while wet for seamless depth. Then, paint your turtle over this moody backdrop, letting some background colour bleed into the shell’s shadows.
Additionally, the shell pattern is your opportunity for beautiful detail work. However, don’t overwork every scale — suggesting texture with loose, confident strokes reads more naturally than laboured perfection. Meanwhile, soft rays of filtered light painted in translucent yellow-green add an enchanting underwater glow to the composition.
For anyone newer to acrylics who wants strong foundational skills before attempting this project, the Watercolor Painting: The Ultimate Beginner to Advanced Guide offers surprisingly transferable wet-blending wisdom. Also, a set of acrylic ocean painting brushes makes creating those dreamy underwater water effects wonderfully smooth.
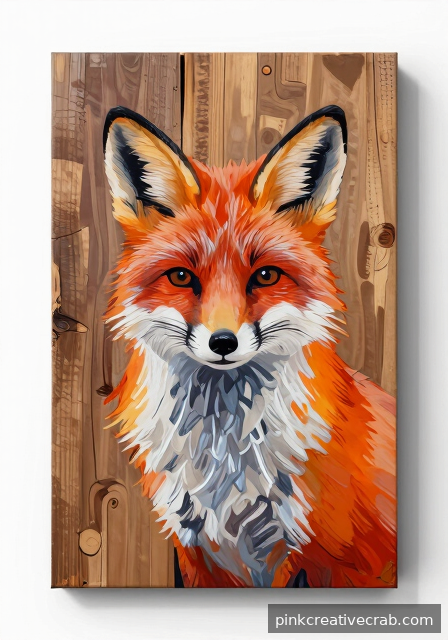
Acrylic Painting Animals on Reclaimed Wood Panels
Painting animals on reclaimed wood is such a rewarding experience! The natural grain of the wood adds instant texture and character to your artwork. However, you do need to seal the surface first with gesso or a wood primer, because raw wood absorbs paint unevenly. Additionally, knots and grain lines can become part of your composition — let the wood tell its own story alongside your animal subject.
For best results, choose simpler animal silhouettes like owls, foxes, or deer. These shapes work beautifully against a wood background. Meanwhile, leaving sections of the natural grain exposed creates a stunning contrast with your painted areas. Therefore, plan your composition before you pick up a brush.
Starting this project is easier than you think! Reclaimed barn wood or pallet wood both work wonderfully. Grab some reclaimed wood painting panels to get started on your next favorite piece.
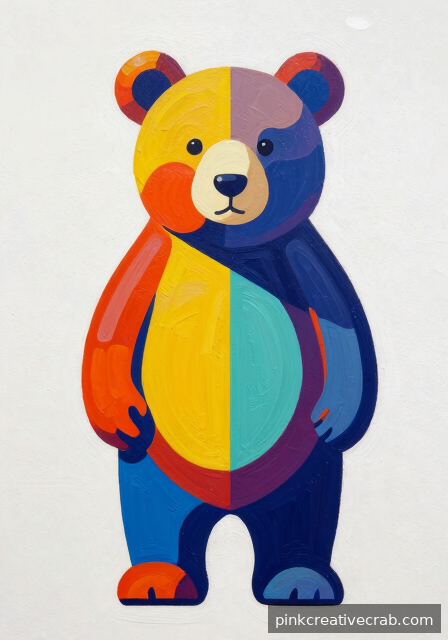
Bold Graphic Bear in a Limited Palette
Working with a limited palette is honestly one of the most freeing things you can do as an artist. Instead of feeling overwhelmed by dozens of color choices, you focus entirely on shape, contrast, and composition. For this bold graphic bear, try restricting yourself to just three colors — perhaps burnt sienna, ivory black, and titanium white. Additionally, a pop of one accent color can make your bear absolutely sing.
Graphic-style animal painting relies heavily on confident, deliberate brushwork. However, don’t stress about perfection — bold shapes actually hide small mistakes beautifully! Therefore, work with a flat brush and commit to clean, strong edges. Think of your bear more like a poster illustration than a realistic portrait.
This approach is surprisingly approachable for beginners and deeply satisfying for advanced painters too. Pick up a quality set of limited palette acrylic paint sets and enjoy the wonderful freedom of painting with less.
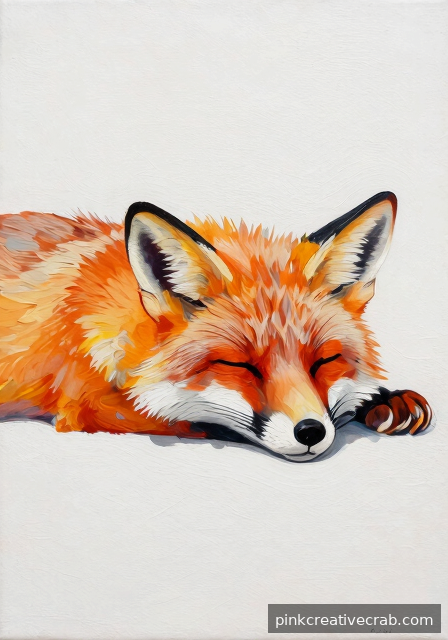
Soft Edges and Hard Lines: Painting a Sleeping Fox
A sleeping fox is the perfect subject for exploring one of the most exciting techniques in acrylic painting — combining soft blended edges with crisp, defined lines. The fox’s curled body and fluffy tail invite beautiful soft blending, while its facial features and fur details call for sharp, confident strokes. Because acrylics dry quickly, you can layer these effects without waiting long between sessions.
To achieve soft edges, work wet-on-wet by misting your palette and canvas lightly. Meanwhile, use a fine liner brush for those gorgeous sharp fur details once underlying layers are dry. Additionally, the contrast between soft and hard areas is exactly what gives your painting visual interest and depth. This technique pairs wonderfully with skills from a solid Art Fundamentals: Complete Guide to Drawing & Painting Basics.
You’ll absolutely love how this painting comes together! Stock up on the right tools with acrylic blending brushes for animals to get those dreamy soft edges just right.
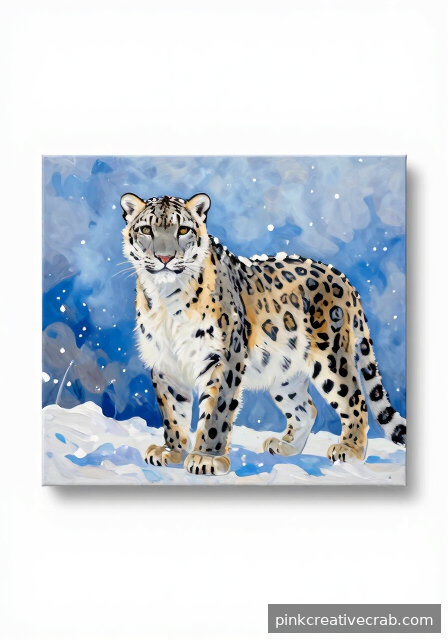
Atmospheric Snow Leopard in Falling Snowflakes
Snow leopards are magnificent, mysterious creatures, and painting one in an atmospheric snowy scene is truly magical. The key is building your background in soft, cool layers first — think misty blues, lavenders, and grays. Because acrylics are so wonderfully opaque, you can paint light snowflakes over a dark background with ease. Additionally, a slightly blurred background makes your leopard feel like it’s emerging from the storm.
For the snow leopard itself, layering is everything. Start with mid-tones, then add shadows, and finally build up the bright fur highlights. However, keep your touch light and varied — fur is never one single texture. Using a dry-brush technique for the coat creates beautiful, natural-looking fur effects. For color mixing tips that will really elevate this piece, the Color Mixing Guide: Everything You Need to Know is an incredible resource.
This painting will genuinely impress you when it’s finished! Grab some acrylic paints for wildlife painting and dive into this stunning project.
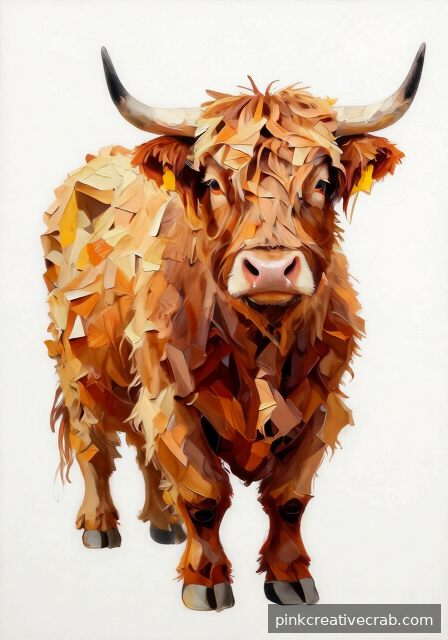
Palette Knife Textures for a Shaggy Highland Cow
Highland cows are basically made for palette knife painting — that gloriously shaggy, wild fur is just begging for thick, expressive texture! Using a palette knife instead of a brush feels completely different and wonderfully liberating. Because acrylics can be applied in thick impasto layers, you can actually build real physical texture that catches the light. Therefore, don’t be shy — pile that paint on!
Start by blocking in your background colors with a brush to establish your composition. Then, switch to the palette knife for the cow’s coat, applying paint in sweeping, directional strokes that follow the fur’s natural growth pattern. Additionally, mixing a little acrylic gel medium into your paint extends working time and adds even more body. The rustic charm of this subject means slightly imperfect strokes actually look better!
Palette knife painting is genuinely addictive once you try it. Get yourself some excellent palette knives for acrylic texture painting and prepare to have a wonderful time.
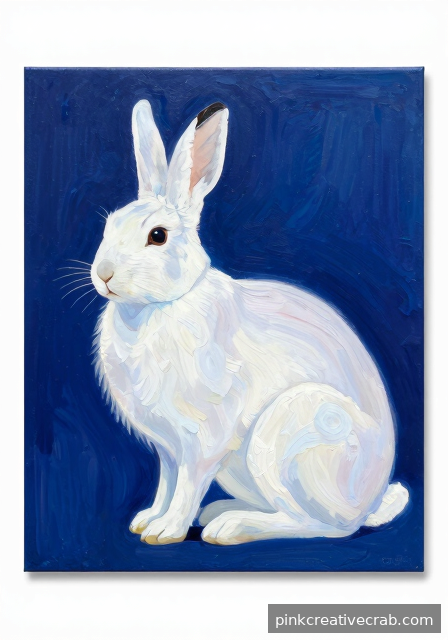
Negative Space Techniques for White Arctic Hare
Painting a white animal on a white canvas sounds tricky, but negative space techniques make it surprisingly achievable and incredibly striking! Instead of painting the hare itself, you essentially paint everything around it, letting the white canvas become the animal’s fur. Because the background colors define your subject’s edges, you end up with a beautifully crisp, luminous hare. This approach also connects beautifully to concepts explored in the Drawing Techniques Encyclopedia: 50+ Essential Methods.
Choose a dramatic, moody background — deep midnight blue, stormy purple, or rich forest green all work beautifully against white. However, don’t forget that shadows are crucial for giving your hare form and dimension. Therefore, use very soft cool blues and lavenders in the shadowed areas of the fur, rather than leaving everything pure white. Additionally, warm highlights on the lit edges add gorgeous depth.
This technique will genuinely change how you think about painting! Explore it with quality fine art acrylic paint sets for the most beautiful results.
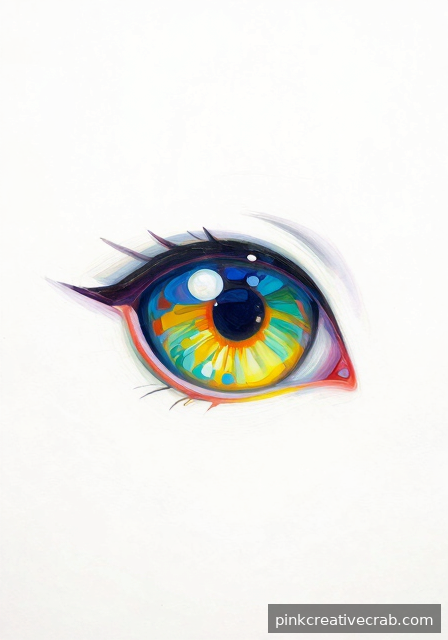
Painting Animal Eyes That Truly Come Alive
Animal eyes are the absolute heart of any wildlife painting — get them right, and your whole piece comes to life! The secret is understanding that eyes are essentially glass spheres, reflecting light from one consistent source. Therefore, always place your brightest highlight in the same position relative to your light source. Additionally, the reflection should include a tiny hint of the surrounding environment, which adds incredible realism and depth.
Building up layers is key here. Start with your darkest values in the pupil and deep iris, then gradually add mid-tones and finally those brilliant highlights. However, resist adding the highlight too early — it’s always the very last touch. Because acrylics dry so quickly, you can work in confident thin layers without mudding your colors. This layering principle is the same approach recommended throughout the Acrylic vs Watercolor vs Oil vs Gouache: Which Medium Should You Choose? guide.
Mastering animal eyes is genuinely one of the most satisfying skills you’ll ever develop. Invest in quality detail brushes for acrylic eye painting and watch your animals truly come alive!
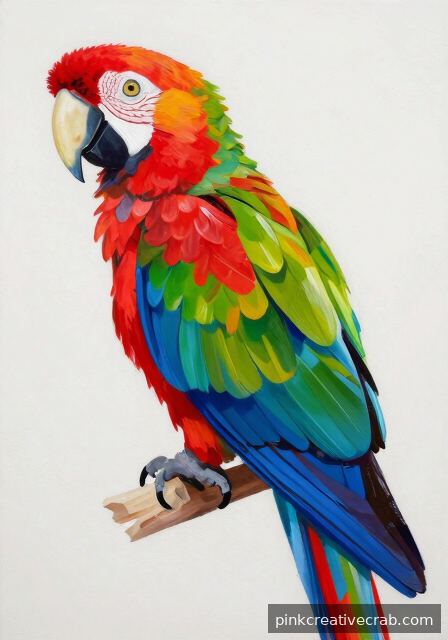
Vibrant Tropical Parrot with Complementary Colours
Painting a tropical parrot is honestly one of the most joyful projects you can tackle in acrylics. Because parrots naturally display bold reds, greens, and blues, they give you the perfect excuse to explore complementary colour pairings. Start by mapping out your colour plan before touching brush to canvas — this simple step saves so much frustration later.
However, the real magic happens when you push those complements hard. For example, place vivid orange feathers directly against a deep blue background and watch the parrot practically leap off the canvas. Additionally, layering glazes over dried paint lets you build that jewel-like tropical intensity that flat applications simply cannot achieve. Don’t be afraid of going too bright — you can always tone down, but boldness is the goal here.
Building colour confidence is a skill worth developing slowly. Therefore, exploring a dedicated Color Mixing Guide: Everything You Need to Know alongside this project is a brilliant idea. Meanwhile, keeping a professional acrylic paint set handy ensures your complements stay rich and true.
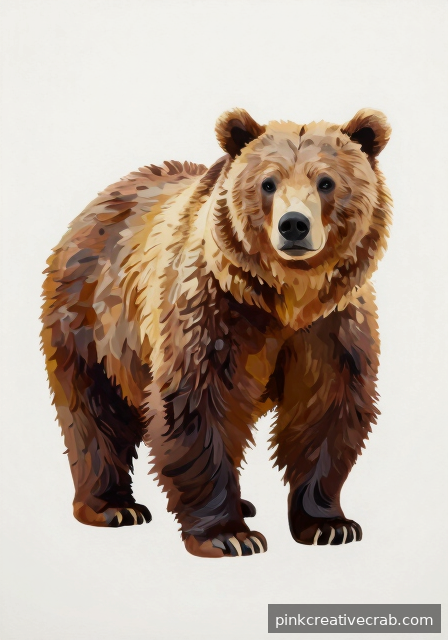
Underpainting a Grizzly Bear in Raw Umber
Underpainting might feel like an extra step, but it is honestly a game-changer for advanced animal portraits. Raw umber is a favourite choice because it dries quickly, mixes beautifully with acrylics, and creates a warm neutral foundation. Starting with this earthy tone helps you map values — lights and darks — before colour even enters the picture.
For a grizzly bear specifically, the underpainting does heavy lifting. Because bears have such complex fur textures and muscular forms, establishing your values early means you are never guessing later. Additionally, blocking in the bear’s massive shape with diluted raw umber first makes the final paint layers feel confident and purposeful rather than timid. Every brushstroke suddenly has intention behind it.
As a result, your finished bear will have that satisfying sense of depth and weight. However, getting comfortable with foundational techniques first is really helpful — so browsing Art Fundamentals: Complete Guide to Drawing & Painting Basics is a wonderful place to start. For the underpainting itself, grabbing a tube of raw umber acrylic paint is absolutely essential.
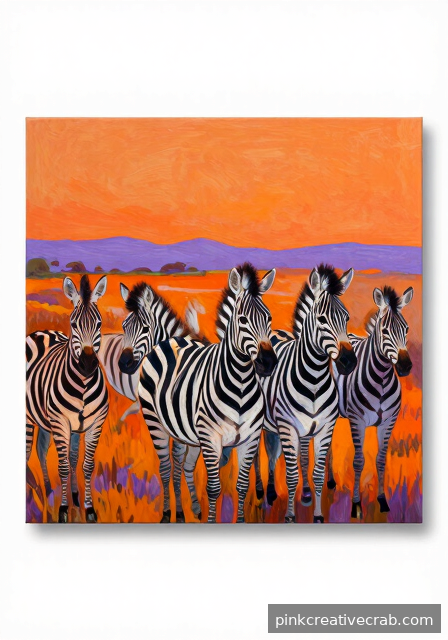
Impressionistic Herd of Zebras at Dusk
Painting a herd of zebras impressionistically is wonderfully freeing, especially because you are not chasing perfect stripes. Instead, think about the overall atmosphere — that warm, dusty dusk light washing over bold black and white forms. Impressionism gives you permission to let shapes blur at the edges and colours bleed into one another, which actually makes the painting feel more alive.
Meanwhile, the dusk palette is where things get really exciting. Warm oranges, dusty pinks, and deep purples interact beautifully with the cool black and white of the zebras. Additionally, using a palette knife to drag paint across the canvas can suggest movement and the shimmer of fading light far better than a fine brush ever could. Vary your stroke direction to keep energy flowing through the composition.
Therefore, the key is trusting your instincts and not overworking it. Because spontaneity is the heart of impressionism, knowing when to stop is genuinely a skill. However, if colour mixing for complex light scenarios feels tricky, a Color Mixing Guide: Everything You Need to Know can clarify everything. Stock up on palette knives for acrylic painting before you dive in.
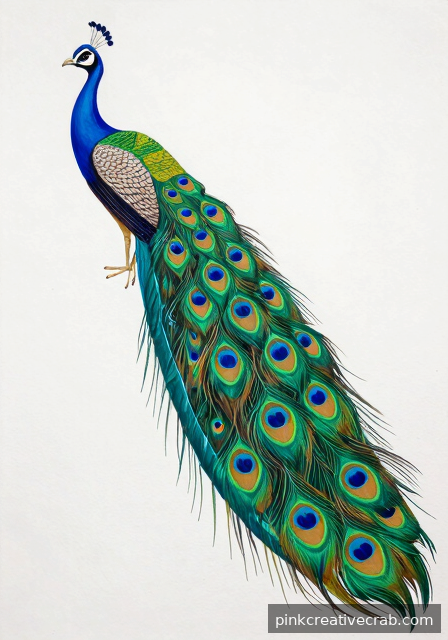
Feather by Feather: A Peacock Tail Study
A peacock tail study is genuinely one of the most meditative and rewarding projects an advanced acrylic painter can undertake. Because each feather contains its own micro-world of iridescent blues, greens, and golds, you are essentially painting dozens of tiny compositions that work together. Starting with the darkest values first and gradually building toward those electric teals creates a glow that feels almost supernatural.
However, the eye-spot at the centre of each feather deserves special attention. Working in small, deliberate strokes and using a fine detail brush lets you capture that layered, almost three-dimensional shimmer. Additionally, a tiny dab of iridescent acrylic medium mixed into your blues and greens can push the luminosity even further — it is a small trick with a big payoff.
As a result, patience truly becomes your superpower on this project. Meanwhile, planning your composition carefully before painting helps enormously, and the Drawing Techniques Encyclopedia: 50+ Essential Methods offers fantastic compositional guidance. For capturing those magical iridescent effects, a set of iridescent acrylic mediums is absolutely worth adding to your supply collection.
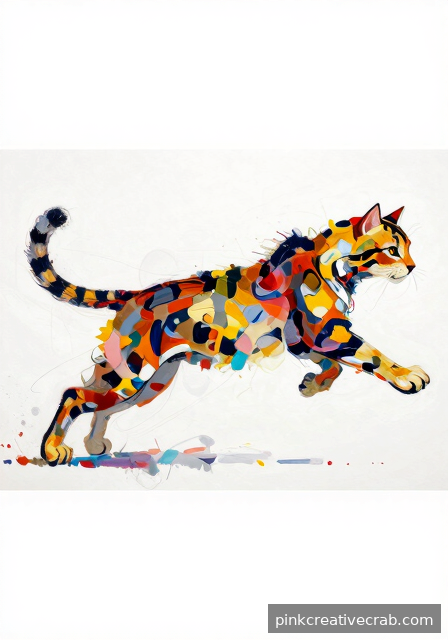
Wildlife in Motion — Acrylic Painting Animals Mid-Leap
Capturing an animal mid-leap is one of those challenges that separates a good painting from a truly thrilling one. Because movement is frozen in a single frame, every element of the composition must suggest energy — from the angle of the body to the direction of paint strokes. Studying reference photos frame by frame is genuinely essential here, so do not skip that step.
However, the brushwork itself becomes your greatest storytelling tool. For example, using loose, directional strokes along the line of motion — rather than rendering every detail statically — tricks the eye into perceiving speed. Additionally, leaving some edges intentionally soft while sharpening others creates a beautiful focal point that guides the viewer’s attention naturally. The sense of air moving around the animal is just as important as the animal itself.
Therefore, understanding foundational drawing before painting motion is incredibly helpful. As a result, spending time with the Pencil Drawing: Complete Beginner to Advanced Guide to practise gesture first pays off enormously. Meanwhile, a quality set of acrylic painting brushes for detail and loose work gives you the versatility this kind of project demands.
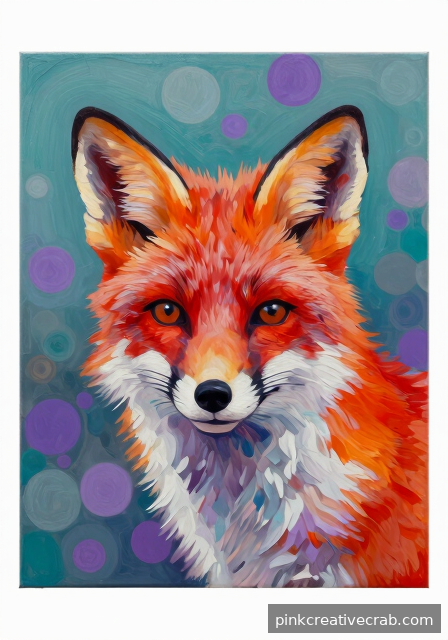
Dreamy Bokeh Background Behind a Red Fox
A soft, glowing bokeh background transforms a wildlife portrait into something almost magical. Because the red fox already carries such a rich colour story — those warm russets and creamy whites — placing it against dreamy, out-of-focus circles of light creates instant visual drama. Mixing your background wet-on-wet and allowing colours to bloom softly into each other mimics that photographic blur beautifully.
Additionally, the colour temperature contrast is what makes this technique sing. For example, using cool teal and violet bokeh circles behind a warm orange fox creates vibrant tension without the painting ever feeling harsh. However, restraint matters — keep the bokeh loose and light, because overworking the background kills the dreamy softness that makes this effect so appealing. Less truly is more here.
Meanwhile, understanding how acrylics behave differently from other mediums is genuinely useful context. Therefore, if you have ever wondered how this approach compares with other painting styles, Acrylic vs Watercolor vs Oil vs Gouache: Which Medium Should You Choose? is a fantastic read. For blending those soft background tones, a set of soft fan blending brushes for acrylics works beautifully.
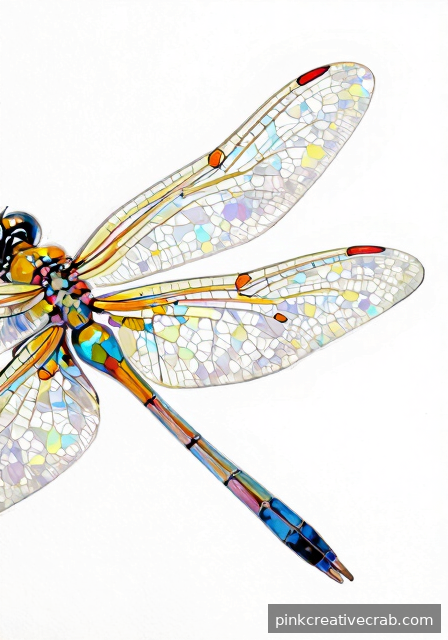
Translucent Wings of a Dragonfly in Acrylics
Painting dragonfly wings in acrylics is a genuinely delightful technical puzzle, because transparency in an opaque medium requires clever thinking. The secret lies in thinning your paint dramatically with water or glazing medium, then building up translucency through multiple thin layers rather than trying to achieve it in one pass. Because acrylics dry slightly darker, testing each glaze layer on a scrap piece first saves a lot of guesswork.
However, the delicate network of veins across the wings is where patience truly pays off. Using a rigger or liner brush — those wonderfully long, thin brushes designed for fine lines — makes tracing those intricate patterns feel almost meditative rather than stressful. Additionally, a light touch of iridescent medium mixed into your wing glazes adds that gossamer shimmer dragonfly wings are famous for in nature.
As a result, this project becomes a wonderful exercise in transparency and control. For extra technical grounding before starting, the Art Fundamentals: Complete Guide to Drawing & Painting Basics covers layering concepts brilliantly. Meanwhile, stocking up on acrylic glazing medium and liner brushes will make this entire project so much more enjoyable.
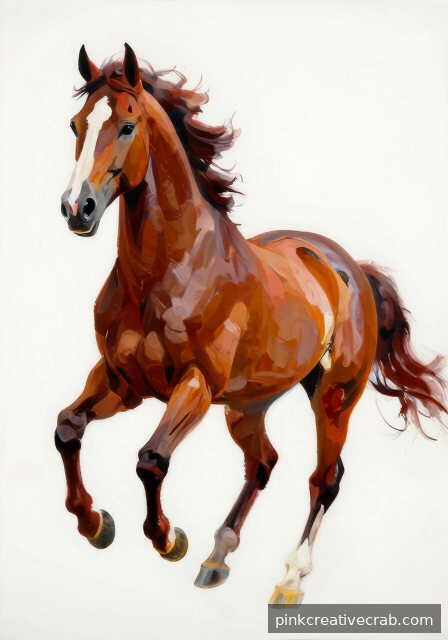
Expressive Loose Strokes for a Galloping Stallion
Capturing a galloping stallion in acrylics is one of the most exciting challenges for advanced painters. Because horses move with such powerful energy, your brushwork needs to reflect that momentum. Therefore, forget tight, cautious strokes — this is your permission slip to paint boldly and freely. Load your brush generously and let those marks sweep across the canvas with confidence.
Additionally, consider your stroke direction carefully. Following the natural flow of muscle and movement creates instant visual energy. Meanwhile, leaving some areas loose and undefined actually strengthens the composition — your viewer’s eye fills in the rest beautifully. For example, a few gestural marks suggesting flying mane can feel more alive than painstakingly rendered individual hairs.
To practice this technique, warm up with quick gesture sketches first. However, once you move to canvas, trust your instincts completely. A fan brush works wonderfully for mane and tail flow. For this project, grab a quality set of acrylic fan and filbert brushes to give yourself every expressive advantage.
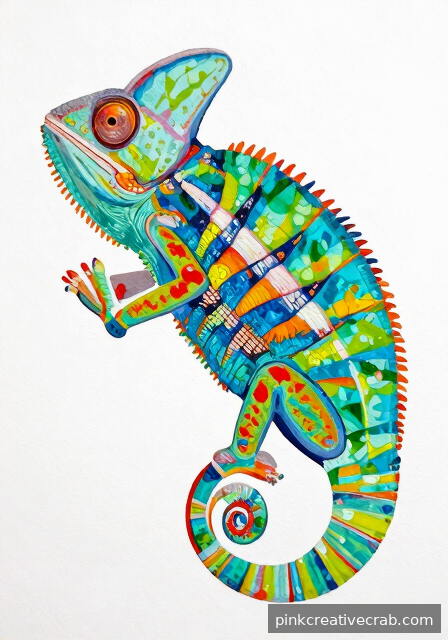
Colour Theory in Action: Painting a Chameleon
A chameleon is honestly the perfect subject for exploring colour theory in acrylic painting. Because these remarkable creatures naturally display shifting, iridescent hues, you have a wonderful excuse to experiment with unexpected colour combinations. Additionally, painting a chameleon teaches you to see colour relationships rather than just local colour — a skill that will genuinely transform every painting you make afterward.
However, the real magic happens when you start layering complementary and analogous colours together. For example, placing warm oranges next to cool purples creates that signature reptilian shimmer without any special paint. Meanwhile, glazing thin transparent layers over dried base colours builds incredible depth. If you want to strengthen your foundational understanding first, the Color Mixing Guide: Everything You Need to Know is an absolute treasure.
Therefore, approach this painting as a joyful colour experiment rather than a technical challenge. Start with a neutral background so your chameleon’s colours sing beautifully. Iridescent and interference acrylics add spectacular effects here — try a set of iridescent acrylic paints for genuinely stunning results.
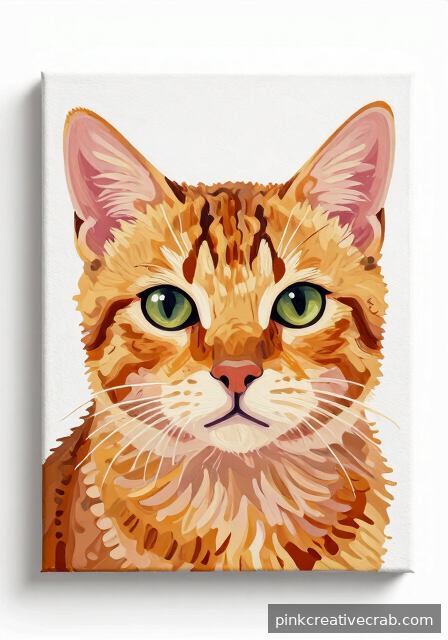
From Photo Reference to Canvas — Acrylic Painting Animals with Accuracy
Working from photo reference is a wonderful skill that helps you paint animals with genuine confidence and accuracy. However, the biggest mistake artists make is copying mechanically without truly understanding what they’re seeing. Therefore, before touching brush to canvas, spend real time studying your reference — observe proportions, value relationships, and how light actually falls across fur or feathers. This observational habit makes an enormous difference.
Additionally, breaking your reference into a simple grid helps maintain accurate proportions beautifully. Meanwhile, squinting at your photo simplifies complex detail into clear value shapes, making the painting process far less overwhelming. Because acrylics dry quickly, working section by section keeps everything manageable and fresh. For building strong foundational observation skills, the Art Fundamentals: Complete Guide to Drawing & Painting Basics offers genuinely brilliant guidance.
As a result, combining careful observation with confident brushwork produces paintings that feel both accurate and alive. Furthermore, a good easel keeps your reference and canvas at the same eye level — an underrated game-changer. Consider investing in a tabletop easel with reference holder to streamline your entire workflow beautifully.
Final Thoughts
You have just explored 24 wonderful ways to dive deeper into acrylic painting animals, and hopefully your sketchbook is already filling up with ideas. Every single one of these projects is an opportunity to grow — to notice more, feel more, and express more through your brushwork. Additionally, remember that advanced painting does not mean perfect painting. It means thoughtful, intentional, and joyful painting.
Therefore, do not wait until conditions feel ideal before you begin. Pick the idea that excites you most right now — even if it feels a little scary — and just start. Because the best way to improve is always to put paint on canvas and see what happens. Celebrate every small breakthrough, every texture that surprises you, and every eye that suddenly looks alive.
Most importantly, enjoy the process. Acrylic painting animals is a lifelong adventure, and you are already on your way. Keep going, keep experimenting, and know that every canvas you complete makes you a better, braver artist. You have absolutely got this — now go make something beautiful.
Frequently Asked Questions
What are the best acrylic brushes for painting animal fur?
For acrylic painting animals with realistic fur, fan brushes and fine liner brushes are your best friends. Additionally, a flat filbert brush creates beautiful soft edges between colour zones. However, do not overlook old, splayed brushes — they create wonderfully organic fur strokes. Therefore, building a varied brush collection gives you far more expressive options for every coat and texture.
How do I make animal eyes look realistic in acrylic?
Realistic animal eyes start with a strong dark base, followed by careful layering of reflected colour and light. Additionally, the white highlight dot — added last with a fine brush — makes all the difference. However, placement matters enormously, so observe your reference closely. Because even a tiny shift in that highlight changes the entire mood and direction of the animal’s gaze.
Should I use a reference photo when painting animals in acrylics?
Absolutely — reference photos are an advanced painter’s greatest tool, not a shortcut. Therefore, use high-quality wildlife photos to study anatomy, light direction, and texture up close. Additionally, sites like Unsplash or Paint My Photo offer free reference images. However, feel free to change colours, backgrounds, or lighting to make the painting your own creative interpretation.
How do I stop my acrylic animal painting from looking stiff or flat?
Stiffness usually comes from overworking wet paint or adding too much detail too soon. Therefore, block in large value shapes first and resist the urge to detail early. Additionally, vary your brushwork — some loose areas contrast beautifully against tight focal points. Because animals have soft, organic forms, allowing your brush to move freely creates a far more lifelike and energetic result.
What canvas size is best for advanced acrylic animal portraits?
For advanced acrylic painting animals, a larger canvas — such as 16×20 inches or bigger — gives you room to develop detail without feeling cramped. However, smaller formats like 8×10 are perfect for studies of eyes or texture sections. Additionally, working across multiple sizes builds versatility. Therefore, experiment with different formats to discover which scale suits your natural painting style best.
Have any thoughts?
Share your reaction or leave a quick response — we’d love to hear what you think!
-
 0
0 -
0
-
0
-
0
-
0
-
0


