

Texture painting on canvas turns a flat piece of acrylic into something you almost want to touch, raised ridges and soft shadows that look carved rather than painted. All it takes is modeling paste, a palette knife and a canvas, and within an hour you have a little relief that catches light differently depending on where you hang it.
Below you will find 28 ideas that run from a single paste flower to a full carved landscape, each one built with the same handful of tools so you can start wherever your confidence sits today. Pick one, load your knife, and let the paste do most of the work.
Using these images: free for personal projects such as printing, coloring, cards, journals and gifts. Handmade items that include them may be sold up to 30 pieces per design. More than that is commercial use and is not permitted, and neither is selling or sharing the images themselves or passing them off as your own. Please ask before any other use.
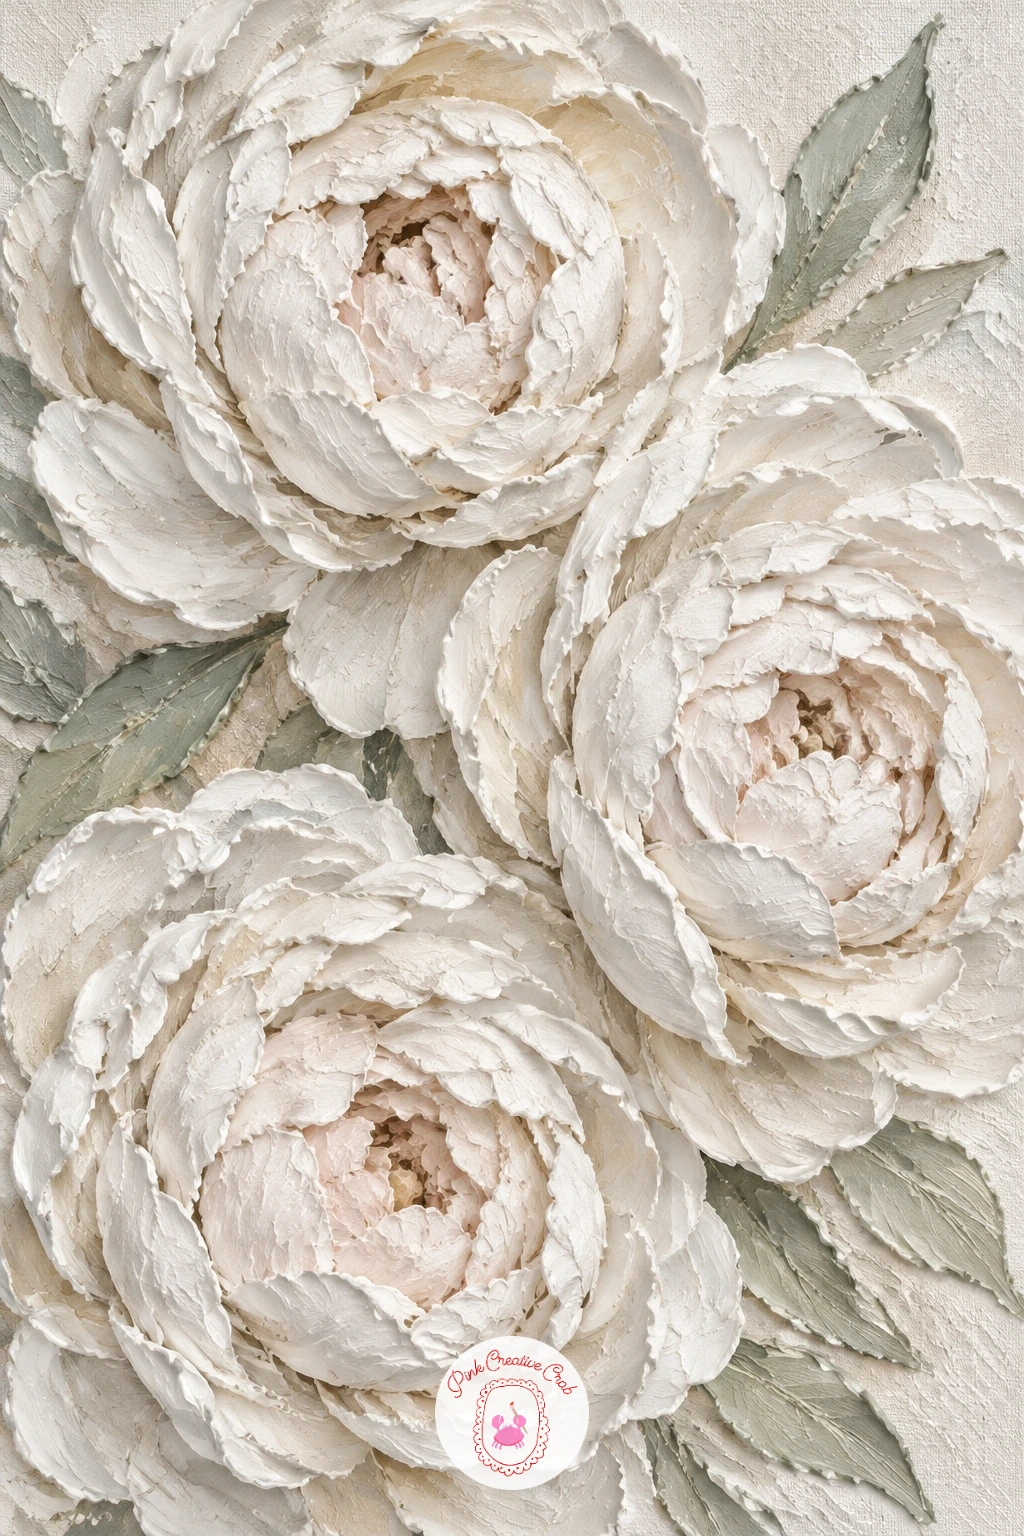
Raised paste peonies make the friendliest starting point for texture painting on canvas because the whole flower is built from one repeated knife motion. Load a palette knife with a generous scoop of modeling paste and press short curved strokes in a loose spiral, working from the center of each bloom outward so the petals overlap like real peony layers.
Keep the canvas and the paste both white so the whole piece reads as one soft relief, letting shadow do the work of separating petal from petal. If your spiral starts looking too neat and flat, stop smoothing and leave the knife marks rough, that is what catches the light.
Measure before you commit: hold your knife up against the canvas and compare the width of one flower to the width of the canvas, three peonies across a square canvas usually looks balanced, four starts to crowd. No modeling paste on hand yet, thick gesso mixed with a little joint compound gives a similar raised body in a pinch.
Let the paste cure overnight before you decide the piece is finished, it often looks flatter wet than dry.
You Will Need
- acrylic modeling paste
- palette knife
Palette: Titanium White,Warm White,Pale Grey
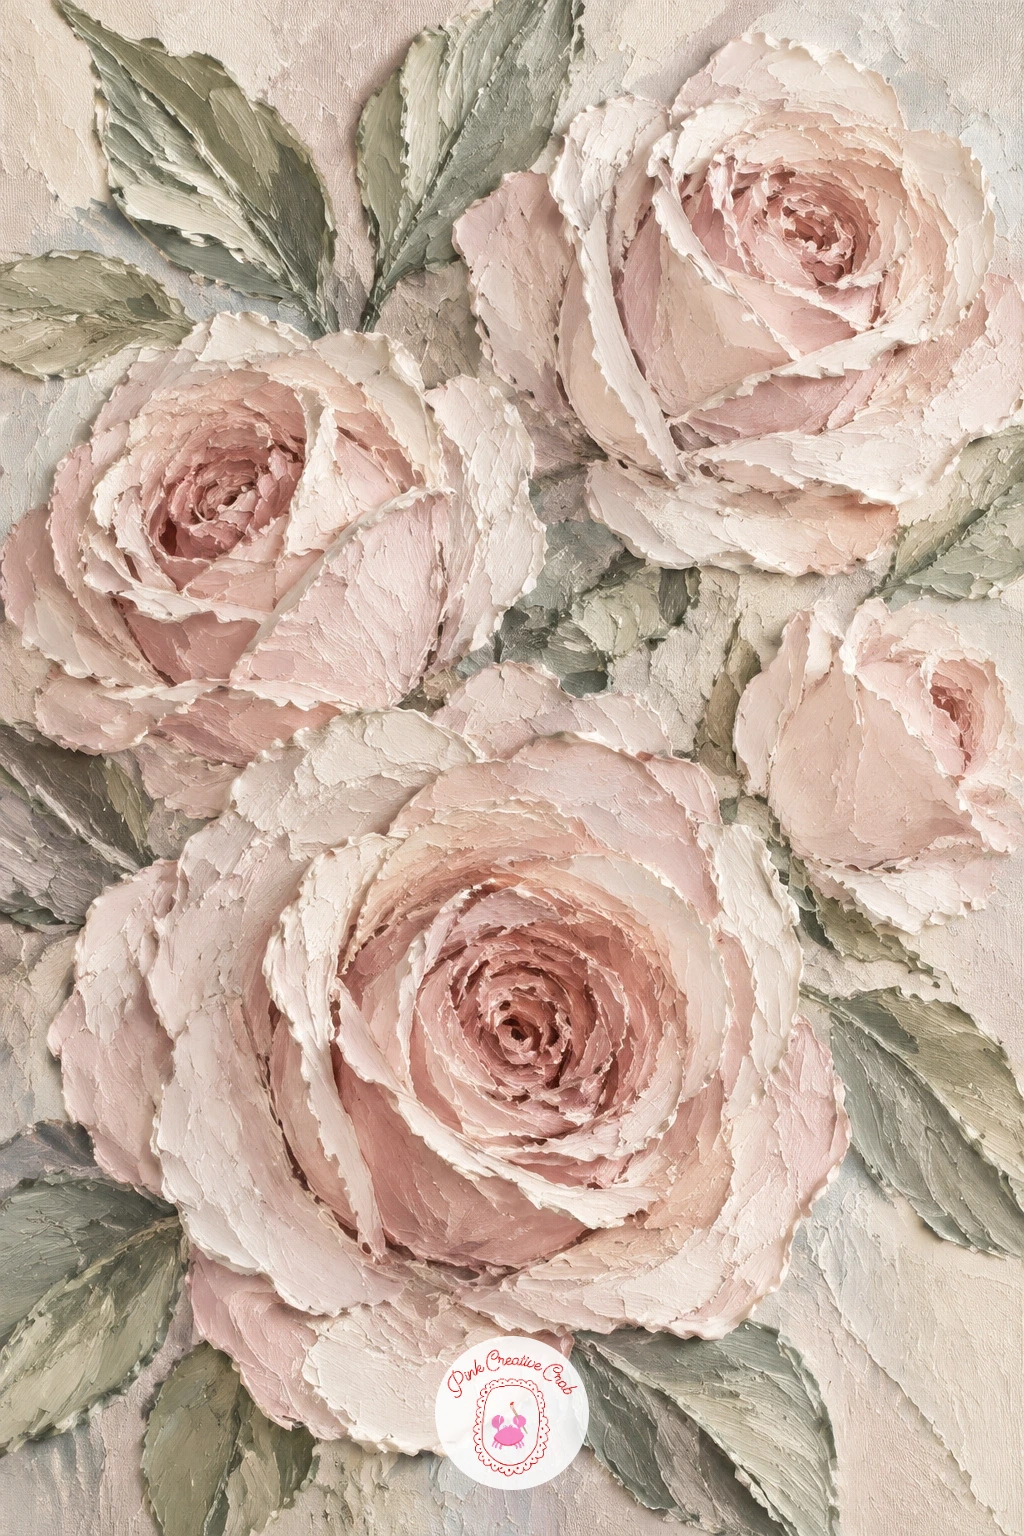
Blush palette knife roses build on the same spiral motion as the peonies but push the color and the knife pressure further. Mix a small amount of acrylic paint into your modeling paste until you get a soft blush pink, then load the knife and lay short curving strokes in rings, turning the canvas slightly between each stroke so the spiral winds naturally.
Start at the center of each rose and work outward, leaving the outer petals thicker and rougher than the tight inner coil, that contrast is what reads as a rose rather than a blob. If the center looks too tidy, drag the knife edge through it once more at an angle to break it up.
Light matters here: angle a lamp from one side while you work so you can see the ridges forming real shadows, not just color. A butter knife or an old credit card does the same spiral job if you do not own a proper palette knife yet.
Finish with one or two sage leaves pressed in beside the blooms using the flat of the knife, they ground the pink without competing for attention. Readers who enjoyed the acrylic painting flowers ideas for beginners will recognize the same build-up-in-layers patience here, just with a knife instead of a brush.
You Will Need
- acrylic modeling paste
- palette knife
Palette: Blush Pink,Sage Green,Titanium White
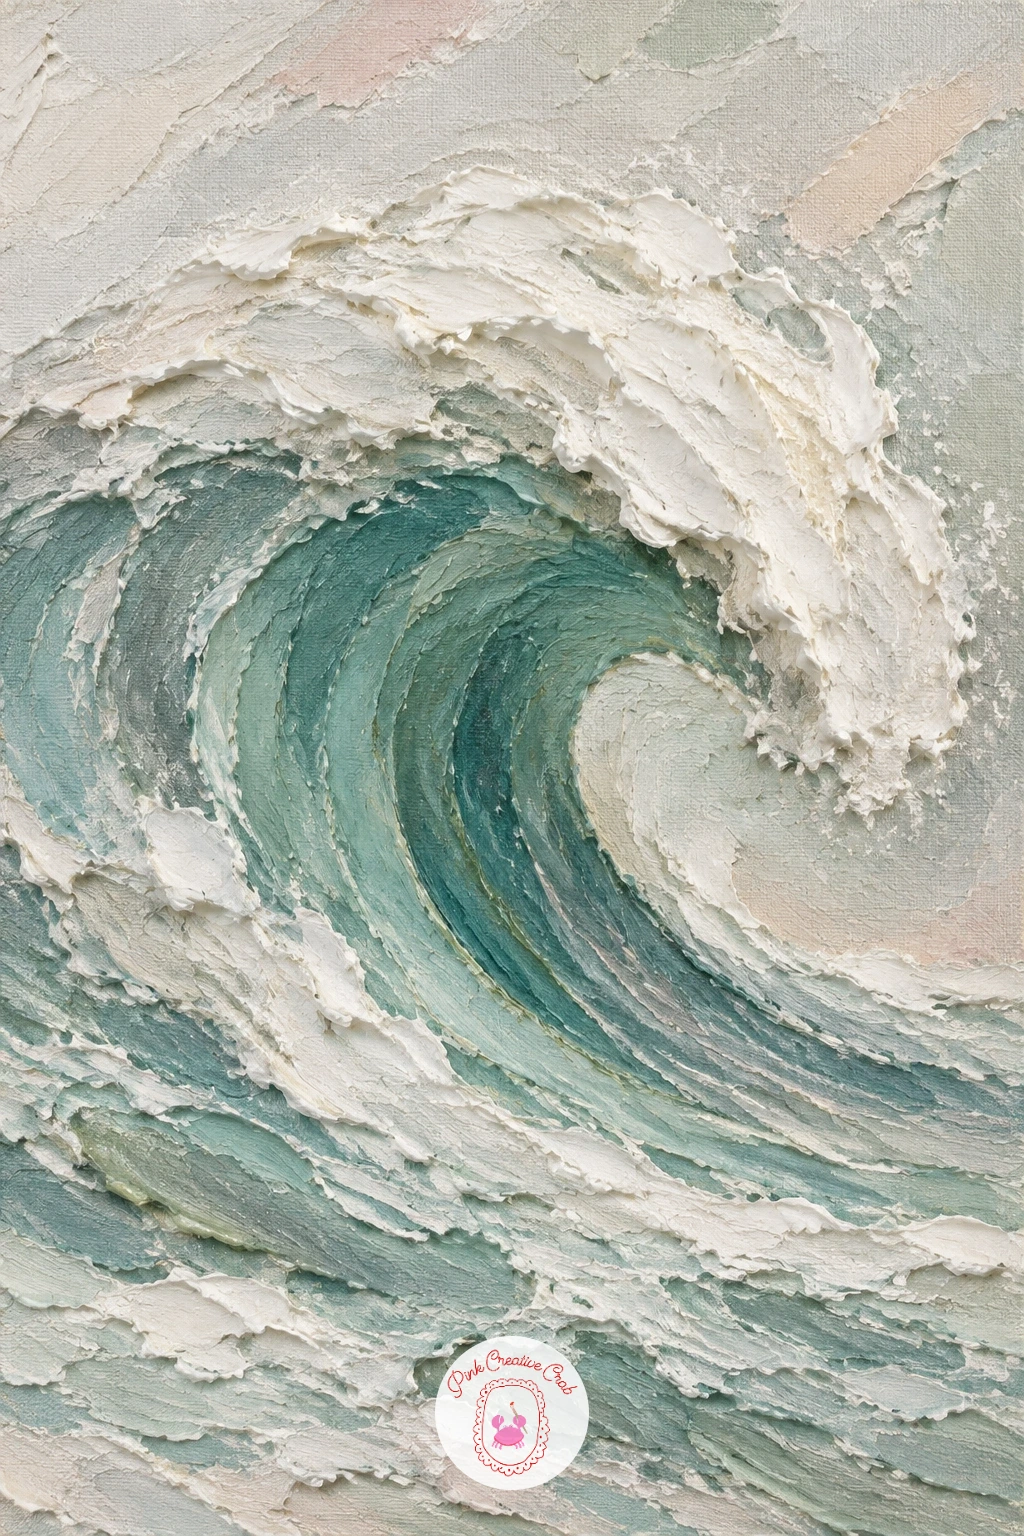
A sculpted wave asks you to think like a sculptor before you think like a painter, so plan the curl of the wave in pencil on the dry canvas first. Build the base layer of paste in white across the whole shape, then come back with a loaded knife and drag long sweeping strokes along the curl, leaving the crest noticeably thicker than the trough.
Eye level matters more here than in a flat seascape, keep your sightline low and close to the canvas as you work the crest so the curl looks like it is breaking toward you rather than sitting flat. Mix a little teal into a second batch of paste and drag it into the trough of the wave while the white is still workable, so the two colors blend at the edges instead of sitting in hard stripes.
If the wave stiffens before you get the blend you want, work fast in small sections rather than trying to cover the whole canvas at once. No teal paint on hand, a touch of blue mixed with a little green gets you there.
Let the white crest catch the most paste, that is where the eye lands first.
You Will Need
- acrylic modeling paste
- palette knife
Palette: Titanium White,Teal,Payne’s Grey
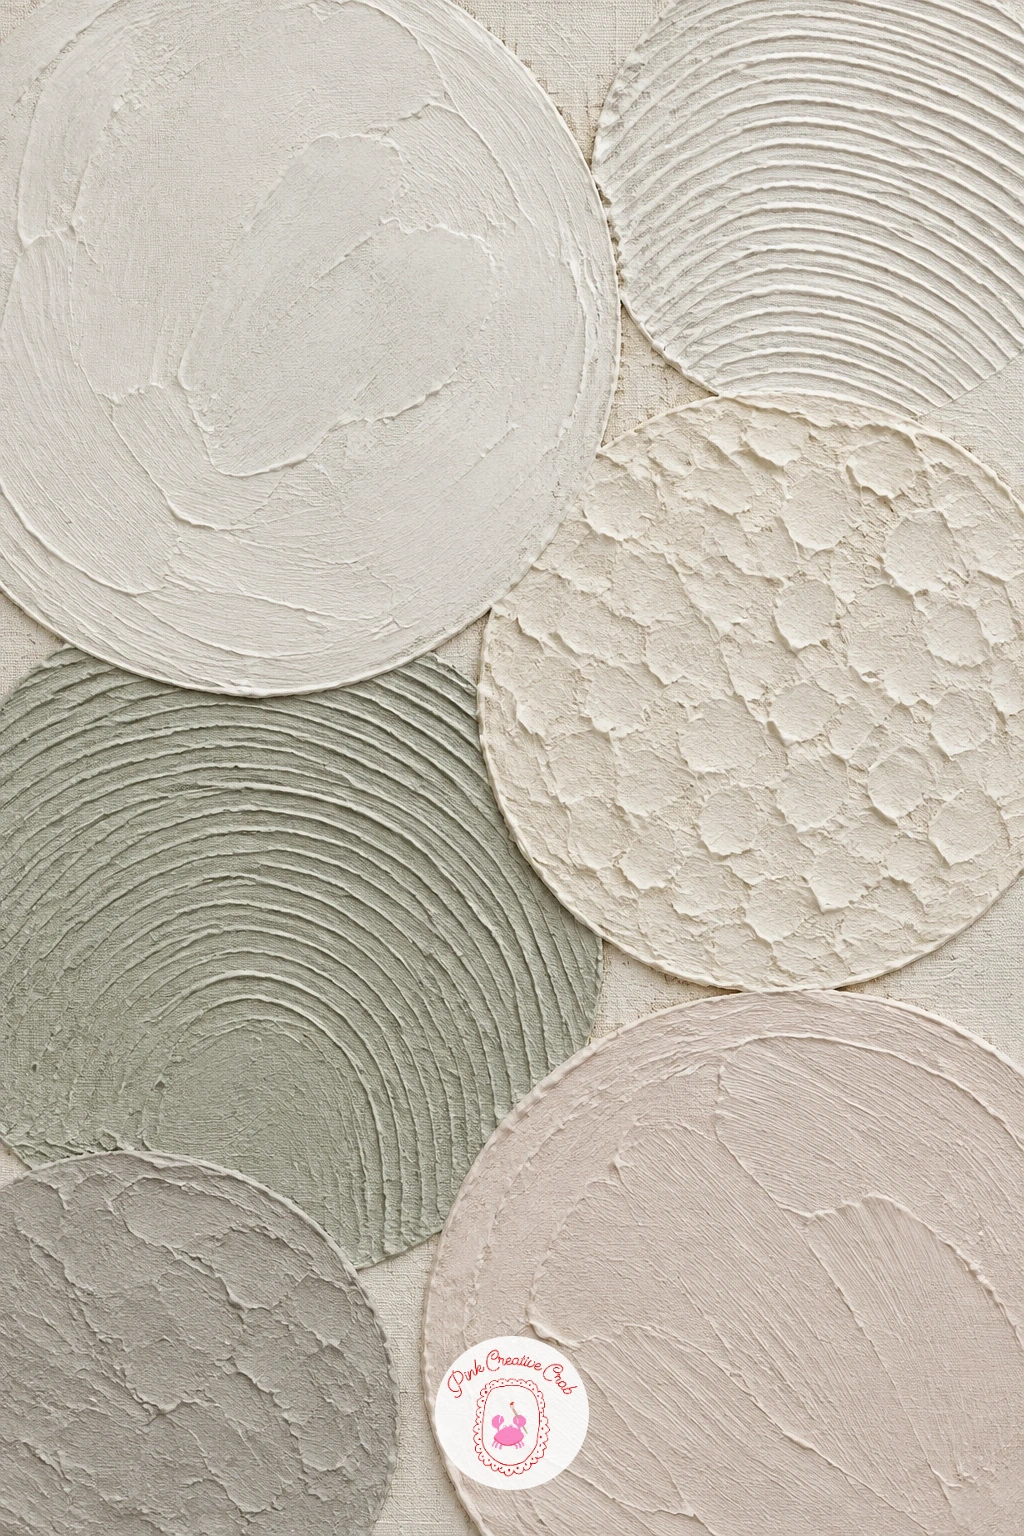
White on white circles rely entirely on shadow to read as a picture, which makes this one of the more satisfying textures once you see it under the right light. Trace a few overlapping circles onto the dry canvas in pencil using a cup, a jar lid and a small plate for different sizes, then fill each one with a different knife texture: one smooth and rounded, one combed in straight ridges, one dabbed in small peaks.
Build up the paste along the edges of each circle first so the outlines stay crisp where they overlap, then fill the centers more loosely. Keep every bit of paste the same shade of white, the whole point of this piece is that color never helps you, only the raking light across the ridges does.
Photograph your progress with a lamp held low to one side rather than overhead, that is the only way to judge whether the texture differences are actually showing up. If the circles start blending into each other, let that section dry fully before adding the next ring of paste so the edges stay defined.
A toothpick is handy here for scratching fine lines into any circle that still looks too plain.
You Will Need
- acrylic modeling paste
- palette knife
- cup or jar lid to trace circles
Palette: Titanium White,Warm White,Soft Grey
Photograph the finished piece in both daylight and lamp light before you call it done, white on white reliefs change completely depending on the light source.
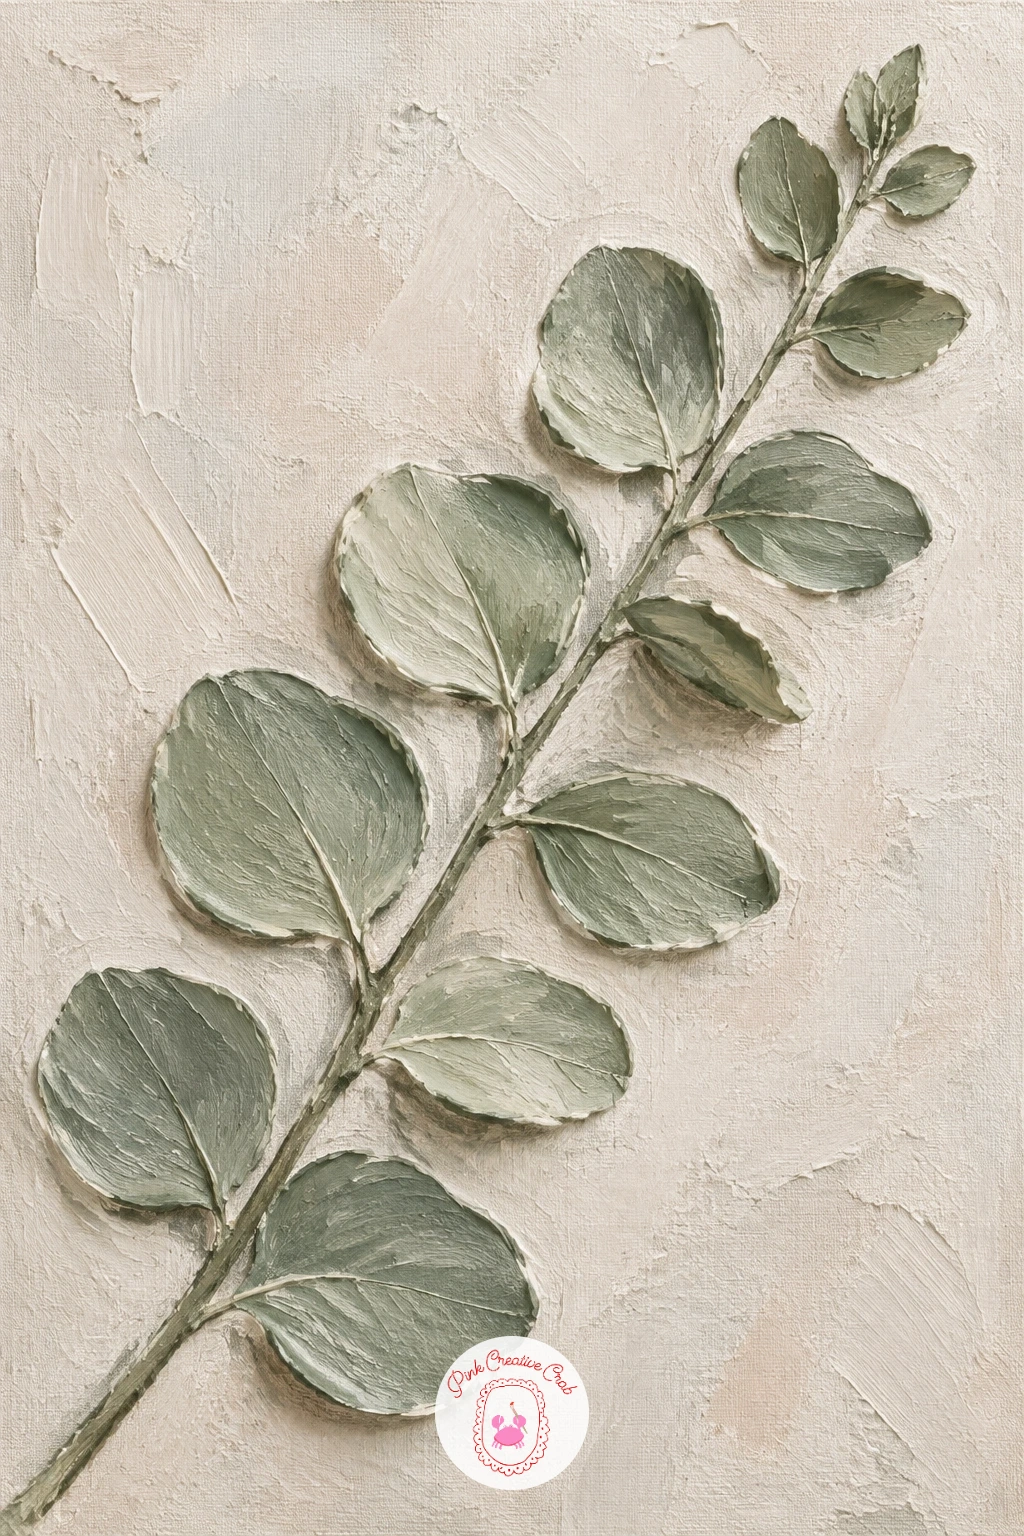
A raised eucalyptus stem is a good texture piece for practicing restraint, since the whole composition is one long diagonal line with a handful of leaves branching off it. Sketch the stem lightly in pencil first, then build it up in paste using the knife edge dragged along the line rather than the flat, so the stem stays thinner than the leaves.
Tint a batch of paste a dusty sage and press each leaf on with one or two knife strokes, rounding the tip with a small turn of the wrist. The most common mistake here is making every leaf the same size, so vary them, smaller near the top of the stem and larger lower down, the way real eucalyptus grows.
Work the whole piece in under ten minutes if you want a quick, loose relief with just the stem and six or seven leaves. Given forty minutes, add a second, shorter stem crossing behind the first and a few dried seed pods in a slightly deeper green to give the piece more depth.
No sage paint mixed up yet, a little olive green with a touch of grey gets close enough.
You Will Need
- acrylic modeling paste
- palette knife
Palette: Sage Green,Olive,Titanium White
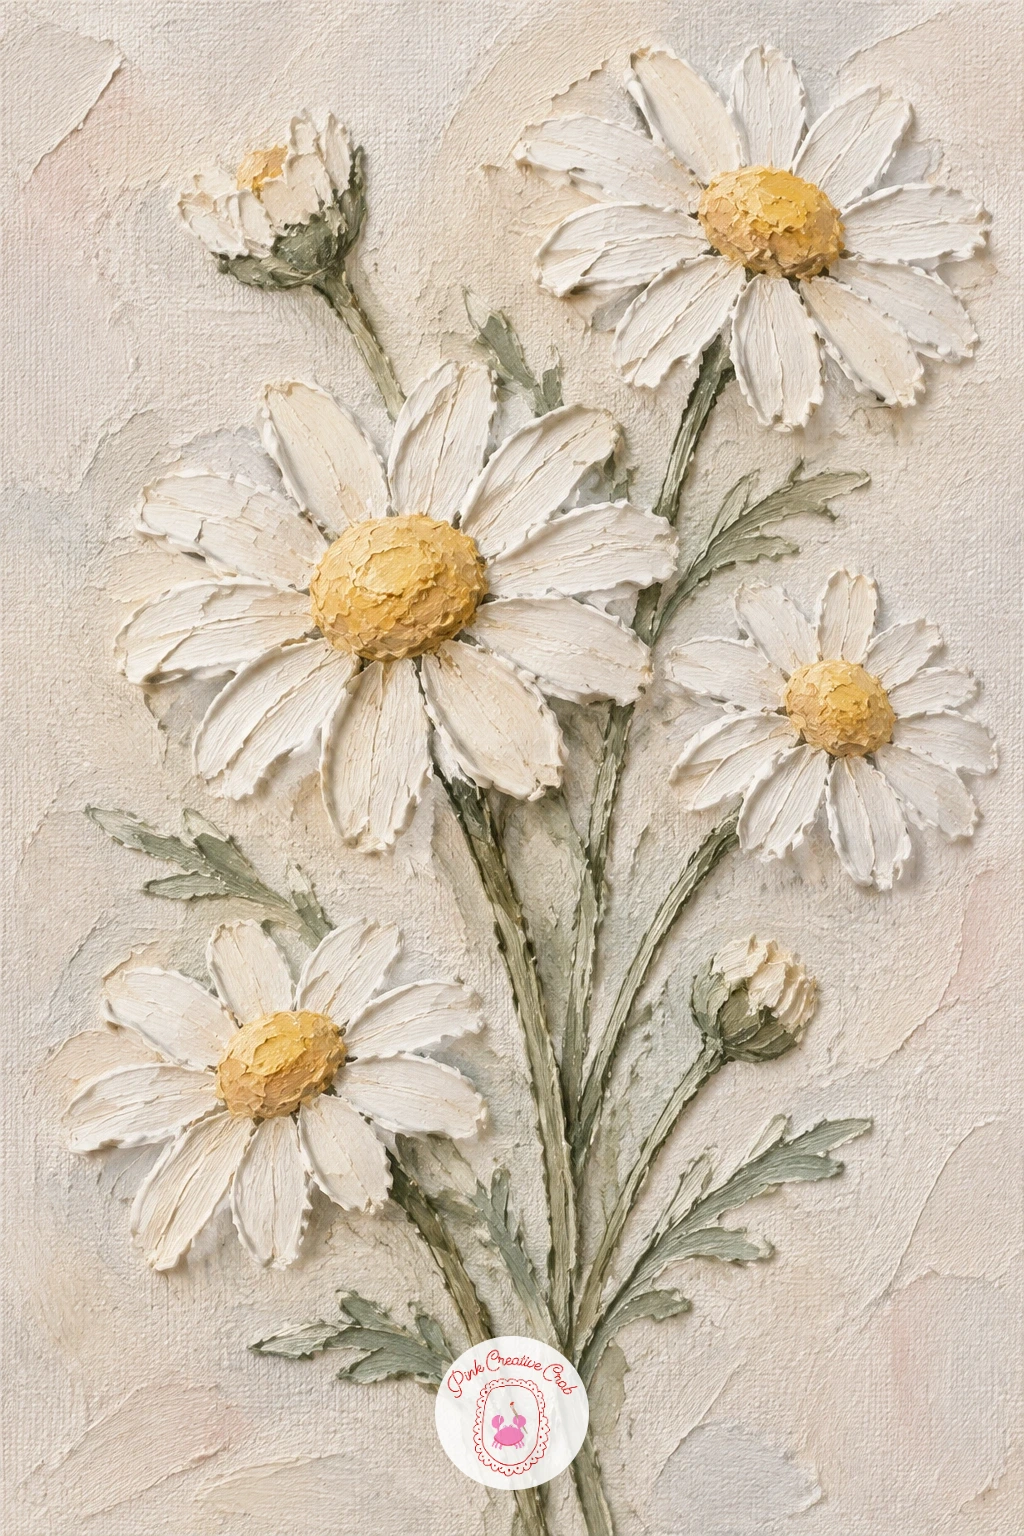
A cluster of chamomile flowers gives you a good excuse to practice small, repeated knife dabs instead of one big sweep. Block in a loose cluster of circles in pencil first, three or four flowers at slightly different heights, then press the knife flat to lay a small disc of yellow-tinted paste at the center of each one.
Add the white petals around each center using short flicking strokes with the knife tip, six or seven petals per flower is plenty, more than that and they start to look busy rather than delicate. The centers are the part most likely to go wrong: if the yellow disc looks too flat, press the tip of the knife handle into it while the paste is still wet to leave a little texture.
Sage stems connecting the flowers can be dragged in afterward with a thinner line of green paste. If you do not want to mix a yellow, a warm cream works almost as well for the centers and keeps the whole piece closer to the tonal plaster look.
Keep the stems loose and slightly curved rather than straight, it reads as more natural.
You Will Need
- acrylic modeling paste
- palette knife
Palette: Soft Yellow,Titanium White,Sage Green
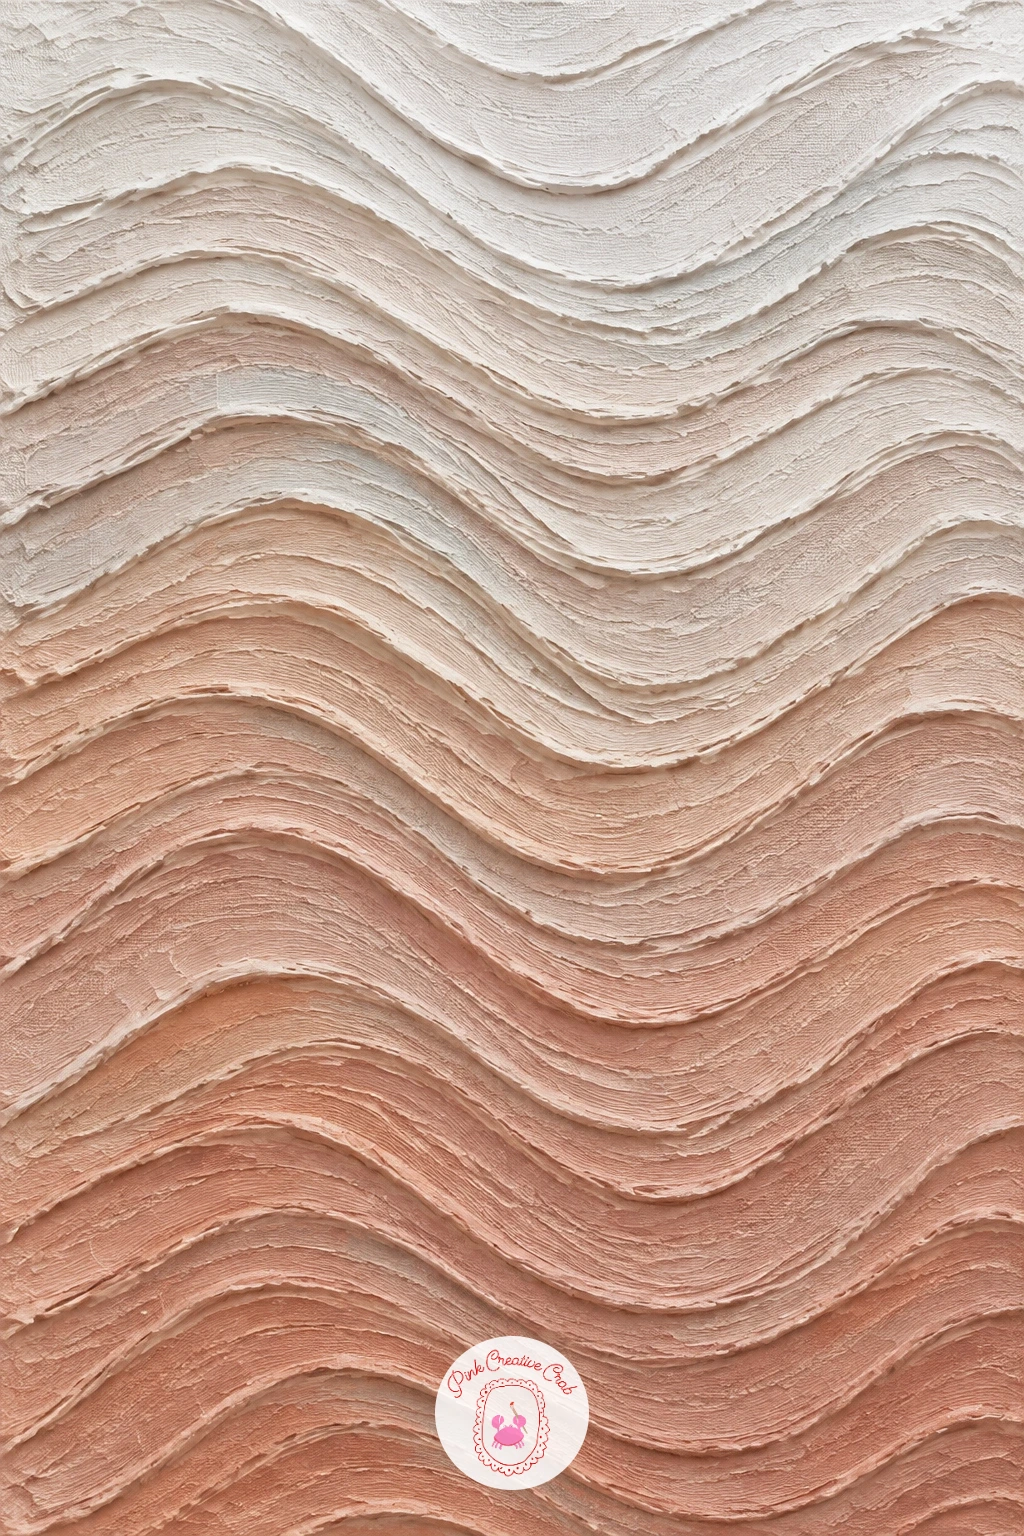
Combed wavy ridges are the easiest texture on this list to get genuinely striking results from, because the pattern comes from a tool rather than freehand skill. Spread an even layer of terracotta-tinted paste across the canvas with the flat of the knife, then drag a cake comb or an old plastic fork through it in long wavy strokes, keeping the motion consistent from edge to edge.
Work in one direction at a time rather than crossing the lines, crossing ridges tends to flatten the pattern instead of adding interest. If your comb drags unevenly and leaves gaps, smooth the whole layer flat again and start the pass over rather than trying to patch individual lines.
A ten minute version covers the canvas in one pass of even waves. For a forty minute piece, let the first layer dry, then comb a second, thinner layer of white paste over just the top third so the ridges shift from terracotta into white as they rise, like sand catching light.
No cake comb in the house, the teeth of a plastic fork dragged at a slight angle does the same job.
You Will Need
- cake decorating comb or fork
- acrylic modeling paste
Palette: Terracotta,Warm White,Sand
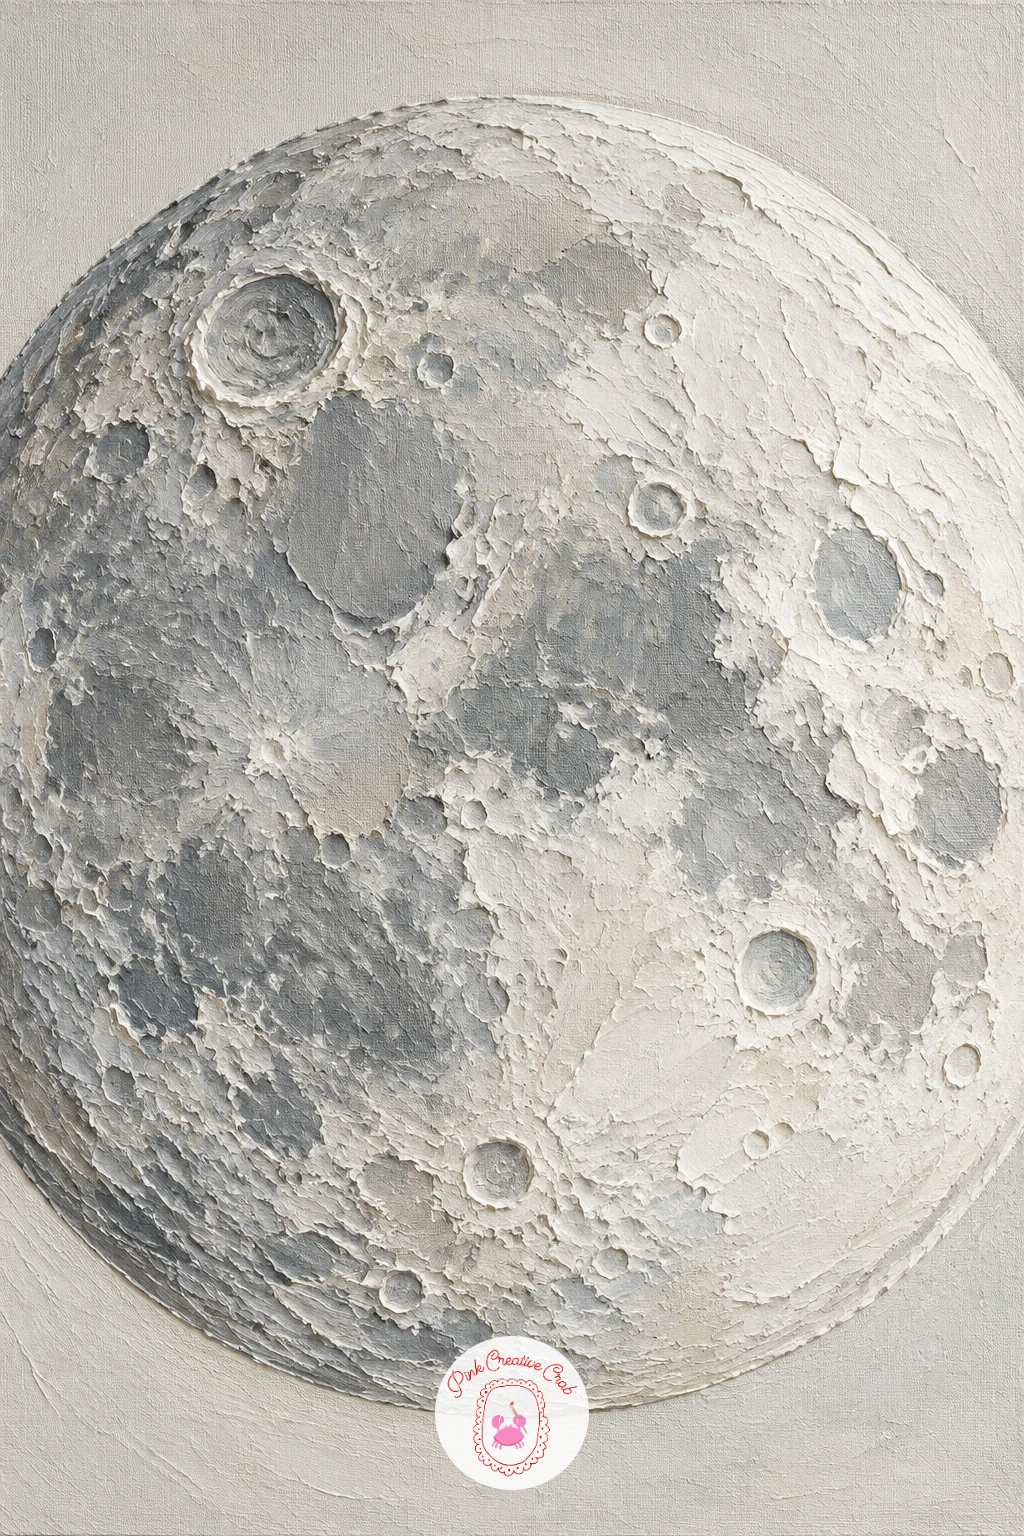
A textured moon gives you a reason to really push the depth of your knife marks, since every crater needs to read as a true dent rather than a flat circle. Build a thick disc of white and grey paste first, mixing the two only partly so streaks of each stay visible, then press the back of the knife or a small spoon into random spots while the paste is still soft.
Light source decides everything on this one: pick one side, usually the upper left, and keep every crater’s shadow falling consistently toward the same lower right edge as you work. That single decision is what makes a scattering of dents look like one lit sphere instead of a random texture.
Vary the crater sizes, three or four larger ones and a scatter of small pecks reads more convincingly than evenly spaced dots. If the surface skins over before you finish pressing in craters, mist it lightly with water from a spray bottle to keep the paste workable a few minutes longer.
Leave the rim of the moon slightly raised above the craters, that edge is what catches the brightest highlight once it dries.
You Will Need
- acrylic modeling paste
- palette knife
- small spoon for pressing craters
Palette: Titanium White,Stone Grey,Payne’s Grey
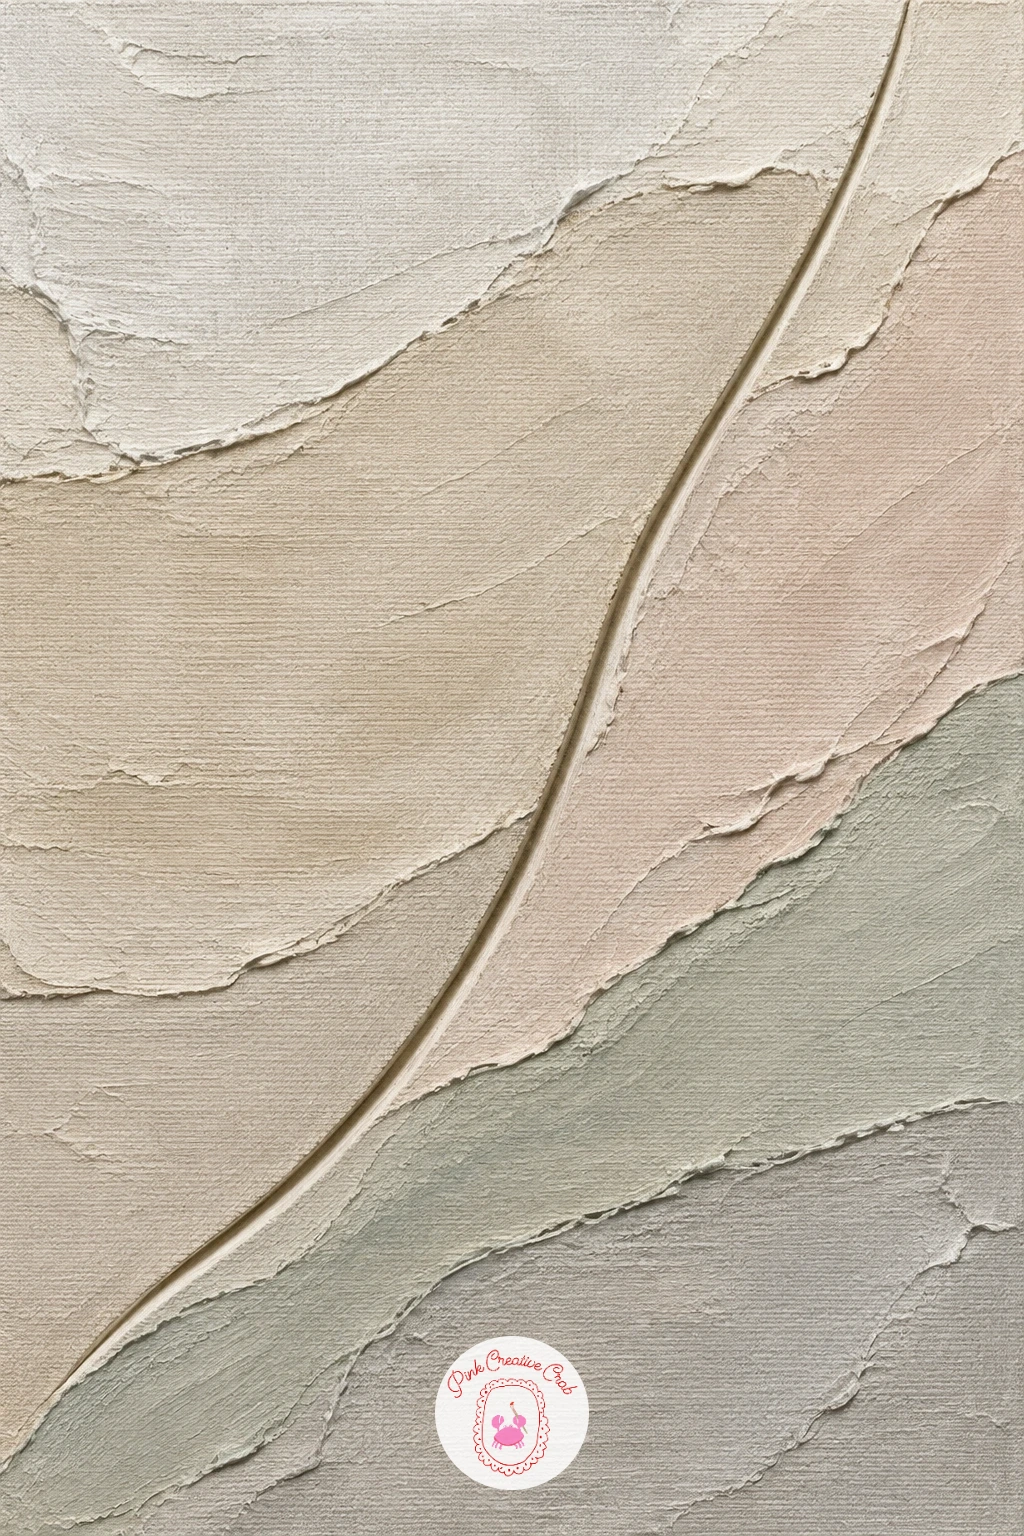
Stucco-like layers in beige are built the opposite way from most of the textures on this list, since you are aiming for a flat, calm surface broken by a single deliberate mark. Spread two or three thin layers of beige-tinted paste across the canvas, letting each dry slightly before the next so you build real depth without heavy ridges, smoothing each pass with the flat of the knife held almost parallel to the canvas.
Once the final layer is still workable but no longer wet, drag one confident line through it with the edge of the knife or a thin stick, straight or gently curved, and leave it. Resist the urge to add a second line, the whole effect depends on that single carved mark standing alone against the quiet surface around it.
If your line wobbles, smooth that section flat again and recut it rather than trying to disguise the wobble with more paste. For a quicker version, skip the multiple layers and spread one thick layer instead, the carved line will still read clearly against it.
Let the final surface dry fully before judging the depth of the line, it often deepens visually as the paste cures and lightens in color.
You Will Need
- acrylic modeling paste
- palette knife or thin stick for carving
Palette: Beige,Warm White,Taupe
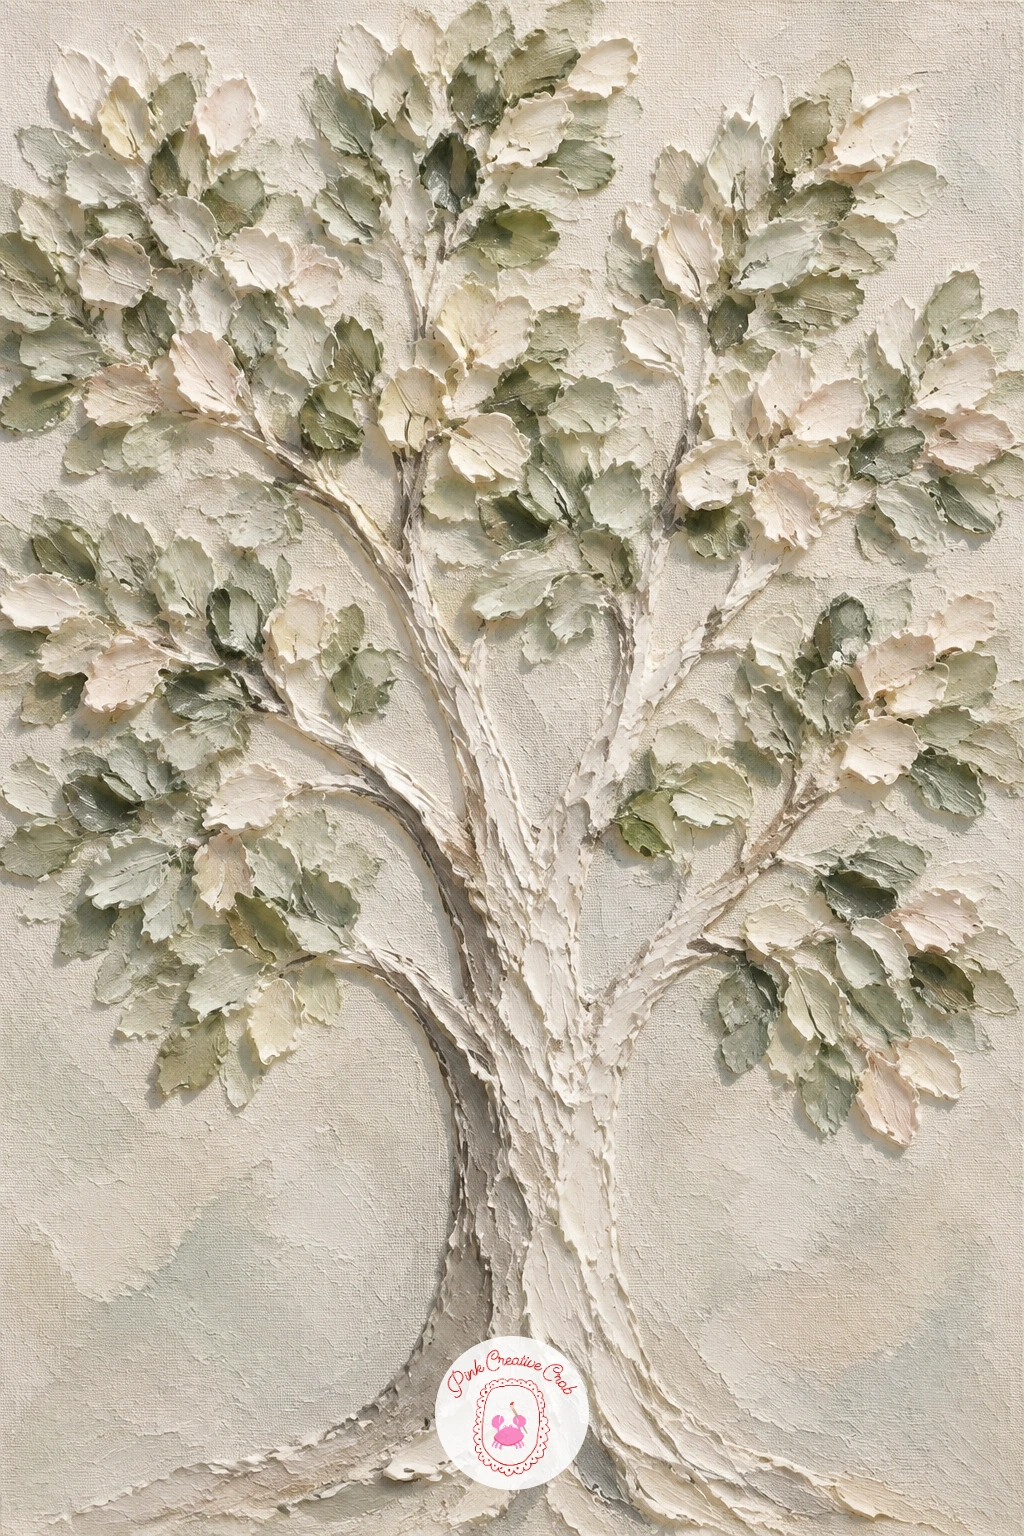
A tree of raised paste leaves works well as a piece you build outward from a trunk rather than planning every leaf in advance. Press a tapering vertical shape in paste for the trunk, then branch out several thinner lines from it before the paste sets, keeping the branches irregular rather than symmetrical.
Add individual leaves by pressing the flat of the knife against the canvas and lifting it in a small twisting motion, which leaves a slightly cupped, leaf-shaped mark. Cluster leaves more densely near the ends of branches and thin them out near the trunk, that distribution is what makes the tree look like it is actually growing rather than just decorated.
If the canvas starts to feel too crowded, stop adding leaves and let the open space around the tree do some of the work, a sparse textured tree against pale background often looks more considered than a dense one. No modeling paste handy, heavy body acrylic alone holds enough texture for the trunk, though the leaves will sit flatter.
Work the top branches slightly looser and the lower ones a little tighter, it reads as natural growth.
You Will Need
- acrylic modeling paste
- palette knife
Palette: Sage Green,Warm White,Taupe
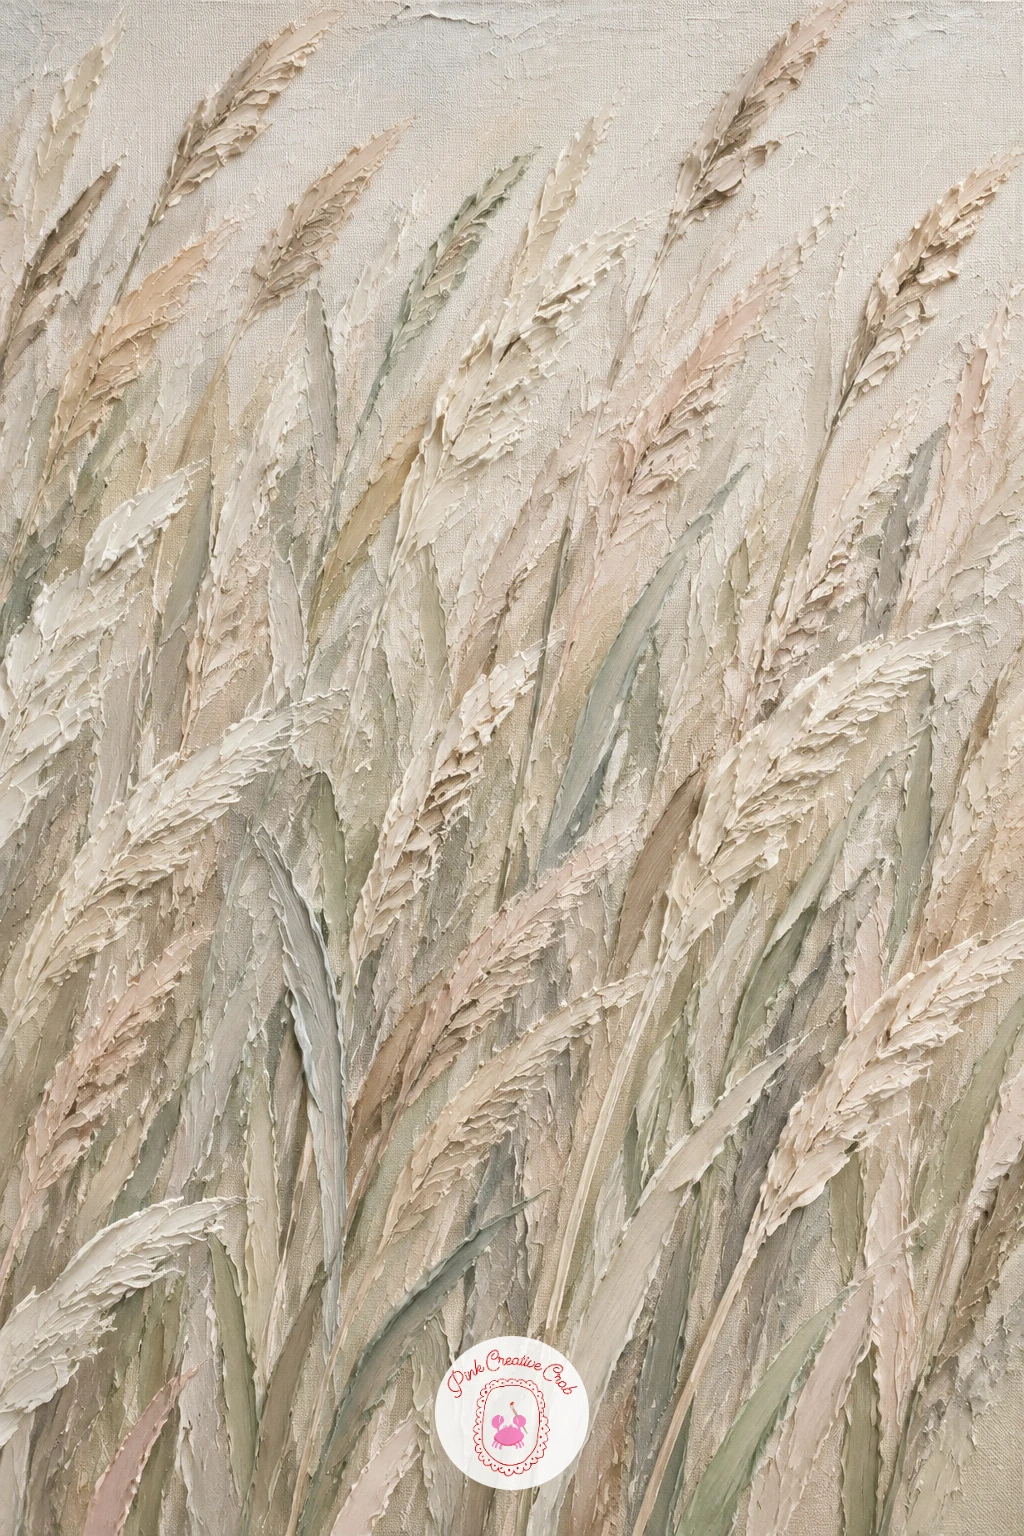
A field of tall textured grasses turns the whole canvas into one long rhythm of upward knife strokes, which makes it a calming piece to build even though it covers a lot of surface. Load the knife edge with cream or sand paste and drag it upward from the base of the canvas in a single pulling motion per blade, letting the paste taper naturally to a point as you lift the knife away.
Vary the height and the lean of each blade, some upright, some curving slightly to one side, so the field reads as grass moving rather than a row of identical marks. Work from the back of the field toward the front, with shorter, paler blades further back and taller, thicker ones in the foreground, which gives the flat canvas a real sense of distance.
If the blades start to blur together, let one section dry before you drag the next row of strokes over it. Try this one in cream alone for a quick ten minute version, or build toward a second pass of deeper sand tones through the foreground for a more layered forty minute piece.
A few taller, isolated blades breaking the skyline at the top keep the field from looking like a flat block.
You Will Need
- acrylic modeling paste
- palette knife
Palette: Cream,Sand,Warm White
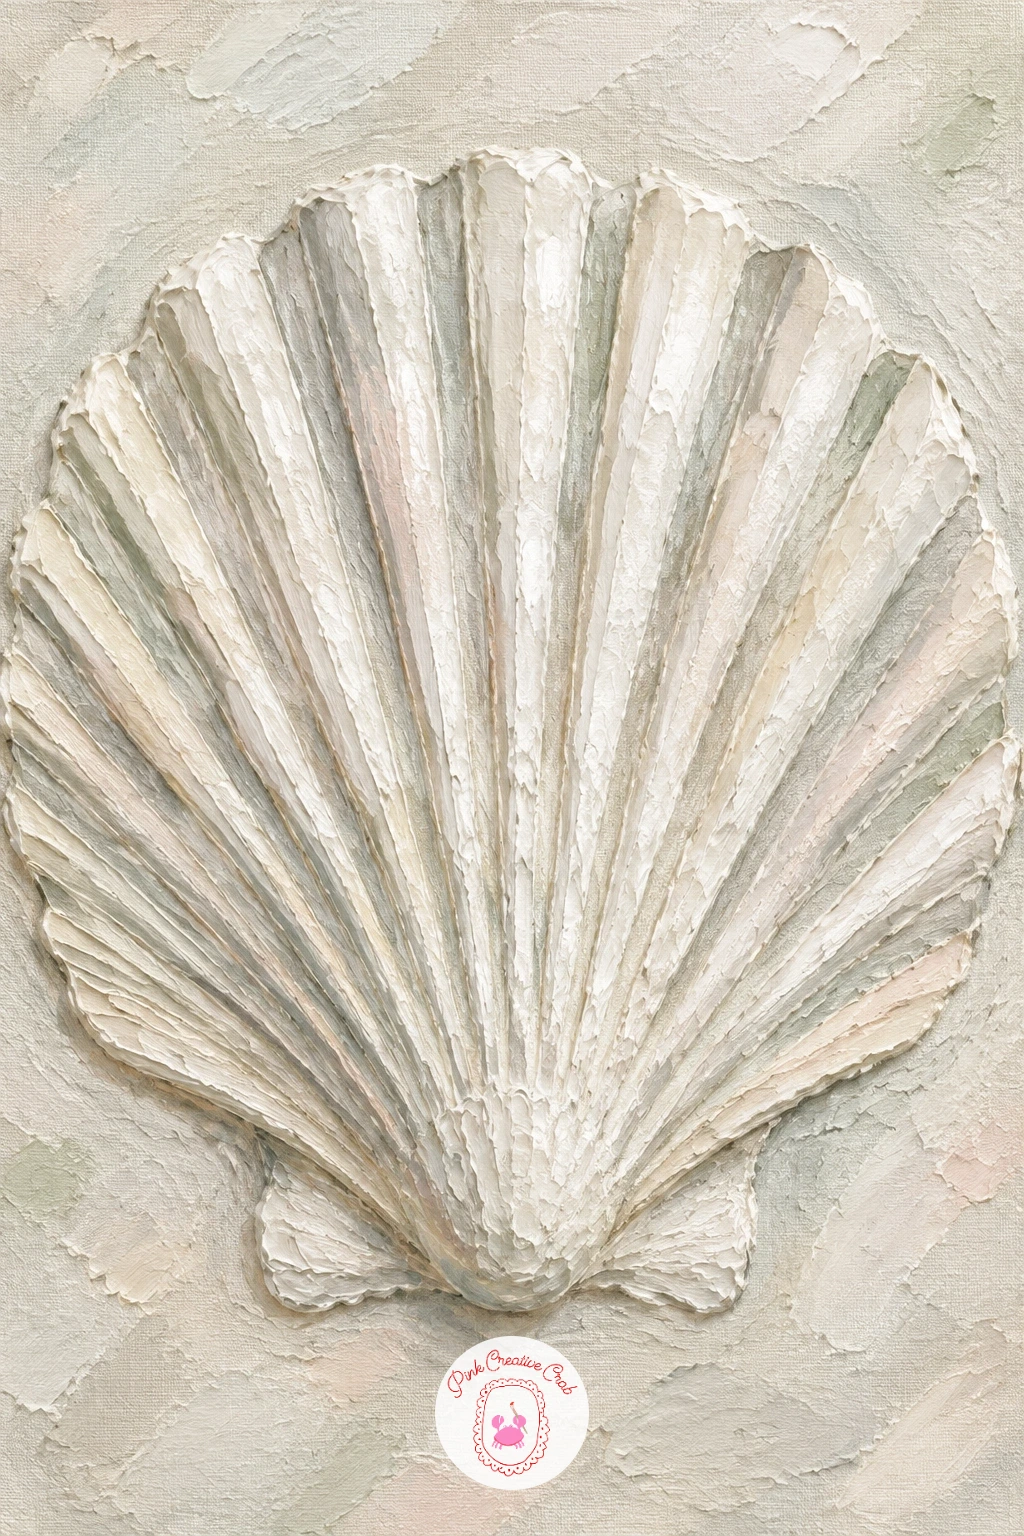
A raised scallop shell is a satisfying piece for practicing radiating lines, since the whole fan shape comes from one repeated motion from a single center point. Mark the center and the rough fan outline lightly in pencil, then drag the knife edge outward from that one point in straight lines, spacing them evenly like spokes on a wheel.
Build the ridges between the lines slightly raised and the lines themselves slightly recessed, which is the reverse of what feels natural but is exactly how a real scallop shell catches light. Tint the paste a soft pearly white with the faintest hint of pink or grey mixed in, just enough to keep it from looking stark.
The hinge of the shell at the center tends to look too pointed if you rush it, round it off gently with the flat of the knife once the radiating lines are in place. If you do not have a reference nearby, look up a photograph of a real scallop shell before you start, the curve of the outer edge is less round than most people expect.
Keep the outer edge slightly ruffled rather than perfectly smooth, that small irregularity sells the whole shape.
You Will Need
- acrylic modeling paste
- palette knife
Palette: Pearl White,Soft Blush,Stone Grey
Keep a real shell or a clear photograph beside your canvas while you work, the spacing between the ridges is easy to get wrong from memory alone.
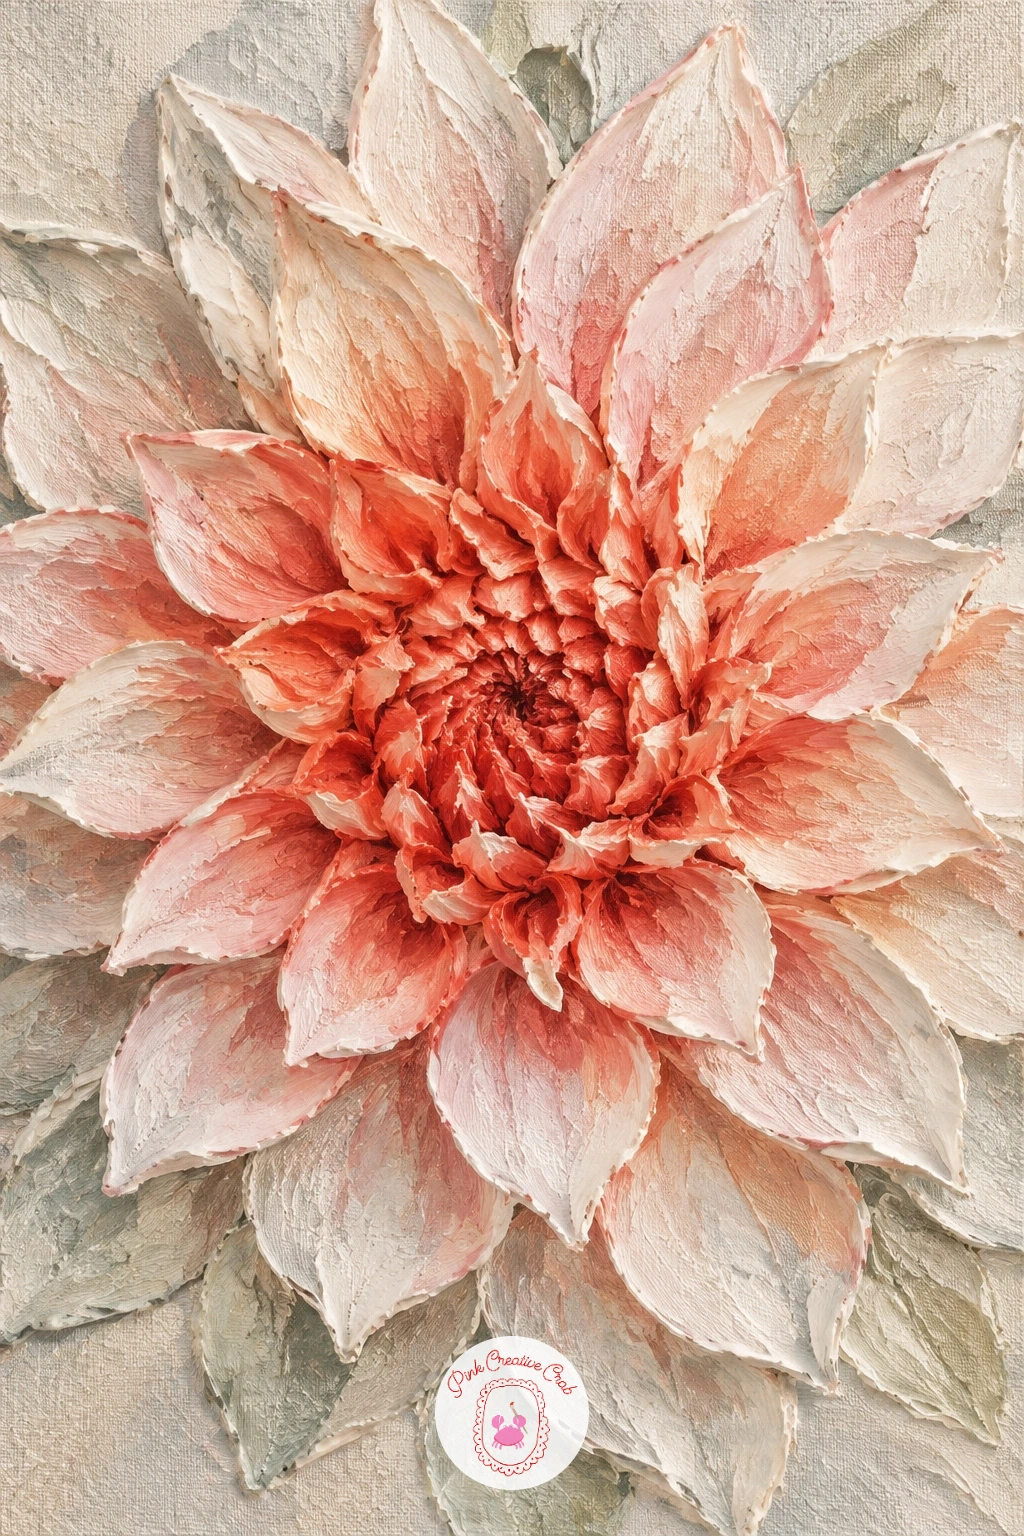
Thick paste dahlias push the spiral petal technique from the peonies and roses even further, since a real dahlia has dozens of narrow, pointed petals layered in tight rings. Start at the center with small, short knife strokes in a tight circle, then work outward in progressively larger rings, turning each petal slightly more pointed as you move toward the outer edge.
Mix two batches of paste, one coral and one blush, and alternate them between rings rather than blending them, the visible shift from ring to ring is what gives a dahlia its structured, layered look. The center ring is where this most often goes wrong: if it looks too chunky, use the very tip of the knife instead of the flat edge to make those first petals finer.
Add a few sage leaves at the base with broader strokes to contrast with all those narrow petals. If mixing two separate paste colors feels like too much for one sitting, a single coral paste with blush dry-brushed over the tips once it cures gets a similar two-tone effect.
Let the outer petals stay a little rougher than the center, that contrast reads as real texture rather than a flat pattern.
You Will Need
- acrylic modeling paste
- palette knife
Palette: Coral,Blush Pink,Sage Green
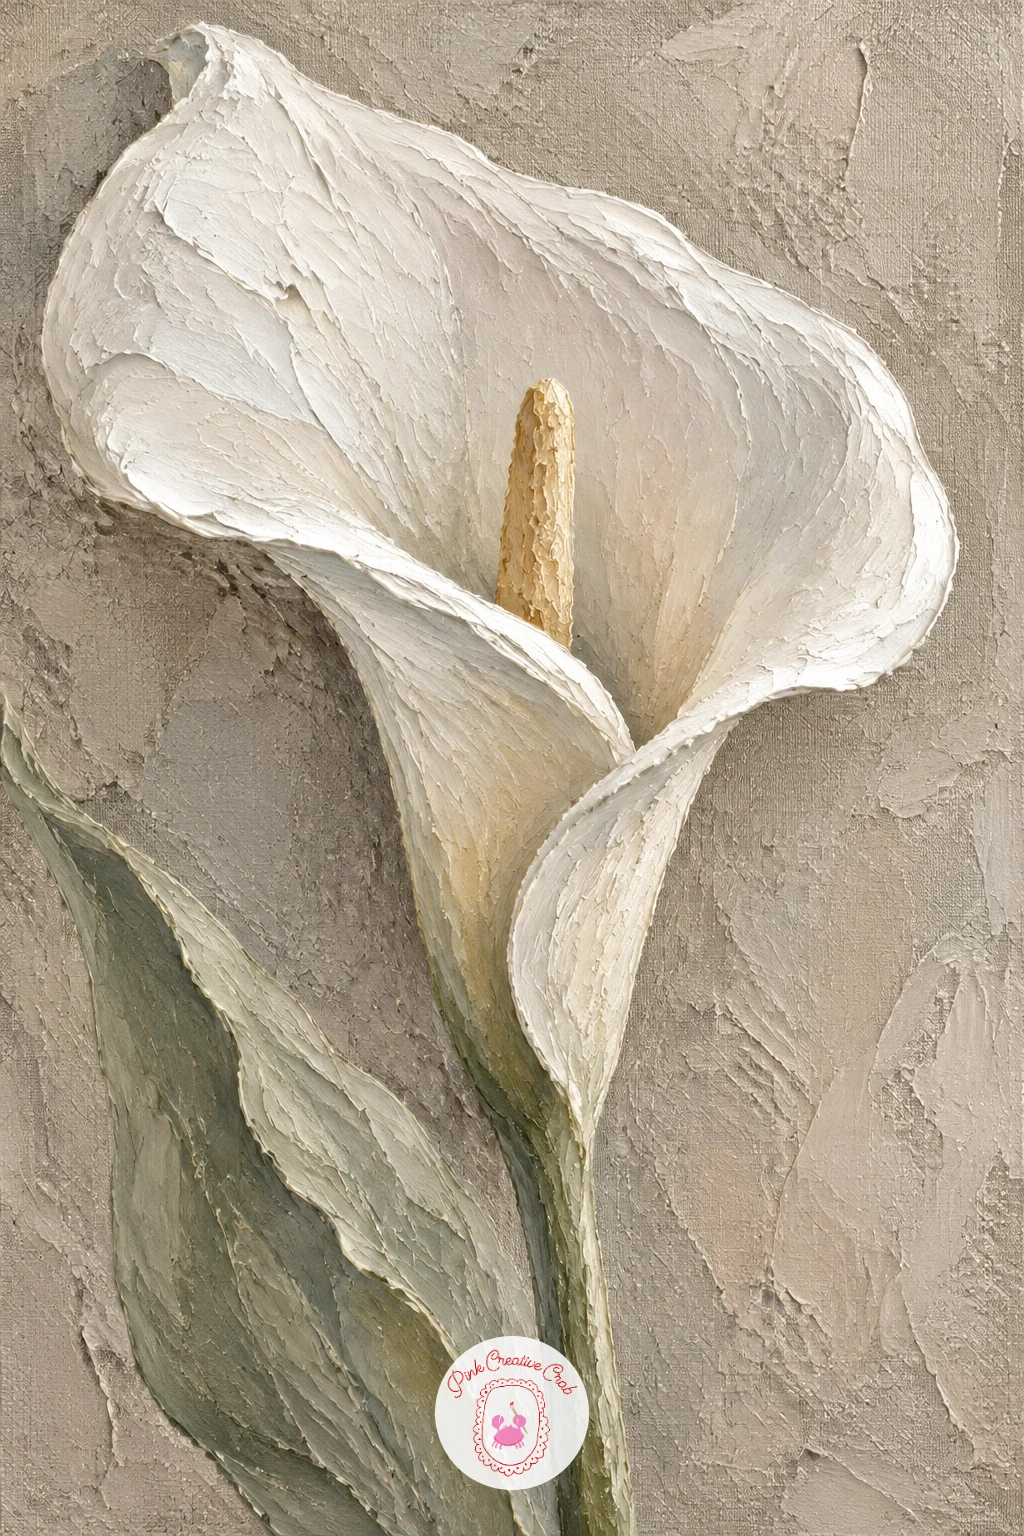
A raised calla lily is a good piece for practicing a single smooth, curving shape instead of a repeated pattern, since the whole bloom is one continuous trumpet form wrapping around a slim central spadix. Lay down the taupe background first across the whole canvas, then build the lily in white paste on top, pressing the knife in one long curved stroke to form the outer edge of the petal and folding it gently inward near the base.
Keep the spadix at the center noticeably more raised and slightly yellow-toned than the surrounding white petal, that contrast in both height and color is what makes a calla lily read correctly rather than looking like a generic trumpet shape. The curl at the top of the petal is the part most likely to flatten out as it dries, so exaggerate it more than feels necessary while the paste is still wet.
A single long stem trailing down from the base, dragged thin with the knife edge, finishes the piece without needing a second flower. No taupe paint mixed, a soft grey-brown from mixing white, a little black and a touch of orange gets close.
Leave the base of the petal where it meets the stem slightly thicker, that is where real calla lilies are heaviest.
You Will Need
- acrylic modeling paste
- palette knife
Palette: Taupe,Titanium White,Soft Yellow
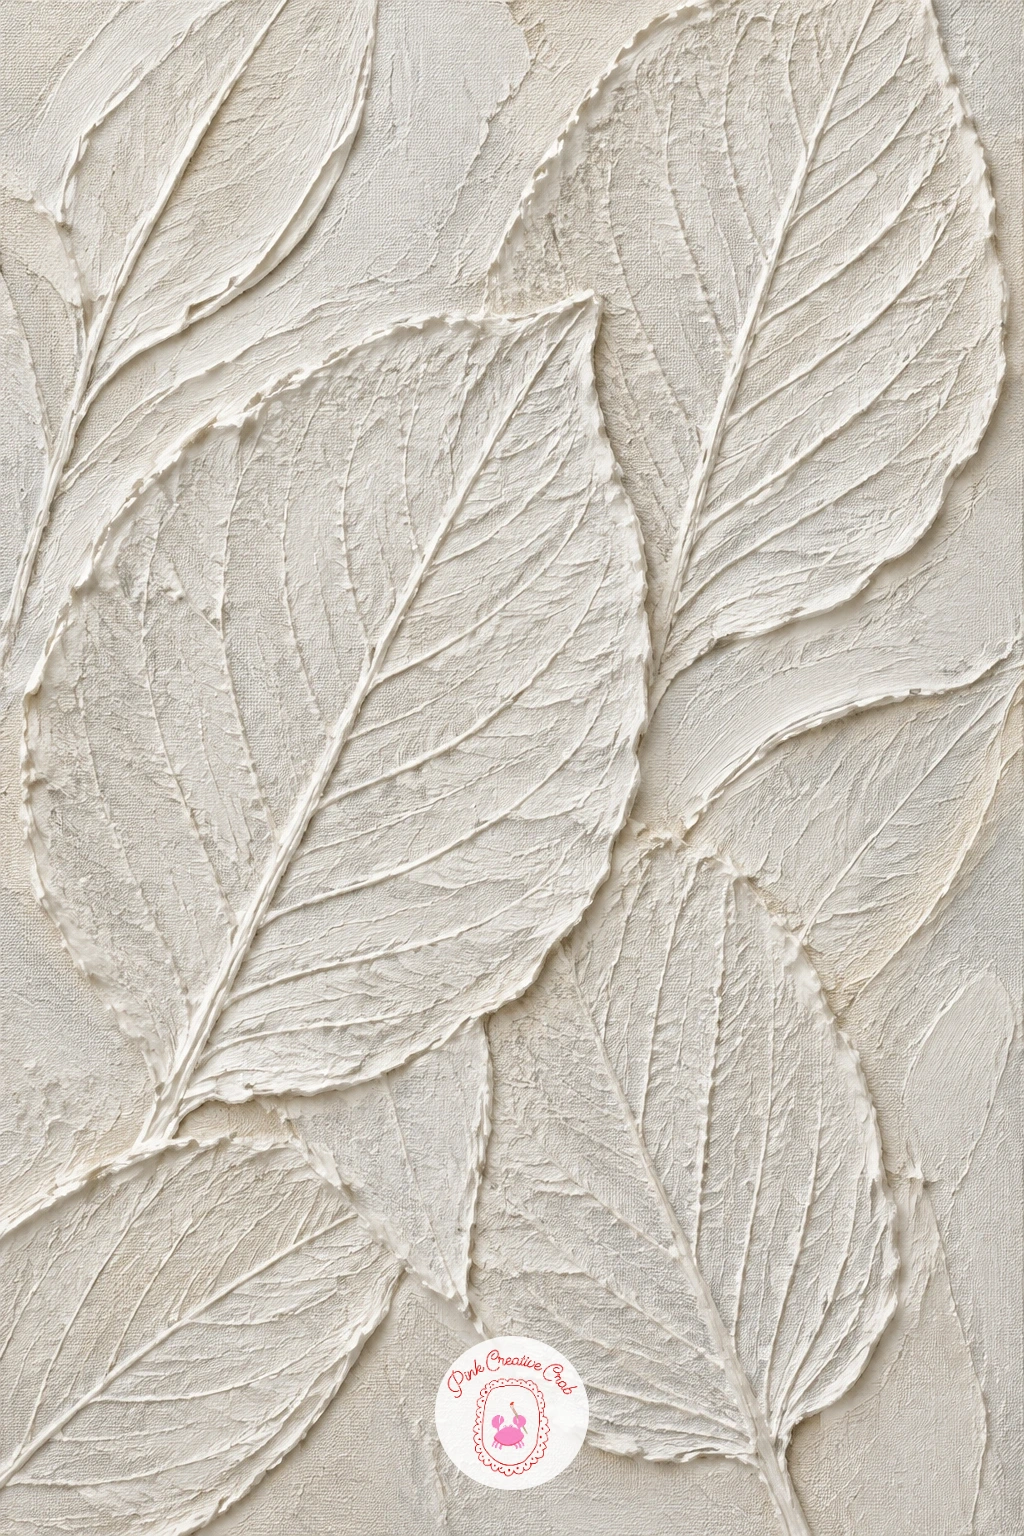
A white on white relief of pressed leaves works almost like printmaking, since you are leaving an impression rather than sculpting a shape from nothing. Spread an even layer of white paste across the canvas, then while it is still wet, press real leaves (or leaf-shaped cardboard cutouts) into the surface and lift them away carefully, leaving their veined texture behind as a shallow imprint.
Arrange the leaves so they overlap a little, scattering a few at different angles rather than lining them up, which keeps the composition from looking like a stamped pattern. If a leaf sticks to the paste when you lift it, press a piece of plastic wrap over it first next time, or use the back of a rubber stamp if real leaves are not on hand.
This relief depends entirely on raking light to read, so once it is dry, check it under a lamp angled low from one side before deciding it needs more contrast. Readers who enjoy this tonal, botanical approach might also like the pressed outline techniques in floral watercolor ideas with free outline templates, even though the medium there is paint rather than paste.
Leave a little negative space around the leaf cluster so the imprint has room to breathe.
You Will Need
- acrylic modeling paste
- real leaves or leaf-shaped cutouts
- plastic wrap optional
Palette: Titanium White,Warm White,Soft Grey
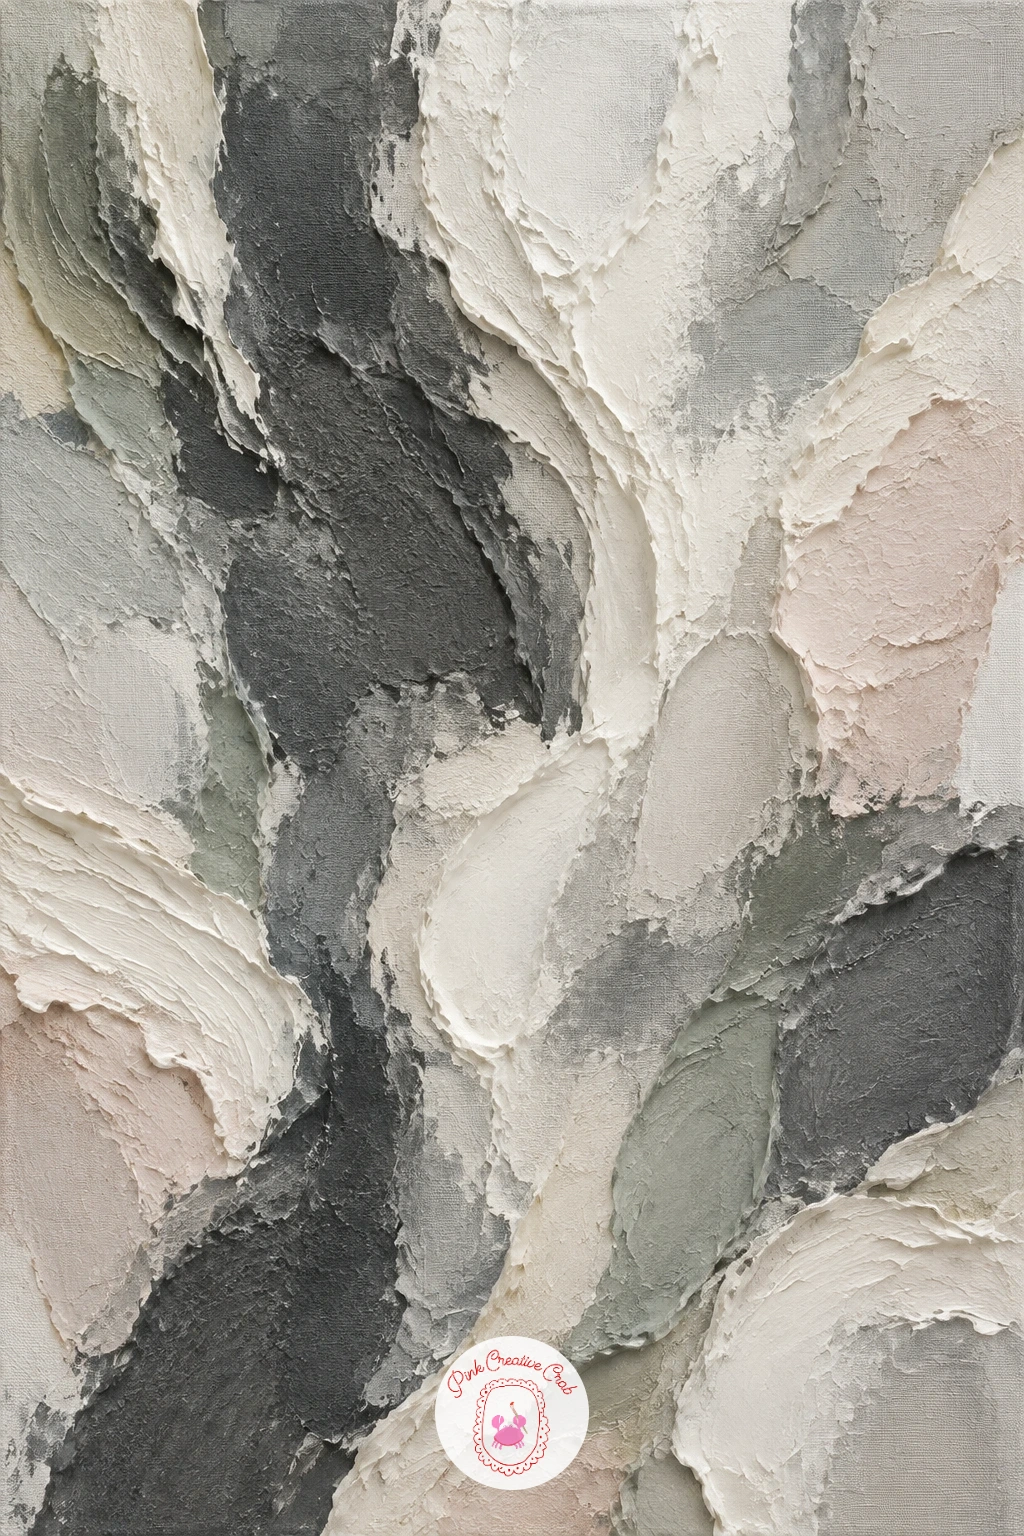
A heavily textured abstract in charcoal and cream gives you permission to work without a plan, which can be the hardest and most freeing piece on this list. Start by dividing the canvas loosely into two or three large zones in your head, not drawn out, then load the knife heavily and build thick, confident strokes in cream across most of the surface, leaving the charcoal for smaller, denser passages that sit like shadow pockets within the cream.
Vary your knife pressure deliberately: press hard and drag in some areas for smooth ridges, then dab lightly in others to leave peaks and valleys, the contrast between smooth and rough is what carries an abstract piece when there is no recognizable subject to lean on. If the canvas starts feeling too even all over, that usually means you need more contrast between light and heavy texture, not more color.
Step back from the canvas every few minutes, abstract texture is nearly impossible to judge up close. No charcoal grey paint on hand, mixing black with a little white and a touch of brown gets you there.
Keep at least one small area of bare, smooth charcoal with almost no texture, it gives the eye somewhere to rest.
You Will Need
- acrylic modeling paste
- palette knife
Palette: Charcoal Grey,Cream,Warm White
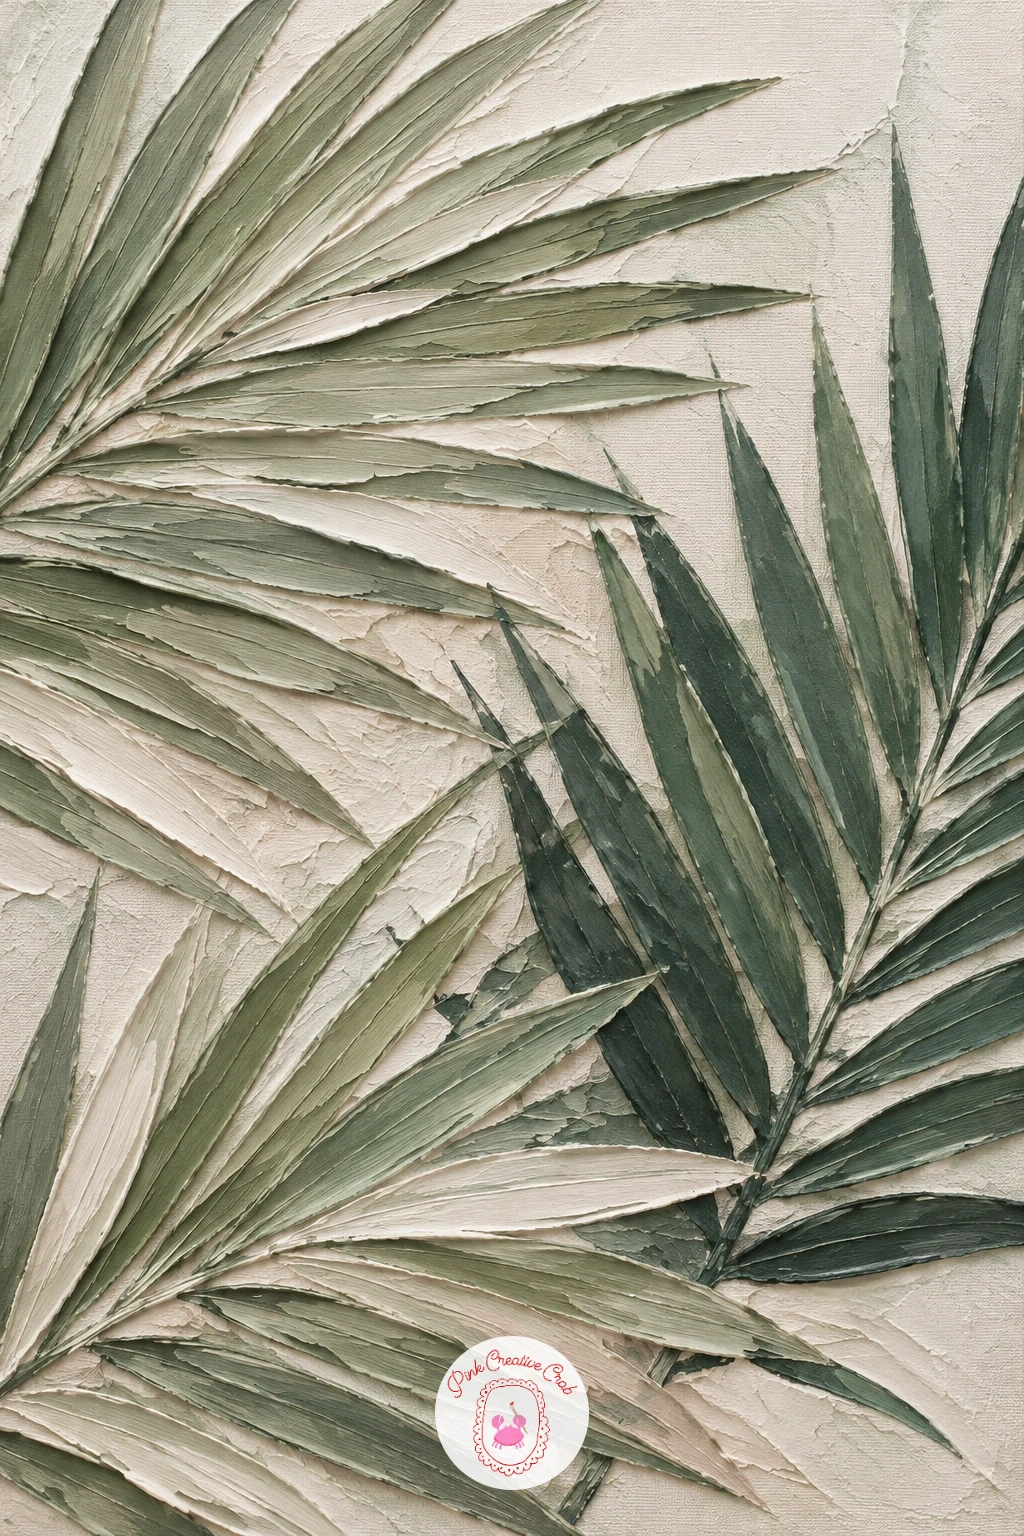
Textured palm leaves ask for long, confident knife strokes rather than the shorter dabbing motion used for rounder leaves earlier on this list. Sketch the central stem of each frond lightly first, then drag the knife outward from the stem in long diagonal strokes on both sides, keeping the strokes close together near the base of the frond and spacing them wider as they reach the tip.
Overlap two or three fronds at different angles so they read as a cluster rather than a single flat leaf, which also hides any stroke that did not come out as clean as you wanted underneath another leaf. If the green paste looks too uniform, drag a slightly darker green through the center of a few fronds while the paste is wet to suggest the central rib without drawing a hard line.
This one works well as a quick ten minute piece with just two overlapping fronds, or expand to a fuller cluster of five or six for a more involved forty minute composition. No modeling paste on hand, heavy body acrylic alone holds enough texture for the long diagonal strokes, just expect a slightly flatter relief.
Let the tips of each frond taper to a genuine point rather than rounding off, that is what reads as palm rather than fern.
You Will Need
- acrylic modeling paste
- palette knife
Palette: Sage Green,Deep Green,Warm White
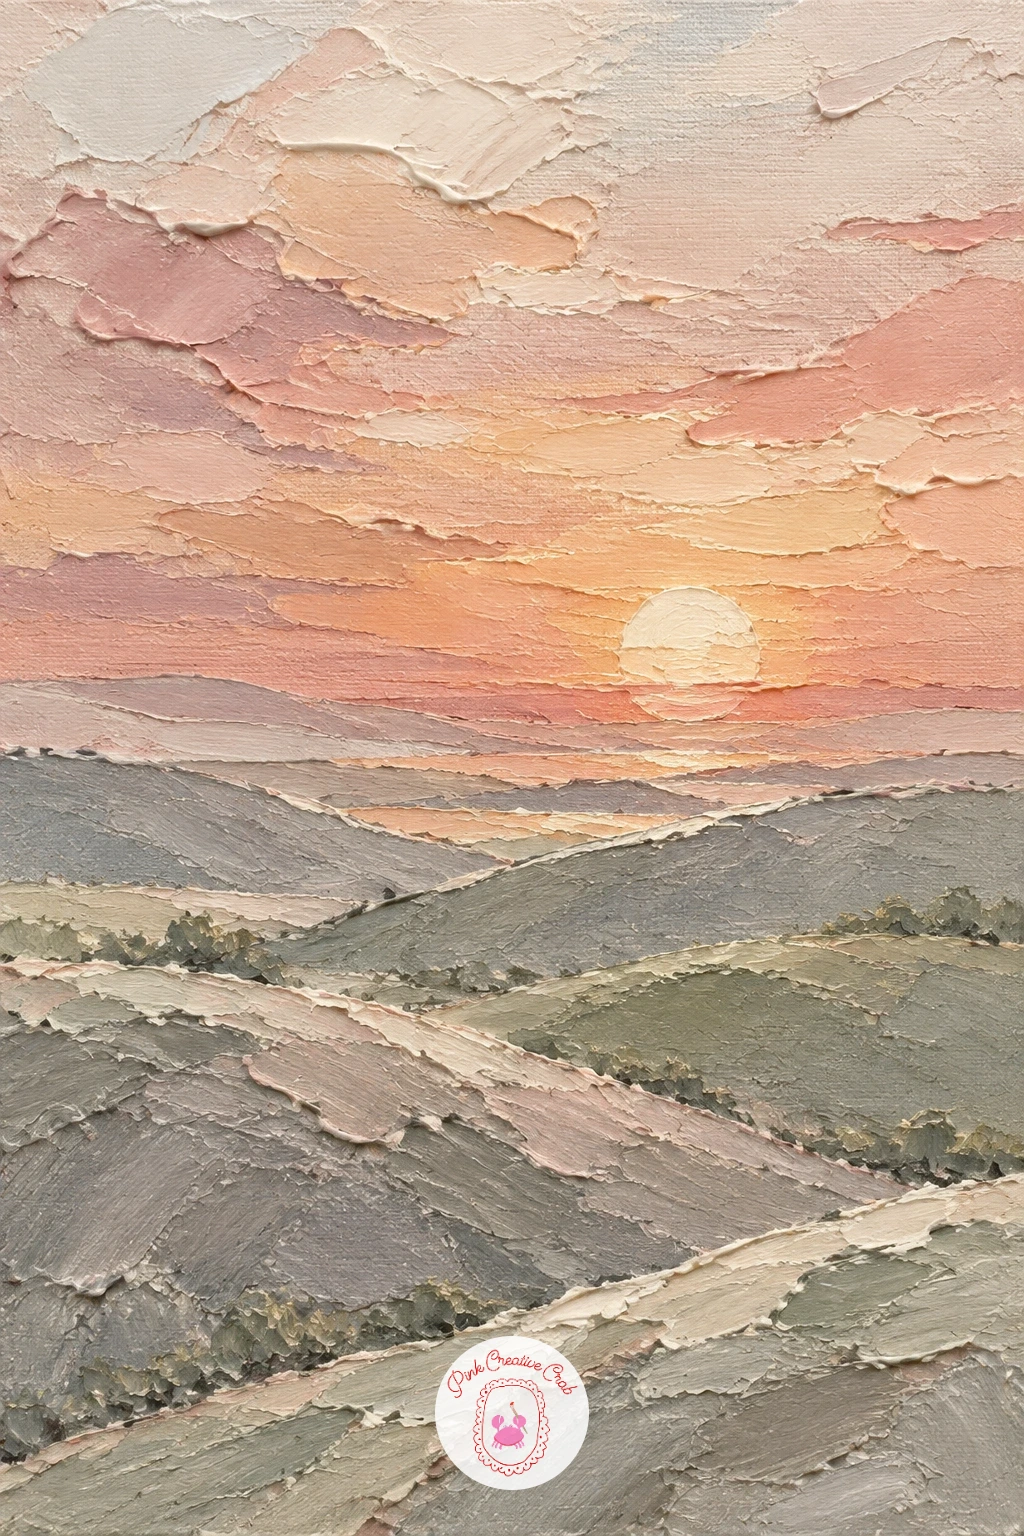
A thick impasto sunset over textured hills works best if you decide on your light source before you pick up the knife, since every stroke in the sky needs to radiate outward from one point low on the horizon. Build the sky first in bands of warm tone, dragging the knife horizontally and letting the colors blend slightly where they meet rather than mixing them on a palette beforehand.
Once the sky is in place, build the hills in front of it with the knife held almost flat against the canvas, pressing down and lifting away to leave soft, rounded peaks rather than sharp ridges. Keep the hills noticeably less textured than the sky, a smoother foreground against a heavily worked sky gives the piece real depth.
If the colors in the sky start to look muddy where they overlap, that usually means too many passes in one spot, let that section dry and add one clean final layer on top instead of reworking it wet. A simple version uses just two hill shapes and three sky bands; a fuller one adds a thin strip of distant hills behind the main ones for more depth.
Leave the lightest point of the sky, just above the horizon, as the thickest, palest paste on the whole canvas.
You Will Need
- acrylic modeling paste
- palette knife
Palette: Warm Peach,Dusty Rose,Stone Grey
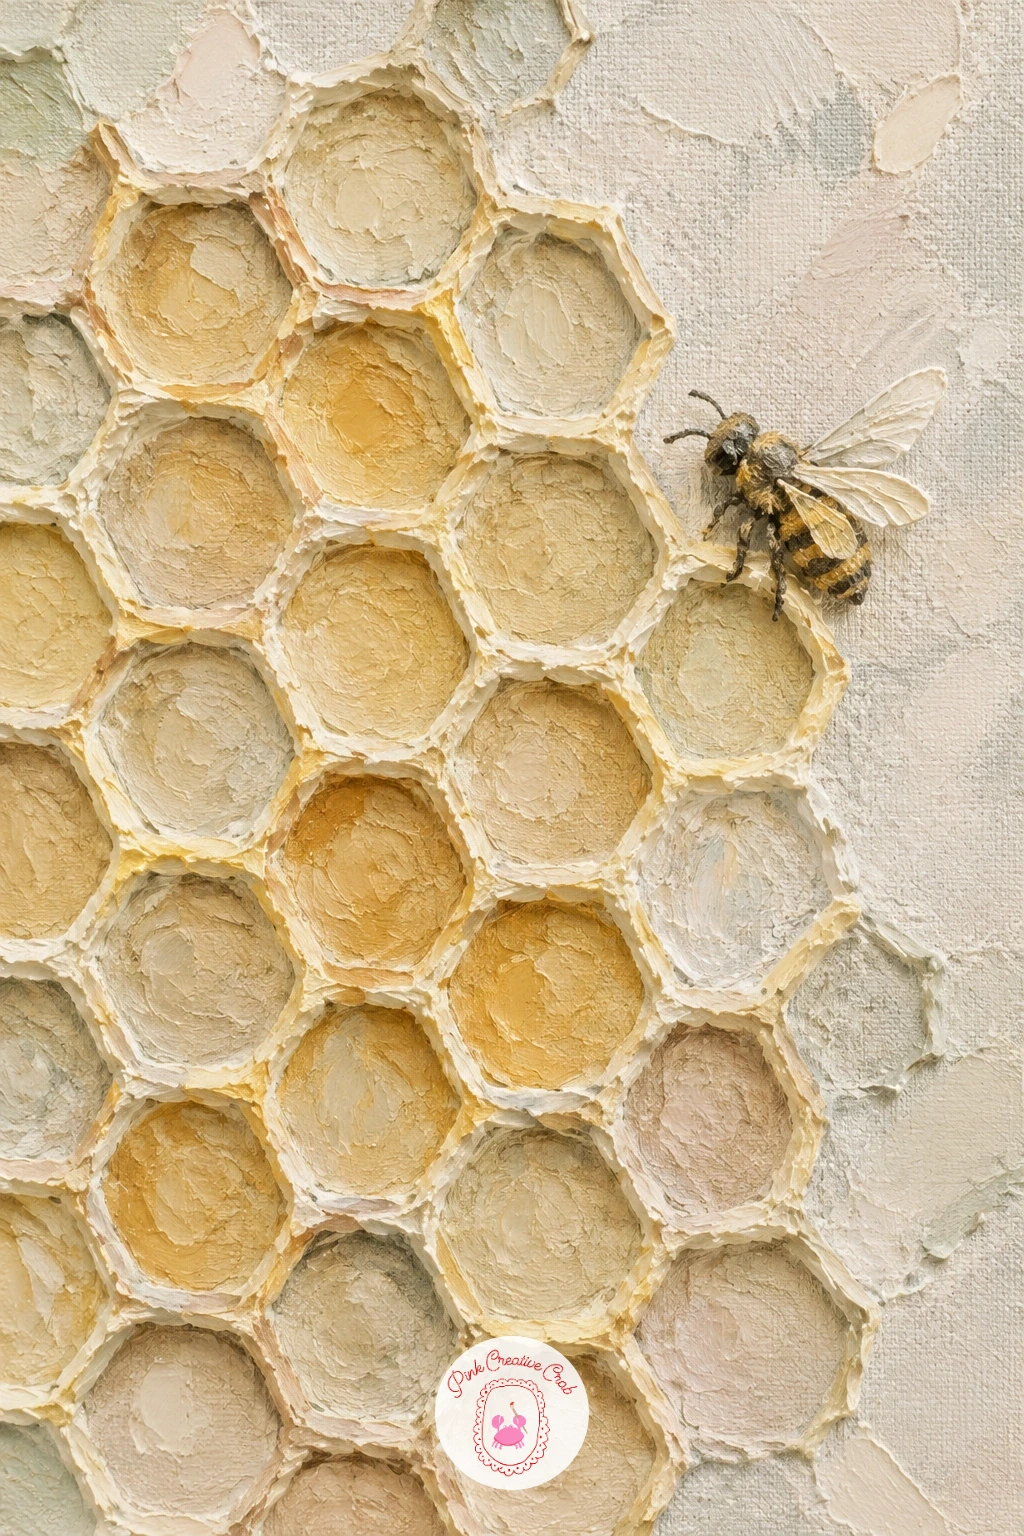
A raised honeycomb pattern is one of the more structured pieces on this list, so start by lightly marking a loose grid of hexagons in pencil across the canvas rather than trying to freehand each cell. Build up the ridges between the cells in pale yellow paste using the knife edge, keeping the lines fairly even but not perfectly ruler straight, hand-built texture should still look hand built.
Leave the centers of a few cells slightly lower than the ridges around them, almost like shallow dishes, and fill one or two with a slightly deeper gold to suggest honey pooling. Add the bee last, once the honeycomb paste has set enough to hold a small shape on top: a simple oval body with two or three quick stripe lines scored in with the back of the knife is all it needs, resist adding fine detail like wings or legs in paste.
If the hexagons start drifting out of shape across the canvas, that is fine, honeycomb in nature is never perfectly regular either. No pale yellow mixed, a warm cream with a touch of ochre gets close enough.
Keep the bee small and placed slightly off-center, it reads as a visiting detail rather than the main subject.
You Will Need
- acrylic modeling paste
- palette knife
- pencil for grid lines
Palette: Pale Yellow,Ochre,Warm White
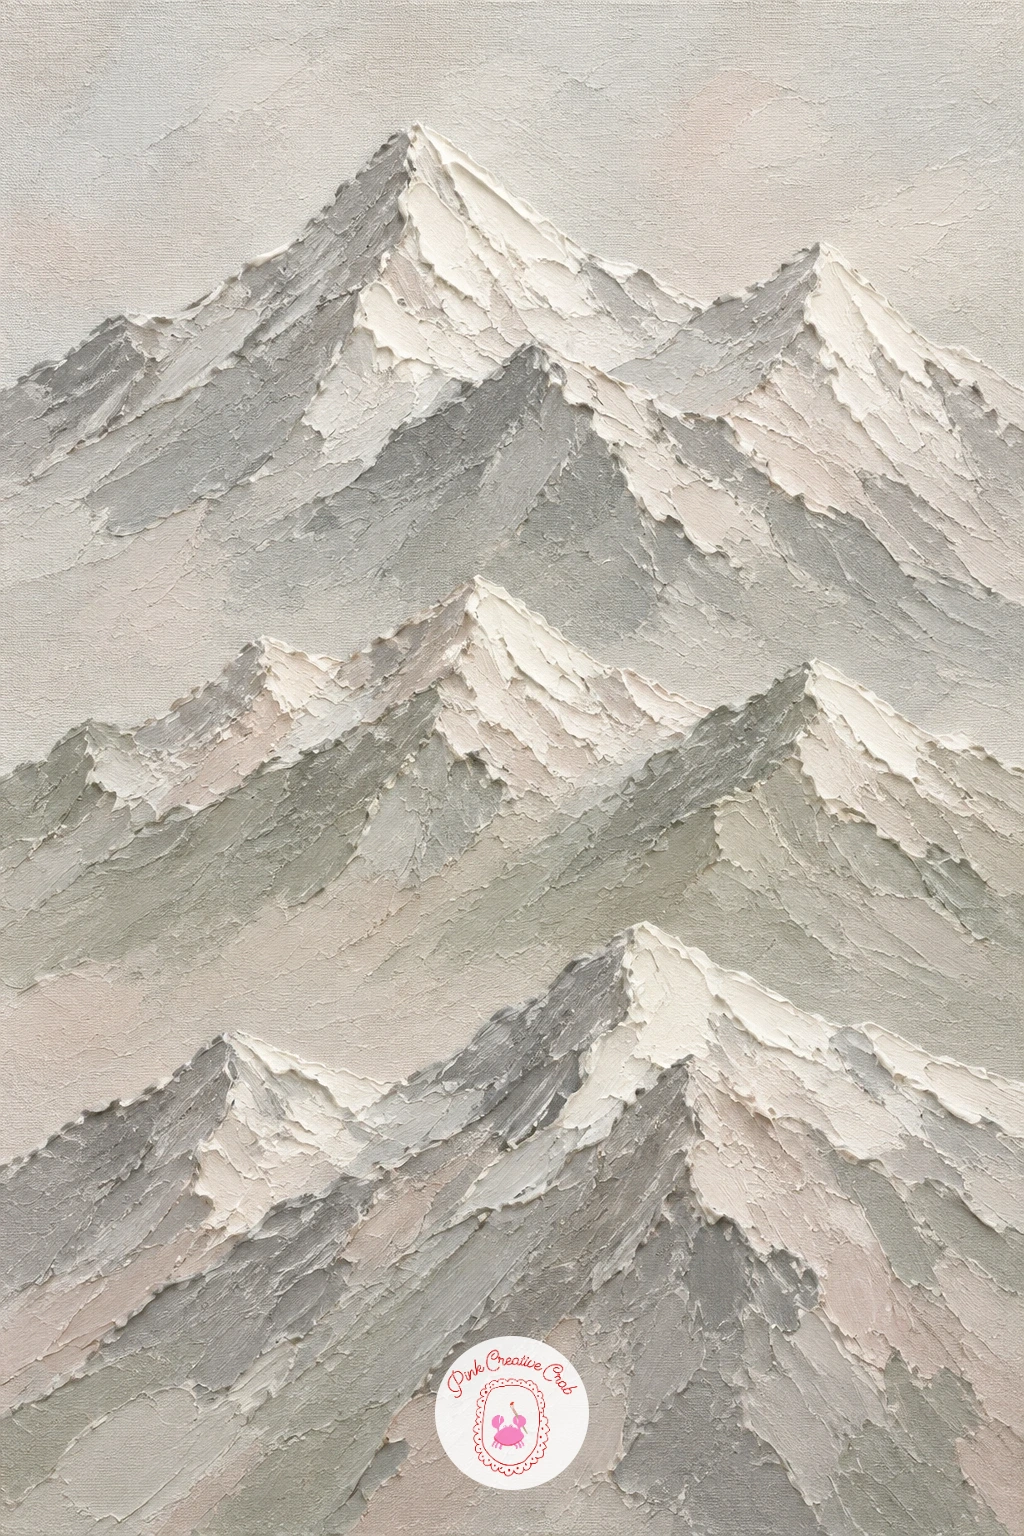
A textured mountain range leans on overlapping triangular shapes built at different depths, so plan your furthest peaks first and work forward. Build the back row of mountains thin and pale, almost blending into the sky, using a lightly loaded knife dragged upward into sharp points.
Bring the middle row forward slightly darker and more textured, and the front row the thickest, heaviest paste on the canvas, with the most visible ridges and knife marks.
Side lighting decides how three dimensional this ends up looking: pick a direction and keep every peak’s shaded side consistent, usually the right side of each peak in shadow if your light comes from the upper left. If the layering starts looking flat, check that contrast, the back row should genuinely look paler and smoother than the front, not just smaller.
A quick version uses just two overlapping rows; a fuller one adds a third distant row and a thin strip of raised white at the peaks to suggest snow. No stone grey mixed, white with a touch of black and a hint of blue gets you there fast.
Keep the snow caps the single most raised point on the whole canvas, that is where the eye should land first.
You Will Need
- acrylic modeling paste
- palette knife
Palette: Stone Grey,Titanium White,Payne’s Grey
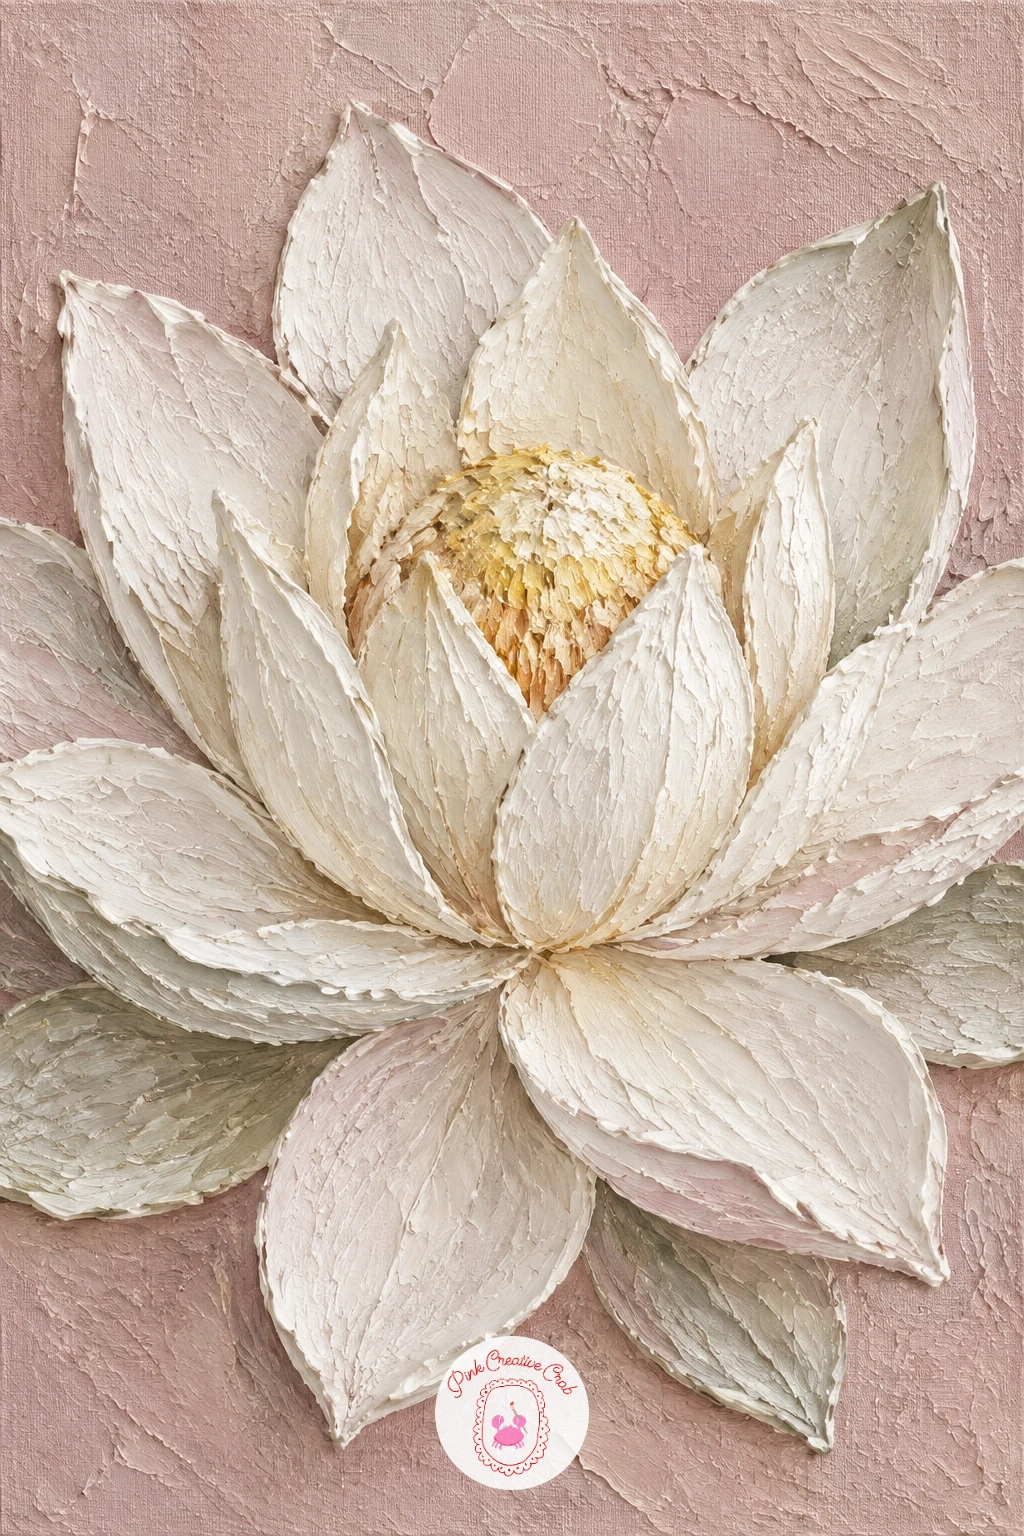
A raised lotus flower sits well against a dusty pink ground because the flat color gives the raised white petals somewhere calm to stand out. Lay the pink background first across the whole canvas, then build the lotus in white paste starting with the outer ring of petals, broad and slightly rounded, pressed with the flat of the knife in a fan shape around a center point.
Work inward with progressively smaller petals, tightening the spacing as you go, and leave the very center slightly domed and more yellow-toned to suggest the seed pod at the heart of the flower. Compare the width of the open flower to the height of the canvas as you build it, a lotus that takes up roughly two thirds of the canvas width usually feels generous without crowding the edges.
If the petals near the center start collapsing into each other, let the outer ring dry a little before adding the inner ones so each layer has something firm to press against. A simple lily pad shape dragged in beneath the flower with a single broad knife stroke finishes the piece quickly.
Keep the outer petals the widest and flattest, narrowing steadily toward the center.
You Will Need
- acrylic modeling paste
- palette knife
Palette: Dusty Pink,Titanium White,Soft Yellow
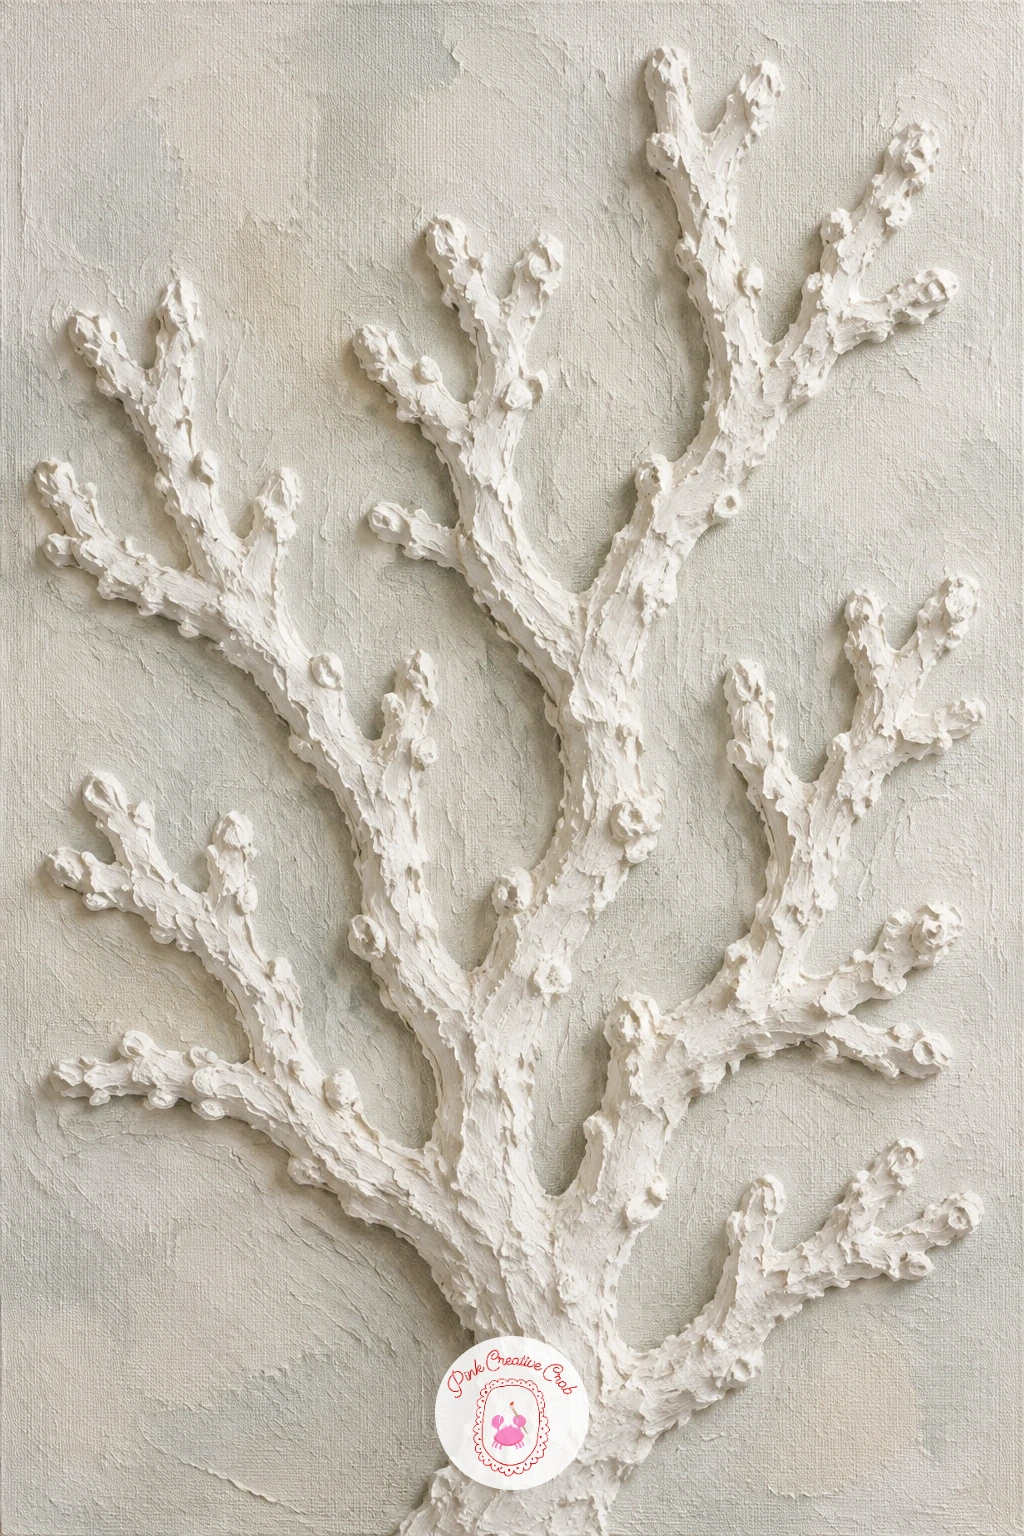
A textured coral branch rewards a looser hand than the flowers on this list, since real coral grows in irregular, forking shapes rather than symmetrical patterns. Start with one main branch dragged in thick white paste from the base of the canvas, then fork off two or three secondary branches at uneven angles, each one tapering as it extends outward.
Press small bumps and knobs along each branch with the tip of the knife, varying their size and spacing so the surface feels organic rather than patterned. The place this most often goes wrong is symmetry, if your branches start mirroring each other, break the pattern by adding one branch that twists back toward the center instead of away from it.
Keep the whole piece in white alone for a clean plaster look, or warm it slightly with a touch of cream mixed into the paste for the tips of each branch. No modeling paste handy, thick gesso built up in several layers gets a similar raised, porous texture.
Leave a little rough, uneven surface along every branch rather than smoothing it, that texture is what makes it read as coral rather than a simple branch shape.
You Will Need
- acrylic modeling paste
- palette knife
Palette: Titanium White,Warm Cream,Soft Grey
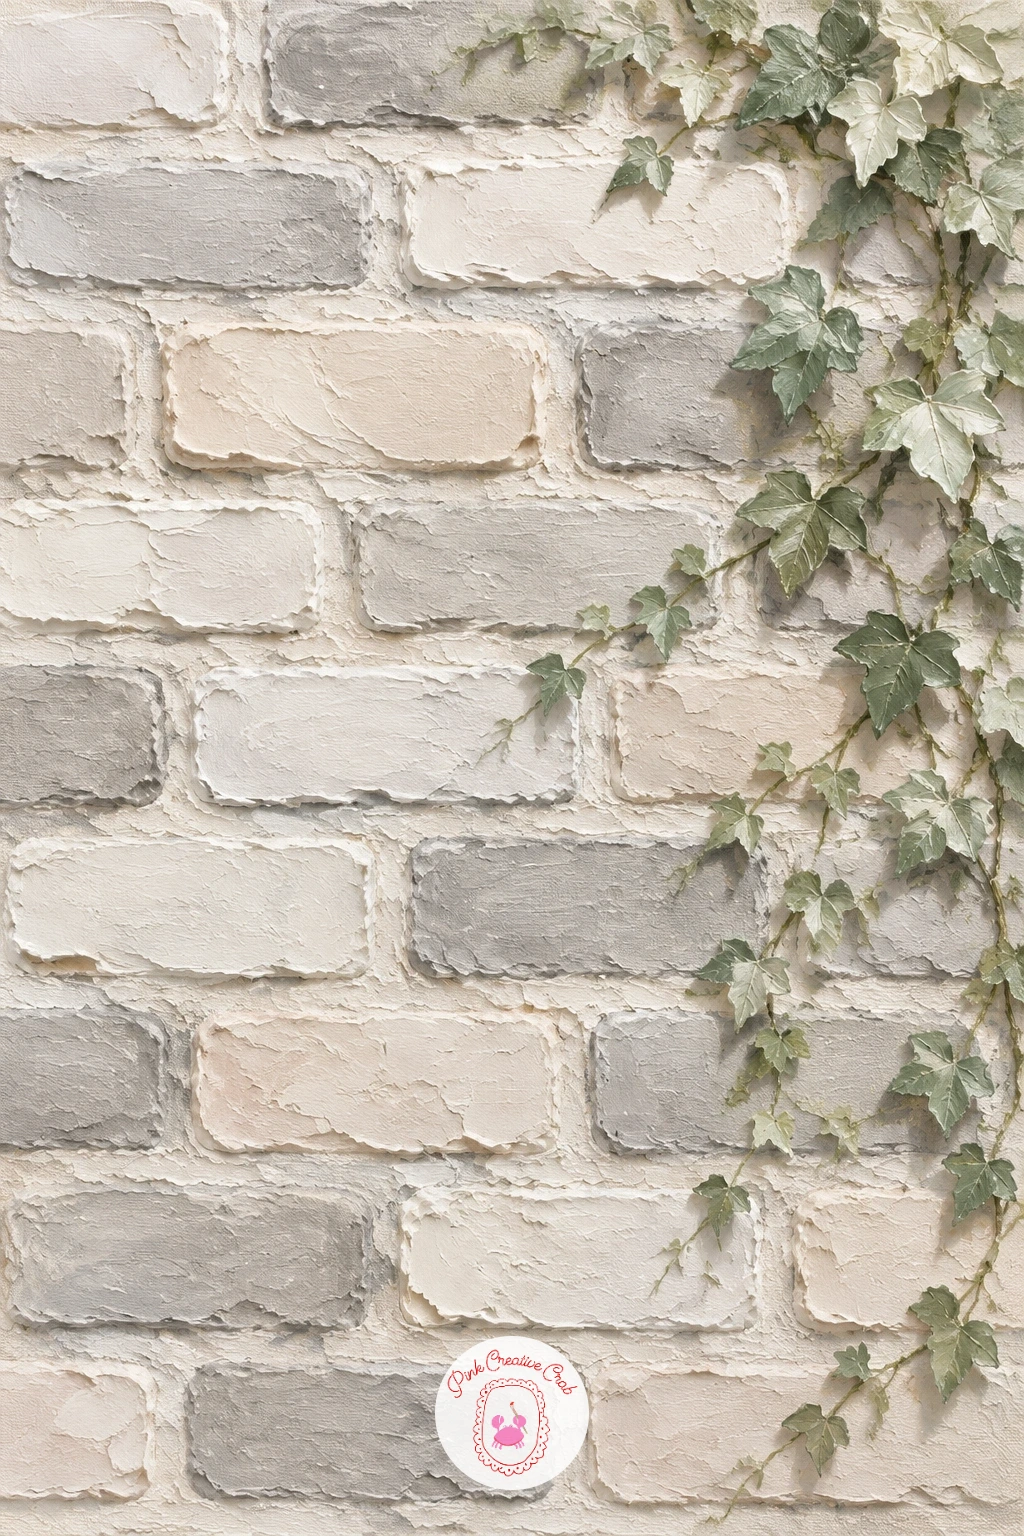
A wall of raised paste bricks gives you a chance to use a ruler for once, since the structure depends on fairly even rows even though the final texture stays rough. Mark light pencil guidelines for the rows, then build each brick as a rectangle of paste pressed with the flat of the knife, leaving a shallow recessed line of bare canvas or darker paste between each one to act as mortar.
Vary the thickness of individual bricks slightly rather than making every one perfectly uniform, real plaster walls are never that tidy. Once the wall has set, add trailing ivy climbing up one corner with thin dragged stems and small pressed leaves in sage green, letting it spill across two or three bricks rather than growing in a straight line.
If the brick rows start drifting out of level, stop and recheck your pencil guidelines before continuing, this is the one piece on this list where a crooked foundation really shows. A simple version uses three or four rows of brick with a small ivy sprig in one corner; a fuller one covers the whole canvas with bricks and lets the ivy trail further down.
Keep the ivy leaves smaller and more delicate than the brick texture around them, that contrast makes the vine read as something soft growing over something hard.
You Will Need
- acrylic modeling paste
- palette knife
- ruler for guidelines
Palette: Stone Grey,Warm White,Sage Green
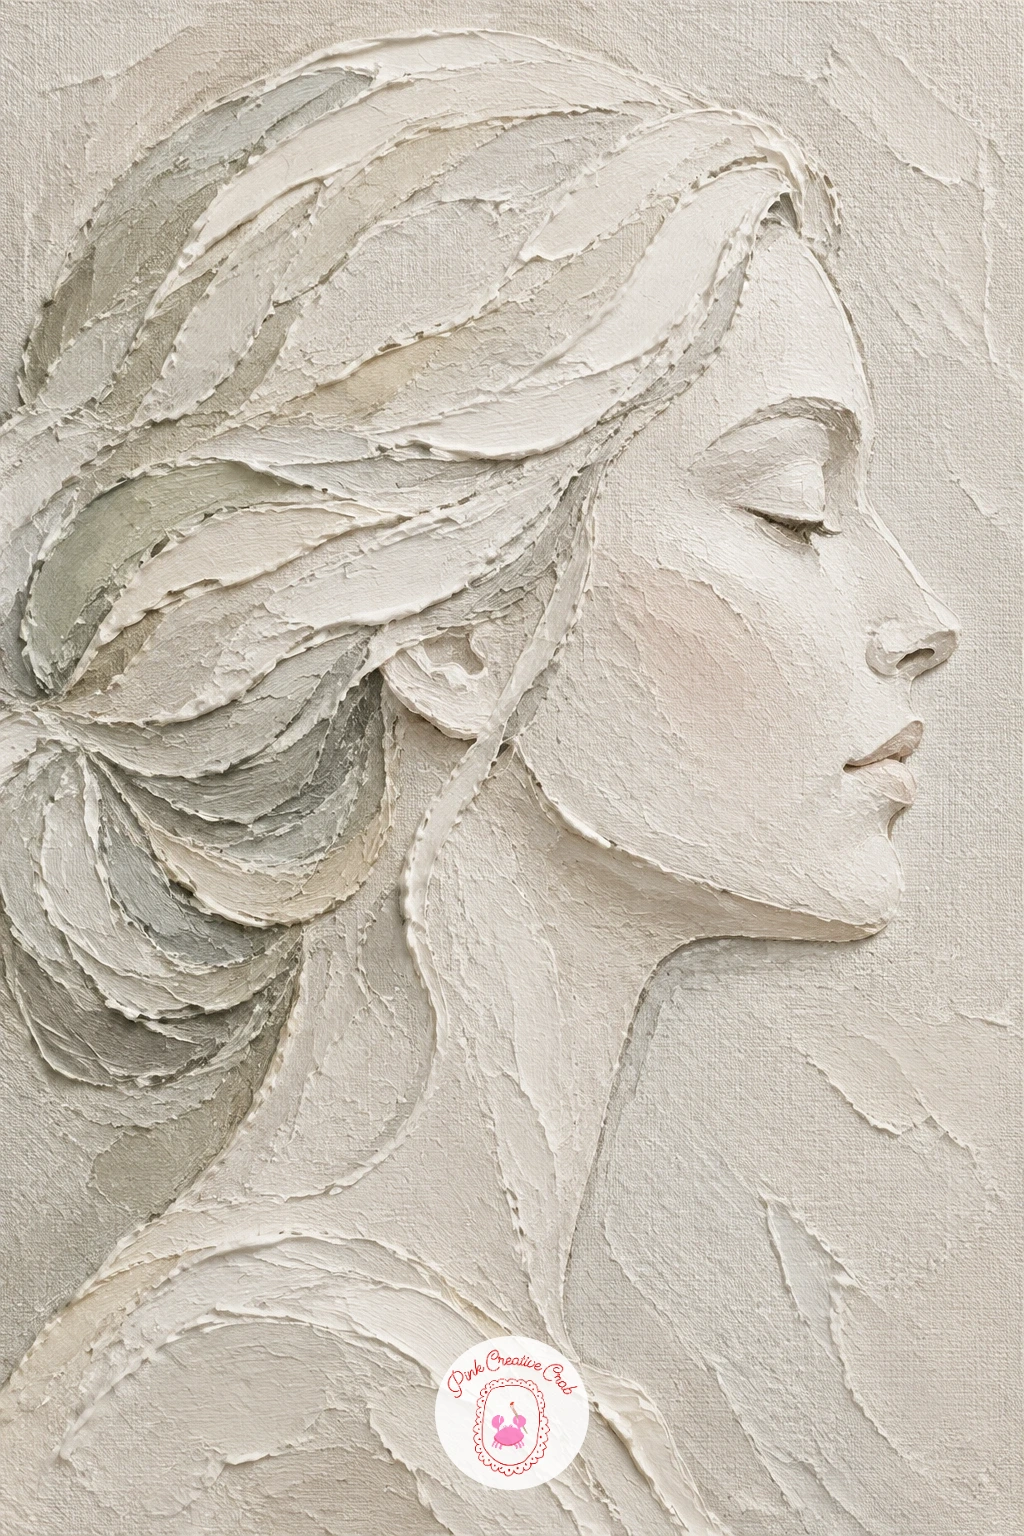
A white on white relief of a woman’s profile is the most technical piece on this list, so sketch the outline carefully in pencil first using a reference photo turned to a clean side view, nose, lips and chin clearly separated before you touch the paste. Build the face in one even layer of paste first to establish the overall raised plane, then come back with the knife edge to carve in the features by adding slightly more paste along the bridge of the nose, the curve of the lips and the jawline, rather than by cutting into what is already there.
Hair reads most convincingly as a few broad, sweeping knife strokes rather than individual strands, keep it simple and let it frame the face without competing with it. Side lighting is everything here, a profile relief that looks flat under flat light can look fully three dimensional once a lamp is angled from one side, so check your progress under raking light often rather than waiting until the end.
If a feature looks wrong once it is raised, it is easier to smooth that one small section flat and rebuild it than to try to fix it on top of what is already there. Keep every feature soft and simplified, this is closer to a plaster frieze than a portrait, and that simplicity is exactly what makes it work.
You Will Need
- acrylic modeling paste
- palette knife
- reference photo of a profile
Palette: Titanium White,Warm White,Soft Grey
Work from a clean, high contrast side-view photograph rather than a three-quarter angle, a true profile is far easier to translate into raised paste.
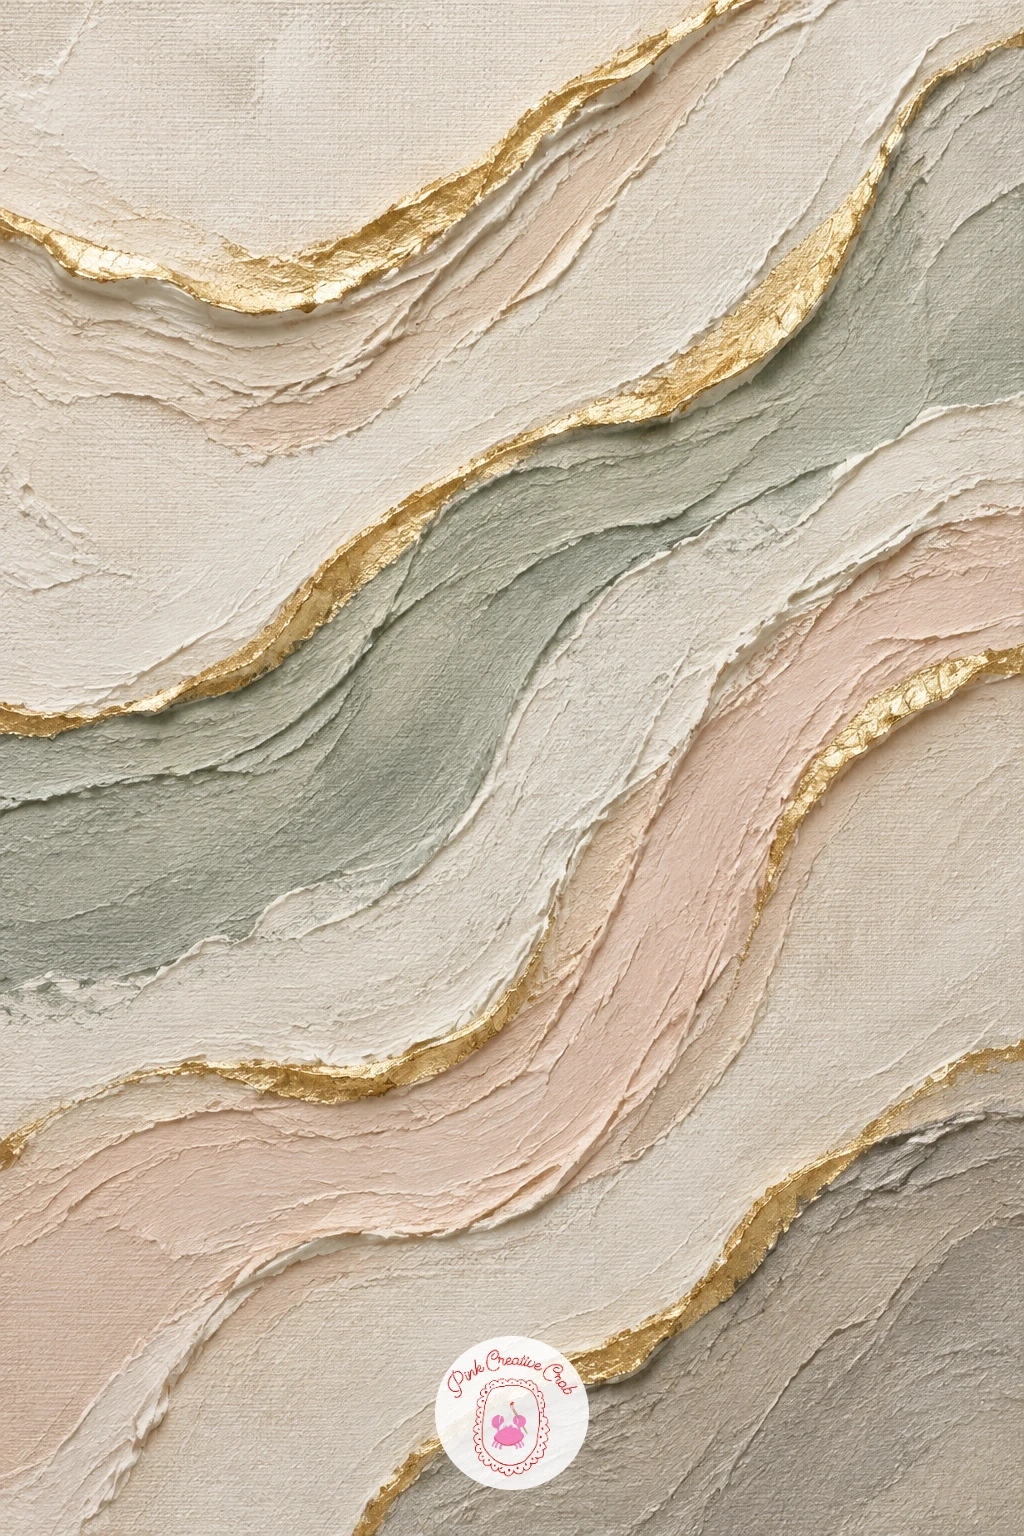
A textured abstract with raised lines works well as a piece built around negative space, since a few confident lines against a calm field read as far more intentional than a busy surface. Spread a smooth, thin layer of cream paste across the canvas first, then drag three or four thick raised lines across it with the edge of the knife, varying their length and angle but keeping them loosely parallel so they feel related to each other.
Let the lines dry fully before adding gold leaf, since gold leaf adhesive needs a stable, mostly dry surface to bond to properly. Brush a thin layer of leafing adhesive along the top ridge of each raised line only, wait until it turns tacky rather than wet, then press the gold leaf on and brush away the excess with a soft, dry brush.
If the gold leaf cracks or lifts in places, that usually means the adhesive was still too wet, in which case let it dry a little longer next time and apply in smaller sections. No gold leaf on hand, a gold paint pen traced carefully along the top of each ridge gives a similar glint without the extra materials.
Keep the gold confined to the very top edge of each line, that restraint is what makes it look intentional rather than decorative.
You Will Need
- acrylic modeling paste
- palette knife
- gold leaf sheets and leafing adhesive
Palette: Cream,Warm White,Gold
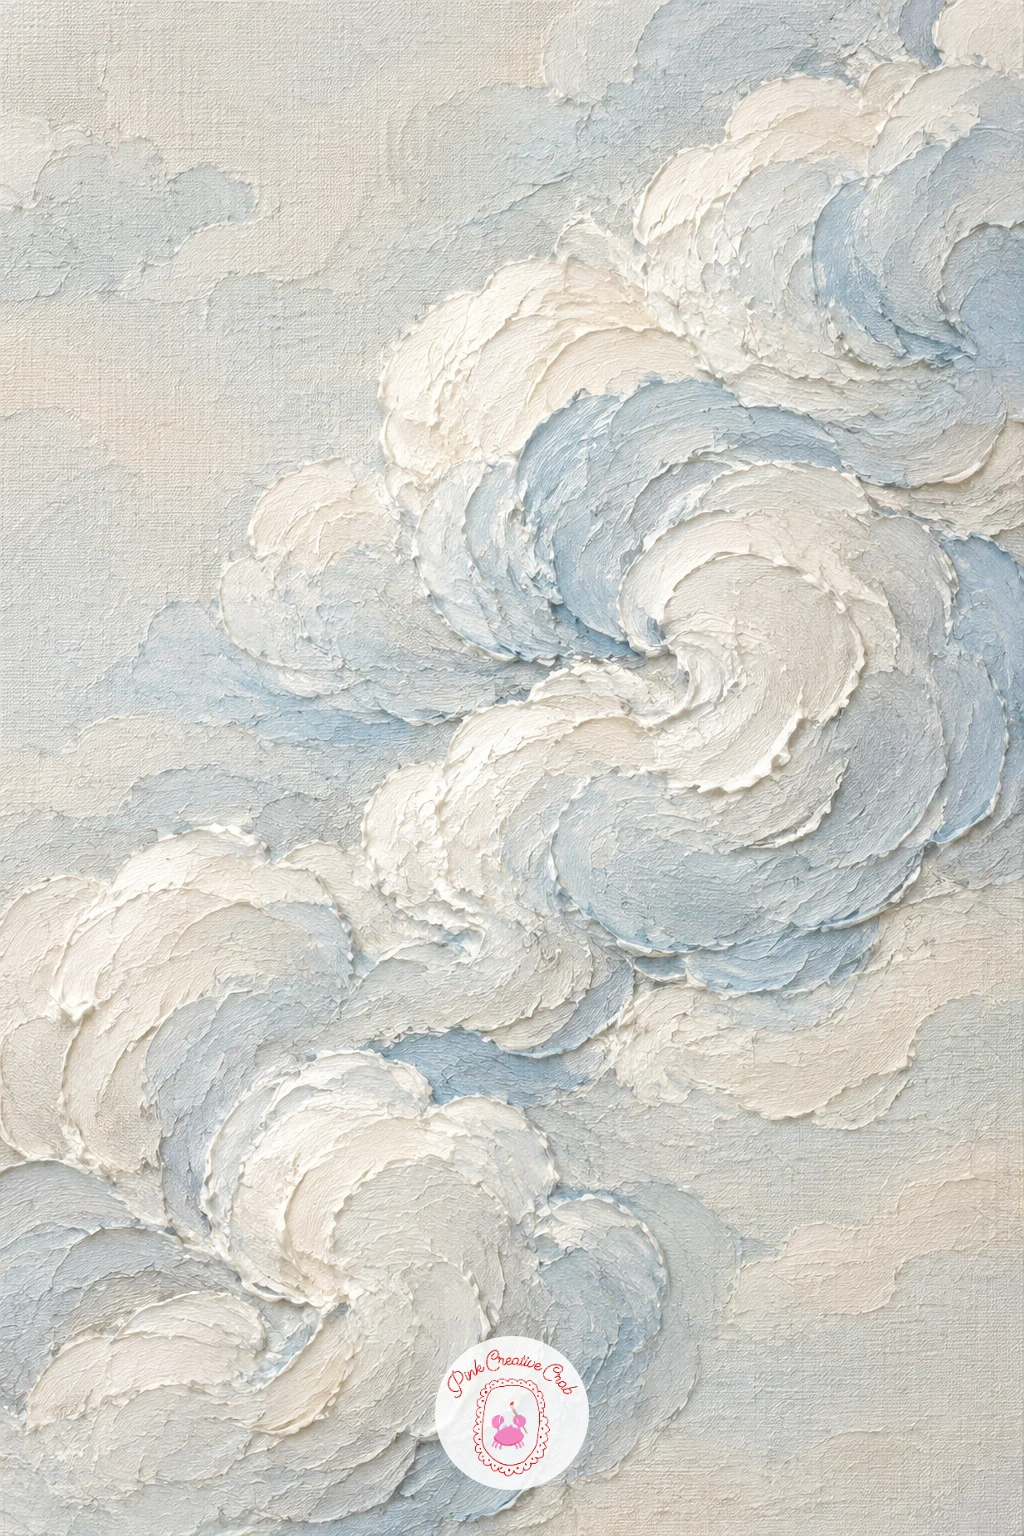
A raised swirl of clouds in pale blue asks for loose, circular knife motions rather than any straight lines at all. Load the knife generously and work in overlapping curved strokes, turning your wrist as you press so each cloud puffs outward rather than smearing flat, building two or three connected swirl shapes across the canvas rather than one single mass.
Keep the underside of each cloud shape slightly more raised and shadowed than the top, that is what makes a cloud swirl look like it is lifting off the canvas rather than sitting flat on it. Mix just a whisper of pale blue into mostly white paste so the color stays soft, too much blue starts to look more like water than sky.
If the swirls start losing their puffy edges as you blend them together, stop and let that section firm up slightly before adding the next connecting stroke. A quick version keeps the swirl to one corner of the canvas with plenty of bare pale background around it; a fuller one lets the clouds drift across the whole surface in a loose diagonal band.
Leave a few small, separate puffs drifting away from the main swirl, that scatter sells the sense of movement.
You Will Need
- acrylic modeling paste
- palette knife
Palette: Pale Blue,Titanium White,Soft Grey
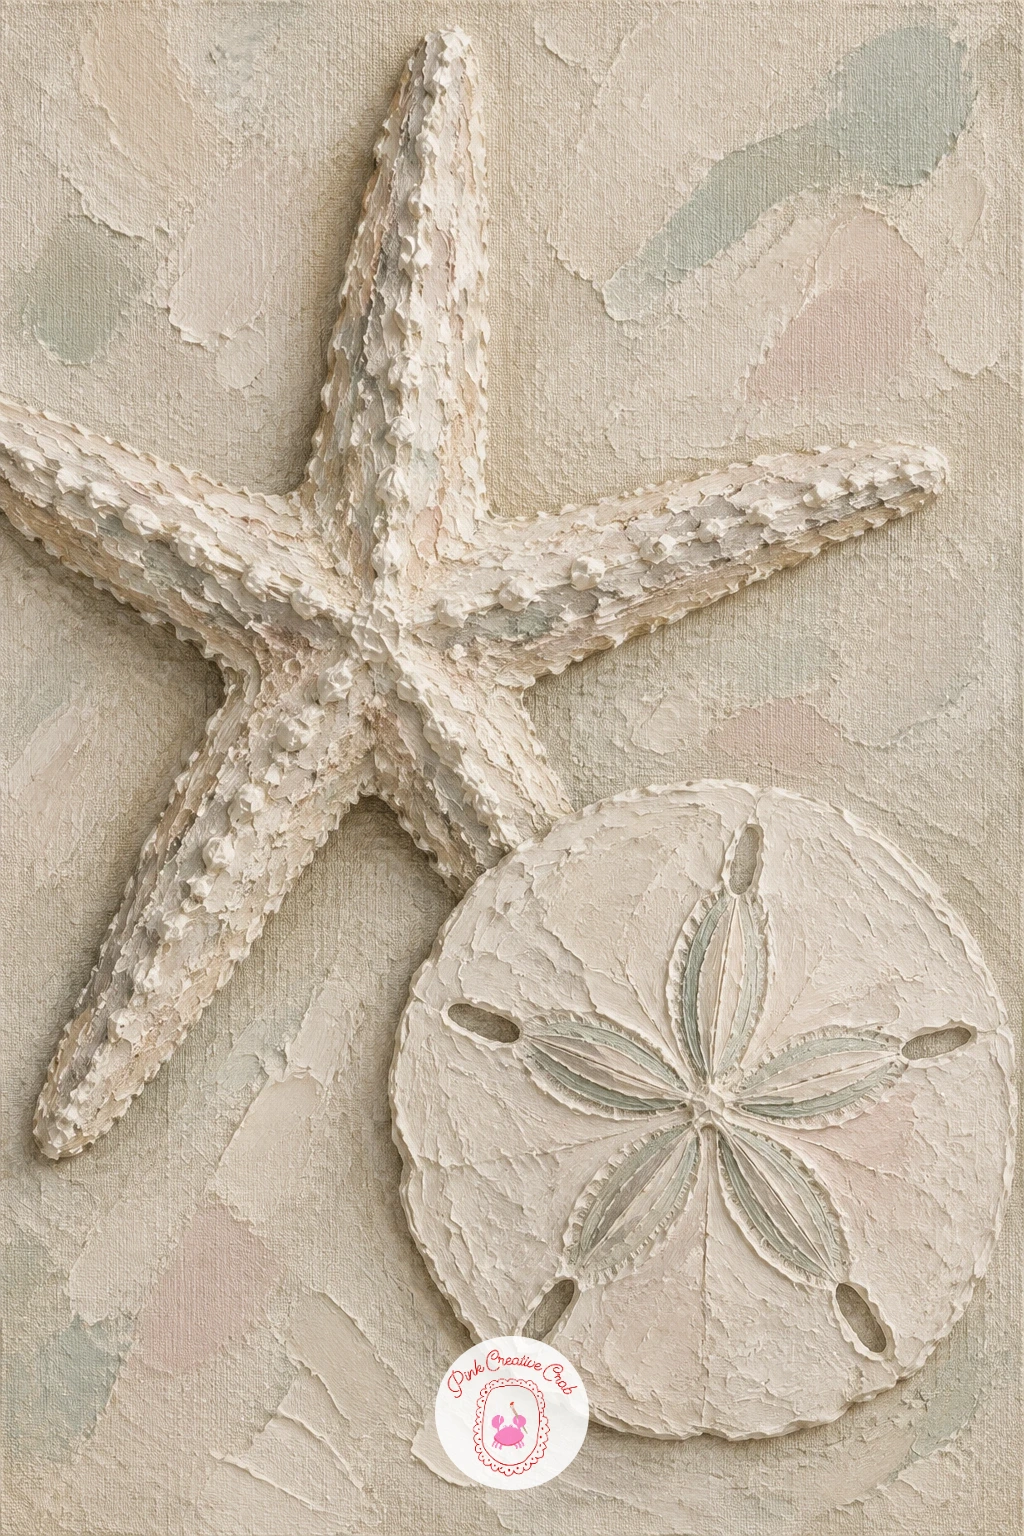
A raised starfish and sand dollar pair well together because they balance a pointed shape against a round one on the same beige ground. Build the starfish first, pressing five tapering arms outward from a central point with the knife edge, keeping the arms slightly uneven in length the way a real starfish never grows perfectly symmetrical, then texture the surface of each arm with small dabs from the knife tip to suggest its bumpy skin.
Place the sand dollar beside it as a flat raised disc, scoring a simple five-petal pattern into the center with the back of the knife or a toothpick before the paste sets. Compare the two sizes as you work, a sand dollar roughly two thirds the width of the starfish usually balances the composition without either one overpowering the other.
If the starfish arms start looking too stiff and straight, curve one or two of them very slightly, that small irregularity makes a real difference. No toothpick on hand for the sand dollar pattern, the tip of a pencil works just as well for scoring the lines.
Leave a little loose, sandy texture in the beige ground around both shapes using light, random dabs of the knife, it ties the pair together.
You Will Need
- acrylic modeling paste
- palette knife
- toothpick for scoring
Palette: Beige,Titanium White,Stone Grey
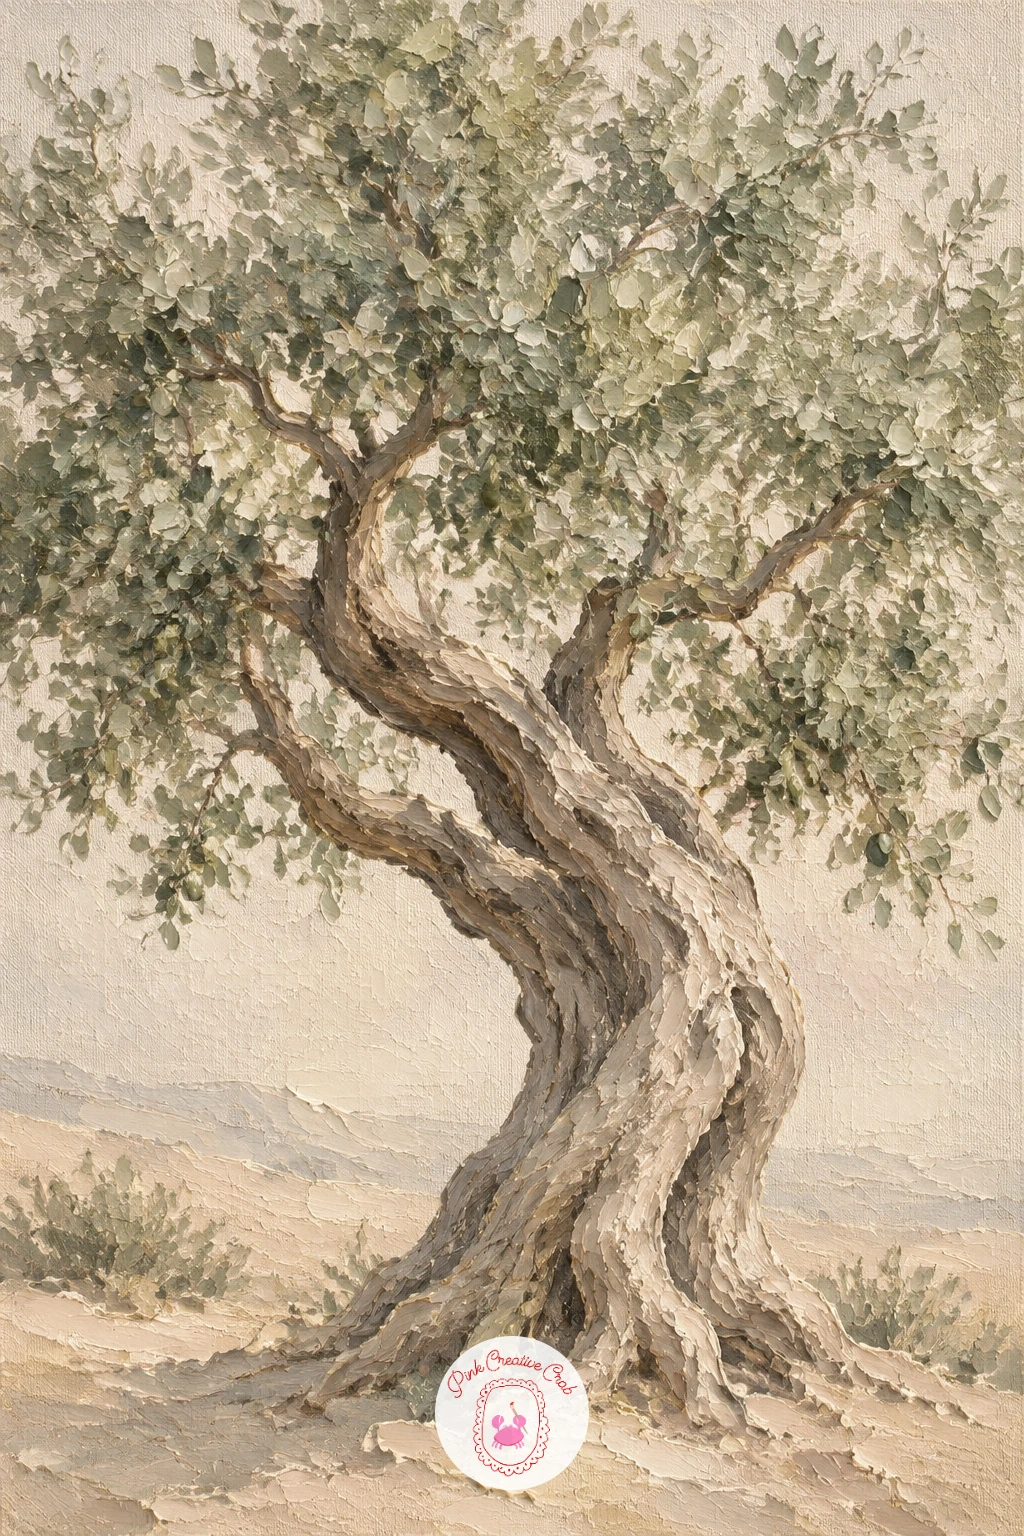
A textured olive tree closes out this list by combining several techniques already used earlier, a textured trunk, clustered leaves and a tonal ground all in one piece. Lay the sand-colored background across the whole canvas first, then build a gnarled, slightly bent trunk in a deeper taupe paste, pressing the knife at slightly irregular angles along its length rather than one smooth straight stroke, since olive trunks twist as they grow.
Cluster small sage green leaf marks at the top in a rounded, somewhat uneven canopy shape, pressing the knife tip in short flicking strokes rather than trying to define individual leaves clearly. The trunk is the part most likely to look too thin and straight if you rush it, so build it up in two passes, letting the first layer set a little before adding a second pass of paste along one side to give it real bulk and a slight lean.
A few small dots of deeper green or near-black scattered through the canopy suggest olives without needing to paint individual fruit in detail. Readers drawn to this kind of warm, sun-baked palette might also enjoy the tones used throughout watercolor desert landscape ideas with Moroccan dunes and warm earth tones, even in a very different medium.
Keep the canopy looser and rougher than the trunk, that contrast between solid wood and scattered leaf texture is what makes the tree feel alive.
You Will Need
- acrylic modeling paste
- palette knife
Palette: Sand,Taupe,Sage Green
What to Do Next
Pick one idea, spread your first layer of paste on a canvas no larger than a sheet of paper, and let the knife find its rhythm before you worry about the finished look. The texture always reads better once it dries, so step back, give it a day, and decide from there whether it needs one more pass.
Frequently Asked Questions
What kind of modeling paste works best for texture painting on canvas?
A heavy acrylic modeling paste made for texture work holds raised ridges best. Lighter gesso or texture gels spread more thinly and flatten faster, so they suit subtle detail rather than the deep relief shapes used in these ideas.
How long does textured modeling paste take to dry on canvas?
Thin layers dry to the touch in a few hours, but thick raised areas like paste flowers or carved lines can take one to two full days to cure completely. Judge the final look only after it has dried fully, since wet paste often looks flatter than cured paste.
Can you tint modeling paste with regular acrylic paint?
Yes, mixing acrylic paint directly into modeling paste tints it while it keeps its thick, raised quality. Add paint gradually and mix thoroughly, since too much liquid paint can thin the paste and reduce how well it holds its shape.
Does the canvas need priming before applying modeling paste?
A pre-primed, stretched canvas works fine for every idea on this list. If you are working on raw canvas, a coat of gesso first gives the paste something stable to grip so it does not crack or lift as it cures.
What tool can replace a palette knife for texture painting?
An old credit card, a butter knife or a small plastic spatula can all spread and shape modeling paste in a pinch. Each gives a slightly different edge quality, so try a small test patch before committing to a whole canvas.
Have any thoughts?
Share your reaction or leave a quick response — we’d love to hear what you think!
-
 0
-
0
-
0
-
0
-
0
-
0


