

Realistic eye drawing turns one small feature into a whole page, which is exactly why it is so satisfying to practice. Every eye carries its own light, its own wrinkles, its own mood, so you never run out of new ones to try, and you only need a pencil and an hour to get somewhere good.
Below are 29 eyes to draw, moving from simple shapes toward trickier lighting, reflections and animal anatomy. Pick whichever one catches your attention on the scroll, grab a pencil, and work through it start to finish before you move on to the next.
Using these images: free for personal projects such as printing, coloring, cards, journals and gifts. Handmade items that include them may be sold up to 30 pieces per design. More than that is commercial use and is not permitted, and neither is selling or sharing the images themselves or passing them off as your own. Please ask before any other use.
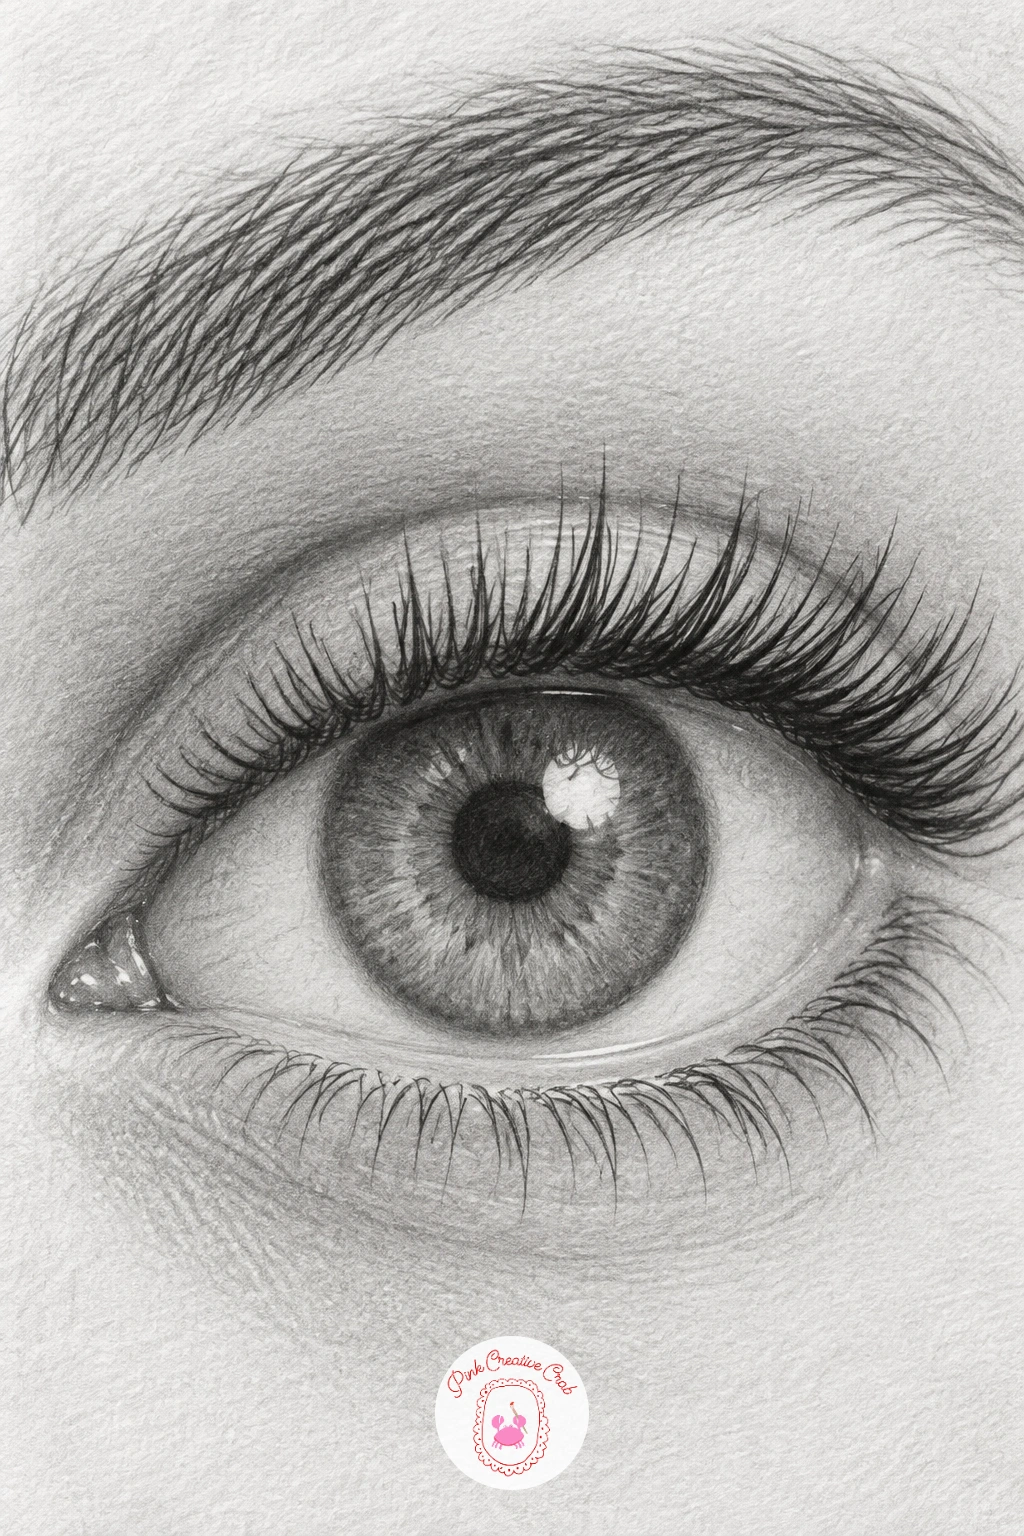
Start here if realistic eye drawing is new to you, because a young woman’s eye with long curled lashes gives you clean, predictable shapes to build from. Sketch the almond outline lightly with an HB pencil, then block in the iris as a near-perfect circle sitting just under the upper lid, never a full circle, since the lid always covers a sliver of its top edge.
Shade the iris first, radiating short strokes out from the pupil and leaving a bright highlight dot untouched. Build the white of the eye next with the lightest grey you can manage, since a stark white eyeball looks plastic. Save the lashes for last, drawing each one as a tapering curved line that thickens near the lid and thins to a point.
The usual mistake is making every lash the same length and angle, which flattens the whole effect. Vary the length and let a few lashes cross each other near the outer corner for a fuller look. If your fine-tip pencil keeps breaking, switch to a mechanical pencil with 2B lead for the lash tips.
Finish by darkening the lash line itself with a sharp 6B, which anchors the whole eye and makes the lashes read as attached rather than floating.
Palette: Graphite Grey,Charcoal Black,Paper White
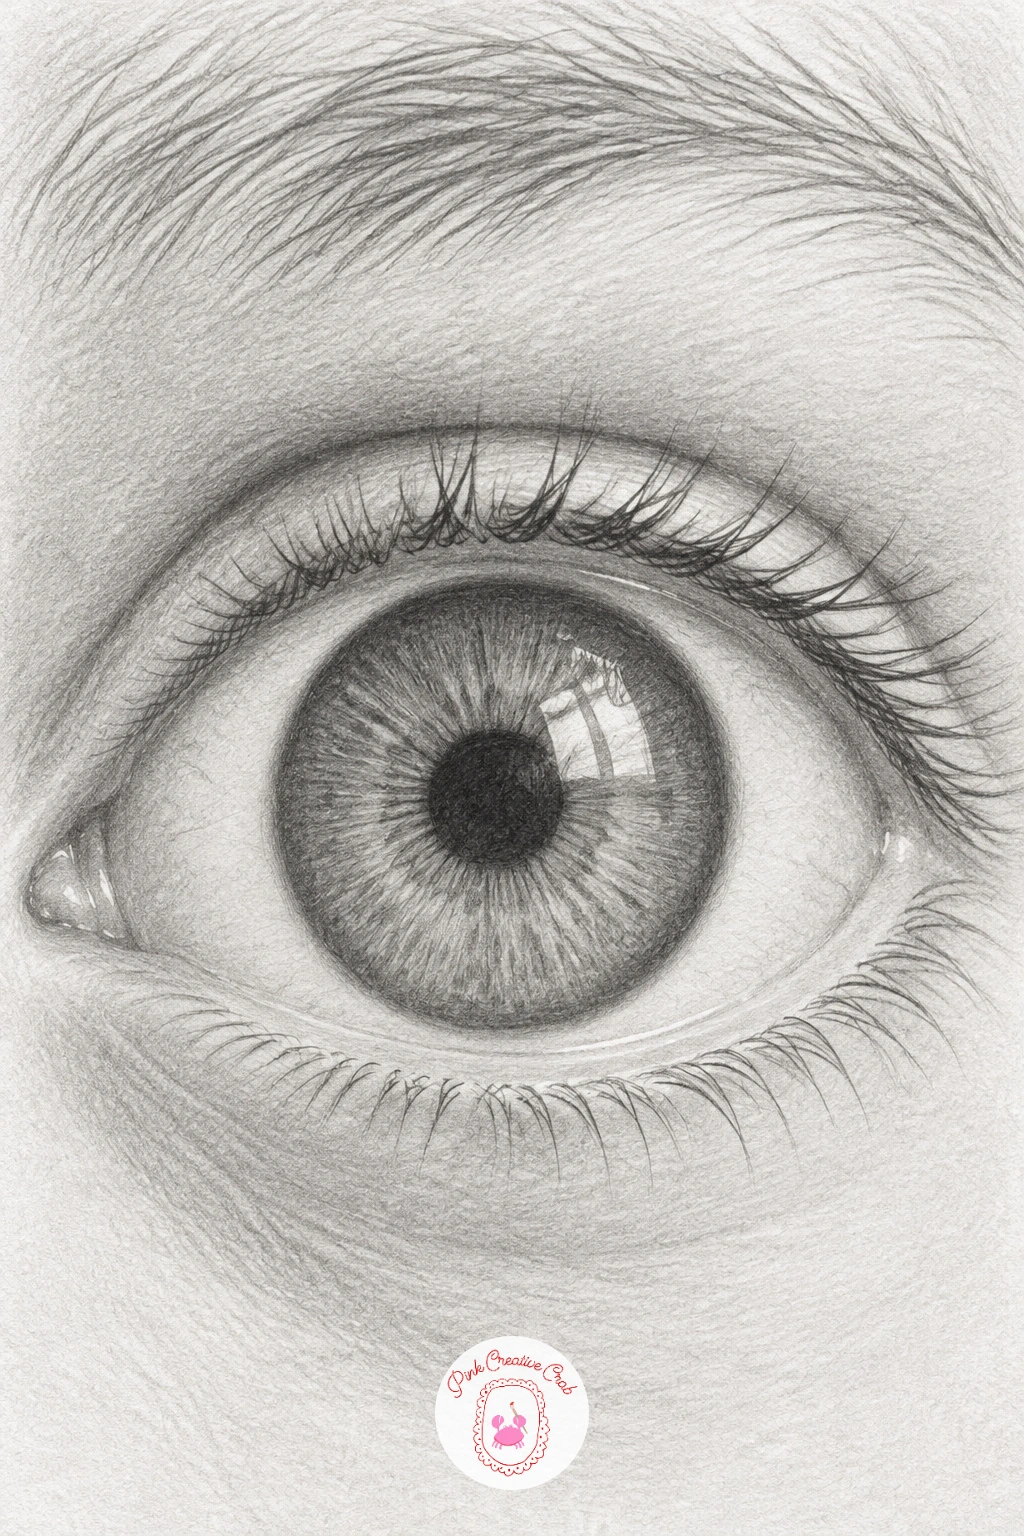
Move from lashes to proportion with a child’s wide open eye, which has a much bigger iris relative to the white of the eye than an adult’s does. Measure before you shade: a child’s iris often sits large enough that the upper lid barely covers it, with the lower lid nearly touching the bottom edge too, so there is very little white showing above or below.
Draw the outline rounder and less almond-shaped than an adult eye, then place the pupil centred and slightly oversized, since wide curiosity reads partly through pupil size. Shade the iris in soft concentric bands rather than sharp spokes, keeping the edges gentle.
Where this goes wrong is drawing the eye too narrow, which instantly ages the face. Keep checking the width against the height as you go, aiming for a rounder, more open shape than feels natural at first. If you do not have a soft 4B on hand, a regular HB pressed harder in small circular motions gets a similar smooth tone.
Leave the lashes short, straight and sparse, since a child’s lashes rarely curl dramatically.
Palette: Soft Grey,Warm Charcoal,Paper White
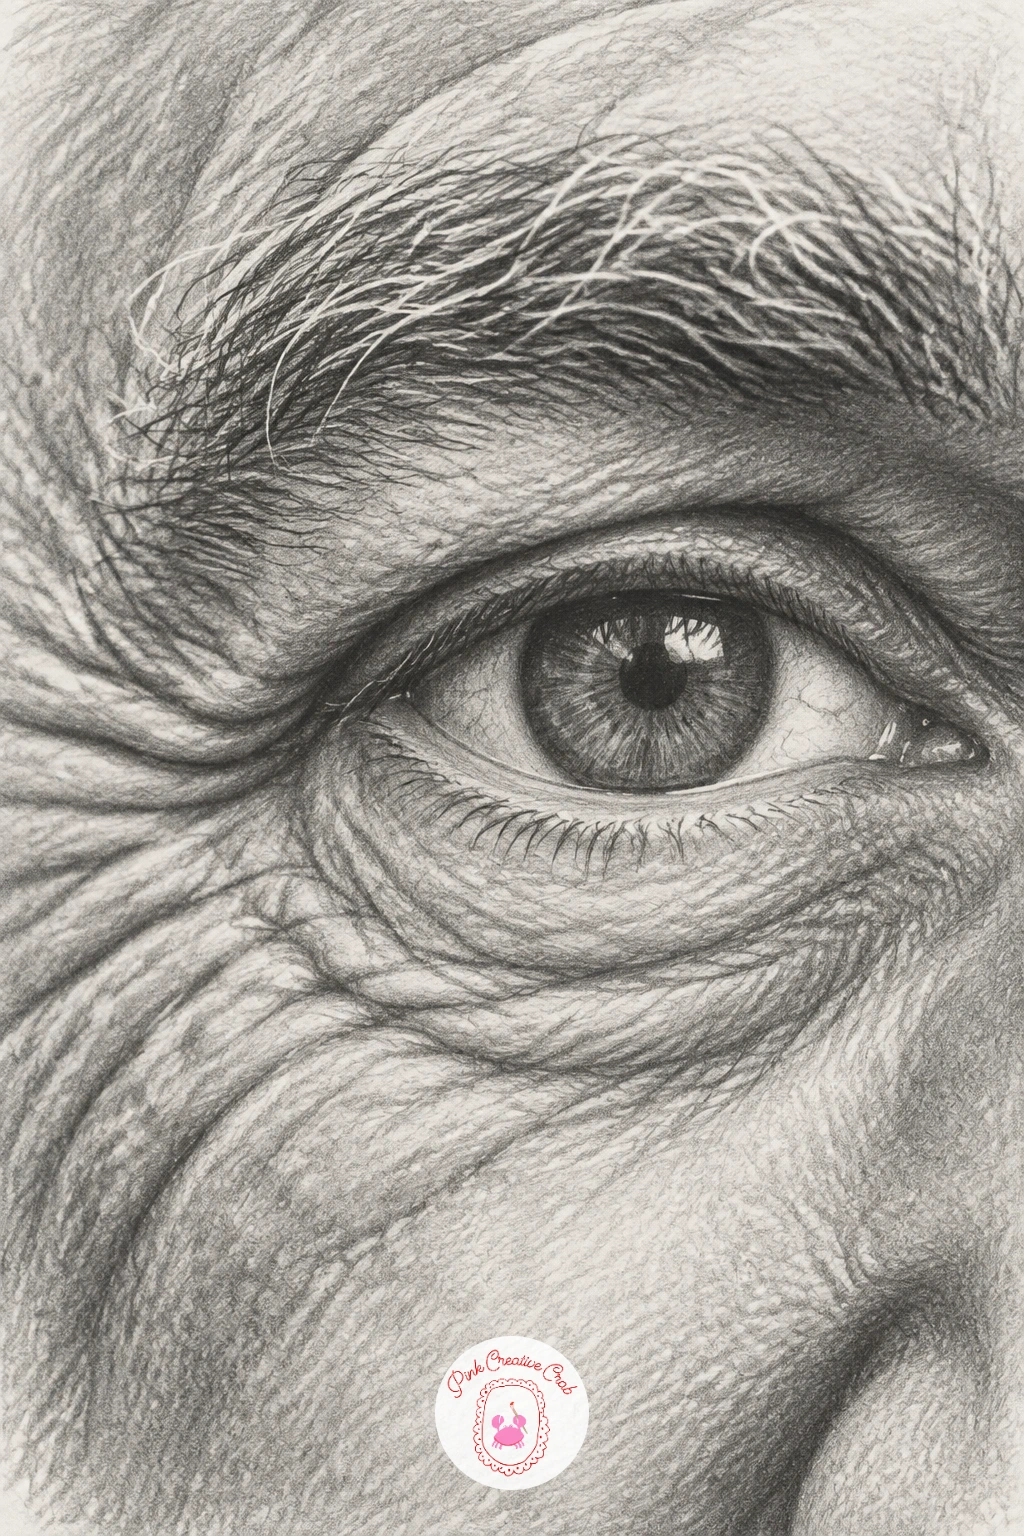
From the smooth roundness of a child’s eye, jump to the opposite end of the spectrum with an old man’s eye, where deep crow’s feet and a bushy brow carry most of the character. Lightly sketch the eye shape first, slightly drooped at the outer corner, then map the wrinkle lines radiating from that corner before you shade anything else.
Work the crow’s feet as a series of short curved lines that follow the natural fan pattern around the socket, pressing harder where a wrinkle folds deepest and lifting off toward its end. Shade the eyelid heavier and looser than a younger eye, since skin there sags and catches more shadow.
The brow is where beginners rush. Draw it hair by hair in short overlapping strokes going in slightly different directions, rather than one solid grey block, and let a few stray hairs poke out above the main shape. A kneaded eraser pulled through damp-looking shadow areas can lift soft highlights along the wrinkle ridges if you pressed too dark.
Keep the iris slightly cloudier in tone than a young eye, with a softer edge, to suggest age honestly without overdoing it.
Palette: Deep Charcoal,Mid Grey,Paper White
Look at reference photos of older faces in good side lighting before you start, since raking light shows the wrinkle direction far more clearly than flat light does.
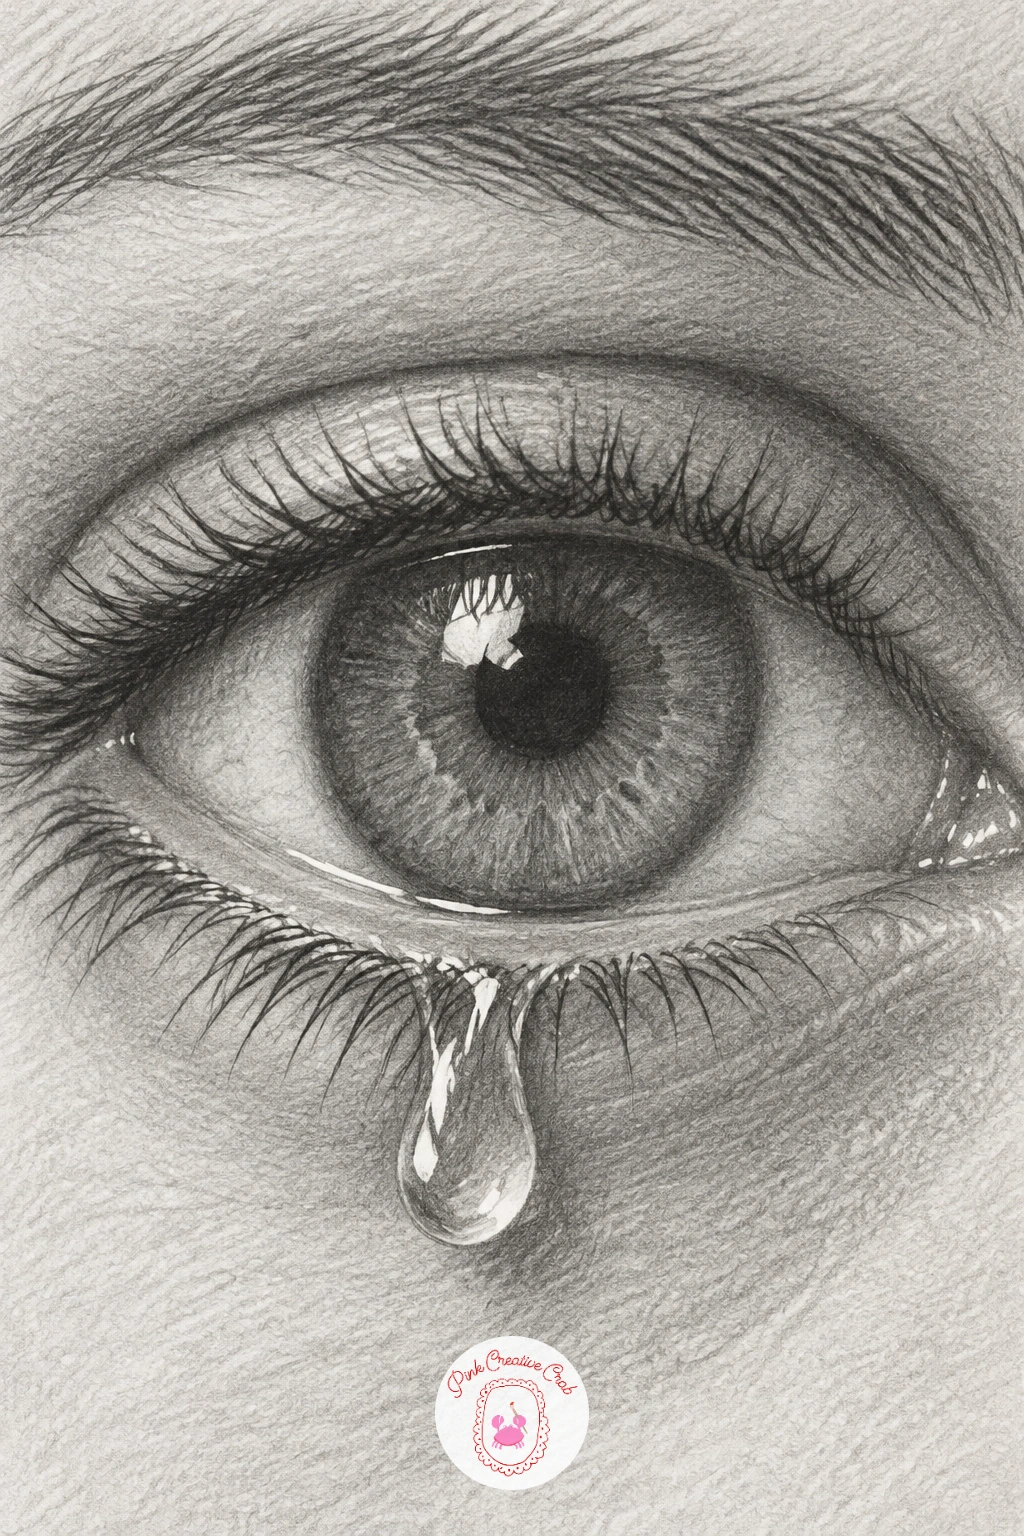
A teary eye asks you to draw something transparent sitting on top of something already detailed, so build the eye fully first and add the tear last. Finish the iris, lashes and lower lid shading as you would for any realistic eye, then look at where gravity would actually pull a drop, usually resting on the lower lash line before it falls.
Draw the tear drop’s outline faintly, then shade only its edges and underside, leaving the centre almost untouched paper white where light passes straight through. A thin dark line along the top of the drop and a tiny bright highlight make it read as wet glass rather than a flat blob.
People often shade the whole tear evenly, which kills the illusion of liquid. Keep most of the drop pale and let the darkest value sit in a thin crescent at its lower rim where the water curves away from the light. If you are working digitally with no eraser handy, a white gel pen can punch back a highlight on paper too.
Add a faint smudge of grey just below the tear track on the cheek to suggest it has already run once.
You Will Need
- white gel pen (optional)
Palette: Graphite Grey,Charcoal Black,Paper White
Reflections give an eye a whole second drawing inside it, and a window reflected in the pupil is a gentle way to start. Finish the eye’s basic shading first, iris, lashes and lid, leaving the pupil area dark but not yet solid black.
Inside the pupil, sketch a tiny window shape, just a rectangle with a cross of panes, kept small and slightly distorted to follow the pupil’s curve. Shade the panes themselves mid-grey and leave thin paper-white lines for the frame and a soft glow where light would come through the glass.
The mistake here is making the reflection too crisp, which looks pasted on rather than reflected. Blur its edges very slightly with a blending stump and keep its contrast lower than the rest of the eye, since reflections in a wet, curved surface never stay sharp. Surround the whole reflection with a ring of near-black pupil to anchor it back into the eye.
Try the same trick later with a reflected tree or a face instead of a window, once this smaller version feels comfortable.
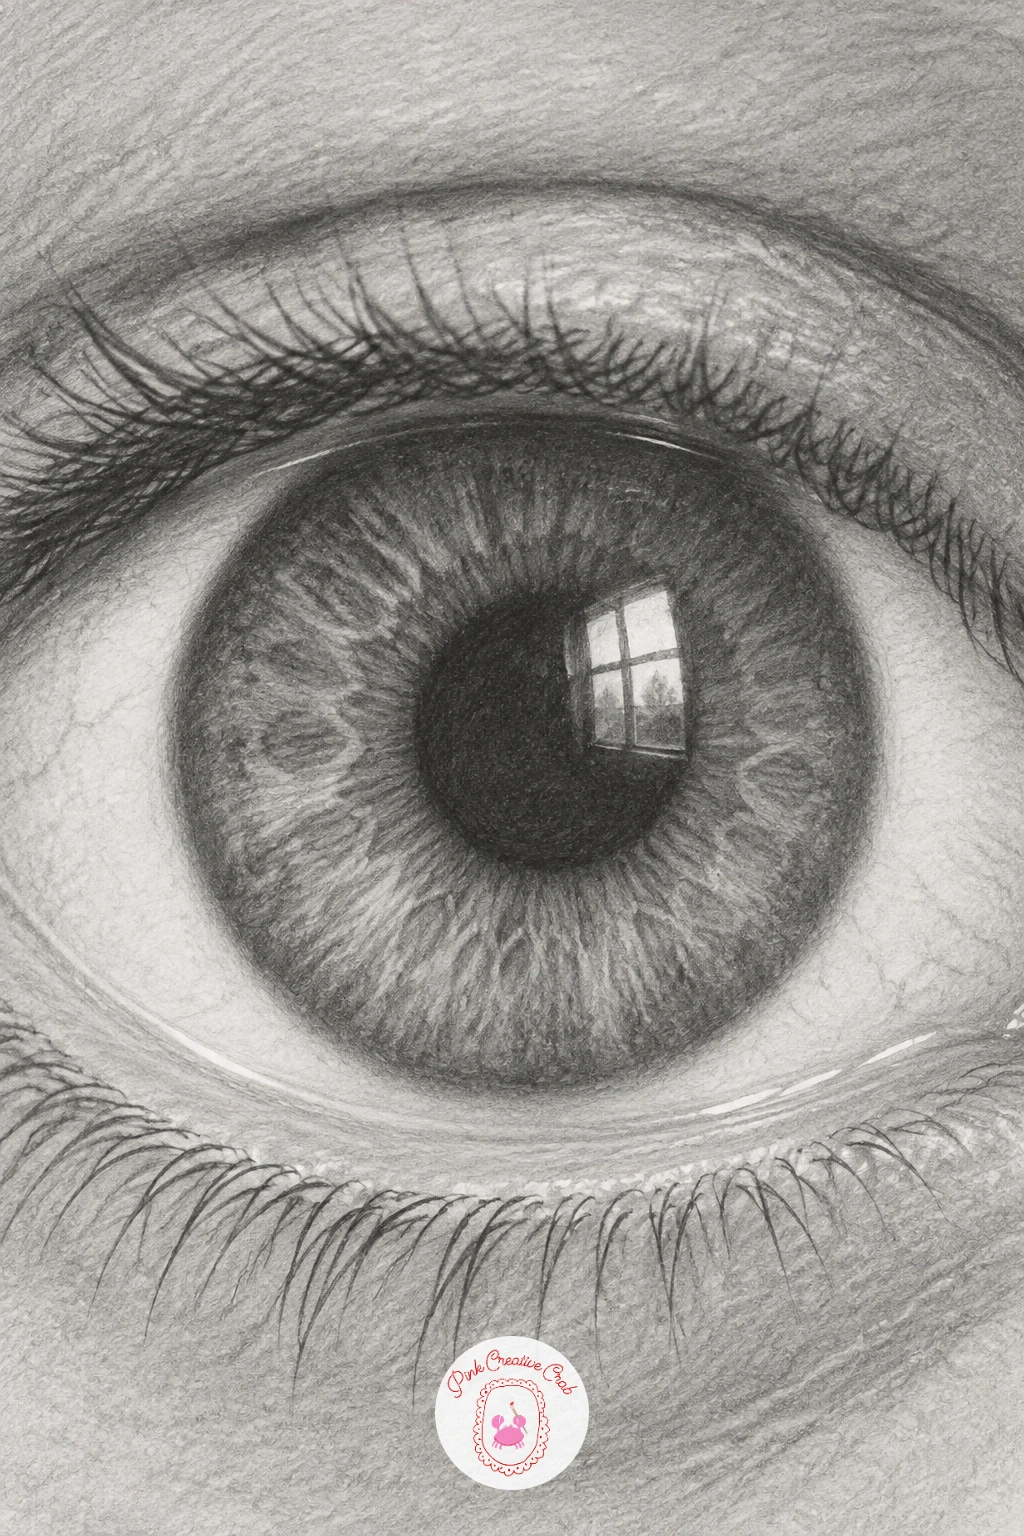
Palette: Charcoal Black,Mid Grey,Paper White
A half-closed sleepy eye under a heavy lid is mostly about what you choose not to show. Draw the lid line curving down much further than a fully open eye, covering most of the iris and leaving only a thin curved sliver of it and the pupil visible underneath.
Shade the heavy upper lid itself with soft, loose strokes and a slightly darker crease line where it folds, since a drooping lid always has a visible fold above the lash line. Keep the visible strip of iris dark and simple, no detailed radiating lines, since there is barely room to see them anyway.
Beginners often draw the eye too open out of habit, so measure the gap between lids honestly against your reference before committing to the shading. If the result still looks too alert, lower the outer corner of the lid slightly and soften the brow above it so it sits relaxed rather than raised.
Lashes here point downward and inward rather than curling up, following the drooping lid line.
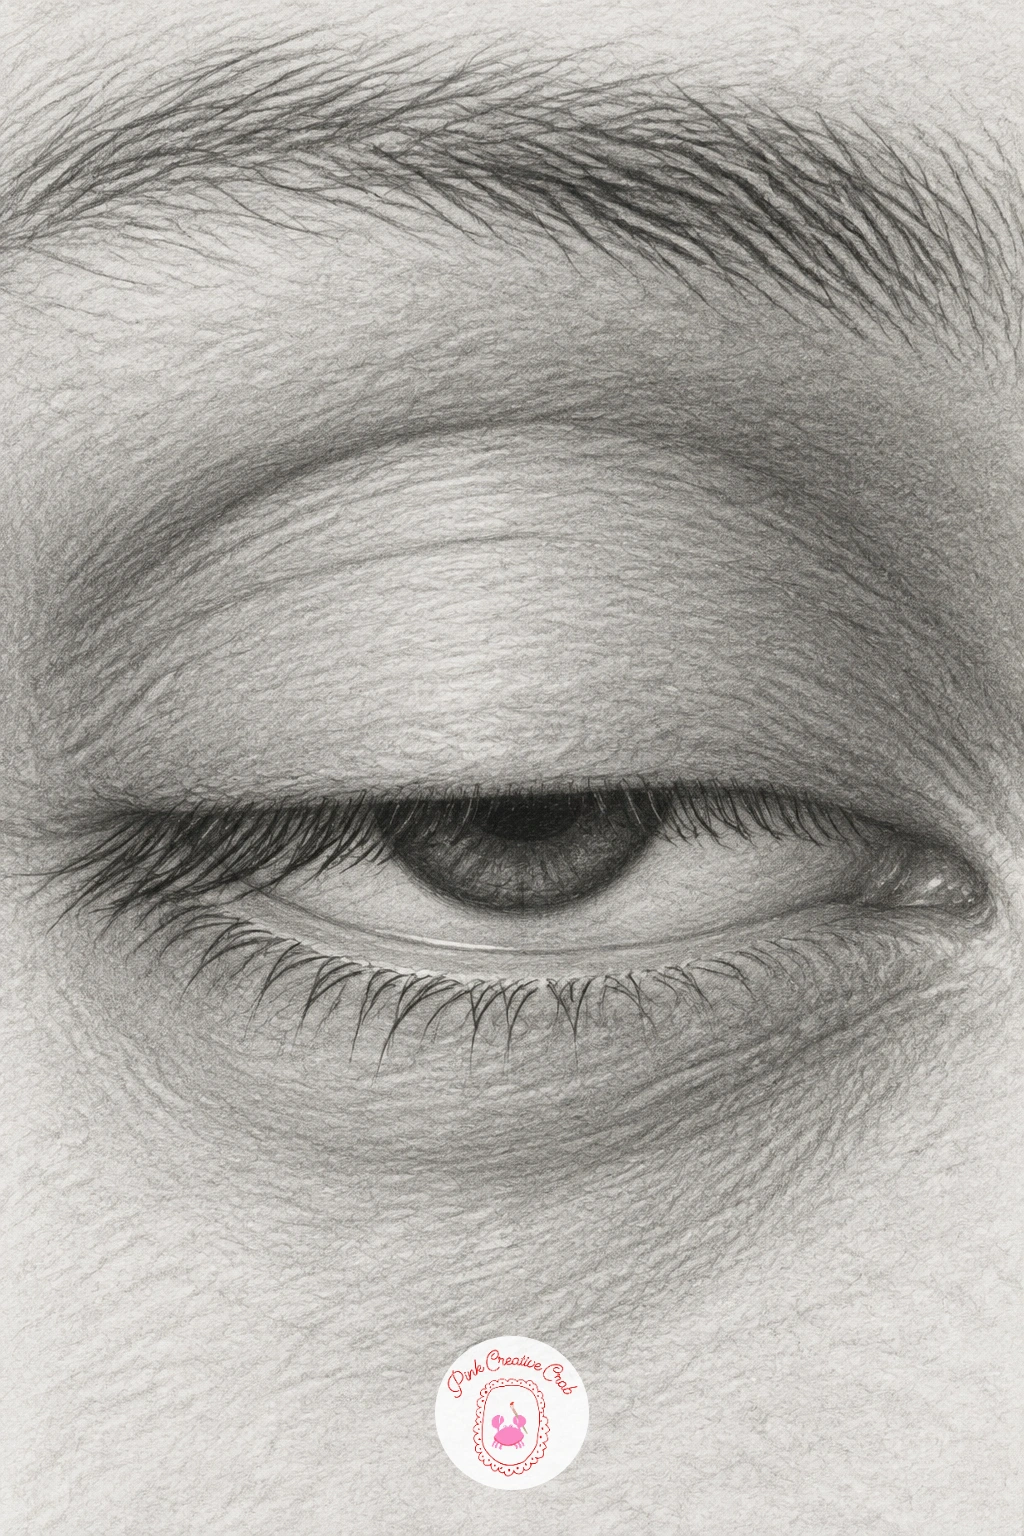
Palette: Soft Grey,Charcoal Black,Paper White
An eye looking sideways under a raised brow is a good place to practice how the iris and pupil shift inside a fixed-looking socket. Draw the outer eye shape straight on as usual, but push the entire iris and pupil circle toward one corner, leaving a wider strip of white showing on the opposite side.
That shifted white is the part people forget to shade. Give it a very light grey tone and a soft shadow where the upper lid curves over it, or the eye will look like it is floating off-centre rather than genuinely glancing sideways. Lift the brow above with a slightly steeper arc and add one or two short lines in the forehead skin above it to show the muscle pulling up.
If the sideways glance looks cross-eyed instead of alert, check that the pupil is not drawn too close to the inner corner. Pull it back toward centre slightly and recheck against a mirror or photo.
A raised brow pairs well with slightly wider spacing between the lashes, since the whole eye area stretches a little when lifted.
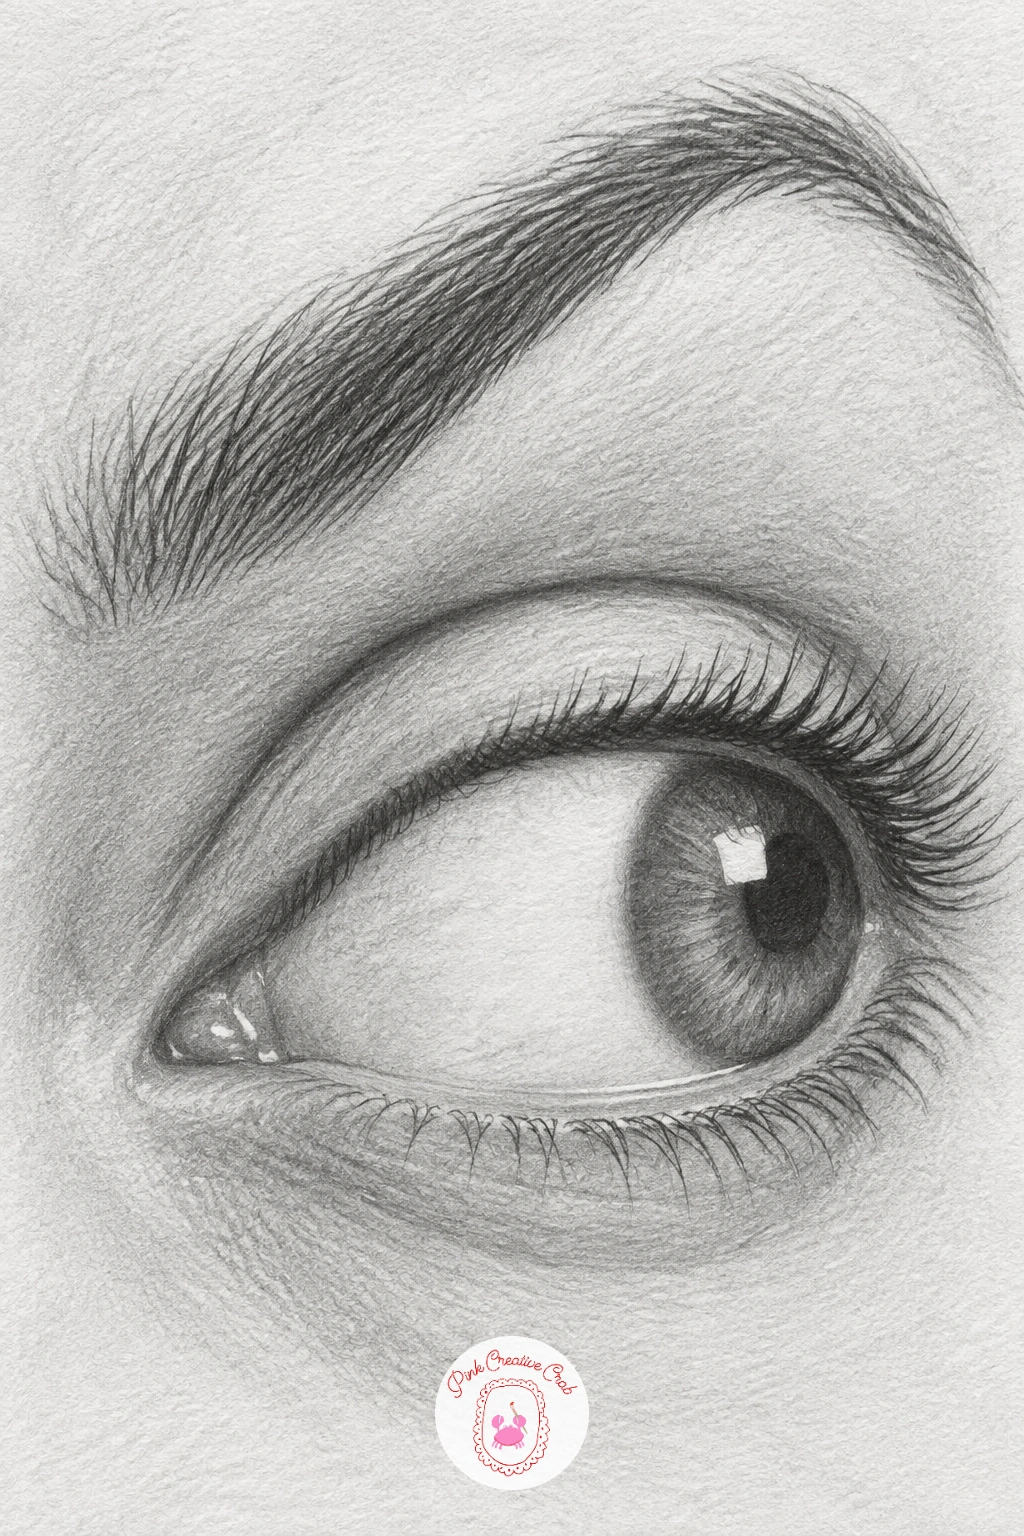
Palette: Graphite Grey,Charcoal Black,Paper White
A pair of laughing eyes with crinkled corners works best as two matching eyes side by side, since the symmetry of genuine laughter is part of what reads as happy. Sketch both eye shapes narrower and more curved upward than a neutral eye, since laughing squeezes the lids together from both sides.
The crinkles at the outer corners are small fan-shaped wrinkle clusters, three or four short curved lines radiating outward and slightly down. Shade these lightly, keeping them softer in value than the lash line itself so they read as skin folding rather than heavy shadow. Push the cheeks up slightly into the lower lid on both eyes to show the squint.
Drawing one eye more open than the other is the easiest way to accidentally ruin the symmetry, so sketch both at once in light pencil before darkening either. A ruler held lightly against the page can help you check both eyes sit on the same angle.
Keep the irises mostly hidden behind the squinted lids, since very little of the coloured part shows in a real laugh.
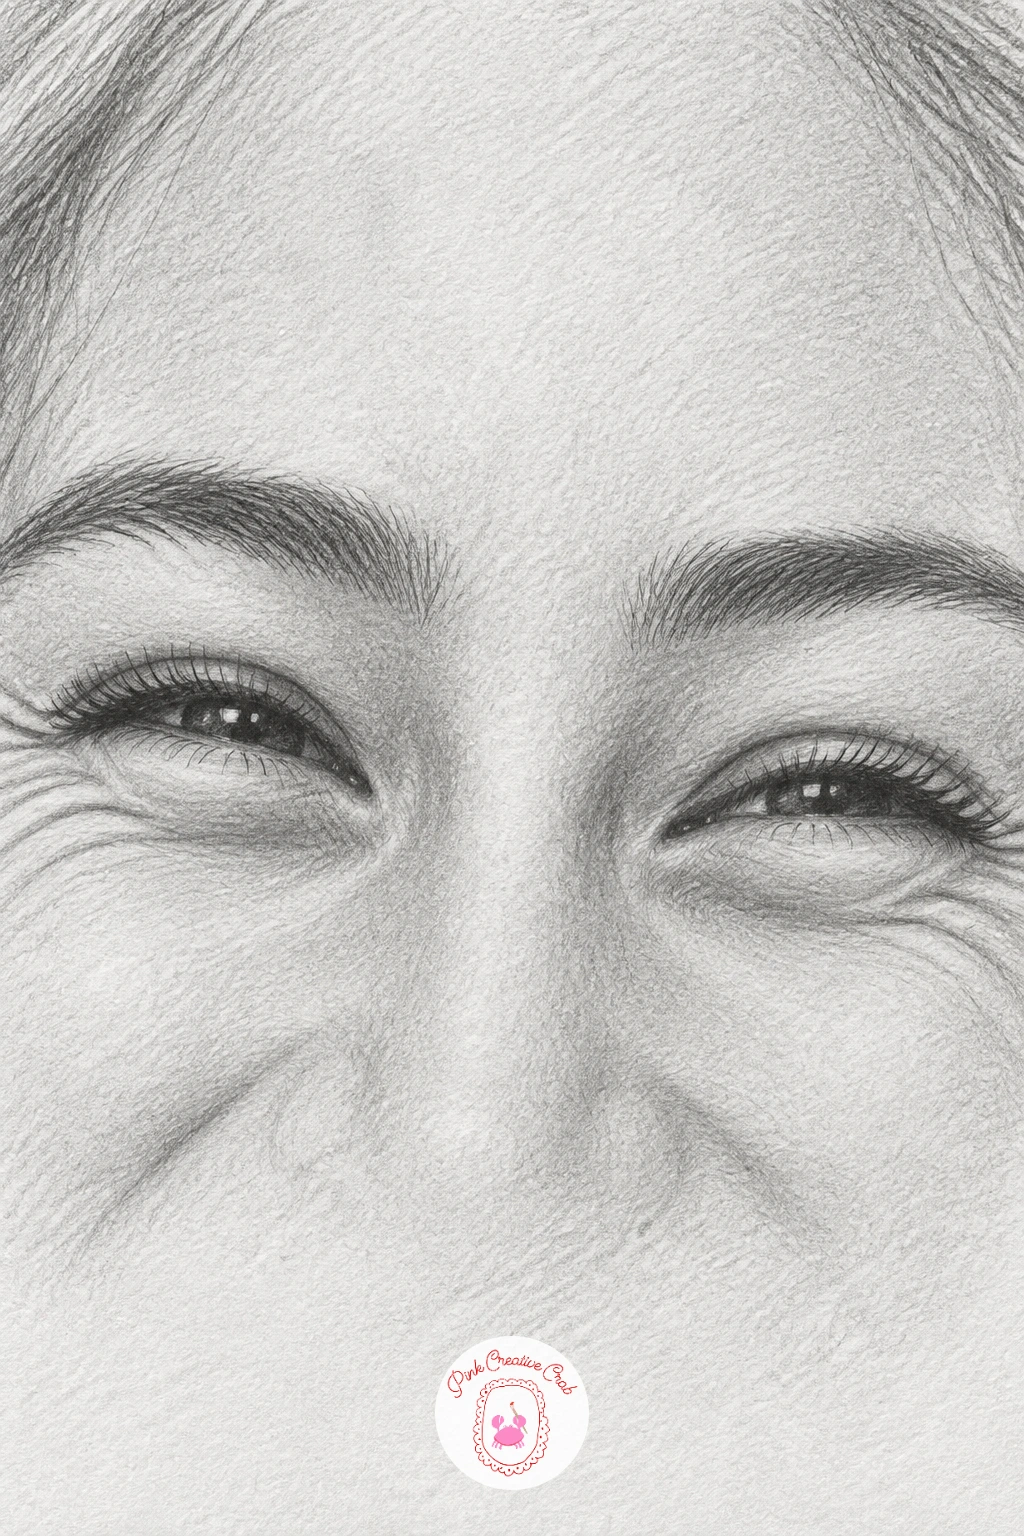
Palette: Soft Grey,Charcoal Black,Paper White
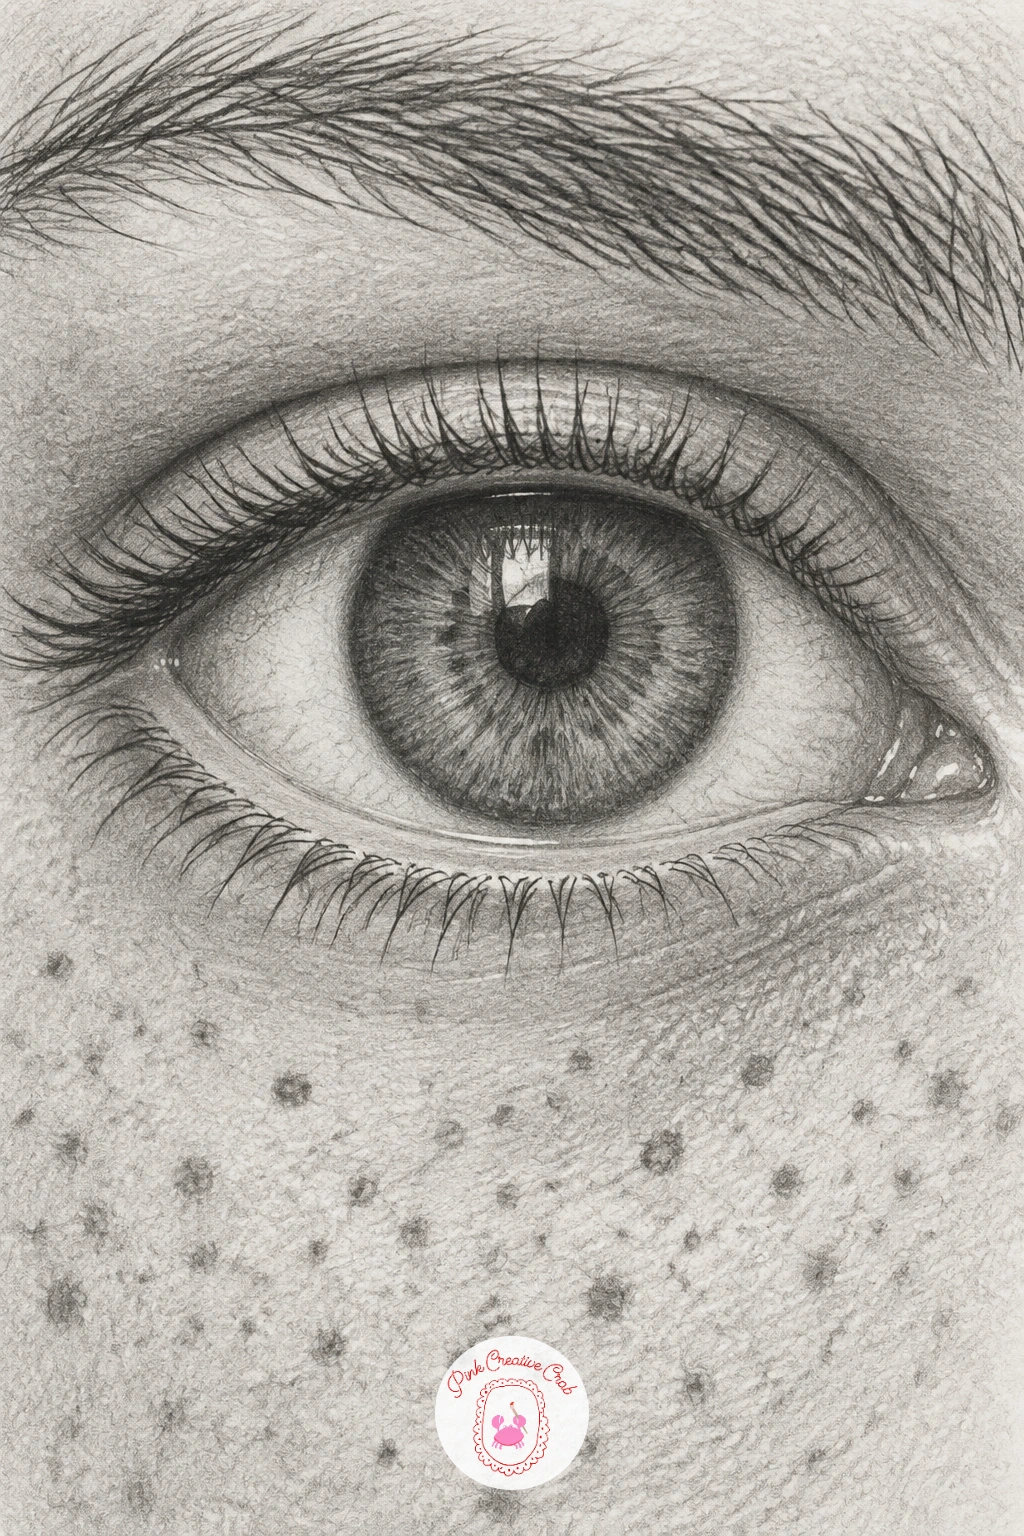
Freckles beneath an eye add texture without adding much extra drawing time, which makes this a relaxing one after the busier laughing eyes. Build the eye itself fully first with its usual shading, then look at the skin area just below the lower lid where freckles naturally cluster.
Place the freckles with a sharp pencil point in small irregular dots, never in a neat grid, varying their size slightly and leaving larger gaps in some spots than others, since real freckles cluster unevenly. Shade each dot solid rather than a soft grey smudge, since freckles have defined edges even though they are tiny.
Scattering them too evenly is the most common slip, so step back and check the pattern reads as random before adding the final darkest dots. If your pencil point keeps going blunt from all the sharpening, a fine fineliner pen can stand in for the freckle dots instead of graphite.
Keep the rest of the skin shading soft and smooth so the freckles stay the clear focal texture rather than competing with heavy shadow.
You Will Need
- fine fineliner pen (optional)
Palette: Graphite Grey,Charcoal Black,Paper White
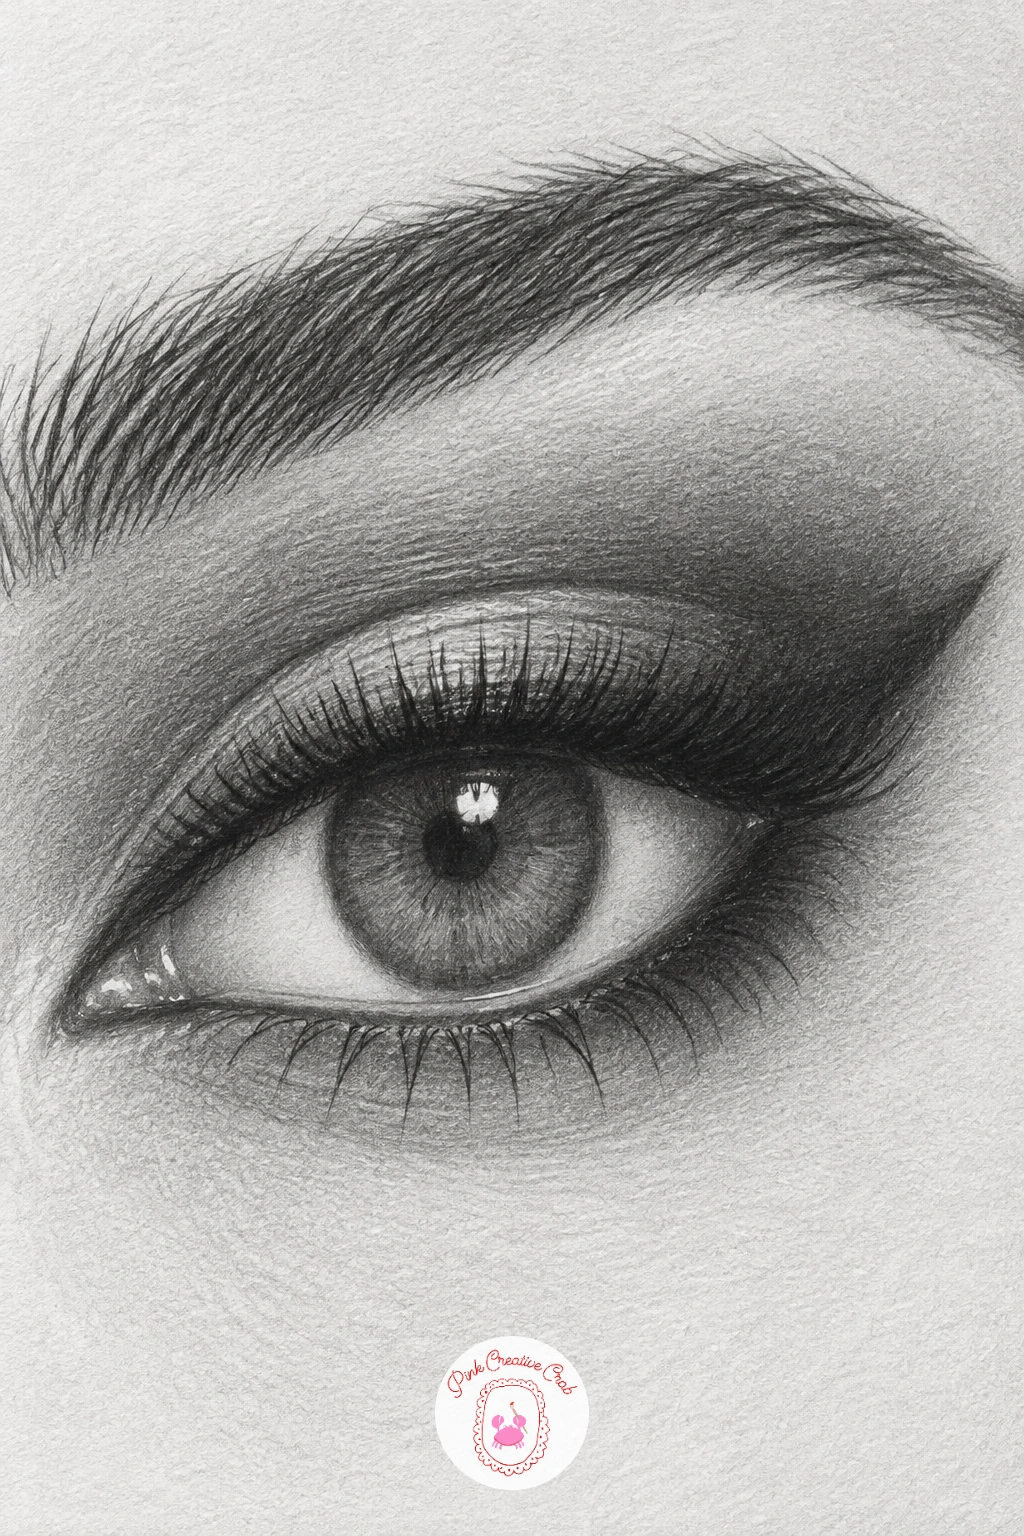
Bridging from skin texture to makeup, an eye with a smoky winged liner is really an exercise in blending gradients cleanly. Draw the eye shape first, then sketch the wing extending past the outer corner at a slight upward angle, following the natural line of the lower lid if you extend it outward.
Block in the darkest value right along the lash line and the wing’s edge with a sharp 6B, then work backward from that dark edge with a blending stump, dragging the graphite upward and outward so it fades into nothing rather than stopping abruptly. That gradual fade is the whole point of “smoky,” so keep blending until you cannot see a hard line where the dark tone ends.
Winged liner drawn too thick at the base is the most common wobble, so keep the inner corner thinner and let the line thicken only toward the outer wing. If you do not own a blending stump, a cotton swab works almost as well for softening graphite.
Finish with two or three precise lashes drawn over the liner’s top edge so they sit on top of the makeup rather than floating separately above it.
You Will Need
- blending stump or cotton swab
Palette: Charcoal Black,Smoky Grey,Paper White
If you enjoy the makeup side of this one, a feature full of eye makeup looks is worth exploring, like these watercolor makeup ideas for more inspiration on shapes and shading.
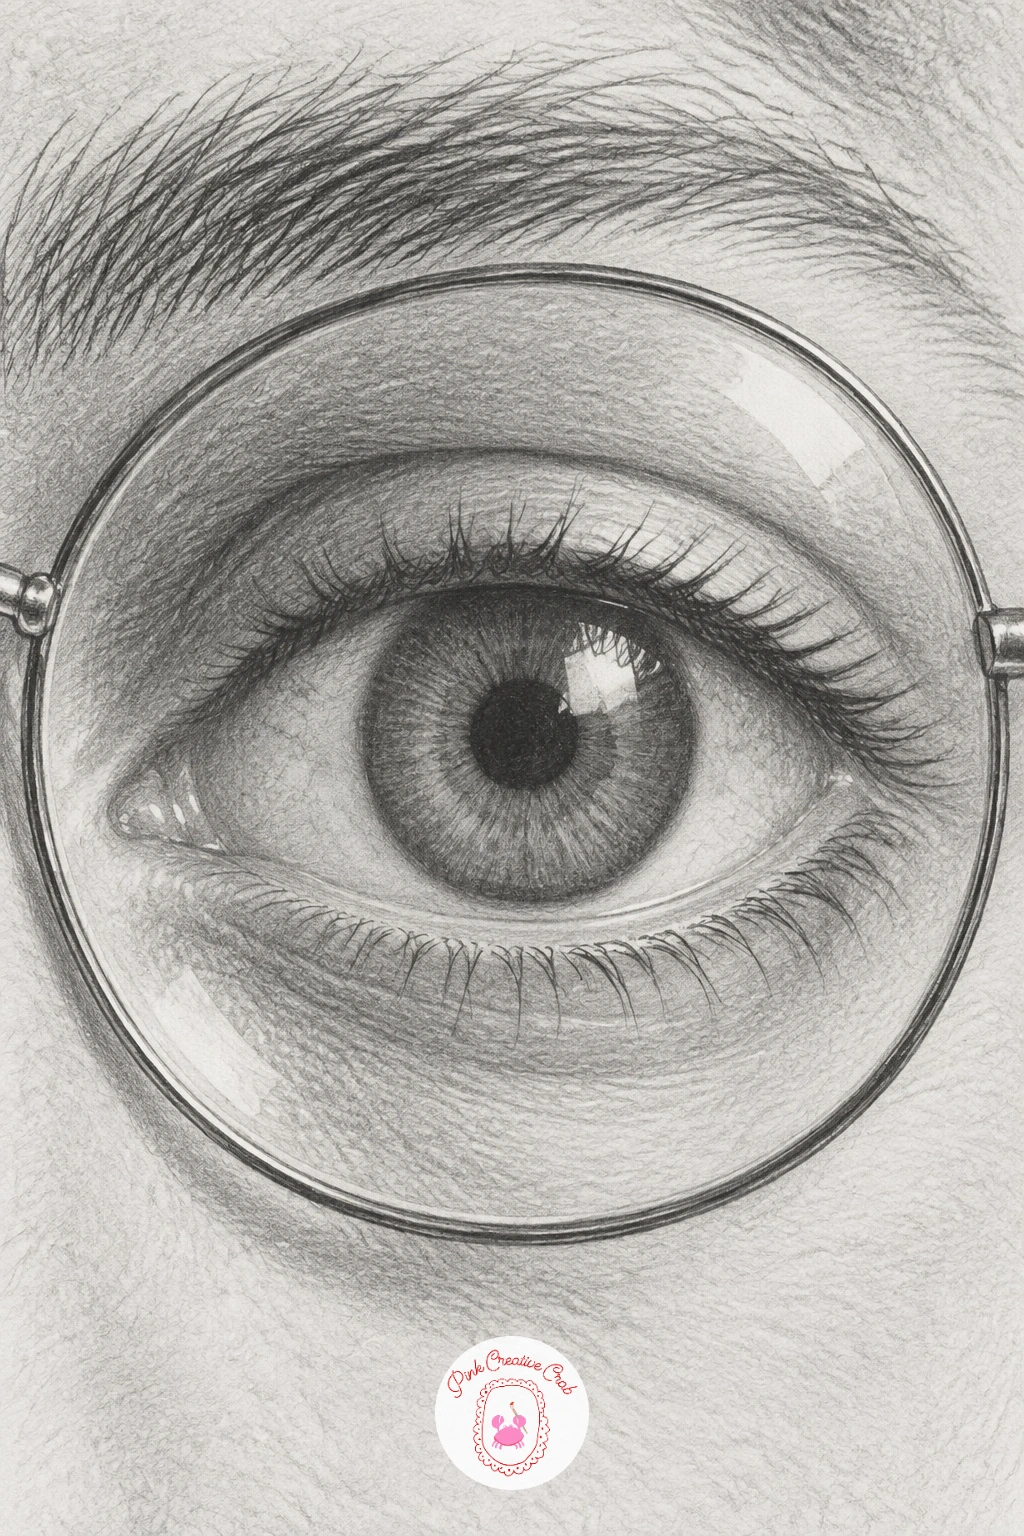
An eye framed by wire round glasses introduces a new challenge: drawing something transparent and reflective in front of something you have already rendered in detail. Finish the eye and brow completely first, then lightly sketch the circular wire frame over the top, keeping the wire itself a thin, evenly pressed line rather than a thick band.
The lens distorts whatever sits behind it slightly, so soften the eye details that fall directly under the glass with a light blending pass, as if seen through a faint haze, while keeping the parts outside the frame crisp. Add one curved streak of near-white highlight across the lens to suggest glass catching light, and a thin crescent of shadow along its lower inner edge.
Drawing the lens perfectly clear defeats the purpose, so resist leaving it untouched paper white. A very light, even haze across the whole lens area reads as glass far better than nothing does. If the wire keeps smudging as you work, switch to a mechanical pencil for that one line and come back to blending afterward.
Keep the frame’s screw hinge at the corner as one tiny dark dot, a small detail that sells the realism.
Palette: Charcoal Black,Soft Grey,Paper White
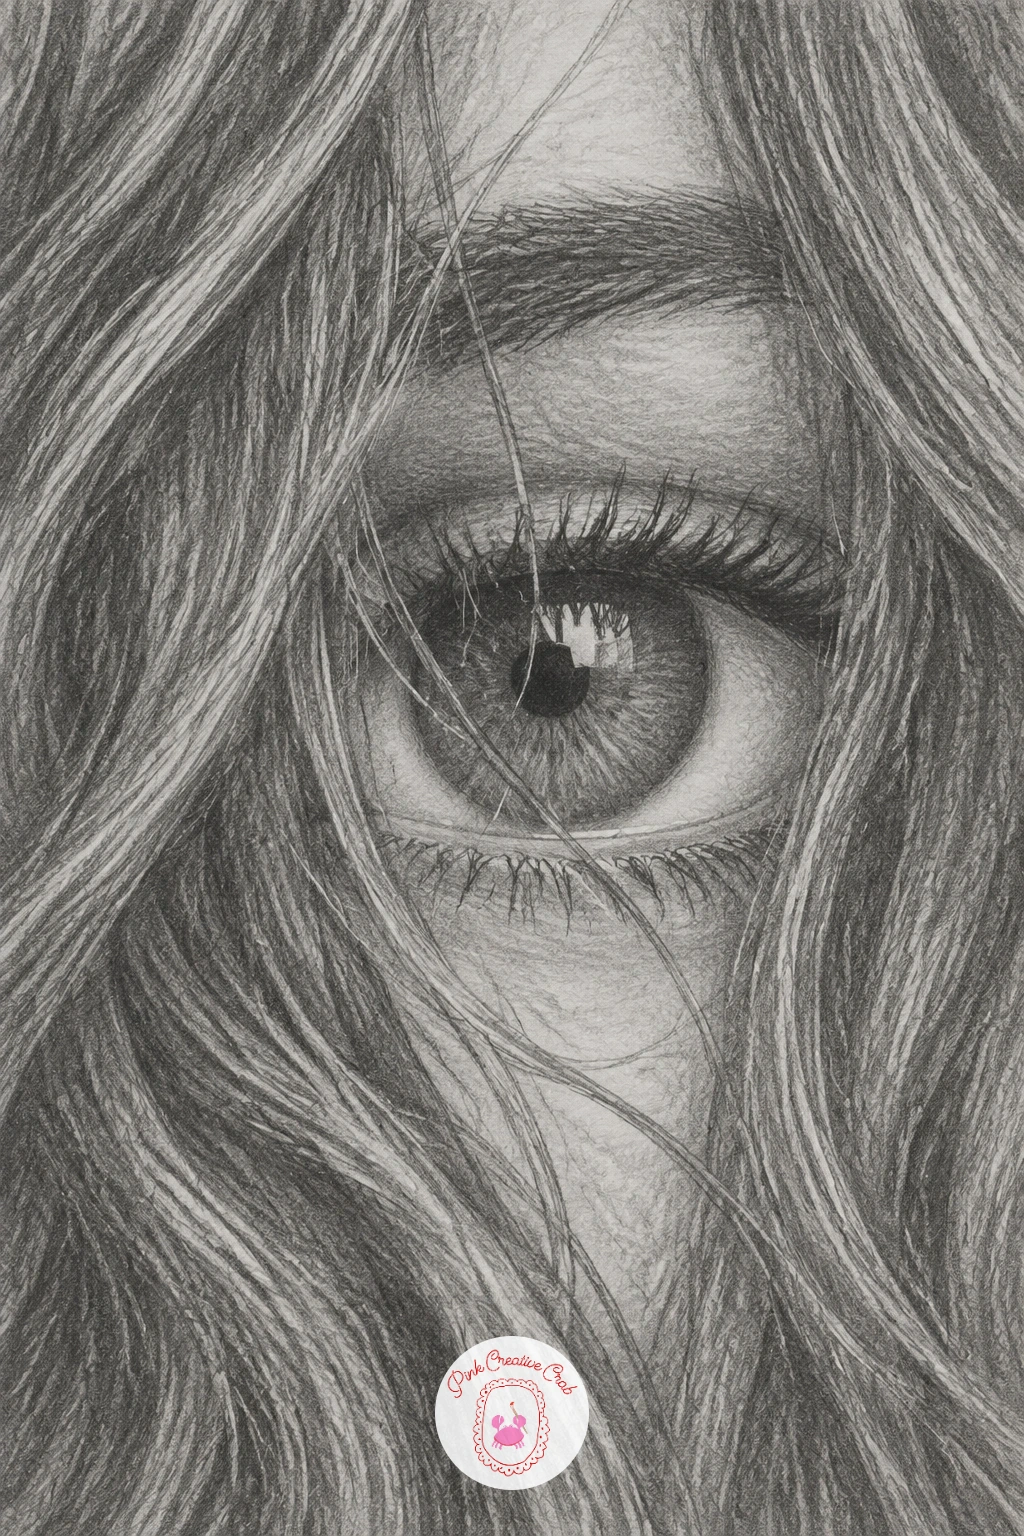
An eye peeking through a curtain of hair means drawing the hair strands first as the frame, then letting the eye emerge only partly from behind them. Lightly block the overall hair shape falling across the face, then decide which narrow gap the eye will show through before you draw the eye itself.
Draw the hair strands in long, slightly wavy, uneven lines, varying pressure so some strands are darker and some almost disappear into the paper, since flat even hair looks like a wig. Where strands cross directly in front of the eye, stop the eye’s lines underneath them rather than drawing the eye complete and the hair on top, so the layering reads correctly.
Drawing too few strands is the usual letdown, since sparse hair looks thin and patchy rather than curtain-like. Add more fine strands than feels necessary, clustering them more densely at the edges of the part and thinning them near the eye itself. A soft 2B works well for the bulk of the strands if your darkest pencil feels too heavy for the fine lines.
Let a stray strand or two cross directly over the iris, since that single detail makes the peek feel candid rather than posed.
Palette: Charcoal Black,Graphite Grey,Paper White
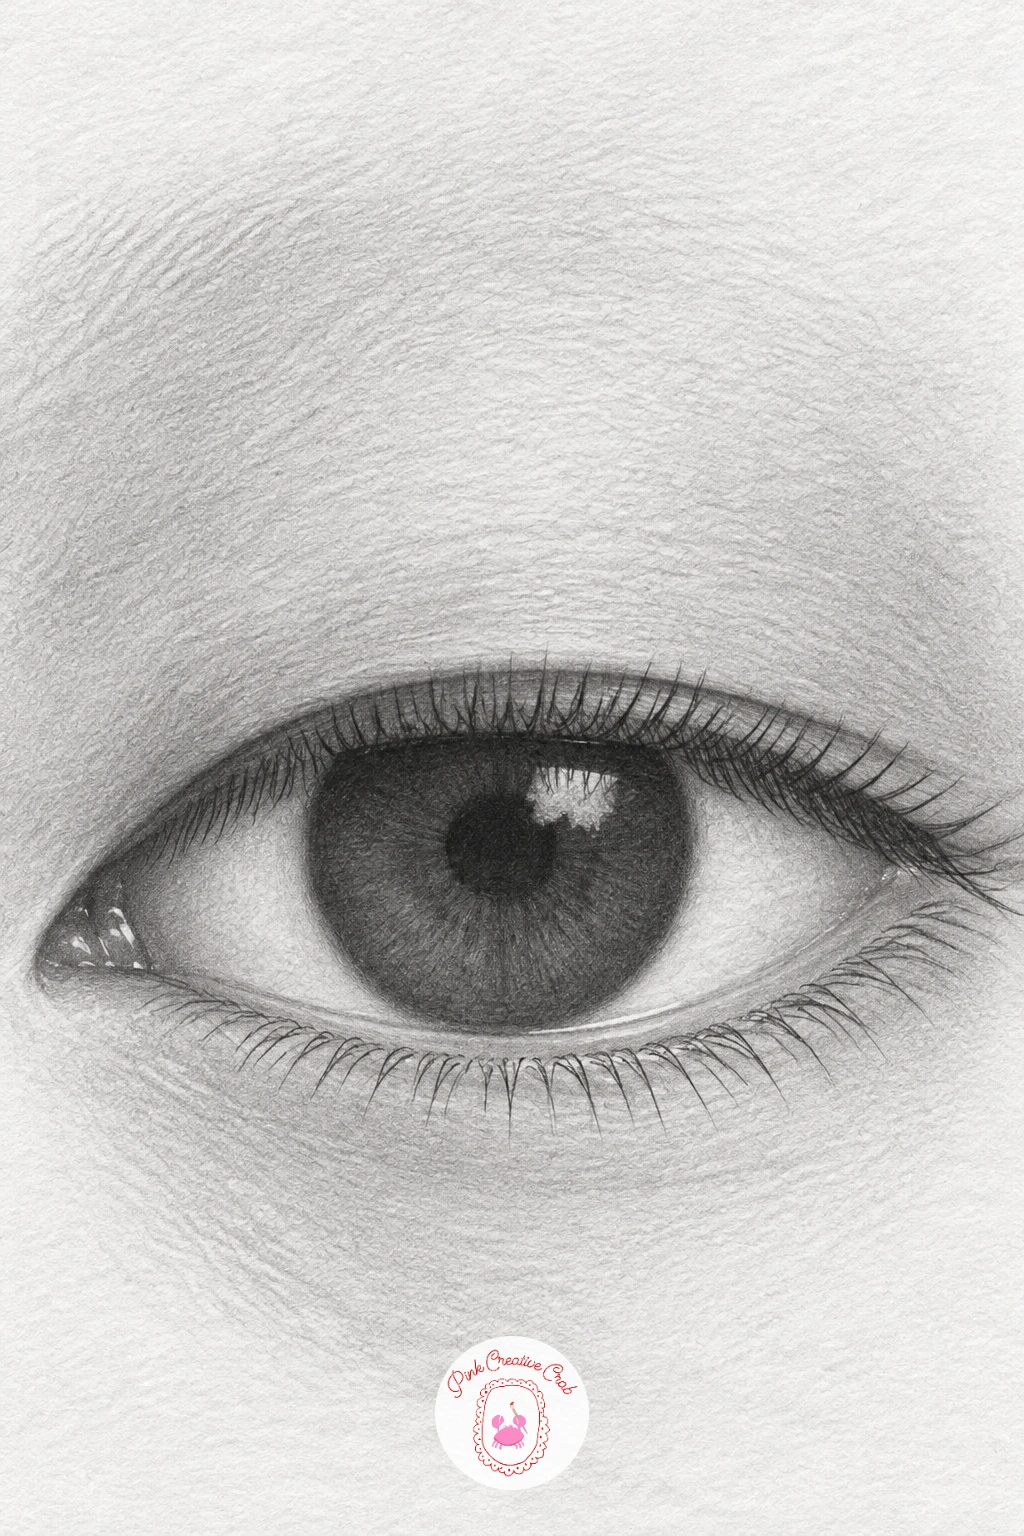
A monolid eye with straight lashes and soft shading has no visible crease fold, which changes how you handle the upper lid entirely. Draw the eye shape with a single smooth curve from the inner to outer corner, skipping the usual fold line that other eyes need just above the lash line.
Shade the lid in one continuous soft gradient rather than breaking it into separate crease sections, darkest near the lash line and gradually lighter toward the brow bone. Keep the lashes straight rather than curled, angled gently outward and slightly downward rather than sweeping upward, which is the natural lash direction on a monolid.
Adding a crease line out of habit is the easiest way to get this wrong, so double check your reference and leave that fold out entirely if it is not there. If your shading looks patchy, go over it again with a clean blending stump in small circular motions until the gradient sits smooth and even.
Keep the iris mostly covered along its top edge, since the lid on a monolid eye often sits lower and flatter across the whole eye shape.
Palette: Soft Grey,Charcoal Black,Paper White
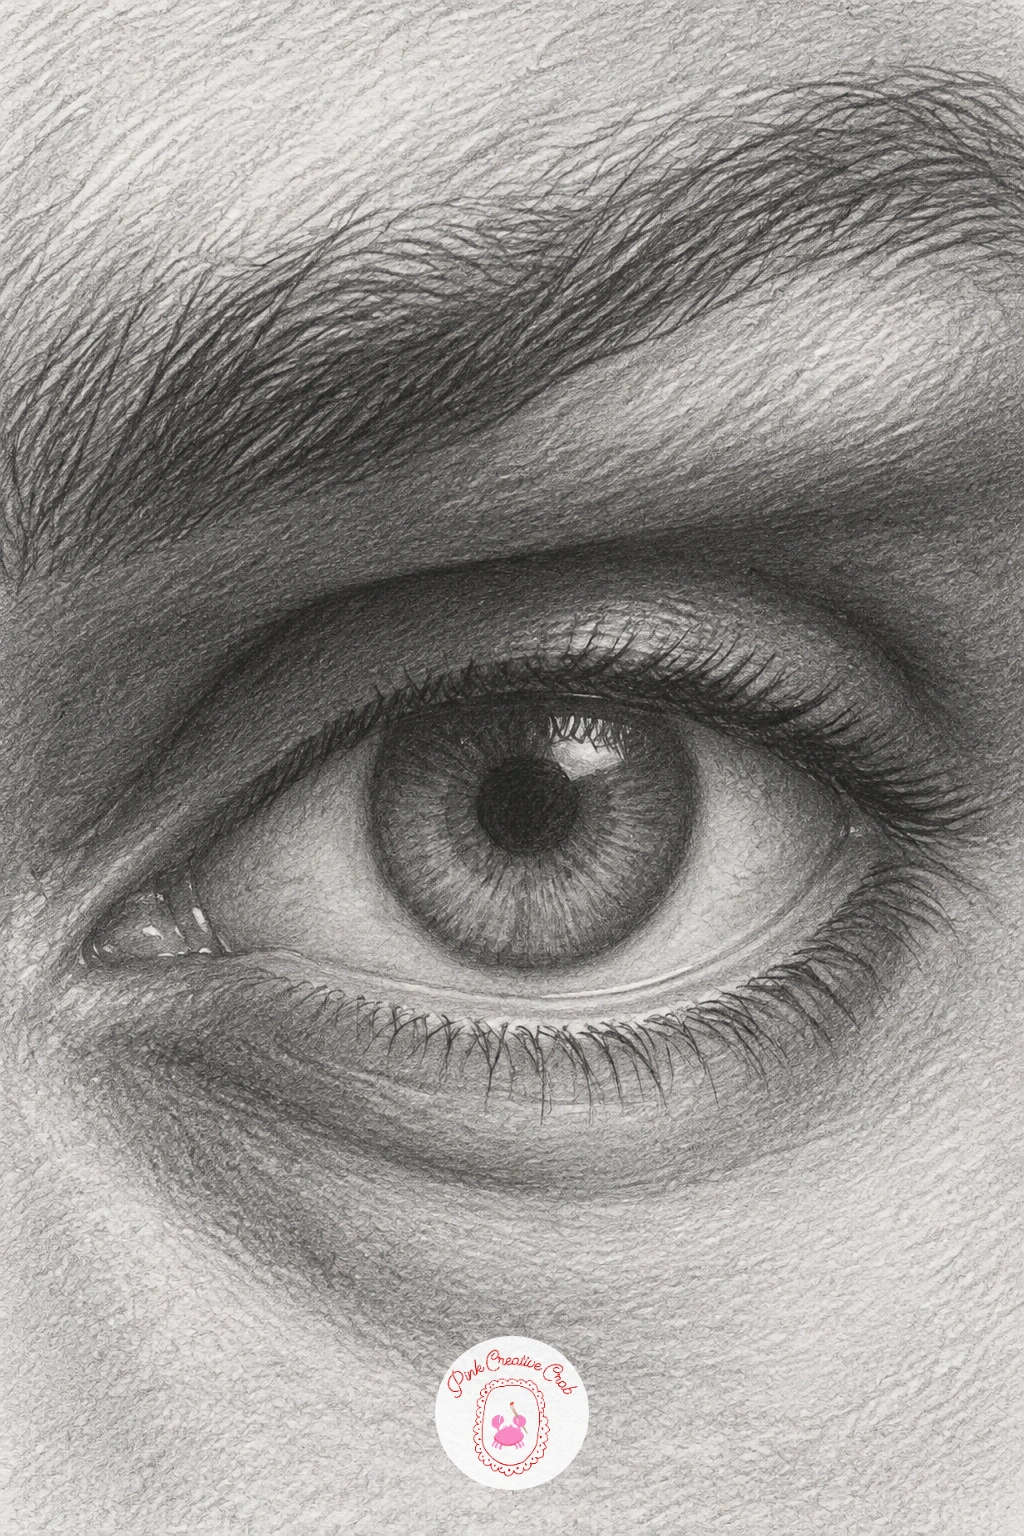
Look at where the eye socket actually sits before drawing a deep-set eye under a strong brow bone, since this subject is mostly about shadow depth rather than the eye shape itself. The brow bone projects forward and casts a real shadow down onto the upper lid, so that lid sits noticeably darker than it would on a flatter face.
Shade that overhang shadow first, before the eye’s own details, using broad soft strokes that curve to follow the bone’s shape rather than the eye’s. Let the shadow fade gradually rather than stopping in a hard line, then build the eye itself inside that already-darkened zone, keeping its highlights a touch dimmer than they would be on an eye with no overhang.
Drawing the brow shadow as a flat band is the common misstep, since a true shadow from a bony ridge curves and varies in intensity across its width. Blend it unevenly on purpose, darker near the inner corner and softer near the temple. A 4B pencil held on its side gives you the broad soft strokes this shadow needs more easily than a sharp point does.
Keep the brow hair itself heavier and closer to the bone than on a flatter-browed eye, since it tends to grow denser along a pronounced ridge.
Palette: Deep Charcoal,Mid Grey,Paper White
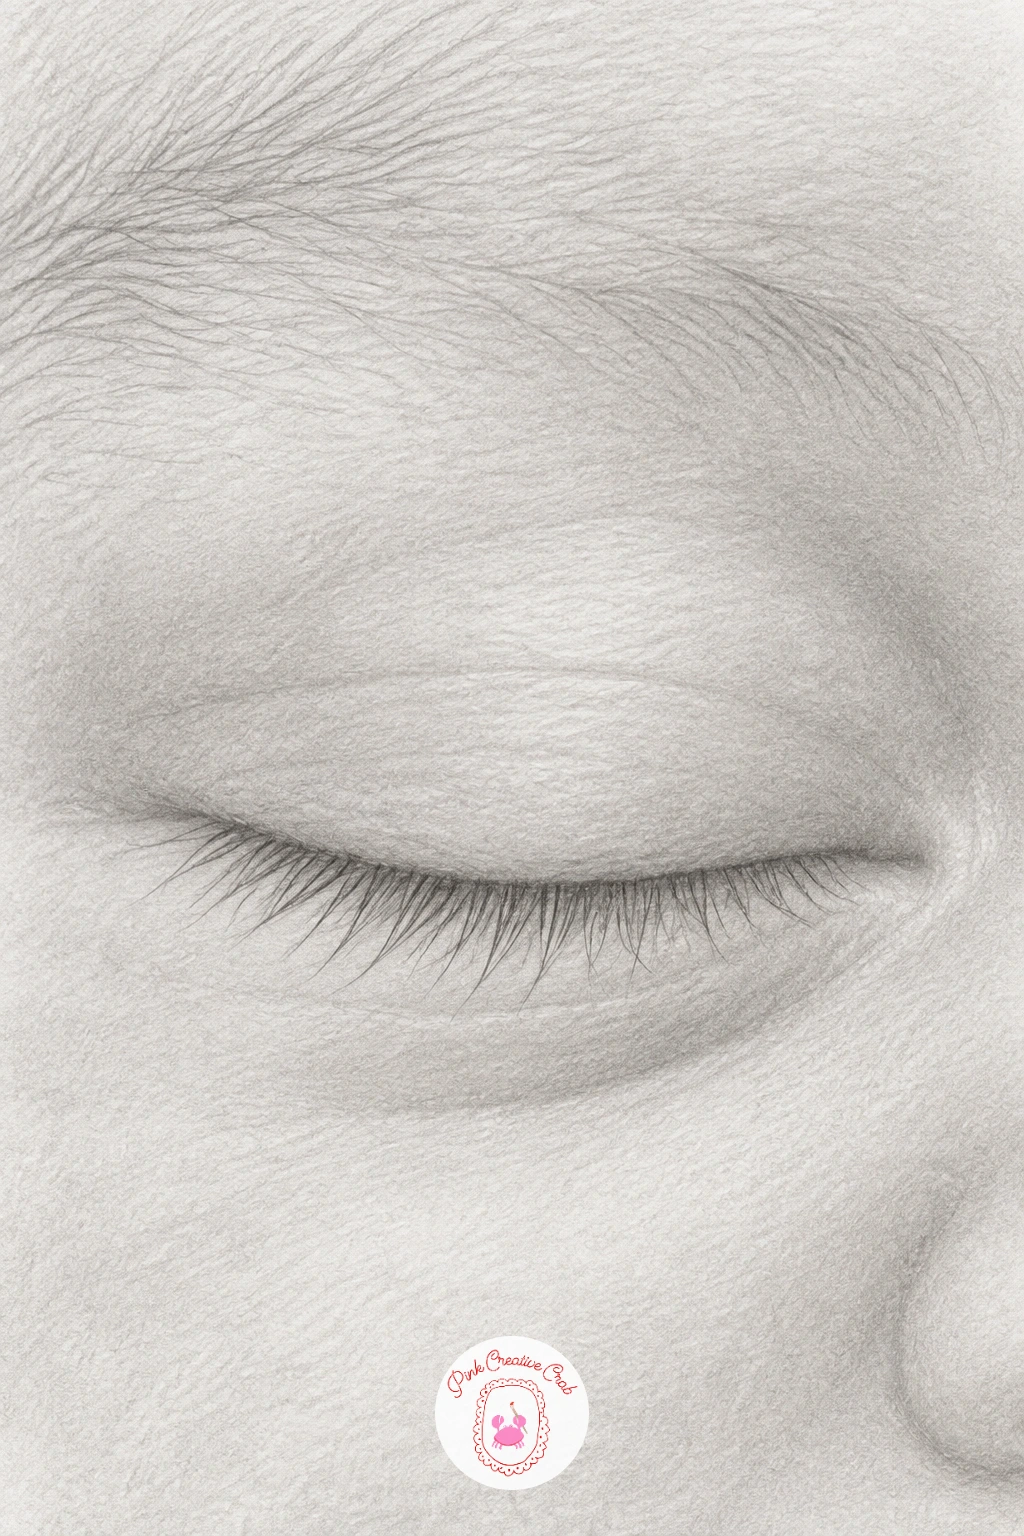
A newborn’s closed eye with tiny lashes is a quieter, gentler subject after all that heavy shadow work, and a good one for practicing restraint. Draw the closed lid as one soft, slightly puffy curved line, rounder and plumper than an adult’s closed lid, since newborn skin sits fuller around the eye.
Shade the lid itself very lightly, barely more than a light grey wash, since a newborn’s skin has almost no visible crease or shadow detail yet. The lashes are the main feature here: tiny, short, straight and fine, drawn with a sharp point in short careful strokes along the lid’s edge rather than the longer sweeping lashes used elsewhere in this list.
Over-shading the lid is the easy mistake, since too much contrast ages the whole face instantly. Keep everything soft, smooth and pale, reserving your darkest pencil only for the thin closed lash line itself. If your pencil point keeps going too thick for the tiny lashes, a mechanical pencil with a fine 0.5 lead gives more control.
Leave the surrounding skin almost untouched white paper, since newborn skin reflects light evenly with very little shadow.
Palette: Soft Grey,Light Charcoal,Paper White
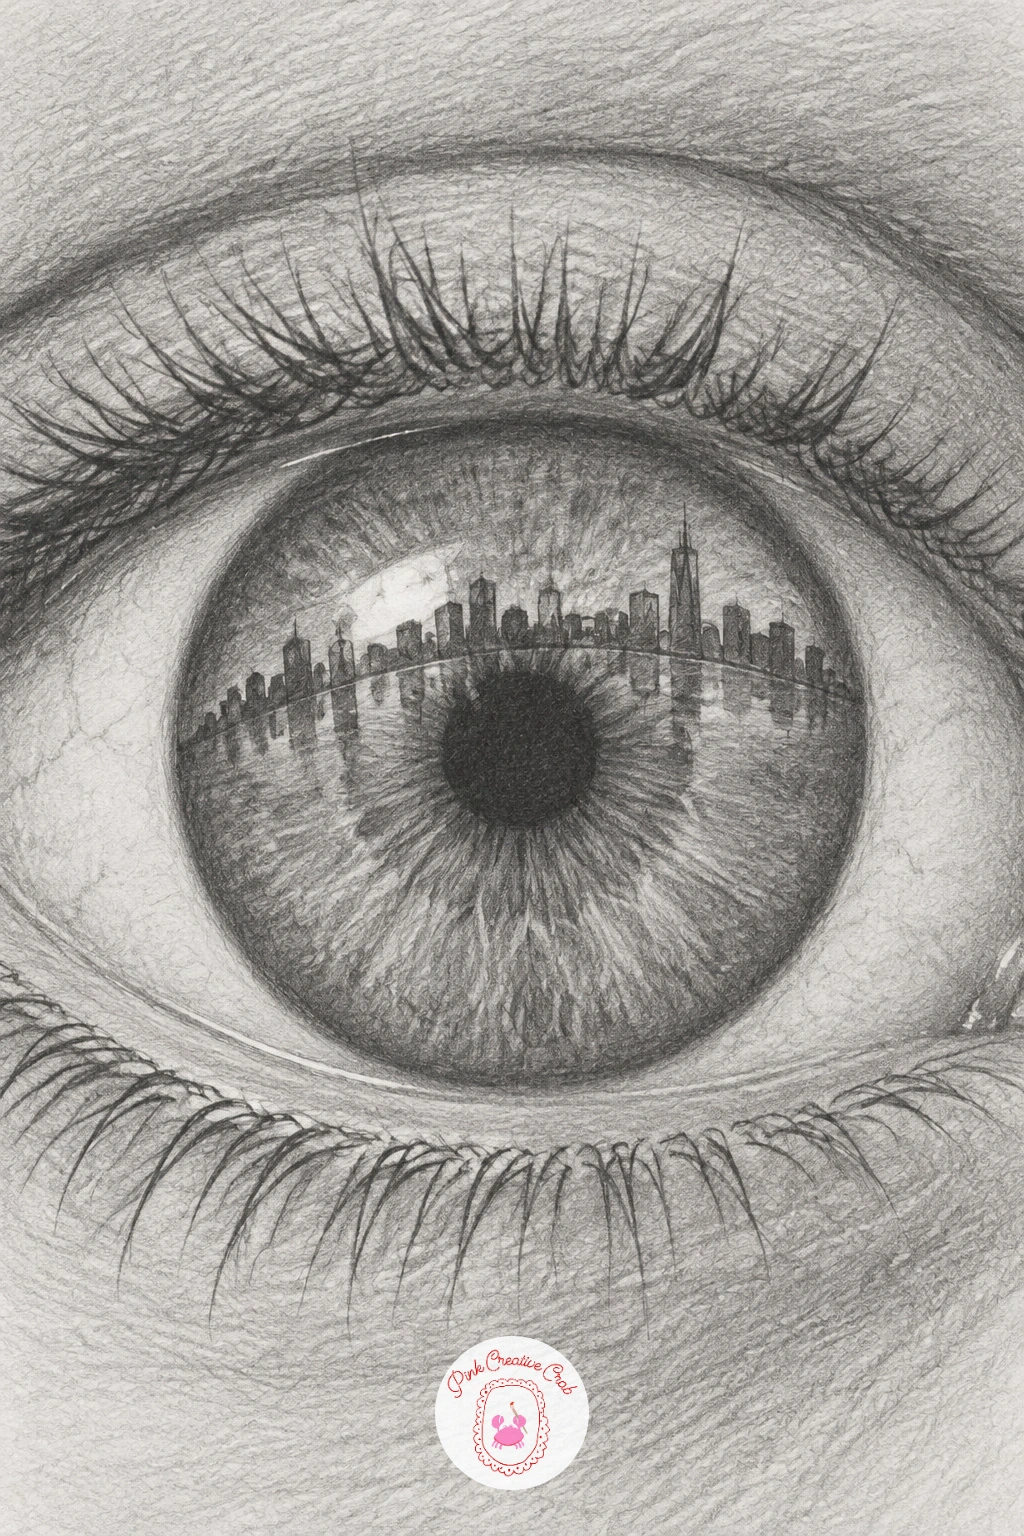
Scale up the reflection trick from earlier with an eye that has a city skyline reflected in the iris, which fills far more of the coloured area than the small window did. Finish the iris’s base shading with its usual radiating pattern, then lightly sketch a row of simple building silhouettes curving along the lower half of the iris, following its circular shape rather than sitting on a flat line.
Shade the buildings as solid dark silhouettes, varying their heights, with a few tiny light dots left unshaded for windows. Blur the whole skyline very slightly with a blending stump so it sits believably inside the wet curve of the eye rather than looking stuck on top of it, and let the iris’s own radiating lines still show faintly through the reflection.
A reflection with sharp, perfectly straight buildings breaks the illusion fastest, so keep every line following the iris’s curve, even the vertical edges of the buildings should bow very slightly. If fine detail at this scale is tricky, a mechanical pencil with a 2H lead keeps the small silhouettes crisp without smudging.
Keep the pupil dark and separate from the skyline so the two elements do not blur into one shape.
Palette: Charcoal Black,Graphite Grey,Paper White
An angry narrowed eye under a furrowed brow leans entirely on the muscles between and above the eyes, so start the sketch there rather than with the eye shape. Draw two or three short vertical lines between where the brows would meet, pulled down and inward toward the nose, before you even outline the eye itself.
Narrow the eye shape more than a relaxed eye, with both lids pulled tighter and the brow pressing down heavily over the upper lid, casting real shadow onto it. Shade that shadow dark and compress the visible iris into a smaller sliver than usual, since anger squeezes the whole eye area shut slightly.
Drawing the furrow lines too straight and even makes the expression look flat rather than tense, so vary their depth and let them curve slightly as real frown lines do. Darken the inner corner crease hardest of all, since that is where the pulling force concentrates most. A sharp 2B gives good control for these short, deliberate furrow lines.
Keep the lashes short and straight rather than curled, since a genuinely angry eye rarely has soft, lifted lashes.
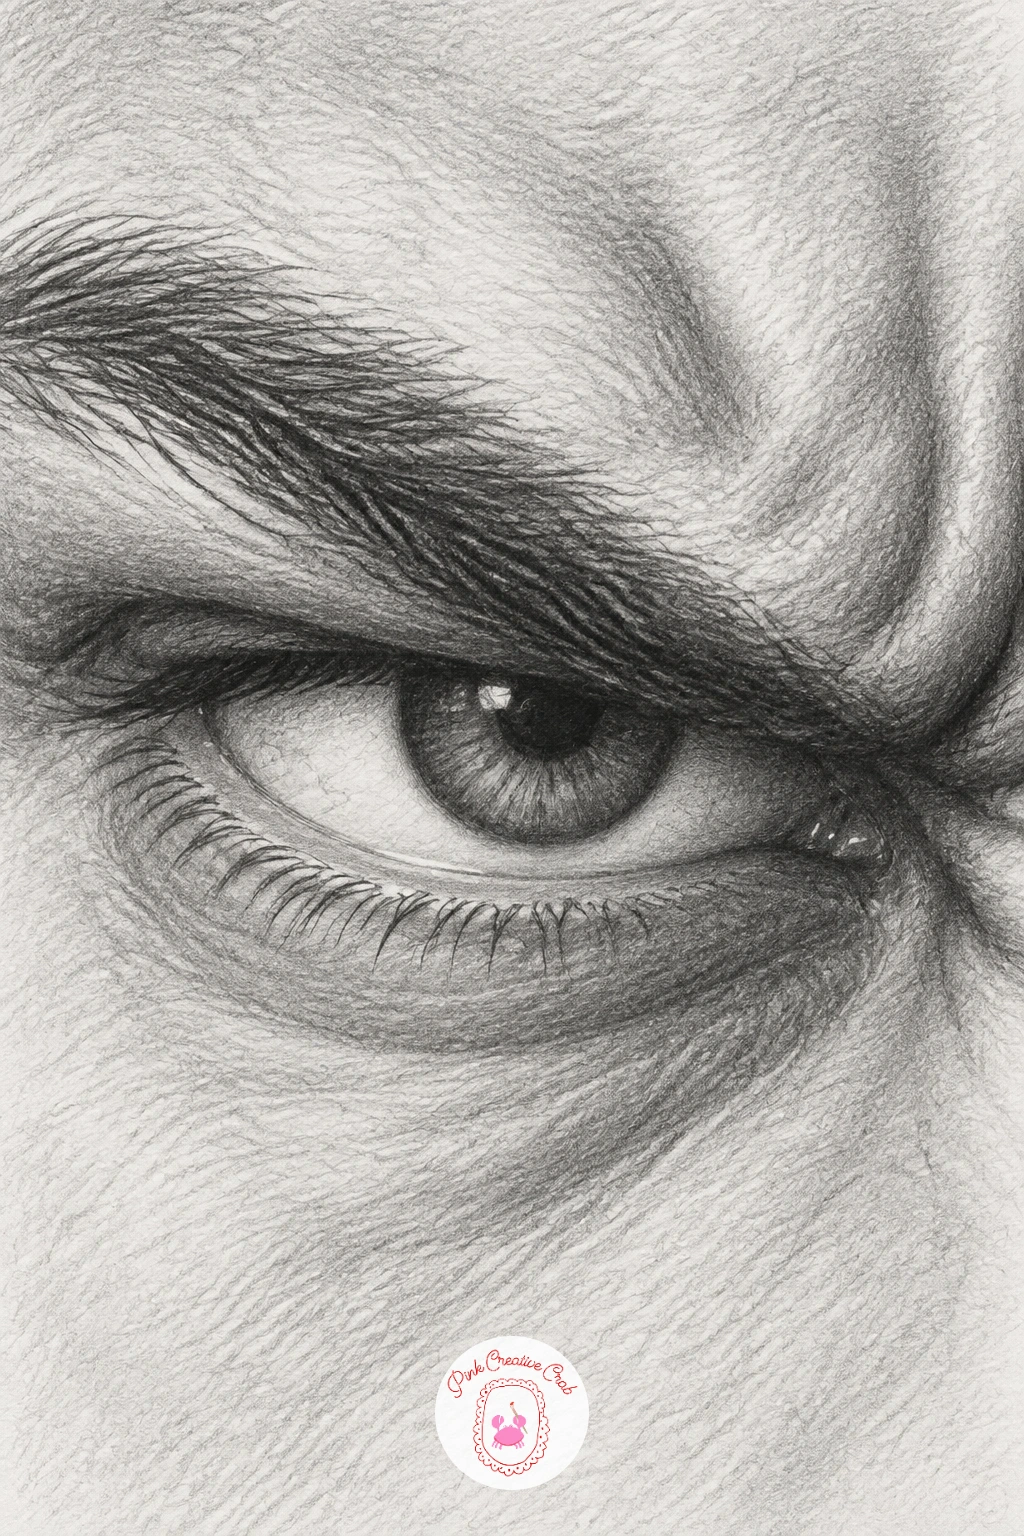
Palette: Charcoal Black,Deep Grey,Paper White
A surprised eye wide open with a lifted brow is close to the opposite shape of the angry eye just before it, which makes the two worth drawing back to back to feel the contrast. Draw the eye shape rounder and more open than normal, with visible white showing both above and below the iris, something that almost never happens in a relaxed or neutral eye.
Lift the brow with a steep upward arc and add two or three short horizontal lines in the forehead skin above it, since surprise pulls the whole forehead up and creates visible creases there too. Keep the pupil slightly smaller than in the angry eye, since wide surprise often narrows the pupil even as the lids open fully.
Forgetting the white showing above the iris is the easiest way to lose the surprised feeling entirely, so check that gap carefully against your reference before shading. If the forehead lines look too harsh, soften them with a light blending pass so they read as skin creasing rather than hard scratches.
Lashes here can curl upward dramatically, since a lifted brow often pulls the whole lid area up with it.
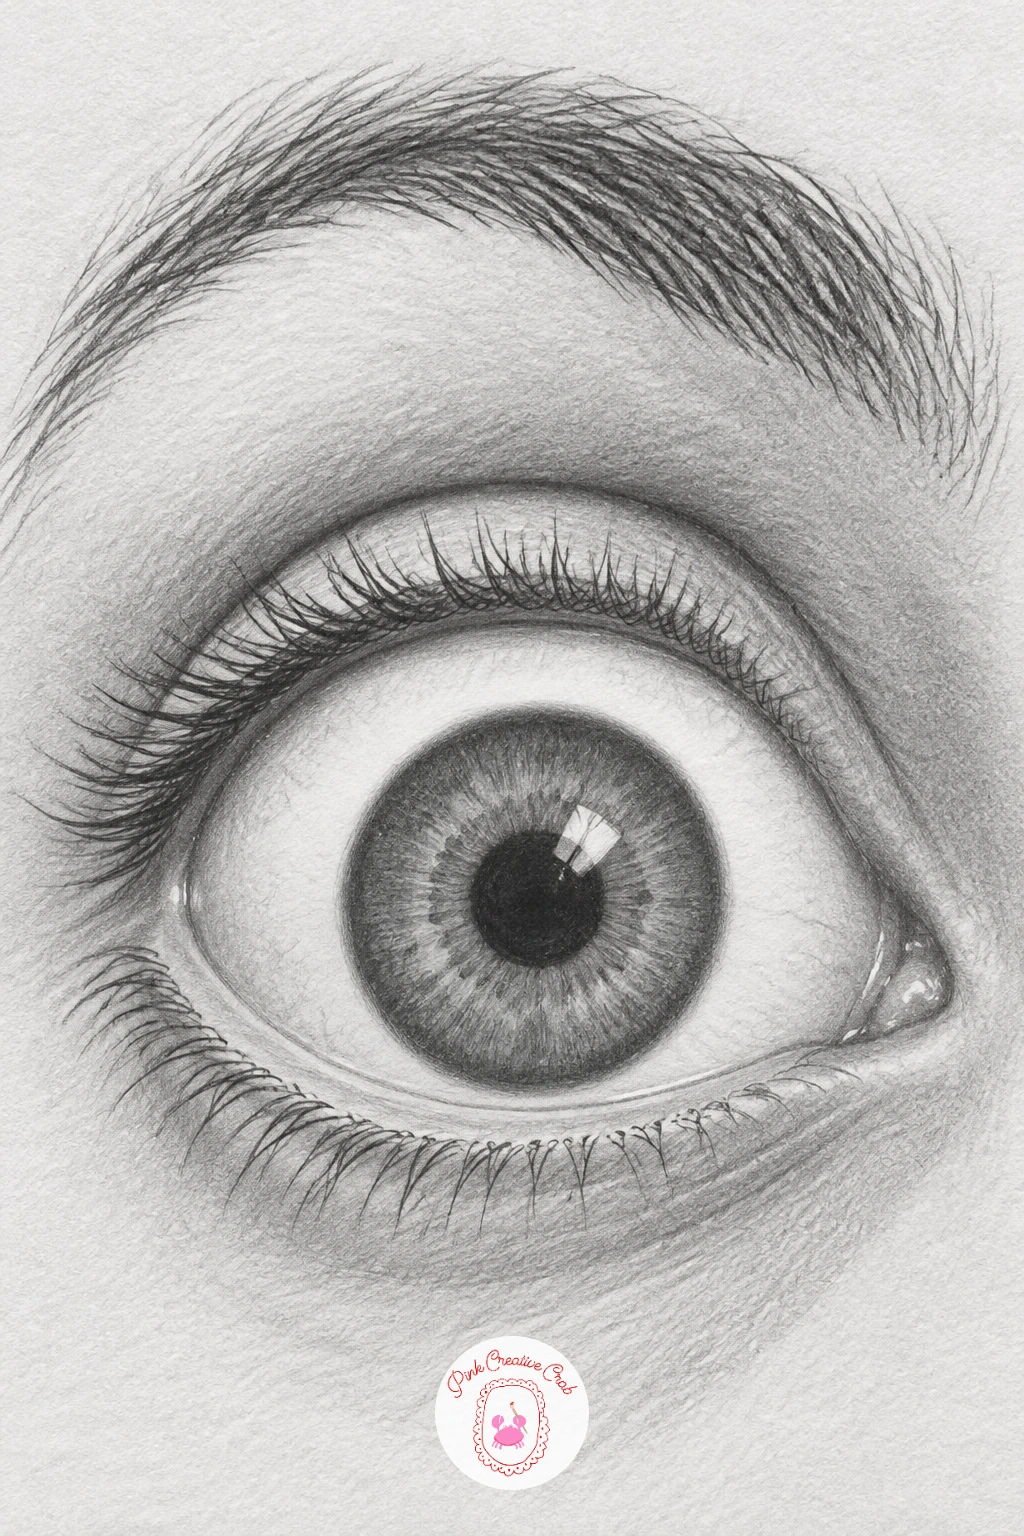
Palette: Graphite Grey,Charcoal Black,Paper White
An eye looking up with light catching the iris shifts the iris and pupil toward the top of the eye shape, the reverse of the sideways glance from earlier in this list. Draw the outer eye shape as usual, then push the iris circle upward so more white shows below it than above, with the upper lid covering a touch more of the iris’s top edge than normal.
Place the brightest highlight in the iris higher up than you would for a straight-ahead gaze, since the light source and the upward tilt now line up differently. Shade the lower white of the eye, now more exposed, with a careful soft gradient so it does not look like a flat blank gap.
Centring the iris out of habit undercuts the upward gaze completely, so keep checking that the pupil sits closer to the top lid than the bottom one throughout. If the highlight placement feels uncertain, a small round object like a marble under a lamp makes a quick, easy reference to study.
Let the lower lashes show a touch more than usual too, since tilting the head back to look up exposes them slightly.
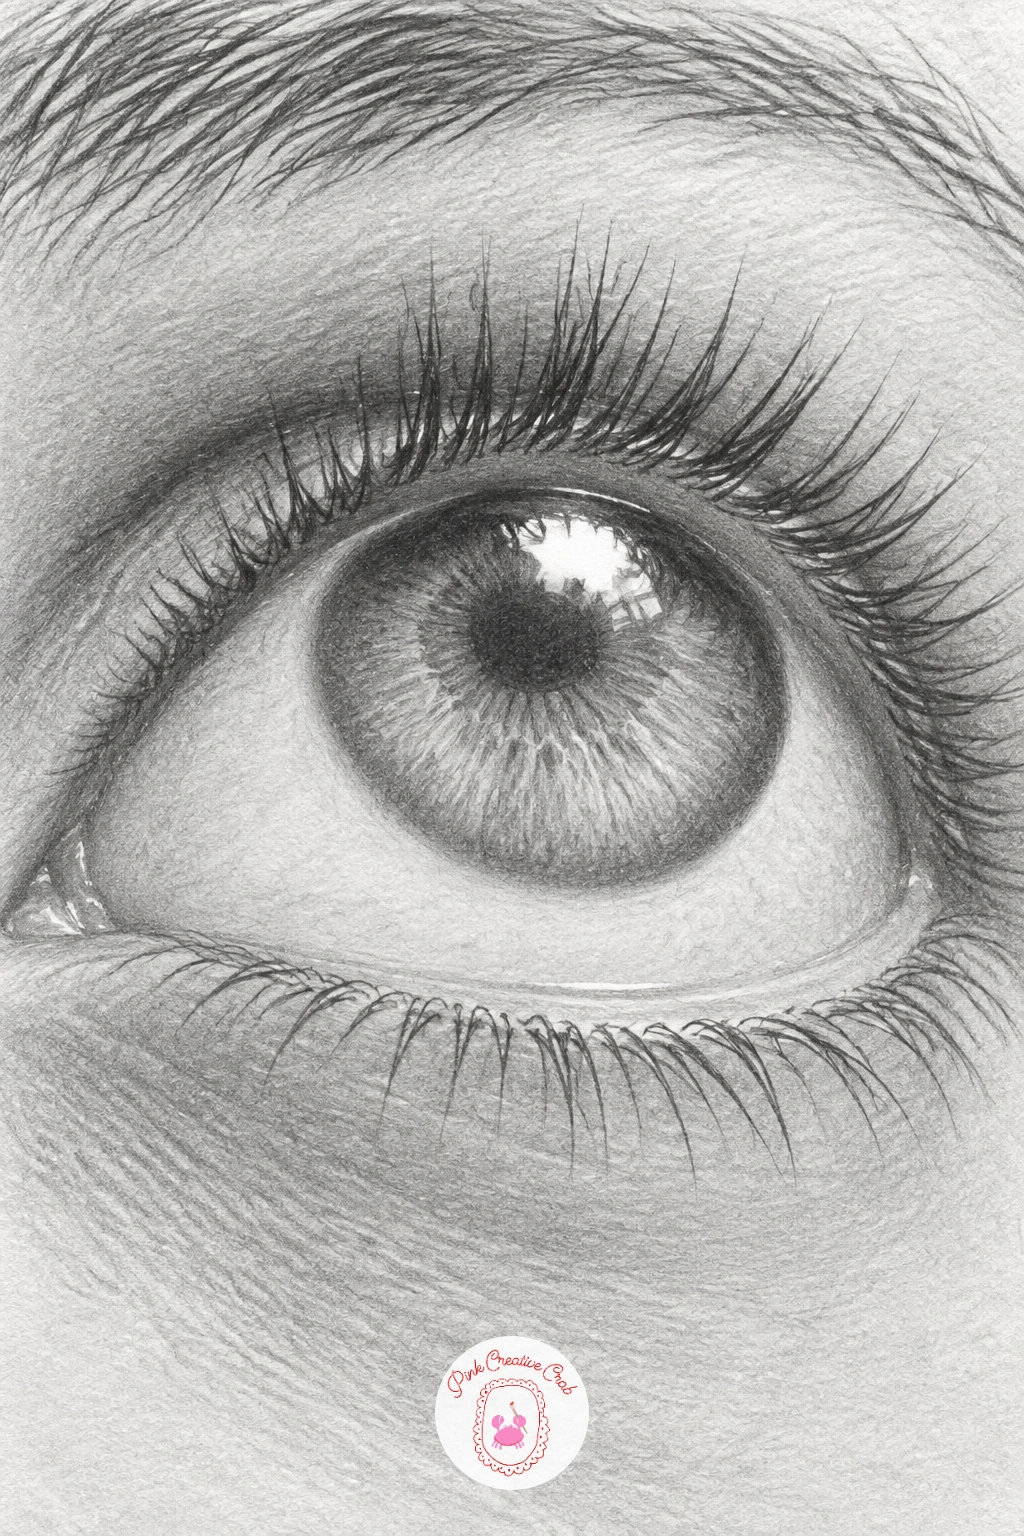
Palette: Charcoal Black,Graphite Grey,Paper White
An eye in profile showing the curved cornea asks you to draw a shape most people never actually look at closely, since from the side the eyeball’s dome becomes visible rather than hidden. Sketch the eye socket’s outer edge first as a gentle curve, then draw the eyeball itself bulging slightly past the lids at the point where the cornea sits, a small but real protrusion.
Shade that curved bulge with a careful gradient, darkest where it tucks back under the upper lid and lightest right at the point of the curve facing you, since that is where light grazes across the dome most directly. The iris appears as a narrow ellipse rather than a circle from this angle, flattened by the perspective.
Drawing the cornea perfectly flat against the lids is the most common error in profile eyes, since it ignores the actual three-dimensional bulge of the eyeball. Study a real side-on photo rather than guessing, and keep that small forward curve even if it feels exaggerated at first. A 2B pencil on its side blends the dome’s gradient smoothly without sharp edges.
Keep the lashes from this angle shorter and more compressed, since foreshortening hides most of their length.
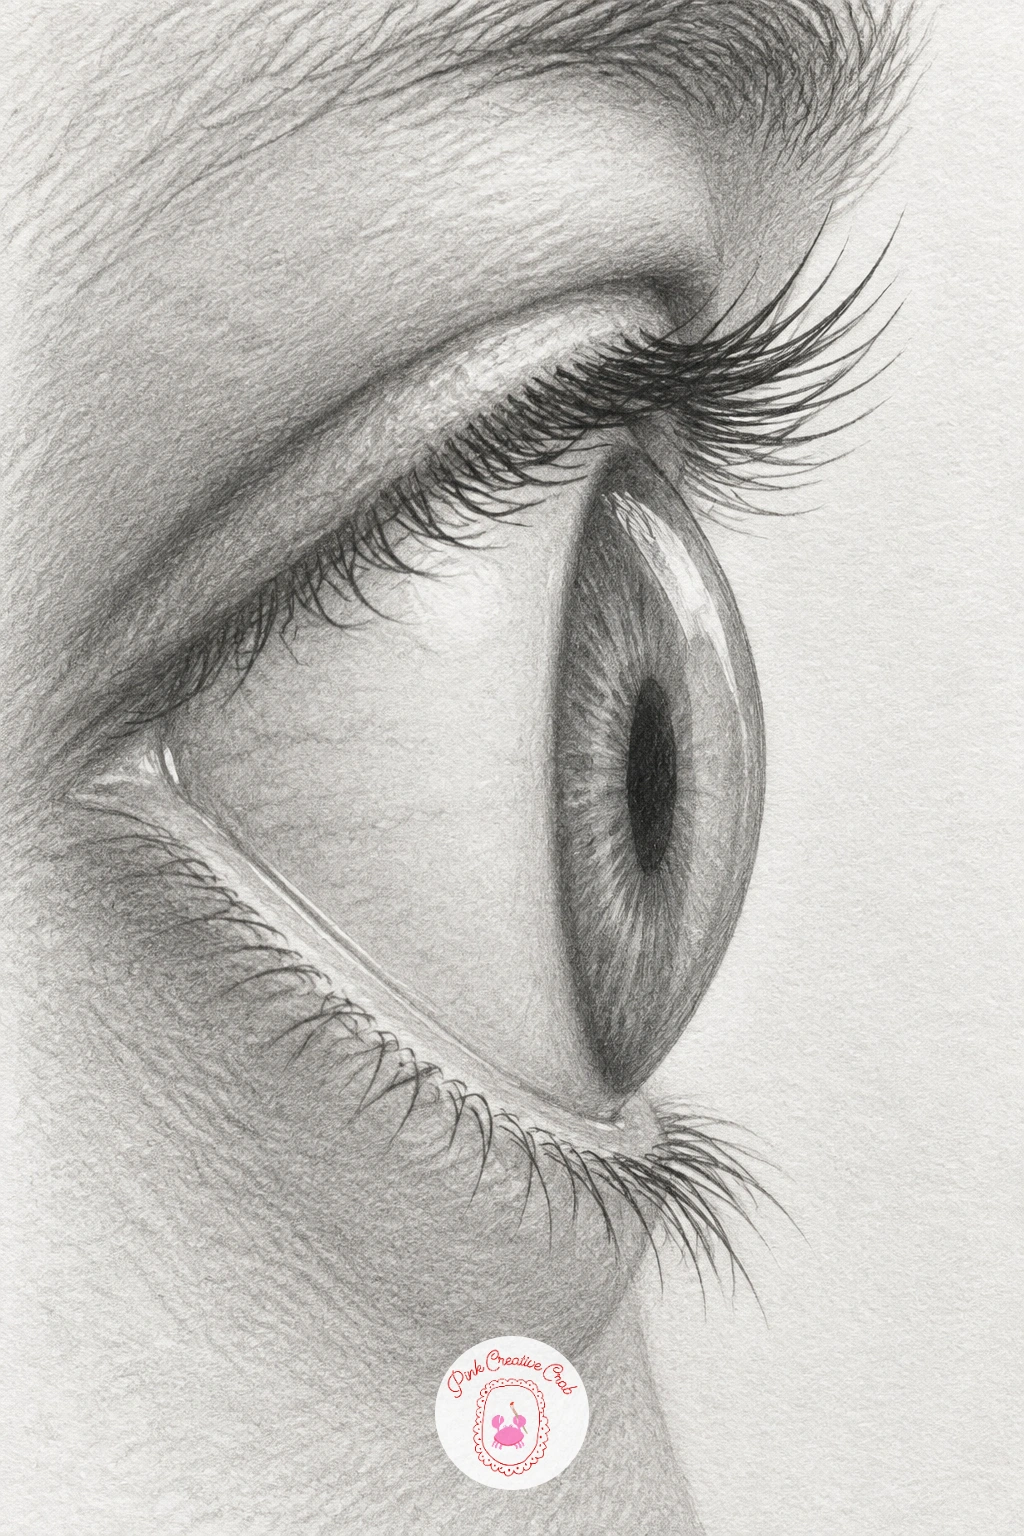
Palette: Graphite Grey,Charcoal Black,Paper White
If profile faces interest you beyond just the eye, the girl pencil drawing ideas cover full side-on portraits worth trying next.
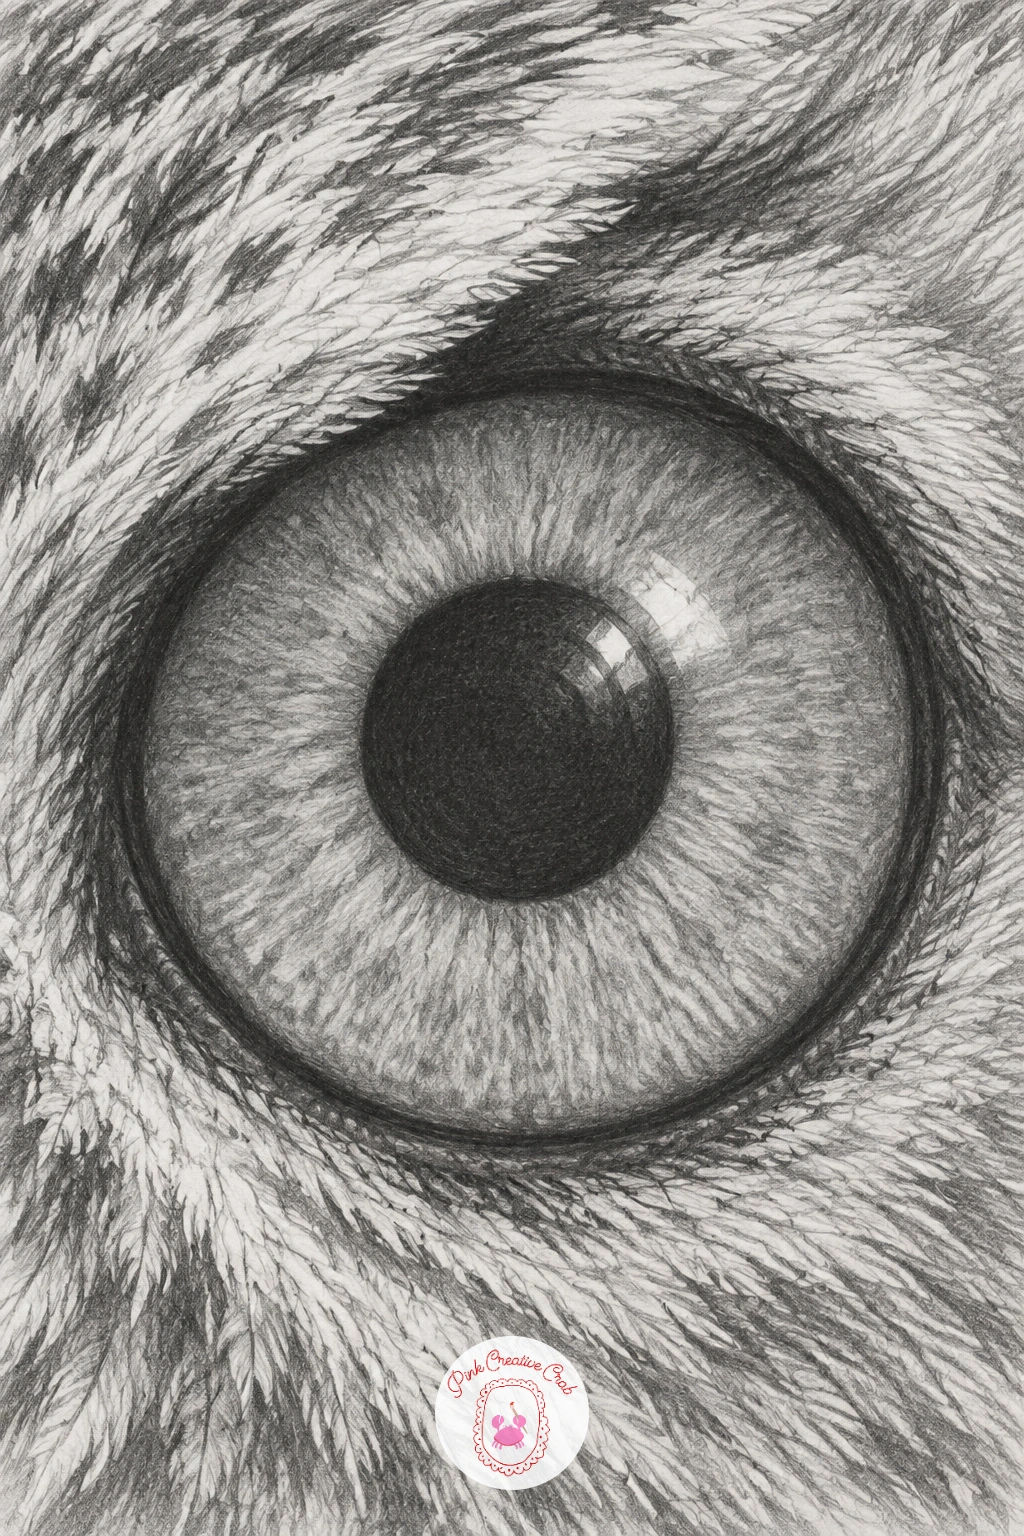
Shift into animal eyes with an owl’s round staring eye with a feathered rim, which trades human lash detail for a ring of fine feather texture instead. Draw the eye itself as a nearly perfect circle, much rounder than any human eye, with the iris filling almost the entire visible shape and only a thin dark ring around it.
Surround that circle with short, overlapping feather strokes radiating outward like petals, varying their length and darkness so the rim looks layered rather than drawn in one pass. Shade the iris itself in fine radiating lines from the pupil outward, keeping a crisp round highlight that makes the stare feel alert and glassy.
Making the feather rim too uniform flattens the texture fast, so vary stroke length and pressure deliberately, darker feathers near the outer edge and softer ones closer to the eye itself. If your pencil tip struggles with the fine feather strokes, a fine fineliner pen can rough in the feather shapes before you shade over them with graphite.
Keep the whole eye perfectly round and unblinking, since that fixed, staring quality is what makes an owl’s eye instantly recognisable.
You Will Need
- fine fineliner pen (optional)
Palette: Charcoal Black,Amber Grey,Paper White
For more owl subjects beyond just the eye, the owl drawing ideas cover full owls in winter settings worth trying after this.
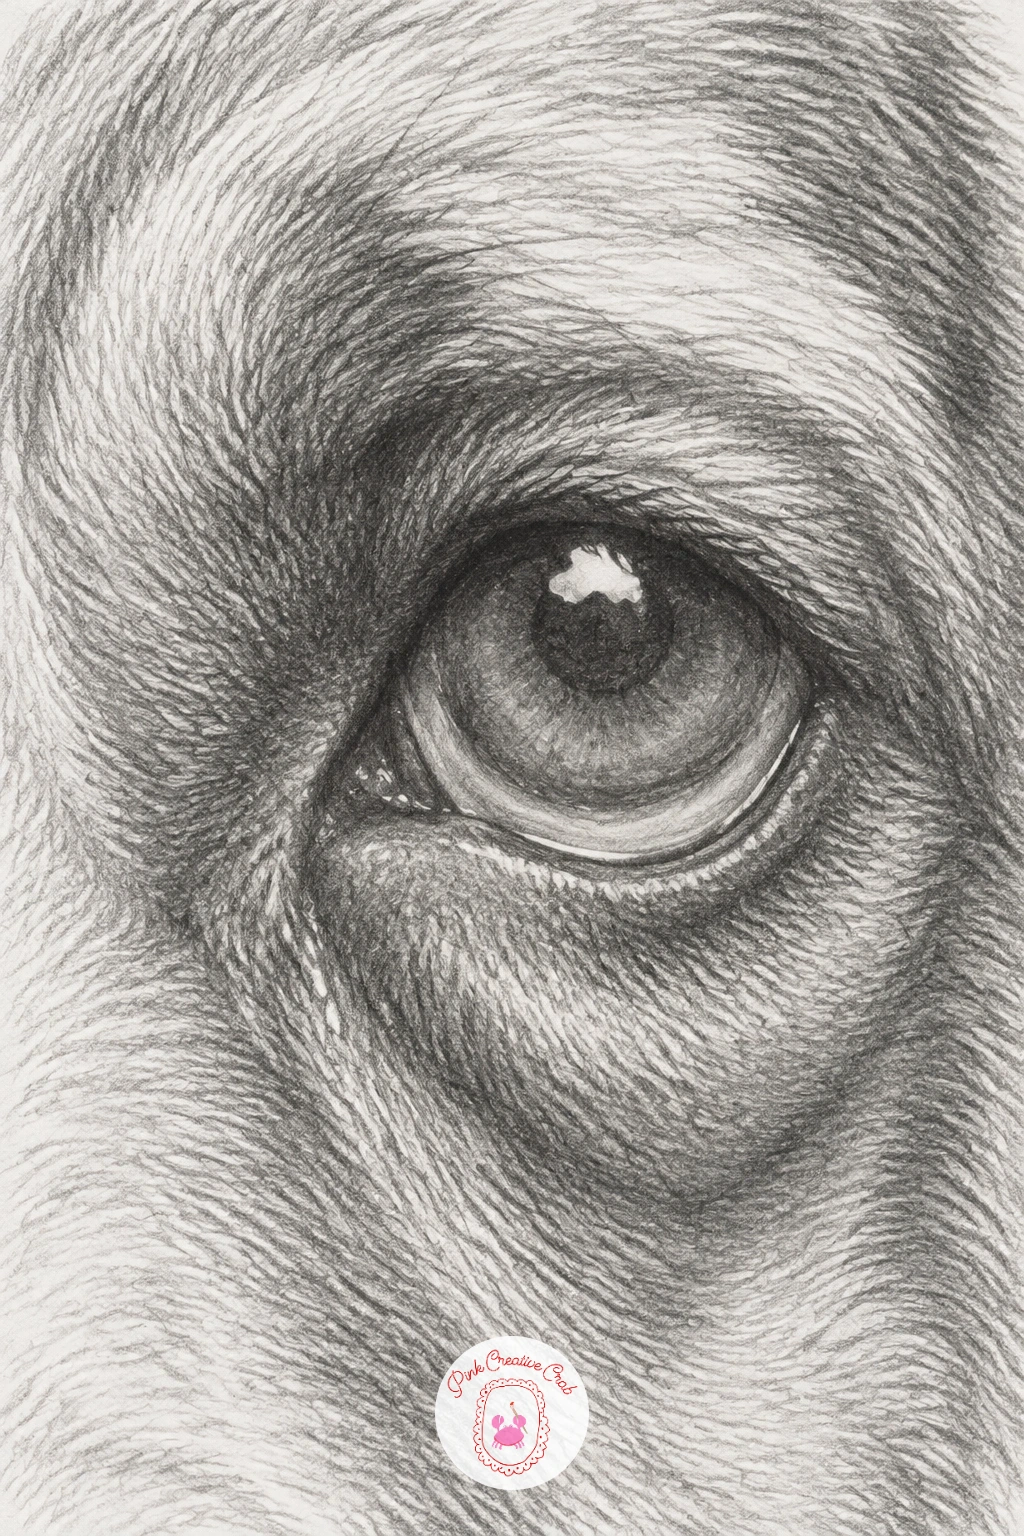
A dog’s soulful eye with a droopy lid softens the stare of the owl eye before it into something warmer and rounder at the edges. Draw the eye shape with a slightly drooping lower lid, since many breeds show a visible loose fold of skin pulling the lower lid down and exposing a thin pink-toned rim, even in graphite kept as a pale grey band.
Shade the iris in warm-toned grey values, built up gradually with overlapping circular strokes rather than straight radiating lines, since a dog’s iris tends to look softer and less crystalline than a human one. Keep the highlight slightly larger and softer-edged than you would for a human eye, which helps the whole expression read as gentle rather than sharp.
Overworking the lower lid into a hard dark line kills the droopy softness, so blend that edge gradually instead of outlining it firmly. A soft blending stump dragged lightly along the lower lid achieves this better than an eraser correction afterward. If you want a quicker version, spend ten minutes on the iris and lid alone and skip the fine fur texture around the socket entirely; a fuller forty-minute pass adds short fur strokes radiating from the eye’s edge.
Keep a few stray short fur lines crossing the inner corner, since that small detail makes the eye sit convincingly in a furred face.
Palette: Warm Grey,Charcoal Black,Paper White
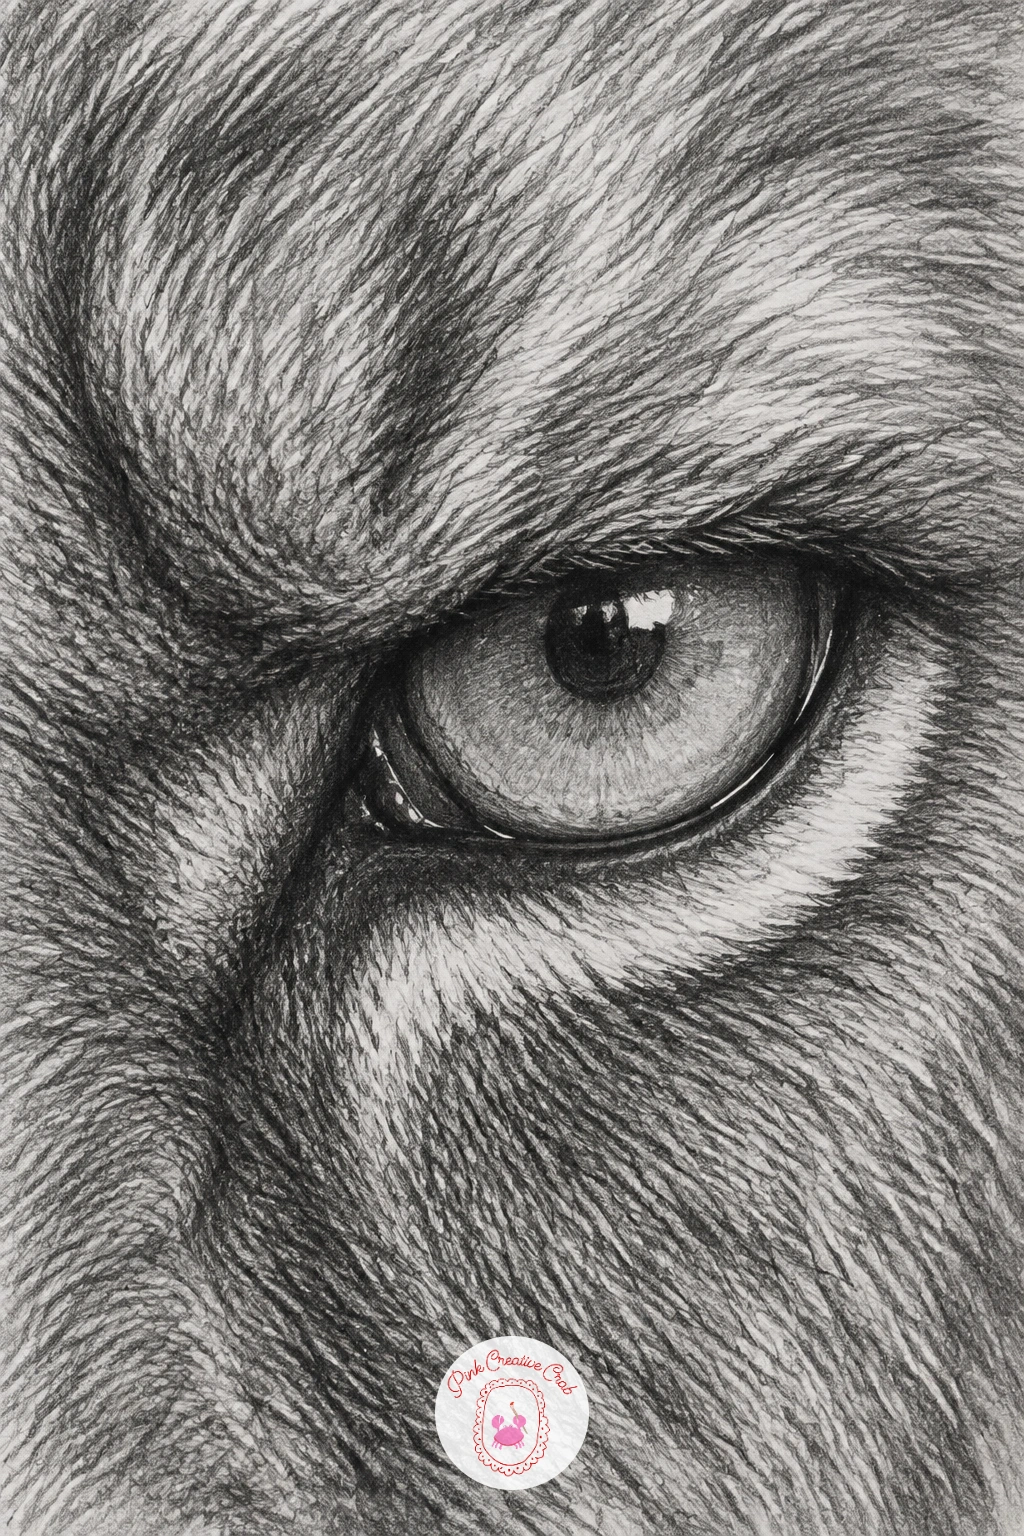
A lion’s eye under a heavy furrowed brow needs a much bolder, heavier approach than the dog’s eye before it, since this subject carries weight rather than softness. Draw the eye shape narrower and more angular, set deep under a thick ridge of brow, and block in that overhanging shadow with broad dark strokes before touching the eye’s own details.
Shade the iris in a warm amber-toned grey, built with confident overlapping strokes rather than delicate radiating lines, since a lion’s iris reads as dense and intense rather than crystalline. Keep the pupil a tight, hard dark shape, and surround the whole eye with short, coarse fur strokes that bristle outward rather than lying flat.
Drawing the brow fur too neat and combed loses the wild, heavy quality this eye needs, so vary the direction and length of each stroke deliberately, letting some cross over others. A stiffer pencil like a 2B for the base fur and a soft 6B only for the darkest shadow pockets keeps the contrast strong without turning muddy.
Keep the overall mood heavy and still, since a lion’s stare reads as calm authority rather than any obvious action.
Palette: Amber Grey,Charcoal Black,Paper White
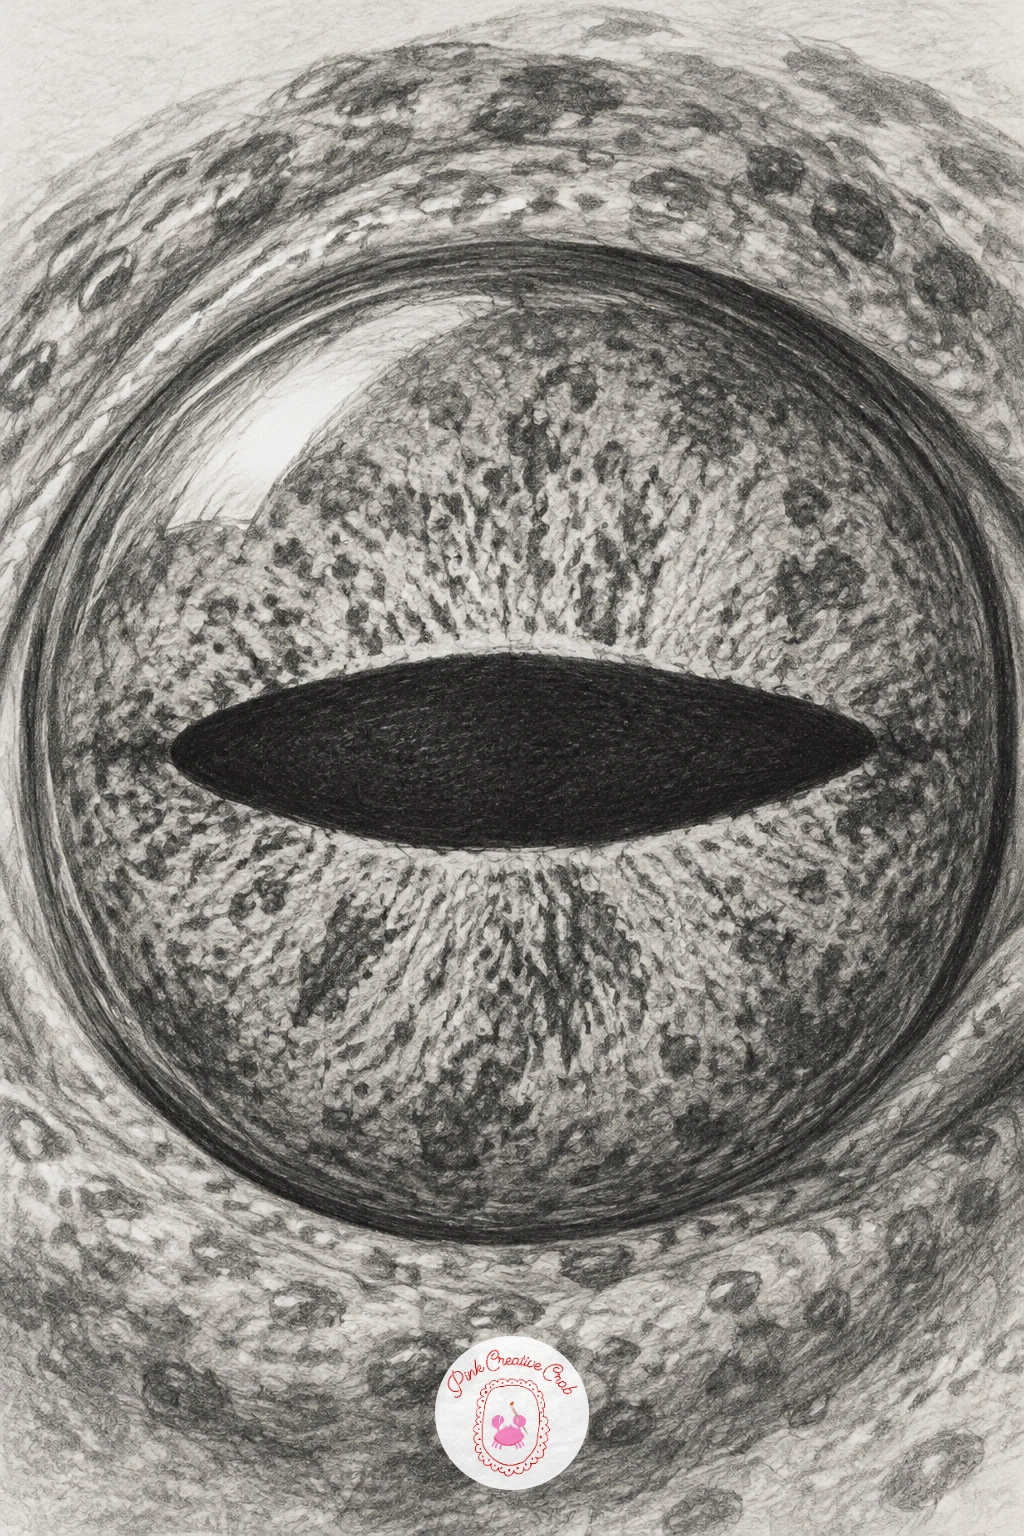
A frog’s bulging eye with a horizontal pupil is one of the strangest shapes on this list, so measure carefully before shading anything. Draw the eyeball itself as a strong rounded dome sitting proud of the surrounding skin, much more exaggerated than any mammal eye so far, with the pupil drawn as a flattened horizontal bar rather than a circle or slit.
Shade the iris in a mottled pattern of small uneven blotches rather than smooth radiating lines, since frog irises often have a speckled, metallic quality. Keep the horizontal pupil crisp and solid black, with its edges perfectly straight top and bottom, since that geometric shape is the whole identifying feature of this eye.
Rounding the pupil out of habit is the easiest way to lose the frog entirely, so keep checking that flattened bar shape against reference as you darken it. The surrounding skin can be left simple and smooth, with just a few small bump textures scattered near the eye’s rim; if fine speckling in the iris feels fiddly, a fine fineliner pen stippled lightly works faster than pencil dots.
Leave a single bright round highlight near the top of the dome, since the bulging wet surface catches light strongly at its highest point.
You Will Need
- fine fineliner pen (optional)
Palette: Olive Grey,Charcoal Black,Paper White
An eagle’s piercing eye under a bony ridge borrows the brow shadow idea from the lion’s eye earlier but sharpens every edge instead of roughening them. Draw a hard, angular ridge of bone arching directly over the eye, far more defined and smooth than fur-covered brows, casting a crisp rather than soft shadow down onto the top of the eye.
Shade the iris in a bright, intense value with minimal gradient, almost flat in places, since a bird of prey’s eye often looks startlingly clear and glassy rather than textured. Keep the pupil small and extremely dark, surrounded by a thin, precise ring where the iris meets it, and work the whole eye with harder pencil grades than the fur-based animal eyes before it.
Softening every edge out of old habit undercuts this eye’s whole character, so keep the bony ridge’s edge clean and almost geometric rather than blended into the surrounding texture. A 2H or HB pencil for the ridge’s crisp top edge keeps it sharp, reserving your softest, darkest pencil only for the pupil itself.
Add a few short, stiff feather marks just below the eye, kept sparse and pointed rather than fluffy, to finish the sense of a hard-edged hunting bird.
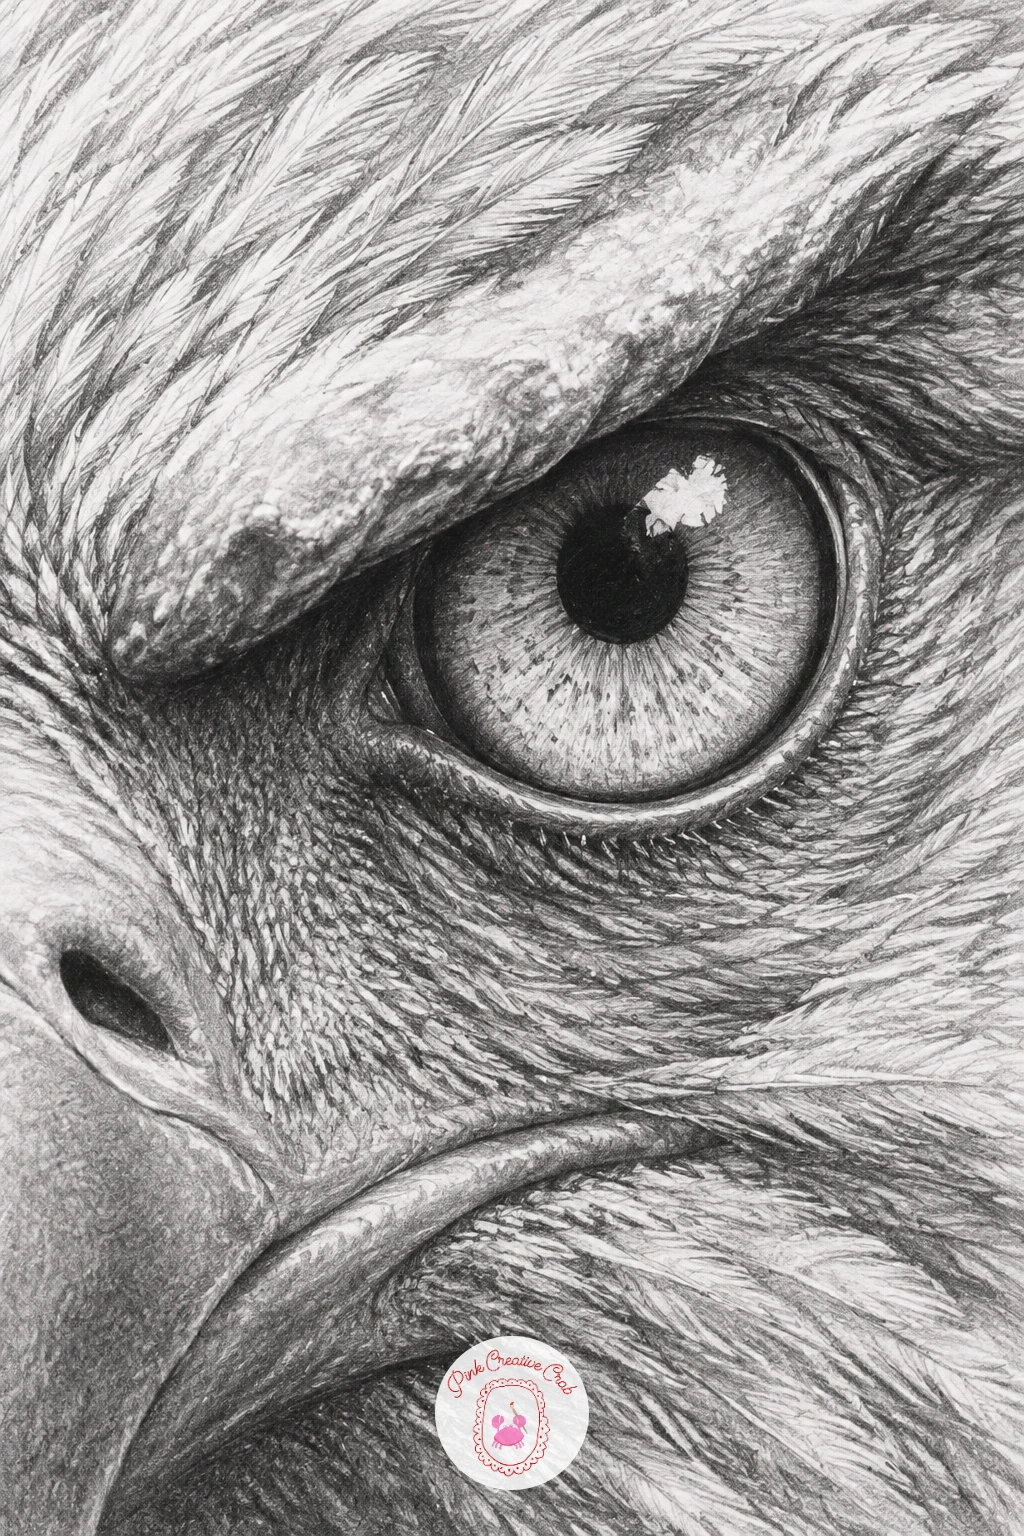
Palette: Charcoal Black,Steel Grey,Paper White
A goat’s eye with a rectangular pupil is another odd shape worth slowing down for, since the pupil here reads almost like a small dark window rather than any round or slit shape. Draw the eyeball as a wide, fairly flat oval rather than a deep dome, then place the pupil as a clean horizontal rectangle with gently rounded corners sitting across its centre.
Shade the iris in a pale, warm grey tone with fine horizontal striations rather than radiating spokes, since goat irises often show a subtle banded texture running sideways across the eye. Keep the rectangle itself a flat, even dark tone with no gradient inside it, since the contrast between the smooth pupil and the textured iris is what sells the strangeness of this shape.
Letting the rectangle’s corners round off too much turns it back into a generic oval, losing the goat’s distinctive look, so keep those corners only lightly softened rather than fully curved. A ruler held just outside the pupil shape, used only to check the top and bottom edges stay parallel, helps keep the rectangle convincing without drawing a mechanically perfect box.
Leave the surrounding fur loose and short, since this eye works best when the strange pupil stays the clear centre of attention.
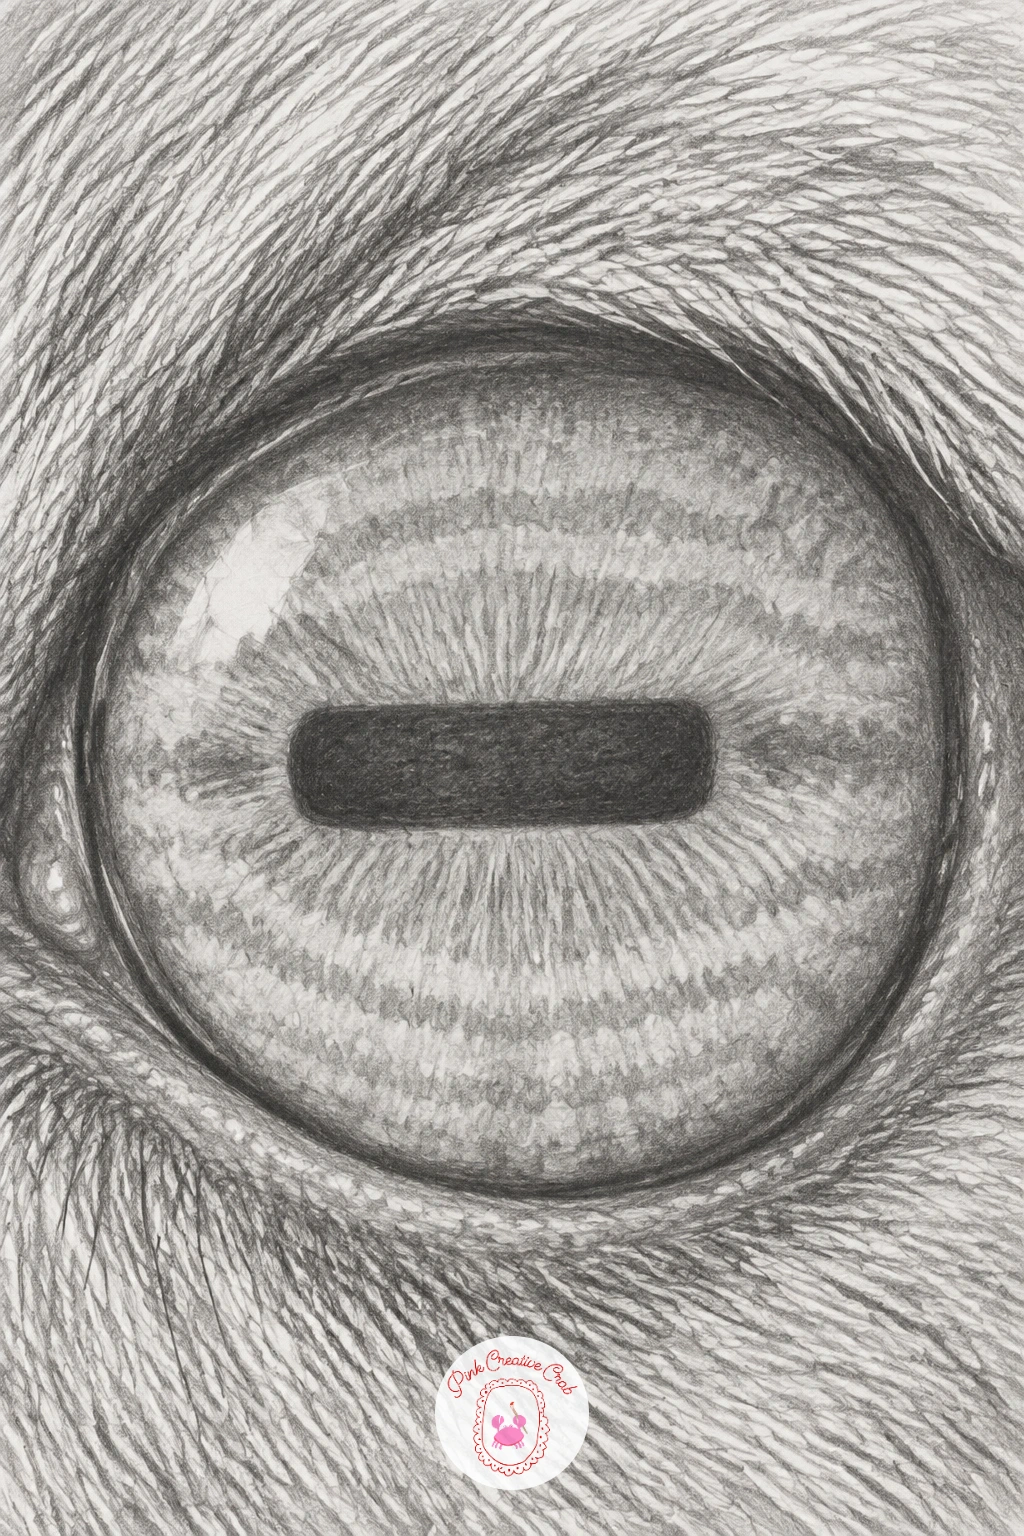
You Will Need
- small ruler
Palette: Warm Grey,Charcoal Black,Paper White
Return to human expression with an eye closed in a wink with a smile line, a cheerful subject to draw after all the animal anatomy before it. Draw the closed lid as a confident curved line, slightly more compressed and energetic than a resting closed eye, since a wink closes with intention rather than relaxation.
Add a short curved smile line just below the outer corner, where the cheek lifts and folds as the face smiles, and shade it lightly as a soft crease rather than a hard scratch. Keep the lashes along the closed lid longer and more deliberately curled than a sleepy closed eye, since a wink usually comes with a bit of flirtatious styling.
Drawing the closed lid perfectly flat and straight loses the wink’s playful energy, so give it a slight upward curve at the centre and a gentle downward tuck at the outer corner instead. If the smile crease looks too heavy, blend it lightly with a stump until it reads as a soft fold rather than a wrinkle.
One concrete tip: finish the wink with a single short line above the lid for the brow lift that usually accompanies it, since a wink without any brow movement above it can look oddly flat.
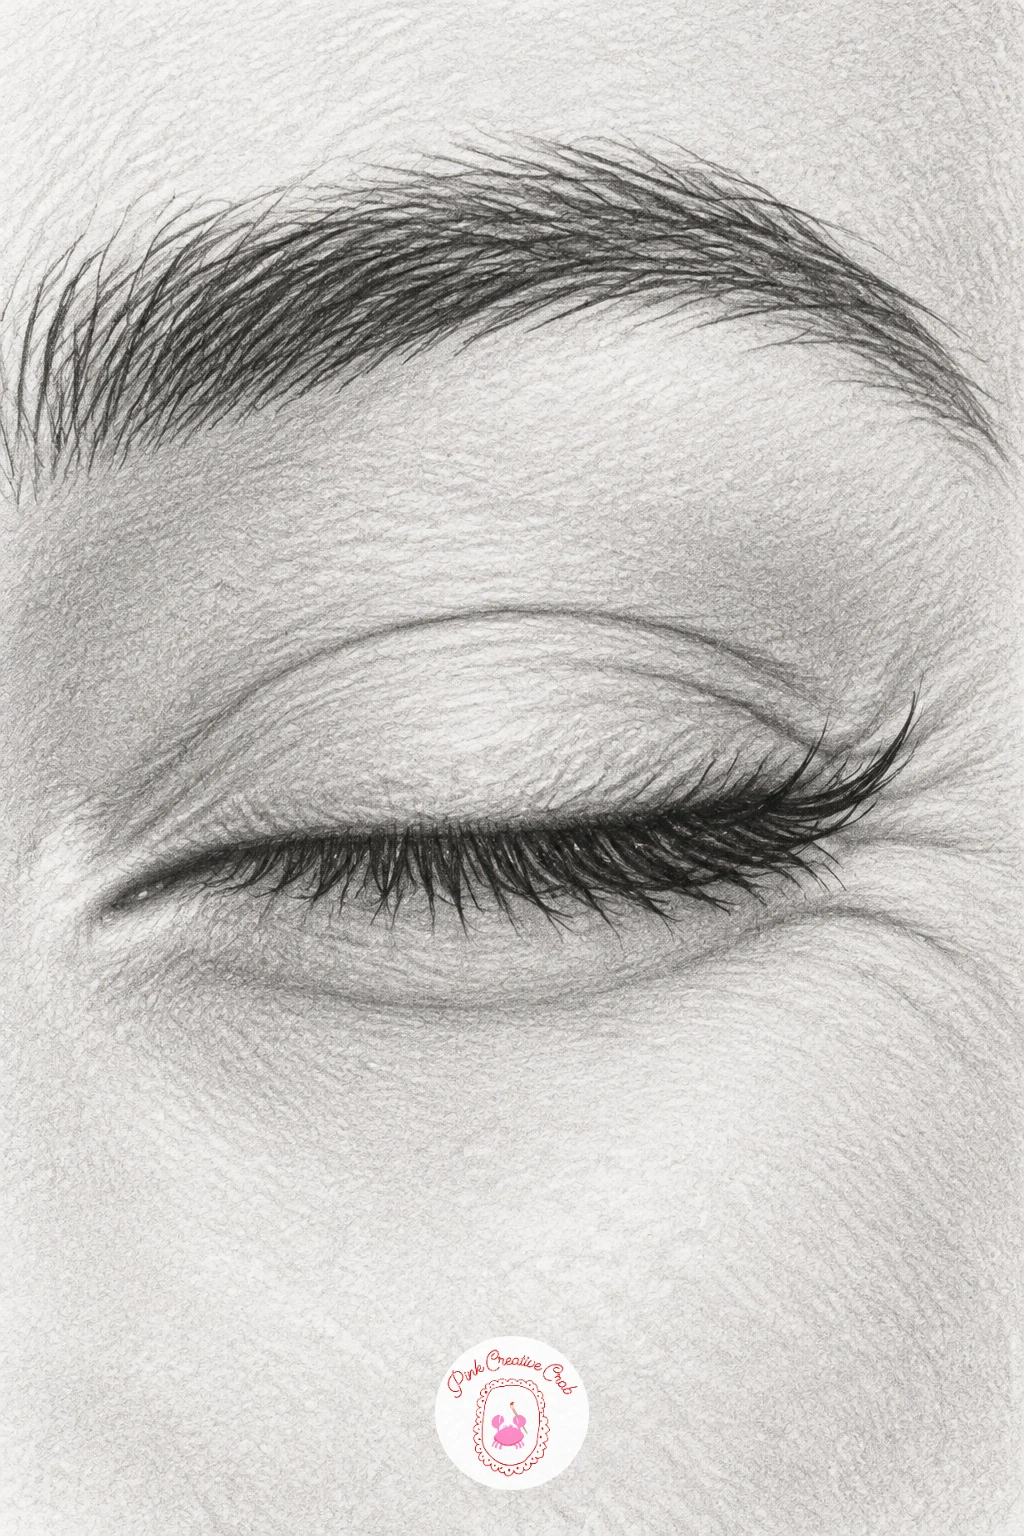
Palette: Soft Grey,Charcoal Black,Paper White
An eye with glitter on the lid and lashes is a fun, sparkly finish to the makeup-style eyes earlier in this list, and it is built almost entirely through small scattered highlights rather than dark shading. Finish the eye and lid shading fully first, keeping the lid tone a touch darker overall than usual, since glitter reads far better against a mid-to-dark background than against pale skin.
Add the sparkle with a sharp white pencil or a white gel pen, dotting small irregular star-like flecks across the lid, varying their size and clustering them more densely near the lash line than toward the brow. A few flecks can sit directly on the lashes themselves, drawn as tiny bright points along their length.
Scattering the glitter in an even grid pattern is the giveaway mistake, since real glitter clusters randomly with gaps and dense patches side by side. Step back often to check the scatter looks natural rather than mechanical, and resist adding too much, since a handful of bright, well-placed flecks reads better than covering the whole lid.
Keep the eye’s own graphite shading calm and simple underneath, so the white sparkle marks have clear dark ground to stand out against.
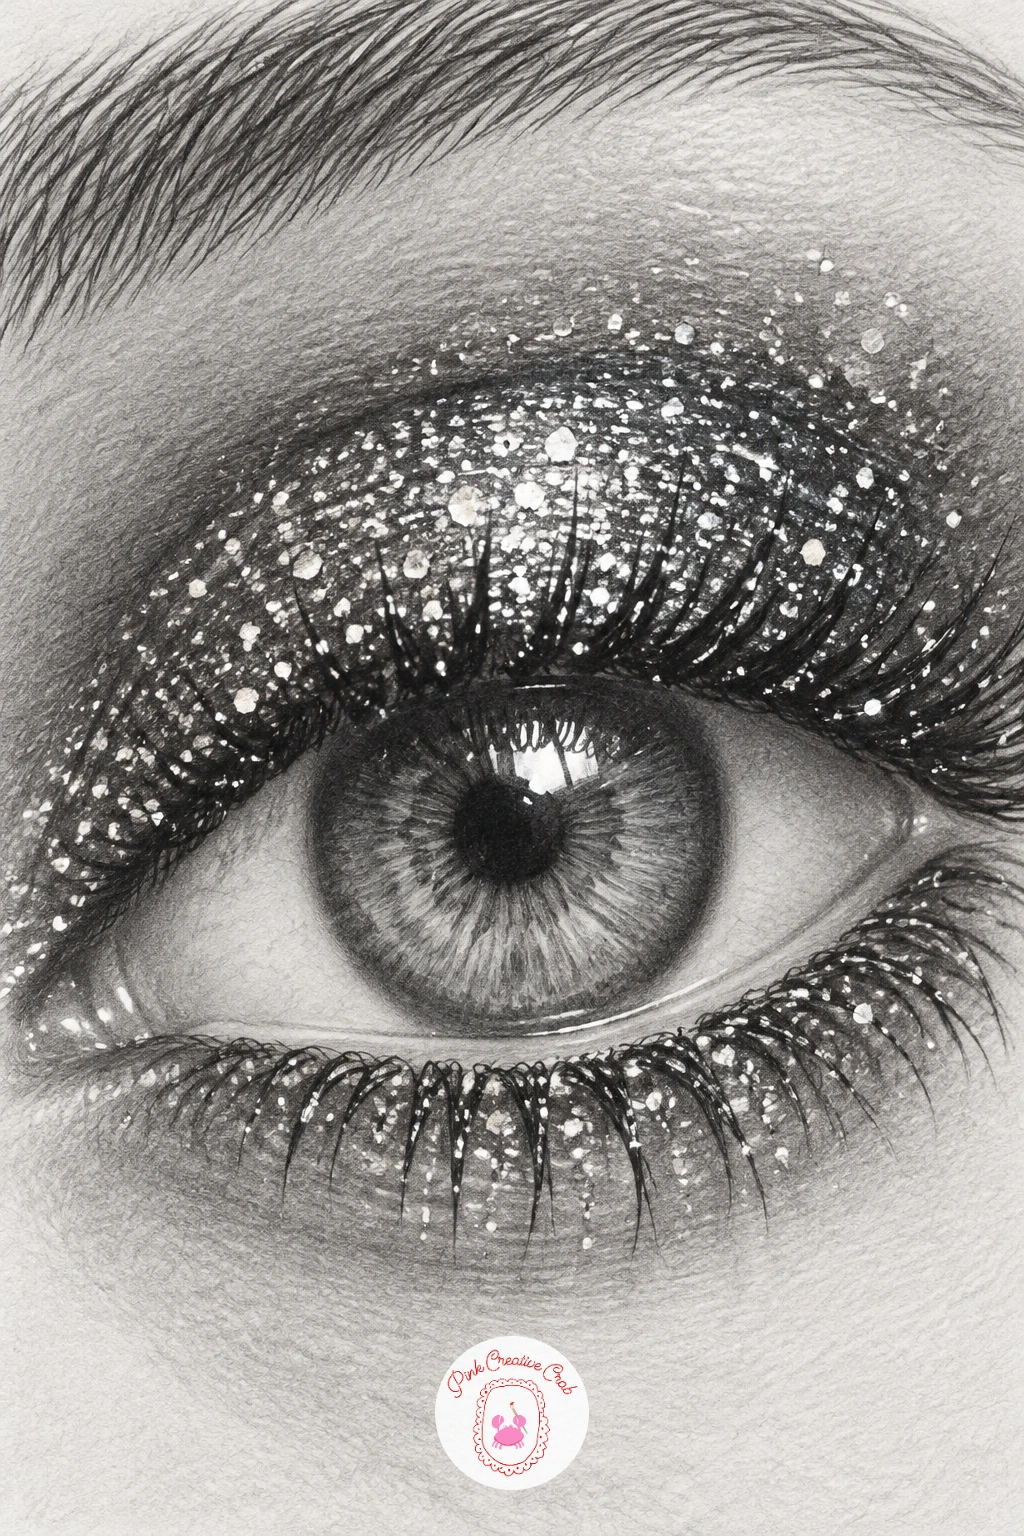
You Will Need
- white pencil or white gel pen
Palette: Charcoal Black,Deep Grey,Paper White
Close the list with a grandmother’s eye with soft creased lids and kind wrinkles, a gentler cousin of the old man’s eye drawn earlier, with rounder, softer wrinkle patterns rather than deep sharp ones. Draw the eye shape with a slightly lowered outer corner and a visibly looser upper lid, then map the surrounding creases as soft, rounded folds rather than the angular crow’s feet used for a more weathered face.
Shade those creases gradually, letting each fold fade softly into the next rather than outlining any of them with a hard line, since kindness and age both read better through gentle gradients than crisp edges. Keep the brow above thinner and more neatly groomed than the bushy version drawn earlier, and let the eye’s expression settle into a warm, relaxed downward curve at the outer corners.
Making every wrinkle the same depth flattens the warmth this eye is meant to carry, so vary the pressure, pressing a little harder near the deepest natural folds and lightening off toward the temple. A kneaded eraser dabbed gently across the heaviest shading can soften any area that came out too harsh.
Once this version feels comfortable, try varying it next time with a slightly more open eye and a hint of a smile line, for a livelier version of the same gentle face.
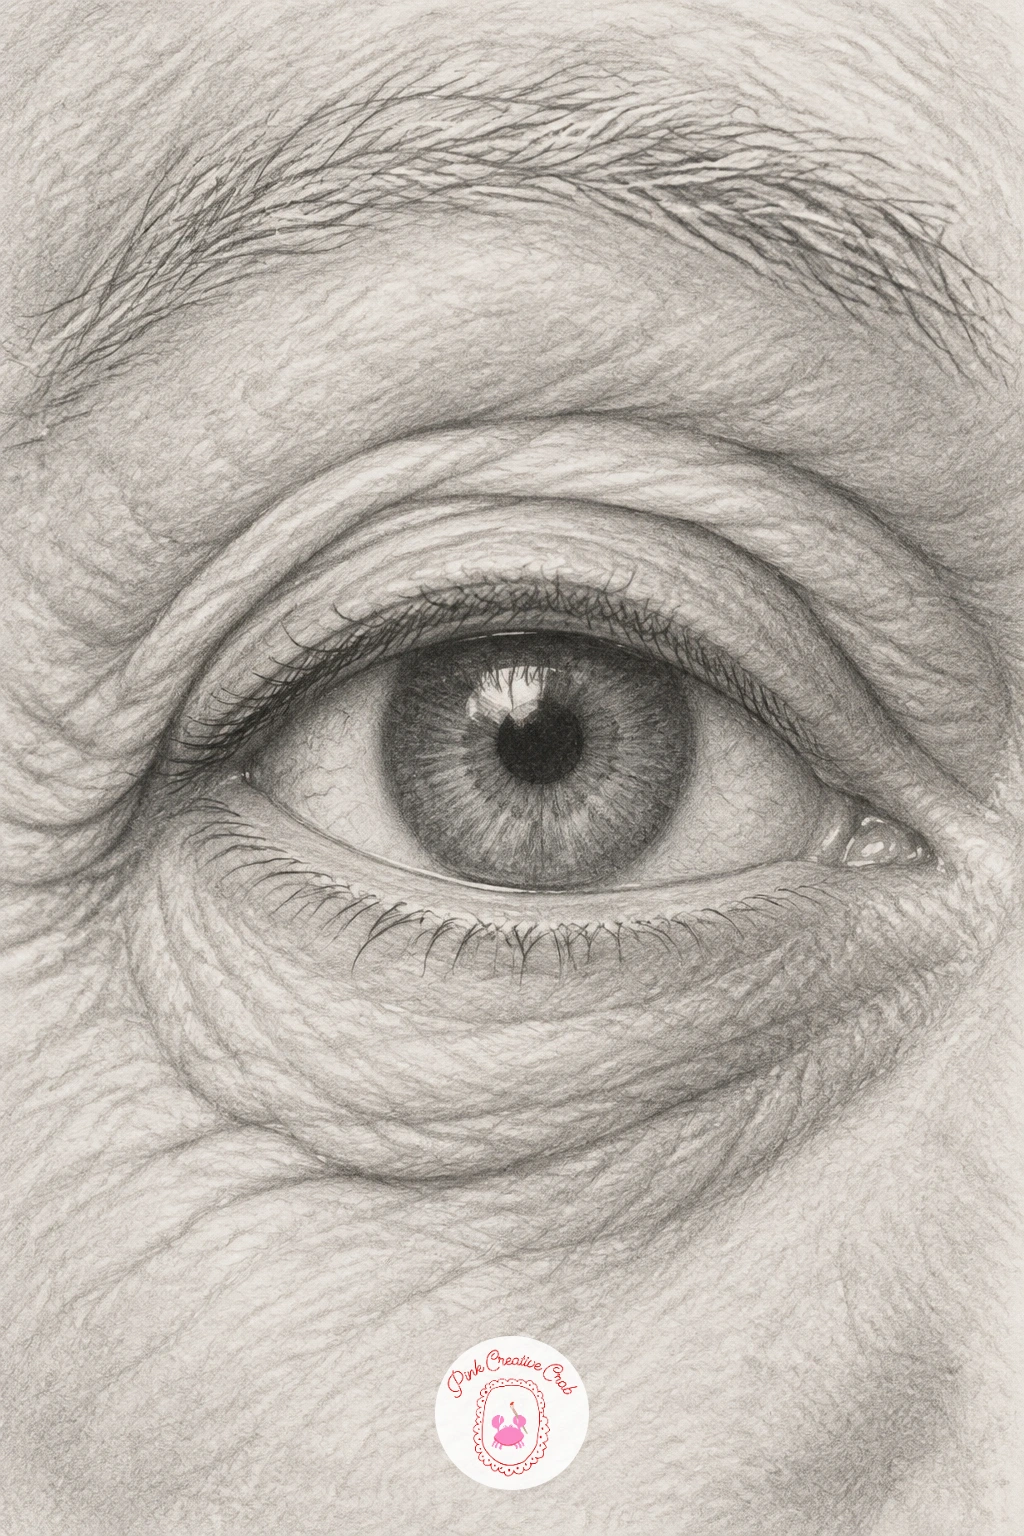
Palette: Soft Grey,Warm Charcoal,Paper White
What to Do Next
Pick one eye from this list that matches a pencil and a free half hour you actually have today. Start on a clean sheet of smooth paper, sketch the shape lightly first, and build the shading in gradual layers rather than rushing to the darkest tone too soon.
Frequently Asked Questions
What pencils do I need for realistic eye drawing?
A small range from HB to 8B covers most eyes well. Use HB or 2H for light sketch lines, 2B to 4B for mid-tones, and 6B to 8B for the darkest pupil and lash accents.
Why does my eye drawing look flat instead of realistic?
Flatness usually comes from skipping the gradual value changes between light and dark areas. Blend transitions with a stump, keep one clear highlight, and avoid outlining every shape with a hard black line.
How do I get the eye shape symmetrical when drawing both eyes?
Sketch both eyes lightly at the same time rather than finishing one before starting the other. Use a ruler held loosely against the page to check both sit on the same angle before you darken either.
What is the best paper for pencil eye drawings?
Smooth bristol or a fine-tooth drawing paper holds detailed graphite shading best. Rougher paper breaks up fine lash lines and makes smooth gradients harder to blend evenly.
Have any thoughts?
Share your reaction or leave a quick response — we’d love to hear what you think!
-
 0
-
0
-
0
-
0
-
0
-
0


