

Hot chocolate drawing is one of those subjects that rewards you fast: a round mug, some steam, a melting marshmallow, and you already have something warm and finished sitting on the page. Alcohol markers love this kind of subject because the browns blend so smoothly into cream, and a few confident fineliner lines do most of the work before color even touches the paper.
Below are 28 cold-weather cocoa moments, from a simple mug with marshmallows to a Parisian cup served with a croissant, a snowman marshmallow floating in cocoa, and two friends sharing a mug on a porch swing. Work through them in order if you like, starting easy and building up to the busier scenes, or just pick whichever one makes you want to grab a marker right now.
Using these images: free for personal projects such as printing, coloring, cards, journals and gifts. Handmade items that include them may be sold up to 30 pieces per design. More than that is commercial use and is not permitted, and neither is selling or sharing the images themselves or passing them off as your own. Please ask before any other use.
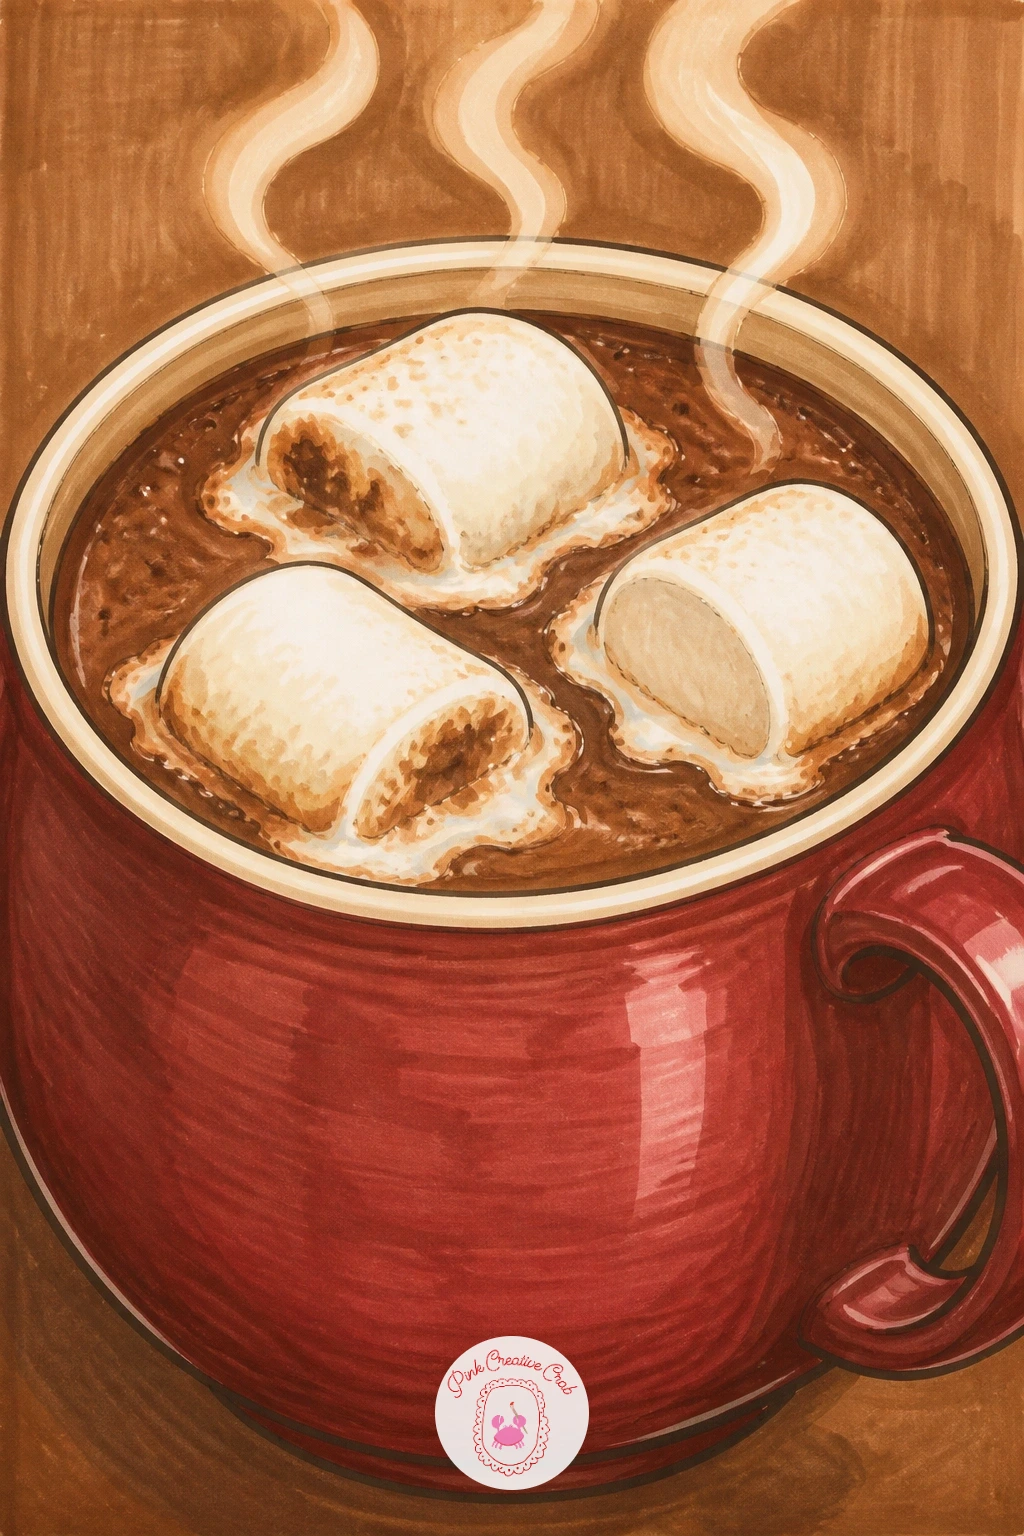
Mug of hot chocolate with marshmallows melting on top is the friendliest place to start, since it is just one rounded shape and a few soft blobs sitting in it. Outline the mug first with a thin fineliner, keeping the sides slightly curved rather than dead straight, then draw three or four marshmallows piled unevenly across the rim, letting one or two sag into the cocoa.
Block in the cocoa with a warm chocolate brown marker first, then go back over the marshmallow edges with a lighter cream to show where they have started to soften and blur into the drink. Most beginners draw the marshmallows too neat and square: round off every corner and let the bottom edge dissolve rather than sit as a clean line.
If your marker set is limited, a single mid-brown plus a cream or pale yellow still reads perfectly well, since the contrast is what sells the melt. Steam lines in thin, wavy fineliner strokes above the mug finish the warmth without needing any extra color.
Keep one marshmallow fully intact on top so the eye has a clear “before” shape to compare against the melted ones.
Palette: Chocolate Brown,Cream,Warm White
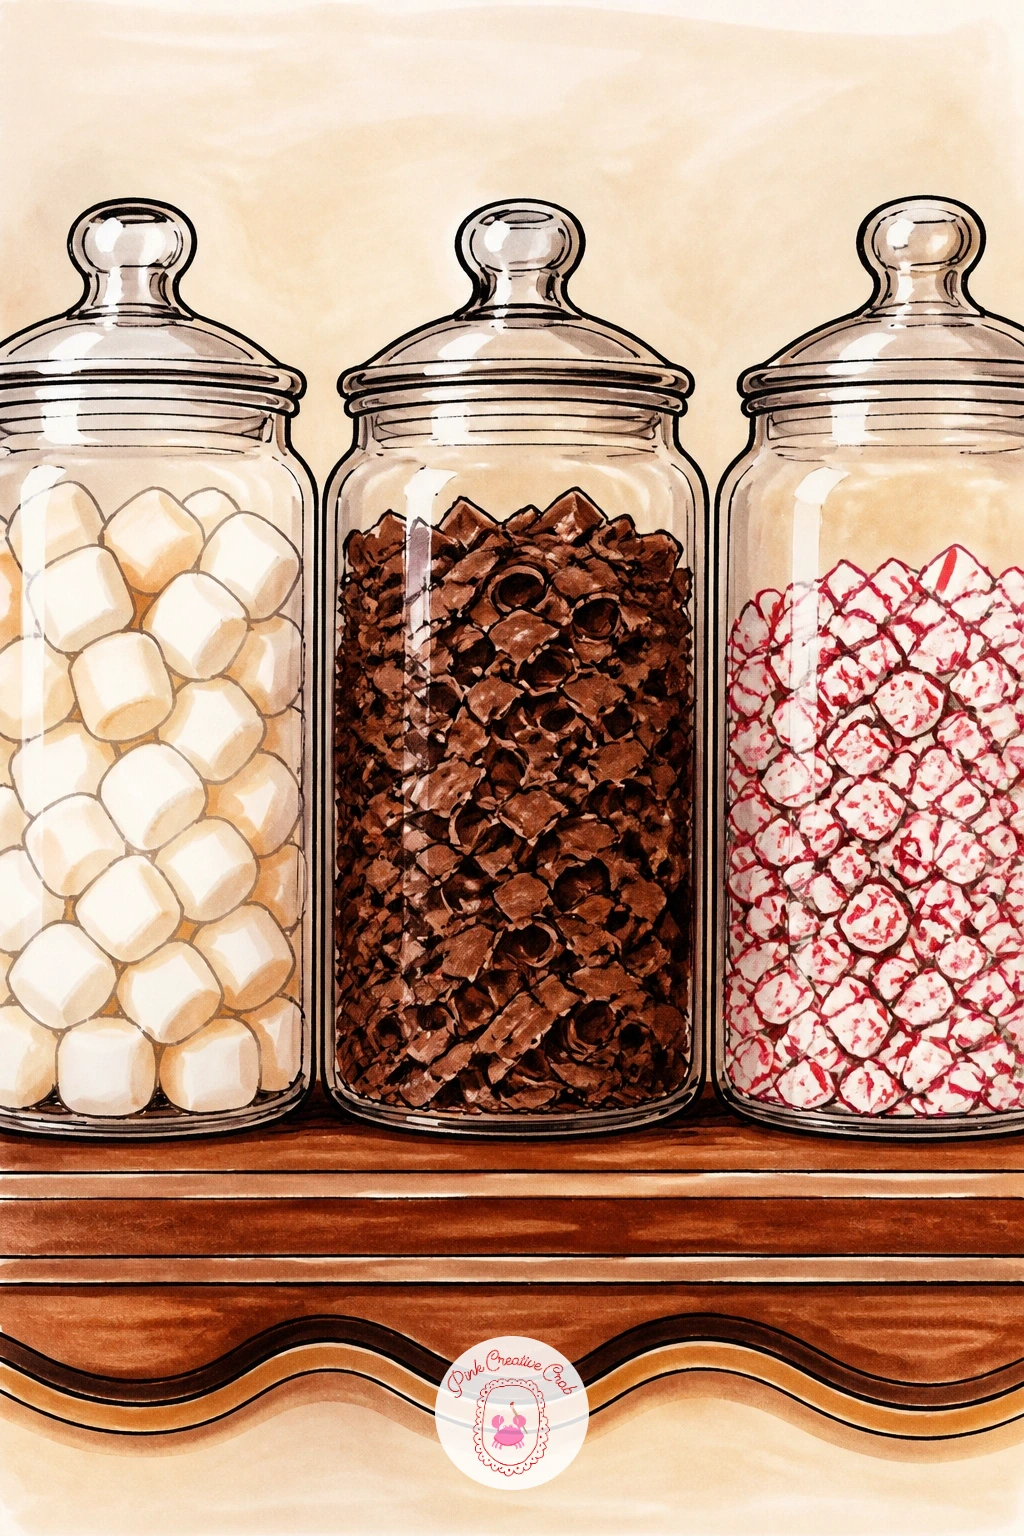
Hot cocoa bar with toppings in jars gives you a chance to practice drawing several small round containers lined up together. Start with a simple horizontal eye level across the page, a thin pencil guideline you erase later, and sit three or four jars along it so their bottoms line up evenly even though their heights differ.
Draw the jars as simple cylinders with slightly narrower necks, then fill each one with a different topping: mini marshmallows, chocolate shavings, crushed peppermint, cinnamon sticks. Ink the jar outlines and lids before adding any color, since clean glass edges are what make the scene read as a tidy little station rather than a jumble.
The eye level trick matters here because jars drawn at different heights with no shared baseline look like they are floating. If you want a quicker version, two jars and a small chalkboard sign behind them still reads as a full cocoa bar in ten minutes.
For a fuller forty-minute piece, add a mug waiting in front of the jars with a spoon resting beside it.
Palette: Chocolate Brown,Mint,Cream,Soft Grey
Try drawing the jar labels as tiny blank rectangles rather than lettering them, which keeps the focus on color and shape instead of handwriting.
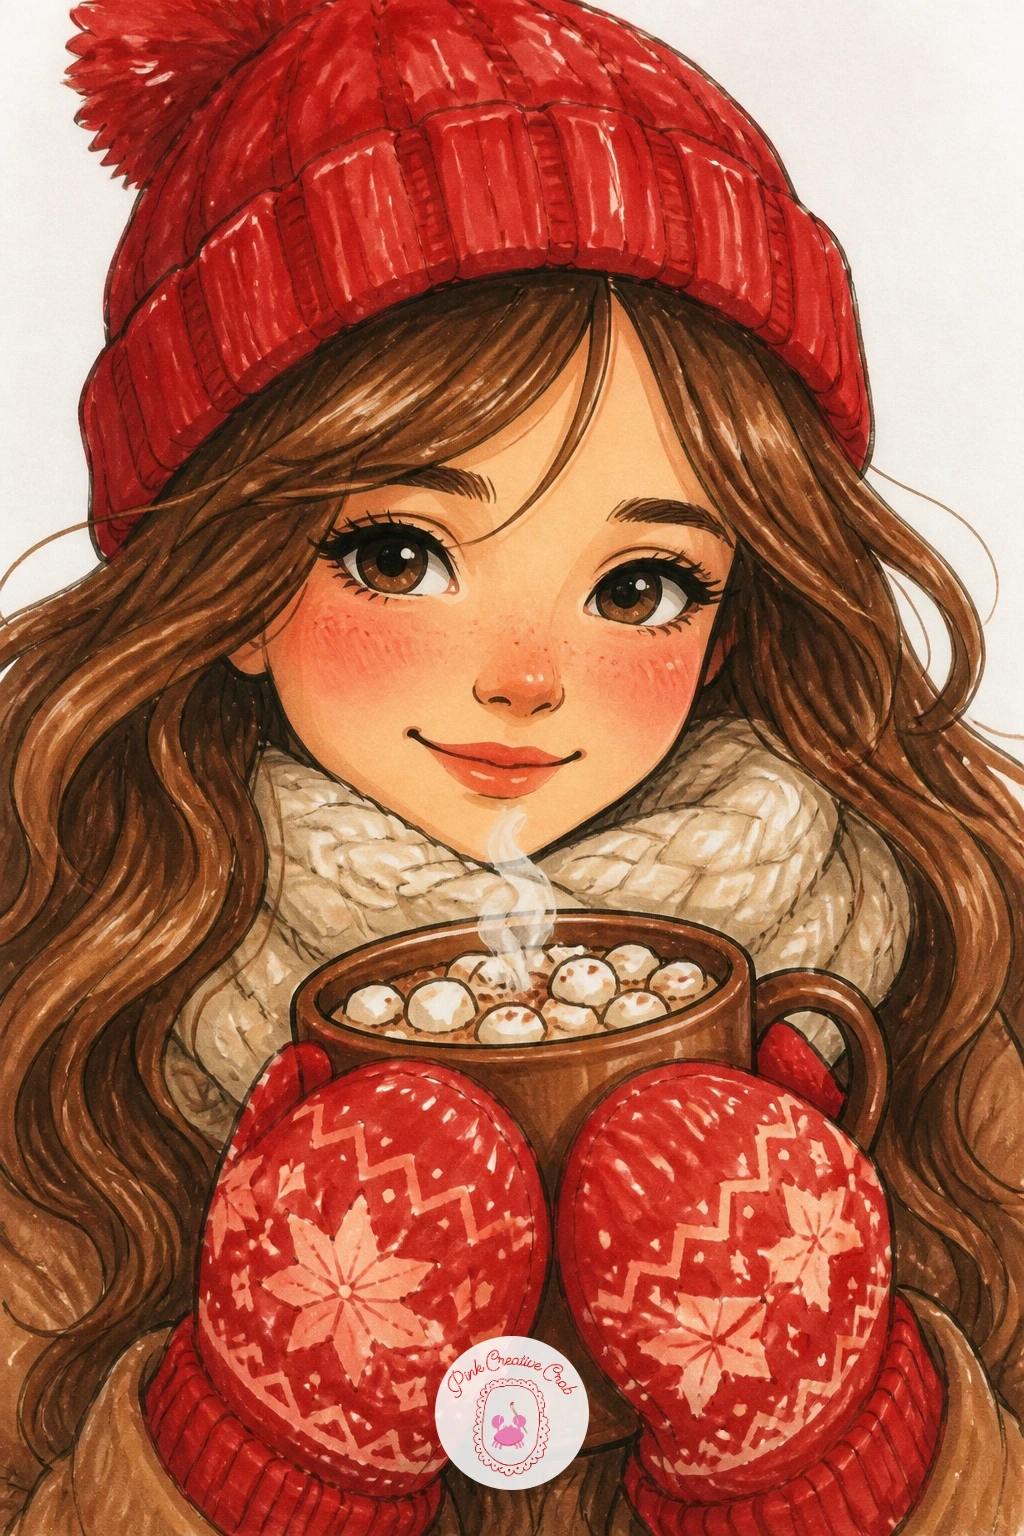
Girl in mittens holding a steaming mug moves you into a simple figure, so lightly block the proportions first: head roughly one-eighth of the total height, shoulders about two head-widths across, hands drawn as soft mitten shapes rather than fingered gloves. Sketch the pose loosely in pencil before any ink touches the page.
Work from the head down, then the scarf and coat, then the mug held at chest height with both mitten hands wrapped around it. Ink the figure outline first in fineliner, then the mug, saving the steam lines for last so they sit cleanly over the finished shapes.
Faces are where this one goes wrong fastest: keep the features minimal, a soft smile and closed or barely-open eyes, rather than trying for a detailed expression. If figures still feel shaky, this girl pencil drawing guide is a good place to warm up proportions before coloring.
Color the coat and mittens in one bold tone so the eye lands on the mug, not the clothing.
Palette: Rosy Red,Chocolate Brown,Soft Pink,Cream
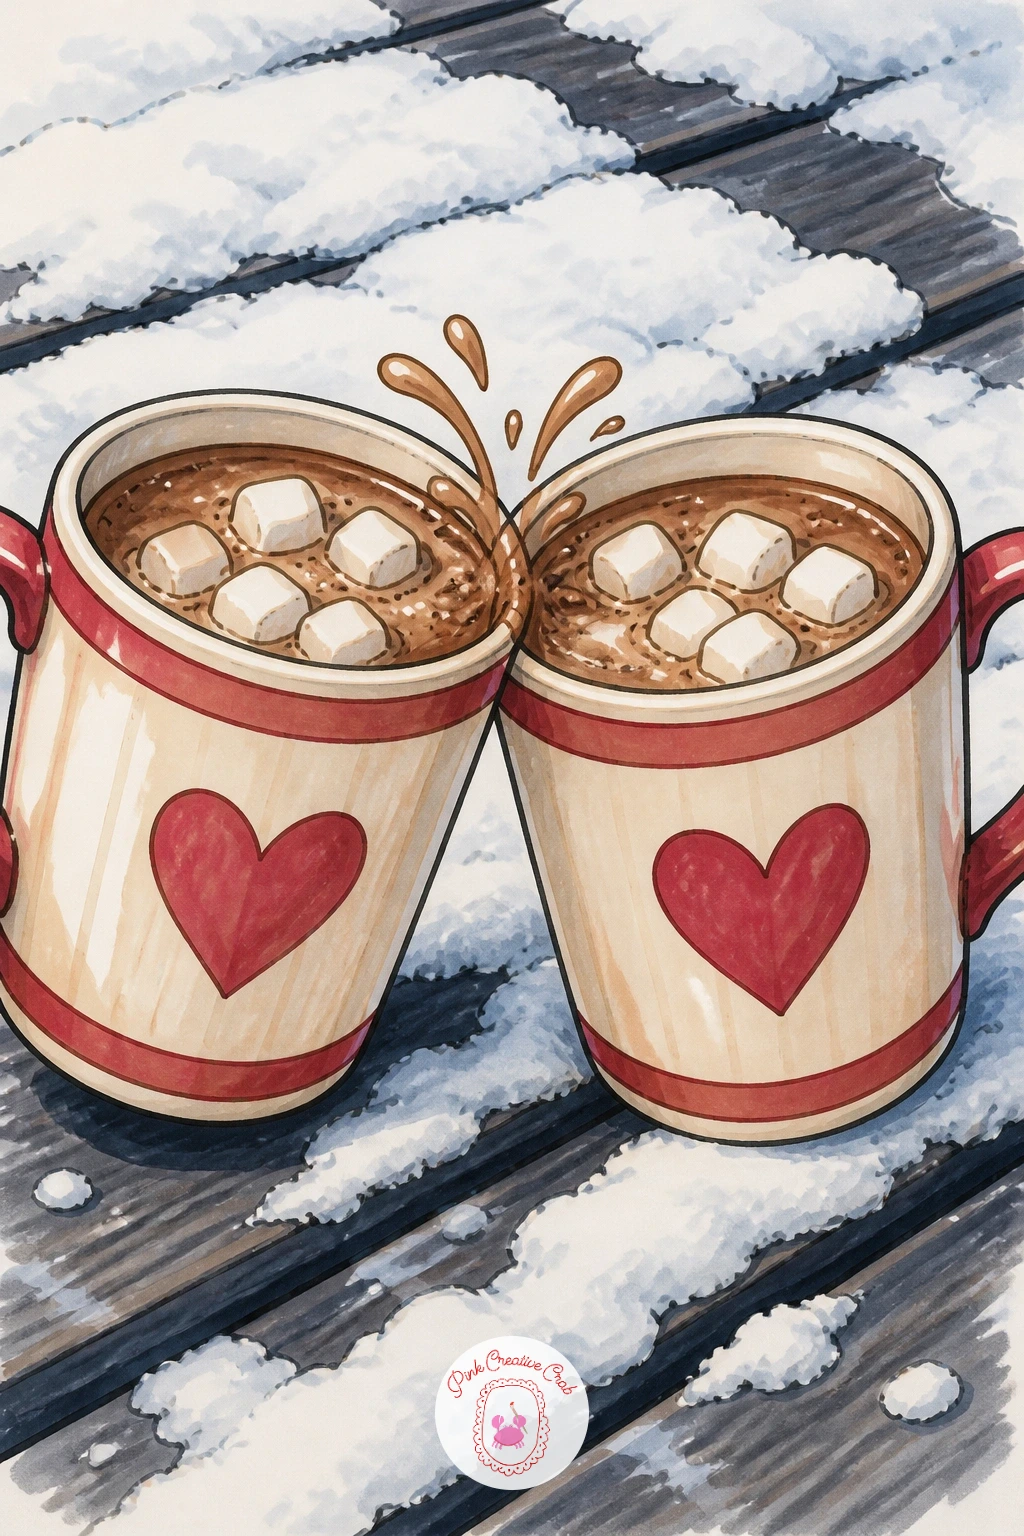
Two mugs clinking on a snowy picnic table asks you to think about eye level, since both mugs sit on the same flat surface but tilt slightly toward each other at the moment they touch. Draw the table edge first as a simple horizontal line, then place both mugs along it at the same height, angling their rims a few degrees inward so the clink feels caught mid-motion.
Sketch a light dusting of snow along the table edge and on the mug handles before inking, since that snow line is what tells the eye this is an outdoor winter scene rather than a kitchen table. Fineliner the mugs and table first, then add the snow texture last in white gel pen over the dried marker.
The most common slip is making both mugs identical: vary the handle shape or the rim height slightly so the pair feels like two real cups, not a stamped copy.
One warm brown for the cocoa and a cool blue-grey shadow under the snow is enough color to carry the whole scene.
You Will Need
- white gel pen
Palette: Chocolate Brown,Snow White,Cool Blue Grey,Cream
Hot chocolate with a whipped cream mountain and sprinkles turns the topping into the real subject, so give the cream far more height and volume than feels natural at first, piling it up in soft overlapping peaks above the mug rim. Pencil the cream as a rough triangle of loose scribbles before refining it into individual swirls.
Ink each swirl as a short curved line rather than a hard outline around the whole mound, since whipped cream reads through its ridges, not its silhouette. Drop sprinkles in as tiny dashes and dots scattered unevenly across the peak, heavier near the top and thinning out toward the base.
Overworking the cream outline is the usual trap: too many hard lines flatten it into a static shape. Switch to a lighter cream marker for the shaded undersides of the swirls and a near-white for the highlighted tops to keep the whole mound feeling soft and three-dimensional.
Finish with two or three bright sprinkle colors dotted at random, never in a neat row.
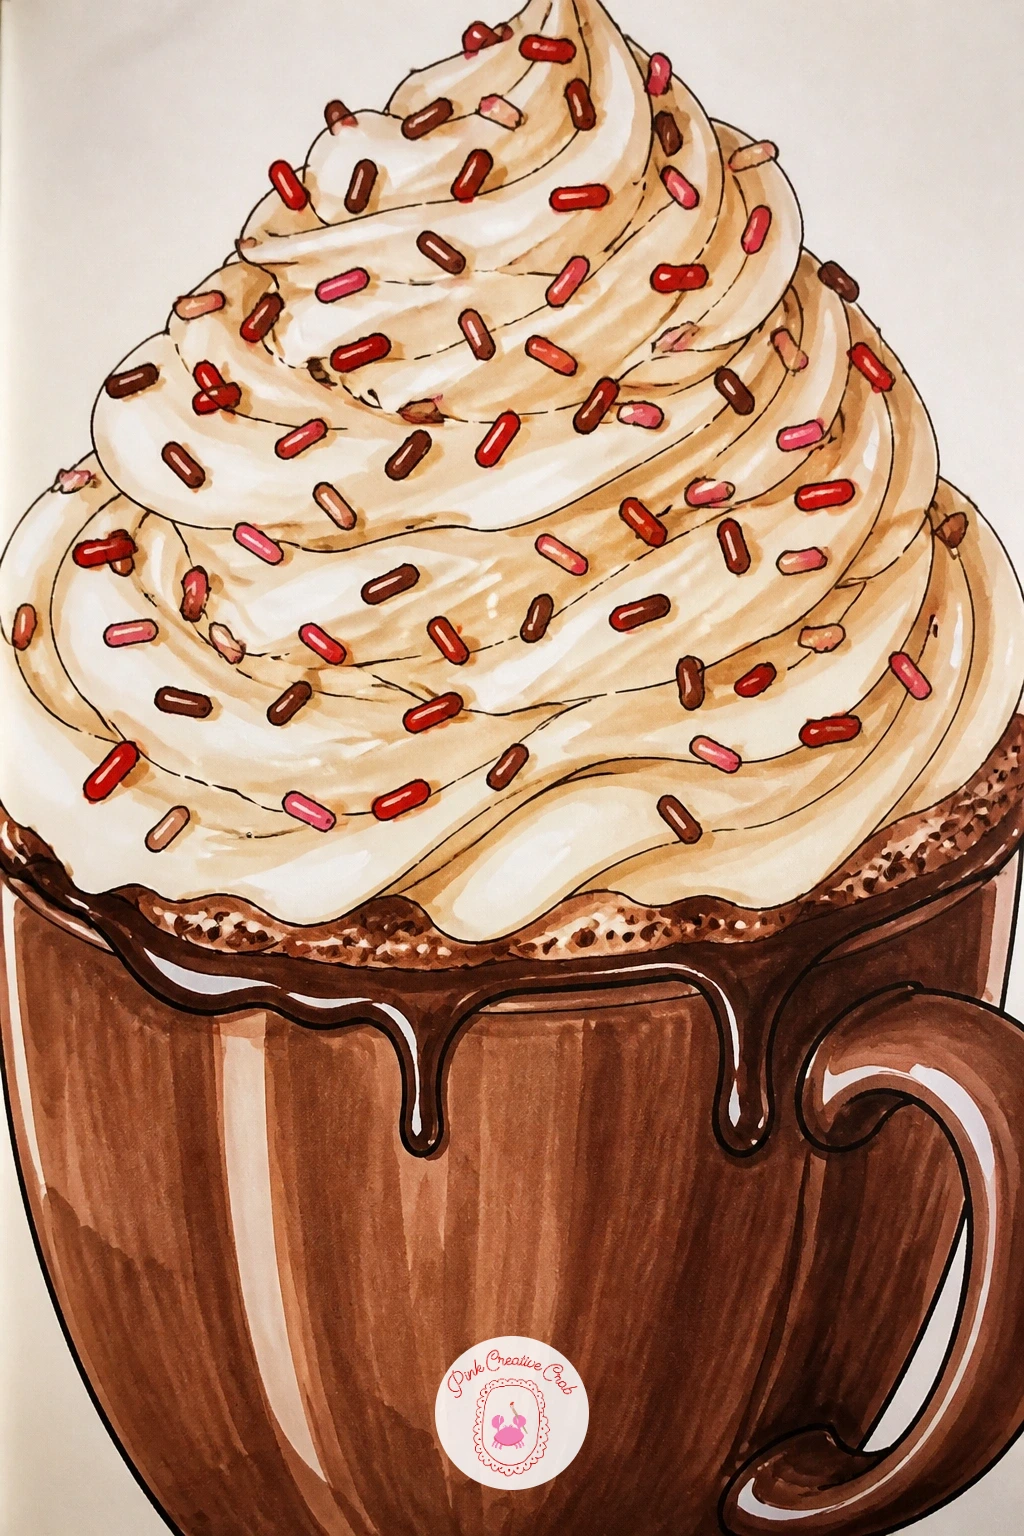
Palette: Cream,Chocolate Brown,Rosy Red,Mint
Thermos and two cups after sledding is a small still life with a story built in, so arrange the three objects close together: the thermos upright in the center, lid off and resting beside it, with two small cups angled toward each other as if just poured. Pencil the thermos as a tall cylinder with a narrower cap before adding the cups.
Ink the thermos first since it anchors the group, then the cups, leaving a thin curl of steam rising from each. A patch of snow or a sled runner peeking in from one edge of the frame is enough to place the scene outdoors without drawing a full landscape.
Metal thermoses often come out looking flat: add one clean vertical highlight stripe down the side in white gel pen to suggest its shine, which does more than careful shading ever will at this size.
If you want the quick version, skip the sled entirely and let the steam and snow patch carry the cold-weather feeling.
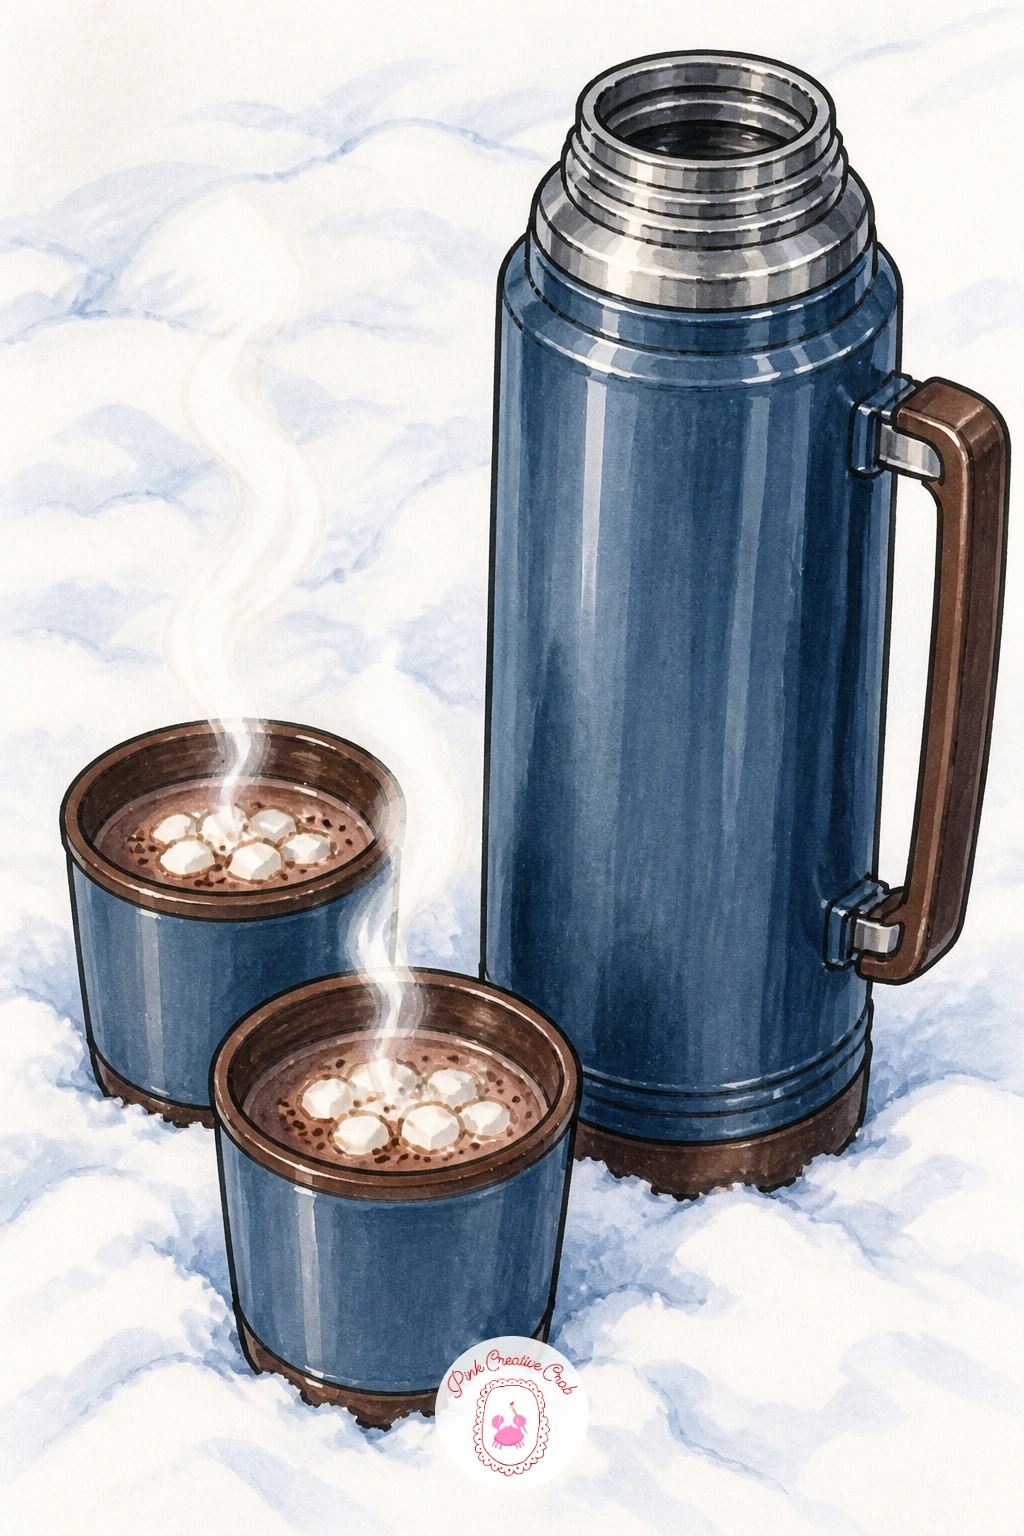
You Will Need
- white gel pen
Palette: Steel Blue,Chocolate Brown,Cream,Snow White
Cocoa bomb melting in a mug is a fun one to draw in stages, since the sphere is cracking open as hot milk hits it. Start with a simple circle for the bomb sitting in the center of the mug, then break its outline with a few jagged gaps where the shell has split, letting little marshmallows and chocolate crumbs spill out through the cracks.
Ink the mug and the intact part of the sphere first, then add the cracked edges as short angular lines rather than one smooth curve, since the shell should look brittle, not rubbery. Color the shell a slightly darker brown than the milk pooling around it so the two surfaces stay distinct.
The melt itself is the tricky part: keep the milk area lighter and looser at the edges, almost dissolving into the brown, instead of drawing a hard boundary between chocolate and milk.
No cocoa bomb on hand for reference is fine, a plain dark chocolate truffle photo gives you the same cracked-shell texture to study.
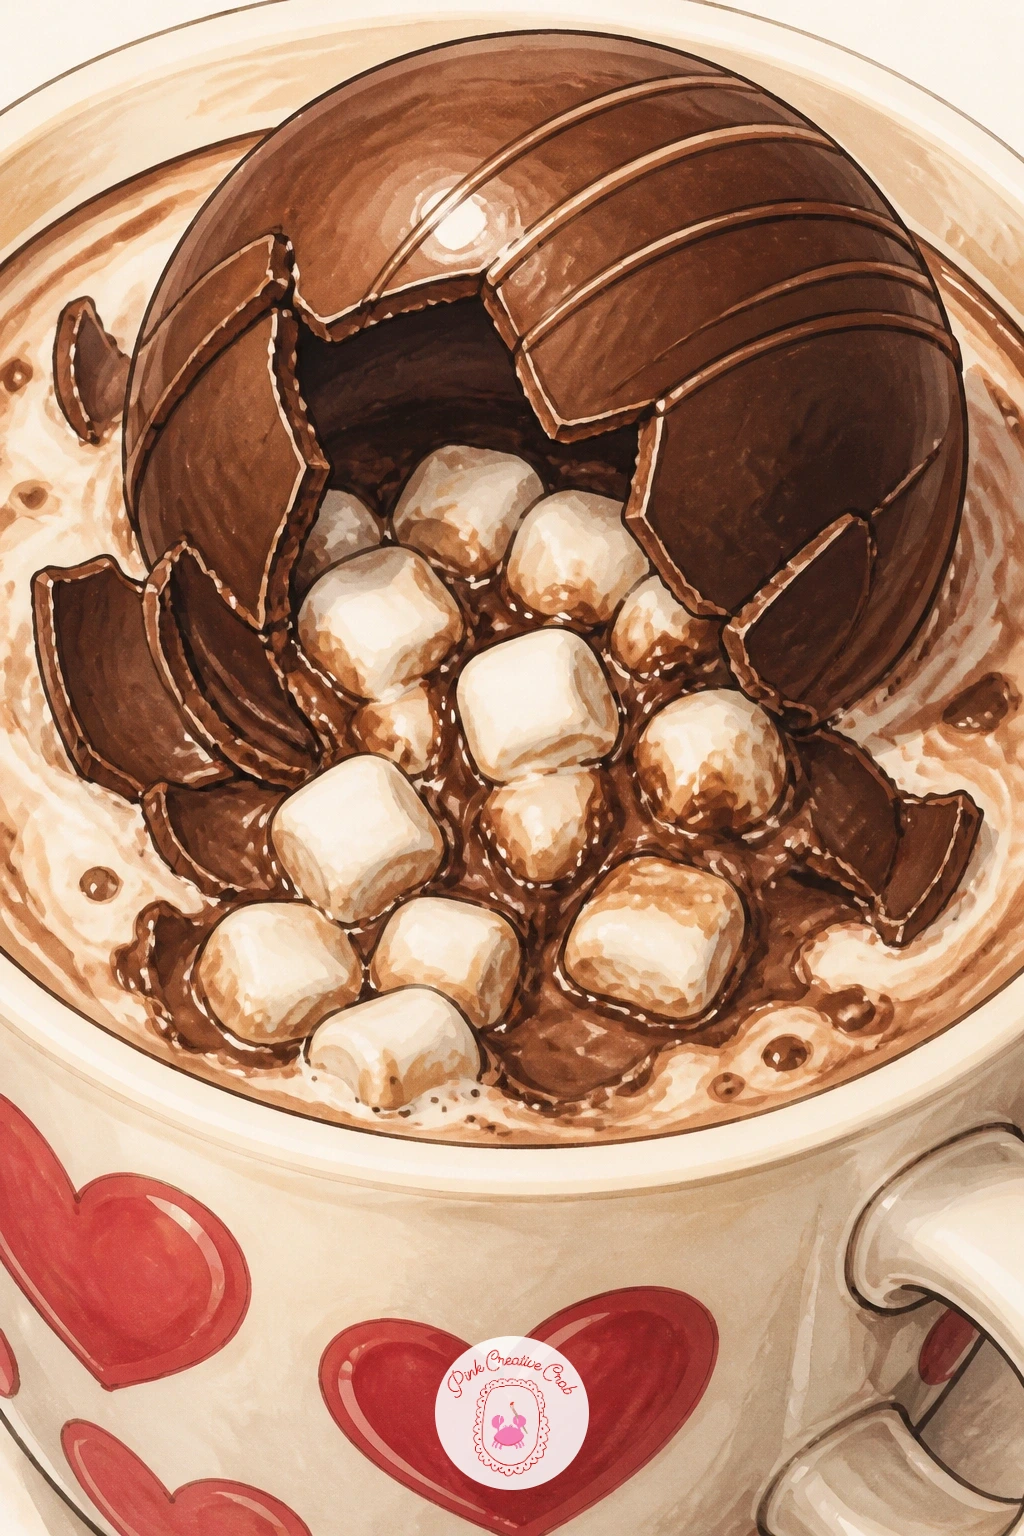
Palette: Dark Chocolate,Chocolate Brown,Cream,Warm White
Snowman-shaped marshmallow floating in cocoa builds on the melting mug idea but gives the topping a little personality. Stack two or three graduated circles for the marshmallow snowman, smallest on top, then add tiny dot eyes and a small orange triangle nose before it ever touches the cocoa.
Draw the mug and cocoa surface first in brown, then place the marshmallow snowman slightly off-center so it feels like it is bobbing rather than glued dead middle. Ink the marshmallow shapes with a lighter, looser line than the mug, since marshmallow is softer than ceramic.
Keep the snowman’s features tiny: oversized eyes or a big carrot nose will make it look like a sticker rather than a floating marshmallow. A thin brown line where the cocoa laps against the bottom circle sells the floating effect better than any shading underneath.
Swap the orange nose for a small brown dot if you only have warm-toned markers on hand.
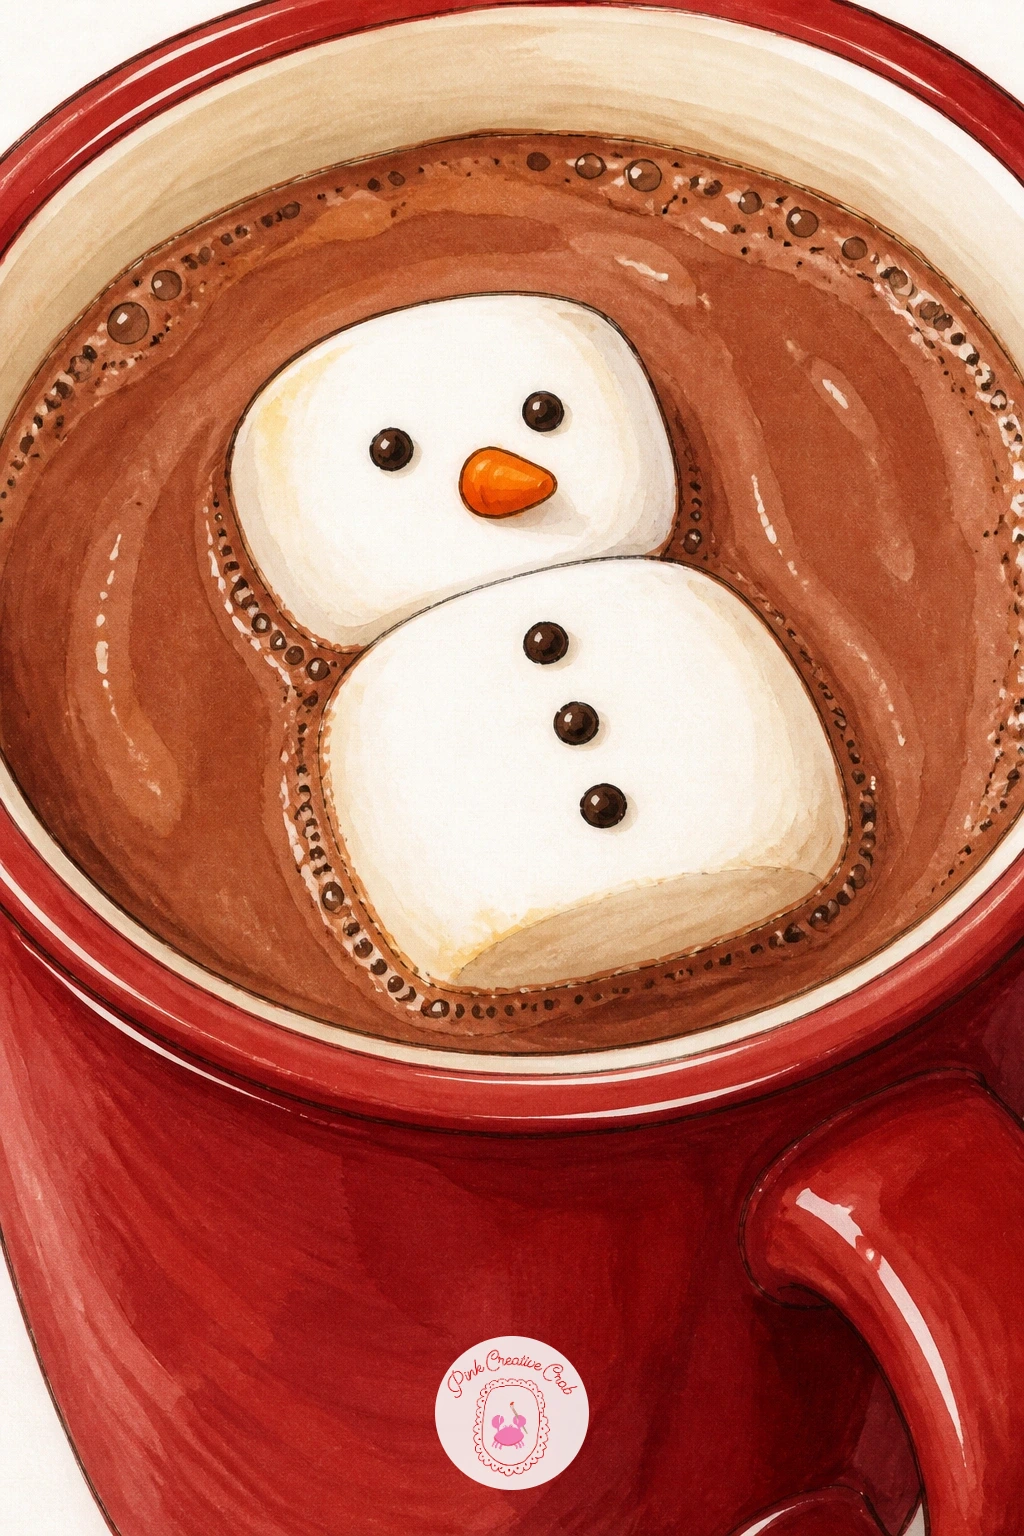
Palette: Chocolate Brown,Snow White,Soft Orange,Cream
Mug with a peppermint stick stirrer is a good chance to practice a spiral pattern on a small object. Draw the mug and cocoa surface first, then add the peppermint stick leaning out at an angle, roughly twice the height of the mug so it reads clearly against the rim.
Pencil the red stripe spiral loosely around the stick before inking, keeping the bands slightly uneven in width since perfectly even stripes look printed rather than hand-twisted. Color the white sections first, let them dry, then layer the red stripes on top so the edges stay crisp instead of bleeding into each other.
Red and white stripes on a round object often end up looking flat: add a thin shadow stripe along one side of the stick using a pale grey or dusty pink to round it out.
A simple candy cane shape works as a substitute if a straight peppermint stick feels harder to picture.
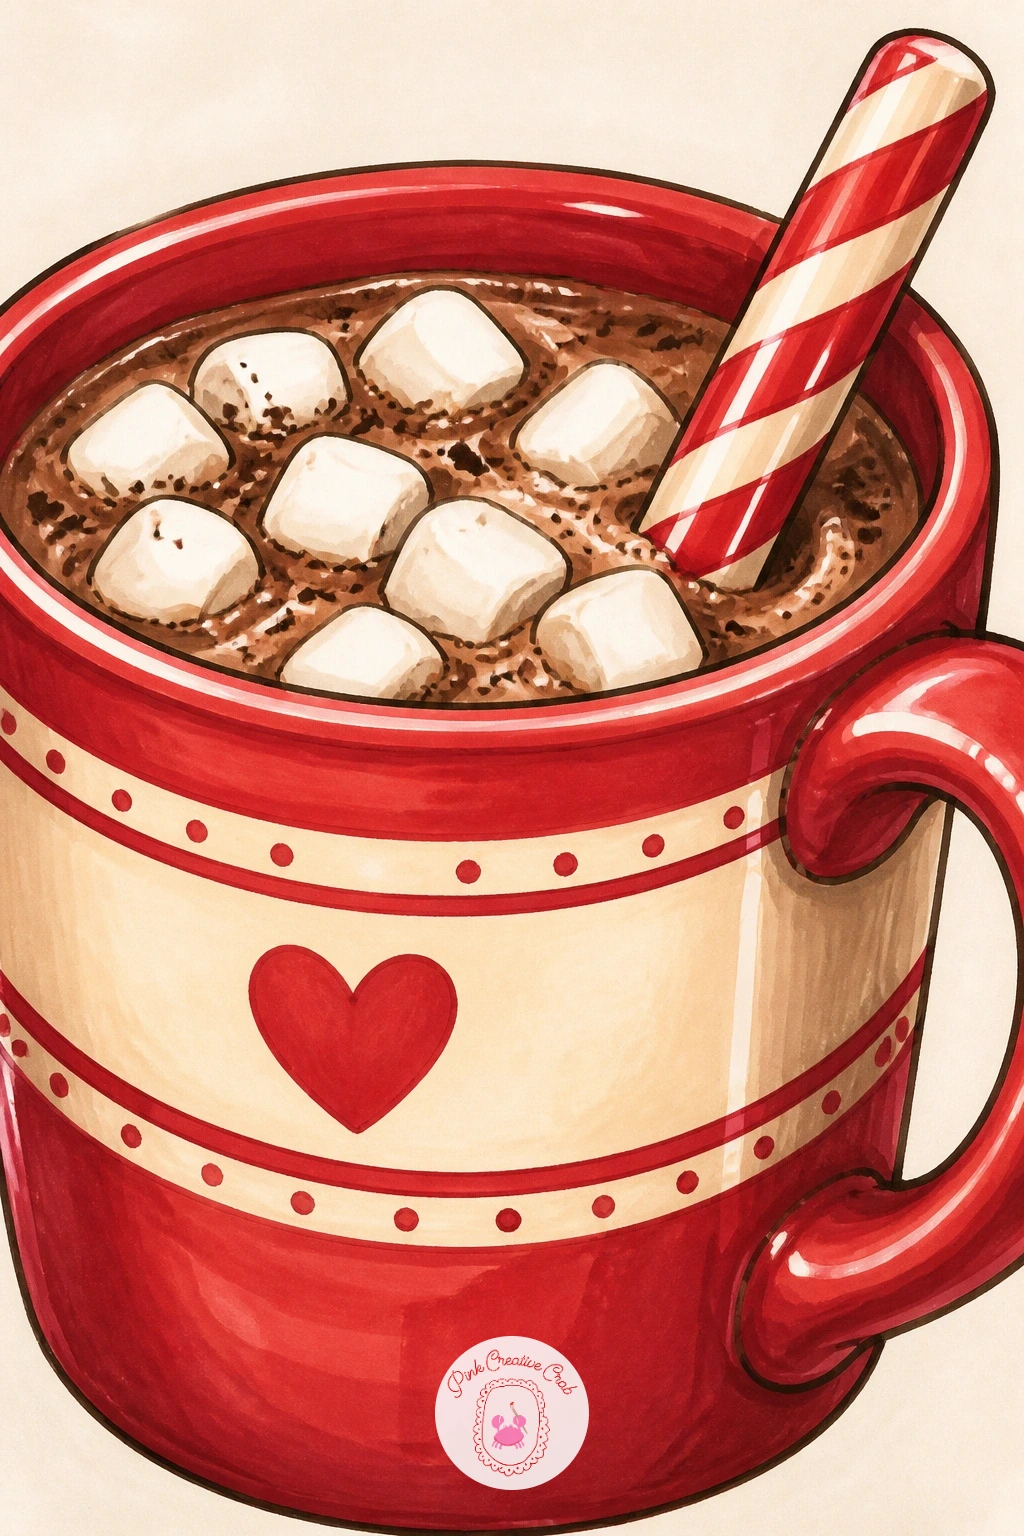
Palette: Rosy Red,Warm White,Chocolate Brown,Dusty Pink
Hot chocolate stand at a winter market is the first real scene on this list, so simplify it down to three shapes before adding detail: a rectangular counter, a striped awning above it, and a row of mugs or a pot sitting on top. Block these three forms in pencil, checking that the awning is roughly twice as wide as the counter so it reads as a proper stall, not a narrow booth.
Ink the stand’s structure first, then the mugs and signage, and leave the background mostly open so the stand stays the clear focal point. A hanging sign with a simple cup icon does more work than any written word.
Crowded little market scenes often lose their subject in the details: keep any background figures or stalls as loose, unfinished suggestions near the edges, saving full detail and color for the cocoa stand itself.
If a full stand feels like a lot for one sitting, the counter with two mugs and a small sign is a complete scene on its own.
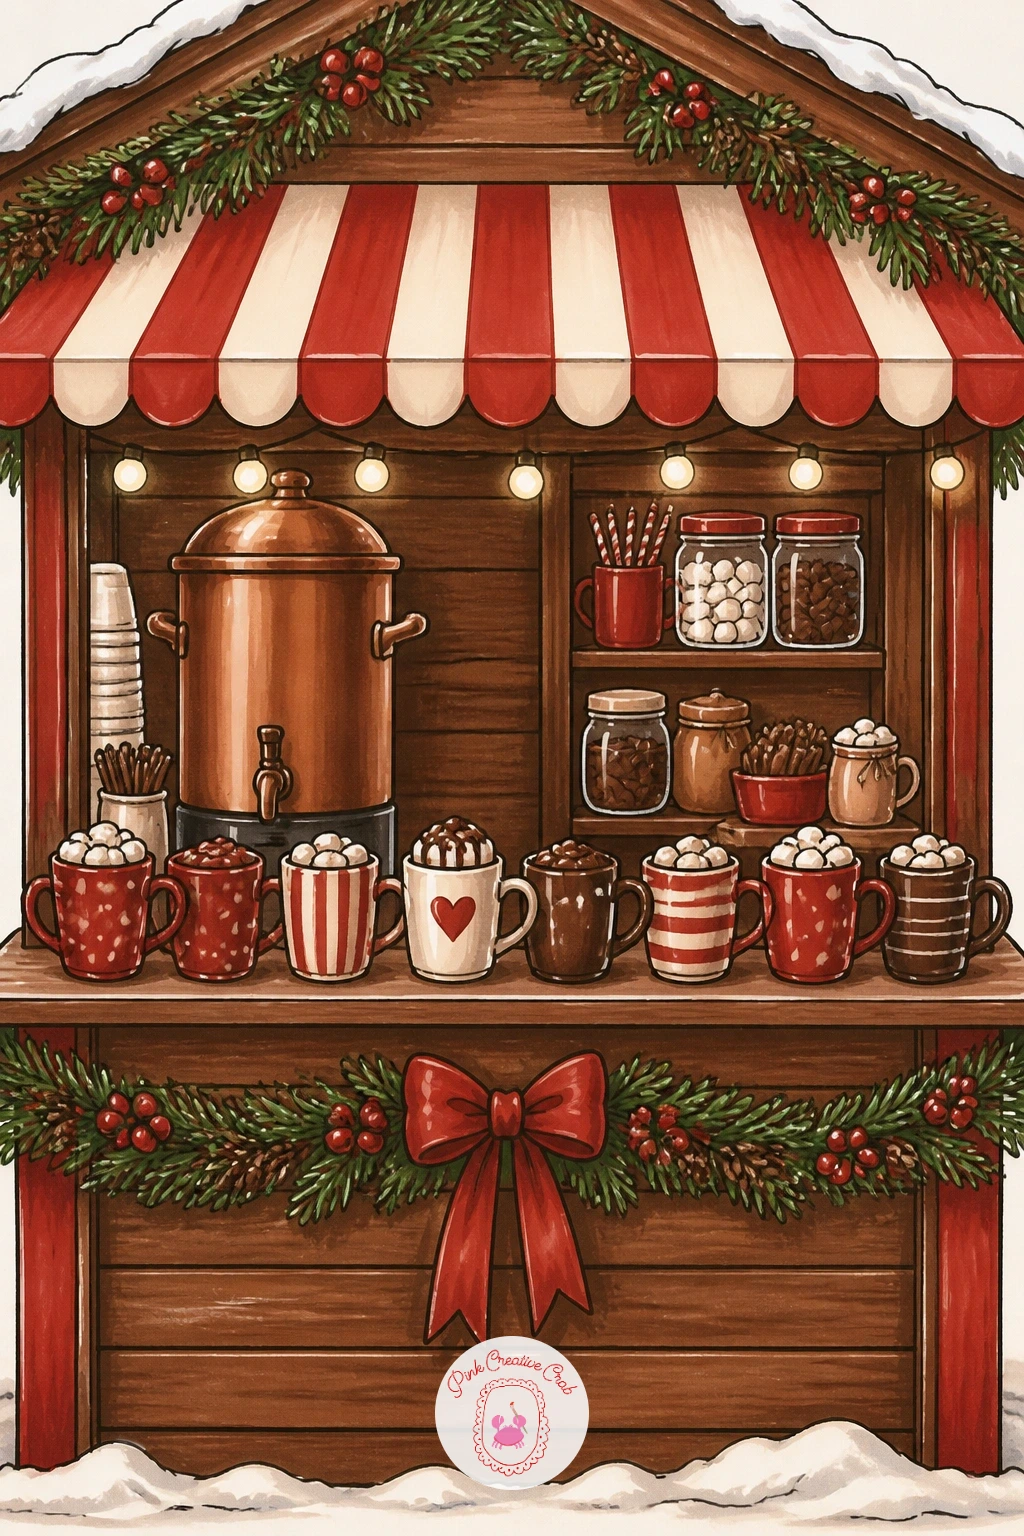
Palette: Chocolate Brown,Rosy Red,Cream,Soft Grey
Cat sniffing a cocoa mug pairs a simple animal pose with the mug you have already been practicing. Draw the mug first, then build the cat from basic rounded shapes: an oval body, a smaller round head tilted down toward the steam, ears as two simple triangles, and the nose pointed just above the rim without quite touching it.
Ink the mug before the cat so the steam lines can weave naturally around the cat’s whiskers rather than sitting on top of them. Color the cat in one solid tone first, then add a few short fur strokes along the back and tail with a darker shade of the same color for texture.
Cat faces at this angle often end up too flat: tilt the head slightly and angle one ear back to suggest curiosity rather than a straight-on stare.
A short-haired tabby pattern of simple stripes is easier to finish quickly than a fluffy long-haired coat.
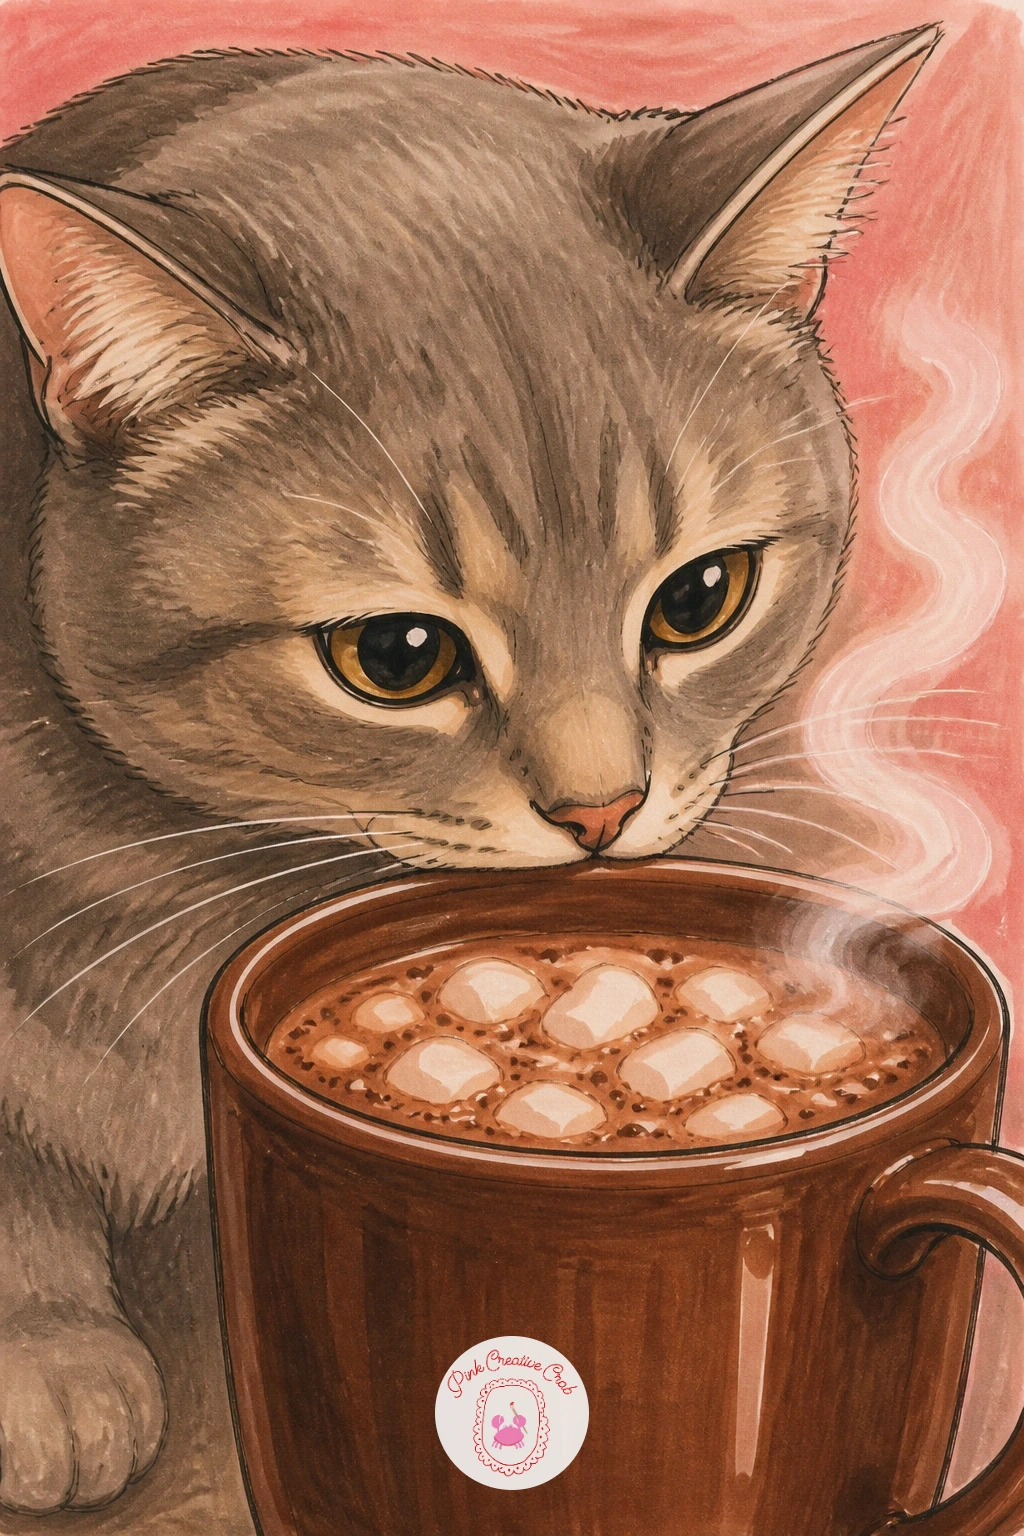
Palette: Warm Grey,Chocolate Brown,Cream,Charcoal
Small cup of thick Parisian hot chocolate with a croissant leans on a thicker, glossier drink than the usual mug, so draw the cup smaller and the chocolate itself with a slightly raised, syrupy surface rather than a flat line across the top. A small saucer underneath and a demitasse spoon resting beside it complete the setting.
Sketch the croissant next to the cup as a curved crescent with a few diagonal lines marking its layered ridges. Ink the cup and saucer first, then the croissant, keeping its outline soft and irregular since a croissant is never perfectly symmetrical.
The chocolate inside the cup is the detail to get right: color it a deep, almost solid dark brown with just one small highlight streak, since thick Parisian hot chocolate barely moves or ripples the way thinner cocoa does. For more cafe scenes in this mood, the Paris sketchbook ideas cover plenty of similar table setups.
Swap the croissant for a simple pain au chocolat if curved shapes feel tricky today.
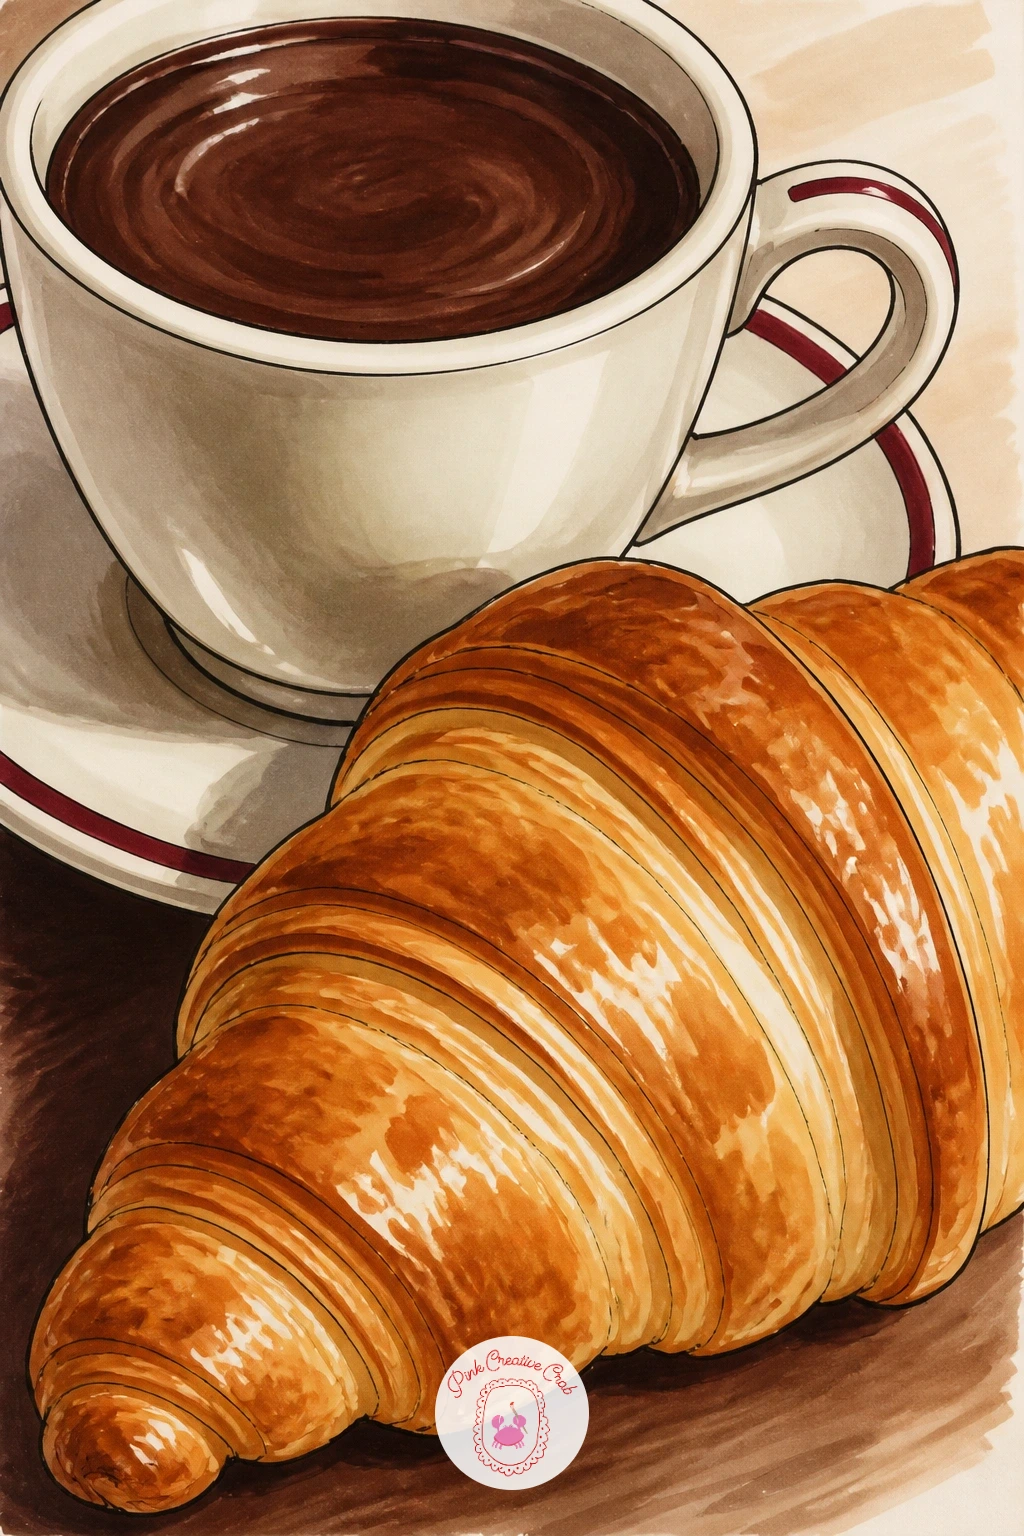
Palette: Dark Chocolate,Golden Tan,Cream,Soft White
Cocoa mug with a plate of cookies is a simple pairing that works well as a quick still life. Place the mug and a small round plate side by side, checking that the plate sits roughly the same height as the mug’s base so neither object looks like it is floating above the table line.
Draw two or three cookies overlapping slightly on the plate rather than lined up in a neat row, since overlap is what makes a small pile look natural. Ink the mug, then the plate, then the cookies, finishing with any chocolate chip dots or a drizzle line last so they sit crisply on top of the cookie color.
Flat, single-tone cookies are the usual letdown here: add a slightly darker brown around the edges of each cookie to suggest the baked crust, keeping the center a shade lighter.
Ten minutes gets you the mug and two plain cookies, forty minutes lets you add chip texture and a linen napkin folded under the plate.
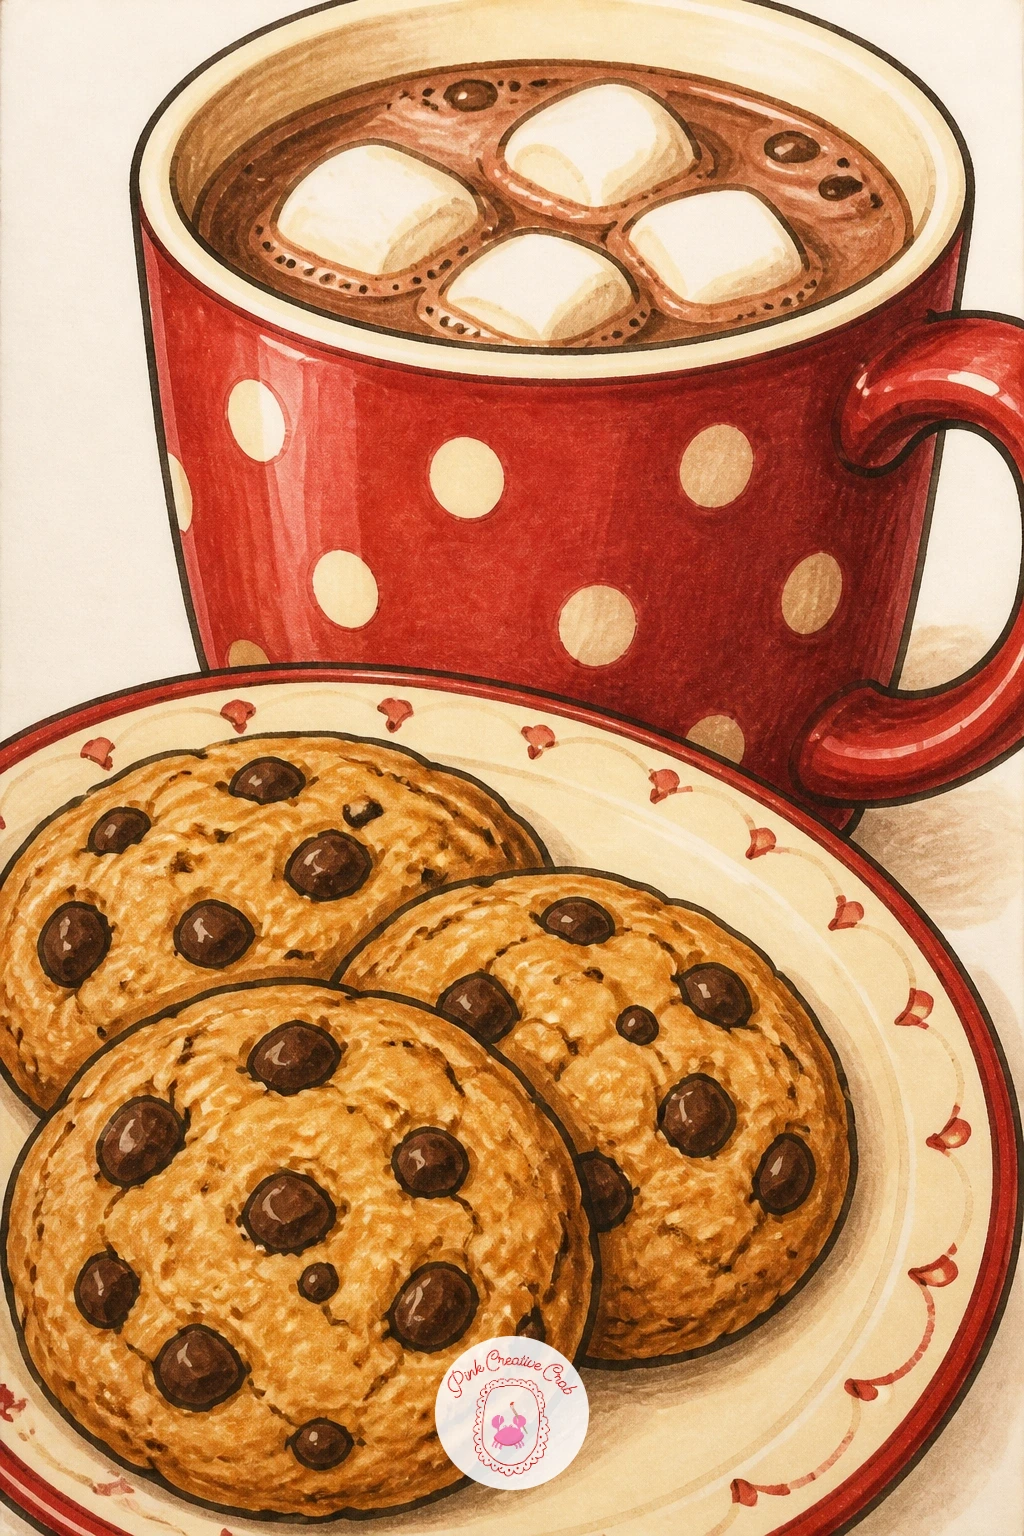
Palette: Golden Tan,Chocolate Brown,Cream,Warm White
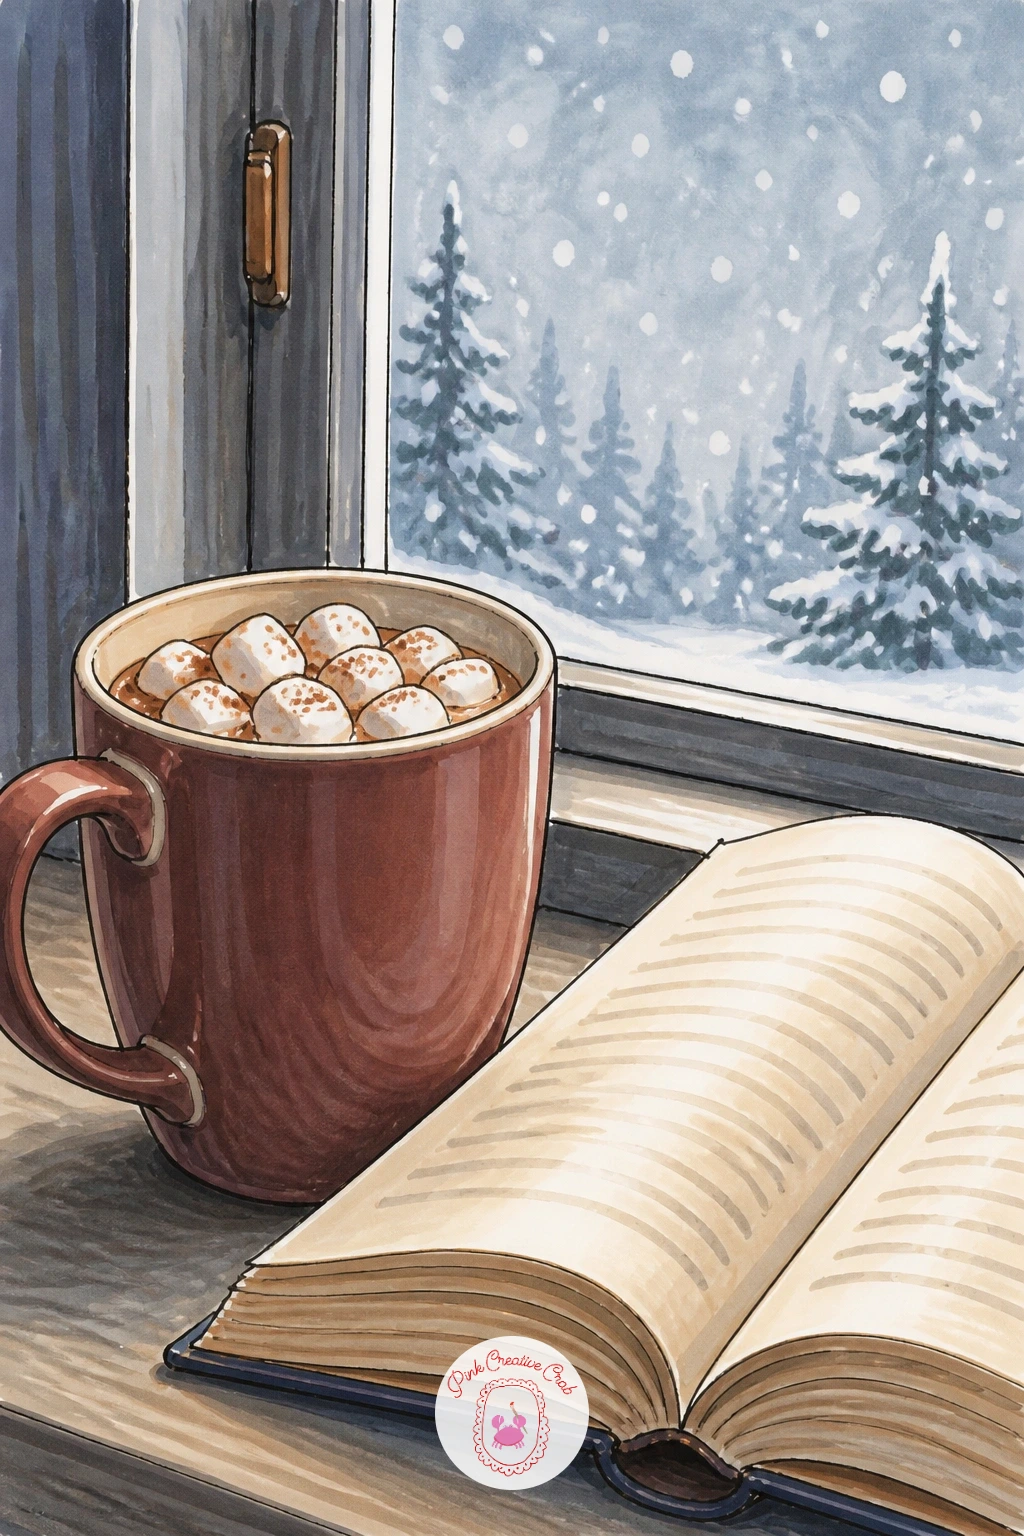
Mug of cocoa by a snowy window with a book shifts the eye level low, as if you are sitting at the table looking slightly up toward the window frame, which makes the scene feel cozier than a straight-on view. Draw the window frame first as a simple rectangle with a crossbar, then the sill where the mug and open book will sit.
Place the mug closer to the viewer and slightly larger than the book beside it, since objects nearer the eye read larger even in a simple flat illustration. Ink the window and furniture first, then the mug and book, saving the snowflakes outside the glass for last in white gel pen.
A common mistake is making the outdoor snow scene as detailed as the indoor objects, which pulls focus away from the mug: keep everything past the window glass loose and pale, almost a soft blur of grey-blue.
Fogged glass along the bottom edge of the window, left mostly white, finishes the warm-versus-cold contrast nicely.
You Will Need
- white gel pen
Palette: Chocolate Brown,Cool Blue Grey,Cream,Golden Tan
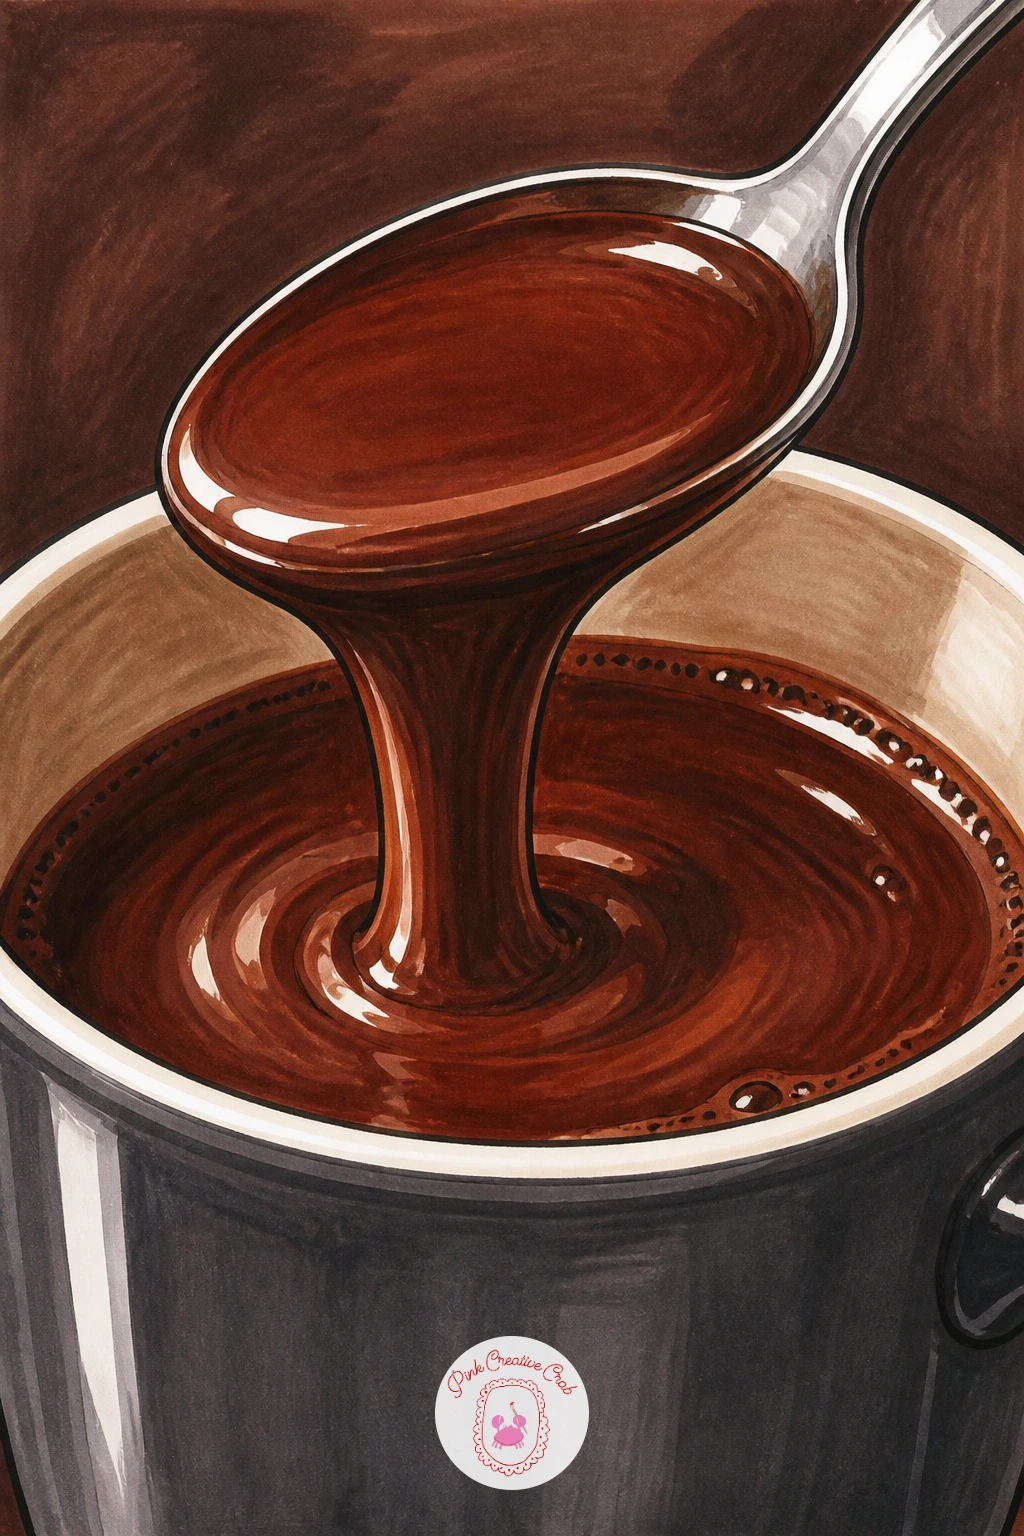
Spoon dipping into rich cocoa is a close-up study, so fill most of the frame with just the mug rim and the spoon tilted at an angle as it lifts a thick ribbon of chocolate. Draw the spoon bowl first, then the cocoa surface rippling slightly where the spoon has just broken through it.
Ink the spoon’s metal edge with a clean, confident line since any wobble reads immediately on a simple curved object like this. Color the cocoa itself in two tones: a darker shade pooling in the spoon and a lighter, glossier streak along the top where light catches the surface.
Light and reflection are the whole point of this one: decide where your light source sits, usually above and slightly to one side, and keep every highlight consistent with that, on both the spoon and the chocolate surface.
A thin white gel pen line along the spoon’s top edge finishes the metal shine in seconds.
You Will Need
- white gel pen
Palette: Dark Chocolate,Chocolate Brown,Steel Grey,Warm White
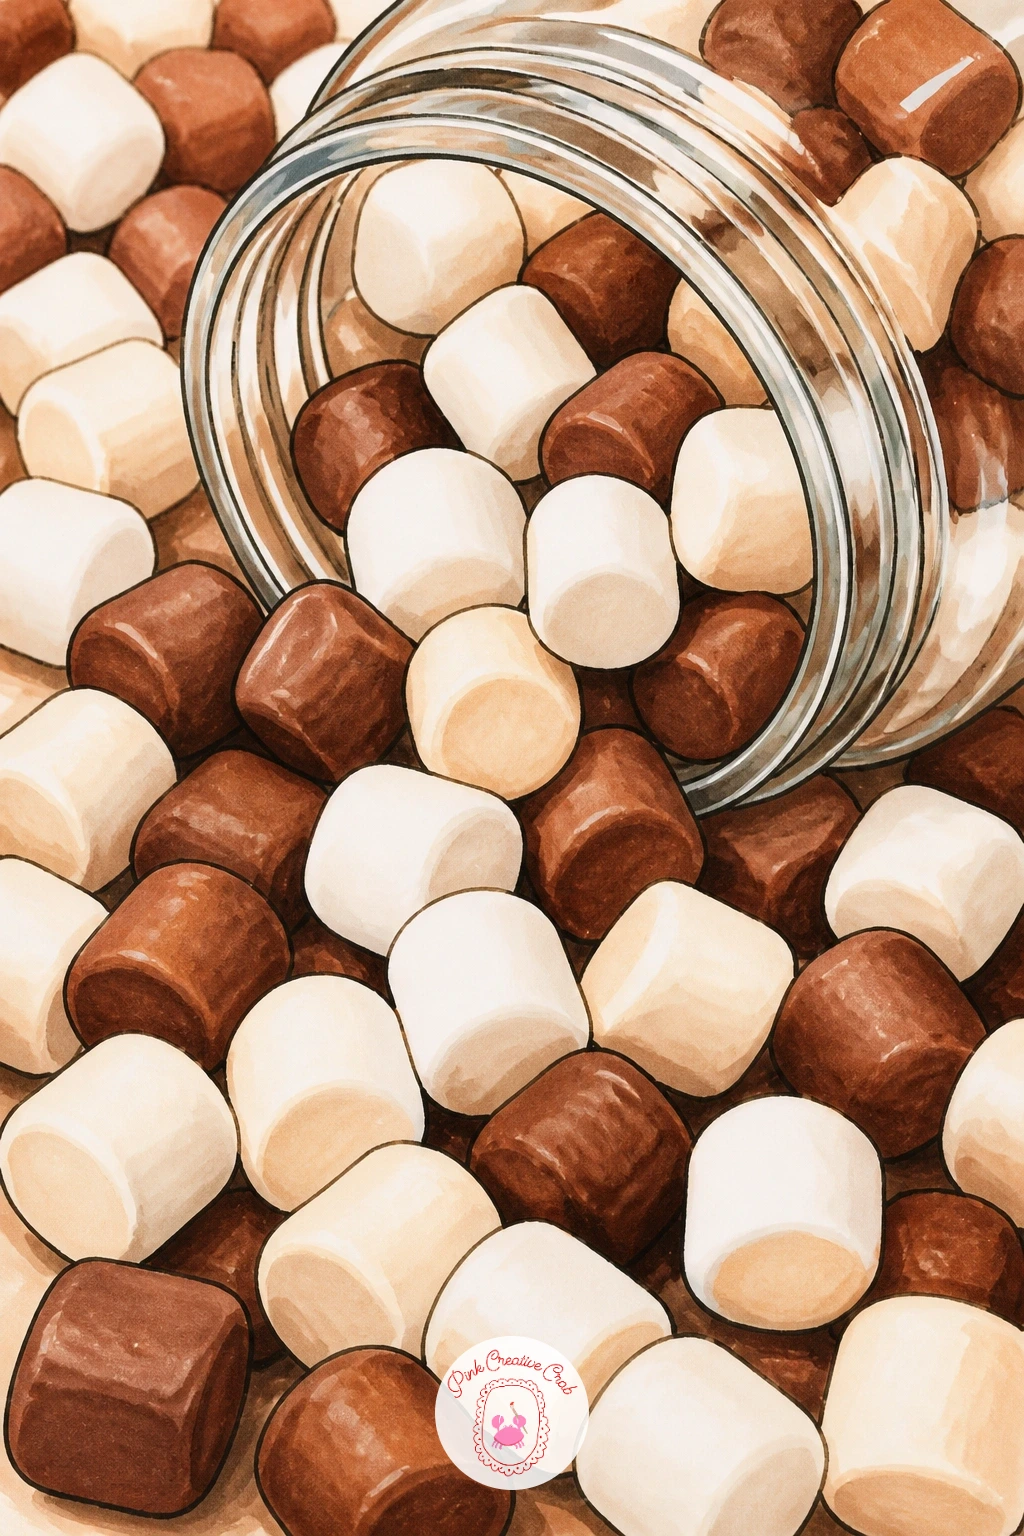
Mini marshmallows spilling from a jar turns a simple topping into the main subject, with the jar tipped on its side and a small cascade of marshmallows pouring out across the surface it sits on. Draw the jar first as a tipped cylinder, then the marshmallows as a cluster of soft overlapping circles trailing out from the opening.
Vary the marshmallow sizes slightly rather than drawing them all identical, and let a few roll further from the jar than the rest so the spill feels like it is still in motion. Ink the jar outline first, then each marshmallow with a light, rounded line, leaving small white gaps between overlapping shapes rather than outlining every edge.
Too many marshmallows drawn the exact same size is the giveaway that flattens this idea: mix in a handful of slightly squashed or tilted ones among the round ones.
A short-handled jar with a wide mouth is the easiest shape to draw if a tall narrow jar feels fiddly today.
Palette: Warm White,Cream,Soft Grey,Chocolate Brown
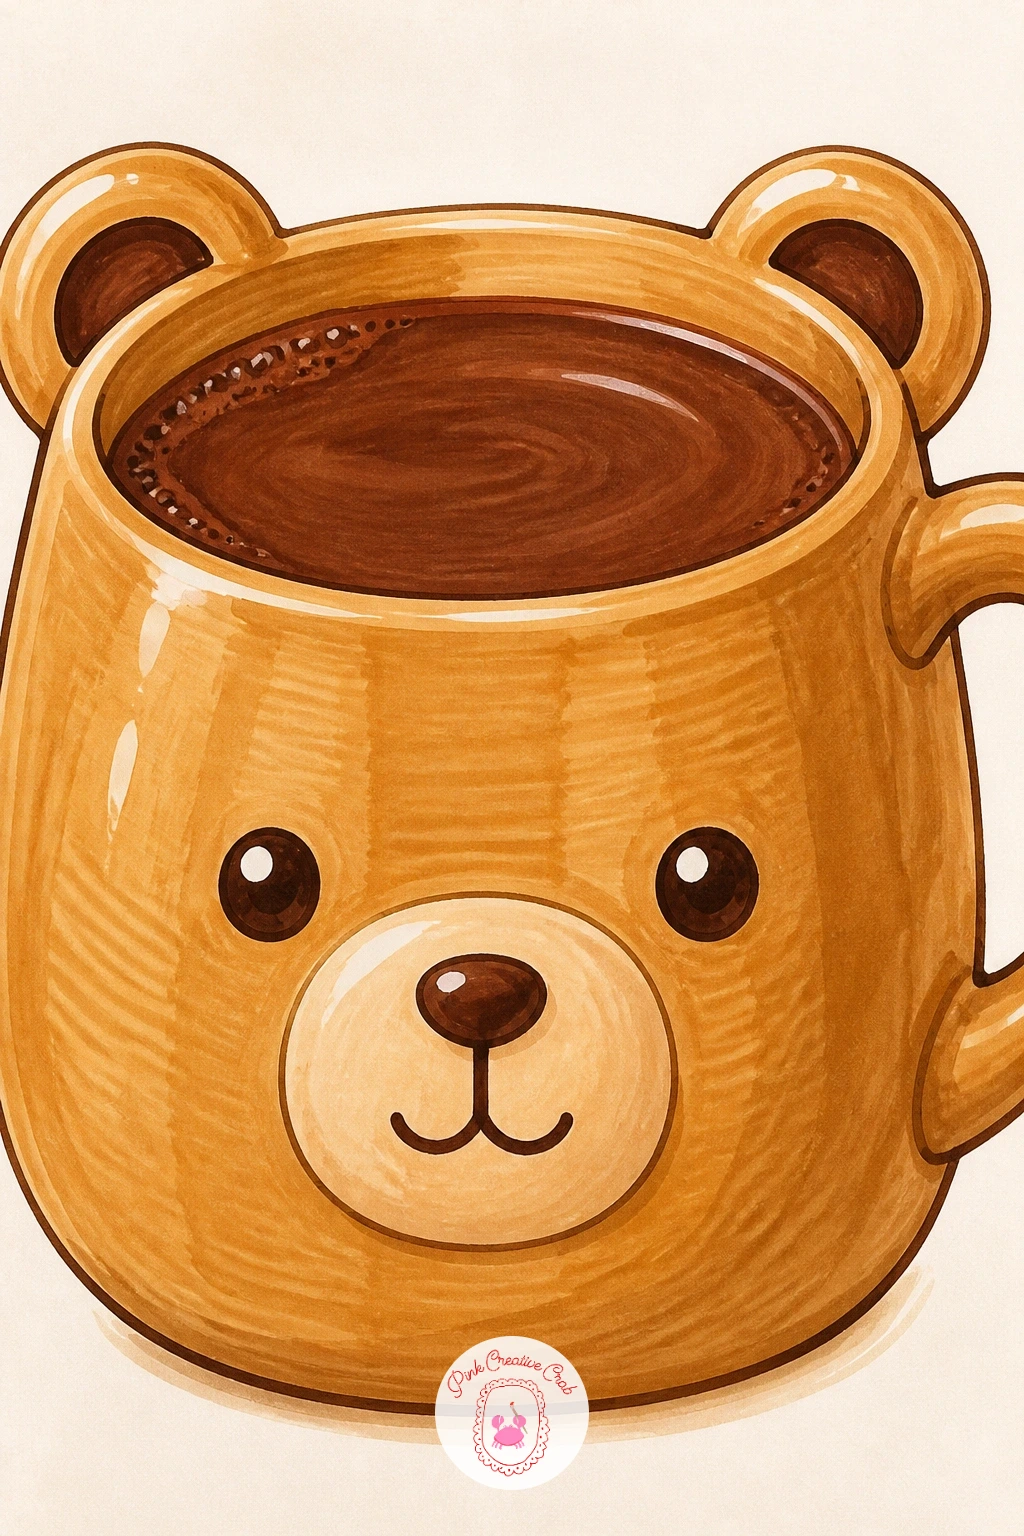
Bear-shaped mug full of cocoa is a fun shape study, since the handle and body need to read clearly as a bear even though the whole thing is really just a cup. Draw the mug’s basic cylinder first, then build two small rounded ears on top of the rim and a simple muzzle shape on the front as the spout.
Ink the bear features with a slightly thicker line than the rest of the mug so the face reads instantly even at a glance. Color the mug itself in a warm tan or brown, then fill the cocoa visible inside with a darker chocolate shade so the two browns stay distinct from each other.
Flat, expressionless bear faces are the usual issue: two small dot eyes placed close together and a simple curved line for the muzzle edge give it far more charm than trying to draw a detailed snout.
If novelty mug shapes like this are fun for you, the bear painting ideas cover plenty of other ways to draw bear faces and poses.
Palette: Golden Tan,Chocolate Brown,Cream,Charcoal
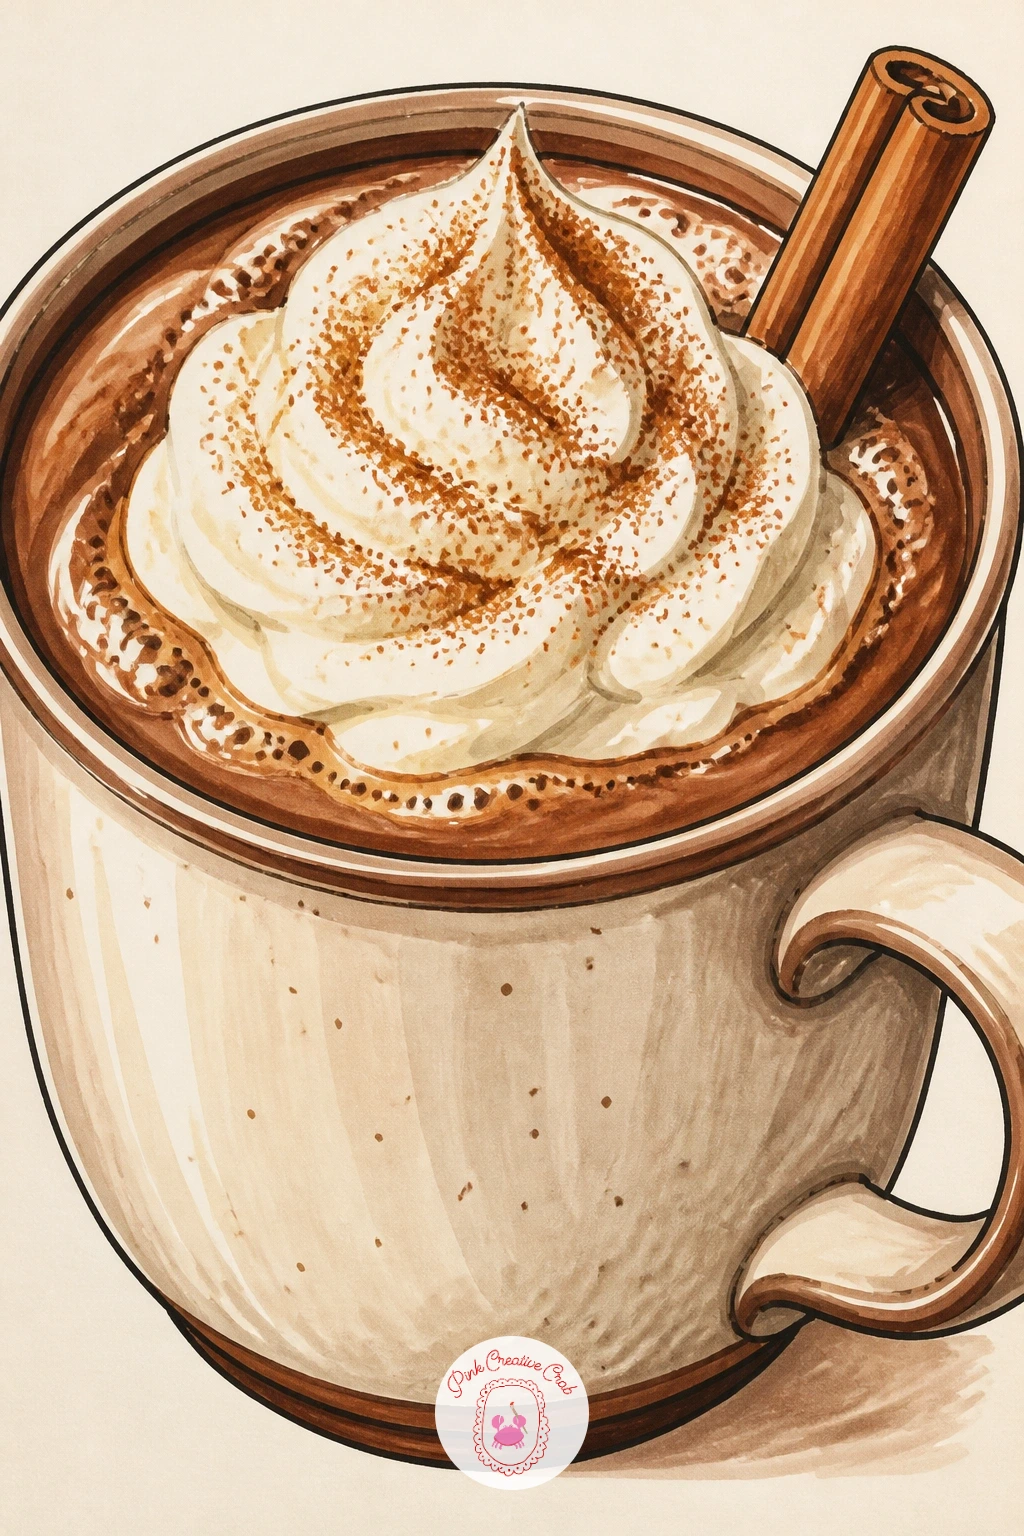
Hot chocolate with a dollop of cream and cinnamon keeps the shapes simple so you can focus on the ten-minute versus forty-minute choice. For the quick version, draw the mug, one soft dollop of cream sitting on top, and a light dusting of cinnamon dots across it, done in a handful of clean marker layers.
For the longer version, add a cinnamon stick resting across the rim and a faint spiral pattern swirled into the cream where it meets the chocolate below, which takes real care with the fineliner but rewards you with a much richer-looking mug. Ink the cream dollop with a single soft curved outline rather than scalloped edges, since cream holds a smooth shape, not a frilly one.
Cinnamon dust often ends up too uniform: scatter the dots unevenly, heavier in the center of the dollop and thinning toward the rim, using a fine marker tip or the point of your fineliner dipped lightly in brown.
Either version finishes well with one thin highlight line along the top edge of the cream.
Palette: Cream,Chocolate Brown,Cinnamon,Warm White
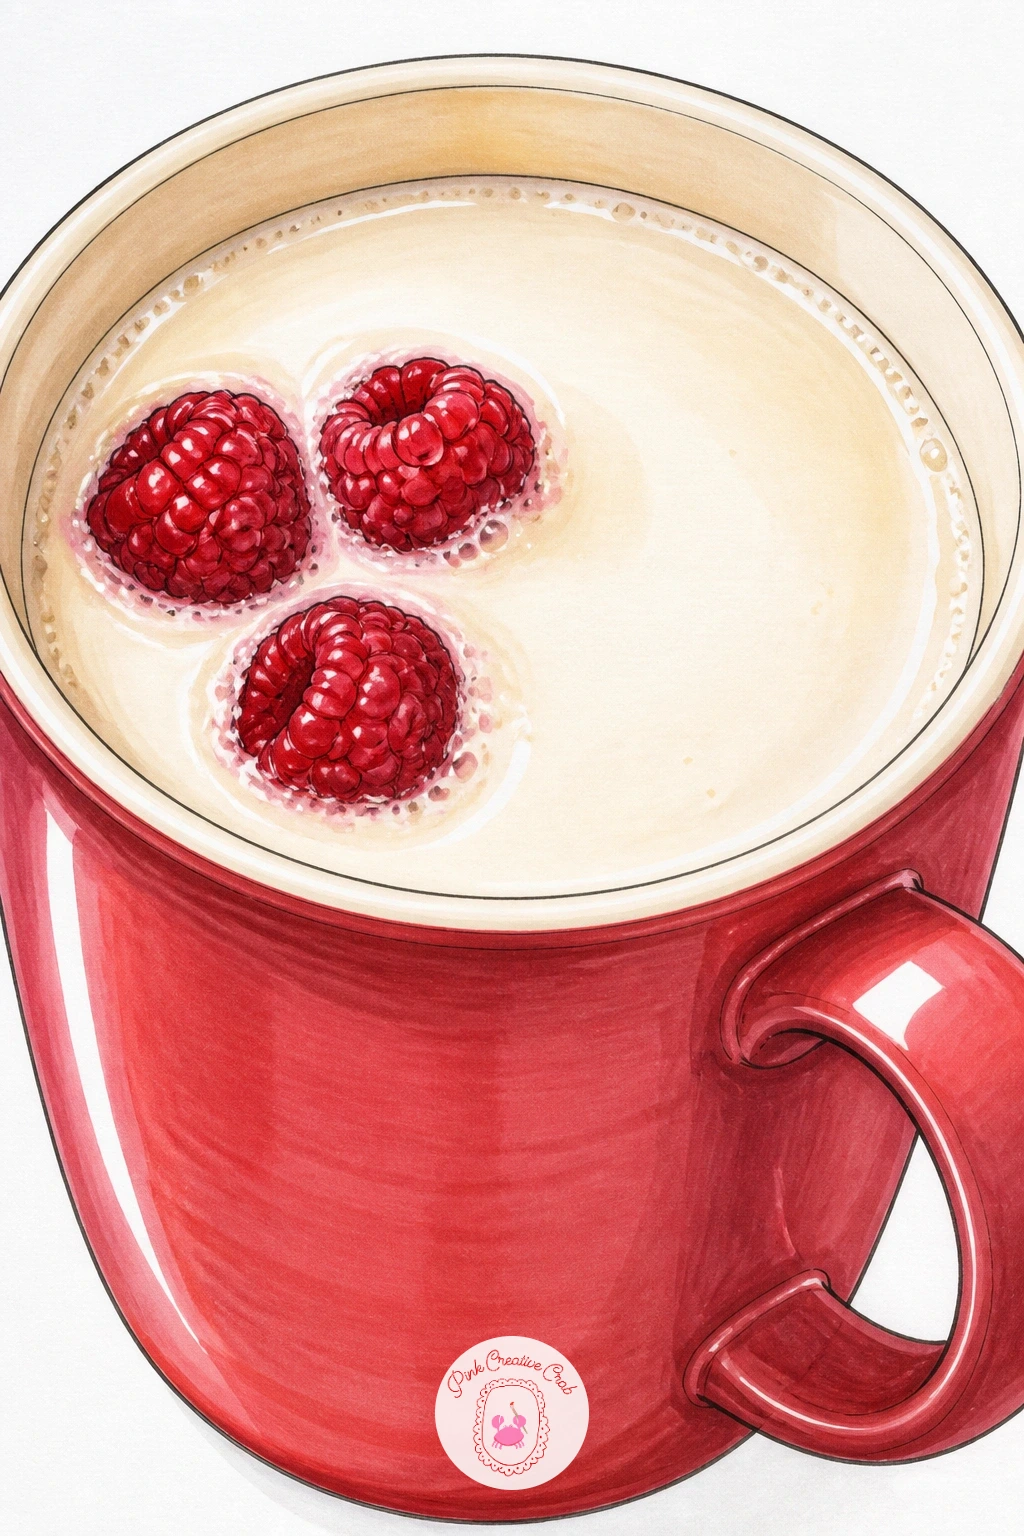
White hot chocolate with raspberries swaps the usual brown palette for cream and pink, so plan your color order carefully: lay down the pale cream base of the drink first and let it dry fully before placing the raspberries, since dark red over wet cream marker will bleed and muddy the whole cup.
Draw two or three raspberries floating near the rim, each built from a cluster of small bumps rather than one smooth circle, since that bumpy texture is what reads as raspberry rather than any other round fruit. Ink the mug and drink surface first, then the raspberries last so their fine outlines stay crisp.
A flat white drink can look empty without enough contrast: add a faint warm shadow along one side of the cup using a pale grey or blush tone to give the white chocolate some roundness.
Swap raspberries for a few dried cranberries if red marker is all you have, since the small cluster shape works for either.
Palette: Warm White,Rosy Red,Blush Pink,Soft Grey
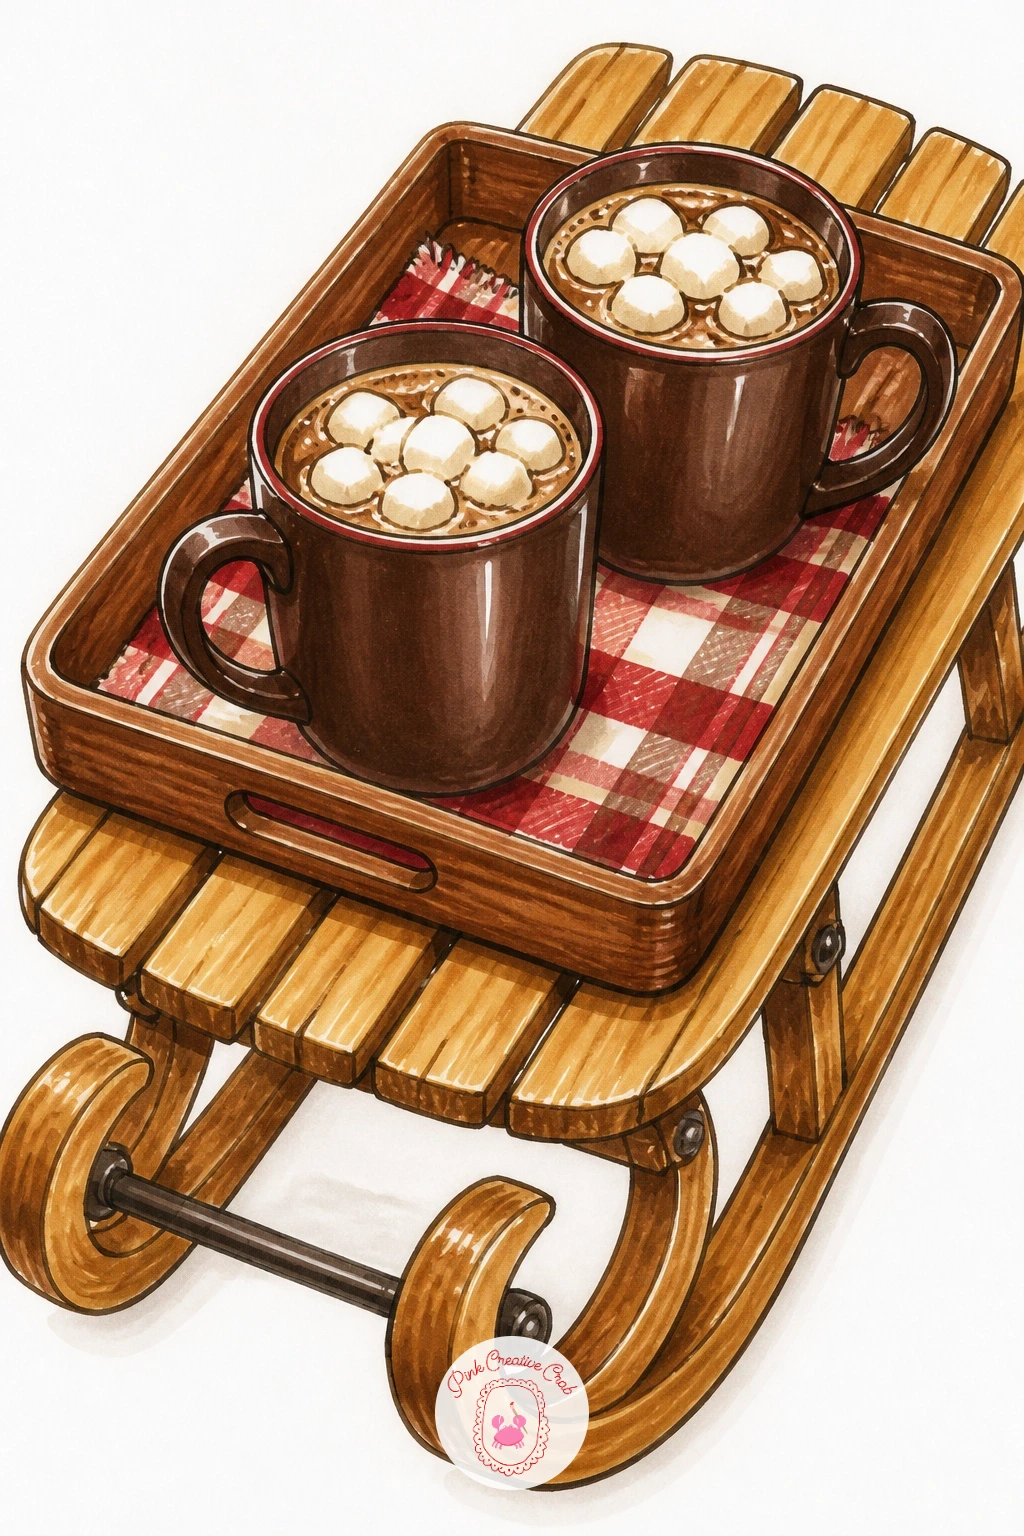
Cocoa tray riding on a sled is a playful little scene, so decide on your eye level before sketching: looking down slightly at the sled from above makes the tray and mugs read clearly, while a side view shows off the sled’s curved runners better. Either works, but pick one and keep every shadow consistent with it.
Draw the sled first as two curved runners connecting a flat wooden platform, then place the tray with two mugs on top, angled slightly so it feels like it just arrived rather than posed perfectly straight. Ink the sled’s wood grain with a few short parallel lines before adding color.
Runners drawn too straight are the usual flaw: give them a gentle curve at the front tip, which instantly makes the sled look like it glides rather than sits stiff on the snow.
A patch of snow spray behind the runners, drawn as a few loose white gel pen flicks, suggests motion without any extra linework.
You Will Need
- white gel pen
Palette: Golden Tan,Chocolate Brown,Snow White,Cream
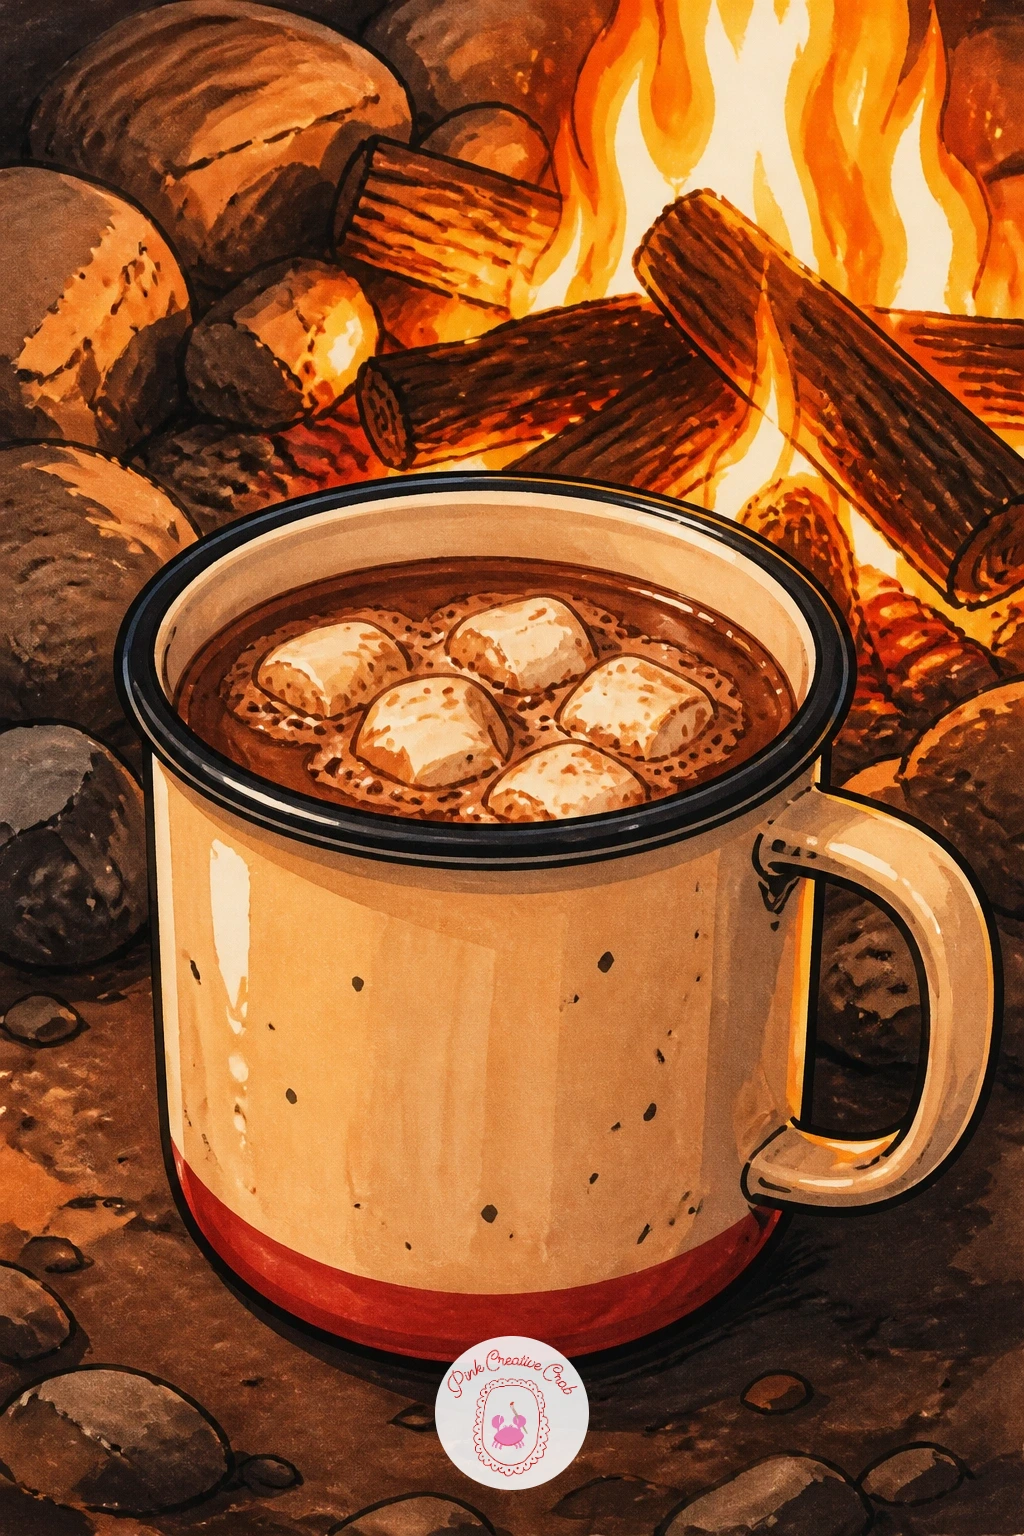
Camping mug of cocoa by a campfire works best with the light source placed low and warm, coming up from the fire rather than from above, which changes where every shadow and highlight falls. Draw the enamel mug first, a slightly dented cylinder with a simple wire handle, then sketch a loose suggestion of flames and logs just beside it in the frame.
Ink the mug with confident, slightly uneven lines to suggest worn metal rather than smooth ceramic, then the fire’s rough edges, letting the flame shapes stay loose and irregular. Color the firelight side of the mug in warm orange and the shadow side in a cooler brown, since that single shift is what makes the campfire glow feel real.
A fire that glows evenly all over looks flat and unconvincing: keep the brightest orange tight around the flame base and let it fade quickly into darker brown and grey toward the edges of the scene.
No enamel mug reference handy is fine, any simple metal camping mug photo gives you the same dented, handled shape.
Palette: Burnt Orange,Chocolate Brown,Charcoal,Warm Grey
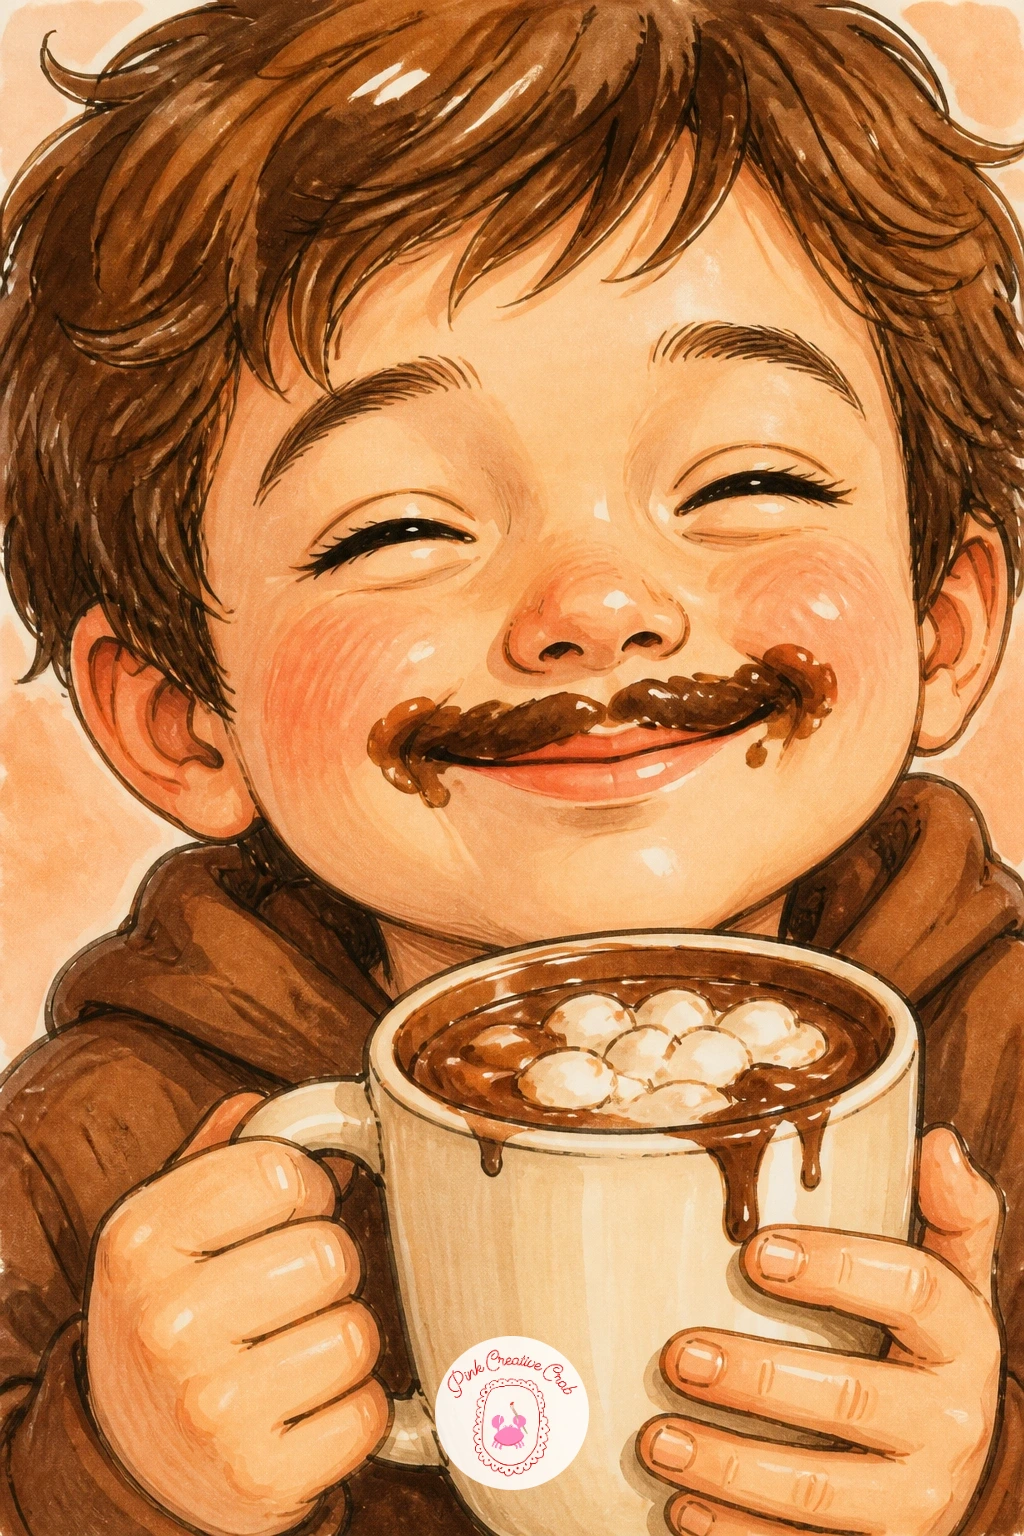
Kid with a chocolate mustache is a small portrait moment, so block the head shape and the mug held just below the chin before worrying about the smudge itself. Keep proportions simple and rounded, a child’s face reads younger with a slightly larger head-to-body ratio and bigger eyes than an adult’s.
Ink the face and mug first, then add the chocolate mustache last as a soft, slightly uneven smear above the upper lip, following the natural curve of the mouth rather than a straight line. A little smudge at one corner of the mouth sells the mess better than a perfectly centered mustache shape.
Overly symmetrical smudges are the tell that this was planned rather than messy: nudge the chocolate mark slightly off-center and vary its edge so one side trails off thinner than the other.
If drawing a full face feels like a lot today, a close crop of just the mouth, chin and mug rim tells the same story with far fewer lines.
Palette: Rosy Red,Chocolate Brown,Soft Peach,Cream
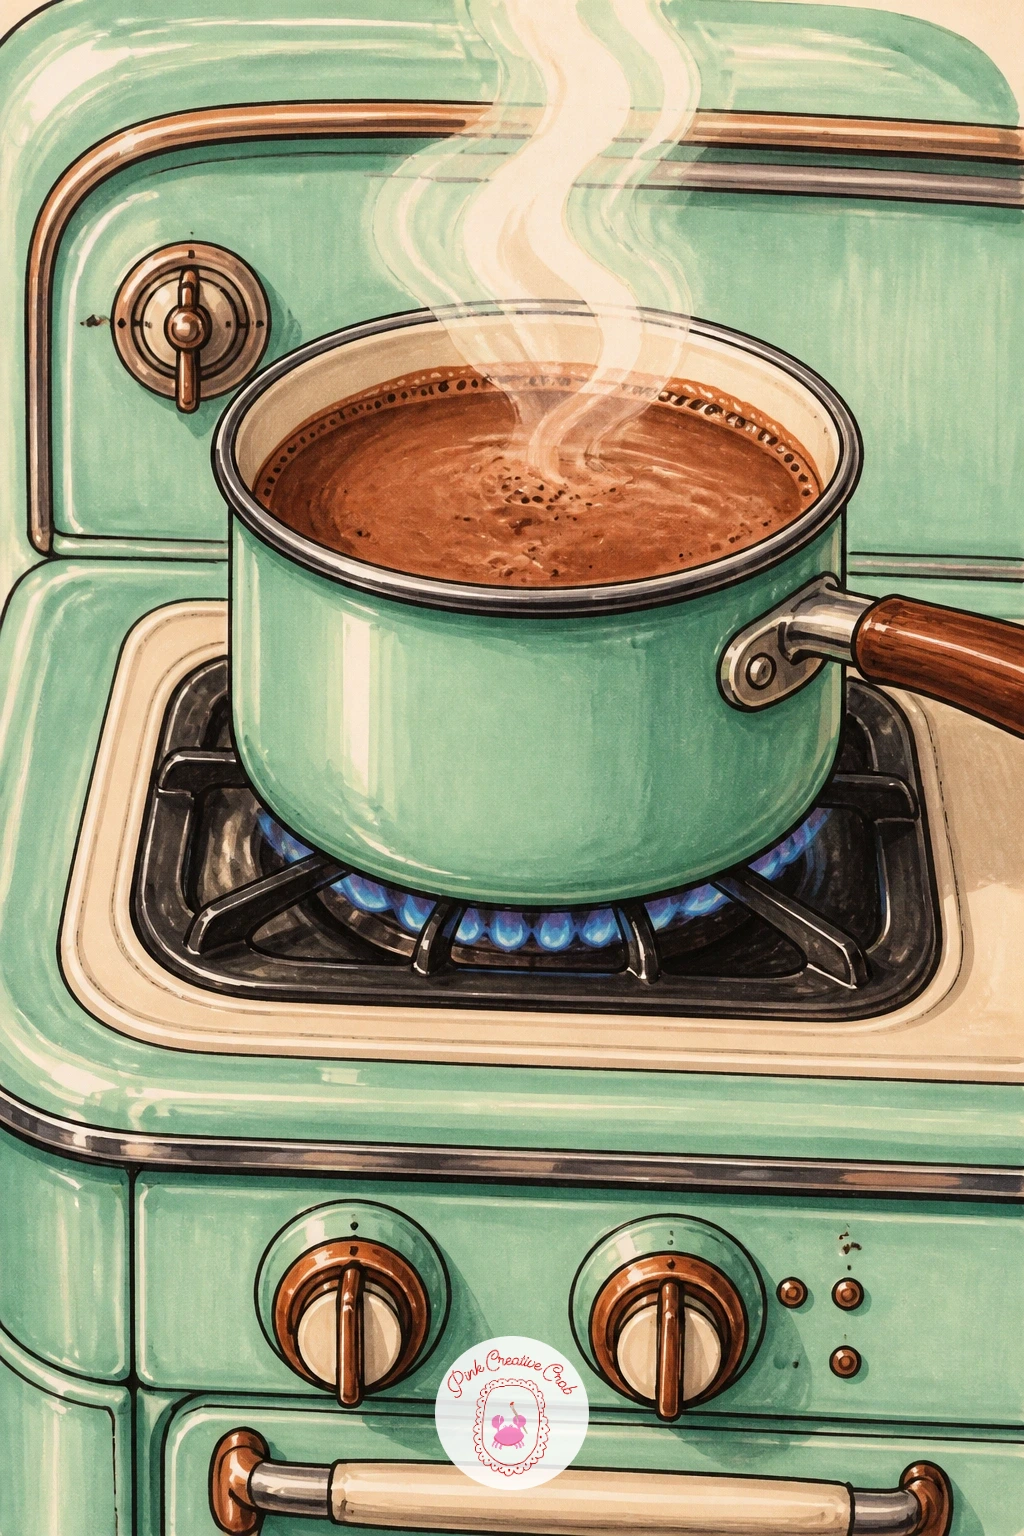
Pot of cocoa on a vintage stove brings in a bit of furniture drawing, so start with the stove as a simple boxy shape with rounded corner details and a couple of dial knobs along the front, keeping the overall form chunky and old-fashioned rather than sleek. Place the pot on one burner, slightly larger than you expect, since a stovetop pot reads better oversized than too small to notice.
Ink the stove’s outline first, then the pot, then the rising steam wisps last so they layer cleanly over the stove’s edges. Color the stove in a muted vintage tone, enamel white or a soft mint, and keep the pot itself in a darker, more saturated brown so it stands out against the lighter appliance.
Modern-looking straight edges are what undercuts the vintage feel: round every corner on the stove slightly and add one or two small dents or worn patches in a slightly darker shade.
A simple two-knob stove is plenty of detail if a full dial panel feels like too much for one sitting.
Palette: Mint,Chocolate Brown,Warm White,Charcoal
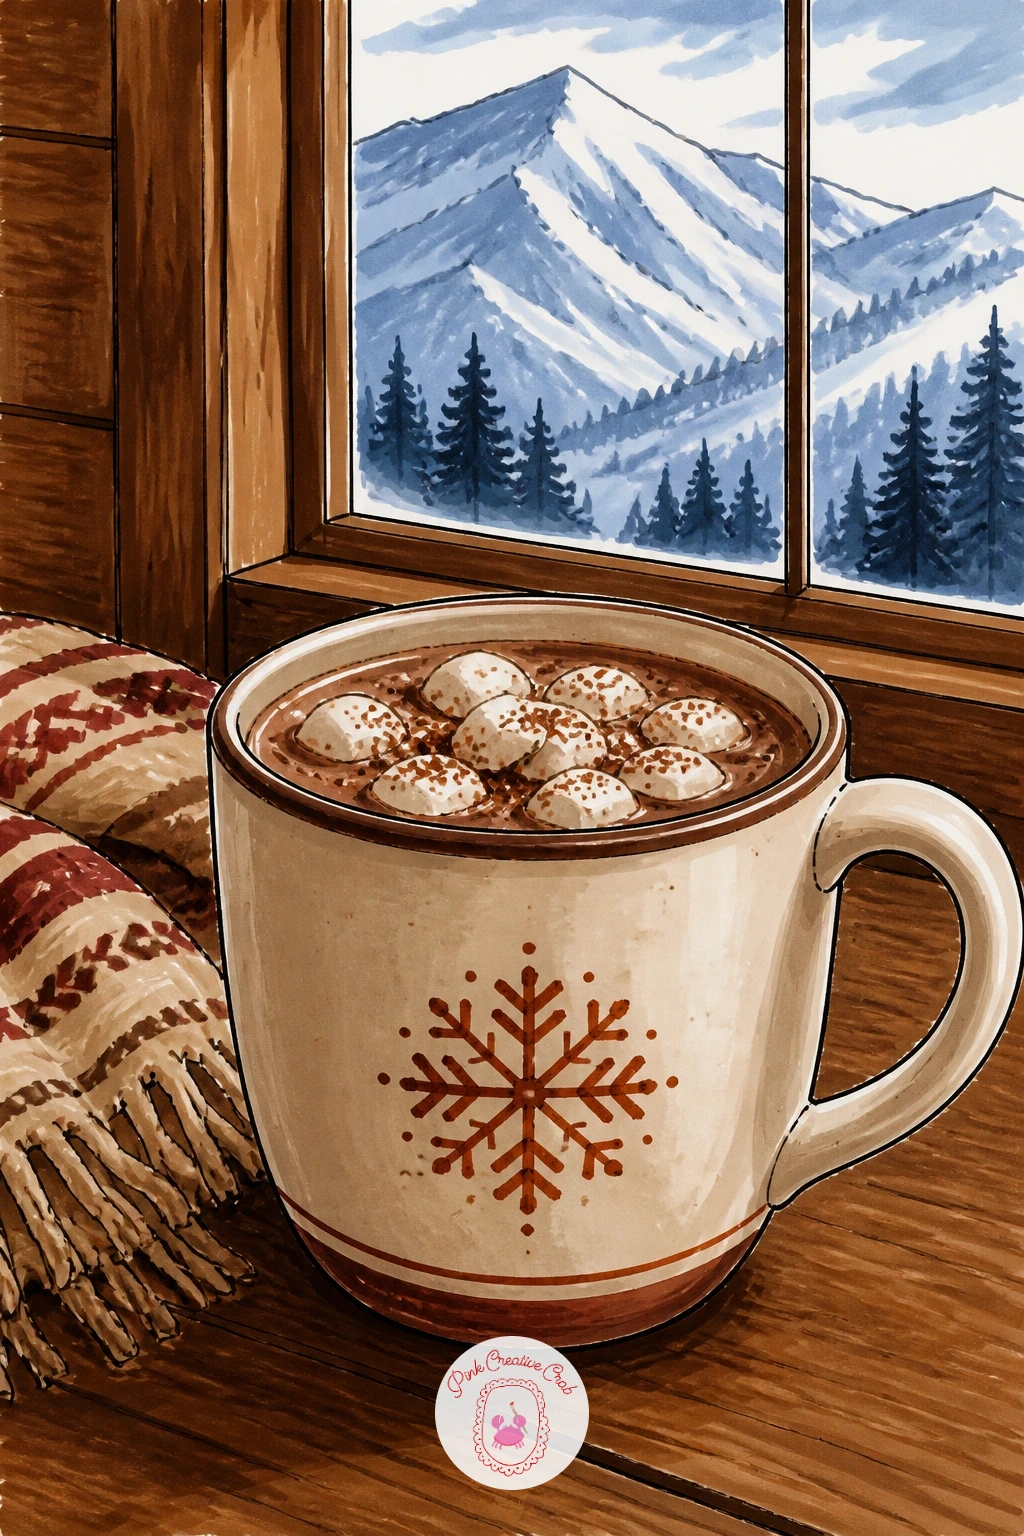
Mug of cocoa on a ski lodge table with mountains outside pulls the eye level back a little, treating the mug and table as the close, detailed foreground while the mountains through the window stay simple and distant. Draw the mug and a slice of the wooden table first, then the window frame, then the mountain shapes beyond it as soft overlapping triangles rather than any jagged detail.
Ink the foreground objects with full detail and a confident dark line, then switch to a lighter, thinner line for the mountains so they recede visually rather than competing with the mug for attention. Color the distant peaks in a pale, slightly blue-grey tone, since far-off snow reads cooler and lighter than anything nearby.
Equal detail on foreground and background is the most common issue in a window scene like this: keep every mountain edge soft and let the color fade paler toward the farthest peak.
A single wood-grain line or two on the tabletop is enough texture, more than that competes with the view.
Palette: Chocolate Brown,Cool Blue Grey,Golden Tan,Soft White
Mug of cocoa with a shortbread cookie is a simple still life pairing that works well for practicing edges and texture. Draw the mug first, then a single shortbread cookie resting against its side or on a small plate beside it, keeping the cookie’s shape a plain rounded rectangle or circle rather than anything fussy.
Ink the mug with a smooth, continuous line, then the cookie with a slightly broken, textured edge, since shortbread crumbles a little at the border rather than holding a crisp outline. A dry brush style stroke with the marker’s chisel tip along the cookie’s edge, dragging lightly so some paper shows through, gives it a crumbly look fast.
A cookie outlined too cleanly ends up looking like plastic: let a few small crumb flecks sit loose near the base of the cookie, inked separately from the main shape.
Swap in a plain round biscuit shape if shortbread’s usual rectangle feels fussier than you want today.
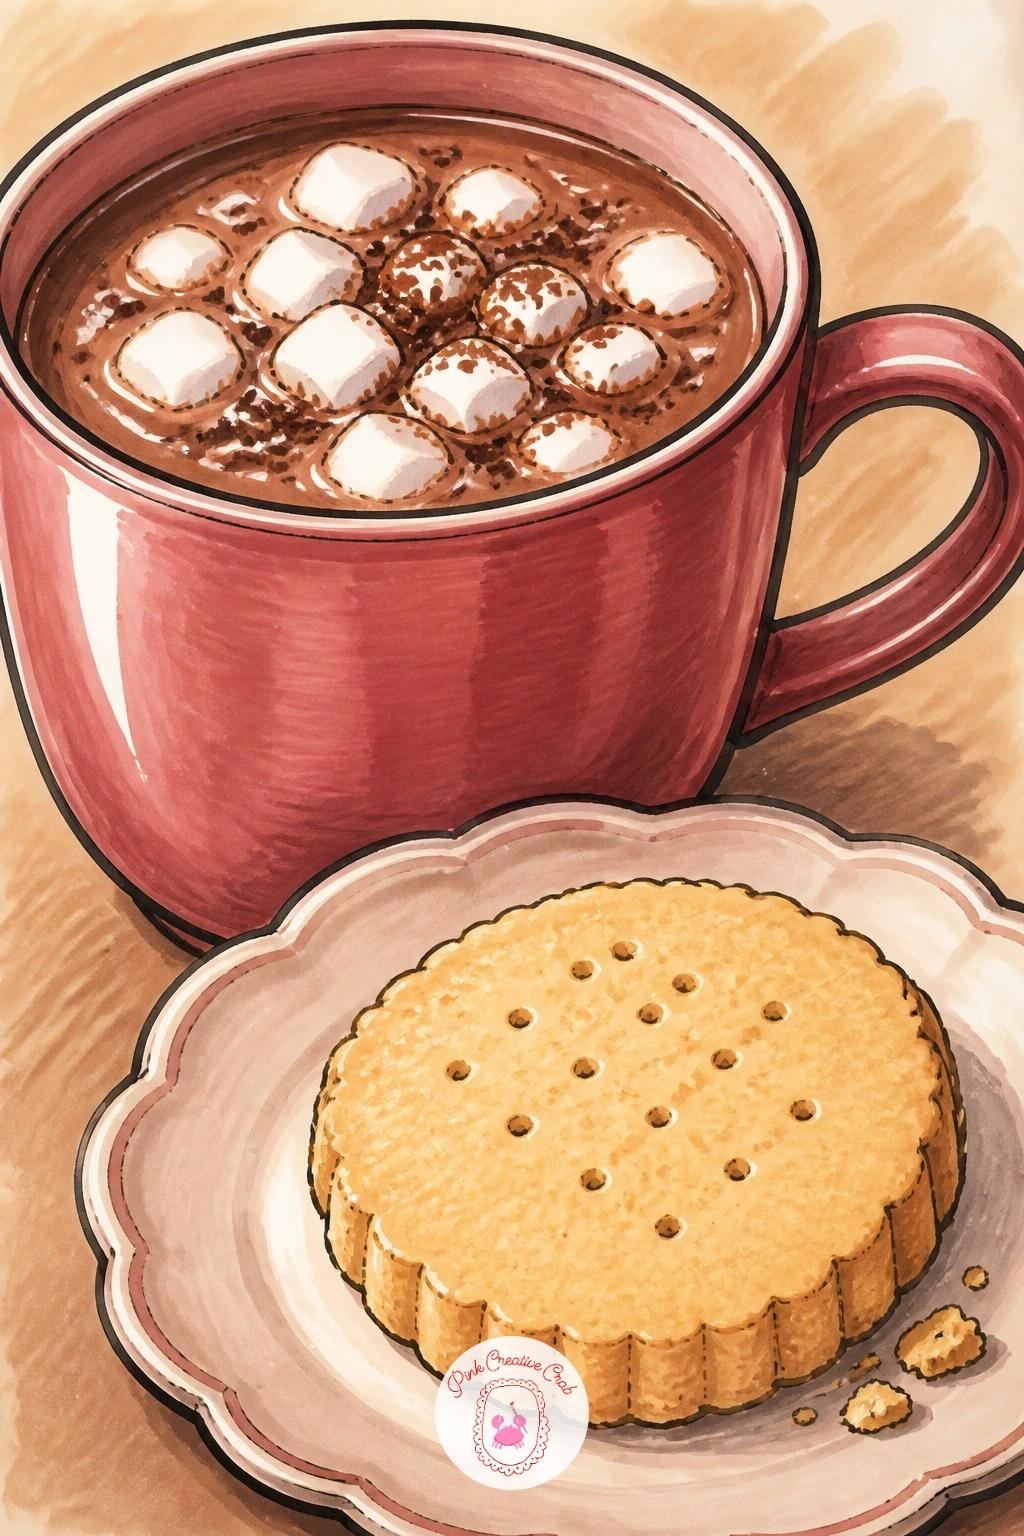
Palette: Golden Tan,Chocolate Brown,Cream,Soft White
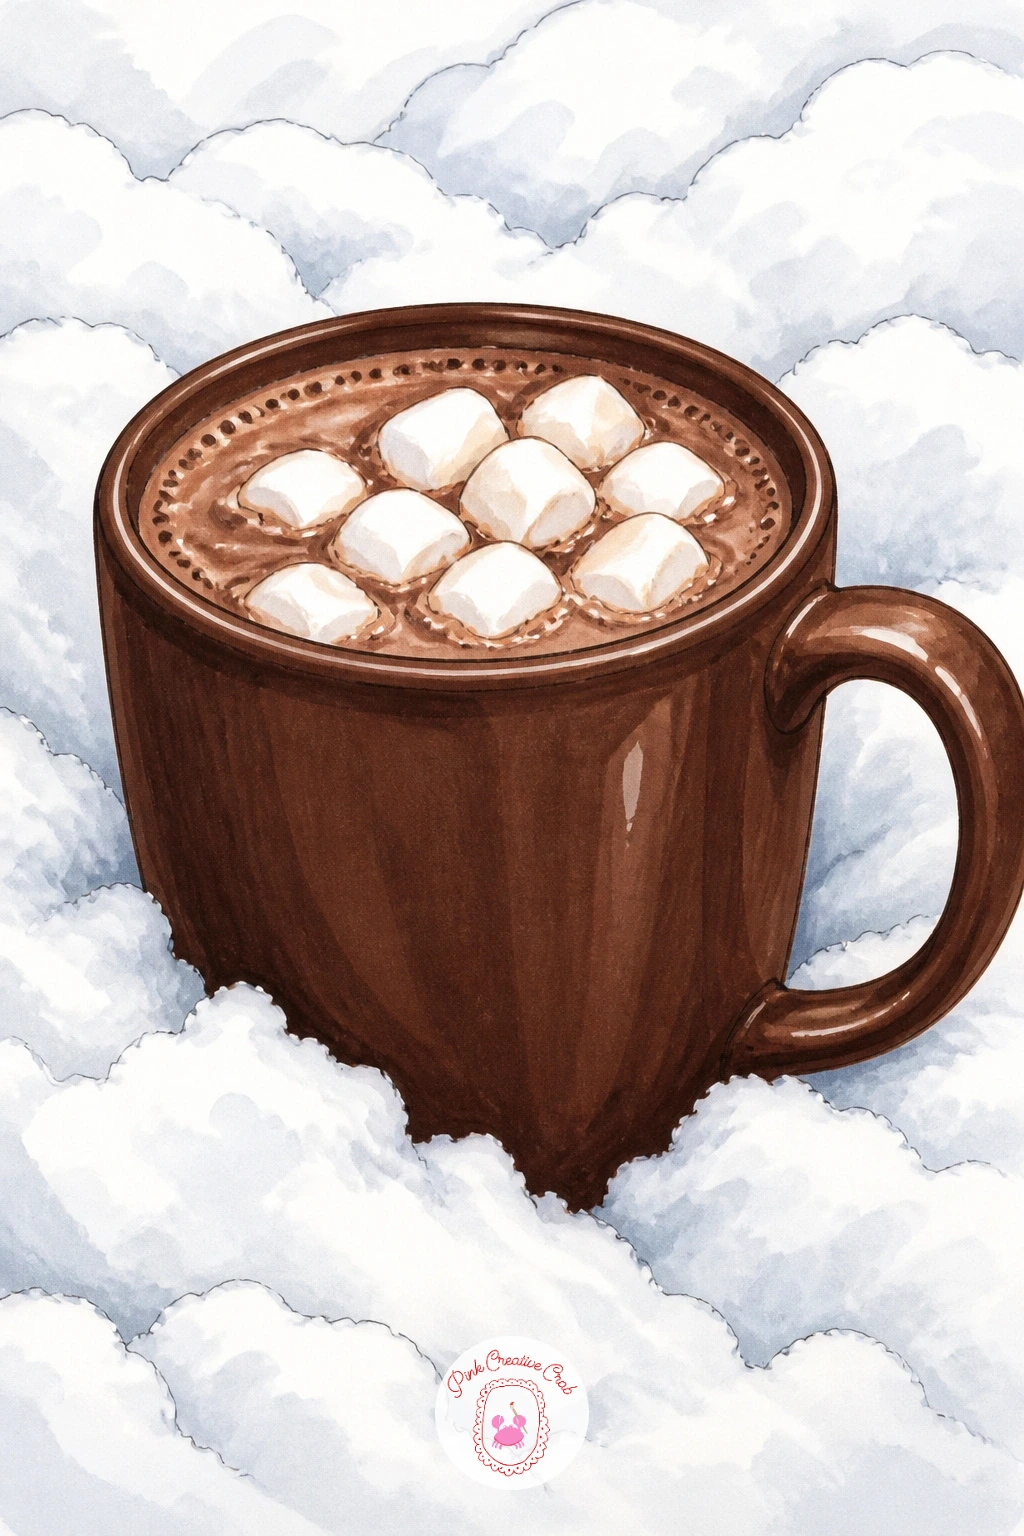
Cocoa mug sitting in fresh snow turns the mug itself into the whole composition, nestled directly into a soft mound of snow with no table or hand in sight. Draw the mug first, then build the snow around its base as a series of soft overlapping bumps rather than one flat white shape, letting it rise slightly up the sides of the mug.
Ink the mug cleanly, then the snow’s outer edge in a looser, more broken line, since snow never holds a crisp silhouette the way ceramic does. Leave most of the snow as untouched white paper, adding only light blue-grey shading in the dips and shadowed hollows to suggest its texture.
Flat white snow with no shading at all looks like a blank gap rather than snow: a few short curved shadow strokes along the base of each mound, using a pale cool grey, is all it takes to round the drifts out.
A dusting of tiny white gel pen flecks across the brown mug suggests a few stray snowflakes landing on its side.
You Will Need
- white gel pen
Palette: Chocolate Brown,Snow White,Cool Blue Grey,Cream
Tall glass of hot chocolate with layered cream is the most technical drawing on this list, since it asks you to show distinct layers through a clear glass rather than one solid fill. Draw the glass as a simple tall cylinder first, then pencil in two or three horizontal band guidelines marking where chocolate, milk and cream will separate.
Color from the bottom up in thin, controlled strokes, letting the darkest chocolate layer sit at the base, a lighter milk-chocolate band above it, and the whipped cream layer pale and textured on top. Leave a thin sliver of white paper between each band to suggest the glass reflecting light at the layer lines, which is what actually reads as “glass” rather than a plain brown and white cup.
Muddy, blended layers are the usual issue when markers overlap before drying: let each band dry fully before starting the next one, working top to bottom or bottom to top in clearly separate sessions if needed.
A straw added last, angled slightly, finishes the tall glass shape nicely.
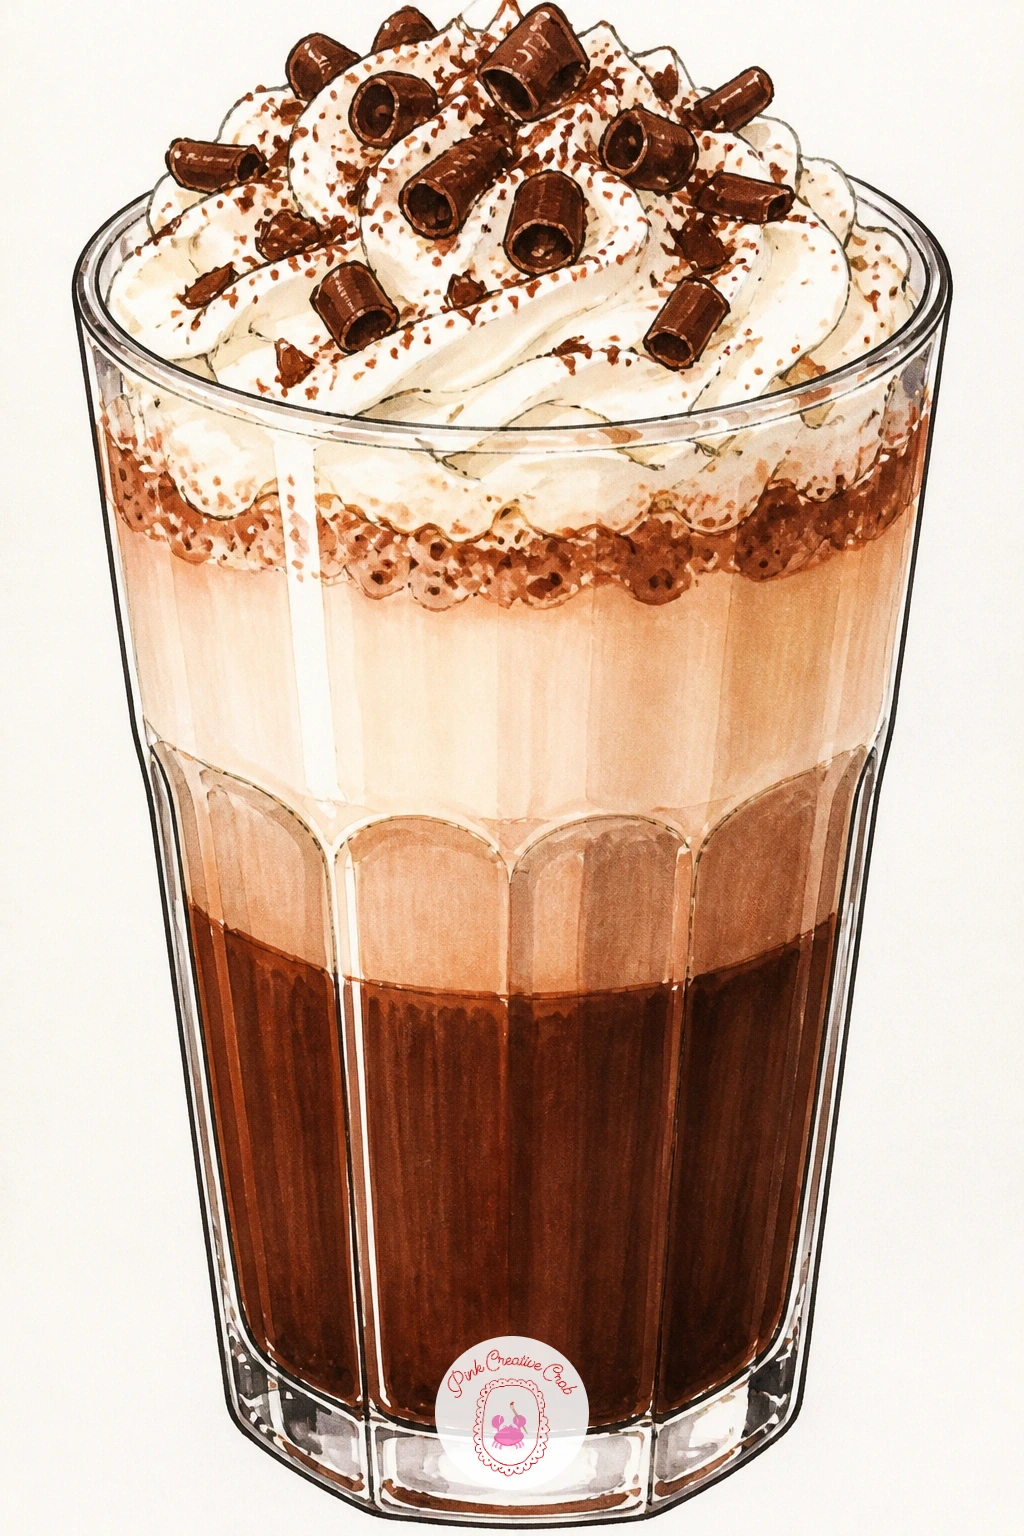
Palette: Dark Chocolate,Golden Tan,Cream,Soft White
For a different take on layered food and drink shapes, the still life drawing ideas cover more objects with visible layers and transparency.
Two friends sharing cocoa on a porch swing closes the list with a small two-figure scene, so block both figures loosely first, checking that their shoulders sit at roughly the same height on the swing seat even if one leans in slightly more than the other. Keep both faces simple, a few soft lines for a smile is enough at this size.
Draw the swing’s frame and chains first, then the two figures seated on it, then the two mugs held between them, one in each friend’s near hand, angled slightly toward each other. Ink the figures before the background porch railing or hanging plant, so the people stay the clear subject.
Stiff, front-facing figures are the usual flat spot in a two-person scene: turn one figure’s shoulders slightly toward the other and let one knee or foot overlap the swing’s edge to suggest a relaxed, settled pose.
If two full figures feel ambitious today, crop the scene to just their shoulders, mugs and the swing chain for a quicker, cozier version.
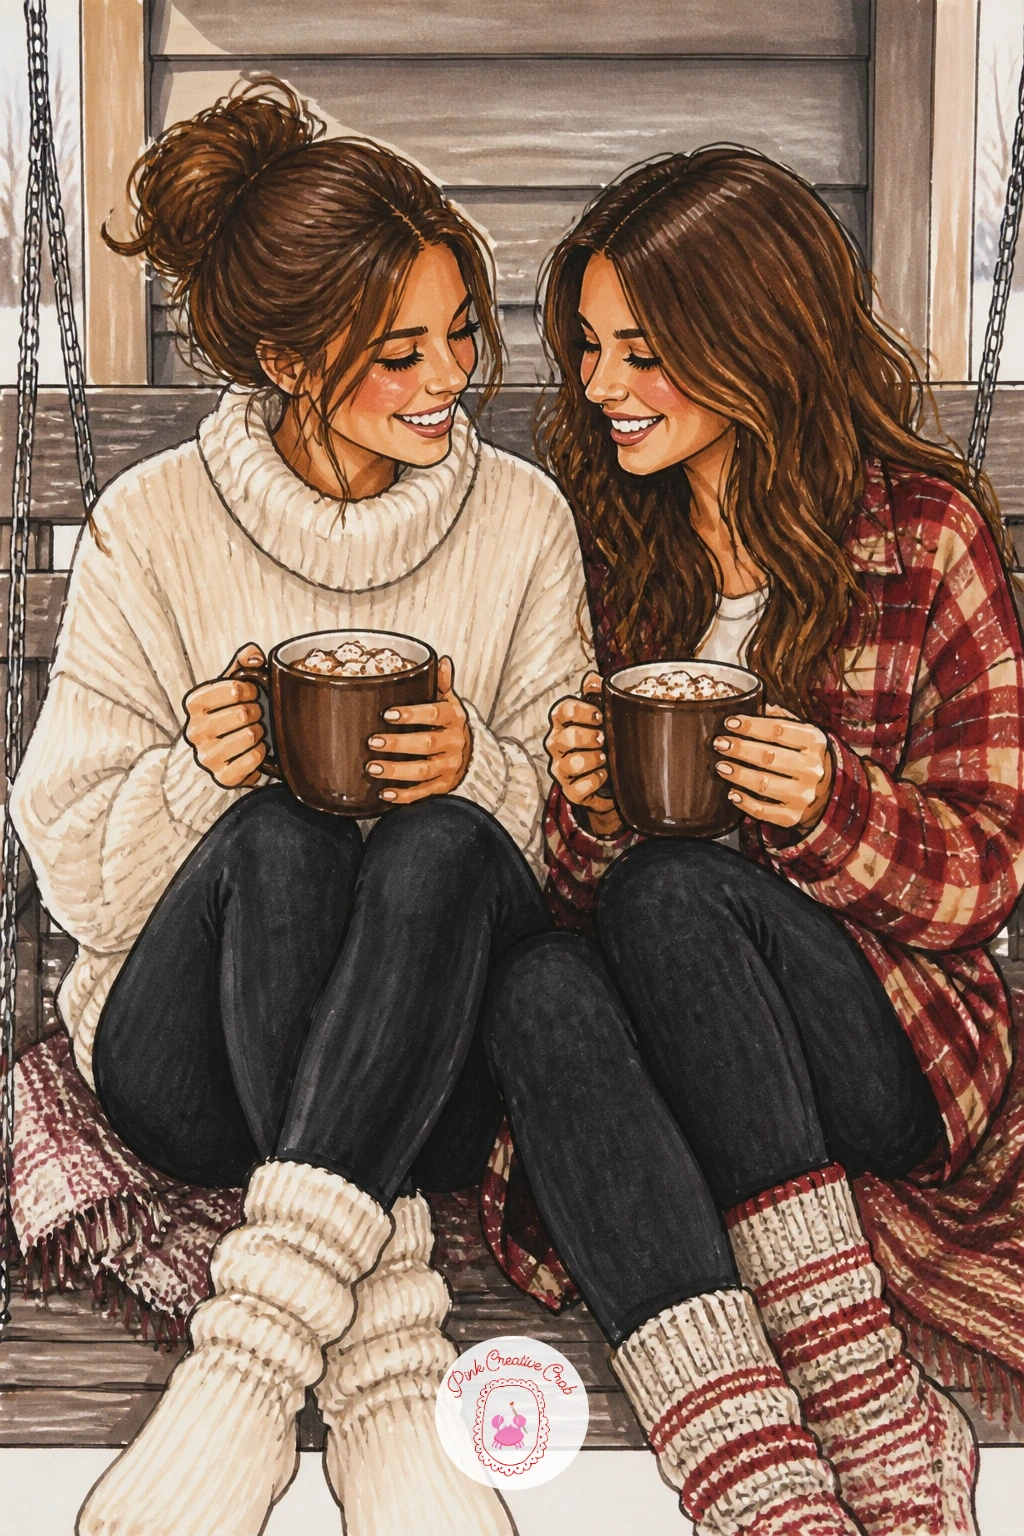
Palette: Chocolate Brown,Rosy Red,Cream,Warm Grey
What to Do Next
Pick one idea that matches how much time you actually have today, whether that is a quick mug with marshmallows or the fuller ski lodge scene, and start with a light pencil sketch on smooth marker paper before any ink touches the page.
Frequently Asked Questions
What markers work best for hot chocolate drawing?
Alcohol-based markers work best because they blend smoothly without streaks, which matters for the soft gradients in cocoa, cream and steam. A warm brown, cream, and one accent red cover most of the ideas on this list.
How do you make hot chocolate look steamy in a drawing?
Draw a few thin, wavy fineliner lines rising above the mug, spaced unevenly rather than in a neat row. Keep the lines loose and slightly curved, since straight steam lines read as static rather than rising.
Should I ink before or after coloring a hot chocolate drawing?
Ink the main outlines first with a fine black fineliner, then color inside them once the lines are fully dry. Working in this order keeps the marker blending smooth and stops the ink from smudging into wet color.
How do I make a mug look round instead of flat?
Curve the top and bottom ellipses of the mug slightly rather than drawing them as straight lines, and add one soft highlight stripe down one side. That single highlight does most of the work in suggesting a rounded ceramic surface.
What is an easy way to practice before a full scene?
Start with a single mug and marshmallows before attempting a scene with a figure or background. Mastering the basic cocoa shapes first makes the busier ideas, like the ski lodge table or porch swing, much faster to finish later.
Have any thoughts?
Share your reaction or leave a quick response — we’d love to hear what you think!
-
 0
-
0
-
0
-
0
-
0
-
0


