

Journal first page ideas solve the one problem that stops a new diary in its tracks: that blank first page that feels too important to mess up. The good news is that this first page does not need to be perfect, it just needs to be yours, and a little fineliner plus a few watercolor touches can carry it a long way.
Below you will find thirty one of them, from a simple hello page in bubble letters to a fox trotting off with your journal title on a banner. Pick whichever one matches your mood today, grab your pens, and let your new book start on a page you actually love looking at.
Using these images: free for personal projects such as printing, coloring, cards, journals and gifts. Handmade items that include them may be sold up to 30 pieces per design. More than that is commercial use and is not permitted, and neither is selling or sharing the images themselves or passing them off as your own. Please ask before any other use.
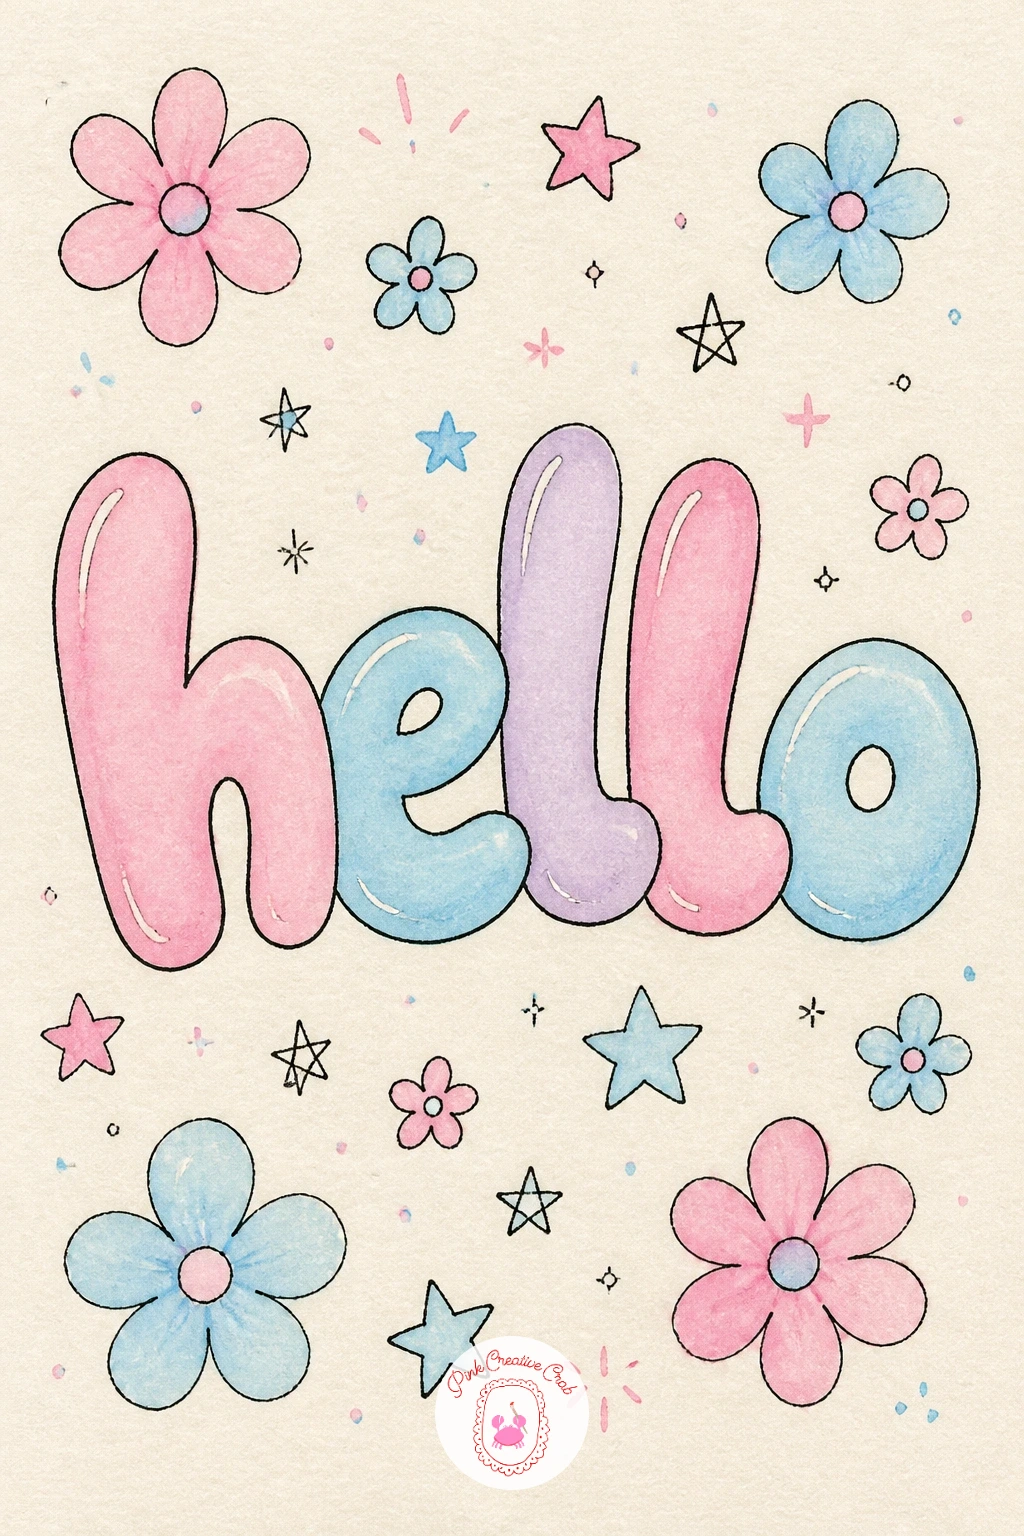
Start the whole journal with a hello page, because a big friendly word is the easiest thing to draw well on your first try. Pencil the word HELLO lightly across the middle of the page in bubble letters, keeping each letter the same height so the word sits level, then go over the outline in fineliner once you are happy with the shape.
Fill the empty space around the word with small doodles: a flower, a heart, a few wavy lines or little stars, whatever feels like you today. Color the letters with a light watercolor wash, one color per letter or a soft rainbow across the word, and let the doodles stay mostly linework so the title keeps the focus.
If the bubble letters wobble, a kneaded eraser lifts stray pencil marks before you ink, so you get a second chance at the curve. No watercolor on hand yet, pastel markers do the same soft fill job.
Keep this one loose and quick, the goal is a friendly welcome, not a perfect alphabet.
Palette: Pastel Pink,Butter Yellow,Sky Blue,Sage Green
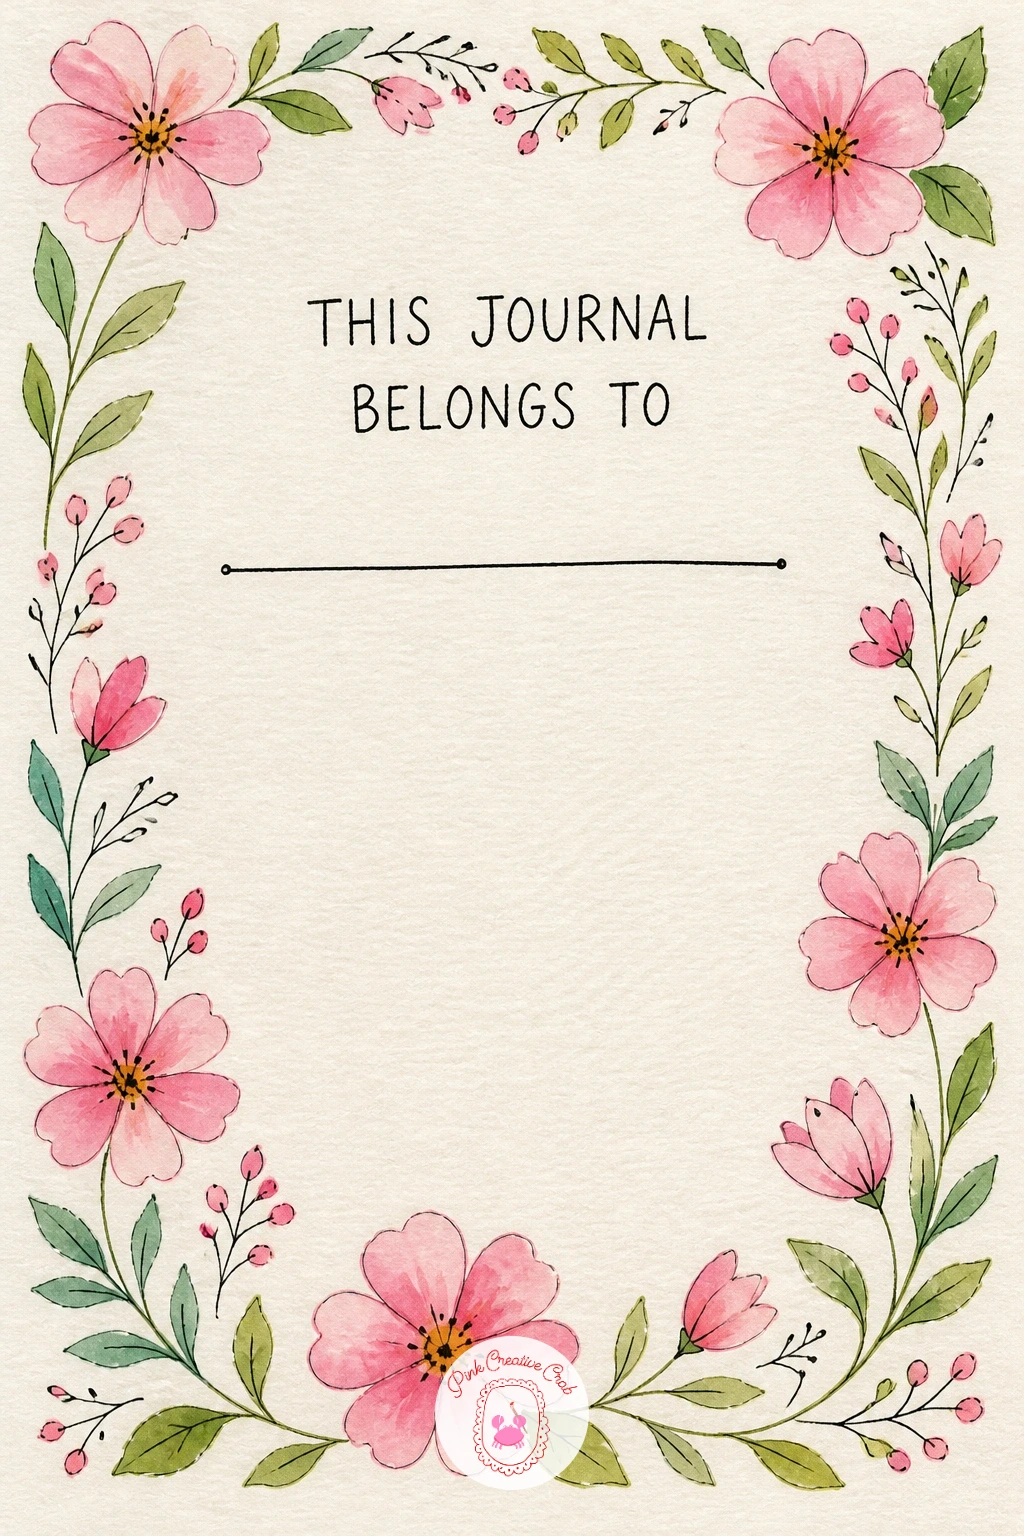
Follow the hello page with the classic this journal belongs to page, since it gives the whole book a sense of ownership right from the start. Begin by lettering the phrase this journal belongs to near the top in simple cursive or print, leaving a line underneath for your name.
Draw a loose floral frame around the border in pencil first: a few roses in the corners connected by thin curling stems, nothing botanically exact. Ink the flowers with fineliner, then wash them in with watercolor, keeping petals pink and leaves sage so the frame reads as one soft family of color rather than a rainbow.
The corners are where this one usually goes wrong, so sketch the flowers small and let them overlap the border edge rather than trying to fit a large bloom into a tight space. A gel pen works instead of watercolor if you want the frame to stay crisp and linear.
Write your name last, in your neatest hand, so it becomes the finishing touch rather than something squeezed in.
Palette: Dusty Rose,Sage Green,Butter Yellow,Cream
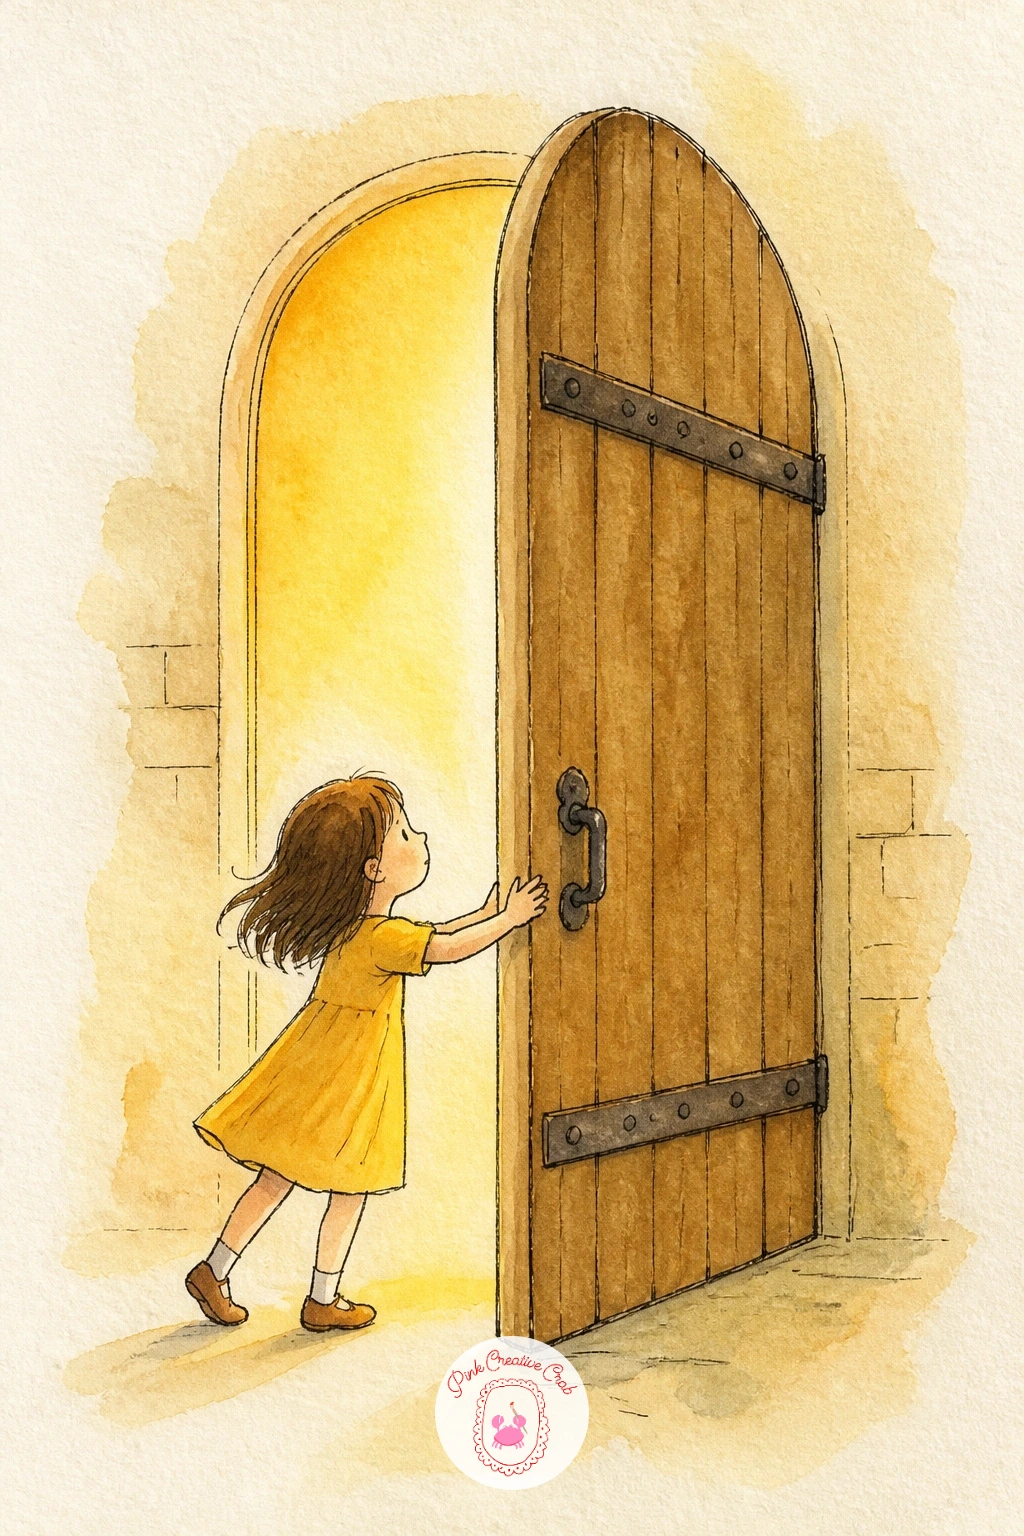
Give the new journal a little story with a girl opening a giant door, drawn as though she is stepping straight into the page. Sketch a tall rectangular door first, slightly taller than she is, with a simple frame and a round handle, then draw her in profile with one hand pushing it open.
Keep her figure simple: a round head, a dress or jumper in one solid shape, no detailed hands or face beyond a few soft lines. Ink the door and figure, then watercolor the door a warm wood tone or butter yellow and her outfit in pastel pink or sky blue, leaving a bright gap of white or pale yellow light spilling through the open doorway.
The light gap is the detail that sells the whole scene, so mask that shape with a scrap of tape or simply paint around it carefully rather than trying to lift color back out later. If this is your first time drawing a figure, trace a simple doll shape lightly in pencil before you commit to ink.
Letter your journal title or the date inside that bright doorway gap.
You Will Need
- masking tape for the light gap (optional)
Palette: Butter Yellow,Sky Blue,Warm Brown,Pastel Pink
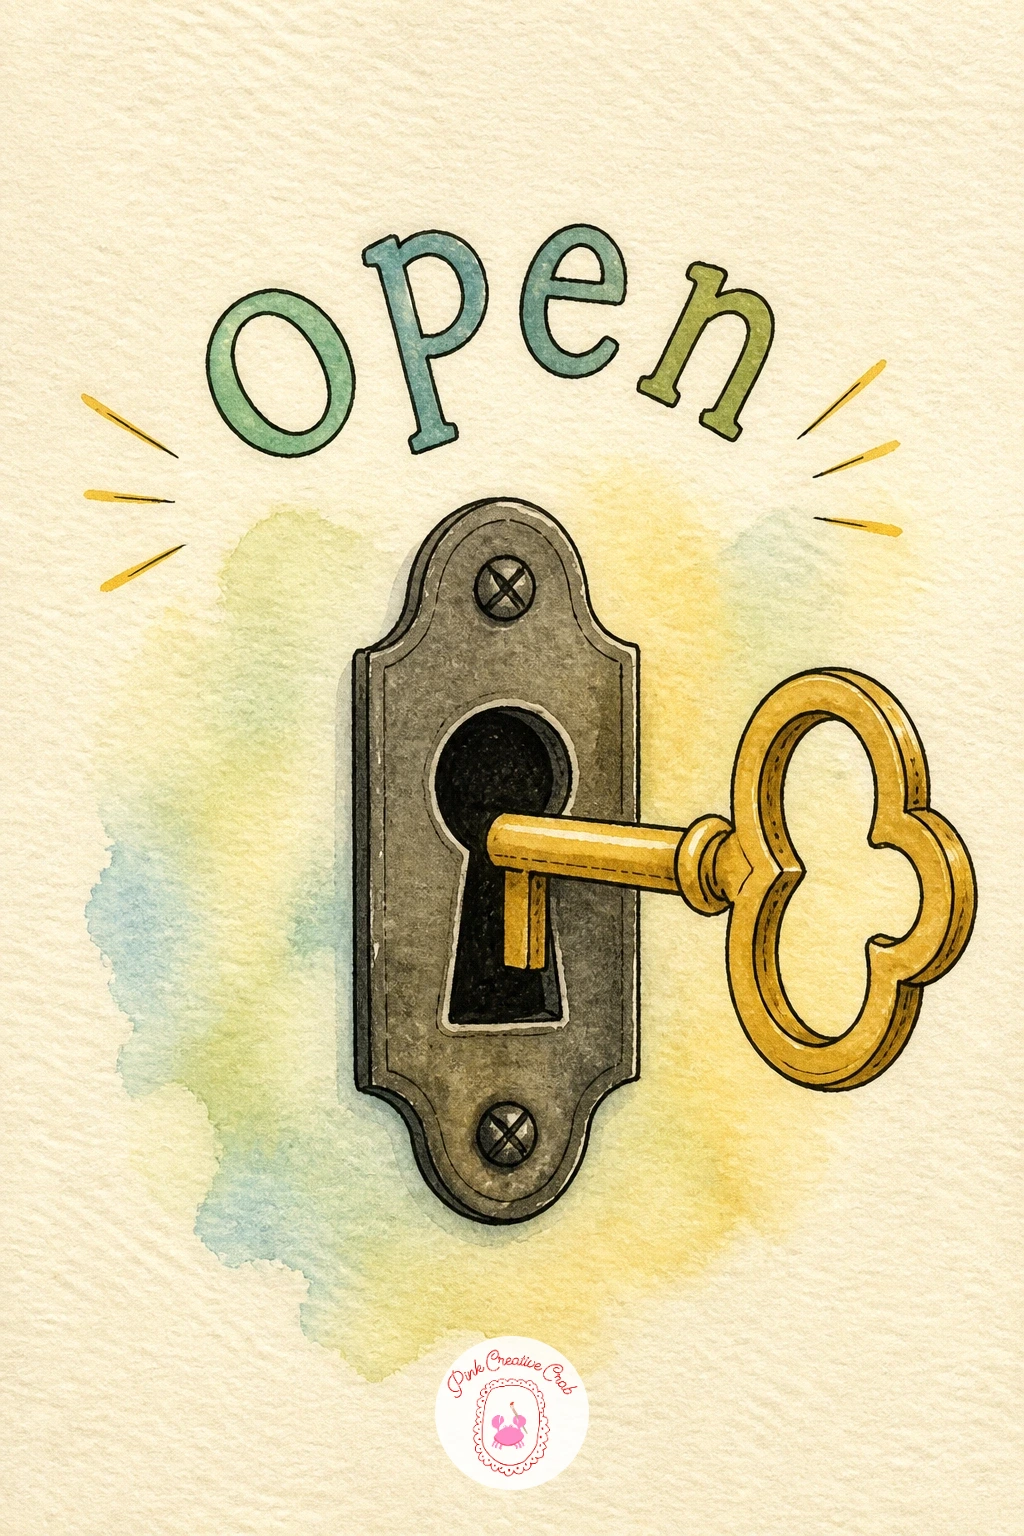
A key in a lock makes a quieter opening page, good for a day when you want something small and symbolic rather than a full scene. Draw a simple keyhole shape in the center of the page in pencil, a circle sitting on top of a narrow triangle, then draw an old fashioned key angled into it with a round or heart shaped top.
Ink both shapes with a steady line, keeping the key’s teeth simple, just two or three notches rather than a realistic cut pattern. Letter the word open in a curved line above or below the keyhole, following the curve of the page rather than a straight ruled line, which keeps the whole thing feeling handwritten.
Watercolor the key in a warm gold or butter yellow with a touch of shadow along one edge to give it some weight, and leave the keyhole itself dark or deep sage so it reads as an opening rather than a flat shape. A metallic gel pen over the dry watercolor adds a nice glint to the key’s edge if you have one.
Finish with a single small flourish, a tiny star or heart floating near the word open.
You Will Need
- metallic gel pen (optional)
Palette: Butter Yellow,Sage Green,Warm Brown,Cream
Move from symbols into yourself with a simple self portrait holding a cup of coffee, a nice way to mark exactly who is starting this journal. Work from a mirror or a recent photo, but simplify everything: a rounded head shape, basic hair shape in one or two tones, simple shoulders, and a mug held in both hands near the chest.
Pencil the head and shoulders first, checking that the eyes sit roughly halfway down the face rather than too high, since that single proportion check keeps a simple portrait from looking off. Ink the outline once the proportions feel right, then watercolor skin tone, hair color and a warm cup in butter yellow or sage.
Steam from the coffee is the easiest part of this page, just two or three soft wavy fineliner lines rising from the cup, so do not overthink it. If faces feel hard right now, draw yourself from behind or in profile instead, which hides the features that usually cause trouble.
Letter today’s date or a single word like “begin” beside the cup.

Palette: Warm Beige,Butter Yellow,Sage Green,Soft Brown
A photo on your phone from this morning works as reference just as well as a mirror, and saves you holding a pose while you draw.
Carry the idea of a beginning further with a little girl planting a seed that grows up into your journal title, since the image of planting something new suits a first page perfectly. Draw a small mound of earth near the bottom of the page, a tiny figure kneeling beside it with a seed in her open palm, and a thin curling stem rising up from the soil.
Letter your journal title along that stem as though it were a vine, with small leaves branching off between the letters. Ink the figure and the stem first, then watercolor the earth in warm brown, her dress in pastel pink, and the leaves in sage so the title feels like it is genuinely growing out of the page.
Spacing the leaves evenly along a curving stem is the trickiest part, so lightly pencil the whole curve of the title path before you letter a single word, adjusting the curve until the length matches comfortably. A fine brush pen gives cleaner small leaves than a wide brush if your kit has one.
Keep the sky above empty or add just one soft cloud, so the eye stays on the growing title.
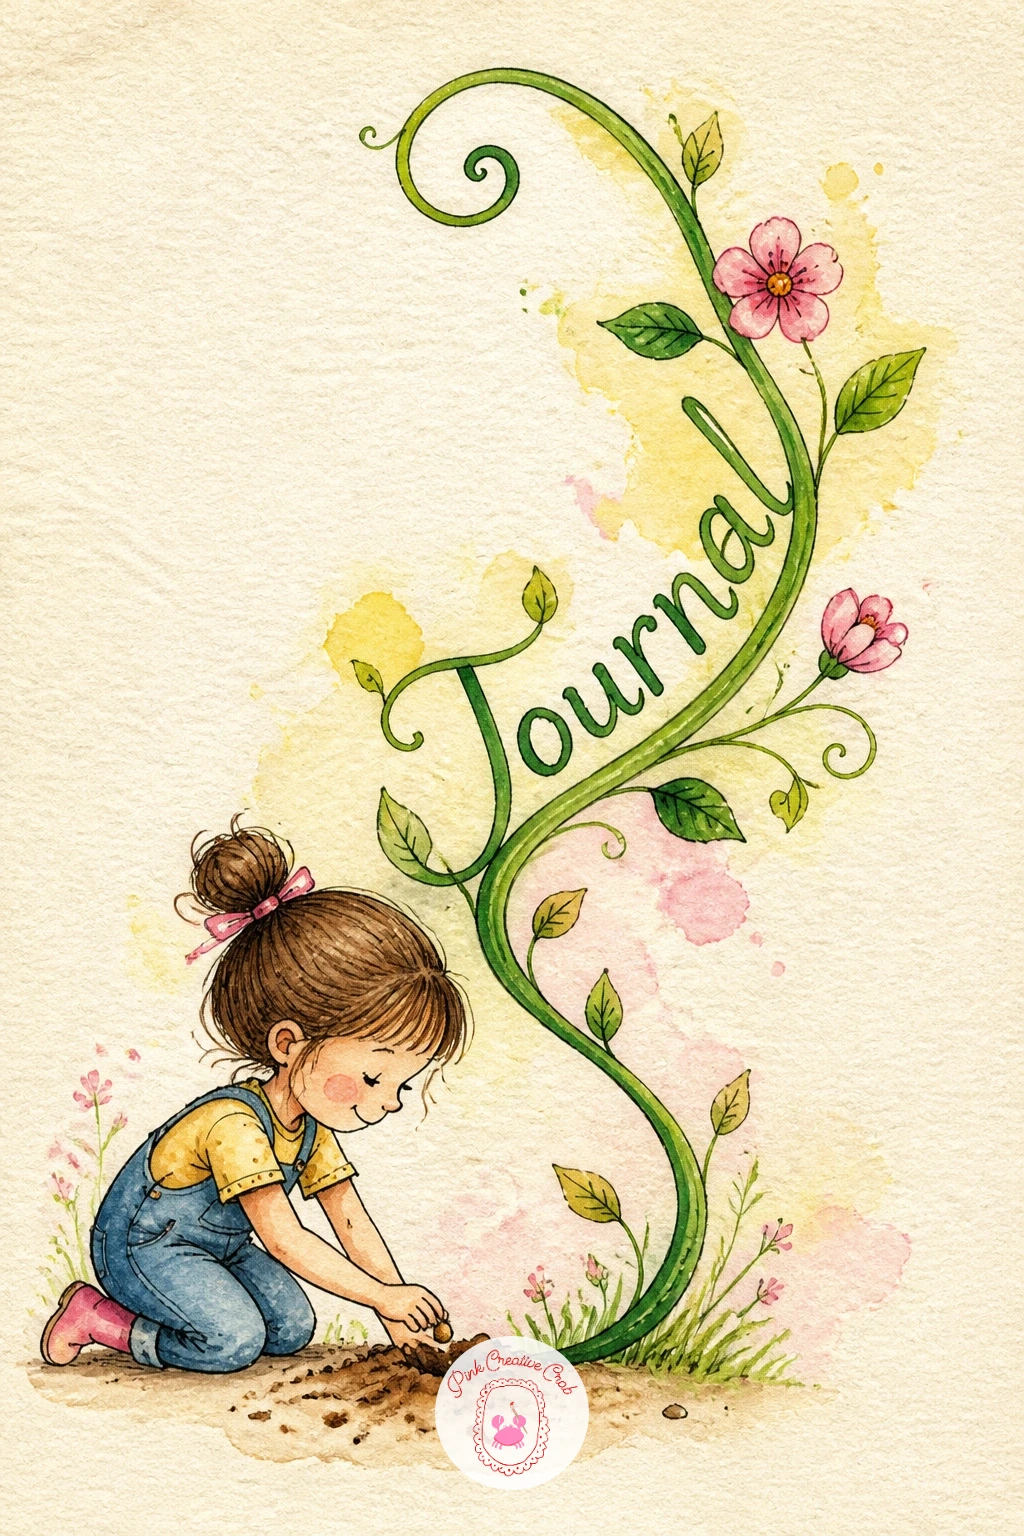
Palette: Sage Green,Pastel Pink,Warm Brown,Sky Blue
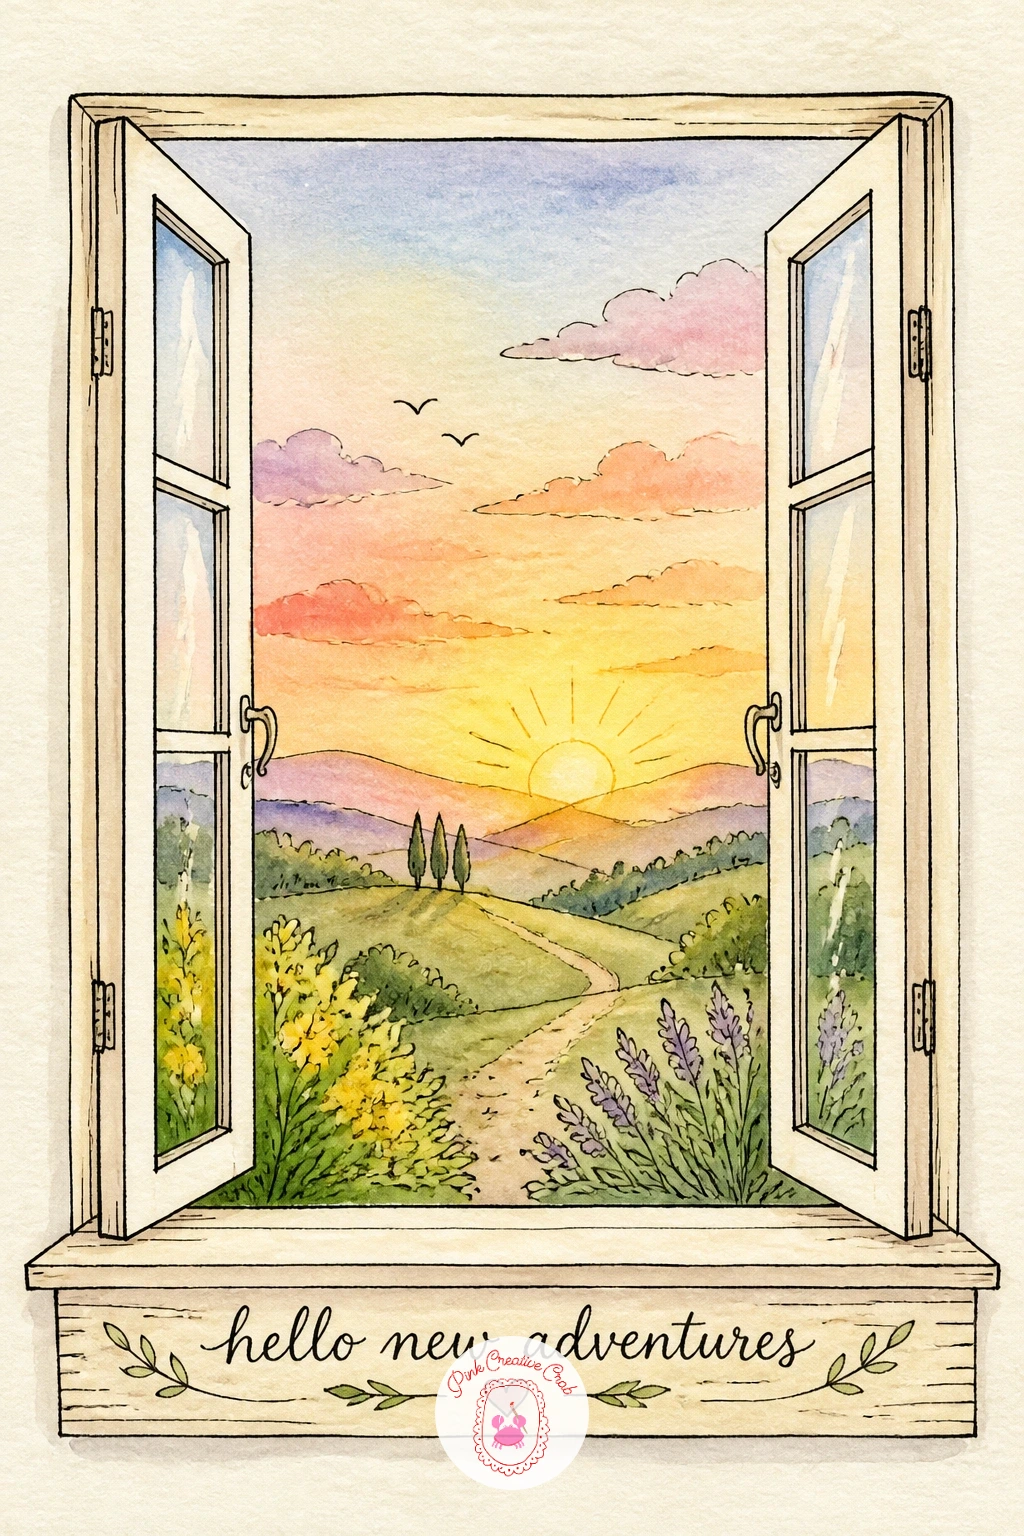
Follow the growing vine with something quieter, a window opening onto a new year, which works well whether you are starting this journal in January or simply starting fresh. Draw a simple window frame with four panes taking up most of the page, shutters open to either side, and through the glass sketch a plain landscape, a hill, a tree, a pale sky.
Ink the window frame first since straight lines are easiest to control early, then ink the little scene behind the glass more loosely. Watercolor the sky in sky blue fading to butter yellow near the horizon, and leave the window frame itself white or a soft cream so it reads as separate from the view.
If the straight lines of the frame wobble, a ruler is a perfectly fair tool here, only the scene through the glass needs a free hand. Letter the new year or your intention for the months ahead along the windowsill at the bottom.
A smaller version with just two panes works just as well if the page feels crowded.
You Will Need
- ruler
Palette: Sky Blue,Butter Yellow,Sage Green,Cream
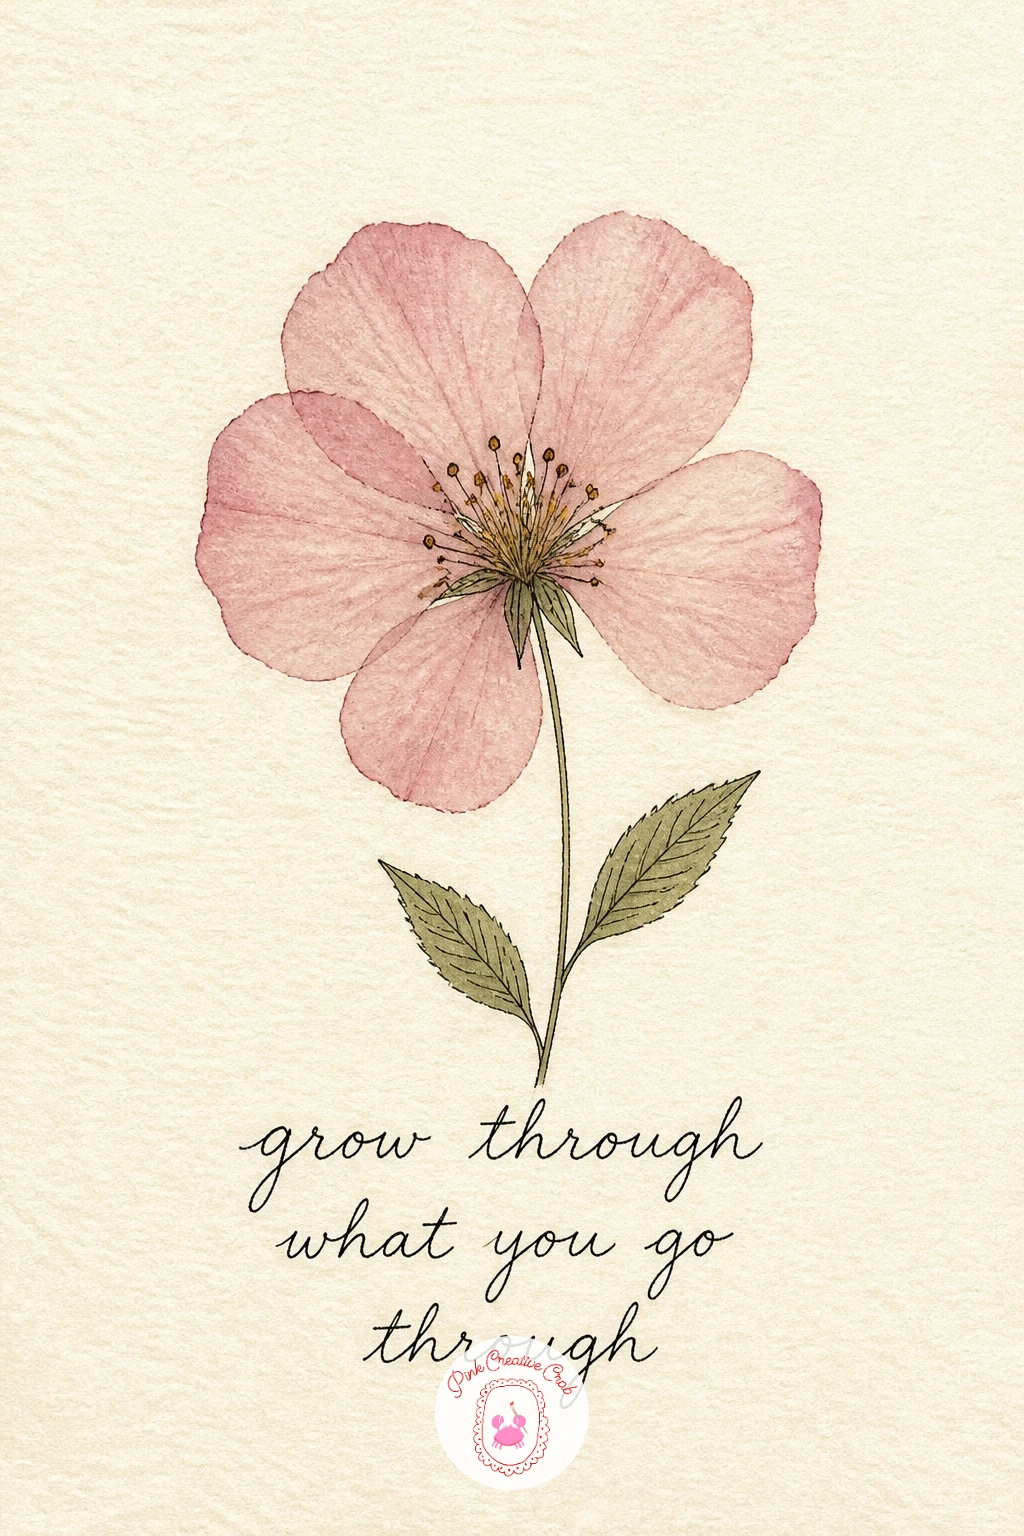
For a calmer page, draw a pressed flower beside a quote you love, borrowing the look of a real flower flattened between book pages. Choose one simple bloom, a daisy, a pansy or a small rose, and draw it flat and symmetrical rather than in perspective, the way a dried flower actually sits once pressed.
Ink the petals with slightly uneven, papery edges rather than perfectly smooth curves, which is what makes a pressed flower read as pressed rather than freshly drawn. Watercolor it in faded, slightly dusty tones, a washed out pink or pale sage, rather than the bright color a fresh flower would have.
Letter your chosen quote beneath or beside the flower in a simple serif or cursive hand, keeping the line length short so it fits without crowding the bloom. Dry brushing a little extra color along the petal edges before the wash fully dries adds the slightly uneven stain real pressed flowers leave behind.
Keep the rest of the page empty, since the quiet space is part of what makes this page feel restful.
Palette: Dusty Pink,Faded Sage,Cream,Soft Brown
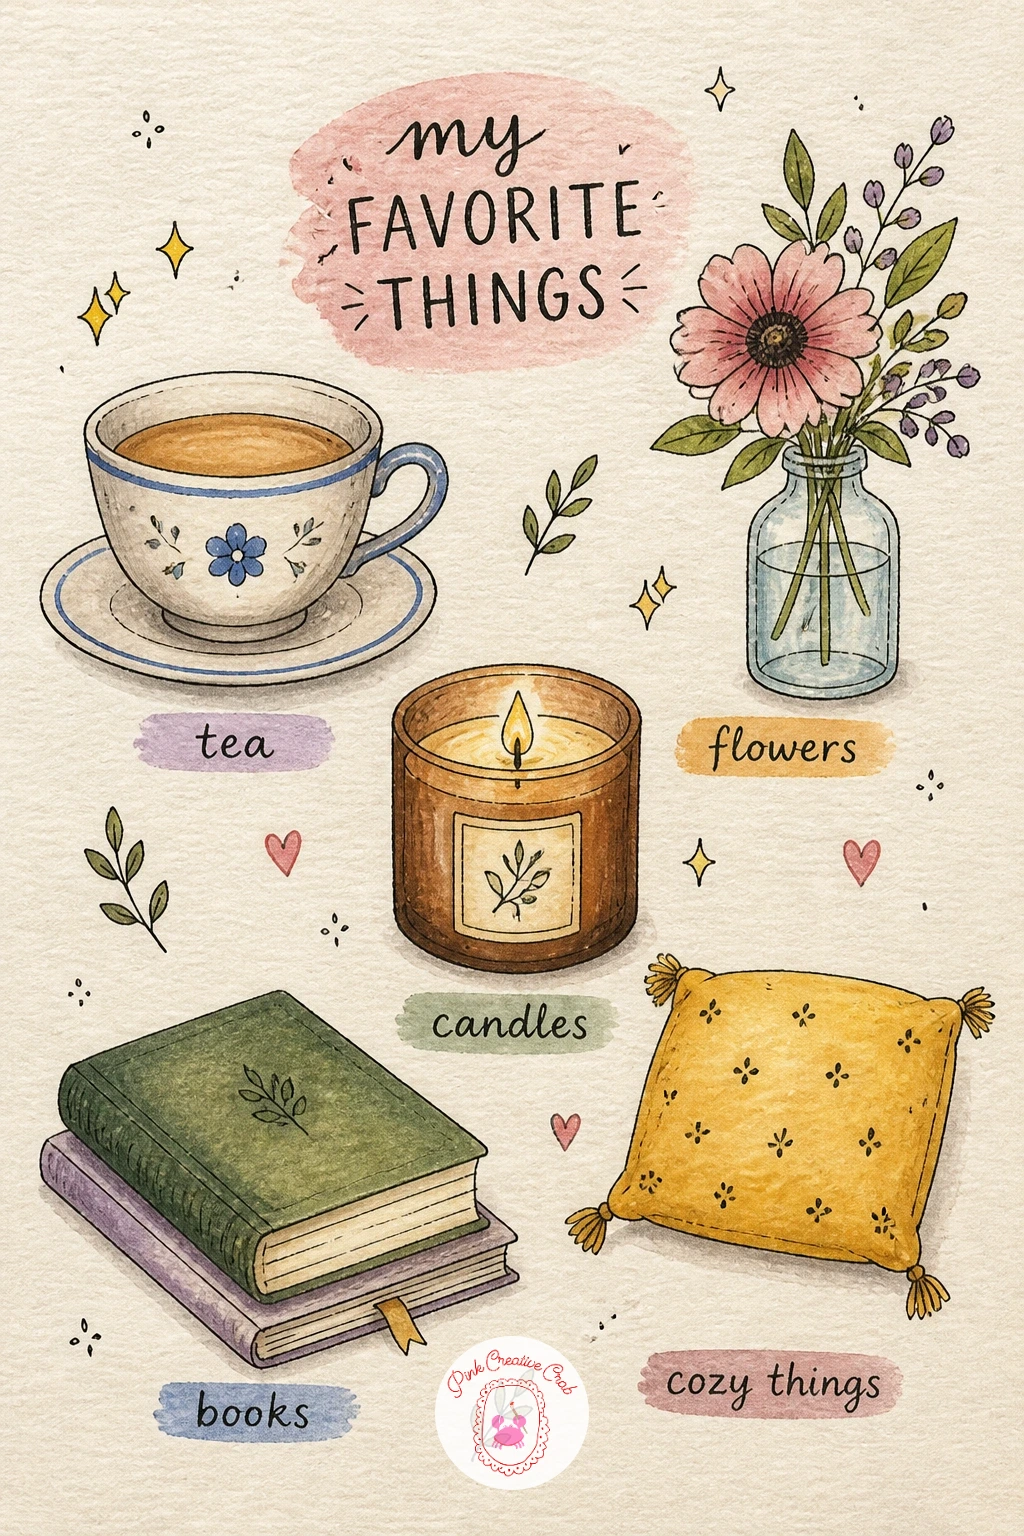
Give yourself a lighter page next with a list of your favorite things, drawn as a cluster of small doodled objects rather than written in plain sentences. Pick five or six items that feel like you right now, a teacup, a book, a flower, a record, a candle, and scatter them loosely across the page instead of lining them up.
Pencil each object small and simple, checking that no two sit so close they overlap awkwardly, then ink them one at a time rather than the whole page at once, which keeps your hand relaxed. Watercolor each item a different soft color from the palette so the page reads as cheerful and varied without clashing.
Label each item with one tiny word beneath it in your neatest small lettering. If six objects feels like too much today, three is plenty, spaced generously with room to breathe between them.
Next time you revisit this idea, swap in objects from a different season of your life and compare the two pages side by side.
Palette: Pastel Pink,Butter Yellow,Sky Blue,Sage Green
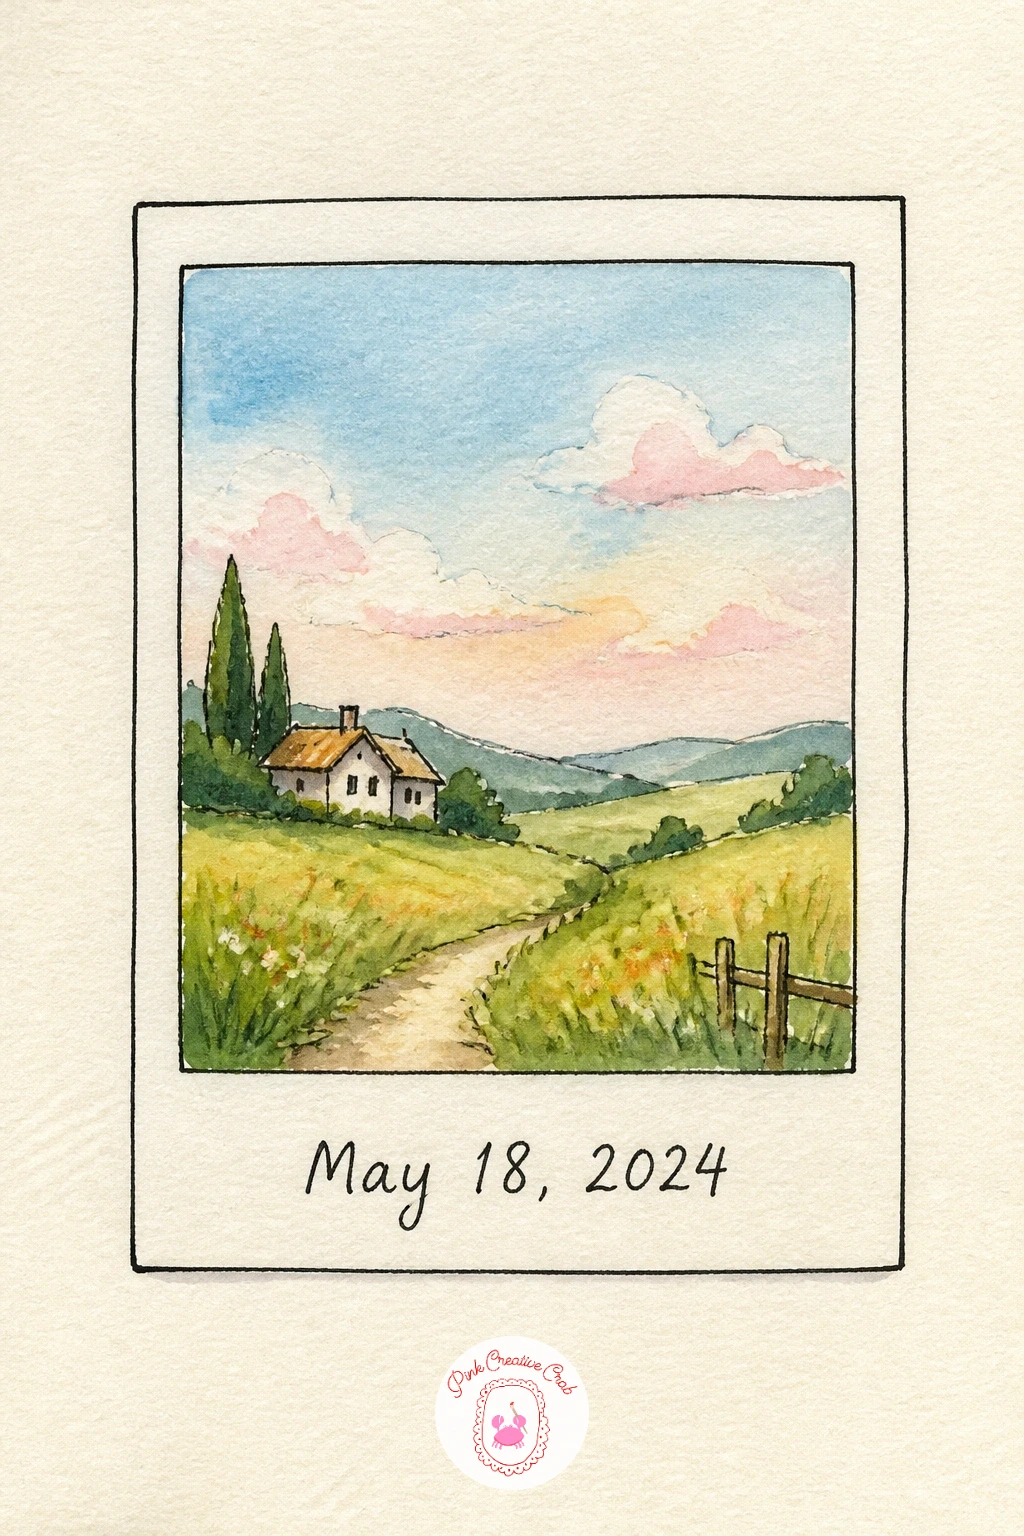
Give the first page a photographic feel with a drawn polaroid frame holding today’s date instead of a photo. Draw the classic polaroid shape, a square with a wider white strip along the bottom, then fill the square “photo” area with a simple scene, your window view, a cup of tea, or just a soft wash of color standing in for a memory.
Ink the polaroid border first with a ruler so the frame stays crisp, since a wobbly polaroid border looks like a mistake rather than a style. Watercolor the inner scene loosely, letting the colors bleed slightly at the edges the way a real instant photo sometimes fades.
Letter the date along the white strip at the bottom in handwriting, the way you would caption a real photo. A strip of washi tape drawn across one corner, just two quick fineliner lines with a little color fill, finishes the illusion nicely.
Keep the background around the polaroid empty so the frame stays the clear focus of the page.
You Will Need
- ruler
Palette: Sky Blue,Pastel Pink,Cream,Butter Yellow
Split the page between a moon and a sun for a welcome page that works for both morning and night pages ahead. Draw a simple sun shape in one top corner with short even rays, and a crescent moon with a few small stars in the opposite corner, leaving the center of the page open for a welcome message.
Think about light direction here: keep the sun’s rays golden and warm and the moon’s glow cool and pale, so even without any other color the two halves of the page feel like day and night. Ink both shapes with simple, even linework, then watercolor the sun in butter yellow and the moon in pale sky blue with a soft grey shadow along its curved edge.
Letter a short welcome phrase in the center in a gentle arc, matching the curve of the sun or moon above it rather than a straight line. If gouache is part of your kit, a few opaque white dots make sharper stars than watercolor alone.
Leave plenty of plain cream paper around the words so the two shapes do not crowd the message between them.

Palette: Butter Yellow,Sky Blue,Soft Grey,Cream
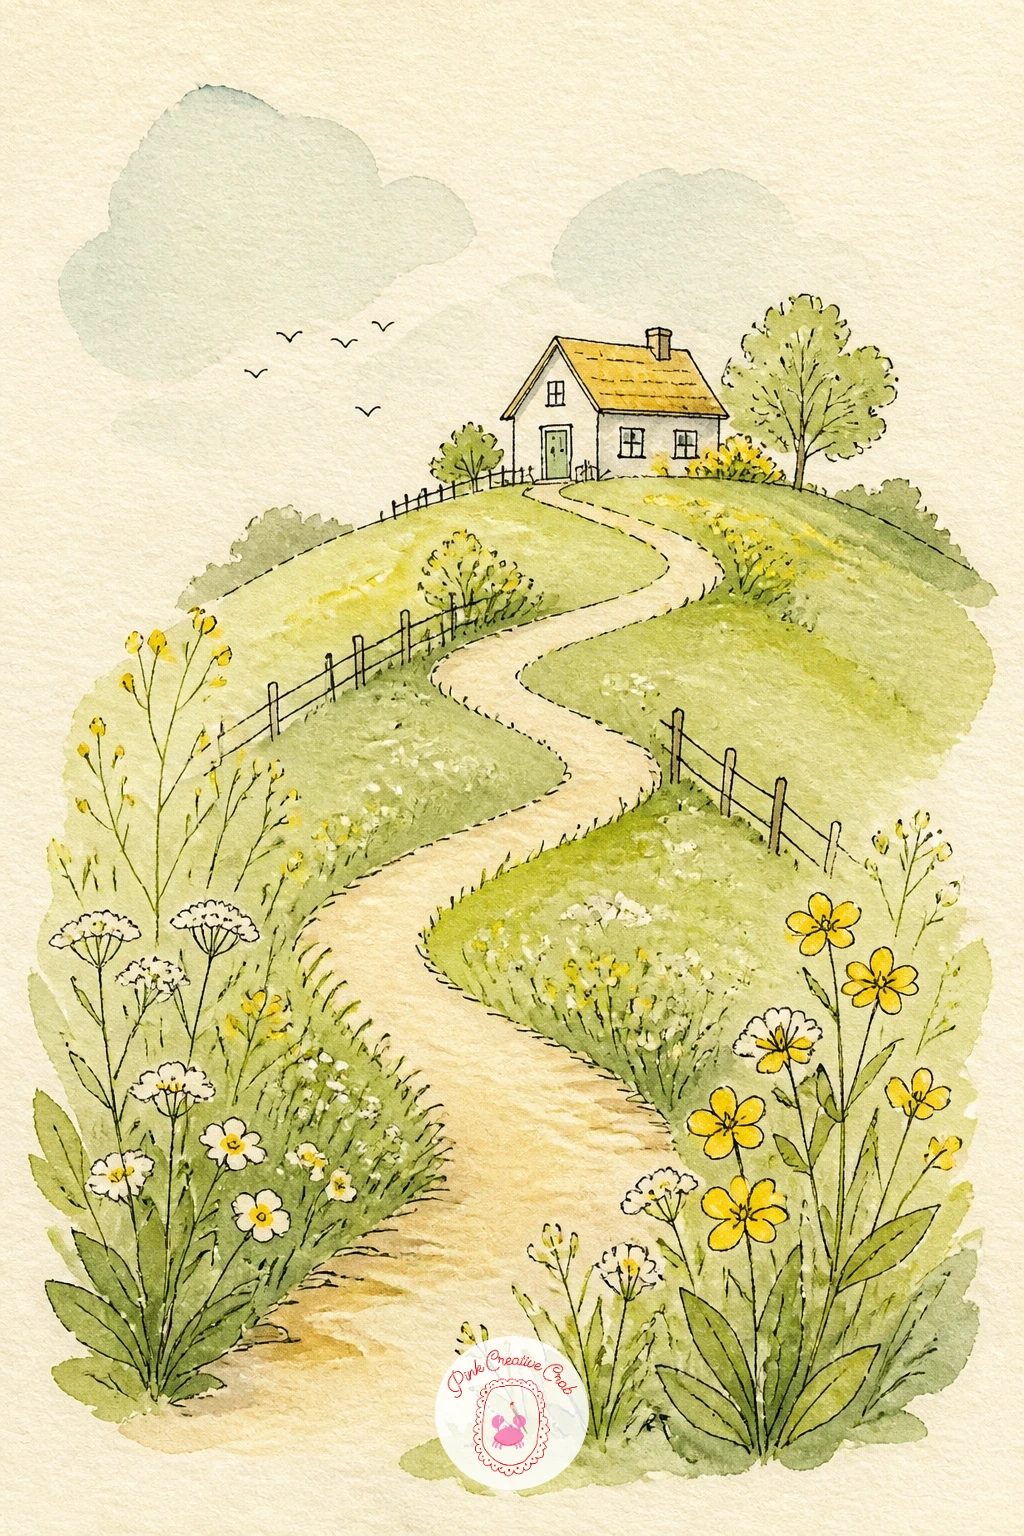
Draw a path leading to a little house, a nice small landscape for a page about settling into something new. Start with a simple horizon line roughly a third of the way up the page, place a small cottage with a pitched roof near that horizon, and draw a curving path winding from the bottom edge of the page up toward its door.
Keep the house small and the path wide and prominent near the viewer, since that scale difference is what makes the house feel like a destination still ahead rather than something already reached. Ink the house and path first, then the few trees or bushes alongside the path, and watercolor the whole scene in soft sage and butter yellow with the roof in a warm rust or brown.
Letter your journal title or a short phrase about starting this chapter along the path itself, following its curve. If the path’s curve feels stiff, loosen your wrist and draw it quickly in one single stroke rather than several short cautious ones, you can always redraw it.
A single lamp post glowing beside the door adds a cozy finishing touch.
Palette: Sage Green,Warm Brown,Butter Yellow,Sky Blue
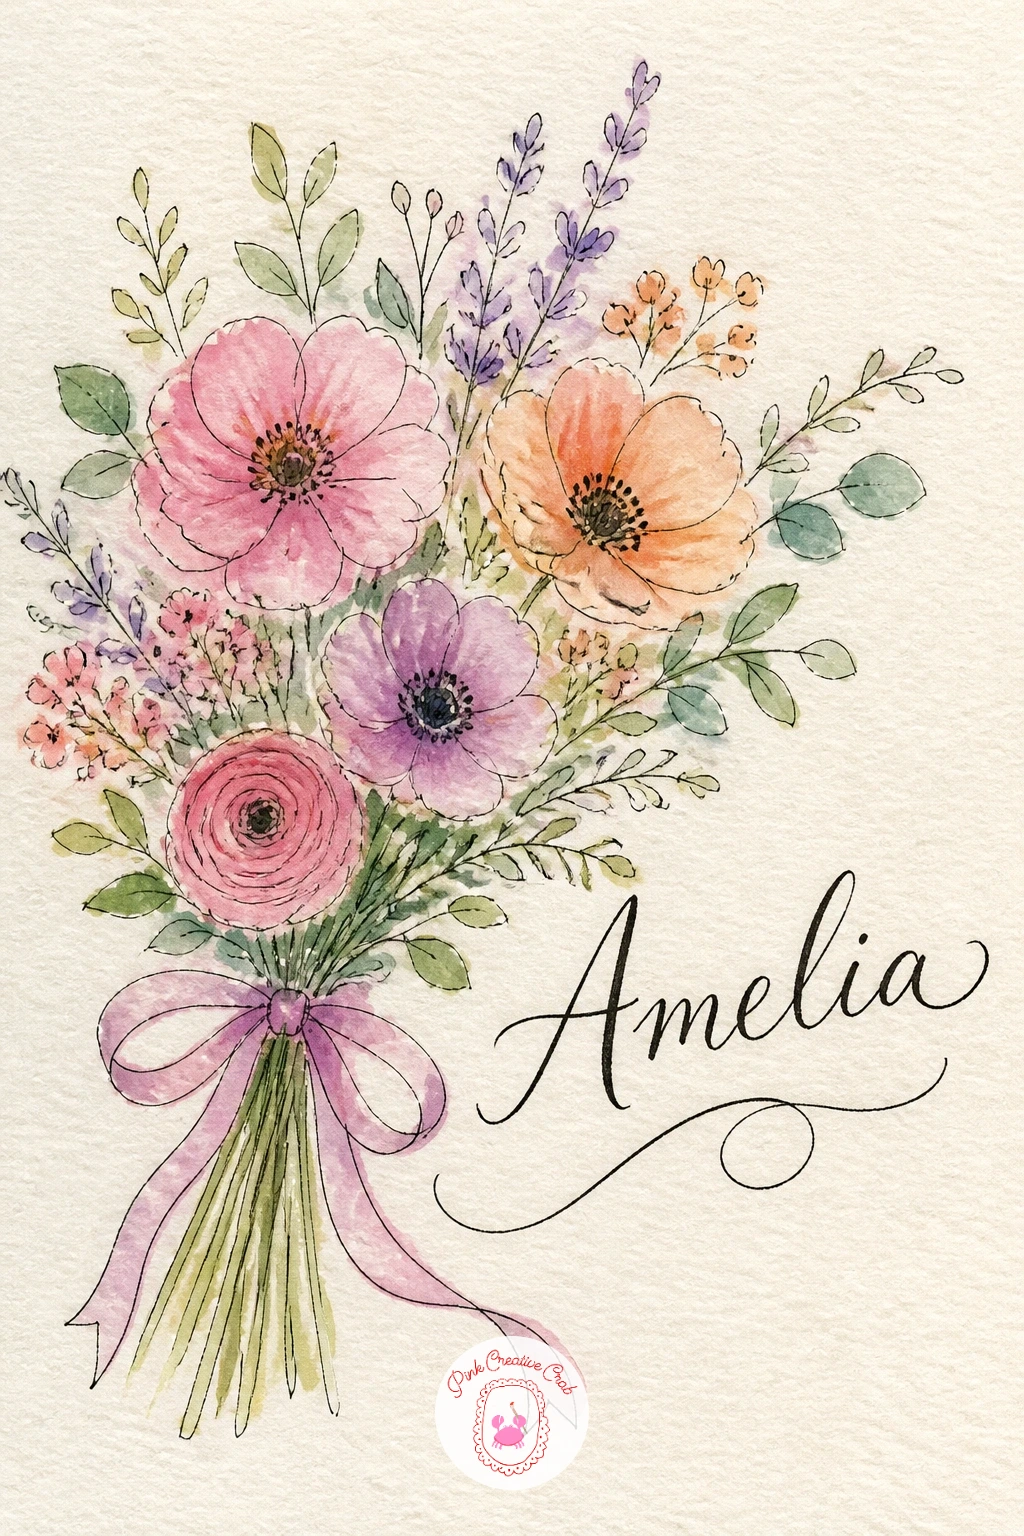
After the quiet cottage scene, bring in some color with a simple bouquet and your name lettered beside or beneath it. Choose three or four flowers that feel easy to draw, a rose, a daisy, a sprig of lavender, and bunch them loosely together with their stems crossing near the bottom rather than drawn perfectly parallel.
Pencil the bouquet first as simple round and oval shapes before adding petal detail, which keeps the overall bunch looking balanced before you commit to any fine lines. Ink the flowers and a loose ribbon tied around the stems, then watercolor each bloom a different soft color from the palette so the bouquet reads as varied without clashing.
Letter your name in a flowing script just beside the bouquet, roughly at the same height as the flower heads so the two elements feel connected rather than stacked. A white gel pen adds tiny highlight flecks on the petals once the watercolor is fully dry, which lifts the whole bouquet nicely.
Keep the ribbon simple, two loose loops and a couple of trailing ends is plenty.
You Will Need
- white gel pen (optional)
Palette: Dusty Rose,Butter Yellow,Sage Green,Lavender
Shape the whole page like an envelope receiving a letter, complete with a drawn stamp in the corner, for a first page that feels like a message to yourself. Draw a simple envelope outline filling most of the page, the flap triangle at the top folded down, and a small rectangular stamp in the upper right corner.
Design the stamp like a tiny picture within the page, a flower, a bird or a simple landscape, with a scalloped or perforated edge drawn as a row of small bumps rather than a straight line. Ink the envelope and stamp, then watercolor the envelope in cream or pale sky blue and the stamp in a brighter accent color so it stands out as its own small artwork.
Letter your address to yourself, something like “to: a new chapter” across the center of the envelope, and a return address or date in the corner where a sender’s details would normally sit. The scalloped stamp edge is fiddly, so draw it as evenly spaced dots first in pencil before inking each little bump.
A wax seal doodle over the flap finishes the look if you want one more detail.

Palette: Sky Blue,Pastel Pink,Butter Yellow,Soft Brown
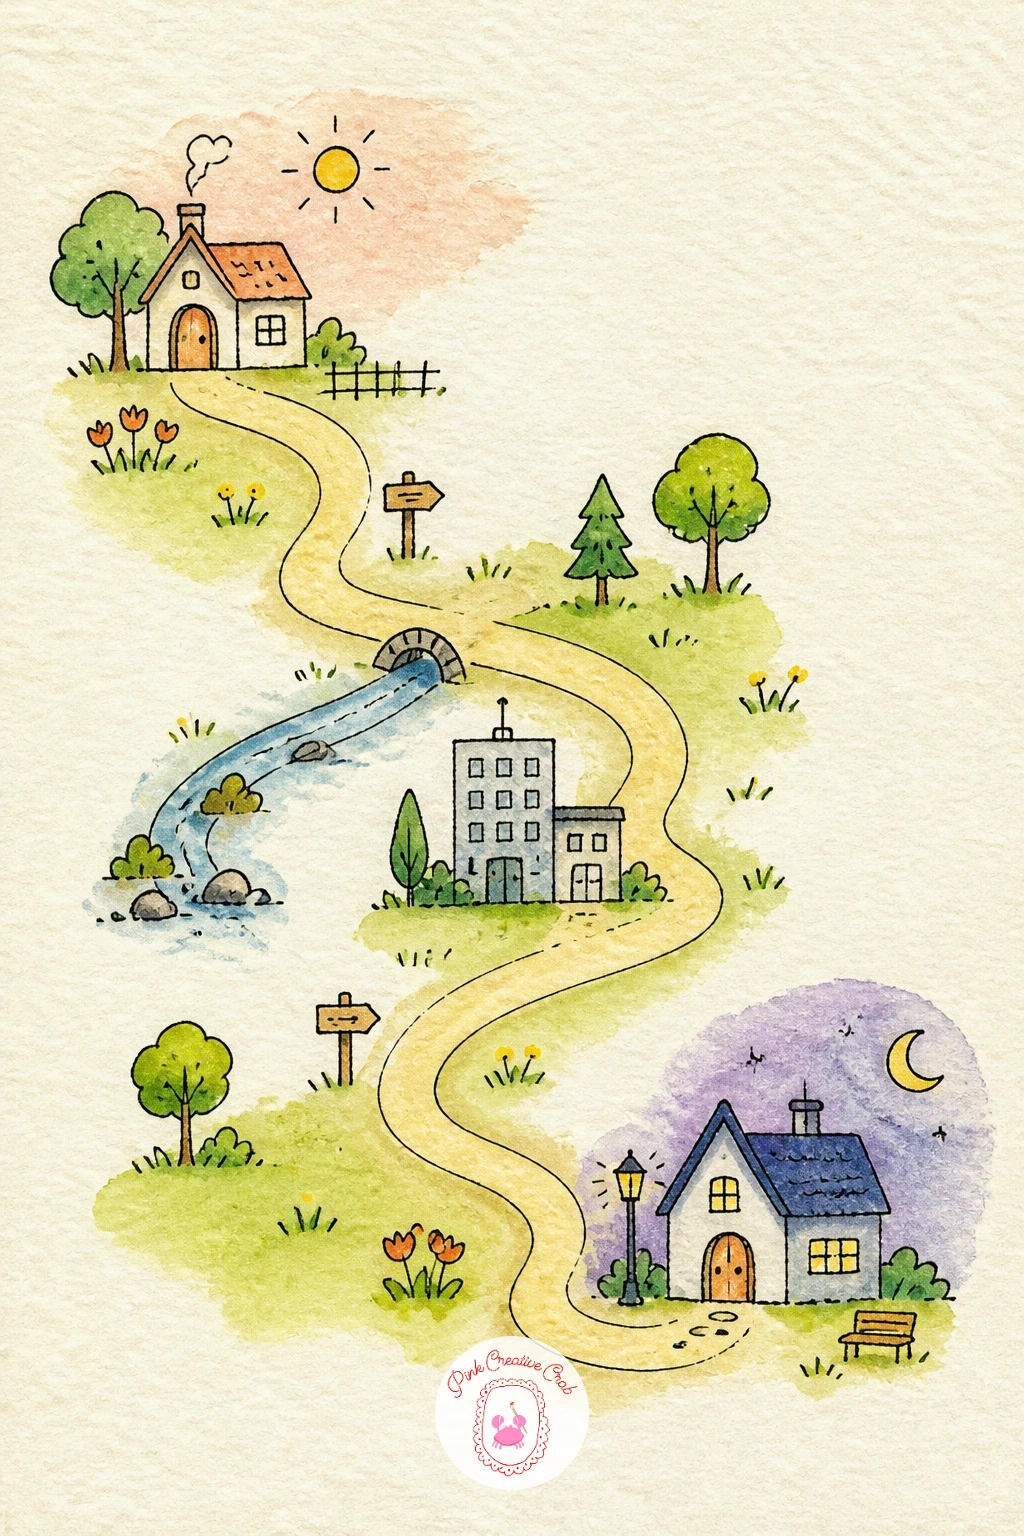
Sketch a tiny map of your day as a playful alternative to a written schedule, treating morning, afternoon and evening as little landmarks on a miniature island or trail. Draw a simple curving path or coastline shape across the page, then mark three or four small icons along it, a coffee cup for morning, a desk for work, a moon for evening.
Pencil the overall path shape first and check that your landmarks sit at roughly even spacing along it, since a map with everything bunched at one end looks unbalanced. Ink the path and icons, then watercolor the land areas in sage and the water or sky around them in sky blue, keeping each little icon a single bright color so it stands out against the map.
Letter a small label beside each landmark, just a word or two. If a full island shape feels like too much today, a simple straight timeline with the same icons along it works just as well and is quicker to fit on the page.
Add a little compass rose or “you are here” arrow near the start for a nice finishing touch.
Palette: Sage Green,Sky Blue,Butter Yellow,Soft Brown
Bring in your first animal character with a fox trotting across the page carrying your journal title on a banner in its mouth. Draw the fox in simple side profile, a rounded body, pointed ears and a full tail held up behind it, then draw a ribbon banner trailing from its mouth with enough length for your lettered title.
Keep the fox’s proportions simple by comparing the body length to the head, a fox body is usually about two and a half head lengths, which stops the figure looking too stretched or too stubby. Ink the fox and banner, then watercolor the fox in warm orange with a white chest and tail tip, and the banner in butter yellow or sky blue so the lettering stands out clearly against it.
Letter your title along the banner’s curve rather than in a straight line, matching the gentle wave the ribbon makes as it trails behind the fox. If orange fur feels tricky to shade evenly, a dry brush with very little water dragged lightly over the back adds texture without needing a smooth gradient.
A single paw lifted mid-step keeps the whole pose feeling light and in motion.
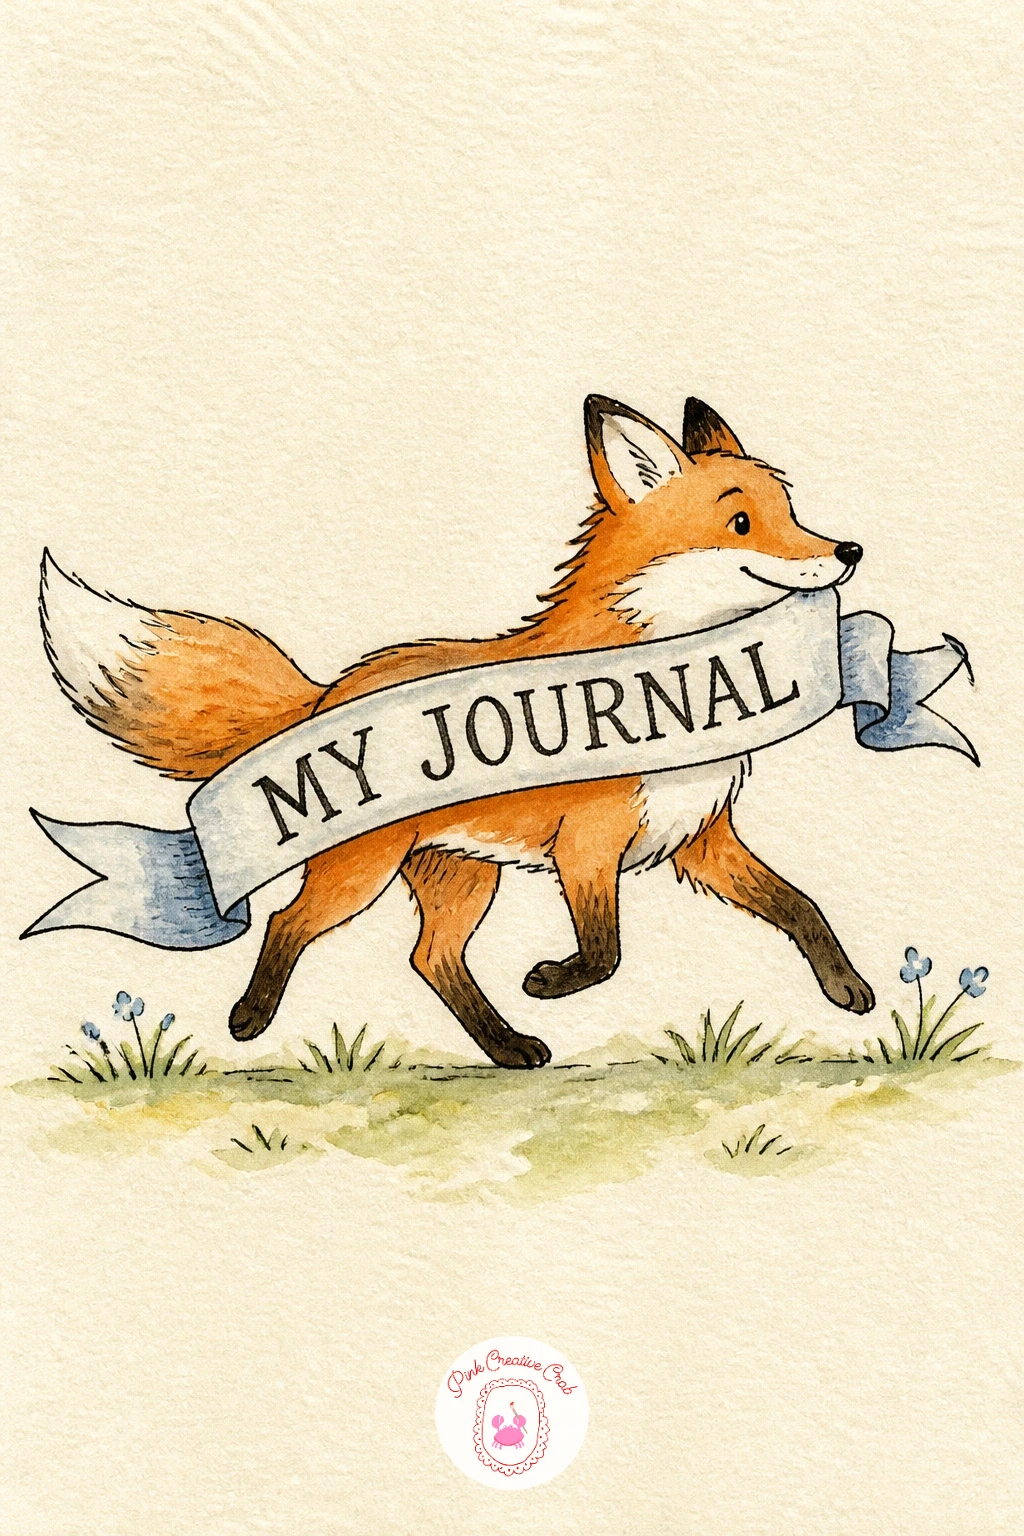
Palette: Burnt Orange,Cream White,Butter Yellow,Sage Green
Settle into something cozier with a simple teacup resting on a folded blanket, a page that suits a journal meant for quiet evening entries. Draw a teacup and saucer first, keeping the oval of the cup’s rim simple and even, then draw a soft folded blanket beneath it with a few loose wrinkles and a knitted or plaid pattern.
Ink the teacup’s clean lines first since it is the smaller, more precise shape, then loosen your hand for the blanket’s folds, which should look relaxed rather than ruled straight. Watercolor the tea itself in a warm amber, the cup in sage or sky blue, and the blanket in a soft plaid of butter yellow and dusty pink.
The folds in the blanket are where this one can go flat, so leave a few streaks of plain cream paper unpainted along the top of each fold to suggest where the fabric catches the light. Letter a cozy phrase or the date on a small tag or label tucked beside the cup.
Steam lines rising from the tea finish the page with almost no extra effort.
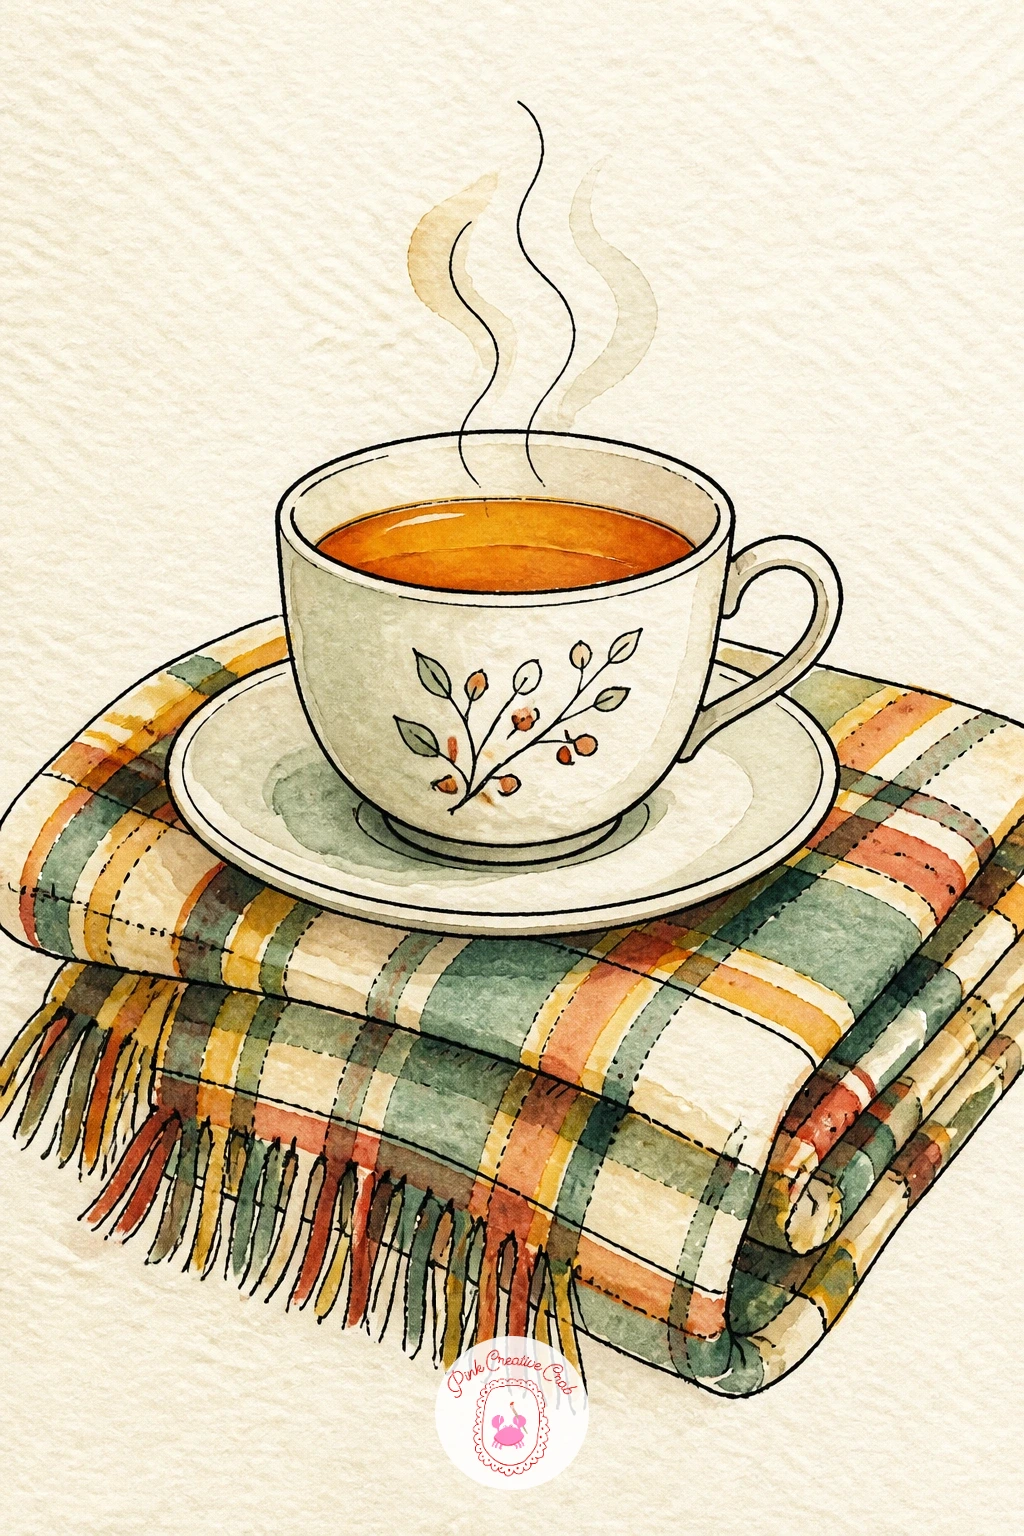
Palette: Dusty Pink,Butter Yellow,Sage Green,Warm Amber
Let a sleeping cat take over the title lettering, curled right on top of the words as though it has claimed the page for a nap. Letter your journal title first in plain simple capitals across the middle of the page, then draw the cat as a loose curled oval shape resting directly over part of the letters, tail wrapped around its body.
Keep the cat simple: one curved back line, two small triangle ears, a few whisker marks, no need for visible paws or a detailed face since a sleeping cat tucks most of that away. Ink the cat over the lettering, then watercolor it in a soft grey tabby or warm ginger, leaving the exposed parts of the title in a contrasting color so the words stay readable around the curled shape.
If the cat’s curled shape looks stiff, study a reference of a sleeping cat and notice how the spine curves almost into a full circle, which is the single shape to get right here. Marker works just as well as watercolor for the cat’s fur if you want cleaner, flatter color.
A few “zzz” marks drifting up from its head add a playful final touch.

Palette: Soft Grey,Warm Ginger,Cream White,Sage Green
Look up a few photos of sleeping cats before you start, the tight curl of the spine is the one shape worth really studying.
If you share your home with an animal, dedicate the next opening page to a simple pet portrait, since a familiar face is often the easiest thing to draw with real feeling. Work from a clear photo on your phone, sketching the head and shoulders only rather than the whole body, and block in the basic proportions, the width of the head against the length of the ears or muzzle, before adding any fur detail.
Ink the main outline and facial features first, keeping linework loose around the fur edges rather than tracing every strand. Watercolor the base coat first in flat washes, let it dry fully, then add a second, darker layer only in the shadow areas, around the ears and under the chin, to build some gentle form.
Soft fur edges are the trickiest part of any pet portrait, so once the first wash is dry, go back in with a damp clean brush and lift a little color right at the outer edge to blur the hard line into something fluffier. For fur color that will not blend smoothly in watercolor, colored pencil layered on top fixes the texture nicely.
Letter your pet’s name underneath once the portrait is dry.
For more animal portrait practice beyond this one page, this watercolor animals tutorial walks through several woodland creatures in the same soft style.
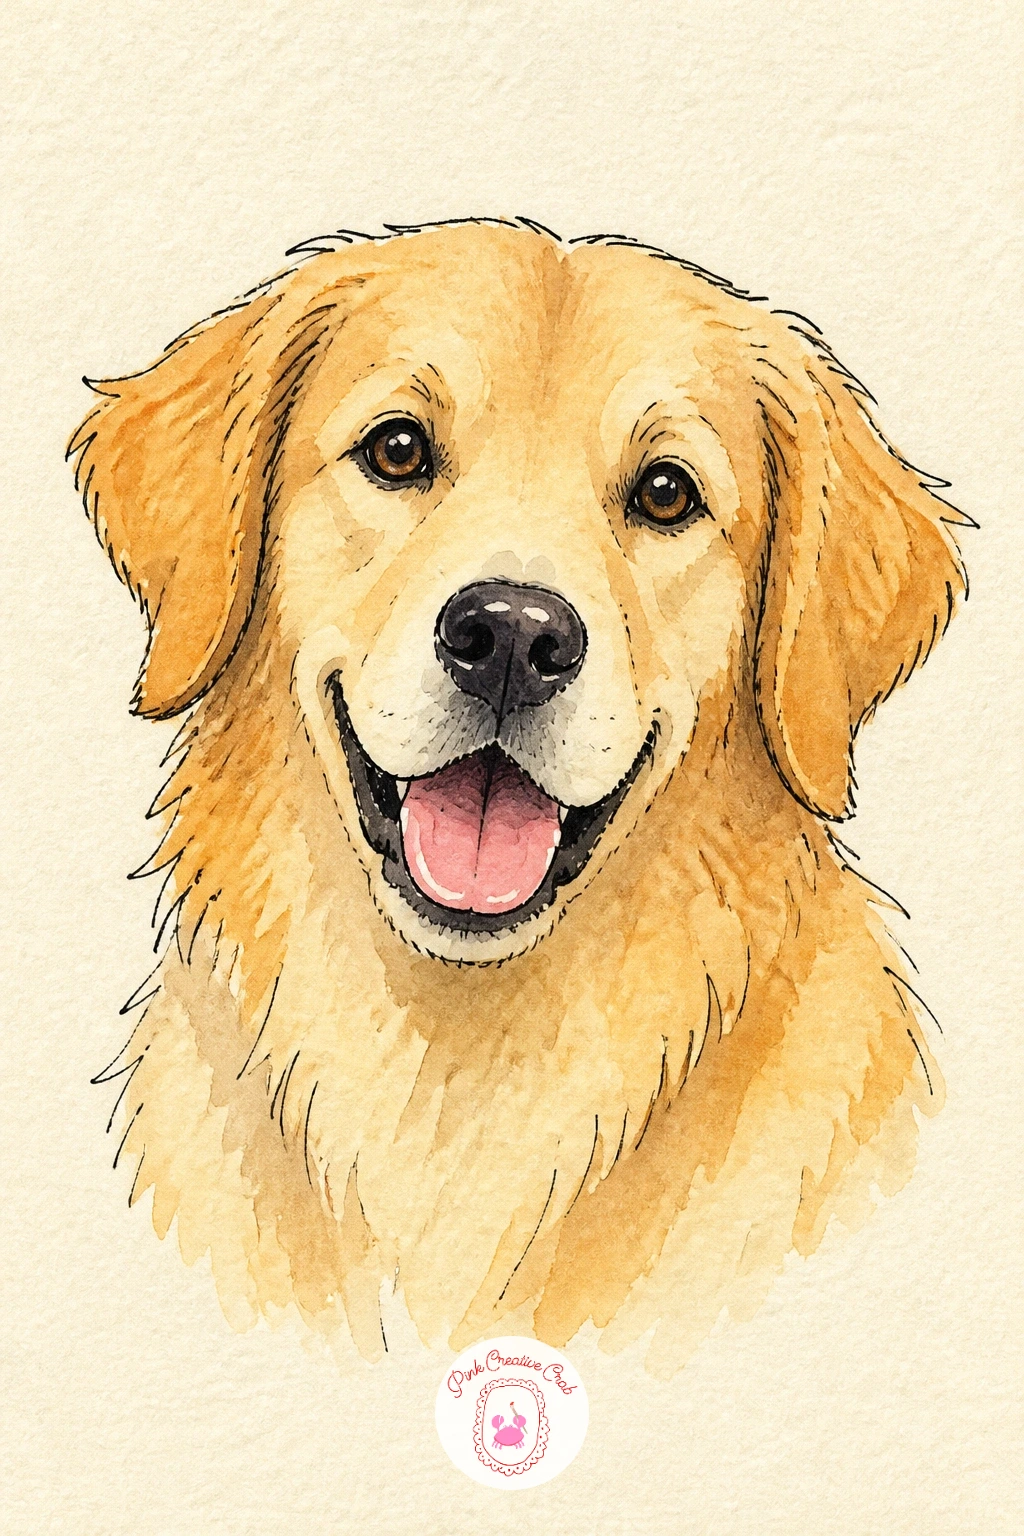
Palette: Warm Brown,Soft Grey,Cream White,Butter Yellow
Keep the movement going with a bicycle carrying a basket of flowers and your name painted along its frame. Draw the bicycle in simple side profile, two even circles for the wheels joined by a basic triangular frame, then add a round basket on the front overflowing with small flowers.
Check the wheel sizes against each other before inking, since two mismatched circles is the single thing that makes a drawn bicycle look wrong fastest, a quick trace around a coin or small lid keeps both wheels identical. Ink the frame and basket, then watercolor the bicycle frame in sky blue or sage, the basket flowers in a cheerful mix of pink and yellow, and leave the wheels mostly open with just a thin dark rim.
Letter your name along the bicycle’s crossbar in a flowing script, following its diagonal angle rather than writing straight across. A ten minute version keeps the bicycle as a simple flat side view, while a forty minute version adds a basket overflowing with five or six distinct little blooms and a light cast shadow beneath the wheels.
A ribbon trailing from the handlebar is a nice optional extra if there is room.
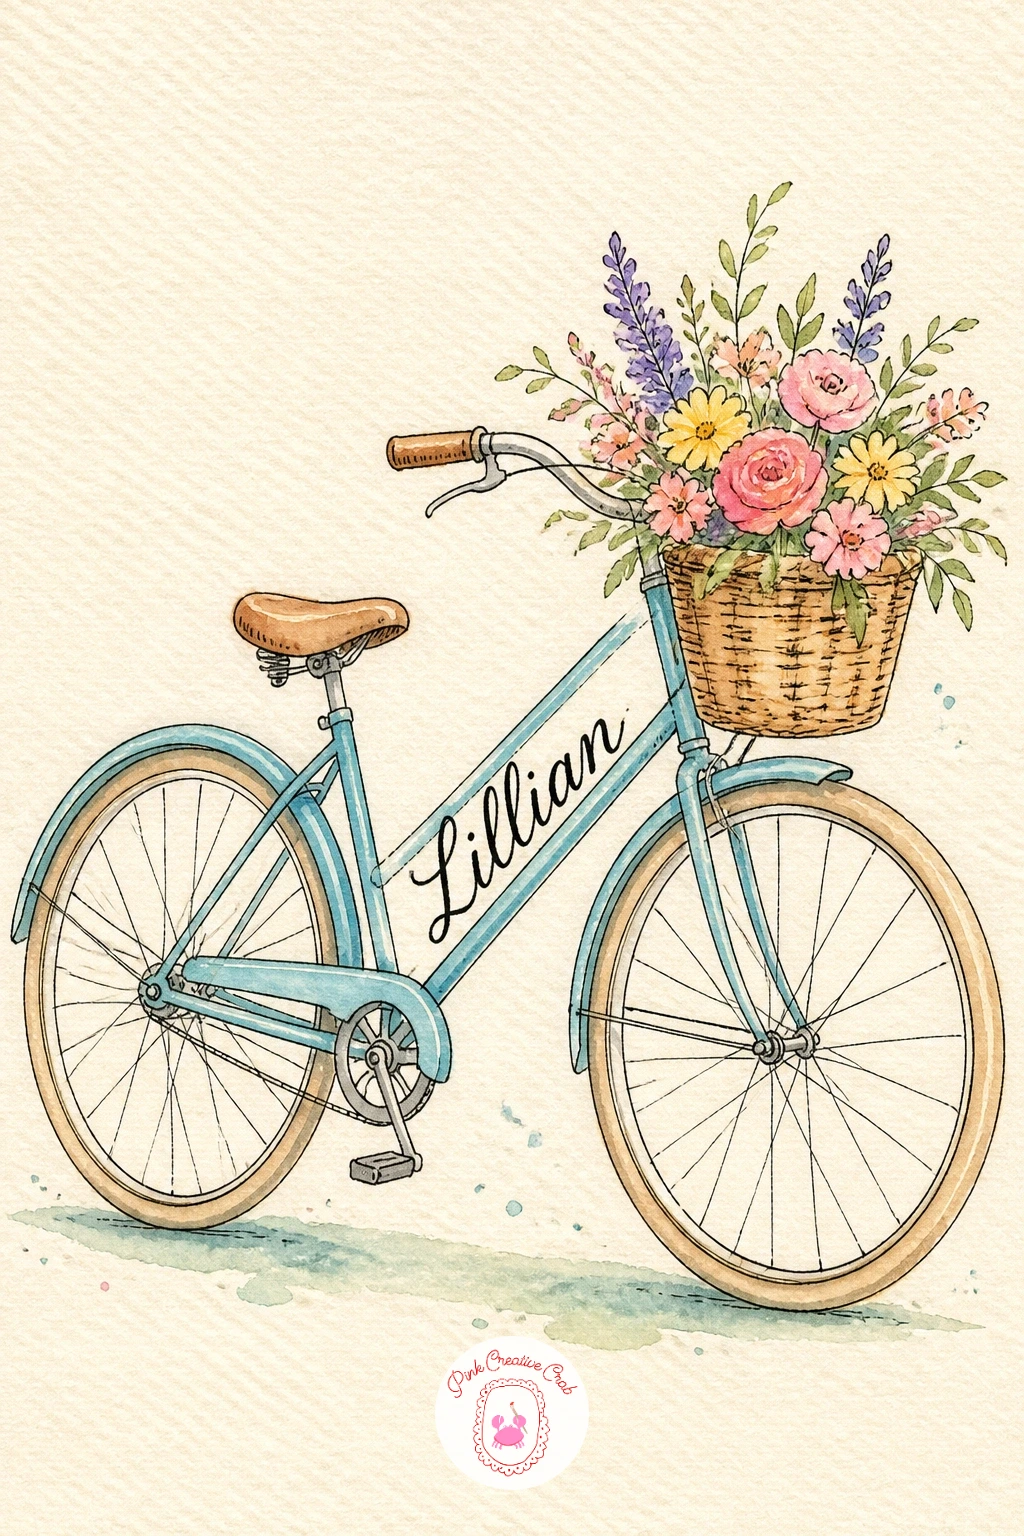
You Will Need
- coin or small lid to trace circles
Palette: Sky Blue,Pastel Pink,Butter Yellow,Sage Green
Turn your goals for this journal into a small bookshelf, where each spine stands in for one thing you want to work toward. Draw a simple shelf as two horizontal lines with short vertical ends, then fill it with five or six book shapes of varying height and width standing side by side, exactly the way a real shelf looks uneven.
Pencil the books first as plain rectangles before adding any spine detail, checking that their heights vary enough to feel natural rather than lining up like a bar chart. Ink each spine, then watercolor the books in different colors from the palette so the shelf reads as a cheerful mixed collection rather than a matching set.
Letter one goal along each spine, short enough to fit a single line of text, and keep the words simple, a phrase rather than a full sentence. A couple of books leaning at a slight angle rather than standing perfectly straight adds real charm and is easier to draw than a perfectly tidy row.
A small plant or bookend on one side finishes the shelf nicely if you want one more detail.
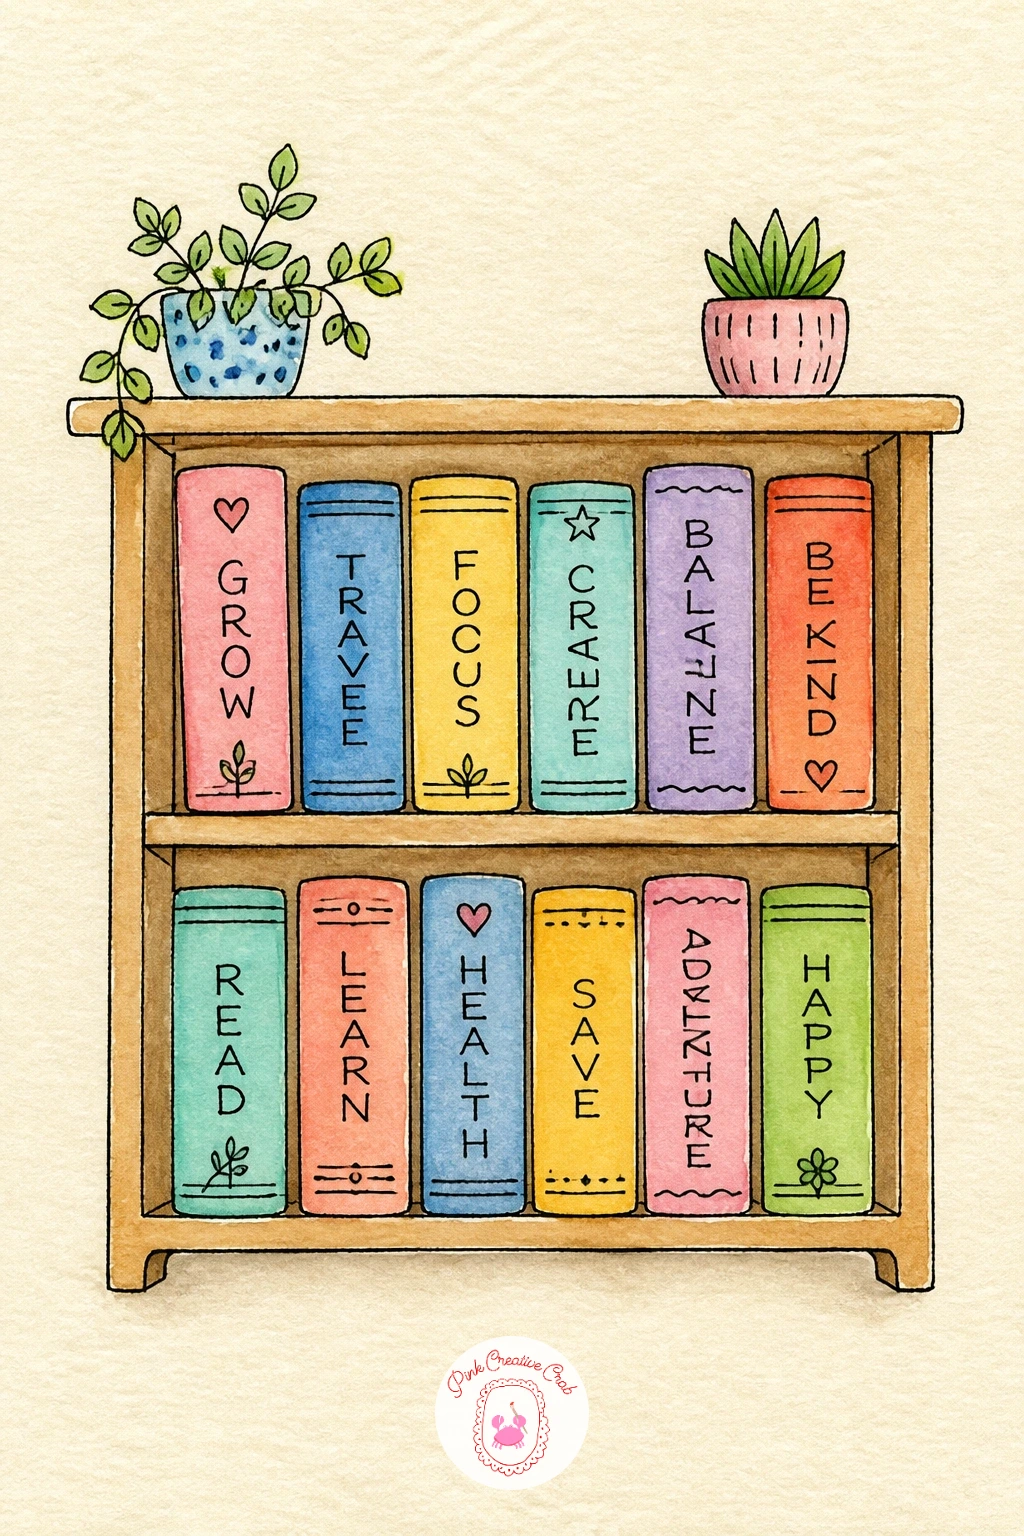
Palette: Sage Green,Dusty Rose,Sky Blue,Butter Yellow
Lift the goals idea higher with a hot air balloon of dreams, carrying a woven basket into a soft pastel sky. Draw a large rounded balloon shape divided into vertical panels, a few ropes connecting it down to a small woven basket, and a soft sky around it with a scatter of clouds.
Think about where the light comes from before you paint: if the sun sits in one corner, keep the panels nearest it lighter and the panels on the opposite side slightly deeper in tone, which gives the balloon’s round shape some real volume without much extra work. Ink the balloon panels and basket weave lines first, then watercolor alternating panels in soft pink, sky blue and butter yellow, leaving one or two panels paler where the light hits.
Letter your dreams or hopes for the journal ahead either inside the basket or floating around it in small clouds. The ropes connecting balloon to basket are fiddly in ink, so draw them last with a fine nib once everything else is dry so a shaky line does not smear wet paint.
A tiny bird flying alongside adds scale and a bit of motion.
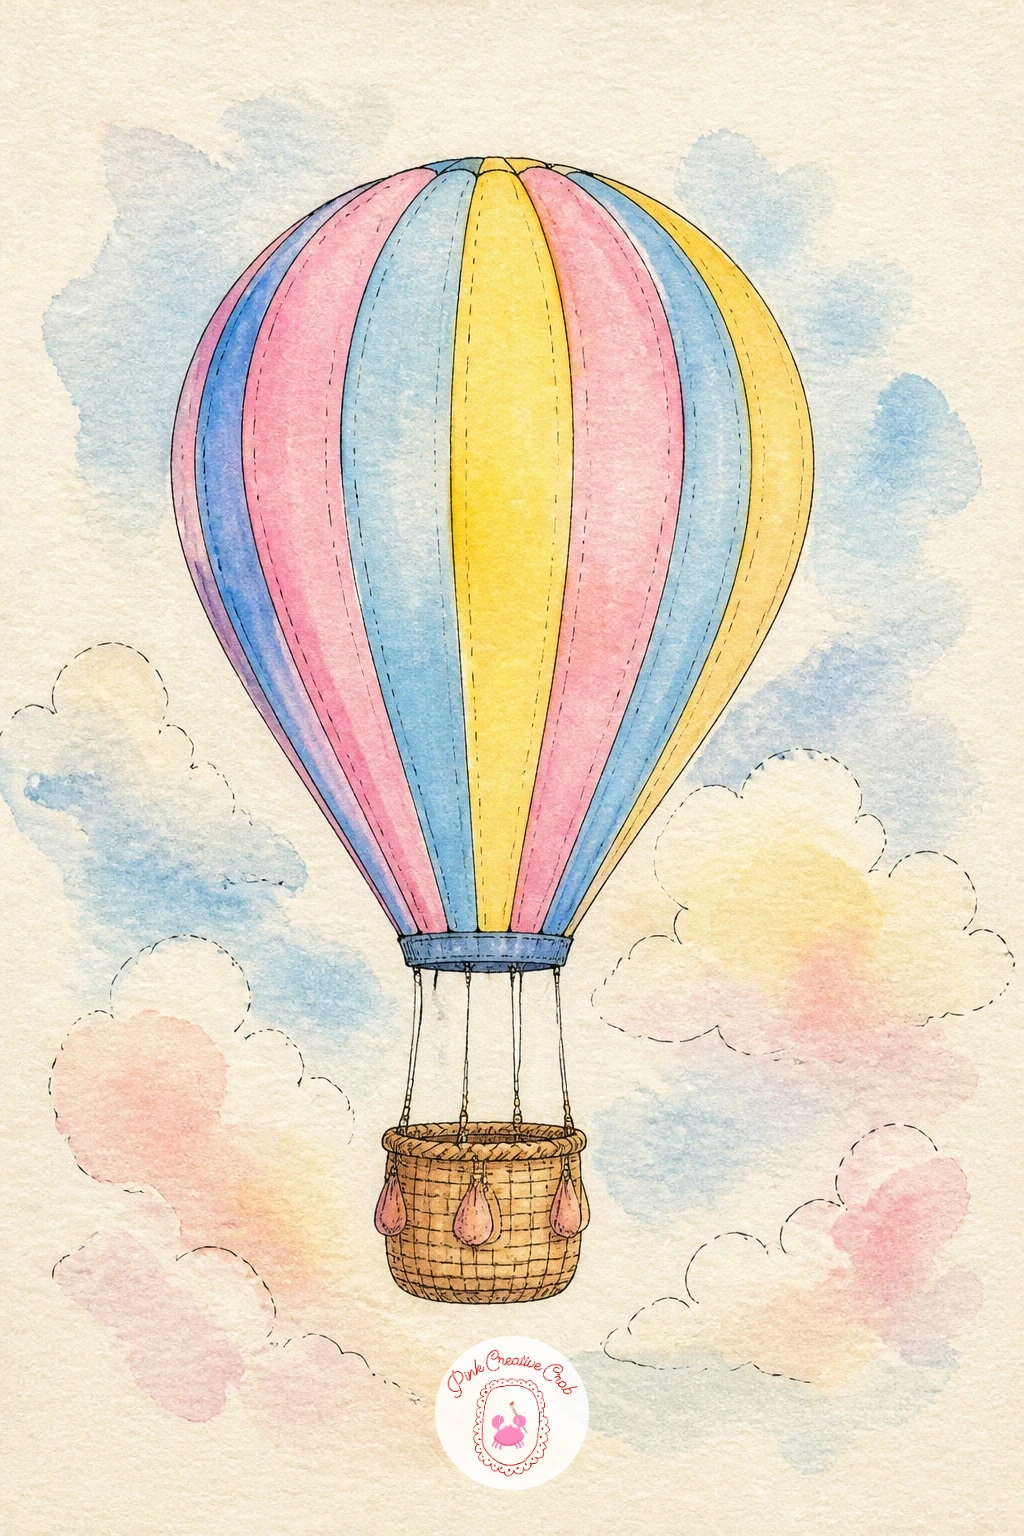
Palette: Pastel Pink,Sky Blue,Butter Yellow,Soft Brown
Plant your habits as a small garden, where each flower or row stands for one thing you want to build into your days. Draw a simple raised garden bed as a wide rectangle near the bottom of the page, then fill it with several small plants of different heights and shapes, a row of tulips, a cluster of daisies, a few herb sprigs.
Vary the plant shapes rather than repeating one flower across the whole bed, since a mixed little garden reads as more alive than identical rows. Ink the plants from back to front so the shapes in the rear stay slightly smaller and simpler, which gives the bed a touch of real depth without any complicated perspective work.
Watercolor the bed itself in warm brown and the plants in a cheerful mix from the palette, letting a little green wash run along the base of the stems where they meet the soil. Letter one habit beside each plant, small and neat, so the garden doubles as a simple tracker you can glance back at.
Water the whole thing in your head with a watering can doodle resting against the edge of the bed if there is room left.
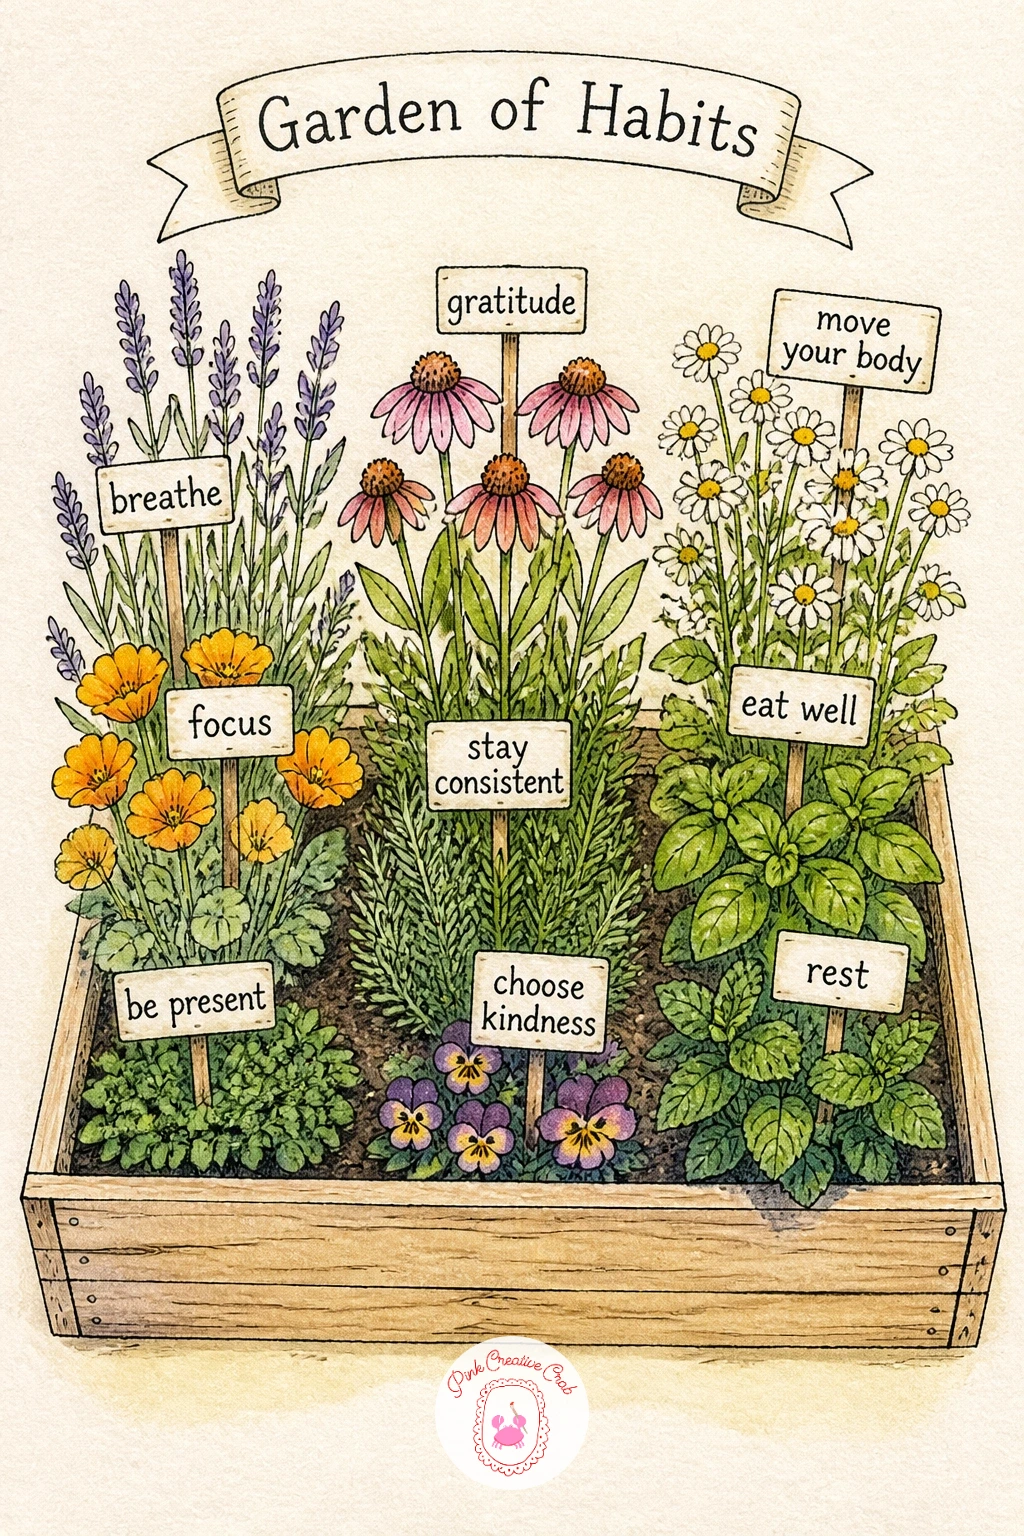
Palette: Sage Green,Pastel Pink,Butter Yellow,Warm Brown
Take the goals theme up into the night sky with a page of constellations of wishes, each little star cluster standing for one hope rather than a real astronomical shape. Watercolor a deep sky wash across most of the page first in soft sage or dusky blue, letting it dry fully before any inking begins so the paper does not buckle under your pen later.
Once dry, dot in several small clusters of stars across the wash with a white gel pen, connecting a few dots within each cluster with a thin straight line the way real constellation charts do. Keep each cluster small, four to six dots is plenty, and spread the clusters out rather than crowding them into one corner.
Letter one wish or hope in tiny handwriting beside each constellation, curving the text slightly to follow the open space around the stars. A fine white paint pen gives a slightly bolder dot than a gel pen if your sky wash came out quite dark and the gel pen struggles to show up.
A single shooting star streaking across one corner is a nice finishing flourish.
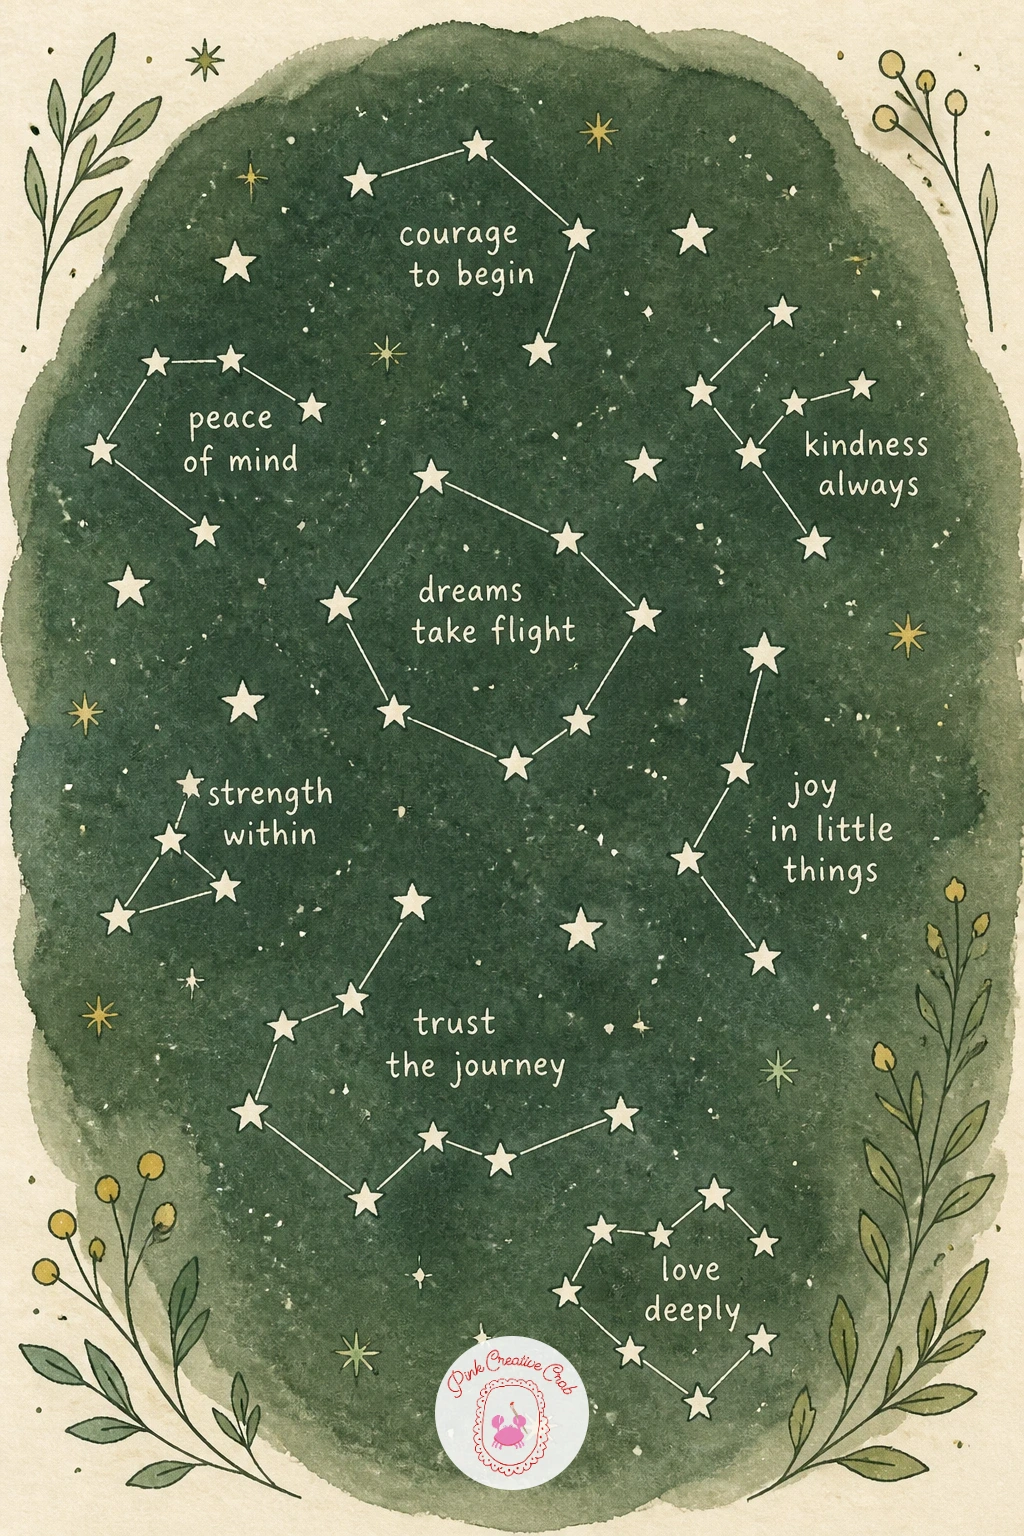
You Will Need
- white gel pen
Palette: Deep Sage,Dusky Blue,Cream White,Soft Grey
Pack your plans for the months ahead into a simple suitcase, drawn open and half filled the way a real case looks before a trip. Draw the case as a rounded rectangle with a sturdy handle and two latch details, then draw it open at an angle with a few folded items, a scarf, a notebook, a small plant, tucked inside.
Keep the open lid at a believable angle, roughly resting at the same slant you would see a real laptop screen propped halfway, which stops the case looking either flat shut or impossibly wide open. Ink the case exterior in solid clean lines, then ink the contents more loosely, and watercolor the case itself in a warm tan or sage with the contents in brighter accent colors so they stand out against it.
Letter your plans or intentions on a luggage tag hanging from the handle, a small oval shape with a punched hole and a short loop of string. If a full case feels like too much detail today, draw just the tag and handle with one item peeking out, which still tells the same story in less time.
A couple of travel stickers doodled on the case’s side add character with very little extra effort.
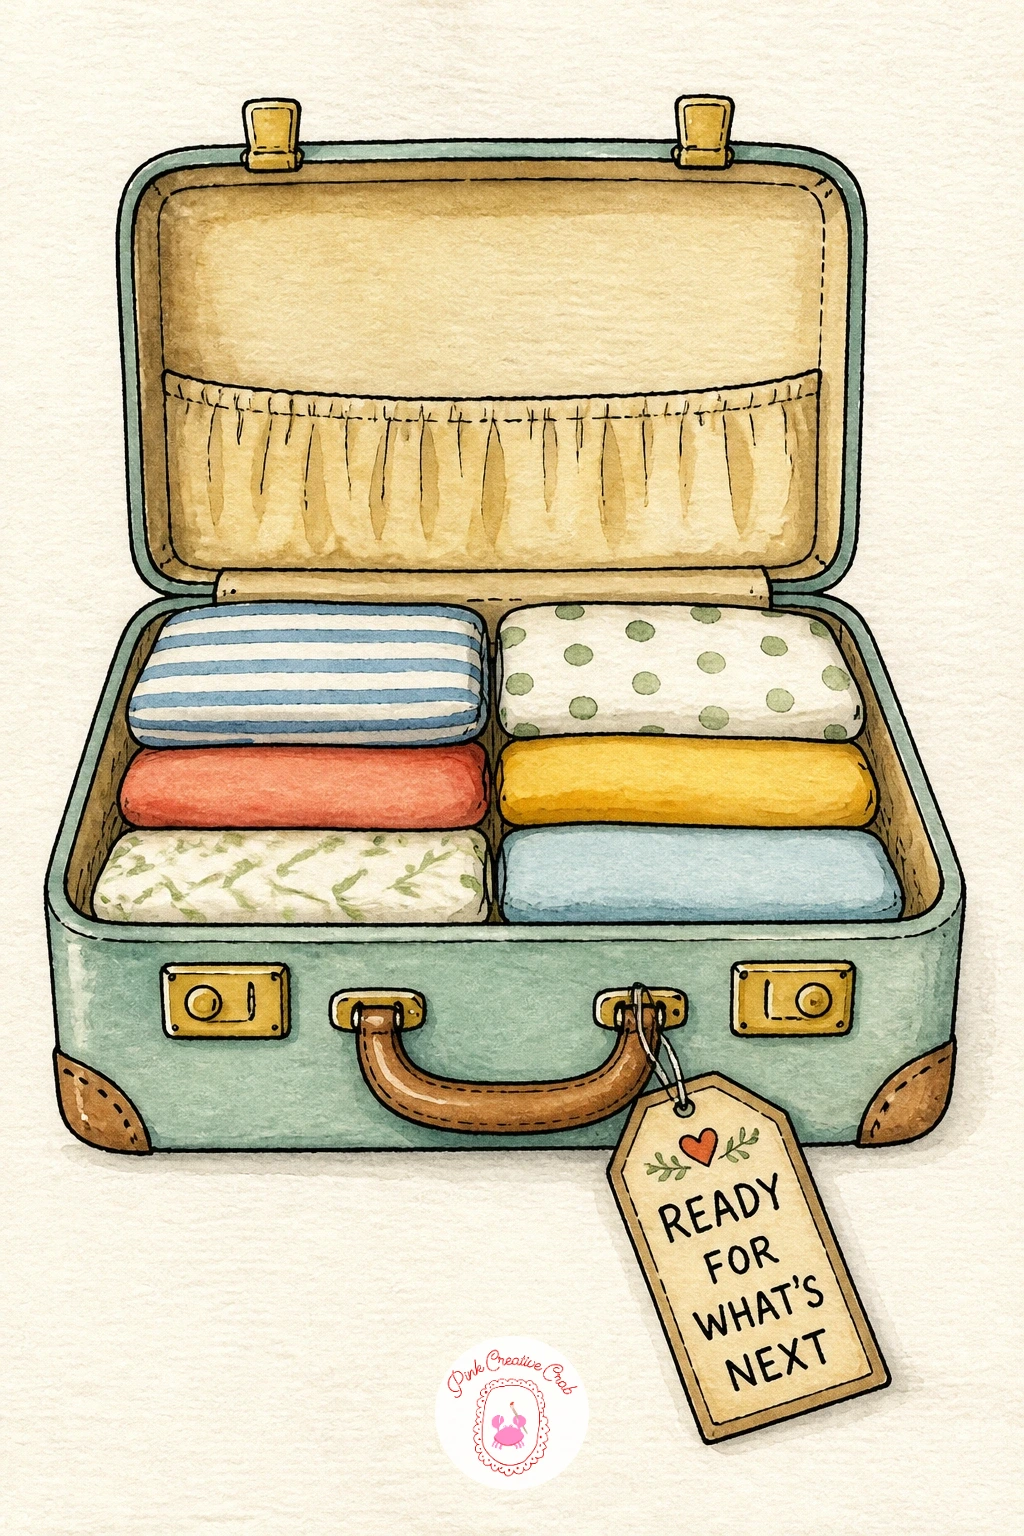
Palette: Warm Tan,Sage Green,Pastel Pink,Sky Blue
For more small travel themed pages once this one works, this travel journal idea list has plenty to keep a trip on paper.
Bring in a second small character with a mouse writing the very first entry using a pen many times its own size. Draw the mouse small and round, simple ears, a long curling tail, standing on its back legs and gripping an oversized fountain pen with both front paws, the nib pressed to the page below it.
Scale is everything in this one, so sketch the pen first at roughly four or five times the mouse’s own body length, which is what makes the size joke land, then build the mouse’s pose around gripping it rather than the other way round. Ink the mouse and pen, then watercolor the mouse in soft grey or warm brown and the pen in a glossy dark tone with a thin gold band near the nib.
Letter a tiny line of “writing” curling out from the pen’s nib as though the mouse has just begun the entry, in handwriting too small to fully read, which keeps the joke visual rather than literal. A whisker or two drawn with a single confident stroke reads better than several short timid lines.
Next time, try the same mouse holding an oversized paintbrush instead for a companion page.
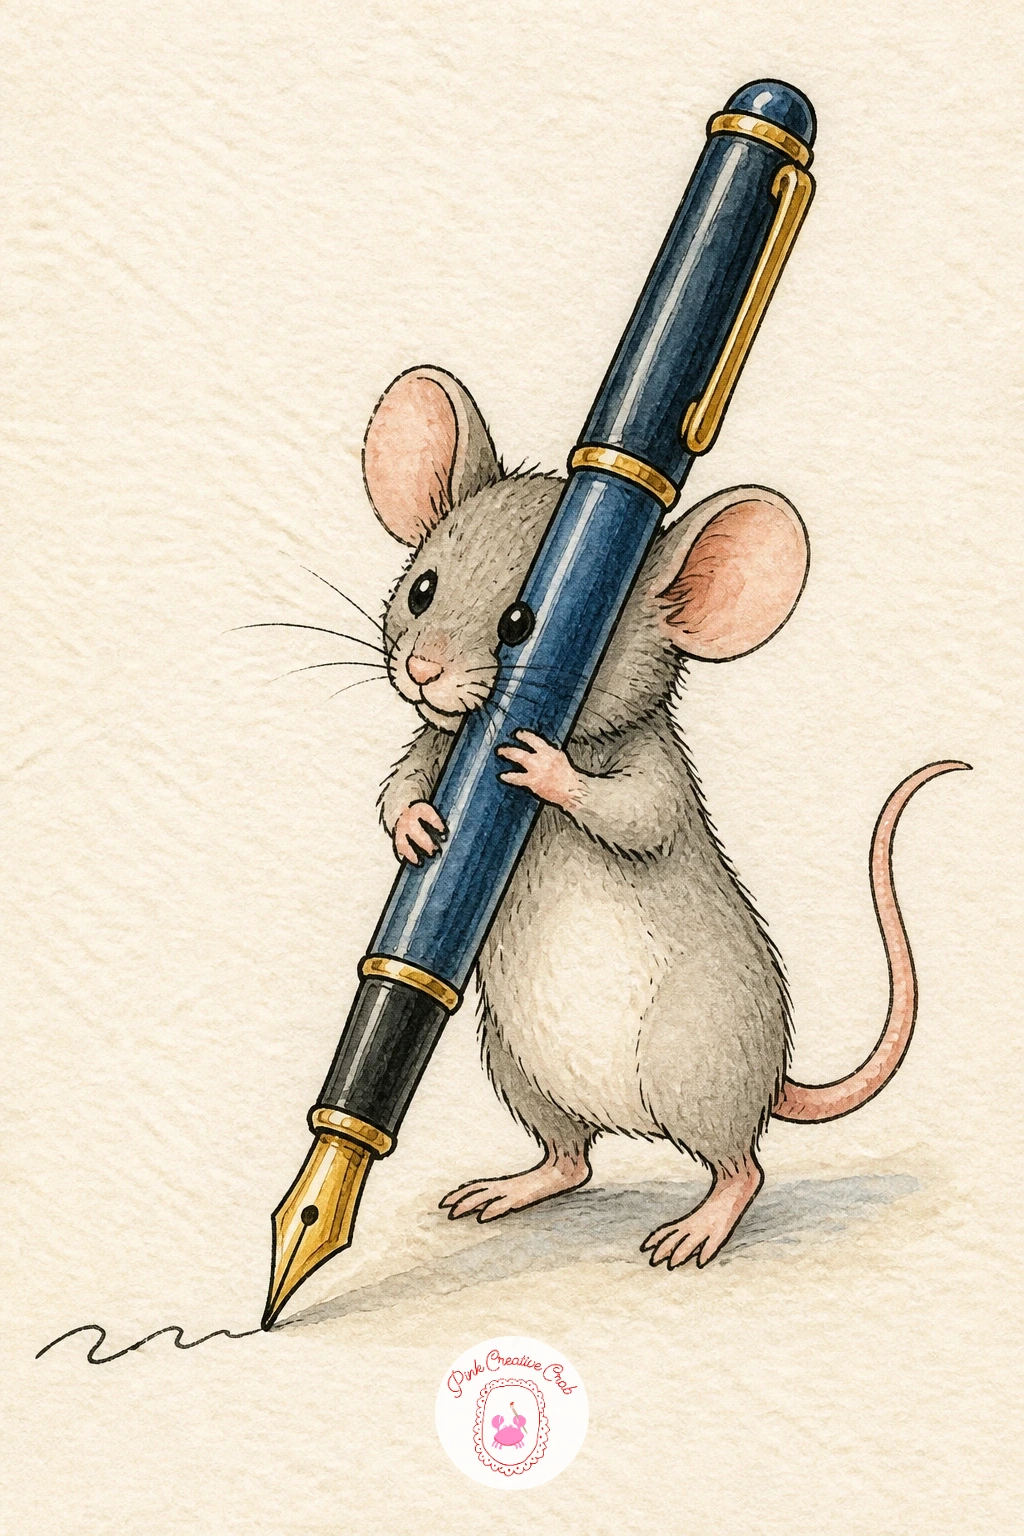
Palette: Soft Grey,Warm Brown,Butter Yellow,Cream White
After the small characters, let a simple sunrise carry the page on color alone. Divide the page into three loose horizontal bands, a pale sky at top, a warmer middle band where the sun sits, and a simple dark horizon line of hills or rooftops along the bottom.
Think about where the sun itself sits, roughly on that horizon line rather than floating higher in the sky, which is what makes a sunrise read correctly rather than looking like a midday sun. Watercolor wet into wet for the sky, dropping butter yellow near the horizon and letting it bleed gently up into pastel pink and then sky blue higher up the page, before the hills are inked on top once that wash is fully dry.
Keep the horizon silhouette simple, a few soft hill bumps or simple rooftop shapes filled in as one flat dark tone rather than detailed buildings. Letter your journal title or the date directly into the sky where the color is palest, so the words stay legible against the wash.
A few birds as simple V shapes crossing the sky finish the page with almost no effort.
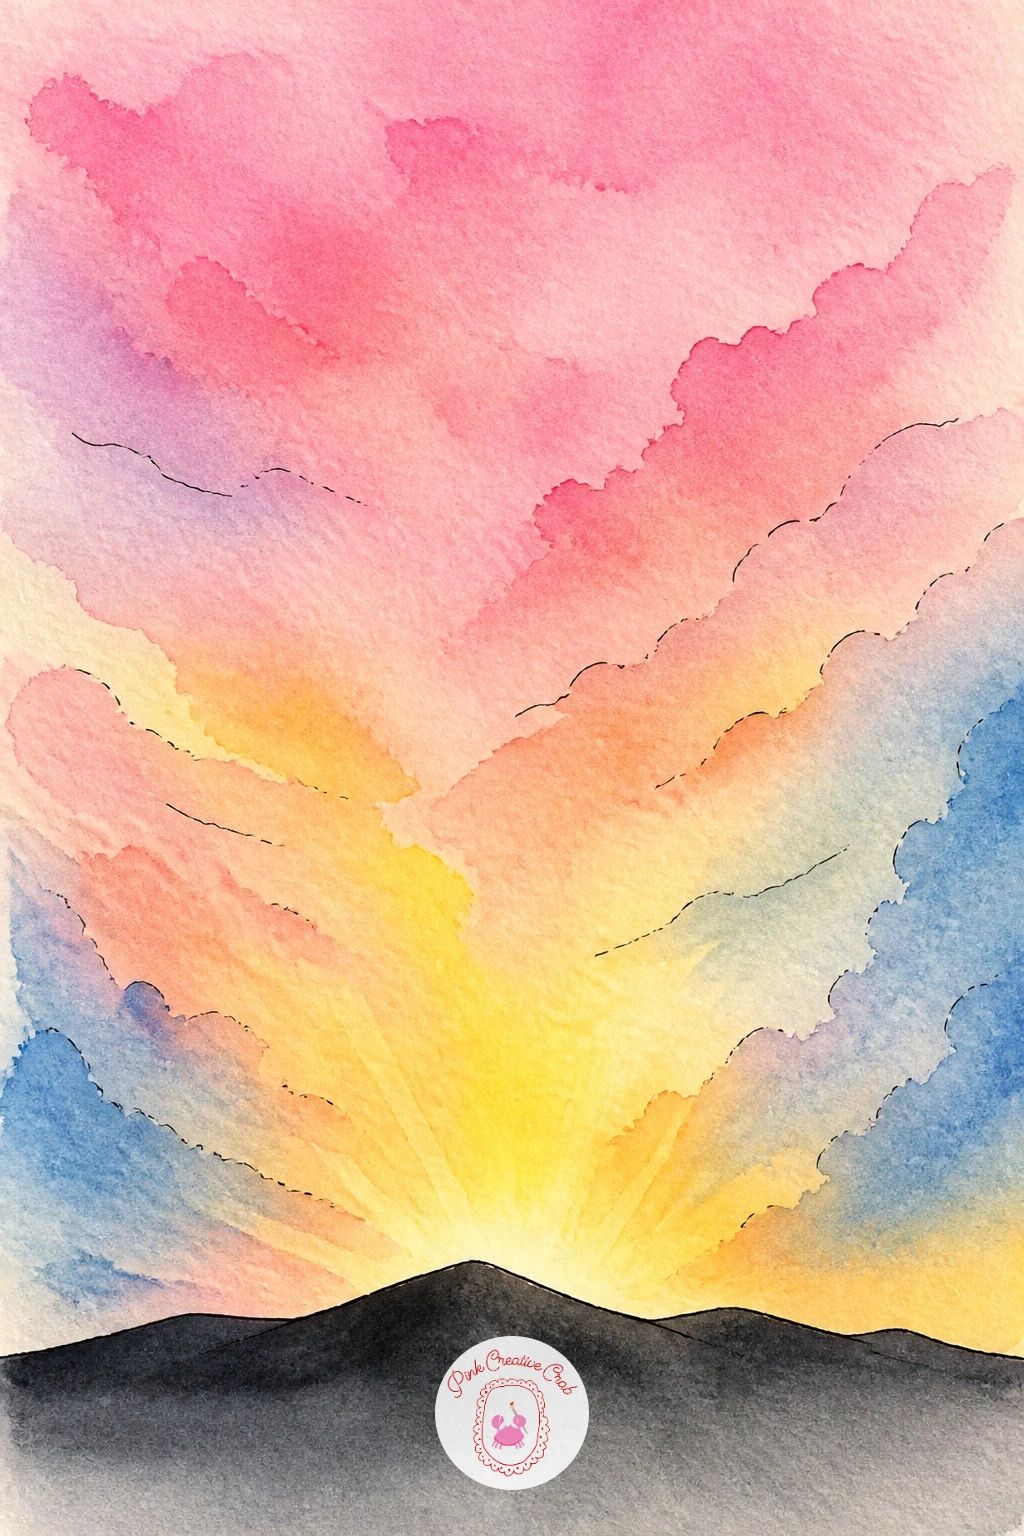
Palette: Pastel Pink,Butter Yellow,Sky Blue,Deep Sage
Have a bird postman deliver the new journal itself, drawn carrying a small wrapped parcel or envelope in its beak as it lands on the page. Draw a simple bird in profile, a round body, a small cap or satchel strap if you want the postman touch, and wings mid flap as though it has just landed, with a small parcel tied in string held in its beak or clutched in one foot.
Keep the bird’s body as one smooth curved shape rather than many separate feather sections, since simple shapes with few details suit this style and this level best. Ink the bird and parcel, then watercolor the bird in sky blue or soft grey with a touch of butter yellow on its chest, and the parcel in warm brown with a sage ribbon.
Letter “special delivery” or your journal’s title on the parcel’s label. If a flying pose feels tricky, a simple standing bird with the parcel at its feet works just as well and is easier to balance on the page.
A small postmark stamp doodled beside the parcel adds a nice finishing detail.
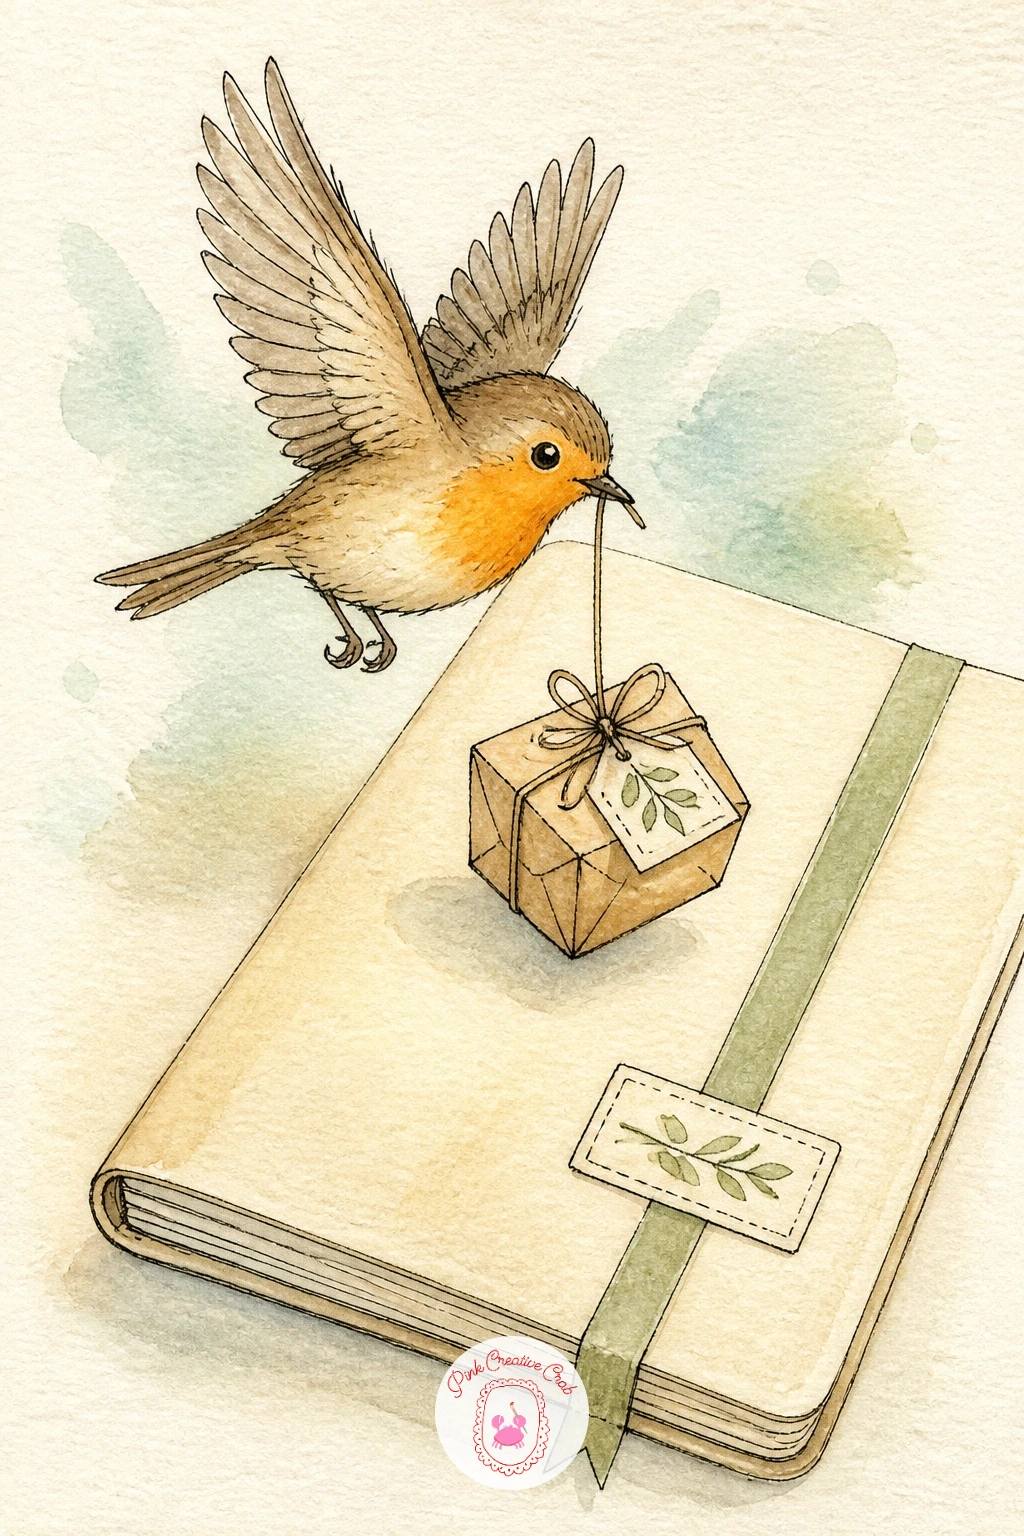
Palette: Sky Blue,Soft Grey,Warm Brown,Butter Yellow
Readers who enjoy drawing birds might like this swan painting idea list for a gentler water bird next.
Let a bunny take over the dating duties, shown painting today’s date onto a low garden wall with its own tiny brush. Draw a simple low brick or stone wall running across the lower third of the page, then draw a bunny sitting up on its hind legs beside it, one paw holding a small paintbrush against the wall’s surface.
Build the bunny from basic shapes first, an oval body, a rounder head, two long ears held upright, before adding any fur texture, which keeps the pose readable even before details go in. Ink the bunny and wall, then watercolor the bunny in soft grey or warm brown with a white chest patch, and the wall in a warm stone tone with a few darker lines between the bricks.
Letter the date directly onto the wall in a slightly uneven hand, as though freshly painted rather than printed, with the bunny’s brush tip touching the last letter. A damp brush dragged quickly through the stone wash before it dries adds a soft mottled texture that reads as old stone with very little effort.
A dropped paint pot with one small splash beside the bunny’s feet adds a playful last touch.
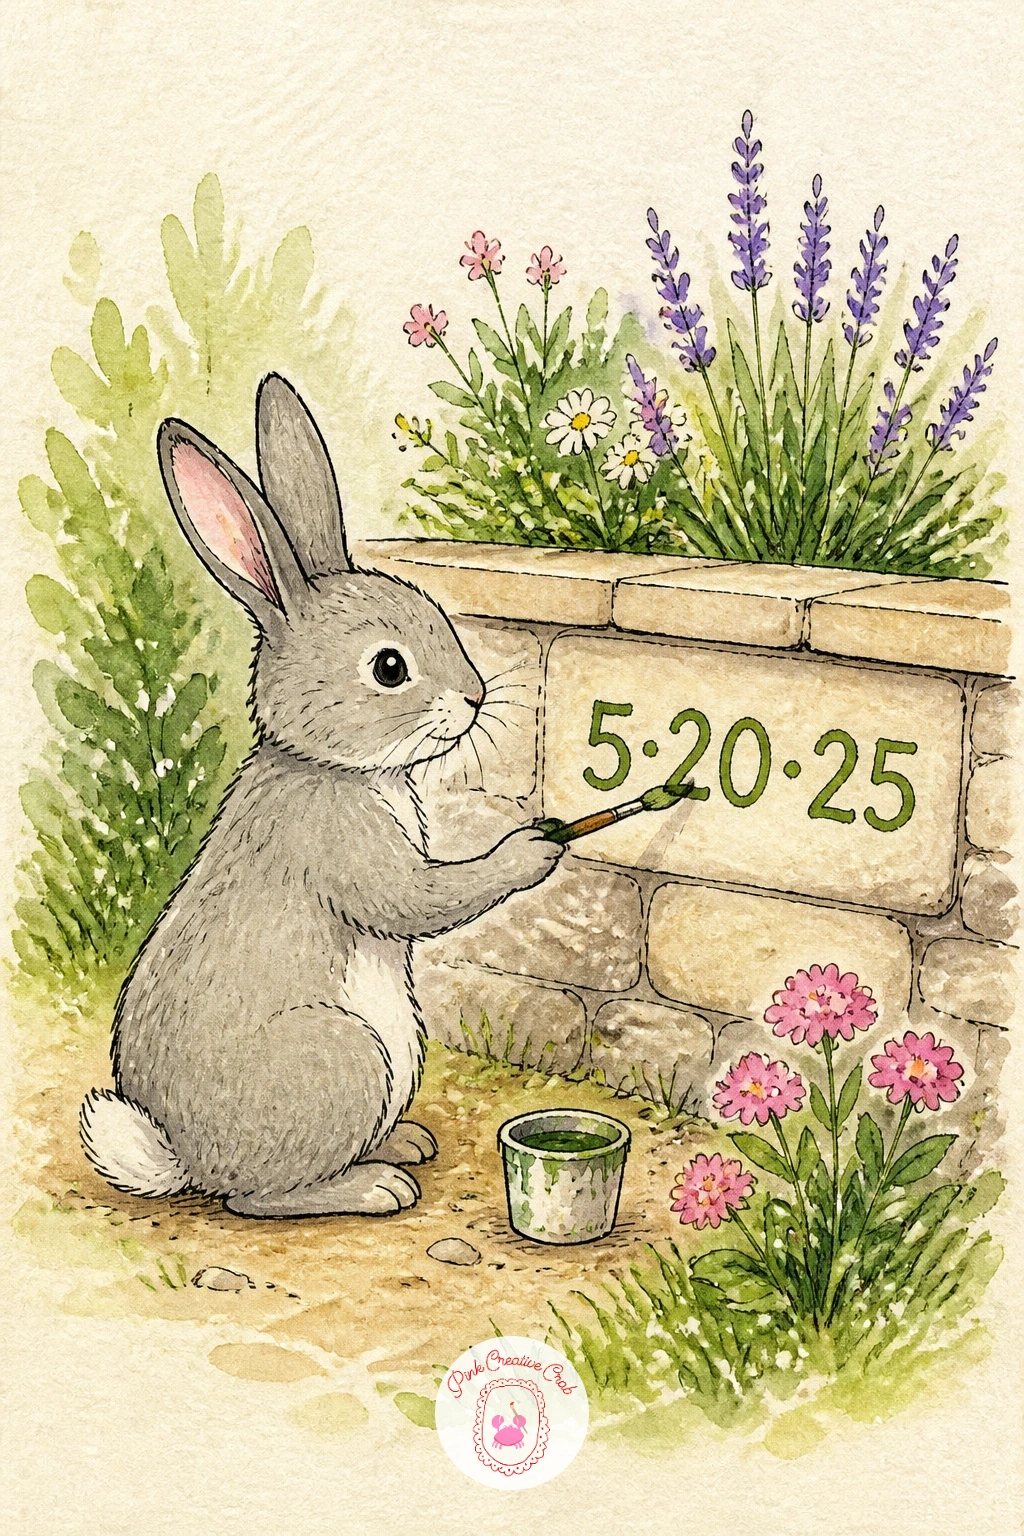
Palette: Soft Grey,Warm Brown,Stone Beige,Sage Green
Warm things up with a mug of hot cocoa resting on a windowsill while snow falls outside, a cozy page for a journal started in the colder months. Draw a simple window frame taking up the top half of the page with a soft snowy scene visible through the glass, then draw a full mug of cocoa on the sill in front of it, topped with a little swirl of whipped cream and a mini marshmallow or two.
Ink the window frame with a ruler for clean straight lines, then ink the mug and its contents more loosely by hand, since the contrast between a crisp frame and a soft mug reads nicely on the page. Watercolor the sky outside pale grey blue, the cocoa in warm deep brown, and leave small untouched white dots across the glass for falling snow.
If the snow dots look too even once painted, splatter a little opaque white gouache lightly across the dried scene with an old toothbrush for a more natural scatter. Letter the date or a cozy word like “home” on the windowsill beneath the mug.
Steam curling up from the cocoa finishes the page with just a few soft lines.
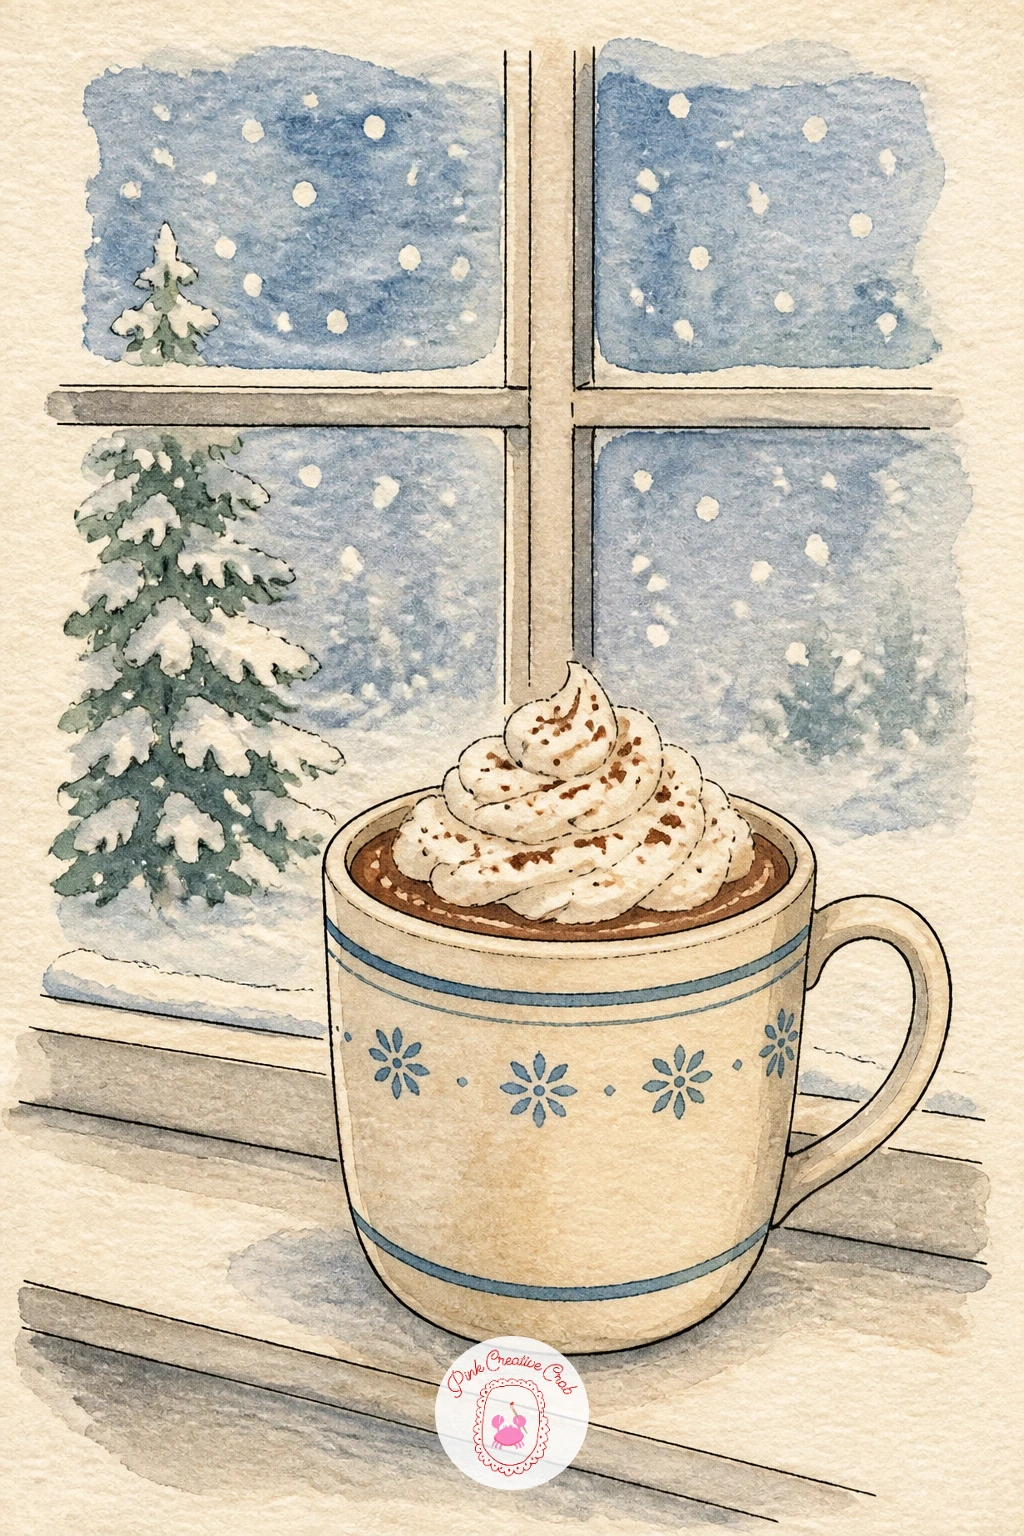
You Will Need
- old toothbrush for splatter
- white gouache (optional)
Palette: Warm Brown,Soft Grey Blue,Cream White,Butter Yellow
Close the opening run of pages with a single lit candle beside the very first date, written in gold to mark the real start of the journal. Draw a simple candle in a low holder near the center of the page, a straight waxy body, a small flame with a soft glow drawn as a few loose rings around it in pencil before inking.
Ink the candle and holder with steady, simple lines, then watercolor the candle in cream or sage and the flame in warm orange fading to butter yellow at its base, leaving the glow rings around it as untouched white paper for brightness. Once everything is fully dry, letter the first date directly beside the flame using a gold gel pen or gold paint marker, so the ink only touches the page once, keeping the gold crisp rather than muddy.
If a gold pen is not part of your kit yet, a regular pen traced over lightly with a metallic colored pencil gives a similar soft shine. Keep the background around the candle plain and dark enough that the flame and gold lettering both stand out clearly against it.
This makes a fitting last page in the opening set, quiet and a little ceremonial, before the actual entries begin.
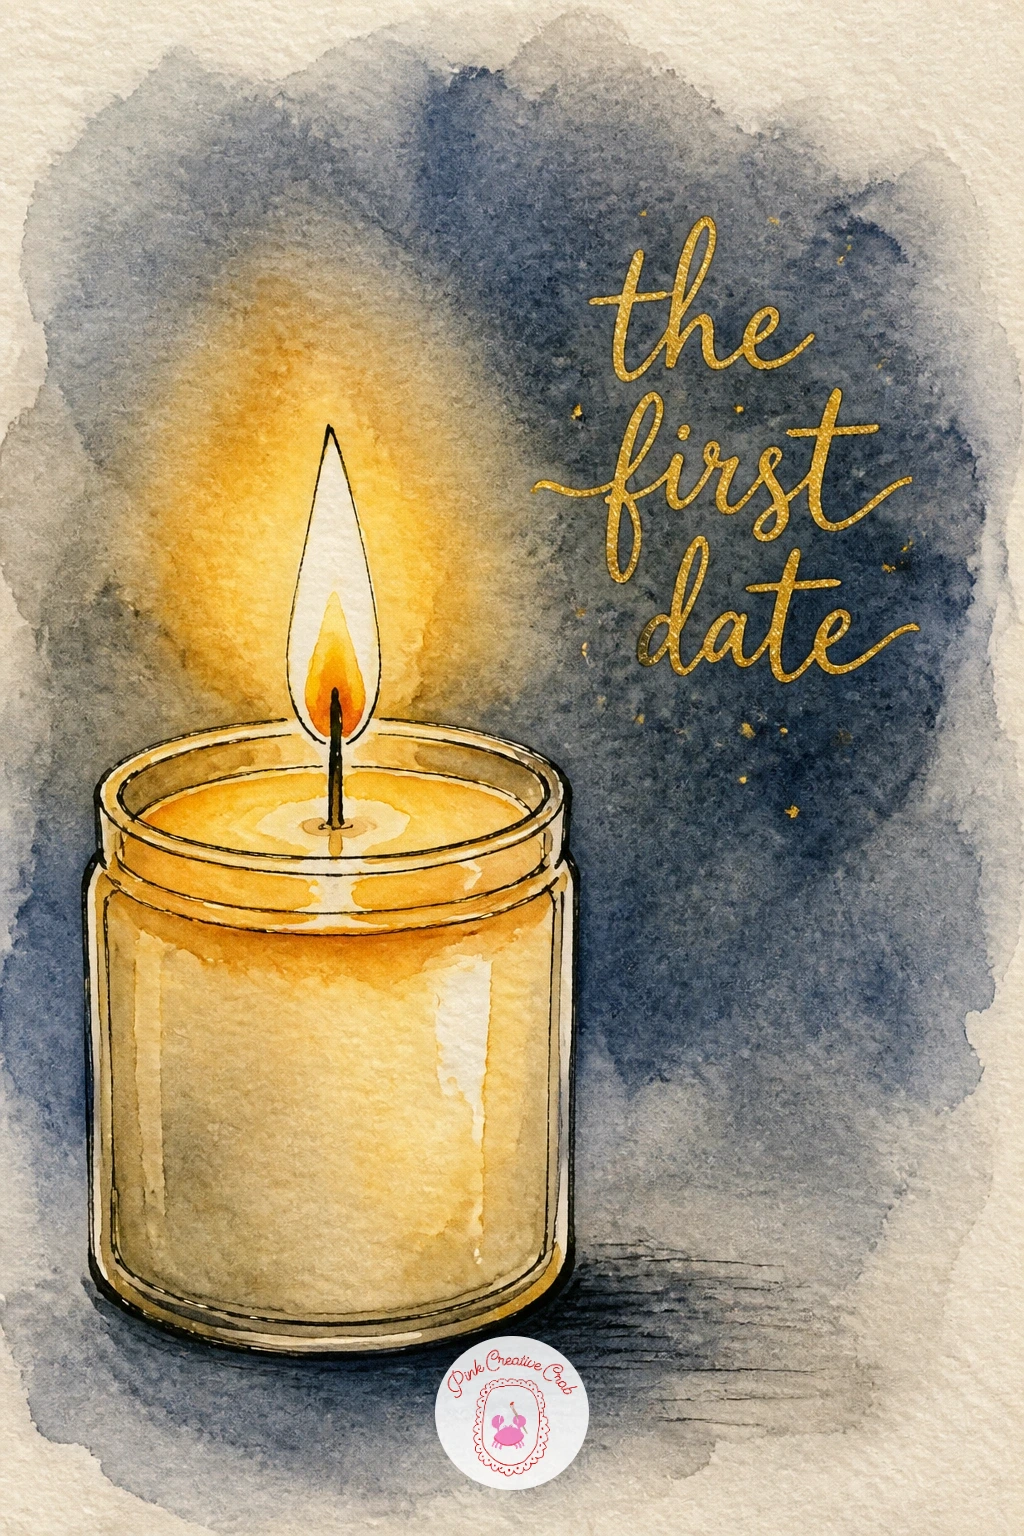
You Will Need
- gold gel pen or metallic paint marker
Palette: Warm Orange,Butter Yellow,Sage Green,Deep Grey
What to Do Next
Pick one idea that matches how you feel about this new journal right now, sketch it lightly in pencil first, and ink it only once the shapes sit where you want them. A page of cream or toned paper and your usual fineliner and watercolor kit is all you need to turn that blank opening page into the one you will want to look back at.
Frequently Asked Questions
What is the easiest journal first page idea to start with?
A hello page in simple bubble letters is the easiest start, since it needs no figures or scenes, just one friendly word to outline and color in.
Do I need watercolor paint for these journal first page ideas?
No, a fineliner alone finishes any of these pages. The watercolor adds softness and mood, but markers or colored pencils fill in the same shapes just as well.
How do I keep my hand lettering straight without ruling lines?
Lightly pencil a guide line first, then letter over it and erase afterward. A ruler helps for straight borders, but curved titles are easier drawn freehand in one quick pass.
What if I make a mistake on my actual first page?
Pencil the whole design first and only ink once you are happy, since ink mistakes are far harder to fix. A small sticker, a patch of washi tape or a quick doodle covers a stray line nicely too.
How long should a journal first page take to finish?
Most of these pages take between twenty and forty minutes once you include coloring time. Simpler ideas like the key in a lock or the pressed flower finish faster, closer to ten or fifteen minutes.
Have any thoughts?
Share your reaction or leave a quick response — we’d love to hear what you think!
-
 0
-
0
-
0
-
0
-
0
-
0


