

You have likely scrolled past innumerable tropical flower paintings on social media, wondering if you could create something equally stunning. The truth is, hibiscus and orchids aren’t just beautiful—they’re surprisingly forgiving subjects that’ll teach you essential watercolor techniques faster than traditional roses or daisies. Whether you’re picking up a brush for the first time or looking to refine your botanical skills, these bold blooms offer something most flowers can’t.
Key Takeaways
- Hibiscus features five overlapping petals and prominent pistils, ideal for practicing gradient washes from yellow to deep orange.
- Orchids showcase complex anatomy with dorsal sepals, lateral sepals, standard petals, and labellum requiring layered lavender and blue washes.
- Use wet-on-wet techniques with magenta, quinacridone rose, and phthalo blue to create vibrant, soft-edged tropical petal transitions.
- Apply salt textures on damp petals and dry brush strokes on orchid lips to achieve organic patterns and dimensional ridges.
- Layer transparent single-pigment washes with cool grays at petal overlaps to build botanically accurate, three-dimensional depth and luminosity.
Why Tropical Flowers Are Perfect for Watercolor Beginners
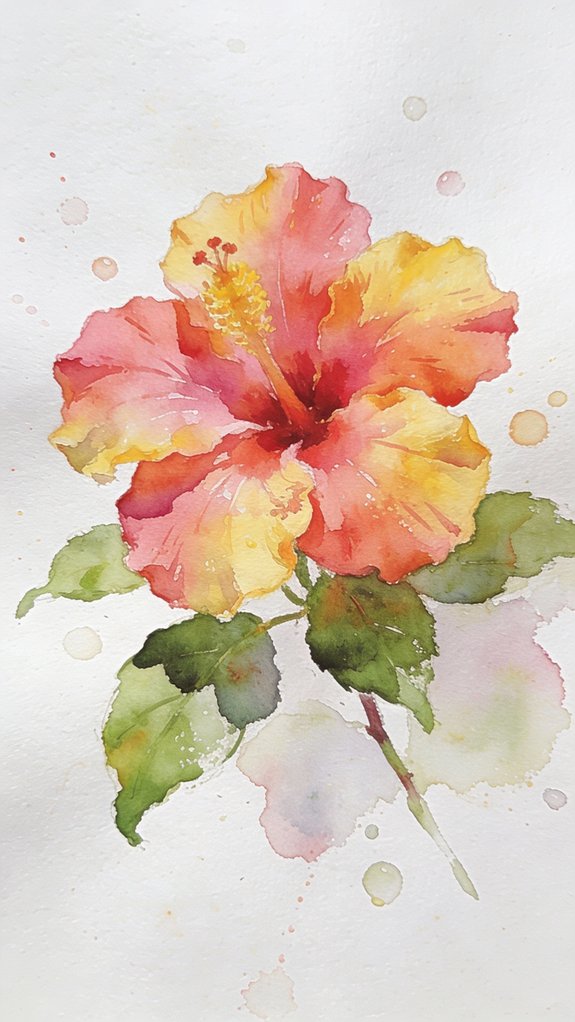
Because tropical flowers feature bold, distinctive shapes and vibrant colors, they’re ideal subjects for watercolor beginners. You’ll find that hibiscus petals and orchid blooms offer forgiving forms that don’t require precise detail work to achieve stunning results.
These flowers naturally showcase vibrant color palettes, letting you experiment with wet-on-wet techniques and color bleeding without fear of “mistakes”—those unpredictable watercolor effects actually enhance tropical compositions. You can master beginner friendly techniques like layering washes and creating gradients through their large, simple petal structures.
Unlike intricate botanical subjects, tropical flowers reward bold brushstrokes and loose interpretation. You’re free to explore innovative color combinations—think electric purples bleeding into hot pinks—while building confidence in your painting approach. Understanding your water-to-pigment ratio will help you control whether those tropical hues appear as intense, saturated tones or soft, delicate washes. They’ll transform your learning process into creative experimentation.
Essential Watercolor Supplies for Painting Hibiscus and Orchids
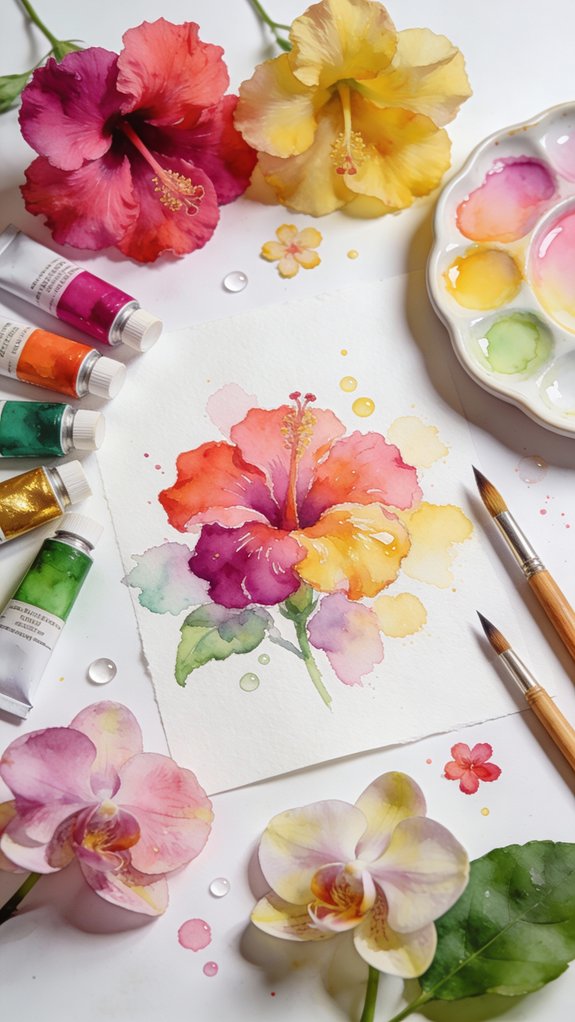
While you don’t need expensive materials to paint tropical flowers, investing in a few quality supplies will dramatically improve your results. Start with 140lb cold-press watercolor paper that won’t buckle under wet washes.
For selecting appropriate watercolor brushes, grab a size 8 round for petals, a rigger for fine details, and a flat brush for bold leaves. Choose professional-grade paints in magenta, quinacridone rose, and phthalo blue—they’ll give you vibrant blooms that won’t fade. Experiment with mixing watercolor paint mediums like gum arabic for luminosity or ox gall for smoother color flow.
A ceramic palette with deep wells lets you create custom tropical hues. If you want to add fine botanical details or preliminary sketches to your watercolor work, consider keeping graphite pencils on hand for their precise control and easy erasability. These essentials unleash creative possibilities for stunning hibiscus and orchid paintings.
Choosing the Right Paper for Vibrant Tropical Florals
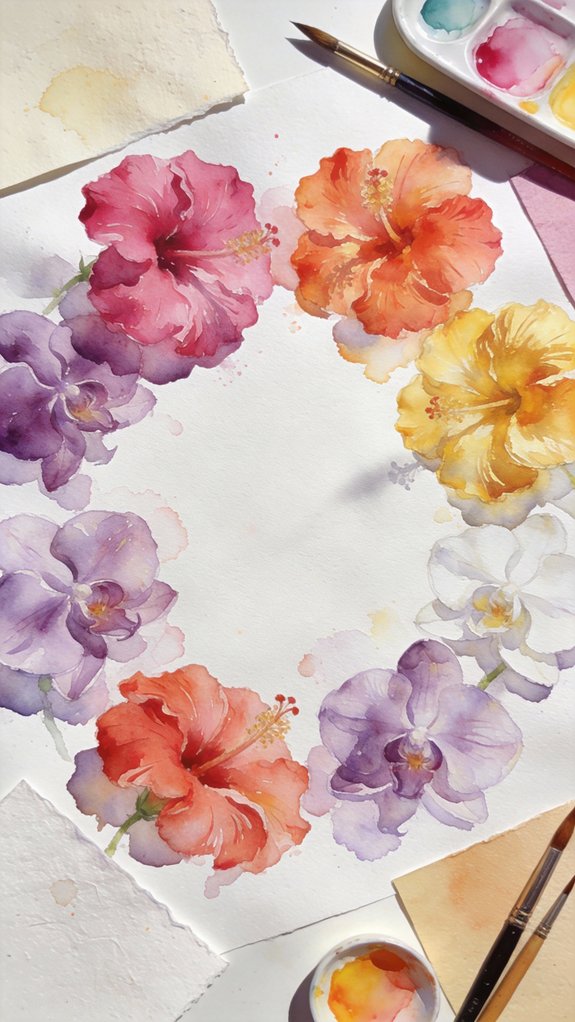
Among all your watercolor supplies, paper selection makes the biggest difference in how your tropical florals turn out. You’ll want to experiment with paper texture to discover what best captures those lush petals and bold colors. Cold-pressed paper offers moderate texture that works brilliantly for hibiscus blooms, while hot-pressed provides a smooth surface ideal for orchids’ delicate details.
Paper weight matters tremendously when you’re layering multiple washes. Choose 140lb minimum to prevent buckling, but 300lb delivers superior results for ambitious tropical compositions. It’ll hold wet-on-wet techniques without warping, letting you create those gorgeous color gradients characteristic of exotic flowers.
Don’t settle for student-grade options. Professional cotton-based papers absorb pigments differently, producing the vibrant, luminous effects that make tropical watercolors truly spectacular. Understanding the difference between artist grade vs student grade materials will help you invest wisely in supplies that showcase your tropical florals at their best.
Best Watercolor Pigments for Capturing Tropical Flower Colors
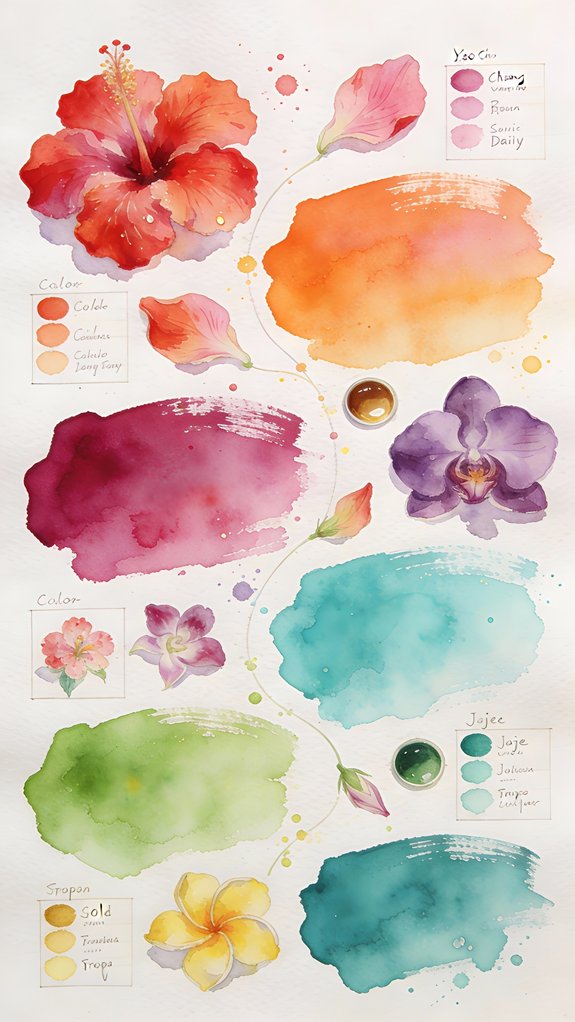
When you’re painting bird of paradise, heliconia, or plumeria, your pigment choices determine whether you’ll achieve those eye-popping colors or settle for muddy disappointments.
Invest in single-pigment paints like Quinacridone Magenta, Phthalo Blue, and Hansa Yellow for maximum vibrancy. These pure pigments mix cleanly without creating chromatic chaos. Choosing ideal pigment combinations means pairing analogous colors—think Pyrrol Orange with Quinacridone Rose for hibiscus petals that practically glow.
Master understanding value and saturation in tropical hues by layering transparent washes rather than diluting everything into pastel oblivion. Start light, build gradually. To keep your tropical mixes brilliant rather than dull, remember that mixing warm with warm colors preserves vibrancy while combining warm and cool tones creates neutralizing effects.
For those shocking purples in orchids, try Dioxazine Violet straight from the tube. Don’t fear intensity—tropical flowers demand bold pigments that match their natural drama.
Understanding the Basic Anatomy of Hibiscus Flowers
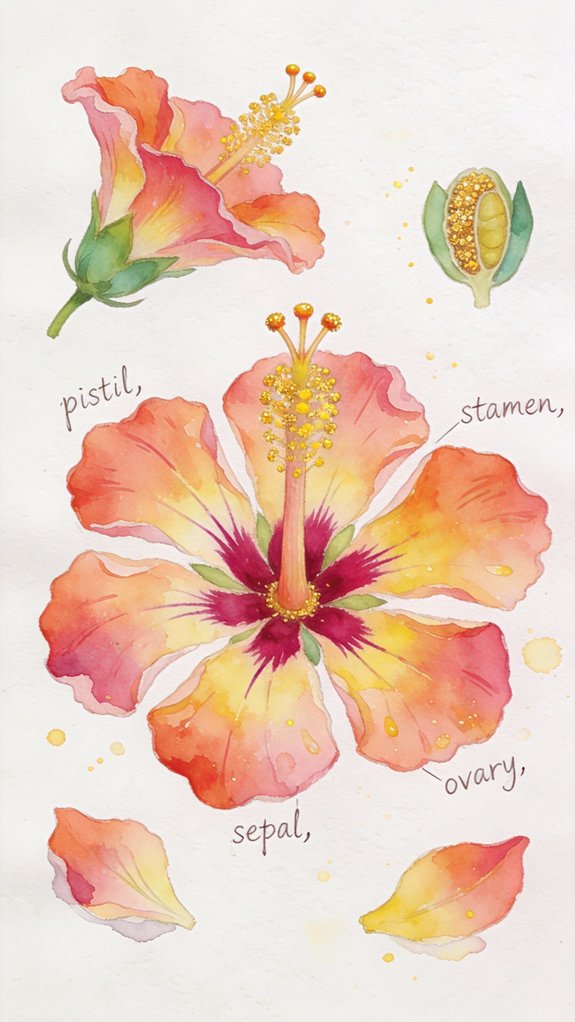
Why do so many watercolor hibiscus paintings look flat and unconvincing? You’re likely missing the flower’s structural complexity. The hibiscus features five overlapping petals that create depth through their arrangement.
At the center, you’ll find the pistil—a long, slender column extending prominently from the bloom’s core. Surrounding this are the detailed stamen structure, which branches outward in a distinctive formation. These stamens carry delicate pollen grains that catch light beautifully when rendered correctly.
The petals themselves aren’t uniform; they display natural ruffles, veining patterns, and subtle color gradations from center to edge. To capture these delicate petal transitions, work at the shiny wet stage where paint spreads in a controlled way with soft edges. Master these anatomical elements, and you’ll transform your hibiscus paintings from basic florals into botanically accurate, three-dimensional works that capture the flower’s true essence.
Understanding the Basic Anatomy of Orchid Blooms
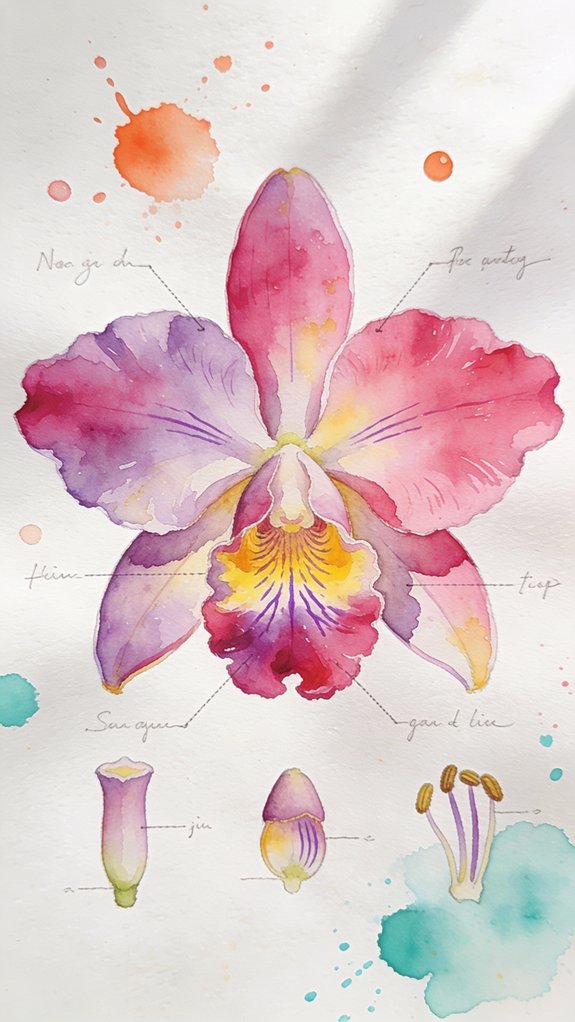
To master orchid petal arrangement, focus on these key elements:
Mastering orchid petal arrangement requires understanding these essential structural elements that define the flower’s unique anatomy.
- The dorsal sepal crowns the top while lateral sepals frame the sides
- Two standard petals flank the bloom horizontally
- The labellum serves as the landing platform, often featuring intricate patterns and colors
You’ll discover that understanding this six-part structure revolutionizes your approach. Once you’ve mapped the basic anatomy, you can confidently capture even the most complex orchid varieties with precision and artistic flair. Using layering techniques allows you to build rich, complex colors in your watercolor orchid petals by applying multiple transparent washes rather than a single heavy application.
Classic Red Hibiscus With Wet-On-Wet Technique
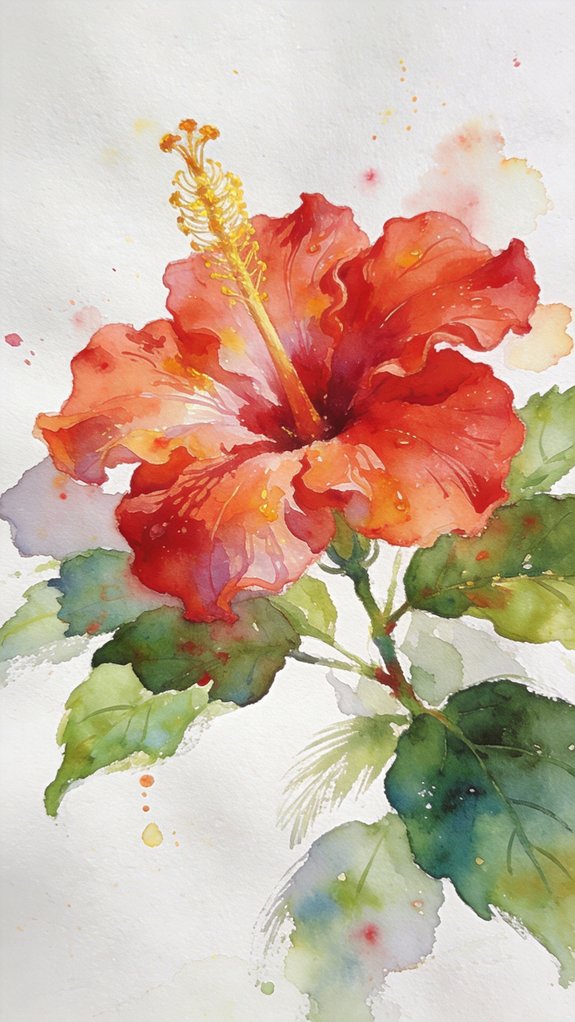
The hibiscus’s bold, ruffled petals make it an ideal subject for practicing wet-on-wet watercolor techniques. You’ll start by saturating your paper with clean water where the bloom will sit. While it’s still glistening, drop in your reds—alizarin crimson mixed with cadmium red creates depth. Watch the pigments dance and merge naturally.
For capturing vibrant hues, you’ll layer darker values at petal edges while the surface remains damp. This wet on wet application produces those signature soft changes hibiscus flowers demand. Add your yellow center before everything dries, letting it bleed slightly into the red. You’re creating organic movement, not rigid boundaries. Understanding gradation and smooth transitions helps you master the subtle value shifts that give petals their dimensional, lifelike quality. The technique transforms static shapes into living, breathing tropical blooms that push beyond traditional botanical illustration.
Sunset Orange Hibiscus Using Gradient Washes
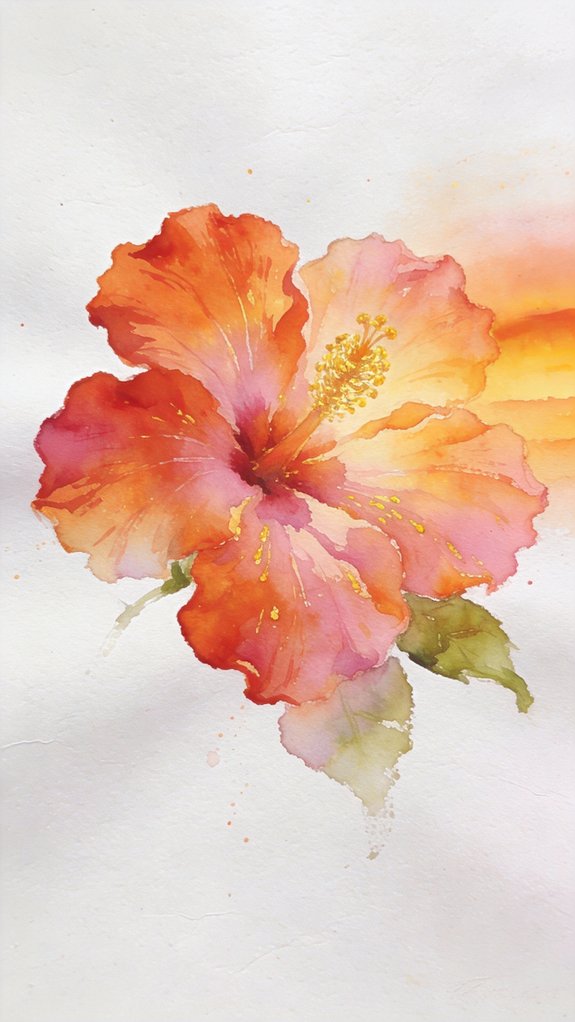
Gradient washes capture the fiery metamorphosis from yellow to deep orange that makes sunset hibiscus varieties so alluring. You’ll master this technique through strategic layering gradient washes, building intensity from petal centers outward. Start with diluted cadmium yellow at the throat, then introduce orange mid-tones while the surface remains damp.
Master the sunset hibiscus glow through strategic gradient layering—start with diluted yellow at the throat, then blend orange mid-tones on damp paper.
Your approach to achieving vibrant orange requires thoughtful color mixing:
- Blend cadmium yellow with permanent rose for warm peachy conversions
- Layer quinacridone gold beneath pyrrole orange for luminous depth
- Reserve burnt sienna for shadowed petal edges and dimensional creases
Let each layer dry completely before introducing darker values. This prevents muddy colors and maintains the transparent glow essential to tropical flowers. The final petals should radiate warmth, mimicking those breathtaking moments when sunset light filters through living blooms. These finished watercolor hibiscus paintings make stunning additions to themed journals where you can preserve your artistic journey alongside travel memories or botanical collections.
Yellow Hibiscus With Bold Shadow Contrasts
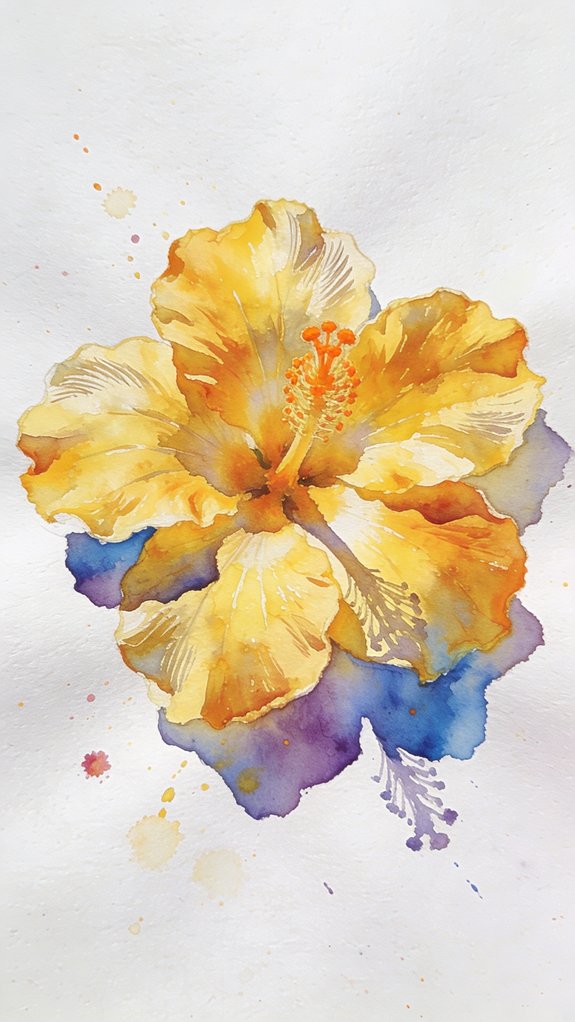
While sunset hibiscus blooms demand mastery of warm color shifts, yellow varieties present a different challenge: creating dimension through dramatic shadows. You’ll need to embrace bold shading techniques that push beyond subtle gradations.
Mix violet or indigo with your yellow washes to create striking depth—these complementary contrasts make petals pop off the page.
Start with a luminous cadmium yellow base, then introduce deep purple-gray shadows while the paint’s still damp. This wet-in-wet approach creates diffused petal edges that feel organic rather than harsh. Don’t shy away from intense darks in the flower’s throat and beneath curled petals. Understanding effective use of light and shadow is essential for making these dramatic value shifts feel natural rather than jarring.
The interplay between brilliant yellows and near-black shadows transforms flat shapes into sculptural forms that capture tropical light’s intensity.
Pink Hibiscus Cluster Composition
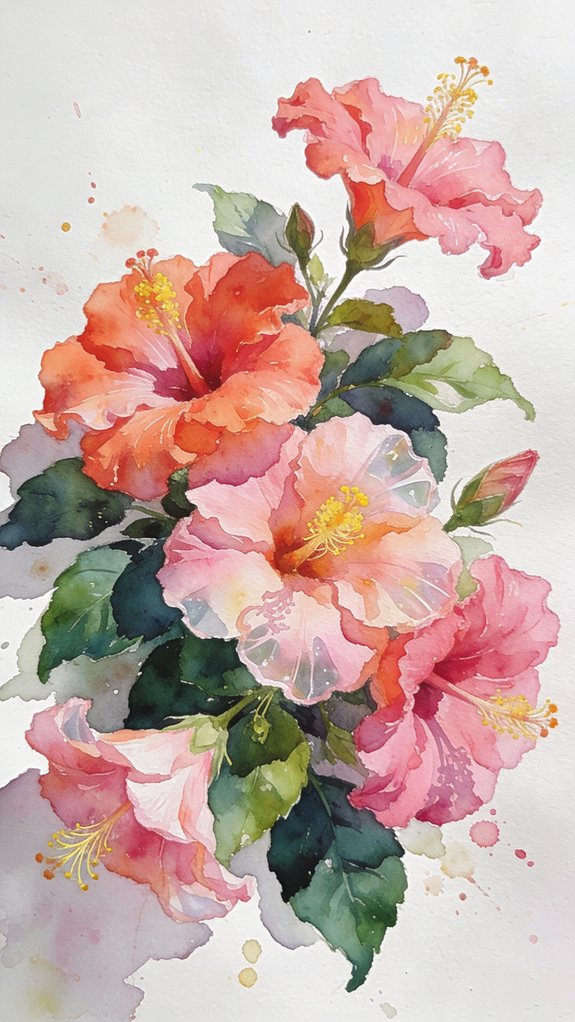
Pink Hibiscus Cluster Composition
Arranging multiple pink hibiscus blooms on a single page requires strategic planning before your brush touches paper. You’ll want to map out variations in petal shapes across your composition, ensuring each flower feels distinct yet harmonious. Consider implementing techniques for capturing symmetry while deliberately breaking it in select areas to create visual interest.
Plan your hibiscus composition before painting—map petal variations, balance symmetry with intentional asymmetry, and ensure each bloom feels both distinct and harmonious.
Your cluster composition gains depth through:
- Layering blooms at different angles – position some flowers face-forward while others twist in three-quarter views
- Varying color intensity – use diluted washes for background flowers and saturated pigments for focal points
- Staggering bloom sizes – combine fully opened blossoms with partially unfurled buds
Mastering water control techniques becomes essential when building up these layered transparent washes without disturbing previous applications. This approach transforms your canvas into a dynamic tropical garden that captivates viewers through intentional contrast and sophisticated spatial relationships.
White Hibiscus on Toned Paper
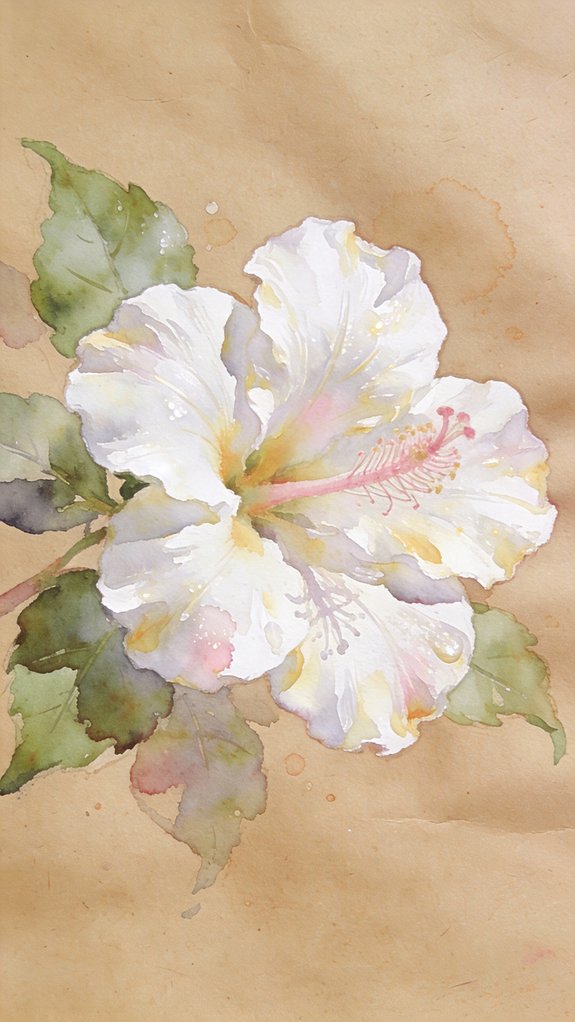
When you switch from white paper to toned surfaces, white hibiscus paintings demand an entirely different technical approach. You’ll need to build luminosity by layering opaque whites and gouache over your watercolor base. The toned surface becomes your midtone, allowing you to work both darker and lighter values simultaneously.
Contrasting background tones amplify the white petals’ brilliance—try kraft paper or gray cardstock for dramatic effects. You’re essentially painting in reverse, establishing shadows first before adding highlights.
Focus on layered petal textures by alternating transparent washes with opaque white applications. This creates dimensional depth impossible on traditional white paper. Apply masking fluid strategically to preserve the paper’s tone where you want subtle shifts. Your darkest watercolor values will anchor the composition while white accents define form.
Purple Hibiscus With Dramatic Dark Backgrounds
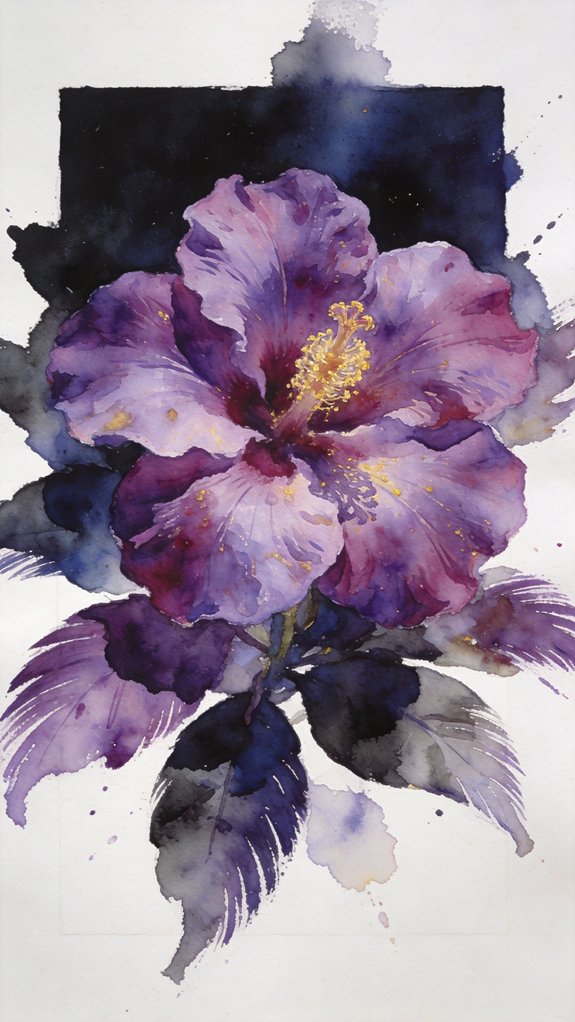
Dark backgrounds transform purple hibiscus into show-stopping focal points by creating maximum color contrast and visual drama. You’ll elevate your moody floral portraits by layering deep indigos, charcoals, and blacks behind vibrant purple petals. This technique intensifies the flower’s luminosity while adding sophisticated depth.
Master dramatic shadow effects with these approaches:
- Apply wet-on-wet washes of Payne’s gray and Prussian blue for seamless darkness
- Reserve white space strategically on petal edges to enhance dimensionality
- Layer glazes gradually, building richness without muddying your purples
You’ll discover that negative painting techniques work exceptionally well here. Paint around your hibiscus shape to define its form through contrast rather than outlines. This method creates authentic atmospheric depth that makes your purple blooms practically glow against the darkness.
Coral Hibiscus With Complementary Green Leaves
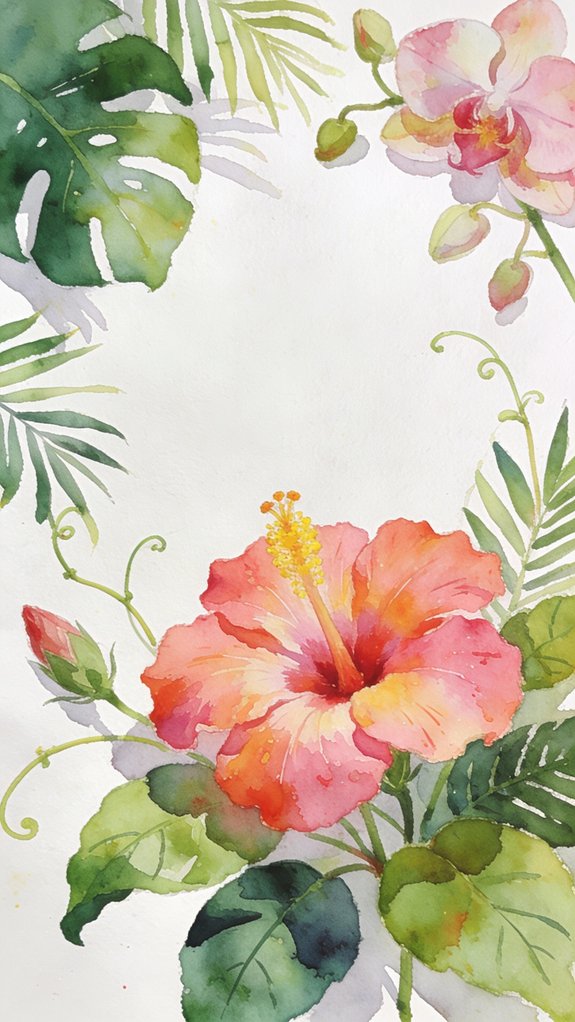
Coral hibiscus blooms paired with complementary green leaves create naturally balanced compositions that showcase color theory in action. You’ll discover how the warm coral tones naturally oppose cooler greens on the color wheel, producing visual tension that energizes your paintings.
Your artistic interpretation of coral hibiscus benefits from experimenting with translucent layers that capture the petals’ delicate luminosity. Apply wet-on-wet techniques to blend peachy oranges into deeper coral shades, creating dimensional blooms that appear to glow from within.
Don’t overlook the lively foliage details surrounding your hibiscus—they’re essential to composition success. Paint varied leaf shapes with multiple green values, from deep forest to bright lime. This range adds depth while preventing your foliage from becoming monotonous. Consider incorporating veining patterns and subtle color shifts within individual leaves.
Phalaenopsis Orchid: Painting Delicate White Petals
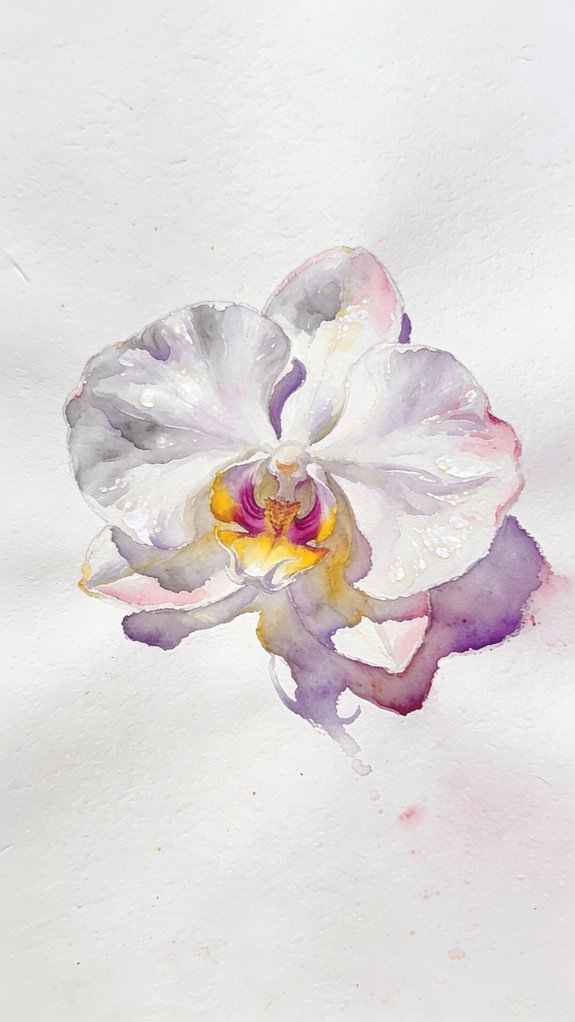
White petals present unique challenges since you’re not simply painting white on white paper—you’re capturing shadows, reflections, and subtle temperature shifts. Phalaenopsis orchids demand a nuanced approach where achieving petal transparency becomes your primary focus.
Master these techniques for ethereal results:
- Layer diluted lavender and pale blue washes in shadowed areas to create dimensional depth
- Employ painting soft edges by keeping your brush damp, allowing colors to bloom naturally into wet paper
- Apply cool grays mixed with hints of yellow where petals overlap, establishing structural form
You’ll discover that leaving strategic areas untouched preserves luminosity while carefully placed pigment defines the flower’s architecture. The delicate veining requires a steady hand and barely-there strokes that suggest rather than influence, letting the orchid’s elegant simplicity shine through.
Cattleya Orchid With Rich Purple Hues
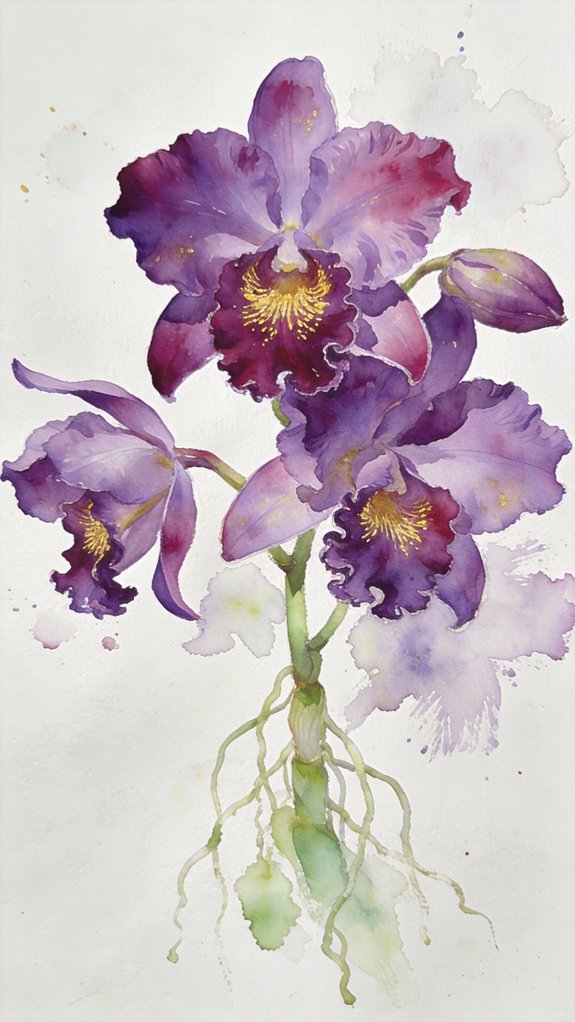
Vibrant purples transform your watercolor practice when you tackle the dramatic Cattleya orchid, often called the “Queen of Orchids” for good reason. You’ll master orchid petal shapes by observing the distinctive ruffled lip that contrasts with smoother outer petals. Layer dioxazine violet with quinacridone magenta to achieve depth, building orchid color gradients from pale lavender edges to intense purple centers.
Start with wet-on-wet techniques for the throat’s yellow accent, then switch to controlled wet-on-dry for the lip’s intricate veining. Push your boundaries by experimenting with salt textures on damp petals—they’ll create organic patterns mimicking natural variations. Let colors bleed strategically where petals overlap, establishing dimensional realism that elevates your tropical portfolio beyond conventional florals.
Dendrobium Orchid Spray Composition
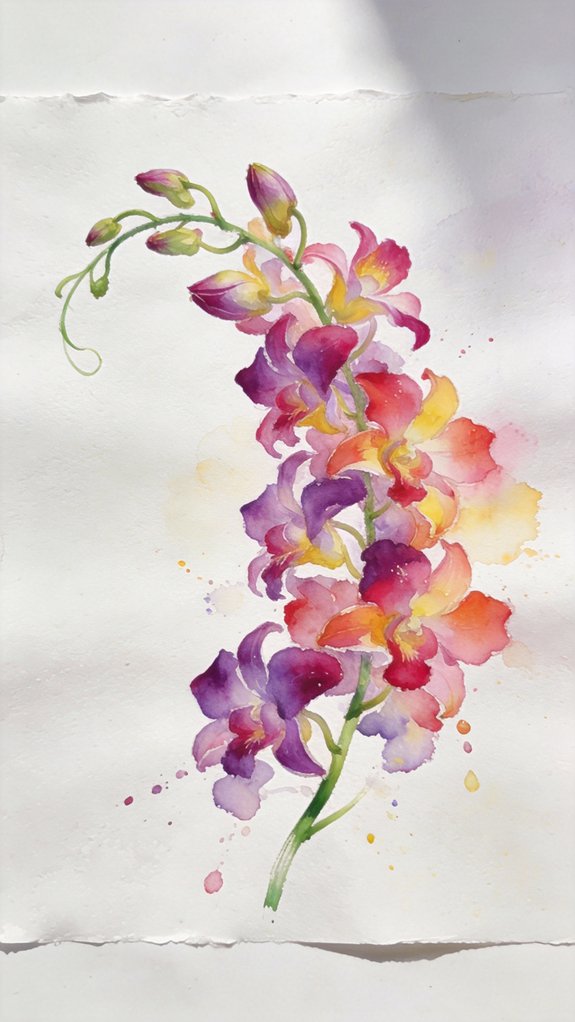
When you arrange multiple Dendrobium blooms along their characteristic arching stems, you’ll discover compositional opportunities that single-flower studies can’t provide. These cascading sprays create dynamic movement through your watercolor paintings, emphasizing the orchid’s natural growth pattern.
Focus on these innovative techniques for asymmetrical orchid composition:
- Layer blooms at varying stages—buds, half-open flowers, and full blooms—to establish visual depth
- Alternate your orchid petal placement between foreground and background positions along the stem
- Allow negative space to balance the spray’s natural curve and prevent overcrowding
You’ll achieve sophisticated results by observing how each bloom rotates slightly along the stem, creating rhythmic variation. This approach transforms simple botanical studies into compelling artistic statements that capture the Dendrobium’s elegant architecture.
Vanda Orchid in Electric Blue Tones
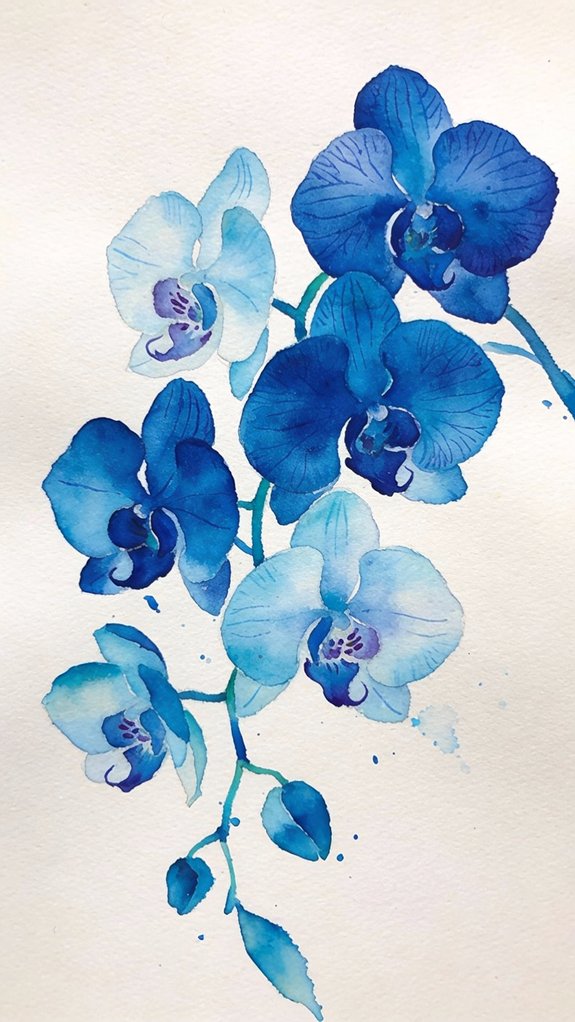
The Vanda orchid’s electric blue petals present one of watercolor’s most challenging color-mixing exercises, requiring you to balance intensity with translucency. You’ll need to layer phthalo blue with hints of violet, allowing white paper to shine through for maximum luminosity.
Study the differing petal curvatures carefully—the lateral sepals arch backward while the lip curves forward, creating dynamic spatial relationships. These unique pollination adaptations result in striking geometric forms that demand precise brushwork. Start with pale washes, building depth gradually through successive glazing. Don’t overwork the pigment; electric blue loses its vibrancy when muddied.
Let your initial strokes remain visible, capturing the flower’s ethereal quality while maintaining the bold, saturated hues that make Vanda orchids unmistakable.
Miniature Oncidium Orchids in Yellow and Brown
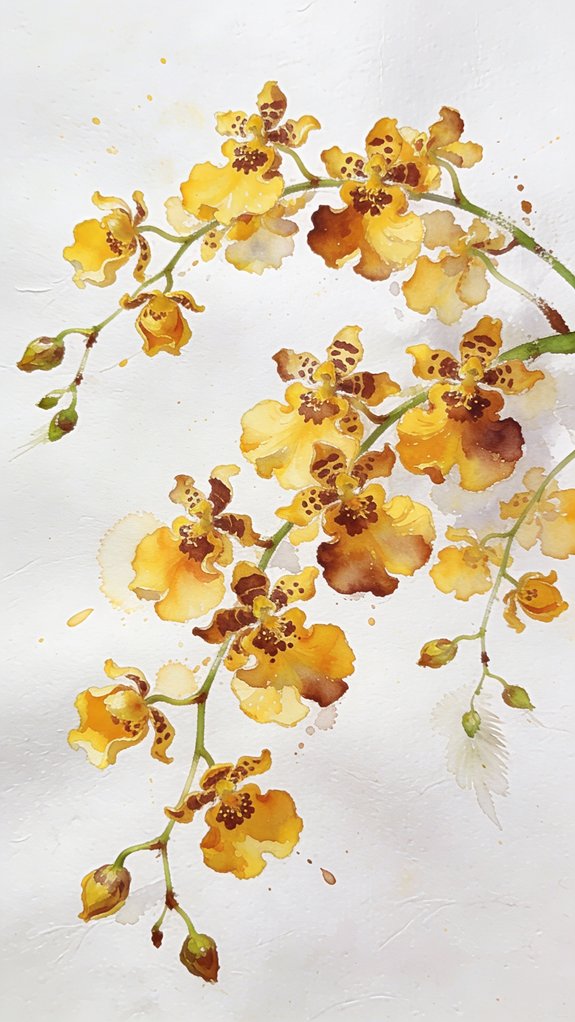
Often called “dancing ladies” for their ruffled, skirt-like forms, Oncidium orchids cascade in sprays of dozens—sometimes hundreds—of diminutive blooms that’ll test your ability to balance repetition with variation. These miniature oncidium orchid shapes demand a loose wrist and confidence—you’re capturing movement, not botanical precision.
Master these techniques for authentic results:
- Layer transparent golden yellows first, then add burnt sienna and raw umber for the distinctive tiger-stripe markings
- Use a fine brush’s tip to flick petals outward, creating that characteristic butterfly silhouette
- Vary scale and orientation throughout each spray to suggest depth
The miniature oncidium orchid colors—ranging from buttery yellow to deep chocolate—offer natural contrast that elevates your composition beyond single-hue florals. Let individual blooms overlap and fade strategically for atmospheric perspective.
Lady Slipper Orchid With Textured Details
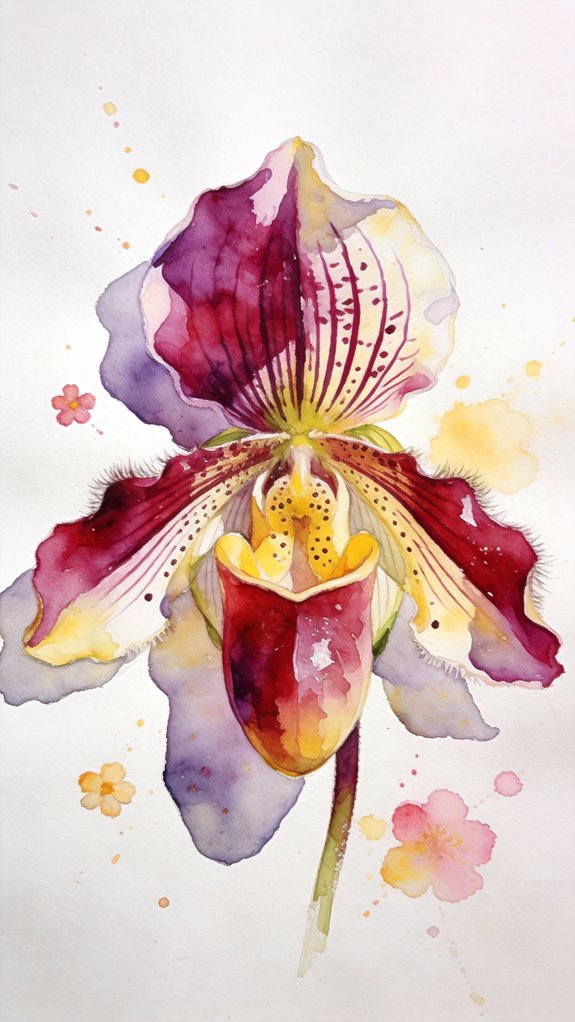
Distinguished by their pouch-like labellum, lady slipper orchids present watercolorists with a unique challenge: rendering dimensional texture on a curved surface. You’ll need to master detailed petal textures through strategic layering—start with pale washes, then build complexity using stippling and fine brushwork to capture the orchid’s characteristic veining and spotted patterns.
The bulbous pouch demands careful attention to light and shadow placement. Apply vibrant color blending where the slipper curves, shifting from deep burgundies to golden yellows or spotted greens. Don’t overwork the surface; let white space suggest the flower’s waxy sheen. Experiment with salt techniques or plastic wrap textures while paint remains wet to achieve those distinctive mottled effects. Your goal isn’t photorealism—it’s capturing the exotic architecture that makes these orchids unforgettable.
Cymbidium Orchid in Soft Pastel Shades
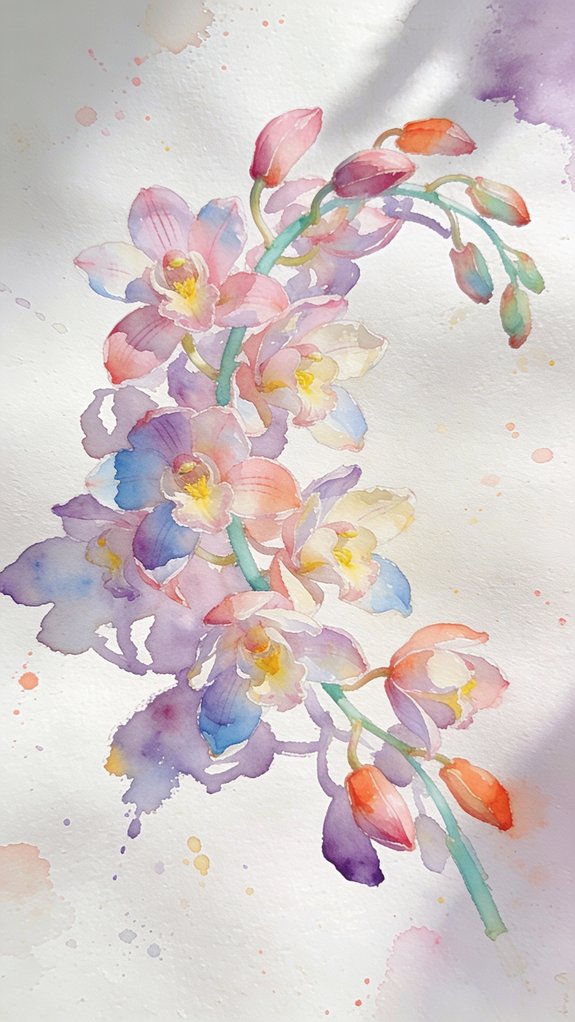
While their tropical cousins command attention with bold pigments, cymbidium orchids shine through understated elegance in blush pinks, creamy ivories, and subtle greens. These sophisticated blooms reward patient artists who master softly blended petals and delicate color gradients.
Cymbidium orchids celebrate quiet sophistication, their muted palette of blush, ivory, and sage demanding gentle brushwork and masterful color transitions.
Transform your watercolor technique with these innovative approaches:
- Layer translucent washes to build depth gradually, allowing each application to dry completely before adding dimension
- Wet-on-wet techniques create seamless interchanges between pale yellow centers and rose-tinted edges
- Negative painting defines individual petals while maintaining the flower’s characteristic soft, romantic quality
You’ll discover that cymbidium orchids offer perfect subjects for exploring nuanced color mixing. Their cascading sprays provide compositional flexibility, whether you’re painting a single stem or designing an elaborate arrangement that captures their refined botanical beauty.
Creating Realistic Hibiscus Stamen and Pistil Details
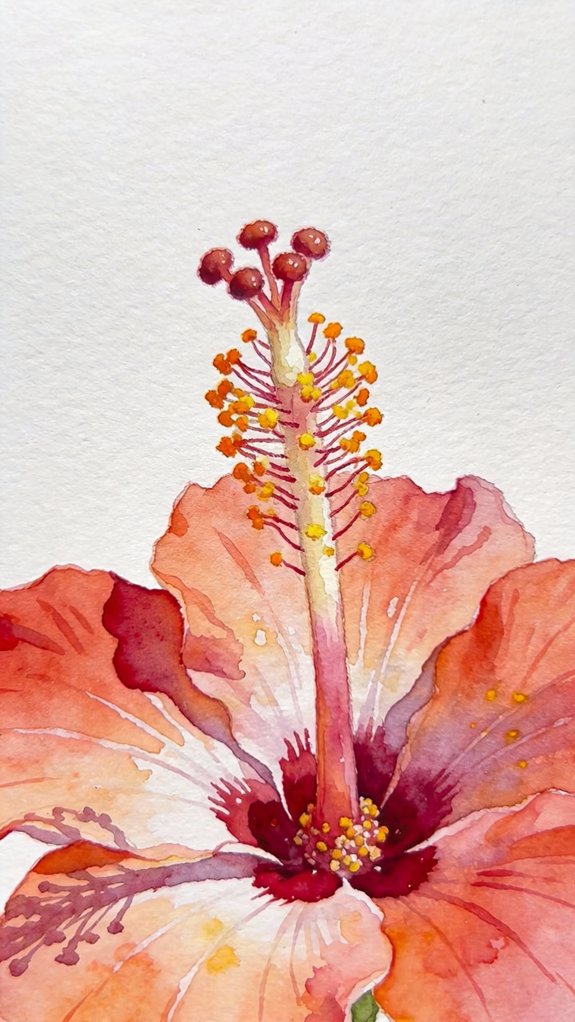
The hibiscus’s most distinctive feature—its prominent reproductive column crowned with dusty pollen anthers—transforms a simple flower painting into a botanical study. Master delicate stamen shaping by loading a fine-tipped brush with concentrated pigment, creating threadlike filaments that extend from the central pistil. You’ll achieve precise pistil rendering through layered applications—start with a pale yellow-green base, then add definition with darker values along one side to establish dimension.
For authentic pollen texture, tap dry yellow or orange pigment onto damp anthers using a barely-moist brush. The key lies in restraint: too many stamens overwhelm the composition, while too few lack botanical accuracy. Aim for five distinct anthers positioned naturally around the pistil’s tip, each catching light differently to create visual interest and depth.
Painting Orchid Lip Patterns and Spots
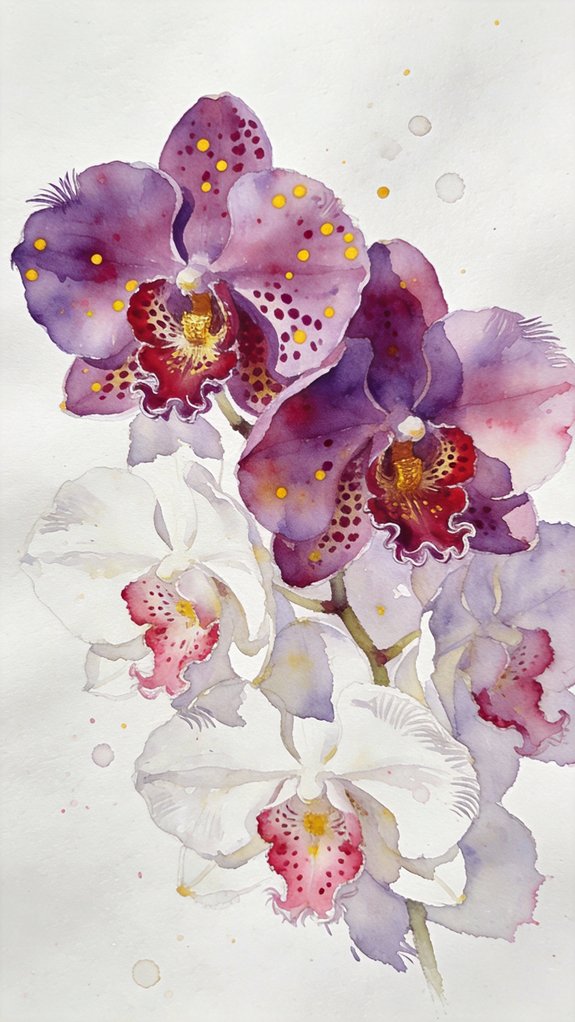
Because orchid lips showcase nature’s most intricate decorative patterns, you’ll need strategic color placement to capture their spotted, striped, or mottled designs authentically. Start with a pale base wash, then layer concentrated pigments while they’re damp to create organic bleeding effects that mimic natural markings.
Master these essential techniques for dimensional orchid lips:
- Apply dots with varying pressure using a fine brush tip to achieve size gradation in spots
- Build graduated color intensity from the throat outward, respecting petal shape variation
- Layer translucent glazes between pattern applications to enhance depth
Consider overlapping petal placement when positioning your decorative elements—spots should follow the lip’s natural curves and folds. Let each layer dry completely before adding crisp accent marks for maximum visual impact and botanical accuracy.
Mastering Translucent Petal Effects in Tropical Flowers
Beyond the detailed patterns of orchid lips, tropical flowers captivate viewers through their luminous, light-catching petals that seem to glow from within. You’ll master this effect by achieving translucency through strategic water control and layering techniques.
Start with wet-on-wet applications, allowing pigments to pool naturally in petal centers while fading toward edges. Build depth gradually—each translucent layer intensifies color without losing that characteristic inner light. Control your water-to-pigment ratio precisely; too much paint creates opacity, destroying the luminous quality.
Focus on controlling soft edges where petals overlap or curve away from light. Let colors bleed intentionally, creating atmospheric shifts that mimic how light penetrates delicate tissue. Work quickly while surfaces remain damp, lifting pigment strategically to preserve highlights where backlighting would naturally shine through.
Layering Transparent Washes for Depth and Dimension
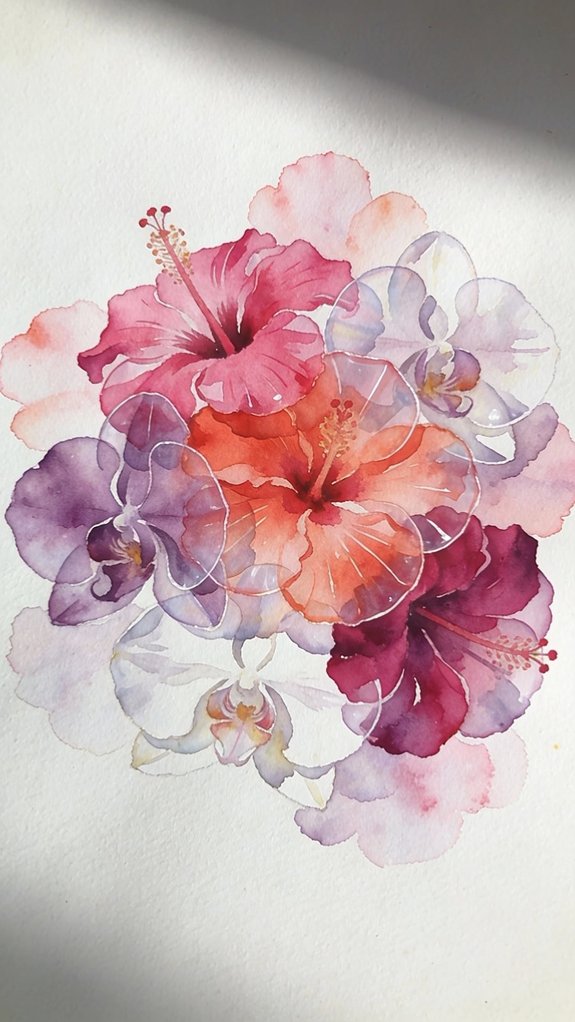
How can you transform a flat wash into dimensional petals that appear to lift off the page? Master the interplay between glazing and wet in wet layering to create stunning depth in your tropical blooms.
Start with your lightest value as a foundation, then build complexity through strategic layering:
- Apply subsequent washes only after the previous layer dries completely when glazing—this prevents muddy colors and maintains luminosity
- Introduce wet in wet layering for soft shifts within individual petals, dropping pigment into damp surfaces for organic bleeds
- Reserve your darkest values for final layers, concentrating them in shadow areas and petal bases
Each transparent layer intensifies color while preserving the luminous quality beneath. You’ll achieve realistic form by varying wash density and timing your applications precisely.
Using Salt Technique for Organic Texture on Petals
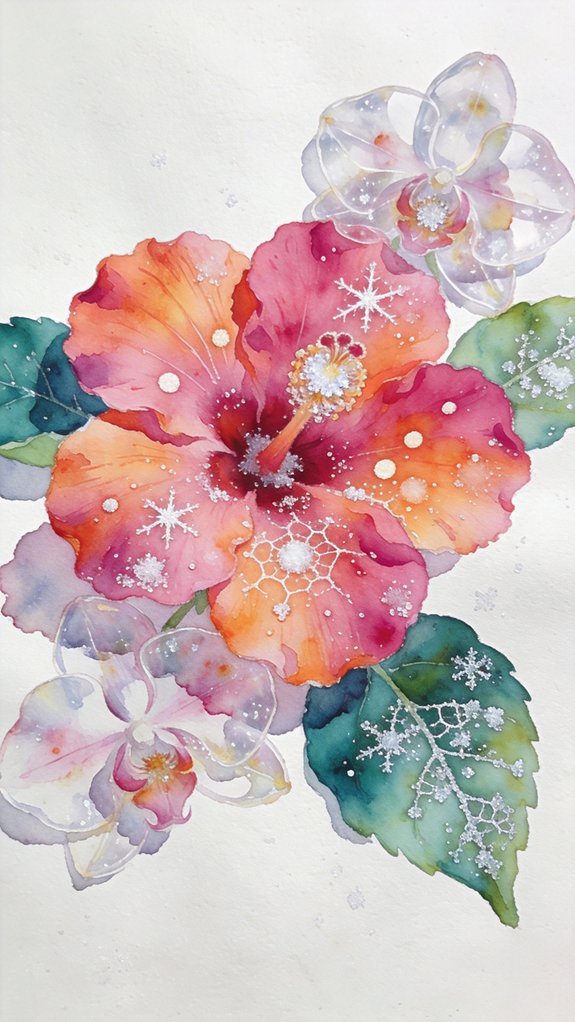
The magic of salt transforms ordinary watercolor washes into alluring surfaces that mimic nature’s irregular patterns. You’ll achieve stunning crystallized texture by sprinkling coarse sea salt onto wet petals, creating dynamic focal points that capture light uniquely. Apply salt while your wash maintains a glossy sheen—too wet produces blooms, too dry yields minimal effect.
Experiment with grain sizes for varied natural salt effects. Fine table salt generates delicate speckles, while kosher salt creates bold starbursts. You can strategically place crystals along petal edges or scatter them randomly across hibiscus faces for authentic tropical character.
Remove dried salt by gently brushing it away, revealing organic formations that elevate your florals beyond predictable techniques. This unpredictable medium pushes creative boundaries, offering fresh interpretations with each application.
Adding Veins and Fine Details With Dry Brush
Mastering dry brush technique reveals intricate botanical details that bring tropical flowers to life with remarkable realism. You’ll transform your hibiscus and orchid paintings through controlled dry brushing that captures nature’s delicate architecture.
Load minimal paint on your finest brush, then remove excess moisture on a paper towel. Apply these fine brushwork techniques with precision:
- Petal veins: Use feather-light strokes from the flower’s center outward, following natural growth patterns
- Texture mapping: Build dimensional ridges on orchid lips with parallel strokes
- Edge refinement: Define crisp petal boundaries without overpowering your initial washes
You’ll achieve professional-grade results by varying pressure and angle. This approach creates depth that flat color applications can’t match, elevating your tropical watercolors from amateur to gallery-worthy pieces.
Lifting Color to Create Highlights on Flower Petals
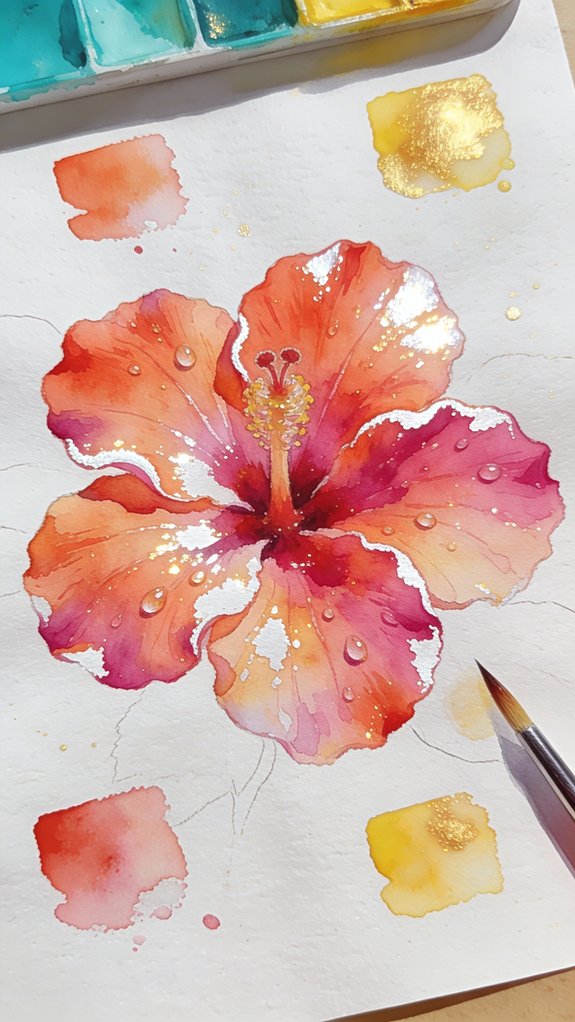
While your initial washes dry to perfect dampness, strategic color lifting transforms flat petals into luminous, three-dimensional blooms. You’ll achieve stunning realism by creating highlights where light naturally strikes curved surfaces. Use a clean, damp brush to gently lift color from designated areas—petal edges, centers, or folded sections. The lifting color technique works best on semi-wet paper, allowing controlled pigment removal without disturbing the paper’s surface.
For tropical flowers like hibiscus and orchids, focus on the petal’s natural curves. A thirsty brush absorbs lifted pigment effectively, revealing the white paper beneath. Experiment with different brush pressures: light touches create subtle gradations, while firmer strokes produce dramatic highlights. You can also use crumpled tissue or cotton swabs for varied textural effects, pushing beyond traditional watercolor boundaries.
Painting Tropical Leaves: Monstera and Palm Fronds
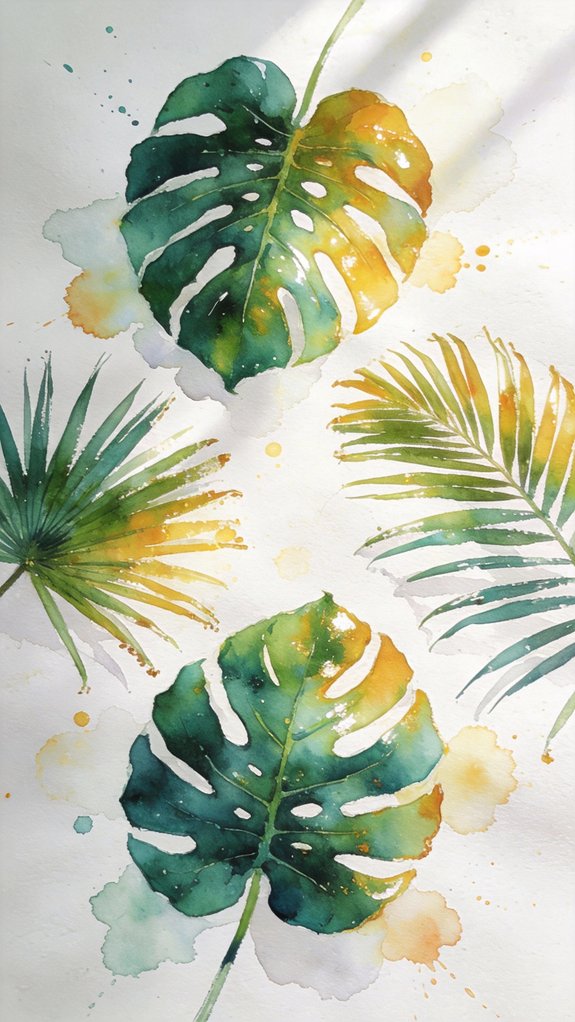
After mastering petal highlights, you’ll discover that tropical leaves demand an entirely different approach—one that celebrates bold shapes and dramatic shifts. Layering watercolor washes transforms flat greens into dimensional foliage that rivals nature’s complexity.
Start with Monstera’s iconic fenestrations, painting around the natural splits rather than cutting them out later. Palm fronds require confident, sweeping strokes that capture their architectural grace:
- Begin with a light yellow-green base, then drop in deeper emerald while still wet
- Reserve white paper strategically for veins and natural light patterns
- Build depth through three distinct wash layers, darkest at the edges
Capturing translucent textures separates amateur work from compelling botanical art. Let each layer dry completely before adding shadows—patience yields that coveted backlit effect.
Creating Natural-Looking Stems and Branches
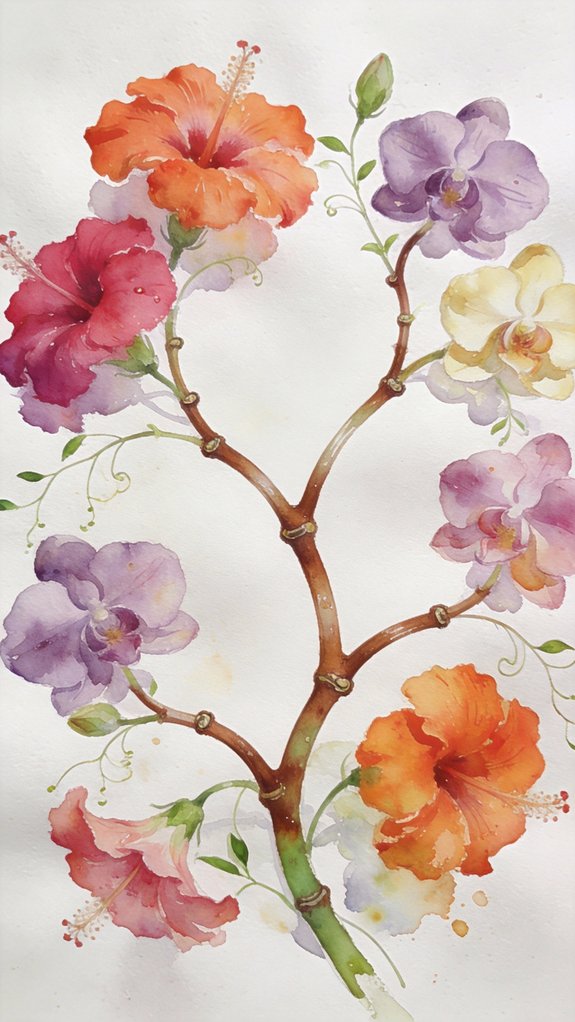
Once you’ve established vibrant petals and dramatic leaves, stems and branches become the skeletal framework that anchors your composition. You’ll want to observe how tropical plants actually grow—orchid stems curve gracefully, while hibiscus branches extend with angular confidence.
Create natural looking stems by varying your brushstrokes: start with diluted pigment at the base, gradually intensifying as you work upward. Let the watercolor bleed slightly where stems meet petals for organic shifts. Add depth by layering cooler tones on one side, suggesting shadow and dimension.
For natural foliage effects, incorporate subtle color variations—perhaps hints of burgundy or ochre within green stems. Don’t paint perfectly straight lines; introduce gentle curves and occasional irregularities that mirror nature’s imperfect beauty.
Negative Painting Technique for Hibiscus Backgrounds
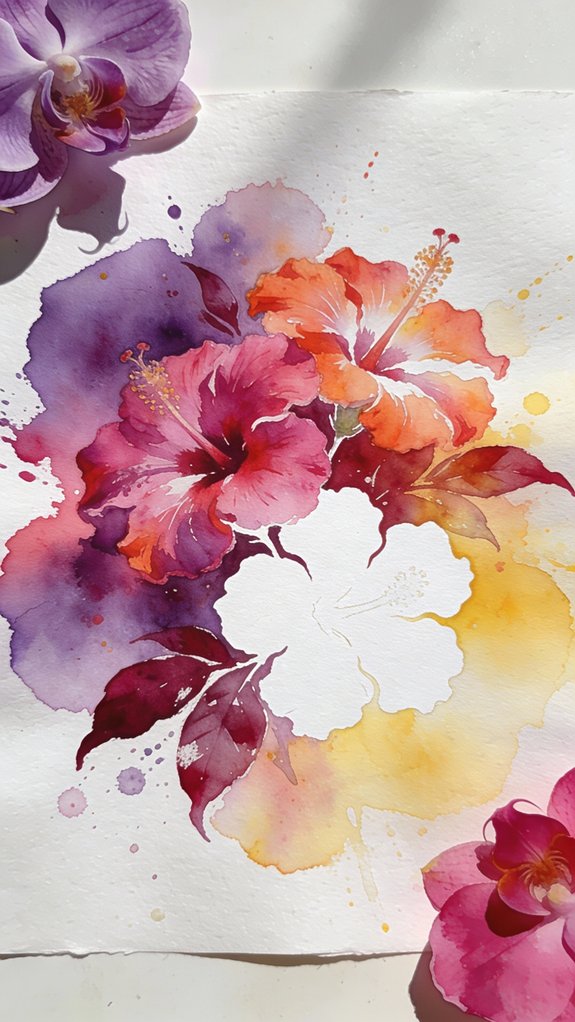
Because negative painting works backwards from traditional watercolor methods, you’ll paint around your hibiscus rather than painting the flower itself. This technique creates stunning depth while maintaining minimalist negative space composition.
Start with your hibiscus outline in light pencil, then build darker values in the surrounding areas. You’ll discover how loose, gestural backgrounds emerge naturally through layering.
Essential steps for mastering this approach:
- Apply successive washes from light to dark, preserving white space where petals exist
- Use varied brushstrokes to create organic, flowing backgrounds that complement your flower’s form
- Layer translucent glazes to develop atmospheric depth without overworking
This innovative method transforms your hibiscus into a luminous focal point, where the unpainted areas become as important as the painted ones.
Loose Watercolor Style: Abstract Tropical Florals
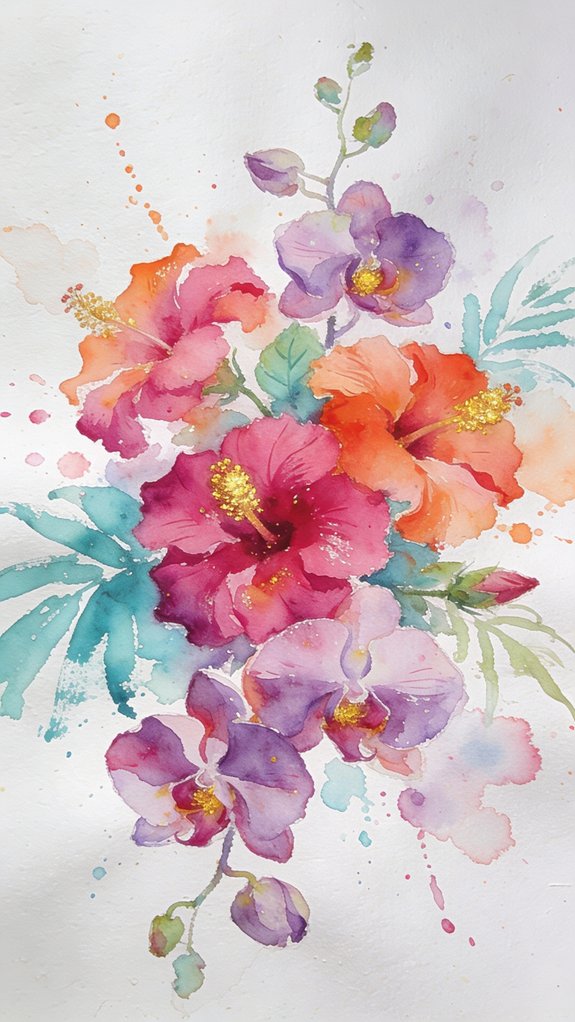
While traditional botanical illustration demands precision, loose watercolor style invites you to embrace spontaneity and celebrate the organic chaos of tropical blooms. You’ll discover freedom through fluid brushwork that captures essence rather than exactitude. Let pigments merge unpredictably, creating abstract interpretations of hibiscus petals and orchid forms.
Start with moody backgrounds using bold washes of indigo, violet, and deep emerald. Allow colors to bleed naturally, forming atmospheric foundations for your florals. Don’t overthink petal placement—instead, work quickly with confident strokes that suggest shape through movement and color intensity.
This approach transforms tropical flowers into expressive art pieces where mood supersedes accuracy. You’re not documenting specimens; you’re channeling their energy through gestural marks and unexpected color relationships that push creative boundaries.
Botanical Illustration Approach for Precise Orchids
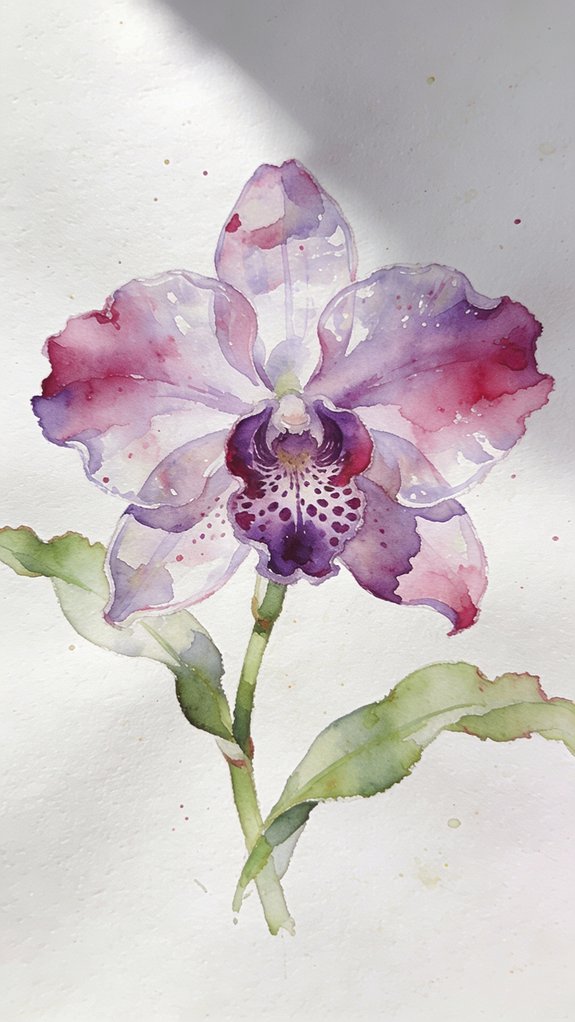
If precision calls to you more than spontaneity, botanical illustration techniques will transform your orchid paintings into scientifically accurate works of art. You’ll achieve botanical accuracy by observing each petal’s unique structure, venation patterns, and color gradations before applying paint. Strategic brushwork becomes your foundation—use fine-tipped rounds for delicate edges and larger brushes for smooth color shifts.
Master these essential techniques:
- Layer transparent glazes to build dimensional depth while preserving intricate details
- Map out your composition with light pencil sketches, identifying each botanical element’s precise placement
- Mix custom colors that match your reference specimen’s exact hues and subtle variations
This methodical approach demands patience, but you’ll create orchid portraits that honor both artistic expression and scientific documentation.
Tropical Flower Bouquet Arrangement Ideas
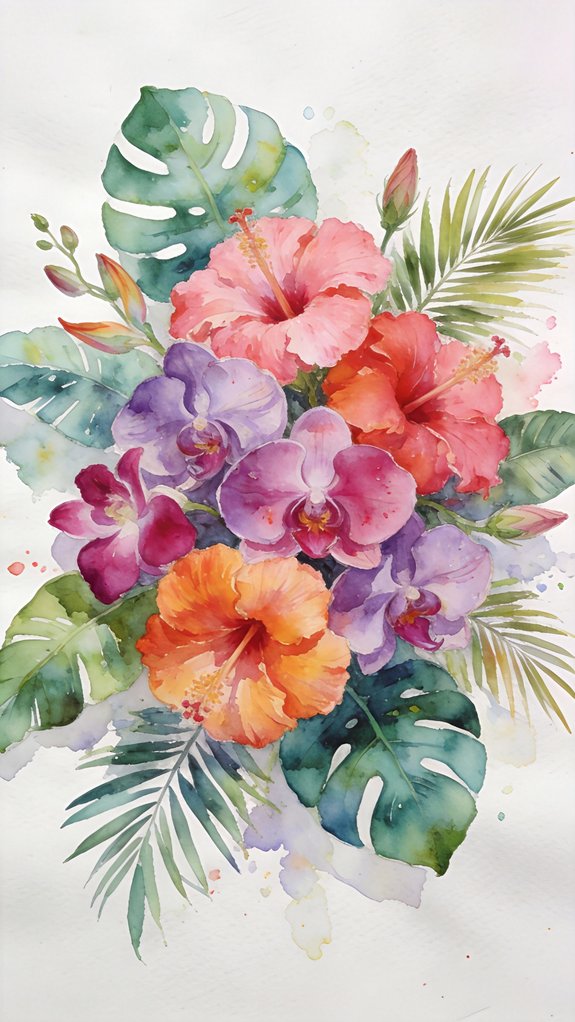
Three compositional approaches will elevate your tropical watercolor bouquets from basic arrangements to dynamic paintings that capture the jungle’s wild energy.
First, experiment with asymmetrical balance when arranging tropical bouquets—position your largest hibiscus or bird of paradise off-center, then counterweight with smaller orchids and foliage. This creates visual tension that mirrors nature’s spontaneity.
Second, layer depth by painting background flowers with diluted pigments, gradually intensifying colors as you move forward. This atmospheric perspective transforms flat compositions into dimensional creative tropical centerpieces.
Third, incorporate negative space strategically. Don’t fill every corner—let the white paper breathe between clustered blooms. This contrast amplifies your flowers’ vibrancy while suggesting the dappled light filtering through a rainforest canopy. Your arrangement becomes a portal rather than just decoration.
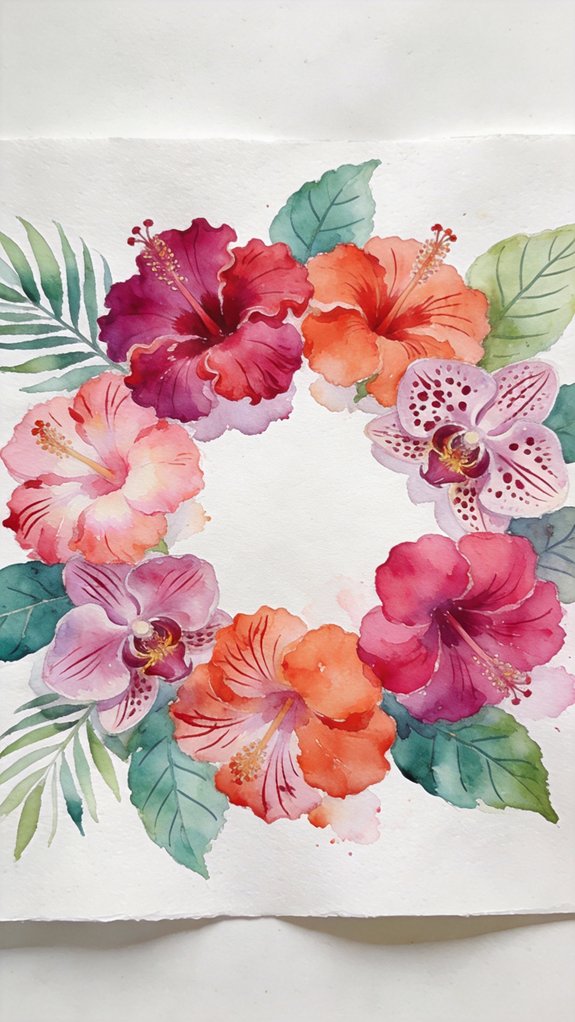
Hibiscus and Orchid Wreath Composition
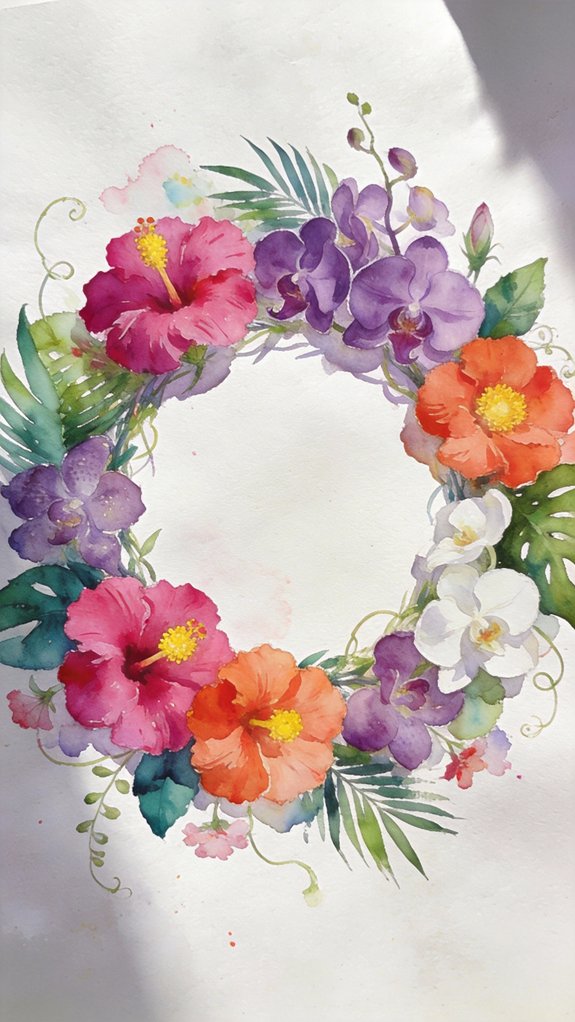
Circular compositions harness a distinct energy—wreath arrangements draw the eye in continuous motion while creating perfect symmetry for tropical watercolors. When creating balanced hibiscus wreath compositions, you’ll position larger blooms at strategic intervals, establishing visual rhythm around the circle. The technique transforms static florals into dynamic art.
Anchor points: Place three to five statement hibiscus blooms at equal distances, then fill gaps with smaller orchids and foliage
Color progression: Graduate from deep magentas to soft corals, guiding viewers through your composition
Negative space: Leave intentional gaps—they’re essential for preventing visual overwhelm
Choosing focal points in orchid bouquets within wreaths requires asymmetrical thinking. Position your most striking orchid at either the top or bottom, breaking perfect symmetry to add contemporary edge.
Single Bloom Focus With Minimal Background
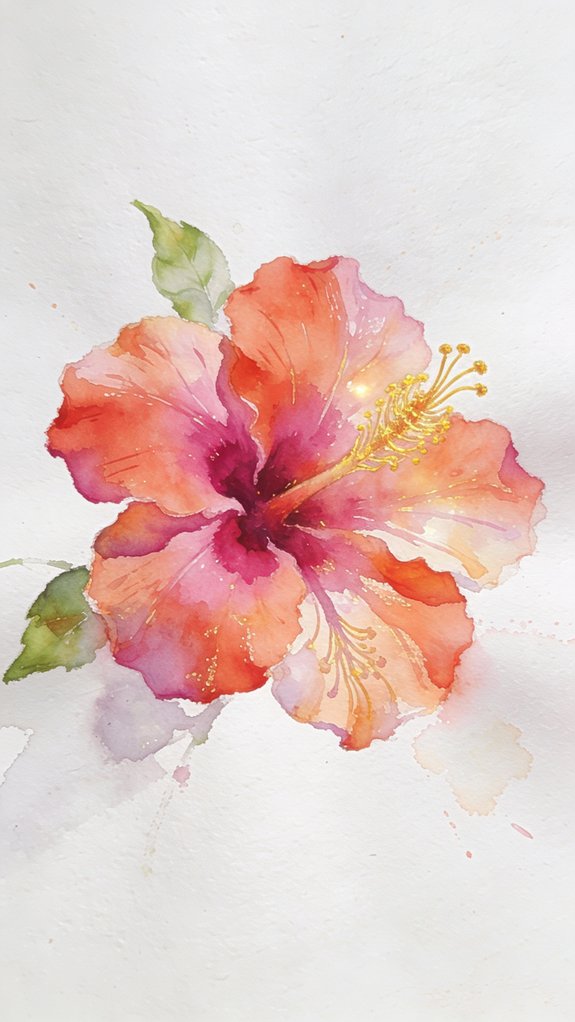
While elaborate compositions showcase technical range, stripping away complexity reveals watercolor’s true poetry—a single tropical bloom against unmarked paper commands attention through restraint rather than abundance. You’ll discover that simplified composition transforms your hibiscus or orchid into a statement piece where every brushstroke matters. This minimalist style demands precision; you can’t hide behind busy backgrounds or decorative flourishes.
Focus on capturing your bloom’s essential character—the velvet texture of petals, the dramatic curve of stamens, the subtle color shifts. Let negative space breathe around your subject, creating visual tension between presence and absence. You’re not removing elements arbitrarily; you’re distilling the flower to its purest expression. This approach challenges you to make deliberate choices about what stays and what goes.
Tropical Flowers With Hummingbird or Butterfly
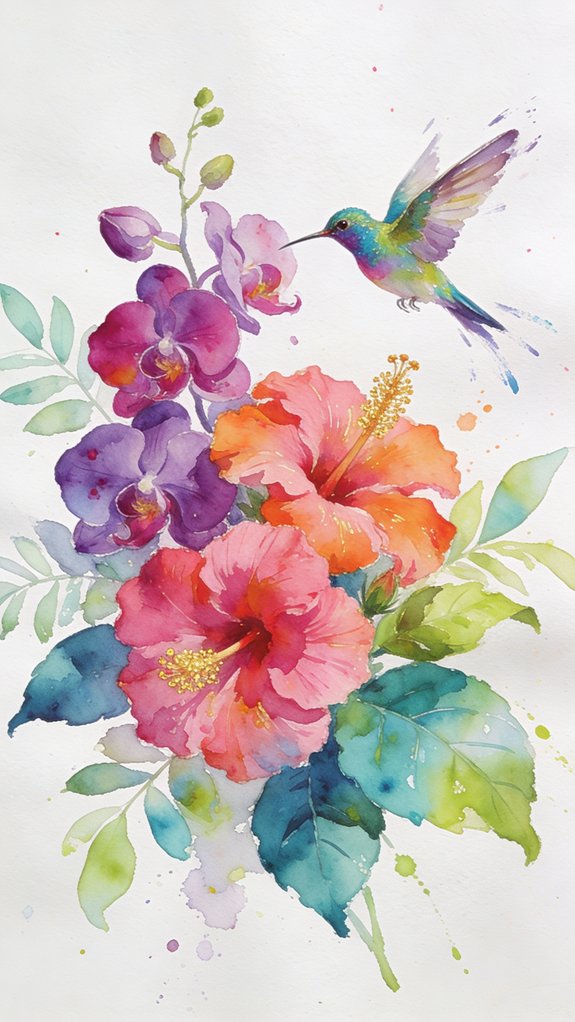
When you introduce a hummingbird or butterfly to your tropical composition, you’re adding movement and narrative tension that static florals can’t achieve. These dynamic elements transform your watercolor from botanical study into living story.
Consider these innovative approaches:
- Paint hummingbirds pollinating blossoms with iridescent greens and blues, capturing their hover mid-flight
- Show butterflies visiting flowers with translucent wings that reveal underlying petals
- Layer wet-on-wet techniques to blur backgrounds while keeping fauna sharply defined
Position your creature off-center, creating visual flow toward the bloom. The interaction between pollinator and flower establishes purpose—you’re documenting nature’s essential exchange rather than decorative arrangement. Let watercolor’s spontaneous quality mirror the unpredictable grace of wings in motion, emphasizing organic connection over rigid composition.
Beach Scene With Scattered Hibiscus Blooms
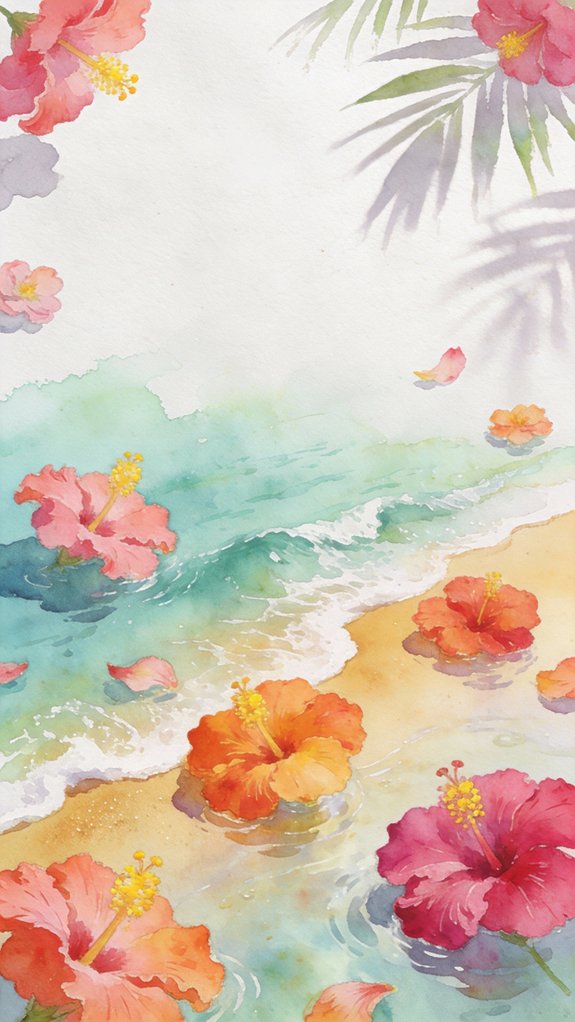
Shifting your tropical watercolors from garden intimacy to coastal expanse opens dramatic possibilities for hibiscus compositions. You’ll create compelling visual narratives by scattering vibrant blooms across sandy shores, letting them drift between driftwood and sea foam. This beach landscape approach transforms traditional floral painting into environmental storytelling.
Layer your composition strategically: establish atmospheric washes for sky and ocean first, then anchor your scene with scattered hibiscus in varying scales. You’ll achieve depth by painting distant blooms with muted tones while reserving saturated pigments for foreground flowers. Integrate tropical foliage sparingly—perhaps palm fronds edging the frame or monstera leaves partially buried in sand.
This coastal context amplifies hibiscus’s exotic nature while introducing dynamic elements like crashing waves, windswept petals, and salt-weathered textures that elevate your watercolor beyond conventional botanical studies.
Jungle Background for Layered Orchid Paintings
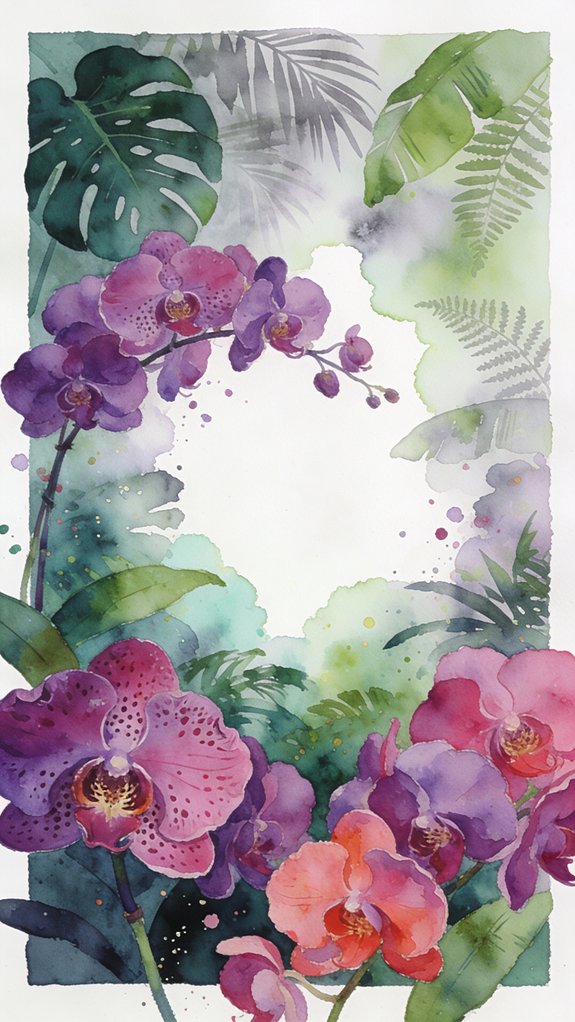
The lush complexity of jungle environments provides the perfect dramatic backdrop for showcasing orchids’ delicate architecture. You’ll create depth by layering dark, saturated greens behind lighter blooms, making unique petal textures pop dramatically.
Build your background using wet-on-wet techniques for atmospheric depth, then add sharper lush foliage elements as your layers dry.
Consider these innovative approaches:
- Mix unexpected colors like deep purples and navy blues into your greens for dimensional shadows
- Reserve white space strategically around petal edges to create natural highlighting
- Add textural variety with salt crystals or alcohol drops in background washes
Your orchids will appear luminous against moody jungle depths. Don’t overwork the background—you’re establishing atmosphere, not competing with your focal flowers. Let strategic negative space breathe life into your composition.
Color Mixing Formulas for Authentic Tropical Hues
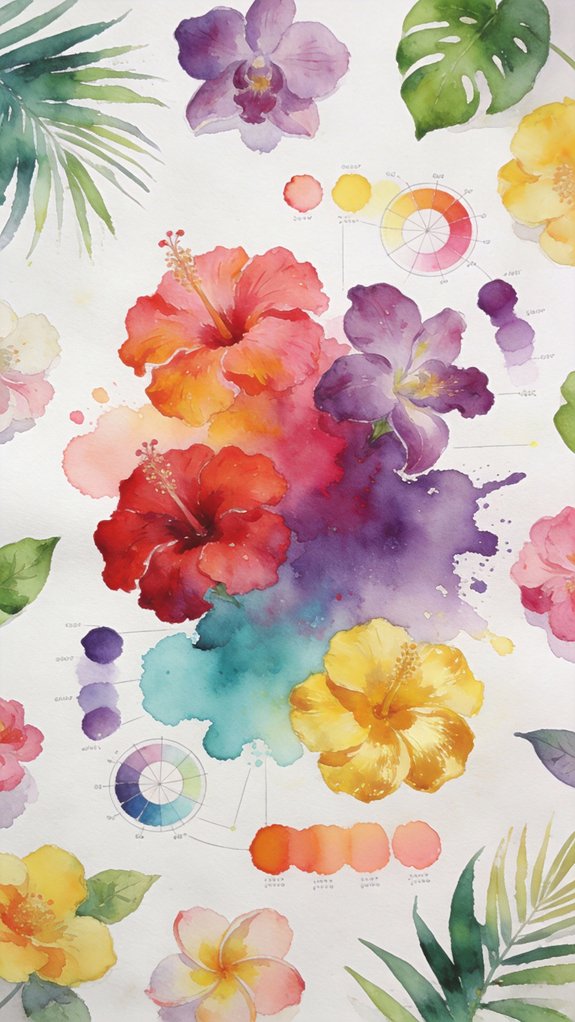
Capturing genuine tropical vibrancy demands more than grabbing bright pigments from your palette—you’ll need strategic color combinations that mirror nature’s bold intensity. Start with complementary color combinations like magenta and yellow-green to create dynamic hibiscus petals that pulse with energy. Mix quinacridone rose with opera pink for those signature hot-pink tropical blooms.
For orchids, blend dioxazine violet with quinacridone magenta, then introduce subtle yellow undertones. Blending wet into wet techniques allows colors to merge organically, producing those characteristic gradient shifts found in authentic tropical specimens. Create deep jungle greens by mixing phthalo blue with new gamboge rather than relying on pre-mixed tubes. Add burnt sienna to tropical yellows for sun-kissed warmth. These precise formulas transform ordinary watercolors into exotic masterpieces.
Avoiding Muddy Colors When Painting Multi-Layered Petals
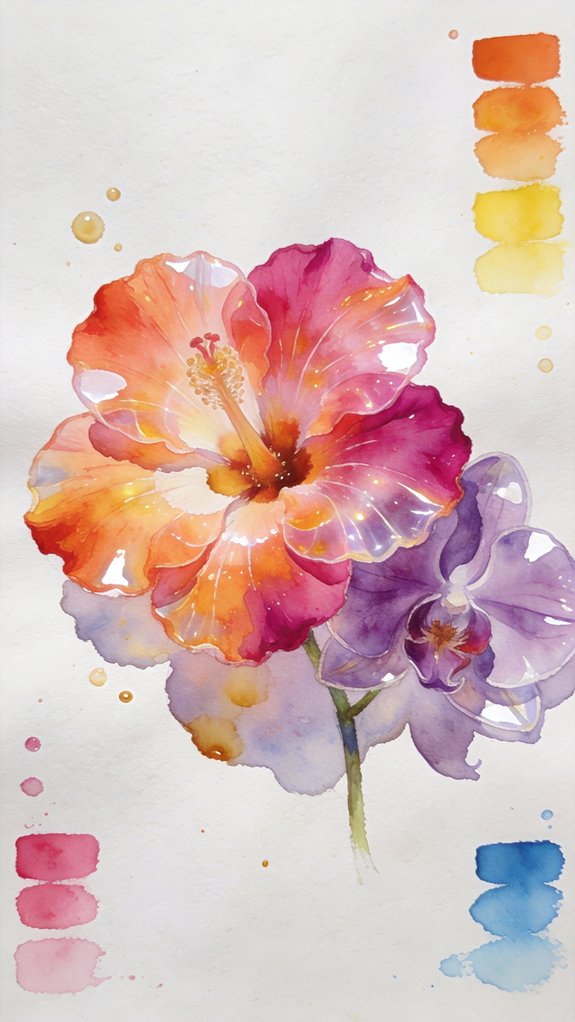
Multi-layered tropical petals demand precise timing and color discipline to maintain their luminous clarity. You’ll conquer layered petal challenges by respecting the water-to-pigment ratio at each stage. Avoiding muddy colors starts with allowing complete drying between layers—resist the temptation to rush.
Patience and precision transform watercolor petals—proper drying time and pigment balance are essential for maintaining tropical flower luminosity.
Master these strategic approaches:
- Limit your palette per layer to three complementary pigments maximum, preventing optical mixing that creates dullness
- Apply lighter washes first, building darkness gradually rather than attempting to lift heavy pigment
- Use transparent pigments for underlayers and reserve semi-opaque colors for final accents
When painting hibiscus or orchid petals, you’ll achieve depth through controlled glazing rather than wet-into-wet chaos. Each subsequent layer intensifies vibrancy while preserving the alluring quality that makes tropical flowers enchanting.
How to Paint Dewdrops on Tropical Flower Petals
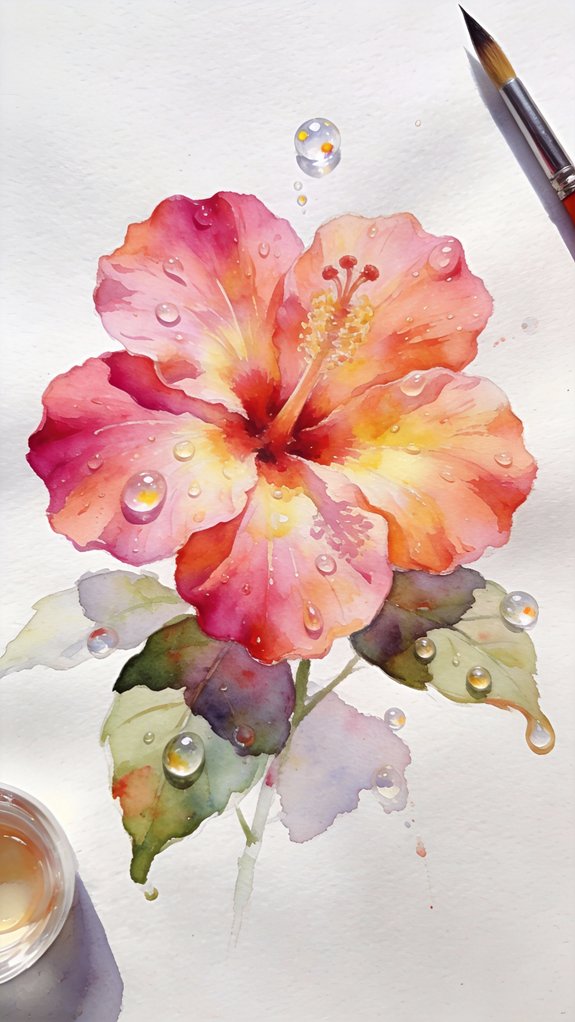
Once your tropical petals display their full vibrancy, dewdrops add that final touch of realism that transforms a beautiful painting into a breathtaking one. You’ll create these luminous spheres by first applying a diluted wash where you want each drop, mastering wet on wet application to achieve soft edges.
While the paint’s still damp, lift a highlight with a clean, dry brush at the top curve—this captures light reflection. Next, add a tiny shadow beneath using concentrated pigment, adding depth to petals and anchoring your dewdrop in place.
For maximum impact, place drops strategically along petal edges where moisture naturally collects. The technique requires precision: too much water creates backruns, too little prevents proper blending.
Creating Movement and Flow in Tropical Compositions
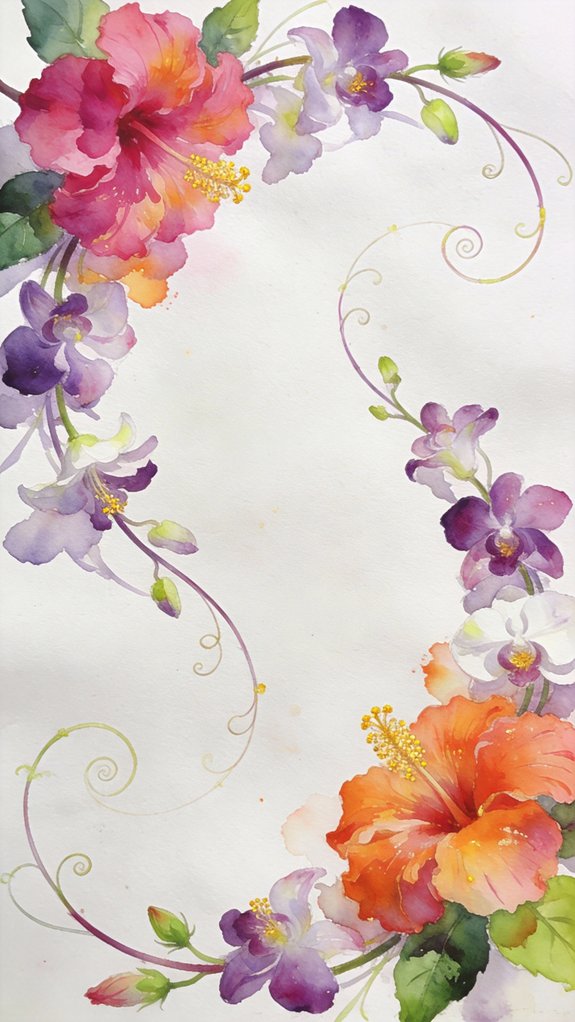
Three directional elements transform static tropical flowers into dynamic compositions that guide your viewer’s eye naturally across the canvas. Master controlling water flow by tilting your paper strategically—gravity becomes your collaborator, pulling pigments along predetermined paths. You’ll create natural curves that echo tropical growth patterns while achieving directional movement through intentional brushwork.
Strategic techniques for compositional flow:
- Position larger blooms at focal points, then scatter smaller elements along S-curves or diagonal lines
- Layer wet-into-wet washes that bleed organically, mimicking nature’s spontaneous growth patterns
- Use stem angles and leaf orientations to create visual pathways connecting separate floral clusters
Experiment with asymmetrical arrangements where foliage sweeps dramatically across negative space. Your composition should feel alive, pulling viewers through each carefully orchestrated section.
Common Mistakes When Painting Hibiscus and How to Fix Them
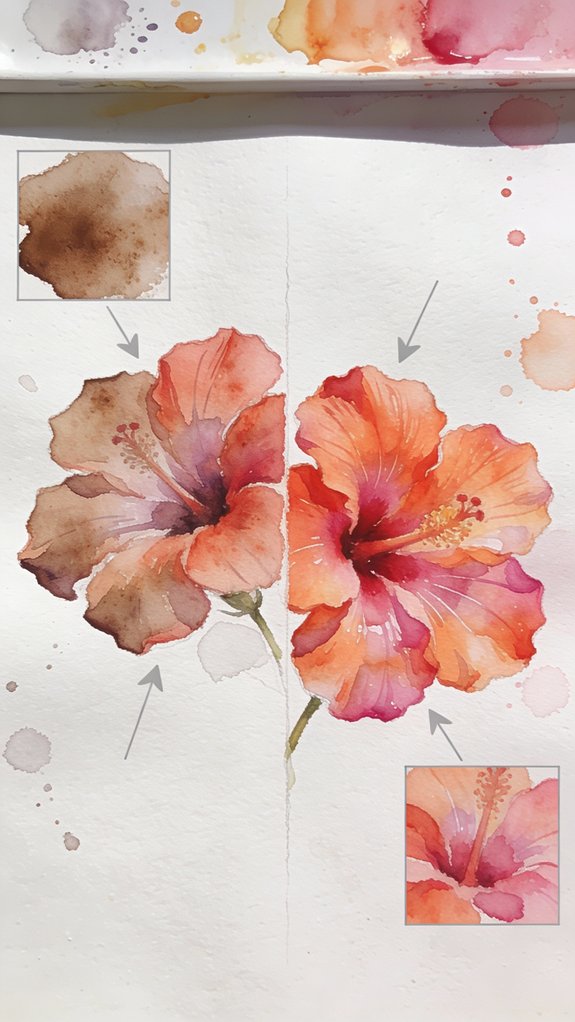
While mastering compositional flow sets the stage for compelling tropical paintings, even experienced artists stumble when rendering hibiscus blooms. You’ll likely encounter muddy petals from overworking common mistakes when blending wet on wet—solve this by limiting your brushstrokes and letting colors merge naturally.
Another frequent error involves timid pigment application; achieving vibrant colors requires bold, saturated mixes from the start, not multiple weak layers. Many painters also create flat, lifeless petals by neglecting tonal variation. Fix this by establishing clear light sources and preserving luminous whites for highlights.
Finally, you might paint symmetrical petals that look artificial. Break this pattern by varying petal sizes and introducing organic irregularities. These adjustments transform amateur attempts into professional-grade tropical artwork.
Common Mistakes When Painting Orchids and How to Fix Them
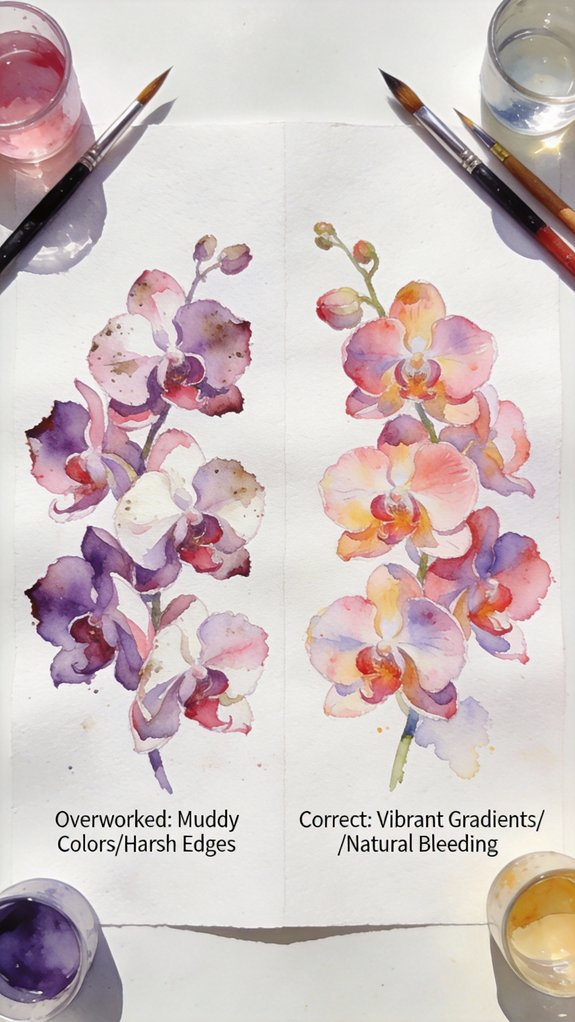
Because orchids possess complex anatomical structures, painters often misjudge their unique petal arrangements and end up creating blooms that resemble generic flowers. You’ll transform your technique by addressing these critical errors:
* Improper petal shaping occurs when you treat all five petals equally—remember the labellum (lip petal) differs dramatically in size and form from lateral petals and sepals
-
- Lack of stamen detail eliminates the orchid’s defining column structure where reproductive organs fuse together, creating that signature central feature
- Overworking wet-on-wet applications muddles the delicate color shifts orchids naturally display
- Lack of stamen detail eliminates the orchid’s defining column structure where reproductive organs fuse together, creating that signature central feature
Fix these issues by studying reference photos before painting. Map out your petal architecture with light pencil marks, then layer translucent washes to build dimension. You’ll achieve authentic orchids that showcase botanical accuracy.
Preserving Your Tropical Watercolor Paintings
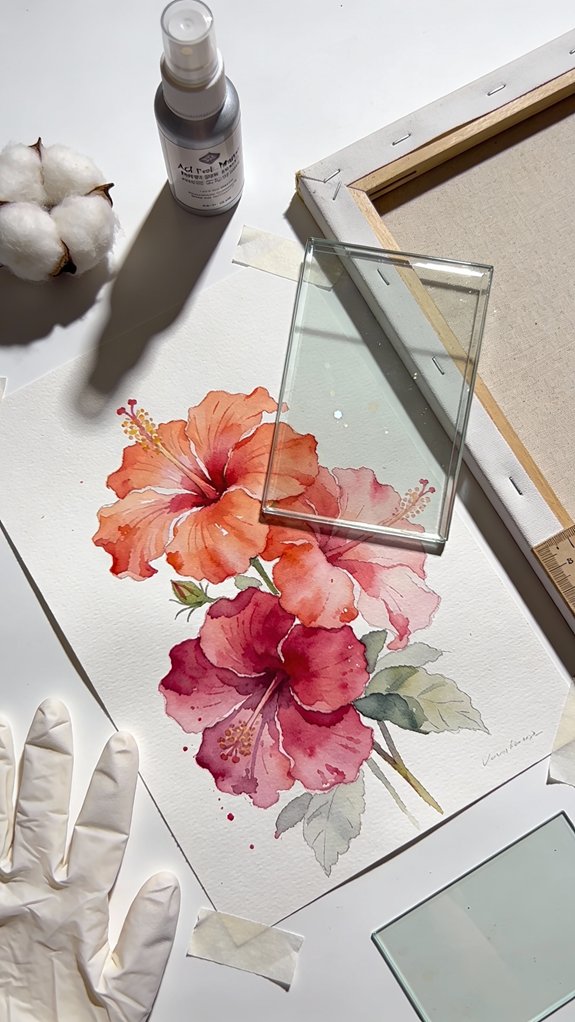
Longevity determines whether your tropical watercolor paintings survive for decades or fade within months. You’ll need to implement cutting-edge preservation techniques that protect your vibrant hibiscus and orchid artworks from environmental damage.
Start by using archival-quality materials—acid-free paper, lightfast pigments, and UV-protective glass when framing. Store your finished pieces in a climate-controlled space away from direct sunlight, maintaining 40-50% humidity levels.
When storing watercolor paintings safely, place acid-free tissue between each piece and keep them flat in archival portfolios. For transporting watercolor artworks, invest in rigid portfolio cases with moisture barriers and shock-absorbing corners.
Apply fixative sprays specifically designed for watercolors to prevent smudging. Digital documentation through high-resolution scanning creates backup records while preserving your creative legacy.
Taking Your Skills Further: Advanced Tropical Flower Techniques
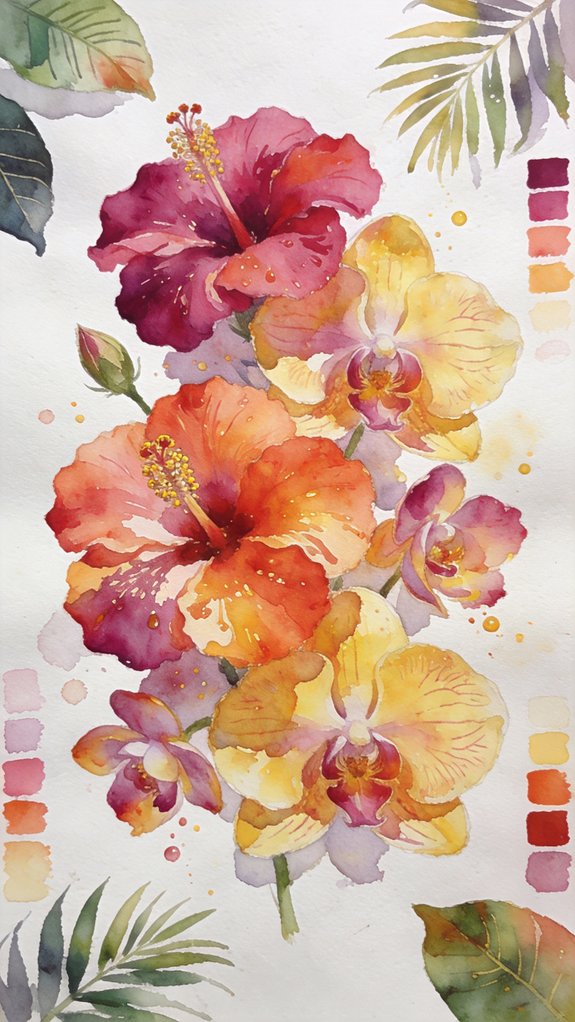
Your preserved paintings now offer a stable foundation for pushing your artistic boundaries with complex tropical compositions. Advanced techniques transform your work from pleasant florals into dynamic botanical art that captures movement and emotion.
Master these sophisticated approaches to elevate your tropical watercolors:
-
-
- Negative painting layers – Build depth by painting around shapes rather than filling them, creating luminous highlights that make petals appear translucent
- Wet-into-wet gradations – Execute innovative color blending by dropping saturated pigments into wet washes, allowing them to bloom naturally for organic changes
- Directional brushwork – Apply expressive brush techniques using confident, deliberate strokes that follow petal veins and leaf structures, conveying energy and botanical accuracy
-
Experiment with combining multiple techniques within single compositions, developing your signature style that distinguishes your tropical watercolors.
Frequently Asked Questions
Can I Use Watercolor Pencils Instead of Traditional Paints for Tropical Flowers?
You’ll open/reveal vibrant possibilities with watercolor pencils for tropical blooms. Master your blending techniques and experiment with water saturation levels to create stunning gradients that’ll transform your hibiscus and orchid artwork into bold, fresh masterpieces.
How Long Does It Take to Complete a Tropical Flower Watercolor Painting?
Painting time varies based on your chosen complexity—you’ll spend anywhere from 30 minutes to several hours. Watercolor pencils provide unique textures that’ll let you experiment with innovative layering techniques, potentially extending your creative process.
What’s the Best Way to Frame Tropical Watercolor Paintings for Display?
You’ll want to choose lightweight wooden frames with acrylic glass framing to protect your tropical watercolors from UV damage while maintaining vibrant colors. This modern combination guarantees durability without overwhelming your artwork’s delicate beauty.
Can I Sell Tropical Flower Watercolors I Create Using These Tutorial Ideas?
You can sell your tropical flower watercolors after obtaining appropriate licensing if tutorials require it. Focus on promoting your unique creative style to differentiate your work and attract collectors seeking fresh, innovative botanical art interpretations.
Should I Sketch Tropical Flowers in Pencil Before Applying Watercolor Paint?
You’d think pencil sketches are mandatory, but they’re not. However, they’ll help you nail your sketch composition initially. As you advance, experiment with techniques like painting directly—it’s how you’ll discover your innovative style.
Conclusion
You’ve now got a vibrant toolkit for bringing tropical blooms to life on paper. Like a hummingbird sampling nectar from flower to flower, you’ll find yourself moving between hibiscus and orchids, gathering techniques and building confidence with each stroke. Don’t rush perfection—these bold beauties thrive on spontaneity and happy accidents. Grab your brushes, mix those luminous colors, and let your watercolor garden bloom. Your tropical masterpiece awaits.
Have any thoughts?
Share your reaction or leave a quick response — we’d love to hear what you think!
-
 0
0
-
0
-
0
-
0
-
0
-
0


