

Table of Contents
Imagine turning that stack of old magazines, forgotten greeting cards, and coffee-stained papers into a beautiful handmade journal that tells your unique story. That’s junk journaling—and you can start today with materials you already have at home.
Unlike pristine store-bought journals, junk journals embrace imperfection. Old book pages become journal spreads. Vintage postcards transform into decorative elements. That wrinkled paper bag? Perfect vintage aesthetic. Moreover, you don’t need artistic talent—the beauty comes from layering interesting materials, not drawing or painting skills.
This comprehensive guide takes you from complete beginner to confident creator. You’ll learn what junk journals are, how to gather free materials, simple binding techniques, decorating methods, and how to use downloadable printables to expand your options. Furthermore, we’ll explore different journal styles from romantic vintage to modern minimalist.
If you’ve ever felt intimidated by blank journal pages, wished you could be more creative but thought you weren’t “artistic enough,” or wanted a meaningful hobby that doesn’t require screens—junk journaling might be exactly what you’re looking for. This craft transforms “mistakes” into character, celebrates imperfection, and creates something uniquely yours without requiring artistic training.
According to the growing community on platforms like Pinterest and YouTube, junk journaling has exploded in popularity as people seek tactile, screen-free creative outlets. The hobby combines sustainable practices—reusing materials destined for recycling—with artistic expression and functional memory keeping.
Whether you want to create memory books, art journals, travel diaries, or simply enjoy relaxing creative time, junk journaling offers endless possibilities with minimal investment.
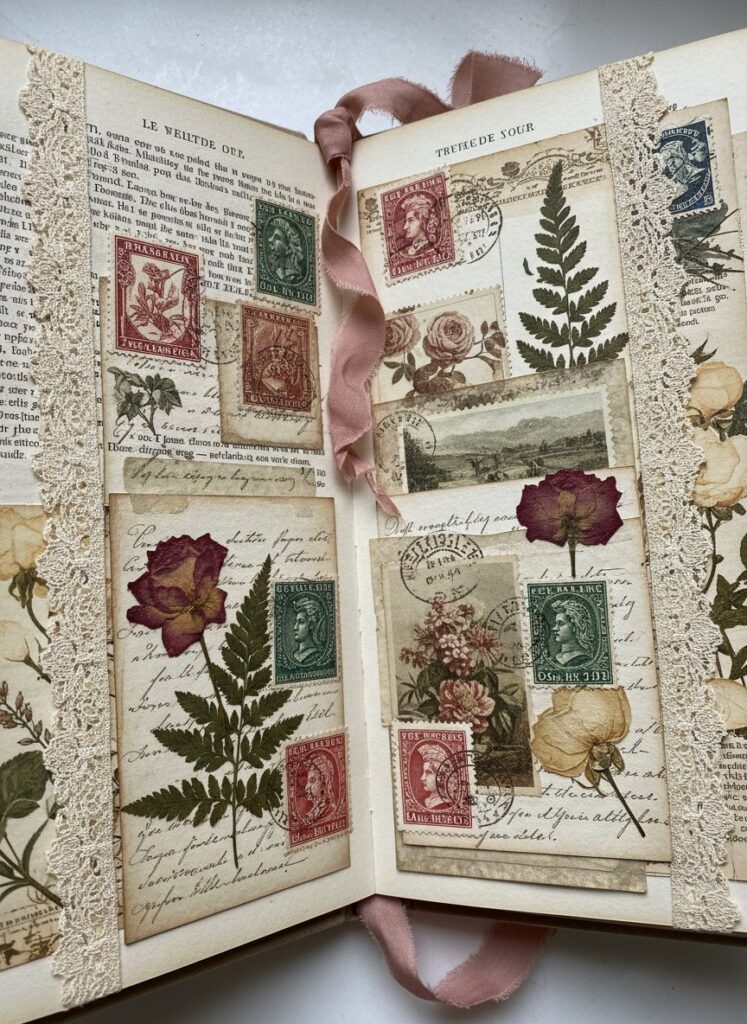
Want to Start RIGHT NOW? (10-Minute Quick Start)
Can’t wait to try junk journaling? Here’s the fastest path to your first page:
Grab these three things:
- Any old hardcover book (or stack of papers)
- Magazine pages, old envelopes, or decorative paper
- Glue stick (even basic school glue stick works)
Create your first page:
- Tear (don’t cut) interesting pages from magazines—choose images, colors, or text that appeal to you
- Layer 2-3 pieces on a book page, overlapping slightly
- Glue them down, smoothing from center outward
- Done! You just created your first junk journal page
That’s it. No planning, no rules, no “correct” way. The wrinkles and imperfections add character.
Ready to learn techniques that create sophisticated results? Continue reading.
What is Junk Journaling?
Junk journaling is beautifully simple: you create handmade journals from materials most people throw away. That old book no one reads? Perfect pages. Yesterday’s mail? Potential art supplies. Coffee-stained napkin? Vintage aesthetic gold.
The “junk” isn’t garbage—it’s treasure waiting to be reimagined. An old dictionary becomes journal pages with interesting text backgrounds. Vintage postcards become focal points for memory keeping. Even mistakes become features—smudges, tears, and wrinkles create authentic vintage character.
The Core Concept
A junk journal is a handmade book created primarily from salvaged materials rather than pristine scrapbook papers. Old book pages, vintage ephemera (paper collectibles), paper bags, envelopes, maps, music sheets, and packaging form the foundation. Therefore, each junk journal is completely unique and cannot be exactly replicated—even you couldn’t make the same journal twice.
Key characteristics:
- Handmade from start to finish (or altered from existing books)
- Recycled and repurposed materials form the majority of content
- Embraces imperfection—tears, stains, and wrinkles add character
- Combines multiple purposes—art, writing, memory keeping, collage
- Tells personal stories through collected materials
A Brief History
Junk journaling synthesizes several creative traditions:
Victorian scrapbooks (1800s): Wealthy Victorians created elaborate albums featuring pressed flowers, calling cards, tickets, and memorabilia. These mixed-media books preserved memories through collected ephemera—the original junk journals.
Art journaling (1990s-2000s): Artists began using bound journals for mixed media experimentation, combining painting, collage, and found materials for personal expression.
Modern junk journaling (2015-present): YouTube and Pinterest sparked explosive growth as creators shared techniques and inspired others worldwide. The movement emphasizes sustainability (reusing materials), accessibility (anyone can participate), and vintage aesthetics.
How Junk Journals Differ from Other Memory Keeping
Traditional journals:
- Pristine, uniform blank pages
- Purchased complete and ready to use
- Often intimidating to “mess up” with imperfect writing
- Focus on writing only
Junk journals:
- Varied, imperfect pages from multiple sources
- Handmade from collected materials
- Imperfection celebrated as character
- Combine writing, art, and memorabilia
Scrapbooks:
- Use new, purchased scrapbook papers and embellishments
- Focus heavily on photographs with decorative elements
- Typically large-format albums
- Document specific events comprehensively
Junk journals:
- Use recycled, vintage, found materials
- May or may not include photos (focus on papers and ephemera)
- Book format, often smaller and portable
- Ongoing, diary-like documentation
Both scrapbooks and junk journals preserve memories beautifully—choose based on your preferences and working style.
Common Uses for Junk Journals
People create and use junk journals for various purposes:
Memory keeping: Document daily life, special events, travels, and milestones through combination of writing, photos, and collected ephemera.
Art journaling: Express creativity through collage, layering, and mixed media without the pressure of “finished artwork.”
Gratitude and mindfulness: Record daily appreciations, positive moments, and reflections in beautifully decorated pages.
Travel documentation: Collect tickets, maps, brochures, and memories from adventures in portable handmade journals.
Planning and organization: Create functional planners with beautiful handmade pages that inspire use.
Gift giving: Handmade journals personalized for recipients become deeply meaningful, treasured gifts.
Relaxation and stress relief: The meditative, tactile process provides screen-free creative time and mental break.
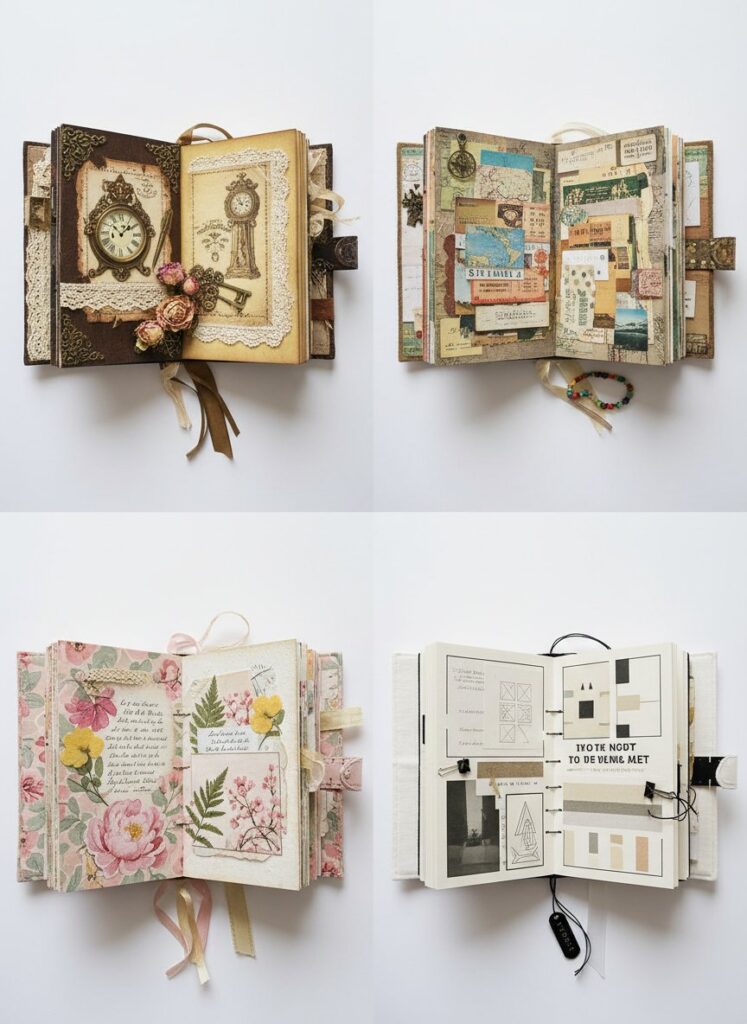
Why People Love Junk Journaling
Junk journaling appeals to crafters, memory keepers, and creative souls for compelling reasons beyond simple hobby enjoyment.
Sustainability and Eco-Friendliness
Junk journaling gives new life to materials destined for recycling bins or landfills. That stack of old magazines becomes art supplies. Vintage books unsuitable for reading become journal pages. Packaging, envelopes, and “junk” mail transform into beautiful decorative elements.
This sustainable approach resonates with environmentally conscious crafters who want creative outlets aligned with their values. Moreover, the hobby reduces consumption—you’re using what exists rather than buying new materials constantly.
Real example: Maria created her first three junk journals spending only $5 total—one thrift store book and a glue stick. The rest came from her recycling bin, old birthday cards, and printed vintage images from free online archives. “I felt good creating beauty from ‘trash’ instead of buying expensive scrapbook supplies,” she says.
Affordable Creative Outlet
Unlike many crafts requiring hundreds in specialty supplies, junk journaling thrives on free or nearly-free materials. Thrift stores provide old books for $1-2. Your home likely contains everything else—magazines, envelopes, paper bags, packaging, old cards.
Dollar stores carry basic adhesives and tools for $1 each. Professional scrapbooking supplies can cost $200-500 to start. Junk journaling costs under $10 while producing equally beautiful, more unique results.
Furthermore, the hunt for materials—thrifting, collecting ephemera, noticing interesting packaging—becomes enjoyable part of the hobby rather than expensive burden.
Budget breakdown:
- $0-5: Use only found materials and household glue = beautiful first journal
- $5-15: Add thrift book, washi tape, few embellishments = expanded options
- $15-30: Include specialty adhesives, stamps, varied tools = professional results
Preserving Memories Tangibly
Junk journals create physical memory keeping that feels more personal and permanent than digital photos on devices or cloud storage. Handling vintage papers, writing by hand, creating dimensional books connects you to memories in ways screens cannot replicate.
The mixed-media nature allows incorporating actual items from experiences—concert ticket stubs, maps from road trips, pressed flowers from special gardens, letters from loved ones, wedding invitation fragments. These authentic elements preserve not just visual memories but textures, even scents, creating multi-sensory connection to past experiences.
Moreover, handmade journals become family heirlooms passed down generations—physical artifacts telling your story in your handwriting, with your creative choices, using materials from your time and place.
Therapeutic and Relaxing Benefits
The tactile, repetitive nature of junk journaling provides significant stress relief and mindfulness benefits. Tearing papers (satisfying!), arranging elements, applying glue, and decorating require present-moment focus that quiets anxious mental chatter.
Real example: Sarah, a busy marketing manager, spends 30 minutes each evening tearing papers and arranging ephemera. “It’s the only time my mind isn’t racing with work emails,” she says. “The repetitive motions calm my anxiety better than scrolling social media ever did. I actually sleep better on nights I journal.”
Furthermore, the hobby offers screen-free relaxation in our hyper-digital age. No notifications interrupt. No endless scrolling tempts. Just hands, paper, glue, and creativity. This unplugged quality appeals to people seeking balance in technology-saturated lives.
The process matters as much as the product—even “unfinished” journals provide therapeutic value through the creative act itself.
No Artistic Skill Required
This bears repeating because it’s the biggest barrier beginners imagine: You don’t need to draw, paint, or have artistic training. The aesthetic comes from selecting and arranging interesting materials, not creating illustrations from scratch.
Vintage papers provide visual interest automatically. Ephemera brings built-in beauty. Your role is curator and composer—intuitive skills every human possesses. You arrange elements the way you instinctively arrange furniture or choose clothes—through personal aesthetic preferences you already have.
Mistakes become happy accidents adding character rather than failures requiring perfection. Wrinkled paper? Vintage character. Torn edge? Organic beauty. Asymmetrical placement? Artistic composition. The medium forgives everything.
Common fear: “I can’t even draw a stick figure!” Truth: You won’t need to. Layer interesting papers, add vintage images, include text from magazines. Your journal will be beautiful without drawing a single line.
Unique Personal Expression
Every junk journal reflects its creator’s personality, interests, and aesthetic preferences automatically. Your material choices (vintage vs. modern, colorful vs. neutral, busy vs. minimal), color palettes, themes, and decorating style create something uniquely yours.
Two people following identical tutorials produce completely different results based on their materials and creative decisions. This individuality means junk journals make deeply personal gifts—a handmade journal created specifically for someone, incorporating their favorite colors, themes, and memories, carries emotional weight impossible in store-bought items.
Moreover, your journal evolves with you. Early pages look different from later pages as you discover your style and preferences. This visible growth creates a record of your creative journey alongside your written memories.
Welcoming, Supportive Community
The junk journaling community thrives online and in many local areas. YouTube features thousands of free tutorials and process videos. Instagram and Pinterest overflow with inspiration and ideas. Facebook groups connect enthusiasts who share techniques, materials, troubleshooting advice, and encouragement.
This community genuinely welcomes beginners and celebrates all skill levels. Experienced creators remember starting with messy first journals and generously share knowledge. Many cities have junk journaling meetups where crafters work together, swap materials, and learn from each other in person.
The culture emphasizes sharing rather than competing, inspiration rather than comparison, and encouragement rather than criticism. When you have questions or feel stuck, thousands of fellow journalers offer support.
Essential Supplies and Materials
One of junk journaling’s greatest appeals is the minimal investment required. Start with absolute basics, then gradually expand as you discover your preferences.
Absolute Essentials (Start with These Only)
You need only FIVE things to create your first junk journal:
1. Something to bind:
- Old hardcover book from thrift store ($1-2) [EASIEST FOR BEGINNERS]
- OR stack of papers you’ll bind yourself
2. Papers to add:
- Magazine pages (FREE from home)
- Old envelopes (FREE)
- Junk mail with decorative elements (FREE)
- Paper bags (FREE)
- Packaging with interesting text or patterns (FREE)
3. Adhesive:
- Basic glue stick from dollar store ($1)
- OR white school glue you already own (FREE)
4. Scissors:
- Any household scissors work perfectly
5. Something to write with:
- Pen, marker, or pencil you already own
Total startup cost: $1-5 maximum (or absolutely FREE if you use papers and household glue)
Everything else enhances your journals but isn’t necessary to start. Many beautiful junk journals contain nothing but these five basic elements.
Nice to Have (Add Gradually as You Continue)
As you discover your personal style and preferences, these supplies expand your creative options:
Additional Adhesives
Washi tape ($2-5): Decorative Japanese masking tape available in endless patterns. Adds color, secures elements, covers mistakes, creates borders. Removable and repositionable.
Mod Podge ($6-10): Seals and adheres simultaneously. Creates glossy or matte finish. Prevents ink from bleeding through thin papers.
Double-sided tape ($3-5): Clean application without moisture. Prevents paper warping. Good for delicate materials.
Why not buy all adhesives at once? Different crafters prefer different adhesives. Start with glue stick, discover what frustrates you, then buy specific solutions.
Free and Found Materials to Collect
Old books: Thrift stores, library sales, and estate sales provide books for $0.25-2. Look for:
- Vintage books with aged, yellowed pages (1920s-1970s ideal for authentic vintage aesthetic)
- Damaged books unsuitable for reading (guilt-free repurposing)
- Interesting covers or bindings you can use
- Dictionaries and encyclopedias (thin pages layer beautifully)
- Foreign language books (interesting text backgrounds)
Ephemera (collectible paper items):
- Vintage postcards and greeting cards
- Old letters and envelopes
- Used postage stamps
- Tickets (movies, concerts, travel, events)
- Maps and atlas pages
- Sheet music
- Newspaper and magazine clippings
- Playing cards
- Business cards
- Receipts with interesting typography
Everyday items (FREE from your home):
- Paper grocery bags (brown kraft paper has instant vintage feel)
- Gift bags and tissue paper
- Security envelopes (patterns inside)
- Decorative catalog pages
- Tissue paper from gifts
- Wrapping paper scraps
- Cardboard (cereal boxes, shipping boxes)
- Coffee filters (dye or stain for unique papers)
Where to find these free:
- Your own recycling bin (start looking at “trash” differently)
- Ask friends and family to save materials for you
- Office recycling (with permission)
- Coffee shops (ask for used bags, napkins)
- Restaurants (interesting menus, coasters, paper placemats)
Cutting Tools
Scissors: Your basic household scissors work. If you want to expand, add:
- Decorative edge scissors ($3-8) create scalloped, wavy, or zigzag edges
- Small detail scissors for intricate cutting
Craft knife and cutting mat (optional, $8-15): Precise cuts and trimming. Not necessary for beginners.
Paper trimmer (optional, $15-40): Straight cuts on multiple pages quickly. Convenience item, not essential.
Basic Tools
Bone folder ($3-8): Creates crisp folds and burnishes adhesive for better adhesion. You can substitute with butter knife or credit card initially.
Ruler ($1-3): Measuring and straight edges. Use what you have at home.
Pencil and eraser: Light guidelines that disappear. Use household pencils.
Stapler: Securing signatures (folded paper sets) for binding. Use household stapler.
Hole punch ($3-10): Creating holes for ring binding or ribbon closures.
Needle and thread (for binding): Regular sewing needle and any thread, embroidery floss, or even dental floss works.
Embellishments (Optional and Fun)
Only add embellishments after you’ve created a few basic journals and know what you’ll actually use:
Decorative elements:
- Lace and ribbon scraps (thrift stores, fabric stores, or your sewing stash)
- Buttons (thrift stores sell bags for $1-2)
- Paper flowers (craft stores or make your own)
- Stickers, especially vintage-style
- Doilies (dollar stores)
- Fabric scraps
- Pressed flowers (free! press flowers between book pages)
- Small charms
Writing and mark-making:
- Additional pens in various colors
- Rubber stamps and ink pads (start with one alphabet set if interested)
- Stencils
- Markers and colored pencils
- Watercolors for backgrounds (inexpensive sets work fine)
Printables and Digital Resources
Free downloadable elements dramatically expand your material options:
- Vintage images and ephemera (public domain)
- Journal cards and tags
- Backgrounds and patterned papers
- Decorative frames and borders
- Typography and quotes
- Lined and grid templates
Our site provides free printable collections specifically designed for junk journaling. Print on regular printer paper or cardstock. These digital elements cost nothing beyond paper and ink, allowing unlimited use—print favorites multiple times, resize as needed, or edit colors.
Best sources for free printables:
- Our site’s curated junk journaling collections
- Library of Congress (massive public domain archive)
- Smithsonian Open Access (museum collections)
- Graphics Fairy (vintage images blog)
- Old Book Illustrations
Storage and Organization
Don’t buy storage supplies until you have materials to store. Initially, use what you have:
Simple storage solutions:
- Shoe boxes (sort materials by color or type)
- Large envelopes (flat ephemera)
- Ziplock bags (small embellishments)
- Paper grocery bags (current project materials)
- Drawer or shelf (everything in one accessible place)
As your collection grows, invest in:
- Clear plastic bins (see contents without opening)
- File folders in a box
- Binders with page protectors (vintage paper collections)
- Small drawer units (buttons, charms, small items)
Budget-Friendly Shopping Strategy
Start with FREE: Collect materials from home for one week before buying anything. You’ll be surprised how much you accumulate.
Thrift stores are treasure troves:
- Old books: $0.25-2
- Vintage ephemera: $0.25-1 per item
- Lace, ribbon, buttons: $1-3 per bag
- Vintage papers and postcards: Often free in “take a box” sections
Dollar stores for basics:
- Glue sticks, washi tape, scissors, rulers: $1 each
- Some embellishments and stickers: $1
When to invest more:
- Quality adhesives (after you know what you prefer): $5-12
- Special tools like good craft knife: $10-20
- Professional-grade supplies (once you’re committed): varies
Avoid these beginner mistakes:
- ❌ Buying every supply before starting (you don’t know preferences yet)
- ❌ Expensive “junk journaling kits” (you’re paying for packaging; collect your own)
- ❌ Ordering vintage ephemera online (expensive; find locally or print free images)
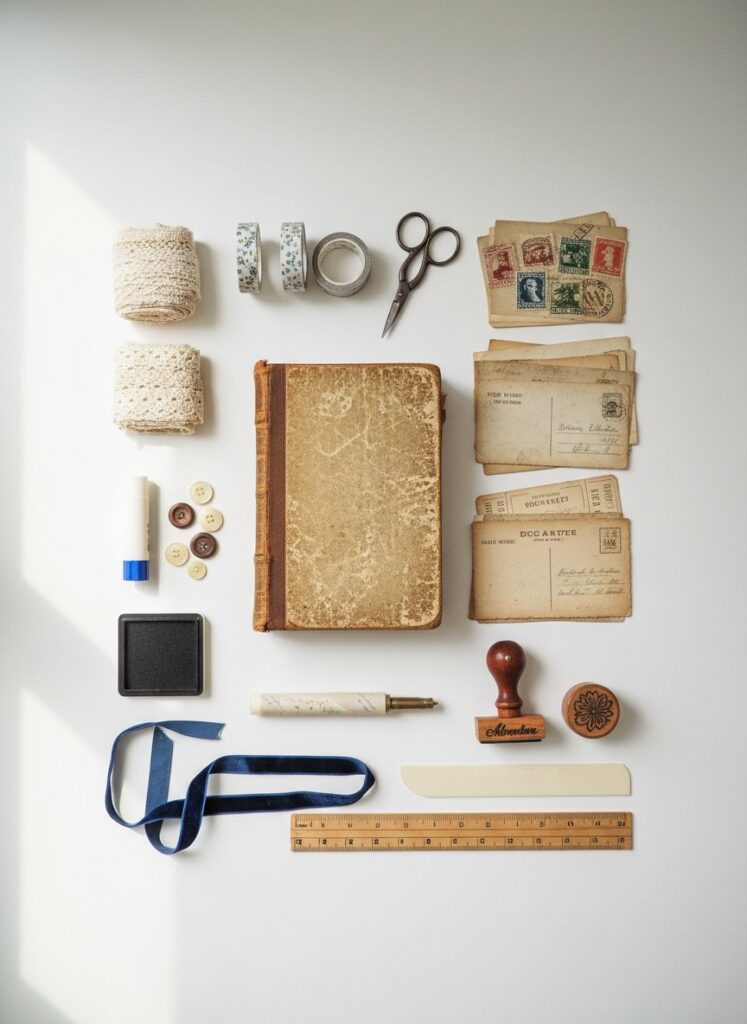
Types of Junk Journals
Understanding different journal types helps you choose the best starting point for your interests and skill level.
Altered Book Journals ⭐ BEST FOR BEGINNERS
Description: Transform existing hardcover books into junk journals by adding pages, pockets, and embellishments while keeping the original structure.
Why start here:
- Book provides cover and binding already (major work done!)
- No bookbinding skills required
- Quick, satisfying results
- Inexpensive ($1-2 thrift store book)
- Forgiving of mistakes
How it works:
- Buy old hardcover book
- Remove some original pages (prevents excessive bulk when you add materials)
- Add papers, ephemera, pockets to remaining pages
- Decorate cover
- Done!
Difficulty: ⭐ Easy (perfect first project)
Time: 2-4 hours spread over several sessions
Tips for success:
- Choose books with intact bindings
- Select books with matte, not glossy, pages (better adhesion)
- Remove 1/3 to 1/2 of original pages
- Books 150-300 pages work best (not too thick or thin)
Signature-Based Journals
Description: Build journals from “signatures” (folded sets of papers) sewn or bound together—traditional bookmaking structure.
Characteristics:
- Multiple signatures of 3-6 folded papers each
- Binding holds signatures together
- Can add or remove sections
- Most traditional, authentic journal format
Best for:
- Those interested in bookbinding craft
- People wanting substantial, long-lasting journals
- Crafters enjoying process as much as product
Difficulty: ⭐⭐⭐ Moderate (requires learning binding techniques)
Time: 4-8 hours for complete journal
Traveler’s Notebook Inserts
Description: Individual small journals (inserts) that fit inside leather traveler’s notebook covers with elastic closures.
Characteristics:
- Single signature format (simpler than multi-signature journals)
- Portable size (standard sizes: passport, regular, A5)
- Interchangeable—swap inserts in same cover
- Often themed for specific purposes
Best for:
- Travelers wanting portable documentation
- People who like switching between projects/themes
- Those who already own traveler’s notebook system
Difficulty: ⭐⭐ Easy to Moderate
Time: 1-2 hours per insert
Mini Junk Journals
Description: Small-format journals, typically 4×6 inches or smaller—perfect quick projects.
Characteristics:
- Fast to complete (finish in one session)
- Use fewer materials (great for using up scraps)
- Perfect gift size
- Often themed (gratitude, quotes, lists, specific occasions)
Best for:
- Practicing techniques without large time commitment
- Gift-making (affordable, personal presents)
- Using up leftover materials from larger projects
- Beginners wanting quick wins
Difficulty: ⭐ Easy
Time: 1-3 hours total
Themed Journals
Description: Journals dedicated to specific topics, purposes, or aesthetics rather than general life documentation.
Popular themes:
- Travel journals: Maps, tickets, travel ephemera, destination documentation
- Garden journals: Botanical prints, seed packets, planting records, pressed flowers
- Recipe journals: Vintage recipe cards, food ephemera, family recipes, cooking notes
- Holiday journals: Christmas, Halloween, seasonal celebration documentation
- Baby/wedding journals: Commemorating specific life events with related memorabilia
- Gratitude journals: Daily thankfulness, positive focus, mindfulness practice
- Nature journals: Outdoor observations, pressed plants, nature sketches
Best for:
- Focused documentation of specific interests
- Gifts tailored to recipient’s passions
- Creating cohesive aesthetic throughout entire journal
Difficulty: Varies (⭐ to ⭐⭐⭐ depending on complexity)
Flip-Through vs. Functional Journals
Understanding this distinction helps clarify your goals:
Flip-through journals:
- Created primarily for visual appeal and artistic expression
- Heavily decorated with minimal writing space
- Showcase techniques and materials
- Popular in social media videos (“flip-through” videos)
- May have little blank space for actual use
Functional journals:
- Designed for daily/regular use (writing, planning, documenting)
- Balance decoration with usable space
- Include lined papers, blank areas, practical elements
- Accommodate regular handling and writing
Which should you create?
- Beginners often benefit from starting with functional journals (lower pressure, very forgiving of imperfection, useful daily)
- As you gain confidence, create flip-through journals for artistic satisfaction
- Many crafters create both types for different purposes
Neither is “better”—choose based on whether you want functional daily tool or artistic expression piece.
Creating Your First Junk Journal
Let’s create a simple altered book journal—the most beginner-friendly project. This teaches fundamental techniques while producing a complete, usable journal.
Project Overview
⏱️ Total time: 2-4 hours (spread over several sessions with drying time)
💰 Cost: $1-10
✂️ Difficulty: ⭐ Beginner-friendly
📚 Result: Complete functional journal ready to use
Step 1: Choose and Prepare Your Book
⏱️ Time: 15 minutes
💰 Cost: $1-2
✂️ Action: Select and prep book
Selecting the right book:
Look for:
- ✅ Hardcover with intact binding (spine not broken)
- ✅ 150-300 pages (manageable size)
- ✅ Matte or slightly textured pages (adhesive sticks better than on glossy)
- ✅ Cover you find attractive OR can easily paint/cover
- ✅ Size that appeals to you (small journals easier for first project)
Avoid:
- ❌ Paperbacks (covers too flimsy)
- ❌ Very thick books over 400 pages (overwhelming, heavy)
- ❌ Glossy magazine-style pages (difficult adhesion)
- ❌ Library books or books someone might want to read (choose damaged or outdated)
Preparation process:
- Remove book jacket if present (set aside—you might use it for decoration later)
- Remove pages to prevent bulk:
- Gently tear (don’t cut) out every 3rd-5th page throughout book
- Leave enough pages for structure—remove about 1/3 to 1/2 of total pages
- Tear rather than cut for softer, more organic edges
- Why this matters: Added papers create bulk; removing original pages compensates
- Create gutter margin (optional but recommended):
- Fold each remaining page lengthwise about 1/2 inch from the spine
- Crease firmly with bone folder (or butter knife/credit card)
- This creates space along spine to accommodate added thickness
- Pages will still open fully but won’t strain binding
Your book is now ready for transformation!
Step 2: Gather and Prepare Materials
⏱️ Time: 20 minutes
💰 Cost: FREE (use what you have)
📦 Action: Collect and organize
Collect these materials for your first journal:
Papers (choose 10-15 pieces):
- Magazine pages with interesting images or colors
- Old envelopes (security envelopes have great patterns inside)
- Paper bags (brown kraft paper)
- Junk mail with decorative elements
- Maps or atlas pages
- Old book pages (if you have another damaged book)
- Music sheets
- Vintage-style printables from free sites
Ephemera (choose 5-10 pieces):
- Postage stamps (used or decorative)
- Tickets from movies, concerts, events
- Postcards (vintage-style or from your travels)
- Old photographs or photocopies of photos
- Labels or tags
- Playing cards
Decorative elements (choose 3-5):
- Ribbon scraps
- Lace trim
- Buttons
- Fabric scraps
- Pressed flowers
- Stickers
Organize your materials:
- Sort by color family (makes decorating cohesive)
- OR sort by theme (vintage, travel, floral, etc.)
- Place in piles or containers near your workspace
- Set aside one or two favorite pieces as focal points
Create simple pockets and envelopes:
Even beginners can make these functional elements:
Simple glued pocket:
- Take paper bag or envelope
- Cut to size slightly smaller than journal page
- Glue three sides to journal page, leaving top open
- Perfect for storing cards, tags, or memorabilia
Folded envelope pocket:
- Cut square or rectangle
- Fold corners toward center
- Glue to page along bottom and sides
- Instant pocket for tucking items
Make 2-3 pockets to include in your journal.
Step 3: Create Your First Pages
⏱️ Time: 30-45 minutes
🎨 Action: Layer and glue
💡 Remember: Imperfection = character
Basic page creation process:
Start with page 1 (or 2-3 if you want to keep page 1 blank):
- Choose background paper:
- Select piece slightly smaller than book page (leaves border of original page showing)
- Tear edges instead of cutting (softer, more vintage look)
- This becomes your base layer
- Apply adhesive:
- Glue stick works great for papers
- Apply glue around edges and center
- Don’t over-glue (causes wrinkling)
- Thin, even layer works better than thick globs
- Adhere to book page:
- Place background paper on book page
- Smooth from center outward with hands or bone folder
- Press firmly but gently
- Don’t worry about small wrinkles—they add character!
- Layer additional elements:
- Add second, smaller paper on top (offset, not centered)
- Add ephemera piece (stamp, ticket, small image)
- Add decorative element (ribbon, lace corner)
- Build layers gradually—3-5 elements per page is plenty
- Vary your techniques between pages:
- Some pages heavily layered
- Some simple with just 1-2 elements
- Some with pockets
- Some with writing space
- Variety creates visual interest
Creating interesting page variations:
Folded elements:
- Fold pages in half or thirds
- Creates reveal elements (unfold to see hidden content)
- Adds dimension
Pockets:
- Glue envelope or folded paper pocket to page
- Leave top open for tucking items
- Functional and decorative
Flip-outs:
- Attach papers that extend beyond page edge
- Fold inward when closing book
- Unfold to reveal extra surface
Windows:
- Cut shapes in top page
- Reveals element on page underneath
- Creates layered, dimensional effect
Tuck spots:
- Don’t glue down one edge of element
- Allows tucking small tags or cards behind
- Interactive feature
Work on 3-5 pages in this first session, then let dry completely.
Step 4: Add Embellishments and Personal Touches
⏱️ Time: 30-60 minutes (after glue dries)
✨ Action: Decorate and personalize
Wait for glue to dry completely (30+ minutes) before this step.
Decorating techniques:
Layering for depth:
- Start with largest pieces (backgrounds)
- Add medium pieces (secondary papers, larger ephemera)
- Add focal elements (special images, photos, postcards)
- Finish with smallest details (stamps, buttons, small text)
This creates natural visual hierarchy—eye knows where to look first.
Using washi tape:
- Create decorative borders around page edges
- Secure elements with tape edge showing (decorative + functional)
- Create patterns with different tape strips
- Cover mistakes or unwanted text
- Frame focal points
Rubber stamps (if you have them):
- Add text, images, or patterns
- Vintage-style stamps perfect for junk aesthetic
- Ink in brown, sepia, or black enhances aged look
- Stamp directly on pages or on separate paper to glue down
Hand lettering and writing:
- Add titles, dates, or decorative text
- Imperfect handwriting adds personal character
- Use markers, pens, or pencils
- Don’t stress about perfect writing—authentic > perfect
Creating balance:
- If left page is heavily decorated, keep right page simpler (or vice versa)
- OR create symmetry with similar decoration on both pages
- Avoid decorating every single inch
- White/neutral space provides visual rest
Remember: You can always add more later, but you can’t easily remove. When in doubt, step back and assess before adding another element.
Step 5: Create Functional Writing Spaces
⏱️ Time: 20-30 minutes
📝 Action: Add usable elements
Make your journal actually functional for use:
Add writing spaces:
- Include lined papers torn from notebooks
- Add blank cardstock pieces for journaling
- Create journaling cards (small papers with borders, space for writing)
- Leave some pages partially blank for notes
Create pull-out tags:
- Cut small rectangles from cardstock
- Decorate one side
- Tuck into pockets or behind elements
- Pull out for writing, shopping lists, reminders
Add date elements:
- Small calendar pages
- Date stamps
- “Today” or “This week” journaling prompts
- Birthday/anniversary tracking pages
Include organizational elements:
- Checkbox lists
- “To-do” sections
- Goal-setting pages
- Habit trackers
Balance decoration with function:
The journal should invite use, not intimidate with too-perfect decoration. If every page is completely covered with decorations, you’ll hesitate to write in it. Good rule: 40-60% decorated, 40-60% usable space.
Step 6: Finishing Touches
⏱️ Time: 30-45 minutes
🎨 Action: Complete the journal
Decorate the cover:
Your book cover sets the entire journal’s tone:
Simple cover decoration:
- Paint with acrylic paint (white, cream, or soft color)
- Glue decorative paper covering original cover
- Add central focal point (vintage postcard, special image, title)
- Add embellishments (lace, ribbon, buttons)
- Distress edges with sandpaper for vintage feel
Title and personalization:
- Add journal title or purpose
- Include year or date range
- Handwrite or use letter stickers
- Keep it simple—elaborate isn’t necessary
Add bookmark:
- Glue ribbon along spine
- Let it hang from bottom for page marking
- Coordinate color with overall aesthetic
Optional closure mechanisms:
Elastic band:
- Wrap elastic around closed journal
- Holds journal shut
- Available at craft stores or repurpose from old notebooks
Ribbon ties:
- Glue ribbon to center-front and center-back of cover
- Tie in bow to close
- Pretty and functional
Button and string:
- Glue button to front cover
- Attach string to back cover
- Wrap string around button to close
Seal pages (optional):
Some crafters seal finished pages with Mod Podge or acrylic sealer for durability and water resistance. This is completely optional—many prefer unsealed paper’s tactile quality.
If sealing:
- Apply thin layer with brush
- Let dry completely
- Creates slight sheen and protection
Your first journal is complete!
Tips for Success
Start simply: Your first journal doesn’t need elaborate techniques. Focus on basic layering and adhesion. Complexity comes naturally with practice.
Embrace imperfection: Wrinkles, tears, asymmetry, and “mistakes” add character. Perfection isn’t the goal—personal expression is.
Work in stages: Don’t try finishing in one sitting. Work on a few pages, let them dry, return later refreshed. This prevents feeling overwhelmed.
Test adhesives: Different papers behave differently. Test glue on scraps first, especially with thin or delicate papers.
Step away periodically: Distance helps you see what works and what needs adjustment. Sometimes you need fresh eyes.
Document your process: Take photos of your first journal. In six months, you’ll be amazed how much you’ve improved.
Use your journal: Don’t let it sit pristine on a shelf. Write in it, use the pockets, add more as you go. Journals exist for use, not just display.
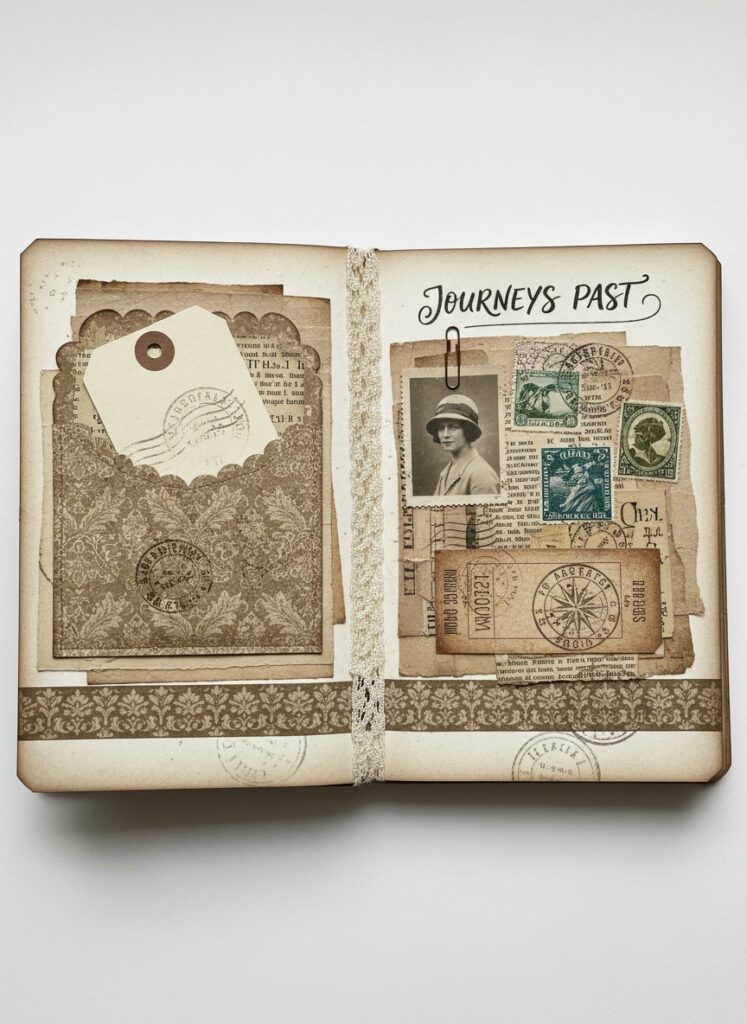
Binding Techniques
Understanding binding gives you control over journal structure and allows creating journals from scratch rather than only altering existing books.
Pamphlet Stitch ⭐ EASIEST BINDING
Description: Single signature (folded paper set) bound with simple running stitch through the fold. The most basic bookbinding technique and perfect starting point.
⏱️ Time: 15-20 minutes
✂️ Difficulty: ⭐ Easy
📚 Creates: Small journals, notebook inserts, mini journals
When to use:
- First-time binding projects
- Mini journals and quick gifts
- Traveler’s notebook inserts
- Practice before attempting complex bindings
Materials needed:
- 3-6 sheets of paper folded in half and nested together (creates one signature)
- Embroidery floss, thread, or thin string
- Needle (large enough for thread to pass through)
- Awl, large needle, or thumb tack (for piercing holes)
- Ruler and pencil
Step-by-step process:
- Create signature:
- Fold 3-6 papers in half
- Nest inside each other (one inside another)
- This creates one signature
- Mark hole positions:
- Open signature to center fold
- Mark 3 or 5 evenly-spaced points along fold
- 3-hole: One at center, one 1 inch from each end
- 5-hole: One at center, evenly space four others
- Pierce holes:
- Use awl or large needle
- Pierce through all layers at marked points
- Work from inside to outside
- Thread needle:
- Cut thread 3x the height of your signature
- Thread needle
- Sew (3-hole method):
- Start from outside, go through center hole
- Come out one end hole
- Go in other end hole
- Come back out center
- Tie off with starting thread, knot inside fold
- Trim thread ends
Variations:
- Three-hole pamphlet: Fastest, adequate strength
- Five-hole pamphlet: Stronger, more decorative
- Decorative patterns: Create visible stitching patterns outside
Tips:
- Don’t pull thread too tight (pages won’t turn easily)
- Keep tension consistent throughout
- Practice on scrap paper first
Coptic Stitch ⭐⭐⭐ BEAUTIFUL EXPOSED SPINE
Description: Multi-signature binding with decorative exposed spine created through chain-like stitching. Pages lie completely flat when open.
⏱️ Time: 2-3 hours for first attempt
✂️ Difficulty: ⭐⭐⭐ Moderate (requires patience and practice)
📚 Creates: Professional-looking journals that open flat
When to use:
- When you want journal to lie completely flat for writing/drawing
- When spine becomes decorative design element
- Multiple signatures (thicker journals)
- Projects where adding/removing sections is useful
Characteristics:
- Beautiful exposed spine with chain-link pattern
- Extremely durable and strong
- Can add or remove signatures
- Lies completely flat when open
- More time-consuming than hidden bindings
Materials needed:
- Multiple signatures (3-6 folded papers each)
- Two covers (cardboard, bookboard, or heavy cardstock)
- Waxed linen thread or strong embroidery floss
- Needle
- Awl for piercing holes
- Binder clips or weights
Basic concept: Each signature connects to the one below it through chain-like stitches along the spine edge. First and last signatures also attach to covers. The visible stitching creates decorative pattern.
Learning this binding: Coptic stitch is better learned through video demonstration than text instructions. The hand movements and thread paths become clear visually.
Search for: “Coptic stitch bookbinding tutorial” on YouTube for excellent visual guides.
Tips when learning:
- Start with just 2-3 signatures for first attempt
- Use contrasting thread color so you can see stitches clearly
- Keep consistent tension (not too tight or loose)
- Be patient—this takes practice but results are stunning
Japanese Stab Binding ⭐⭐ DECORATIVE EDGE BINDING
Description: Pages stacked (not folded) and bound through holes along one edge with decorative stitching pattern visible on spine edge.
⏱️ Time: 1-2 hours
✂️ Difficulty: ⭐⭐ Moderate
📚 Creates: Beautiful bound edge with traditional patterns
When to use:
- Single-sided pages (pages don’t fold, so only one side fully usable)
- When you want binding as decorative focal point
- Mixed papers of different weights or textures
- Traditional Asian aesthetic
Characteristics:
- Pages stacked, not folded
- Decorative stitching visible along bound edge
- Cannot open completely flat
- Beautiful, traditional appearance
- Various pattern options
Popular patterns:
- Four-hole binding: Simple, strong, good for beginners
- Hemp leaf pattern: Traditional Japanese decorative pattern
- Tortoiseshell pattern: More intricate, beautiful results
Materials needed:
- Stack of papers (any weights, sizes, types)
- Two covers (slightly larger than paper stack)
- Strong thread or embroidery floss
- Needle
- Drill, awl, or Japanese screw punch for holes
- Binder clips
Basic process:
- Stack pages between covers
- Mark hole positions along one edge (typically 4-6 holes)
- Drill or punch holes through entire stack
- Sew through holes in specific pattern
- Tie off and trim thread
Considerations:
- Bound edge remains closed (unlike folded books that open flat)
- Choose pattern based on aesthetic preference
- Thread color becomes design element
Ring Binding ⭐ EASIEST, NO SEWING
Description: Pages bound with metal or plastic book rings through punched holes.
⏱️ Time: 15-30 minutes
✂️ Difficulty: ⭐ Very easy
📚 Creates: Functional journals with add/remove capability
When to use:
- When you want no-sew option
- When ability to add/remove pages important
- Quick assembly needed
- Working with heavy materials (cardboard covers, thick pages)
Advantages:
- No sewing skills required
- Easily add or remove pages
- Works with any paper thickness
- Very quick assembly
- Can reconfigure page order
Disadvantages:
- Less traditional aesthetic
- Rings can catch on items
- Doesn’t lie as flat when closed
- More contemporary than vintage look
Materials needed:
- Hole punch (single or multi-hole)
- Book rings (available at office supply or craft stores in various sizes)
- Pages and covers with punched holes
Process:
- Punch holes:
- Mark hole positions (2-6 holes depending on journal size)
- Punch through all pages and covers
- Keep holes aligned
- Add rings:
- Open rings
- Thread through holes
- Close rings
Done!
Tips:
- Use ruler to mark hole positions for alignment
- Consider reinforcing holes with eyelets for durability
- Choose ring size appropriate for thickness
Accordion Fold ⭐ NO BINDING REQUIRED
Description: Single long strip of paper folded back and forth accordion-style, creating connected pages without binding materials.
⏱️ Time: 10-20 minutes
✂️ Difficulty: ⭐ Very easy
📚 Creates: Display journals, concertina books
When to use:
- Quick mini journals
- Display pieces that stand on their own
- Children’s projects
- Artistic books meant to be viewed fully extended
Characteristics:
- Opens in continuous strip
- Both sides usable
- Self-supporting when partially opened
- No binding materials needed
- Can be quite long or kept short
Materials needed:
- Long strip of paper (or connect multiple sheets)
- Optional: two covers for first and last panels
Process:
- Create or cut long paper strip
- Fold accordion-style:
- Fold paper in half
- Fold each half back on itself
- Continue folding back and forth
- All folds should be same width
- Add covers (optional):
- Glue cardboard or heavy cardstock to first and last panels
Decorate pages as desired.
Tips:
- Use bone folder for crisp folds
- Keep fold widths consistent
- Heavier paper works better than flimsy
Choosing the Right Binding
For complete beginners: Start with altered book (no binding needed) or pamphlet stitch (simplest actual binding)
For intermediate crafters: Try Japanese stab binding or ring binding
For challenging projects: Attempt Coptic stitch after mastering simpler bindings
Practice makes perfect: Your first bound journals won’t be flawless. Each one improves your skills. Use scrap paper for practice before working with precious materials.
Decorating and Embellishing
Decorating transforms plain pages into beautiful, personalized journal spreads. These techniques work across all journal types and skill levels.
Layering Papers (Foundation Technique)
Layering creates depth, visual interest, and unique compositions without requiring artistic skill. This is THE fundamental junk journaling technique.
Why layering works:
- Creates dimension through multiple levels
- Hides “mistakes” (just add another layer!)
- Builds complex compositions from simple elements
- Requires no drawing or painting ability
Basic layering principles:
1. Work large to small:
- Bottom/first layer: Largest background paper
- Middle layers: Medium-sized secondary papers
- Top layers: Focal elements and smaller pieces
- Final layer: Tiny details (stamps, buttons, small text)
This creates natural visual hierarchy—eye knows where to focus.
2. Vary sizes and shapes:
- Combine rectangles with torn irregular edges
- Mix circles with squares
- Use triangular pieces
- Variety = visual interest
3. Offset placement (don’t center everything):
- Center-alignment looks static
- Off-center placement creates movement
- Overlapping elements creates depth
- Asymmetry = more sophisticated
4. Leave breathing room:
- Don’t cover every inch of every page
- Glimpses of under-layers create depth
- White/neutral space provides visual rest
- Less can be more
Practical layering techniques:
Torn edges:
- Tear toward yourself: Creates white edge (paper tears exposing white core)
- Tear away from yourself: Creates colored edge
- Torn edges always more organic and vintage than cut edges
- Practice on scrap to see the difference
Distressed edges:
- Run ink pad (brown, black, sepia) along torn edges
- Creates definition and aged appearance
- Instant vintage effect
Folded corners:
- Fold one or more corners like dog-earing a book
- Adds dimension
- Creates vintage “well-loved book” aesthetic
Dimensional layering:
- Use foam tape or small cardboard pieces between layers
- Elevates certain elements physically
- Creates shadows and depth
- Reserve for focal points (don’t elevate everything)
Pockets and Interactive Elements
Pockets add functionality and visual interest while creating spaces for tucking memorabilia, tags, and hidden journaling.
Types of pockets:
Simple three-sided glued pocket:
- Take any paper/envelope
- Glue along bottom and two sides to journal page
- Leave top open
- Fastest, easiest pocket
Folded envelope pocket:
- Cut square of paper
- Fold corners toward center
- Glue to page along bottom and sides
- Creates envelope-style pocket
Repurposed envelope:
- Use existing envelopes (especially security envelopes with patterns inside)
- Trim to fit page
- Glue down three sides
Library-style pocket:
- Classic rectangular pocket like old library card pockets
- Fold cardstock into pocket shape
- Glue to page
Interactive elements beyond pockets:
Pull-out tags:
- Create small tags (2×3 inches or similar)
- Decorate one side
- Tuck into pockets
- Pull out for writing, lists, notes
Flip-outs:
- Attach papers along one edge only
- Papers extend beyond page edge
- Fold inward when closing journal
- Unfold to reveal hidden content
Lift-the-flap:
- Glue element along top edge only
- Creates flap that lifts up
- Reveals hidden content underneath
Spinning wheels:
- Cut two circles
- Attach with brad through centers
- Top circle has window
- Spin to reveal different content
Sliding elements:
- Create channels or slits
- Elements slide side to side
- Reveals/hides content
Tips for interactive elements:
- Test movement before gluing permanently
- Don’t over-complicate—simple works well
- Consider wear from repeated use
- Make functional, not just decorative
Stamps and Stencils
Rubber stamps and stencils add repeated patterns, text, and images without drawing skills.
Rubber stamps:
Types useful for junk journaling:
- Alphabet stamps: Create words, titles, dates
- Date stamps: Traditional date format
- Postal-themed: Postmarks, airmail, vintage postage
- Decorative borders: Frames and edges
- Flourishes: Vintage ornamental designs
- Nature motifs: Flowers, leaves, butterflies
Inking techniques:
Direct stamping:
- Ink stamp on ink pad
- Press firmly onto paper
- Lift straight up (don’t rock)
- Basic technique, crisp results
Distress ink:
- Specialized inks (Ranger Distress Ink brand most popular)
- Colors designed for vintage aesthetic (vintage photo, walnut stain, tea dye)
- Create aged, worn appearance
- Perfect for junk journaling aesthetic
Layered stamping:
- Stamp same image multiple times
- Offset slightly or use different colors
- Creates depth and visual interest
Masking:
- Cover areas with paper masks
- Stamp over masks
- Remove masks to reveal patterns
Stencils:
Using stencils:
- Secure stencil to paper (low-tack tape)
- Apply ink, paint, or texture paste through openings
- Lift carefully
- Creates patterns, backgrounds, or focal images
Types:
- Commercial stencils: Available at craft stores
- Homemade stencils: Cut shapes from cardstock
- Found objects: Lace, mesh, or textured items as stencils
Applications:
- Backgrounds (subtle patterns)
- Borders and frames
- Focal images
- Texture addition
Washi Tape Applications
Washi tape—decorative Japanese masking tape—is junk journaler’s secret weapon. It’s removable, repositionable, decorative, and functional.
Common uses:
1. Decorative borders:
- Frame entire pages
- Border specific elements
- Create color blocks
2. Secure elements decoratively:
- Attach ephemera with tape edge showing
- Combines function and decoration
- Easier than glue for some materials
3. Create patterns:
- Layer strips in geometric designs
- Weave strips together
- Create color gradients
4. Cover mistakes:
- Hide errors or unwanted text
- Decoratively mask problems
- Transform mistakes into design features
5. Tab dividers:
- Extend tape beyond page edge
- Fold over for pull-tab
- Mark sections or months
6. Reinforce elements:
- Strengthen pocket openings
- Reinforce edges
- Add durability to high-use areas
7. Repair tears:
- Fix torn pages while adding decoration
- Transparent or decorative depending on preference
Tips:
- Build collection of coordinating colors/patterns
- Mix widths (thin and wide) for variety
- Metallics add elegance
- Patterns should coordinate with overall aesthetic
Collage Techniques
Collage combines multiple images or elements into unified composition.
Approaching collage:
Theme-based collage:
- Collect related images (all flowers, all travel, all vintage portraits)
- Combine around central theme
- Creates cohesive narrative
Color-based collage:
- Choose all elements within specific color palette
- Creates visual harmony through color
- Particularly effective for mood-based pages
Texture-based collage:
- Mix smooth and rough textures
- Combine glossy and matte
- Layering different paper types
- Creates tactile and visual interest
Abstract collage:
- Combine unrelated elements
- Focus on composition, color, shape
- Less narrative, more artistic
Composition techniques:
Overlapping:
- Layer images partially covering each other
- Creates depth
- Builds complex compositions
Juxtaposition:
- Place contrasting elements side by side
- Creates visual tension and interest
- Odd combinations often most effective
Repetition:
- Repeat similar elements throughout spread
- Creates rhythm and cohesion
- Particularly effective with small elements
Focal point:
- One element larger or more prominent
- Eye naturally lands here first
- Everything else supports focal point
Tips:
- Arrange before gluing (try different compositions)
- Take photo to remember arrangement
- Work from background to foreground
- Step back periodically to assess
Typography and Lettering
Adding text without being a hand-lettering expert.
Methods for adding text:
1. Handwriting (most personal):
- Your natural handwriting adds authenticity
- Imperfection adds character
- Use various pens for variety
- Don’t stress about “perfect” writing
2. Vintage text cutouts:
- Cut words from old books, newspapers, magazines
- Arrange to create messages
- Instant vintage aesthetic
- No writing required
3. Alphabet stamps:
- Create words by stamping individual letters
- Consistent, vintage look
- Requires stamp set and ink pad
- Time-consuming but effective
4. Printables:
- Print text in various fonts
- Cut out and glue
- Control over fonts and sizes
- Can create any text needed
5. Letter stickers:
- Quick, easy, consistent
- Available in many styles
- Less vintage than other methods
- Good for titles
6. Rub-on transfers:
- Apply decorative lettering without adhesive
- Professional appearance
- More expensive
- Limited reusability
Typography tips:
Vary sizes:
- Large titles
- Medium supporting text
- Small details
- Creates visual hierarchy
Mix methods:
- Combine handwriting with printed text
- Mix fonts and styles
- Creates eclectic, layered look
Consider readability:
- Ensure text contrasts with background
- Decorative text should enhance, not overwhelm
- Functional text (journaling) must be readable
Direction and placement:
- Try vertical, diagonal, or curved text
- Don’t always align text horizontally
- Text can follow design elements
Pages and Inserts
Creating varied, interesting pages keeps journals visually dynamic and functionally useful.
Page Variations
Standard pages: Regular full-size pages forming journal’s main body. Can be original book pages or added papers.
Half pages: Papers attached along one edge, extending only halfway across spread. Creates layered effect.
Fold-out pages: Pages that fold inward (smaller than standard page) and unfold to reveal additional content or surface area.
Vellum overlays: Translucent vellum pages layered over regular pages. Creates soft, dreamy effect while allowing underlying page to show through.
Tabbed pages: Pages with protruding tabs extending beyond page edge. Easy navigation and visual interest.
Accordion inserts: Small accordion-folded paper strips attached to regular pages. Multiple surfaces in compact space.
Tip pages: Small papers glued along one edge that “tip out” when opening page. Surprising hidden elements.
Creating Functional Inserts
Make your journal actually useful for daily life.
Journaling cards:
Pre-decorated small cards (typically 3×4 or 4×6 inches) perfect for daily writing.
Elements to include:
- Decorative border or background
- Space for writing (lined, grid, or blank)
- Date line or area
- Optional prompt or theme
Uses:
- Daily gratitude
- Memory documentation
- Quick notes
- Tuck into pockets or adhere to pages
To-do and list pages:
Functional pages for planning and organization.
Include:
- Checkbox areas for tasks
- Categories or sections
- Date headers
- Decorative but still functional
Variations:
- Weekly to-do lists
- Shopping lists
- Goal-setting pages
- Priority matrices
Calendar pages:
Track dates, events, or create perpetual calendars.
Options:
- Monthly calendar grids
- Week-at-a-glance layouts
- Dated journaling pages
- Birthday/anniversary trackers
- Habit trackers
Memory pockets:
Dedicated spaces for storing memorabilia.
Types:
- Deep pockets for thick items (tickets, small objects)
- Flat pockets for photos or flat ephemera
- Windowed pockets showing contents
- Multiple small pockets on single page
Using Free Printables
Digital printables expand your creative options infinitely without cost.
Types of printables:
1. Backgrounds and patterned papers:
- Vintage designs
- Textures (wood, fabric, aged paper)
- Patterns (florals, geometrics, text)
- Solid colors with texture
2. Journaling cards:
- Pre-designed cards with space for writing
- Various sizes and styles
- Themed options (gratitude, travel, daily, etc.)
3. Ephemera sheets:
- Collections of vintage-style elements
- Postcards, stamps, tickets, tags
- Cut out and use like real ephemera
4. Templates:
- Calendars
- List templates
- Trackers
- Specialized formats
5. Vintage images:
- Public domain illustrations
- Historical photographs
- Botanical prints
- Decorative elements
6. Typography and quotes:
- Inspirational quotes
- Decorative text elements
- Vintage advertising text
- Lettering elements
7. Frames and borders:
- Decorative frames for photos
- Vintage borders
- Corner embellishments
- Edge decorations
Where to find free printables:
Our site: Curated collections specifically for junk journaling
Public domain archives:
- Library of Congress (loc.gov)
- Smithsonian Open Access (si.edu/openaccess)
- Biodiversity Heritage Library (biodiversitylibrary.org)
- Old Book Illustrations (oldbookillustrations.com)
- New York Public Library Digital Collections
Creative Commons:
- Flickr Creative Commons
- Wikimedia Commons
- Unsplash (more modern images)
Tips for using printables:
Paper choice:
- Matte paper for best gluing (glossy resists adhesive)
- Regular printer paper works for most uses
- Cardstock (heavier) for tags and sturdy elements
- Vellum for overlays
Sizing:
- Scale elements to fit your journal
- Most software allows percentage scaling
- Test print one before printing full sheet
Color adjustments:
- Convert to sepia or grayscale for vintage feel
- Adjust warmth (increase yellow/orange tones)
- Reduce saturation for aged appearance
- Edit in free software (Canva, Photopea, GIMP)
Making printables look authentic:
Distress after printing:
- Tea or coffee stain for aged appearance
- Ink edges with distress ink
- Crumple and flatten for texture
- Tear edges instead of cutting
Print on pre-aged paper:
- Tea/coffee stain blank paper first
- Let dry completely
- Print on aged paper
- Instant vintage look
Layer with physical elements:
- Sandwich printables between real ephemera
- Combine with handmade elements
- Mix digital and analog freely
Integration tips:
Don’t let printables dominate:
- Balance digital elements with found materials
- Use printables to supplement, not replace, collected ephemera
- Mix eras (vintage printables with modern elements)
Edit for cohesion:
- Adjust colors to match your palette
- Resize to consistent scales
- Choose similar aesthetic across printables
Have any thoughts?
Share your reaction or leave a quick response — we’d love to hear what you think!
-
 0
0
-
0
-
0
-
0
-
0
-
0


