

A watercolor hot air balloon is one of those subjects that rewards you the moment the paint hits the page: loose, glowing skies behind a few confident stripes of color, and suddenly you have a scene that feels like a postcard from somewhere you would love to visit. These paintings forgive wobbly lines and reward soft color, which makes them perfect for a relaxed afternoon with your paints out and your phone propped up for reference.
Below you will find balloons drifting over sunrise valleys, lavender fields and snowy villages, then a run of other charming vintage ways to travel: trains, trams, seaplanes, scooters and more. Pick whichever one matches your mood today, gather a small paper and a warm cup of something, and let the sky do most of the work.
Using these images: free for personal projects such as printing, coloring, cards, journals and gifts. Handmade items that include them may be sold up to 30 pieces per design. More than that is commercial use and is not permitted, and neither is selling or sharing the images themselves or passing them off as your own. Please ask before any other use.
Cappadocia’s valleys are famous for having dozens of balloons in the air at once, so start this one by sketching the rolling, pale rock formations low on the page in pencil, leaving plenty of sky above. Wet the sky area and drop in warm peach, soft pink and a little lavender while the paper is still damp, letting the colors bleed into each other for that early morning glow.
Once the sky dries, paint the rock formations in soft ochre and warm grey, keeping the brushwork loose since detail here matters less than the color temperature. Add five or six balloons of varying size as simple ovals with a thin basket line underneath, using a different color for each so the sky feels busy without feeling crowded.
The common mistake is making every balloon the same size, which flattens the sense of distance. Keep the balloons nearest the top of the page smaller and lighter in value, and the ones lower down larger and more saturated, since objects closer to you read as bigger and bolder.
If you do not have a fine liner for the basket strings, a sharpened pencil works just as well once the paint is fully dry.
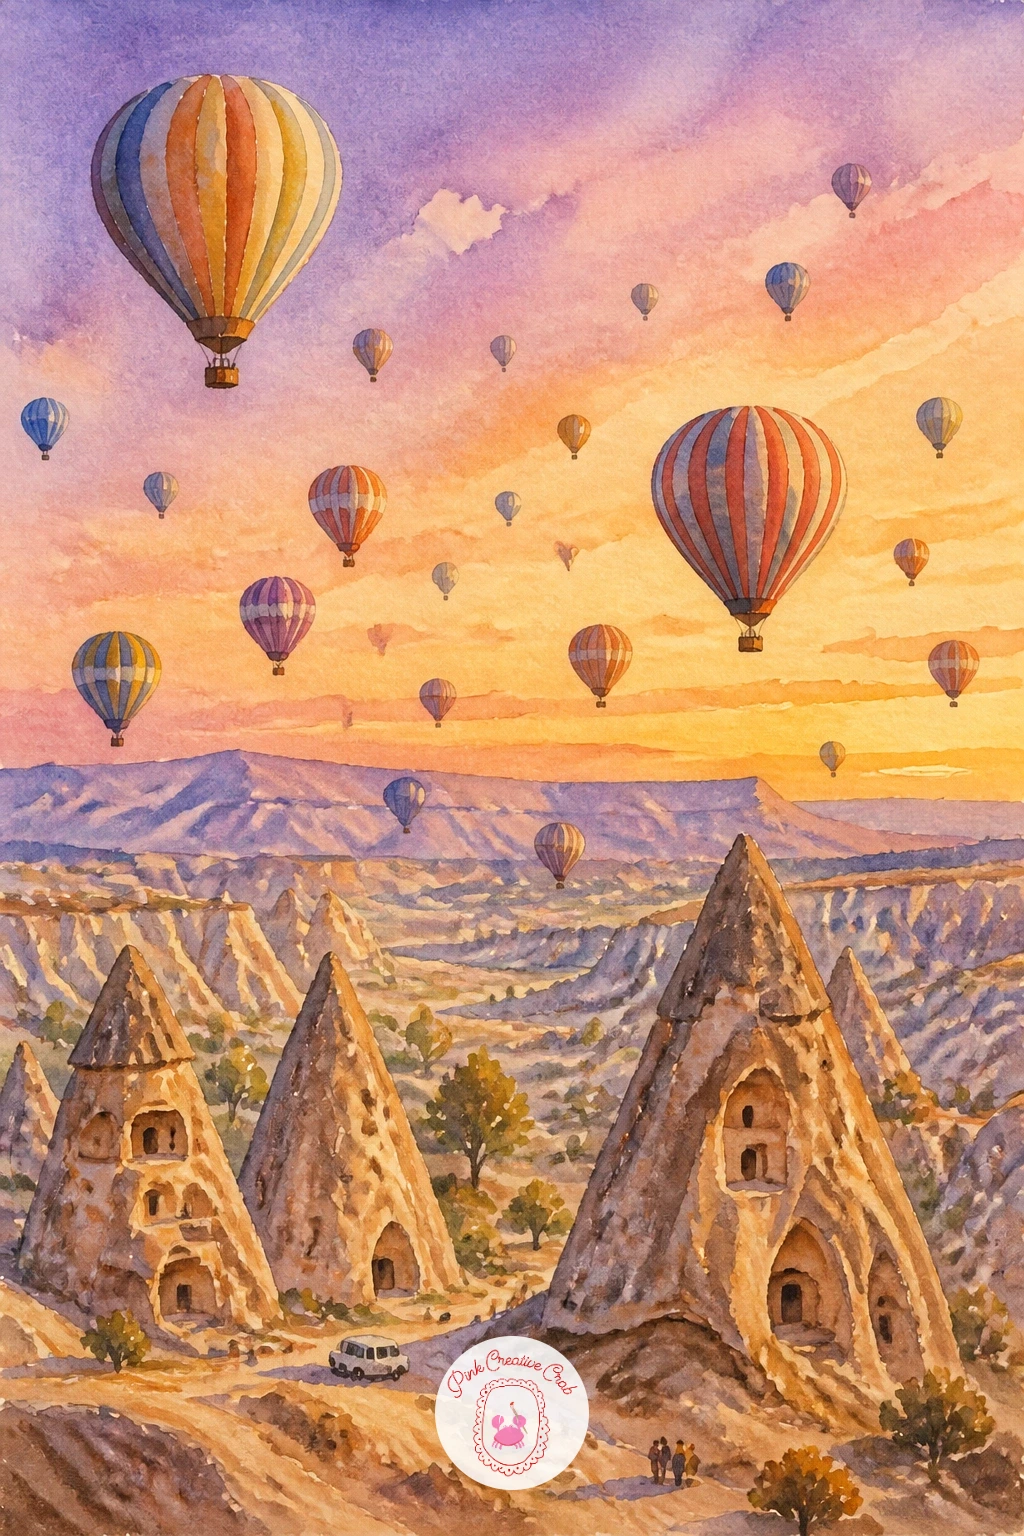
Palette: Rose Madder,Naples Yellow,Cobalt Violet,Raw Sienna
Moving from Cappadocia’s valleys to Tuscany’s rolling hills, this scene trades drama for a gentler, more pastoral mood. Begin with a simple horizon line about a third of the way up the page, then wash a soft blue sky above it and let it dry fully before touching the land.
Paint the hills in layered sap green and olive, working from the lightest hill in the distance to the darkest one closest to you, since this layering is what gives rolling hills their sense of depth. A single cypress tree or two as thin dark green triangles along a ridge sells the Tuscan feel instantly.
Add one balloon in warm red and cream stripes floating above the hills, keeping it modest in size so the landscape stays the star. If your greens start looking muddy, lift a little color out with a damp clean brush while the paint is still wet rather than adding more pigment on top.
No masking fluid on hand? Simply paint around the balloon shape carefully with your sky wash instead.
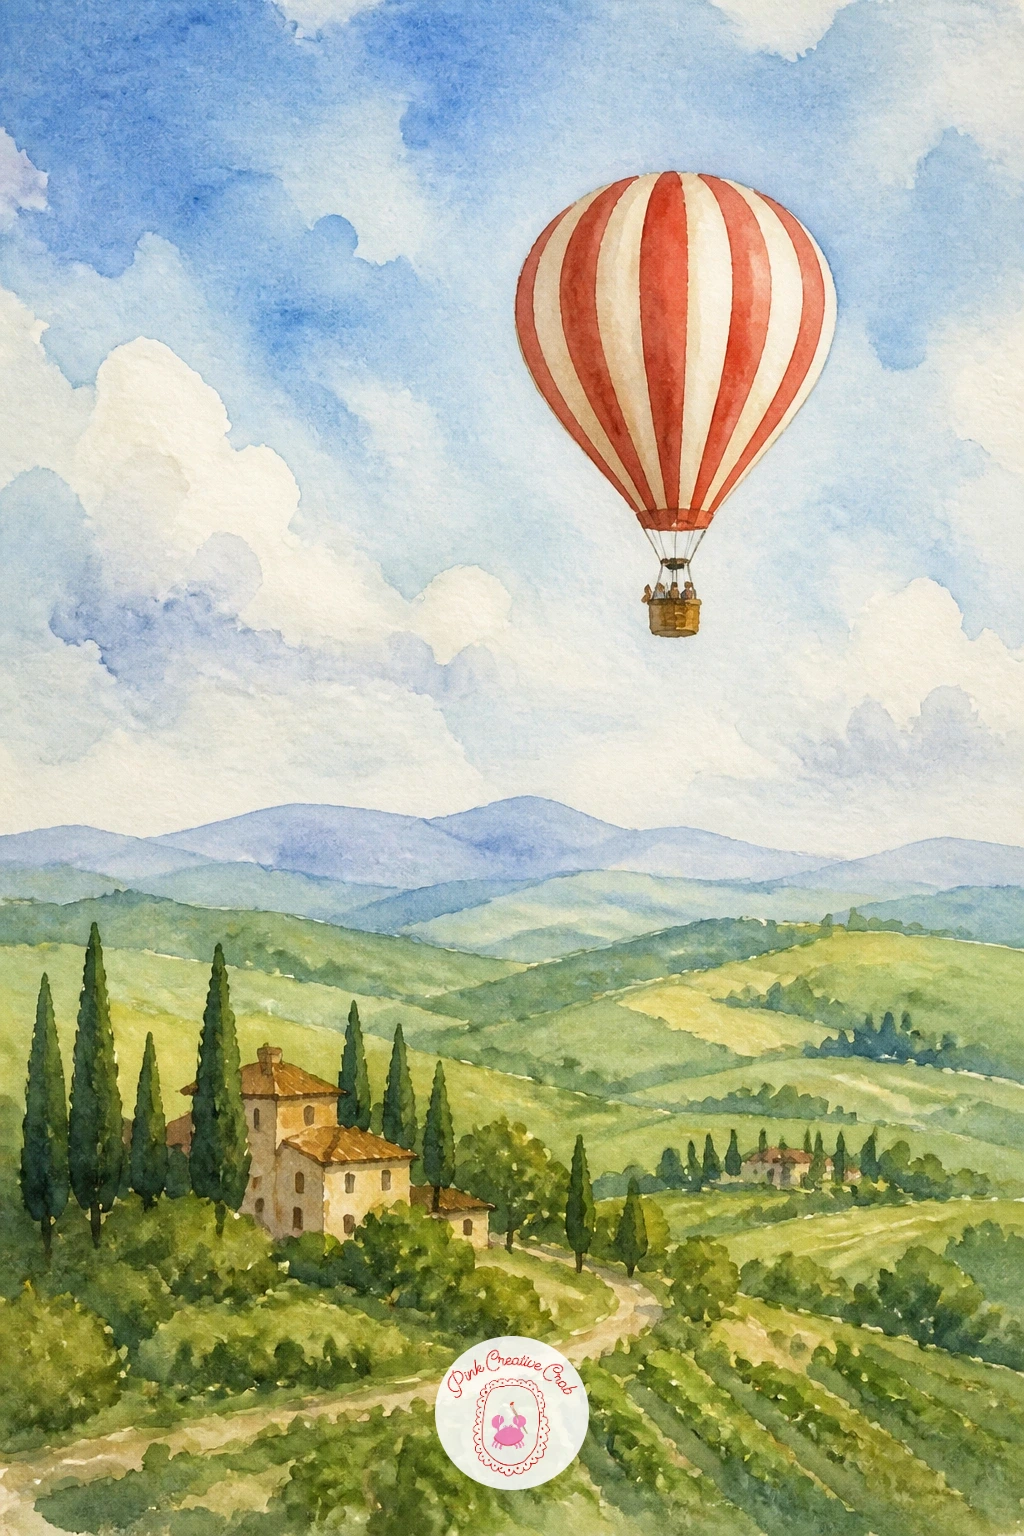
Palette: Sap Green,Olive Green,Cadmium Red,Cerulean Blue
After the greens of Tuscany, a lavender field gives you a chance to play with a completely different palette built on violets and soft greys. Start with a pale blue wash across the sky, then once dry, paint the horizon of lavender rows using short, repeated diagonal strokes in violet and purple that get smaller as they recede toward the horizon.
This repetition is the key trick for this subject: rows that shrink and lighten in the distance read as a field stretching far back, while rows that stay the same size feel flat. Paint one balloon in soft lilac and white stripes hovering just above the rows, with a tiny basket and two small figures if you like.
The place this goes wrong is painting every lavender row at full saturation, which crowds the eye and hides the balloon. Keep the front few rows richer and the back rows pale and loose.
If you would like another dreamy sky to practice this kind of layered color before committing to the full scene, these easy watercolor skies are a gentle warm-up.
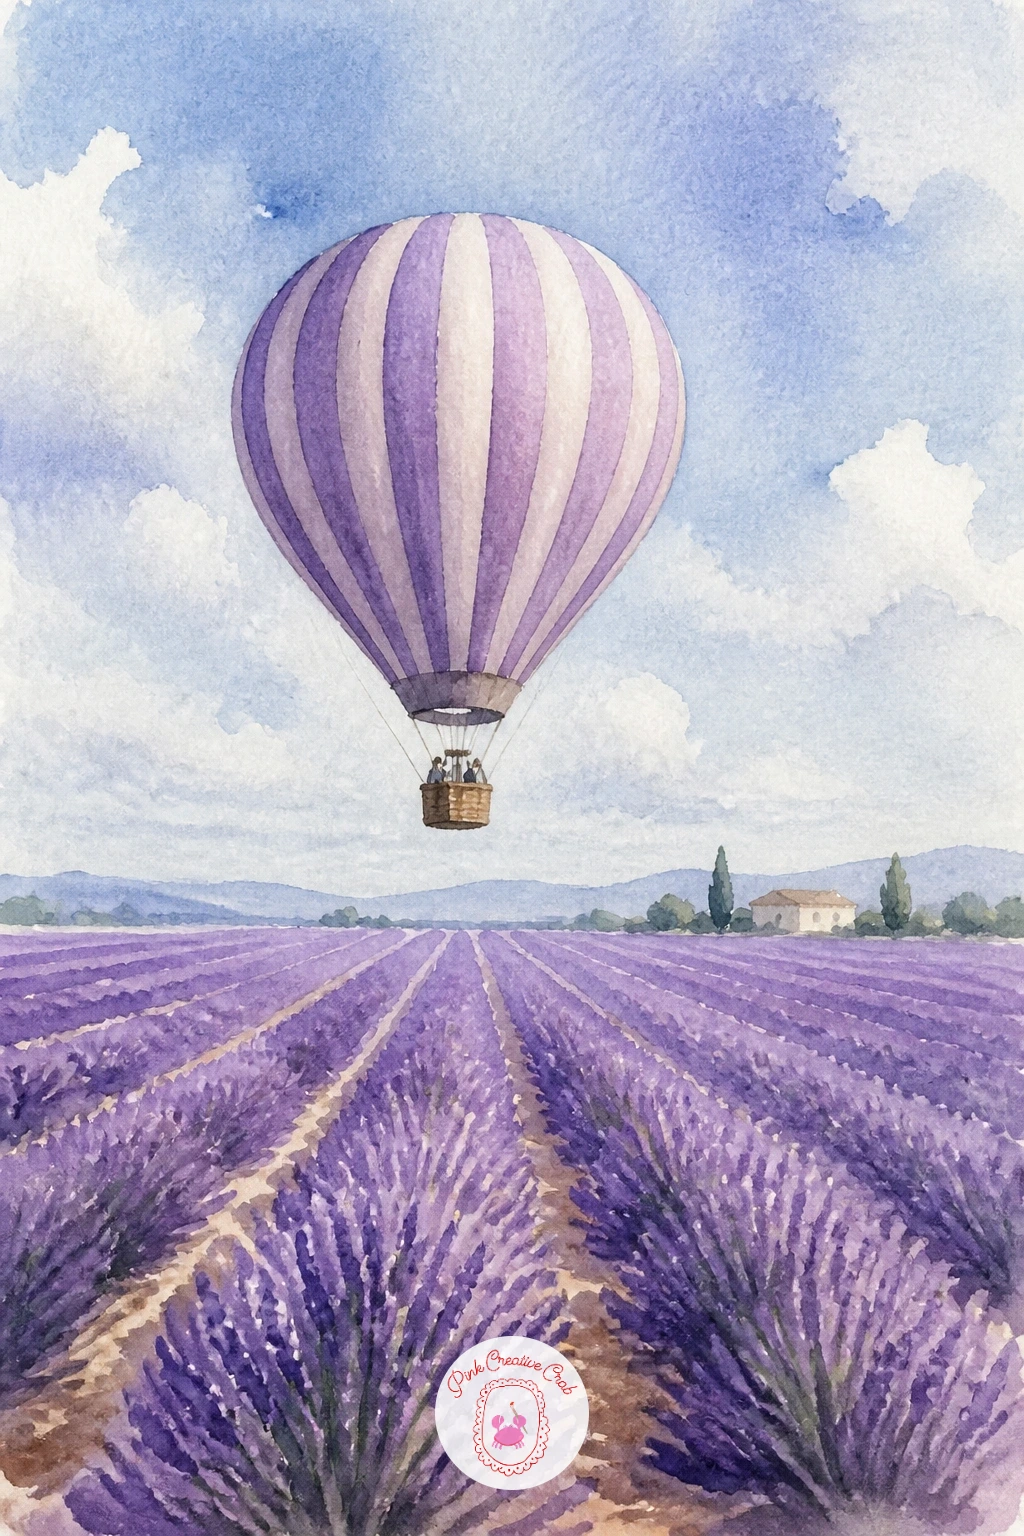
Palette: Dioxazine Violet,Lilac,Payne’s Grey,Titanium White
Time to bring a little character into the sky. Sketch a simple balloon shape with a basket at the bottom, then add a small figure inside, just a rounded head, simple shoulders and one raised arm waving, kept loose rather than detailed.
Paint the balloon first in two or three cheerful stripe colors, letting each stripe dry a little before adding the next so they stay crisp rather than bleeding together. The figure comes last, painted small and simple with a dot of color for hair and a dress, since trying to add facial features at this scale usually backfires.
If your figure ends up looking stiff, soften it by painting the dress and hair with one loaded brushstroke rather than several small ones, which keeps the gesture relaxed. A great comparison trick: the figure’s whole body should be about the same height as the basket itself, which keeps proportions believable even at this tiny scale.
If you do not want to paint a face at all, a simple silhouette works beautifully and avoids the issue entirely.
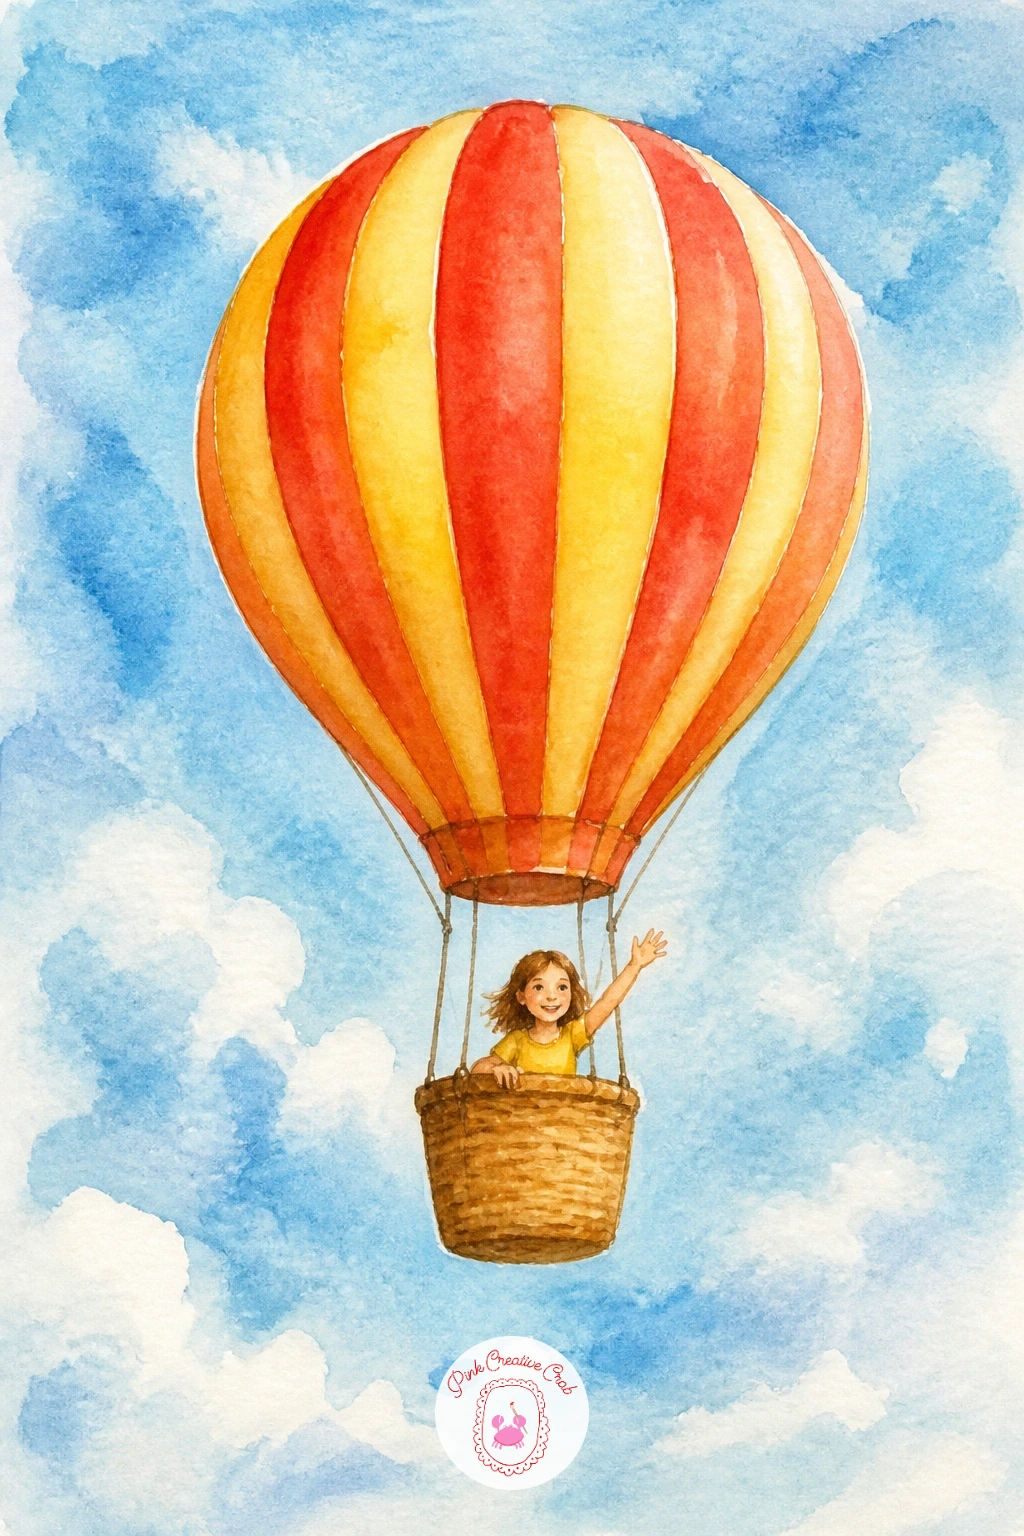
Palette: Alizarin Crimson,Golden Yellow,Burnt Umber,Sky Blue
Following the girl in the basket, here is a sweeter variation with a small dog as the passenger instead. Paint the balloon and basket the same way as before, in two or three stripe colors with crisp dry edges, then focus your attention on the dog shape.
Keep the dog simple: an oval body, two triangle or floppy ears, and its front paws resting on the edge of the basket as if it is peeking out. A warm brown or golden wash with a few darker brown strokes for shadow under the ears and chin is all the detail this needs.
The texture trick here is dry brushing a little texture into the dog’s fur once the base color is dry, using a barely-wet brush dragged lightly across the surface so it catches only the raised texture of the paper. This gives a soft, furry look without fussy linework.
If your paper is too smooth for dry brush texture to show, switch to a few short flicked lines with a fine brush instead for the same furry effect.
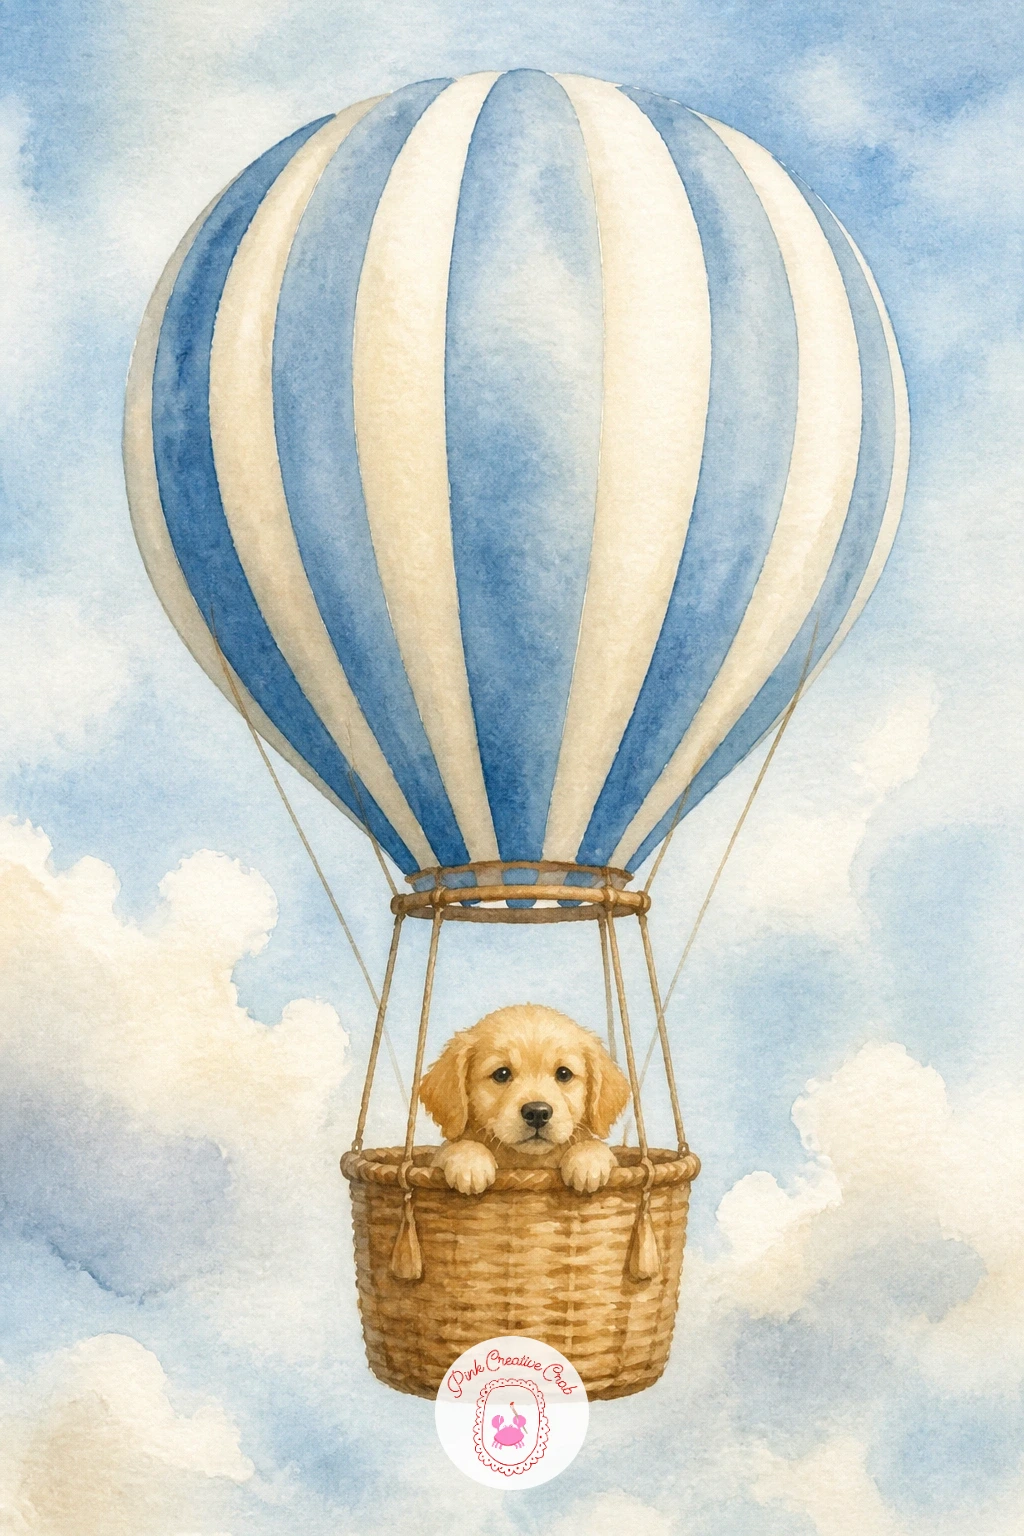
Palette: Burnt Sienna,Raw Umber,Ultramarine Blue,Cream
A balloon over still water is really an exercise in reflection, so this one is worth slowing down for. Paint the sky and balloon first exactly as you like them, then once fully dry, paint the lake below using the same colors as the sky but in a softer, slightly muted version.
The quick ten-minute version stops there: a simple wash of reflected color with a thin horizon line. The forty-minute version adds the balloon’s reflection as a soft, slightly stretched and wavering echo of its stripes directly below it, broken up with a few horizontal squiggly lines to suggest gentle ripples.
Painting reflections upside down and softer, never as a sharp mirror image, is what sells the illusion of water rather than a second sky. If the reflection comes out too crisp, soften its edges immediately with a clean damp brush before it dries.
No time for the full reflection today? A few loose horizontal strokes of the balloon’s main color under it reads as water just fine.
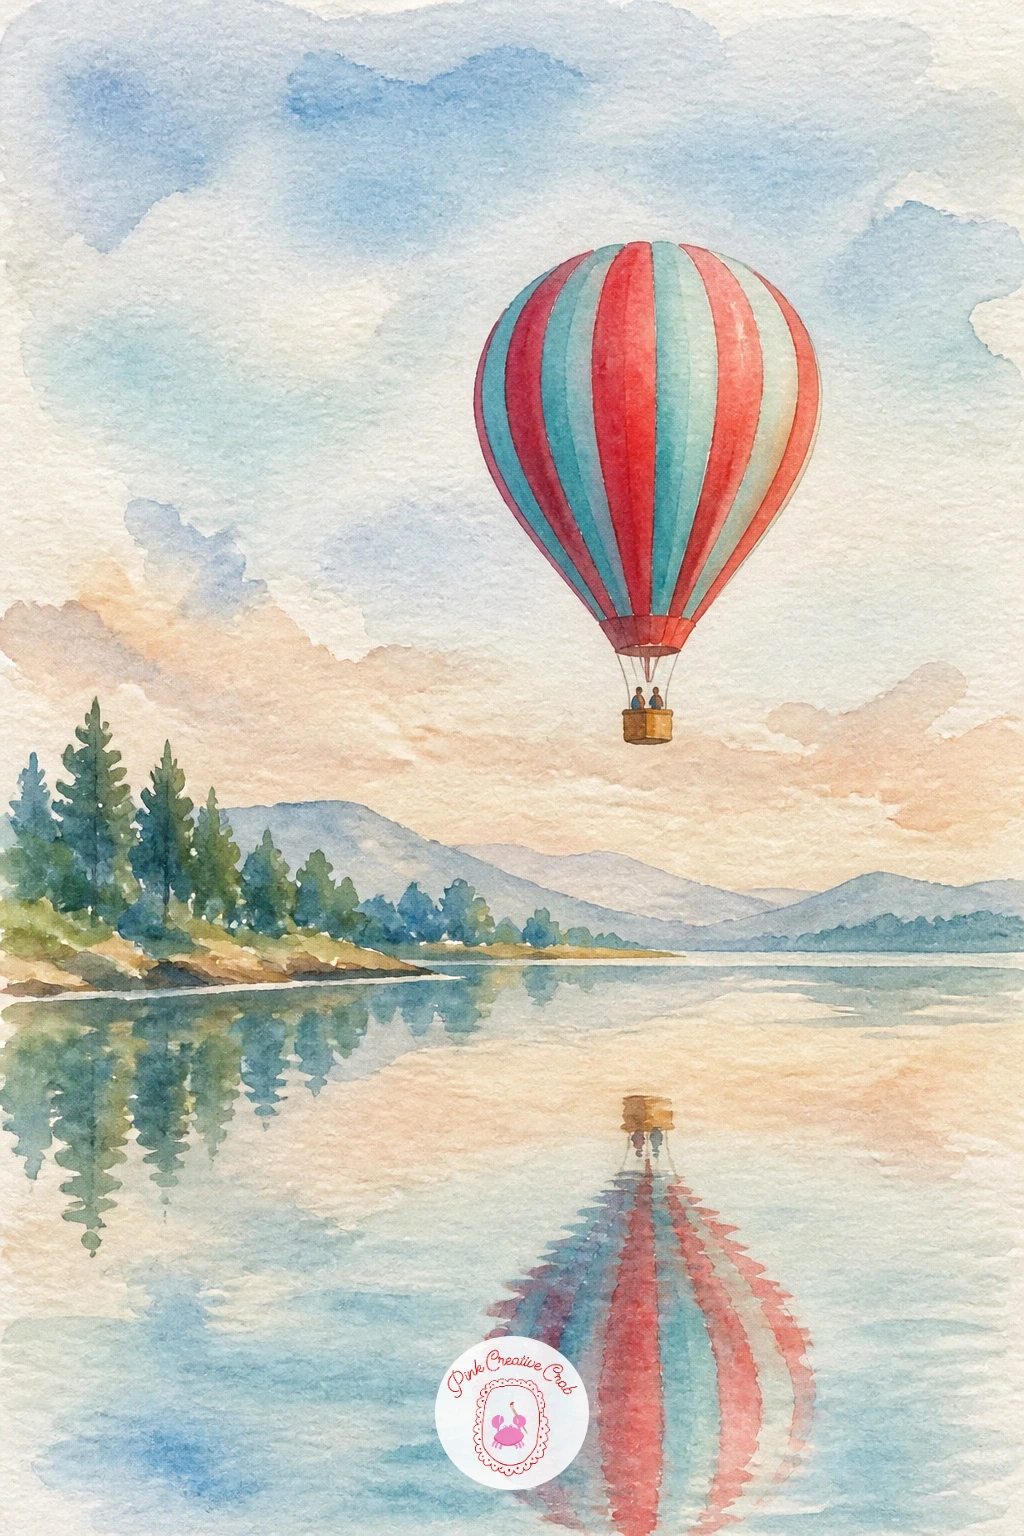
Palette: Prussian Blue,Turquoise,Scarlet,White Gouache
Try a water-soluble pencil for the ripple lines once the paint has dried, it gives you more control than a loaded brush for that final wavy detail.
Shift the mood now toward a cozy winter scene. Start by masking out the balloon shape and a scattering of tiny rooftops with masking fluid so you can paint the sky freely around them without worrying about edges.
Wash a soft grey-blue sky, then once dry, remove the masking fluid and paint the village rooftops in warm red, ochre and brown with simple white triangle roofs left bare for snow. A balloon in deep green and cream stripes above the rooftops finishes the composition nicely.
Light matters most here: decide the sun sits low and soft behind the balloon, and keep the shadow sides of the rooftops a cool blue-grey while the sunlit sides stay warm, which instantly makes the snow look convincingly cold and bright. Flick a little white gouache for falling snow once everything else is dry.
No masking fluid? Simply paint the sky in sections around the rooftops and balloon with a smaller brush instead, it just takes a bit more patience.
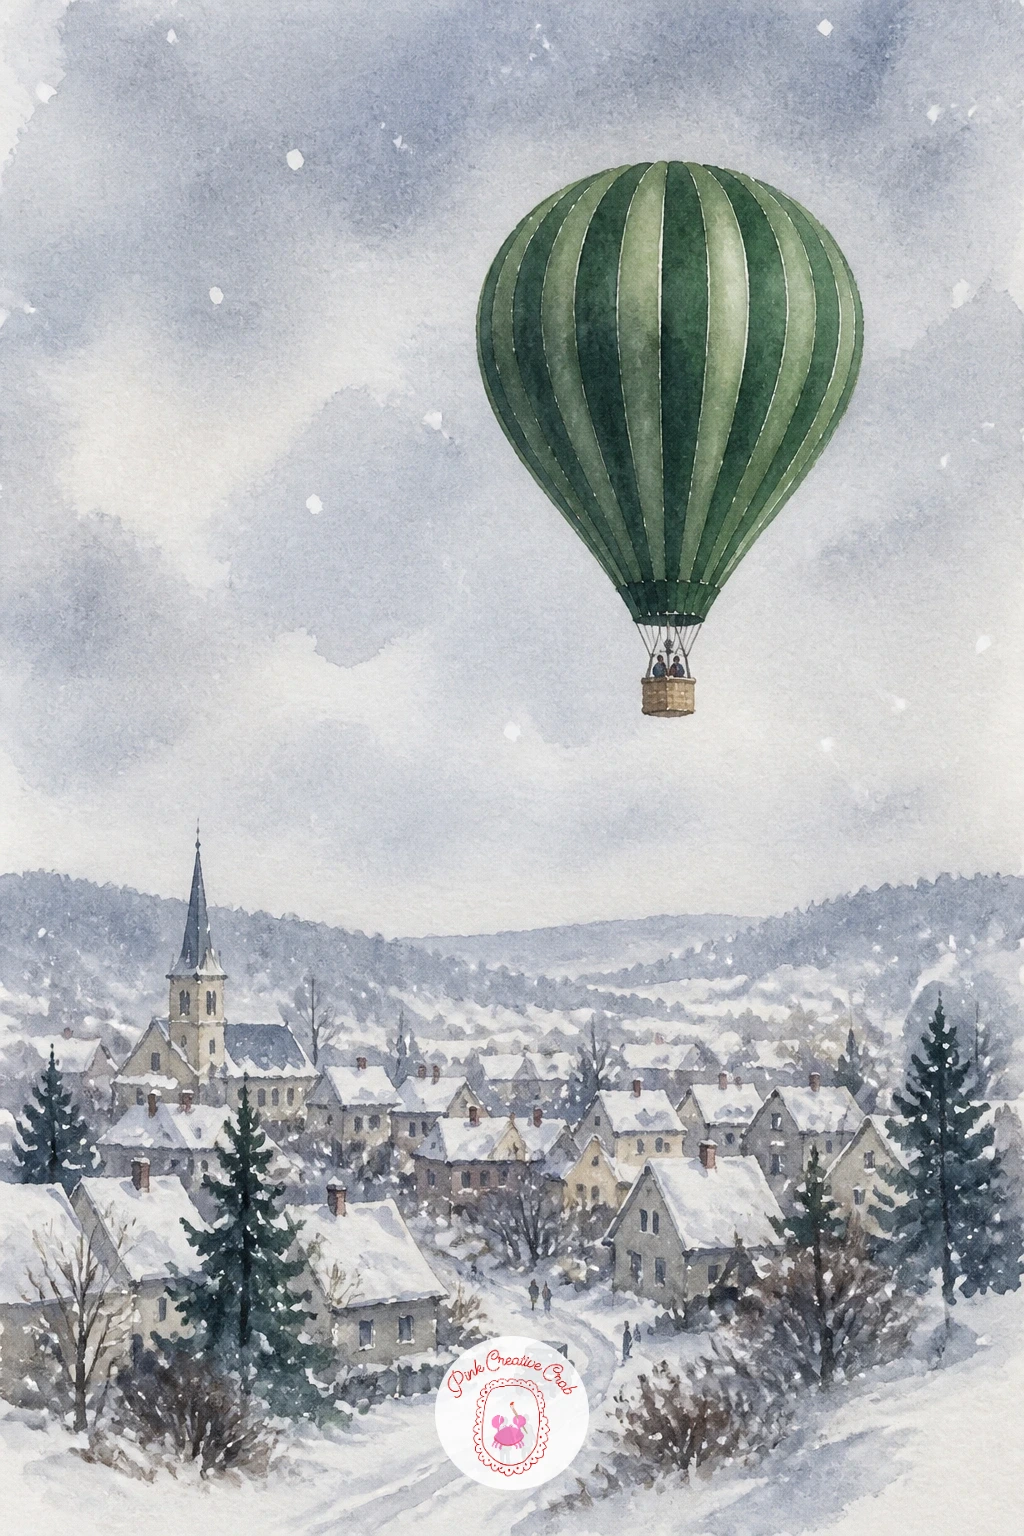
You Will Need
- masking fluid
- white gouache or white gel pen
Palette: Payne’s Grey,Forest Green,Venetian Red,Titanium White
For something more dramatic, paint a balloon lit from within against a night sky. Wash the whole sky first in deep indigo and midnight blue, leaving the paper slightly damp, then while it is still wet, lift a soft circular patch of color with a dry tissue or clean dry brush right where the balloon will sit, creating a pale glow halo before you even add the balloon shape.
Once the sky dries, paint the balloon itself in warm gold and amber, keeping the color richest near the center to suggest the glow of a flame inside it. Tiny dots of white gouache scattered around complete the night sky as stars.
The quick version stops at that glowing balloon alone. The longer version adds a distant silhouette of hills or a cityscape along the bottom edge in flat dark shapes, which grounds the scene and makes the glow read as genuinely lighting the night.
If lifting color from wet paint feels fiddly, try painting the glow halo directly in a very pale yellow before the dark sky goes around it instead.
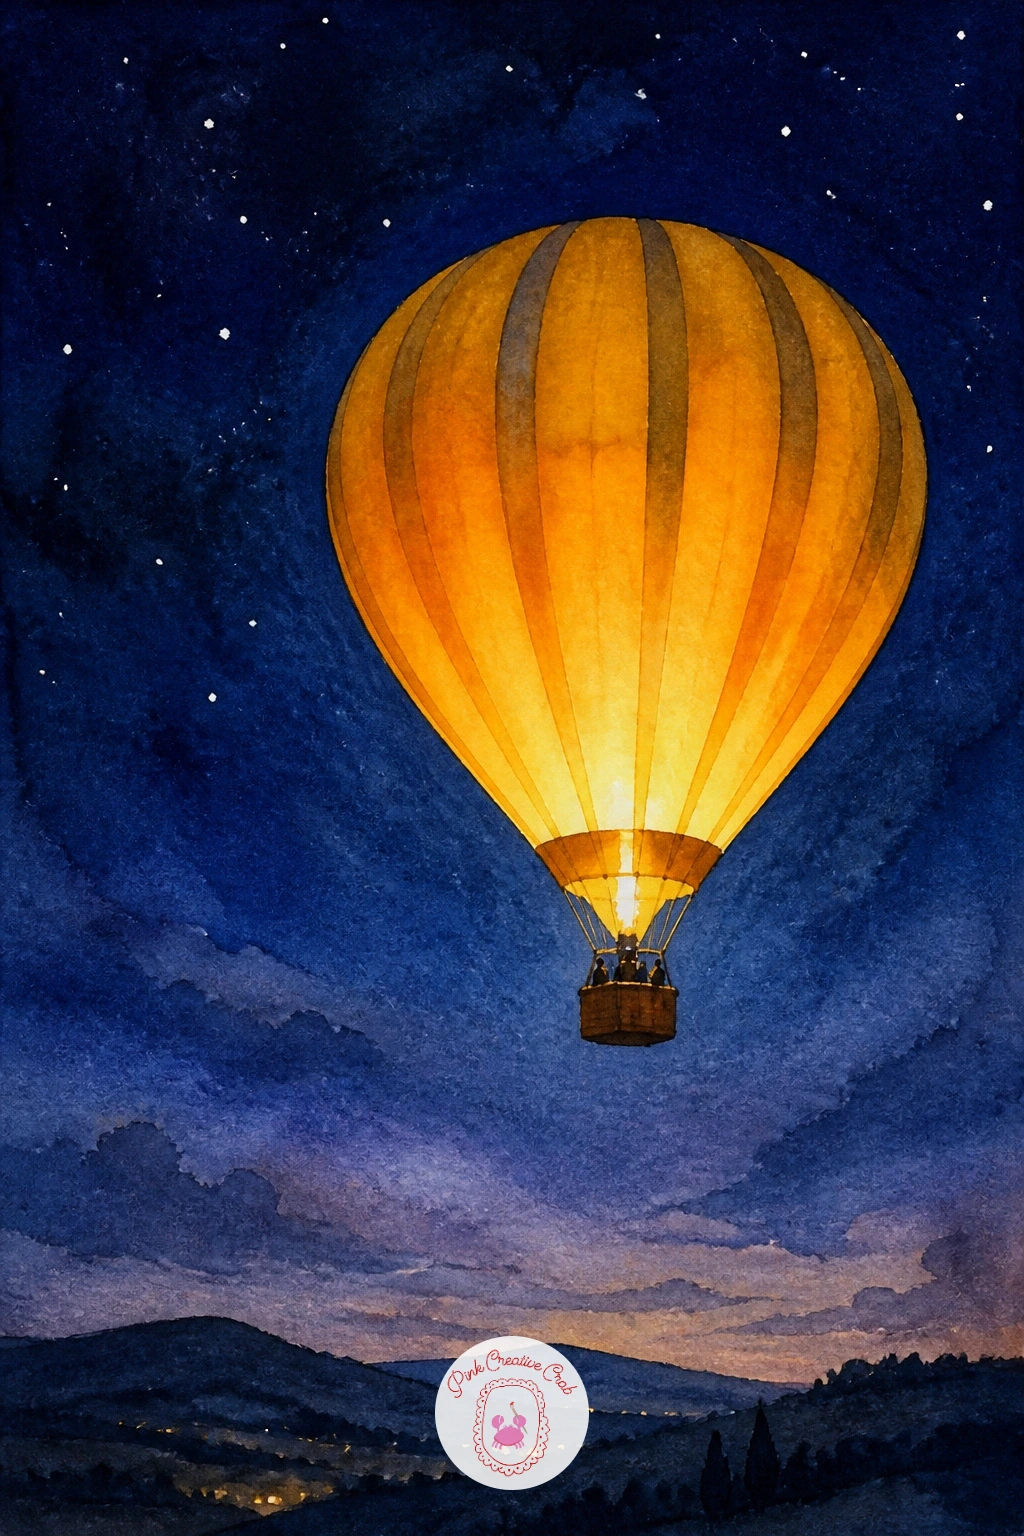
You Will Need
- white gouache or white gel pen
Palette: Indigo,Midnight Blue,Amber,Deep Gold
From night back to bright daylight, this scene lets you paint bold color blocks the way the Dutch tulip fields are famous for. Lightly pencil in a few long horizontal bands across the lower half of the page, then paint each band a different saturated color: pink, red, yellow and orange, keeping the bands slightly uneven rather than ruler straight.
Once dry, add a thin dark green line along the top edge of each band to suggest the leafy edge of each row before the next color begins. A single striped balloon in a color that does not appear in the fields, soft blue works well, keeps the balloon from disappearing into all that color below it.
Comparing values matters a great deal here: step back and check that your balloon color is either lighter or darker than the field behind it, never the same mid-tone, or it will blend in rather than float above the scene.
A fine liner pen is handy for crisp thin lines between the color bands if your brush control feels shaky today.
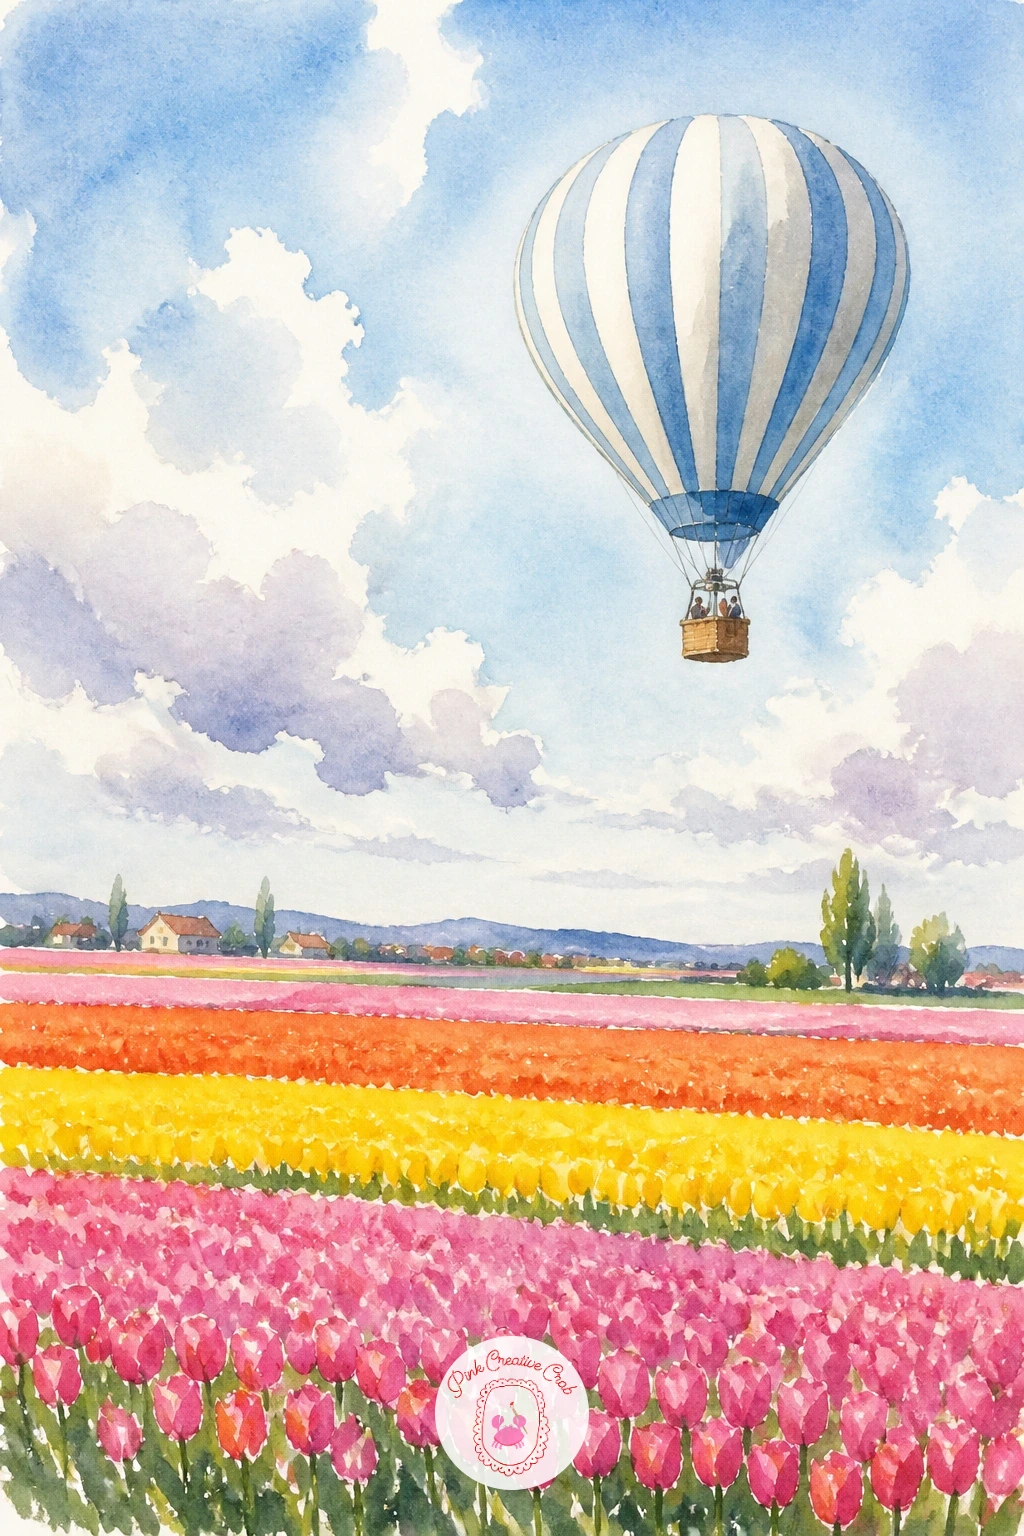
Palette: Magenta,Cadmium Yellow,Cadmium Orange,Hooker’s Green
This whimsical idea borrows from storybook illustration: a tiny cottage hanging beneath the balloon instead of a basket. Sketch a simple house shape first, a square body with a triangle roof, one small window and a chimney, then attach thin lines up to the balloon above it.
Paint the balloon in warm coral and cream stripes, then the cottage in soft blue with a brown roof, keeping every shape simple since the charm here comes from the idea rather than fine detail. A tiny curl of smoke from the chimney in pale grey finishes the story nicely.
Next time you paint this one, vary it by changing the house into a lighthouse, a windmill or a stack of books instead, since the whimsical “balloon carries something unexpected” idea works with almost any small object you swap in.
If straight lines for the ropes feel difficult freehand, use the edge of a ruler to pencil them in lightly before painting over with a fine brush.
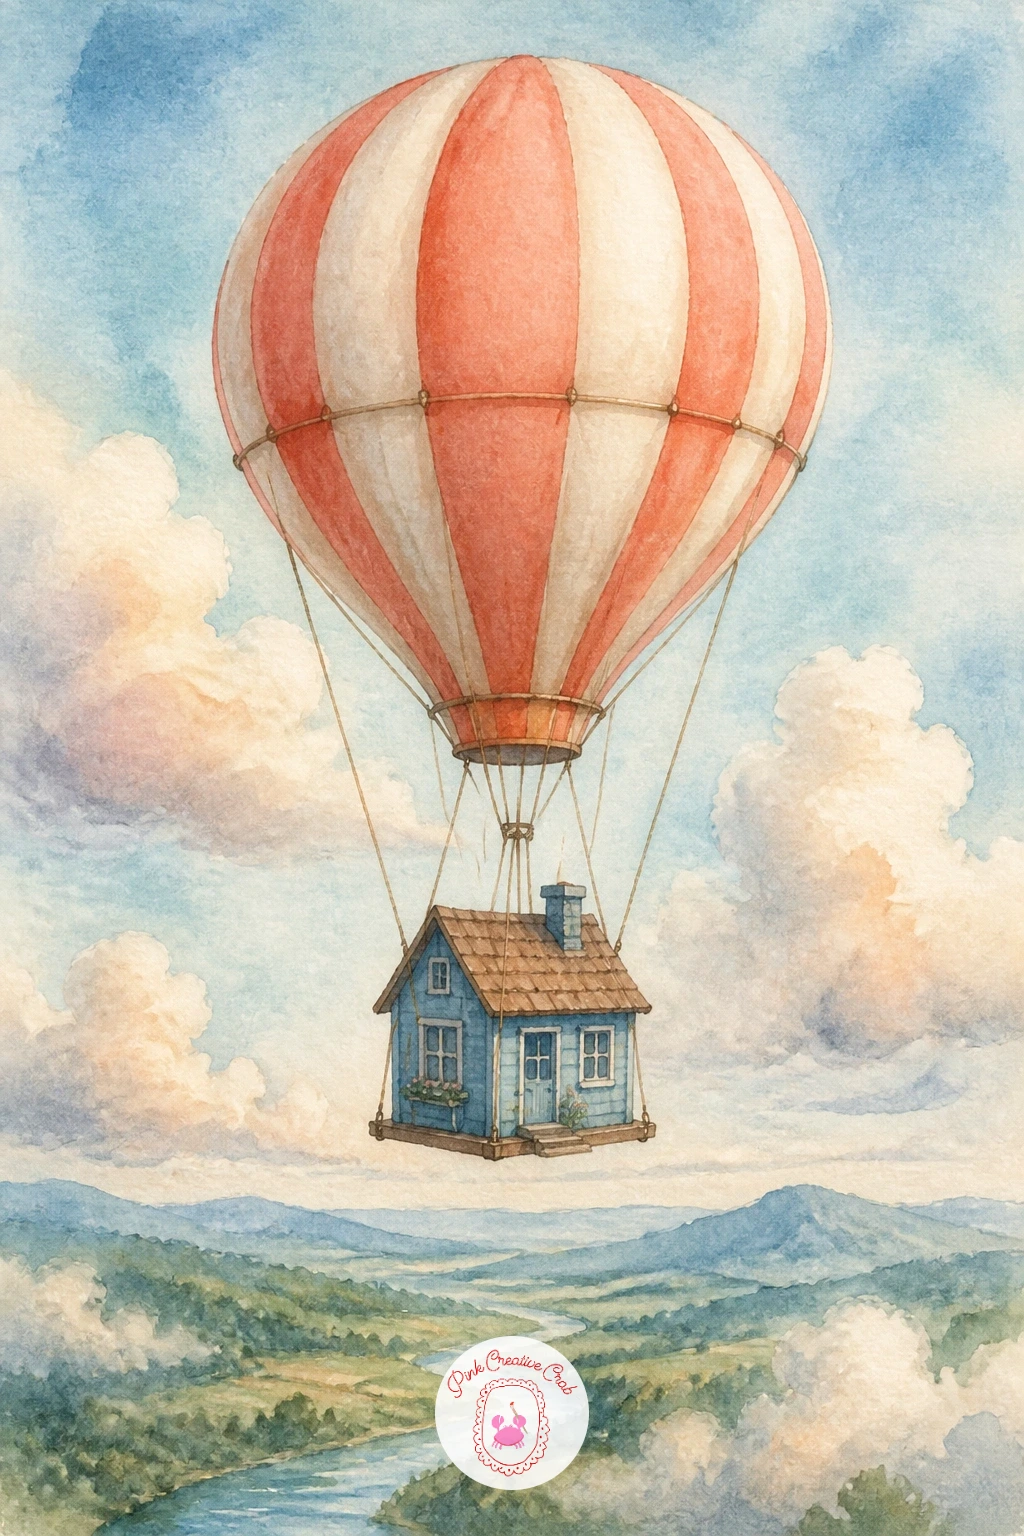
Palette: Coral,Cream,Sky Blue,Chestnut Brown
Leaving balloons behind for a moment, a steam train winding through mountains brings a different kind of vintage charm. Pencil a simple curved track along the lower third of the page with a small train on it, just a rounded engine, two or three box cars and a puff of smoke, kept basic rather than mechanically accurate.
Paint the mountains behind first in cool blue-grey, layering darker shapes in front of lighter ones for depth, then let that dry completely before painting the train itself in deep green or black with one red accent stripe. The smoke is painted last with a very wet, pale grey wash that you lift gently at the edges with a damp brush so it fades into the sky rather than stopping abruptly.
The common mistake is painting the smoke too solid and cloud-like; keep it thin and wispy, since real steam train smoke trails rather than puffs. If your smoke looks too heavy, lift color out immediately with a clean wet brush while it is still damp.
Love moody mountain scenery like this? These easy watercolor landscapes cover more mountain and valley techniques.
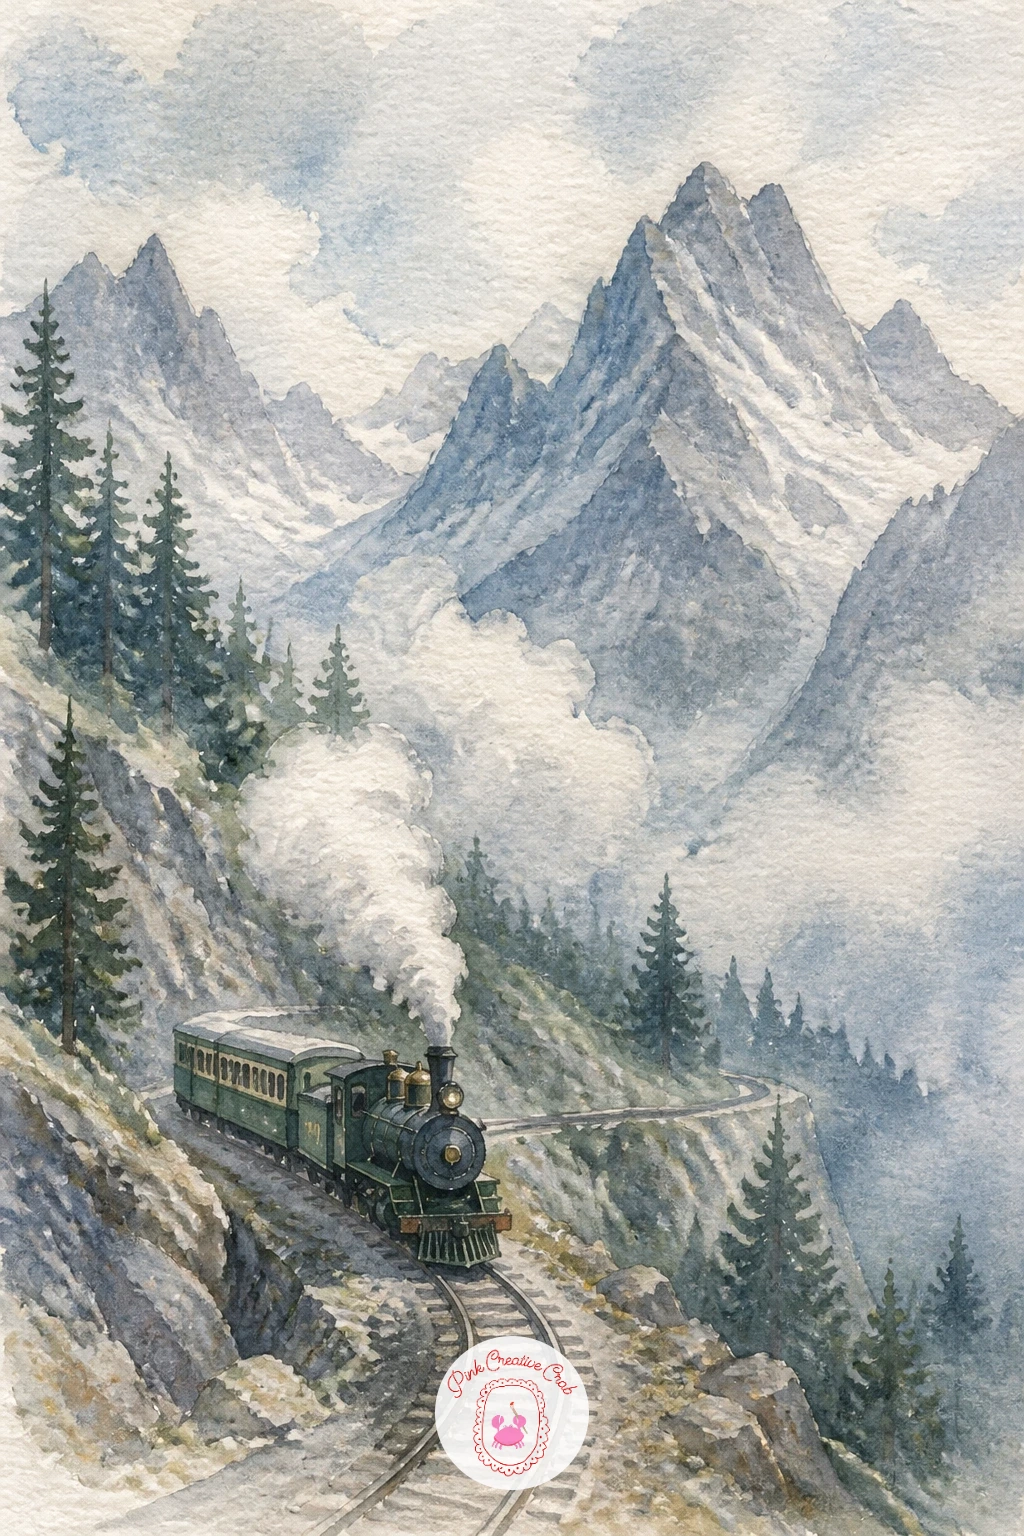
Palette: Payne’s Grey,Forest Green,Ivory Black,Venetian Red
An airship drifting above rooftops gives you a chance to practice both perspective and a soft city silhouette. Decide your eye level sits roughly at rooftop height, which means the airship above floats higher in the composition while the buildings below it stay low and compact along the bottom edge.
Paint the city first as simple flat-toned building shapes in varied warm greys and browns, overlapping a few taller shapes in front of shorter ones to suggest a skyline without drawing a single window if you do not want to. Once dry, paint the airship as a long soft oval in muted silver or cream with a small gondola underneath, using a dry brush along its lower edge to suggest subtle metallic sheen.
Keeping the sky pale and the city in mid-tones is what lets the airship read clearly against both without disappearing into either. A light wash of warm yellow low on the horizon suggests late afternoon and ties the whole scene together.
If silver paint is not in your set, mix a little Payne’s grey into white gouache for a convincing metallic substitute.
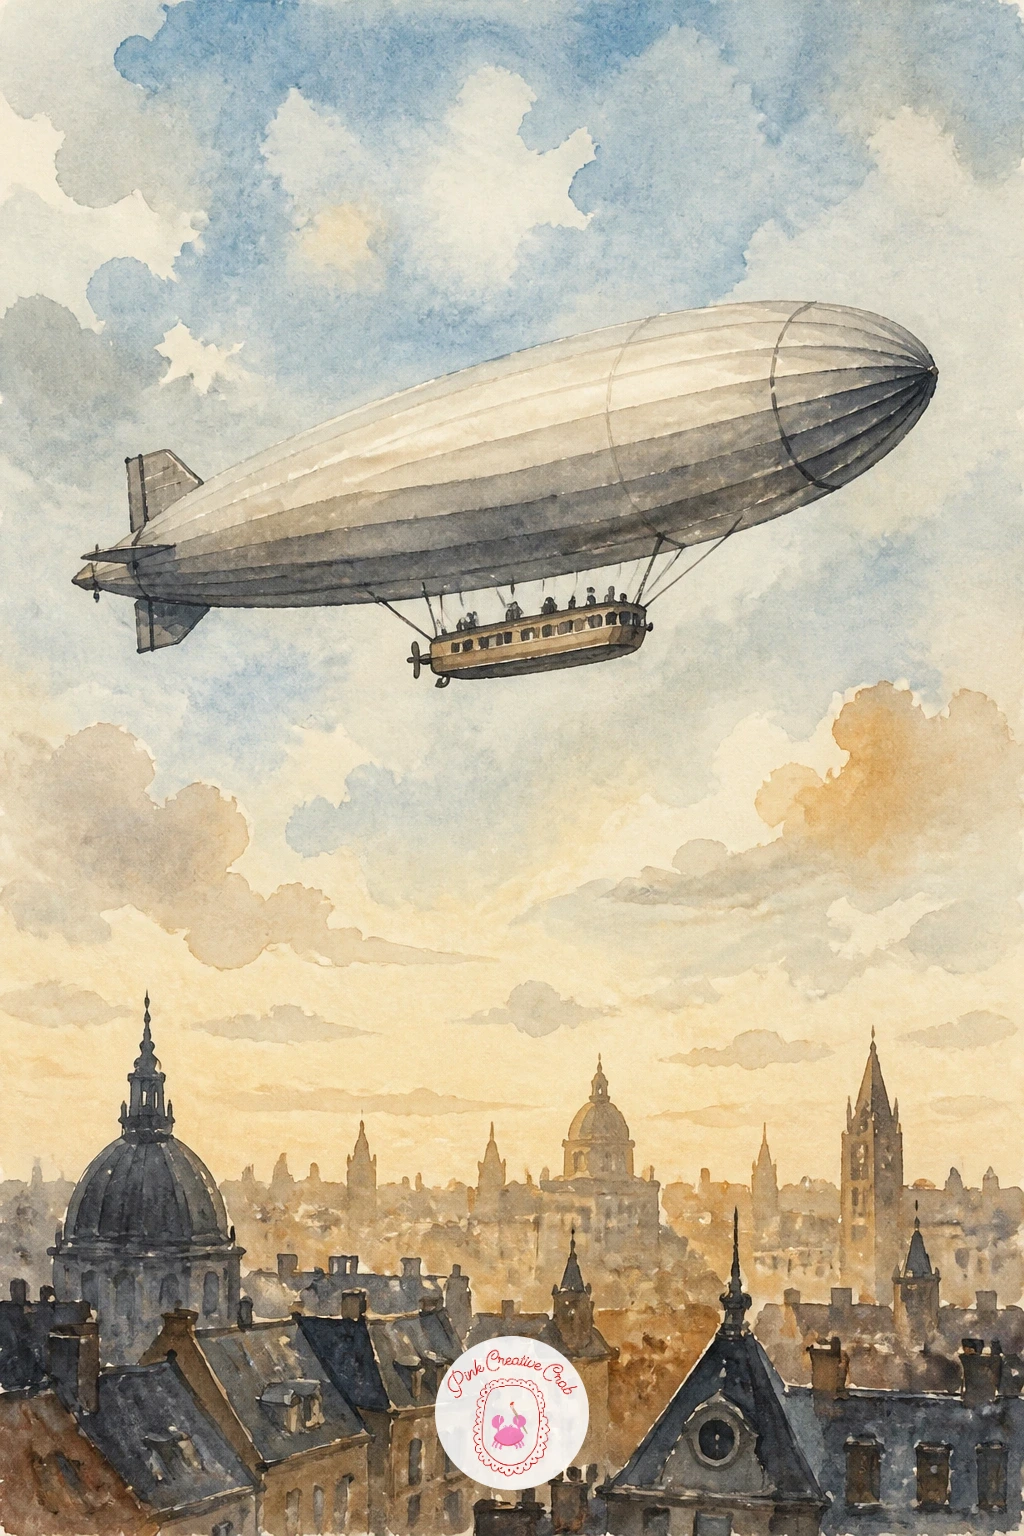
Palette: Payne’s Grey,Silver Grey,Raw Umber,Naples Yellow
A cable car crossing between two peaks is a lovely study in sparse, confident shapes. Pencil in two mountain peaks with a thin cable line strung between them, then a small boxy cable car hanging from the midpoint of that line.
Paint the mountains first in cool blues and violets, leaving jagged white peaks unpainted for snow, then once dry, add the cable line with a ruler-guided thin brush stroke and the car itself in a cheerful red or yellow so it stands out clearly against the cool mountain palette. A scattering of tiny dark green triangle pines along the lower slopes adds scale.
The ten-minute version is just the two peaks, the line and the car. The forty-minute version adds soft cloud wisps drifting below the car’s level and a pale valley visible far beneath, which makes the height feel much more dramatic.
If a perfectly straight cable line proves tricky freehand, lightly stretch a thread across the dry page as a guide, then paint along it before lifting the thread away.
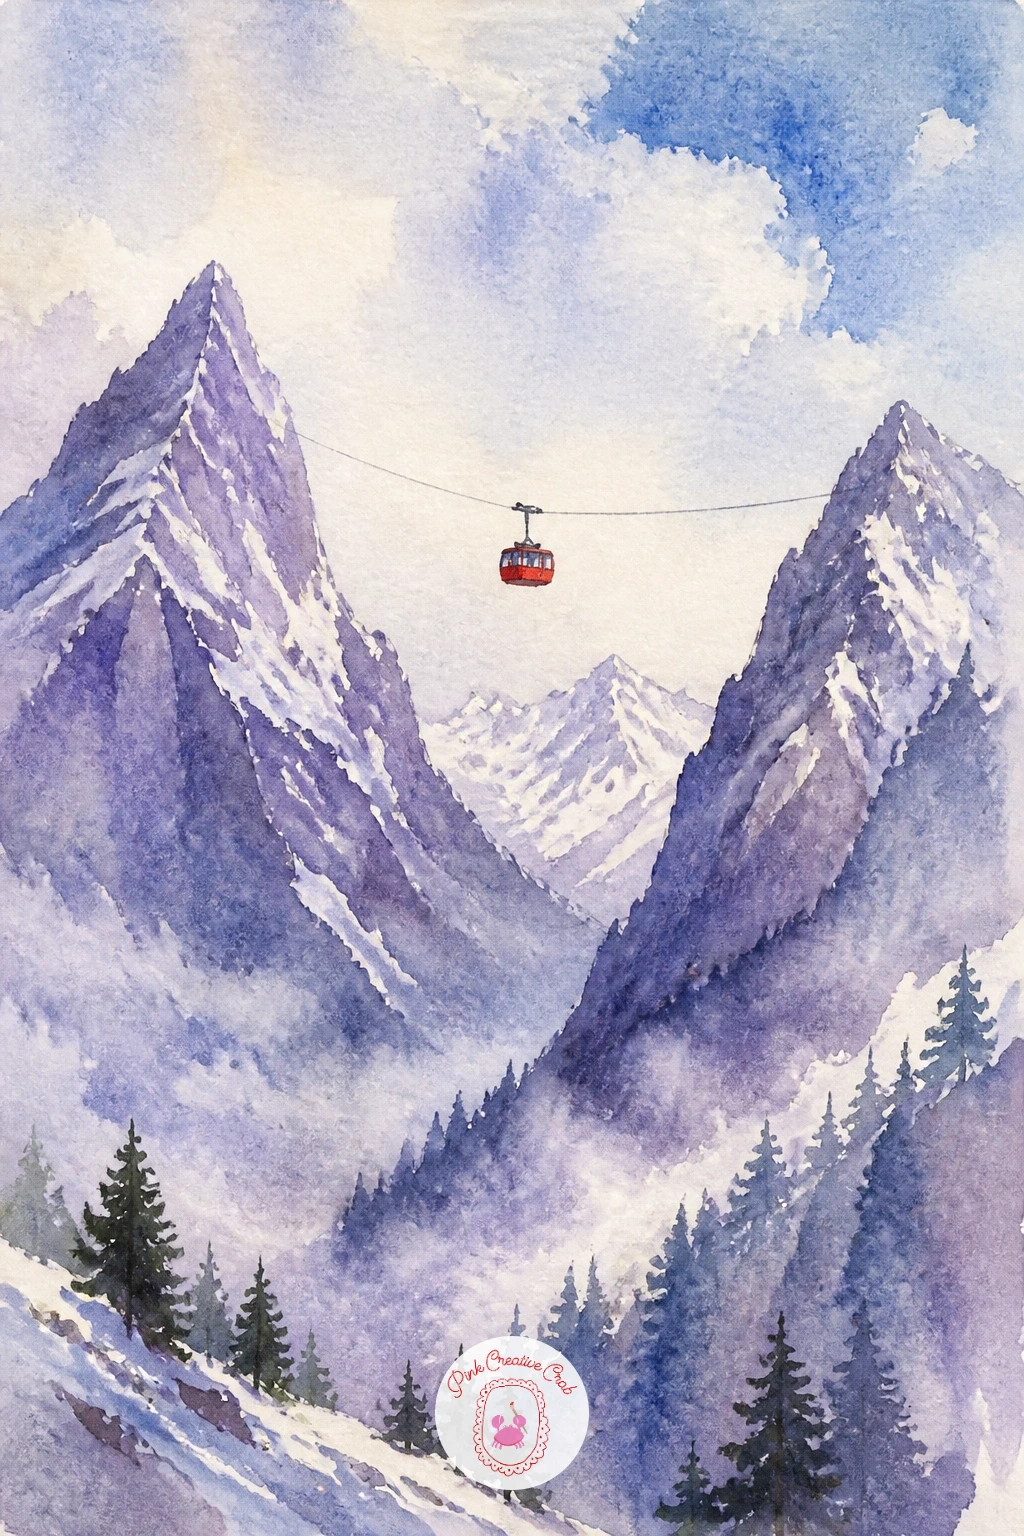
Palette: Ultramarine Blue,Cobalt Violet,Cadmium Red,Titanium White
A seaplane resting on calm water pairs well with the lake reflection trick from earlier in this list, so it is a nice one to try once that technique feels comfortable. Paint a simple plane shape, a rounded body, short wings and twin floats underneath, in cream and navy, keeping the proportions a little stout and old-fashioned rather than sleek.
Once the plane is dry, paint the lake around it in soft blue-green, then add its reflection directly beneath as a softened, slightly wavy echo of the same colors. Mountains in pale violet along the horizon give the water somewhere to sit.
Comparing the plane’s wingspan to its body length before you commit to paint keeps the proportions believable: on most small vintage seaplanes, the wings stretch to roughly twice the length of the body, and eyeballing that ratio first saves a lopsided plane later.
If you would rather skip the reflection today, a simple ring of ripples around the floats reads as water just as well.
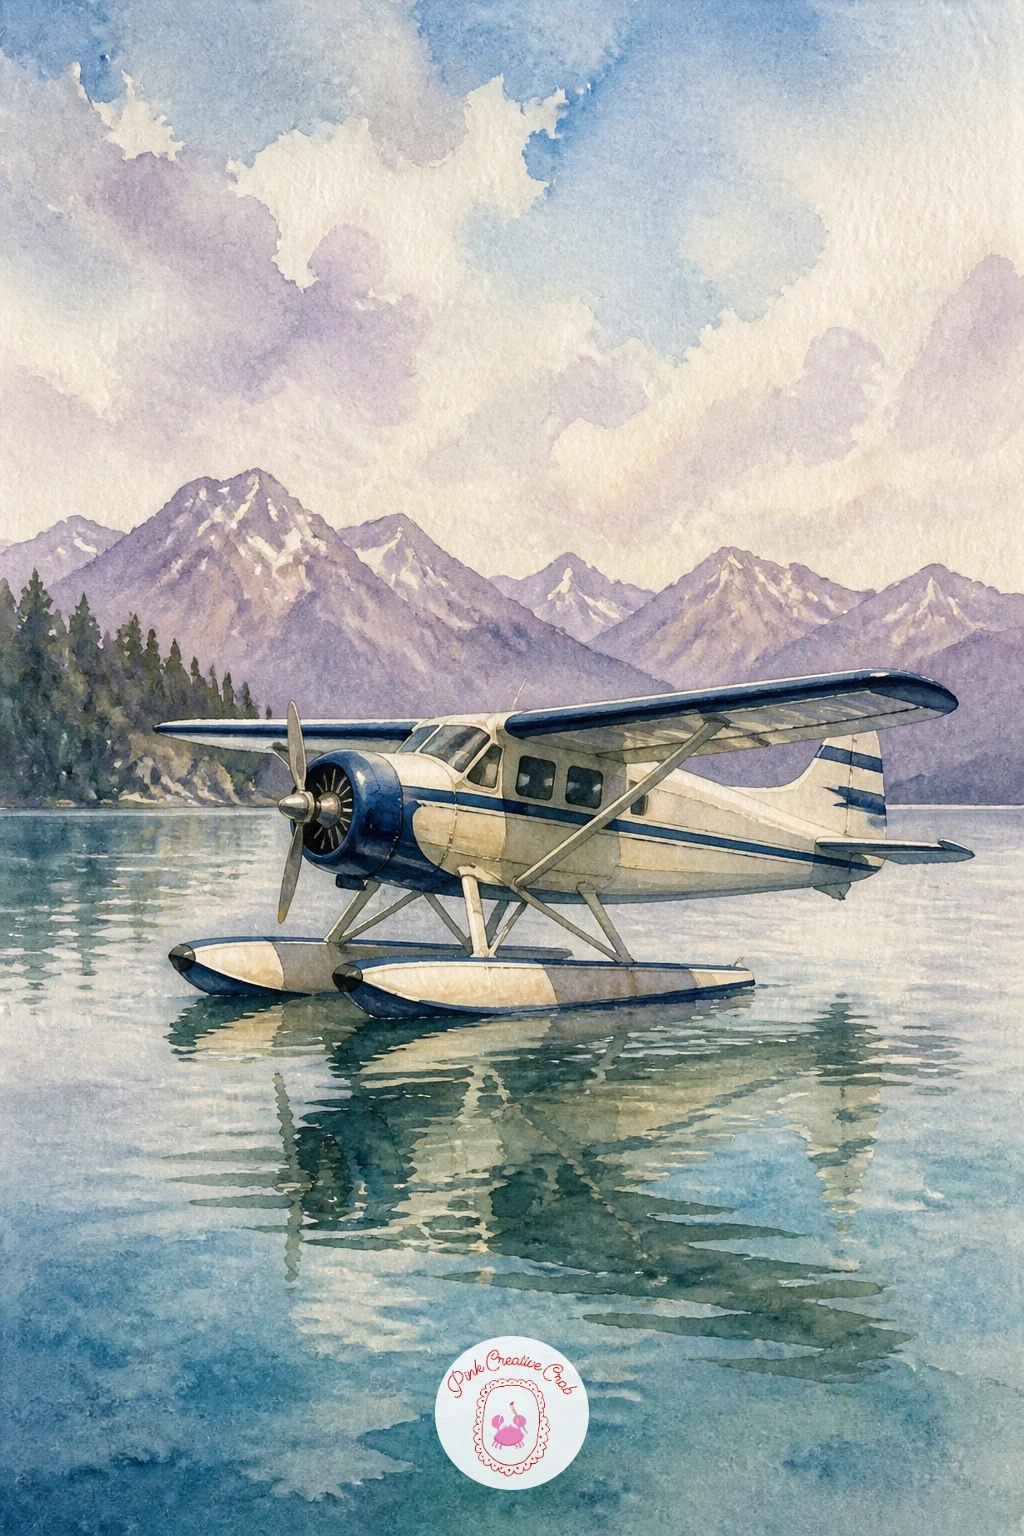
Palette: Navy Blue,Cream,Teal,Cobalt Violet
Bringing a little old-world romance into the mix, a horse-drawn carriage moving through a park scene relies on warm autumn or spring color and a gentle sense of motion. Sketch the carriage shape simply, a curved body on two tall wheels, with the horse in front as an elongated oval body on four simple legs.
Paint the park setting first in loose washes, soft greens and golds with a few tree shapes dabbed in with the side of the brush, letting it dry before adding the carriage and horse in richer brown and burgundy tones. A few quick diagonal lines near the wheels suggest motion without needing any real detail.
The place this often goes wrong is overworking the horse’s legs trying to make them anatomically perfect; keep them as simple tapered shapes and trust that a loose, confident line reads better at this scale than a careful, hesitant one.
No burgundy in your set? Mix alizarin crimson with a touch of Payne’s grey for a similar deep tone.
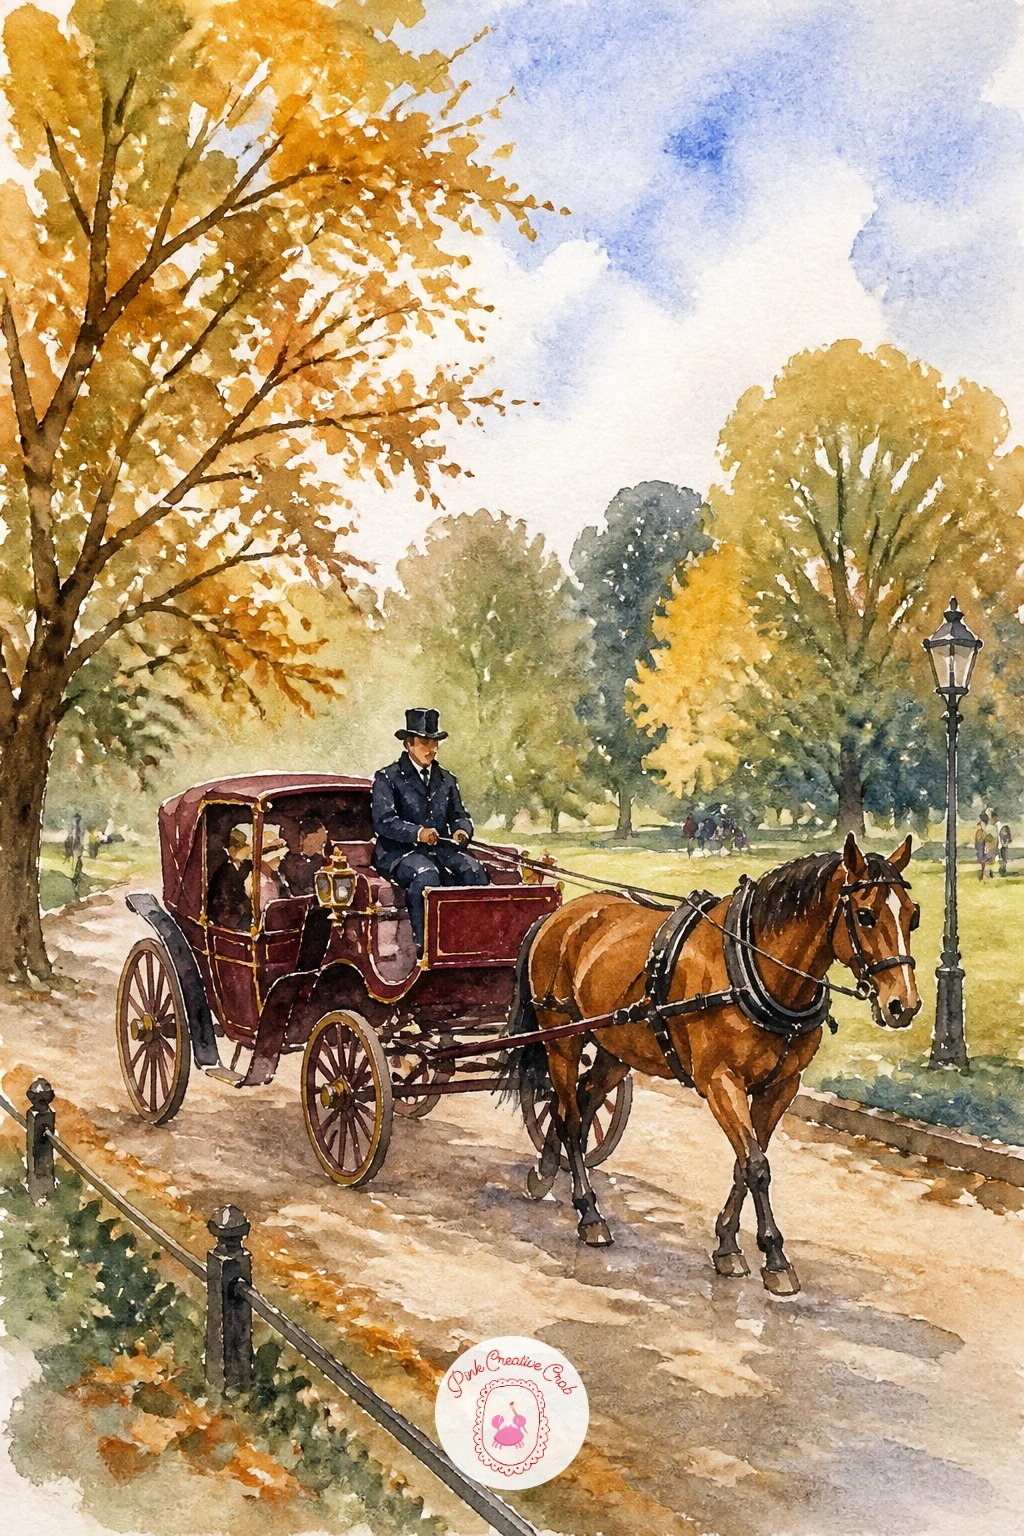
Palette: Burnt Sienna,Burgundy,Sap Green,Golden Yellow
Switching gears entirely, a red convertible cruising a coastal road is pure vintage postcard energy. Paint the sky and sea first as two simple horizontal bands of blue, slightly different in value so the horizon line reads clearly, then let that dry fully before adding any road or car.
Sketch the convertible small and angled slightly, a simple rounded body with two wheels and a low windshield, then paint it in a bold, confident red with a cream interior glimpse. The road beneath it is a warm grey curve hugging the edge of the cliff, with a few loose green dabs for roadside shrubs.
Decide where the sun sits before you paint the car’s shadow: a low sun to one side means a long shadow stretching away from the car across the road, which does more to sell speed and sunshine than almost any other single detail in this scene.
If red feels intimidating straight from the tube, a creamy pink-red mix is a softer, equally charming alternative.
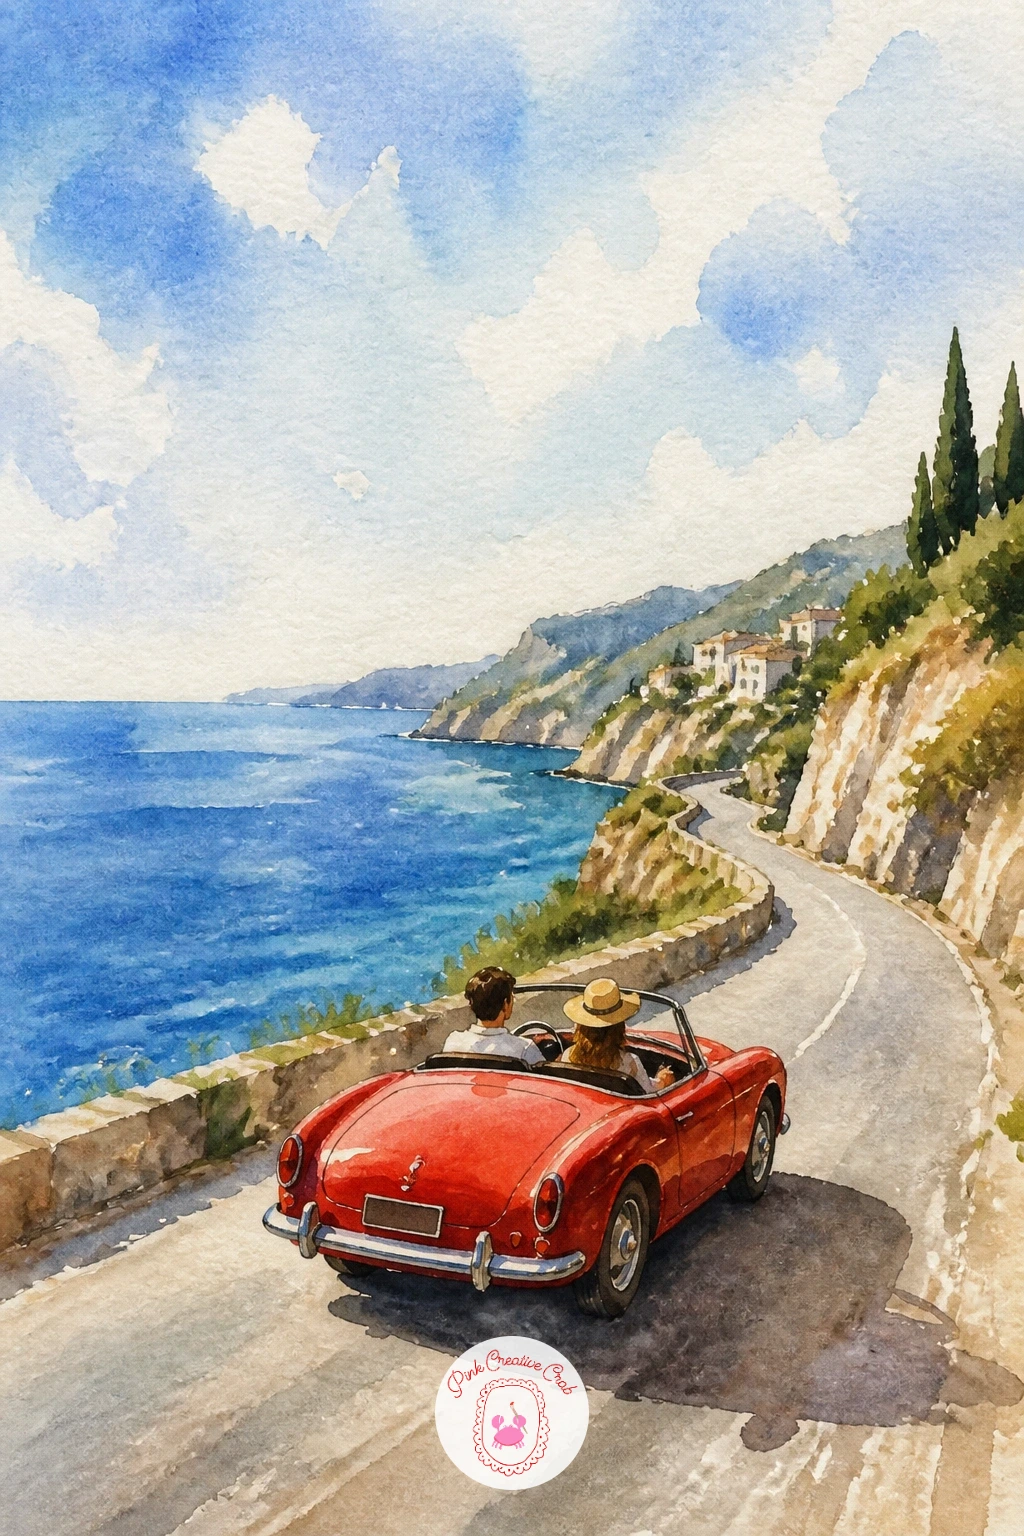
Palette: Cadmium Red,Cerulean Blue,Warm Grey,Cream
Returning briefly to the sky, a gondola lift carries you over a dense forest canopy instead of mountain peaks. Paint the forest first as a rich, textured mass of dark and mid green using a mix of wet-into-wet blending and some dry brush dabbing on top, which gives the canopy a convincing bumpy texture without painting individual trees.
Once that dries, add a thin cable line across the upper portion of the page with one small round gondola cabin hanging from it, painted in a cheerful color that pops against all that green, mustard yellow or soft red both work nicely.
The dry brush technique is worth practicing here specifically: load your brush lightly, blot most of the water out on a paper towel, then drag it sideways across already-dry green paint so it only catches the paper’s texture, creating that dappled leafy look in seconds.
If your forest green turns muddy from too many colors mixed together, stick to just two greens plus a touch of yellow for cleaner results.
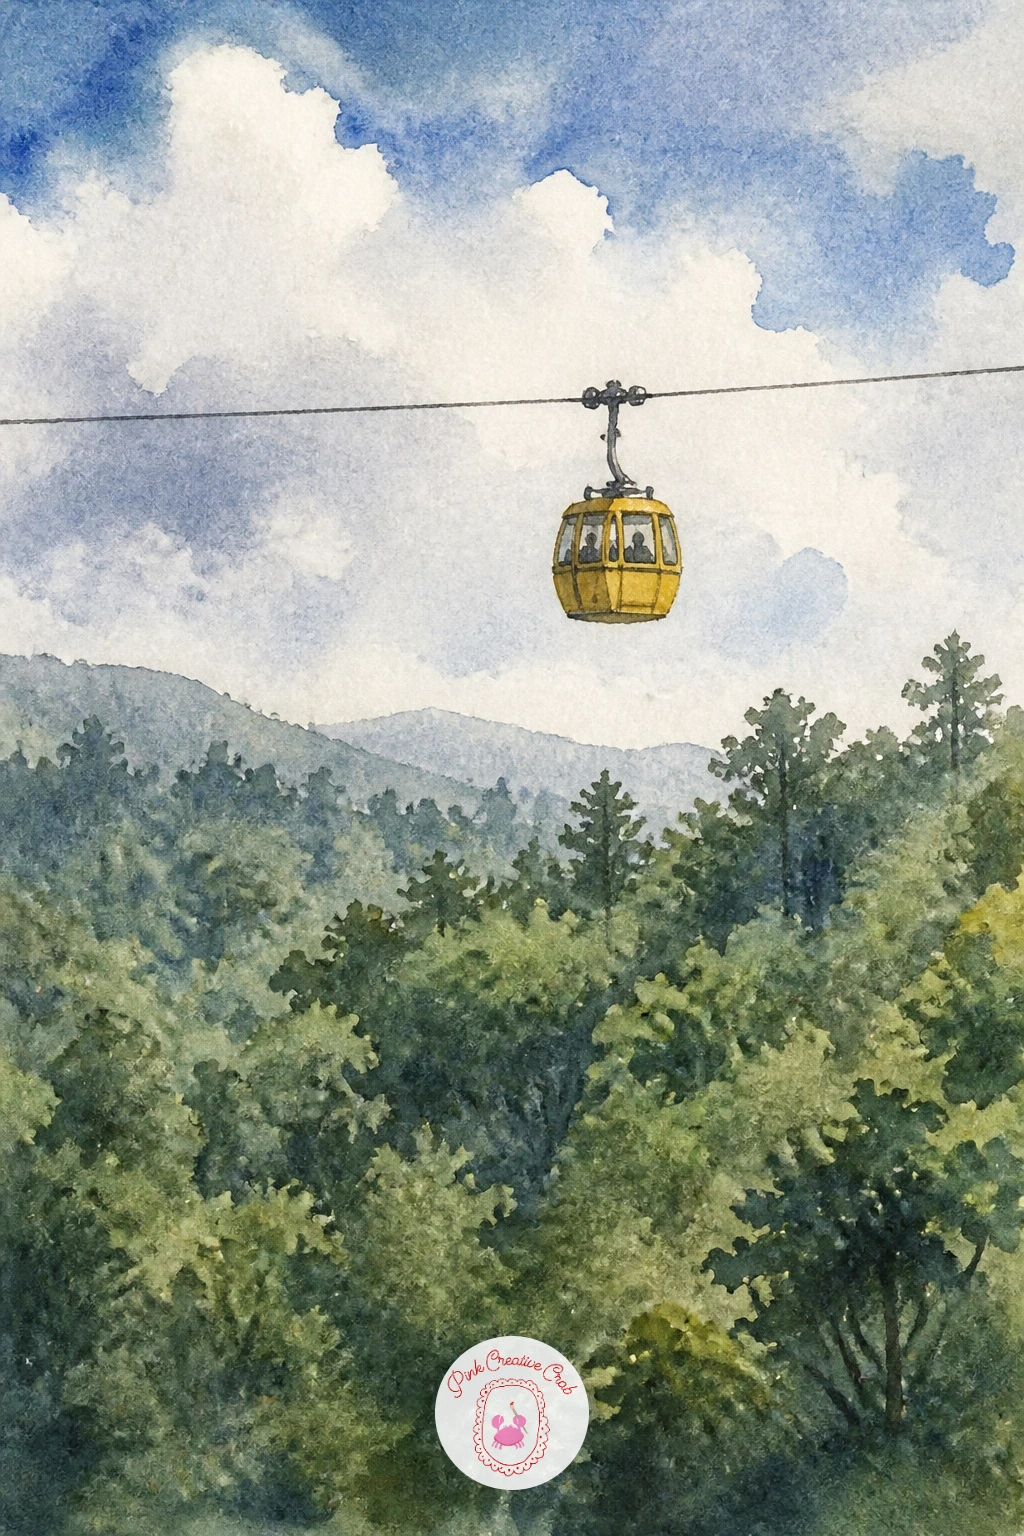
Palette: Sap Green,Hooker’s Green,Mustard Yellow,Cadmium Red
A tuk-tuk weaving down a bright street setting lets you practice packing a lot of color into a small space without it turning chaotic. Block in the street scene first as simple flat shapes, a few narrow building fronts in varied warm colors, strings of small triangle flags overhead, and a patch of warm ground below.
Once dry, paint the tuk-tuk itself in one bold color, yellow or turquoise work beautifully, with a simple rounded canopy and three visible wheels, keeping it the most detailed object in the scene since everything else stays loose and flat behind it.
The trick to keeping all this color readable is value contrast: make sure the tuk-tuk is either noticeably lighter or darker than the street color directly behind it, otherwise it gets lost in all that surrounding brightness.
If painting several building fronts feels like too much today, two or three suggested shapes along the edges is plenty; let the tuk-tuk carry the scene.
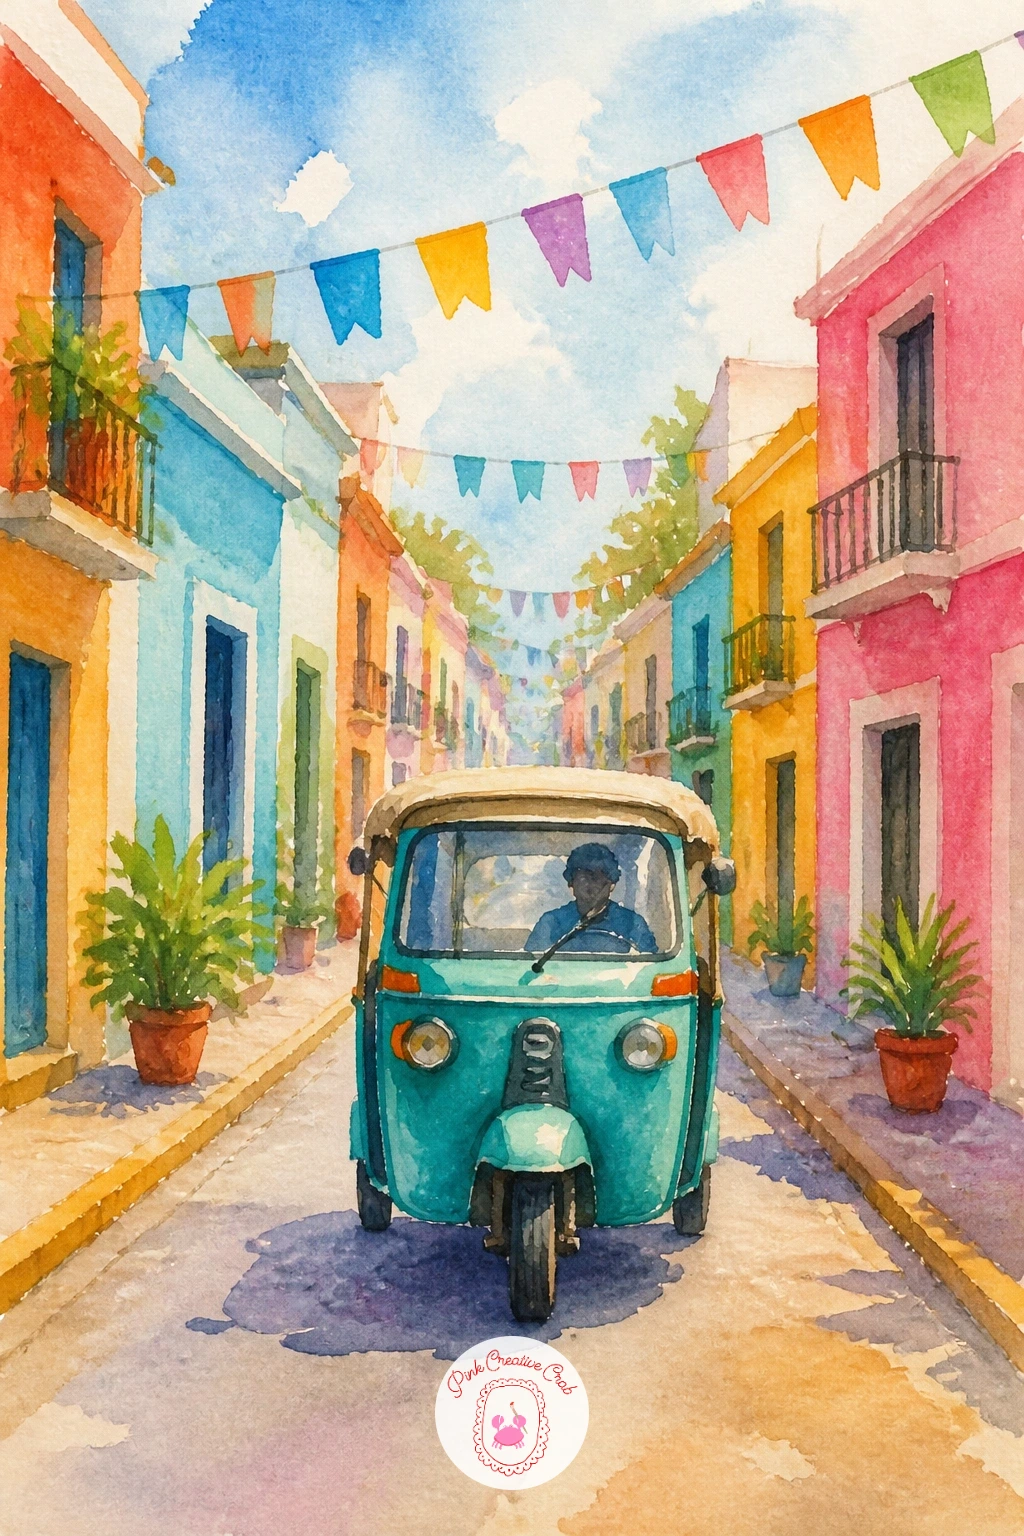
Palette: Turquoise,Magenta,Cadmium Yellow,Burnt Orange
A rounded vintage camper parked on an open desert road is a quieter, more spacious scene after all that street color. Paint the sky first in a warm gradient from pale yellow near the horizon to soft blue overhead, then once dry, add a simple flat desert floor in warm sandy tones with a few loose cactus silhouettes scattered across it.
The camper itself is a simple rounded rectangle on small wheels, painted in cream with a stripe of turquoise or mint along its side, the retro color pairing that defines this whole vintage camper look. Keep its window as a single soft rectangle of pale blue.
Vary this one next time by changing the stripe color and the desert plants, swap cacti for distant mesas, or paint the same camper parked by a lake instead, since the basic shape and palette approach adapts easily to almost any backdrop.
If you do not have a mint or turquoise paint, mix a touch of blue into yellow-green until it brightens up nicely.
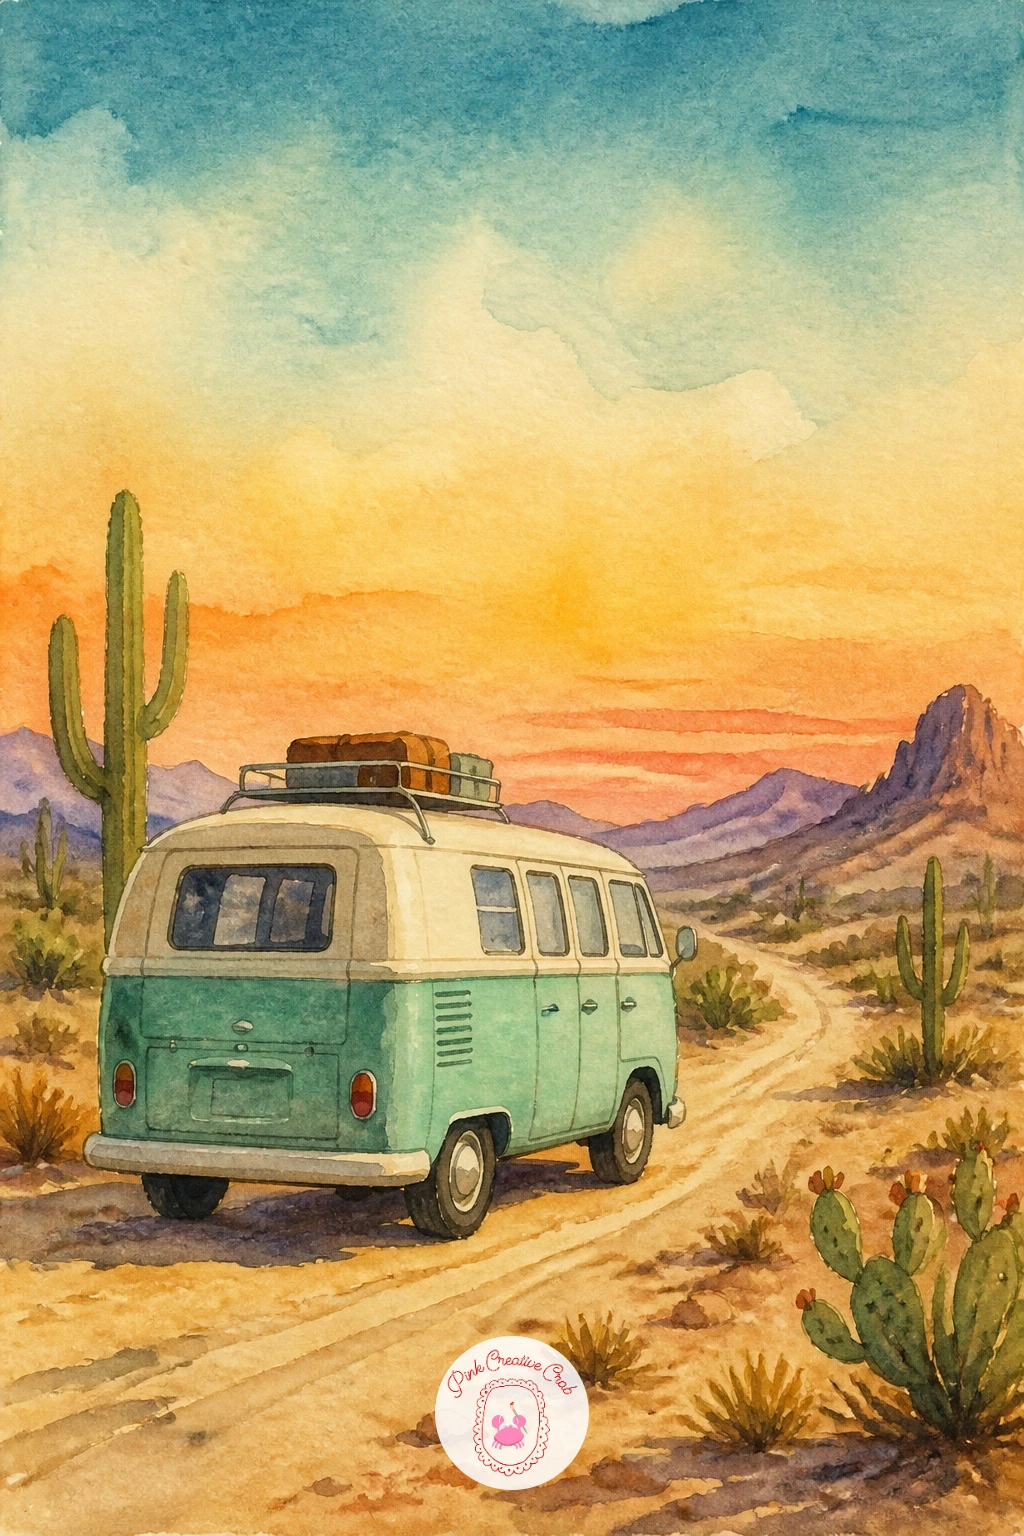
Palette: Naples Yellow,Mint Green,Burnt Sienna,Cream
A small yellow tram climbing a steep cobbled hill brings in Lisbon’s famous color and charm. Sketch the hill at a steep diagonal angle across the page, which immediately gives the scene its sense of climbing, then paint tall narrow buildings along both sides in a mix of warm pastel colors, slightly leaning for character.
Once dry, paint the tram itself in bright yellow with cream trim, kept boxy and simple, sitting right on the diagonal line of the hill so it reads as climbing rather than floating. A string of laundry lines between two upper windows adds a lovely authentic detail if you want it.
Working the perspective correctly here means every window and door on these buildings should angle very slightly toward a shared vanishing point in the distance, rather than staying perfectly vertical, which is what makes the steep hill feel convincing rather than flat.
If drawing a convincing perspective angle feels tricky, a ruler held at the hill’s angle while you pencil in the building edges keeps everything consistent.
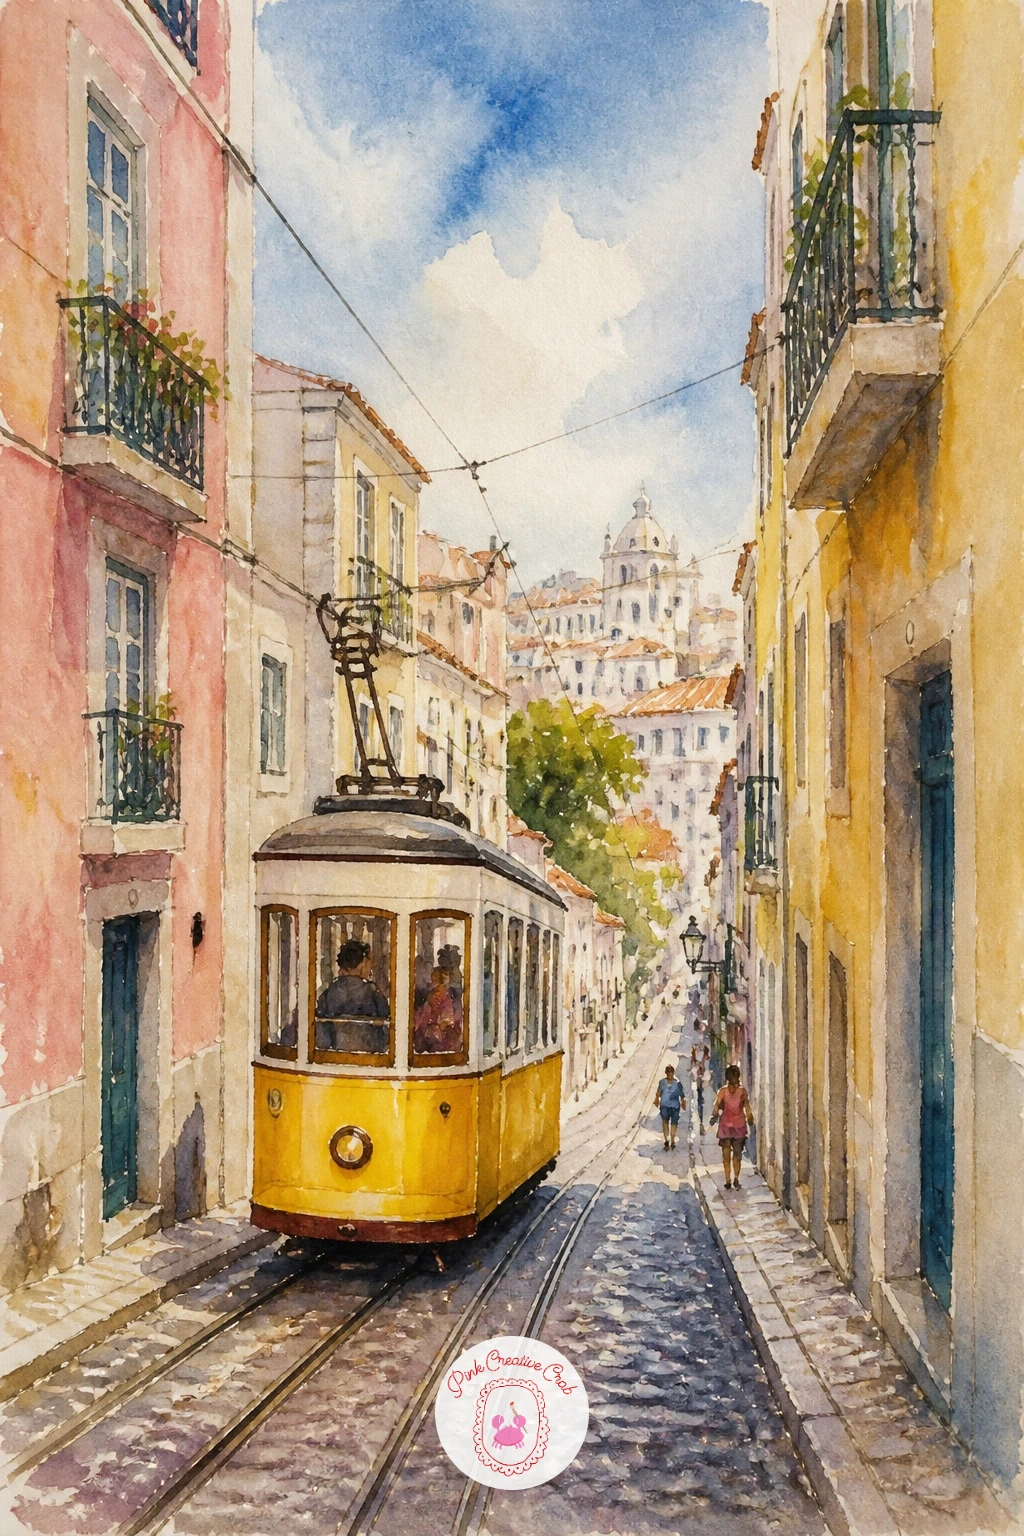
Palette: Cadmium Yellow,Terracotta,Pale Pink,Cream
This one takes a different approach: instead of painting the whole train, you paint the view as if looking out through its window at dawn. Pencil a simple rounded window frame taking up most of the page, then inside it, paint a soft dawn landscape, layered hills in pink, lavender and pale gold with a thin strip of track or platform suggested at the very bottom edge.
Once that inner scene is fully dry, paint the window frame itself in a warm wood brown or deep green, adding a thin highlight line along one edge to suggest the glass catching the light. A soft curtain shape tucked in one corner adds a cozy, lived-in feeling.
The quick version is just the dawn landscape and frame. The forty-minute version adds a little condensation texture to the glass using a nearly dry brush dabbed lightly in the corners, plus a small cup or book resting on a sill beneath the frame.
If painting a perfectly round window edge feels difficult, trace around a jar lid or small plate for a clean circular guide.
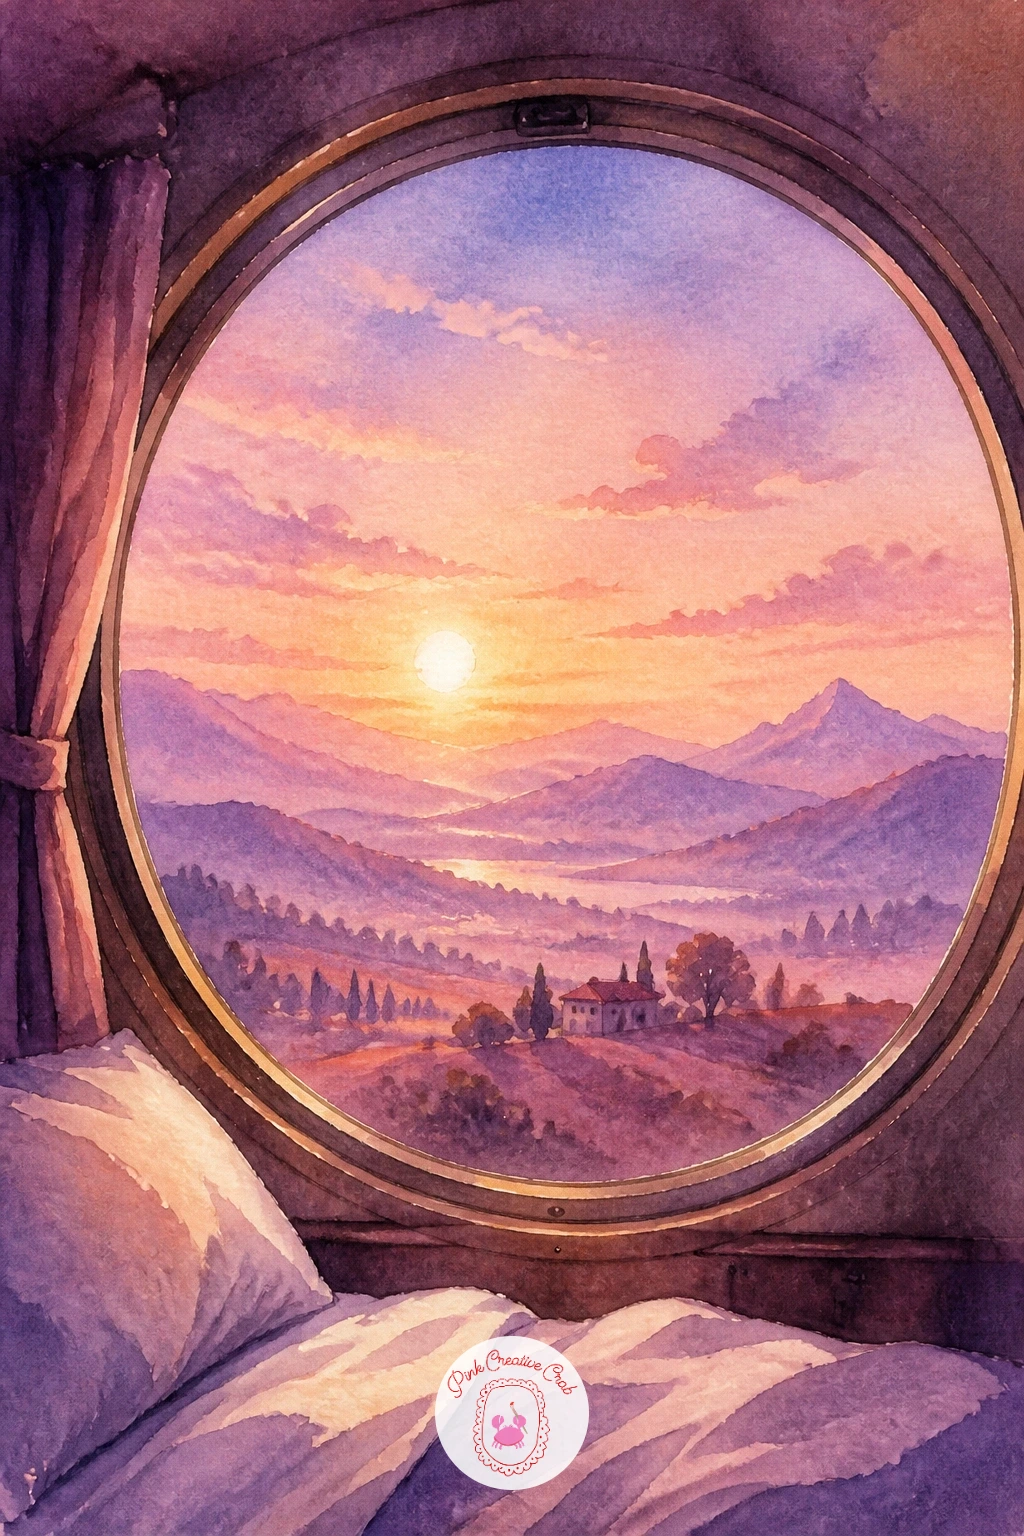
You Will Need
- a small plate or jar lid to trace the window
Palette: Rose Pink,Lavender,Golden Yellow,Walnut Brown
A small funicular car climbing a steep track pairs nicely with the tram idea but trades city buildings for an open hillside. Pencil a straight diagonal track running from the bottom corner up to the middle of the page, then a small boxed car sitting on it, painted in red or forest green with simple square windows.
Paint the hillside around the track in warm greens and golds, using loose dabs rather than outlined shapes to keep it feeling breezy, then add the track itself as two thin parallel lines once the hillside paint is dry. A small building or two at the top of the hill gives the funicular somewhere to arrive.
Measuring the track’s angle against the edge of your paper before you paint helps enormously here: a track steeper than about forty-five degrees reads as dramatic and alpine, while a gentler angle feels more like a leisurely garden funicular, so decide which mood you want before committing to pencil.
If straight parallel lines are hard freehand, a ruler makes quick work of the track itself.
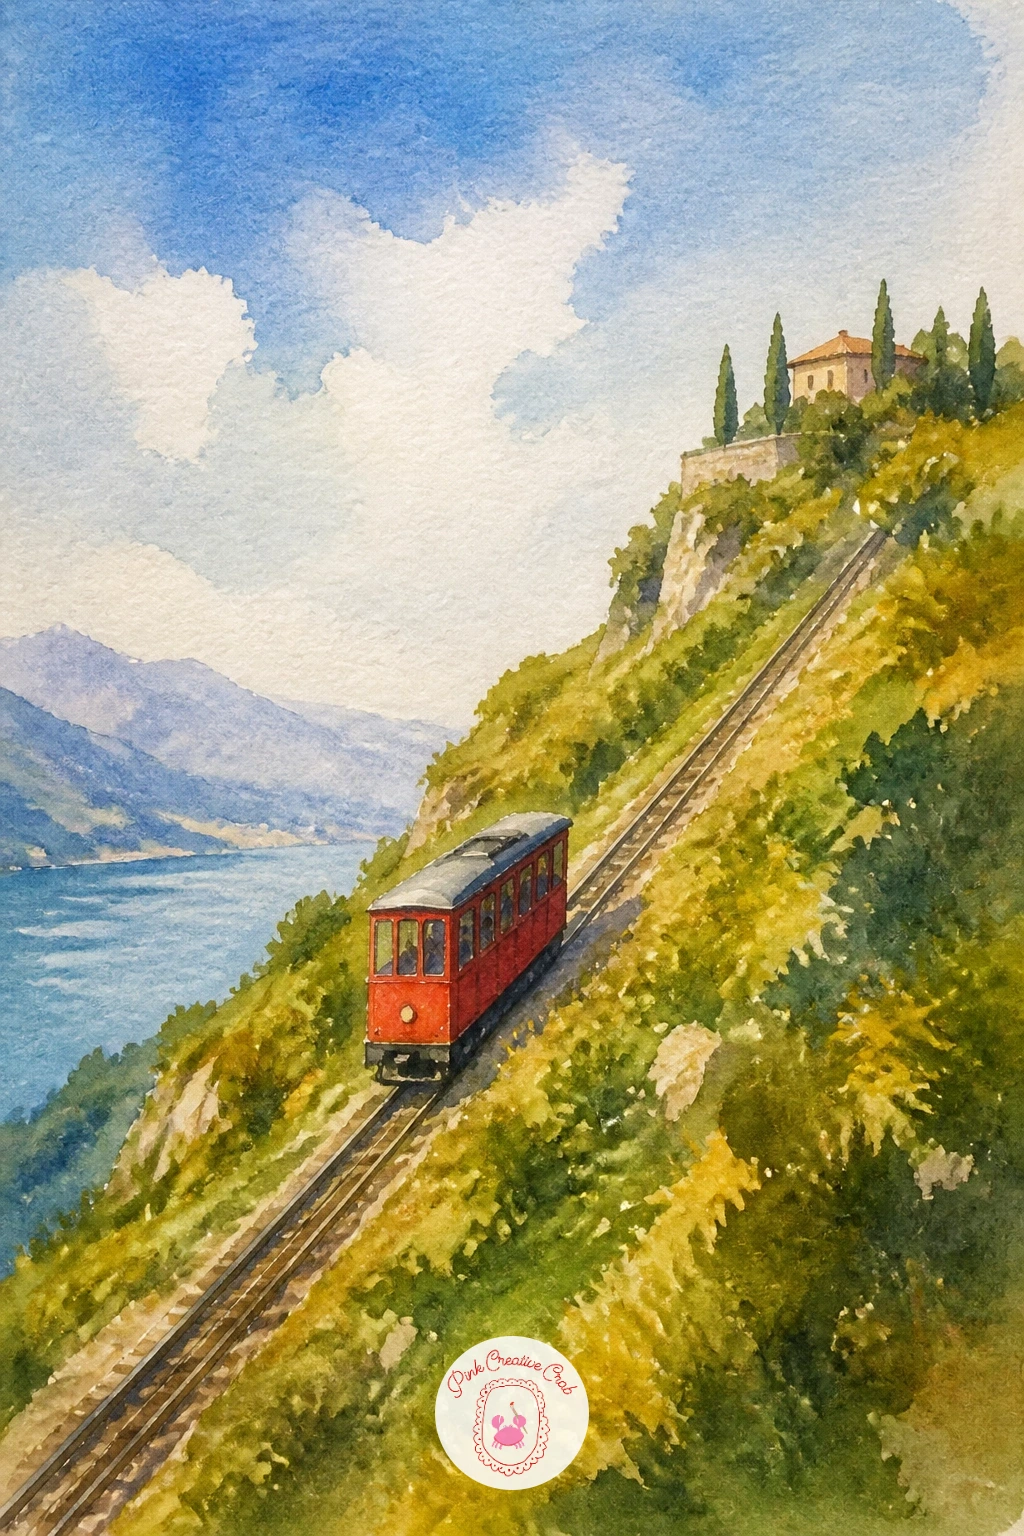
Palette: Forest Green,Cadmium Red,Golden Ochre,Warm Grey
A Vespa scooter parked by the sea brings a relaxed, sunny holiday feeling to the page. Paint the sea and sky first as two soft bands of blue, adding a few loose white gouache flecks for sunlight on the water once everything is dry, then sketch the scooter small and simple in the foreground, rounded body, two wheels, one curved handlebar.
Paint the Vespa itself in a cheerful pastel, mint or pale pink both suit the vintage look, with a small cream seat and simple round headlight. A basket on the front filled with a loose scribble of flower colors adds charm without needing real detail.
If this is your first time painting a scooter shape, simplify it even further into just two overlapping circles for the wheels and one long curved shape for the body; the eye fills in the rest surprisingly well at this scale.
No pastel mint on hand? Mix a tiny bit of blue into white gouache plus a touch of yellow for a soft, custom version.
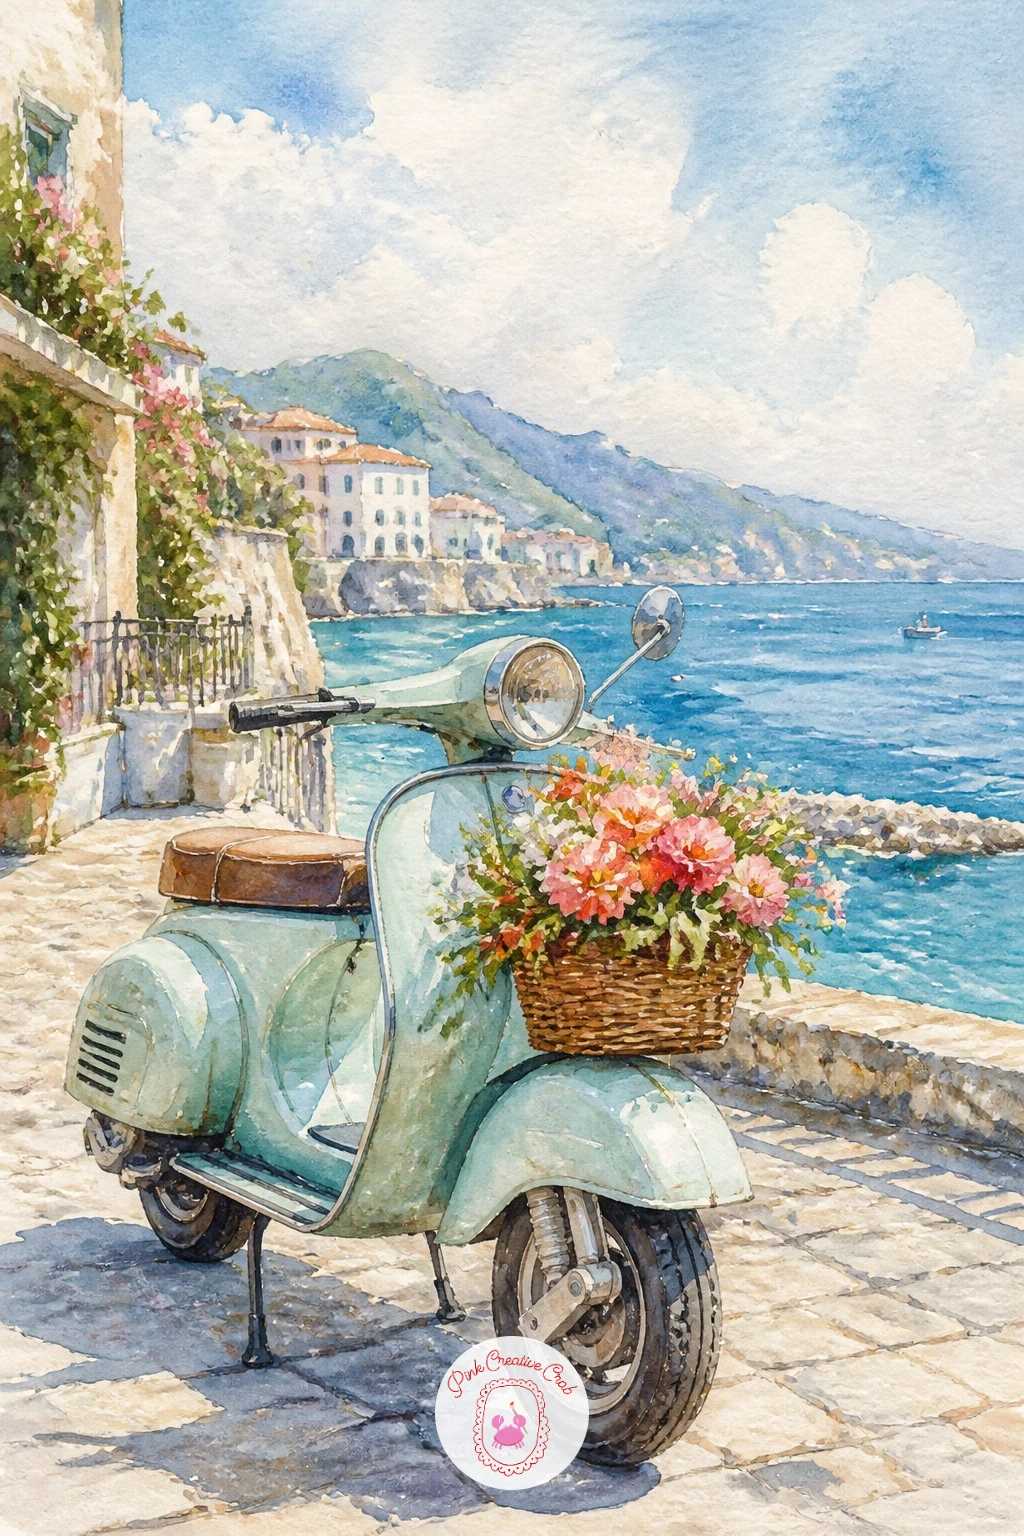
You Will Need
- white gouache for sunlight flecks
Palette: Mint Green,Cerulean Blue,Cream,Rose Pink
Moving into evening light, a rickshaw moving beneath a row of glowing lanterns is a lovely chance to practice warm light against a cooler background. Paint the background first in deep blue-violet to suggest dusk, then once dry, paint a row of small round lanterns strung overhead in warm yellow and orange, each with a soft halo of lighter color bled gently into the dusk sky around it while still slightly damp.
Paint the rickshaw and its puller below in silhouette or deep warm brown, since keeping this foreground shape simple and dark lets all your attention go to the glowing lanterns above, which are really the heart of this piece.
The ten-minute version is just the lanterns and the dusk sky. The forty-minute version adds the full rickshaw scene beneath plus a little reflected lantern glow on the ground, warm dabs of orange and yellow scattered loosely along the path.
If a soft lantern halo proves tricky, dab a damp clean brush around each lantern shape the moment you paint it to blur the edge immediately.
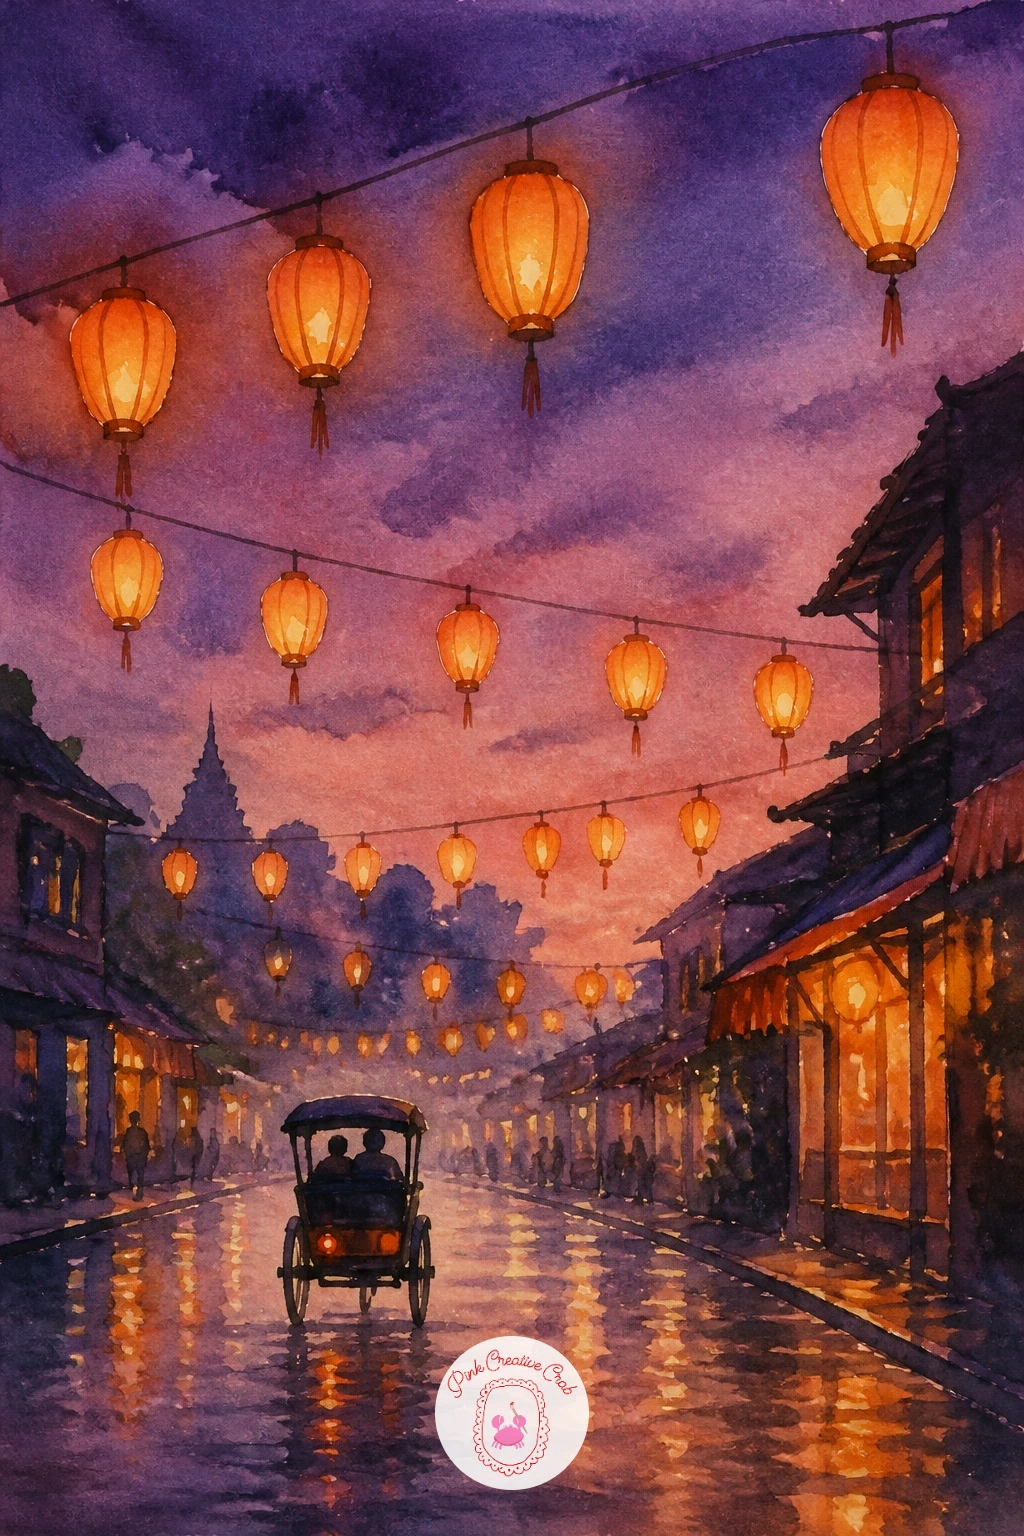
Palette: Deep Violet,Amber,Burnt Orange,Chestnut Brown
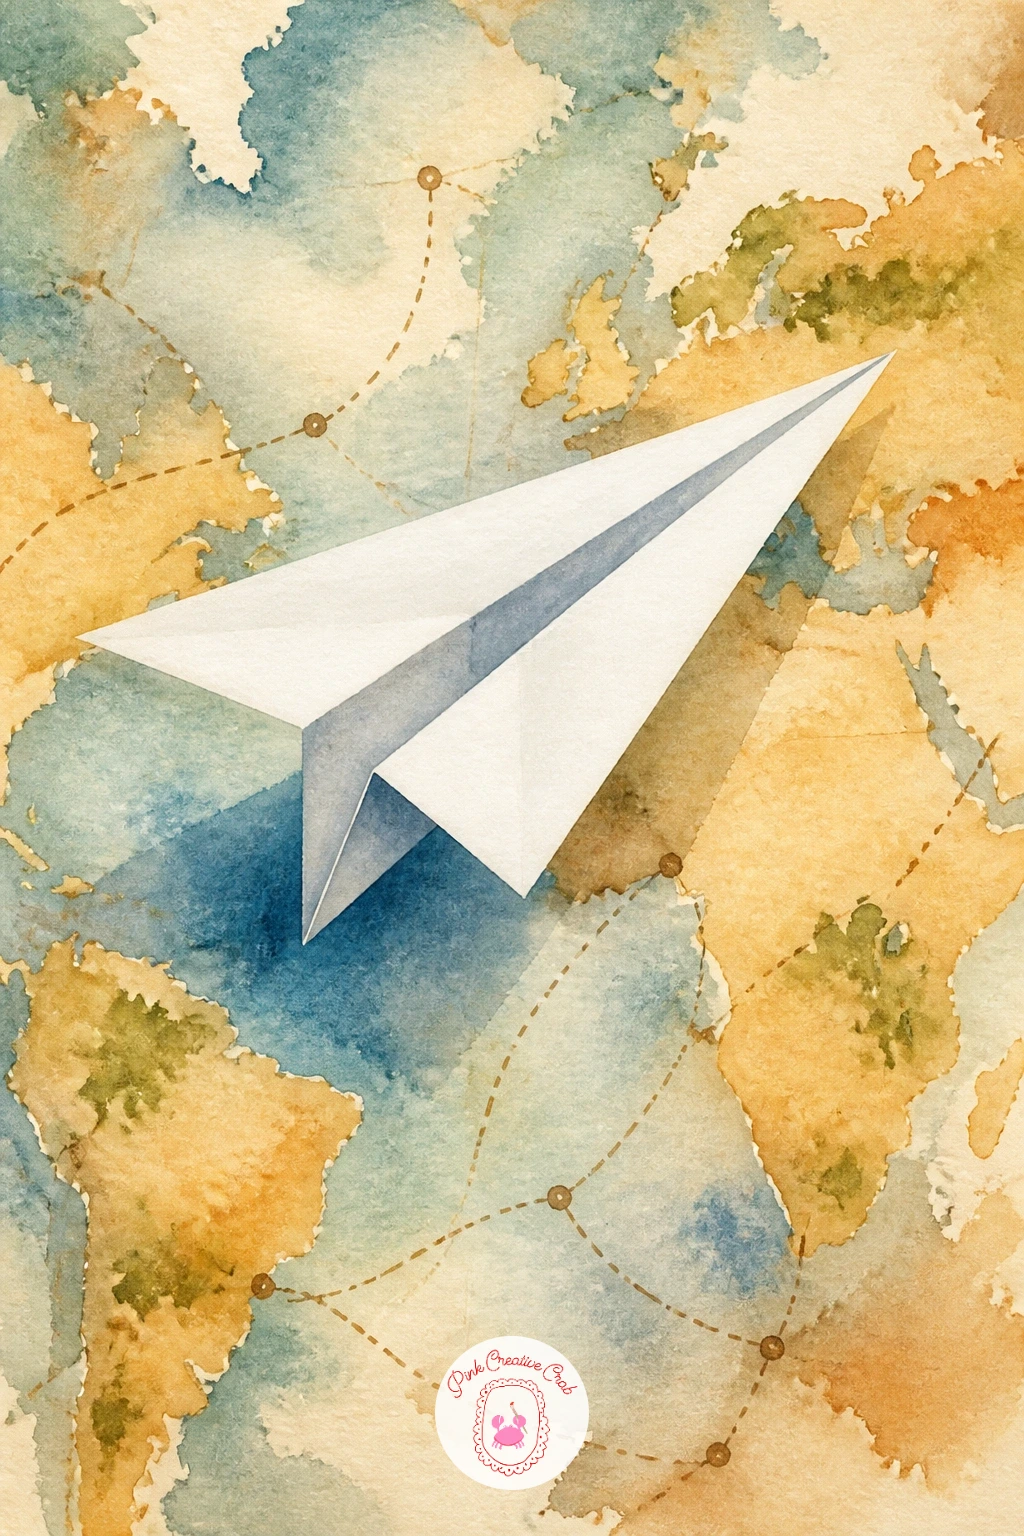
For something a little different, paint a paper plane soaring over an old map rather than a sky. Start by washing the whole background in warm tea tones and soft aged yellows, then once dry, add loose suggestions of map lines, a coastline, a compass rose, a few dotted travel routes, all kept simple and sketchy rather than geographically accurate.
Paint the paper plane itself in crisp white or cream with sharp folded edges defined by thin grey shadow lines along each crease, floating diagonally across the upper portion of the composition as if caught mid-flight.
The sharp, angular folds of the paper plane are what make this subject work, so resist the urge to soften its edges the way you would with a balloon or cloud; keep every line of the plane clean and a little geometric against all that loose, washy map background behind it.
If you enjoy sky based pieces like this, these dreamy watercolor pencil sky drawings explore more loose atmospheric backgrounds worth trying.
Palette: Raw Sienna,Sepia,Payne’s Grey,Cream
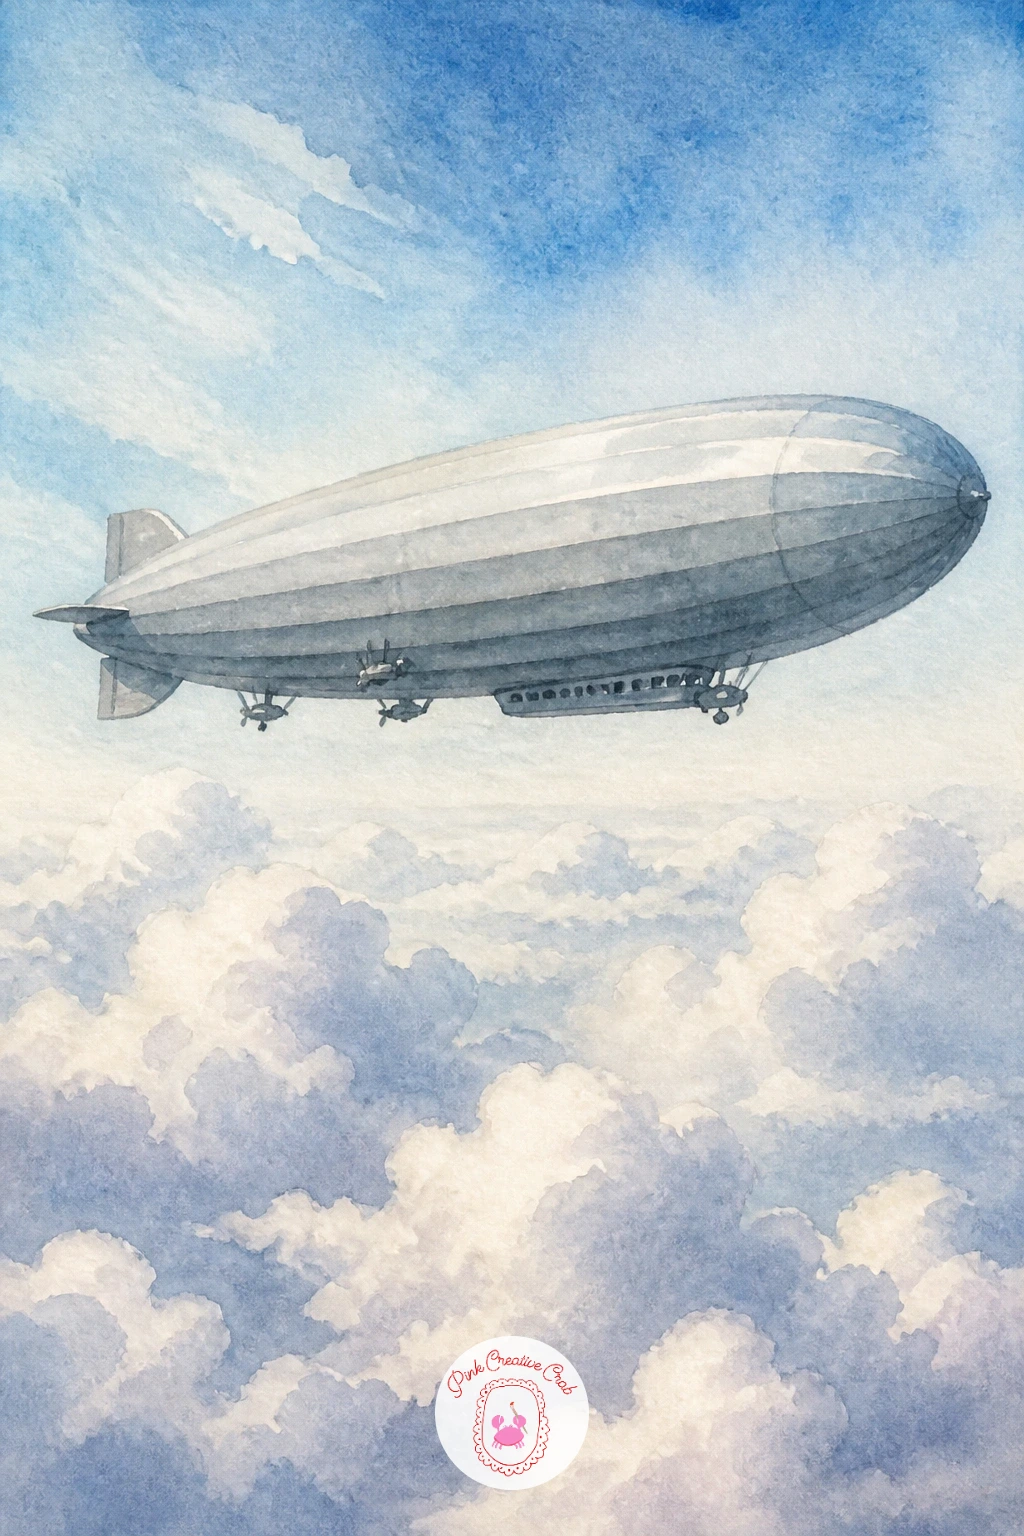
A zeppelin drifting above a sea of clouds is a peaceful, almost dreamlike scene built mostly from soft whites and silvers. Paint the sky first in a gentle gradient from pale blue at the top to near white near the horizon, then while still slightly damp, dab in loose cloud shapes using a tissue to lift color back out, leaving soft white puffy clouds below.
Once everything is dry, paint the zeppelin as one long smooth oval in silver-grey with a small gondola underneath, positioned so it appears to float just above the cloud layer rather than sitting on top of it.
The hands-on trick here is all in that tissue-lifting technique for the clouds: press, do not wipe, and lift in small dabbing motions rather than one smear, which keeps the cloud edges soft and rounded rather than streaky.
If you do not have a spare tissue nearby, a dry flat brush dabbed gently works nearly as well for lifting cloud shapes.
You Will Need
- tissue for lifting clouds
Palette: Silver Grey,Pale Blue,Payne’s Grey,Titanium White
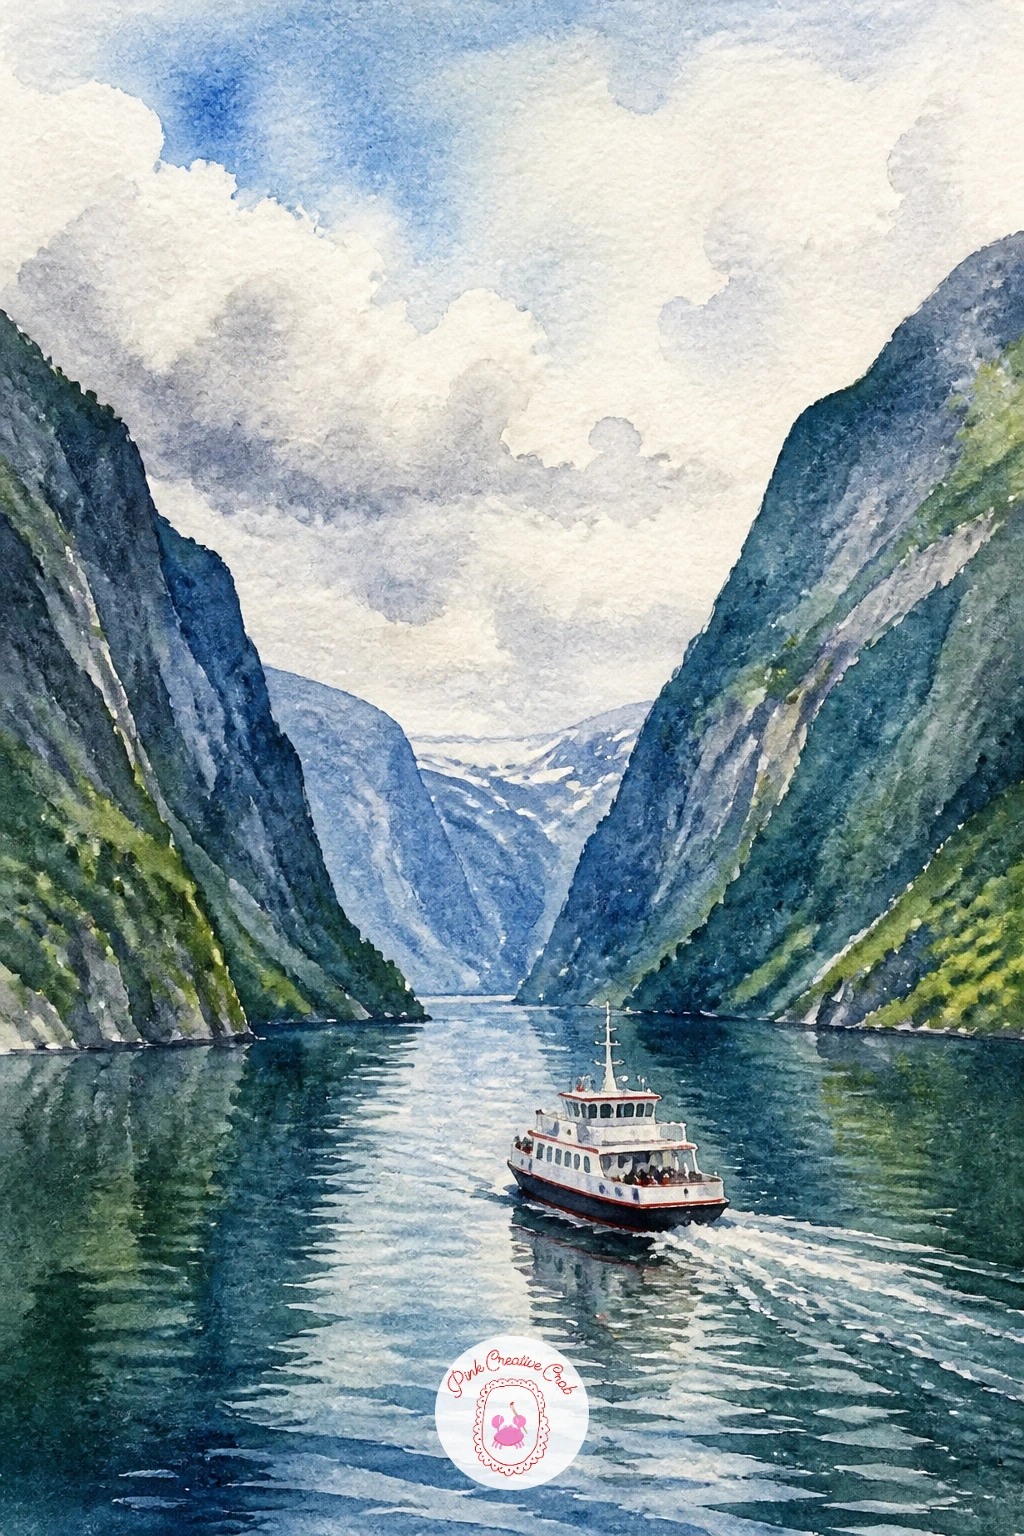
A small ferry crossing a Norwegian-style fjord gives you tall, dramatic cliffs to balance against a tiny boat. Paint the cliffs first on either side of the page in deep cool blues and greens, layering darker tones where they meet the water, and leave the center channel open for the water and ferry.
Once dry, paint the water in a slightly lighter version of the cliff colors, then add the small ferry as a simple white and red boxy shape with a thin trail of wake behind it painted in a few quick horizontal strokes.
Keeping the cliffs noticeably larger and darker than the tiny ferry is the comparison trick that makes this scene feel grand: the ferry should take up no more than a tenth of the page’s width, which exaggerates the scale of the fjord around it beautifully.
If deep blue-green mixes turn muddy, keep your cliff palette to just two pigments plus water rather than mixing in a third color.
Palette: Prussian Blue,Hooker’s Green,Cadmium Red,Titanium White
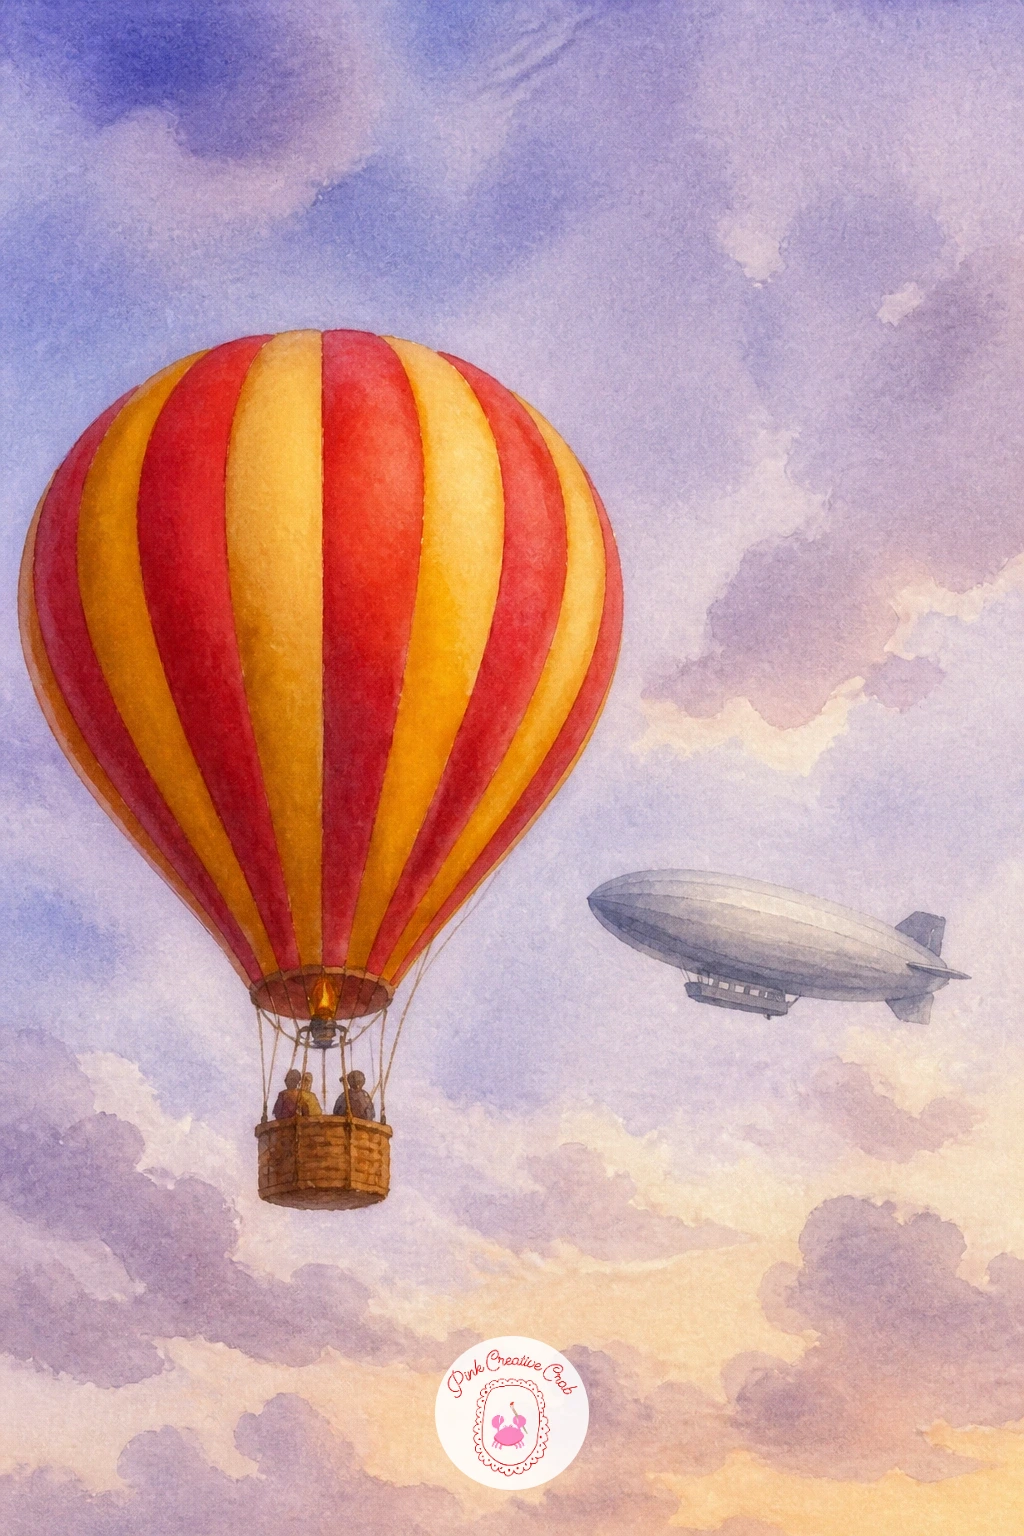
Bringing two of this list’s vehicles together, this scene pairs a colorful balloon with a sleek airship sharing the same stretch of sky. Paint a soft, wide sky wash first in pale blue and lavender, then once dry, place your balloon lower and to one side in bold warm stripes, and the airship higher and further back in muted silver-grey.
Keeping the two at clearly different heights and sizes is what stops this composition from feeling cluttered: the balloon reads as closer and more colorful, the airship as farther away and quieter, which gives the eye a clear path to follow between them rather than two competing focal points.
A few soft clouds scattered between the two, lifted with a dry tissue as before, help separate them further and add depth to the space between.
If you would rather simplify, drop the clouds entirely and let the open sky do that separating work instead.
You Will Need
- tissue for lifting clouds
Palette: Scarlet,Golden Yellow,Silver Grey,Lavender
The last stop on this journey is a balloon drifting above layered rice terraces, a fitting close since it combines the curved landscape shapes from the Tuscan hills idea with the balloon work from the very start of this list. Pencil in a series of curved, stepped terrace lines following the natural contour of a hillside, then paint each level in a slightly different shade of green and gold, working from the lightest distant terraces to the richest ones nearest the bottom of the page.
Once the terraces are dry, add thin reflective strips of pale blue water along a few of the terrace edges, since flooded rice paddies catch the sky’s color beautifully. A single striped balloon in warm orange and cream floats above it all, tying this closing piece back to where the list began.
If your terrace curves feel stiff, loosen your wrist and paint each line in one smooth continuous stroke rather than several short hesitant ones.
Try pairing this piece with the earlier lavender field idea in a small series, since both rely on the same repeated-row trick for depth, just with a different palette each time.
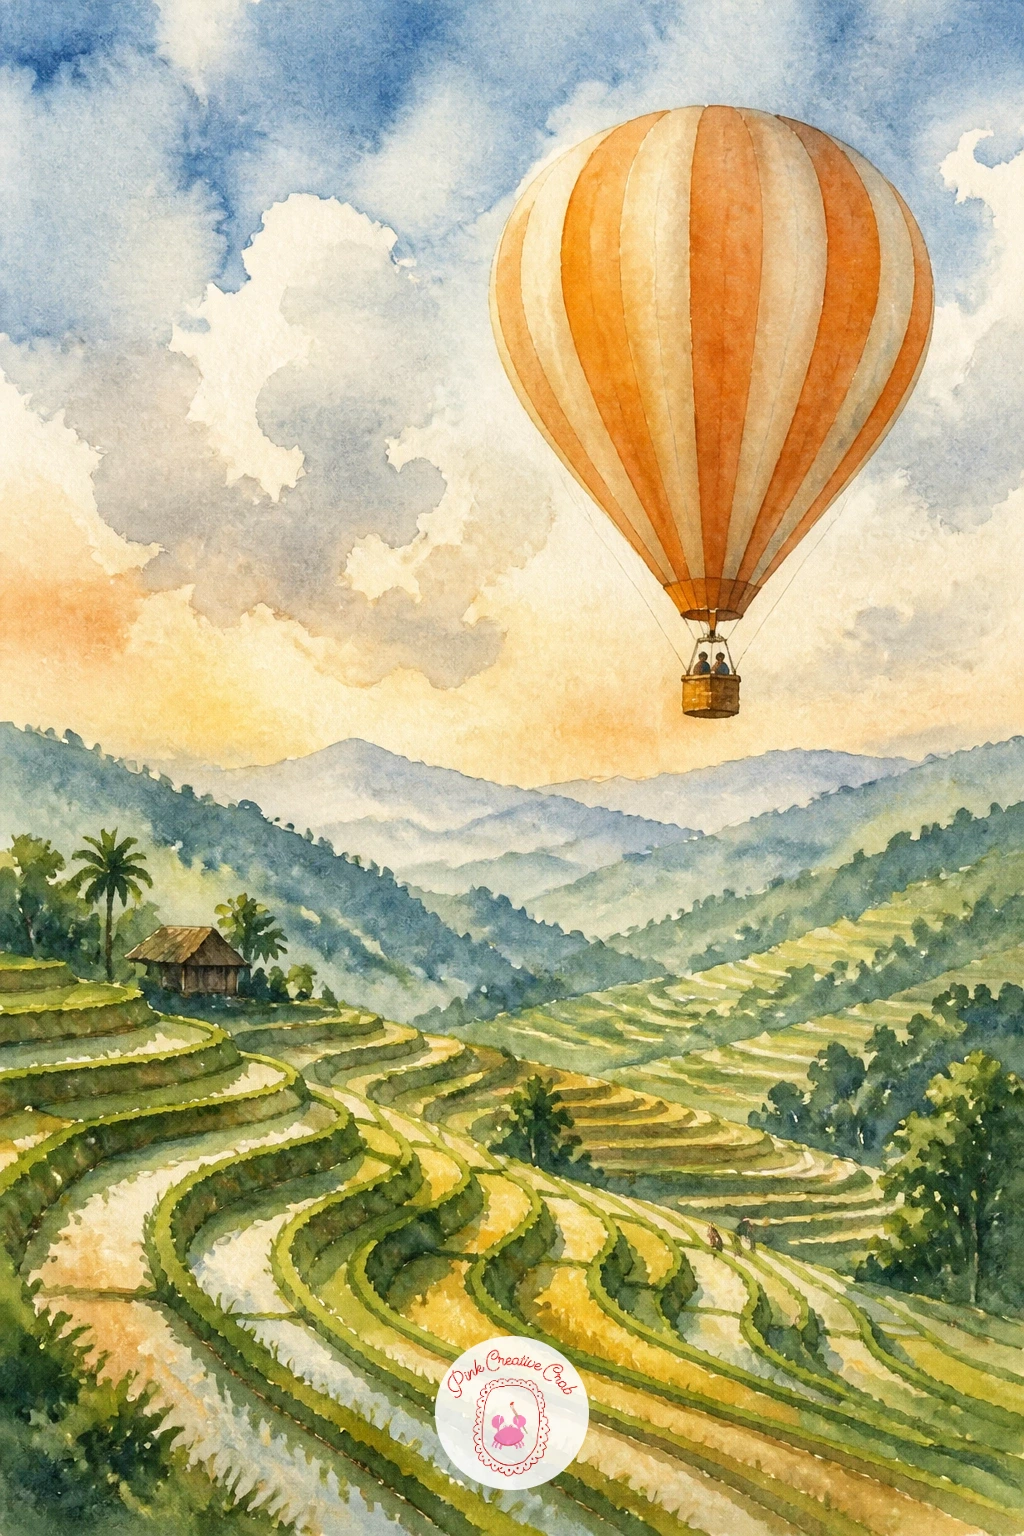
Palette: Sap Green,Golden Ochre,Pale Blue,Cadmium Orange
What to Do Next
Choose one balloon or vintage traveler that caught your eye, tear a small sheet from your watercolor pad, and let the sky go down first while your paint is still loose and juicy. The rest of the scene will follow naturally once that first wash is dry.
Frequently Asked Questions
What paper works best for a watercolor hot air balloon scene?
Cold press watercolor paper around 140lb works best, since its texture holds wet-into-wet sky washes beautifully while still letting you add crisp balloon stripes once it dries.
How do you keep balloon stripes from bleeding into each other?
Let each stripe dry fully before painting the one next to it. If you are in a hurry, a hair dryer on a cool setting speeds up drying between stripes without disturbing the paint.
What is the easiest way to paint a glowing sunrise or sunset sky?
Wet the paper first, then drop warm colors like pink, peach and yellow into the damp area and let them blend on their own, which creates a soft natural glow with very little brushwork.
Do I need masking fluid for these ideas?
No, masking fluid helps for a few scenes with fine details like snowy rooftops, but you can always paint carefully around a shape with your sky color instead if you do not have any on hand.
How small can these travel scenes be painted?
Most of these ideas work beautifully at postcard size or in a small travel journal, since loose, simple shapes actually read better small than they do on a large sheet.
Have any thoughts?
Share your reaction or leave a quick response — we’d love to hear what you think!
-
 0
-
0
-
0
-
0
-
0
-
0


