

A penguin painting is the happiest excuse to grab black, white and ice blue and build a whole cute little world in one sitting. Every bird below is painted as smooth opaque shapes, so you block in simple forms first and let the personality come from one tilted head or one small prop, nothing fussy.
You will find all 29 species and their real homes here, from snowy Antarctic huddles to sandy African beaches and even a rainforest penguin, each one sized to fill the canvas and finish today. Pick the one that makes you smile first and start there.
Using these images: free for personal projects such as printing, coloring, cards, journals and gifts. Handmade items that include them may be sold up to 30 pieces per design. More than that is commercial use and is not permitted, and neither is selling or sharing the images themselves or passing them off as your own. Please ask before any other use.
Start simple: an emperor chick standing on its parent’s feet is the easiest penguin story to tell and a gentle way into the whole series. Block in the adult as one tall oval body in black and white first, then paint the grey fluffy chick as a smaller rounded shape tucked against its belly, feet just peeking below.
Work largest shapes to smallest: body, head, beak, eye, then the pale yellow neck patch last. If the chick ends up looking too big or too small, measure it against the parent’s head rather than guessing, the chick should sit about as tall as the adult’s head and neck together.
Beginners can leave the background a flat ice blue wash; more confident painters can soften it with a dry brush of white for drifting snow. If you do not have grey paint for the chick, mix white into black a little at a time until you get a warm charcoal.
Finish with one white gel pen highlight in each eye today, it brings the whole pair to life instantly.
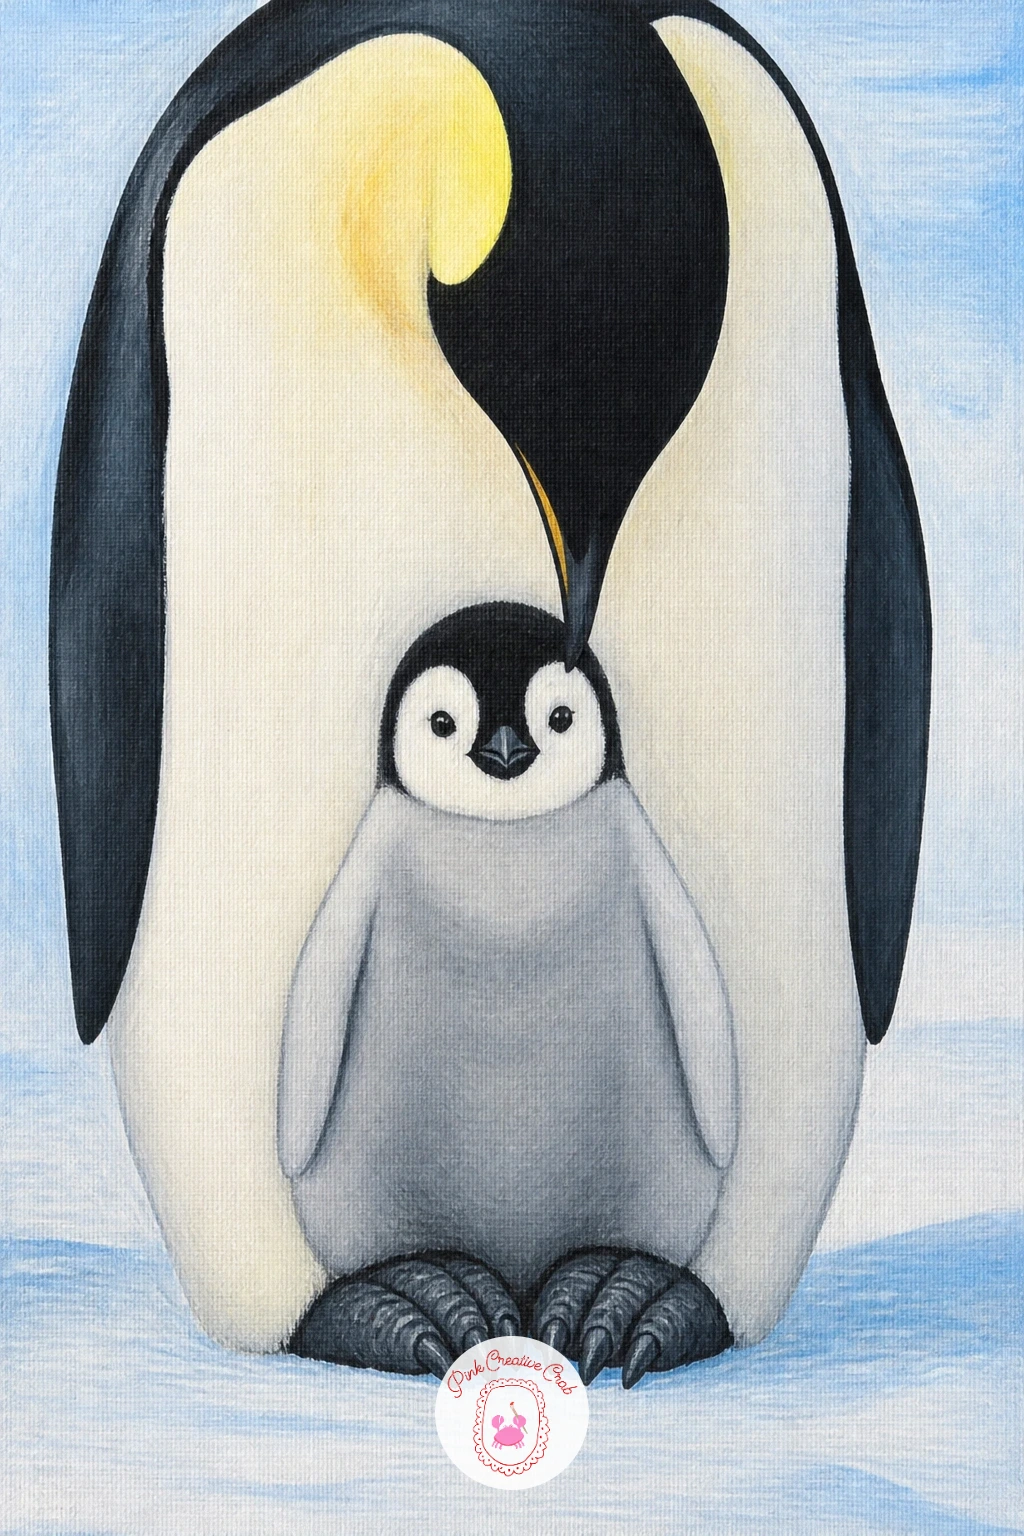
Palette: Mars Black,Titanium White,Ice Blue,Soft Yellow
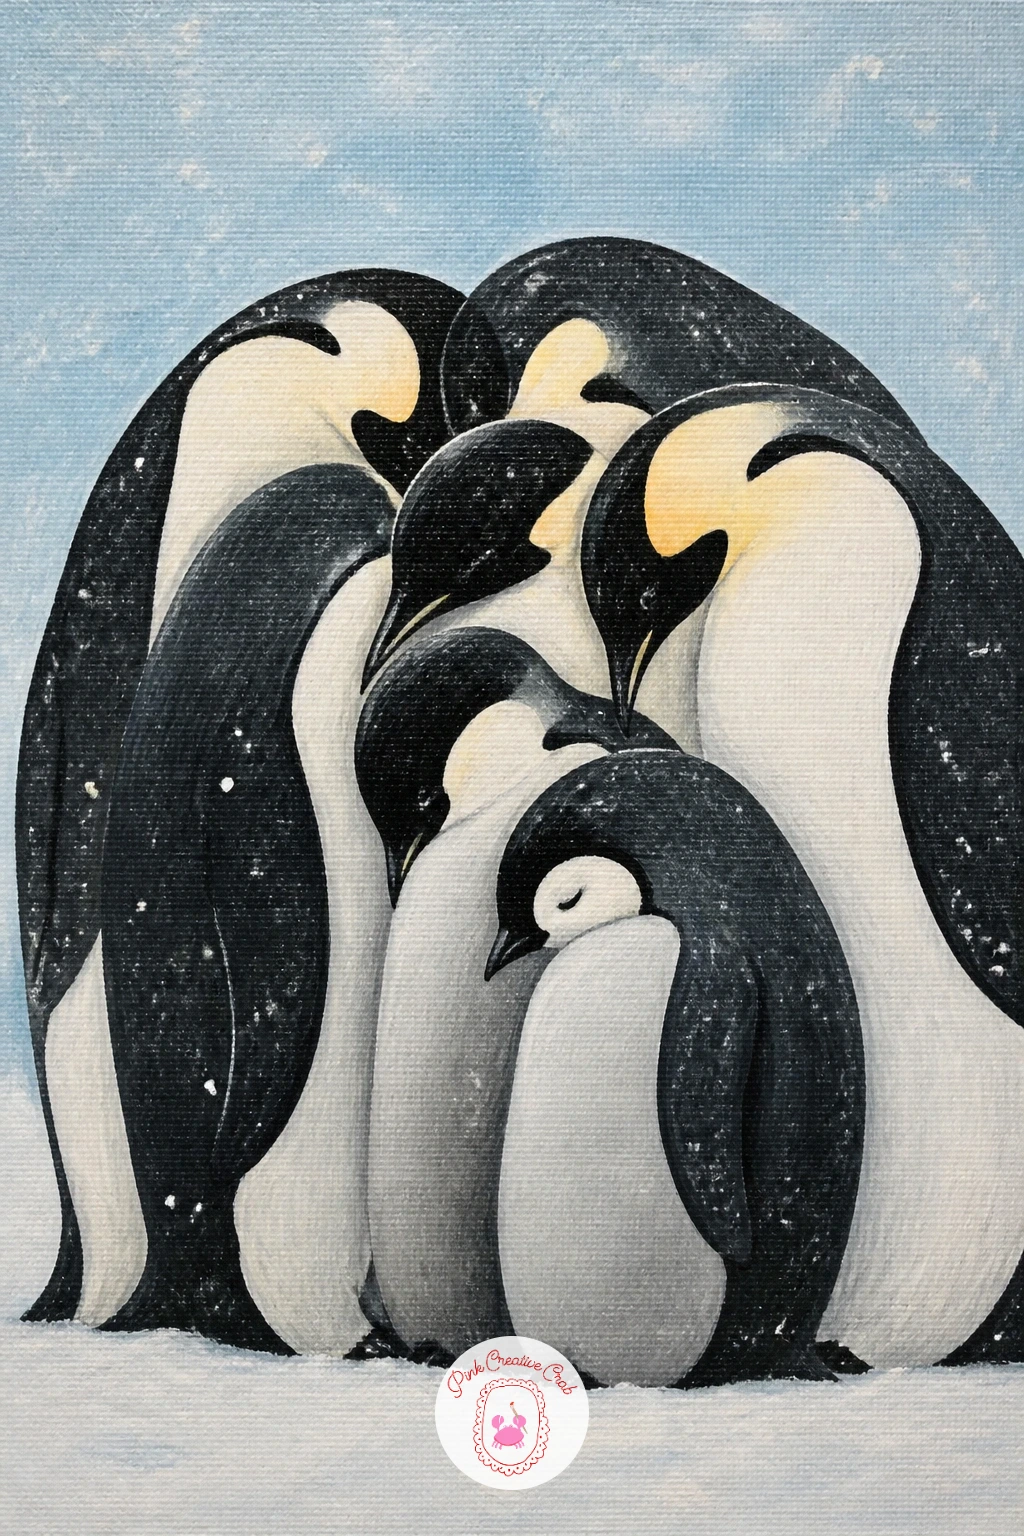
Build on that single emperor by grouping a few together: an emperor huddle in falling snow turns one bird into a cosy crowd without much extra work, since every body is the same simple oval. Paint three or four overlapping shapes, varying the lean of each head so no two are identical.
Work back to front, painting the furthest, smallest penguin first and layering the nearer ones over it so the overlap looks natural. The common mistake here is spacing them too evenly, which flattens the scene, so cluster two close together and leave one slightly apart.
Use a stiff dry brush loaded with white paint and almost no water to flick snow across the whole canvas last, this is what sells the blizzard. If you do not have a stiff brush, an old toothbrush flicked with your thumb gives the same scatter.
Keep every beak and eye a single confident dot rather than outlining them, it keeps the flock feeling soft and cold.
You Will Need
- old toothbrush or stiff dry brush for snow flicks
Palette: Mars Black,Titanium White,Payne’s Grey,Ice Blue
Widen the scene again with a king penguin colony on a beach, which trades snow for golden sand and lets you bring in warmer tones for the first time. Sketch a loose horizon line low on the canvas, then paint a cluster of king penguins as tall slim black and white shapes with a bold orange patch at the neck.
Paint the sand first as a flat warm base, then the penguins over it largest to smallest working toward the back of the group to suggest distance. Kings are taller and slimmer than most other penguins, so compare height to width as you block each one in, they should look nearly twice as tall as they are wide.
The orange neck patch is easy to overdo, so paint it as one soft curved stripe rather than a hard block, it reads as warmer and more natural. Swap orange for a deep soft yellow if that is what is in your set, kings vary a little in tone anyway.
Finish today by adding one gull or wave line far back to anchor the beach setting without extra detail.
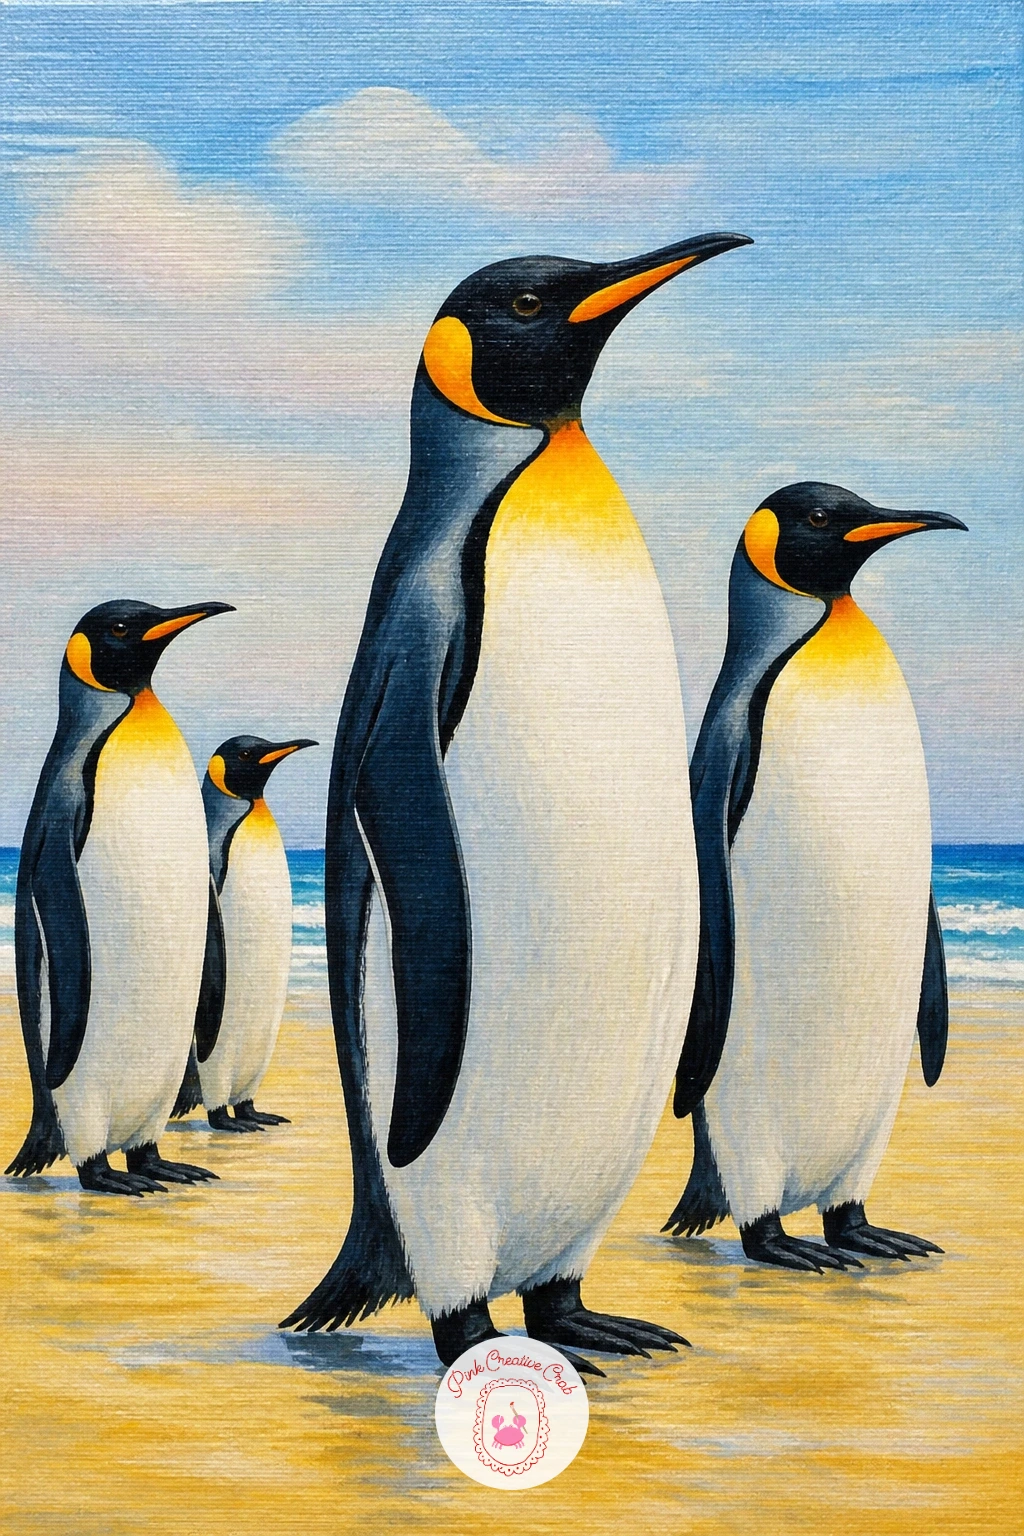
Palette: Mars Black,Titanium White,Sand Beige,Burnt Orange
If you enjoy painting beach wildlife scenes, the approach here works for other coastal subjects too, see the ideas in 15 Easy Acrylic Painting Ideas for Beginners.
Give your penguin a job: a gentoo carrying a pebble to its mate is a sweet little story and a good one for practicing a mid-stride pose. Paint the body first in a gentle forward lean, one foot slightly raised, then add the small grey pebble in the beak as the very last detail.
Gentoos have a distinctive white patch stretching over the top of the head like a cap, paint this after the black head shape has dried so the edge stays crisp rather than muddy. Lay your reference or a printed photo beside the canvas and compare the angle of the lean every few strokes, it is easy to drift the body upright by accident.
If the pose looks stiff, loosen the tail feathers into a slight upward flick, it suggests motion without any extra painting. No small round brush for the pebble is needed either, the flat tip of a liner brush dabbed once works just as well.
Keep the background a soft plain ice blue so the pebble stays the clear focal point.
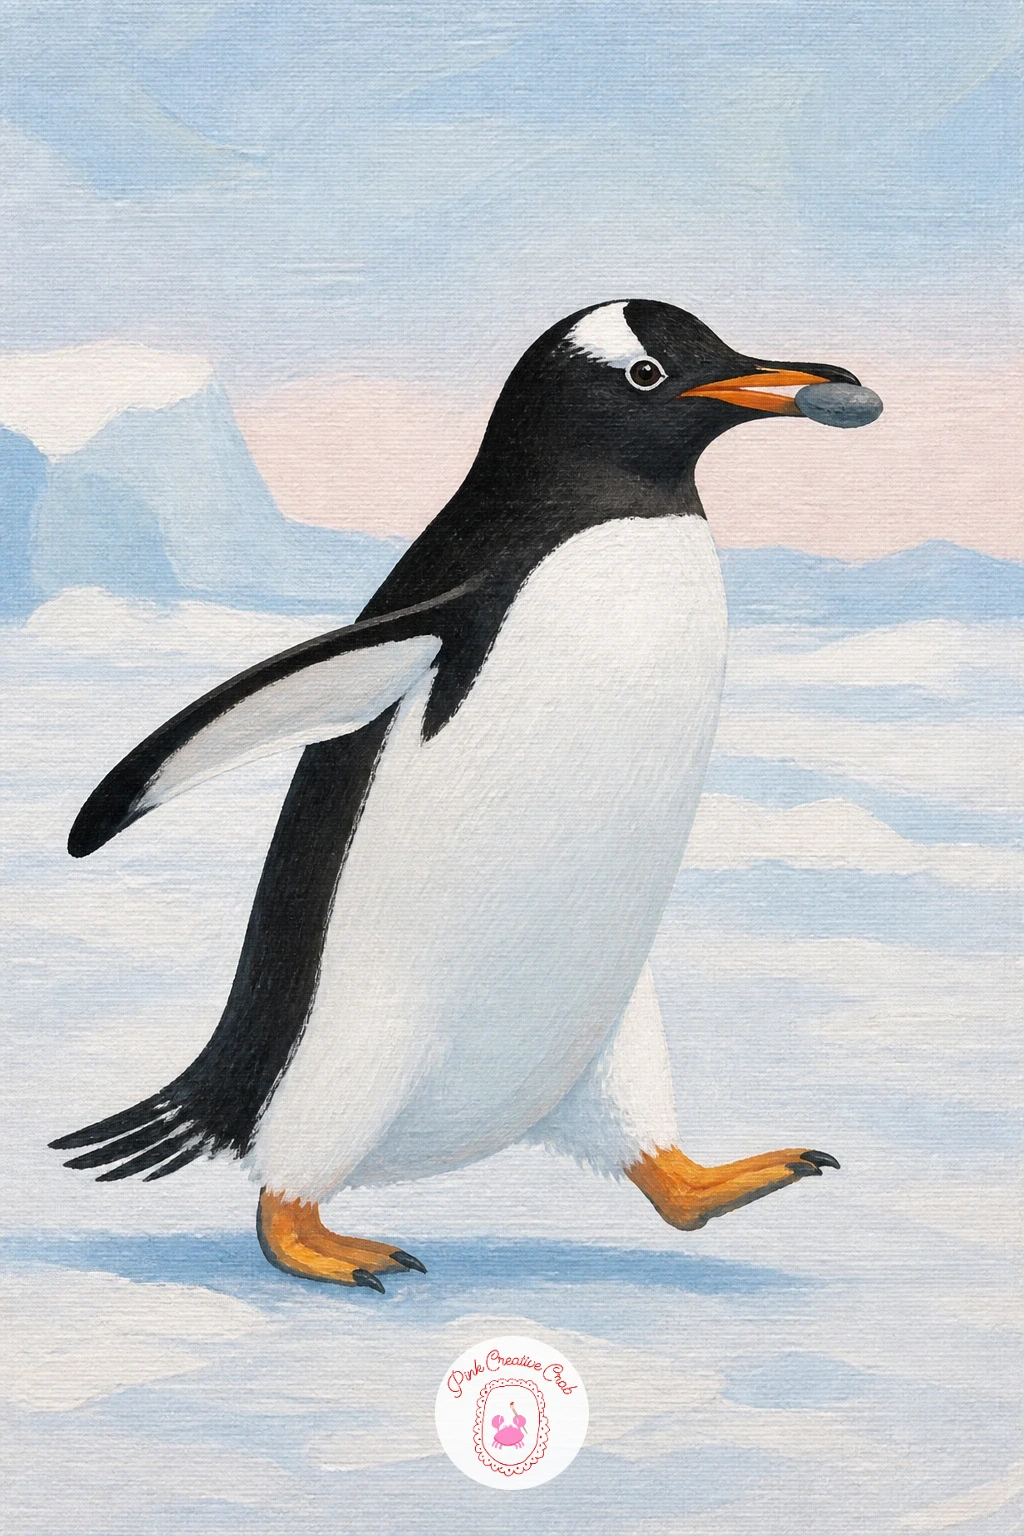
Palette: Mars Black,Titanium White,Stone Grey,Ice Blue
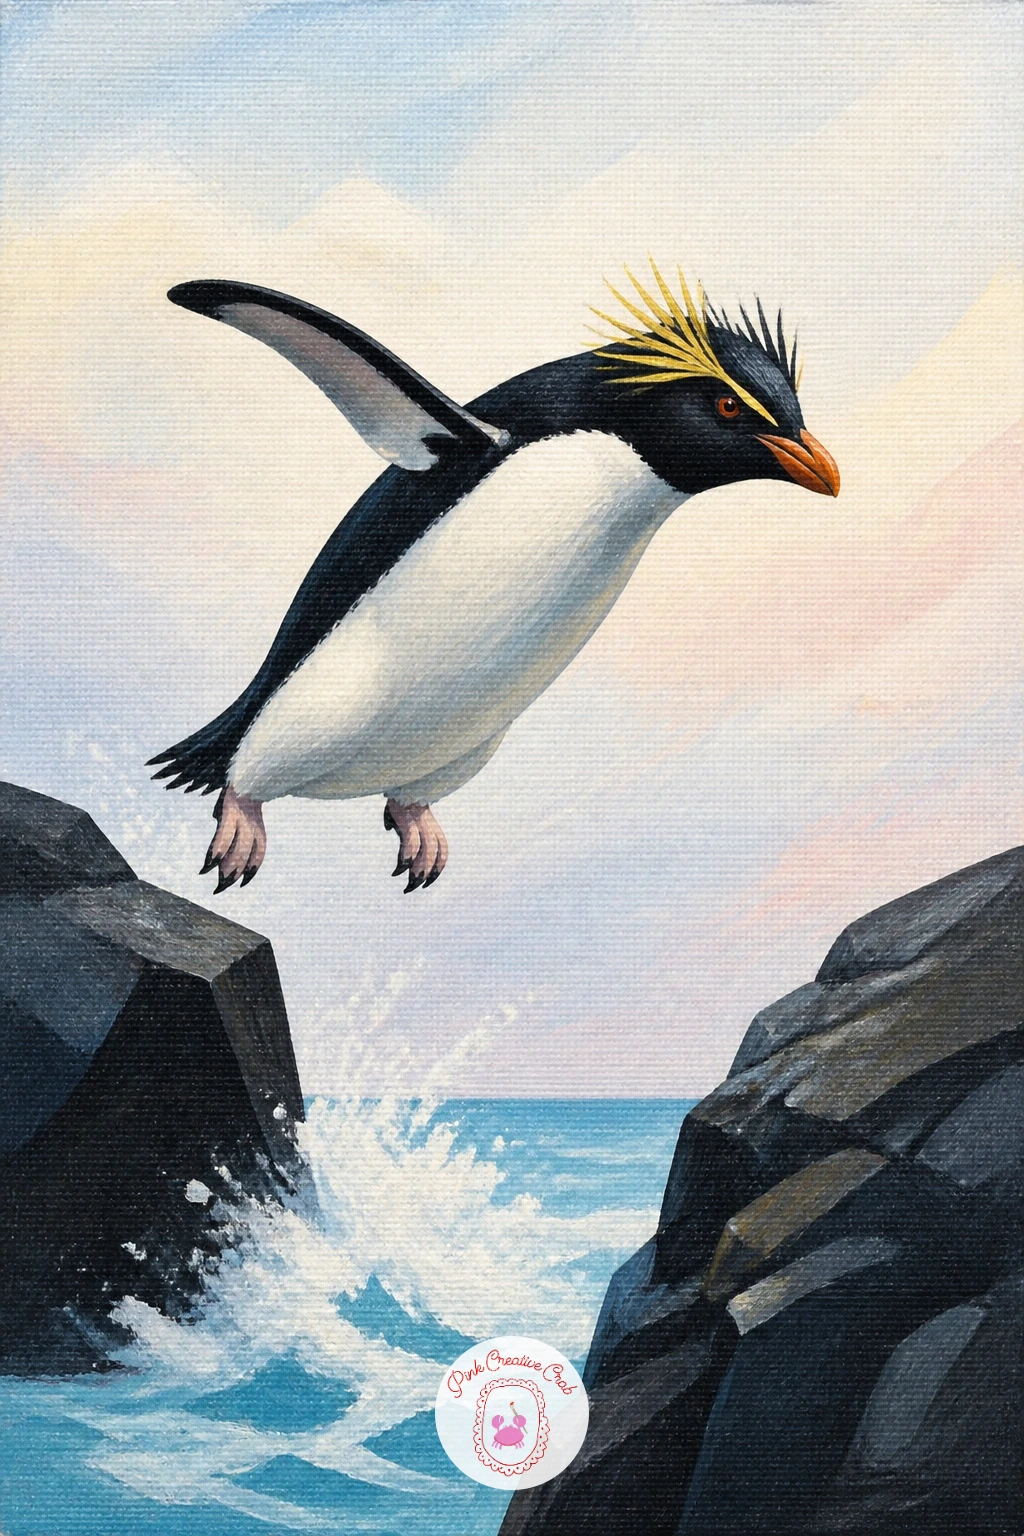
Where does the eye go first in a jumping pose. For a rockhopper jumping between rocks, it goes straight to the spiky yellow crest, so place the light source coming from above and slightly to one side so that crest catches a highlight while the rest of the body sits in soft shadow.
Block in two dark rock shapes first, leaving a gap between them, then paint the rockhopper mid-air in that gap with both feet tucked up. Add the crest feathers as short loose flicks of soft yellow paint, angled backward as though the wind is catching them from the jump.
A common slip is painting the body too flat against the rocks, so round the belly out with a touch of white highlight on the side facing the light. If yellow paint feels too thin over black, undercoat the crest area in white first and let it dry before adding yellow on top.
Finish with a single spray of sea foam between the rocks using a dry brush for texture.
You Will Need
- old toothbrush or stiff dry brush for foam texture
Palette: Mars Black,Titanium White,Soft Yellow,Slate Grey
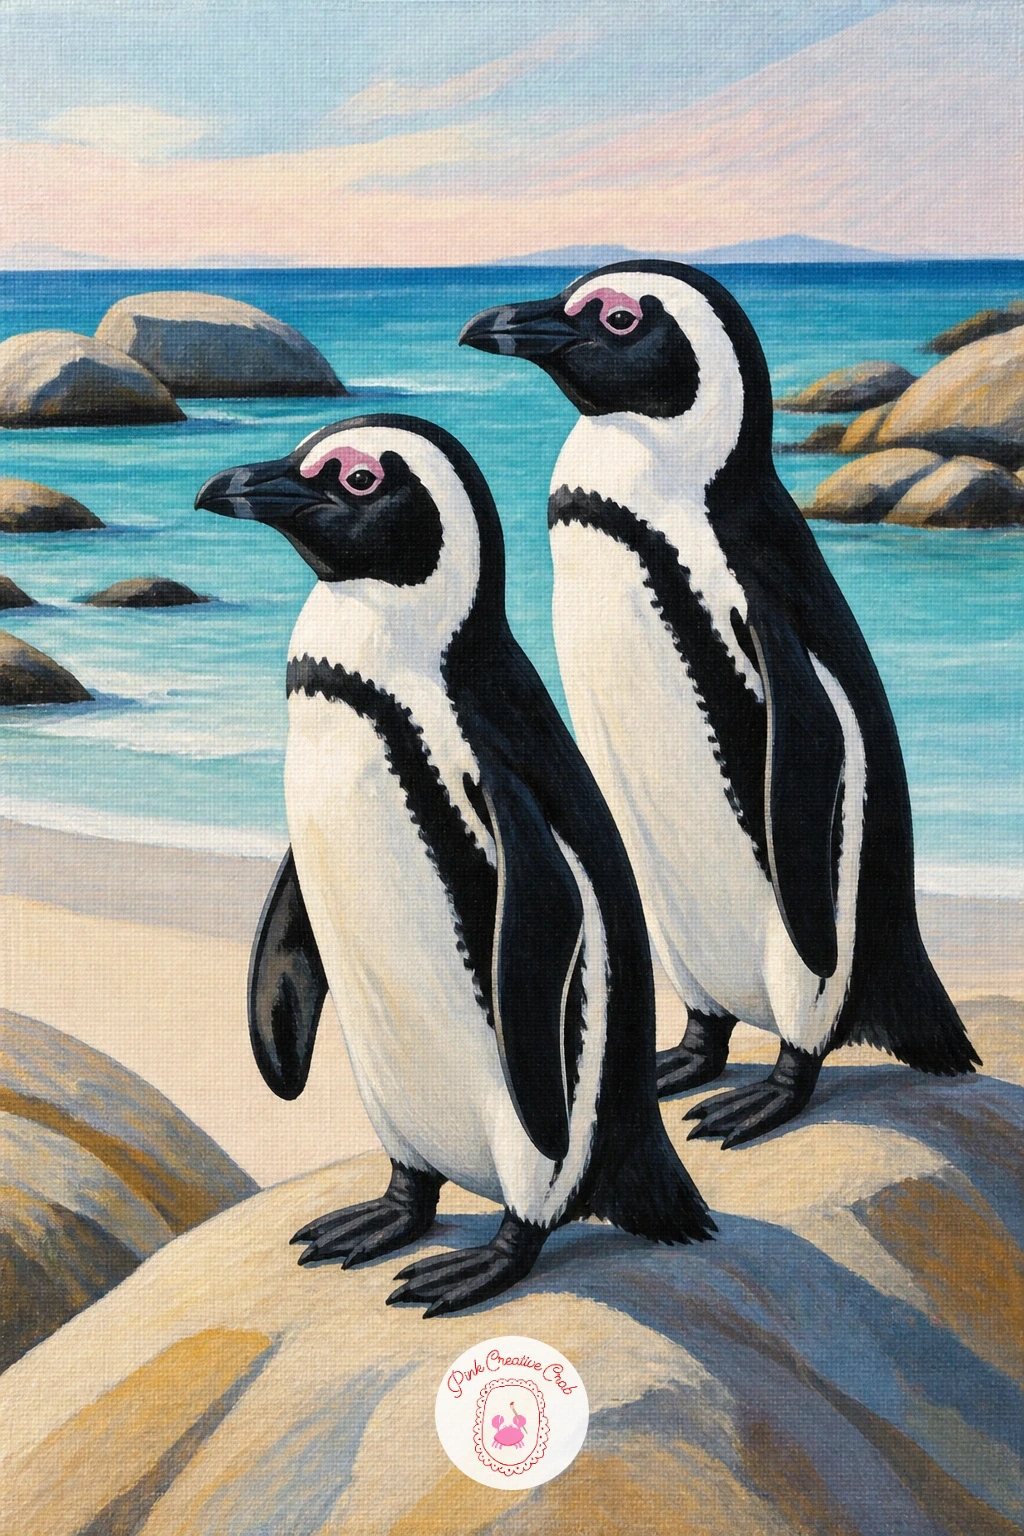
Trade ice for turquoise with African penguins on Boulders Beach, a scene built entirely on warm sand and bright water rather than snow. Paint the sea first as a smooth turquoise gradient, lighter near an imagined shoreline, darker toward the top, then add two or three rounded granite boulders in warm grey before the penguins go in last.
These penguins are smaller and rounder than emperors or kings, so keep their bodies compact with a pink patch above each eye, their one truly distinctive feature. Paint that patch only once the black head shape is fully dry, a single small dab of dusty pink is enough, more reads as cartoonish.
The easy mistake is making the turquoise too saturated, which fights with the penguins for attention, so mix in a touch of white to soften it before it goes down. If you do not have a true turquoise, mix blue and a little green with white until it sits between the two.
Add one tip today: paint the boulders slightly warmer in tone than the sand so they visually sit forward in the scene.
Palette: Mars Black,Titanium White,Turquoise,Dusty Pink
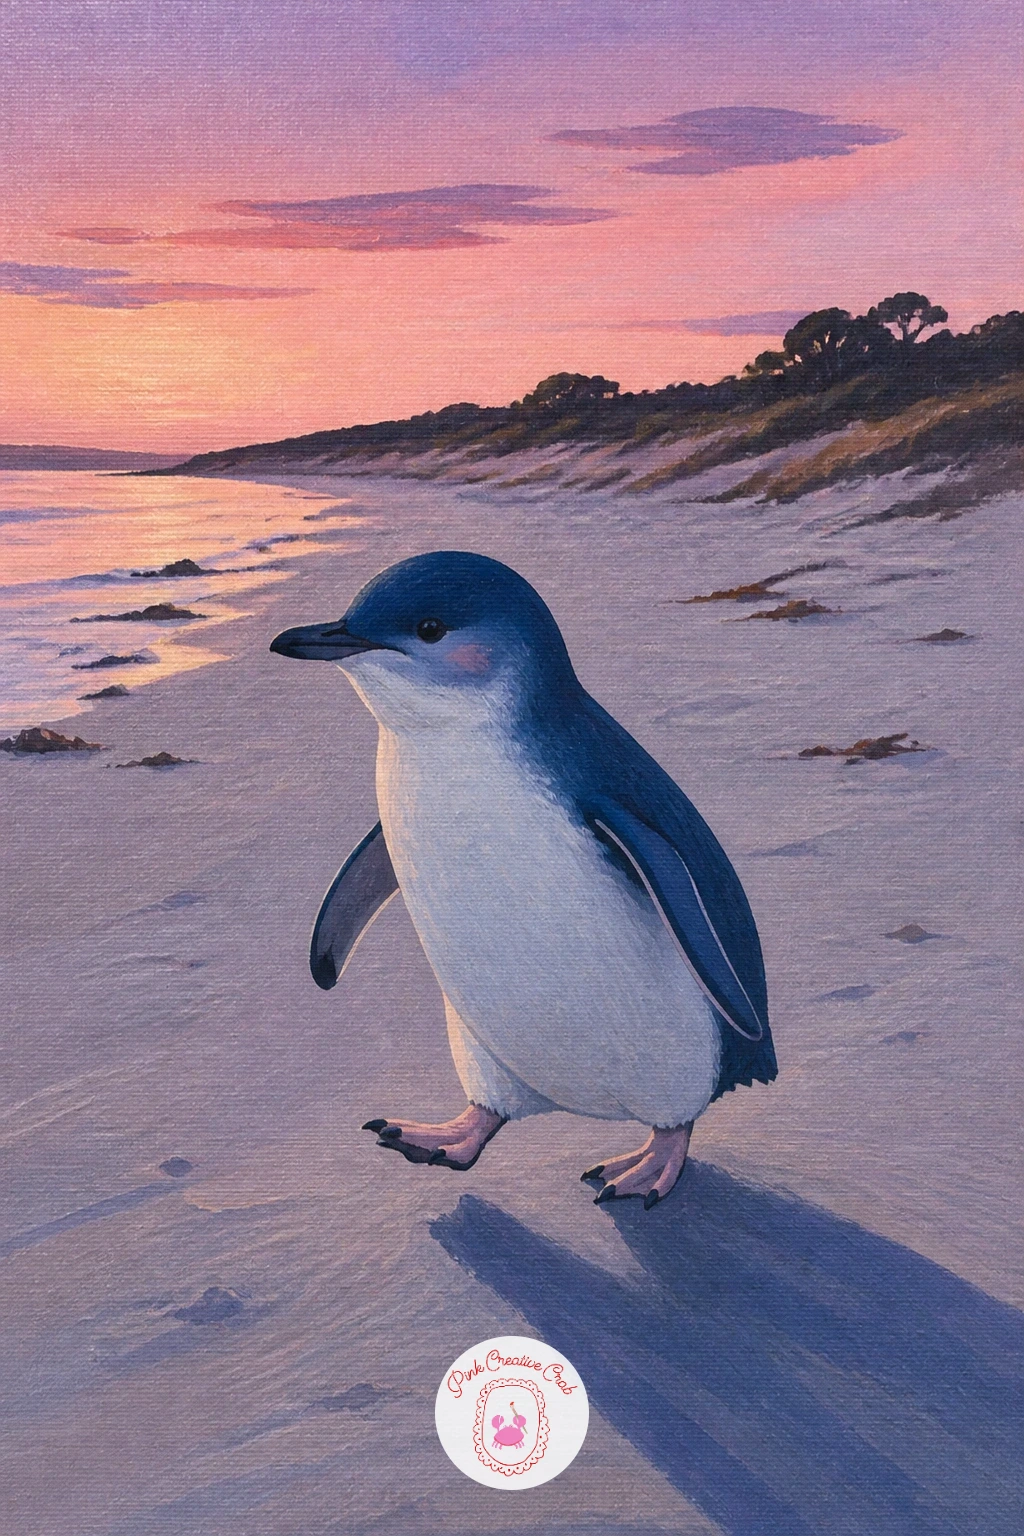
Soften the palette next for a little blue penguin waddling home at dusk, the smallest penguin species and a good excuse to practice a warm sunset sky behind a cool blue body. Paint the sky first in horizontal blush and lavender bands, blending wet into wet while the paint is still workable, then let it dry fully before adding the penguin.
Little blues have a soft blue-grey back rather than black, mix white into Payne’s grey with a hint of blue until you find that dusty tone. Paint the body in profile, waddling toward one side of the canvas, with its shadow stretched long behind it to sell the low evening light.
If the sunset blend looks streaky, go back over it with a dry brush once still slightly wet to feather the bands together. No blending brush at hand, a clean dry flat brush used lightly works the same way.
Finish by adding one or two dark shrub shapes along the horizon for a sense of coastal scrub at dusk.
Palette: Payne’s Grey,Titanium White,Blush Sky,Lavender
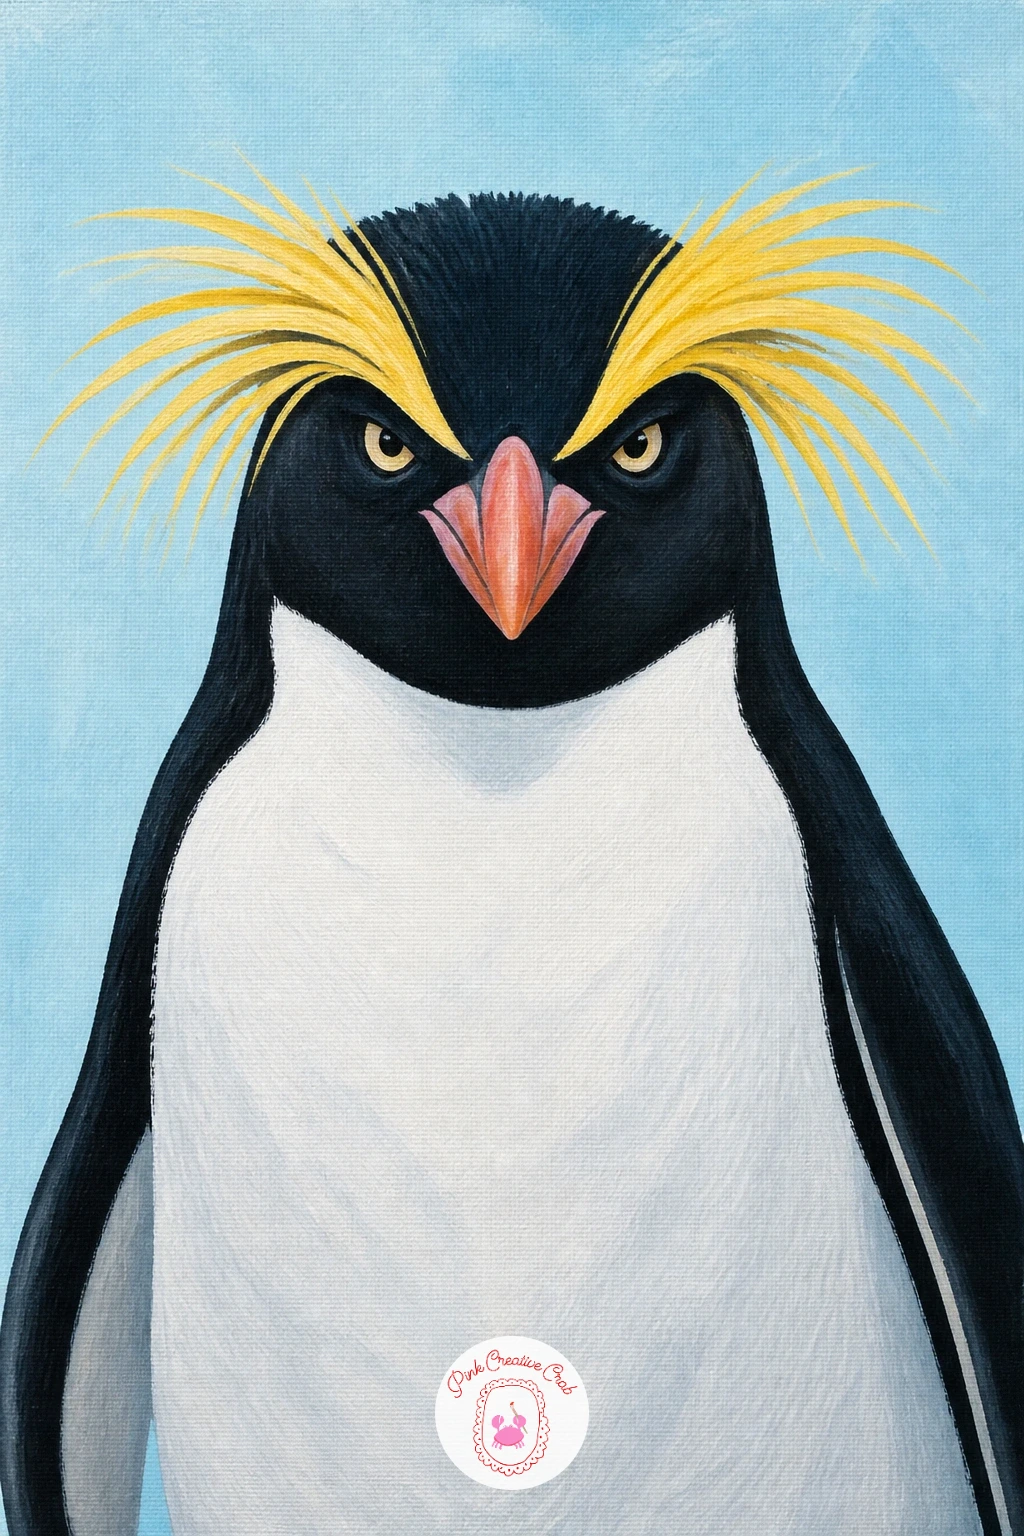
Follow the blue dusk scene with something brighter: a macaroni penguin with a yellow crest is almost entirely about getting those wild feathers right, since the body itself is a simple black and white oval. Block the body in first and let it dry completely before touching the crest, this stops the yellow from dragging into wet black and turning muddy.
Paint the crest as several loose curved strokes fanning from above each eye, varying the length and angle of each stroke so it feels windblown rather than combed flat. Compare the crest width to the width of the head itself, it should spread roughly twice as wide as the head to look convincingly dramatic.
The feathers can end up too neat and wig-like, so once the yellow has dried, drag a fine dry brush with a touch of orange along a few strands for depth and movement. If yellow paint feels weak over black, two thin coats beat one thick one every time.
Keep the background plain ice blue so every bit of attention stays on that crest.
Palette: Mars Black,Titanium White,Soft Yellow,Burnt Orange
Keep the energy up with an Adelie sliding on its belly across the ice, a pose built entirely around one strong diagonal line. Sketch that line first in light pencil before any paint goes down, it keeps the whole body angled consistently from head to tail instead of looking bent in the middle.
Paint the body flat along the diagonal with both flippers pressed back like tiny wings, then add a short white spray behind the feet to suggest the push-off. Adelies have a simple white ring around each eye, a small but important detail, paint it only after the black head is dry so the edge stays clean.
If the slide looks static rather than fast, angle the flipper strokes further back and lengthen the spray trail behind, speed reads through direction more than detail. No pencil for sketching the diagonal, a thinned stripe of pale paint works as a guide just as well.
Add one tip for today: tilt the whole canvas slightly while painting the spray trail, gravity helps the paint drip in the right direction.
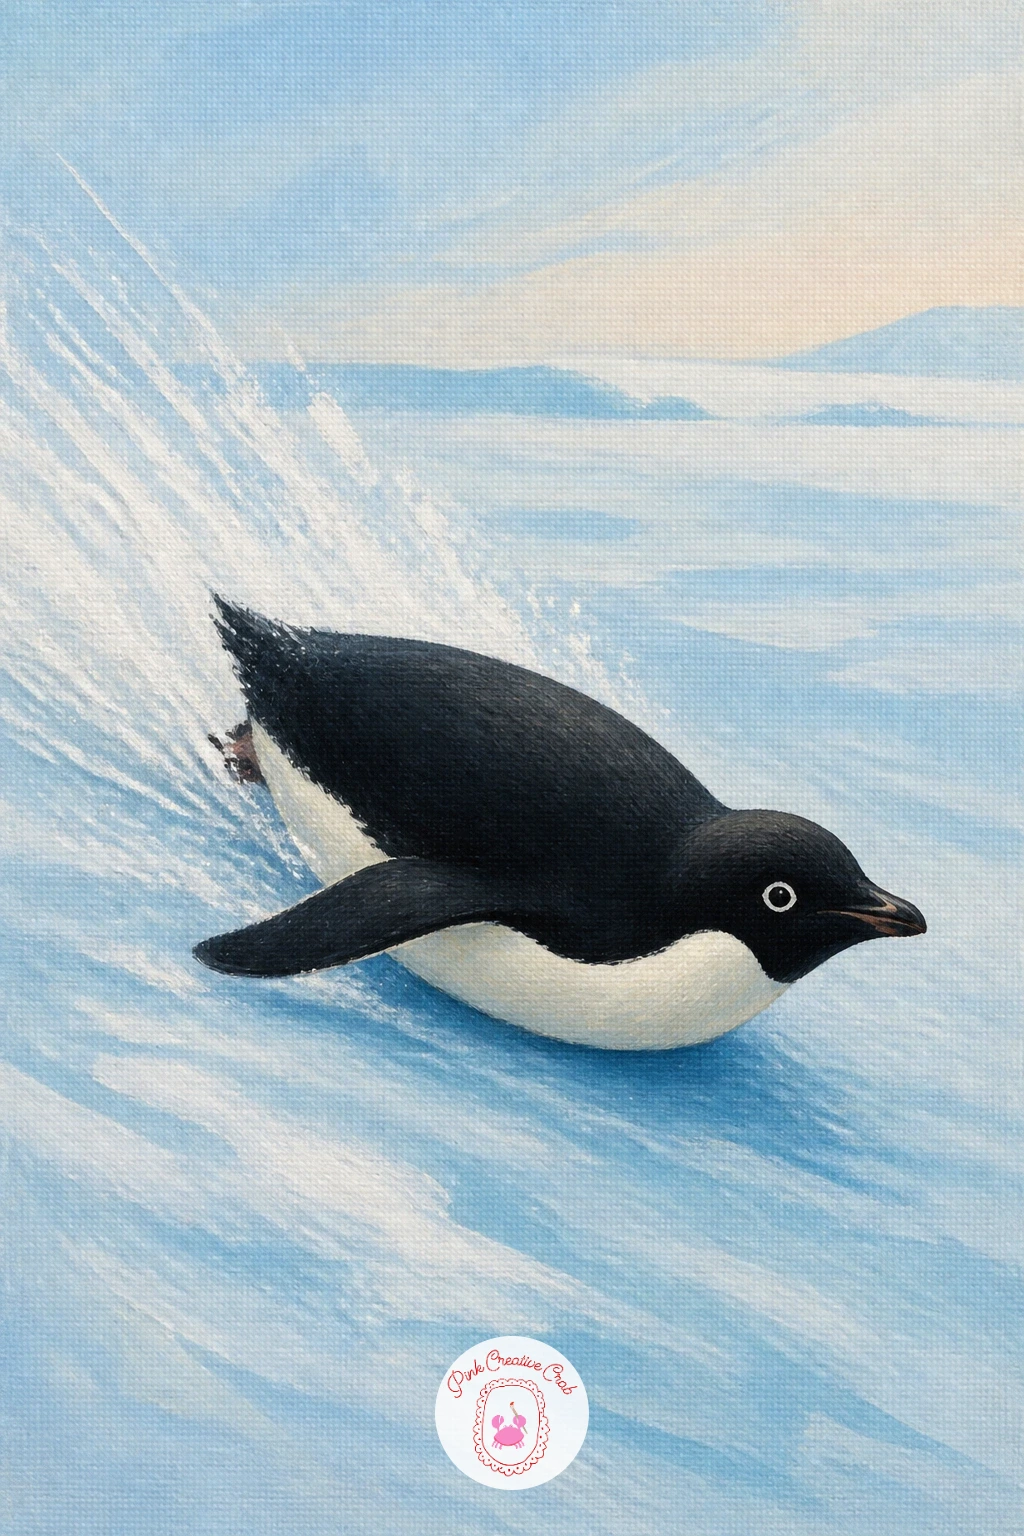
Palette: Mars Black,Titanium White,Ice Blue,Slate Grey
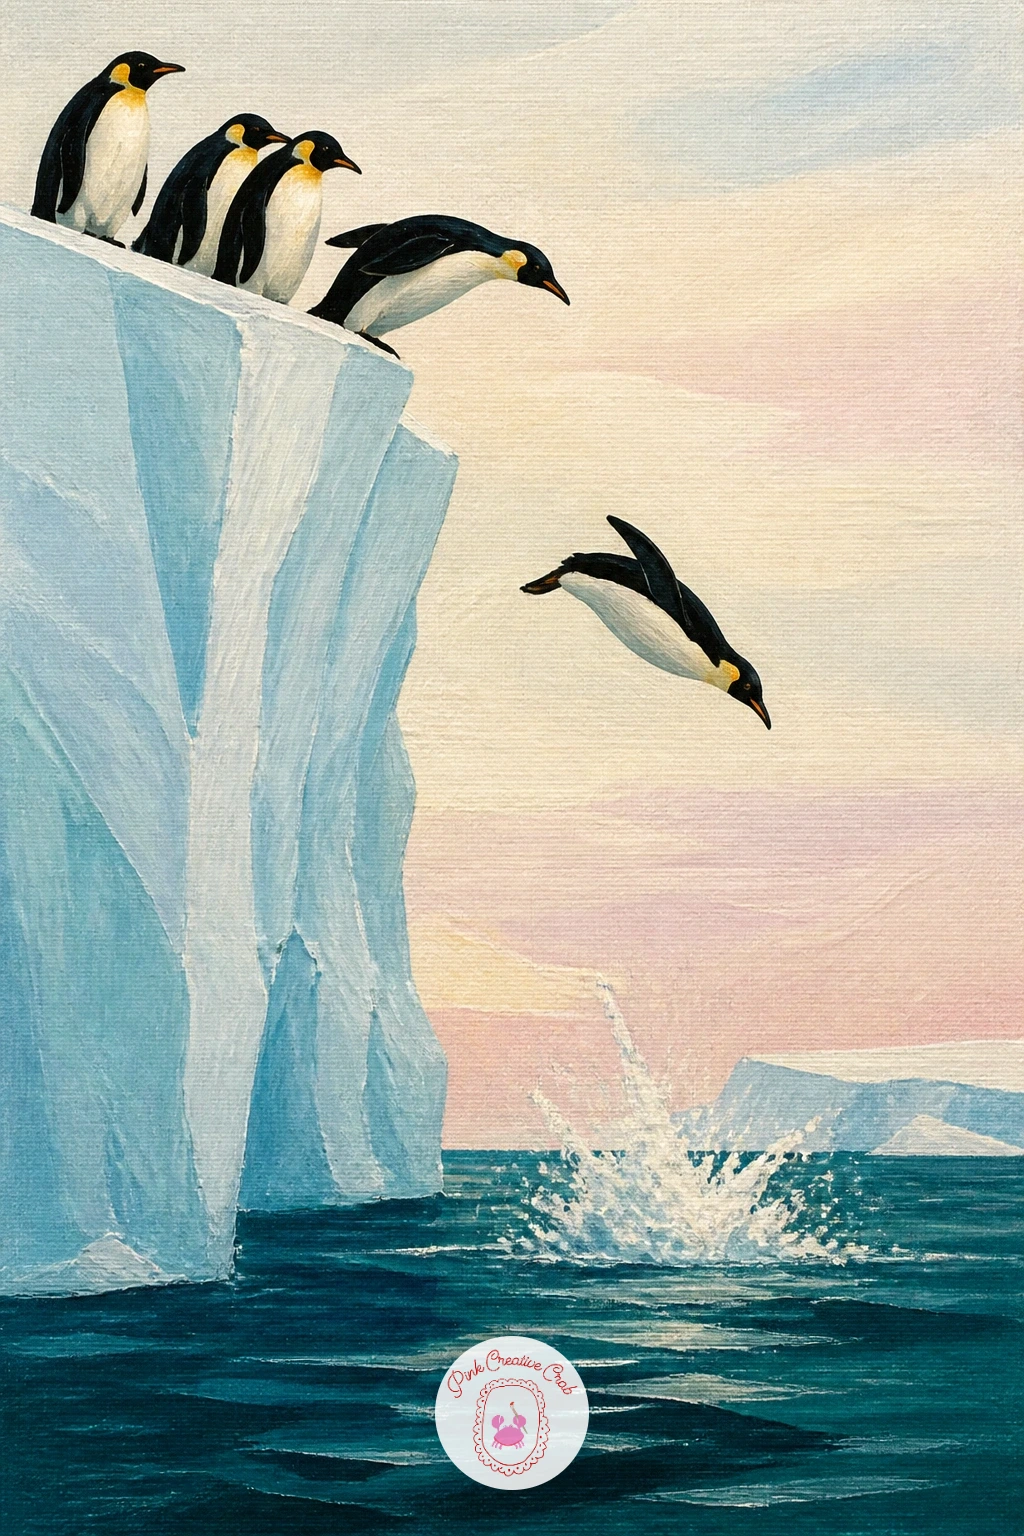
Raise the stakes with penguins jumping off an iceberg, a scene that needs a clear sense of height to work. Paint the iceberg first as a tall pale blue-white wedge shape, its base fading into darker water below, then place two or three penguins at different points of the jump, one still standing at the edge, one mid-air, one already breaking the water.
Eye level sits low here, near the waterline, which makes the iceberg loom upward and the falling birds feel like they are dropping past the viewer. Keep each penguin’s body angle slightly different to show the stages of the fall, arms back, body curling forward, splash beginning.
The water splash is where this piece can go wrong if it is painted too soft, so use short choppy white strokes rather than a smooth blend for the impact point. If a palette knife is not available for texture, the edge of an old gift card dragged through wet white paint gives a similar sharp splash.
Finish with a few scattered white dots rising from the splash for extra energy.
You Will Need
- old plastic card or palette knife for splash texture
Palette: Mars Black,Titanium White,Ice Blue,Deep Teal
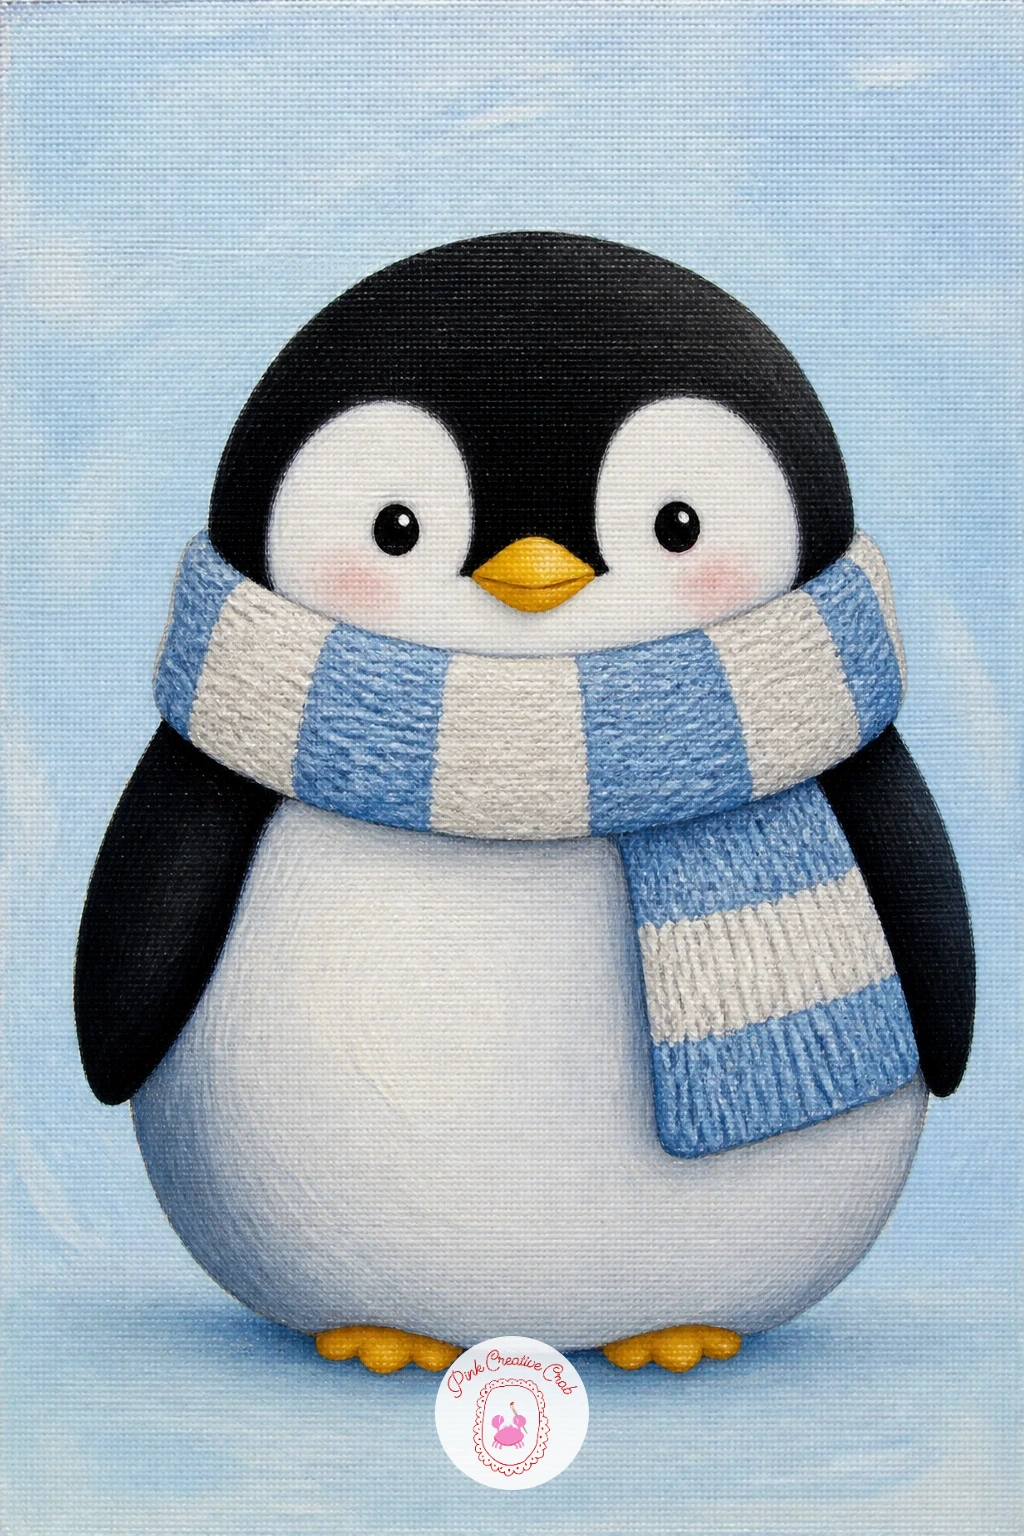
Cosy things up with a penguin in a knitted scarf, one of the simplest paintings in this whole list and a nice one for a quick finish. Block the body in first as a single rounded black and white shape, then wrap the scarf around the neck last in two or three overlapping loops with the ends trailing down one side.
Paint the scarf stripes with a small flat brush in short confident strokes rather than trying to draw each line first, uneven stripes actually look more like real knit texture. If the stripes blur together, let the base scarf colour dry fully before adding the second stripe colour on top.
No red or green in your set for a classic scarf, any two contrasting colours work just as well, even soft yellow and blush look charming together. This is a ten-minute piece as described, plain body, simple scarf, done.
For a forty-minute version, add a light dusting of snow in the background and a small puff of breath near the beak using soft white dry-brush strokes.
Palette: Mars Black,Titanium White,Blush Pink,Soft Yellow
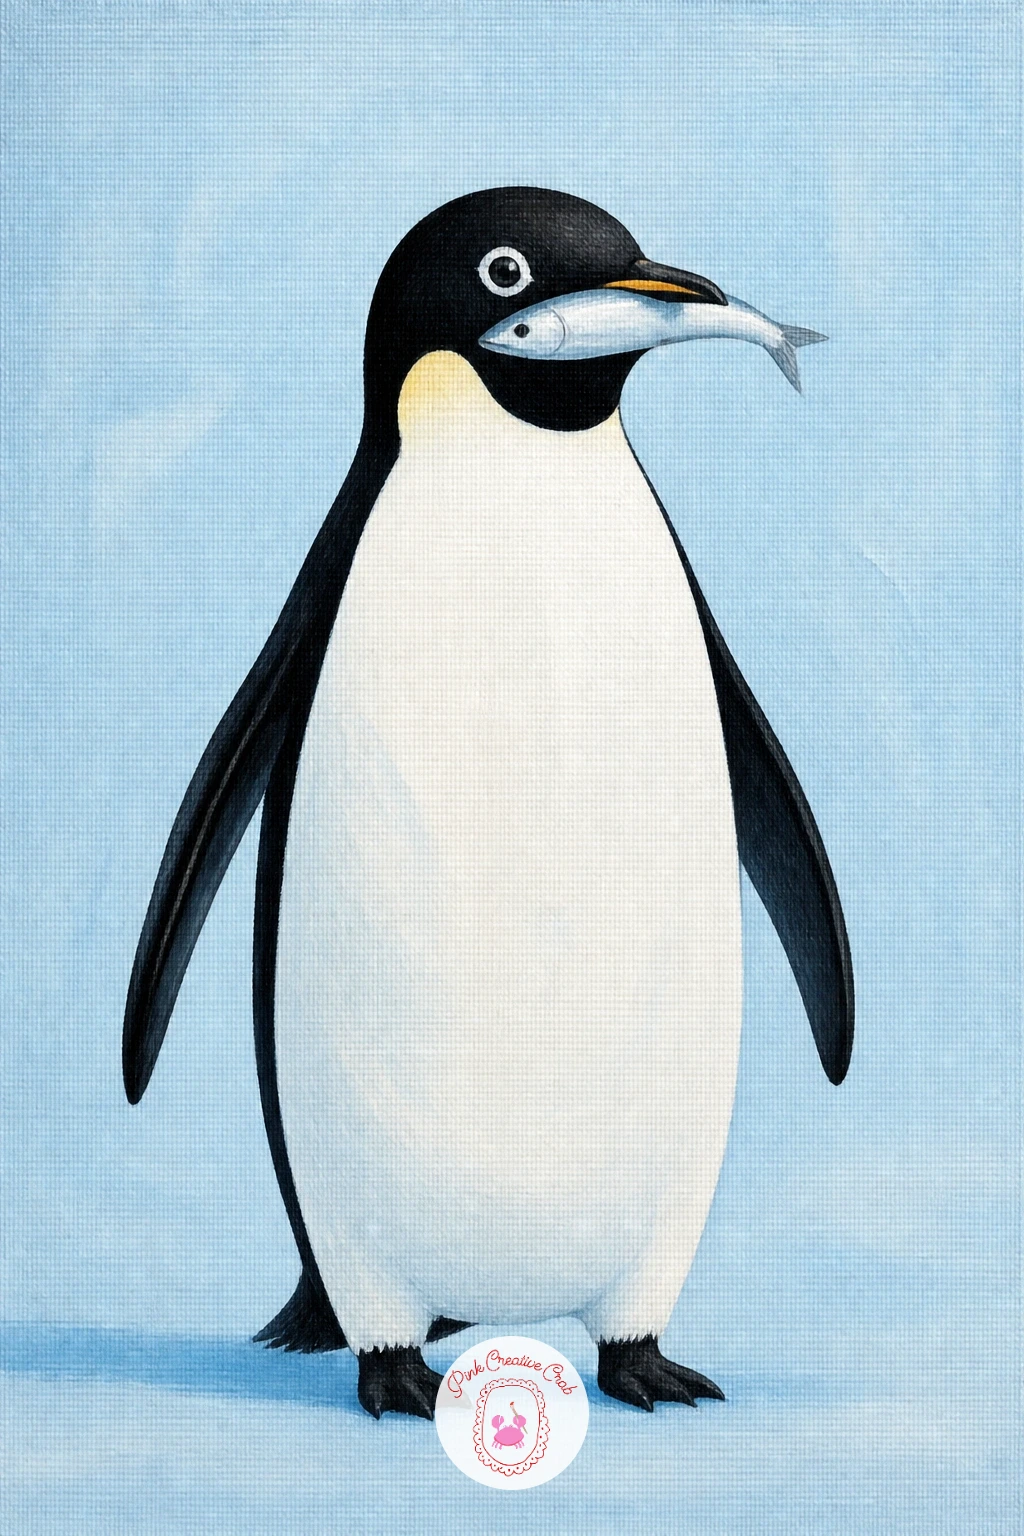
Give the scarf penguin a meal next with a penguin with a fish in its beak, a fun little composition built around one confident diagonal shape held sideways in the beak. Paint the penguin’s body first in its usual upright stance, then add the fish last as a simple silver teardrop shape crossing the beak at an angle.
Fish scales do not need individual painting, a few curved white dry-brush strokes over a base of cool grey-blue suggest shimmer without fuss. Keep the fish smaller than the penguin’s head so the proportion reads believably, a fish that size is a realistic catch for most penguin species.
The beak and fish overlap is where edges can smear, so let the beak dry fully before laying the fish across it. If silver or grey-blue paint is not on hand, plain white with a thin wash of blue glazed over the top creates the same cool shimmer.
Finish today with one small white highlight dot on the fish’s eye for a playful final touch.
Palette: Mars Black,Titanium White,Steel Blue,Ice Blue
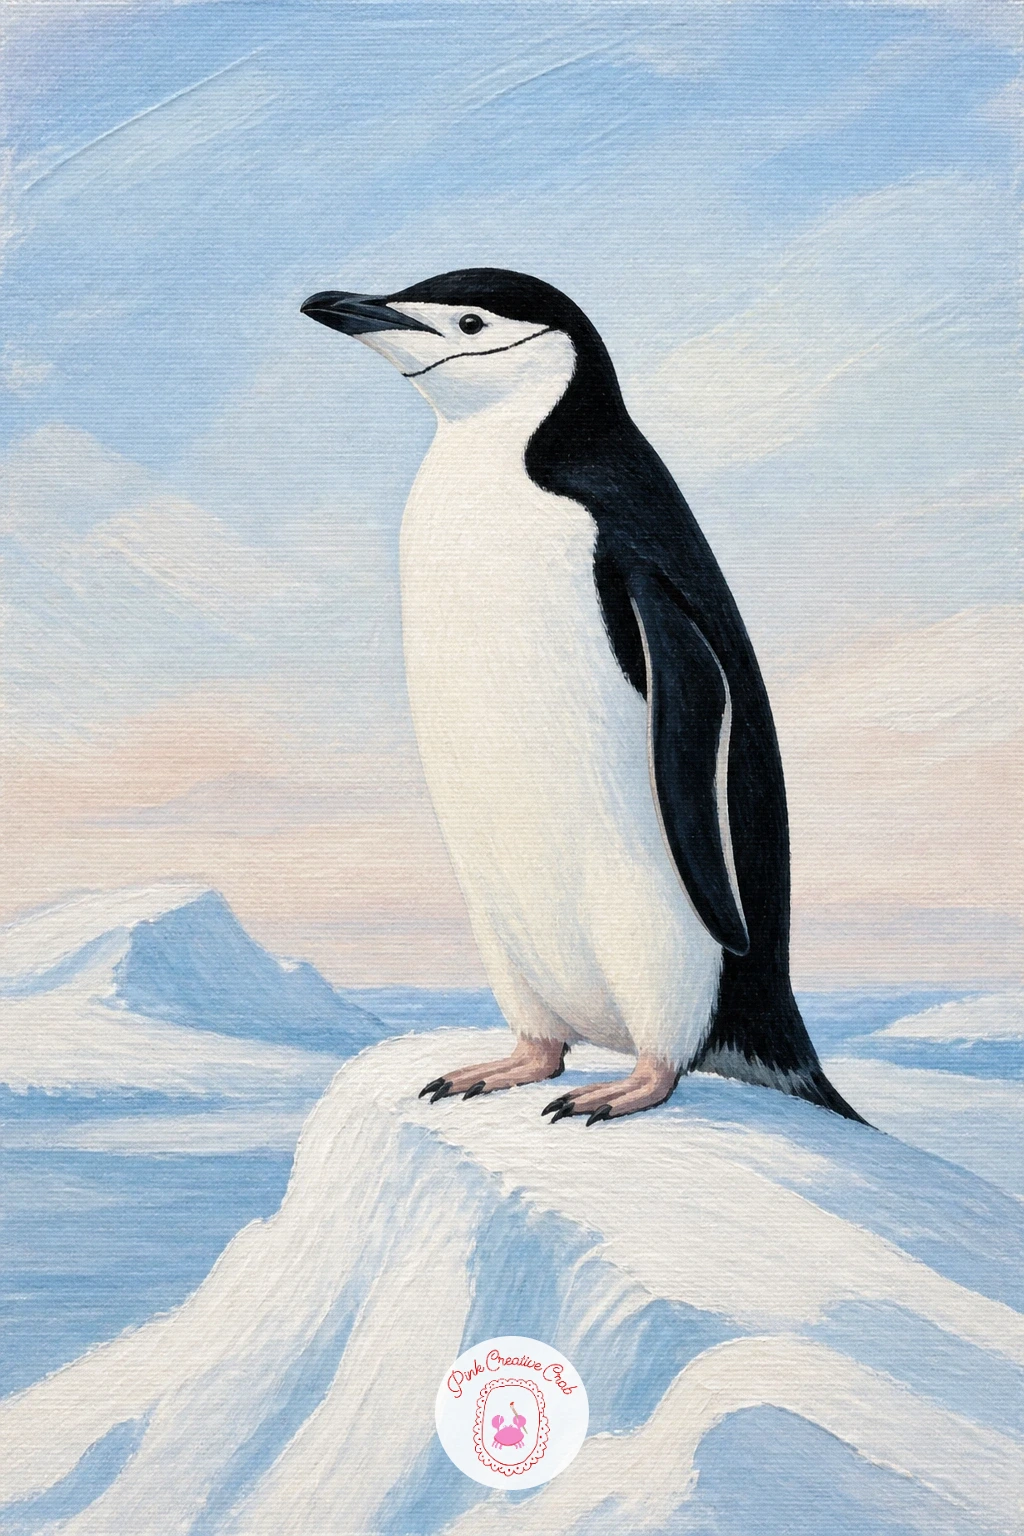
Climb a little higher with a chinstrap penguin on a snowy ridge, named for the thin black line running under its chin like a strap. Paint the white face shape first and let it dry completely, then add that chinstrap line with a fine liner brush in one smooth confident stroke rather than several short ones, which tend to look shaky.
Place the penguin standing near the top of a snowy ridge shape, with the ridge line crossing the lower third of the canvas so the bird reads as standing on a high point rather than floating. Shade the ridge with a soft blue-grey on the side away from the light to give it some form.
If the chinstrap line wobbles, steady your hand by resting your little finger on the canvas edge as a brace, or redraw it lightly in pencil first as a guide. No fine liner brush, the tip of a round brush loaded thin works almost as well.
Add one tip for today: keep the line slightly curved rather than straight, it follows the natural curve of the jaw better.
Palette: Mars Black,Titanium White,Ice Blue,Slate Grey
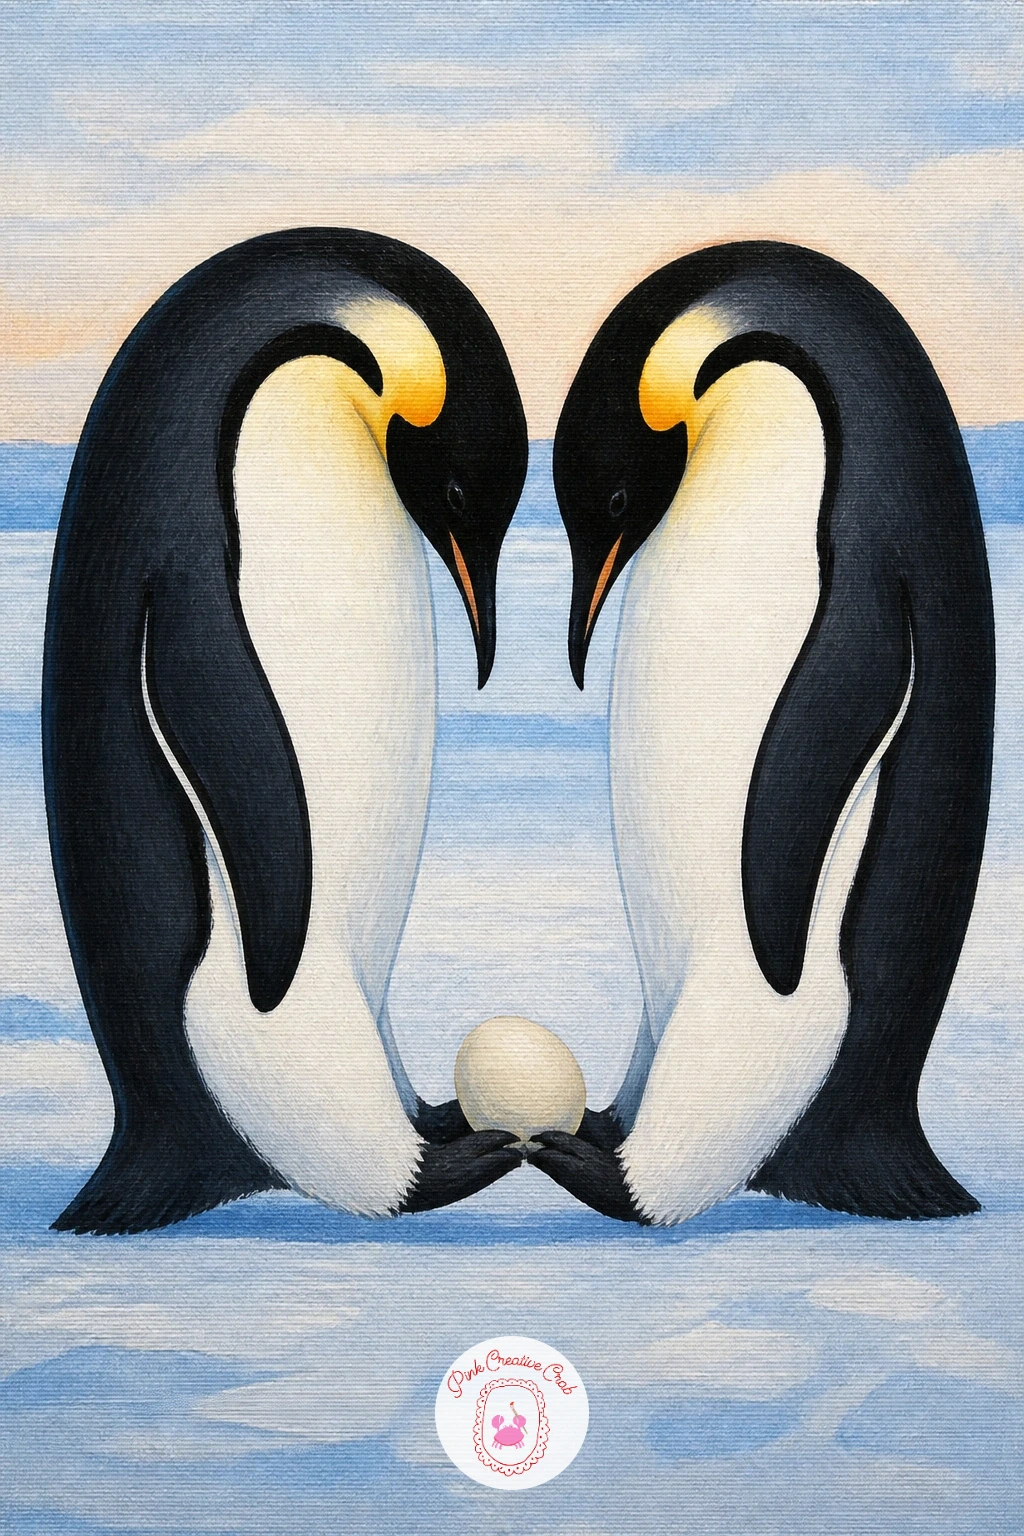
Bring in a tender moment with penguin parents passing an egg between their feet, a classic emperor behaviour and a nice two-figure composition. Paint both adults facing each other first, bodies slightly leaned in, then add the pale egg balanced between their feet last so it sits clearly in the gap between the two shapes.
Measure the egg against one adult’s beak for scale, it should look roughly as long as the beak itself, any bigger and it reads as a ball rather than an egg. Keep both penguins’ heads tilted slightly downward toward the egg, this single gesture carries the whole story.
If the composition feels crowded, widen the gap between the two bodies slightly so the egg has clear space to read on its own. No cream or ivory paint for the egg, mix a touch of soft yellow into white for a warm, convincing shade.
Finish with a faint blue shadow beneath the egg to ground it between the feet.
Palette: Mars Black,Titanium White,Cream,Ice Blue
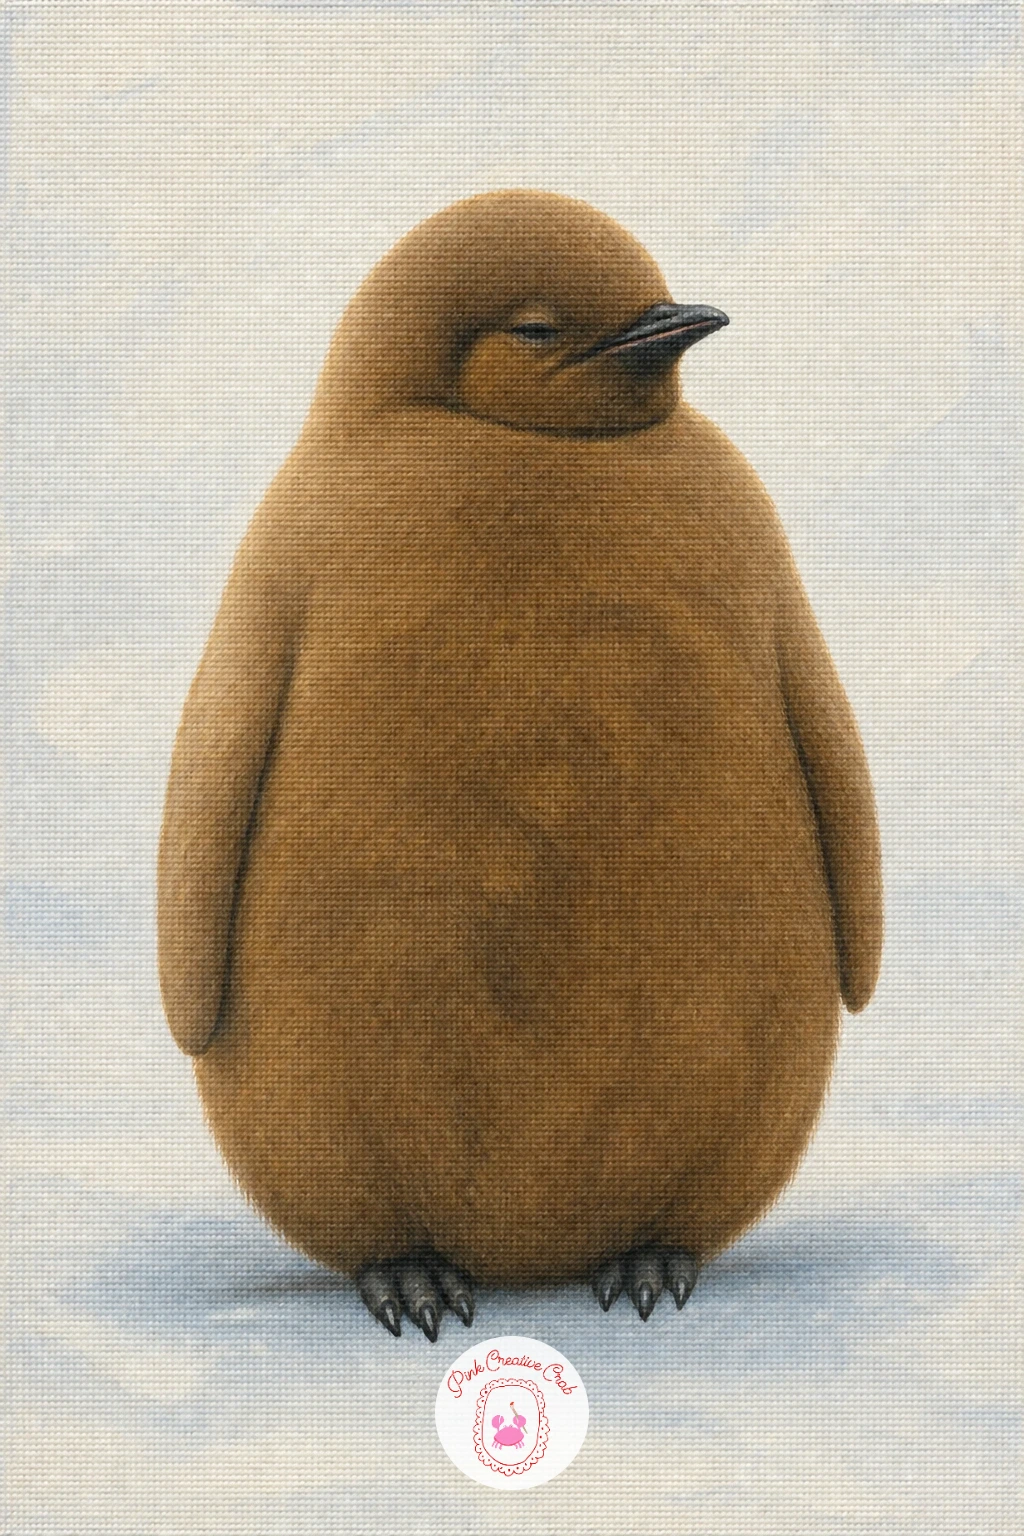
Step away from the egg to meet what hatches from it eventually: a fluffy brown king penguin chick, famous for looking nothing like its sleek parents. Paint the whole body as one soft rounded brown shape first, warmer and fuzzier than any adult penguin on this list, then add the small black feet and beak last.
The fluffy texture is the whole point here, so once the base brown coat has dried, stipple a lighter brown over the top with the very tip of a dry brush in small dabs rather than strokes, this breaks up the flat colour into something soft and downy. Keep the stippling denser around the edges of the body where fluff naturally catches light.
If the texture ends up looking spotty rather than furry, go back over heavy spots with a light glaze of the base brown to soften them. No separate stippling brush, a stiff round brush dabbed flat works the same way.
Finish with one small white gel pen dot for each eye against the dark face.
Palette: Umber Brown,Soft Tan,Mars Black,Titanium White
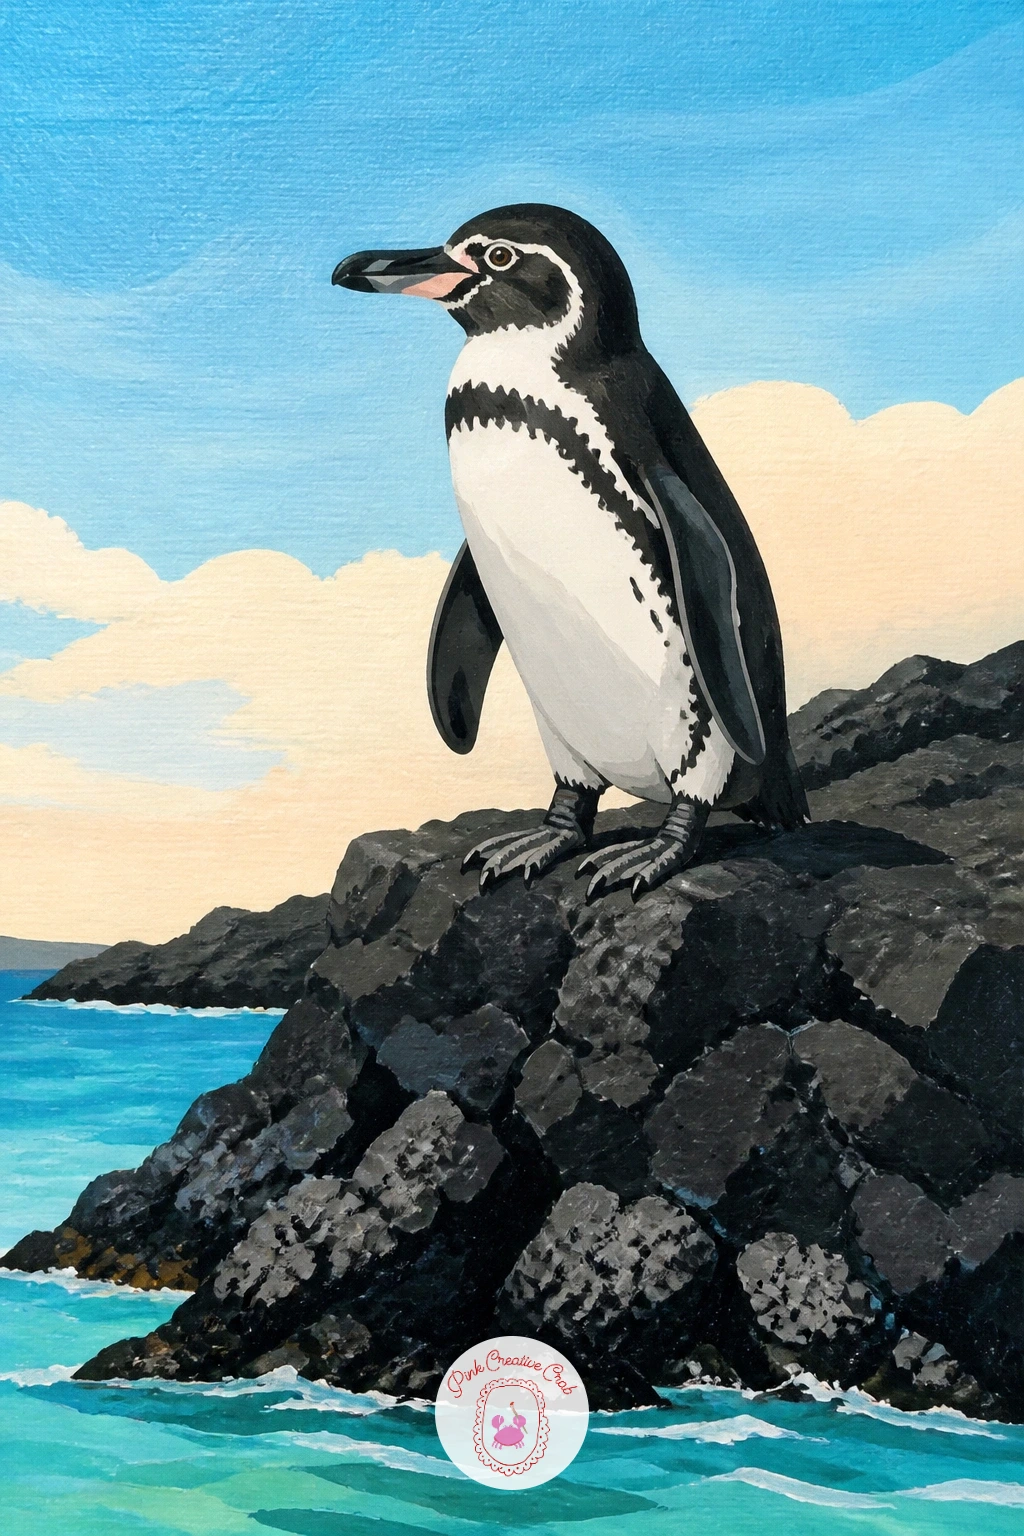
Trade snow for volcanic rock with a Galapagos penguin on black lava rocks, the only penguin species found near the equator and a chance to paint something genuinely different in this list. Block in dark, jagged lava shapes first using a mix of black and a touch of burnt orange for warmth, then place the small penguin standing on top once the rock has dried.
Light here comes from a bright, high sun rather than the soft grey light of Antarctic scenes, so give the penguin a crisp white highlight along its back and a short, hard-edged shadow beneath its feet on the rock. This single lighting choice is what separates this piece from every icy one before it.
If the lava rock looks too smooth, drag a dry brush loaded with a lighter grey across the surface once the black base is dry, catching only the raised texture. No burnt orange on hand, a touch of red mixed into black warms it just as well.
Add a strip of bright turquoise water at the base of the rocks to finish the tropical feel.
Palette: Mars Black,Burnt Orange,Turquoise,Titanium White
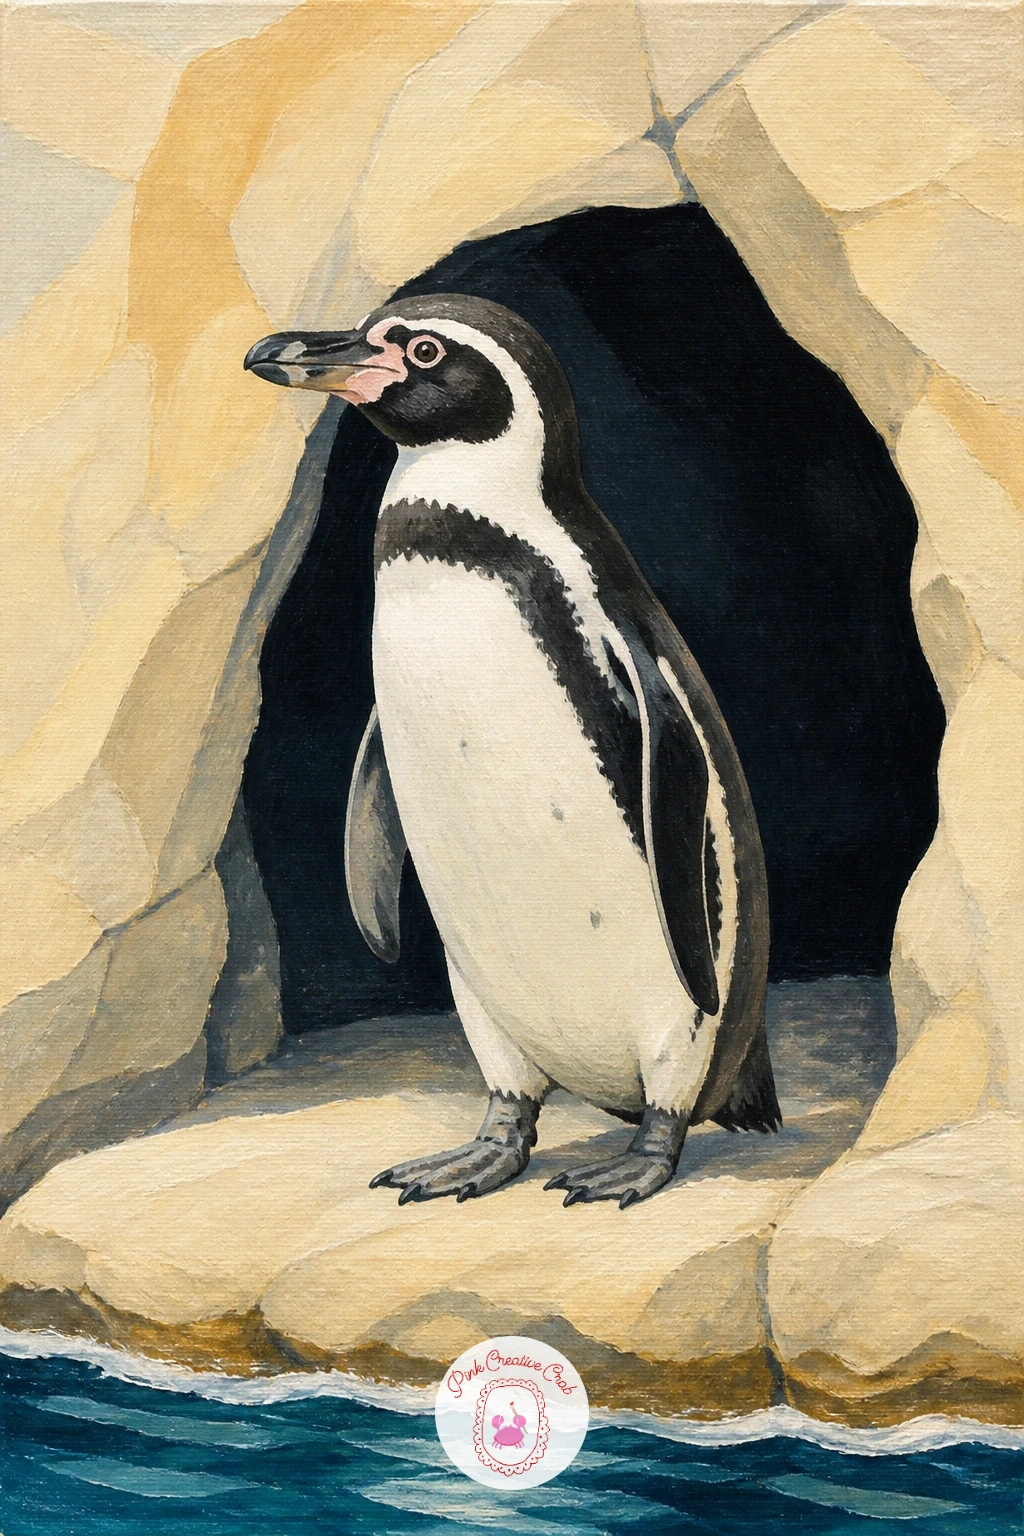
Carry that warm coastal feeling into a Humboldt penguin by a sea cave, a species that nests along the rocky coast of South America. Paint the cave opening first as a dark curved shape set into warm tan rock, leaving the inside of the arch nearly black, then place the penguin standing just outside it in full light for strong contrast.
That contrast between the dark cave mouth and the brightly lit penguin is the whole trick of this piece, so resist the urge to soften the cave’s edge, a hard line here reads as rock and shadow far better than a blended one. Humboldts have a pale pink patch of bare skin near the beak, add this with a single small dab once the face is dry.
If the cave looks flat, deepen the very center of the opening with a second coat of black after the first has dried, true black depth takes more than one layer. No tan paint available, mix yellow ochre and white for a similar warm rock tone.
Finish with a thin white foam line where the sea meets the rock below.
Palette: Mars Black,Yellow Ochre,Titanium White,Dusty Pink
Rocky coastal light like this behaves a lot like the scenes in Ocean Oil Painting: 24 Beginner Ideas That Look Stunning, worth a look if you enjoy painting shoreline contrast.
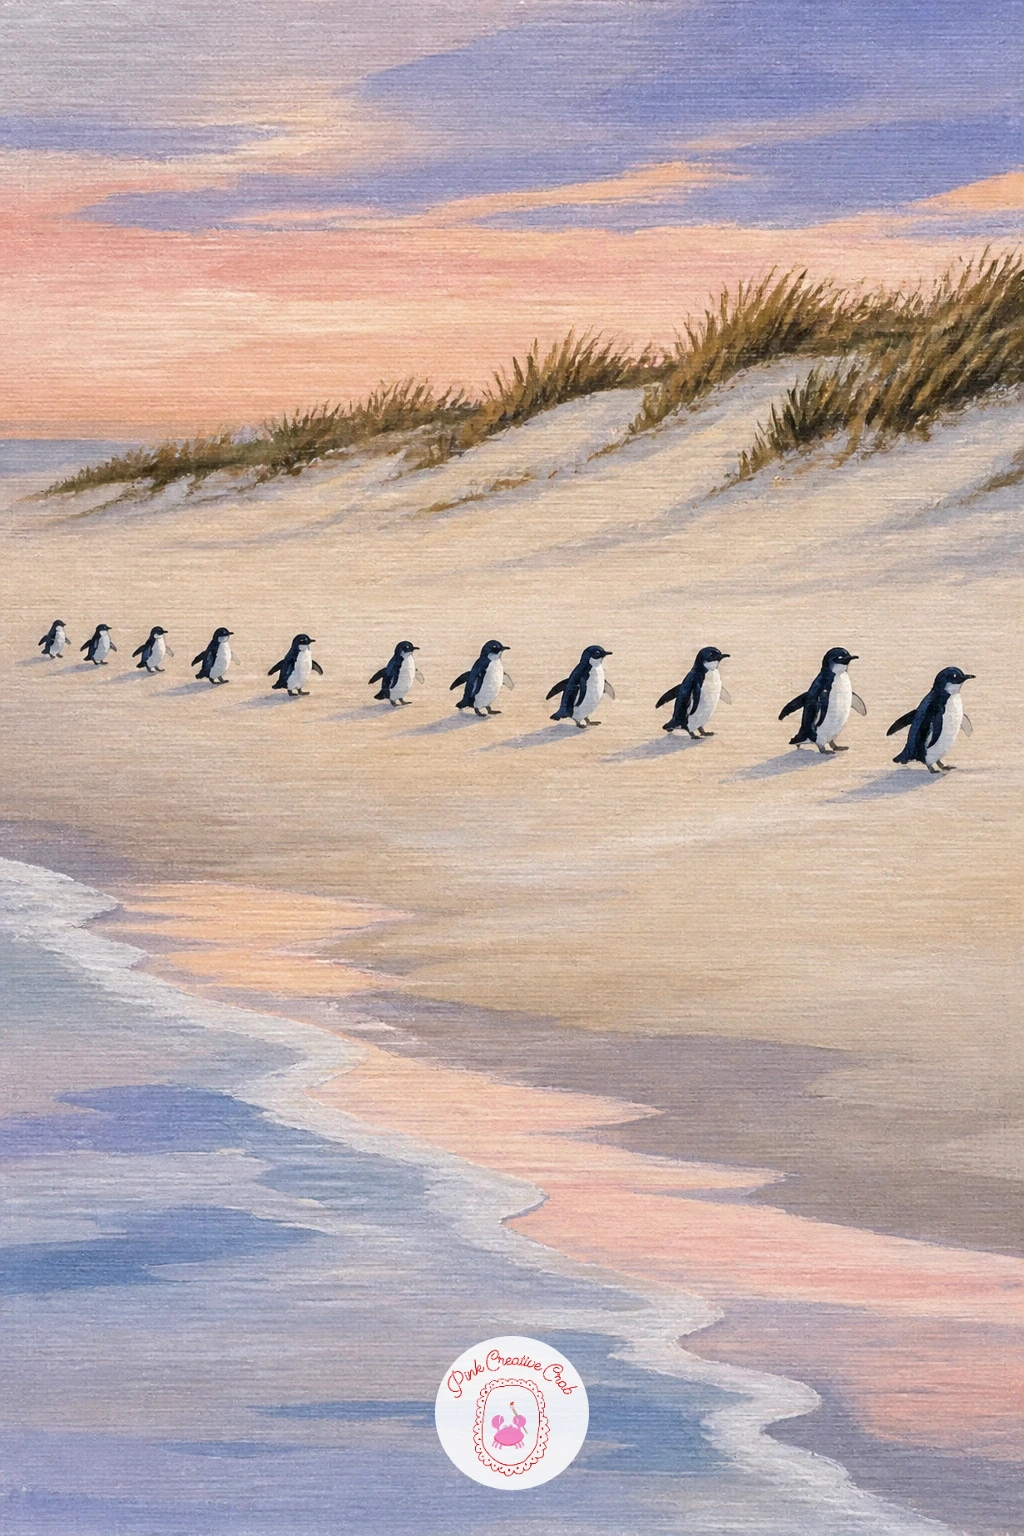
Zoom out for a group scene with the penguin parade at Phillip Island, where little penguins cross a beach together at dusk in a loose, charming line. Paint the sky and sand first in soft blush and lavender bands, then add five or six small penguin silhouettes in a gentle wandering line across the lower third of the canvas.
Keep every silhouette a simple dark shape at this distance, there is no need for any detail beyond a rounded body and small head, since it is the group shape that tells the story rather than any one bird. Vary the spacing and size slightly, a few closer together, one or two trailing behind, so the line feels natural rather than a printed row.
If the silhouettes look too uniform, rotate your canvas and paint every second one at a slightly different angle before turning back, it breaks the pattern without extra thought. No lavender paint in your set, mix a little blue and red into white until it turns soft and dusty.
Finish with a few soft dune grass strokes along the top edge of the sand for a sense of place.
Palette: Mars Black,Blush Sky,Lavender,Sand Beige
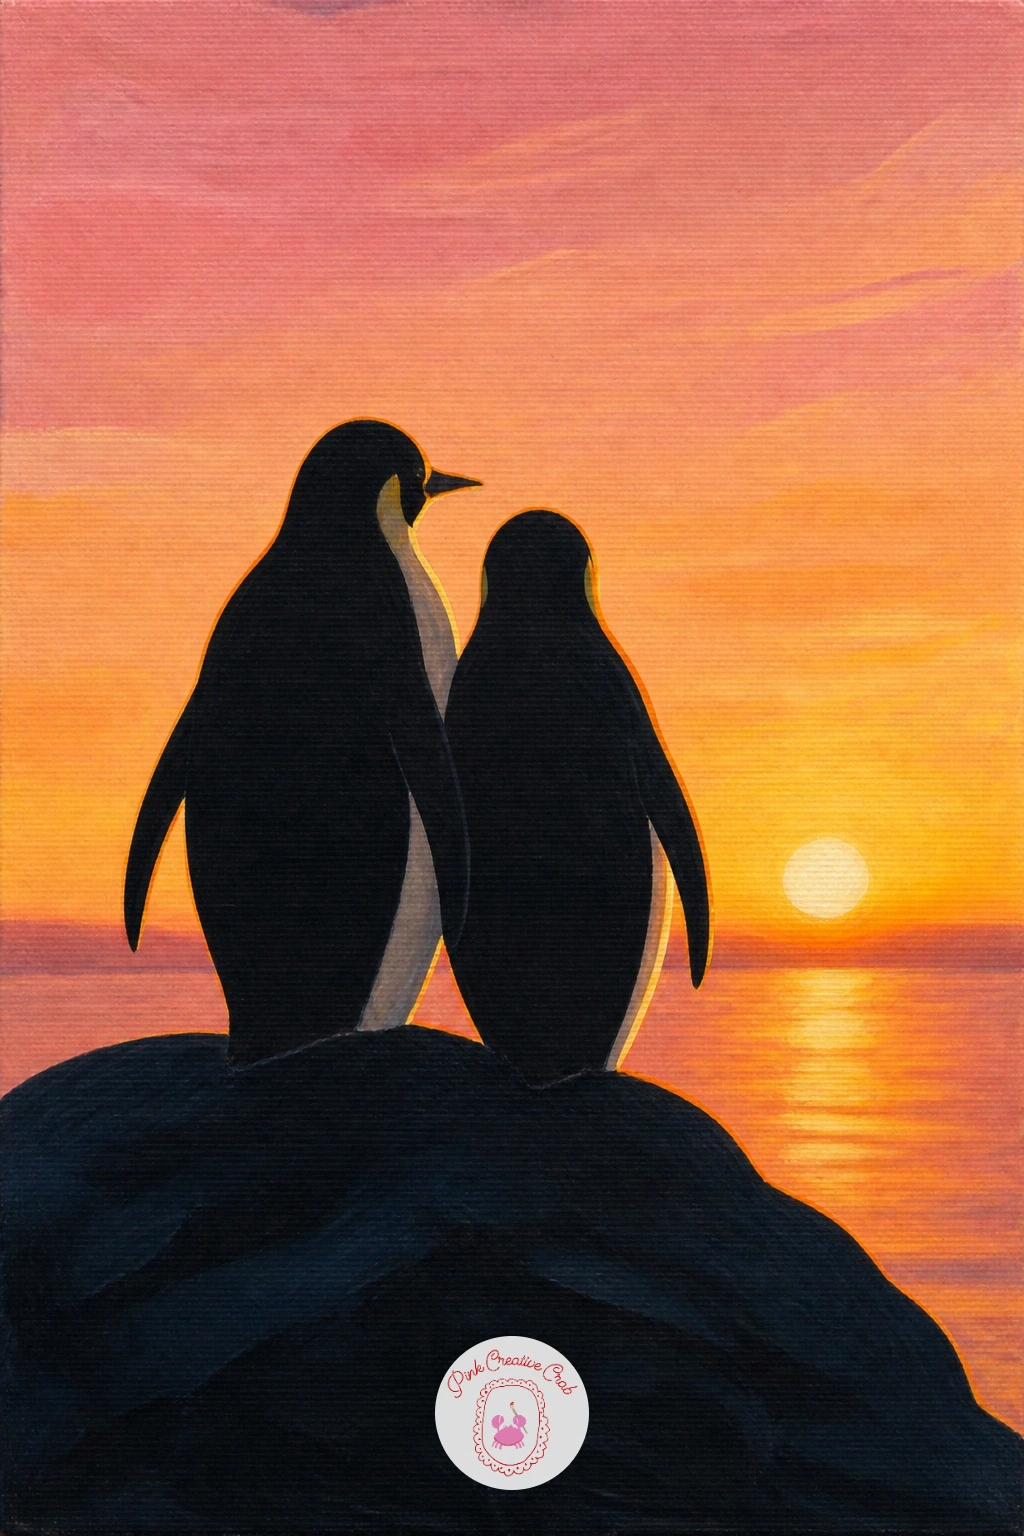
Slow things down with a penguin couple on a rock at sunset, a quiet two-figure piece built around warm light rather than any action. Paint the sunset sky first in broad horizontal bands of blush, soft orange and lavender, blending them while wet, then let it dry fully before adding a dark rock silhouette and the two penguins standing close together on top.
Since the light source sits low and behind the pair, paint both bodies almost entirely as dark silhouettes with only a thin rim of warm highlight along their backs where the sunset catches the edge. This backlit approach is quicker than fully rendering two birds and reads as far more romantic.
If the rim light looks patchy, use a very fine brush and a steady hand to trace one continuous thin line along the top edge of each shape rather than dabbing it in sections. No fine brush for that line, the edge of a flat brush turned sideways gives a similarly thin mark.
Add one soft cloud streak across the sky to finish the mood today.
Palette: Mars Black,Blush Sky,Soft Orange,Lavender
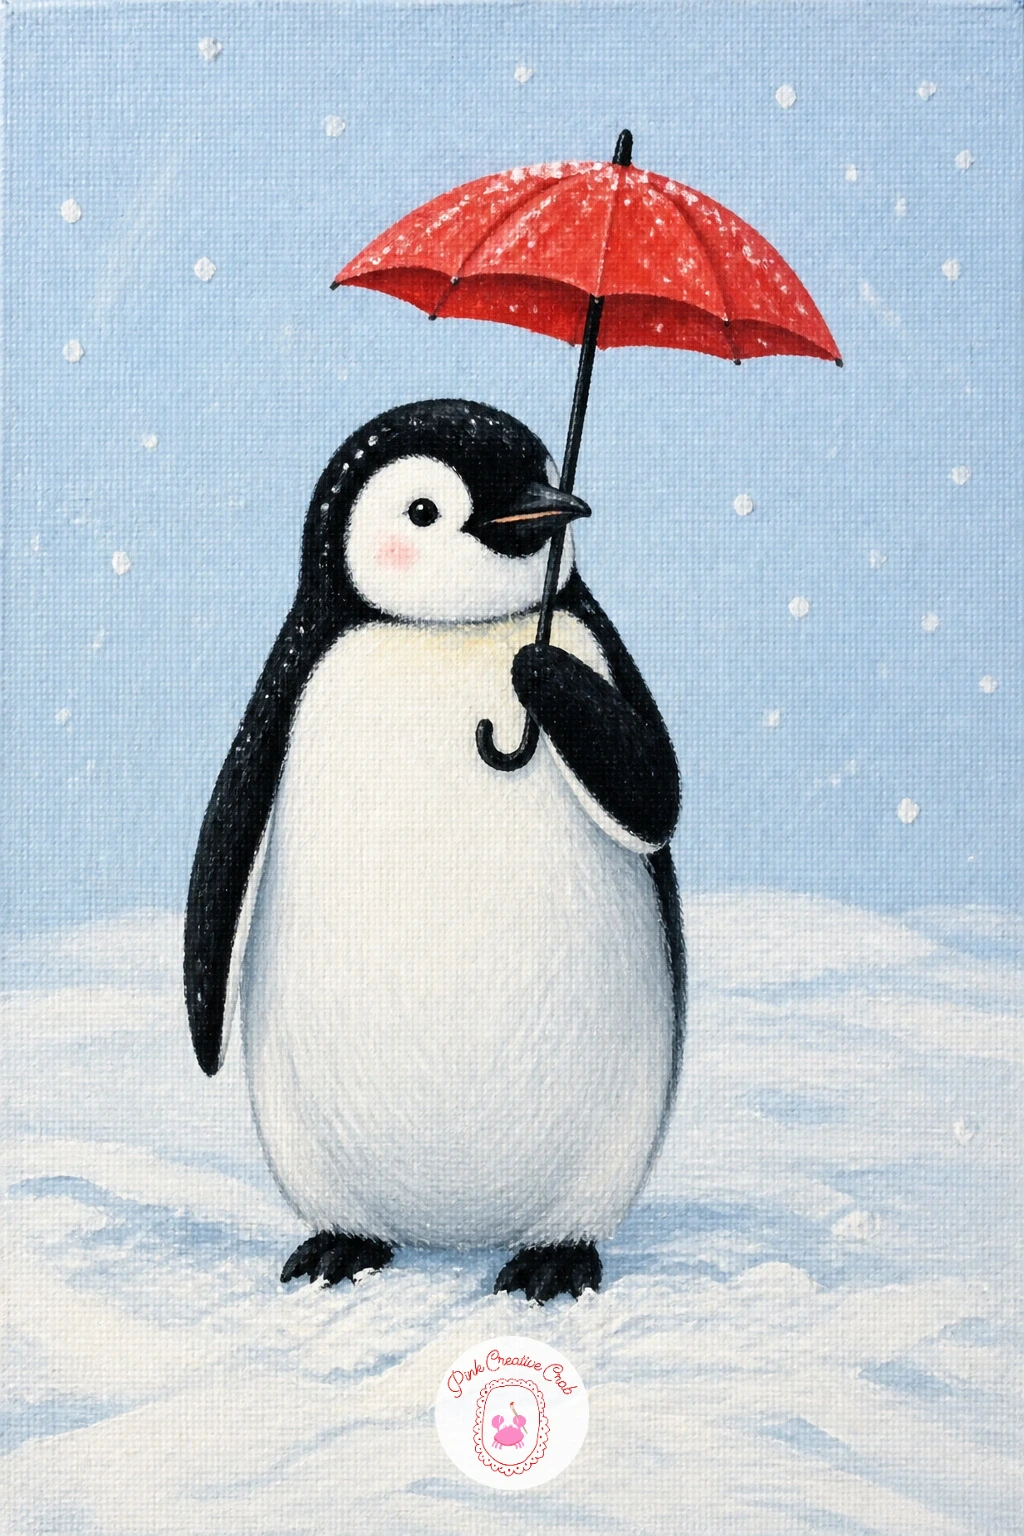
Add a little whimsy with a penguin with a tiny umbrella in the snow, a playful piece that works well as a quick, fun finish. Paint the penguin’s body first in its usual simple stance, one flipper raised slightly to hold the umbrella handle, then add the open umbrella last as a small curved dome shape above its head.
Keep the umbrella in a single bold colour against all that black, white and blue, a warm red or deep pink stands out best and gives the whole piece its personality. Paint the umbrella ribs as a few thin dark lines radiating from the center point once the dome colour has dried.
If the umbrella looks flat, add a thin white highlight along its upper curve and a soft shadow beneath it falling onto the penguin’s head, this small bit of shading does a lot of work. No red or pink paint, any colour that contrasts with the icy palette works just as well, even soft yellow is charming here.
Finish with a few snowflakes dotted around using the tip of a round brush loaded with white.
Palette: Mars Black,Titanium White,Cherry Red,Ice Blue
Take the penguin below the surface now for a penguin swimming among bubbles underwater, a composition built on cool layered blues rather than ice or sand. Paint the water first as a gradient from pale blue at the top to a deeper teal toward the bottom, then add the penguin mid-stroke, flippers extended like wings, once that background has dried.
Underwater, penguins streamline into a far sleeker shape than they show on land, so stretch the body slightly longer and flatten the belly curve compared to a standing pose. Add a trail of small round bubbles behind the penguin last, varying their size so the smallest trail furthest back.
If the bubbles look too uniform, paint them with the end of a round brush handle dipped in white rather than a brush tip, the slight irregularity looks more natural. No teal in your palette, mix blue with a touch of green and a little white to find it.
Add one tip today: a soft white glow around the penguin’s body suggests light filtering down from the surface above.
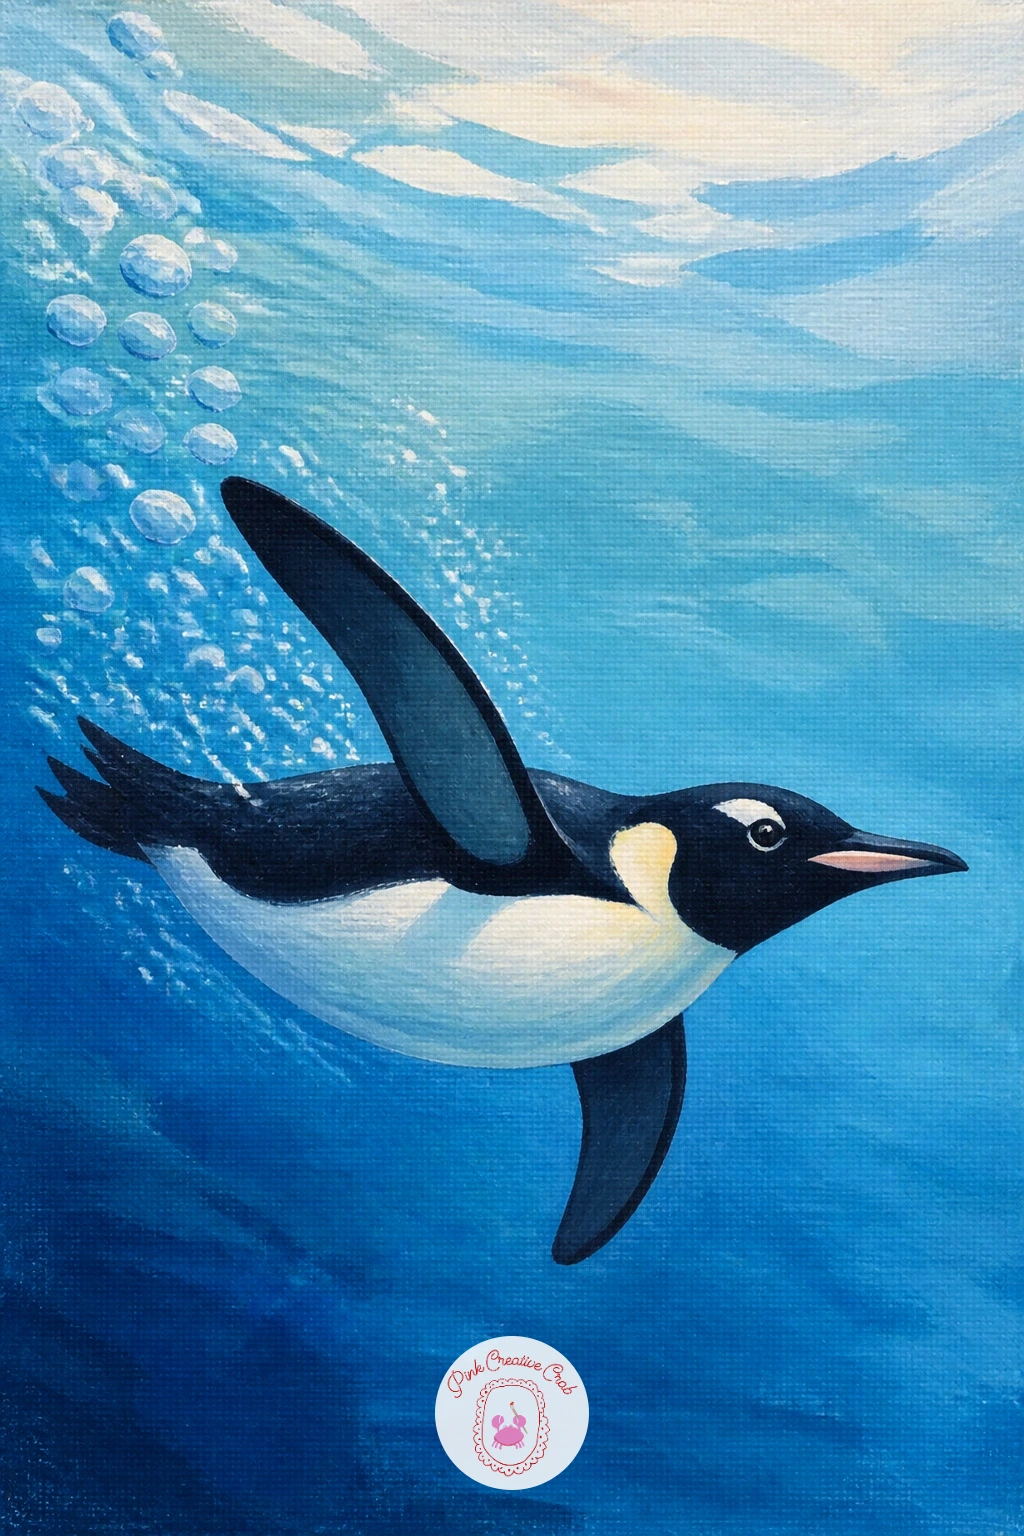
Palette: Mars Black,Titanium White,Deep Teal,Ice Blue
Return to dry land for a line of penguins marching, a simple repeating composition that looks far more impressive than the effort it takes. Paint one penguin shape first as your template, then repeat it several times across the canvas, varying the tilt of each head and the position of each flipper slightly so no two look identical.
Overlap the figures just slightly from front to back rather than spacing them in a perfectly even row, this single choice adds real depth to what is otherwise a flat repeated shape. Work left to right, letting each dry slightly before the next overlaps it so edges stay clean rather than smudging together.
If the line starts to feel mechanical, break the rhythm with one penguin facing a slightly different direction or glancing sideways. No need for a stencil or template, a loose freehand repeat actually looks livelier than a traced one.
Finish with a single long shadow beneath the whole line to tie the group together on the ice.
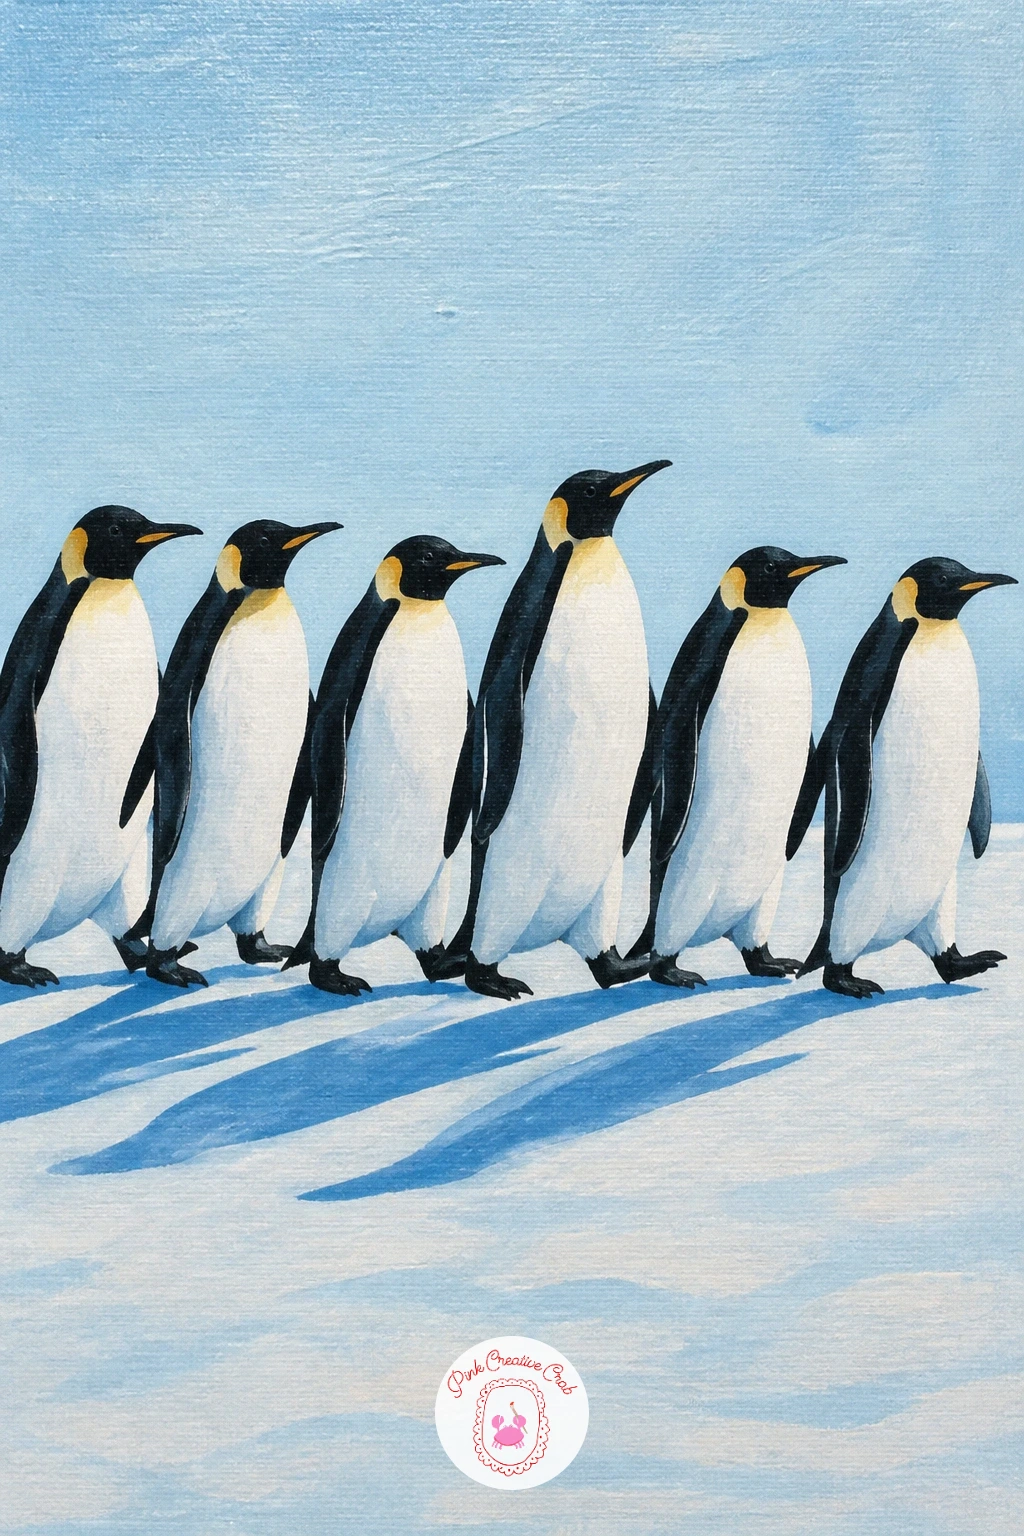
Palette: Mars Black,Titanium White,Ice Blue,Slate Grey
Slow the pace right down with a sleeping penguin chick, one of the gentlest and fastest pieces in this whole list. Paint the chick as one soft rounded grey shape curled into itself, head tucked down against its own body, then add closed eyes as two simple curved lines rather than dots, since open eyes would break the sleepy mood instantly.
Keep every edge of this shape soft and rounded, there are no sharp points anywhere on a curled sleeping bird, which makes this an easy, forgiving subject for a first attempt at the whole series. If the curl looks stiff, round off the back further until the whole body reads as one continuous soft loop.
This is comfortably a ten-minute piece, one shape, two closed-eye lines, done. For a forty-minute version, add a soft blanket of snow dusted gently over the top half of the body using a dry brush.
No grey paint on hand, mix white into black slowly until you reach a warm, soft charcoal tone.
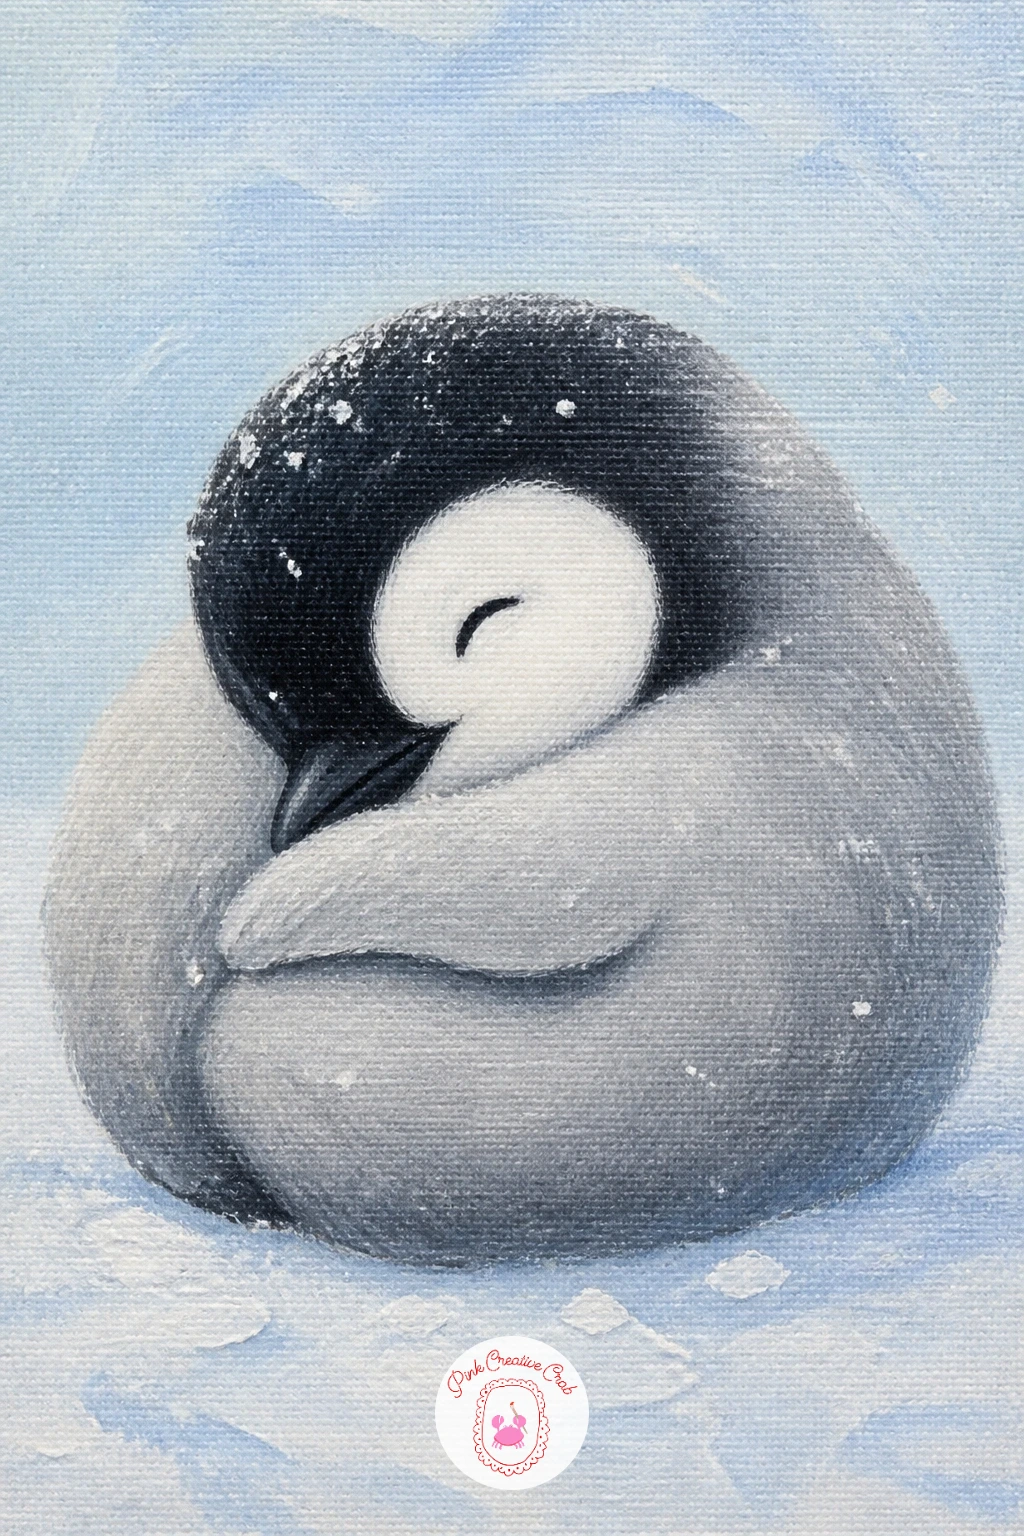
Palette: Payne’s Grey,Titanium White,Ice Blue,Soft Yellow
Give the viewer a sense of home with a Magellanic penguin by its burrow, since this species nests in dug-out ground burrows rather than open colonies. Paint a low mound of sandy earth first with a dark oval burrow opening cut into it, then place the penguin standing just beside the entrance, body angled slightly toward it as though about to duck inside.
Magellanics have a distinct double black band across the chest, paint these as two curved stripes once the white belly has dried fully, spacing them evenly from throat to lower belly. Shrubby, dry grass tufts around the burrow entrance help ground the whole scene, add these last with a few quick upward flicks of a dry brush in dusty green.
If the burrow opening looks too flat, deepen the very center with a touch more black once the first layer dries, true shadow needs that second pass. No dusty green on hand, mix yellow ochre with a touch of black for a similarly muted scrub tone.
Finish with one small clump of sandy soil scattered at the burrow’s edge for texture.
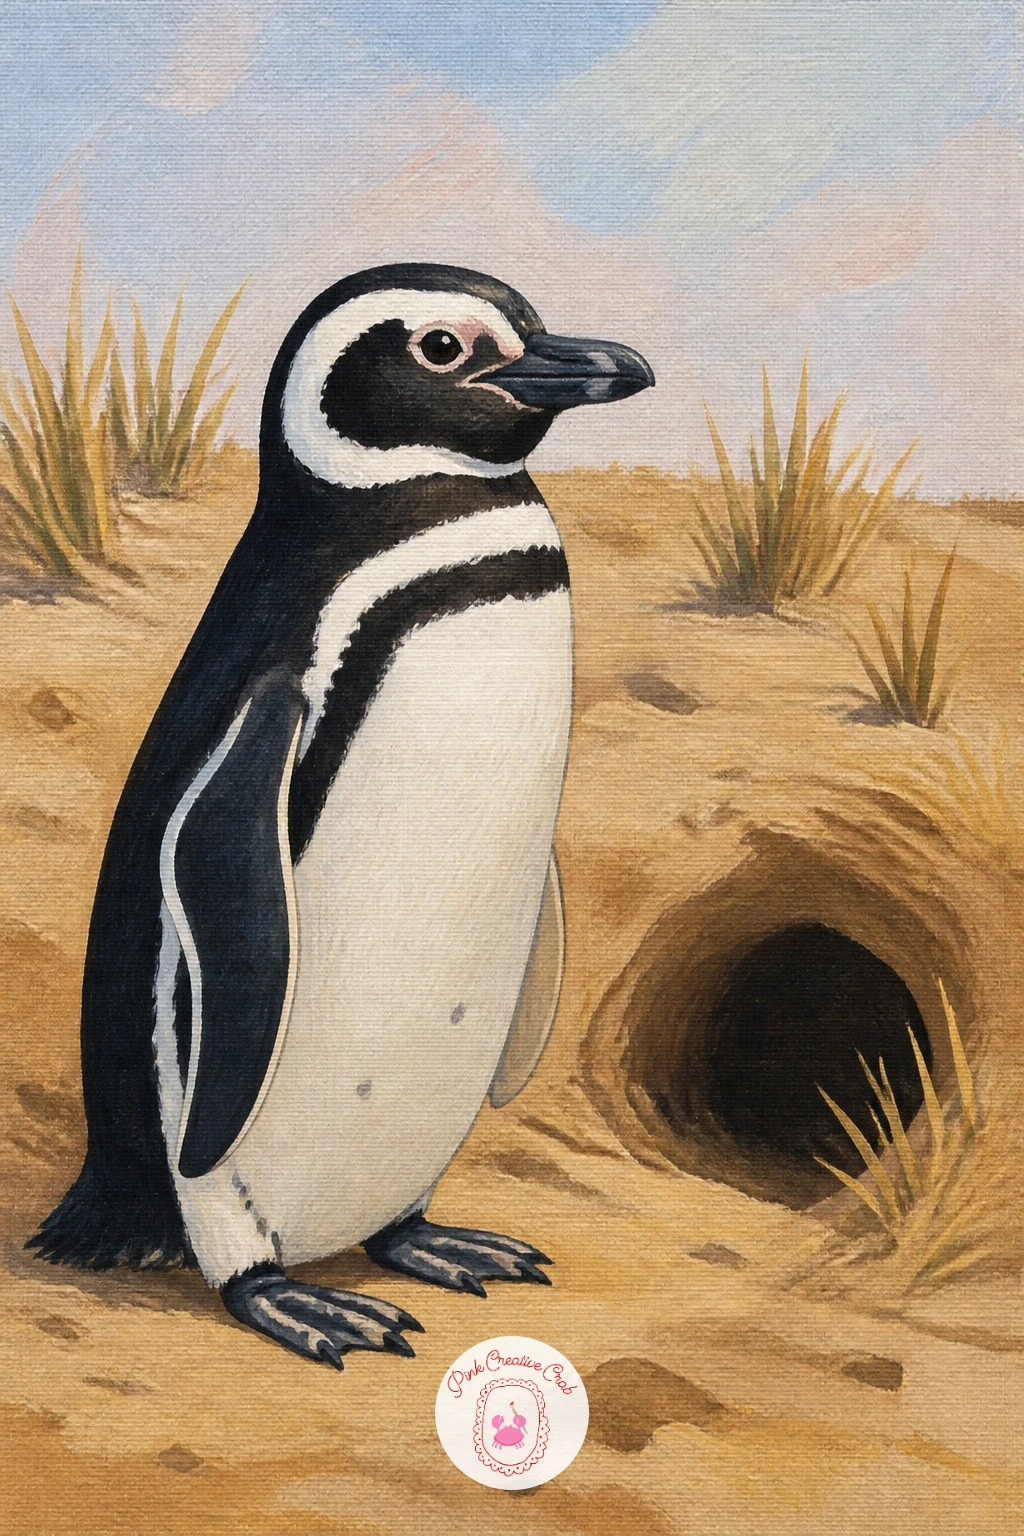
Palette: Mars Black,Titanium White,Sand Beige,Dusty Green
Build a little mystery with a penguin peeking from a crack in the ice, a fun composition that hides most of the body for effect. Paint a large jagged ice shape first, covering most of the canvas, then cut a narrow irregular gap through the middle before adding just the penguin’s head and the top of its shoulders poking through.
Shade the inside edges of the crack darker than the surrounding ice to give it real depth, since a flat crack reads as a sticker rather than an opening. This framing device puts all the attention on the small amount of penguin showing, so give that peeking head extra care, a slightly curious tilt and one bright round eye go a long way.
If the crack looks too clean and straight, redraw its edges with a few small jagged offshoots branching from the main line, real ice never cracks in a perfectly smooth path. No dark blue for the ice shadow, straight black softened with a touch of white works nearly as well.
Finish with one small highlight along the top edge of the ice crack to catch the light.
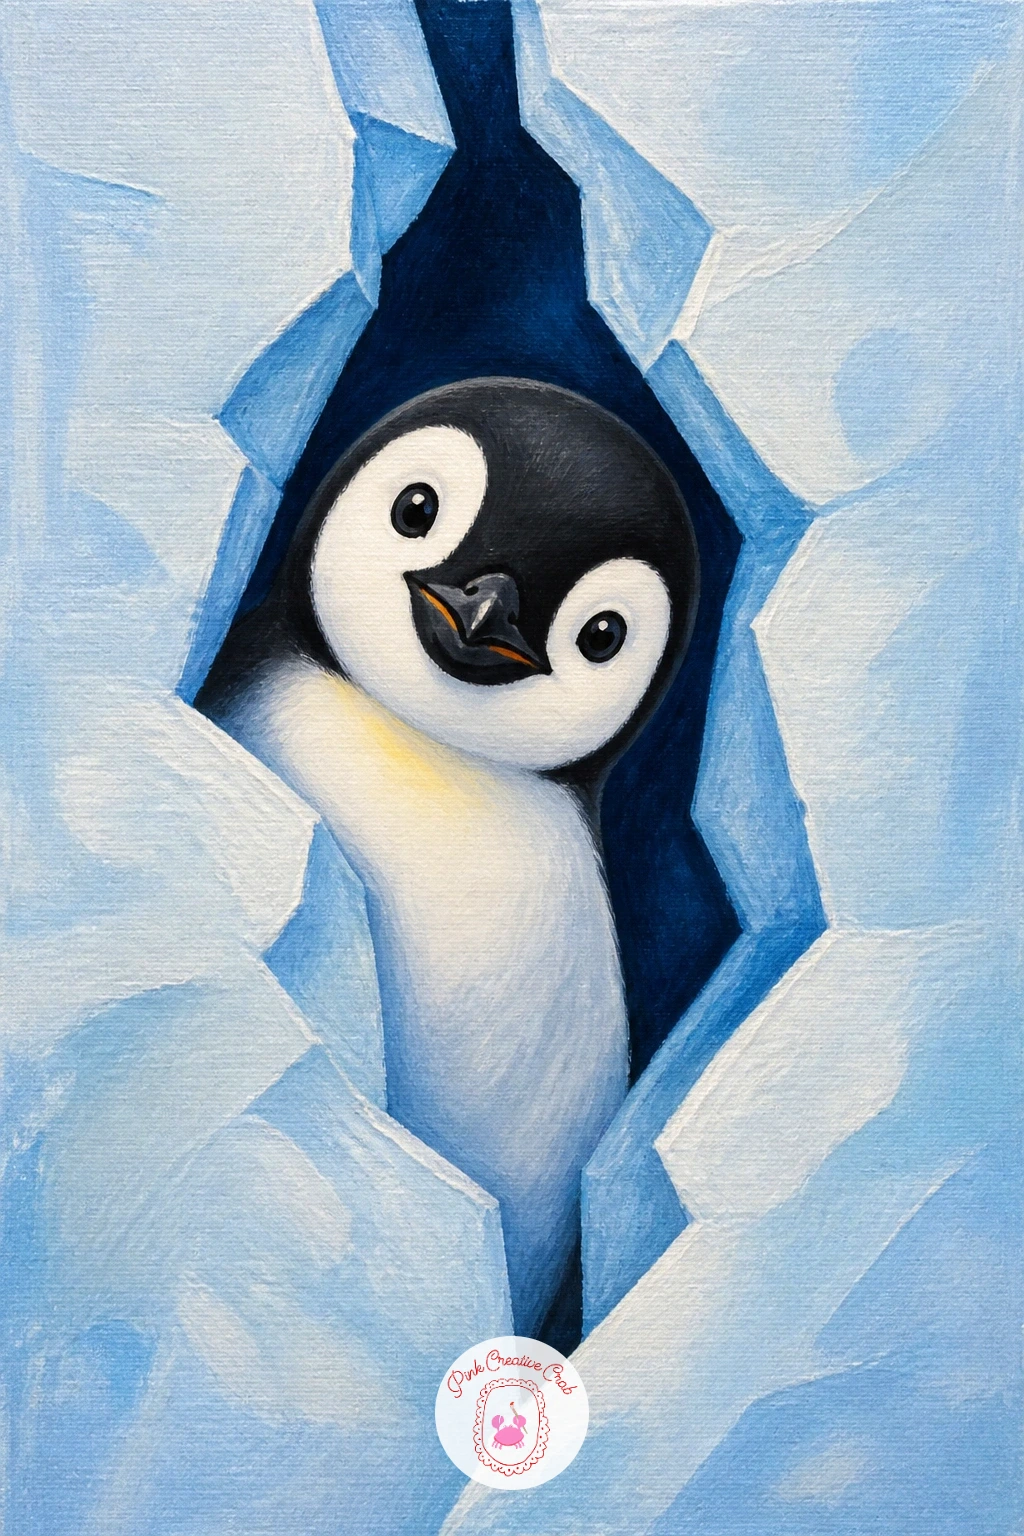
Palette: Ice Blue,Titanium White,Mars Black,Deep Blue
Have some fun with a penguin riding a little sled, a cheerful action pose that works well once the earlier marching line has built some confidence with repeated shapes. Paint the sled first as a simple curved wooden shape low on the canvas, then add the penguin sitting on top, flippers gripping the front edge as though steering downhill.
Angle the whole composition on a diagonal, sled and penguin both tilted as though mid-slide, with a trail of white spray kicked up behind the runners. This diagonal is what sells the speed, a perfectly level sled looks parked rather than moving.
If the sled looks too flat against the snow, add a short dark shadow beneath the runners on the side opposite the light. No brown paint for the sled, a mix of black and a little soft yellow makes a convincing weathered wood tone.
Finish with two or three small snow clumps flying off the back runners for extra motion.
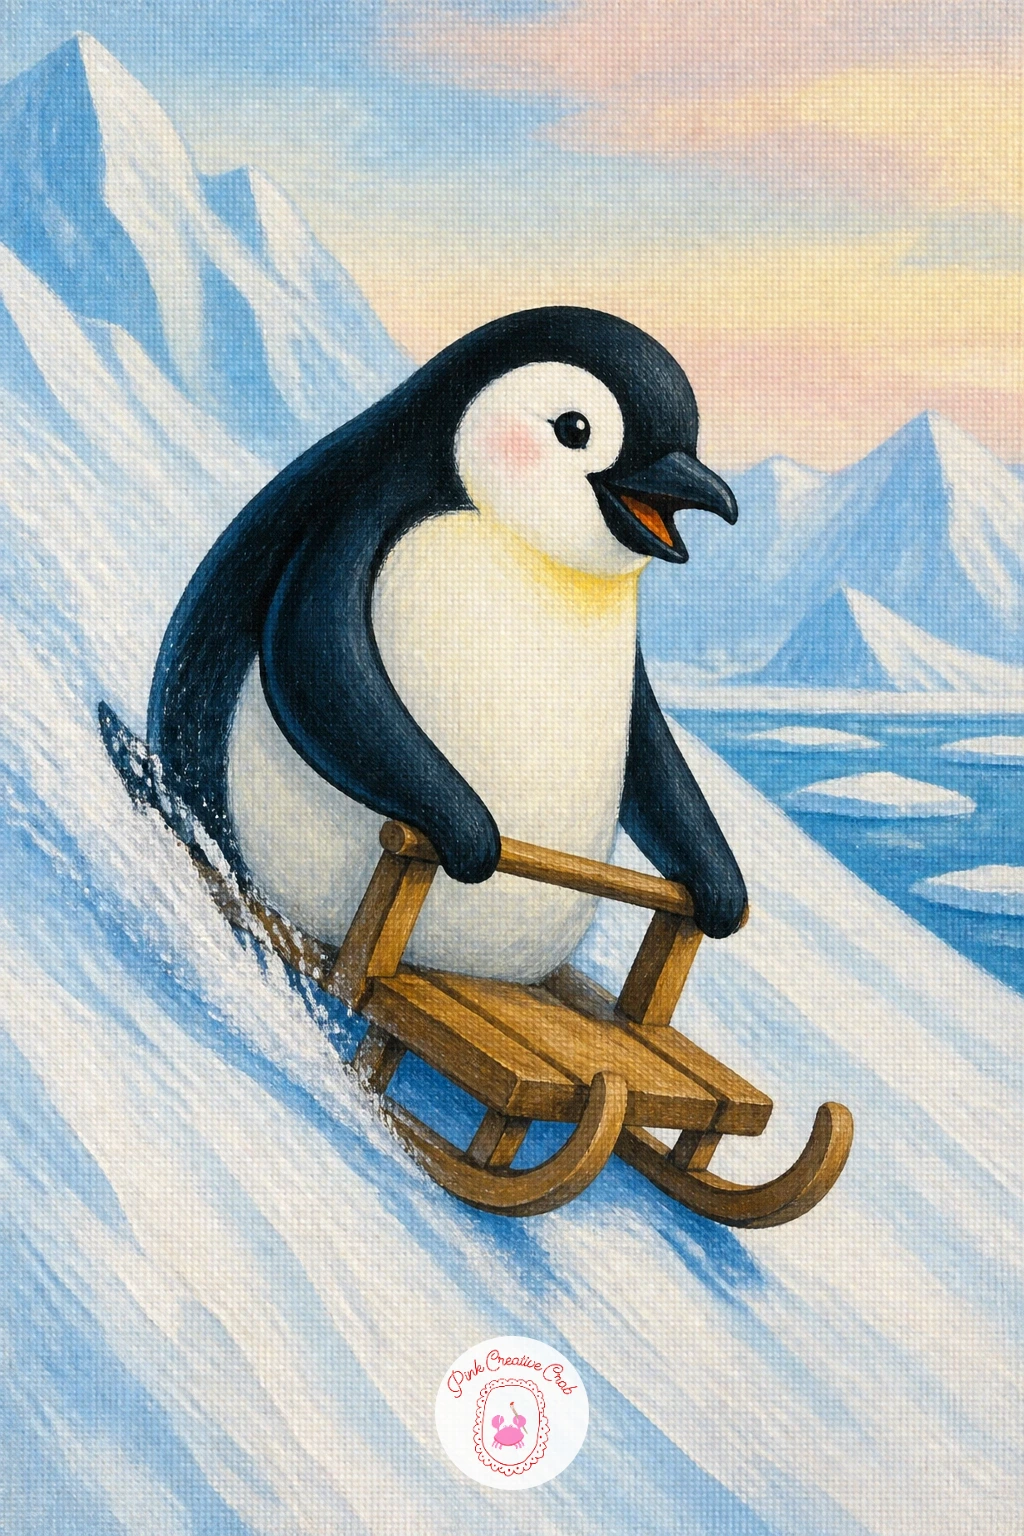
Palette: Mars Black,Titanium White,Warm Wood Brown,Ice Blue
Pair with the earlier scarf idea for a rescued penguin in a knitted jumper, a gentle nod to the real jumpers volunteers knit for penguins affected by oil spills. Paint the body first, then fit a simple jumper shape over the torso and flippers, leaving just the head, feet and lower belly showing, since real penguin jumpers cover exactly that much.
Vary the jumper from the earlier scarf by adding a simple pattern, a row of dots or a zigzag stripe, painted with the tip of a small round brush once the base jumper colour has dried fully. Keep the penguin’s expression soft, a slightly lowered head and gentle eye suit the caring tone of this subject better than a bright alert pose.
If the jumper looks stiff, round off its lower edge slightly rather than painting it as a straight line, knitwear never sits perfectly flat on a rounded body. No contrasting colour for the pattern, even a slightly darker shade of the same jumper colour reads as texture.
Finish with a soft blush background to keep the whole mood warm and gentle.
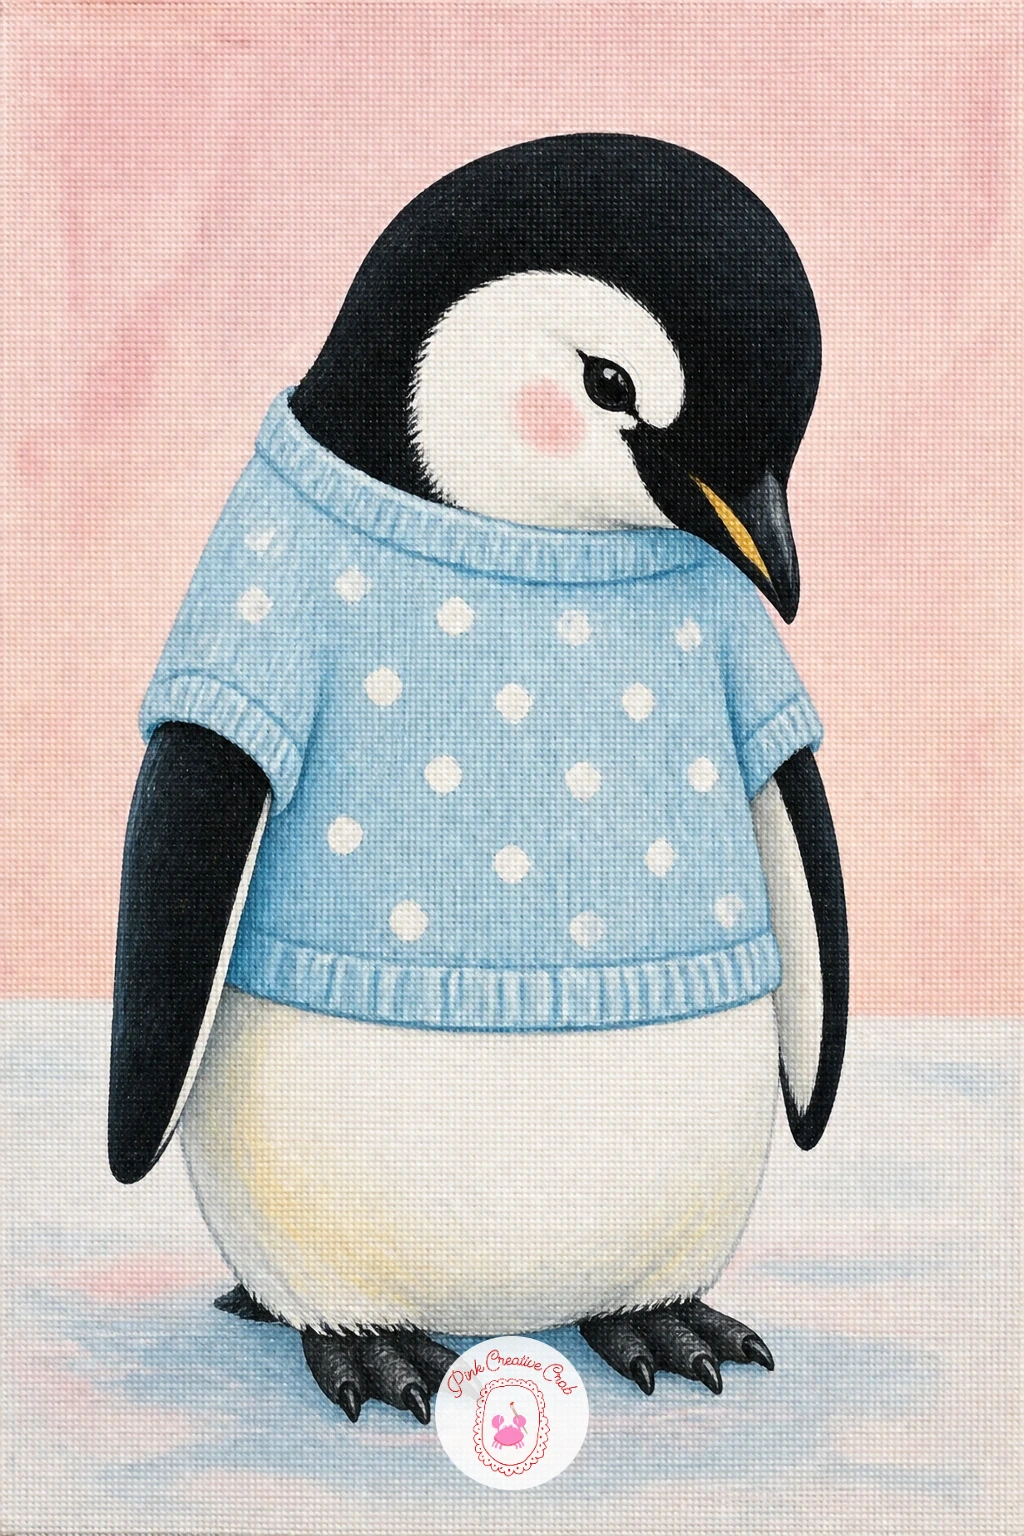
Palette: Mars Black,Titanium White,Dusty Rose,Soft Yellow
For more gentle animal subjects painted with this kind of soft, caring mood, 21 Animal Doodle Painting Ideas for Beginners has a similar warm approach worth browsing.
Build toward a sweet finishing pair with two emperors bowing heads into a heart, a composition where the negative space between the two birds forms the shape rather than any drawn outline. Paint both emperor bodies first, standing close and facing each other, then curve each neck inward so the gap between the two heads naturally reads as a heart shape.
Compare the curve of each neck constantly against the other as you paint, they need to mirror each other closely for the heart shape to read clearly, a common slip is making one curve tighter than the other. Keep the background plain and light so that negative heart space stands out clearly rather than getting lost in detail.
If the heart shape feels lopsided once both necks are in, a thin pale outline traced carefully along the inner curve can help correct it before the paint fully dries. No steady hand for that fix, a pencil line sketched first as a guide works well here too.
Finish with a soft blush glow in the background behind the heart gap to highlight it further.
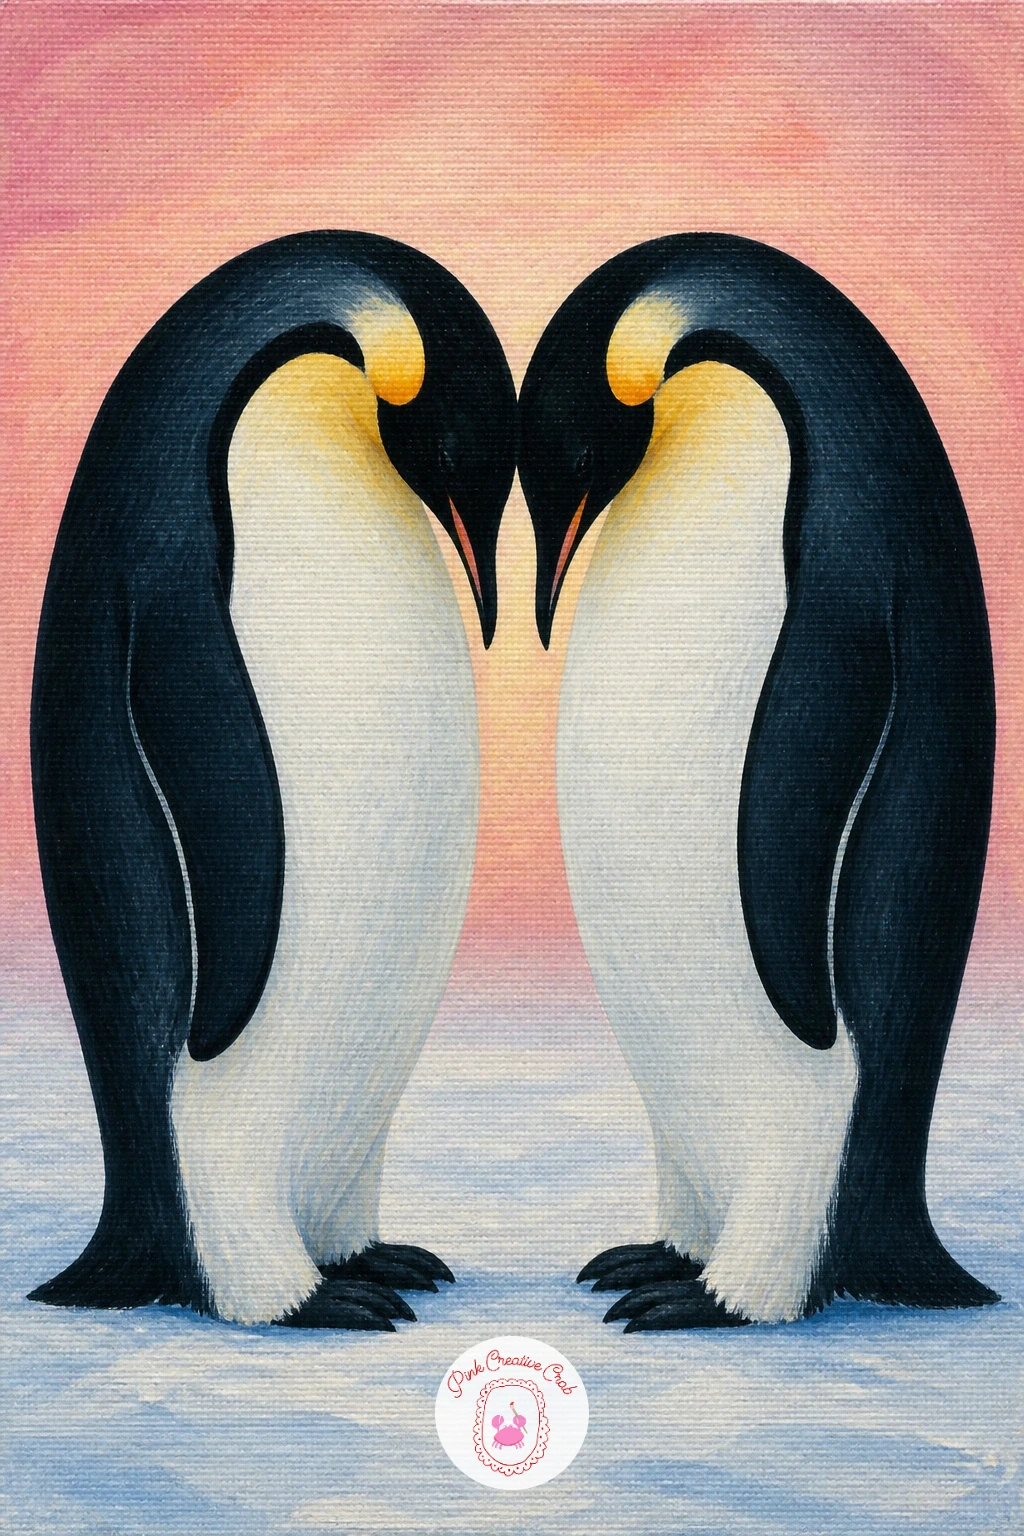
Palette: Mars Black,Titanium White,Blush Sky,Ice Blue
Close the series somewhere unexpected with a yellow-eyed penguin in a forest, since this rare species nests among coastal trees and ferns rather than open beaches or ice. Paint a loose backdrop of tall tree trunks and soft green fern shapes first, keeping them simple and slightly blurred, then add the penguin standing in a small clearing once that backdrop has dried.
This penguin’s pale yellow eye band is its signature feature, running from the eye back around the head, paint it as one continuous soft curve rather than a sharp line to match its naturally gentle look. Next time you paint this one, try varying the setting slightly, a misty background or dappled light through the leaves gives a very different mood from the same simple pose.
If the forest background competes too much with the penguin, mute its colours with a thin wash of white glazed over the top once dry, pushing it gently behind the main subject. No green paint for ferns, mix blue and yellow fresh on the palette for a livelier tone than any premixed green.
Finish with a few soft light patches filtering down through the trees for atmosphere.
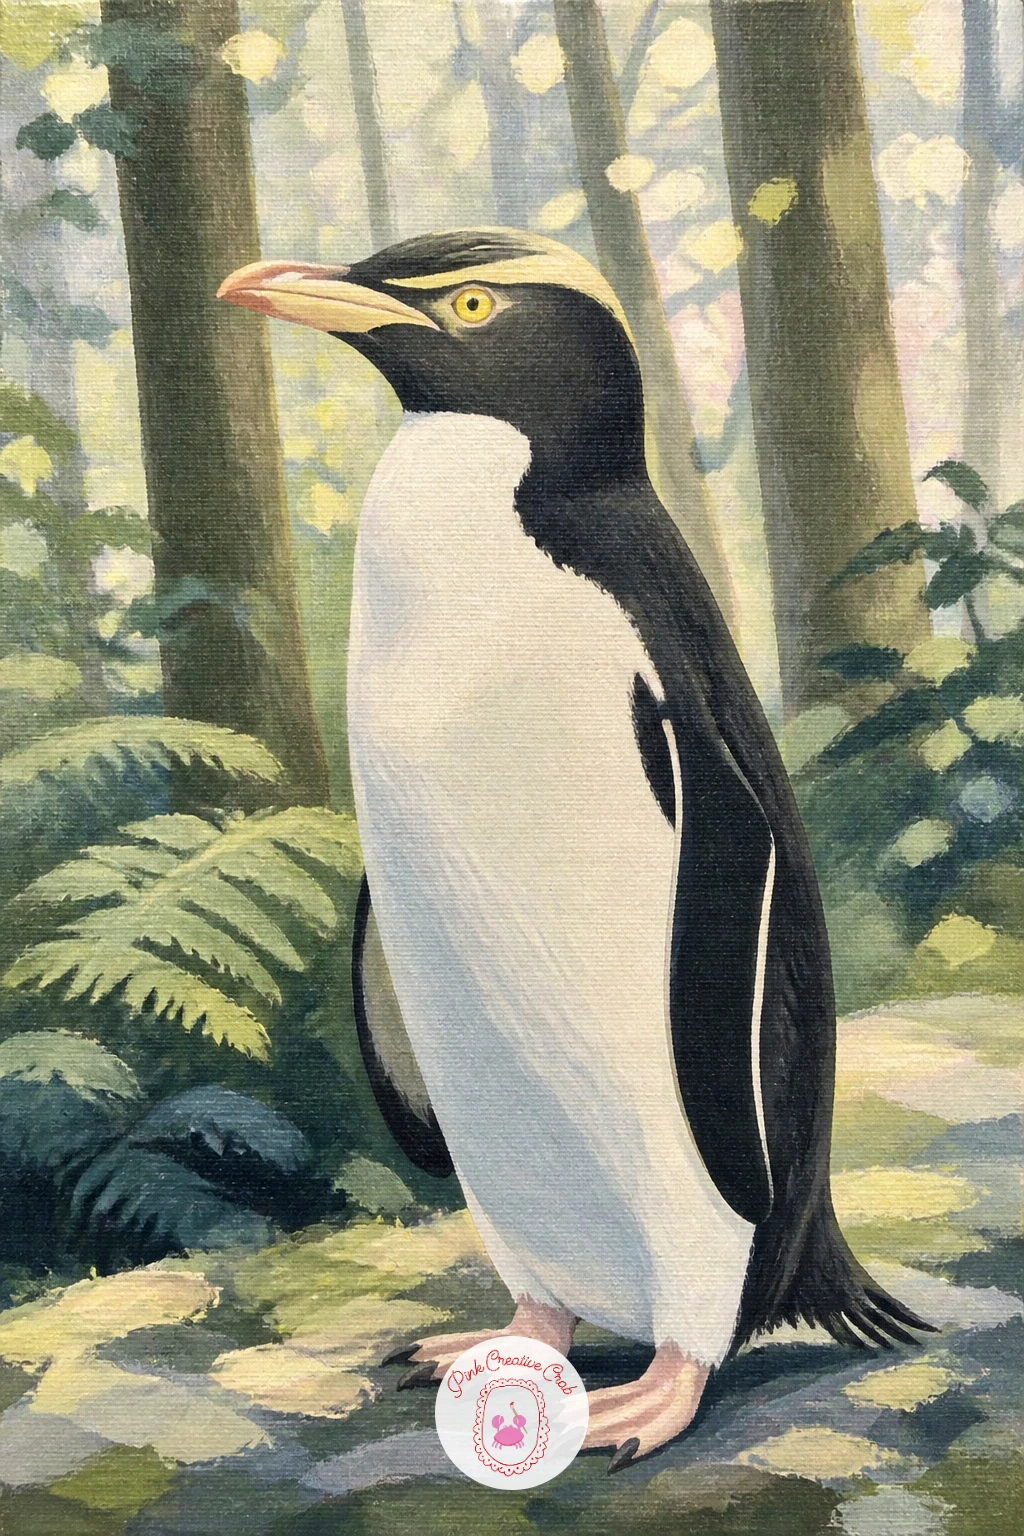
Palette: Mars Black,Titanium White,Soft Yellow,Forest Green
What to Do Next
Pick whichever penguin made you smile first, that is always the one worth starting on today. Grab a canvas board, block in the biggest shape first, and let the small details like a crest, a scarf or a fish come last.
Frequently Asked Questions
What paint works best for a penguin painting with smooth flat shapes?
Acrylic paint works best, since it dries fast and covers in flat opaque layers. Build each penguin from large shapes first, let each layer dry fully, then add small details like eyes and crests last for clean edges.
How do you paint penguin skin so it does not look flat?
Mix a tiny amount of white into the black for the areas catching light, rather than keeping one flat black everywhere. A single soft highlight along the back or head gives the illusion of roundness without extra blending.
Which penguin species is easiest to paint for beginners?
A sleeping chick or a simple standing penguin in a scarf works best for beginners, since both rely on one rounded body shape with very few extra details like crests or stripes to manage.
How do you keep white and black paint from turning grey on the canvas?
Let the black layer dry completely before painting white next to or over it, and use a clean brush for each colour. Wet black and wet white blending together is what causes muddy grey patches.
Do I need reference photos to paint penguins accurately?
A reference photo helps a great deal, especially for species-specific markings like crests, chest bands or eye patches. Even a quick phone search for the named species keeps proportions and colours believable.
Have any thoughts?
Share your reaction or leave a quick response — we’d love to hear what you think!
-
 0
-
0
-
0
-
0
-
0
-
0


