

Boots drawing gives you something a plain shoe sketch never does: a whole little story in one frame. A pair by the door, a splash in a puddle, a cat curled up inside one forgotten boot. That story is what makes this subject so satisfying to draw with markers, because the boots themselves are simple shapes and all the charm comes from the scene around them.
Below you will find 27 of these scenes, ordered from quick and simple to a bit more involved, all built the same way: a thin fineliner outline first, then smooth marker color on top. Pick whichever one matches your mood today, grab your markers, and let the first one pull you in.
Using these images: free for personal projects such as printing, coloring, cards, journals and gifts. Handmade items that include them may be sold up to 30 pieces per design. More than that is commercial use and is not permitted, and neither is selling or sharing the images themselves or passing them off as your own. Please ask before any other use.
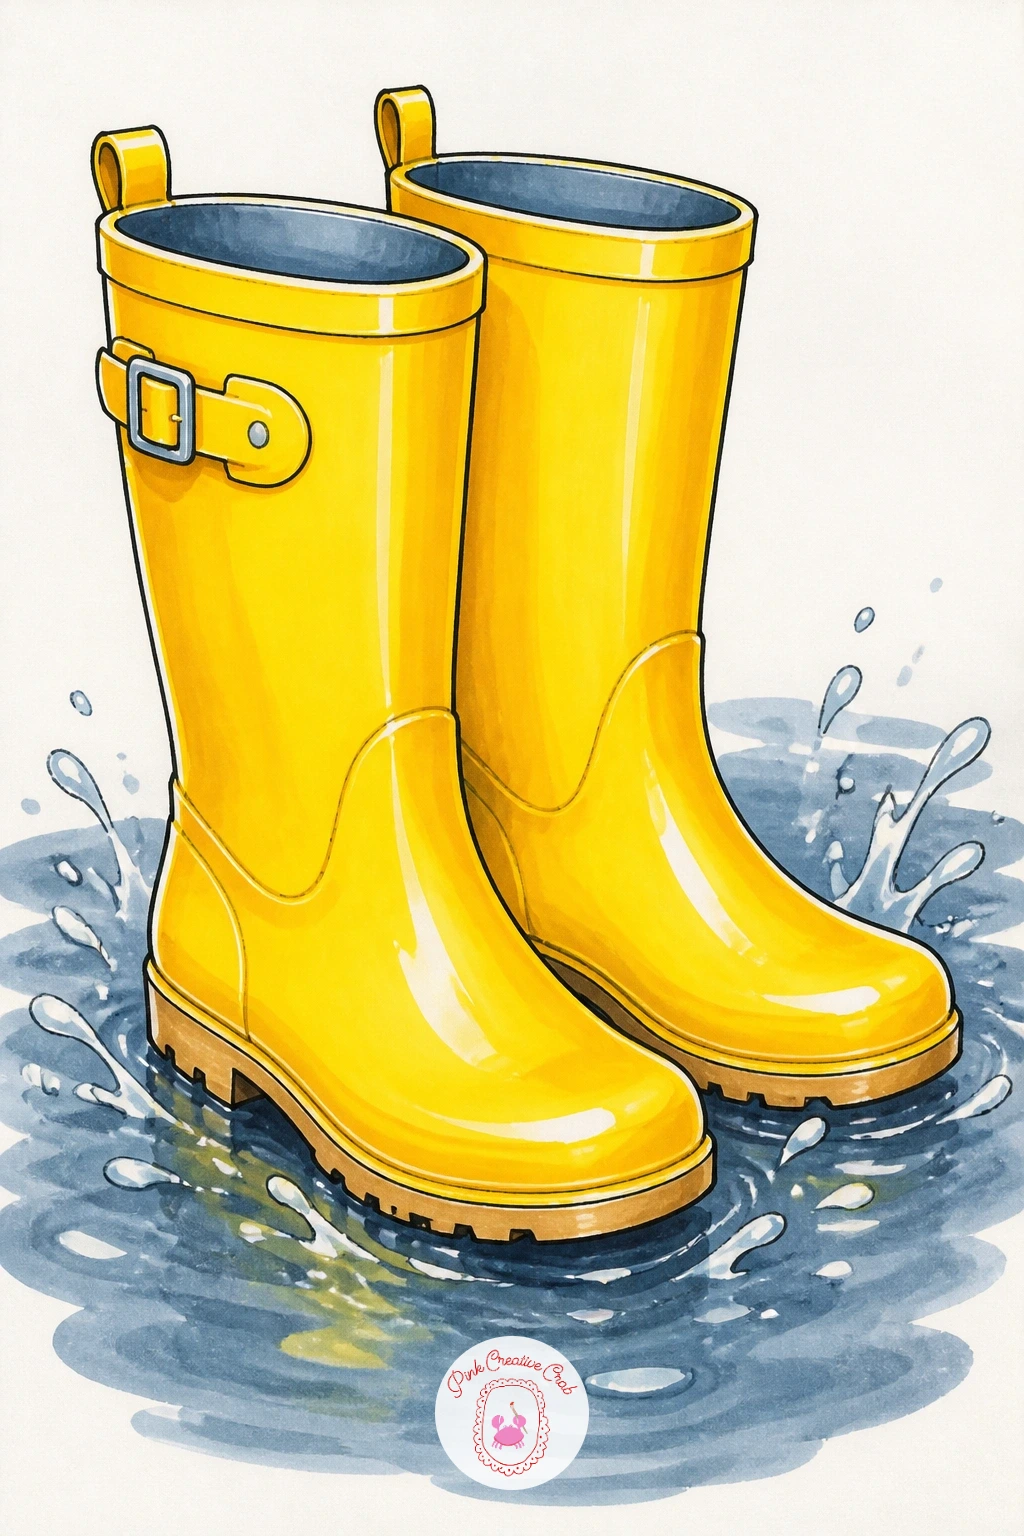
Start where this whole list starts: a single pair of yellow rain boots standing in a puddle, toes slightly turned in toward each other. Sketch the boots first in fineliner, keeping the shape simple, a rounded toe and a straight calf, then draw the puddle as a flattened oval beneath them.
Block in the yellow with your lightest marker first, then go back over the lower half and the folds near the ankle with a second, deeper yellow to build the shadow. The puddle is where beginners rush, so take your time: a pale grey-blue wash with one or two white gel pen streaks for reflection sells the whole thing.
If your yellow markers run warm, cool the shadow side down with a touch of grey rather than brown, which keeps the boots looking rubbery instead of muddy. No grey marker on hand, a light blue works just as well for that shaded side.
Finish with a few small white dots for splash marks jumping off the puddle’s edge, since that one detail turns a static pair of boots into a moment caught mid-step.
You Will Need
- white gel pen
Palette: Canary Yellow,Golden Yellow,Steel Grey,Pale Sky Blue
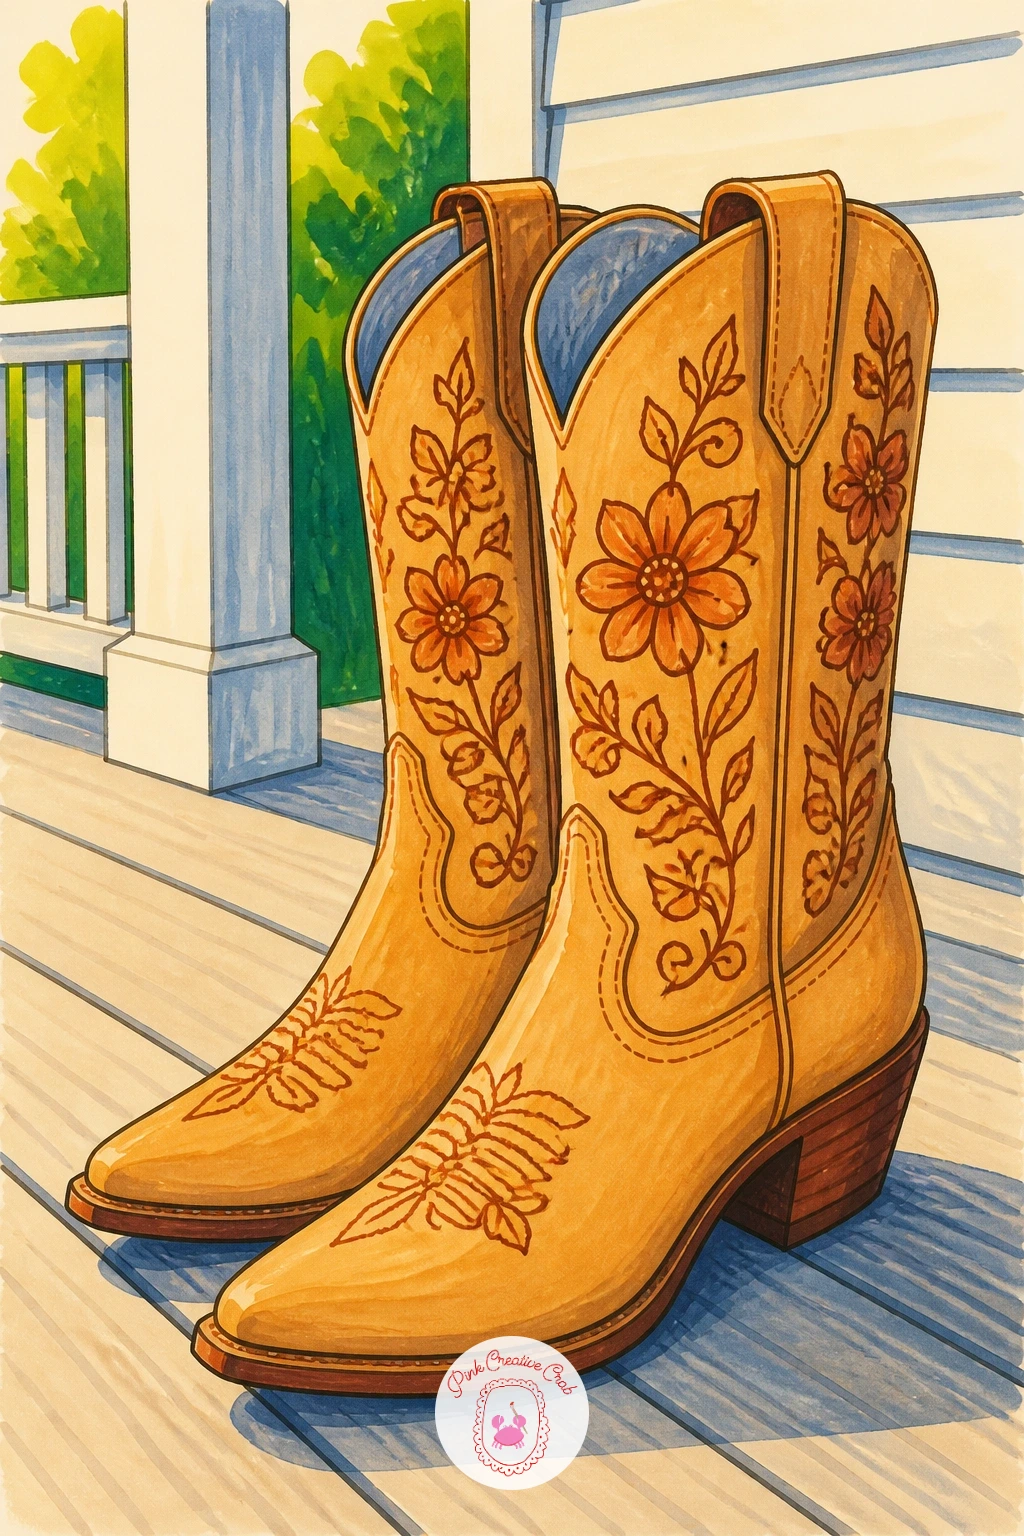
Cowboy boots bring in pointed toes and a tall, angled shaft, so give yourself a light pencil guide before you commit to fineliner: two boots standing slightly apart, one turned a touch more than the other so the pair feels relaxed rather than stiff. Measure the shaft height against the boot’s own foot length first, since cowboy boots read wrong the moment the shaft gets too short.
Ink the stitched flower detail as simple looping lines along the shaft rather than tiny individual petals, which keeps the pattern readable at a small scale. Color the leather in warm tan first, then layer a rust or chestnut brown only along the seams and the heel to carry the stitching lines.
The porch board beneath them can be three or four long parallel marker strokes in a soft warm grey, nothing more. If you only own cool-toned browns, warm them up by adding a thin layer of yellow underneath before the brown goes down.
Keep one boot leaning slightly against the other for a lived-in, just-kicked-off feeling.
Palette: Saddle Tan,Chestnut Brown,Rust Red,Warm Grey
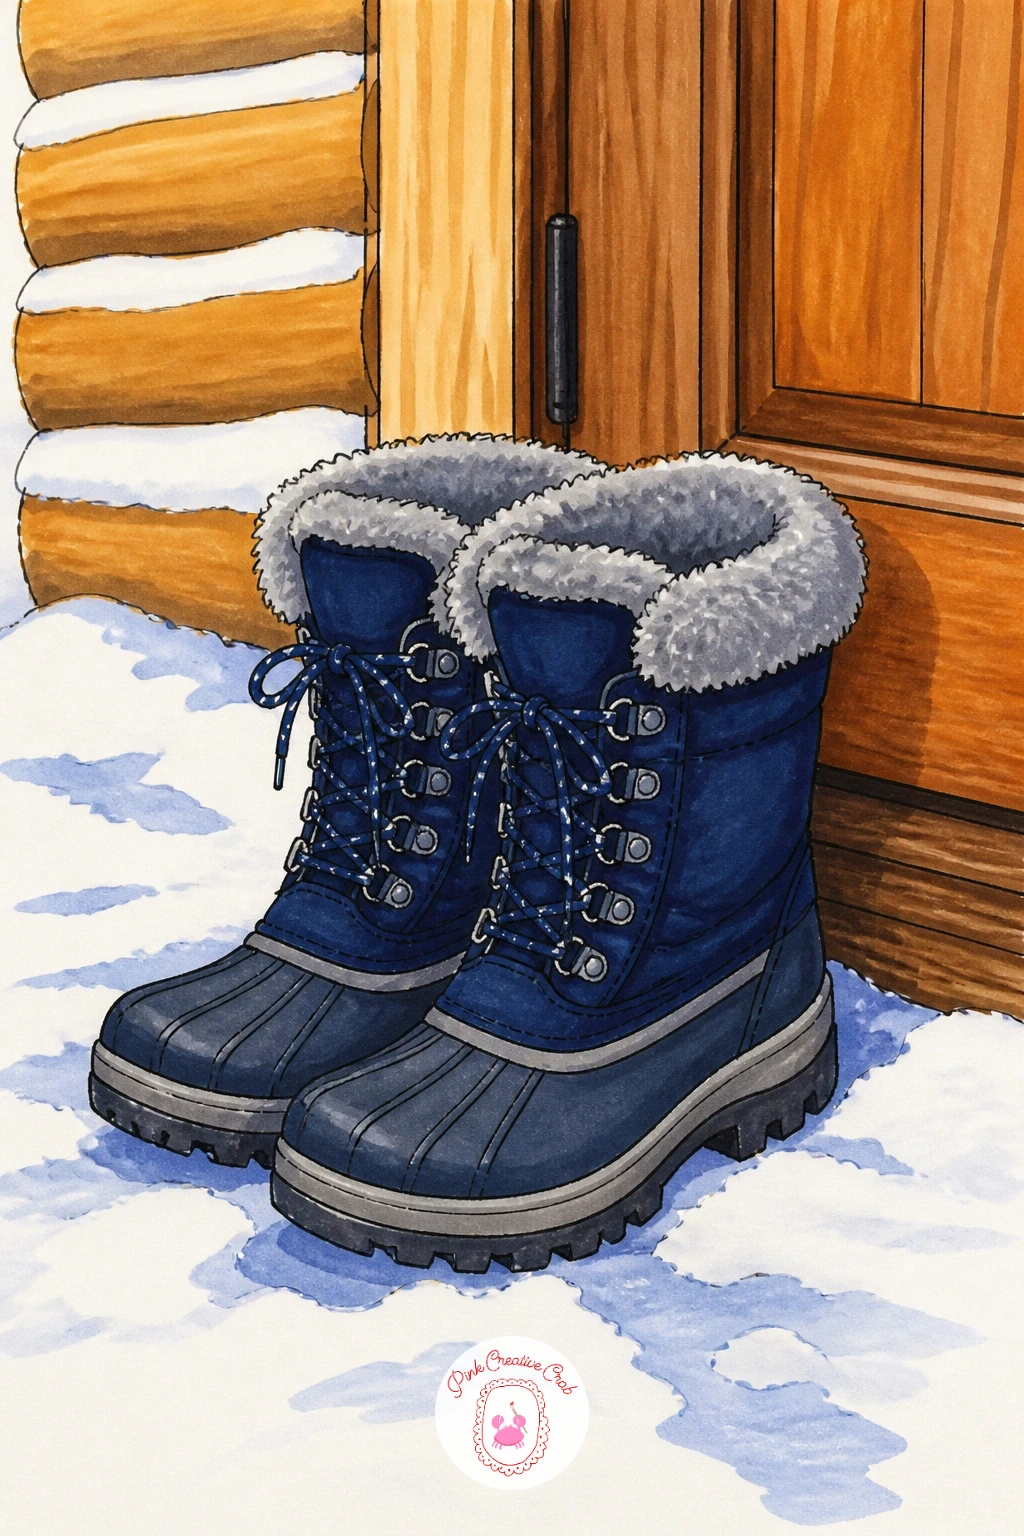
Move from the porch to a snowy doorstep, with a pair of chunky snow boots propped beside a cabin door. Draw the boots wide and rounded, heavier than the rain boots earlier, with a thick tread line along the sole that you can ink as a zigzag.
Work the door frame in behind them with a few straight fineliner lines, just enough wood grain in grey-brown marker to suggest a cabin without drawing the whole building. Color the boots in a deep navy or forest green body with a lighter grey faux-fur cuff at the top, blended so the fur edge looks soft rather than scribbled.
Snow at the base is the easy part to get wrong by overworking it, so leave the paper white and only add a thin blue-grey shadow line where the boots meet the ground. If your light blue marker looks too flat there, go over just the shadow edge a second time to deepen it.
A single pinch of white gel pen snow flecks in the air finishes the scene.
You Will Need
- white gel pen
Palette: Deep Navy,Forest Green,Soft Grey,Cool Shadow Blue
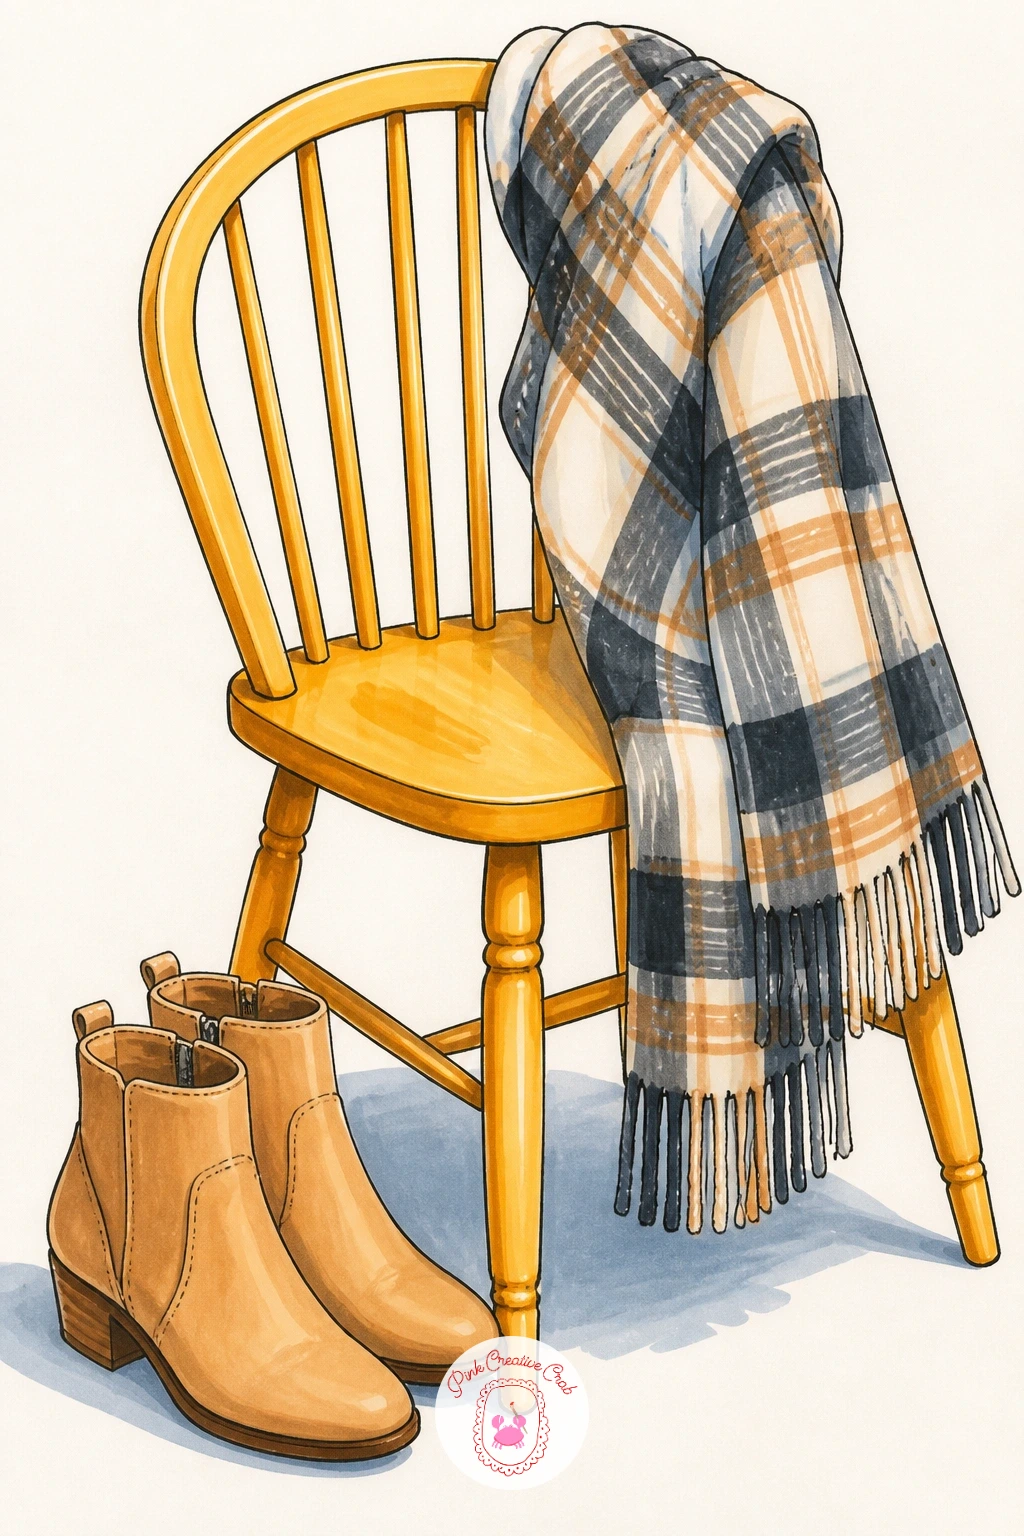
Here the boots sit still rather than walking anywhere, so think eye level: you are looking slightly down onto the seat of the chair, which means the top opening of each ankle boot shows as a visible oval rather than a straight line. Get that ellipse right first and the rest of the boot follows naturally.
Draw a simple wooden or upholstered chair seat beneath the boots, kept loose, then drape a scarf in soft folds over the chair back behind them. Color the boots in a buttery tan or dusty rose, whichever feels more like your own wardrobe, and let the scarf carry a plaid or striped pattern in two contrasting markers.
Fabric folds are where this scene can go flat, so add two or three short curved shadow lines wherever the scarf dips, rather than shading the whole thing evenly. No plaid marker set at hand, alternating stripes of two colors read just as well from a short distance.
Let one boot lean slightly against the chair leg for a casual, just-stepped-out-of feeling.
Palette: Dusty Rose,Buttery Tan,Charcoal Grey,Warm Cream
Hiking boots need a sturdier outline than anything drawn so far: thicker soles, a lace pattern crossing up the front, and a slightly scuffed look. Pencil the boots first standing on an angled rock or trail edge rather than flat ground, which immediately gives the scene a sense of place.
Here the light source matters more than in a studio shot, so decide early whether the sun sits high behind the hiker or low along the trail, then keep every shadow consistent with that one choice. A high sun means short shadows tucked close under the sole; a low trail-side sun stretches the shadow out long across the rocks.
Color the boots in olive or warm grey-brown, then use a darker version of the same color only on the side away from your light source. Sketch a loose suggestion of distant hills in pale blue-grey behind the boots so the trail does not feel like it floats in empty space.
If your greens run too bright for rock and dust, mix in a touch of tan marker first to mute them down.
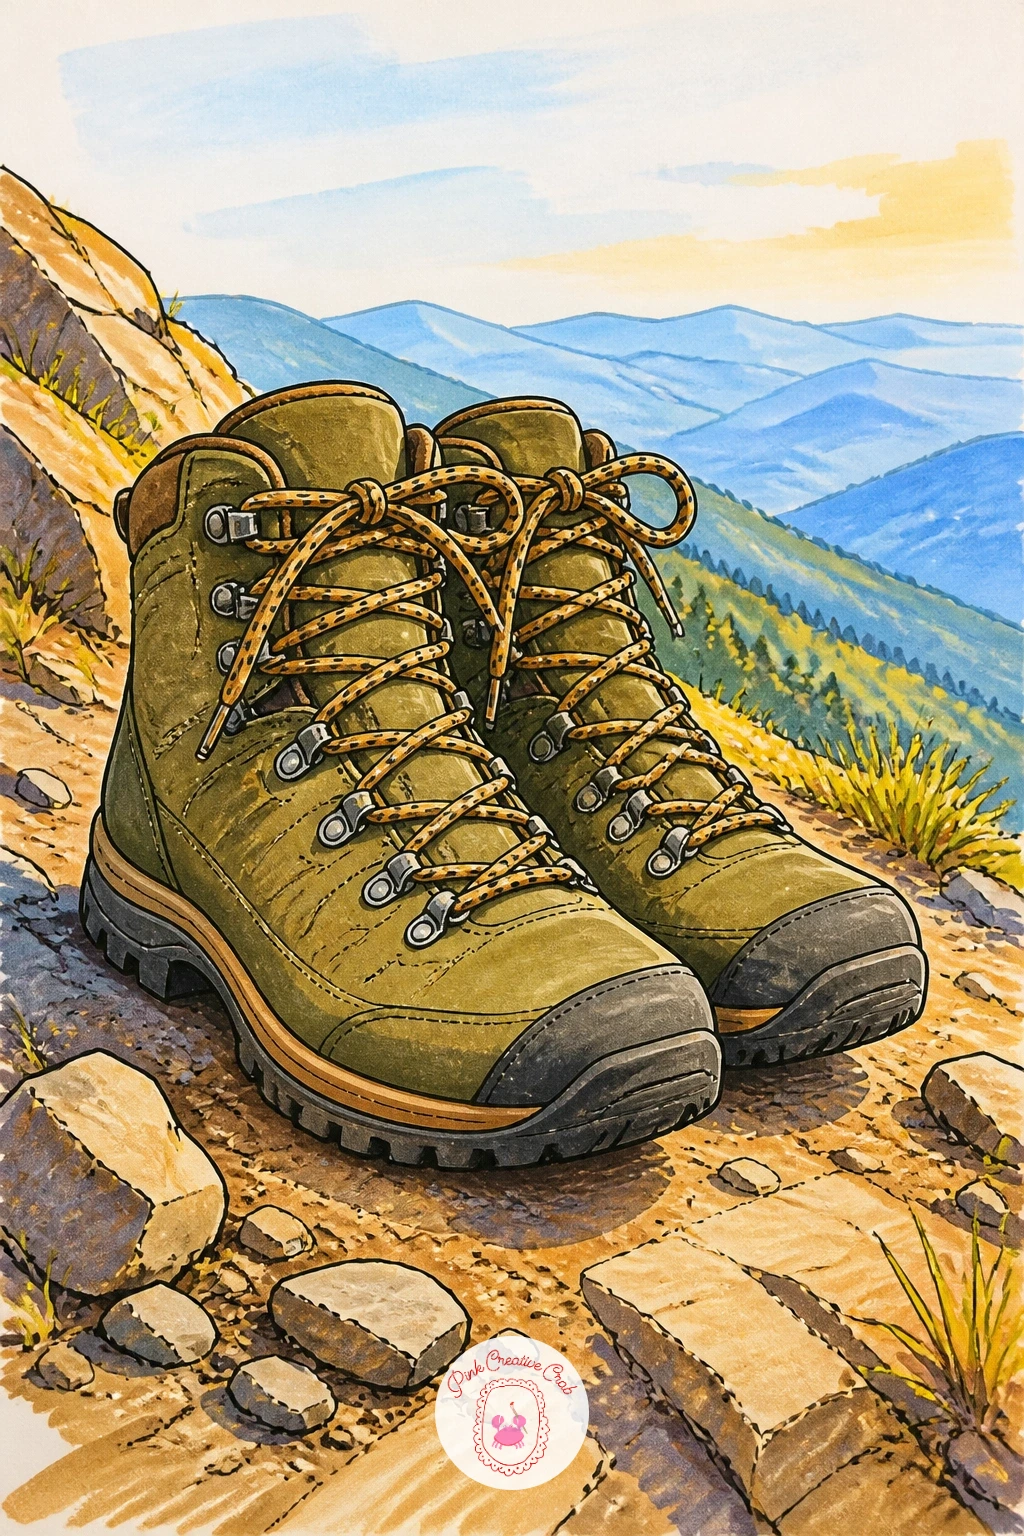
Palette: Olive Green,Warm Grey-Brown,Dusty Tan,Pale Hill Blue
Try tilting the boots at different angles on the rock for a second version; a steeper angle reads as a harder climb and changes the whole feeling of the scene.
This one turns the rain boot into a container rather than footwear, so draw it tipped slightly onto its side or standing upright with the top opening wide, whichever composition you prefer. Keep the boot shape itself identical to the puddle idea earlier in this list, since by now you have that silhouette down.
Fill the opening with a loose bunch of simple garden flowers: a few daisies, a couple of tulip shapes, maybe one trailing ivy leaf spilling over the rim. Color the boot in a cheerful red or polka-dot pattern, then let the flowers carry the brighter, busier color so your eye lands on the blooms first.
Overcrowding the flowers is the easiest mistake here, so stop at four or five stems rather than filling every gap, and vary their heights so the arrangement feels picked rather than stuffed. If you want a quieter version, swap the flower mix for a single tall sunflower instead.
Add one or two fallen petals on the ground beside the boot for a finishing touch.
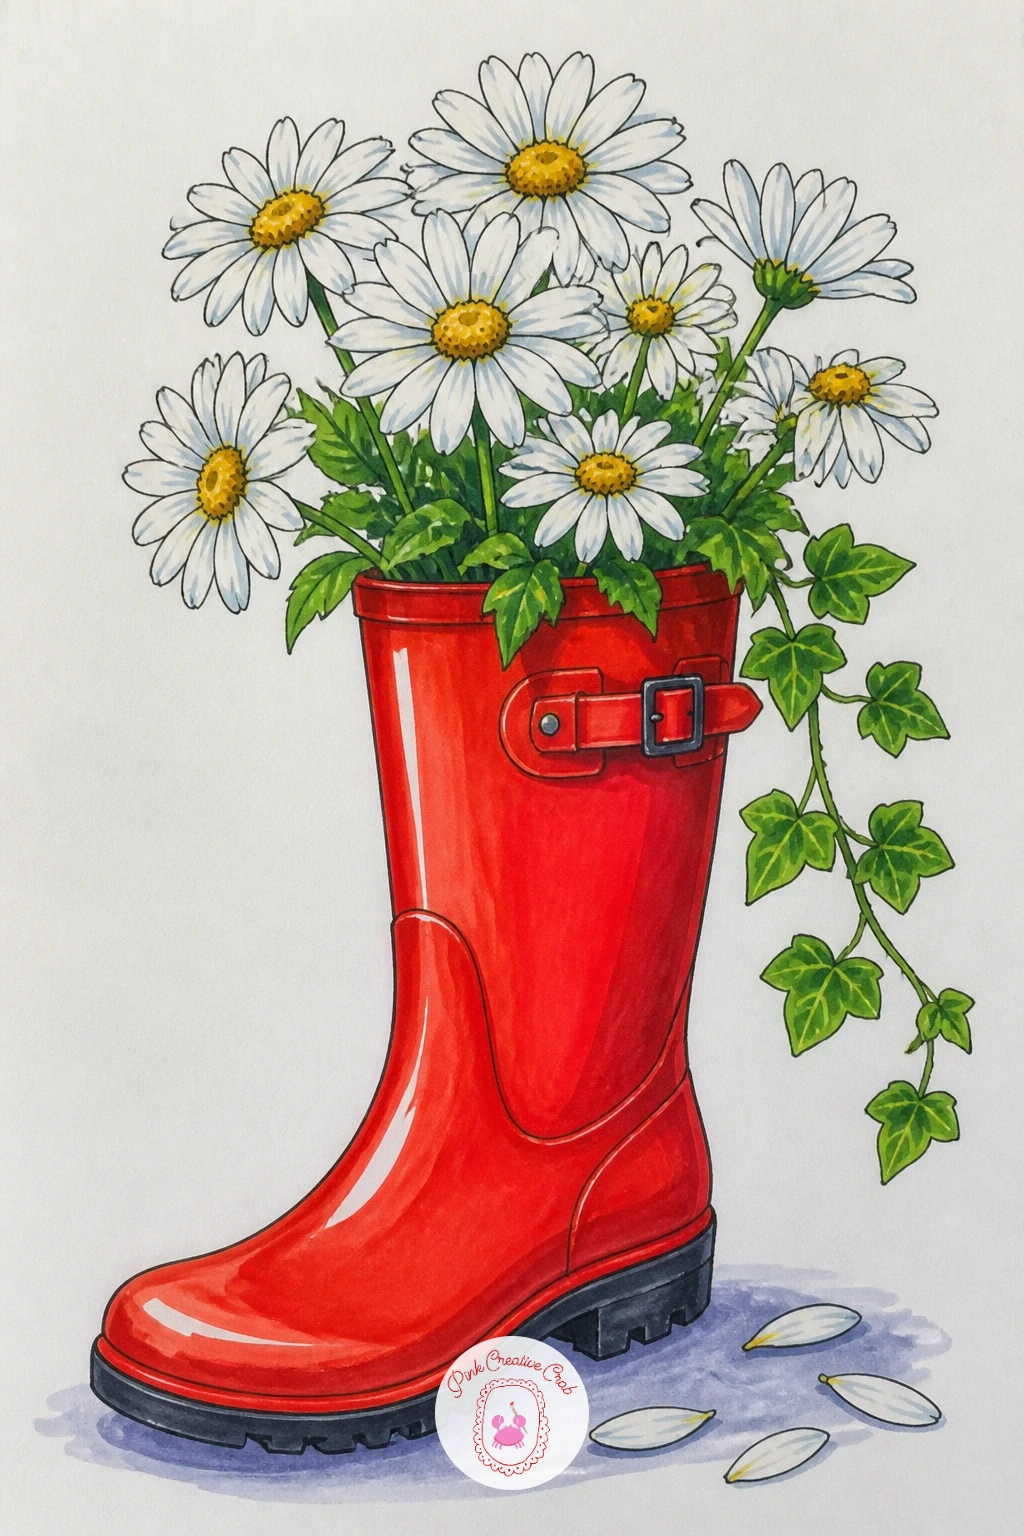
Palette: Cherry Red,Leaf Green,Daisy White,Sunny Yellow
Riding boots run tall and slim, closer to the cowboy boot shaft than the hiking boot bulk, so keep the silhouette narrow and let the leather shine do the visual work instead. Pencil the boots standing upright against a wooden stable door, leaning just slightly so they are not perfectly symmetrical.
Color the leather in a rich chocolate or black-brown, then leave a thin unmarked strip down the front of each boot before you color around it, which reads instantly as a polished shine once the rest of the leather goes dark. That strip is the trick that separates a flat boot from a glossy one.
Behind them, a few horizontal plank lines in warm grey-brown suggest the stable door without needing a full barn drawing. If your darkest brown marker looks muddy rather than rich, layer black fineliner cross-hatching sparingly into the deepest shadow instead of reaching for a second marker.
A loose coil of rope or a hanging horseshoe beside the door adds a nice small detail if you want to push the scene a little further.
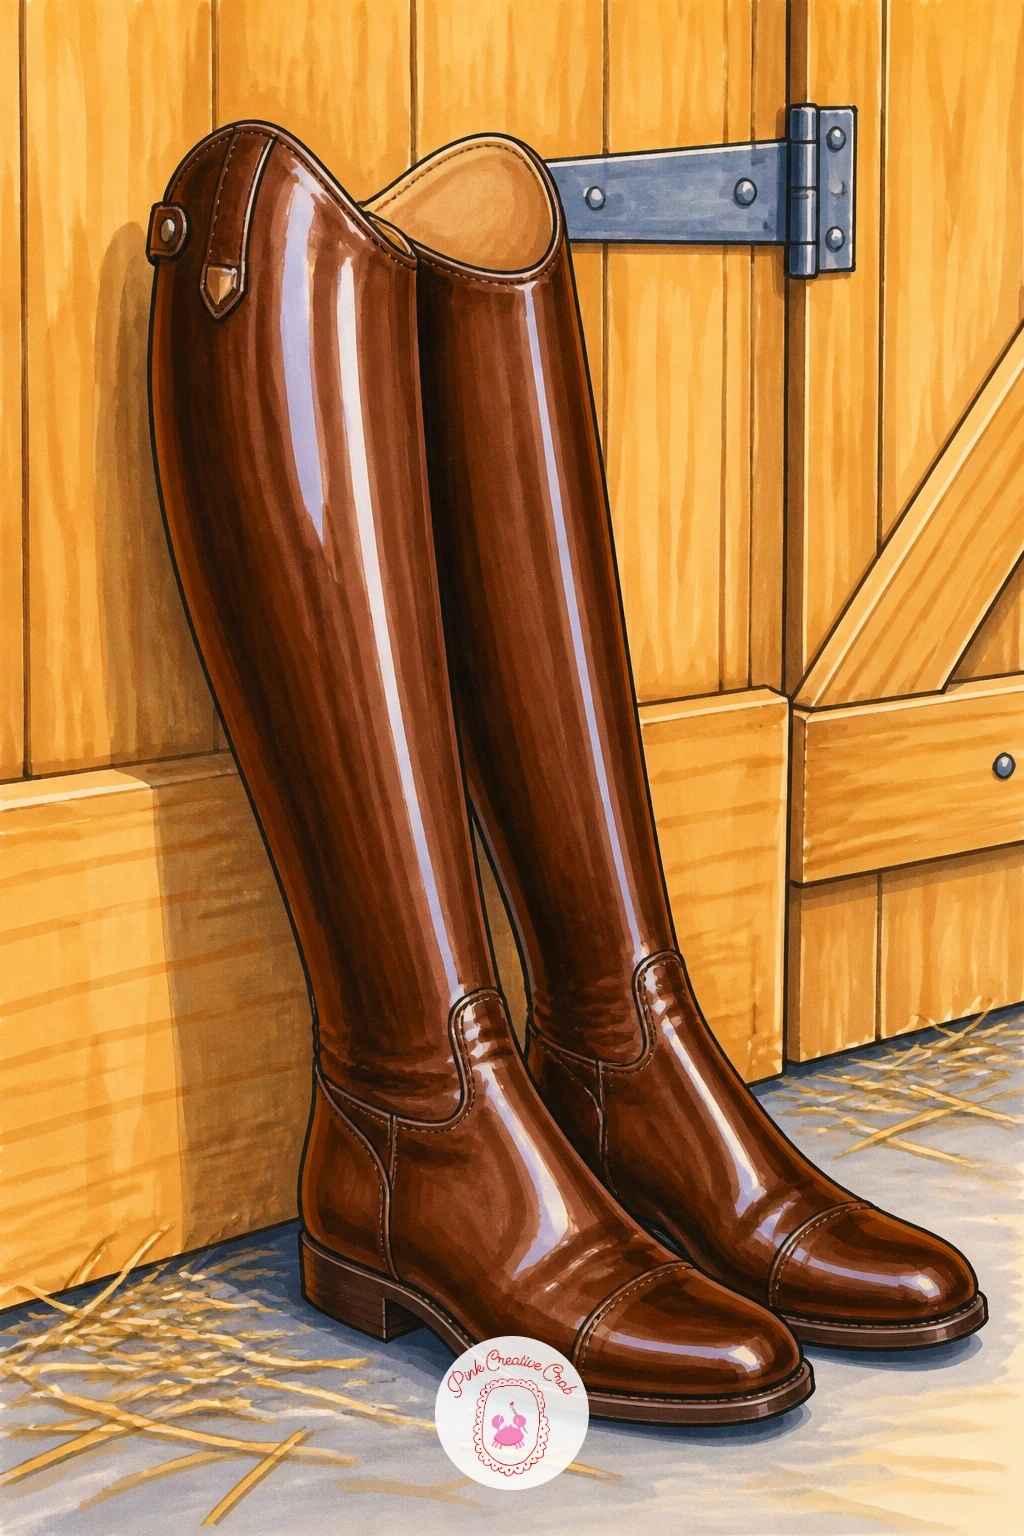
Palette: Chocolate Brown,Rich Black-Brown,Stable Grey-Brown,Straw Gold
Ten minutes gets you the boots alone: two knee-high boots standing side by side, simple straight shafts tapering slightly toward the ankle, colored in a single rich tan or burgundy with minimal shading. That quick version already makes a charming small page.
Give yourself forty minutes and the scene grows into a full styled moment, with a plaid skirt hem draped just above the boot tops as though caught mid-outfit, plus a scattering of autumn leaves at the feet. The plaid pattern is the part worth the extra time, since a careful grid of two or three colors reads as fabric while a rushed one reads as scribble.
Draw the skirt hem first in fineliner as a soft wavy line, then build the plaid grid lightly in pencil before inking, keeping the lines evenly spaced. Color the boots before the skirt so the darker boot leather does not bleed under the lighter plaid.
Short on plaid-ready markers, a simple two-tone stripe or houndstooth suggestion works as a stand-in and still reads as a skirt pattern at a glance.
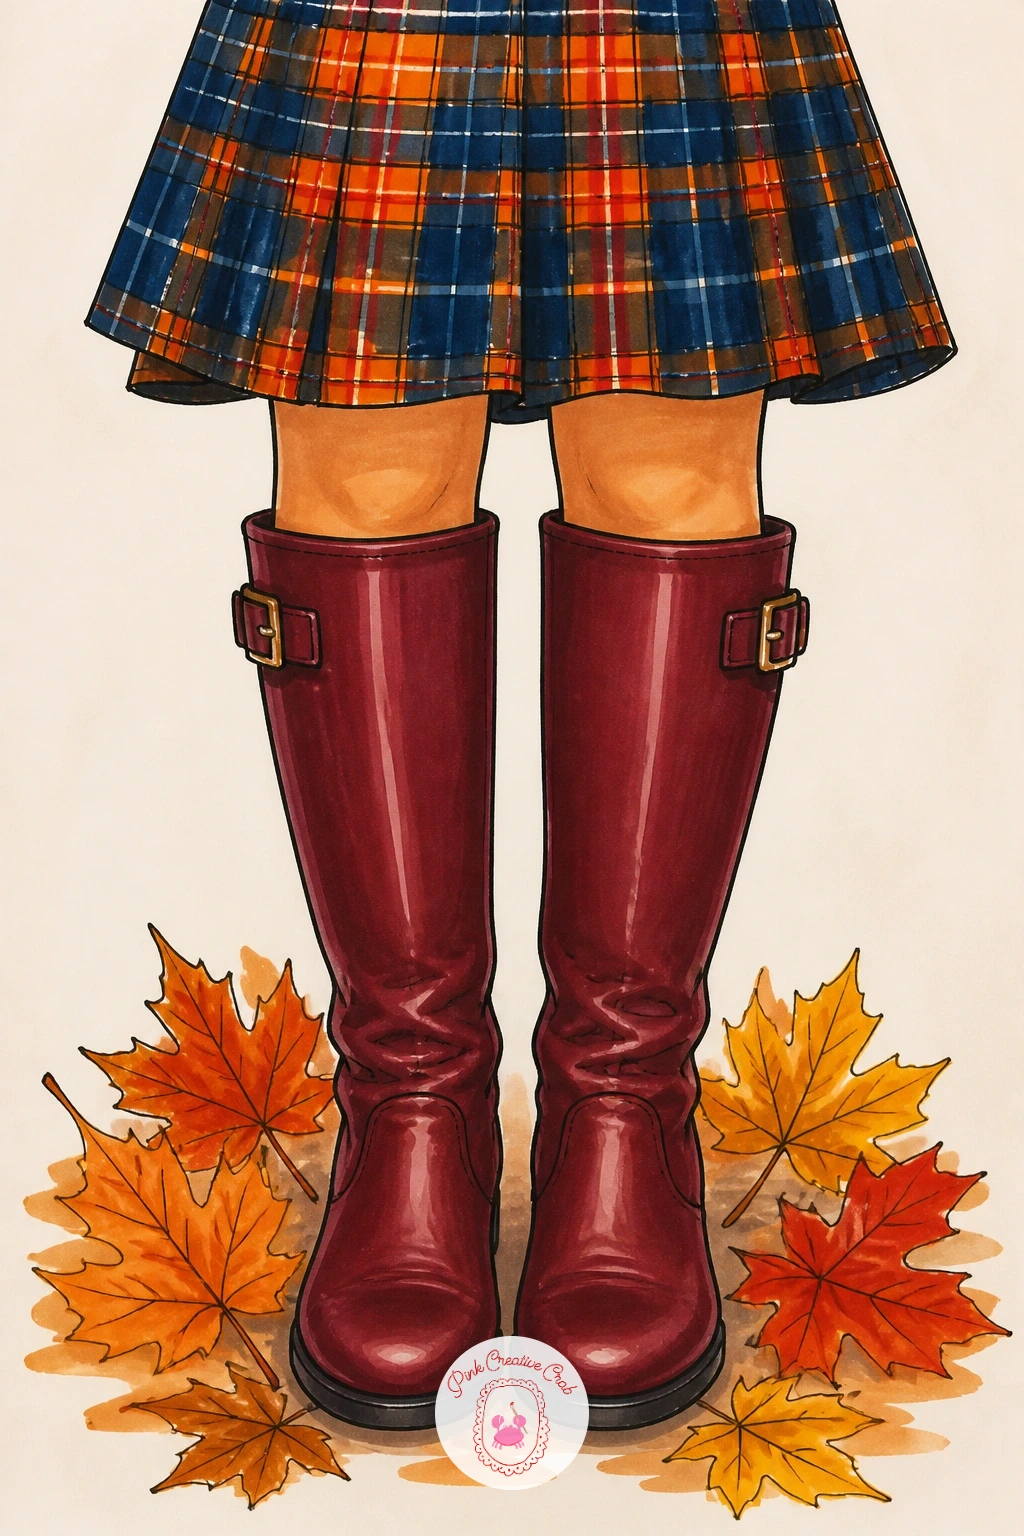
Palette: Burgundy,Warm Tan,Plaid Navy,Autumn Orange
Keep this pair planted flat and tired-looking, toes pointing slightly outward as though just kicked off at the door. The doormat beneath them is a great texture exercise, so draw its woven ridges as short, evenly spaced fineliner dashes rather than one solid rectangle.
Mud is where a dry brush or light cross-hatch trick saves the whole drawing: rather than coloring mud as a flat brown blob, dab your marker tip in short, irregular strokes along the sole and lower boot, letting bits of the original boot color show through underneath. That broken, uneven texture reads as actual mud far better than a smooth wash ever will.
Color the boots themselves in a warm tan or olive first, then add the mud strokes once that base layer is fully dry so the colors do not bleed into mush. If your marker tip is too wide for fine mud flecks, a brown fineliner or fine brush pen gives you finer control.
A couple of stray mud specks tracked onto the mat finish the little story.
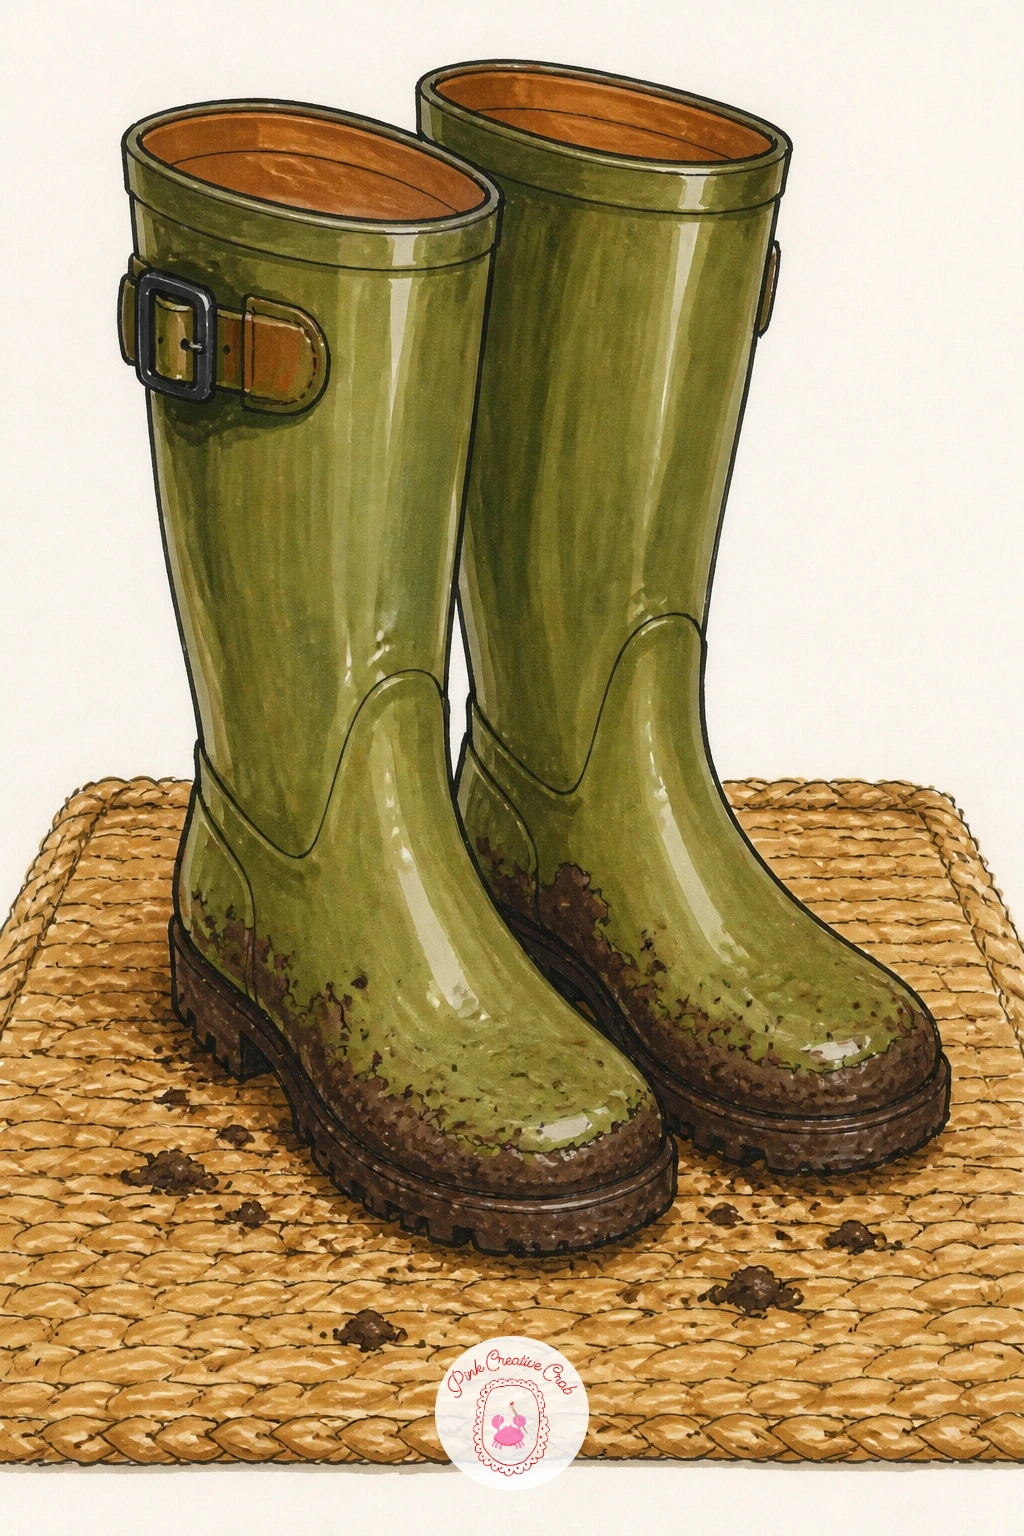
Palette: Olive Tan,Mud Brown,Doormat Beige,Deep Umber
Scale comparison is the whole trick here, so draw the adult boot first at full size, then measure the child’s boot against it directly on the page, aiming for roughly half the height so the size difference reads instantly rather than looking like two adult boots drawn carelessly.
Stand them close together, perhaps the small boot slightly turned in toward the larger one, which adds warmth without needing any figures in the scene at all. Color both pairs in the same red so they read as a matching family moment, keeping the child’s boot a touch brighter or glossier to emphasize its newness.
The proportion mistake to watch for is making the child’s boot too narrow, since children’s boots are usually nearly as wide as an adult’s, just shorter. Check the width against the adult pair before you ink the final outline.
If red feels too matched, try the child’s pair in yellow against the adult’s red for a playful contrast instead.
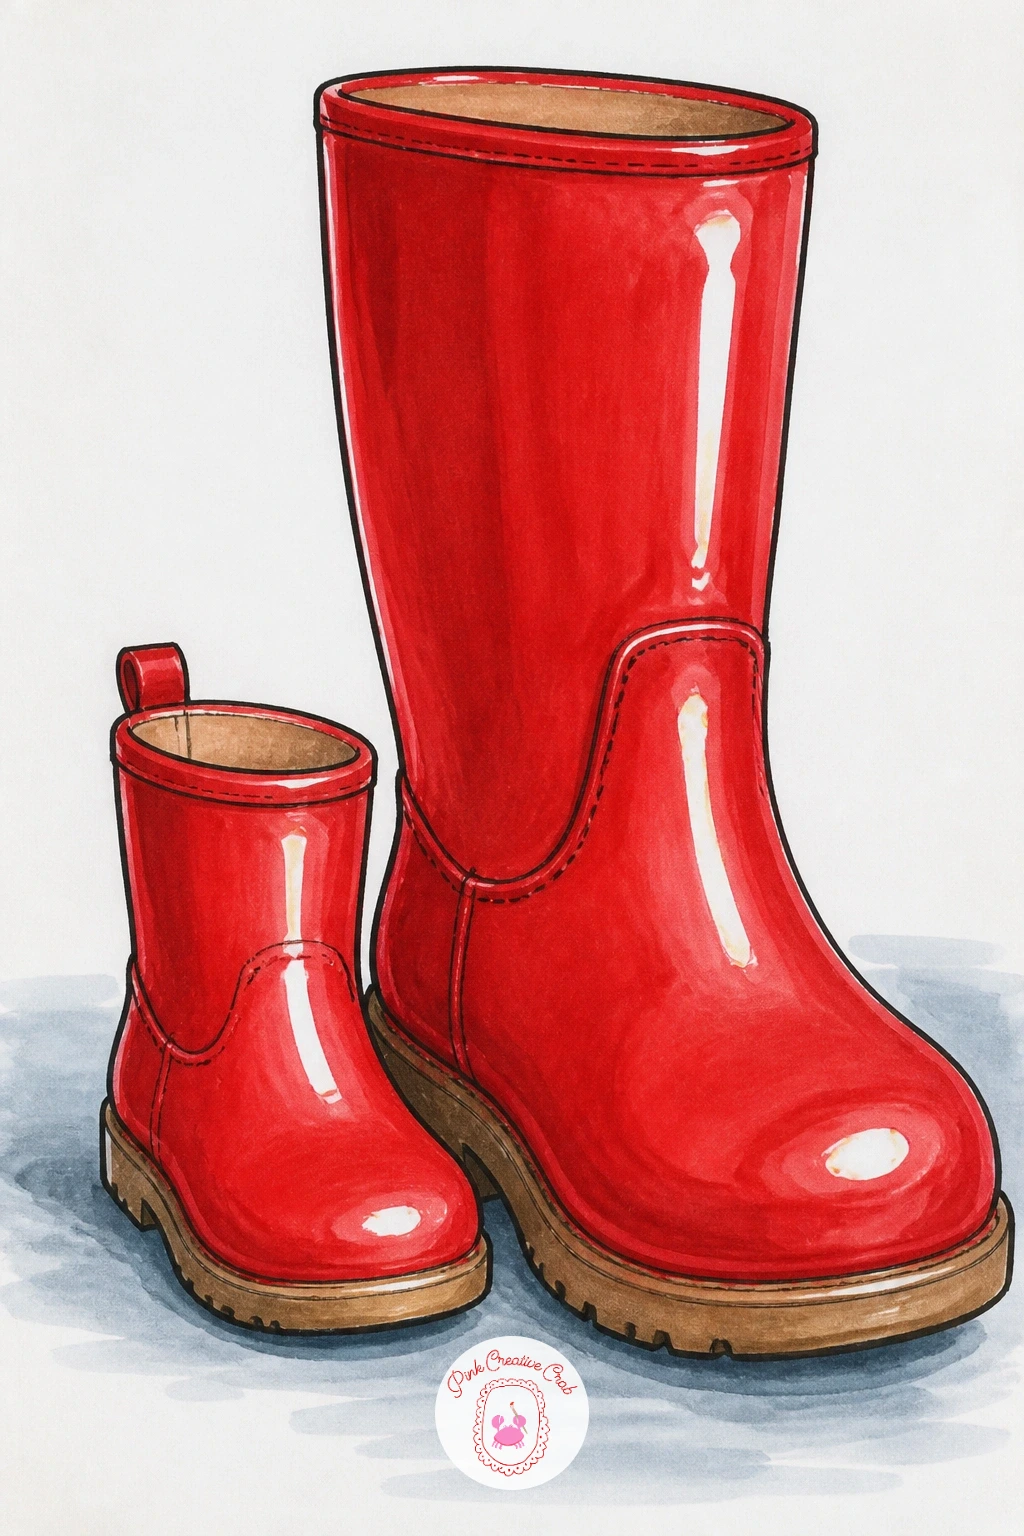
Palette: Cherry Red,Bright Red,Soft Grey Ground,Highlight Cream
Build on the snow boots from earlier by pushing the fur trim into the main event this time, drawn with a looser, scalloped outline rather than a clean straight edge, since fur reads best when the fineliner line itself wobbles slightly. Keep the boot body simple and smooth so all the visual texture lives in that collar.
Color the fur in two shades of cream or grey, blending them together while the marker is still wet so the edge between light and dark fur softens rather than shows a hard line. The boot body beneath can take a single confident color, maybe a deep plum or chocolate, with minimal shading so it does not compete with the fur.
Snow at the base stays simple again: white paper, one pale blue shadow line, done. If blending two creams looks patchy, try going over the whole fur shape once more with your lightest marker to even the tone out before adding the darker streaks back in.
A few loose snowflake marks falling around the boots round out the mood.
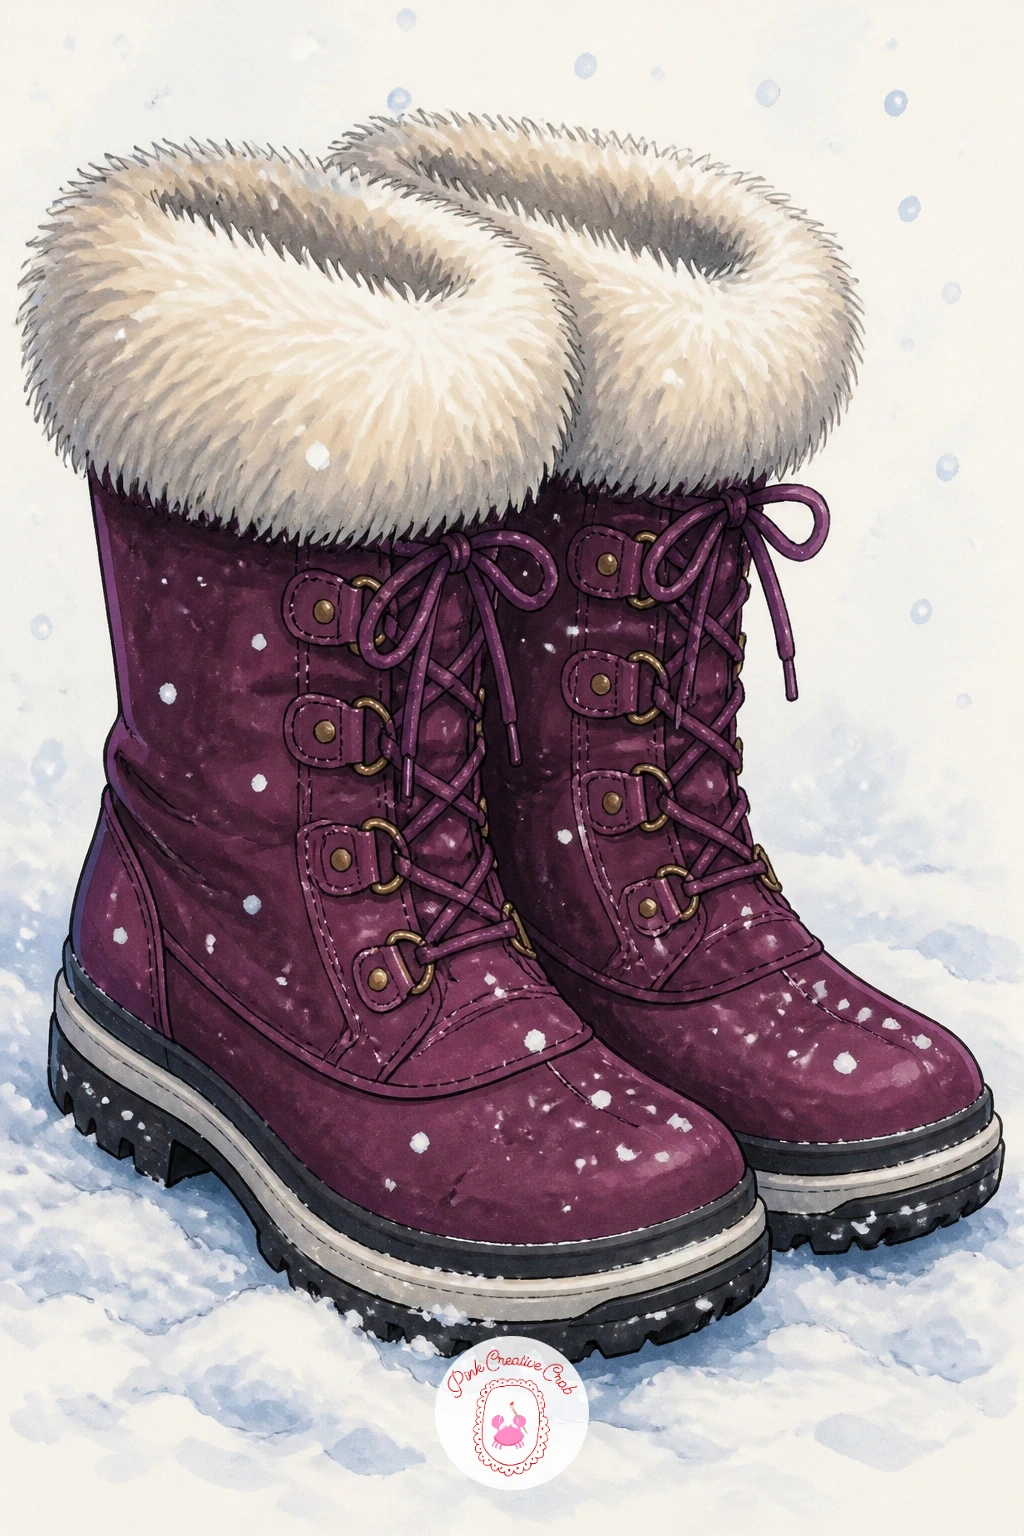
Palette: Deep Plum,Cream Fur,Soft Grey Fur,Cool Shadow Blue
Chelsea boots are the cleanest silhouette on this whole list, just a smooth ankle line with an elastic side panel and no laces to draw, so this is a good one to practice confident, single-stroke fineliner outlines. Stand the pair at a slight angle, one boot a half step ahead of the other, as if the sitter just crossed her legs under a cafe table.
Color the leather in a warm cognac or soft black, keeping the elastic panel a shade lighter or slightly greyed so it reads as a different material without needing a separate outline. The cafe floor beneath them can be a simple checkerboard or herringbone pattern in two muted tones, which frames the boots nicely without pulling focus.
The floor pattern is the part that tends to wander off-grid if you rush it, so lightly pencil a few guide lines before inking any tile edges. No cognac marker on hand, a warm orange-brown mixed visually by layering yellow then brown gets you close.
Leave the top half of the frame empty to keep the focus low and intimate, like a glance down at your own feet.
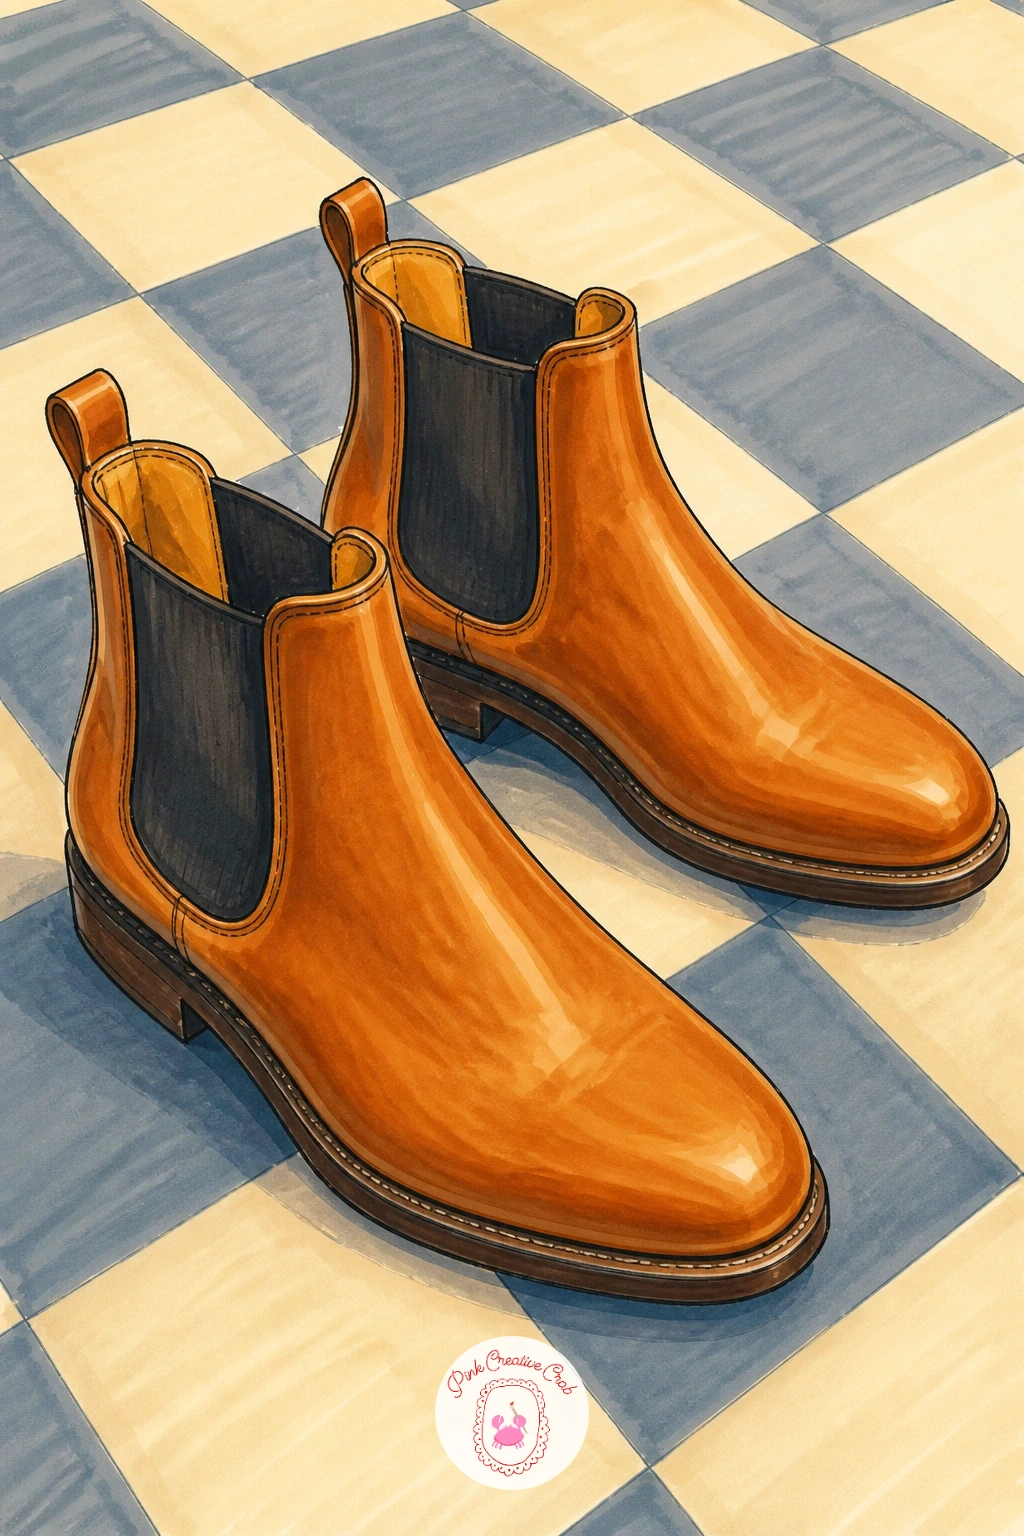
Palette: Cognac Tan,Soft Black,Muted Tile Grey,Warm Cream Tile
Bring the hiking or snow boots in from the cold here, standing slightly apart near a fireplace with a pair of socks draped over the top edges to dry. Draw the boots leaning gently, not perfectly upright, since boots set down to dry rarely stand at attention.
The firelight changes everything about this scene’s color choices: instead of neutral daylight tones, warm the whole palette with an orange glow along the side of the boots facing the flame, and let that same orange tint creep into the sock fabric and the floor beneath. A cool shadow on the opposite side keeps the warm glow believable rather than flat.
Socks draped over a boot top are an easy place to lose the shape, so draw the fabric falling in two or three soft folds rather than a stiff rectangle, and let gravity pull the fold lines downward. If orange markers run too hot, tone it down by layering a light yellow first.
A sliver of fireplace glow in the corner of the page is all the background this scene needs.
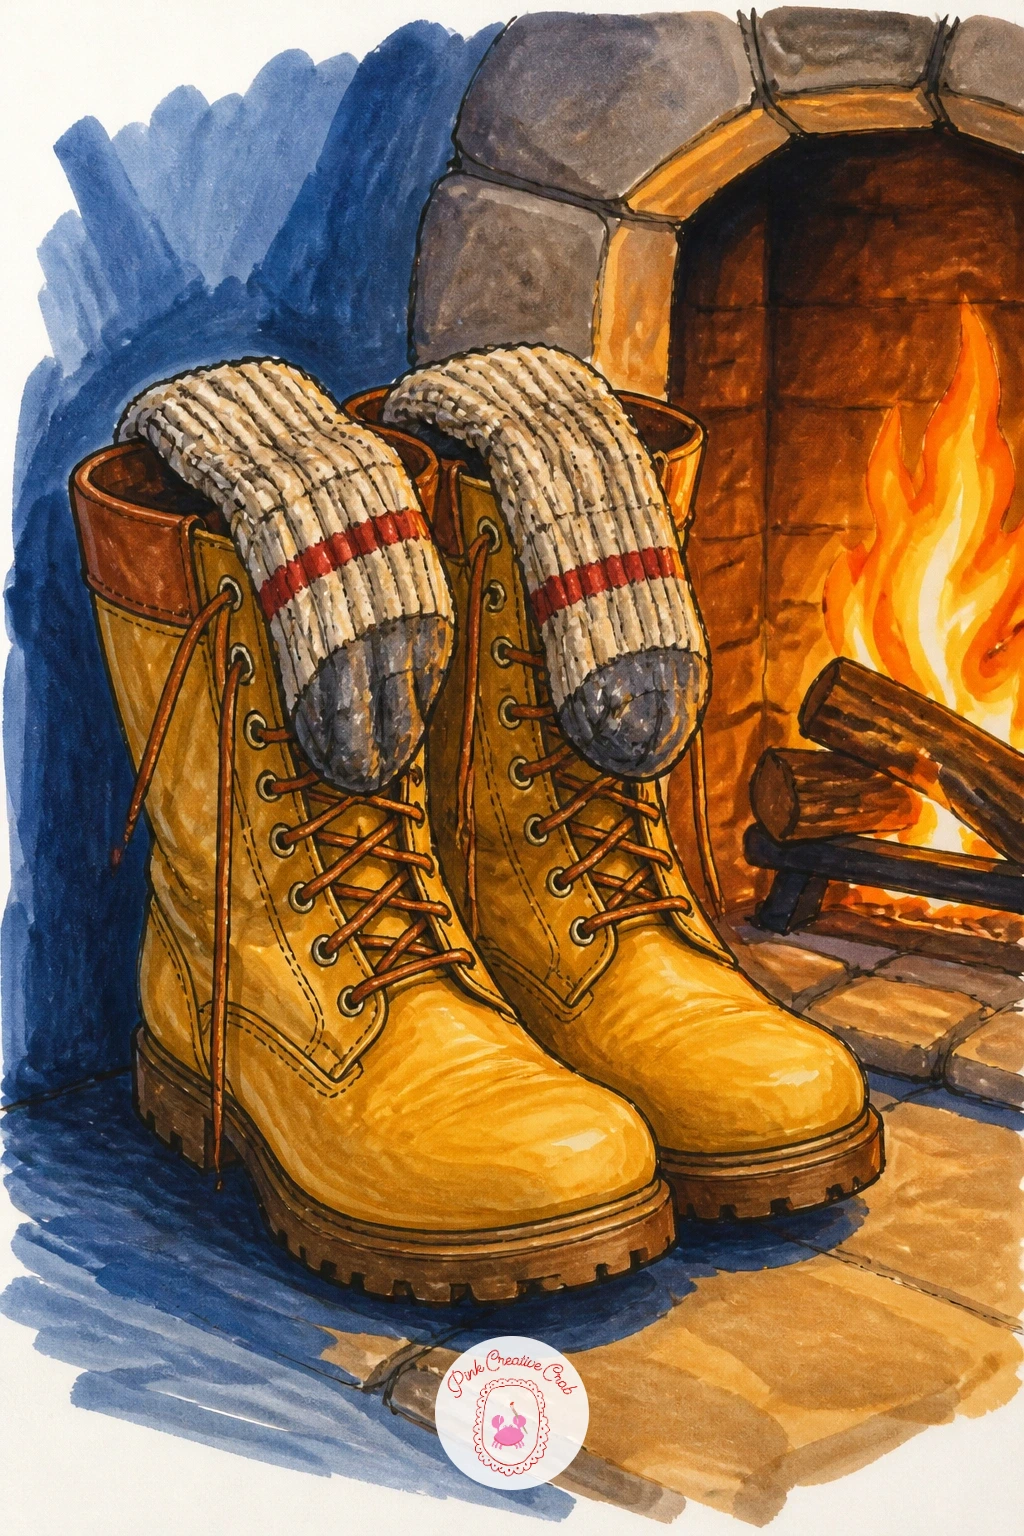
Palette: Firelight Orange,Warm Amber,Cool Shadow Blue,Knit Cream
Fit several pairs onto one rack and this becomes the most varied drawing on the list, so plan the layout before you ink anything: three or four pairs of different heights and styles lined up, maybe a short ankle boot next to a tall riding boot, so the silhouette along the top edge rises and falls instead of staying flat.
Sketch the rack itself as a simple wooden frame with two or three horizontal rails, then place each boot pair resting against or hanging from a rail. Give each pair its own color story, a tan, a black, a dusty blue, so your eye travels across the row rather than reading it as one repeated shape.
The mistake here is making every boot the same size out of habit, so actively vary the heights and widths as you sketch, checking each new pair against the ones already drawn. If a full hallway feels like too much, three pairs instead of four keeps the composition just as lively with less to ink.
A coat hook or a hanging scarf above the rack finishes the hallway feeling.
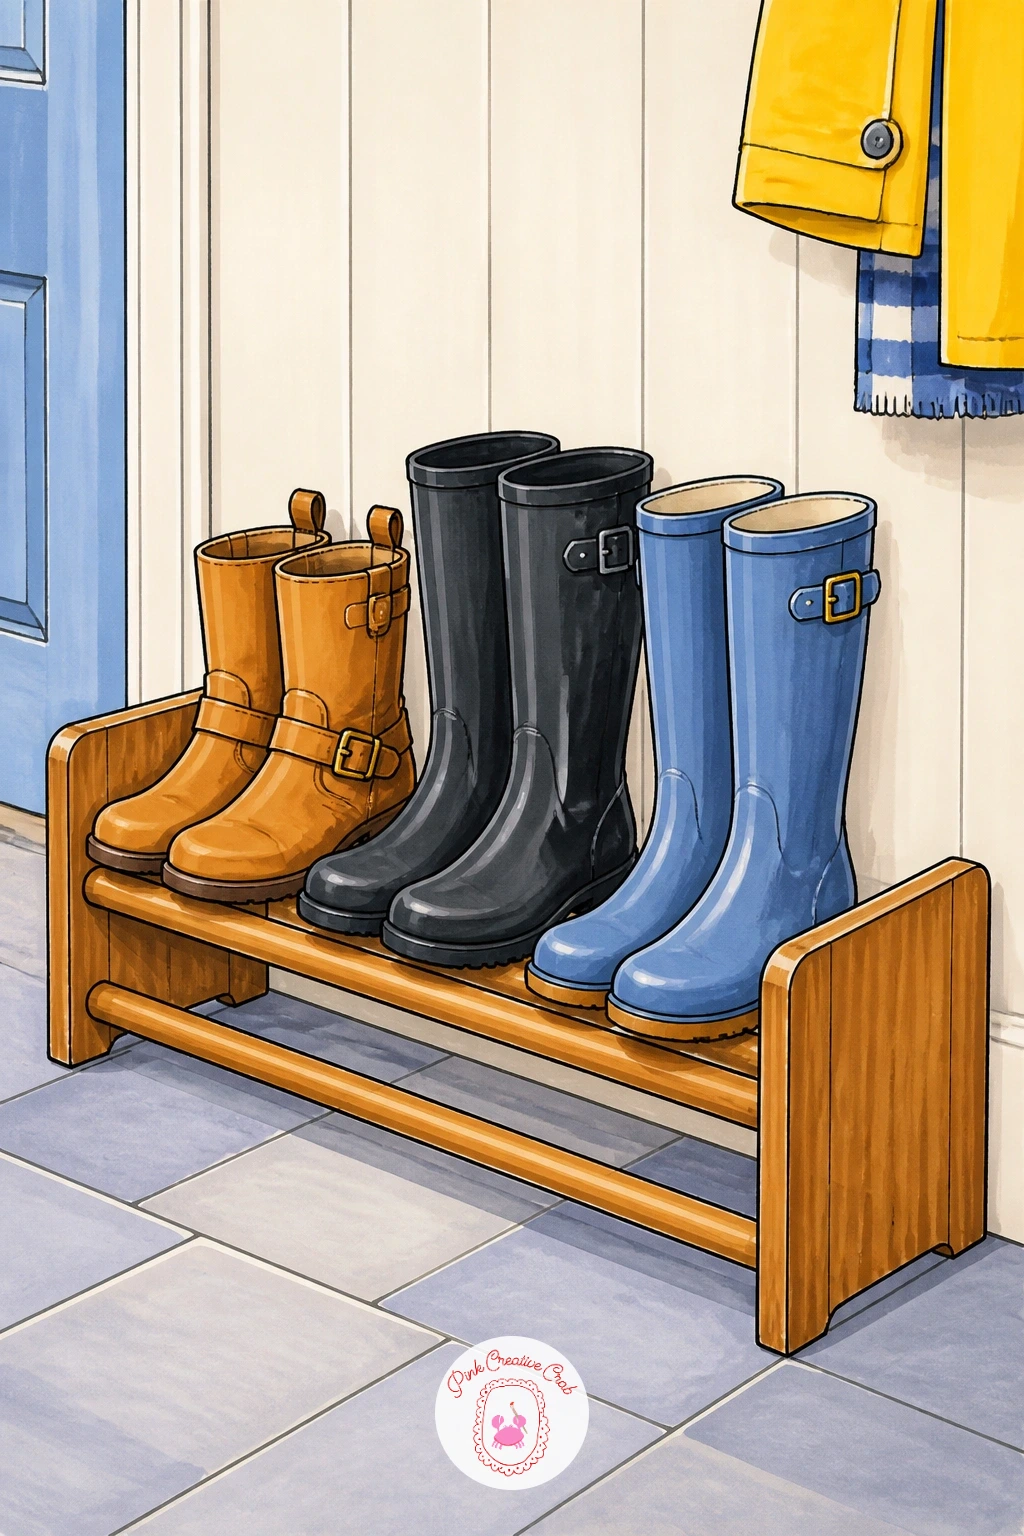
Palette: Warm Tan,Soft Black,Dusty Blue,Wood Rack Brown
Try this same layout with only two pairs for a quieter version, or crowd in five for a busier entryway feeling; the rack itself barely needs to change.
Place a single pair of boots on a doorstep with a closed umbrella leaning beside them, raindrops just starting to speckle the stone. Draw the umbrella first since its diagonal line sets the whole composition’s angle, then build the boots around it standing upright nearby.
Color the boots in a glossy black or deep green, leaving thin unmarked highlight strips down the front just like the riding boot shine trick, since rain-wet leather catches light in exactly the same way. The umbrella can carry a bold solid color or a simple stripe pattern for contrast against the boots.
Rain itself is best suggested rather than drawn in full: a handful of short diagonal fineliner marks in the air plus a few darker wet patches on the stone step, rather than covering the whole page in rain lines. If your blending leaves hard edges on the wet stone, soften them while the marker is still damp with a blender marker or a cotton swab.
One stray puddle reflection beneath the umbrella tip adds a nice final touch.
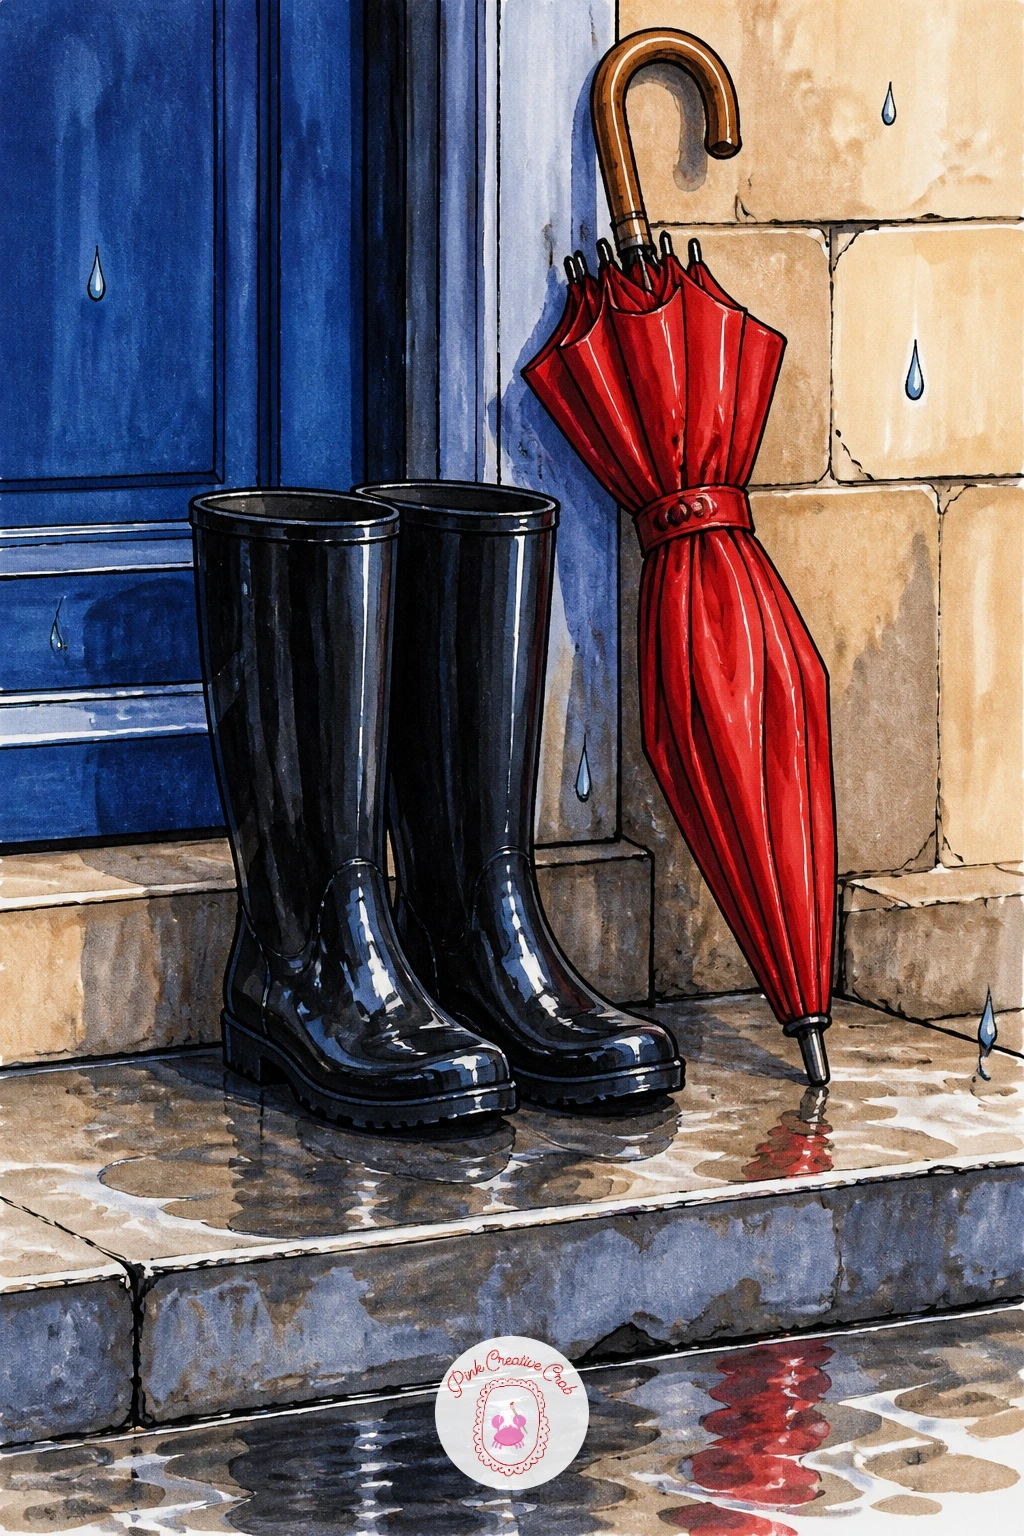
Palette: Glossy Black,Forest Green,Stone Grey,Umbrella Red
Set a sturdy pair of rubber garden boots on bare soil beside a small trowel and a tray of seedlings, which makes for a lively still life without needing any figure at all. Draw the boots wide and practical-looking, close in shape to the rain boots but in a muddier, more working color.
Lay the trowel at an angle across the soil, its metal blade catching a thin white highlight stripe, then add the seedling tray as a simple grid of small green sprouts poking from dark soil. Keep the sprouts loose, a few curved strokes each, rather than drawing individual leaves on every seedling.
Color the boots in olive or forest green, then use the same soil brown under both the boots and the trowel so the whole scene feels grounded in one shared setting rather than three separate objects. If green markers feel limited, vary the seedling tones between yellow-green and blue-green for more life in that small patch.
Gardeners drawing this one often enjoy pairing it with other potting-shed subjects; the garden junk journal ideas cover plenty more of that same cozy outdoor clutter.
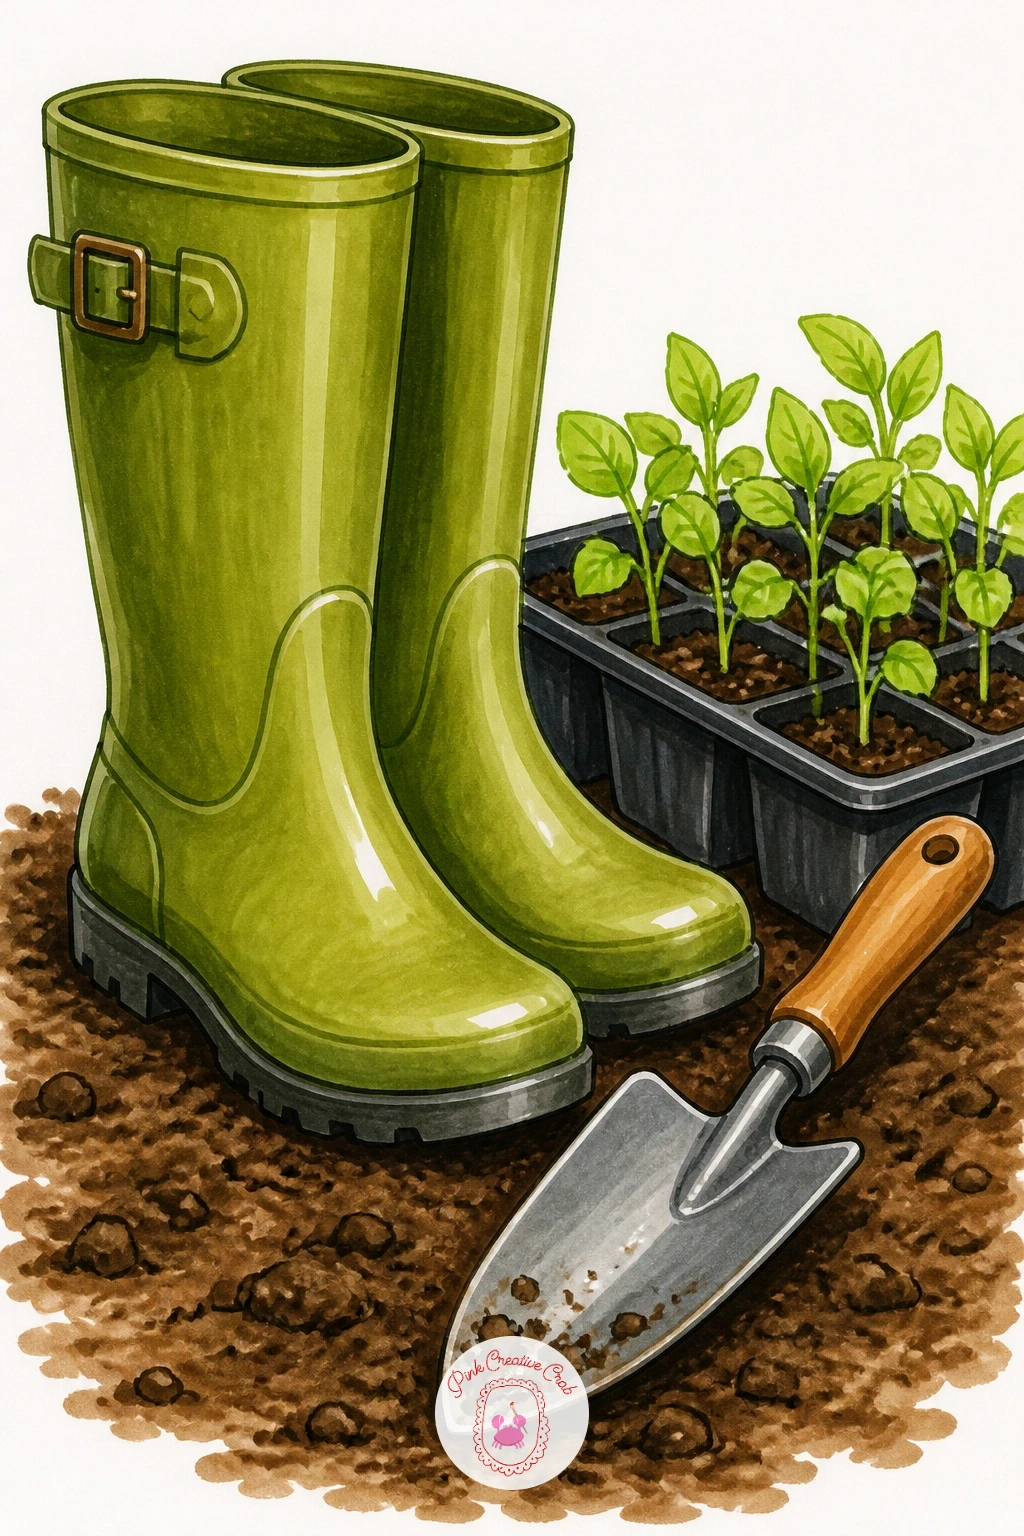
Palette: Olive Green,Soil Brown,Sprout Green,Metal Grey
Give the cowboy boots from earlier a second life here, mid-step on a dance floor, one heel lifted slightly as though caught mid-turn. That lifted heel is the detail that sells motion, so exaggerate the angle a little more than feels natural; a boot drawn flat on the ground never reads as dancing.
Ground the scene with a polished wood floor rendered as a few long diagonal plank lines in warm honey tones, angled to match the direction the boot is turning toward. Color the boots themselves in a bold color this time, a deep red or turquoise rather than plain tan, since a dance floor scene can carry more boldness than a quiet porch one.
Motion is easy to overdo with too many speed lines, so stick to one or two short curved marks trailing off the lifted heel rather than a whole cloud of them. If turquoise feels too bold, a warm coral does the same lively job.
A scatter of small star or sparkle marks near the boot finishes the festive feeling.
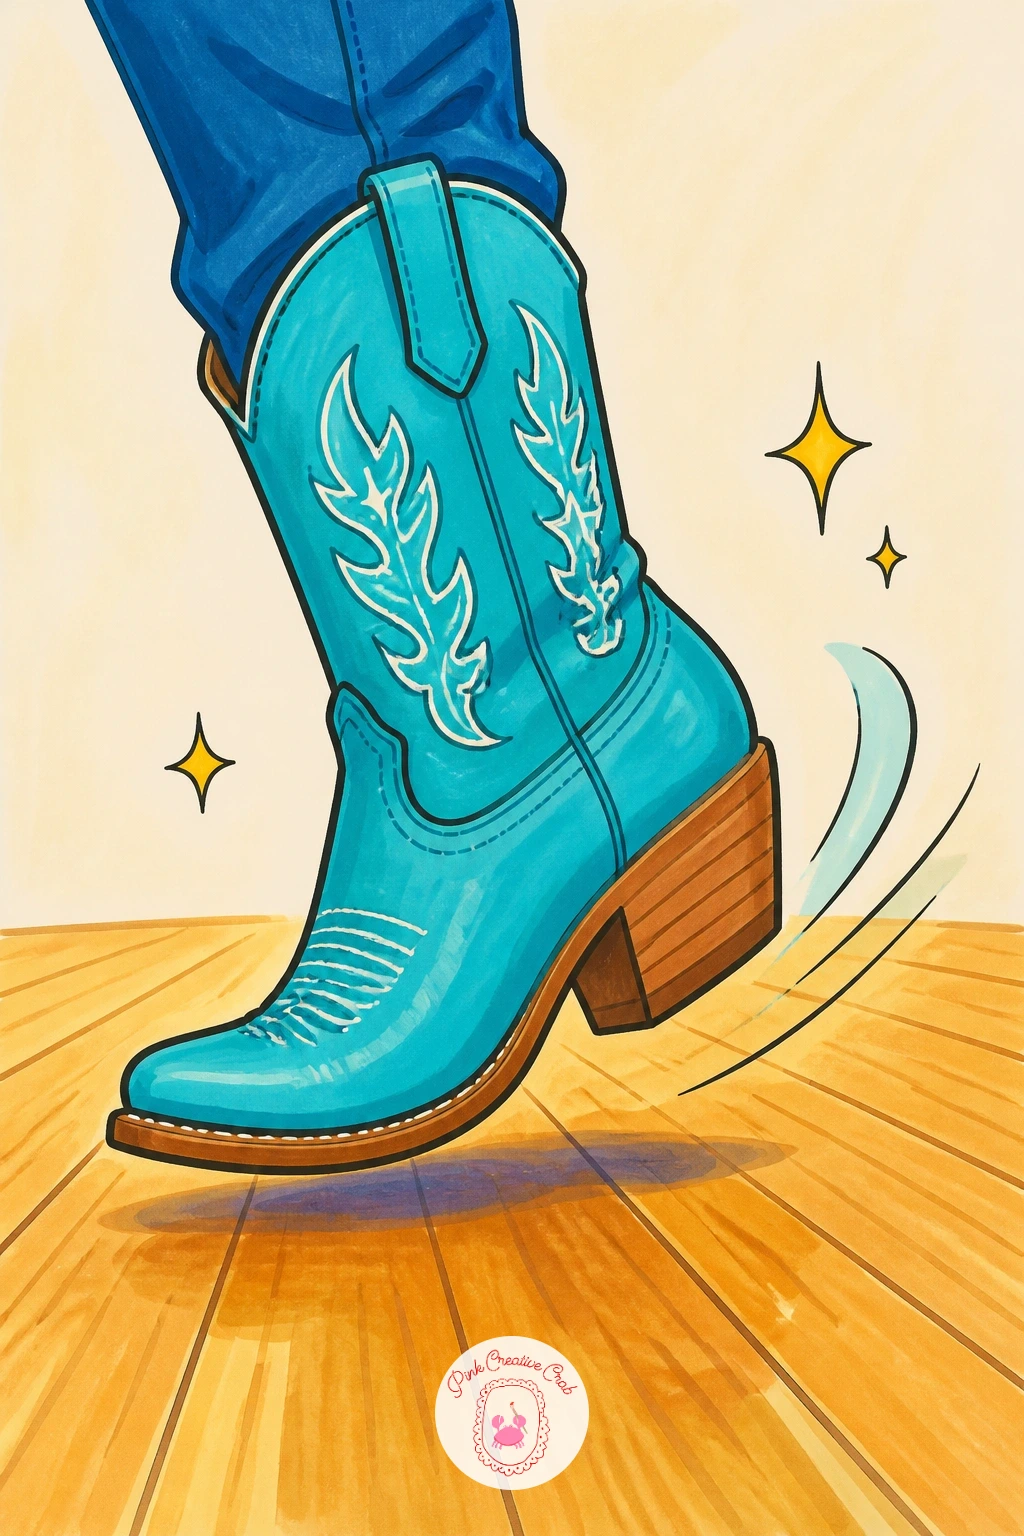
Palette: Turquoise,Deep Red,Honey Wood,Sparkle Gold
Frame this one differently from everything before it: a single elegant pair of boots displayed on a small stand behind a shop window, the glass itself suggested with a few soft diagonal reflection streaks across the lower corner. The window frame can be as simple as four straight lines meeting at the corners.
Light here comes from above and slightly behind the viewer, like gallery lighting on display shoes, so keep the shadow directly beneath the boots short and soft rather than long and dramatic. That overhead light also means the boot’s shine highlight sits right along the top curve of the toe rather than down the side.
Color the boots in whatever rich tone feels most like a splurge purchase, burgundy or deep emerald work beautifully here, with the glass reflection kept pale and barely-there so it never competes with the boots themselves. If the glass streaks look too heavy, lighten them by going over with a blender or a damp cotton swab.
A small price tag or ribbon detail by the stand is an optional finishing flourish.
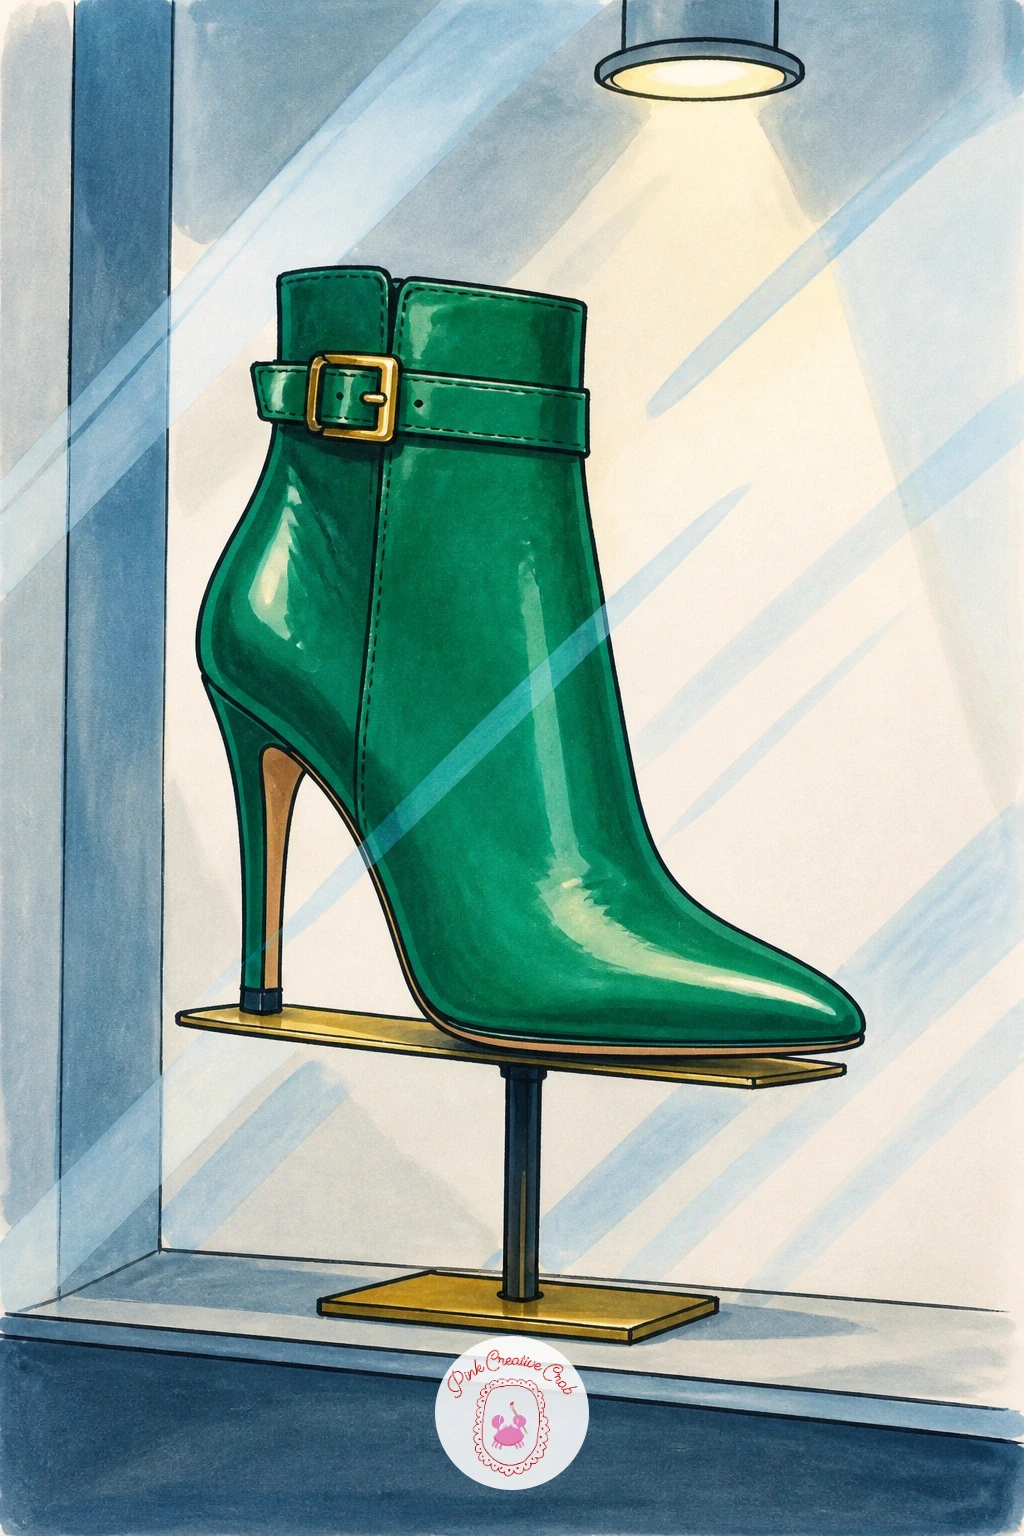
Palette: Deep Emerald,Burgundy,Glass Pale Blue,Display Grey
Catch a boot mid-stride kicking up a small pile of autumn leaves, the kind of action shot that needs you to draw the boot at a dynamic angle rather than standing still. Tilt the toe upward and bend the ankle slightly to suggest forward motion before you ink a single line.
Build the leaf pile as a cluster of simple curved leaf shapes in overlapping orange, red and yellow, drawn loosely rather than individually perfected, with two or three leaves caught mid-air above the boot to show the kick in progress. Color the boot in a cozy brown or burgundy that sits warmly against all that autumn color without blending into it.
Too many leaves scattered evenly across the page flattens the energy, so cluster most of them around the boot and leave the rest of the page calmer. If your orange and red markers look too similar, push one toward a deeper rust so the pile has more range.
For more seasonal inspiration once this one is finished, the winter scenery drawing ideas carry the same cozy outdoor mood into the colder months.
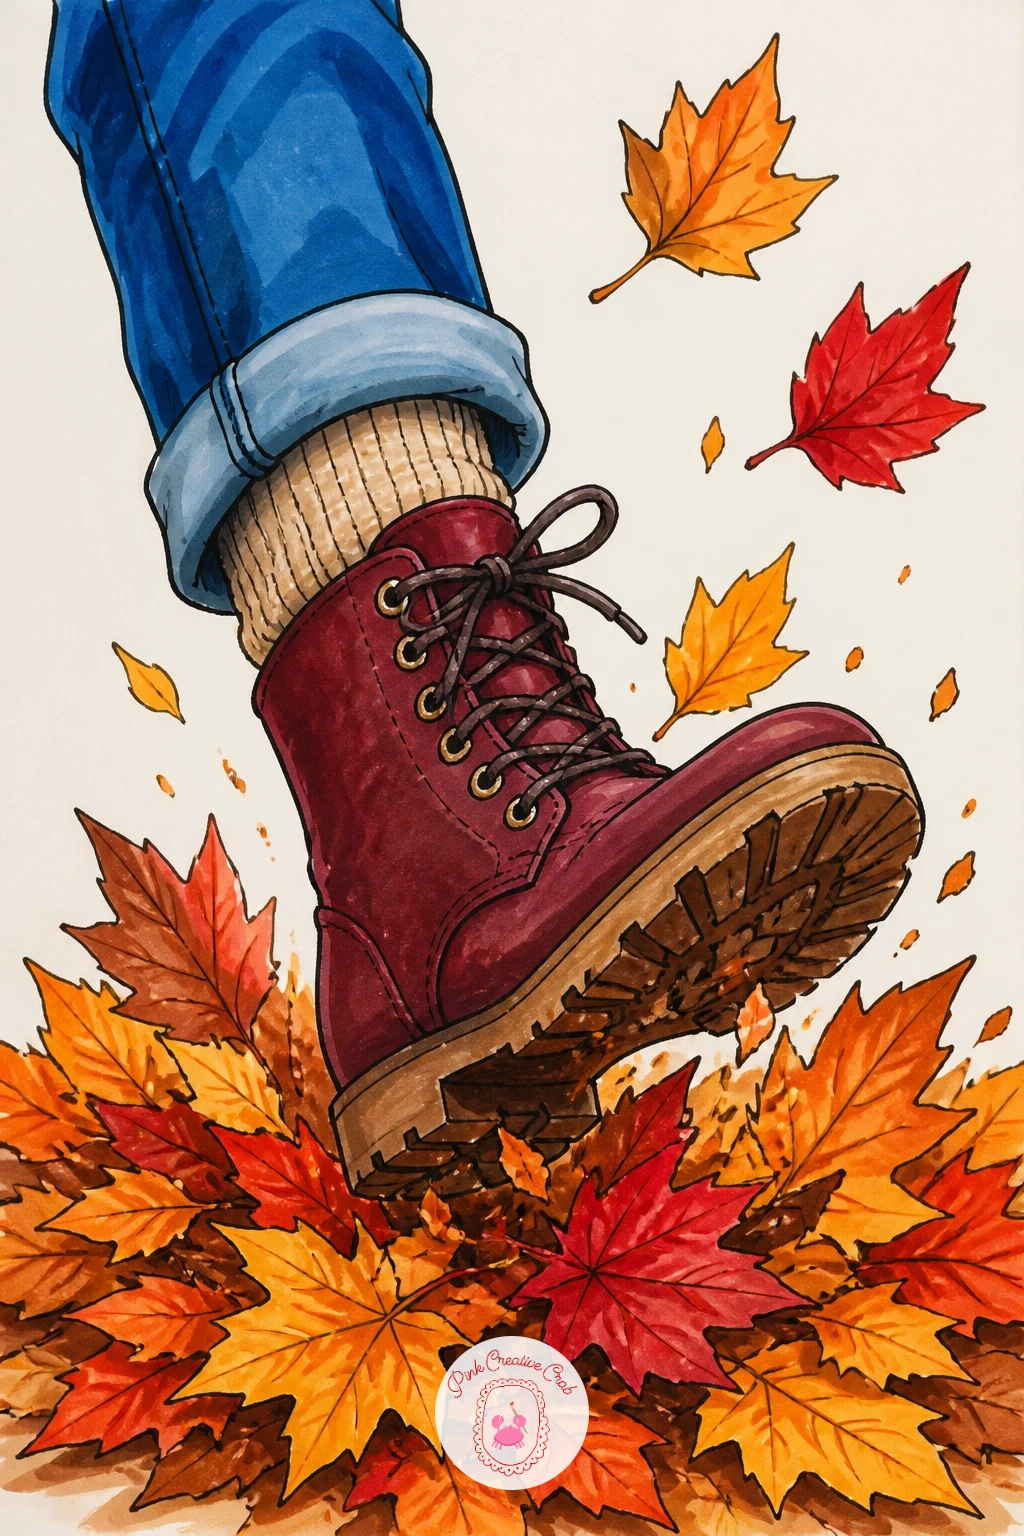
Palette: Rust Red,Pumpkin Orange,Golden Yellow,Burgundy Boot
Curl a small cat into the top opening of a tall boot, its body tucked in a tight loose spiral and just its head and one paw resting over the rim. Draw the boot first, wide enough at the opening to believably fit a curled cat, then build the cat’s shape around that opening rather than squeezing it in afterward.
The texture trick here belongs to the fur, not the leather: use short, light, flicking marker strokes along the cat’s outline rather than a single smooth fill, which gives the coat a soft, slightly fuzzy edge against the smooth boot leather beside it. Keep the boot itself smooth and glossy by contrast, so the two textures play off each other.
Color the cat in whatever pattern feels charming, a simple tabby stripe or a solid ginger both work well at this scale, and keep its eyes closed or half-lidded for that sleepy mood. If fine fur strokes are tricky with a thick marker tip, switch to a fine brush pen just for the fur edges.
A single whisker line or two drawn last, right over the dried color, keeps them crisp and bright.
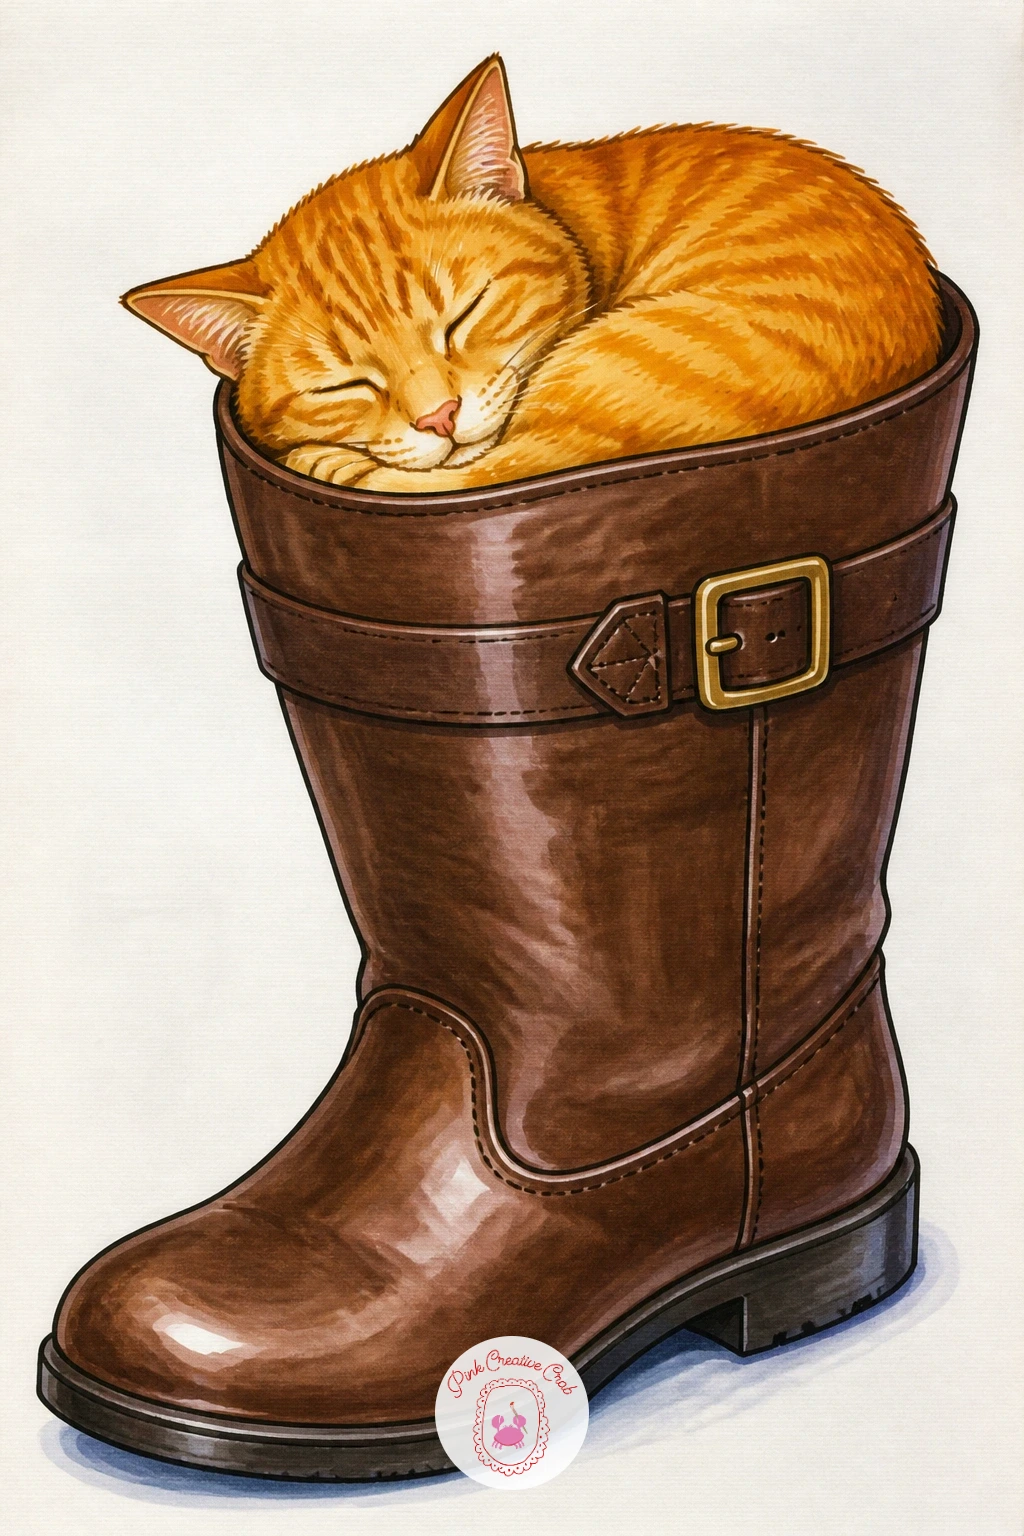
Palette: Ginger Tabby,Cream Belly,Chocolate Boot,Soft Black Stripe
These boots carry the most delicate detail on the whole list, so plan the lace pattern in pencil before any ink touches the page: a simple scalloped edge along the top of the boot with a few small looping lines suggesting lace trim, rather than an attempt at photographic lace texture. Less detail reads as more elegant here.
Color the boots in soft ivory or the palest blush, keeping the shading minimal and the whole piece light and airy rather than deeply shadowed, since wedding boots belong to a softer visual world than hiking or combat boots. A single thin ribbon tie at the ankle, drawn as two curved lines crossing into a small bow, adds a nice finishing detail.
Overworking the lace with too many crossing lines is the main risk, so stick to a simple repeating scallop rather than a dense pattern. If ivory markers run too close to white to show up, add the faintest warm grey shadow along the fold lines to give the boot some form.
A scatter of two or three small white flowers at the base finishes the romantic mood.
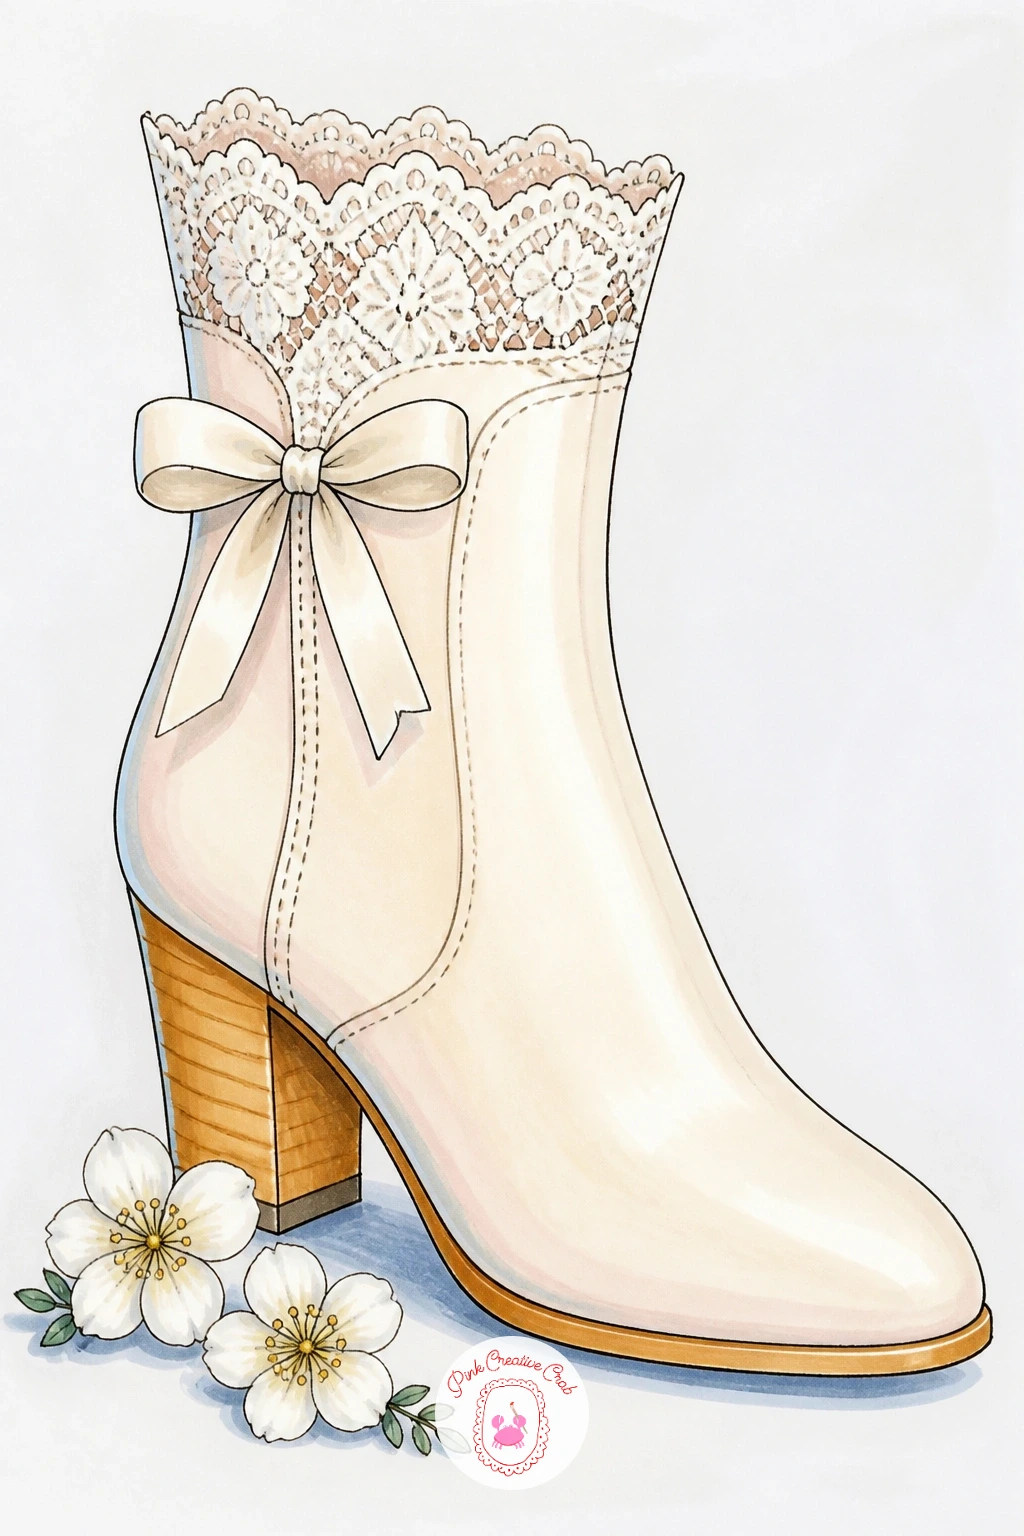
Palette: Ivory,Blush Pink,Soft Grey Shadow,Ribbon Cream
Contrast is the whole idea of this one, so lean into it: draw the combat boot heavy and sturdy, with a thick sole and a chunky zigzag tread, then thread a few delicate flowers through the laces instead of a plain bow knot. That soft-against-tough pairing is what makes the drawing interesting.
Ink the boot’s sole and eyelets with confident, slightly thick lines to emphasize its weight, then switch to a much finer line for the flower stems and petals woven through the laces, so the two elements feel genuinely different in character rather than drawn with the same hand. Color the boot in matte black or deep olive, keeping the sole lighter grey to separate it visually from the upper.
Flowers lost in a mass of lace crossings is the usual problem, so place just two or three blooms at one or two points along the laces rather than scattering them the whole way up. If black marker looks too flat and plasticky, add a few grey-blue highlight strokes along the toe for a worn leather feel instead.
Daisies or small wildflowers in white and yellow read especially well against black boot leather.
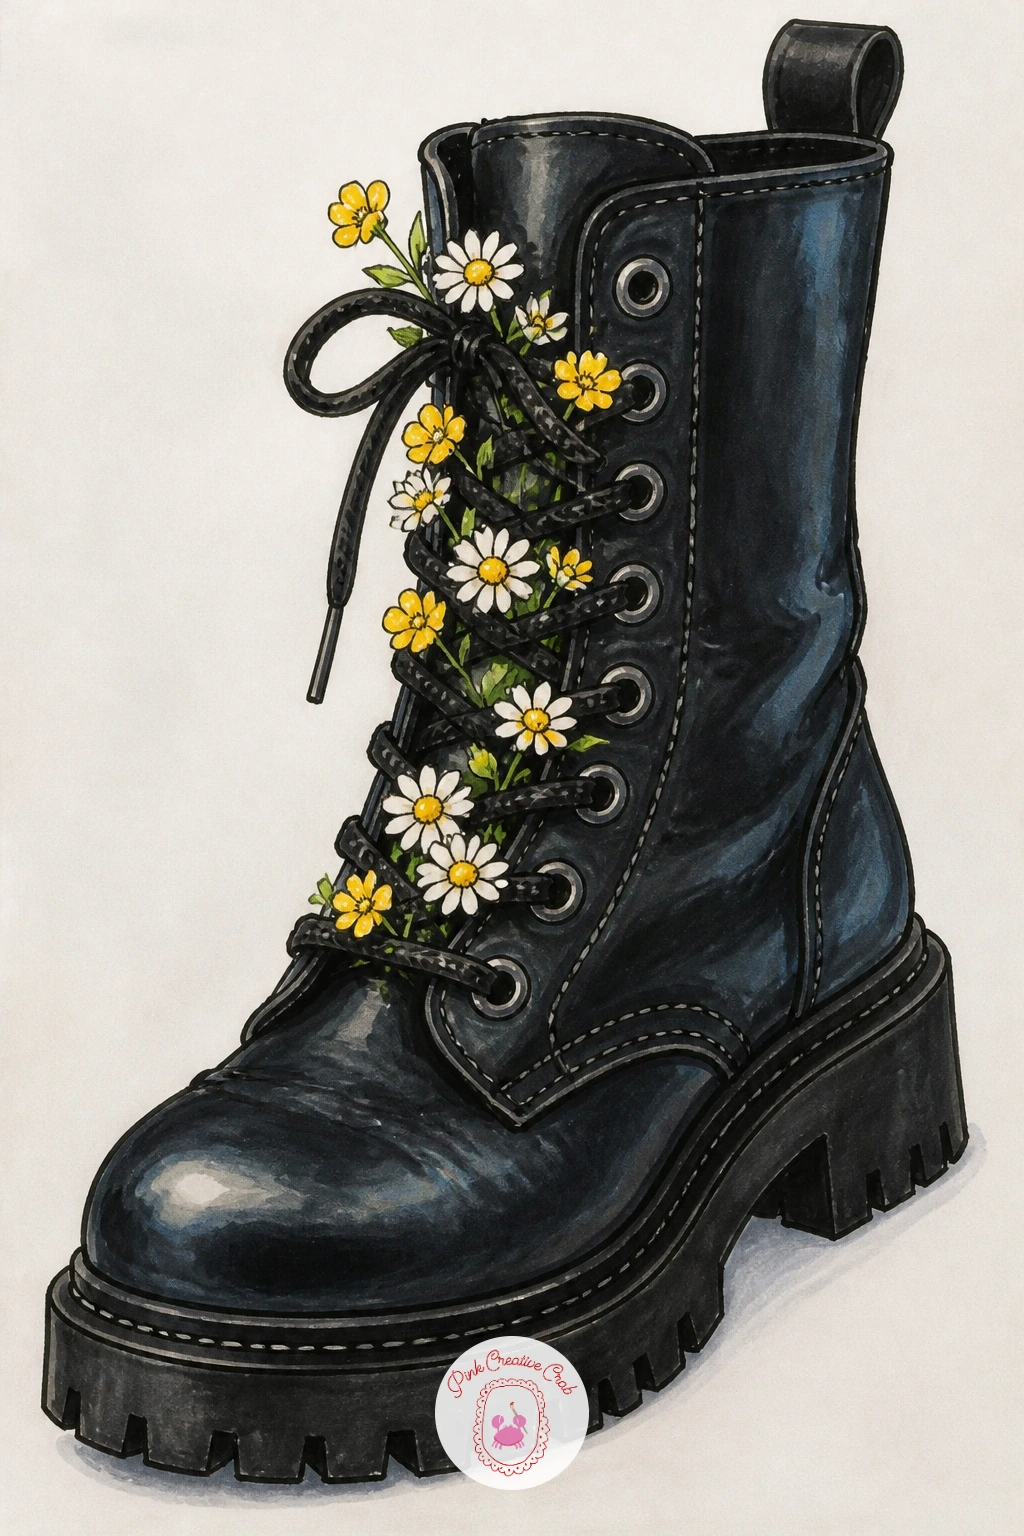
Palette: Matte Black,Sole Grey,Daisy White,Wildflower Yellow
Perch a pair of ankle or short boots on top of a closed suitcase, as though packed and ready by the door before a trip. Draw the suitcase first as a simple rounded rectangle with a strap or buckle detail, since that solid base shape needs to feel stable enough for boots to rest on top of it believably.
Vary this scene next time by swapping the suitcase style entirely, a vintage hard-shell case in one version and a soft canvas duffel in another, since the boots on top barely need to change at all between the two. That one swap alone makes this idea feel fresh a second time.
Color the suitcase in a warm vintage tan or deep teal canvas, then let the boots pick up one shared color note from it, maybe a matching buckle tone, so the whole composition feels coordinated rather than randomly assembled. A luggage tag hanging off the handle is a nice small extra.
If patterned suitcase fabric feels like too much detail, a plain solid color case keeps the focus entirely on the boots.
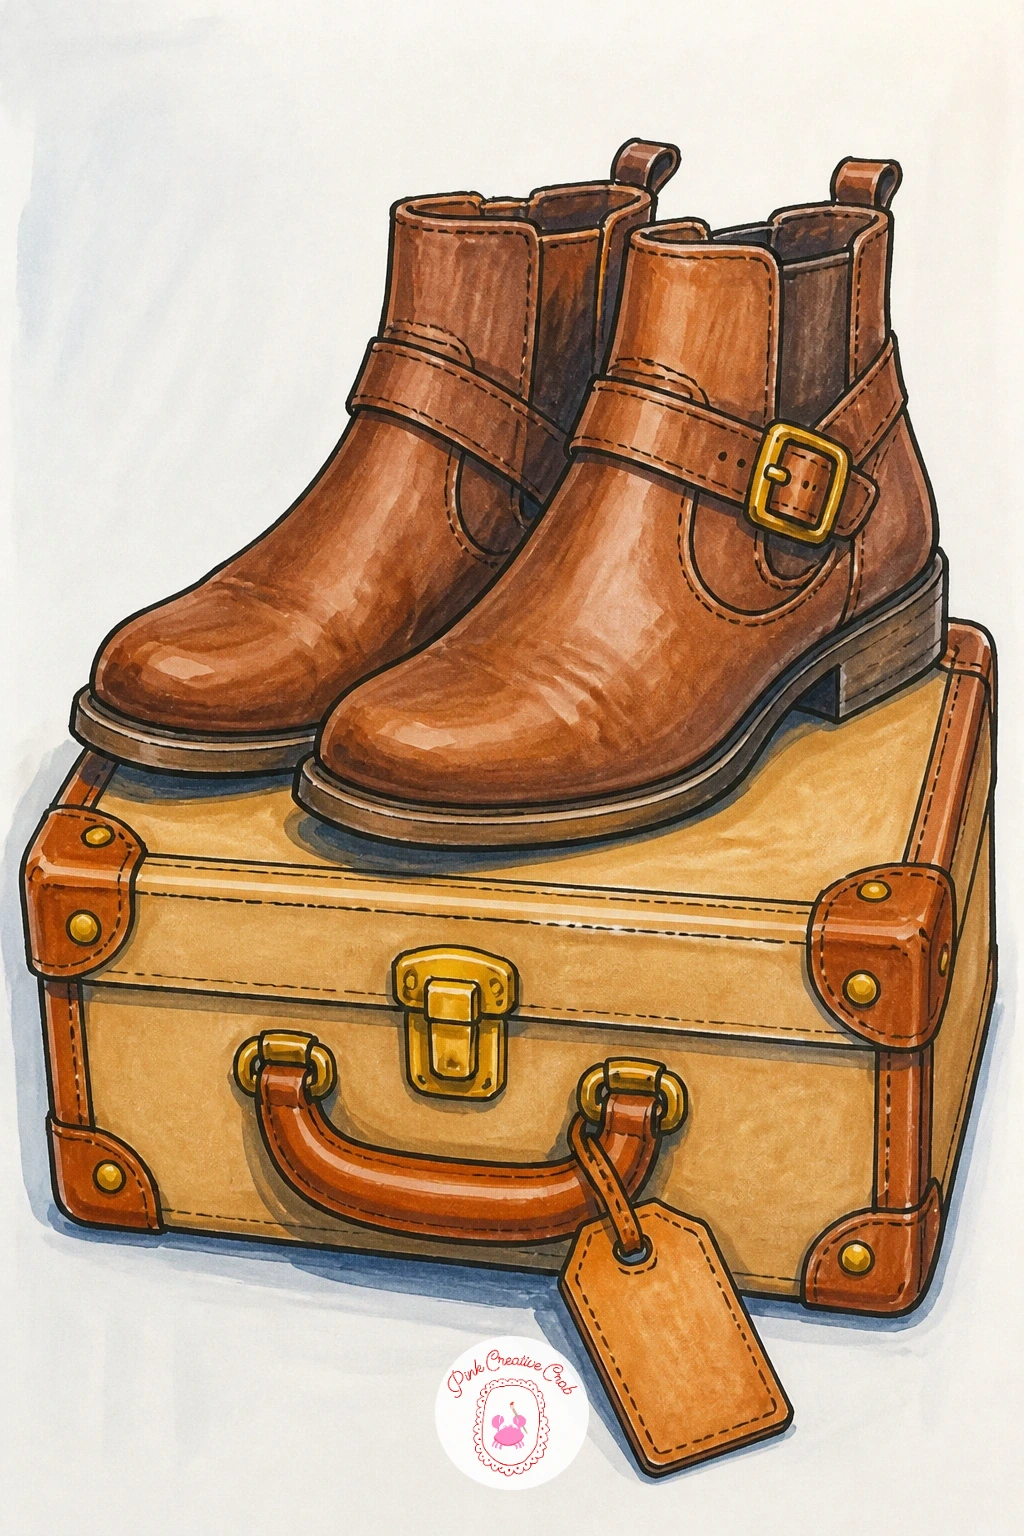
Palette: Vintage Tan,Deep Teal,Boot Brown,Buckle Gold
Set a sturdy pair of hiking or rain boots just outside a small tent flap, as though left at the entrance for the night. Draw the tent first as a simple triangular shape with one flap pulled open, then place the boots just at the edge of that opening, slightly angled as if kicked off in a hurry.
This is an evening scene, so think about where a lantern or campfire glow would sit just outside the frame and let that light touch one side of the boots and the tent fabric with a warm orange tint while the rest stays in cool blue shadow. That single light choice does most of the atmospheric work for you.
Color the tent in a muted green or warm orange canvas, keeping the fabric folds simple, just two or three curved lines rather than a fully rendered textile. If orange glow and green tent fight each other visually, shift the tent toward a warm tan canvas instead so the whole palette stays friendly.
A single small campfire glow suggested at the frame’s edge finishes the mood without needing to draw the fire itself.
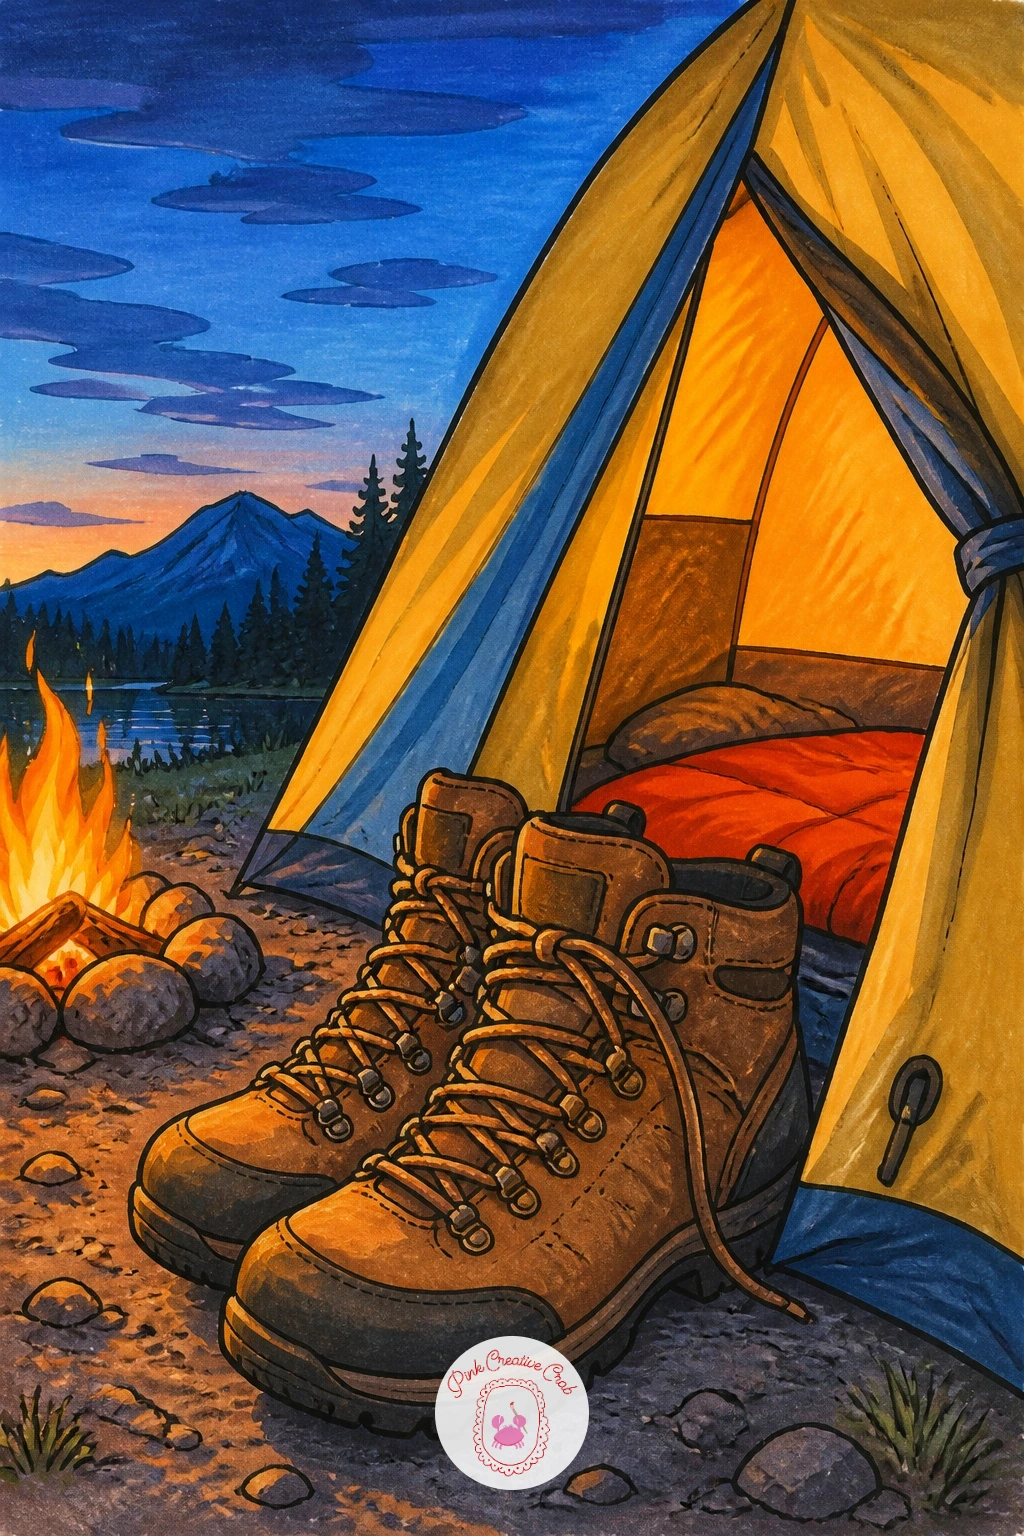
Palette: Campfire Orange,Tent Green,Cool Night Blue,Warm Tan Canvas
Give the sturdiest boot on the page a mischievous companion: a small puppy with its teeth tugging playfully at the laces or the boot’s edge. Draw the boot first, planted solidly, then build the puppy’s body around and against it, one paw braced on the sole for leverage.
Keep the puppy’s proportions soft and rounded, a big head relative to its body and short stubby legs, since that is what reads as a young puppy rather than a full-grown dog at a glance. Compare the puppy’s head size directly against the boot’s toe as you sketch; if the head looks smaller than the boot’s toe, it will not read as a puppy.
Color the boot in a worn tan or brown with a few scuff marks already inked in, since a boot a puppy is chewing should look a little lived-in from the start. The puppy itself can take any playful coloring, a golden coat or black and white patches both work nicely against brown leather.
For more playful animal subjects at this same friendly level, the dog pencil drawing ideas make a fun companion list to this one.
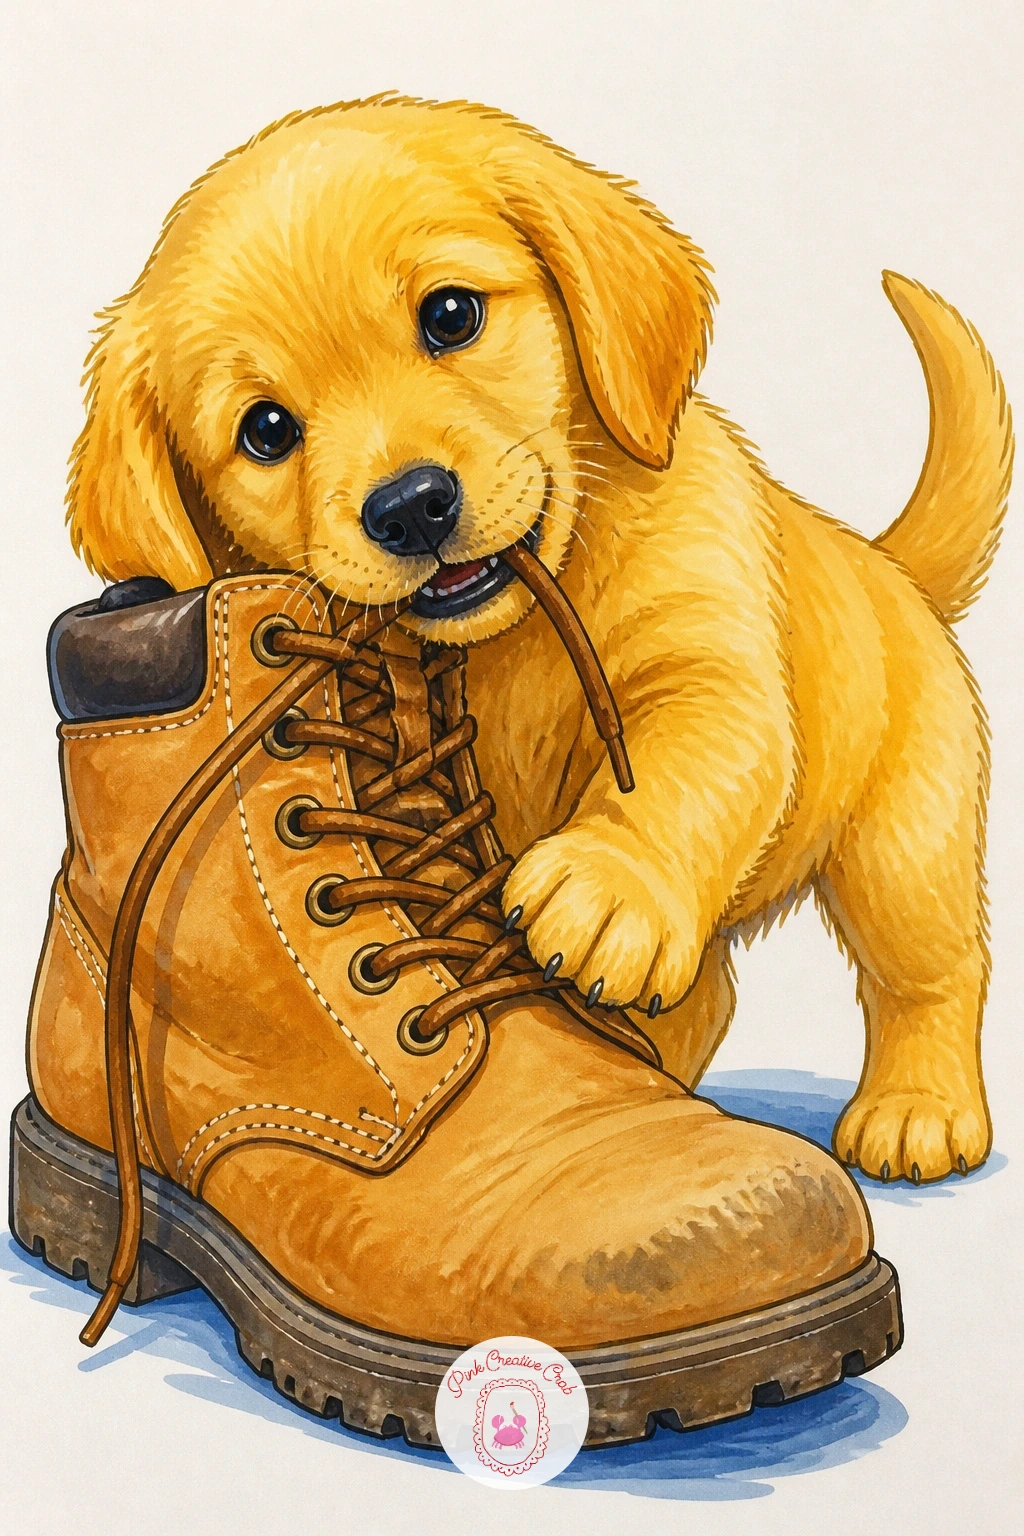
Palette: Golden Puppy,Worn Tan Boot,Scuff Brown,Cream Highlight
Stand a pair of boots on a sandy path with beach grass bending sideways in the wind, which gives you a chance to draw real movement through the background rather than the boots themselves. Angle every grass blade the same direction, strongly, since inconsistent wind direction is the single fastest way to break the illusion.
Draw the boots first, planted firmly despite the wind around them, then add the grass afterward so you can judge exactly how much windblown chaos the scene needs without it swallowing the boots. A scarf or loose shoelace flicking in the same wind direction as the grass ties the whole motion together.
Color the boots in a weathered tan or faded denim blue, then let the sandy path and sky behind carry the day’s light, a cooler grey-blue sky for a blustery mood or a warm late sun if you want something gentler. If straight wind-blown grass lines feel stiff, add a slight curve to each blade rather than drawing them perfectly straight.
A single gull shape far off in the sky adds scale without any extra detail work.
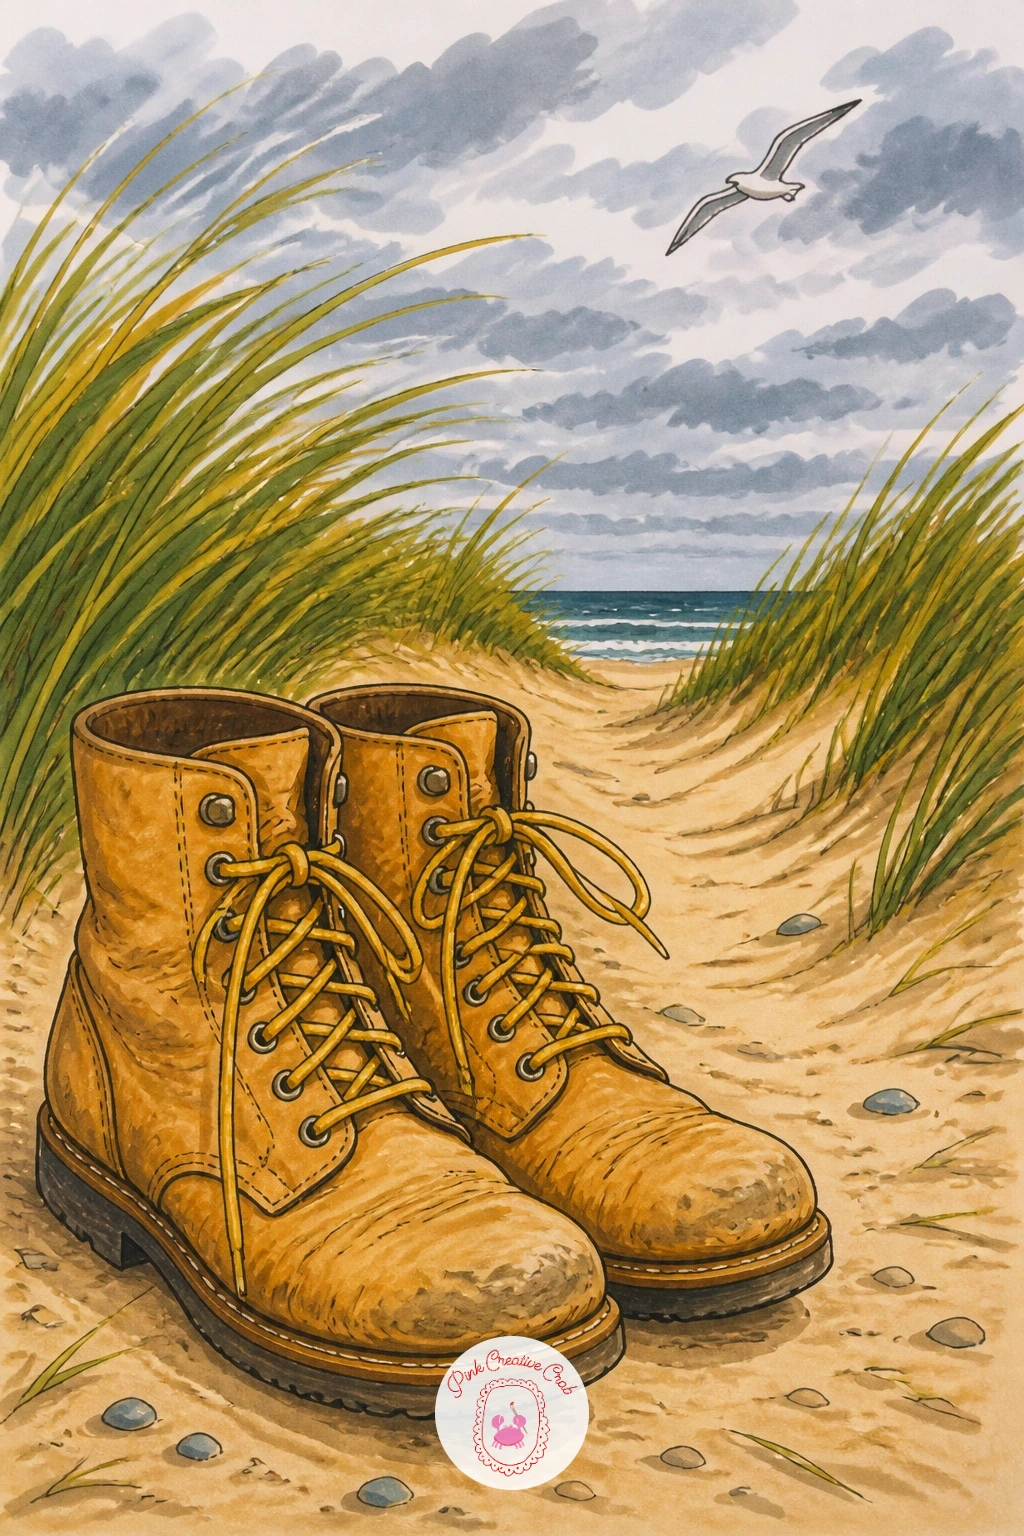
Palette: Weathered Tan,Faded Denim Blue,Beach Grass Green,Overcast Sky Grey
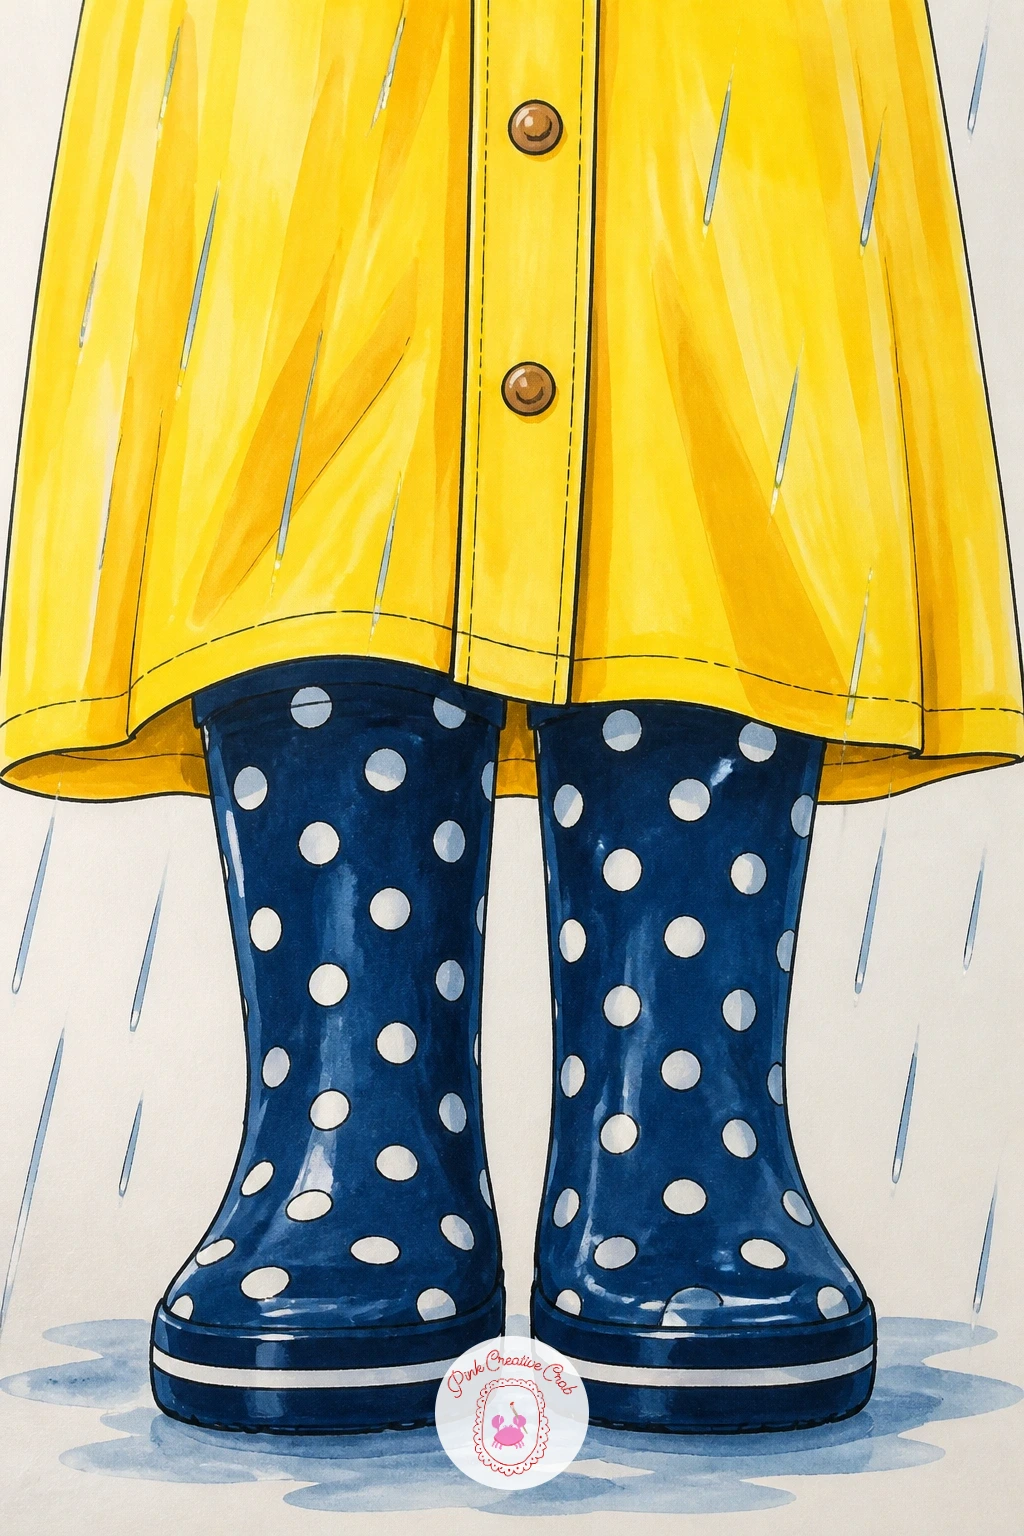
Close the list with the most pattern-heavy piece so far: a pair of polka dot rain boots peeking out beneath the hem of a long raincoat, as though caught mid-walk on a rainy day. Draw the raincoat hem first as a simple curved line across the lower part of the page, then build the boots emerging from beneath it.
Lay down the boot’s base color first and let it dry completely before adding the polka dots, since wet-on-wet dots bleed into fuzzy blobs instead of crisp circles. A fine brush pen or the tip of a fineliner gives you cleaner dots than a broad marker tip ever will.
Keep the dots varied slightly in size rather than perfectly uniform, which reads as hand-drawn and charming rather than mechanical. Color the raincoat in a solid contrasting shade, a soft yellow against navy polka dot boots or the reverse, so the two patterns do not visually fight for attention.
A single rain streak falling past the raincoat’s edge finishes the scene with a nice sense of weather.
You Will Need
- fineliner for dots
Palette: Navy Boot,Soft White Dot,Raincoat Yellow,Rain Streak Blue
What to Do Next
Pick whichever pair speaks to you today, start with the fineliner outline, and let the marker blending do the rest; a plain sheet of marker paper and twenty quiet minutes is really all this list asks for.
Frequently Asked Questions
What markers work best for boots drawing?
Alcohol-based markers work best because they blend smoothly without streaking. Layer a light base color first, then add a second, darker tone only in the shadow areas for simple, believable shading on leather or rubber.
How do you make boots look shiny with markers?
Leave a thin unmarked strip of paper down the front of the boot before coloring around it. That untouched strip reads as a shine once the surrounding leather is colored darker, no white marker needed.
Do I need to draw the whole outfit to draw boots well?
No, a small setting works better than a full figure. A doormat, a puddle or a chair beside the boots gives enough context for a complete, satisfying scene without drawing a whole person.
How do I stop my boots from looking flat or stiff?
Angle the pair slightly instead of lining them up perfectly straight. One boot turned a touch more than the other, or a lifted heel, instantly makes the pair feel natural and relaxed rather than posed.
What paper should I use under alcohol markers?
Use marker paper or a bleedproof pad made for alcohol-based markers. Regular printer paper lets the ink bleed through and feather at the edges, which ruins clean fineliner outlines and smooth color blending.
Have any thoughts?
Share your reaction or leave a quick response — we’d love to hear what you think!
-
 0
-
0
-
0
-
0
-
0
-
0


