

Birthday card drawing is the fastest way to turn a blank rectangle into something someone actually keeps on the shelf, and colored pencil is the right tool for it: no drying time, no water to manage, just a pencil and some bare white paper you get to leave showing. These card fronts work because they are small scenes with one clear thing happening, a cake on the move, a party animal in a paper hat, balloons drifting over a wall, so you never run out of steam halfway through.
Below are 36 of them, ordered from quick and simple to a little more involved, each one built to finish in a single sitting. Pick whichever cake or creature makes you smile and start with the lightest pencil lines you can manage.
Using these images: free for personal projects such as printing, coloring, cards, journals and gifts. Handmade items that include them may be sold up to 30 pieces per design. More than that is commercial use and is not permitted, and neither is selling or sharing the images themselves or passing them off as your own. Please ask before any other use.
Start simple: a dog in a party hat sitting politely beside a cake, because it teaches you the whole card-front habit in one go, light pencil first, color after, white paper left alone on purpose. Sketch an oval body, a round head and two triangle ears in a very pale gray, then draw the cake beside him as two stacked ovals with a wavy icing edge.
Color the dog in warm tan or golden brown with short strokes that follow the direction his fur would grow, leave a cone-shaped party hat in cherry red with a small mint pom on top. The cake gets lemon yellow sponge and cherry icing, and you can leave the plate it sits on as just an outline, no shading needed.
Where this goes wrong is usually the eyes, too big and the dog looks startled instead of patient; keep them as small dark dots set low on the face. If you do not have a brown pencil, layer orange under a light gray for the same warm fur color.
Finish today by adding one small dropped crumb near his paw, it tells the whole story of good behavior being tested.
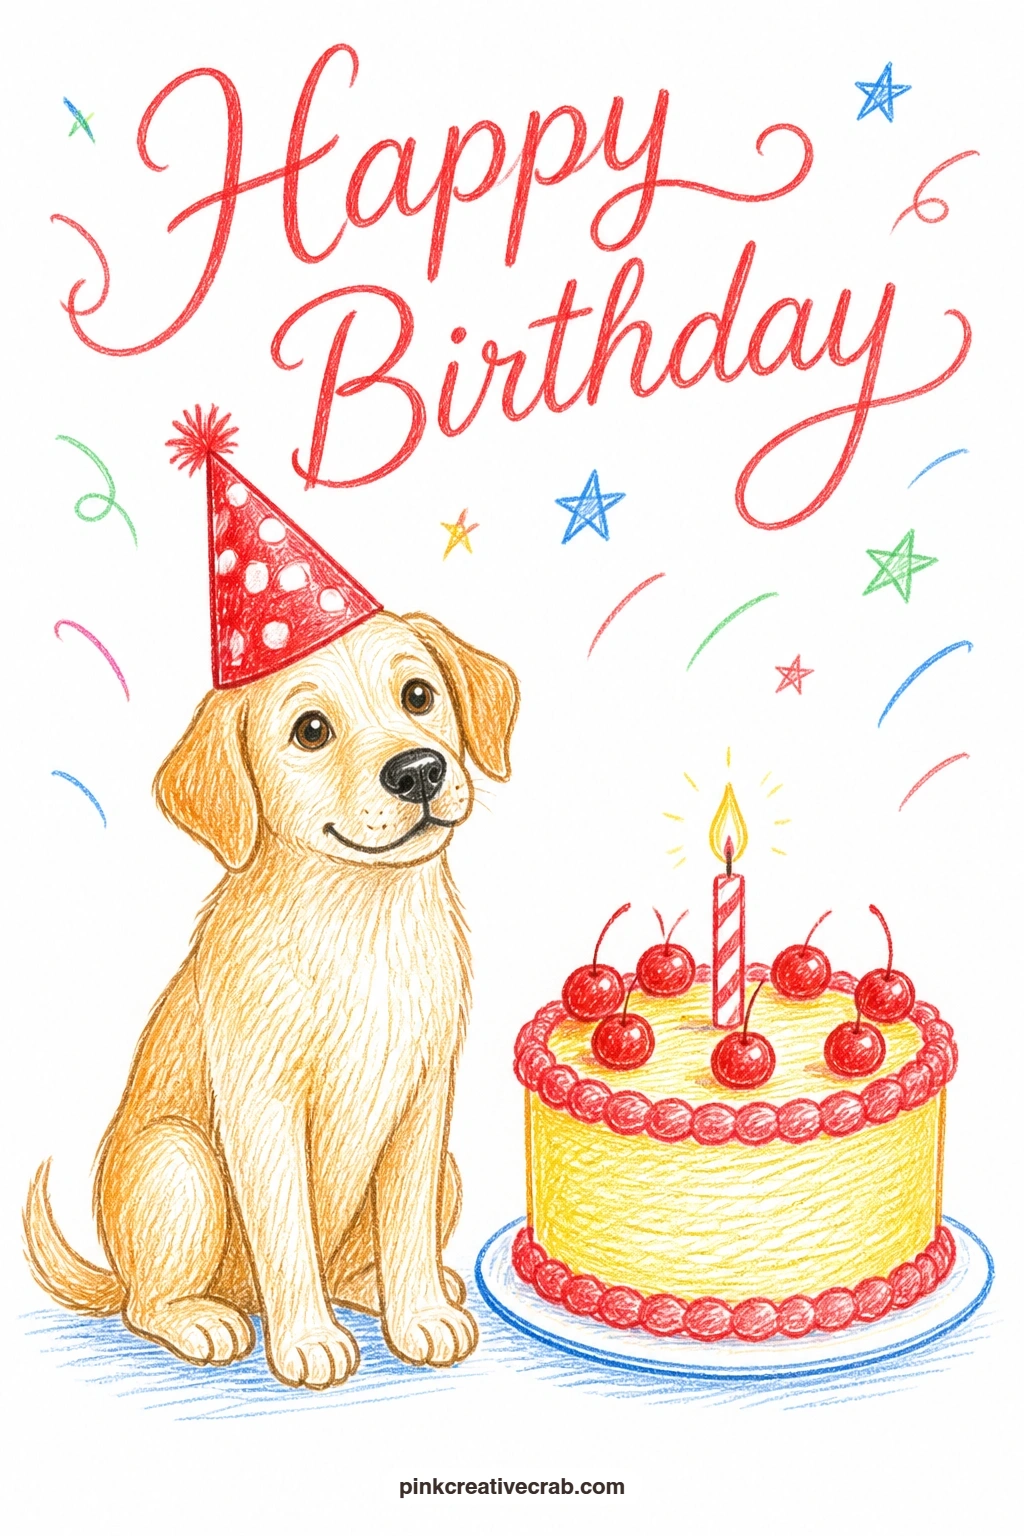
Palette: Cherry Red,Lemon Yellow,Mint Green,Burnt Sienna
Move from a patient dog to a frog caught mid-leap, since a jumping pose is forgiving at this stage, any wobble in the outline just reads as motion. Pencil a round frog body low and to one side, back legs stretched behind him, front legs reaching toward a red and white toadstool he is about to land on.
Work the frog in mint green with slightly darker green hatching on his back for a rounded feel, and keep his belly bare white paper with just a hint of pale yellow. The toadstool cap goes on in cherry red with white paper left as the spots, so do not pencil the spots in, just paint around them.
Beginners usually draw frog legs too straight; bend them at a clear joint so the leap looks springy rather than stiff. A tiny party hat in sky blue sitting slightly crooked on his head adds the birthday note without any extra drawing time.
Keep one tip in mind for today: draw the leap diagonally across the card rather than straight up, it fills the space far better.
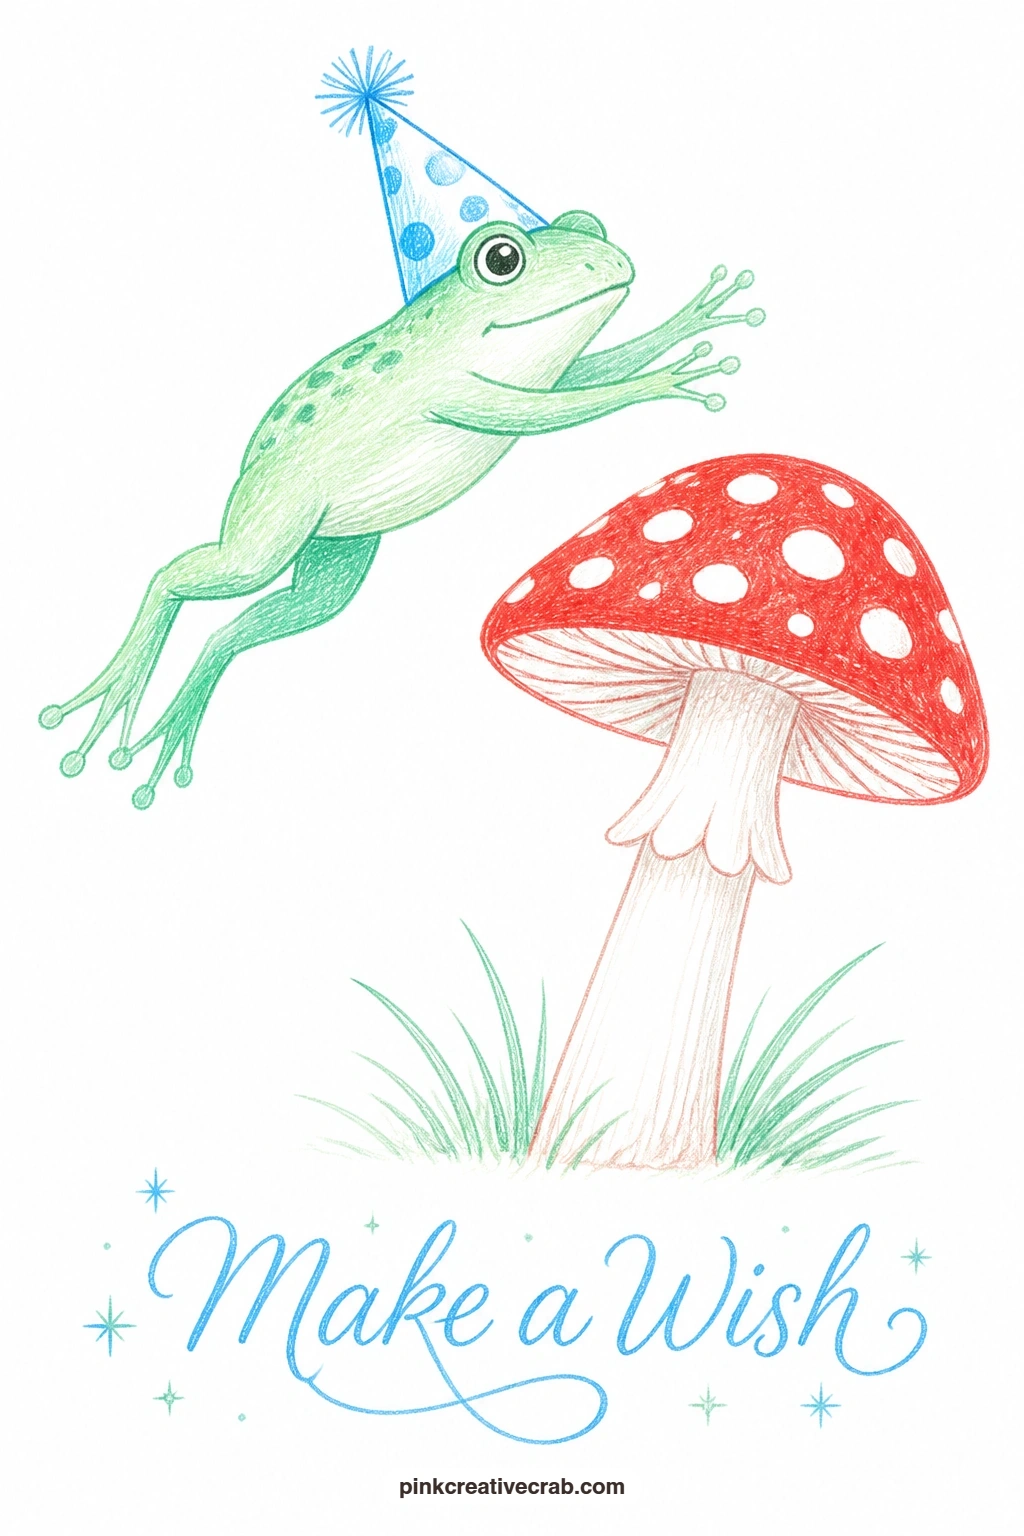
Palette: Mint Green,Cherry Red,Sky Blue,White
After a leaping frog, slow down for something sweetly still: a toddler in a high chair with cake smeared across its face, a classic birthday card moment that only needs a round head, a bib and a lot of cherry red icing. Pencil the head as a soft circle, the high chair tray as a simple rectangle, and keep the body mostly hidden behind the tray so you are not drawing tiny clothes.
Color the icing mess first in cherry red with a little lemon yellow crumb mixed in, scribbled rather than neat, then fill the face around it in a warm skin tone with pink cheeks. The bib can stay sky blue with a scalloped edge, and the tray stays bare white or very light gray.
The easy mistake here is making the mess too tidy; let the red go slightly outside where a clean face would be, on the chin and one cheek, that is what sells the joke. If you lack a skin tone pencil, blend a little orange and white together with light pressure.
For the quick version, just the face and icing in ten minutes works fine, add the full high chair and bib if you have more time.
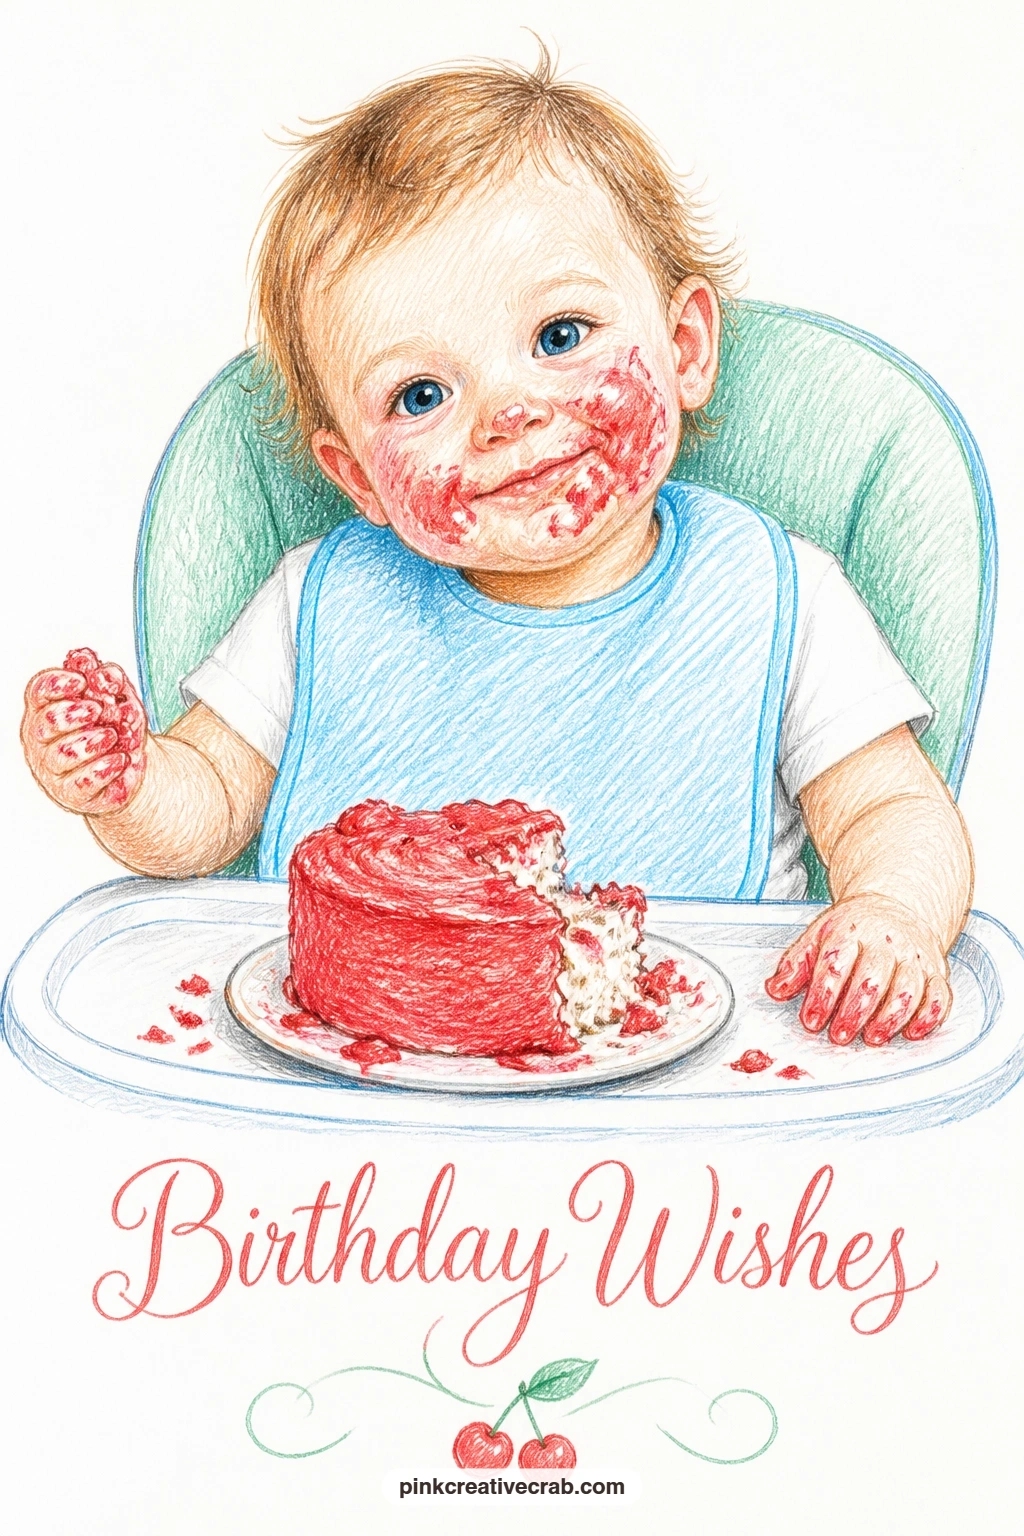
Palette: Cherry Red,Lemon Yellow,Sky Blue,Peach
Carry the party upward with a hot air balloon shaped like a cupcake drifting over open fields, a fun shift from close-up characters to a small landscape. Draw the balloon envelope as a cupcake, wide fluted paper base in cherry red stripes narrowing to a swirl of lemon yellow frosting on top, with a tiny basket hanging underneath.
Lay in the sky first with very light sky blue strokes so the white cupcake stays crisp against it, then add rolling mint green hills far below with a simple fence line or two. The basket can be left mostly as an outline, just a few short lines suggest woven wicker without much work.
From eye level, keep the horizon line low on the card so the balloon has plenty of sky to float in, that single choice makes the whole scene feel airborne rather than cramped. Swap sky blue for a pale gray if you want an early morning feel instead of midday.
One thing to try today: leave a thin white gap between the balloon and the sky color, it reads as a rim of sunlight.
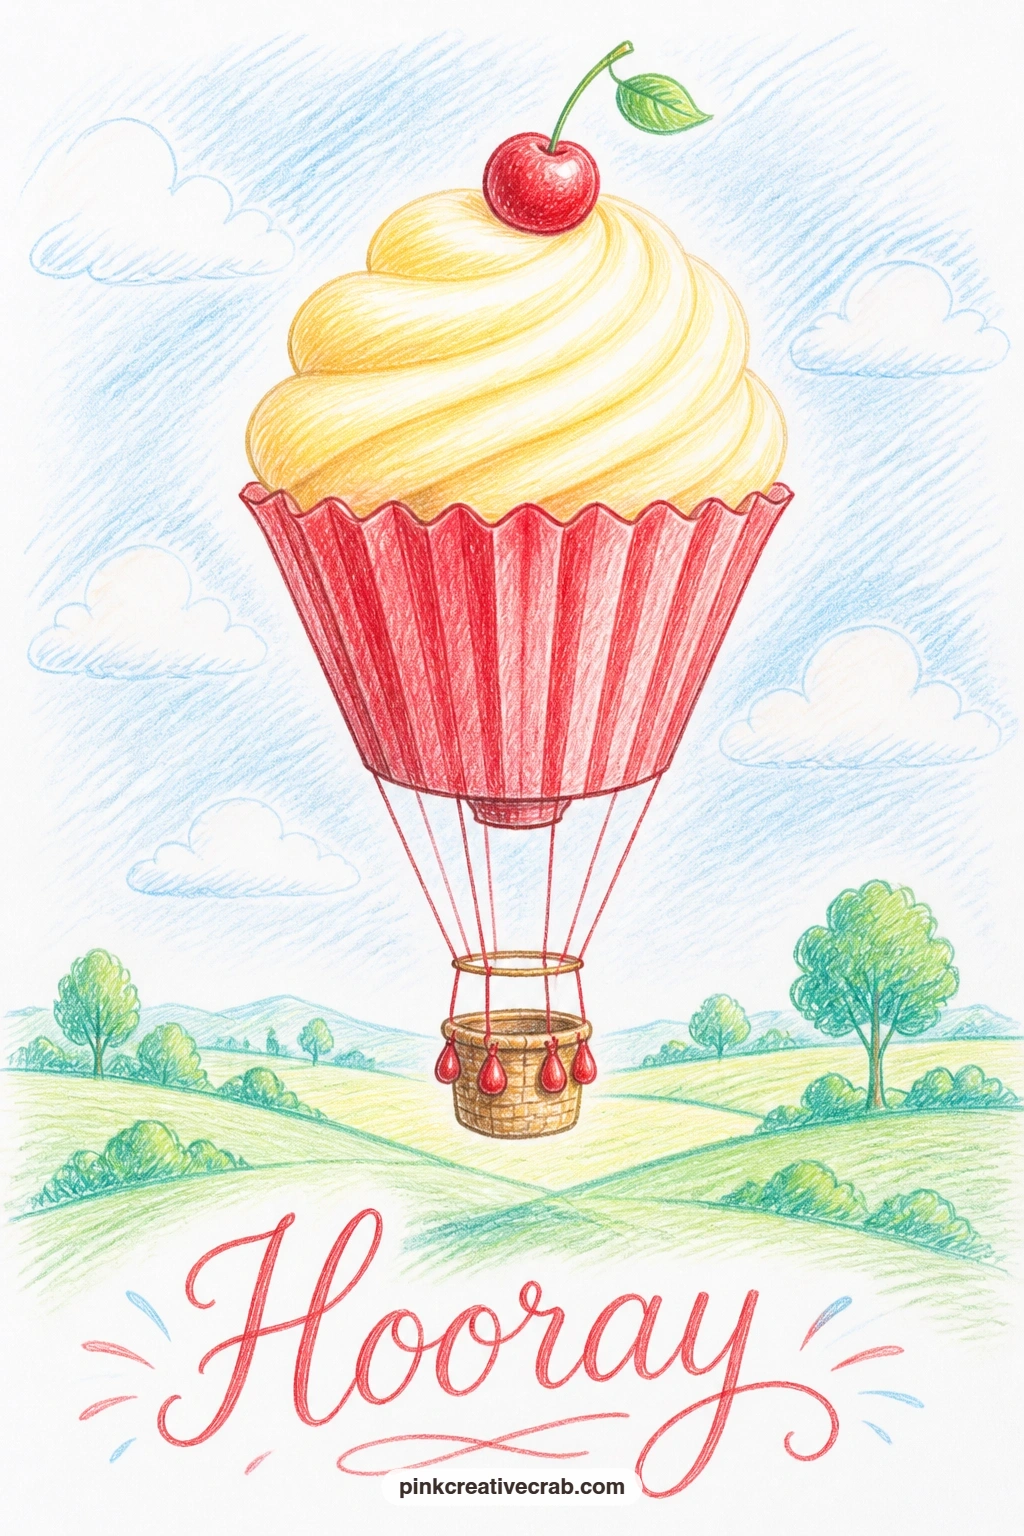
Palette: Cherry Red,Lemon Yellow,Sky Blue,Mint Green
Bring the scene back down to something small and quiet: a bunch of balloons tied to a red mailbox at the end of a country lane. Pencil the mailbox first, a simple rounded box on a post, then draw three or four balloon ovals above it at slightly different heights with strings curving down to the post, not straight lines.
Color the mailbox in cherry red, leave its little flag white or lemon yellow, and give the balloons a mix of sky blue, mint green and lemon so no two touching balloons are the same color. The lane behind can stay almost bare, just a thin strip of mint green grass and a pale gray line for the road.
Curving the strings is the detail that makes or breaks this one; straight strings look stiff and toy-like, so let each one bow slightly as if caught in a light breeze. No red pencil on hand, a deep pink works just as well for the mailbox.
Finish with one extra detail today: a small bird perched on the mailbox flag, it gives the eye somewhere to land first.
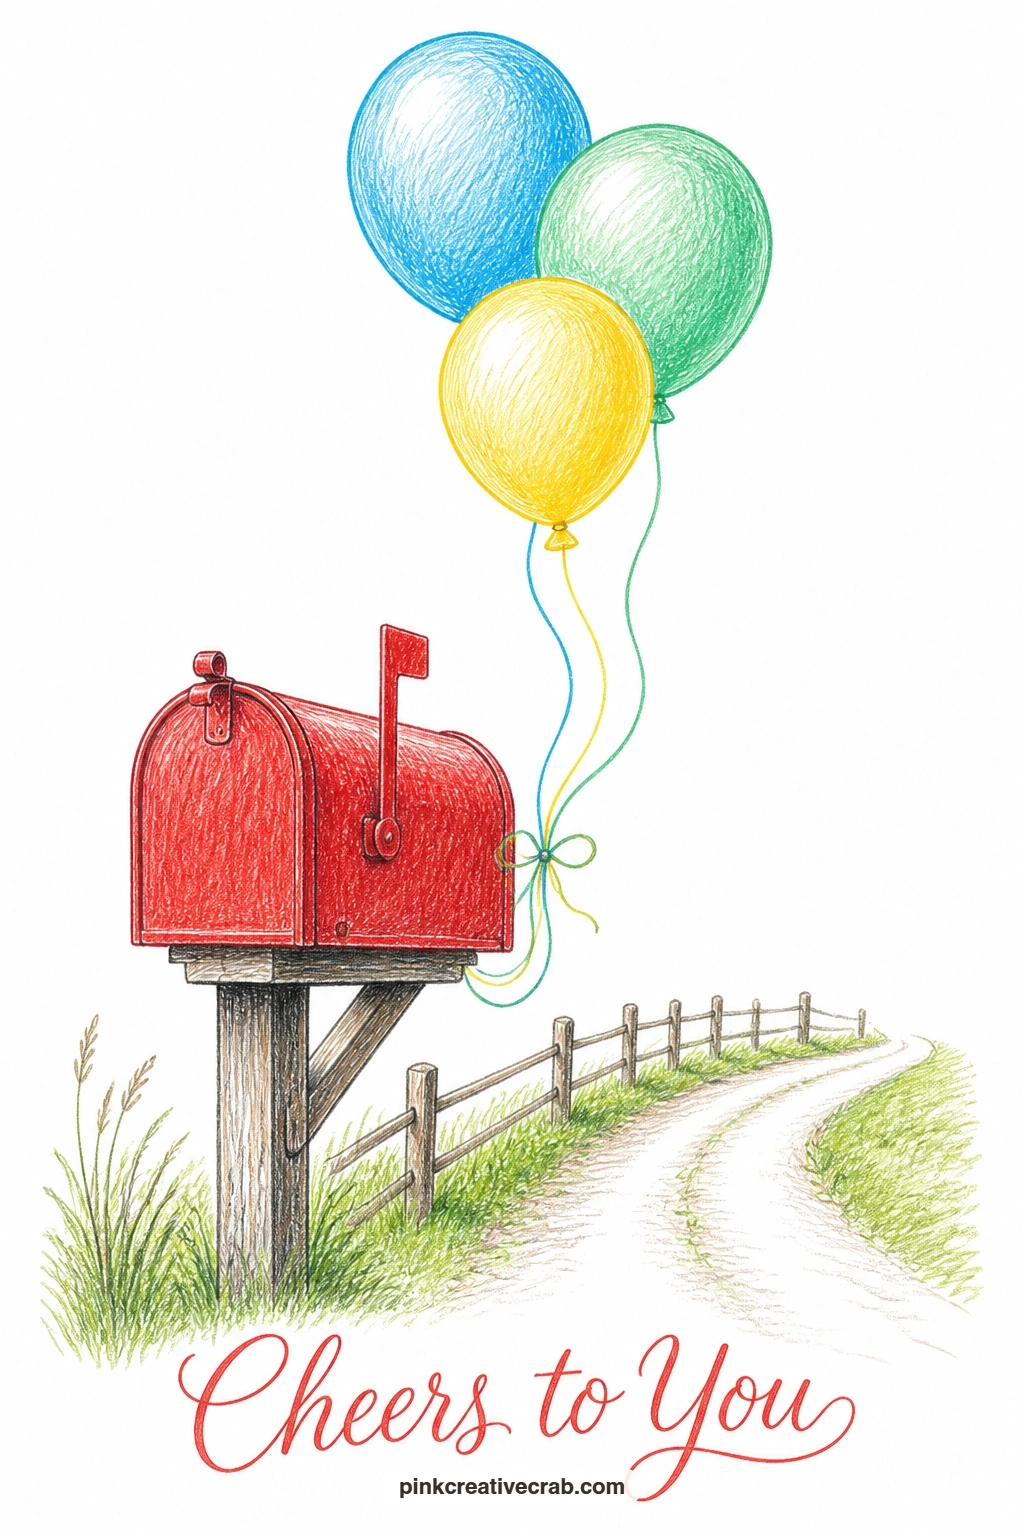
Palette: Cherry Red,Sky Blue,Mint Green,Lemon Yellow
Switch to something with more wiggle: a kitten tumbling out of an open gift box on a birthday morning, legs and tail flying in different directions. Pencil the box first as a simple open cube with the lid flopped to one side, then draw the kitten mid-tumble with one paw still inside the box and the rest of her spilling out.
Color the box in sky blue with a cherry red ribbon left as bare white paper lines, and give the kitten soft gray or cream fur with short hatched strokes that follow the curve of her tumble. A few mint green tissue paper scraps poking out of the box add color without adding drawing time.
Hands-on trick here: lift a little graphite with a kneaded eraser along the kitten’s back to suggest a highlight catching the morning light, it rounds her out fast. If gray pencil feels flat, warm it slightly with a touch of tan underneath.
One tip for today, keep her tail mid-swish rather than straight, a curved tail reads as motion even when everything else is still.
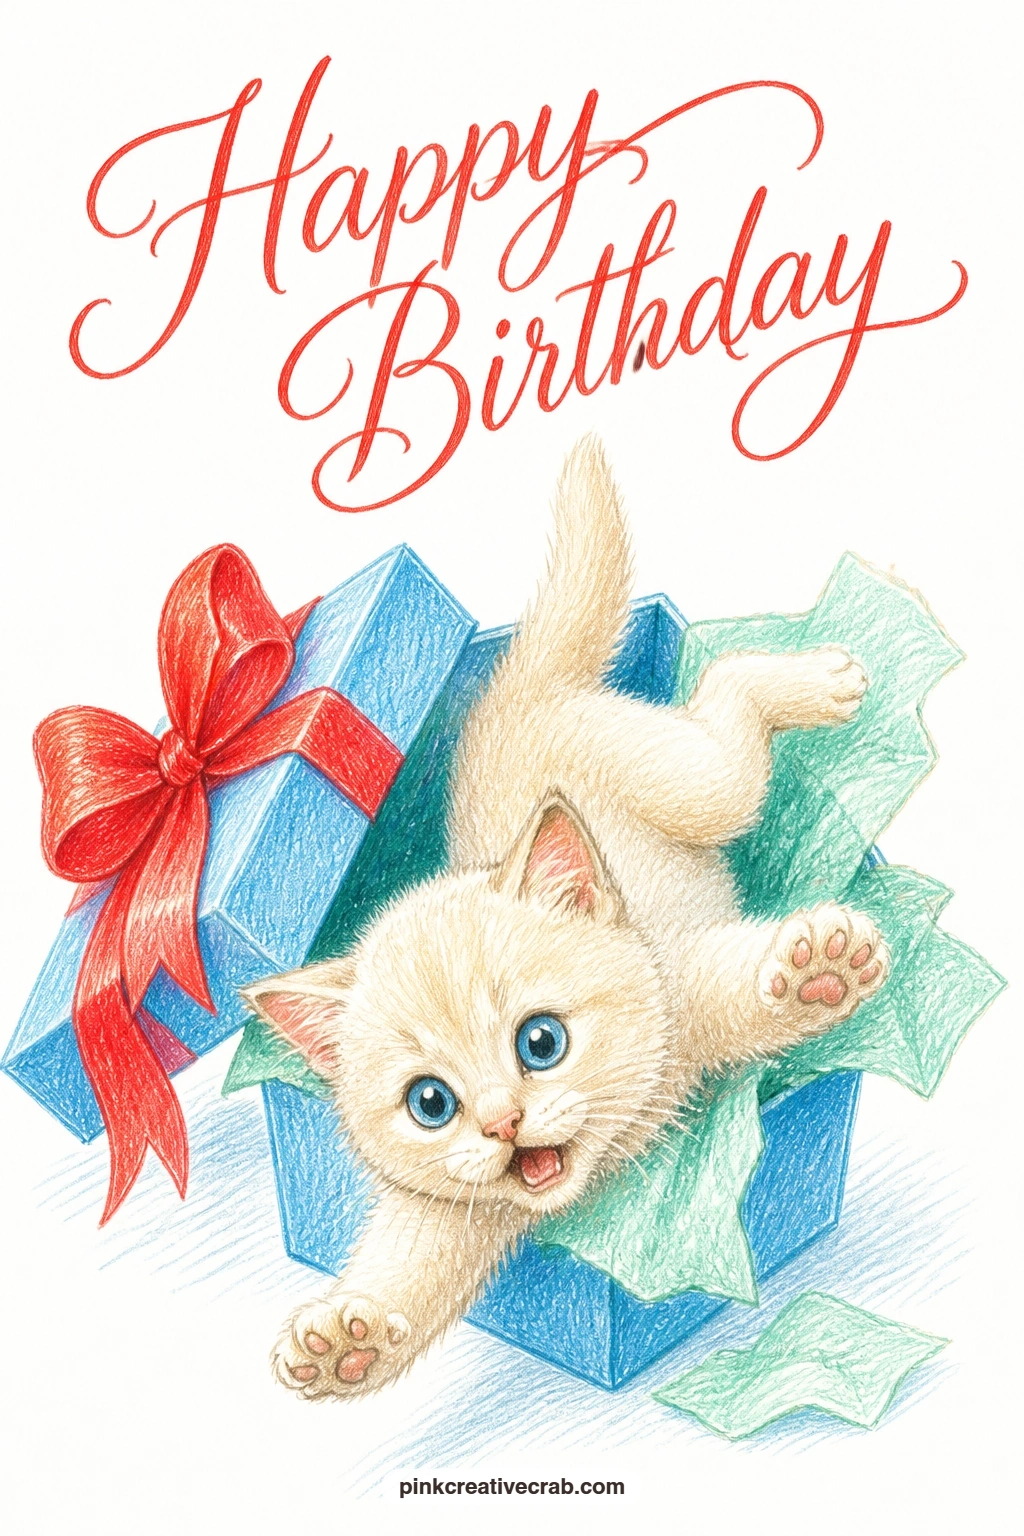
Palette: Sky Blue,Cherry Red,Mint Green,Warm Gray
After the tumbling kitten, settle into a calmer pose: a little girl in a paper crown sitting on a garden swing, one of the easiest figures on this list because the swing ropes hide most of the tricky arm work. Pencil two long curved ropes first, hang a simple plank seat between them, then draw the girl sitting with her legs swinging slightly forward.
Color her dress in sky blue or cherry red, whichever feels more like a celebration, and keep her paper crown lemon yellow with a few simple triangle points, no jewels or detail needed. The swing frame can stay a pale gray outline, and the grass beneath her just a soft mint green strip.
One measuring trick helps the proportions here: her head should be roughly one quarter of her total height if you want her to read as a child rather than a small adult, so sketch a light guideline before you commit to ink or heavy color. Swap the swing for a simple bench if ropes feel fiddly to draw.
Today, try tilting her crown slightly off center, it makes her look more like she is mid-swing and less like she is posing.
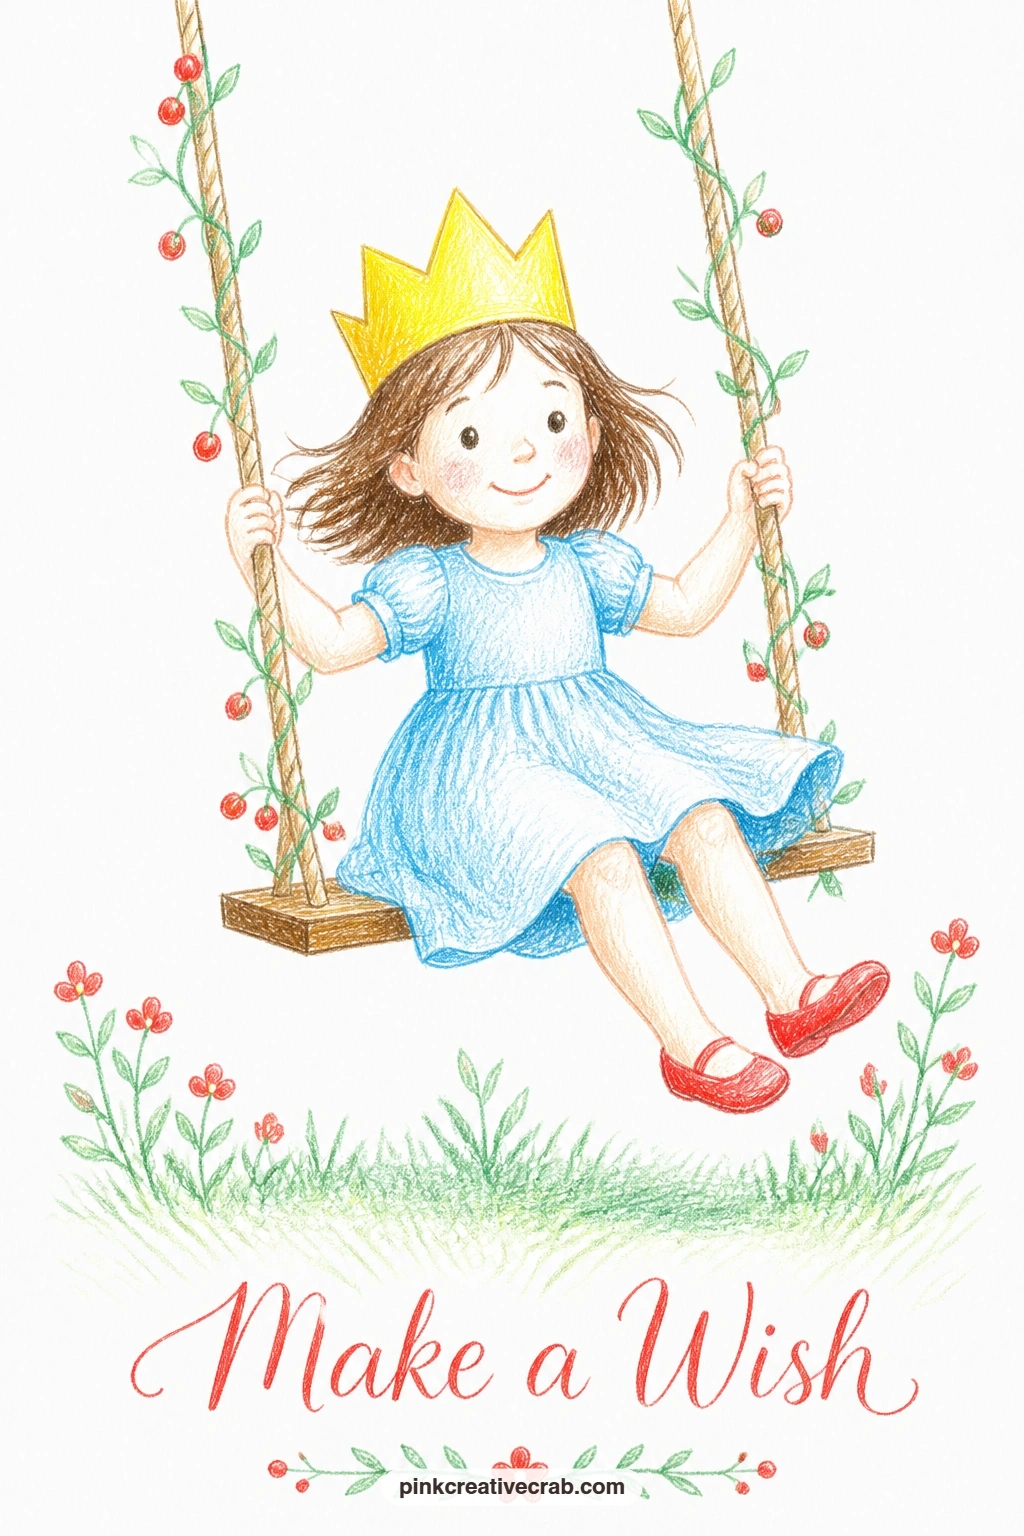
Palette: Sky Blue,Lemon Yellow,Mint Green,Cherry Red
Give yourself a breather with a still subject: a lemon drizzle cake cooling on a windowsill as bees drift by outside. Pencil a simple loaf shape first, rounded on top with a crackled glaze line, sitting on a thin windowsill with a window frame sketched lightly behind it.
Color the cake in lemon yellow with white paper left bare for the drizzle lines running down the sides, then add a soft sky blue square behind it for the window, leaving the glass mostly untouched paper so it reads as bright daylight. One or two small bees, just a tan oval with thin dark stripes, drifting near the top corner finish the scene.
The glaze is where this one usually goes wrong, too neat and it looks painted on rather than dripped; draw the drizzle lines at uneven lengths and let a couple trail right off the edge of the loaf. No lemon pencil available, mix pale yellow with a touch of green for the same fresh citrus tone.
Try this today: leave one bee slightly out of focus by drawing it with lighter pressure, it gives the window a small sense of depth.
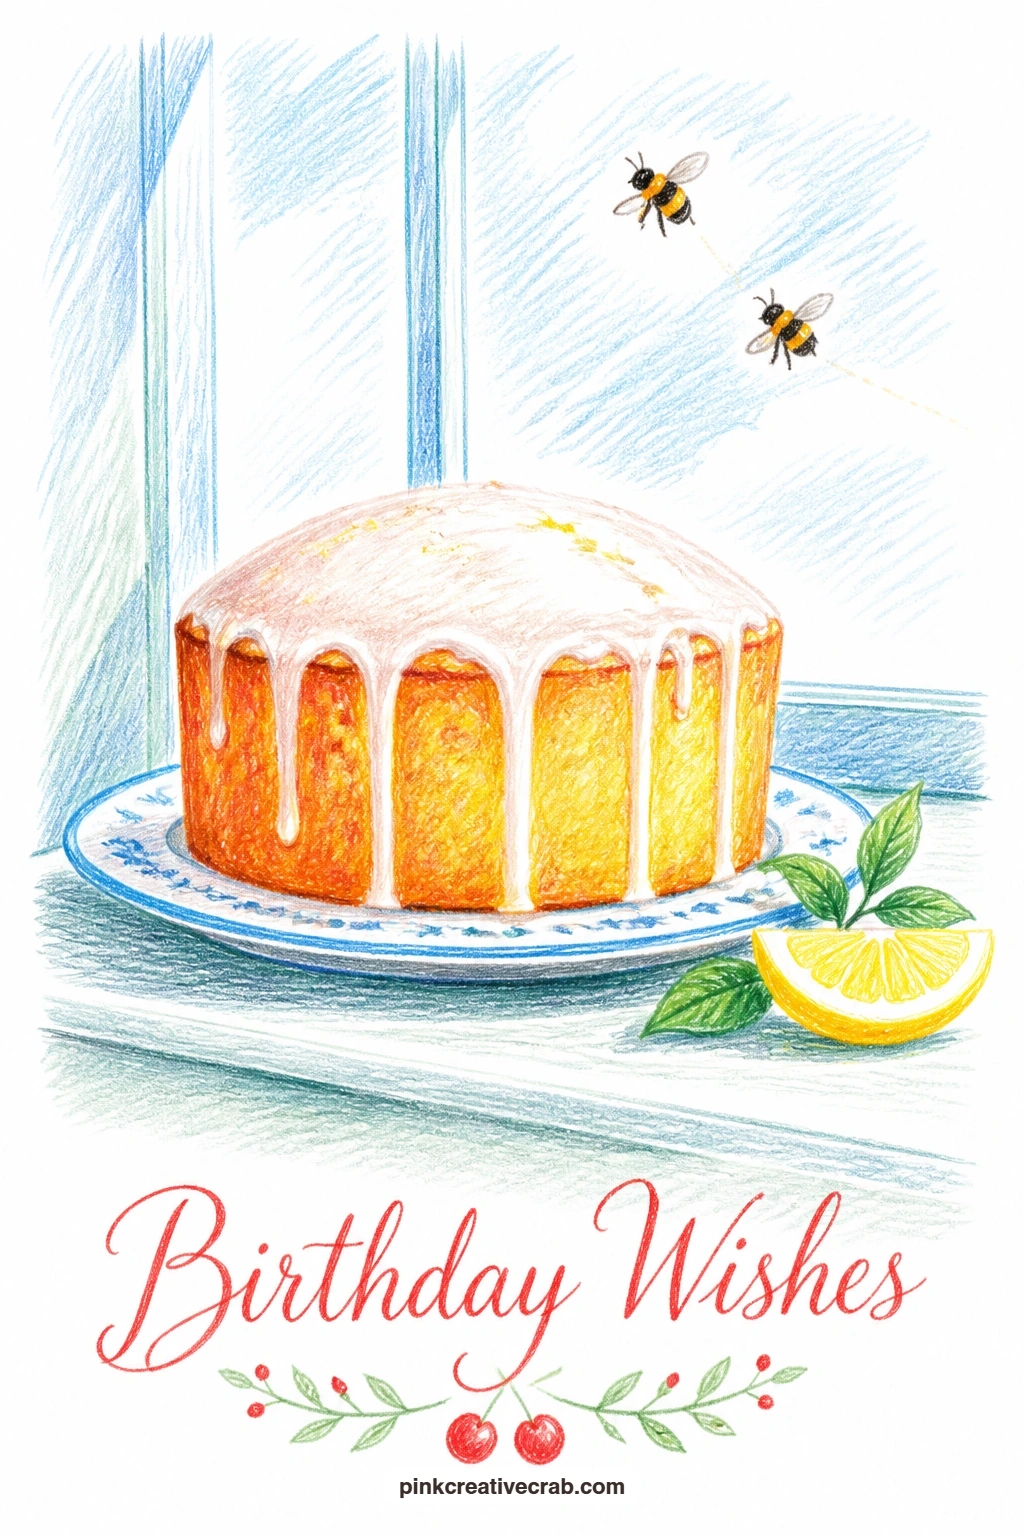
Palette: Lemon Yellow,Sky Blue,Burnt Sienna,White
Step into the garden proper with a cake stand on a table under a blooming lilac tree, a nice chance to practice drawing something delicate above something solid. Pencil the cake stand first as a simple pedestal shape holding a round cake, then build the lilac tree above it with a thin trunk and a cloud of small overlapping oval clusters for the blooms.
Color the lilac clusters in soft purple-pink with mint green leaves tucked between them, keeping each cluster slightly different in shape so the tree does not look stamped. The cake on the stand can go lemon yellow with cherry red berries on top, and the stand itself stays a pale gray or white outline so it does not compete with the tree.
From a normal eye level, the lilac blooms should feel like they are gently arching over the cake rather than floating beside it, so angle a few of the clusters downward toward the stand. If purple pencil is not in your set, blend pink and a touch of blue for the same soft lilac tone.
One tip for today, leave small gaps of bare paper between lilac clusters rather than coloring them as one solid shape, it keeps the blossom feeling airy.
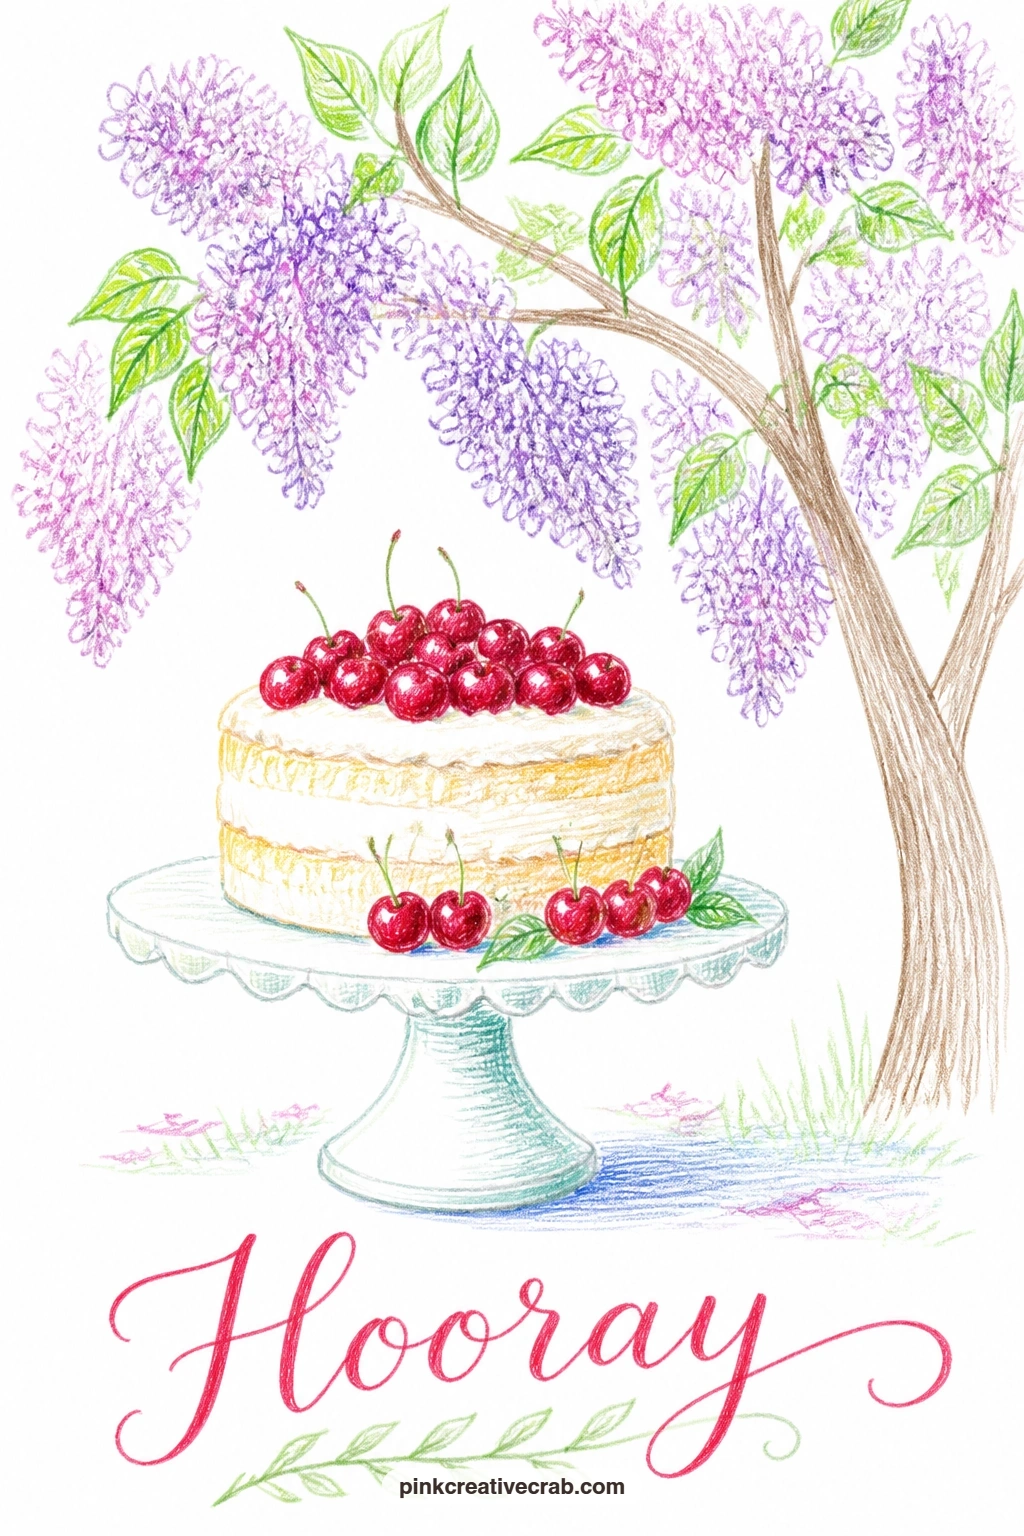
Palette: Purple Pink,Mint Green,Lemon Yellow,Cherry Red
Head out to a picnic party on a hill with a strawberry cake set on a checkered cloth, a scene that gives you plenty of color blocks to enjoy filling in. Pencil the hill as one gentle curved line across the lower card, lay the checkered cloth as a simple grid of squares on top of it, and set the cake slightly off-center so it does not sit dead in the middle.
Color the cloth in alternating cherry red and white squares, keeping the lines a little loose rather than ruler straight, then build the cake in white or cream with whole strawberries on top drawn as simple red teardrops with tiny seed dots. The hill itself stays mint green with a few darker green strokes for texture, and the sky above can be left almost entirely bare white.
If this is your first time drawing a checkered pattern, draw the grid lines first in pencil before adding any red, it keeps the squares even instead of drifting. A plain red pencil works fine instead of strawberry red for the fruit.
For the ten minute version, just the cake and cloth corner will do, the full hill and sky belong to the forty minute version when you have time to spare.
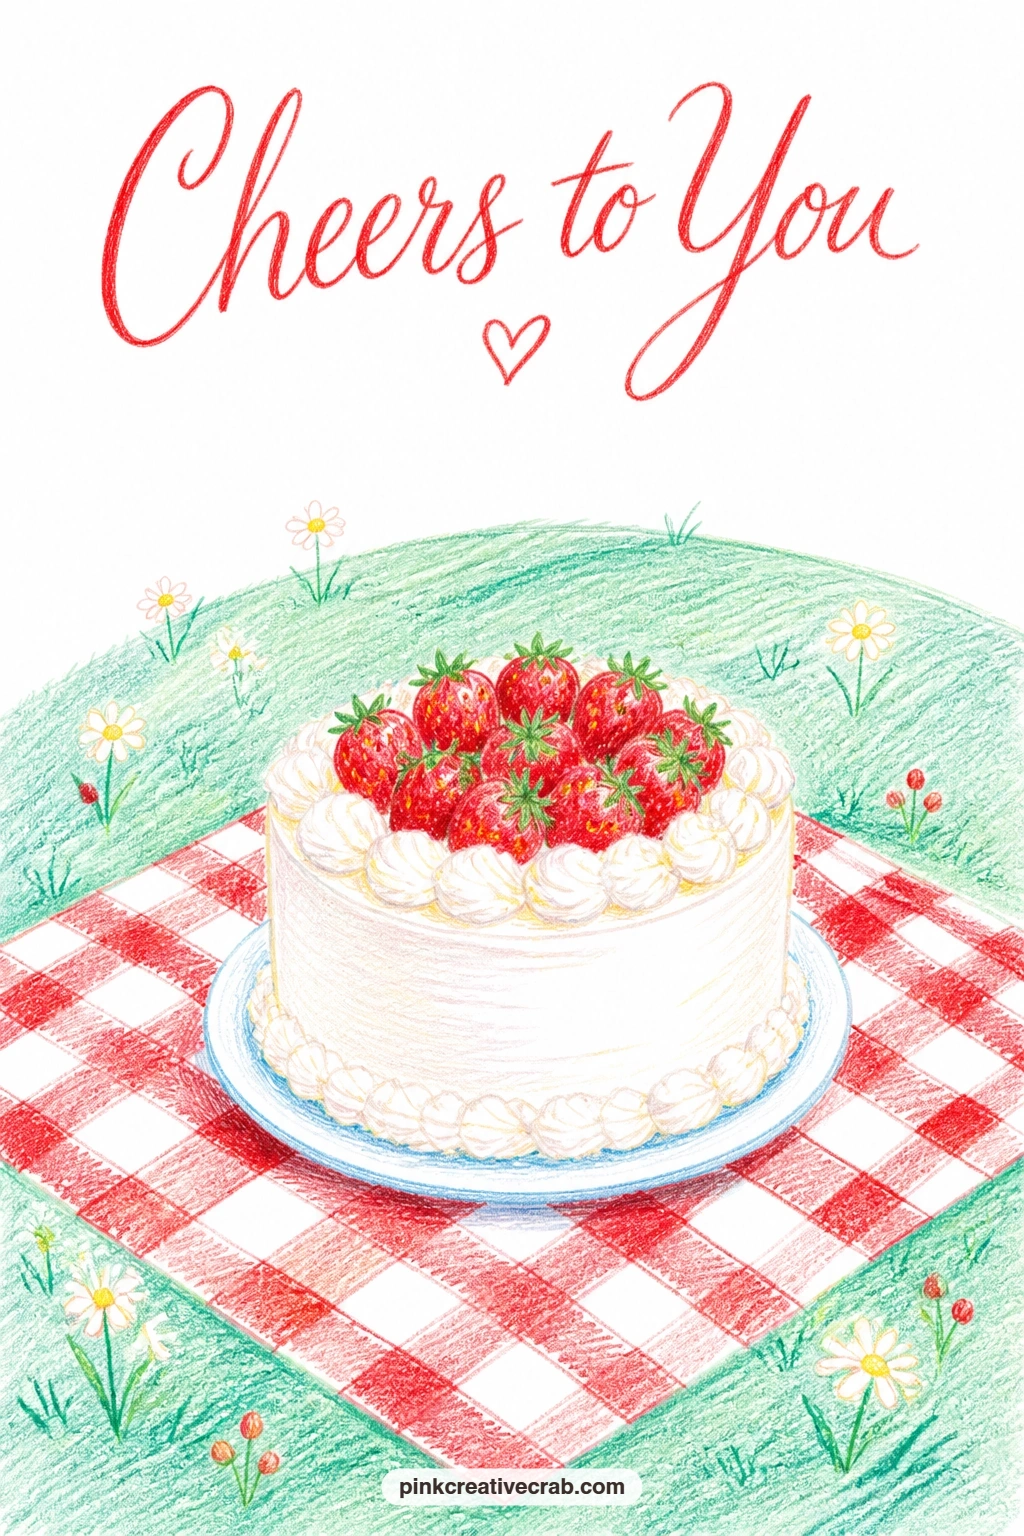
Palette: Cherry Red,White,Mint Green,Cream
Bring the celebration indoors with a girl blowing out candles on a cake in a sunny kitchen, keeping the lettering and numbers off the card by leaving the candles plain and unlit at the tips except for a soft glow. Pencil the cake on a counter first, then the girl leaning in from one side with cheeks puffed out, her hair falling forward slightly as she blows.
Color the cake in cherry red and lemon yellow layers, and keep the candles themselves as thin sky blue sticks with small lemon flame shapes you can leave glowing or smudge slightly with a finger for softness. The kitchen background can stay minimal, a hint of a window square in pale yellow light is enough, no need for cabinets or tiles.
Where this scene usually goes wrong is the puffed cheeks, too round and she looks startled rather than blowing; keep the cheek just slightly rounder than the rest of the face and angle her mouth forward in a small pucker. No yellow pencil for the flame, a touch of orange works just as well.
One tip for today: let the window light fall only on one side of her face, it adds warmth without any extra shading work.
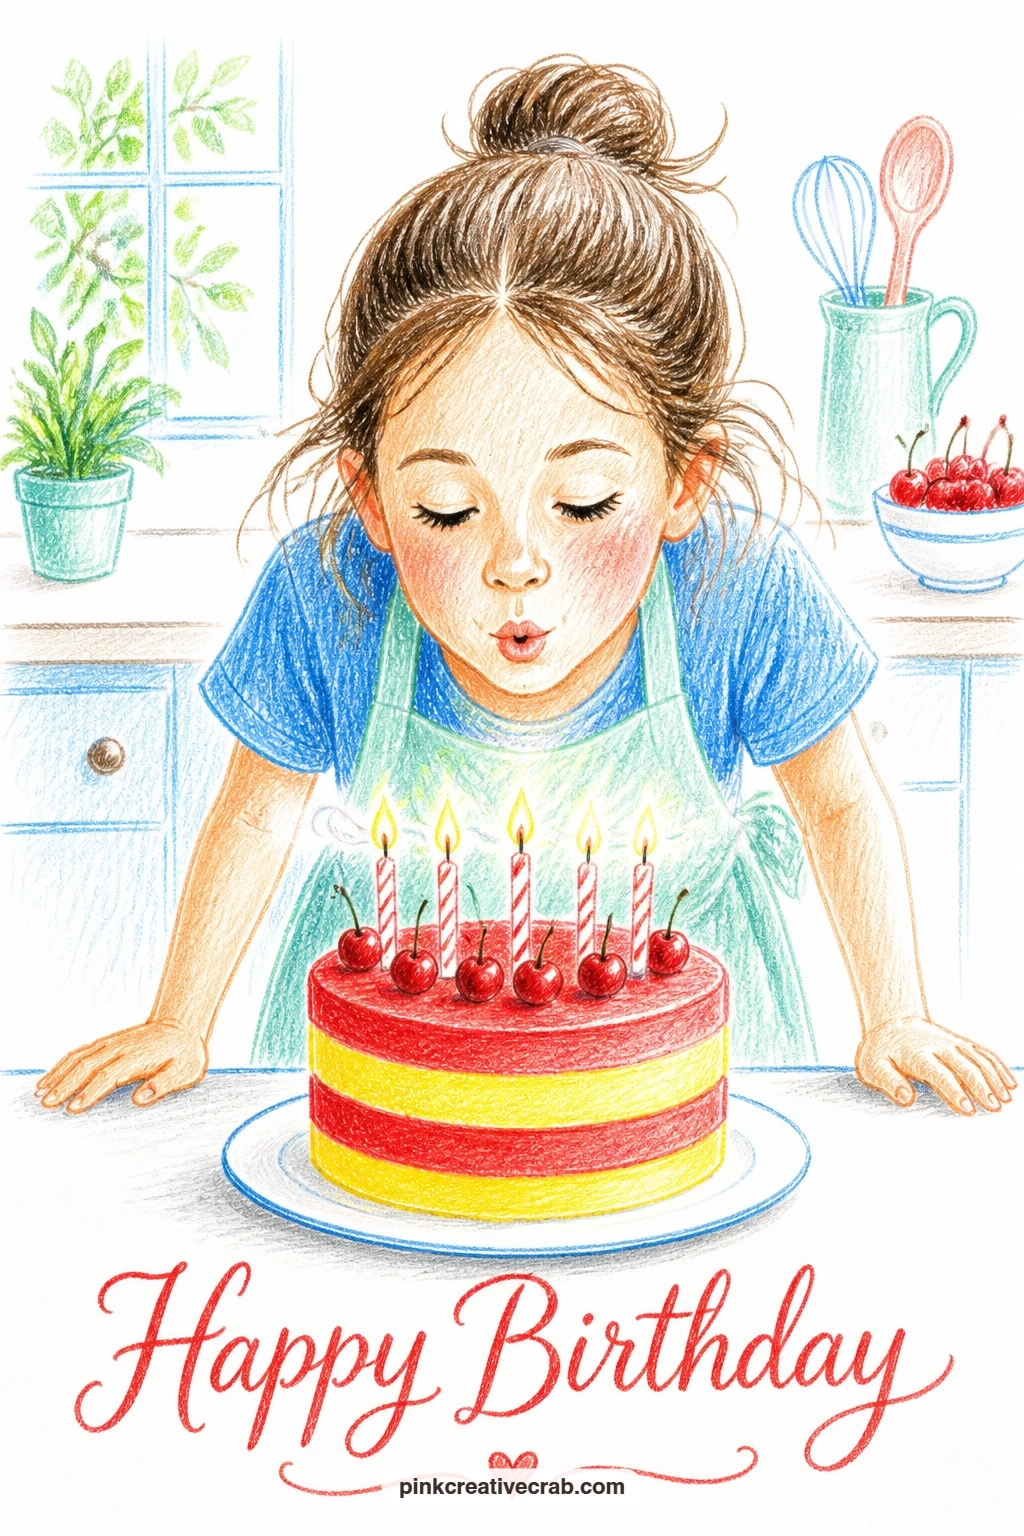
Palette: Cherry Red,Lemon Yellow,Sky Blue,Peach
Fill the page with a small flock of sheep in paper party hats scattered across a green meadow, an easy way to practice repeating a simple shape with small variations. Pencil each sheep as a cloud-like oval body with a small dark face and four thin legs, placing three or four of them at different sizes to suggest distance.
Color the wool in soft white with light gray shading only in the hollows between the bumps of the cloud shape, and give each sheep a differently colored party hat, cherry red, sky blue and mint green, so the flock reads as festive rather than uniform. The meadow stays a simple mint green with a few darker blades of grass scattered near the sheep’s feet.
The common slip here is making every sheep the same size and shape, which flattens the scene; vary the sizes so the smaller ones sit higher on the card to suggest they are further away. If gray pencil is unavailable, a light blue shadow works just as well in the wool hollows.
Try this today: give one sheep its hat slightly askew, it is a small touch that makes the whole flock feel more alive.
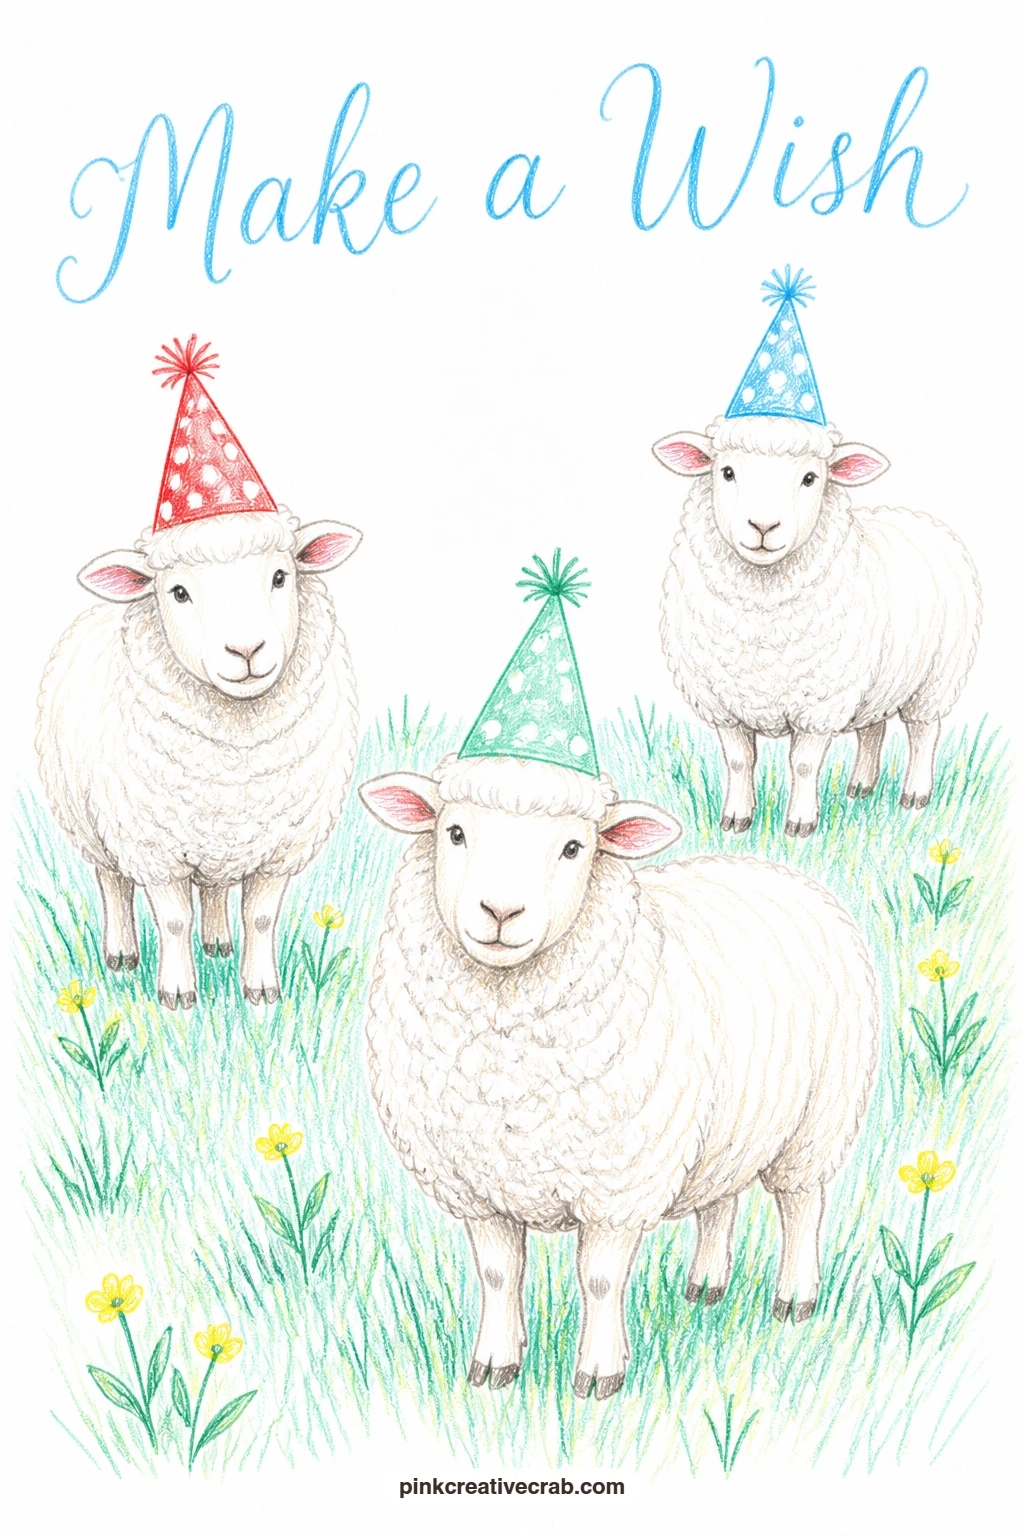
Palette: White,Light Gray,Cherry Red,Mint Green
Switch to something with real charm in its scale: a mouse dragging a slice of cake twice its size across the floor, the kind of size joke that makes a card front memorable. Pencil the cake slice first as a tall triangle wedge, far bigger than the mouse will be, then add the tiny mouse behind it gripping the plate edge or a thread tied around it.
Color the cake slice in cherry red icing over lemon yellow sponge with a line of white frosting between the layers, and keep the mouse in simple warm gray with a long thin tail trailing behind him. The floor can stay almost bare, just a thin pale gray line to anchor everything in place.
Proportion is the whole joke here, so measure before you commit: the cake slice should stand at least twice the mouse’s height, and leaning it very slightly as if it is heavy to pull sells the effort. No gray pencil on hand, a light tan works just as well for simple mouse fur.
One tip for today: give the mouse a strained little expression, eyebrows pulled up slightly, it adds the humor without any extra drawing.
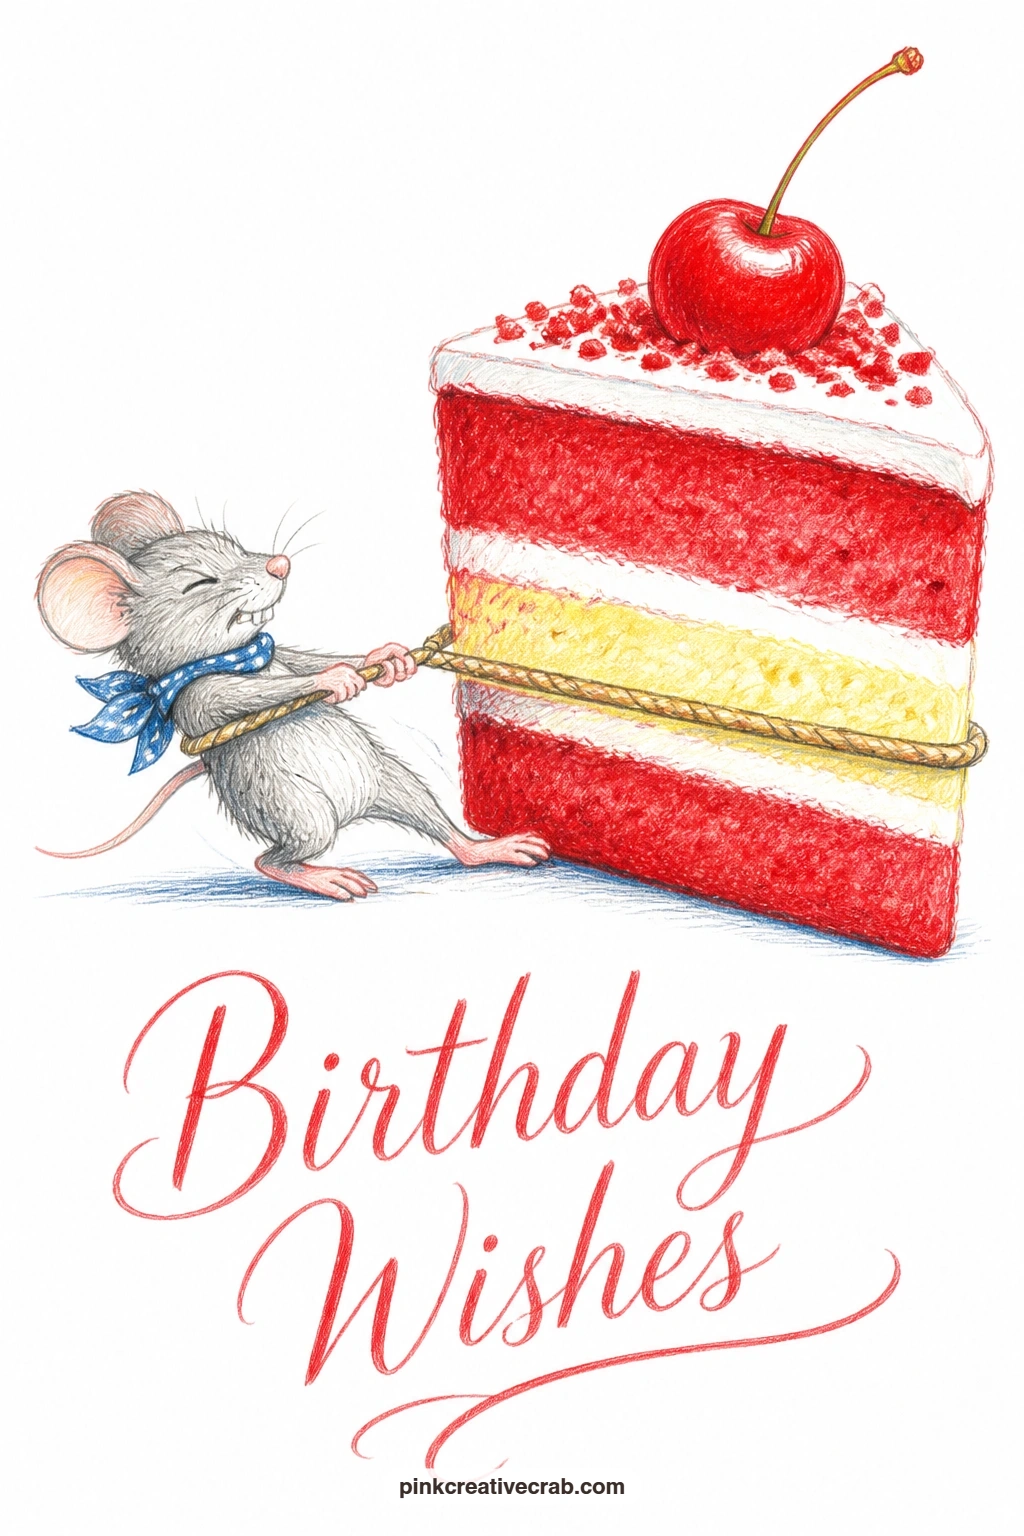
Palette: Cherry Red,Lemon Yellow,White,Warm Gray
Move to the water with a duck family ferrying a cupcake across a pond on a lily pad, a scene that pairs naturally with the mouse and its oversized cake since both play with scale and effort. Pencil a large round lily pad first, add a cupcake balanced carefully on top, then draw two or three small ducks paddling around or behind it, wings tucked for balance.
Color the lily pad in mint green with a darker green vein line down the middle, and keep the ducks in simple warm yellow with small orange bills and feet just breaking the water’s surface. The cupcake stays lemon yellow with a cherry red cherry on top, small enough to look precious rather than heavy.
A hands-on trick for the water: draw a few short curved pencil strokes radiating out from the lily pad edge to suggest gentle ripples, then lightly smudge one or two with a finger for softness. If you lack a true pond blue, plain sky blue laid very lightly does the same job.
Try this today: keep the water mostly bare white paper with just a few ripple lines, it reads as sunlit rather than murky.
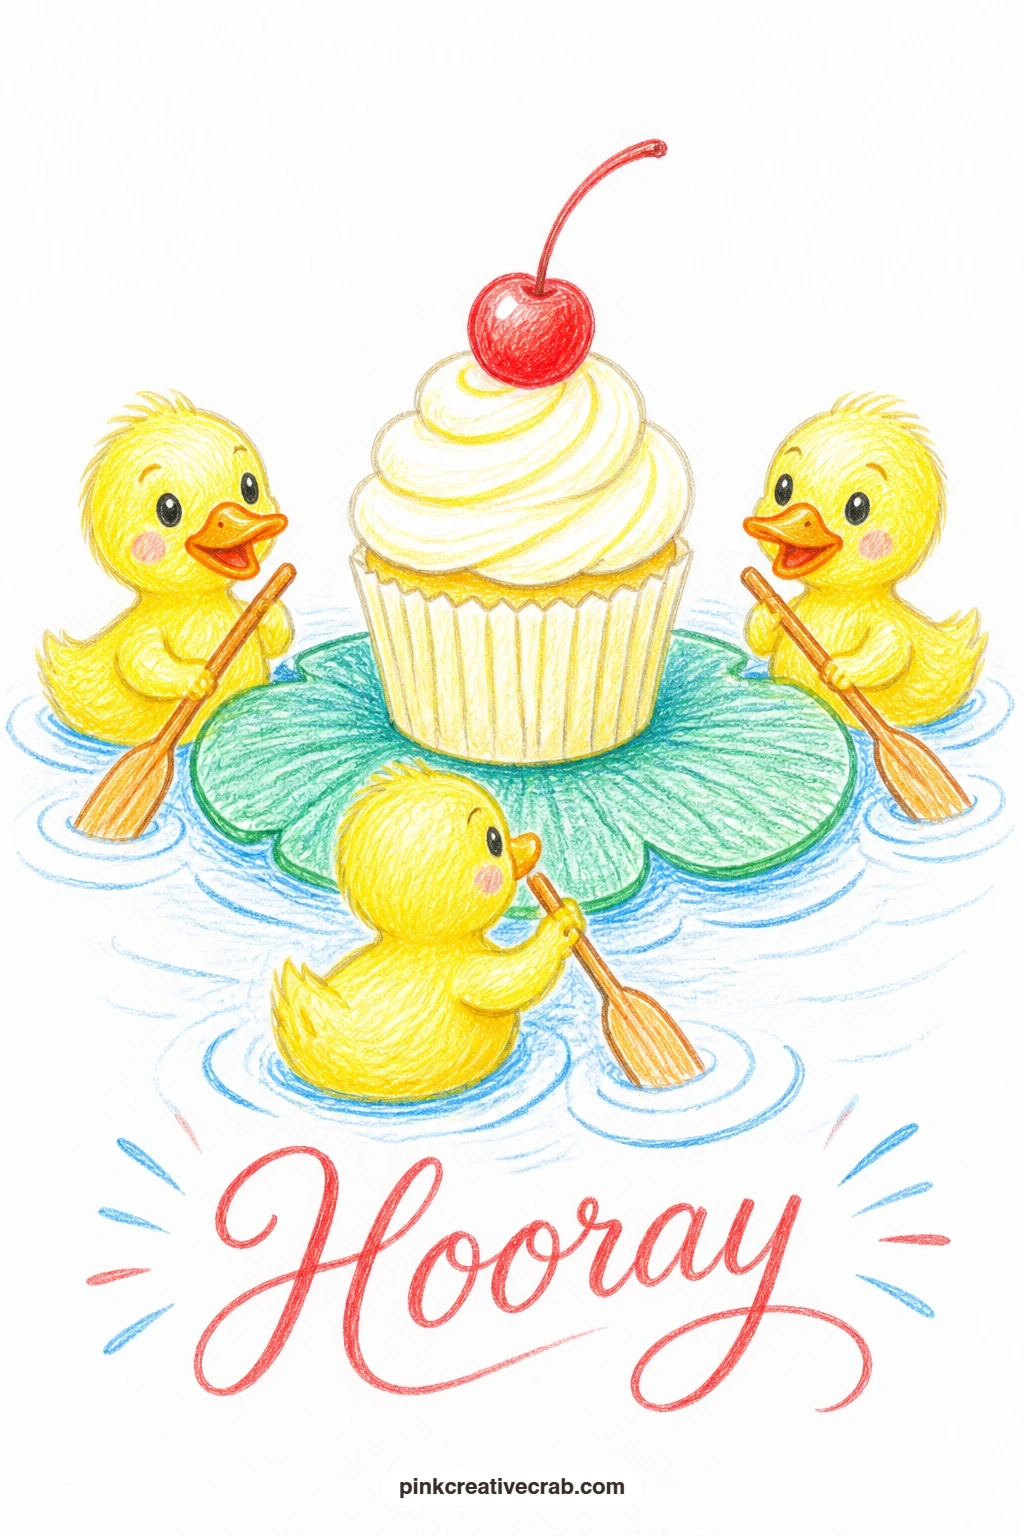
Palette: Mint Green,Lemon Yellow,Cherry Red,Sky Blue
Keep the animal cast going with a giraffe bending down to blow out candles on a tall cake, an idea built entirely on the joke of matching his height to the cake’s. Pencil a tall narrow cake first, several layers stacked high, then draw the giraffe’s long neck curving down toward it from one side, head tilted so his mouth lines up with the candles.
Color the giraffe in warm tan with small irregular patches in a slightly darker tan or burnt sienna scattered over the neck, and keep the cake in alternating cherry red and lemon yellow layers so it reads clearly as tall rather than just big. His legs can stay mostly out of frame, cropped at the bottom edge, which also saves drawing time.
Comparing the two heights is the key measuring trick: sketch a very light guideline showing the cake reaching about chest height on the giraffe before you draw his neck curve, otherwise the bend looks awkward rather than natural. If burnt sienna is not available, a light orange brown works for the patches instead.
One tip for today: curve the neck in a smooth S shape rather than a sharp bend, it keeps him looking graceful rather than broken.
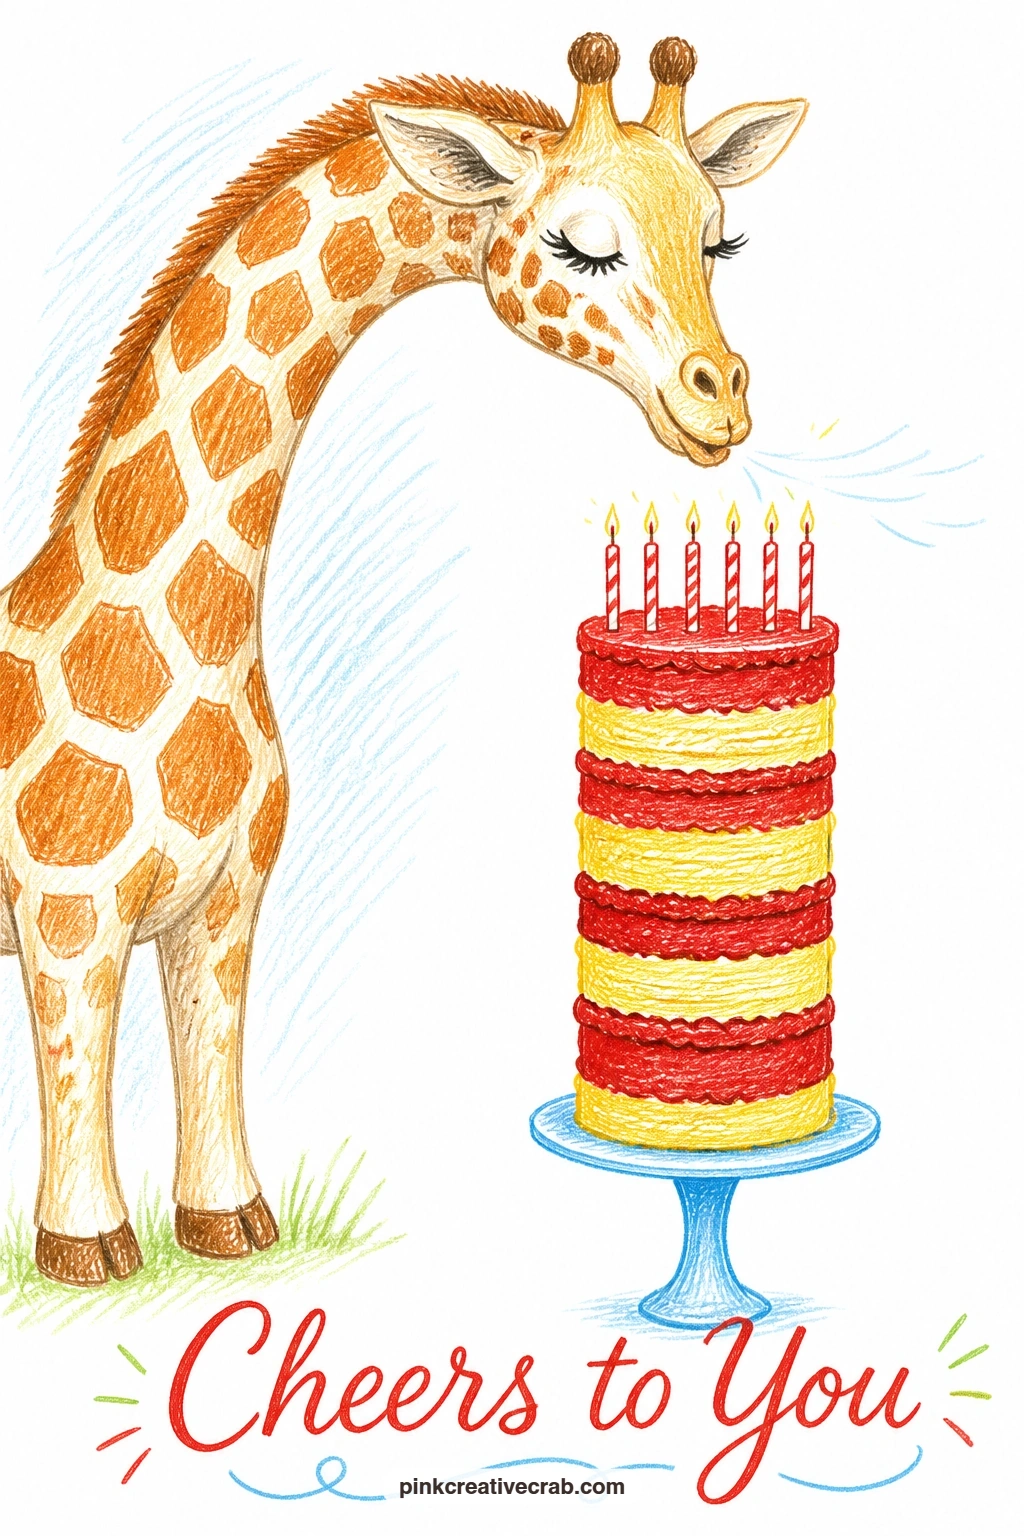
Palette: Burnt Sienna,Cherry Red,Lemon Yellow,Tan
Bring the pace down with a birthday breakfast tray, pancakes and one single candle, carried carefully upstairs. Pencil the tray first as a simple rectangle seen at a slight angle, then stack a few round pancakes on a plate with a thin candle standing in the middle, no lettering needed on the plate itself.
Color the pancakes in warm golden brown with a drizzle of syrup left as bare paper lines, and add a small pat of butter in lemon yellow melting on top. A pair of hands or just the edge of a sleeve at the bottom of the card suggests the carrying without needing a full figure, which keeps this one quick.
Light matters most here: imagine morning sun coming from one side and keep that side of the pancake stack a touch lighter, with the opposite edge slightly darker, it gives the stack real roundness with very little extra work. Swap maple syrup lines for a few lemon yellow dots if drawing drips feels fiddly.
Try this today: tilt the tray very slightly as if it is being carried up a step, it adds motion to an otherwise still composition.
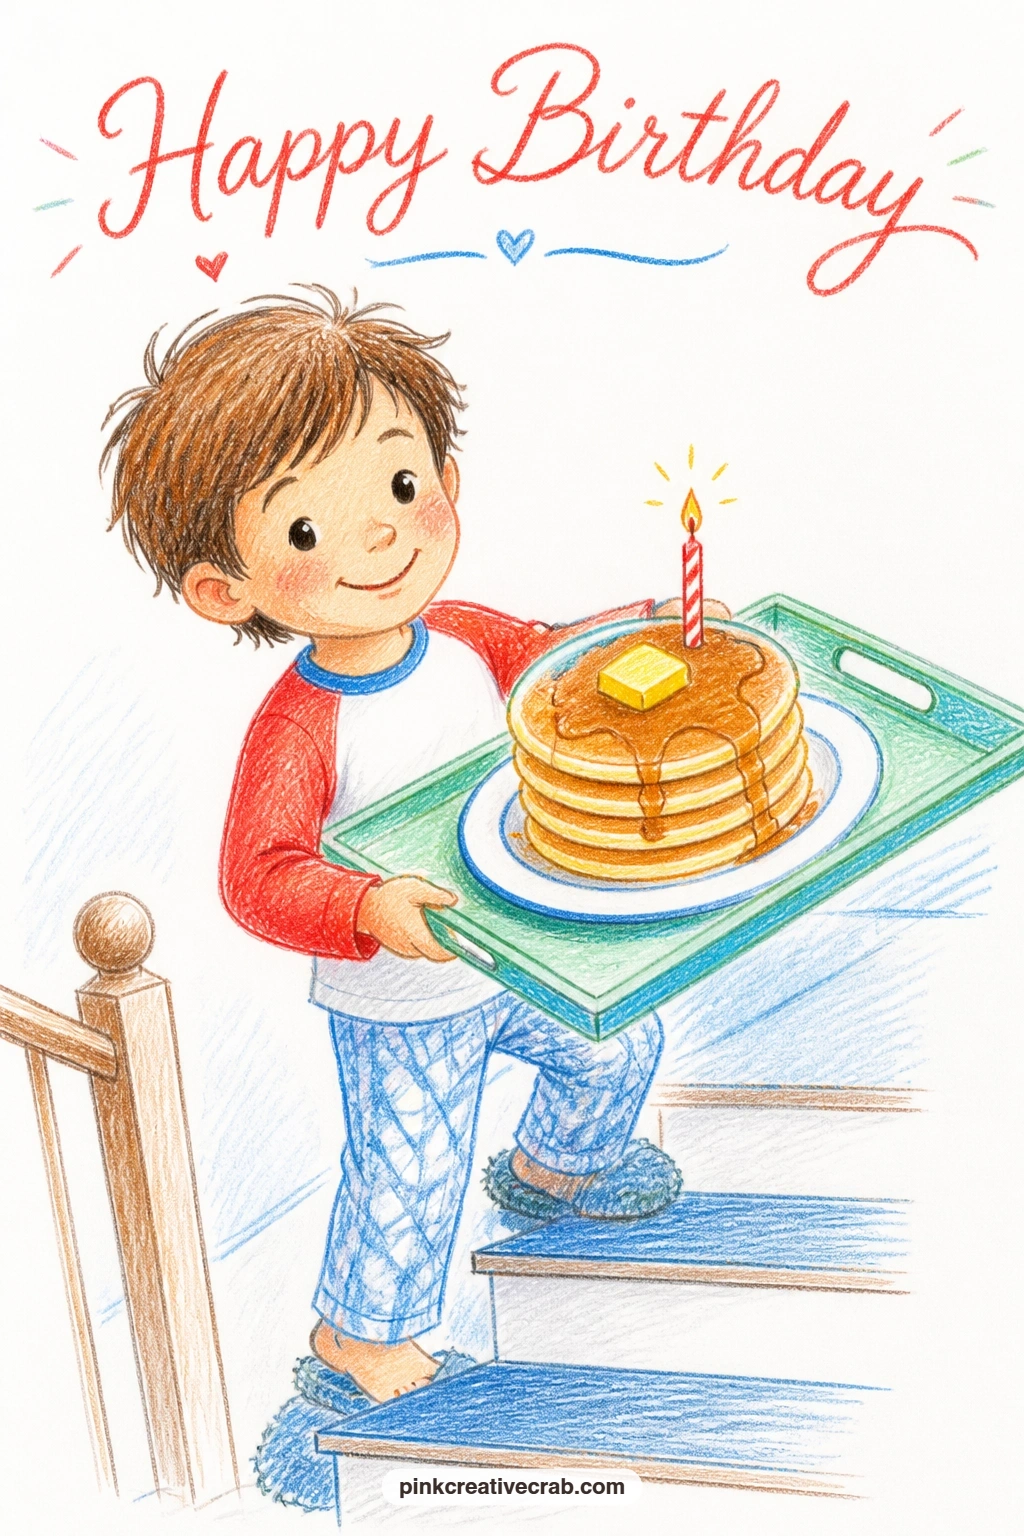
Palette: Golden Brown,Lemon Yellow,Sky Blue,White
Return to the garden party for an elephant sprinkling confetti with its trunk, a playful central figure you can build the whole card around. Pencil a large rounded elephant body first, trunk curved upward with the tip flared slightly open, then scatter small confetti shapes falling from the trunk tip down across the lower half of the card.
Color the elephant in soft gray with slightly darker gray hatching along the folds of the ears and trunk for a little dimension, and make the confetti pieces tiny squares and circles in cherry red, sky blue and lemon yellow so they pop against the gray. A party hat in mint green perched between the ears adds one more color without much extra drawing.
The trunk is where proportion matters most, so compare it to the body before you commit: a trunk drawn too short loses the joke entirely, it should reach roughly as long as the elephant’s front leg. No gray pencil available, a very light blue gray mix works just as well.
One tip for today: scatter the confetti unevenly, denser near the trunk and thinning out as it falls, it reads far more naturally than an even sprinkle.
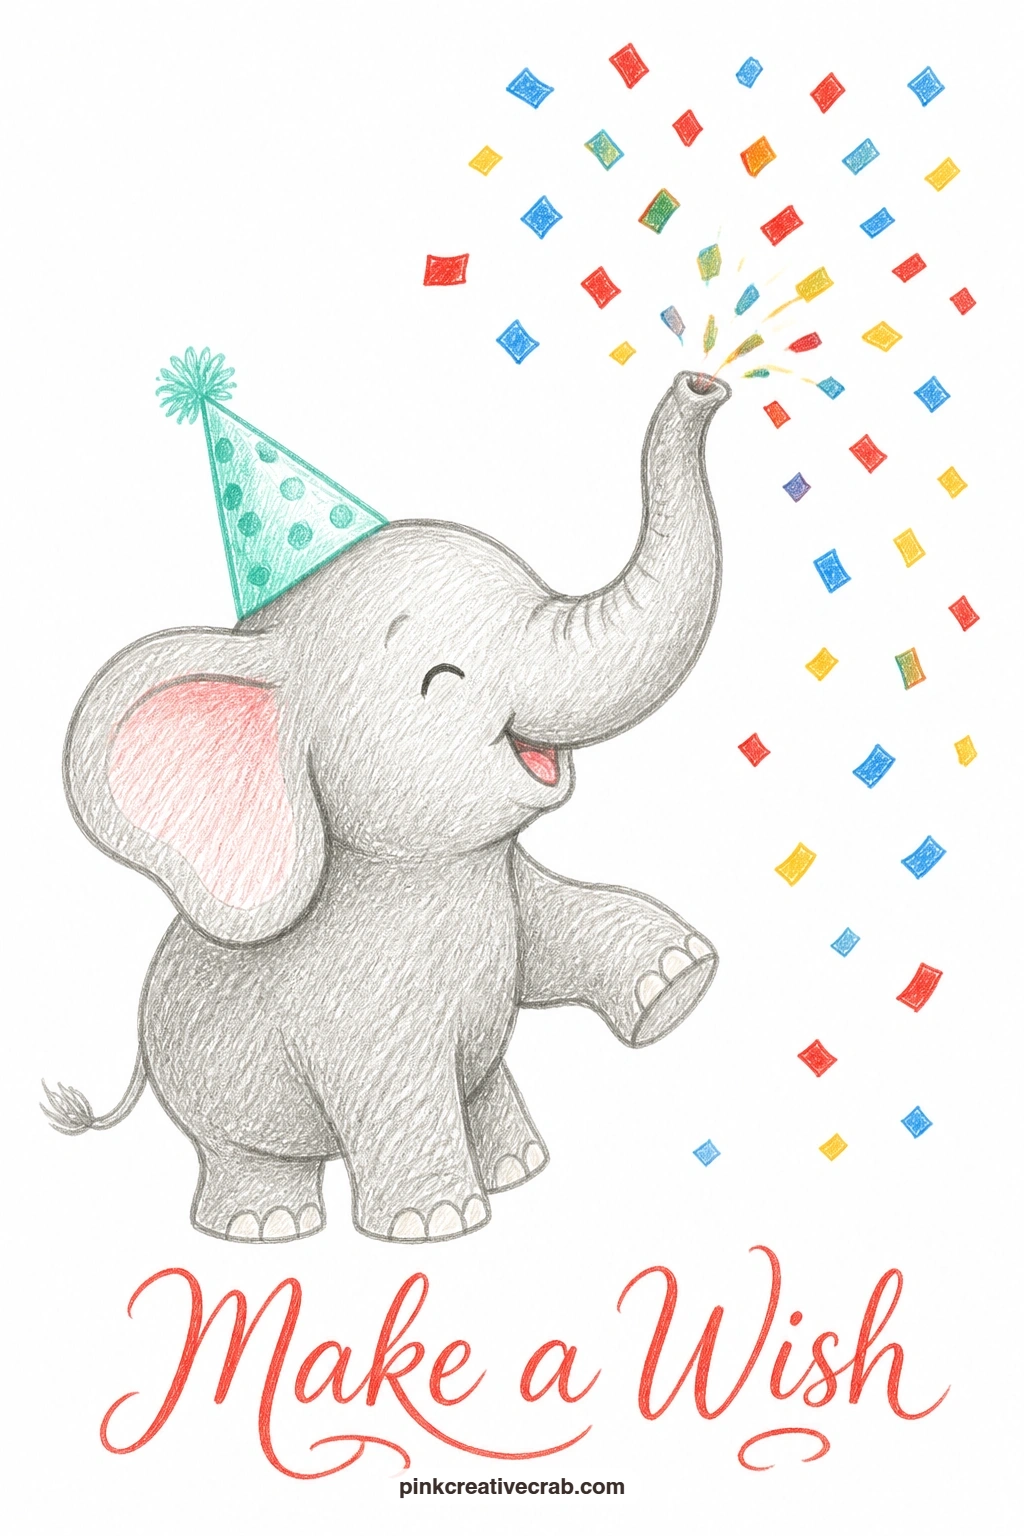
Palette: Light Gray,Cherry Red,Sky Blue,Lemon Yellow
Settle into a quieter composition with a bunch of balloons floating up over a cottage garden wall, letting the wall itself do most of the visual work. Pencil a low stone wall across the bottom third of the card first, textured with a few simple irregular blocks, then draw the balloon bunch rising just behind and above it, strings trailing down out of sight.
Color the wall in warm gray and soft brown blocks with a little moss-like mint green in the cracks, and give the balloons a cheerful mix of cherry red, sky blue and lemon yellow, varying their sizes slightly so they do not look stamped from the same template. The sky above stays almost entirely bare white paper, which makes the colors below feel brighter by contrast.
One trick for the stone texture: vary the pressure as you shade each block, heavier at the bottom edge of each stone and lighter toward the top, it gives a convincing sense of weight without needing fine detail. If brown pencil is scarce, a warm gray alone reads just as well as old stone.
Try this today: let one balloon drift slightly higher and further right than the rest, it breaks the symmetry and makes the bunch feel like it is actually rising.
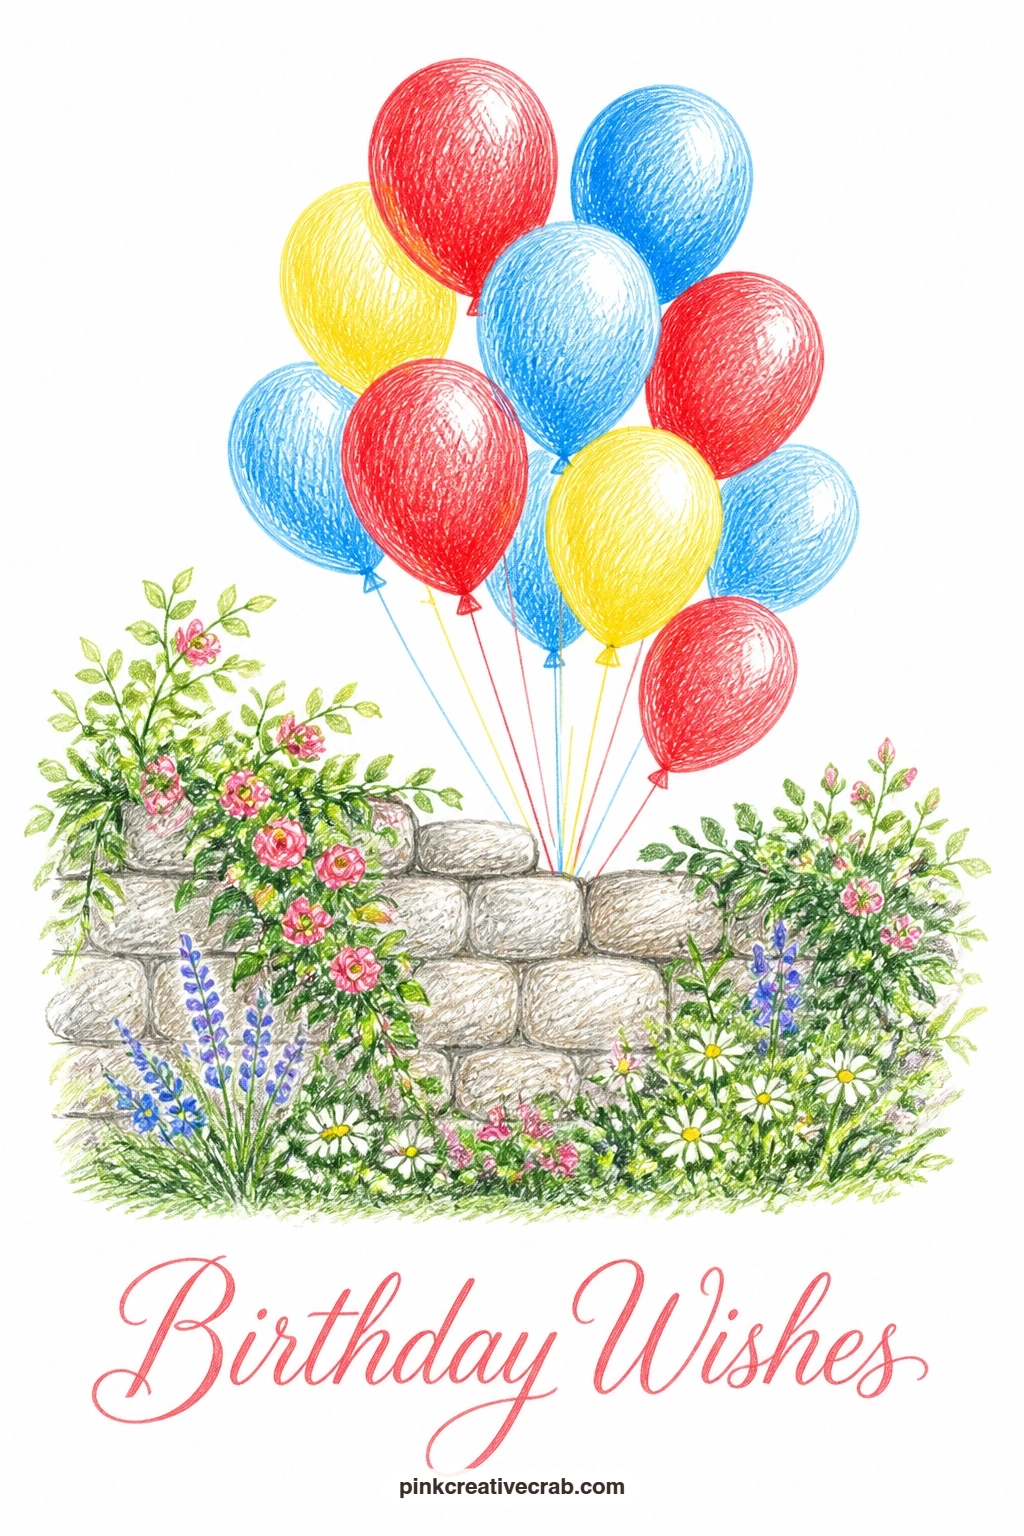
Palette: Warm Gray,Burnt Sienna,Cherry Red,Sky Blue
Take on a slightly busier scene with a bear pedaling a tricycle, a cake balanced carefully in the front basket. Pencil the tricycle frame first, two small back wheels and one larger front wheel with a round basket mounted above it, then build the bear’s rounded body sitting on the seat with legs reaching down to the pedals.
Color the bear in warm brown with a lighter tan patch on the belly and muzzle, and keep the tricycle itself in simple cherry red or sky blue so it reads clearly against the bear’s fur. The cake in the basket stays small and tidy, lemon yellow with a cherry red topper, since it is a passenger rather than the main subject here.
This is a good one for the quick versus full approach: in ten minutes, sketch just the bear’s upper body and the basket with cake, letting the wheels fade off the bottom edge of the card; given more time, finish the full tricycle frame and add a bit of road texture beneath the wheels. Swap brown for a warm gray if you would rather draw a koala instead of a bear.
One tip for today: angle the front wheel very slightly, it suggests he has just turned a corner and keeps the whole pose from feeling frozen.
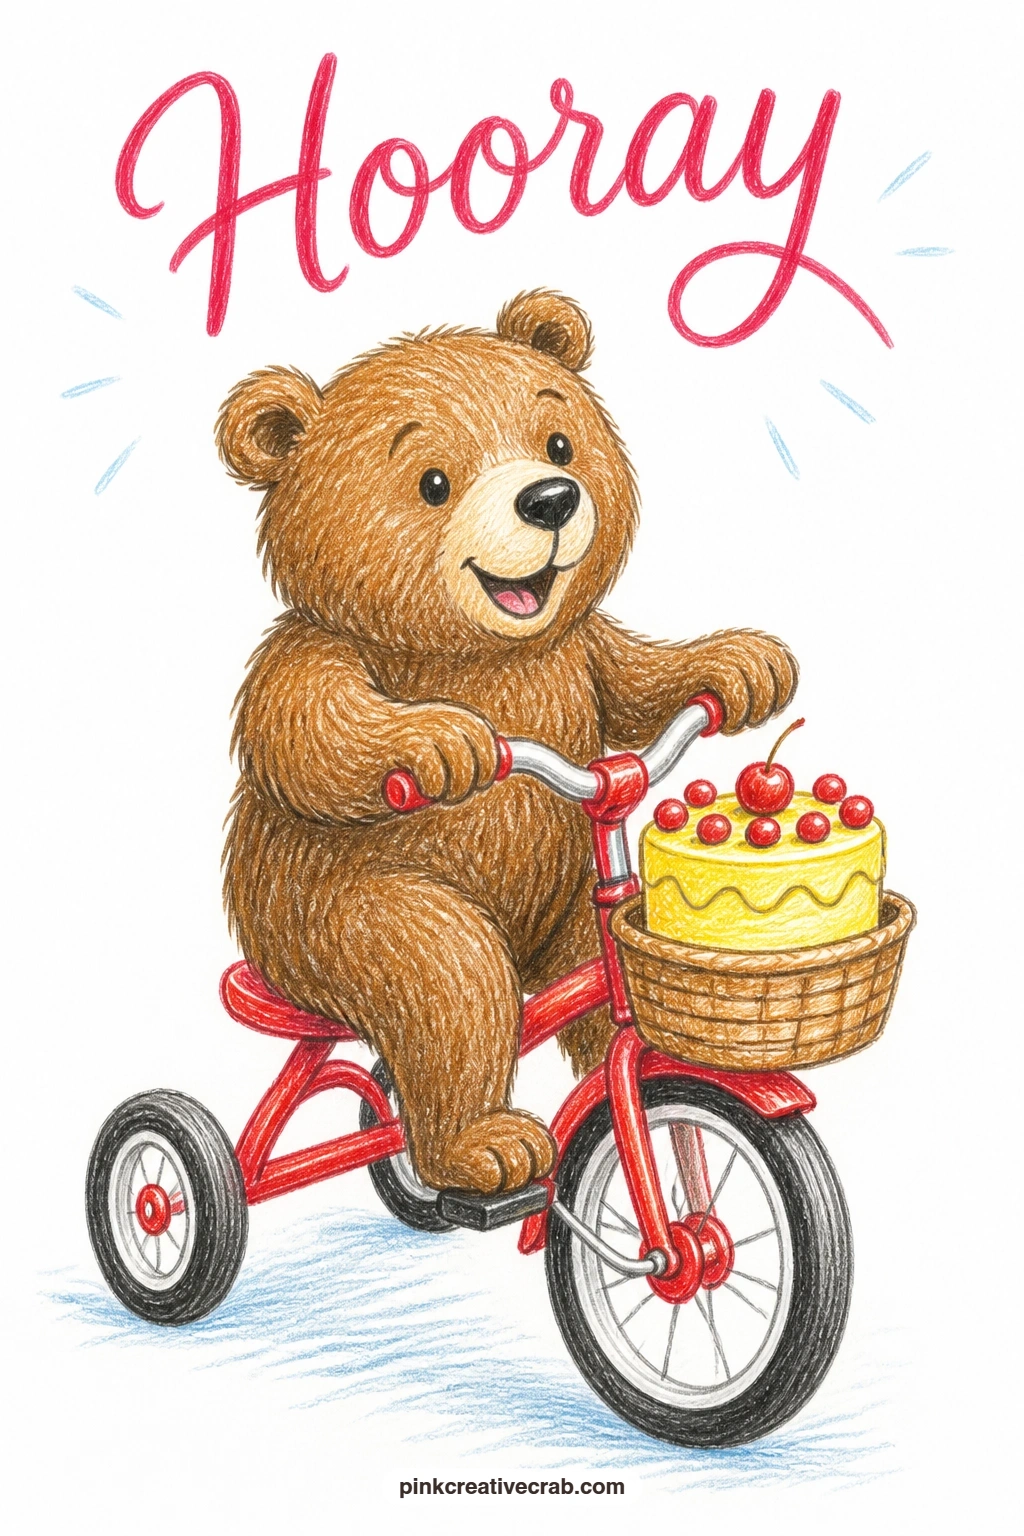
Palette: Burnt Sienna,Tan,Cherry Red,Lemon Yellow
Keep the motion going with a little delivery van driving through town, a giant cake strapped precariously on its roof. Pencil a simple boxy van shape first, round headlights and wheels, then draw the oversized cake on top held in place with a couple of thin strap lines crossing over it.
Color the van in a cheerful sky blue or mint green with a few simple window shapes left mostly bare white, and build the cake in tall cherry red and lemon yellow layers, clearly too big for the van it rides on. A couple of simple building shapes in pale gray behind the van suggest a town street without needing real architectural detail.
The straps are the detail that sells the whole joke, so keep them slightly taut looking, cutting faintly into the icing at the point they cross the cake, rather than floating loosely above it. No sky blue on hand, a cheerful red van works just as well with a different colored cake on top.
Try this today: tilt the cake slightly as if it is about to slide, it adds a small note of comedy that makes the scene feel alive rather than parked.
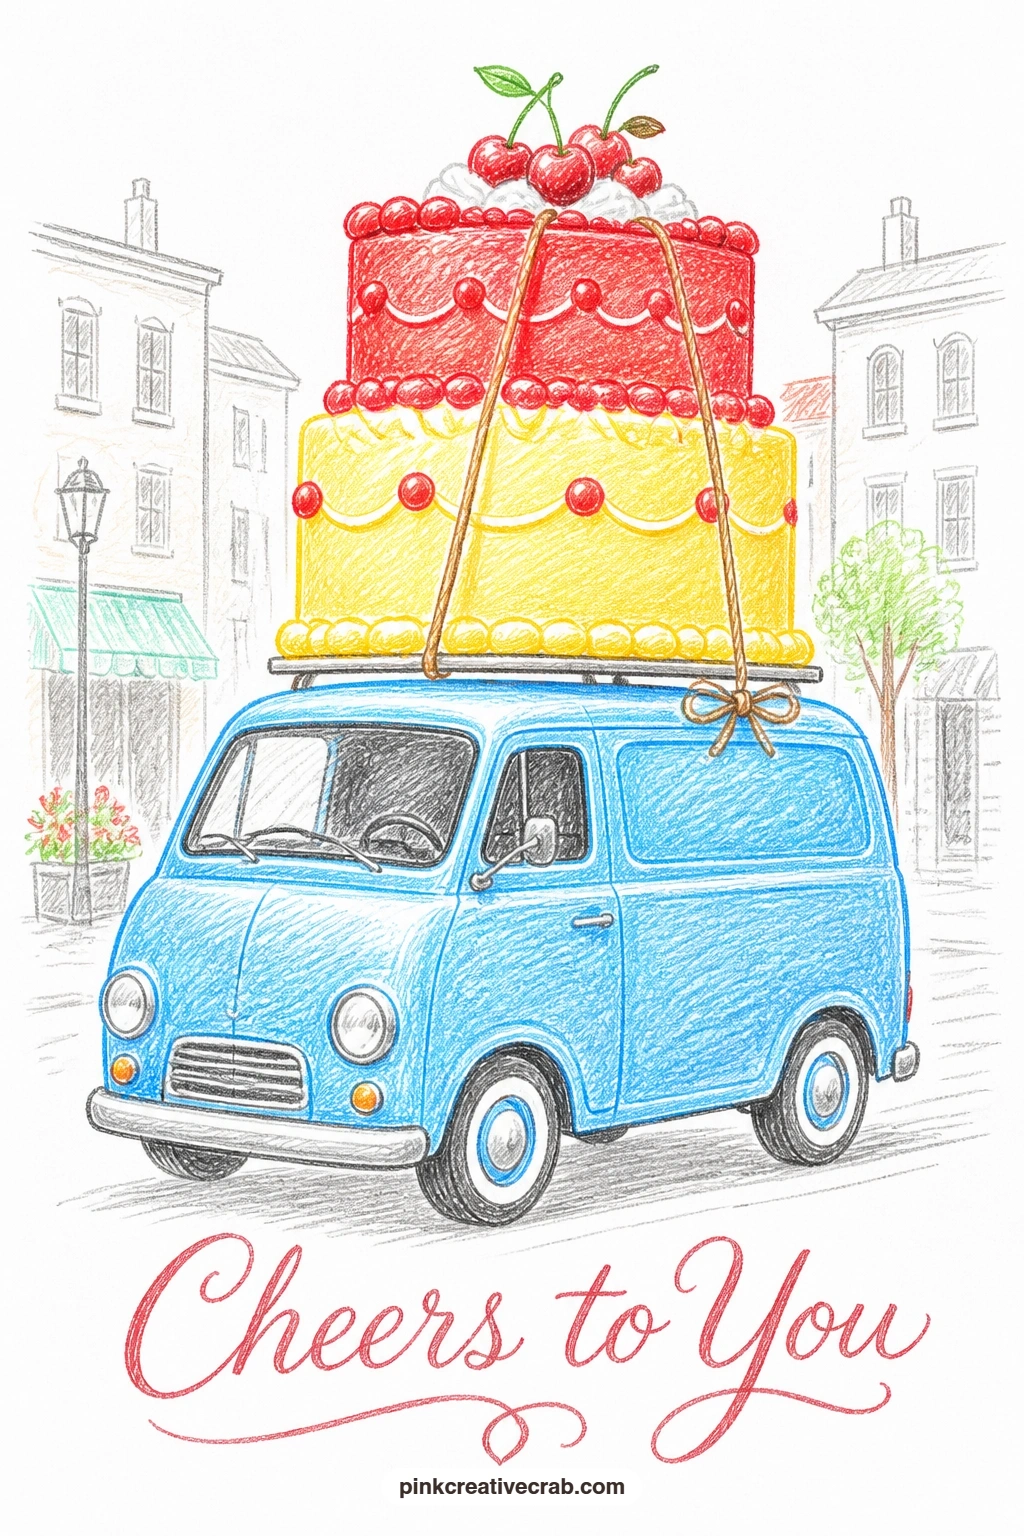
Palette: Sky Blue,Cherry Red,Lemon Yellow,Light Gray
Widen the scene into a full garden birthday party with paper lanterns strung between two apple trees, a good project once a few single subjects feel comfortable. Pencil the two tree trunks first at the outer edges of the card, loose round canopies above them, then string a gentle curved line between the branches and hang four or five lantern ovals along it.
Color the lanterns in alternating cherry red and lemon yellow with a thin darker line marking their ribs, and keep the tree canopies in mixed mint green tones with a few small apple shapes in cherry red tucked among the leaves. The ground beneath can carry a simple picnic table or cloth in one corner without needing much detail, just enough to suggest the party is set up and waiting.
If strings and lanterns feel like a lot of fiddly drawing, work from the trees outward, trunk first, canopy second, string third, lanterns last, so each step has something solid to hang from rather than guessing at spacing in the air. For more on hanging light shapes like these, the lantern drawing ideas cover different shapes worth trying next.
One tip for today: let the string sag naturally between the trees rather than drawing it straight, it is the detail that makes the whole party feel relaxed.
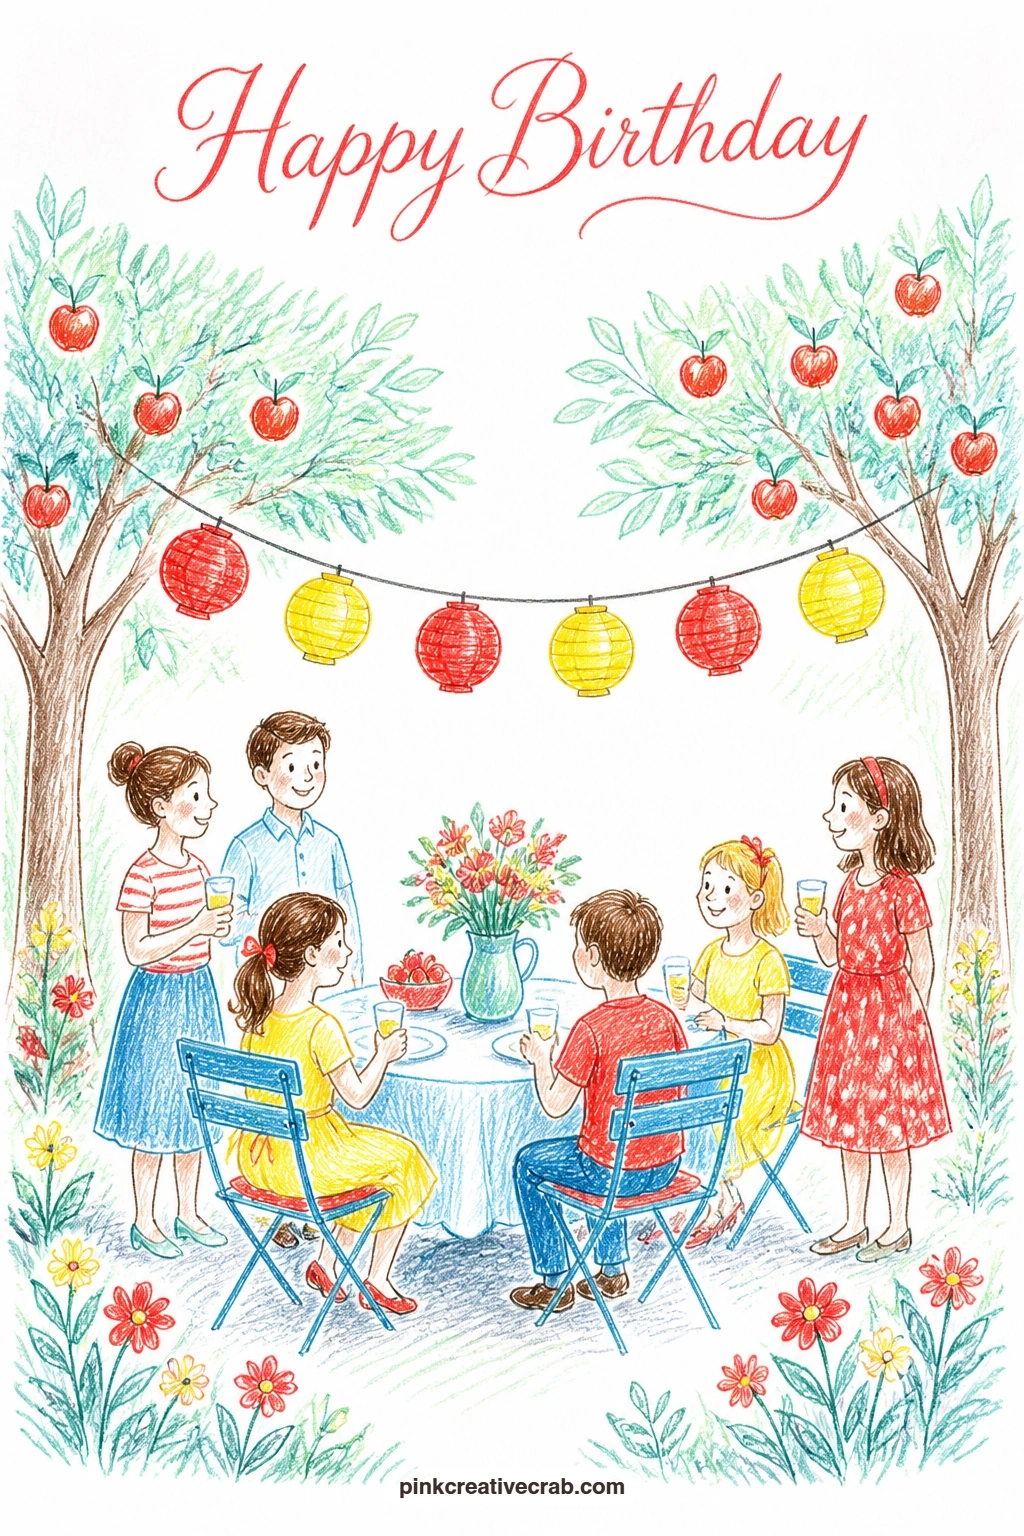
Palette: Cherry Red,Lemon Yellow,Mint Green,Burnt Sienna
Follow the garden party with something smaller and more composed: a tea party on the lawn with stacked cake stands and teacups. Pencil two or three graduated cake stands first, tallest layer on top, then surround them with a few simple teacups on saucers scattered loosely on a cloth beneath.
Color the cakes on each tier in a mix of cherry red and lemon yellow so the stand reads as varied rather than repetitive, and keep the teacups themselves in soft sky blue or plain white with a thin cherry red rim line. The lawn beneath stays a simple mint green, with the cloth under the stands left mostly bare white to keep the whole arrangement feeling light.
Stacked stands are easiest to get right if you measure before drawing: each tier should sit noticeably smaller than the one below it, roughly by half, otherwise the stand looks lopsided rather than graduated. If a true stand feels tricky, a single large cake plate surrounded by teacups tells nearly the same story.
Try this today: leave steam lines rising from one teacup as a few short curved pencil strokes, it is a small touch that makes the whole scene feel freshly poured.
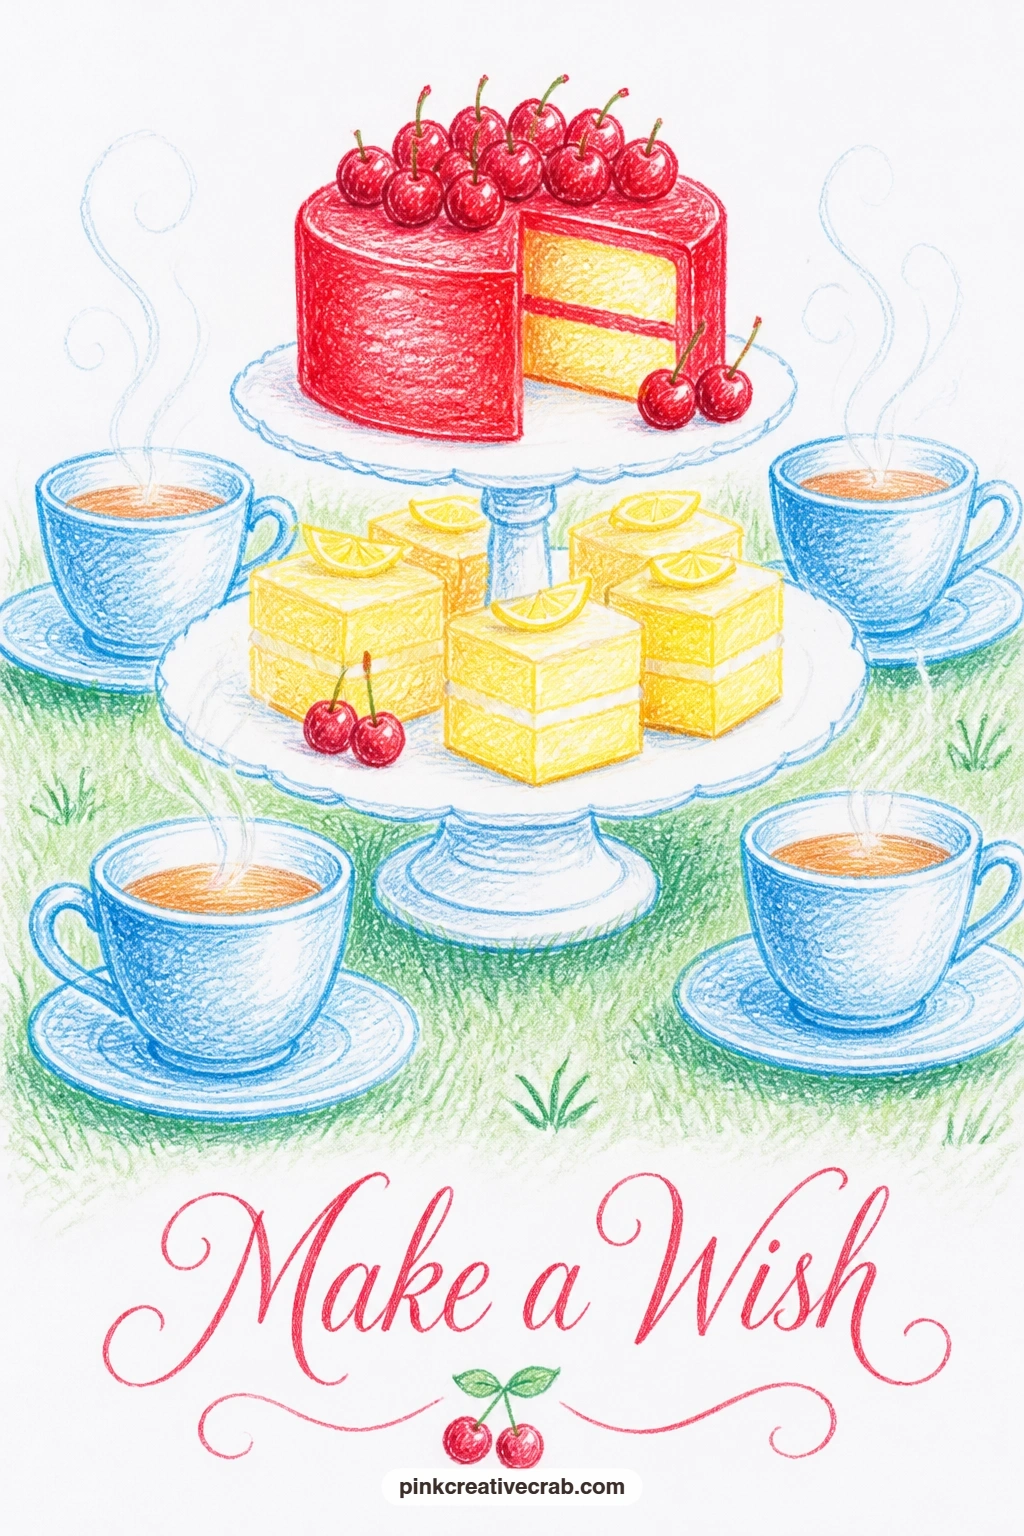
Palette: Cherry Red,Lemon Yellow,Sky Blue,Mint Green
Move the picnic onto the water with a birthday picnic set inside a rowboat drifting on a calm lake. Pencil a simple curved rowboat hull first, wide enough to hold a small cake and a couple of mugs or plates resting between the seats, then add two thin oars crossing slightly at the center.
Color the boat in warm wood tones or a soft sky blue, and keep the cake inside in cherry red and lemon yellow, small and neat since it has to fit comfortably within the hull. The lake around the boat can stay almost entirely bare white paper, with just a few short curved sky blue lines suggesting gentle ripples near the hull.
Perspective matters most here: keep your eye level fairly low, almost at the waterline, so the boat reads as floating rather than parked on dry ground, and let the far end of the hull curve slightly smaller than the near end. No wood brown pencil, a warm tan does the same job for the hull.
One tip for today: tuck a small flag or balloon tied to one oar, it is an easy way to flag the birthday theme without adding any lettering.
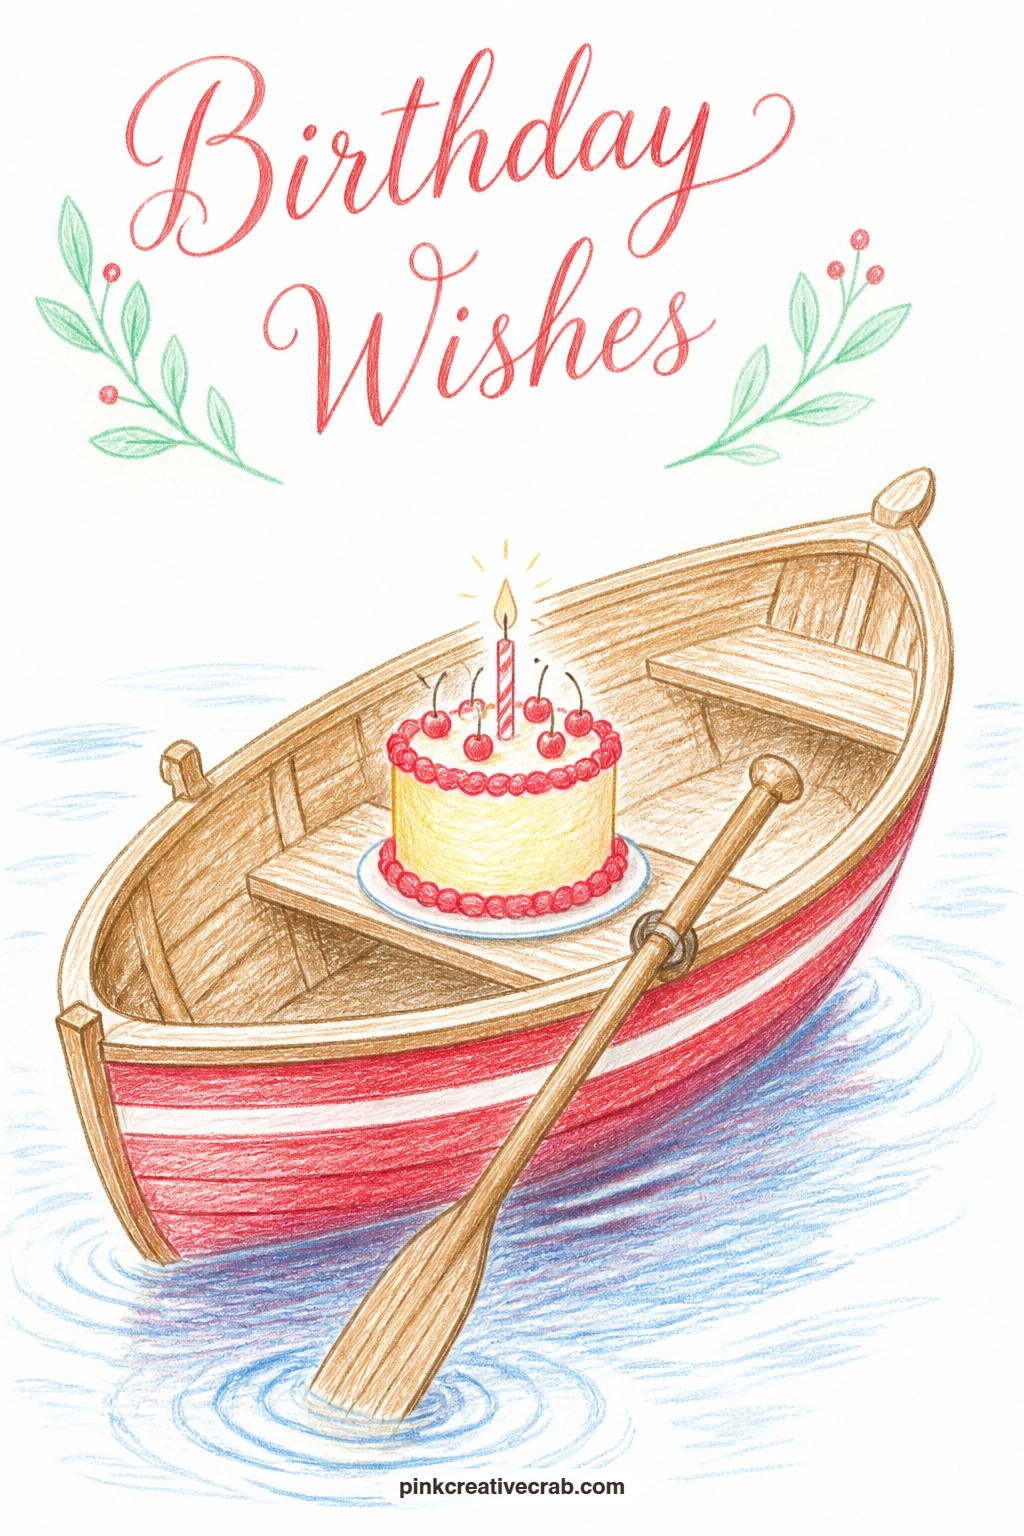
Palette: Burnt Sienna,Sky Blue,Cherry Red,Lemon Yellow
Return briefly to a dog theme, but change the setup: this time he waits by the front door in his party hat for the guests to arrive, rather than sitting beside a cake. Pencil a simple door shape first, with a round handle and a small window pane left bare white, then draw the dog sitting just in front of it, ears perked and tail curled around his paws.
Color the door in a cheerful sky blue or mint green with a cherry red wreath shape hung on it if you want one extra festive touch, and keep the dog himself in warm gray or tan fur with short hatched strokes. A party hat in lemon yellow sits slightly tilted on his head, echoing the earlier cake-side dog but in a new pose and setting.
The easiest way to vary this from the earlier waiting dog is to change his posture entirely, here he is alert and upright rather than relaxed, ears forward and head slightly tilted as if listening for the doorbell. If you already drew the cake-side version, try a different breed here, a longer snout or floppier ears, to keep the two feeling distinct.
One tip for today: leave a sliver of bare white paper along the door’s edge to suggest it is slightly ajar, as if he is already listening for footsteps.
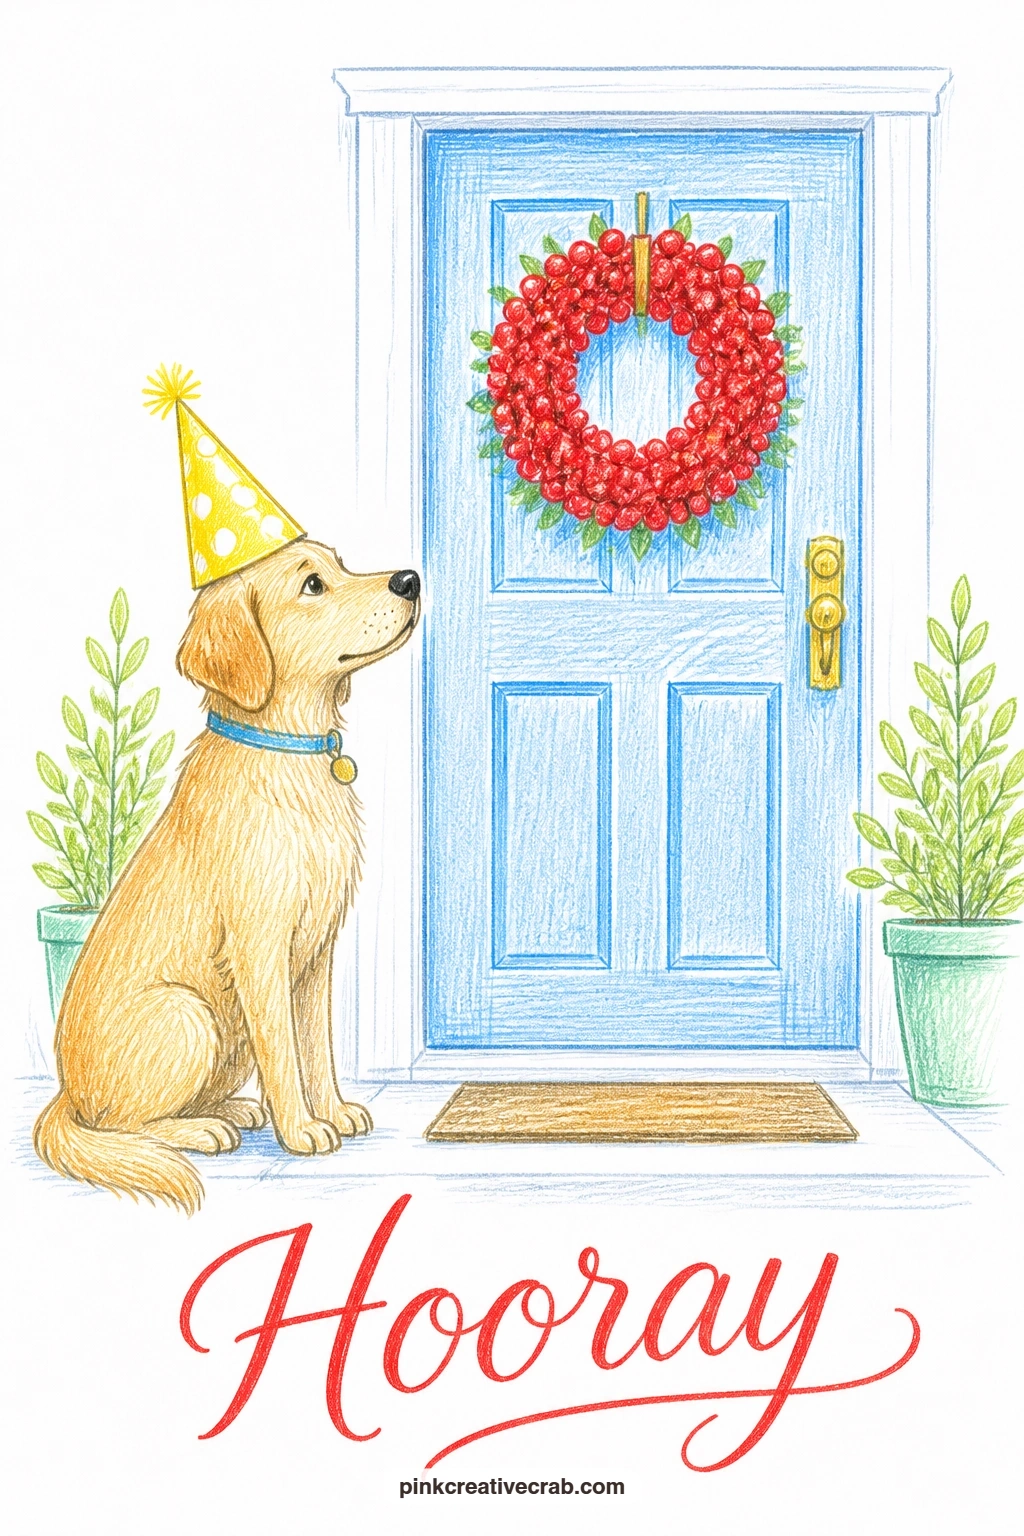
Palette: Sky Blue,Cherry Red,Lemon Yellow,Tan
For another dog pose worth trying after this one, the dog pencil drawing ideas for beginners has a few gentler poses that pair nicely on a second card.
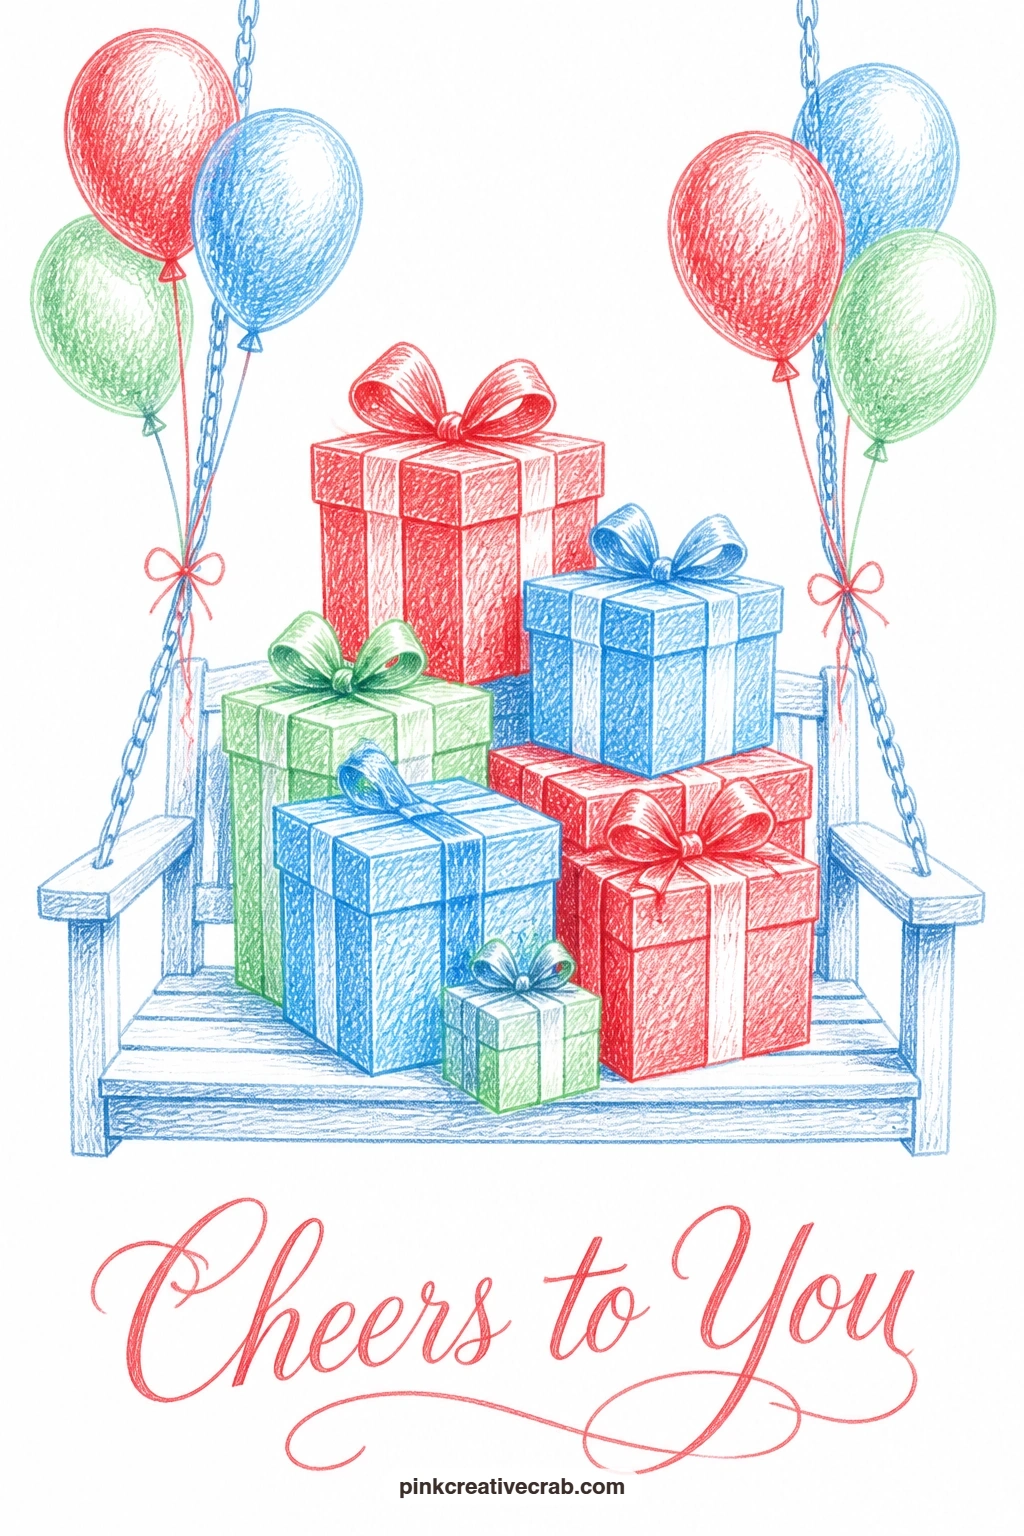
Shift from the doorway to a pile of gift boxes stacked on a porch swing, balloons tied loosely to the chains that hold it. Pencil the swing frame first, two simple chains hanging from the top edge of the card down to a flat seat, then stack three or four gift boxes of different sizes on the seat, slightly tilted against one another.
Color the boxes in a mix of cherry red, sky blue and mint green with simple ribbon lines left as bare white paper crossing each lid, and tie a couple of small balloons in contrasting colors to the chains above. The porch itself can stay minimal, just a hint of railing or a single potted plant in one corner, so the boxes and swing stay the clear focus.
Stacking boxes convincingly comes down to overlap: let the front box hide part of the one behind it rather than lining them up edge to edge, that alone makes the pile look three dimensional instead of flat. No ribbon lines feel right in white, a thin lemon yellow line works just as well.
Try this today: make the top box the smallest and slightly askew, it is a simple trick that makes the whole stack feel like it was just set down rather than arranged.
Palette: Cherry Red,Sky Blue,Mint Green,Lemon Yellow
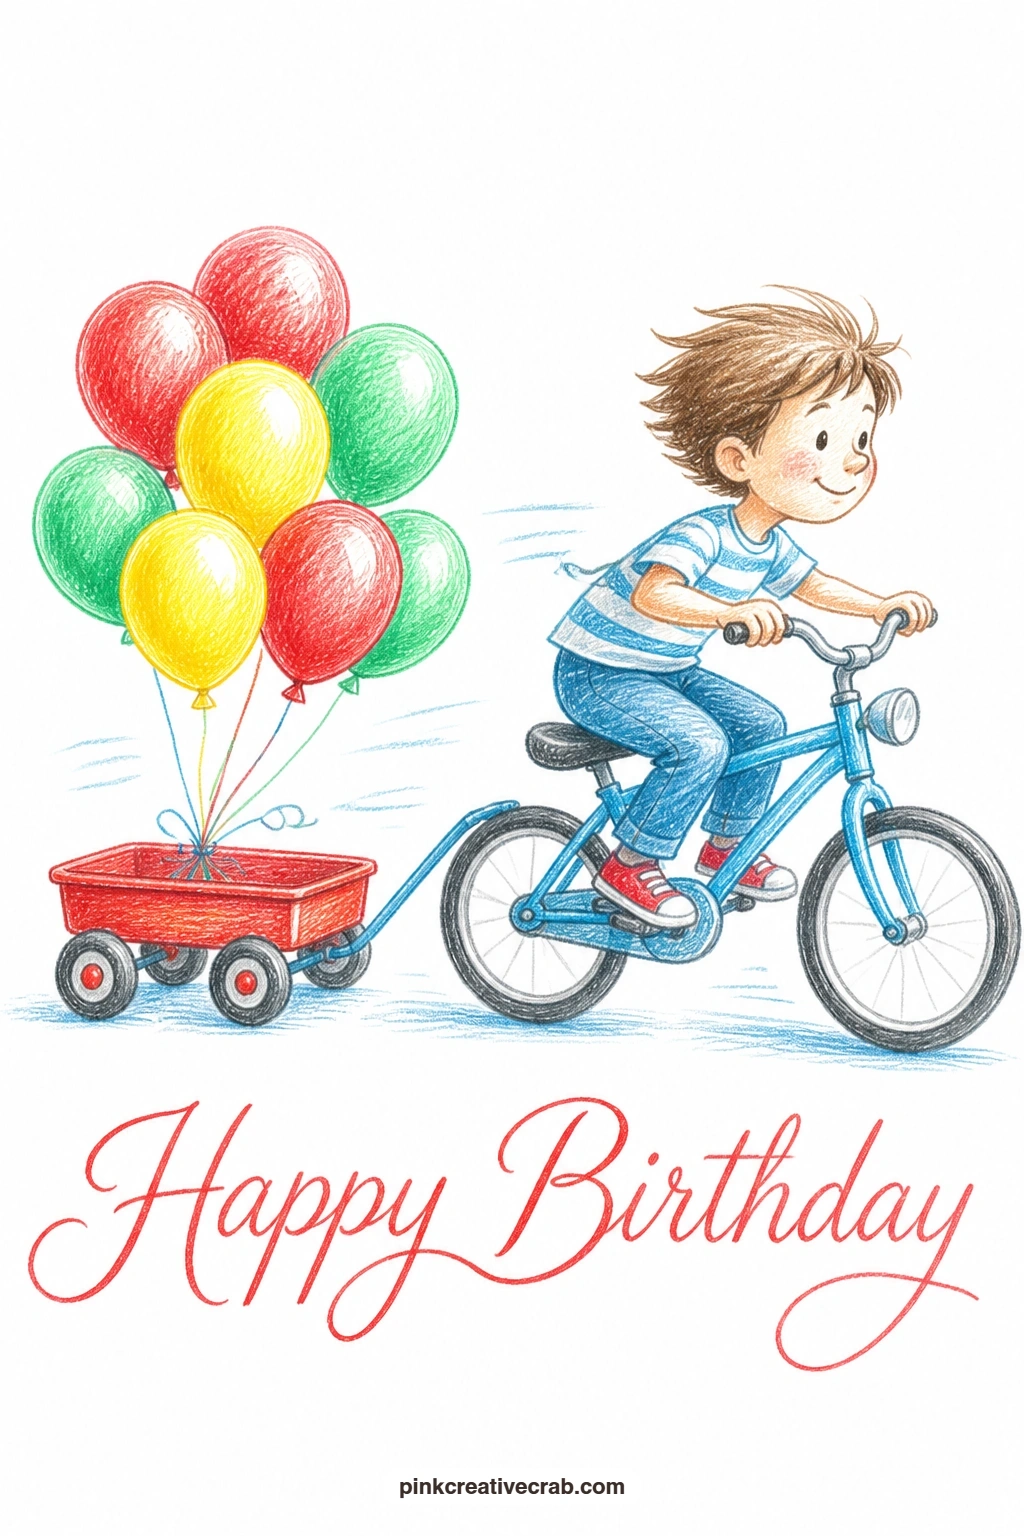
Bring motion back with a kid on a bicycle towing a small wagon full of balloons behind him. Pencil the bicycle first, two wheels and a simple frame, then add the kid leaning slightly forward over the handlebars, and finally a small wagon trailing behind on a short rope, filled with a cluster of balloon ovals rising above its sides.
Color the bicycle frame in cherry red or sky blue, and give the balloons in the wagon a cheerful mix of colors so they stand out against the single-color bike. Keep the kid’s clothing simple, a plain shirt in one solid color and shorts in another, which saves time without losing any of the charm of the scene.
The wheels are the part most likely to look wrong if rushed, so draw them as true circles rather than ovals, using a small round object to trace if freehand circles feel shaky. If a wagon feels like too much extra drawing, a basket on the back of the bike holding the same balloon cluster tells almost the same story.
One tip for today: tilt the whole bicycle slightly forward, front wheel lower than the back, it is a small trick that makes the ride look like it is actually moving rather than standing still.
Palette: Cherry Red,Sky Blue,Lemon Yellow,Mint Green
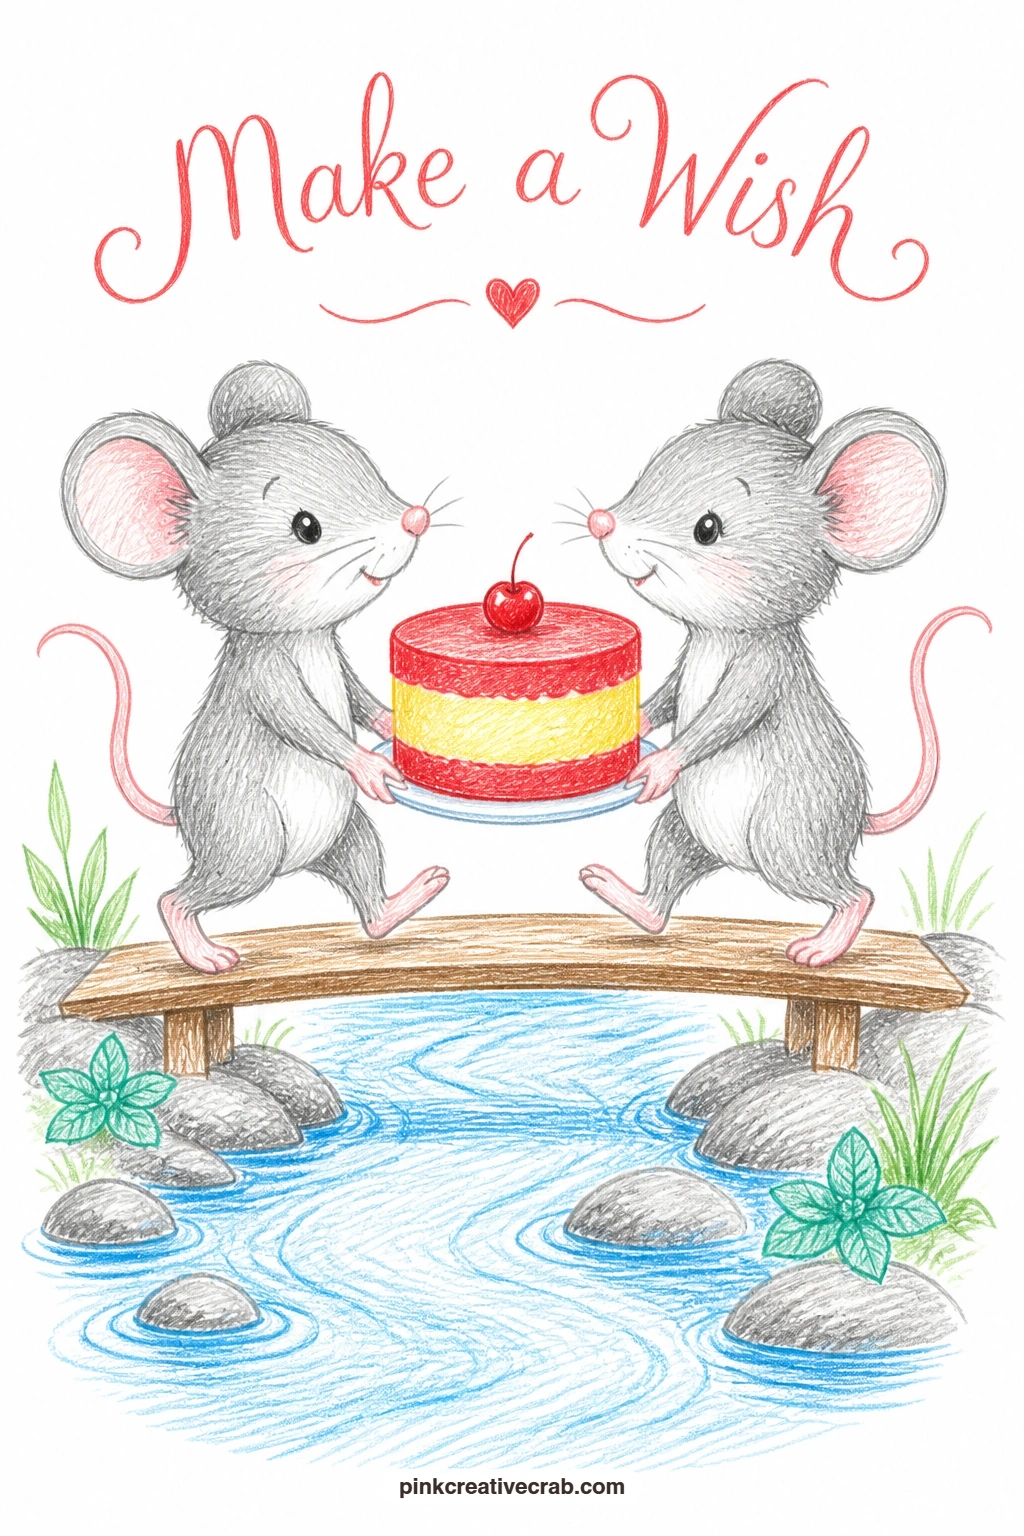
Return to the mouse theme with a cooperative twist: two mice carrying a cake together across a stream on a wooden plank, balancing each other out the way the single dragging mouse from earlier could not. Pencil a simple plank bridge first laid across a narrow stream, then place the two mice at either end of a small cake, each gripping an edge of the plate or a thin pole running through handles on the cake stand.
Color the cake in cherry red and lemon yellow, smaller and lighter than the oversized slice from before since this time the weight is shared, and keep both mice in simple warm gray with slightly different poses, one leaning back, one leaning forward, so the balance feels real. The stream beneath the plank stays bare white paper with just a few short sky blue ripple lines.
Where this differs from the earlier dragging mouse is entirely in body language: keep these two upright and coordinated rather than straining, which makes the pair read as teamwork rather than struggle. If a full plank bridge feels fiddly, a single flat stone crossing works as a simpler stand-in.
One tip for today: give the two mice slightly different tail positions, one curled, one straight, it is a small detail that keeps them from looking identical.
Palette: Warm Gray,Cherry Red,Lemon Yellow,Sky Blue
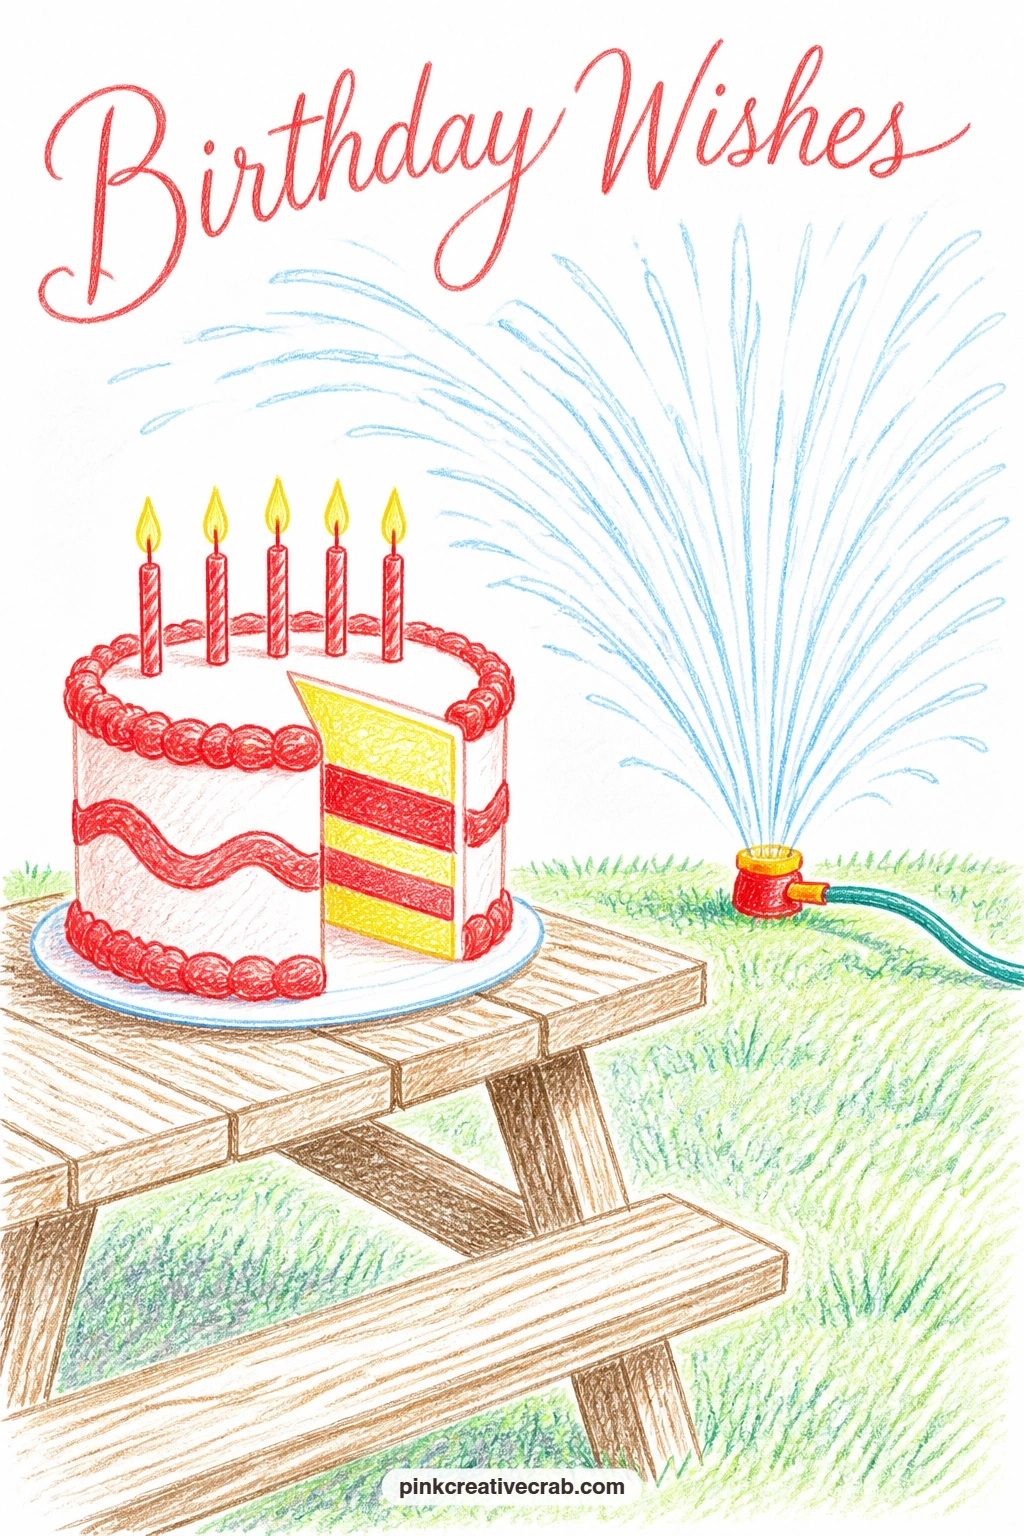
Cool things down with a backyard sprinkler party, a cake sitting safely on the picnic table while a sprinkler arcs water nearby. Pencil the picnic table first as a simple rectangle with bench lines, place the cake toward one end of it, then draw the sprinkler a little distance away with a few curved lines fanning out to suggest the spray.
Color the cake in cherry red and lemon yellow as usual, keep the table in a warm wood tone, and render the sprinkler spray with very light sky blue strokes left mostly as bare paper, just enough color to suggest water catching the light. A patch of mint green grass beneath everything ties the scene together.
The spray is the part that benefits most from a light hand, since drawing every droplet makes it look busy rather than refreshing; a few curved lines and some scattered dots do the job better than a dense pattern. No wood brown pencil, a plain warm gray table works just as well.
One tip for today: let a couple of droplets land right at the edge of the cake plate without touching the cake itself, it adds a small note of suspense to an otherwise calm scene.
Palette: Cherry Red,Lemon Yellow,Sky Blue,Mint Green
Take the celebration into the woods with a birthday camping trip, a single cupcake set on a tree stump beside a small tent. Pencil the tent first as a simple triangle shape with a flap left slightly open, then add a rounded tree stump beside it with visible growth rings, and set the cupcake on top of the stump as the clear focal point.
Color the tent in cherry red or sky blue canvas with a mint green ground cloth peeking from underneath, and keep the stump in warm brown tones with the rings drawn as simple concentric lines. The cupcake itself stays lemon yellow with a cherry red cherry on top, small and glowing against the darker stump beneath it.
Light placement helps this scene feel like early evening rather than midday: imagine a low sun coming from one side and darken the opposite side of the tent and stump slightly, which gives the whole scene a cozy campfire feeling without needing to draw an actual fire. If a full tent feels like too much, a simple sleeping bag roll beside the stump tells the camping story just as well.
One tip for today: scatter two or three small pinecones near the base of the stump, it grounds the scene in the woods with very little extra drawing.
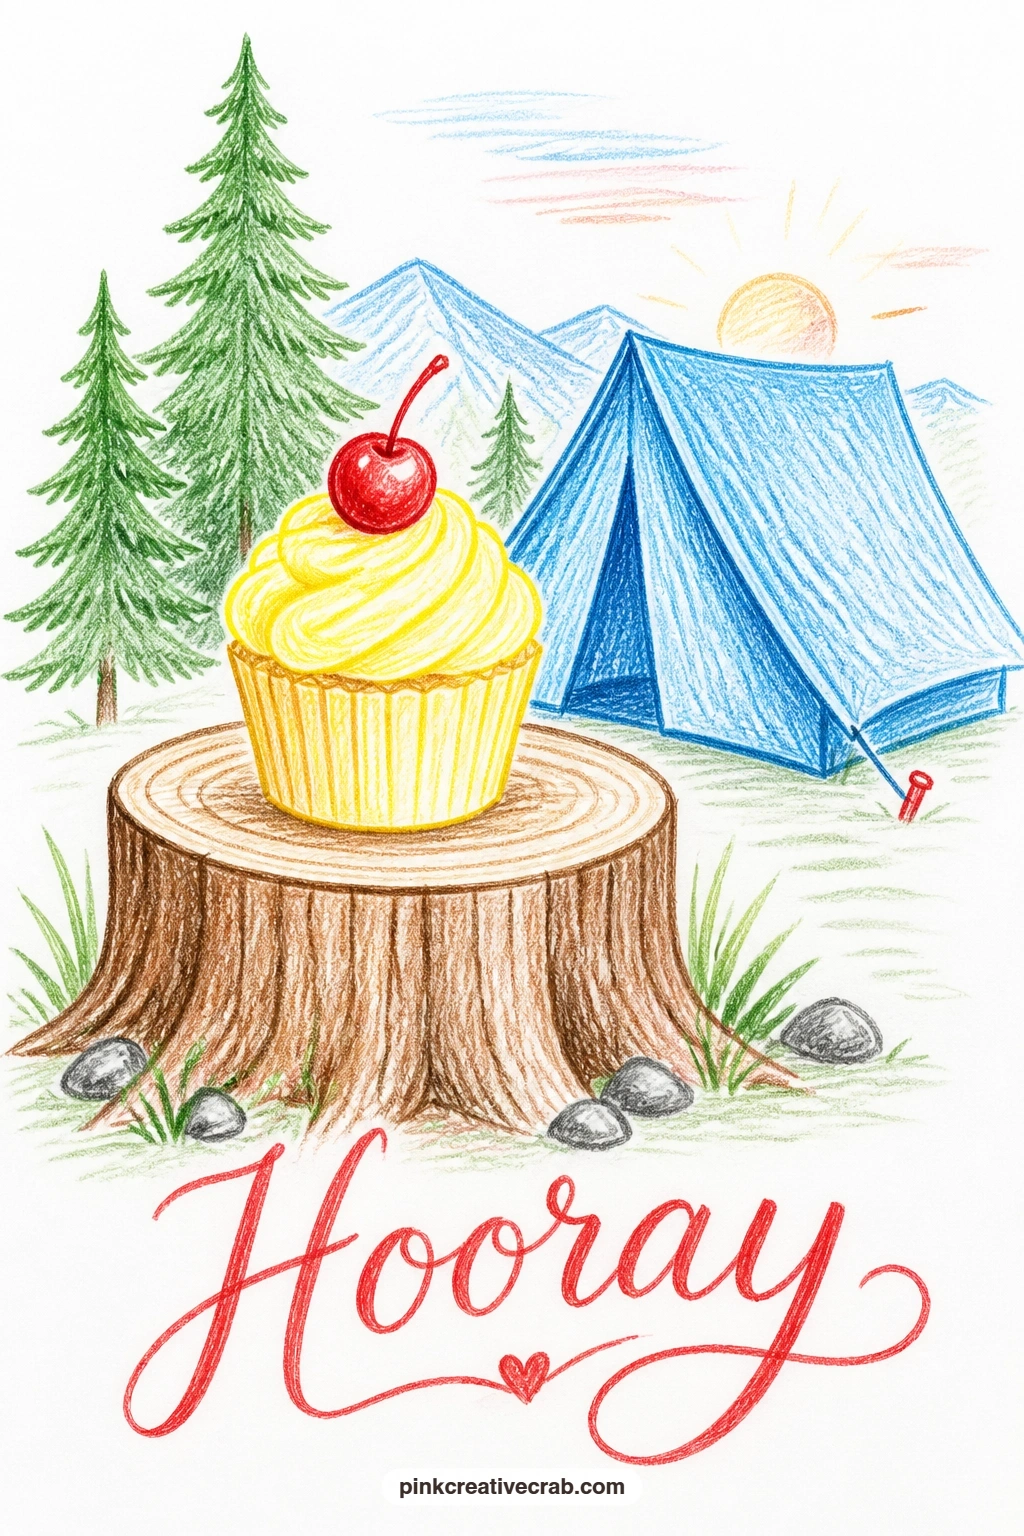
Palette: Burnt Sienna,Sky Blue,Lemon Yellow,Cherry Red
Add one more animal party touch with a donkey pinata hanging from a sturdy oak branch in a garden. Pencil the branch first as a thick curved line across the top of the card, then hang the pinata donkey from it by a simple rope, round body, short legs, and tissue paper fringe drawn as short overlapping strips rather than one solid shape.
Color the fringe in alternating bands of cherry red, sky blue and lemon yellow, keeping each band’s strips slightly uneven in length so the texture feels papery rather than smooth. The oak branch and a few leaves above stay in warm brown and mint green, with the rest of the background left bare white so the pinata stays the clear star of the card.
The fringe is the part worth taking slowly: draw each band of strips before coloring, slightly overlapping the row below, since trying to color a solid shape and texture it after tends to look flat rather than fringed. If three colors feels like too much, two alternating bands still read clearly as a pinata.
One tip for today: let the rope sway slightly rather than hanging perfectly straight, it suggests a light breeze and keeps the whole garden feeling alive.
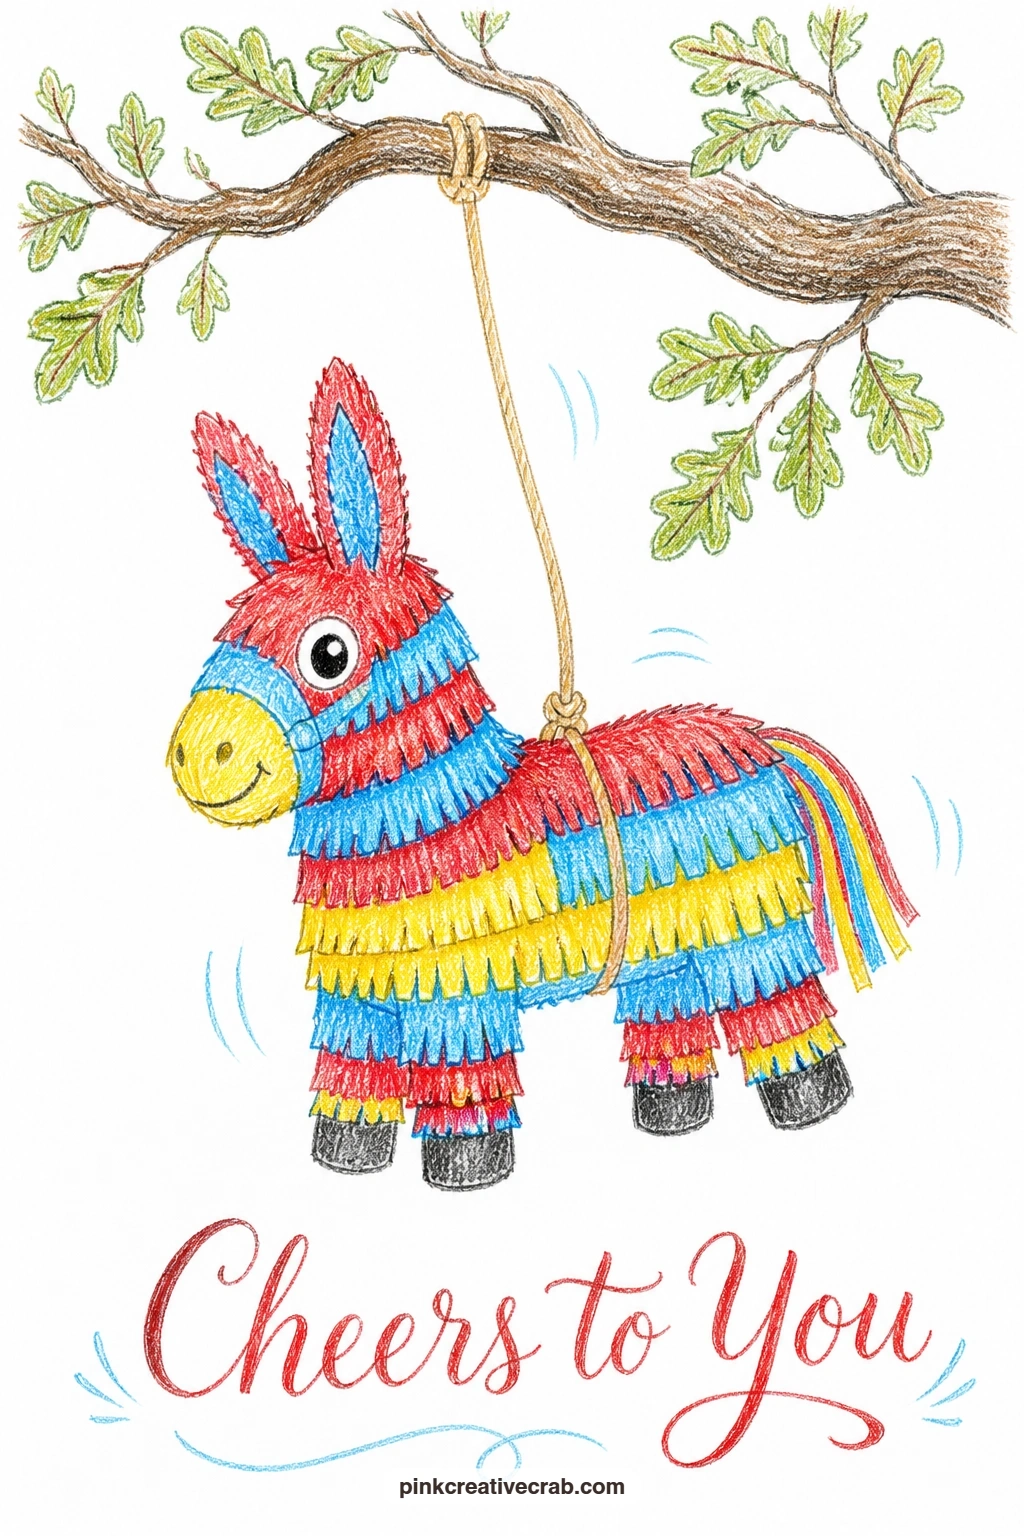
Palette: Cherry Red,Sky Blue,Lemon Yellow,Burnt Sienna
Bring in a quieter family moment with grandma frosting a cake while a grandchild licks the spoon beside her. Pencil grandma first, a simple rounded figure leaning over a cake on a counter, spatula in hand smoothing frosting across the top, then add the smaller figure of a child standing on tiptoe beside her, spoon held up to their mouth.
Color the cake in soft white or lemon yellow frosting with the icing left mostly as bare paper textured by a few light curved pencil strokes to suggest smoothness, and dress both figures simply, grandma in a warm apron color, the child in a bright solid shirt. Keep facial features minimal, just small dots and simple curved lines, since the charm here comes from the pose rather than detailed expressions.
The height difference is the detail to get right: measure lightly before drawing so the child’s head sits no higher than grandma’s waist, which makes the age gap read clearly at a glance. If a full kitchen counter feels like too much, a simple tabletop with the cake on it works just as well.
One tip for today: give the child a small smear of frosting near their mouth, it is a tiny touch that tells the whole story without any extra drawing time.
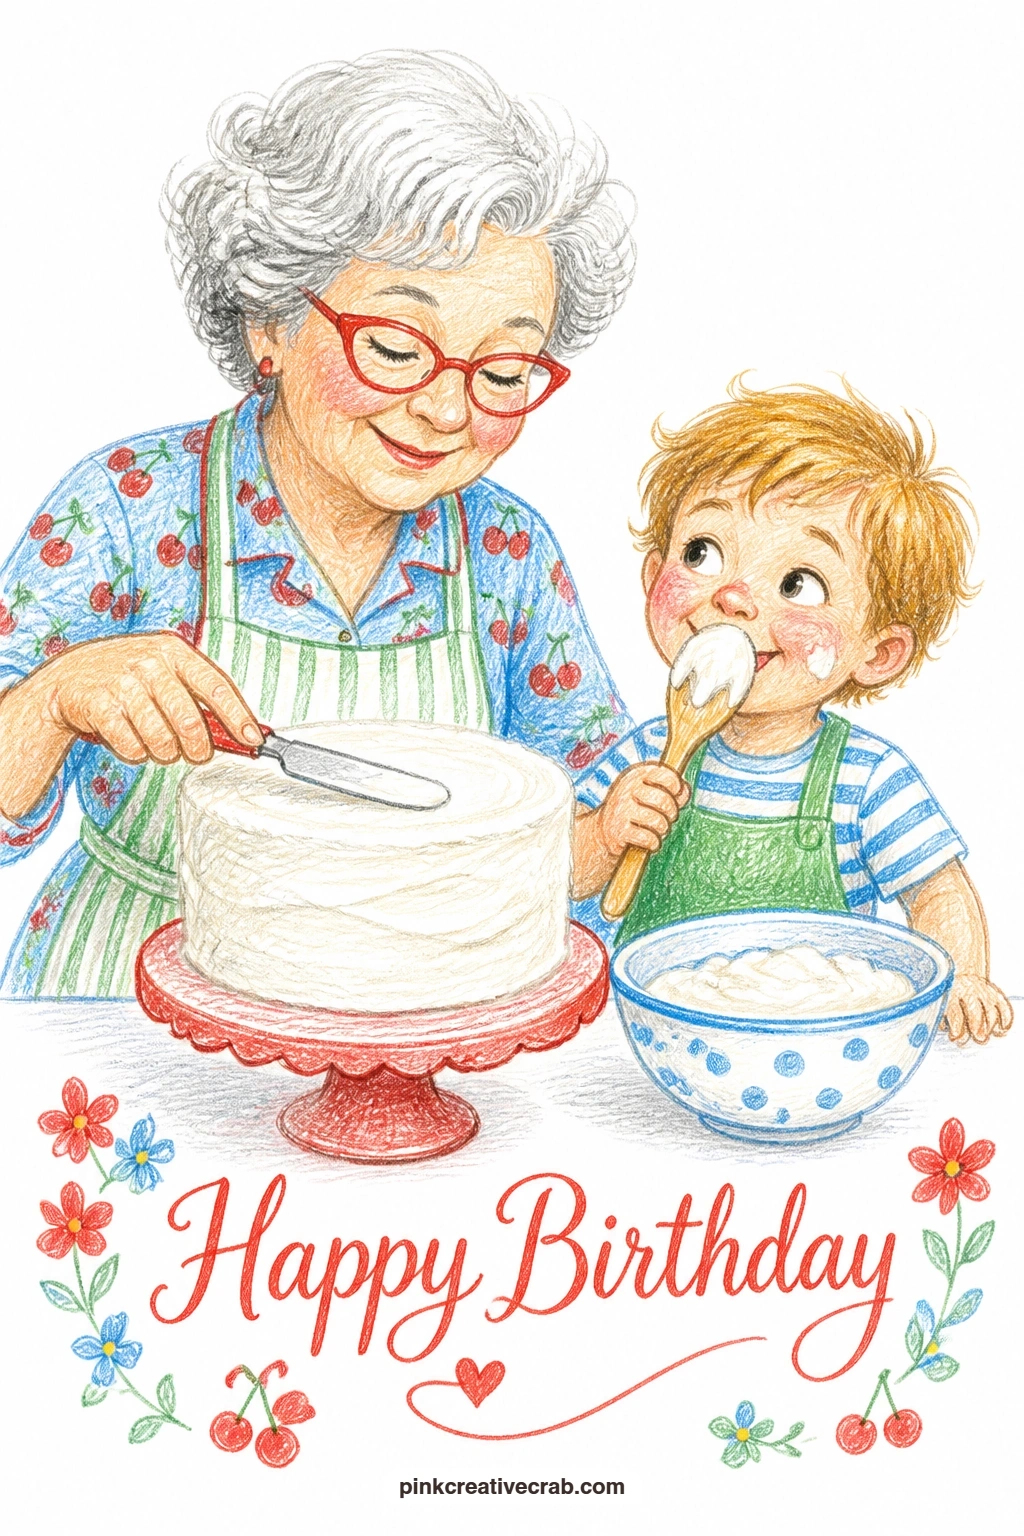
Palette: White,Lemon Yellow,Cherry Red,Burnt Sienna
Widen into a small cityscape with balloons drifting over a row of pastel townhouses, a nice change of pace after several close-up scenes. Pencil three or four simple townhouse shapes side by side first, varying their roof heights slightly, then let a cluster of balloons rise up from behind one of the rooftops, strings disappearing down out of sight.
Color each townhouse a different soft pastel, mint green, sky blue, pale pink, so the row feels varied rather than repeated, and keep the windows and doors as simple rectangles left mostly bare white or lightly shaded gray. The balloons above stay in brighter cherry red and lemon yellow, standing out clearly against the softer buildings below.
Contrast is what makes this one work: keep the townhouses in muted, chalky versions of their colors while the balloons stay bold and saturated, that difference alone does most of the compositional work for you. If pastel pencils are not in your set, lay a regular color down very lightly with minimal pressure for a similar soft effect.
One tip for today: let one balloon drift higher than the rooftops and slightly off to the side, it draws the eye upward and gives the whole row some lift.
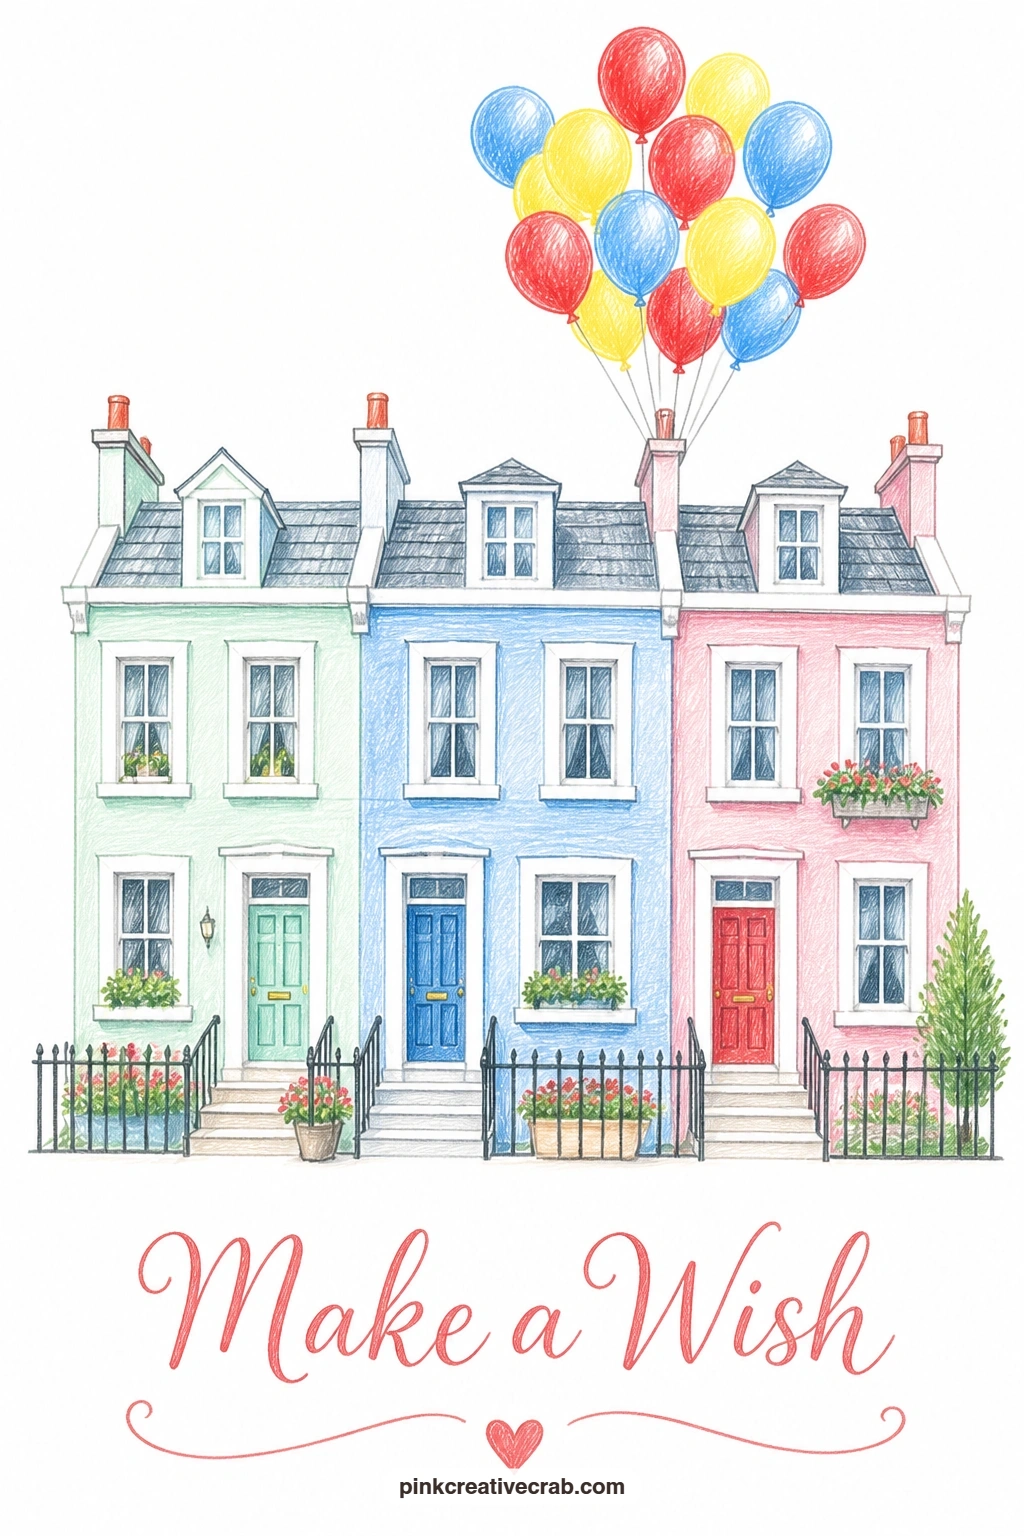
Palette: Mint Green,Sky Blue,Pale Pink,Cherry Red
Return to a single still object with a bouquet of tulips and balloons tucked together in a vintage bicycle basket. Pencil the basket first as a simple woven rectangle attached to the front of a bicycle frame, then fill it with a loose bunch of tulip shapes, simple cup-like blooms on thin stems, with two or three small balloons rising just above them.
Color the tulips in a mix of cherry red and lemon yellow with mint green stems and leaves, and keep the balloons in sky blue so they read clearly apart from the flowers below. The bicycle frame itself can stay a simple pale gray or cherry red outline, with the wheels only partly shown at the bottom edge of the card to keep focus on the basket.
Tulips are easiest if you draw the cup shape first with a flat open top, then add the stem afterward, rather than trying to build the bloom around a stem already in place. For more flower shapes that pair well with a bouquet like this one, the carnation drawing ideas are worth a look for a second card.
One tip for today: let a couple of tulip heads droop at slightly different angles rather than standing perfectly upright, it makes the bunch look gathered rather than arranged.
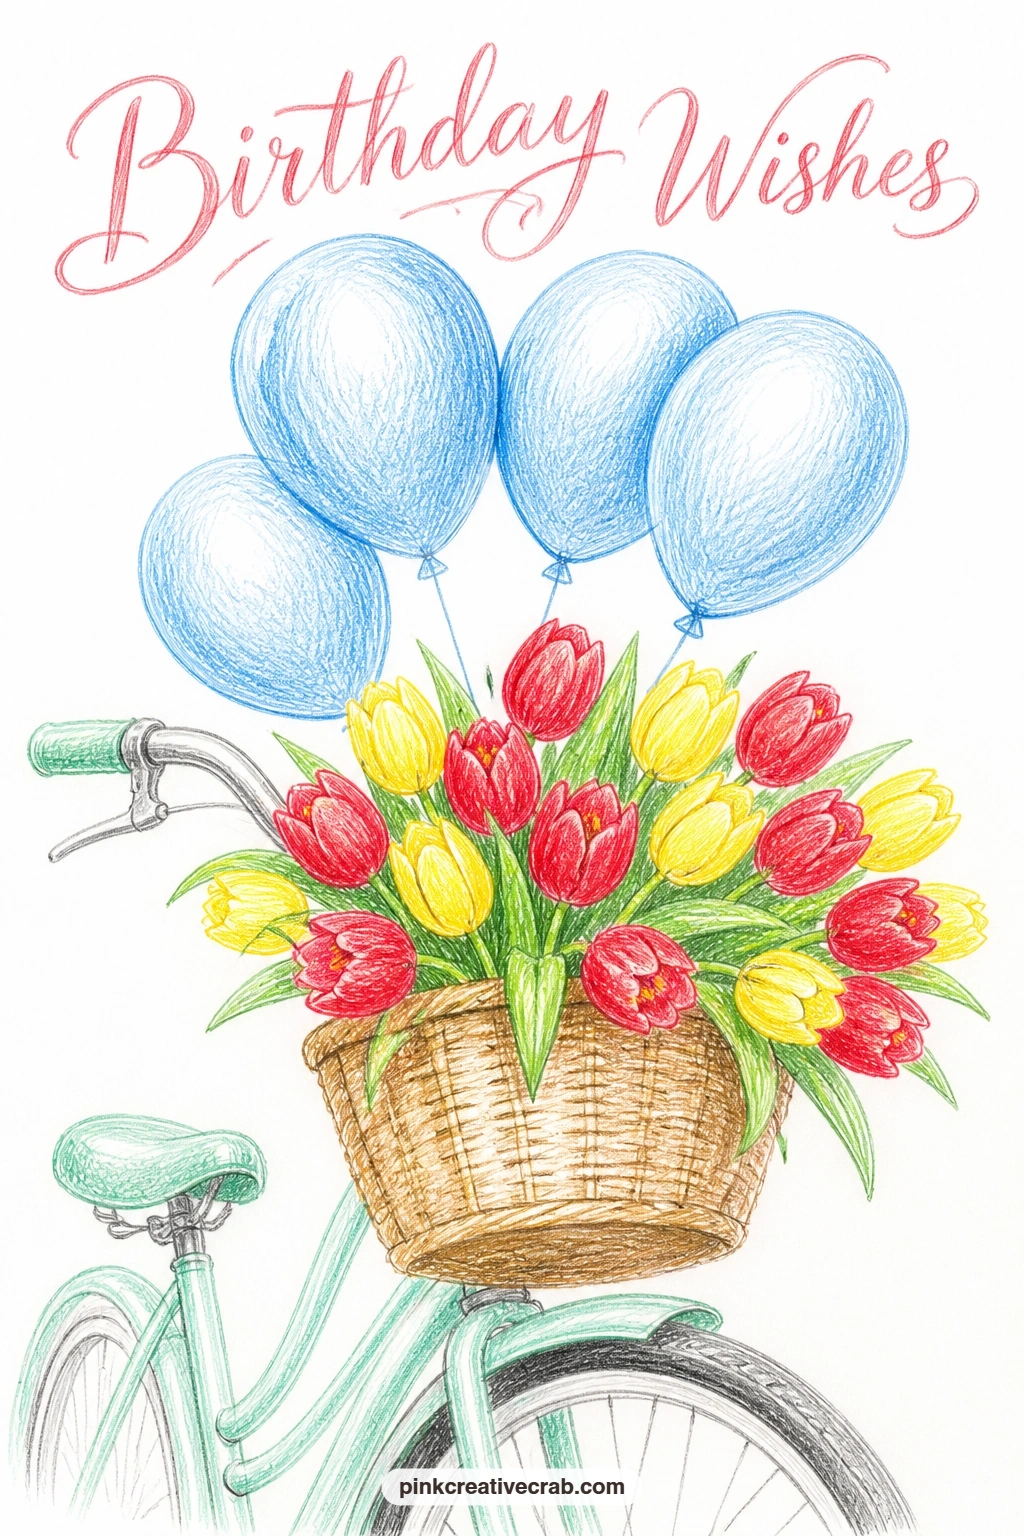
Palette: Cherry Red,Lemon Yellow,Mint Green,Sky Blue
Settle into a cozy final animal scene with an owl family sharing a cupcake inside a hollow tree. Pencil the tree hollow first as a simple rounded arch shape, then fit two or three owls inside it, perched close together on a short branch, with a single cupcake set between them on the branch itself.
Color the owls in warm brown and tan with simple overlapping feather marks rather than fully detailed plumage, and give each one slightly different sized eyes so the family reads as parents and a smaller owlet. The cupcake stays lemon yellow with a cherry red cherry on top, and the tree hollow around them can stay in darker warm brown with a thin mint green vine or leaf tucked along one edge.
For a next version of this scene, swap the owl family for a different pair of nesting birds, or move the same cozy hollow setup to nighttime with a soft gray blue wash around the opening instead of warm brown, which changes the whole mood with the same composition. If brown pencil tones feel limited, layering orange under gray gives a similar warm owl color.
One tip for today: keep the owls’ eyes large and round but not perfectly matching in size, it is a small detail that makes the family feel more like individuals than copies.
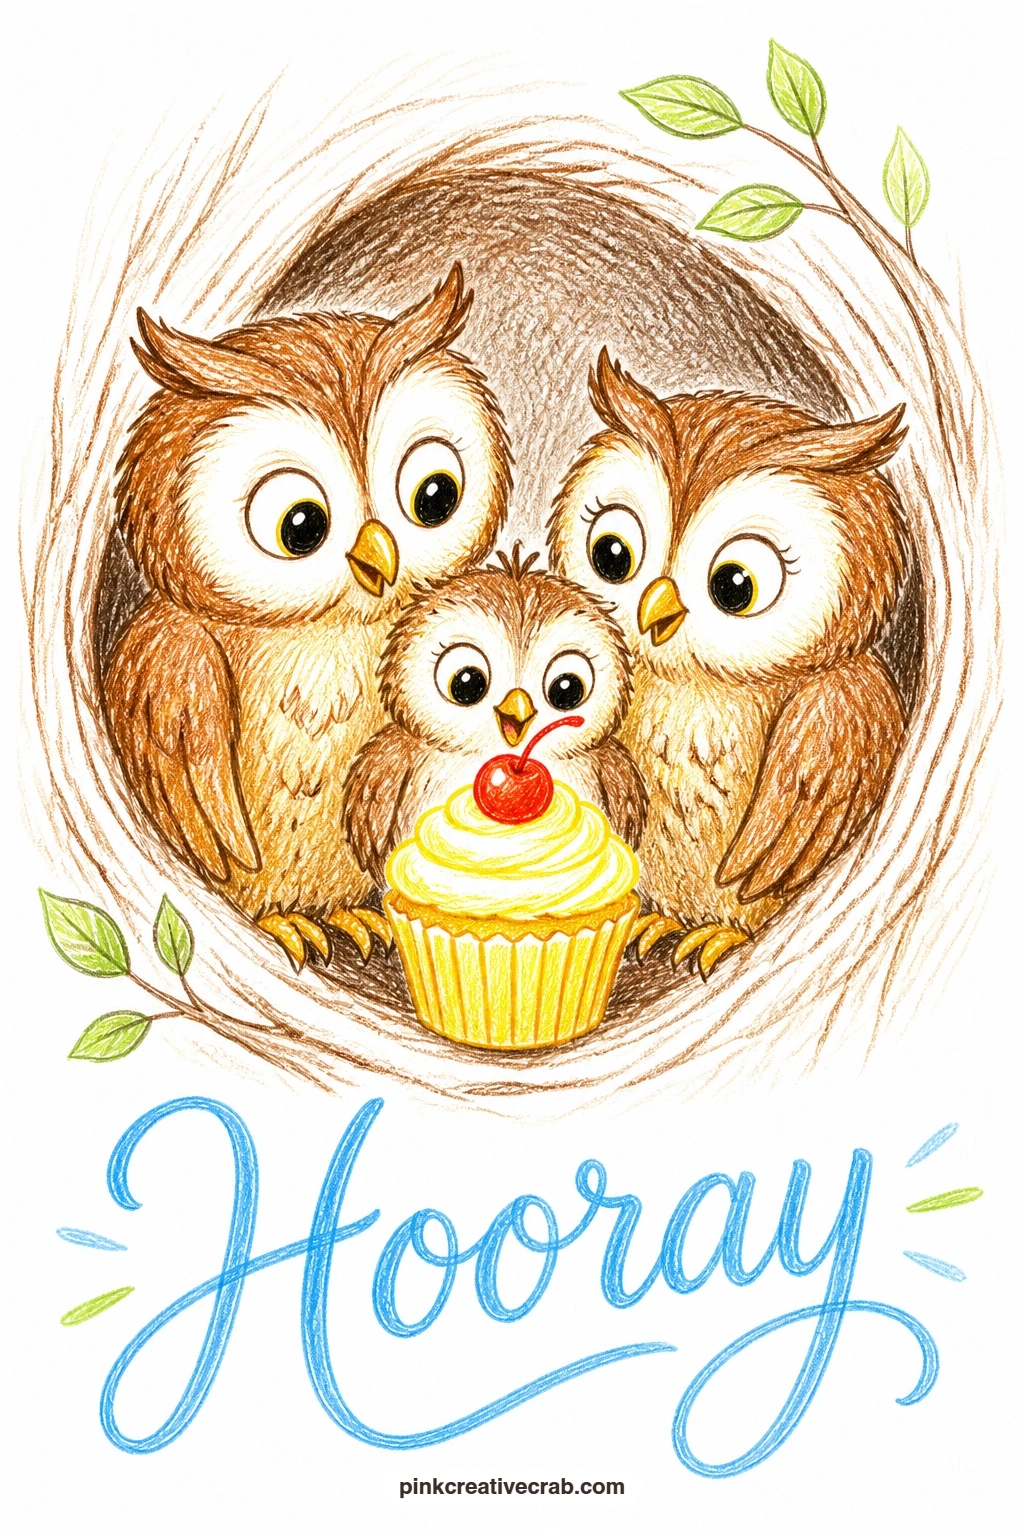
Palette: Burnt Sienna,Tan,Lemon Yellow,Cherry Red
Finish with the most involved scene on the list: a waiter carrying a tall layered cake through a crowded cafe, balancing careful figure work with a busy little background. Pencil the waiter first, a simple upright figure with one arm raised holding a tray above shoulder height, then build the tall cake on the tray in several stacked layers, and finally sketch a loose scattering of cafe tables and chair backs around him to suggest the crowd without drawing full figures at each one.
Color the cake in alternating cherry red and lemon yellow layers so it reads clearly as tall even at a glance, and keep the waiter’s outfit simple, a plain white shirt and dark trousers or apron, so he does not compete with the cake for attention. The cafe background stays mostly suggested, a few chair backs and table edges in pale gray or mint green scattered loosely rather than drawn in full detail.
Balance is the proportion trick to watch here: keep the tray at true shoulder height and the cake centered directly above the waiter’s raised hand, since a tray drawn too far forward or back makes the whole pose look unsteady rather than practiced. If a full cafe background feels like too much for one sitting, two or three simple chair shapes are enough to suggest the setting. For more picnic and table scenes to round out a set of cards, the picnic drawing lessons and the happy birthday drawing ideas both pair well with this one.
One tip for today: lean the waiter’s whole body very slightly backward from the hips, it is the small counterbalance that makes carrying a tall cake look convincing rather than stiff.
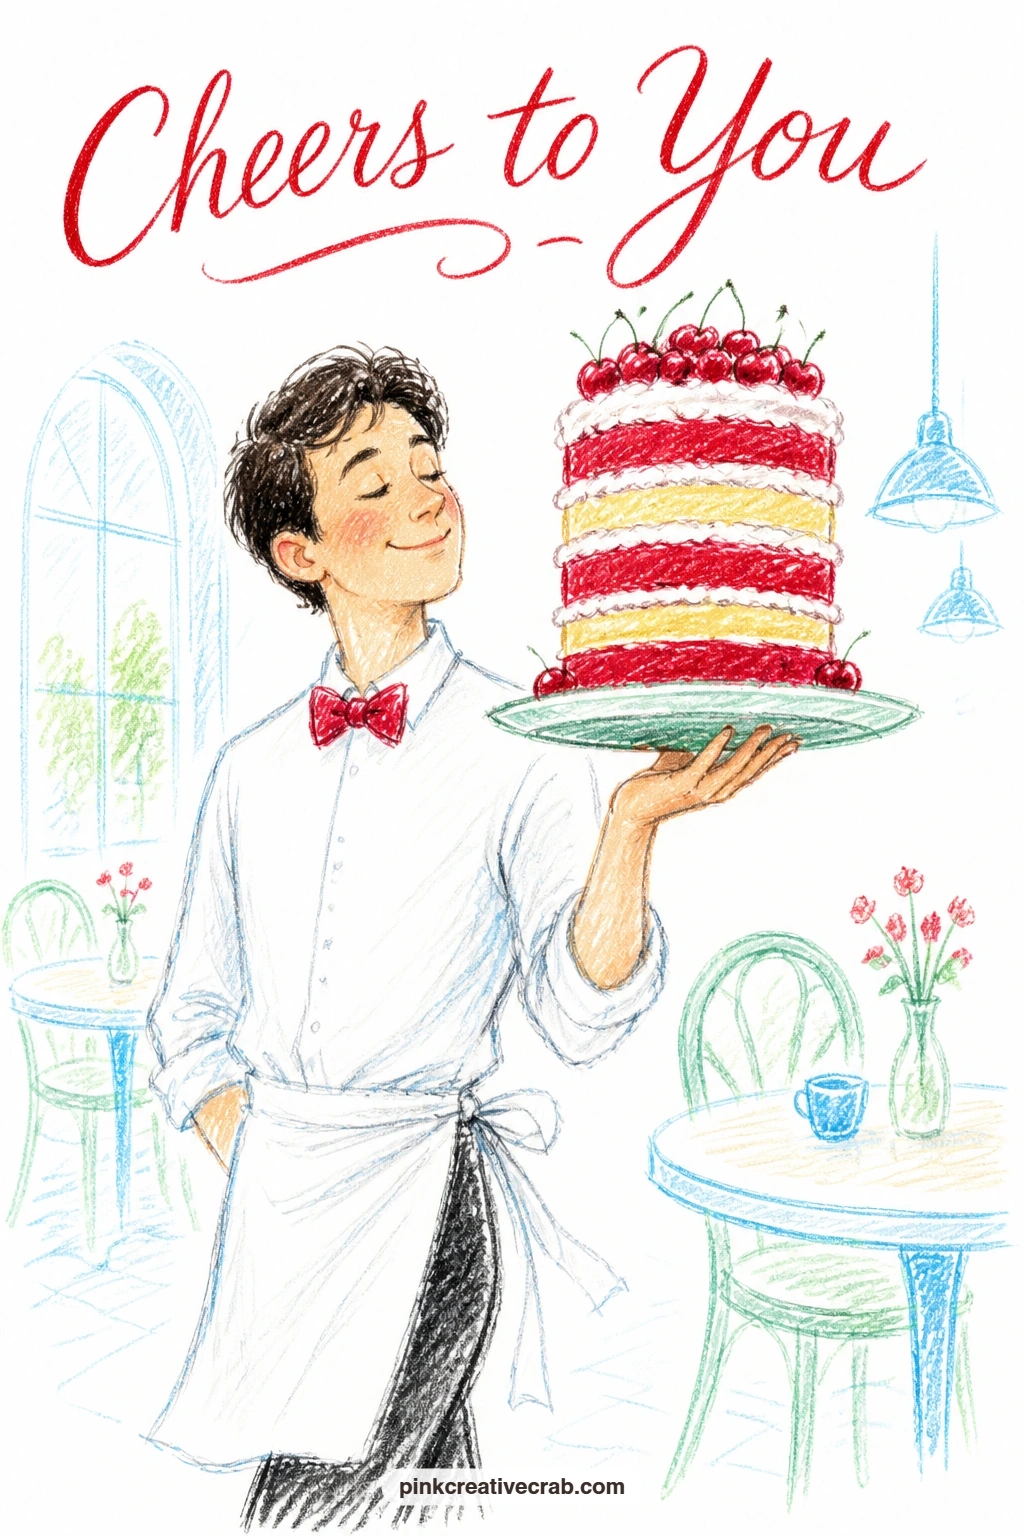
Palette: Cherry Red,Lemon Yellow,White,Light Gray
What to Do Next
Pick one scene that made you smile on the way down this list, cakes on the move, a party animal, balloons over a garden wall, and start it on a fresh sheet of bright white cardstock today. Keep your first pencil lines light, build the color in slowly, and let the paper stay bare where it wants to.
Frequently Asked Questions
What paper works best for birthday card drawing in colored pencil?
Bright white cardstock works best because it keeps colors looking clean and lets you leave plenty of paper bare on purpose. Smooth or lightly textured cardstock both take color well, so pick whichever feels comfortable to layer on.
How do I keep colored pencil birthday scenes looking fresh rather than muddy?
Use light pressure and build color up in a few thin layers rather than pressing hard once, and leave some white paper showing around each shape. Too many colors blended heavily in one spot is what causes mud, so stop before you overwork an area.
Do I need to draw lettering or a number on the card front?
No, none of these ideas use lettering or number candles, so the scene itself carries the birthday feeling. You can add a greeting inside the card later or leave the front entirely as a small picture.
How long does a birthday card drawing like this actually take?
Most of these ideas take between twenty and forty minutes once you know the subject, since they are built around one clear scene rather than a full illustration. Simpler single-object ideas near the start of the list go even faster.
What if I make a mistake partway through a colored pencil card?
Light pencil strokes lift easily with a kneaded eraser if caught early, so sketch loosely before adding any color. Once color is down, a small mistake can often be absorbed into the drawing, a stray mark becomes a shadow or a fold rather than a flaw.
Have any thoughts?
Share your reaction or leave a quick response — we’d love to hear what you think!
-
 0
-
0
-
0
-
0
-
0
-
0


