

London drawing is the fastest way to visit the city without booking a flight, and a set of alcohol markers turns every landmark into a warm little postcard you can finish in one sitting. There is something about the pillar box red of a bus or a phone box against a navy winter sky that makes even a simple sketch feel festive and lived in.
Below are 33 scenes that move from quiet street corners to full landmark views, each one built to work at a beginner to confident level with markers over a fineliner outline. Pick whichever pulls at you most, whether that is snow falling on a Georgian door or swans gliding past a frozen palace pond, and work through the steps at your own pace.
Using these images: free for personal projects such as printing, coloring, cards, journals and gifts. Handmade items that include them may be sold up to 30 pieces per design. More than that is commercial use and is not permitted, and neither is selling or sharing the images themselves or passing them off as your own. Please ask before any other use.
Start this one with the bridge, not the bus: sketch a shallow curve of railing in fineliner running across the lower third of the page, since the whole scene balances on that line. Add the bus on top as a long rounded rectangle with a flat roof and big square windows, kept simple rather than photographic.
Block in pillar box red for the bus body first, then drop deep navy into the dusk sky above and let it blend lighter toward the horizon. Windows get a pale cream glow, which is what sells the cold evening feel more than any other single mark.
The place this goes wrong is the bridge railing competing with the bus for attention, so keep railing lines thin and uniform and let the red dominate. If your marker set has no true pillar box red, mix a warm red over a touch of orange underneath for the same postcard punch.
Finish with a white gel pen flicking a few snow dots across the sky and settling on the railing top, which instantly reads as falling snow.
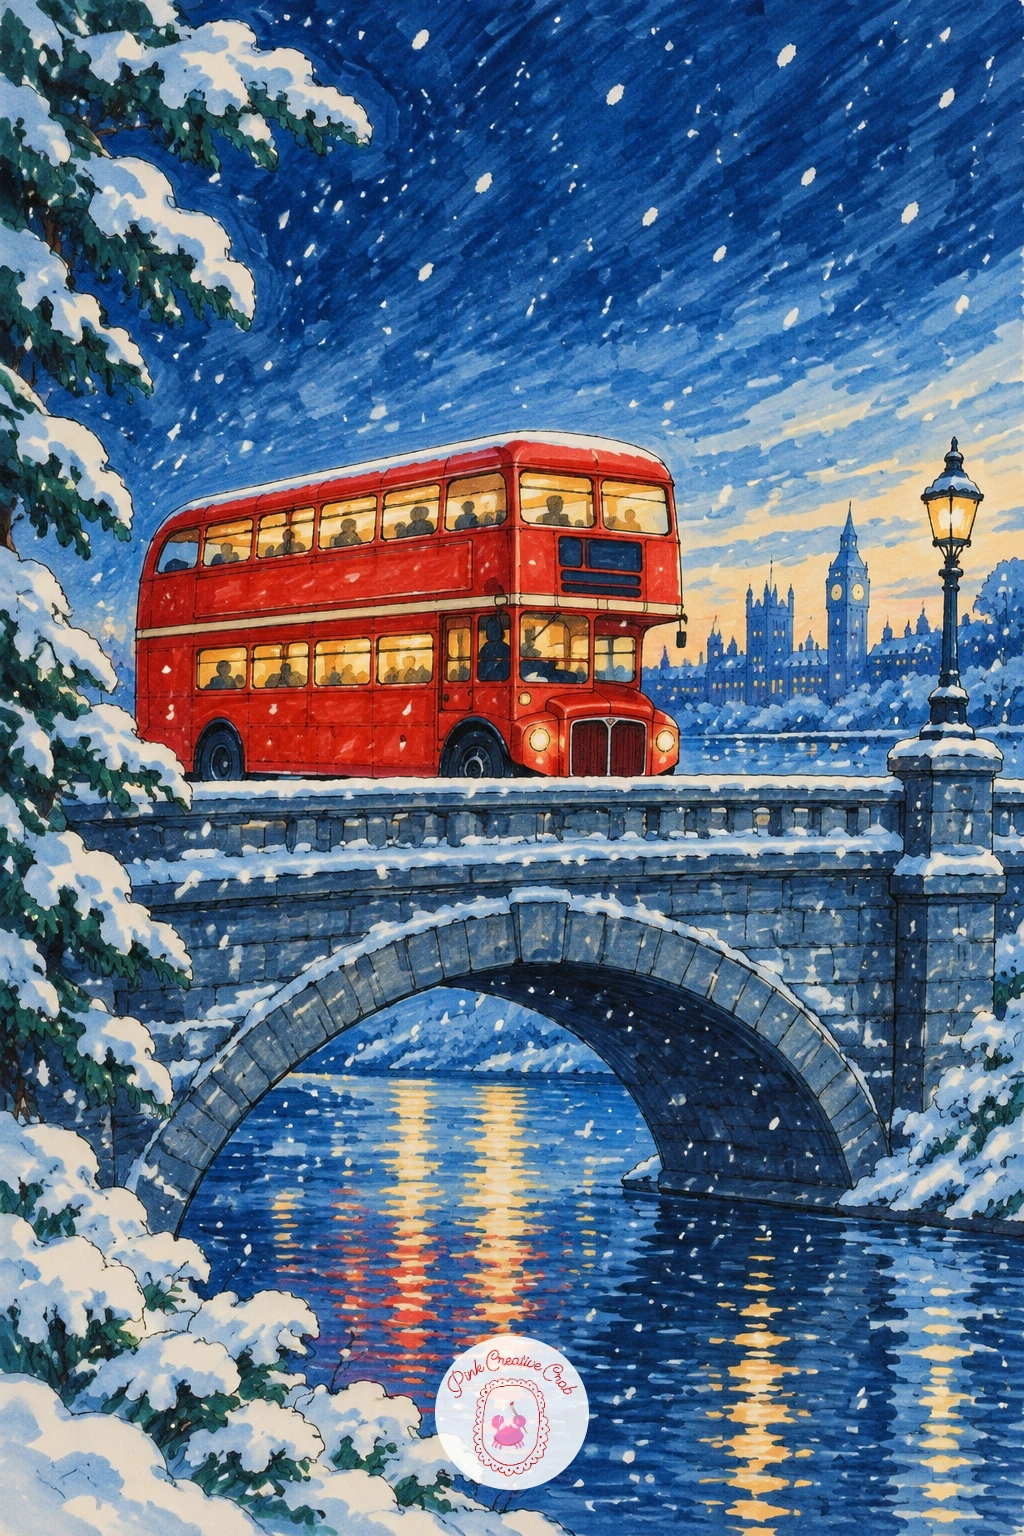
Palette: Pillar Box Red,Deep Navy,Cream,Frosty Sky Blue
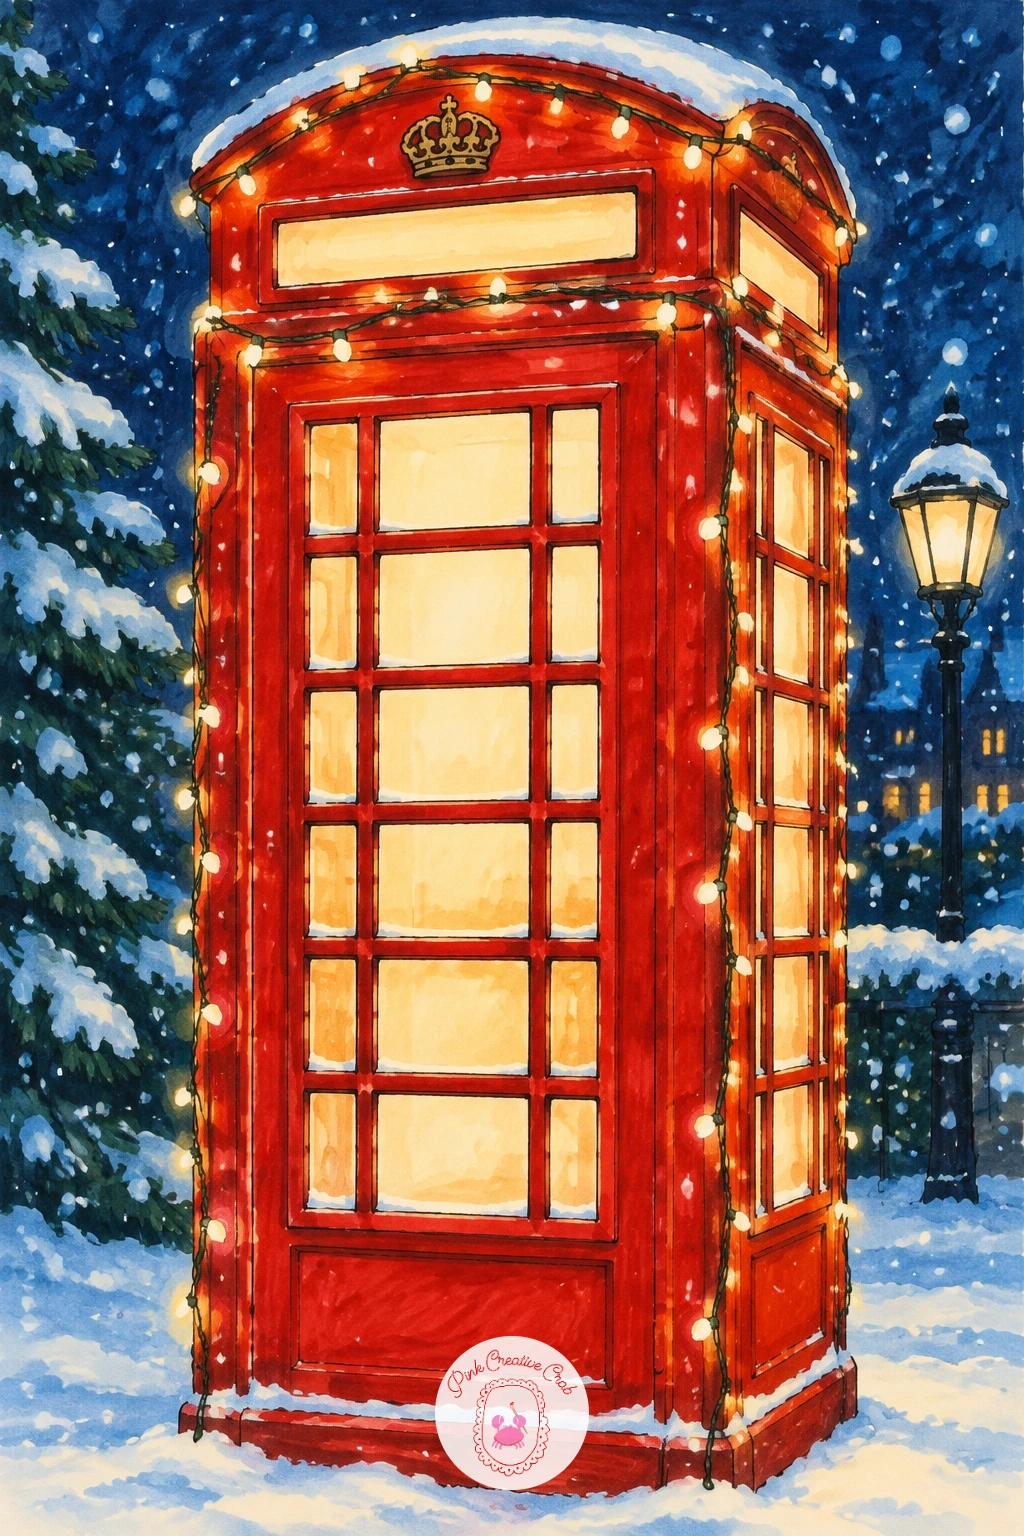
Draw the phone box next, since its straight sides make it a forgiving shape right after the bridge curve. Rule a tall rectangle in fineliner, divide the top third into small glass panes, and keep the roof a simple stepped dome rather than anything ornate.
Color the box in pillar box red with a slightly darker red along one edge to suggest roundness, then let the glass panes stay pale cream so light seems to glow from inside. String a loose curve of fairy lights overhead using a thin wire line with tiny dots of cream and soft yellow along it.
If the box starts looking flat, add one shadow strip of deep navy down its shaded side and the whole thing lifts off the page. No deep navy marker on hand works fine with a grey blended underneath instead.
Scatter white gel pen snowflakes falling past the lights and resting on the box roof as your last step, since snow always reads best added over finished color rather than under it.
You Will Need
- white gel pen
Palette: Pillar Box Red,Cream,Deep Navy,Soft Yellow
Try drawing the fairy light wire slightly sagging between two points rather than a straight line, it reads far more natural and cozy strung above a street.
Big Ben rewards a proportion check before a single line goes down, so lightly mark the clock tower at roughly six times taller than it is wide, with the clock face sitting about a third of the way down from the top. Rule the tower in fineliner with simple vertical panel lines rather than fussy stone detail, and keep the clock face a clean circle.
Lay deep navy across the whole sky first and let it sit, since Big Ben at blue hour depends on that cold backdrop more than on the tower itself. Warm the clock face and a few tower windows with soft yellow glow, then bring the Houses of Parliament in as a lower, wider silhouette beside it in a slightly lighter navy so the tower still reads as the tallest, nearest shape.
The Thames below takes a few horizontal strokes of frosty sky blue with a thin cream reflection line under each lit window. If blending two navies feels tricky, one navy marker used lighter for the river and darker for the sky works just as well.
Keep the clock hands as two thin confident lines added last, once the face color has fully dried.
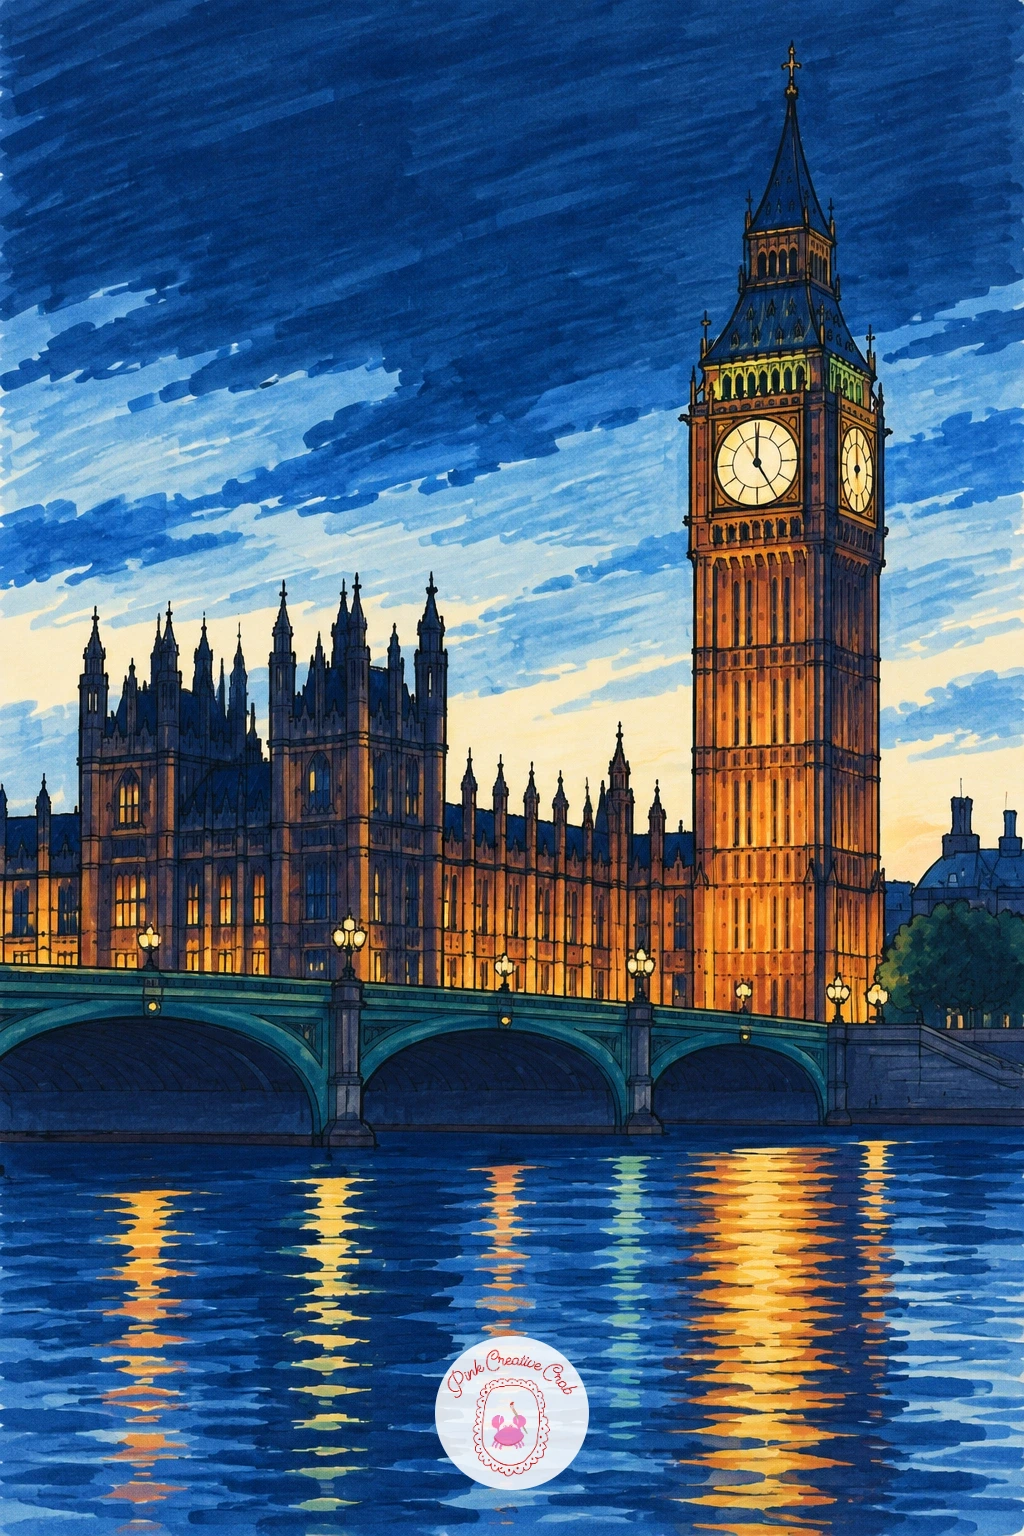
Palette: Deep Navy,Soft Yellow,Frosty Sky Blue,Cream
Line up a row of narrow rectangular houses in fineliner, varying their heights slightly so the terrace does not look stamped from one mold, and add a simple peaked or flat roof to each. This is where a quick measuring trick helps: keep every door and window the same height across the row even as the house widths change, since matching verticals are what make a terrace read as real architecture.
Color each house a different soft pastel, pink, butter yellow, mint, pale blue, blending each flat and clean rather than streaky. Add a small wreath of fir green with a dot of red berry on every door, which is the detail that pulls the whole street into Christmas without any text or signage.
If the row starts feeling too busy, rest the eye by leaving one house pale cream with no wreath at all. Swap pastel markers for colored pencil over the same fineliner line if your markers run too saturated for this soft palette.
Finish each window with a warm cream glow and a thin white gel pen frost line along the rooftops.
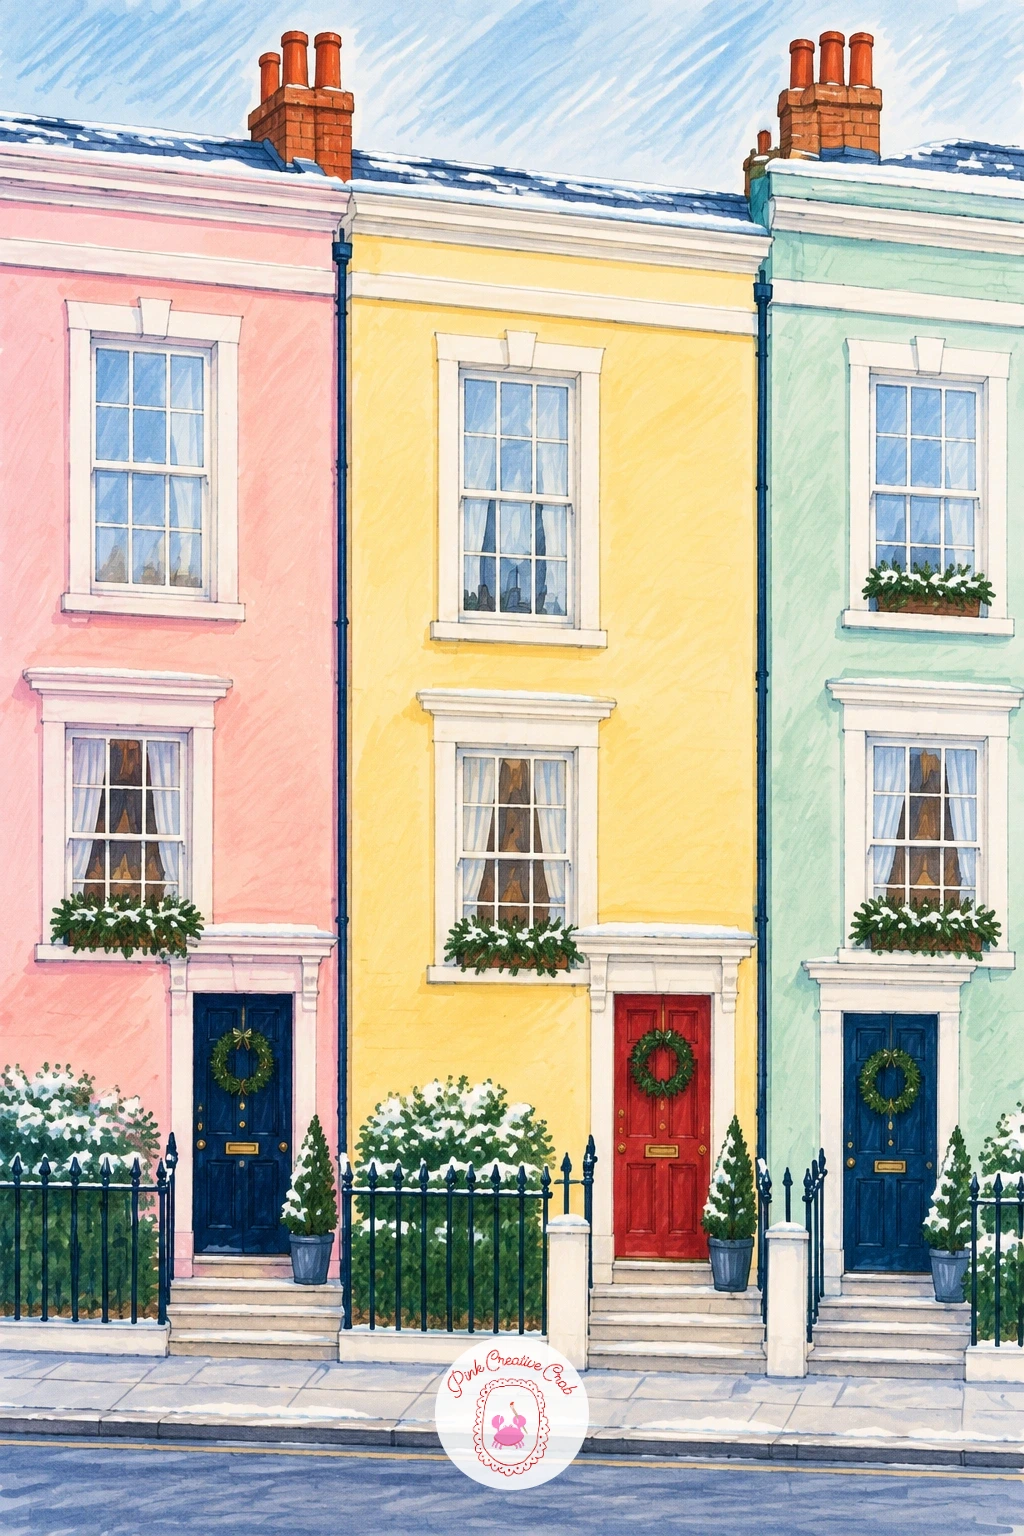
Palette: Mint Pastel,Butter Yellow,Blush Pink,Fir Green
This scene asks for a little perspective thinking before the tree goes in: place the glass roof arcs converging gently toward a vanishing point above the tree, which makes the covered market feel tall and airy rather than flat. Draw the tree as a wide-based triangle stack in fineliner, then the iron roof ribs as thin curved lines fanning outward above it.
Color the tree in layered fir green, darker in the lower branches and lighter toward the top where light falls from the glass roof. Let frosty sky blue wash faintly through the glass panels above, since that cool light is what sells the indoor winter feel against the warm tree.
Ornaments go on last as small dots of pillar box red and soft yellow scattered unevenly rather than in a neat grid, which keeps the tree looking hand-trimmed. If your paper buckles under heavy green layering, switch to a lighter pressure and build the shade in thin passes instead.
A string of cream fairy lights looping through the branches finishes the glow.
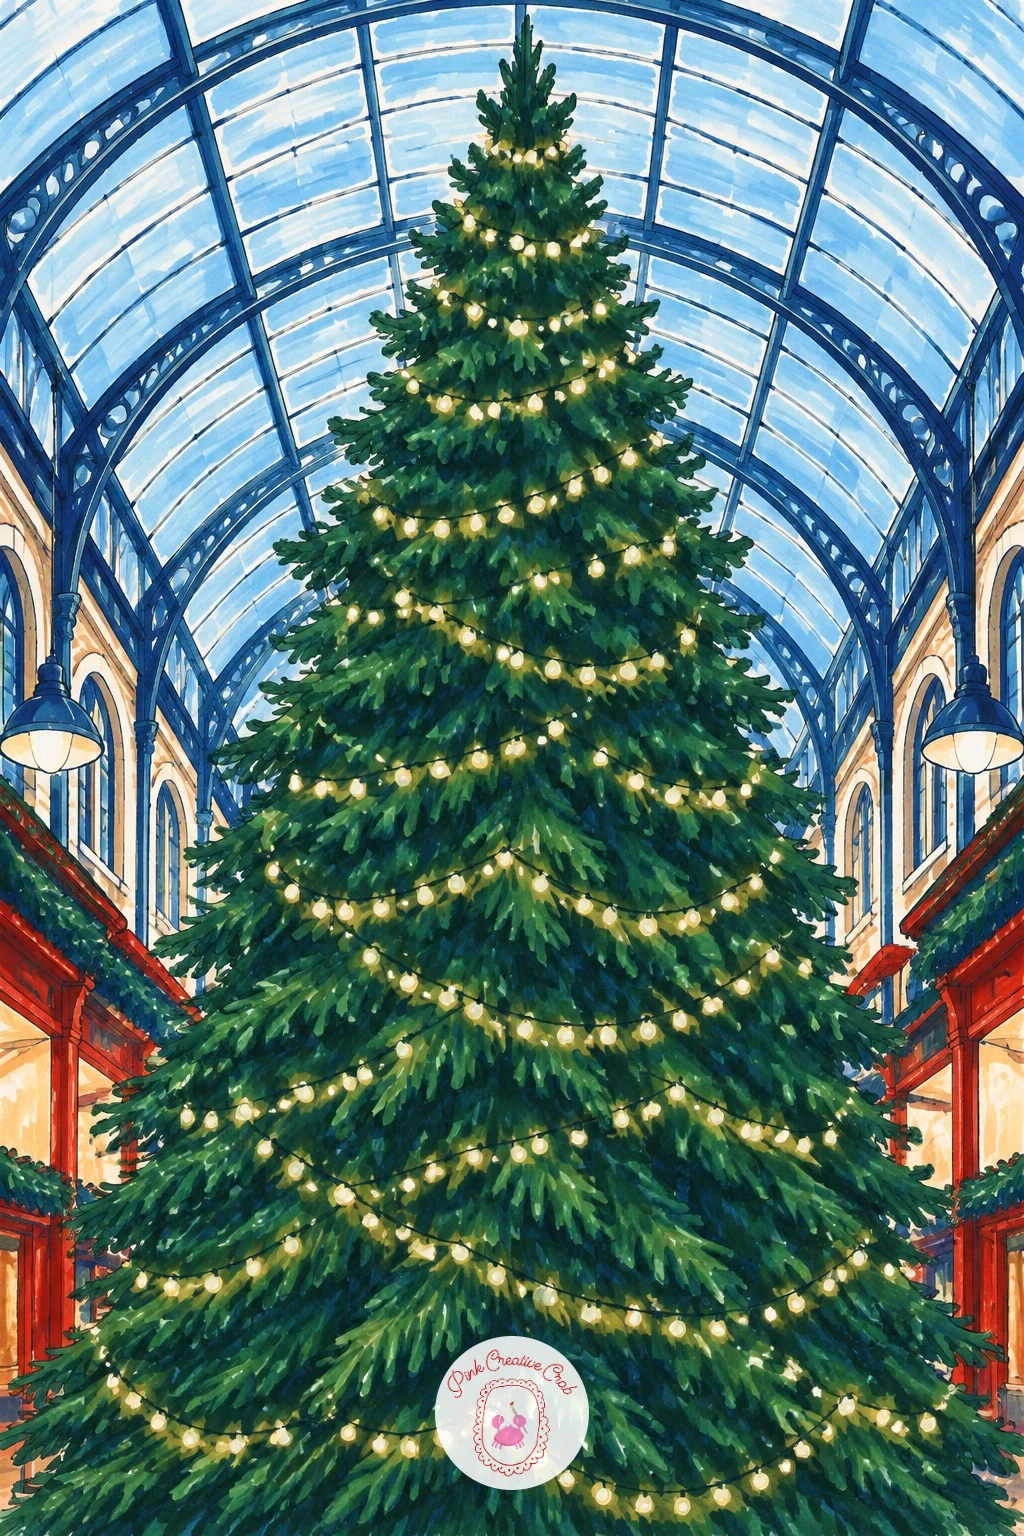
Palette: Fir Green,Pillar Box Red,Frosty Sky Blue,Cream
The black cab sits low and rounded, so draw its body in fineliner as a boxy curve with a short bonnet and tall rear, closer to a van shape than a sports car. Place it slightly off center on the page so there is room for a long stretch of wet road running toward the viewer.
Paint the cab body in deep navy blended almost to black along the roofline, then turn to the street: lay frosty sky blue and cream in loose vertical streaks beneath the cab to suggest reflected light on wet tarmac. This is the one hands-on trick worth practicing, dragging a damp blending nib straight down from each light source keeps the reflection soft rather than a hard mirrored copy.
Splash a few drops of water-diluted white gel pen or a flicked white marker along the lower edge of the cab for a road spray effect. If flicking feels risky on a finished page, practice the splash on scrap paper first and only commit once the angle feels right.
Keep headlights as two small warm yellow dots, the brightest marks in the whole scene.
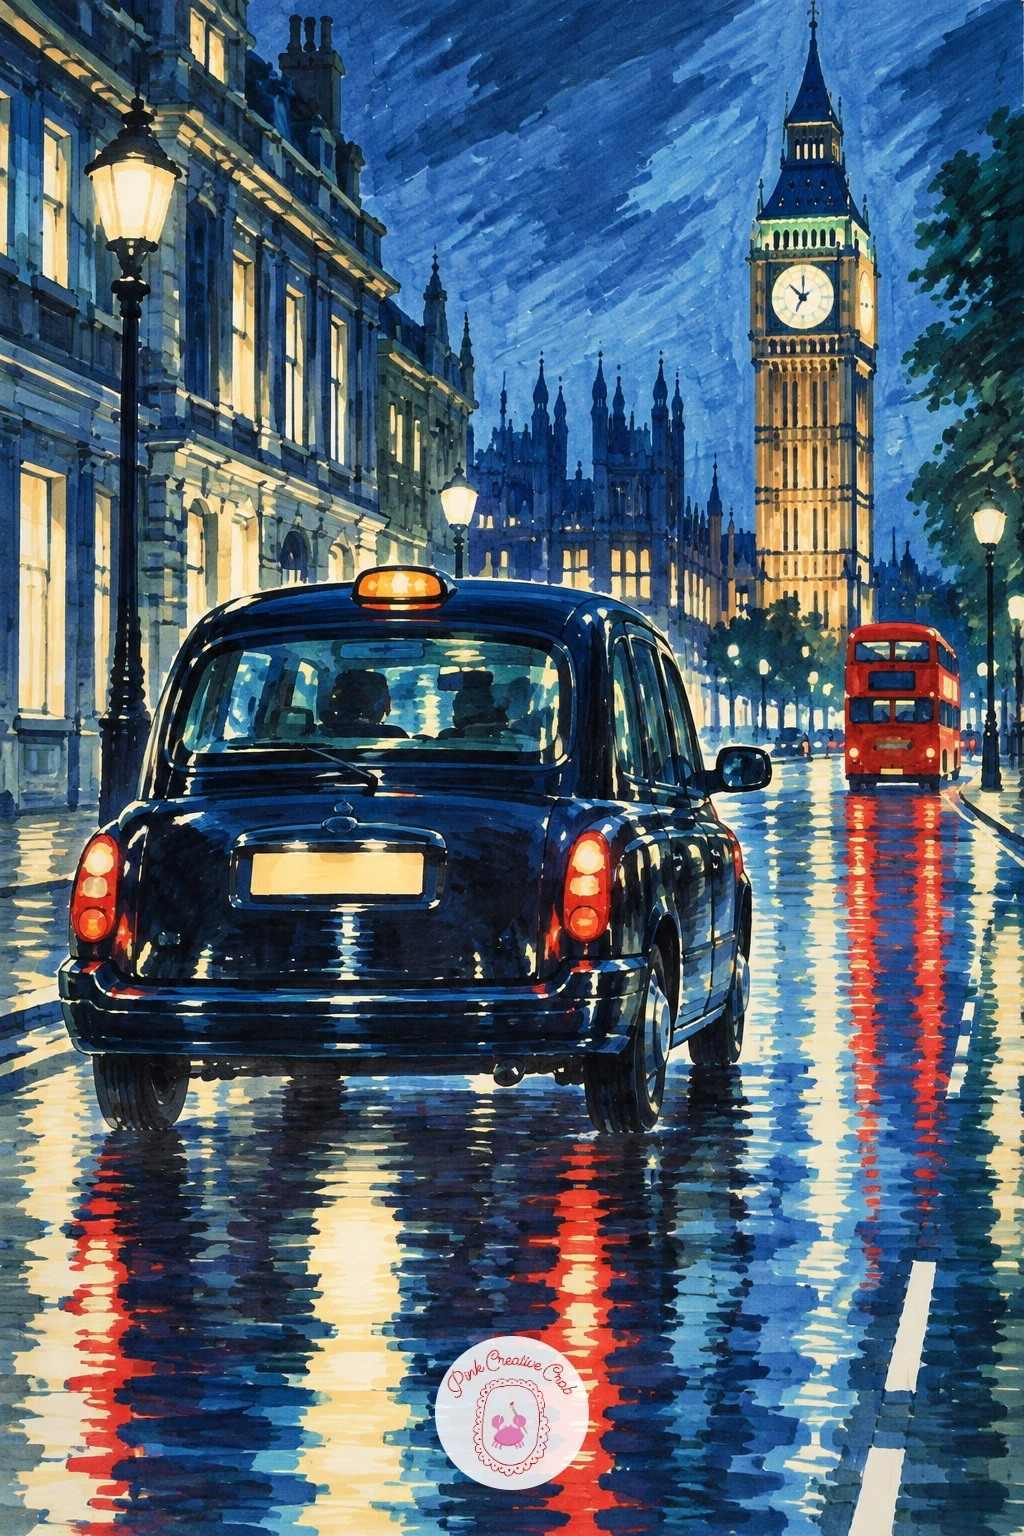
You Will Need
- white gel pen
Palette: Deep Navy,Frosty Sky Blue,Cream,Soft Yellow
Set the tiered cake stand first since it anchors the whole composition: three decreasing circles stacked on a thin central pole, drawn in fineliner with a light ellipse guide for each tier so they read as round rather than lopsided. Add two simple teacups and a teapot beside it, keeping handles small and rounded.
Color the stand’s tiny cakes in soft pinks, creams and a touch of fir green icing, each one a different small shape so the stand feels varied rather than repeated. The window behind gets a frosty sky blue wash with a few white gel pen fern patterns scratched into the corners for the frosted glass effect.
If the frost pattern feels intimidating freehand, keep it to the corners only and leave the center of the pane clear glass, which still reads convincingly and is far easier to control. For a quicker version, skip the fern detail entirely and just soften the window corners with a pale blue vignette.
Finish the teapot with a thin curl of cream steam rising from the spout.
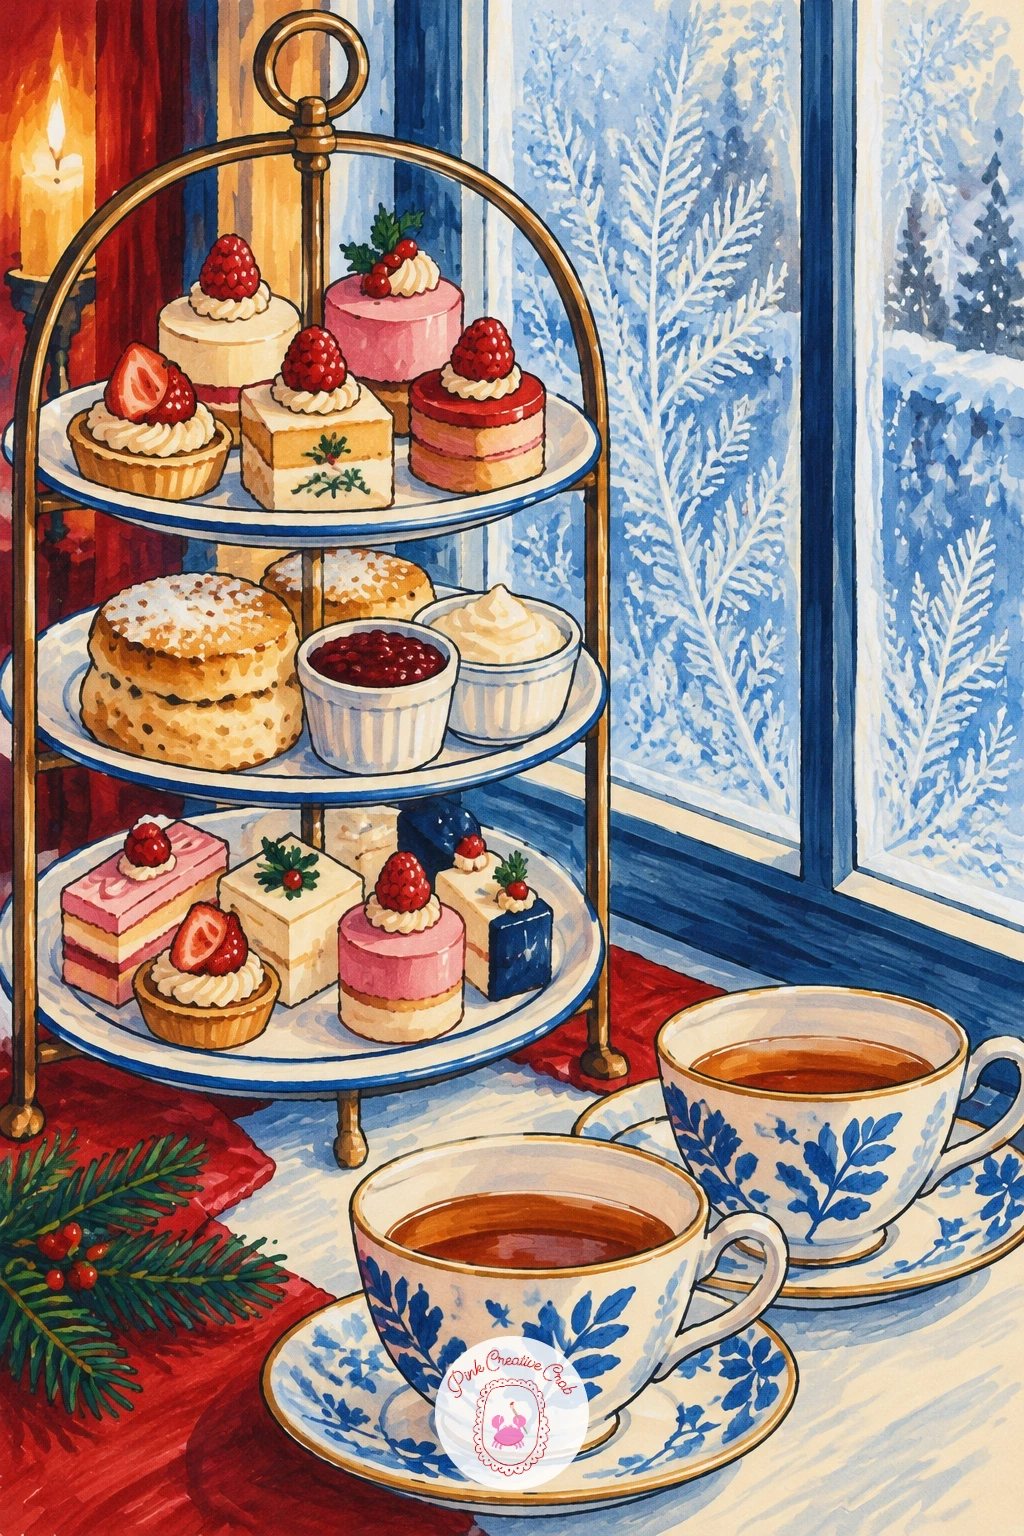
Palette: Blush Pink,Cream,Frosty Sky Blue,Fir Green
Begin high and work down for this one: sketch the tall Trafalgar Square tree first as a narrow triangle reaching near the top edge of the page, then add the small crowd of carollers as simple rounded shapes clustered at its base. Keep each figure to a coat shape, a small head, and maybe a scarf, no facial detail needed at this scale.
Layer fir green up the tree with slightly darker shading on one side to show the light source, usually a streetlamp glow coming from below. Dress the carollers in a mix of deep navy, cream and one or two pillar box red coats so the crowd reads as varied without needing individual faces.
Crowds like this often go wrong when every figure ends up the same height and width, so vary shoulder width and head size slightly across the group. If drawing a full crowd feels like too much, cut it down to three or four carollers standing closer together, which still tells the story.
Finish with warm yellow dots of light scattered through the tree and a soft glow pooling on the ground beneath it.
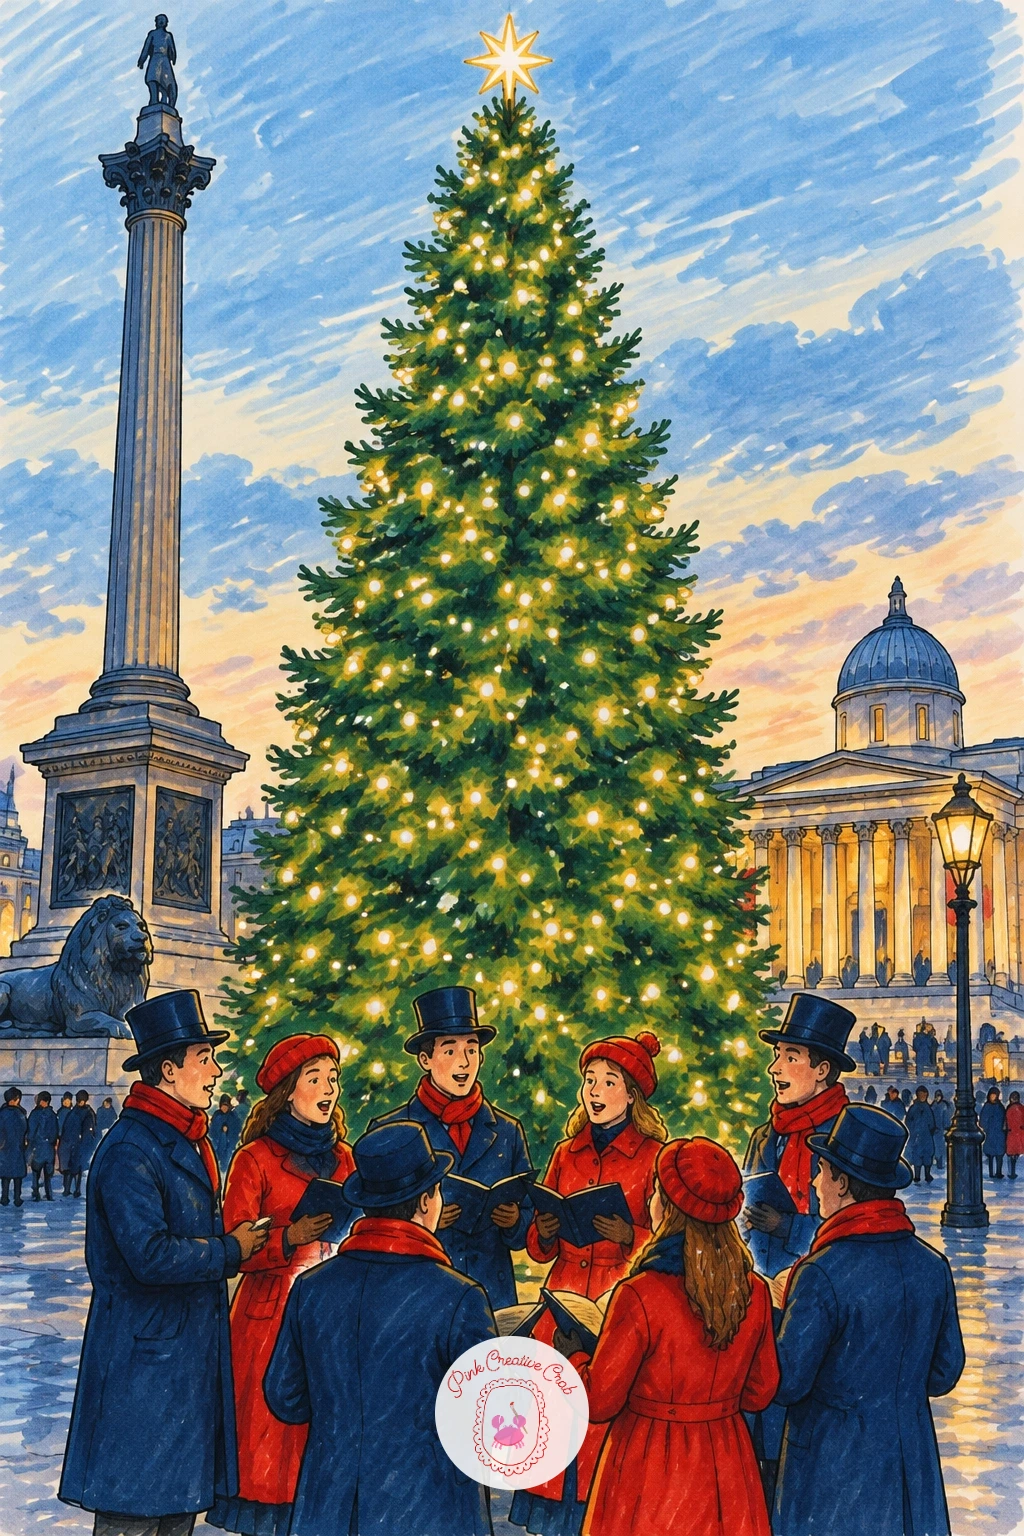
Palette: Fir Green,Deep Navy,Pillar Box Red,Soft Yellow
Try reading about cozy Christmas scene drawing for more ways to light a crowd gathered under string lights or a lamppost glow.
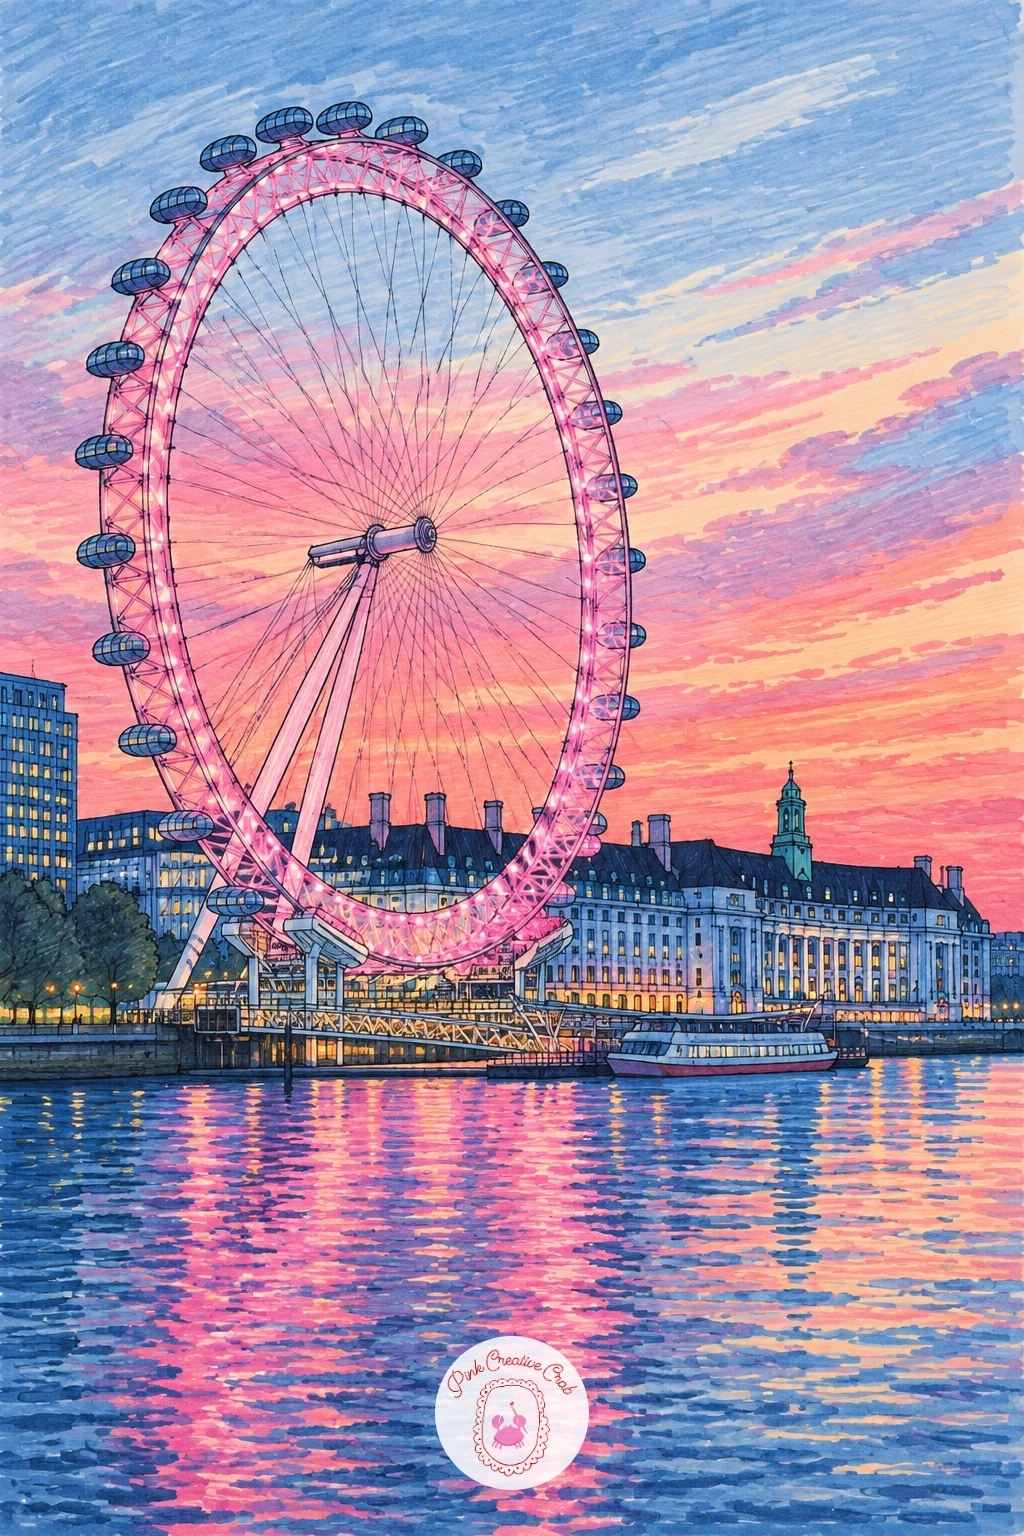
The London Eye is really one careful circle, so trace around a round object or compass in fineliner for the outer ring, then add thin spokes radiating to a smaller center hub. Space the little capsule pods evenly around the rim rather than freehand guessing, since uneven spacing is the fastest way to make a wheel look wrong.
Wash the sky behind it in a soft blend from pale pink near the horizon up into frosty sky blue higher up, letting the two colors meet and blend while still wet for a smooth sunset gradient. Color the wheel structure itself in a cool grey-blue so it sits quietly in front of that warm sky rather than competing with it.
If the capsule pods start looking too mechanical, soften their outlines slightly and let a couple blur into the pink behind them at the edges of the wheel. A smaller coin or cup works just as well as a compass for tracing the circle if you do not own one.
Add the river below in a thin reflective strip picking up the same pink and blue tones.
You Will Need
- a plate or compass to trace a circle
Palette: Blush Pink,Frosty Sky Blue,Cool Grey-Blue,Cream
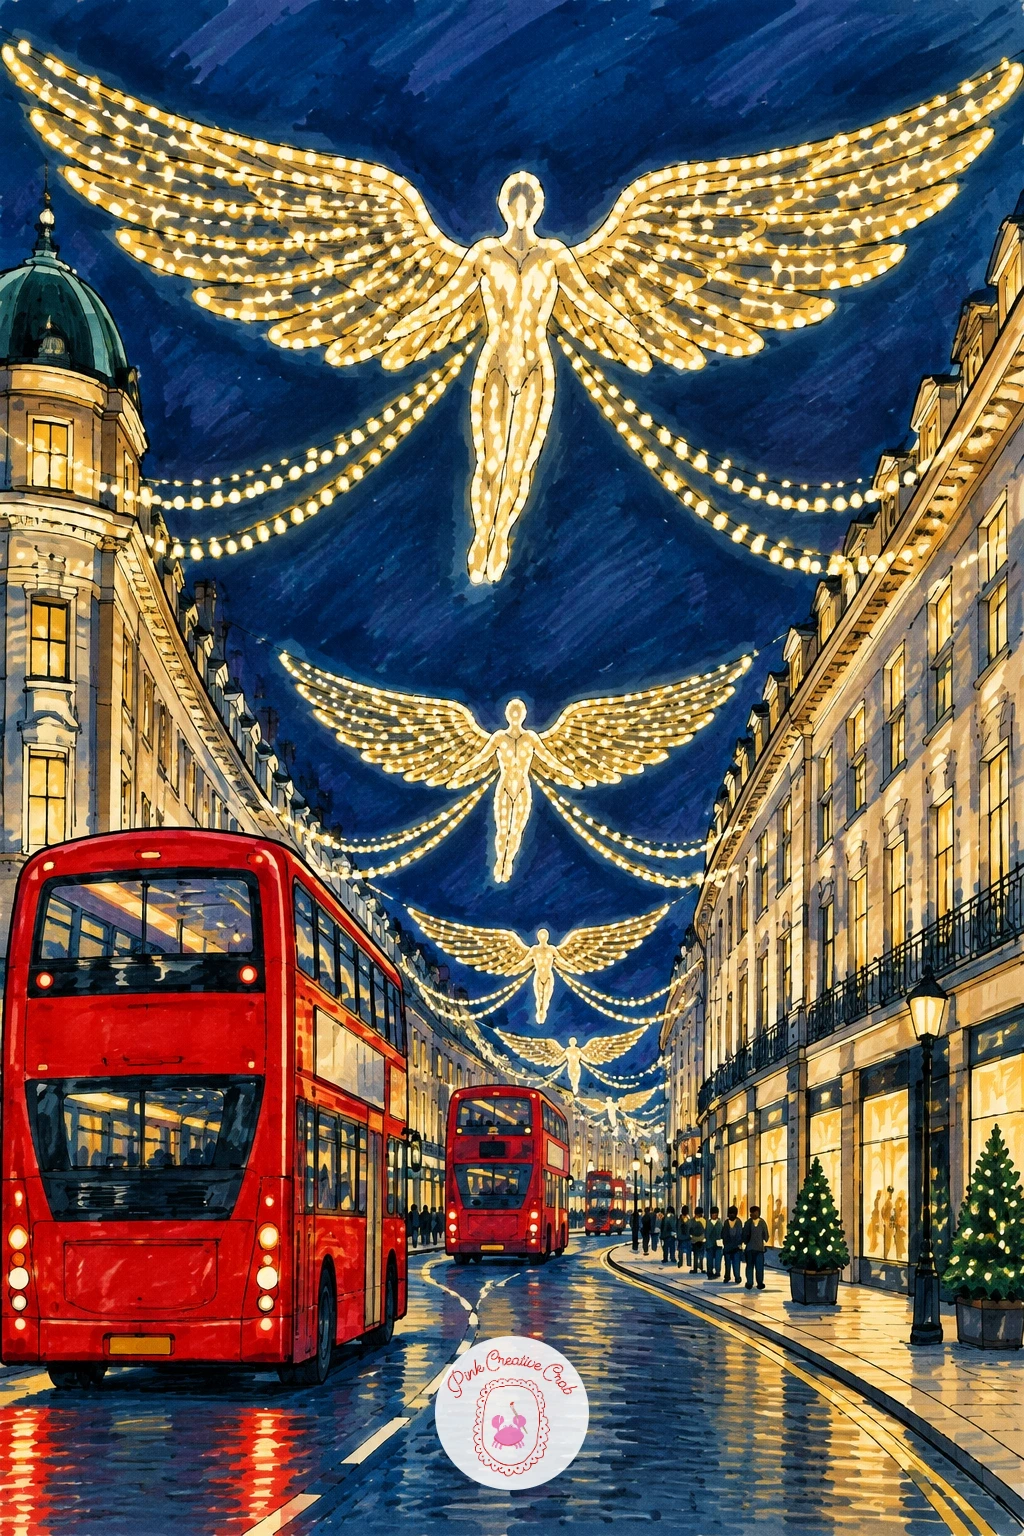
This one plays with eye level more than any other scene here: draw the curving street from a slightly raised viewpoint, looking gently down the row of buildings so both sides recede toward a shared vanishing point in the distance. That downward angle is what lets the angel light arches hang convincingly overhead across the whole street.
Sketch two or three simple angel-shaped light arches in fineliner spanning the street, kept geometric rather than detailed, just a curved silhouette with wings suggested in a few lines. Color them in soft yellow with a warm glow bleeding into the navy sky around each one.
Add a couple of red double-decker buses along the curving street below, kept small since they are secondary to the lights above. If the street curve feels hard to judge, lightly sketch a single curved guideline first and build every building edge off that one line before adding any detail.
Finish with glowing shop windows in cream along the ground floor to carry warmth down to street level.
Palette: Soft Yellow,Deep Navy,Pillar Box Red,Cream
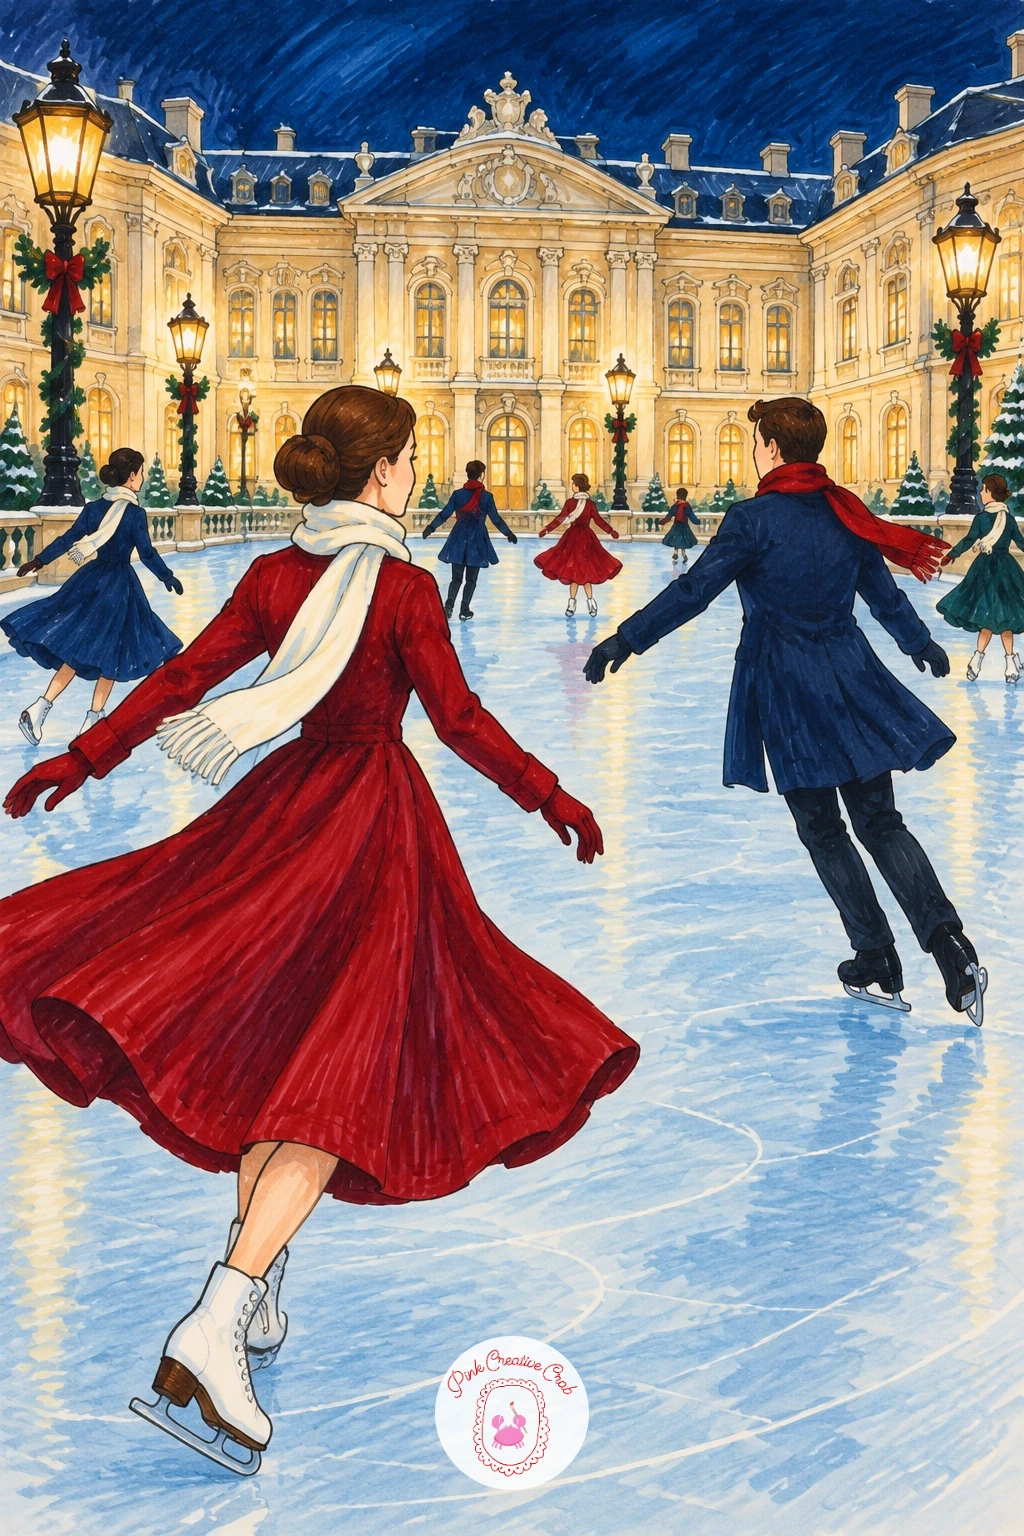
Block the rink as a wide oval in fineliner first, since everything else sits around that shape. Sketch a handful of skaters as simple leaning figures with one leg trailing behind, angled slightly rather than upright, which is what makes a drawn skater look like they are actually moving across ice.
Color the ice in pale frosty sky blue with a few curved white gel pen lines scratched across it to suggest skate marks cutting the surface. Keep the palace facade behind the rink in warm cream and soft grey stonework, with tall lamp posts glowing soft yellow at even intervals around the courtyard edge.
Skaters often end up looking stiff, so loosen the pose of at least two figures with bent arms or a slight forward lean before adding color. For a faster version, draw just three skaters close together in the foreground and let the rest of the rink stay empty ice.
Finish the sky above the palace in deep navy with a scatter of tiny white dots for stars.
You Will Need
- white gel pen
Palette: Frosty Sky Blue,Cream,Soft Yellow,Deep Navy
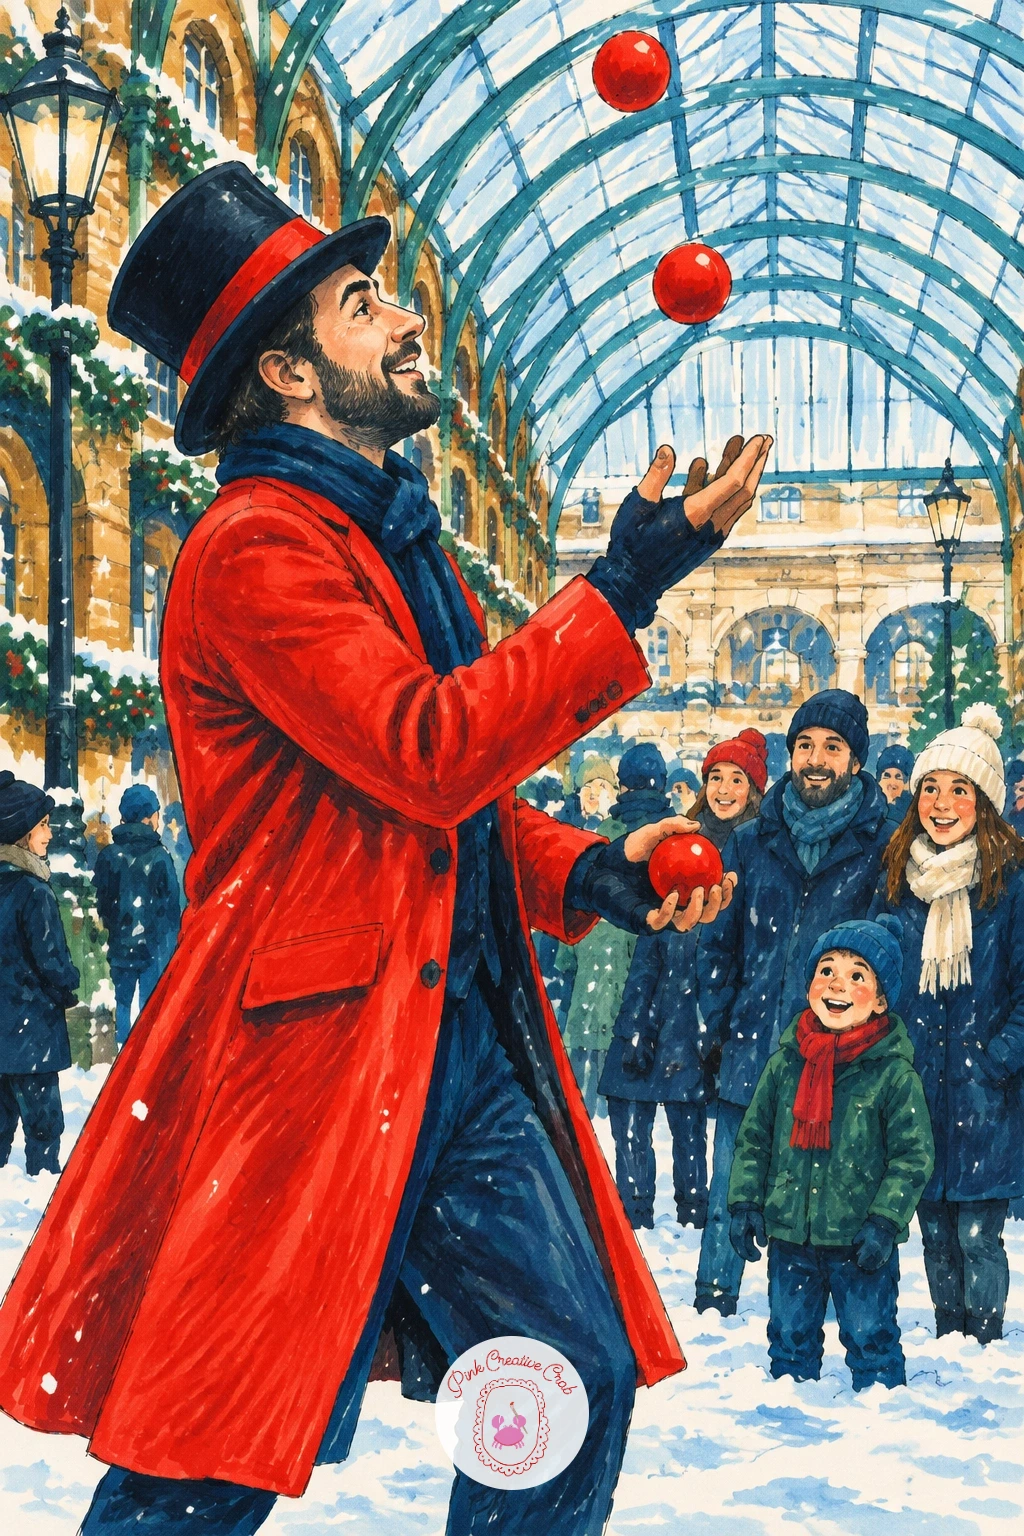
Draw the juggler first as a simple standing figure with arms raised and a loose scatter of small circles arcing above their hands, kept playful rather than anatomically exact. Build the Covent Garden piazza around them with the glass-roofed arcade curving away behind in soft perspective lines.
Color the juggler in a pillar box red coat so they pop immediately against the cooler stone and glass behind, then add a loose semicircle of small cloaked figures as the watching crowd, each one just a simple coat shape and head. Snow falls lightly across the whole scene in scattered white gel pen dots added last.
Crowds watching a performer often end up facing the viewer instead of the juggler, so angle every head and shoulder toward the center of the scene. If a full crowd feels like too much detail, three or four onlookers still tell the story clearly.
Keep the juggling balls or pins in warm yellow and cream so they catch the eye as the brightest moving shapes.
You Will Need
- white gel pen
Palette: Pillar Box Red,Cream,Soft Yellow,Deep Navy
Give this door the full page close up, since a single Georgian door filling the frame is a satisfying change of scale after wider street scenes. Rule the door and its surrounding frame in fineliner with a simple fanlight window above and clean paneling lines down the door itself.
Paint the door in deep navy or a near black blended smoothly so the panel lines still show through as slightly darker grooves. Add a fir green wreath with pillar box red berries hanging just above the knocker, and render the brass lion knocker in warm soft yellow with one small cream highlight to suggest polished metal.
Metal details like a knocker are where a kneaded eraser earns its keep: once the yellow is down, press a small dab of eraser onto the lightest point to lift back a bright highlight rather than trying to paint around it. If you do not have one, a white gel pen dot does the same job just as convincingly.
Dust a little white gel pen snow along the top of the frame and door hinges to finish.
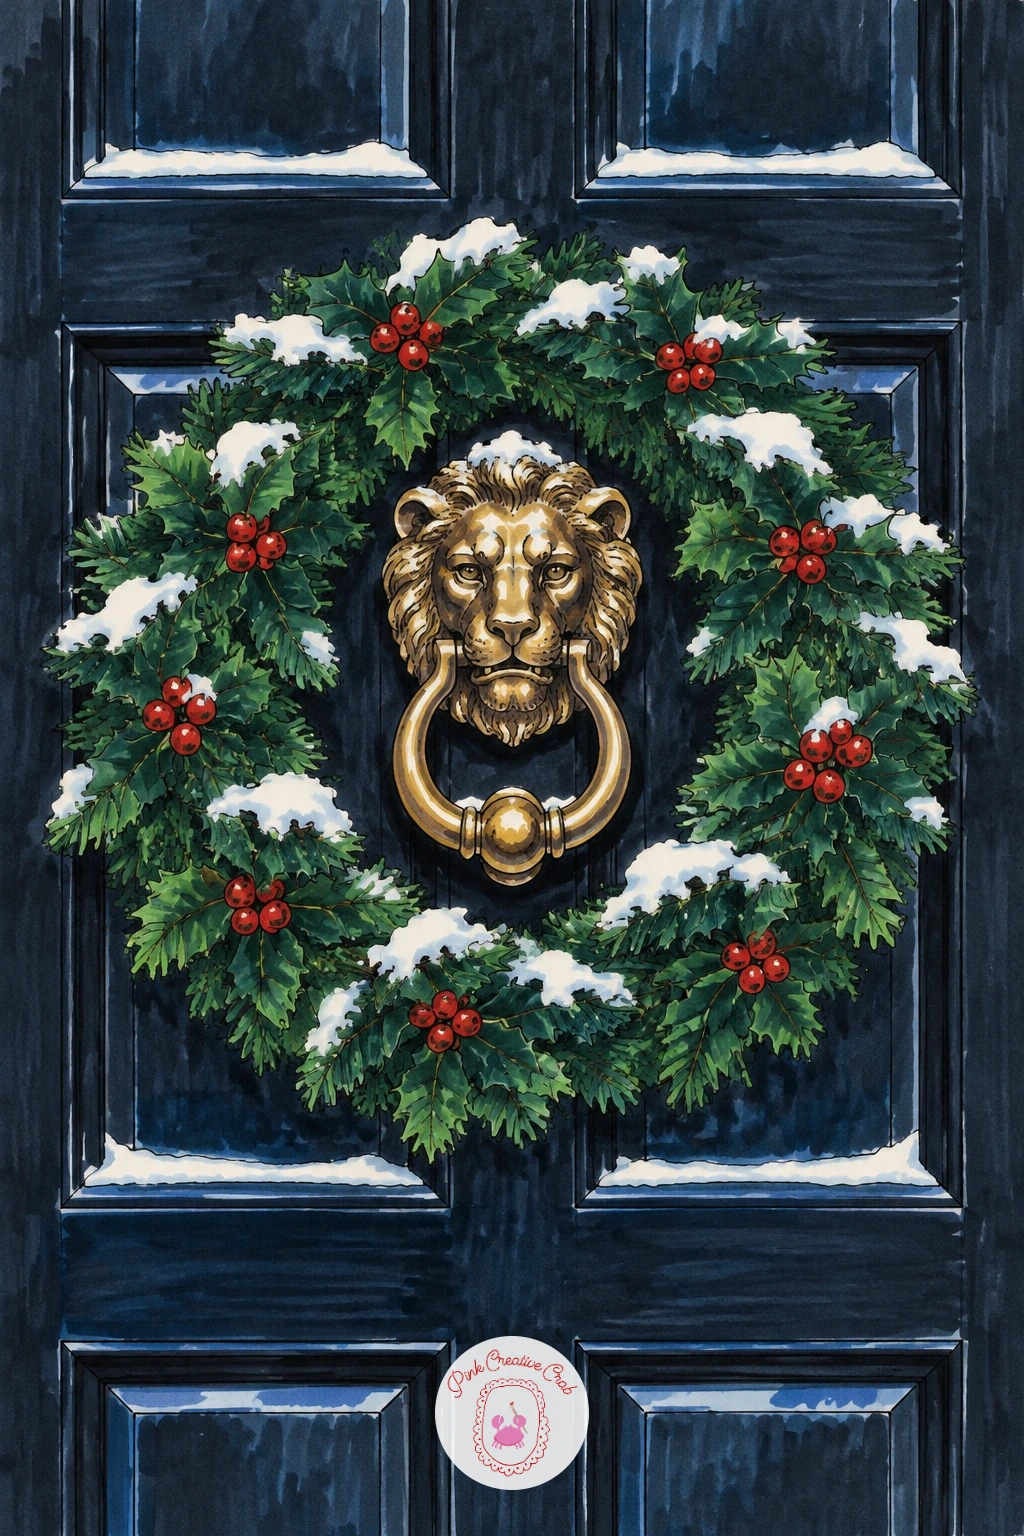
You Will Need
- kneaded eraser or white gel pen
Palette: Deep Navy,Fir Green,Pillar Box Red,Soft Yellow
Keep this one small and simple after the large door: draw a short stretch of iron railing in fineliner, just a few vertical spikes with a horizontal top rail, then perch a robin on top using a round body, small pointed tail, and a neat little head.
Color the robin’s chest in warm pillar box red orange blended softly into a cream belly, with deep navy-grey wings and back kept matte and simple. The railing underneath gets a thin cap of white gel pen snow along every spike, which is the detail that makes the whole perch read as freezing cold.
Robins are easy to overwork around the eye, so keep it to one small dark dot with a single white gel pen fleck for life rather than layering extra lines. For a quicker ten minute version, skip the garden square background entirely and let the robin and railing float on plain white paper for a clean postcard feel.
A soft blurred hedge of fir green behind the railing adds just enough garden square context for the longer version.
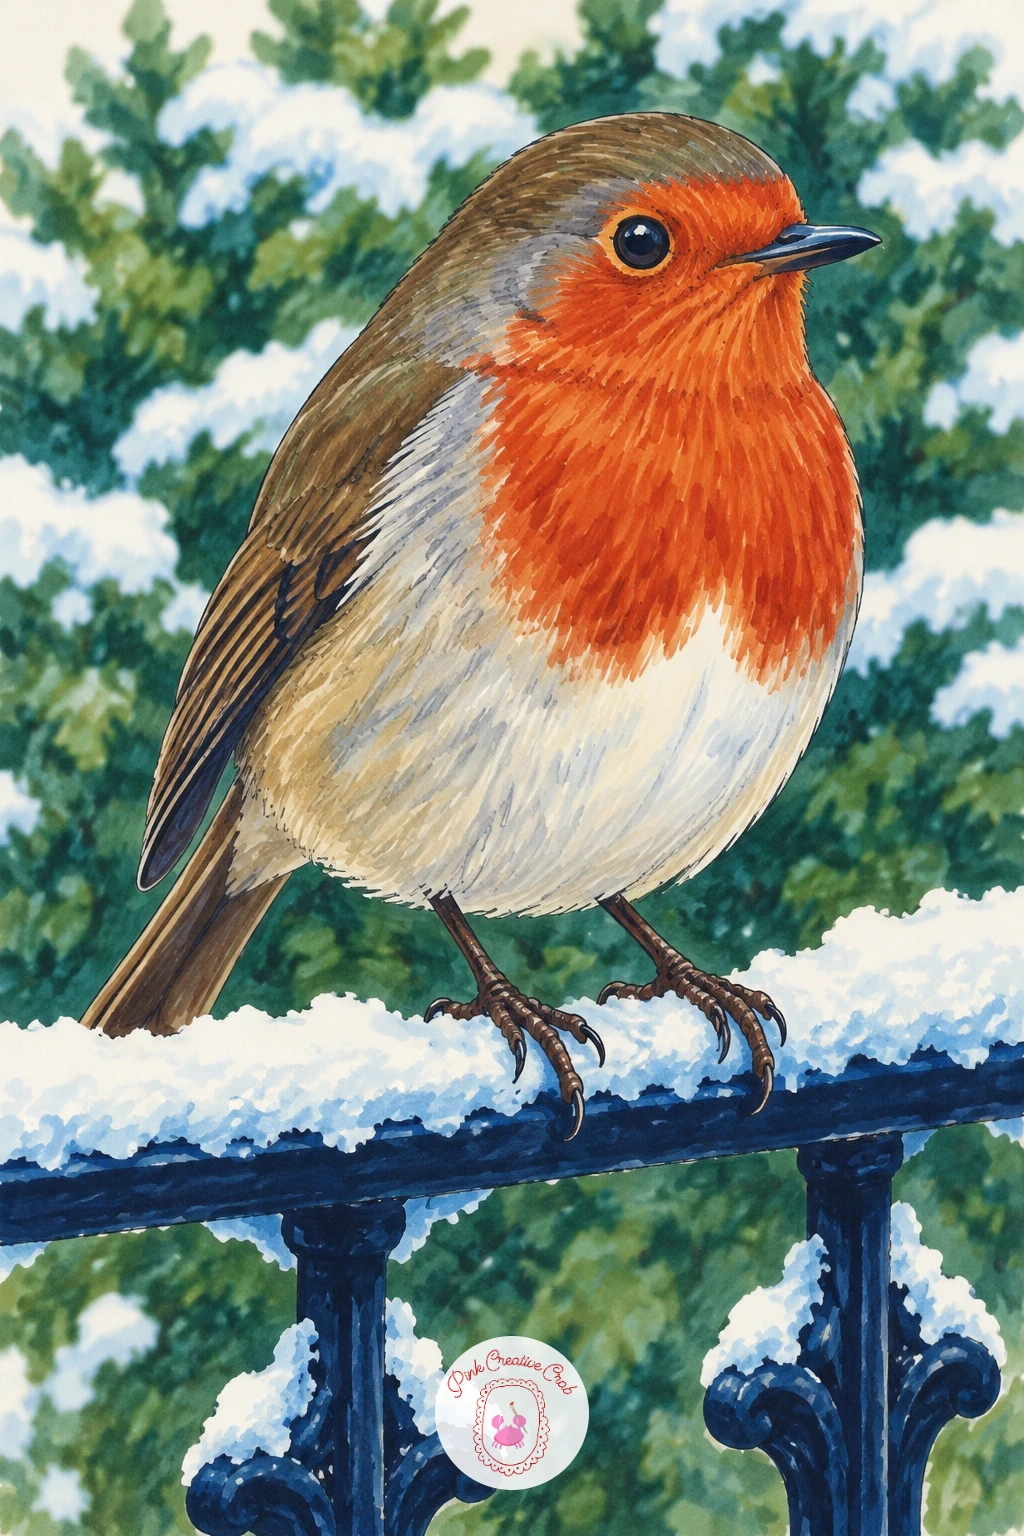
You Will Need
- white gel pen
Palette: Pillar Box Red,Cream,Deep Navy,Fir Green
A quick look at cardinal drawing ideas is useful here too, since the chest-color trick for red birds on snowy branches works the same way for a robin.
Place the glowing cart at the center of the page first, a simple box shape on two wheels with a small chimney puffing smoke, since the warm light from inside it drives the whole mood of the scene. Draw the seller standing beside it in a bulky coat with hands held out toward the cart’s heat.
Light here comes from one source only, the cart’s glowing coals, so keep every other surface in cooler deep navy and frosty sky blue and let only the cart interior and the seller’s hands and face catch warm soft yellow and pillar box red light. That single light source is what sells a cold riverside evening more than any amount of detail elsewhere.
The Thames and a hint of a bridge in the background stay loose and dark, barely more than a few navy strokes, so they never compete with the cart’s glow. If warm and cool blending feels tricky, practice the glow on scrap paper first, building yellow outward into navy in short overlapping strokes.
Finish with a curl of pale smoke rising from the chimney into the dark sky.
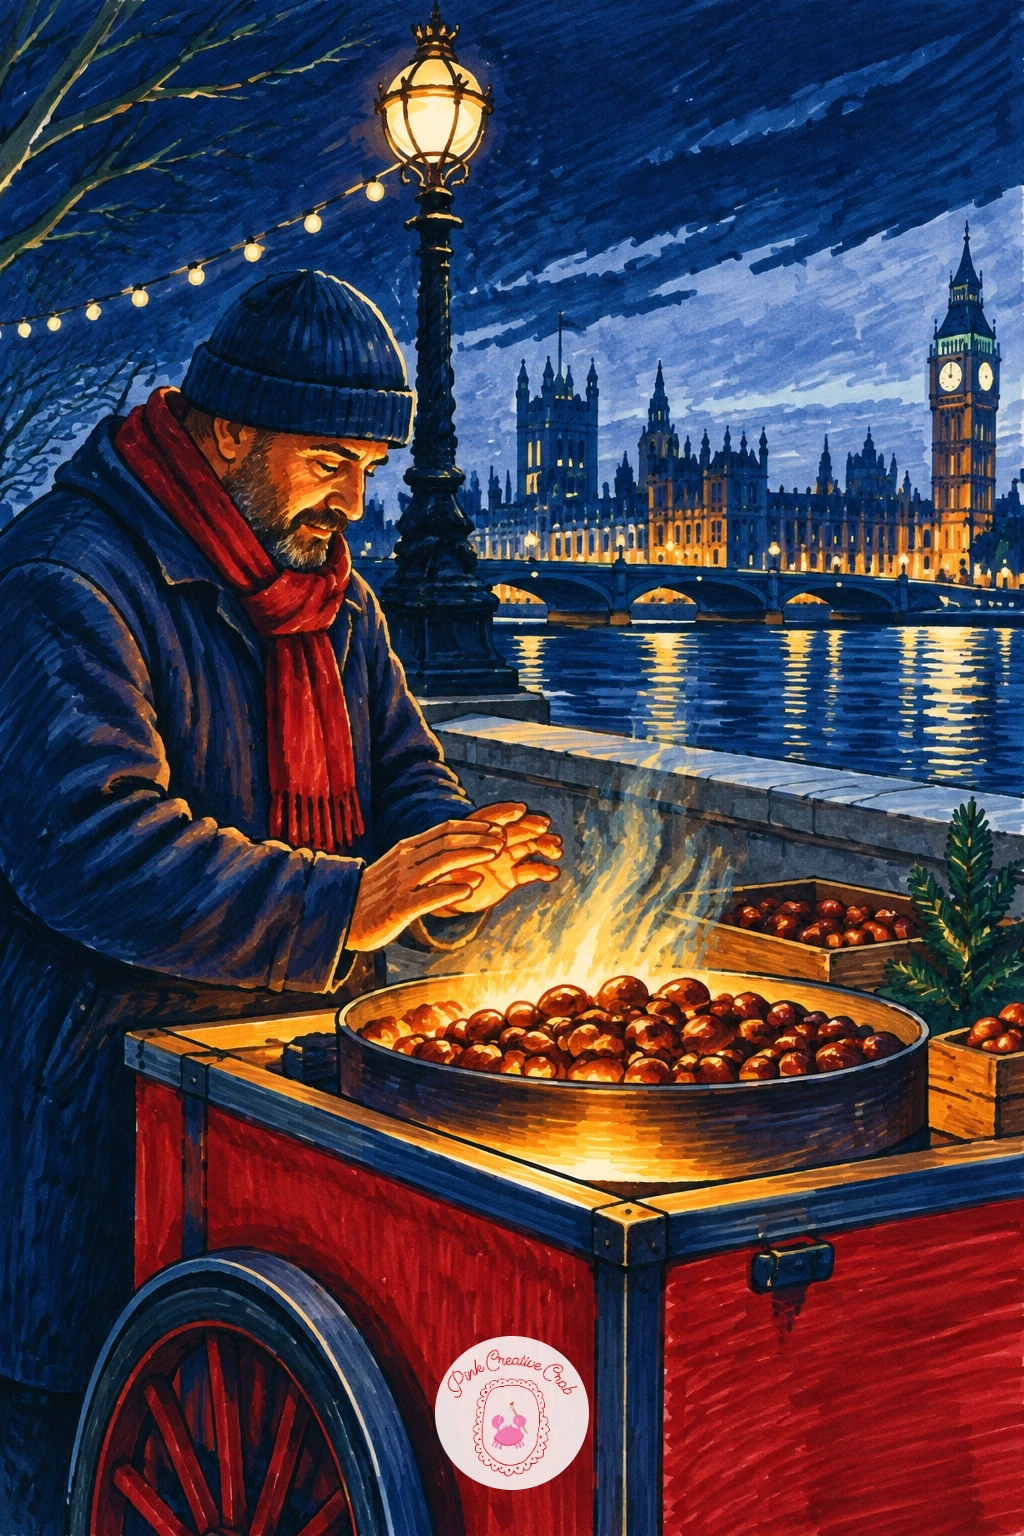
Palette: Soft Yellow,Pillar Box Red,Deep Navy,Frosty Sky Blue
Center the dome high on the page in fineliner as a wide rounded curve topped with a small lantern spire, kept clean and geometric rather than architecturally precise. Build a loose skyline of smaller rooftops below it, each one just a simple rectangle with a triangular or flat top, varying their heights so the dome clearly rises above everything else.
Wash soft cream and warm grey across the dome where light catches it, then let the rooftops below sit in cooler frosty sky blue and navy shadow, which pushes the dome forward as the brightest shape in the scene. Snow caps every rooftop ridge in white gel pen, applied once all the color beneath has dried.
Domes are easy to flatten by accident, so shade one side of the curve slightly darker than the other to keep it reading as round rather than a flat half circle stuck on the page. If the lantern spire on top feels fiddly at this size, simplify it to a single thin vertical line with a tiny ball shape at the tip.
A faint warm glow in one or two distant windows finishes the quiet winter morning feel.
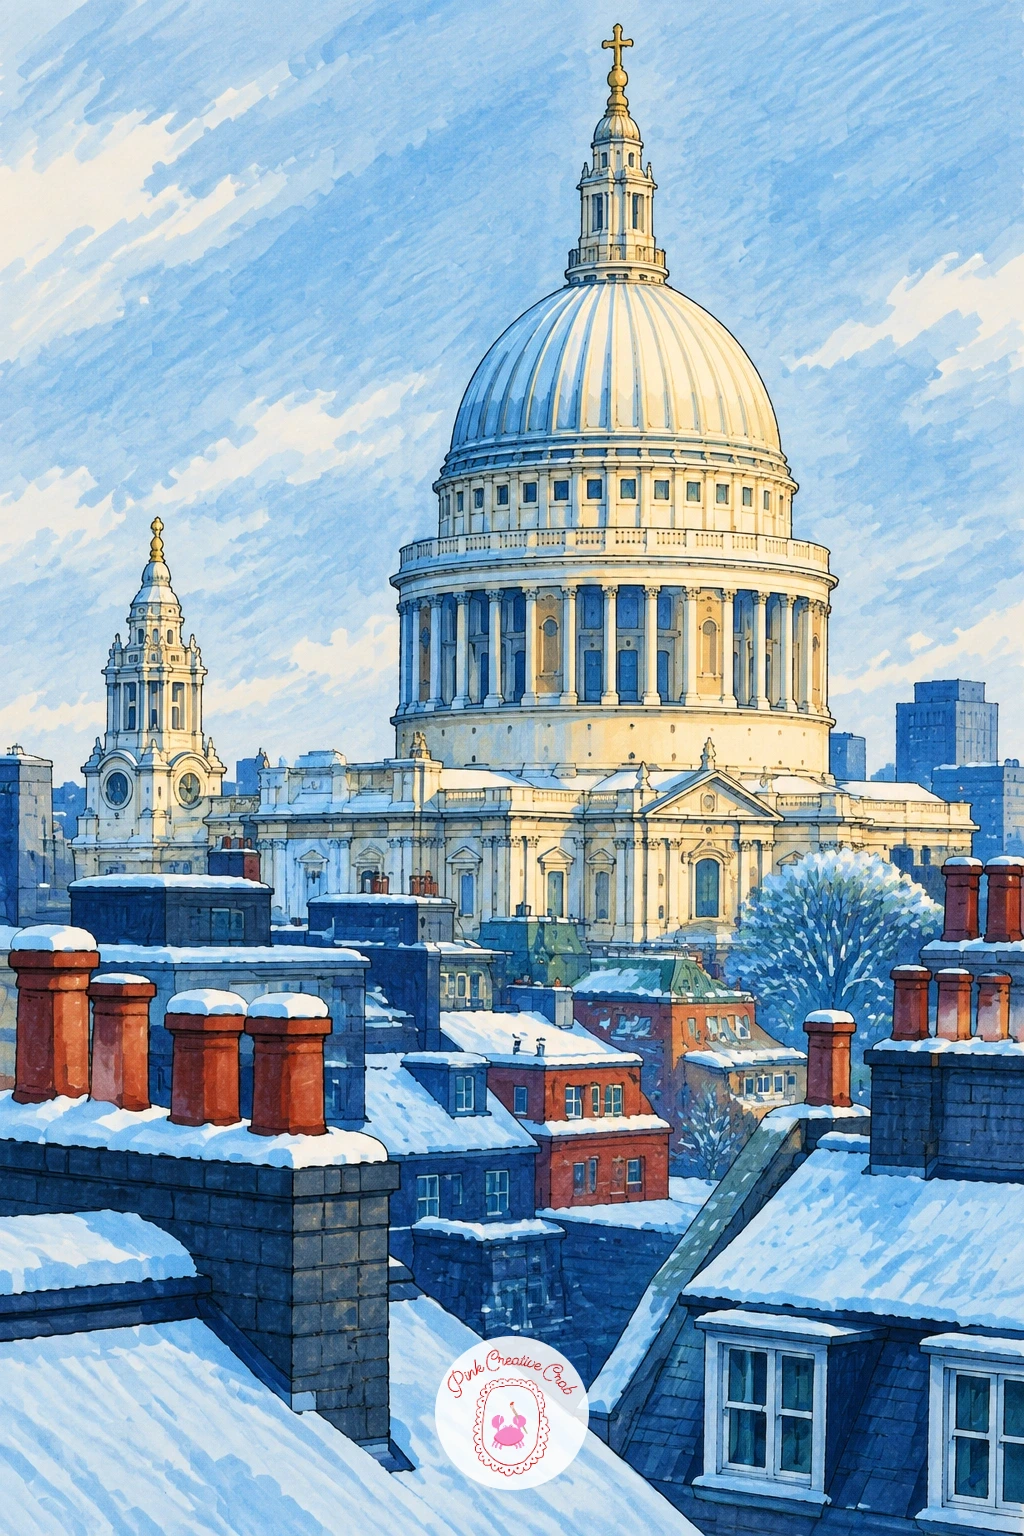
You Will Need
- white gel pen
Palette: Cream,Frosty Sky Blue,Deep Navy,Soft Yellow
Build this scene from the figure outward: sketch the girl in a red coat walking at roughly one third from the left edge, striped umbrella tilted slightly against the weather, since placing her off center leaves room for the bridge and tower behind to lead the eye. Keep her coat a simple A-line shape with the umbrella as a half circle of alternating thin stripes.
Color the coat in confident pillar box red, the brightest mark on the page, then let the umbrella stripes alternate cream and deep navy to echo the palette without pulling focus from her. Westminster Bridge recedes behind her in soft frosty sky blue mist, with Big Ben just a pale navy silhouette in the distance rather than a sharply detailed tower.
Figures walking toward or across a bridge often end up facing straight ahead stiffly, so angle her shoulders and the umbrella slightly into the direction she is walking. If red feels too bold for a first attempt, a deep burgundy coat still carries the same warm anchor against the cool bridge tones.
Finish with a scatter of soft snow falling around the umbrella, heavier near her and fading into the misty background.
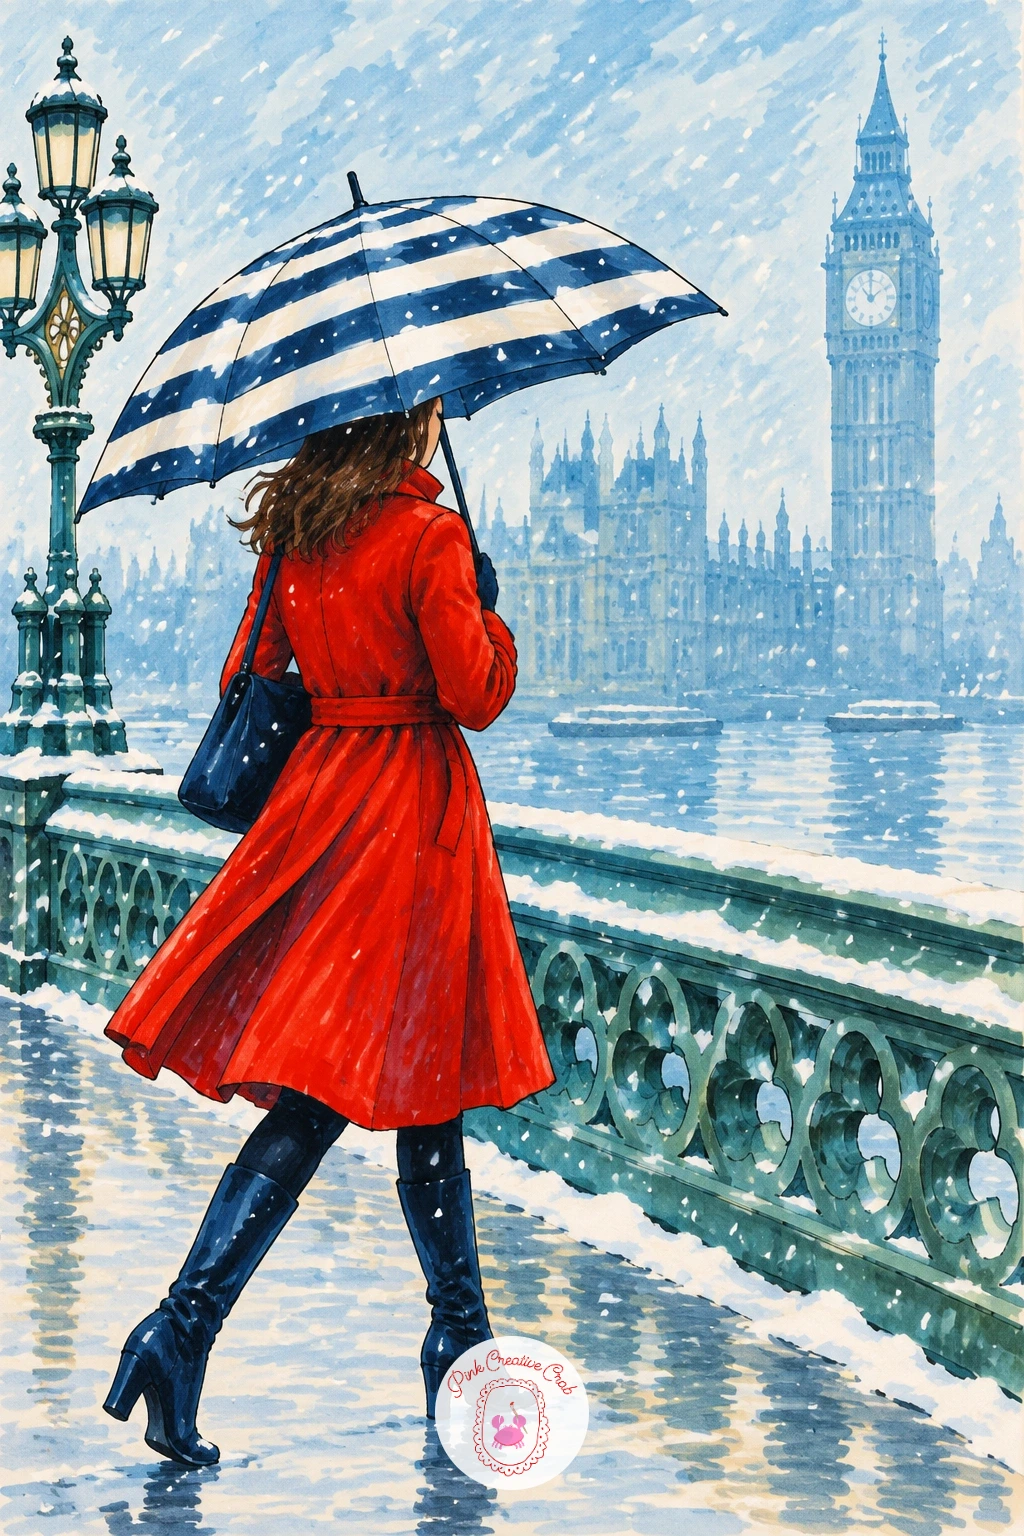
Palette: Pillar Box Red,Cream,Deep Navy,Frosty Sky Blue
Set the Ferris wheel slightly off center in fineliner, a careful circle again, with fairground tents and a smaller ride or two clustered at its base to keep the ground level busy and festive. Space the wheel’s gondola cars evenly around the rim using the same even-spacing approach as the London Eye, but smaller and more colorful here.
Light each gondola and tent in alternating pillar box red, soft yellow and fir green, since a fairground at night earns a slightly brighter, more playful palette than the rest of the city scenes. Let the night sky behind stay deep navy so every lit shape glows clearly against it.
Small fairground rides are where paper can get overworked fast with too many tiny shapes, so keep background tents simple triangles and let only the wheel carry real detail. For a quicker version, draw the wheel alone filling most of the page and only hint at a tent or two in the corner.
Finish with light trails, thin curved streaks of soft yellow suggesting other rides spinning just out of frame.
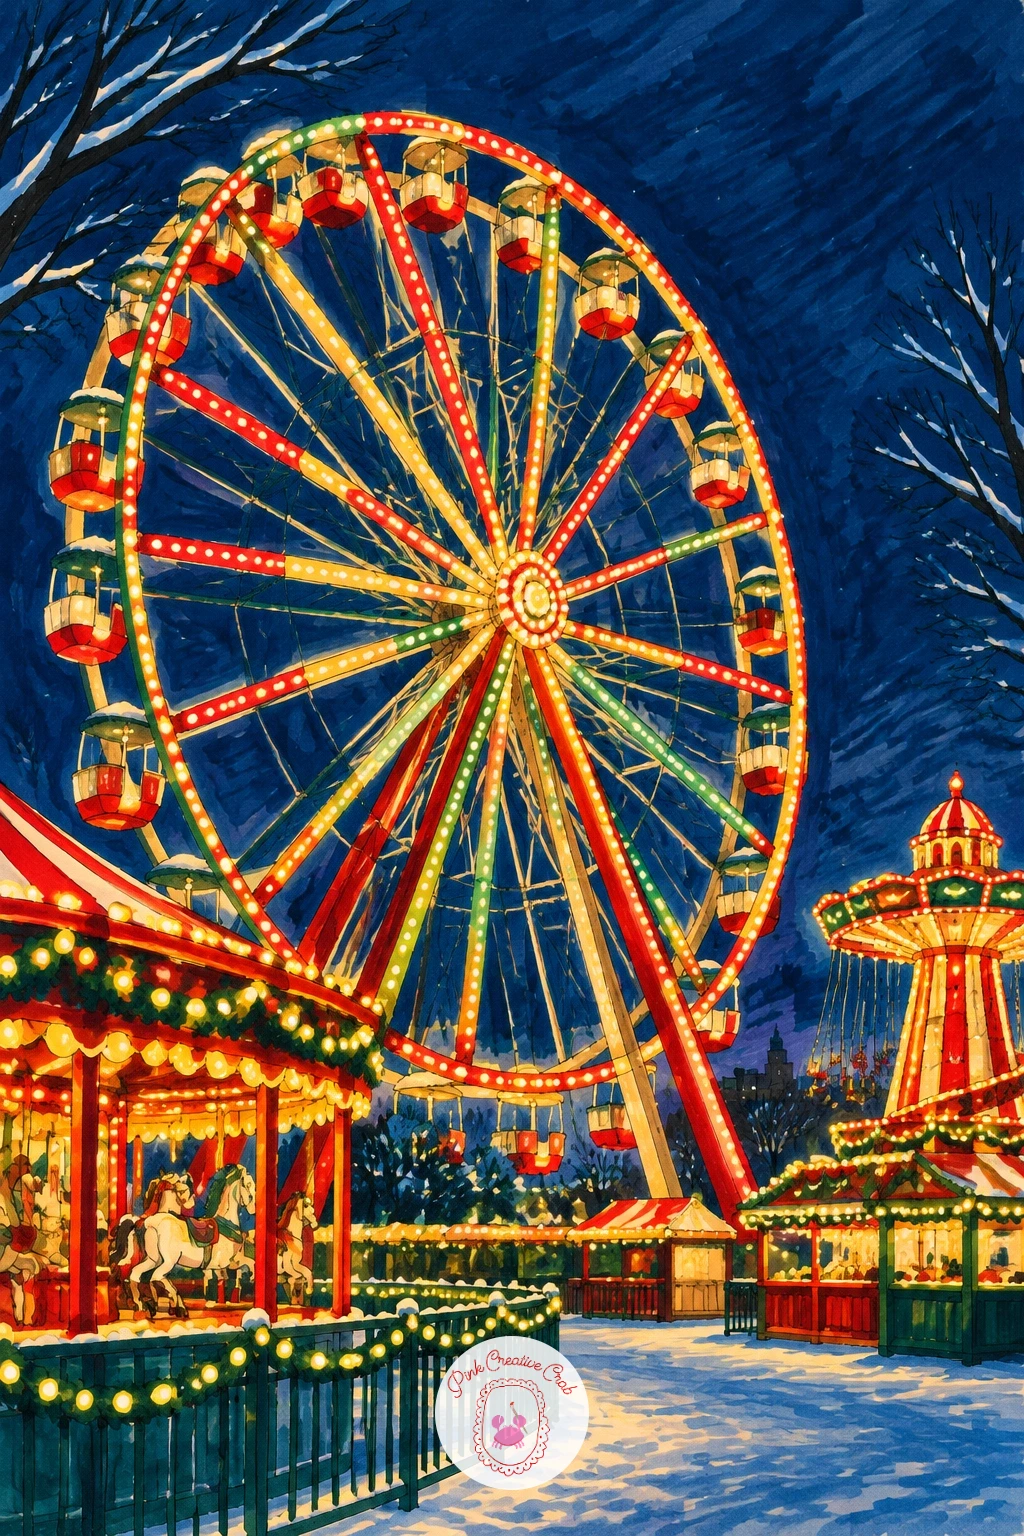
You Will Need
- a plate or compass to trace a circle
Palette: Pillar Box Red,Soft Yellow,Fir Green,Deep Navy
Draw two or three deer standing loosely scattered across the page rather than lined up, since a scattered group reads far more natural grazing in mist than a tidy row. Keep each deer’s body a simple oval with thin legs and a small raised head, no antler detail needed unless you want one stag as the focal point.
Color the deer in warm soft brown and cream blended together, then build the mist around them with very pale frosty sky blue washed thin, letting the furthest deer fade almost into the background while the closest stays more defined. That fading distance is the whole trick to convincing morning mist.
Frosty grass beneath their feet takes short white gel pen flicks over a pale green-grey base rather than solid white, which keeps it looking like frost rather than snow. If blending soft mist feels hard with alcohol markers, try a dry blending nib with no fresh ink to pull existing color outward and soften it.
Leave the background trees as the faintest navy silhouettes, barely more than suggestion.
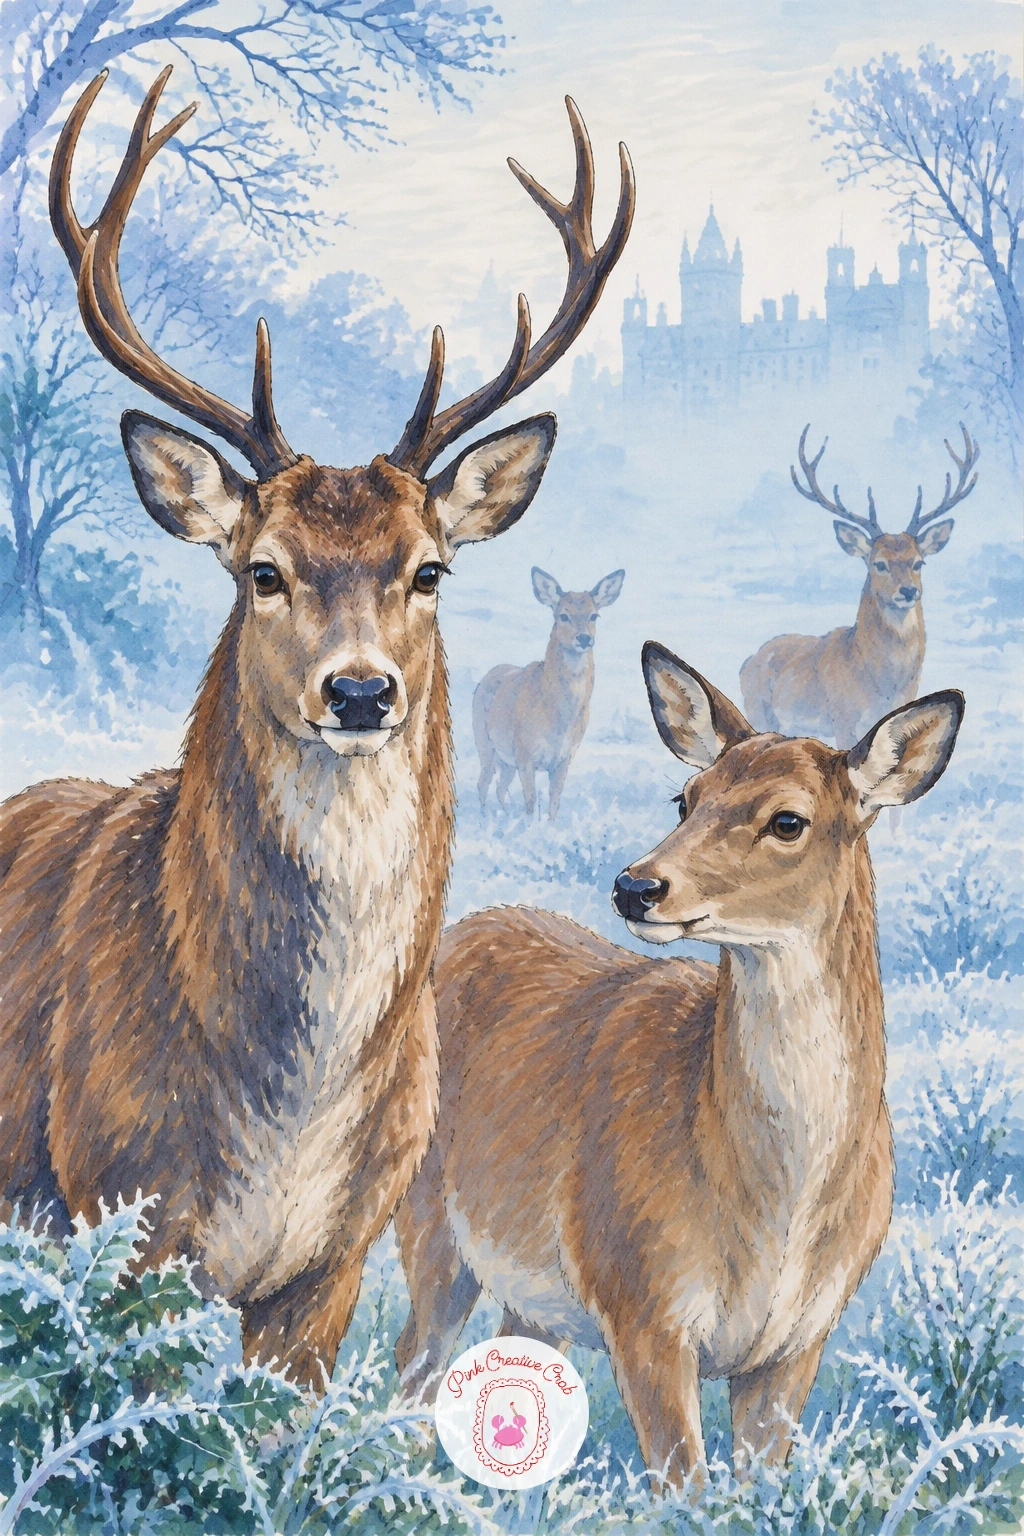
Palette: Warm Brown,Cream,Frosty Sky Blue,Deep Navy
Frame this one as an interior close up: draw a stone fireplace in fineliner filling most of the lower half of the page, flames sketched as simple overlapping teardrop shapes rather than realistic fire. Curl a sleeping dog on the hearth rug in front, body in one smooth comma shape with the head tucked down.
Color the fire in layered pillar box red and soft yellow, brightest at the base and softening upward into smoke, then let everything beyond the fireplace sit in warm deep navy shadow so the flames read as the main light source. The dog’s coat takes a warm cream or brown, lit on the side facing the fire and left in soft shadow on the far side.
Interiors like this often lose warmth if the surrounding room gets too much detail, so keep any furniture or beams simple dark shapes barely emerging from shadow. For a faster version, crop tighter so only the fire and the dog show, cutting the room out entirely.
Finish with a few sparks as tiny soft yellow dots rising from the flames.
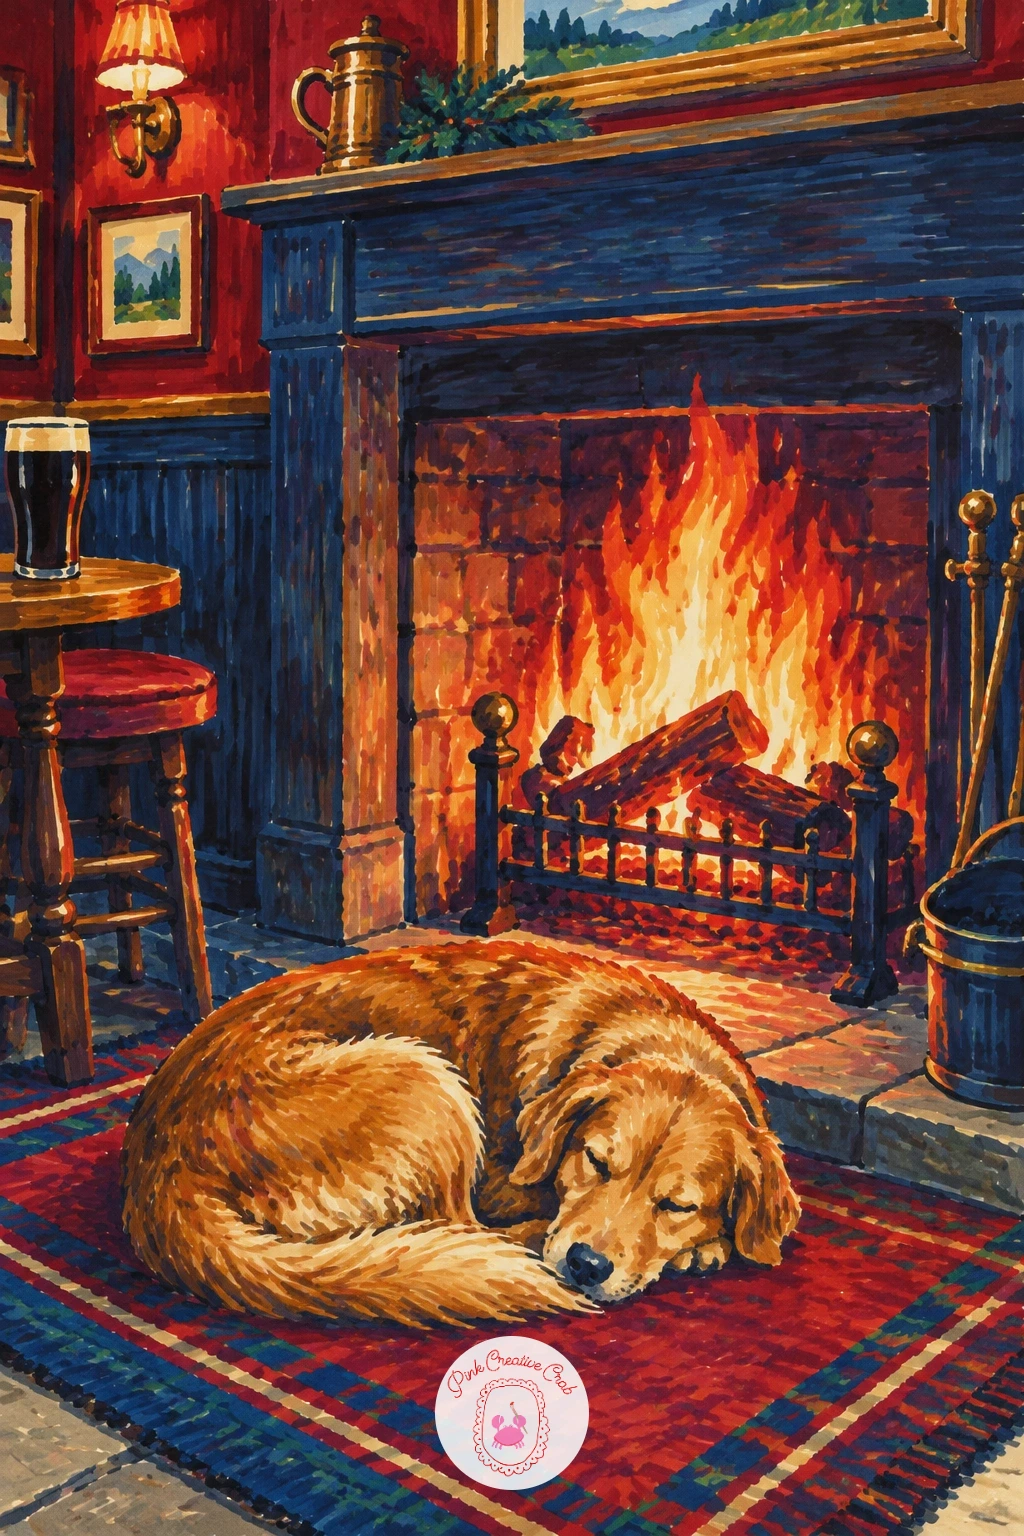
Palette: Pillar Box Red,Soft Yellow,Deep Navy,Warm Brown
Sketch two swans gliding close together in fineliner, long curved necks in an S shape and simple oval bodies, since swans rely entirely on that curve to look graceful rather than lumpy. Place the palace facade behind them in soft perspective, kept low and wide with simple window rows rather than ornate stonework.
Leave the swans themselves almost entirely white paper, adding only the faintest cream shadow along their underside and a warm soft yellow beak, since pure white against the cooler pond is what makes them glow. Ring the edges of the pond in pale frosty sky blue ice cracking into deeper navy water where the swans sit.
The pond’s frozen edge is where a dry brush or dry marker nib technique helps most, dragging an almost-empty blending nib lightly across the ice edge breaks the color up just enough to suggest texture rather than a flat painted ring. If you do not have a spare dry nib, a clean cotton swab lightly dabbed over fresh marker does something similar.
Finish with the palace windows glowing a faint warm cream in the low winter light.
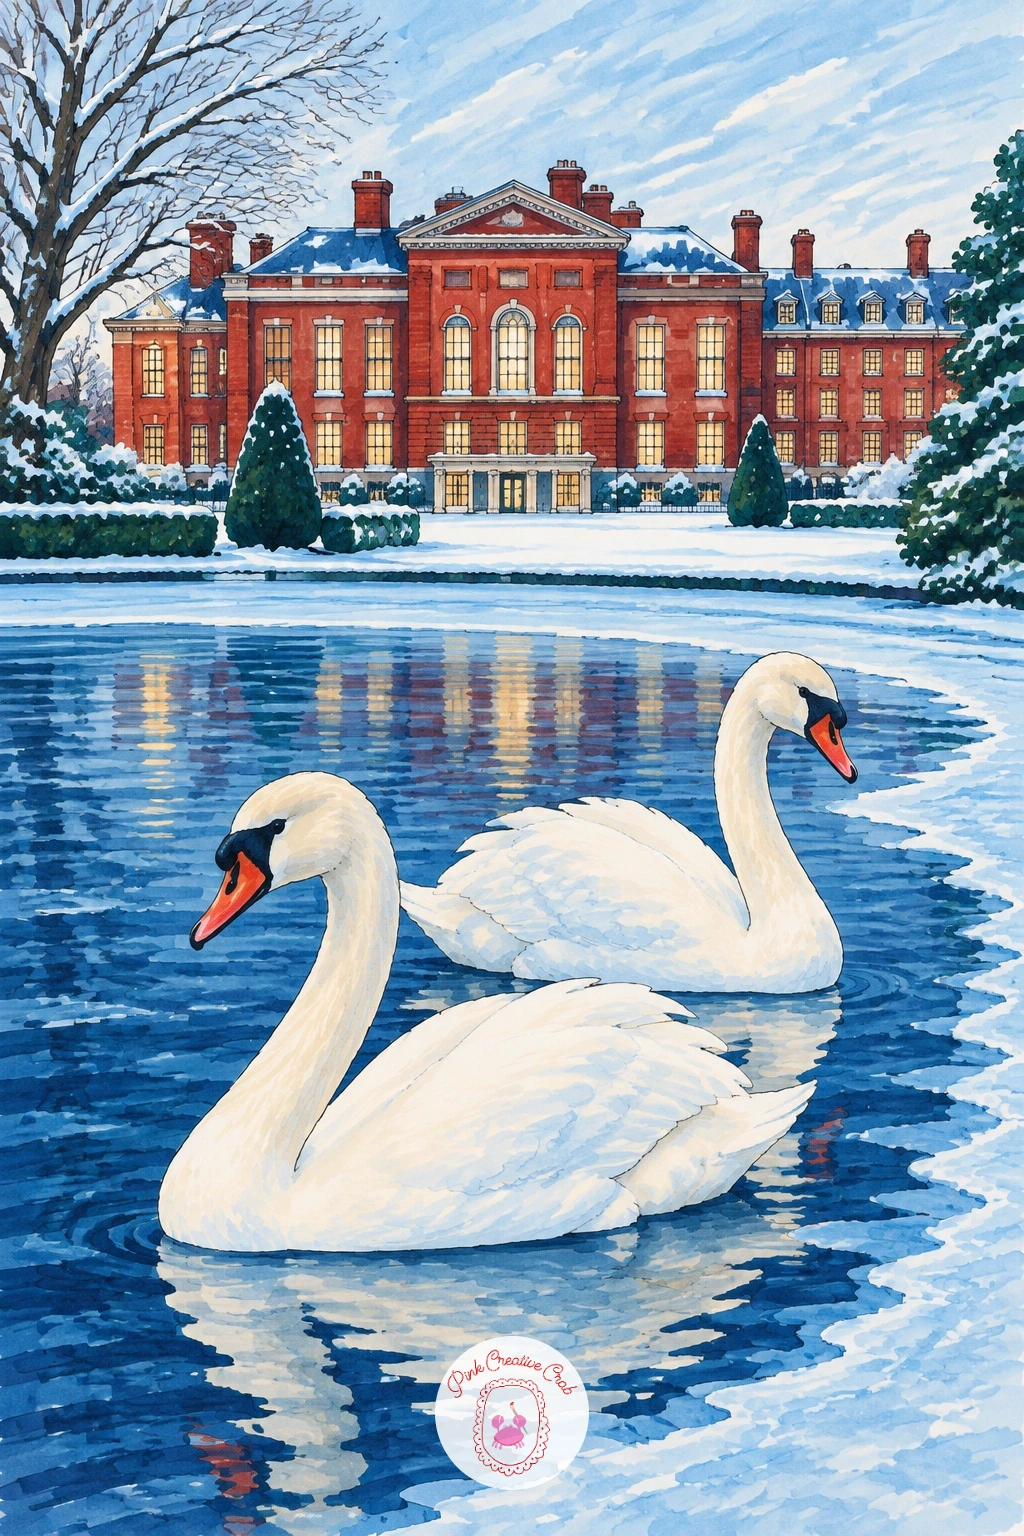
Palette: Frosty Sky Blue,Deep Navy,Cream,Soft Yellow
After the swans, return to something small and quick: draw the classic cylindrical post box in fineliner, a simple rounded top and a thin horizontal mail slot, standing on a patch of cobbled corner sketched as loose overlapping ovals rather than a perfect grid.
Paint the box in solid pillar box red with one darker red shadow stripe down its shaded side to keep it rounded rather than flat. The cobbles beneath take a mix of cool grey and frosty sky blue, each stone slightly different in tone so the ground does not look like one flat slab.
A simple subject like this is the easiest in the whole set to try as a ten minute quick sketch, just the box and a few cobbles with no background at all, or stretched to forty minutes by adding a blurred shopfront glow and a lamppost behind it. Either version earns a generous cap of white gel pen snow balanced on top.
Let a few snowflakes drift past the box in the air for the finishing touch.
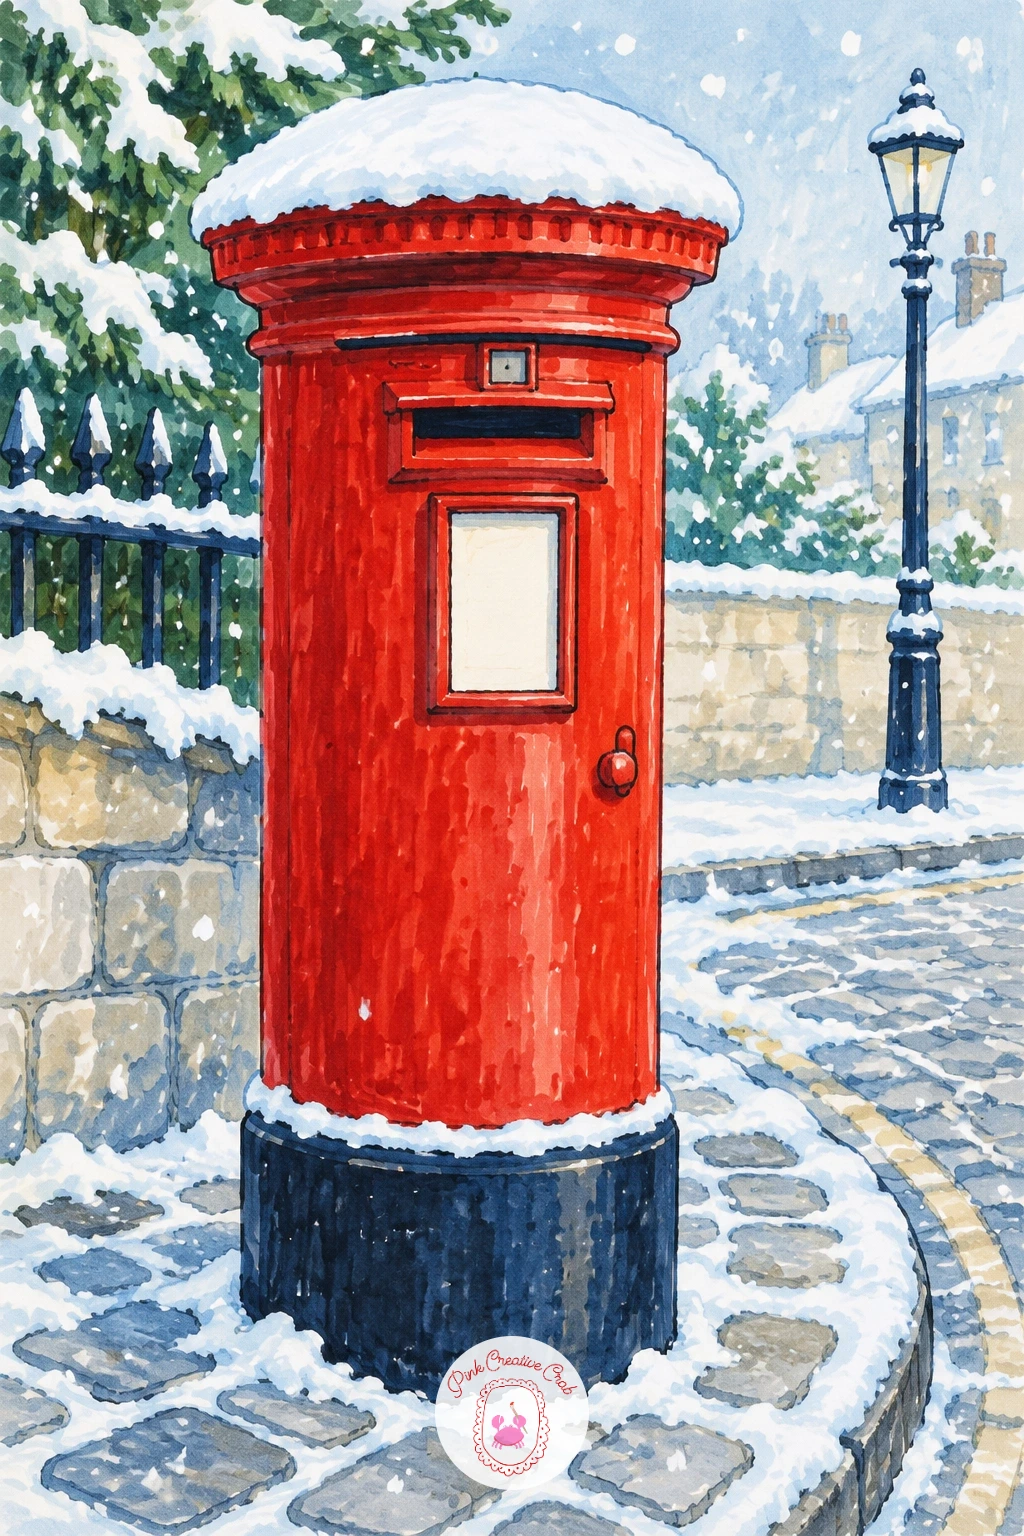
You Will Need
- white gel pen
Palette: Pillar Box Red,Cool Grey,Frosty Sky Blue,Cream
Frame a bay window filling most of the page in fineliner, three angled panes of glass meeting at soft corners, with a Christmas tree twinkling inside positioned just off center so the window frame still reads clearly around it. Brick or render around the window takes a warm cream or soft terracotta tone, kept simple with minimal texture.
Layer fir green for the tree inside, then dot ornaments in pillar box red and soft yellow scattered through the branches, letting the glow spill out gently onto the window glass itself as a warm cream halo. That halo bleeding slightly past the window frame is what makes the whole house feel lit from within rather than just containing a tree.
Outside the window, keep everything in cooler deep navy and frosty sky blue, since the temperature contrast between warm glowing interior and cold street is the whole point of this scene. If the warm glow spreads too far and looks messy, go back in with a cream colored pencil to tighten the edge where glow meets glass.
Finish with a dusting of snow on the windowsill outside.
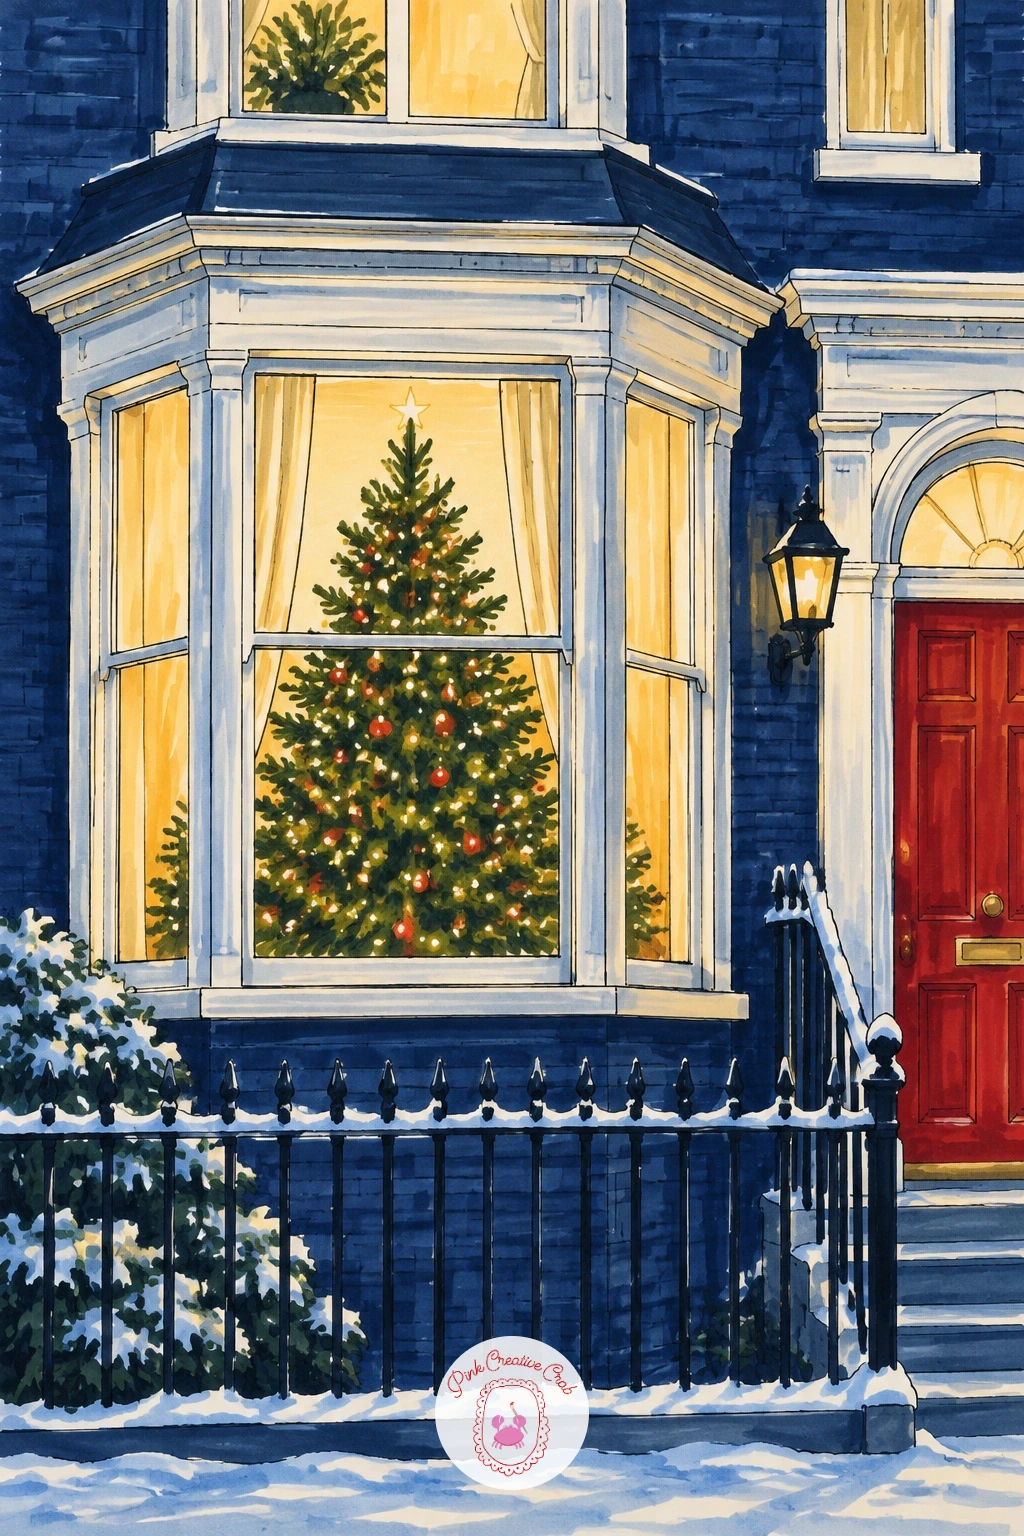
Palette: Fir Green,Pillar Box Red,Cream,Deep Navy
Work this one in clear bands from back to front: a pale cream and soft pink sky along the horizon, a hazy skyline of simplified towers and domes in frosty sky blue just above the tree line, and dark fir green and navy trees filling the foreground closest to the viewer. Keeping those three bands distinct is what gives a heath view its sense of real distance.
The skyline itself needs only simple rectangular and pointed shapes, no architectural accuracy, since from this distance recognizable silhouettes matter more than detail. Let frost sit on the foreground grass and tree branches as scattered white gel pen marks rather than a solid white layer.
Distant views like this often collapse when the background gets too much contrast, so keep the far skyline soft and low contrast while saving your darkest darks for the nearest branches. If you want a faster version, simplify the skyline to two or three recognizable shapes rather than a full silhouette row.
A pale sun low in the sky, barely more than a soft yellow smudge, finishes the frosty morning mood.
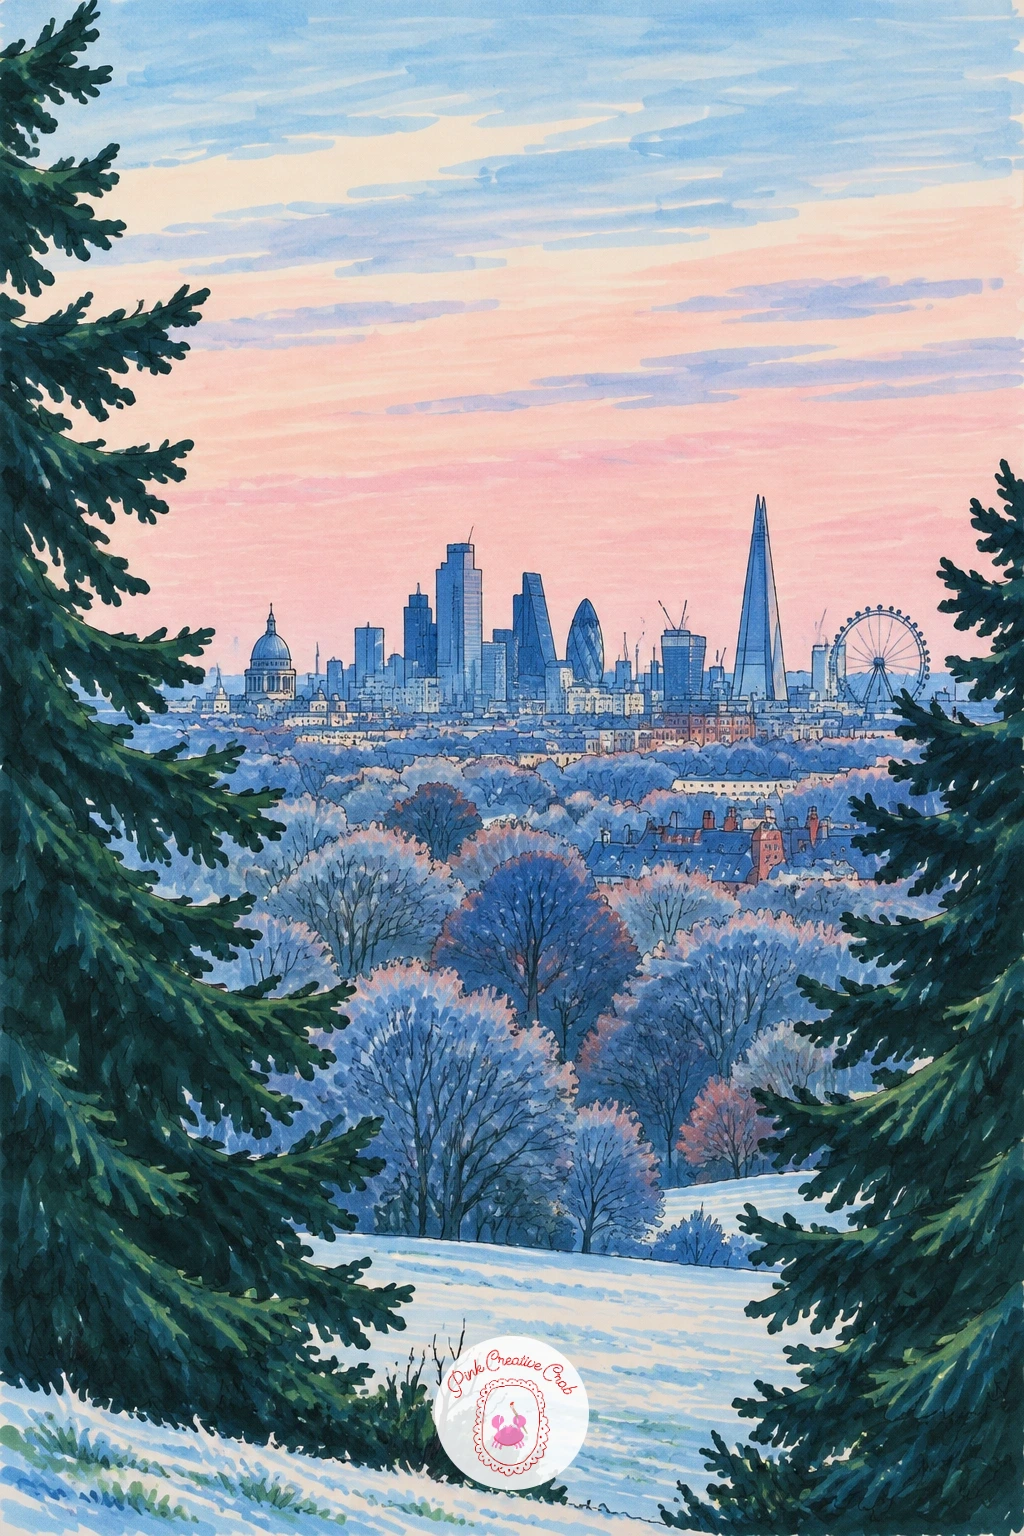
Palette: Blush Pink,Frosty Sky Blue,Fir Green,Deep Navy
Draw the riverboat low and wide in fineliner, a simple hull with a row of small square windows along its side, drifting roughly parallel to the bottom edge of the page. Place the South Bank skyline behind it as a loose row of simplified building shapes, varying their heights so the skyline has rhythm rather than a flat ruler line.
Light every boat window in warm soft yellow against a deep navy hull, then let that same warm light drop as thin vertical reflections into the water directly beneath the boat. The water itself stays mostly navy with just a few frosty sky blue ripple lines breaking the surface.
Reflections are the one part of this scene worth slowing down for: keep each reflected light streak directly below its source window and let it waver slightly rather than staying perfectly straight, which is what makes it read as moving water rather than a mirror. If vertical reflections feel fiddly, a few short horizontal dashes under the boat suggest the same thing more simply.
Finish the sky above the skyline in deep navy fading to near black at the very top of the page.
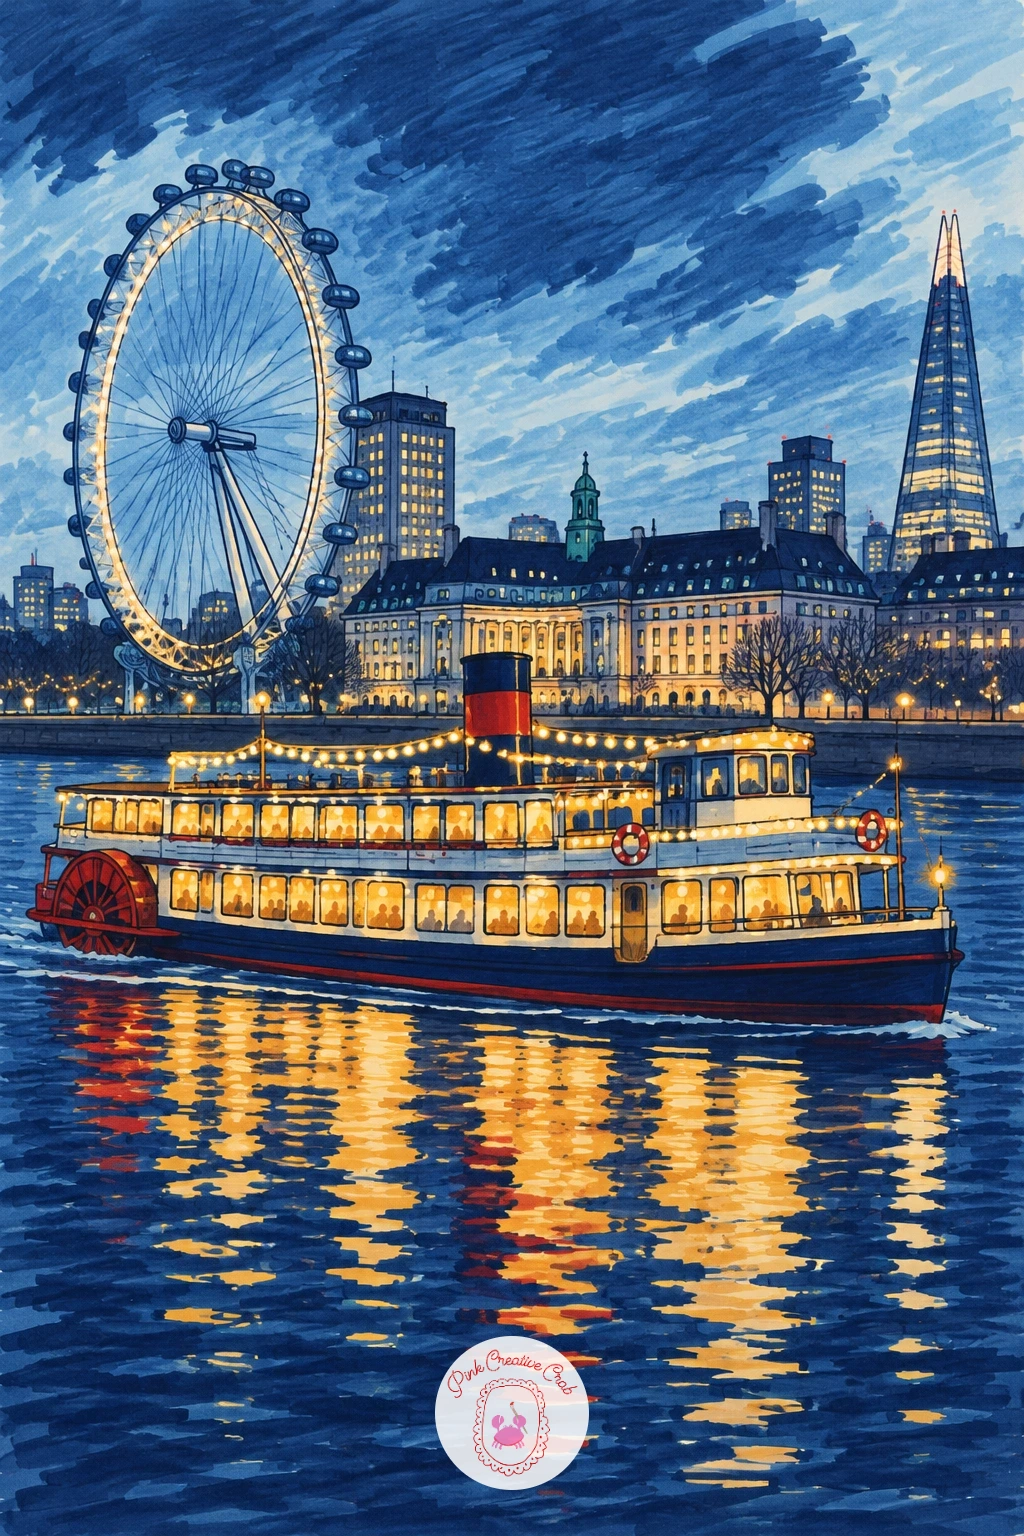
Palette: Deep Navy,Soft Yellow,Frosty Sky Blue,Cream
Place the figure walking toward the viewer along a gently lit street, coat falling in a simple long A-line shape in fineliner, arms wrapped around a stack of two or three gift boxes tied with ribbon. Keep the boxes slightly different sizes and angles in the stack rather than a perfectly neat pile, which looks more carried and less staged.
Color the coat in deep navy or soft camel, then let the gift boxes carry the brightest color in the scene, pillar box red and cream with simple ribbon lines in a contrasting shade. Streetlamps lining the path behind her glow soft yellow, with their light pooling faintly on the pavement in small warm patches.
Figures carrying something often end up with stiff, straight arms, so curve her forearms slightly around the top box and tilt her head down a touch as if watching her footing on the icy pavement. For a quicker variation, reduce the gift boxes to just one large one under her arm instead of a stack.
Finish with a few flakes of snow settling on her shoulders and the top box.
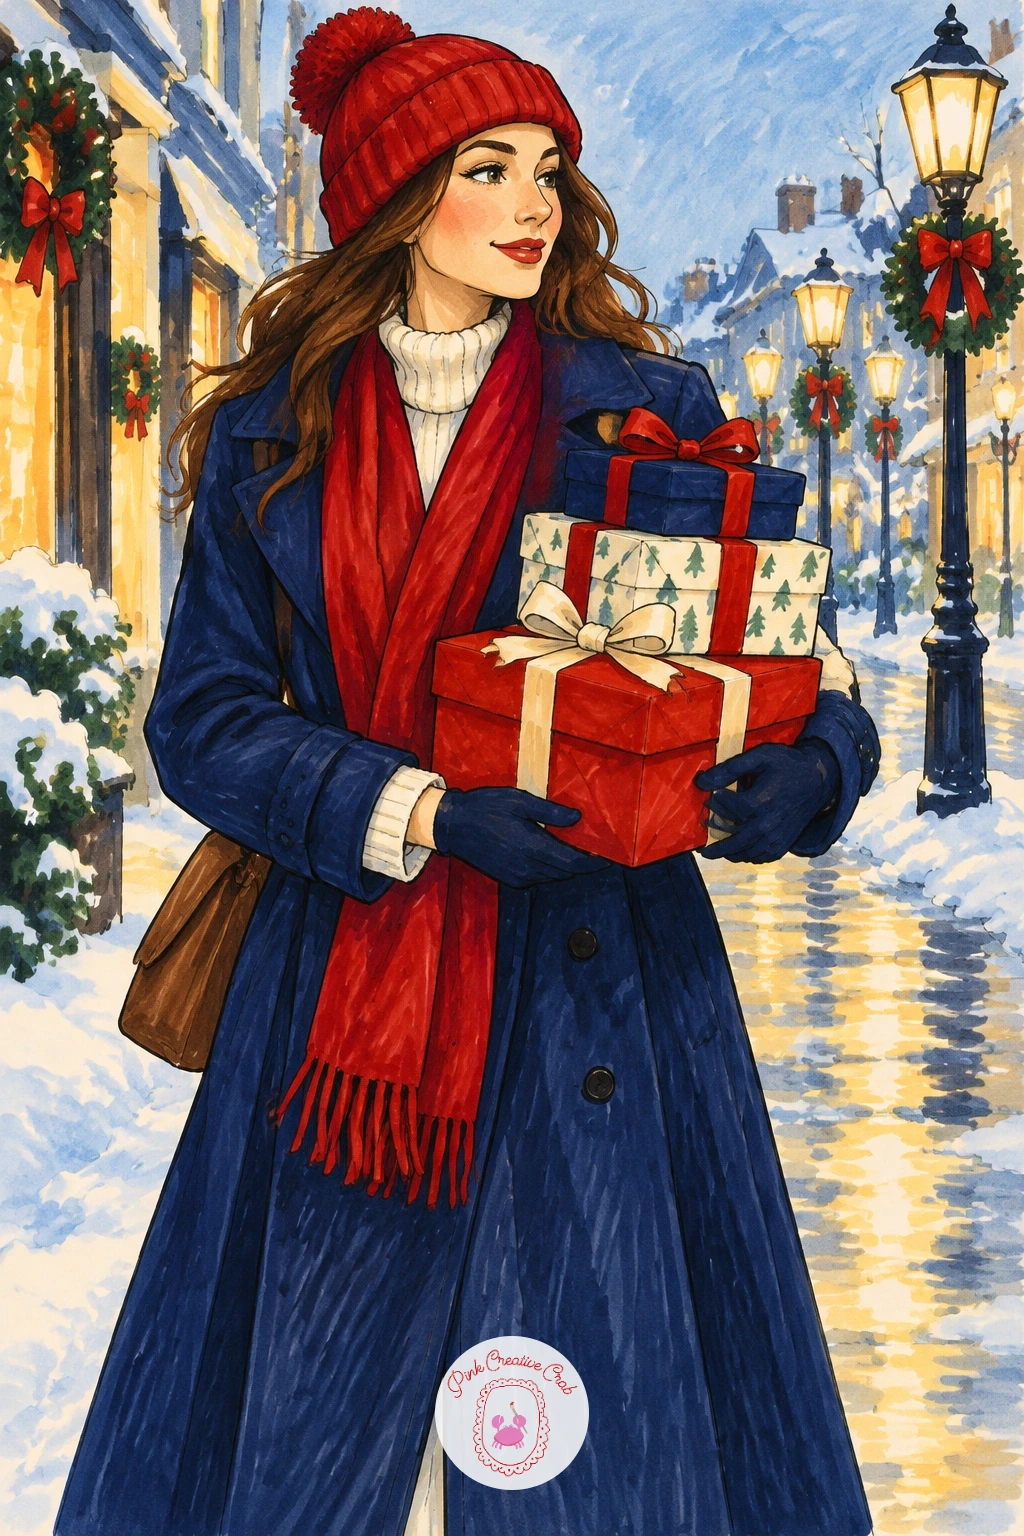
Palette: Deep Navy,Pillar Box Red,Cream,Soft Yellow
The memorial’s gold detailing is the whole point of this scene, so build it slowly in layers: block the spire and canopy shape in fineliner first, simple and symmetrical, then lay a base of warm soft yellow across the ornamental areas before glazing a thin gold or amber tone over the top once the first layer is dry. That layering is what gives gilded stone its glow rather than looking like flat yellow paint.
Surround the memorial in fresh white snow, left mostly as untouched paper with only the faintest frosty sky blue shadow in the recesses of the stonework to keep it from looking flat. Deep navy trees and sky behind push the gold forward as the clear focal point.
Ornate structures like this are easy to overwork trying to capture every carved detail, so pick two or three key decorative elements to render carefully and let the rest stay suggested with simple lines. If gold marker is not in your set, layering soft yellow under a thin brown glaze gets close enough for this scale.
Finish with a light scatter of white gel pen snow settling into every ledge and crevice.
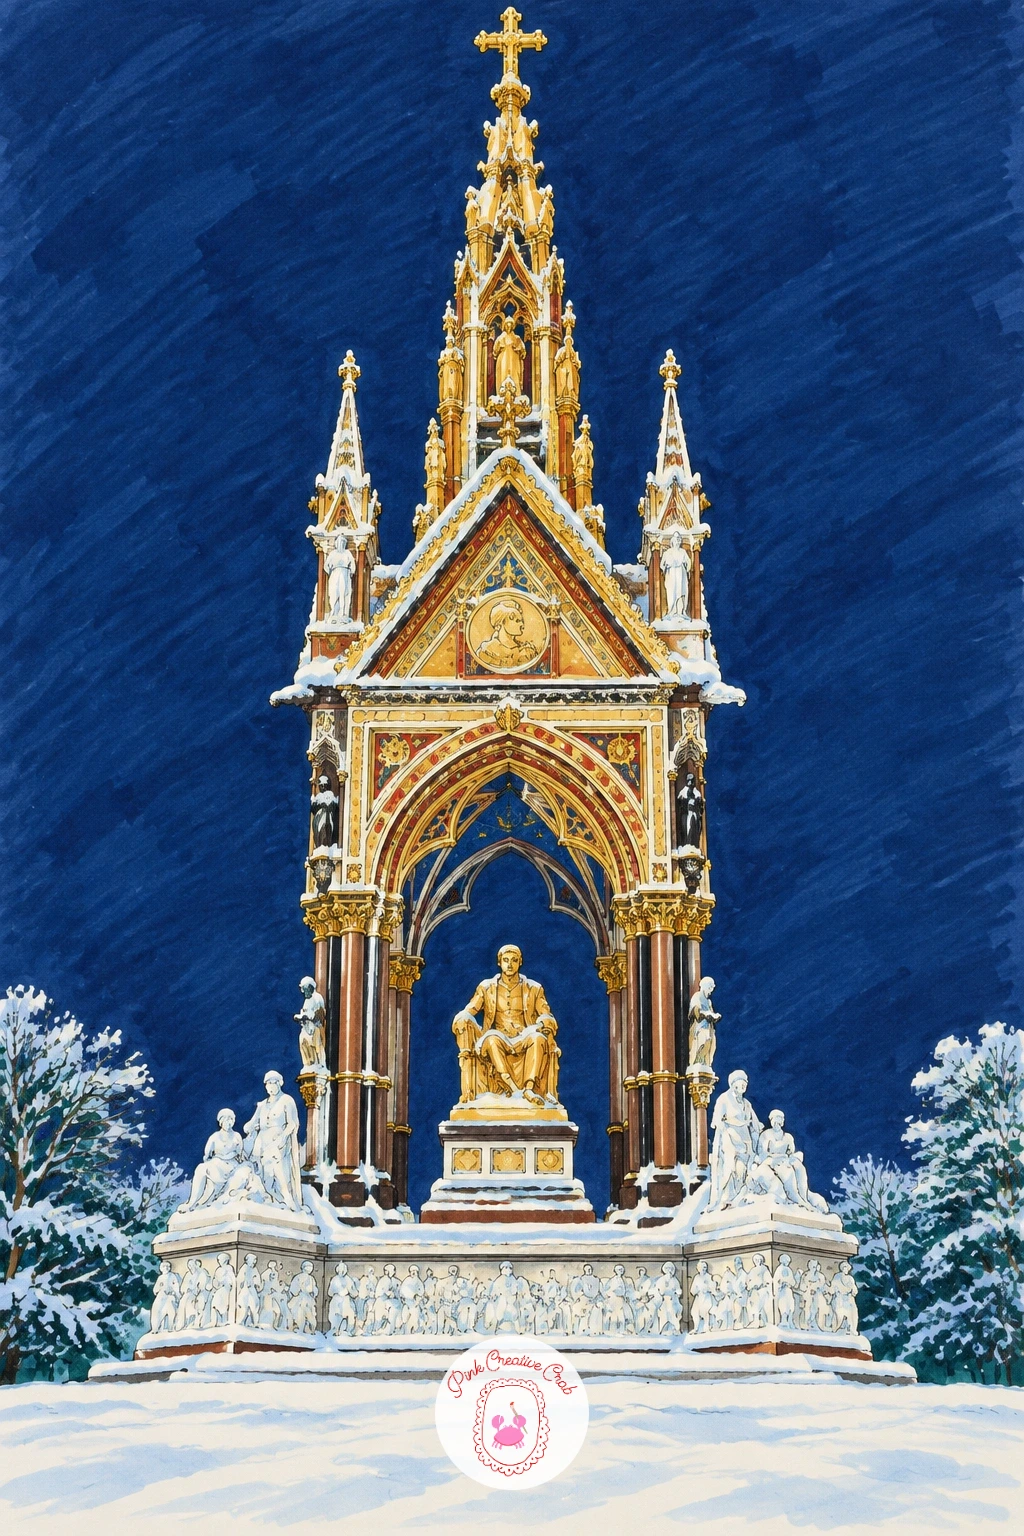
You Will Need
- gold or amber marker (optional)
Palette: Soft Yellow,Amber Gold,Frosty Sky Blue,Deep Navy
Build a simple window frame in fineliner first, then arrange three or four toy soldiers inside in varied marching poses, legs mid step and arms swinging, since a little variation in pose is what makes them look like they are dancing rather than standing still. Add two or three small children outside the glass, drawn from behind or in profile looking up and in, kept simple with just coat shapes and small heads.
Color the soldiers in pillar box red and cream uniforms with soft yellow trim and buttons, set against a warm cream window backdrop so they glow like a lit stage. The children watching outside stay in cooler deep navy coats, which keeps the warm window the clear center of attention.
This scene depends on a contrast between warm and cool holding steady, so resist the urge to add too much color to the street side of the glass. For a quicker version, reduce the display to two soldiers and one watching child rather than a full window scene.
Finish with a soft reflection of the street lamp glow across the lower pane of glass.
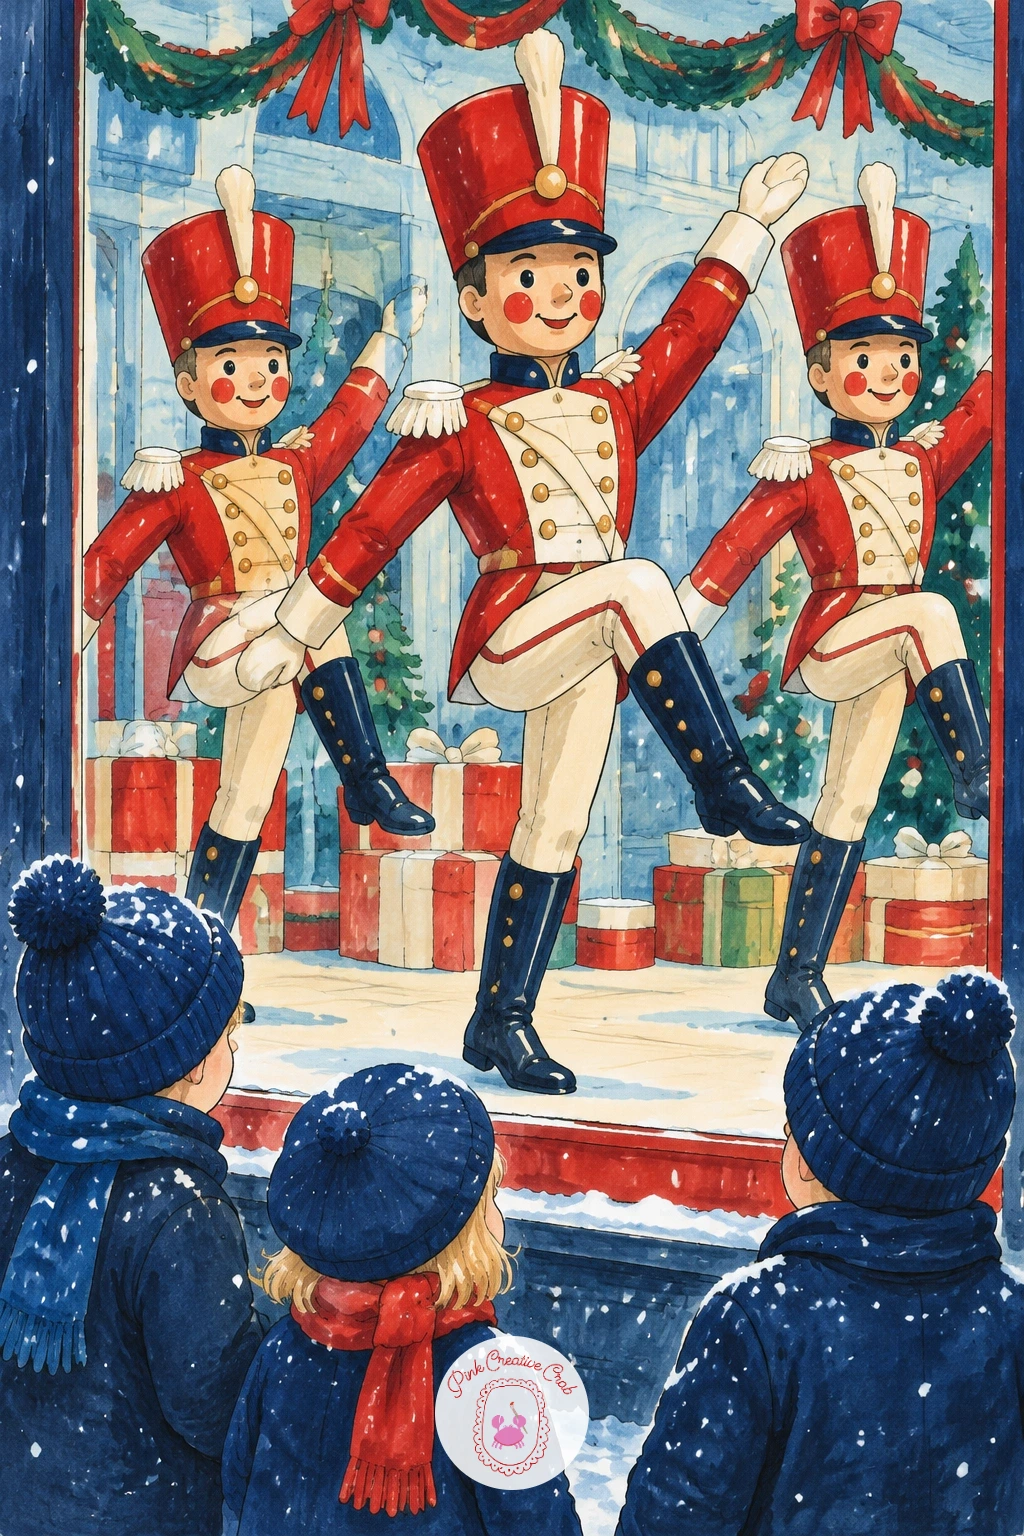
Palette: Pillar Box Red,Cream,Soft Yellow,Deep Navy
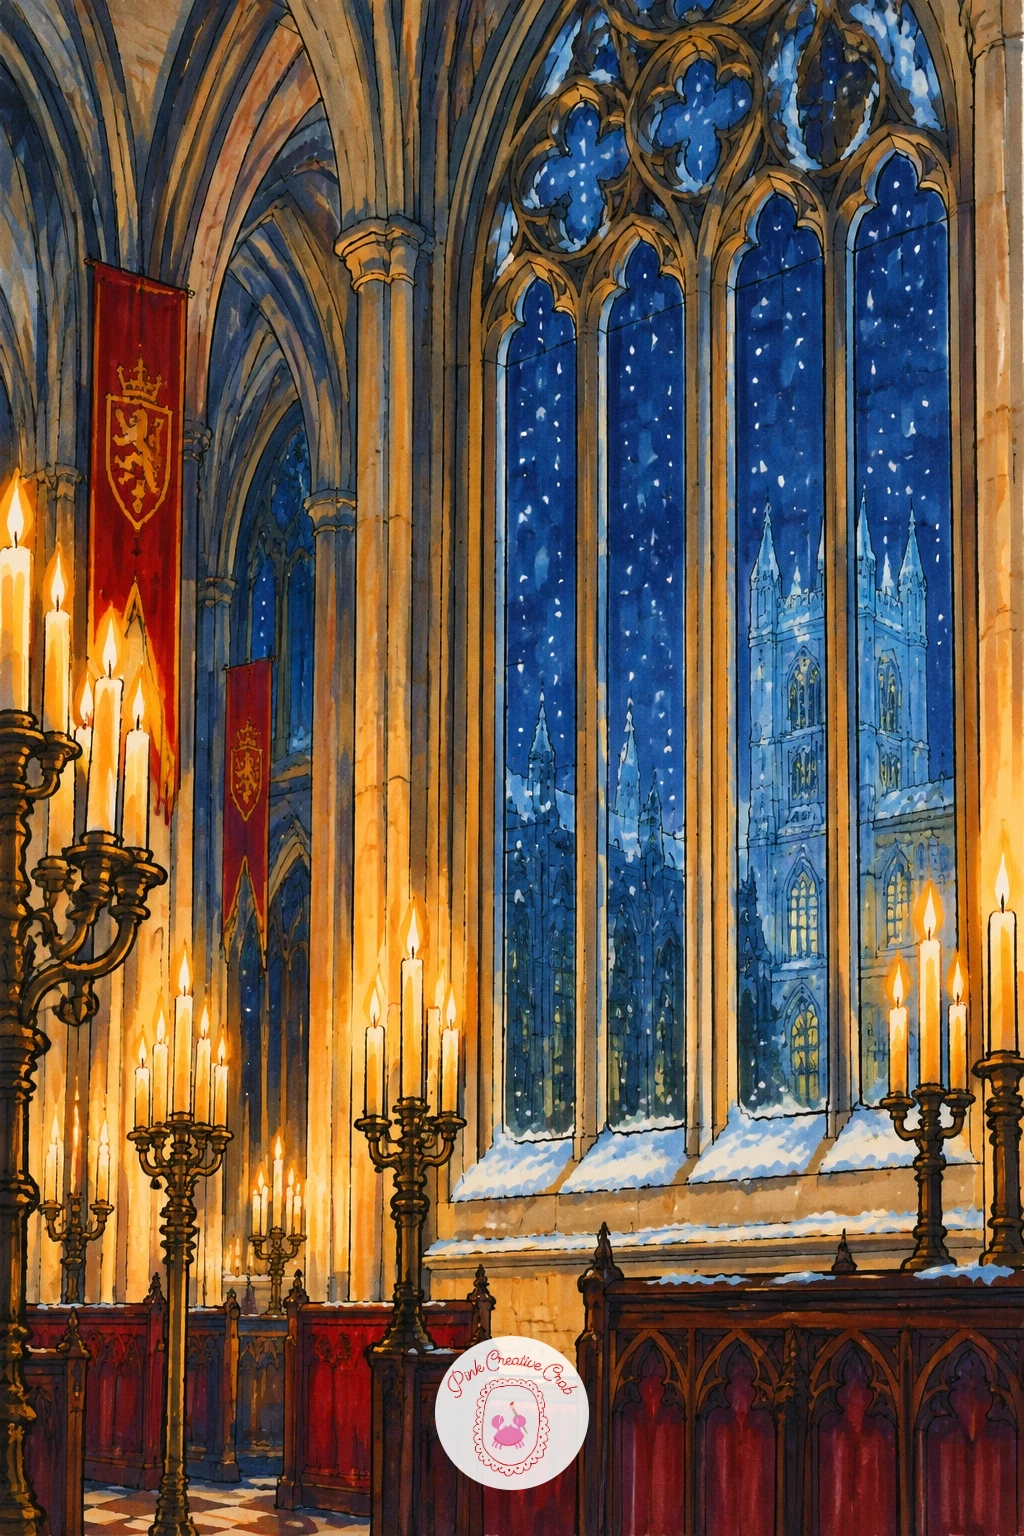
Draw two or three tall pointed windows in fineliner, filling most of the page with their Gothic arch shapes, since the windows themselves are the real subject here more than the full building. Keep the stonework between them simple and dark, just enough structure to frame the glow.
Light the windows from within using a layered glow technique: lay soft yellow first across the lower half of each window, then blend upward into cream and finally let the top edge fade into deep navy evening sky outside. That gradual shift from warm to cool inside a single window pane is what makes candlelight read as flickering and alive rather than flat.
Snow gathers along the stone ledges and window sills in white gel pen, applied once the glow colors beneath have fully dried so they stay crisp rather than smudging into the ink. If three full windows feels like too much for one sitting, crop to a single tall window filling the page for a simpler, equally effective version.
Finish the stonework with the faintest frosty sky blue highlight along one edge to suggest moonlight.
You Will Need
- white gel pen
Palette: Soft Yellow,Cream,Deep Navy,Frosty Sky Blue
For more lit-window practice, the glowing houses in winter illustration ideas use the same warm to cool gradient trick inside a window pane.
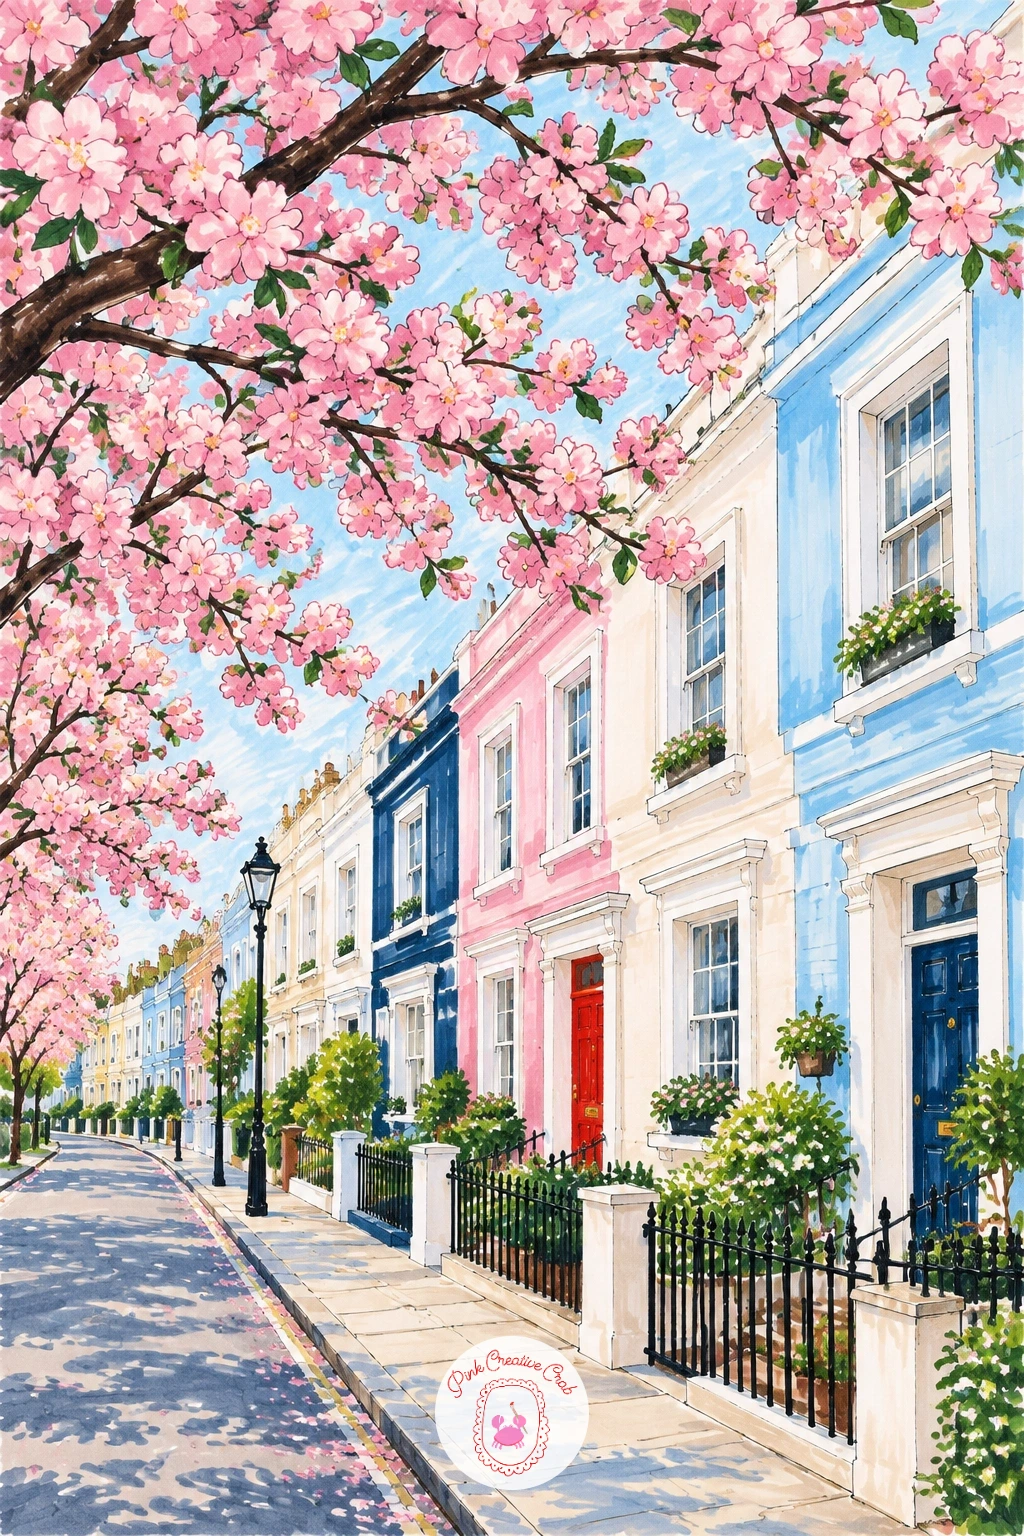
Switch the palette entirely for this one, since it is the article’s spring scene: sketch the same kind of pastel terraced houses as earlier but now under arching cherry blossom branches in fineliner, branches curving gently inward from both sides of the street toward the top of the page. This is the idea to try next once the winter Notting Hill row feels comfortable, same houses, completely different season and mood.
Color the blossoms in soft pink clustered in loose rounded shapes along each branch, varying cluster size so the canopy feels natural rather than uniform. Let a scatter of fallen petals drift down onto the pastel houses and pavement below in the same pink, tying sky and street together.
Blossom trees often turn into solid pink blobs, so leave small gaps of visible sky or cream paper between clusters to keep individual blooms readable. If pink marker runs too strong, a pale blush colored pencil layered lightly over white gives a softer, more delicate bloom.
Finish with a pale blue sky glimpsed through the gaps in the branches.
Palette: Blush Pink,Frosty Sky Blue,Cream,Mint Pastel
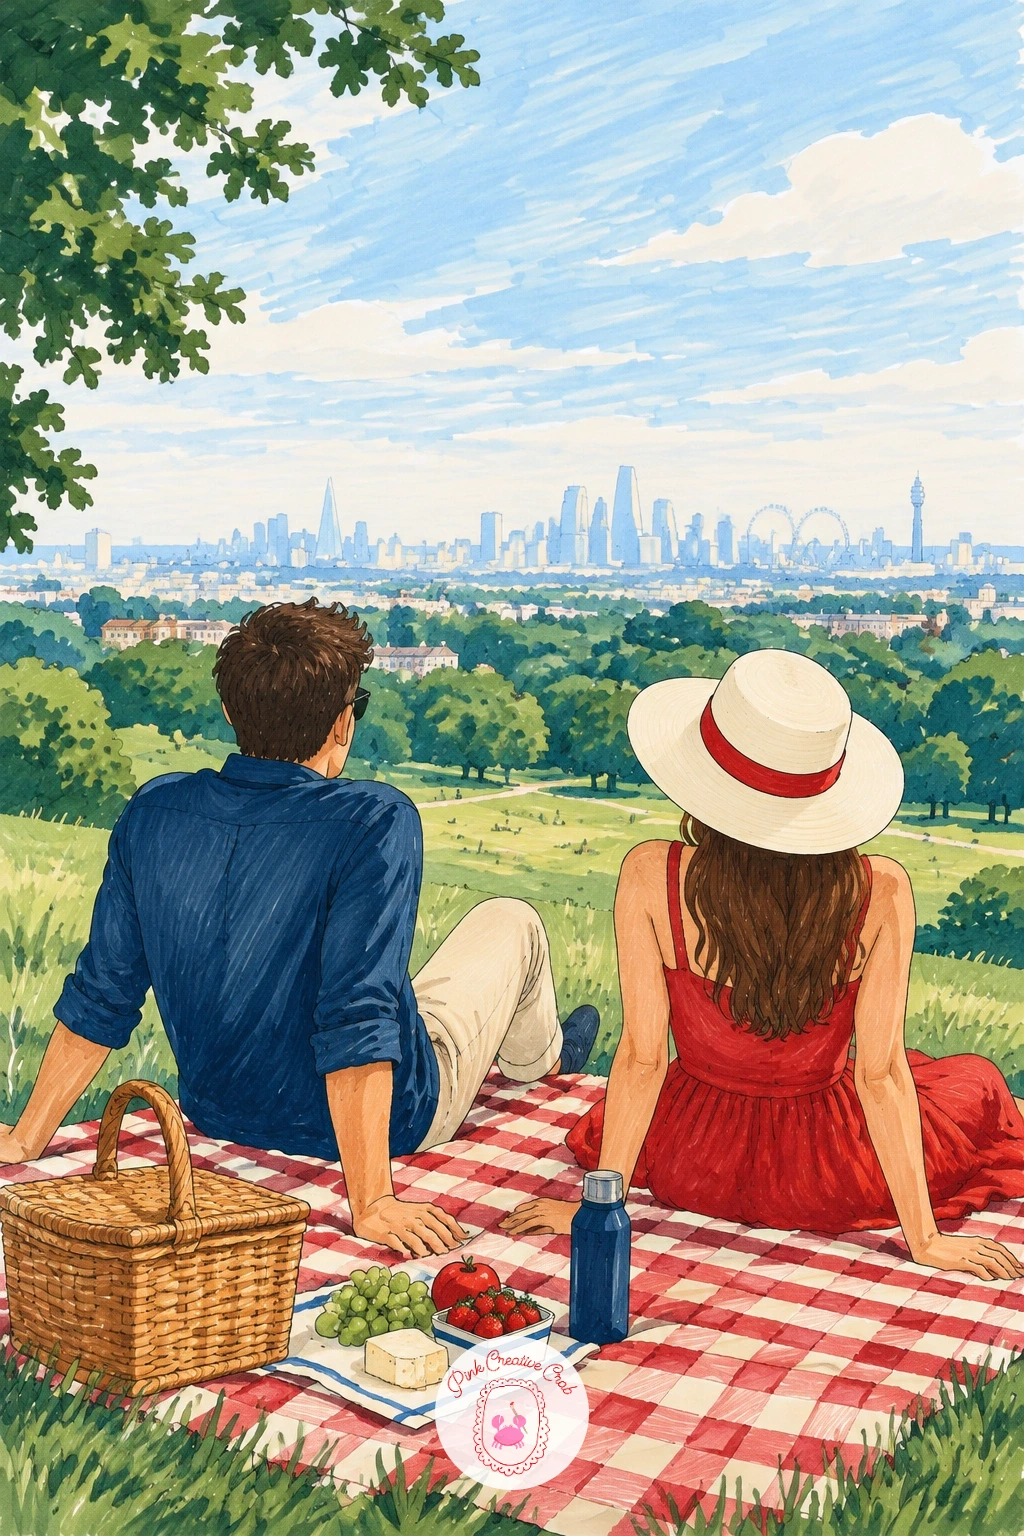
Lay a gingham blanket in fineliner on a gentle grassy slope, with a small picnic basket and a couple of simple seated figures, since the hill’s famous skyline view only works if the foreground stays uncluttered and inviting. Keep the figures loose, just rounded shapes leaning back or toward each other, no detailed faces needed.
Color the grass in warm sunlit green rather than the fir green used in the winter scenes, with the skyline far below rendered small and pale in frosty sky blue haze to show real distance from the hilltop. The blanket takes a simple red and cream check, which echoes the pillar box red from the winter scenes while still feeling like a warm season.
This is a good one to revisit differently each time: try it again later at golden hour with longer shadows, or with kites in the sky instead of a picnic, since the same hillside view supports many small variations once this version feels comfortable. If the skyline at this distance feels fussy, three or four simple building silhouettes are enough to suggest the whole city.
Finish with a few scattered clouds drifting across the pale summer sky.
Palette: Sunlit Green,Frosty Sky Blue,Pillar Box Red,Cream
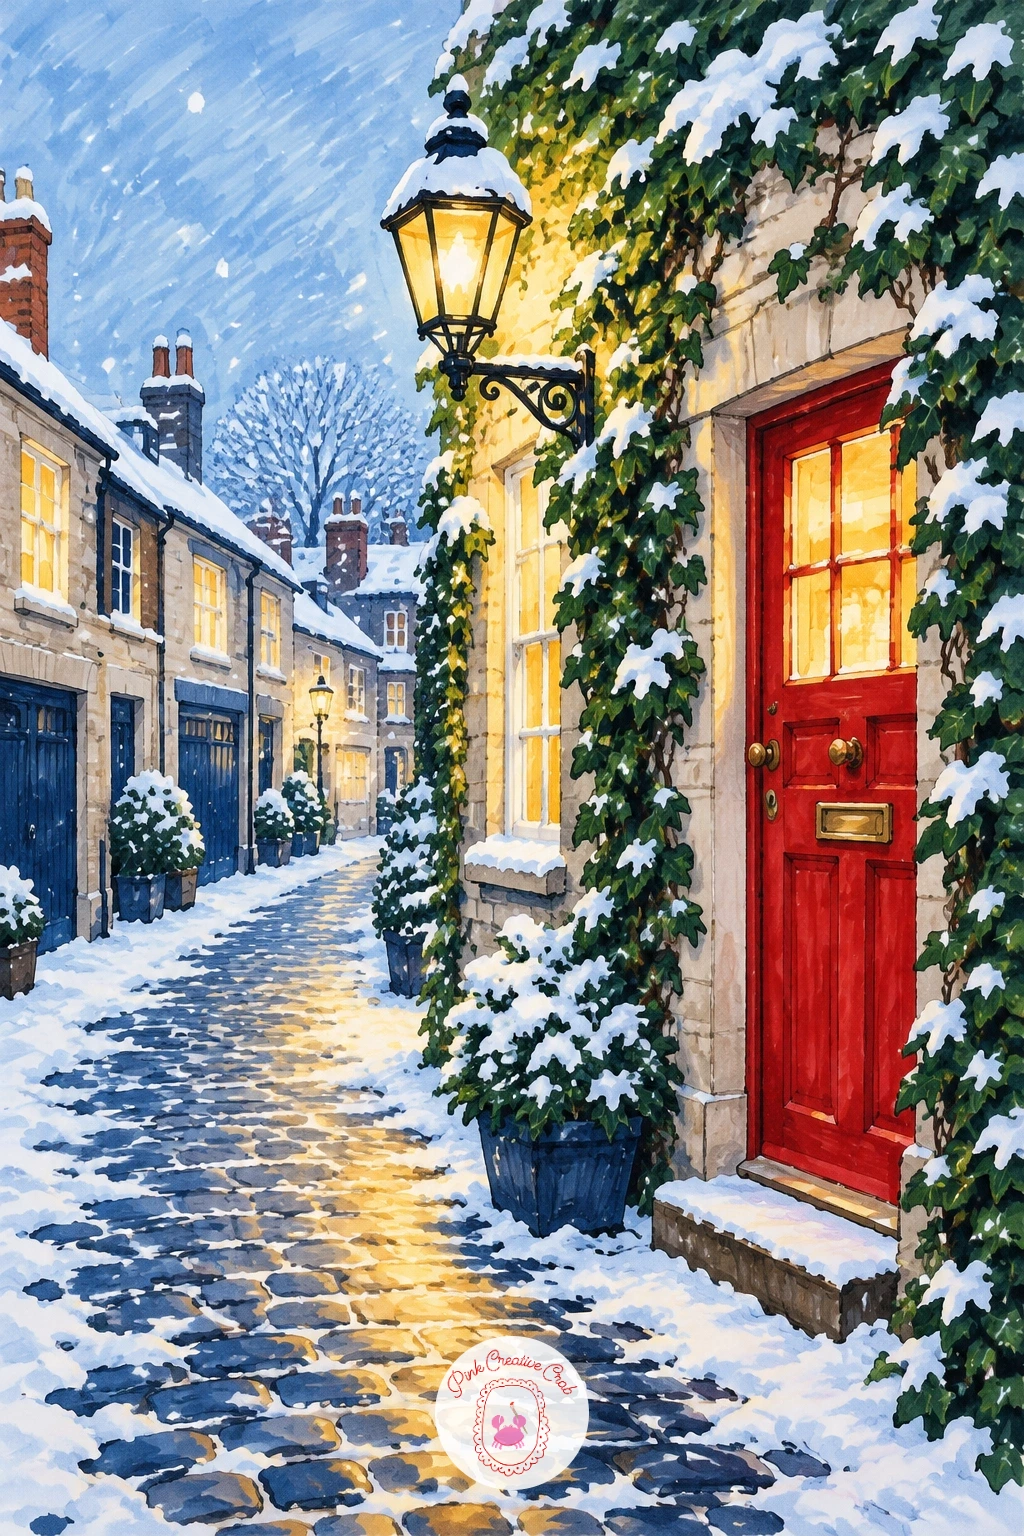
Finish the set close and intimate: draw a narrow cobbled mews in fineliner, a single lamplit lane with a red front door and climbing ivy trailing up one wall, since this tight framing makes a quiet good closing scene after the wider landmark views earlier in the list. Keep the cobbles small and varied, the door simple and centered, and the ivy a loose scatter of leaf shapes rather than a dense tangle.
Color the door in pillar box red against warm cream brickwork, then let the ivy climb in fir green with small dark shadow leaves tucked beneath the brighter ones for depth. A single lamp post beside the door glows soft yellow, its light spilling into a warm pool on the snowy cobbles below.
Narrow lanes like this can feel cramped if every cobble and leaf gets equal detail, so let the ones nearest the lamp stay crisp and let everything at the far end of the mews soften into shadow. If ivy feels fiddly to draw leaf by leaf, a looser scribbled texture in fir green reads just as convincingly from a normal viewing distance.
Finish with snow settled along the top of the door frame and caught in the ivy leaves nearest the light.
Palette: Pillar Box Red,Cream,Fir Green,Soft Yellow
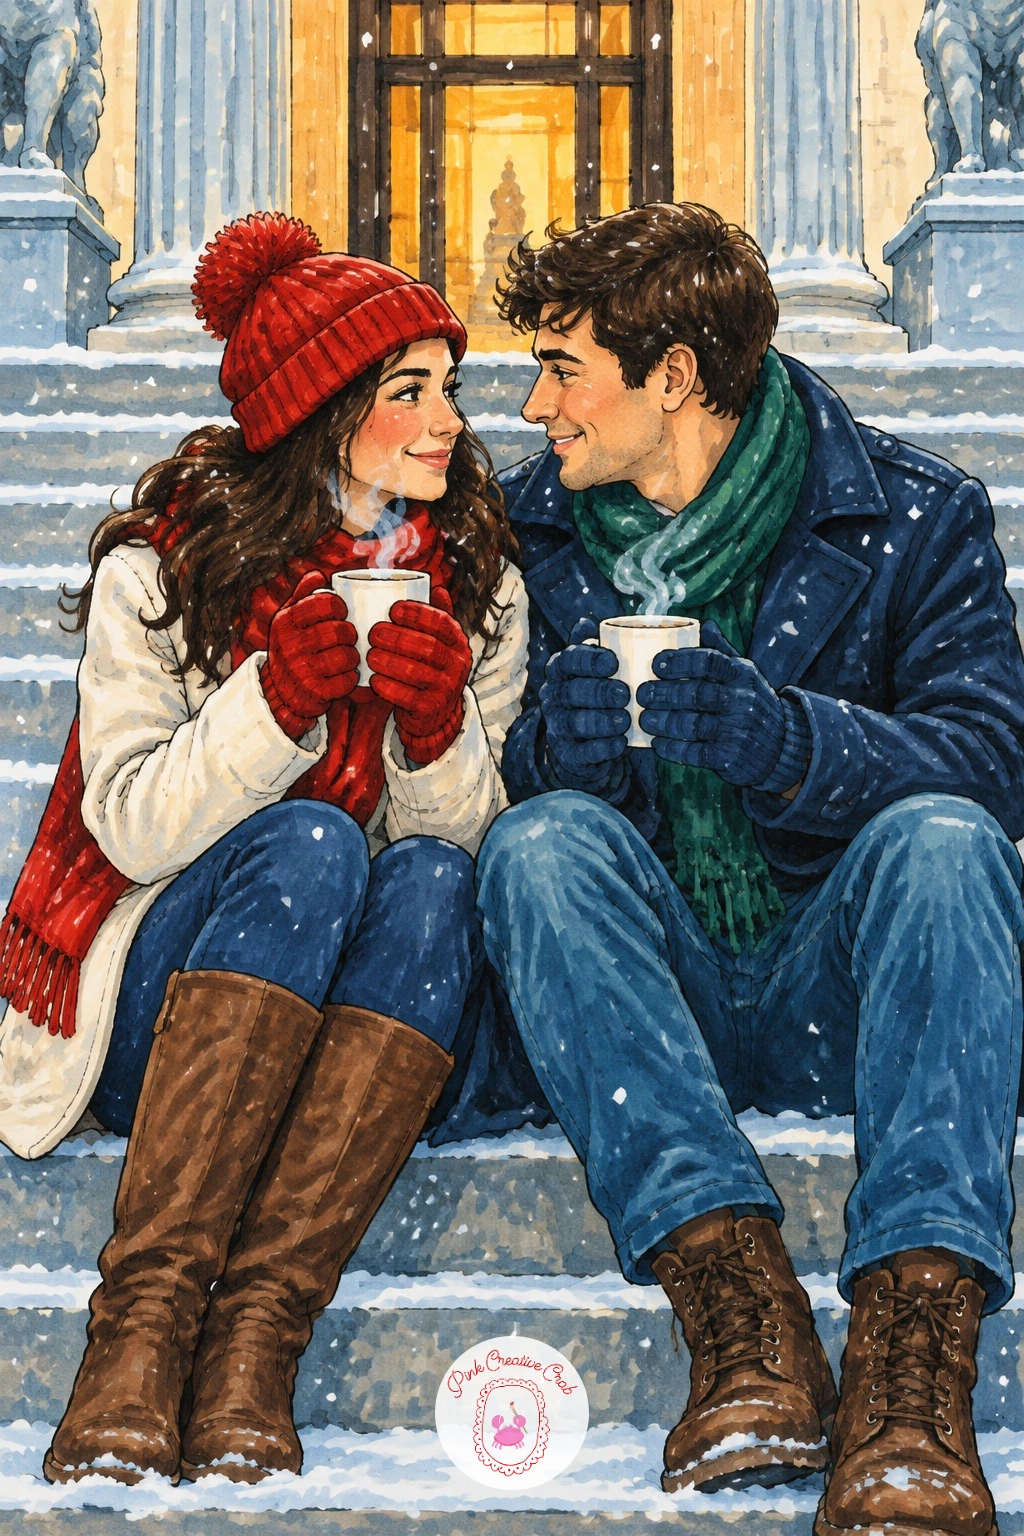
Seat two simple figures side by side on a wide set of stone museum steps in fineliner, each holding a small cup with a curl of steam rising, shoulders close together and heads tilted slightly toward each other. Keep the steps themselves plain and geometric, a few parallel lines receding gently rather than full architectural columns.
Color the coats in a cozy mix of deep navy and warm camel, with the two cocoa cups in simple cream and soft yellow, steam rendered as thin wavering white gel pen lines against the darker coats behind them. Light snow falls steadily around the pair, settling on their shoulders and the stone steps beneath them.
Pairs like this often end up facing straight ahead like strangers, so angle both heads very slightly toward each other and let one figure’s shoulder overlap the other’s just a touch, which reads instantly as a shared quiet moment. If a full museum facade feels too ambitious to finish today, a few plain columns suggested at the edge of the page are enough context.
Finish with warm light glowing faintly from an entrance behind them to close out the scene.
You Will Need
- white gel pen
Palette: Deep Navy,Warm Camel,Cream,Soft Yellow
What to Do Next
Pick one scene that matches how much time you actually have today, the post box or the robin for a quick warm up, Big Ben or the Ferris wheel if you want to settle in longer. Start with a light fineliner outline on smooth marker paper, keep your lightest colors down first, and let the navy and pillar box red do the heavy lifting once the shapes are in place.
Frequently Asked Questions
What markers work best for a London drawing in this cozy winter style?
Alcohol based markers blend the smoothest and give that soft glowing effect seen in these scenes. A core set of navy, red, cream and sky blue covers nearly every idea here without needing a huge collection.
Do I need to draw real architectural detail to make London landmarks recognizable?
No, simplified shapes work fine since silhouette and color carry recognition more than fine detail. Keep towers, domes and windows geometric and clean, and let the familiar outline do the work.
How do I keep snow looking natural instead of just white dots everywhere?
Add snow last, after all other color has dried, using a white gel pen in uneven clusters rather than evenly scattered dots. Concentrate it on upward facing edges like railing tops, window sills and rooftops.
What is the easiest London scene to start with if I am new to markers?
The snow topped post box or the robin on the railing are the simplest, since each is one small subject with few shapes. Both can be finished in under fifteen minutes and still look complete.
How do I avoid readable text or shop signs appearing by accident?
Leave shopfronts, windows and signage as plain glowing color blocks rather than adding any lettering shapes. A warm glow or a few simple panes reads as a lit shop without ever needing a single letter.
Have any thoughts?
Share your reaction or leave a quick response — we’d love to hear what you think!
-
 0
-
0
-
0
-
0
-
0
-
0


