

Table of Contents
- Summer Fridays Lip Balm
- Laneige Lip Mask
- Drunk Elephant Serum Bottle
- Glossier Balm Tube
- La Roche Posay Cream Jar
- Vanicream Moisturizer Tub
- Rose Water Spray Bottle
- Eye Cream Pot with Bow
- Toner Pads Jar
- Facial Oil Dropper Bottle
- Gua Sha and Petals Scene
- Vanity Tray with Mini Bottles
- Bathroom Shelf Display Scene
- Frequently Asked Questions
Skincare drawing is one of my favorite little rabbit holes because the bottles are already so cute before you even pick up a brush. Round jars, pastel tubes, that one lip balm everyone owns: they practically beg to be painted in a soft, matching palette, and once you add a gingham bow or a sprig of hydrangea next to them, the whole thing feels like a page from a sweet little beauty catalog.
Below you will find thirteen worksheets, each one a single cult favorite product with its own styling detail, all kept in the same cobalt, sky blue and white family so they look like a set when you line them up. Grab the one that catches your eye first and paint it start to finish today, no sketching experience required beyond a light pencil hand.
Using these images: free for personal projects such as printing, coloring, cards, journals and gifts. Handmade items that include them may be sold up to 30 pieces per design. More than that is commercial use and is not permitted, and neither is selling or sharing the images themselves or passing them off as your own. Please ask before any other use.
Summer Fridays Lip Balm
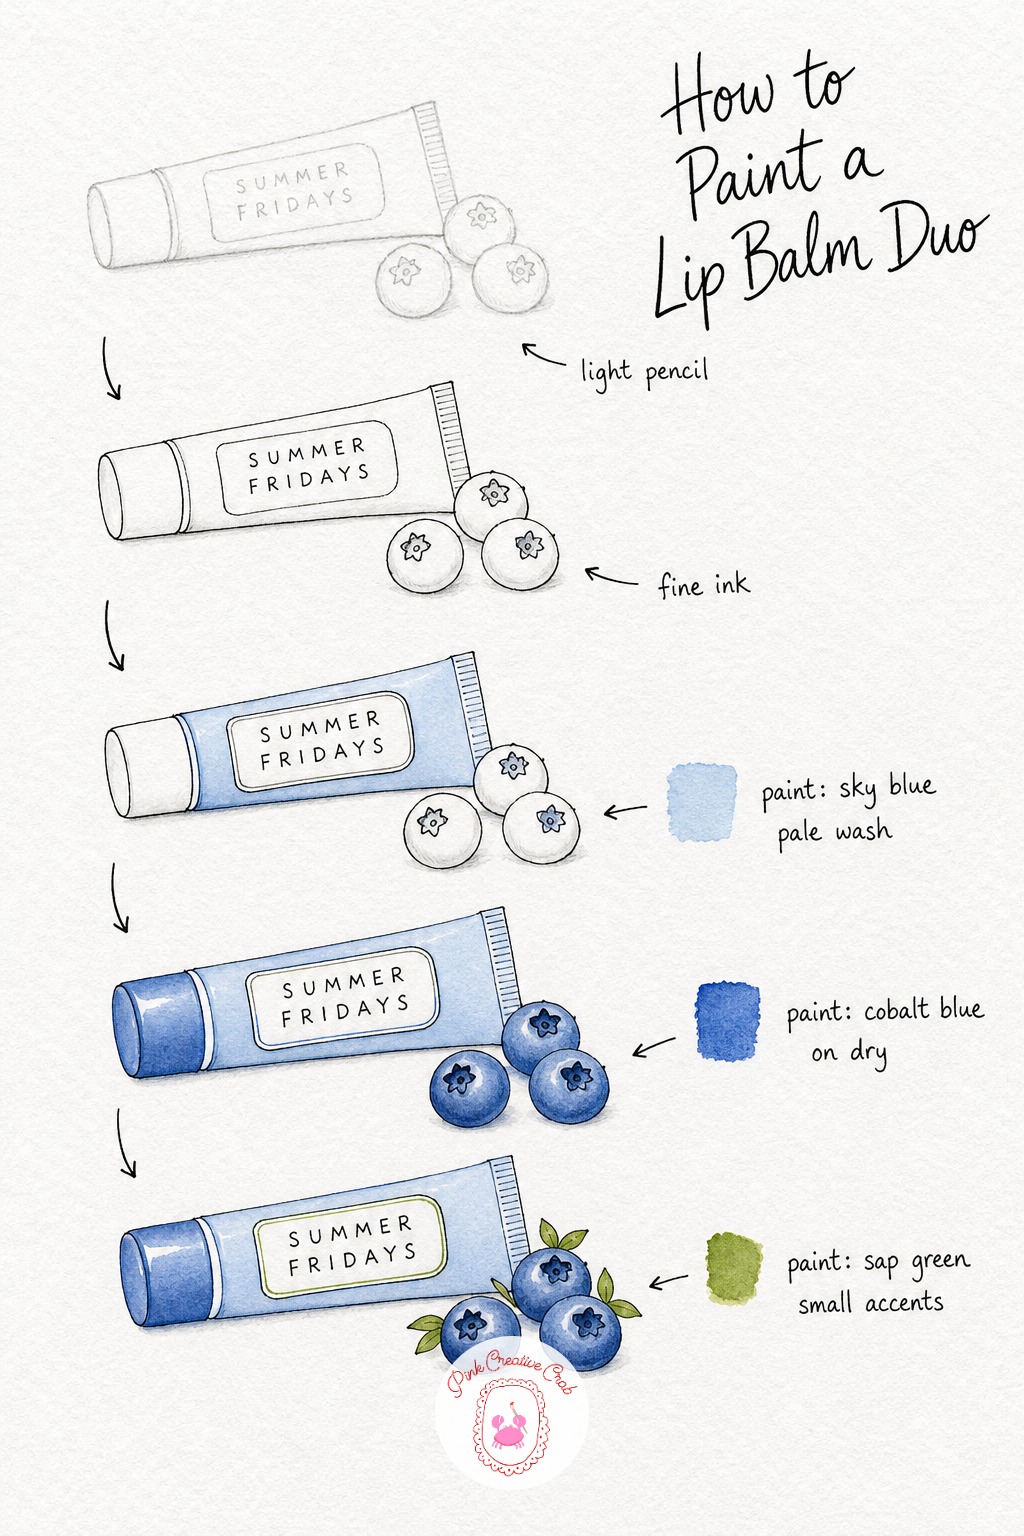
Start with a light pencil tube and a loose little cluster of blueberries resting against it, nothing fussy, just rounded shapes. Go over the cap edge, the label line and each berry with fine black ink so the whole thing reads clean once the pencil disappears under paint.
Lay a pale sky blue wash over the tube first, leaving a strip of white paper for the shine, then come back with deeper cobalt on the cap and on the berry skins once that first layer is dry. A touch of green on the stems keeps it from feeling all one color.
Finish with white gel pen dots on the cap and on each berry: that single dot is what makes a flat blue circle suddenly look wet and round. Keep your berries slightly uneven in size, it reads far more natural than three identical circles.
Laneige Lip Mask
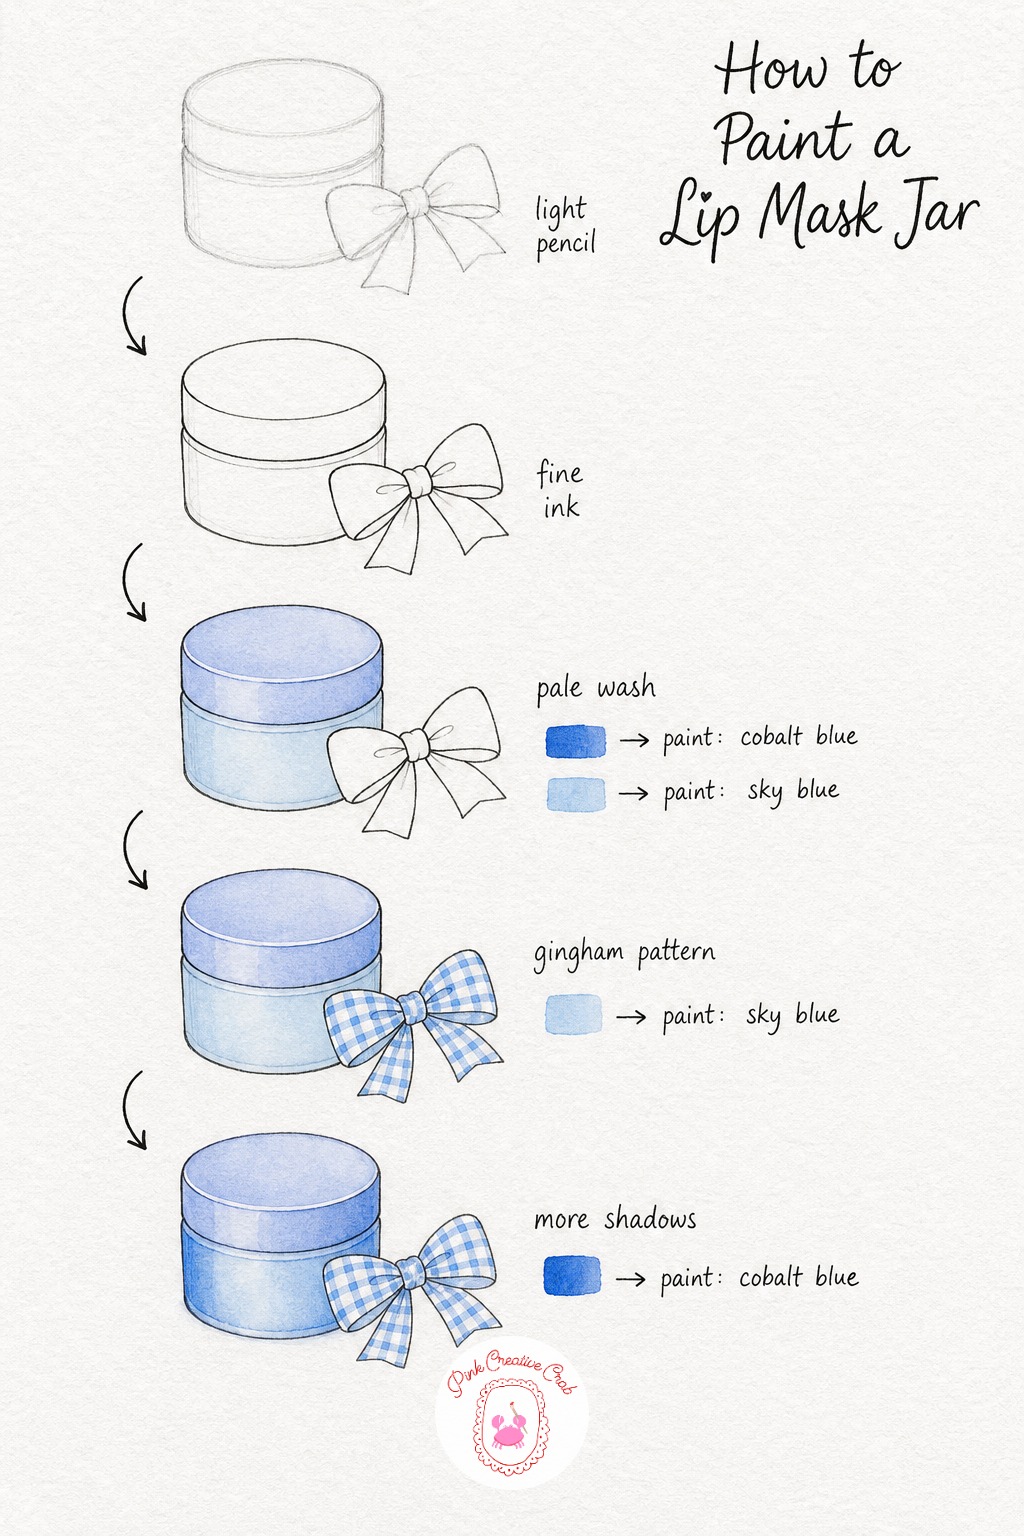
Sketch a simple round jar with a slightly domed lid, then rest a bow shape against its base, loose loops and two tails are plenty. Ink the jar rim, the lid seam and the ribbon edges so the gingham has clean lines to sit inside later.
Wash the lid in pale cobalt and the jar body in sky blue, keeping both layers thin so the gingham reads through cleanly. Once dry, paint the small check squares across the bow in a slightly stronger sky blue, leaving every other square white.
Deepen one side of the jar with a second cobalt layer for a gentle roundness, then finish with a white gel pen streak down the jar and a dot on the lid. If gingham feels fiddly, pencil a light grid first and paint inside it square by square.
Drunk Elephant Serum Bottle
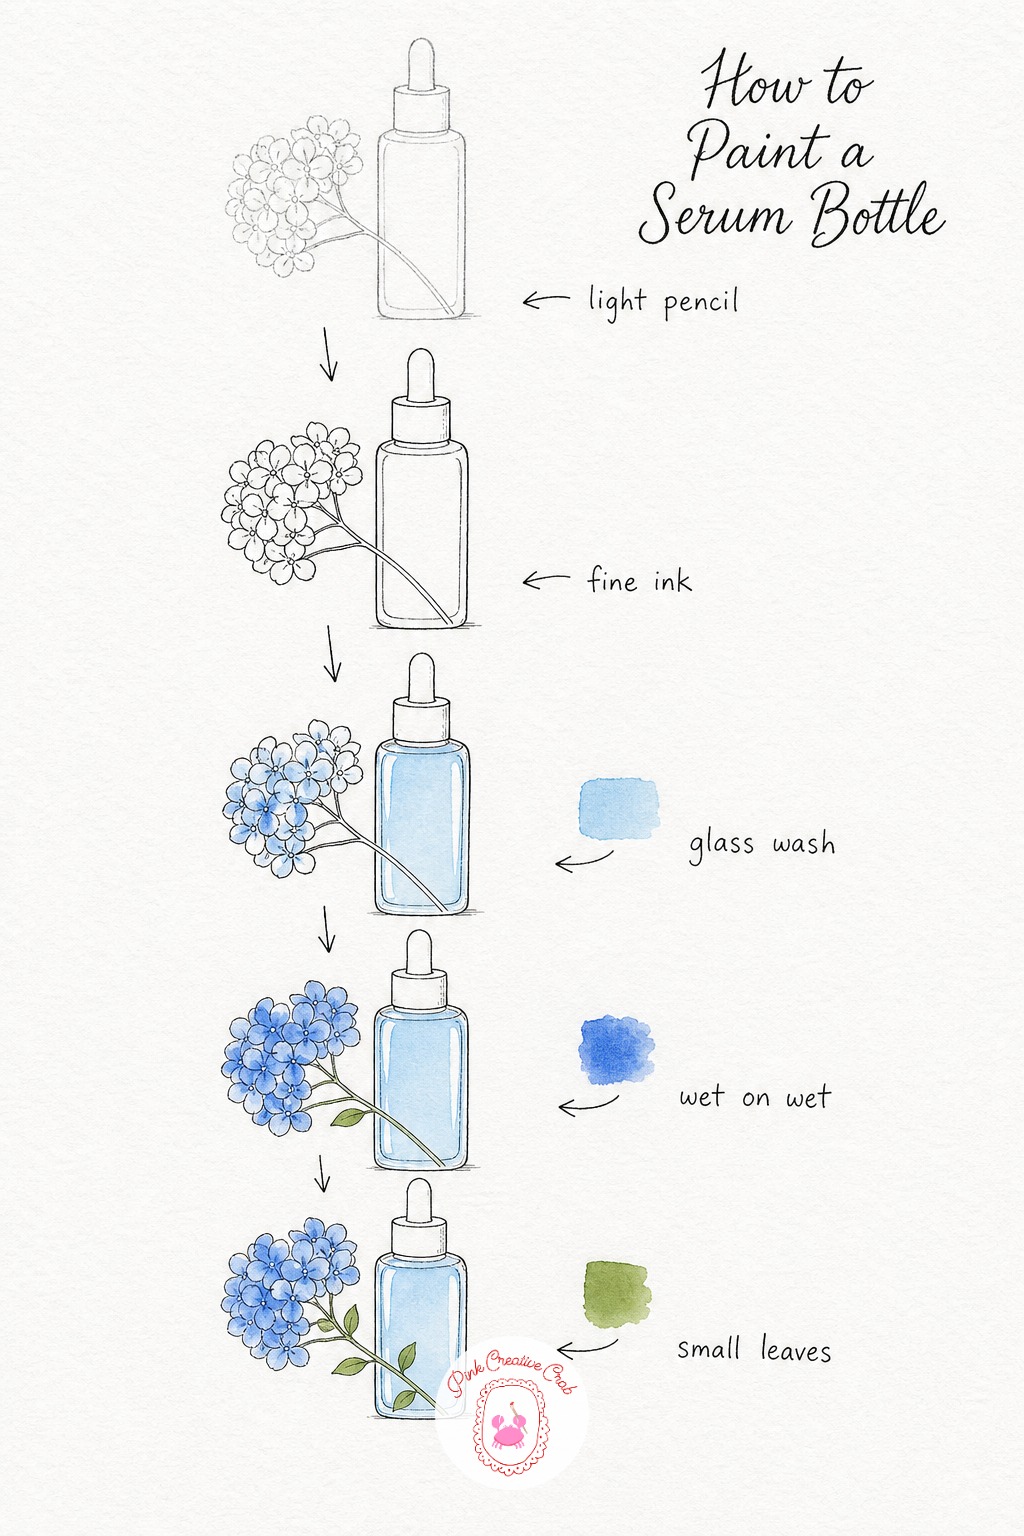
Draw a tall slim bottle with a dropper cap, then lean a small hydrangea sprig against its side, just a cluster of four petaled florets and a stem. Ink the bottle outline and the petal edges so the glass keeps a crisp silhouette once the washes go on.
Fill the bottle with a pale sky blue wash, leaving the very edge white so it looks like glass catching light. While the paper still has a little dampness, dab soft cobalt across the hydrangea cluster so the color blurs softly between petals.
Add a few small green leaves along the stem once everything is dry, then finish with a white gel pen highlight down the bottle and tiny dots scattered on the petals. Painting hydrangea florets wet on wet is the one trick that keeps them from looking stiff.
Glossier Balm Tube
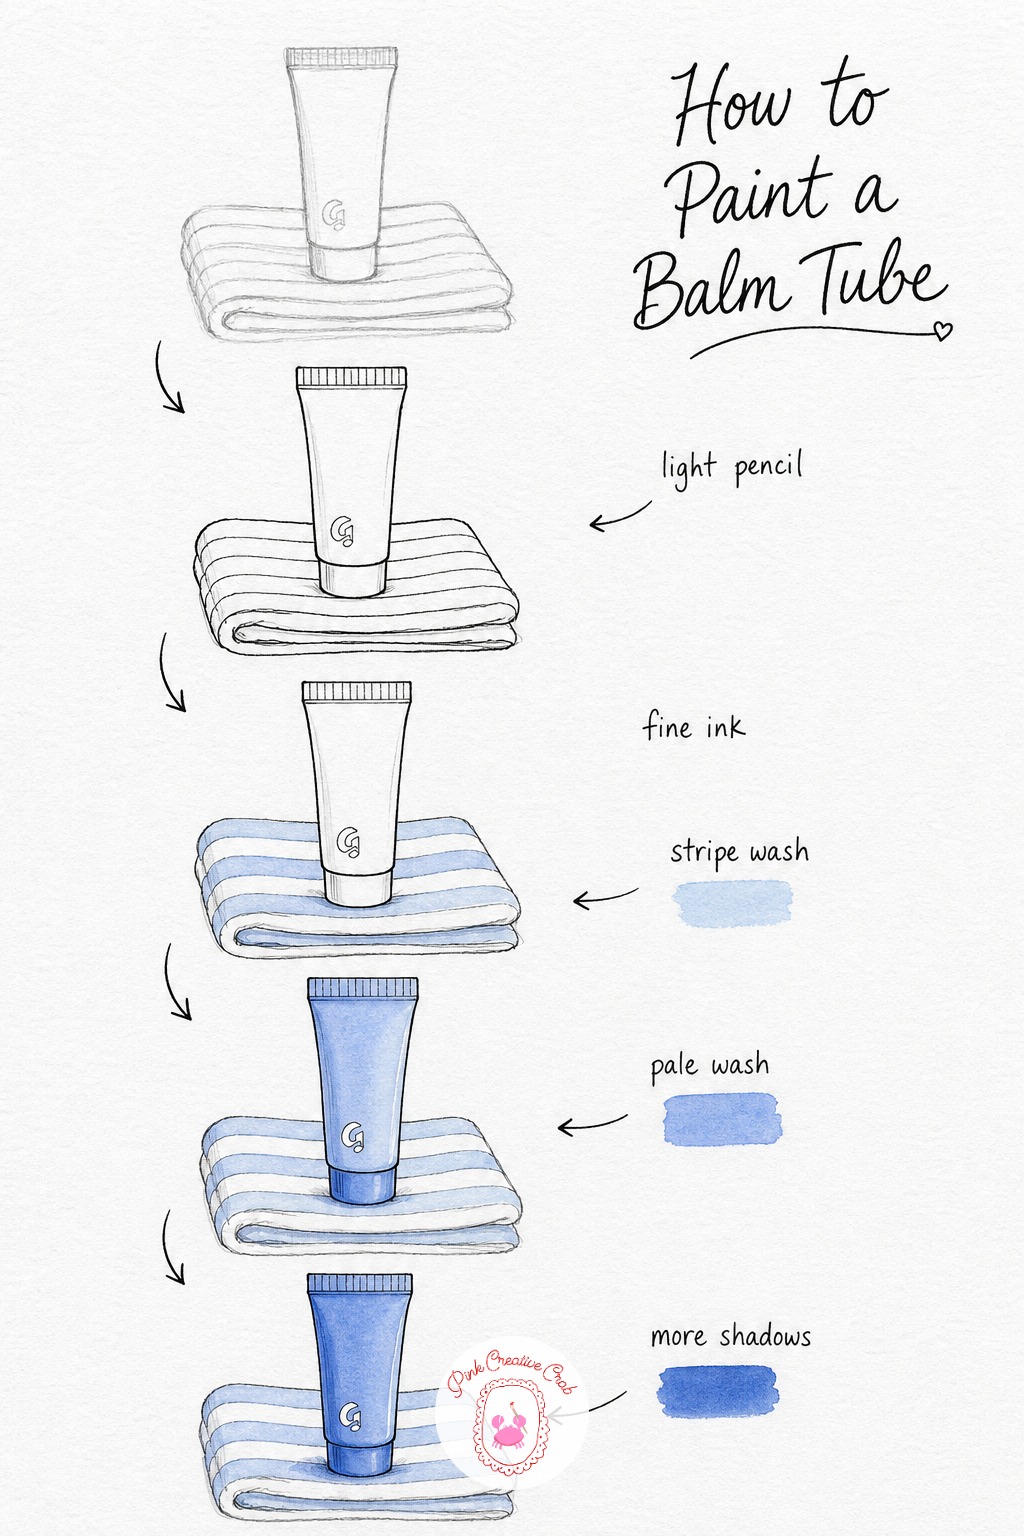
Sketch a simple squeeze tube standing upright on a loosely folded towel, letting a few soft fold lines show in pencil. Ink the tube outline and each towel stripe so you have clean lanes to paint into once the color stage starts.
Paint every other stripe on the towel in a pale sky blue wash, leaving the rest of the stripes bare white paper, then wash the tube itself in a slightly deeper cobalt once the towel is dry. This keeps the tube reading as the focal point against the quieter striped background.
Add a darker cobalt shadow where the tube meets the towel to ground it, then finish with a white gel pen streak on the tube for shine. Keep your stripes a touch uneven, a perfectly ruled towel actually looks less like fabric.
La Roche Posay Cream Jar
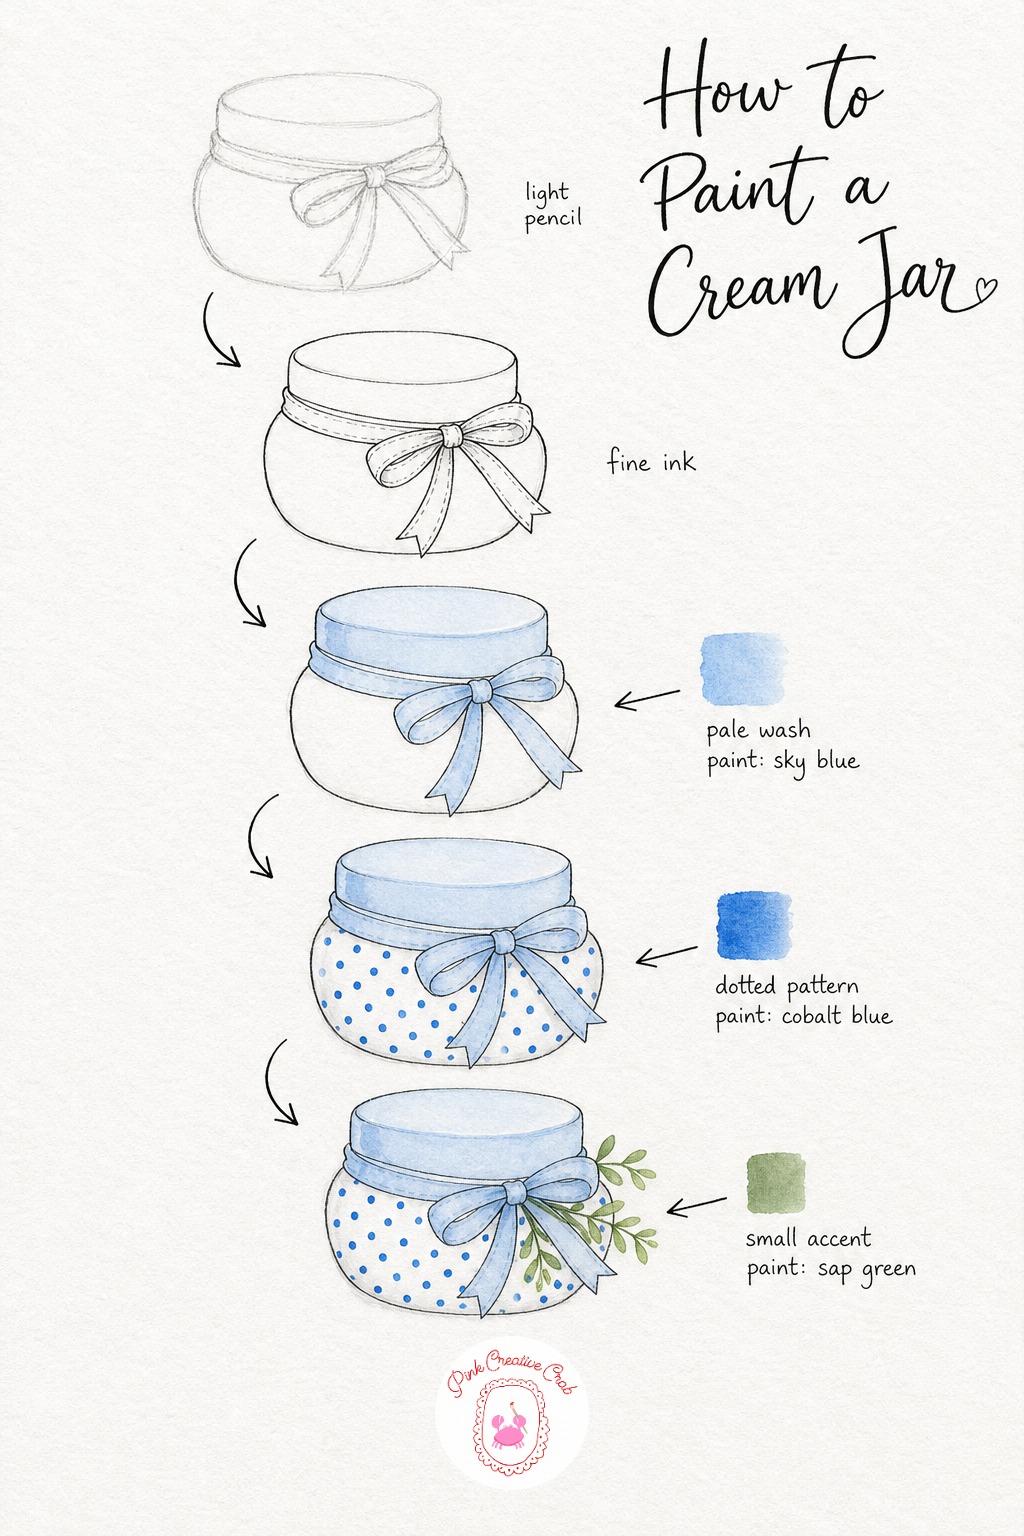
Draw a squat round jar with a flat lid, then tie a simple ribbon bow around its neck with two loose loops and short tails. Ink the jar edge, lid rim and ribbon folds so each shape stays separate once the washes overlap near the knot.
Wash the lid and ribbon in pale sky blue first, then once dry, paint small evenly spaced cobalt dots across the jar body for that classic dotted pattern. A tiny green sprig tucked under the bow knot adds just enough contrast to the all blue palette.
Finish with a white highlight oval on the jar’s rounded side and a white line along the ribbon’s top fold. Space your dots loosely rather than in a strict grid, it keeps the pattern feeling hand painted.
Vanicream Moisturizer Tub
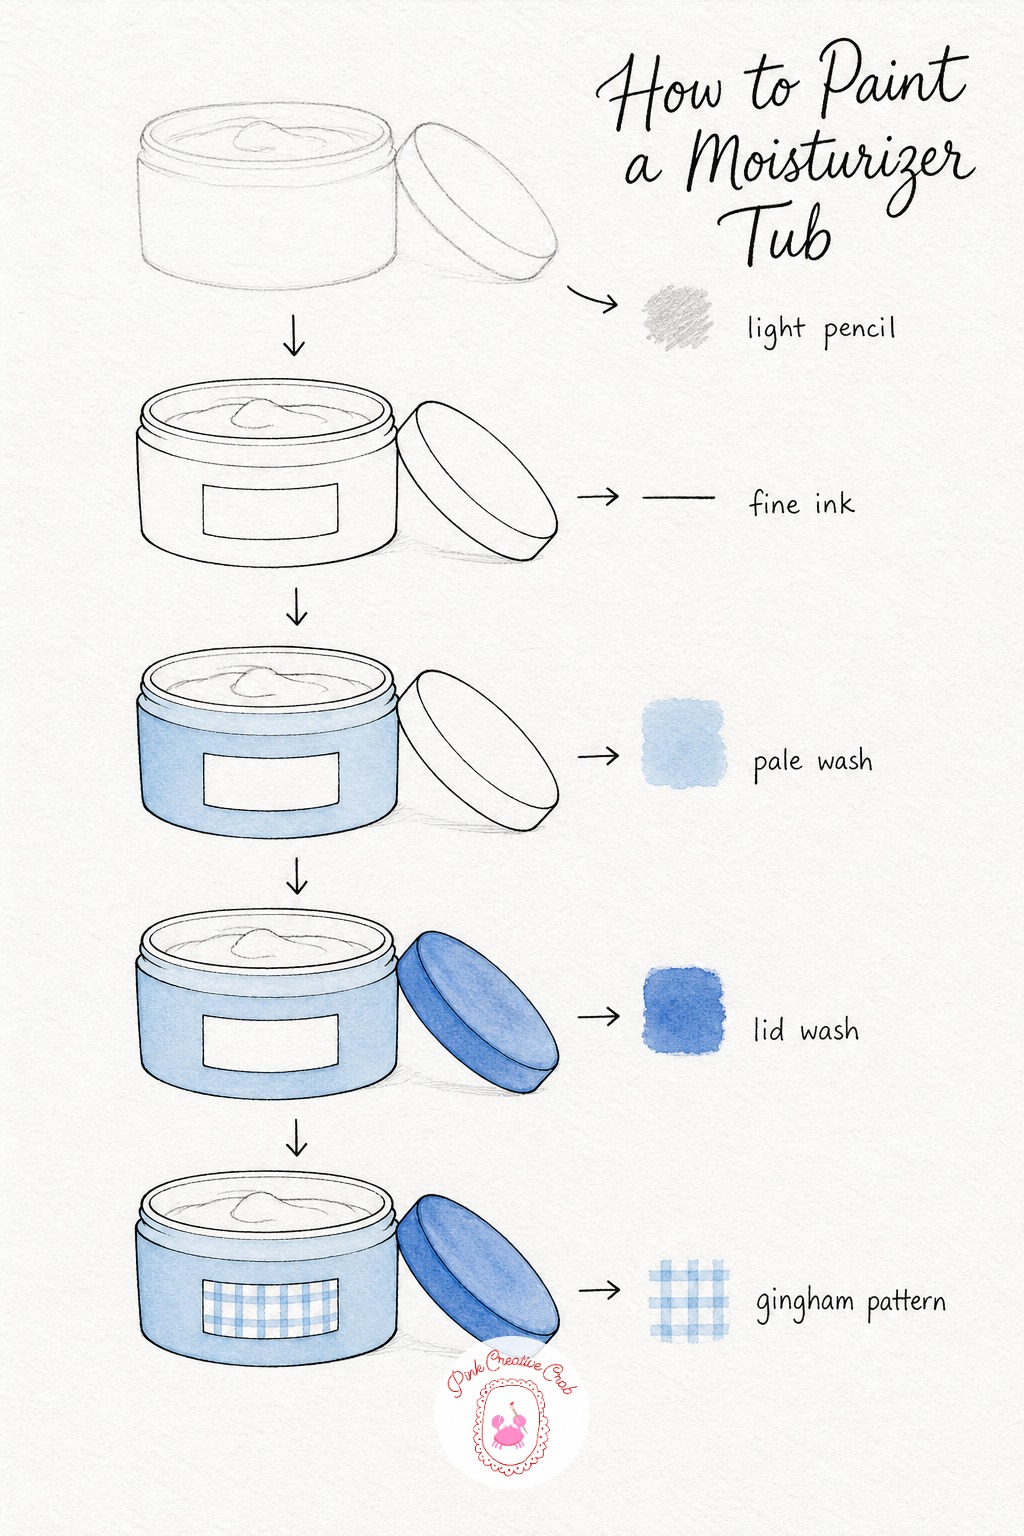
Sketch a wide, shallow tub with a separate round lid resting just beside it, plus a small rectangle for the label. Ink the tub edge, the lid rim and the label box so each flat shape has a clean border before any paint touches the page.
Wash the tub body in pale sky blue, carefully working around the label so it stays bright white, then give the lid its own soft cobalt wash once the tub layer has dried. Painting lid and body as two separate washes keeps the jar reading as two distinct pieces, not one flat blob.
Add a thin gingham grid inside the label rectangle in sky blue, then finish with a white highlight crescent along the tub’s rounded edge. A single white dot on the lid center gives it just enough shine to look plastic rather than flat.
Rose Water Spray Bottle
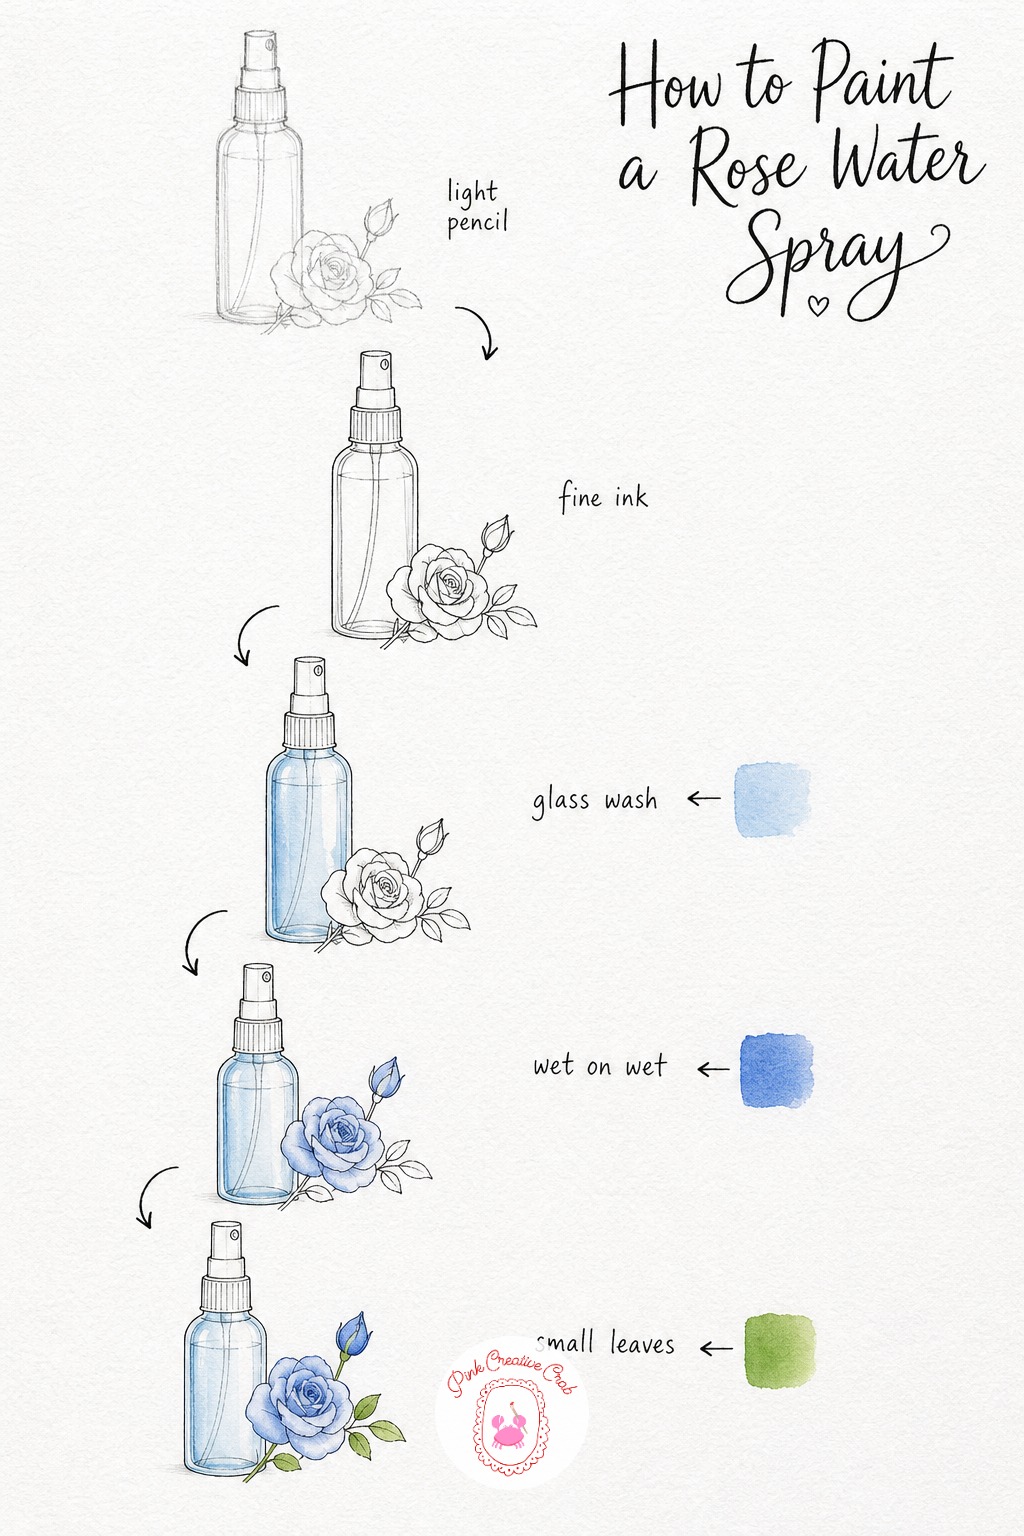
Draw a tall spray bottle with a simple pump top, then rest a small open rose beside it with just a few curved petal lines. Ink the bottle, the nozzle and the petal edges so the glass and the flower both keep a tidy outline under the wash.
Wash the bottle in pale sky blue, skipping a thin strip near the nozzle for a glassy highlight, then layer soft cobalt over the rose petals while the paper still has a little moisture so the color pools gently. This is the same loose wet on wet approach used for the hydrangea sprig on the serum bottle page, and it works just as well on a rose.
Tuck in a few small green leaves along the stem, then finish with a white gel pen streak down the bottle and a dot on the nozzle. Keep the rose petals a touch irregular, it reads more like a real garden bloom.
Eye Cream Pot with Bow
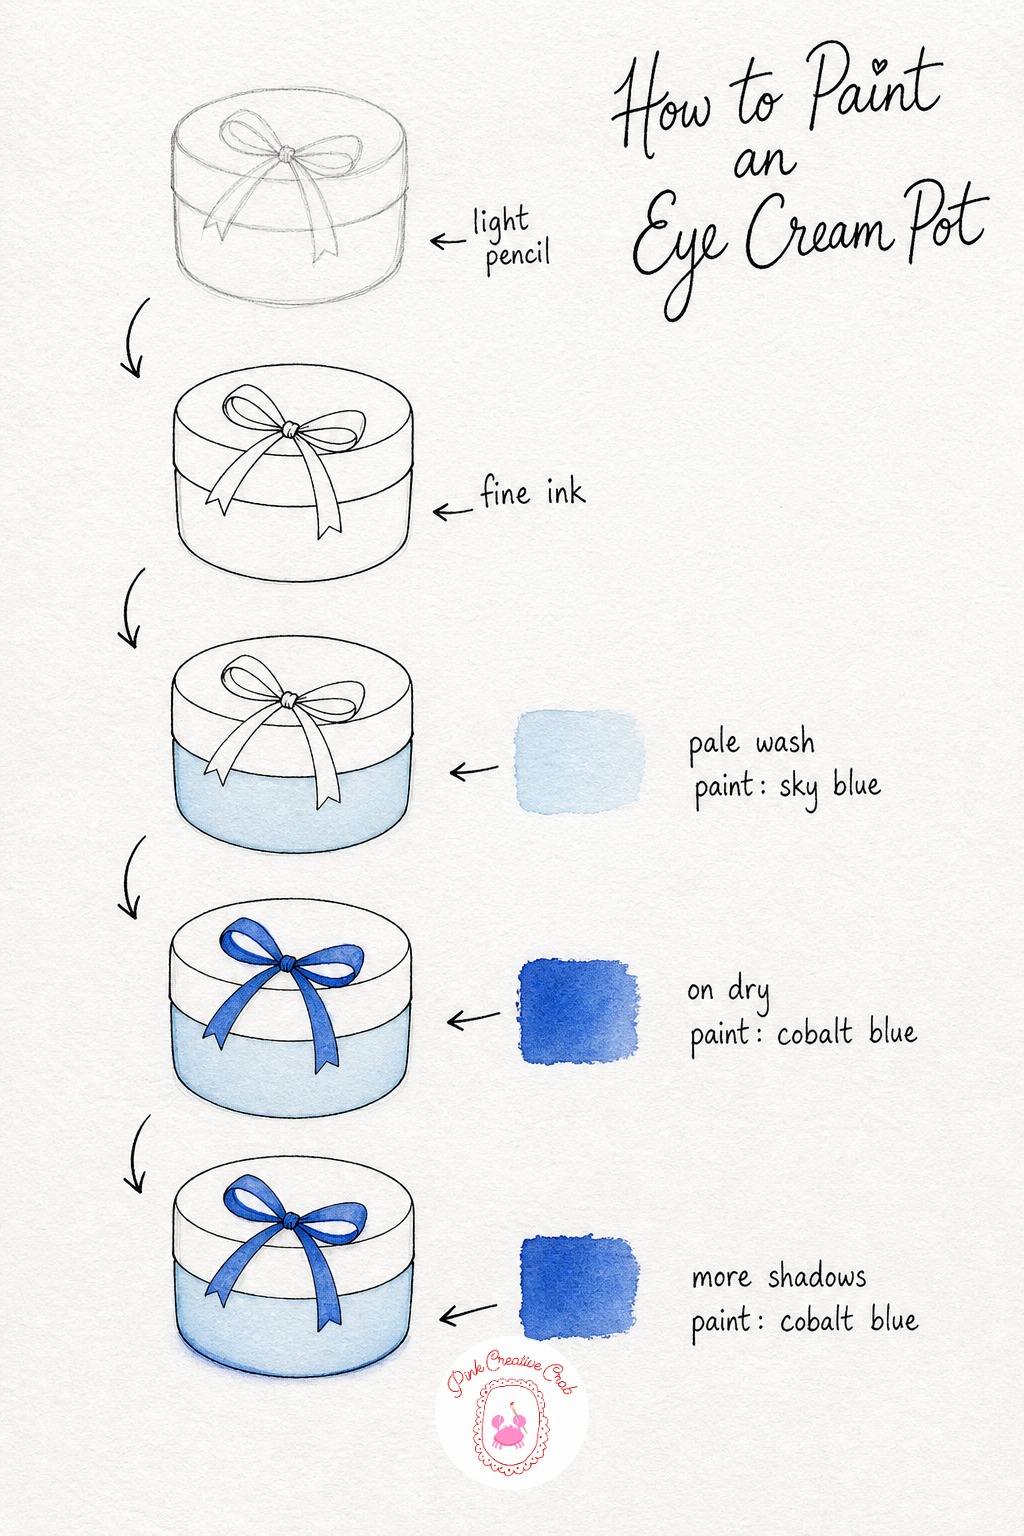
This little pot is the smallest subject in the set, so keep the pencil simple: a short cylinder, a flat lid and a thin ribbon tied across the top in a small bow. Ink the pot outline, the lid seam and the ribbon loops before any color goes down.
Wash the pot body in pale sky blue and leave the lid bare white for contrast, then once dry, paint the ribbon in a deeper cobalt so it pops against the paler jar. A thin shadow line along the base gives the little pot some weight on the page instead of floating.
Finish with a white highlight dot on the lid and a thin white line tracing the top edge of the ribbon. Because this subject is so small, it is a good one to practice your gingham and dot patterns before tackling a bigger jar.
Toner Pads Jar
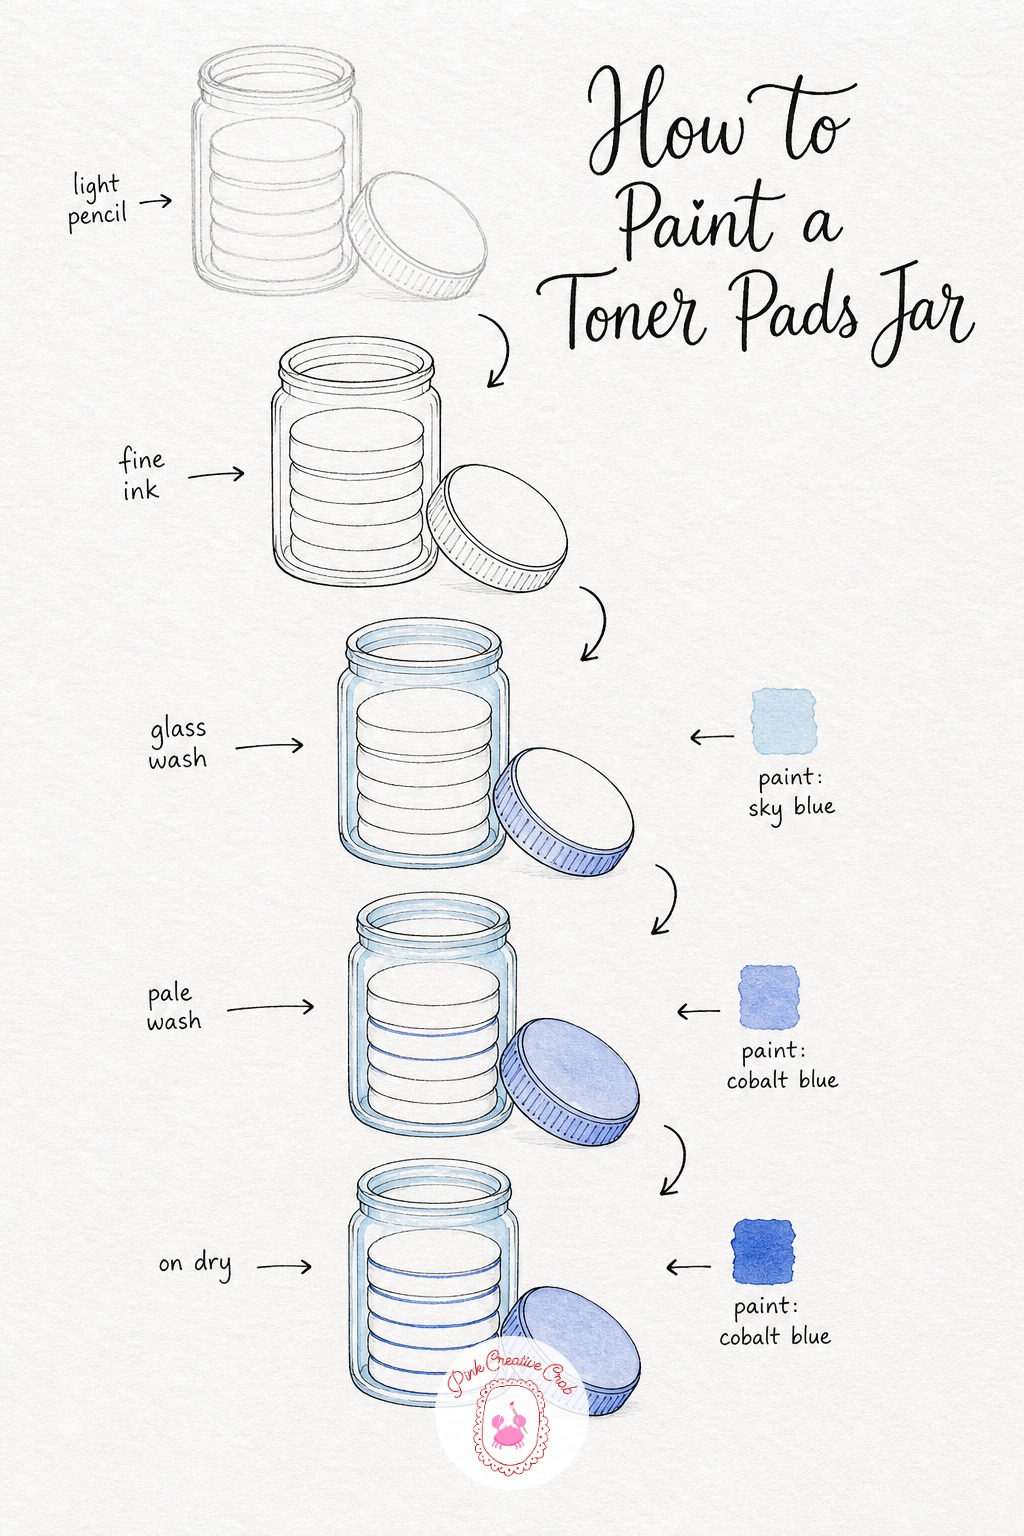
Sketch a simple cylindrical jar with a stack of round pads drawn inside it as a row of thin ovals, plus a lid set just beside the jar. Ink the jar outline, the lid and the edge of each pad so the stack reads clearly once the glass wash goes over everything.
Wash only the glass edges of the jar in pale sky blue, keeping the pads themselves bare white paper so they look bright inside the glass. Once that is dry, give the lid its own soft cobalt wash and add a thin shadow line between each pad so the stack does not read as one solid shape.
Finish with a white gel pen streak down the jar glass and a small dot on the lid for shine. Leaving the pads white is the single most important choice here, it is what sells the glass illusion.
Facial Oil Dropper Bottle
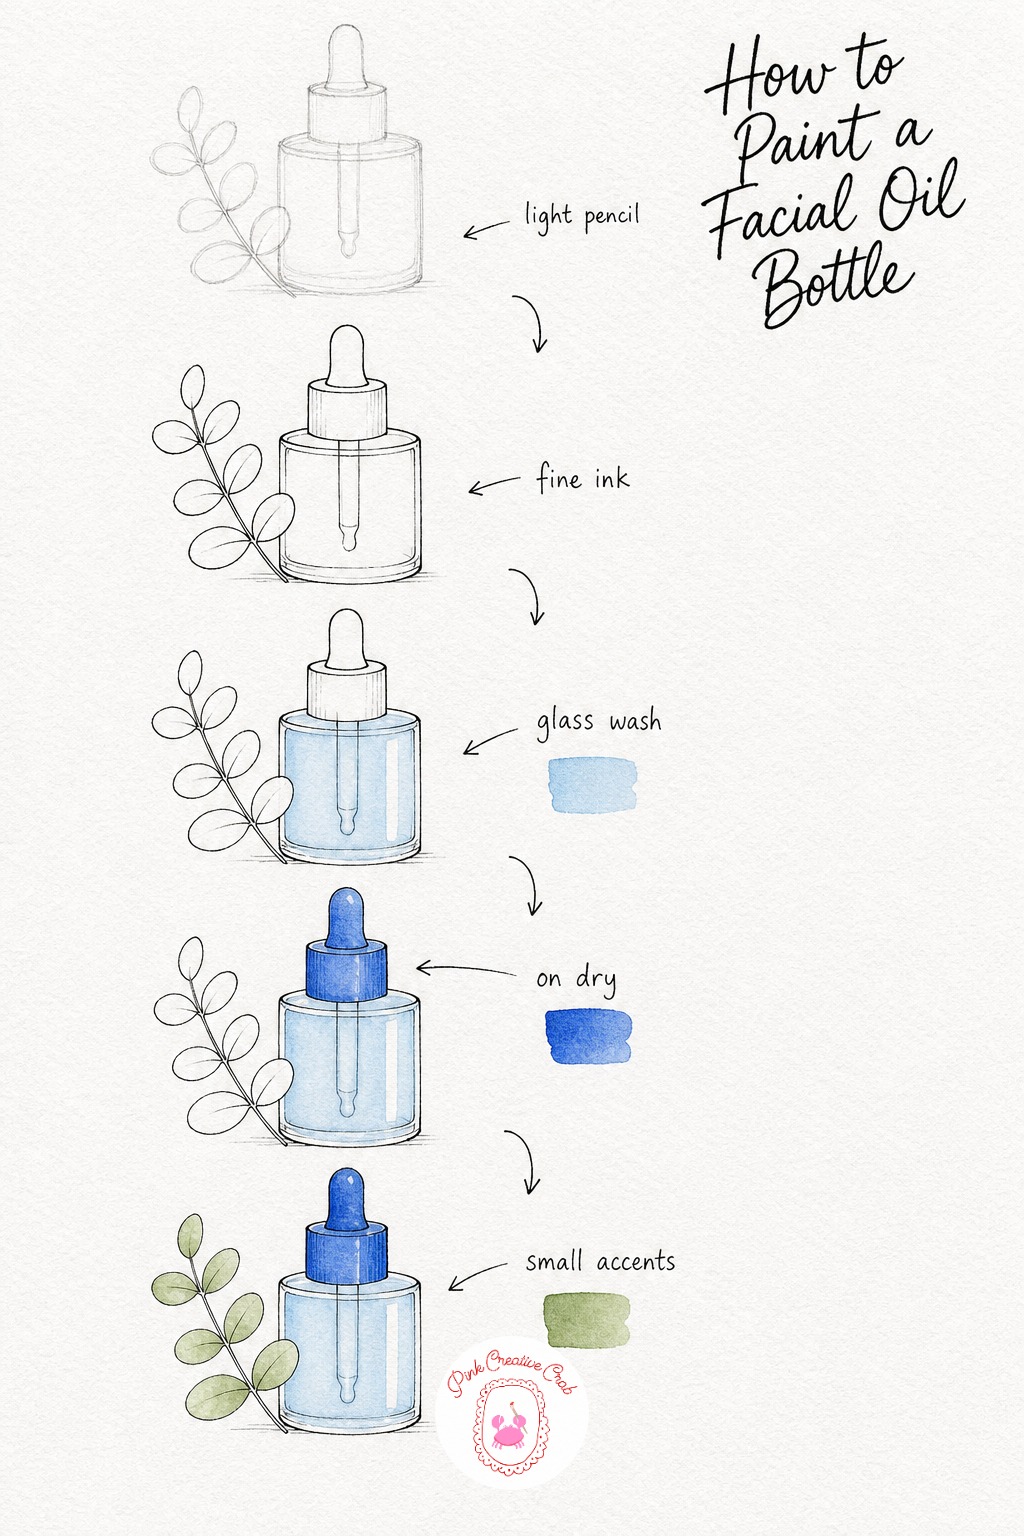
Draw a short, wide bottle with a long glass dropper resting beside a small sprig of rounded eucalyptus leaves. Ink the bottle outline, the dropper shape and each little leaf so the composition stays crisp before the washes blend them together.
Fill the bottle with a pale sky blue wash, leaving a thin vertical strip of bare paper for the glass shine, then deepen the dropper bulb and cap with a richer cobalt once that first layer has dried. The eucalyptus leaves get their own soft green wash, the only warm note against all this blue.
Finish with a white highlight line down the bottle body and a single white dot on the dropper bulb. If you enjoy pairing a product with a small sprig like this, the loose florals in this watercolor flowers collection are worth a look for more sprig ideas.
Gua Sha and Petals Scene
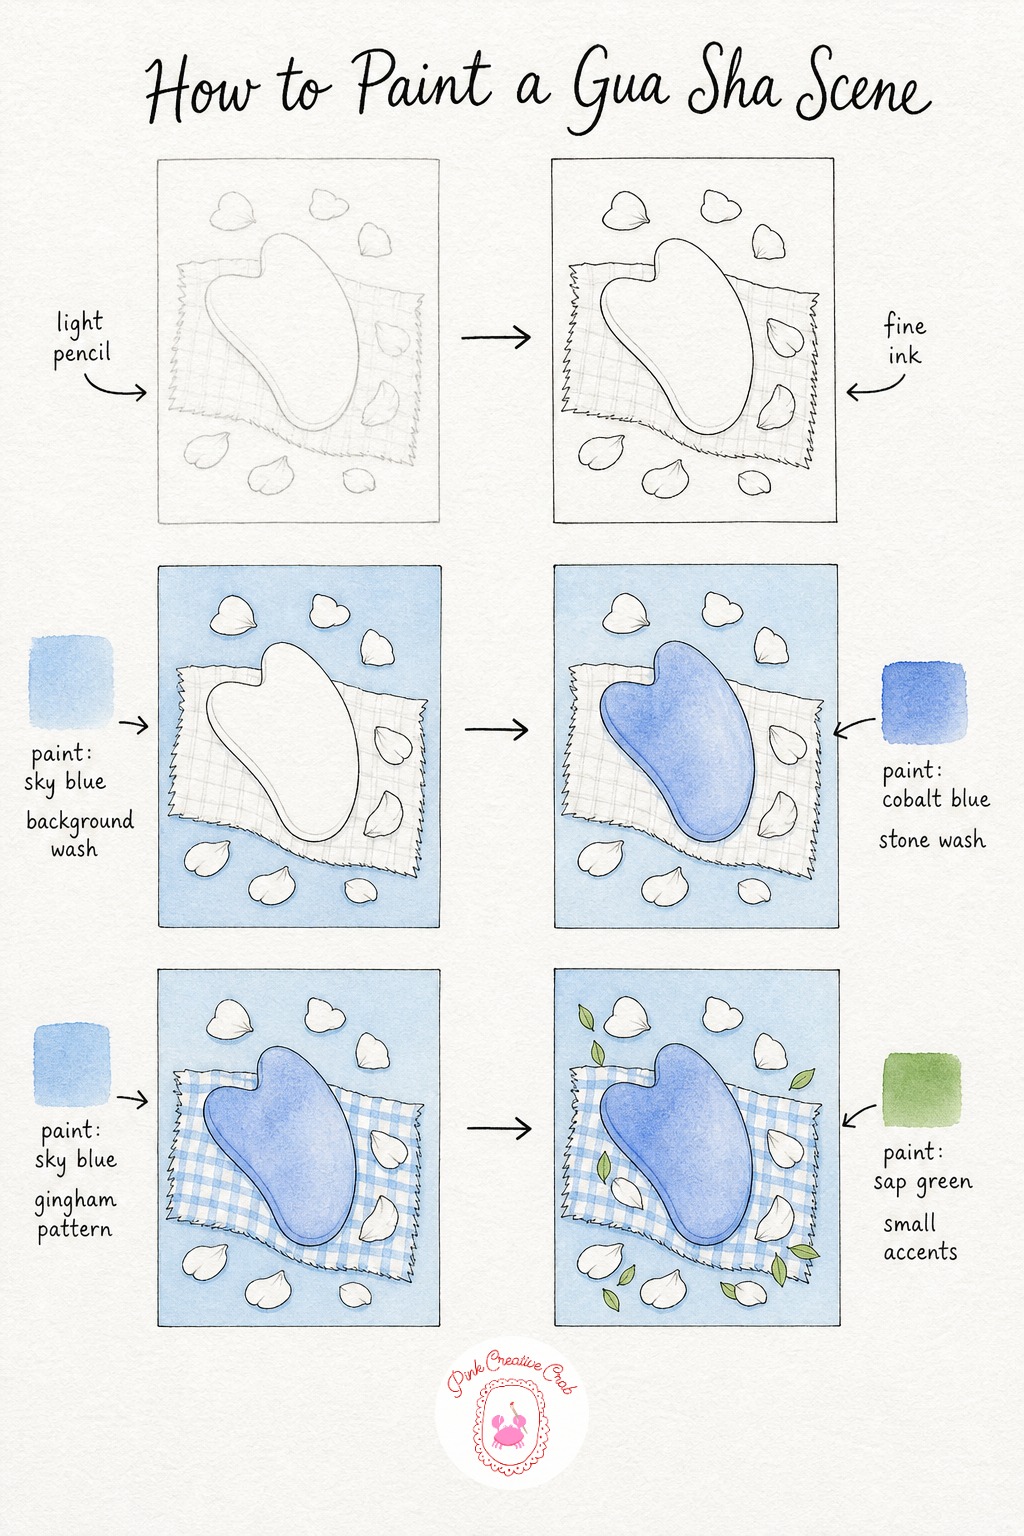
This small scene starts with a gua sha stone drawn as a smooth curved shape, set on a little folded gingham cloth with a few loose petals scattered around it. Ink every edge first, the stone’s curve, the cloth corner and each petal outline, so the scene holds together once washes start overlapping.
Lay a very pale sky blue wash behind the whole arrangement to quiet the background, then once dry, paint the stone itself in a soft cobalt that pools slightly darker along its curve. The cloth takes a gingham check in sky blue, and a few small green leaf accents sit among the petals for contrast.
Finish with a white gel pen streak along the stone’s highlight edge and small white dots scattered on the petals. Readers who enjoy building a little still life scene like this one might also like the arrangements in this blue and white painting collection, which uses a very similar palette.
Vanity Tray with Mini Bottles
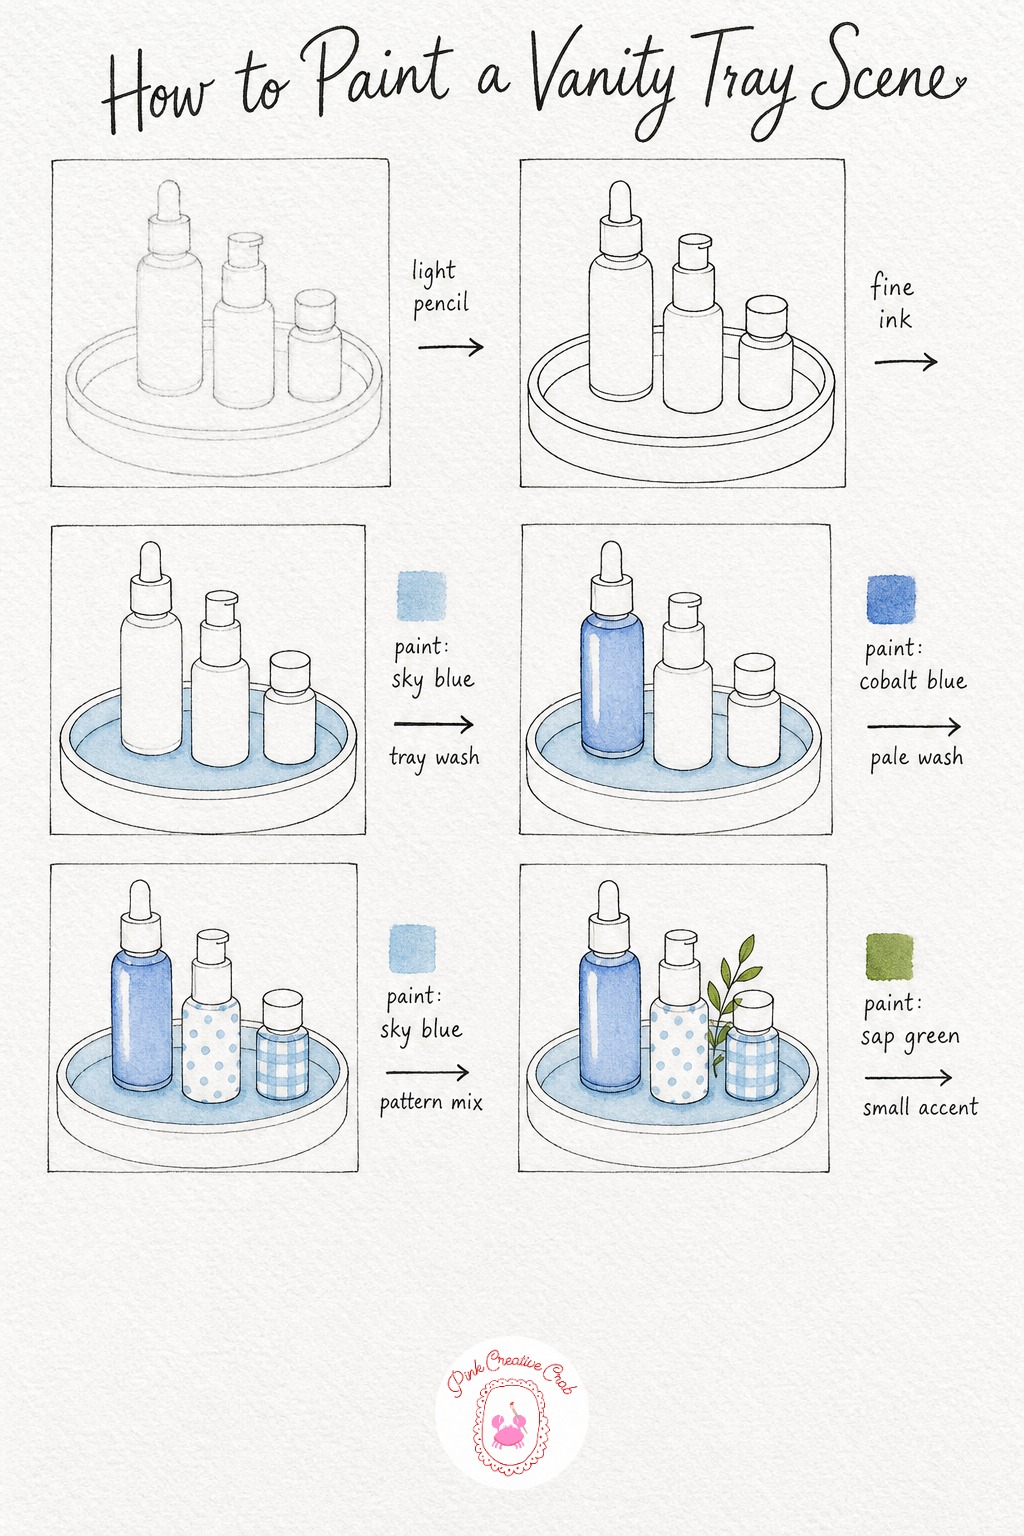
Sketch a simple round tray from a slightly raised angle, then line up three bottles of different heights across it, nothing more detailed than tall ovals and rectangles. Ink the tray rim and every bottle outline so the arrangement stays readable once three separate washes start going on.
Wash the tray itself in pale sky blue, then give the tallest bottle a soft cobalt wash with a bare highlight strip down one side. The second bottle gets a small dotted pattern and the third a gingham check, both in sky blue, so the trio feels coordinated without being identical.
Tuck a tiny green sprig between the bottles before finishing with white gel pen highlights down each one and a thin white line along the tray rim. Grouping three patterns together like this is a lovely way to practice all three techniques on one page, and it pairs nicely with the still life ideas in this picnic drawing collection if you enjoy building little arranged scenes.
Bathroom Shelf Display Scene
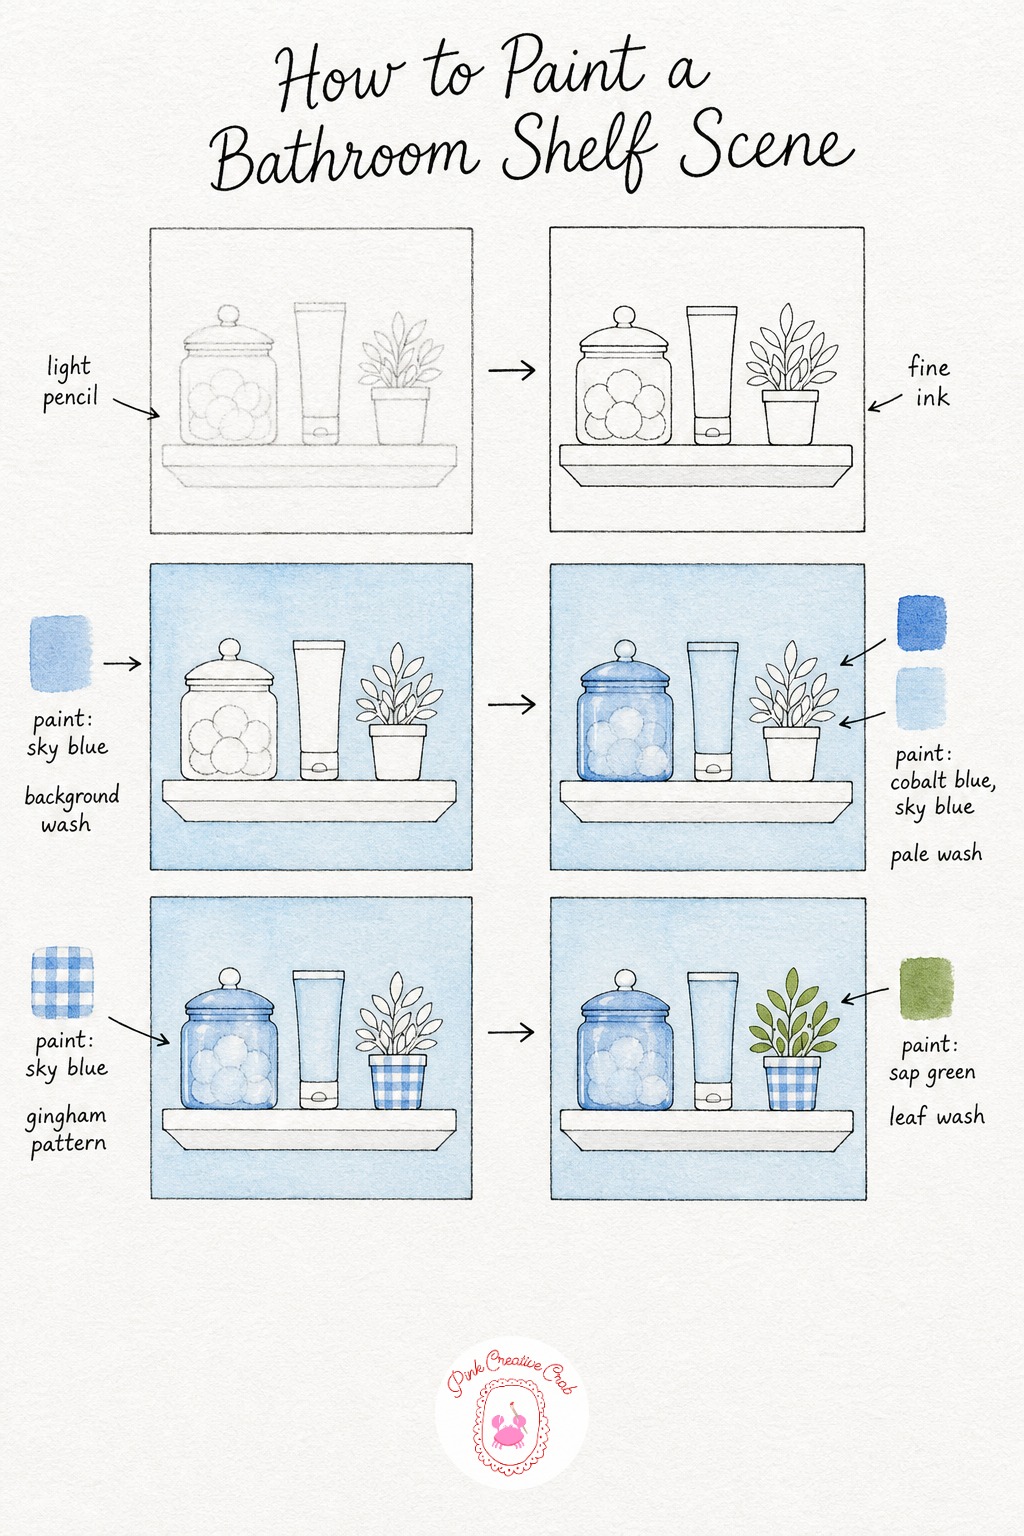
Draw a simple floating shelf as a flat rectangle, then arrange a round jar, a short tube and a tiny potted plant along its length. Ink the shelf edge and each object outline, including a few simple leaf shapes rising from the little pot.
Wash the wall behind everything in a very pale sky blue to set the scene back a little, then paint the jar in soft cobalt and the tube in a lighter sky blue so the two products stay distinct. The plant pot takes a small gingham check, and its leaves get a plain green wash that breaks up all that blue nicely.
Finish with white gel pen highlights on both the jar and tube, plus a thin white line along the shelf’s front edge for a little glow. If you like filling in small cozy scenes like this one product at a time, the layouts in this easy step by step drawing collection work the same way.
What to Do Next
Pick whichever product you reach for every morning and start there, since that is always the most satisfying one to paint first. Keep your blues mixed thin for the first wash on each page, you can always deepen them once the paper is dry.
Frequently Asked Questions
What paint colors do I need for skincare drawing in this blue palette?
You only need two or three blues: a true cobalt, a lighter sky blue, and a small tube of green for leaf accents. Keeping the palette this narrow is exactly what makes the finished set of pages look matched.
Do I need to be good at drawing bottles to start?
No, most bottles and jars in this collection are just ovals, rectangles and simple curves. The pencil stage stays loose on purpose, since the ink line and the paint do most of the visual work afterward.
Should I ink before or after the pencil sketch dries?
Ink goes straight over the pencil sketch once you are happy with the shapes, no drying time needed since pencil does not need to set. Let the ink itself dry for a minute or two before erasing stray pencil lines underneath.
How do I paint gingham and dotted patterns without a ruler?
Pencil a light, loose grid first and paint each square or dot freehand inside it, slightly uneven on purpose. A perfectly ruled pattern actually looks less charming than one with a little natural wobble.
What paper works best for these small skincare illustrations?
A cold press watercolor paper around 140 pounds handles the thin ink lines and layered washes well without buckling. Since most subjects here are small, even a modest sized pad will give you many pages to work through.
Have any thoughts?
Share your reaction or leave a quick response — we’d love to hear what you think!
-
 0
-
0
-
0
-
0
-
0
-
0


