

Fish doodles are the kind of small, happy drawing that fits in the corner of any page and never asks for much time. One curved body, a tail, a few fin lines and suddenly you have a character, which is exactly why these little swimmers show up in notebooks everywhere. Grab a black fineliner and a couple of markers and you are already halfway done.
Below are 28 fish, from a plain goldfish in a bowl to a fish skeleton grinning on a rock. Work through them in order if you like building confidence, or jump to whichever one makes you smile first.
Using these images: free for personal projects such as printing, coloring, cards, journals and gifts. Handmade items that include them may be sold up to 30 pieces per design. More than that is commercial use and is not permitted, and neither is selling or sharing the images themselves or passing them off as your own. Please ask before any other use.
Start with the bowl, not the fish: draw a simple circle with a slightly flattened bottom, then add a smaller curved line inside near the top to show the waterline. That one curve does all the work of suggesting glass and water without any shading.
Draw the goldfish floating inside with a plump oval body, a fanned tail made of two or three curved triangles, and one dot eye near the front. Keep the fins small and simple if this is your first time drawing fish, since oversized fins are the easiest way for the shape to go wrong.
Color the body in coral orange, leave a few white streaks unfilled for shine, then trace the waterline in aqua. A couple of small bubble circles above the fish finish the scene.
Tip for today: draw the bowl outline first and the fish second, always, so the fish fits the space instead of fighting it.
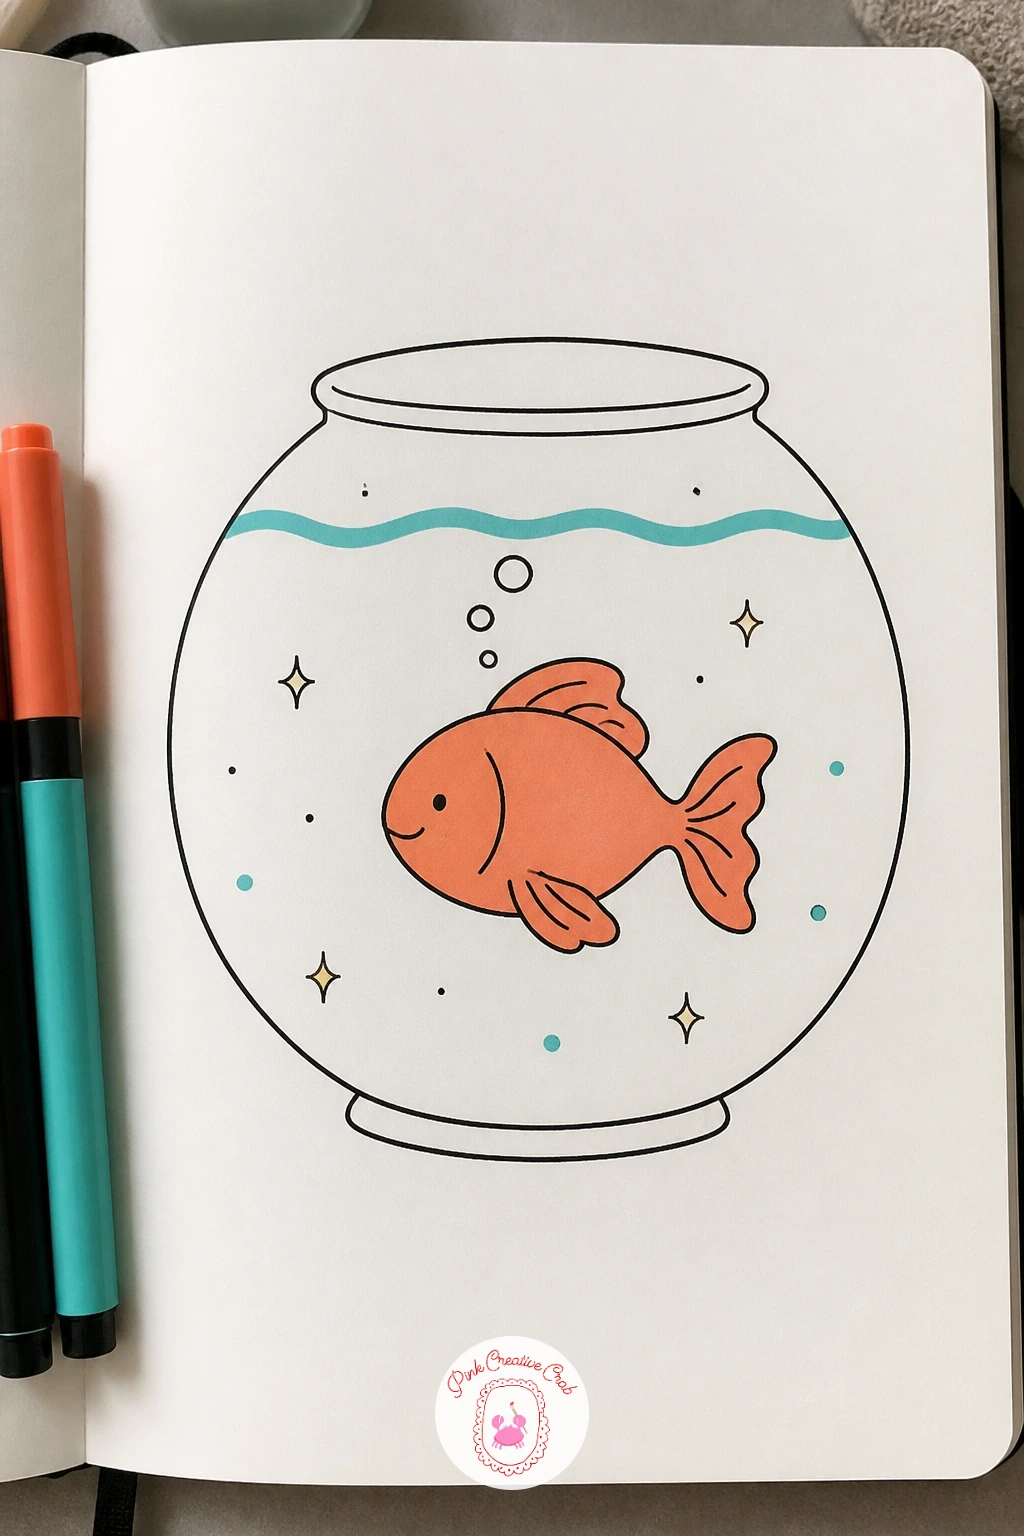
Palette: Coral Orange,Aqua,Black
Move from a calm goldfish to a pufferfish mid-surprise, since the shape is just as forgiving but the mood is funnier. Draw a near-perfect circle for the body first, bigger than you think it needs to be, because the spikes will eat into that space once they are added.
Ring the circle with short straight lines pointing outward, spaced evenly like a sun, then add two wide round eyes and a small open mouth in an O shape to read as shock. Tiny fins and a short tail stick out at the bottom.
If the spikes end up uneven, do not erase them: vary a few lengths on purpose and it reads as texture rather than a mistake. Color the body pale coral orange and leave the spikes black for contrast, or swap in a lemon yellow marker if coral runs out.
One tip for today: draw the eyes first inside the circle before the spikes go on, so the surprised expression sets the whole mood.
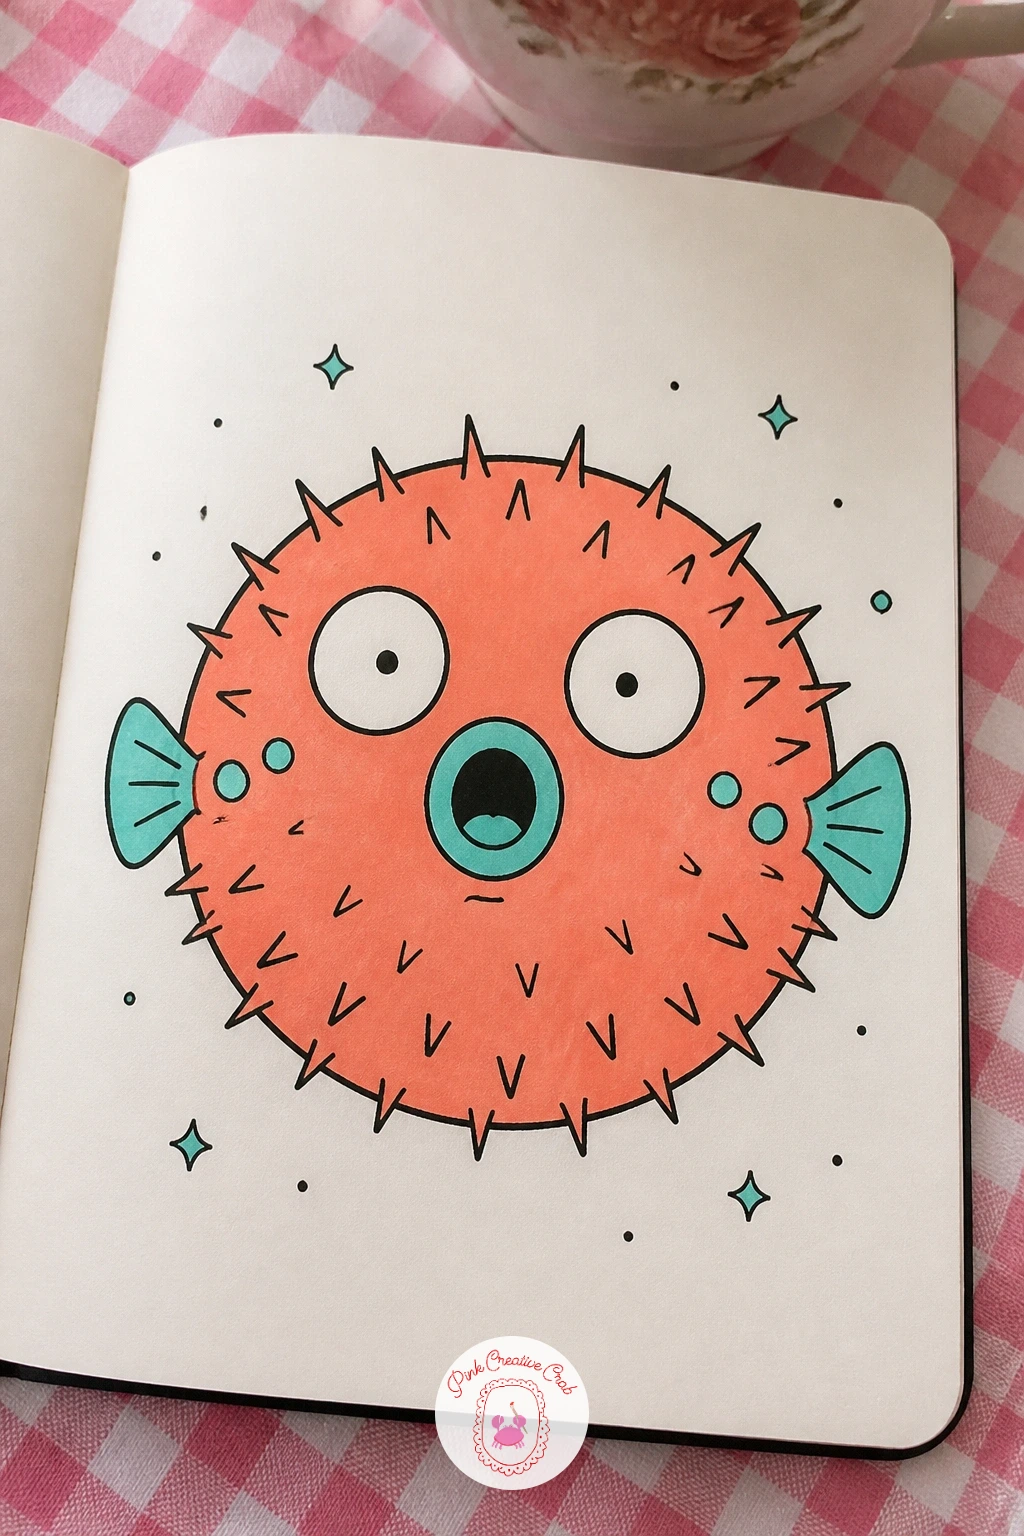
Palette: Coral Orange,Black,White
After two solo fish, give this one a home: a clownfish tucked into an anemone. Draw the fish body first, a short oval with a rounded nose, then add two or three white vertical stripes outlined in black across it before coloring the rest in coral orange.
Build the anemone around the fish’s tail end with a cluster of wavy tube shapes, like a bundle of fat noodles reaching upward, some overlapping the fish slightly so it looks nestled in rather than floating beside it. Color the tubes in aqua with a few left white for highlights.
The eye level matters more than you’d think here: place the fish’s single dot eye and small smile close to the top of the head, looking slightly upward, and the whole pose suddenly feels like it is peeking out of the anemone rather than sitting flat beside it.
Tip for today: draw the anemone tubes at slightly different heights so the cluster does not look like a row of identical fingers.
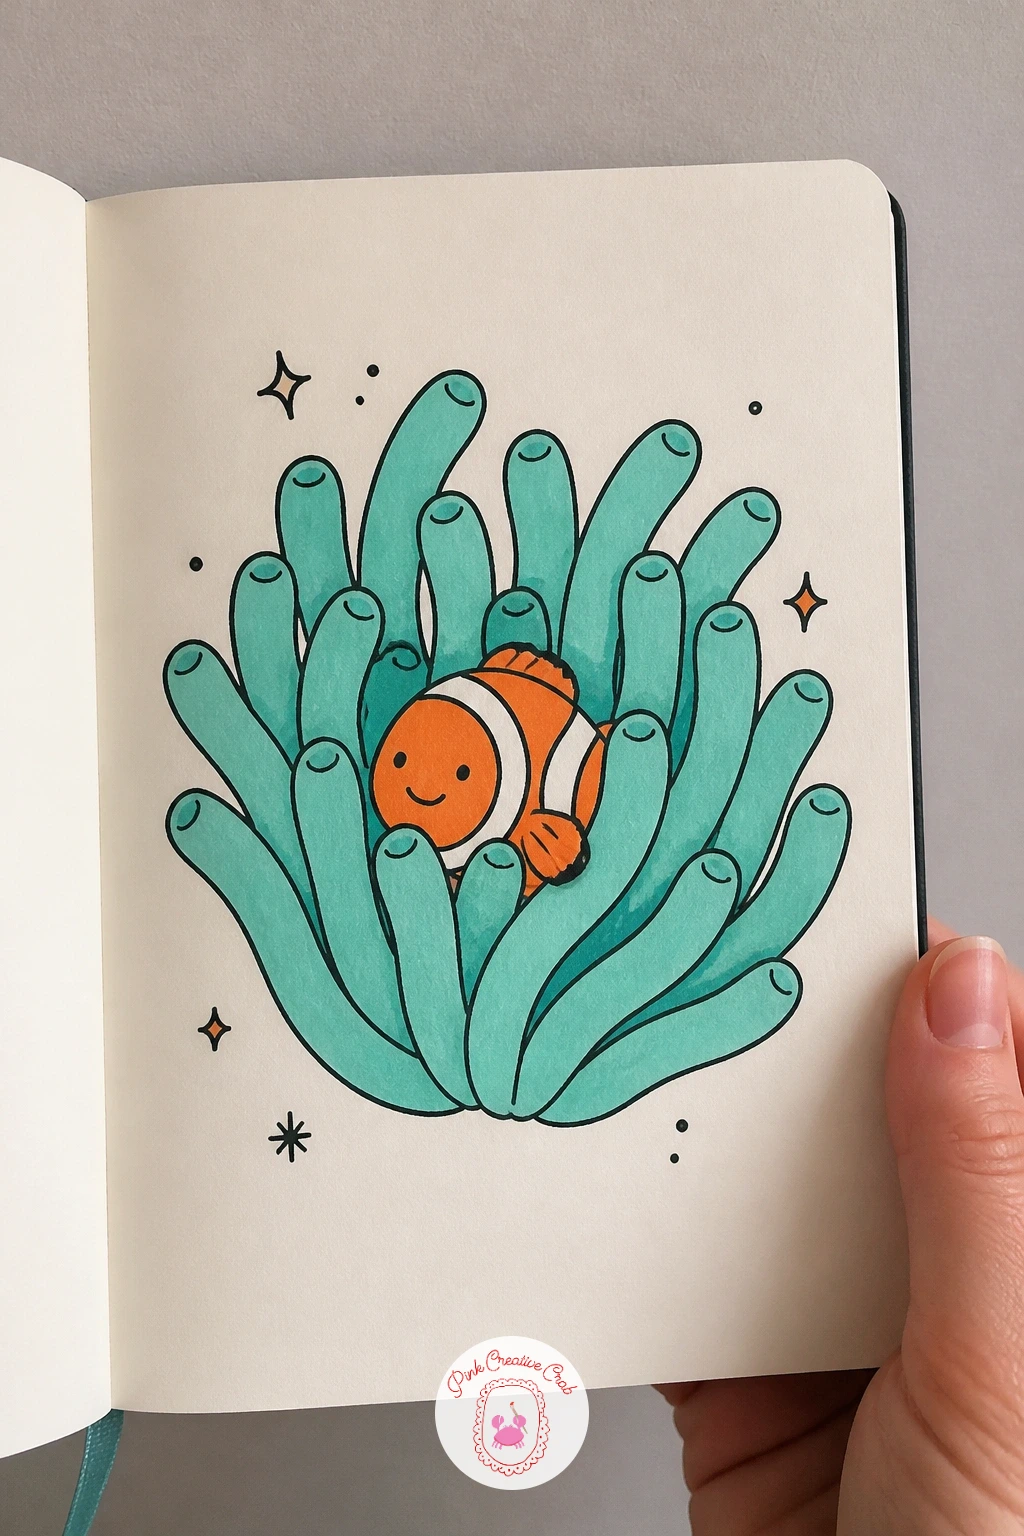
Palette: Coral Orange,White,Aqua
Carry the same calm mood into a koi fish resting near a single flower. Draw the koi’s body longer and more S-curved than the earlier fish, with a wide flowing tail split into two soft points and long trailing fins along the sides.
Add one small flower, a simple five-petal blossom, drifting just above the koi’s head or resting near its mouth as if it fell onto the water. Keep the petals plain and rounded so they do not compete with the fish.
Koi are usually colored in patches rather than one solid fill, so dab coral orange in two or three uneven blotches along the body and leave the rest white, then outline each patch edge in black once dry. A dry brush stroke of aqua along the tail edge adds movement without a hard line.
Today’s tip: let the orange patches touch the body outline unevenly rather than filling edge to edge, since that uneven edge is what makes it read as koi markings instead of a plain stripe.
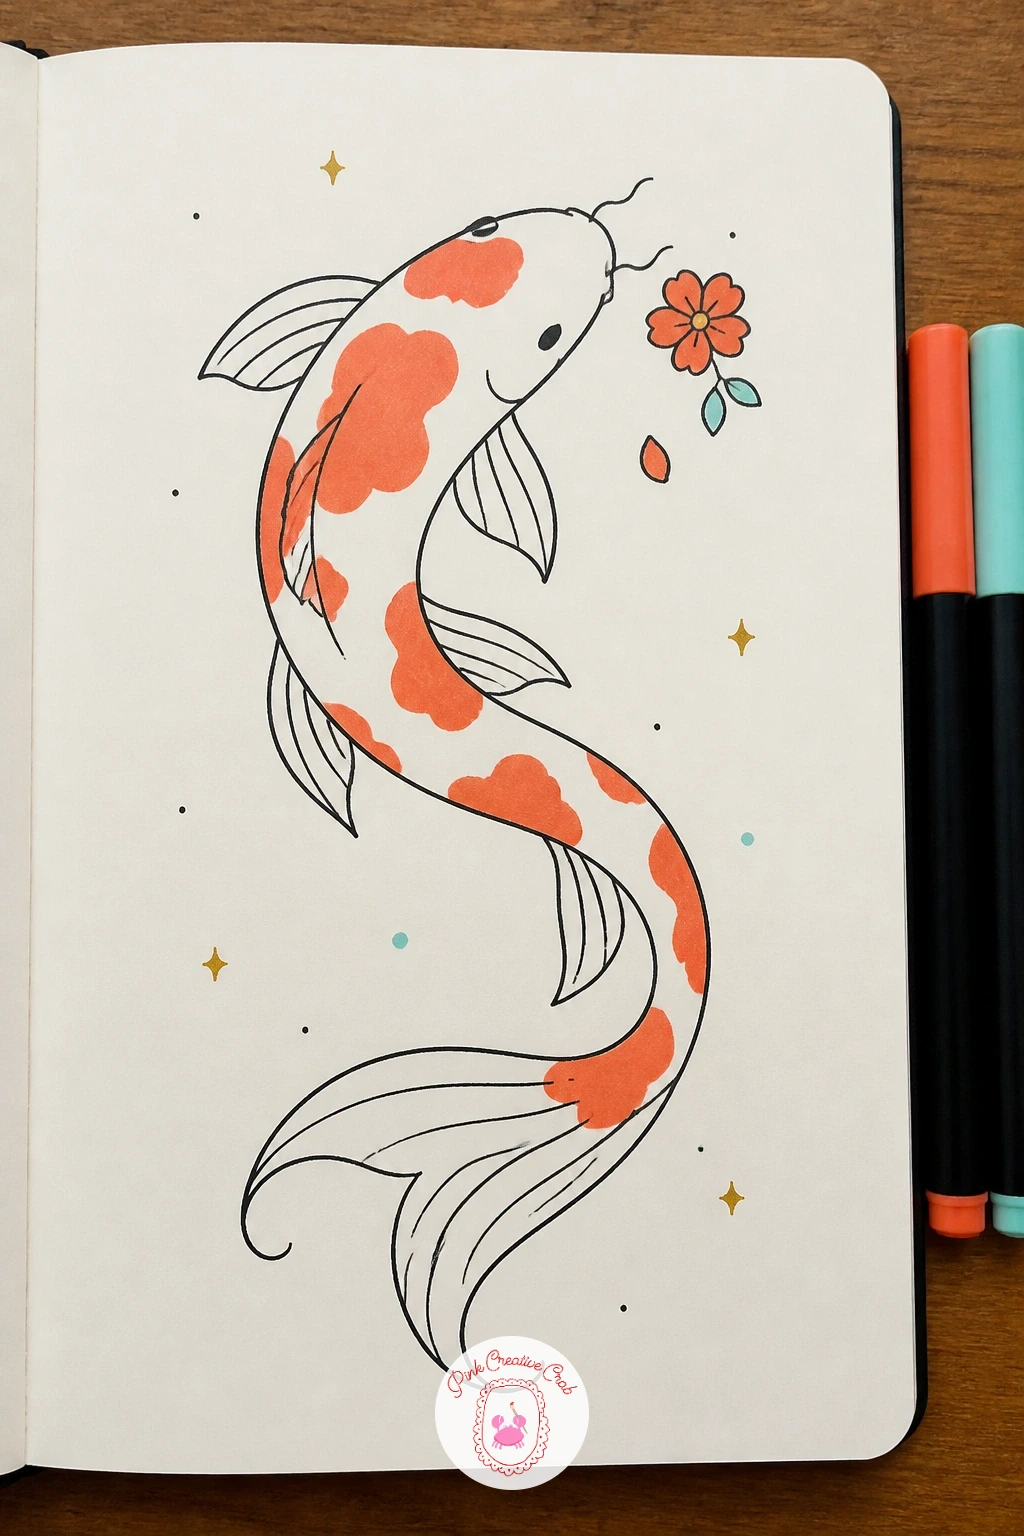
Palette: Coral Orange,White,Aqua,Black
Shift into character fish now, starting with one in a party hat. Draw the fish body as a simple rounded teardrop shape facing slightly upward, since an upward tilt reads as cheerful before you have added a single detail.
Perch a small cone shape on top of the head for the hat, angled to match the fish’s tilt, with a tiny pompom circle at the tip and a thin strap line curving under where the chin would be. A few short zigzag or dot patterns on the cone make it look festive.
This is a fast one: ten minutes covers the fish, hat and a happy curved-line smile. If you have more time, add a scatter of small confetti dashes in coral and aqua floating around the fish to finish the scene.
Tip for today: tilt the hat slightly off-center rather than straight up, since a perfectly centered hat looks stiff and a tilted one looks like it is about to slip off, which is funnier.
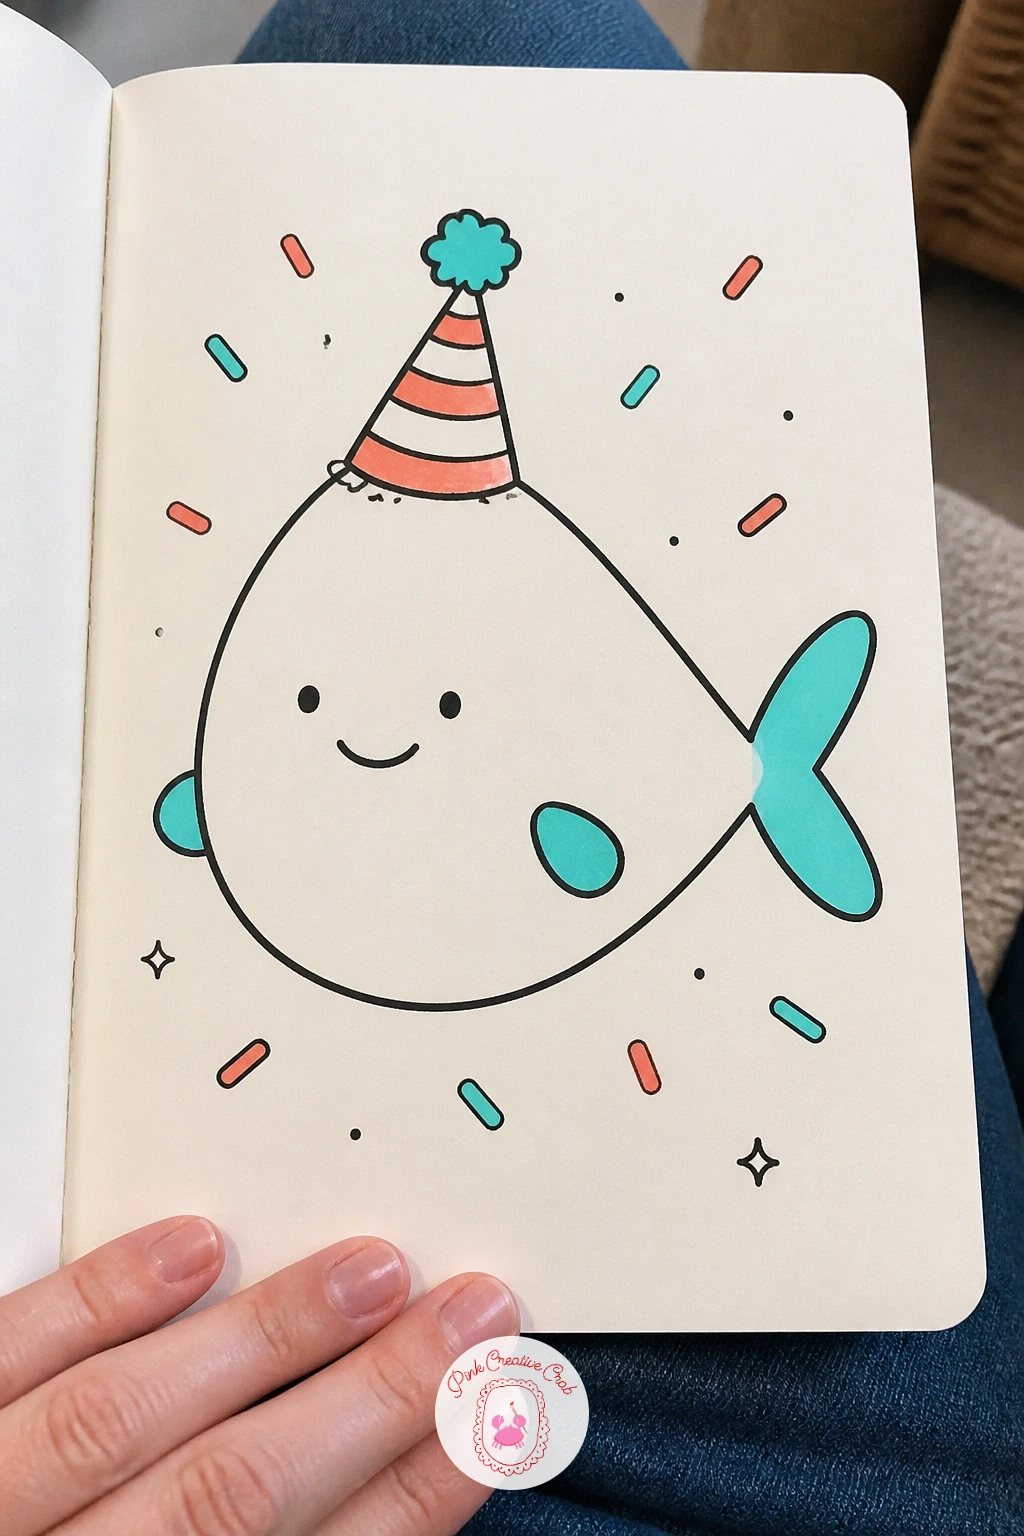
Palette: Coral Orange,Aqua,Black
Keep the sweet mood going with a fish blowing bubbles shaped like hearts instead of circles. Draw the fish in profile with its mouth in a small round pucker, since that pucker is what sells the blowing action more than anything else on the page.
From the mouth, draw a trail of three or four heart shapes in increasing size, each one a simple two-bump heart outline, drifting upward and slightly apart. Leave the smallest ones near the mouth and the largest furthest away, which gives the trail a sense of floating distance.
Color the fish body in coral orange and the hearts in aqua, or swap the colors between fish and hearts if you want more contrast. A thin dotted line trailing from each heart suggests motion without adding real detail.
One tip for today: keep the mouth small and round rather than wide, since a wide mouth reads as a yawn instead of a bubble-blow.
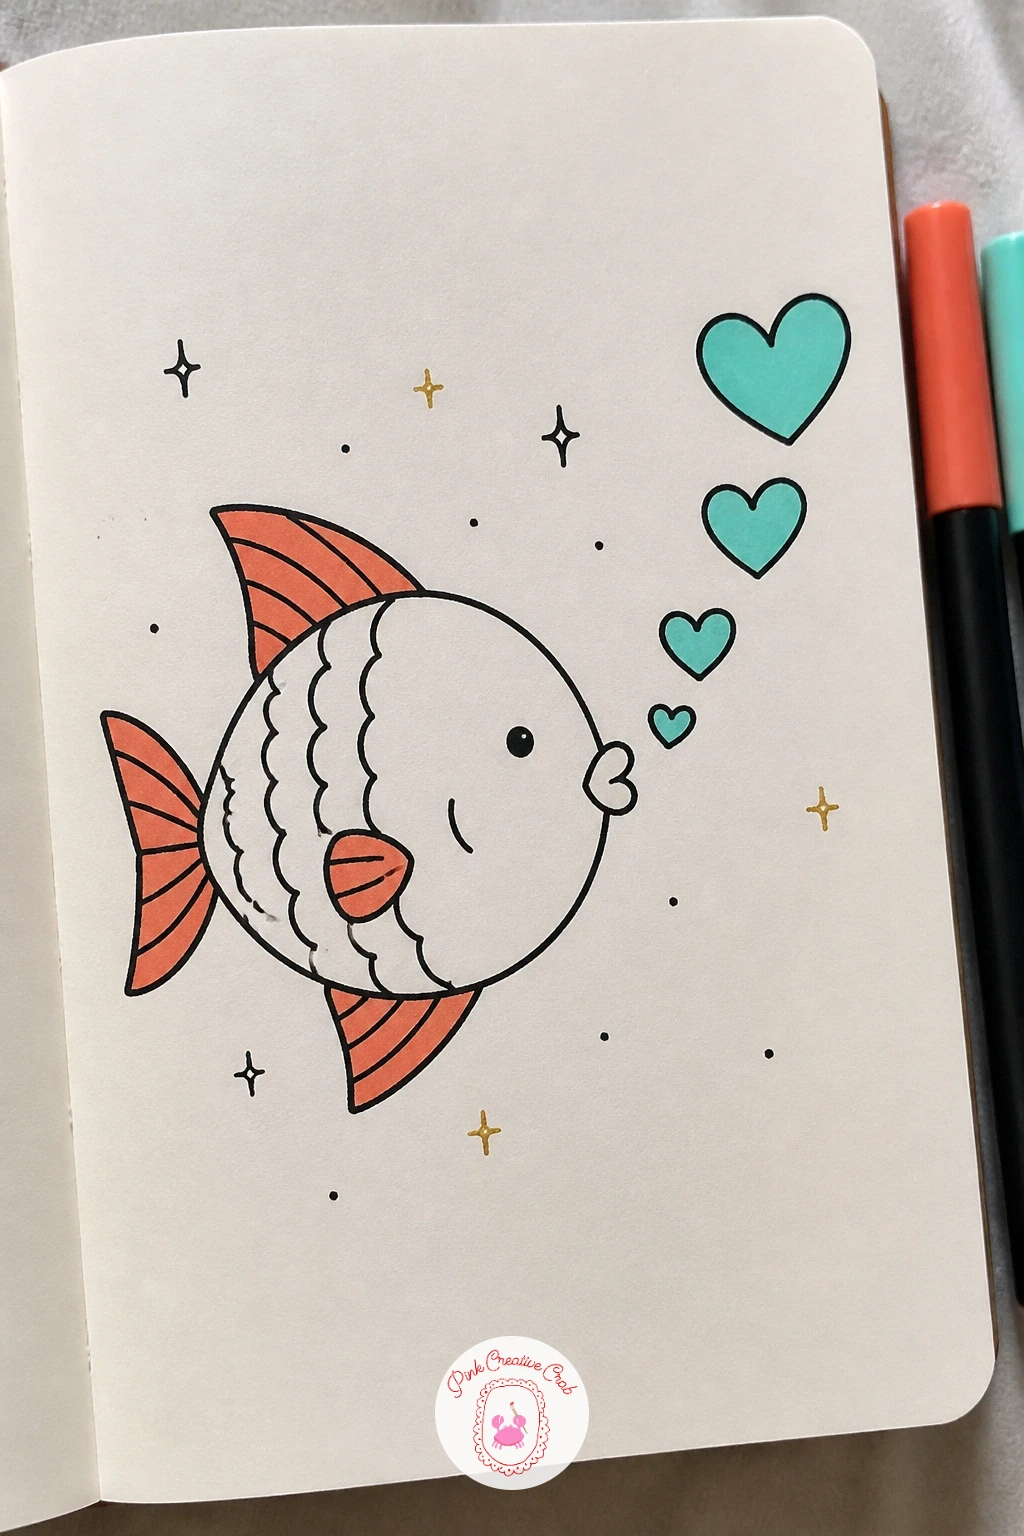
Palette: Coral Orange,Aqua,Black
Scatter several tiny fish together inside one curved wave shape. Start with the wave itself: one long curling line like a wide hook, thicker at the base and tapering to a point at the top, the kind of line you might know from a classic wave illustration.
Inside and around the wave’s curl, add six or eight tiny fish, each no more than a simple pointed oval with a small tail triangle, facing different directions so the school feels scattered rather than lined up in a row. Vary their sizes slightly, since identical fish look stamped rather than drawn.
Color the wave body in aqua with a few white foam dashes along the curling tip, and leave the tiny fish in a mix of coral orange and plain black silhouettes so they read as a crowd rather than individual portraits.
Tip for today: draw the wave’s curl first and place every fish inside or just below that curve, never above it, so the whole group reads as caught in the water.
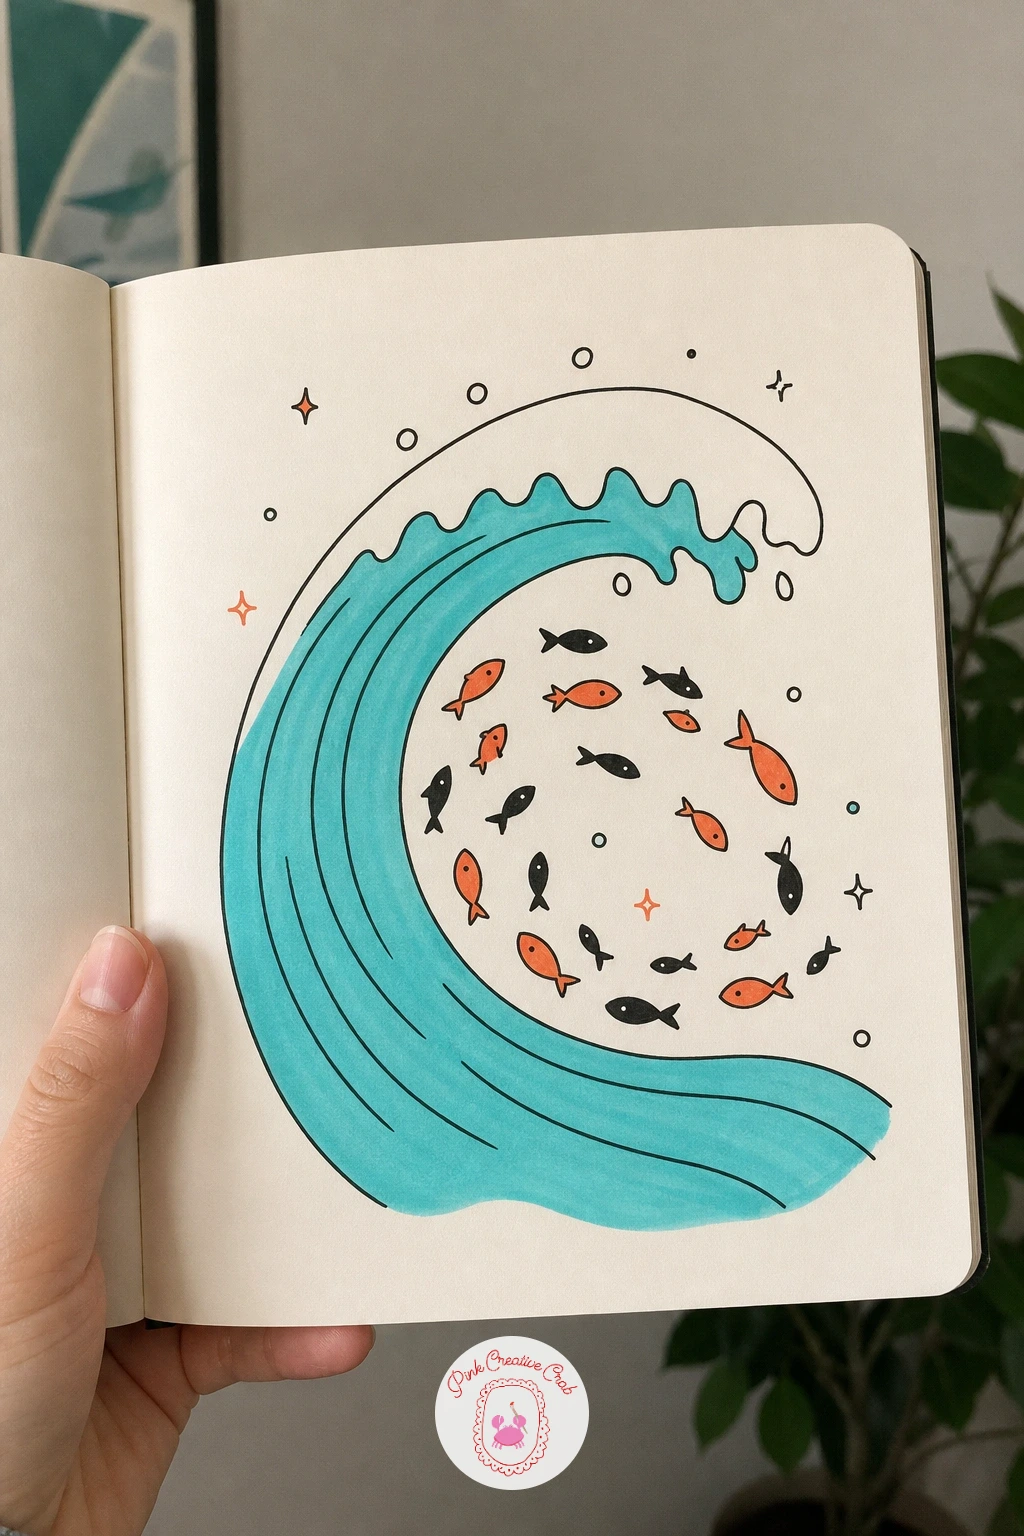
Palette: Aqua,White,Coral Orange,Black
If the fish start looking too uniform, draw a few facing backward or at an angle, which instantly makes the school feel alive instead of stamped from one template.
Trade the wave for something cozier: a single fish resting inside a teacup. Draw the cup first, a simple rounded cylinder with a small curved handle on one side and a thin ellipse for the rim, then a wavy line just below the rim to show the water level.
Fit the fish inside the cup’s body, curling its tail slightly to match the cup’s curve so it looks tucked in rather than too big for the space. One raised eyebrow line above the eye or a small closed-eye smile gives it a relaxed, bathing look.
Where this goes wrong most often is drawing the fish too large first and running out of cup, so sketch the teacup fully before adding a single fish line. Color the cup in a soft aqua with a thin coral orange stripe around the rim for a painted-china look.
Tip for today: add two or three small steam curls rising from the cup if you want it to feel warm rather than just full of water.
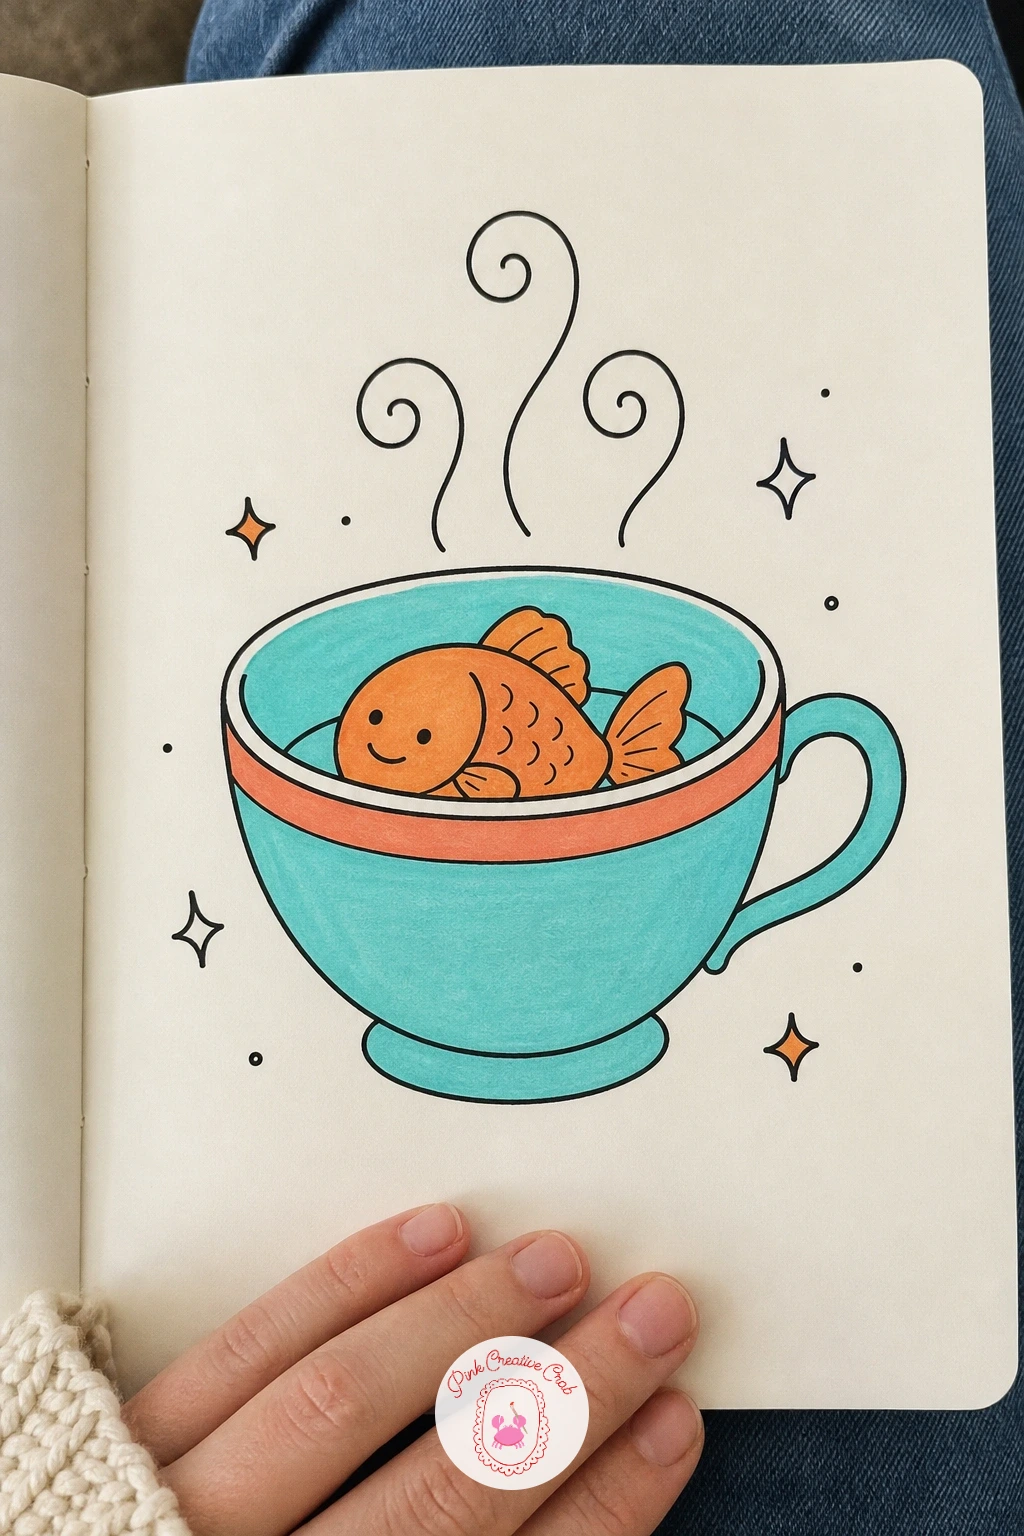
Palette: Aqua,Coral Orange,Black
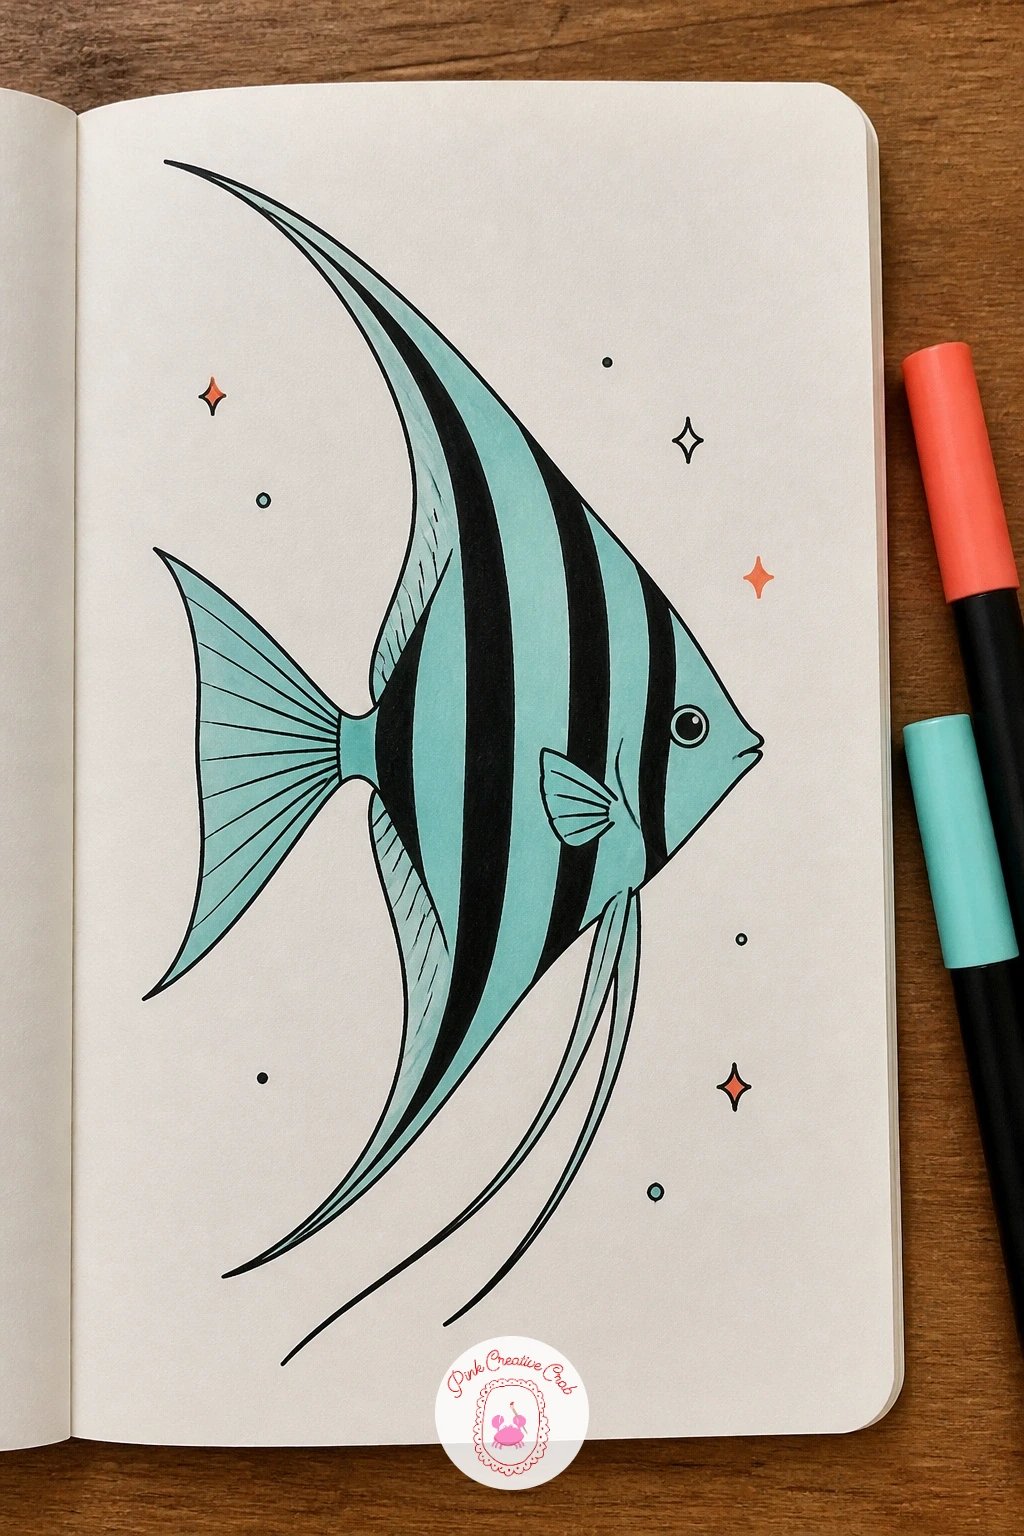
Angelfish give you a chance to play with elegant proportion. Draw a tall diamond shape for the body first, taller than it is wide, which is the single measurement that separates an angelfish from every rounder fish on this list.
From the top and bottom points of the diamond, draw long trailing fins that sweep backward in soft curves, roughly as long as the body itself, and add two slim side fins near the middle. Keep the tail small and simple compared to those dramatic top and bottom fins, since that contrast is what makes the shape read correctly.
Add two or three thin vertical stripes down the body in black, then color the rest in a pale aqua wash from marker, leaving the fin tips white or barely tinted for a delicate look.
Tip for today: measure the top fin and bottom fin against each other before inking, since even slightly mismatched lengths make the whole fish look lopsided once color is added.
Palette: Aqua,White,Black
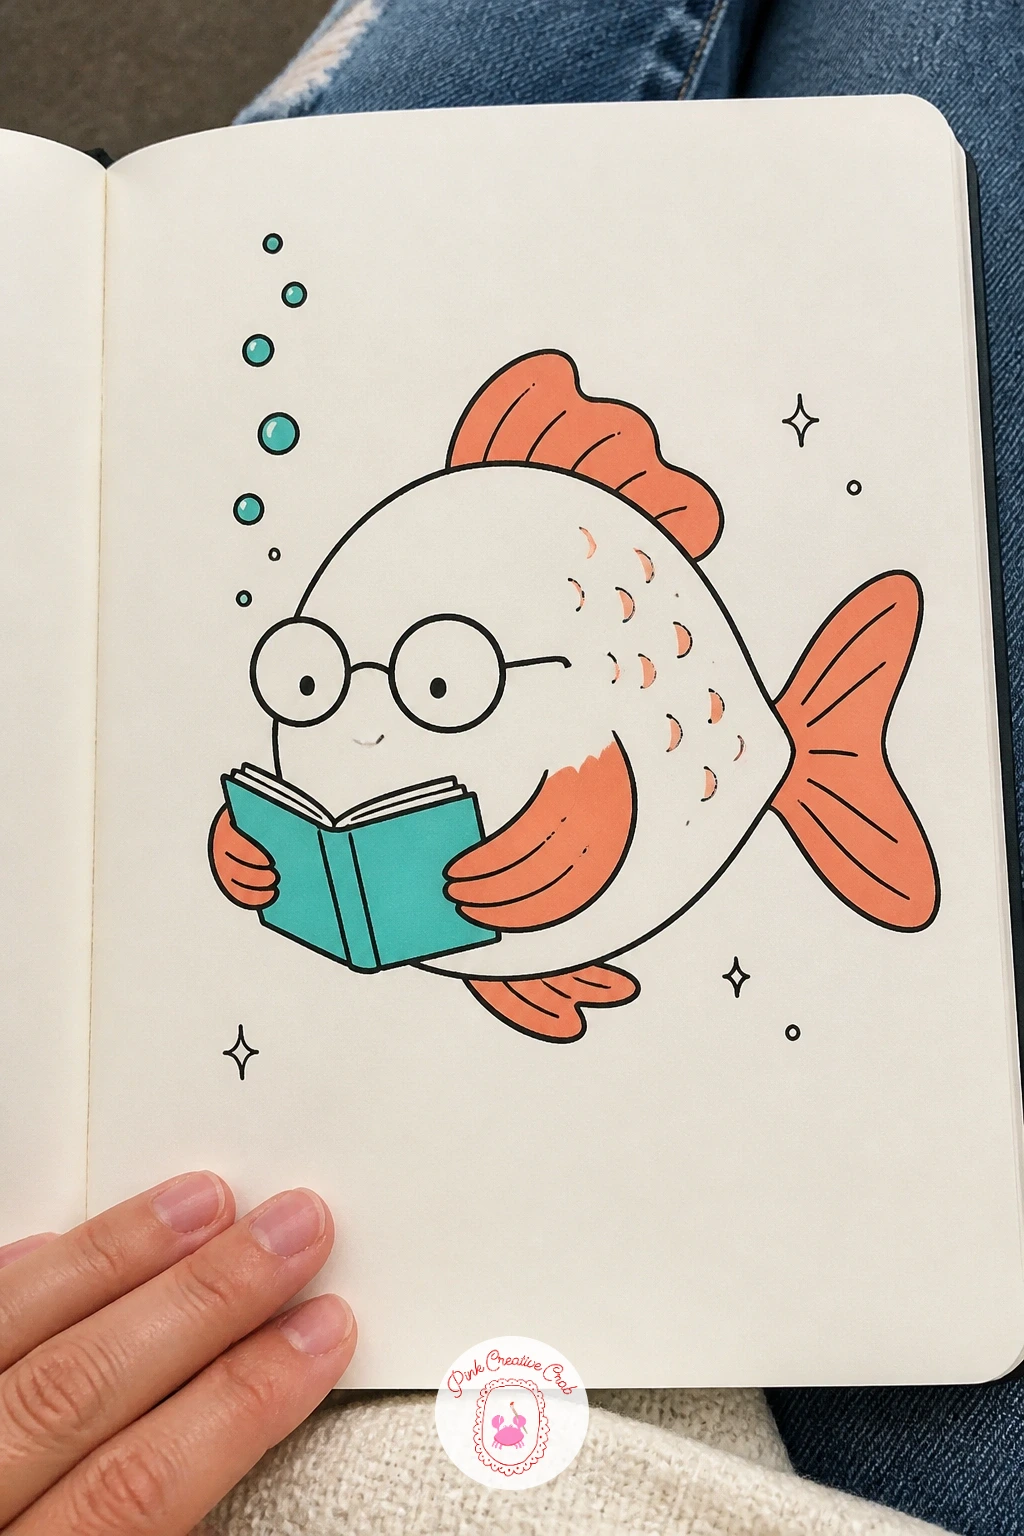
Give a fish a quiet hobby: reading. Draw the fish body first in a relaxed horizontal pose, then add two small fin shapes positioned like hands holding a tiny open book in front of its face, the book drawn as two simple rectangles meeting at a center spine line.
Small curved lines on the book pages suggest text without needing to write anything, and a pair of simple round glasses perched above the eye adds instantly to the studious mood. Bubbles rising from a small open mouth suggest it is humming along as it reads.
The eye level question here is really about the glasses: sit them slightly low on the “nose” area rather than centered on the eye, the way reading glasses actually slip down, and the whole pose reads more natural.
Tip for today: keep the book small, no wider than the fish’s head, so it stays a charming prop rather than an object the fish seems to be hiding behind.
Palette: Coral Orange,Aqua,Black
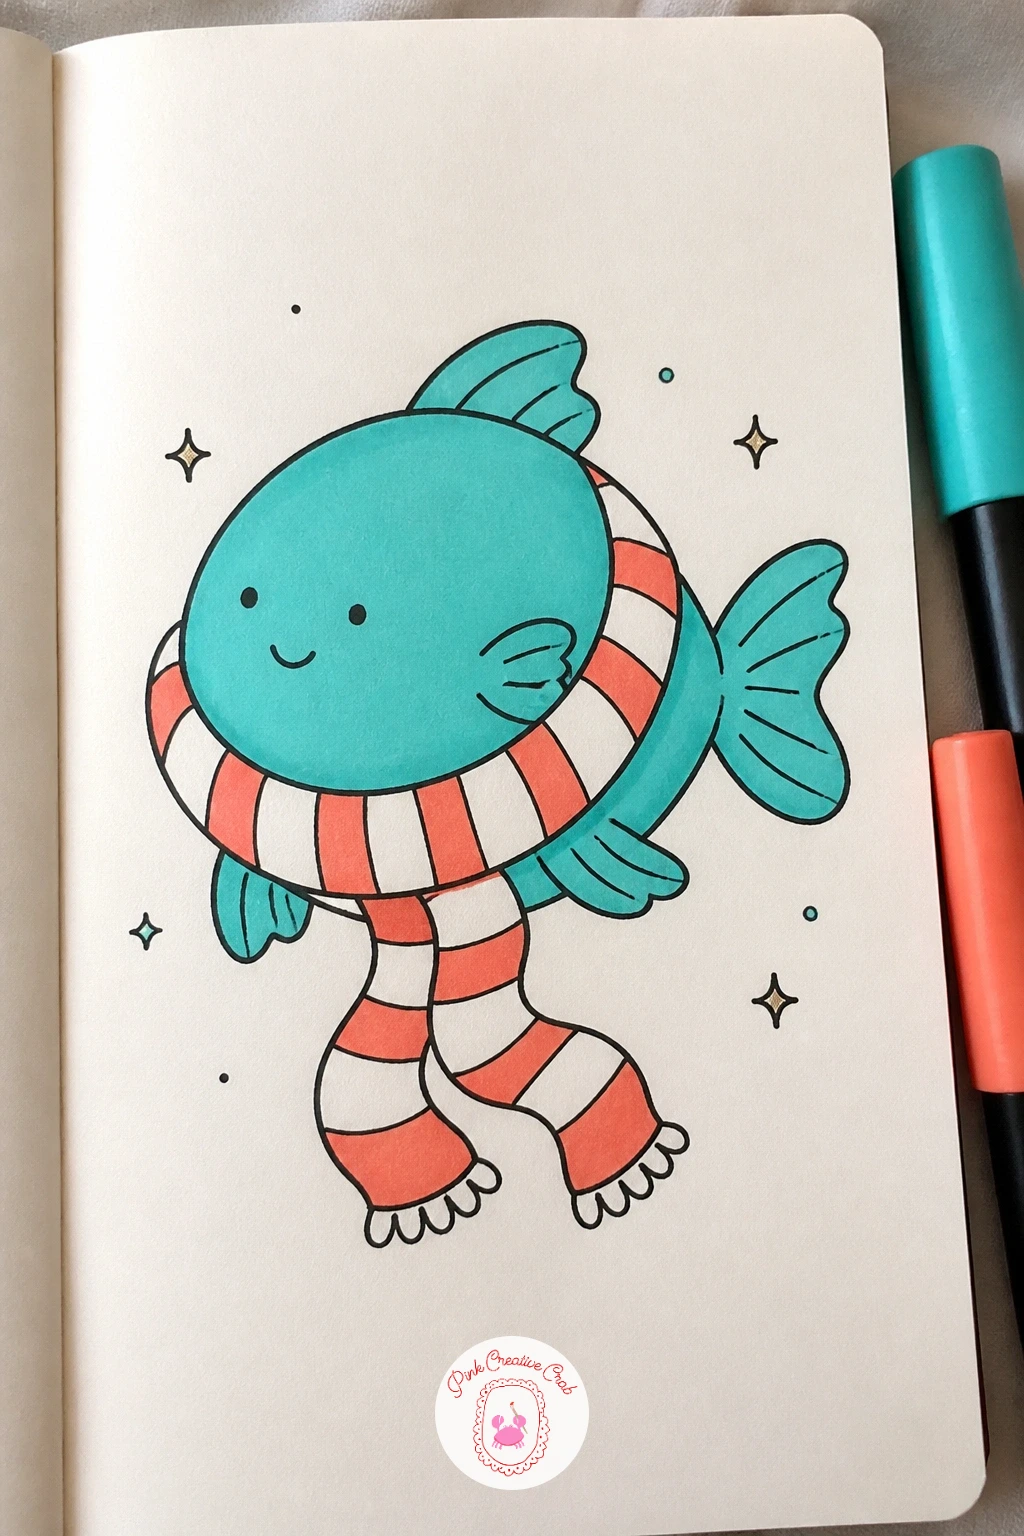
Bundle a fish up for cold water with a simple striped scarf. Draw the fish body in a gentle curve, then wrap a long thin band around its neck area in a loose loop with two tail ends trailing down past the belly.
Alternate short diagonal or straight lines across the scarf band in coral orange and leave gaps of white between them for the stripe pattern, which reads clearly even at small size. Keep the fish’s own fins simple so the scarf stays the clear focal point.
If the scarf ends up looking stiff or flat, loosen the trailing ends with a slight wave instead of straight lines, since fabric rarely hangs perfectly straight even on an imaginary fish. No orange marker on hand works fine too, since a plain black-striped scarf against an aqua fish body reads just as cozy.
Tip for today: draw the scarf loop before the fins, so the fins can tuck naturally behind or beside it instead of getting drawn over and erased.
Palette: Coral Orange,White,Aqua
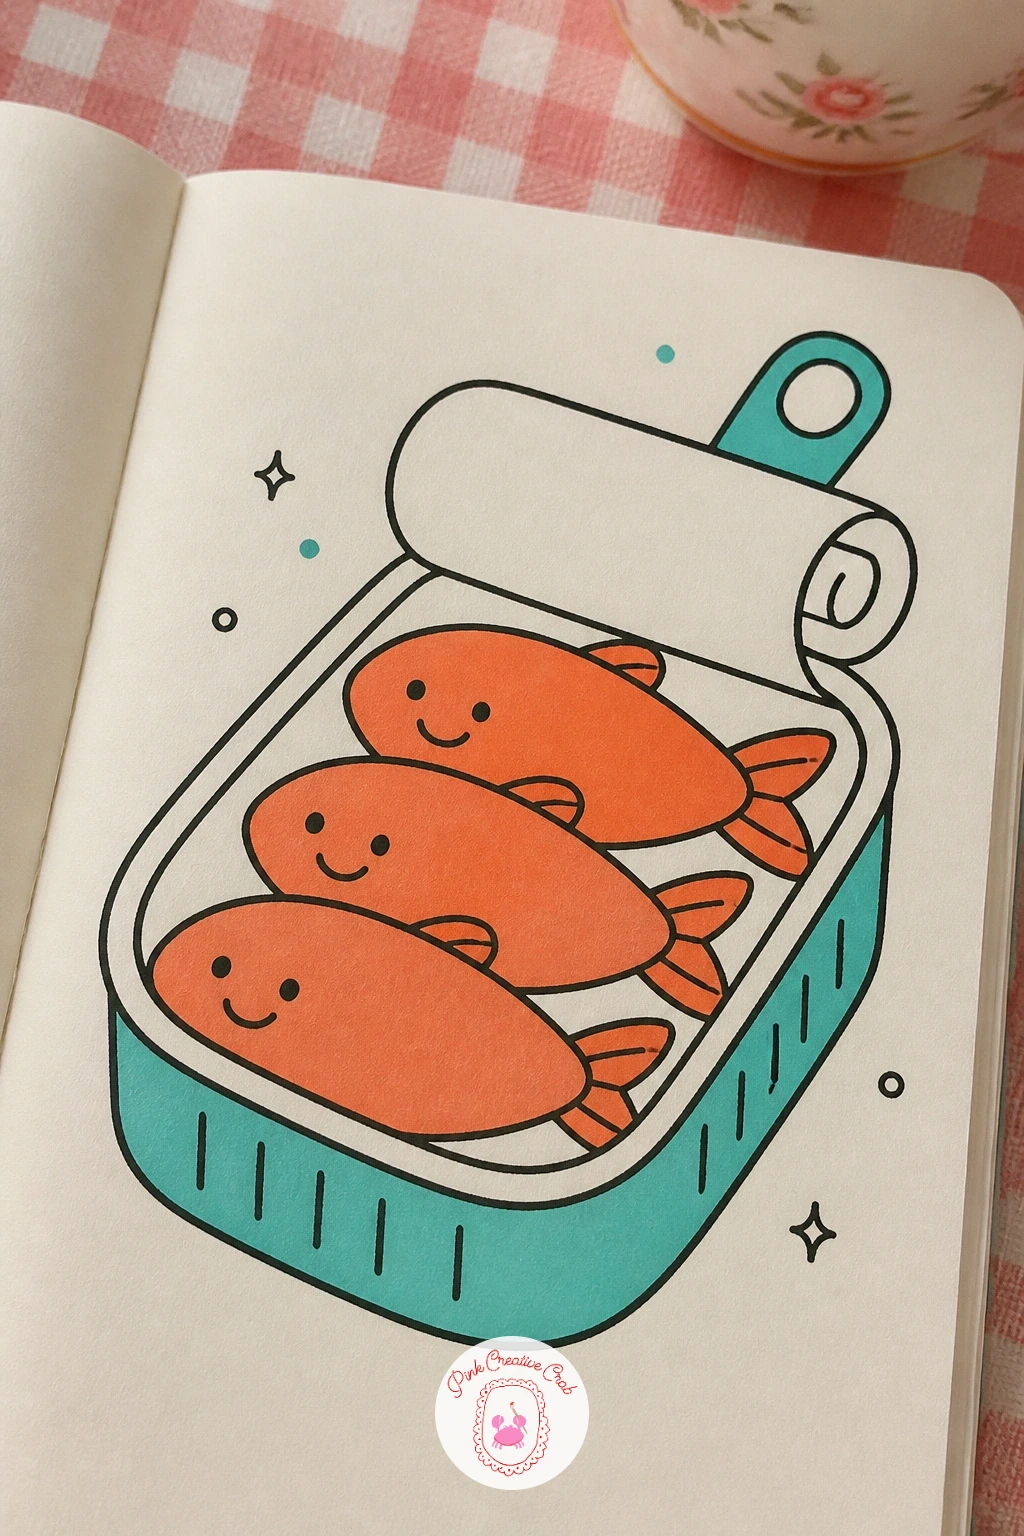
Pack a whole tin of fish for a change of format. Draw a simple open rectangle for the tin first, with a slightly rolled-back lid edge along one side to show it has been opened, and a thin rim line around the inside edge.
Lay three or four small fish inside, packed close and slightly overlapping the way real sardines sit, each one a simple curved oval with a tiny tail and a closed, content smile rather than an open mouth. Facing them in alternating directions, head to tail, fills the tin shape more convincingly than lining them all the same way.
Color the fish bodies in a mix of coral orange and plain silver gray from an uncolored pencil line, then shade the tin itself in a cool aqua gray so it reads as metal rather than blending into the fish.
Tip for today: draw the tin’s opened lid curling slightly upward at one corner, since that small detail does more to sell “tin” than any amount of shading on the fish.
Palette: Coral Orange,Aqua,Black
Move into one of the most dramatic fish shapes with a betta and its flowing tail. Draw a small, almost plain oval for the body, since the real drawing happens entirely in the fins: betta tails are famously oversized compared to the body that grows them.
From the back of the oval, draw one large tail fan in soft overlapping ripples rather than one solid triangle, and add two smaller fins along the top and bottom in the same rippled style. Work from the body outward, letting each ripple layer slightly over the last.
Dry brush a marker lightly along the fin edges rather than filling them solid, dragging the tip with very little ink left in it, which leaves soft streaky color that suits flowing fins far better than a flat fill. Coral orange and aqua blended loosely side by side on the same fin looks especially good on a betta.
Tip for today: keep the body small and the fins large, roughly three times the body’s size, since an even betta-to-fin ratio is what makes this fish instantly recognizable.
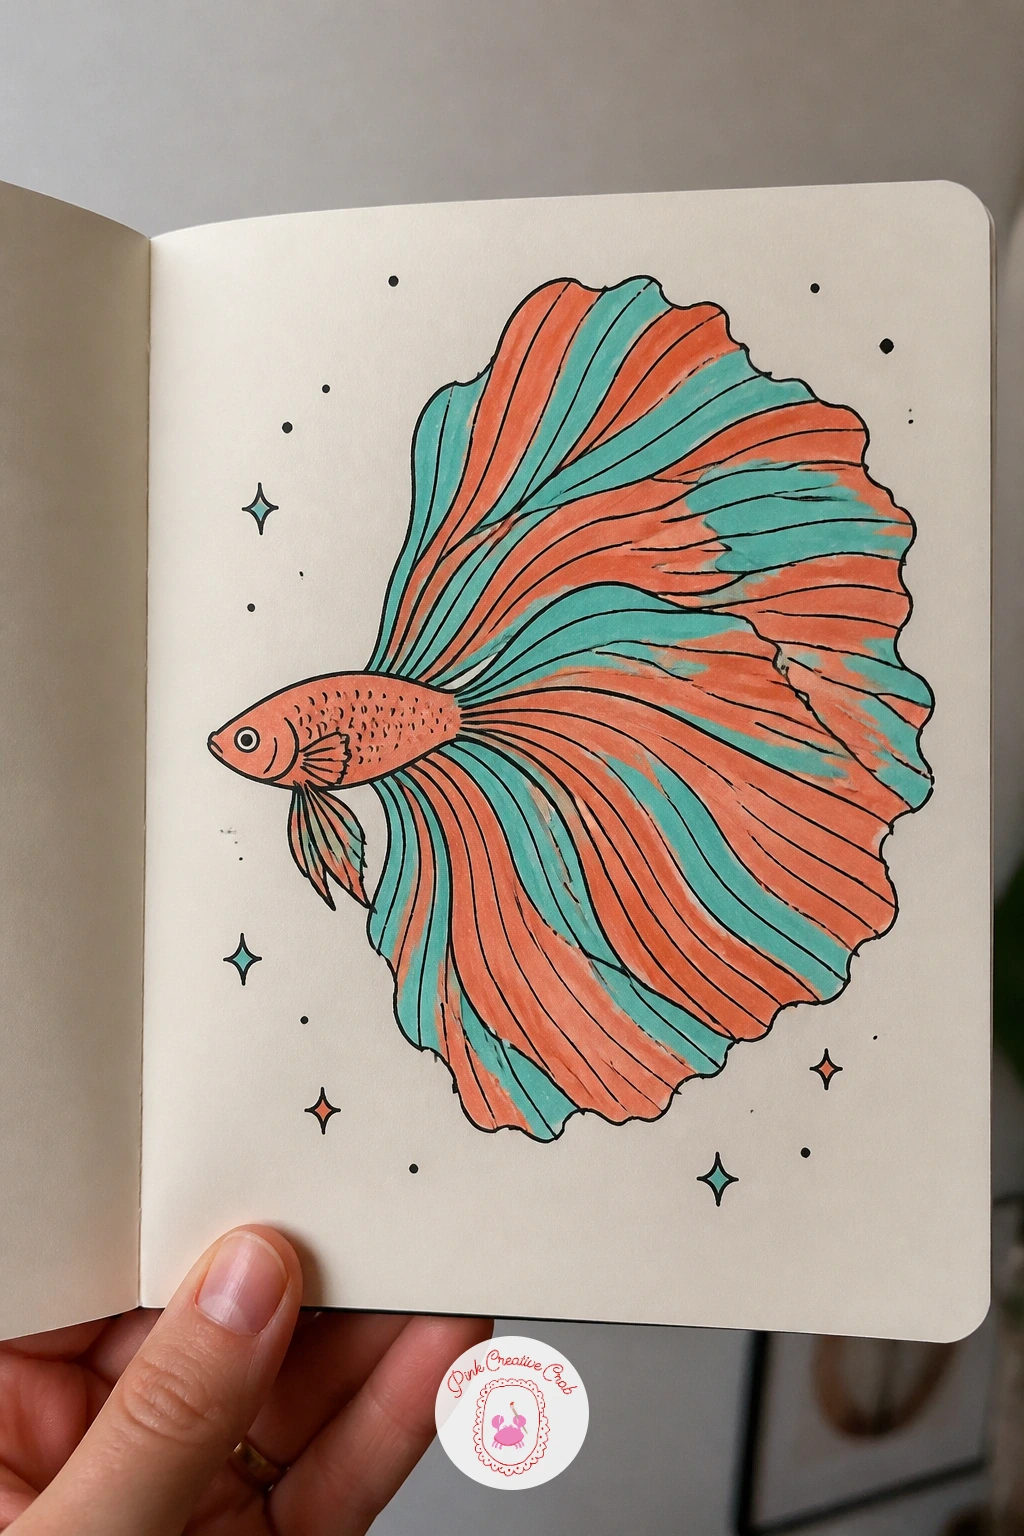
Palette: Coral Orange,Aqua,Black
Add a little drama with a fish mid-escape from a hook. Draw a simple curved hook shape first, hanging from a single straight line for the fishing wire, then place the fish beside it rather than on it, body arched away in a dramatic C-curve as if twisting free.
Small motion lines trailing from the fish’s tail and a few scattered water droplets around the bend of its body sell the sense of sudden movement. An open mouth and wide round eye give it the panicked, cartoonish expression the scene needs.
This is a fast sketch, easily done in ten minutes with just the hook, fish and a couple of motion lines. With more time, add a small splash shape at the water’s surface above the scene to suggest the fish just broke through it.
Tip for today: curve the fish’s body away from the hook rather than toward it, since a fish bending toward the hook reads as caught, not escaping.
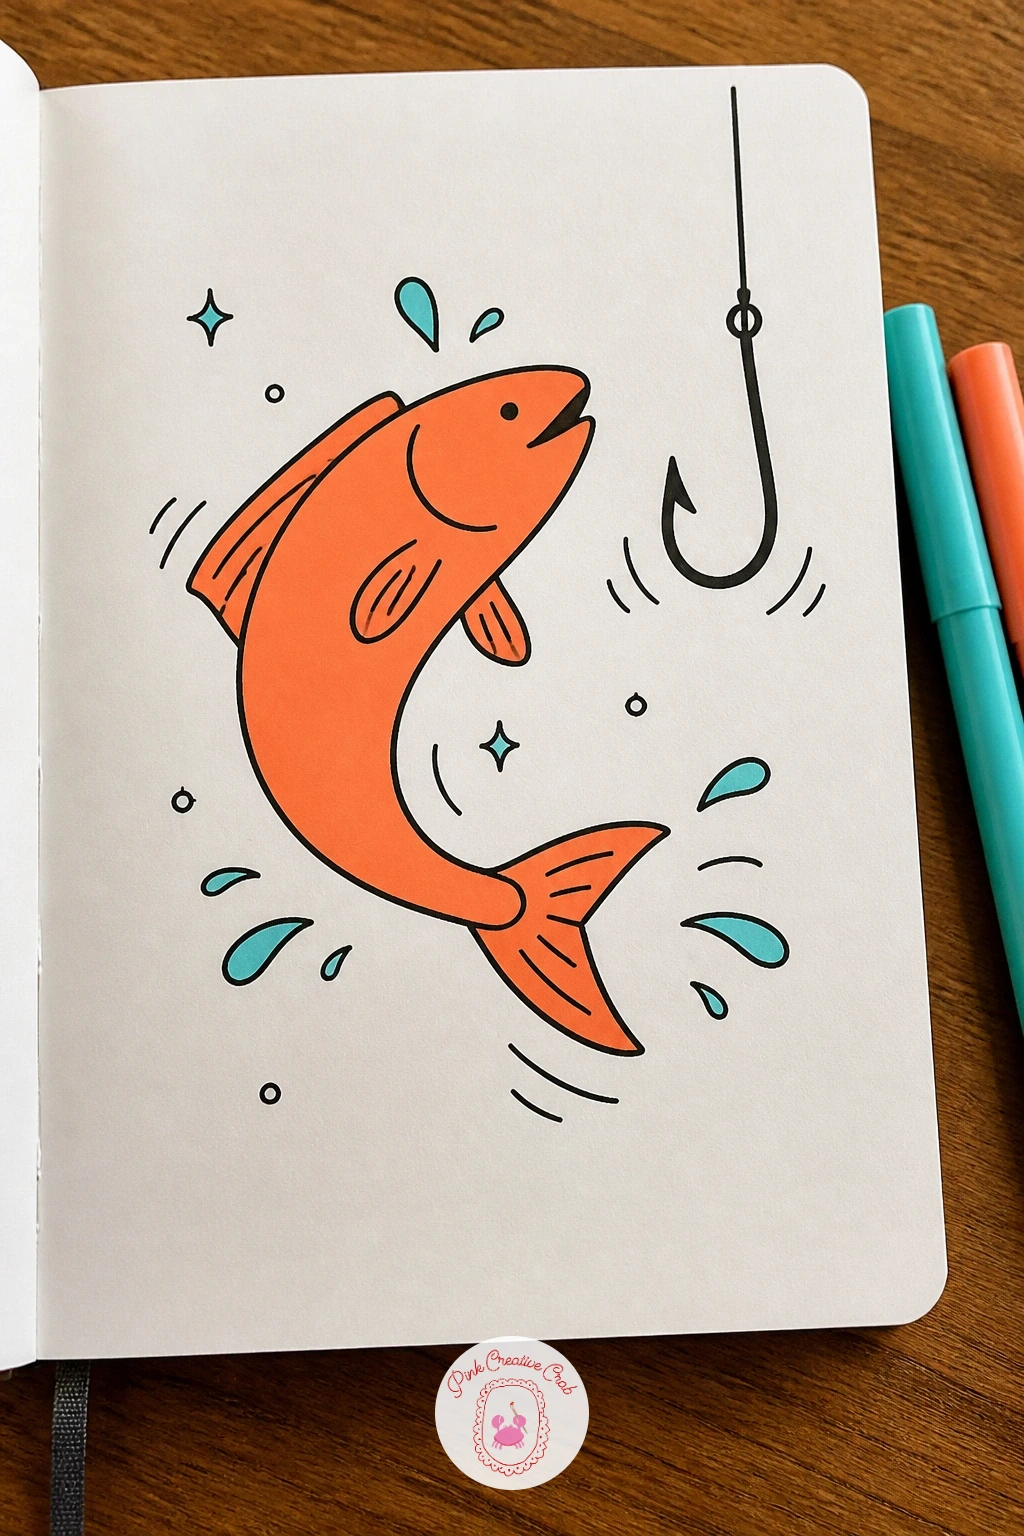
Palette: Coral Orange,Aqua,Black
Pair two fish together for a sweet, simple scene. Draw both bodies facing each other in mirrored curves, leaving a small gap between their mouths, then connect that gap with a tiny heart shape or a few small dotted hearts to suggest the kiss without drawing the moment itself.
Keep the two fish slightly different in size or color so they read as two individuals rather than one fish mirrored, since matched twins can look flat side by side. A faint blush mark, two small curved lines near each cheek, adds warmth cheaply.
Color one fish in coral orange and the other in aqua for instant visual balance across the pair, which also means you are using both accent colors evenly instead of leaning on just one.
Tip for today: angle both fish slightly toward each other rather than drawing them perfectly level, since the slight tilt is what makes the pose feel affectionate instead of accidental.
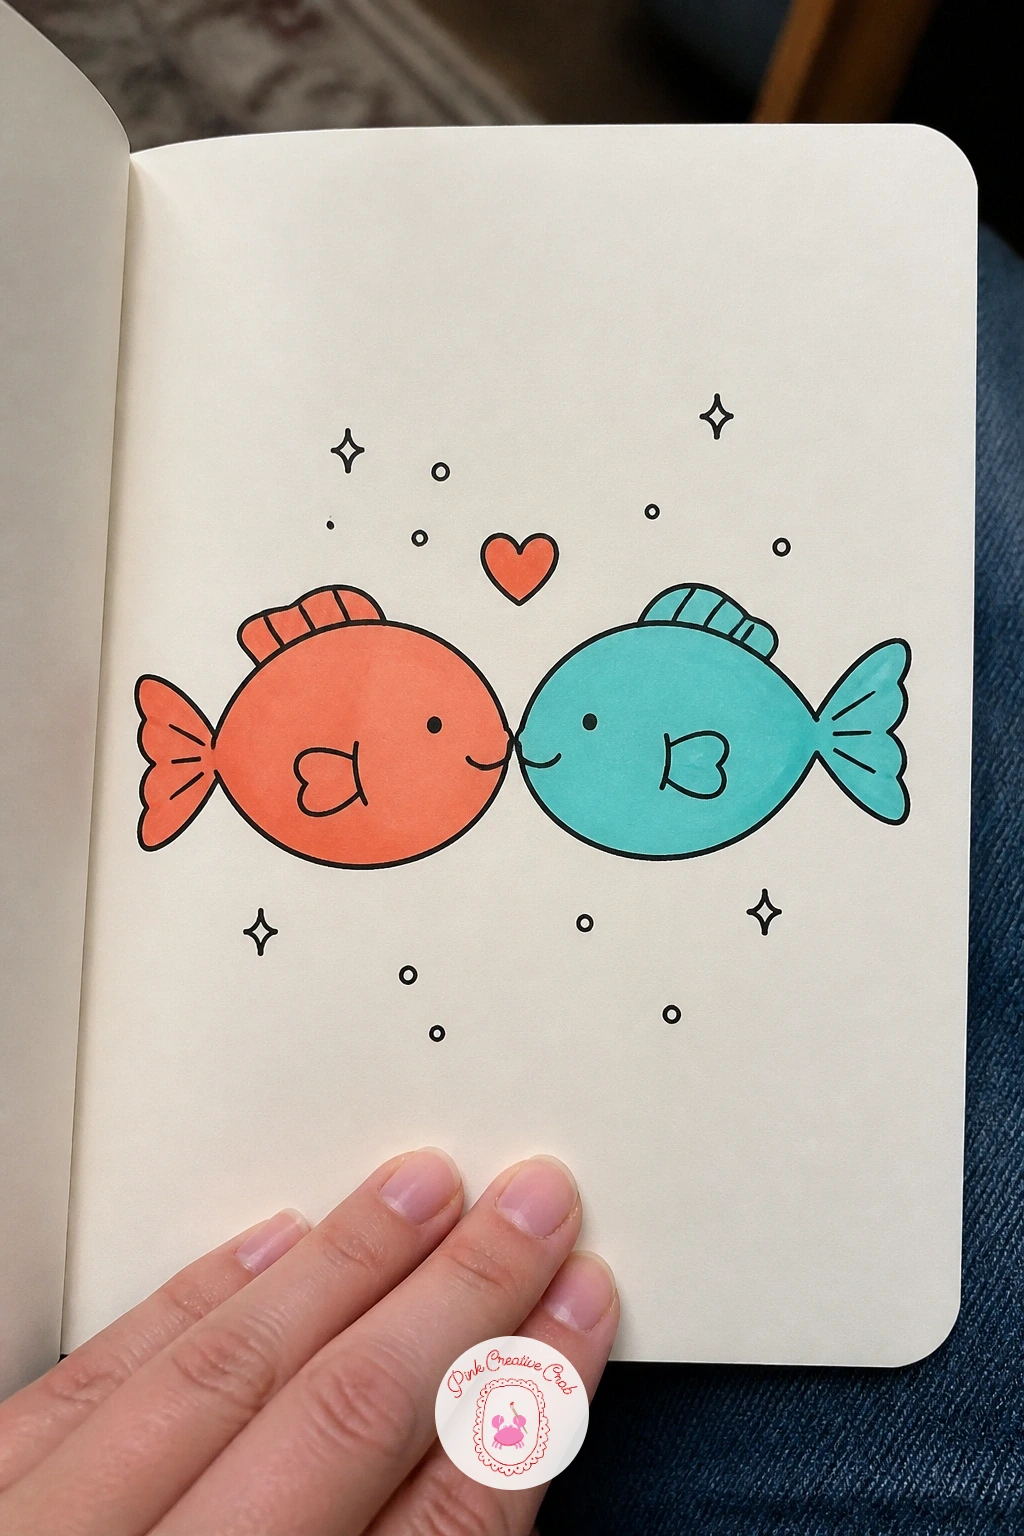
Palette: Coral Orange,Aqua,Black
Borrow a classic carnival image: a fish inside a knotted plastic bag of water. Draw a loose rounded bag outline first, wide at the bottom and gathered into a twisted knot at the top, using a wobbly uneven line rather than a straight one since real plastic never sits perfectly smooth.
Place the fish inside, body curved to fit the bag’s rounder bottom half, and leave the top portion of the bag mostly empty to represent air above the waterline. A thin wavy line partway up the bag marks where water ends and air begins.
Color only below that waterline in aqua, leaving the air pocket above uncolored, which does more to sell “bag of water” than any amount of linework could. If aqua marker runs dry, a light pencil crosshatch below the line reads as water just as well.
Tip for today: twist the knot at the top slightly off to one side rather than centering it, since a centered knot looks stiff and a twisted one looks freshly tied.
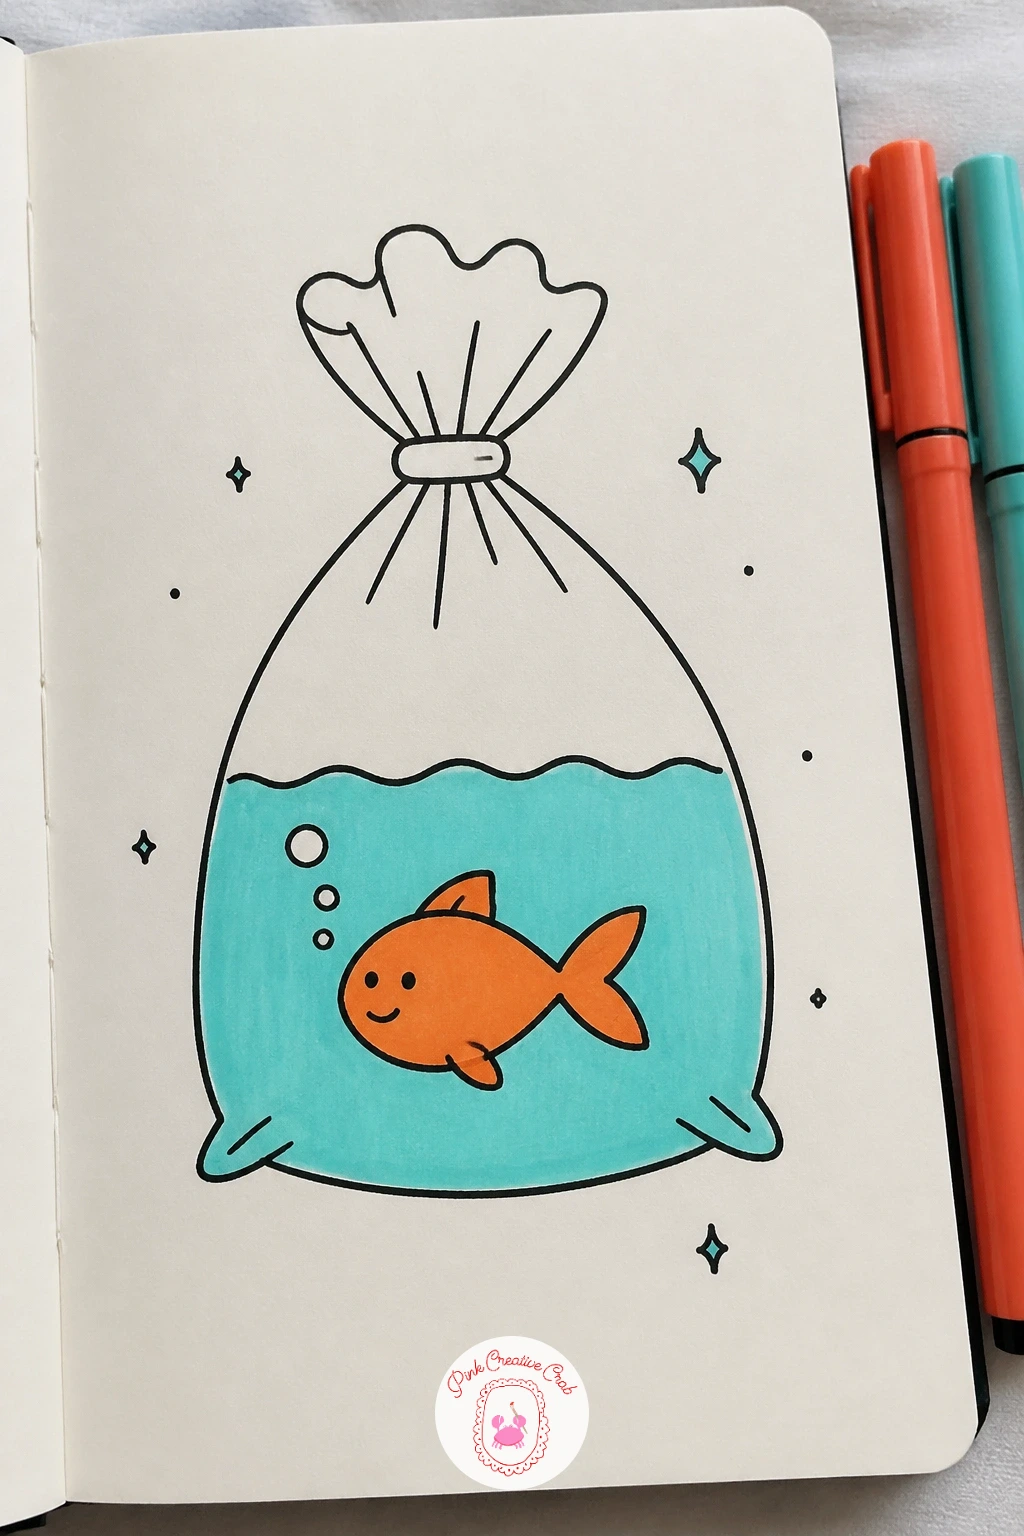
Palette: Aqua,Coral Orange,Black
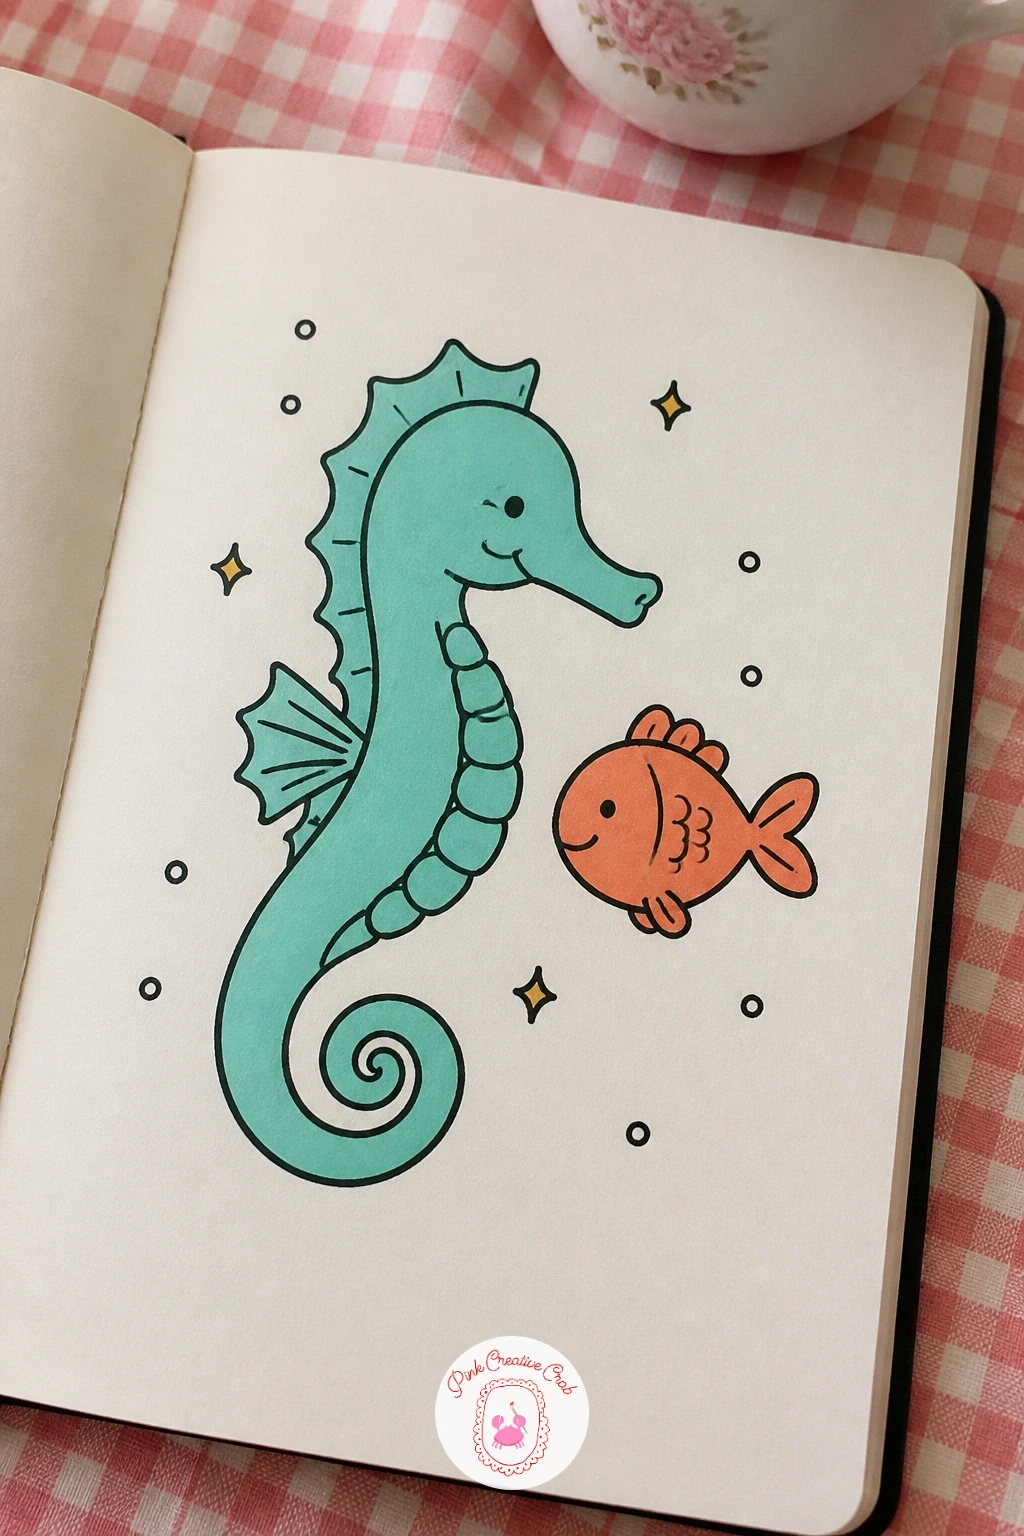
Introduce a new shape into the mix by pairing a fish with a seahorse. Draw the seahorse first, since its S-curved body and curled tail take more care than the fish will: start at the head with a small snout, curve down through the neck, then spiral the tail into a tight curl at the bottom.
Place the fish swimming just beside or slightly behind the seahorse, smaller in scale so the seahorse reads as the taller shape in the pair, and angle both so they face the same direction as if swimming together.
Color the seahorse in aqua with a few small fin ridges along its back in black, and the fish in coral orange so the two shapes stay visually distinct even though they overlap slightly at the middle of the scene.
Tip for today: curl the seahorse’s tail tightly, almost a full loop, since a loose or straight tail is the easiest way for a seahorse to accidentally look like a strange fish instead.
Palette: Aqua,Coral Orange,Black
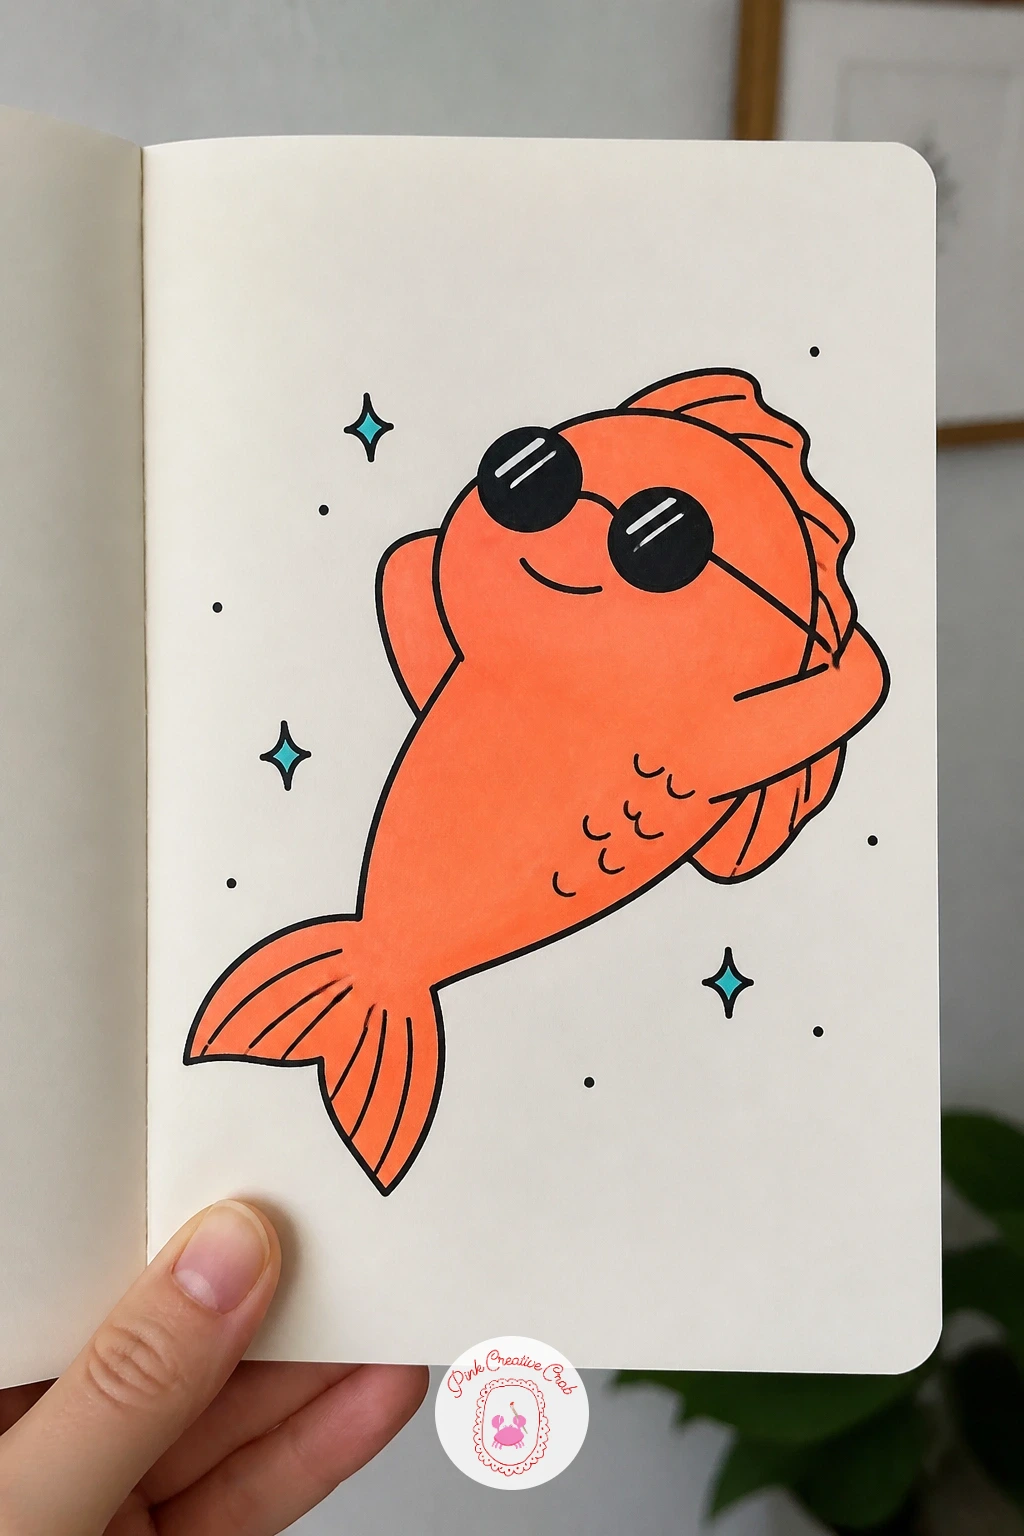
Give a fish some attitude with a pair of sunglasses. Draw the fish body in a relaxed, slightly tilted-back pose, head up as if lounging, then add a simple sunglasses shape across the eye area: two rounded lenses connected by a thin bridge line, following the slight curve of the head rather than sitting flat.
Fill the lenses solid black or dark aqua so they read as glass rather than empty outlines, and leave a tiny white dot or curved line in one lens for a reflective highlight. A small closed-mouth smirk under the glasses finishes the confident look.
If the glasses end up looking too big for the head, scale them down rather than redrawing the whole fish: sunglasses that cover a little less than half the head always look more natural than ones covering the whole face.
Tip for today: tilt the fish’s whole body back slightly, not just the head, since a relaxed body angle sells “cool” far more than the sunglasses alone.
Palette: Coral Orange,Black,Aqua
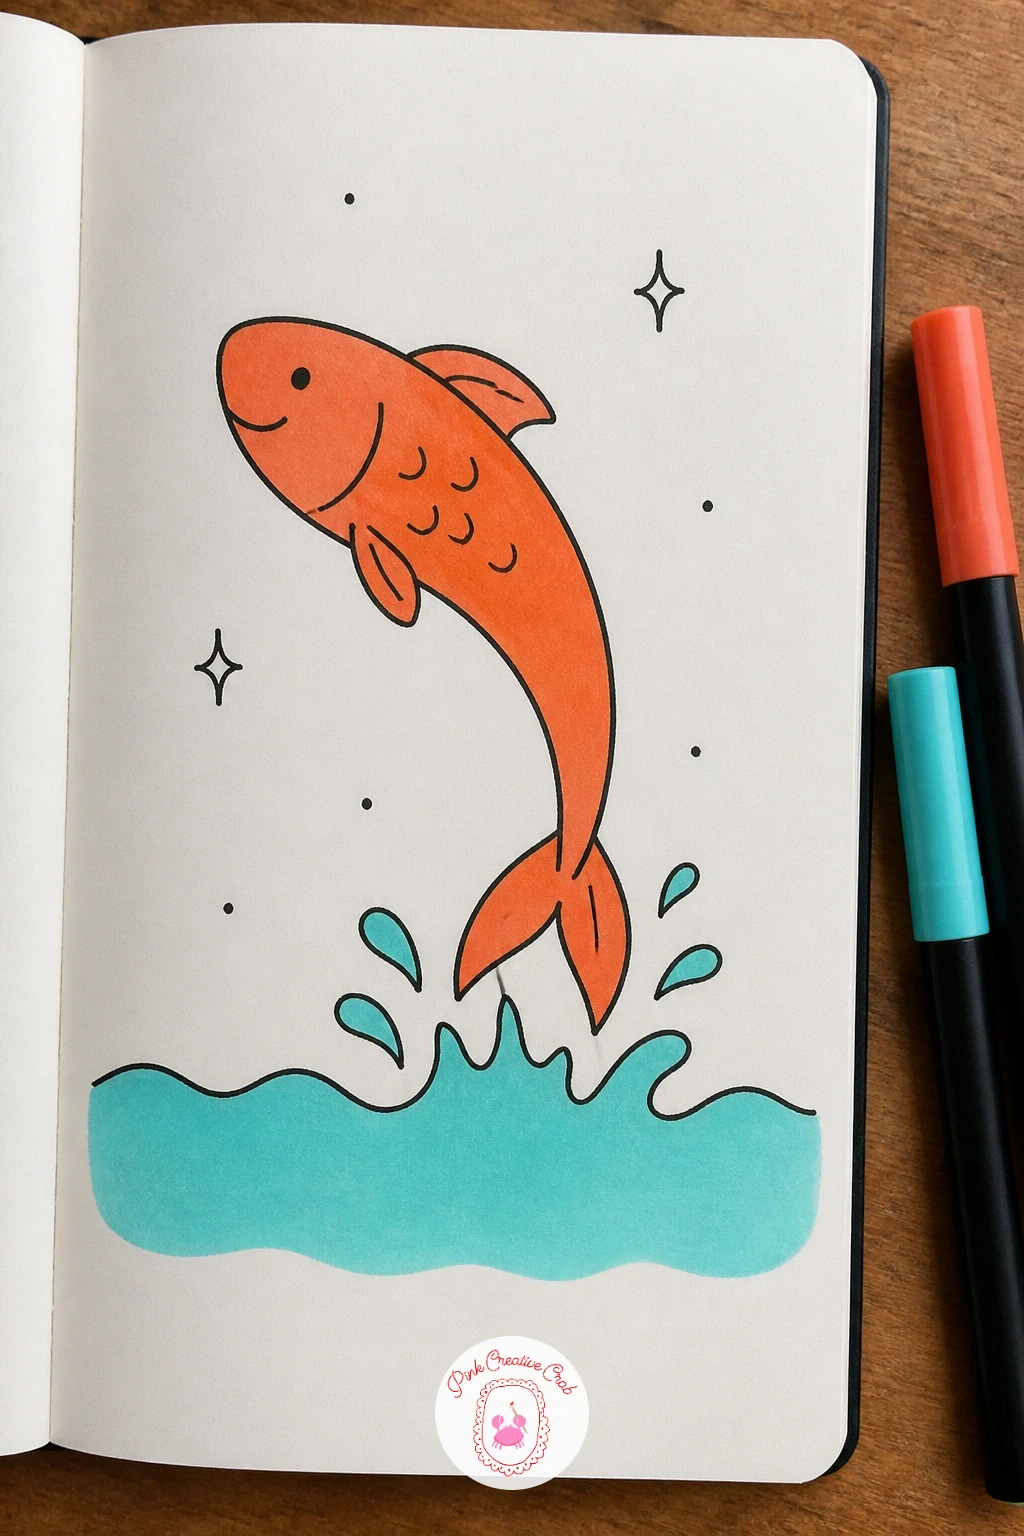
Capture a fish mid-leap above the surface. Draw a simple horizontal wavy line across the lower third of the page first to mark the waterline, then place the fish arched above it in a strong C-curve, tail pointing down toward the water and head angled upward.
Add a splash shape where the tail would have broken the surface: a cluster of small curved droplet marks and a few short radiating lines, concentrated right at the waterline rather than scattered everywhere. This single detail does the most to convince the eye the fish just launched out of the water.
Shade the water below the line in a flat aqua wash and leave the fish and the air above the line uncolored except for its coral orange body, which keeps the two zones of the drawing clearly separate.
Tip for today: arch the fish’s body more than feels natural at first, since an exaggerated curve reads as motion far better than a straight, stiff leap.
Palette: Aqua,Coral Orange,Black
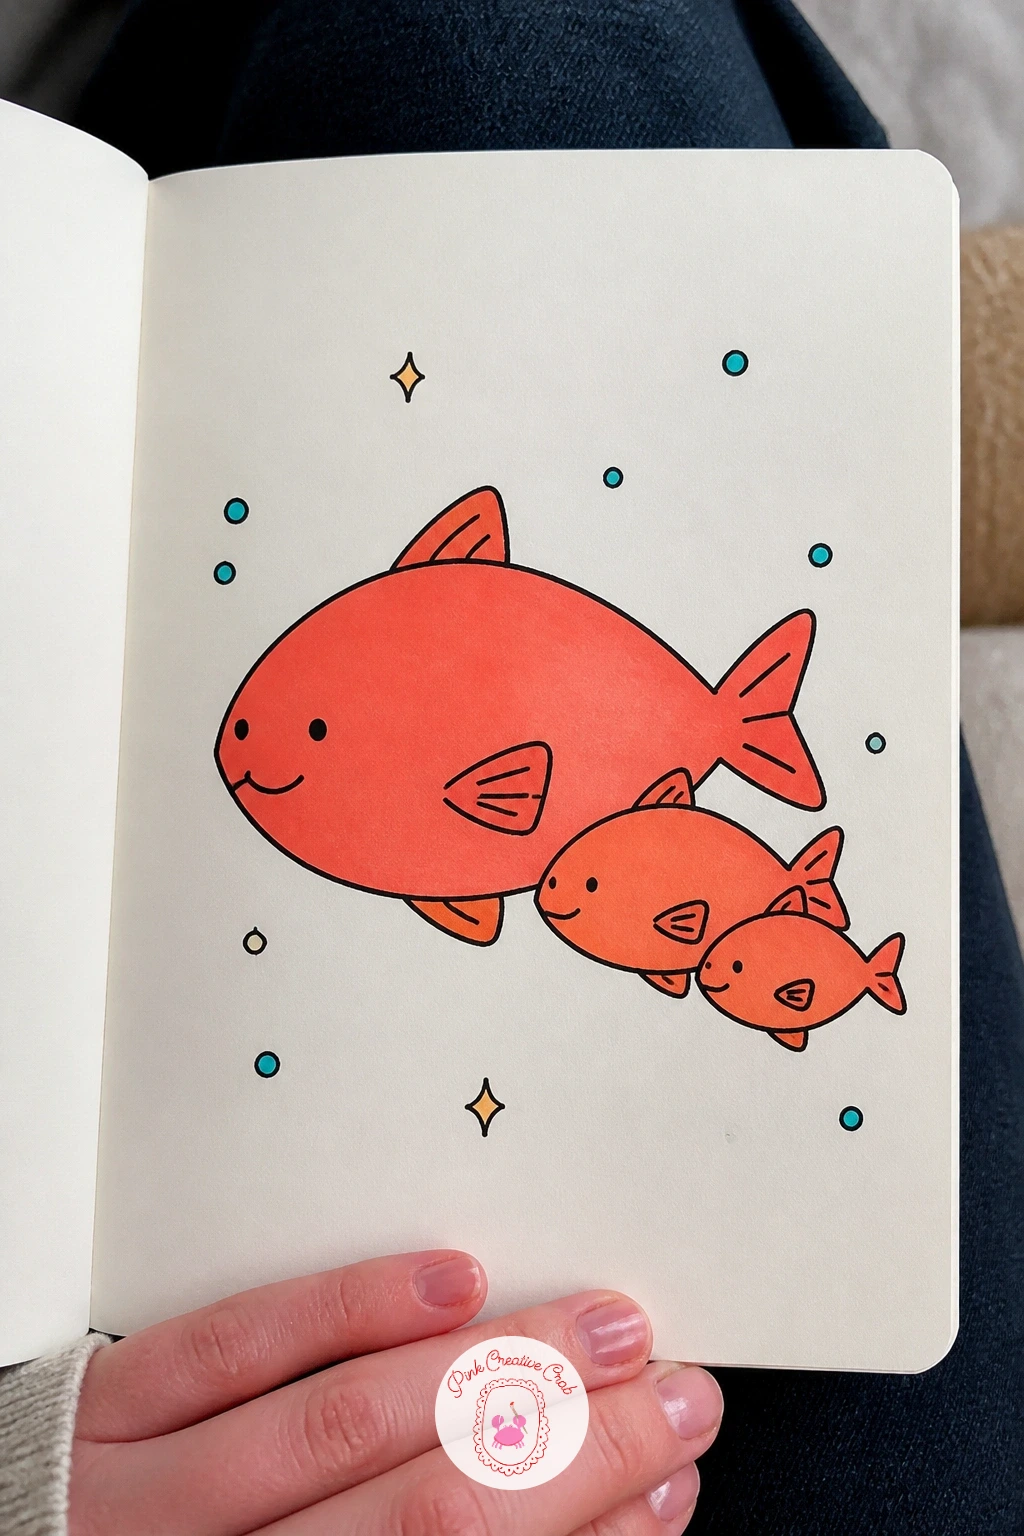
Group a few fish together as a family unit. Draw the largest fish first, centered and facing forward, then add one medium fish and one or two small fish clustered close around it, all echoing the same basic body shape so they clearly belong to the same species.
Vary only the size between them, not the shape, since identical proportions scaled down is exactly what makes a group read as parent and offspring rather than unrelated fish that happen to be swimming nearby. Keep all of them facing the same direction for a sense of swimming together.
Color the largest fish in a deeper coral orange and the smaller ones in a lighter tint of the same color, which reinforces the family feel more than giving each one a different color would.
Tip for today: overlap the smallest fish slightly behind the larger ones rather than lining them all up in a neat row, since a little overlap looks like a group moving together instead of a posed lineup.
Palette: Coral Orange,Coral Orange,Black
Have some fun blending food and fish into one silly subject: a taco with a tiny fish face peeking from inside the shell. Draw the taco shell first as a simple curved half-circle, ridged along the open edge with a few short wavy lines to suggest the folded tortilla texture.
Inside the fold, draw a small rounded fish face poking out, just the head and a wide friendly eye, as if the fish itself is the filling looking back at you. Scatter a few small shapes around it, like simple leaf bits or round dots, to stand in for lettuce and other toppings without drawing them in detail.
Color the shell in a warm tan or light coral tone and the peeking fish in a brighter coral orange so it stands out clearly against the shell. If you have no tan marker, a plain uncolored shell outlined in black reads perfectly well on its own.
Tip for today: keep the fish face small and only partly visible, since a whole fish body stuffed into a taco shell looks cramped rather than charming.
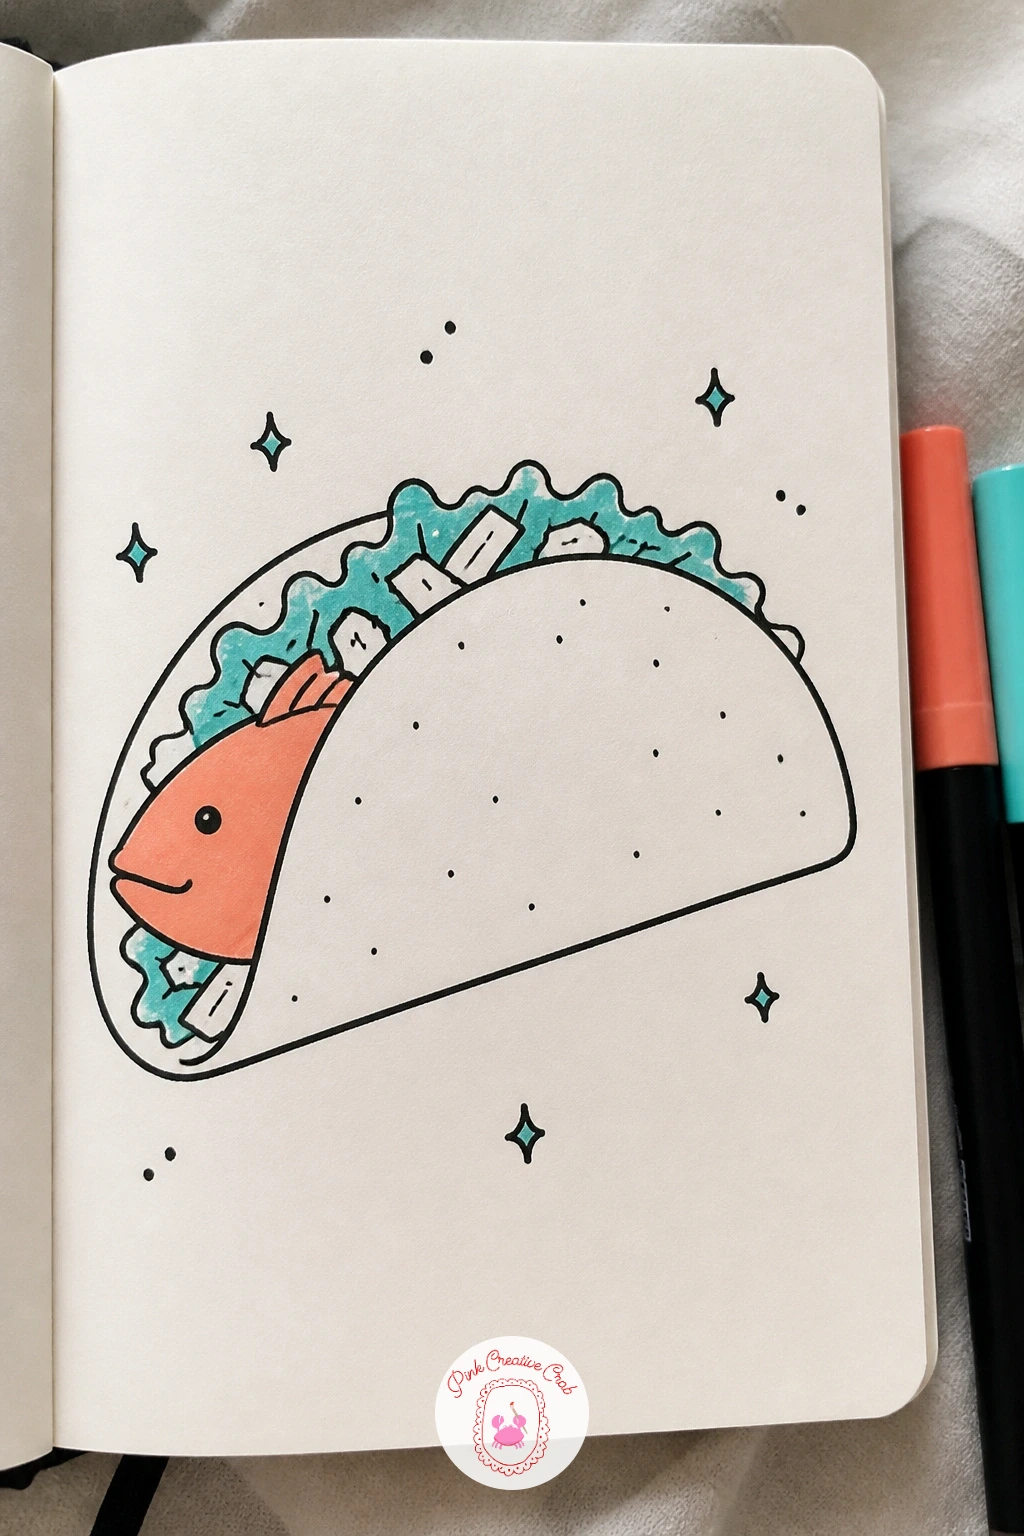
Palette: Coral Orange,Black,Aqua
Slow things down with a fish napping on a rock. Draw the rock first, a wide rounded lump shape with a flat-ish top, since the fish needs somewhere stable to rest its curved body across.
Lay the fish along the top of the rock in a relaxed horizontal curve, tail drooping slightly off one edge, eyes drawn as two closed, curved lines rather than open dots to show it is asleep. A small “z” shape or two floating above its head makes the sleeping read instant and unmistakable.
Shade the rock in a flat gray or leave it uncolored with just a few short curved lines for texture, so the coral orange fish on top stays the clear focal point of the scene. A light kneaded eraser dab can soften any rock outline that ends up too heavy once inked.
Tip for today: let part of the fish’s tail hang off the rock’s edge rather than keeping the whole body neatly on top, since that small detail makes the pose look genuinely relaxed instead of posed.
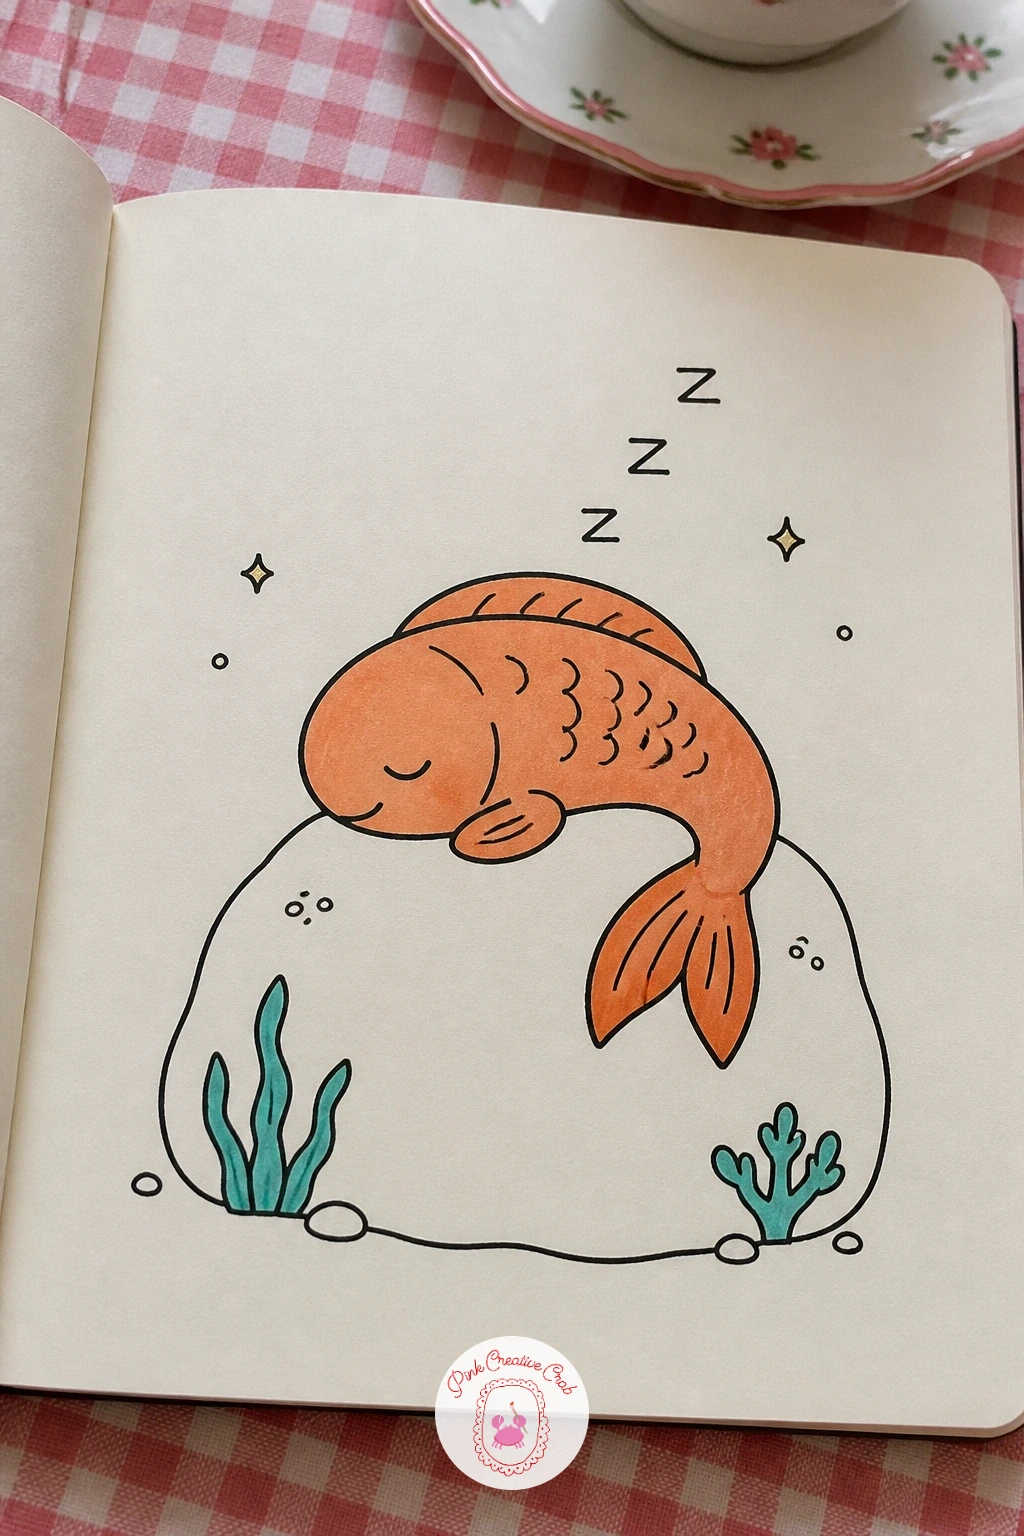
Palette: Coral Orange,Aqua,Black
Have some fun with a pun by drawing a swordfish with an actual miniature sword instead of its natural bill. Start with the body in a long streamlined shape, narrower and more torpedo-like than the rounder fish earlier on this list, since swordfish are built for speed.
Where the bill would normally extend, draw a small sword shape instead, complete with a tiny crossguard and handle, held out in front like a weapon rather than growing naturally from the face. This small swap is what turns a plain swordfish into a joke worth smiling at.
Keep the body fins sleek and swept back to match the streamlined shape, and color the body in a cool aqua gray with the sword itself left plain black and white for contrast, like polished metal against water.
Tip for today: draw the sword slightly too large for the fish’s head, since an oversized prop reads as funnier than one sized realistically to the body.
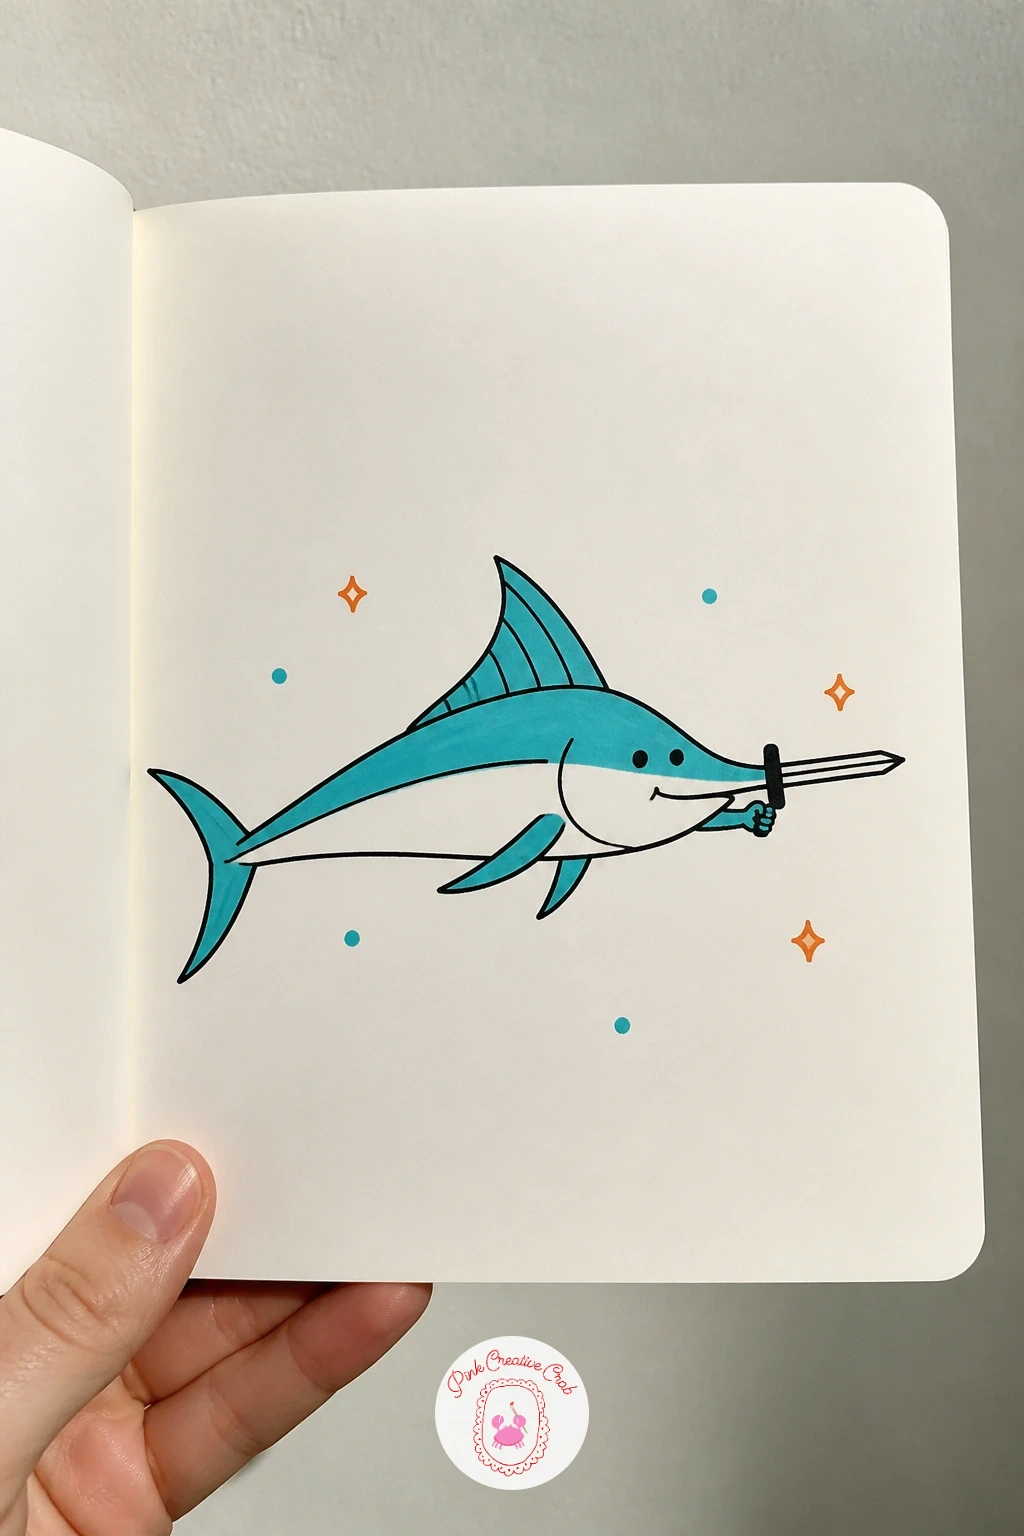
Palette: Aqua,Black,White
Turn a fish into a glowing lantern shape for a cozier subject. Draw the body as a rounded oval first, then add a small loop or hook shape at the top of its back as if it could be hung from a string, and a short tassel or fin detail dangling from the tail end like the bottom of a paper lantern.
Instead of a plain fill, draw a few vertical panel lines down the body, the way a paper lantern is segmented, breaking the solid shape into soft sections. This one swap is what separates “fish lantern” from a plain fish shape.
Color the panels in alternating coral orange and a lighter cream or white, then add a soft aqua glow outline just outside the whole shape using short dashes, as if light is radiating gently from inside it.
Tip for today: keep the panel lines curved rather than perfectly straight, following the oval body’s own curve, so the lantern still reads as a fish shape and not a straight-sided box.
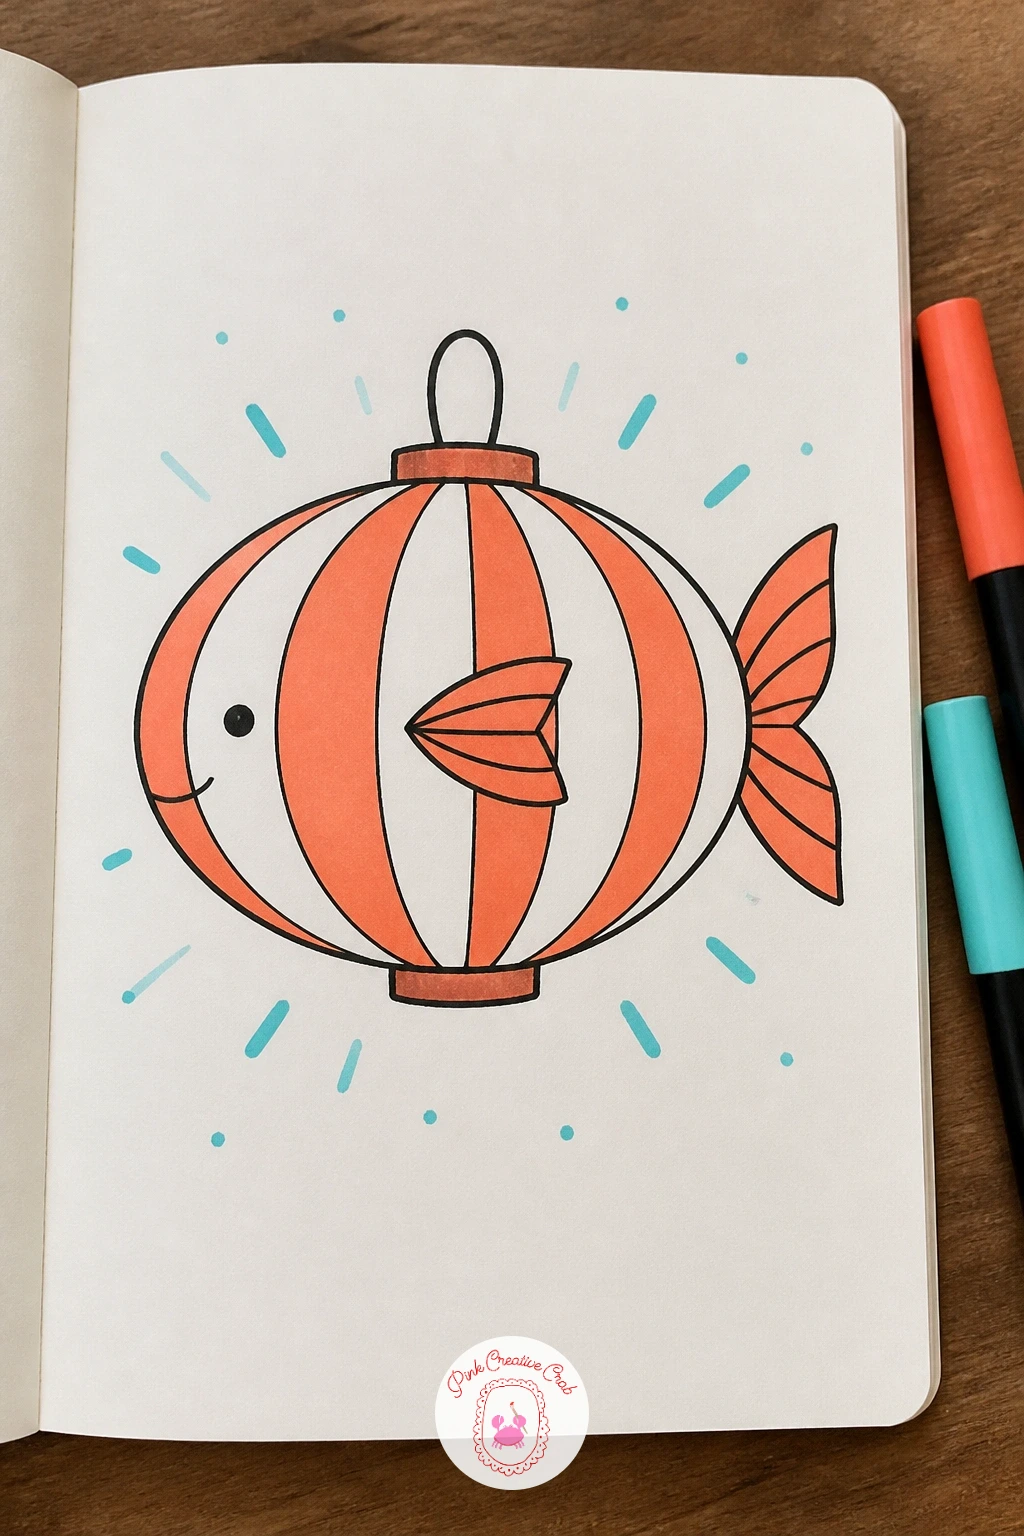
Palette: Coral Orange,White,Aqua
Crown one of your fish as royalty for a simple but satisfying subject. Draw the fish body facing forward or slightly turned, holding its head a little higher than usual, since posture does a lot of the “regal” work before the crown is even added.
Place a small crown shape on top of the head: three or five simple pointed triangles joined at the base, with a tiny round dot or jewel shape at the center point. Keep the crown proportioned to about a third of the head’s width so it sits like a real crown rather than swallowing the whole face.
Color the crown in a warm gold tone if available, or leave it uncolored with just black outline and a coral orange dot jewel for a simpler version. The fish body itself works well in a calm aqua to contrast against the warmer crown color.
Tip for today: give the fish a slightly raised chin and a small closed smile, since the expression sells royalty just as much as the crown sitting on top of its head.
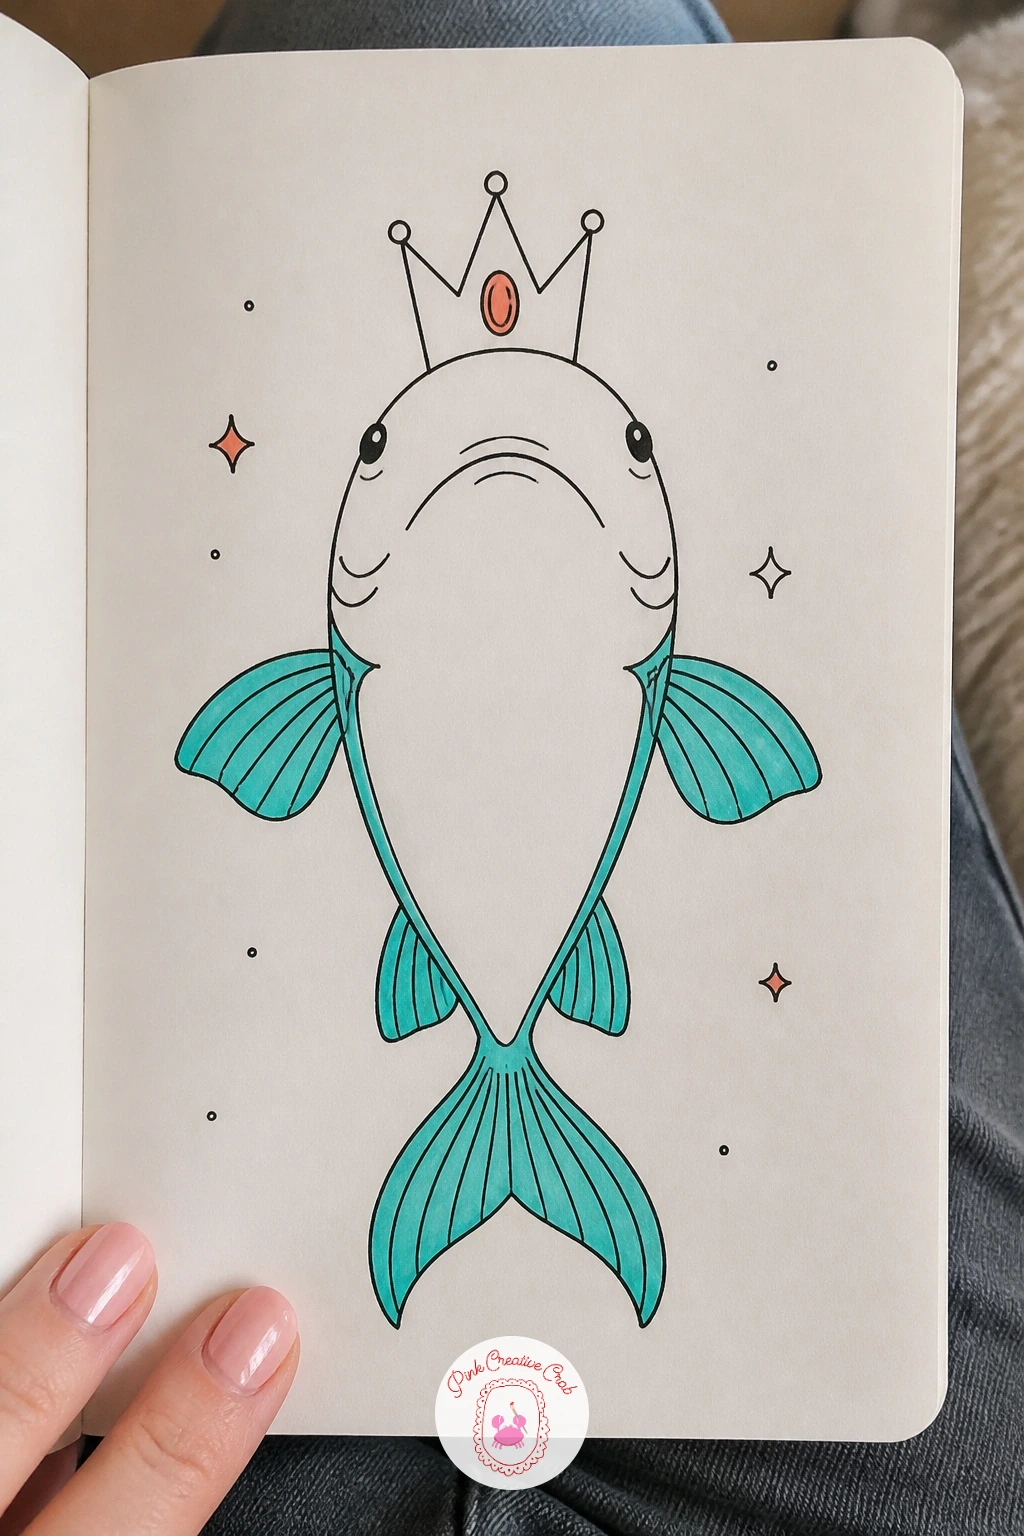
Palette: Aqua,Coral Orange,Black
Borrow the shape of a garden wind sock for a fish that looks like it is caught mid-flutter in the breeze. Draw a wide open mouth ring at the front, then let the body taper backward into a long tube shape rather than a solid fish body, ending in a few separate ribbon-like tail streamers instead of one solid fin.
Curve the whole shape gently to one side, as if caught in a gust, and let the tail streamers wave in small opposing curves rather than hanging straight, since that waviness is what reads as “caught in wind” instead of just “fish shaped tube.”
Alternate coral orange and white bands down the tube body the way real wind socks are striped, and color the tail streamers in aqua so they stand out as separate moving parts rather than blending into the body.
Tip for today: leave the front mouth ring as a plain open circle rather than adding teeth or a face, since wind socks read best when they stay purely decorative rather than becoming a character.
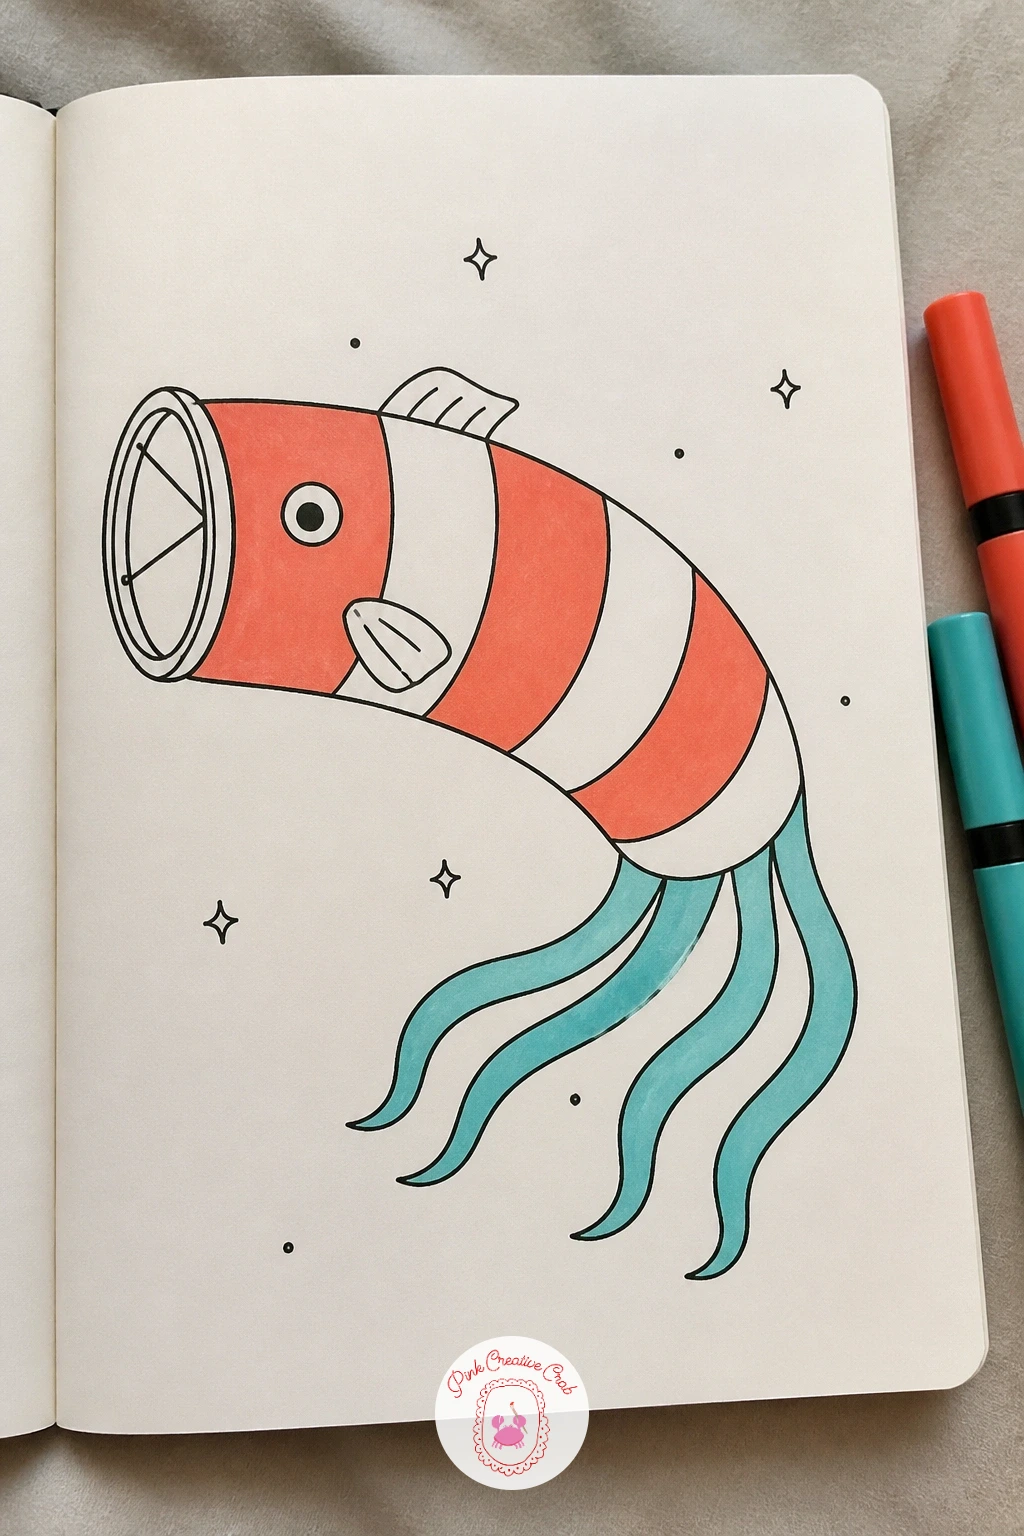
Palette: Coral Orange,White,Aqua
Go a little spookier, in a friendly way, with a grinning fish skeleton. Draw the spine first, a single curved line running the length of where the body would be, then add short rib lines branching off it in a fan pattern along both sides, shorter near the tail and slightly longer near the head.
Keep the head mostly solid rather than skeletal, with a simple rounded shape and one wide, friendly smile full of small triangle teeth, so the skull half of the subject stays cute rather than frightening. Add a single round eye socket as an open circle.
Outline the whole thing in black only, with no fill at all, since leaving the bones completely white against the page is what reads clearly as skeleton rather than a shaded, solid fish. If you want one touch of color, add a small aqua dot for the eye socket’s center only.
Tip for today: curve the spine slightly rather than drawing it dead straight, since a gentle curve keeps the skeleton looking relaxed and friendly instead of stiff.
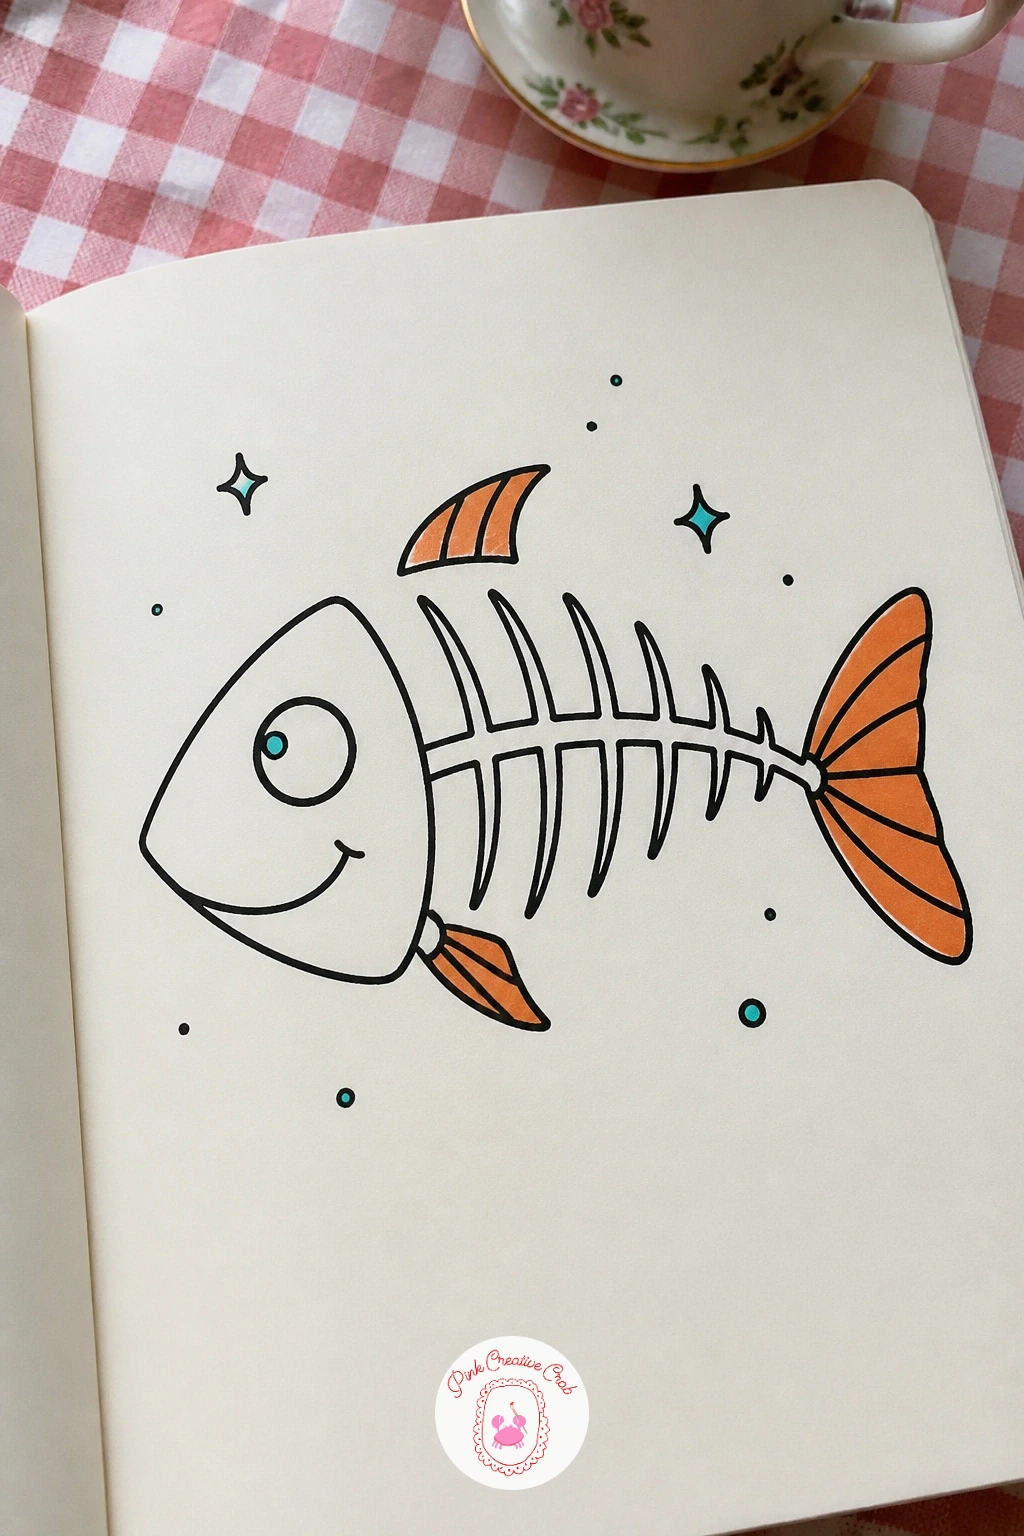
Palette: Black,Aqua,White
Close with a crossover character: a cat with a fish bowl stuck on its head, fish and all. Draw the cat’s head shape first, simple rounded ears and a round face, then draw the bowl as a clear circle sitting fully over the whole head rather than off to one side, so it looks properly stuck rather than just placed nearby.
Inside the bowl, add a small curved waterline and one tiny fish swimming near the top of it, exactly the same simple fish shape used earlier in this list, which ties the whole article’s subject back together in one last drawing.
Give the cat a slightly dazed, cross-eyed expression beneath the bowl, since a confused look sells the “stuck” joke better than a calm one would. Color the cat in any shade you like, keep the bowl glass clear with just a few curved highlight lines, and finish the little fish in coral orange.
Tip for today: draw the bowl slightly larger than the cat’s head rather than fitted tightly, since an oversized bowl looks more like a genuine mishap than a neat accessory.
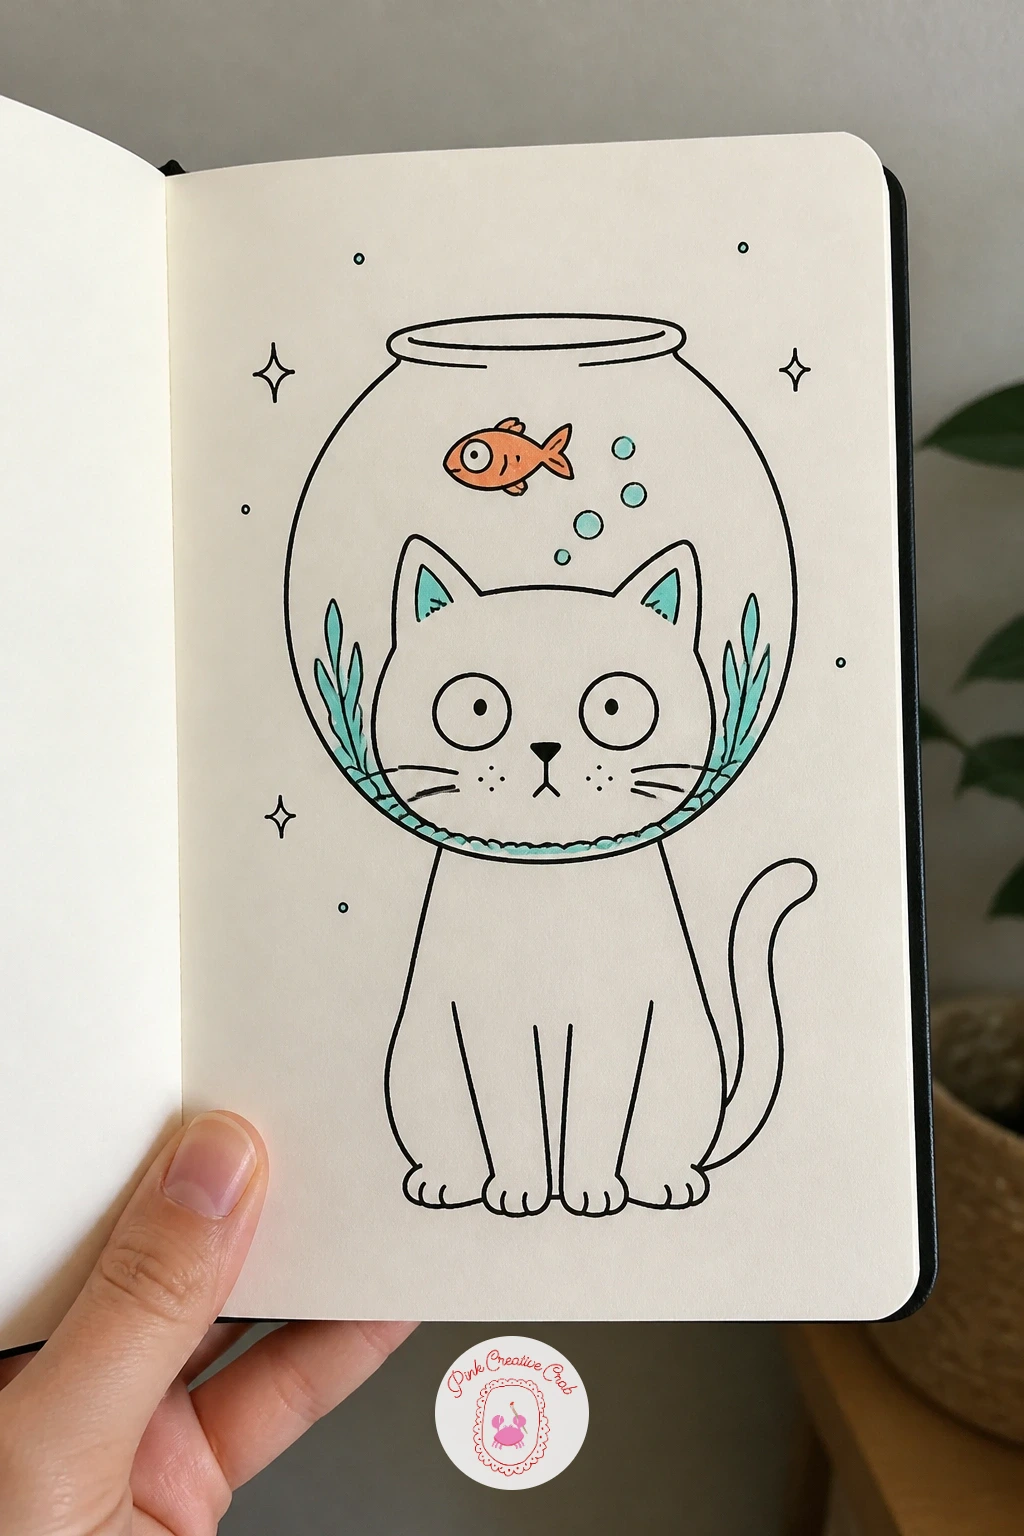
Palette: Coral Orange,Aqua,Black
For a bigger set of ocean themed characters to pair this one with, browse the ocean doodles beginner ideas for more small sea creatures to add to the page.
What to Do Next
Pick whichever fish made you smile first, open to a blank page, and start with its outline in fineliner before any color goes near it. A plain notebook page or a sheet of sketch paper is all this needs to look good by the time you add the last aqua highlight.
Frequently Asked Questions
What pens work best for fish doodles?
A black fineliner in a fine tip, around 0.3 to 0.5, gives clean outlines for every fish shape on this list. Add coral orange and aqua dual tip markers for quick color fills without needing a full paint set.
How do you make a simple fish shape look right?
Start with one curved body shape and attach the tail as a separate triangle or fan rather than one continuous outline. This two-step approach keeps proportions controlled and avoids the tail swallowing the whole fish.
Do fish doodles need to be realistic?
No, these doodles work best loose and simple, with rounded shapes and a few confident lines rather than accurate anatomy. The charm comes from expression and small details like a hat or scarf, not realism.
What is the easiest fish doodle to start with?
A goldfish in a round bowl is the simplest subject here, since the bowl is drawn first as a plain circle and the fish fits comfortably inside it. It needs no background and only one color to feel finished.
How long does one fish doodle usually take?
Most of these fish take ten to twenty minutes from first outline to finished color. Simpler subjects like the sunglasses fish or sleeping fish suit a quick coffee break, while the betta or koi reward a little extra time.
Have any thoughts?
Share your reaction or leave a quick response — we’d love to hear what you think!
-
 0
-
0
-
0
-
0
-
0
-
0


