

Table of Contents
You’ve likely admired watercolor flowers in galleries or on social media, wondering if you could create something equally beautiful. The truth is, you don’t need advanced skills to paint stunning florals—just a few basic techniques and the right approach. Whether you’re picking up a brush for the first time or looking to expand your repertoire, these simple flower ideas will show you exactly where to start and how to build confidence with each brushstroke.
Key Takeaways
- Loose watercolor roses use spontaneous petal strokes to capture beauty without requiring years of practice for realistic techniques.
- Wet-on-wet wildflowers and lilacs embrace controlled chaos, creating organic five-petal blooms through layered washes and pale violet bases.
- Cherry blossoms use the dot-and-pull method while lavender requires simple vertical brushstrokes for tall, clustered bloom stems.
- Sunflowers and peonies offer forgiving structures with bold center dots and concentric petal rings expanding from tight central clusters.
- Single-stroke cosmos and hydrangea clusters use decisive motions and small rounded shapes, prioritizing spontaneity over perfection.
Loose Watercolor Roses With Simple Petal Strokes
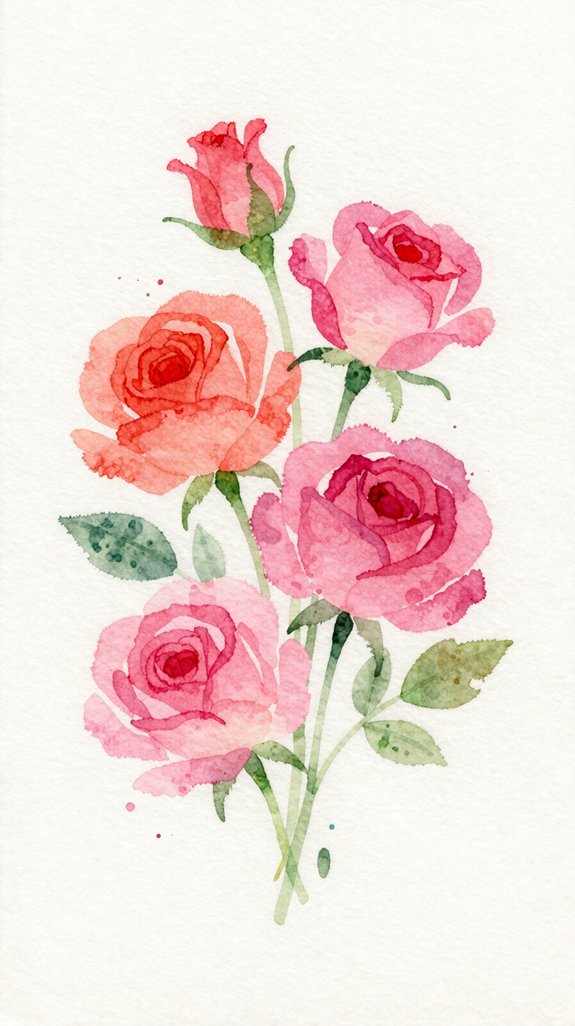
While mastering realistic roses can take years of practice, you’ll find that loose watercolor roses capture their beauty with just a few spontaneous petal strokes. You’re breaking free from rigid techniques by embracing organic, flowing movements that create depth through layering. Start with your lightest shade at the center, then build outward using soft brushstrokes that barely touch the paper. Let each stroke overlap while the paint’s still wet, allowing colors to merge naturally.
A muted color palette—think dusty pinks, warm grays, and diluted crimsons—adds sophistication without overwhelming your composition. You’ll notice that imperfections actually enhance the charm, creating movement and life. Focus on capturing the rose’s essence rather than its exact form, and you’ll achieve stunning results faster than traditional methods.
Five-Petal Wildflowers Using the Wet-on-Wet Technique
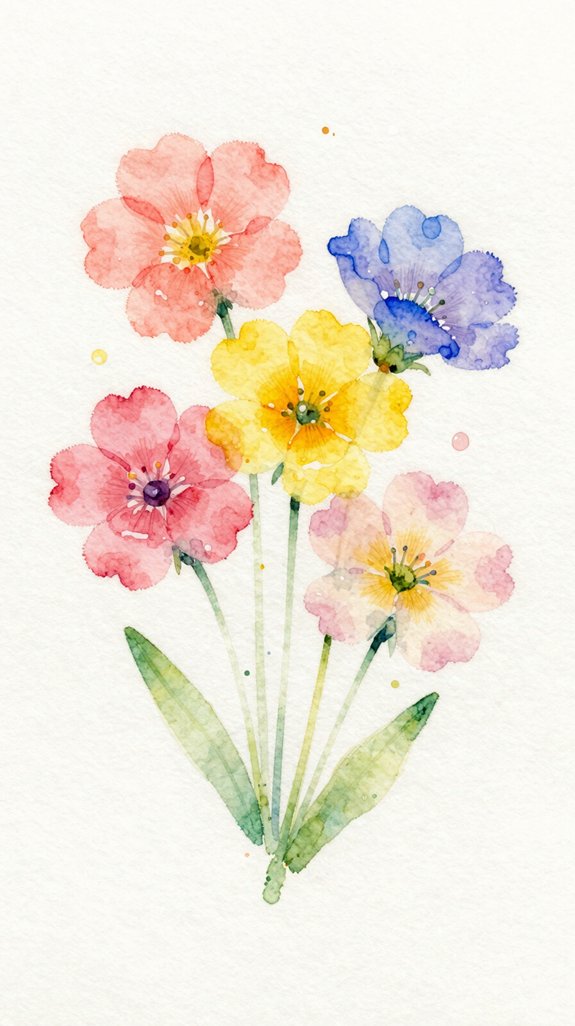
Because wet-on-wet technique thrives on controlled chaos, you’ll discover that five-petal wildflowers are the perfect subject for mastering this spontaneous method. Start by wetting your paper with clean water, then drop diluted pigment directly onto the damp surface. You’ll watch colors spread organically, creating luminous petals with soft edges.
Experiment with varied brushstroke techniques—tap your brush tip for delicate petals or use quick flicks for organic shapes. The beauty emerges when blending color combinations while the paper’s still wet. Try merging violet with magenta, or blend yellow into coral for unexpected results.
Don’t overthink placement. Let each petal form naturally, embracing imperfections. Add centers once everything dries. This approach transforms simple florals into dynamic, contemporary artwork that captures nature’s spontaneous energy.
Cherry Blossoms With the Dot-And-Pull Method
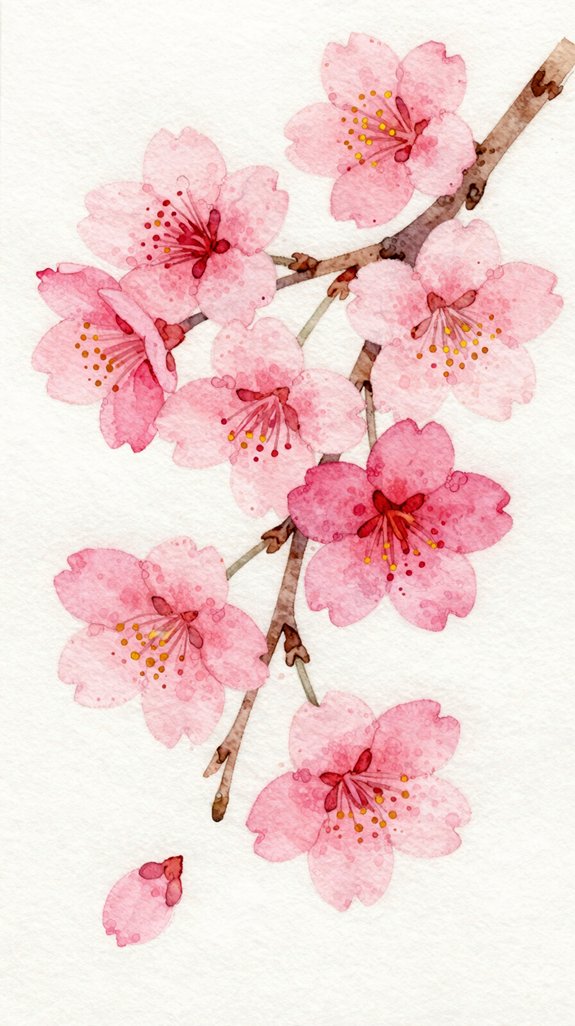
The dot-and-pull method transforms your cherry blossoms into delicate masterpieces with minimal effort. You’ll create authentic-looking petals by placing a small dot of pigment on your paper, then using your brush to pull the paint outward in gentle strokes. This technique captures cherry blossoms’ characteristic shape while maintaining their ethereal quality.
Start with light paint application—watery pink works perfectly. Position five dots in a circular formation, then execute controlled pulling motions from each dot toward the center. The gradient effect happens naturally as you pull, creating depth without extra layers.
Experiment with varying your brush pressure and water ratios to discover unique petal formations. Add touches of darker pink or crimson at the base for dimensional appeal. You’ll achieve stunning results quickly once you’ve mastered this innovative approach.
Easy Lavender Sprigs Using Vertical Brushstrokes
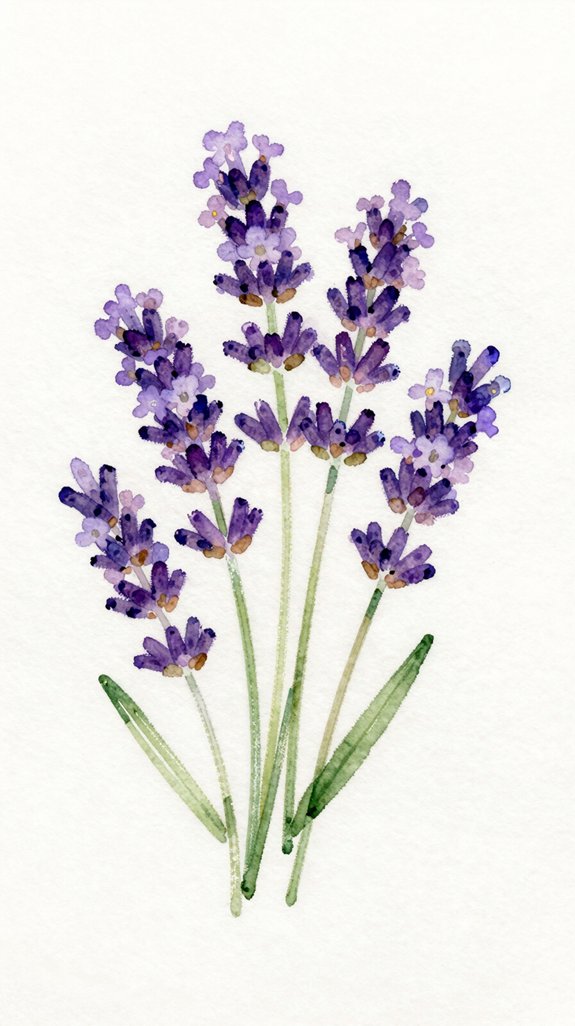
Lavender’s distinctive tall stems and clustered blooms make them surprisingly simple to paint with basic vertical strokes. You’ll master this technique by loading your brush with diluted purple and applying quick upward flicks along a central stem line. The vertical brushwork creates natural texture while maintaining the flower’s characteristic elongated shape.
Transform your lavender paintings with these innovative approaches:
- Layer different purple intensities from top to bottom, creating dimensional depth
- Experiment with wet-on-wet techniques for soft color blending between adjacent blooms
- Add negative space strategically to prevent overcrowding your composition
- Introduce subtle green undertones in shadow areas for realistic variation
Start with lighter shades at the top, gradually intensifying color toward the base. This gradient effect mimics lavender’s natural bloom pattern while demonstrating sophisticated control over your medium.
Simple Sunflowers With Bold Center Dots
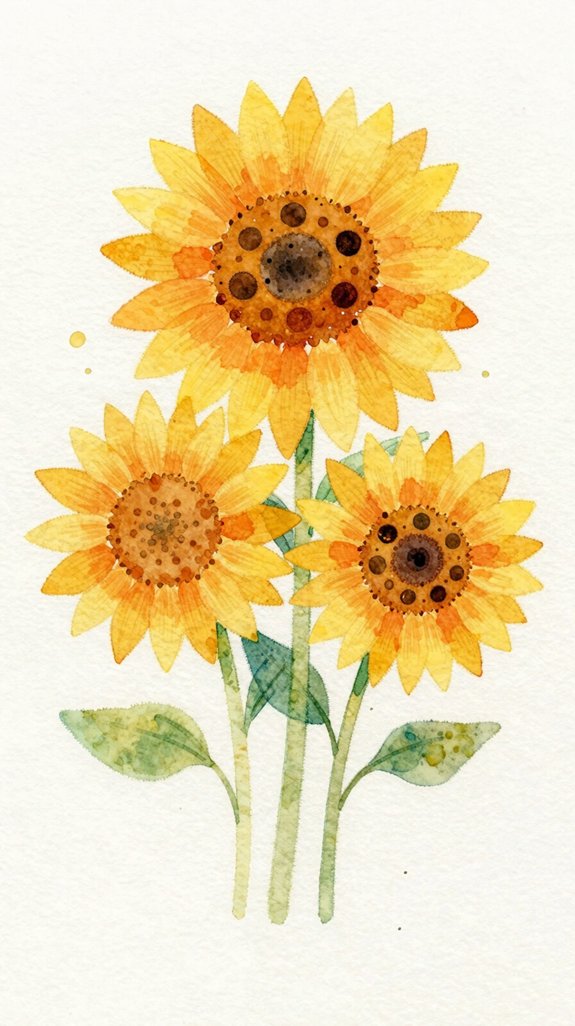
Sunflowers command attention with their cheerful disposition and surprisingly forgiving structure for beginning watercolorists. You’ll create these iconic blooms by starting with bold central dots in burnt umber or sepia, building outward with spontaneous petal strokes. Don’t overthink symmetry—sunflowers thrive on organic irregularity.
Experiment with a monochromatic color palette using various yellow intensities, from pale lemon to deep golden ochre. This approach strengthens your value control while maintaining visual impact. Layer wet-on-dry techniques for defined petals, leaving white spaces between strokes to suggest dimension and movement.
The center becomes your focal point: add texture by dotting dark browns and blacks while the paint’s still damp. You’ll discover that imperfections enhance authenticity—real sunflowers aren’t perfectly uniform. This liberating technique builds confidence in expressive botanical painting.
Delicate Watercolor Daisies for Beginners
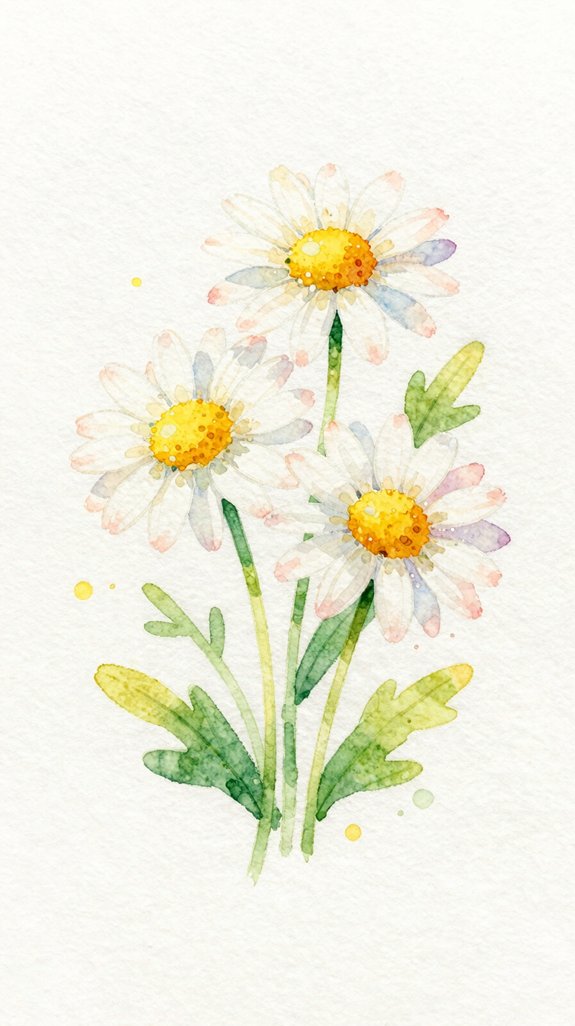
Daisies offer the perfect training ground for mastering petal placement and negative space control. You’ll discover how delicate petal shapes naturally teach fundamental watercolor techniques while building your confidence.
Daisies provide an ideal foundation for learning essential watercolor skills through their simple yet elegant petal structure and natural spacing.
Start with soft layered petals using diluted washes, allowing each layer to dry before adding depth. This approach prevents muddy colors while creating dimensional blooms.
Essential techniques for breakthrough results:
- Paint the yellow center first, then work outward with white petals containing subtle gray shadows
- Leave strategic gaps between petals to create authentic organic spacing
- Layer transparent washes to build dimension without losing luminosity
- Experiment with wet-on-wet techniques for natural petal edges
You’ll transform simple circles into sophisticated compositions by varying petal lengths and angles, creating dynamic arrangements that showcase your evolving artistic vision.
Abstract Poppies Using Bleeding Color Techniques
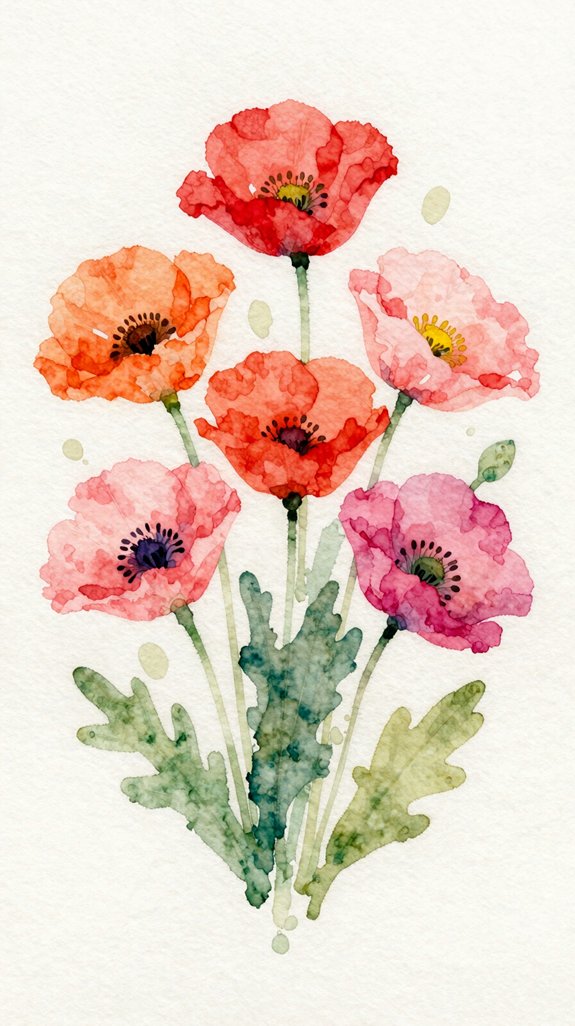
While traditional botanical painting demands precision, abstract poppies thrive on spontaneity and the unpredictable magic of bleeding colors. You’ll drop vibrant reds and oranges onto wet paper, watching pigments dance and merge organically. This bleeding technique exploration creates ethereal petals with soft, undefined edges that capture movement and emotion.
Color intensity considerations matter substantially here. You’ll layer translucent washes first, then introduce concentrated pigment while surfaces remain damp. The timing determines your results—wet paper produces gentle diffusion, while slightly dried areas create controlled bleeds with dramatic contrasts.
Don’t overthink placement. Let crimson bleed into magenta, allowing accidental patterns to emerge. Add dark centers using concentrated paint for striking focal points. You’re creating impressions of poppies, not replicas, embracing happy accidents that make each piece uniquely yours.
Minimal Tulips With Three-Stroke Simplicity
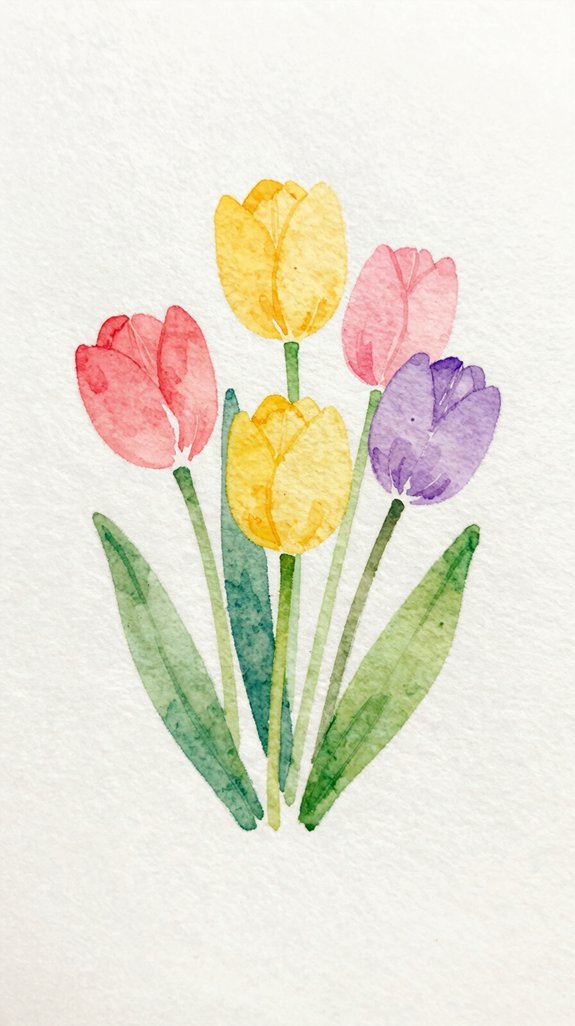
The three-stroke tulip method strips watercolor down to its most efficient form, proving you don’t need complexity to create recognizable beauty. You’ll master this technique by executing one central stroke for the bloom body, flanked by two curved side strokes that define the petals. This approach demands controlled paint flow—too wet creates muddy edges, too dry loses that signature watercolor luminosity.
Your innovation toolkit includes:
- Varied brushstrokes that shift from thick to thin pressure
- Single-load technique where colors blend on the brush before touching paper
- Negative space utilization that lets white paper define light and form
- Strategic stem placement using quick downward flicks
You’ll discover that constraints actually fuel creativity. Three strokes become your design language, transforming limitation into sophisticated minimalism.
Loose Hydrangea Clusters Using Small Round Shapes
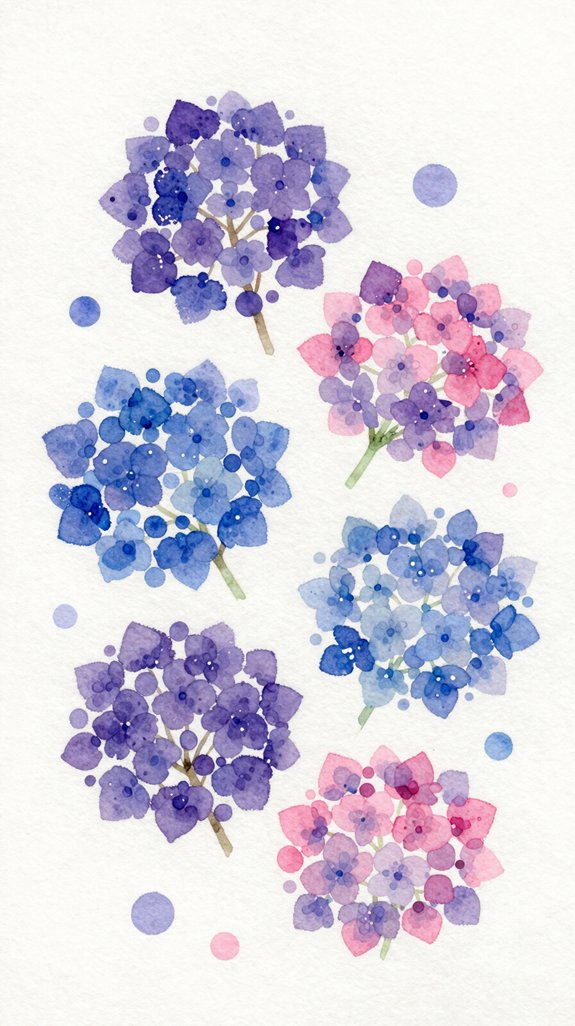
Hydrangea clusters challenge you to embrace controlled chaos—building complex floral masses from dozens of simple circular marks. You’ll create each floret by dabbing your brush to form small, rounded shapes in varying sizes. Don’t aim for perfection—loosening petals allows natural variation that captures hydrangeas’ organic beauty.
Start with a concentrated color at your cluster’s center, then gradually lighten your mix as you work outward. You’re exploring varied shapes by rotating your brush angle and adjusting pressure with each mark. Layer wet-on-dry for defined blooms or wet-on-wet for softer shifts.
Add negative space between florets—this prevents muddy overlaps and maintains visual clarity. You’ll discover that strategic gaps actually strengthen your composition, creating dimension within these voluminous flower heads.
Watercolor Dandelions With Fine Splatter Details
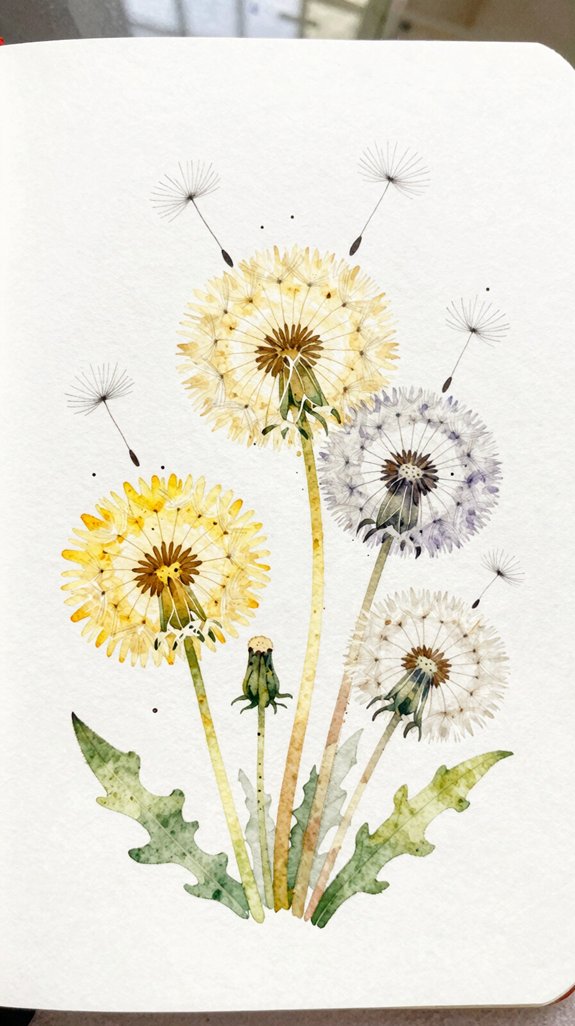
Moving from dense flower clusters to airy seed heads requires a completely different approach—one that celebrates delicacy over mass. Watercolor dandelions demand detailed splatter techniques that transform your brush into a precision tool. You’ll create those iconic dispersing seeds through controlled flicking motions, capturing the airy nature of these ephemeral structures.
Master this innovative technique through:
- Load a fine rigger brush with diluted paint and tap it sharply against your finger to create radiating seed patterns
- Vary your splatter intensity by adjusting water ratios for both dense seed heads and floating dispersed seeds
- Add delicate stems using threadlike strokes that connect each seed to the central sphere
- Layer splatters directionally to suggest wind movement and natural dispersal patterns
Single-Stroke Cosmos Flowers for Quick Practice
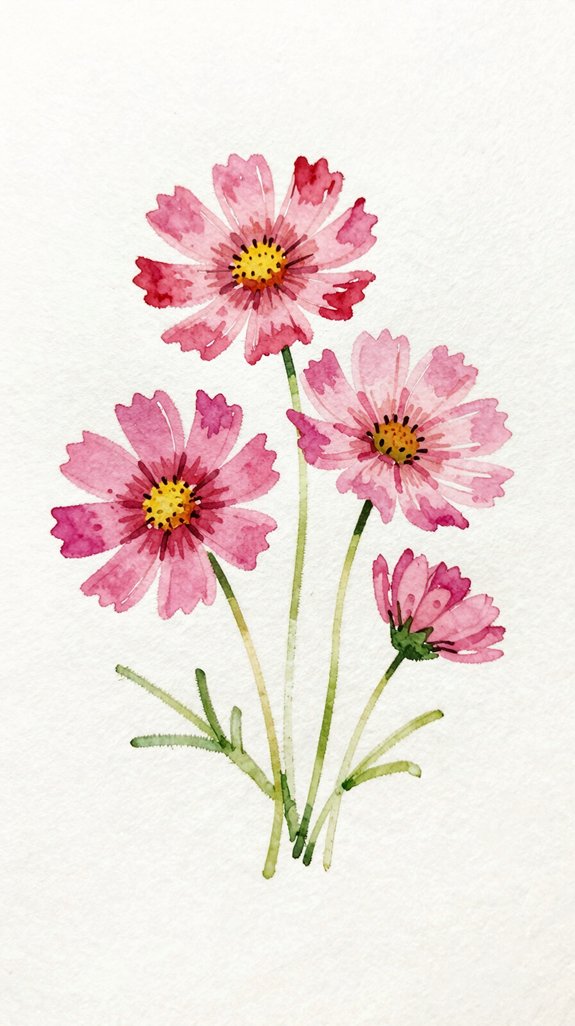
Because cosmos petals naturally form in simple, elongated shapes, they’re perfect candidates for mastering the single-stroke technique that builds painting speed and confidence. You’ll load your brush with diluted pigment and create each petal with one decisive motion, encouraging spontaneity over perfection.
Focus on petal placement by arranging five to eight strokes around a central point, varying angles to create dynamic compositions. Don’t overthink the abstract shapes that emerge—cosmos flowers thrive on asymmetry and organic irregularity. Let some petals overlap while others stand alone.
This approach trains your hand-eye coordination while developing intuitive color mixing. You’re building muscle memory that translates across botanical subjects. Practice with pink, white, and magenta variations, experimenting with wet-on-dry versus wet-on-wet techniques for different textural effects.
Impressionistic Lilacs Using Layered Wash Techniques
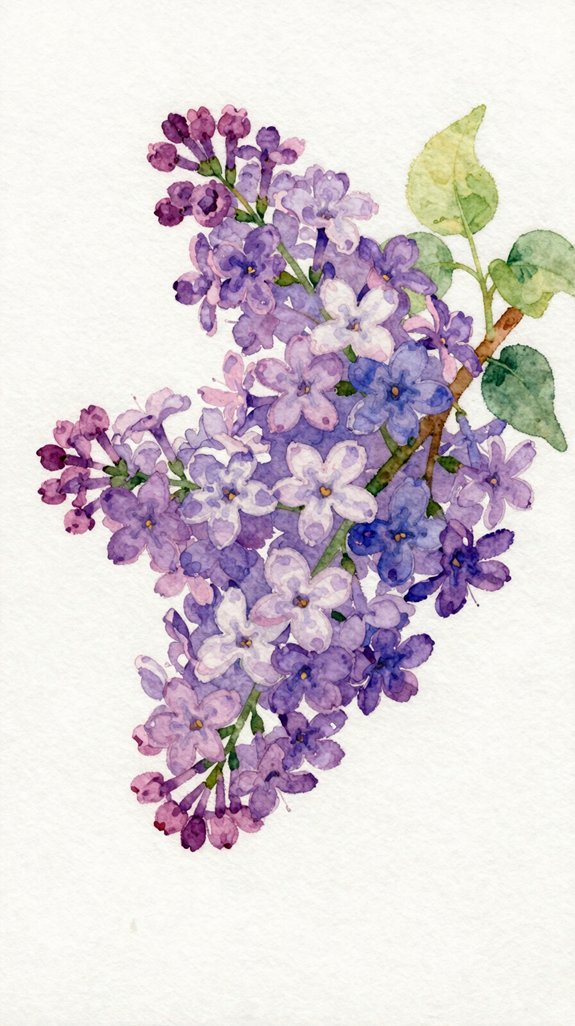
While single-stroke cosmos flowers develop speed through decisive marks, lilacs demand a different mindset—one that embraces patience and atmospheric depth. You’ll build these blooms through progressive layered wash effects, allowing each application to dry before introducing darker tones. This technique excels at creating depth impressions that capture lilac’s characteristic clustered appearance.
Master this approach by focusing on:
- Initial pale violet washes that establish the overall flower shape without defined edges
- Mid-tone purple layers applied while previous washes remain slightly damp for soft passages
- Concentrated pigment dots in shadow areas to suggest individual florets
- Negative space preservation between cluster sections for dimensional realism
You’re not painting individual petals—you’re orchestrating value shifts that trick the eye into perceiving botanical complexity through strategic color placement.
Simple Peony Blooms With Circular Petal Layers
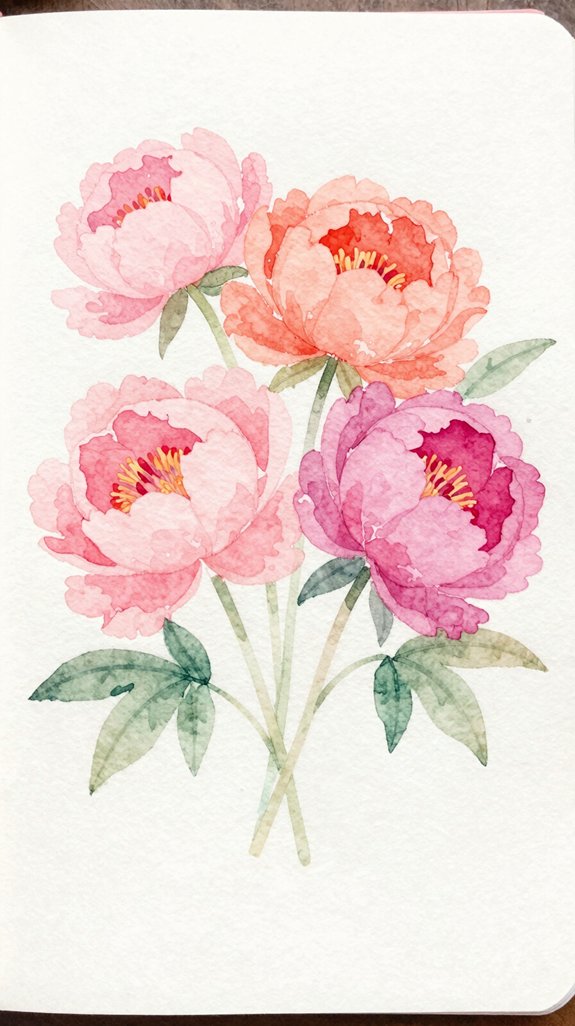
Peonies radiate from their centers like architectural blueprints, making them surprisingly approachable for watercolorists who understand rotational construction. You’ll build these blooms in concentric rings, starting with a tight central cluster and expanding outward with increasingly larger petals.
Begin by mapping your core with concentrated pigment, then work systematically around this anchor point. Each successive layer introduces variable petal shapes—some rounded, others slightly angular—creating organic irregularity that prevents mechanical repetition. You’re orchestrating soft gradient petal tones by loading your brush heavily at petal bases and allowing natural water diffusion toward edges.
The rotational method eliminates guesswork. You’ll always know where your next petal originates, building dimensional complexity through strategic overlapping rather than complicated brushwork. This structural approach transforms intimidating florals into manageable geometric exercises.
Wildflower Meadow Combining Multiple Easy Flowers
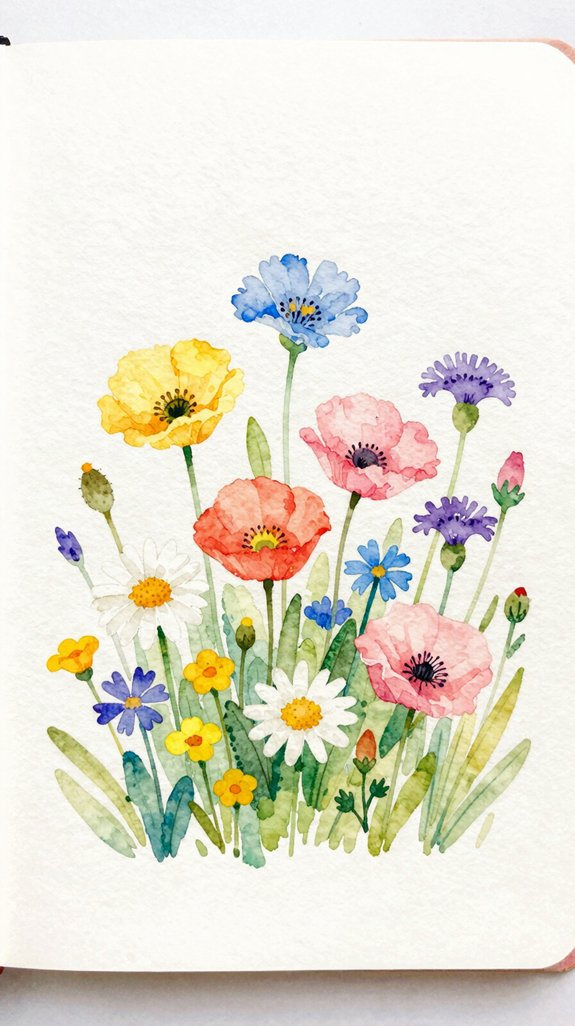
Wildflower meadows translate complex natural scenes into strategic clusters of simplified shapes, allowing you to practice compositional balance without rendering every botanical detail. You’ll combine daisies, poppies, and loose stems across your paper, creating depth through overlapping elements and blended color effects.
Master compositional balance through simplified wildflower clusters—no need to render every petal when strategic shapes and overlapping elements create convincing depth.
Layer your composition strategically:
- Establish focal flowers first using bold colors like red poppies or purple cornflowers in the foreground
- Add mid-ground elements with varied petal shapes—simple five-petal blooms and elongated buds
- Create atmospheric distance by diluting pigments for background flowers
- Connect elements using thin green stems and subtle leaf suggestions
This approach lets you experiment with color harmony while mastering spatial relationships. You’re building a cohesive scene through repetition and variation rather than technical precision.
Adding Stems, Leaves, and Finishing Touches to Your Florals
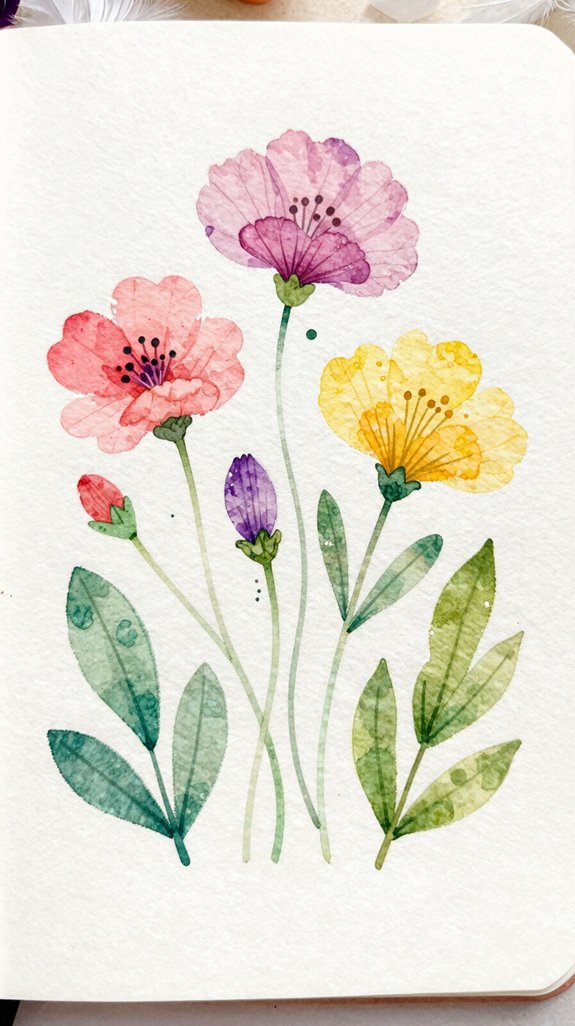
Your flower compositions gain structure and believability once you add the supporting elements that anchor blooms to the page. Start with stems using thin, confident brushstrokes in olive or sap green mixed with burnt sienna. You’ll achieve natural variation through blending washes—let colors merge wet-into-wet for organic shifts.
Leaves demand thoughtful placement. Paint them with layering techniques, establishing a base wash before adding darker veins and shadows. Don’t overcrowd; negative space creates visual breathing room.
For finishing touches, consider spattering diluted paint for texture or adding delicate tendrils with a fine brush. White gouache highlights bring dimension to petals and leaves. Step back periodically to assess balance. These refinements transform simple florals into sophisticated compositions that showcase your developing artistic vision.
Frequently Asked Questions
What Type of Watercolor Paper Is Best for Painting Flowers?
You’ll achieve stunning results with cold press paper featuring high rag content paper, typically 100% cotton. This professional-grade surface offers superior texture and absorption, letting you explore advanced techniques while maintaining brilliant pigment vibrancy in your floral compositions.
How Do I Prevent My Watercolor Paints From Becoming Muddy?
Think of your palette as a dance floor—keep colors from crashing! You’ll achieve vibrant florals by properly mixing colors in dedicated wells and controlling water to paint ratio. Clean brushes between hues for crisp, luminous petals.
What Brushes Should Beginners Buy for Watercolor Flower Painting?
You’ll want to start with three essential brush types: a medium round (#8), a fine detail brush (#2), and a flat wash brush. These brush sizes cover petals, stems, and backgrounds, letting you explore varied techniques efficiently.
How Long Does Watercolor Paint Take to Dry Between Layers?
You’ll typically wait 5-15 minutes between layers, though drying time depends on paper thickness, paint layers, temperature, and humidity. Experiment with a heat tool to accelerate the process and discover unique bleeding effects for innovative florals.
Can I Use Masking Fluid to Preserve White Areas in Flowers?
You’ll achieve stunning results using masking fluid to preserve white areas in flowers. Varied masking techniques let you protect delicate petals and stamens while preserving background details. Experiment with different application tools for innovative, professional-looking floral compositions.
Conclusion
You’ve now got a garden of techniques blooming at your fingertips, each flower a brushstroke away from bringing your creative vision to life. Don’t let perfectionism be the frost that kills your artistic growth—watercolor’s fluid nature thrives on happy accidents and organic imperfection. Pick up your brush, let the pigments dance across wet paper, and watch as your confidence blossoms with every petal you paint. Your watercolor journey has only just begun.
Have any thoughts?
Share your reaction or leave a quick response — we’d love to hear what you think!
-
 0
0
-
0
-
0
-
0
-
0
-
0


