

A tree oil painting gives you everything landscape painting is good for in one subject: a solid shape to build, bark and leaves to push paint around on, and a sky to set the mood. You do not need a big canvas or a long weekend. Every idea below sits comfortably on a small canvas and comes together in one sitting, with the brush doing most of the talking.
Below you will find twenty seven trees, from a single oak standing alone in a meadow to a jacaranda dripping with purple flowers, a crooked old apple tree, and a treehouse tucked into a sycamore. Each one tells you what to mix, where to start, where it usually goes wrong, and one tip to use today. Pick whichever one you are already picturing and go straight to the canvas.
Using these images: free for personal projects such as printing, coloring, cards, journals and gifts. Handmade items that include them may be sold up to 30 pieces per design. More than that is commercial use and is not permitted, and neither is selling or sharing the images themselves or passing them off as your own. Please ask before any other use.
Start the lone oak in a green meadow by blocking in the sky and ground first, leaving a gap where the canopy will sit. Use a big filbert for this so the whole background goes down fast, wet, and loose. Let the horizon sit low on the canvas, maybe a third of the way up, so the meadow and sky both have room to breathe.
Paint the trunk next with a thin mix of burnt umber and a little black, keeping it slightly off-center for a more natural feel. Build the canopy in three rounded clumps rather than one even blob: a dark olive green underneath, a mid leaf green over most of it, and small dabs of warm yellow-green on the sunlit side.
If this is your first time painting a tree canopy, compare the width of the canopy to the height of the trunk below it before you commit to the shape, since most beginner oaks end up too narrow and too tall. A fan brush dabbed lightly over the green, rather than a smooth stroke, keeps the leaf texture believable.
Finish with a few strokes of dry, pale green dragged across the meadow in the foreground to suggest grass catching the light.
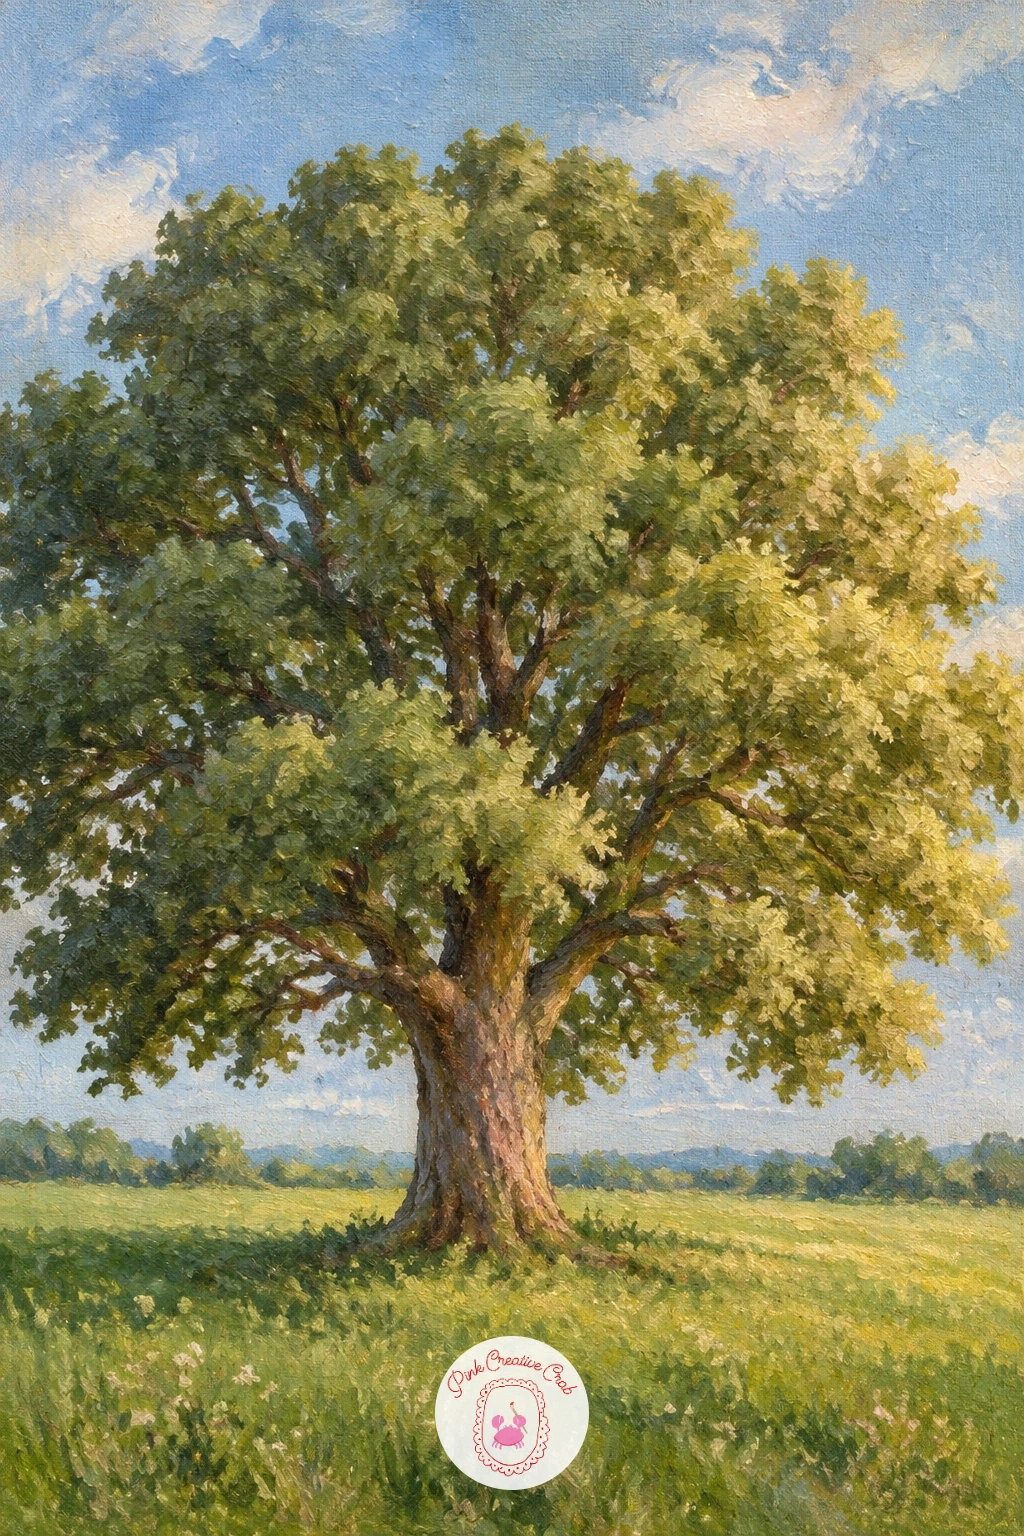
Palette: Sap Green,Olive Green,Burnt Umber,Cerulean Blue,Titanium White
Once an oak feels manageable, a birch grove with white trunks tests something different: light falling through many small gaps rather than one big canopy. Tone the whole canvas with a thin wash of warm grey-green first, so the white trunks have something to sit against other than raw white canvas.
Paint the trunks with a small flat brush loaded with titanium white, placing them at different widths apart so the grove reads as real trees rather than a fence. Mark the dark bands and knots on each trunk with a thin, almost black-grey mix, using short horizontal flicks rather than long lines.
Here is where eye level matters: keep your light source coming from one side and let every patch of dappled sunlight on the ground and trunks fall on that same side, otherwise the grove feels flat. Dab warm yellow-green light patches on the ground with a small brush where the sun breaks through.
If white trunks feel chalky, warm them with a whisper of yellow ochre before the final white highlight goes on. Keep this one loose and quick, since overworking the trunks is the easiest way to lose the light.
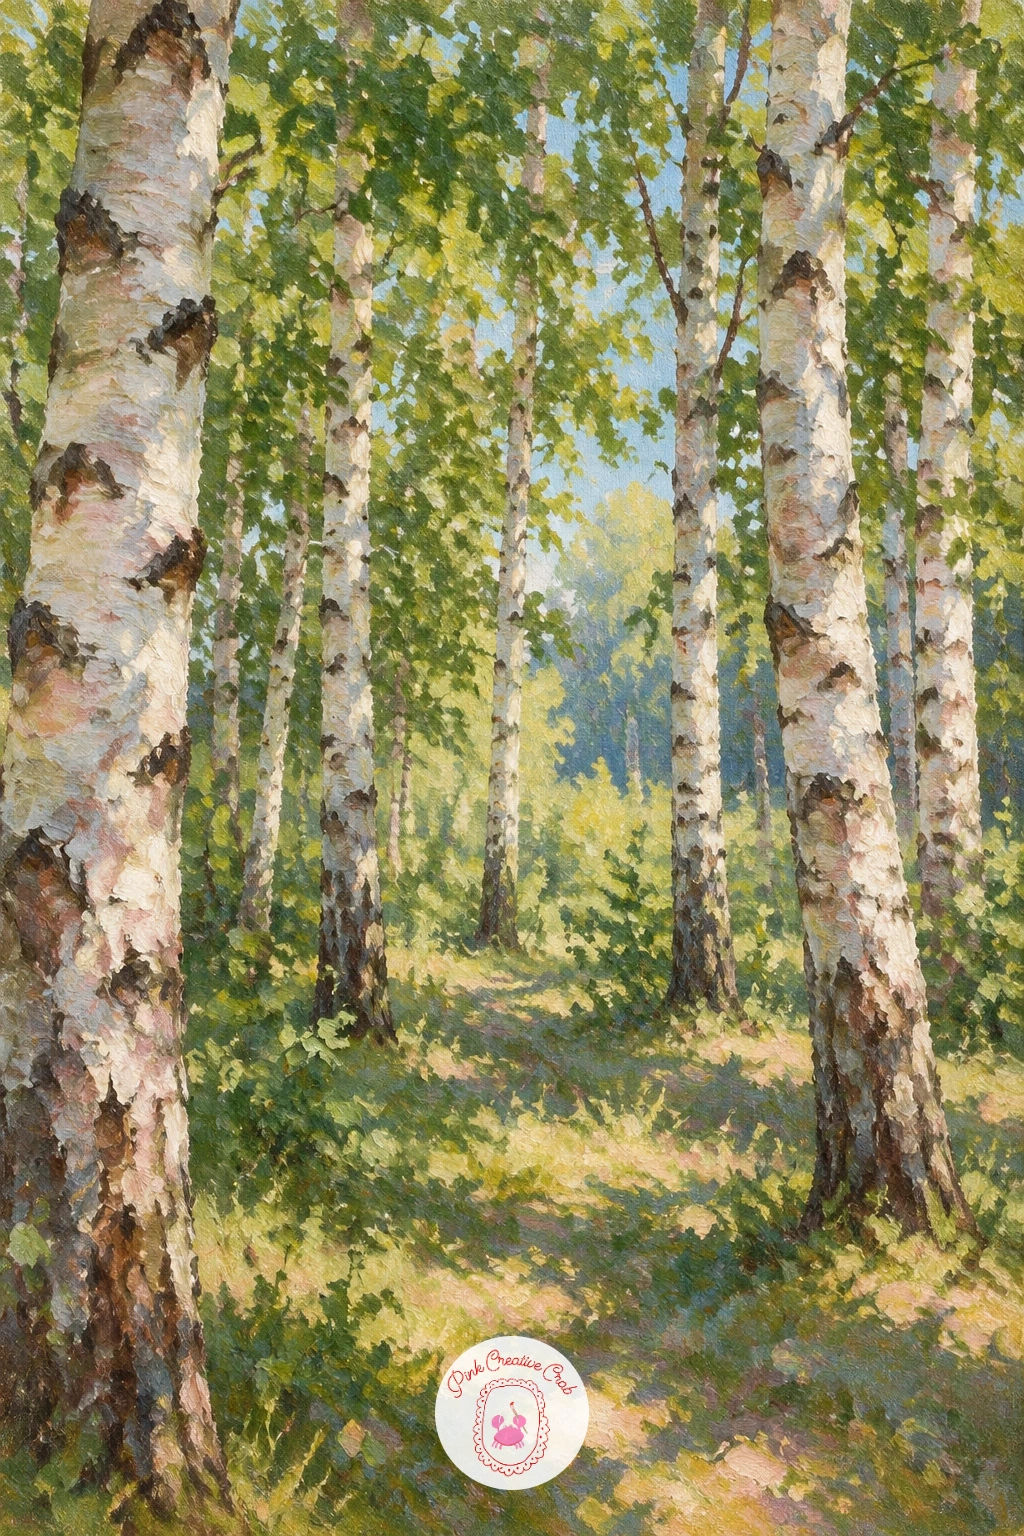
Palette: Titanium White,Payne’s Grey,Yellow Ochre,Sap Green,Burnt Umber
Look at reference photos of real birch bark before you paint the dark marks, since no two trunks repeat the same pattern and uneven marks read as more convincing than neat stripes.
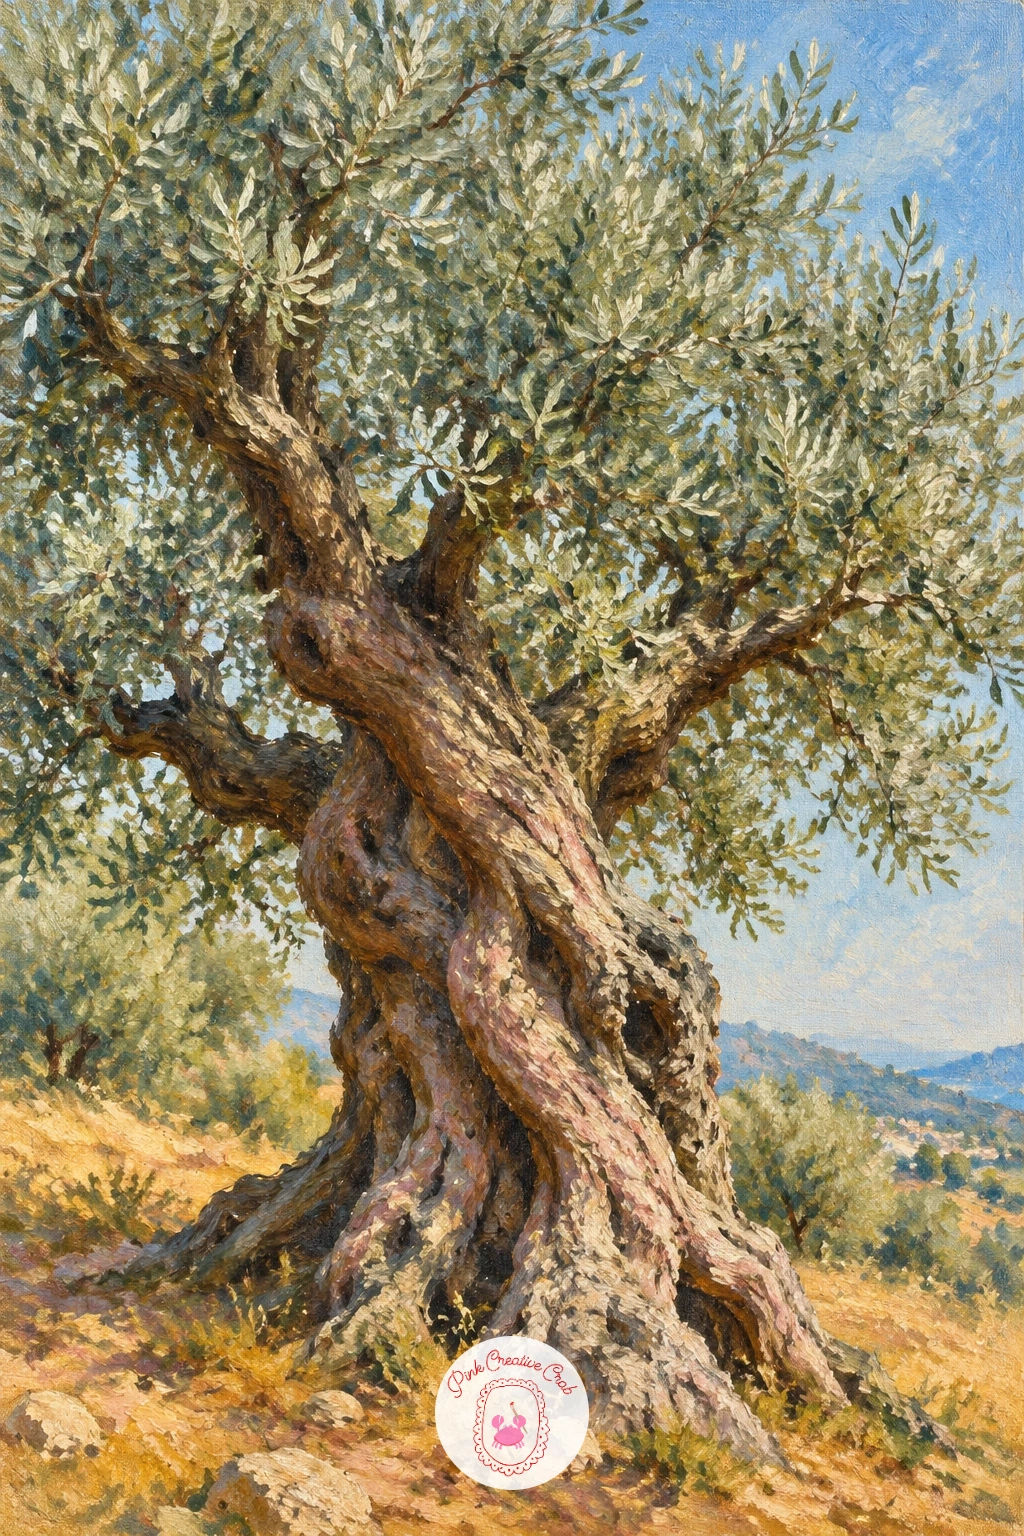
An ancient olive tree on a sunny hill asks for a gnarlier trunk than the oak or the birches, so slow down on the structure before you touch green. Sketch the trunk with thinned burnt sienna, letting it twist and split into two or three thick branches rather than growing straight up.
Block the hill behind it in warm ochre and soft olive, since Mediterranean light tends to bleach the grass pale rather than deep green. Build the canopy in small, soft clusters using a mix of sage green and grey-green, since olive leaves read silvery rather than bright.
The usual mistake is painting the trunk too smooth. Drag a dry, stiff brush loaded with dark umber across the trunk once the base color is tacky, so the ridges and hollows of old bark come through on their own rather than being drawn in line by line.
If you enjoy this one, the olive tree painting collection has more Mediterranean groves and terraces to try next. A palette knife instead of a brush gives the bark even more texture if you want to push it further.
You Will Need
- palette knife
Palette: Sage Green,Yellow Ochre,Burnt Sienna,Payne’s Grey,Titanium White
Trailing branches make the weeping willow a good one for practicing a single hanging gesture rather than a round canopy. Begin with the pond: a flat horizontal band of soft blue-green, laid in with a wide brush and left slightly uneven so it already looks like water.
Build the trunk short and thick near the water’s edge, then let the canopy spill from the top in loose, drooping strands. Use a thin rigger brush or the very tip of a round brush for the trailing branches, pulling each stroke downward in one motion rather than several short ones.
The easiest way to lose this painting is stiff, straight willow branches. Let your wrist curve slightly on every stroke so the lines sag naturally, and vary their length so the canopy does not look like a hairdo.
Drag a few of the same green strands straight down into the pond with a dry brush to suggest a soft reflection. If you want to keep exploring quiet water scenes afterward, the willow tree painting ideas carry this mood into rowboats and garden swings.
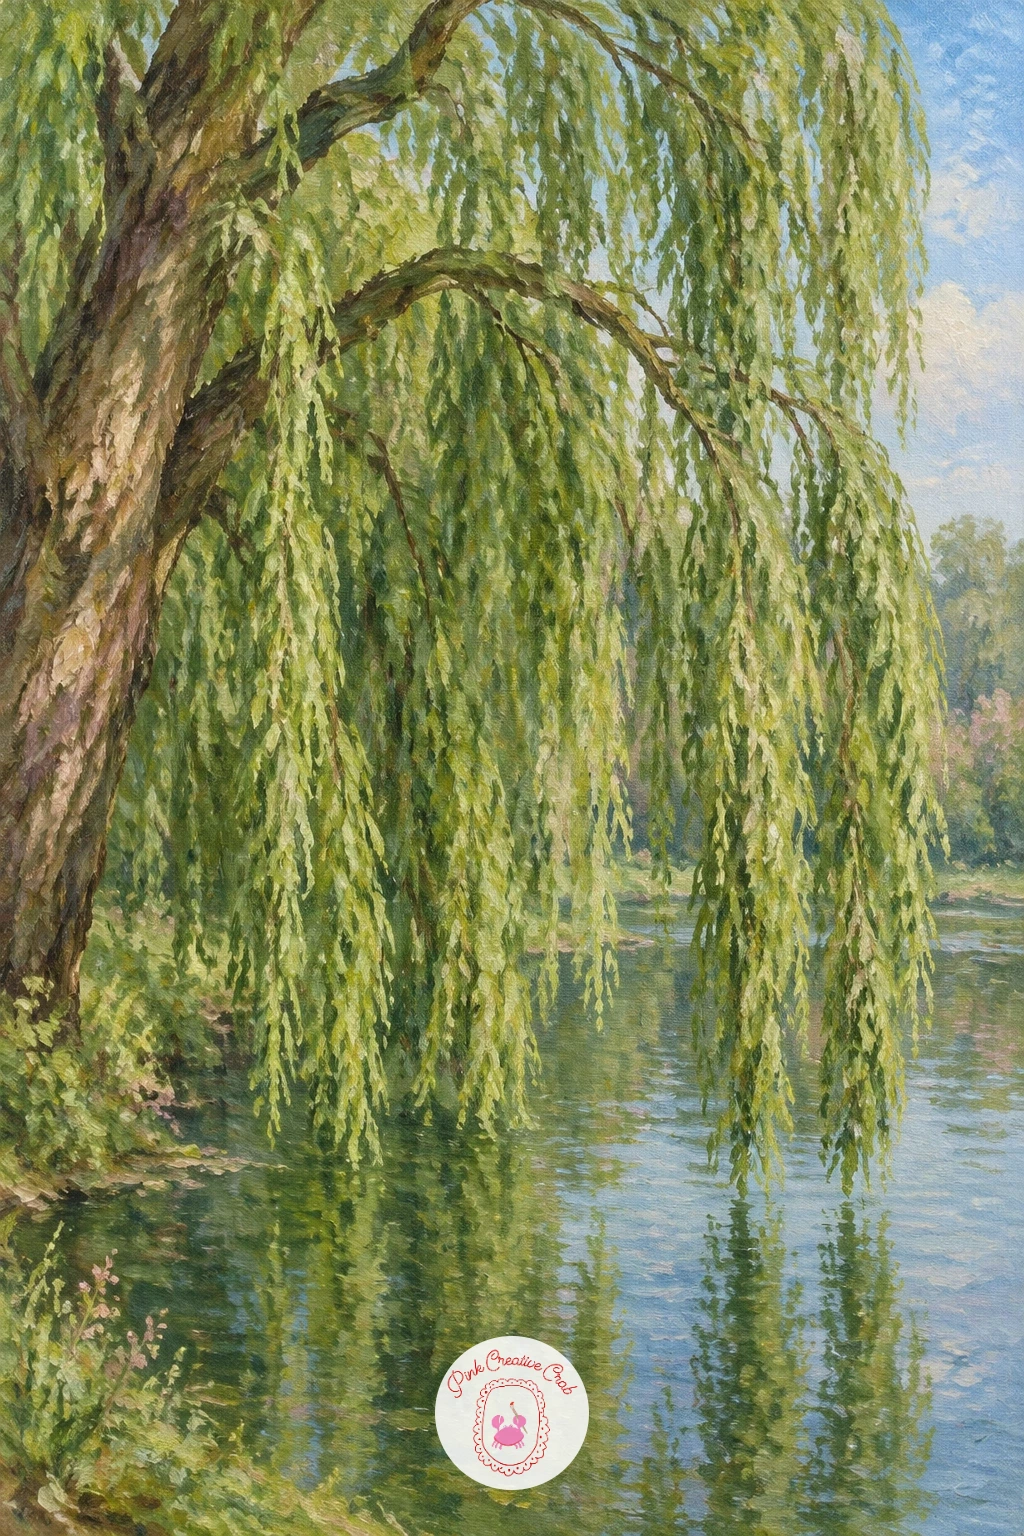
Palette: Sap Green,Cerulean Blue,Payne’s Grey,Burnt Umber,Titanium White
Switch from green to pink with the cherry tree in full blossom, which rewards a light touch more than careful drawing. Lay the trunk and main branches first in thin dark brown, keeping them narrower than a leafy tree since blossom reads as cloud-like clusters rather than solid canopy.
Load a small round or fan brush with a pale pink and white mix and dab, do not stroke, the blossom clusters around the branch ends. Vary the pink from pale blush to a slightly deeper rose so the canopy has depth rather than one flat color.
A dirt path curving away beneath the tree gives the eye somewhere to travel, so block it in with warm grey-brown before the blossom goes on top. If your blossoms start looking like cotton balls, break up the edges with a few single dabs scattered loosely beyond the main cluster.
No pink in your set? Mix titanium white with a touch of alizarin crimson and you will get a cleaner blossom tone than most tube pinks anyway.
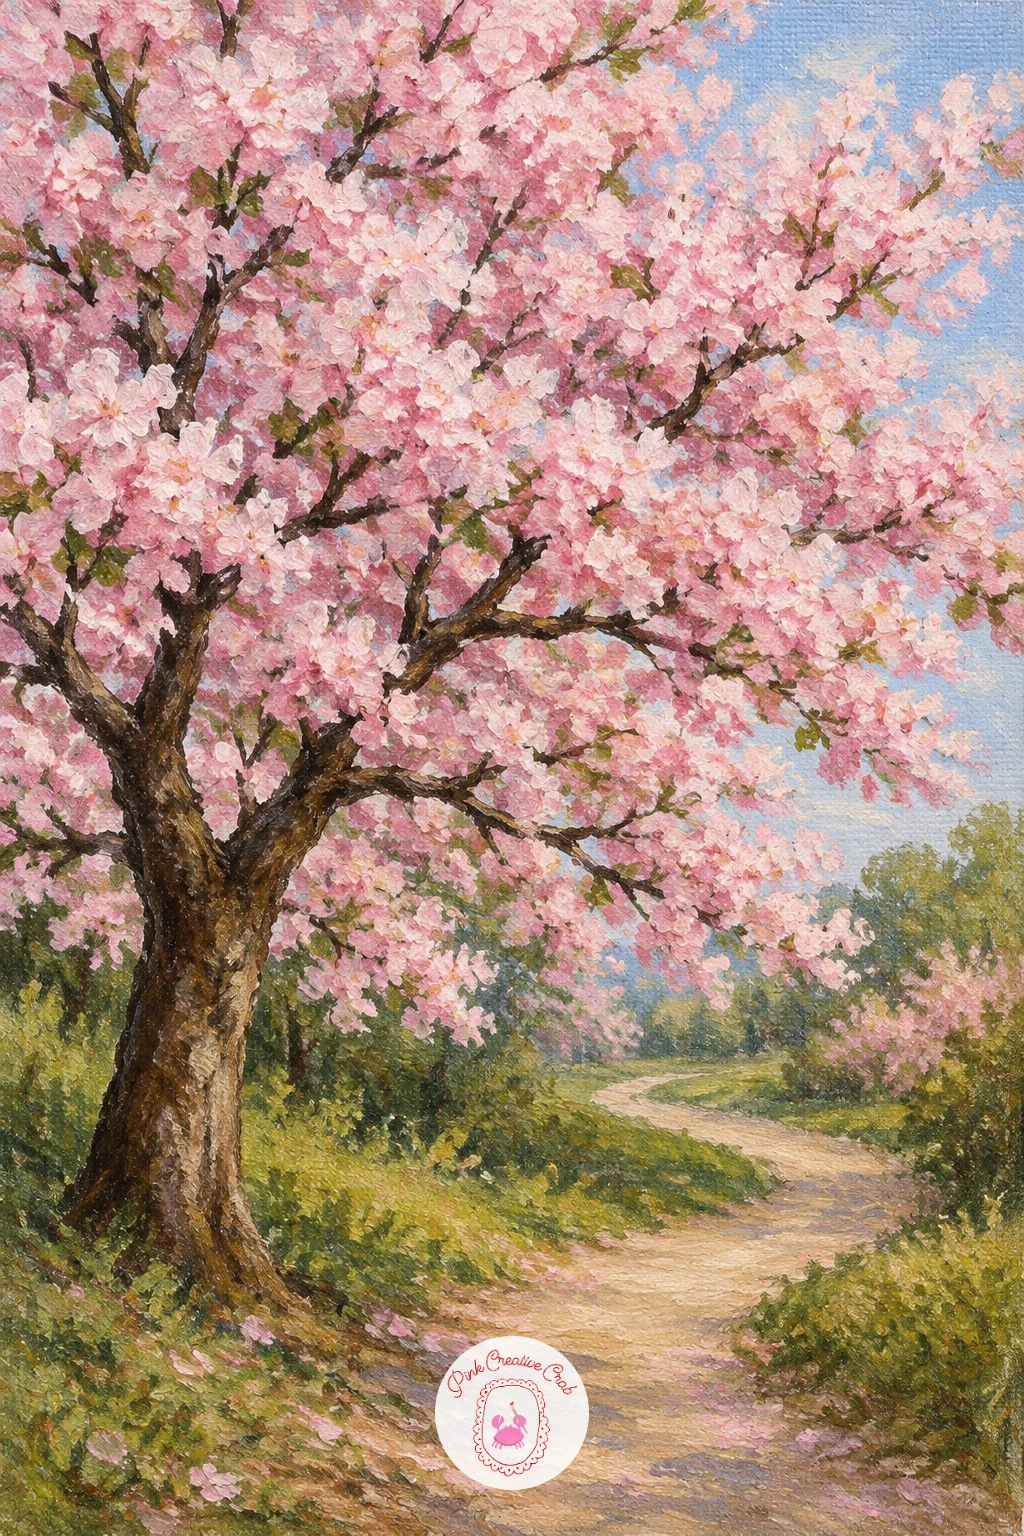
Palette: Titanium White,Alizarin Crimson,Burnt Umber,Yellow Ochre,Payne’s Grey
Pines on a cliff change the proportions again, since these trees are tall and narrow rather than round. Compare the height of the tallest pine to the width of the cliff edge before you paint anything else, so the trees do not end up dwarfing or disappearing into the rock.
Block the sea and sky first in two bands of blue, the sky slightly paler and warmer than the deeper sea below. Paint the cliff face in warm grey and ochre, then add the pine trunks as thin, slightly leaning verticals, since coastal trees rarely grow perfectly straight.
Build each pine’s foliage in small triangular clusters stacked up the trunk, using a dry, stiff brush dabbed rather than dragged, so the needles stay rough at the edges instead of smooth.
Leave a sliver of white or pale blue between some of the foliage clusters and the sky behind, since that gap is what makes the needles look sharp rather than mushy. The ocean oil painting ideas pair nicely with this one if you enjoy coastal scenes.
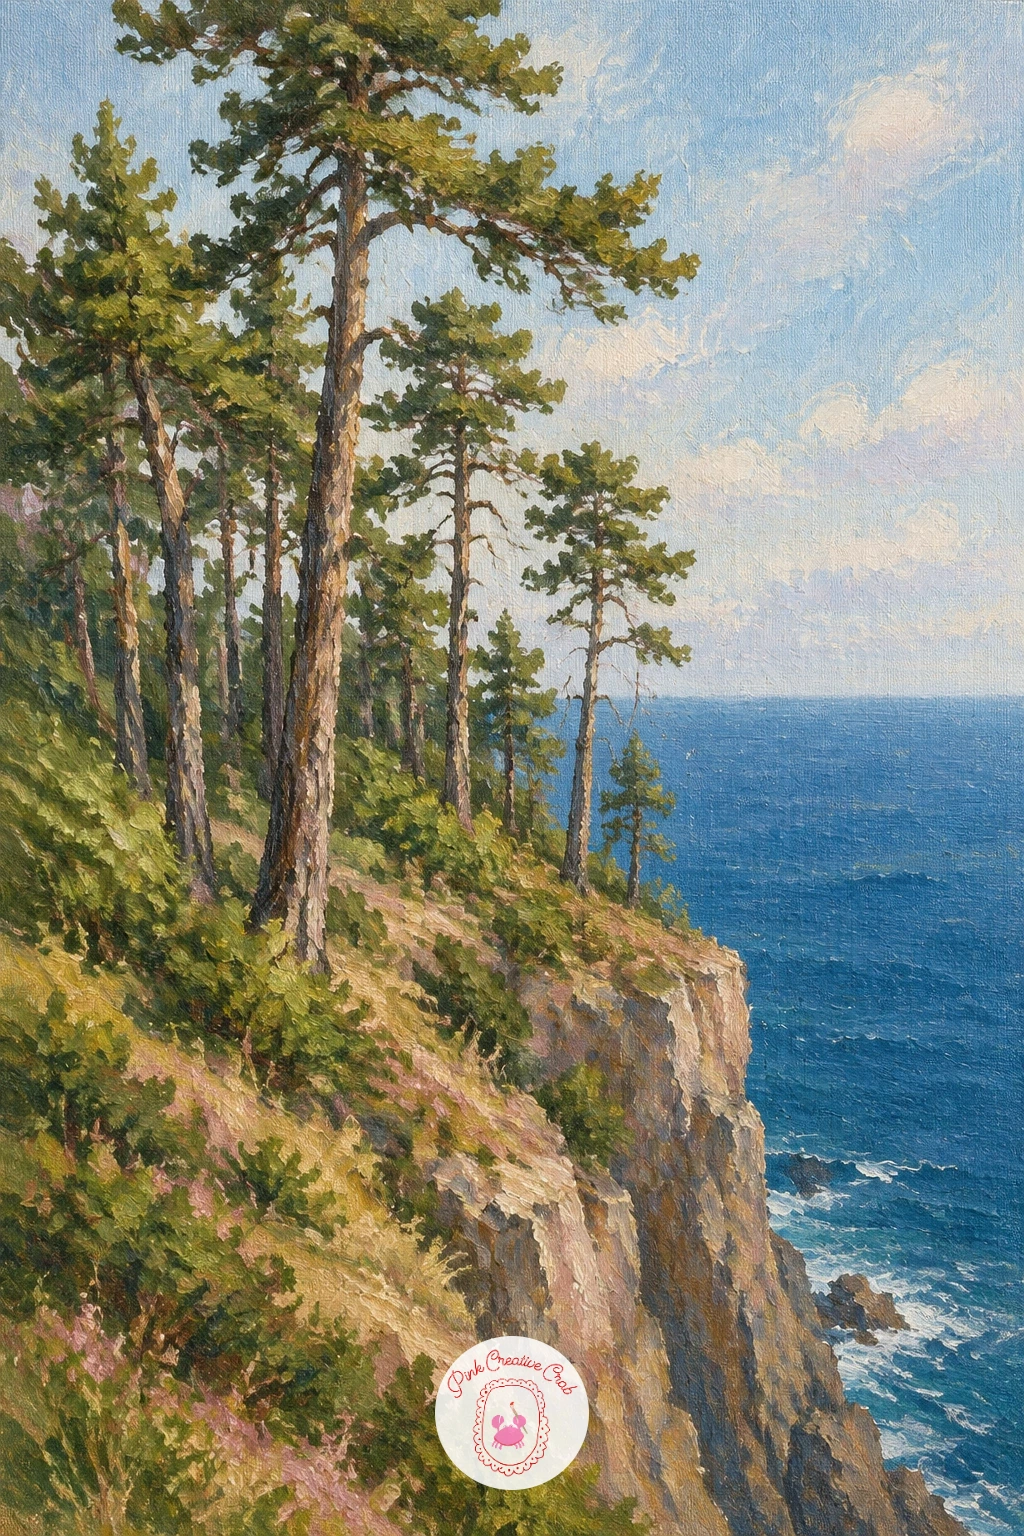
Palette: Payne’s Grey,Cerulean Blue,Sap Green,Yellow Ochre,Titanium White
A jacaranda in full bloom is one of the boldest color choices on this list, so commit to the purple early rather than easing into it. Sketch the branch structure thin and open, since jacaranda canopies look lacy compared to a dense oak.
Mix a true violet from ultramarine and alizarin crimson for the main canopy color, then dab it on in loose, airy clusters with plenty of sky showing through the gaps. Keep a second, lighter lavender mixed with white ready for the sunlit side of the canopy, so the purple has some lift rather than sitting flat.
The ground beneath a real jacaranda often carries a carpet of fallen purple flowers, so drag a few loose violet dabs across the base of the trunk to tie the whole painting together.
If the canopy starts looking heavy, scrape a few branch lines back out with the wooden end of your brush while the paint is wet, letting the pale sky underneath show through as negative space.
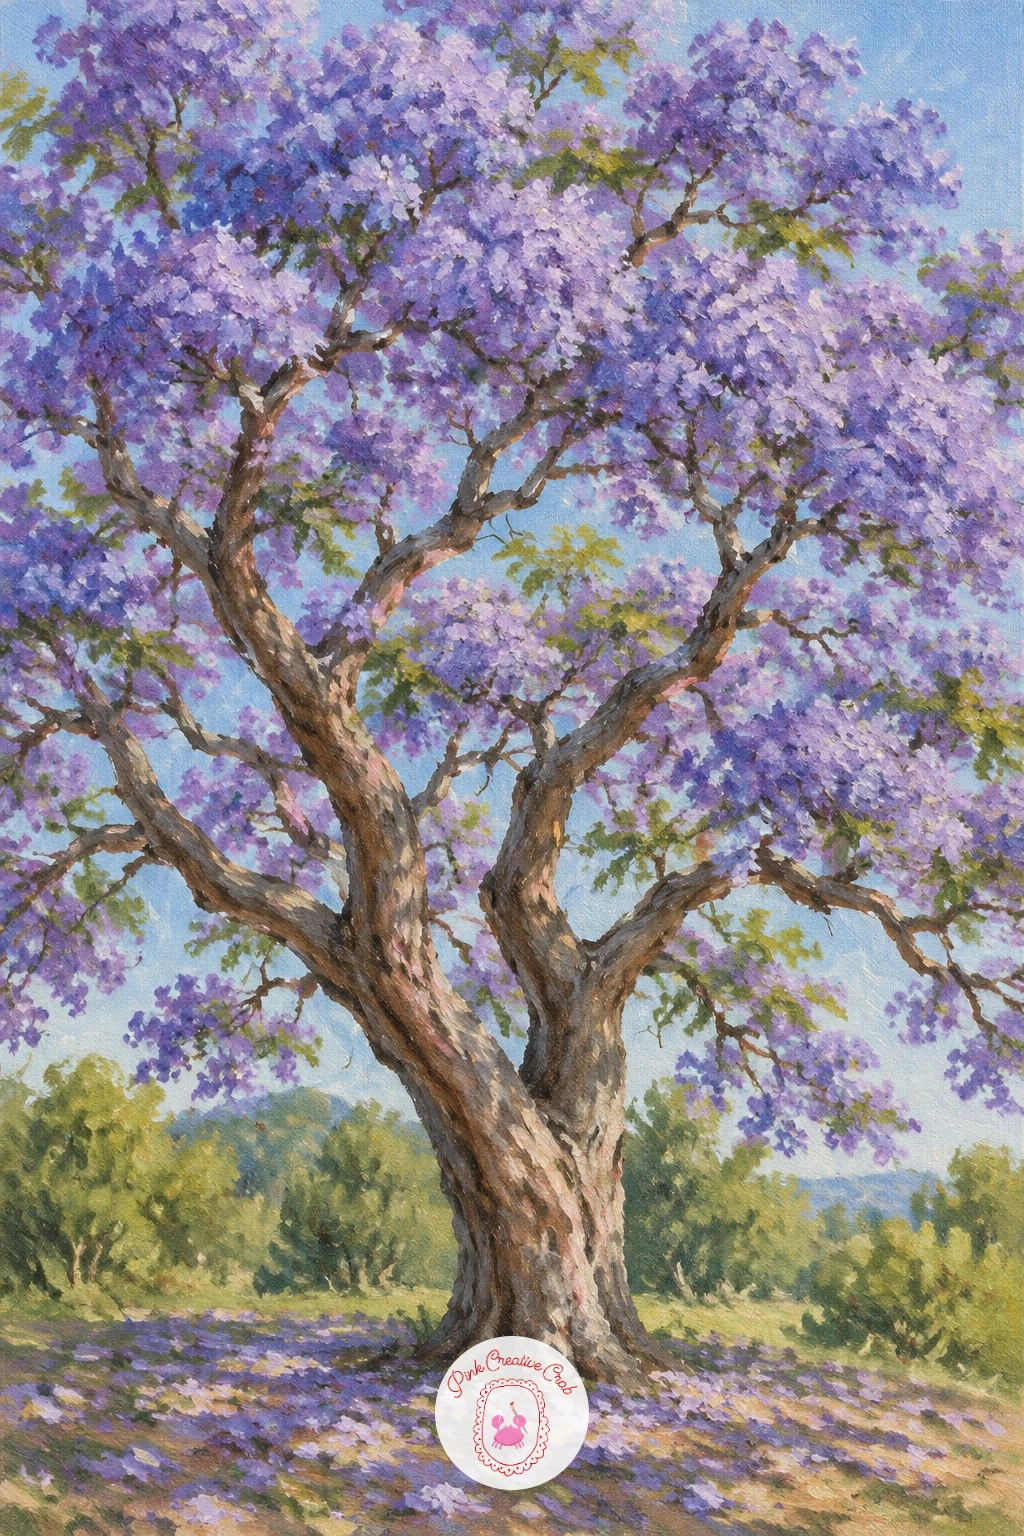
Palette: Ultramarine Blue,Alizarin Crimson,Titanium White,Burnt Umber,Cerulean Blue
A tunnel of trees arching over a road is really an exercise in perspective, so set your vanishing point before anything else, roughly in the center of the canvas where the road disappears. Every branch and trunk on both sides should lean toward that same point.
Paint the road first as a pale, warm strip narrowing toward the vanishing point, then build the trunks on each side, making the nearest trunks thickest and darkest and the farthest ones thinner and paler to push them back in space.
Arch the canopies from both sides so they meet or nearly meet overhead, letting a little sky glow through the gap in the middle. This is where most tunnels fall apart: if the arch looks too symmetrical and stiff, break it with one branch that crosses lower than the rest.
Dab warm light where the road meets the horizon glow to pull the eye straight down the tunnel. Work the near trees last, since they carry the most detail and will anchor the whole scene.
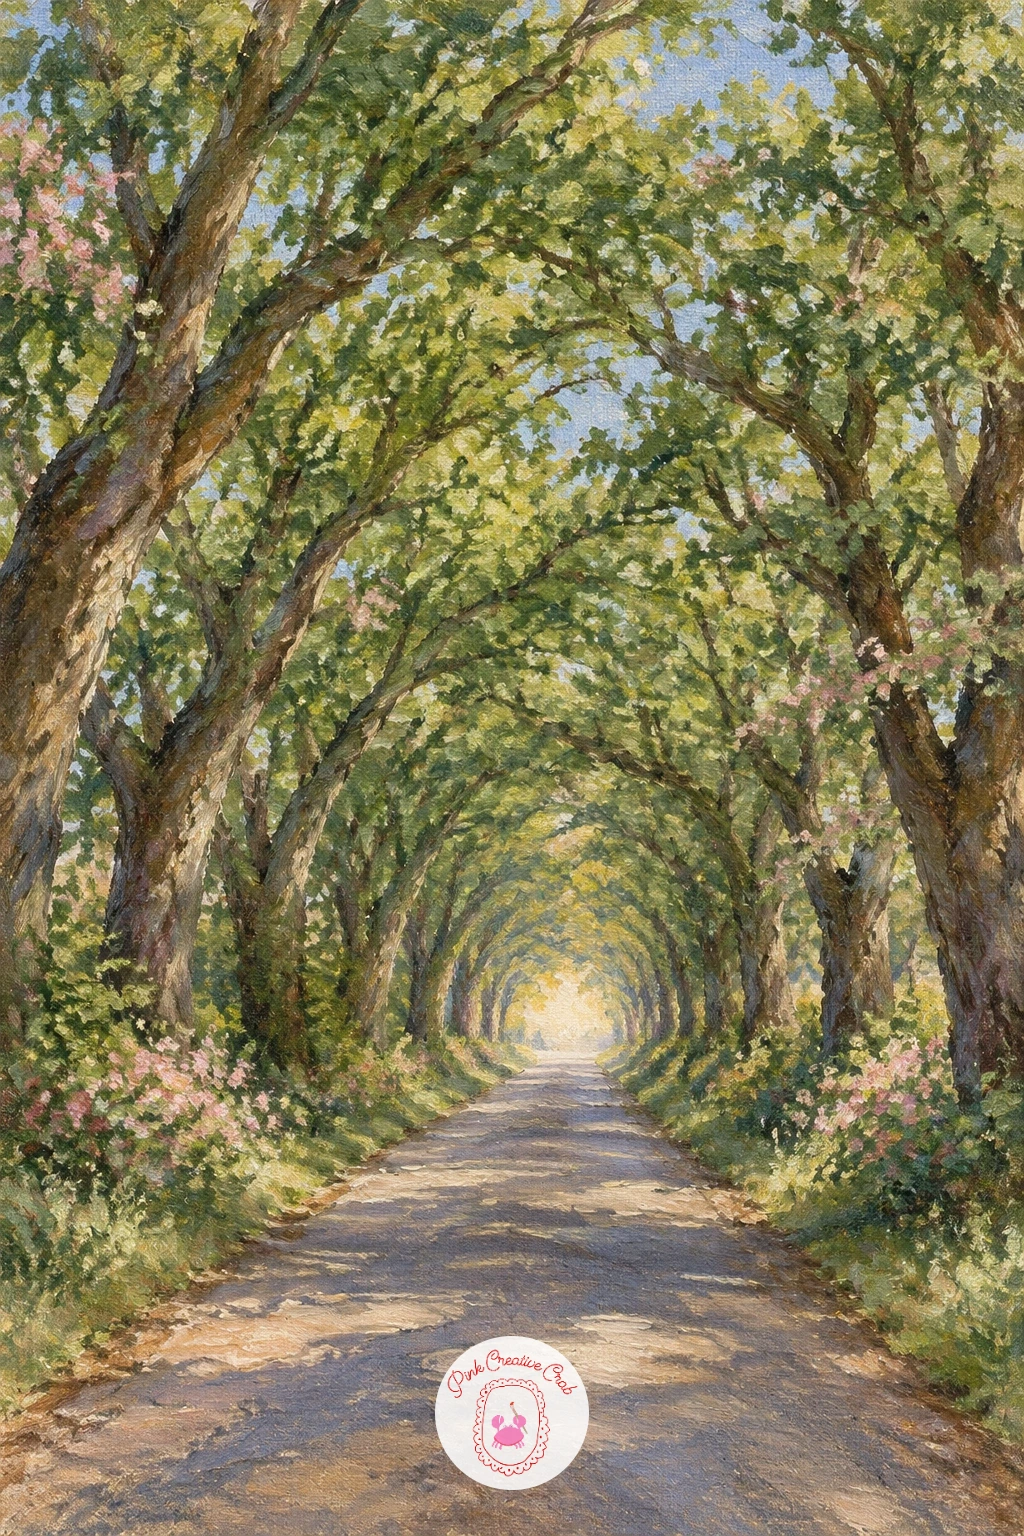
Palette: Sap Green,Burnt Umber,Yellow Ochre,Payne’s Grey,Titanium White
The baobab’s whole character is in its swollen trunk and bare, root-like branches, so give the trunk real weight before adding anything else. Use a wide flat brush to build the trunk thick and rounded, far broader at the base than any tree so far on this list.
Keep the branches sparse and twisting at the top, more like roots reaching upward than a leafy canopy, since a baobab often carries few or no leaves. Paint the wide sky behind it in a warm gradient, pale gold near the horizon fading into soft blue above, since baobabs are usually pictured against open, dry landscapes.
If the trunk looks flat, add a darker warm brown down one side and a lighter ochre highlight down the other to round it out, treating it almost like painting a tree trunk the size of a barrel.
A single small silhouette of grass tufts at the base gives scale to just how massive this trunk really is.
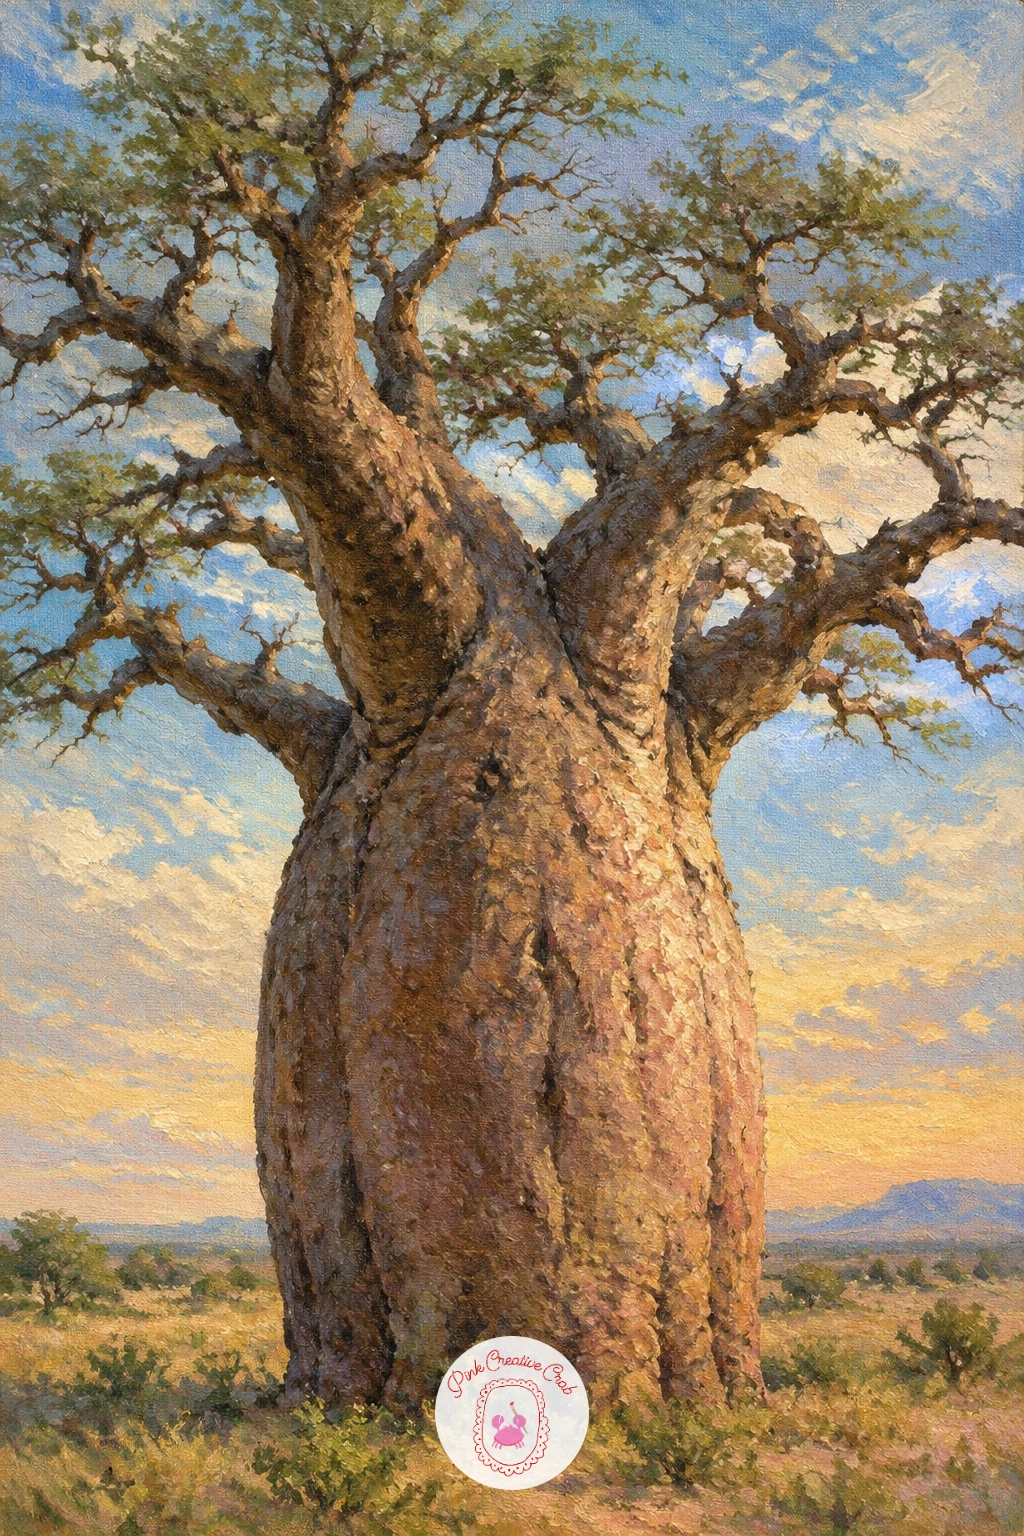
Palette: Burnt Sienna,Yellow Ochre,Payne’s Grey,Titanium White,Burnt Umber
A crooked apple tree gives you permission to paint a trunk that leans and bends, so exaggerate the lean more than feels natural at first. Sketch the trunk curving to one side, with two or three thick branches splitting off low down rather than high up.
Build the canopy in uneven, lumpy clumps of mid green, leaving gaps where light comes through, then dab small spots of red and yellow-green scattered through the leaves for the apples. Keep the apples few and placed in twos and threes rather than evenly spaced, since that scattered look reads as more natural.
Rows of other trees fading paler into the background suggest the rest of the orchard without painting each one in full. The classic mistake is making every apple the same size and shade, so vary them, some half-hidden by leaves, one or two fully lit.
If your reds look too bright against the green, grey them slightly with a touch of burnt umber before placing them.
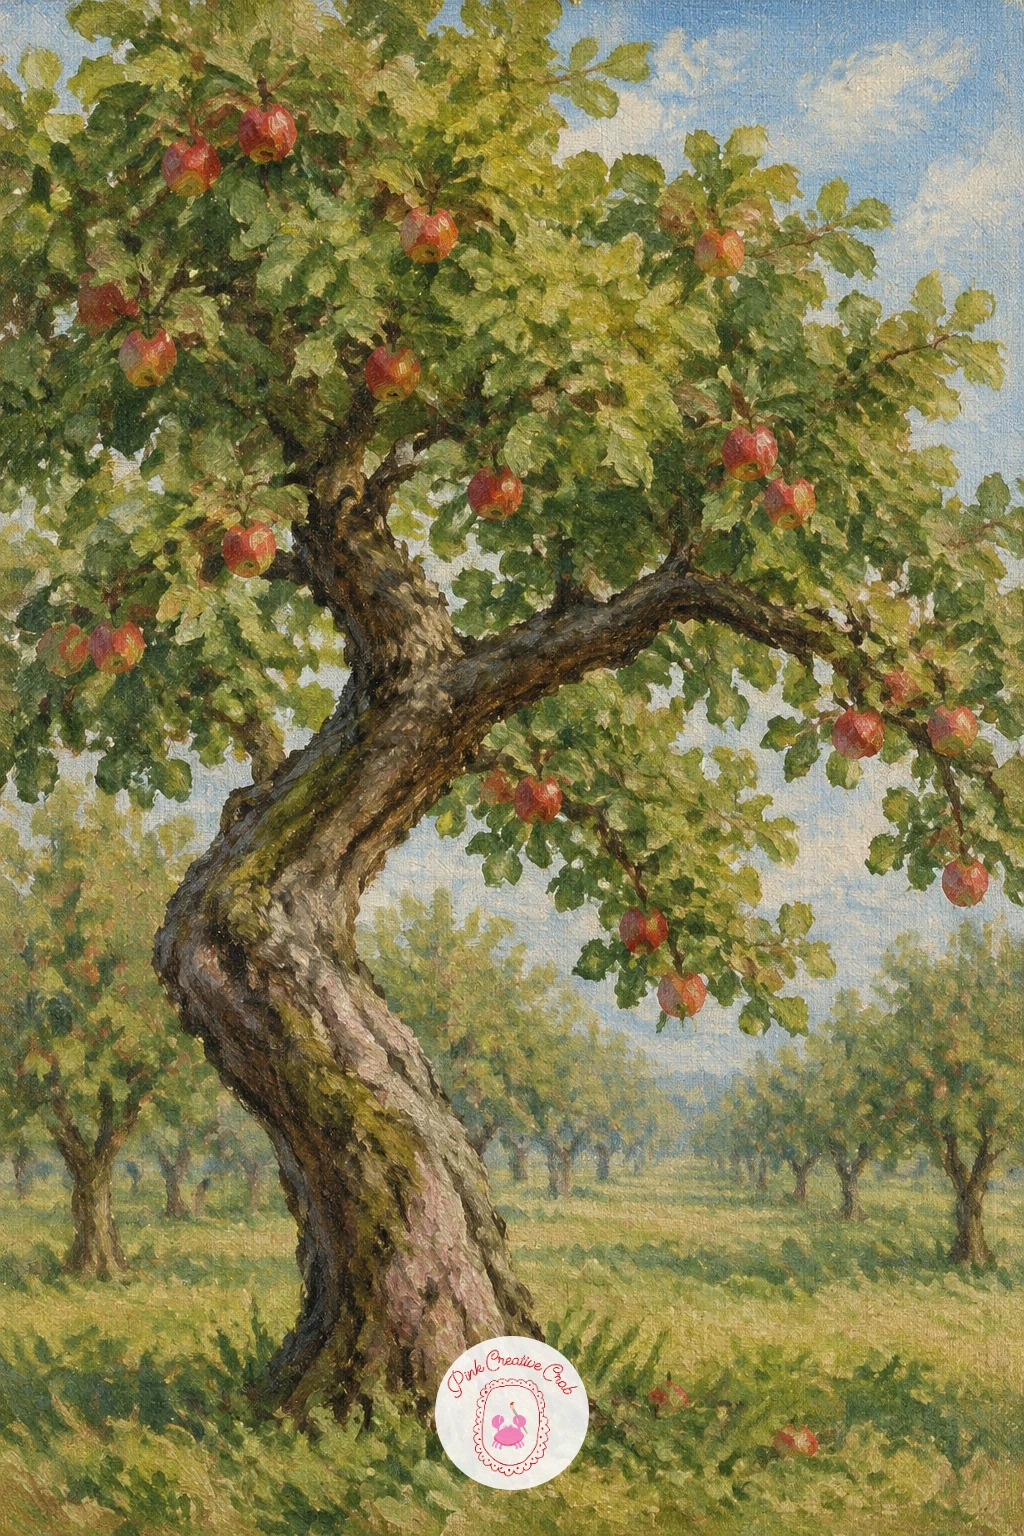
Palette: Sap Green,Cadmium Red,Yellow Ochre,Burnt Umber,Titanium White
Sunbeams cutting between tall trunks turn the redwood forest into a light study more than a tree study, so paint the dark forest first, then add the light on top. Block the whole canvas in deep, muted greens and browns, keeping it dark enough that the beams will have something to cut through.
Paint the trunks as tall, slightly tapering verticals in rich red-brown, spacing them unevenly across the canvas with some closer together and some further apart.
For the sunbeams themselves, mix a warm pale yellow and drag it downward in soft diagonal strokes with a dry brush, letting the edges stay soft rather than hard-edged like a spotlight. Where a beam crosses a trunk, lighten that section of trunk slightly so the light looks like it is actually touching the bark.
If the beams look too solid, soften them with a clean dry brush dragged lightly over the wet paint. This one rewards patience with light more than detail in the trees themselves.
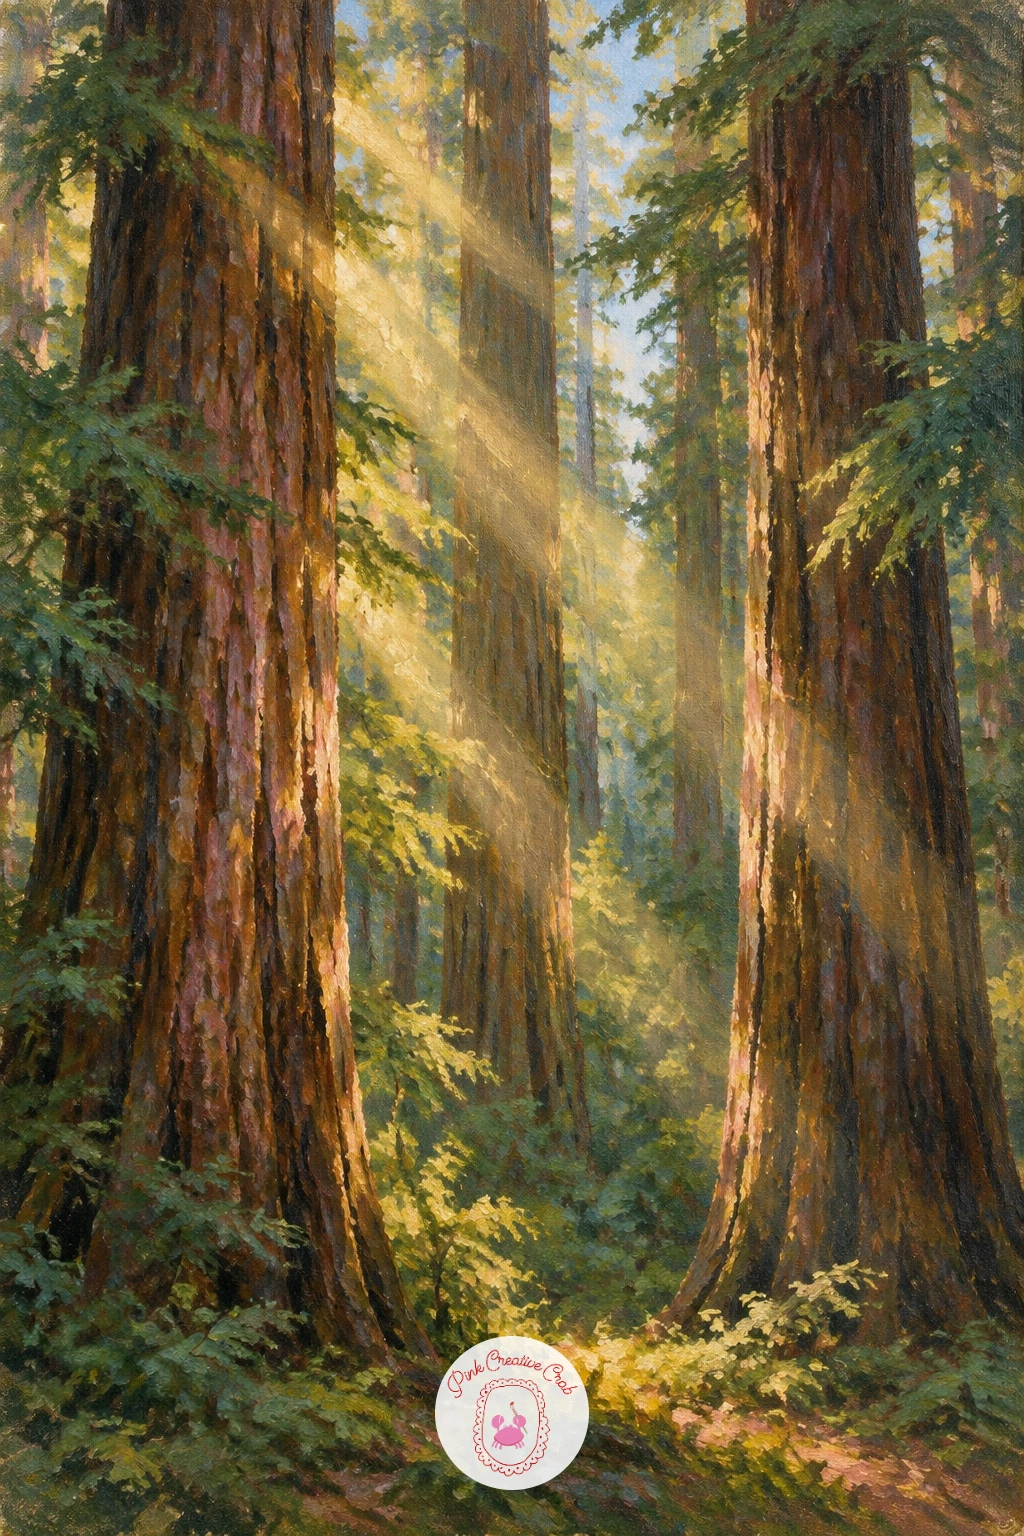
Palette: Burnt Sienna,Burnt Umber,Sap Green,Yellow Ochre,Titanium White
Zooming into a single magnolia branch rather than a whole tree makes for a quick, satisfying painting with large, confident shapes. Sketch two or three thick cup-shaped blossoms along one diagonal branch, keeping the petals big and simple rather than fussy.
Paint each blossom in three values: a deep rose-pink shadow at the base of the cup, a mid pink across most of the petal, and a bright white-pink highlight where light hits the curved edge. Work one flower fully before moving to the next, so you do not lose track of the light direction.
The branch itself should look sturdy and dark against the pale petals, with a few simple leathery green leaves tucked behind rather than scattered everywhere. Overworking the petal edges is the most common slip here, so keep the brushstrokes broad and let a few rough edges stay.
In ten minutes you can block one or two blossoms loosely; give it forty and you can add the layered petal shadows that make the flowers look sculptural rather than flat.
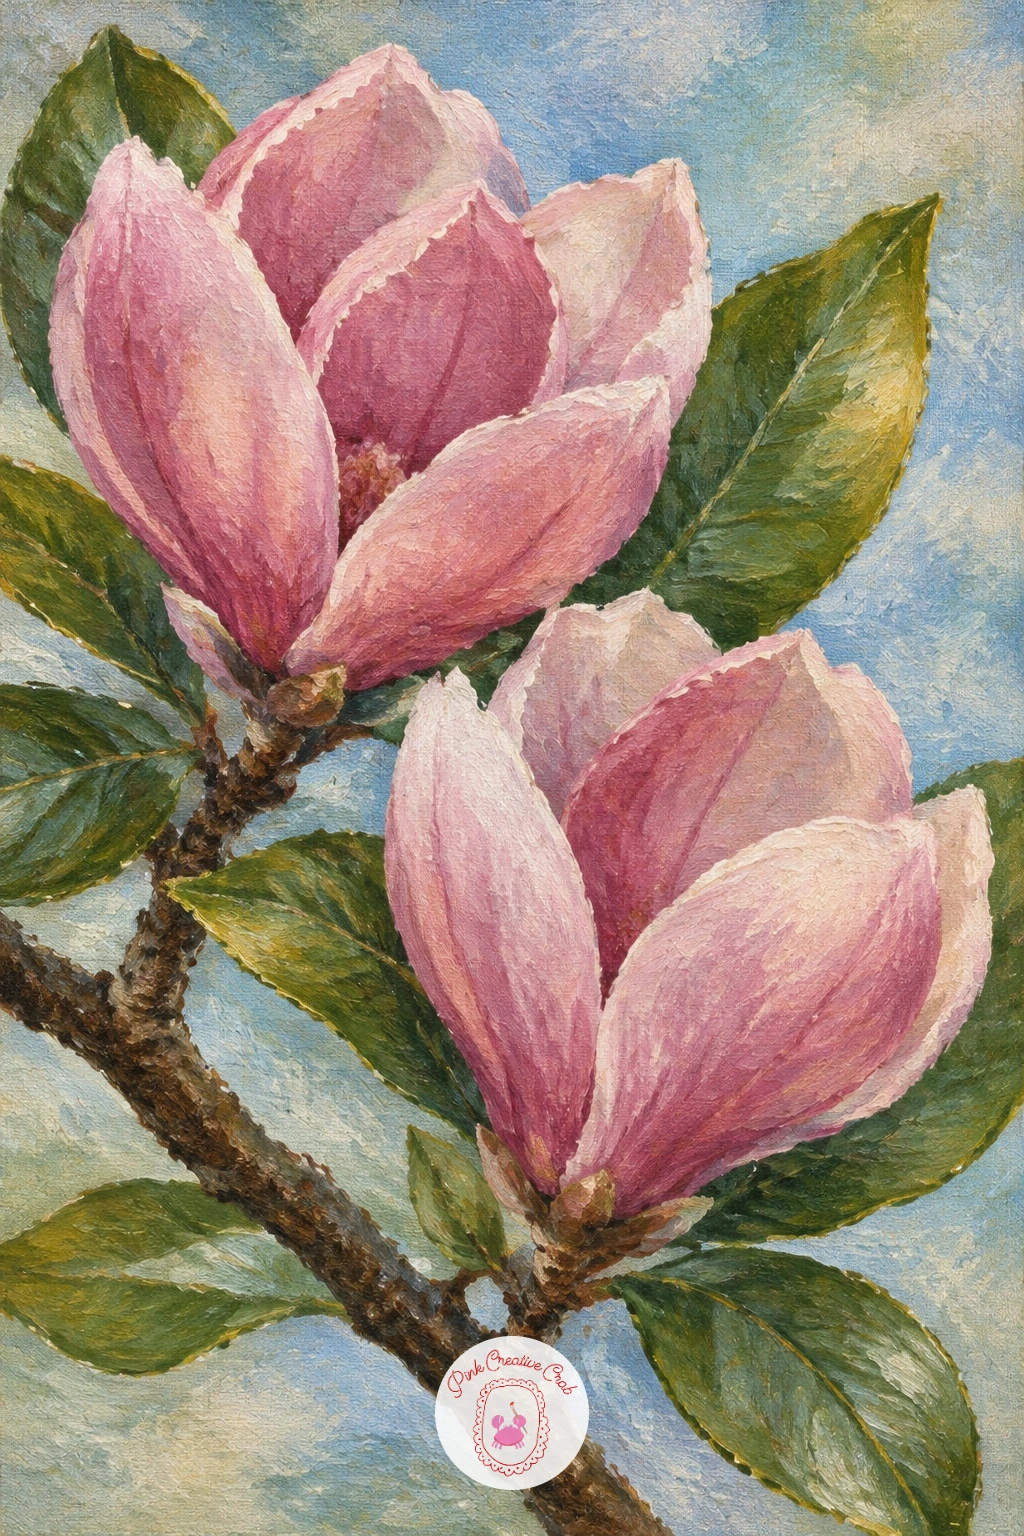
Palette: Titanium White,Alizarin Crimson,Sap Green,Burnt Umber,Payne’s Grey
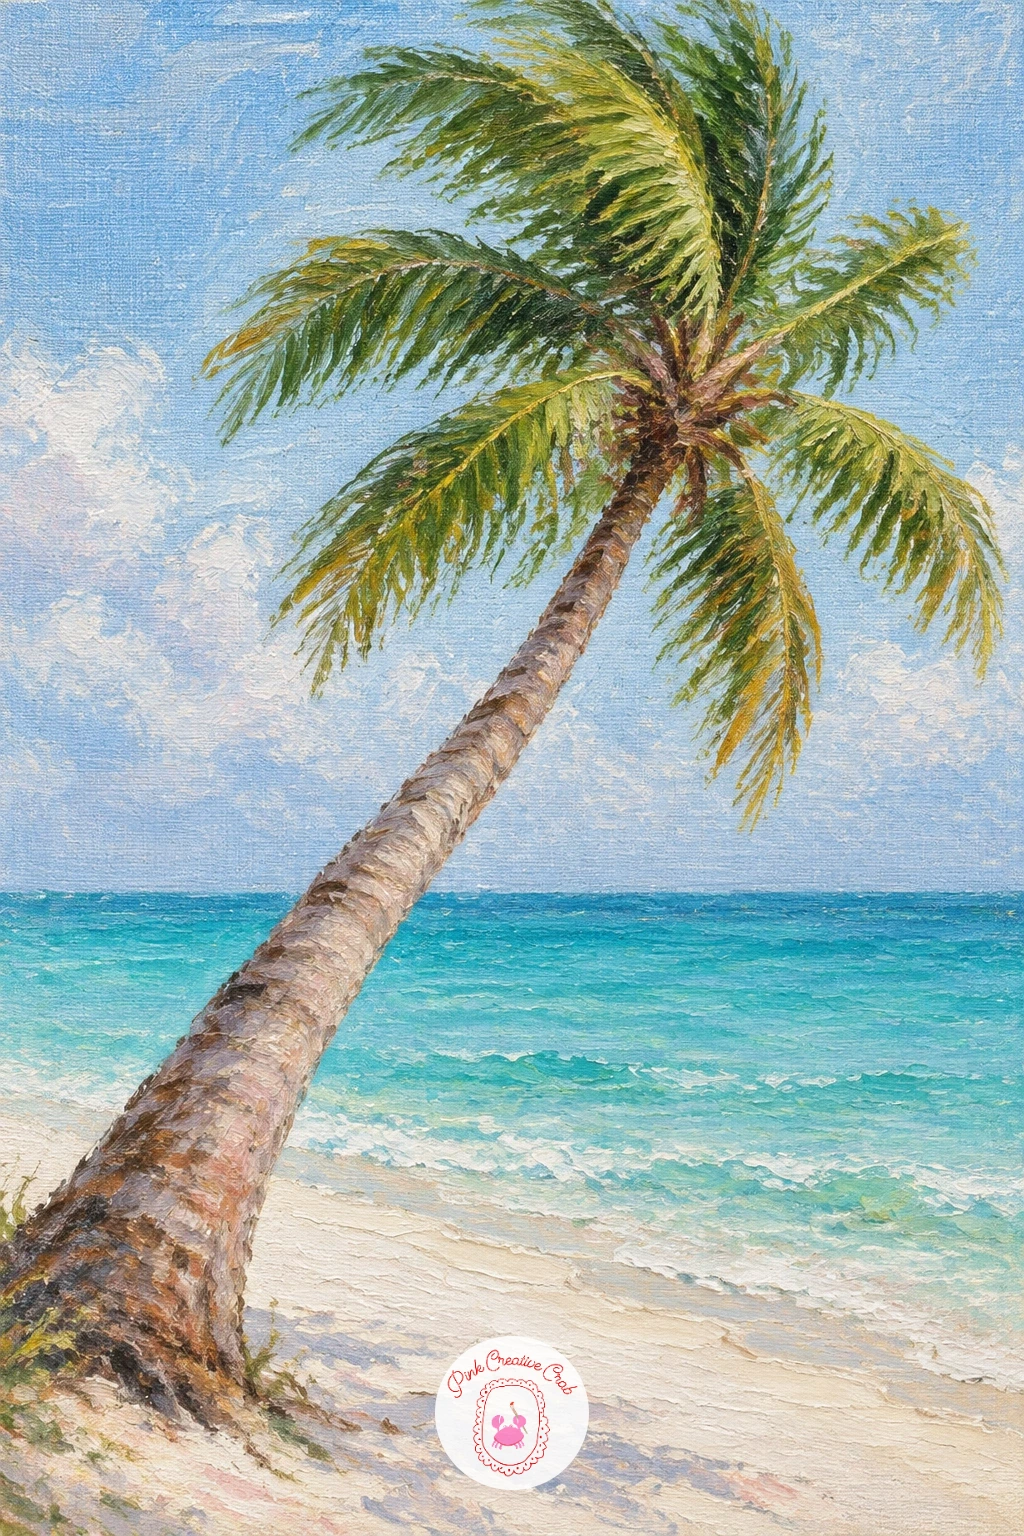
A leaning palm asks for a confident curved trunk, so draw that curve in one continuous motion rather than several short, straight segments. Angle the trunk well off vertical, since a palm leaning hard toward the water sells the beach mood better than a straight one.
Block the sky and sea first in warm blue and turquoise bands, then the pale sand beneath, before the trunk goes on top so its edges stay crisp against the light background. Paint the fronds from a central point at the top of the trunk, pulling each one outward and slightly drooping with a single loaded stroke of a flat or fan brush.
Vary the length and angle of the fronds so they do not look like a perfect fan, and let one or two droop lower than the rest for a windblown feel. If the trunk looks too smooth, add a few short dark horizontal marks for the bark rings once the base color is dry to the touch.
A fan brush dragged lightly through wet green for the fronds gives a more convincing frayed edge than a flat brush alone.
Palette: Cerulean Blue,Sap Green,Yellow Ochre,Titanium White,Burnt Umber
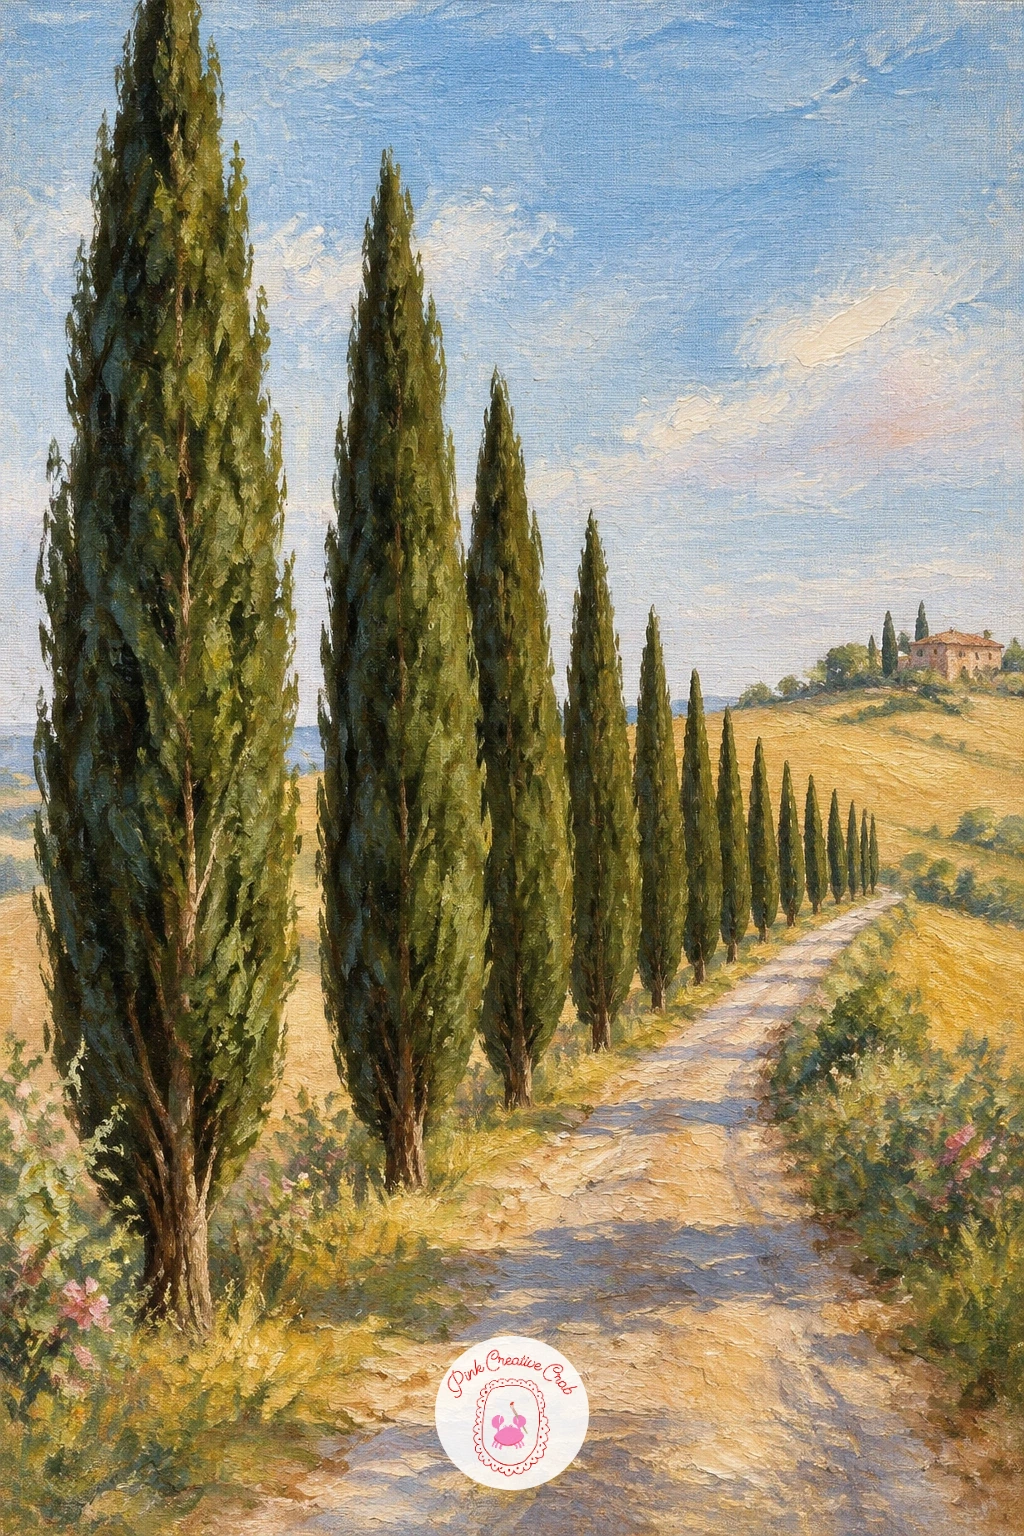
Thin, dark cypress trees lined along a road make for a strong graphic shape, so get the spacing right before adding any color. Space the trunks unevenly, closer together near the front of the canvas and tighter together as they recede, to help the row feel like it is receding into distance.
Paint each cypress as one tall, narrow, flame-shaped silhouette rather than a detailed tree, since from a distance that is really all they read as. Keep them dark, almost black-green, against a warm gold hillside and soft blue sky, which is what gives this scene its classic Mediterranean feel.
The road running alongside or beneath the row should narrow gently as it moves back, with a small warm farmhouse shape optional near the far end for scale. If the row looks too even and fence-like, vary the height of two or three trees slightly.
This pairs naturally with the Provence mood if you enjoy that kind of countryside scene elsewhere in your sketchbook.
Palette: Payne’s Grey,Sap Green,Yellow Ochre,Cerulean Blue,Burnt Umber
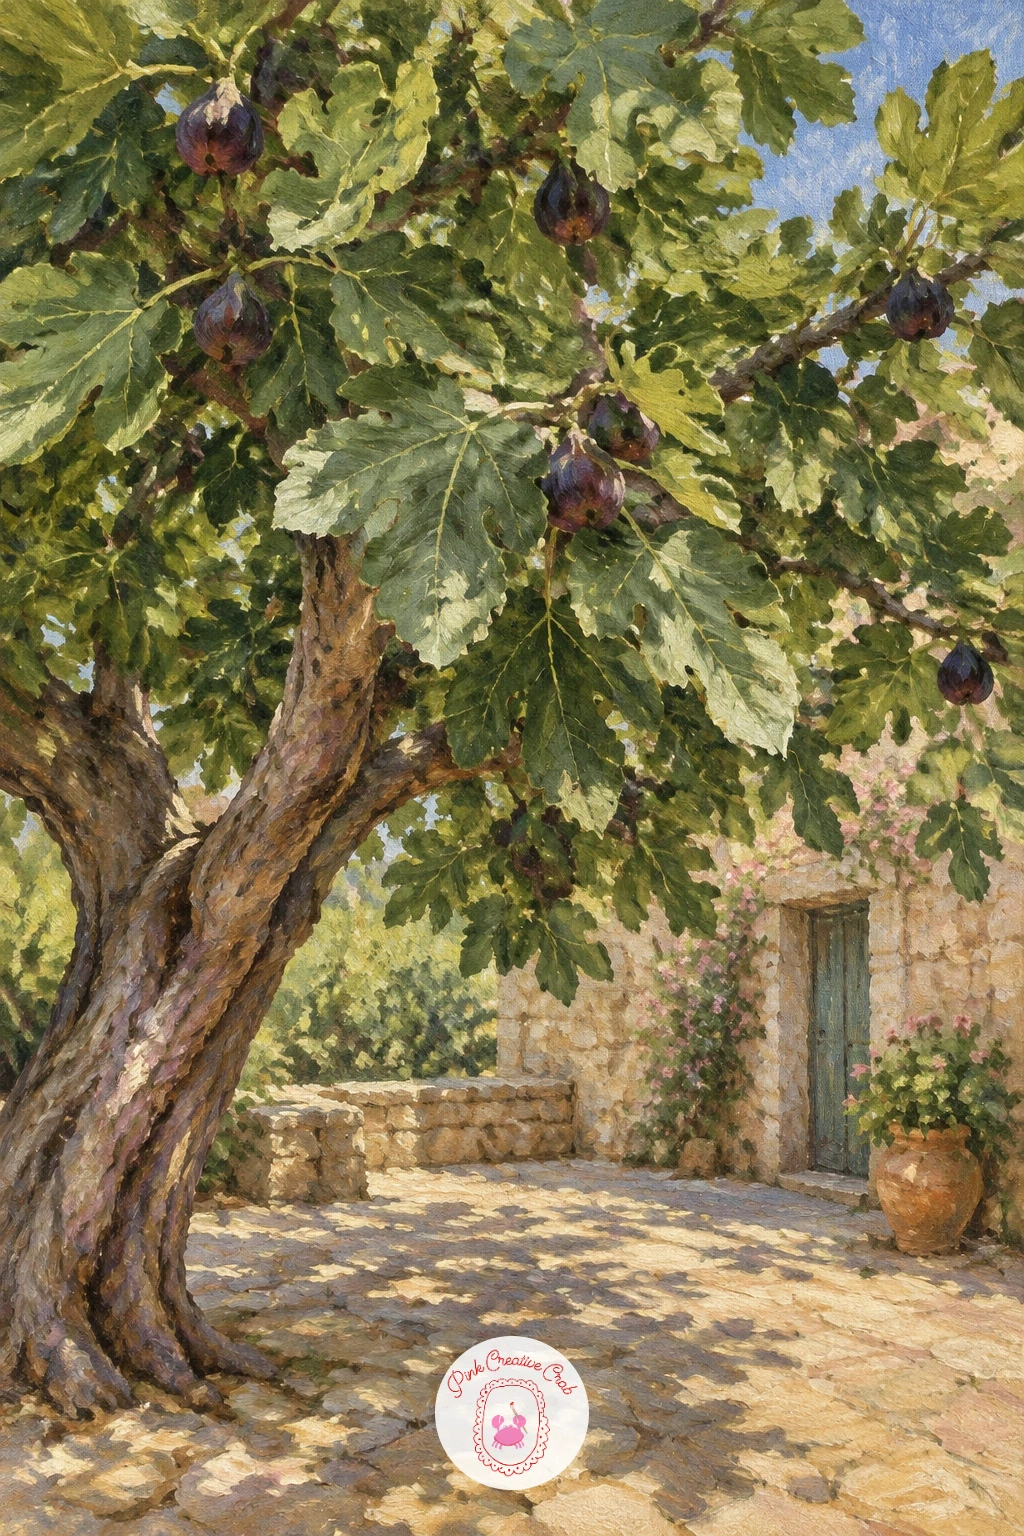
A fig tree spreading over a courtyard is as much about the stone beneath it as the tree itself, so block the warm pale stone ground first and let the tree’s shadow fall across it in a cool grey-violet. That contrast between warm stone and cool shadow is what makes the scene feel sun-baked.
Build the fig canopy wide and low rather than tall, since fig trees tend to spread sideways more than reach up. Use big, broad leaf shapes rather than fine detail, since fig leaves are large and lobed, easy to suggest with a few confident strokes of a flat brush.
Hang a few dark, teardrop-shaped figs among the leaves in deep purple-brown, tucking most of them half into shadow since they rarely sit in full light. If the canopy starts looking like a solid green mass, cut a few small gaps through to the sky to let light break it up.
A stone wall or low courtyard edge behind the trunk gives the scene somewhere to sit.
Palette: Sap Green,Yellow Ochre,Payne’s Grey,Burnt Umber,Alizarin Crimson
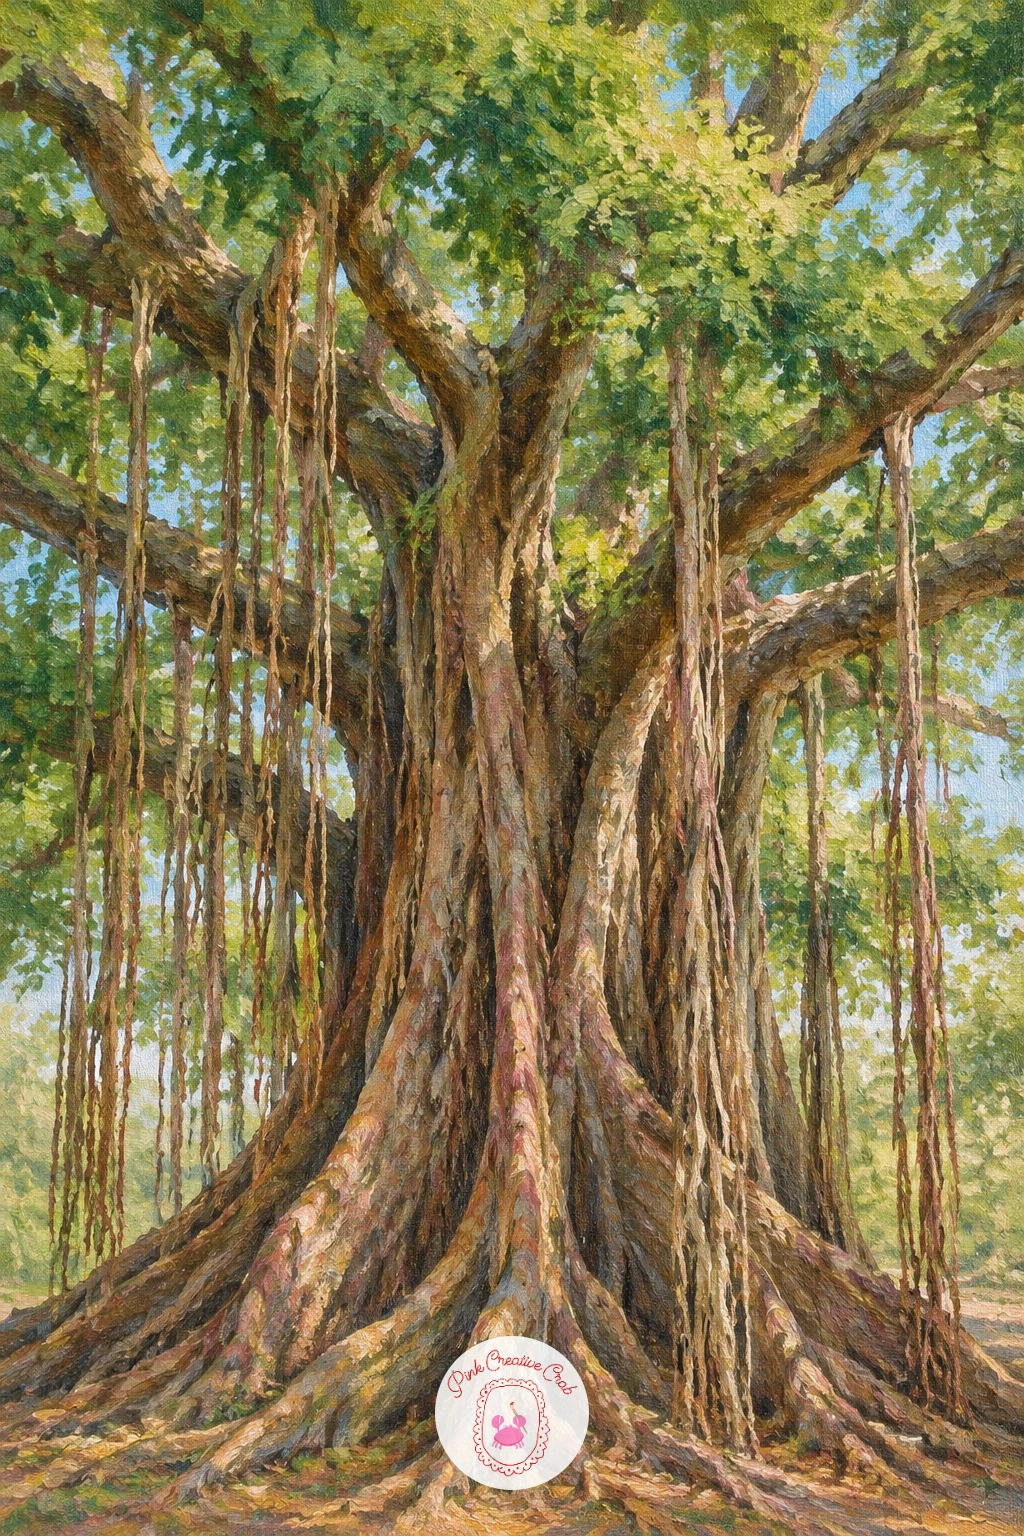
The banyan’s hanging aerial roots make it one of the more unusual trunks on this list, so plan those roots before the canopy goes anywhere near the canvas. Sketch the main trunk thick and buttressed at the base, then add several thin, straight roots dropping down from the branches above like loose vertical threads.
Paint the roots with a thin rigger brush in a slightly lighter brown than the trunk, pulling straight down in single strokes and varying their length so some reach the ground and some stop partway.
Build the canopy broad and heavy above, since banyans are known for spreading wide, using overlapping clumps of mid and dark green to suggest real volume rather than a flat shape. Where roots cross in front of the trunk, keep the trunk slightly darker behind them so they read as separate, hanging elements rather than scratches.
If the roots look too stiff, let two or three sway slightly off vertical rather than making every one perfectly straight.
You Will Need
- rigger brush
Palette: Burnt Umber,Sap Green,Yellow Ochre,Payne’s Grey,Titanium White
Adding a rope swing to a sturdy oak turns a straightforward tree into a small scene with a bit of story, so pick one long, strong branch reaching out horizontally before you touch the rope. That branch needs to look thick enough to believably hold weight, so paint it slightly heavier than the others around it.
Build the oak’s trunk and canopy the same way as the meadow oak, solid rounded clumps of green over a dark umber trunk, then let that one long branch extend further out from the canopy than the rest.
Paint the rope with a fine brush in warm grey-brown, two thin parallel lines hanging straight down from the branch, ending in a simple wooden seat shape, just a small flat rectangle. Keep the rope perfectly vertical even if the branch above it curves, since gravity does not bend.
If the swing looks like it is floating, add a small dark shadow beneath the seat on the ground to ground it in the scene.
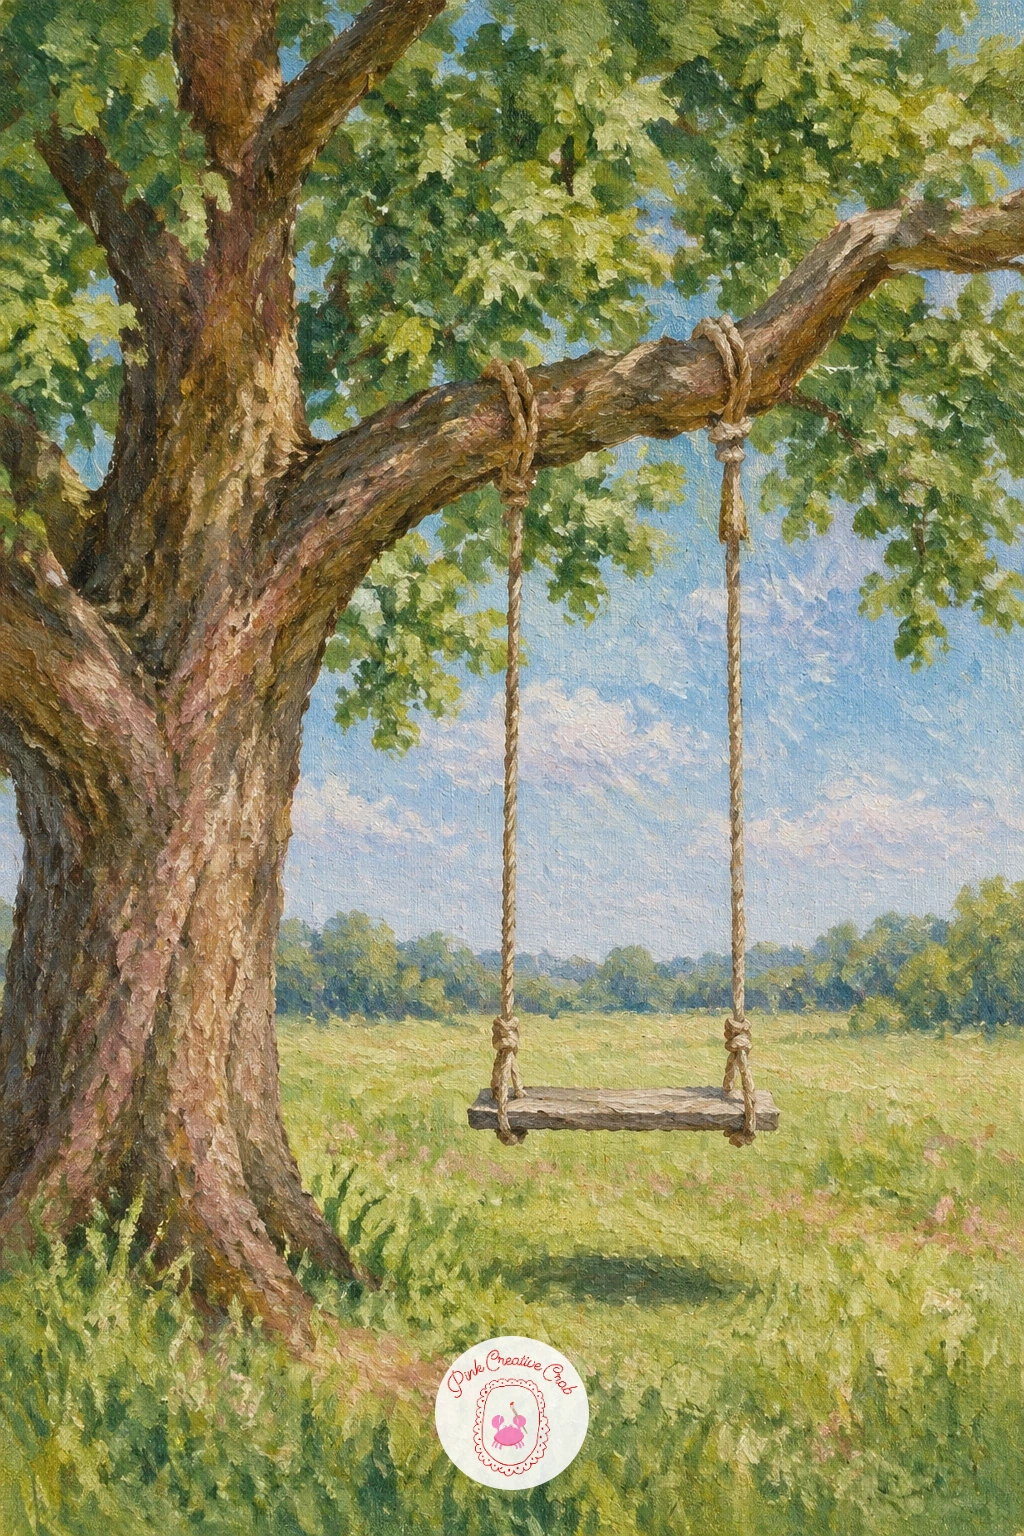
Palette: Sap Green,Burnt Umber,Yellow Ochre,Cerulean Blue,Titanium White
A bonsai is really a still life with a tree in it, so treat the pot with as much care as the plant. Paint the shallow ceramic pot first, a simple rectangular or oval shape in a solid color, leaving the top edge slightly lighter where it would catch light.
Build the trunk thin and deliberately twisted, since bonsai trunks are trained into dramatic bends, then cluster the foliage in a few flat, cloud-like pads rather than one round mass, which is the shape most bonsai styling aims for.
Keep the whole piece smaller in scale on the canvas than the other trees on this list, with visible table or shelf surface around the pot to emphasize how compact the tree is. If the foliage pads look too neat, break their outer edges with a few single dabs poking past the main shape.
This one is quick: ten minutes gets you the pot and basic shape, forty lets you add the fine twisting branches between the foliage pads.
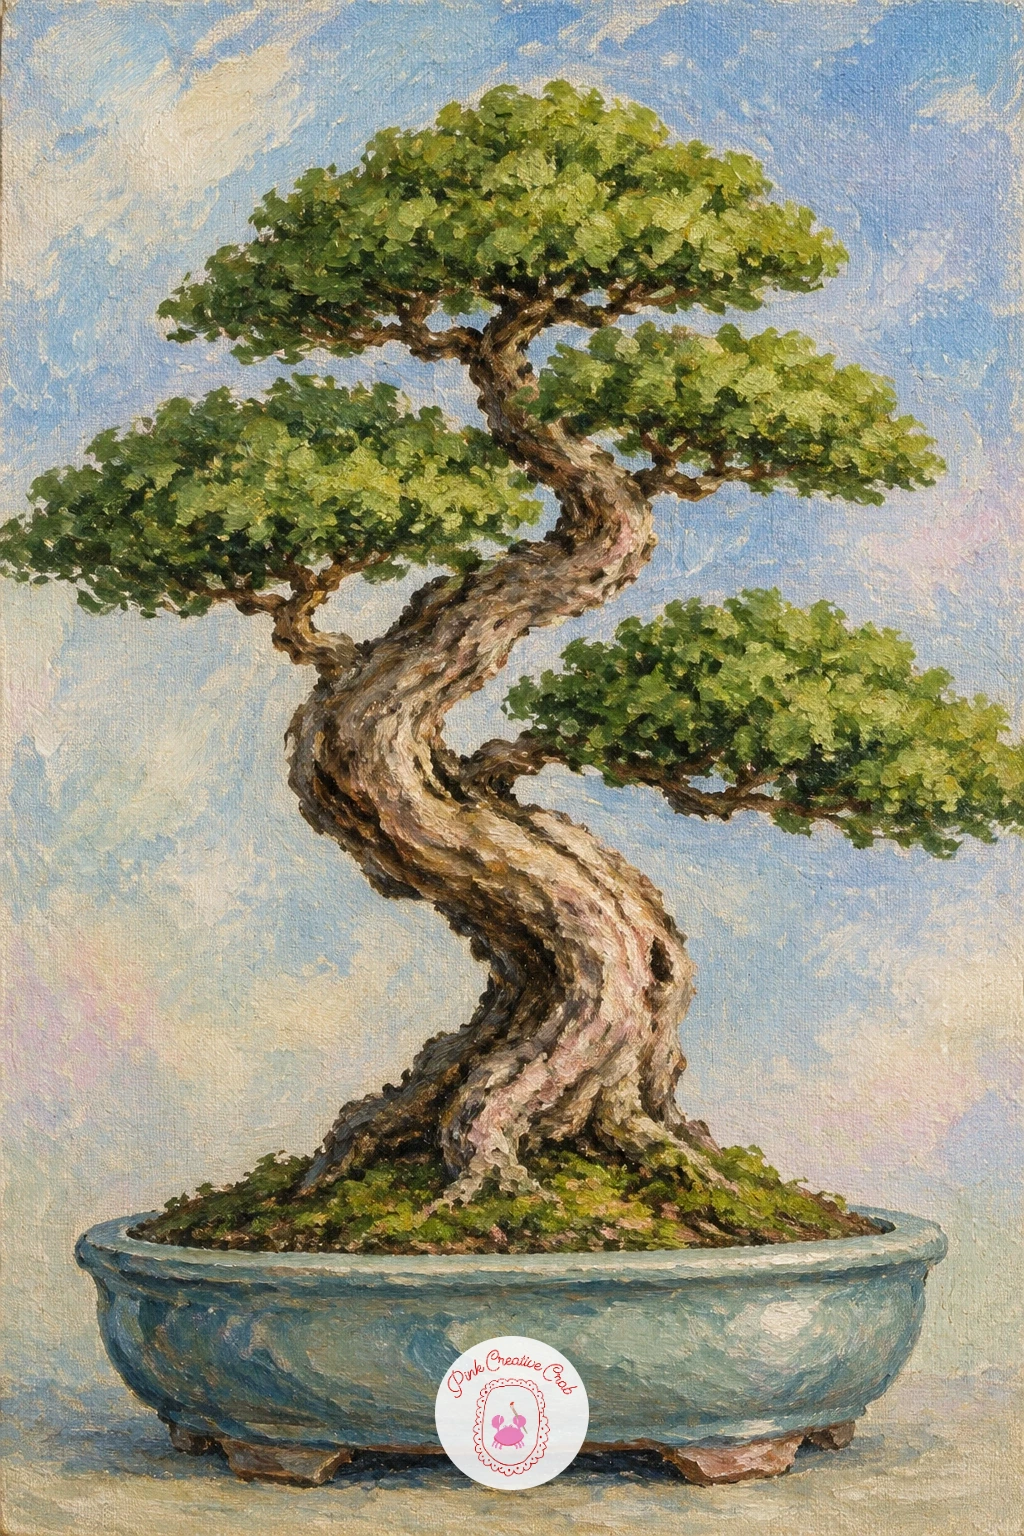
Palette: Sap Green,Burnt Umber,Payne’s Grey,Terracotta,Titanium White
A lemon tree heavy with fruit against a painted blue wall is really a color contrast exercise, so get that wall color right before anything else goes on the canvas. Block in a solid, slightly chalky blue background first, flat and even, since that calm backdrop is what makes the yellow lemons pop later.
Build the tree’s green canopy in loose, rounded clusters over the blue, leaving it slightly looser at the edges so the wall shows through in places. Place the lemons in small clusters of two or three rather than scattering them evenly, painting each with a bright yellow center and a touch of green shadow on the underside where it meets a leaf.
The most common slip is making the lemons too perfectly round and smooth, so let a couple have a slightly uneven, lopsided shape. A white gel pen or a thin white oil highlight dot on two or three lemons suggests sunlight catching the waxy skin.
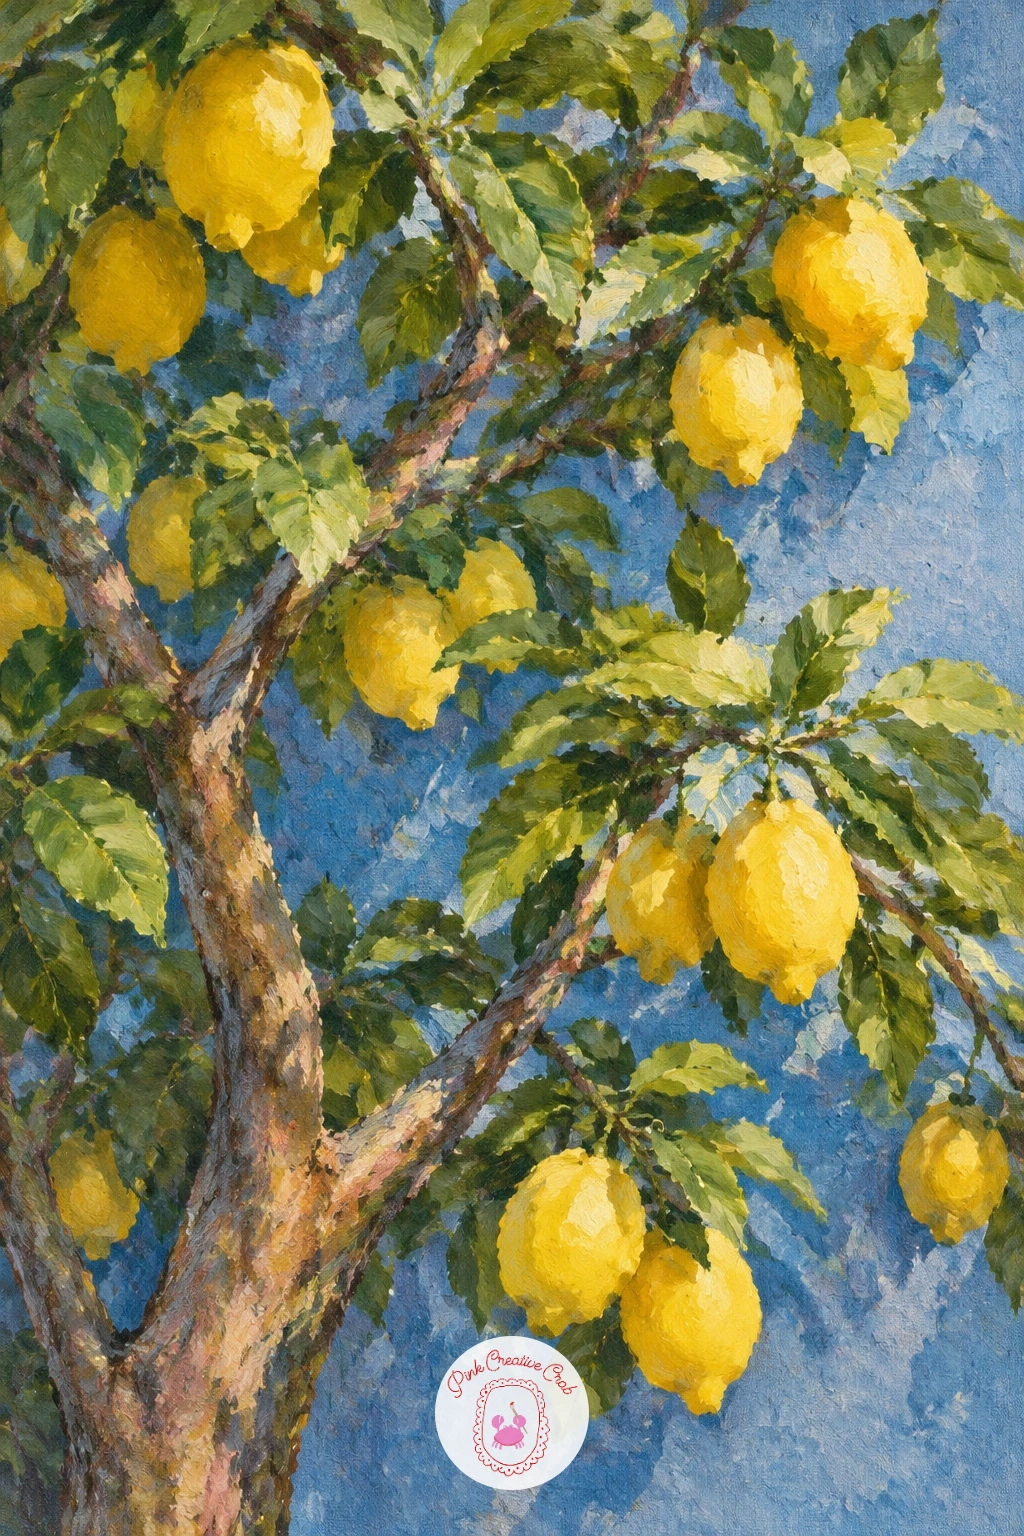
You Will Need
- white gel pen (optional for highlights)
Palette: Cerulean Blue,Sap Green,Cadmium Yellow,Burnt Umber,Titanium White
A Japanese maple in deep red is the strongest single color statement on this list, so mix your reds before you start and keep three or four variations ready rather than one flat red. Sketch the trunk and branches thin and wide-spreading, since maples of this kind tend to fan outward low and gracefully rather than growing tall.
Dab the foliage in small, soft clusters using a mix of deep crimson, burnt sienna, and a touch of violet for the shadowed undersides, keeping the brightest orange-red reserved for clusters catching direct light.
A stone garden setting beneath the tree, a few flat grey stones and raked pale gravel, grounds the maple without stealing attention, so keep that part simple and muted. If the red canopy looks too uniform, vary the size of your leaf dabs, some tighter and small near the branch tips, some looser further out.
This tree looks equally good quick and loose or built up slowly with layered dabs, so let your mood decide how long you spend on the canopy.
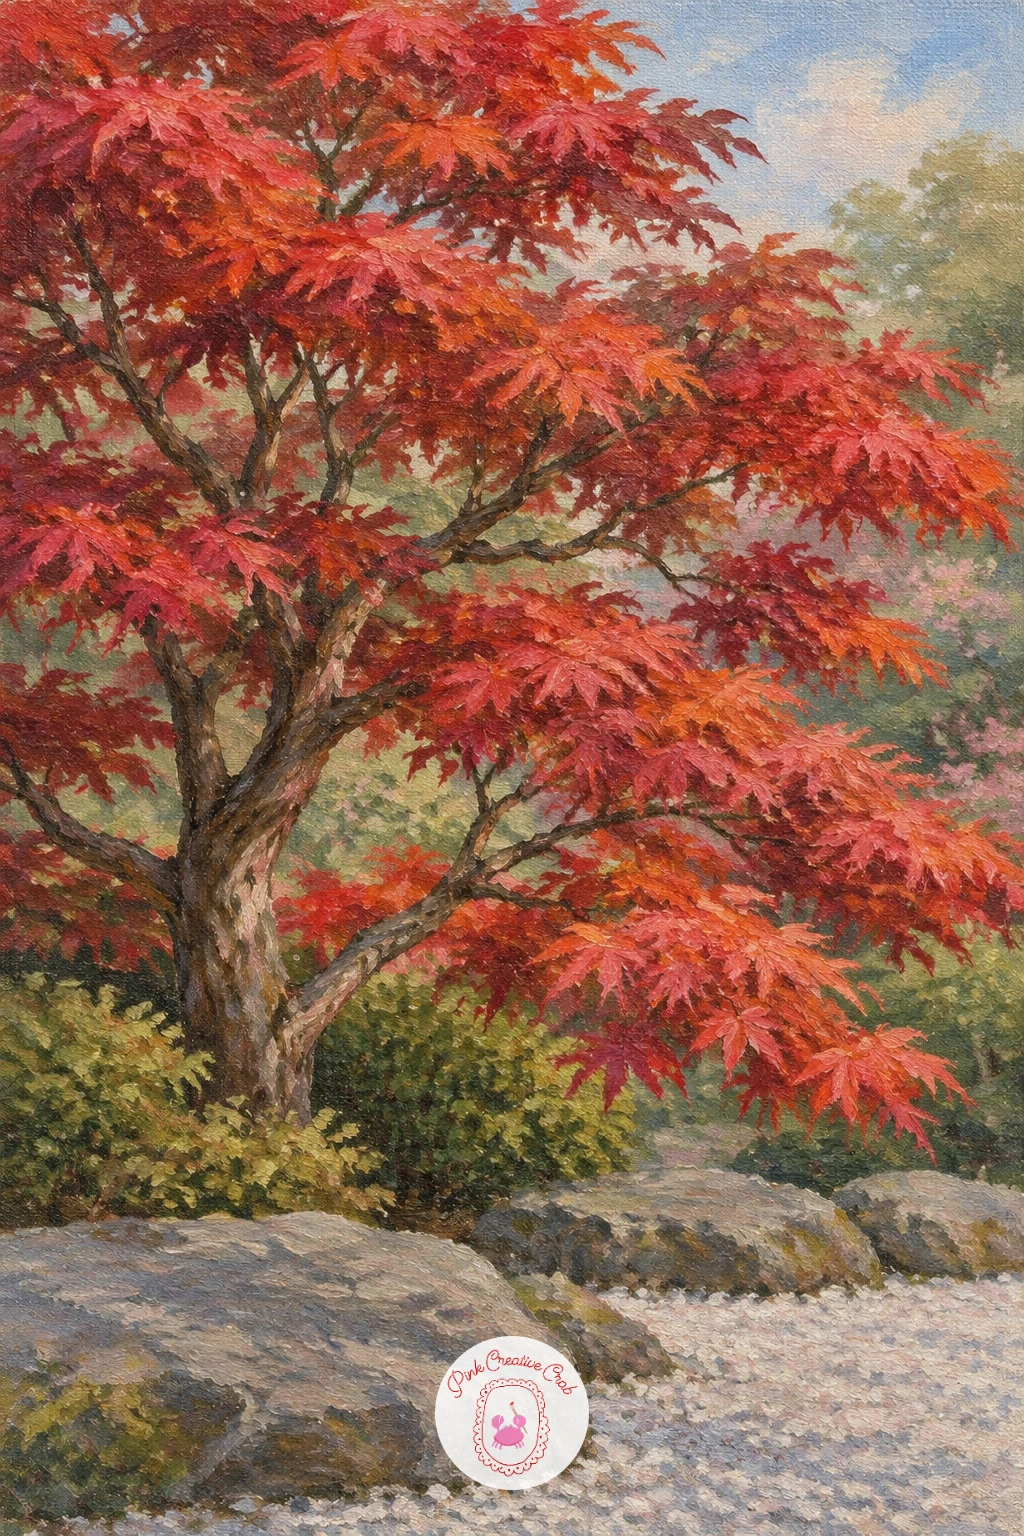
Palette: Alizarin Crimson,Burnt Sienna,Cadmium Orange,Payne’s Grey,Titanium White
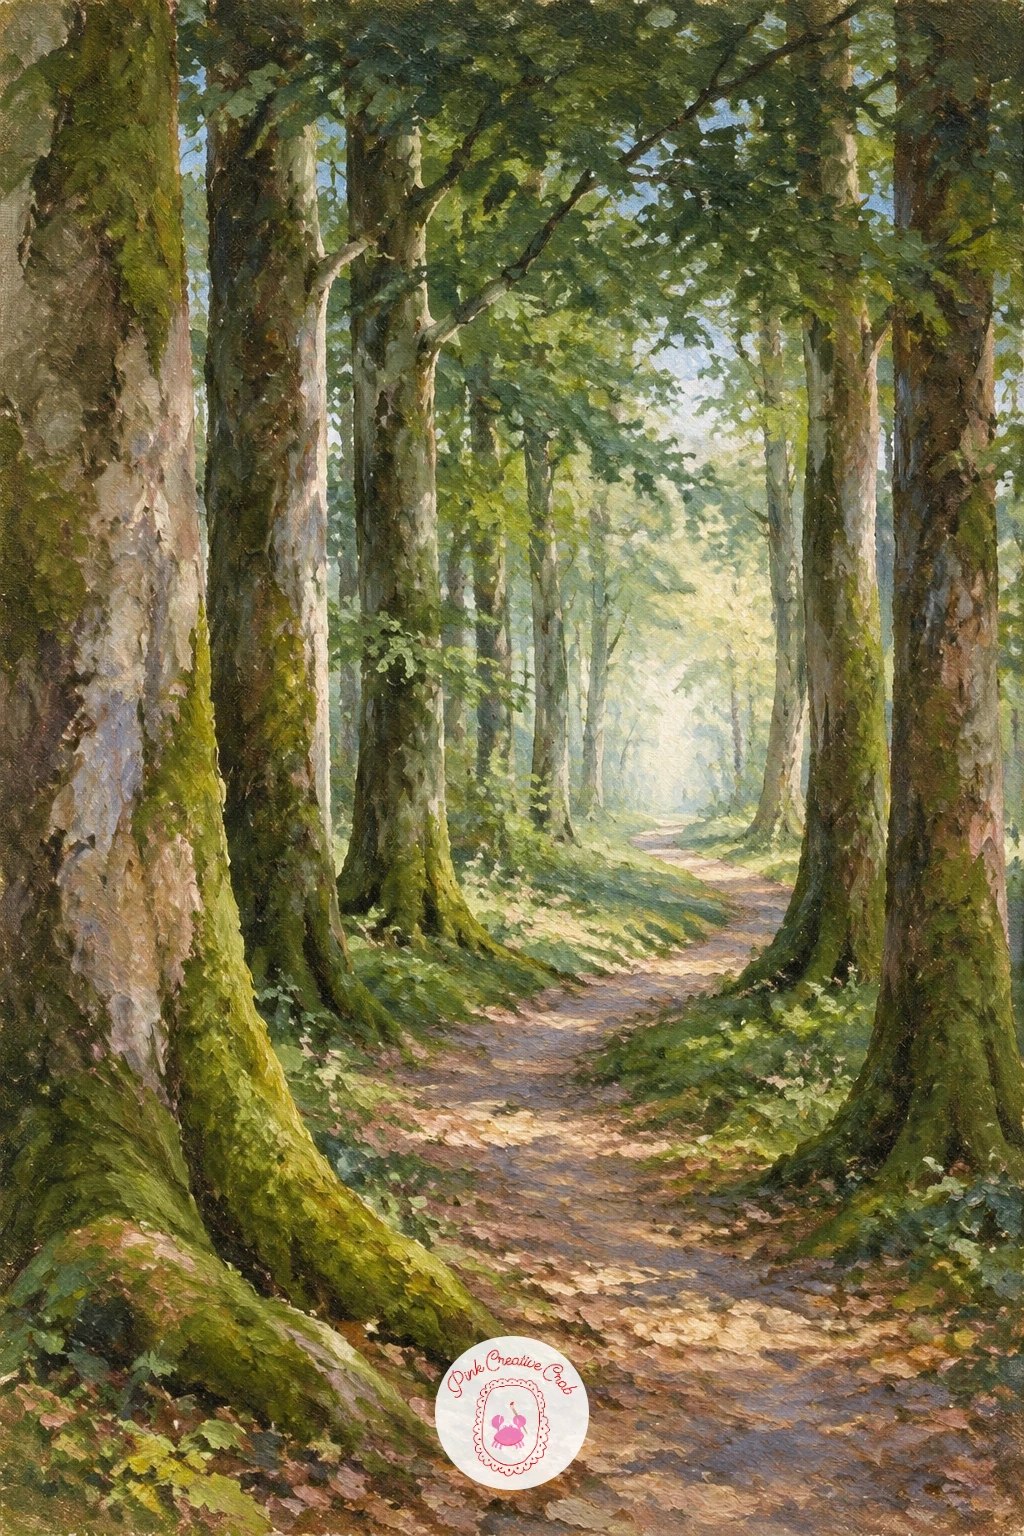
A forest path through mossy beech trees is built from front to back, so start with the trunks nearest to you, painted largest and darkest, and work backward with each trunk a little smaller and paler. That simple size change is the main trick that makes the path feel deep rather than flat.
Paint the path itself as a pale, slightly curving strip running from the bottom of the canvas back toward a soft point of light between the distant trunks. Add patches of moss low on the trunks nearest to you in mossy green-grey, using a dry, dabbing brush so the texture stays rough rather than smooth.
Keep the canopy overhead loose and dark, mostly suggested rather than fully painted, so the eye stays on the path and the trunks. If the path looks too flat and even, add a few darker shadow patches crossing it where the overhead branches would block the light.
If you like walking through quiet, shaded scenes like this one, the tree painting collection has more lone trees and winter paths worth trying.
Palette: Sap Green,Payne’s Grey,Burnt Umber,Yellow Ochre,Titanium White
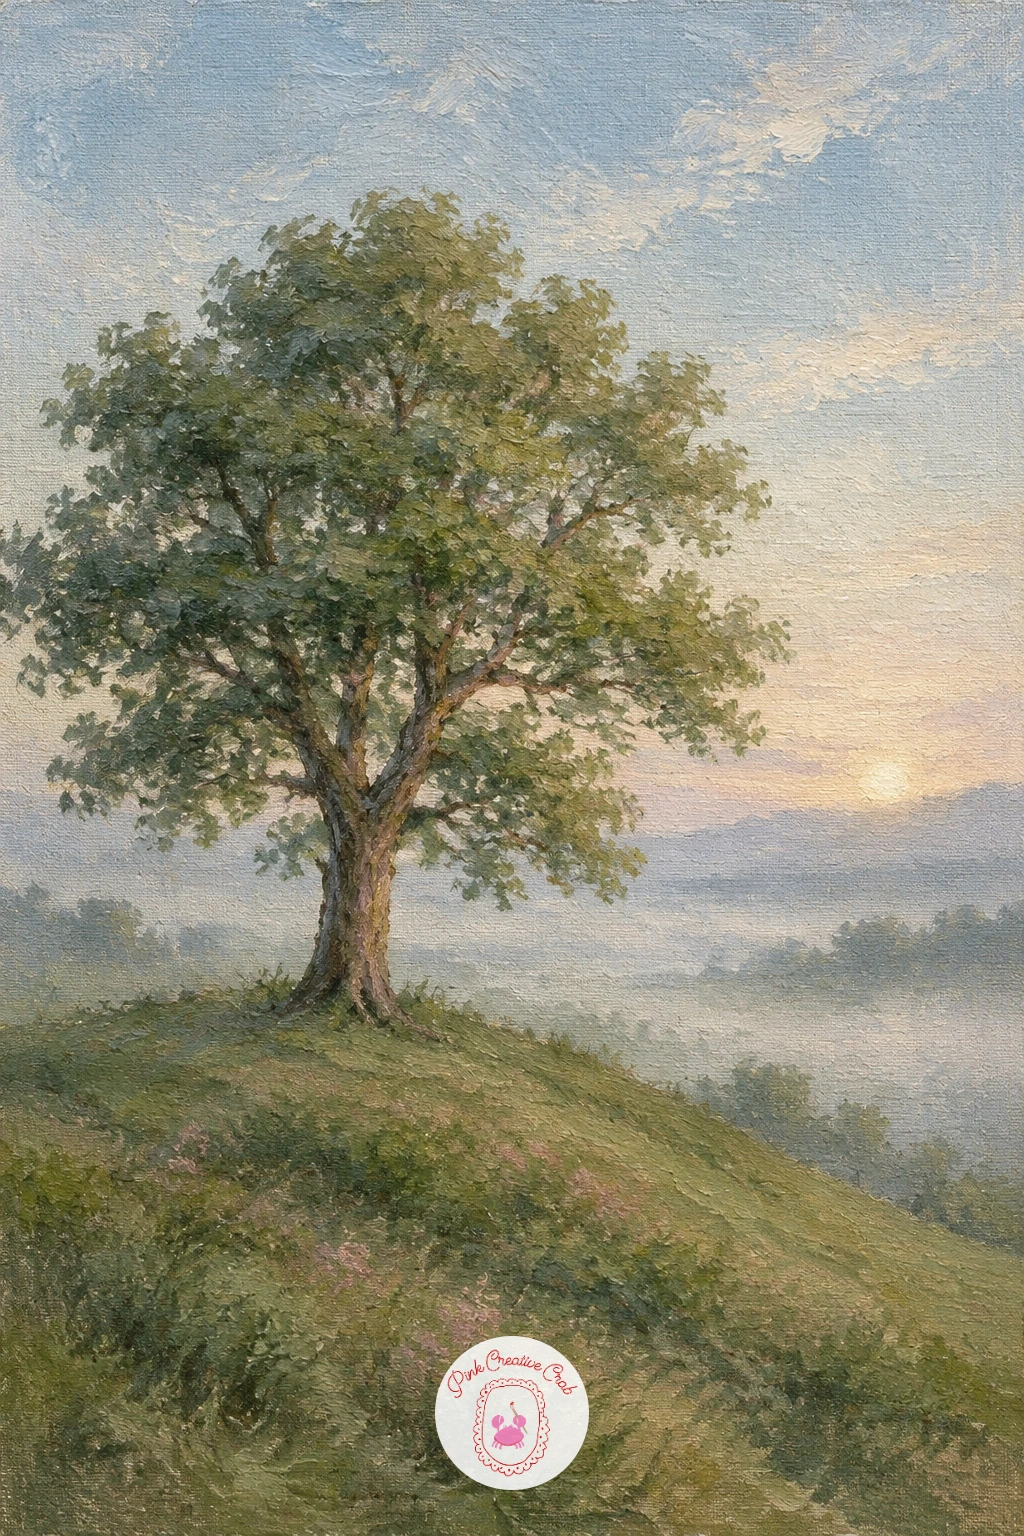
Misty light means softening nearly everything except the tree itself, so keep the background barely-there while the trunk and canopy stay the sharpest shapes on the canvas. Mix a pale grey-lavender for the whole background and lay it in first, soft and even, with no hard edges anywhere.
Paint the hill as a gentle, rounded slope just a shade darker than the mist, blending its top edge softly into the sky so there is no visible horizon line. Build the tree itself with slightly more defined brushwork than everything around it, a simple rounded canopy over a straight trunk, using muted green-grey rather than a bright leaf green so it still belongs to the misty mood.
The temptation here is to add too much detail to the tree, which breaks the quiet feeling, so keep its edges a little soft too, just less soft than the hill behind it.
A dry fan brush dragged very lightly over the finished canopy edge blurs it just enough to feel like morning mist is still settling.
Palette: Payne’s Grey,Titanium White,Sap Green,Yellow Ochre,Cerulean Blue
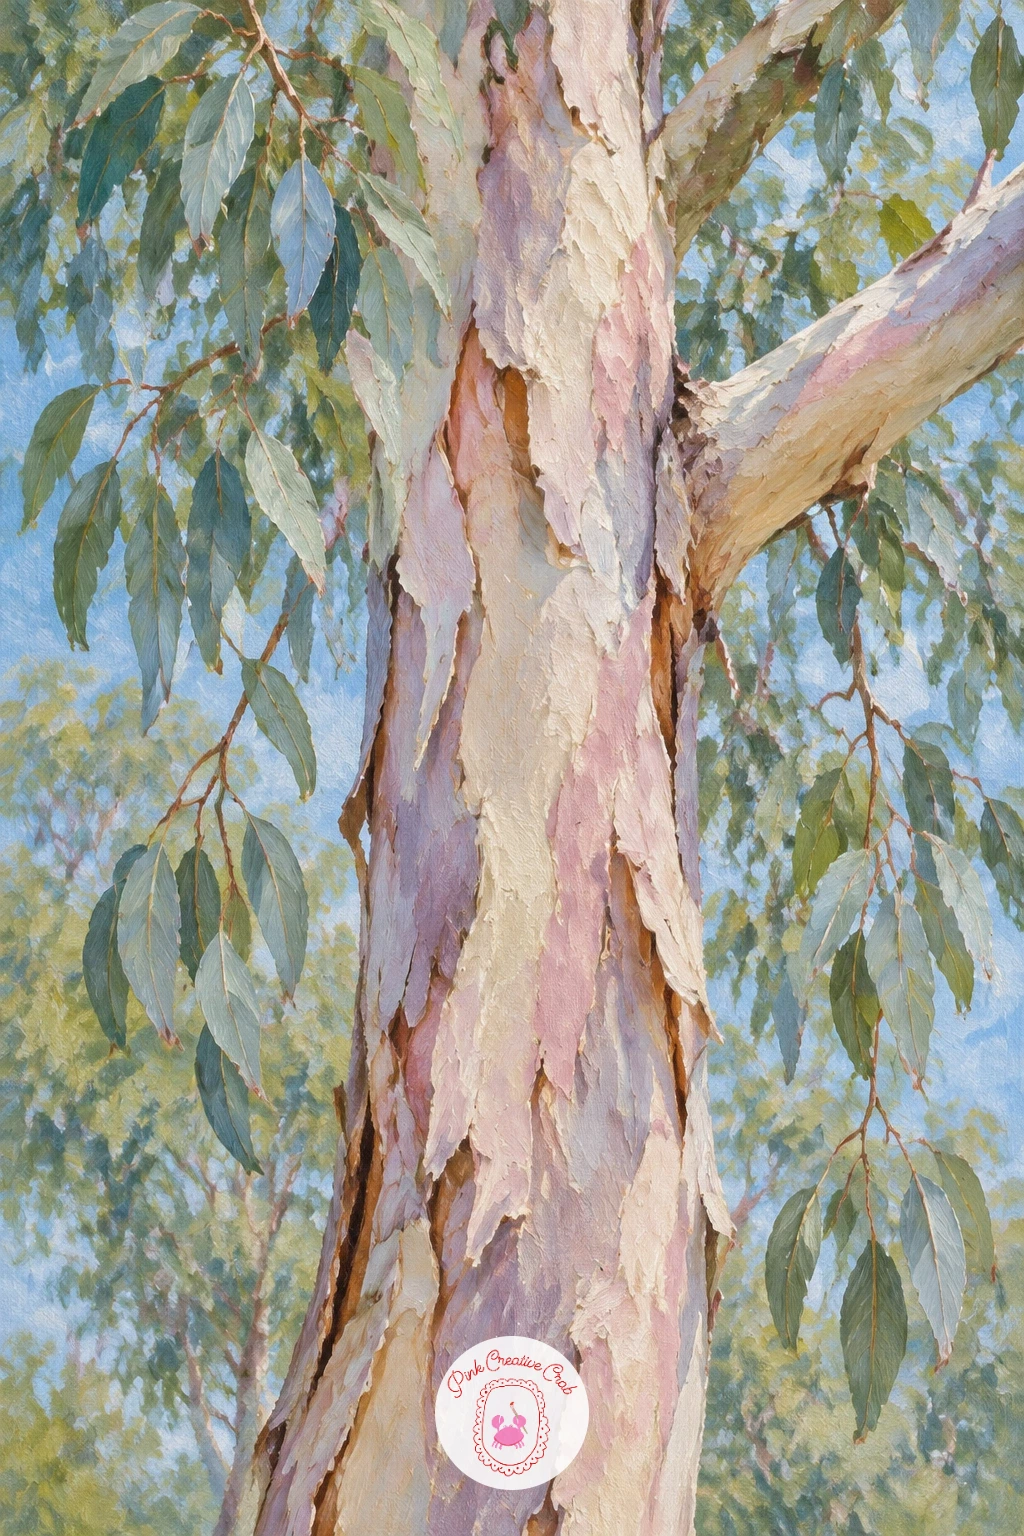
The eucalyptus earns its place on this list for the bark alone, so spend most of your time there rather than the leaves. Paint the trunk first in a base of pale grey-green, then while it is still wet, drag patches of soft pink, lavender, and cream across it in uneven vertical strips, letting them blend slightly into the base color rather than sitting on top as flat stripes.
Use the end of a palette knife or the wooden tip of a brush to scrape thin lines through the wet bark layers, revealing a hint of the color beneath, which mimics the way real eucalyptus bark peels in ribbons.
Keep the leaves sparse and elongated, silvery blue-green ovals hanging in loose pairs rather than a dense canopy, since eucalyptus foliage is naturally airy. If the bark colors turn muddy, wipe back to the base coat with a rag and try the pastel strips again with less blending.
Swap the palette knife for a cotton swab if you do not have one, it lifts paint just as well for the peeling marks.
You Will Need
- palette knife or cotton swab for scraping bark texture
Palette: Sage Green,Soft Pink,Lavender,Payne’s Grey,Titanium White
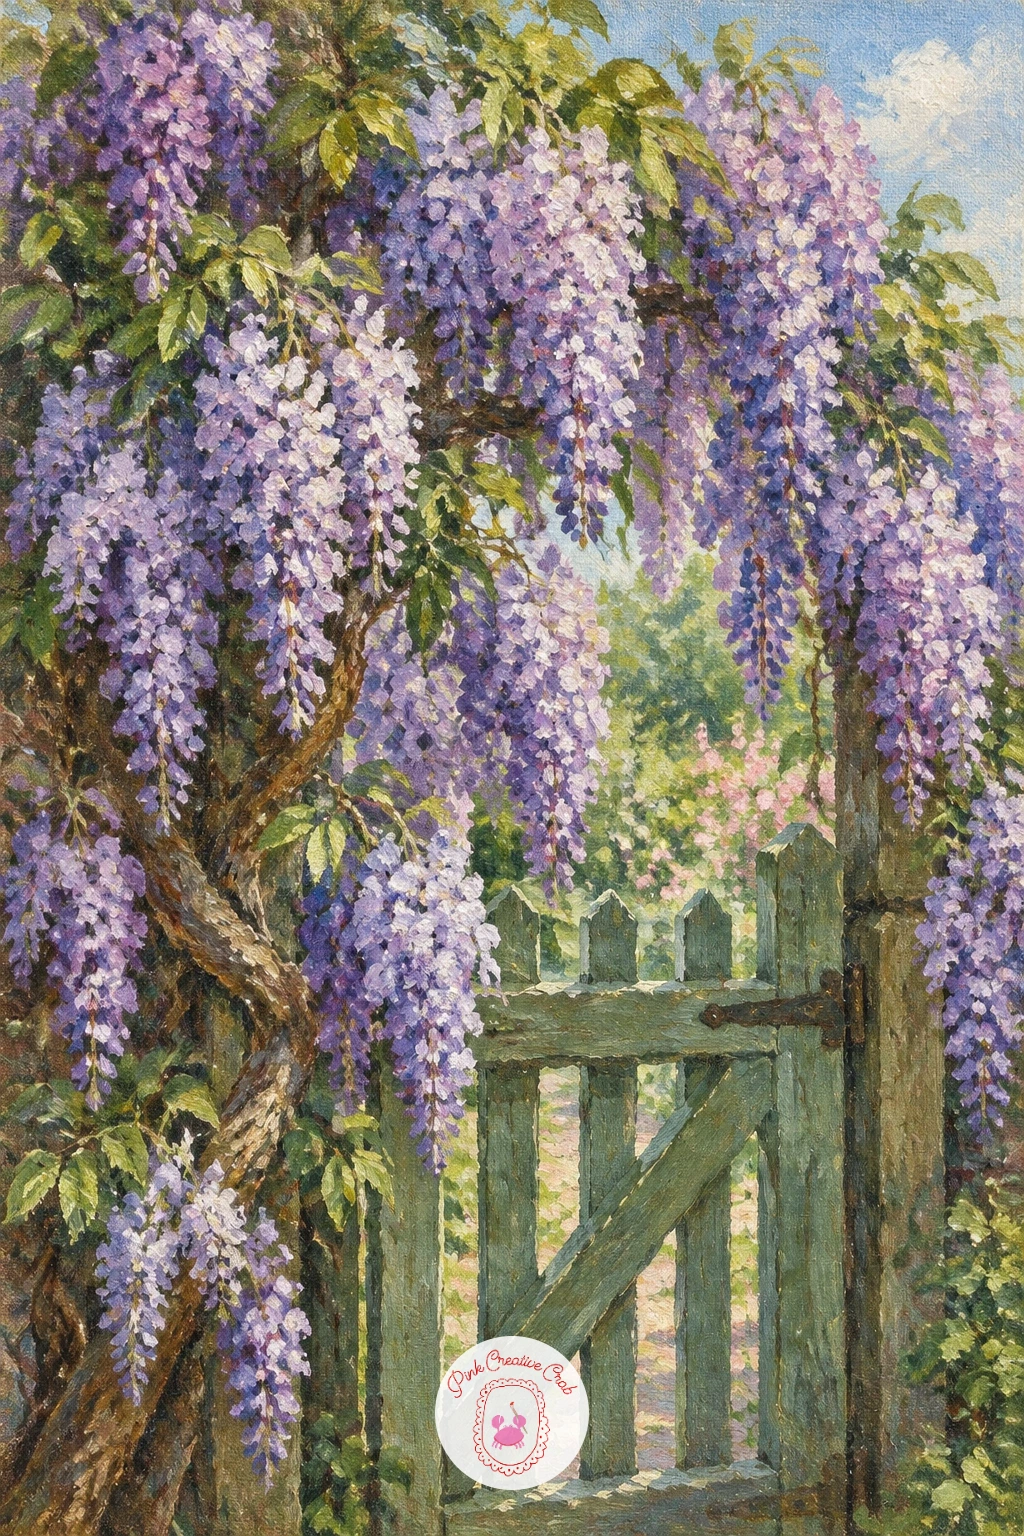
Wisteria is less about the tree shape and more about letting color hang and cascade, so build the gate structure first in simple dark lines before any purple goes on. Paint a plain wooden or iron gate shape, just a few straight verticals and a horizontal top rail, kept simple enough that it reads instantly.
Drape the wisteria over and down from the top rail using long, loose clusters of soft purple and lavender, painted with downward strokes that taper to a point, much like the willow’s hanging branches but in flower color instead of leaf green.
Vary the length of the clusters so some hang well past the gate and others stop higher, since even, matching clusters look artificial. Tuck a few small green leaves among the purple to break up the color and give the eye somewhere to rest.
If the purple clusters look stiff, soften their tips while the paint is wet by dragging a clean dry brush gently downward through the last inch of each one.
Palette: Lavender,Ultramarine Blue,Sap Green,Burnt Umber,Titanium White
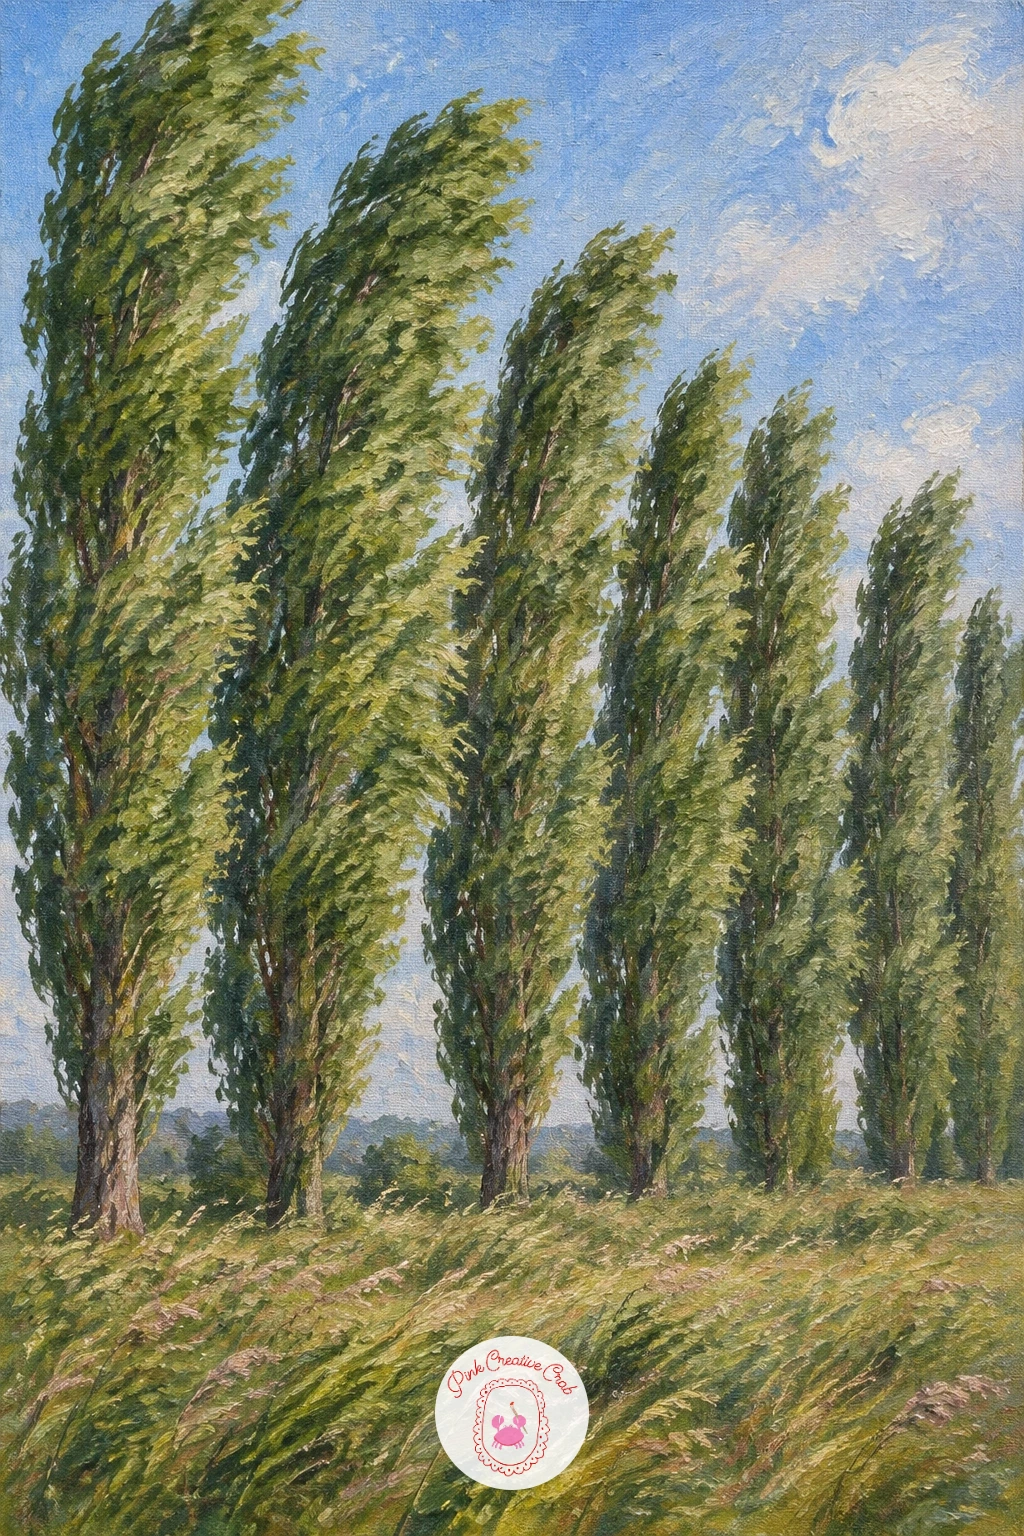
Poplars are tall, thin, and move as a group, so think of this painting as one gesture repeated with small variations rather than twenty seven separate trees. Sketch four or five narrow vertical trunks across the canvas, spacing them a little unevenly, then lean each one slightly in the same direction to suggest wind.
Build each canopy as a tall, narrow column of green rather than a round shape, since poplars grow upward more than outward. Use quick upward flicks of a small flat brush for the leaves, letting the edges of each canopy stay a little ragged rather than smooth.
Painting a field of wheat or grass beneath them, with the same windblown lean echoed in a few quick horizontal strokes, ties the whole scene together and makes the movement feel consistent from ground to treetop.
If the row looks too stiff and upright, go back and lean each trunk a touch more, even the ones in the middle, since wind rarely spares just a few trees.
Palette: Sap Green,Yellow Ochre,Cerulean Blue,Burnt Umber,Titanium White
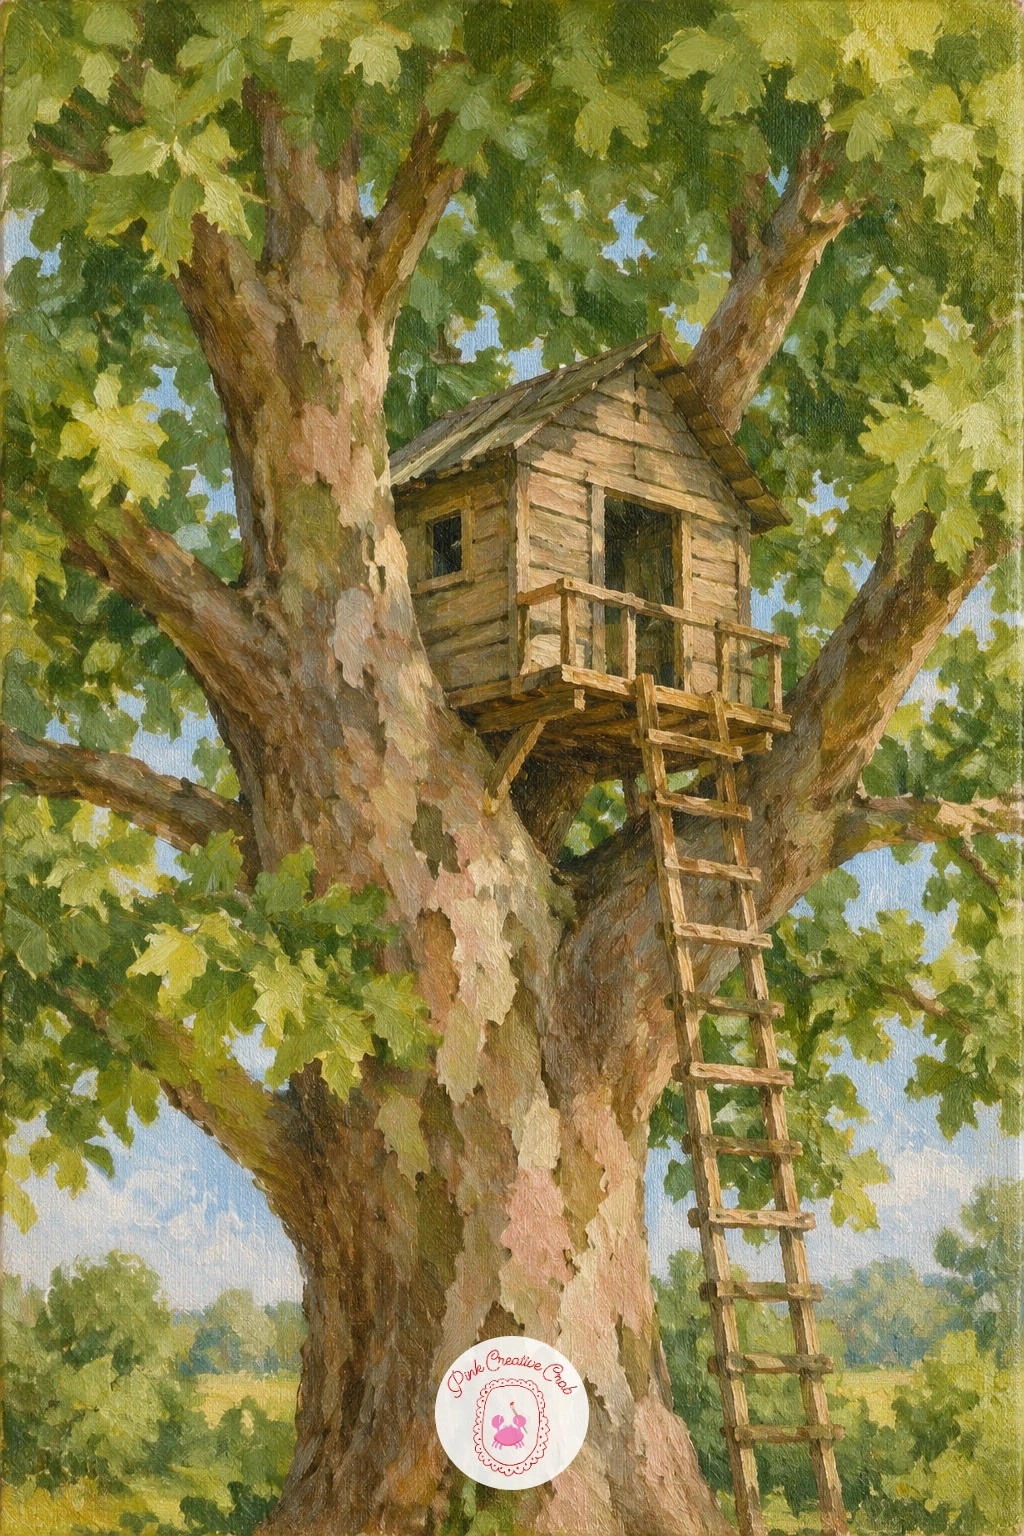
A treehouse adds a small structure to paint alongside the tree, so decide its position early, tucked into a fork of thick branches rather than perched awkwardly on top. Build the sycamore first: a broad trunk splitting into two or three heavy branches partway up, with a full, rounded canopy of mid and dark green.
Paint the treehouse as a simple wooden box shape nestled into that fork, a few plain planks and a small angled roof, kept rough and a little uneven since a hand-built treehouse never looks perfectly square. Add a thin ladder or rope leading up from the ground to the platform, a few simple parallel lines.
Leave gaps in the canopy around the treehouse so it reads clearly rather than disappearing into solid green, since that is the detail beginners most often lose. A single small window, just a dark square with a lighter dab inside, adds a lot of charm for very little extra work.
Palette: Sap Green,Burnt Umber,Yellow Ochre,Payne’s Grey,Titanium White
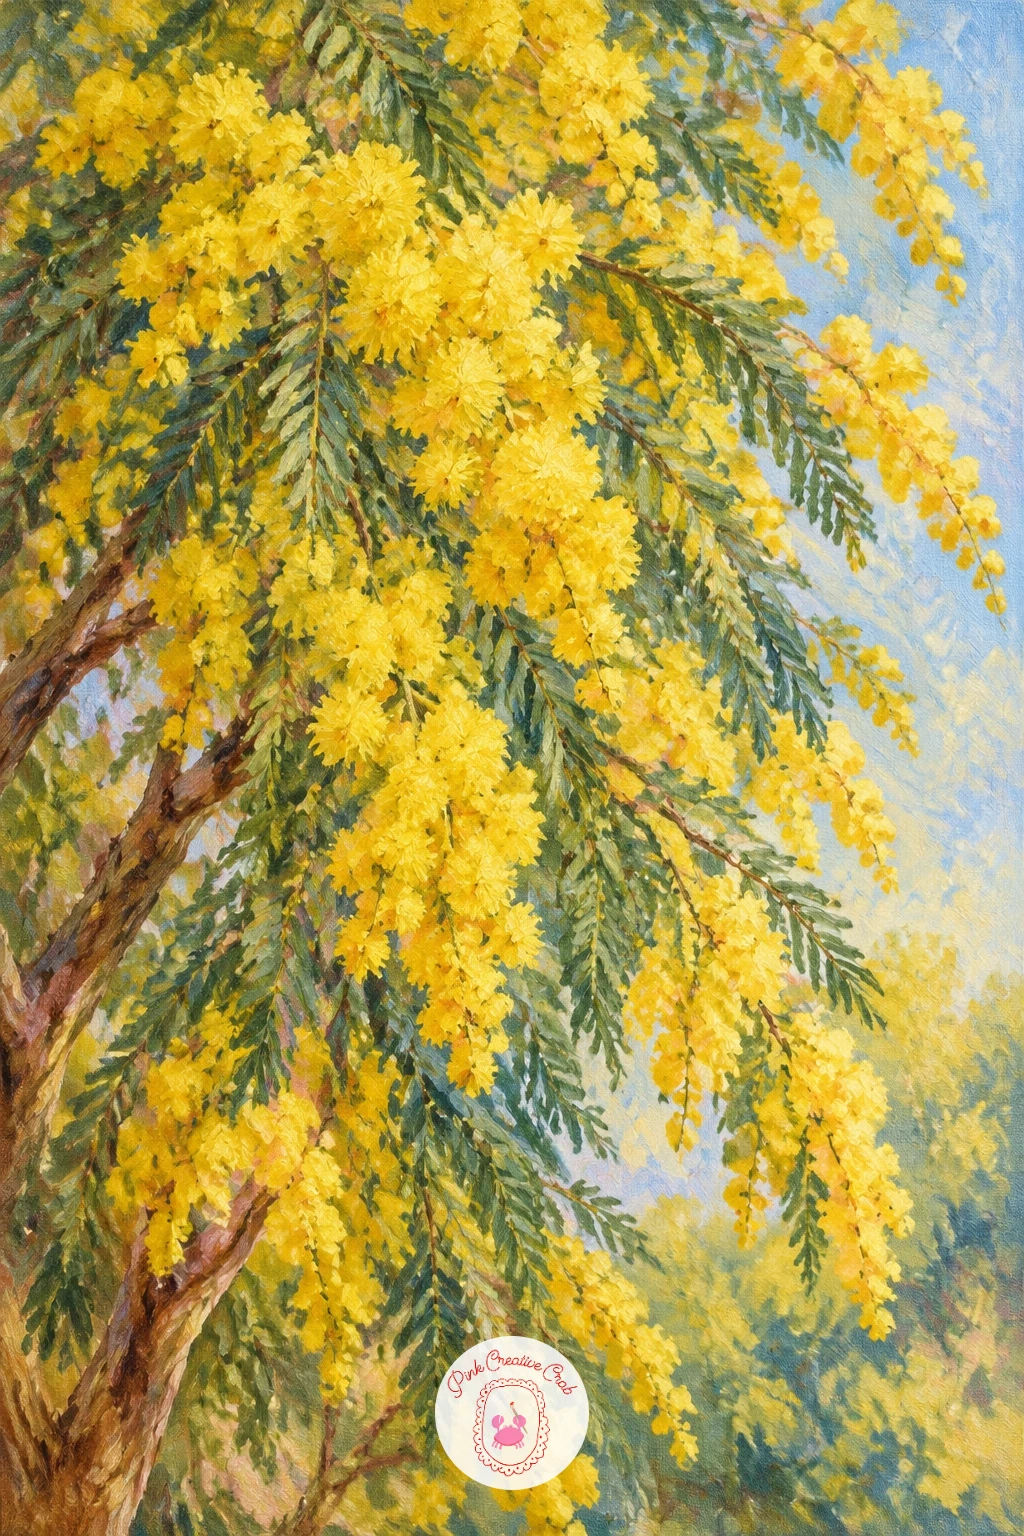
Mimosa flowers are small, soft, and fluffy rather than petal-shaped, so a stippling technique works better here than any brushstroke used so far on this list. Sketch the branch structure loosely first, thin and slightly drooping under the weight of the blooms to come.
Load a stiff round brush or an old toothbrush with bright cadmium yellow and dab it repeatedly along the branches in small, round clusters, letting the texture stay rough and bobbly rather than smoothing it out. Vary the clusters from pale lemon to a deeper golden yellow so the blooms have some depth rather than reading as one flat color.
Keep the leaves minimal, just a few soft blue-green fern-like sprigs peeking between the yellow clusters, since the flowers are the whole point of this tree. If the yellow looks too solid and blocky, dab a little white into some clusters to lighten them unevenly, which mimics the fluffy, uneven texture of real mimosa flowers.
A toothbrush flicked lightly with thinned yellow paint gives an even finer, more scattered bloom texture if you want to try it.
You Will Need
- old toothbrush for stippled texture (optional)
Palette: Cadmium Yellow,Lemon Yellow,Sage Green,Burnt Umber,Titanium White
What to Do Next
Pick whichever tree is already in your head, whether that is the lone oak in its meadow or the mimosa in fluffy yellow bloom, and set up a small canvas today. Mix your greens and browns first, block in the sky, and let the brush stay loose: a tree oil painting finished in one sitting beats a perfect one left half done.
Frequently Asked Questions
What oil paint colors do you need for a tree oil painting?
A small core set covers most trees: a sap or olive green, burnt umber, yellow ochre, a blue for sky, and titanium white. Add alizarin crimson for blossoms and cadmium yellow for autumn or flowering trees as needed.
How do you make tree leaves look realistic in oil paint?
Dab the canopy in clusters rather than painting one flat green shape, using a fan brush or stiff round brush for texture. Vary the green from dark underneath to warm light on top, and leave small gaps so sky shows through.
How long does it take to finish a tree oil painting?
Most trees on this list finish in one sitting of one to two hours on a small canvas. Simpler subjects like a single branch or a bonsai can be done in under an hour with a loose approach.
What size canvas works best for painting trees?
A small canvas, around eight by ten inches or similar, works well for a single tree filling the frame. It keeps the session short while still giving enough room for trunk, canopy, and a simple sky.
Do you need to sketch the tree before painting in oil?
A light sketch helps, especially for trunk angle and branch placement, but keep it loose with thinned paint or a soft pencil. Oil paint covers easily, so small sketch mistakes disappear under the first layer of color.
Have any thoughts?
Share your reaction or leave a quick response — we’d love to hear what you think!
-
 0
-
0
-
0
-
0
-
0
-
0


