

The toy shop aesthetic is everything a sketchbook page loves: round shapes, chipped paint, soft dials and tiny keys that beg to be drawn slowly and looked at twice. Nothing here needs a model session or a trip to a museum, just one small vintage toy at a time, drawn big enough to fill the page and loved enough to get its scuffs and seams right.
Below you will find 29 toys to study one by one, from a simple spinning top to a tin carousel with four little horses. Each one is sized for a single sitting, with fineliner for the line, colored pencil for the shading and a touch of pastel marker where the light catches.
Using these images: free for personal projects such as printing, coloring, cards, journals and gifts. Handmade items that include them may be sold up to 30 pieces per design. More than that is commercial use and is not permitted, and neither is selling or sharing the images themselves or passing them off as your own. Please ask before any other use.
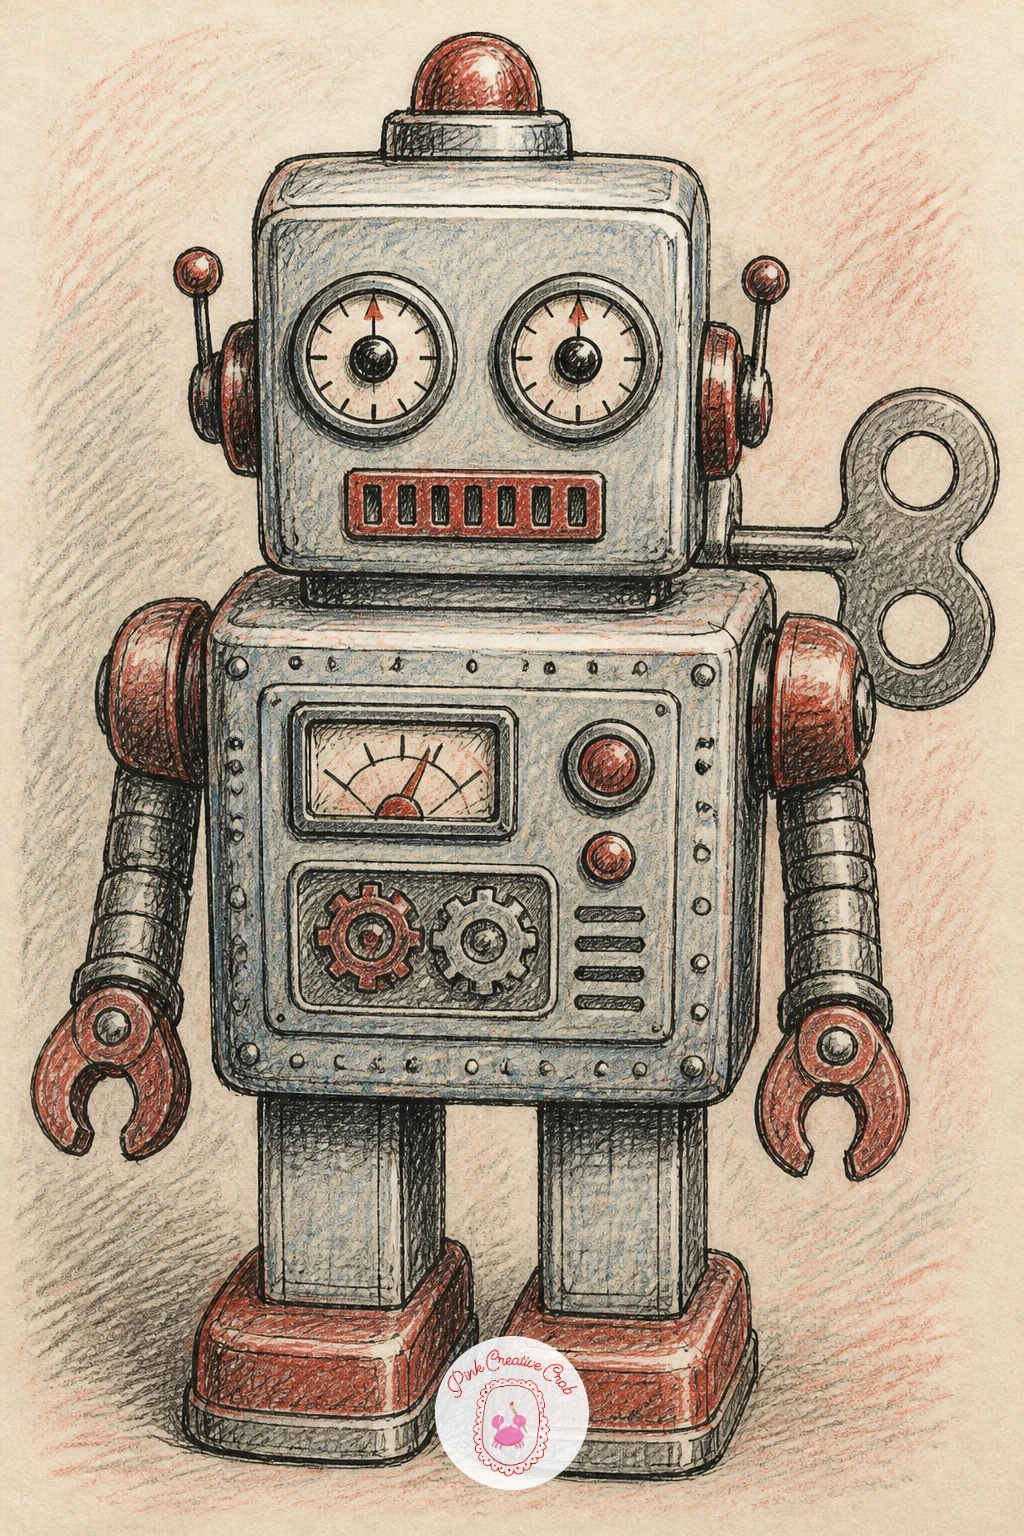
Start with the tin robot, because its whole body is built from shapes you already know: a box head, a rounded barrel chest, short rectangle arms and legs. Block these in lightly with pencil first, keeping the proportions chunky and squared off, then go over the outline in fineliner once you are happy with the stance.
Measure before you commit to the face: the dial eyes should sit at roughly the same height and the same size, so pencil a faint horizontal line across the head and place both circles on it. The wind-up key on the side or back is the detail that sells the toy, so give it a thick little cross or loop shape rather than a fussy one.
If the robot looks flat, add a few straight pencil lines across the chest and limbs to suggest tin panel seams, then shade one side darker with colored pencil to show where the light falls. No metallic pencil on hand, a pale gray with a white gel highlight does the same job.
Keep the palette to two or three tin colors so the robot reads as one toy, not a patchwork.
Palette: Payne’s Grey,Cadmium Red,Yellow Ochre
Try drawing the robot slightly tilted on its stand rather than standing straight on, it reads as far more charming and toylike than a perfectly upright pose.
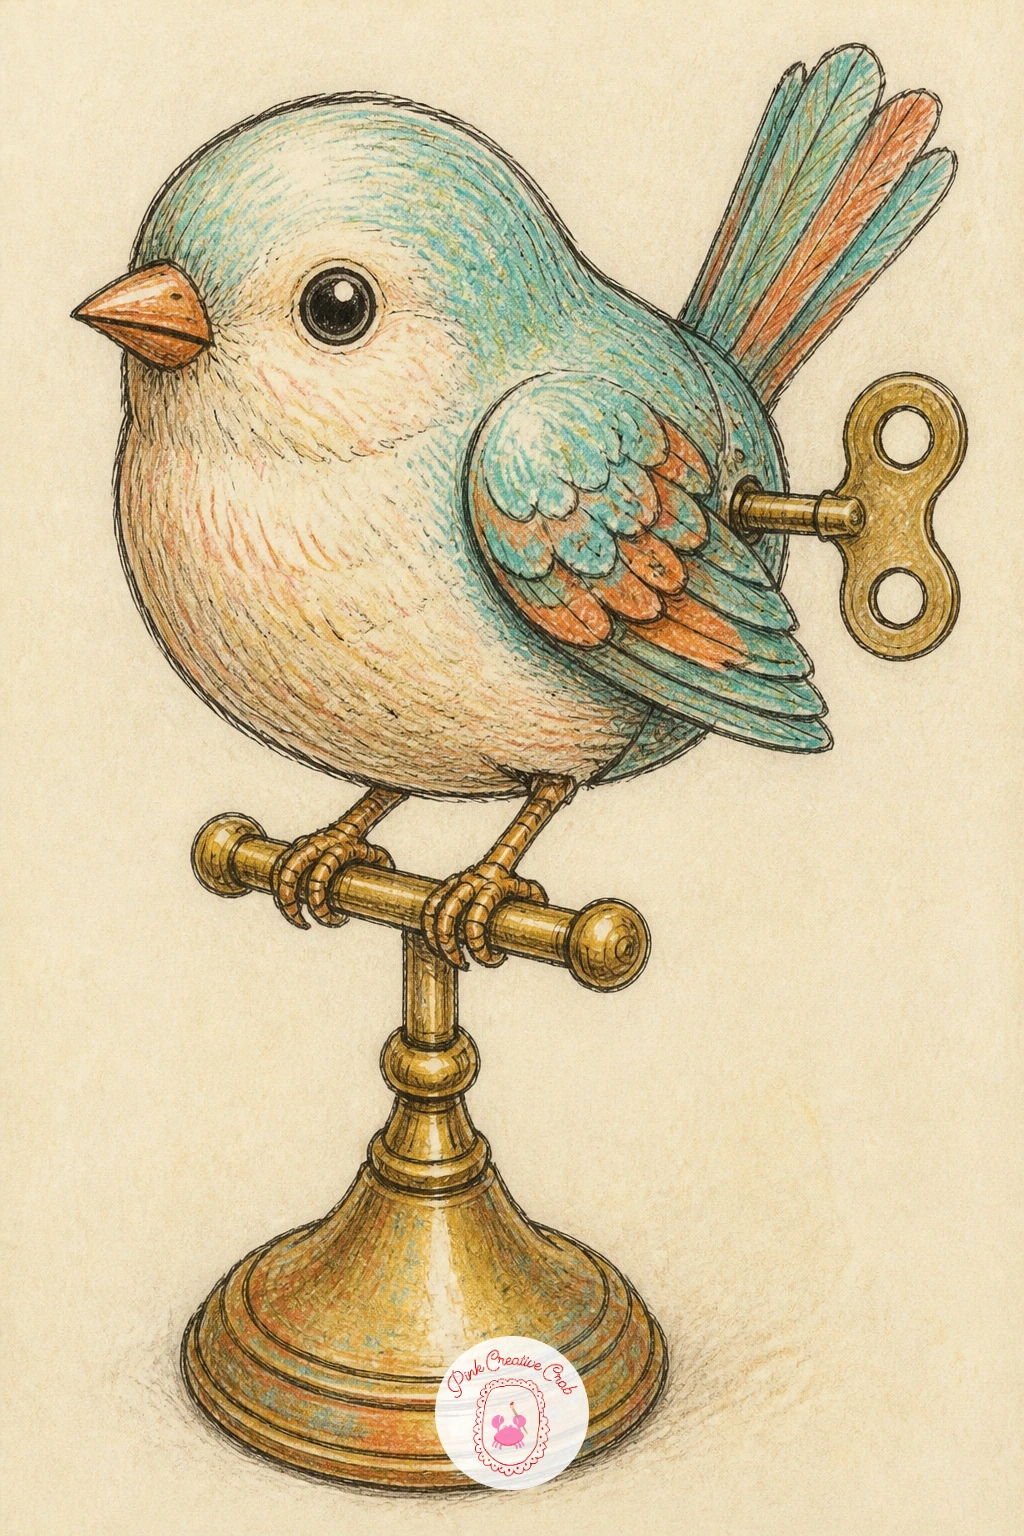
After the robot’s hard edges, the wind-up bird is a nice change of pace: soft curves, a plump body and a little brass perch underneath. Sketch the body as an egg shape first, then add the tail as a fan of simple curved strokes and the stand as two thin vertical lines meeting a small round base.
Think about where the light source sits before you color, because a bird with painted feathers reads best with one side catching the light and the other falling into soft shadow. Pick a light direction, usually from the upper left works well on a page, and keep every shadow consistent with it.
The painted feather pattern is the fun part: use short colored pencil strokes layered in two or three colors rather than one flat fill, following the curve of the body so the marks feel like feathers and not scribbles. If the pattern gets messy, a kneaded eraser can lift color back to the paper to soften a hard edge.
Finish with a tiny wind-up key at the bird’s side, drawn smaller than you think it should be.
Palette: Turquoise,Burnt Sienna,Brass Yellow
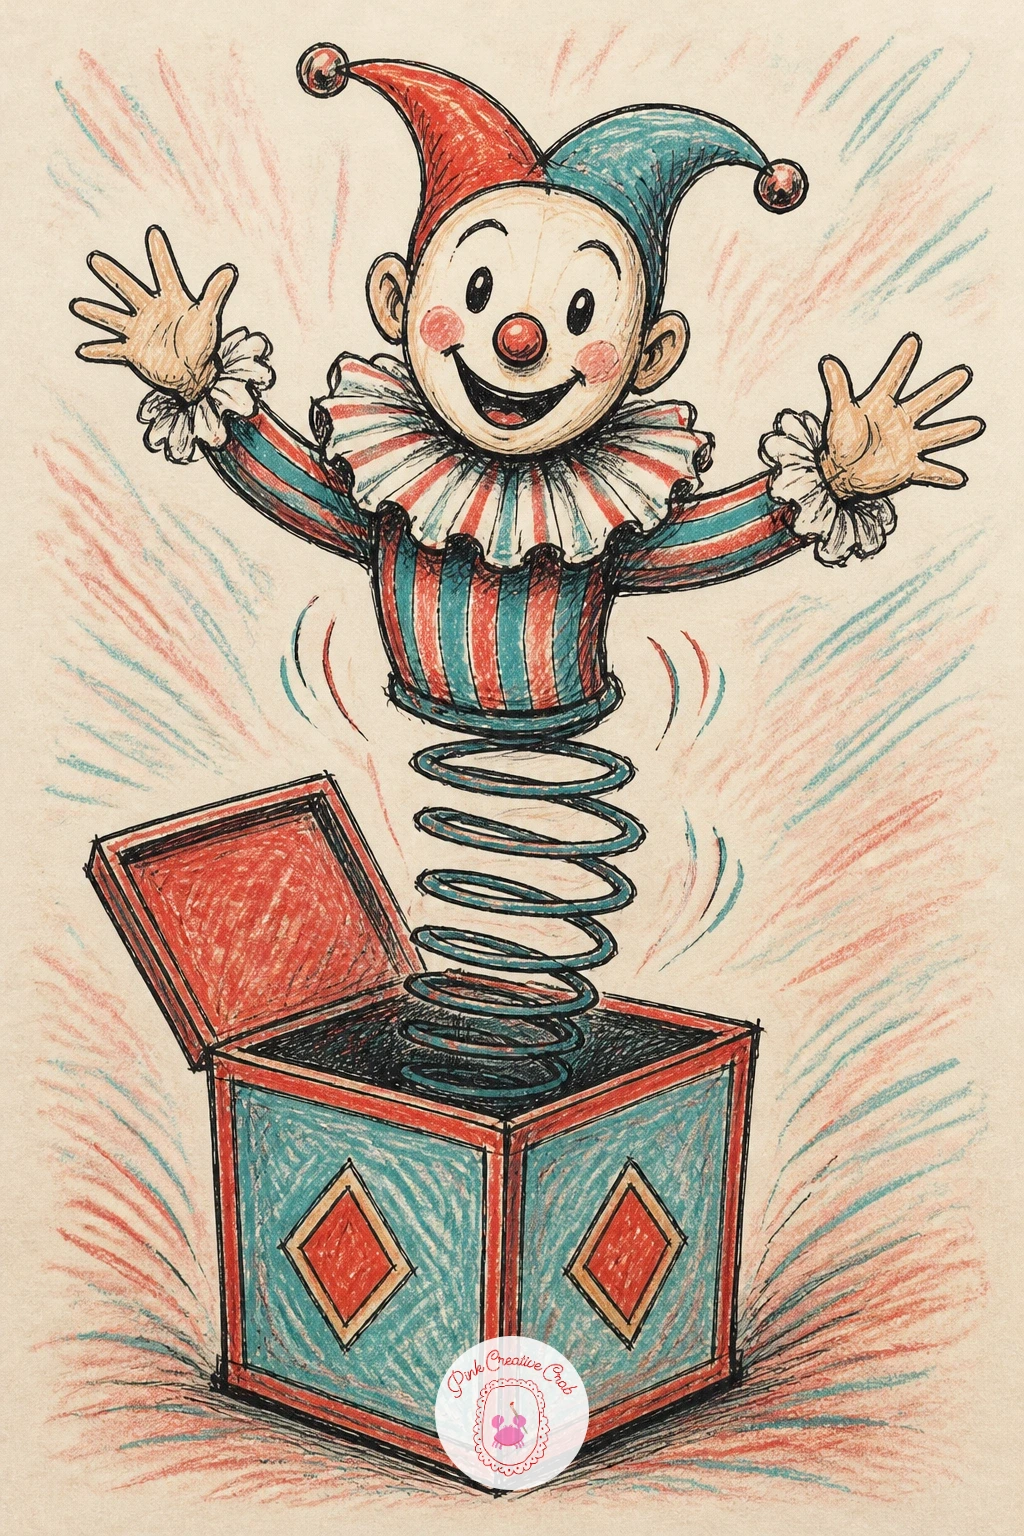
The jack in the box asks for a little drama, so plan the pose before you touch ink: the box sits square and still at the bottom while the figure above it leans and twists on its spring. Draw the box first as a simple cube, then build the spring as a loose zigzag line rather than a tidy coil, since a slightly wobbly spring looks more alive than a neat one.
Work from the box upward: box, spring, body, then the striped ruffled collar last, so the collar sits naturally around the neck instead of floating. Keep the face simple, a round head with a painted smile is enough, this toy’s charm comes from its collar and its spring, not from an expressive face.
Stripes on the collar are easiest with a ruler-free hand, alternating two colors in slightly uneven bands, which again adds to the handmade toy shop feel rather than working against it. If the stripes wobble too much, a thin fineliner line traced over the pencil guide steadies them.
Shade the inside of the box dark to push the figure forward in the frame.
Palette: Scarlet,Cream White,Deep Teal
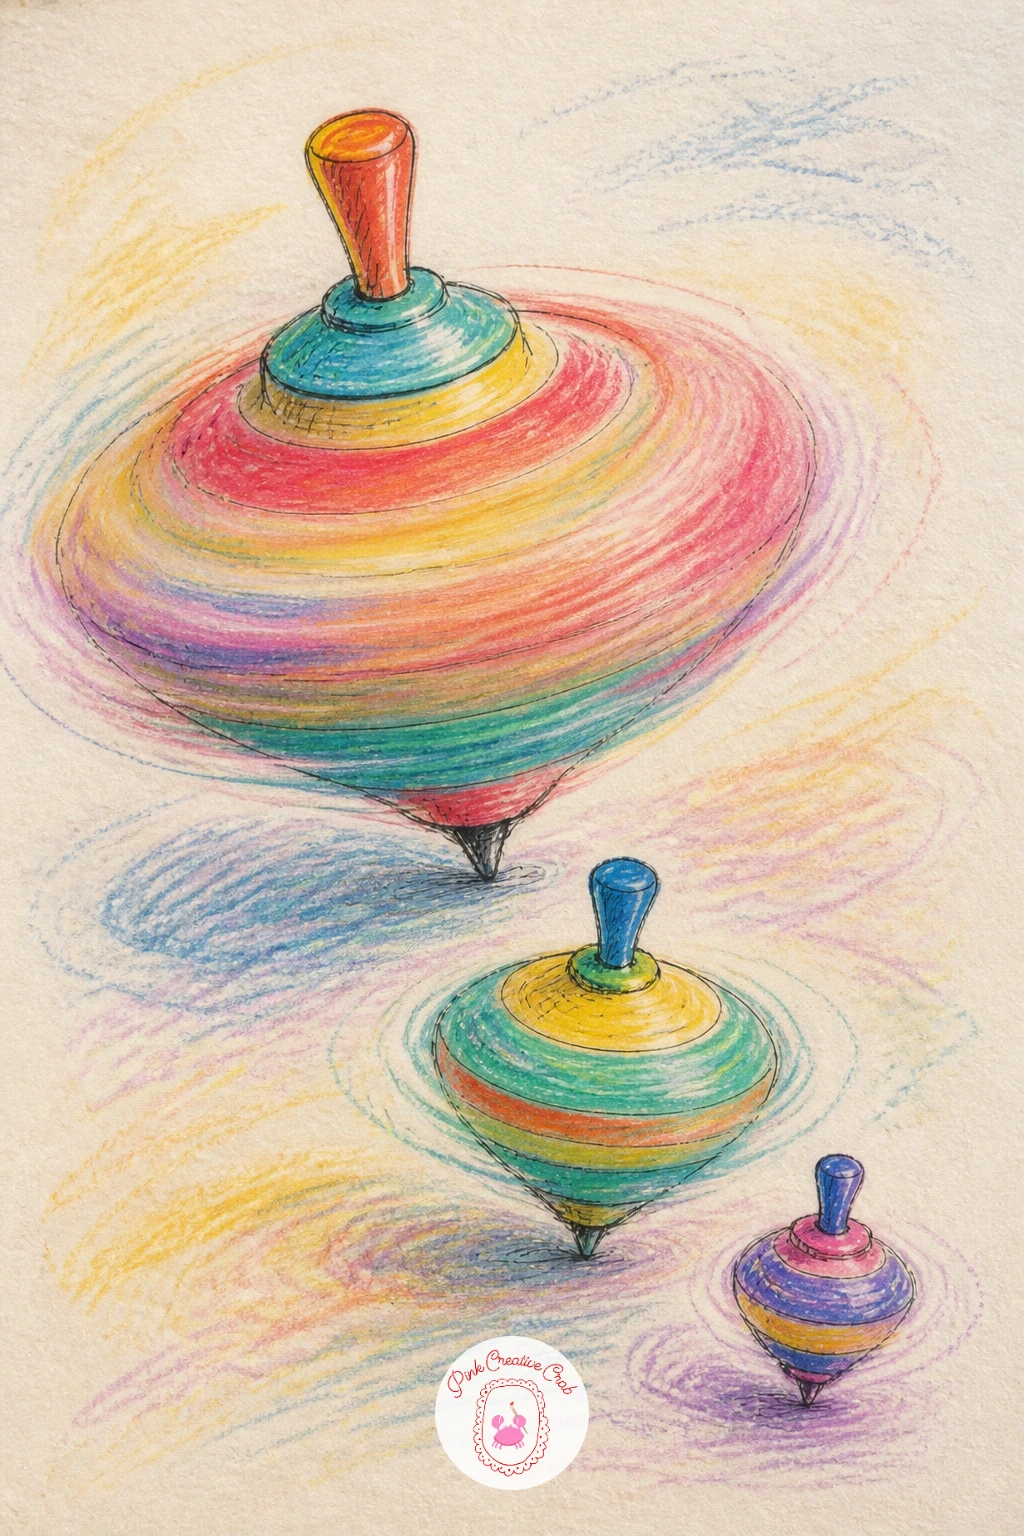
Three tops side by side is really a study in size comparison, so start by drawing a horizontal baseline and marking three dots along it for the three different heights before you draw a single shape. The smallest top can sit still, the middle one leaning slightly, and the largest one caught mid-spin with a blurred base.
Each top is just a cone shape with a small point at the bottom and a rounded cap on top, but the spinning one needs a trick: draw its body as a slight vertical smear rather than a crisp outline, and add two or three faint curved motion lines around its base. That blur is what separates “spinning” from “sitting still” on the page.
Paint the still tops in solid flat color bands, but keep the spinning top’s colors softer and more blended, almost like they are mixing together in motion. A pastel marker works well here for a soft blurred stripe that a sharp colored pencil cannot quite give you.
Group all three close together so they read as one toy box moment, not three separate drawings.
Palette: Cobalt Blue,Marigold,Rose Pink
From a blur of motion to something calm and upright, the toy sailboat is a good one for practicing clean vertical and diagonal lines. Draw the hull first as a simple curved boat shape, then the mast as one straight vertical, and the striped sail as a triangle leaning slightly off the mast for a sense of wind.
Eye level matters more here than you might expect: if you draw the hull from slightly above, showing a bit of the deck, the boat feels like a toy sitting on a shelf in front of you rather than a ship on open water. Keep that same slightly-above angle for the wooden stand underneath so the whole thing feels grounded.
The striped sail is the one chance for pattern, so alternate two colors in even diagonal or vertical bands that follow the sail’s gentle curve rather than running perfectly straight, which would look too stiff for a soft cloth sail.
Add a short wooden stand with two simple curved feet to finish the piece.
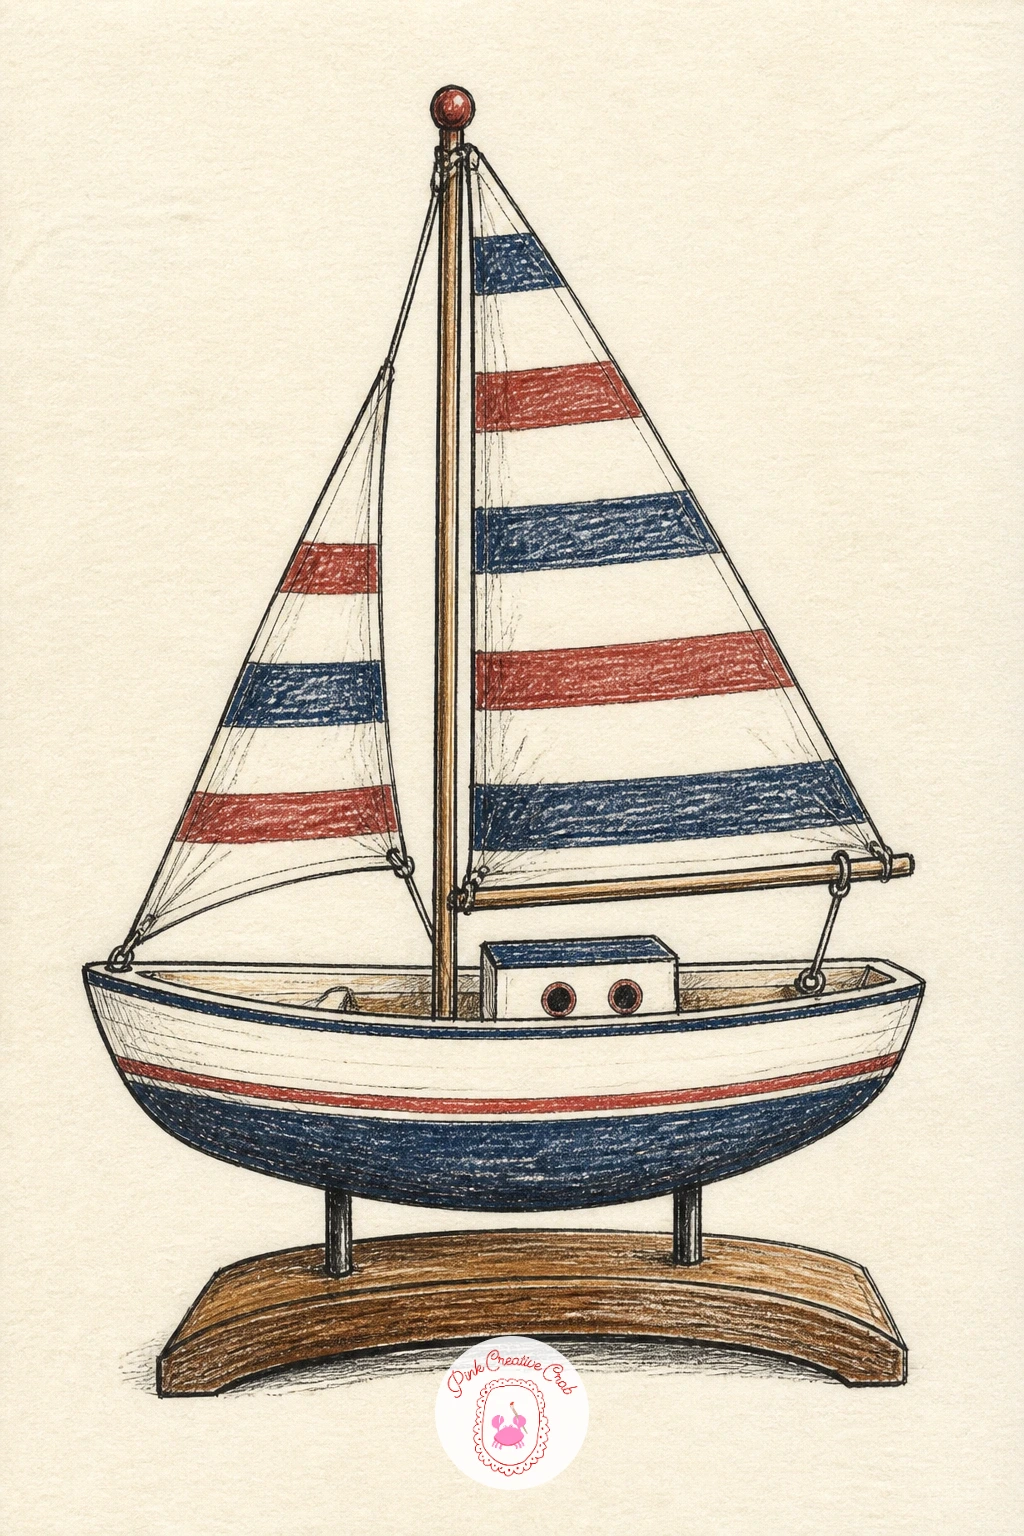
Palette: Navy Blue,Brick Red,Warm White
The music box ballerina rewards patience with proportion, since a figure that looks even slightly off balance will ruin the twirl. Lightly sketch a center vertical line down the page first, then build the ballerina’s pose symmetrically around it: one arm up, one arm out, the skirt flaring evenly on both sides.
Draw the velvet-lined lid underneath as a simple open box shape with a soft scalloped or straight edge, and keep its colors darker and richer than the ballerina so she stands out as the pale, delicate focus of the page. A deep plum or burgundy for the velvet lining works beautifully against a pale pink skirt.
For the skirt itself, layer short colored pencil strokes in two shades of the same color rather than one flat fill, which gives the tulle a soft, slightly transparent look. If the figure feels stiff, erase and redraw just the arms at a slightly different angle until the pose feels light rather than frozen.
Finish with one tiny wind-up key tucked at the base of the box.
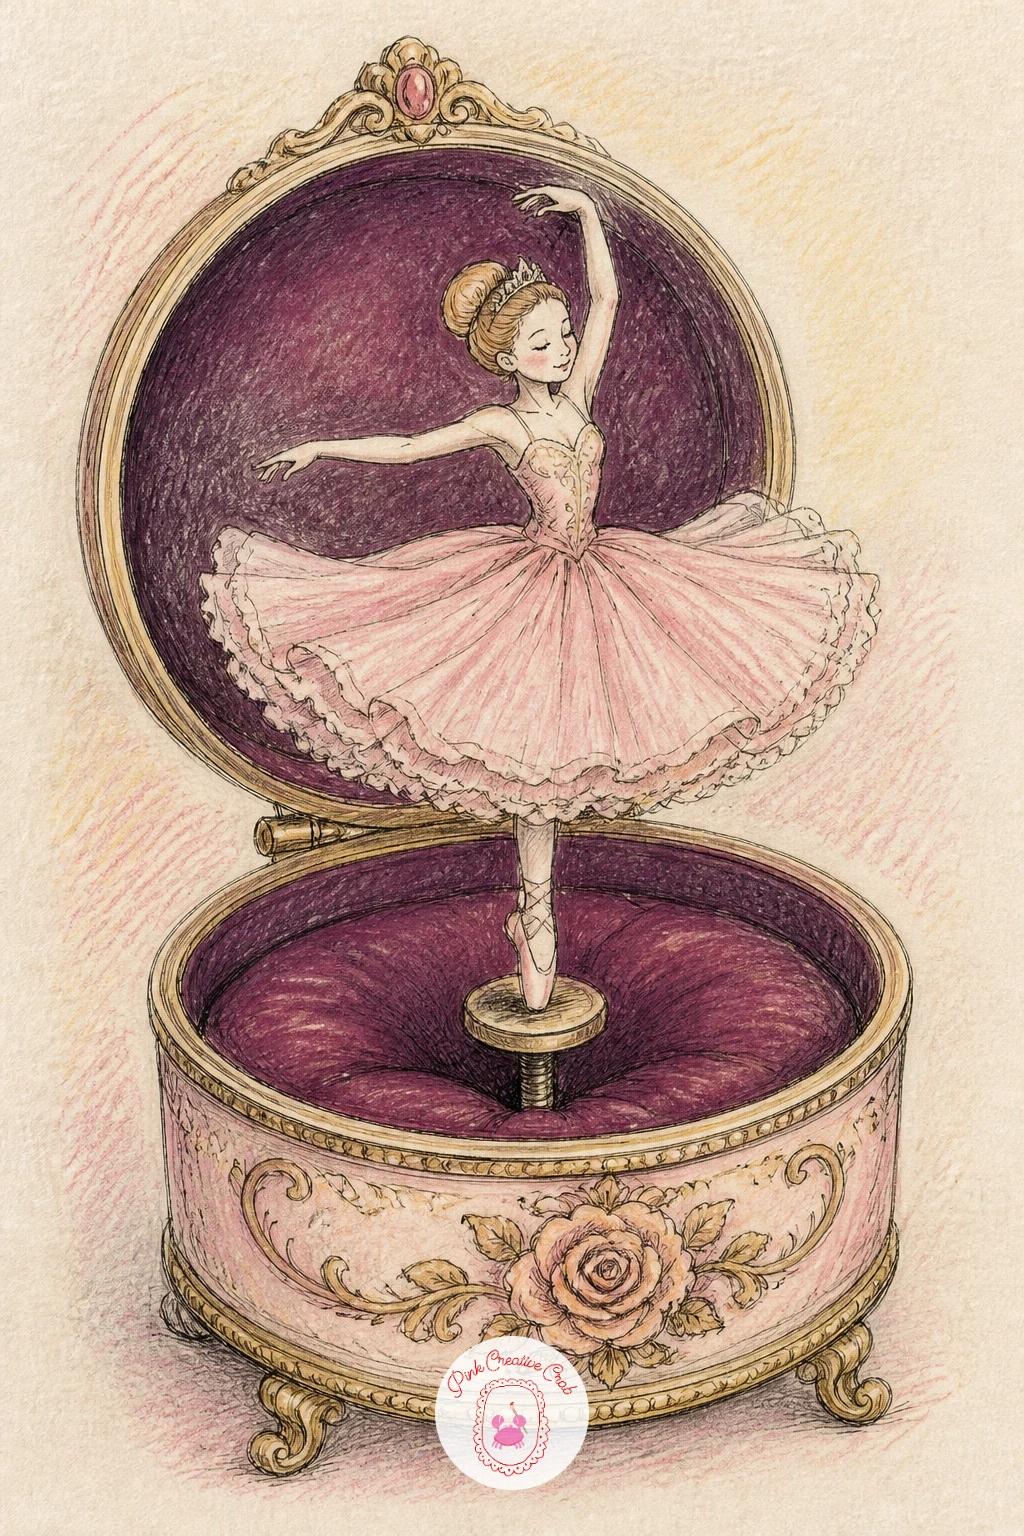
Palette: Blush Pink,Deep Plum,Soft Gold
For more spinning, twirling figures in a sketchbook, the ballerina pairs nicely with ideas from this music doodle list.
Stacked blocks are a quiet lesson in keeping edges honest even when the whole tower leans. Draw a faint center guideline up the page first, then build each block slightly offset from the one below rather than perfectly aligned, since a slight wobble is what makes the tower feel like it is about to topple rather than glued in place.
Vary the block sizes a little as you go up, a wide base block, a couple of mid-size ones, then a small one near the top, which adds visual interest and makes the lean feel more believable. Each block only needs two visible faces, a front and a top, kept in simple flat colors.
Where two blocks meet is where beginners often lose the edge, so use a slightly heavier fineliner line at each block boundary and a lighter line for the corners, which keeps the stack readable even when blocks overlap.
If you do not have painted wooden blocks to reference, plain colored building blocks from any toy box work just as well as a stand-in shape.
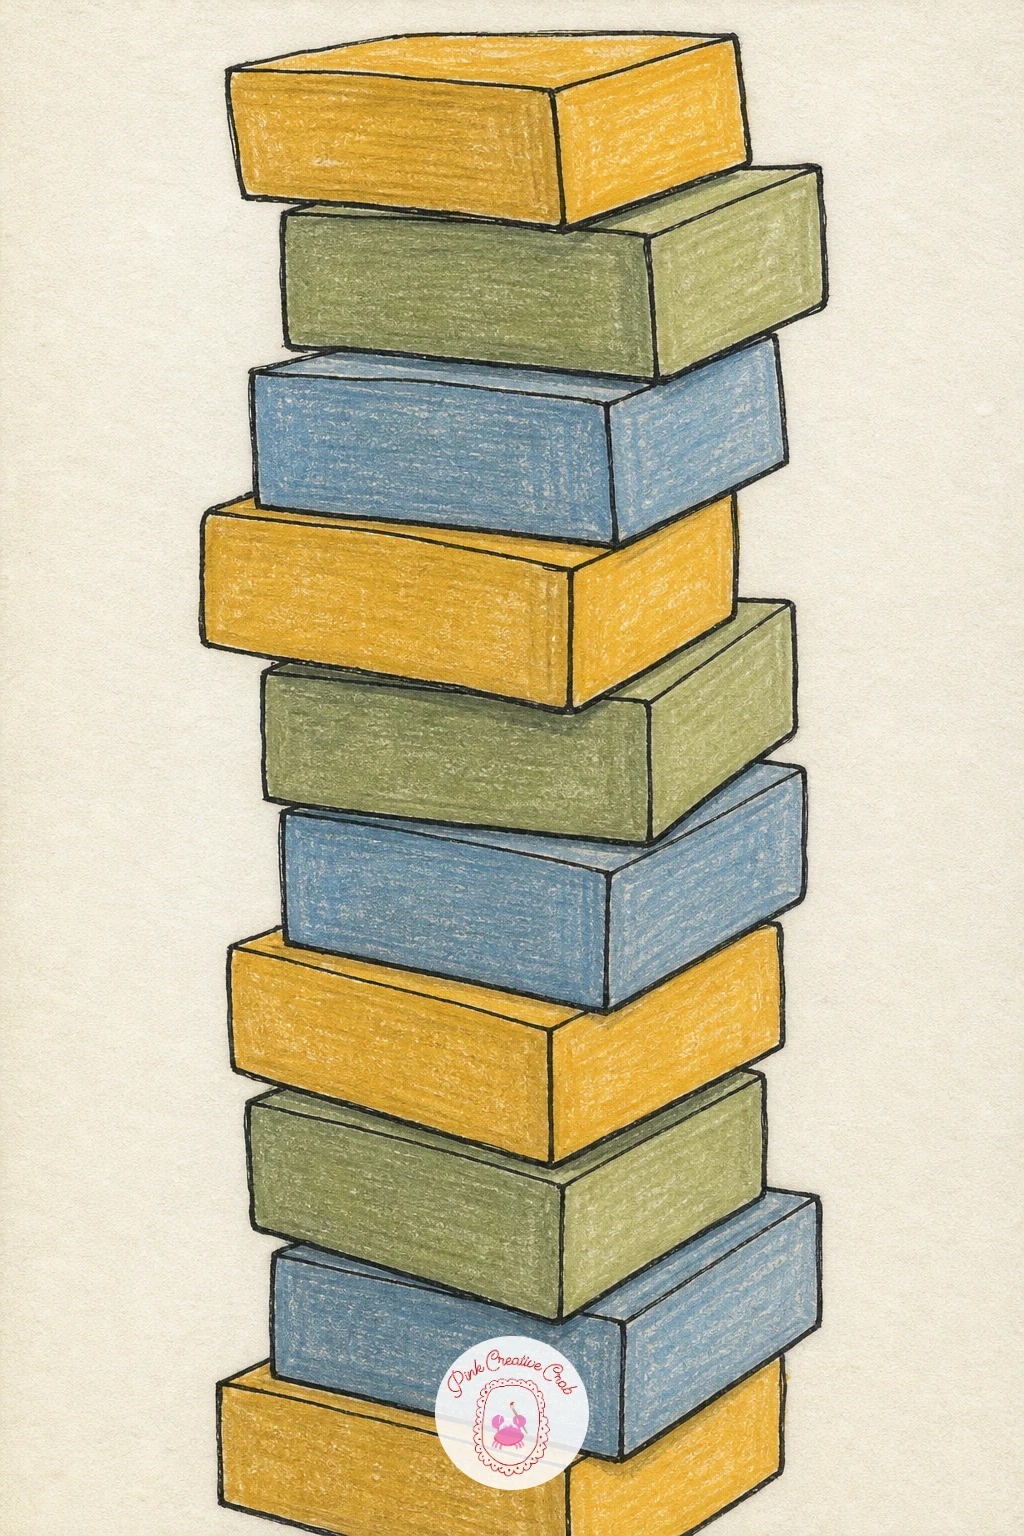
Palette: Mustard Yellow,Sage Green,Dusty Blue
The patched teddy bear is less about perfect proportion and more about posture, so before drawing any detail, sketch the overall silhouette as one soft rounded shape leaning against the box behind it. A slumped teddy has a slightly curved spine and a head that tips gently to one side rather than sitting bolt upright.
Build the limbs as simple rounded sausages attached loosely to the body, then add the patched ear last as an odd-shaped little patch of a different color stitched on with a few short crossing lines. That patch is the detail that gives the whole bear its history, so do not make it too neat.
For the worn fur texture, use short, slightly uneven colored pencil strokes rather than smooth shading, going over some areas twice to suggest flattened, loved fur. A pastel marker lightly blended over the strokes softens everything into a warm, well-hugged look.
Keep the box behind simple and plain so all the warmth stays with the bear.
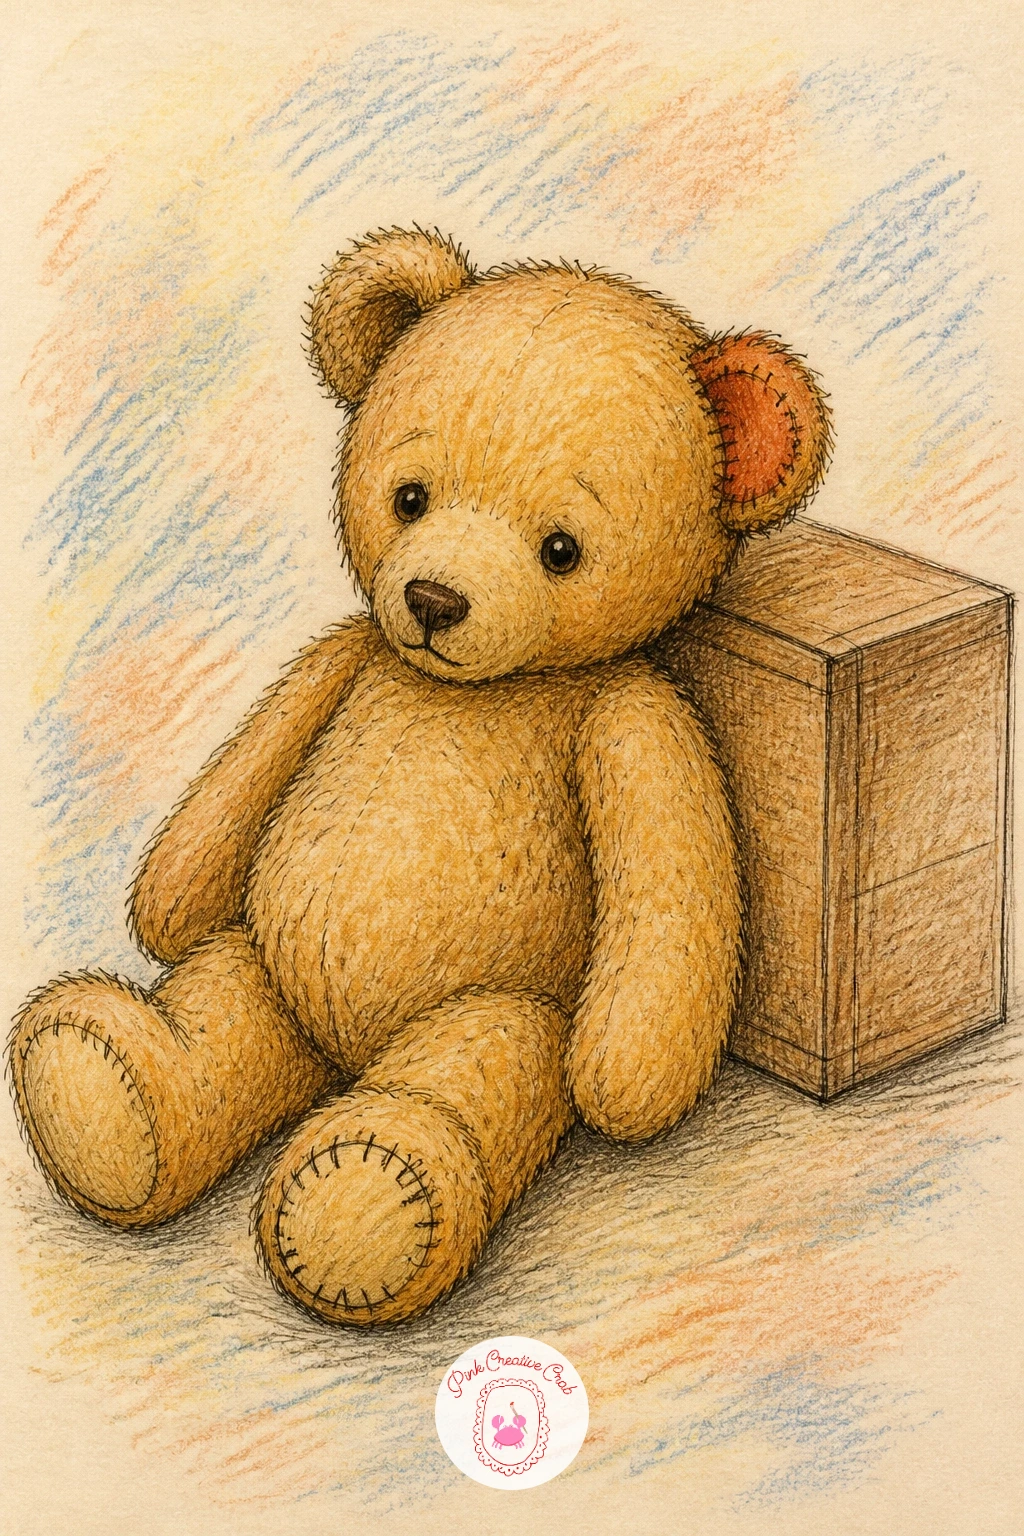
Palette: Honey Brown,Rust Patch,Cream
Switch from soft fur to hard tin again with the clockwork mouse, a small subject you can finish quickly. Draw the body as one simple teardrop shape, pointed at the nose and rounded at the back, with two tall oval ears and thin wire whiskers added last so they stay crisp and do not get smudged by shading underneath.
The curled key on its back is the star detail: draw it as a tight little spiral rather than a straight handle, since the curl is what makes it read instantly as clockwork rather than a plain wind-up toy. Keep the key slightly larger than feels realistic, toy details read better oversized on the page.
For texture, this is a good subject for dry brush style colored pencil strokes: press lightly and drag the pencil in short strokes along the body to suggest the painted tin surface catching light unevenly, rather than one flat smooth fill.
Finish with a thin tail curling out behind, echoing the curl of the key.
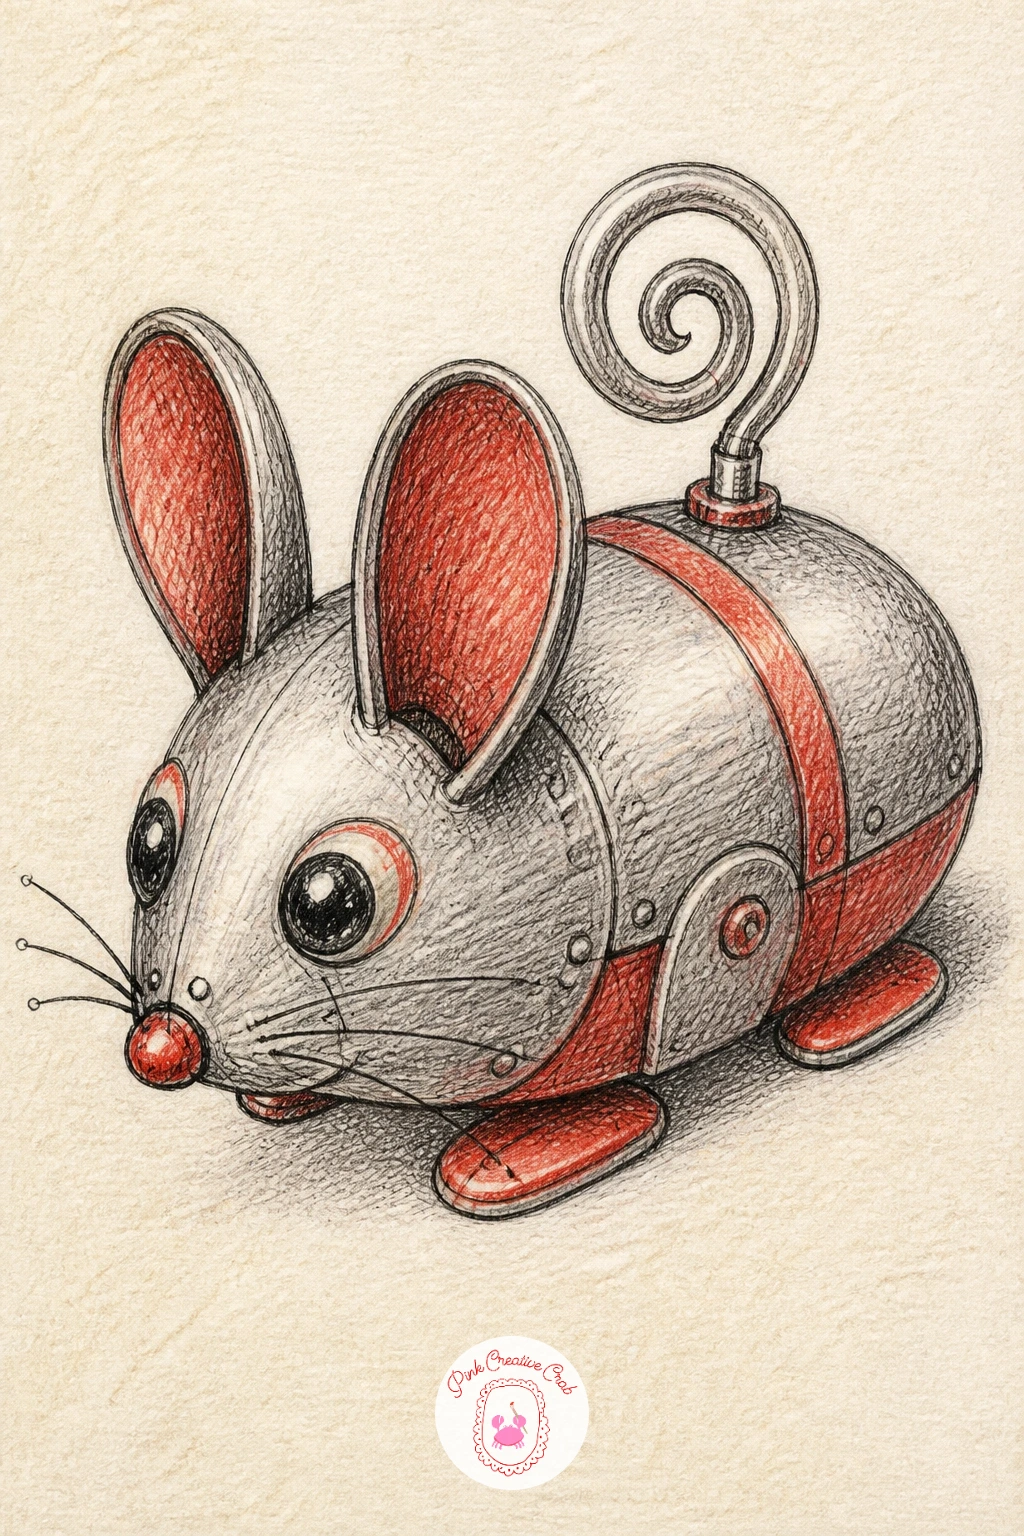
Palette: Pewter Grey,Rose Red,Charcoal
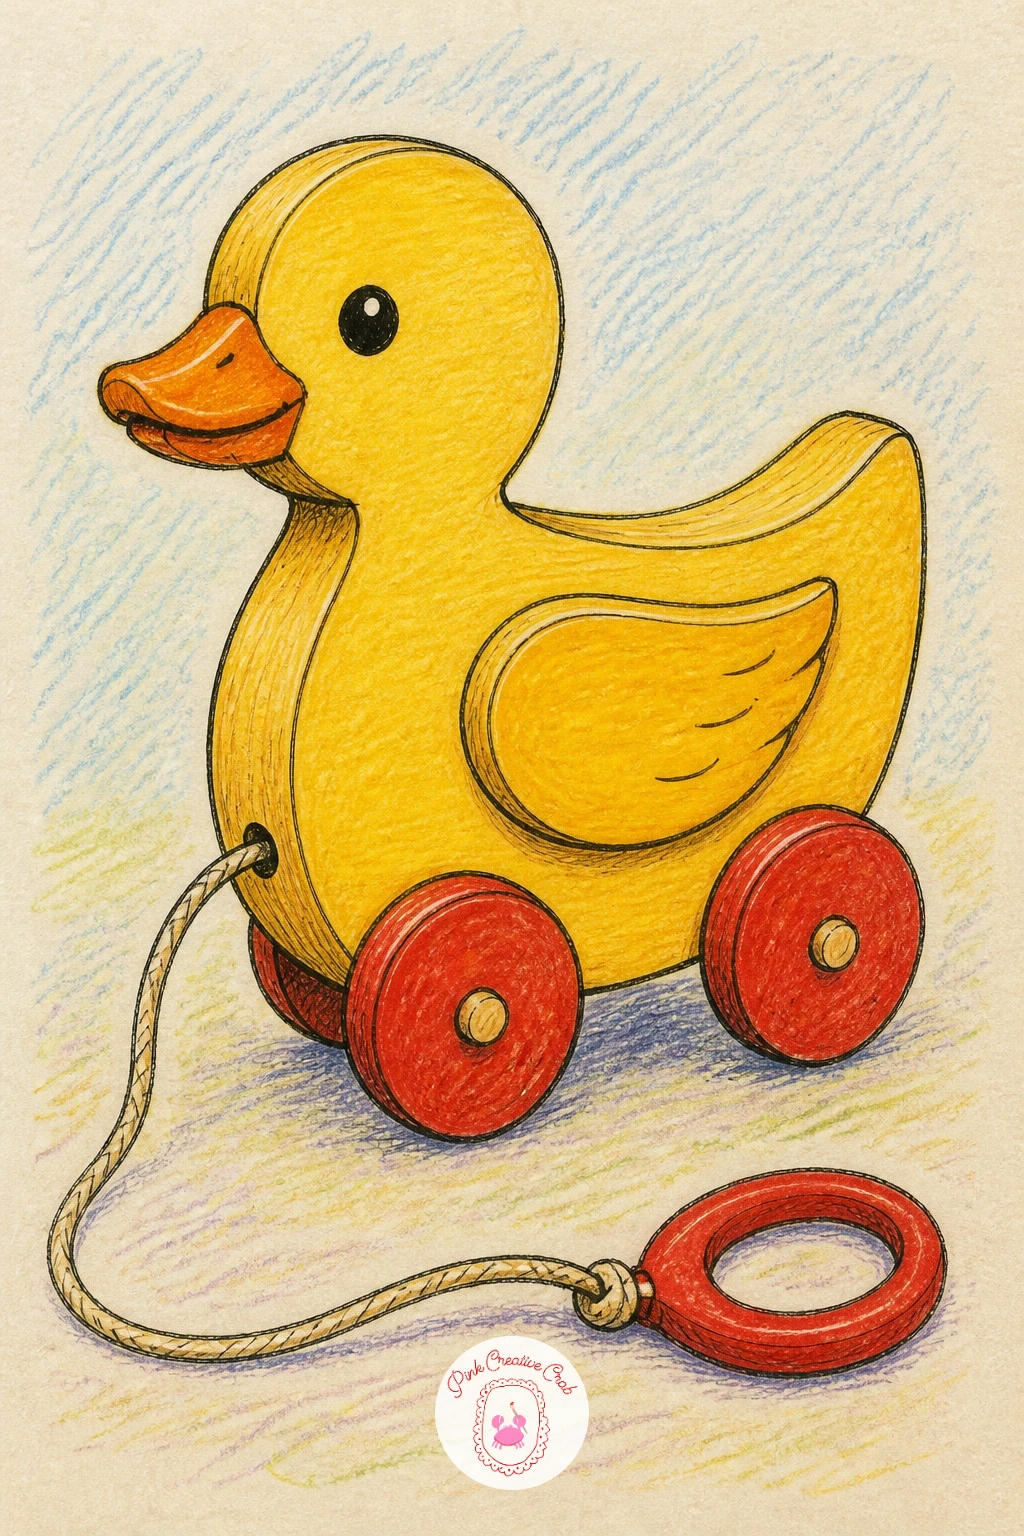
The pull-along duck is a friendly next subject because its whole charm sits in the contrast between a round soft body and hard round wheels. Sketch the duck’s body as one plump oval first, then add the head and beak as smaller shapes on top, keeping the proportions chunky and toy-like rather than anatomically correct.
Drawing circles freehand is the tricky part here, so a coin or a bottle cap traced lightly in pencil gives you two perfectly matched wheels before you commit to ink. Red wheels against a yellow or cream body give the piece an instant cheerful toy shop pop.
Add a simple curved axle line connecting the wheels under the body, and a thin string trailing off to one side with a small loop handle at the end, drawn slightly wavy rather than perfectly straight so it feels light and pulled rather than stiff.
Keep the duck’s face minimal, a dot eye and a simple beak line are all it needs.
You Will Need
- a coin or cap to trace the wheels
Palette: Butter Yellow,Fire Red,Soft Orange
Move into something quieter and more delicate with the porcelain doll, where the real work is in the face and the ringlet curls rather than the body. Lightly pencil a simple oval face with a faint center line and eye line before inking anything, since porcelain dolls look wrong fast if the features sit even slightly uneven.
Build the ringlets as a series of connected C shapes stacked around the face rather than one solid mass of hair, which keeps each curl readable and gives the hair some bounce. Work from the center part outward on both sides so the curls stay roughly balanced.
The lace collar is the best place to slow down: draw a simple scalloped edge first in pencil, then add a few short looping lines inside each scallop to suggest lace texture without drawing every thread. If the lace gets too busy, pull back and let plain white space do some of the work.
Keep the doll’s cheeks a soft pink and the skin very pale for that classic porcelain look.
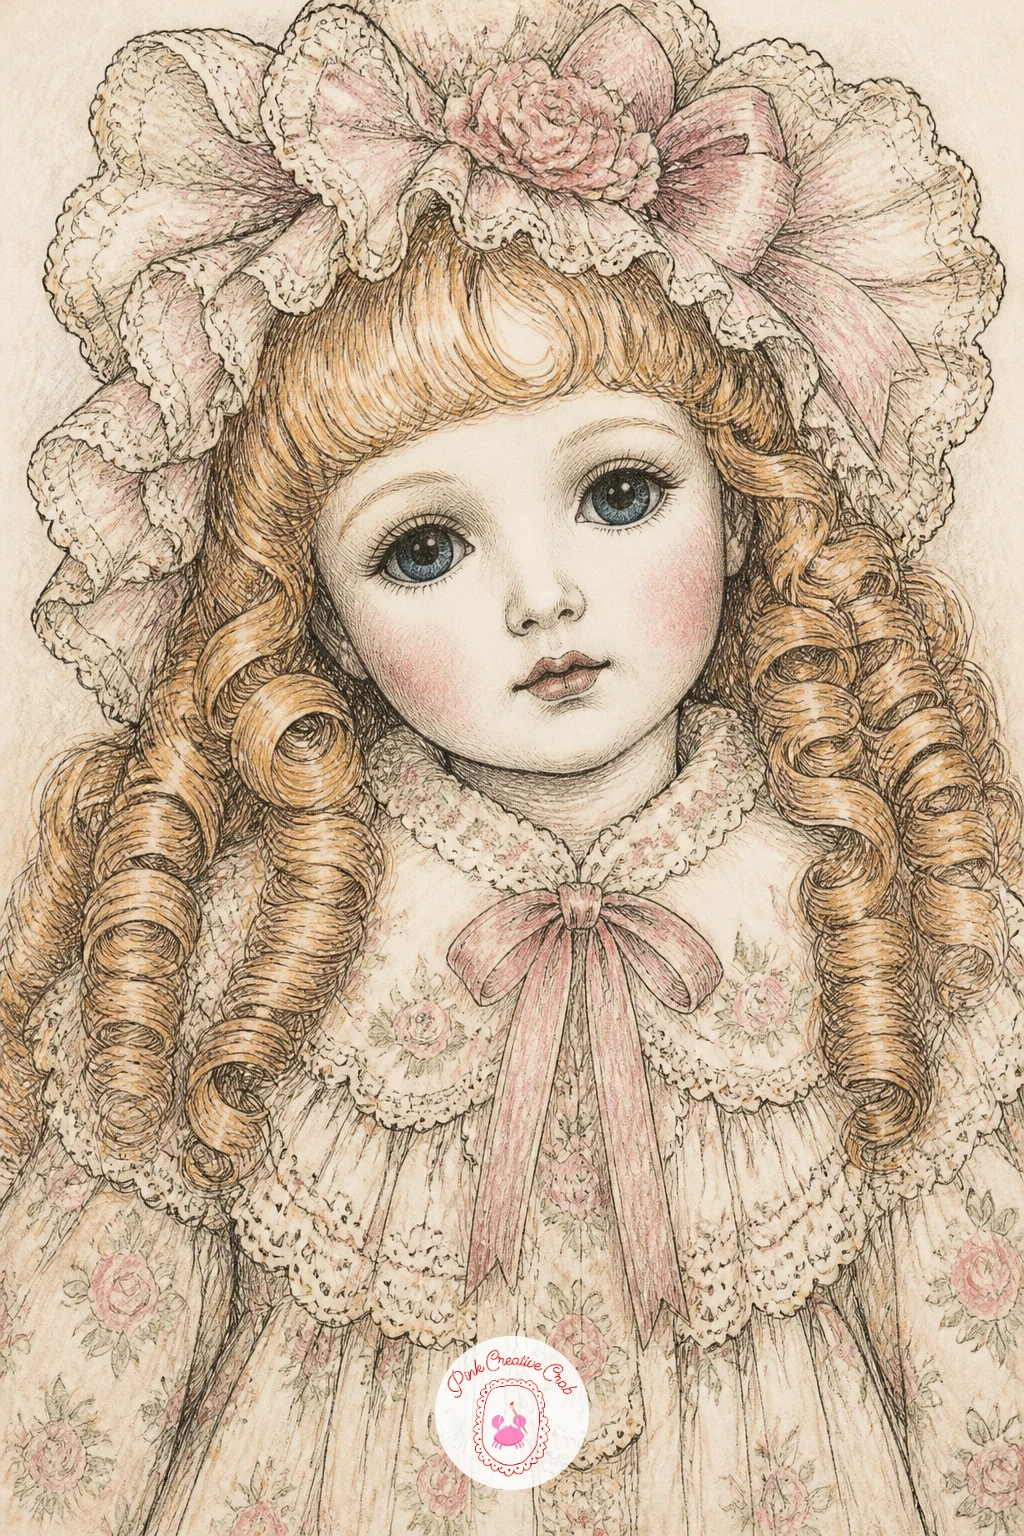
Palette: Porcelain Pale,Soft Blush,Chestnut Brown
The nesting dolls are the best subject in this whole list for practicing size comparison, since the entire drawing depends on getting the scale steps right. Before any ink, draw five faint ovals in a row and check that each one shrinks by roughly the same amount, using the tallest doll’s height as a ruler you mentally divide down each time.
Once the sizes feel even, build each doll with the same basic shape: a rounded head on top of a wider rounded body, so the family reads as one design repeated rather than five different toys. Vary only the painted pattern on the front of each one slightly, a flower here, a simple dot pattern there.
Color the dolls in alternating warm tones so neighboring dolls contrast a little, which helps the eye separate each size in the lineup. Keep the smallest doll almost solid color with barely any pattern, since detail at that tiny scale usually just turns into mud.
Line them up on one shared baseline so the whole row feels grounded.
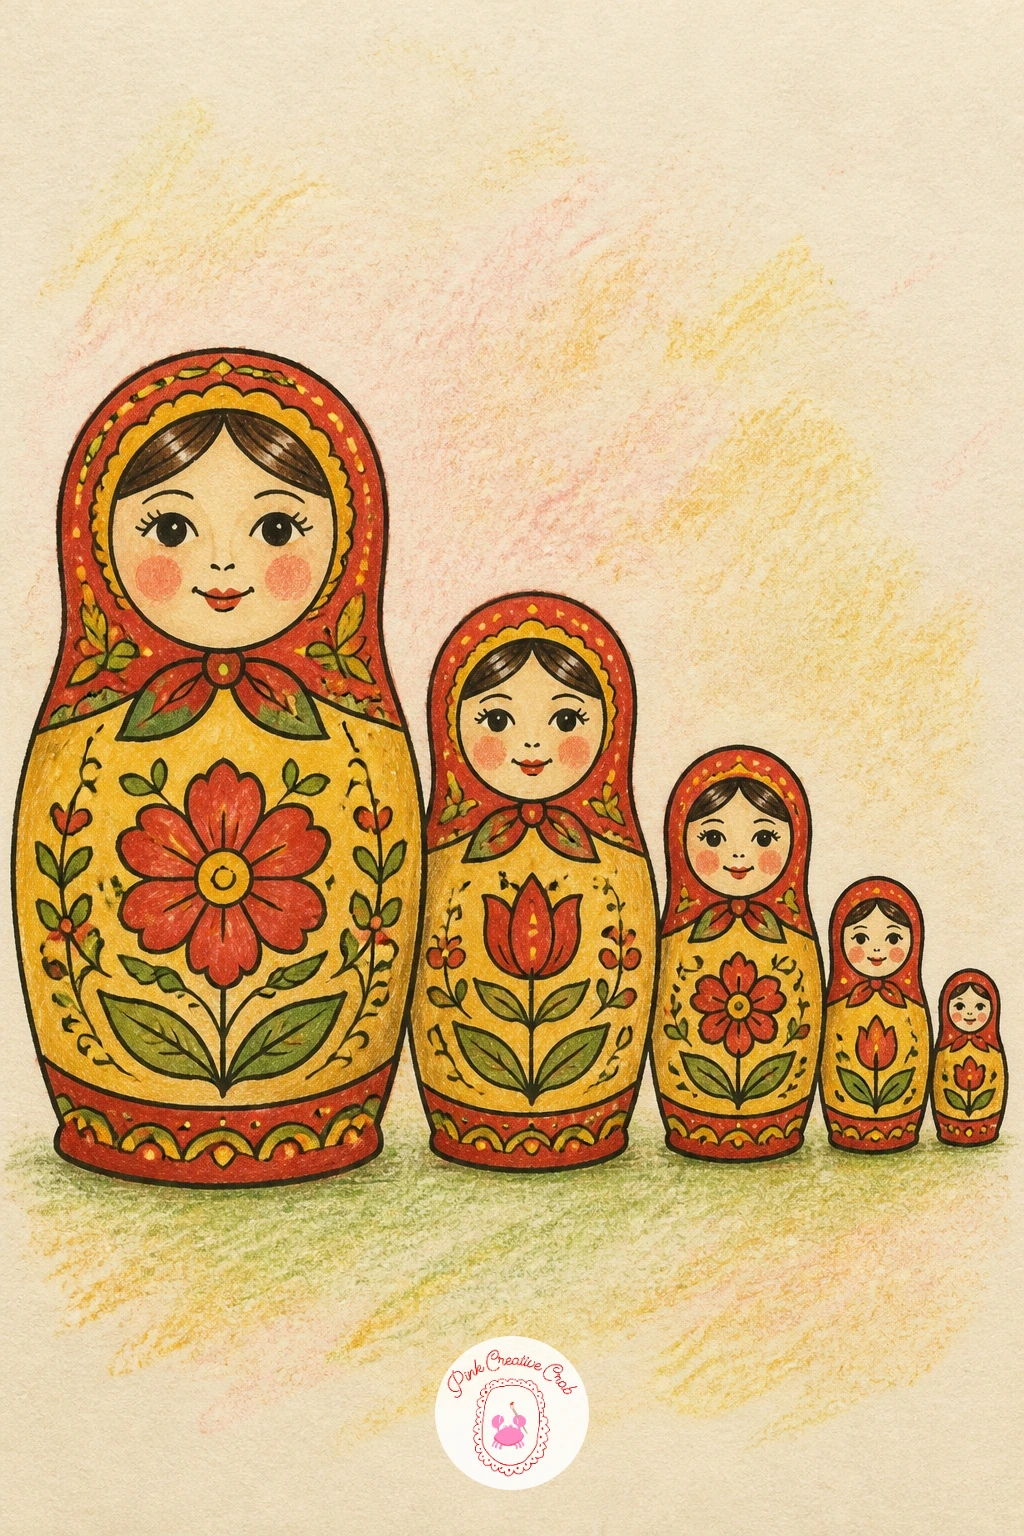
Palette: Poppy Red,Golden Yellow,Forest Green
The tin carousel is one of the more involved pieces here, so think about eye level before you start: drawing it from slightly below makes the scalloped roof feel grand and towering, while drawing it straight on keeps it feeling like a tabletop toy. For a cozy sketchbook study, straight on usually works best.
Build the structure first as a simple cylinder with a cone-shaped roof on top, then divide the roof edge into even scallops using light pencil ticks before inking the wavy line. Place the four horses evenly around the visible curve of the carousel, two facing slightly left and two slightly right, at slightly different heights to suggest they are mid-ride.
Each horse only needs a simple arched neck, a flowing mane and two visible legs, since too much detail on four small horses quickly overwhelms the page. Keep the scalloped roof in one or two bright colors and let the horses stay a little paler so the structure reads first.
Finish with a thin center pole running through the middle.
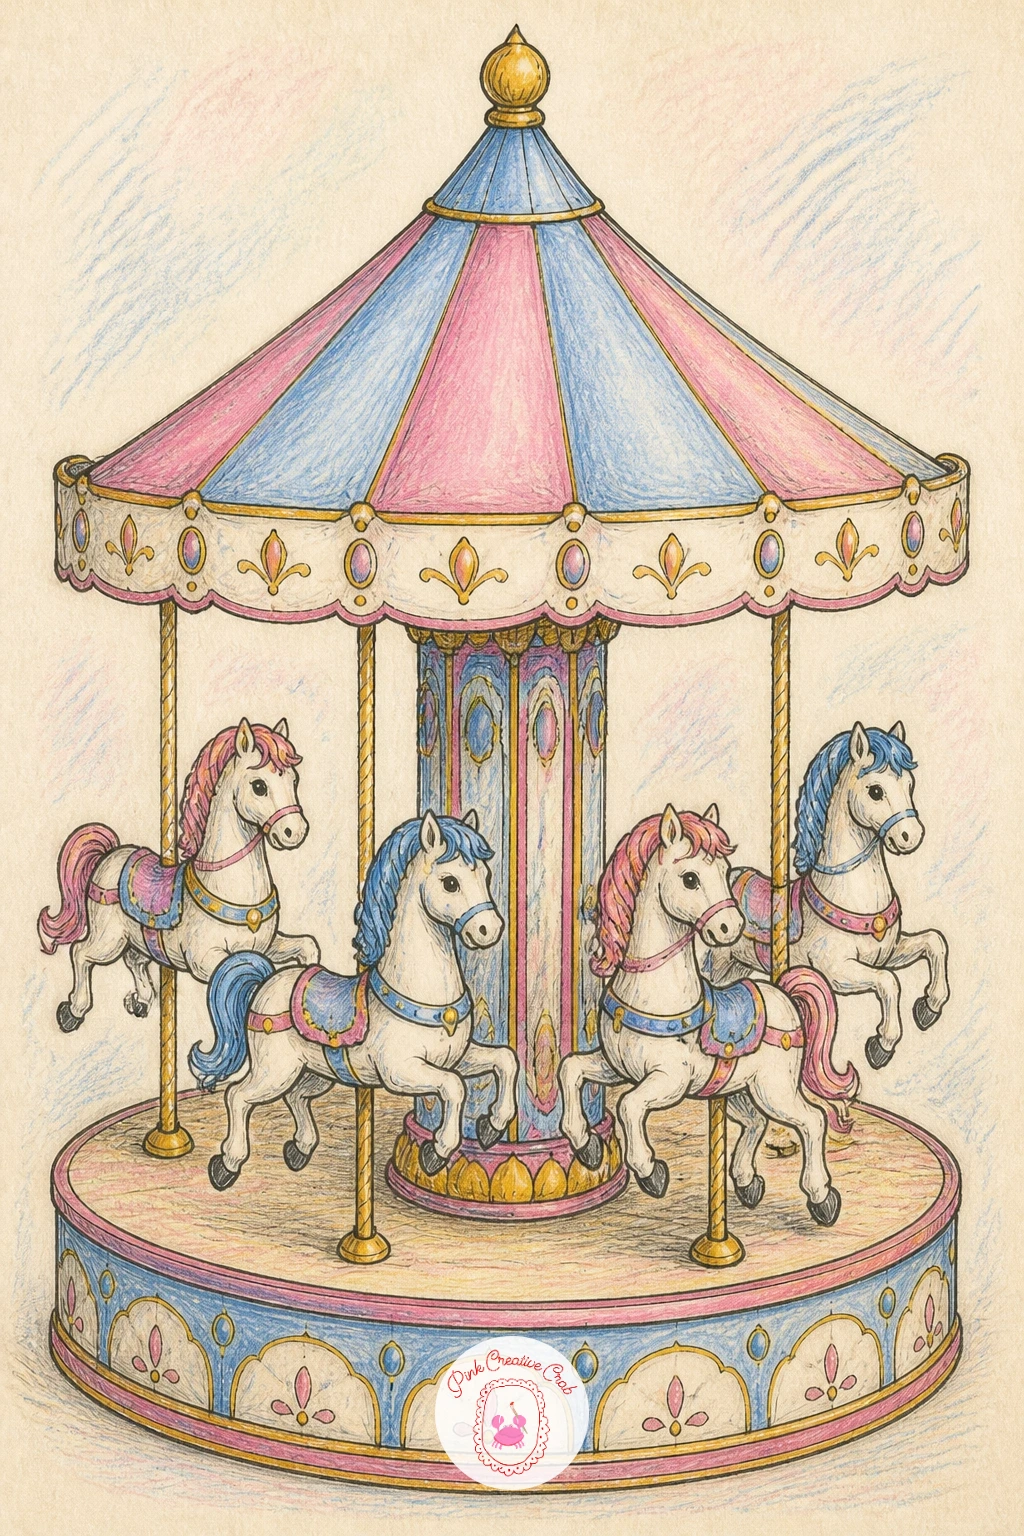
Palette: Candy Pink,Sky Blue,Ivory
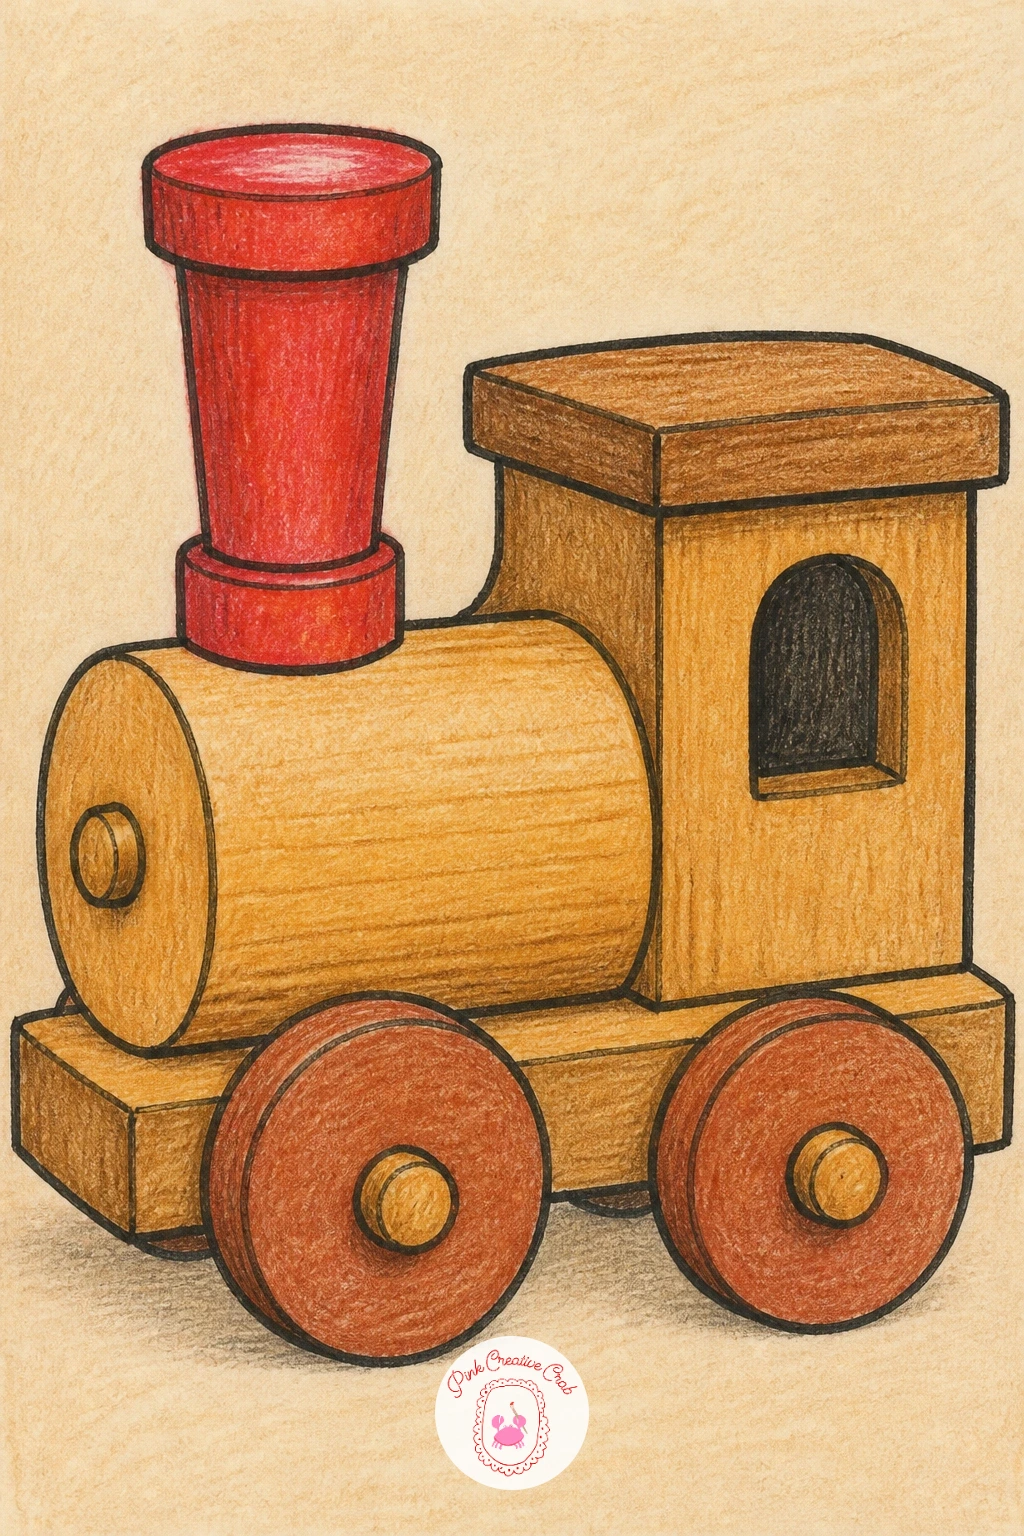
Give yourself an easier breather after the carousel with the wooden train engine, built almost entirely from simple blocks and circles. Draw the main body as a long rectangle, then add a smaller box cab on top and a cylinder boiler shape at the front, keeping every edge slightly rounded rather than sharp for that toy-shop softness.
The red chimney is the detail that gives the engine its personality, so make it a bit taller and wider than realistic, a simple cylinder with a slightly flared top, painted in a bold red that pops against a plainer painted body. Two circle wheels at the base, traced from a coin for an even curve, finish the structure.
If the shading looks flat, add one strong cast shadow underneath the whole engine rather than shading every small part separately, which instantly grounds the toy on the page.
Swap the chimney color if you like, a deep green or navy chimney reads just as charming against a red body.
You Will Need
- a coin to trace the wheels
Palette: Fire Engine Red,Soft Black,Cream
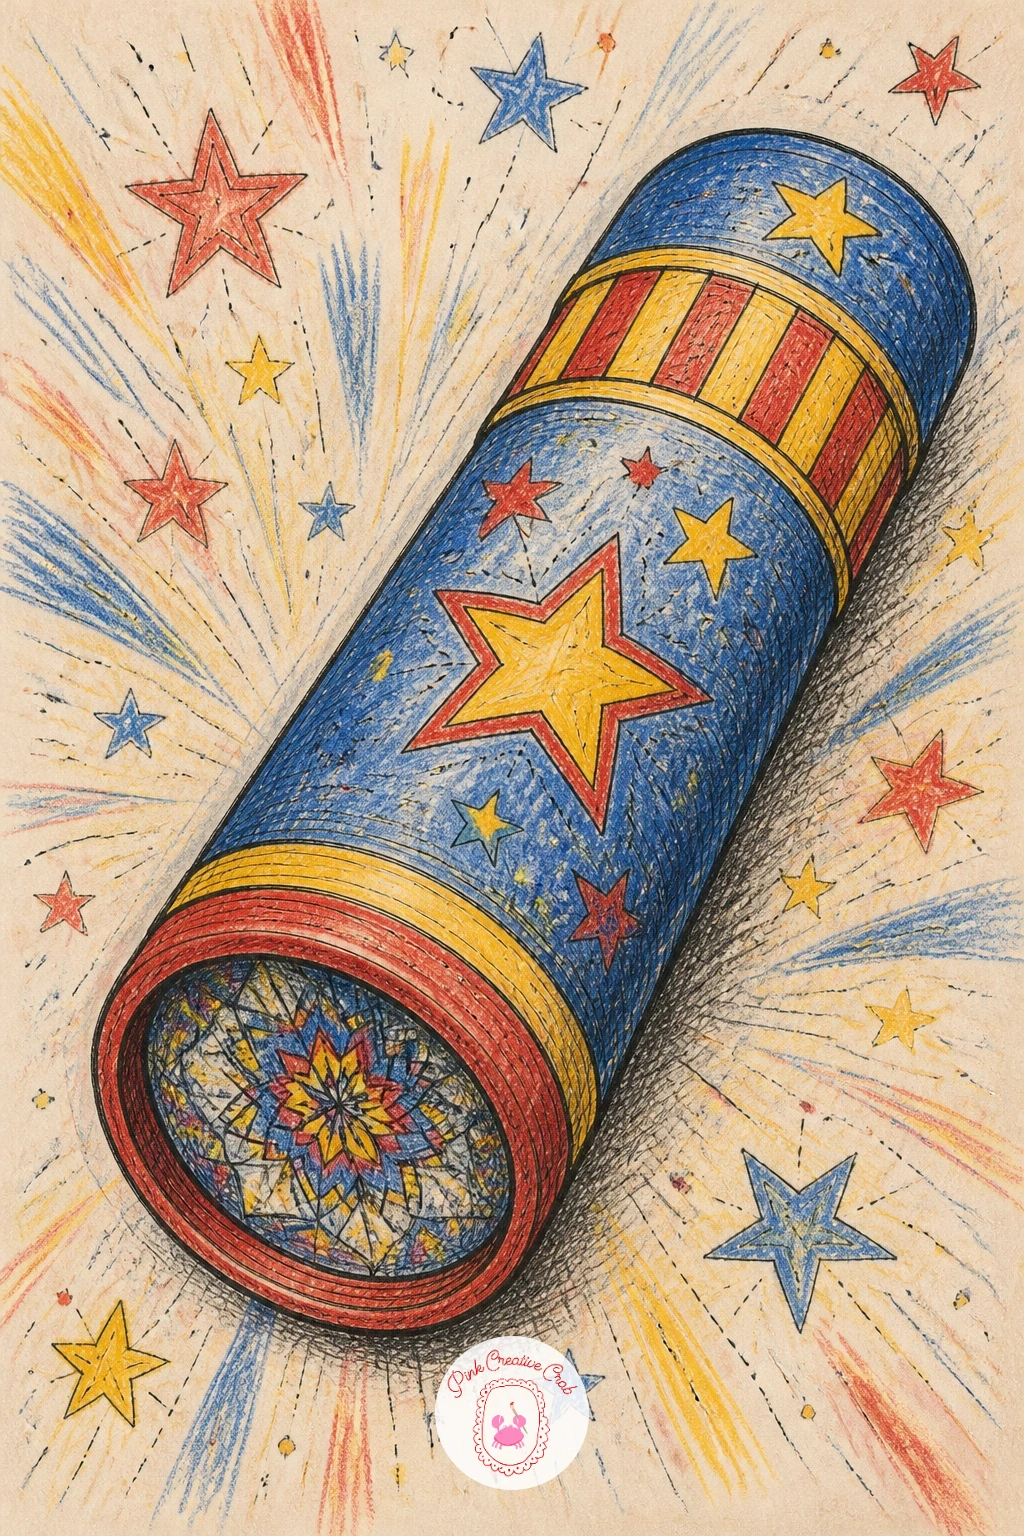
The kaleidoscope is a good excuse to draw pattern on a cylinder, which is trickier than it looks because the pattern has to curve with the tube rather than sit flat. Draw the tube first as a simple long cylinder shape with two ellipses for the open ends, then lightly pencil a few vertical guide lines around the curve before adding any stars or stripes.
Keep the painted stars simple, five-pointed shapes scattered a little unevenly rather than in a perfect grid, which feels more handmade and toy shop than mechanically repeated. Alternate the stripe colors between the stars so the eye has somewhere to rest between each one.
Shade the top and bottom edges of the tube slightly darker than the middle to reinforce the cylinder curve, since flat color across the whole tube will make it read as a flat strip rather than a round object. A pastel marker blended gently along those edges softens the transition nicely.
One end of the tube can show a small dark circle for the eyepiece.
Palette: Royal Blue,Sunshine Yellow,Candy Red
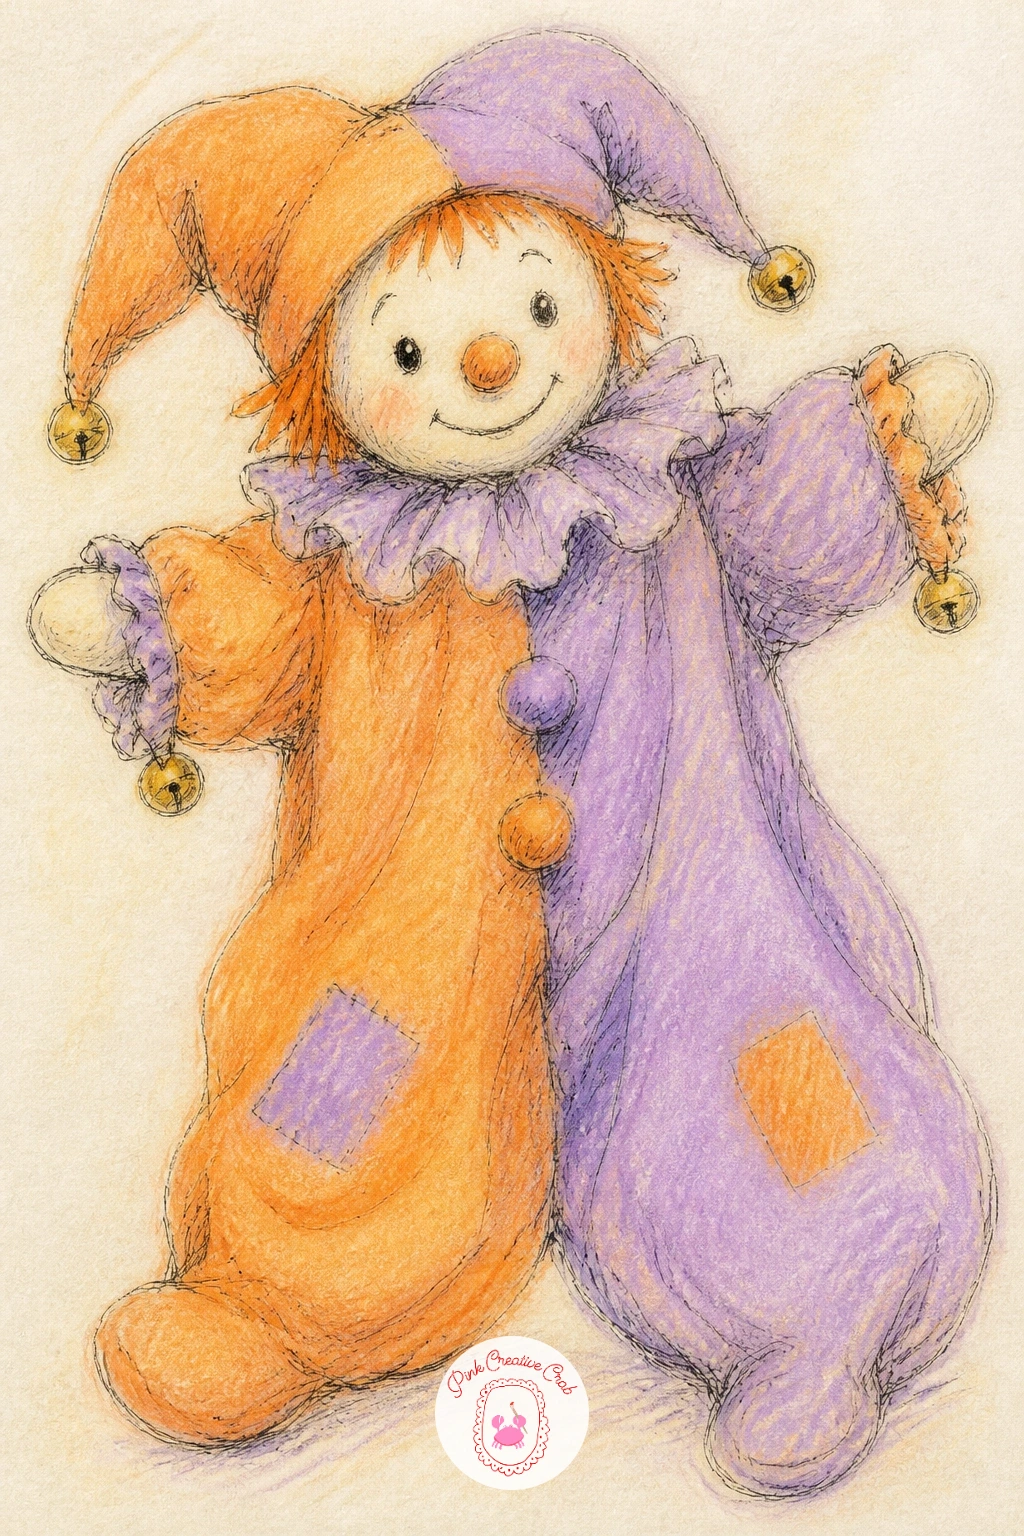
The cloth clown puppet brings softness back after the kaleidoscope’s hard edges, so lean into loose, slightly floppy shapes for the limbs and body. Sketch the body as a simple rounded triangle shape like a loose sack, with thin dangling arms and legs that hang rather than stand firm, since a puppet at rest should look a little limp.
The ruffled collar deserves the most attention: draw a wavy scalloped circle around the neck, slightly uneven on purpose, then add short curved lines inside each ruffle to suggest the folds of fabric catching light. Tiny bells can sit at the cuffs or the pointed hat tip, drawn as small circles with one short line each for a hint of shine.
If the puppet looks too stiff, go back and redraw just the arms hanging at slightly different angles, since puppets rarely hang perfectly symmetrical.
Soft pastel marker over the fabric folds gives a gentle worn-cloth look that colored pencil alone cannot quite match.
Palette: Carnival Orange,Lilac,White
The ruffled collar and dangling bells pair well with the playful character studies in this Japanese doodles collection if you enjoy small figures with personality.
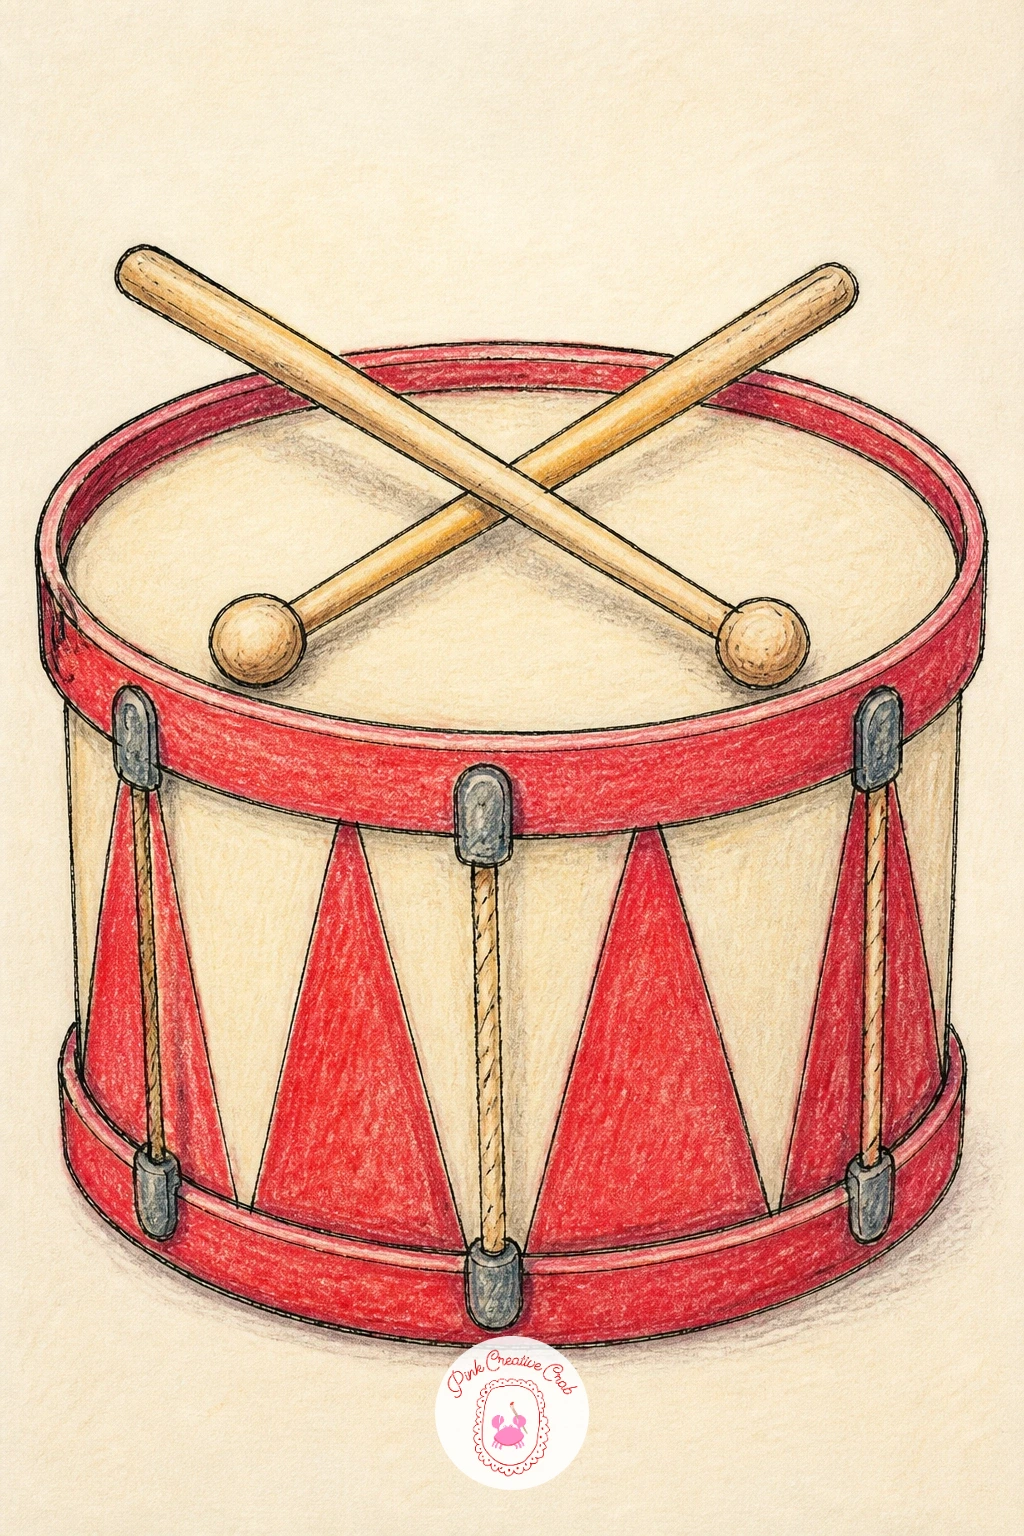
The toy drum is a quick, satisfying subject built almost entirely from one cylinder and two thin sticks. Draw the drum body as a short wide cylinder, then add a painted stripe or band around the middle before inking, keeping the top and bottom ellipses evenly curved by drawing them lightly several times until they match.
Place the two drumsticks resting across the top at a slight diagonal, crossing near the center, since parallel sticks look stiff while a slight cross feels casual and believable. Keep the sticks simple, two thin lines each with a small rounded tip.
For a quick ten-minute version, leave the drum a single flat color with one painted stripe and simple sticks. For a fuller forty-minute piece, add a textured drumhead with subtle radiating lines and a soft shadow cast by the sticks onto the drum surface below.
A pastel marker lightly swept along the curved side gives the drum a rounded, glossy toy finish.
Palette: Cherry Red,Cream White,Walnut Brown
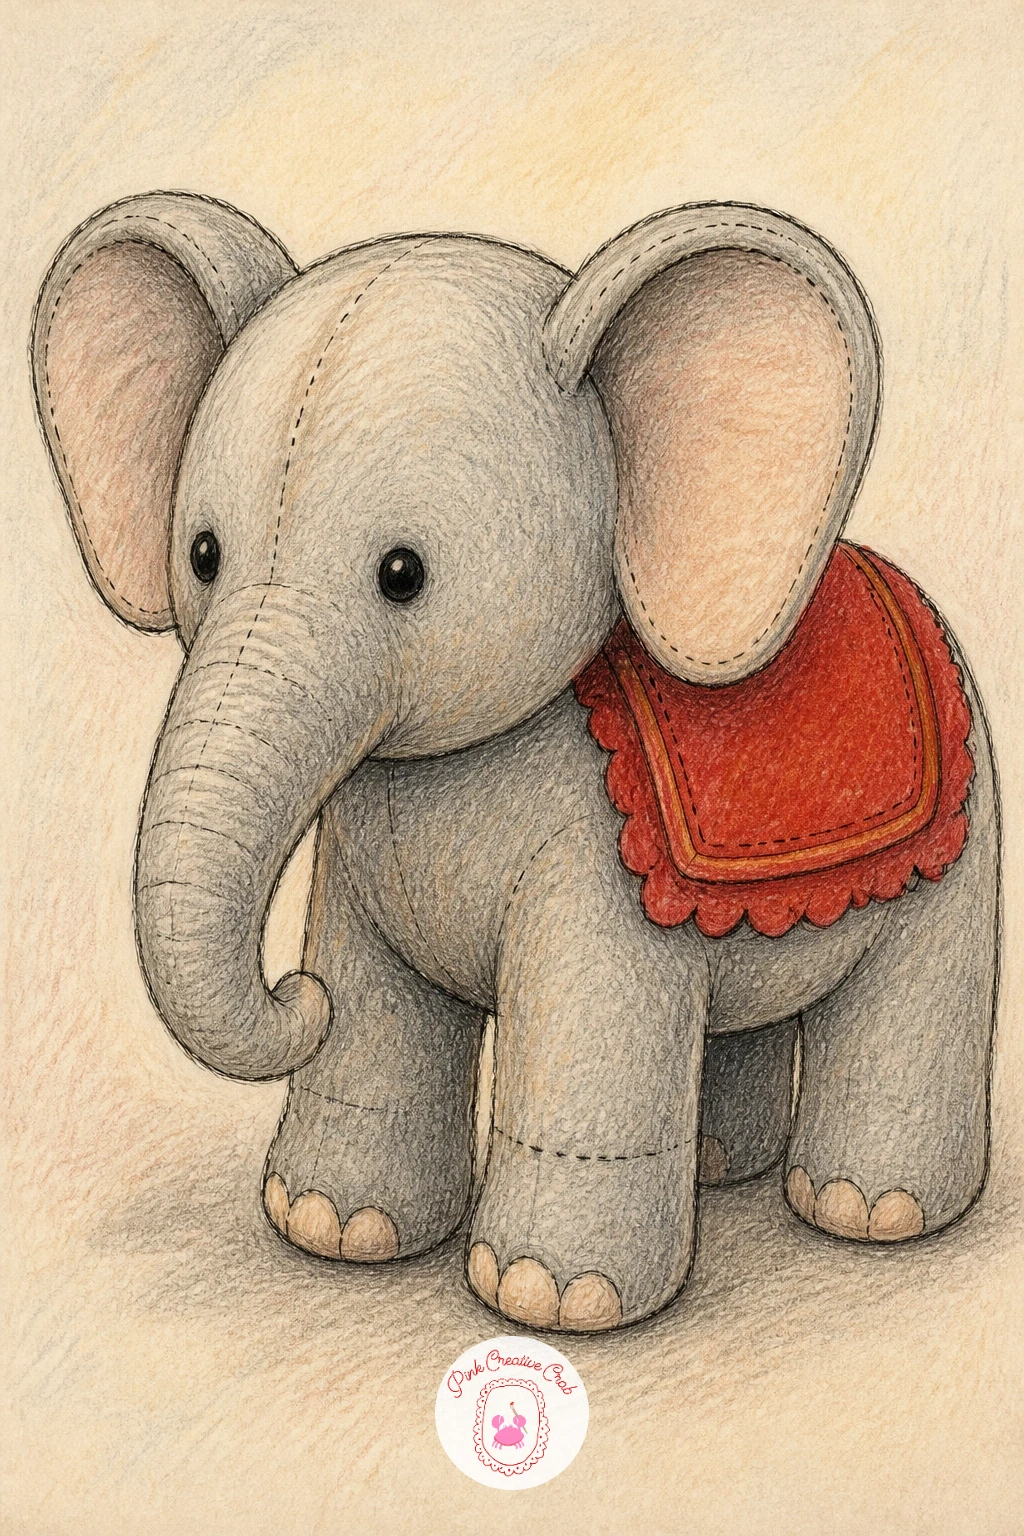
The stuffed elephant is a lovely subject for soft, rounded shading since almost every part of its body curves. Build the form from one large rounded body shape, then add the head, ears and trunk as separate soft ovals overlapping it, keeping the trunk gently curved rather than straight for a friendly, droopy look.
The felt saddle blanket sits across the back and gives you a chance to break up all that softness with one flat, slightly stiffer shape, so draw it with a straighter edge than the elephant’s rounded body to create a nice contrast in texture. A simple scalloped or straight trim along the blanket edge adds a toy-shop finish.
Shade the elephant’s body with short overlapping colored pencil strokes to suggest soft stuffed fabric, building up gradually rather than pressing hard in one pass, and leave the ears a touch darker where they fold over.
If gray feels flat, a warm gray with a hint of lavender underneath gives the elephant more life.
Palette: Warm Grey,Dusty Lavender,Felt Red
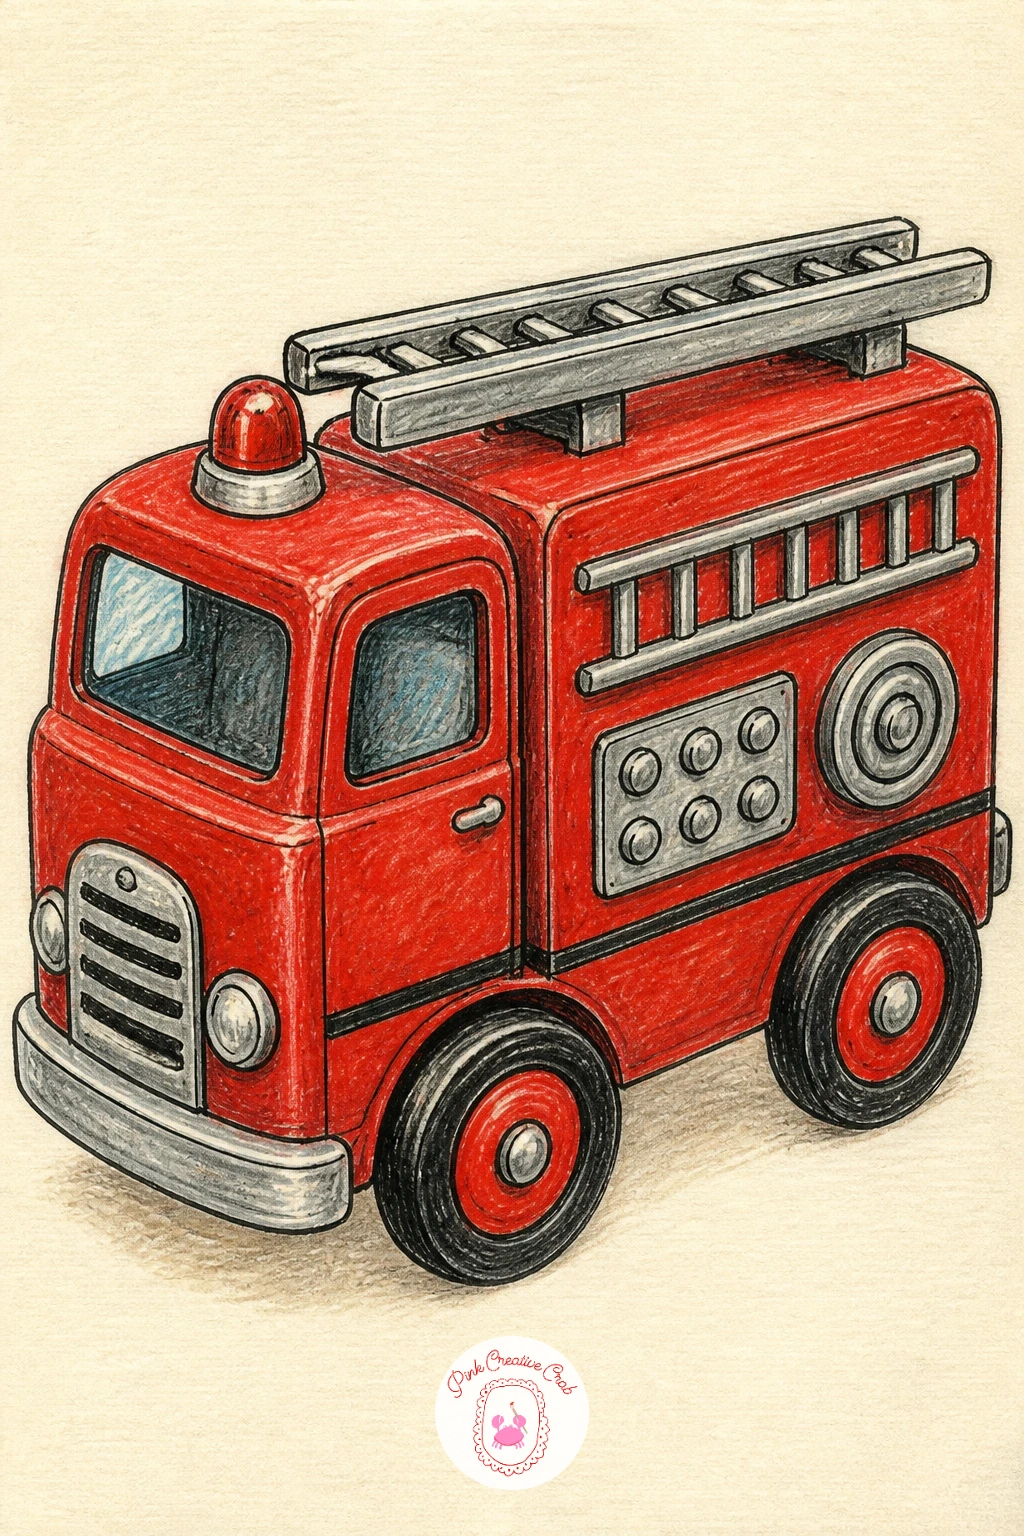
The fire engine is one of the busier subjects here, so build it in stages rather than trying to capture everything at once: body first, then wheels, then the ladder last. Start with a long rectangular body with slightly rounded corners, add a smaller cab box toward the front, and keep the whole thing low and chunky like a real toy rather than a realistic vehicle.
Four wheels traced from a small coin keep the proportions even on both sides, which matters more here than on rounder toys since any mismatch in wheel size is obvious on a boxy vehicle. The tiny ladder on top is the standout detail, drawn as two parallel lines with short evenly spaced rungs between them, angled slightly rather than lying perfectly flat.
Shade the body in bold flat red first, then add one or two darker red strokes along the lower edge to suggest where the tin curves under, which reads as dimension without much extra work.
Keep window shapes simple, just a few flat rectangles along the side.
You Will Need
- a coin to trace the wheels
Palette: Fire Red,Soot Black,Silver Grey
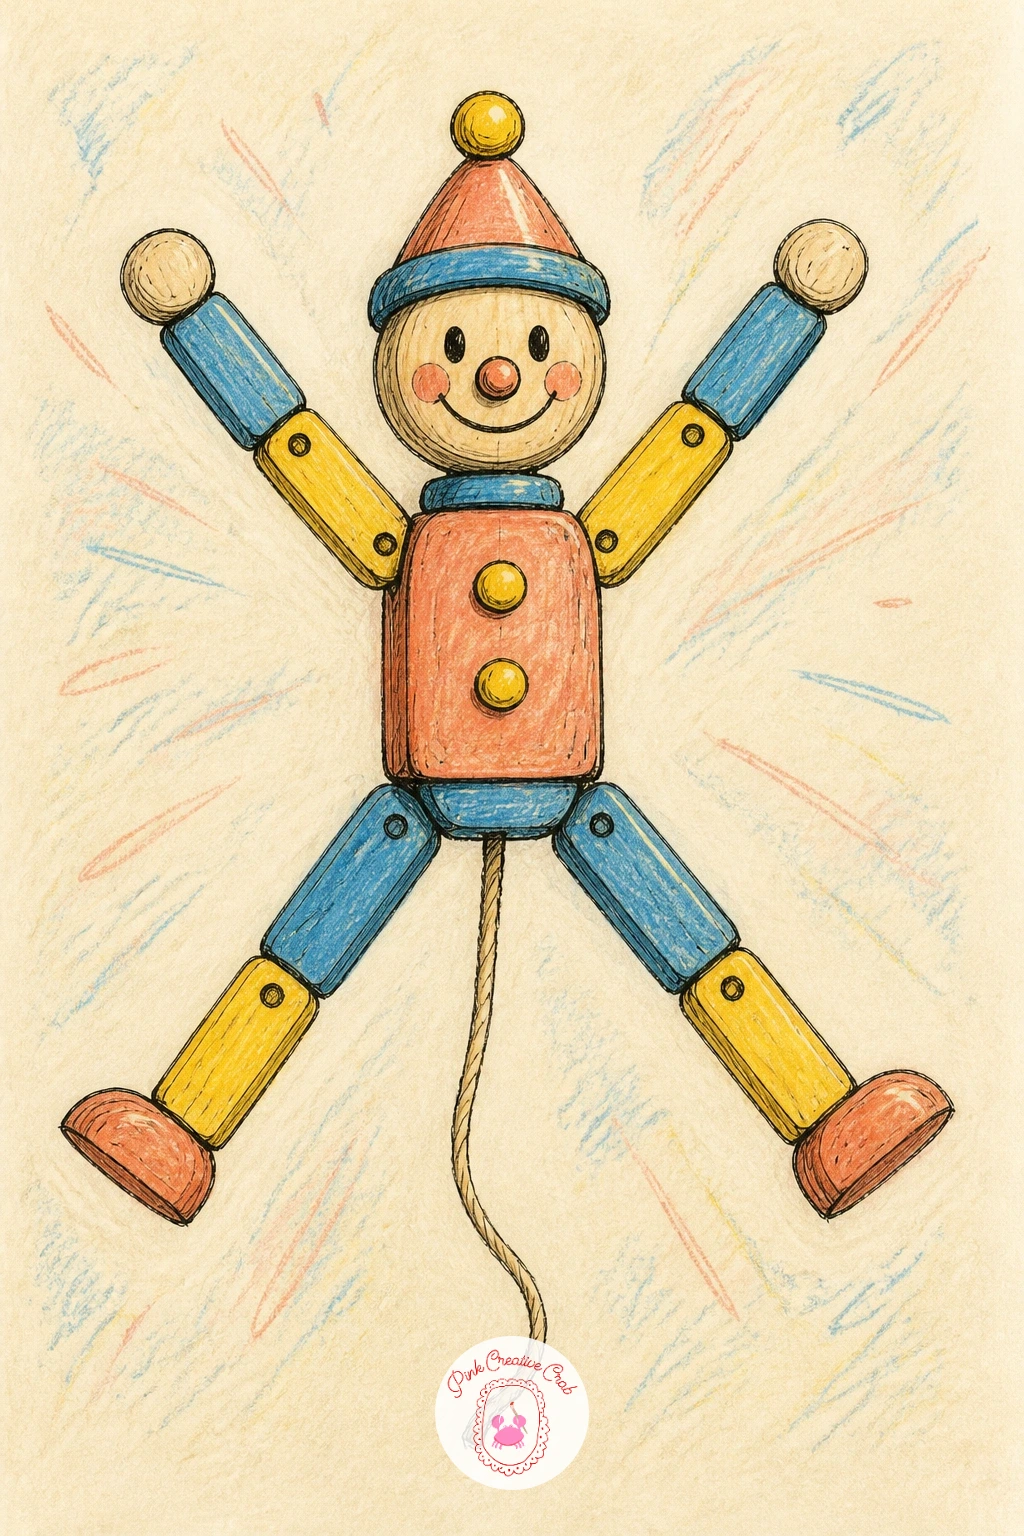
The jumping jack toy is a fun study in a pose caught mid-action, with limbs flung slightly outward as if the string has just been pulled. Sketch the body as a simple figure made of rounded rectangle limbs connected at visible joint dots, arms raised and legs apart rather than hanging straight down.
Draw the pull string last, trailing down from the bottom of the figure in a loose curved line rather than a straight one, since a string that has just been pulled will still have a little slack and sway in it. A small knot or loop at the string’s end adds a nice finishing touch.
Paint each limb a slightly different bright color, which is historically how these toys were often decorated and also makes the jointed structure easier to read at a glance. Keep the joints themselves as small dark dots so they read clearly against the brighter limb colors.
If the pose feels stiff, raise one arm higher than the other for a livelier, mid-jump feeling.
Palette: Lemon Yellow,Sky Blue,Coral Red
The tin spaceship brings a small change of pace with its rounded glass dome, which is really just a careful ellipse drawn over the astronaut figure inside. Build the ship’s body first as a simple rocket or saucer shape, then lightly sketch the tiny astronaut figure sitting inside before adding the dome over the top, so the dome sits naturally around the figure rather than looking pasted on.
Light matters a lot on glass, so decide early where the shine falls and keep one small curved highlight streak across the dome consistent with that light direction, leaving the rest of the dome mostly clean so the highlight actually reads as glass. Too many scattered highlights will just look like scratches.
Keep the astronaut simple, a round helmet and a small blocky suit are enough, since the dome will soften the details anyway. Shade the ship’s tin body with the same dry-stroke technique used for the other tin toys on this list, for a consistent material across the page.
A pale blue-grey dome against a bright ship body keeps the glass believable.
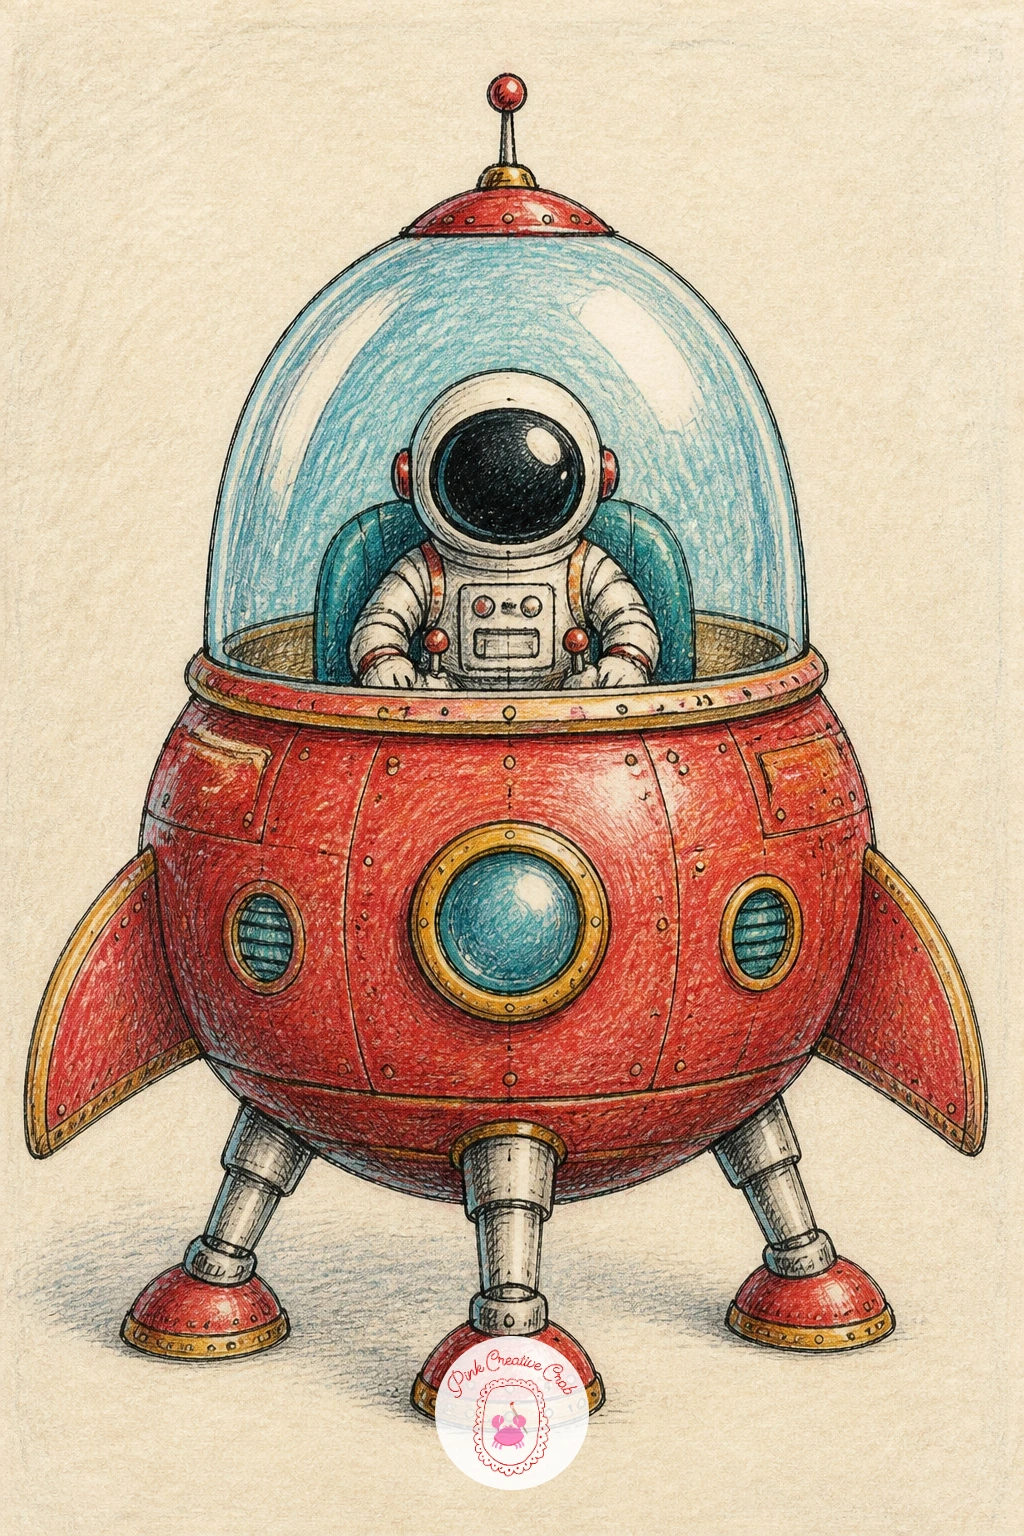
Palette: Pale Sky Blue,Rocket Red,Silver
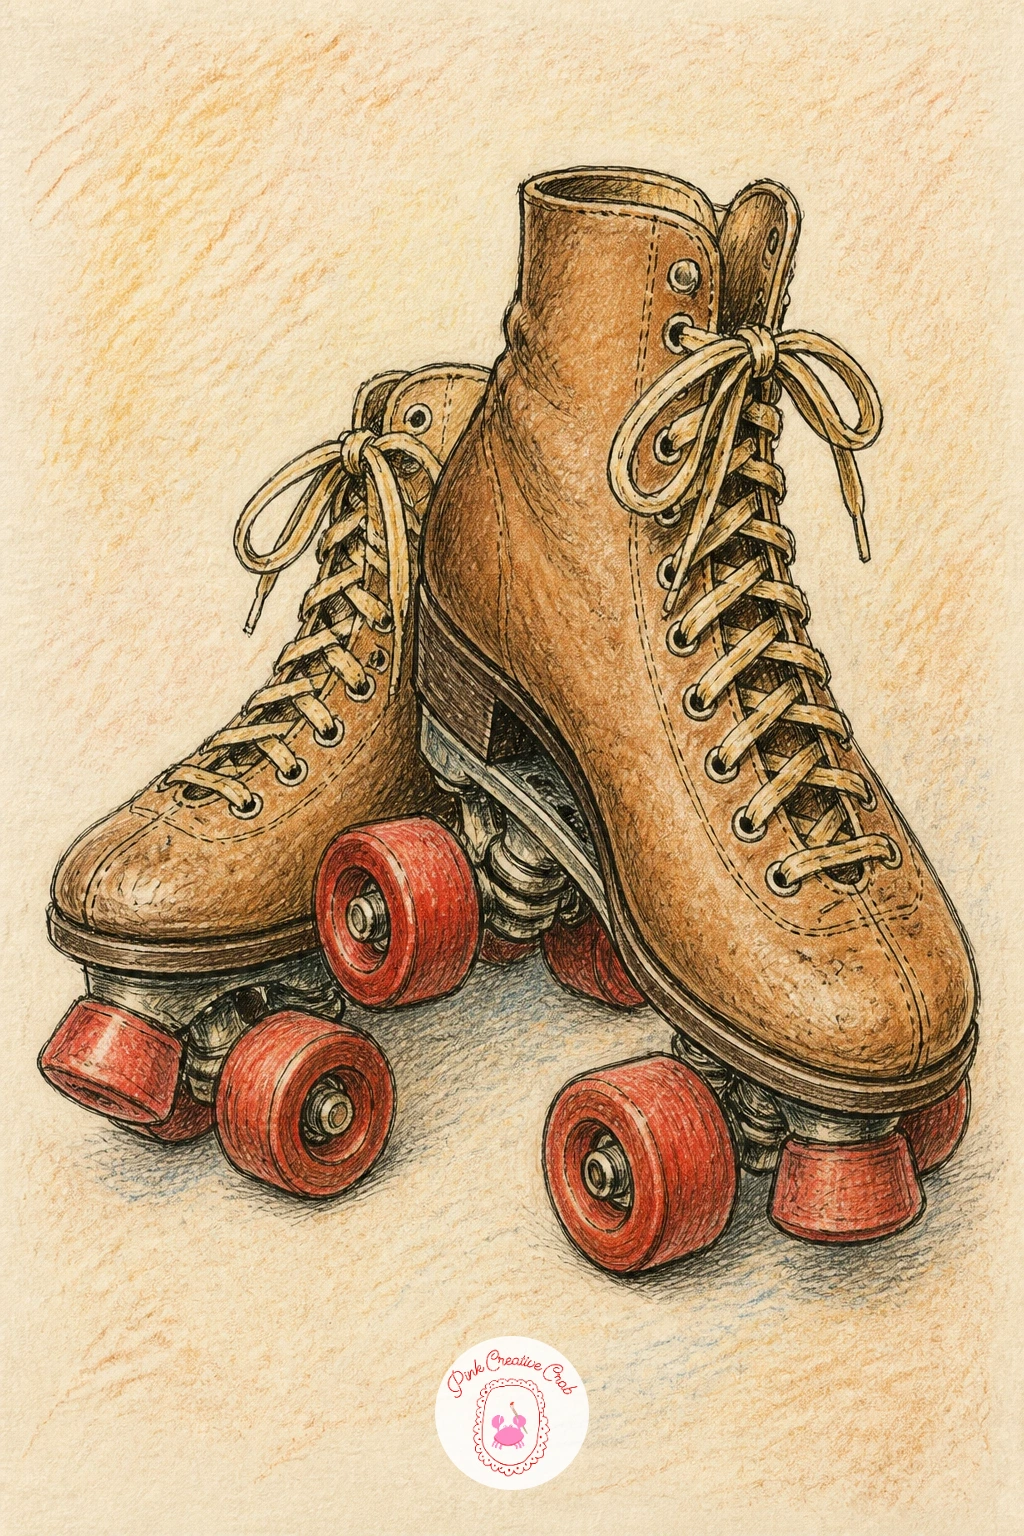
Roller skates are a nice compact subject built from one boot shape repeated twice, so get the first skate right and the second becomes much easier to mirror. Draw the boot as a simple curved shoe shape with a strap or buckle detail, then add the wheel frame underneath as a straight bar with four small round wheels attached.
Overlap the second skate slightly behind or beside the first rather than placing them perfectly side by side, which adds a sense of depth and keeps the composition from feeling too stiff and symmetrical. Vary the angle just slightly between the two for the same reason.
Red wheels against a leather brown or cream boot gives the classic vintage toy shop contrast, and a coin traced lightly under each wheel keeps all eight circles even. Shade the boot leather with smooth, slightly glossy strokes and keep the metal wheel frame colder and greyer by comparison.
A single small buckle detail on each strap finishes the pair without overloading them.
You Will Need
- a coin to trace the wheels
Palette: Saddle Brown,Fire Red,Steel Grey
The doll’s tea set rewards a light touch with small repeated shapes, since every cup should feel like part of a matching set. Draw one teacup carefully first, a simple rounded cup shape with a small curved handle and a flat saucer beneath it, then repeat that same cup two or three more times at slightly different angles on the tray.
Keep every cup the same size using the first one as a reference rather than redrawing from scratch each time, which is the detail that makes a tea set look like a set rather than mismatched pieces. The tray underneath is just a simple oval or rectangle with a slightly raised rim.
For a quick version, flat color on the cups with one simple painted pattern is enough. For a fuller piece, add a thin painted rim line around each cup and saucer in a contrasting color, plus a soft cast shadow where each cup sits on the tray.
Pastel colors keep the whole set feeling light and delicate rather than heavy.
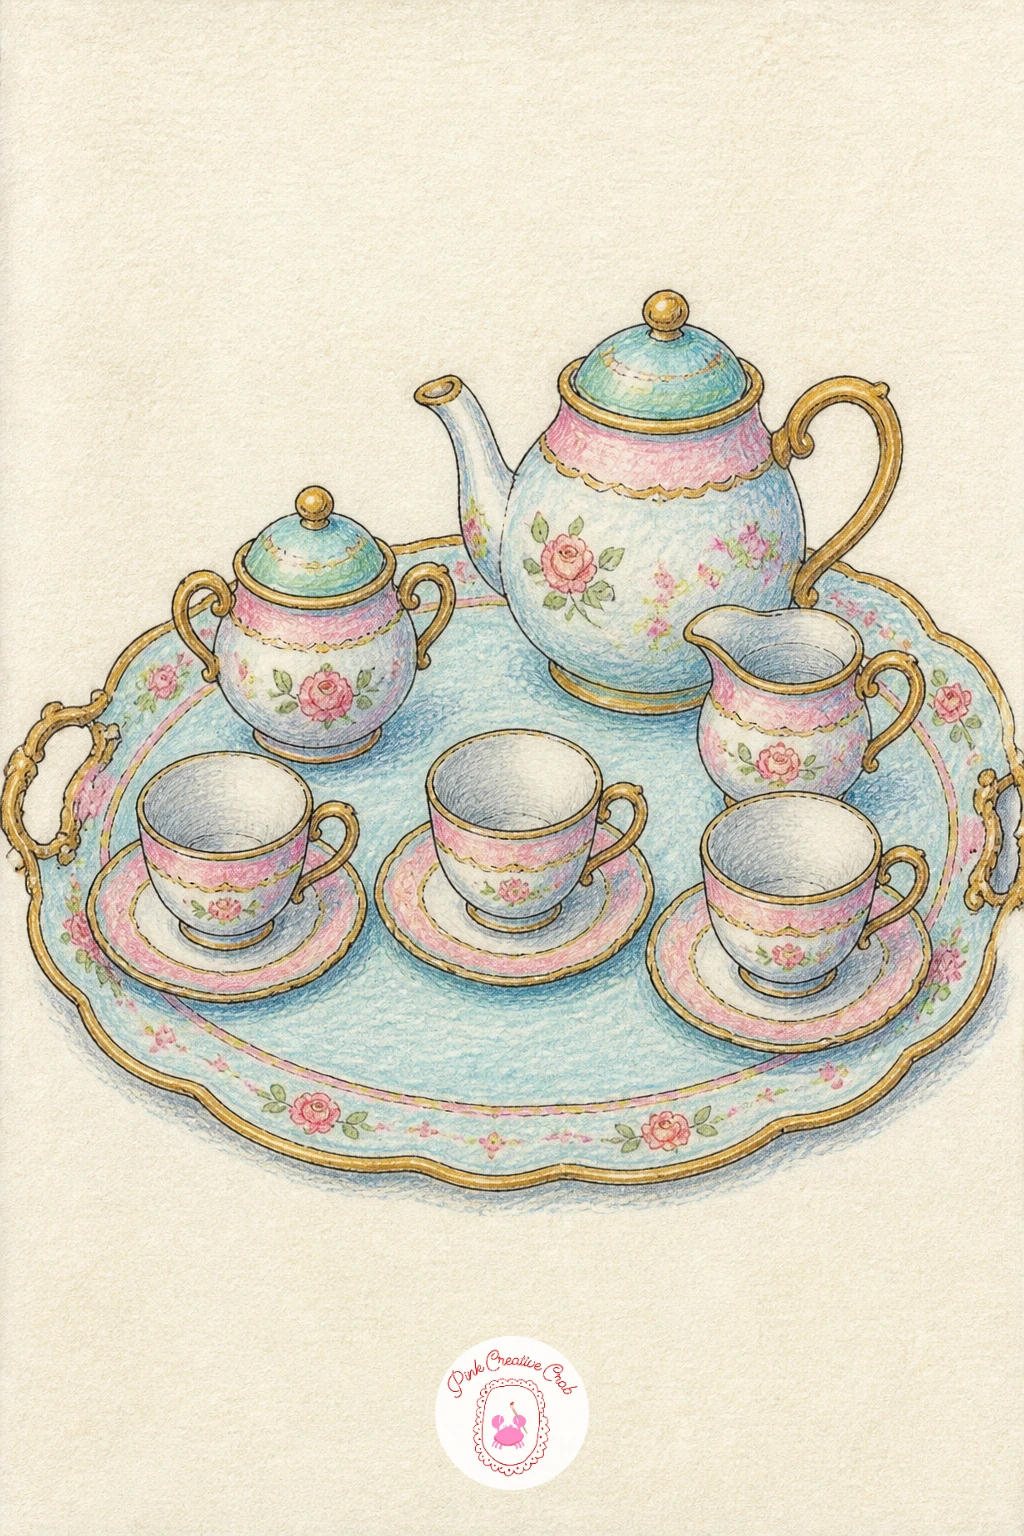
Palette: Powder Blue,Blush Pink,Gold Trim
The wind-up frog is a chance to draw motion again, this time with a crouched, springy pose rather than a blur. Build the body as a rounded shape with bent back legs tucked underneath and front legs stretched slightly forward, as if caught right at the top of a hop rather than sitting flat on the ground.
A few short curved lines beneath the back feet suggest the ground just left behind, which, paired with the raised pose, is usually enough to read as mid-hop without needing heavy motion lines like the spinning top drawing used earlier. Keep those lines light and few.
Paint the frog in a bright toy green with a contrasting lighter belly, and add the wind-up key at the side as a simple loop, matching the style used on the other tin toys in this set so the page feels consistent.
Round bulging eyes on top of the head give the frog its toy personality instantly.
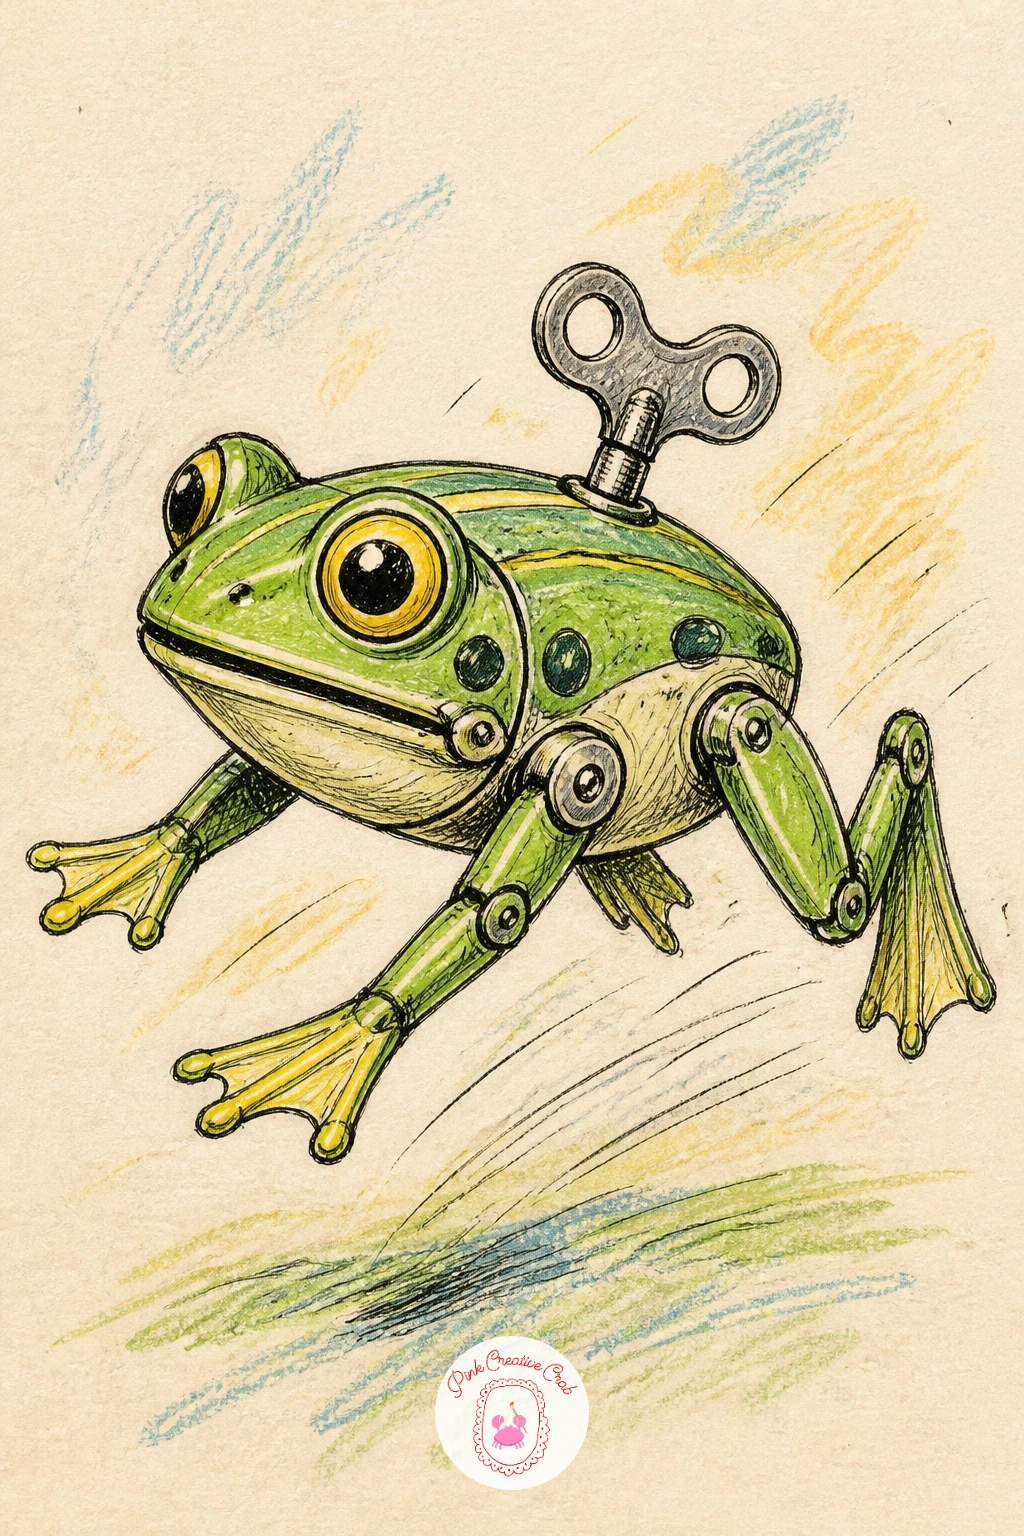
Palette: Toy Green,Pale Lime,Tin Grey
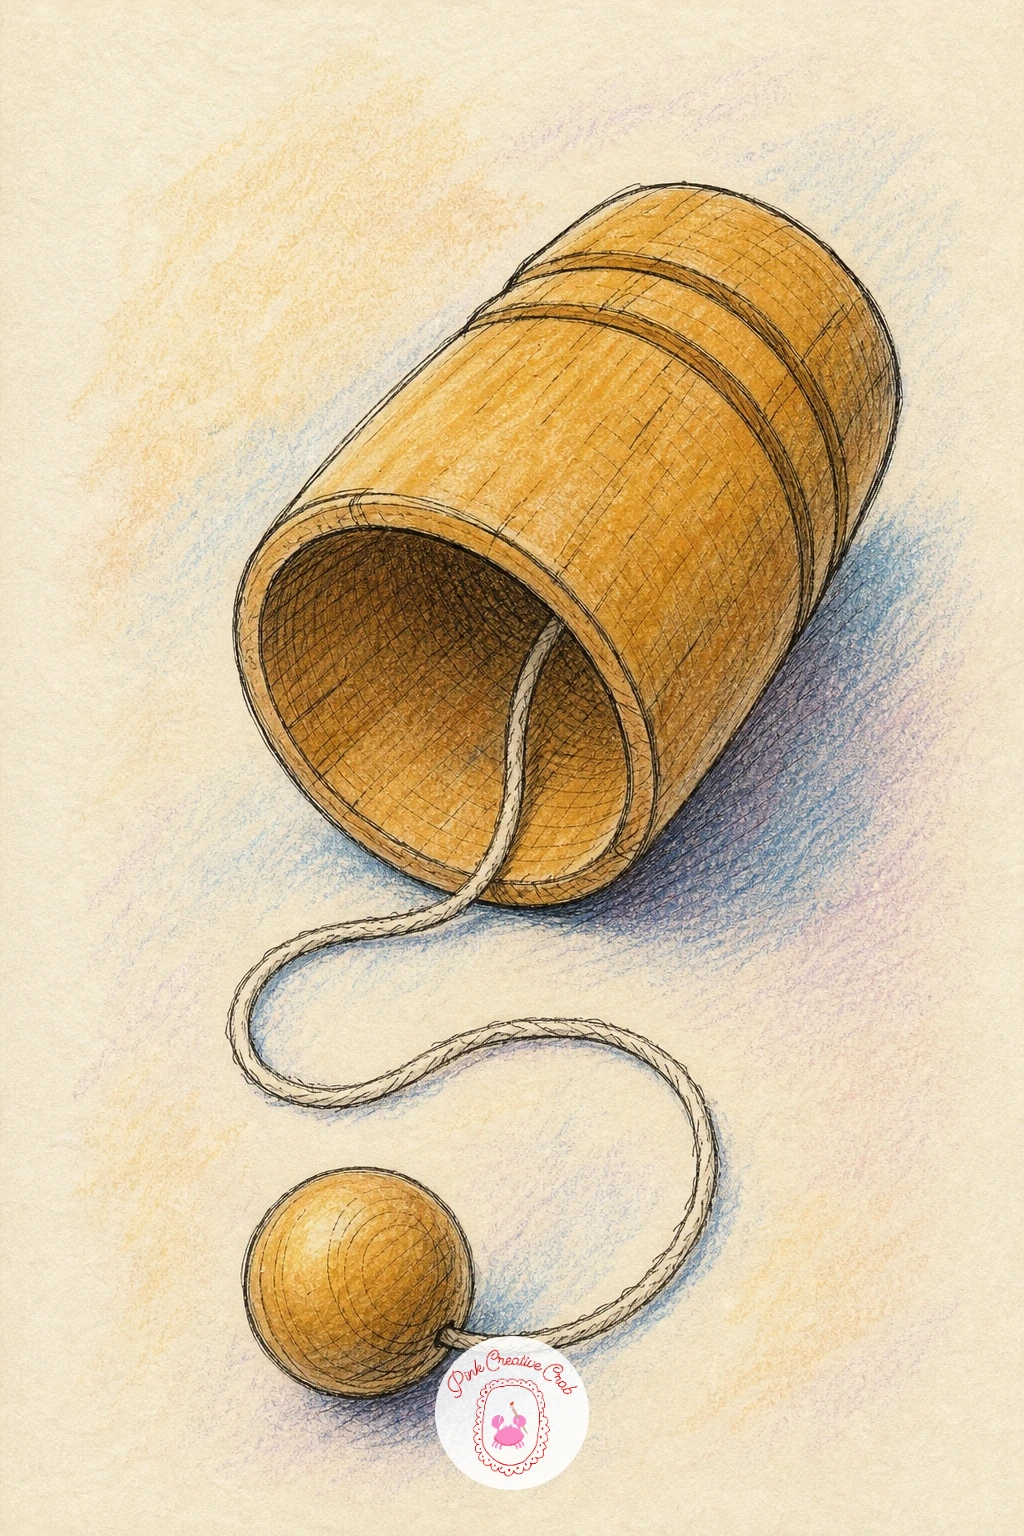
The cup-and-ball toy is one of the simplest shapes on this list, which makes it a good subject for practicing clean, confident fineliner lines with no pencil underneath once you feel ready. The cup is a narrow tapered shape with a hollow top, the handle below it is a simple rounded stick, and the ball sits connected by a single curved string.
Draw the string with a gentle sag rather than a straight line, since a taut string looks like it is made of wire rather than cord, and a toy mid-play always has a little slack hanging. Position the ball slightly to one side rather than dangling straight down the middle for a livelier composition.
Keep the wood tones warm and simple, a honey brown handle with a slightly darker cup rim is enough detail, and let the ball be the one bright spot of color on the page.
This is a fast subject, so if you want more challenge, add a second ball resting nearby for comparison.
Palette: Honey Oak,Cherry Red,Walnut
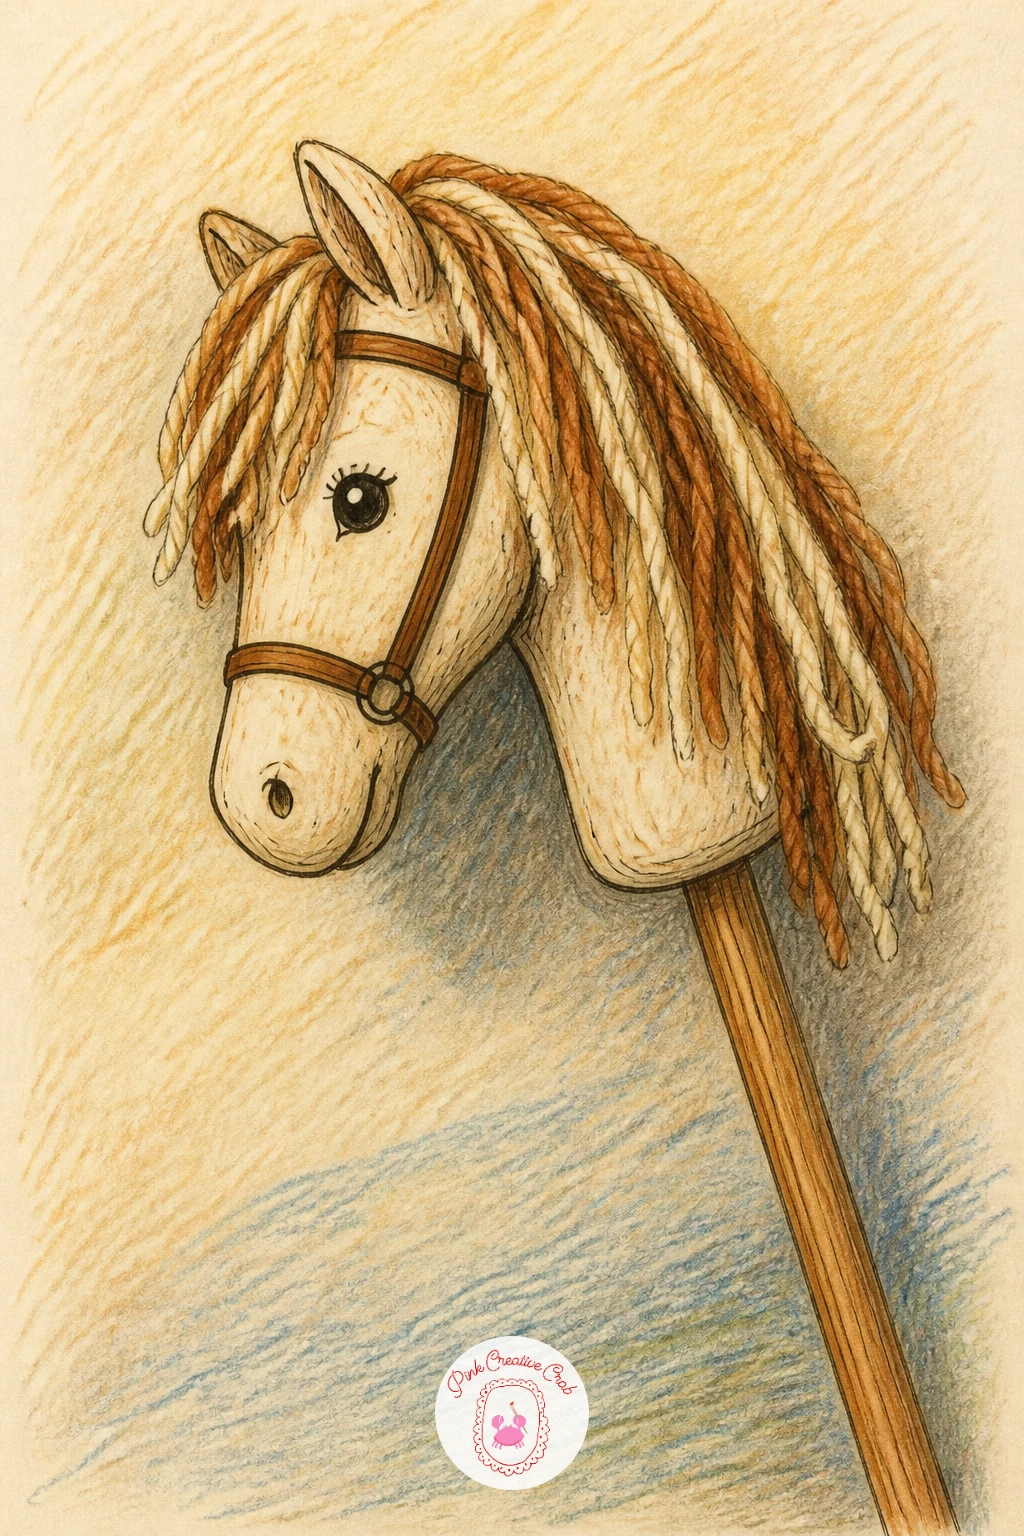
The hobby horse leans a plain stick against a wall, so think about perspective before drawing: a slight lean to one side against the wall feels far more natural than a horse standing perfectly straight on its own. Draw the long straight stick first, then add the horse head at the top as a simple elongated shape with pointed ears and a gentle curve to the nose.
The yarn mane is the best texture moment here, made from several short overlapping curved lines rather than one solid shape, layered in two or three colors so it looks like loose yarn rather than painted hair. Let a few strands fall slightly over the forehead for a worn, well-loved look.
Keep the wall behind simple, just a flat plain color or a few soft pencil lines suggesting boards, so it does not compete with the horse.
If yarn colors feel limited, a single warm brown with a lighter cream highlight strand reads just as well as a full rainbow mane.
Palette: Chestnut Brown,Cream,Faded Red
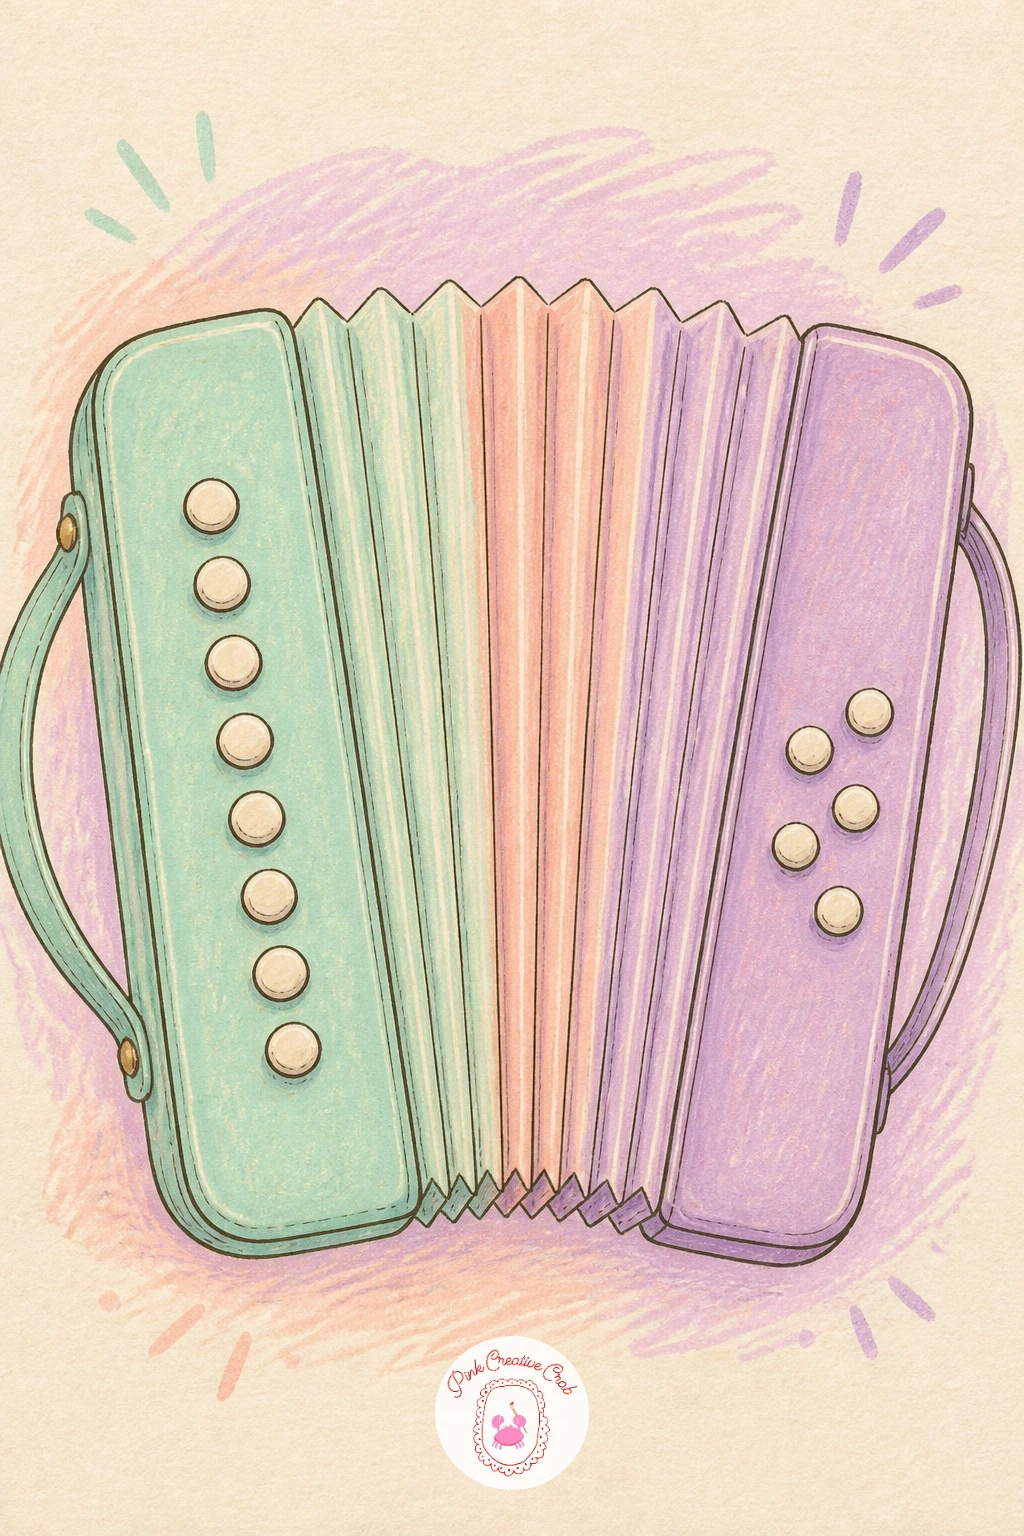
The toy accordion is mostly about one tricky shape, the pleated bellows, so practice that fold pattern separately in the margin before committing to the main drawing. Draw the two end panels first as simple flat boxes, then connect them with a zigzag strip of evenly spaced folds, checking that the spacing stays roughly consistent across the whole bellows.
Color each pleat fold in alternating pastel shades, light and slightly darker versions of the same two or three colors, which makes the fold pattern pop without needing to shade every single crease by hand. A light pastel marker swept once across the whole bellows after the colored pencil layer softens all the folds together nicely.
Keep the end panels in a plainer solid color so the eye lands on the colorful pleats first. A few simple straight buttons or keys along one panel finish the instrument without extra fuss.
If the folds feel too stiff and ruler-straight, curve the whole bellows gently to one side for a more relaxed, played-with look.
Palette: Mint Green,Soft Peach,Lavender
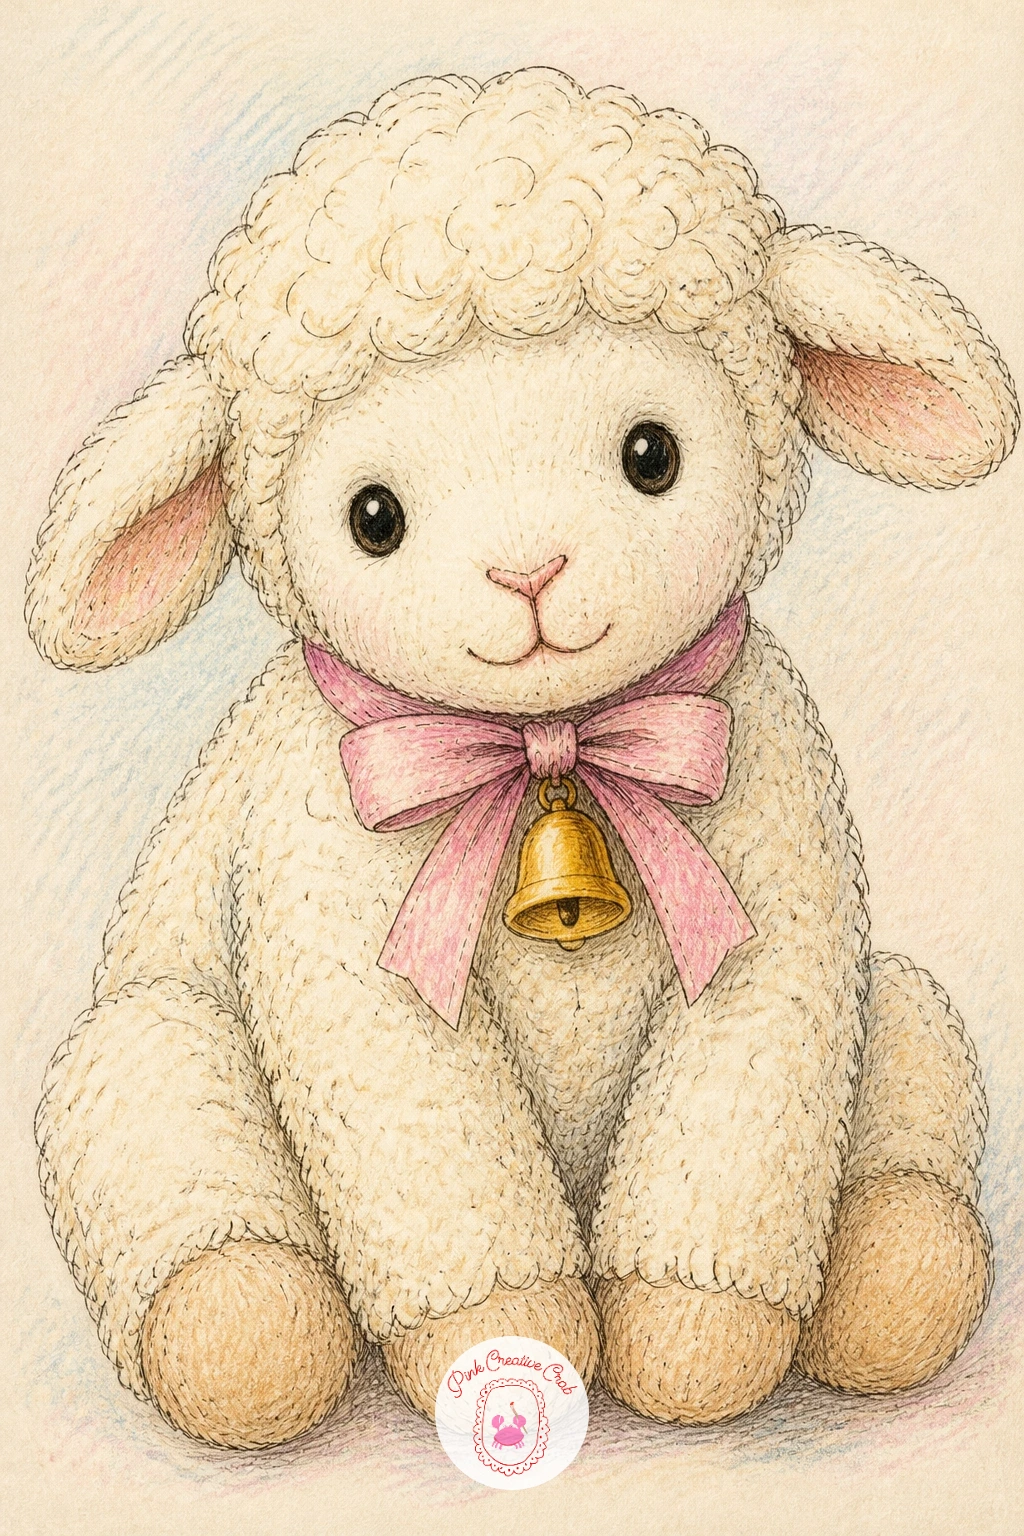
The stuffed lamb brings the set to a gentle close with soft, rounded curls and one small shiny detail. Build the body as one plump oval shape, then cover most of it with small overlapping loop shapes to suggest curly wool, working from the back of the body forward so the loops naturally overlap in the right direction.
Keep the face, legs and ears smooth and simple by comparison, no curly texture there, which creates a nice contrast between the fluffy wool and the plainer features. A small ribbon around the neck with a tiny bell hanging from it is the one bright accent on an otherwise soft, pale animal.
If the curls start to look too uniform, vary a few loop sizes slightly larger or smaller as you go, since real wool never curls in perfectly even rows.
A pale cream or off-white works better than pure white for the wool, since it shades more believably in colored pencil.
Palette: Cream Wool,Soft Pink,Brass Bell
Close the sketchbook page with the biplane, a toy that uses the same mid-action trick as the spinning top and the hopping frog earlier but on a propeller instead of a whole body. Draw the fuselage first as a simple long oval with two straight wings crossing it, upper and lower, connected by a few short diagonal strut lines between them.
For the propeller, skip drawing individual sharp blades and instead draw a soft circular blur shape at the nose with two or three faint curved lines radiating through it, the same soft-motion approach used for the spinning top. A perfectly sharp propeller shape will look stopped rather than spinning.
Keep the body in one or two bright toy colors with a plain painted finish, and let the wings be a slightly different shade so the two wing layers read clearly against each other.
A small round wheel beneath the fuselage grounds the plane as a toy sitting on a shelf rather than flying free.
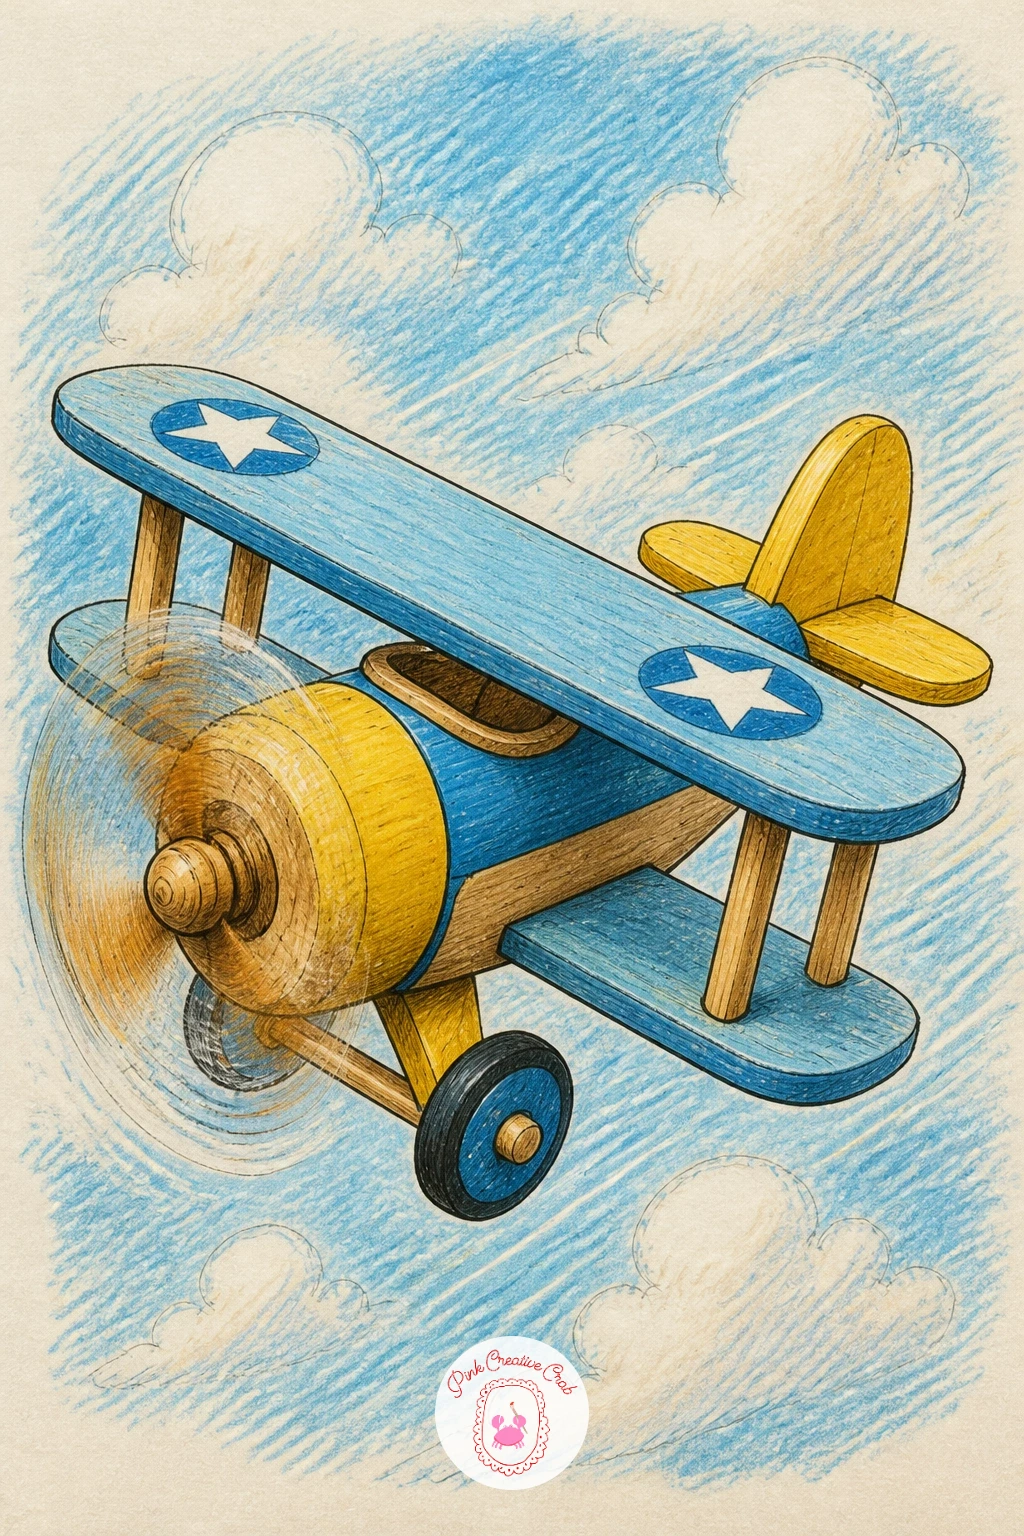
Palette: Sky Blue,Sunburst Yellow,Warm Grey
For more small vehicles and tiny moving parts to sketch, the toy shop junk journal collection has a few more rolling and winding toys worth studying.
What to Do Next
Pick one toy that caught your eye first, whether that is the quick cup-and-ball or the more involved tin carousel, and give it one full page so the drawing has room to breathe. Keep a pencil, a fineliner, colored pencils and one pastel marker within reach, and let the next toy follow naturally once this one feels finished.
Frequently Asked Questions
What paper works best for a toy shop aesthetic sketchbook page?
Cream toned paper works best, since it warms up colored pencil and pastel marker tones and avoids the stark white look of printer paper, matching the vintage feel of these toys.
Do I need to draw every toy with a pencil sketch first?
Beginners benefit from a light pencil layout for proportions, especially on tin robots and wheels, but confident drawers can go straight to fineliner on simpler shapes like the cup-and-ball or drum.
How do I keep tin toys from looking flat?
Use short, slightly uneven colored pencil strokes rather than one smooth fill, and add one consistent light direction across the piece so one side always shades darker than the other.
What if I do not own pastel markers for these ideas?
Colored pencil blended with a little extra pressure, or a damp fingertip lightly smudged over pencil shading, gives a softer gradient close to what a pastel marker adds.
How long does one toy study usually take?
Most of these toys finish in twenty to forty minutes depending on detail level, with simpler subjects like the drum or cup-and-ball closer to ten minutes for a quick sketch.
Have any thoughts?
Share your reaction or leave a quick response — we’d love to hear what you think!
-
 0
-
0
-
0
-
0
-
0
-
0


