

A mushroom doodle is the kind of small drawing that fills a page in minutes and still feels like a little story. Give a toadstool a face, a tiny door or a walking stick and suddenly it has somewhere to go and something to do, which is exactly why these shapes are so easy to keep drawing.
Below you will find 28 of them, from a napping toadstool you can draw in two minutes to a full tree stump house with a cat peeking out of the window. Grab a black fineliner and a couple of markers and work through them in any order, the easiest ones sit near the top.
Using these images: free for personal projects such as printing, coloring, cards, journals and gifts. Handmade items that include them may be sold up to 30 pieces per design. More than that is commercial use and is not permitted, and neither is selling or sharing the images themselves or passing them off as your own. Please ask before any other use.
Start with a toadstool, the simplest subject on this whole list, because its cap is just a dome and its stem is a rounded rectangle. Draw the cap first with one curved line, add the stem underneath, then tilt the cap edge down low over where the eyes would be so it reads as asleep rather than awake.
Ink the outline with your fineliner, then add two short curved lines poking out under the cap for closed eyes, since the cap hides most of the face anyway. A small open mouth or a single z floating above finishes the sleepy mood.
The common mistake is making the cap too flat, which makes the toadstool look squashed instead of relaxed. Round the top generously and let the brim dip lower on one side than the other for a lazy, lopsided lean.
Color the cap in toadstool red with white spots left blank, then add a thin moss green line for grass underneath. If you only have one marker, red alone still reads clearly against plain fineliner spots.
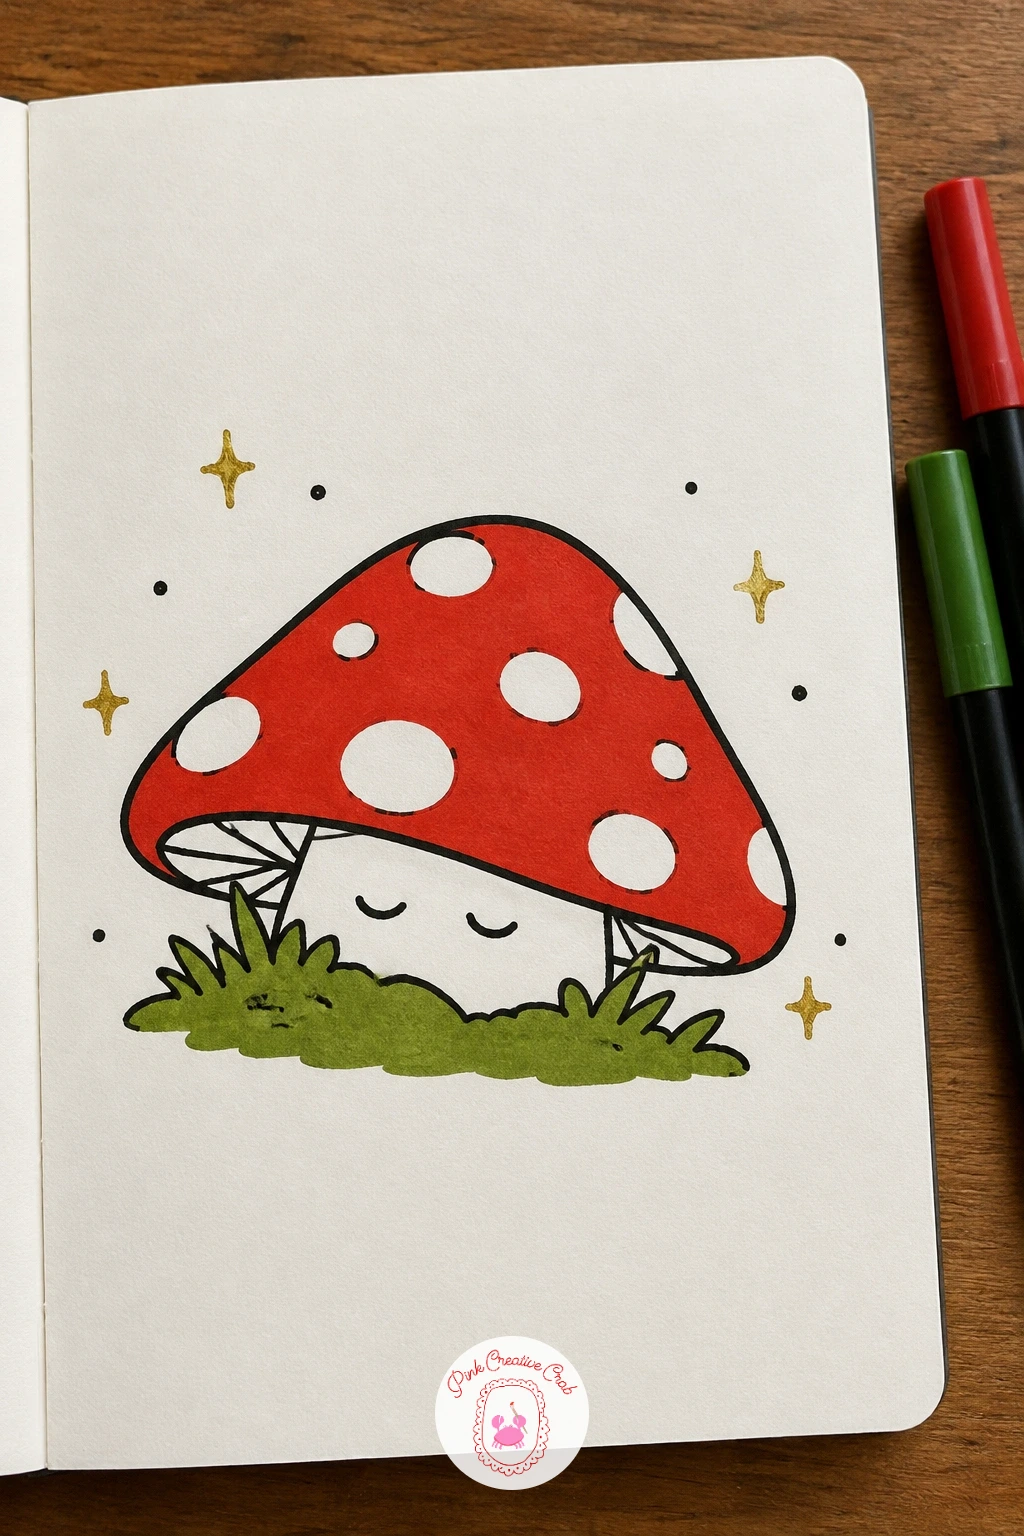
Palette: Toadstool Red,Moss Green,Ivory White
Puffball mushrooms skip the cap and stem shape entirely and that makes them a nice quick change after a classic toadstool. Draw one plain circle sitting directly on the ground with no stem at all, then give it a proud little face with wide round eyes and a closed smug smile.
Add two stubby arms with hands on hips, since that pose does more to sell the “proud of being round” idea than any detail on the face. Keep the circle a touch imperfect, a perfectly mechanical circle looks stiff compared to one with a slight wobble.
If the circle comes out lopsided, lean into it rather than erasing: add a tiny sparkle line beside it so the wobble reads as a shine instead of a mistake. That one small sparkle fixes more awkward circles than redrawing does.
Leave the puffball plain white or pale cream rather than red, since puffballs really do grow that pale color, and let the moss green marker sit under its feet as ground.
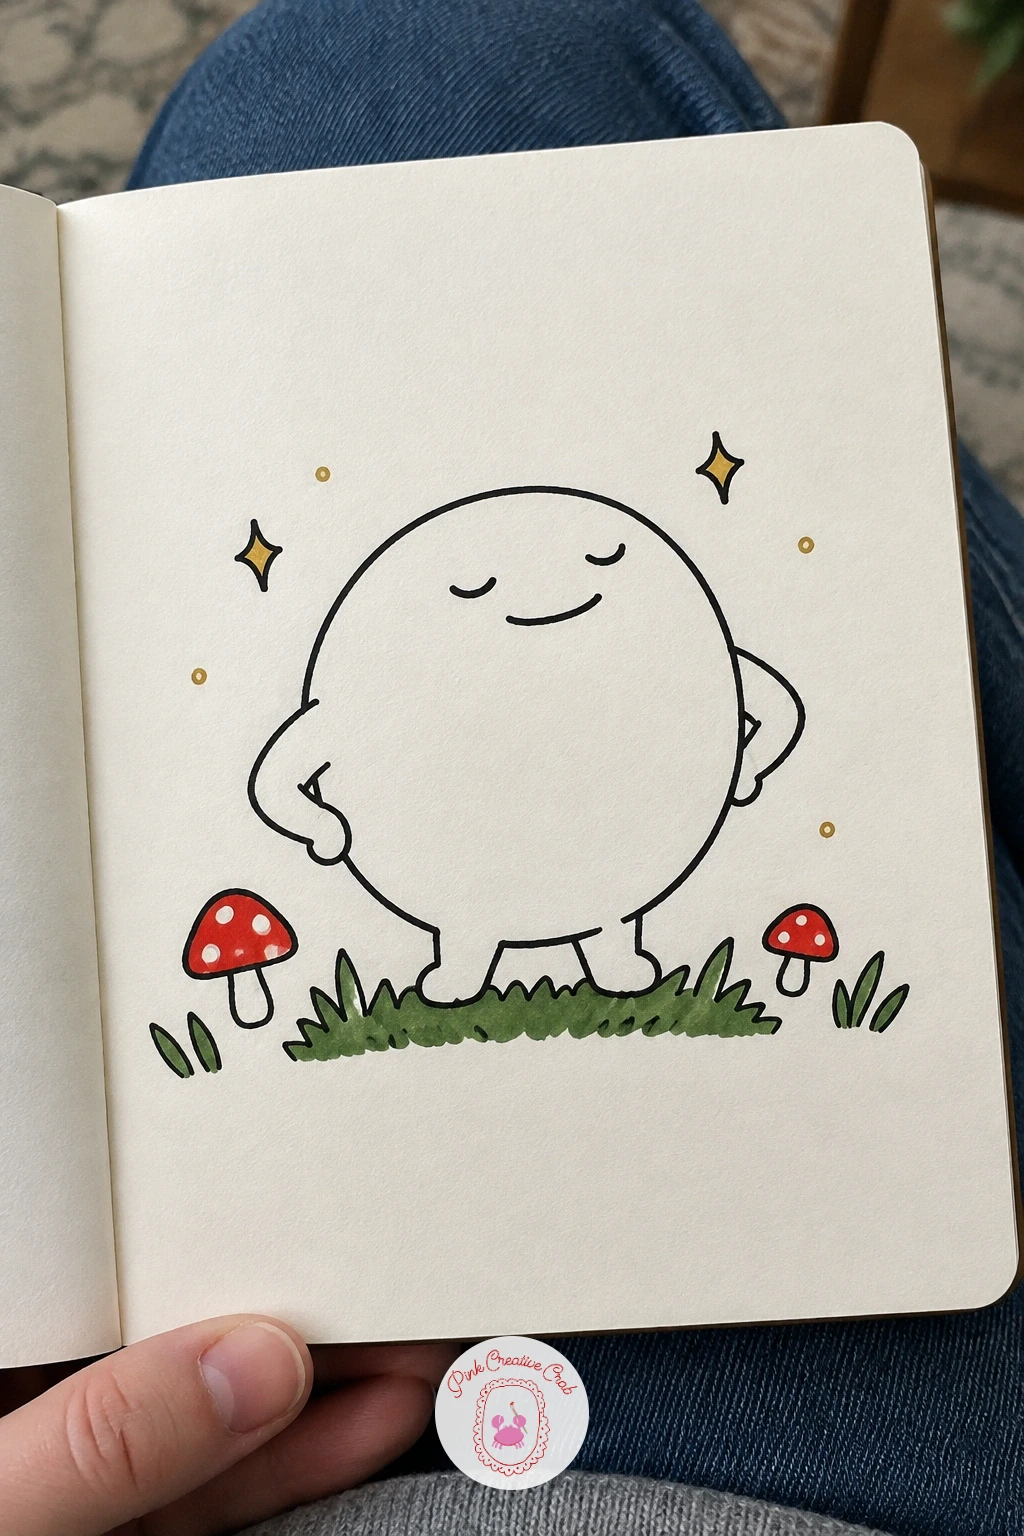
Palette: Cream White,Soft Grey,Moss Green
After a calm toadstool, give a mushroom some motion by drawing it mid sneeze. Draw the cap and stem as usual, then tip the whole mushroom back slightly so the cap leans away from its feet, which is the single detail that sells the sneeze more than the face does.
Scrunch the eyes into tight closed arcs and draw the mouth as a small open oval, then add two tiny feet lifting off the ground to show the force of it. Above the cap, draw a little cloud shape with three or four dots scattered inside for the spores.
Keep the spore cloud small and loose, a tight neat cloud looks like a thought bubble instead of a sneeze. If it starts looking too formal, scribble the cloud outline a little faster and messier on purpose.
Color the cap toadstool red and leave the spore dots uncolored so they stand out against the white paper, just a thin green line of grass is enough underneath.
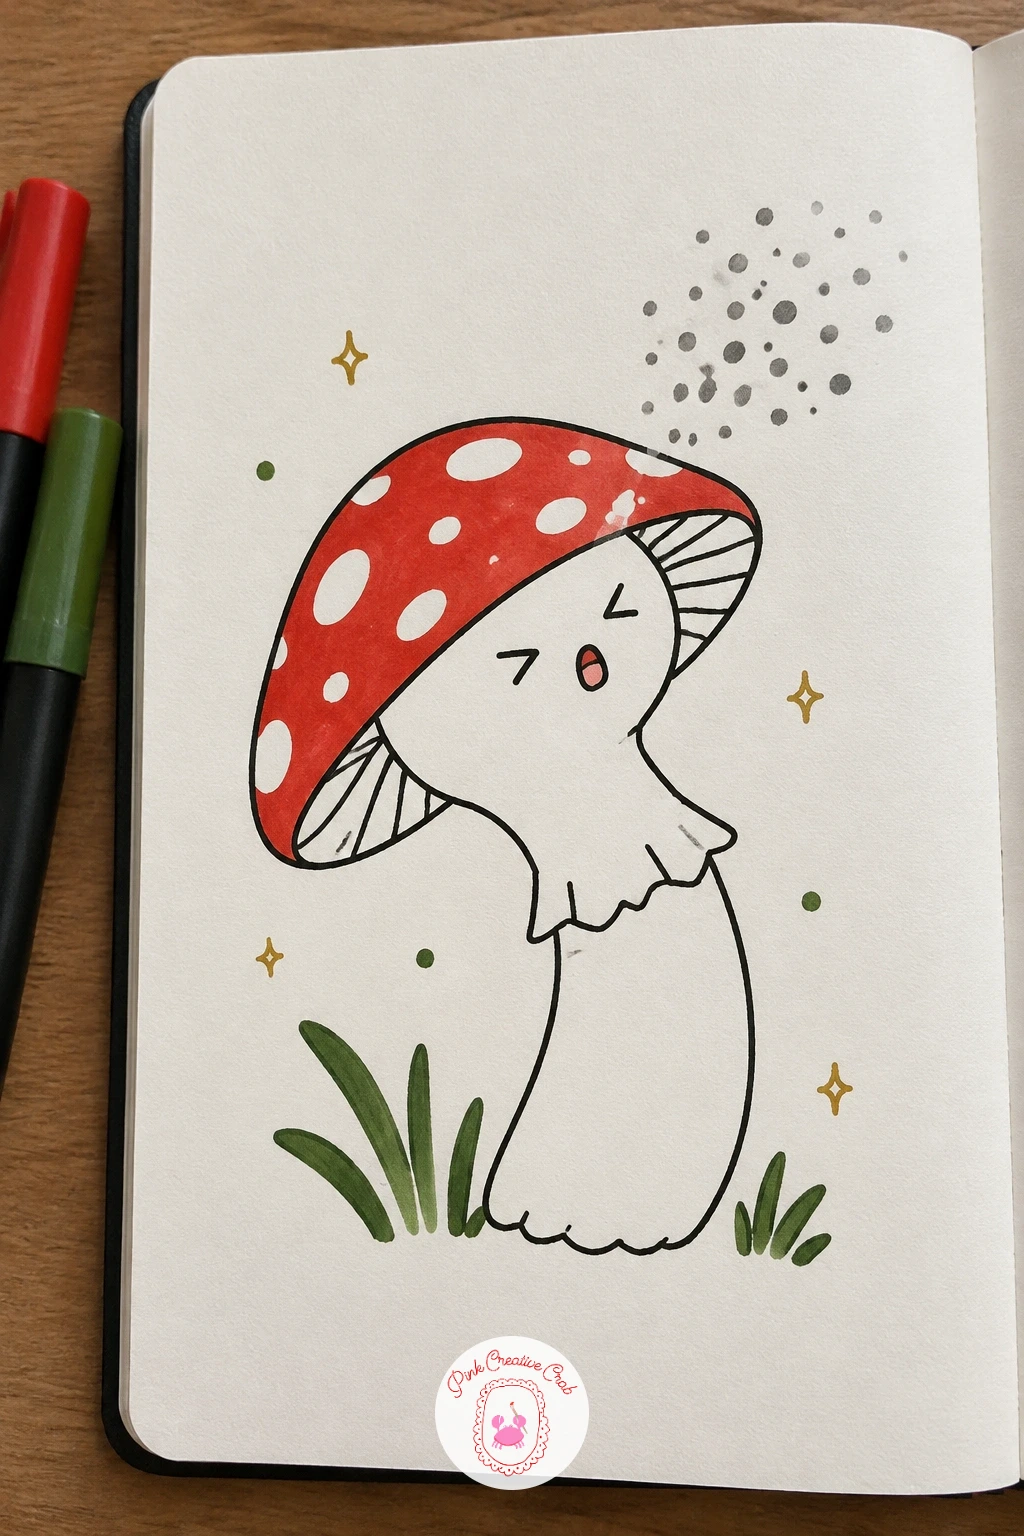
Palette: Toadstool Red,Soft Grey,Moss Green
Move from a single mushroom to a tiny scene by drawing a flat topped mushroom doing a job instead of having a face. Draw the cap wide and level rather than domed, almost like a little tabletop, with a short thick stem holding it up.
Place a round beetle beside it first in pencil to get the scale right: the beetle should sit about as tall as the stem, small enough that the cap clearly works as its table. Ink the mushroom, then the beetle with two curved lines for its shell and six thin legs.
Add two tiny dots on the cap for a “plate” and a leaf crumb beside it, which makes the picnic read instantly without needing extra props. If the beetle looks lost, draw it sitting rather than standing, it reads calmer and more settled at the table.
Keep the beetle in a plain dark color or leave it uncolored, and save the red marker for the mushroom cap so the eye knows where to land first.
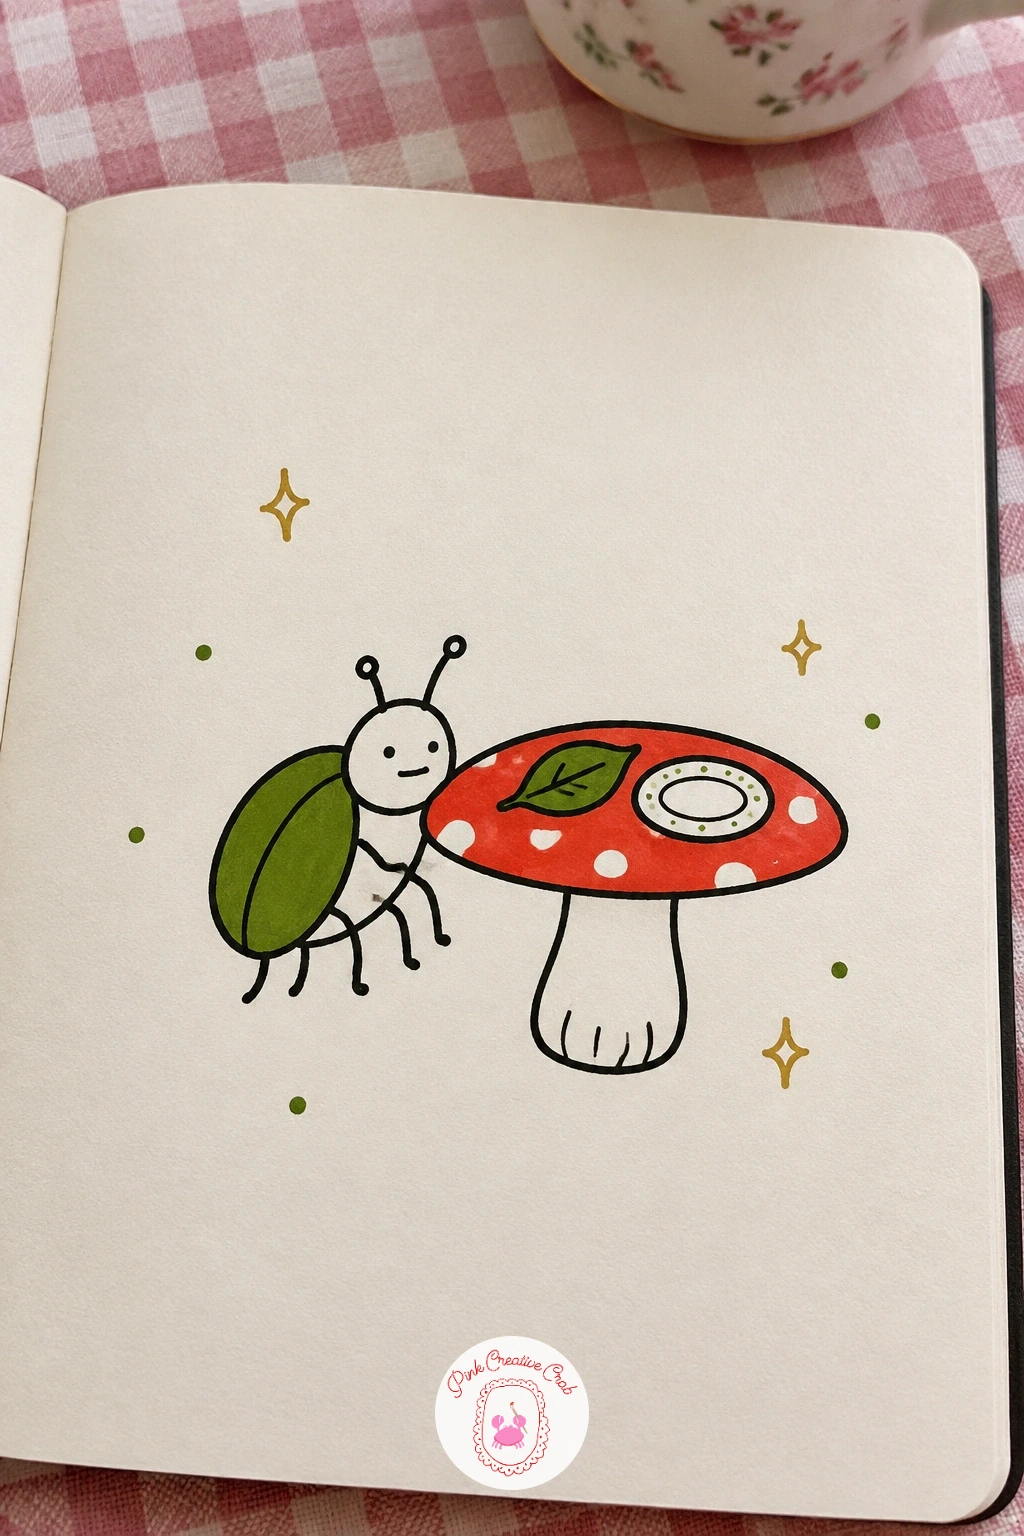
Palette: Toadstool Red,Charcoal Grey,Moss Green
Shyness is easy to draw once you know where to hide the face, so start this one with a large simple leaf shape, oval with a center vein and a few side veins. Draw the mushroom small and tucked behind the bottom edge of the leaf, with just its cap and one eye peeking around the side.
Work leaf first, then slide the mushroom in behind it so the leaf edge naturally overlaps the mushroom’s shoulder. That overlap is what makes the hiding read, a mushroom drawn fully beside the leaf just looks like it is standing next to it.
If the one peeking eye looks blank, add a small raised eyebrow line above it, that tiny line carries most of the shy expression on a face this small. A thin blush mark on the visible cheek helps too.
Color the leaf in moss green and the mushroom cap in toadstool red, keeping the red small so the leaf still reads as the bigger shape doing the hiding.
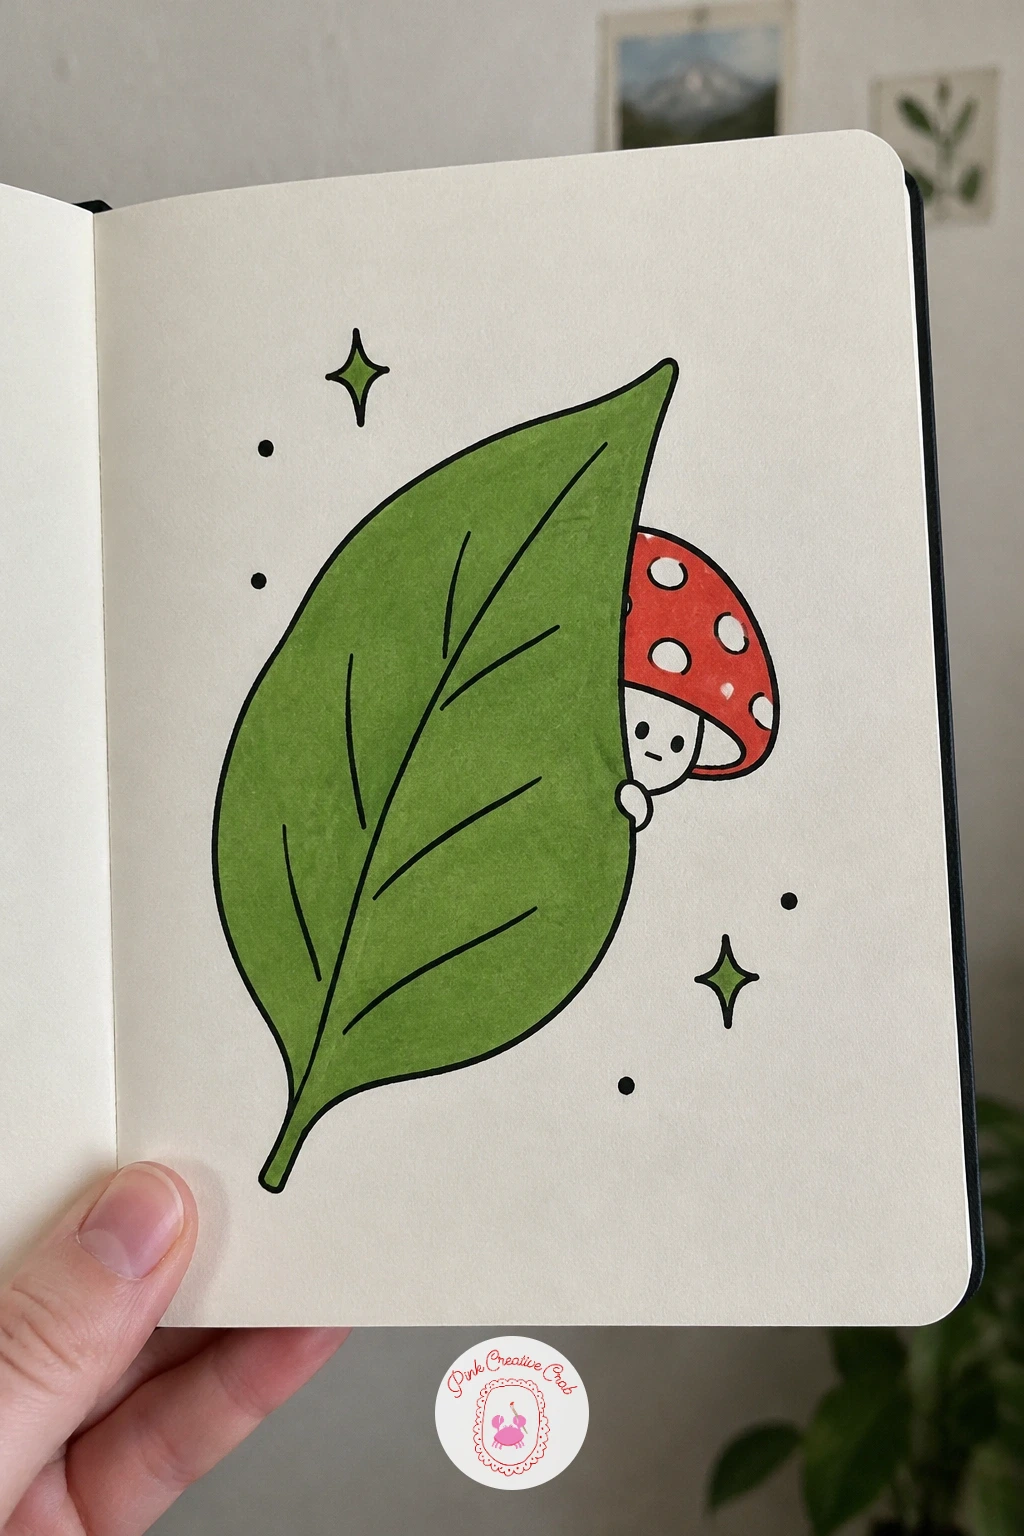
Palette: Moss Green,Toadstool Red,Soft Grey
If a plain leaf feels too empty on its own, scatter two or three small dots along its edge for texture, like light dew, before you add any color.
Build this scene around the mushroom’s shape doing double duty as an umbrella, which means drawing the cap a little wider and flatter than a resting toadstool so there is clear room underneath it. Draw the cap and stem first, then draw rain as short diagonal lines falling everywhere except directly under the cap.
Add the snail next, a simple spiral shell on a curved body with two small eye stalks, tucked just under the brim where the rain lines stop. Keeping that one dry patch empty of rain lines is what makes the shelter obvious without needing an umbrella handle or any extra prop.
If the rain lines end up crowding the drawing, thin them out near the mushroom and keep them denser toward the edges of the page, the contrast reads as shelter even more clearly. For a quicker version, skip the shell spiral and draw the snail as a simple rounded blob with a small curl on top.
Color the cap toadstool red, the shell a soft moss green, and leave the rain lines in plain black ink so they stay light and quick looking against the color.
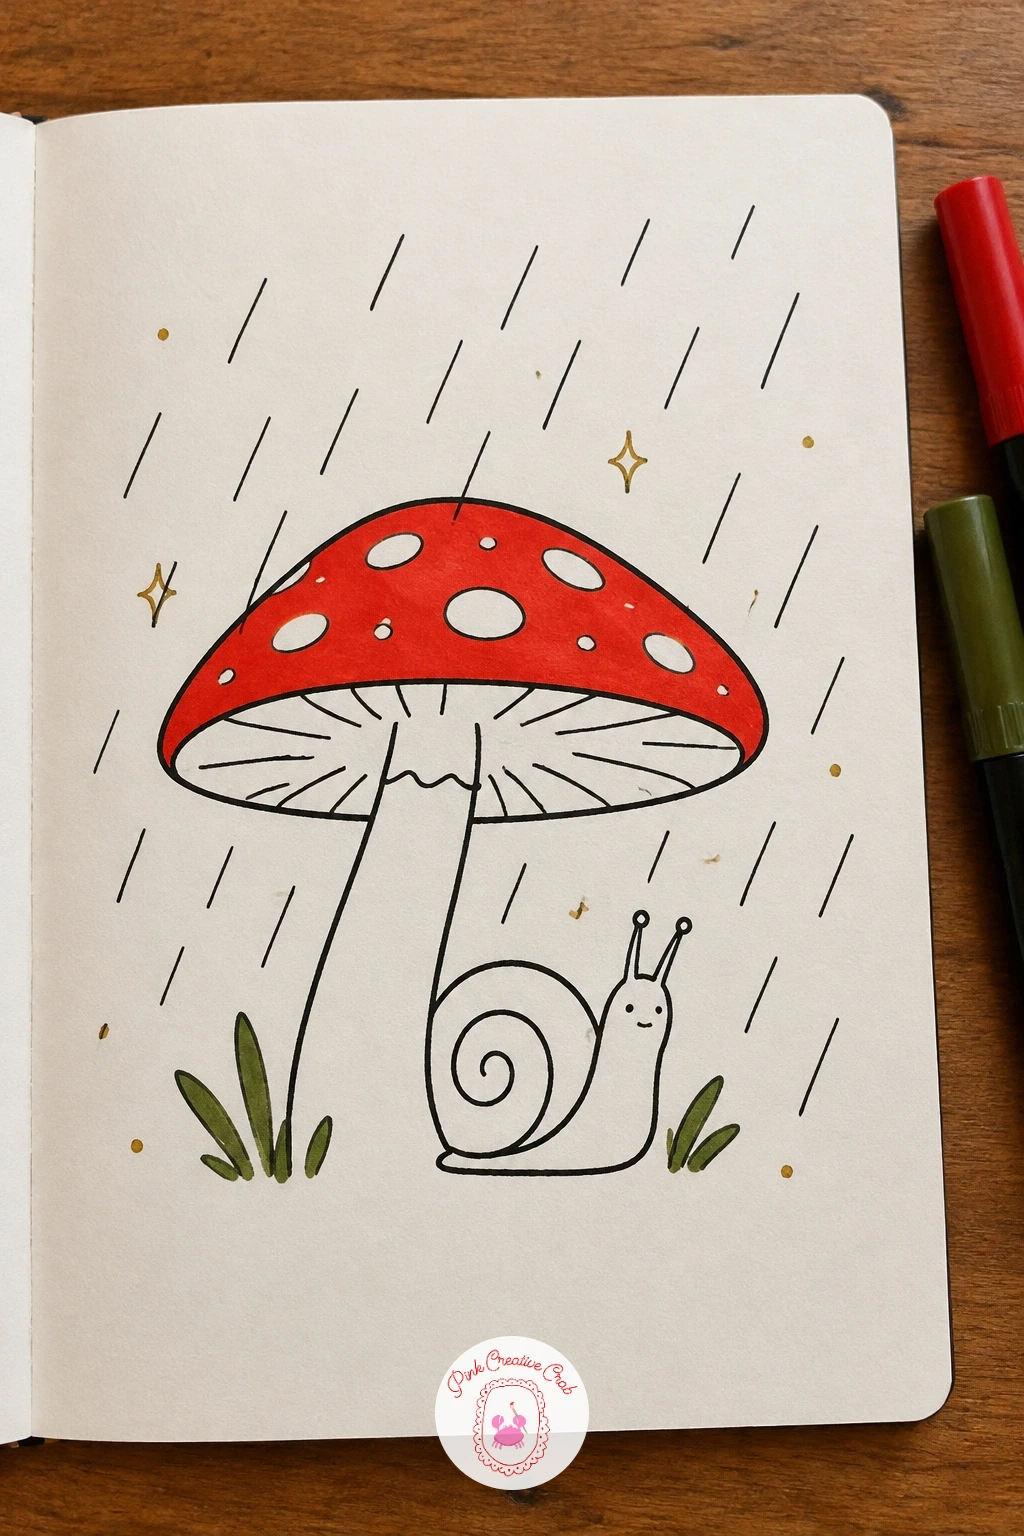
Palette: Toadstool Red,Moss Green,Soft Grey
This is a nice one for practicing proportion because the whole joke depends on counting spots correctly. Draw a toadstool with its cap covered in white spots as usual, but leave one obvious gap where a spot should be, and give the toadstool a puzzled expression looking down at its own cap.
Plan the spot placement lightly in pencil first: space them evenly around the dome, then erase just one so the gap looks intentional rather than like you simply ran out of room. That planning step is the trick that keeps the missing spot readable instead of looking like a drawing mistake.
Draw the arms reaching up to pat the cap, feeling around for the missing spot, which sells the search better than the face alone would. A small questioning squiggle beside the head works well if you want to add one extra motion line.
Keep the cap toadstool red with the spots left white, and leave the one gap as plain red so it stands out clearly against the rest.
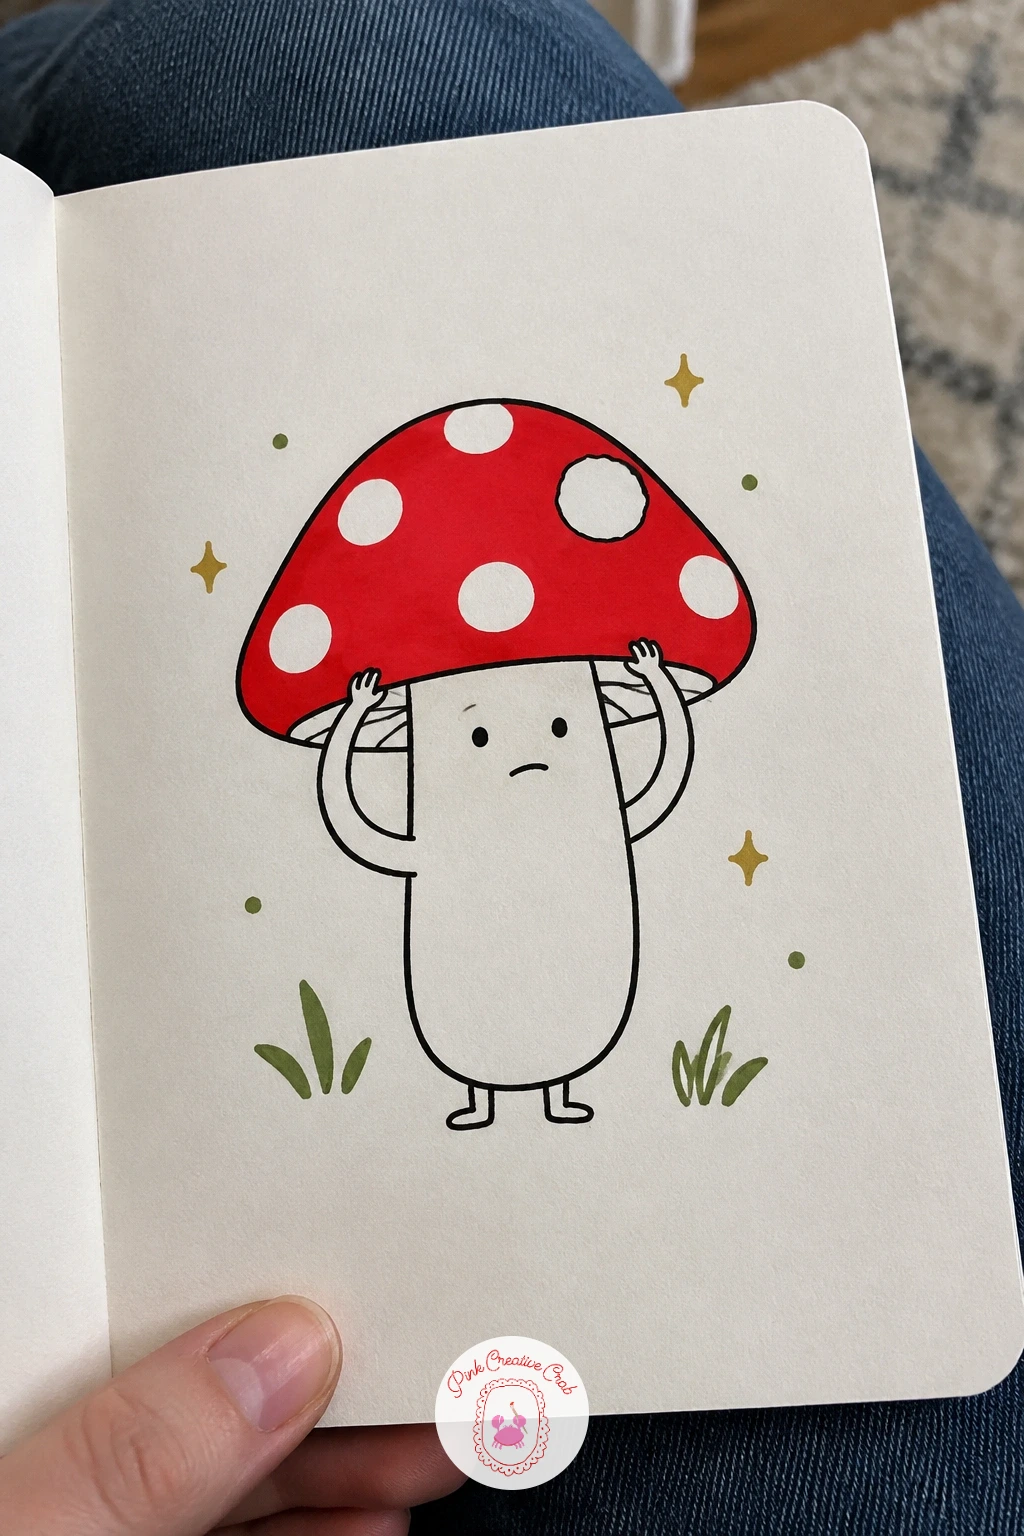
Palette: Toadstool Red,Ivory White,Soft Grey
Give a mushroom a job that needs a prop, which is a good way to practice drawing something leaning at an angle. Draw the mushroom first with its cap and stem, then lean a simple two railed ladder against the edge of the cap, angled rather than straight up, the way a real ladder rests against a wall.
Picture the light coming from one side as you draw the rungs, spacing them slightly wider apart near the bottom and tighter near the top, which is how a leaning ladder naturally reads in perspective even in a simple doodle. That small rung spacing trick does more for believability than careful straight lines would.
If the ladder looks like it is floating next to the cap rather than touching it, add one small shadow line where the top rail meets the cap edge. That single contact line anchors the whole prop.
Keep the mushroom cap toadstool red and the ladder in plain black ink, since a wooden brown would need a third marker you may not have on hand.
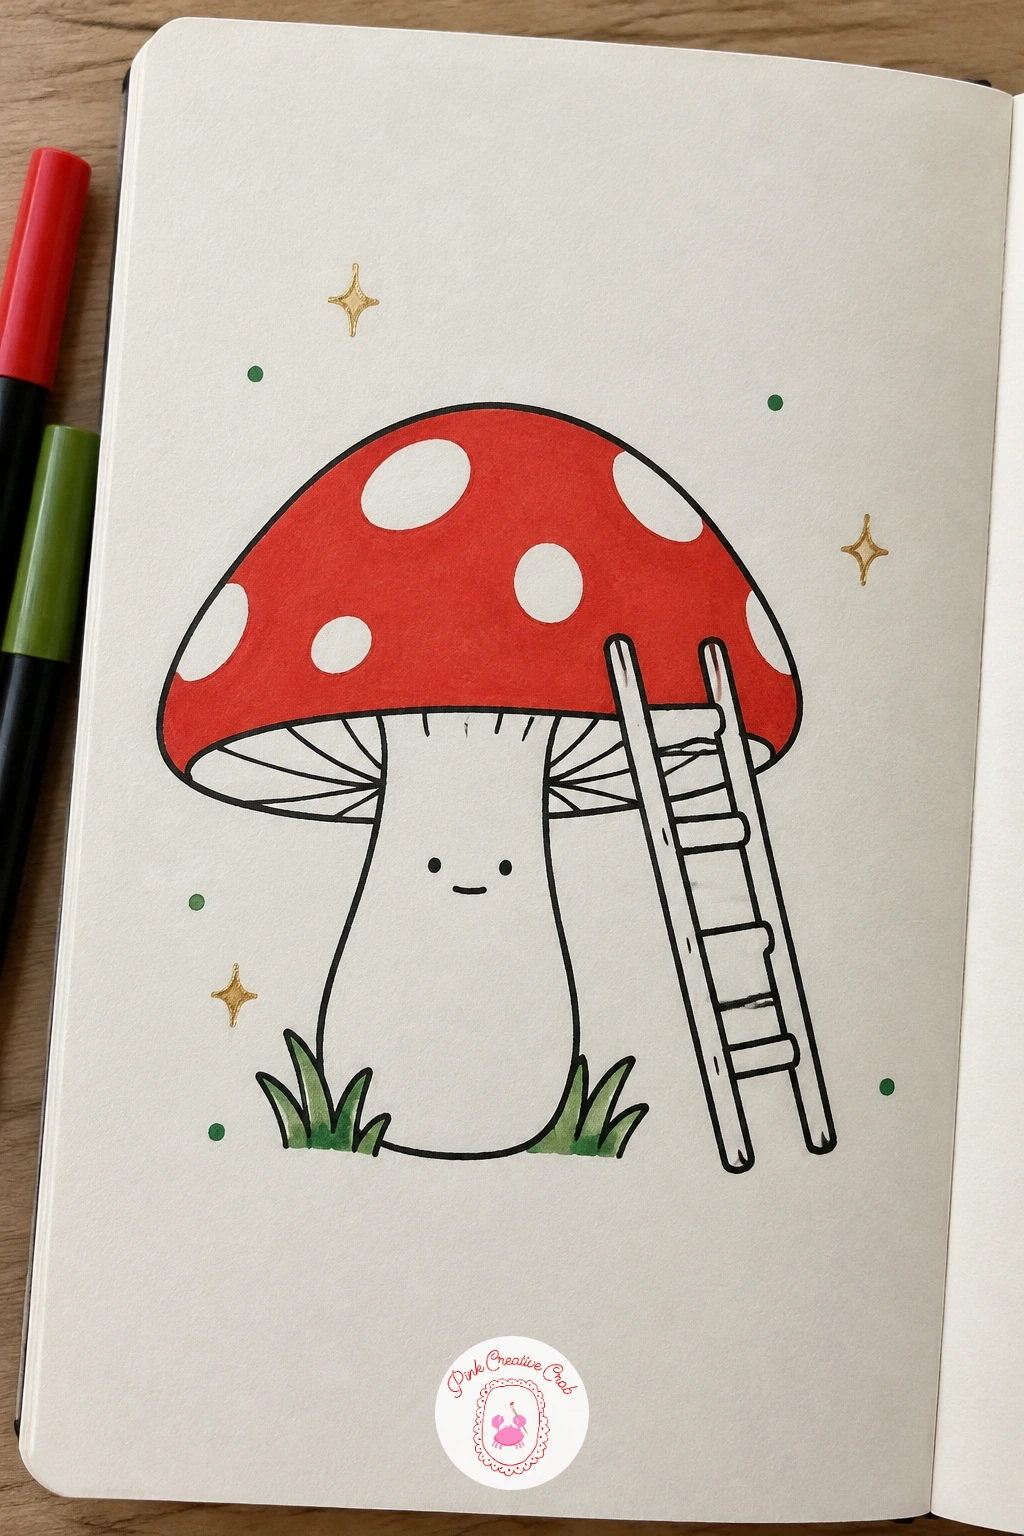
Palette: Toadstool Red,Soft Grey,Charcoal Grey
This one is about drawing an expression clearly enough that it reads as unwell rather than just tired. Start with the cap and stem, then give the face droopy half closed eyes, a red tinted nose area on the stem, and a small furrowed brow line above the eyes.
Draw a tiny hot water bottle cradled in its arms, a simple rounded rectangle shape with a short neck, held close against the stem. Work the face before the hot water bottle, since getting the droopy sick expression right matters more here than the prop does.
If the face reads as sleepy instead of sick, add one small wavy line near the top of the cap for heat or discomfort, and a single drip shape for a runny nose. Those two tiny additions shift the mood instantly.
Color the cap toadstool red as usual, but leave the hot water bottle a plain soft grey or pale pink rather than bright red, so the two red elements do not blur into each other.
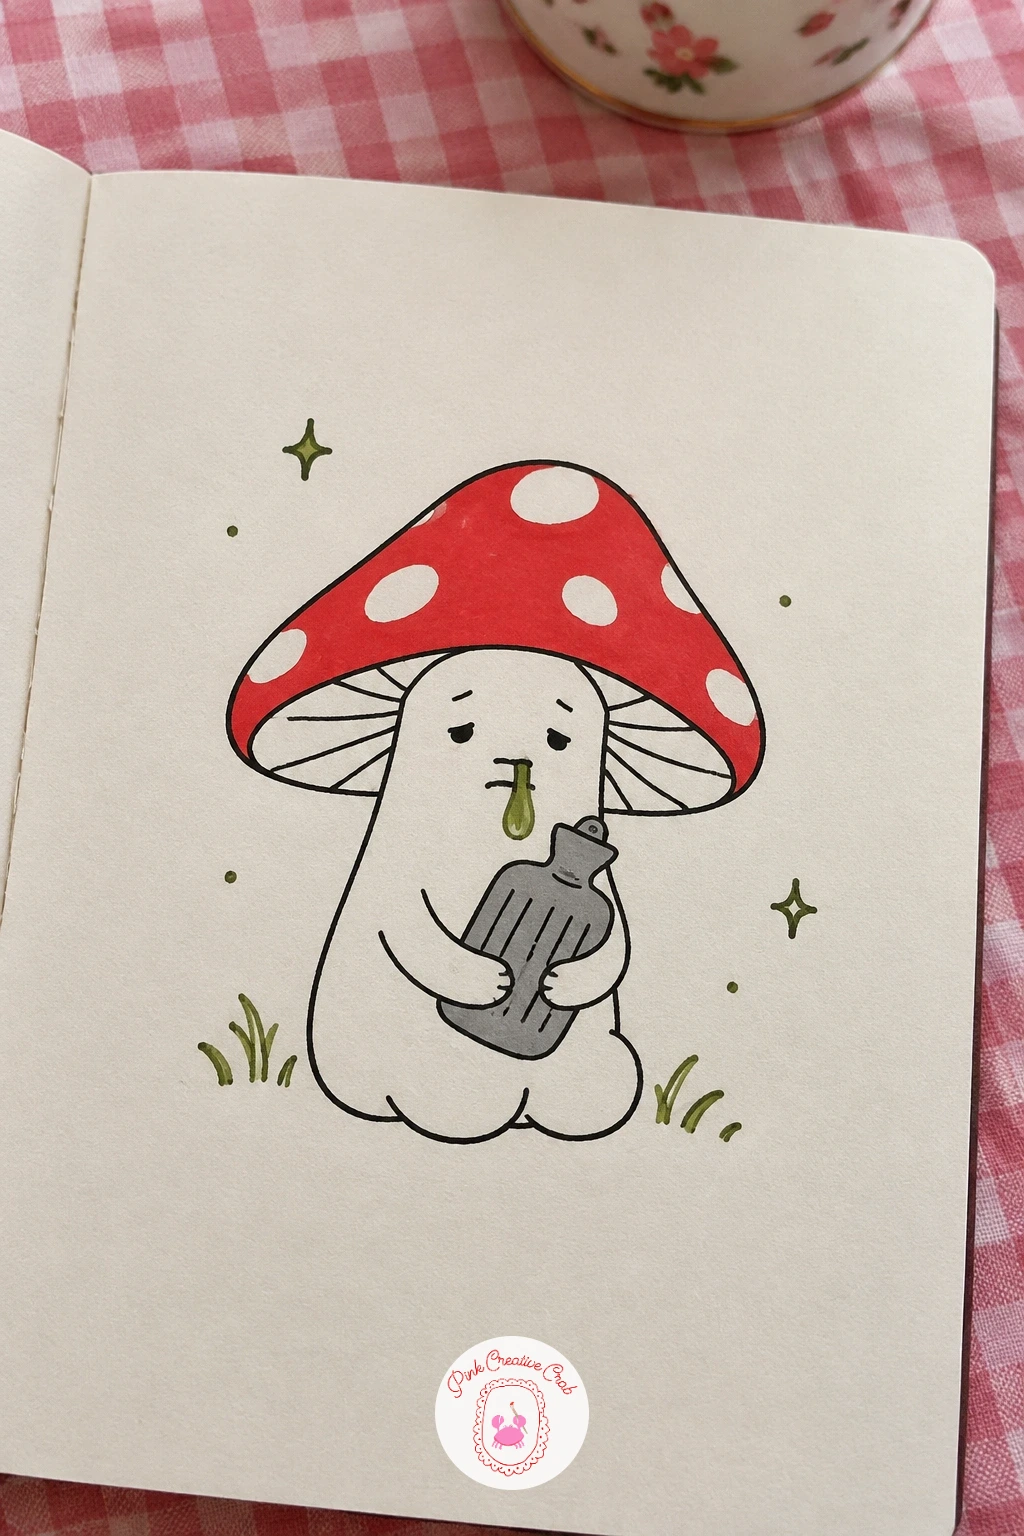
Palette: Toadstool Red,Soft Grey,Blush Pink
Pair two mushrooms side by side to practice keeping proportions consistent across more than one shape. Sketch a light horizontal guideline first, then build the tall one with a narrow stem and a small narrow cap rising well above the line, and the chubby one with a wide short stem and a broad low cap.
Measure the chubby mushroom’s total height against the tall one’s stem alone before inking, since that comparison is what keeps the height difference readable instead of just “two random mushrooms.” The tall one should end up roughly twice the chubby one’s height.
Give them matching simple faces so the size contrast is the only real difference between them, a shared expression makes them read as a pair rather than two unrelated doodles. A small curved line connecting their feet, like they are standing on the same patch of ground, ties them together further.
Color one cap toadstool red and the other a softer rust or leave it uncolored, so your eye can tell them apart at a glance even from across the page.
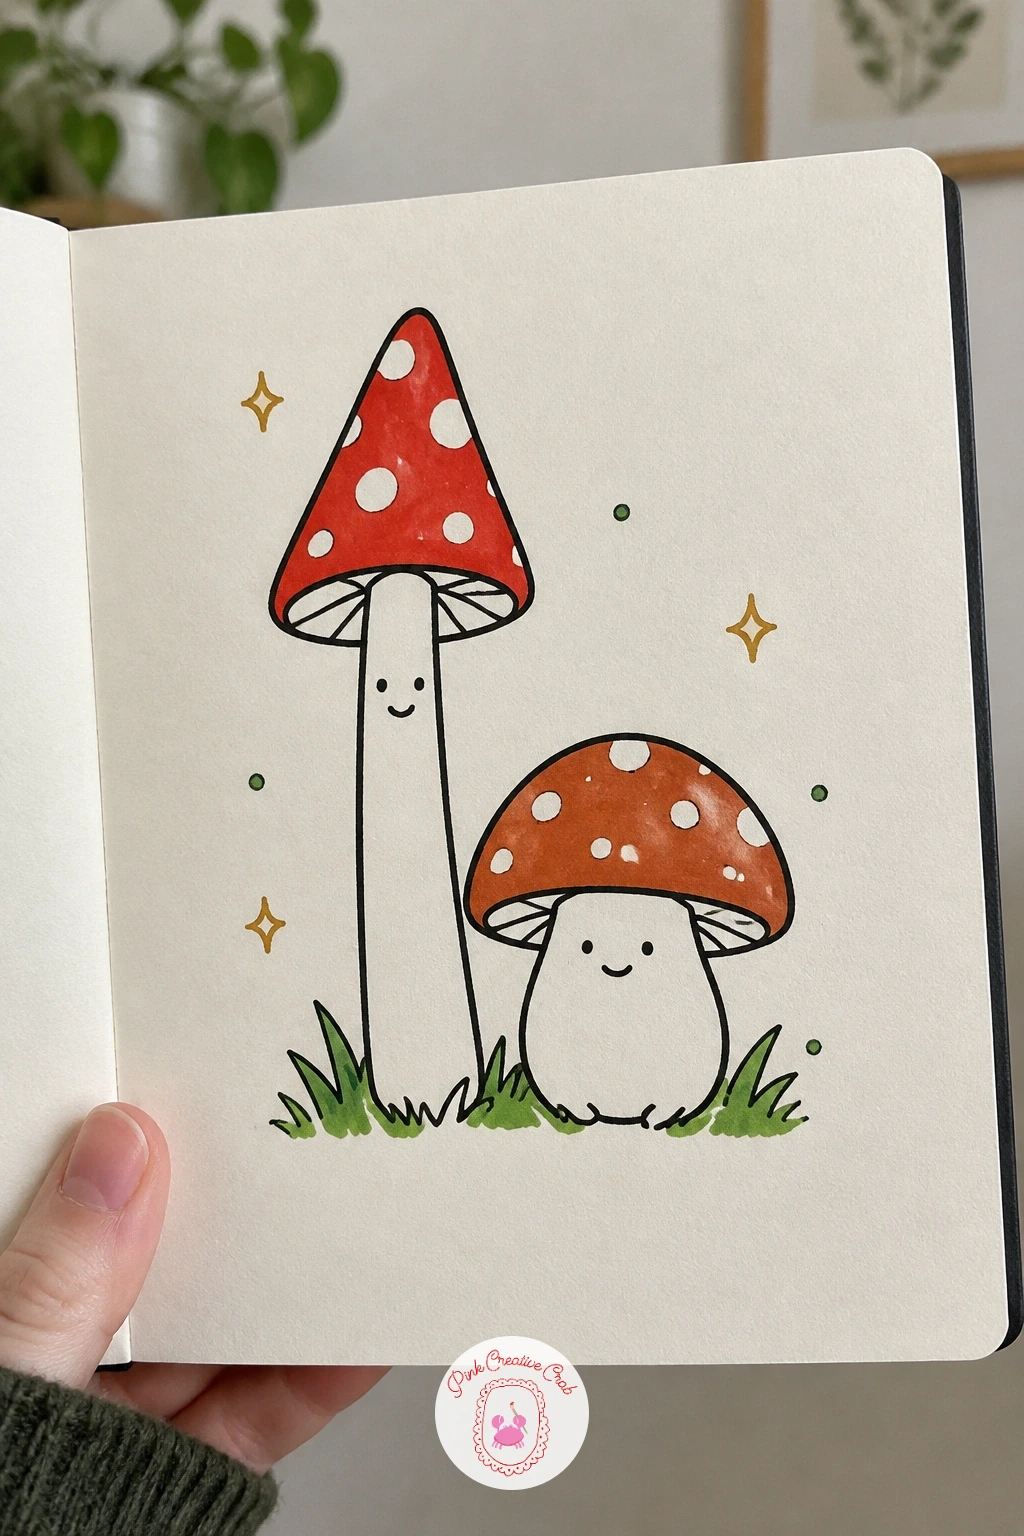
Palette: Toadstool Red,Rust Orange,Moss Green
Movement is the whole point here, so plan the pose before you ink anything. Draw the stem bending slightly to one side rather than straight, with both stubby arms raised and one tiny foot lifted off the ground, which together read as mid dance step rather than standing still.
Add a simple crescent moon in the upper corner first, then draw two or three short curved motion lines trailing behind the lifted foot and raised arms. Those motion lines matter more to the dancing feel than the exact pose of the arms does.
If the mushroom looks like it is simply leaning rather than dancing, check that the stem bend and the lifted foot point in opposite directions, that opposing lean is what real motion looks like. Straightening both to match usually flattens the energy.
Keep the scene mostly in black ink with the moon left white, and add just the cap in toadstool red so the color sits on the one shape doing all the moving.
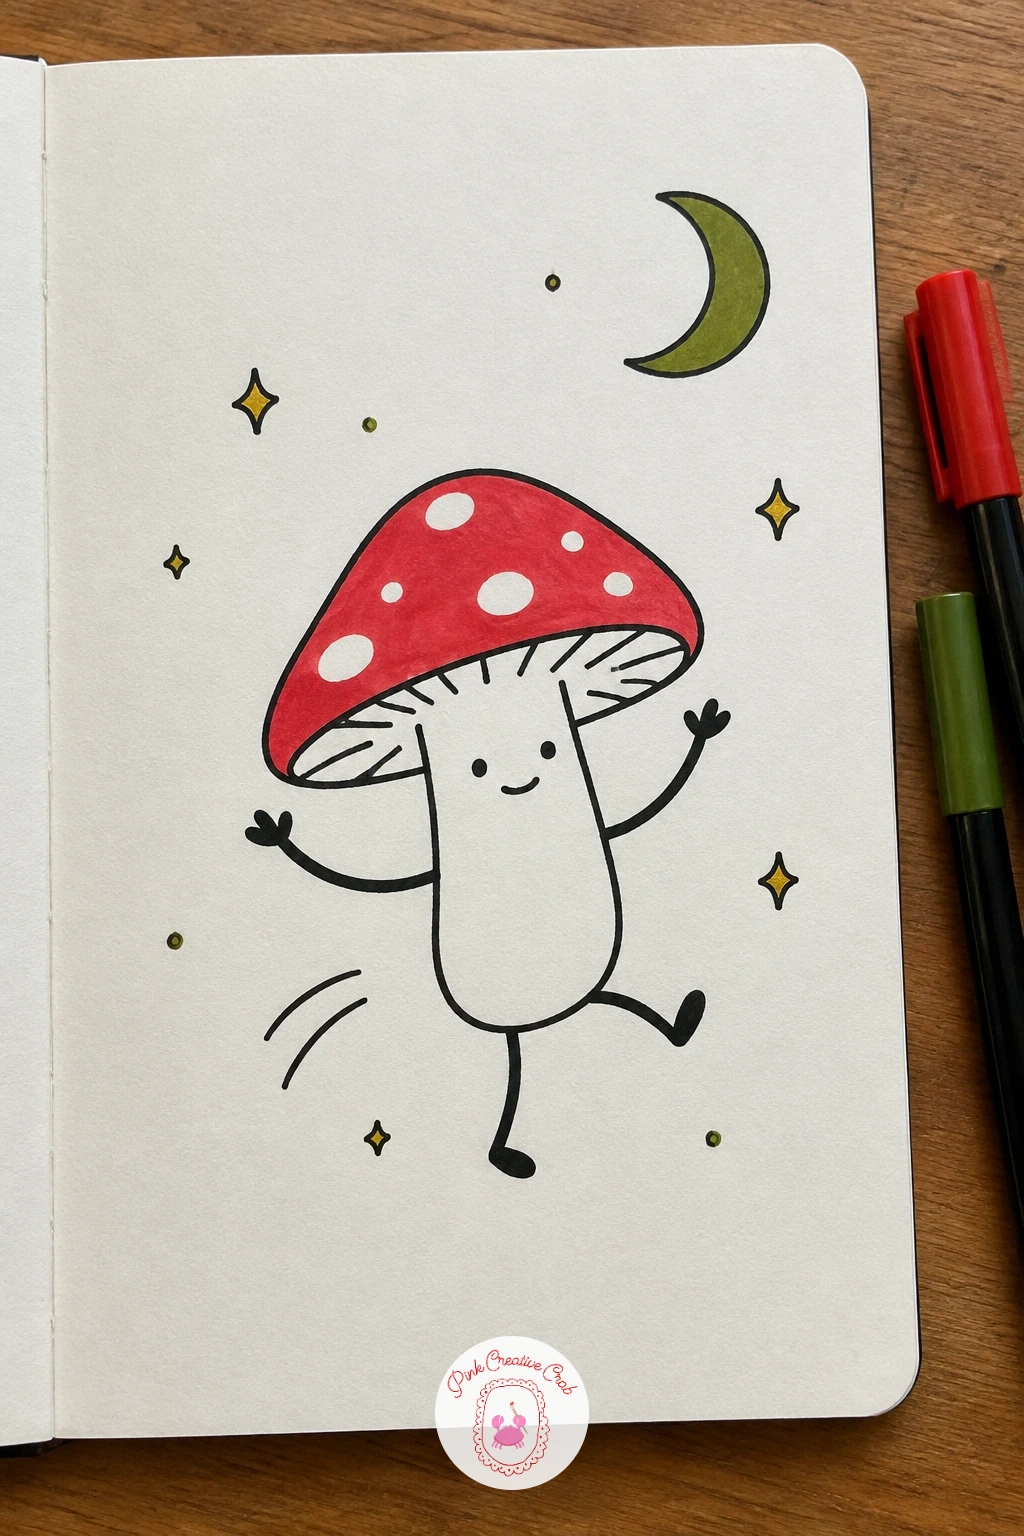
Palette: Toadstool Red,Charcoal Grey,Soft Grey
For a more confident version, add a closed eyes, open mouth expression like singing along to its own dance, which pushes the joy further without any new props.
This scene asks you to draw water, so start there: a simple wavy horizontal line across the lower third of the page, with two or three smaller curved lines beneath it for gentle ripples. Draw the walnut shell boat sitting right on that main line, a rounded half oval shape with a textured rippled edge like real walnut shell.
Place the mushroom standing inside the shell rather than beside it, feet hidden below the rim, which is the detail that makes it read as floating in a boat rather than standing next to a walnut. Keep the mushroom’s arms out slightly for balance.
If the boat looks like it is sinking rather than floating, raise the whole shell shape slightly above the water line and add one small ripple curve just under its hull. That little gap between hull and water line sells buoyancy.
Color the mushroom cap toadstool red, leave the walnut shell in warm brown or uncolored, and keep the water as plain black ink waves so the two colors do not compete.
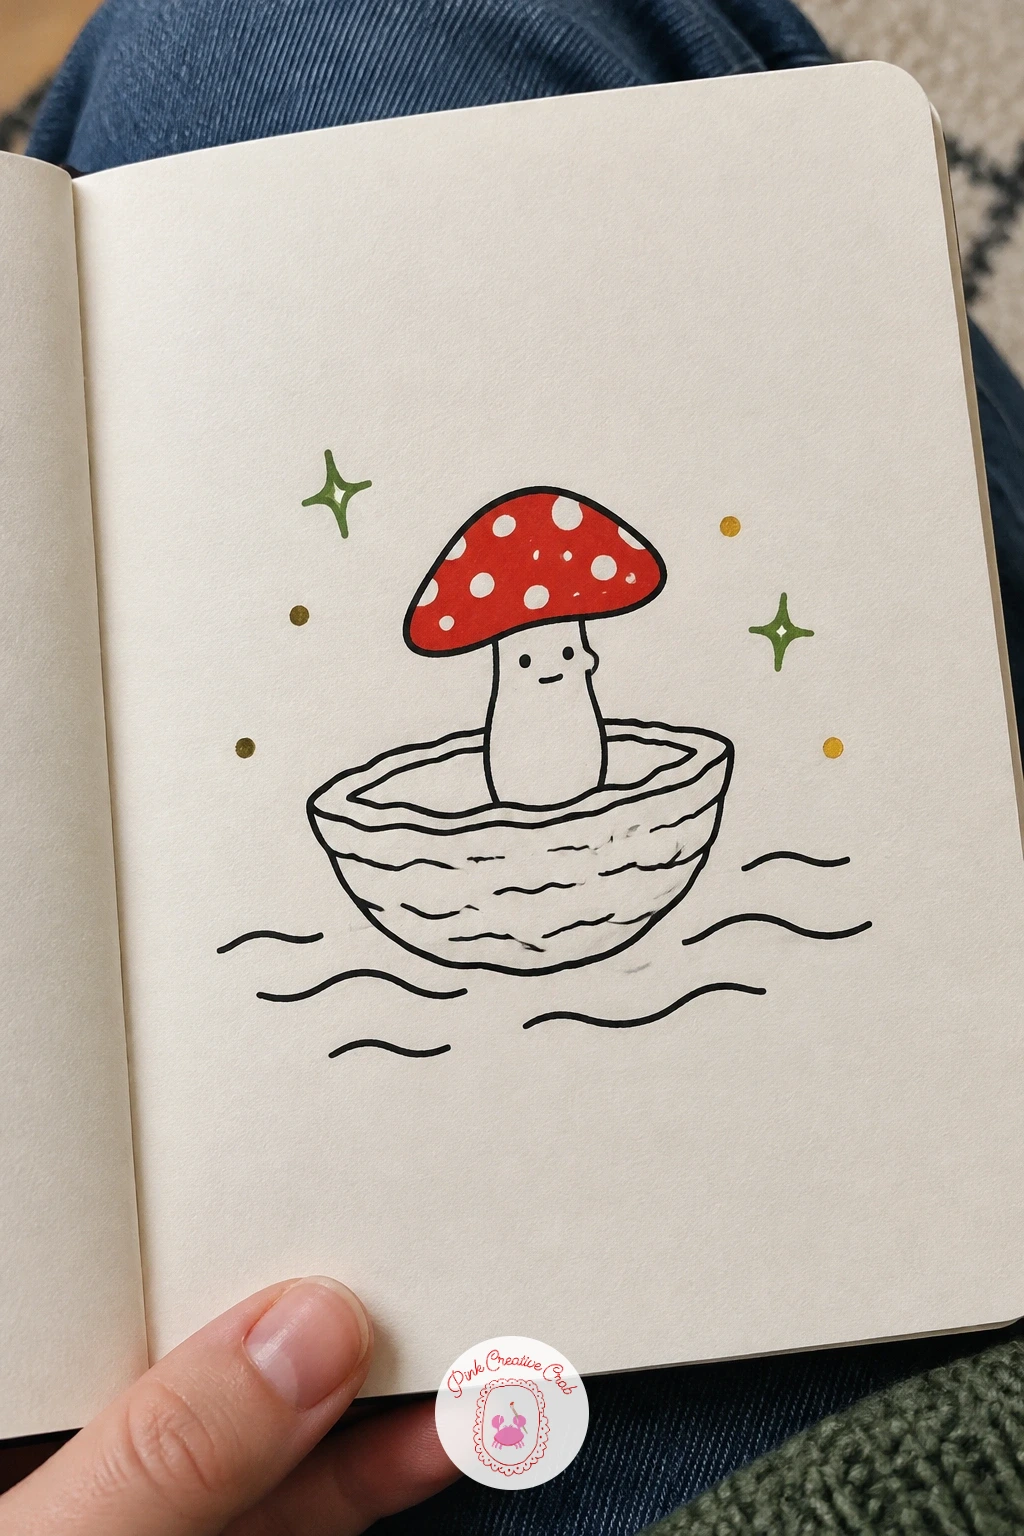
Palette: Toadstool Red,Warm Brown,Soft Grey
Keep this one small and quiet: a single mushroom holding an acorn the way you might hold something precious, both arms wrapped partway around it and its face looking down rather than out at the viewer. Draw the mushroom first, then the acorn sized to sit comfortably against its chest, roughly as wide as the mushroom’s own cap.
Work the acorn’s cap texture with short quick hatch marks rather than a smooth fill, that rough little texture is what makes an acorn read as an acorn instead of a plain oval. The nut body underneath stays smooth by contrast.
If the acorn looks too big or swallows the mushroom’s whole body, shrink it slightly and shift the mushroom’s arms further around its curve so the size relationship reads as “holding carefully” rather than “overwhelmed by.”
Color the acorn’s cap in warm brown with the hatch marks left as plain ink lines on top, and keep the mushroom’s own cap in toadstool red so the two separate shapes stay easy to tell apart.
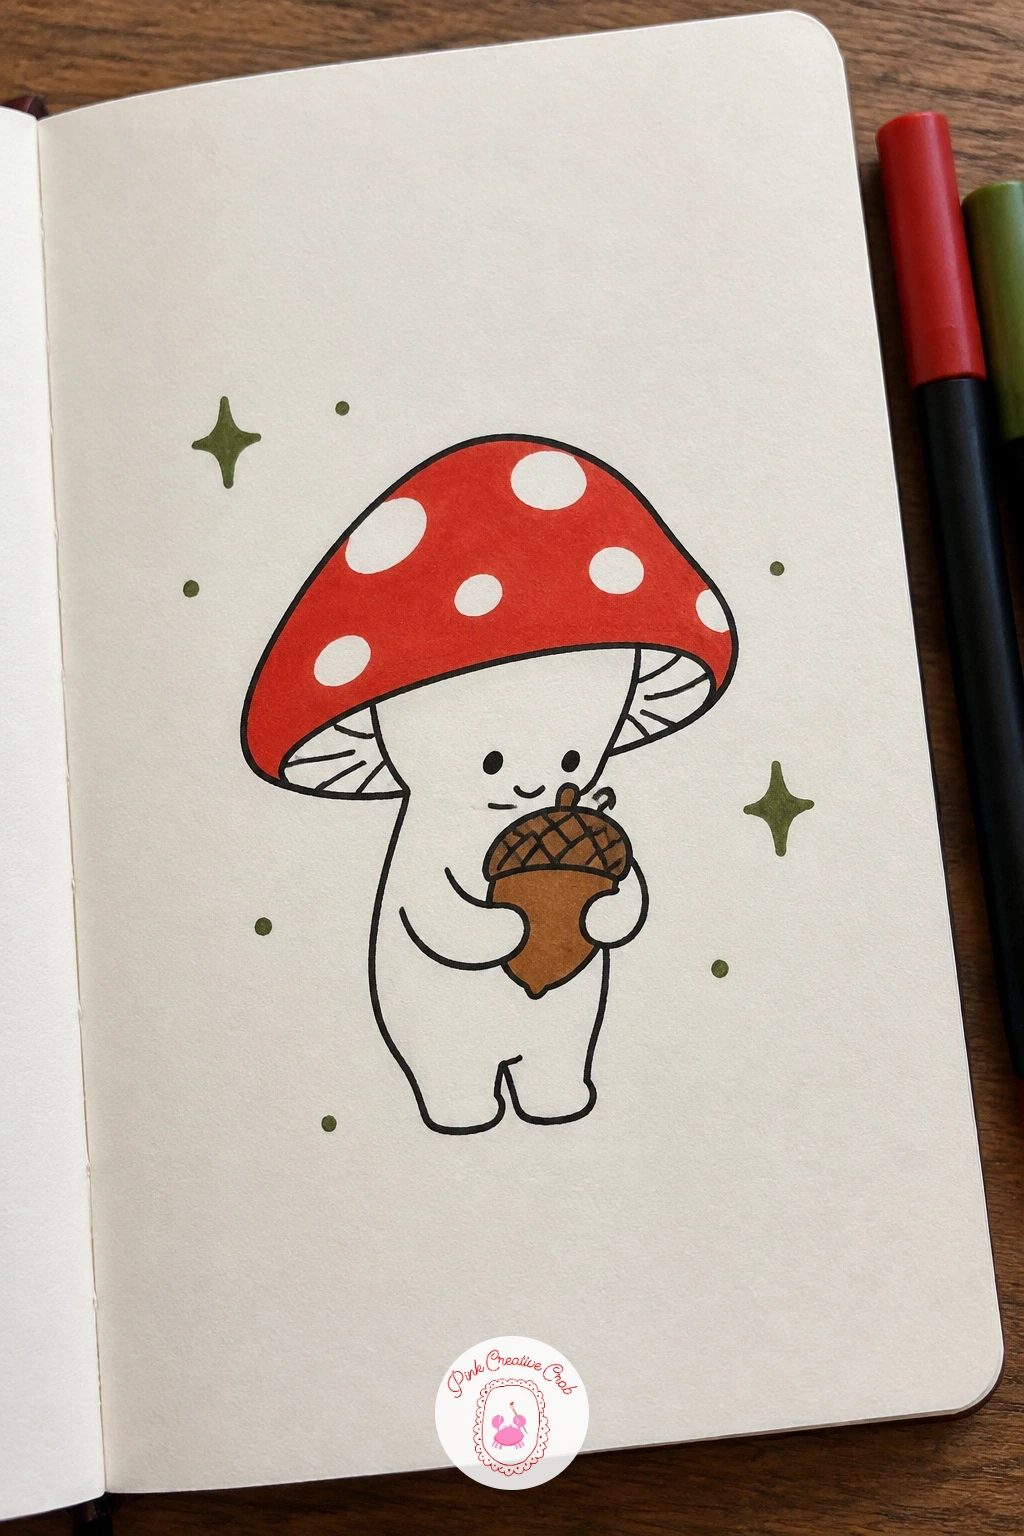
Palette: Toadstool Red,Warm Brown,Soft Grey
This is the best subject on the list for practicing proportion directly, since the whole drawing depends on getting three heights clearly different. Draw a light baseline first, then place the tallest mushroom, the middle one at roughly two thirds its height, and the smallest at about one third, measuring each against the first before inking any of them.
Give the smallest one one foot lifted and up on tiptoe, reaching toward the others, which both explains the size gap and adds a little character beyond just “small.” That single tiptoe pose is doing more work than a perfect size ratio would alone.
If the three end up looking too similar in height once inked, exaggerate the gap between the tallest and the middle one rather than the smallest, height differences read more clearly at the top of a line than at the bottom.
Color all three caps in slightly different shades, toadstool red for the tallest, a softer rust for the middle, and a pale orange or uncolored cap for the smallest, so the size order is reinforced by color too.
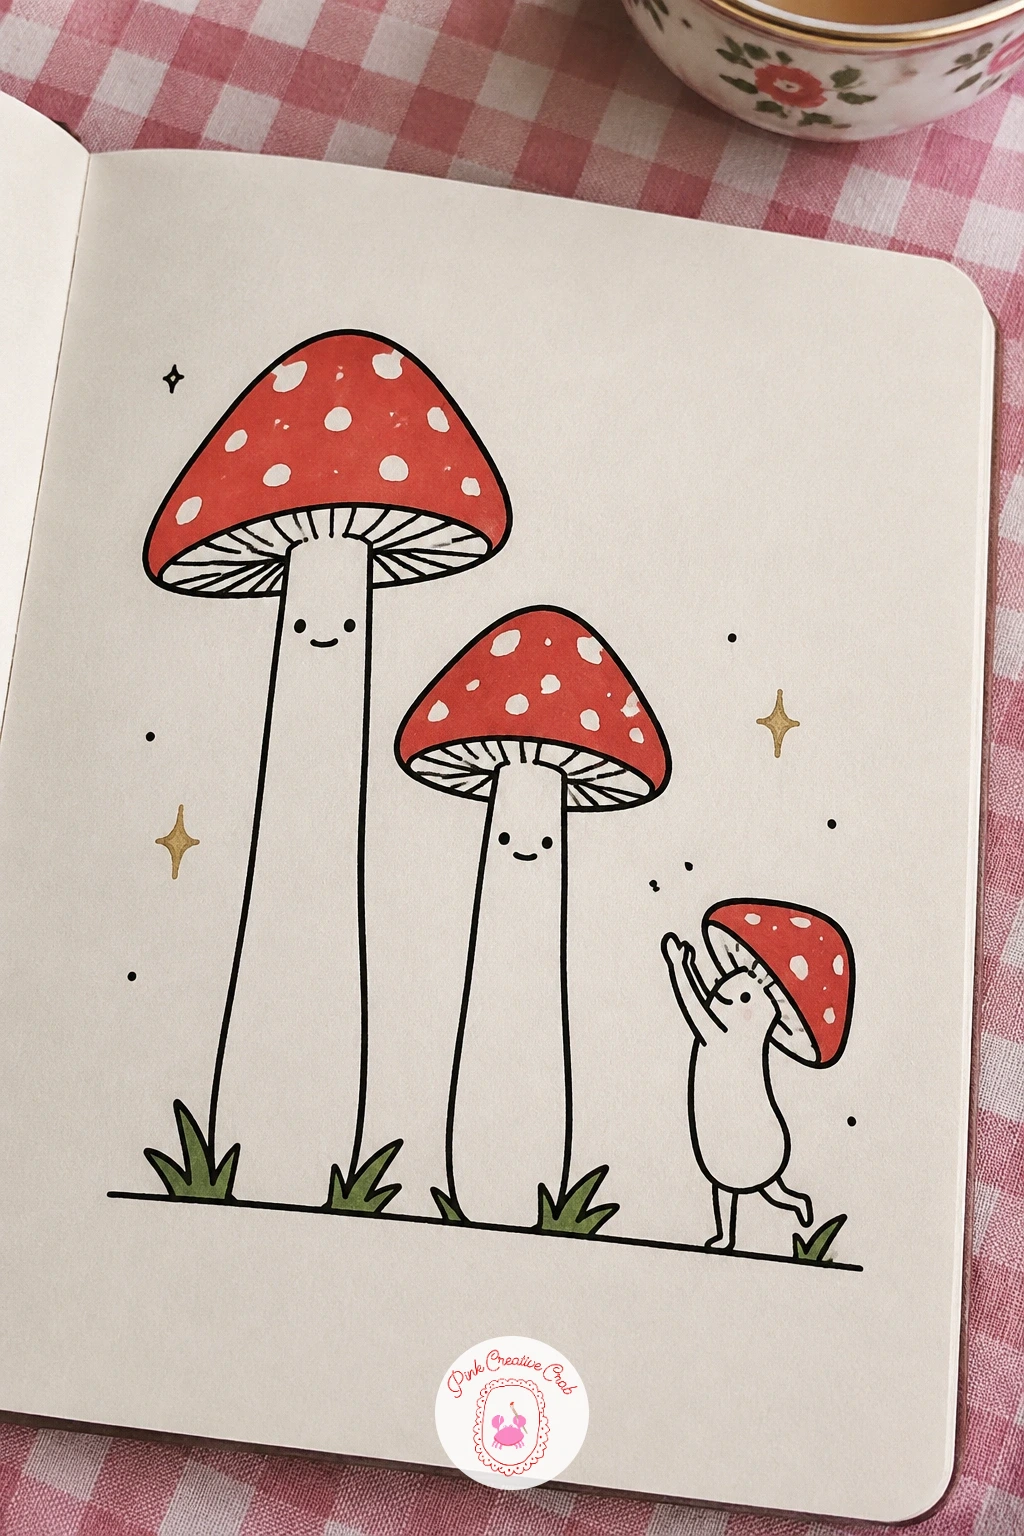
Palette: Toadstool Red,Rust Orange,Pale Orange
Move from single mushrooms into a small building by using the cap as a roof shape rather than a hat. Draw a wide domed cap first, then a rounded rectangle body underneath for the walls, a round door in the center, and one circular window off to the side.
Work roof to door to window in that order, since getting the roof’s curve settled first makes it much easier to judge where the door and window fit comfortably underneath without crowding the edges. Keep the window simple, just a circle with a plus sign for the panes.
If the whole house looks flat, add a short curved line along the bottom edge of the roof where it overhangs the walls, that small shadow line gives it just enough depth to read as three dimensional rather than a flat sticker shape.
Color the roof toadstool red with the walls left plain white or cream, and add a thin moss green line of grass along the base so the house sits on ground rather than floating on the page.
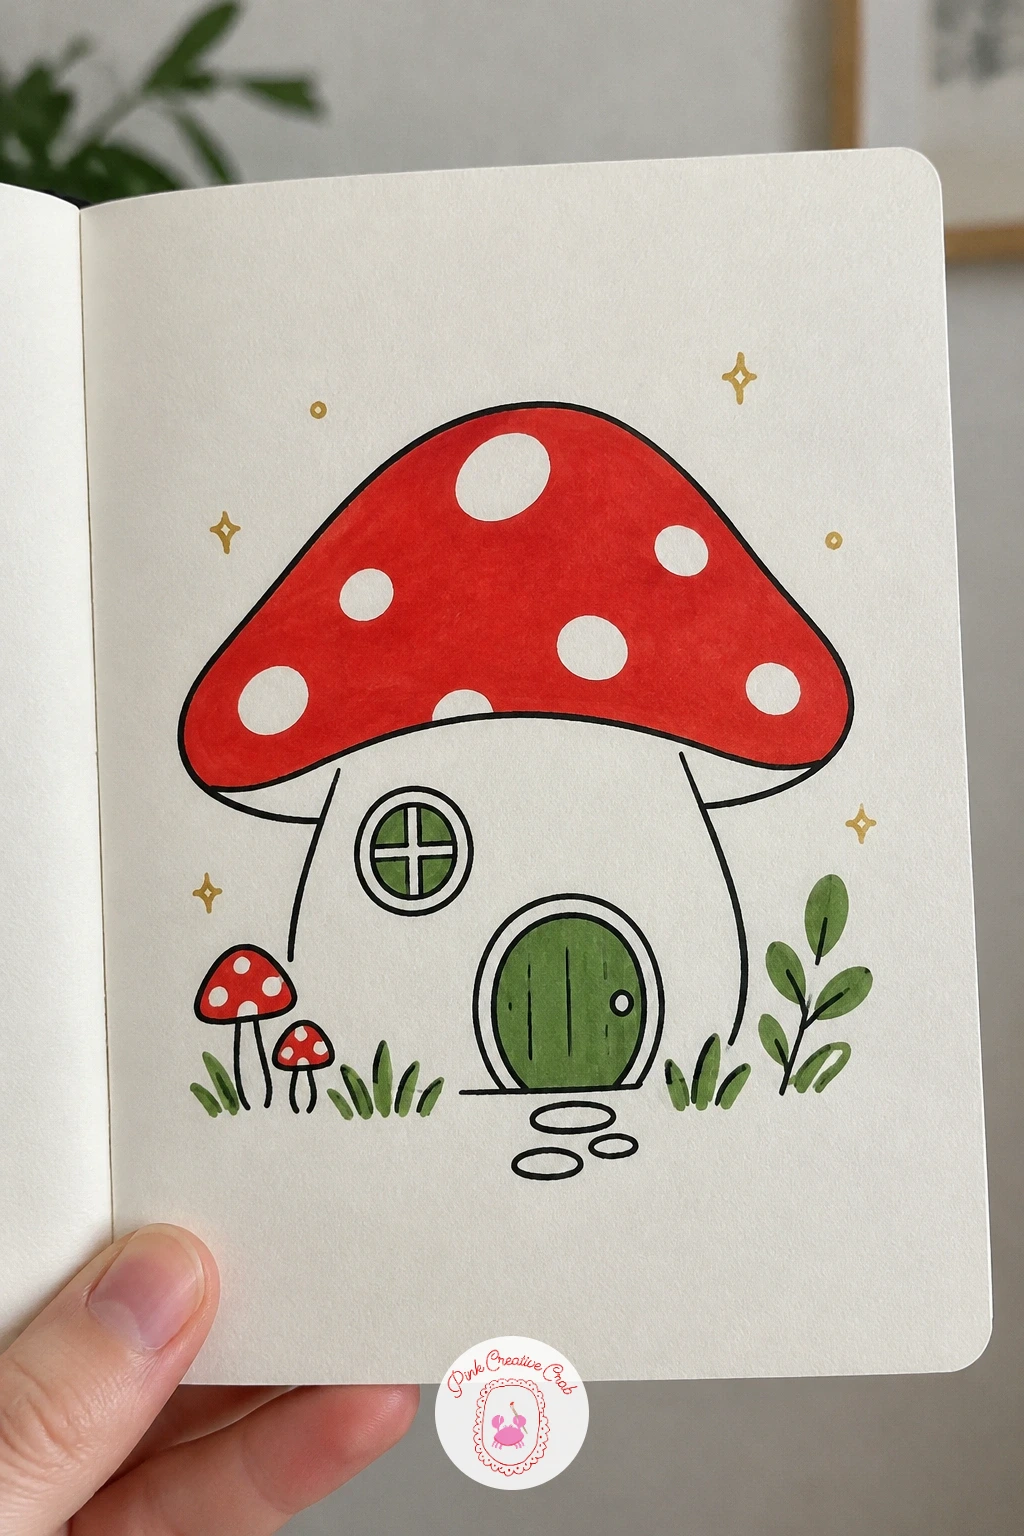
Palette: Toadstool Red,Cream White,Moss Green
If you enjoy drawing tiny buildings like this one, the fairy house drawing ideas cover more mushroom cottages and tree stump homes in detail.
Build on the mushroom house idea by adding a chimney and giving it a bit of personality through the smoke rather than the building itself. Draw the same roof and wall shapes as before, then add a short chimney poking up from one side of the roof with a small heart shaped ring of smoke drifting above it.
Shape the smoke as one clean heart outline first, then add one or two wobbly smaller loops trailing above it to suggest it is dissolving into the air. Getting the heart clean before adding the looser trailing smoke is what keeps the shape readable as a heart rather than a scribble.
If the heart smoke looks too solid and graphic, lighten your line pressure on the trailing loops above it, a heavier clean heart with lighter fading wisps above reads far more like real smoke.
Keep the roof toadstool red and leave the smoke in plain black ink, it does not need color to read clearly against the house below it.
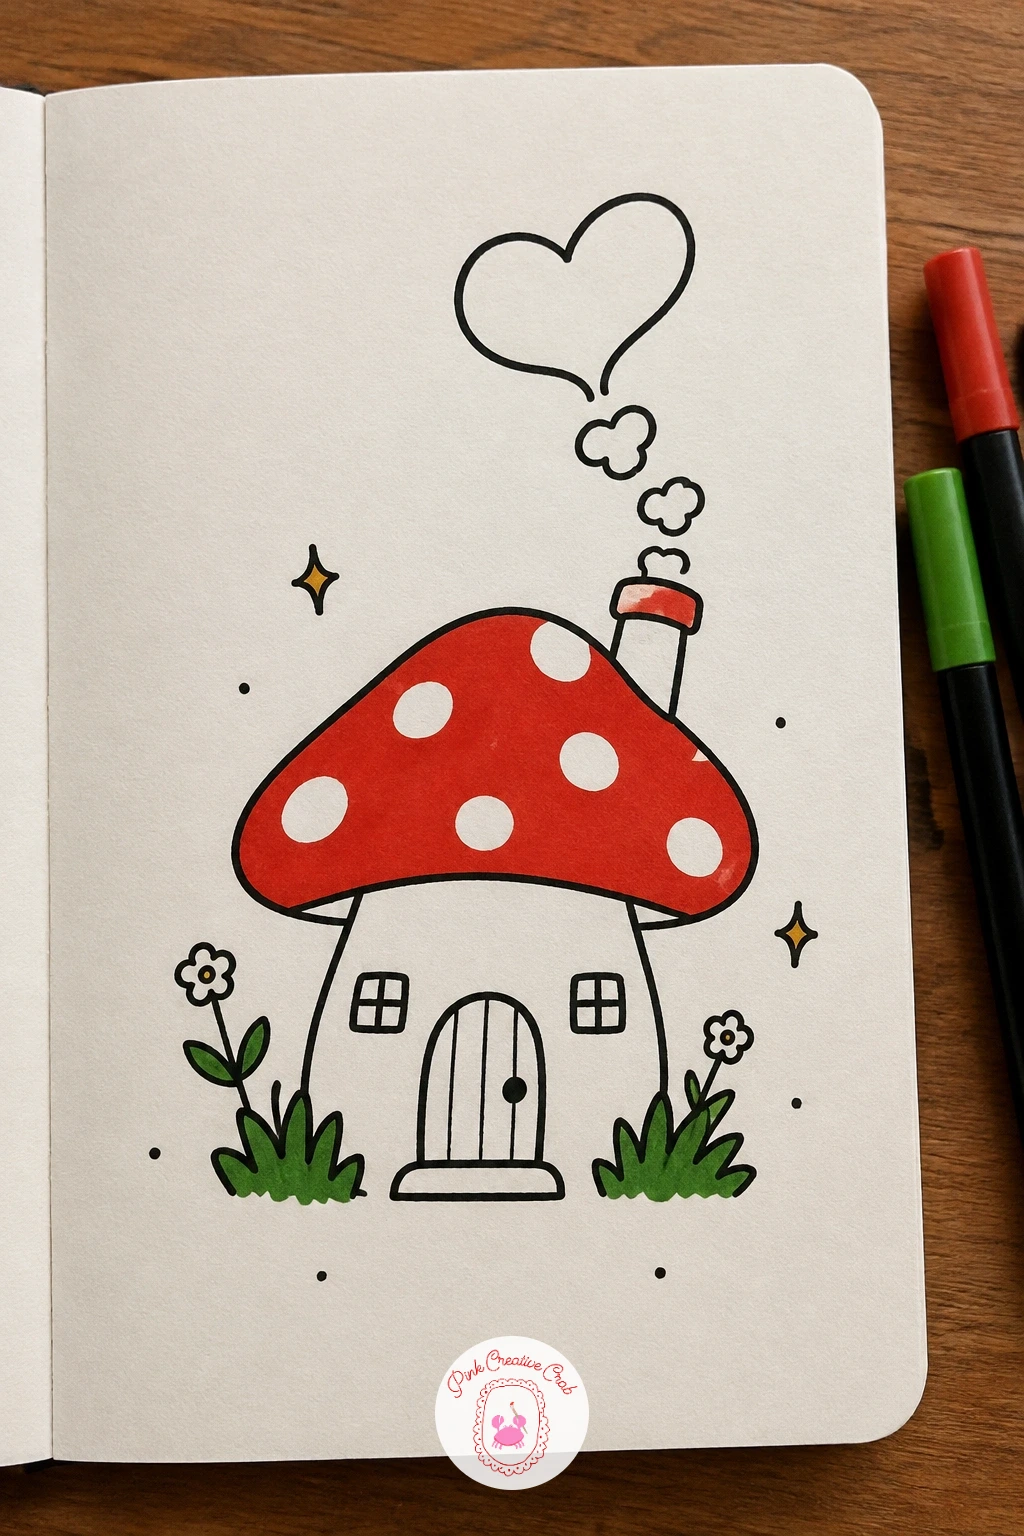
Palette: Toadstool Red,Cream White,Soft Grey
Add one more detail to the mushroom house family by placing a small mailbox on a thin post beside the front door. Draw the house as before, then set the mailbox slightly shorter than the door itself, with a simple flag shape on its side and a small slot for letters.
Position the mailbox close enough to the door that the two clearly belong to the same little property, rather than floating separately on the page. That proximity is what makes a mailbox read as “this house’s mailbox” instead of a random prop nearby.
If the post looks too thin to stand on its own, thicken its base slightly where it meets the ground and add one short curved shadow line beside it, a slightly wider base reads as more stable even in a loose doodle.
Color the roof toadstool red as with the earlier houses, and give the mailbox a small patch of moss green or leave it plain black so it stays a quiet detail rather than competing for attention.
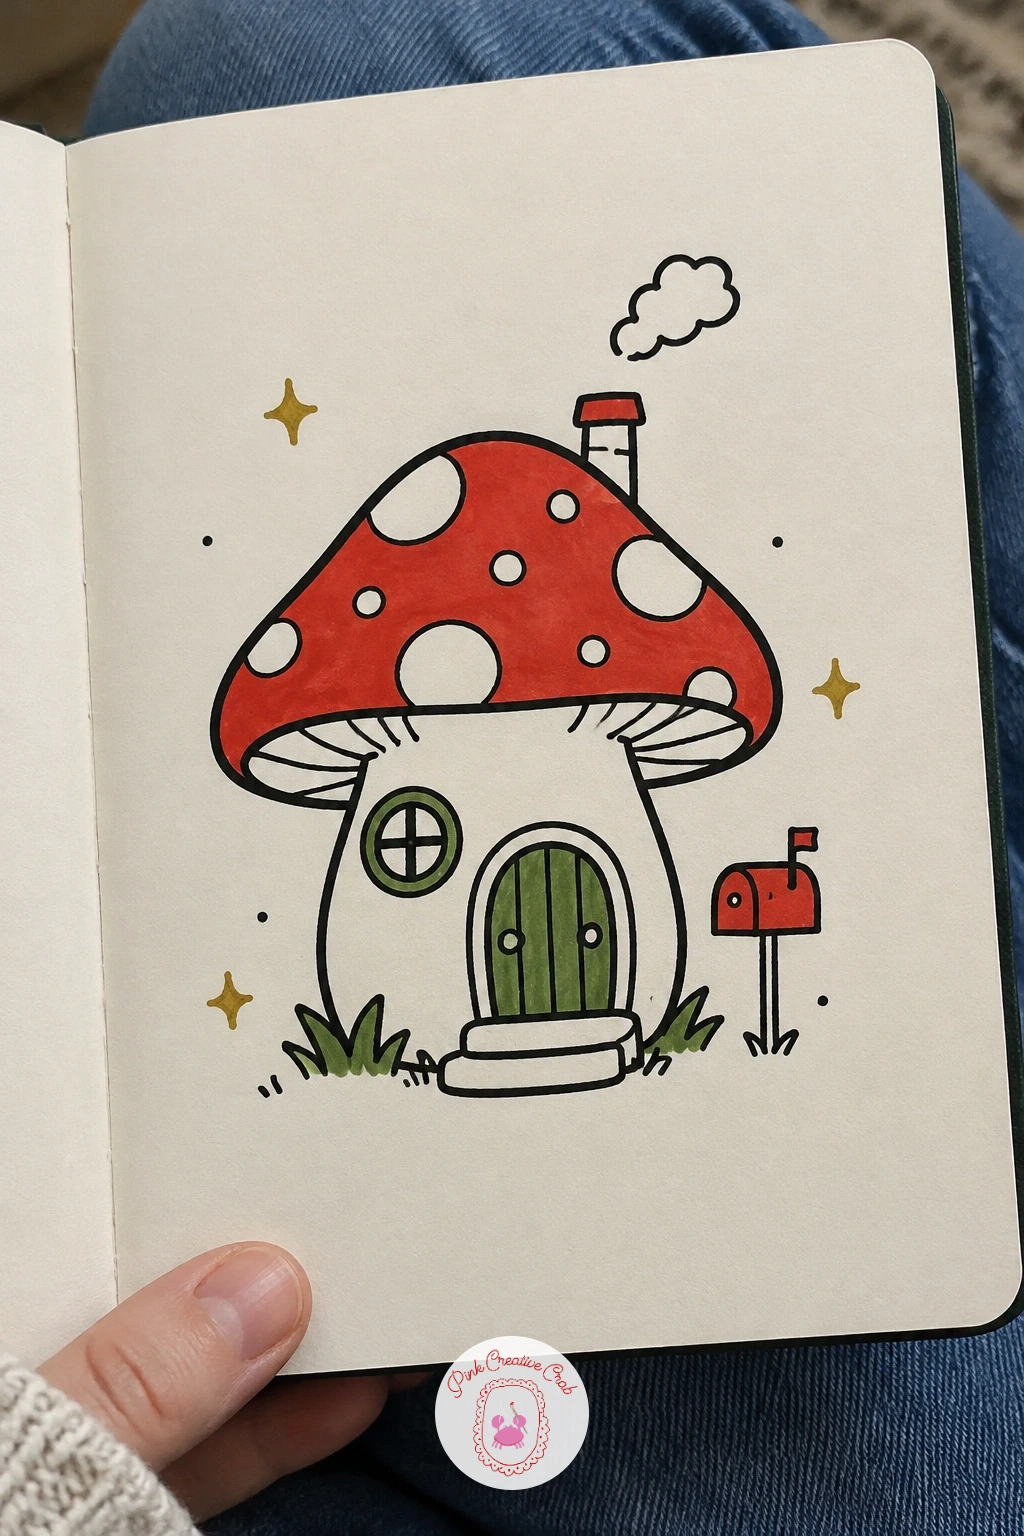
Palette: Toadstool Red,Moss Green,Cream White
Give the mushroom house series one more variation by adding a small cat face peeking out of the round window instead of leaving it empty. Draw the house as usual, then inside the circular window shape add two triangle ears, two round eyes and a small nose, just enough to read as a cat without drawing its whole body.
Keep the cat’s face centered and fairly small within the window frame, with a bit of window visible around it on all sides. If the ears poke outside the window circle, pull them in slightly, the cat should look like it fits comfortably inside rather than bursting out of the frame.
If the window looks too plain once the cat is added, draw a short curved line beneath it for a windowsill, which gives the cat a small ledge to be peeking over as well as through.
Color the roof toadstool red, leave the cat’s face in plain ink with maybe one small patch of grey, and keep the walls cream so the window and its visitor stay the clear focal point.
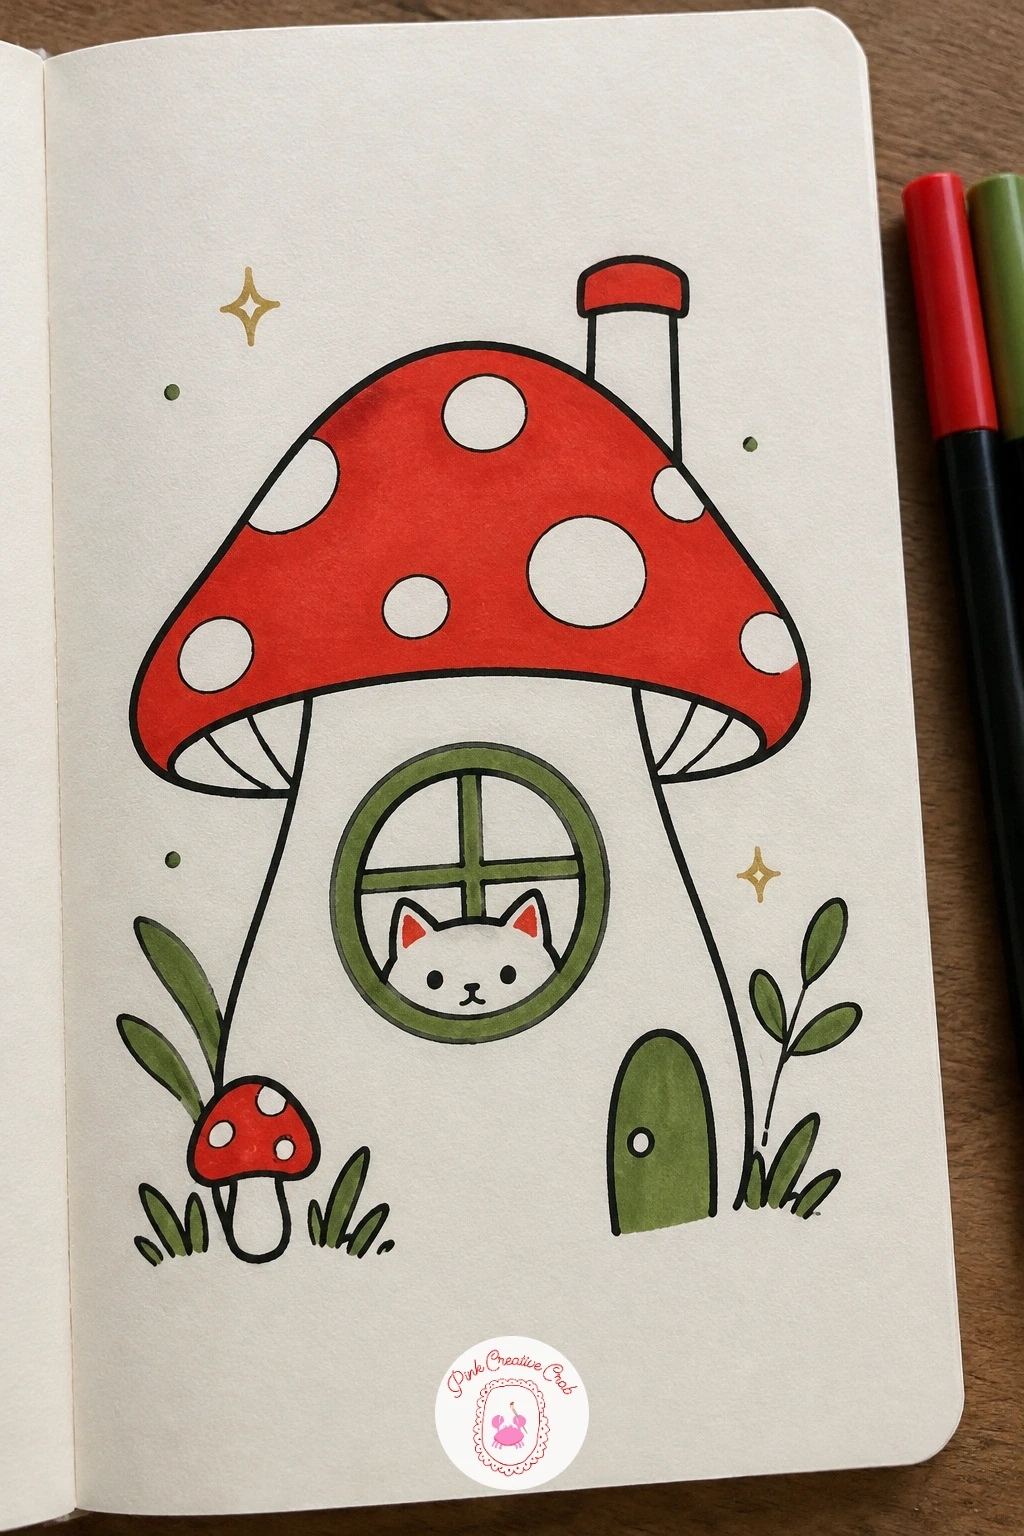
Palette: Toadstool Red,Cream White,Soft Grey
Characters with personality details like a mustache are a good test of keeping a face simple while adding one strong feature. Draw the usual cap and stem, then give the face two small round glasses, a wide curved mustache taking up much of the lower face, and gentle closed eyes above it.
Add a thin walking stick held in one hand, angled slightly forward like it is taking the weight of a step, and consider drawing the stem with a very slight stoop forward to suggest age in the posture itself, not just the face.
If the mustache ends up too big and swallows the rest of the face, trim its width so it sits between the eyes and the chin line rather than stretching edge to edge, a mustache that wide can accidentally read as a closed mouth shape.
Color the cap toadstool red and leave the mustache and walking stick in plain black ink, a grandpa character does not need extra color to read warmly.
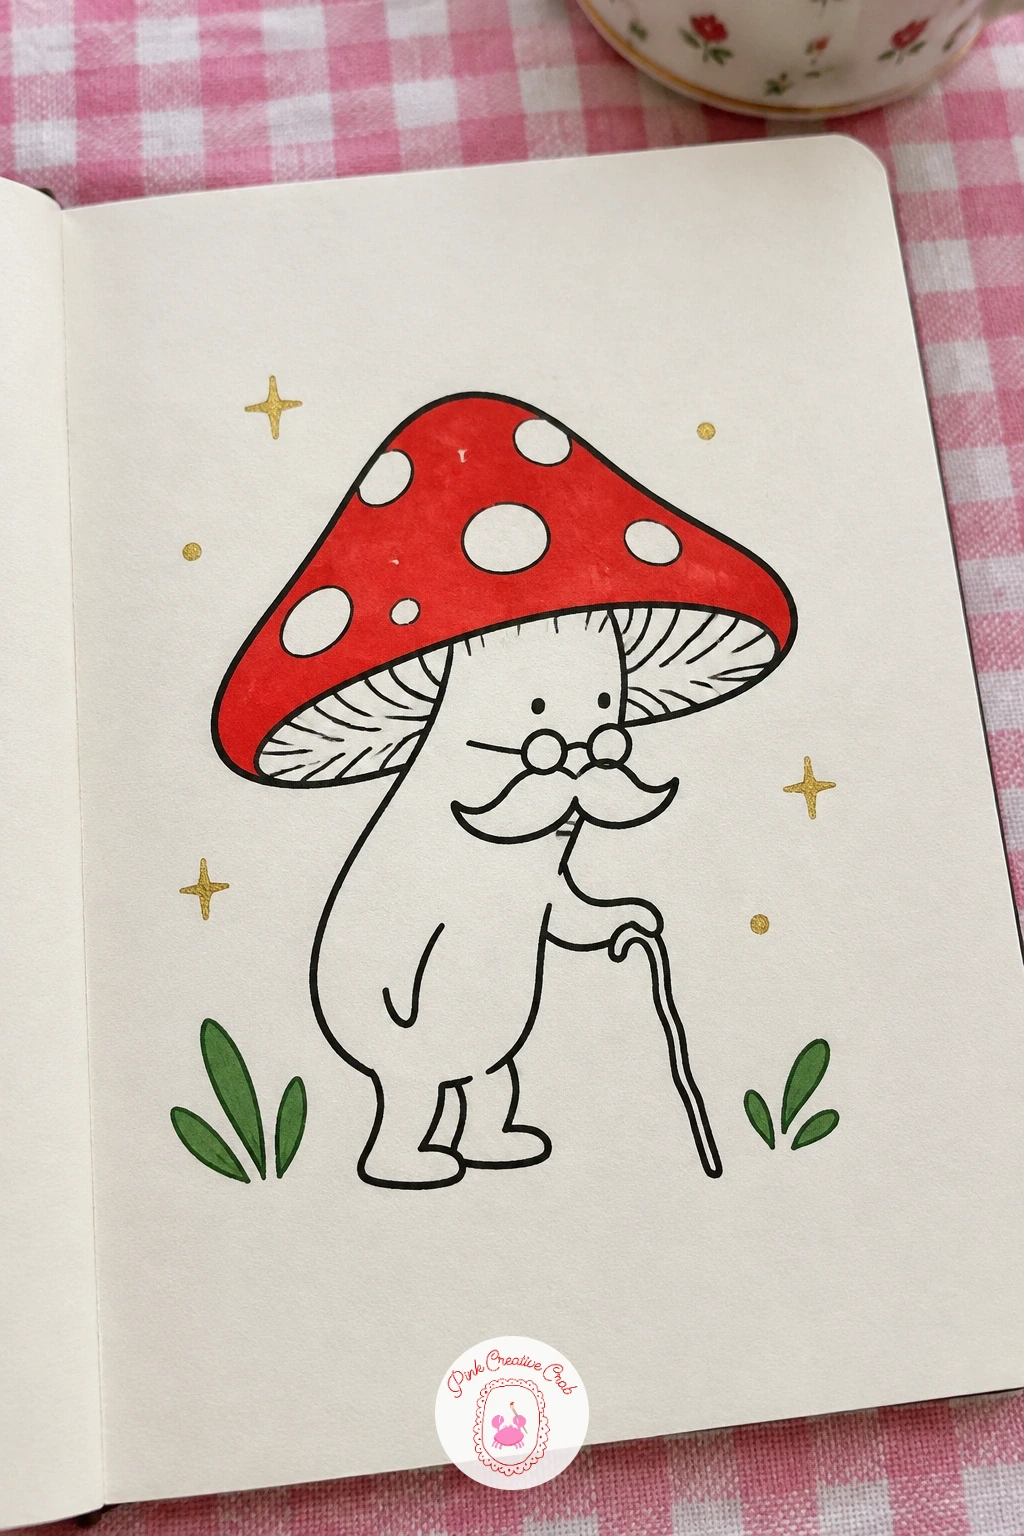
Palette: Toadstool Red,Soft Grey,Charcoal Grey
Pairs of small characters work well once you have practiced a single mushroom a few times, so draw two small mushrooms side by side first, matching their heights closely since “baby” mushrooms should look young and similarly sized rather than one clearly bigger. Connect their inner arms in a simple held hands pose between them.
Add rain as short diagonal lines across the whole scene, falling evenly on both of them since neither has shelter here, which is what makes “holding hands in the rain” read as comforting rather than simply wet. Give both faces a soft smile despite the rain.
If the held hands look awkward or disconnected, draw the connecting arm as one continuous curved line between the two bodies rather than two separate stubby arms meeting in the middle, a single joined line reads far more naturally.
Color both caps in slightly different shades of red or one red and one softer pink, and keep the rain lines plain black ink so the two small figures stay the warm focus of the scene.
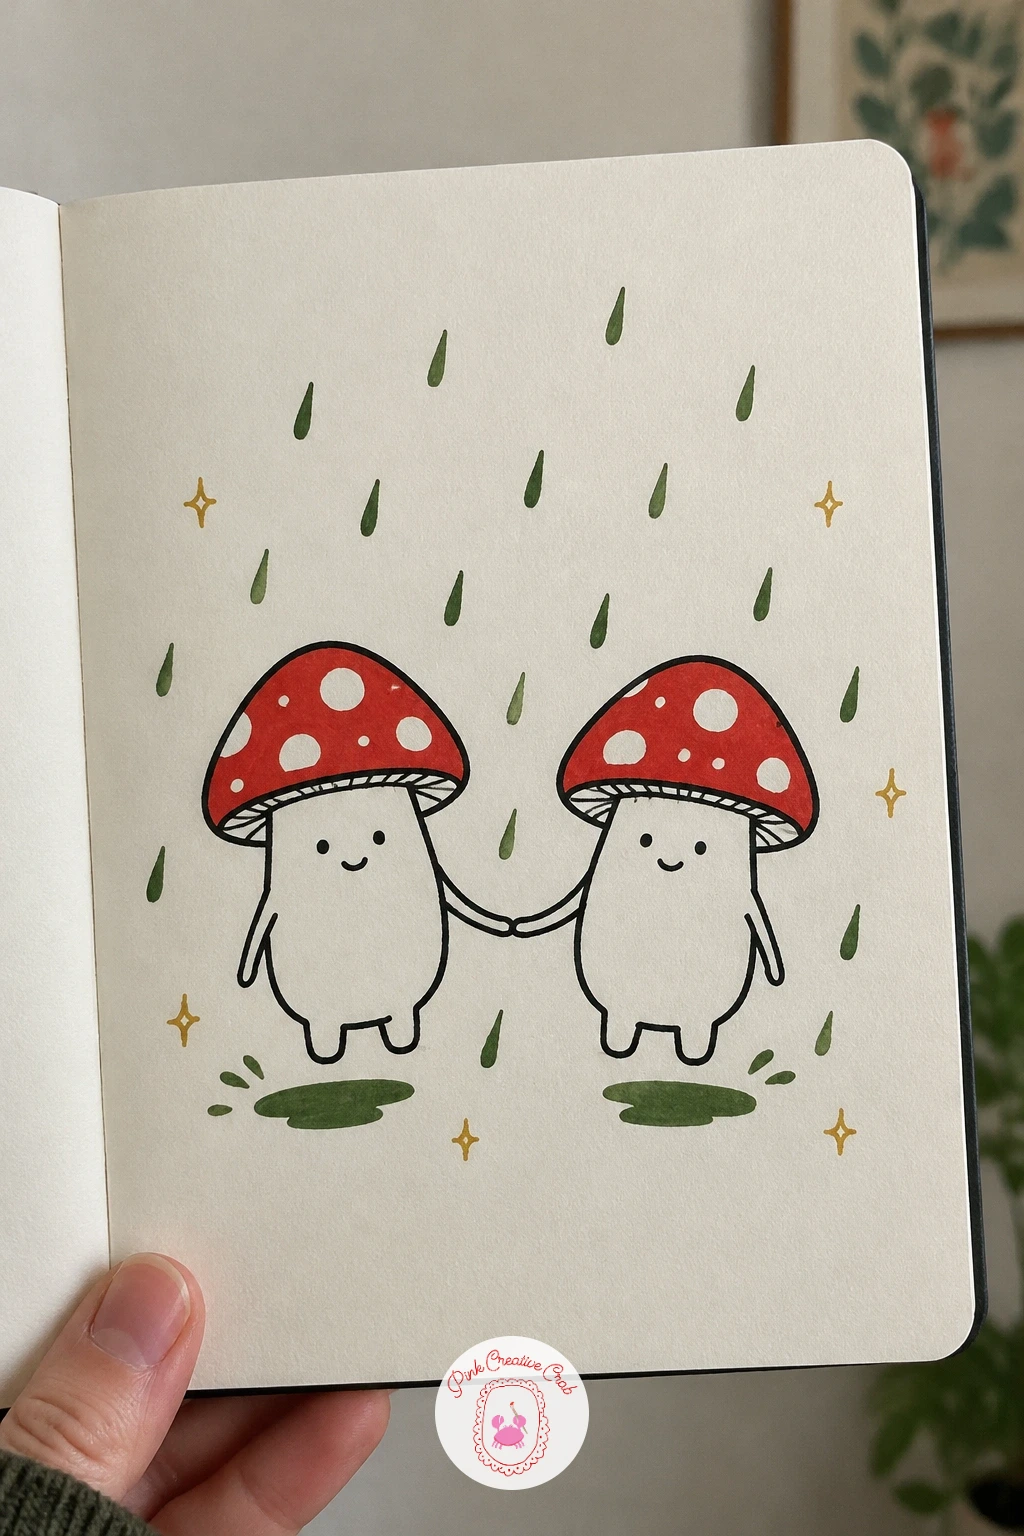
Palette: Toadstool Red,Blush Pink,Soft Grey
This is a good subject for practicing eye level and light, since the whole pose is about looking up from the ground just as the mushroom emerges. Draw the cap first poking just above a simple curved ground line, with the stem still mostly buried, then add both arms stretching straight up and out, as if stretching after waking.
Place a few raindrops or droplet shapes scattered above the cap to show it has just rained, and keep the light coming from directly above with a small sun or simple rays in one corner, since the “after rain” feeling depends on that bright, fresh light rather than a dark cloudy sky.
If the mushroom looks like it is just standing rather than emerging, add two or three short curved lines around the base of the stem where it meets the ground, like little lifted clumps of soil, which sells the popping up motion.
Color the cap toadstool red, the ground a strip of moss green, and leave the droplets and light rays uncolored so they stay crisp and bright against the color below.
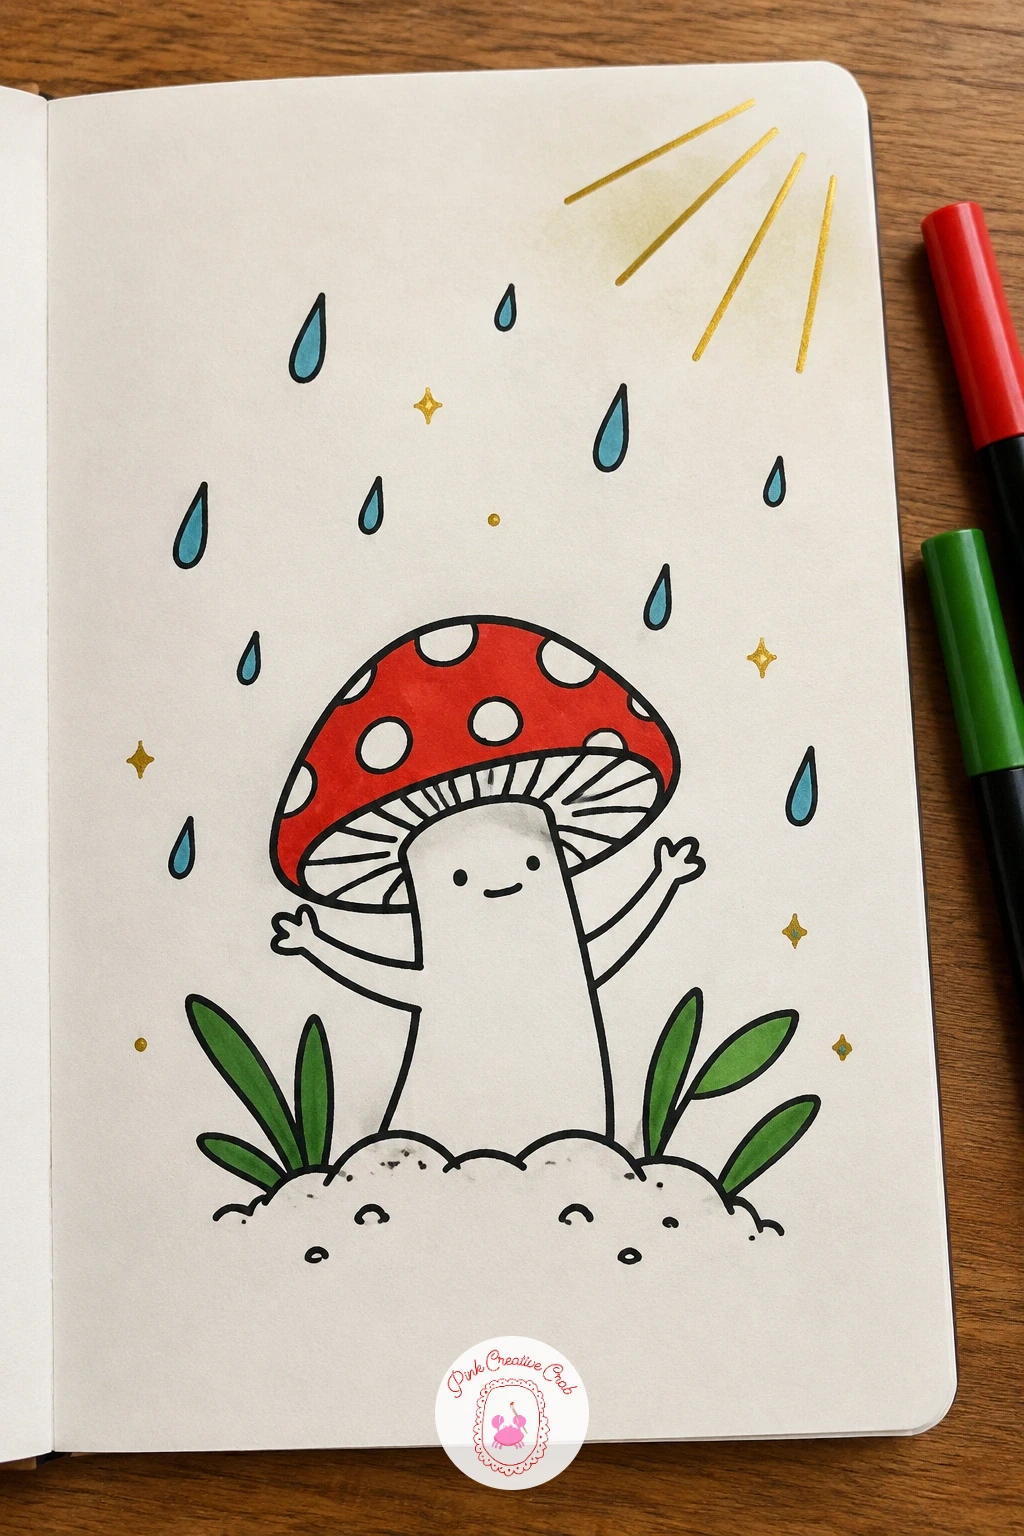
Palette: Toadstool Red,Moss Green,Soft Grey
Here the light source matters because it decides where the raindrops glint as they fall, so decide first whether your light sits upper left or upper right and keep every droplet’s small highlight dot on that same side. Draw the mushroom with its head tilted fully back, mouth wide open, then add several raindrops falling in a loose line straight toward that open mouth.
Vary the raindrop sizes slightly as they fall, bigger near the top of the page and smaller as they near the mouth, which gives a gentle sense of distance even in a simple ink doodle. Keep the mushroom’s arms relaxed at its sides so the open mouth and tilted head carry the whole pose.
If the raindrops look static, add one or two thin motion lines trailing just above each drop, short and quick, which is enough to suggest falling without turning the drops into comma shapes.
Color the cap toadstool red, leave the raindrops as plain white shapes with a thin outline, and skip any background color so the falling drops stay the clear visual path down the page.
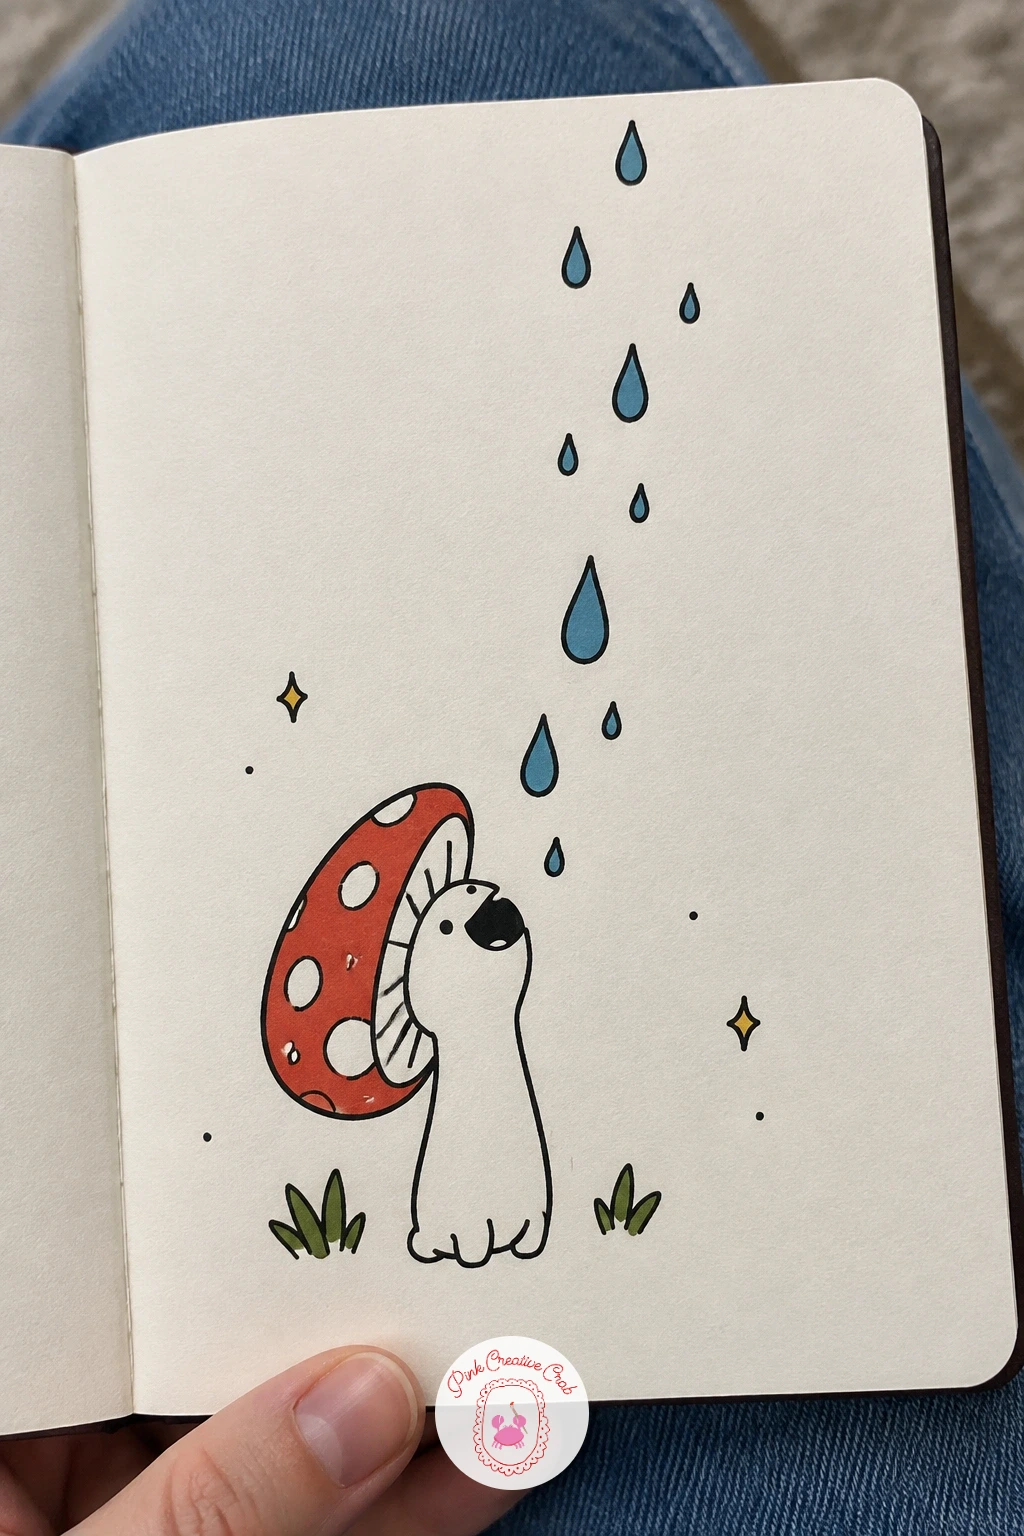
Palette: Toadstool Red,Soft Grey,Ivory White
Scale contrast is the whole point here, so decide the watering can’s size before you draw the mushroom: make it tall enough to reach the mushroom’s chin and wide enough that both arms are clearly straining to hold it. Draw the watering can first, a simple rounded body with a spout and handle, then fit the mushroom around it rather than the other way round.
Tilt the mushroom’s body slightly backward against the weight, with both arms wrapped around the can’s middle rather than gripping a handle it is too small to hold properly. That backward lean is what makes the “bigger than itself” idea read clearly without needing extra size labels or comparison objects.
If the can ends up looking light rather than heavy, add a short strain line or two near the mushroom’s arms, and bend its knees very slightly, both small additions suggest effort without any change to the can itself.
Color the mushroom cap toadstool red, leave the watering can in plain grey or soft blue, and add one or two drips at the spout in uncolored ink for a touch of action.
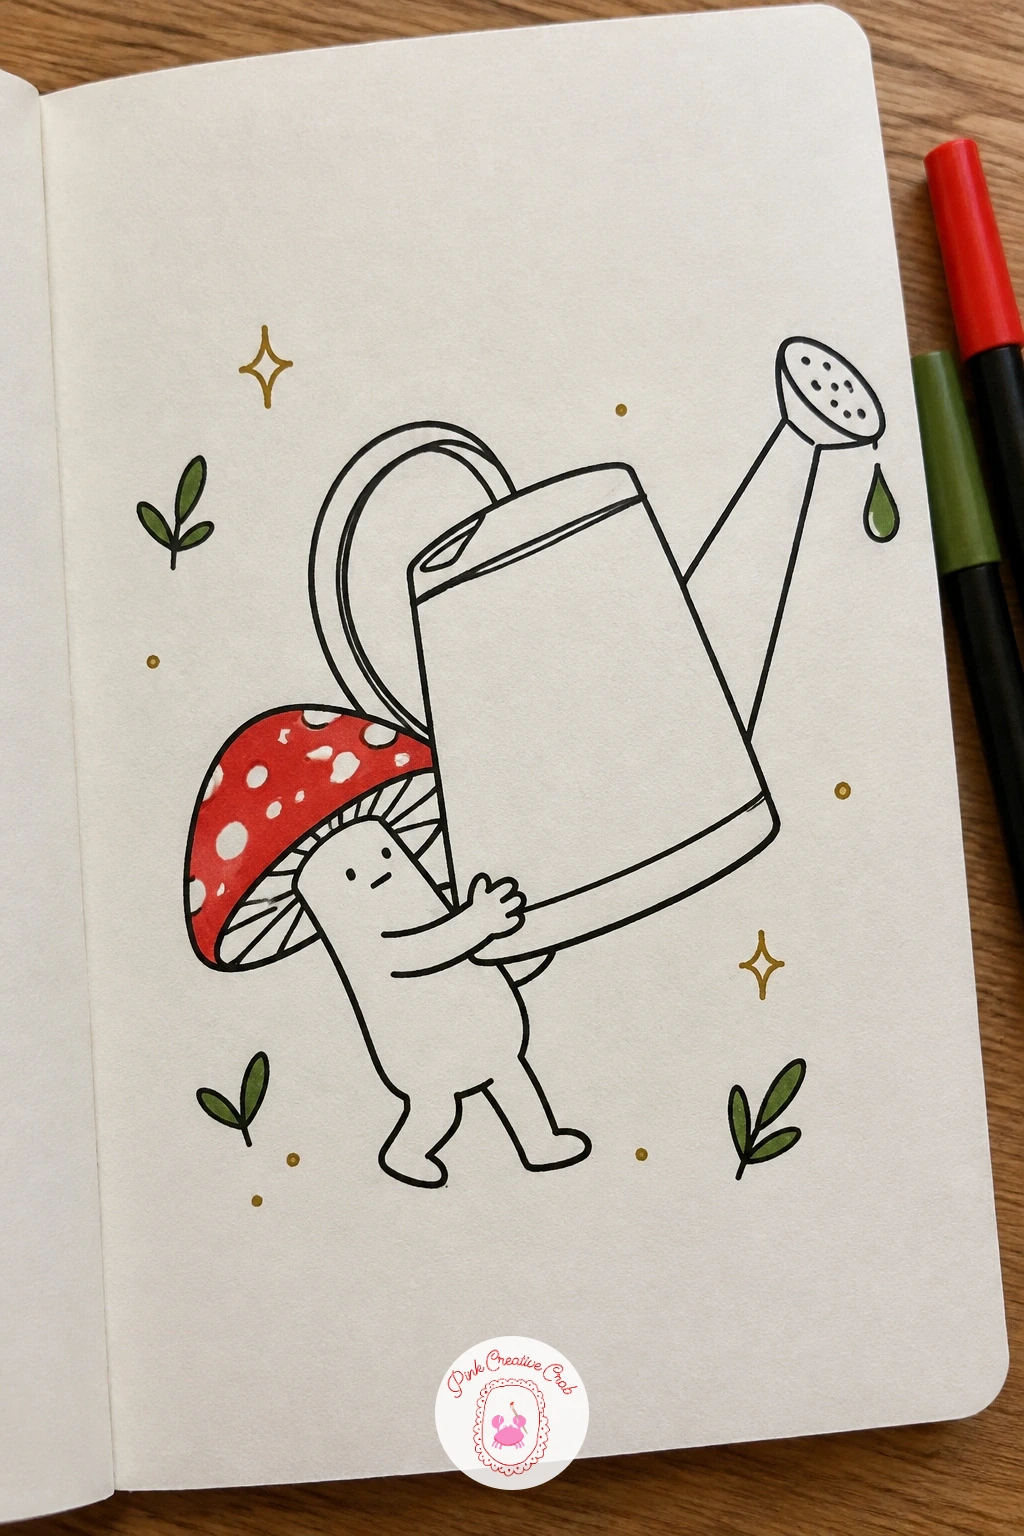
Palette: Toadstool Red,Soft Grey,Dusty Blue
This cozy bedtime scene works best drawn in ten minutes if you keep it simple: a mushroom with its cap barely visible under a floppy sleeping cap, half closed sleepy eyes, and one hand holding a short candle with a small teardrop flame. That version alone, drawn quickly in plain ink with no color, already reads clearly as a bedtime mushroom.
Given forty minutes instead, add a few extra touches: a soft glow around the candle flame using small radiating lines, a patterned tassel on the end of the sleeping cap, and a thin blanket or leaf draped loosely over one arm. These extras turn a quick sketch into a fuller little scene without changing the pose itself.
Either way, work the sleeping cap over the mushroom’s own cap shape rather than replacing it, letting a little of the original dome peek out at the base so it still reads clearly as a mushroom wearing a hat rather than a different character entirely.
Color the visible mushroom cap edge in toadstool red, the sleeping cap in a soft contrasting color or plain ink, and leave the candle flame uncolored so it stands out as the brightest point in the drawing.

Palette: Toadstool Red,Soft Grey,Dusty Blue
This idea takes the mushroom house concept and nests it into a real tree stump instead of a freestanding building, which changes how you draw the outer shape. Draw a wide rounded stump silhouette first, bark texture as a few short vertical lines, then cut a round door into the lower middle of the stump and a mushroom standing just inside it, one arm raised in a wave.
Keep the mushroom smaller than the doorway itself with a little space around its head and shoulders, since a figure that fills the whole doorway frame starts to look cramped rather than at home. Add one small root shape curling out from the base of the stump into the ground for extra stability.
If the bark texture starts looking too busy, reduce the vertical lines to just a handful near the top and bottom edges of the stump rather than covering the whole surface, a few well placed lines read as bark more clearly than a dense scribble does.
Color the stump in warm brown, the door frame in a slightly darker brown, and give the mushroom’s visible cap edge a small patch of toadstool red so it stands out against the stump behind it.
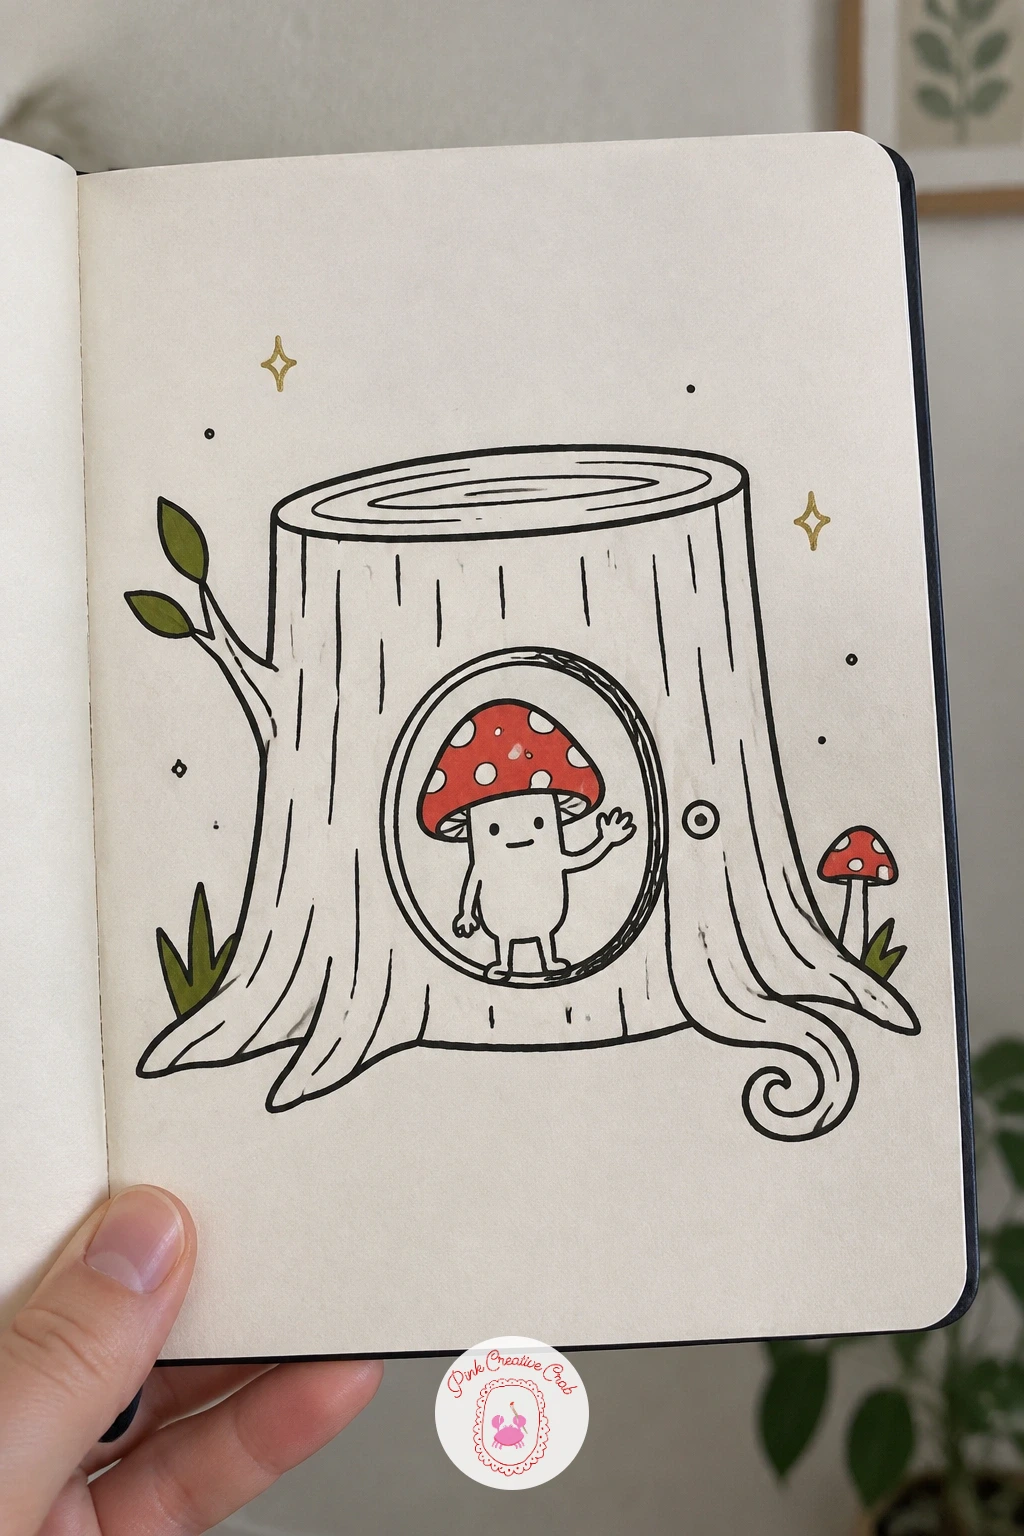
Palette: Warm Brown,Toadstool Red,Soft Grey
For more tree stump and woodland building ideas at this scale, the fantasy diorama scenes page is worth a look.
Perspective matters a lot here because the whole pose depends on the viewer feeling like they are looking slightly up from below as the mushroom floats down. Draw the cap wide and slightly flattened like a dome catching air, with the stem and tiny legs hanging below it, knees bent and arms out for balance, floating in open space with nothing underneath.
Add a few short curved lines trailing upward from the sides of the cap to suggest air resistance pushing against it as it falls, and scatter two or three small cloud shapes around the upper part of the page to establish height. Those trailing air lines are what separate “floating gently” from “just standing in midair.”
If the pose looks stiff, loosen the legs into a slight dangling bend rather than straight lines, and tilt the whole body a touch off center rather than perfectly vertical, real falling motion is rarely perfectly symmetrical.
Color the cap toadstool red, leave the clouds and air lines in plain ink, and skip any ground line entirely so the sense of height stays uninterrupted.
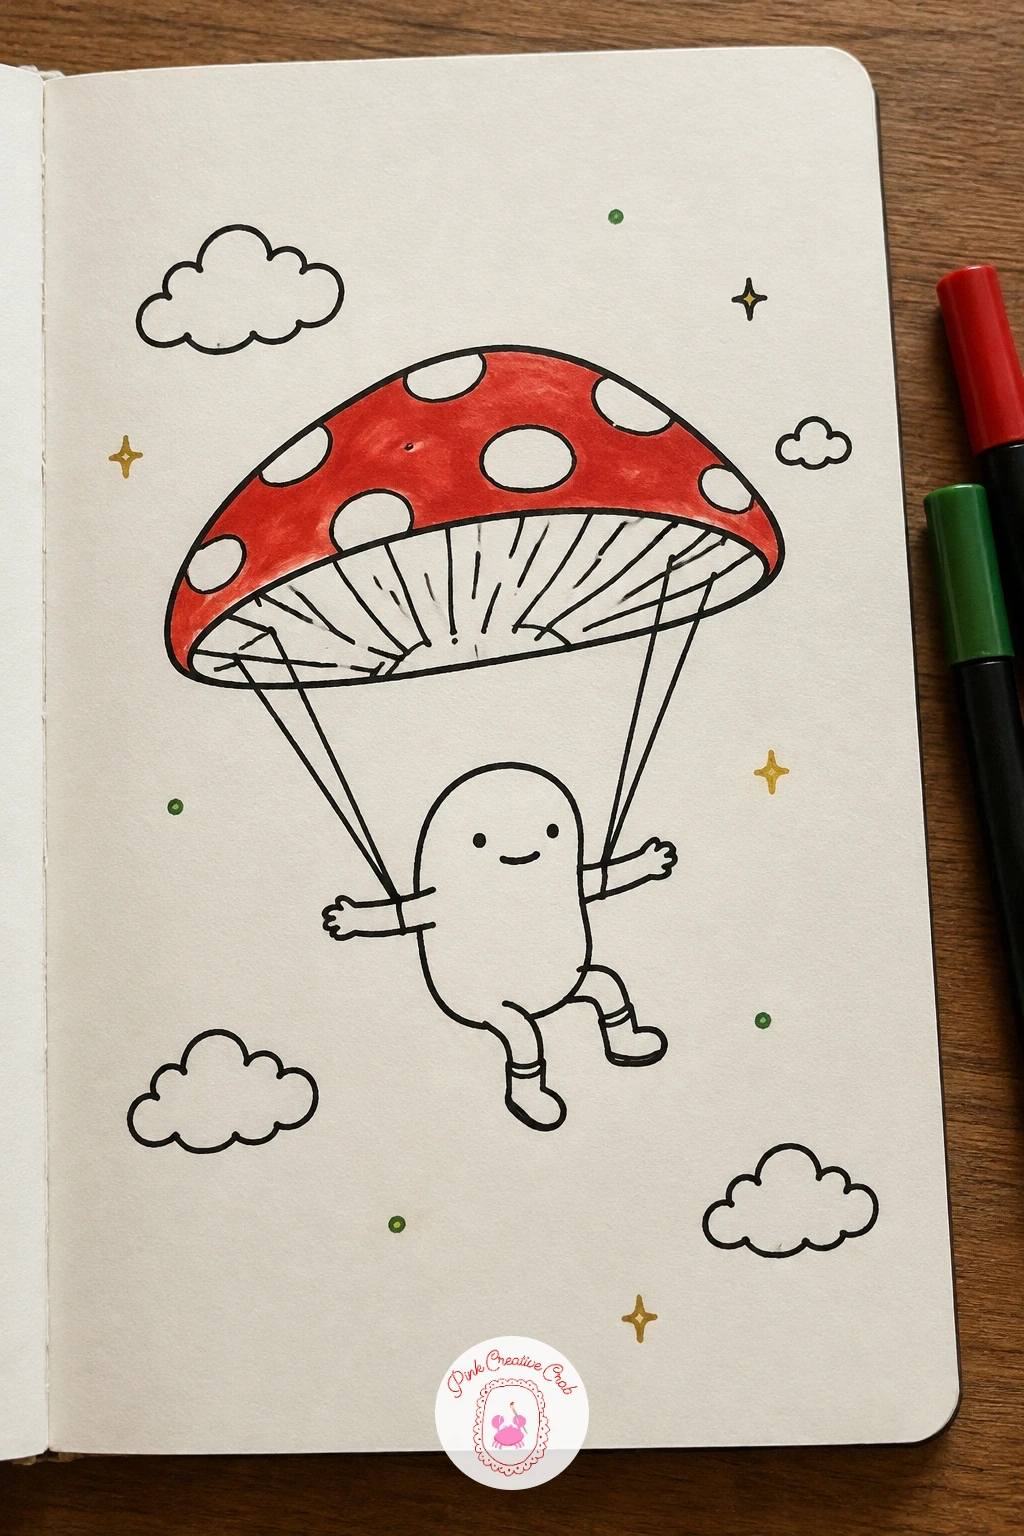
Palette: Toadstool Red,Soft Grey,Ivory White
Finish on a quiet, confident scene that brings light into the drawing directly. Draw a single glowing mushroom first with its cap in a pale warm color and a soft radiating glow sketched as short light lines all around its edge, since that glow decides where every shadow and highlight on the beetle beside it will fall.
Position the beetle curled up close to the base of the glowing mushroom, legs tucked in and eyes closed, catching the light on the side nearest the cap while leaving its far side slightly darker or plain. That one light and shadow choice is what makes the glow feel real rather than just decorative.
If the glow looks flat, vary the length of the radiating lines around the cap, some short and some a little longer, rather than making them all identical, uneven lines read more like soft light than a hard outline does.
Color the mushroom cap in a pale warm yellow or soft toadstool red rather than a deep saturated red, since a lighter tone reads more convincingly as glowing, and leave the sleepy beetle in plain ink beside it.
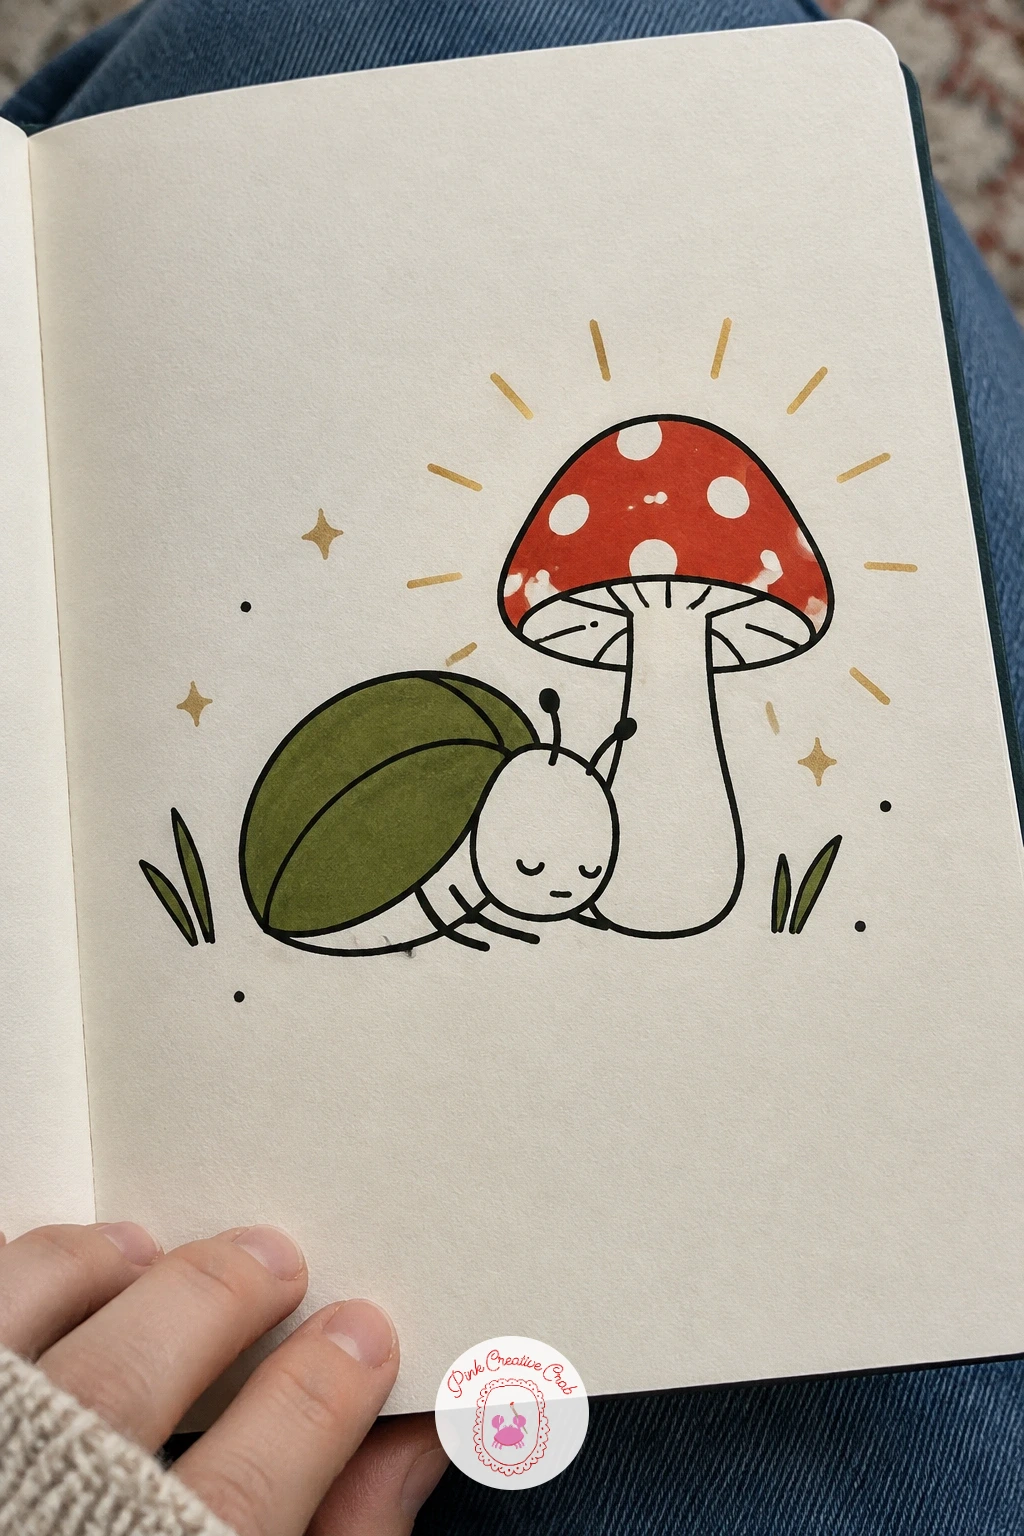
Palette: Pale Yellow,Soft Grey,Moss Green
If you enjoy small glowing night scenes like this one, the mini doodle ideas have more pocket sized subjects worth trying next.
Close the set with the subject that first gives this doodle style its charm, a mushroom walking at night with a small lantern held out in front of it. Draw the mushroom mid stride, one leg forward and one arm raised holding a simple lantern shape, a small box with a curved handle and a soft glow drawn as short lines radiating from inside it.
Place the light source clearly inside the lantern and let it decide the mood of the rest of the page: add a dark simple background of a few tall grass blades or small trees just behind the mushroom, left mostly plain ink so the lantern glow reads as the only bright point in the scene.
If the night feeling does not come through, darken the background shapes slightly more than you first planned, a page that stays too light all over will flatten the lantern’s glow instead of letting it stand out.
Color the mushroom cap toadstool red, the lantern glow in pale warm yellow, and the background grass in moss green kept deliberately darker than usual so the little light leads the whole scene.
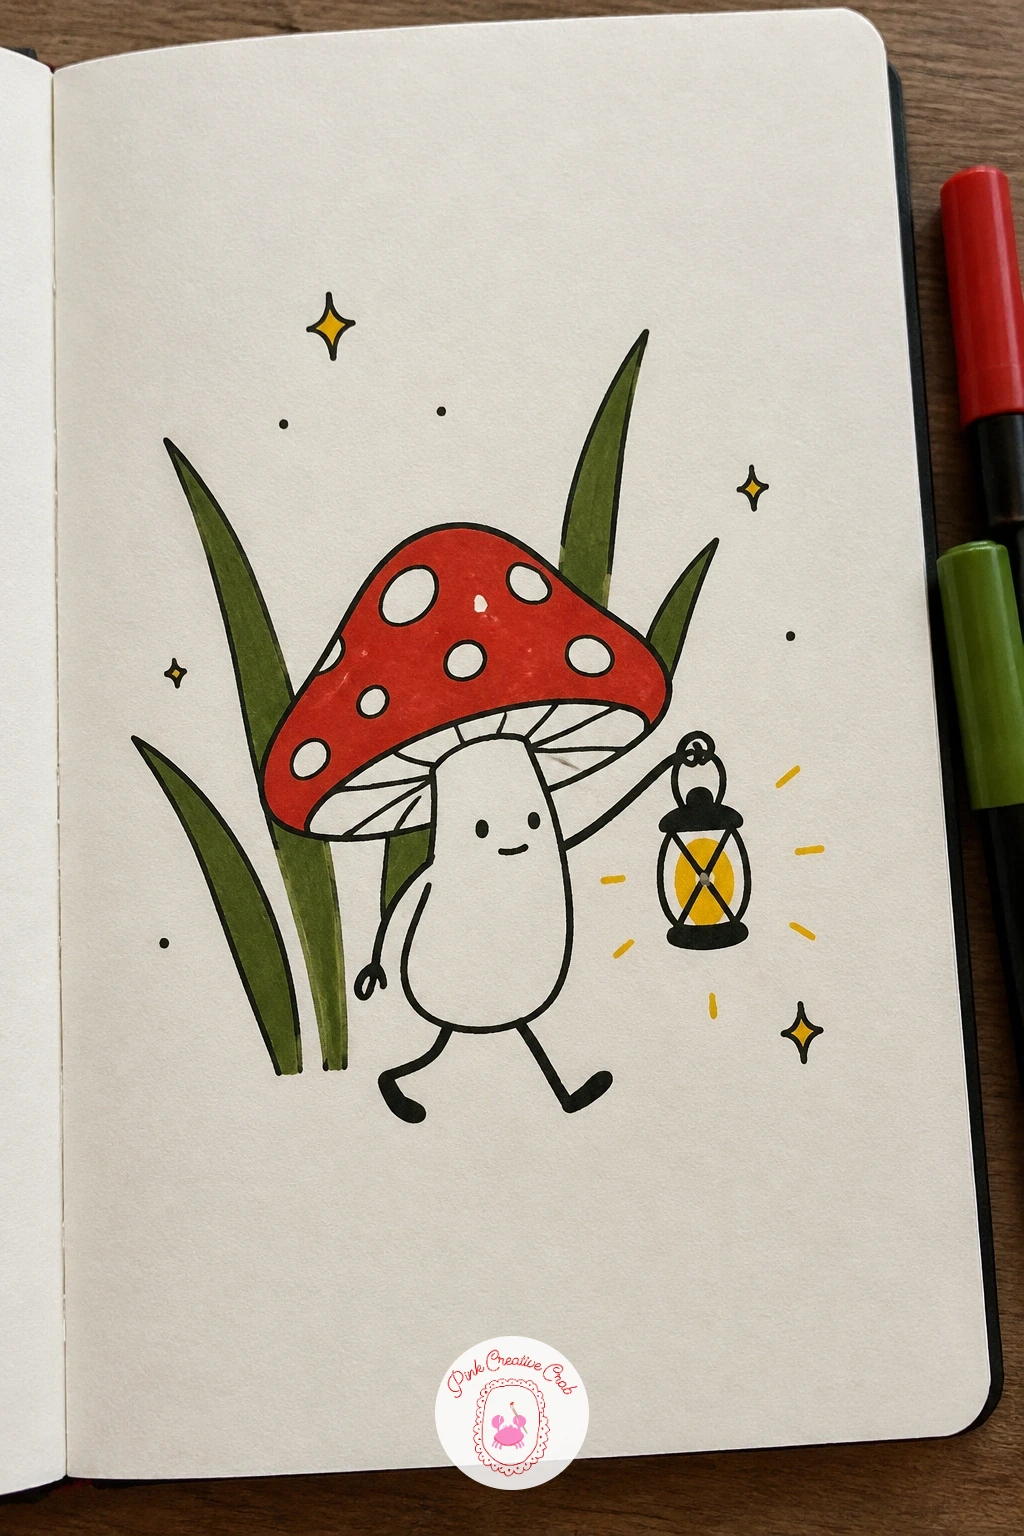
Palette: Toadstool Red,Pale Yellow,Moss Green
What to Do Next
Pick one toadstool from the top of the list to warm up, then work down toward the lantern walk or the glowing nightlight scene once your hand settles into the shapes. A plain sketchbook page and your fineliner are all you need to finish several of these in one sitting.
Frequently Asked Questions
What pens work best for a mushroom doodle like this?
A black fineliner in a fine tip, around 0.3 to 0.5 millimeters, works best for clean outlines. Add toadstool red and moss green markers or dual tip pens for the accent color once the ink is fully dry.
How do I keep mushroom faces from looking the same every time?
Change the eyes and the tilt of the cap first, since those two things carry most of the expression. A lowered cap edge, raised eyebrows or a tilted head give very different moods from the same basic mushroom shape.
Do I need to draw every mushroom with spots?
No, spots belong to classic toadstool shapes but plain caps work for puffballs, grandpa mushrooms or any character where spots would clutter the design. Save spots for the ideas where they help tell the story, like a missing spot search.
What if my marker bleeds through the paper?
Switch to a thicker sketchbook paper or slip a spare sheet behind the page you are coloring to protect the one underneath. Testing a new marker on a scrap corner first also helps you judge how much it will bleed.
How small can these doodles be and still work?
Most of these fit comfortably within a two by two inch square, small enough for a notebook margin or a journal corner. Simpler subjects like the napping toadstool work even smaller, while the mushroom houses need a touch more room for the extra details.
Have any thoughts?
Share your reaction or leave a quick response — we’d love to hear what you think!
-
 0
-
0
-
0
-
0
-
0
-
0


