

Bread watercolor is the kind of painting that smells good before you even pick up a brush. Warm crusts, soft crumb, a little steam curling off a fresh loaf: it is all golden browns and creamy whites, forgiving to mix and satisfying to shade. If you love baking, this is your subject.
Below are 31 bakery moments to paint, starting simple and building up to full little scenes with a girl, a cat or a cafe table thrown in. Pick whichever one is calling to you from your feed and get your palette warm, you can finish most of these in one sitting.
Using these images: free for personal projects such as printing, coloring, cards, journals and gifts. Handmade items that include them may be sold up to 30 pieces per design. More than that is commercial use and is not permitted, and neither is selling or sharing the images themselves or passing them off as your own. Please ask before any other use.
Start where every bread painter should start: a single round sourdough loaf. Pencil in a soft, slightly lopsided circle, real loaves are never perfectly symmetrical, and that wobble is what sells it. Keep the outline light so it does not show through your washes.
Wet the whole loaf shape first and drop in a pale yellow ochre wash, then while it is still damp, touch in burnt sienna around the edges and underneath where the crust darkens and curls over the baking stone. Let the colors blend on their own rather than stirring them together.
Once that first layer is bone dry, use a fine brush loaded with a darker burnt umber to paint the scored lines, the slashes a baker cuts before baking. Keep them a little uneven and let a few go slightly off the edge of the loaf.
If your scoring lines bleed into the wet crust, that is the mistake to watch for: always wait for full dryness before adding them. No burnt sienna on hand, raw sienna mixed with a touch of red works as a swap.
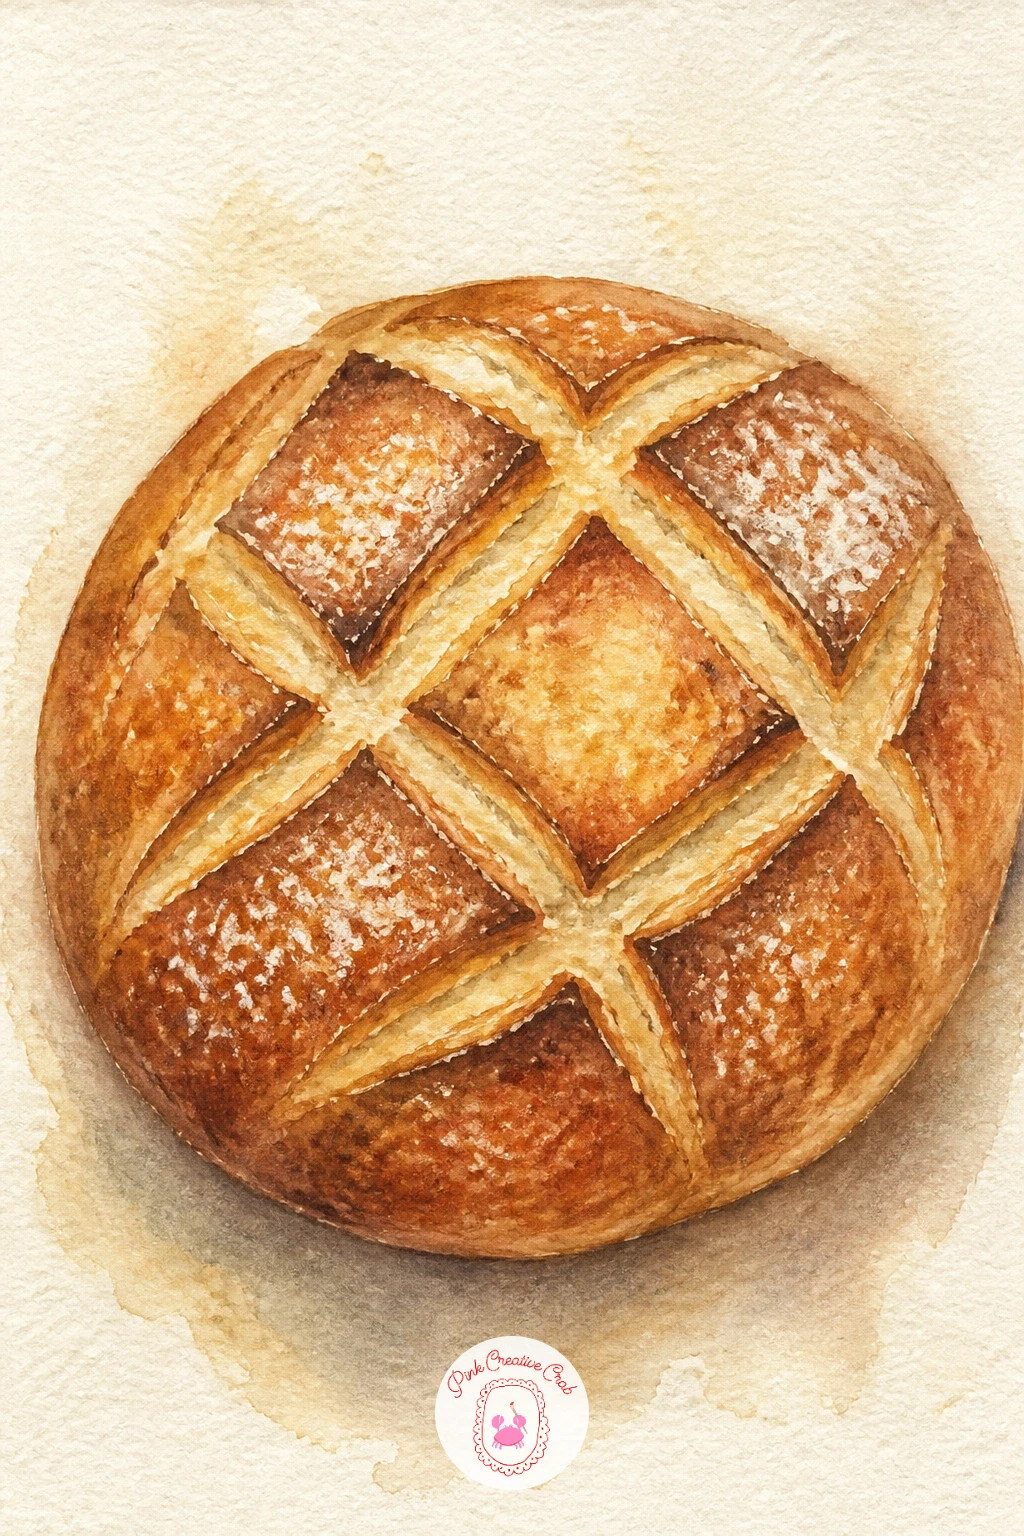
Palette: Yellow Ochre,Burnt Sienna,Burnt Umber
Move from a single loaf to a whole little scene: a woven basket stuffed with baguettes, balanced on the front of a bicycle. Block in the bike first with light pencil, just the basic shape of the frame, handlebars and front wheel, kept loose and slightly sketchy.
Paint the basket in warm raw umber with dry, scratchy brushstrokes to suggest woven texture, then add the baguettes on top in long thin ochre shapes with darker sienna tips at each end where the crust browns hardest.
Compare the length of each baguette to the width of the basket as you go, that relationship is what keeps the loaves looking believable rather than oversized or tiny. The bike itself can stay a simple gray-blue line sketch so the bread stays the star.
If the basket weave gets muddy, lift a little paint with a dry tissue while still damp to bring back some texture. Today’s tip: paint the bread before the bike so the loaves set the scale for everything else.
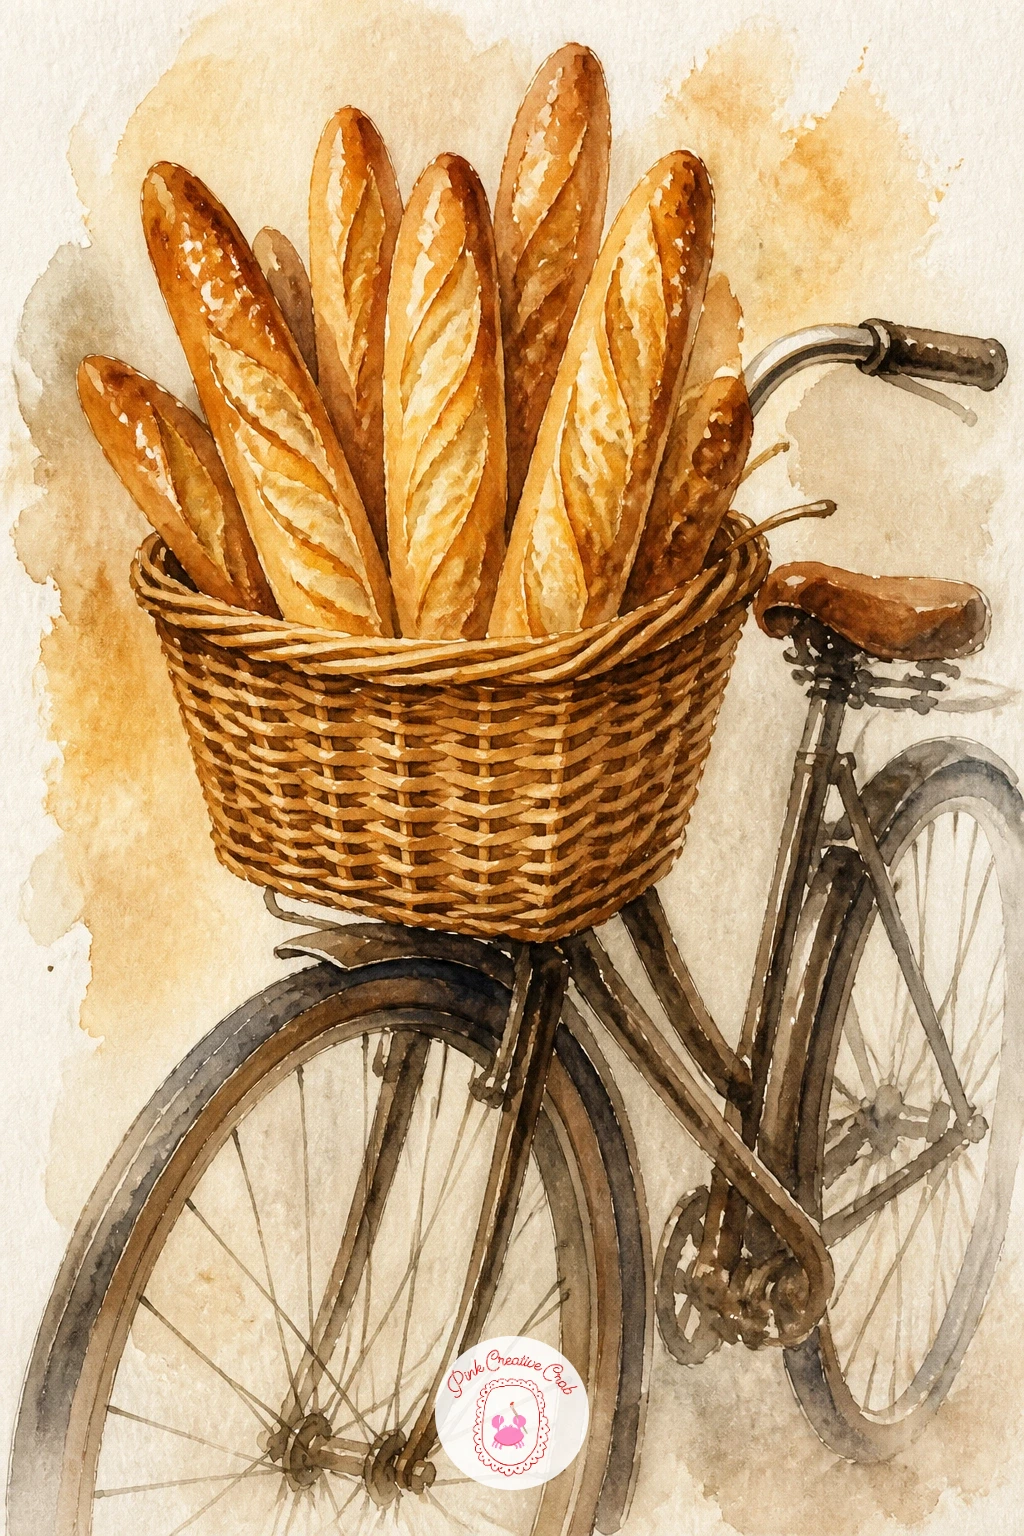
Palette: Raw Umber,Yellow Ochre,Payne’s Grey
After painting straight loaves, a croissant is good practice for curved, layered shapes. Sketch the crescent lightly, then look closely at how the layers twist around the curve rather than sitting flat, this is the detail that makes it read as a croissant and not a banana.
Wash in pale gold first, then while damp pull short curved strokes of burnt sienna along the ridges to follow the twist of the pastry. Keep your brush fairly dry for this part so the lines stay crisp instead of flooding into one blob.
Paint the plate as a simple pale gray ellipse underneath, and add a small dollop of jam in cadmium red with a tiny white highlight left unpainted for shine.
If the croissant looks flat, add one stronger shadow line underneath where it meets the plate, that single dark edge does more for the shape than extra highlights ever will. No cadmium red, alizarin crimson works just as well for the jam.
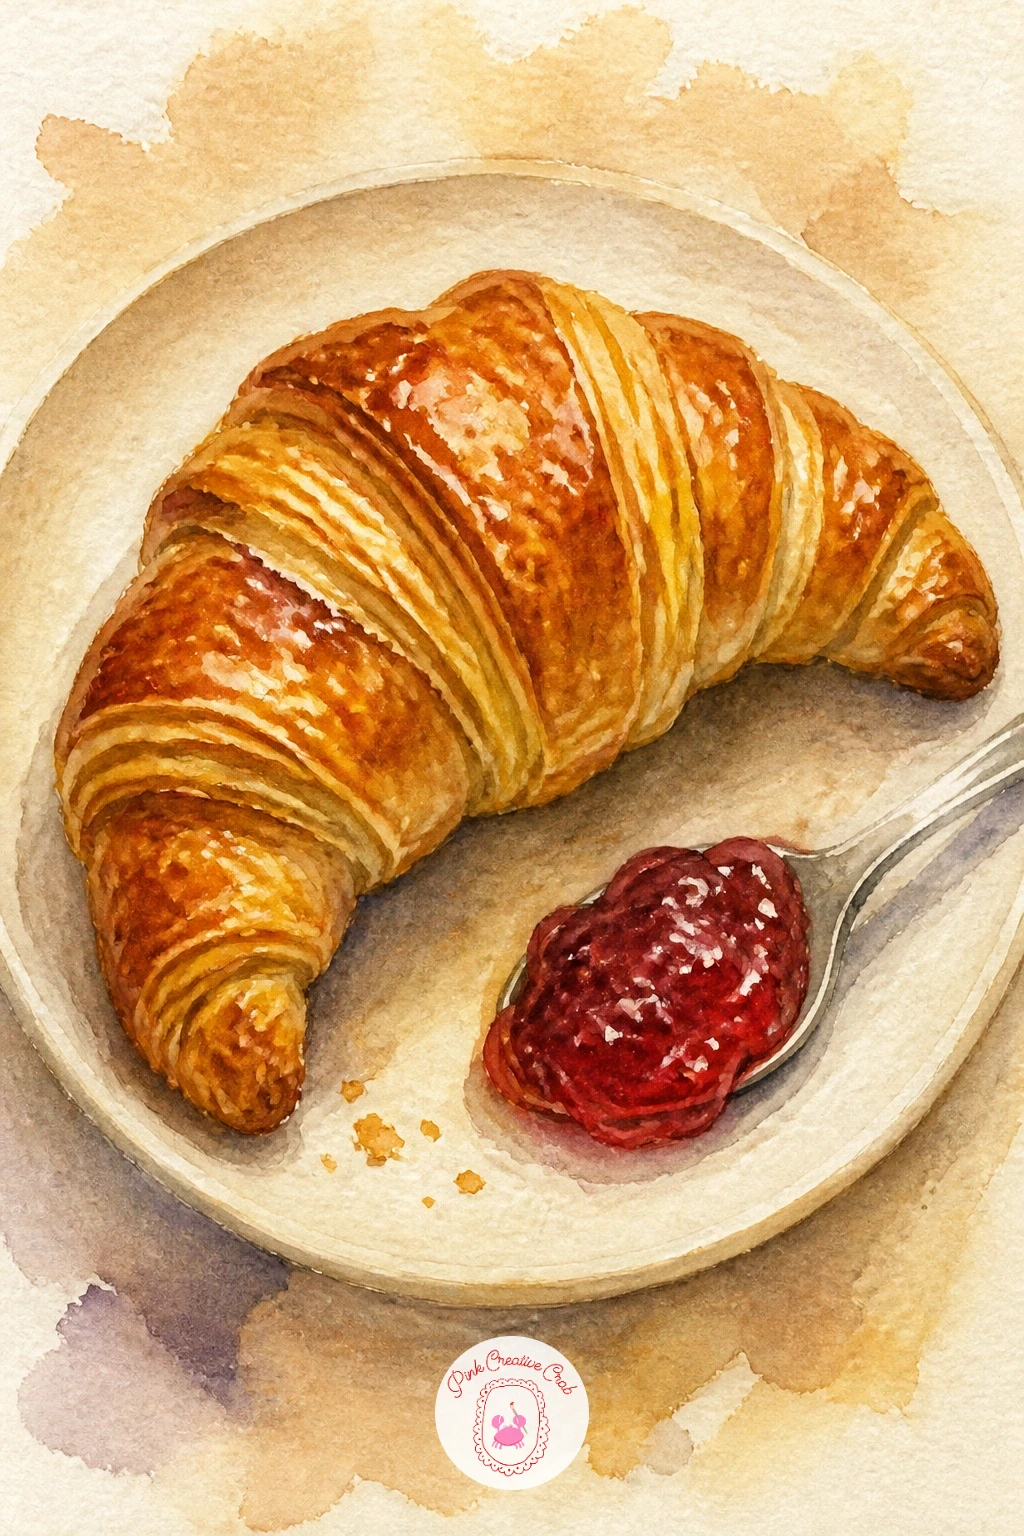
Palette: Yellow Ochre,Burnt Sienna,Cadmium Red
If you enjoy painting small food still lifes like this, you might like these easy watercolor food ideas for more journal-sized pieces.
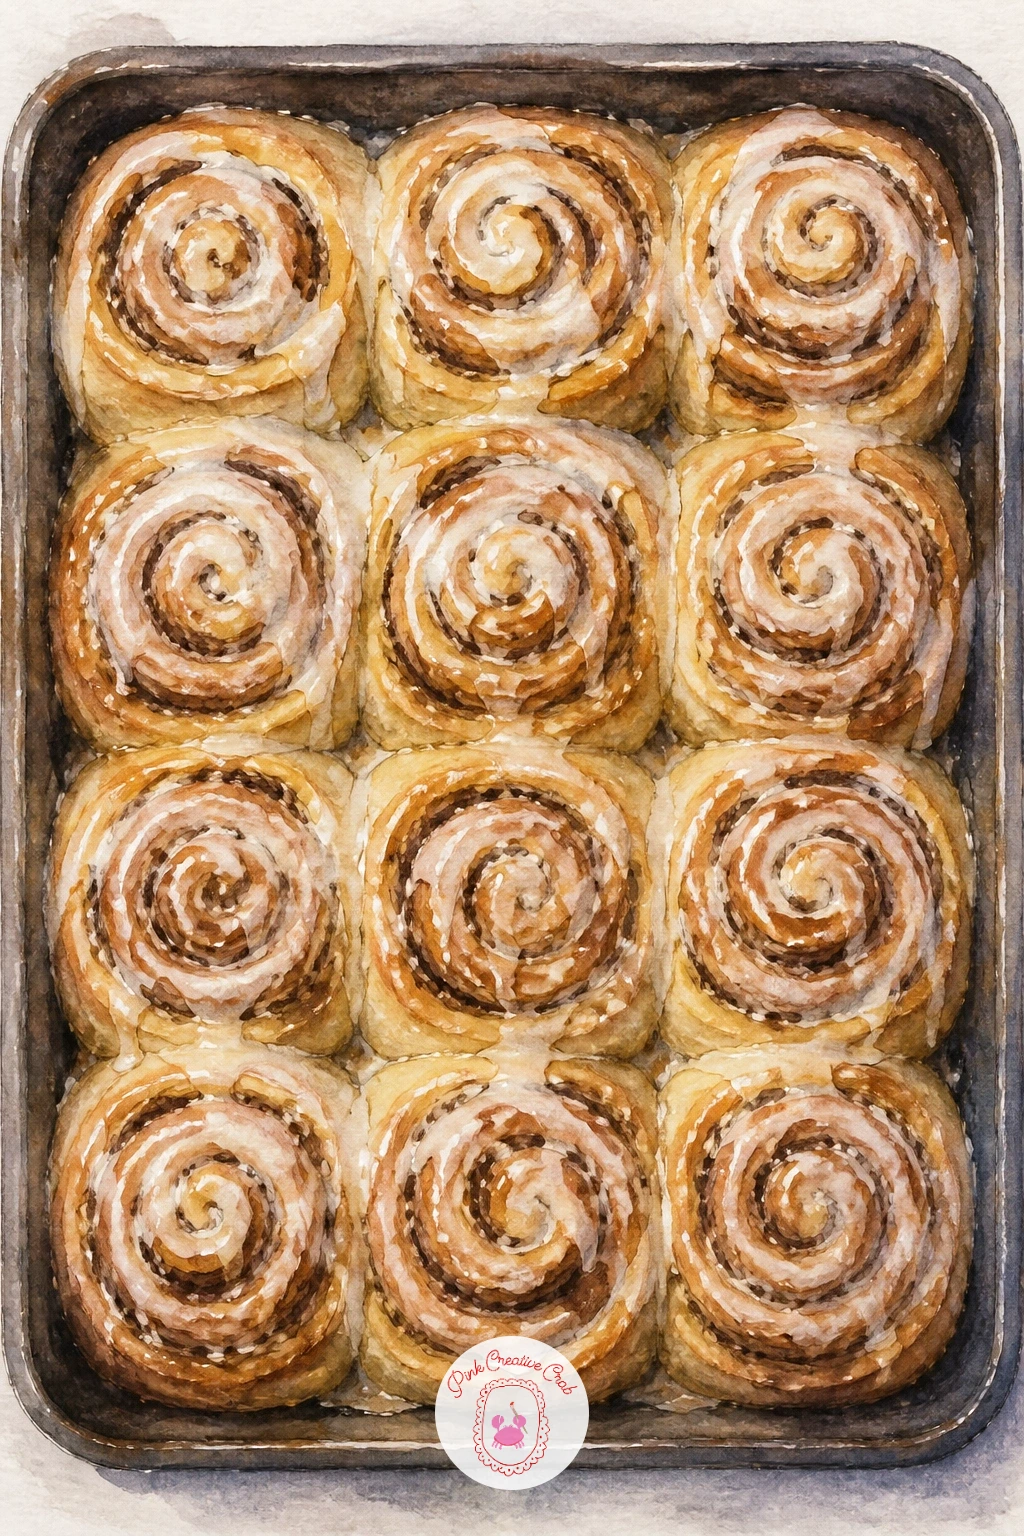
Cinnamon rolls give you a chance to paint a whole tray of swirls rather than one shape alone. Draw four or five overlapping circles loosely inside a rectangle for the tray, varying their sizes slightly so they feel baked, not stamped out by machine.
Paint each roll with a light cream base, then once dry, load a fine brush with cinnamon brown and paint a spiral into each one, starting from the center and working outward in one continuous curved stroke.
Drizzle icing on top with pure white gouache or just the white of the paper left unpainted, and dot a few raisins or extra swirl lines in dark umber for variety between the rolls.
Spirals that look too perfect read as fake, so let a couple wobble or break slightly. If you only have watercolor and no gouache, a white gel pen does the icing drizzle just as well.
You Will Need
- white gouache or white gel pen for icing
Palette: Naples Yellow,Cinnamon Brown,Burnt Umber
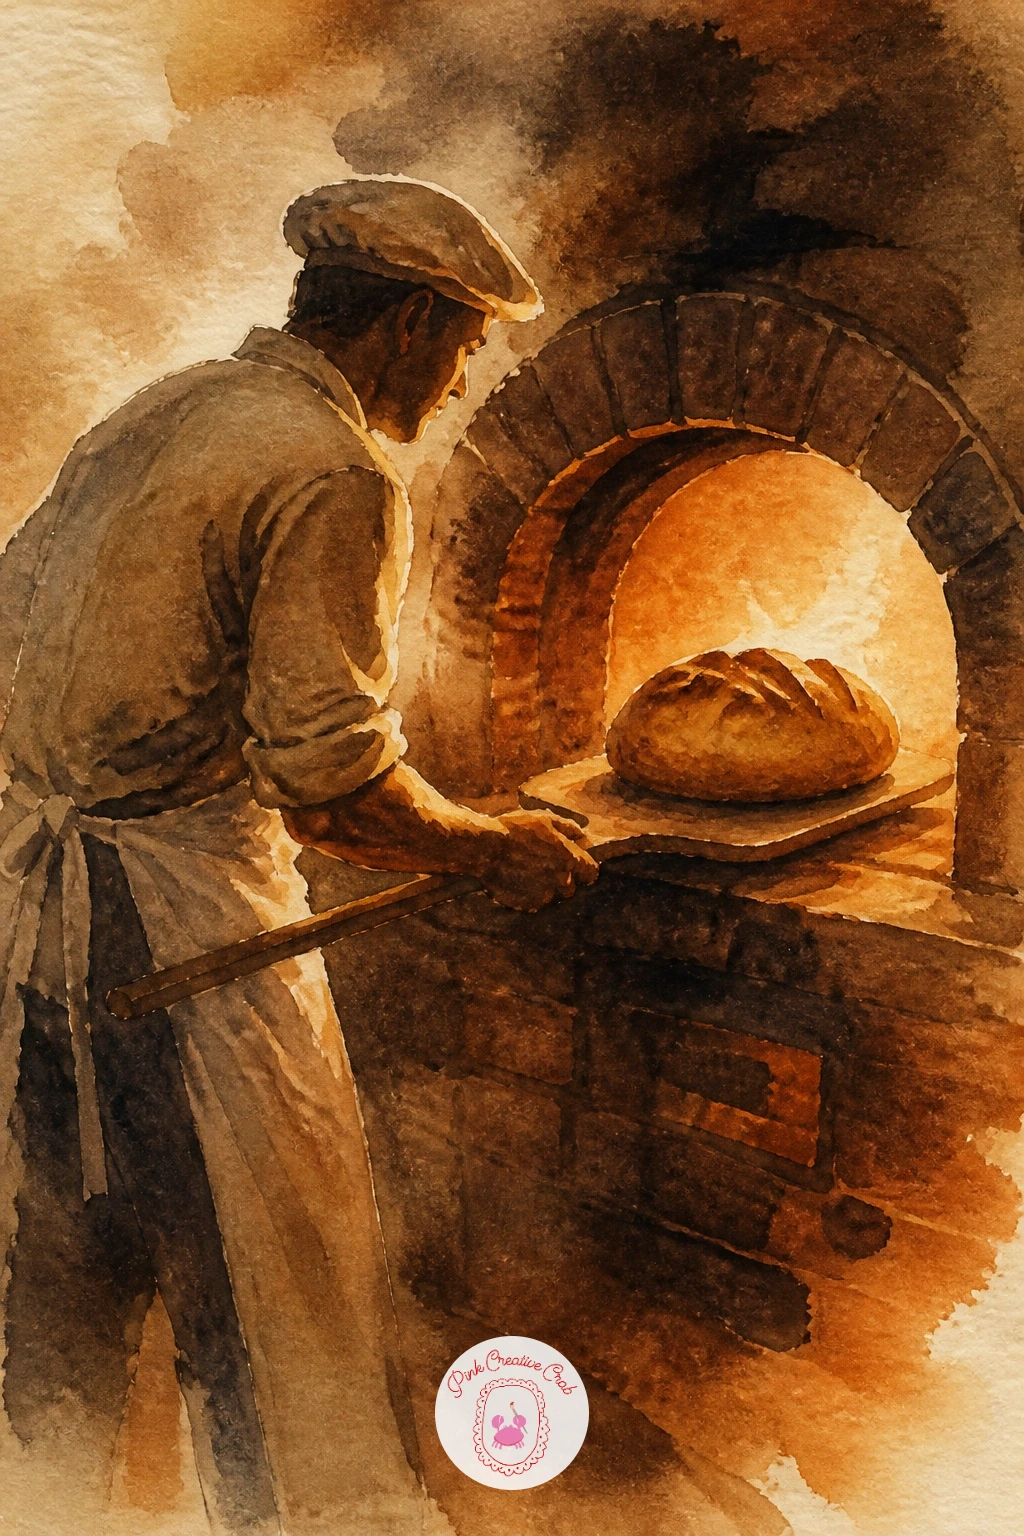
This is your first figure in the series, so keep the baker simple: a loose silhouette in an apron, arms extended, holding a wooden peel with a loaf balanced on the end. Sketch the figure small and slightly off-center so the oven and bread stay the focus.
Think about where your light source sits here, usually glowing from inside the oven, which means the baker’s front should stay in shadow while the oven opening and the bread itself catch warm golden light. Paint the oven interior in deep orange and red first, then let it dry before adding the darker silhouette on top.
Keep the apron and clothing in flat, muted color so it does not compete with the glowing oven, and leave the edge of the loaf closest to the oven light almost white.
If the whole painting looks too dark and heavy, add one more warm highlight along the baker’s forearm to pull some light back into the figure. A limited palette of just orange, brown and one cool gray keeps this scene from getting busy.
Palette: Cadmium Orange,Burnt Sienna,Payne’s Grey
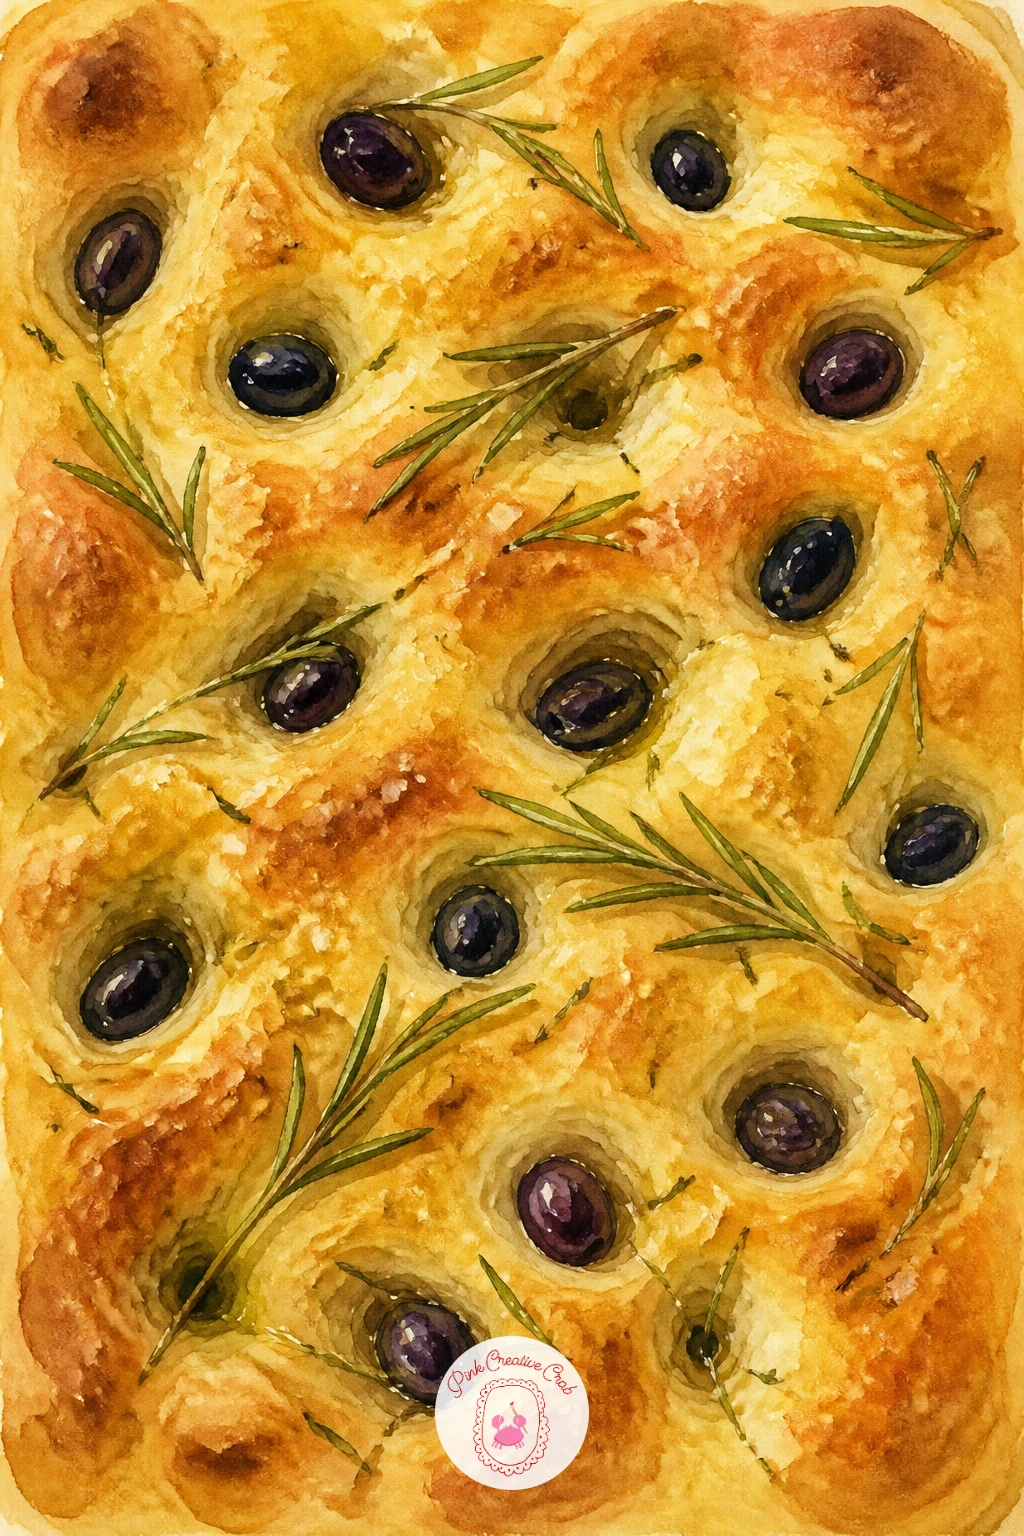
Focaccia rewards a looser hand than most breads here, since its surface is all dimples, oil sheen and scattered toppings. Paint a flat, slightly irregular rectangle or oval first in a wet wash of yellow ochre and olive green mixed loosely together, letting the colors pool unevenly to suggest the oiled surface.
While still a little damp, press the flat side of your brush into the paint in several spots to create the dimpled texture bread gets from a baker’s fingertips, this works far better than trying to draw each dimple with lines.
Once dry, add rosemary sprigs in two or three quick dark green strokes per sprig, and dot in olives as small dark purple-black ovals scattered, not lined up.
If the surface looks too smooth and flat, go back in with a nearly dry brush and dab a few darker ochre spots for extra texture. No olive green on hand, mix yellow ochre with a touch of Payne’s grey.
Palette: Yellow Ochre,Olive Green,Deep Violet
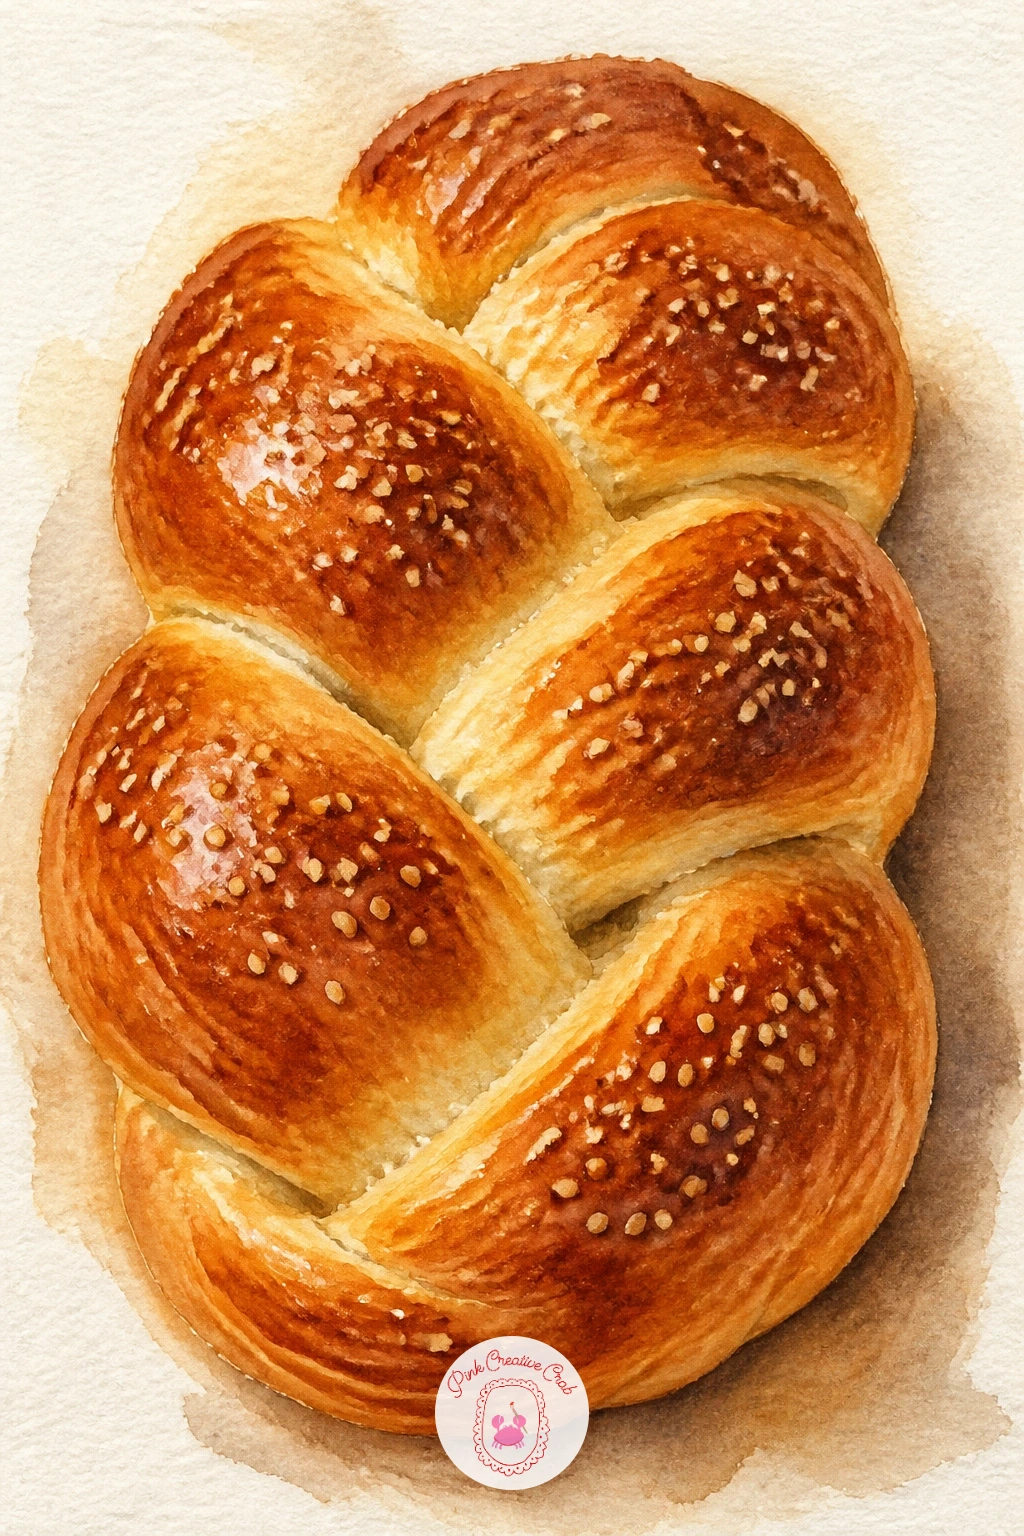
Challah’s braid is the real challenge here, so slow down on the pencil sketch before any paint touches the page. Draw three soft rope shapes weaving over and under each other in a loose S pattern, checking that each strand stays roughly the same thickness as it travels.
Paint the whole braid first in a warm golden wash, then once dry, add shadow lines exactly where one strand tucks under another, this is what makes the weave read correctly rather than looking like three separate logs lying side by side.
Finish with a scatter of sesame seeds using the tip of a fine brush or the back end of it dipped in pale cream paint, and add a glossy highlight line along the top of each strand.
If the braid looks flat, darken only the undercrossing shadows, never the top of any strand, light should always sit highest on top. A round toothpick dipped in paint works well for tiny sesame seed dots if your brush feels too thick.
You Will Need
- toothpick for sesame seed dots (optional)
Palette: Yellow Ochre,Burnt Sienna,Cream
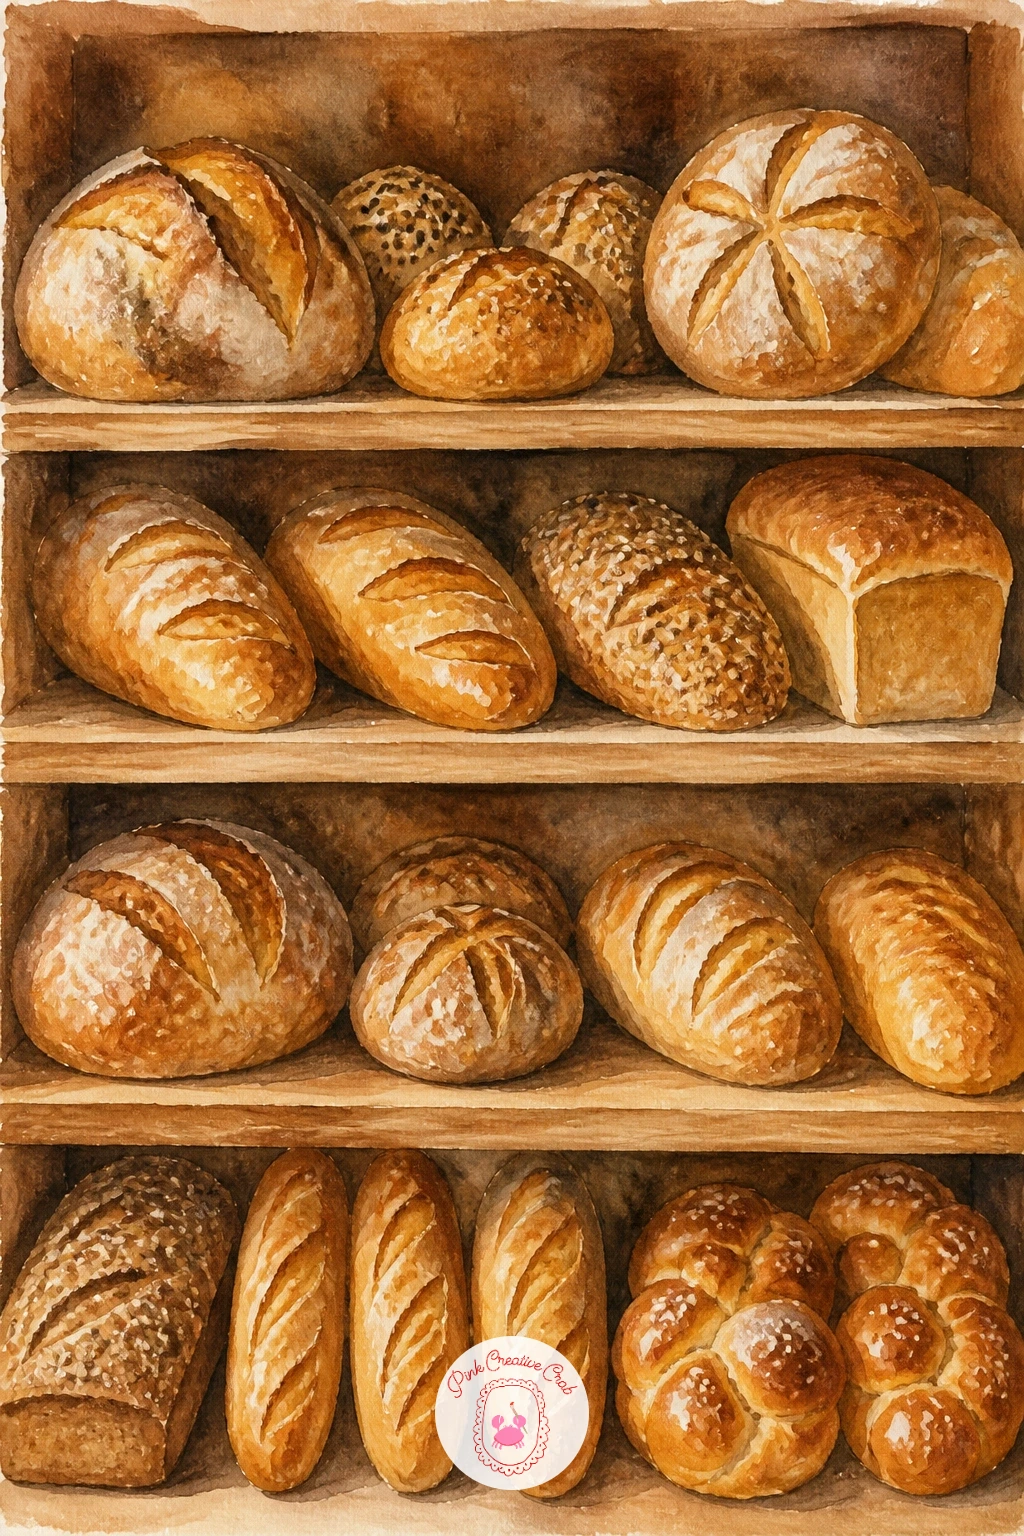
Once a few single loaves feel comfortable, try painting a whole shelf of them lined up together. Sketch a simple horizontal shelf line, then place five or six loaf shapes along it in different sizes and forms, round, oval, long, so the row does not feel repetitive.
Work back to front: paint the loaves furthest from view first in slightly cooler, grayed-down browns, then layer the front loaves on top in warmer, more saturated golds. This simple shift in temperature does more to create depth than careful outlines ever could.
Keep the shelf itself plain, a flat strip of warm wood brown, so attention stays on the bread. Add just a few scoring lines and one or two darker shadow gaps between loaves to separate them.
If the row looks flat and even, make the lighting inconsistent on purpose, let one loaf catch more highlight than its neighbors. Swap a crowded shelf for just three loaves if ten minutes is all you have today.
Palette: Yellow Ochre,Burnt Sienna,Raw Umber
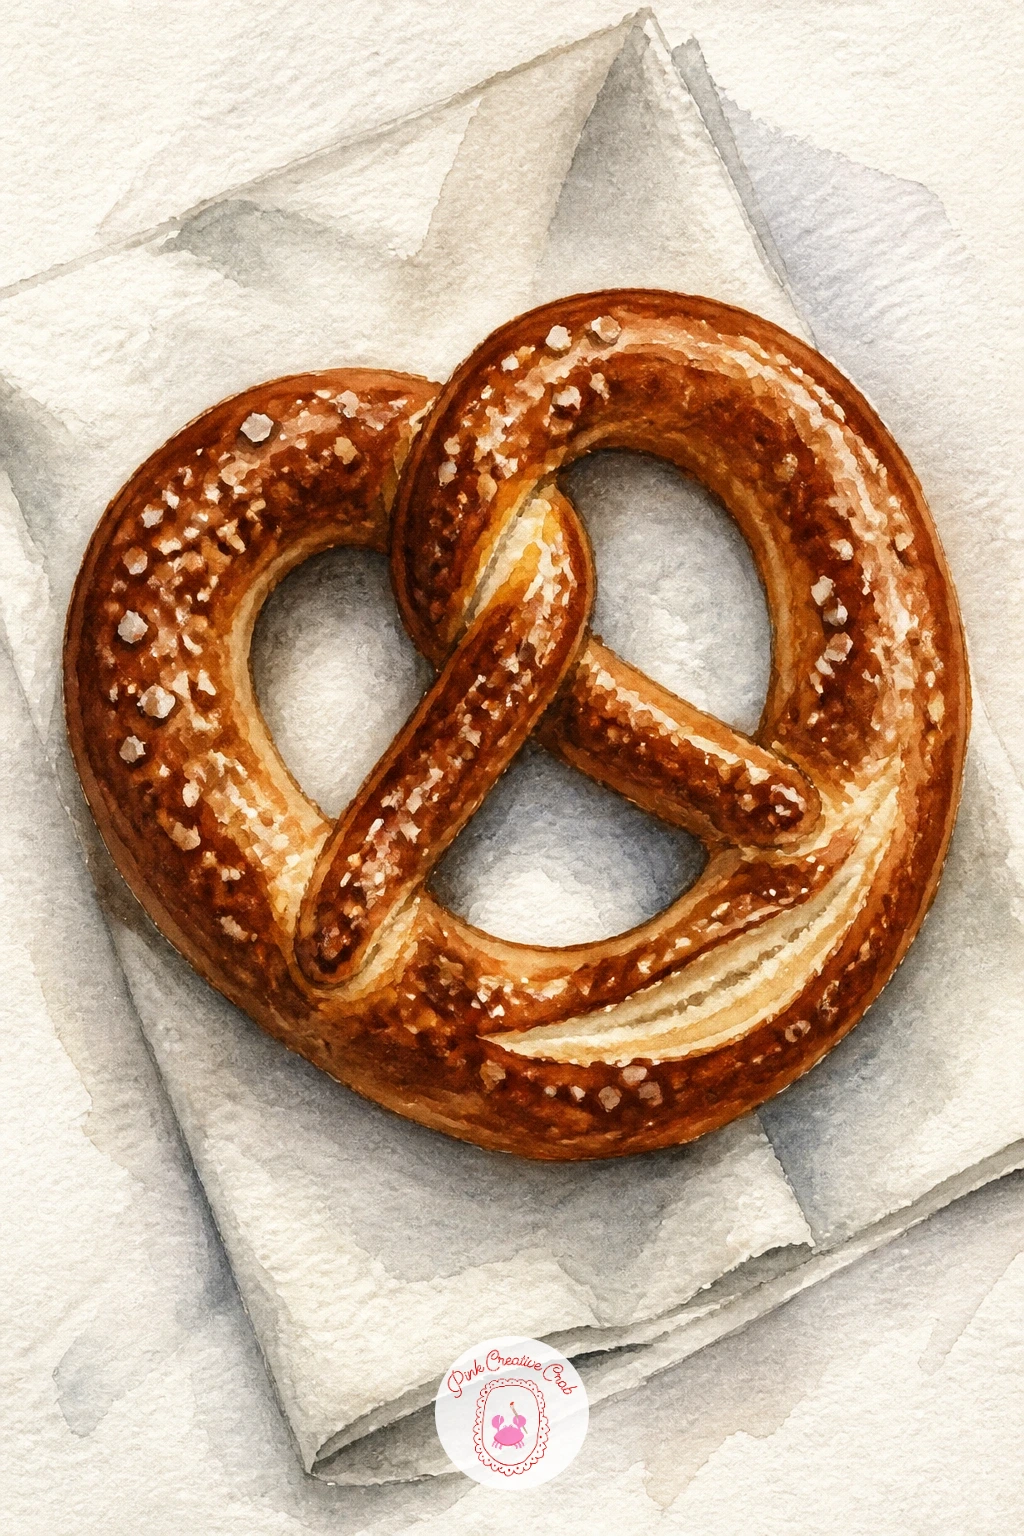
A soft pretzel is a nice quick painting once the loaves above feel routine. Draw the classic twist shape lightly in pencil, it helps to think of it as a loop that crosses itself twice rather than trying to freehand the whole curve at once.
Paint the pretzel in a warm reddish brown, darker than bread crust usually gets, since pretzels get that deep mahogany color from their baking soda bath. Leave small gaps of white paper showing along the ridges for shine.
Once dry, add coarse salt crystals with tiny dots of white gouache or a white gel pen, scattered unevenly rather than in a tidy pattern. Paint a simple folded white napkin underneath with pale gray shadow folds.
If the pretzel color looks too flat and uniform, deepen just the crossed-over sections where dough overlaps, those spots bake darker in real life too. Ten minutes gets you the pretzel alone, forty minutes lets you add the napkin folds and a cozy table edge behind it.
You Will Need
- white gouache or white gel pen for salt
Palette: Mahogany,Burnt Sienna,Warm Gray
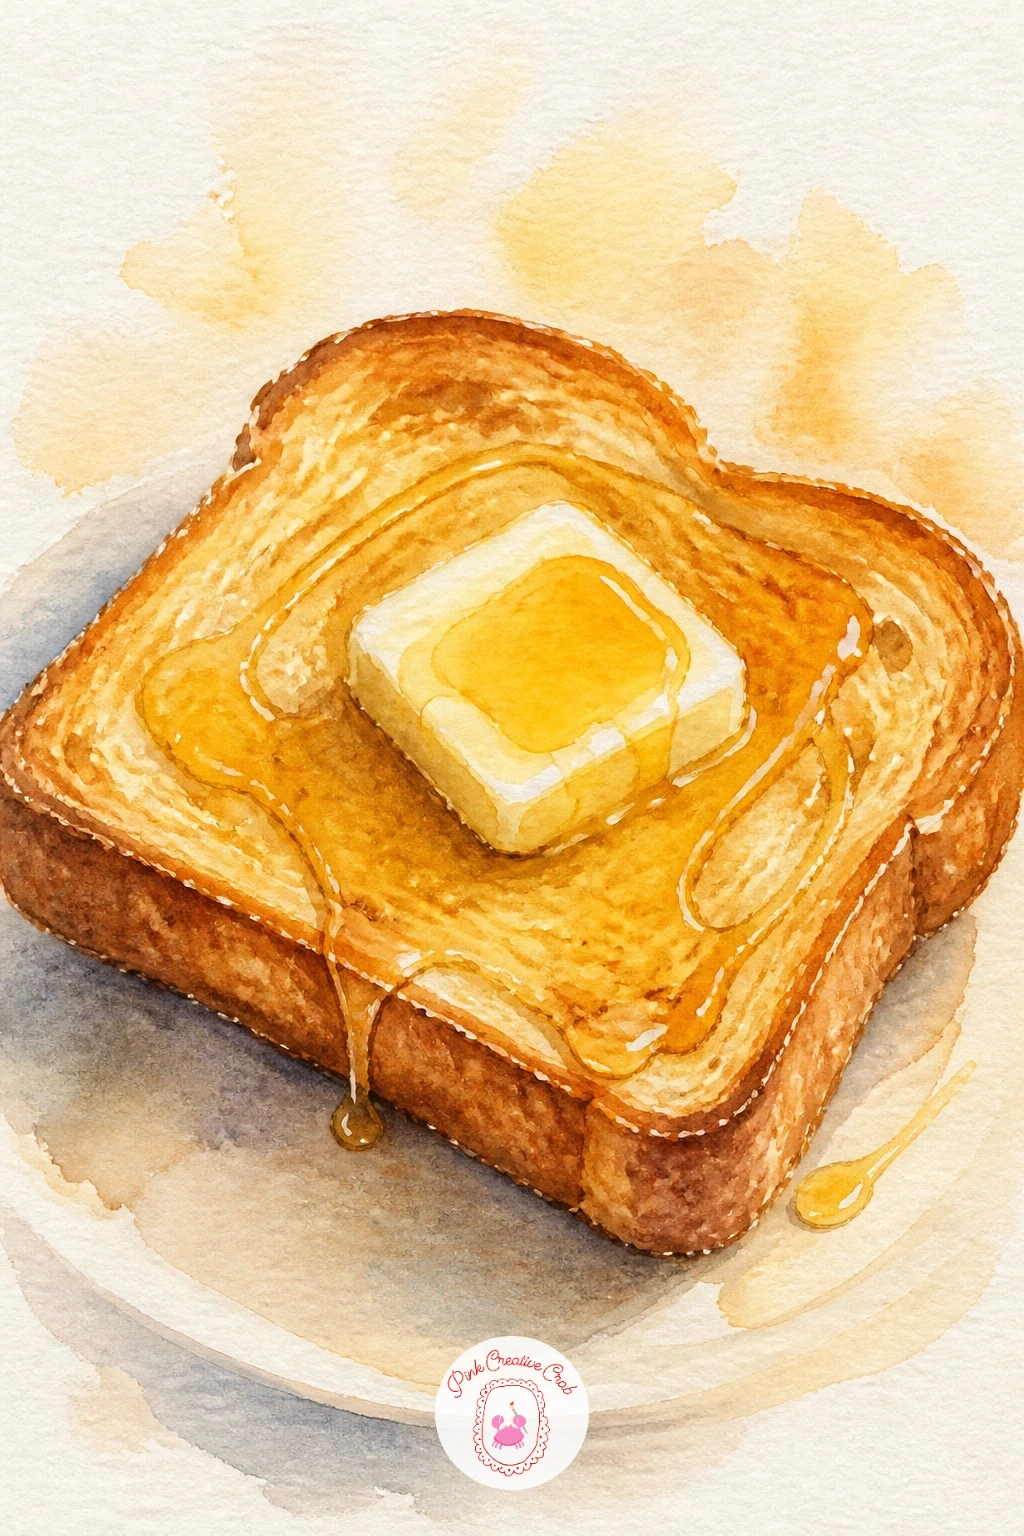
Toast is one of the easiest bread subjects to paint and a good one if today is a shorter session. Draw a simple square or slightly rounded rectangle, then paint the crust edge in a deeper golden brown and the center crumb in a much paler cream, leaving the contrast clear between the two.
While the crumb area is still damp, dot in a few small air holes with the tip of your brush in a slightly darker tan, just two or three, not a grid.
Paint a pat of butter as a simple pale yellow square melting slightly at the edges, then drizzle honey on top using thin, glossy golden lines with tiny gaps of white paper left between them to suggest shine.
If the honey looks flat, add one single bright white highlight dot where the drizzle catches the most light. No gold or honey-tone paint on hand, mix yellow ochre with a touch of orange for the same warm glow.
Palette: Golden Ochre,Cream,Pale Yellow
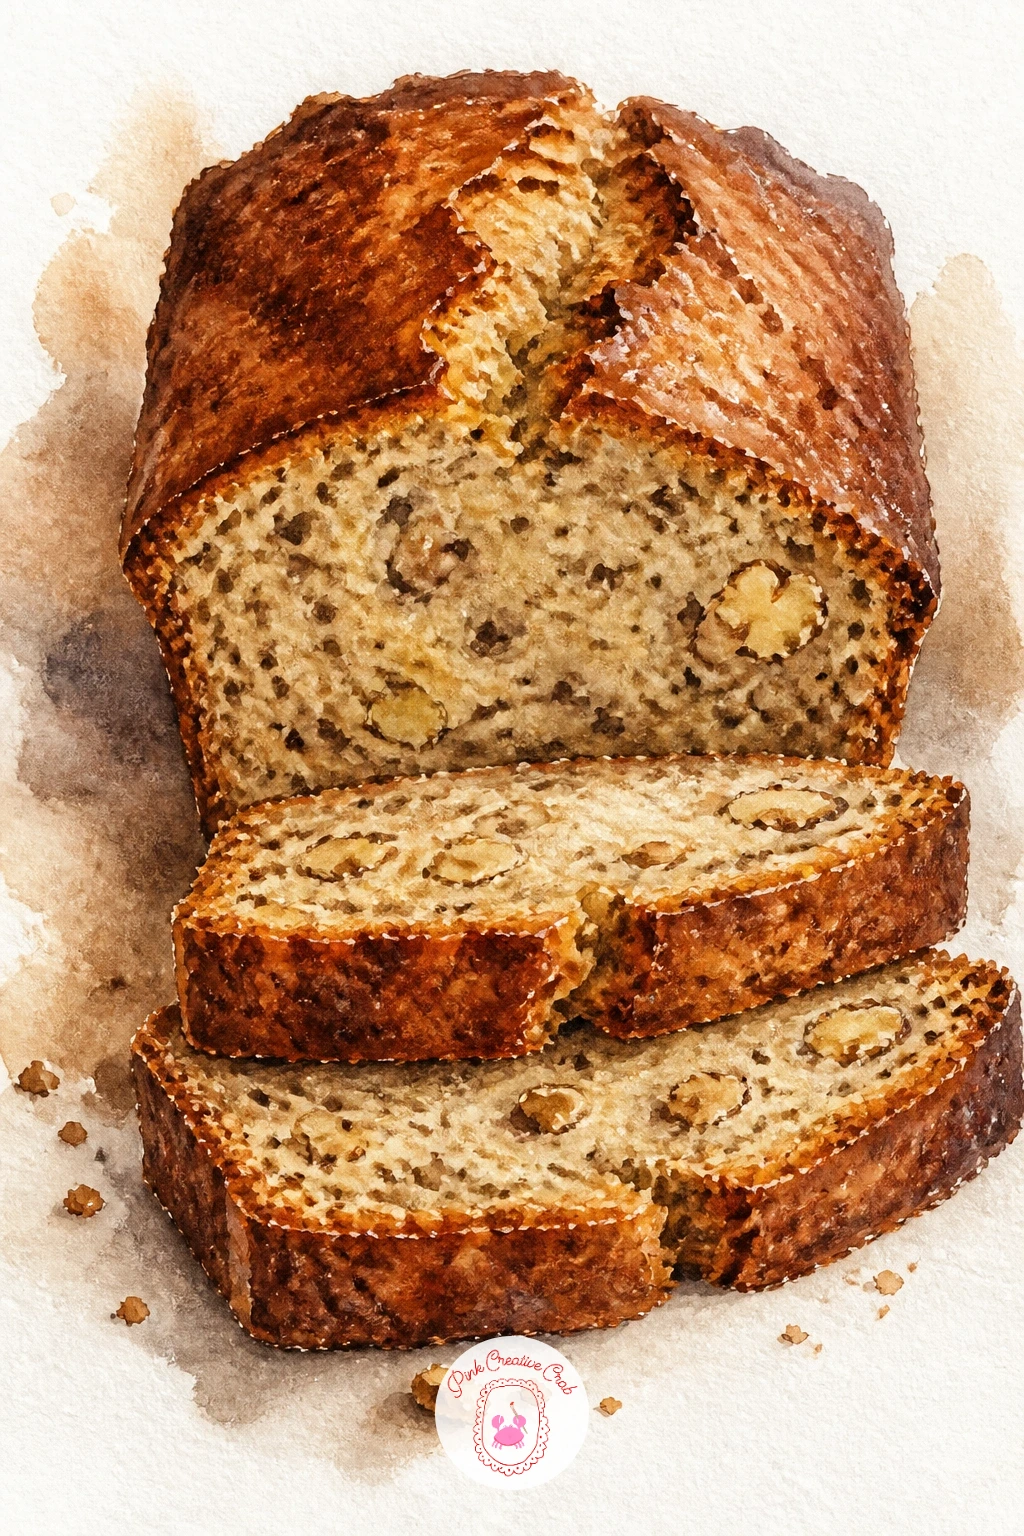
Banana bread brings a different texture than crusty loaves: a darker, almost caramelized top crust with a moist, speckled interior peeking from a cut end. Paint the whole loaf shape first in a warm mid-brown, slightly more red than sourdough tones, then let it dry fully.
For the cut end, paint a paler beige interior and once dry, dot in small dark brown flecks for walnuts or chocolate chips scattered through the crumb, along with a few darker streaks for the banana itself.
Keep the top crust slightly cracked looking, a few thin broken lines in dark umber running across the top, which is typical of a well-baked loaf.
If the crumb texture looks too busy, step back and remove a few of your dots with a damp brush before they fully set, less is usually more here. Swap walnuts for chocolate chips by making the dots rounder and glossier with a touch of black mixed in.
Palette: Burnt Sienna,Raw Umber,Beige
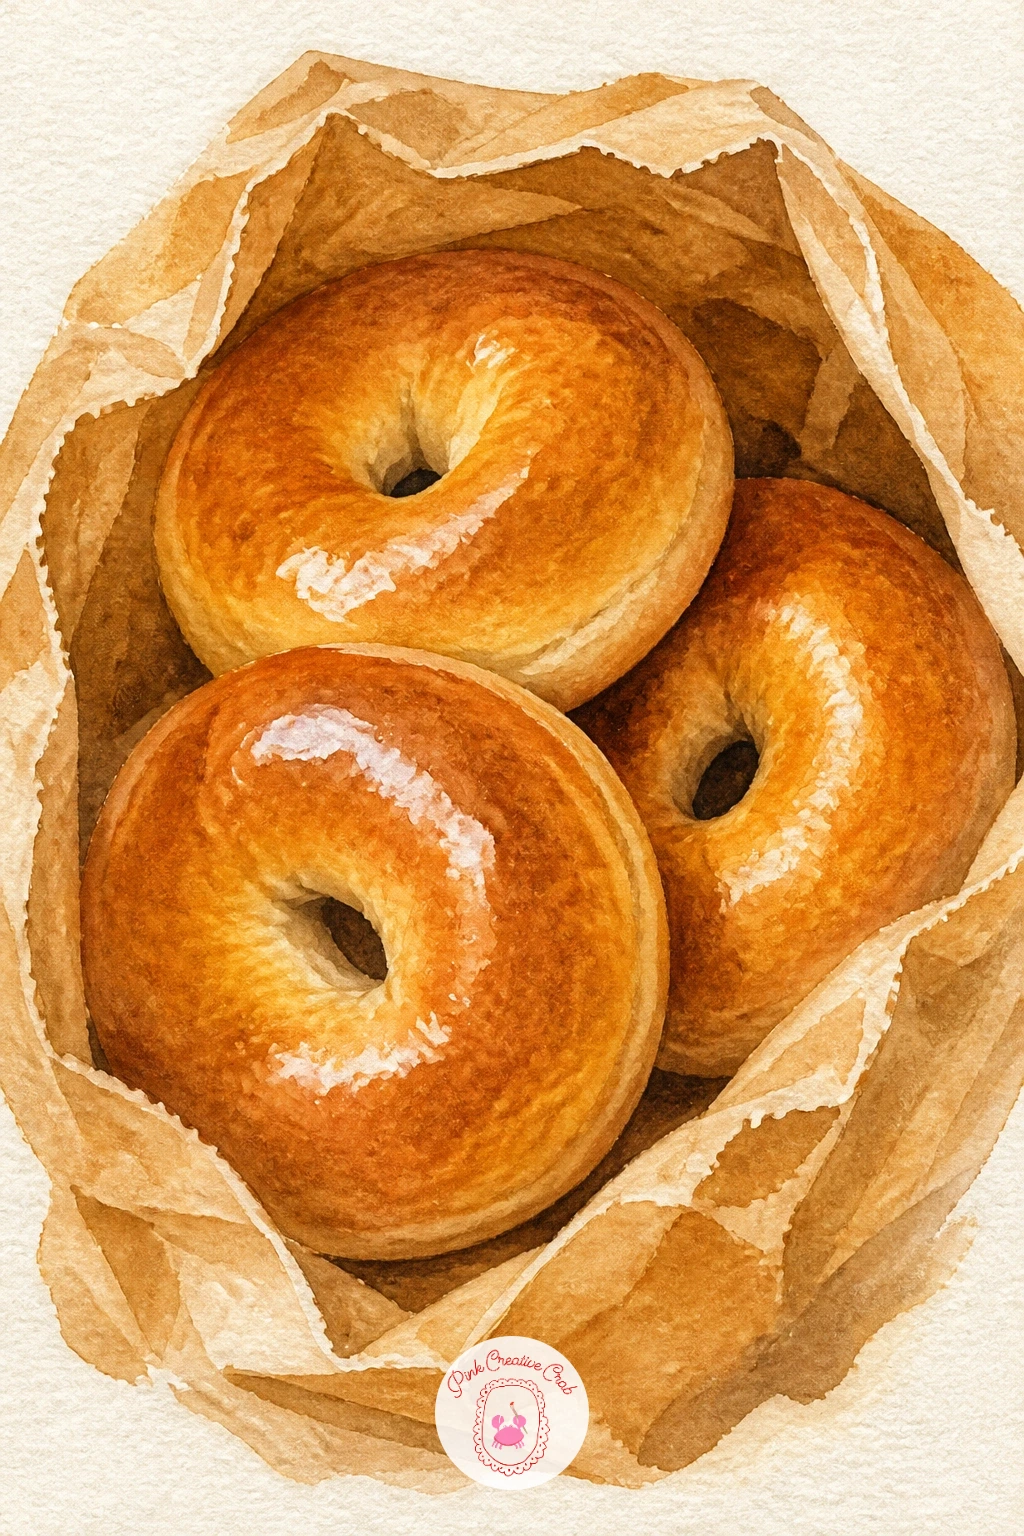
Bagels are simple rings but their shine takes a bit of care. Draw two or three overlapping circles with smaller circles cut from their centers, varying the tilt of each one so they look tumbled together rather than lined up.
Paint each bagel in a warm golden brown, and while still slightly damp, leave a thin curved strip of white paper unpainted along the top of each ring, that is the shine from the boiled-then-baked crust. Add seeds with small dark dots once dry if you are painting an everything bagel.
For the paper bag, use a dry brush technique: load very little paint onto a mostly dry brush and drag it in short strokes to get that crinkled, textured look of kraft paper, rather than a smooth flat wash.
If the bagels look too smooth and plasticky, that missing white highlight strip is usually why, go back and lift a thin line of color with a damp clean brush. A used coffee stain or diluted burnt umber makes a good kraft paper substitute if you are out of that color.
Palette: Burnt Sienna,Yellow Ochre,Kraft Brown
Brioche has that distinctive topknot shape, a small ball of dough sitting on top of a larger one, which makes it a nice simple form to practice rounded shading on. Draw the two stacked circles, keeping the top one noticeably smaller and slightly off-center.
Paint both parts in a rich egg-yolk yellow, deeper than regular bread dough, since brioche gets its color from butter and eggs. Shade the underside of the top knot and the base of the larger bun with a warm brown to show where they curve away from the light.
Add a glossy egg-wash sheen by leaving small curved highlights of white paper unpainted on the rounded top, this single detail sells the richness of the dough more than any other step.
If the bun looks flat, deepen the shadow where the small top knot meets the larger base, that crease needs to read clearly. No deep yellow paint on hand, mix cadmium yellow with a touch of burnt sienna for the same buttery tone.
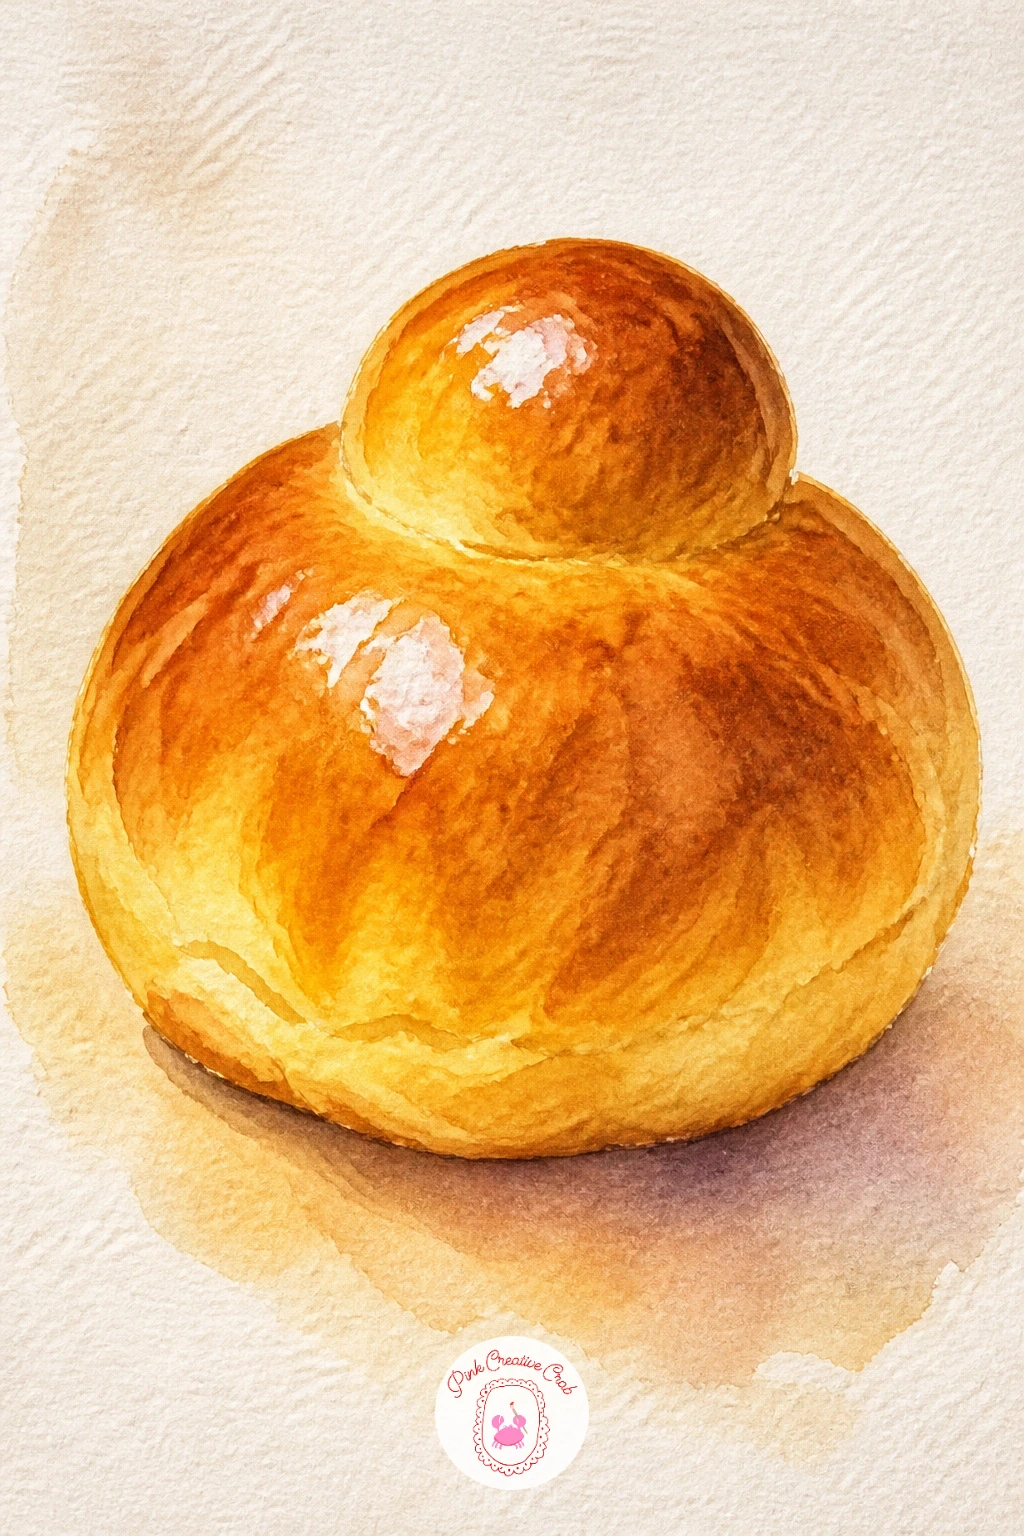
Palette: Cadmium Yellow,Burnt Sienna,Golden Brown
Bring a small figure back in with this cheerful little scene: a girl walking along with a baguette tucked under one arm. Keep her figure loose and simple, a soft silhouette in a coat or dress, with just enough gesture in the pose to suggest she is mid-stride.
Paint the baguette first since it anchors the whole composition, a long golden shape with darker sienna tips, angled slightly diagonally under her arm rather than perfectly horizontal, which reads more natural.
For her clothing, pick one or two muted colors, a soft red coat or a cream dress, and keep the brushwork loose and impressionistic rather than detailed, since the bread should still catch the eye first.
If the figure looks stiff, soften her outline with a damp brush right after painting so the edges blur slightly, this gives a sense of movement. Swap a coat for a simple apron if you would rather place her just outside a bakery door.
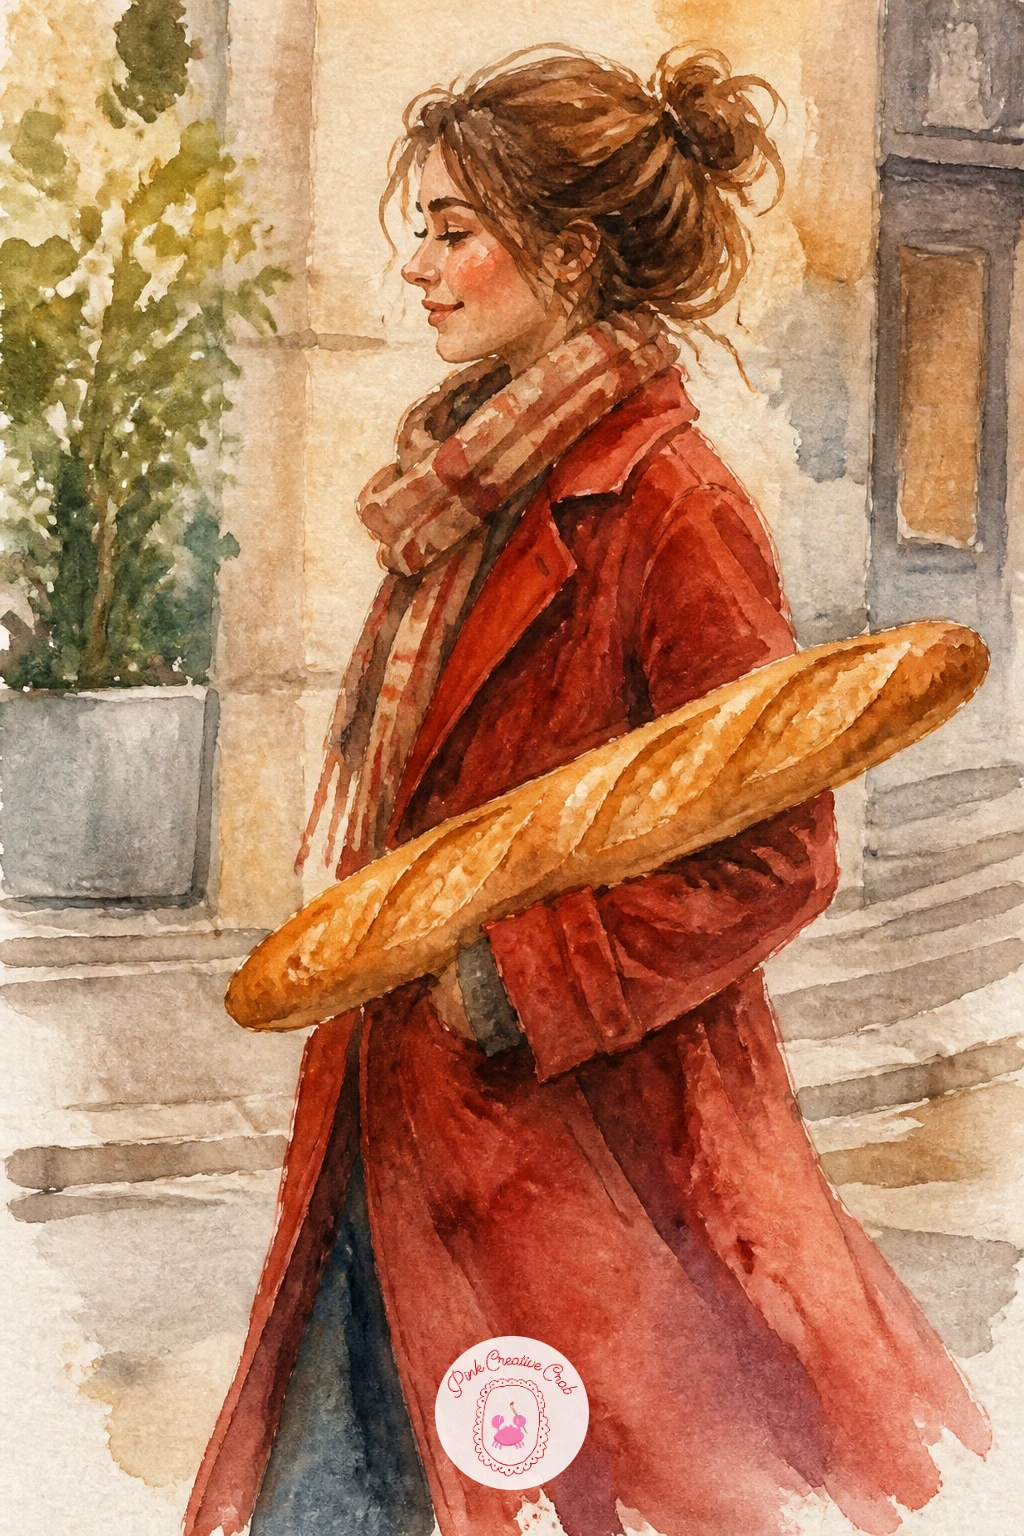
Palette: Burnt Sienna,Soft Red,Cream
Widen the scene again with a basket of bread set out on a picnic blanket. Sketch a round or oval basket shape first, then a checked or plain blanket beneath it, keeping the perspective simple by looking at this from slightly above, almost straight down onto the blanket.
That higher eye level means the basket should look more oval than round, and anything beside it, fruit, a small jar, a wedge of cheese, sits flat rather than upright, since you are looking down on the whole spread.
Paint a few rolls and a torn baguette piece inside the basket in warm golds and browns, then add the blanket pattern last with a few confident straight lines rather than trying to paint every square.
If the perspective looks off, check that nothing in the scene stands taller than the basket itself, a flat picnic layout keeps everything reading correctly from above. Today’s tip: paint the shadows under each object before adding small details, it locks the layout in place early.
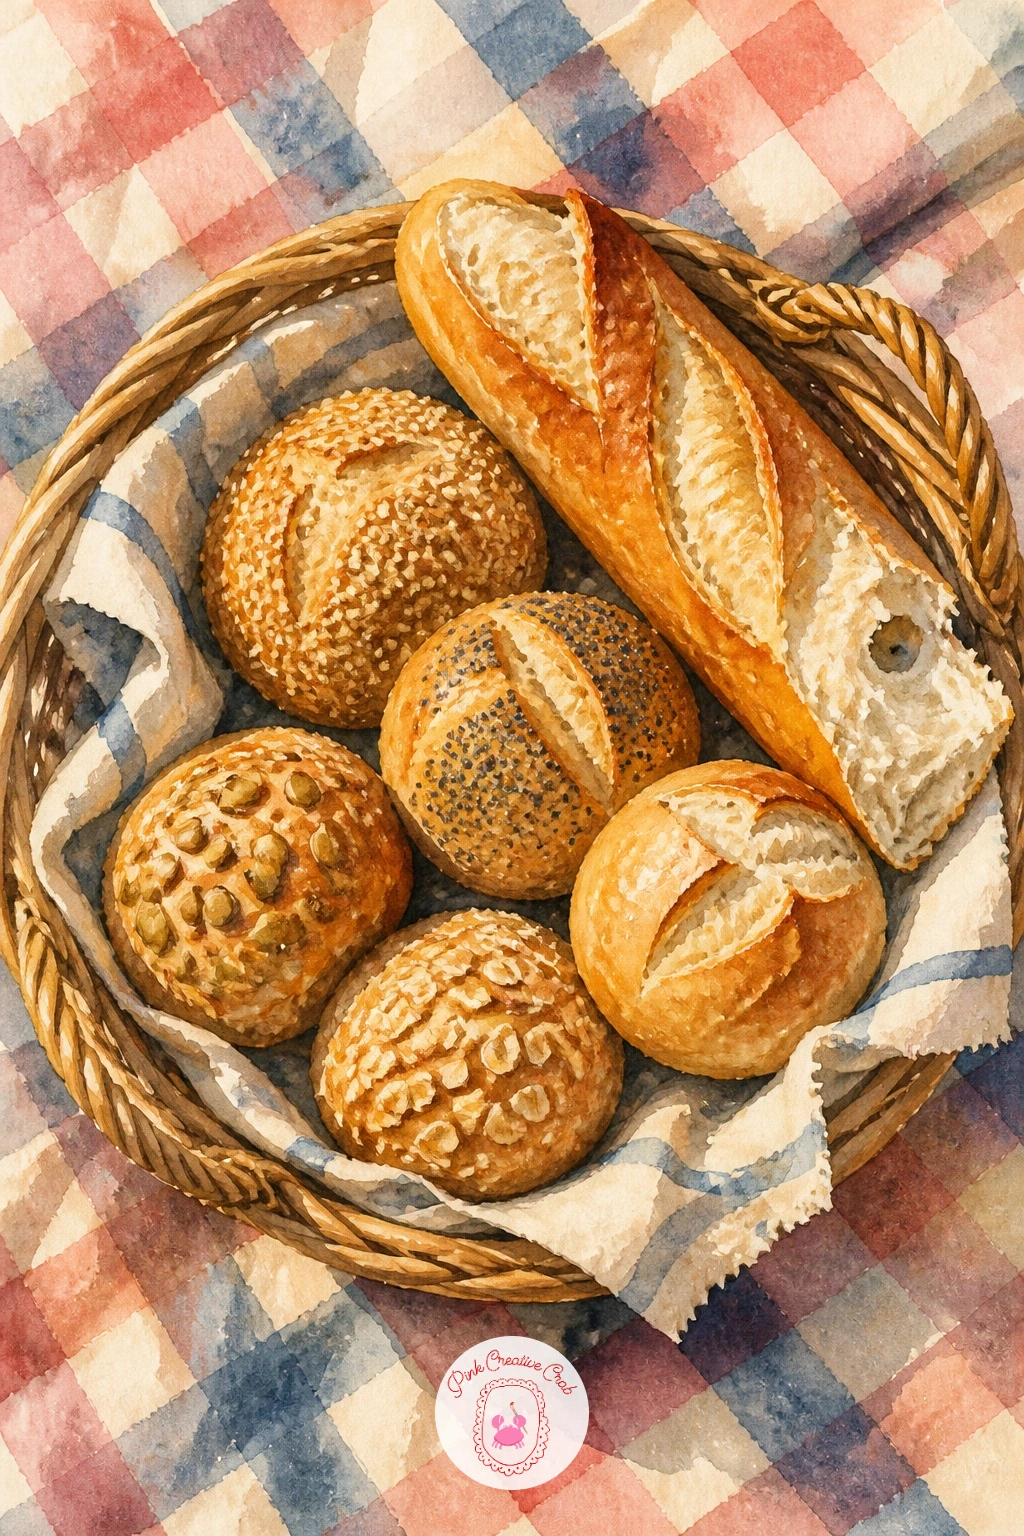
Palette: Yellow Ochre,Raw Umber,Sage Green
For more outdoor food scenes like this one, the easy watercolor fruit paintings list pairs nicely with a bread basket.
Pain au chocolat shares the croissant’s flaky layers but in a rectangular shape, so the technique carries over nicely. Sketch a soft rectangle with slightly rounded corners, then paint it in the same pale gold base wash as a croissant, working wet into wet.
While still damp, pull short, mostly horizontal strokes of burnt sienna across the top to catch the flaky ridges, keeping the strokes going the same direction so the layers feel consistent rather than scattered.
Once fully dry, add the chocolate strip peeking from inside using a dark, almost black brown, placed slightly off-center near the top where the pastry splits open, plus one smaller peek lower down for the second strip most bakeries use.
If the pastry edges look too hard, soften just the bottom edge with a damp brush so it blends gently into the shadow beneath. Swap chocolate for a smear of almond paste color if that is the version you bake at home.
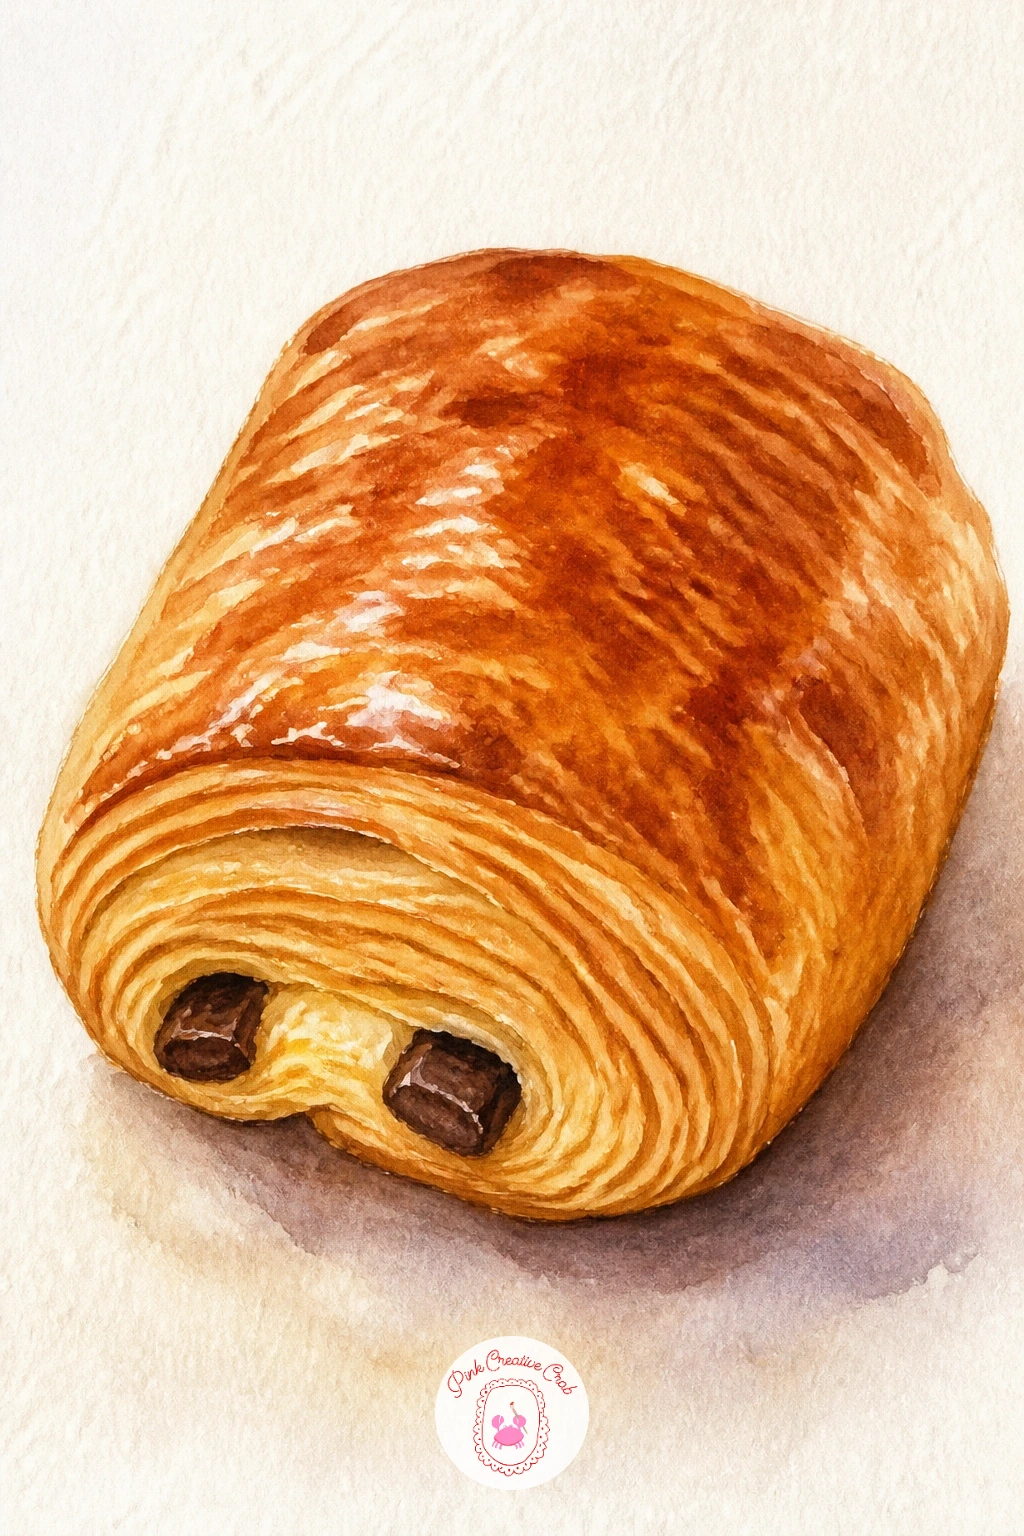
Palette: Pale Gold,Burnt Sienna,Dark Chocolate
Rye bread has a denser, darker look than most loaves here, which makes it a good contrast piece if you have painted several golden loaves already. Paint the whole oval loaf shape in a deep purplish brown, mixing burnt umber with a touch of Payne’s grey to get that cooler rye tone.
Once the base is dry, use a dry brush loaded with just a little dark paint to drag short rough strokes across the surface, giving it that coarser, denser crust texture rye is known for, rather than the smoother shine of white bread.
Finish with caraway seeds, tiny dark flecks scattered across the top, placed in small loose clusters rather than spread evenly, which looks more natural.
If the loaf ends up looking too smooth and pale, that is usually a sign it needs a second, darker glaze layer once the first wash is fully dry. No caraway color handy, a dark burnt umber mixed with black works just as well for the seed dots.
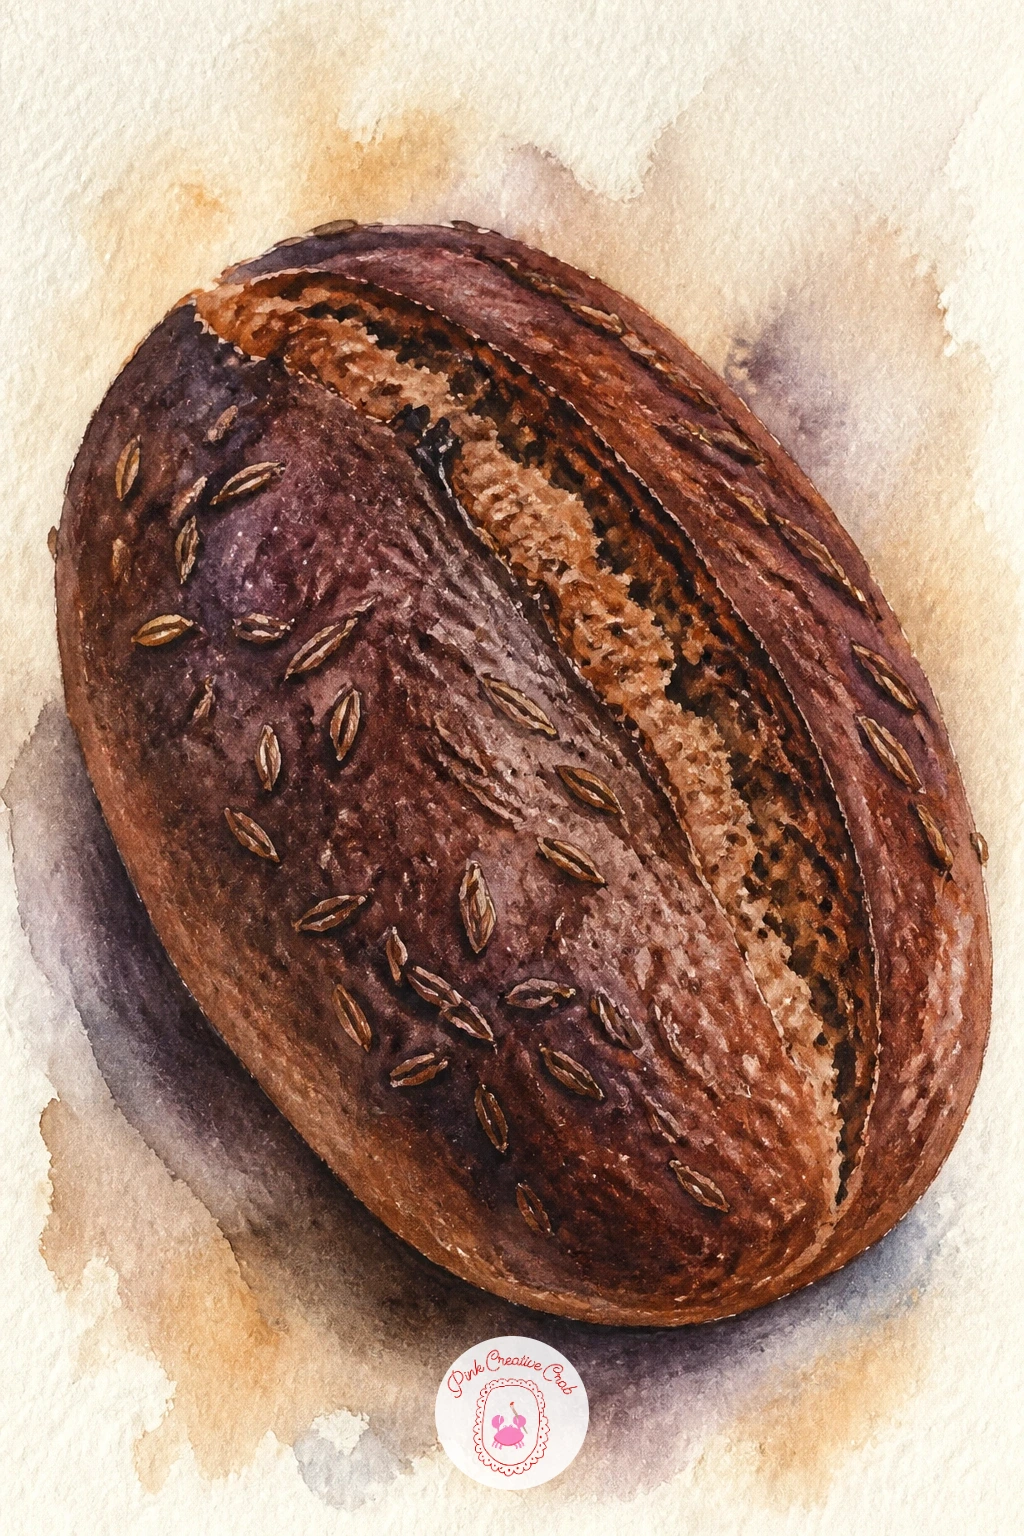
Palette: Burnt Umber,Payne’s Grey,Dark Brown
A stacked sandwich is a fun exercise in painting layers from the side. Sketch two bread slices with a filling bulging slightly between them, lettuce, tomato, cheese, whatever you like to paint, since the shape matters more than the exact ingredients.
Paint the bread slices first in warm gold with a slightly darker crust edge, then work the fillings in flat simple shapes layered between them: a wavy green for lettuce, a red circle for tomato, a pale yellow strip for cheese, each one just slightly wider than the bread so it peeks out at the sides.
Add the cutting board underneath as a plain warm wood tone, and a few loose crumb specks scattered beside the sandwich to suggest it was just cut.
If the layers look too neat and stacked, let the top slice sit at a slight angle, real sandwiches are rarely perfectly level. Swap any filling color freely, this one is easy to make your own.
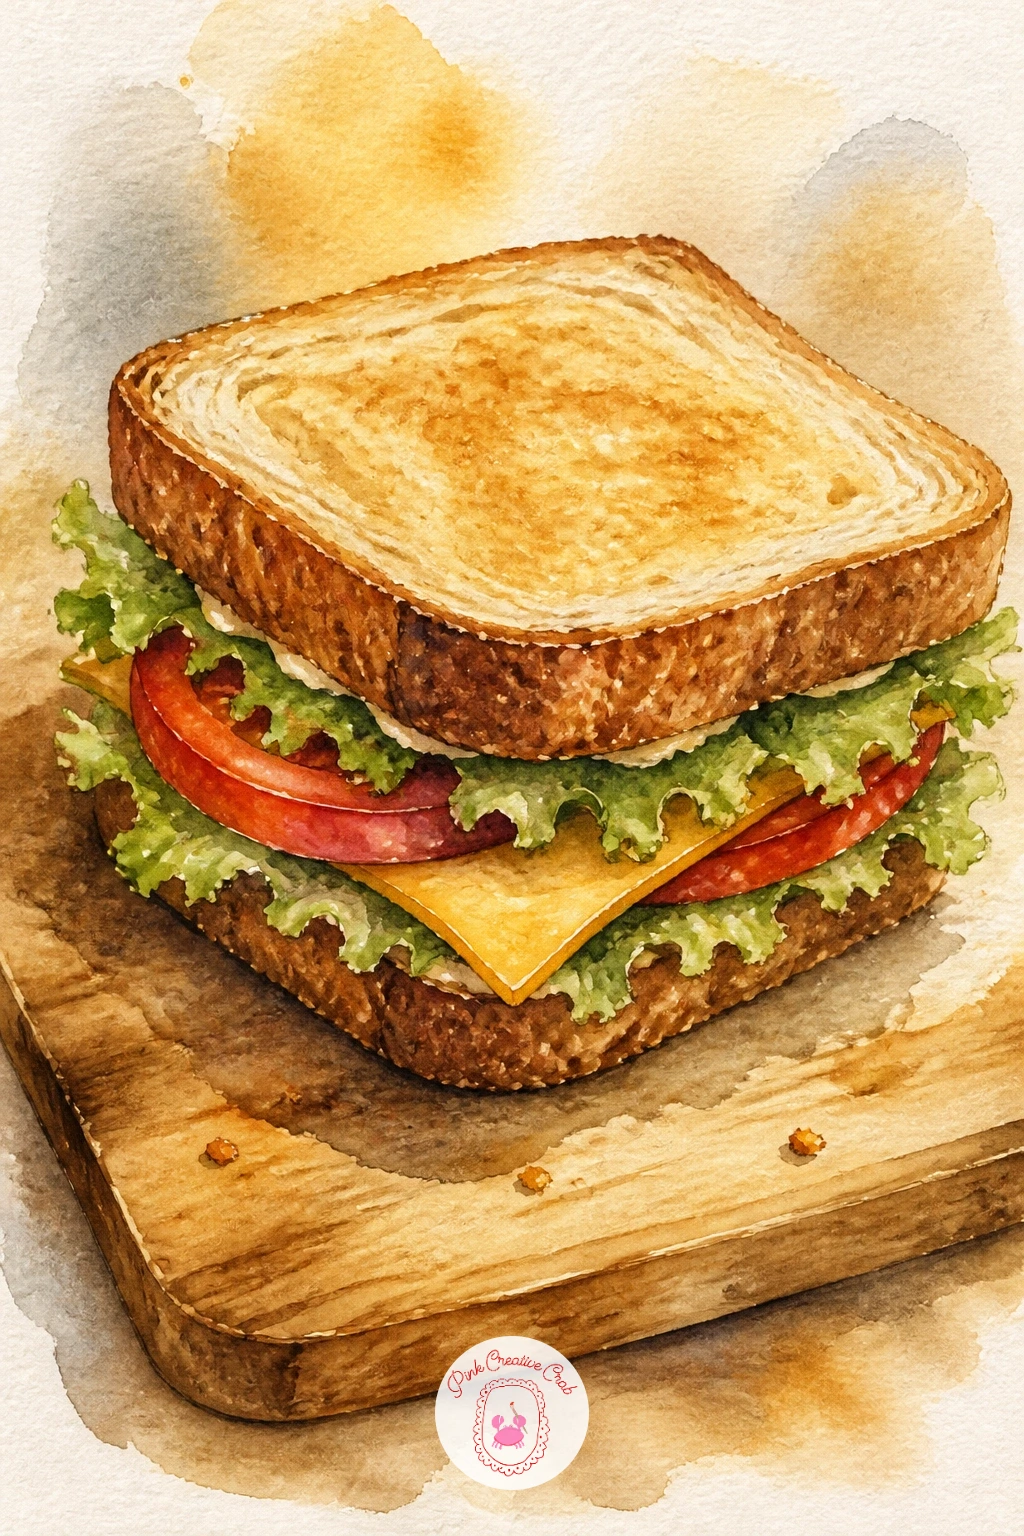
Palette: Golden Ochre,Leaf Green,Tomato Red
Pair your bread with a warm bowl of soup for a full cozy lunch scene. Paint the bowl first as a simple rounded shape, filling it with a warm orange-red wash for a tomato or pumpkin soup, leaving a thin white rim of paper showing at the very top edge for shine.
Add a swirl of cream on top with a dry brush dragged lightly across the surface, or skip it for a simpler bowl. Place a torn chunk of bread resting against the rim of the bowl, painted in the same golden tones used throughout this list, slightly dipped-looking if you want it to look freshly torn and soaking.
Keep the table and any background elements minimal, a simple napkin or spoon is plenty, so the warm colors of the soup and bread stay the focus of the piece.
If the soup looks flat, add one small steam line rising from the surface in a very pale gray-blue, just a soft wavy stroke. Swap tomato soup for a greener pea or squash tone any time you like.
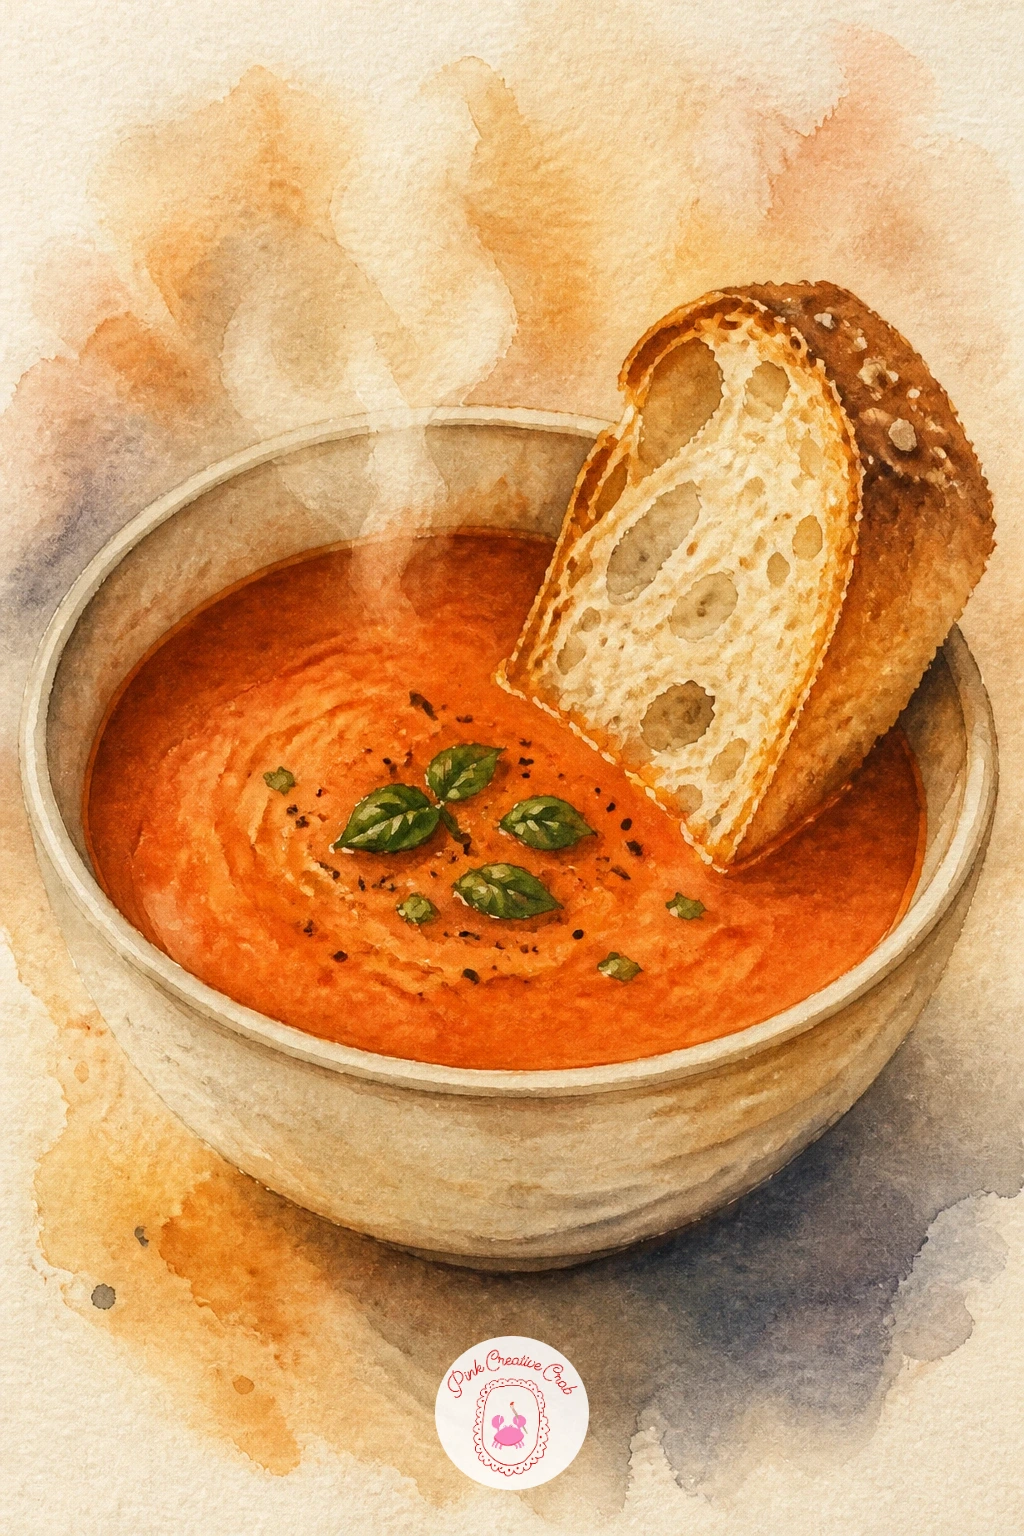
Palette: Tomato Red,Cadmium Orange,Yellow Ochre
Zoom in close for this one: just a serrated bread knife lying beside a scatter of crumbs and maybe one cut end of a loaf. Draw the knife carefully since its proportions matter here, the blade should be noticeably longer than the handle, and the serrated edge reads better as a wavy line than individual teeth.
Paint the blade in a cool silvery gray with a thin white highlight line running along its length to suggest metal shine, then the handle in a warm wood tone to match the bread nearby.
Add the cut loaf end beside it in your usual golden crust and pale crumb colors, then scatter a handful of small loose crumb shapes across the surface in varying sizes, some tiny dots, a few slightly larger flecks.
If the knife looks too flat, darken just the underside edge of the blade slightly so it lifts off the surface beneath it. A toothpick dipped in paint makes quick work of the smallest crumb dots.
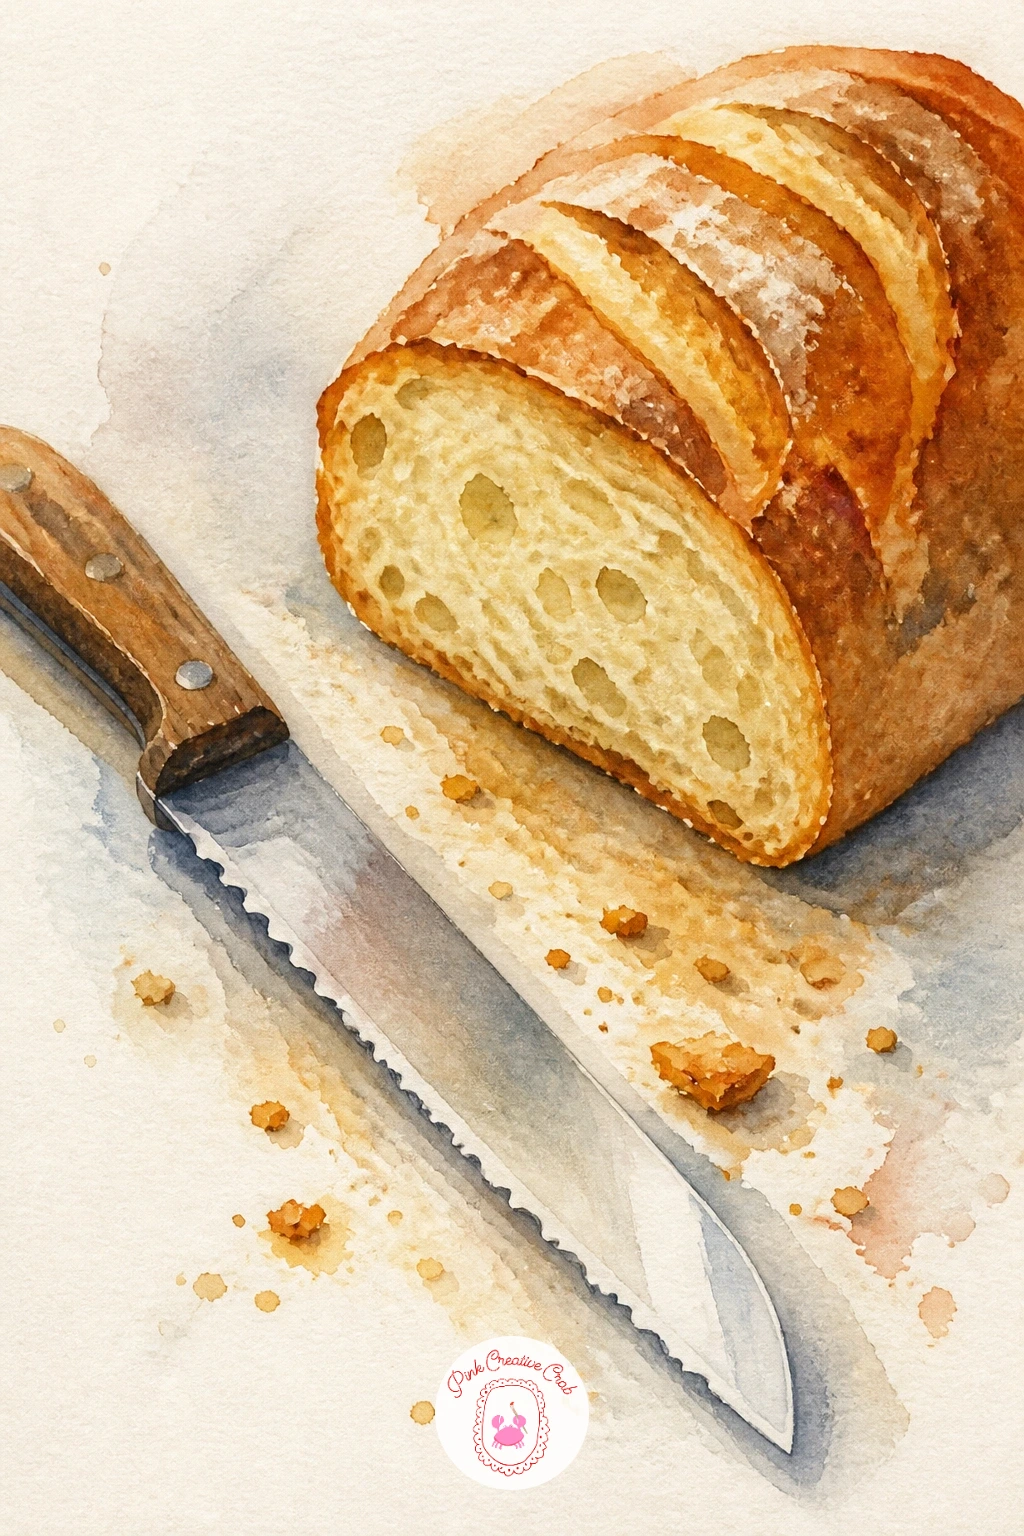
You Will Need
- toothpick for tiny crumb dots (optional)
Palette: Silver Gray,Warm Wood Brown,Golden Ochre
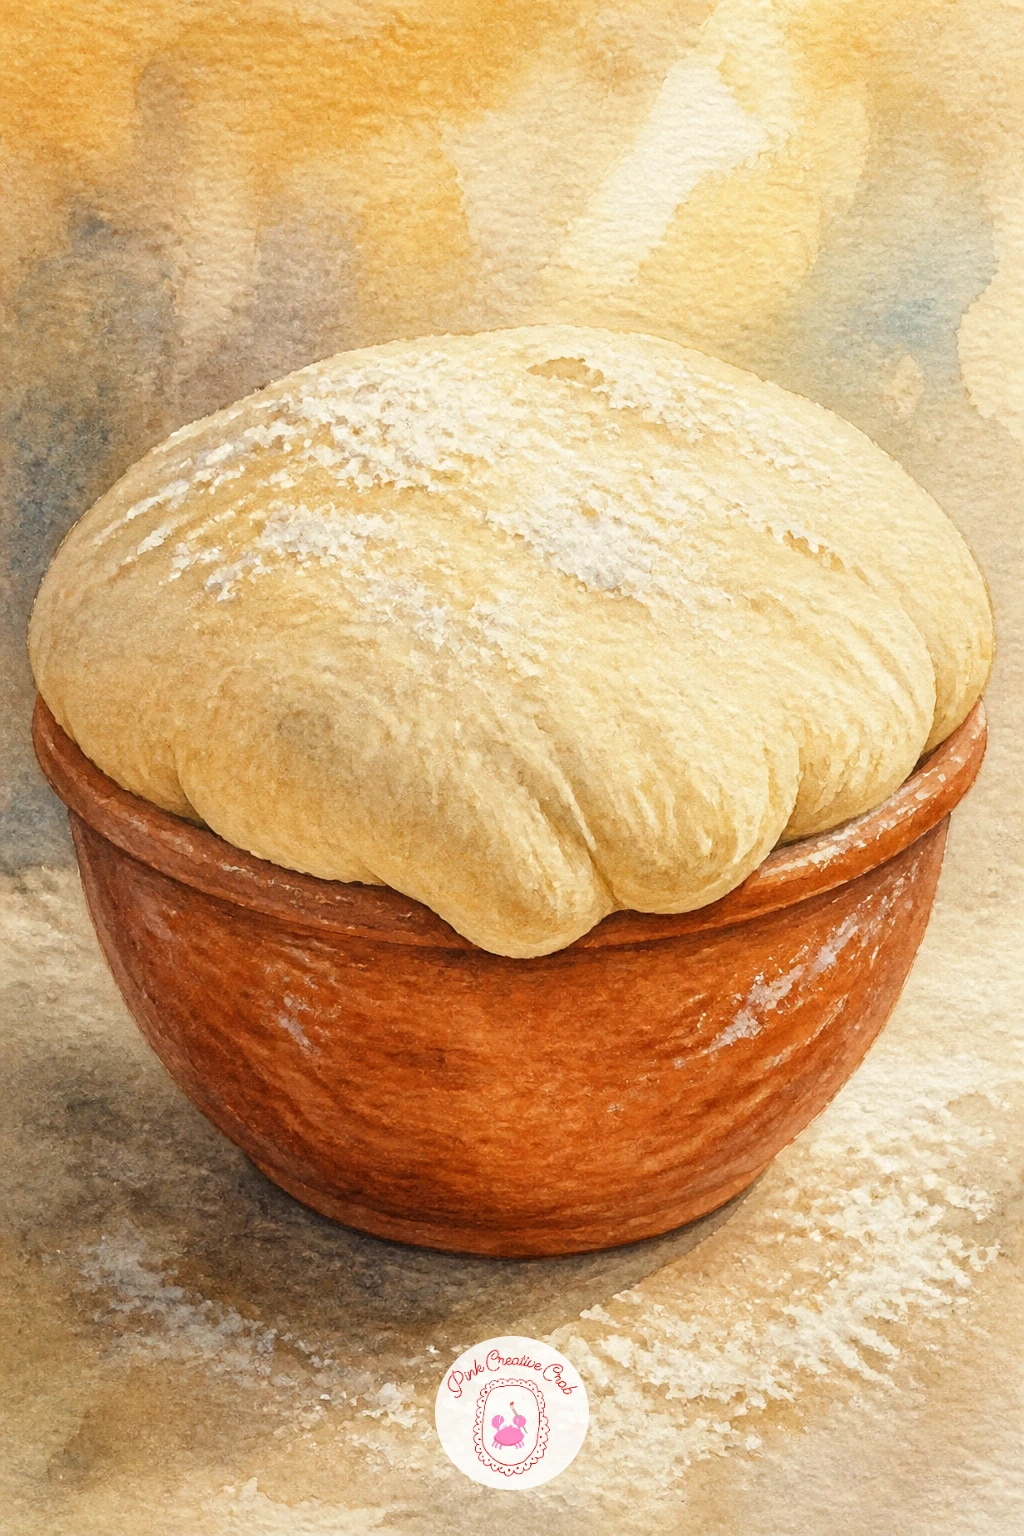
Painting dough itself, rather than baked bread, is a nice change of texture. Draw a simple round bowl shape, then a soft domed mound of dough filling it, slightly overflowing the rim since risen dough always pushes past its container.
Paint the dough in a very pale cream, almost white, with the faintest warm undertone, since raw dough has none of the deep browns baked bread gets. Use soft, rounded shading with a damp brush rather than hard lines to capture its smooth, pillowy surface, the edges here should stay gentle and blurred.
Add a thin film of flour dusted across the top using a nearly dry brush flicked lightly over the surface, or tiny white gouache specks for a more scattered look. Paint the bowl in a simple earthy tone beneath it.
If the dough looks too solid and heavy, soften the top highlight more, risen dough should look almost glowing where light hits the dome. Swap gouache flour for simply leaving small flecks of white paper unpainted.
You Will Need
- white gouache for flour dusting (optional)
Palette: Pale Cream,Warm Beige,Terracotta
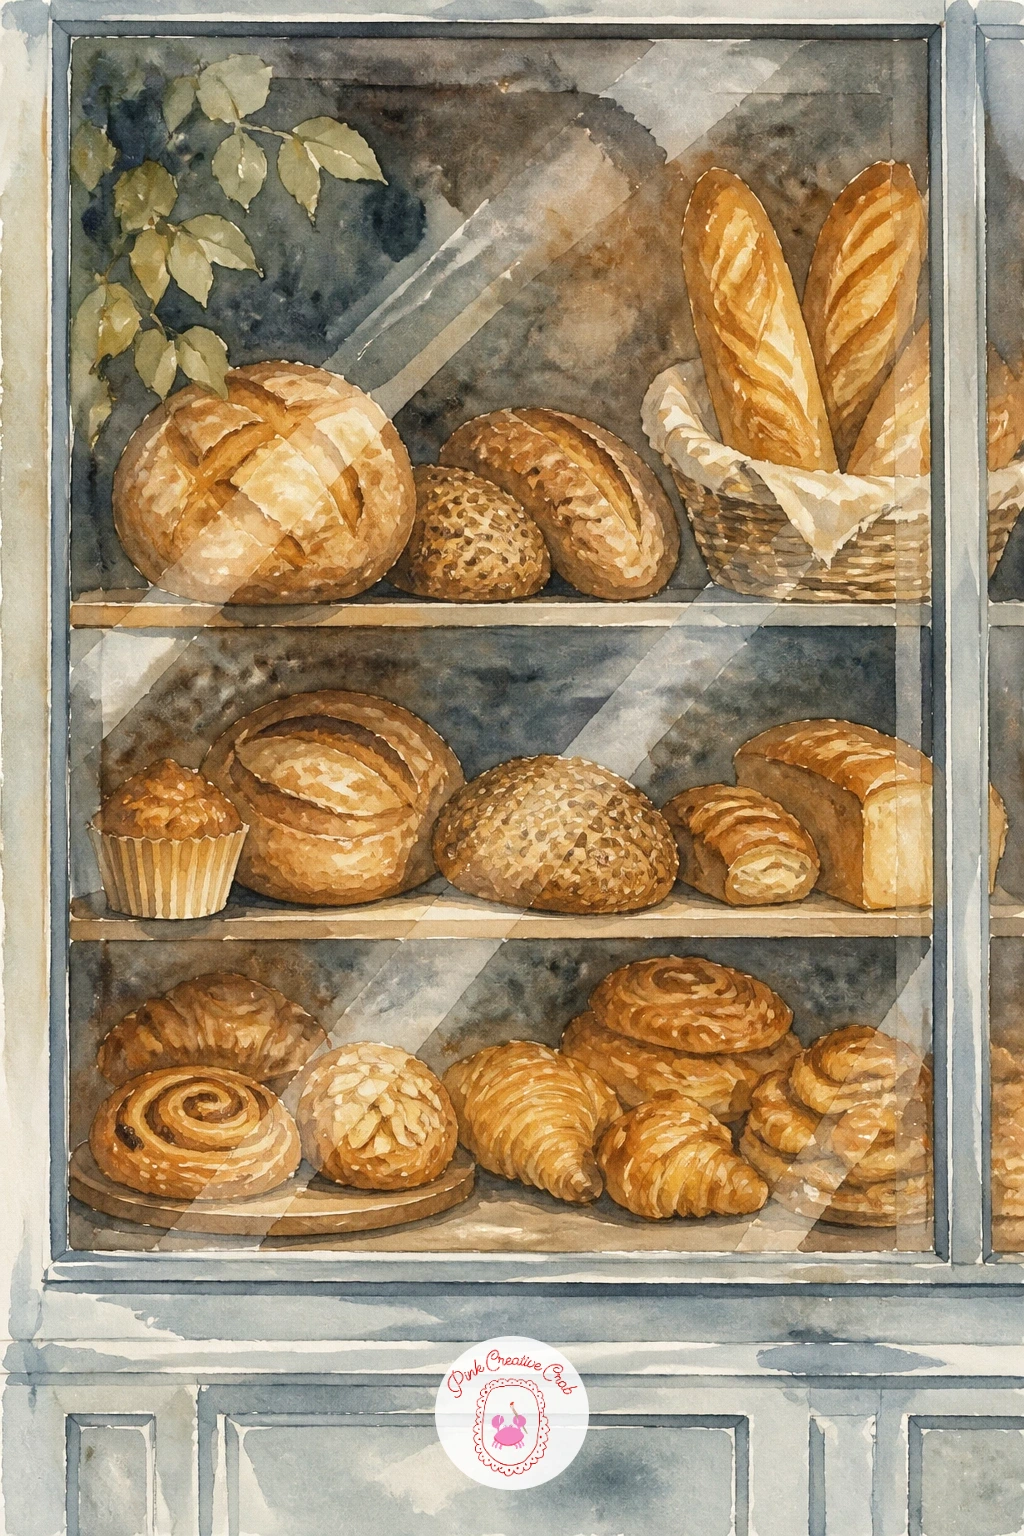
Painting a bakery window lets you place several of your earlier bread shapes together behind glass, framed by a cozy storefront. Sketch a simple window frame first, then fill the inside with a loose arrangement of loaves, pastries and a cake stand or two, kept smaller and simpler than if they stood alone.
Paint the glass with a very pale blue-gray wash first, since windows are rarely pure white, then add the bread shapes on top in your usual warm tones, slightly muted compared to how you would paint them up close, glass softens color a little.
Add one or two reflection streaks across the glass using a thin diagonal stroke of white gouache or by lifting paint with a damp brush, this single detail makes the scene read as glass rather than an open shelf.
If the window looks too busy, remove detail from the breads furthest back and let the front row carry the most contrast. For a cozier feel in the evening, try the easy watercolor skies, sunset and clouds ideas for the sky glimpsed above the storefront.
You Will Need
- white gouache for glass reflection (optional)
Palette: Pale Blue Gray,Yellow Ochre,Burnt Sienna
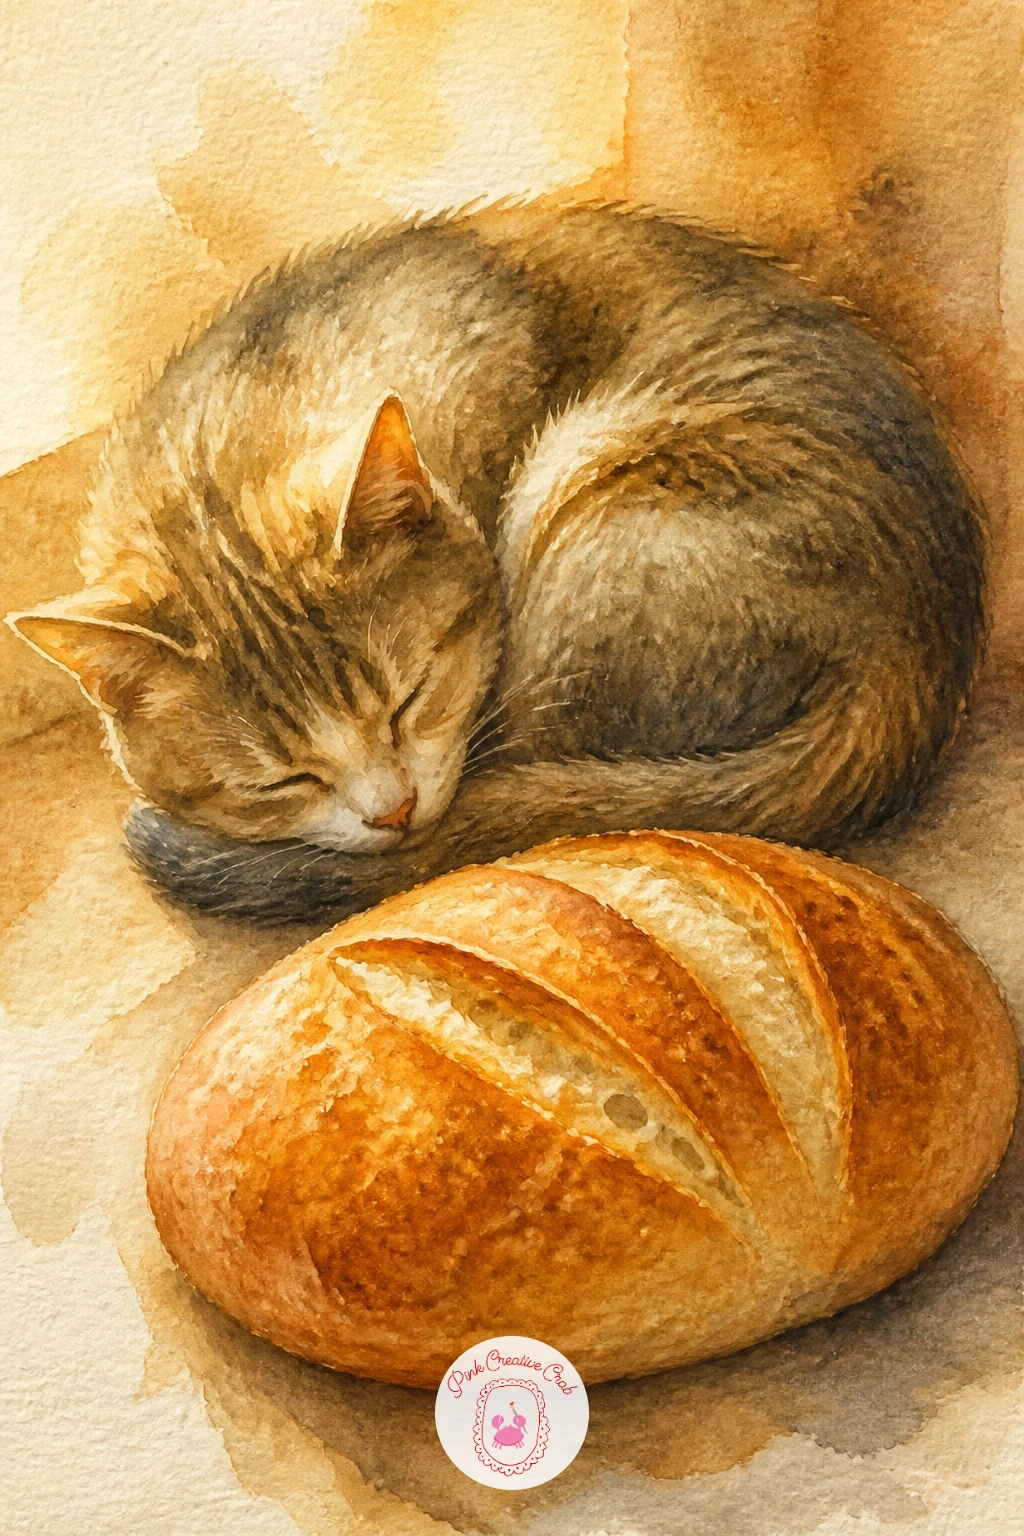
Give the bakery a little life with a cat curled up beside a warm loaf on the counter. Sketch the cat first as a simple curled oval shape, tail tucked around its body, since cats sleeping into tight curls are easier to paint convincingly than ones stretched out.
Paint the cat in a soft warm gray or orange tabby tone, using a dry brush dragged lightly over the surface once the base wash is dry to suggest fur texture along the edges.
Place the loaf just beside or slightly behind the cat, painted in your usual golden crust tones, with a soft shadow connecting the two shapes so they feel like they share the same warm patch of counter.
If the cat looks stiff, round off every edge, cats sleeping have almost no sharp angles anywhere on their body. Swap a tabby for a solid black or white cat any time, just adjust the shading to match.
Palette: Warm Gray,Burnt Sienna,Golden Ochre
If painting cats is new to you, the cat watercolor ideas list has more poses to practice on their own first.
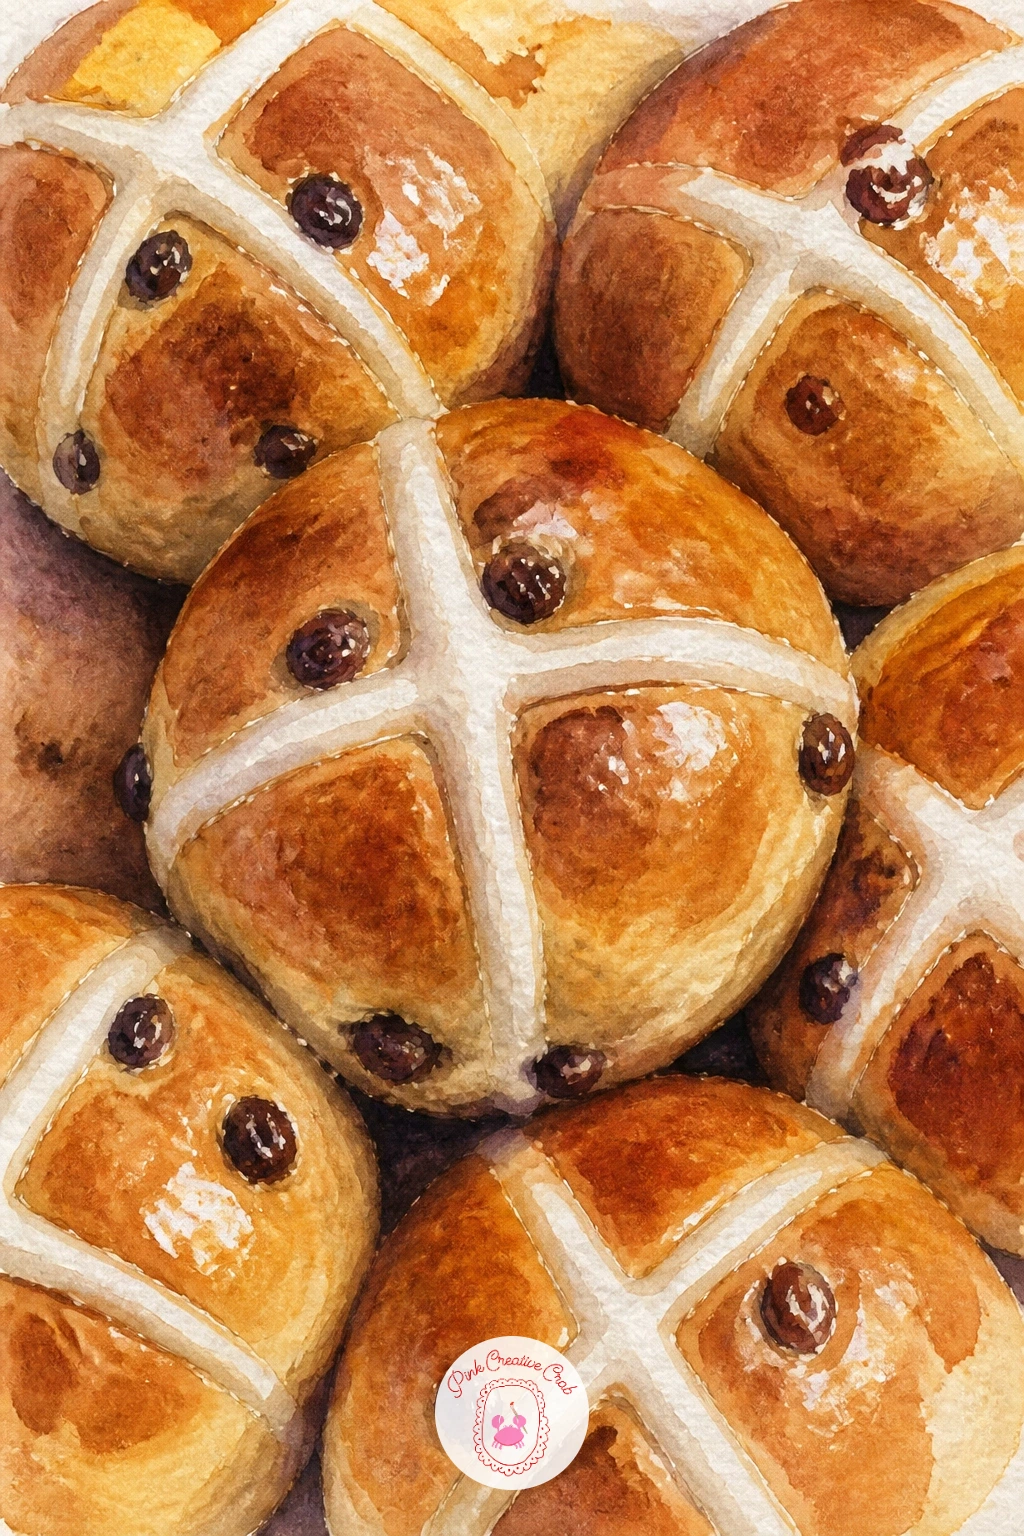
Hot cross buns give you a nice small cluster to paint together, three or four buns touching slightly where they baked side by side. Sketch soft rounded shapes with flattened bottoms and slightly domed tops, letting their edges touch so they look like they rose together in the same tray.
Paint each bun in warm golden brown, then once dry, dot in a scatter of tiny dark currants across the surface, slightly denser near the center of each bun.
Add the signature cross on top last, using white gouache or a white gel pen in a simple plus shape across each bun, keeping the lines slightly uneven since piped icing never comes out perfectly straight.
If the crosses look too thick and heavy, thin your gouache with a touch more water, a thin crisp line reads better than a thick one. No gel pen or gouache handy, a masking fluid cross applied before painting and removed after leaves the same clean white shape.
You Will Need
- white gouache or white gel pen for the crosses
- masking fluid (optional alternative)
Palette: Golden Brown,Burnt Sienna,Dark Currant
Garlic bread’s sliced, fanned-out shape makes it a nice composition exercise after painting so many whole loaves. Sketch a long baguette shape sliced diagonally most of the way through at regular intervals, then fan the slices slightly apart as if the loaf has just been opened on the table.
Paint the crust in your usual golden brown, then the cut faces of each slice in a buttery yellow with a faint green tinge where melted garlic butter and herbs pool between the slices.
Once dry, speckle a few tiny flecks of dark green parsley and pale garlic bits across the buttery surfaces, keeping them small and scattered rather than evenly spaced.
If the fanned slices look too stiff and even, vary the gaps between them, a slightly wider gap in the middle looks more natural than a perfectly even fan. Swap parsley flecks for oregano by making the green dots slightly darker and more scattered.
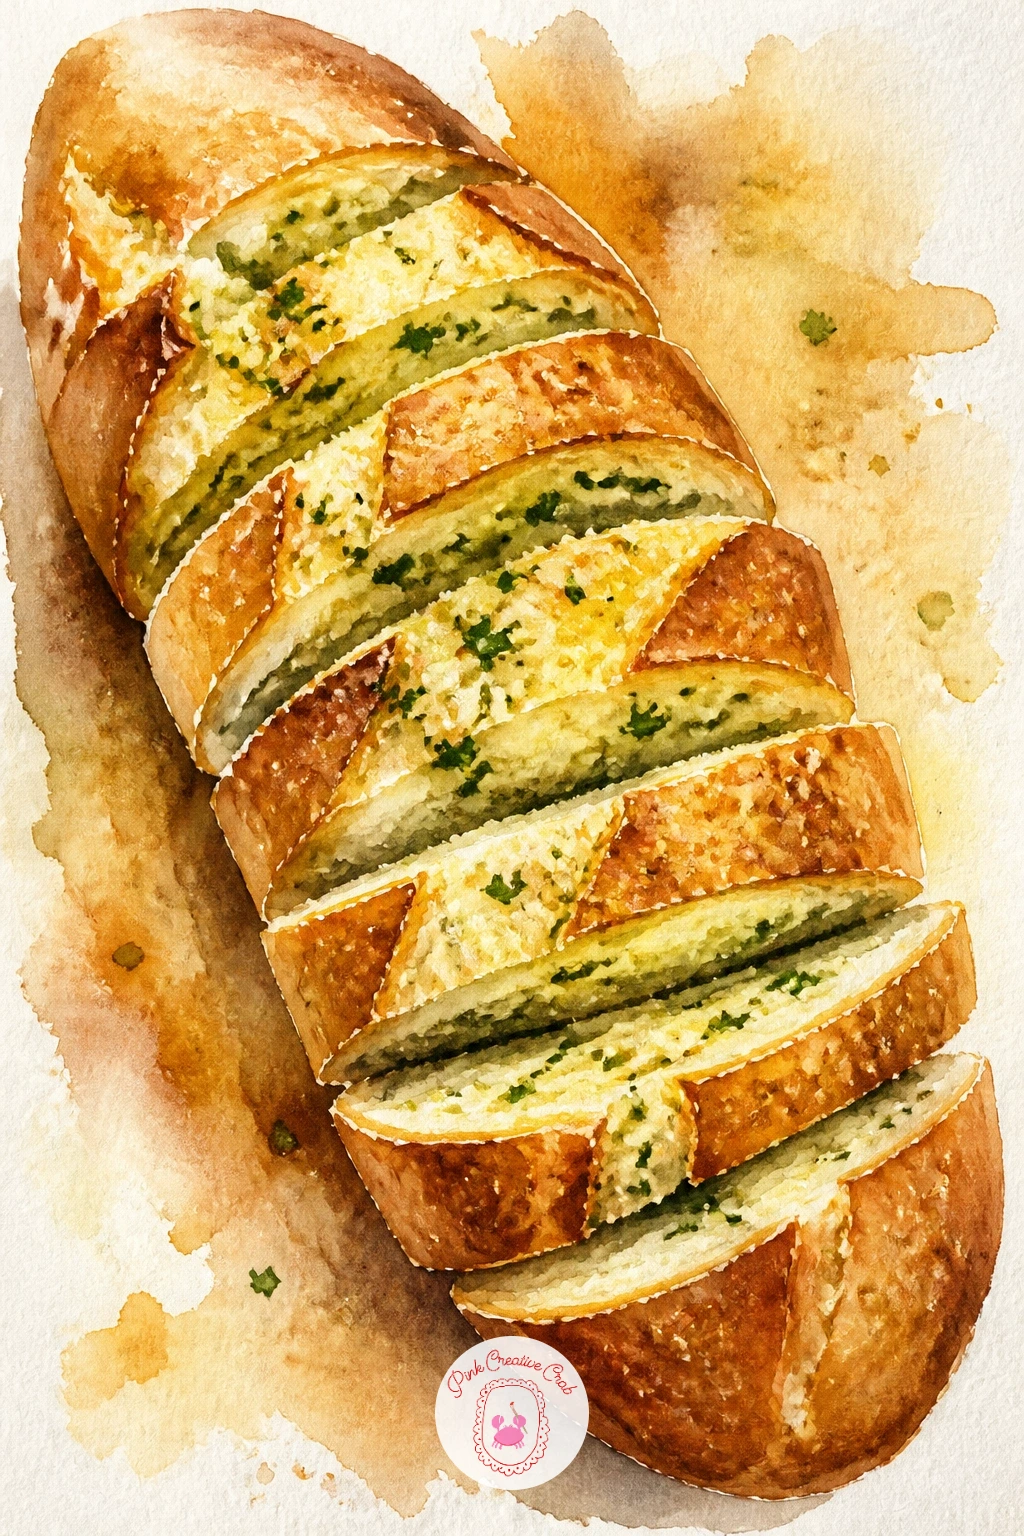
Palette: Golden Brown,Buttery Yellow,Herb Green
This is the most landscape-leaning idea on the list: a small outdoor clay or brick bread oven tucked into a garden corner. Sketch the oven’s domed shape first, a simple rounded form with a small dark archway opening, then build the garden loosely around it with a few plants and stones.
Keep your light source consistent, usually a warm sun from one side, so the oven’s dome has a bright lit side and a cooler shadow side, with the archway opening painted almost black to suggest the deep heat inside.
Paint the surrounding garden in soft greens and earthy browns, keeping the plants loose and impressionistic so they frame the oven without pulling focus from it, and perhaps a small loaf or two resting on a stone shelf beside the opening.
If the oven looks flat, that dark archway is doing the most work, make sure it stays the darkest point in the whole painting. For more help with outdoor light and shadow, the easy watercolor landscapes list is a good companion piece.
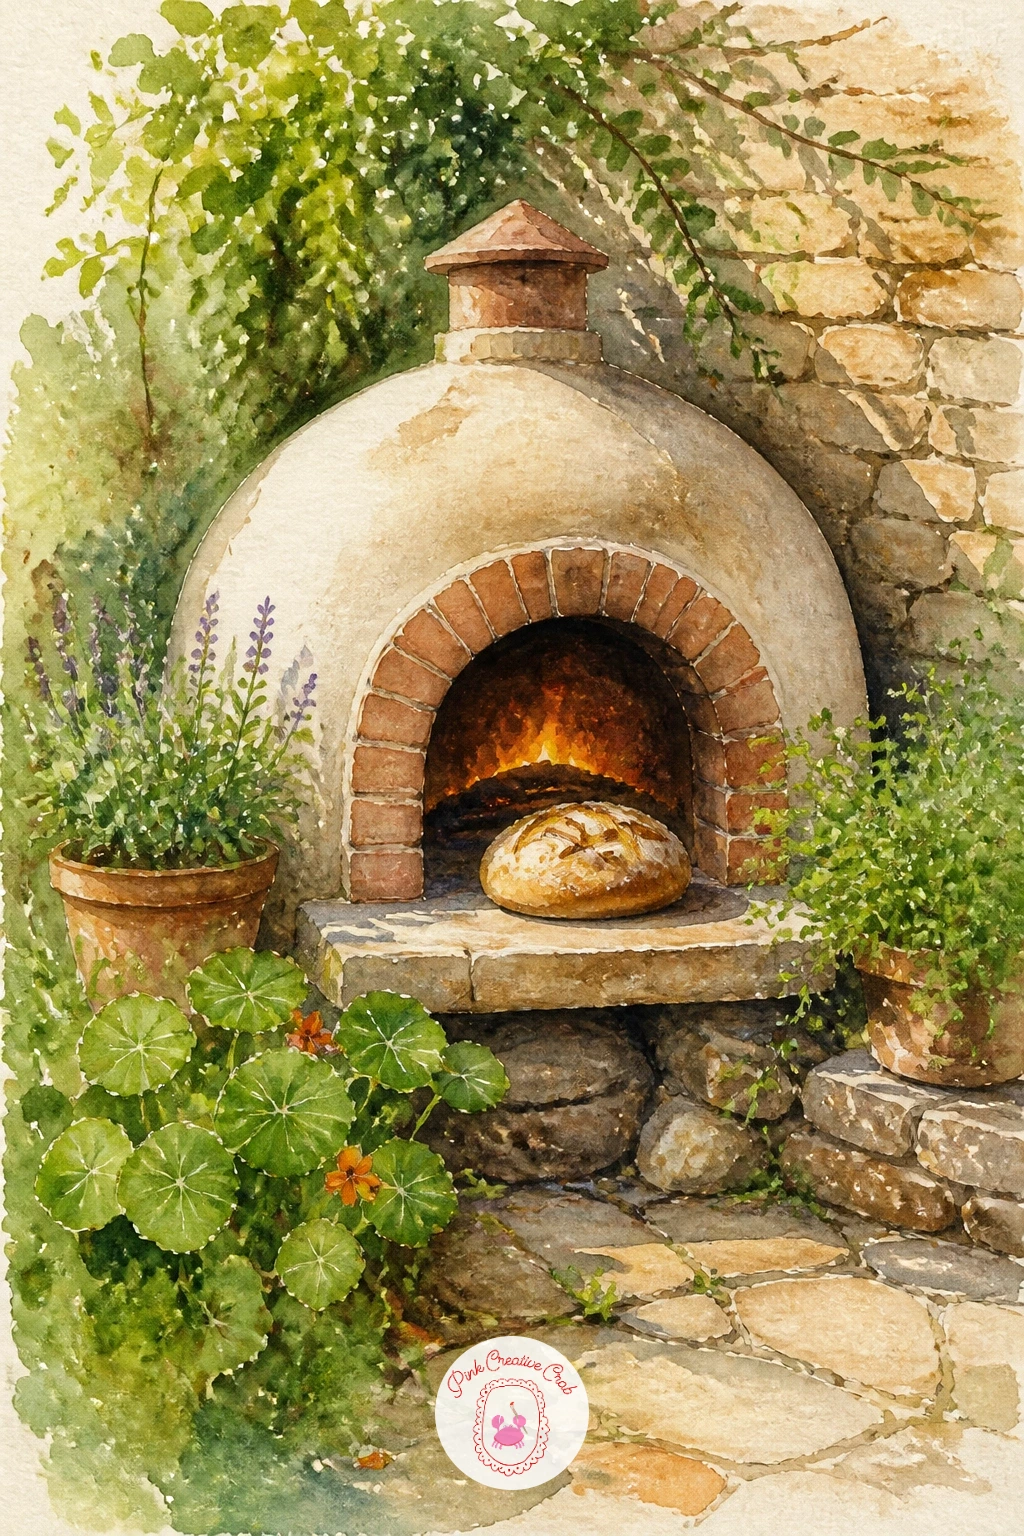
Palette: Terracotta,Sage Green,Charcoal Black
After the garden scene, come back indoors with something smaller: a canvas tote bag with a couple of baguettes poking out the top. Sketch the bag first as a simple rectangle with short handles, then the bread emerging from the opening at an angle, leaning against each other slightly.
Paint the tote in a flat, muted color, natural canvas beige or a soft denim blue, using simple folds suggested with just two or three darker shadow creases rather than many small lines.
Add the baguettes in your usual golden tones on top, letting their tips overlap the top edge of the bag so they look like they are genuinely resting inside it rather than floating above.
If the bag looks stiff, round off the bottom corners slightly, canvas totes sag and soften with weight inside them. Swap baguettes for a mixed bundle of smaller rolls if you want a fuller looking bag.
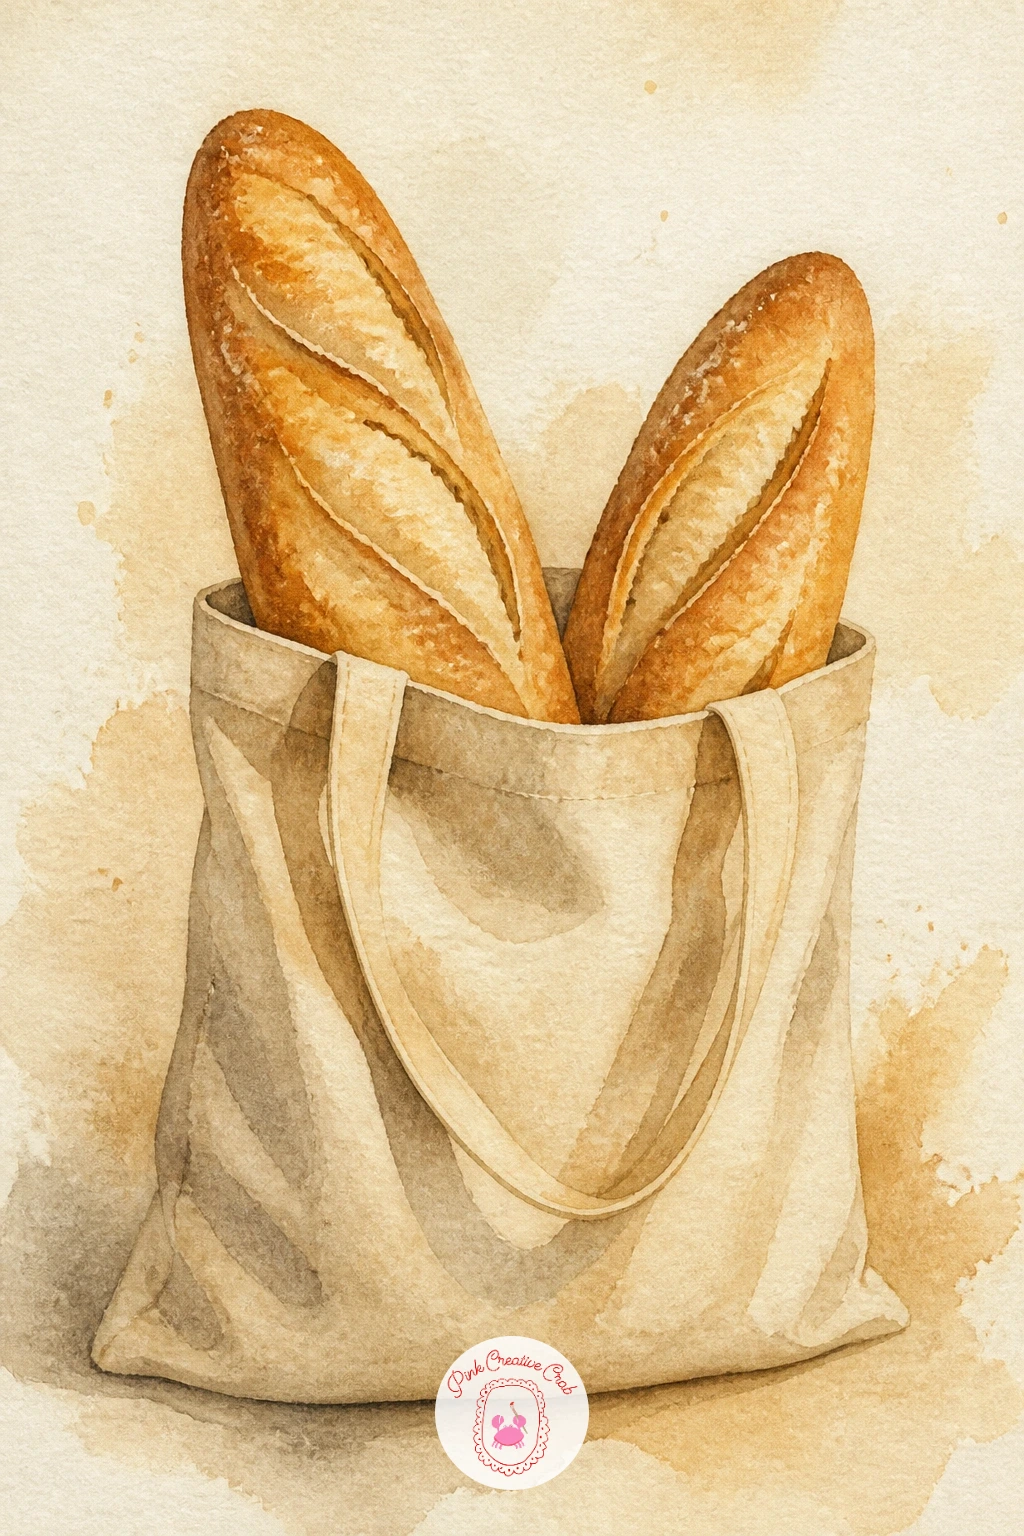
Palette: Canvas Beige,Burnt Sienna,Yellow Ochre
Pair your croissant skills with a coffee cup for a full little cafe moment. Sketch a round coffee cup and saucer beside a croissant, placing them at a slight diagonal to each other rather than lined up straight, which feels more like a real table setting.
Paint the coffee first, a dark warm brown wash in the cup with a thin band of cream-colored foam if you like a latte look, leaving a small white highlight crescent on the rim of the cup for shine.
Add the croissant beside it using your layered gold and sienna technique from earlier, then a simple wooden or marble table surface underneath both, kept pale and uncluttered so the two subjects stand out clearly.
If the scene feels empty, add one small extra detail, a spoon, a sugar cube, a folded napkin corner, just one is enough. For more cozy table scenes with this kind of warm, simple palette, the easy watercolor food ideas list has several worth trying next.
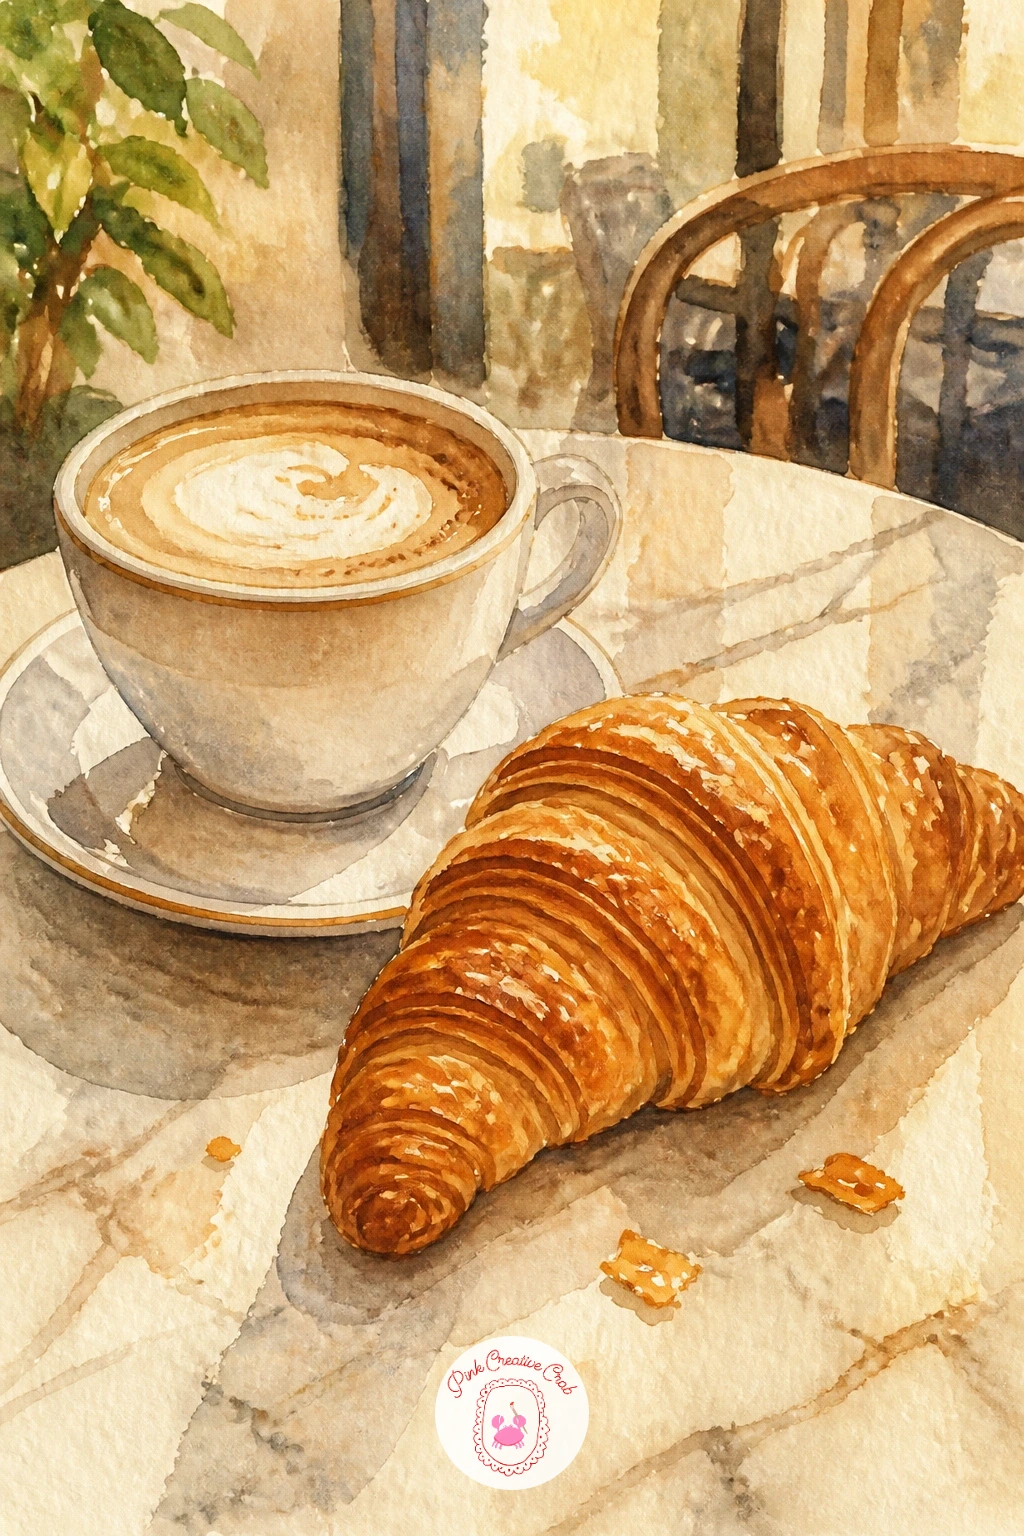
Palette: Coffee Brown,Cream,Golden Ochre
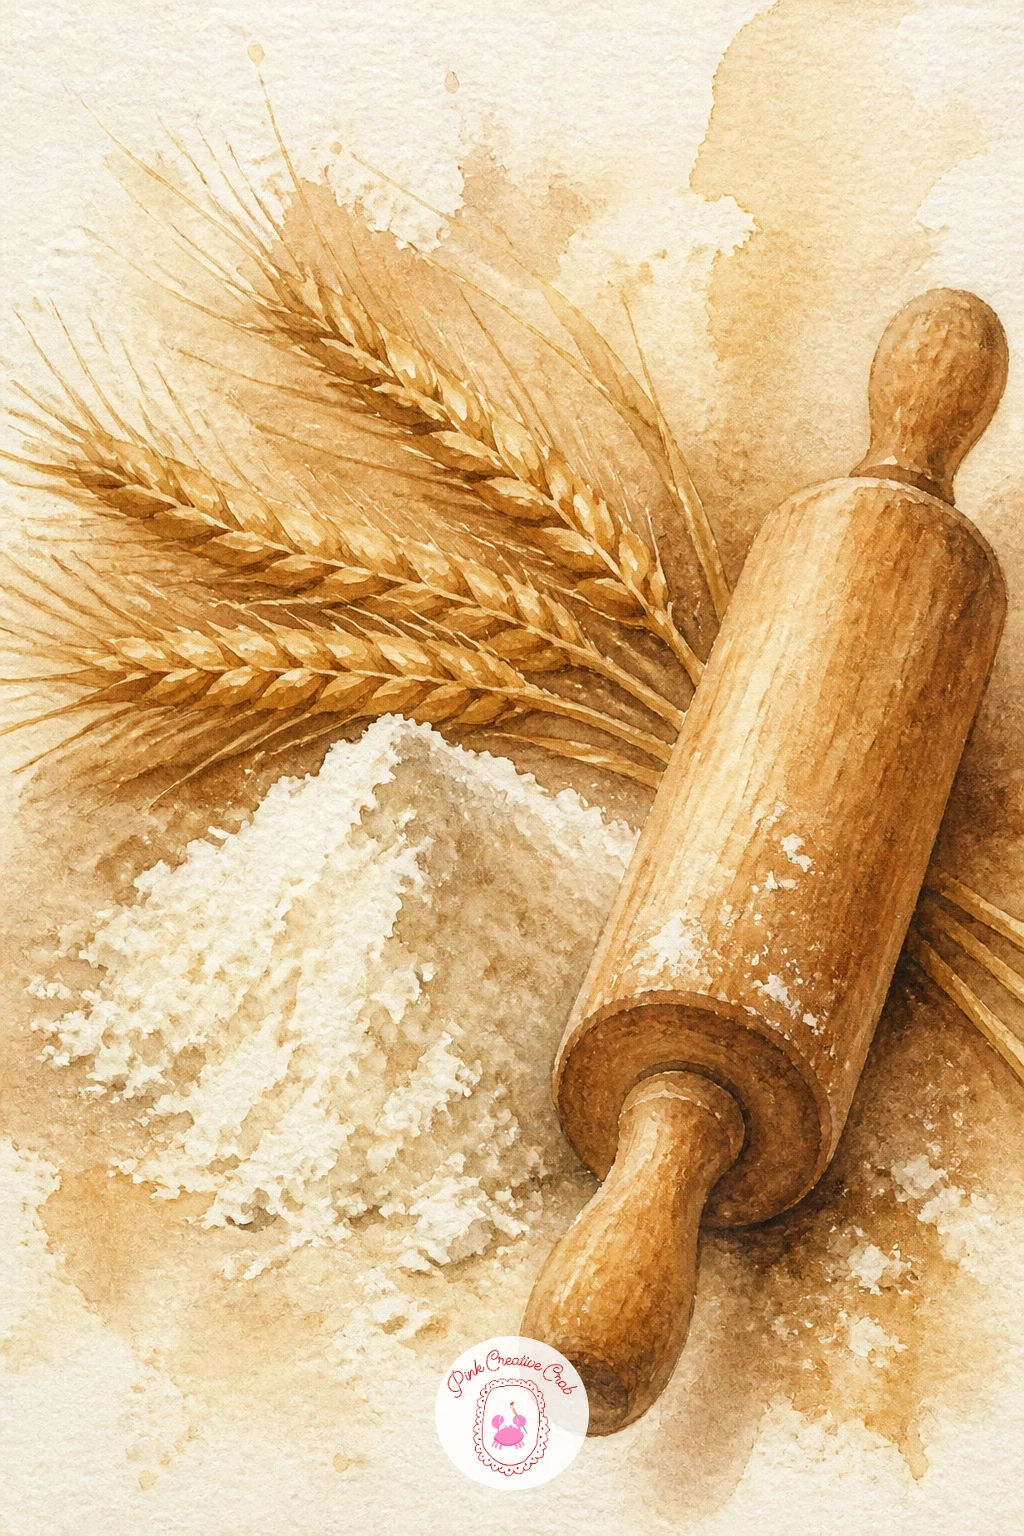
This still life pulls back to the ingredients and tools behind every loaf: a small pile of flour, a few stalks of wheat, and a wooden rolling pin laid across the scene. Sketch the rolling pin first since its straight lines anchor the composition, then build the softer flour pile and curved wheat stalks around it.
Paint the flour pile with a very pale, almost dry-brushed white and cream, letting some texture show through rather than a flat wash, then add the wheat stalks in warm gold with a fine brush, keeping each stalk’s little seed head slightly different in angle.
Paint the rolling pin in a simple warm wood tone with a darker shadow line along its underside to show it resting on the surface, and scatter a few loose flour specks around it with a flick of a nearly dry brush.
If the flour pile looks too solid, leave more white paper showing through unpainted, flour should look soft and uneven, never like a solid block. Swap wheat stalks for a sprig of rosemary if that fits your bakery theme better.
Palette: Wood Brown,Golden Wheat,Cream White
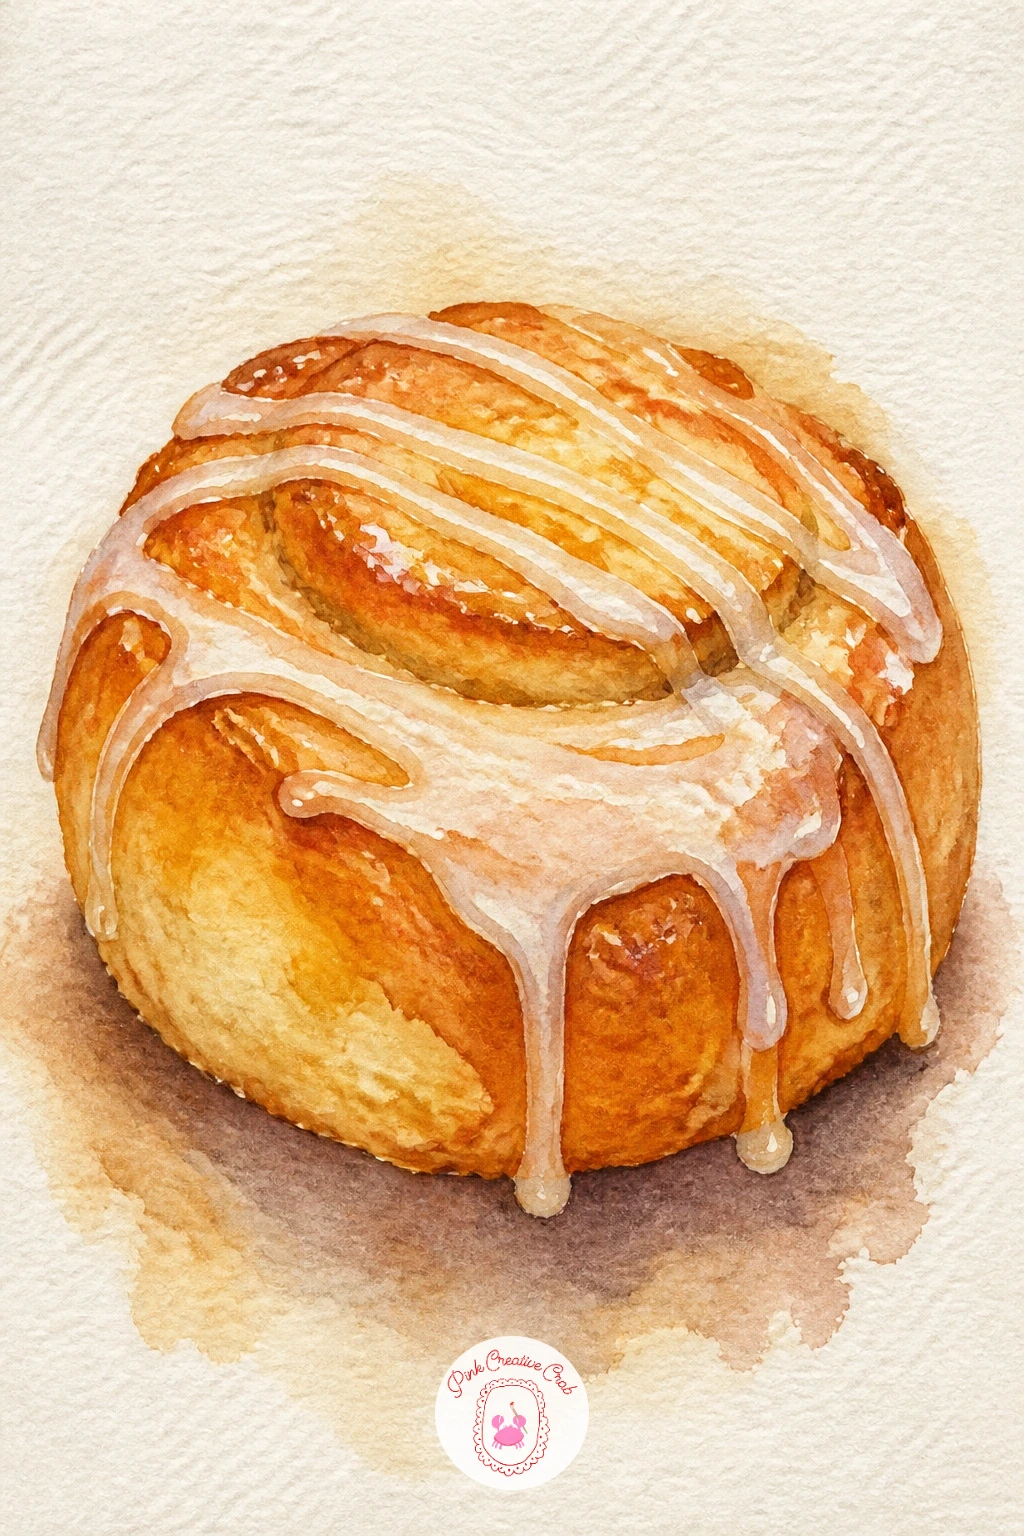
Finish the smaller bakery items with a simple sweet bun topped with icing, a good last practice piece for controlled drizzle work. Paint a soft round bun shape in warm golden brown, slightly paler on top where it catches the most light.
Once fully dry, load a fine brush with thinned white gouache and drizzle it across the top in loose zigzag lines, letting some drip slightly down the sides of the bun the way real icing does under its own weight.
Add a little extra shine by leaving a small curved highlight of bare paper on the bun’s rounded top before the icing drizzle goes on, so the glaze looks like it is sitting on a glossy surface rather than a flat matte one.
If the icing lines come out too thick, blot them gently with a dry tissue right away before they dry. No white gouache on hand, a white gel pen gives the same crisp drizzle look once the paint beneath is fully dry.
You Will Need
- white gouache or white gel pen for icing
Palette: Golden Brown,Cream,Warm Highlight Yellow
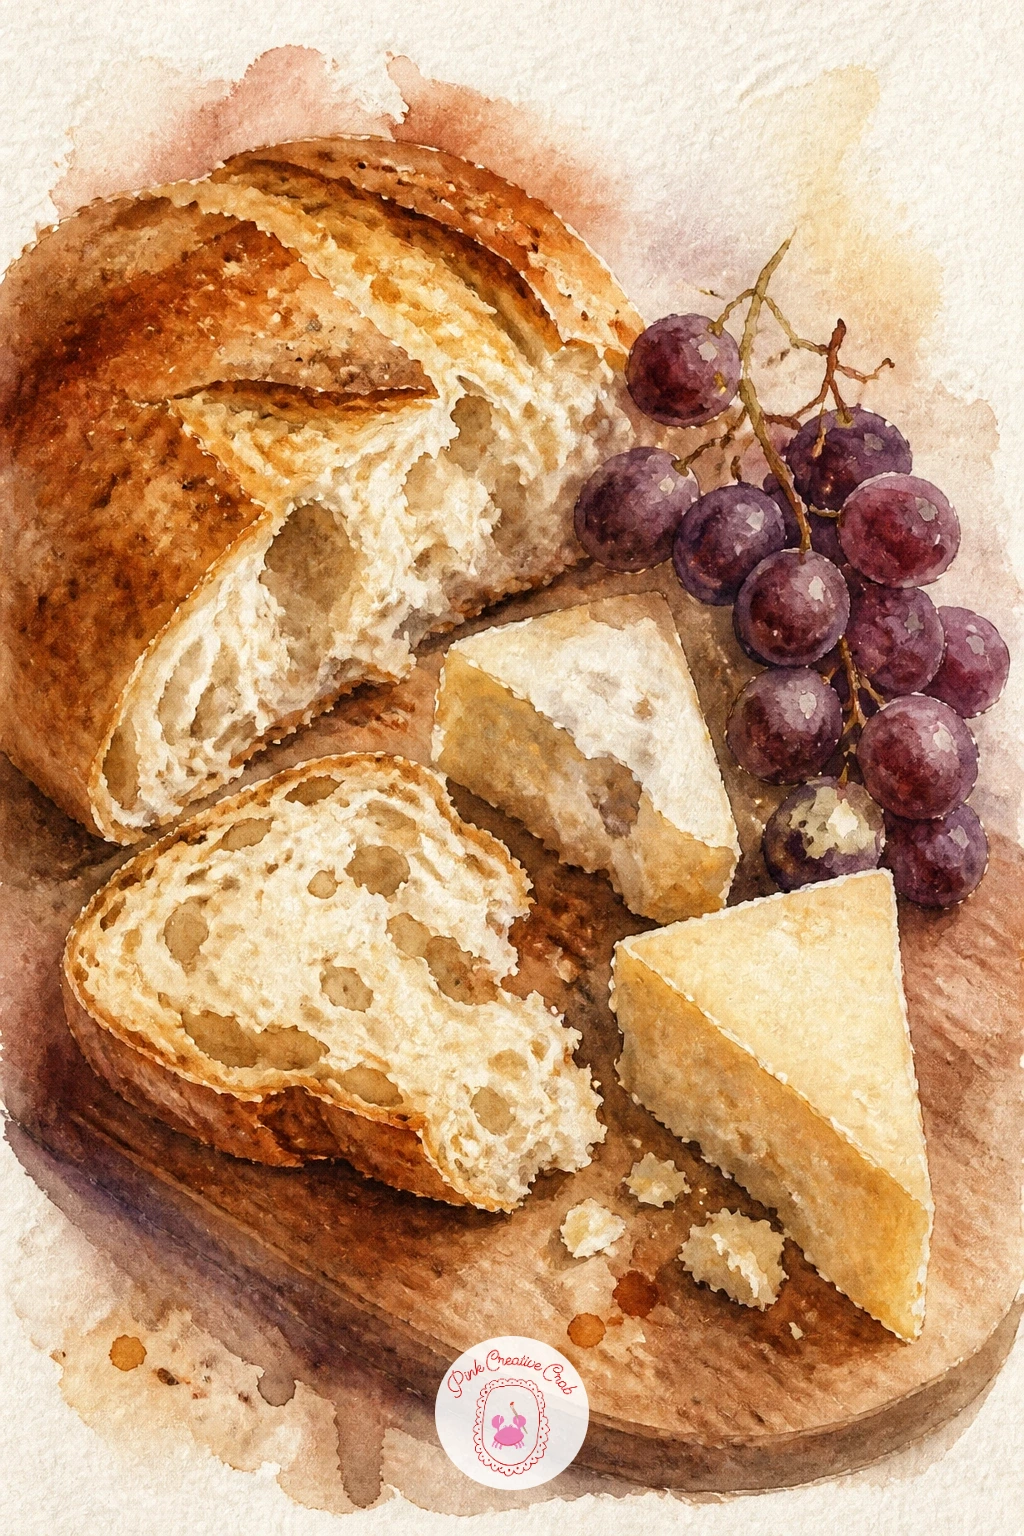
Close out the list with a fuller spread: a wooden board holding a torn loaf, a wedge or two of cheese, and perhaps a small bunch of grapes. Sketch the board as a simple rounded rectangle, then arrange the bread and cheese in a loose triangle across it rather than a straight row, which looks more like a real spread.
Paint the bread in your usual warm golds, torn rather than sliced for texture, then the cheese in pale cream and golden yellow tones, using a dry brush for any rind texture on the outside edge.
Add grapes as small overlapping circles in deep purple or green, clustered tightly together rather than scattered, and finish with a few loose crumbs and perhaps a small knife resting at an angle across the board.
If the board looks crowded, remove one element entirely rather than shrinking everything, a cheese board painting needs breathing room between its pieces. Today’s tip: paint the board’s wood grain last with a few quick dry strokes, so it never competes with the food on top.
Palette: Golden Ochre,Cream,Deep Purple
What to Do Next
Pick one loaf or bakery moment that is calling to you most today, tape a small sheet of cold press paper to your table, and let your first wash go down loose and wet. The crust details can always wait for the second layer.
Frequently Asked Questions
What colors do I need for bread watercolor?
A small warm-toned palette covers almost everything here: yellow ochre, burnt sienna, burnt umber and a touch of Payne’s grey or black. These four mix into every crust shade from pale gold to deep mahogany, so you rarely need more than that for a cozy bakery piece.
How do I stop my bread paintings from looking flat?
Flatness usually comes from skipping the second, darker layer once the first wash has dried. Let your base crust color dry fully, then add a smaller, more concentrated layer only in the shadowed areas, under the loaf, inside a tear, along a scored line, to bring real depth.
What paper works best for these bakery scenes?
Cold press watercolor paper gives the best balance of texture for crusty bread and smoothness for icing drizzle or glass reflections. A heavier weight, around 140 pounds, handles the wet-into-wet crust washes used throughout this list without buckling.
Can I paint these bread ideas without any drawing experience?
Yes, most of these loaves and pastries start from simple circles, ovals and rectangles, so confident shape drawing is all you need. Keep early pencil sketches very light and loose, since watercolor forgives a wobbly outline far more than it forgives an overworked one.
How do I get that warm, golden bakery glow in my paintings?
Lean on yellow ochre and burnt sienna as your two main crust colors and let them blend wet into wet rather than mixing them on the palette first. Keep backgrounds pale and warm too, cream or soft beige, so nothing cools down the overall feel.
Have any thoughts?
Share your reaction or leave a quick response — we’d love to hear what you think!
-
 0
-
0
-
0
-
0
-
0
-
0


