

Long canvas painting ideas solve a problem every hobby painter runs into eventually: a tall stretch of wall or a narrow canvas that a normal square composition just does not fit. The good news is that plenty of subjects are already shaped that way, a stem, a waterfall, a skyline, a neck, and once you stop fighting the format and start choosing subjects that love it, the painting almost lays itself out.
Below are twenty seven of them, sorted from the quickest sittings to the ones that ask a little more patience, upright subjects for tall narrow canvases and wide horizontal ones for skylines, rivers and rows. Pick whichever shape matches the canvas already leaning against your wall and go.
Using these images: free for personal projects such as printing, coloring, cards, journals and gifts. Handmade items that include them may be sold up to 30 pieces per design. More than that is commercial use and is not permitted, and neither is selling or sharing the images themselves or passing them off as your own. Please ask before any other use.
Foxglove stems are almost made for a narrow canvas, since one stalk can run the full height with room to spare on either side. Start with a vertical pencil line down the center of the canvas as a spine, then block in a soft sage green stem with a flat brush before adding the bell shapes.
Paint the bells as simple teardrop shapes in rose and a lighter pink, largest near the bottom and shrinking as they climb, with a tiny dot of deeper pink inside each opening. Leave the background pale sky blue or off white so the stem reads clearly against it.
If this is your first time painting a flower spike, count the bells before you start, seven or eight is plenty, so you do not run out of canvas near the top. A thin liner brush keeps the small leaf veins and bell edges crisp once the base shapes are dry.
One concrete tip: paint the stem first and let it dry completely before adding bells, so wet green does not bleed into the pink.
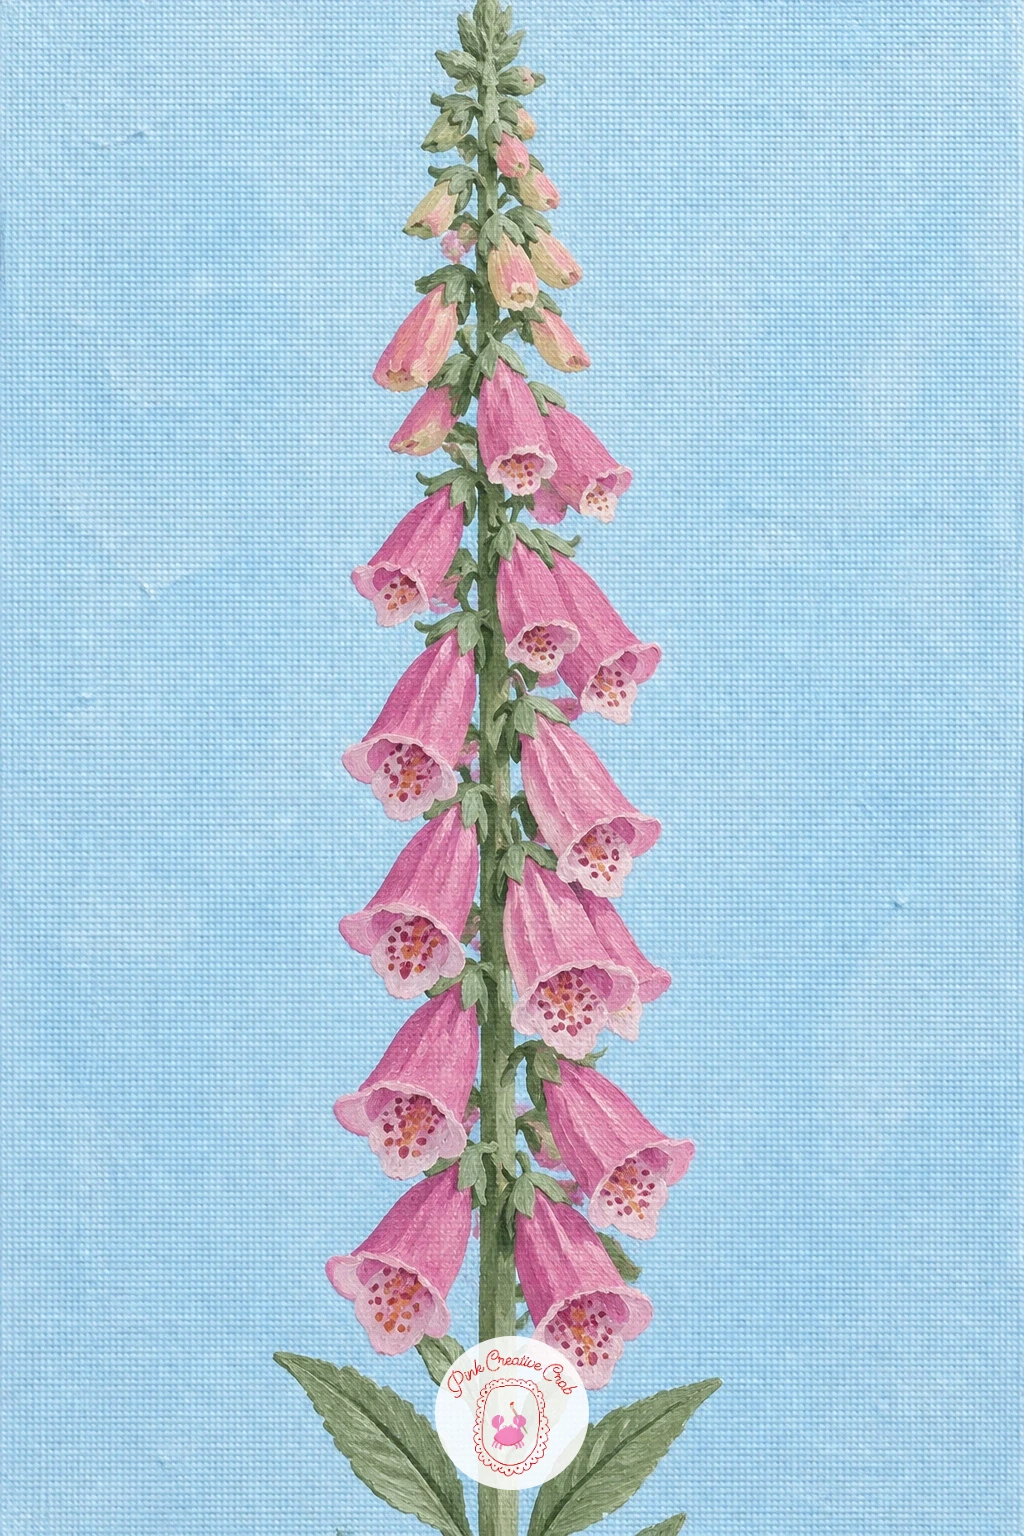
Palette: Sap Green,Rose Pink,Deep Pink,Pale Sky Blue
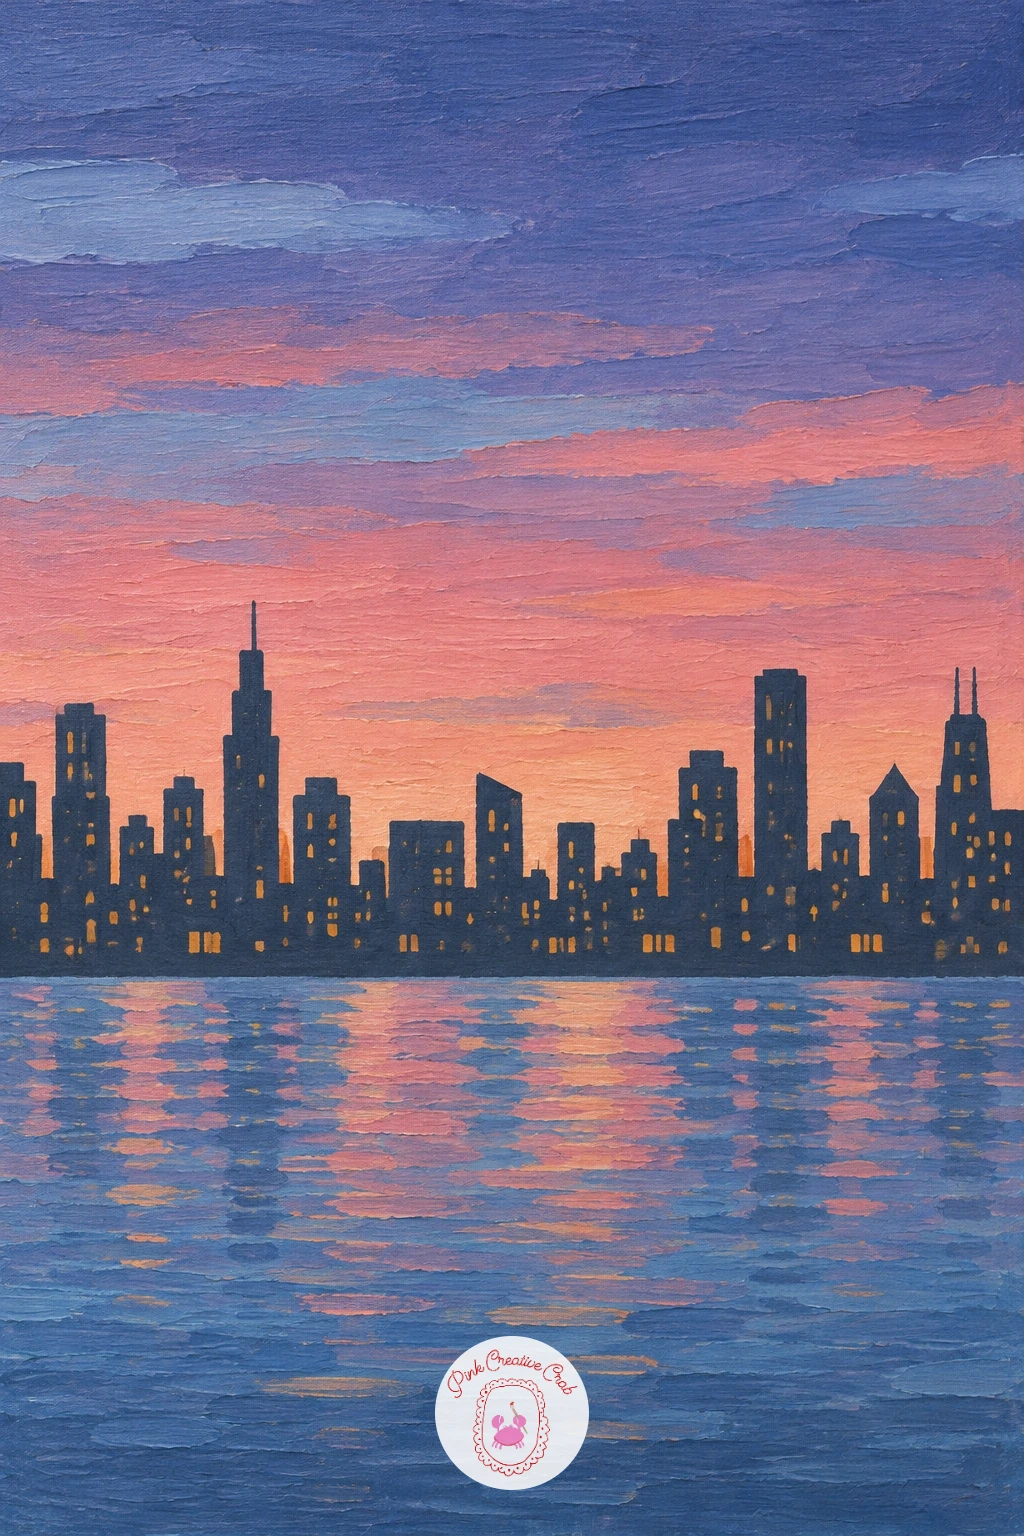
Switch to a wide canvas for this one, since a skyline needs horizontal room more than height. Tape off a flat horizon line about a third up from the bottom, then block in the sky first with a soft gradient from rose at the horizon into deeper blue toward the top, blending while the paint stays wet.
Once the sky dries, paint the buildings as flat dark silhouettes of varying rectangle heights, working left to right so the spacing stays even. Vary the widths so the skyline does not look like a row of matching boxes.
The eye level for this scene sits low, right where sky meets rooftops, which is what makes the buildings feel tall even though they are simple shapes. A few tiny ochre window squares, dotted in once the silhouettes are dry, finish the glow without any fussy detail.
Keep one tip in mind: paint the sky gradient in one go so it blends smoothly, since reworking it after it dries tends to look patchy.
You Will Need
- painter’s tape
Palette: Payne’s Grey,Dusty Rose,Deep Indigo,Ochre
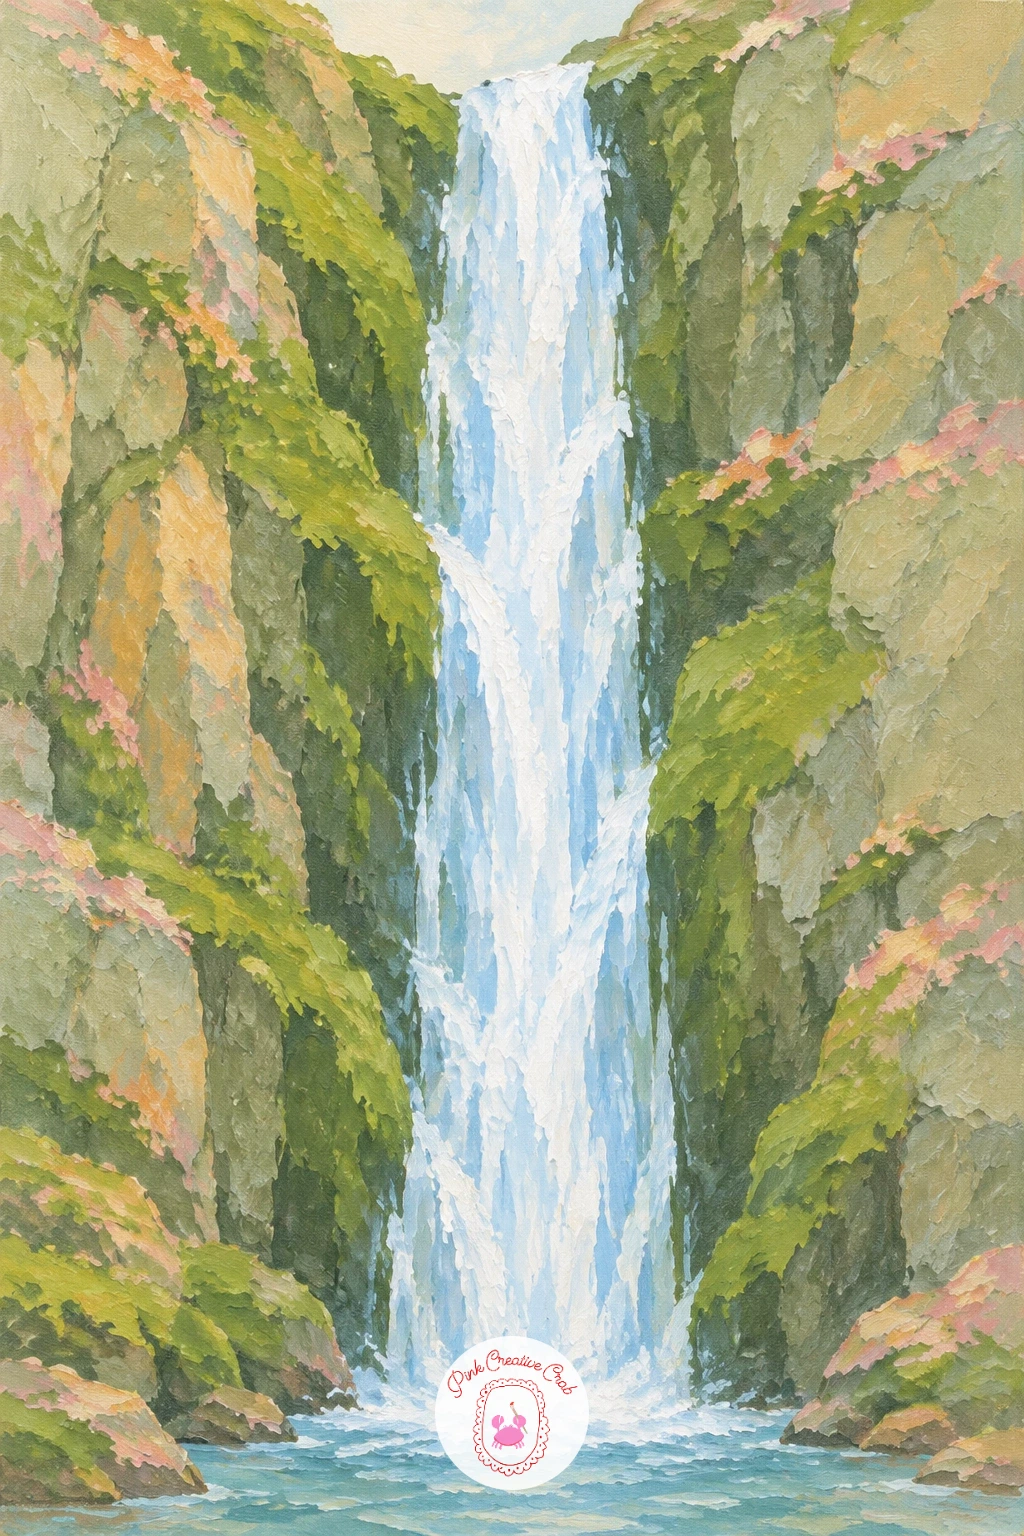
A waterfall is a natural fit for a tall canvas, since the water simply needs to fall from top to bottom. Block in the cliff face first in broken patches of sage and darker green for moss, leaving a clear vertical channel bare for the water.
Paint the falls in soft white and pale blue, using a dry brush dragged downward so some canvas texture shows through, which reads as moving water far better than a flat solid stripe. Add a small pool of white and blue swirls at the base where the water lands.
This is where beginners often flatten the water into a stiff ribbon. Save it by varying the width slightly as it falls and softening the edges where it meets the rock, rather than painting one straight-sided column.
If you do not have a fan brush for the misting spray at the base, an old toothbrush flicked lightly with white paint gives the same soft spatter.
You Will Need
- toothbrush or fan brush for spray
Palette: Sage Green,Forest Green,Titanium White,Pale Blue
After the foxglove, a delphinium spike is a nice variation since the florets cluster tighter and the blue reads cooler against the same pale sky background. Pencil in a slim vertical stem first, then build the flower cluster as a series of small five-petal blossoms stacked closely from base to tip.
Paint the lower florets a touch larger and more open, the top ones smaller and more closed, which is the real trick to a convincing spike: compare each floret’s size to the one below it rather than guessing freehand. This single comparison keeps the taper believable all the way up.
Use a round brush for the petals and a liner for the thin stem and leaf edges. Keep the background pale, sky blue or soft white, so the cobalt blue of the flowers stays the brightest note on the canvas.
One swap: no cobalt blue on hand, mix ultramarine with a touch of white and a whisper of green for a close match.
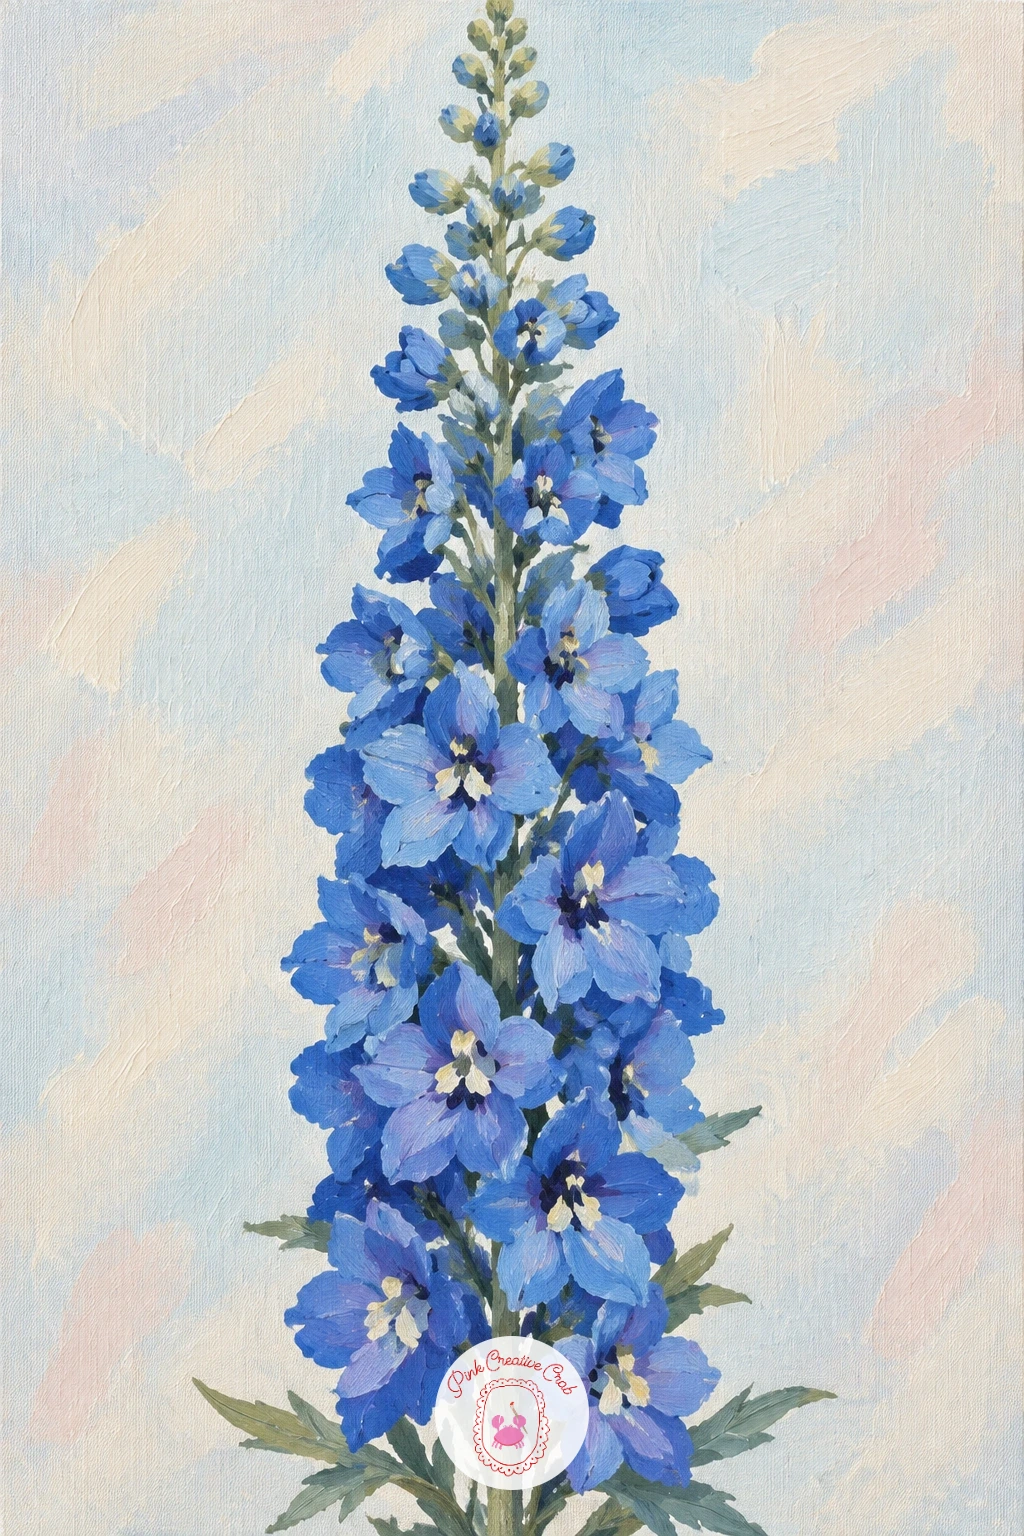
Palette: Cobalt Blue,Ultramarine,Sap Green,Pale Sky Blue
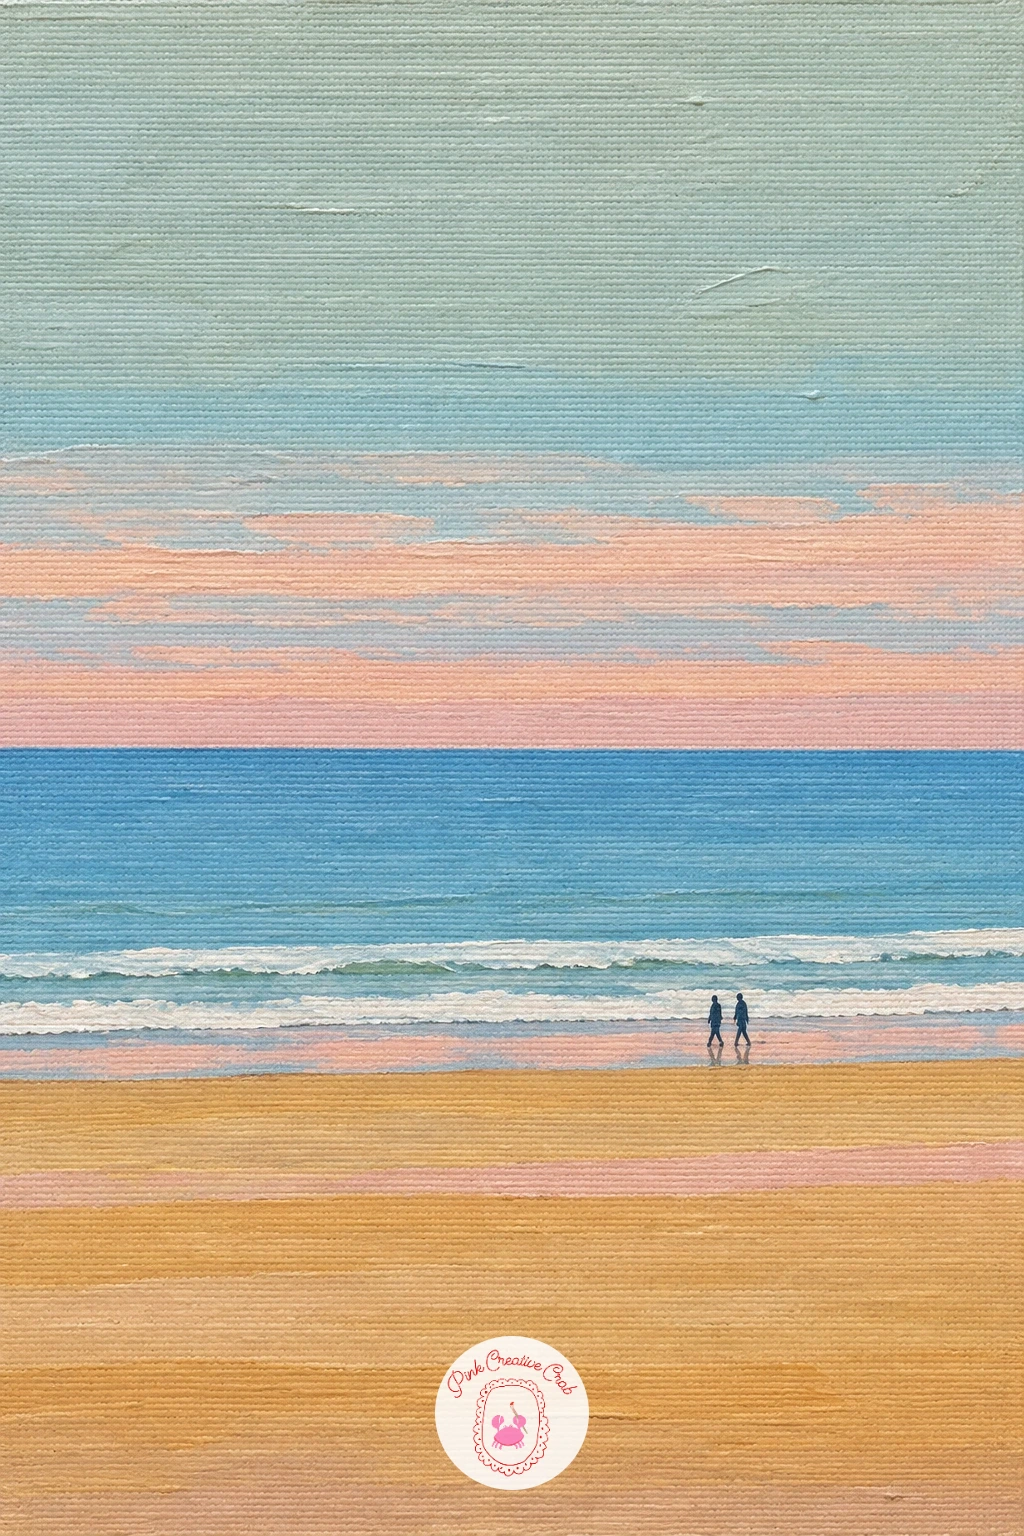
Give the brush a rest from tall subjects and stretch a wide canvas for a beach horizon instead. Divide the canvas into three flat bands, pale sky, sea, and sand, taping each line if you want it crisp, and block each band in before any detail goes on top.
Once the bands are dry, paint two or three tiny dark silhouette figures walking along the sand line, each no more than a few brush strokes tall. Keep them small and simple, a vertical dab for the body and a small round head, since anything more detailed will fight the calm of the scene.
The quick ten minute version stops right there: three flat bands and a couple of tiny walkers. The forty minute version adds a soft horizon glow where sky meets sea and a few gentle wave lines in white along the shore.
Keep the walkers’ shadows short and pointed toward the viewer, which anchors them to the sand instead of letting them float.
You Will Need
- painter’s tape
Palette: Pale Sky Blue,Sea Blue,Sand Ochre,Charcoal
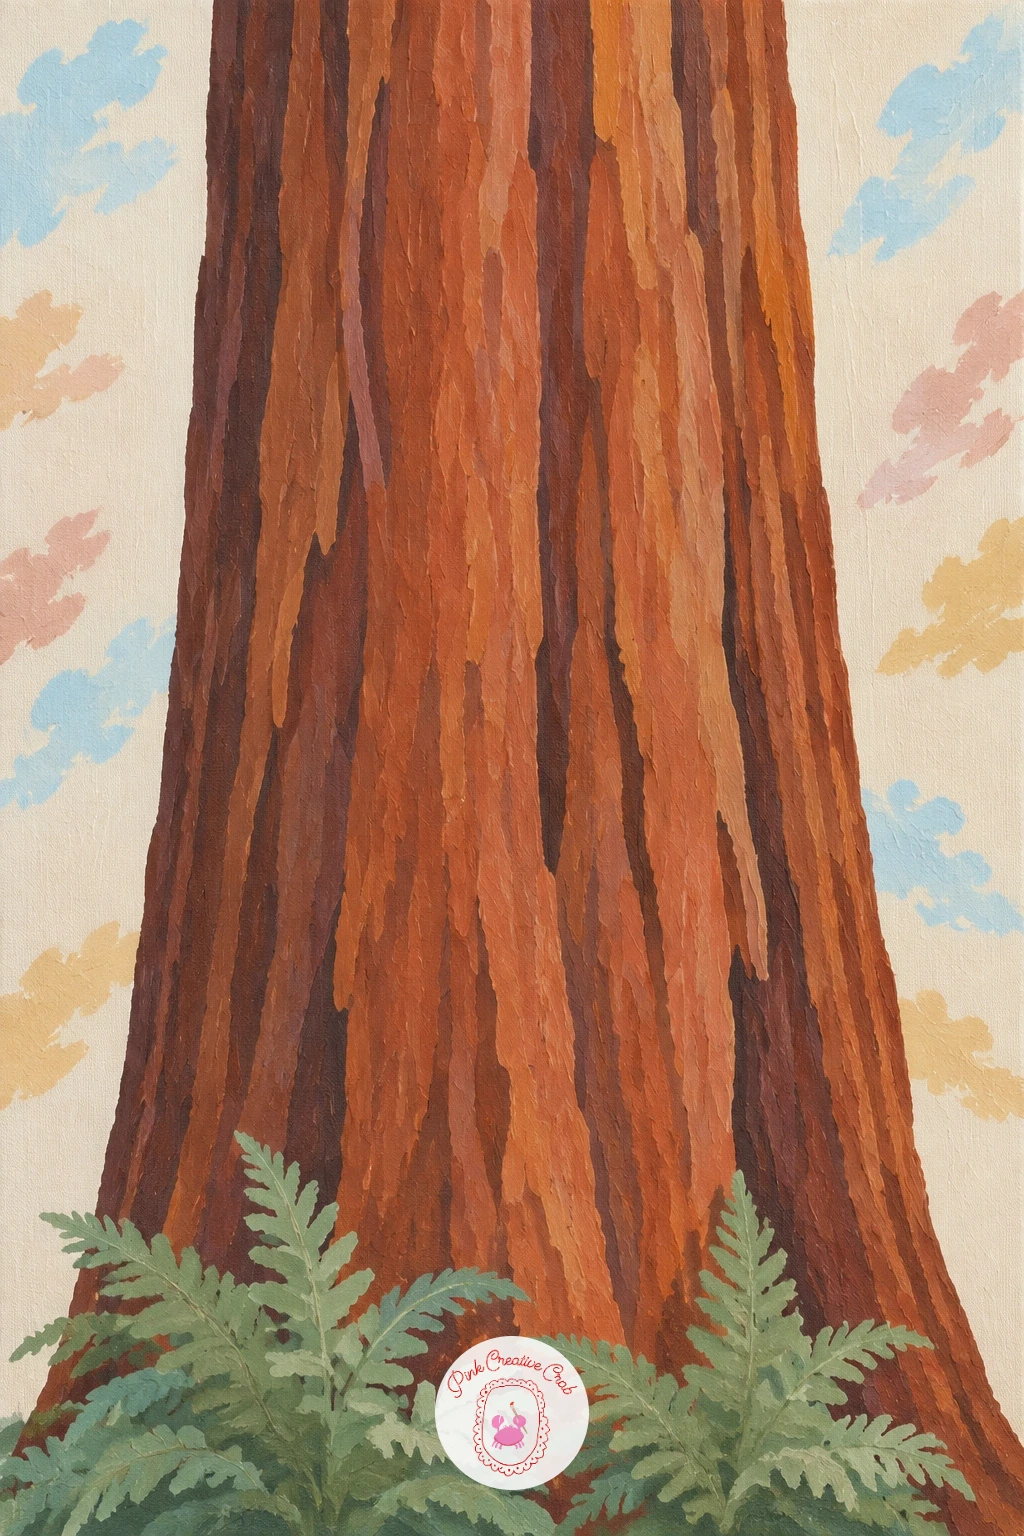
Move back to a tall canvas for a redwood trunk, which fills the height the same way the waterfall did but asks for more texture work along the bark. Block in one wide vertical trunk shape first in warm reddish brown, running almost edge to edge up the canvas, then add darker bark grooves with a dry brush dragged upward in short strokes.
Dry brushing is the trick that saves this piece: load very little paint on a flat brush, wipe most of it off, then drag it lightly over the trunk so the ridges show through rather than looking painted on top. Too much paint here just flattens the bark back out.
Once the trunk is dry, paint a cluster of simple fern fronds in sage green at the base, overlapping a few shapes so it reads as a small thicket rather than single leaves. Keep the background pale and soft so the dark trunk commands the canvas.
No dry brush technique handy, a sponge dabbed lightly over the trunk gives a similar broken texture.
Palette: Burnt Sienna,Raw Umber,Sage Green,Pale Sky Blue
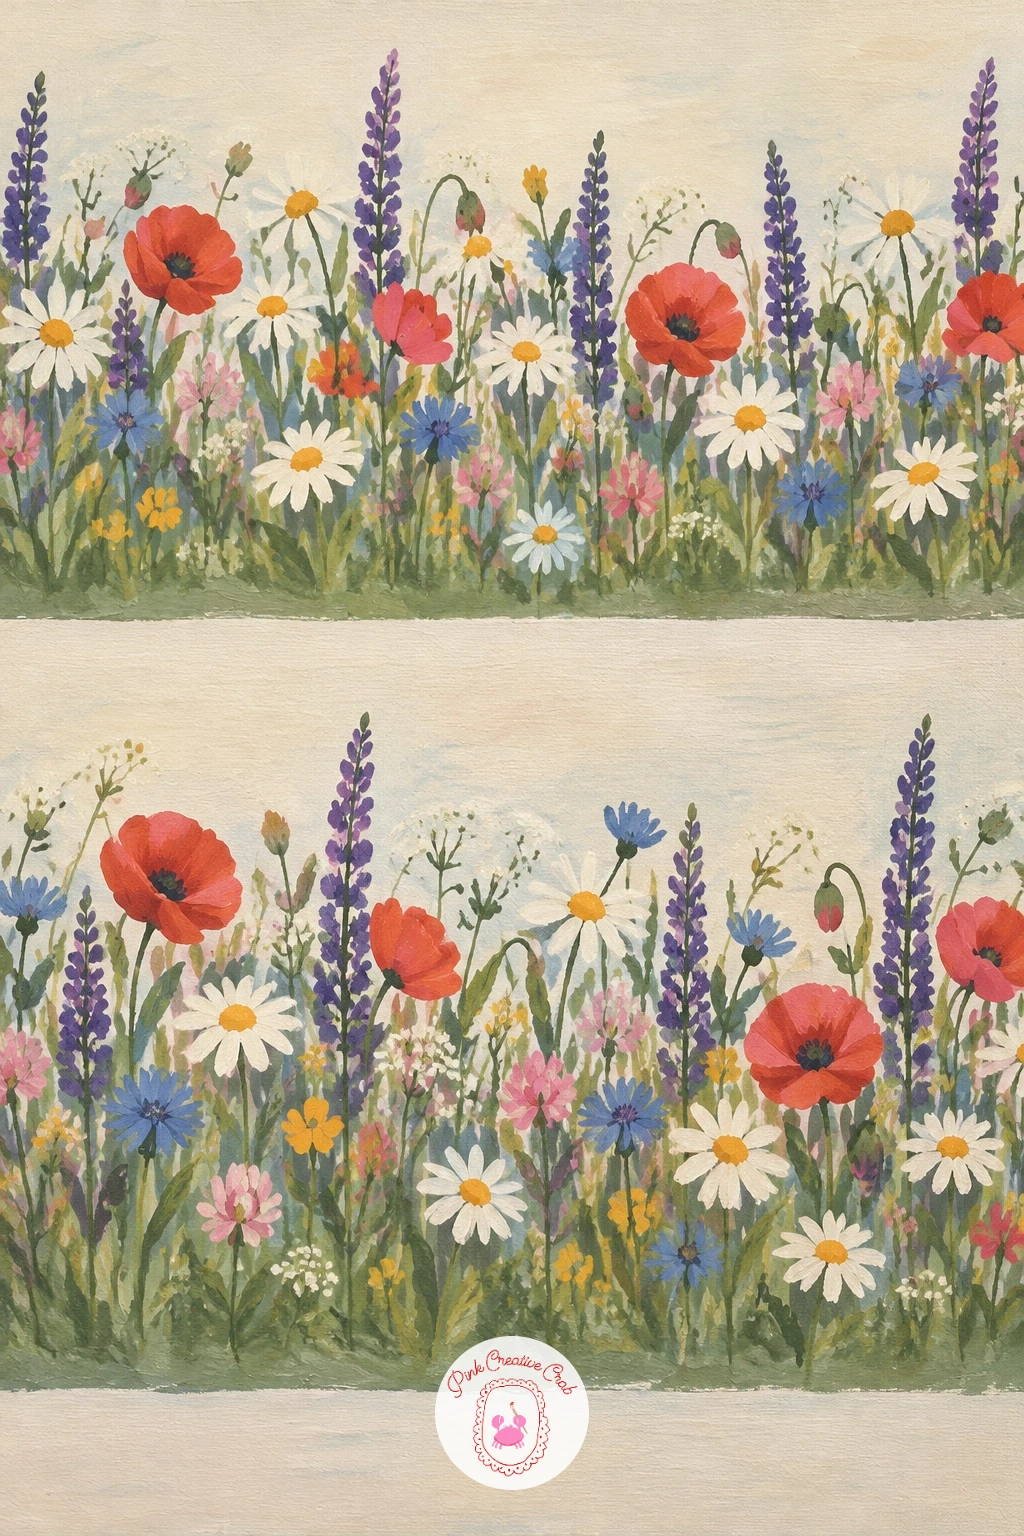
A horizontal canvas suits a wildflower border nicely, since the flowers can scatter left to right at roughly the same height rather than stacking upward. Lightly sketch a gentle wavy baseline first, then block in loose green stems and leaves along it before any blossoms go on.
Paint the flowers in small clusters of three or four types, simple daisy shapes in white, round poppy heads in rose, and a few tall purple spikes for height variation, repeating the mix two or three times along the border so it feels continuous rather than one isolated bunch.
Borders tend to go wrong when every flower sits at the same height and size. Save it by letting a few stems lean and vary in length, and by clustering blooms more densely in two or three spots rather than spacing everything evenly.
If your canvas is very long, work in sections and step back often to check the rhythm reads well from across the room.
Palette: Sap Green,Rose Pink,Titanium White,Violet
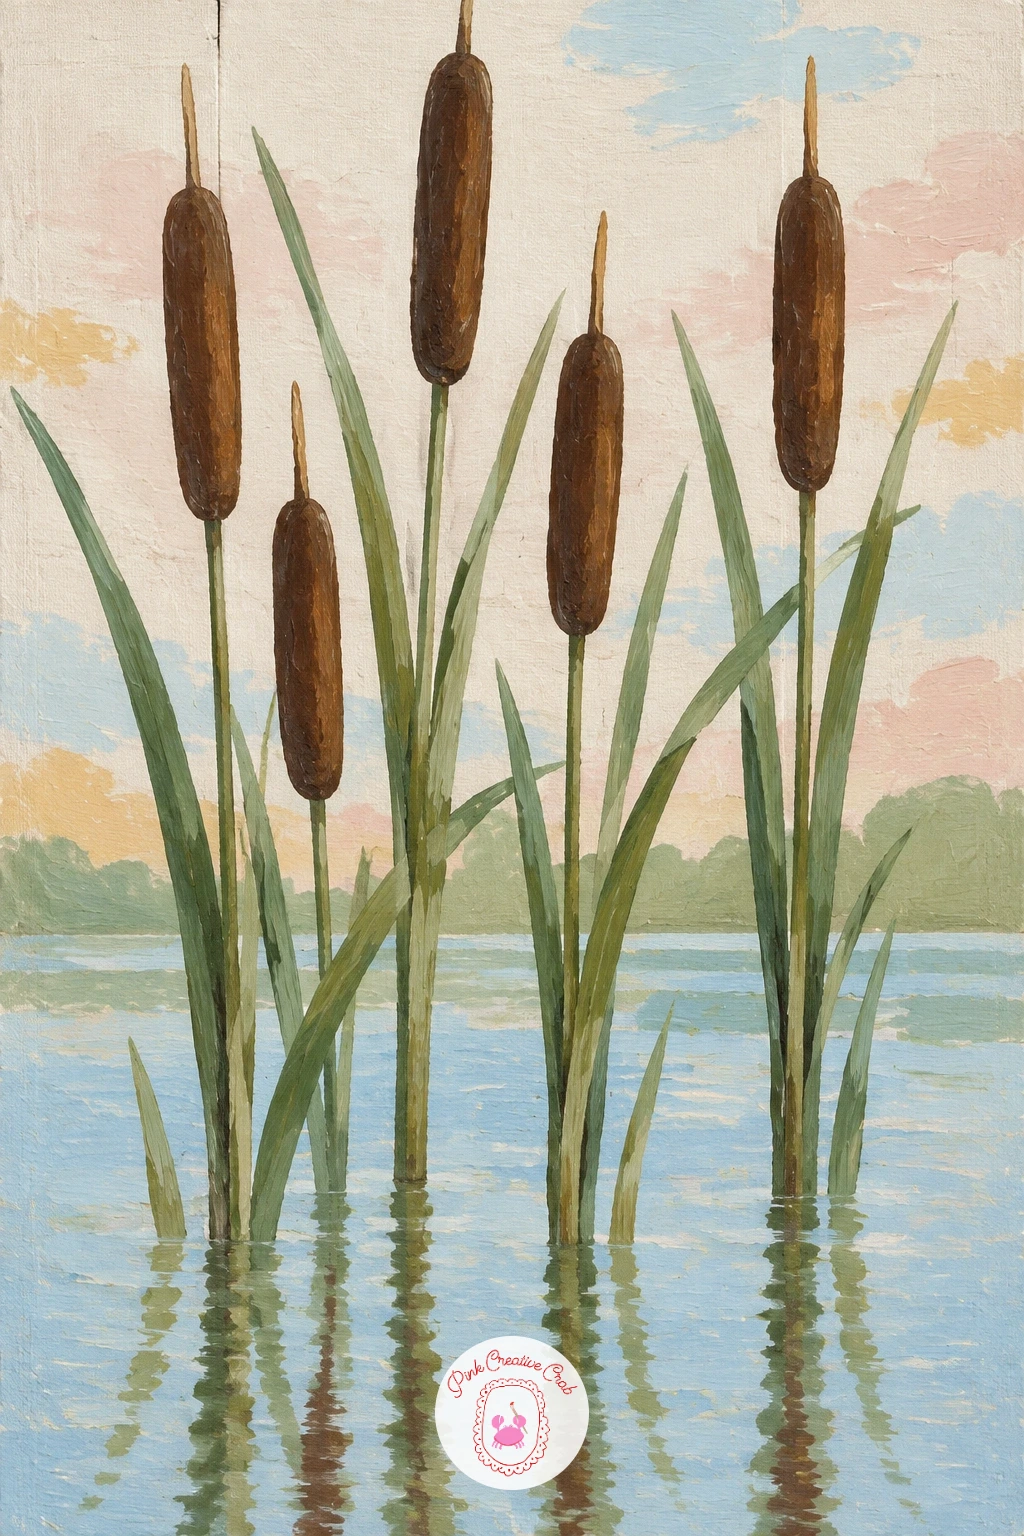
Cattails pair nicely with the wildflower border before them since both are plant subjects, but cattails ask for a tall canvas instead of a wide one. Paint a simple flat water band across the lower third first, then add three or four vertical stems rising straight up from it in varying heights.
Top each stem with a brown sausage shaped cattail head, painted with the side of a flat brush in one confident stroke rather than built up slowly, which keeps the shape smooth instead of lumpy. Add a few thin blade leaves around the stems with a liner brush once the heads are dry.
Light here usually comes from one side in a still pond scene, so add a soft reflection of the stems in the water directly below them, slightly blurred with a dry brush to suggest the water’s surface rather than a mirror image.
A quick swap if brown paint runs short: mix burnt sienna with a touch of black for the same warm dark cattail head.
Palette: Burnt Sienna,Sap Green,Pale Sky Blue,Payne’s Grey
Stretch out wide again for a mountain panorama, which rewards the long format more than almost any other landscape. Block in overlapping mountain silhouettes from back to front, the farthest range in the palest blue grey and each closer layer a shade darker, which is the simplest way to build convincing distance without any detailed shading.
Once the layers are blocked in and dry, paint a soft rose and ochre glow along the horizon where the sun is about to rise, blending it upward into the pale sky before the mountain layers go on top if you want the glow to show through gaps between peaks.
Keep the peaks’ shapes varied in height and angle so the range does not read as a repeated zigzag. A thin dry brush line of white along the top edge of each peak suggests snow without turning into a full separate shape.
Work the foreground mountain last, since it should be the darkest and crispest shape on the canvas.
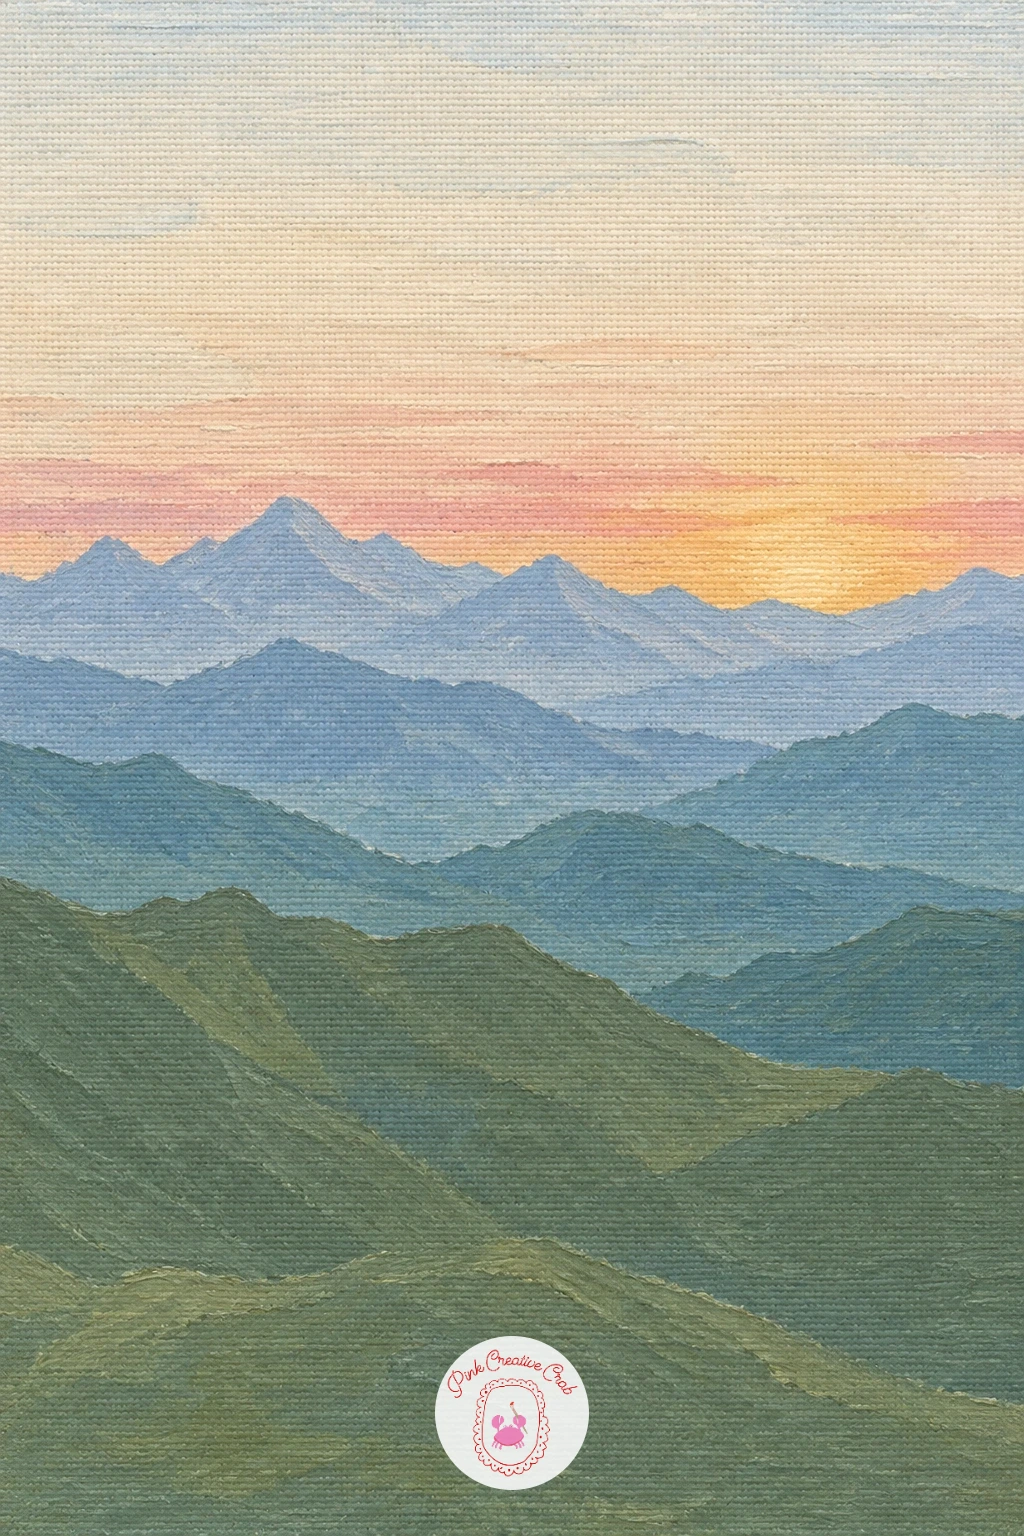
Palette: Pale Blue Grey,Slate Blue,Dusty Rose,Ochre
A stepped alley is a good tall subject once you have practiced the skyline and the mountains, since it needs both the vertical reach of those stems earlier and a sense of depth. Sketch the stairs first as a simple zigzag running up the canvas, narrower at the top than the bottom to suggest distance.
Block in flat pastel buildings on either side, leaning slightly inward toward the top, then paint the stairs themselves in warm ochre with a thin darker line marking each step’s edge. Keep every building a flat single color block rather than adding window detail to every one.
This composition goes wrong when the stairs look flat instead of climbing. Fix it by making each step slightly shorter than the one below as the stairs rise, which mimics how perspective naturally shrinks distant things.
A few potted plants in sage green along the steps, dabbed in with the tip of a round brush, add life without extra work. For more street scene practice like this, the ideas in this canvas painting roundup cover a similar relaxed townscape approach.
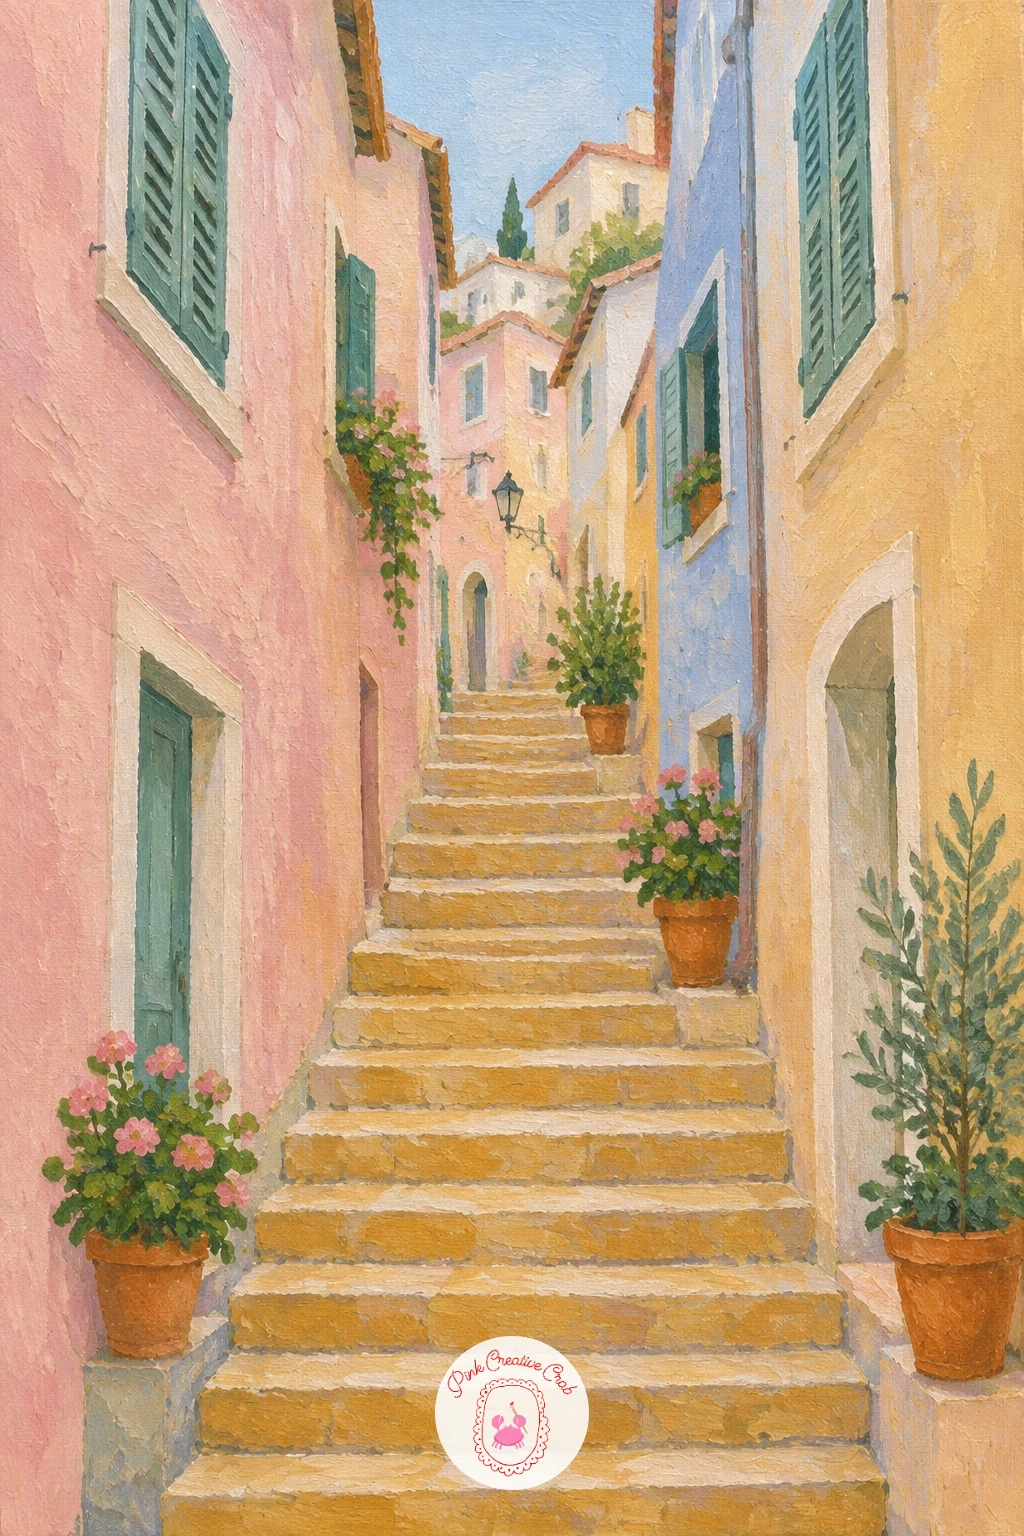
Palette: Ochre,Dusty Rose,Sage Green,Pale Sky Blue
A standing figure is one of the few subjects that fits a tall canvas as naturally as a plant stem, since the gown itself can run nearly the full height. Block in the figure with a simple elongated silhouette, a small oval head, narrow shoulders, and a gown that flares gently from waist to floor.
Measure the figure in head lengths before you paint anything else, roughly seven to eight heads tall for a graceful, slightly stylized look, marking those divisions lightly in pencil so the proportions hold even though the shapes stay simple. This single check prevents the common mistake of a gown that ends up too short for the body above it.
Paint the gown as one flat rose or ochre color block first, then add a few soft folds with a slightly darker shade of the same color using a dry brush dragged downward. Keep the face and hands as the simplest possible shapes, since detail there competes with the gown’s long sweep.
If gowns feel tricky to fold convincingly, start with a completely straight-sided dress shape and only add folds once that base feels right.
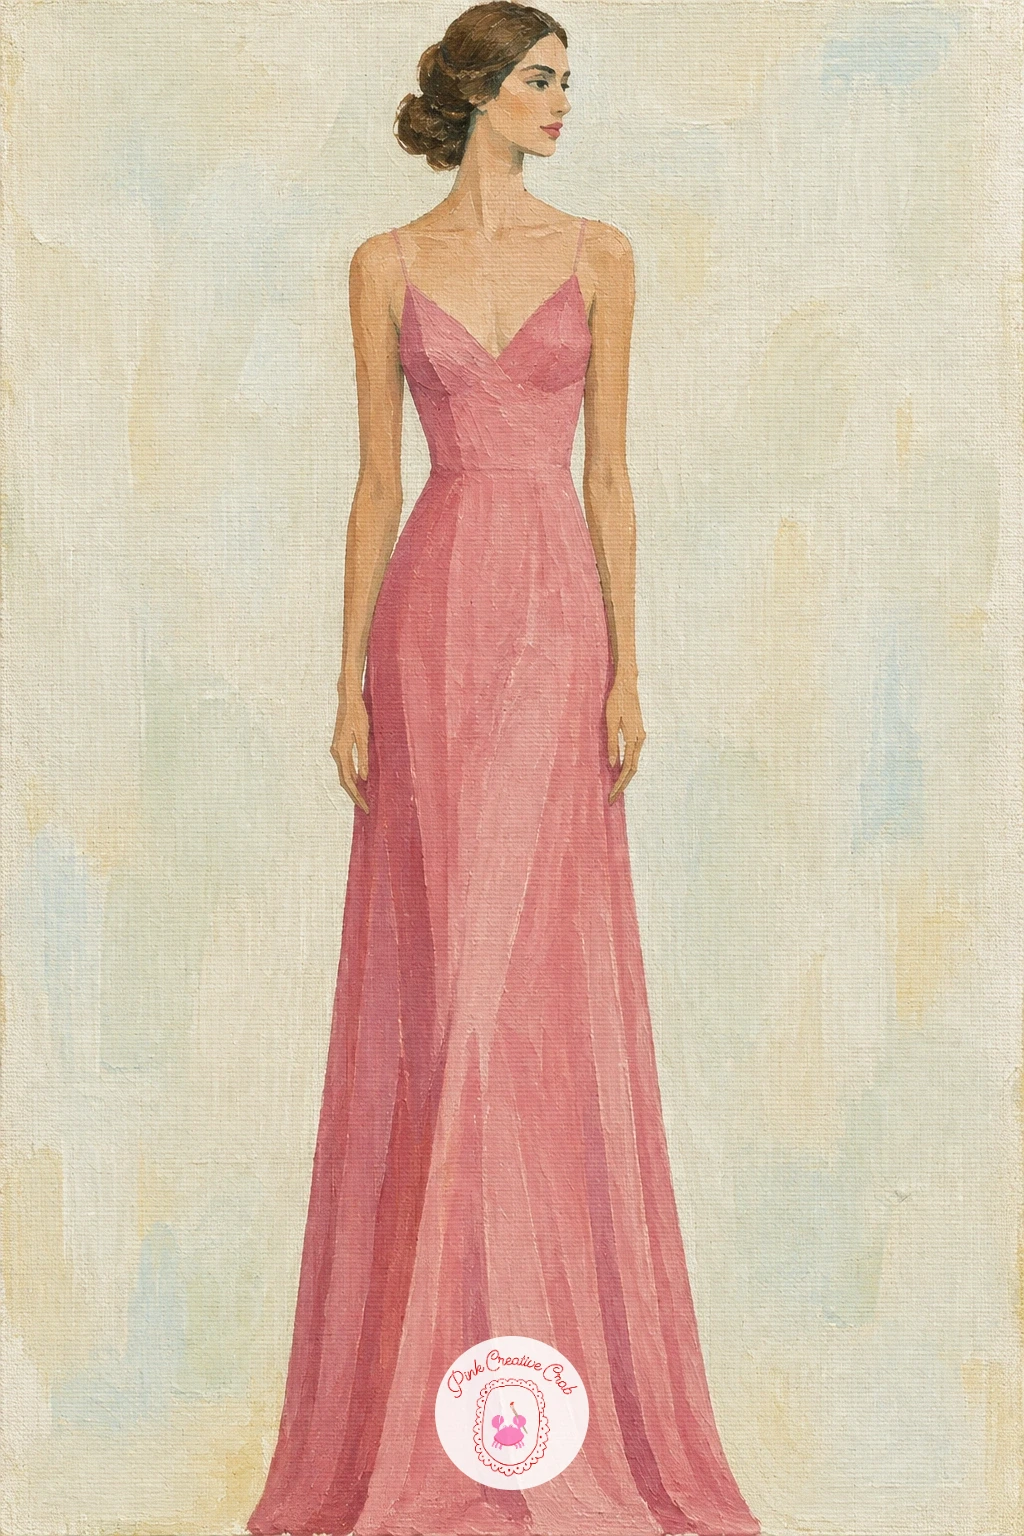
Palette: Dusty Rose,Ochre,Warm Beige,Pale Sky Blue
Wisteria hangs rather than stands, which makes a nice change of direction on a tall canvas after the upright gown before it. Start at the top of the canvas with a thin brown woody vine stretched horizontally, then let clusters of small purple blossoms drip downward from it in loose teardrop shaped bunches.
Paint each blossom cluster with small dabs of a round brush, darker purple near the top of each cluster fading to a lighter lilac near the tip, which gives the hanging weight a soft gradient rather than one flat color. Vary the length of each cascade so they do not all stop at the same point.
The quick ten minute version keeps three or four simple cascades and a plain pale background. The forty minute version adds a few sage green leaves tucked among the vines and a soft shadow beneath the vine to seat it against the wall.
Work top to bottom in one sitting if you can, since wisteria reads best when the purple dabs stay loose and wet rather than overworked later.
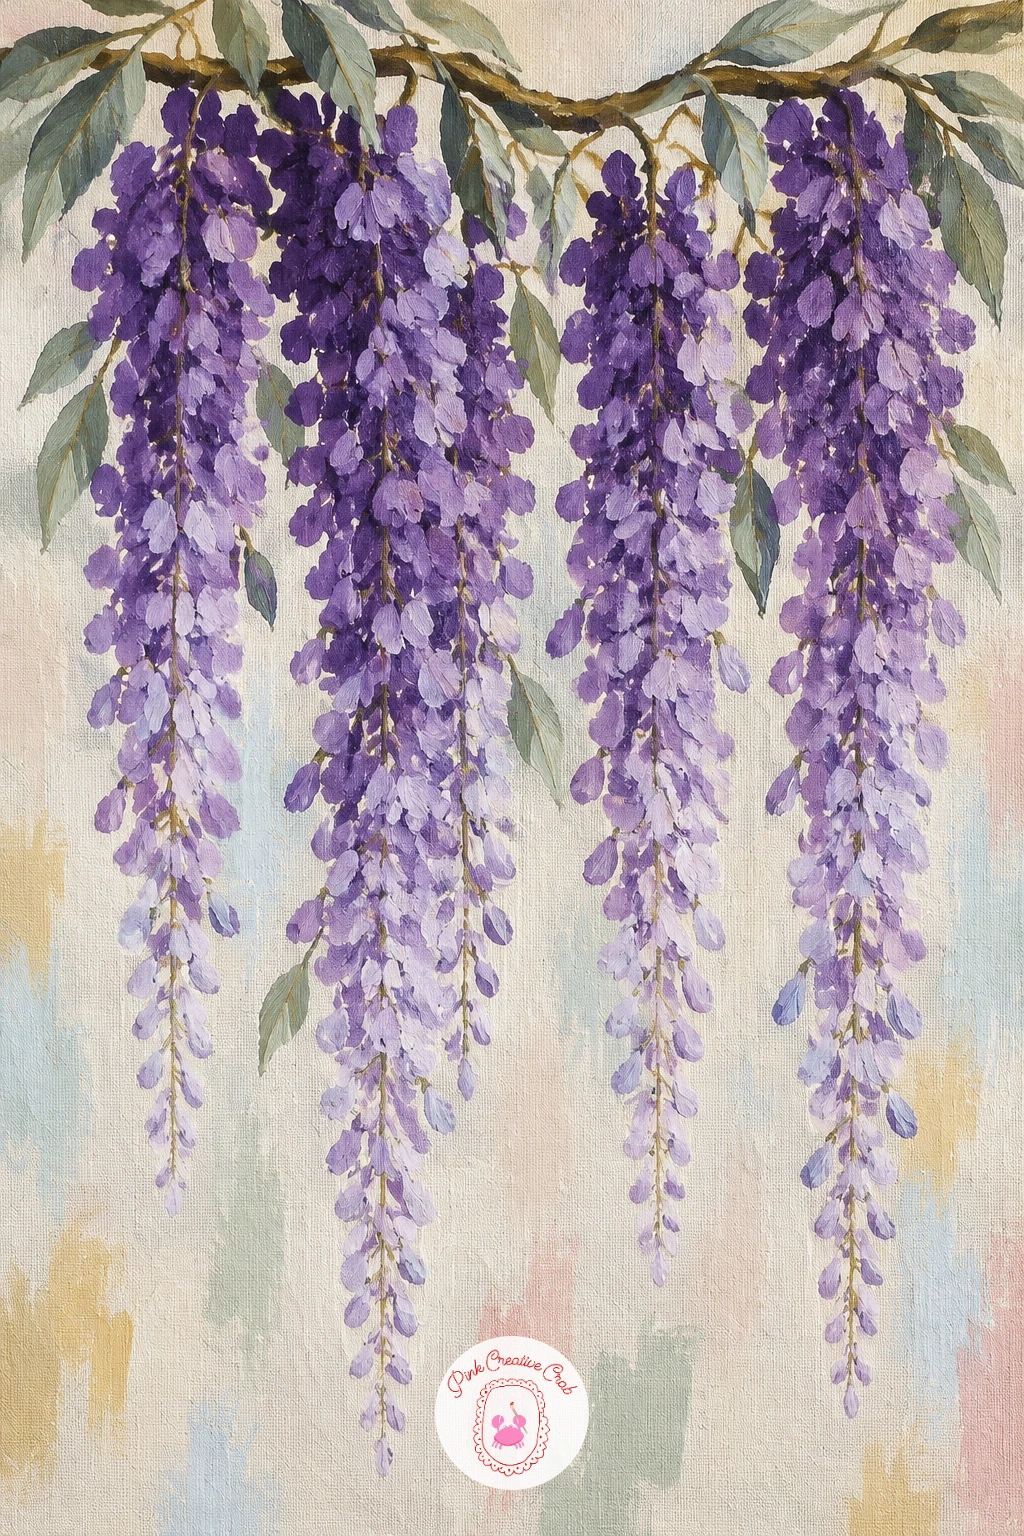
Palette: Violet,Lilac,Raw Umber,Sage Green
Try adding a hint of white to the lowest blossoms on each cascade, since real wisteria often pales slightly toward the tip of the bunch.
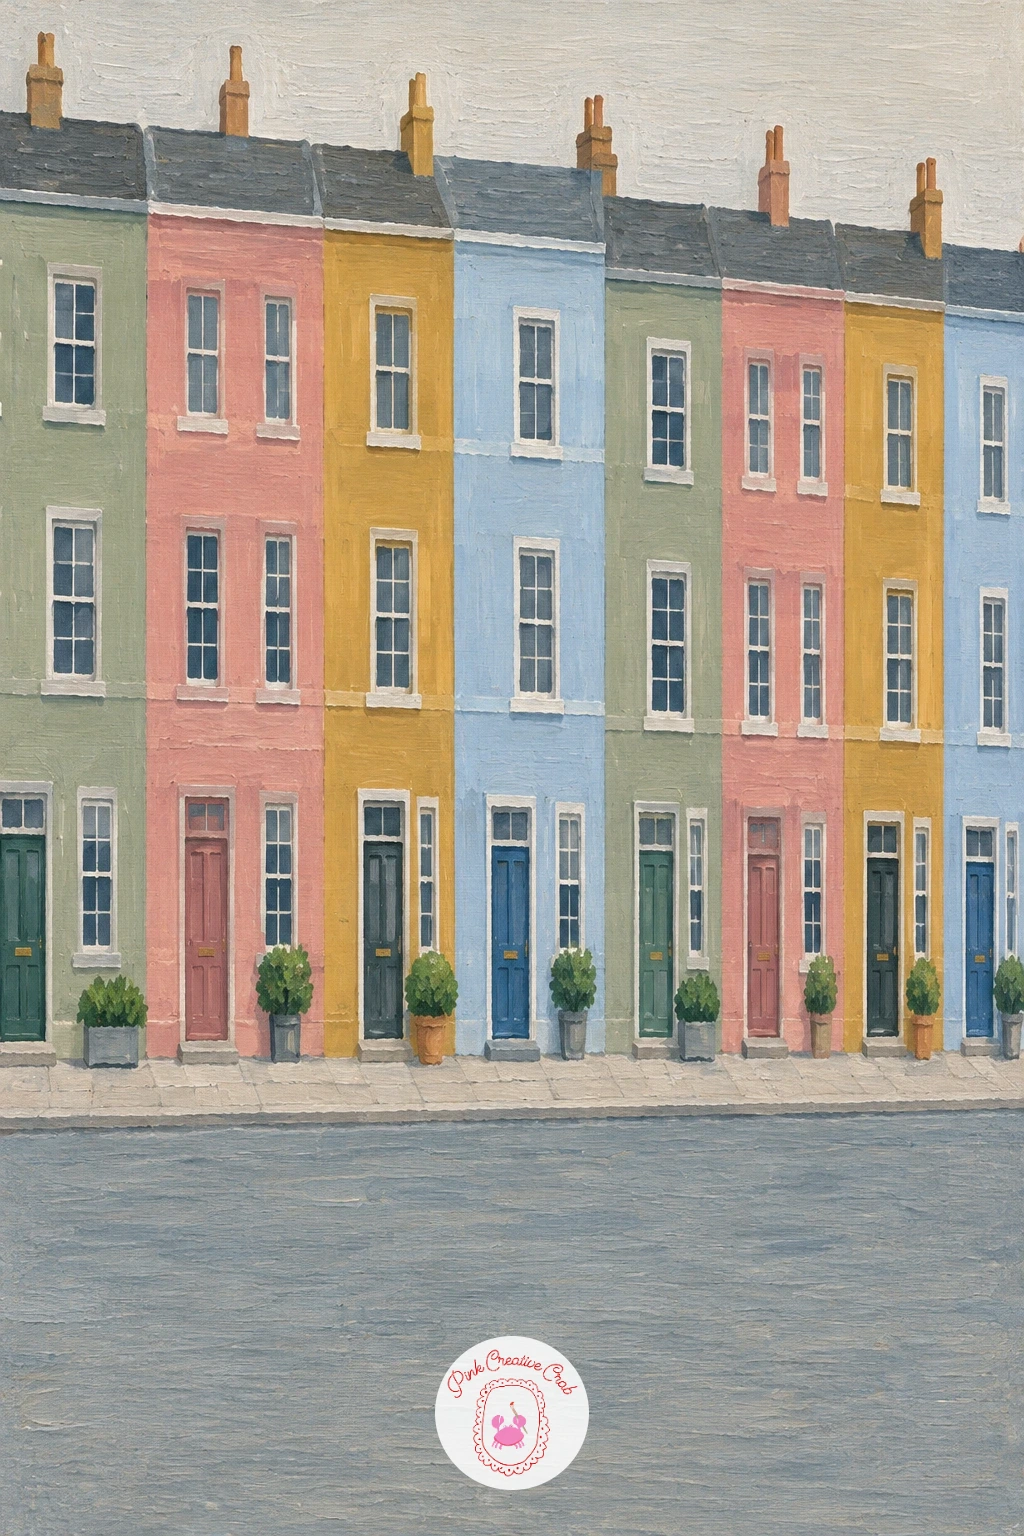
Bring the canvas back to a wide format for a row of townhouses, a cheerful companion to the earlier skyline but much closer up and in full color rather than silhouette. Tape off even vertical divisions first so each house gets a clean straight edge, then block in each townhouse front in a different flat color, rose, sage, ochre and pale blue repeating along the row.
Paint simple rectangular windows and a flat roofline on each house once the base colors are dry, keeping every house the same height so the row reads as one continuous terrace rather than a mismatched skyline. A single thin dark line along the base of the row grounds the whole street.
This is where color choice really drives the mood, so place your boldest color in the middle of the row rather than at either end, which keeps the eye moving across the whole canvas instead of stopping at one edge.
No painter’s tape on hand, a steady hand and a ruler-drawn pencil line work almost as well for the straight edges.
You Will Need
- painter’s tape
Palette: Dusty Rose,Sage Green,Ochre,Pale Sky Blue
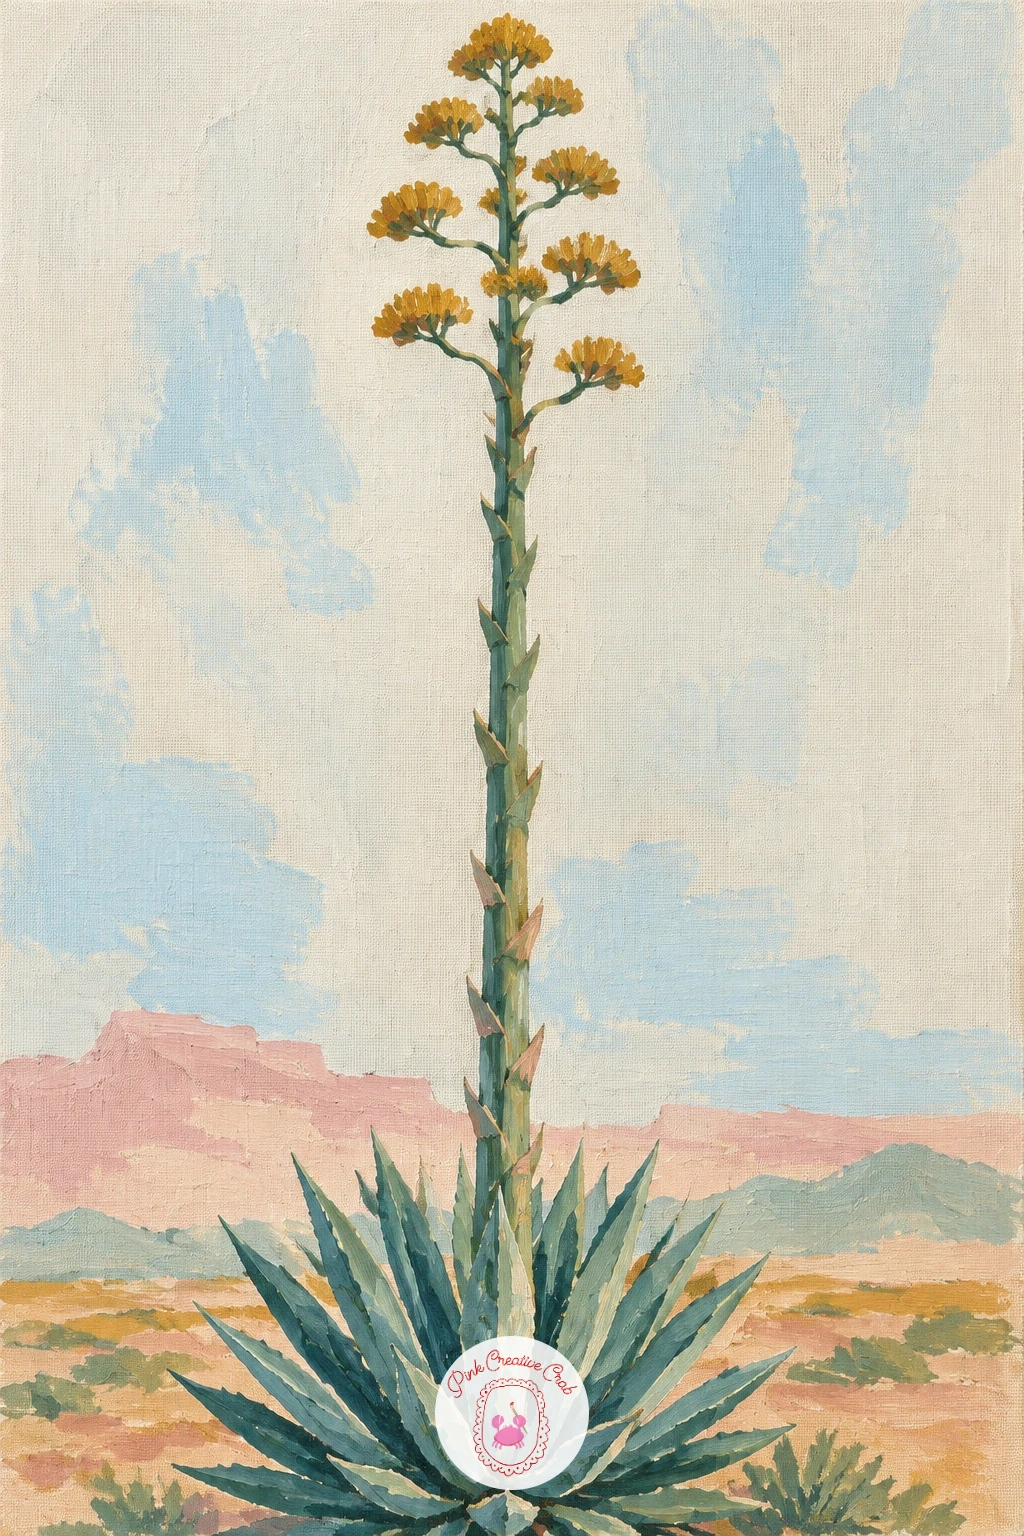
An agave stalk is one of the tallest shapes in nature and makes a striking tall canvas subject after the softer flower stems earlier in this list. Block in the rosette of spiky blue green leaves near the base first, then paint one very tall straight stalk rising from its center, branching into a few small flower clusters near the top.
Keep the stalk perfectly straight using a long ruler edge as a guide while the paint is still workable, since a wobbly stalk undercuts the whole point of this dramatic upward thrust. The small flower clusters at the top can be loose dabs of ochre and pale yellow, no need for individual petals.
Paint the desert ground in a warm sandy band across the bottom, with a flat pale sky filling almost the entire rest of the canvas to really let the stalk’s height register.
If a ruler is not available, tape a long strip along the stalk’s path before painting to keep the edge clean.
You Will Need
- ruler or long strip of tape
Palette: Sage Green,Ochre,Sand Beige,Pale Sky Blue
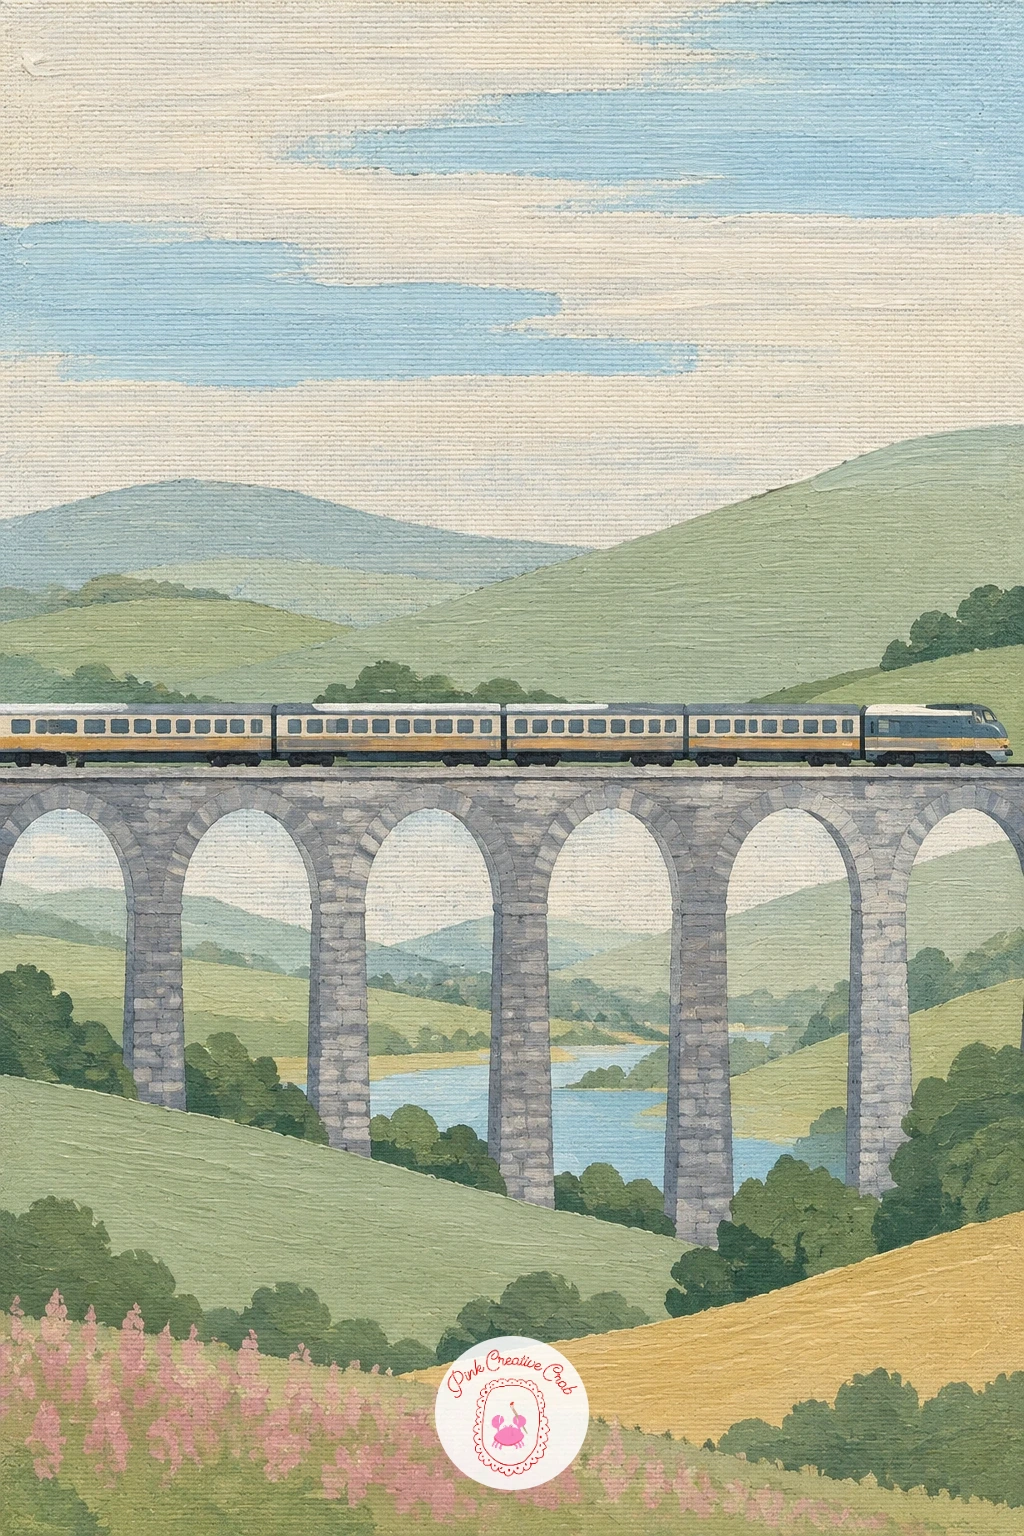
A viaduct scene gives the wide canvas a strong horizontal line to anchor against, which makes it a good next step after the agave’s vertical drama. Paint the stone arches first as a repeating row of simple rounded shapes in warm grey, keeping each arch identical in size so the rhythm stays even across the canvas.
Once the arches are dry, paint a simple train as a long flat rectangle running along the top of the viaduct, broken into a few window squares and a rounded front end, with a soft puff of pale grey smoke trailing behind if you want a touch of motion.
Perspective matters here more than detail: keep the viaduct and train at the same eye level running straight across the canvas, since even a slight tilt makes the whole structure look like it is sliding off the edge.
Background hills in soft sage behind the viaduct, kept pale, push it forward and give the scene some depth without extra work.
You Will Need
- painter’s tape
Palette: Warm Grey,Payne’s Grey,Sage Green,Pale Sky Blue
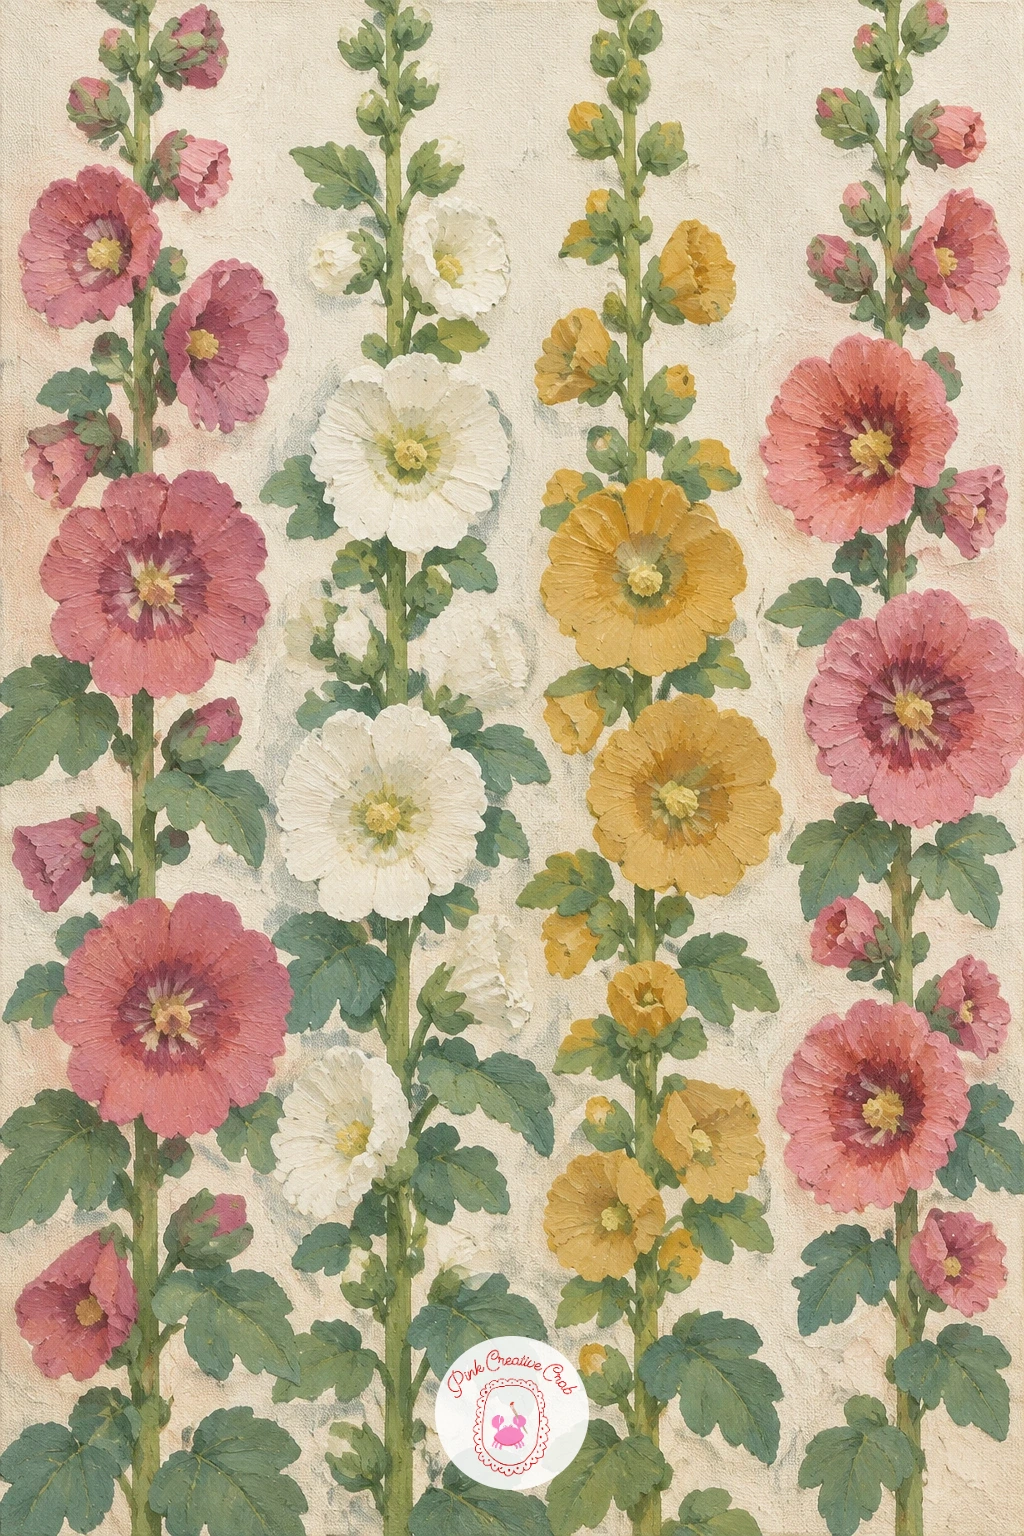
Hollyhocks return the canvas to a tall upright format and pair nicely with the earlier flower spikes, though their blooms open flat and wide rather than staying closed like a bell. Paint one or two straight green stems running most of the canvas height, then build the flowers as simple flat discs in rose, ochre and soft white opening outward from the stem at intervals.
Vary the bloom sizes as they climb, the largest fully open near the middle of the stem and smaller tighter buds near the very top, which is the simplest trick for making the stem feel alive rather than a row of identical stamps.
Keep the background a flat warm white rather than pure white straight from the tube, mixing in the faintest touch of ochre so the wall feels sunlit rather than stark. A few heart shaped leaves along the stem fill any gaps that feel too empty.
One tip worth trying today: angle two or three blooms slightly to the side rather than facing straight forward, which breaks the symmetry just enough to feel natural.
Palette: Sap Green,Rose Pink,Ochre,Warm White
A winding river is the clearest demonstration of what a wide canvas can do, since the whole point is watching one line travel from edge to edge. Sketch the river’s path first as a loose S curve, wider in the foreground and narrowing as it recedes, then block in the surrounding land in two or three flat green and ochre bands.
Paint the water itself in pale blue, leaving a thin streak of lighter blue or white along one edge of the curve to suggest where the light catches the surface. This single highlight line does more to sell moving water than any amount of detail in the rest of the river.
Rivers often go flat and lifeless when the banks stay perfectly straight. Save it by letting the land edges curve gently along with the water rather than cutting it with hard straight lines.
A few small trees scattered along the banks, painted as simple green blobs on thin trunks, help establish scale without slowing you down. The scenery techniques in this acrylic landscape guide are worth a look if you want to push the water further.
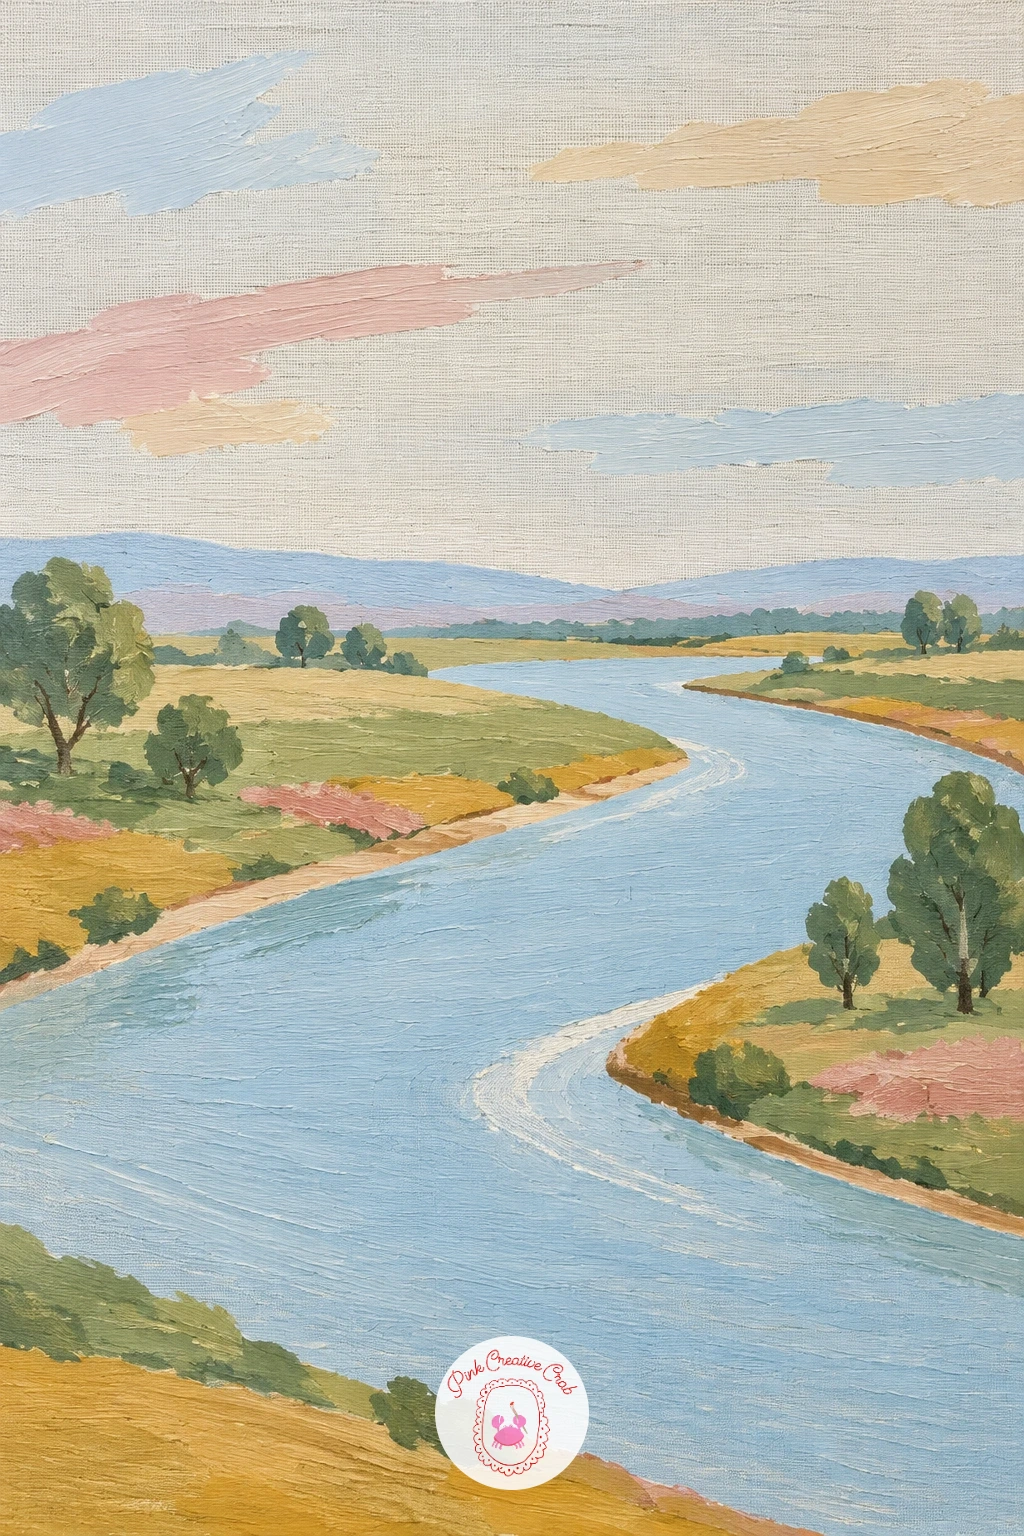
Palette: Pale Blue,Sap Green,Ochre,Titanium White
White orchids ask for more restraint than the flower spikes earlier, since the whole appeal is the contrast between crisp white petals and a dark background. Paint the background first in a deep charcoal or dusty plum, letting it dry fully, then add one arching stem in soft green curving up and across the canvas.
Build each orchid bloom from three simple petal shapes layered slightly over each other, white with the faintest touch of pale pink at the center, spaced unevenly along the stem rather than in a perfectly even row. Uneven spacing is what keeps a single stem of blooms from looking like a printed pattern.
A kneaded eraser pressed lightly over any pencil guidelines still visible through the paint lifts them away cleanly once the white petals are dry, which matters a lot against a dark background where stray pencil marks show.
If white paint looks chalky on the dark base, let the first layer dry fully and add a second thin coat rather than trying to cover it in one pass.
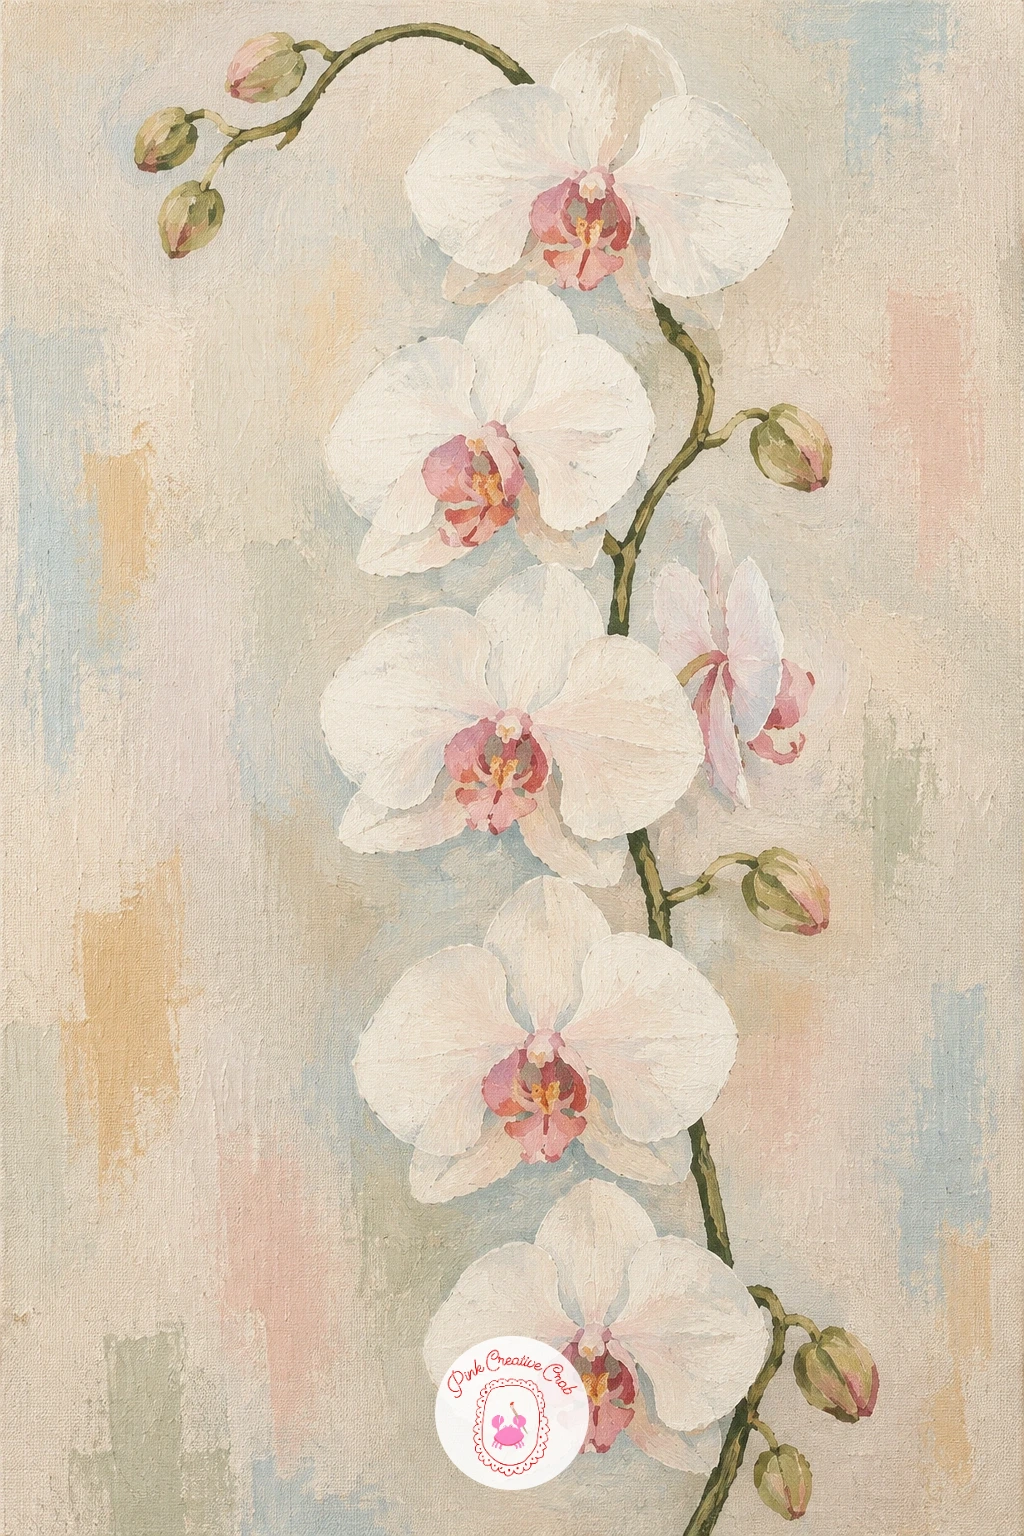
You Will Need
- kneaded eraser
Palette: Charcoal,Titanium White,Pale Pink,Sage Green
A boardwalk gives the wide canvas a strong perspective exercise after the gentler curves of the river. Mark a vanishing point lightly in pencil near the center of the canvas, then draw the two boardwalk rails converging toward it, with the cross planks getting closer together as they near that point.
Paint the planks in warm weathered brown, the marsh grass on either side in loose strokes of sage and ochre, and a pale sky filling the top third. Keeping that single vanishing point consistent for both rails and every plank is what makes the walkway feel like it recedes into real distance rather than sitting flat.
Add a thin reflection of the boardwalk in a few patches of still water among the grass, softened with a dry brush so it reads as water rather than a mirrored copy.
If the perspective feels off once painted, a few extra cross plank lines added afterward, slightly closer together than you think necessary, usually fixes it.
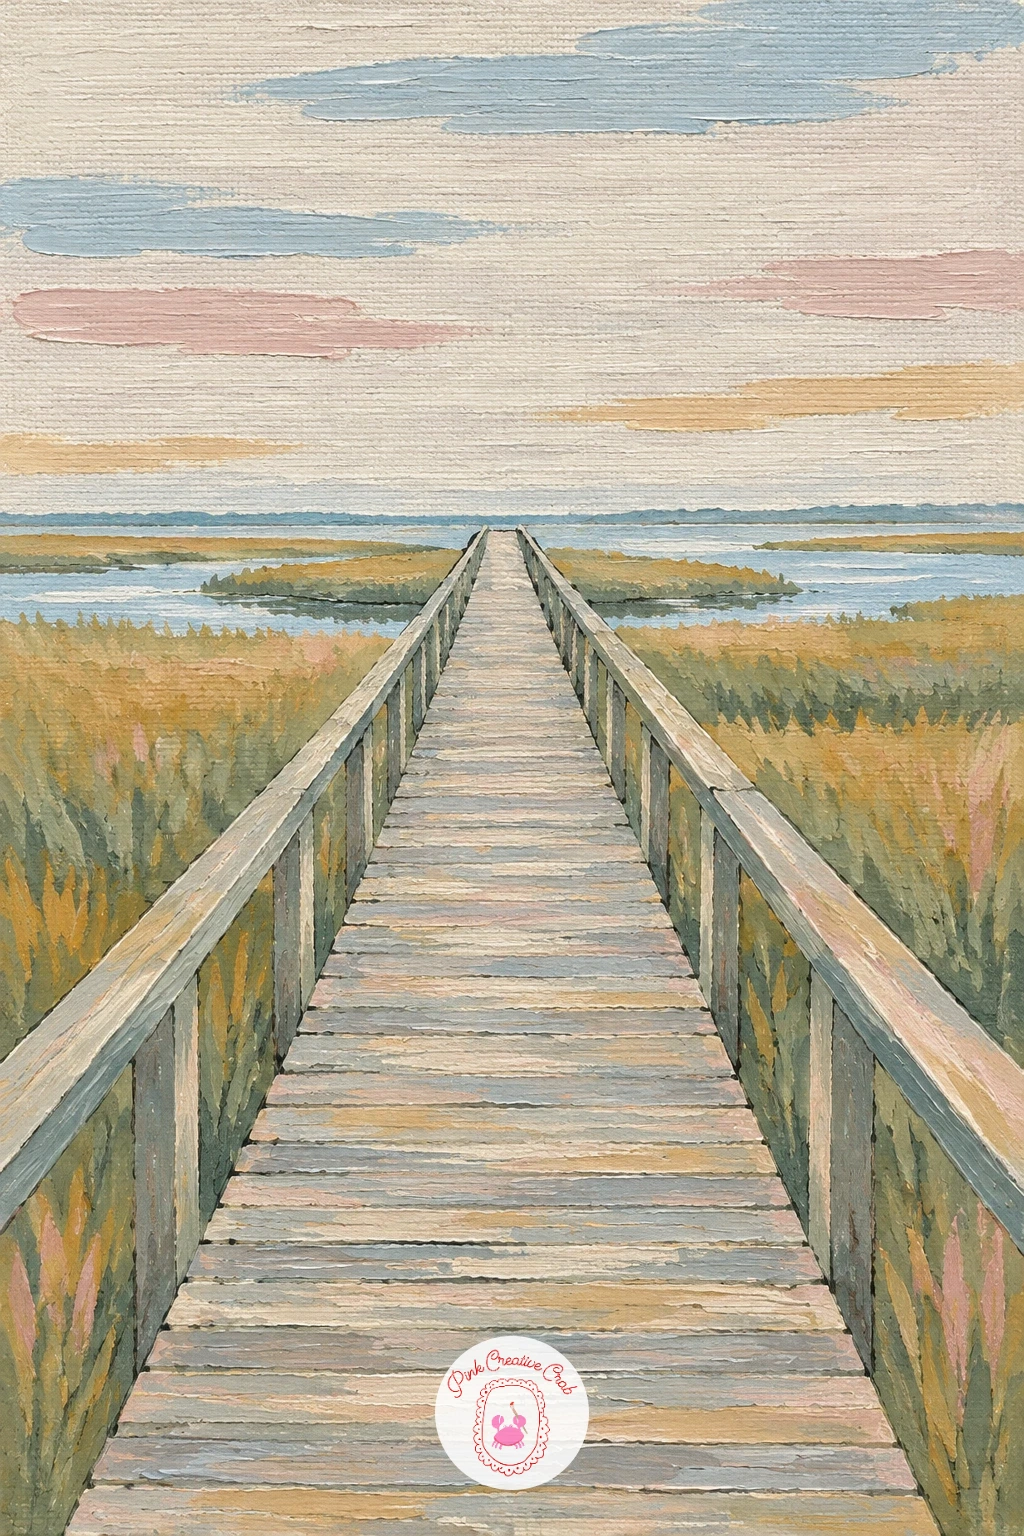
Palette: Raw Umber,Sage Green,Ochre,Pale Sky Blue
After the structural perspective of the boardwalk, a string of lanterns is a relaxing return to simple shapes stacked down a tall canvas. Paint a thin dark string running from the top edge, then hang three or four lantern shapes from it at varying heights, each a simple rounded rectangle with a small loop at the top.
Color the lanterns in warm ochre and rose with a soft glow painted around each one using a very lightly loaded brush in pale yellow, blended outward so it fades rather than stopping in a hard circle. That soft glow is the one detail that makes them read as lit rather than just hanging shapes.
Keep the background a flat deep blue or charcoal so the warm lantern colors stand out clearly against it. A few thin hanging strings without lanterns on them, left bare, add rhythm to the gaps.
No pale yellow on hand, mix a touch of white into ochre for a similar soft glow effect.
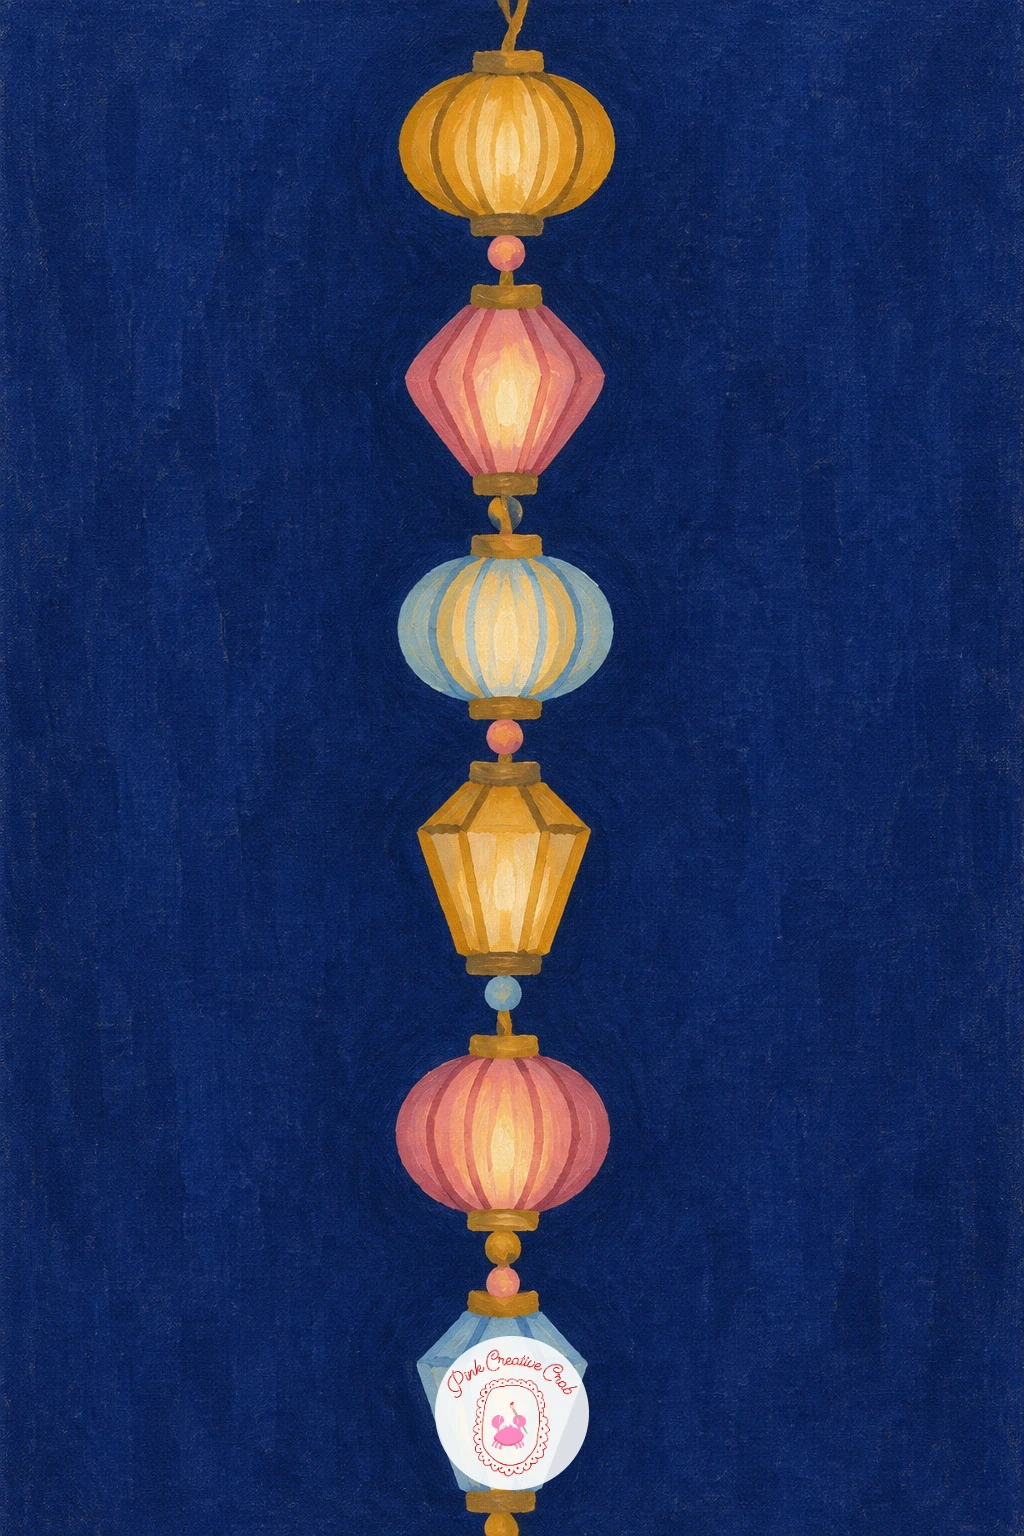
Palette: Ochre,Dusty Rose,Deep Indigo,Pale Yellow
A lily stem is a quieter subject after the lanterns, with just three blooms to carry the whole tall canvas, so getting their proportions right matters more than on a busier piece. Measure the stem length first and mark the position of each of the three blooms at roughly even thirds, then adjust slightly so one sits a touch higher than perfectly even, which keeps the arrangement from looking too mechanical.
Paint the petals as six narrow curved shapes per bloom in soft white, with a warm ochre throat and a scattering of tiny dark freckles near the center using the tip of a liner brush. Add the stem and a few long narrow leaves in sap green last, since painting them first risks smudging into the white petals.
Keep the background pale and nearly empty so the three blooms carry all the visual weight.
One tip: turn the canvas sideways while painting the thin curved petals, since dragging the brush toward you rather than across often gives a cleaner curve.
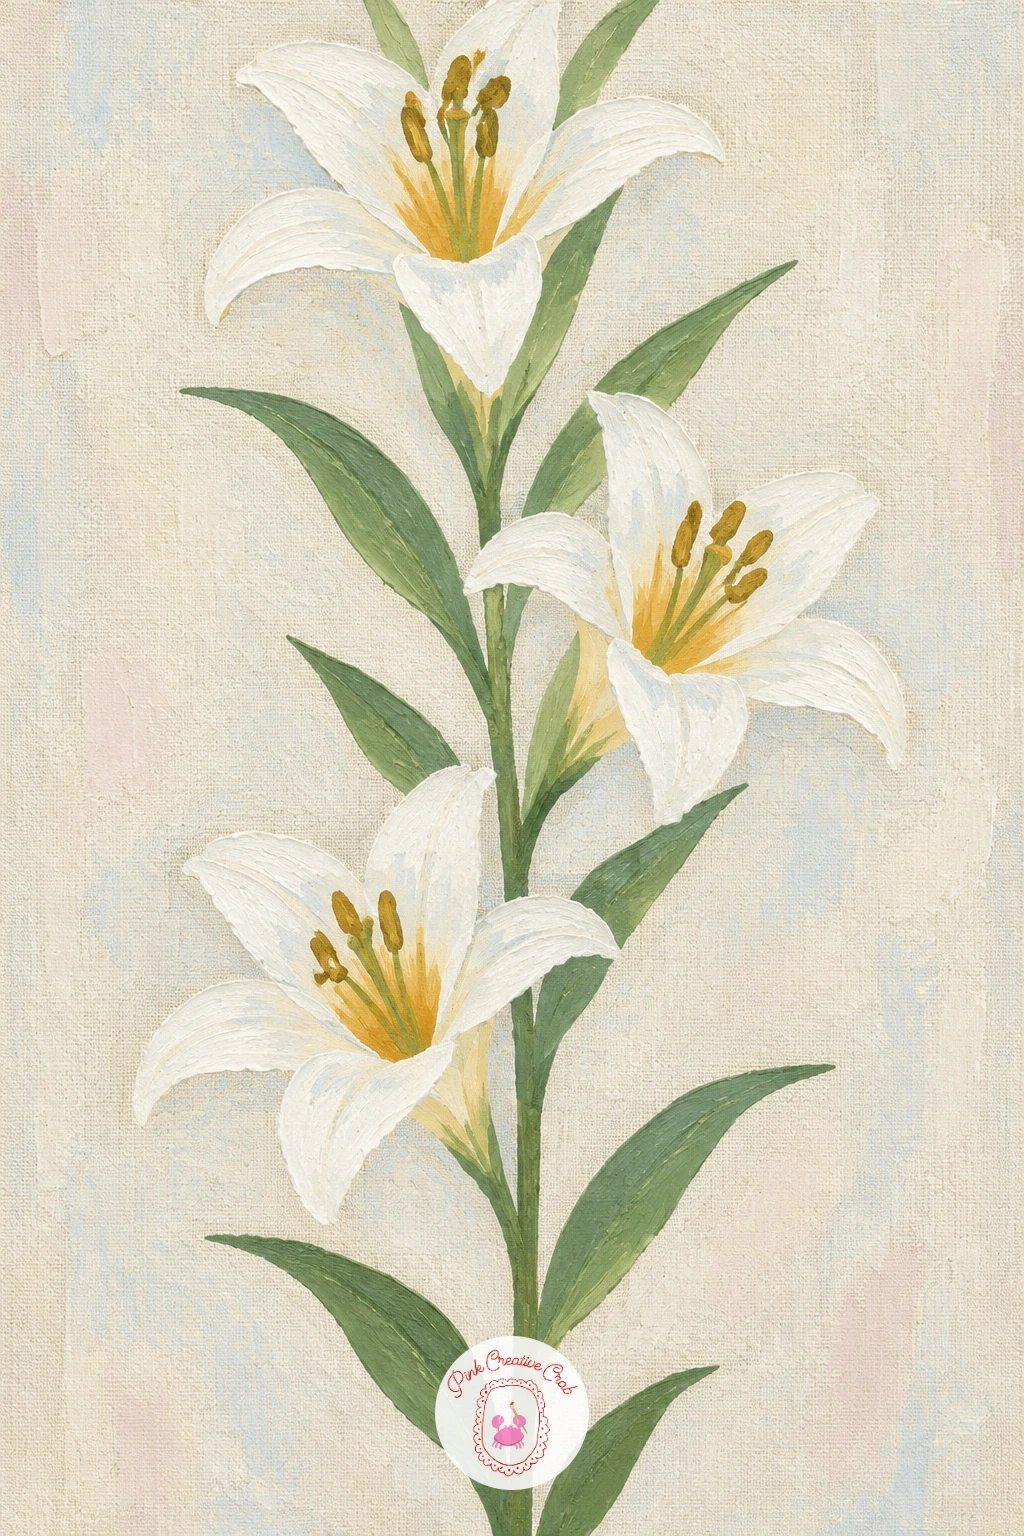
Palette: Titanium White,Ochre,Sap Green,Charcoal
Switch back to a wide canvas for a long dachshund, whose shape practically demands a horizontal format the way the skyline did at the start of this list. Block in the long sausage shaped body first in warm reddish brown, keeping the proportions generous, roughly five head lengths from nose to tail, so the stretch reads as deliberately long rather than oddly thin.
Add short simple legs along the bottom edge, a small pointed tail, and a gently rounded head with soft floppy ears at one end. Keep the body one smooth flat color block and save the only real detail, a small dark nose and two simple eye shapes, for the head.
This shape goes wrong when the legs look too long and turn the dog into something else entirely. Keep them short and stubby, barely reaching past the belly line, which is the real key to a convincing dachshund silhouette.
A simple pale background with no other elements keeps the whole focus on that long stretched body.
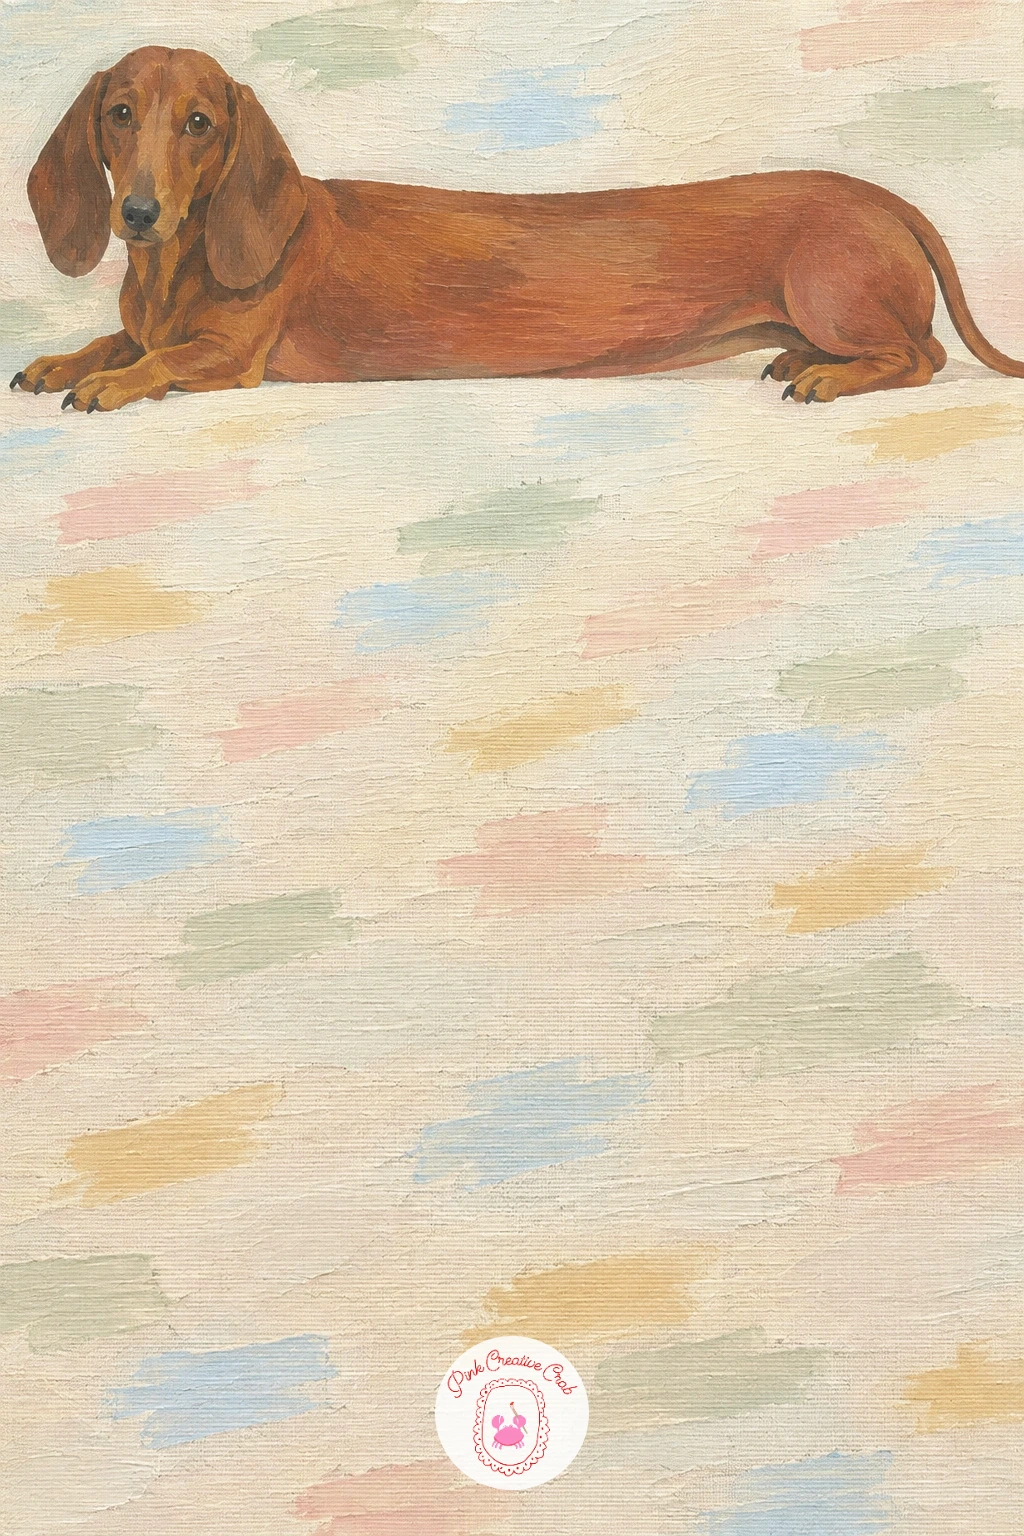
Palette: Burnt Sienna,Raw Umber,Warm Beige,Pale Sky Blue
A giraffe’s neck is the tall counterpart to the dachshund’s length, so if that one suited your wide canvas, this one is a natural pair for a tall one. Block in the long neck first as a gently curving column from the bottom edge of the canvas nearly to the top, narrower at the top near the head and slightly thicker at the base near the shoulders.
Paint the warm ochre coat with simple patchwork spots using a round brush, smaller and more densely packed near the head and a little larger lower down, which mimics how real giraffe markings taper. Add a small simple head at the top reaching toward a cluster of flat green treetop leaves painted along the very top edge of the canvas.
Keep the neck’s curve gentle rather than sharply bent, since too much curve reads as awkward rather than graceful. A straight edge held lightly against the canvas while sketching helps check the curve stays smooth.
If patterned spots feel fiddly, simplify them to soft rounded blotches rather than sharp edged shapes, which still reads clearly as giraffe markings from a normal viewing distance.
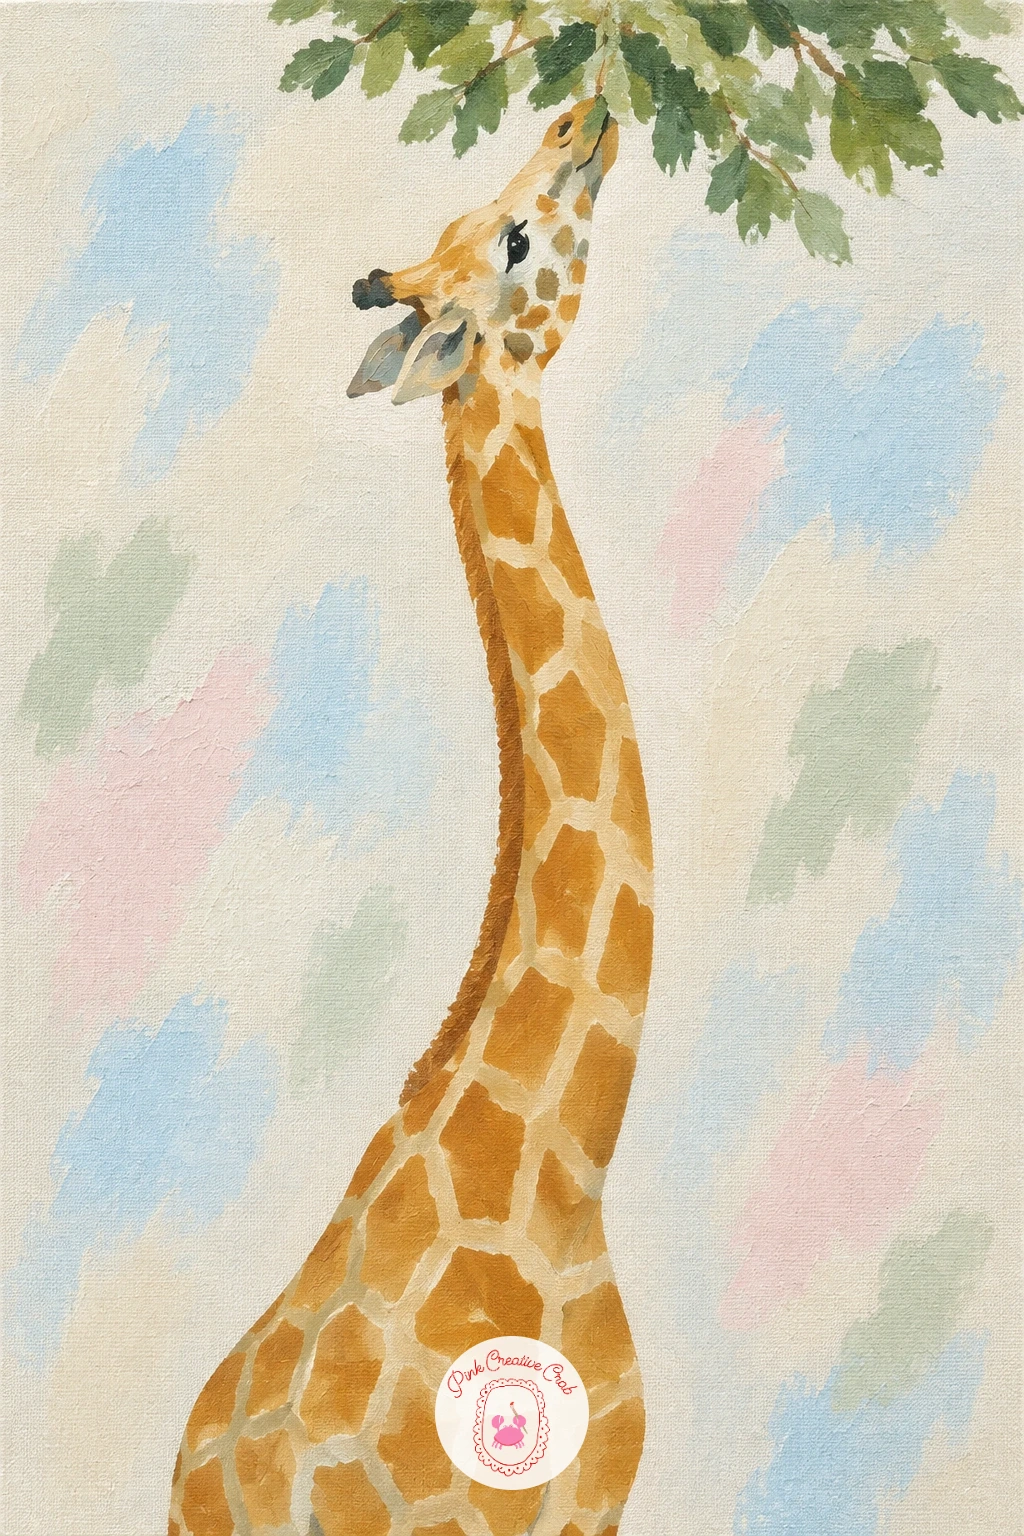
Palette: Ochre,Raw Umber,Sage Green,Pale Sky Blue
A fence line is another strong wide canvas subject, built the same way as the earlier townhouse row but softened all over with climbing flowers. Paint a simple horizontal fence first, flat wooden posts and rails in warm weathered grey or ochre, running the full width of the canvas at a consistent height.
Once the fence is dry, paint trumpet shaped morning glory blooms in soft blue and purple climbing up and along the rails, with simple heart shaped leaves and thin curling vine tendrils filling the gaps between blooms. Cluster the flowers more thickly in two or three spots along the fence rather than spacing them with perfect evenness, which keeps the climb looking natural.
Painting the fence before the flowers, and keeping the fence itself a flat simple shape, is what saves this piece from looking cluttered, since all the visual activity can then live in the flowers alone.
A thin dry brush line of lighter grey along the top edge of each post suggests worn wood without extra detail work.
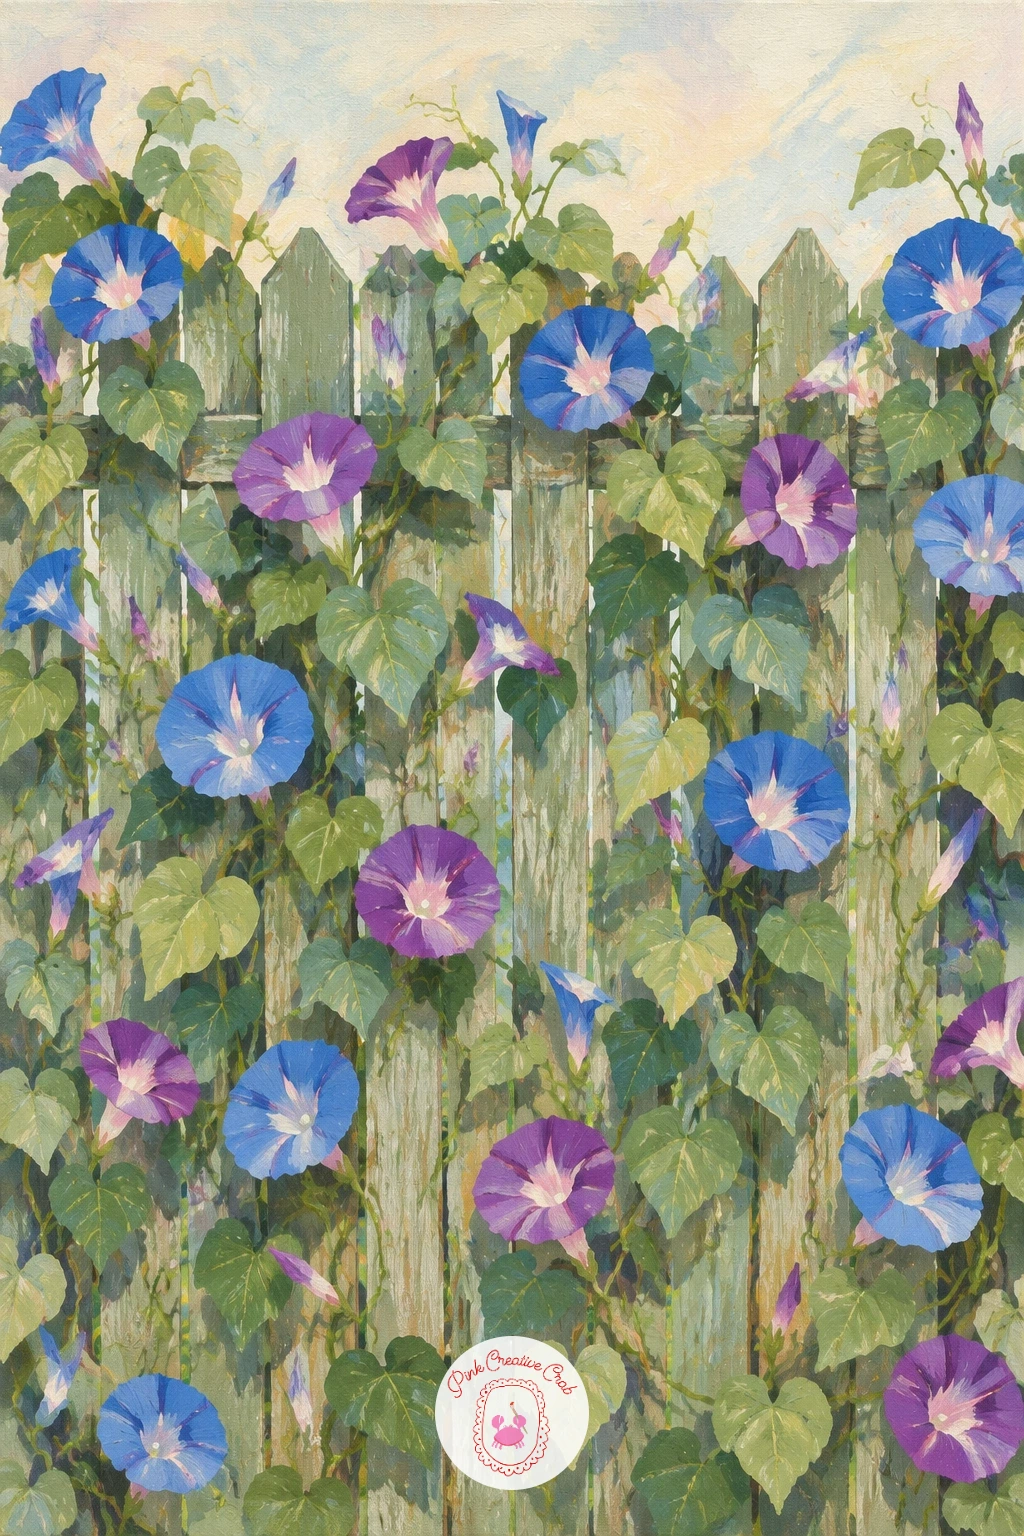
Palette: Weathered Grey,Sky Blue,Violet,Sage Green
A lamppost pairs the vertical strength of the earlier flower stems with a bit of atmosphere, since rain and glow add mood without adding real complexity. Paint the lamppost itself as one thin dark vertical line running most of the canvas height, topped with a simple lantern shape glowing in warm ochre.
Surround the glowing lantern with a soft halo of pale yellow light, blended outward with a lightly loaded brush, then add thin diagonal white and pale blue rain streaks across the whole canvas using quick single strokes of a liner brush dragged at a consistent angle. Keeping every rain streak at the same angle is what sells the rain as a single passing shower rather than a scattered mess of lines.
Paint the ground below in dark wet pavement tones with a soft reflection of the glow beneath the lamp, smudged downward with a dry brush.
If rain streaks come out too heavy, a clean damp brush dragged once over each line lightens it without removing it entirely.
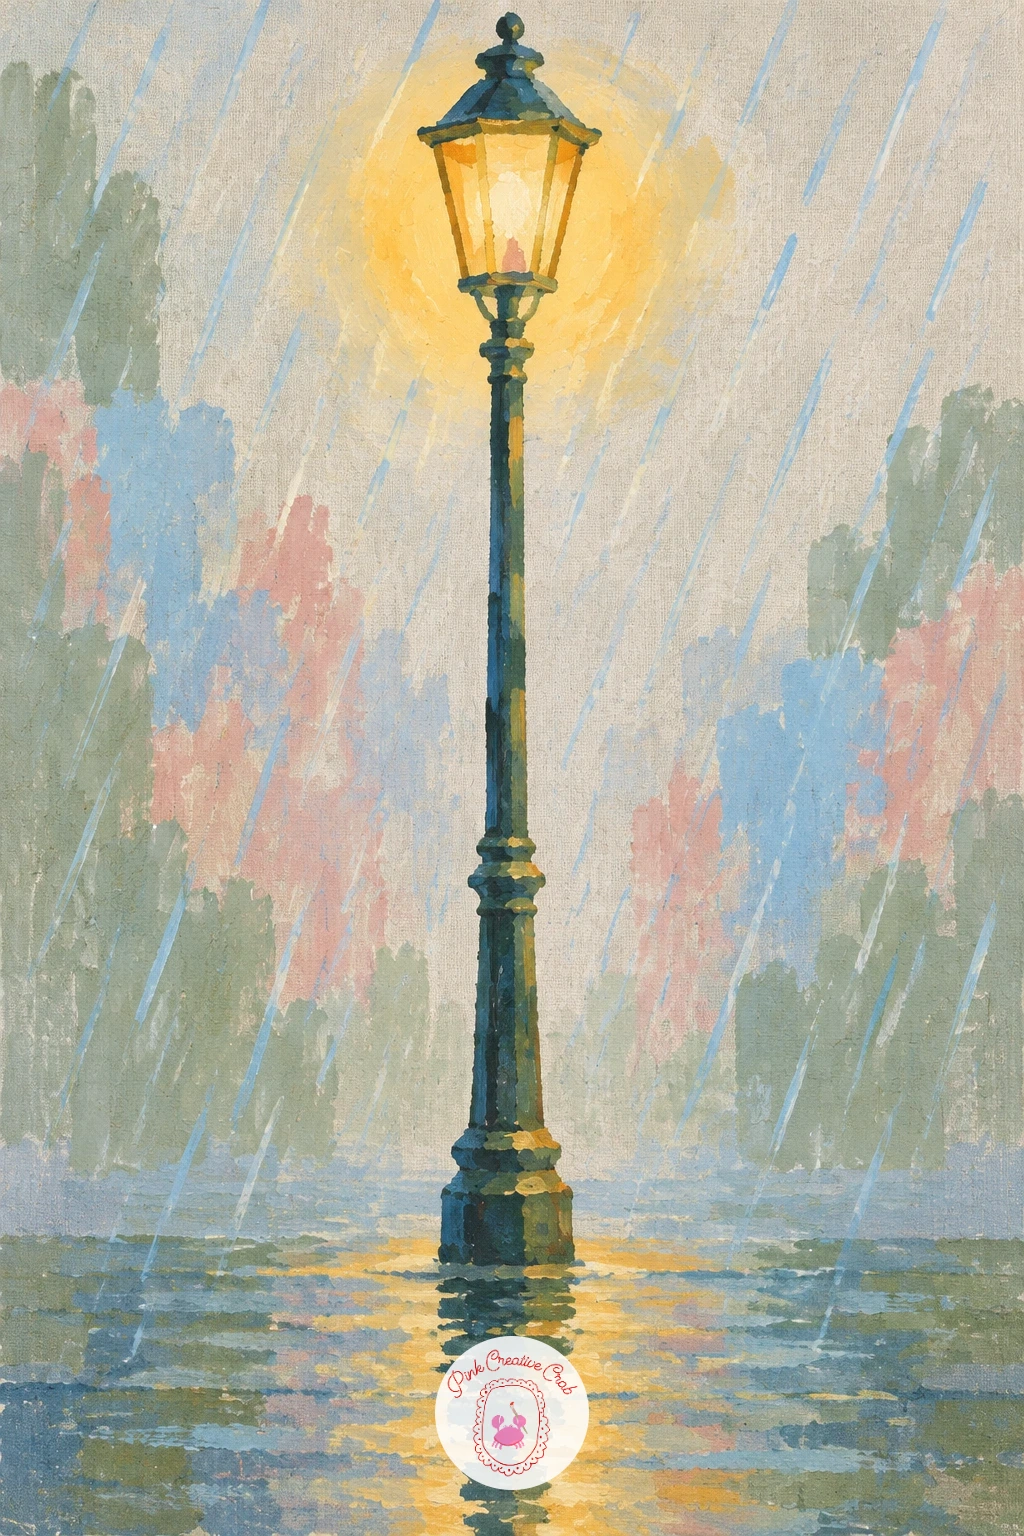
Palette: Payne’s Grey,Ochre,Pale Yellow,Pale Blue
Vineyard rows give the wide canvas one more strong perspective exercise, this time with repeating diagonal lines rather than the single converging point of the boardwalk. Paint the sky and distant hills first in soft pale blue and sage, then block in the rows of vines as repeating diagonal bands running from the bottom corners toward a shared point somewhere near the horizon.
Keep every row’s angle consistent, checking each new row against the one before it rather than eyeballing from scratch each time, since even a slightly mismatched angle breaks the sense of an orderly field. Add small rounded dabs of green along each row for the leafy vines, denser in the foreground and sparser toward the distance.
A scattering of small dark dots for grape clusters along the nearest row or two adds detail exactly where the eye looks first, while the distant rows can stay simple green dabs.
No ruler for checking the row angles, hold your brush handle up against the canvas as a quick straight edge to compare.
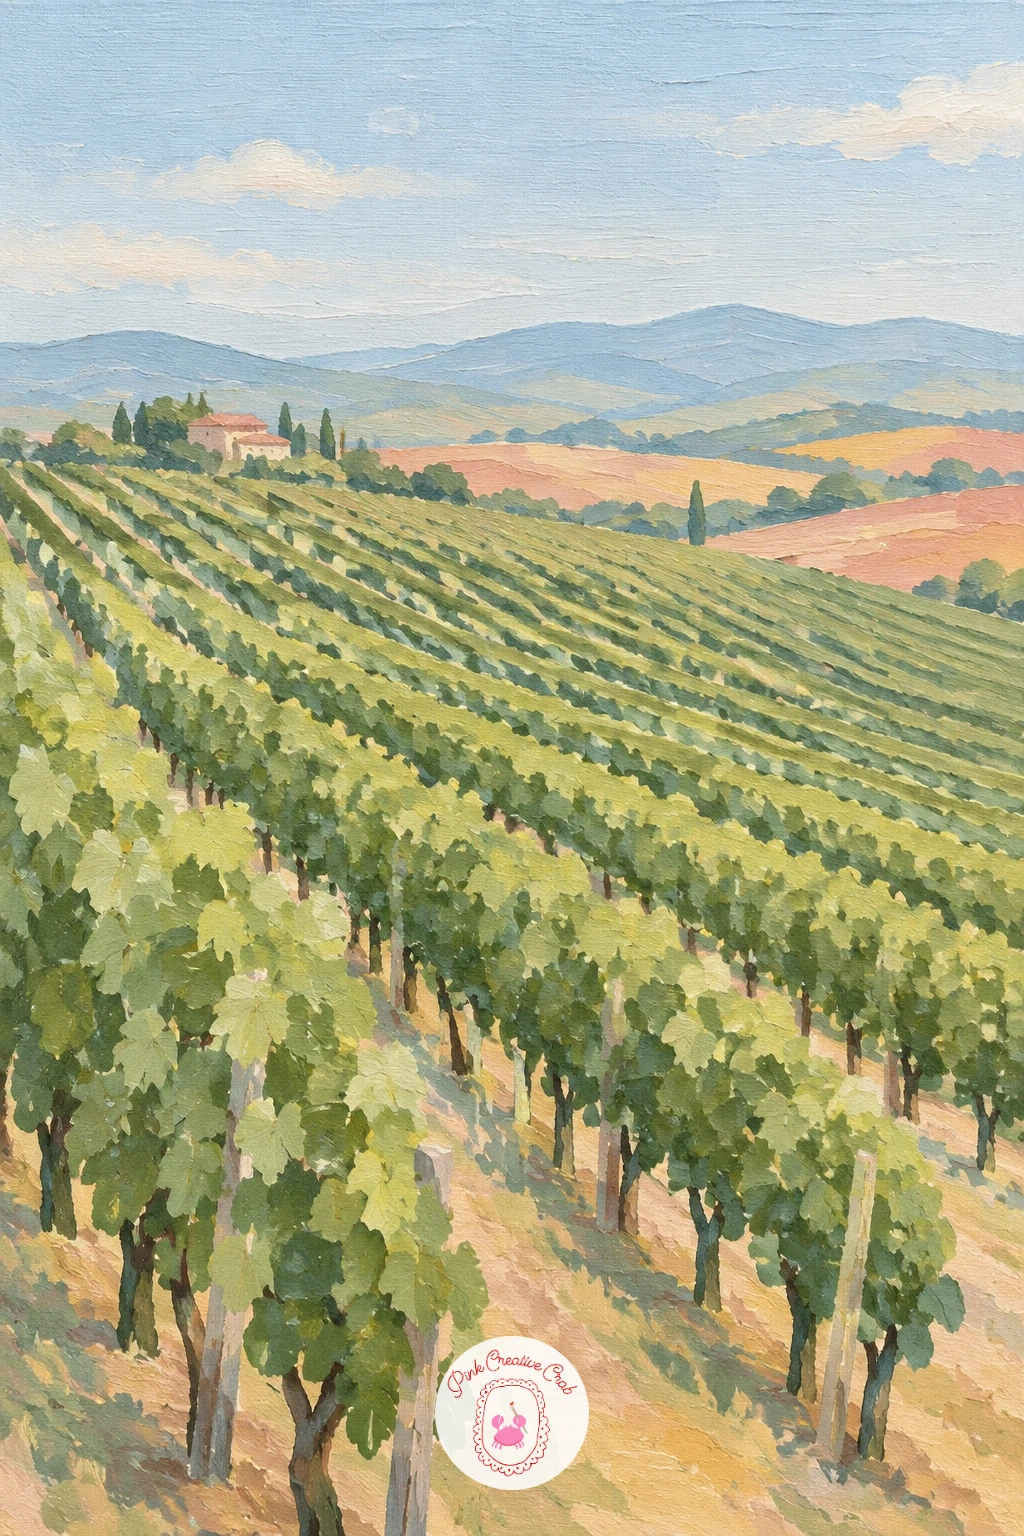
Palette: Sage Green,Deep Green,Pale Sky Blue,Deep Purple
Close out with a kelp strand, which takes the same long upward sweep as the foxglove at the start but underwater, with a cooler palette and a little movement added by fish darting past. Paint a deep blue green water background first, darker near the bottom and paler near the top, then add one long wavy kelp strand rising the full height of the canvas with a gentle S curve rather than a straight line.
Build the kelp from a series of overlapping oval leaf shapes along the strand, largest near the base and smaller near the top, using a round brush loaded with olive green. Once dry, add three or four small simple fish shapes swimming past at different depths, each just a curved body, a tail triangle, and a dot for an eye.
Scatter the fish at different heights and facing slightly different directions rather than lining them up, which keeps the water feeling alive rather than staged.
A few soft white dabs scattered lightly through the water suggest floating particles and finish the scene without extra effort.
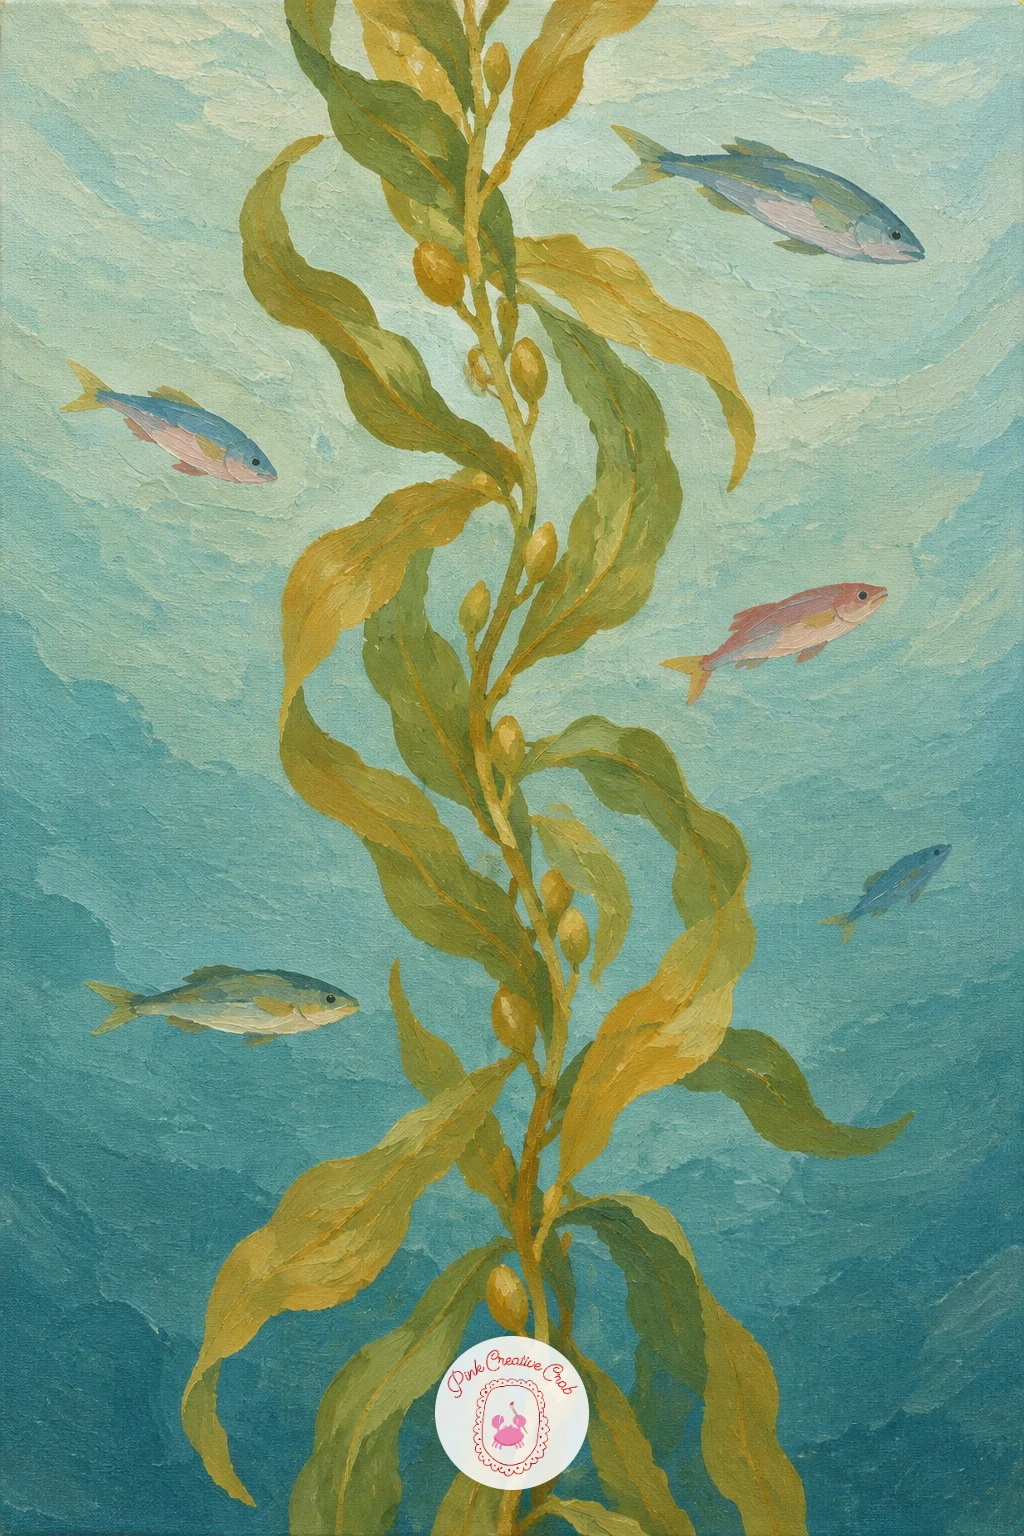
Palette: Deep Teal,Olive Green,Pale Aqua,Ochre
What to Do Next
Pick whichever shape matches the canvas you already have, tall for a stem or a trunk, wide for a skyline or a river, and block in the simplest flat shapes first before any detail work. A pale ground coat and one confident pencil guideline will carry you most of the way there.
Frequently Asked Questions
What size canvas works best for long canvas painting ideas?
A ratio of about three or four to one, such as 12 by 36 inches or 10 by 40 inches, gives tall stems and wide skylines enough room to stretch without feeling cramped at either end.
Should a tall subject or a wide subject use a different canvas orientation?
Yes, upright subjects like stems, trunks and figures need a vertical canvas, while horizontal subjects like skylines, rivers and rows need the canvas turned sideways for the composition to work.
How do you keep a long thin shape like a stem or a neck from looking wobbly?
Sketch a single straight or gently curving guideline first in pencil before any paint goes on, then check the shape against that line as you build it up, rather than freehanding the whole length at once.
What acrylic colors suit this long narrow style best?
Soft sage green, sky blue, dusty rose and warm ochre against a pale background keep the palette calm and let the subject’s long shape stay the main focus of the painting.
Can these long canvas painting ideas be finished in one sitting?
Most of them can, especially the simpler flower stems and single subjects, though pieces with more texture work like the waterfall or redwood trunk go more smoothly across two short sessions so each layer dries fully.
Have any thoughts?
Share your reaction or leave a quick response — we’d love to hear what you think!
-
 0
-
0
-
0
-
0
-
0
-
0


