

Nature drawing in winter means slowing down enough to notice the small things: a leaf held still in ice, a line of tracks heading off into the trees, a bird fluffed up against the cold. Every page below starts from one of those quiet moments on a walk, and every one fits easily into a single sitting with a fineliner and a little paint.
Work through them in any order you like, from the simple studies near the top to the busier scenes further down. Each idea tells you how to build the page from first line to last wash, where it tends to go wrong, and what to do about it, so you can open your sketchbook and start today.
Using these images: free for personal projects such as printing, coloring, cards, journals and gifts. Handmade items that include them may be sold up to 30 pieces per design. More than that is commercial use and is not permitted, and neither is selling or sharing the images themselves or passing them off as your own. Please ask before any other use.
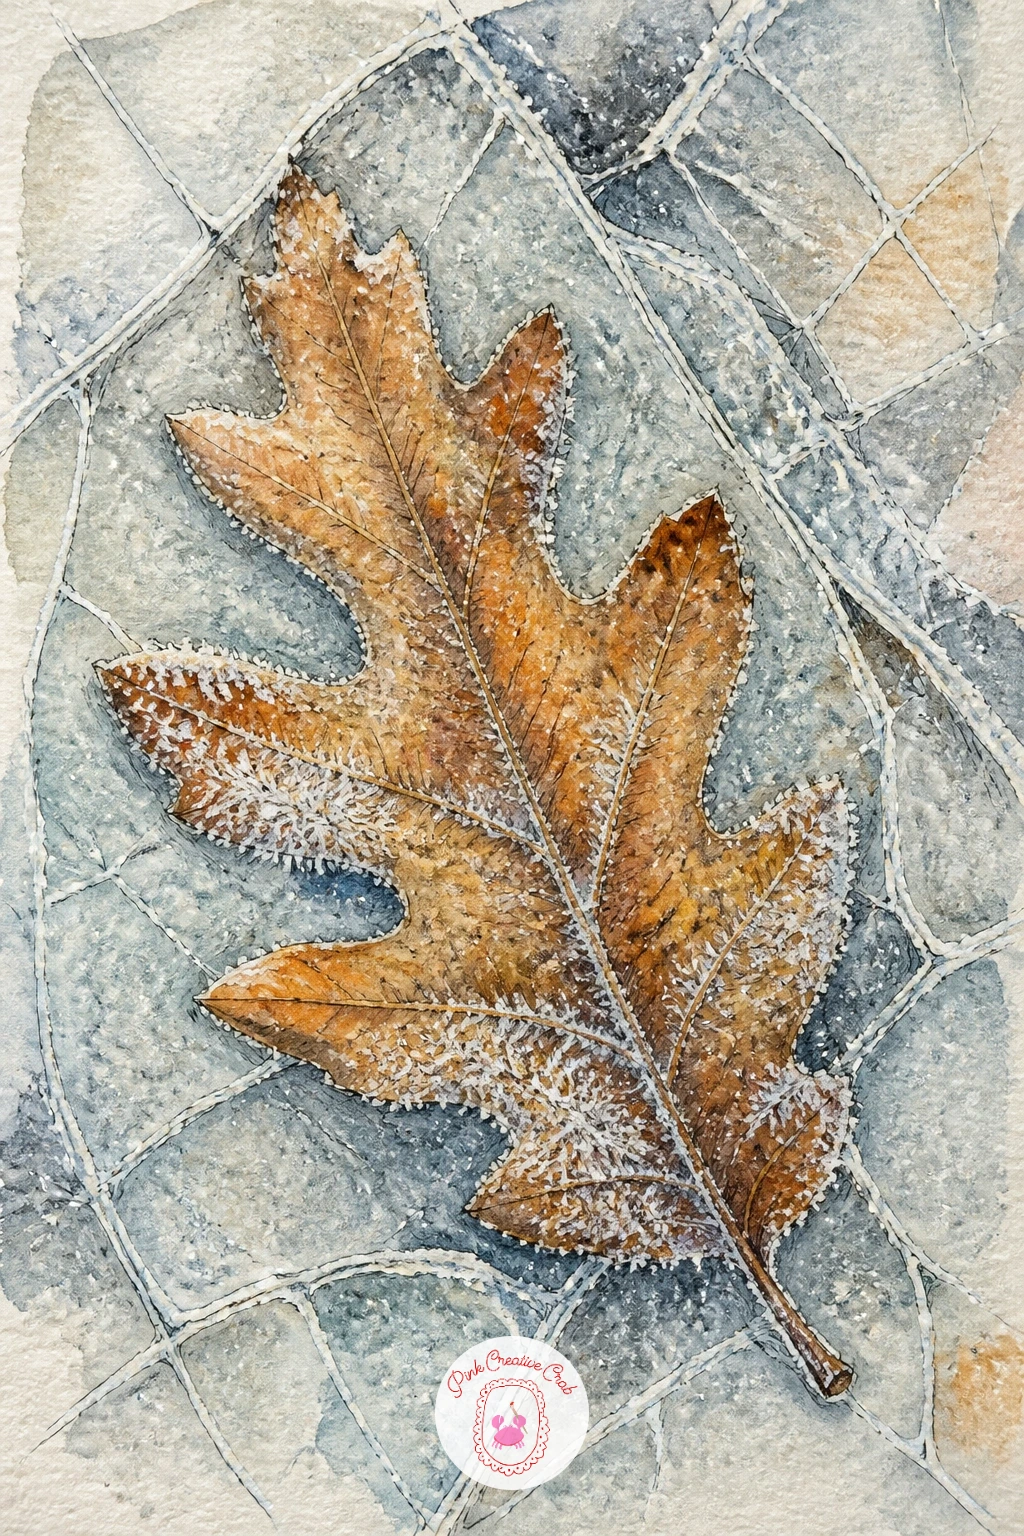
Start a nature drawing practice with something you can find in any puddle after a cold night: a single oak leaf trapped under a skin of ice. Pencil the leaf shape first, keeping the lobes slightly uneven since no real leaf is symmetrical, then ink the outline and veins with a fine black fineliner before erasing the pencil.
Lay a pale ochre and rust watercolor wash over the leaf, then paint the surrounding ice as a cool grey blue with a dry brush dragged in short strokes to suggest cracks. The place this goes wrong is making the ice too smooth and flat looking, so leave small unpainted patches of white paper showing through for the glare of light on frozen water.
Measure the leaf against an imaginary circle of ice around it before you start inking, so the leaf sits a little off-center rather than dead in the middle, which feels more like something you actually spotted underfoot. Add a few colored pencil scratches of white or pale blue once the wash is dry to sharpen the crack lines.
If you do not have colored pencil on hand, a white gel pen does the same job over dry watercolor.
You Will Need
- white gel pen
Palette: Burnt Sienna,Payne’s Grey,Raw Umber,Titanium White
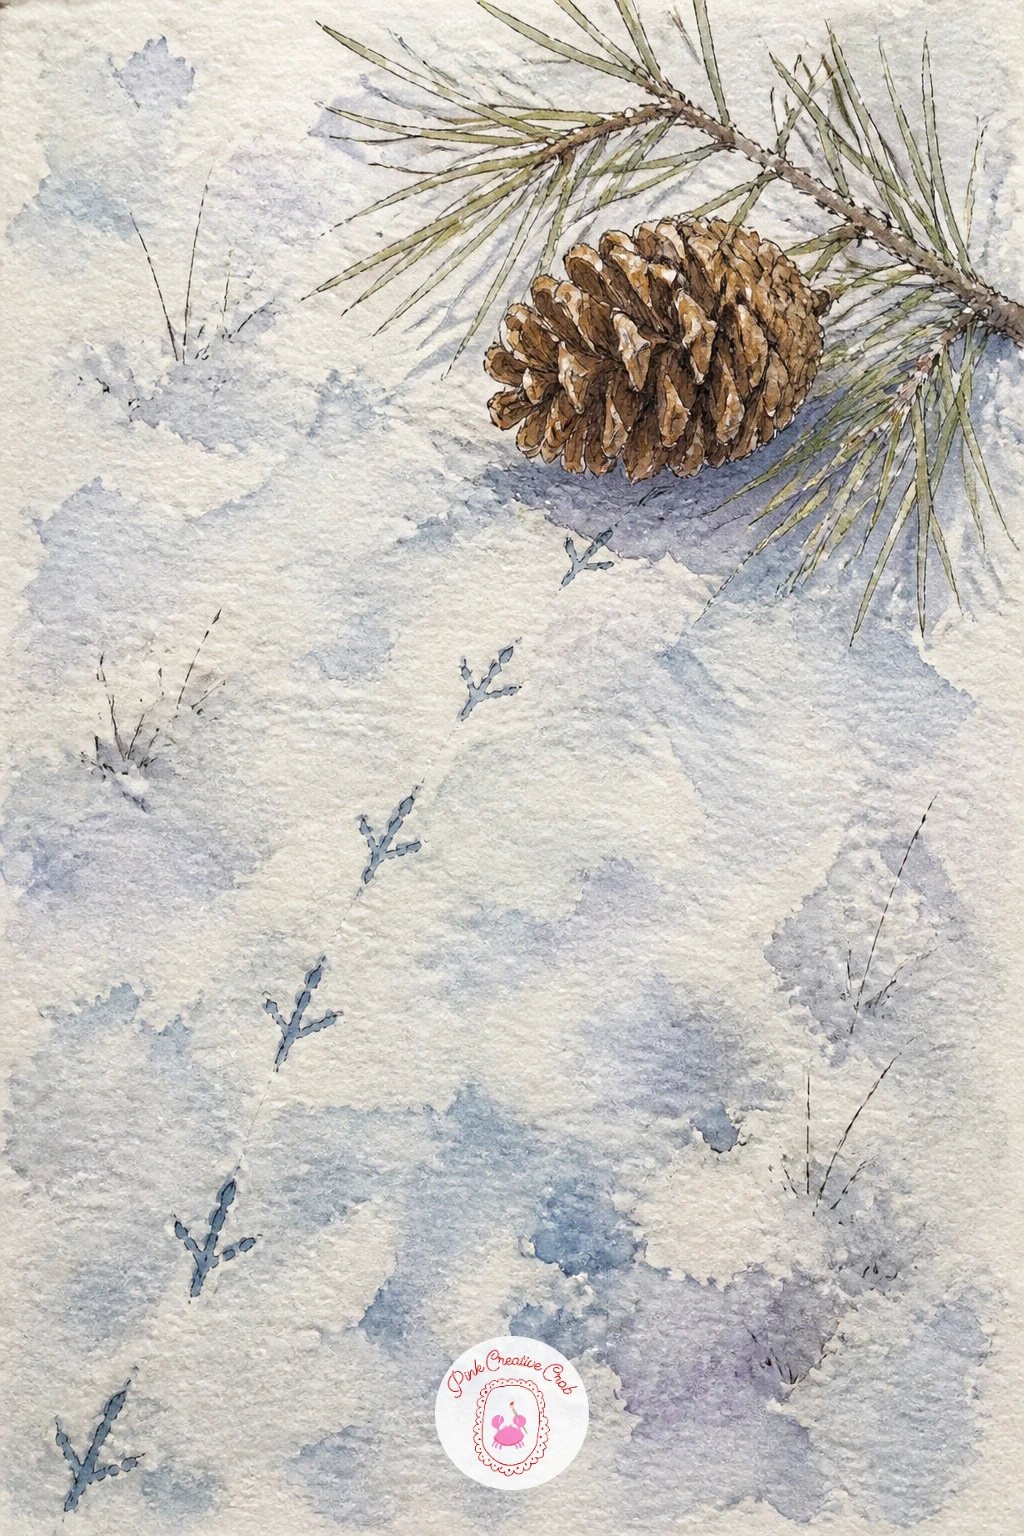
Bird tracks make a satisfying next subject because the whole page is really about one simple path moving across snow. Pencil in a loose diagonal line of small Y shaped prints, spacing them unevenly as a real bird would, leading toward a fallen pinecone resting in the lower corner of the page.
Ink the tracks with quick confident fineliner marks rather than careful outlines, since hesitant lines make tracks look stamped rather than walked. Paint the snow as a very pale blue grey wash around the tracks, leaving the tracks themselves as bare white paper, then add the pinecone in warm brown watercolor with darker ink hatching between its scales.
The eye level here sits low, almost at snow height, which is what makes a few tracks and one pinecone feel like a whole scene rather than a diagram. Keep the light coming from one side so each track print catches a thin blue shadow on its lower edge.
If your fineliner is too fine to read from a distance, switch to a slightly thicker pen for the tracks only and keep the fine one for the pinecone scales.
Palette: Cerulean Blue,Raw Sienna,Payne’s Grey,Titanium White
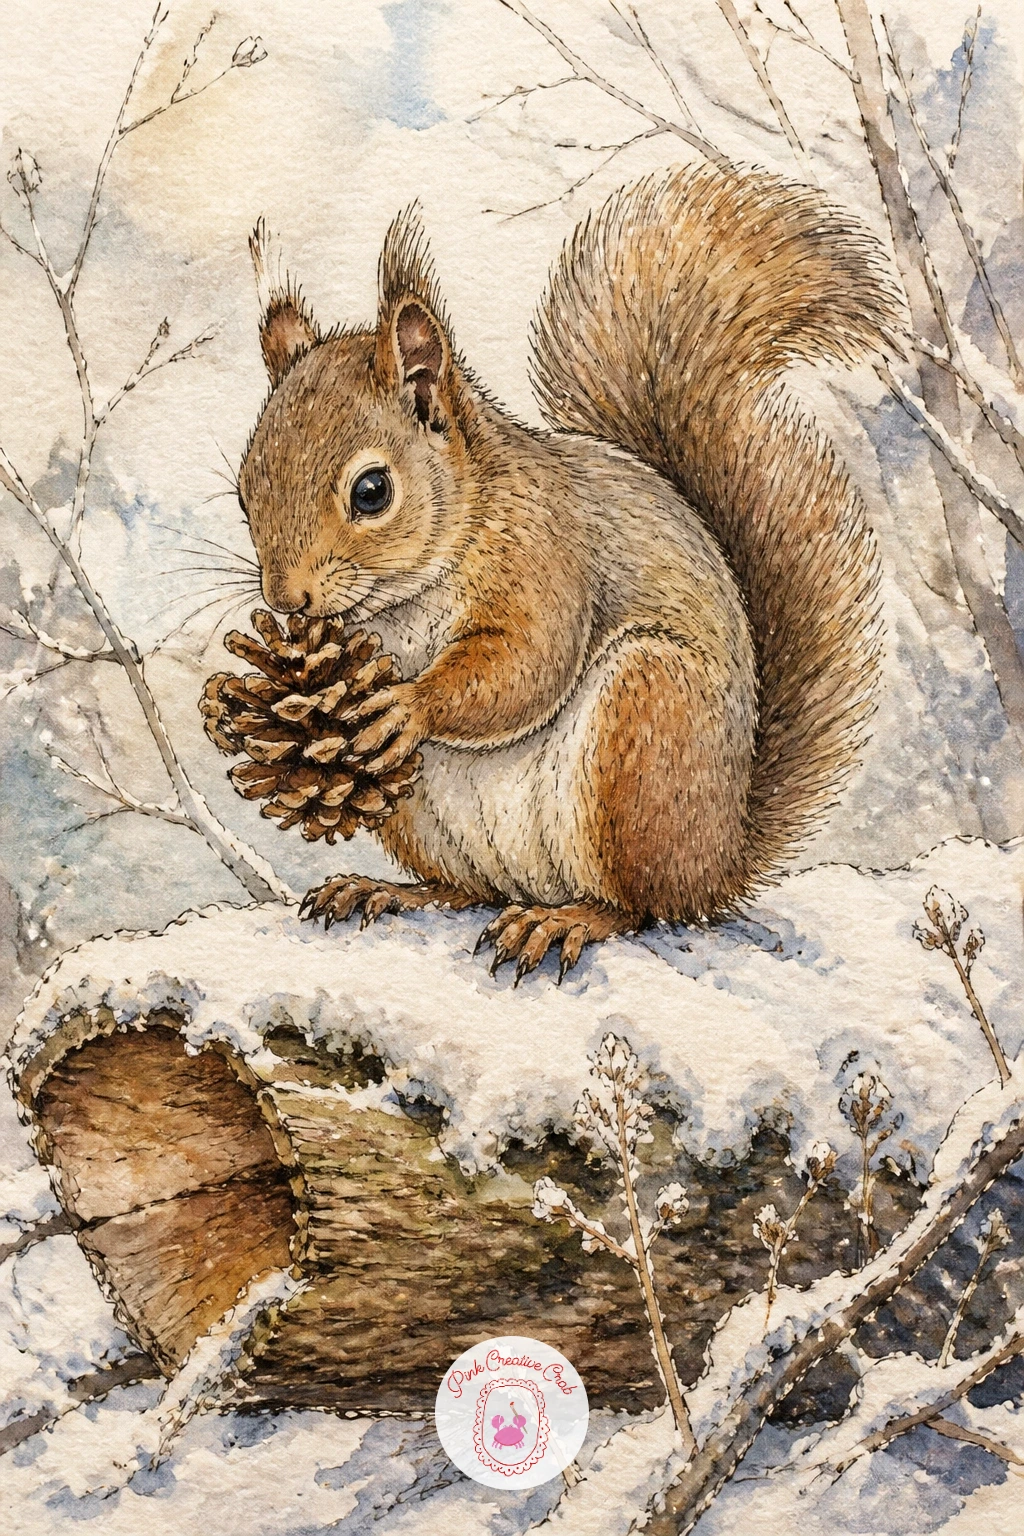
Move from tracks to the animal that might have left them, with a squirrel perched on a snowy log working through an open pinecone held in its front paws. Block in the body as two overlapping ovals, one for the haunches and one for the chest, before adding the head, ears and that full curling tail.
Ink the outline in one steady pass, then add short fineliner strokes along the tail and back for fur direction rather than solid shading. Watercolor the body in warm grey brown, leave the belly paler, and paint the log underneath in cool brown with a line of white gouache or left paper for the snow sitting along its top edge.
Squirrels go wrong most often in the tail, which ends up too thin or too straight, so sketch it as a thick comma shape before you refine the fur lines. If gouache is not in your kit, a white colored pencil pressed firmly over the dry watercolor gives the same crisp snow edge.
Keep the pinecone small and let the paws do the work of showing what the squirrel is doing.
You Will Need
- white gouache or white colored pencil
Palette: Burnt Umber,Raw Sienna,Payne’s Grey,Titanium White
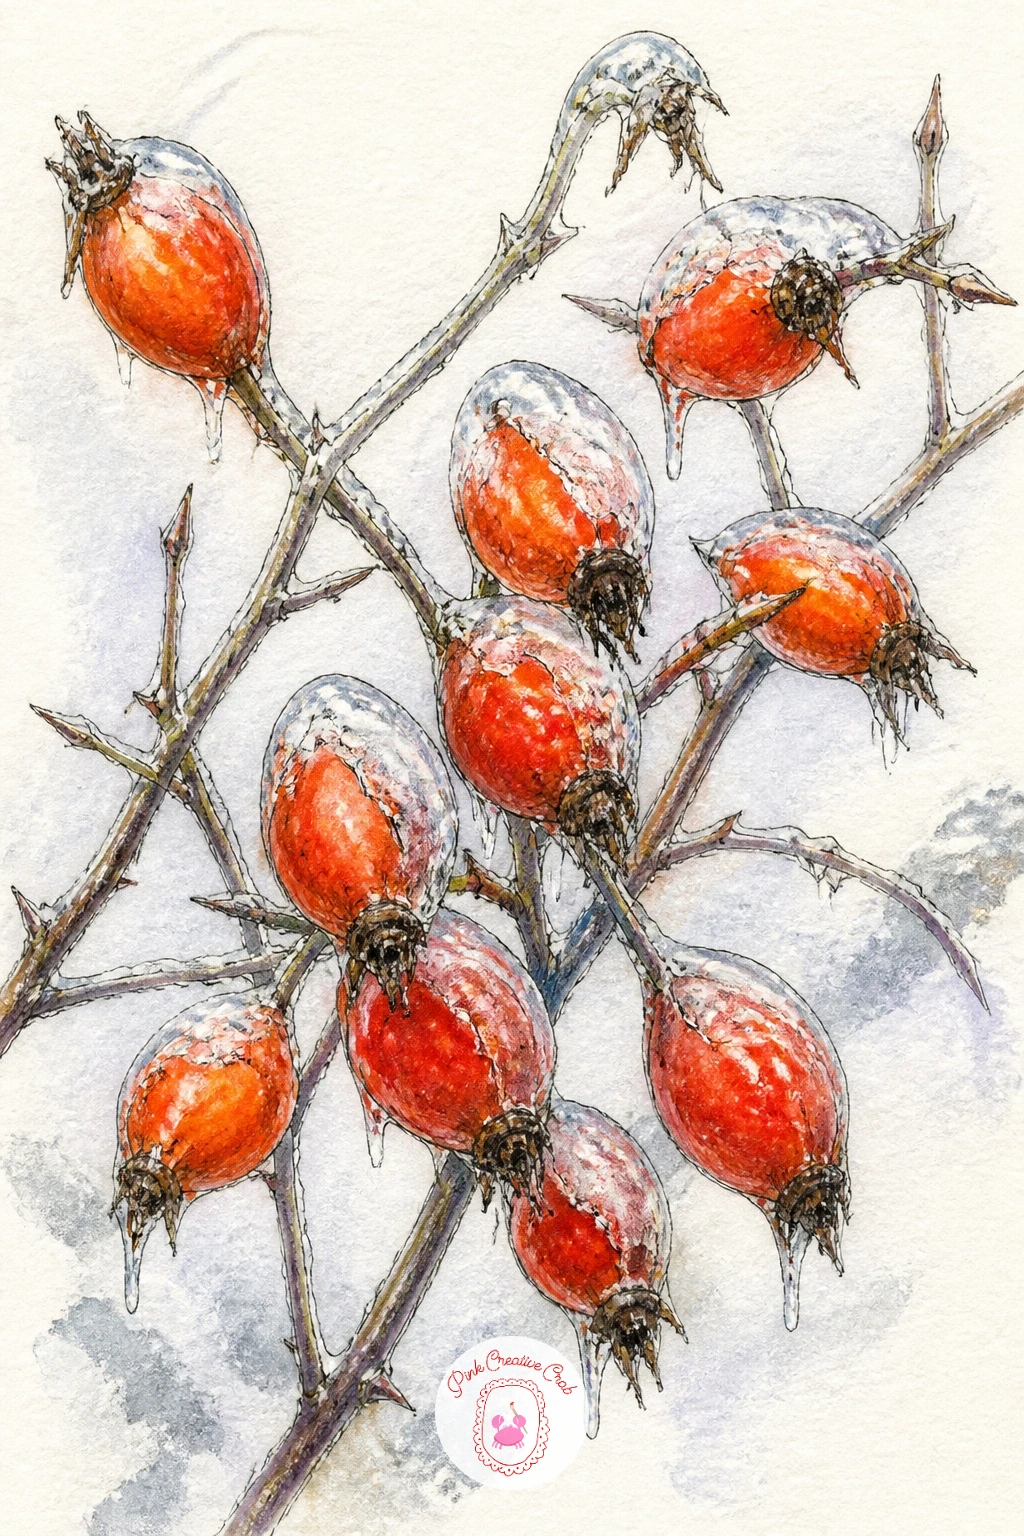
Rose hips hanging on a bare hedge after a frost give you strong color against a quiet background, which makes them a good small study. Draw the bare stems first as a loose zigzag of thin branches, then add the hips as clusters of small ovals, varying their size so the cluster reads as natural rather than stamped.
Ink the stems with a fine line and the hips with slightly heavier outlines, since they sit forward of the twigs. Wash the hips in bright red orange, let that dry fully, then glaze a thin cool grey wash only over the tops and one side of each hip to suggest the ice coating, leaving the lower half of each hip glowing red underneath.
The trick with any iced surface is restraint: one thin wash reads as ice, a second heavy one just looks like grey paint over red. If you want the ice to catch more light, scratch tiny white lines into the dried wash with the tip of a craft knife or the edge of a fingernail.
Keep the hedge stems sparse so the hips stay the clear subject of the page.
Palette: Cadmium Red,Burnt Orange,Payne’s Grey,Sap Green
A wren tucked into a bramble tangle is tiny, round and fairly forgiving to draw, which makes it a good subject once you want a bird with more character than the tracks earlier. Start with one small round body shape, tail cocked upward at the back, and keep the whole bird no bigger than a thumbnail on the page.
Ink the bird first in fine confident strokes, barring a little texture on the wing with short diagonal lines, then build the bramble around it with thorny overlapping stems in darker ink. Watercolor the wren in warm brown with a paler buff throat, and wash the brambles in cool grey green with white left bare along their frosted edges.
Wrens go wrong when the tail is drawn too long and flat, so keep it short and tilted sharply upward, almost perpendicular to the body. For reference, look at how round and compact real wrens look against a twig, barely bigger than the branches around them.
Swap watercolor for colored pencil entirely if you want a quicker page, building the fur tones in layered hatching instead of washes.
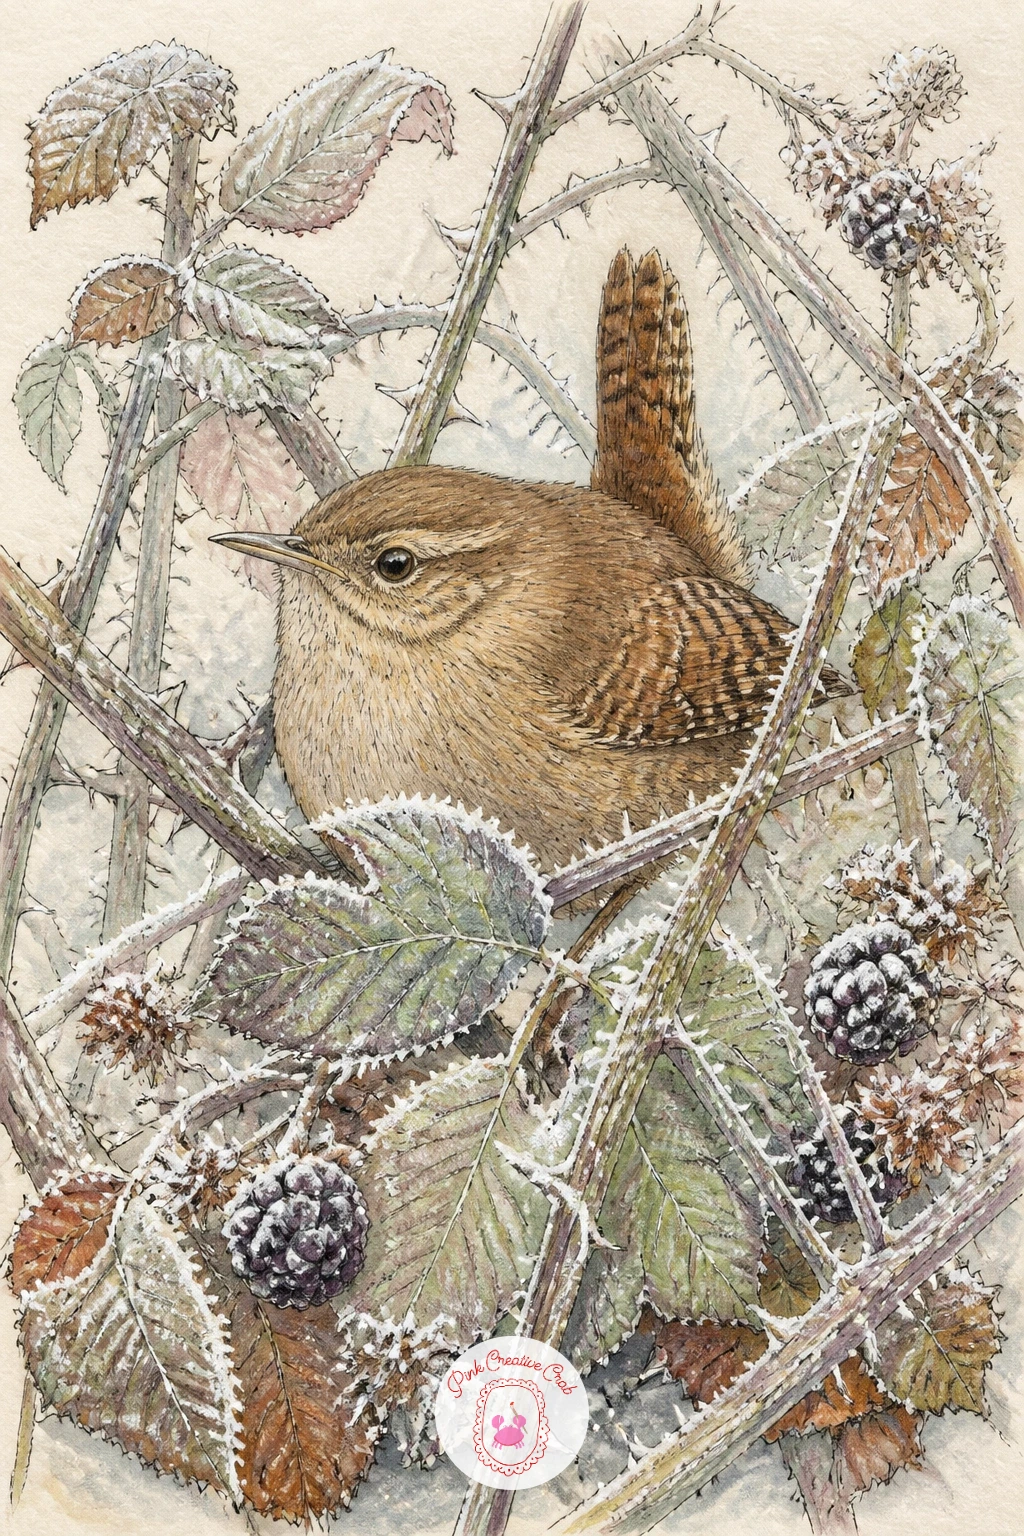
Palette: Burnt Sienna,Raw Umber,Sap Green,Titanium White
Look at reference photos of wrens from the side with the tail cocked up, since that silhouette is what makes the bird instantly recognizable even at a small size.
A single snowdrop pushing up through snow next to a mossy stone is one of the simplest pages on this list and a nice one if you want a quick win. Pencil the stone as a rounded lump first, then add the snowdrop stem rising beside it with the drooping white bell at the top and two narrow leaves at the base.
Ink the snowdrop with a light touch since its petals are delicate, then paint the bell in the palest green white wash, leaving most of the petal as bare paper with just a thin green line marking each petal tip. Wash the stone in grey brown and dab patches of bright mossy green with a small round brush, then scatter a little salt into the wet green paint for a mottled lichen texture before it dries.
The stone usually ends up looking too smooth, so once the salt lifts, flick the dried grains off to reveal a stippled texture that reads as rough old stone. If you do not have salt on hand, lifting small dots of wet paint with a dry brush gives a similar broken texture.
Keep the snow around both subjects as plain white paper so the green and white stay the brightest things on the page.
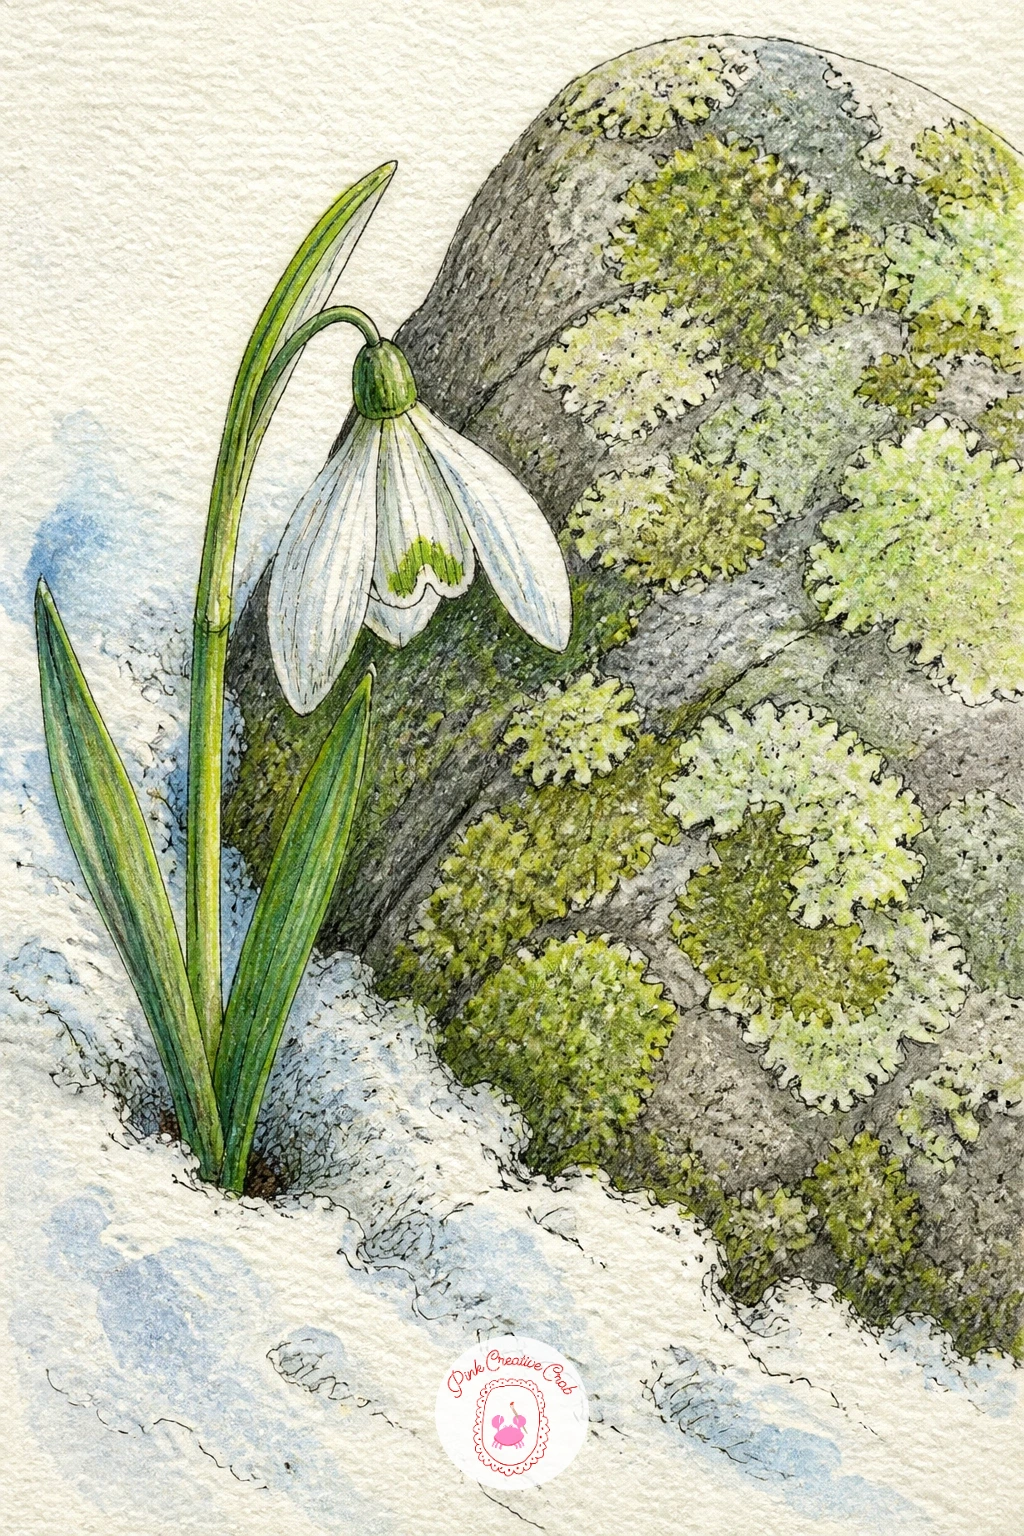
You Will Need
- table salt for texture
Palette: Sap Green,Raw Umber,Payne’s Grey,Titanium White
Few things reward careful observation like a spider web frozen mid-air between dry grass stems. Pencil in three or four tall curving grass stems first, spaced unevenly, then lightly map the web’s main spokes radiating from a center point before adding the spiral threads connecting them.
Ink the web with a very fine pen and a steady hand, working from the center outward so the spiral stays even, and let the grass stems be looser and less precise by comparison. Watercolor the grass in pale straw and warm brown, and leave the web itself as bare white ink lines, touching a tiny bit of pale blue grey wash only at the thickest ice-coated joins.
Webs fall apart visually when every thread gets equal weight, so thicken the ink line slightly on the main spokes and keep the spiral threads hair thin. For a forty minute version, catch the low winter light by adding a faint warm yellow wash behind the web on one side, which makes the frost on the threads seem to catch the sun.
If ink smudges on wet paper, let the pencil layout dry completely and ink only once everything else is finished.
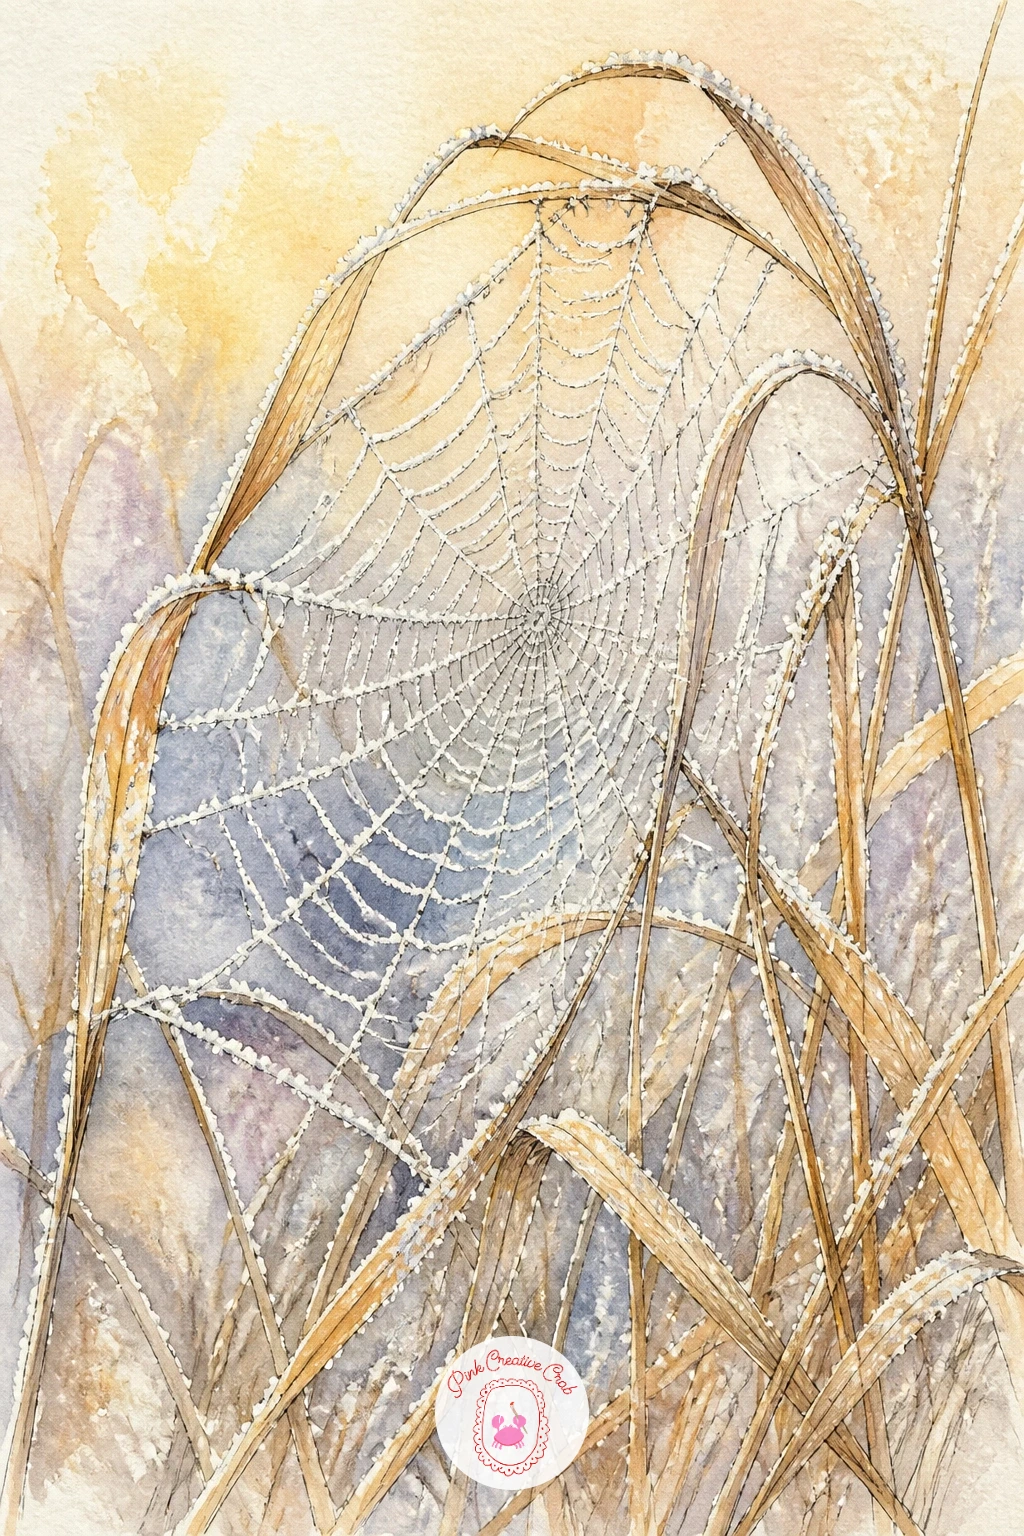
Palette: Straw Yellow,Raw Umber,Payne’s Grey,Titanium White
Following the earlier bird tracks, try a larger set of deer tracks peeling off a snowy path into the trees, which gives you a chance to draw a little depth into the page. Lightly pencil a path running across the lower third of the paper, then mark a line of narrow split hoof prints curving away from it toward a few simple tree trunks in the distance.
Ink the near tracks with slightly heavier lines than the ones further off, since closer things read darker and bolder to the eye. Wash the snow in pale blue grey with the path itself left almost pure white, and paint the distant trees as soft grey brown shapes with less detail the further back they sit.
Perspective is what carries this page: keep the tracks getting smaller and closer together as they recede, and keep the tree trunks thinner and paler in the distance, which pushes the whole scene back convincingly. A loose sketchbook spread like this pairs well with the woodland mood covered in this winter forest painting roundup if you want more snowy tree ideas.
If you are short on time, skip the trees entirely and let the tracks trail off the edge of the page instead.
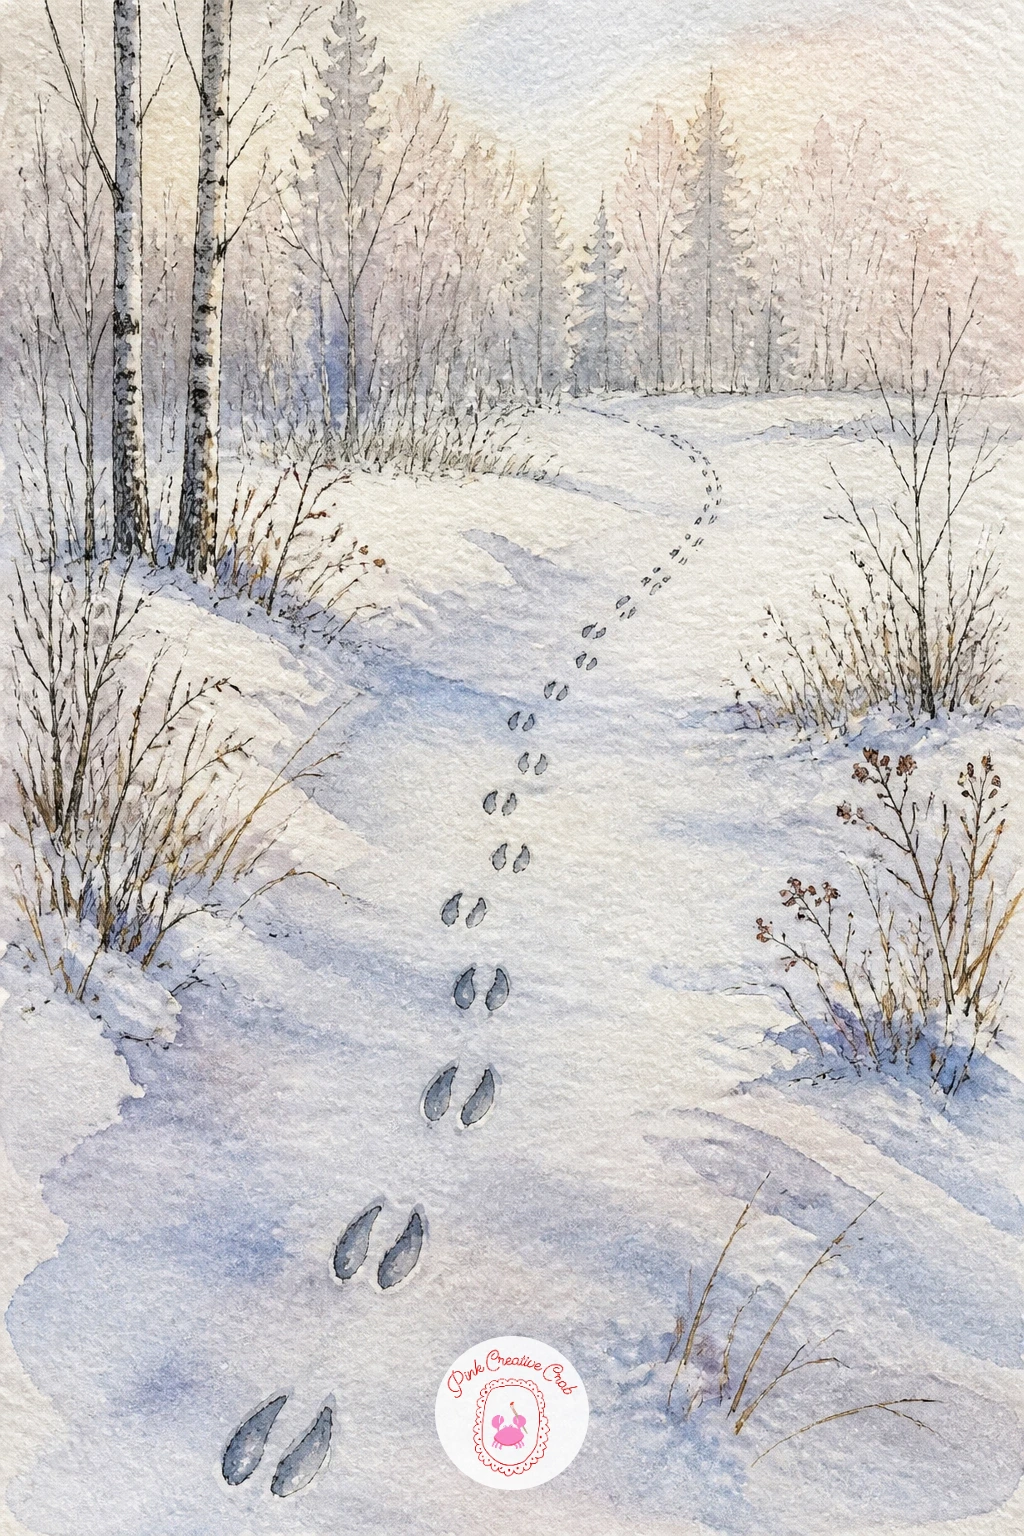
Palette: Payne’s Grey,Raw Umber,Cerulean Blue,Titanium White
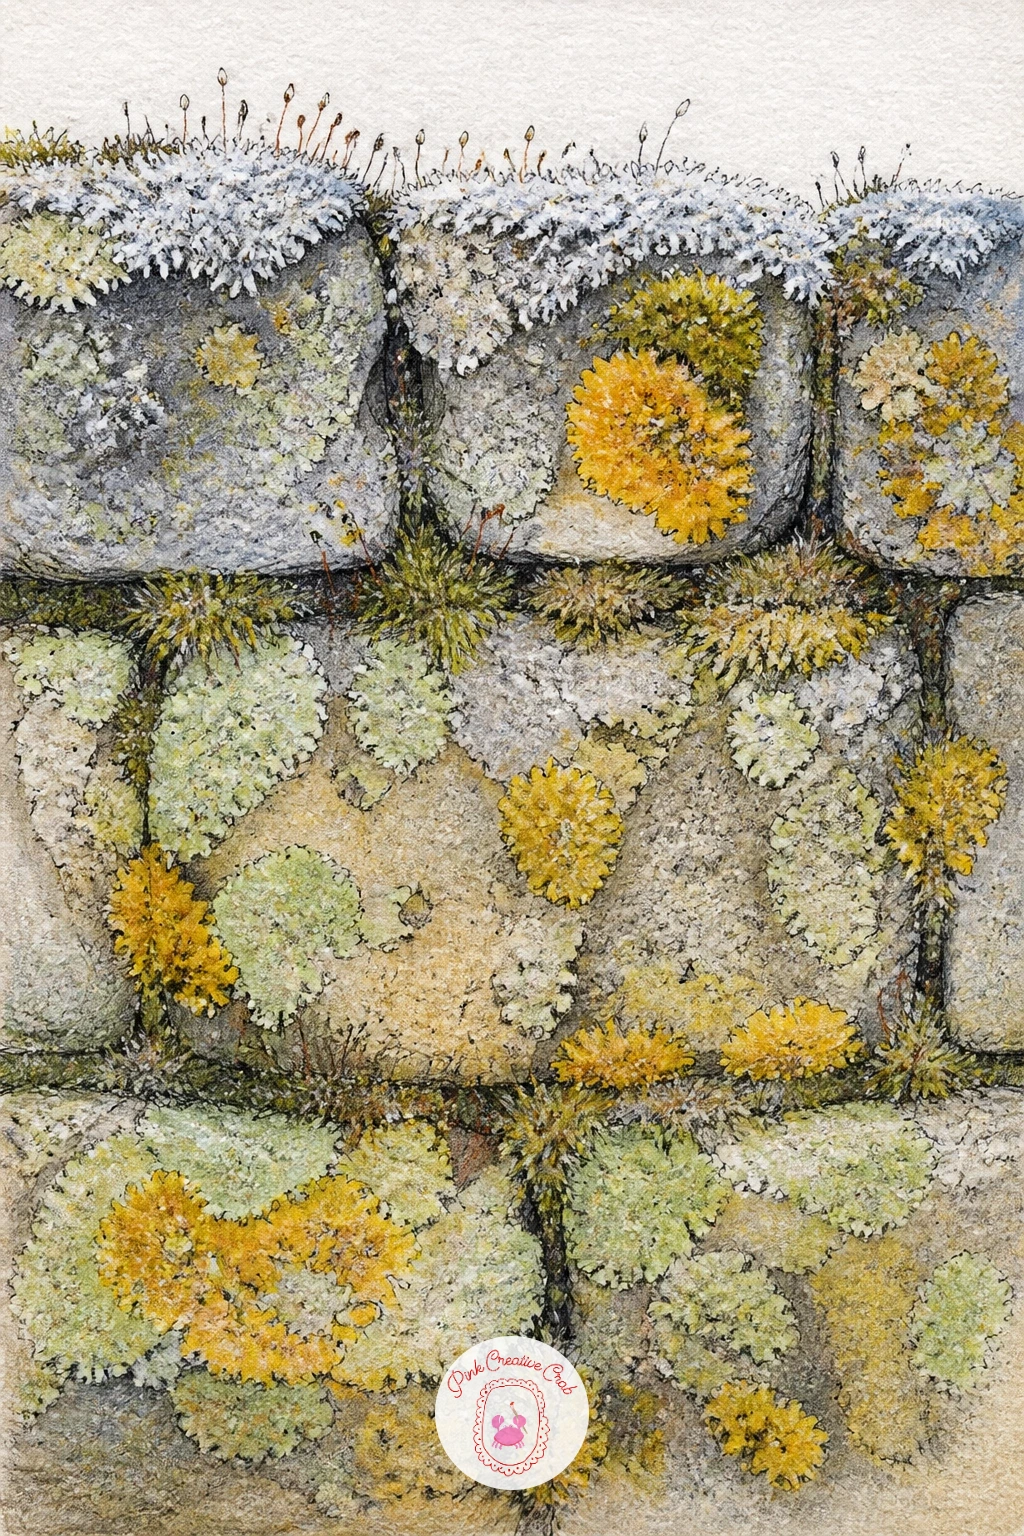
A stretch of old stone wall covered in frost touched lichen and moss is really a texture study disguised as a landscape, which makes it a nice change of pace. Pencil a row of irregular stone blocks first, varying their size and keeping the mortar lines uneven rather than a neat grid.
Ink the stone outlines loosely, then paint each stone a slightly different grey or warm brown so the wall does not read as one flat slab. While the stones are still damp, drop in small rounds of bright green and mustard yellow for the lichen patches, letting the colors bloom softly into the wet stone wash rather than sitting as hard dots.
This subject lives or dies on edges: hard crisp edges on the lichen patches look painted on, while dropping color into damp paper lets it feather naturally into the stone the way real lichen does. Touch a light frost of white colored pencil across the top edges of the stones once everything is dry.
If your paper is too dry to get a soft bloom, mist the stone area lightly with water from a spray bottle before dropping in the lichen color.
You Will Need
- spray bottle for water
Palette: Payne’s Grey,Raw Umber,Olive Green,Titanium White
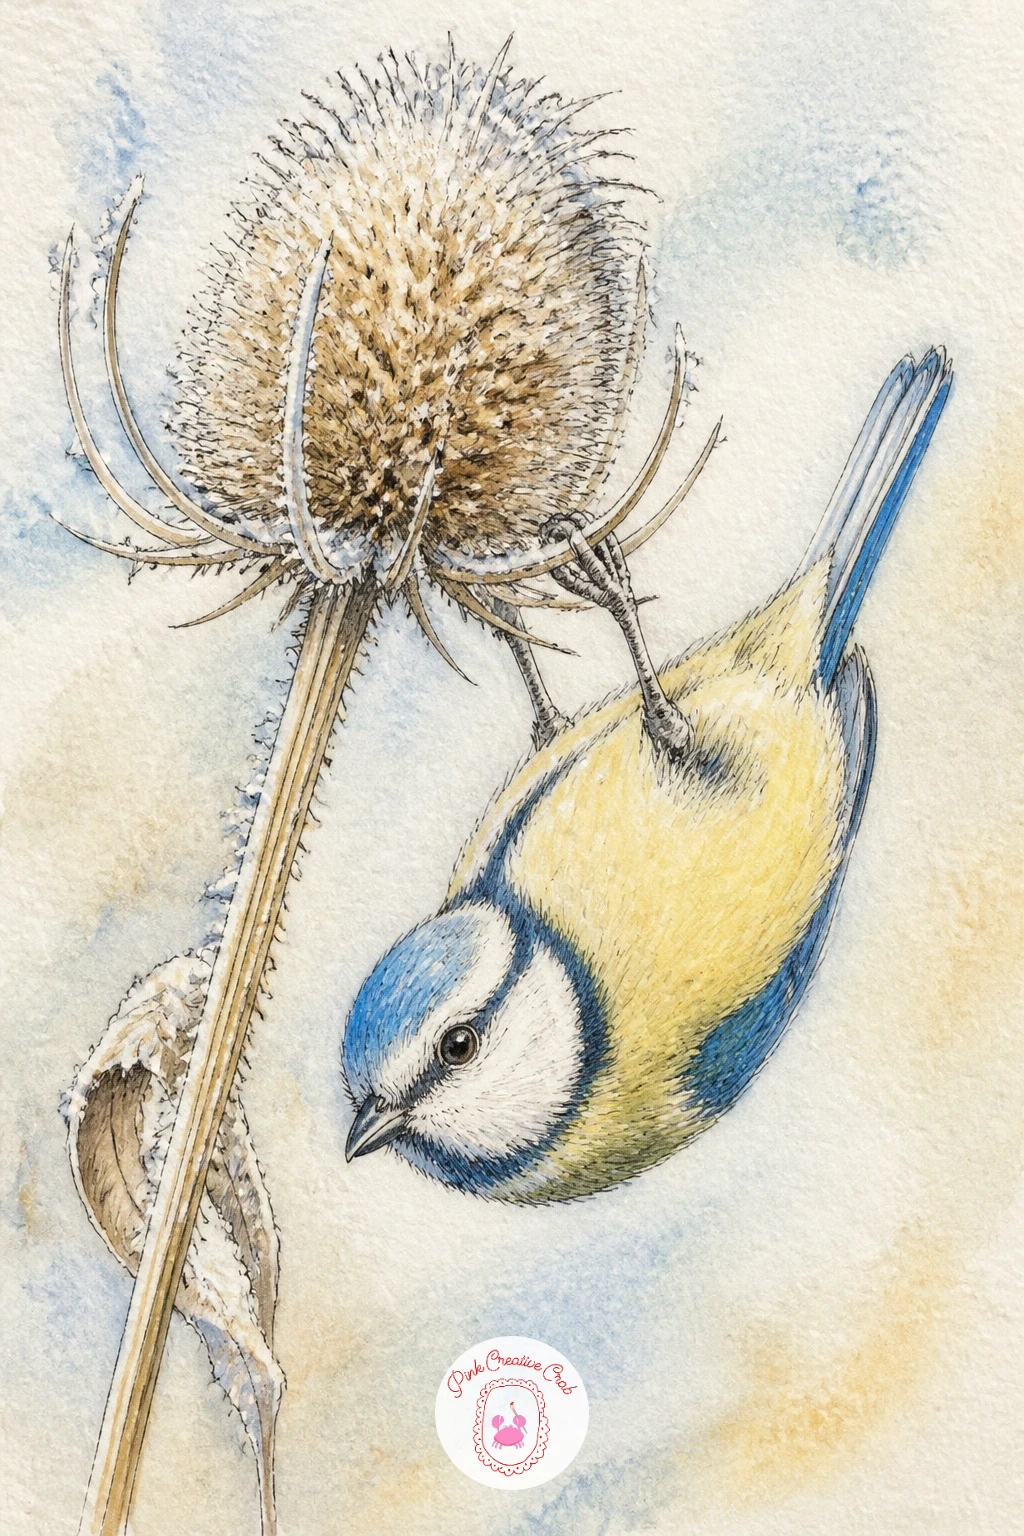
A blue tit hanging upside down from a seed head is a lively little scene that asks you to think about balance more than most birds on this list. Sketch the seed head first as a cluster of small round pods on a thin stem, then add the bird gripping it with its feet above its head, body hanging at an angle rather than upright.
Ink the bird’s outline carefully around the feet since that grip is what sells the whole pose, then work outward to the wings and that neat black eye stripe. Watercolor the cap and wings in soft blue grey, the cheeks and chest in pale yellow, and leave the seed head in warm straw tones with a touch of white frost along its top edge.
Compare the bird’s head size to one seed pod before you ink: the head should be roughly the same size as two or three pods together, which keeps the proportions believable at this small scale. If the upside down pose feels tricky to work out, sketch the bird right side up first and then flip your sketchbook to add the final details.
A dry brush dragged lightly over the blue cap once the wash is dry adds a soft fluffed texture without hard lines.
Palette: Cerulean Blue,Lemon Yellow,Payne’s Grey,Straw Yellow
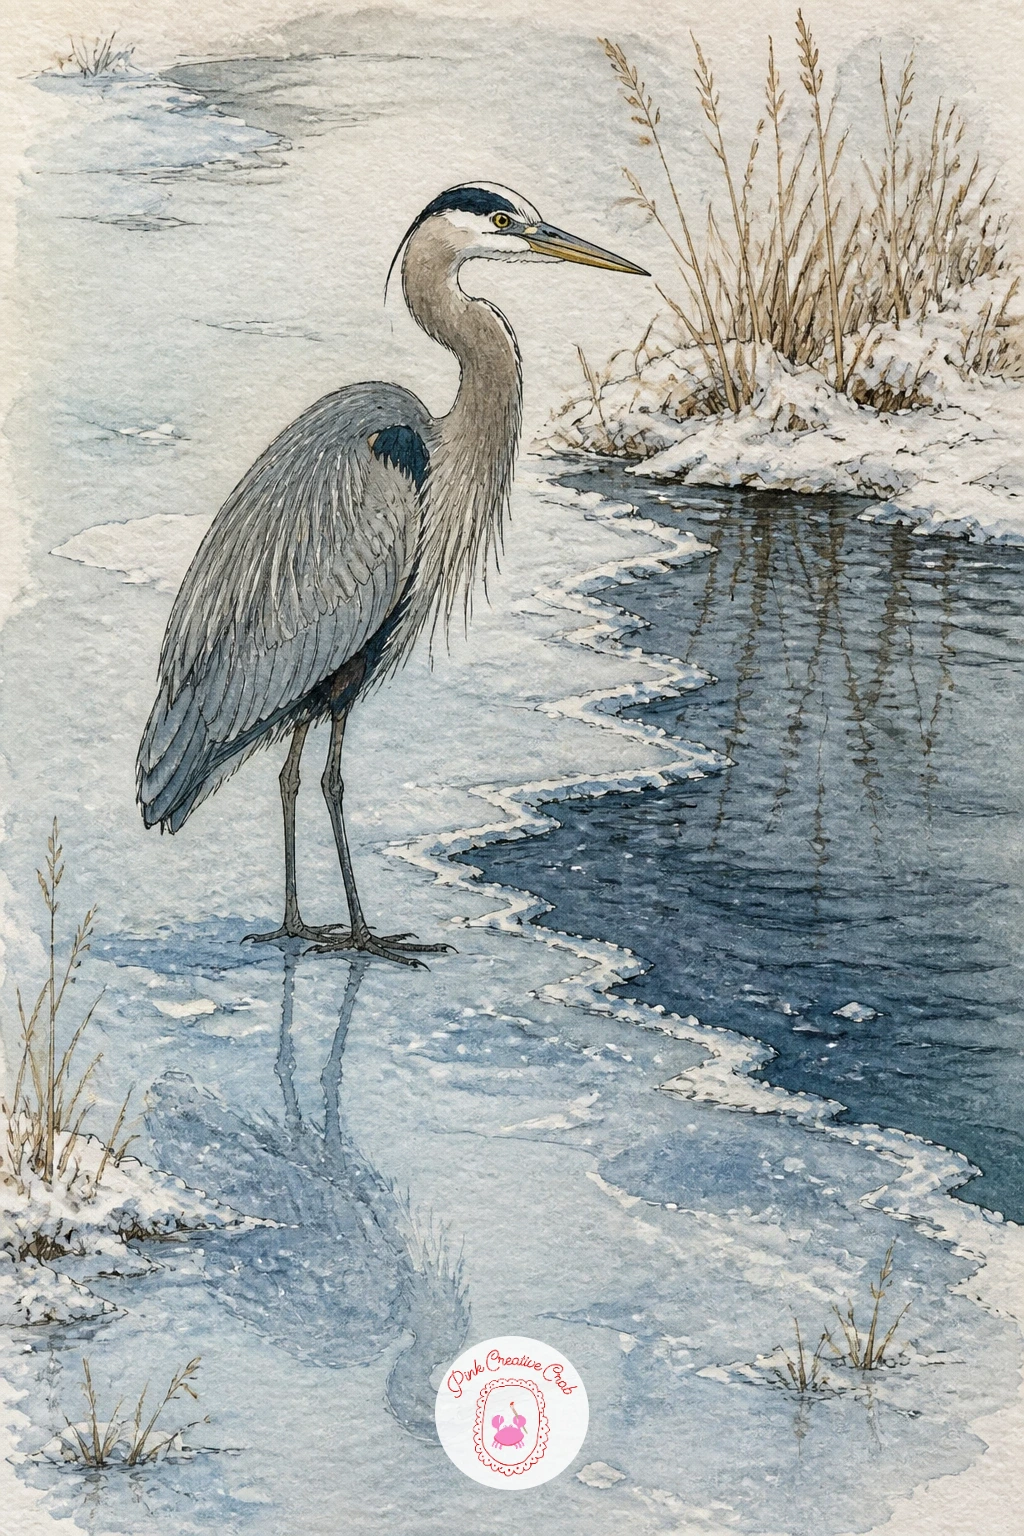
A heron standing motionless at the edge of an icy pond is a good subject for practicing patience in your line work, since the whole pose depends on long still shapes. Pencil the body as one tall narrow oval, then the neck as a long S curve rising from it, finishing with the thin legs planted at the water’s edge.
Ink the outline slowly, keeping the neck line smooth and unbroken, and add fine feather strokes only along the back and chest rather than over the whole body. Wash the heron in soft blue grey with a darker grey crest and back, then paint the pond as pale ice blue with a band of open black water left unpainted or washed very dark where it has not frozen over.
The eye level sits low and level with the water, which makes the heron’s reflection worth a faint echo of grey directly beneath its legs in the ice. If the long neck keeps coming out stiff, draw it first as a loose curved line before adding any width, then build the neck shape around that line.
For a softer finish, lift a little color out of the wet wash along the heron’s chest with a damp brush to suggest the palest highlight.
Palette: Payne’s Grey,Cerulean Blue,Charcoal Grey,Titanium White
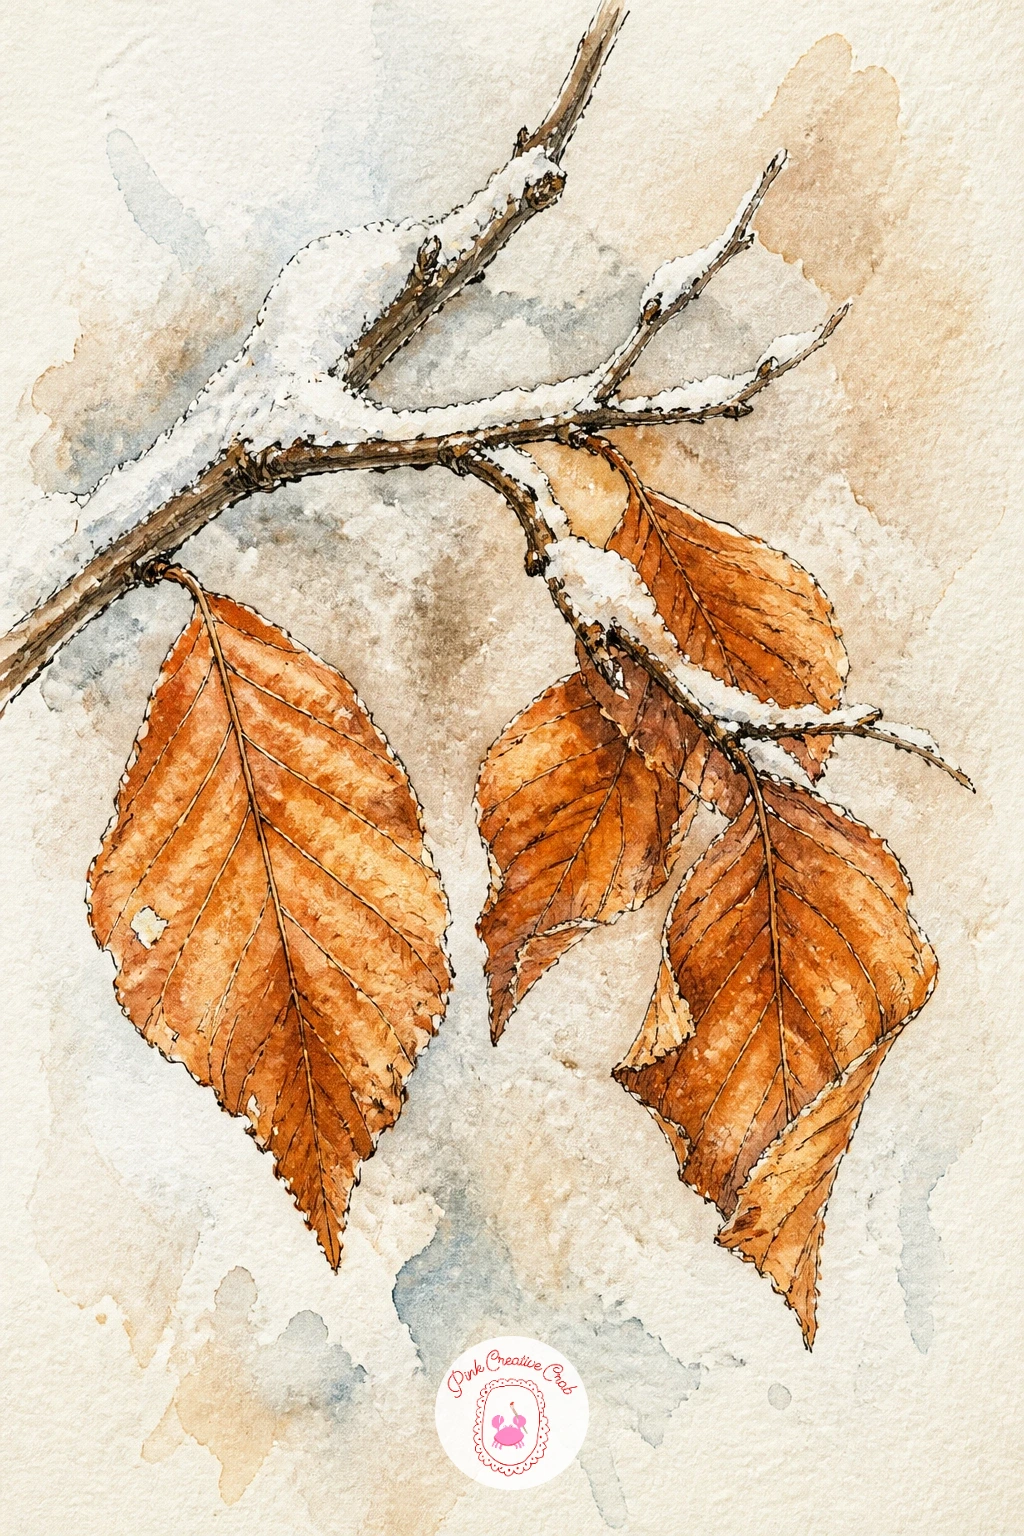
Beech twigs that hold onto their papery copper leaves through winter make a quiet, almost botanical study, a nice contrast after the heron. Draw one main twig branching into two or three smaller stems, then add the leaves still clinging on, each one a long oval with a slightly curled, papery edge.
Ink the twig in a continuous confident line and the leaves with slightly broken, scratchy strokes along their edges to suggest how dry and thin they have become. Watercolor the leaves in warm copper and rust, letting some patches stay paler where the paper shows through, and dust a thin wash of pale blue grey snow along the top of the twig itself.
Keep the leaf shapes varied in size and angle, since beech leaves that have survived the winter twist and curl unevenly rather than hanging neatly in a row. Once dry, add fine colored pencil lines along each leaf for the midrib and a few side veins, pressing harder near the stem and lighter toward the tip.
If your copper watercolor looks too flat, mix a touch of burnt sienna into a warm yellow for a livelier variation leaf to leaf.
Palette: Burnt Sienna,Raw Sienna,Payne’s Grey,Titanium White
A field mouse peeking out from a burrow entrance in the snow gives you a chance to draw something shy and half hidden, which is often more interesting than a full figure. Pencil a small dark burrow opening first, then add just the mouse’s head and front paws emerging from it, with the rest of the body implied by the dark of the hole.
Ink the visible parts of the mouse with fine detail on the whiskers and round ear, then let the burrow opening itself go nearly solid black with the pen, since that contrast is what makes the small creature pop forward. Wash the snow mound around the burrow in pale blue white, and tint the mouse in warm grey brown with a pink tinge at the ear and nose.
The common mistake here is drawing too much mouse, which flattens the sense of hiding, so resist the urge to show its whole body and trust the dark hole to do the storytelling. If black ink feels too heavy for the burrow, a thick layer of Payne’s grey watercolor gives a softer dark.
Keep the whiskers as single fine pen lines added last, once the ink has had time to dry completely.
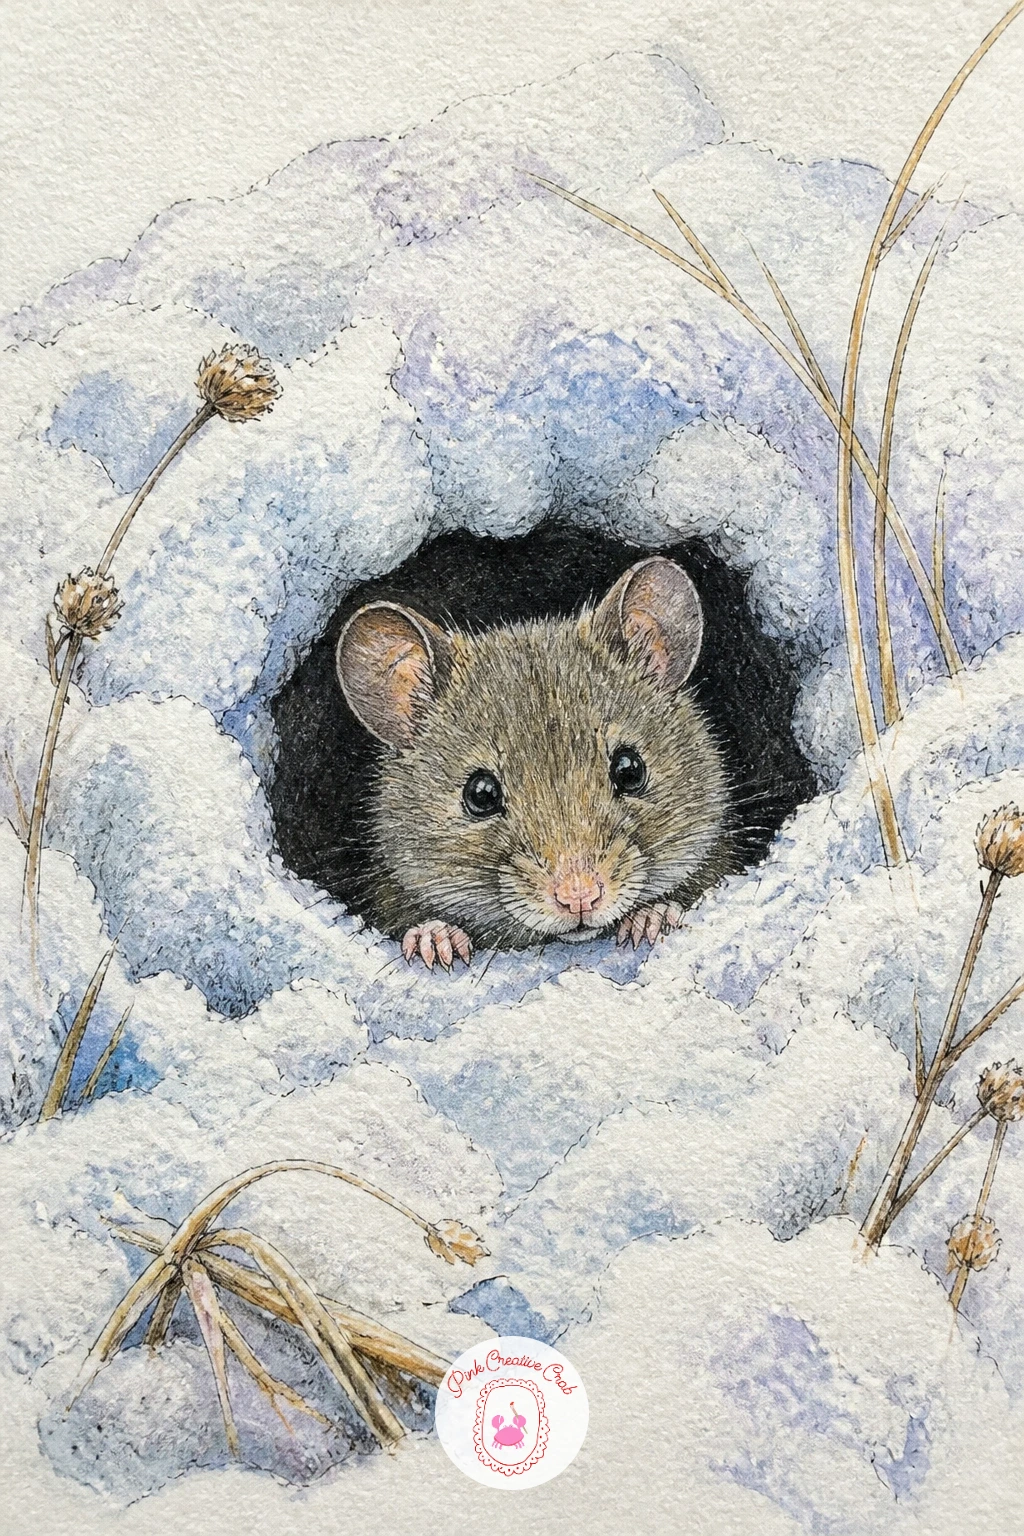
Palette: Raw Umber,Payne’s Grey,Titanium White,Pink Madder
Icicles hanging from a fern frond at the edge of a creek combine two very different textures on one small page, soft fern against hard ice. Draw the fern first with its familiar feathery pattern of small leaflets branching off a central stem, then add thin tapering icicles dripping from the lowest fronds down toward the water.
Ink the fern leaflets with quick short strokes rather than careful outlines, keeping the overall shape loose, and ink the icicles as clean tapering triangles with a single highlight line left unpainted down one side of each. Watercolor the fern in deep green, nearly black in the shadowed parts, and paint the icicles in the palest blue white with just a touch of grey at their thickest point near the frond.
Ice reads most convincingly when you leave real white paper showing through rather than painting it fully, so resist filling every icicle edge to edge with color. For a quick ten minute version, draw just two or three icicles and a handful of fern leaflets rather than a full frond, which still reads clearly as the scene.
A damp brush pulled downward through wet blue paint on the icicles helps them taper naturally to a point.
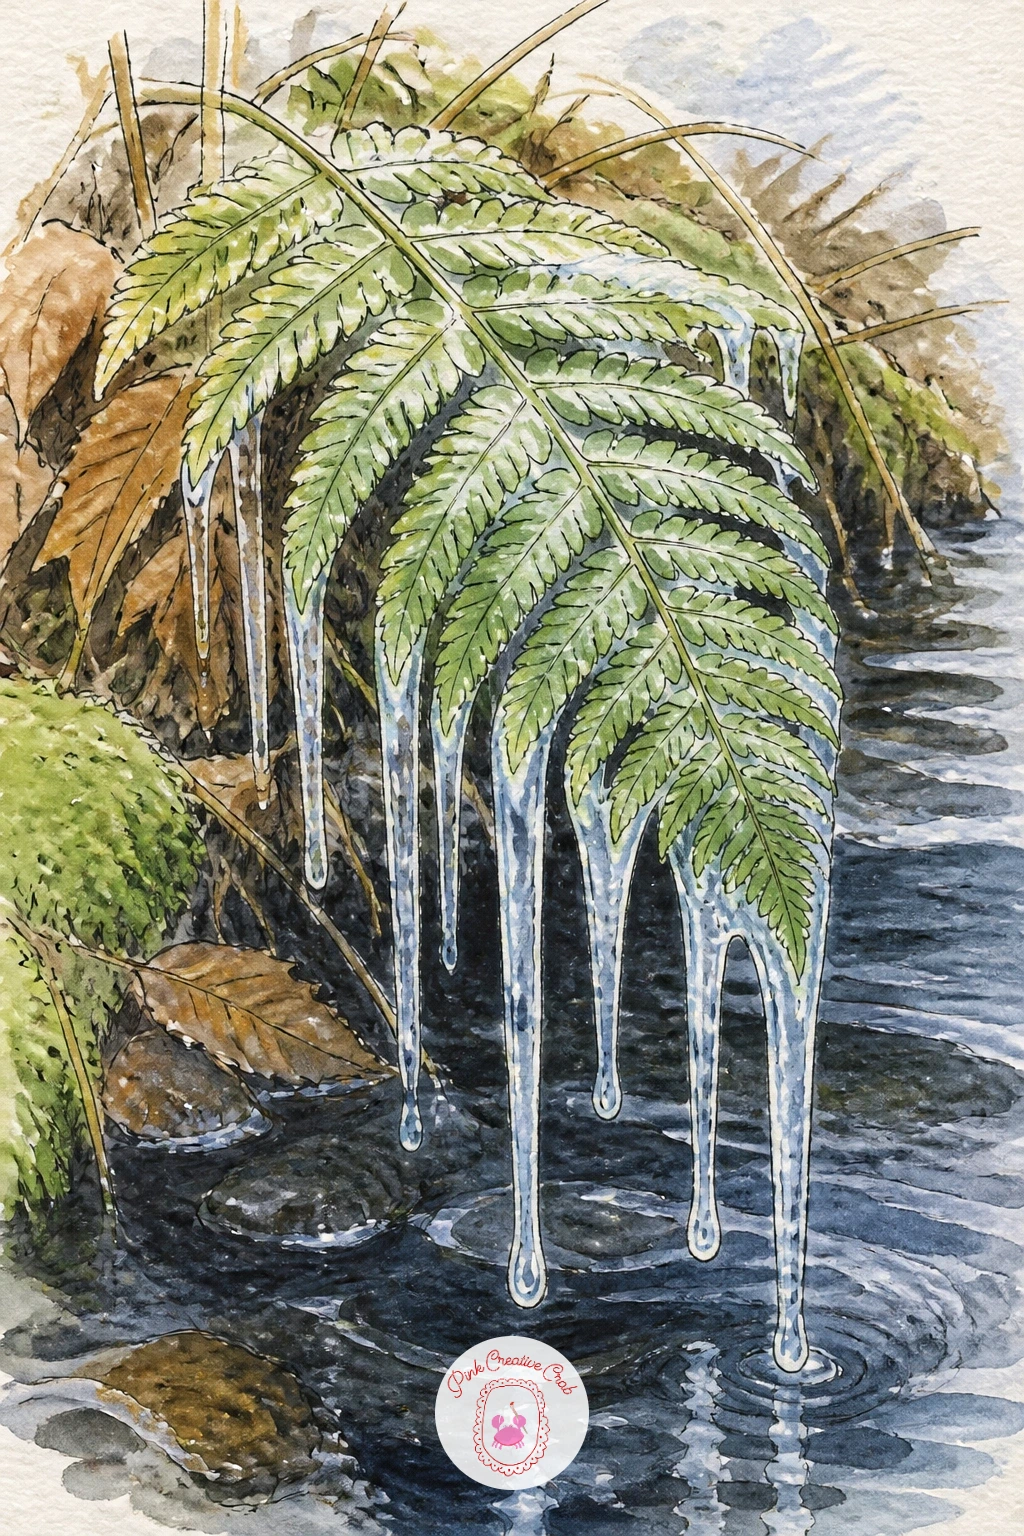
Palette: Sap Green,Cerulean Blue,Payne’s Grey,Titanium White
A dried teasel head with a small neat cap of snow balanced on top is one of the more graphic, pattern-like subjects here, good for practicing repeated marks. Draw the teasel’s oval seed head first, covered in short spiky bracts pointing outward in rows, then add a rounded cap of snow sitting on its top third.
Ink the spiky bracts one row at a time working from the top down, keeping each spike roughly the same length so the pattern reads as orderly rather than chaotic. Watercolor the dried head in warm sandy brown, leave the snow cap as bare white paper, and add a thin blue grey shadow line along the underside of the snow where it meets the brown seed head.
This subject rewards a little variation: next time, try the same teasel head without snow, dusted instead with a scatter of ice crystals drawn as tiny white cross marks over the brown. Keep the stem underneath thin and slightly bent, since teasels sway and lean rather than standing perfectly straight.
If your fineliner tip is too broad for the fine spikes, a technical drawing pen with a narrower nib handles this pattern more cleanly.
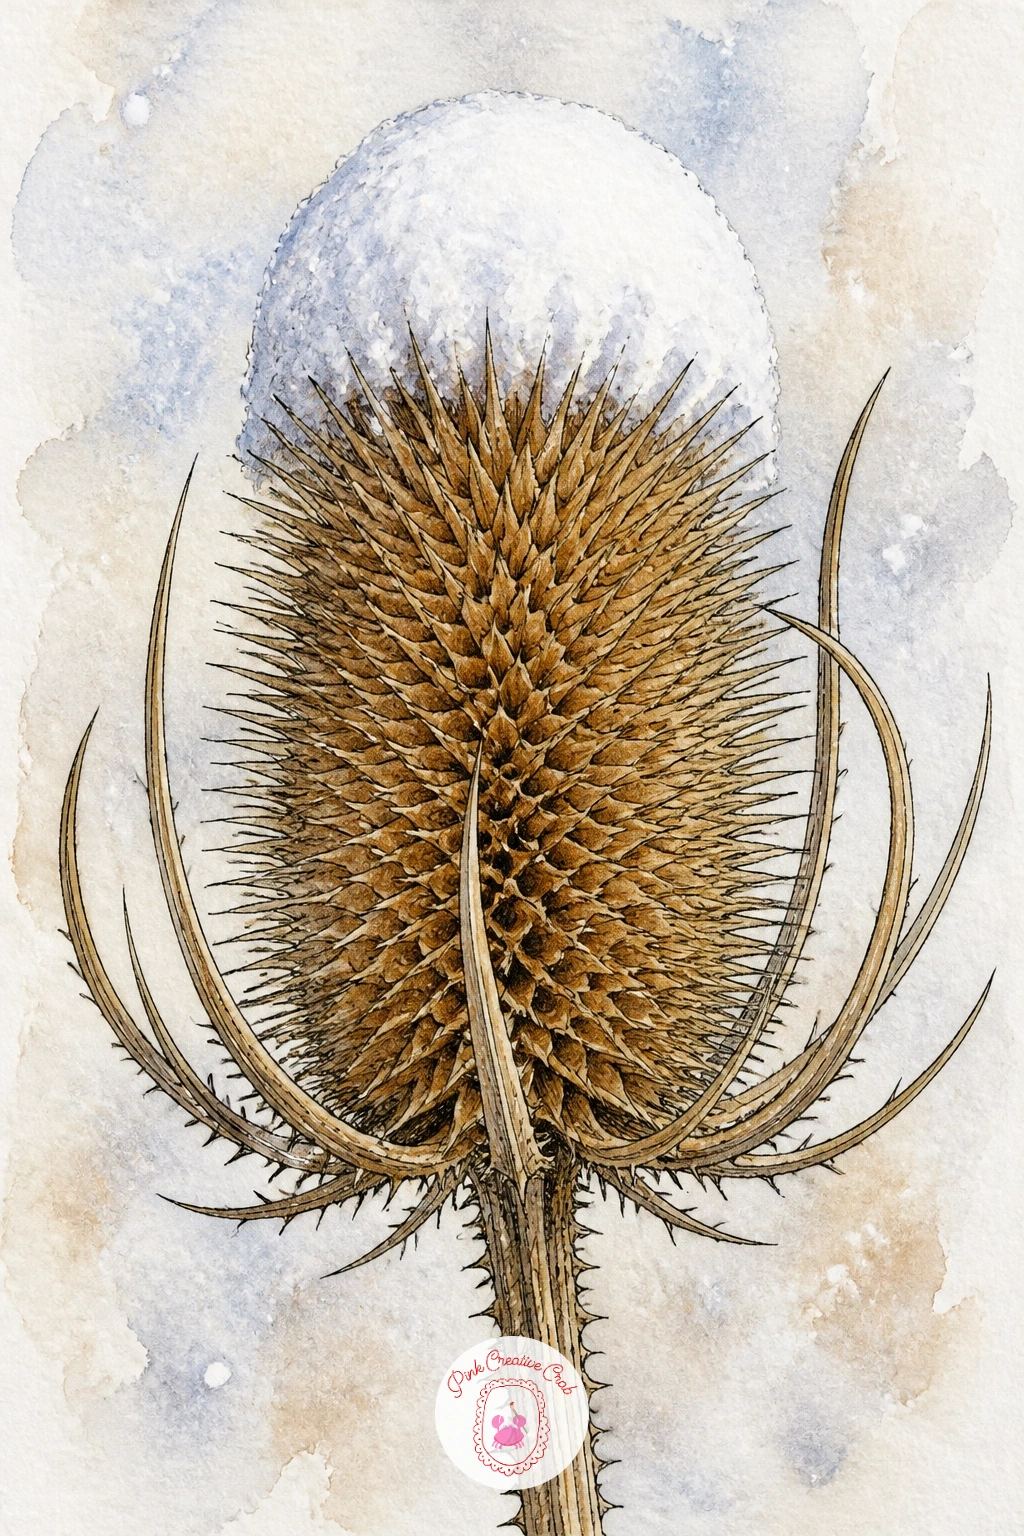
Palette: Raw Sienna,Payne’s Grey,Titanium White,Burnt Umber
After several frozen scenes, a pair of mallards paddling in one patch of open water on an otherwise iced pond makes a welcome splash of color. Draw the male first with his glossy head and curved tail feathers, then the female beside him with a plainer mottled brown body, both floating at the same waterline.
Ink the male’s head outline carefully since the green sheen depends on a clean shape, then rough in the female’s mottled feather pattern with short overlapping strokes. Watercolor his head in deep bottle green with a touch of blue, his chest in warm chestnut, and her whole body in layered warm and cool browns, then surround both birds with a ring of open dark water fading out to pale icy blue at the edges.
Light on water works best from one direction, so pick a side and let the near edges of both birds catch a thin pale highlight while the far side stays in shadow, which also helps separate the two birds visually from each other. Ripple lines radiating gently from each body in the water sell the idea that they are actually floating rather than resting on ice.
If green watercolor looks too flat for the drake’s head, glaze a thin blue wash over the dry green for the oily sheen real mallards have.
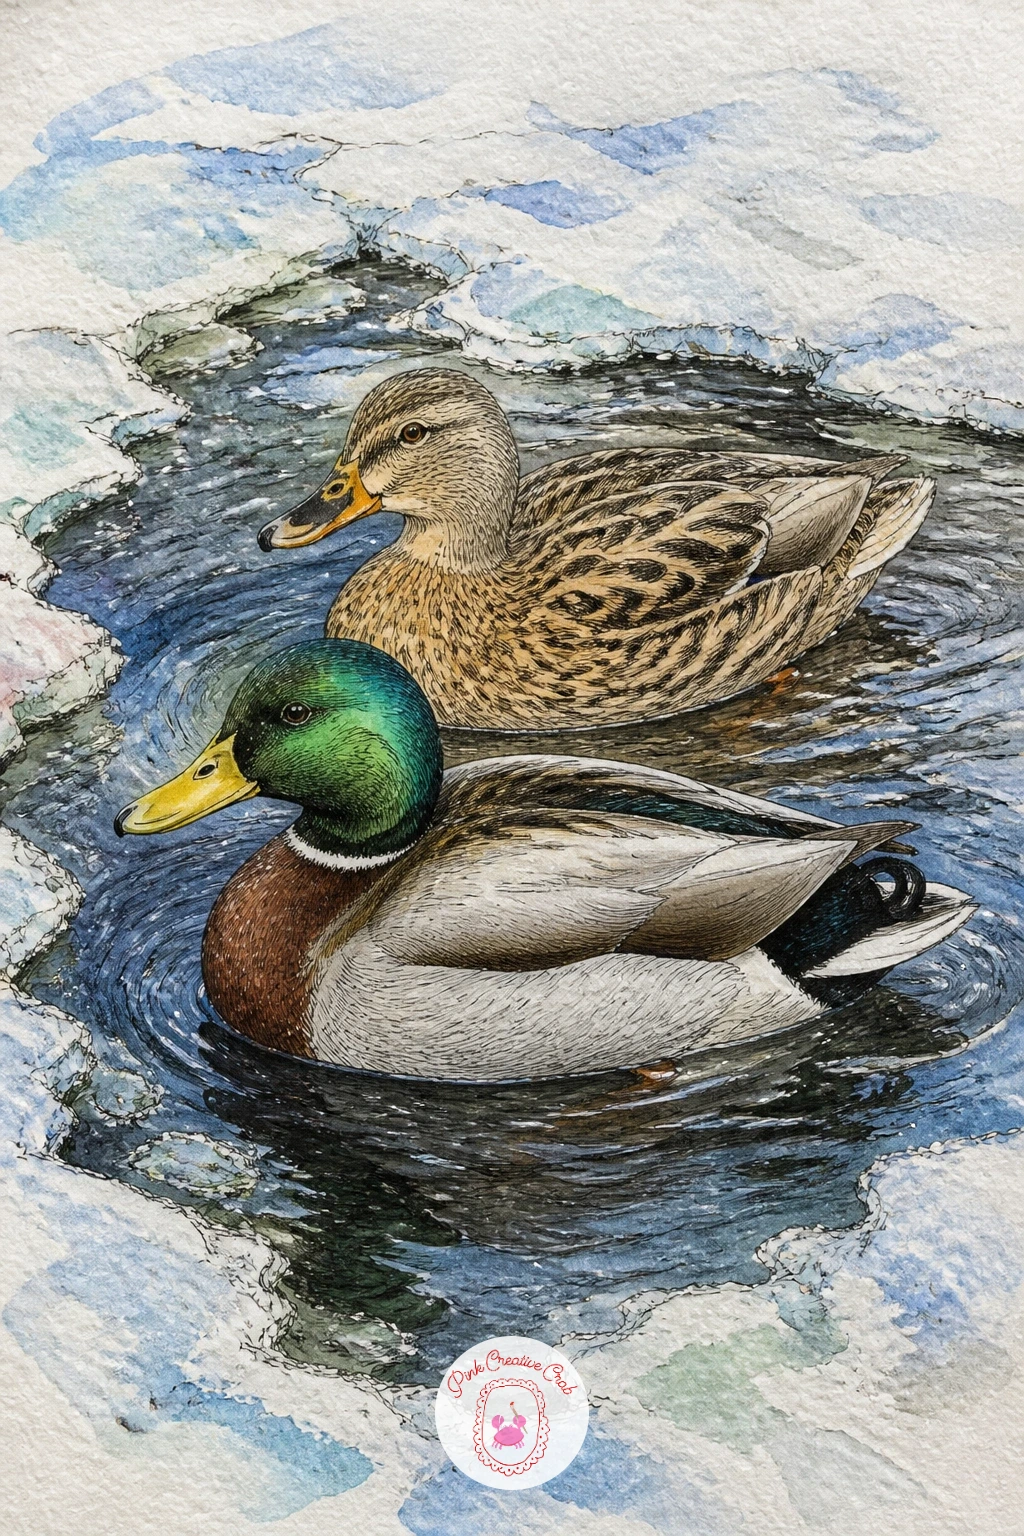
Palette: Sap Green,Burnt Sienna,Cerulean Blue,Raw Umber
A single fallen feather lying on fresh snow next to a scatter of tiny tracks is a quiet, almost still life subject that tells a small story without showing any animal at all. Draw the feather first as a long narrow shape with a slightly curved spine, adding fine barbs angled off it in both directions, then scatter a handful of small three-toed prints nearby leading off the edge of the page.
Ink the feather with careful parallel strokes for the barbs, keeping them evenly spaced but not perfectly identical, and ink the tracks loosely and quickly by comparison. Watercolor the feather in soft grey with darker grey at the tip, and leave the snow as bare paper throughout, adding only a faint blue grey shadow beneath the feather to ground it on the page.
Measuring matters here more than almost any other idea on this list: keep the feather roughly three or four times longer than it is wide, since a feather drawn too short and fat loses the delicate look entirely. Once the ink is dry, drag a kneaded eraser lightly along the feather’s edge over pencil guidelines to soften them into a feathered edge rather than a hard outline.
If grey watercolor feels flat, add the faintest hint of warm brown at the feather’s base for a more natural look.
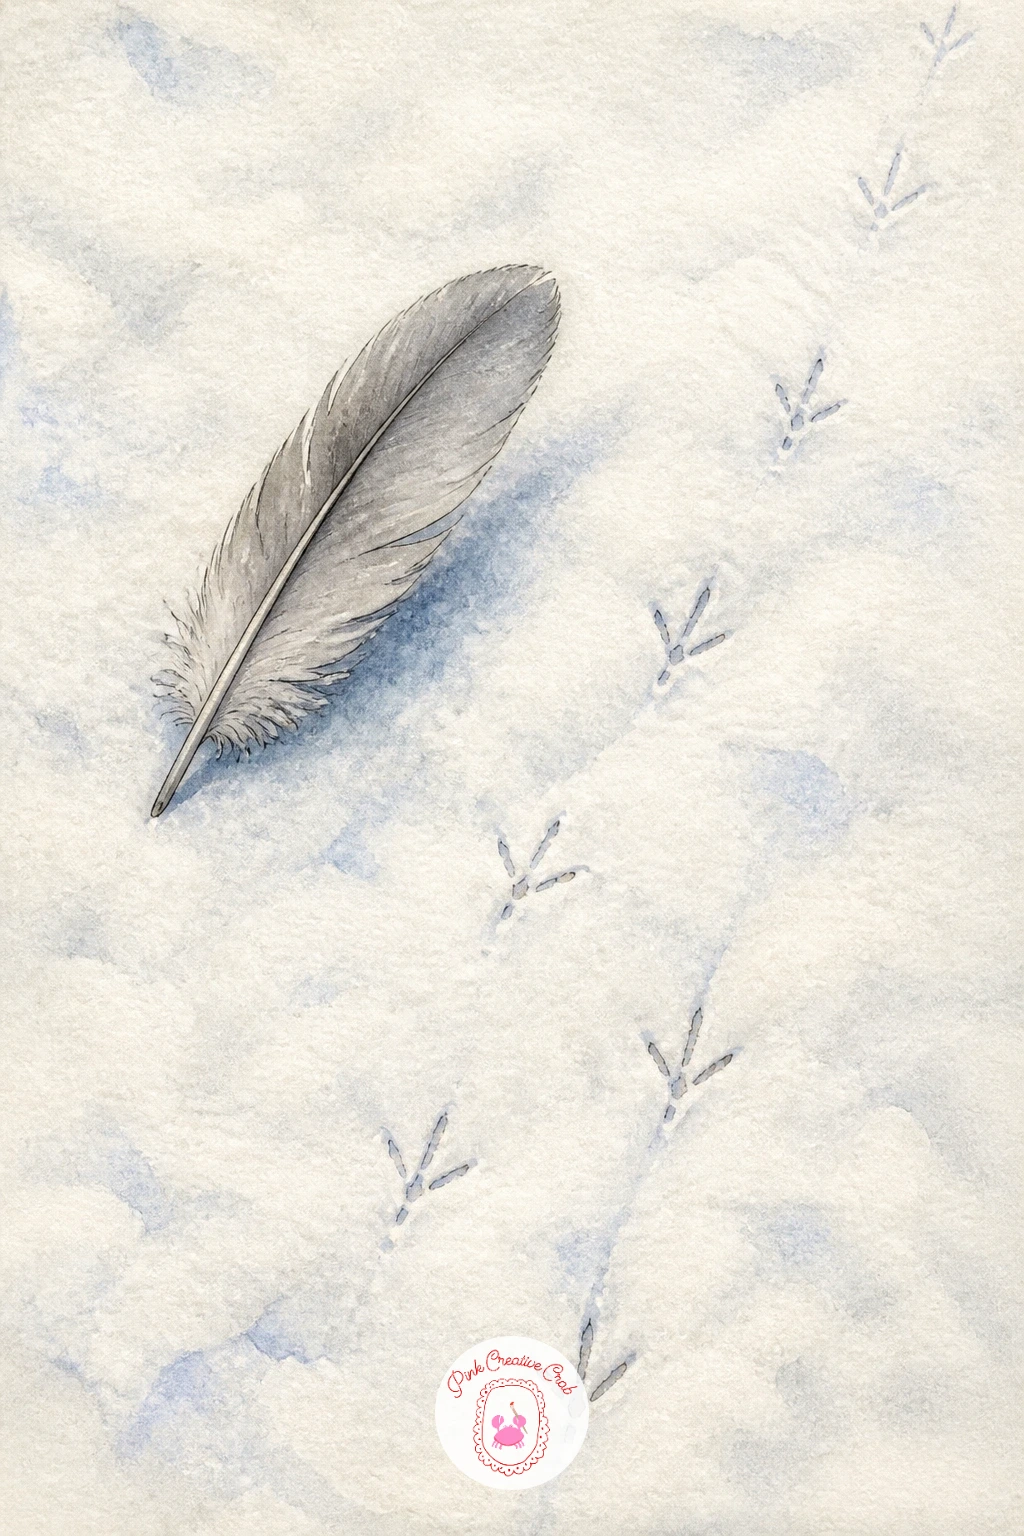
Palette: Payne’s Grey,Charcoal Grey,Titanium White,Raw Umber
Frost ferns forming on the inside of a cold windowpane, with the garden softly blurred behind, let you draw something delicate in front of something deliberately out of focus. Pencil in loose branching fern-like patterns radiating from one or two points on the page, then sketch the garden behind very simply, just a few soft shapes for trees and fence without any real detail.
Ink only the frost patterns crisply, using a fine pen to build up the branching crystal shapes, and leave the background completely unlined since ink would sharpen it in exactly the way you do not want. Wash the background in soft, barely-there blues and greens blended wet into wet so the edges blur together, then leave the frost ferns themselves as pure white paper standing out crisply against that soft wash.
This whole page depends on contrast between sharp and soft: the more blurred and loose the background wash is, the crisper the frost will read by comparison, so do not be tempted to add any hard lines behind the glass. For a change next time, try frost ferns radiating from a single corner of the page instead of the center, as real window frost often does.
If your washes bleed into each other more than planned, let them, since a little unplanned blending only helps this particular background.
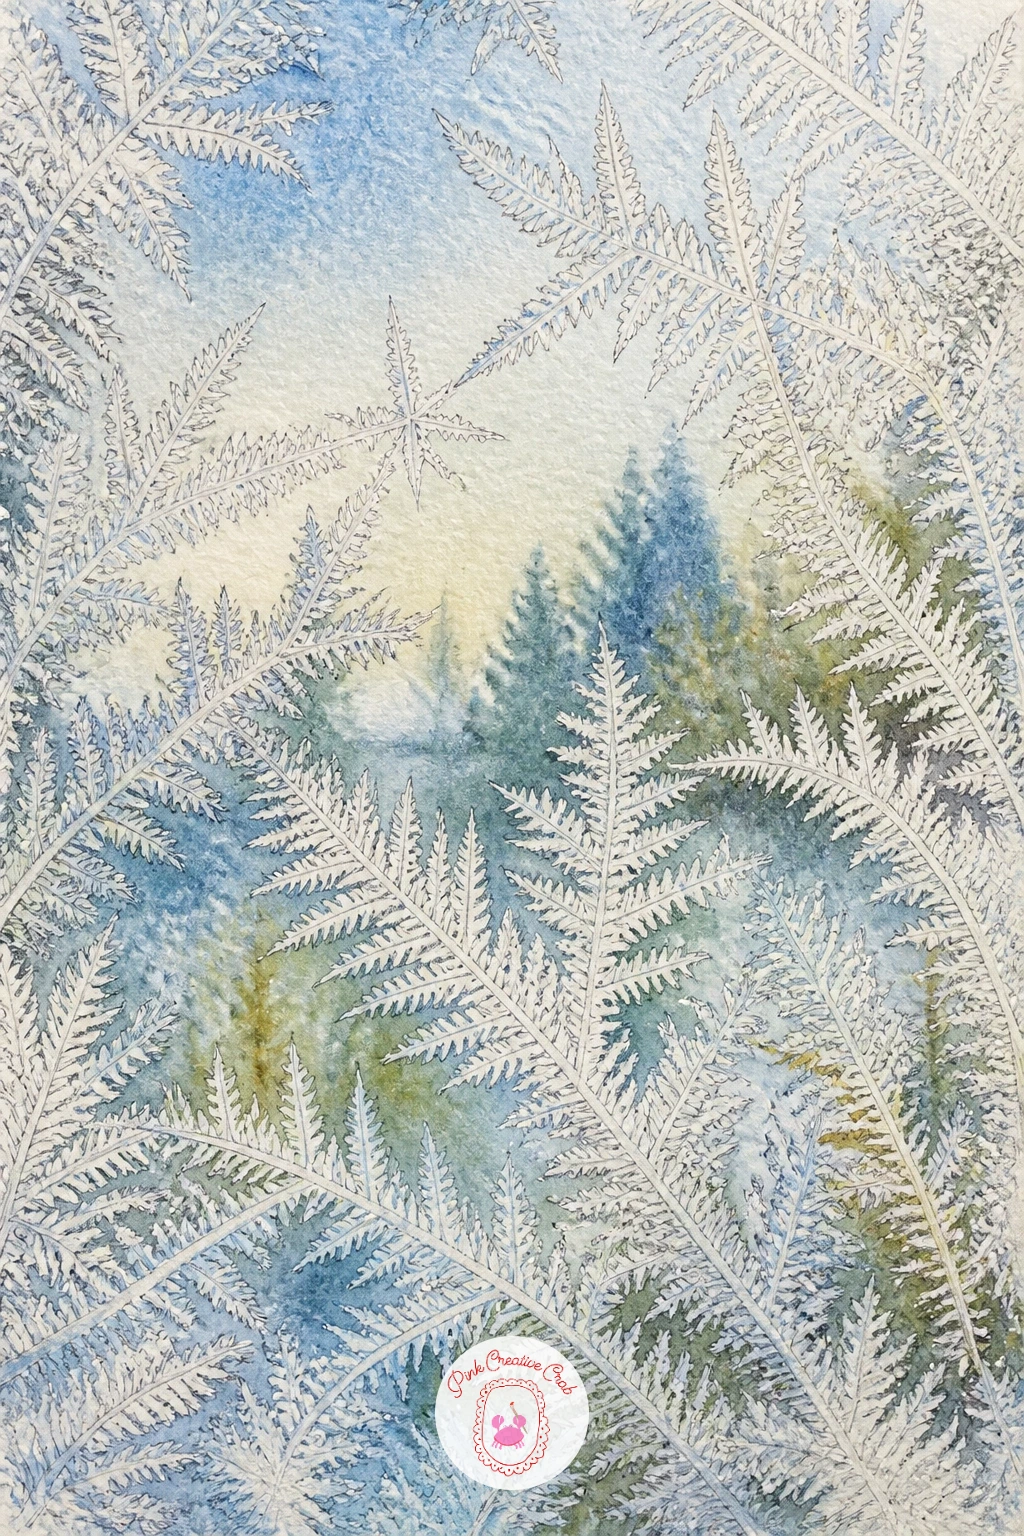
Palette: Cerulean Blue,Sap Green,Payne’s Grey,Titanium White
A crow walking across an open snowy field is almost entirely a study in silhouette and one confident shape. Draw the body as a single smooth rounded form, add the thick straight beak and a few simple tail feathers, and keep the legs thin and slightly bent mid-stride rather than standing stiffly upright.
Ink the whole bird nearly as one solid dark shape, since crows read from a distance as pure silhouette, and add just a few curved lines within the black to suggest the sheen on the wing without breaking up the overall dark mass. Wash the field around it in pale blue white with longer soft blue shadows trailing behind the crow’s feet to show the low winter sun.
The eye level for this one sits fairly high, looking slightly down on the field, which lets you show the whole stretch of snow with the crow as a small dark anchor somewhere off center rather than square in the middle. Keep the field almost entirely empty elsewhere, since the emptiness is what makes the single dark bird so effective.
If pure black ink feels too stark, build the crow up instead in several layers of very dark watercolor for a slightly softer edge.
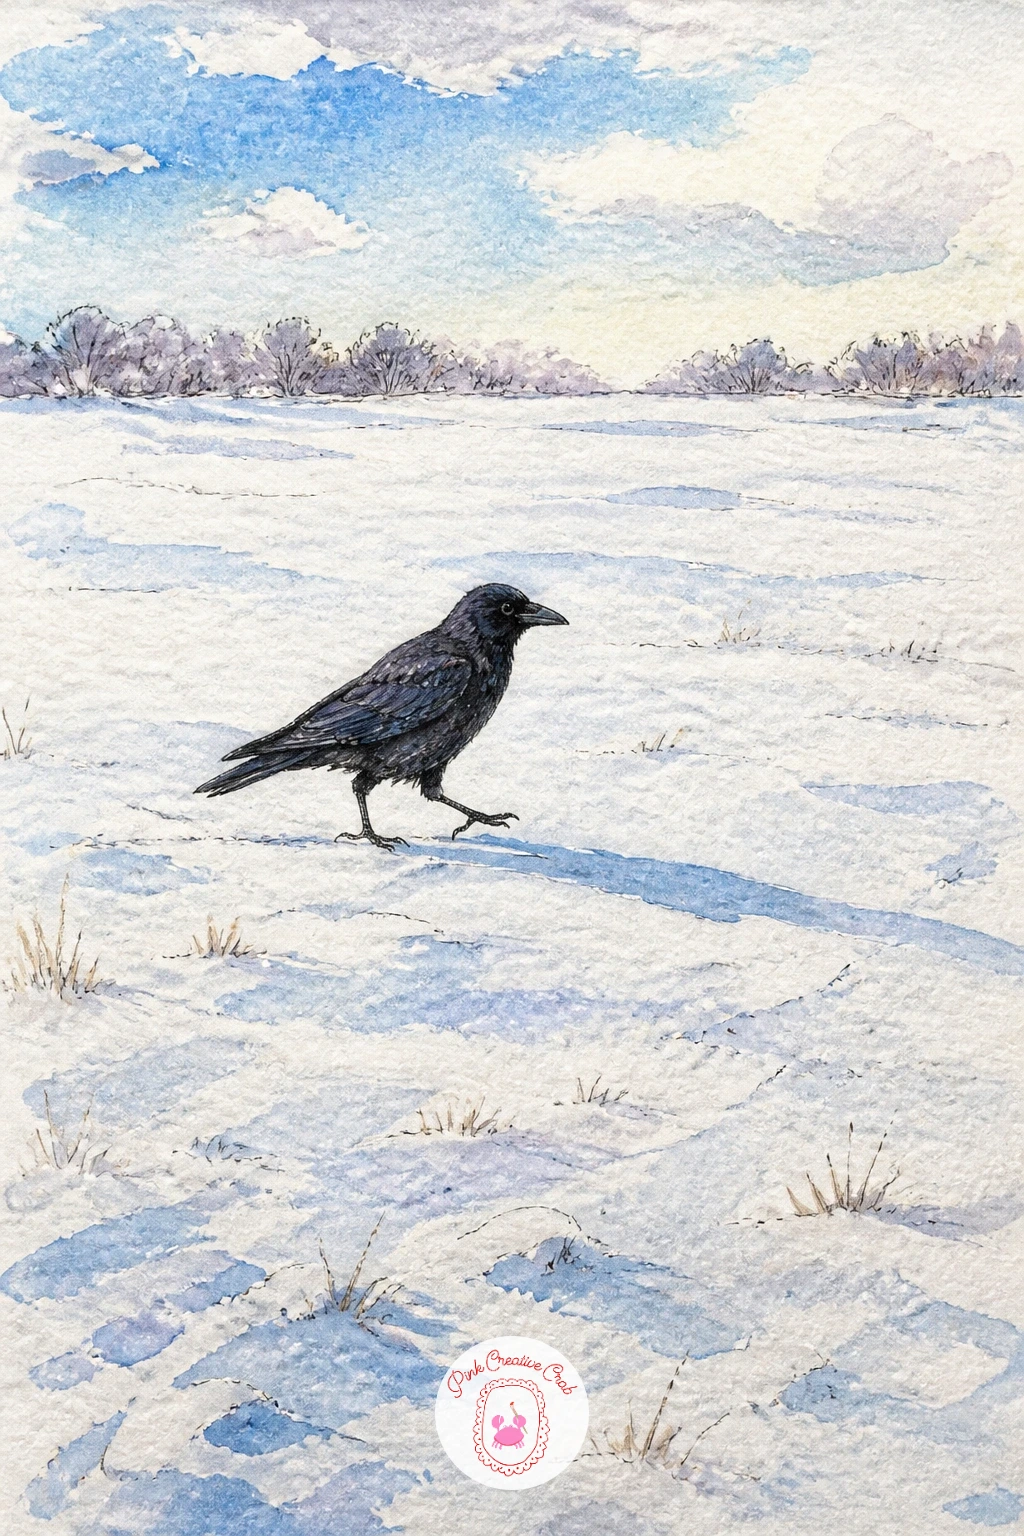
Palette: Charcoal Grey,Cerulean Blue,Titanium White,Payne’s Grey
Hazel catkins dangling over a snowy path in late winter bring a welcome bit of yellow green into an otherwise pale page. Draw a bare branching twig arching across the top of the page, then hang several soft cylindrical catkins from it at varying lengths and angles, since they never hang perfectly parallel.
Ink the twig with a fine continuous line and the catkins with short overlapping scale marks running down each one to suggest their slightly textured surface. Watercolor the catkins in soft yellow green, letting the color pool a little heavier near the tip of each one, and wash the path below in pale blue grey with just the faint suggestion of footprints trailing into the distance.
Hazel catkins go wrong when they are drawn too stiff and straight, so let gravity pull each one into a gentle downward curve, longer ones curving more than the shorter ones nearby. For a bolder forty minute version, add a scatter of tiny red female flowers along the same twig, drawn as small dots tipped with thread-like red styles.
If yellow green watercolor looks muddy, keep the yellow and green as two thin separate washes layered rather than premixing them on the palette.
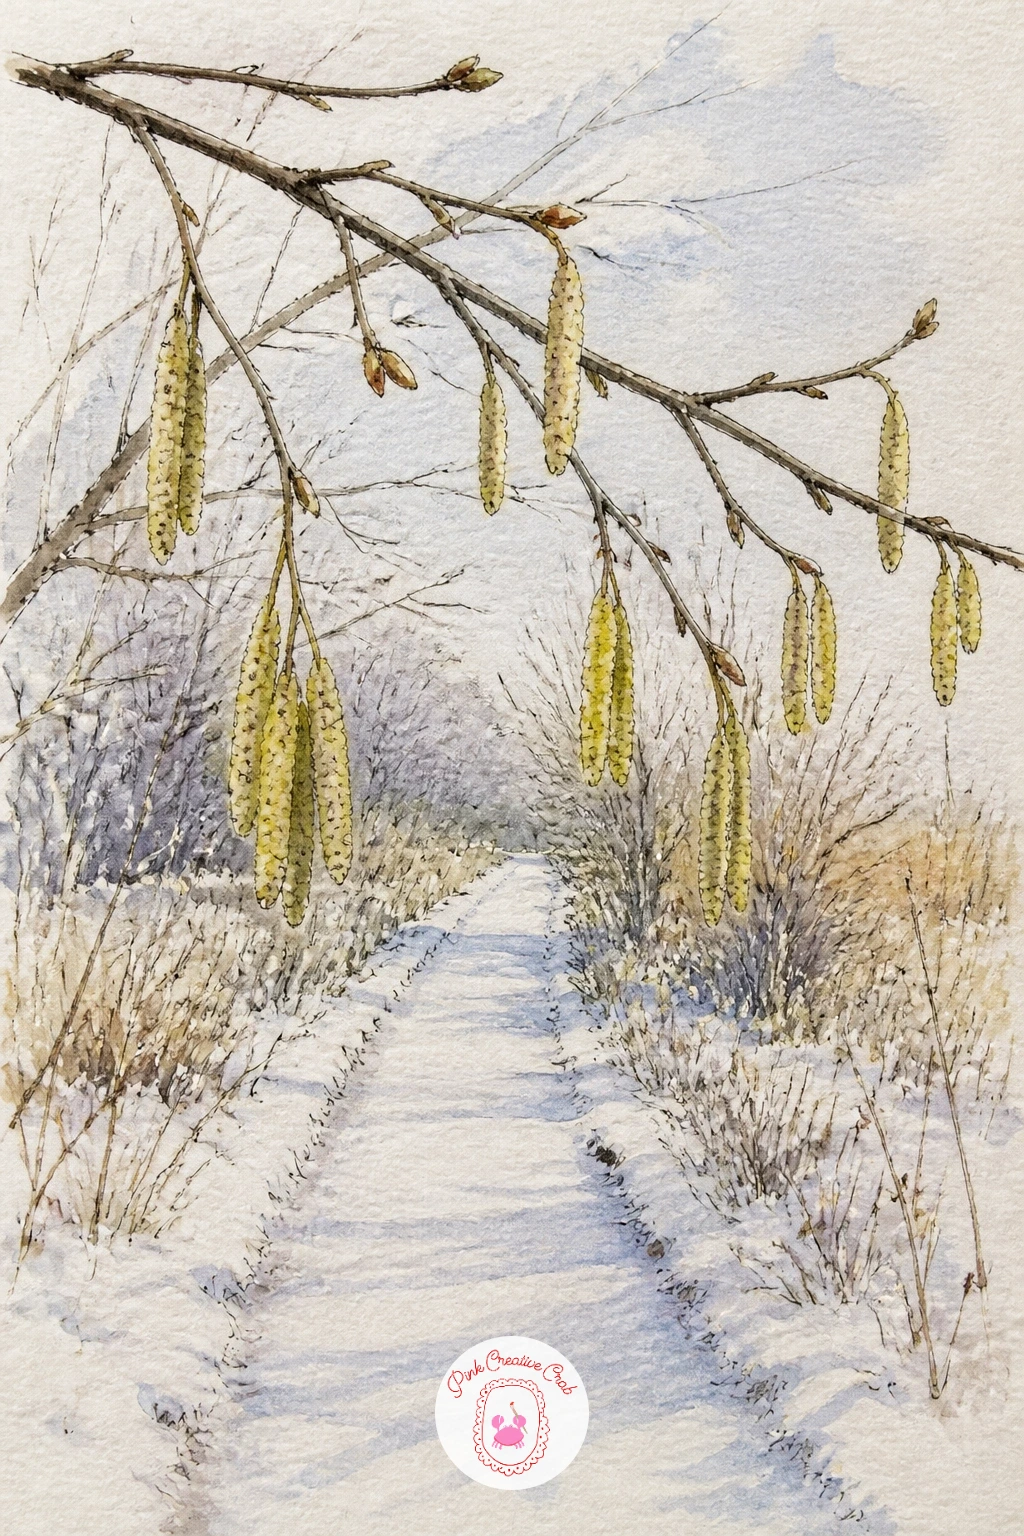
Palette: Lemon Yellow,Sap Green,Payne’s Grey,Cadmium Red
A mossy log scattered with tiny frost-covered mushrooms is a good subject once you want to practice drawing a cluster of small similar shapes rather than one single object. Draw the log as a long cylinder lying across the page, covered patchily in moss, then dot a handful of tiny mushroom caps along its length, varying their height and angle slightly rather than lining them up evenly.
Ink the log’s bark texture with short curved lines following its length, and ink the mushrooms with simple curved cap outlines and a thin stem beneath each. Watercolor the log in warm brown with patches of bright green moss dabbed on while still damp, then paint the mushrooms in soft grey or pale tan, dusting a touch of white colored pencil over their caps for the frost.
A dry brush loaded with just a little paint, dragged lightly across the bark, breaks the color up into a rough texture far more convincing than a flat wash, which is the detail that makes old wood believable. Vary the mushroom sizes noticeably, since a cluster where every cap matches looks printed rather than grown.
If you want more mushrooms than you have patience for, group a tight cluster of three or four rather than spreading a dozen along the whole log.
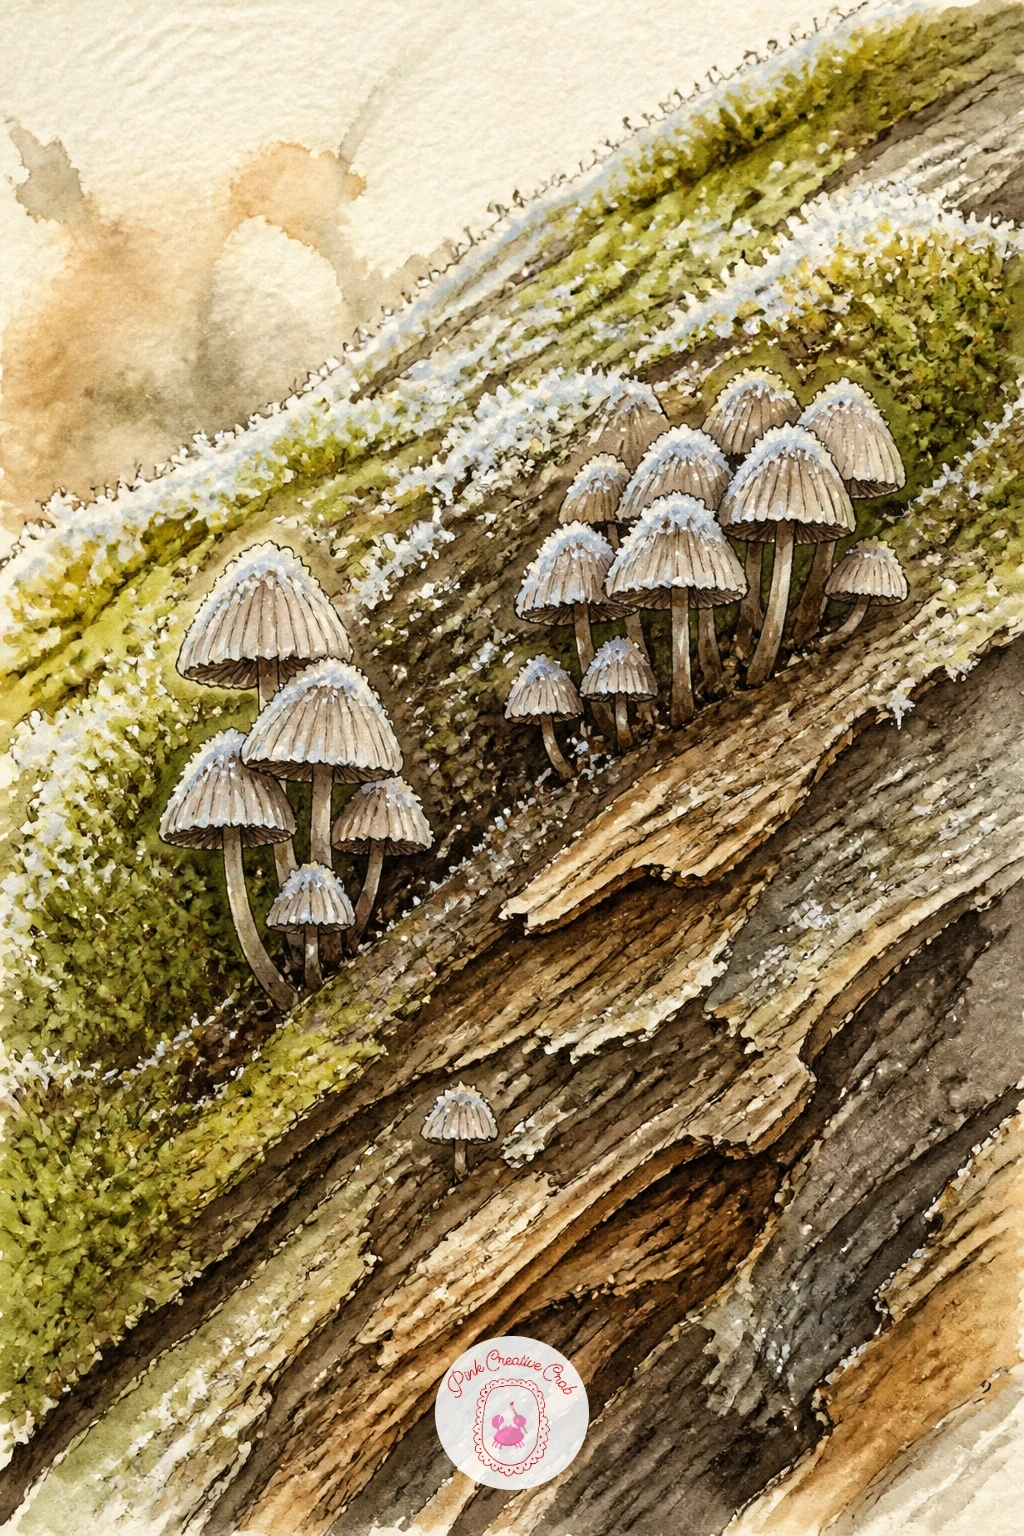
Palette: Raw Umber,Sap Green,Raw Sienna,Titanium White
An old snowy tree trunk with a single round woodpecker hole part way up is a simple composition built almost entirely around one dark shape and the bark texture around it. Draw the trunk filling most of the page vertically, then cut one clean round hole into the bark at roughly eye level, with a small scatter of wood chips at its base implying the digging that made it.
Ink the bark in long vertical broken lines of varying length, then make the hole itself nearly solid black, since a true void reads more convincingly than a grey circle. Watercolor the trunk in warm greys and browns, dusting the top edges of any ridges with a thin white wash or left paper for snow that has settled along the bark.
The hole should sit slightly off from the vertical center of the trunk, since a perfectly centered hole looks designed rather than found, and keep the bark texture busier near the hole than further away to draw the eye there. A kneaded eraser dabbed over dry pencil bark lines before inking softens a few of them into variation rather than uniform stripes.
If pure black ink for the hole feels too flat, layer several passes of dark watercolor instead for a slightly softer depth.
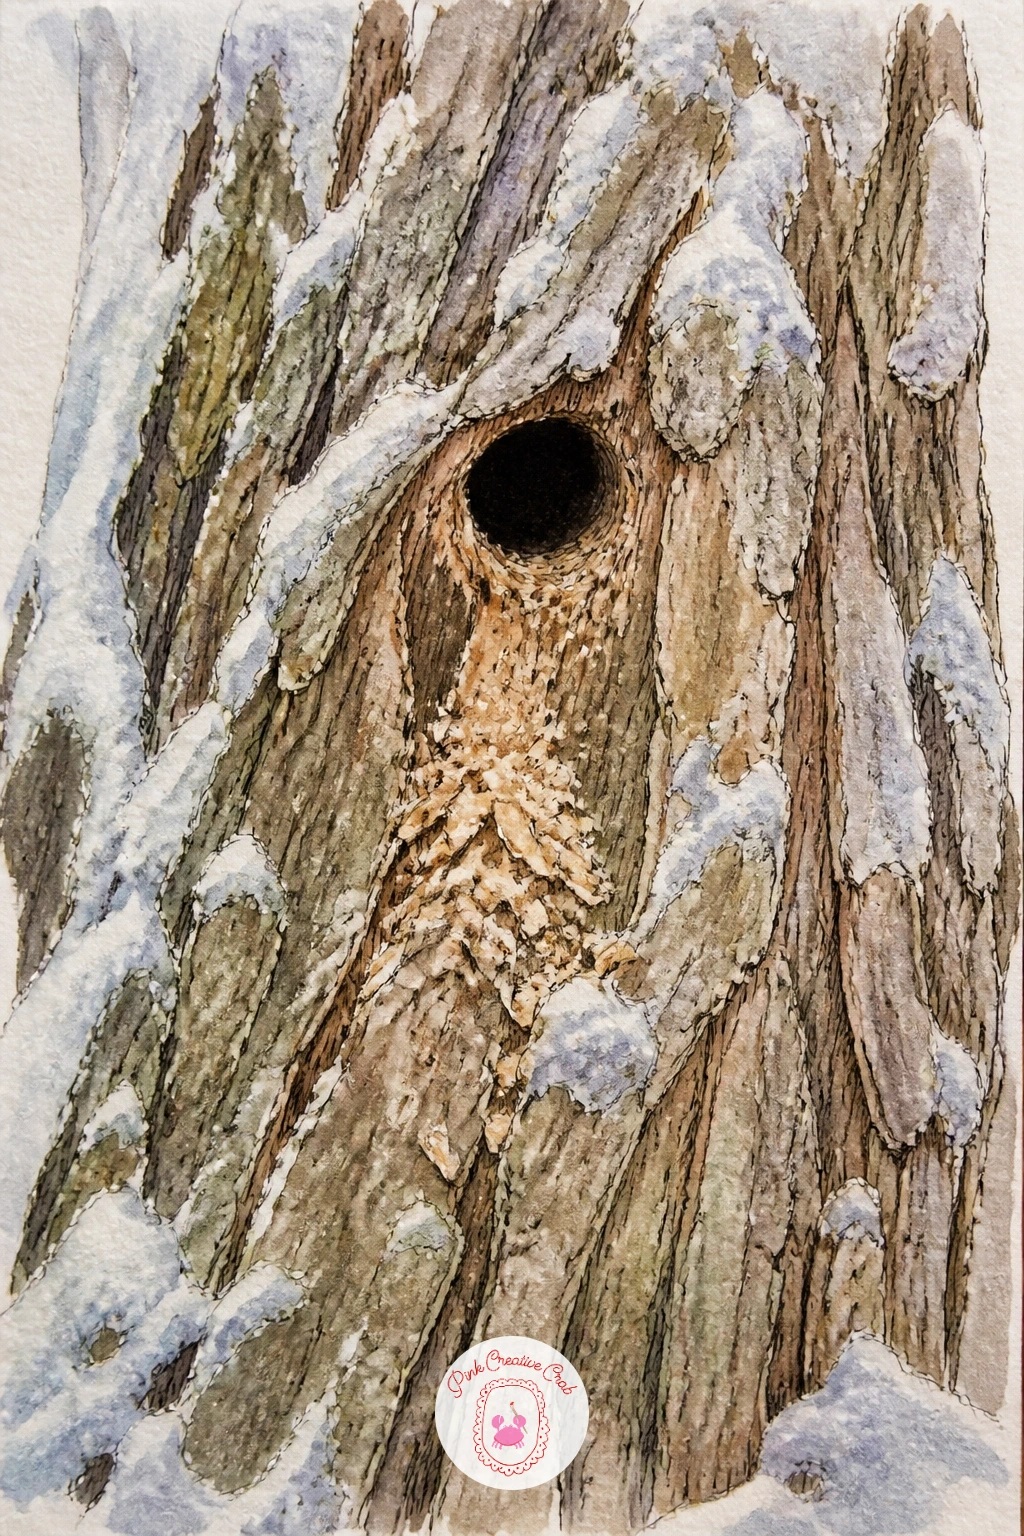
Palette: Raw Umber,Payne’s Grey,Charcoal Grey,Titanium White
A red mitten held out flat, cradling a few acorns and a single feather found on a walk, makes a personal, still life kind of page after so many wild scenes. Draw the mitten first as a simple rounded shape with a separate thumb, keeping the knitted texture suggested rather than drawn stitch by stitch, then add two or three acorns and one feather resting in its palm.
Ink the mitten’s outline with a slightly wobbly line to suggest the softness of knitted wool, and ink the acorns and feather with crisper, cleaner lines so they read as the harder found objects against the soft fabric. Watercolor the mitten in bright red with a darker red in its folds, paint the acorns in warm brown and tan, and leave the feather mostly as pale grey with a few fine barb lines in colored pencil once the paint is dry.
Knitted texture is easy to overdo, so a handful of short diagonal ink lines across the mitten’s cuff is enough to suggest ribbing without turning the whole thing into a grid. If you enjoy this kind of personal page, the boots drawing ideas make a good companion study of winter gear from the same kind of walk.
If bright red watercolor runs thin, build it in two or three layered washes rather than one heavy coat for richer color.
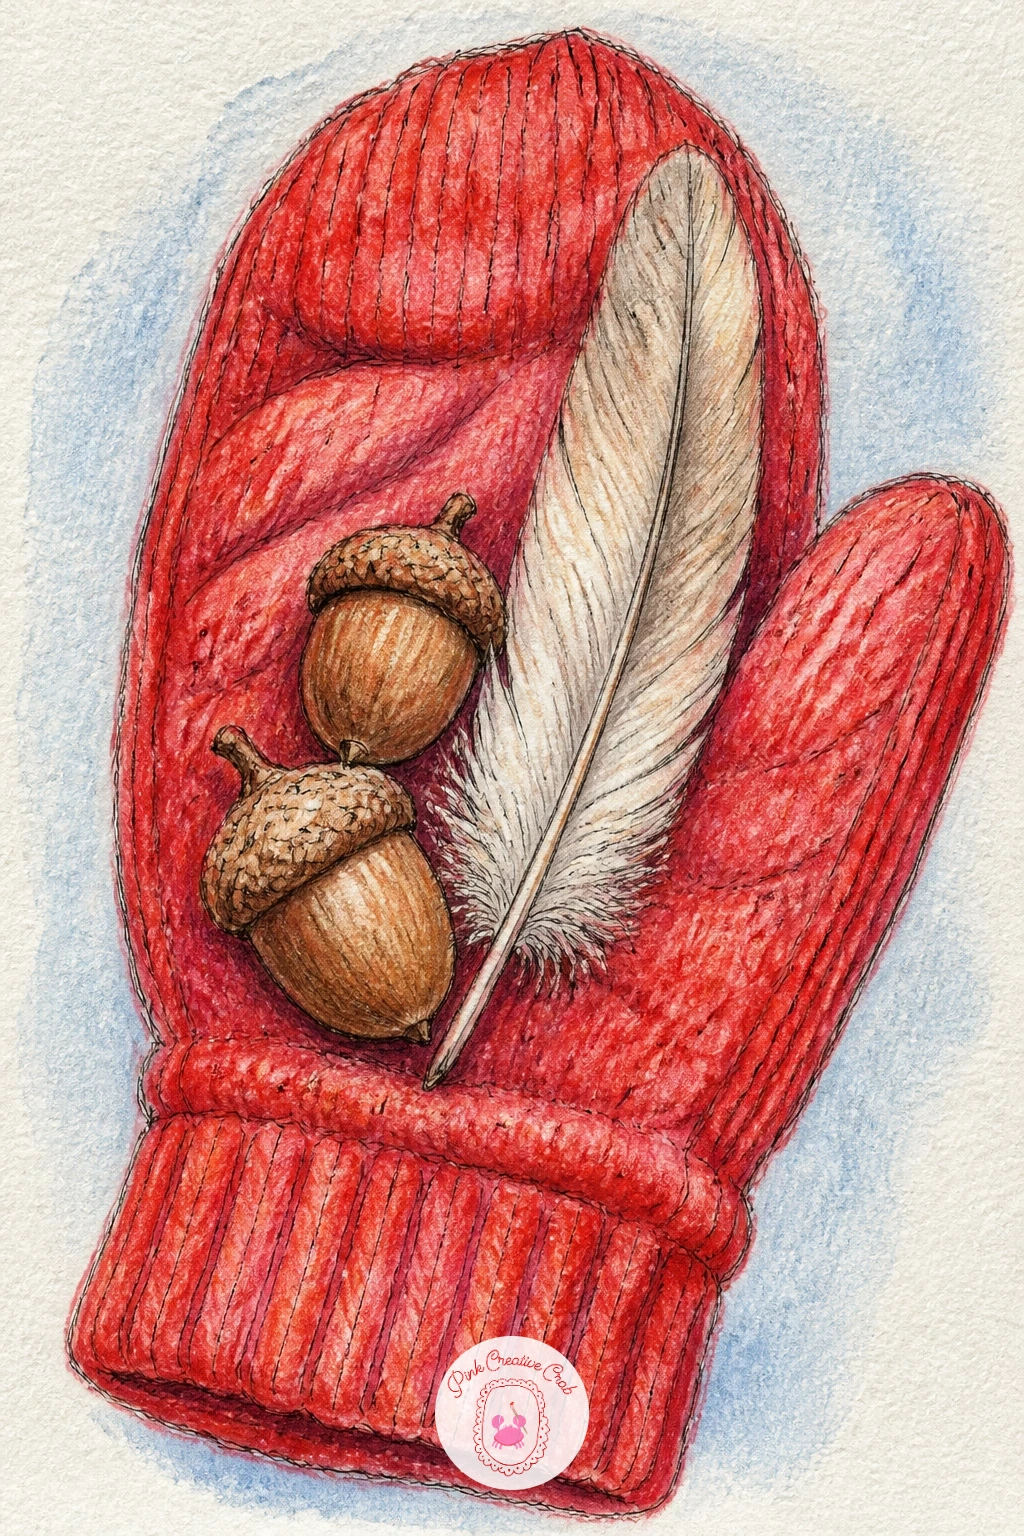
Palette: Cadmium Red,Raw Sienna,Burnt Umber,Payne’s Grey
A fieldfare pecking at the last soft apple left hanging on an otherwise bare tree is a good chance to pair a colorful bird with a colorful piece of fruit on an otherwise muted page. Draw one bare branch crossing the page, the apple hanging from it looking slightly shriveled, and the fieldfare perched beside it leaning in to feed, wings held loosely away from the body.
Ink the bird’s speckled chest with a scatter of small dashes rather than a solid wash, since that speckling is a key identifying feature, then ink the apple with a few soft wrinkles in its skin to show it is past its best. Watercolor the fieldfare in warm grey, chestnut and buff tones, and paint the apple in a mix of dulled red and brown rather than a fresh bright red, since a shriveled apple reads better slightly desaturated.
Keep the branch itself thin and bare except for the one apple, since a branch crowded with leaves or other fruit would undercut the sense of this being the very last one left. For a simpler ten minute version, draw just the bird’s head and shoulders leaning toward the fruit rather than its whole body.
If the speckled chest pattern feels fiddly in ink, stipple it instead with the tip of a fine brush loaded with dark watercolor.
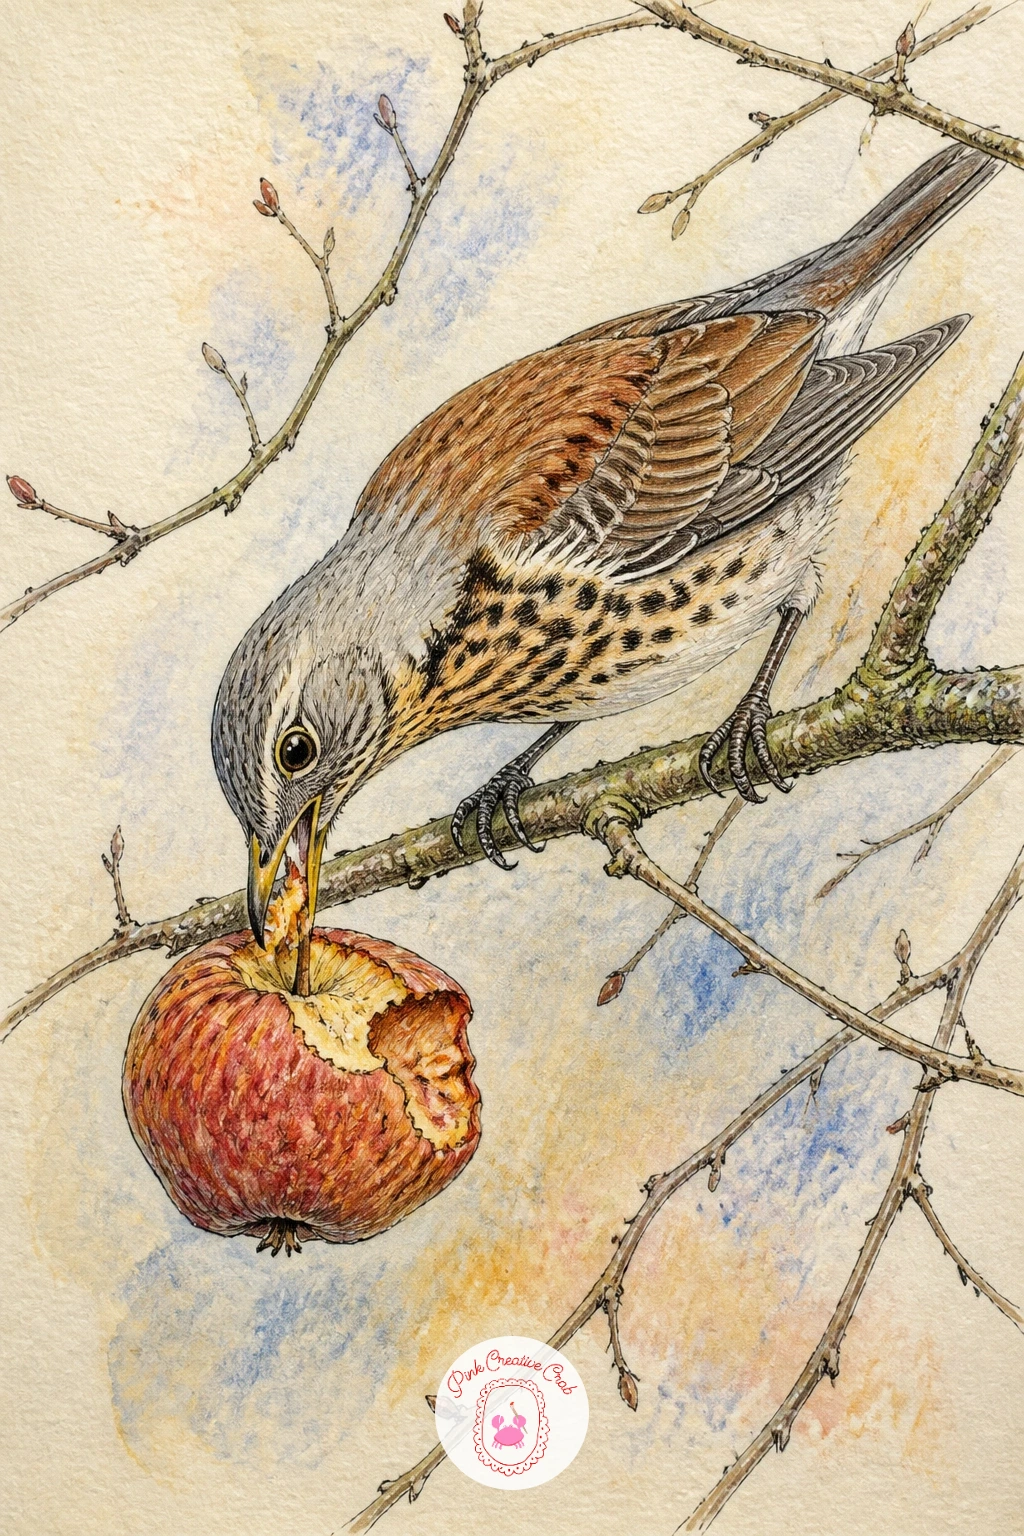
Palette: Raw Sienna,Burnt Umber,Payne’s Grey,Cadmium Red
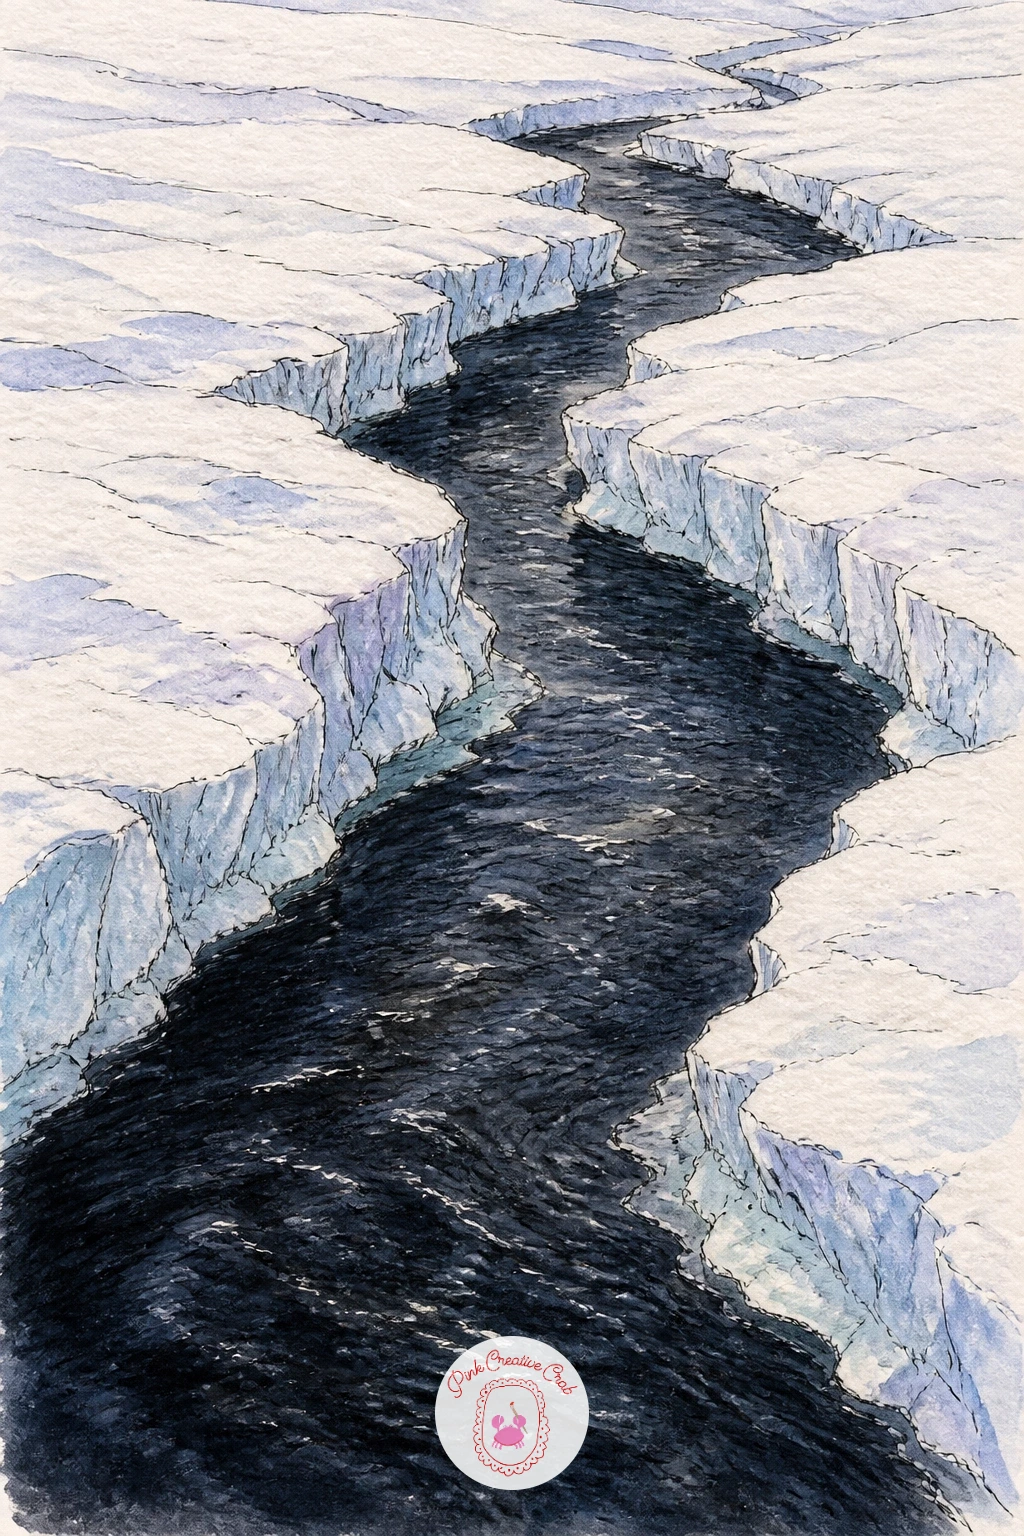
A stream running dark and open down the middle while ice shelves build up along both banks is one of the more atmospheric landscape pages on this list. Draw the stream as a gently curving ribbon running through the page, then add jagged, overlapping ice shapes pushing in from both banks toward the open water in the center.
Ink the open water’s edge with a confident wavering line where it meets the ice, and ink the ice shelves themselves with angular cracked lines rather than smooth curves, since ice breaks unevenly. Watercolor the open water in dark blue grey, nearly black in places, and paint the ice shelves in pale blue white, letting a little of the dark water wash bleed faintly under the thinnest edges of ice for a translucent look.
This whole scene depends on keeping the darkest value for the water and the lightest for the ice, since a stream painted too pale loses the contrast that makes it look genuinely open and cold. Try varying this one next time by changing the stream’s curve, or by adding a single dark rock breaking the surface where the current runs fastest.
If dark blue grey looks too flat, mix in a touch of green for a more believable, less uniform water color.
Palette: Payne’s Grey,Cerulean Blue,Sap Green,Titanium White
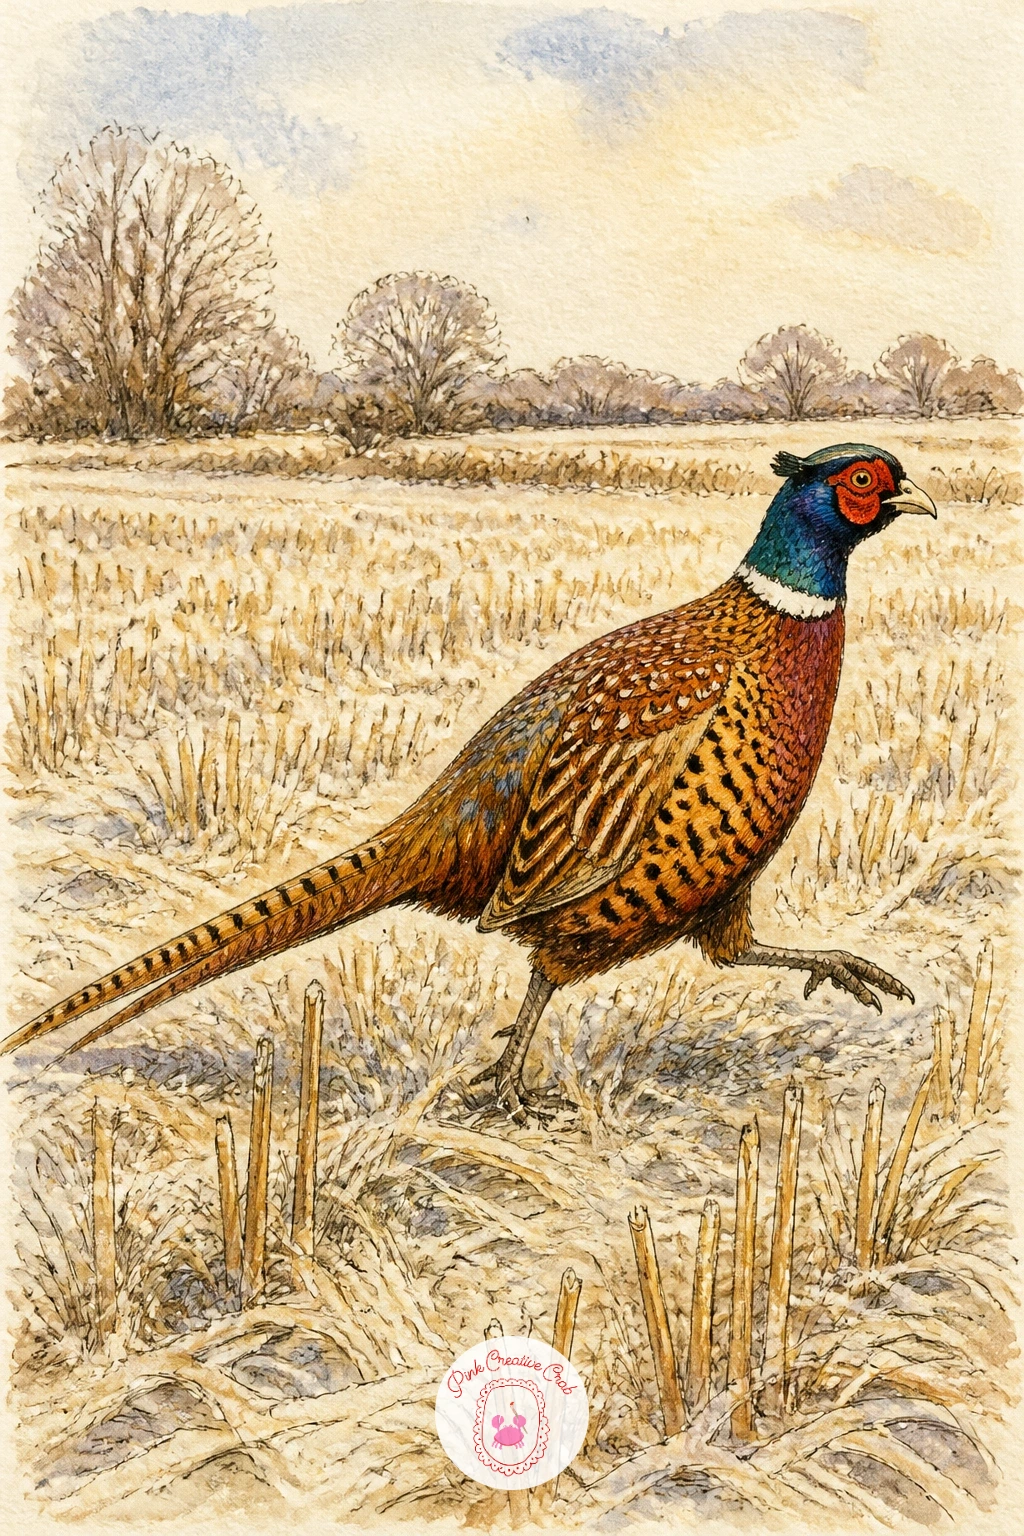
A pheasant stepping carefully across a frosty stubble field lets you combine a strongly patterned bird with a simple textured ground. Draw the body as a long oval with that unmistakable long pointed tail trailing behind, then add the small head with its bright wattle, standing or mid-step among short cut stalks of stubble.
Ink the body’s barred feather pattern with careful short curved strokes following the body’s contour, saving the longest cleanest lines for the tail feathers themselves. Watercolor the male in rich copper, bronze and dark green around the head, or keep a female plainer in mottled browns if you prefer, then wash the stubble field in pale gold with a thin frost of white colored pencil scratched across the tips of the cut stalks.
Patterned feathers like a pheasant’s go wrong when every mark gets equal attention, so block in the overall copper and bronze color first and add the fine barring only afterward, concentrating detail on the body and letting the tail stay simpler and more linear. If the stubble field feels like it is competing with the bird for attention, keep its color pale and let the pheasant carry all the saturation on the page.
Swap colored pencil frost for a scatter of white gouache flicked from a toothbrush if you want a quicker, speckled finish.
You Will Need
- toothbrush for splatter (optional)
Palette: Burnt Sienna,Sap Green,Raw Sienna,Titanium White
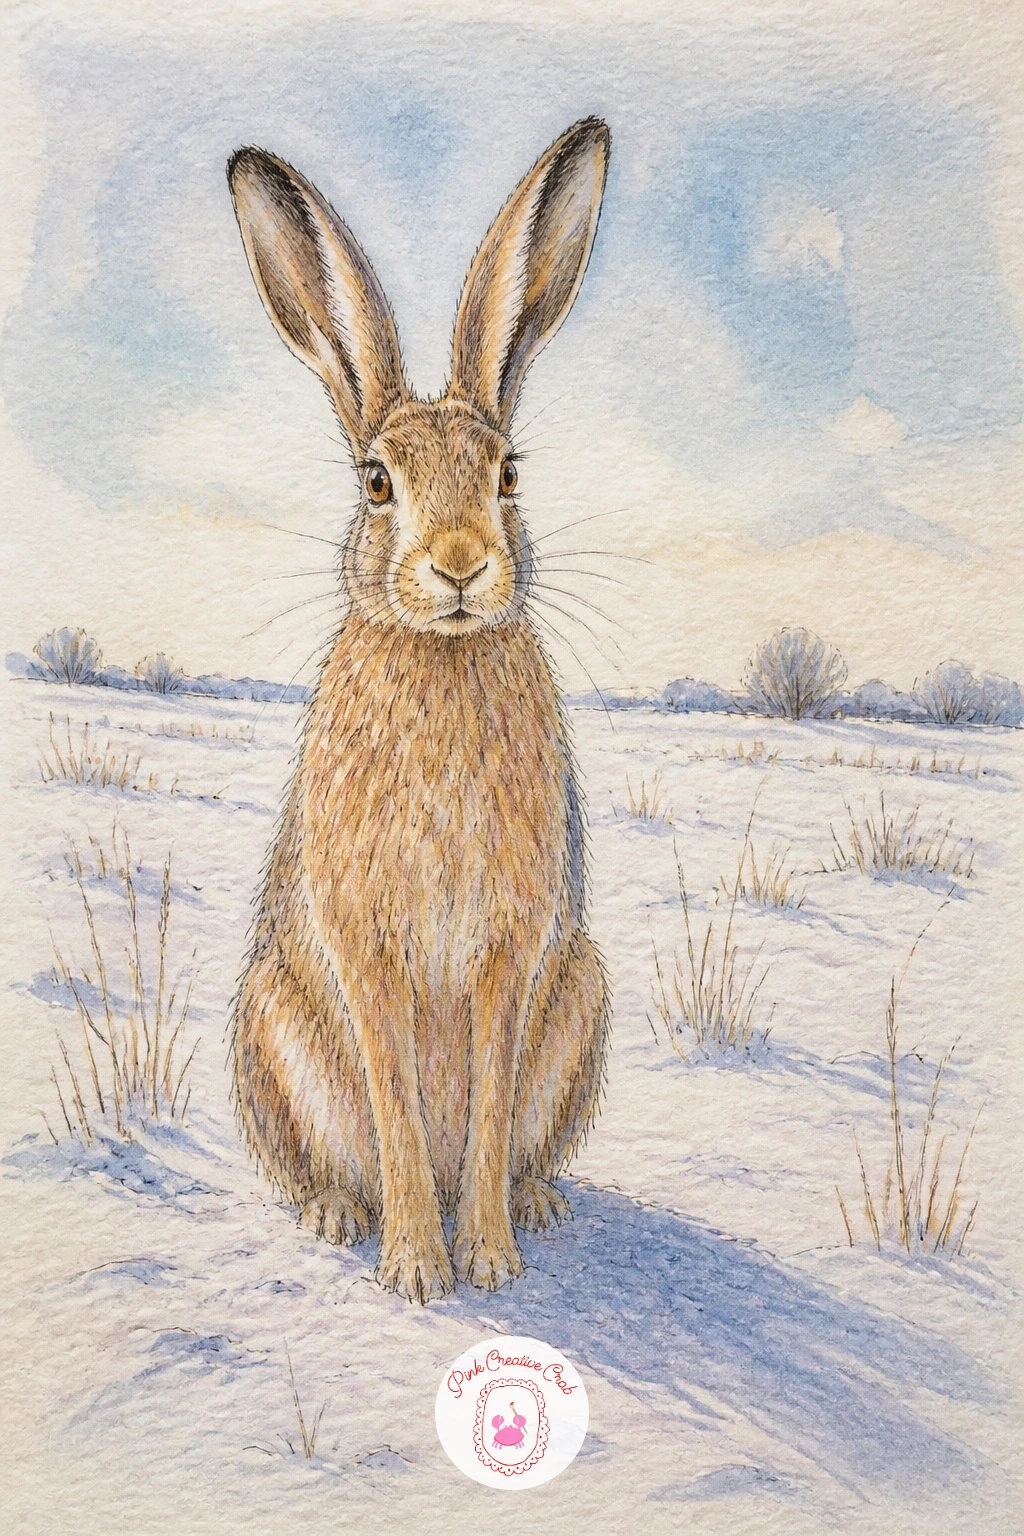
A hare sitting up alert in the middle of an open snowy meadow is one of the more rewarding animal subjects here, mostly because of those long ears. Draw the body as a rounded upright oval, then add the long back legs tucked beneath it and the two tall ears rising straight up, slightly angled apart rather than perfectly parallel.
Ink the body outline cleanly, then add fur texture only along the back and ear edges with short flicked strokes rather than covering the whole body, keeping the belly smoother and paler. Watercolor the coat in warm tawny brown with grey undertones, darker along the back and ear tips, and wash the meadow around it in pale blue white with a long warm shadow stretching out from the hare to show low winter light.
Compare the ear length to the head before you ink: a hare’s ears are roughly as long as its whole head and neck combined, which is what separates the silhouette from a rabbit’s shorter, rounder ears. If the shadow direction feels arbitrary, decide where the winter sun sits first and let every shadow on the page, hare included, agree with that single light source.
For a softer coat texture, try dry brushing a little extra tawny color along the spine once the base wash has dried.
Palette: Raw Sienna,Burnt Umber,Payne’s Grey,Titanium White
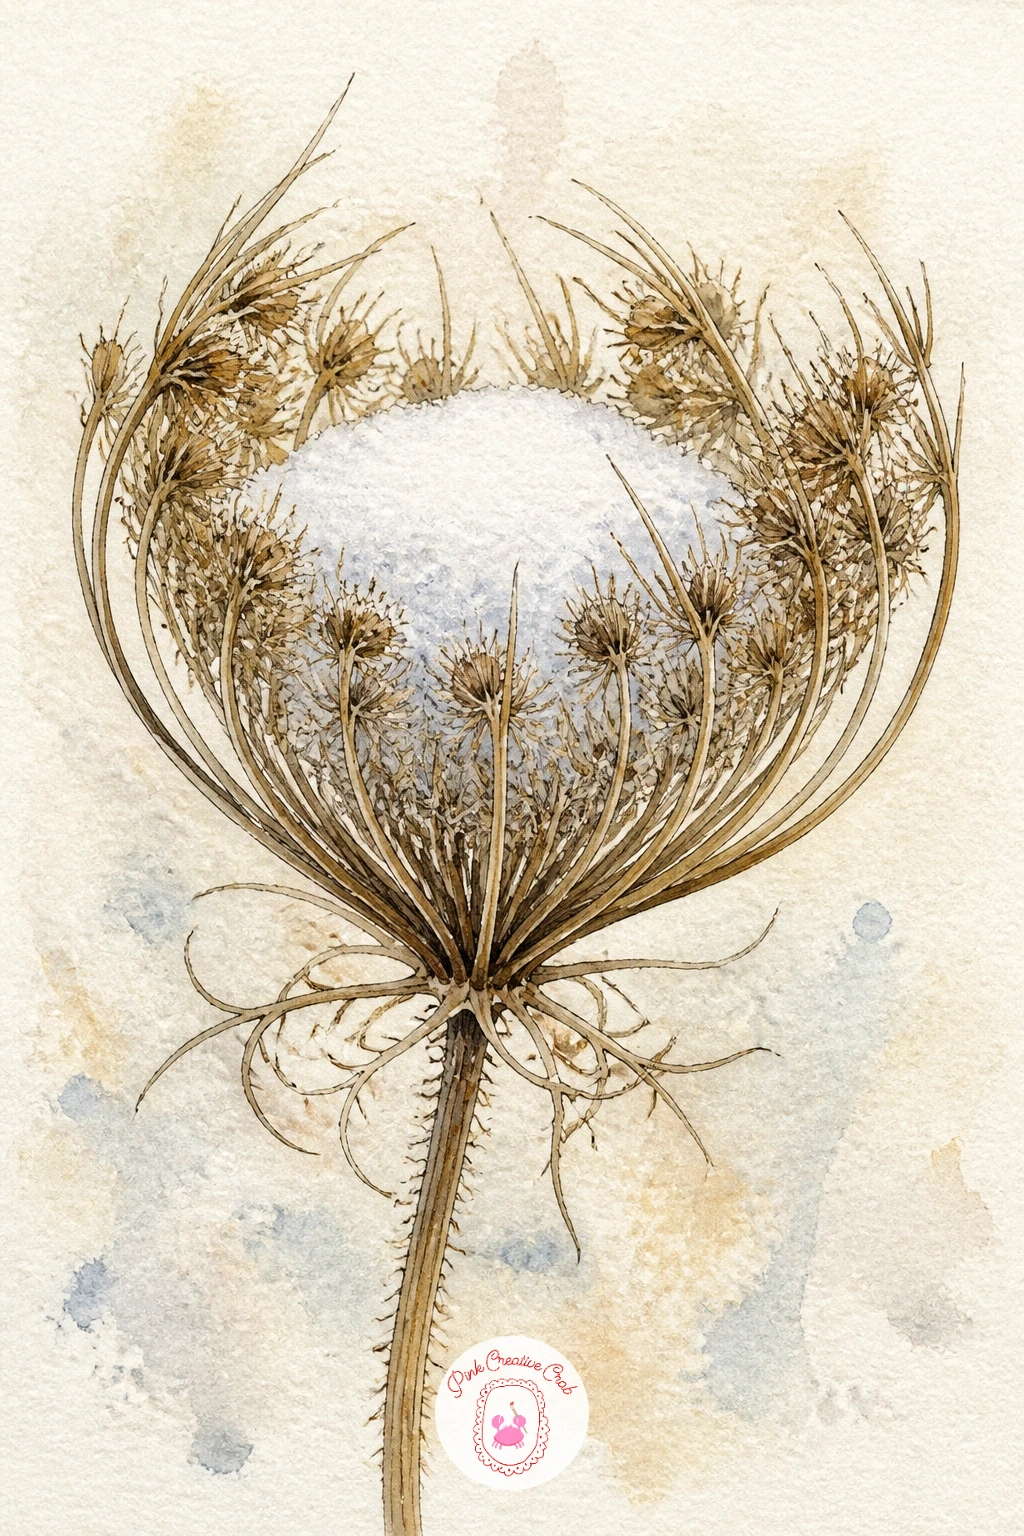
Wild carrot, sometimes called Queen Anne’s lace, forms a dried seed head that curls inward like a little nest, and in winter it often holds a neat cap of snow in that hollow. Draw the overall shape as a shallow cupped circle made of many thin curving spokes meeting at a center, then add a small rounded mound of snow sitting in that central hollow.
Ink the spokes working outward from the center, keeping the lines fine and slightly uneven in length so the whole head reads as delicate rather than mechanical. Watercolor the dried spokes in pale warm brown, leave the snow cap as bare paper, and add a thin cool grey shadow along one edge of the snow to show where it meets the curved brown spokes beneath.
This subject rewards patience with repeated fine lines more than it rewards shading, so work slowly outward from the center rather than trying to rough in the whole shape at once. Next time, try the same seed head without its snow cap, standing upright against a plain sky wash instead of lying flat and cupped.
If the fine spokes blur together when inked too close, leave slightly more space between them near the center than you think you need.
Palette: Raw Sienna,Payne’s Grey,Titanium White,Burnt Umber
Trapped ice bubbles seen looking straight down into a frozen lake make a striking, almost abstract page after so many straightforward scenes. Draw a loose scatter of round and oval shapes of different sizes clustered more thickly in some areas than others, since real trapped bubbles rarely spread evenly.
Ink each bubble with a simple outline and a single curved highlight line near its top, then add faint crack lines in the ice radiating outward from a few of the larger bubbles. Watercolor the ice in cool blue and grey, varying the tone so some patches sit darker where the ice is thicker, and leave the bubbles themselves paler or even bare white where the trapped air catches light.
Looking straight down changes everything about how this reads: there is no horizon, no sky and no ground, just pattern and depth, so let the bubbles and cracks fill the whole page edge to edge rather than floating in empty space. Vary the bubble sizes dramatically, mixing a few large ones with many small ones, since a field of same-sized bubbles looks printed rather than natural.
If the cool blues start to look flat, glaze a very thin warm grey wash over a few darker patches once dry for more depth.
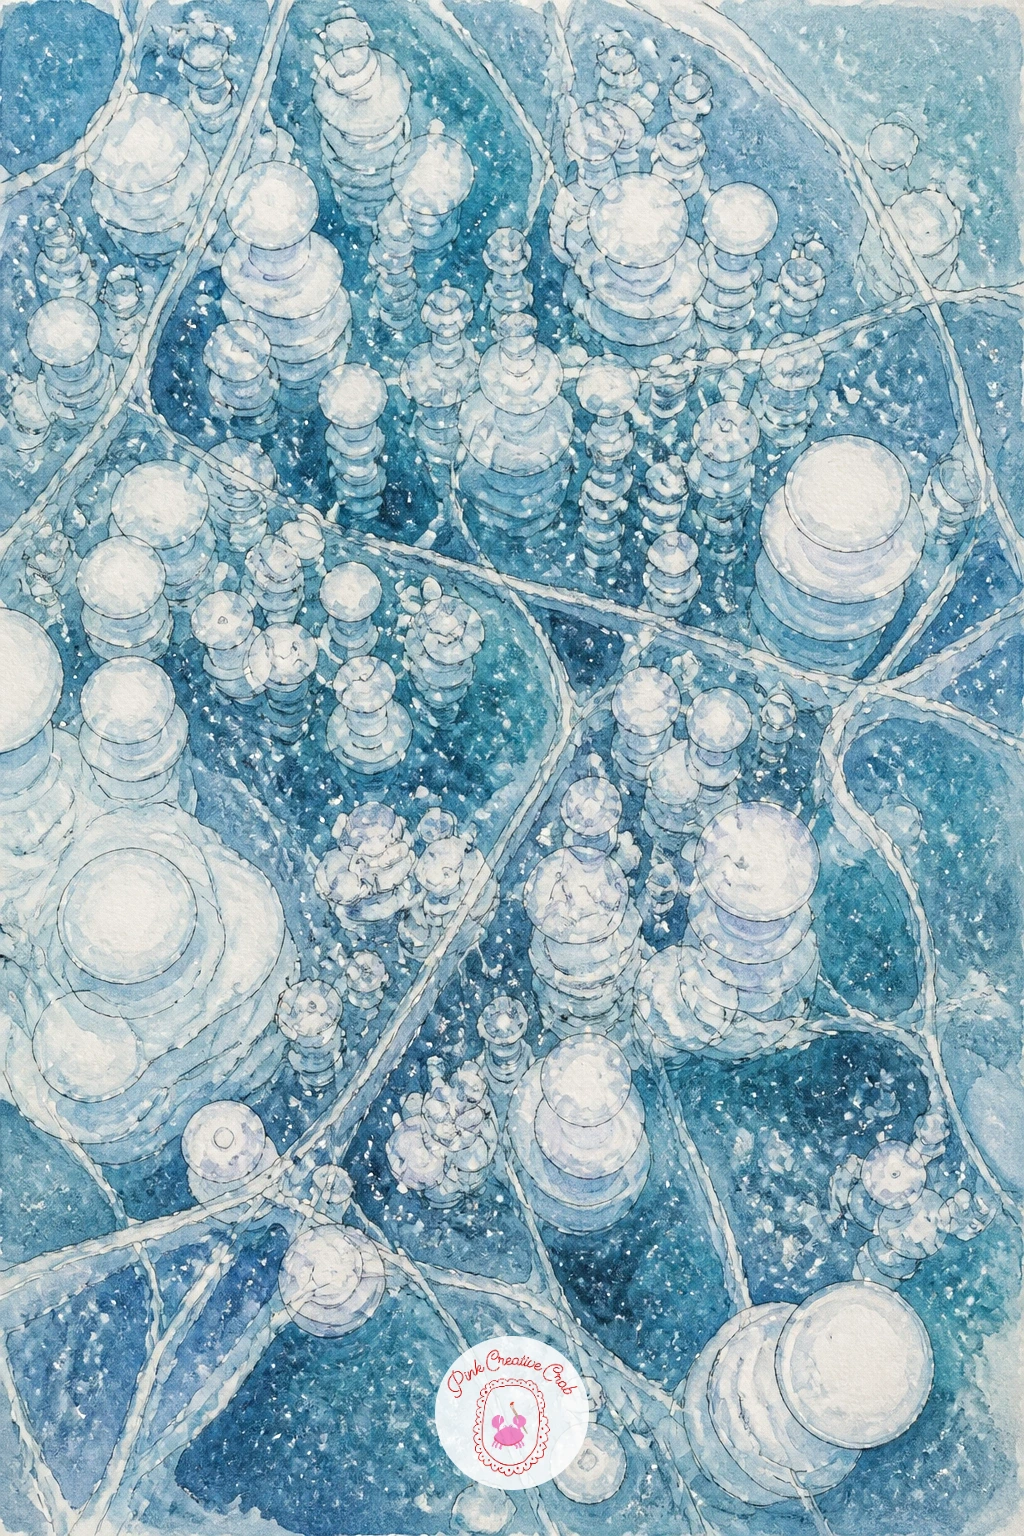
Palette: Cerulean Blue,Payne’s Grey,Titanium White,Charcoal Grey
Two long-tailed tits huddled together on one frosty twig is a chance to draw a pair rather than a single bird, with their round fluffy bodies and long thin tails overlapping slightly. Draw both birds as small rounded puffballs perched close together, tails trailing down and slightly crossing, then add the single thin twig they share running beneath their feet.
Ink both birds’ outlines first, keeping their bodies notably rounder and fluffier than the wren drawn earlier in this list, then add the fine pink, black and white markings on their heads with careful small shapes. Watercolor the bodies in soft pink, black and white patches, leave the long tails mostly dark, and dust the twig beneath them with a thin frost of white colored pencil or gouache.
Keep the two birds genuinely touching or nearly touching along one side, since long-tailed tits huddle close for warmth and spacing them apart loses that cozy, true-to-life feeling entirely. If the pink markings look too strong straight from the tube, mix a touch of white into the pink first and build it up in two thin layers instead of one.
A fine white gel pen over the dry twig adds a crisp last layer of frost sparkle.
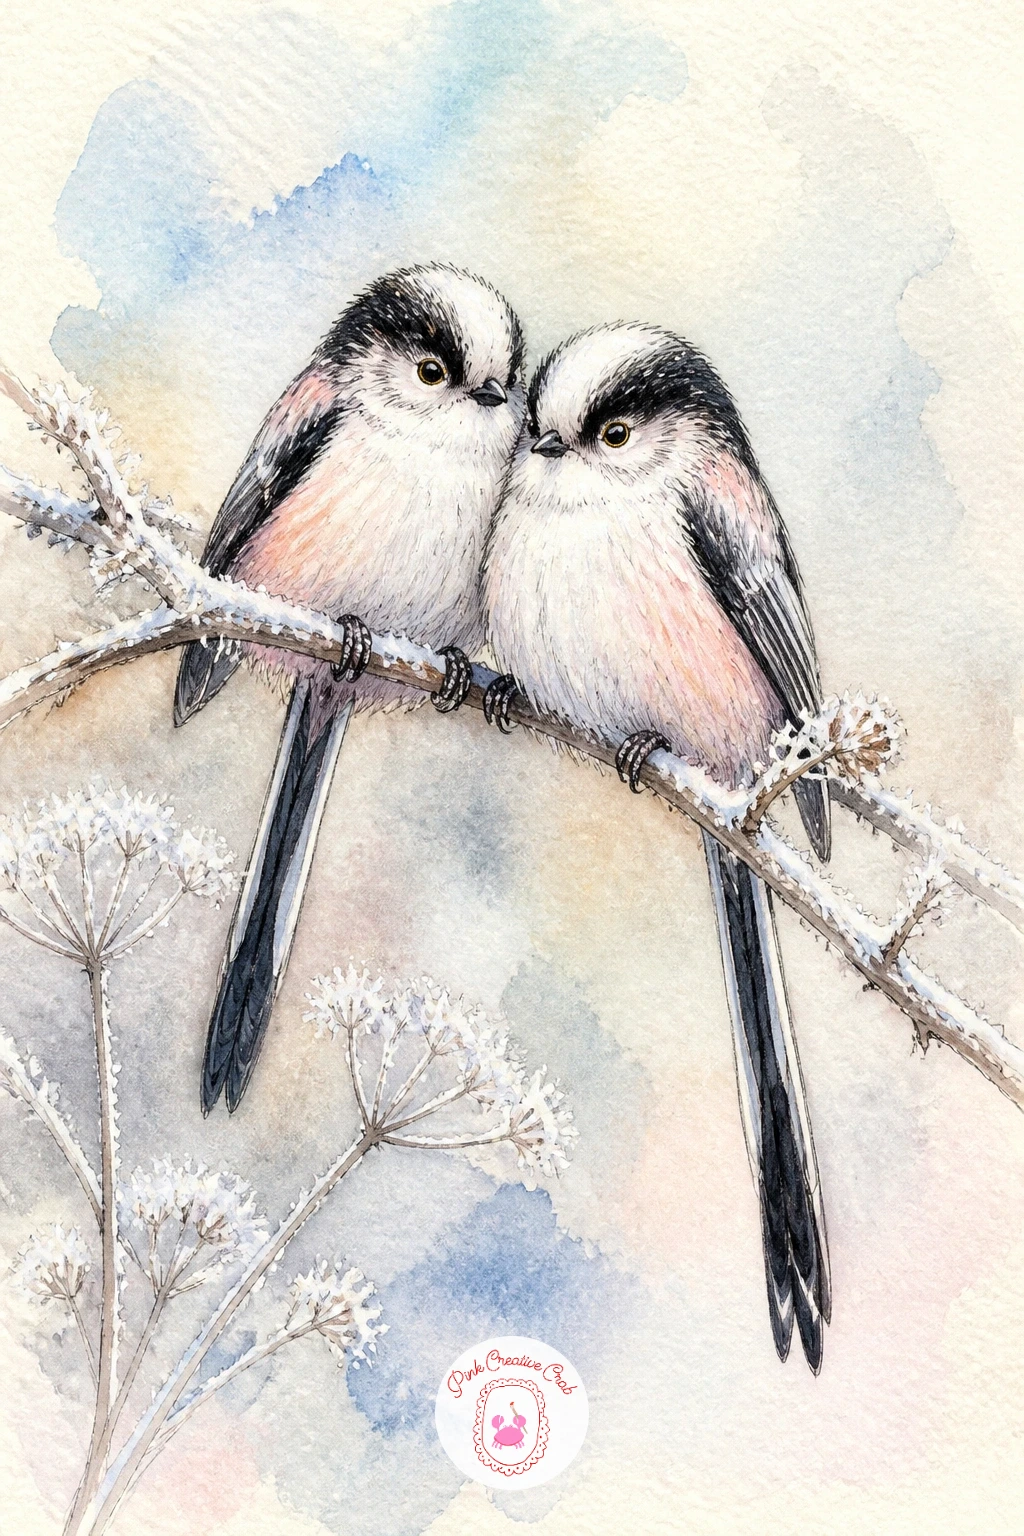
You Will Need
- white gel pen
Palette: Pink Madder,Charcoal Grey,Titanium White,Raw Umber
A blackbird picking at ivy berries along the top of a snowy stone wall brings together a strongly colored bird, dark glossy berries and a textured wall in one page. Draw the wall as a low horizontal band of uneven stones first, with a trailing mass of ivy leaves and berry clusters climbing across part of it, then perch the blackbird at one end reaching toward the nearest berries.
Ink the blackbird’s glossy black body with a few curved highlight lines left unpainted to suggest sheen, and ink the bright orange beak and eye ring with careful small crisp shapes, since that contrast against the black is the bird’s whole character. Watercolor the body in deep black with a hint of blue in the highlights, paint the ivy leaves in dark glossy green and the berries in near-black with a tiny white highlight dot on each, then wash the wall in cool grey with a dusting of snow along its top edge.
Black birds and black berries sitting near each other can easily merge into one dark mass, so keep a thin strip of pale wall or snow visible between the bird’s silhouette and the ivy to separate the two shapes clearly. If pure black paint looks lifeless, build it from a very dark mix of blue and brown instead for more life in the shadows.
Finish with a single bright dot of orange left slightly outside the lines on the beak, which reads as a convincing catch of light.
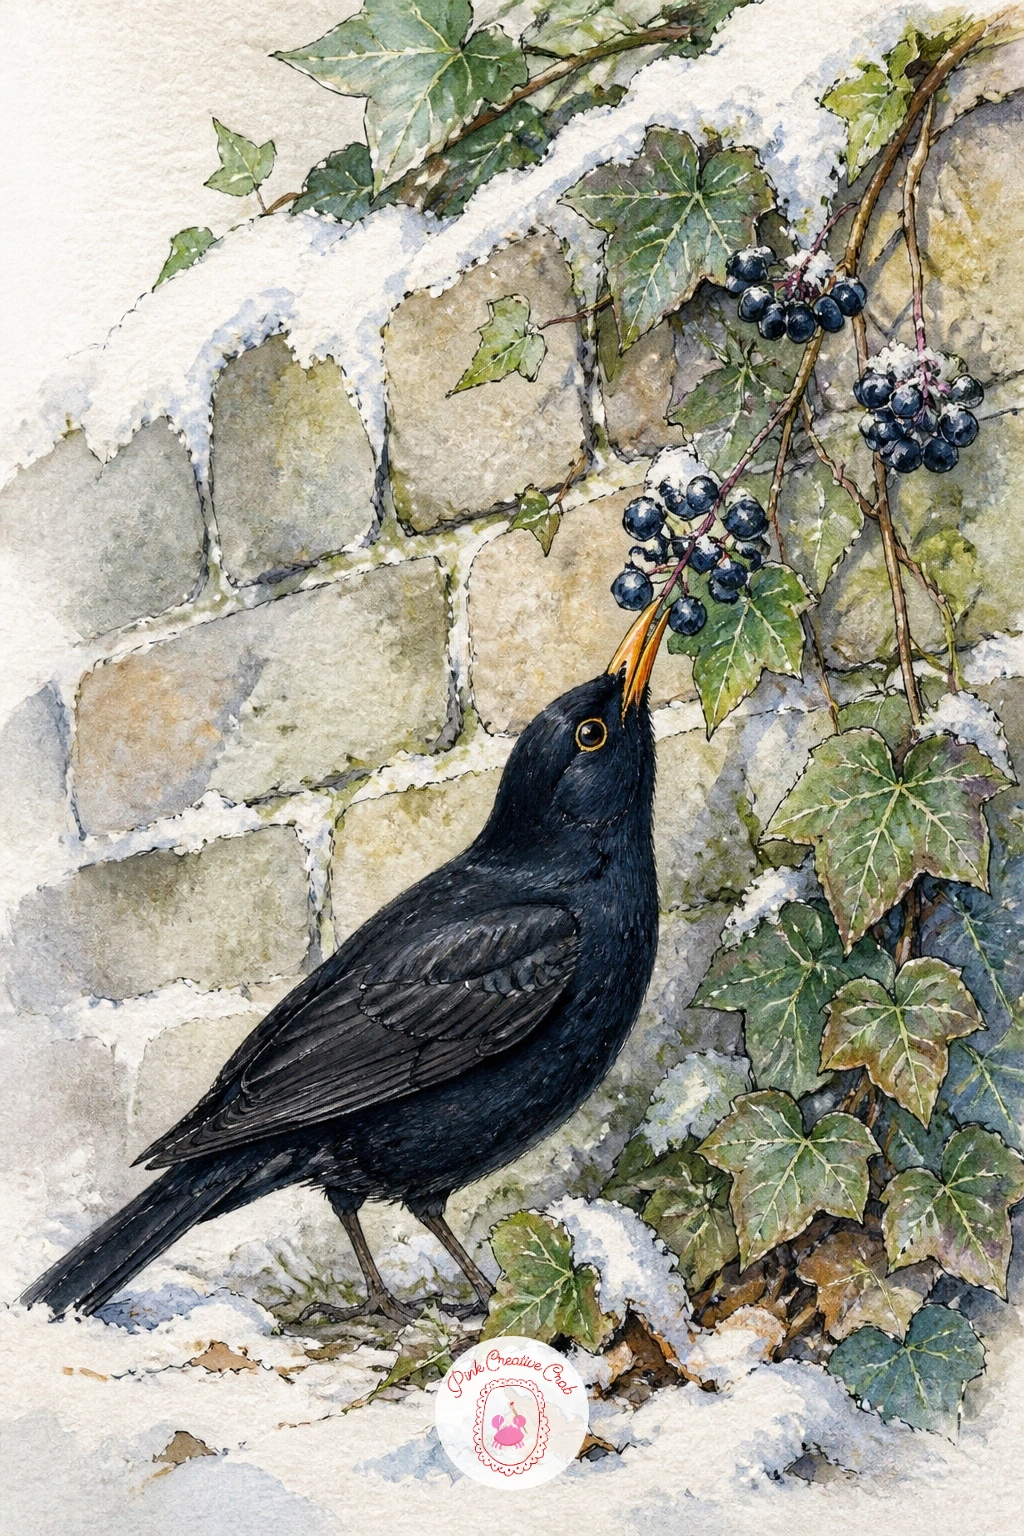
Palette: Charcoal Grey,Sap Green,Burnt Orange,Payne’s Grey
A cluster of ladybirds packed together under a curl of loose bark is a good small subject for practicing a repeated shape with just enough variation to stay interesting. Draw a section of bark peeling away from a trunk first, creating a dark gap beneath it, then cluster eight or ten small domed ladybird shapes tucked into that shadowed space, overlapping slightly where they huddle closest together.
Ink each ladybird with a simple domed outline and a center line down the back, then add just a few black spots per bug rather than counting them out precisely, since from this close a loose scatter of dots reads better than a textbook pattern. Watercolor the ladybirds in bright red orange, keep the gap beneath the bark in deep shadow with a dark grey wash, and paint the bark itself in warm brown with a paler curled edge where it lifts away from the trunk.
Vary the ladybirds in size and the angle they face, since even hibernating insects do not line up in neat rows, and let a few sit only half visible at the edge of the bark’s shadow. If bright red watercolor dries too flat, add a small dry brush stroke of darker red along one edge of each dome for a touch of gloss.
Keep the dark gap beneath the bark genuinely dark, since that shadow is what makes the cluster look tucked away and sheltered rather than sitting out in the open.
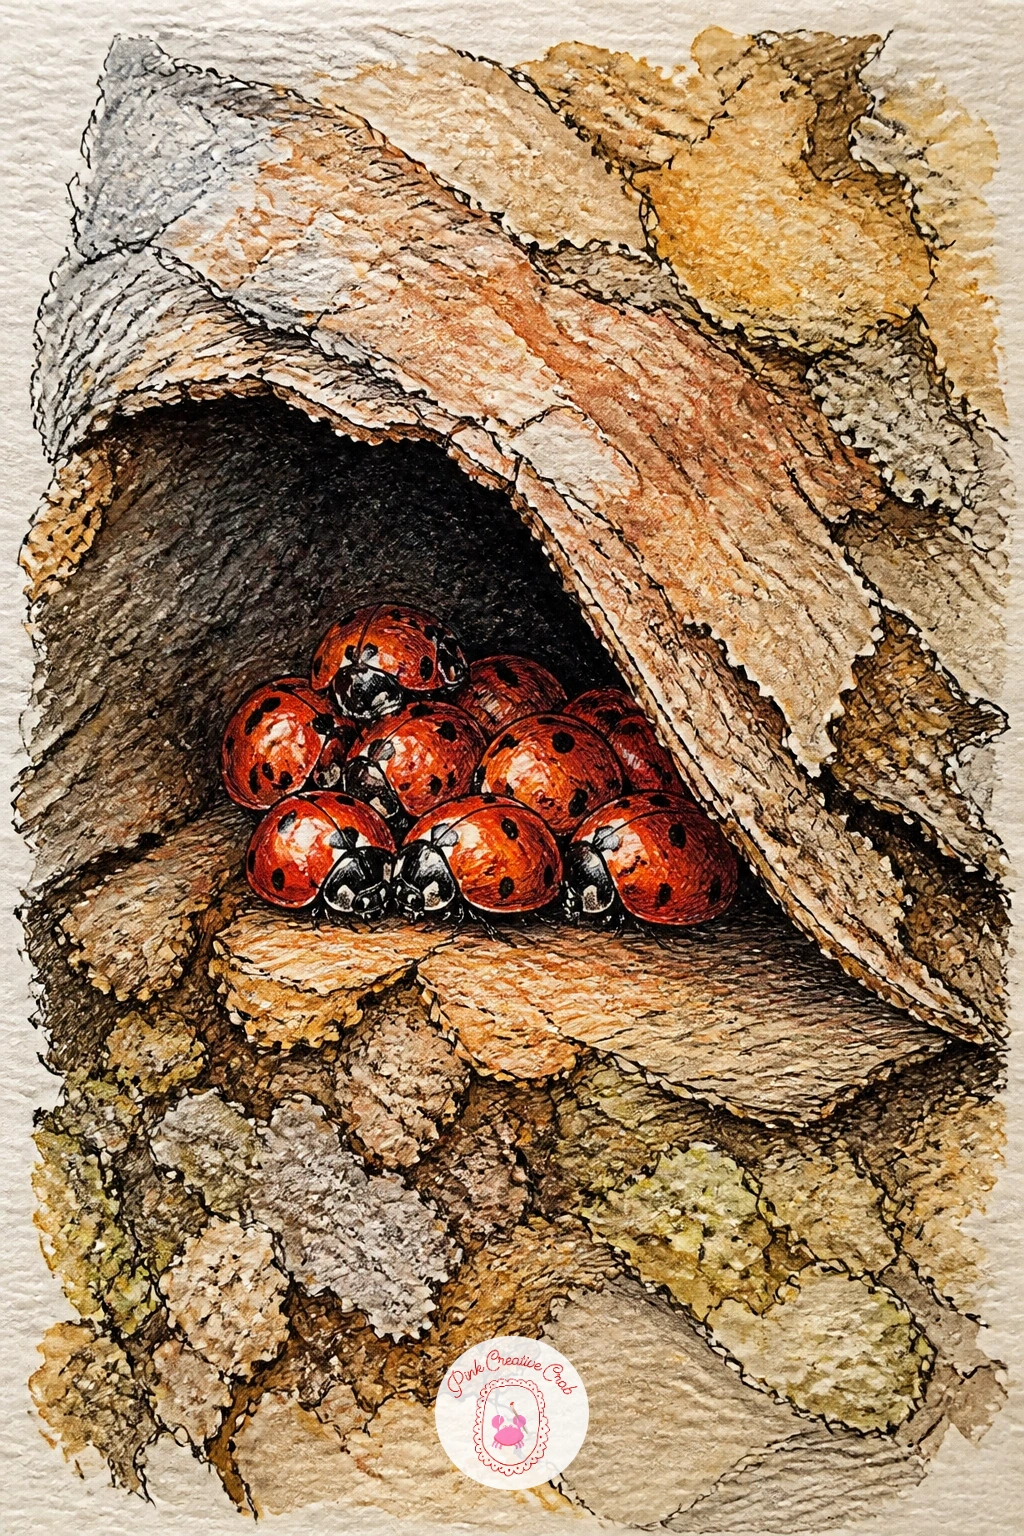
Palette: Cadmium Red,Charcoal Grey,Raw Umber,Burnt Sienna
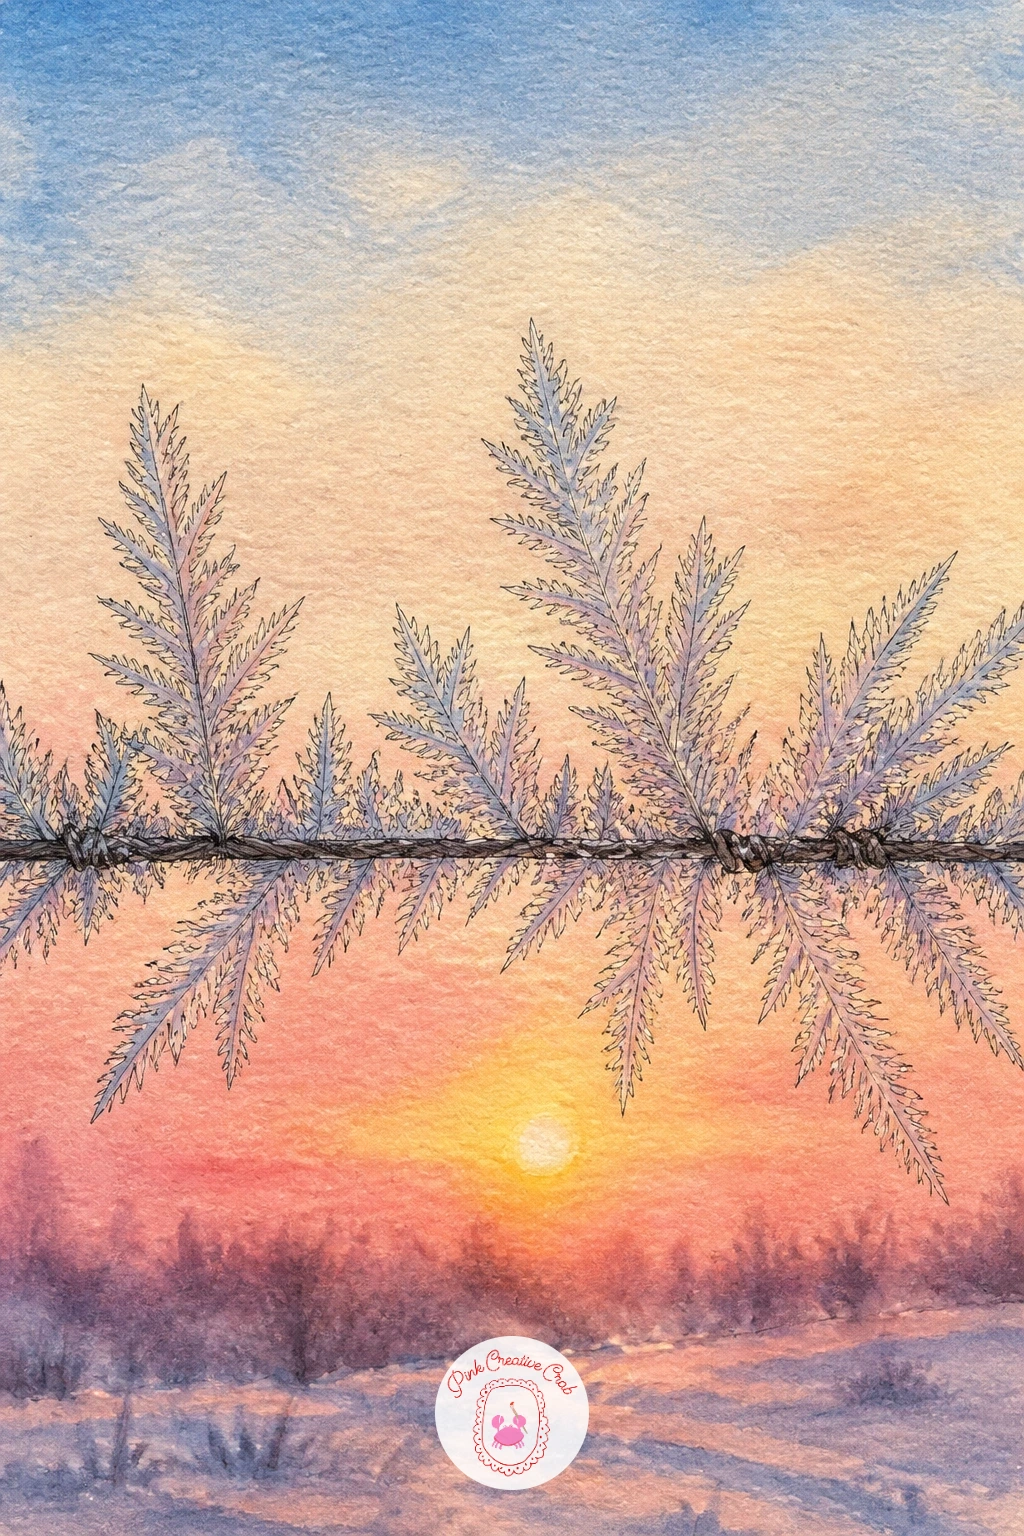
Hoarfrost building up into feathery crystal shapes along a plain fence wire at sunrise is a subject built almost entirely around delicate white marks against warm color. Draw one or two lengths of thin wire running across the page first, then build up feathery, branching frost crystals growing outward from the wire in clusters, denser in some spots than others.
Ink only the wire itself with a clean confident line, and leave the frost crystals unlined entirely, planning to create them with paint and colored pencil instead of ink. Wash the sky behind everything in warm pink and gold for the sunrise, then once that is fully dry, add the frost crystals in white gouache or white colored pencil built up in short branching strokes radiating from the wire.
Morning light changes the whole mood here: keep the warm wash concentrated low on the page near the horizon and let it cool to pale blue higher up, which gives the white frost something warm to glow against exactly where the light would actually hit it first. If gouache feels too thin to show up over a strong wash, add a touch of white watercolor to it for a slightly more opaque white.
Keep the wire itself thin and spare so the frost crystals, not the wire, carry the whole page.
You Will Need
- white gouache
Palette: Rose Pink,Lemon Yellow,Cerulean Blue,Titanium White
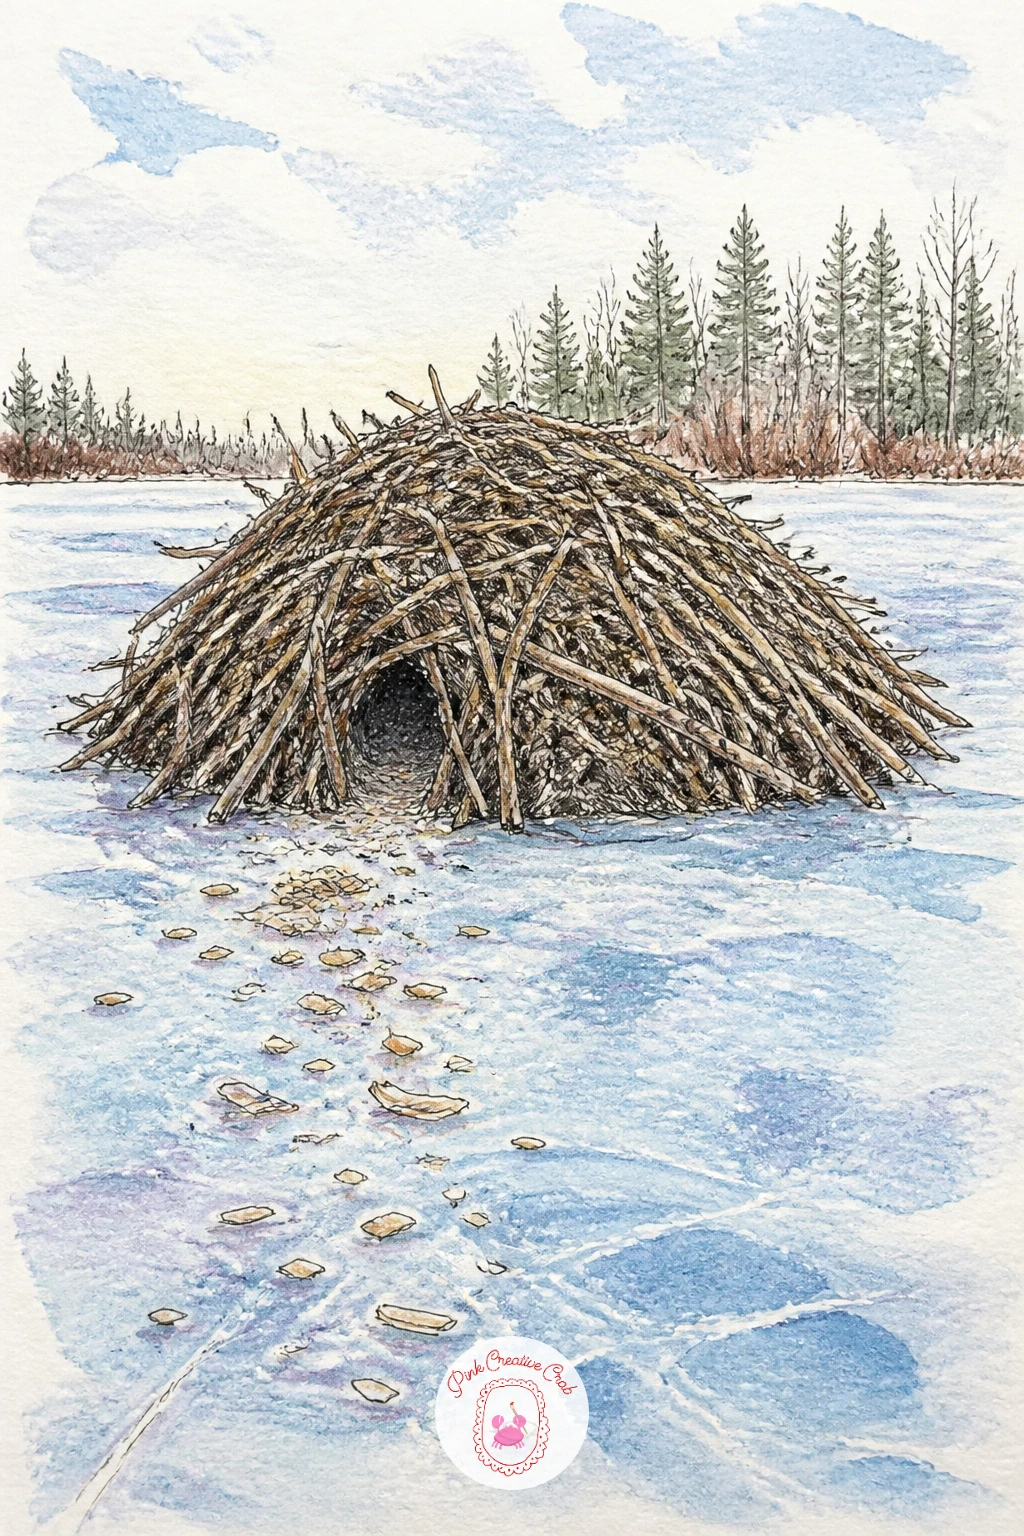
A beaver lodge rising from the middle of a frozen pond, with a trail of gnawed wood chips scattered near its base, makes a good landscape-scale page after so many close studies. Draw the lodge as a rounded dome built from overlapping sticks and mud, sitting slightly off-center in a wide expanse of flat ice, then scatter a few pale wood chips and one or two chewed stick ends near its edge.
Ink the stick texture on the lodge with short overlapping diagonal marks going in varied directions, since real beaver lodges are a rough tangle rather than a neat weave. Watercolor the lodge in warm greys and browns, darker in the gaps between sticks, and wash the surrounding ice in pale blue white with a few faint crack lines radiating outward across the flat surface.
Keep the whole pond surface otherwise empty and still, since the contrast between the one rough textured lodge and the large smooth expanse of ice around it is what gives the page its sense of scale and quiet. For a simpler ten minute version, draw just the lodge filling most of the page with only a narrow strip of ice showing at the bottom rather than the wider pond.
If the stick texture starts looking too even, vary the pressure on your fineliner so some strokes are darker and heavier than others.
Palette: Raw Umber,Payne’s Grey,Cerulean Blue,Titanium White
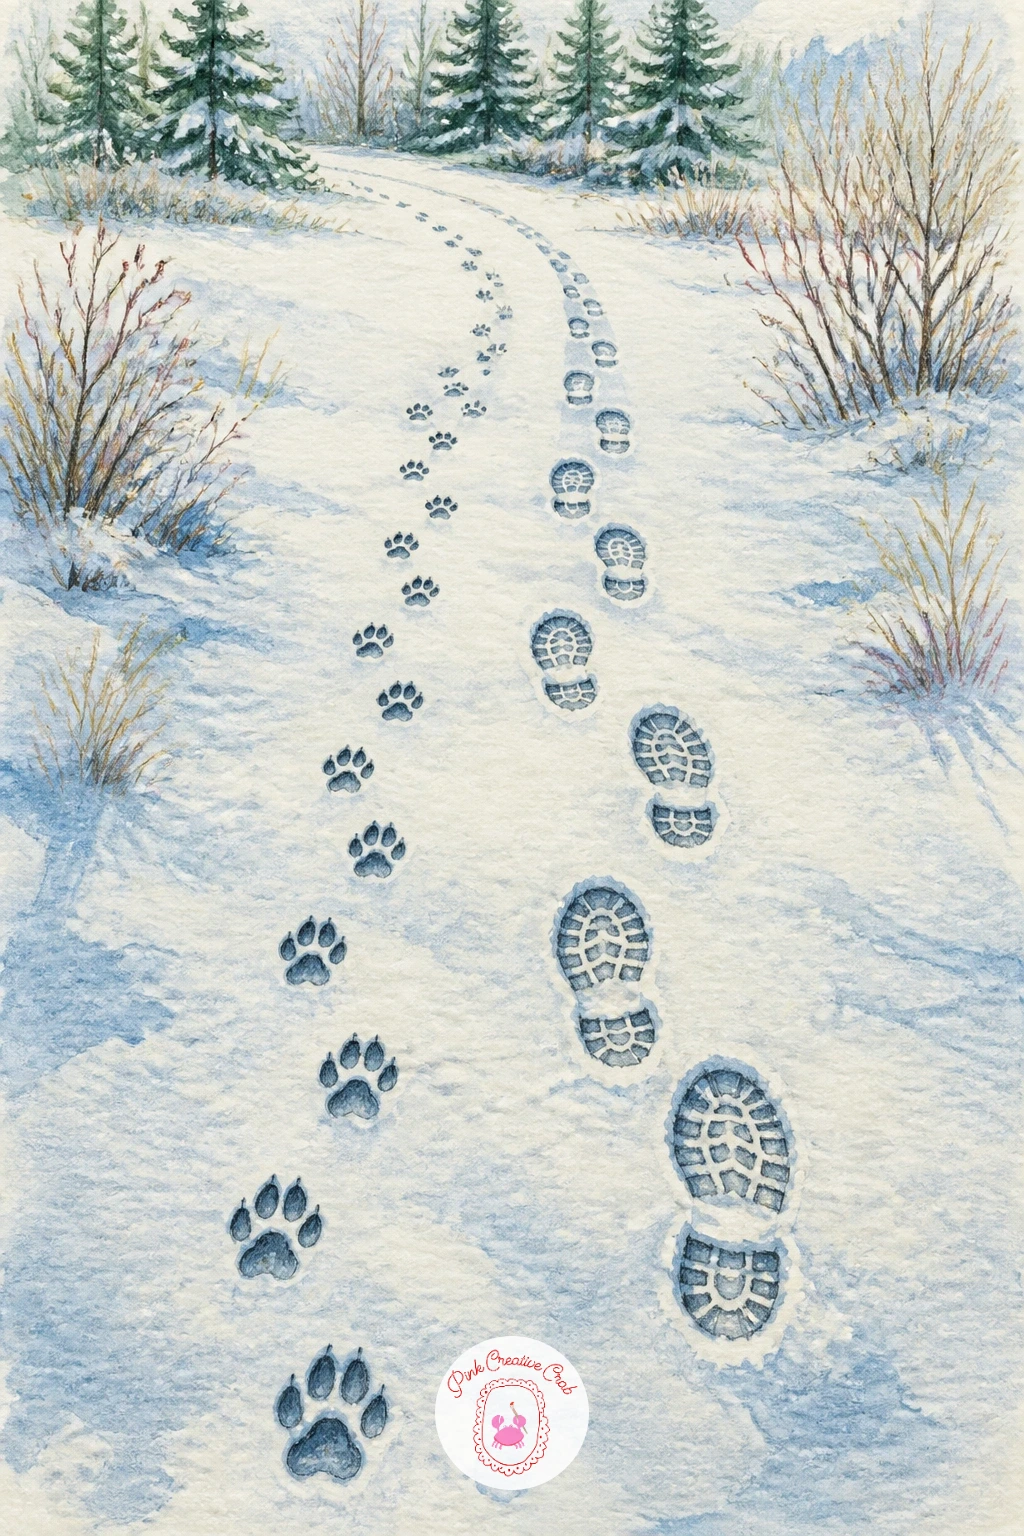
A simple trail of dog paw prints walking alongside boot prints in fresh snow captures a shared winter walk without showing either walker at all. Draw a line of rounded paw prints with four small toe pads each, then a parallel line of boot prints with a simple tread pattern, spacing the two tracks so they clearly belong to companions walking together rather than two separate paths.
Ink the paw prints with soft rounded shapes and the boot prints with straighter, more geometric lines and a few parallel tread marks across each sole, so the two kinds of prints read as distinctly different at a glance. Wash the snow around both in the palest blue white, leaving the prints themselves as bare paper with just a thin grey shadow along one edge of each to show they are pressed into the surface.
The quick version of this page takes about ten minutes and works as a simple pair of parallel trails crossing the whole width of the paper; the longer version adds a little depth by making the tracks curve gently and grow smaller as they head toward the top of the page. If you want a related subject to pair with this one in your journal, the winter morning drawing list has more ideas built around everyday winter routines.
Keep the spacing between prints slightly uneven, since perfectly even spacing looks stamped rather than walked.
Palette: Payne’s Grey,Cerulean Blue,Titanium White,Charcoal Grey
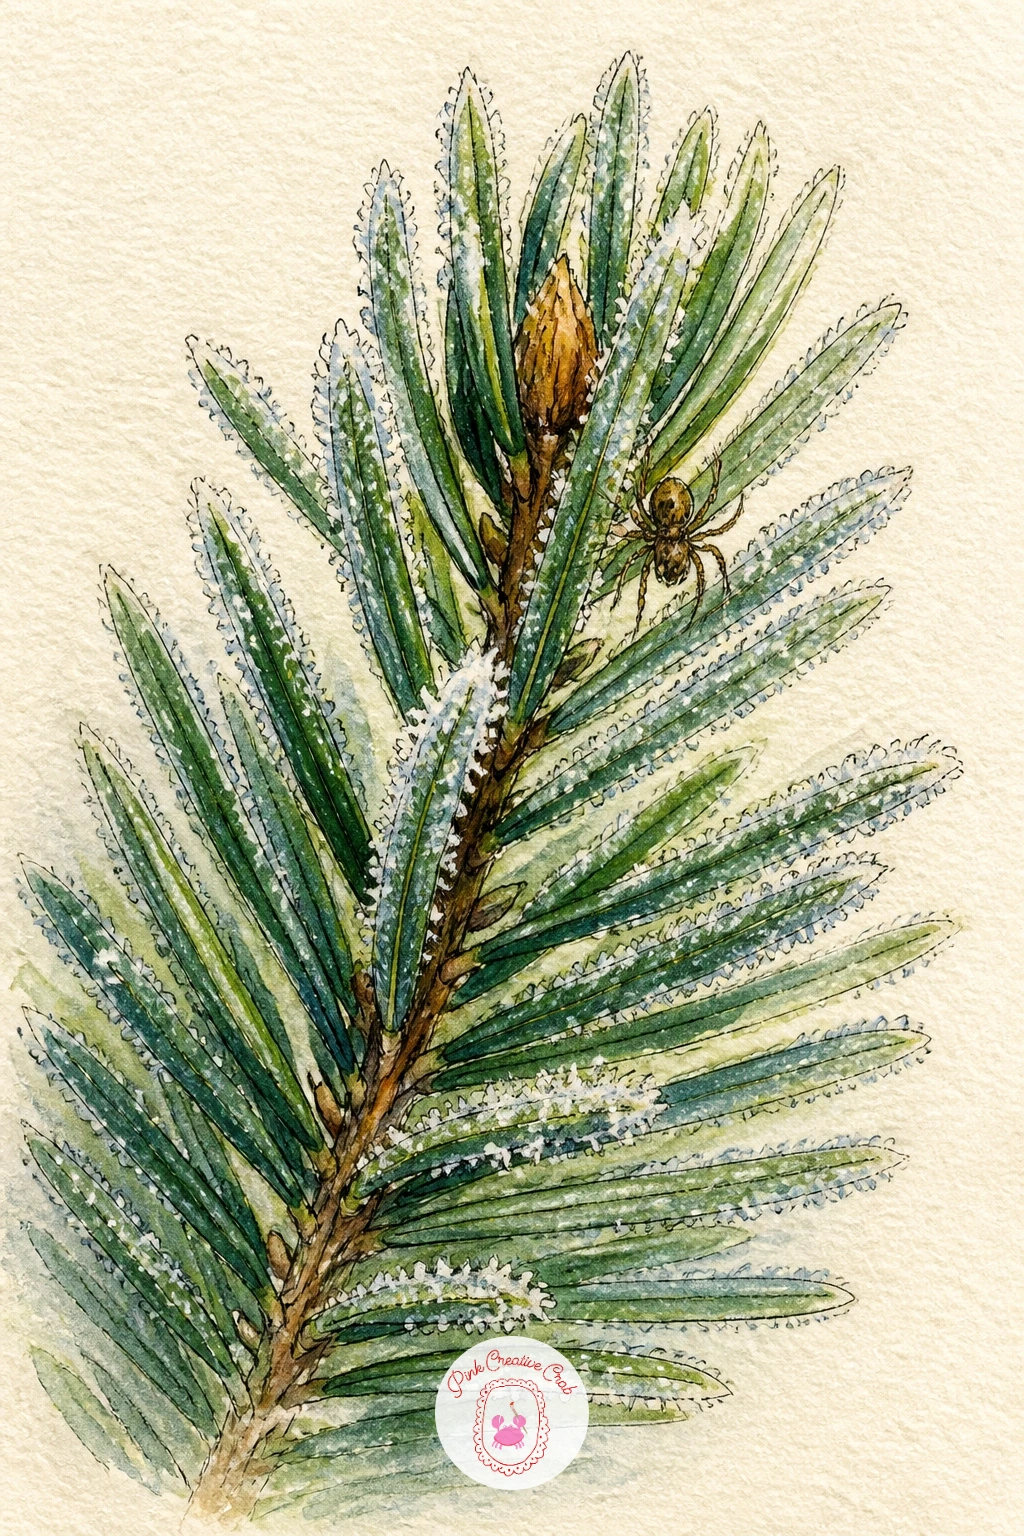
Closing the journal on a small evergreen sprig dusted with frost and holding one tiny spider among its needles brings the whole winter walk back to something you might find right at eye level. Draw a single short evergreen branch first, built from short overlapping needle clusters along a central woody stem, then tuck one small spider among the needles near the tip, legs tucked close to its round body.
Ink the needles in quick short strokes radiating outward in clusters rather than one at a time, and ink the spider with a simple round body and eight thin legs, keeping it noticeably smaller than any needle cluster so it reads as genuinely tiny. Watercolor the sprig in deep green with blue undertones in the shadows, dust a thin white wash or scratched colored pencil frost along the tips of the needles, and leave the spider itself in warm dark brown with a single tiny highlight dot.
If this is your first time drawing conifer needles, work in small clusters of five or six short strokes fanning from one point rather than trying to draw every needle individually, which keeps the texture loose and believable rather than labored. Closing a winter journal on something this small, almost missed on the walk, is a nice way to end the page and the season.
Swap scratched colored pencil frost for a very dry white colored pencil if a craft knife feels too fiddly for such a small area.
Palette: Sap Green,Payne’s Grey,Burnt Umber,Titanium White
What to Do Next
Pick one idea that matches something you have actually seen on a recent walk, start with a light pencil layout, and let the fineliner and washes follow once the shapes feel right. A small cream sketchbook page is all you need to finish a complete winter nature drawing today.
Frequently Asked Questions
What paper works best for a winter nature journal page like these?
Cold press watercolor paper around 140 pound weight works best, since it handles washes without buckling. A mixed media sketchbook with slightly textured cream paper is a good lighter alternative for travel.
Do I need watercolor paint to try these nature drawing ideas?
No, colored pencil alone works for every idea here, built up in layers instead of washes. Watercolor adds softer blended tones, but a fineliner and a set of colored pencils will finish any page convincingly.
How do I draw snow convincingly in a nature drawing without just leaving it blank?
Leave most of the snow as bare white paper and add only thin pale blue grey shadows where it dips or meets an object. Shadow color, not white paint, is what makes snow read as snow rather than empty space.
How do I keep animals and birds looking right without live reference in front of me?
Work from photographs taken on your own walks or reliable field guide images rather than from memory alone. Pay closest attention to proportion, like comparing a bird’s head size to its body, before adding any surface detail.
What is the easiest idea on this list to start with as a beginner?
The frosted oak leaf in ice or the snowdrop beside a mossy stone are the simplest starting points, since both involve a single small subject with few parts. Build confidence on these before moving to busier scenes further down the list.
Have any thoughts?
Share your reaction or leave a quick response — we’d love to hear what you think!
-
 0
-
0
-
0
-
0
-
0
-
0


